Cisco Secure Desktop (CSD) - The Cisco Learning Network
Cisco Secure Desktop (CSD) - The Cisco Learning Network
Cisco Secure Desktop (CSD) - The Cisco Learning Network

You also want an ePaper? Increase the reach of your titles
YUMPU automatically turns print PDFs into web optimized ePapers that Google loves.
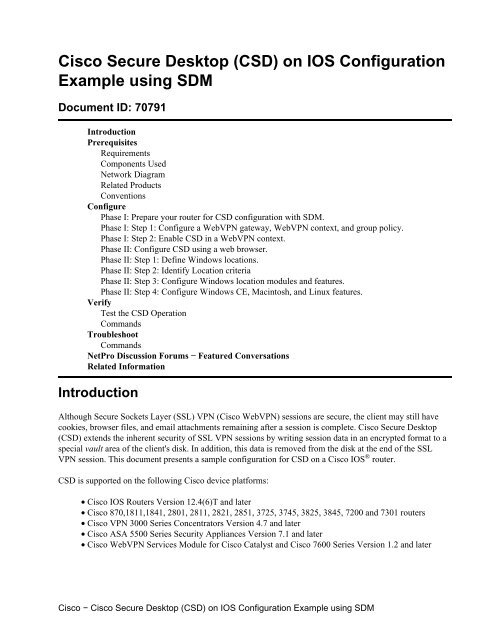
<strong>Cisco</strong> <strong>Secure</strong> <strong>Desktop</strong> (<strong>CSD</strong>) on IOS Configuration<br />
Example using SDM<br />
Document ID: 70791<br />
Introduction<br />
Prerequisites<br />
Requirements<br />
Components Used<br />
<strong>Network</strong> Diagram<br />
Related Products<br />
Conventions<br />
Configure<br />
Phase I: Prepare your router for <strong>CSD</strong> configuration with SDM.<br />
Phase I: Step 1: Configure a WebVPN gateway, WebVPN context, and group policy.<br />
Phase I: Step 2: Enable <strong>CSD</strong> in a WebVPN context.<br />
Phase II: Configure <strong>CSD</strong> using a web browser.<br />
Phase II: Step 1: Define Windows locations.<br />
Phase II: Step 2: Identify Location criteria<br />
Phase II: Step 3: Configure Windows location modules and features.<br />
Phase II: Step 4: Configure Windows CE, Macintosh, and Linux features.<br />
Verify<br />
Test the <strong>CSD</strong> Operation<br />
Commands<br />
Troubleshoot<br />
Commands<br />
NetPro Discussion Forums − Featured Conversations<br />
Related Information<br />
Introduction<br />
Although <strong>Secure</strong> Sockets Layer (SSL) VPN (<strong>Cisco</strong> WebVPN) sessions are secure, the client may still have<br />
cookies, browser files, and email attachments remaining after a session is complete. <strong>Cisco</strong> <strong>Secure</strong> <strong>Desktop</strong><br />
(<strong>CSD</strong>) extends the inherent security of SSL VPN sessions by writing session data in an encrypted format to a<br />
special vault area of the client's disk. In addition, this data is removed from the disk at the end of the SSL<br />
VPN session. This document presents a sample configuration for <strong>CSD</strong> on a <strong>Cisco</strong> IOS ® router.<br />
<strong>CSD</strong> is supported on the following <strong>Cisco</strong> device platforms:<br />
• <strong>Cisco</strong> IOS Routers Version 12.4(6)T and later<br />
• <strong>Cisco</strong> 870,1811,1841, 2801, 2811, 2821, 2851, 3725, 3745, 3825, 3845, 7200 and 7301 routers<br />
• <strong>Cisco</strong> VPN 3000 Series Concentrators Version 4.7 and later<br />
• <strong>Cisco</strong> ASA 5500 Series Security Appliances Version 7.1 and later<br />
• <strong>Cisco</strong> WebVPN Services Module for <strong>Cisco</strong> Catalyst and <strong>Cisco</strong> 7600 Series Version 1.2 and later<br />
<strong>Cisco</strong> − <strong>Cisco</strong> <strong>Secure</strong> <strong>Desktop</strong> (<strong>CSD</strong>) on IOS Configuration Example using SDM
Prerequisites<br />
Requirements<br />
Ensure that you meet these requirements before you attempt this configuration:<br />
Requirements for the <strong>Cisco</strong> IOS router<br />
• <strong>Cisco</strong> IOS router with Advanced Image 12.4(6T) or later<br />
• <strong>Cisco</strong> Router <strong>Secure</strong> Device Manager (SDM) 2.3 or higher<br />
If your router is not already loaded with SDM, you can obtain a free copy from SDM Download. A<br />
valid CCO account and service contract is required. Refer to Configure Your Router with Security<br />
Device Manager for more details.<br />
• A copy of the <strong>CSD</strong> for IOS package on your management station<br />
You can obtain a copy of <strong>CSD</strong> from Software Download: <strong>Cisco</strong> <strong>Secure</strong> <strong>Desktop</strong> <strong>The</strong> software is free<br />
if you have a CCO account with a service contract.<br />
• A router self−signed digital certificate or authentication with a Certificate Authority (CA)<br />
Note: Anytime you use digital certificates, make sure that you set the router's hostname, domain<br />
name, and date/time/timezone correctly.<br />
• An enable secret password on the router<br />
• DNS enabled on your router. Several WebVPN services require DNS to work properly.<br />
Requirements for Client computers<br />
• Remote clients should have local administrative privileges; it is not required, but it is highly<br />
suggested.<br />
• Remote clients must have Java Runtime Environment (JRE) Version 1.4 or higher.<br />
• Remote client browsers: Internet Explorer 6.0, Netscape 7.1, Mozilla 1.7, Safari 1.2.2, or Firefox 1.0<br />
• Cookies enabled and Popups allowed on remote clients<br />
Components Used<br />
<strong>The</strong> information in this document is based on these software and hardware versions:<br />
• <strong>Cisco</strong> IOS router 3825 with Version 12.9(T)<br />
• SDM Version 2.3.1<br />
<strong>The</strong> information in this document was created from the devices in a specific lab environment. All the devices<br />
used in this document began with a cleared (default) configuration. If your network is live, make sure that you<br />
understand the potential impact of any command.<br />
<strong>Network</strong> Diagram<br />
This document uses this network setup:<br />
This example uses a <strong>Cisco</strong> 3825 Series router to allow secure access to the company's intranet. <strong>The</strong> <strong>Cisco</strong><br />
3825 Series router enhances the security of SSL VPN connections with configurable <strong>CSD</strong> features and<br />
characteristics. Clients can connect to the <strong>CSD</strong>−enabled router via one of these three SSL VPN methods:<br />
<strong>Cisco</strong> − <strong>Cisco</strong> <strong>Secure</strong> <strong>Desktop</strong> (<strong>CSD</strong>) on IOS Configuration Example using SDM
Clientless SSL VPN (WebVPN), Thin−Client SSL VPN ( Port−Forwarding), or SSL VPN Client (Full<br />
Tunneling SVC).<br />
Related Products<br />
This configuration can also be used with these hardware and software versions:<br />
• <strong>Cisco</strong> router platforms 870,1811,1841,2801,2811,2821 2851,3725,3745.3825,3845, 7200 and 7301<br />
• <strong>Cisco</strong> IOS Advanced Security Image Version 12.4(6)T and later<br />
Conventions<br />
Refer to the <strong>Cisco</strong> Technical Tips Conventions for more information about document conventions.<br />
Configure<br />
A WebVPN gateway allows a user to connect to the router via one of the SSL VPN technologies. Only one<br />
WebVPN gateway per IP address is allowed on the device, although more than one WebVPN context can be<br />
attached to a WebVPN gateway. Each context is identified by a unique name. Group Policies identify the<br />
configured resources available to a particular WebVPN context.<br />
Configuration of <strong>CSD</strong> on an IOS router is accomplished in two phases:<br />
Phase I: Prepare your router for <strong>CSD</strong> configuration with SDM<br />
1. Configure a WebVPN gateway, WebVPN context, and group policy .<br />
Note: This step is optional and is not covered in great detail in this document. If you have already<br />
configured your router for one of the SSL VPN technologies, omit this step.<br />
2. Enable <strong>CSD</strong> in a WebVPN context .<br />
Phase II: Configure <strong>CSD</strong> using a web browser.<br />
1. Define Windows Locations .<br />
2. Identify Location criteria .<br />
3. Configure Windows location modules and features .<br />
<strong>Cisco</strong> − <strong>Cisco</strong> <strong>Secure</strong> <strong>Desktop</strong> (<strong>CSD</strong>) on IOS Configuration Example using SDM
4. Configure Windows CE, Macintosh, and Linux features .<br />
Phase I: Prepare your router for <strong>CSD</strong> configuration with SDM.<br />
<strong>CSD</strong> can be configured with SDM or from the command−line interface (CLI). This configuration uses SDM<br />
and a web browser.<br />
<strong>The</strong>se steps are used to complete the configuration of <strong>CSD</strong> on your IOS router.<br />
Phase I: Step 1: Configure a WebVPN gateway, WebVPN context, and<br />
group policy.<br />
You can use the WebVPN Wizard to accomplish this task.<br />
1. Open SDM and go to Configure > VPN > WebVPN. Click the Create WebVPN tab and check the<br />
Create a new WebVPN radio button. Click Launch the selected task.<br />
2. <strong>The</strong> WebVPN Wizard screen lists the parameters that you can configure. Click Next.<br />
<strong>Cisco</strong> − <strong>Cisco</strong> <strong>Secure</strong> <strong>Desktop</strong> (<strong>CSD</strong>) on IOS Configuration Example using SDM
3. Enter the IP address for the WebVPN gateway, a unique name for the service, and Digital Certificate<br />
information. Click Next.<br />
4. User accounts can be created for authentication to this WebVPN gateway. You can use either local<br />
<strong>Cisco</strong> − <strong>Cisco</strong> <strong>Secure</strong> <strong>Desktop</strong> (<strong>CSD</strong>) on IOS Configuration Example using SDM
accounts or accounts created on an external Authentication, Authorization, and Accounting (AAA)<br />
server. This example uses local accounts on the router. Check the radio button Locally on this router<br />
and click Add.<br />
5. Enter the account information for the new user on the Add an Account screen and click OK.<br />
6. After you have created your users, click Next on the User Authentication page.<br />
<strong>Cisco</strong> − <strong>Cisco</strong> <strong>Secure</strong> <strong>Desktop</strong> (<strong>CSD</strong>) on IOS Configuration Example using SDM
7. <strong>The</strong> Configure Intranet Websites screen allows you to configure the website available to users of the<br />
WebVPN gateway. Since this document's focus is the configuration of <strong>CSD</strong>, disregard this page.<br />
Click Next.<br />
<strong>Cisco</strong> − <strong>Cisco</strong> <strong>Secure</strong> <strong>Desktop</strong> (<strong>CSD</strong>) on IOS Configuration Example using SDM
8. Although the next WebVPN Wizard screen allows you the choice to enable the Full Tunnel SSL VPN<br />
Client, the focus of this document is how to enable <strong>CSD</strong>. Uncheck Enable Full Tunnel and click<br />
Next.<br />
9. You can customize the appearance of the WebVPN Portal Page to users. In this case, the default<br />
appearance is accepted. Click Next.<br />
<strong>Cisco</strong> − <strong>Cisco</strong> <strong>Secure</strong> <strong>Desktop</strong> (<strong>CSD</strong>) on IOS Configuration Example using SDM
10. <strong>The</strong> Wizard displays the last screen in this series. It shows a summary of the configuration for the<br />
WebVPN gateway. Click Finish and, when prompted, click OK.<br />
<strong>Cisco</strong> − <strong>Cisco</strong> <strong>Secure</strong> <strong>Desktop</strong> (<strong>CSD</strong>) on IOS Configuration Example using SDM
Phase I: Step 2: Enable <strong>CSD</strong> in a WebVPN context.<br />
Use WebVPN Wizard to enable <strong>CSD</strong> in a WebVPN context.<br />
1.<br />
Use the advanced features of the WebVPN Wizard to enable <strong>CSD</strong> for the newly created context. <strong>The</strong><br />
Wizard gives you the opportunity to install the <strong>CSD</strong> package if it is not already installed.<br />
a. In SDM, click the Configure tab.<br />
b. In the navigation pane, click VPN > WebVPN.<br />
c. Click the Create WebVPN tab.<br />
d. Check the Configure advance features for an existing WebVPN radio button.<br />
e. Click the Launch the selected task button.<br />
2. <strong>The</strong> welcome page for the Advanced WebVPN Wizard displays. Click Next.<br />
<strong>Cisco</strong> − <strong>Cisco</strong> <strong>Secure</strong> <strong>Desktop</strong> (<strong>CSD</strong>) on IOS Configuration Example using SDM
3. Choose the WebVPN and user group from the fields' drop−down boxes. <strong>The</strong> Advanced WebVPN<br />
Wizard features will be applied to your choices. Click Next.<br />
4. <strong>The</strong> Select Advanced Features screen allows you to choose from the listed technologies.<br />
<strong>Cisco</strong> − <strong>Cisco</strong> <strong>Secure</strong> <strong>Desktop</strong> (<strong>CSD</strong>) on IOS Configuration Example using SDM
a. Check <strong>Cisco</strong> <strong>Secure</strong> <strong>Desktop</strong>.<br />
b. In this example, the choice is Clientless Mode.<br />
c. If you choose any of the other listed technologies, additional windows open to allow input of<br />
related information.<br />
d. Click the Next button.<br />
5. <strong>The</strong> Configure Intranet Websites screen allows you to configure the website resources you want<br />
available to the users. You can add the company's internal websites such as Outlook Web Access<br />
(OWA).<br />
<strong>Cisco</strong> − <strong>Cisco</strong> <strong>Secure</strong> <strong>Desktop</strong> (<strong>CSD</strong>) on IOS Configuration Example using SDM
6. In the Enable <strong>Cisco</strong> <strong>Secure</strong> <strong>Desktop</strong> (<strong>CSD</strong>) screen, you have the opportunity to enable the <strong>CSD</strong> for<br />
this context. Check the box beside Install <strong>Cisco</strong> <strong>Secure</strong> <strong>Desktop</strong> (<strong>CSD</strong>) and click Browse.<br />
7. From the Select <strong>CSD</strong> Location area, check My Computer.<br />
<strong>Cisco</strong> − <strong>Cisco</strong> <strong>Secure</strong> <strong>Desktop</strong> (<strong>CSD</strong>) on IOS Configuration Example using SDM
a. Click the Browse button.<br />
b. Choose the <strong>CSD</strong> IOS package file on your management workstation.<br />
c. Click the OK button.<br />
d. Click the Next button.<br />
8. A Summary of the Configuration screen displays. Click the Finish button.<br />
<strong>Cisco</strong> − <strong>Cisco</strong> <strong>Secure</strong> <strong>Desktop</strong> (<strong>CSD</strong>) on IOS Configuration Example using SDM
9. Click OK when you see that the <strong>CSD</strong> package file has been successfully installed.<br />
<strong>Cisco</strong> − <strong>Cisco</strong> <strong>Secure</strong> <strong>Desktop</strong> (<strong>CSD</strong>) on IOS Configuration Example using SDM
Phase II: Configure <strong>CSD</strong> using a web browser.<br />
<strong>The</strong>se steps are used to complete the configuration of <strong>CSD</strong> on your web browser.<br />
Phase II: Step 1: Define Windows locations.<br />
Define the Windows locations.<br />
1. Open your web browser at https://WebVPNgateway_IP Address/csd_admin.html, for example,<br />
https:/192.168.0.37/csd_admin.html.<br />
2. Enter the username admin.<br />
a. Enter the password, which is the enable secret of the router.<br />
b. Click Login.<br />
3. Accept the certificate offered by the router, choose the context from the drop−down box, and click<br />
Go.<br />
<strong>Cisco</strong> − <strong>Cisco</strong> <strong>Secure</strong> <strong>Desktop</strong> (<strong>CSD</strong>) on IOS Configuration Example using SDM
4. <strong>The</strong> <strong>Secure</strong> <strong>Desktop</strong> Manager for WebVPN opens.<br />
<strong>Cisco</strong> − <strong>Cisco</strong> <strong>Secure</strong> <strong>Desktop</strong> (<strong>CSD</strong>) on IOS Configuration Example using SDM
5. From the left pane, choose Windows Location Settings.<br />
a. Place the cursor in the box next to Location name, and enter a location name.<br />
b. Click Add.<br />
c. In this example, three location names are shown: Office, Home, and Insecure. Each time a<br />
new location is added, the left pane expands with the configurable parameters for that<br />
location.<br />
<strong>Cisco</strong> − <strong>Cisco</strong> <strong>Secure</strong> <strong>Desktop</strong> (<strong>CSD</strong>) on IOS Configuration Example using SDM
6. After you create the Windows locations, click Save at the top of the left pane.<br />
Note: Save your configurations often because your settings will be lost if you become disconnected<br />
from the web browser.<br />
<strong>Cisco</strong> − <strong>Cisco</strong> <strong>Secure</strong> <strong>Desktop</strong> (<strong>CSD</strong>) on IOS Configuration Example using SDM
Phase II: Step 2: Identify Location criteria<br />
In order to distinguish Windows locations from each other, assign specific criteria to each location. This<br />
allows <strong>CSD</strong> to determine which of its features to apply to a particular Windows location.<br />
1. In the left pane, click Office.<br />
a. You can identify a Windows location with certificate criteria, IP criteria, a file, or registry<br />
criteria. You can also choose the <strong>Secure</strong> <strong>Desktop</strong> or Cache Cleaner for these clients. Since<br />
these users are internal office workers, identify them with IP criteria.<br />
b. Enter the IP address ranges in the From and To boxes.<br />
c. Click Add. Uncheck Use Module: <strong>Secure</strong> <strong>Desktop</strong>.<br />
d. When prompted, click Save, and click OK.<br />
<strong>Cisco</strong> − <strong>Cisco</strong> <strong>Secure</strong> <strong>Desktop</strong> (<strong>CSD</strong>) on IOS Configuration Example using SDM
2. In the left pane, click the second Windows Location Setting Home.<br />
a. Make sure Use Module: <strong>Secure</strong> <strong>Desktop</strong> is checked.<br />
b. A file will be distributed that identifies these clients. You could choose to distribute<br />
certificates and/or registry criteria for these users.<br />
c. Check Enable identification using File or Registry criteria.<br />
d. Click Add.<br />
<strong>Cisco</strong> − <strong>Cisco</strong> <strong>Secure</strong> <strong>Desktop</strong> (<strong>CSD</strong>) on IOS Configuration Example using SDM
3. In the dialog box, choose File, and enter the path to the file.<br />
a. This file must be distributed to all your home clients.<br />
b. Check the radio button Exists.<br />
c. When prompted, click OK , and click Save.<br />
<strong>Cisco</strong> − <strong>Cisco</strong> <strong>Secure</strong> <strong>Desktop</strong> (<strong>CSD</strong>) on IOS Configuration Example using SDM
4. To configure the identification of Insecure locations, simply do not apply any identifying criteria.<br />
a. Click Insecure in the left pane.<br />
b. Leave all the criteria unchecked.<br />
c. Check Use Module: <strong>Secure</strong> <strong>Desktop</strong>.<br />
d. When prompted, click Save, and click OK.<br />
<strong>Cisco</strong> − <strong>Cisco</strong> <strong>Secure</strong> <strong>Desktop</strong> (<strong>CSD</strong>) on IOS Configuration Example using SDM
Phase II: Step 3: Configure Windows location modules and features.<br />
Configure the <strong>CSD</strong> features for each Windows location.<br />
1. Under Office, click VPN Feature Policy. Since these are trusted internal clients, neither <strong>CSD</strong> nor<br />
Cache Cleaner was enabled. None of the other parameters is available.<br />
<strong>Cisco</strong> − <strong>Cisco</strong> <strong>Secure</strong> <strong>Desktop</strong> (<strong>CSD</strong>) on IOS Configuration Example using SDM
2. Turn on the features as shown.<br />
a. In the left pane, choose VPN Feature Policy under Home.<br />
b. Home users will be allowed access to the corporate LAN if the clients meet certain criteria.<br />
c. Under each method of access, choose ON if criteria are matched.<br />
<strong>Cisco</strong> − <strong>Cisco</strong> <strong>Secure</strong> <strong>Desktop</strong> (<strong>CSD</strong>) on IOS Configuration Example using SDM
3. For Web Browsing, click the ellipsis button and choose the criteria that must match. Click OK in the<br />
dialog box.<br />
<strong>Cisco</strong> − <strong>Cisco</strong> <strong>Secure</strong> <strong>Desktop</strong> (<strong>CSD</strong>) on IOS Configuration Example using SDM
4. You can configure the other access methods in a similar fashion.<br />
a. Under Home, choose Keystroke Logger.<br />
b. Place a check mark next to Check for keystroke loggers.<br />
c. When prompted, click Save, and click OK.<br />
<strong>Cisco</strong> − <strong>Cisco</strong> <strong>Secure</strong> <strong>Desktop</strong> (<strong>CSD</strong>) on IOS Configuration Example using SDM
5. Under the Home windows location, choose Cache Cleaner. Leave the default settings as shown in<br />
the screen shot.<br />
<strong>Cisco</strong> − <strong>Cisco</strong> <strong>Secure</strong> <strong>Desktop</strong> (<strong>CSD</strong>) on IOS Configuration Example using SDM
6. Under Home, choose <strong>Secure</strong> <strong>Desktop</strong> General. Check Suggest application uninstall upon <strong>Secure</strong><br />
<strong>Desktop</strong> closing. Leave all other parameters at their default settings as shown in the screen shot.<br />
<strong>Cisco</strong> − <strong>Cisco</strong> <strong>Secure</strong> <strong>Desktop</strong> (<strong>CSD</strong>) on IOS Configuration Example using SDM
7. For <strong>Secure</strong> <strong>Desktop</strong> Settings under Home, choose Allow e−mail applications to work<br />
transparently. When prompted, click Save, and click OK.<br />
<strong>Cisco</strong> − <strong>Cisco</strong> <strong>Secure</strong> <strong>Desktop</strong> (<strong>CSD</strong>) on IOS Configuration Example using SDM
8.<br />
<strong>The</strong> configuration of <strong>Secure</strong> <strong>Desktop</strong> Browser is dependent upon whether or not you want these<br />
users to access a company website with preconfigured favorites.<br />
a. Under Insecure, choose VPN Feature Policy.<br />
b. Because these are not trusted users, allow only web browsing.<br />
c. Choose ON from the drop−down menu for Web Browsing.<br />
d. All other access is set to OFF.<br />
<strong>Cisco</strong> − <strong>Cisco</strong> <strong>Secure</strong> <strong>Desktop</strong> (<strong>CSD</strong>) on IOS Configuration Example using SDM
9. Check the Check for keystroke loggers check box.<br />
<strong>Cisco</strong> − <strong>Cisco</strong> <strong>Secure</strong> <strong>Desktop</strong> (<strong>CSD</strong>) on IOS Configuration Example using SDM
10. Configure the Cache Cleaner for Insecure.<br />
a. Check the Clean the whole cache in addition to the current session cache (IE only) check<br />
box.<br />
b. Leave the other settings at their defaults.<br />
<strong>Cisco</strong> − <strong>Cisco</strong> <strong>Secure</strong> <strong>Desktop</strong> (<strong>CSD</strong>) on IOS Configuration Example using SDM
11. Under Insecure, choose <strong>Secure</strong> <strong>Desktop</strong> General.<br />
a. Reduce the time−out inactivity to 2 minutes.<br />
b. Check the Force application uninstall upon <strong>Secure</strong> <strong>Desktop</strong> closing check box.<br />
<strong>Cisco</strong> − <strong>Cisco</strong> <strong>Secure</strong> <strong>Desktop</strong> (<strong>CSD</strong>) on IOS Configuration Example using SDM
12. Choose <strong>Secure</strong> <strong>Desktop</strong> Settings under Insecure, and configure very restrictive settings as shown.<br />
<strong>Cisco</strong> − <strong>Cisco</strong> <strong>Secure</strong> <strong>Desktop</strong> (<strong>CSD</strong>) on IOS Configuration Example using SDM
13. Choose <strong>Secure</strong> <strong>Desktop</strong> Browser. In the Home Page field, enter the website to which these clients<br />
will be guided for their home page.<br />
<strong>Cisco</strong> − <strong>Cisco</strong> <strong>Secure</strong> <strong>Desktop</strong> (<strong>CSD</strong>) on IOS Configuration Example using SDM
Phase II: Step 4: Configure Windows CE, Macintosh, and Linux features.<br />
Configure the <strong>CSD</strong> features for Windows CE, Macintosh, and Linux.<br />
1. Choose Windows CE under <strong>Secure</strong> <strong>Desktop</strong> Manager. Windows CE has limited VPN features. Turn<br />
Web Browsing to ON.<br />
<strong>Cisco</strong> − <strong>Cisco</strong> <strong>Secure</strong> <strong>Desktop</strong> (<strong>CSD</strong>) on IOS Configuration Example using SDM
2. Choose Mac & Linux Cache Cleaner.<br />
a. <strong>The</strong> Macintosh and Linux Operating Systems have access only to the cache cleaner aspects of<br />
<strong>CSD</strong>. Configure them as shown in the graphic.<br />
b. When prompted, click Save, and click OK.<br />
<strong>Cisco</strong> − <strong>Cisco</strong> <strong>Secure</strong> <strong>Desktop</strong> (<strong>CSD</strong>) on IOS Configuration Example using SDM
Verify<br />
Test the <strong>CSD</strong> Operation<br />
Test the operation of <strong>CSD</strong> by connecting to the WebVPN gateway with an SSL enabled browser at<br />
https://WebVPN_Gateway_IP Address.<br />
Note: Remember to use the unique name of the context if you created different WebVPN contexts, for<br />
example, https://192.168.0.37/cisco.<br />
<strong>Cisco</strong> − <strong>Cisco</strong> <strong>Secure</strong> <strong>Desktop</strong> (<strong>CSD</strong>) on IOS Configuration Example using SDM
Commands<br />
Several show commands are associated with WebVPN. You can execute these commands at the<br />
command−line interface (CLI) to show statistics and other information. For detailed information about show<br />
commands, refer to Verifying WebVPN Configuration.<br />
Note: <strong>The</strong> Output Interpreter Tool ( registered customers only) (OIT) supports certain show commands. Use the<br />
OIT to view an analysis of show command output.<br />
Troubleshoot<br />
Commands<br />
Several debug commands are associated with WebVPN. For detailed information about these commands,<br />
refer to Using WebVPN Debug Commands.<br />
Note: <strong>The</strong> use of debug commands can adversely impact your <strong>Cisco</strong> device. Before you use debug<br />
commands, refer to Important Information on Debug Commands.<br />
<strong>Cisco</strong> − <strong>Cisco</strong> <strong>Secure</strong> <strong>Desktop</strong> (<strong>CSD</strong>) on IOS Configuration Example using SDM
For more information about clear commands, refer to Using WebVPN Clear commands.<br />
NetPro Discussion Forums − Featured Conversations<br />
<strong>Network</strong>ing Professionals Connection is a forum for networking professionals to share questions, suggestions,<br />
and information about networking solutions, products, and technologies. <strong>The</strong> featured links are some of the<br />
most recent conversations available in this technology.<br />
NetPro Discussion Forums − Featured Conversations for VPN<br />
Service Providers: VPN Service Architectures<br />
Service Providers: <strong>Network</strong> Management<br />
Virtual Private <strong>Network</strong>s: General<br />
Related Information<br />
• WebVPN and DMVPN Convergence Deployment Guide<br />
• SSL VPN − WebVPN<br />
• <strong>Cisco</strong> IOS SSLVPN<br />
• Technical Support & Documentation − <strong>Cisco</strong> Systems<br />
All contents are Copyright © 1992−2006 <strong>Cisco</strong> Systems, Inc. All rights reserved. Important Notices and Privacy Statement.<br />
Updated: Oct 25, 2006 Document ID: 70791<br />
<strong>Cisco</strong> − <strong>Cisco</strong> <strong>Secure</strong> <strong>Desktop</strong> (<strong>CSD</strong>) on IOS Configuration Example using SDM