Administrator's Guide (PDF) - Konica Minolta
Administrator's Guide (PDF) - Konica Minolta
Administrator's Guide (PDF) - Konica Minolta

Create successful ePaper yourself
Turn your PDF publications into a flip-book with our unique Google optimized e-Paper software.
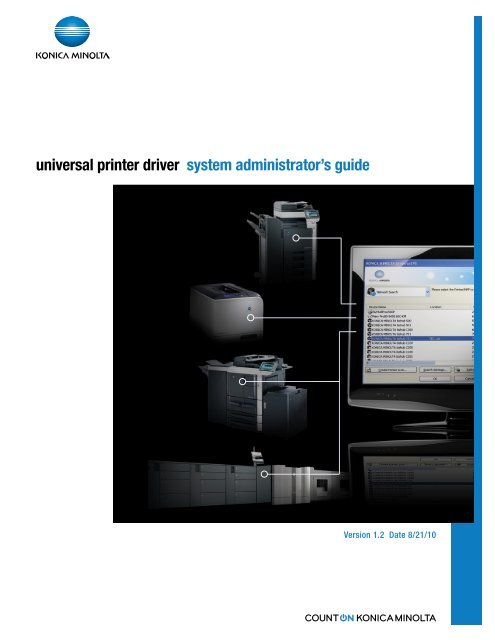
universal printer driver system administrator’s guide<br />
Version 1.2 Date 8/21/10
Index<br />
1. Introduction . . . . . . . . . . . . . . . . . . . . . . . . . . . . . . . . . . . . . . . . . . . . . . . . . 1<br />
2. Software Description . . . . . . . . . . . . . . . . . . . . . . . . . . . . . . . . . . . . . . . . . . 4<br />
2.1 System Requirements . . . . . . . . . . . . . . . . . . . . . . . . . . . . . . . . . . . . . . . . . 4<br />
2.2 UPD Components . . . . . . . . . . . . . . . . . . . . . . . . . . . . . . . . . . . . . . . . . . . . . 5<br />
2.3 Supported Models . . . . . . . . . . . . . . . . . . . . . . . . . . . . . . . . . . . . . . . . . . . . 6<br />
2.4 Third-Party Product Compatibility . . . . . . . . . . . . . . . . . . . . . . . . . . . . . . . . 8<br />
3. Install and Uninstall of the UPD . . . . . . . . . . . . . . . . . . . . . . . . . . . . . . . . . 12<br />
3.1 Install and Uninstall . . . . . . . . . . . . . . . . . . . . . . . . . . . . . . . . . . . . . . . . . . 12<br />
3.2 Use Point & Print . . . . . . . . . . . . . . . . . . . . . . . . . . . . . . . . . . . . . . . . . . . . 19<br />
3.3 Individual Child Driver Updates . . . . . . . . . . . . . . . . . . . . . . . . . . . . . . . . . 21<br />
3.4 Adding New KONICA MINOLTA MFPs to Your Installation . . . . . . . . . . . . .22<br />
4. Using the Universal Print Driver . . . . . . . . . . . . . . . . . . . . . . . . . . . . . . . . .26<br />
4.1 Dynamic Mode and Traditional Mode . . . . . . . . . . . . . . . . . . . . . . . . . . . . .26<br />
4.2 Using Dynamic Mode . . . . . . . . . . . . . . . . . . . . . . . . . . . . . . . . . . . . . . . . .26<br />
4.3 Using Traditional Mode . . . . . . . . . . . . . . . . . . . . . . . . . . . . . . . . . . . . . . . .39<br />
4.4 UPD Versions . . . . . . . . . . . . . . . . . . . . . . . . . . . . . . . . . . . . . . . . . . . . . . .43<br />
5. Frequently Asked Questions . . . . . . . . . . . . . . . . . . . . . . . . . . . . . . . . . . .46<br />
5.1 Is the Cluster Server Environment Supported? . . . . . . . . . . . . . . . . . . . . .46<br />
5.2 Is the Citrix Environment Supported? . . . . . . . . . . . . . . . . . . . . . . . . . . . .46<br />
5.3 How to Find the Supported or Non Supported Products by UPD? . . . . . . .46<br />
5.4 Can I Use MyTab Function? . . . . . . . . . . . . . . . . . . . . . . . . . . . . . . . . . . . .46<br />
5.5 User Profile Size of Windows System Expanded After Installing UPD. . . . 47<br />
5.6 Can Non PC Administrator also Operate UPD without any Restrictions? . 47<br />
5.7 Is the Windows 7 Device Stage Supported? . . . . . . . . . . . . . . . . . . . . . . . 47<br />
Table of Contents
©2010 KONICA MINOLTA BUSINESS TECHNOLOGIES, INC.<br />
All rights reserved.<br />
PostScript is a trademark of Adobe Systems Incorporated.<br />
PCL is a trademark of Hewlett-Packard Company.<br />
Microsoft, Windows, Windows 2000, Windows XP,<br />
Windows Server 2003, Windows Vista, Windows Server<br />
2008, and Windows 7 are U.S. registered trademarks of<br />
Microsoft Corporation.<br />
The information in this document applies to the following<br />
versions of the KONICA MINOLTA Universal Printer Drivers:<br />
• KONICA MINOLTA Universal PCL Version 1.10.1.0<br />
• KONICA MINOLTA Universal PS Version 1.10.0.0
K<strong>Konica</strong> <strong>Minolta</strong>’s Universal Printer Driver is a powerful new print<br />
solution that increases print productivity and reduces administrative<br />
costs by offering a single printer driver for all devices.<br />
User Benefits<br />
EasiEr printEr managEmEnt<br />
You can access multiple printers in your office using a single KONICA<br />
MINOLTA Universal Printer Driver. Eliminate the work and cost of installing<br />
and managing separate printer drivers for each division.<br />
FEwEr printEr icons<br />
With a KONICA MINOLTA Universal Printer Driver, you do not need to create<br />
a large number of printer icons. This eliminates several issues, such has<br />
cluttering your computer with many seldom-used icons, and having to<br />
guess which printer to select every time you print something.<br />
choosing thE bEst printEr<br />
Choosing by printing method<br />
You can select a printer based on information about the printing speed and<br />
functionality of each printer. For example, if you want to print to A3-sized<br />
paper in color at a speed of at least 20 ppm, you can easily find the printer<br />
that matches these parameters, and print to that printer.<br />
Figure 1-1-1 Example of Selecting Printer by Printing Method<br />
1. Introduction<br />
1
1. Introduction<br />
2<br />
Choosing by printer status<br />
You can make sure that a printer does not have an error or warning, and check the<br />
backlog of jobs on the printer. Check the status of each printer, and choose the<br />
one that can print your job the fastest.<br />
Figure 1-1-2 Example of Selecting Printer by Printer Status<br />
printing immEdiatEly whilE away From thE oFFicE<br />
Once you have installed KONICA MINOLTA Universal Printer Driver, you can print<br />
right away while you are away from the office without installing a new printer driver<br />
or setting the printer's IP address. Universal Printer Driver will detect the available<br />
printers at your current office; all you need to do is select the printer that suits your<br />
needs.
Features<br />
• Print to KONICA MINOLTA devices as well as third-party devices (see 2.4 Third-<br />
Party Product Compatibility for details).<br />
• Use many KONICA MINOLTA devices with nearly the same windows and<br />
functionality as a normal driver (see 2.3 Supported Models for details).<br />
• From the device list on the Universal Printer Driver window, you can check the<br />
name, status, location, printing speed, IP address, Mac address, color-printing<br />
capabilities (whether it is color or B&W), and PDL support of each device, and<br />
select devices as well.<br />
• Three methods of device access are available: "Network Search", "History", and<br />
"Manual Connection". Access your devices using the method suited to your<br />
needs.<br />
• In addition to selecting an output device from the Choose a Device window, you<br />
can use Universal Printer Driver to create separate printer icons beforehand, and<br />
access the device-specific printer dialog using nearly the same method as an<br />
ordinary printer driver.<br />
1. Introduction<br />
3
2. Software Description<br />
4<br />
2.1 systEm rEquirEmEnts<br />
KONICA MINOLTA Universal Printer Driver supports the following OS versions.<br />
NOTE: We will end support for Windows 2000 Professional on March 31, 2011,<br />
due to end of support for Windows 2000 by Microsoft. Please contact your local<br />
customer support or dealer for more information.<br />
• Windows 2000 Professional (SP4 or later)<br />
• Windows XP Home Edition (SP1 or later)<br />
• Windows XP Professional (SP1 or later)<br />
• Windows XP Professional x64 Edition<br />
• Windows Server 2003, Standard Edition<br />
• Windows Server 2003, Enterprise Edition<br />
• Windows Server 2003 R2, Standard Edition<br />
• Windows Server 2003 R2, Enterprise Edition<br />
• Windows Server 2003, Standard x64 Edition<br />
• Windows Server 2003, Enterprise x64 Edition<br />
• Windows Server 2003 R2, Standard x64 Edition<br />
• Windows Server 2003 R2, Enterprise x64 Edition<br />
• Windows Vista Home Basic (x86/x64)<br />
• Windows Vista Home Premium (x86/x64)<br />
• Windows Vista Ultimate (x86/x64)<br />
• Windows Vista Business (x86/x64)<br />
• Windows Vista Enterprise (x86/x64)<br />
• Windows Server 2008 Standard (x86/x64)<br />
• Windows Server 2008 Enterprise (x86/x64)<br />
• Windows Server 2008 R2 Standard (x86/x64)<br />
• Windows Server 2008 R2 Enterprise (x86/x64)<br />
• Windows 7 Home Basic (x86/x64)<br />
• Windows 7 Home Premium (x86/x64)<br />
• Windows 7 Professional (x86/x64)<br />
• Windows 7 Enterprise (x86/x64)<br />
• Windows 7 Ultimate (x86/x64)<br />
Windows Cluster environment, Windows Terminal service environment, and Citrix server environment<br />
are not supported.
2.2 upd componEnts<br />
KONICA MINOLTA Universal Printer Driver consists of four main types of<br />
component: UPD Core, Child Driver Core, the Device Selector and child drivers.<br />
UPD Core is the core module of UPD, and provides functionality used internally<br />
throughout UPD. Child Driver Core modules provide functionality common to each<br />
device type. The Device Selector is a module for selecting the output device when<br />
printing. After you have selected the output device, you can connect the individual<br />
printer driver that is appropriate for that device. These individual printer drivers are<br />
called "child drivers." The child drivers' dialogs are used for printer setup.<br />
Figure 2-2-1 UPD Components<br />
Essentially, in order to use UPD, launch the Device Selector first, but if you select<br />
and register the output device beforehand, and create a printer icon, you can also<br />
access the child driver directly.<br />
There are also two types of UPD version: the UPD representative version, which is<br />
the overall version for UPD, and the individual version of each child driver. See 4.4<br />
UPD Versions for details on how to check the version.<br />
2. Software Description<br />
5
2. Software Description<br />
6<br />
2.3 supportEd modEls<br />
The table below lists the KONICA MINOLTA devices supported by each of the Universal<br />
Printer Drivers.<br />
Table 2-3-1 KONICA MINOLTA products supported by Universal Printer Driver<br />
Individual<br />
Child Drivers (*1)<br />
KONICA MINOLTA Common Child Drivers (*2)<br />
Common<br />
Child Drivers (*3)<br />
bizhub series magicolor & pagepro series<br />
bizhub 350/250/200 bizhub C353P magicolor 4650EN/DN Other products<br />
bizhub 362/282/222 magicolor 8650DN magicolor 5550/5570<br />
bizhub 500/420/360 bizhub C200 magicolor 5650/5670<br />
bizhub 501/421/361 bizhub C360/C280/C220 (*4) magicolor 5450<br />
bizhub 750/600 bizhub C650/C550/C451 (*4) magicolor 4695MF<br />
bizhub 751/601 bizhub C652/552 (*4) pagepro 4650/5650<br />
bizhub C250/C250P bizhub C20P<br />
bizhub C252/C252P bizhub C30P/C31P<br />
bizhub C352/C352P/C300 bizhub 40P<br />
bizhub C353/C253/C203<br />
bizhub C360/C280/C220.<br />
bizhub C450/C450P/C351<br />
bizhub C650/C550/C451<br />
bizhub C35/C35P/magicolor<br />
4750<br />
bizhub C652/C552/C452<br />
bizhub C652DS/C552DS<br />
bizhub C20<br />
(*1) This indicates a printer driver supporting an individual model. The devices listed in<br />
this column can print using nearly the same functionality as a normal driver. See Table<br />
2-3-2 Differences between Individual Child Drivers and Production Version Drivers for<br />
details about the differences between normal child drivers and Individual Child Drivers.<br />
(*2) This signifies common printer drivers for KONICA MINOLTA devices. There are two<br />
types: one for the bizhub series, and one for the magicolor and pagepro series.<br />
(*3) These are common printer drivers included with third-party products. Only the main<br />
functionality is available. (See section 2.4).<br />
(*4) The supported drivers depend on the device's firmware. The Individual Child Driver<br />
can be used if the latest firmware is used.
Table 2-3-2 Differences between Individual Child Drivers and Production Version Drivers<br />
Model PDL Target Differences from Production Version Drivers<br />
Common to All Models PCL/PS Printing<br />
Preferences<br />
bizhub 350/250/<br />
200/362/282/222/<br />
500/420/360/750/<br />
600<br />
Note: Items not supported by the Individual Child Driver may be described in the help.<br />
[Favorite Setting] presetting is not supported. Upon start of use of UPD,<br />
[Favorite Setting] item is [Default Setting] only.<br />
2. Software Description<br />
PCL/PS General When using Point & Print:<br />
• In the server’s [Printing Preferences] window, [Output Method] and<br />
[User Settings] settings are not reflected on the client.<br />
• In [Properties] window in a local environment, the settings of [Advanced]<br />
tab-[Printing Defaults] are reflected as the defaults in [Printing<br />
Preferences] window.<br />
PS Printing<br />
Preferences<br />
PCL/PS Printing<br />
Preferences<br />
PCL Printing<br />
Preferences<br />
bizhub 362/282/222 PCL Printing<br />
Preferences<br />
bizhub 751/601 PCL/PS Printing<br />
Preferences<br />
Bizhub C450/<br />
C450P/C351<br />
bizhub C360/C280/<br />
C220/C652/C552/<br />
C452/C652DS/<br />
C552DS<br />
bizhub C35/C35P/<br />
magicolor 4750<br />
[Quality] tab-[Quality Adjustment]-[Download Manager] is not supported.<br />
Even if there is [Download Manager] button, it cannot be used<br />
[Quality] tab-[Image Compression] is not supported.<br />
[Quality] tab-[Image Compression] is not supported.<br />
[Other] tab-[Thin Line Support] is not supported.<br />
The default value of [Layout] tab-[Image Shift Settings]-[Back Side] is<br />
[Bottom].<br />
PCL/PS General C351 uses the same child driver as C450/C450P. For this reason,<br />
the same functionality is provided for C351 as for C450/C450P. In<br />
[Properties] windows, [Configure] tab-[Device Option]-[Model] item<br />
switches among three models: [C450]/[C450P]/[C351].<br />
PCL/PS Printing<br />
Preferences<br />
The following items are not supported.<br />
• [Basic] tab-[Original Size]-[A0], [A1], [A2], [B1], [B2], [B3]<br />
• [Stamp/Composition] tab-[Copy Security]-[Copy Guard], [Password<br />
Copy]<br />
• [Stamp/Composition]-[Overlay]-[Edit]-[Edit Print In Overlay] dialog-<br />
[Change 2nd Page and Later]<br />
• [Favorite Setting]-[Add]-[Add Favorite Setting] dialog-[Restore Items]<br />
PCL/PS Properties The following items are not supported.<br />
• [Configure] tab-[Obtain Settings]-[Enter Password to acquire Device<br />
Information]<br />
• [Configure] tab-[Device Option]-[Function Version]<br />
• [Settings] tab-[My Tab Settings]<br />
PCL/PS Printing<br />
Preferences<br />
PCL Printing<br />
Preferences<br />
PS Printing<br />
Preferences<br />
The following item is not supported.<br />
• [Basic] tab-[Job Retention], [User Settings], [Authentication/Account<br />
Track]<br />
[Stamp/Composition] tab-[Copy Protect] is not supported.<br />
The following items are not supported.<br />
• [Stamp/Composition] tab-[Print in Overlay]<br />
• [Quality] tab-[Color Settings]-[Custom]<br />
PCL/PS Properties The following item is not supported.<br />
• [Configure] tab-[Device Options]-[User Authentication], [Account Track]<br />
7
2. Software Description<br />
8<br />
2.4 third-party product compatibility<br />
This section describes the third-party printers and multifunctional printers supported by<br />
KONICA MINOLTA Universal Printer Drivers.<br />
Information on the "Network Search" window<br />
This page shows all the devices found on the network that are recognized as printers.<br />
Printers determined to be third-party devices as shown with the corresponding icon<br />
in the "Others" field. Information about color/black & white and PDL support is also<br />
obtained, and displayed on the Device Selector window. The Standby Job number,<br />
however, is not obtained.<br />
Table 2-4-1 Printer Type Icons<br />
Meanings of Icons PDL Support<br />
YES<br />
KONICA MINOLTA models Color<br />
B&W<br />
Others Color<br />
B&W<br />
Unknown<br />
Printing to Third-party Devices<br />
PDL Support<br />
NO<br />
If a third-party device is selected, the "Common PCL/PS" driver is loaded, enabling print<br />
data to be sent. <strong>Konica</strong> <strong>Minolta</strong> cannot, however, guarantee the print results.
2. Software Description<br />
Table 2-4-2 Common PCL / PS Driver functions<br />
COMMON PCL<br />
PCL XL PROTOCOL 2.1<br />
Job Tab<br />
Common PS<br />
PS LEVEL 3<br />
Remarks<br />
Favorite Setting Default Setting Default Setting<br />
User Settings User Settings<br />
Original Orientation Portrait Portrait<br />
Landscape Landscape<br />
Original Size Letter Letter (8.5x11 in)<br />
Legal Legal (8.5x14 in)<br />
Executive Executive (7.25x10.5 in)<br />
A3 A3 (297x420 mm)/(11.7x16.5 in)<br />
A4 A4 (210x297 mm)/(8.3x11.7 in)<br />
A5 A5 (148x210 mm)/(5.8x8.3 in)<br />
A6 A6<br />
B4 (JIS) B4 (JIS) (257x364 mm)/(10.1x14.3 in)<br />
B5 (JIS) B5 (JIS) (182x257 mm)/(7.2x10.1 in)<br />
B6 B6<br />
11x17 11x17 (279.4x431.8 mm)/(11x17 in)<br />
Envelope Com10 Envelope Com10 (104.8x241.3 mm)/(4.1x9.5 in)<br />
Envelope DL Envelope DL (110x220 mm)/(4.3x8.7 in)<br />
Envelope C5 Envelope C5 (162x229 mm)/(6.4x9 in)<br />
Postcard Postcard (100x148 mm)/(3.9x5.8 in)<br />
16K 16K (195x270 mm)/(7.7x10.6 in)<br />
Custom Size Custom Size<br />
[Custom Size Settings] [Custom Size Settings]<br />
Width; 90~311mm<br />
Width; 90~311mm<br />
(3.55~12.25 inch)<br />
(3.55~12.25 inch)<br />
Length: 140~1200mm Length: 140~1200mm<br />
5.50~47.24 inch)<br />
5.50~47.24 inch)<br />
9
2. Software Description<br />
10<br />
Table 2-4-2 Common PCL / PS Driver functions<br />
COMMON PCL Common PS<br />
PCL XL PROTOCOL 2.1 PS LEVEL 3<br />
Paper Size Same as Original Size Same as Original Size<br />
Letter Letter (8.5x11 in)<br />
Legal Legal (8.5x14 in)<br />
Executive Executive (7.25x10.5 in)<br />
A3 A3<br />
Remarks<br />
A4 A4 (210x297 mm)/(8.3x11.7 in)<br />
A5 A5 (148x210 mm)/(5.8x8.3 in)<br />
A6 A6<br />
B4 (JIS) B4 (JIS)<br />
B5 (JIS) B5 (JIS) (182x257 mm)/(7.2x10.1 in)<br />
B6 B6<br />
11x17 11x17<br />
Envelope Com10 Envelope Com10 (104.8x241.3 mm)/(4.1x9.5 in)<br />
Envelope DL Envelope DL (110x220 mm)/(4.3x8.7 in)<br />
Envelope C5 Envelope C5 (162x229 mm)/(6.4x9 in)<br />
Postcard Postcard (100x148 mm)/(3.9x5.8 in)<br />
16K 16K (195x270 mm)/(7.7x10.6 in)<br />
Custom Size Custom Size<br />
Zoom Auto Auto<br />
Manual (25-400%) Manual (25-400%)<br />
Paper Tray Auto Auto<br />
Manual Feed Manual Feed<br />
Copies 1-9999 1-9999<br />
Combination Off Off<br />
On On<br />
2 in 1 2 in 1<br />
4 in 1 4 in 1<br />
6 in 1 6 in 1<br />
9 in 1 9 in 1<br />
16 in 1 16 in 1<br />
Combination Details Left-to-Right / Top-to-Bottom Left-to-Right / Top-to-Bottom<br />
Border<br />
Right-to-Left / Bottom-to-Top Right-to-Left / Bottom-to-Top<br />
Sideways from Upper-Left Sideways from Upper-Left<br />
Downward from Upper-Left Downward from Upper-Left<br />
Sideways from Upper-Right Sideways from Upper-Right<br />
Downward from Upper-Right Downward from Upper-Right<br />
Off Off<br />
On On<br />
Frame Frame<br />
Line Line
Table 2-4-2 Common PCL / PS Driver functions<br />
COMMON PCL Common PS<br />
PCL XL PROTOCOL 2.1 PS LEVEL 3<br />
Rotate 180 Off Off<br />
On On<br />
Skip Blank Pages Off N/A<br />
On N/A<br />
Print Type 1-Sided 1-Sided<br />
2-Sided 2-Sided<br />
Booklet Details<br />
Booklet Booklet<br />
Binding Left Binding / Top Binding Left Binding / Top Binding<br />
Direction<br />
Right Binding / Bottom Binding Right Binding / Bottom Binding<br />
Border Off Off<br />
Supported PDL Protocols<br />
On On<br />
Select Color Auto Color Auto Color<br />
Font Settings<br />
Download<br />
Font Format<br />
Use Printer<br />
Fonts<br />
Gray Scale Gray Scale<br />
NA Auto<br />
Outline Outline<br />
Bitmap Bitmap<br />
NA Native TrueType<br />
Off Off<br />
On On<br />
Configure and Settings Tab<br />
Software Tools Web Connection Web Connection<br />
EMF Spool Off N/A<br />
On N/A<br />
Display Constraint Message Off Off<br />
On On<br />
Display paper set in Print Off Off<br />
Server Properties<br />
On On<br />
• KONICA MINOLTA Universal PCL: PCLXL Protocol 2.1<br />
• KONICA MINOLTA Universal PS: Postscript Level 3<br />
Even if PDL is shown as supported, printing may not be possible if the output device's<br />
protocol is below that of the UPD.<br />
2. Software Description<br />
Remarks<br />
11
3. Install and Uninstall of the UPD<br />
12<br />
3.1 install and uninstall<br />
KONICA MINOLTA Universal Printer Driver includes an installer and uninstaller, which let<br />
you easily install and uninstall the software. You can also perform these actions manually,<br />
without using the installer or uninstaller.<br />
Installation<br />
Method 1: Installing Using the Included Installer<br />
1. Run the following exe file.<br />
• UPDSetup.exe (for 32-bit environments)<br />
• UPDSetup64.exe (for 64-bit environments)<br />
2. Check the Software End User License Agreement, and if there are no problems, click<br />
Agree.<br />
Figure 3-1-1 Software End User License Agreement Dialog Box
3. Check the installation details, and click OK.<br />
Figure 3-1-2 Installation Details Confirmation Dialog Box<br />
note:<br />
3. Install and Uninstall of the UPD<br />
If KONICA MINOLTA Universal Printer Driver has already been installed on your<br />
computer, the dialog box below will appear in place of the one above. If you click OK,<br />
the uninstallation dialog box will start, enabling you to delete the existing driver (see steps<br />
2 and later in Uninstallation, below). When you are finished, start the installer again, and<br />
install the new driver.<br />
Figure 3-1-3 Reinstallation Message Box<br />
13
3. Install and Uninstall of the UPD<br />
14<br />
4. The installer runs.<br />
Figure 3-1-4 Installing Dialog Box<br />
5. When the dialog box below appears, installation is complete. Click OK to close the<br />
dialog box.<br />
Figure 3-1-5 Installation Completed Dialog Box
3. Install and Uninstall of the UPD<br />
Method 2: Manual Installation<br />
Install the driver using the Windows "Add Printer" wizard. You can access the "Add<br />
Printer" wizard from the Printers folder.<br />
notE:<br />
In this document, the term "Printers" folder refers to the following folder.<br />
• Windows XP / Server 2003: "Printers and Faxes" folder<br />
• Windows 2000 / Vista / Server 2008: "Printers" folder<br />
• Windows 7 / Server 2008 R2: "Devices and Printers" folder<br />
Uninstallation<br />
Method 1: If You Installed the Software Using the Included Installer<br />
If you installed UPD using the included installer, then the uninstaller is installed on your<br />
operating system. Use that to uninstall the software.<br />
1. Use one of the following methods to start the uninstaller.<br />
• Windows Vista / Server 2008 / 7<br />
Run [Start] menu -> [All Programs] -> [KONICA MINOLTA] -> [Universal<br />
PCL(PS)] -> [Uninstall Printer Driver]<br />
Select [Control Panel] -> [Programs and Features] and double click<br />
[KONICA MINOLTA Universal PCL(PS)]<br />
• Windows 2000 / XP / Server 2003<br />
Run [Start] menu -> [All Programs] -> [KONICA MINOLTA] -> [Universal<br />
PCL(PS)] -> [Uninstall Printer Driver]<br />
Select [Control Panel] -> [Add/Remove Programs] -> [KONICA MINOLTA<br />
Universal PCL(PS)] and click Delete<br />
15
16<br />
3. Install and Uninstall of the UPD<br />
2. The Uninstallation Details Confirmation dialog box appears. Click OK.<br />
Figure 3-1-6 Uninstallation Details Confirmation Dialog Box<br />
3. The uninstallation process runs.<br />
Figure 3-1-7 Uninstalling Dialog Box
4. After the process ends, click OK.<br />
Figure 3-1-8 Uninstallation Complete Dialog Box<br />
3. Install and Uninstall of the UPD<br />
5. If there is no problems restarting your computer, click Yes. Your computer will restart to<br />
complete the uninstallation.<br />
Figure 3-1-9 Restart Confirmation Dialog Box (1)<br />
note:<br />
If you launched the uninstallation dialog via Figure 3-1-3 Reinstallation Message Box, the<br />
message shown below will appear in place of the one above. After restarting, please<br />
begin the installation process for the new driver again.<br />
Figure 3-1-10 Restart Confirmation Dialog Box (2)<br />
17
3. Install and Uninstall of the UPD<br />
18<br />
Method 2: Manual Uninstallation<br />
If you installed UPD manually, you must uninstall it manually by following the procedure<br />
below.<br />
1. From the Printers folder, delete the "KONICA MINOLTA Universal PCL(PS)" printer icon.<br />
If you created any printer icons in Traditional Mode (See section 4.3), delete all those<br />
icons as well.<br />
2. From the "Print Server Properties" dialog box, on the "Drivers" tab, delete "KONICA<br />
MINOLTA Universal PCL(PS)".<br />
3. From the Start menu, specify "regedit.exe". The registry editor starts.<br />
4. In the registry editor, delete the following keys, then close the registry editor.<br />
• PCL<br />
<br />
• PS<br />
<br />
5. Delete the following folders if they exist.<br />
• 32-bit OS (Windows 2000/XP (x86)/Server 2003 (x86)/Vista (x86)/Server 2008<br />
(x86)/7 (x86))<br />
<br />
• 64-bit OS (Windows XP (x64)/Server 2003 (x64)/Vista (x64)/Server 2008<br />
(x64)/7 (x64))<br />
<br />
6. Delete the following folders if they exist.<br />
• Windows Vista (x86 / x64), Server 2008 (x86 / x64), 7 (x86 / x64)<br />
<br />
• Windows 2000, XP (x86 / x64), Server 2003 (x86 / x64)<br />
<br />
notE:<br />
The installer included with Version 1.10.0.0 / 1.10.1.0 uninstalls old versions of UPD, and<br />
then installs Version 1.10.0.0 / 1.10.1.0, so there is no need to perform the uninstallation<br />
manually.
3.2 usE point & print<br />
3. Install and Uninstall of the UPD<br />
You can share using Point & Print with KONICA MINOLTA Universal Printer Driver. Follow<br />
the steps below to print using Point & Print.<br />
1. Install UPD on your server, and then create a printer icon in Traditional Mode. (See<br />
section 4.3 for details.)<br />
2. Configure the printer icon you created for sharing.<br />
3. From a client PC, access the shared printer icon on the server, and download and<br />
install it.<br />
4. Print using the installed child driver.<br />
notE:<br />
We do not recommend sharing via Dynamic Mode, and accessing it from a client.<br />
Although it is also possible to print using Dynamic Mode, it will not be possible to open the<br />
Device Selector dialog box on the client computer, so the device that was last connected<br />
to the server will perform the printing. (See Chapter 4 for details about Dynamic Mode and<br />
Traditional Mode.)<br />
Updating UPD in Point & Print Environment<br />
If you wish to delete an older version of UPD and install a new version in the Point & Print<br />
environment, then in order to delete UPD completely, you must delete UPD on the server, and<br />
also delete the shared printer drivers installed on the client PC. The procedure is as follows.<br />
Method 1: Using the uninstaller<br />
1. On the client PC, execute the following file from the UPD installation package.<br />
• UPDSetup.exe (for 32-bit environments)<br />
• UPDSetup64.exe (for 64-bit environments)<br />
2. Check the Software End User License Agreement, and if there are no problems, click<br />
Agree.<br />
19
3. Install and Uninstall of the UPD<br />
20<br />
3. After the dialog below appears, click OK.<br />
Figure 3-2-1 Reinstallation Message Box (2)<br />
4. Make sure that the name of the shared printer icon you wish to delete appears, and<br />
then click OK to start the deletion.<br />
Figure 3-2-2 Uninstallation Details Confirmation Dialog Box (2)<br />
5. After the deletion is complete, click OK to close the dialog.<br />
Method 2: Deleting manually<br />
1. On the client PC, open the Printers folder.<br />
2. Delete all shared UPD printer icons.<br />
3. From the "Print Server Properties" dialog box, on the "Drivers" tab, delete<br />
"KONICA MINOLTA Universal PCL(PS)".
4. In the registry editor, delete the following keys, then close the registry editor.<br />
• PCL<br />
3. Install and Uninstall of the UPD<br />
<br />
• PS<br />
<br />
5. Delete the following folders if they exist.<br />
• Windows Vista (x86 / x64), Server 2008 (x86 / x64), 7 (x86 / x64)<br />
<br />
• Windows 2000, XP (x86 / x64), Server 2003 (x86 / x64)<br />
<br />
After you have deleted the shared printer drivers from the client PC, install the new<br />
version of UPD on the server, and then create a printer icon in Traditional Mode.<br />
Next, share the printer icon you created with the client PC.<br />
3.3 individual child drivEr updatEs<br />
You can use UPD to print with any device that was released for sale after the release of<br />
your UPD version, by using the following common child drivers included in UPD.<br />
Types of common child drivers<br />
• KONICA MINOLTA magicolor Series<br />
• KONICA MINOLTA pagepro Series (same configurable features as magicolor<br />
Series)<br />
• KONICA MINOLTA bizhub Series<br />
• Common PCL / PS<br />
If you select a device from the Network Search dialog box and connect to it, UPD will<br />
select the appropriate child driver automatically. You can also select the child driver of<br />
your choice from the Manual Connection dialog box.<br />
21
3. Install and Uninstall of the UPD<br />
22<br />
Please note, however, that the less functionality will be available than the printer driver<br />
that is included on the software CD-ROM. For this reason, some models provide updated<br />
versions of UPD, or individual child drivers for these models via update packages.<br />
An update package is a method to provide child drivers of new products. For details of<br />
update packages are described in the following section.<br />
3.4 adding nEw <strong>Konica</strong> minolta mFps to your installation<br />
You can use an update package to add new child drivers without uninstalling the UPD<br />
version you are currently using, or without deleting your printer icons created using UPD.<br />
Update packages are available from the KONICA MINOLTA website in the same way as<br />
other printer drivers.<br />
Update Packages<br />
• The purpose of this package is to add and update child drivers to the existing<br />
UPD already installed on your computer.<br />
• The supported operating systems are the same as the UPD to be updated.<br />
• It may be necessary to restart the computer when updating, depending on the<br />
contents of the update. A warning will appear when performing the update if a<br />
restart is required.<br />
• After an update, the version of UPD will be upgraded. Check the procedure in<br />
section 4.4.<br />
• The UPD versions supported for update are defined for each update package,<br />
and only supported versions can be updated. In general, UPD versions that<br />
were released after the update package cannot be updated.<br />
• The user must have Administrator privileges in order to perform the update.<br />
• When you perform an update, UPD must have been installed successfully. The<br />
update cannot be performed if some of the installed UPD configuration files<br />
are missing.<br />
• We recommend using an update package with the same UI language as the<br />
installed UPD. Although it is possible to update with a different UI language,<br />
all of the UI text will not be changed after the update. If you change the UI<br />
language, please first uninstall UPD, and then install the UPD version with the<br />
desired UI language.
Updating UPD<br />
3. Install and Uninstall of the UPD<br />
Note: The actual appearance of the update tool may differ slightly from the screen<br />
captures shown below.<br />
1. After making sure that the UPD dialog box is not open, run the file "UPDUpdate.exe"<br />
inside the update package.<br />
2. The following window will appear if the update requires a restart. If there are no<br />
problems with this, click Yes.<br />
Figure 3-4-1 1 PC Restart Warning Message<br />
3. Check the update details, and click OK.<br />
Figure 3-4-2 Update Details Confirmation Dialog Box<br />
23
3. Install and Uninstall of the UPD<br />
24<br />
4. The update starts.<br />
Figure 3-4-3 Updating Dialog Box<br />
5. After the processing is complete, the window in Figure 3-4-4 will appear if a restart is<br />
required. If it is not, the window in Figure 3-4-5 will appear. Clicking OK here will close<br />
this window, but if a restart is required, you must then select a restart method in the<br />
window in Figure 3-4-4. Select “Restart now” and click OK to restart the computer<br />
automatically. Selecting “Restart later” will only close the window; the computer will not<br />
be restarted automatically. In order to complete the update, you will need to restart the<br />
computer manually later.
Figure 3-4-4 Update Complete Dialog Box 1<br />
Figure 3-4-5 Update Complete Dialog Box 2<br />
3. Install and Uninstall of the UPD<br />
25
4. Using the Universal Print Driver<br />
26<br />
Using a New Child Driver<br />
After updating UPD, you can essentially use the new child driver in the same way as you<br />
normally would. If you have created printer icons using Traditional Mode, however, then<br />
even if a new child driver for that printer is added or changed by the update, the icon will<br />
still call the old child driver. If you want to call a newly added child driver from a printer<br />
icon crated in Traditional Mode, then you must create the icon again by following the<br />
steps below.<br />
1. From the Windows Printers folder, delete the Traditional Mode printer icon of the printer<br />
you want to update.<br />
2. In the Windows Printers folder, right click on the "KONICA MINOLTA Universal<br />
PCL(PS)" icon, and select Print Setup.<br />
3. The KONICA MINOLTA Universal Printer Driver Device Selector opens.<br />
4. Create the printer icon mentioned in step 1 again.<br />
5. Log off from the operating system, and then log in again. (You do not need to restart<br />
the operating system.)<br />
4.1 dynamic modE and traditional modE<br />
KONICA MINOLTA Universal Printer Driver has two modes: Traditional Mode and<br />
Dynamic Mode. Each mode has a different purpose.<br />
Dynamic Mode<br />
Use this mode to start the UPD's Device Selector, and access the child driver for each<br />
of your devices from there. We recommend you use this mode if you want to search for<br />
nearby available devices, or if you want to select the device to use each time you print.<br />
Traditional Mode<br />
This mode is for when you have already created a printer icon using UPD's Device<br />
Selector, and then access the specific driver for your printer directly from this icon. Once<br />
you have created an icon, you can use it in exactly the same way as an ordinary printer<br />
driver. We recommend this mode if you always use the same printer, or similar situations.
4.2 using dynamic modE<br />
4. Using the Universal Print Driver<br />
This section describes how to print in Dynamic Mode. In Dynamic Mode, you can select<br />
devices using one of three methods: Network Search, Manual Connection, and History.<br />
Dynamic Mode is not available to restricted users (e.g. with "User" privileges).<br />
Network Search<br />
Use Network Search to search for devices on the network, and select one of the<br />
matching devices that are found. The procedure for using Network Search is as follows.<br />
1. From the Windows Printers folder, right click on the "KONICA MINOLTA Universal<br />
PCL(PS)" icon, and select Print Setup.<br />
2. The KONICA MINOLTA Universal Printer Driver Device Selector opens.<br />
3. Select "Network Search" from the pull-down list at the top of the Device Selector<br />
dialog box.<br />
note:<br />
If there is no history data such as when you first open the Device Selector, "Network<br />
Search" will be selected automatically by default.<br />
Figure 4-2-1 Network Search Selection<br />
4. The Device Selector starts to search the network for devices.<br />
note:<br />
Click Cancel at the bottom of the dialog box below to cancel the search.<br />
Figure 4-2-2 Searching Dialog Box<br />
27
4. Using the Universal Print Driver<br />
28<br />
notes:<br />
• Click Refresh at the bottom of the Device Selector dialog box to perform the<br />
search again.<br />
• Click Search Settings at the bottom of the Device Selector dialog box to open an<br />
advanced search settings dialog box. See Search Settings, below, for details.<br />
5. A list of detected devices appears.<br />
Figure 4-2-3 Network Search View
The following information is displayed for each device.<br />
6. Select a device from the list of detected devices, and click OK.<br />
4. Using the Universal Print Driver<br />
Table 4-2-1 Details about Devices in the Network Search View<br />
Column Name Description<br />
Device Name This shows the printer-type icon and the name of the device.<br />
See Table 2-4-1 Printer Type Icons for information about the<br />
printer-type icons.<br />
Status(Number of Jobs Waiting) This shows the device status as an icon and text.<br />
See Status Icon Specification, below, for details.<br />
Location This shows the location where the device is installed. The<br />
location must be entered on the device beforehand.<br />
Speed This shows the maximum print speed of the device in PPM.<br />
Port This shows the IP address (IPv4 or IPv6).<br />
MAC Address This shows the MAC address of the device.<br />
Model Name This shows the model name of the device.<br />
Color/Black and White This shows whether the device is a color or B&W printer.<br />
PS3 (Only for PS version)<br />
PCL-XL (Only for PCL version)<br />
7. The Connection Confirm dialog box opens. Click OK to connect to the child driver for<br />
the selected device.<br />
note:<br />
It may take some time to connect.<br />
Figure 4-2-4 Example of Connection Confirmation Dialog Box<br />
This shows whether the device supports target PDL. Devices<br />
that do not support target PDL cannot be used.<br />
29
4. Using the Universal Print Driver<br />
30<br />
8. The child driver's dialog box appears. Use it to make advanced settings.<br />
Figure 4-2-5 Example of Child Driver's Dialog Box (Dynamic Mode)<br />
9. Click OK to close the child driver's dialog box.<br />
10. Start your application, and open the file that you want to print.<br />
11. Start the application's print dialog box.<br />
12. From the printer pull-down list, select "KONICA MINOLTA Universal PCL (PS)".<br />
13. Print the file.<br />
Manual Connection<br />
Use Manual Connection to select the printer device and child driver manually. The<br />
procedure is as follows.<br />
1. From the Windows Printers folder, right click on the "KONICA MINOLTA Universal<br />
PCL(PS)" icon, and select Print Setup.<br />
2. The KONICA MINOLTA Universal Printer Driver Device Selector opens.
4. Using the Universal Print Driver<br />
3. Select "Manual Connection" from the pull-down list at the top of the Device Selector<br />
dialog box.<br />
Figure 4-2-6 Example of Manual Connection View<br />
4. Select the child driver to use from the list on the left of the dialog box.<br />
5. Specify the connection in the right-hand side of the dialog box. There are three ways to<br />
specify the connection, as shown below.<br />
• IP Address/Host Name<br />
You can specify the connection by entering the IPv4 address, IPv6 address, or<br />
host name directly. Fully Qualified Domain Names (FQDN) cannot be used, and<br />
up to 48 characters can be entered.<br />
• PortSpecify the output device by the port registered with the operating<br />
system.<br />
• Shared Printer<br />
Specify the output device by entering the path to a shared printer<br />
(e.g. "//server/printer"). Up to 239 characters can be entered. You can also<br />
click Browse to specify it while browsing for a shared printer.<br />
note: The Browse button is not supported in Windows 7 (Server 2008 R2) and<br />
later operating systems.<br />
31
4. Using the Universal Print Driver<br />
32<br />
6. After you have specified the child driver and connection, click OK.<br />
7. Perform the same procedures following step 7 in Network Search.<br />
History<br />
You can connect to a device you have connected based on your history information.<br />
The procedure is as follows.<br />
1. From the Windows Printers folder, right click on the "KONICA MINOLTA Universal<br />
PCL(PS)" icon, and select Print Setup.<br />
2. The KONICA MINOLTA Universal Printer Driver Device Selector opens.<br />
3. Select "History" from the pull-down list at the top of the Device Selector dialog box.<br />
•| If there is history data for devices you have connected to in the past, then<br />
"History" will be selected automatically by default. If there is no history data,<br />
"Network Search" will be selected by default.<br />
Figure 4-2-7 Example of History View<br />
4. A list of the devices you have connected to appear in the dialog box.
The following information is displayed for each device.<br />
Table 4-2-2 Details about Devices in the History View<br />
Columne Name Description<br />
4. Using the Universal Print Driver<br />
Last time used This shows the printer-type icon and the last time the device<br />
was used. See Table 2-4-1 Printer Type Icons for information<br />
about the printer-type icons.<br />
Device Name This shows the name of the device.<br />
Status(Number of Jobs Waiting) This shows the device status and job-queue congestion as<br />
an icon and text. The display of the job queue status is only<br />
supported for KONICA MINOLTA devices. See Status Icon<br />
Specification, below, for details.<br />
Memo This shows the text you entered in Figure 4-2-8 History Edit<br />
Dialog Box.<br />
Location This shows the location where the device is installed. The<br />
location must be entered on the device beforehand.<br />
Speed This shows the maximum print speed of the device in PPM.<br />
Port This shows the port of the output device.<br />
MAC Address This shows the MAC address of the device.<br />
Model Name This shows whether the device supports target PDL. Devices<br />
that do not support target PDL cannot be used.<br />
Color/Black and White This shows whether the device is a color or B&W printer.<br />
PS3 (Only for PS version)<br />
PCL-XL (Only for PCL version)<br />
You can use the Edit and Delete functions to edit the list of devices on the History view.<br />
• Edit function<br />
You can use the Edit dialog box below to edit the device's Memo column.<br />
You can start the Edit dialog box using one of the two methods shown below.<br />
> Select the device, and click Edit at the bottom of the dialog box.<br />
> Right click on the device to edit, and select Edit from the menu.<br />
Figure 4-2-8 Example of History Edit Dialog Box<br />
This shows whether the device supports target PDL. Devices<br />
that do not support target PDL cannot be used.<br />
33
4. Using the Universal Print Driver<br />
34<br />
• Delete function<br />
You can delete devices from the list on the History dialog box by the two<br />
methods shown below.<br />
> Select the device, and click Delete at the bottom of the dialog box.<br />
> Right click on the device to delete, and select Delete from the context<br />
menu.<br />
When you perform the method above, the confirmation dialog box shown below asking<br />
you to confirm the deletion. Click Yes to delete the device from the History view.<br />
Figure 4-2-9 Example of History Delete Dialog Box<br />
5. Select a device to output from the list of devices, and click OK.<br />
6. Perform the same procedures following step 7 in Network Search.
Filtering Devices<br />
4. Using the Universal Print Driver<br />
You can specify parameters to filter devices on the Network Search and History views.<br />
Click Details at the lower right of the dialog box to display the Advanced Search Settings<br />
area, and specify your filter parameters.<br />
Figure 4-2-10 Example of Expanded View<br />
Details of the filter parameters that you can specify are described below.<br />
Table 4-2-3 Details about Devices in the History View<br />
Parameter Description<br />
2-Sided Select this checkbox to only show devices capable of two-sided<br />
printing.<br />
A3/11x17 Select this checkbox to only show devices supporting A3 size<br />
and 11x17 inch paper. Note, however, that if this checkbox is<br />
selected, then devices will not be shown if they are unknown to<br />
support that size, or if they are third-party devices.<br />
Printer/MFP Select whether to display only printers, only MFP’s, or both.<br />
Devices will be treated as printers if their type cannot be<br />
determined, or if they are third-party devices.<br />
Color/Black and White Specify whether to display only color printers, only B&W<br />
printers, or both.<br />
35
4. Using the Universal Print Driver<br />
36<br />
Search Settings<br />
When using "Network Search", you can set detailed search parameters in the "Search<br />
Settings" dialog box shown below.<br />
Figure 4-2-11 Search Settings Dialog Box<br />
The settings and their descriptions are described below.<br />
Table 4-2-4 Details about Devices in the History View<br />
Parameter Description<br />
IP Version Specify the IP protocol version to give priority for searching.<br />
IPv4 Priority Give priority to IPv4. This is the default for Windows Vista/<br />
Server 2008 or later operating systems.<br />
IPv6 Priority Give priority to IPv6.<br />
IPv4 Only Only search for IPv4. “IPv4 Only” is the only choice available on<br />
Windows 2000/XP/Server 2003 (other choices will be grayed<br />
out).<br />
IPv6 Only Only search for IPv6.<br />
Subnet Settings Select this checkbox to set the subnet to search for. If this<br />
checkbox is cleared, then IP address and subnet mask are<br />
acquired for computers with UPD installed, and the search is<br />
performed on that computer’s subnet. This cannot be set if<br />
“IPv6 Only” is selected.<br />
IP Address/Subnet Specify the IP address of the subnet to search.<br />
Subnet Mask Specify the subnet mask of the subnet to search.<br />
Search Method(IPv4) Specify the IPv4 search method. This is grayed out if “IPv6<br />
Only” is selected.<br />
Unicast Perform the search via unicast. This will make the search take<br />
longer, because the computer will communicate with devices<br />
on the network on a 1-to-1 basis. And also it may be possible to<br />
detect devices that were not detected using a broadcast.<br />
Broadcast Perform the search via broadcast. This reduces the search<br />
time, because it communicates with all the devices on the<br />
network at once.
notE:<br />
4. Using the Universal Print Driver<br />
If you specify a subnet other than that of the PC/server on which UPD is installed under<br />
"Subnet Settings," then a Broadcast request may not be able to pass through the router,<br />
depending on the router's configuration. If this happens, you can perform the search by<br />
changing the "Search Method" to Unicast.<br />
Status Icon Specification<br />
In the Network Search and History views, the "Status(Number of Jobs Waiting)" column<br />
shows icons indicating the device status and the length of the job queue. Each details is<br />
described below.<br />
• Device Status<br />
IconThis icon indicates whether a warning or error has occurred on the<br />
device. To see details about a warning or error, use the Printer Information<br />
described below, or check the device directly.<br />
Table 4-2-4A Device Status Icons<br />
Device Status Icon Description<br />
Ready The device has no warnings or errors, and is ready to print.<br />
Warning<br />
There is a warning on the device, such as low toner or paper. Print is possible.<br />
Unavailable The device is unable to print, due to a device error, running out of paper, etc.<br />
Unknown The device status could not be acquired.<br />
• Job Queue Icon<br />
This icon indicates the number of standby jobs on the device's queue.<br />
Table 4-2-5 Job Queue Icons<br />
Congestion Queued Jobs Icon<br />
High 10+<br />
Medium<br />
2-9<br />
Low 1<br />
No Jobs in Queue 0<br />
Unknown Unknown<br />
37
4. Using the Universal Print Driver<br />
38<br />
Note, however, that the queue level will always be displayed as "unknown" for third-party<br />
devices.<br />
The number in parentheses in the text to the right of the icon shows the number of<br />
currently queued jobs. The status information of these devices is updated every 10<br />
seconds.<br />
Options<br />
The Option dialog box below enables you to set the Device Selector options and check<br />
the version. To display this dialog, click Details on the Device Selector dialog box to<br />
display the expanded view (Figure 4-2-10 Sample Expanded View), and then click Option<br />
in the lower right of that dialog box.<br />
Figure 4-2-12 Option Dialog Box<br />
The settings available from this dialog box are described below.<br />
Table 4-2-6 Option Dialog Box Settings<br />
Setting Description<br />
When selecting this Universal Printer Driver from an application,<br />
it will be connected to the printer last used. The Device selection<br />
dialog will not be displayed.<br />
When KONICA MINOLTA Universal Printer Driver is started with<br />
this checkbox is selected, the last child driver to be used will be<br />
opened, rather than the Device Selector. However, the Device<br />
Selector dialog box will open if a child driver has never been<br />
used.<br />
Port settings for Network Search Set the port number to use for network searches. Change this<br />
setting only when you cannot perform searches normally.<br />
Auto Port Search Search for the port automatically. This setting is used by<br />
default.<br />
Select Searching Port Set the port number. The default is 35. 1 to 65535 can be<br />
entered.<br />
Version Information Click Version Information to view the KONICA MINOLTA<br />
Universal Printer Driver Version Information dialog box (Figure<br />
4-4-1 Version Information Dialog Box).
Printer Information<br />
4. Using the Universal Print Driver<br />
You can open the KONICA MINOLTA PAGE SCOPE Web Connection from the Device<br />
Selector, and check the device status from a Web browser. The procedure for checking<br />
the Printer Information is as follows.<br />
• Select a device from the Network Search or History view, and click Printer Information.<br />
(The Printer Information can be found in the expanded area that appears when you<br />
click Details.)<br />
• From the History view, right click on the device whose information you want to check,<br />
and select Printer Information from the context menu.<br />
If a third-party device has the similar function to the KONICA MINOLTA PAGE SCOPE<br />
Web Connection, then you can also check its information using Printer Information.<br />
4.3 using traditional modE<br />
This section describes how to print in Traditional Mode. In Traditional Mode, use the<br />
Device Selector to create a printer icon for the device you want to use, and then you use<br />
that printer icon to print.<br />
Creating a Printer Icon<br />
First, a user with Administrator privileges creates a printer icon. The procedure is as<br />
follows.<br />
1. Open the Print Setup dialog box from "KONICA MINOLTA Universal PCL (PS)" in the<br />
Printers folder, o, and launch the Device Selector.<br />
2. Using either History, Network Search, or Manual Connection, select the device for<br />
which you want to create an icon. (See section 4.2)<br />
3. Click Create Printer Icon at the lower left of the Device Selector dialog box.<br />
Figure 4-3-1 Create Printer Icon<br />
39
4. Using the Universal Print Driver<br />
40<br />
4. The Create Printer Icon dialog box appears. Enter the name of the printer icon in the<br />
"Printer Icon Name" textbox, select the "Set as Default Printer" if you want to use this as<br />
the default printer, and then click Add.<br />
• Up to 128 characters can be entered for Printer Icon Name. You cannot use<br />
the following characters: , ! \<br />
Figure 4-3-2 Create Printer Icon Dialog Box<br />
5. When the creation of the printer icon is complete, the dialog box shown below<br />
appears. Click OK.<br />
Figure 4-3-3 Printer Icon Created Message Box<br />
6. The child driver dialog box for the specified device appears. Click OK or Cancel to<br />
close the dialog box.<br />
7. Click Cancel to close the Device Selector dialog box.
8. Check that the printer icon you created is added to the Printers folder.<br />
Figure 4-3-4 Example of Created Printer Icons<br />
notE:<br />
4. Using the Universal Print Driver<br />
If you started UPD from a Server operating system's MMC (Microsoft Management<br />
Console), then Create Printer Icon will be disabled, and it will be impossible to create<br />
printer icons.<br />
41
4. Using the Universal Print Driver<br />
42<br />
Printing in Traditional Mode<br />
After you have created a printer icon, you can use it to print in the same way as when<br />
using a conventional printer driver. Unlike the case of Dynamic Mode, restricted users can<br />
print in Traditional Mode. The procedure is as follows.<br />
1. Start the print dialog box of the application you want to print from.<br />
2. Select the printer icon you created, and click Properties.<br />
Figure 4-3-5 Print Dialog Box<br />
3. When the child driver appears, configure printing, and click OK.<br />
Figure 4-3-6 Example of Child Driver Dialog Box (Traditional Mode)<br />
4. From the Print dialog box, click OK to print the file.
4.4 upd vErsions<br />
This section describes the details of the KONICA MINOLTA Universal Printer Driver<br />
version, and how to check it. UPD includes a version for UPD as a whole, as well as<br />
information about individual versions, including UPD's internal modules, Device Selector,<br />
and the child drivers.<br />
UPD Version<br />
You can check the overall UPD version, and the version of the Device Selector and other<br />
internal UPD modules from the Device Selector dialog box. The procedure is as follows.<br />
1. From the Windows Printers folder, right click on "KONICA MINOLTA Universal<br />
PCL(PS)", and select Print Setup.<br />
2. The KONICA MINOLTA Universal Printer Driver Device Selector opens.<br />
3. Click Details to display the expanded view.<br />
4. Click Option to start the Options dialog box.<br />
5. Click Version Information.<br />
6. The Version Information dialog box appears. Check the version.<br />
Figure 4-4-1 Version Information Dialog Box<br />
4. Using the Universal Print Driver<br />
43
4. Using the Universal Print Driver<br />
44<br />
The following version information can be checked from Figure 4-4-1 Version Information<br />
Dialog Box.<br />
Table 4-4-1 Version Information Dialog Box Items<br />
Parameter Description<br />
Version This shows the overall UPD version. Even when one internal<br />
UPD module is changed, the version number is incremented.<br />
The version is also incremented after an update using the<br />
update tool.<br />
Core This is the UPD Core version.<br />
Sub This is the UPD Core sub-version.<br />
Device Selector This is the Device Selector version.<br />
LOC This is the Device Selector’s localized version.<br />
Child Driver Versions<br />
You can check the version of a child driver from that child driver's dialog box. The<br />
procedure is as follows.<br />
1. From either Dynamic Mode or Traditional Mode start the dialog box of the child driver<br />
whose version you want to check.<br />
2. From the "MyTab" tab or "Other" tab, click Check Driver Version.<br />
3. The Check Driver Version dialog box shown below appears.<br />
Figure 4-4-2 Check Driver Version Dialog Box
The following version information can be checked in the above dialog box.<br />
Table 4-4-2 Items of Check Driver Version Dialog Box<br />
Parameter Description<br />
Version The version of the child driver. Each child driver has an<br />
independent version.<br />
Core This is the Child Driver Core version.<br />
Sub This is the Child Driver Core sub-version.<br />
4. Using the Universal Print Driver<br />
KPD This is the customization file version of the child driver.<br />
45
5. Frequently Asked Questions<br />
46<br />
5.1 is thE clustEr sErvEr EnvironmEnt supportEd?<br />
Yes, cluster server environment is currently supported in the PCL version of the Universal<br />
Printer Driver through a special UPD release. Please contact your <strong>Konica</strong> <strong>Minolta</strong> Service<br />
and Support Division to request this special UPD release. PS UPD support is excepted<br />
by the end of 2010.<br />
5.2 is thE citrix EnvironmEnt supportEd?<br />
Yes, Citrix environment is currently supported in the PCL version of the Universal Printer<br />
Driver through a special UPD release. Please contact your <strong>Konica</strong> <strong>Minolta</strong> Service and<br />
Support Division to request this special UPD release. PS UPD support is excepted by the<br />
end of 2010.<br />
5.3 how to Find thE supportEd or non supportEd products by upd?<br />
The devices in the UPD device list with the "PDL Support - Yes -" icon shown in Table<br />
2-4-1 Printer Type Icons of section 2.4 in the leftmost column support PDL. Those with<br />
the "PDL Support - No -" icon do not support it.<br />
Figure 5-3-1 Example of Printer Type Icon Page View<br />
5.4 can i usE mytab Function?<br />
If MyTab is available from the individual driver for that <strong>Konica</strong> <strong>Minolta</strong> device, then it is also<br />
available from UPD.
Specifically, it is available for the following models.<br />
• bizhub C35 / C35P / magicolor 4750<br />
• bizhub C652DS / C552DS / C452<br />
• bizhub C360 / C280 / C220<br />
5.5 usEr proFilE sizE oF windows systEm has bEEn ExpandEd aFtEr<br />
installing upd.<br />
Individual configuration information for connected devices is shown for each login user,<br />
expanded in the User Area. For this reason, when you first connect a model that has not<br />
been connected before, then the user profile will be large (about 10MB per Child Driver),<br />
but subsequently, after the necessary connections are complete, it will not become larger<br />
no matter how many times you connect that model.<br />
notE:<br />
The following folders are “hidden folders”<br />
• Windows Vista (x86 / x64), Server 2008 (x86 / x64), 7 (x86 / x64)<br />
<br />
• Windows 2000, XP (x86 / x64), Server 2003 (x86 / x64)<br />
<br />
5.6 can non pc administrator also opEratE upd without any rEstrictions?<br />
If a user without port-creation privileges (e.g. having "User" privileges) tries to start the<br />
Device Selector, then the following message will appear, and the Device Selector will not<br />
start.<br />
Figure 5-6-1 Sample Warning Message when Starting Device Selector<br />
5. Frequently Asked Questions<br />
In this case as well, you can still print to connections that have been pre-configured by an<br />
administrator.<br />
5.7 is thE windows 7 dEvicE stagE supportEd?<br />
No, support is not available. If you access the KONICA MINOLTA Universal Printer Driver<br />
icon from the Devices and Printers window of Windows 7, the spooler window will open<br />
instead of the Device Stage window.<br />
47
©2010 KONICA MINOLTA BUSINESS SOLUTIONS U.S.A., INC.<br />
All rights reserved. Reproduction in whole or in part<br />
without written permission is prohibited. <strong>Konica</strong> <strong>Minolta</strong><br />
is a trademarks of KONICA MINOLTA HOLDINGS, INC.<br />
KONICA MINOLTA<br />
BUSINESS SOLUTIONS U.S.A., INC.<br />
100 Williams Drive<br />
Ramsey, NJ 07446<br />
www.CountOn<strong>Konica</strong><strong>Minolta</strong>.com<br />
www.kmbs.konicaminolta.us

![User's Guide Print Operations [IC-208] - Konica Minolta](https://img.yumpu.com/17742233/1/184x260/users-guide-print-operations-ic-208-konica-minolta.jpg?quality=85)

![User's Guide [Network Administrator] - Konica Minolta](https://img.yumpu.com/17742212/1/184x260/users-guide-network-administrator-konica-minolta.jpg?quality=85)
![User's Guide [IC-206 Image Controller] - Konica Minolta](https://img.yumpu.com/17742141/1/184x260/users-guide-ic-206-image-controller-konica-minolta.jpg?quality=85)