Sidewinder G2 6.1.2 Administration Guide - Glossary of Technical ...
Sidewinder G2 6.1.2 Administration Guide - Glossary of Technical ... Sidewinder G2 6.1.2 Administration Guide - Glossary of Technical ...
Chapter 2: Administrator’s Overview Admin Console basics 22 Figure 8: Feature Notification window 3 Click OK. An authentication window appears. Enter the appropriate response, and then click OK. When you connect for the first time, the Feature Notification window appears displaying the status of each licensed feature. Tip: If you do not want this window to appear each time you connect, select the Don’t show this again check box. 4 When you are finished viewing the window, click Close. The main Admin Console window appears. Note: For information on using the main Admin Console window, see “About the main Admin Console window” on page 23.For an overview of the tasks you can perform using the Admin Console, see “Admin Console conventions” on page 25. Disconnecting from the Sidewinder G2 via the Admin Console To end an Admin Console session for a Sidewinder G2, do one of the following: • Right-click the Sidewinder G2 icon, and select Disconnect from the menu that appears. • Select the Sidewinder G2 icon, and click Disconnect in the main Admin Console window.
Figure 9: Main Admin Console menu Main Admin Console window About the main Admin Console window Chapter 2: Administrator’s Overview Admin Console basics When you start the Admin Console, a window similar to the following appears. From this window you can connect to and manage one or more Sidewinder G2s. The main Admin Console window is divided into three areas: top, left, and right, as described in the sections below. About the top portion of the Admin Console window The top portion of the Admin Console window contains five icons that represent various shortcut actions, shown in the table below. Click this icon to add a Sidewinder G2. For more information on adding a new Sidewinder G2, see “Adding a Sidewinder G2 to the Admin Console” on page 20. Click this icon to save changes you make in the Admin Console to the Sidewinder G2. Click this icon to cancel (or ‘rollback’) any unsaved changes in the Admin Console. Click this icon to refresh (or update) the screen. Click this icon to launch the State Change Wizard. (If you are connected to an HA or One-To-Many cluster, clicking this button will take you to the appropriate cluster management window.) Click this icon to access context-sensitive online help for the current Admin Console window that is displayed. 23
- Page 1: ADMINISTRATION GUIDE
- Page 5 and 6: Copyright © 2006 Secure Computing
- Page 7 and 8: Other Terms and Conditions This pro
- Page 9 and 10: CONTENTS Preface . . . . . . . . .
- Page 11 and 12: Table of Contents Modifying the sta
- Page 13 and 14: Table of Contents Configuring the S
- Page 15 and 16: Table of Contents About mail exchan
- Page 17 and 18: Table of Contents Configuring and d
- Page 19 and 20: Table of Contents CHAPTER 20 IPS At
- Page 21 and 22: Table of Contents APPENDIX F Basic
- Page 23 and 24: PREFACE Who should read this guide
- Page 25 and 26: Online help Preface The Sidewinder
- Page 27 and 28: 1 CHAPTER Introduction In this chap
- Page 29 and 30: Figure 2: Protecting multiple netwo
- Page 31 and 32: Chapter 1: Introduction The Type En
- Page 33 and 34: Type Enforced attributes Chapter 1:
- Page 35 and 36: Figure 4: Multiple Type Enforced ar
- Page 37 and 38: Chapter 1: Introduction Additional
- Page 39 and 40: Chapter 1: Introduction Additional
- Page 41 and 42: Network Services Sentry (NSS) Chapt
- Page 43 and 44: 2 CHAPTER Administrator’s Overvie
- Page 45 and 46: Admin Console basics Chapter 2: Adm
- Page 47: Figure 7: Admin Console Login windo
- Page 51 and 52: Admin Console conventions Chapter 2
- Page 53 and 54: Figure 11: Open File window Opening
- Page 55 and 56: Figure 14: Find/Replace window Ente
- Page 57 and 58: Chapter 2: Administrator’s Overvi
- Page 59 and 60: Chapter 2: Administrator’s Overvi
- Page 61 and 62: Figure 15: sshd Server Configuratio
- Page 63 and 64: To access the trusted Telnet server
- Page 65 and 66: 3 CHAPTER General System Tasks In t
- Page 67 and 68: Figure 16: System Shutdown window E
- Page 69 and 70: Setting up and maintaining administ
- Page 71 and 72: Figure 18: Administrator Informatio
- Page 73 and 74: Changing passwords Setting the syst
- Page 75 and 76: Using system roles to access type e
- Page 77 and 78: Figure 20: Configuration file backu
- Page 79 and 80: Chapter 3: General System Tasks Con
- Page 81 and 82: Activating the Sidewinder G2 licens
- Page 83 and 84: Chapter 3: General System Tasks Act
- Page 85 and 86: Figure 23: Firewall License: Compan
- Page 87 and 88: Figure 25: Firewall License: Enroll
- Page 89 and 90: Chapter 3: General System Tasks Pro
- Page 91 and 92: Enabling and disabling servers Figu
- Page 93 and 94: Server Name Notes Chapter 3: Genera
- Page 95 and 96: Configuring virus scanning services
- Page 97 and 98: Chapter 3: General System Tasks Con
Chapter 2: Administrator’s Overview<br />
Admin Console basics<br />
22<br />
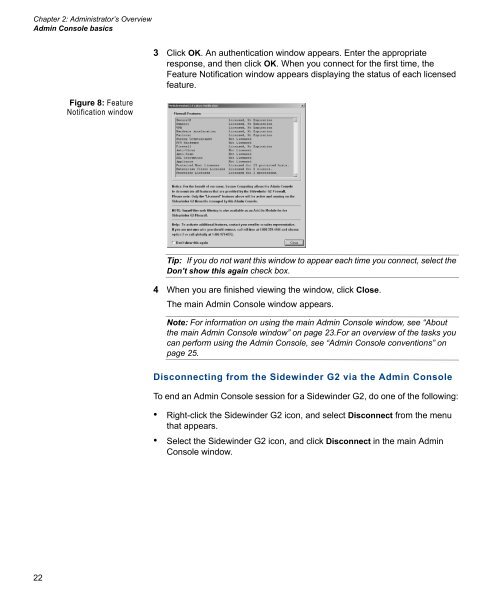
Figure 8: Feature<br />
Notification window<br />
3 Click OK. An authentication window appears. Enter the appropriate<br />
response, and then click OK. When you connect for the first time, the<br />
Feature Notification window appears displaying the status <strong>of</strong> each licensed<br />
feature.<br />
Tip: If you do not want this window to appear each time you connect, select the<br />
Don’t show this again check box.<br />
4 When you are finished viewing the window, click Close.<br />
The main Admin Console window appears.<br />
Note: For information on using the main Admin Console window, see “About<br />
the main Admin Console window” on page 23.For an overview <strong>of</strong> the tasks you<br />
can perform using the Admin Console, see “Admin Console conventions” on<br />
page 25.<br />
Disconnecting from the <strong>Sidewinder</strong> <strong>G2</strong> via the Admin Console<br />
To end an Admin Console session for a <strong>Sidewinder</strong> <strong>G2</strong>, do one <strong>of</strong> the following:<br />
• Right-click the <strong>Sidewinder</strong> <strong>G2</strong> icon, and select Disconnect from the menu<br />
that appears.<br />
• Select the <strong>Sidewinder</strong> <strong>G2</strong> icon, and click Disconnect in the main Admin<br />
Console window.


