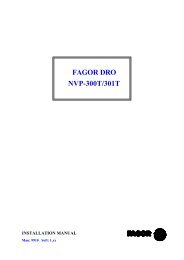
FAGOR DRO NVP-300TS/301TS
FAGOR DRO NVP-300TS/301TS
FAGOR DRO NVP-300TS/301TS

Create successful ePaper yourself
Turn your PDF publications into a flip-book with our unique Google optimized e-Paper software.
INSTALLATION MANUAL<br />
Man: 9910 Soft: 1.xx<br />
<strong>FAGOR</strong> <strong>DRO</strong><br />
<strong>NVP</strong>-<strong>300TS</strong>/<strong>301TS</strong>
INDEX<br />
Declaration of conformity ...................................................................................................... 1<br />
Safety conditions .................................................................................................................... 2<br />
Warranty terms ....................................................................................................................... 4<br />
Material returning terms ......................................................................................................... 5<br />
1. Unit description .......................................................................................................... 6<br />
1.1 Front panel (See operation manual) .............................................................................. 6<br />
1.2 Rear panel..................................................................................................................... 6<br />
1.3 General technical characteristics ................................................................................... 7<br />
2. Connections ................................................................................................................. 8<br />
2.1 connection of the feedback systems .............................................................................. 8<br />
2.2 Input / output connection (X2) ...................................................................................... 9<br />
2.2.1 Operation with inputs and outputs .............................................................................. 12<br />
2.3 RS-232-C connection (connector X7) ....................................................................... 13<br />
2.4 Power and machine connection .................................................................................. 14<br />
2.5 Turning the unit on and off ......................................................................................... 14<br />
3. Installation Parameters ............................................................................................ 15<br />
3.1 Parameter setting......................................................................................................... 16<br />
3.2 Parameters to configure axis count and display .......................................................... 17<br />
3.3 Input/output and spindle related parameters ................................................................ 21<br />
3.4 Messages and programming related parameters .......................................................... 24<br />
3.5 RS-232-C related parameters ...................................................................................... 24<br />
4. Operation with the RS-232-C serial line ................................................................. 25<br />
4.1. Saving and restoring data............................................................................................ 25<br />
4.2 Parameter transmitting format ..................................................................................... 26<br />
Appendix ............................................................................................................................ 27<br />
Connection diagram and spindle parameters ........................................................................ 27<br />
Error codes ........................................................................................................................... 28<br />
Maintenance ......................................................................................................................... 29<br />
Attention:<br />
Before starting up the <strong>DRO</strong>, carefully read the instructions of<br />
Chapter 2 in the Installation Manual.<br />
The <strong>DRO</strong> must not be powered-on until verifying that the<br />
machine complies with the "89/392/CEE" Directive.<br />
Installation Manual <strong>NVP</strong>-<strong>300TS</strong>/<strong>301TS</strong> Man: 9910 Soft: 1.xx
DECLARATION OF CONFORMITY<br />
Manufacturer: Fagor Automation, S. Coop.<br />
Barrio de San Andrés s/n, C.P. 20500, Mondragón -Guipúzcoa<br />
(ESPAÑA)<br />
We hereby declare, under our resposibility that the product:<br />
meets the following directives:<br />
SAFETY:<br />
<strong>NVP</strong>-<strong>300TS</strong>/<strong>301TS</strong> Man: 9910 Soft: 1.xx<br />
Digital Readout (<strong>DRO</strong>) Fagor<br />
<strong>NVP</strong>-<strong>300TS</strong>/<strong>NVP</strong>-<strong>301TS</strong><br />
EN 60204-1Machine safety. Electrical equipment of the machines.<br />
ELECTROMAGNETIC COMPATIBILITY:<br />
EN 50081-2 Emission<br />
EN 55011 Radiated. Class A, Group 1.<br />
EN 55011 Conducted. Class A, Group 1.<br />
EN 50082-2 Immunity<br />
EN 61000-4-2 Electrostatic Discharges.<br />
EN 61000-4-3 Radiofrequency Radiated Electromagnetic Fields<br />
EN 61000-4-4 Bursts and fast transients.<br />
EN 61000-4-5 Power surges<br />
EN 61000-4-6 Conducted disturbance induced by radio<br />
frequency fields.<br />
EN 61000-4-11 Voltage fluctuations and Outages.<br />
ENV 50204 Electromagnetic fields radiated by wireless telephones.<br />
As instructed by the European Community Directives on Low Voltage:<br />
73/23/EEC, (and the 93/68/EEC amendment) on Machine Safety 89/392/<br />
EEC and 89/336/EEC on Electromagnetic Compatibility.<br />
In Mondragón, on April 1st, 1996<br />
Installation Manual - Page: 1
SAFETY CONDITIONS<br />
Read the following safety measures in order to prevent damage to<br />
personnel, to this product and to those products connected to it.<br />
Fagor Automation shall not be held responsible for any physical or material<br />
damage derived from the violation of these basic safety regulations.<br />
Do not open this unit<br />
Only personnel authorized by Fagor Automation may open this<br />
unit.<br />
Do not handle the connectors with the unit connected to AC<br />
power.<br />
Before handling the connectors (mains, feedback, etc.) make<br />
sure that the unit is not connected to AC power.<br />
Use proper Mains AC power cables<br />
To avoid risks, use only the Mains AC cables recommended for this unit.<br />
Avoid electrical overloads<br />
In order to avoid electrical discharges and fire hazards, do not apply electrical<br />
voltage outside the range indicated in chapter 2 of this manual<br />
Ground connection<br />
In order to avoid electrical discharges, connect the ground terminals of all the<br />
modules to the main ground terminal. Before connecting the inputs and<br />
outputs of this unit, make sure that all the grounding connections are properly<br />
made.<br />
Before powering the unit up, make sure that it is connected to ground<br />
In order to avoid electrical discharges, make sure that all the grounding<br />
connections are properly made.<br />
Ambient conditions<br />
Respect the temperature and humidity ranges specified on the chapter about<br />
technical characteristics in this manual (1.3).<br />
Do not work in explosive environments<br />
In order to avoid risks, damage, do not work in explosive environments.<br />
Page: 2 - Installation Manual <strong>NVP</strong>-<strong>300TS</strong>/<strong>301TS</strong> Man: 9910 Soft: 1.xx
Working environment<br />
This unit is ready to be used in Industrial Environments complying with the<br />
directives and regulations effective in the European Community<br />
Install the unit in the right place<br />
It is recommended, whenever possible, to instal the <strong>DRO</strong> so its power switch<br />
of the back panel is at a distance between 0.7 m (27.5 inches) and 1.7 m (5.6<br />
ft) off the floor and away from direct sunlight, hot air, coolants, chemical<br />
products, blows as well as from relays, or high electromagnetic fields (about<br />
0.5m or 20 inches) that could damage it.<br />
This unit complies with the European directives on electromagnetic<br />
compatibility. Nevertheless, it is recommended to keep it away from sources<br />
of electromagnetic disturbance such as.<br />
- Powerful loads connected to the same AC power line as this equipment.<br />
- Nearby portable transmitters (Radio-telephones, Ham radio transmitters).<br />
- Nearby radio / TC transmitters.<br />
- Nearby arc welding machines.<br />
- Nearby High Voltage power lines.<br />
- Disturbance generating elements of the machine.<br />
- Etc.<br />
Safety symbols<br />
Symbols which may appear on the manual<br />
WARNING. symbol<br />
It has an associated text indicating those actions or operations may hurt<br />
people or damage products.<br />
Symbols that may be carried on the product<br />
WARNING. symbol<br />
It has an associated text indicating those actions or operations may hurt<br />
people or damage products.<br />
"ELECTRICAL SHOCK" symbol<br />
It indicates that point may be under electrical voltage<br />
"GROUND PROTECTION" symbol<br />
It indicates that point must be connected to the main ground point of<br />
the machine as protection for people and units.<br />
<strong>NVP</strong>-<strong>300TS</strong>/<strong>301TS</strong> Man: 9910 Soft: 1.xx<br />
Installation Manual - Page: 3
WARRANTY<br />
WARRANTY TERMS<br />
All products manufactured or marketed by Fagor Automation has a warranty<br />
period of 12 months from the day they are shipped out of our warehouses.<br />
The mentioned warranty covers repair material and labor costs, at <strong>FAGOR</strong><br />
facilities, incurred in the repair of the products.<br />
Within the warranty period, Fagor will repair or replace the products verified<br />
as being defective.<br />
<strong>FAGOR</strong> is committed to repairing or replacing its products from the time<br />
when the first such product was launched up to 8 years after such product<br />
has disappeared from the product catalog.<br />
It is entirely up to <strong>FAGOR</strong> to determine whether a repair is to be considered<br />
under warranty.<br />
EXCLUDING CLAUSES<br />
The repair will take place at our facilities. Therefore, all shipping expenses<br />
as well as travelling expenses incurred by technical personnel are NOT<br />
under warranty even when the unit is under warranty.<br />
This warranty will be applied so long as the equipment has been installed<br />
according to the instructions, it has not been mistreated or damaged by accident<br />
or negligence and has been manipulated by personnel authorized by <strong>FAGOR</strong>.<br />
If once the service call or repair has been completed, the cause of the failure<br />
is not to be blamed the <strong>FAGOR</strong> product, the customer must cover all<br />
generated expenses according to current fees.<br />
No other implicit or explicit warranty is covered and <strong>FAGOR</strong> AUTOMA-<br />
TION shall not be held responsible, under any circumstances, of the damage<br />
which could be originated.<br />
SERVICE CONTRACTS<br />
Service and Maintenance Contracts are available for the customer within<br />
the warranty period as well as outside of it.<br />
Page: 4 - Installation Manual <strong>NVP</strong>-<strong>300TS</strong>/<strong>301TS</strong> Man: 9910 Soft: 1.xx
<strong>NVP</strong>-<strong>300TS</strong>/<strong>301TS</strong> Man: 9910 Soft: 1.xx<br />
MATERIAL RETURNING TERMS<br />
When returning the <strong>DRO</strong>, pack it in its original package and with its original<br />
packaging material. If not available, pack it as follows:<br />
1.- Get a cardboard box whose three inside dimensions are at least 15 cm (6<br />
inches) larger than those of the unit. The cardboard being used to make the<br />
box must have a resistance of 170 Kg (375 lb.).<br />
2.- When sending it to a Fagor Automation office for repair, attach a label<br />
indicating the owner of the unit, person to contact, type of unit, serial number,<br />
symptom and a brief description of the problem.<br />
3.- Wrap the unit in a polyethylene roll or similar material to protect it.<br />
4.- Pad the unit inside the cardboard box with poly-utherane foam on all sides.<br />
5.- Seal the cardboard box with packing tape or industrial staples.<br />
Installation Manual - Page: 5
1. UNIT DESCRIPTION<br />
This <strong>DRO</strong> is designed for industrial environments, especially for machine<br />
tools and measuring machines.<br />
It can display the position of three axes and a spindle. Also, repetitive parts can<br />
be programmed<br />
1.1 FRONT PANEL (SEE OPERATION MANUAL)<br />
1.2 REAR PANEL<br />
2<br />
1<br />
3<br />
Dimensions of the Built-in model (in mm):<br />
123456789012345<br />
123456789012345<br />
123456789012345<br />
123456789012345<br />
123456789012345<br />
123456789012345<br />
123456789012345<br />
123456789012345<br />
123456789012345<br />
123456789012345<br />
123456789012345<br />
123456789012345<br />
123456789012345<br />
123456789012345<br />
123456789012345<br />
123456789012345<br />
123456789012345<br />
123456789012345<br />
123456789012345<br />
123456789012345<br />
123456789012345<br />
123456789012345<br />
123456789012345<br />
123456789012345<br />
123456789012345<br />
123456789012345<br />
123456789012345<br />
123456789012345<br />
123456789012345<br />
123456789012345<br />
123456789012345<br />
123456789012345<br />
123456789012345<br />
On the back of the unit, the following items may be found:<br />
1.- Power switch. When the unit is turned off by this switch, the <strong>DRO</strong> no<br />
longer reads axis position. Therefore, it is recommended to use the<br />
key at the front panel to turn the display off so the <strong>DRO</strong> continues keeping<br />
track of the axes position when they are moved.<br />
2.- Three-prong power connector for AC and ground connection.<br />
3.- M6 mm terminal for general machine ground connection.<br />
Page: 6 - Installation Manual <strong>NVP</strong>-<strong>300TS</strong>/<strong>301TS</strong> Man: 9910 Soft: 1.xx
X2.- SUB-D type 37 pin female connector to connect the digital inputs and<br />
outputs as well as the analog input and output.<br />
X3.- SUB-D HD type 15-pin female connector for 1st axis feedback device.<br />
X4.- SUB-D HD type 15-pin female connector for 2nd axis feedback device.<br />
X5.- SUB-D HD type 15-pin female connector for 3rd axis feedback device.<br />
X6.- SUB-D HD type female connector for spindle encoder feedback.<br />
X7.- SUB-D type 9 pin male connector for the RS-232-C serial line connection.<br />
WARNING<br />
Do not handle the connectors while the unit is under power.<br />
Before handling the connectors (mains, feedback, etc.)<br />
make sure that the unit is not under power.<br />
It is NOT enough to turn the display off by using the<br />
key at the keyboard.<br />
1.3 GENERAL TECHNICAL CHARACTERISTICS<br />
Universal Power Supply between 100V AC and 240V AC +10% -15%<br />
Mains frequency of 0 Hz (DC) and from 45 Hz to 400 Hz.<br />
Power outages of up to 20 milliseconds.<br />
10-year memory backup of installation parameter even when the unit is off.<br />
The operating temperature inside the <strong>DRO</strong> enclosure must be between 5º C<br />
and 45º C (41ºF and 113ºF).<br />
The storage temperature inside the <strong>DRO</strong> enclosure must be -25º C and +70º<br />
C (-13º F and 158º F).<br />
Maximum relative humidity: 95% non condensing at 45ºC (113ºF).<br />
Front Panel Sealing: IP54 (DIN 40050), Rear panel: IP4X (DIN40050)<br />
except for built-in models in which case is: IP20.<br />
<strong>NVP</strong>-<strong>300TS</strong>/<strong>301TS</strong> Man: 9910 Soft: 1.xx<br />
Installation Manual - Page: 7
2. CONNECTIONS<br />
The connection for the RS-232 serial line (optional X1 connector) is not<br />
described in this manual; but in a supplement for it.<br />
2.1 CONNECTION OF THE FEEDBACK SYSTEMS<br />
The feedback systems (scales or encoders) are connected via SUB-D HD type<br />
15-pin female connectors: X3, X4, X5 and X6.<br />
Characteristics of feedback inputs: X3, X4, X5 and X6:<br />
- +5V input consumption: 250 mA<br />
- Admits square-wave signal (TTL). (A, B, Io)<br />
- 1Vpp voltage modulated sinewave signals.<br />
- Maximum frequency: 250 KHz, minimum separation between flanks:<br />
950nsec.<br />
- Phase shift 90º ±20º, hysteresis 0.25 V, Vmax 7V, maximum input current:<br />
3 mA.<br />
- High threshold (logic state 1) 2.4V < V IH < 5V<br />
- Low threshold (logic state 0) 0.0V < V IL < 0.8V<br />
1<br />
6<br />
12<br />
15<br />
PinSignal Function<br />
1 A<br />
2 / A *<br />
3 B<br />
4 / B *<br />
5 o<br />
6 / Io<br />
*<br />
7 Alarm<br />
* Available only at the <strong>NVP</strong>-<strong>301TS</strong><br />
Feedback<br />
signals<br />
I Reference<br />
signal<br />
Feedback<br />
alarm<br />
8 / Alarm<br />
*<br />
9 + 5V<br />
Power<br />
for<br />
feedback<br />
10Notconnected Not<br />
being<br />
used<br />
at<br />
this<br />
time<br />
110V Power<br />
for<br />
feedback<br />
12Notconnected Not<br />
being<br />
used<br />
at<br />
this<br />
time<br />
13Notconnected Not<br />
being<br />
used<br />
at<br />
this<br />
time<br />
14Notconnected Not<br />
being<br />
used<br />
at<br />
this<br />
time<br />
15Chassis Shield<br />
Page: 8 - Installation Manual <strong>NVP</strong>-<strong>300TS</strong>/<strong>301TS</strong> Man: 9910 Soft: 1.xx
2.2 INPUT / OUTPUT CONNECTION (X2)<br />
Inputs and their assignments:<br />
4 digital inputs for automatic tool change detection.<br />
4 digital inputs for automatic spindle range detection.<br />
4 digital inputs for external JOG. M3 and M4 which have to keep<br />
their level and correction control Jog+ and Jog- which have to<br />
provide pulses.<br />
1 digital Emergency input.<br />
1 digital input to "tell" the <strong>DRO</strong> that the M function has been<br />
executed (M-done).<br />
1 digital input to indicate that an external potentiometer will be<br />
used to vary the spindle analog output.<br />
1 analog input for that potentiometer. Between 0Vdc and 9.99Vdc<br />
Outputs and their assignment :<br />
2 digital outputs to indicate M3, M4 or M5 (M3=M4=0V).<br />
4 digital outputs to indicate the spindle range (M41 through M44).<br />
1 digital output for M-Strobe, to indicate a change of M. It is<br />
activated for a period of time set by PAR27. M3, M4 or M5 and the<br />
ranges M41...M44.<br />
4 Digital outputs to indicate travel limits and going through "0" on<br />
the "X" and "Z" axes.<br />
1 analog output for the spindle. Between 0Vdc through 9.99Vdc<br />
Signal characteristics of connector "X2":<br />
The supply voltage is at +24V (±25%), thus the threshold between a "0" and a "1"<br />
will be about +6V.<br />
Characteristics of the inputs at 24V :<br />
- Maximum load current: 100mA<br />
- Minimum DC voltage: 18V<br />
- Maximum DC voltage: 30V<br />
The main characteristics of the digital outputs are: (optocoupled with solid<br />
state relay with a normally open contact)<br />
- Maximum AC or DC voltage: 48V<br />
- Maximum load current: 150 mA<br />
- Maximum internal resistance: 24ê<br />
- Maximum peak current:500mA for 100ms at 25ºC<br />
- Through current when open: ≤ 1µA<br />
- Leak current: 200nA (Vload=100V)<br />
- Galvanic isolation voltage: 1500V for 1 minute<br />
- Activation time: ≤ 3ms<br />
- Deactivation time: ≤ 3ms<br />
Main characteristics of the analog input<br />
Voltage range: ±10V Resolution: 10mV<br />
Impedance: >10Kê<br />
Main characteristics of the analog output<br />
Voltage range:<br />
Maximum current:<br />
±10V<br />
10mA<br />
Resolution: 4.88mV<br />
Offset: ±30mV<br />
Impedance: 120 ê referred to GND<br />
<strong>NVP</strong>-<strong>300TS</strong>/<strong>301TS</strong> Man: 9910 Soft: 1.xx<br />
1<br />
19<br />
20<br />
37<br />
Installation Manual - Page: 9
Page: 10 - Installation Manual <strong>NVP</strong>-<strong>300TS</strong>/<strong>301TS</strong> Man: 9910 Soft: 1.xx<br />
See chapter 2.2.1 (operation with inputs and<br />
outputs)<br />
Note .- If any of the outputs is going to be connected<br />
to an inductive device, a 1N4000 type diode<br />
must be placed in anti-parallel.<br />
1<br />
19<br />
20<br />
37<br />
PinI/ O Signal Pin I/ O Signal<br />
1 Chassis 20 I External<br />
0V<br />
2 I External0V 21 I External<br />
24V<br />
3 I External24V 22 O User<br />
24V<br />
4 O User24V 23 I Jog<br />
[ + ]<br />
5 O M3 24 O M4<br />
6 O M41 25 O M42<br />
7 O M43 26 O M44<br />
8 I Jog[ -]<br />
27 O M Strobe<br />
9 O X going<br />
thru<br />
" 0"<br />
28 O X limit<br />
10O Z going<br />
thru<br />
" 0"<br />
29 O Z limit<br />
11I DetectTool1 30 I Detect<br />
Tool<br />
2<br />
12I DetectTool3 31 I Detect<br />
Tool<br />
4<br />
13I Emergency 32 I M done<br />
14I Jog-M3 33 I Jog<br />
- M4<br />
15I DetectM41 34 I Detect<br />
M42<br />
16I DetectM43 35 I Detect<br />
M44<br />
17Chasis 36 I Potent.<br />
on/<br />
off<br />
18I Analog. Potent.<br />
37 O Spindle<br />
analog<br />
19I / O 0V<br />
Analog.
Spindle<br />
Encoder<br />
GEAR<br />
BOX<br />
M<br />
MOTOR<br />
CONTROL<br />
GEAR<br />
CONTROL<br />
TOOL<br />
TURRET<br />
<strong>NVP</strong>-<strong>300TS</strong>/<strong>301TS</strong> Man: 9910 Soft: 1.xx<br />
CONNECTION EXAMPLE<br />
M44<br />
M43<br />
M42<br />
M41<br />
M DONE<br />
MSTROBE<br />
DM44<br />
DM43<br />
DM42<br />
DM41<br />
PAR70(4)=1<br />
15 34 16 35 27 32 6 25 7 26<br />
TOOL<br />
CONTROL<br />
PAR20(7)=1<br />
DT1<br />
DT2<br />
DT3<br />
DT4<br />
11<br />
30<br />
12<br />
31<br />
+10V<br />
5<br />
24<br />
37<br />
19<br />
M3<br />
M4<br />
SPLINDLE ANALOG<br />
ANALOG GND<br />
DIGITAL<br />
GROUND<br />
0V<br />
<strong>NVP</strong> 300 TS<br />
24V<br />
EXTERNAL<br />
2<br />
20<br />
3<br />
21<br />
4<br />
22<br />
18<br />
ANALOG POT.<br />
24V<br />
36<br />
POT.<br />
23 8 33 14<br />
13<br />
24V USER<br />
EMERGENCY<br />
POTENTIOMETER<br />
+ -<br />
PAR20(6)=1<br />
JOG<br />
Installation Manual - Page: 11
2.2.1. OPERATION WITH INPUTS AND OUTPUTS<br />
This <strong>DRO</strong> is especially designed to control the spindle through the 37-pin<br />
connector X2 being possible to carry out the following operations:<br />
- Generate an analog voltage for the spindle speed between pins 37 and 19.<br />
- Generate signals for spindle turning direction (M3 or M4) at pins 5 and 24.<br />
- Detect the spindle range (gear) currently selected (M41 through M44<br />
through pins 15, 16, 34 and 35) in such way that when programming a<br />
particular speed, it automatically generates the corresponding output signal<br />
(pins 6, 7, 25 and 26) for the electrical cabinet to change to the new range.<br />
- Generate a residual back-and-forth analog output for changing gears if<br />
necessary.<br />
- Detect that the M function has been executed by the electrical cabinet (Mdone).<br />
- Vary the spindle analog voltage with a potentiometer connected between<br />
pins 18 and 19. This potentiometer must have a switch to turn it on and off<br />
which must be connected to pin 36 and USER 24V (pin 4 or 22).<br />
When activating the input at pin 36, the <strong>DRO</strong> joins the analog input (pin 18)<br />
with its analog output (pin 37) so the analog signal goes directly from the<br />
potentiometer to that output without being processed by the <strong>DRO</strong> although it<br />
will keep controlling the spindle start, stop and jog keys.<br />
To return the control of the analog voltage back to the <strong>DRO</strong>, just turn off the<br />
potentiometer switch at pin 36.<br />
- Generate output signals when the axes reach the position set by parameter<br />
(pins 9 and 28 for the X axis, 10 and 29 for the Z).<br />
- Change the spindle turning direction M3 or M4 by activating the<br />
corresponding input (pin 14 or pin 33 respectively).<br />
- Detect the current tool (up to 16) by means of a binary combination of<br />
signals at pins 11, 12, 30 and 31.<br />
- Vary the spindle speed incrementally by means of external push buttons<br />
connected to pins 23 and 8.<br />
- Detect an external emergency at pin 13.<br />
These inputs and outputs must be supplied with an external regulated<br />
power supply connected between pins 2 and 3 and between 20 and 21 as<br />
shown in the following table.<br />
Page: 12 - Installation Manual <strong>NVP</strong>-<strong>300TS</strong>/<strong>301TS</strong> Man: 9910 Soft: 1.xx
For the spindle:<br />
Apply a trapezoidal or squared sine (bell-shaped) acceleration/deceleration<br />
ram to the spindle while changing ranges.<br />
If the spindle is already turning, the necessary ramp will be applied to adapt<br />
the spindle to the new speed.<br />
The speed variations due to radius increase or decrease will be handled<br />
without ramp thus generating directly the calculated analog voltage.<br />
2.3 RS-232-C CONNECTION (CONNECTOR X7)<br />
The RS-232-C serial communications line uses a 9-pin male SUB-D type<br />
connector.<br />
Parameter PAR90 sets the transmission speed through this line. See section 3.5<br />
in this manual.<br />
The operating mode for this feature is described in chapter 5 of the Operating<br />
Manual.<br />
Pin Signal Function<br />
1 NC Not connected<br />
2 RxD Receive Data<br />
3 TxD Transmit Data<br />
4 NC Not connected<br />
5 GND Ground<br />
6-9 NC Not connected<br />
<strong>NVP</strong>-<strong>300TS</strong>/<strong>301TS</strong> Man: 9910 Soft: 1.xx<br />
Installation Manual - Page: 13
2.4 POWER AND MACHINE CONNECTION<br />
These <strong>DRO</strong>s can be connected to an AC voltage anywhere between 100V AC and<br />
264 V AC +10% -15% with a frequency between 45 Hz and 400 Hz without having<br />
to select it depending on the country where they are installed thanks to their<br />
universal power supply.<br />
Always mount it vertically so its keyboard is within operator's reach and its digits<br />
are easily visible (at operator's eye level).<br />
Do not connect or disconnect the <strong>DRO</strong> connectors while it is under power.<br />
Connect all metallic parts to a common point on the machine tool and it to the<br />
general ground point. Use cables of enough gage (no thinner than 8 mm 2 ).<br />
2.5 TURNING THE UNIT ON AND OFF<br />
Turning the unit ON<br />
The unit is turned on by actuating on the power switch of the rear panel<br />
The <strong>DRO</strong> runs a self-test and shows on the LCD display the text: “Fagor <strong>NVP</strong>-30x TS,<br />
Press ” (where xxx indicates the model) and the X and Z displays show "Fagor dro"<br />
if everything is OK and the error number if otherwise. See the appendix at the end of<br />
this manual.<br />
Turning the unit OFF<br />
If you press the <strong>DRO</strong> turns off the displays while maintaining the power<br />
supply to the feedback systems and goes on reading the position of the axes at all<br />
times. This is not the case when the equipment is switched off by means of the<br />
switch on its rear panel.<br />
To reset the displays, just press this key again, on condition that the <strong>DRO</strong> is getting<br />
voltage (plugged in and with the switch on the rear panel on).<br />
Notes:<br />
- Before powering the <strong>DRO</strong> down with the switch on the rear panel or disconnecting<br />
it from mains, it is a good idea to press the key in order to store the current<br />
position of the axes permanently.<br />
- If the unit is powered down with its rear panel switch or there is a power outage<br />
without previously having pressed , the <strong>DRO</strong> will keep the last position of the<br />
axes for at least 30 minutes.<br />
- The unit will display ERROR 2 when powered back up if the position reading was lost<br />
when turned off while the axes were moving or after the accidental backup period has<br />
expired without having saved the current position by previously pressing .<br />
Page: 14 - Installation Manual <strong>NVP</strong>-<strong>300TS</strong>/<strong>301TS</strong> Man: 9910 Soft: 1.xx
3. INSTALLATION PARAMETERS<br />
These <strong>DRO</strong>s have a number of installation parameters to configure it for a<br />
particular application.<br />
These parameters may be saved into a peripheral or uploaded from it through<br />
the RS-232-C serial communications line.<br />
The format for these parameters depends on whether they are general or<br />
particular for each axis.<br />
. If it affects the axes, press the corresponding axis key to modify it.<br />
. If it is a general parameter, the X display will show its current value.<br />
. The LCD display will show the description of the parameter and its<br />
number.<br />
There are several kinds of parameters depending on how to set them:<br />
· With binary values. The value of each digit toggles between "0" and "1"<br />
when pressing its corresponding key from to where corresponds<br />
to the rightmost digit and to the leftmost one.<br />
· Numeric values, usually with the corresponding axis resolution, they are<br />
entered as regular preset.<br />
· Options, the value is changed by pressing + -<br />
options appear in a cyclic way.<br />
<strong>NVP</strong>-<strong>300TS</strong>/<strong>301TS</strong> Man: 9910 Soft: 1.xx<br />
which will make the various<br />
Installation Manual - Page: 15
3.1 PARAMETER SETTING<br />
The <strong>DRO</strong> display must be on and in counting mode in order to be able to edit<br />
the parameters.<br />
. Press F . The LCD display will show the menu:<br />
RPM / CSS / UTILIT. -><br />
PARAM / COMM<br />
. Select "PARAM" using the keys.<br />
. When the word "PARAM" appears between < >, press<br />
. The LCD display requests the password ( 060496). If it is not entered, it is<br />
still possible to edit those general parameters not affecting the machine.<br />
The LCD display will show the parameter number and a brief description.<br />
. If it is a general parameter (not affecting the axis reading), the display will<br />
show its current value.<br />
. If it is an axis parameter, each axis display will show its current value.<br />
In this case, press the axis key (X or Z) and key in its new value.<br />
- To go from one parameter to another and save the changes:<br />
Press or to go to the next one. To go to the previous one, press<br />
1 2 or<br />
- Pressing another axis key, (X or Z), the <strong>DRO</strong> saves the value of the previous<br />
axis and shows the new axis to be edited.<br />
- To quit the parameter editing mode, press and the <strong>DRO</strong> will recover<br />
the previous values ignoring the changes just made.<br />
From the count modes, it is also possible to access the user parameters PAR50<br />
(language) with the keystroke sequence: and PAR05 (scaling<br />
factor) with the keystroke sequence: . This way, it is possible<br />
to change operating modes without having to go through all the parameters<br />
preceding the ones we would like to edit. This is also possible for parameters<br />
PAR40, PAR41, PAR51(memory lock), PAR90 (RS-232-C serial line).<br />
Note: If there is an encoder at the spindle, parameters PAR60 through<br />
PAR86 must be set.<br />
The following parameters must also be set: PAR00, PAR02, PAR03<br />
and PAR10. To access these last ones, press F<br />
Page: 16 - Installation Manual <strong>NVP</strong>-<strong>300TS</strong>/<strong>301TS</strong> Man: 9910 Soft: 1.xx
3.2 PARAMETERS TO CONFIGURE AXIS COUNT AND DISPLAY<br />
The digits of digital parameters refer to the digits on the axis displays so digit<br />
"1" corresponds to the rightmost digit and "8" to the leftmost digit.<br />
X X X X X X X X<br />
8 7 6 5 4 3 2 1<br />
PARA-<br />
METER FUNCTION<br />
PAR00 Feedback configuration, different for each axis. Binary type.<br />
Digit<br />
8 Direction of the coded Io (0 = Increasing, 1 = Decreasing)<br />
7 Pitch of the coded Io (0 = 20 mm, 1 = 100mm)<br />
6 Type of linear scale's Io (0 = Fix, 1 = Coded)<br />
5 Feedback resolution units: 0 = microns, 1 = inches<br />
4 Angular (rotary) feedback. Usually, it must be set to "0".<br />
For the spindle, it must be set to "1".<br />
3 Differential feedback signals (0 = No, 1 = Yes)<br />
The <strong>NVP</strong>-<strong>300TS</strong> cannot be set to "1" (Yes)<br />
2 Type of feedback signals (0 = TTL, 1 = 1 Vpp)<br />
The <strong>NVP</strong>-<strong>300TS</strong> cannot be set to "1" (1 Vpp)<br />
1 Counting direction (0 = normal, 1 = reverse)<br />
If an axis count increases or decreases in the opposite direction to<br />
the one desired, change the value of this digit.<br />
<strong>NVP</strong>-<strong>300TS</strong>/<strong>301TS</strong> Man: 9910 Soft: 1.xx<br />
Installation Manual - Page: 17
PAR01 Feedback resolution, independent for each axis,<br />
Possible values: from 0.1µm to 1mm<br />
(0.000005" to 0.03937").<br />
Factory setting: 5 (µm).<br />
PAR02 TTL multiplying factor (subdivision). Independent for each axis.<br />
Options: x4, x2, x1 and x0.5.<br />
The selection of these values rotates by pressing<br />
The factory setting is: x4 and it is the one used for <strong>FAGOR</strong> scales.<br />
When using an encoder, its number of pulses should be calculated<br />
according to the leadscrew pitch, the desired resolution and the<br />
multiplying factor to be applied as per the formula:<br />
Encoder (lines/turn) = Leadscrew pitch (mm/turn)<br />
Resolution (mm/pulse) x F<br />
Where "xF" would be the multiplying factor to be applied.<br />
PAR03 Internal multiplying factor when using sinewave feedback<br />
signals or external multiplying factor when using semi-absolute<br />
feedback devices (coded Io) and TTL feedback signals.<br />
Independent for each axis.<br />
Options: 1, 5, 10, 20, 25, 50. Factory setting: 1<br />
For example, for <strong>FAGOR</strong> scales: MOX, COX or FOT, set this<br />
parameter to 5.<br />
PAR05 Scaling or shrink factor. Independent for each axis, numeric value<br />
within ±9,999.<br />
A "0" value means that no factor is to be applied. It is applied onto<br />
the coordinates to be displayed after compensating for table sag.<br />
It is not applied when reading with respect to machine reference<br />
zero ( led on).<br />
The factory setting is: "0".<br />
Page: 18 - Installation Manual <strong>NVP</strong>-<strong>300TS</strong>/<strong>301TS</strong> Man: 9910 Soft: 1.xx
PAR08 Indicates whether the feedback alarms will be used or not.<br />
Digit<br />
8, 7, 6 Not being used at this time. Must be set to "0".<br />
5 The <strong>NVP</strong>-<strong>301TS</strong> detects the amplitude of the feedback signals.<br />
4 Feedback alarm contact active level (0=low, 1=high)<br />
3 Detect the feedback alarm supplied by the transducer.<br />
2 Detect software travel limits (PAR12 and PAR13).<br />
1 Detect speed alarms.<br />
Possible values 0 (alarm OFF) and "1" (alarms ON).<br />
Factory setting: 0<br />
Refer also to the error codes in the appendix of this manual.<br />
PAR09 Axis sag compensation, per linear axis.<br />
Numeric value within ±99.999 millimeters per meter.<br />
Factory setting: 0.<br />
Notes:<br />
- Even when selecting the display in inches, this value MUST<br />
ALWAYS BE IN MILLIMETERS.<br />
- Remember that 1 inch = 25.4 mm<br />
PAR10 Offset of the reference point with respect to the reference zero of the<br />
scale or the distance between the reference point and the physical<br />
location of the encoder's reference mark, independent for each axis<br />
and for the spindle<br />
Numeric value in resolution units for each axis.<br />
Factory setting: 0.<br />
This value will be in mm or inches depending on whether the INCH<br />
LED is off or on.<br />
PAR11 Miscellaneous, binary.<br />
Digit<br />
8, 7, 6, 5, 4, 3, 2 Not being used. Must be set to "0".<br />
1 The key affects one axis ( = 0) or all of them ( = 1).<br />
<strong>NVP</strong>-<strong>300TS</strong>/<strong>301TS</strong> Man: 9910 Soft: 1.xx<br />
It may toggle from absolute reading mode to incremental. This<br />
parameter determines whether this toggle affects one axis or<br />
all of them.<br />
If it affects by axis, after pressing one must press the axis<br />
key. Factory setting: "1"<br />
Installation Manual - Page: 19
PAR12 To set the negative axis travel limit.<br />
Possible values: between -99999.999 and 0.<br />
This value will be in mm or inches depending on whether the INCH<br />
LED is off or on.<br />
If PAR08=1 (limit alarms ON), when the axis exceeds this distance,<br />
the corresponding axis display starts blinking until it is moved back<br />
into the work zone.<br />
PAR13 To set the positive axis travel limit.<br />
Possible values: between 0 and 99999.999<br />
This value will be in mm or inches depending on whether the INCH<br />
LED is off or on.<br />
If PAR08=1(limit alarms ON), when the axis exceeds this distance,<br />
the corresponding axis display starts blinking until it is moved back<br />
into the work zone.<br />
PAR 14 To carry out the home search when the feedback device does NOT<br />
have reference marks "Io" (for example, <strong>FAGOR</strong> MKT scales), this<br />
parameter must be set to "1". Factory setting = "0".<br />
PAR 15 Contains the leadscrew error compensation.<br />
Enter the number of points to be compensated (up to 40). "0" means<br />
that no compensation is to be applied.<br />
- When pressing , the X axis display shows the position value<br />
and the Z axis display shows the error to be compensated. Use the<br />
and 1 2 to move from point to point.<br />
- Use the axes keys to edit the position or the error with the resolution<br />
and units of the axis (PAR00 and PAR01).<br />
- When pressing , the X axis, shows the home coordinate of the<br />
selected axis. When pressing or the dro assumes the<br />
displayed coordinate as the error position and it then requests the<br />
amount of error to be compensated.<br />
This error amount is the "Actual position - Displayed position".<br />
The Home point (Io) must be assigned an error of "0"<br />
- The preset is canceled by pressing before pressing .<br />
- To exit, press when none of the axes is blinking.<br />
Page: 20 - Installation Manual <strong>NVP</strong>-<strong>300TS</strong>/<strong>301TS</strong> Man: 9910 Soft: 1.xx
3.3 INPUT/OUTPUT AND SPINDLE RELATED PARAMETERS<br />
PAR20<br />
Digit<br />
8, 3, 2, 1 Not being used at this time<br />
7 Indicates whether tool detection is being used or not (1 = Yes).<br />
6 Indicates whether the RPM or CSS will be displayed (1) or not (0).<br />
5 Indicates whether the external spindle START/STOP keys will be<br />
used (1) or not (0). Inputs 14 and 33.<br />
4 Indicates whether the external keys to speed up or slow down the<br />
spindle will be used (1) or not (0). Inputs 8 and 33.<br />
PAR21 Indicates the level of the first 8 inputs (digit 1 = input 1)<br />
PAR22 Indicates the level of the next 7 inputs (digit 1 = input 9)<br />
PAR23 Indicates the level of the first 8 outputs (digit 1 = output 1).<br />
PAR24 Indicates the level of the next 3 outputs (digit 1 = output 9).<br />
PARBit Nr Function<br />
PARBit Nr Function<br />
PAR211 I1 Tool<br />
detect.<br />
Digit<br />
1 PAR231 O1 M3<br />
2 I2 Tool<br />
detect.<br />
Digit<br />
2<br />
2 O2 M4<br />
3 I3 Tool<br />
detect.<br />
Digit<br />
3<br />
3 O3 M41<br />
4 I4 Tool<br />
detect.<br />
Digit<br />
4<br />
4 O4 M42<br />
5 I5 Emergency<br />
5 O5 M43<br />
6 I6 M done<br />
6 O6 M44<br />
7 I7 M3<br />
from<br />
JOG<br />
7 O7 M STROBE<br />
8 I8 M4<br />
from<br />
JOG<br />
8 O 8 X " 0"<br />
PAR221 I 9 Range<br />
1 detect.<br />
PAR241 O9 X LIMIT<br />
2 I 10<br />
Range<br />
2 detect.<br />
2 O 10<br />
Z " 0"<br />
3 I 11<br />
Range<br />
3 detect.<br />
3 O11 Z LIMIT<br />
4 I 12<br />
Range<br />
4 detect.<br />
4 Not<br />
used<br />
5 I 13<br />
Potentiometer<br />
ON<br />
detect.<br />
5 Not<br />
used<br />
6 I14 Decrease<br />
rpm<br />
from<br />
jog<br />
6 Not<br />
used<br />
7 I15 Increase<br />
rpm<br />
from<br />
jog<br />
7 Not<br />
used<br />
8 Not<br />
being<br />
used<br />
8 Not<br />
used<br />
PAR26 Indicates the anticipation distance for the linear axes in units of<br />
0.0001mm or 0.00001 inch.<br />
PAR27 Indicates the duration of the M-Strobe signal and of the travel limit<br />
signals for the corresponding axes. Possible values: 0 to 9.9 seconds.<br />
Going thru "0"<br />
Límite<br />
PAR27 = 0<br />
-PAR40 +PAR40<br />
PAR40 Sets the X axis symmetrical travel limits.<br />
PAR41 Sets the Z axis symmetrical travel limits.<br />
<strong>NVP</strong>-<strong>300TS</strong>/<strong>301TS</strong> Man: 9910 Soft: 1.xx<br />
Going thru "0"<br />
PAR27 = t >0<br />
t<br />
t t<br />
-PAR40 +PAR40<br />
Installation Manual - Page: 21
PAR60<br />
Digit<br />
8,7 Not being used at this time<br />
6 RPM follow-up (1=yes). When using a spindle encoder, the dro will<br />
varies the value of the spindle analog voltage trying to match the actual<br />
spindle speed with its preset value.<br />
5 Indicates whether spindle orientation is used (1) or not (0). It requires<br />
an encoder on the spindle.<br />
4 Indicates whether there is a spindle or not (1=Yes, the actual rpm will<br />
be displayed). It requires an encoder on the spindle.<br />
3 Indicates whether a trapezoidal (=0) or a smoother square-sine (=1,<br />
bell-shaped) acceleration/deceleration ramp is applied to the spindle.<br />
2 Indicates the sign for the M3 when the spindle analog voltage is<br />
bipolar. 0=positive, 1=negative.<br />
1 Indicates the type of spindle analog voltage, bipolar (±10V) or not<br />
(0 to +10V).<br />
PAR61 Indicates the duration (between 0 and 9.9 seconds) of the acceleration<br />
or deceleration ramp from 0 to 10V. If the ramp is bell-shaped, it<br />
indicates the minimum acceleration time (or máximum acceleration).<br />
PAR62 Indicates the percentage the spindle rpm increase or decrease when<br />
pressing the keys or the [jog+] and [jog-] keys respectively.<br />
Possible values: 0 to 50.<br />
PAR65 Indicates the rpm to be used for spindle orientation.<br />
PAR66 Indicates the angular anticipation distance when in spindle orientation.<br />
Possible values: Between 0º and 360º.<br />
PAR67 Indicates the number of pulses (physical lines) of the spindle encoder.<br />
PAR70<br />
Digit<br />
8,7 Not being used at this time<br />
6 Indicates whether the automatic range detection is used (1) or not (0).<br />
5 Indicates whether the dro waits (1) or not (0) for the M-done signal<br />
(pin 32).<br />
4 Indicates whether the dro waits (1) for the range done (M-done) signal<br />
or not (0).<br />
3 Indicates whether the residual voltage is being used in a range change<br />
(1) or not (0).<br />
2 Indicates whether the spindle must stop (1) or not (0) before changing<br />
ranges.<br />
1 Indicates whether the range change is automatic (0) or manual (1).<br />
Page: 22 - Installation Manual <strong>NVP</strong>-<strong>300TS</strong>/<strong>301TS</strong> Man: 9910 Soft: 1.xx
PAR71 Sets the minimum rpm for range 1. Possible values: 0-9999.<br />
PAR72 Same for range 2. Possible values: 0-9999.<br />
PAR73 Same for range 3. Possible values: 0-9999.<br />
PAR74 Same for range 4. Possible values: 0-9999.<br />
PAR75 Sets the maximum rpm for range 1. Possible values: 0-9999.<br />
PAR76 Same for range 2. Possible values: 0-9999.<br />
PAR77 Same for range 3. Possible values: 0-9999.<br />
PAR78 Same for range 4. Possible values: 0-9999.<br />
Note: The unused ranges must be set to the same value as the last one used.<br />
PAR81 Indicates the % of correction for range 1. Possible values: ±99<br />
PAR82 Same for range 2. Possible values: ±99<br />
PAR83 Same for range 3. Possible values: ±99<br />
PAR84 Same for range 4. Possible values: ±99<br />
PAR85 Indicates the oscillation time of the residual analog voltage during a<br />
range change. Possible values: 0 to 2.55 seconds.<br />
PAR86 Indicates the value of the residual analog voltage to be applied during<br />
a range change. Possible values: ±9,99V.<br />
If = 0.00V, the spindle will turn in the M3 direction at minimum speed.<br />
If = 0.01V, the spindle will turn in the M4 direction at minimum speed.<br />
<strong>NVP</strong>-<strong>300TS</strong>/<strong>301TS</strong> Man: 9910 Soft: 1.xx<br />
Installation Manual - Page: 23
3.4 MESSAGES AND PROGRAMMING RELATED PARAMETERS<br />
PAR50 Language selection for the messages appearing on the LCD<br />
display.<br />
0 = English; 1 = Spanish; 2 = German; 3 = French; 4 = Italian;<br />
5 = Portuguese; 6 = User defined.<br />
PAR51<br />
digits<br />
8 to 3 Not being used at this time. They all must be set to "0".<br />
2 To turn on (=0) or off (=1) the confirmation beep when pressing<br />
the keys.<br />
1 Program memory lock, 0 = unlocked; 1 = locked.<br />
PAR52 Loading of the user defined language.<br />
When accessing this parameter, the <strong>DRO</strong> requests the password.<br />
After keying 5564, the <strong>DRO</strong> is ready to receive the file containing<br />
the user defined language.<br />
3.5 RS-232-C RELATED PARAMETERS<br />
This <strong>DRO</strong> sends and receive data at the speed set by PAR90 and with the<br />
following configuration:<br />
Stop bits: 1<br />
Data bits: 8<br />
Parity: None<br />
PAR90 Indicates the transmission speed of the RS 232 line.<br />
Options: 75, 150, 300, 600, 1200, 2400, 4800 & 9600 baud.<br />
Page: 24 - Installation Manual <strong>NVP</strong>-<strong>300TS</strong>/<strong>301TS</strong> Man: 9910 Soft: 1.xx
4. OPERATION WITH THE RS-232-C SERIAL LINE<br />
4.1. SAVING AND RESTORING DATA<br />
With this <strong>DRO</strong>, it is possible to save data into a PC or peripheral device and<br />
later restore it by using the RS-232-C serial communications line.<br />
This data is sent out in the following format:<br />
Baudrate as set by PAR90, 8 data bits, 1 stop bit and no parity.<br />
To access this mode:<br />
- Press F<br />
- Select "->" and press<br />
- Select the "Comm" option (communications) of the LCD display by means<br />
of the keys until that word appears between < > and press .<br />
- Select: and press to send the data out to a PC or peripheral device<br />
or select and press to receive data from a PC or peripheral<br />
device.<br />
- Select the type of data to transmit Parameters, Program or<br />
Tool table by means of the keys and press .<br />
<strong>NVP</strong>-<strong>300TS</strong>/<strong>301TS</strong> Man: 9910 Soft: 1.xx<br />
Installation Manual - Page: 25
4.2 PARAMETER TRANSMITTING FORMAT<br />
The format of the transmitted parameters are:<br />
For value parameters: P?? 123.123<br />
For binary parameters: P?? 10101010<br />
For option parameters: P?? 0<br />
For axis parameters: P?? X 123.123 Z' 123.123 Z'' 123.123<br />
The number of decimals depends on the selected resolution.<br />
The format for the "PAR15" regarding leadscrew error compensation is:<br />
P15 X05<br />
N00 P-1000.000 E-1.000<br />
N01 P-500.000 E-0.500<br />
N02 P0.000 E0.000<br />
N03 P500.000 E0.500<br />
N04 P1000.000 E1.000<br />
Z' 03<br />
N00 P-1000.000 E-1.500<br />
N01 P0.000 E0.000<br />
N02 P1000.000 E1.500<br />
Where "P" corresponds to the axis position referred to home and "E" is the<br />
amount of error to be compensated for that point.<br />
Page: 26 - Installation Manual <strong>NVP</strong>-<strong>300TS</strong>/<strong>301TS</strong> Man: 9910 Soft: 1.xx
<strong>NVP</strong>-<strong>300TS</strong>/<strong>301TS</strong> Man: 9910 Soft: 1.xx<br />
Installation Manual - Page: 27<br />
Parameter list:<br />
SPINDLE:<br />
PAR60 1.- Bipolar analog voltage<br />
2.- Turning direction for M3, if bipolar<br />
3.- Bell-shaped acc/dec.<br />
(PAR61: Ramp duration (0-9.99 sec.)<br />
4.- The spindle has an encoder.<br />
(PAR67: Nr of encoder lines)<br />
5.- Spindle orientation<br />
(PAR65: RPM for spindle orientation 0-9999)<br />
(PAR66: Angular positioning 0-360°)<br />
6.- RPM follow-up.<br />
LIMITS:<br />
PAR40 X limit, PAR41 Z limit<br />
Ranges 1 2 3 4<br />
Min RPM PAR71 PAR72 PAR73 PAR74<br />
Max RPM PAR75 PAR76 PAR77 PAR78<br />
% increm. PAR81 PAR82 PAR83 PAR84<br />
+10V<br />
RANGES:<br />
PAR70 1.- Manual range change.<br />
2.- Stop spindle before range change.<br />
3.- Apply residual analog in range change.<br />
(PAR85: Oscill. time residual voltage (0-2.55 sec)<br />
(PAR86: Residual analog value 0-9.9 V)<br />
4.- Wait for range confirmation.<br />
5.- Waite for M-done signal.<br />
6.- Automatic range detection.<br />
CONNECTION DIAGRAM AND SPINDLE PARAMETERS<br />
POTENTIOMETER<br />
MOTOR<br />
CONTROL<br />
M3<br />
M4<br />
SPLINDLE ANALOG<br />
ANALOG GND<br />
ANALOG POT.<br />
POT.<br />
PAR70(4)=1<br />
EMERGENCY<br />
5<br />
24<br />
37<br />
19<br />
MISCELLANEOUS:<br />
PAR20 5.- Use external Jog.<br />
6.- Display RPM or VCC.<br />
7.- Use tool detection.<br />
PAR26 Anticipation distance (for limits)<br />
PAR27 STROBE duration, limit signal 0-9.99 sec.<br />
PAR62 RPM % increase when pressing JOG. 0-50%<br />
18<br />
36<br />
M<br />
DM41<br />
DM42<br />
13<br />
DM43<br />
GEAR<br />
BOX<br />
GEAR<br />
CONTROL<br />
Encoder<br />
15 34 16 35 27 32 6 25 7 26<br />
JOG<br />
DM44<br />
MSTROBE<br />
M DONE<br />
<strong>NVP</strong> 300 TS<br />
23 8 33 14<br />
+ -<br />
PAR20(6)=1<br />
M41<br />
M42<br />
M43<br />
M44<br />
Spindle<br />
11<br />
30<br />
12<br />
31<br />
2<br />
20<br />
3<br />
21<br />
4<br />
22<br />
DT1<br />
DT2<br />
DT3<br />
DT4<br />
DIGITAL<br />
GROUND<br />
0V<br />
24V USER<br />
24V<br />
TOOL<br />
TURRET<br />
TOOL<br />
CONTROL<br />
PAR20(7)=1<br />
24V<br />
EXTERNAL<br />
APPENDIX
Page: 28 - Installation Manual <strong>NVP</strong>-<strong>300TS</strong>/<strong>301TS</strong> Man: 9910 Soft: 1.xx<br />
ERROR CODES<br />
e<br />
g<br />
a<br />
s<br />
s<br />
e<br />
M n<br />
o<br />
i<br />
t<br />
p<br />
i<br />
r<br />
c<br />
s<br />
e<br />
D<br />
o<br />
r<br />
d<br />
R<br />
O<br />
G<br />
A<br />
F .<br />
a<br />
t<br />
a<br />
d<br />
e<br />
h<br />
t<br />
g<br />
n<br />
i<br />
v<br />
a<br />
s<br />
r<br />
e<br />
t<br />
f<br />
a<br />
h<br />
c<br />
t<br />
i<br />
w<br />
s<br />
n<br />
i<br />
a<br />
m<br />
y<br />
b<br />
f<br />
f<br />
o<br />
d<br />
e<br />
n<br />
r<br />
u<br />
t<br />
r<br />
o<br />
e<br />
g<br />
a<br />
t<br />
u<br />
o<br />
r<br />
e<br />
w<br />
o<br />
P<br />
2<br />
0<br />
r<br />
o<br />
r<br />
r<br />
E<br />
e<br />
h<br />
t<br />
d<br />
e<br />
v<br />
a<br />
s<br />
g<br />
n<br />
i<br />
v<br />
a<br />
h<br />
t<br />
u<br />
o<br />
h<br />
t<br />
i<br />
w<br />
h<br />
c<br />
t<br />
i<br />
w<br />
s<br />
n<br />
i<br />
a<br />
m<br />
y<br />
b<br />
f<br />
f<br />
o<br />
d<br />
e<br />
n<br />
r<br />
u<br />
t<br />
r<br />
o<br />
e<br />
g<br />
a<br />
t<br />
u<br />
o<br />
r<br />
e<br />
w<br />
o<br />
P<br />
.<br />
a<br />
t<br />
a<br />
d<br />
]<br />
F<br />
F<br />
O<br />
/<br />
N<br />
O<br />
[<br />
e<br />
h<br />
t<br />
g<br />
n<br />
i<br />
h<br />
s<br />
u<br />
p<br />
y<br />
l<br />
s<br />
u<br />
o<br />
i<br />
v<br />
e<br />
r<br />
p<br />
t<br />
u<br />
o<br />
h<br />
t<br />
i<br />
w<br />
f<br />
f<br />
o<br />
d<br />
e<br />
n<br />
r<br />
u<br />
t<br />
n<br />
e<br />
e<br />
b<br />
s<br />
a<br />
h<br />
t<br />
i<br />
n<br />
u<br />
e<br />
h<br />
T<br />
e<br />
h<br />
t<br />
d<br />
n<br />
a<br />
)<br />
o<br />
r<br />
e<br />
z<br />
o<br />
t<br />
t<br />
e<br />
s<br />
e<br />
r<br />
e<br />
b<br />
l<br />
l<br />
i<br />
w<br />
(<br />
t<br />
n<br />
u<br />
o<br />
c<br />
n<br />
o<br />
i<br />
t<br />
i<br />
s<br />
o<br />
p<br />
e<br />
h<br />
t<br />
e<br />
s<br />
o<br />
l<br />
y<br />
l<br />
n<br />
o<br />
l<br />
l<br />
i<br />
w<br />
t<br />
I<br />
.<br />
y<br />
e<br />
k<br />
.<br />
)<br />
.<br />
c<br />
t<br />
e<br />
,<br />
s<br />
b<br />
a<br />
,<br />
h<br />
c<br />
n<br />
i<br />
(<br />
s<br />
e<br />
d<br />
o<br />
m<br />
g<br />
n<br />
i<br />
t<br />
a<br />
r<br />
e<br />
p<br />
o<br />
e<br />
h<br />
t<br />
f<br />
o<br />
s<br />
u<br />
t<br />
a<br />
t<br />
s<br />
4<br />
0<br />
r<br />
o<br />
r<br />
r<br />
E s<br />
e<br />
u<br />
l<br />
a<br />
v<br />
r<br />
e<br />
t<br />
e<br />
m<br />
a<br />
r<br />
a<br />
p<br />
g<br />
n<br />
o<br />
r<br />
W<br />
5<br />
0<br />
r<br />
o<br />
r<br />
r<br />
E n<br />
o<br />
i<br />
t<br />
a<br />
r<br />
u<br />
g<br />
i<br />
f<br />
n<br />
o<br />
c<br />
l<br />
a<br />
n<br />
r<br />
e<br />
t<br />
n<br />
i<br />
g<br />
n<br />
o<br />
r<br />
W<br />
6<br />
0<br />
r<br />
o<br />
r<br />
r<br />
E )<br />
.<br />
t<br />
p<br />
e<br />
D<br />
e<br />
c<br />
i<br />
v<br />
r<br />
e<br />
S<br />
(<br />
y<br />
r<br />
o<br />
m<br />
e<br />
m<br />
p<br />
u<br />
k<br />
c<br />
a<br />
b<br />
a<br />
t<br />
a<br />
d<br />
n<br />
i<br />
s<br />
r<br />
o<br />
r<br />
r<br />
E<br />
7<br />
0<br />
r<br />
o<br />
r<br />
r<br />
E .<br />
l<br />
a<br />
n<br />
g<br />
i<br />
s<br />
y<br />
c<br />
n<br />
e<br />
g<br />
r<br />
e<br />
m<br />
e<br />
l<br />
e<br />
c<br />
n<br />
a<br />
c<br />
r<br />
o<br />
]<br />
C<br />
[<br />
s<br />
s<br />
e<br />
r<br />
P<br />
.<br />
e<br />
v<br />
i<br />
t<br />
c<br />
a<br />
t<br />
u<br />
p<br />
n<br />
i<br />
y<br />
c<br />
n<br />
e<br />
g<br />
r<br />
e<br />
m<br />
E<br />
8<br />
0<br />
r<br />
o<br />
r<br />
r<br />
E d<br />
e<br />
g<br />
n<br />
a<br />
h<br />
c<br />
n<br />
e<br />
e<br />
b<br />
s<br />
a<br />
h<br />
e<br />
r<br />
a<br />
w<br />
t<br />
f<br />
o<br />
s<br />
e<br />
h<br />
t<br />
r<br />
o<br />
y<br />
r<br />
o<br />
m<br />
e<br />
m<br />
e<br />
r<br />
a<br />
w<br />
t<br />
f<br />
o<br />
s<br />
g<br />
n<br />
o<br />
r<br />
W<br />
9<br />
0<br />
r<br />
o<br />
r<br />
r<br />
E )<br />
.<br />
t<br />
p<br />
e<br />
D<br />
e<br />
c<br />
i<br />
v<br />
r<br />
e<br />
S<br />
(<br />
y<br />
r<br />
o<br />
m<br />
e<br />
m<br />
k<br />
r<br />
o<br />
w<br />
n<br />
i<br />
s<br />
r<br />
o<br />
r<br />
r<br />
E<br />
2<br />
1<br />
r<br />
o<br />
r<br />
r<br />
E )<br />
o<br />
I<br />
(<br />
e<br />
s<br />
l<br />
u<br />
p<br />
r<br />
e<br />
k<br />
r<br />
a<br />
m<br />
d<br />
e<br />
d<br />
o<br />
c<br />
a<br />
g<br />
n<br />
i<br />
h<br />
c<br />
r<br />
a<br />
e<br />
s<br />
e<br />
l<br />
i<br />
h<br />
w<br />
r<br />
o<br />
r<br />
r<br />
E<br />
0<br />
2<br />
r<br />
o<br />
r<br />
r<br />
E .<br />
e<br />
g<br />
n<br />
a<br />
r<br />
d<br />
i<br />
l<br />
a<br />
v<br />
y<br />
n<br />
a<br />
h<br />
c<br />
t<br />
a<br />
m<br />
t<br />
o<br />
n<br />
s<br />
e<br />
o<br />
d<br />
d<br />
e<br />
t<br />
c<br />
e<br />
t<br />
e<br />
d<br />
e<br />
n<br />
o<br />
e<br />
h<br />
T<br />
.<br />
r<br />
o<br />
r<br />
r<br />
e<br />
n<br />
o<br />
i<br />
t<br />
c<br />
e<br />
t<br />
e<br />
d<br />
e<br />
g<br />
n<br />
a<br />
R<br />
1<br />
3<br />
r<br />
o<br />
r<br />
r<br />
E )<br />
.<br />
t<br />
p<br />
e<br />
D<br />
e<br />
c<br />
i<br />
v<br />
r<br />
e<br />
S<br />
(<br />
n<br />
o<br />
i<br />
t<br />
c<br />
n<br />
u<br />
f<br />
l<br />
a<br />
m<br />
l<br />
a<br />
n<br />
r<br />
e<br />
t<br />
n<br />
I<br />
2<br />
3<br />
r<br />
o<br />
r<br />
r<br />
E )<br />
.<br />
t<br />
p<br />
e<br />
D<br />
e<br />
c<br />
i<br />
v<br />
r<br />
e<br />
S<br />
(<br />
n<br />
o<br />
i<br />
t<br />
c<br />
n<br />
u<br />
f<br />
l<br />
a<br />
m<br />
l<br />
a<br />
n<br />
r<br />
e<br />
t<br />
n<br />
I<br />
0<br />
9<br />
r<br />
o<br />
r<br />
r<br />
E )<br />
.<br />
t<br />
p<br />
e<br />
D<br />
e<br />
c<br />
i<br />
v<br />
r<br />
e<br />
S<br />
(<br />
n<br />
o<br />
i<br />
t<br />
c<br />
n<br />
u<br />
f<br />
l<br />
a<br />
m<br />
l<br />
a<br />
n<br />
r<br />
e<br />
t<br />
n<br />
I<br />
9<br />
9<br />
r<br />
o<br />
r<br />
r<br />
E )<br />
.<br />
t<br />
p<br />
e<br />
D<br />
e<br />
c<br />
i<br />
v<br />
r<br />
e<br />
S<br />
(<br />
n<br />
o<br />
i<br />
t<br />
c<br />
n<br />
u<br />
f<br />
l<br />
a<br />
m<br />
l<br />
a<br />
n<br />
r<br />
e<br />
t<br />
n<br />
I<br />
.<br />
.<br />
.<br />
.<br />
.<br />
.<br />
.<br />
.<br />
.<br />
k<br />
a<br />
e<br />
w<br />
r<br />
o<br />
)<br />
c<br />
t<br />
e<br />
,<br />
r<br />
e<br />
d<br />
o<br />
c<br />
n<br />
e<br />
,<br />
e<br />
l<br />
a<br />
c<br />
s<br />
(<br />
e<br />
c<br />
i<br />
v<br />
e<br />
d<br />
k<br />
c<br />
a<br />
b<br />
d<br />
e<br />
e<br />
f<br />
e<br />
h<br />
t<br />
m<br />
o<br />
r<br />
f<br />
m<br />
r<br />
a<br />
l<br />
a<br />
k<br />
c<br />
a<br />
b<br />
d<br />
e<br />
e<br />
F<br />
.<br />
l<br />
a<br />
n<br />
g<br />
i<br />
s<br />
5<br />
.<br />
2<br />
.<br />
7<br />
.<br />
5<br />
.<br />
6<br />
.<br />
3<br />
.<br />
4<br />
.<br />
l .<br />
h<br />
g<br />
i<br />
h<br />
o<br />
o<br />
t<br />
d<br />
e<br />
e<br />
p<br />
s<br />
k<br />
c<br />
a<br />
b<br />
d<br />
e<br />
e<br />
F<br />
E<br />
E<br />
E<br />
E<br />
E<br />
E<br />
E<br />
E e<br />
m<br />
o<br />
H<br />
g<br />
n<br />
i<br />
h<br />
c<br />
r<br />
a<br />
e<br />
s<br />
n<br />
e<br />
h<br />
w<br />
d<br />
e<br />
d<br />
e<br />
e<br />
c<br />
x<br />
e<br />
d<br />
e<br />
e<br />
p<br />
s<br />
r<br />
o<br />
g<br />
n<br />
i<br />
d<br />
a<br />
e<br />
r<br />
n<br />
o<br />
i<br />
t<br />
i<br />
s<br />
o<br />
p<br />
m<br />
u<br />
m<br />
i<br />
x<br />
a<br />
M
If any message other than the first two from the table were to come up, the<br />
equipment should be switched off and on again until one of the first two are seen.<br />
After pressing to access the counting mode, check the parameters.<br />
If any of the errors shown as (Service Department) are often repeated, ask Fagor<br />
Automation’s Customer Services Department about this.<br />
The feedback alarm error will appear if the bit of the corresponding alarm activating<br />
parameter for the axis has been set to "1" PAR08(1) = 1.<br />
In either case, to clear the display, press .<br />
If the axis value is flashing, this means that one of the travel limits established by<br />
machine parameter has been exceeded. This error will be displayed if the alarm<br />
activation parameter for the axis PAR08(2) = 1<br />
If the <strong>DRO</strong> does not come on or goes out while running, check that the voltage and<br />
ground outlets are as they should be. If an axis does not count, disconnect the<br />
feedback connectors one by one. If the <strong>DRO</strong> comes on, it indicates a fault in the<br />
feedback device. If the fault persists get in touch with Fagor Automation’s Customer<br />
Services Department about it.<br />
MAINTENANCE<br />
Cleaning:<br />
An accumulation of dirt in the equipment can act as a screen preventing proper<br />
dissipation of the heat generated by the internal electronic circuits with the consequent<br />
danger of overheating and <strong>DRO</strong> fault.<br />
Accumulated dirt can also, in some cases, provide a conductive path for electricity<br />
which could give rise to faults in the internal circuits of the equipment, especially in<br />
high humidity conditions.<br />
To clean the equipment non-abrasive dish-washing detergents are recommended (in<br />
liquid, never powder form) or 75% isotropic alcohol with a clean cloth. DO NOT USE<br />
aggressive solvents, (benzol, acetones, etc.) which could damage the materials the<br />
equipment is made with.<br />
Do not use high pressure compressed air to clean the item as this could give rise to an<br />
accumulation of charges which in turn lead to electrostatic discharges.<br />
The plastics used in the front panel of the <strong>DRO</strong> stand up to:<br />
1. Grease and mineral oils.<br />
2. Alkalis and bleaches.<br />
3. Dissolved Detergents.<br />
4. Alcohol<br />
Avoid the effect of solvents such as Chlorohydrocarbons, Benzol, Esters and Ethers<br />
because these could damage the plastics with which the front of the equipment is made.<br />
Preventive Inspection<br />
If the <strong>DRO</strong> does not come on press the rear switch for starting, make sure it is properly<br />
connected and being supplied with the proper mains voltage.<br />
<strong>NVP</strong>-<strong>300TS</strong>/<strong>301TS</strong> Man: 9910 Soft: 1.xx<br />
Installation Manual - Page: 29
OPERATION MANUAL<br />
Man: 9910 Soft: 1.xx<br />
<strong>FAGOR</strong> <strong>DRO</strong><br />
<strong>NVP</strong>-<strong>300TS</strong>/<strong>301TS</strong>
INDEX<br />
Introduction................................................................................................................................. 1<br />
1. Unit description ............................................................................................................ 1<br />
1.1 Front panel...................................................................................................................... 1<br />
1.2 Rear panel (See installation manual).......................................................................... 3<br />
2. Coordinate display....................................................................................................... 4<br />
2.1 Display modes................................................................................................................ 4<br />
2.2 Incremental, absolute and with respect to machine zero ........................................ 6<br />
2.3 Machine reference selection and search.................................................................... 7<br />
2.4 Axis coordinate preset .................................................................................................. 9<br />
3. Special operations ......................................................................................................12<br />
3.1 Scaling factor ...............................................................................................................12<br />
3.2 rpm (spindle speed preset) .........................................................................................12<br />
3.2.1 Modify the spindle speed while it is running..........................................................13<br />
3.3 Activating and presetting the Constant Surface Speed (CSS) ..............................14<br />
3.3.1 Displaying the axis feedrate ......................................................................................15<br />
3.3.2 Spindle orientation ......................................................................................................15<br />
3.4 Taper (cone) calculation.............................................................................................15<br />
3.5 Tool Preset ....................................................................................................................16<br />
3.5.1 Deleting all tool offsets ..............................................................................................17<br />
3.6 Coordinate freeze (Hold) ...........................................................................................17<br />
4 Programming ..............................................................................................................18<br />
4.1 Deleting blocks ............................................................................................................18<br />
4.2 Editing blocks ..............................................................................................................18<br />
4.2.1 Editing a new block (empty)......................................................................................19<br />
4.2.2. Teach-in mode..............................................................................................................20<br />
4.2.3 Special functions .........................................................................................................20<br />
4.2.3.1 Constant Surface Speed (CSS) or RPM ....................................................................20<br />
4.2.3.2 Scaling factor (programming) ...................................................................................21<br />
4.2.3.3 Jump to another block ................................................................................................21<br />
4.2.4 Cycles ............................................................................................................................22<br />
4.2.4.1 Turning / facing cycle .................................................................................................22<br />
4.2.4.2 Taper turning / facing cycle (taper 1).......................................................................23<br />
4.2.4.3 Taper turning / facing cycle (taper 2).......................................................................24<br />
4.2.4.4 Corner rounding cycle ................................................................................................25<br />
4.3 Execution ......................................................................................................................26<br />
4.3.1 program execution ......................................................................................................26<br />
4.3.2 Cycle execution ...........................................................................................................27<br />
4.3.3 Machining steps...........................................................................................................27<br />
4.3.4 Execution errors ..........................................................................................................28<br />
5. Operation with the RS-232-C serial line ...............................................................29<br />
5.1. Saving and restoring data...........................................................................................29<br />
5.2 Parameter transmitting format ...................................................................................29<br />
5.3 Tool table transmitting format ...................................................................................29<br />
5.4 Programs transmission Format ..................................................................................30<br />
Appendix.....................................................................................................................................31<br />
Error codes..................................................................................................................................31<br />
Maintenance ...............................................................................................................................32<br />
Operation Manual <strong>NVP</strong>-<strong>300TS</strong>/<strong>301TS</strong> Man: 9910 Soft: 1.xx
INTRODUCTION<br />
Throughout this manual, certain installation parameters are referred to which<br />
affect the description of certain <strong>DRO</strong> functions.<br />
These parameters have been set by the installer and may be modified by the<br />
operator.<br />
These parameters are described in the installation manual supplied with this<br />
unit.<br />
1. UNIT DESCRIPTION<br />
This <strong>DRO</strong> is designed for industrial environments, especially for machine<br />
tools.<br />
It can display the position of three axes and a spindle and program repetitive<br />
parts.<br />
1.1 FRONT PANEL<br />
LCD display<br />
The LCD display offers assistance for the various operations possible with<br />
this unit.<br />
While in regular position reading mode or before selecting any of the options<br />
of its menus, its contrast may be adjusted by pressing to decrease it or<br />
to increase it<br />
<strong>NVP</strong>-<strong>300TS</strong>/<strong>301TS</strong> Man: 9910 Soft: 1.xx<br />
Operation Manual - Page: 1
Each axis display has eight 14.1mm high LEDs and another one for the minus<br />
sign (-).<br />
ABS-This lamp stays on when operating in absolute mode and off when in<br />
incremental mode. To access or quit this mode, use the key.<br />
φ - This lamp stays on when operating in diameter mode. In this mode, the<br />
<strong>DRO</strong> displays twice the actual axis movement. To access it or quit it, use<br />
the key (if allowed by PAR04)<br />
HOLD- This lamp comes on when "freezing" the axis position by<br />
pressing and the axis key.<br />
INCH- This lamp stays on when working in inches and off when doing it<br />
in millimeters. To access it or quit it, press<br />
This lamp stays on while showing the axes position in reference<br />
(home) mode.<br />
Indicate the spindle turning direction. They blink when the spindle<br />
is accelerating or decelerating.<br />
3rd display The rightmost digit shows a "1", a "2" or is off to indicate<br />
that the Z axis display (2nd one) corresponds to "Z 1 ", "Z 2 " or to the<br />
combination of "Z 1 +Z 2 " respectively.<br />
This selection rotates by pressing . It also shows the text "tool"<br />
followed by the number of the active tool corresponding to the XZ<br />
coordinates shown on the other displays.<br />
Keys to select the first the second and third axis respectively.<br />
Is used for changing the part zero or home reference.<br />
Is used for rotating from the incremental to the absolute mode and<br />
vice versa<br />
Is used to turn the display off while keeping track of the axes<br />
position at all times. This key must be pressed before turning the<br />
unit's power off by the main switch on the back of the unit.<br />
Is used to validate an operation.<br />
Is used to cancel or abort an operation already initiated.<br />
Is used to toggle the display of radius/diameter on the X axis movement.<br />
Page: 2 - Operation Manual <strong>NVP</strong>-<strong>300TS</strong>/<strong>301TS</strong> Man: 9910 Soft: 1.xx
<strong>NVP</strong>-<strong>300TS</strong>/<strong>301TS</strong> Man: 9910 Soft: 1.xx<br />
These are used for entering values.<br />
Is used to change the sign of the entered value or change from fine to<br />
coarse resolution and vice versa.<br />
Is used for “freezing” the display of the feedback even though the axis<br />
moves.<br />
This key is also used to toggle between metric and inch display.<br />
F Is used to access the special operation modes, parameter setting,<br />
communications via RS-232-C, etc.<br />
EDIT Is used to access the program editing mode.<br />
TEACH Is used for programming a part in teach-in mode by inserting blocks after<br />
moving the axes to the desired position.<br />
EXEC Is used to access the execution of a cycle or part program previously<br />
stored.<br />
Is used to select the previous option in the menu or editing mode and<br />
to start the spindle counterclockwise, increase its speed if it is already<br />
turning in that direction or decrease it if it is turning in the opposite<br />
direction.<br />
Is used to select the previous option in the menu or editing mode and<br />
to start the spindle clockwise, increase its speed if it is already turning<br />
in that direction or decrease it if it is turning in the opposite direction.<br />
Is used to stop the spindle and to delete memory blocks and tools in the<br />
editing mode.<br />
1.2 REAR PANEL (SEE INSTALLATION MANUAL)<br />
Operation Manual - Page: 3
2. COORDINATE DISPLAY<br />
2.1 DISPLAY MODES<br />
Turning the unit ON<br />
The unit is turned on by actuating on the power switch of the rear panel<br />
This <strong>DRO</strong> runs a self-test and its LCD screen shows the text:<br />
“Fagor <strong>NVP</strong>-30xTS , Press ” where x indicates the model and the X and<br />
Z displays show "Fagor dro" if everything is OK and the error number if<br />
otherwise. See the appendix at the end of this manual.<br />
Turning the unit OFF<br />
If you press key the <strong>DRO</strong> switches off the displays while maintaining<br />
the power supply to the feedback systems and goes on reading the position<br />
of the axes at all times. This is not the case<br />
when the equipment is switched off by means of the switch on the rear panel<br />
of the same.<br />
To reset the displays, just press this key again, on condition that the <strong>DRO</strong> is<br />
getting voltage (plugged in and with the switch on the rear panel on).<br />
Notes:<br />
- Before powering the <strong>DRO</strong> down with the switch on the rear panel or disconnecting<br />
it from mains, it is a good idea to press the key in order to store<br />
the current position of the axes permanently.<br />
- If the unit is powered down with its rear panel switch or there is a power<br />
outage without previously having pressed , the <strong>DRO</strong> will keep the last<br />
position of the axes for at least 30 minutes.<br />
- The unit will display ERROR 2 when powered back up if the position reading<br />
was lost when turned off while the axes were moving or after the accidental<br />
backup period has expired without having saved the current position by<br />
previously pressing .<br />
Page: 4 - Operation Manual <strong>NVP</strong>-<strong>300TS</strong>/<strong>301TS</strong> Man: 9910 Soft: 1.xx
Language selection<br />
On this <strong>DRO</strong>, it is possible to select the language used for displaying the help<br />
on the LCD screen. To do this:<br />
- Access parameter PAR50 (language) directly by pressing<br />
- Press + -<br />
<strong>NVP</strong>-<strong>300TS</strong>/<strong>301TS</strong> Man: 9910 Soft: 1.xx<br />
repeatedly until the desired language appears (English,<br />
Spanish, French, German, Italian, Portuguese, custom*) and press ENTER .<br />
Press to quit the language selection mode.<br />
"Custom" may be any user defined language. (See section 3.4 PAR52 of the<br />
installation manual).<br />
Conversion mm into inches<br />
This <strong>DRO</strong> can displayed the position of the axes in millimeters or inches by<br />
pressing 0 key depending on whether the INCH led is off or on<br />
inch<br />
respectively.<br />
Fine / coarse resolution<br />
This <strong>DRO</strong> allows a decimal digit to be switched off (coarse resolution) when<br />
the resolution is excessive, simply by pressing + - . For example 0.01 instead<br />
of 0.012.<br />
Radius / Diameter:<br />
When these models are used for measuring radius or diameter, one can display<br />
twice the real displacement of the axis (diameter) by pressing 1 2 . Led Φ<br />
will go on or off to indicate the double or real counting mode respectively.<br />
RPM / CSS<br />
It is possible to display the preset Revolutions Per Minute or the Constant<br />
Surface Speed of the spindle "Sp" or "Cs" as well as the actual (real) rpm "Sr"<br />
(when the spindle has an encoder) and the percentage of correction being<br />
applied.<br />
To do that the <strong>DRO</strong> must be configured accordingly, PAR20(6)=1:<br />
. Press F<br />
. Selec the option or <br />
The Sp and Sr will be in RPM and the CSS in m/min or feet/min depending<br />
on the display units being used metric or inches.<br />
. Preset those values.<br />
0<br />
inch<br />
Operation Manual - Page: 5
2.2 INCREMENTAL, ABSOLUTE AND WITH RESPECT TO<br />
MACHINE ZERO<br />
A coordinate <strong>DRO</strong> displays the<br />
present coordinate of one or several<br />
axes.<br />
Coordinate means the distance from<br />
one point or position with respect to<br />
another chosen as reference.<br />
These <strong>DRO</strong>s can display the position<br />
of the axes in incremental or absolute<br />
mode or referring to home.<br />
The figure shows the coordinates of<br />
an axis which would appear in the<br />
different modes:<br />
- In Incremental (I), when the ABS<br />
and leds are off the distance from<br />
-<br />
the present position of the axis to the<br />
previous position is displayed.<br />
In Absolute (ABS), when the ABS led is on and the is off, the distance from<br />
the present position of the axis to part zero (D) is displayed.<br />
- In reference zero ( ), when led is on, the distance from the present<br />
position of the axis to home (Io) chosen in the feedback system (scale or<br />
encoder) is displayed. To access this mode use key.<br />
- To select another reference point, just press its corresponding key [0] to [9] or the<br />
keys. Once it is selected, press ENTER to activate it or C to cancel the<br />
operation and quit this mode leaving the previous part zero.<br />
- The home reference "0" cannot be preset and it will be assumed when the <strong>DRO</strong><br />
detects the reference pulse coming from the feedback device as described later<br />
on.<br />
Note: If parameter PAR14 = 1, it will be possible to preset the home position when<br />
using feedback devices not having a reference mark (pulse). For example <strong>FAGOR</strong><br />
MKT series scales.<br />
To change from one of these display modes to another, press until the relevant led goes<br />
on or off as described earlier.<br />
It could occur that the installation parameter PAR11(1) has been set to “0” for key to<br />
independently affect each axis so that one axis can display its position in incremental<br />
mode whilst the other does this in absolute. In this case, to change the display mode<br />
for a particular axis, press sequence: for "X", for "Z".<br />
Page: 6 - Operation Manual <strong>NVP</strong>-<strong>300TS</strong>/<strong>301TS</strong> Man: 9910 Soft: 1.xx
2.3 MACHINE REFERENCE SELECTION AND SEARCH<br />
Though it is not absolutely necessary for a large number of applications we<br />
recommend fixing a reference point (home) for each axis using the reference<br />
marks (Io) of its feedback system, whether this is a scale or an encoder in order<br />
to be able to keep the respective zeros (part and incremental) and recover these<br />
after having disconnected the equipment or for any other reason.<br />
Standard <strong>FAGOR</strong> scales have a fixed reference mark (Io) every 50 mm along<br />
their travel.<br />
When starting the home search and pressing an axis key (X, for example) the<br />
current axis position starts blinking with zeros to the left.<br />
<strong>FAGOR</strong> also offers scales with a coded Io with which all you have to do is<br />
move the axis at most 20 mm or 100 mm (depending on the model) from the<br />
present position in order to “find” the exact position of the axis with respect<br />
to home.<br />
When this mode is selected, the <strong>DRO</strong> waits to receive this pulse (Io) to reestablish<br />
all its previous absolute and incremental references (part zero and<br />
incremental zero).<br />
For this reason when fixed Io (not coded) scales are used, one first has to<br />
choose an approximate reference zone, for example about half way along the<br />
axis travel, take the axis up to said zone and<br />
carry out the search for the Io ( ) reference mark of the scale (or encoder).<br />
After said (Io) mark has been “found”, following the steps described below,<br />
this axis zone is marked with a pen or sticker in order to go back to this in later<br />
searches, recommended after having disconnected (not “switched off” the<br />
machine, as will be shown later on).<br />
These <strong>DRO</strong>s keep the relative distance from home ( ) to part zero (ABS on)<br />
and incremental zero (ABS off) for each axis in their internal memory for about<br />
10 years even after cutting off their mains power supply, for example, by<br />
means of the switch on the rear panel. This means that when it is necessary to<br />
reference the axes again, when the Io (home) mark is “found” said absolute<br />
and incremental zero values are recovered.<br />
Note: In Machine Reference mode, the X, Z1 and Z2 axes positions are<br />
displayed and the LCD screen shows the angular position of the spindle "C".<br />
<strong>NVP</strong>-<strong>300TS</strong>/<strong>301TS</strong> Man: 9910 Soft: 1.xx<br />
Operation Manual - Page: 7
The home search sequence is as follows:<br />
- Move the axis to the approximate reference zone (roughly).<br />
This step is only for fixed Io scales (not coded)<br />
- Get the <strong>DRO</strong> in home reference mode by pressing<br />
is on, it is already in that mode.<br />
. If the LED<br />
- Select the axis to be referenced by pressing for X, for Z1 and<br />
for Z2 (this must be done one axis at a time).<br />
Zeros to the left of the axis display will appear.<br />
- Move the axis until the <strong>DRO</strong> detects the reference mark of the feedback<br />
device. This happens when the zeros to the left of the corresponding<br />
display disappear.<br />
When the reference pulse is received, the <strong>DRO</strong> presets this point with<br />
the value assigned to the installation parameter PAR10 for this axis. This<br />
value is (factory set) default “0”. At the same time it recovers the relative<br />
distance from this home to the previously set part zeros (ABS) and the<br />
incremental value.<br />
When using reference-coded scales (distance-coded Io), the value<br />
assumed is the position with respect to scale zero plus the offset.<br />
For the spindle: While in home mode:<br />
. Press F and wait for the marker pulse. The position is displayed on the<br />
LCD screen.<br />
NOTE.- If PAR14=1 (feedback without reference mark -I0-), The home<br />
position may be preset in Machine Reference mode. See the next<br />
section for coordinate preset.<br />
Page: 8 - Operation Manual <strong>NVP</strong>-<strong>300TS</strong>/<strong>301TS</strong> Man: 9910 Soft: 1.xx
2.4 AXIS COORDINATE PRESET<br />
To reset the axis display, just press: sequence: for "X", and<br />
for "Z".<br />
Using the lower figure, let us imagine we wish to make a part in which three<br />
holes have to be drilled with the coordinates stated. It is clear that the blueprint<br />
will only reflect the incremental coordinates (I) or the absolute ones (ABS)<br />
referring to the part zero (point "0" in the figure) although the <strong>DRO</strong> also shows<br />
them with respect to home (Io).<br />
After referencing the axes, as was described in the previous section, we can<br />
make this part in incremental or absolute mode according to whether we chose<br />
a type of dimensions (I) or (ABS) of the blueprint.<br />
In incremental mode:<br />
- Press until the ABS led go out and the key for switching off<br />
the led.<br />
- Move the axis up to corner "D" to set this as part zero.<br />
- At this point, one can proceed in two ways.<br />
- Preset the axis with zero value by pressing<br />
- Move the axis to the face of the part until the <strong>DRO</strong> reads: 022.601<br />
<strong>NVP</strong>-<strong>300TS</strong>/<strong>301TS</strong> Man: 9910 Soft: 1.xx<br />
Operation Manual - Page: 9
- After drilling this hole, one can go to the next position, after having preset<br />
or...<br />
- Preset the axis with value 22.601 by pressing:<br />
validate it.<br />
22.601 to<br />
In case of a mistake, press to cancel it and leave it as it was.<br />
When pressing , the previously preset value is displayed.<br />
- Move the axis towards the first position until the <strong>DRO</strong> reads: 0.000.<br />
This last method turns out to be more practical as after selecting the<br />
destination coordinate one only has to remember to move the axis until<br />
the <strong>DRO</strong> reads zero.<br />
- Once this turning operation has concluded, one can go to the next position,<br />
after having preset the next coordinate (24.337), by moving the axis until<br />
the display reads 0.000.<br />
- And so on until all the turning operations are concluded.<br />
Note: By pressing until the "ABS" LED lights up, the <strong>DRO</strong> will show<br />
the axis real position with respect to part zero "O"<br />
Page: 10 - Operation Manual <strong>NVP</strong>-<strong>300TS</strong>/<strong>301TS</strong> Man: 9910 Soft: 1.xx
In absolute mode:<br />
- Press until the ABS led comes on.<br />
- To preset part zero:<br />
- Place the axis exactly over “0” and press:<br />
At any time, by pressing key , the <strong>DRO</strong> will display the present position<br />
with respect to the previous zero (ABS and leds off), to part zero (ABS led<br />
on) or with respect to home ( led on).<br />
The next section describes how preset up to 16 tools.<br />
<strong>NVP</strong>-<strong>300TS</strong>/<strong>301TS</strong> Man: 9910 Soft: 1.xx<br />
Operation Manual - Page: 11
3. SPECIAL OPERATIONS<br />
3.1 SCALING FACTOR<br />
With this <strong>DRO</strong>, it is possible to apply a scaling factor between 0 and ±9.999 for<br />
applications such as mold making by simply keying in (for the X axis, for<br />
example):<br />
'value' .<br />
The <strong>DRO</strong> will then show the axis position resulting from multiplying its real<br />
position by the 'value' of the scaling factor.<br />
3.2 RPM (SPINDLE SPEED PRESET)<br />
After pressing F , select the option to preset the spindle speed and<br />
range to be used.<br />
Key Action<br />
Programmed RPM<br />
Range<br />
Validate<br />
By default, the <strong>DRO</strong> offers the minimum range for the indicated rpm.<br />
Once has been pressed, to accept the entered data, the <strong>DRO</strong> automatically<br />
checks if the programmed range matches the current one. If not, a range change<br />
is carried out.<br />
If the spindle is already running, an acceleration ramp is applied to reach the new<br />
speed.<br />
Note: If PAR20(6)= 0, the LCD screen does not show the programmed S , the<br />
real "Sr" or the %.<br />
Page: 12 - Operation Manual <strong>NVP</strong>-<strong>300TS</strong>/<strong>301TS</strong> Man: 9910 Soft: 1.xx
3.2.1 MODIFY THE SPINDLE SPEED WHILE IT IS RUNNING<br />
With this <strong>DRO</strong>, it is possible to modify the spindle speed already preset at the<br />
keyboard (using the and keys) or from an external keypad using<br />
a potentiometer and/or the [Jog+] and [Jog-] inputs.<br />
-When the spindle is turning clockwise, every time is pressed, the spindle<br />
speed will increase and every time is pressed, it will decrease.<br />
- On the other hand, if the spindle is turning counterclockwise, every time<br />
is pressed, the spindle speed will decrease and every time is pressed, it<br />
will increase.<br />
NOTE: When the spindle speed is controlled by an external potentiometer, only<br />
the actual spindle speed "Sr" shown on the LCD screen will only make<br />
sense when there is an encoder installed on the spindle.<br />
The are operational only to start the spindle and change its<br />
turning direction, NOT to increase or decrease the speed set by the<br />
potentiometer.<br />
<strong>NVP</strong>-<strong>300TS</strong>/<strong>301TS</strong> Man: 9910 Soft: 1.xx<br />
Operation Manual - Page: 13
3.3 ACTIVATING AND PRESETTING THE CONSTANT SURFACE<br />
SPEED (CSS)<br />
After pressing F and , the desired CSS may be preset as well as the<br />
maximum rpm allowed for a particular machining operation at Constant<br />
Surface speed and the Range to work in. After programming this data, the CSS<br />
mode is activated depending on the radius value (X axis)<br />
Key Action<br />
Constant Surface Speed<br />
Maximum RPM allowed for that cutting speed<br />
Range<br />
Toggles ON/OFF<br />
Validate the data<br />
- When working in mm, the CSS is given in m/min.<br />
- When working in inches, the CSS is given in ft/min.<br />
The CSS mode is only activated after entering all the pertinent data.<br />
Page: 14 - Operation Manual <strong>NVP</strong>-<strong>300TS</strong>/<strong>301TS</strong> Man: 9910 Soft: 1.xx
3.3.1 DISPLAYING THE AXIS FEEDRATE<br />
After pressing F and select the option,<br />
the axis displays start blinking waiting to be selected by pressing their<br />
corresponding key ( for example).<br />
The LCD display will show:<br />
- The current feedrate of the selected axis F0000000 in mm/min. or<br />
tenth-of-an-inch/min.<br />
- The maximum feedrate reached by the axis until then since the this mode was<br />
activated: Fm000000 in mm/min. or tenth-of-an-inch/min.<br />
To select another axis, select again, press and then the key for that<br />
axis ( , for example).<br />
To deselect it, press F or get back into this mode and press the same<br />
keystroke sequence used to activate that axis.<br />
3.3.2 SPINDLE ORIENTATION<br />
After pressing F , , , to orient the jaws towards the<br />
operator, preset the angular position (for example 120º), press EXEC or , when<br />
pressing this key again, it will advance to 240º always in the M3 direction. By pressing<br />
instead of EXEC or it will turn in the M4 direction.<br />
3.4 TAPER (CONE) CALCULATION<br />
After pressing F and select the option, this <strong>DRO</strong><br />
calculates the taper angle (cone) of a part by simply touching two of its points.<br />
To do this, follow this procedure:<br />
- Move the tool until it touches the part at any point of the taper.<br />
- Press .<br />
- Touch the part with the tool at any other point of the taper.<br />
- Press so the <strong>DRO</strong> calculates the angle or to cancel the operation.<br />
(The displays stop blinking).<br />
The "X" axis display will show the angle in ten-thousandths of a degree (0.0001º)<br />
and the "Z" axis display will do so in degrees, minutes and seconds.<br />
<strong>NVP</strong>-<strong>300TS</strong>/<strong>301TS</strong> Man: 9910 Soft: 1.xx<br />
Operation Manual - Page: 15
3.5 TOOL PRESET<br />
Up to 16 tools may be preset on this <strong>DRO</strong> model (from "tool 00" to "tool 15").<br />
The unit stores in its internal memory the relative offsets of all the tools with<br />
respect to that of "T0".<br />
Therefore, if "T0" has been preset in ABSolute mode (on X and Z) and, then,<br />
the rest of the tools, it will suffice to just preset "T0" again (on Z) to make<br />
a new part. The <strong>DRO</strong> will then automatically recalculate all the offsets of the<br />
rest of the tools without having to preset them for each part.<br />
To preset a tool, just follow this procedure:<br />
- Place a part of known diameter in the chuck in ABSolute mode.<br />
- Move the tool to be preset until it touches the part at the known diameter.<br />
- Press and the 3rd display will show the number of the active tool. The<br />
-<br />
LCD screen will show "tool number: XX".<br />
Press the desired number key from "00" to "15".<br />
- Press to validate this operation or to cancel it.<br />
- Preset the axes with the contact position of the tool and the known part.<br />
The tools can also be preset using the TEACH-IN mode. To do that:<br />
1. Press TEACH , The "0" tool will be shown selected.<br />
2. Move the tool to a reference point (previously established).<br />
3. Press . The display will show the next tool.<br />
Repeat steps 2 and 3 for the rest of the tools.<br />
These tool presets are kept in memory even when the unit is powered off up<br />
to a maximum of 10 years.<br />
Notes:<br />
In incremental mode, tools are not used, it is considered as just another tool,<br />
independent from T00.<br />
If the offset of a tool has been preset in either Z 1 , Z 2 or Z S mode, the same<br />
mode (Z 1 , Z 2 or Z S ) must be selected to make the part with it.<br />
Page: 16 - Operation Manual <strong>NVP</strong>-<strong>300TS</strong>/<strong>301TS</strong> Man: 9910 Soft: 1.xx
3.5.1 DELETING ALL TOOL OFFSETS<br />
To delete the offsets of ALL the tools: The LED must be off.<br />
Press .<br />
and to confirm it.<br />
<strong>NVP</strong>-<strong>300TS</strong>/<strong>301TS</strong> Man: 9910 Soft: 1.xx<br />
The <strong>DRO</strong> will request confirmation. Press to ignore it<br />
3.6 COORDINATE FREEZE (HOLD)<br />
It enables “freezing” the display of the counter whilst inside it goes on reading<br />
the real position of the axis. This comes about when it is necessary to change<br />
the tool and preset the dimension of the new one.<br />
For example, to change a tool at any known point of the part:<br />
- Press key<br />
present value.<br />
and the display counting said axis “freezes” at the<br />
- Press key of other axis if you wish to also “freeze” the display of this axis.<br />
- The tool to be replaced withdraws and the new one takes its position.<br />
- The new tool is led to the “freezing” point and the part is touched at said<br />
point.<br />
- Press and the counting “defreezes” starting to count from the<br />
previously “frozen” value.<br />
If 1 2 is pressed, instead, the <strong>DRO</strong> will assume half the distance<br />
travelled since was pressed.<br />
Operation Manual - Page: 17
4 PROGRAMMING<br />
On this <strong>DRO</strong>, up to 100 blocks can be programmed (00 to 99) indicating axis<br />
positions at random or following a particular path (cycle) and some special<br />
functions such as tool change, jump to another block, scaling factor, etc. to<br />
be carried out later on in a repetitive way.<br />
Note: If the memory is locked, the program blocks can be neither edited nor<br />
deleted.<br />
4.1 DELETING BLOCKS<br />
To delete all the program blocks, after pressing EDIT , press the sequence:<br />
press , otherwise, press:<br />
The <strong>DRO</strong> will request confirmation. If not wished to proceed,<br />
4.2 EDITING BLOCKS<br />
In a program, it is possible to "Edit" new blocks (empty) and the data already<br />
in them, "Modify" the contents of the blocks completely or "Delete" their<br />
contents leaving them empty.<br />
The destination coordinates may be entered in the blocks by keying the values<br />
or after moving the axes to the desired destination point as described in the<br />
section on "Teach In".<br />
When pressing EDIT to access the block editing mode, the LCD display shows:<br />
Program Edit<br />
Block: 00<br />
After this, select the block number to be edited either by keying its two digits or<br />
using the and then pressing<br />
Page: 18 - Operation Manual <strong>NVP</strong>-<strong>300TS</strong>/<strong>301TS</strong> Man: 9910 Soft: 1.xx
4.2.1 EDITING A NEW BLOCK (EMPTY)<br />
Once in the desired block as described earlier, the LCD display shows:<br />
Program Edit<br />
Change Cycle<br />
The option between < > () is the one selected.<br />
To select any other option, use the keys.<br />
Then press to access it.<br />
Selecting the POSITION option:<br />
This menu option can be used to move the axes to specific coordinates using<br />
the indicated tool. It requests the following data:<br />
- X coordinate of the target point: Press and key in the value.<br />
- Z coordinate of the target point: Press and key in the value.<br />
- The number of the tool to be used:<br />
Press and key in the value.<br />
If any of the coordinates is left out, its display will show: "-----" indicating that<br />
axis must not be moved.<br />
To enter the target coordinate for another axis, press its corresponding key.<br />
-Once the values have been entered for all the desired axes, press to<br />
validate the block.<br />
-To cancel the changes, press<br />
Selecting the CHANGE option:<br />
If while this option is selected, is pressed, it is possible to change the<br />
scaling factor or edit a jump to another block or subroutine as described in section<br />
4.2.3<br />
Selecting the CYCLE option:<br />
While this is option is selected, it is possible to edit any of the cycles described<br />
in section 4.2.4<br />
<strong>NVP</strong>-<strong>300TS</strong>/<strong>301TS</strong> Man: 9910 Soft: 1.xx<br />
Operation Manual - Page: 19
4.2.2. TEACH-IN MODE<br />
In this mode, it is possible to enter the target coordinates after moving the axes<br />
to the desired position instead of keying its numeric value.<br />
It stores the data on position and active tool.<br />
To edit a block in this mode:<br />
- Press TEACH to access this mode.<br />
The LCD display will show: Teach-In<br />
and the current axis position. Block : 00<br />
- Select the block to be edited by keying its number or by using the:<br />
keys and then pressing to validate the selection.<br />
- Move the axes to the desired position and press<br />
When receiving a probe pulse, the current position is also entered and it goes on<br />
to the next block.<br />
- To quit the TEACH-IN mode, press TEACH<br />
When programming incremental coordinates, "ABS" led off, the <strong>DRO</strong> will<br />
display the distance traveled from the previous block.<br />
4.2.3 SPECIAL FUNCTIONS<br />
Once in block editing mode and after selecting using the<br />
keys and pressing , it is possible to program a scaling factor, a jump to<br />
another block or a tool change to be applied in the following blocks as<br />
described next.<br />
4.2.3.1 CONSTANT SURFACE SPEED (CSS) OR RPM<br />
When selecting the RPM option, the following is programmed in this cycle:<br />
-The spindle speed "S" at the "X" axis display.<br />
-The range at the "Z" axis display.<br />
When selecting the CSS option, the following is programmed in this cycle:<br />
-The Constant Surface Speed at the "X" axis display.<br />
-Maximum rpm allowed for that CSS at the "Z" axis display.<br />
-The CSS mode is activated or deactivated at the "Zs" display by pressing<br />
Page: 20 - Operation Manual <strong>NVP</strong>-<strong>300TS</strong>/<strong>301TS</strong> Man: 9910 Soft: 1.xx
4.2.3.2 SCALING FACTOR (PROGRAMMING)<br />
After selecting this option using the keys and pressing , it is<br />
possible to enter a scaling factor different for each axis, thus being possible to<br />
generate a mirror image (negative factor). This factor will affect the following<br />
blocks and may have a value within ± 9.999<br />
If a scaling factor has been programmed, it will only be applied on to the<br />
programmed coordinates during the execution of the program, but not on to<br />
the axis count or the regular dro mode. To do that, it would have to be set<br />
by installation parameter PAR05 (section 3.1).<br />
4.2.3.3 JUMP TO ANOTHER BLOCK<br />
After selecting this option using the keys and<br />
pressing , it is possible to program this function in<br />
order to change the order the blocks will be executed in or<br />
jump to subroutines from any block of the program.<br />
This type of block contains a jump destination block<br />
number and a return block number.<br />
When programming the return block, the blocks contained<br />
between them will be considered a subroutine and one can<br />
program the number of times they will be executed before<br />
returning to the block after the one it jumped from.<br />
For example:<br />
- Block "02" of the figure contains a jump to block "04".<br />
- If no return block is programmed in this block "02" (a), the <strong>DRO</strong> will<br />
execute blocks: 01, 02, 04, 05, 06, 07.<br />
- If a return block "06" is programmed in this block "02" (b), the number of<br />
times (n) blocks "04, 05 and 06" will be executed. After that, blocks 03, 04,<br />
05, 06 and 07 will be executed.<br />
Note: No nesting is possible. This means that no jumps can be programmed<br />
from inside a group out to another, as from block 05 of the figure in<br />
case (b).<br />
<strong>NVP</strong>-<strong>300TS</strong>/<strong>301TS</strong> Man: 9910 Soft: 1.xx<br />
Operation Manual - Page: 21
4.2.4 CYCLES<br />
With this <strong>DRO</strong>, typical cycles may be programmed in an interactive way<br />
without having to program the exact position of each point.<br />
4.2.4.1 TURNING/FACING CYCLE<br />
After selecting these option with: and pressing<br />
The desired section of the part can be programmed to be turned or faced.<br />
To do this, indicate:<br />
- The initial position (Xi, Zi)<br />
Press: [value]<br />
X<br />
Zf<br />
- The final position (Zf):[value]<br />
- The final diameter (φ):[value]<br />
- The cutting pass: [value]<br />
When executing this cycle, the dro will show the current position with respect<br />
to the target position for each machining movement (step) so the axes have to be<br />
moved until the dro displays read 0.000<br />
Notes: To go from one step to the next, use either or .<br />
to go back to the previous step, press<br />
Page: 22 - Operation Manual <strong>NVP</strong>-<strong>300TS</strong>/<strong>301TS</strong> Man: 9910 Soft: 1.xx<br />
f<br />
Xi,Zi<br />
Z
4.2.4.2 TAPER TURNING / FACING CYCLE (TAPER 1)<br />
After selecting these options with and pressing<br />
The desired section can be programmed to be turned or faced.<br />
To do this, indicate:<br />
- The initial position (Xi, Zi)<br />
X<br />
[value]<br />
- The final position (Xf Zf):<br />
[value]<br />
- The cutting pass:<br />
[value]<br />
- Select either inside or outside<br />
machining with:<br />
and or<br />
<strong>NVP</strong>-<strong>300TS</strong>/<strong>301TS</strong> Man: 9910 Soft: 1.xx<br />
Xi,Zi<br />
Xf,Zf<br />
- Select facing or turning with: and or<br />
- Press to end this operation.<br />
Xf,Zf<br />
Xf,Zf<br />
Outside Machining<br />
Xi,Zi<br />
Xi,Zi<br />
Inside Machining<br />
When executing this cycle, the dro will show the current position with respect<br />
to the target position for each machining movement (step) so the axes have to be<br />
moved until the dro displays read 0.000<br />
Notes: To go from one step to the next, use either or .<br />
to go back to the previous step, press<br />
Operation Manual - Page: 23<br />
Z
4.2.4.3 TAPER TURNING / FACING CYCLE (TAPER 2)<br />
In this cycle, a taper machining operation is programmed for a known taper angle:<br />
After selecting these option with: and pressing<br />
The desired section of the part can be programmed to be turned or faced.<br />
To do this, indicate:<br />
- The initial position (Xi, Zi)<br />
X<br />
[value]<br />
- The taper angle (α):<br />
[value]<br />
- The diameter (φ):<br />
[value]<br />
- The cutting pass:<br />
[value]<br />
- Select facing or turning with: and or<br />
- Press to end this operation.<br />
When executing this cycle, the dro will show the current position with respect<br />
to the target position for each machining movement (step) so the axes have to be<br />
moved until the dro displays read 0.000<br />
Notes: To go from one step to the next, use either or .<br />
to go back to the previous step, press<br />
a<br />
Page: 24 - Operation Manual <strong>NVP</strong>-<strong>300TS</strong>/<strong>301TS</strong> Man: 9910 Soft: 1.xx<br />
a<br />
a<br />
a<br />
f<br />
Xi,Zi<br />
Z
4.2.4.4CORNER ROUNDING CYCLE<br />
In this cycle the rounding of a section is programmed from the following data<br />
requested by the dro:<br />
- The initial position (Xi, Zi):<br />
[value]<br />
- The final position (Xf Zf):<br />
[value]<br />
- Rounding radius<br />
(negative = inside)<br />
[value]<br />
- The cutting pass:<br />
[value]<br />
- Select the quadrant with<br />
- Select facing or turning with and or<br />
- Press to end this operation.<br />
Notes: To go from one step to the next, use either or .<br />
to go back to the previous step, press<br />
<strong>NVP</strong>-<strong>300TS</strong>/<strong>301TS</strong> Man: 9910 Soft: 1.xx<br />
X<br />
Xi,Zi<br />
Quadrant 2<br />
R<br />
Quadrant 2<br />
Xf,Zf<br />
Xf,Zf<br />
R<br />
Quadrant 1<br />
Xi,Zi<br />
Quadrant 4<br />
Inside Machining<br />
Z<br />
Quadrant 3<br />
Operation Manual - Page: 25
4.3 EXECUTION<br />
To access the program execution mode, press EXEC and the LCD display will<br />
show: EXECUTION<br />
CYCLE<br />
4.3.1 PROGRAM EXECUTION<br />
This option is selected using the keys and pressing<br />
- If a spindle speed change has been programmed requiring a range change,<br />
the <strong>DRO</strong> will carry it out or request the operator to do it depending on<br />
whether it has been configured for it or not.<br />
- In incremental mode, the currently shown reading is the distance to the target<br />
point with the opposite sign. Therefore, the axes must be moved until their<br />
displays read 0.000.<br />
- In absolute mode, the <strong>DRO</strong> shows the difference between the programmed<br />
coordinate and the current one with the opposite sign (distance to go).<br />
Notes:<br />
- If a tool has been programmed to carry out the cycle and when executing<br />
it, it does not match the current one, the LCD screen will show a message<br />
requesting a tool change.<br />
- If a scaling format has been programmed, it will only be applied during<br />
the execution of the program and not in the regular dro mode. To do that<br />
it has to be set by installation parameter PAR05 (see chapter 3.1)<br />
Page: 26 - Operation Manual <strong>NVP</strong>-<strong>300TS</strong>/<strong>301TS</strong> Man: 9910 Soft: 1.xx
4.3.2 CYCLE EXECUTION<br />
Once the tool to be used in the cycle has been selected by the keystroke<br />
sequence: tool<br />
[tool number] or keying<br />
<strong>NVP</strong>-<strong>300TS</strong>/<strong>301TS</strong> Man: 9910 Soft: 1.xx<br />
1<br />
2<br />
tool<br />
Operation Manual - Page: 27<br />
3<br />
and the<br />
option fro execution has been selected by pressing EXEC ,<br />
any type of cycle may be executed directly. To do that, enter the data requested<br />
by the LCD display and go directly into execution. The <strong>DRO</strong> will automatically<br />
calculate the value and the sign of the compensation to be applied on each<br />
move.<br />
Notes: To go to the next block in the cycle, press<br />
After this cycle is executed, the entered data is lost.<br />
4.3.3 MACHINING STEPS<br />
The machining operation is divided into several steps. These steps are further<br />
divided into three sub-steps.<br />
1.-Increment the position in the stepping axis.<br />
2.-Machine up to the calculated position.<br />
3.-Withdraw up to the starting point.<br />
Facing example.
Turning example:<br />
1<br />
These illustrations show a full step. The machining will consist of consecutive<br />
steps until finishing the operation. The LCD screen shows the step and substep<br />
numbers of the machining process (000.0)<br />
When executing a block, the LCD display shows the distance to move. When the<br />
"Zero" position is reached on each axis, when pressing the substep being<br />
executed is considered to be completed.<br />
Example: Execution of program number 00 that corresponds to a "taper 1"<br />
machining cycle.<br />
The machining is at step 3 and substep 2.<br />
N00 - Taper 1<br />
003.2 Move to zero<br />
4.3.4 EXECUTION ERRORS<br />
When executing a block or program, the following error messages may come<br />
up:<br />
Error in axes: A wrong axis has been programmed (it does not exist).<br />
Error empty block: An attempt has been made to execute an empty block.<br />
Error in data:Some necessary data for block execution is missing or...<br />
In rounding: - The total angle of the arc is greater than 90º.<br />
In Jump: - A jump to an empty block has been programmed.<br />
- There is an empty block in the subroutine.<br />
Page: 28 - Operation Manual <strong>NVP</strong>-<strong>300TS</strong>/<strong>301TS</strong> Man: 9910 Soft: 1.xx<br />
2<br />
3
5. OPERATION WITH THE RS-232-C SERIAL LINE<br />
5.1. SAVING AND RESTORING DATA<br />
With this <strong>DRO</strong>, it is possible to save data into a PC or peripheral device and<br />
later restore it by using the RS-232-C serial communications line.<br />
To access this mode:<br />
- Press F<br />
- Press "->" and select the "Comm" option (communications) of the LCD<br />
display by means of the keys until that word appears between<br />
< > and press .<br />
- Select: and press to send the data out to a PC or peripheral device<br />
or select and press to receive data from a PC or peripheral<br />
device.<br />
- Select the type of data to transmit Parameters, Program or<br />
Tool table by means of the keys and press .<br />
5.2 PARAMETER TRANSMITTING FORMAT<br />
The format of the transmitted parameters are:<br />
For value parameters: P00 123.123<br />
For binary parameters: P00 10101010<br />
For option parameters: P00 0<br />
For axis parameters: P?? X 123.123 Z' 123.123 Z''123.123<br />
The number of decimals depends on the selected resolution.<br />
5.3 TOOL TABLE TRANSMITTING FORMAT<br />
The format is:<br />
In mm: T?? X 1234.1234 Z 1234.1234<br />
In inches: T?? X 123.12345 Z 123.12345<br />
<strong>NVP</strong>-<strong>300TS</strong>/<strong>301TS</strong> Man: 9910 Soft: 1.xx<br />
Operation Manual - Page: 29
5.4 PROGRAMS TRANSMISSION FORMAT<br />
The format is "Nxx Gxx X Z" where Nxx indicates the block number and Gxx<br />
the type of programmed cycle followed by its parameters.<br />
The values sent out by block may be one or several of the following:<br />
Cycle Code Parameters<br />
Go to a position X___ Z___ T___<br />
Jump to a subroutine G25 N beguin.end.repetitions<br />
Scaling Factor G72 X__Z__<br />
Turning G81 X__ Z__ M__ C__ D<br />
Facing G82 X Z = Initial coordinate<br />
M = Final Z coordinate<br />
C = Increment (pass)<br />
D = Final diameter<br />
Turning. Taper 1 G83 X__ Z__ L__ M__ C__ I__<br />
Facing. Taper 1 G84 X Z = Initial coordinate<br />
L M = Final coordinate<br />
C = Increment (pass)<br />
I = Inside machining<br />
(blank) = Outside machining<br />
Turning. Taper 2 G85 X__ Z__ C__ D__ A__<br />
Facing. Taper 2 G86 X Z = Initial coordinate<br />
C = Increment (pass)<br />
D = Final diameter<br />
A = Taper angle<br />
Rounding while turning G87 X__ Z__ L__ M__ C__ R__ K__<br />
Rounding while facing G88 X Z = Initial coordinate<br />
L M = Final coordinate<br />
C = Increment (pass)<br />
R = Radius<br />
(negative = inside machining)<br />
K = quadrant<br />
VCC G96 S___ V___ M___<br />
RPM G97 S___M<br />
S = Spindle speed at CSS or rpm<br />
V = Maximum rpm in CSS mode<br />
M = Range (M41, M42, M43, M44)<br />
Note: If the memory is locked, no program can be received.<br />
Page: 30 - Operation Manual <strong>NVP</strong>-<strong>300TS</strong>/<strong>301TS</strong> Man: 9910 Soft: 1.xx
Operation Manual - Page: 31<br />
<strong>NVP</strong>-<strong>300TS</strong>/<strong>301TS</strong> Man: 9910 Soft: 1.xx<br />
ERROR CODES<br />
e<br />
g<br />
a<br />
s<br />
s<br />
e<br />
M n<br />
o<br />
i<br />
t<br />
p<br />
i<br />
r<br />
c<br />
s<br />
e<br />
D<br />
o<br />
r<br />
d<br />
R<br />
O<br />
G<br />
A<br />
F .<br />
a<br />
t<br />
a<br />
d<br />
e<br />
h<br />
t<br />
g<br />
n<br />
i<br />
v<br />
a<br />
s<br />
r<br />
e<br />
t<br />
f<br />
a<br />
h<br />
c<br />
t<br />
i<br />
w<br />
s<br />
n<br />
i<br />
a<br />
m<br />
y<br />
b<br />
f<br />
f<br />
o<br />
d<br />
e<br />
n<br />
r<br />
u<br />
t<br />
r<br />
o<br />
e<br />
g<br />
a<br />
t<br />
u<br />
o<br />
r<br />
e<br />
w<br />
o<br />
P<br />
2<br />
0<br />
r<br />
o<br />
r<br />
r<br />
E<br />
e<br />
h<br />
t<br />
d<br />
e<br />
v<br />
a<br />
s<br />
g<br />
n<br />
i<br />
v<br />
a<br />
h<br />
t<br />
u<br />
o<br />
h<br />
t<br />
i<br />
w<br />
h<br />
c<br />
t<br />
i<br />
w<br />
s<br />
n<br />
i<br />
a<br />
m<br />
y<br />
b<br />
f<br />
f<br />
o<br />
d<br />
e<br />
n<br />
r<br />
u<br />
t<br />
r<br />
o<br />
e<br />
g<br />
a<br />
t<br />
u<br />
o<br />
r<br />
e<br />
w<br />
o<br />
P<br />
.<br />
a<br />
t<br />
a<br />
d<br />
]<br />
F<br />
F<br />
O<br />
/<br />
N<br />
O<br />
[<br />
e<br />
h<br />
t<br />
g<br />
n<br />
i<br />
h<br />
s<br />
u<br />
p<br />
y<br />
l<br />
s<br />
u<br />
o<br />
i<br />
v<br />
e<br />
r<br />
p<br />
t<br />
u<br />
o<br />
h<br />
t<br />
i<br />
w<br />
f<br />
f<br />
o<br />
d<br />
e<br />
n<br />
r<br />
u<br />
t<br />
n<br />
e<br />
e<br />
b<br />
s<br />
a<br />
h<br />
t<br />
i<br />
n<br />
u<br />
e<br />
h<br />
T<br />
e<br />
h<br />
t<br />
d<br />
n<br />
a<br />
)<br />
o<br />
r<br />
e<br />
z<br />
o<br />
t<br />
t<br />
e<br />
s<br />
e<br />
r<br />
e<br />
b<br />
l<br />
l<br />
i<br />
w<br />
(<br />
t<br />
n<br />
u<br />
o<br />
c<br />
n<br />
o<br />
i<br />
t<br />
i<br />
s<br />
o<br />
p<br />
e<br />
h<br />
t<br />
e<br />
s<br />
o<br />
l<br />
y<br />
l<br />
n<br />
o<br />
l<br />
l<br />
i<br />
w<br />
t<br />
I<br />
.<br />
y<br />
e<br />
k<br />
.<br />
)<br />
.<br />
c<br />
t<br />
e<br />
,<br />
s<br />
b<br />
a<br />
,<br />
h<br />
c<br />
n<br />
i<br />
(<br />
s<br />
e<br />
d<br />
o<br />
m<br />
g<br />
n<br />
i<br />
t<br />
a<br />
r<br />
e<br />
p<br />
o<br />
e<br />
h<br />
t<br />
f<br />
o<br />
s<br />
u<br />
t<br />
a<br />
t<br />
s<br />
4<br />
0<br />
r<br />
o<br />
r<br />
r<br />
E s<br />
e<br />
u<br />
l<br />
a<br />
v<br />
r<br />
e<br />
t<br />
e<br />
m<br />
a<br />
r<br />
a<br />
p<br />
g<br />
n<br />
o<br />
r<br />
W<br />
5<br />
0<br />
r<br />
o<br />
r<br />
r<br />
E n<br />
o<br />
i<br />
t<br />
a<br />
r<br />
u<br />
g<br />
i<br />
f<br />
n<br />
o<br />
c<br />
l<br />
a<br />
n<br />
r<br />
e<br />
t<br />
n<br />
i<br />
g<br />
n<br />
o<br />
r<br />
W<br />
6<br />
0<br />
r<br />
o<br />
r<br />
r<br />
E )<br />
.<br />
t<br />
p<br />
e<br />
D<br />
e<br />
c<br />
i<br />
v<br />
r<br />
e<br />
S<br />
(<br />
y<br />
r<br />
o<br />
m<br />
e<br />
m<br />
p<br />
u<br />
k<br />
c<br />
a<br />
b<br />
a<br />
t<br />
a<br />
d<br />
n<br />
i<br />
s<br />
r<br />
o<br />
r<br />
r<br />
E<br />
7<br />
0<br />
r<br />
o<br />
r<br />
r<br />
E .<br />
l<br />
a<br />
n<br />
g<br />
i<br />
s<br />
y<br />
c<br />
n<br />
e<br />
g<br />
r<br />
e<br />
m<br />
e<br />
l<br />
e<br />
c<br />
n<br />
a<br />
c<br />
r<br />
o<br />
]<br />
C<br />
[<br />
s<br />
s<br />
e<br />
r<br />
P<br />
.<br />
e<br />
v<br />
i<br />
t<br />
c<br />
a<br />
t<br />
u<br />
p<br />
n<br />
i<br />
y<br />
c<br />
n<br />
e<br />
g<br />
r<br />
e<br />
m<br />
E<br />
8<br />
0<br />
r<br />
o<br />
r<br />
r<br />
E d<br />
e<br />
g<br />
n<br />
a<br />
h<br />
c<br />
n<br />
e<br />
e<br />
b<br />
s<br />
a<br />
h<br />
e<br />
r<br />
a<br />
w<br />
t<br />
f<br />
o<br />
s<br />
e<br />
h<br />
t<br />
r<br />
o<br />
y<br />
r<br />
o<br />
m<br />
e<br />
m<br />
e<br />
r<br />
a<br />
w<br />
t<br />
f<br />
o<br />
s<br />
g<br />
n<br />
o<br />
r<br />
W<br />
9<br />
0<br />
r<br />
o<br />
r<br />
r<br />
E )<br />
.<br />
t<br />
p<br />
e<br />
D<br />
e<br />
c<br />
i<br />
v<br />
r<br />
e<br />
S<br />
(<br />
y<br />
r<br />
o<br />
m<br />
e<br />
m<br />
k<br />
r<br />
o<br />
w<br />
n<br />
i<br />
s<br />
r<br />
o<br />
r<br />
r<br />
E<br />
2<br />
1<br />
r<br />
o<br />
r<br />
r<br />
E )<br />
o<br />
I<br />
(<br />
e<br />
s<br />
l<br />
u<br />
p<br />
r<br />
e<br />
k<br />
r<br />
a<br />
m<br />
d<br />
e<br />
d<br />
o<br />
c<br />
a<br />
g<br />
n<br />
i<br />
h<br />
c<br />
r<br />
a<br />
e<br />
s<br />
e<br />
l<br />
i<br />
h<br />
w<br />
r<br />
o<br />
r<br />
r<br />
E<br />
0<br />
2<br />
r<br />
o<br />
r<br />
r<br />
E .<br />
e<br />
g<br />
n<br />
a<br />
r<br />
d<br />
i<br />
l<br />
a<br />
v<br />
y<br />
n<br />
a<br />
h<br />
c<br />
t<br />
a<br />
m<br />
t<br />
o<br />
n<br />
s<br />
e<br />
o<br />
d<br />
d<br />
e<br />
t<br />
c<br />
e<br />
t<br />
e<br />
d<br />
e<br />
n<br />
o<br />
e<br />
h<br />
T<br />
.<br />
r<br />
o<br />
r<br />
r<br />
e<br />
n<br />
o<br />
i<br />
t<br />
c<br />
e<br />
t<br />
e<br />
d<br />
e<br />
g<br />
n<br />
a<br />
R<br />
1<br />
3<br />
r<br />
o<br />
r<br />
r<br />
E )<br />
.<br />
t<br />
p<br />
e<br />
D<br />
e<br />
c<br />
i<br />
v<br />
r<br />
e<br />
S<br />
(<br />
n<br />
o<br />
i<br />
t<br />
c<br />
n<br />
u<br />
f<br />
l<br />
a<br />
m<br />
l<br />
a<br />
n<br />
r<br />
e<br />
t<br />
n<br />
I<br />
2<br />
3<br />
r<br />
o<br />
r<br />
r<br />
E )<br />
.<br />
t<br />
p<br />
e<br />
D<br />
e<br />
c<br />
i<br />
v<br />
r<br />
e<br />
S<br />
(<br />
n<br />
o<br />
i<br />
t<br />
c<br />
n<br />
u<br />
f<br />
l<br />
a<br />
m<br />
l<br />
a<br />
n<br />
r<br />
e<br />
t<br />
n<br />
I<br />
0<br />
9<br />
r<br />
o<br />
r<br />
r<br />
E )<br />
.<br />
t<br />
p<br />
e<br />
D<br />
e<br />
c<br />
i<br />
v<br />
r<br />
e<br />
S<br />
(<br />
n<br />
o<br />
i<br />
t<br />
c<br />
n<br />
u<br />
f<br />
l<br />
a<br />
m<br />
l<br />
a<br />
n<br />
r<br />
e<br />
t<br />
n<br />
I<br />
9<br />
9<br />
r<br />
o<br />
r<br />
r<br />
E )<br />
.<br />
t<br />
p<br />
e<br />
D<br />
e<br />
c<br />
i<br />
v<br />
r<br />
e<br />
S<br />
(<br />
n<br />
o<br />
i<br />
t<br />
c<br />
n<br />
u<br />
f<br />
l<br />
a<br />
m<br />
l<br />
a<br />
n<br />
r<br />
e<br />
t<br />
n<br />
I<br />
.<br />
.<br />
.<br />
.<br />
.<br />
.<br />
.<br />
.<br />
.<br />
k<br />
a<br />
e<br />
w<br />
r<br />
o<br />
)<br />
c<br />
t<br />
e<br />
,<br />
r<br />
e<br />
d<br />
o<br />
c<br />
n<br />
e<br />
,<br />
e<br />
l<br />
a<br />
c<br />
s<br />
(<br />
e<br />
c<br />
i<br />
v<br />
e<br />
d<br />
k<br />
c<br />
a<br />
b<br />
d<br />
e<br />
e<br />
f<br />
e<br />
h<br />
t<br />
m<br />
o<br />
r<br />
f<br />
m<br />
r<br />
a<br />
l<br />
a<br />
k<br />
c<br />
a<br />
b<br />
d<br />
e<br />
e<br />
F<br />
.<br />
l<br />
a<br />
n<br />
g<br />
i<br />
s<br />
5<br />
.<br />
2<br />
.<br />
7<br />
.<br />
5<br />
.<br />
6<br />
.<br />
3<br />
.<br />
4<br />
.<br />
l .<br />
h<br />
g<br />
i<br />
h<br />
o<br />
o<br />
t<br />
d<br />
e<br />
e<br />
p<br />
s<br />
k<br />
c<br />
a<br />
b<br />
d<br />
e<br />
e<br />
F<br />
E<br />
E<br />
E<br />
E<br />
E<br />
E<br />
E<br />
E e<br />
m<br />
o<br />
H<br />
g<br />
n<br />
i<br />
h<br />
c<br />
r<br />
a<br />
e<br />
s<br />
n<br />
e<br />
h<br />
w<br />
d<br />
e<br />
d<br />
e<br />
e<br />
c<br />
x<br />
e<br />
d<br />
e<br />
e<br />
p<br />
s<br />
r<br />
o<br />
g<br />
n<br />
i<br />
d<br />
a<br />
e<br />
r<br />
n<br />
o<br />
i<br />
t<br />
i<br />
s<br />
o<br />
p<br />
m<br />
u<br />
m<br />
i<br />
x<br />
a<br />
M<br />
APPENDIX
If any message other than the first two from the table were to come up, the<br />
equipment should be switched off and on again until one of the first two are seen.<br />
After pressing to access the counting mode, check the parameters.<br />
If any of the errors shown as (Service Department) are often repeated, ask Fagor<br />
Automation’s Customer Services Department about this.<br />
The feedback alarm error will appear if the bit of the corresponding alarm activating<br />
parameter for the axis has been set to "1" PAR08(1) = 1.<br />
In either case, to clear the display, press .<br />
If the axis value is flashing, this means that one of the travel limits established by<br />
machine parameter has been exceeded. This error will be displayed if the alarm<br />
activation parameter for the axis PAR08(2) = 1<br />
If the <strong>DRO</strong> does not come on or goes out while running, check that the voltage and<br />
ground outlets are as they should be. If an axis does not count, disconnect the<br />
feedback connectors one by one. If the <strong>DRO</strong> comes on, it indicates a fault in the<br />
feedback device. If the fault persists get in touch with Fagor Automation’s Customer<br />
Services Department about it.<br />
MAINTENANCE<br />
Cleaning:<br />
An accumulation of dirt in the equipment can act as a screen preventing proper<br />
dissipation of the heat generated by the internal electronic circuits with the consequent<br />
danger of overheating and <strong>DRO</strong> fault.<br />
Accumulated dirt can also, in some cases, provide a conductive path for electricity<br />
which could give rise to faults in the internal circuits of the equipment, especially in<br />
high humidity conditions.<br />
To clean the equipment non-abrasive dish-washing detergents are recommended (in<br />
liquid, never powder form) or 75% isotropic alcohol with a clean cloth. DO NOT USE<br />
aggressive solvents, (benzol, acetones, etc.) which could damage the materials the<br />
equipment is made with.<br />
Do not use high pressure compressed air to clean the item as this could give rise to an<br />
accumulation of charges which in turn lead to electrostatic discharges.<br />
The plastics used in the front panel of the <strong>DRO</strong> stand up to:<br />
1. Grease and mineral oils.<br />
2. Alkalis and bleaches.<br />
3. Dissolved Detergents.<br />
4. Alcohol<br />
Avoid the effect of solvents such as Chlorohydrocarbons, Benzol, Esters and Ethers<br />
because these could damage the plastics with which the front of the equipment is made.<br />
Preventive Inspection<br />
If the <strong>DRO</strong> does not come on press the rear switch for starting, make sure it is properly<br />
connected and being supplied with the proper mains voltage.<br />
Page: 32 - Operation Manual <strong>NVP</strong>-<strong>300TS</strong>/<strong>301TS</strong> Man: 9910 Soft: 1.xx