The Rise of the Mongols - Strategy & Tactics Press
The Rise of the Mongols - Strategy & Tactics Press
The Rise of the Mongols - Strategy & Tactics Press

Create successful ePaper yourself
Turn your PDF publications into a flip-book with our unique Google optimized e-Paper software.
Russian Navy WWI • Battle <strong>of</strong> Lech • S&T Best <strong>of</strong> 2004<br />
U.S. $22. 99<br />
With Co m p l e t e<br />
historiCal Ga m e<br />
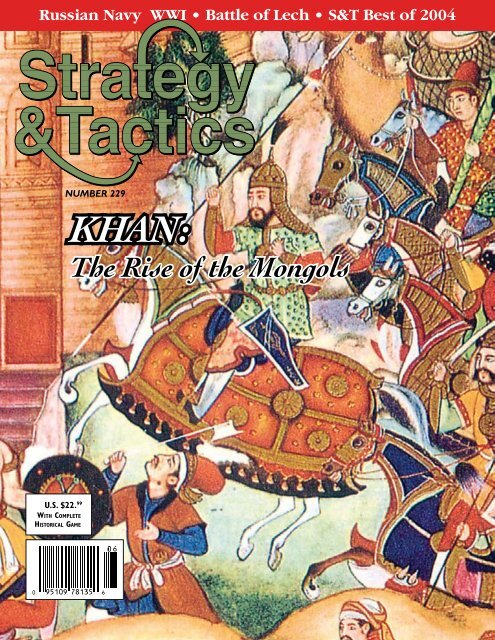
Number 229<br />
Khan:<br />
<strong>The</strong> <strong>Rise</strong> <strong>of</strong> <strong>the</strong> <strong>Mongols</strong><br />
strategy & tactics 1
3<br />
3<br />
Court<br />
+2<br />
endeavor<br />
1<br />
Palace<br />
USN DelUxe<br />
Refight <strong>the</strong> greatest naval-air-land war <strong>of</strong> history.<br />
USN Deluxe is an update <strong>of</strong> <strong>the</strong> classic SPI<br />
game on <strong>the</strong> War in <strong>the</strong> Pacific, 1941-45. While<br />
maintaining <strong>the</strong> original game’s basic systems,<br />
<strong>the</strong> new design includes rules for a comprehensive<br />
simulation that includes <strong>the</strong> entire war, extending<br />
<strong>the</strong> game from Hawaii to <strong>the</strong> Asian Mainland.<br />
Scenarios include <strong>the</strong> first year <strong>of</strong> <strong>the</strong> Japanese <strong>of</strong>fensive,<br />
as well as 1941-43, 1943-45 and 1941-45.<br />
<strong>The</strong>re are also mini-games for Midway, <strong>the</strong> Solomons,<br />
Burma, China, <strong>the</strong> Philippines, Manchuria<br />
and o<strong>the</strong>rs. Included is a War Plan Orange scenario<br />
for a “what-if” naval war with <strong>the</strong> US and Japan<br />
squaring <strong>of</strong>f in <strong>the</strong> 1930s.<br />
Naval forces are at <strong>the</strong> squadron level, except aircraft carriers,<br />
which are each represented by individual counters. Air units are in<br />
groupings based on squadrons. Land units are regiments, brigades,<br />
divisions, corps and armies. <strong>The</strong> game system uses an interactive<br />
sequence <strong>of</strong> play in which both sides can launch strikes, exploit errors<br />
and win great victories. New rules include kamikazes, armored<br />
divisions, task force markers, Soviet intervention, MAGIC, special<br />
operations forces, <strong>the</strong> China front, strategic bombing, and yes, <strong>the</strong><br />
atom bomb. Contents: 2 22x34 inch maps, 840 die-cut counters,<br />
rules book and assorted Player Aid cards. $70<br />
Claim<br />
Claim<br />
Claim<br />
Claim<br />
Claim<br />
Claim<br />
Name<br />
address<br />
City, state Zip<br />
phoNe email<br />
Visa/mC (oNly)#<br />
expiratioN date<br />
sigNature<br />
2 #229<br />
New Releases from Decision Games<br />
2<br />
Palace<br />
1<br />
Partial<br />
1<br />
3<br />
2<br />
+<br />
Magnate 2<br />
+<br />
-1<br />
Crusader<br />
UNreSt<br />
Pagan<br />
1<br />
Stature<br />
EmpirEs <strong>of</strong> thE middlE AgEs<br />
Between <strong>the</strong> glories <strong>of</strong> Rome and <strong>the</strong> rise <strong>of</strong> national states stood an age in which<br />
each land was defined by <strong>the</strong> virtue and failings <strong>of</strong> its monarch. Empires <strong>of</strong> <strong>the</strong><br />
Middle Ages is a multi-player game <strong>of</strong> diplomacy in which up to six may act<br />
as dynasts and attempt to build <strong>the</strong>ir historic kingdoms into vast empires. <strong>The</strong><br />
period covered in <strong>the</strong> game spans from 771 A.D., <strong>the</strong> time <strong>of</strong> Charlemagne’s<br />
reign, to1465, <strong>the</strong> time <strong>of</strong> <strong>the</strong> final collapse <strong>of</strong> <strong>the</strong> Byzantine Empire. <strong>The</strong> game<br />
is played on a map <strong>of</strong> medieval Europe on which <strong>the</strong> players record <strong>the</strong> power<br />
<strong>of</strong> <strong>the</strong>ir kingdoms. Playing cards resolve <strong>the</strong> basic actions <strong>of</strong> <strong>the</strong> game, while<br />
random event cards add period flavor, such as plagues, crusades and heresy. Six<br />
scenarios are included, from a solitaire game to a grand scenario covering <strong>the</strong><br />
entire Middle Ages.<br />
Contents: 2 22x34 inch maps, 1120 die-cut counters, 220 full color playing cards,<br />
rule book and player aid cards. $100<br />
PO Box 21598<br />
Bakersfield CA 93390<br />
661/587-9633 • fax 661/587-5031 • www.decisiongames.com<br />
shipping Charges<br />
*ships as 3 units on ship chart.<br />
1st item Adt’l items Type <strong>of</strong> Service<br />
$8 $2 UPS Ground/US Mail Domestic Priority<br />
15(20) 4 UPS 2nd Day Air (Metro AK & HI)<br />
14(10) 2(7) Canada, Mexico (Express)<br />
17(25) 7(10) Europe (Express)<br />
20(25) 9(10) Asia, Africa, Australia (Express)
Classic Games for a New Era<br />
lightNiNg SerieS—A FAst & EAsy Pl Ay i n g sEt o F CArd gAmEs<br />
D-Day<br />
June 6, 1944, <strong>the</strong> day that decided <strong>the</strong> fate <strong>of</strong> World War II in<br />
Europe. Now you command <strong>the</strong> Allied and Axis armies as each<br />
struggles to control <strong>the</strong> five key beaches along <strong>the</strong> Normandy<br />
coastline. If <strong>the</strong> Allied troops seize <strong>the</strong><br />
beaches, Germany is doomed. But if<br />
<strong>the</strong> assault fails, Germany will have <strong>the</strong><br />
time it needs to rebuild its mighty war<br />
machine. You get to make vital command<br />
decisions that send troops into<br />
battle, assault enemy positions, and<br />
create heroic sacrifices so o<strong>the</strong>rs can<br />
advance to victory!<br />
MiDway<br />
From June 4 th to June 6 th <strong>of</strong> 1942, a massive battle raged around <strong>the</strong> tiny Pacific island <strong>of</strong> Midway that<br />
changed <strong>the</strong> course <strong>of</strong> World War II. <strong>The</strong> victorious Imperial Japanese Navy was poised to capture <strong>the</strong><br />
airfield on <strong>the</strong> island <strong>of</strong> Midway and thus threaten <strong>the</strong> west coast <strong>of</strong> <strong>the</strong> United States. <strong>The</strong> only obstacle<br />
in <strong>the</strong>ir path was an outnumbered US fleet itching for payback for Pearl Harbor. You get to command <strong>the</strong><br />
US and Japanese fleets and <strong>the</strong>ir squadrons <strong>of</strong> fighter planes, torpedo bombers and dive bombers in this<br />
epic battle!<br />
War Between <strong>the</strong> States, 1861-1865<br />
War Between <strong>the</strong> States, 1861-1865, simulates <strong>the</strong> American Civil<br />
War from <strong>the</strong> opening shot at Fort Sumter to Lee’s surrender atAppomatox,<br />
using three maps to cover <strong>the</strong> major <strong>the</strong>aters <strong>of</strong> operation from Galveston,<br />
Texas, to St. Joseph, Missouri, and from Philadelphia, Pennsylvania, to<br />
Jacksonville, Florida.<br />
A total <strong>of</strong> 1,400 counters represent units and game effects. Game turns<br />
represent <strong>the</strong> passage <strong>of</strong> a week, with intervening “cycles” during which<br />
players carry out such routines as production, blockade, construction and<br />
politics. Each game turn is divided into two player turns, during which one<br />
player or <strong>the</strong> o<strong>the</strong>r may move his ground and naval combat units on <strong>the</strong><br />
map and attack his opponent.<br />
<strong>The</strong>reisan<strong>of</strong>f-maprostersystemtotrack<strong>the</strong>fluctuatingstrengths<strong>of</strong><strong>the</strong><br />
ground combat units. <strong>The</strong> combat system requires both players to secretly<br />
andsimultaneouslychooseone<strong>of</strong>severalcombatoptions.Cross-referencing<br />
those choices determines which combat results table is used to resolve each<br />
battle, <strong>the</strong>reby determining <strong>the</strong> extent <strong>of</strong> strength point casualties assessed<br />
against both players’ units, as well as o<strong>the</strong>r combat effects. Heavy losses<br />
normally result only when both players desire a major battle.<br />
Supply must be expended in each cycle or units are exposed to attrition<br />
or elimination. Combat supply may be expended as a result <strong>of</strong> battle, and<br />
it’s difficult for a force <strong>of</strong> any size to operate for long out <strong>of</strong> supply.<br />
<strong>The</strong> game can be played as a huge campaign using all three maps and<br />
simulating <strong>the</strong> entire war from beginning to end. That requires hundreds<br />
<strong>of</strong> man-hours. Alternatively, six scenarios are also <strong>of</strong>fered, covering <strong>the</strong><br />
eastern campaigns <strong>of</strong> 1862, 1863 and 1864, along with three o<strong>the</strong>rs covering<br />
<strong>the</strong> western campaigns <strong>of</strong> those same years. <strong>The</strong> scenarios vary in length<br />
from eight to 24 game turns. When playing <strong>the</strong>m, players don’t execute<br />
<strong>the</strong> intervening cycles, since production and related matters are built into<br />
<strong>the</strong>ir systems. <strong>The</strong> scenarios are also played on just one or two maps.<br />
Each game comes with 110 full color playing<br />
cards for only $19. 99<br />
Expanded and optional rules have been added to this new edition <strong>of</strong><br />
<strong>the</strong> game, which work to enhance <strong>the</strong> role <strong>of</strong> headquarters, allow for variable<br />
leader entry into play, give more detail to naval and riverine combat,<br />
as well as more fully integrating <strong>the</strong> era’s politics into play. <strong>The</strong> updated<br />
map has a more accurate representation <strong>of</strong> <strong>the</strong> actual terrain fought over<br />
and <strong>the</strong> addition <strong>of</strong> more counters including set <strong>of</strong> counters for <strong>the</strong> variant<br />
leaders.<br />
Contents: 3 22x34 inch maps, 1400 die-cut counters, rule book<br />
and player aid cards.<br />
$110<br />
*ships as 3 units on ship chart.<br />
strategy & tactics 3
Editor-in-Chief: Joseph Miranda<br />
FYI Editor: Ty Bomba<br />
Design • Graphics • Layout: Callie Cummins<br />
Copy Editors: Ty Bomba, Rob Dean, Mark Brown<br />
and Jason Burnett.<br />
Map Graphics: Meridian Mapping<br />
Publisher: Christopher Cummins<br />
Advertising: rates and specifications available<br />
on request. Write P.O. Box 21598, Bakersfield<br />
CA 93390.<br />
sUBsCriPtiOn rAtes are: six issues per year—<br />
<strong>the</strong> United states is $99.97/1 year. Canada surface<br />
mail rates are $110/1 year and Overseas surface<br />
mail rates are $130/1 year. international rates are<br />
subject to change as postal rates change.<br />
six issues per year-newsstand (magazine only)<strong>the</strong><br />
United states is $29.97/1 year. Canada surface<br />
mail rates are $36/1 year and Overseas surface<br />
mail rates are $42/1 year.<br />
All payments must be in U.s. funds drawn on a<br />
U.s. bank and made payable to strategy & tactics<br />
(Please no Canadian checks). Checks and money<br />
orders or visA/MasterCard accepted (with a<br />
minimum charge <strong>of</strong> $40). All orders should be sent<br />
to decision games, P.O. Box 21598, Bakersfield<br />
CA 93390 or call 661/587-9633 (best hours to<br />
call are 9am-12am Pdt, M-F) or use our 24-hour<br />
fax 661/587-5031 or e-mail us from our website<br />
www.decisiongames.com.<br />
nOn U.s. sUBsCriBers PLeAse nOte: surface<br />
mail to foreign addres ses may take six to ten<br />
weeks for delivery. inquiries should be sent to<br />
decision games after this time, to P.O. Box 21598,<br />
Bakersfield CA 93390.<br />
strAtegY & tACtiCs ® is a registered trademark<br />
for decision games’ military history magazine.<br />
strategy & tactics (©2005) reserves all rights<br />
on <strong>the</strong> contents <strong>of</strong> this publication. nothing may<br />
be reproduced from it in whole or in part without<br />
prior permission from <strong>the</strong> publisher. All rights<br />
reserved. All correspondence should be sent<br />
to decision games, P.O. Box 21598, Bakersfield<br />
CA 93390.<br />
STRATEGY & TACTICS (ISSN 1040-886X) is published<br />
bi-monthly by Decision Games, 1649 Elzworth St. #1,<br />
Bakersfield CA 93312. Periodical Class postage paid<br />
at Bakersfield, CA and additional mailing <strong>of</strong>fices.<br />
Address Corrections: Address change forms to<br />
<strong>Strategy</strong> & <strong>Tactics</strong>, PO Box 21598, Bakersfield CA<br />
93390.<br />
4 #229<br />
contents<br />
F e A t U R e s<br />
6 KHAn: <strong>the</strong> <strong>Rise</strong> <strong>of</strong> <strong>the</strong> Mongol empire<br />
<strong>The</strong> <strong>Mongols</strong> conquer Eurasia in <strong>the</strong> 13 th century,<br />
creating <strong>the</strong> first continent-wide empire.<br />
by Joseph Miranda<br />
20 <strong>the</strong> Russian navy in World War I<br />
While facing sometimes difficult odds in <strong>the</strong> Great<br />
War, <strong>the</strong> Russian navy won significant victories in<br />
<strong>the</strong> Baltic and Black Sea.<br />
by James gordon
F e A t U R e s<br />
RUles<br />
contents<br />
42 <strong>the</strong> lion conquers Bavaria:<br />
<strong>the</strong> Battle <strong>of</strong> lech, April 1632<br />
Gustavus Adolphus fights his way into<br />
Bavaria during <strong>the</strong> 30 Years War, demonstrating<br />
<strong>the</strong> power <strong>of</strong> <strong>the</strong> new Swedish army.<br />
by William Welsh<br />
R1 KHAn: RIse oF tHe <strong>Mongols</strong><br />
by Joseph Miranda<br />
depARtMents<br />
Number 229<br />
jul/aug 2005<br />
33 for your iNformatioN<br />
l.m.f.<br />
by Gregory M. Smith<br />
Confederate indian units in <strong>the</strong> american<br />
Civil War<br />
by Mark Lardas<br />
<strong>the</strong> rise & fall <strong>of</strong> alexius Ducas<br />
by Darin Levill<strong>of</strong>f<br />
australian Conquest <strong>of</strong> Kaiser<br />
Wilhelm’s land<br />
by Peter Wyche<br />
WWii electronic Warfare<br />
by Gregory M. Smith<br />
39 tHe long tRAdItIon<br />
56 WoRKs In pRogRess<br />
57 tHe WInneRs:<br />
Best oF s&t 2004<br />
strategy & tactics 5
6 #229<br />
KHAN: KHAN: <strong>The</strong> <strong>Rise</strong> <strong>of</strong> <strong>the</strong> Mongol Mongol<br />
Empire in <strong>the</strong> 13th Century Century<br />
by Joseph Miranda
In AD 1206 a seemingly petty Mongol warlord by<br />
<strong>the</strong> name <strong>of</strong> Temujin led a confederation <strong>of</strong> tribal<br />
warriors in an invasion <strong>of</strong> China. <strong>The</strong> Chinese<br />
had repelled many such invasions in <strong>the</strong> past,<br />
but this time it would be different. Temujin had taken<br />
<strong>the</strong> grandiloquent title <strong>of</strong> Genghis Khan, or universal<br />
ruler, and this invasion was <strong>the</strong> beginning <strong>of</strong> a series<br />
<strong>of</strong> campaigns that ended only when <strong>the</strong> <strong>Mongols</strong> had<br />
created an empire stretching from <strong>the</strong> Yellow Sea to<br />
Baghdad and <strong>the</strong> gates <strong>of</strong> Vienna. <strong>The</strong> <strong>Mongols</strong> would<br />
burn into <strong>the</strong> peoples <strong>of</strong> Eurasia a reputation for military<br />
efficiency and ferocity for centuries <strong>the</strong>reafter. But who<br />
were <strong>the</strong> <strong>Mongols</strong>, and how was it that <strong>the</strong>y could create<br />
<strong>the</strong> mightiest empire <strong>of</strong> <strong>the</strong> Middle Ages?<br />
<strong>Strategy</strong><br />
In military terms <strong>the</strong> <strong>Mongols</strong> had any number <strong>of</strong><br />
strategic advantages. One was central position. With <strong>the</strong>ir<br />
heartland in <strong>the</strong> steppes <strong>of</strong> inner Asia, <strong>the</strong>y could strike east<br />
against <strong>the</strong> Chinese, south against <strong>the</strong> Muslim world, and<br />
west against Europe. At <strong>the</strong> same time, <strong>the</strong>ir opponents<br />
lacked <strong>the</strong> mobility and logistical wherewithal to attack<br />
into <strong>the</strong> Mongol homeland. Routes into that heartland were<br />
blocked by mountain ranges, deserts and vast uninhabited<br />
expanses that more conventional armies would have had<br />
difficulty negotiating. More fundamentally, <strong>the</strong> <strong>Mongols</strong><br />
lacked anything that might constitute a vulnerable strategic<br />
center <strong>of</strong> mass, such as great cities or complex irrigation<br />
systems. Being nomadic, <strong>the</strong>y could move <strong>the</strong>ir populace<br />
and <strong>the</strong>ir cattle as far as <strong>the</strong> grasslands that supported<br />
<strong>the</strong>m.<br />
Given <strong>the</strong>ir central position, <strong>the</strong> <strong>Mongols</strong> could pick <strong>of</strong>f<br />
<strong>the</strong>ir enemies one at a time. If <strong>the</strong>ir opponents had formed<br />
a grand alliance, <strong>the</strong> <strong>Mongols</strong> could have conceivably<br />
been overwhelmed by having to fight on multiple fronts.<br />
Of course no such alliance was likely, given <strong>the</strong> limits on<br />
communications in <strong>the</strong> pre-modern era.<br />
Much is made <strong>of</strong> <strong>the</strong> <strong>Mongols</strong> withdrawing from central<br />
Europe in 1242 following <strong>the</strong> death <strong>of</strong> <strong>the</strong> Khan Ogedai. <strong>The</strong><br />
reason for <strong>the</strong> withdrawal was to attend a Kuriltai (grand<br />
council) to elect a new great khan. Yet it was precisely<br />
such institutions as <strong>the</strong> Kuriltai that cemented <strong>the</strong> Mongol<br />
tribes into a devastating fighting force. Such councils<br />
were routinely held prior to <strong>the</strong> start <strong>of</strong> any campaign.<br />
Commanders could agree on strategy, and maneuvers for<br />
upcoming campaigns were coordinated. This might be<br />
compared with <strong>the</strong> much more haphazard system in effect<br />
with such opponents as <strong>the</strong> Europeans <strong>of</strong> <strong>the</strong> time, where<br />
councils <strong>of</strong> war were ad hoc affairs and strategy was <strong>of</strong>ten<br />
a matter <strong>of</strong> determining aristocratic prerogatives. More<br />
critically, <strong>the</strong> Kuriltais provided political unity via Mongol<br />
leaders arriving at a consensus <strong>of</strong> who was to be <strong>the</strong> great<br />
khan. Once that consensus had been achieved, a single<br />
military strategy could be planned and implemented.<br />
Genghis Khan launched his sweep to Eurasian empire<br />
at a time when most <strong>of</strong> his opponents were divided. China<br />
had disintegrated into three states, <strong>the</strong> Chi’in (or Kin,<br />
sometimes Chin, Qu’in or Jin) in <strong>the</strong> north, <strong>the</strong> Sung in<br />
strategy & tactics 7
8 #229
a Brief history <strong>of</strong> <strong>the</strong> 13 th Century<br />
1190-1206: Unification <strong>of</strong> <strong>the</strong> <strong>Mongols</strong>. Temujin rises to<br />
power as chief <strong>of</strong> inner Asian tribes and declares himself<br />
Genghis Khan.<br />
1204: Fall <strong>of</strong> Constantinople. <strong>The</strong> Fourth Crusade storms<br />
and pillages <strong>the</strong> ancient capital, crippling <strong>the</strong> Byzantine<br />
Empire.<br />
1205-1209: Genghis’ War with Xi Xia. <strong>The</strong> Xi Xia kingdom<br />
<strong>of</strong> western China becomes a Mongol vassal.<br />
1211-15: War with <strong>the</strong> Chi’in. <strong>Mongols</strong> gain suzerainty<br />
over nor<strong>the</strong>rn China.<br />
1211-50: Reign <strong>of</strong> Frederic II. <strong>The</strong> German king spends<br />
much <strong>of</strong> his time involved in <strong>the</strong> petty politics <strong>of</strong><br />
<strong>the</strong> Italian states and campaigning against <strong>the</strong> popes.<br />
Meanwhile <strong>the</strong> <strong>Mongols</strong> invade Europe.<br />
1218-21: Khwarezmian War. Genghis leads an army<br />
westward, defeating <strong>the</strong> Persian-based Khwarezmians in<br />
a series <strong>of</strong> campaigns from <strong>the</strong> Caucasus to <strong>the</strong> Indus.<br />
1218-21: Fifth Crusade. Crusaders invade Egypt but are<br />
forced to withdraw after indecisive campaigning.<br />
1224-27: Renewed War with Chinese. Xi Xia and Chi’in<br />
rebel against Mongol rule. Genghis turns east and defeats<br />
<strong>the</strong>m.<br />
1227: Death <strong>of</strong> Genghis Khan. Mongol leaders elect Ogedai<br />
as new Great Khan. He reigns until his death in 1241.<br />
1228-29: Sixth Crusade. Fredrick II <strong>of</strong> Germany obtains<br />
Christian access to Jerusalem.<br />
1231-34: Conquest <strong>of</strong> Chi’in. Ogedai allies with Sung<br />
Chinese to defeat <strong>the</strong> Chi’in Empire.<br />
1231-36: Mongol Conquest <strong>of</strong> Western Persia. This was<br />
aided in part by Ottoman attacks against <strong>the</strong> remnant<br />
Khwarezmian Empire.<br />
1237: Mongol capital established at Karakorum. This<br />
was Genghis’ great campsite. Karakorum becomes a<br />
center for administration and tribute.<br />
1234-79: Conquest <strong>of</strong> Sung Empire. Mongolian dispute<br />
with Sung leads to open warfare that continues through<br />
Ogedai’s successors, with Kublai Khan gaining <strong>the</strong> final<br />
victory.<br />
1236-63: Alexander Nevsky. Alexander <strong>of</strong> Novgorod<br />
became a respected vassal <strong>of</strong> <strong>the</strong> Golden Horde, defeating<br />
a Swedish invasion on <strong>the</strong> Neva River (1240), and <strong>the</strong><br />
Teutonic Knights at Lake Peipus (1242).<br />
1241-42: Mongol Invasion <strong>of</strong> Central Europe. <strong>The</strong> Mongol<br />
general Subedai, under <strong>the</strong> titular command <strong>of</strong> Genghis<br />
Khan’s grandson Batu, overruns Poland, defeating a<br />
combined eastern European army under Henry <strong>the</strong><br />
Pious at Leignitz (9 April 1241). Ano<strong>the</strong>r Mongol army<br />
advances into Hungary, defeating King Bela at Mohi (or<br />
Sajo River, 11 April 1241).<br />
1242-1256: Batu and <strong>the</strong> Golden Horde. Batu establishes<br />
his capital at Sarai on <strong>the</strong> Volga and makes <strong>the</strong> Golden<br />
Horde <strong>the</strong> major power in eastern Europe.<br />
1243: <strong>Mongols</strong> push into Anatolia. <strong>The</strong>y defeat <strong>the</strong> Anatolian<br />
Turkish tribes and give <strong>the</strong> Byzantine Empire a respite.<br />
1248-54: Seventh Crusade. Louis IX <strong>of</strong> France lands in Egypt<br />
where he is defeated by <strong>the</strong> Moslems.<br />
1250: Mamluks. Egyptian slave-soldiers seize control <strong>of</strong> <strong>the</strong><br />
country and establish a militaristic dynasty.<br />
1251-59: Mongke (Mangu) as Great Khan. A capable<br />
administrator, he maintains <strong>the</strong> unity <strong>of</strong> <strong>the</strong> empire.<br />
1255-60: Hulegu and <strong>the</strong> Ilkhanate. Hulegu establishes<br />
a khanate based in Persia, aligns with various Christian<br />
forces, storms Baghdad (1258), and destroys <strong>the</strong> Abbasid<br />
Caliphate.<br />
1258-59: Mongol invasion <strong>of</strong> Syria. Hulegu attacks <strong>the</strong><br />
Egyptian-based Mamluk kingdom, but withdraws when<br />
news <strong>of</strong> <strong>the</strong> death <strong>of</strong> <strong>the</strong> Khan Mongke reaches him.<br />
1260: Battle <strong>of</strong> Ain Jalut. Mamluks defeat a Mongol army.<br />
This battle becomes a psychological turning point,<br />
demolishing <strong>the</strong> myth <strong>of</strong> Mongol invincibility.<br />
1260-1294: Kublai Khan. Kublai comes to power following<br />
a civil war with his bro<strong>the</strong>r. He establishes his capital in<br />
Peking and proclaims <strong>the</strong> Yuan dynasty.<br />
1261: Hungarians Defeat <strong>Mongols</strong>. King Bela repulses a<br />
second Mongolian incursion.<br />
1261: Byzantines Recapture Constantinople. While <strong>of</strong>ficially<br />
re-established, <strong>the</strong> Byzantine Empire is never again able<br />
to regain its former power. Asia Minor and <strong>the</strong> Balkans<br />
continue to be a scene <strong>of</strong> constant warfare.<br />
1261-62: Ilkhans Versus <strong>the</strong> Golden Horde. <strong>The</strong> two western<br />
Mongol khanates vie for power in an inconclusive war.<br />
1270: Eighth Crusade. Louis IX lands in Tunis, but <strong>the</strong><br />
crusade comes to an end when he dies during an epidemic.<br />
1274: First Invasion <strong>of</strong> Japan. <strong>Mongols</strong> launch an invasion<br />
from Korea, landing on Kyushu, but Japanese resistance<br />
prevents <strong>the</strong>m from advancing inland. <strong>The</strong> invasion army<br />
withdraws following a storm that destroys many <strong>of</strong> <strong>the</strong>ir<br />
ships.<br />
1281: Second Invasion <strong>of</strong> Japan. <strong>Mongols</strong> face fierce Japanese<br />
counterattacks and are defeated when a storm (kamikaze,<br />
<strong>the</strong> “divine wind”) again wrecks <strong>the</strong>ir fleet.<br />
1281-1300: Invasions <strong>of</strong> Sou<strong>the</strong>ast Asia. Mongol armies march<br />
into Annam (Vietnam), Champa and Burma, experiencing<br />
stout resistance. Those regions become Mongol vassals but<br />
maintain a degree <strong>of</strong> autonomy. A Mongol naval expedition<br />
to Java is defeated.<br />
1291 Siege <strong>of</strong> Acre. Moslems capture <strong>the</strong> last Crusader<br />
stronghold in <strong>the</strong> Holy Land. This was <strong>the</strong> end <strong>of</strong> <strong>the</strong><br />
Crusader states.<br />
Armored Mongol warriors in action.<br />
strategy & tactics 9
10 #229<br />
<strong>the</strong> south, and Xi Xia (or Hsi Hsia) in <strong>the</strong> west. Those<br />
states were <strong>of</strong>ten at war with each o<strong>the</strong>r and, indeed,<br />
formed alliances with <strong>the</strong> <strong>Mongols</strong> at various times in<br />
<strong>the</strong> 13th century thinking <strong>the</strong>y would gain advantages<br />
against <strong>the</strong>ir Chinese rivals—only to find out too late<br />
<strong>the</strong> <strong>Mongols</strong> were <strong>the</strong> ultimate threat.<br />
In what is today <strong>the</strong> Middle East, <strong>the</strong> once grand<br />
Muslim Caliphate had long since divided into multiple<br />
warring empires: <strong>the</strong> Ayyubid Caliphate based in<br />
Egypt, <strong>the</strong> Abbasids in Iraq, <strong>the</strong> Khwarezmians in<br />
Persia, <strong>the</strong> Seljuk Turks pressuring <strong>the</strong> decaying<br />
Byzantine Empire, and <strong>the</strong> Ismailis in <strong>the</strong>ir mountain<br />
redoubts.<br />
Making matters worse were <strong>the</strong> Crusades, with<br />
European (or “Frankish”) armies wreaking havoc<br />
throughout much <strong>of</strong> <strong>the</strong> region. <strong>The</strong> First through<br />
Fourth Crusades ranged over <strong>the</strong> years 1098-1204,<br />
with more to follow in <strong>the</strong> 13 th century. One <strong>of</strong> <strong>the</strong><br />
Crusaders’ primary accomplishment was crippling<br />
<strong>the</strong> once mighty Byzantine Empire. <strong>The</strong> Byzantines,<br />
long a bulwark <strong>of</strong> Christendom in <strong>the</strong> east, had been<br />
<strong>the</strong> victim <strong>of</strong> a plot to seize its mighty capital city,<br />
Constantinople. Constantinople fell to a Crusader<br />
army in 1204, becoming <strong>the</strong> center <strong>of</strong> a weak “Latin<br />
Empire.” While <strong>the</strong> Byzantines would recover later in<br />
<strong>the</strong> 13 th century (ironically, with some help from <strong>the</strong><br />
<strong>Mongols</strong>), <strong>the</strong> damage had been done, and <strong>the</strong> one state<br />
which might have been a counterpoise to depredations<br />
in <strong>the</strong> east had been rendered a shadow <strong>of</strong> its former<br />
self.<br />
With so much <strong>of</strong> <strong>the</strong> Muslim world engaged in<br />
fending <strong>of</strong>f <strong>the</strong> Fifth through Eighth Crusades during<br />
<strong>the</strong> 13 th century, it’s small wonder a concerted defense<br />
could not be established against <strong>the</strong> Mongol threat. It<br />
was not until <strong>the</strong> rise <strong>of</strong> <strong>the</strong> Mamluks in Egypt in 1250<br />
that an effective counterattack could begin.<br />
As for Europe, since <strong>the</strong> collapse <strong>of</strong> <strong>the</strong> Carolingian<br />
Empire centuries before, <strong>the</strong>re was no single entity<br />
capable <strong>of</strong> uniting <strong>the</strong> numerous kingdoms, states,<br />
principalities, trading leagues and free cities into<br />
a single military force. <strong>The</strong> Europeans spent most<br />
<strong>of</strong> <strong>the</strong>ir time fighting each o<strong>the</strong>r. To make matters<br />
worse, European divisions over <strong>the</strong> particular brand<br />
<strong>of</strong> Christianity to be practiced, Catholicism or Eastern<br />
Orthodox, not to mention assorted “heresies,” put <strong>the</strong><br />
kibosh on any political unity and, obviously, without<br />
political unity <strong>the</strong>re would be no united military<br />
effort.<br />
For example, prior to <strong>the</strong> Mongol invasion<br />
<strong>of</strong> Hungary, King Bela was involved in a power<br />
struggle against his own nobles <strong>the</strong>re. Complicating<br />
matters was <strong>the</strong> presence <strong>of</strong> numerous Turkish and<br />
Muslim refugees from prior Mongol wars. Had all<br />
those contingents formed a single army, combining<br />
<strong>the</strong> heavy Hungarian cavalry with <strong>the</strong> eastern light<br />
horsemen, <strong>the</strong>y might have been able to gain some<br />
tactical parity against <strong>the</strong> <strong>Mongols</strong>. Instead <strong>the</strong>y all<br />
fell to fighting among <strong>the</strong>mselves, with <strong>the</strong> result, that<br />
when <strong>the</strong> confrontation with <strong>the</strong> <strong>Mongols</strong> finally came<br />
at <strong>the</strong> Battle <strong>of</strong> Mohi (11 April 1241), <strong>the</strong> Hungarians<br />
were outmaneuvered and defeated.<br />
Operations<br />
Before starting a campaign, <strong>the</strong> <strong>Mongols</strong> would<br />
ga<strong>the</strong>r intelligence information via spies, merchants<br />
and scouts. <strong>The</strong> information was analyzed by Mongol<br />
commanders using an impromptu staff system. Both<br />
military and political intelligence were found useful.<br />
For example, in preparing for <strong>the</strong>ir invasion <strong>of</strong> Europe,<br />
<strong>the</strong> <strong>Mongols</strong> realized <strong>the</strong> division <strong>of</strong> Russia and <strong>the</strong><br />
lands to its west into numerous independent feuding<br />
states would provide opportunities for exploitation.<br />
Each European kingdom could be defeated one at a<br />
time and, indeed, <strong>the</strong> Europeans were never able to<br />
mount a single continent-wide defense. When <strong>the</strong><br />
<strong>Mongols</strong> launched <strong>the</strong>ir second invasion <strong>of</strong> Poland in<br />
1261, Pope Alexander IV called for a European alliance<br />
to fight <strong>the</strong> intruders, but could get no response. <strong>The</strong><br />
German emperors were busy asserting <strong>the</strong>ir authority<br />
against <strong>the</strong> popes; <strong>the</strong> French were fighting <strong>the</strong><br />
English, and <strong>the</strong> various Baltic powers were struggling<br />
for control over seaborne trade routes. Meanwhile, <strong>the</strong><br />
Crusades were absorbing <strong>the</strong> attention <strong>of</strong> <strong>the</strong> European<br />
military class while providing no strategic advantages<br />
in return.<br />
<strong>The</strong> <strong>Mongols</strong> would <strong>of</strong>ten plan a campaign to take<br />
advantage <strong>of</strong> <strong>the</strong> wea<strong>the</strong>r. <strong>The</strong>ir 1237 invasion <strong>of</strong><br />
Russia was launched in <strong>the</strong> dead <strong>of</strong> winter. Winter was<br />
not <strong>the</strong> normal campaign season for medieval armies,<br />
but <strong>the</strong> <strong>Mongols</strong> were used to operating under such<br />
conditions, though no doubt at some cost in attrition.<br />
Ironically, <strong>the</strong> frozen ground facilitated movement,<br />
and operations would slow down when <strong>the</strong> spring<br />
thaw set in.<br />
In <strong>the</strong> field, <strong>the</strong> <strong>Mongols</strong> divided <strong>the</strong>ir army into<br />
independent columns when moving cross country,<br />
but concentrated for fighting major battles. Riding in<br />
separate columns reduced <strong>the</strong> strain foraging put on<br />
<strong>the</strong> animals, as well as facilitating maneuver with units<br />
operating in manageable formations. <strong>The</strong> numerous<br />
columns helped spread rumors about Mongol “hordes”<br />
overrunning <strong>the</strong> countryside, fur<strong>the</strong>r demoralizing any<br />
foes.<br />
Timing <strong>of</strong> operations was agreed to at <strong>the</strong> precampaign<br />
kuriltai. Communications were by an<br />
efficient system <strong>of</strong> messengers with relay stations and<br />
remounts. What is interesting is how <strong>of</strong>ten Mongol<br />
maneuvers actually worked in <strong>the</strong> field. In <strong>the</strong> premodern<br />
era, before <strong>the</strong> invention <strong>of</strong> instantaneous<br />
communications, attempting to coordinate diverse<br />
military columns for single maneuvers <strong>of</strong>ten ended<br />
in disaster. Army commanders would frequently lose<br />
contact with independent detachments and units would<br />
show up late if at all.<br />
For example, Napoleon Bonaparte, arguably <strong>the</strong><br />
best European general <strong>of</strong> <strong>the</strong> last millennium, suffered<br />
several major setbacks when he attempted just such
maneuvers, and <strong>the</strong> French emperor had a well organized<br />
staff system with a messenger service and some <strong>of</strong><br />
<strong>the</strong> best marshals <strong>of</strong> his time. At Bautzen (20-21 May<br />
1813), Napoleon directed Marshal Ney’s corps to make<br />
a wide sweeping movement in order to cut <strong>the</strong> lines <strong>of</strong><br />
communications <strong>of</strong> an Allied army. But Ney showed<br />
up late, and <strong>the</strong> French lost <strong>the</strong> opportunity to envelop<br />
and destroy <strong>the</strong> Allies. At Waterloo two years later,<br />
Napoleon could not maintain contact between his own<br />
main army and adjacent forces under Ney and Grouchy<br />
even though <strong>the</strong>y were all fighting within a day’s march<br />
<strong>of</strong> each o<strong>the</strong>r. So it is all <strong>the</strong> more remarkable <strong>the</strong><br />
<strong>Mongols</strong> could “move divided, fight united,” especially<br />
when maneuvering across relatively unknown terrain<br />
and through hostile country.<br />
<strong>Tactics</strong><br />
<strong>The</strong> <strong>Mongols</strong> stressed combined arms on <strong>the</strong><br />
battlefield. Originally, <strong>the</strong>ir entire army was made up<br />
<strong>of</strong> horsemen, two-fifths <strong>of</strong> <strong>the</strong> troopers being heavy<br />
cavalry and <strong>the</strong> remainder light horse-archers. <strong>The</strong> light<br />
troopers would proceed on <strong>the</strong> front and flanks to harass<br />
<strong>the</strong> foe. When <strong>the</strong> enemy was sufficiently disrupted,<br />
<strong>the</strong> heavy cavalry would close in for <strong>the</strong> charge. In <strong>the</strong><br />
final assault, <strong>the</strong> heavies would go in first with <strong>the</strong> horse<br />
archers firing overhead. Flanking forces would move to<br />
envelop <strong>the</strong> enemy.<br />
Commands in <strong>the</strong> field were transmitted by drums,<br />
standards and signal flags. Mongol soldiers were<br />
ordered to remain silent during <strong>the</strong> initial maneuvers<br />
so orders could be understood. When <strong>the</strong> final assault<br />
came, a single great war cry was raised, backed up by<br />
<strong>the</strong> beating <strong>of</strong> great war drums.<br />
Many <strong>of</strong> <strong>the</strong> <strong>Mongols</strong>’ tactics were millennia old,<br />
but <strong>the</strong>y still worked. For example, much use was<br />
made <strong>of</strong> feigned flight, in which an advance guard<br />
would withdraw on contact with <strong>the</strong> enemy in order<br />
to lure him into an ambush. After winning a battle, <strong>the</strong><br />
<strong>Mongols</strong> would pursue ruthlessly. In <strong>the</strong> Khwarizm<br />
campaign, Genghis chased <strong>the</strong> broken Persians for five<br />
months, from central Asia to <strong>the</strong> shores <strong>of</strong> <strong>the</strong> Caspian.<br />
Tactical victories could <strong>the</strong>reby be turned into strategic<br />
triumphs.<br />
strategy & tactics 11
Mongol Organization<br />
Mongol armies were organized on <strong>the</strong> decimal basis; that<br />
is, 10 units were combined in each echelon <strong>of</strong> command. <strong>The</strong><br />
touman <strong>of</strong> 10,000 warriors was <strong>the</strong> largest standard unit. it<br />
was formed from 10 minghans (1000 men each), which in turn<br />
consisted <strong>of</strong> ten jaguns (100 men), and <strong>the</strong>n finally 10 arbans<br />
(10 men). Obviously, strengths in <strong>the</strong> field could vary owing to<br />
attrition, attachments, and so forth.<br />
A Mongol field army or ordus would consist <strong>of</strong> two or three<br />
toumans under <strong>the</strong> command <strong>of</strong> a general. “Ordus,” incidentally<br />
is <strong>the</strong> origin <strong>of</strong> <strong>the</strong> word “horde,” though in its original sense it<br />
meant a specific military unit. Genghis Khan’s army consisted<br />
<strong>of</strong> three such armies: <strong>the</strong> Junghar (army <strong>of</strong> <strong>the</strong> left wing/east),<br />
Baraunghar (army <strong>of</strong> <strong>the</strong> right/west), and Khol (army <strong>of</strong> <strong>the</strong><br />
center, with <strong>the</strong> khan himself). Mongol armies pitched camp<br />
facing south, hence <strong>the</strong> titles refer to each sub-army’s relative<br />
position. Contemporary observers noted <strong>the</strong> standardized units<br />
facilitated Mongol generals in passing down orders, since each<br />
<strong>of</strong>ficer had to deal with a limited number <strong>of</strong> subordinates. That<br />
compared well to <strong>the</strong> <strong>of</strong>ten chaotic situation in polyglot European<br />
armies where disputes over aristocratic privilege disrupted<br />
command arrangements.<br />
All able-bodied Mongol men owed military service. Heavy<br />
cavalry wore armor made <strong>of</strong> iron or hardened lea<strong>the</strong>r. Light<br />
cavalry were expert horse-archers. Silk shirts were worn by all<br />
as arrowheads could not tear <strong>the</strong> material; so arrows could be<br />
removed from body wounds simply by pulling out <strong>the</strong> garment.<br />
Younger <strong>Mongols</strong> would accompany an army to herd cattle and<br />
gain experience. Each unit had its own <strong>of</strong>ficers. Advancement<br />
was generally based on proven skill in battle. Sometimes nobles<br />
would be allowed to nominally command a major unit for political<br />
reasons, but actual command devolved on a veteran subordinate<br />
<strong>of</strong>ficer.<br />
As <strong>the</strong> <strong>Mongols</strong> conquered more peoples, <strong>the</strong>ir armies were<br />
accompanied by considerable numbers <strong>of</strong> subject levy troops,<br />
as well as specialists such as engineers, artillerists (using early<br />
gunpowder weapons) and camp artisans. Often, subject royalty<br />
were in <strong>the</strong> field army where <strong>the</strong> khan could keep an eye on <strong>the</strong>m,<br />
as well as using <strong>the</strong>m as hostages to maintain <strong>the</strong>ir citizenry’s<br />
loyalties. <strong>The</strong> increase in size <strong>of</strong> Mongol armies by <strong>the</strong> mid-13 th<br />
century does justify in some degree <strong>the</strong> belief in vast numbers <strong>of</strong><br />
<strong>Mongols</strong> overwhelming <strong>the</strong>ir foes, though how much <strong>of</strong> those<br />
numbers represented auxiliaries is open to speculation.<br />
<strong>The</strong>re were some special units. <strong>The</strong> Keshig was <strong>the</strong> khan’s<br />
guard. It was maintained at <strong>the</strong> strength <strong>of</strong> a touman and was used<br />
as an elite reserve and assault force. Members <strong>of</strong> <strong>the</strong> Keshig had<br />
higher status than <strong>the</strong> rest <strong>of</strong> <strong>the</strong> army, and guardsmen received<br />
<strong>the</strong> equivalent <strong>of</strong> modern staff <strong>of</strong>ficer training. <strong>The</strong>re were also<br />
volunteer (and not-so-volunteer) “suicide” units, which would<br />
lead assaults on fortified cities.<br />
Mongol armies were well disciplined in <strong>the</strong> field. Military<br />
codes specified punishments for <strong>of</strong>fenses such as missing guard<br />
duty. That was, apparently, <strong>the</strong> result <strong>of</strong> Mongol contact with <strong>the</strong><br />
Chinese civilizations to <strong>the</strong>ir south and east. <strong>The</strong> discipline, along<br />
with non-stop training, gave <strong>the</strong> <strong>Mongols</strong> a real edge over <strong>the</strong><br />
armies <strong>of</strong> China and Europe, which usually consisted <strong>of</strong> a core <strong>of</strong><br />
pr<strong>of</strong>essionals or feudal knights supported by much larger numbers<br />
<strong>of</strong> militia levies. Two <strong>of</strong> <strong>the</strong> more significant Mongol defeats,<br />
at Ain Jalut and in <strong>the</strong> invasions <strong>of</strong> Japan, were both inflicted<br />
by opponents who had consistently high levels <strong>of</strong> military skill:<br />
<strong>the</strong> Mamluks in <strong>the</strong> former battle and <strong>the</strong> samurai in <strong>the</strong> latter.<br />
Regardless, Mongol iron discipline welded <strong>the</strong> usually unruly<br />
tribes <strong>of</strong> <strong>the</strong> steppes into <strong>the</strong> most efficient military machine <strong>of</strong><br />
<strong>the</strong>ir time.<br />
12 #229<br />
As <strong>the</strong> <strong>Mongols</strong> absorbed more conquered peoples into<br />
<strong>the</strong>ir empire, <strong>the</strong>y increasingly deployed subject auxiliaries,<br />
including infantry archers. <strong>The</strong>re was occasional use <strong>of</strong><br />
camels to disrupt enemy cavalry formations (horses reacted<br />
erratically to <strong>the</strong>m), early gunpowder weapons (courtesy<br />
<strong>of</strong> <strong>the</strong> Chinese), and “suicide” corps (picked volunteers or<br />
conscripted prisoners who made <strong>the</strong> initial assault).<br />
<strong>The</strong> <strong>Mongols</strong> exploited battlefield stratagems for all<br />
<strong>the</strong>y were worth, such as setting grass fires and mounting<br />
straw-stuffed dummies on horses to deceive <strong>the</strong> enemy<br />
about <strong>the</strong>ir strength. <strong>The</strong>y also put a new spin on <strong>the</strong> old<br />
Chinese battle tactic <strong>of</strong> leaving <strong>the</strong> enemy army a gap<br />
through which it could withdraw. <strong>The</strong> original idea was<br />
that would prevent <strong>the</strong> enemy from making a fanatic fight<br />
to <strong>the</strong> death, but <strong>the</strong> <strong>Mongols</strong> wanted <strong>the</strong> enemy to think<br />
he could get away. As his troops fell back, <strong>the</strong>y lost <strong>the</strong>ir<br />
cohesion and <strong>the</strong>n <strong>the</strong> <strong>Mongols</strong> would launch a fierce<br />
pursuit.<br />
Logistics<br />
As <strong>the</strong> cliché goes, “an army travels on its stomach.”<br />
In <strong>the</strong> case <strong>of</strong> <strong>the</strong> <strong>Mongols</strong>, <strong>the</strong> army also traveled on<br />
<strong>the</strong> backs <strong>of</strong> its animals. <strong>The</strong> <strong>Mongols</strong>, like many o<strong>the</strong>r<br />
steppe peoples, were brought up from childhood to be<br />
horsemen. <strong>The</strong> horses gave advantages in mobility, as<br />
well as saving wear and tear on <strong>the</strong> troops who would<br />
ride <strong>the</strong>m—a critical factor when considering a Mongol<br />
army might travel several thousand miles in <strong>the</strong> course <strong>of</strong><br />
a campaign.<br />
Mongol fieldcraft was good—hunting, land navigating,<br />
pitching tents, surviving in o<strong>the</strong>rwise inhospitable terrain.<br />
That meant <strong>the</strong> army could maintain itself in <strong>the</strong> field<br />
without <strong>the</strong> logistical support that would o<strong>the</strong>rwise be<br />
required. <strong>The</strong> typical Mongol dwelling was <strong>the</strong> yurt, a<br />
tent-like hut which could be moved easily and carried via<br />
draught animals.<br />
Each trooper would bring several horses for a campaign.<br />
That minimized <strong>the</strong> exhaustion <strong>of</strong> animals by switching<br />
mounts, as well as allowing <strong>the</strong> carrying <strong>of</strong> more supplies.<br />
<strong>The</strong> horses <strong>the</strong>mselves could be a source <strong>of</strong> nourishment,<br />
with field rations including mare’s milk (<strong>of</strong>ten fermented<br />
into yoghurt), blood (collected by opening a vein in a<br />
horse’s neck and <strong>the</strong>n closing it before <strong>the</strong> animal was too<br />
impaired), and even meat (if <strong>the</strong> situation got desperate<br />
enough).<br />
<strong>The</strong> steppe horses were a small, hardy breed that could<br />
live <strong>of</strong>f various grasses. On <strong>the</strong> march, <strong>the</strong> <strong>Mongols</strong> would<br />
also drive along immense herds <strong>of</strong> cattle for meat on <strong>the</strong><br />
ho<strong>of</strong>, as well as conducting <strong>the</strong> usual foraging to live <strong>of</strong>f<br />
<strong>the</strong> land.<br />
<strong>The</strong> downside was that vast traveling menagerie<br />
required immense amounts <strong>of</strong> fodder. So <strong>the</strong> Mongol<br />
system could work well in lands with open grazing, but<br />
would break down elsewhere. <strong>The</strong>re is some speculation <strong>the</strong><br />
<strong>Mongols</strong> halted operations against central Europe because<br />
<strong>the</strong> countryside simply could not support a Mongol army.<br />
Similarly, <strong>the</strong> deserts <strong>of</strong> <strong>the</strong> Middle East also diminished<br />
Mongol capabilities in <strong>the</strong> face <strong>of</strong> <strong>the</strong> Mamluks.
Unconventional Warfare<br />
<strong>The</strong> <strong>Mongols</strong> had a reputation for terror, a reputation<br />
that has persisted until this day. This was due in part<br />
to propaganda <strong>the</strong> <strong>Mongols</strong> <strong>the</strong>mselves disseminated<br />
to demoralize <strong>the</strong>ir foes. It was also <strong>the</strong> result <strong>of</strong> <strong>the</strong><br />
panic that spread among defeated foes looking for<br />
explanations for <strong>the</strong>ir defeats. One belief was <strong>the</strong><br />
Mongol “hordes” won through superior numbers, but<br />
<strong>the</strong> reality was <strong>the</strong> <strong>Mongols</strong> were <strong>of</strong>ten outnumbered<br />
by <strong>the</strong>ir foes.<br />
<strong>The</strong>re was ano<strong>the</strong>r reason for <strong>the</strong> Mongol reputation<br />
for ferocity, and that is <strong>the</strong>y made no small use <strong>of</strong> terror<br />
tactics in <strong>the</strong>ir campaigns. It was not uncommon for<br />
Mongol armies to issue ultimatums to enemy cities,<br />
demanding surrender or face total annihilation, a<br />
threat <strong>the</strong> <strong>Mongols</strong> inevitably carried out. Great cities<br />
such as Baghdad and Kiev were destroyed by Mongol<br />
assaults.<br />
Actually, <strong>the</strong> destruction <strong>of</strong> cities that refused to<br />
surrender was common military practice in that era.<br />
Crusader armies showed no hesitation in pillaging<br />
Jerusalem in 1099 and Constantinople in 1204.<br />
Sometimes <strong>the</strong> <strong>Mongols</strong> were responding to enemy<br />
provocations—on more than one occasion, Mongol<br />
envoys were executed by defiant defenders. <strong>The</strong> great<br />
khan’s vengeance was <strong>of</strong>ten less than pleasant. And<br />
<strong>the</strong>re were Mongol massacres <strong>of</strong> o<strong>the</strong>rwise peaceful<br />
populaces, <strong>the</strong> usual devastation <strong>of</strong> <strong>the</strong> countryside by<br />
foraging armies, <strong>the</strong> destruction <strong>of</strong> irrigation systems,<br />
which returned fertile countryside into desert, and<br />
such niceties as creating mountains <strong>of</strong> skulls.<br />
What <strong>the</strong> <strong>Mongols</strong> did that was unique was to<br />
deliberately exploit terror as a propaganda weapon<br />
to demoralize <strong>the</strong>ir foes. <strong>The</strong>y gained a psychological<br />
edge over <strong>the</strong>ir foes such that, when <strong>the</strong> confrontation<br />
came on <strong>the</strong> battlefield, <strong>the</strong> <strong>Mongols</strong> won before a<br />
single arrow was fired.<br />
Underlying <strong>the</strong> terror was a more subtle<br />
psychological rationale for conquest. Genghis Khan<br />
and his successors spread <strong>the</strong> belief <strong>the</strong> <strong>Mongols</strong> were<br />
destined to rule <strong>the</strong> world. Consequently, <strong>the</strong> enemies<br />
<strong>of</strong> <strong>the</strong> <strong>Mongols</strong> were considered rebel subjects who<br />
ought to be vanquished and absorbed into <strong>the</strong> empire.<br />
That belief served as a common unifying ideology<br />
among <strong>the</strong> far-flung Mongol armies.<br />
Mongol agents would frequently encourage<br />
downtrodden groups within targeted countries to<br />
believe <strong>the</strong> invaders would liberate <strong>the</strong>m. And Mongol<br />
tolerance for diverse religions sometimes encouraged<br />
minority groups to enlist for <strong>the</strong> duration. Interestingly,<br />
<strong>the</strong>re were large Christian contingents among <strong>the</strong><br />
Mongol armies that invaded <strong>the</strong> Islamic caliphates.<br />
Empire <strong>of</strong> <strong>the</strong> Steppes<br />
Simply conquering territories was not enough to<br />
establish an empire. <strong>The</strong> real problem was consolidating<br />
power. That meant setting up a functioning<br />
administration and gaining at least some support from<br />
<strong>the</strong> locals. It is to <strong>the</strong> credit <strong>of</strong> <strong>the</strong> <strong>Mongols</strong> <strong>the</strong> states<br />
<strong>the</strong>y set up survived for a century or more, though<br />
<strong>the</strong>ir ultimate demise was due to factors inherent in<br />
<strong>the</strong> Mongol system, as will be seen.<br />
Mongol practice was to conscript <strong>the</strong> best assets<br />
from conquered peoples. For example, <strong>the</strong>ir early<br />
armies lacked <strong>the</strong> ability to conduct sieges, a common<br />
shortcoming in nomadic armies. <strong>The</strong> <strong>Mongols</strong><br />
overcame that by conscripting Chinese and Islamic<br />
engineers (<strong>of</strong>ten sparing <strong>the</strong>m from <strong>the</strong> usual massacre).<br />
<strong>The</strong>y also employed political talent. Yeh-lu Chu-ts’ai,<br />
a Chi’in <strong>of</strong>ficial, did much to ameliorate Mongol rule<br />
in China by assisting Genghis in setting up an efficient<br />
administration. Censuses and tax collection quickly<br />
became part <strong>of</strong> <strong>the</strong> Mongol system.<br />
<strong>The</strong> <strong>Mongols</strong> drafted troops from subject peoples<br />
and created a multi-national army. Unusual for <strong>the</strong><br />
era, <strong>the</strong> <strong>Mongols</strong> practiced a considerable degree <strong>of</strong><br />
religious tolerance, really a necessity in forming an<br />
empire that embraced so many different peoples. That<br />
move also removed much <strong>of</strong> <strong>the</strong> internal squabbling<br />
that had caused <strong>the</strong> disintegration <strong>of</strong> many o<strong>the</strong>r<br />
alliances in <strong>the</strong> past. A Mongol army might contain<br />
Buddhists, Christians, Moslems and assorted pagans.<br />
<strong>The</strong> <strong>Mongols</strong> established law and order within<br />
conquered territories with <strong>the</strong> usual ruthless methods.<br />
<strong>The</strong> economy was encouraged, as <strong>the</strong> depredations <strong>of</strong><br />
bandits were considerably reduced and trade routes<br />
flourished on a continent-wide basis. Consequently,<br />
<strong>the</strong> khanates could rely on a degree <strong>of</strong> economic<br />
stability, enhancing <strong>the</strong>ir revenues via customs duties<br />
<strong>The</strong> Tartars<br />
“Tartar” (or “Tatar”) is a general European term for various<br />
Mongolian and Turkic peoples who raided or invaded westward<br />
at various times throughout <strong>the</strong> Medieval era. <strong>The</strong> origin <strong>of</strong><br />
<strong>the</strong> term is disputed. Some linguists claim it is derived from<br />
“Tartarus,” <strong>the</strong> pit <strong>of</strong> <strong>the</strong> underworld, reflecting <strong>the</strong> dread<br />
inspired among <strong>the</strong> Europeans by <strong>the</strong> ferocity <strong>of</strong> <strong>the</strong> <strong>Mongols</strong>.<br />
More likely, <strong>the</strong> term originates from <strong>the</strong> name <strong>of</strong> <strong>the</strong> Ta-Ta<br />
Mongol clan. “Ta-Ta” means “warrior-warrior,” <strong>the</strong> idea being<br />
<strong>the</strong> <strong>Mongols</strong> were doubly ferocious fighters.<br />
strategy & tactics 13
14 #229<br />
Men on horseback<br />
Genghis Khan (1155?-1227)<br />
Genghis Khan (Jinghiz Khan) was born as Temujin in<br />
<strong>the</strong> Borjigan clan <strong>of</strong> <strong>the</strong> <strong>Mongols</strong>. He spent much <strong>of</strong> his<br />
youth involved in <strong>the</strong> usual inter-fighting <strong>of</strong> <strong>the</strong> tribesmen,<br />
displaying good military skill and even better political<br />
leadership. He surrounded himself with loyal retainers,<br />
<strong>the</strong>reby avoiding <strong>the</strong> backstabbing that inevitably caused <strong>the</strong><br />
disintegration <strong>of</strong> tribal confederations. His early campaigns<br />
showed <strong>the</strong> skill he would later employ on a continent-wide<br />
scale—exploitation <strong>of</strong> interior lines and mobility in order to<br />
defeat his enemies in detail.<br />
At a grand assembly <strong>of</strong> <strong>Mongols</strong> in 1206, Temujin<br />
declared himself Genghis Khan or “Universal Ruler” (also<br />
translated as “World Conqueror” or “Prince <strong>of</strong> Conquerors,”<br />
or even as “Emperor <strong>of</strong> <strong>the</strong> Seas,” <strong>the</strong> latter illogically<br />
enough for landlocked Mongolia). With formal unification<br />
<strong>of</strong> Mongolia in hand, Genghis would begin his march <strong>of</strong><br />
Eurasian conquest. China, central Asia, <strong>the</strong> Khwarezmian<br />
Empire would all fall to his horsemen. He also campaigned in<br />
northwestern India in pursuit <strong>of</strong> <strong>the</strong> defeated Khwarezmians<br />
and sent a reconaissance in force into sou<strong>the</strong>rn Russia.<br />
One <strong>of</strong> Genghis’ skills was <strong>the</strong> ability to assimilate tactical<br />
methods from o<strong>the</strong>r peoples, including combined heavylight<br />
cavalry tactics on <strong>the</strong> battlefield, and siege operations<br />
against fortified cites. He enforced a rigid discipline<br />
among his troops, a rarity for steppe armies. Politically, he<br />
maintained <strong>the</strong> loyalty <strong>of</strong> his subordinates, no mean feat in an<br />
era known for treachery and power grabs. That loyalty, along<br />
with a reasonable administration <strong>of</strong> conquered territories,<br />
maintained Genghis’ empire for decades after his death.<br />
Kublai Khan (1215-1294)<br />
Kublai Khan was Genghis’ grandson and one <strong>of</strong> <strong>the</strong><br />
greatest rulers in history, at least in terms <strong>of</strong> geographic<br />
extent. His Mongol Empire stretched from Korea to eastern<br />
Europe and into <strong>the</strong> Middle East. While serving in <strong>the</strong><br />
<strong>Mongols</strong>’ Chinese wars, he quickly showed his political<br />
skills, making good use <strong>of</strong> local advisors to rationalize<br />
administration. He also proved to be a talented general,<br />
winning battles against <strong>the</strong> Sung Empire. When <strong>the</strong> great<br />
Khan Mongke died in 1259, Kublai threw himself into<br />
<strong>the</strong> struggle for <strong>the</strong> ultimate power, a struggle that led to<br />
civil war. Kublai emerged triumphant in 1264, but it was<br />
something <strong>of</strong> a balancing act. His urbane Chinese ways did<br />
not sit well with <strong>the</strong> more traditional steppe warriors.<br />
Kublai went on to unify China, establishing <strong>the</strong> Ta<br />
Yuan dynasty (“Great Origin”) in 1271, though <strong>the</strong> fighting<br />
continued until 1279. He launched somewhat successful<br />
invasions <strong>of</strong> Burma and Vietnam, and somewhat disastrous<br />
invasions <strong>of</strong> Java and Japan. Kublai made good use <strong>of</strong><br />
Chinese and foreign advisors. Among o<strong>the</strong>rs, he appointed<br />
<strong>the</strong> Venetian adventurer, Marco Polo, to high <strong>of</strong>fice. But he<br />
allowed <strong>the</strong> traditional Confucian examination system, which<br />
opened <strong>the</strong> civil service to all qualified applicants, to lapse,<br />
replacing it with <strong>the</strong> Mongol practice <strong>of</strong> handing over key<br />
posts to trusted individuals. While <strong>the</strong>re was considerable<br />
prosperity in his realm, it mainly benefited <strong>the</strong> ruling elites.<br />
One legacy was he established his capital at Peking<br />
(“Nor<strong>the</strong>rn Capital,” formerly called Peiping or “<strong>the</strong> North is<br />
Pacified”). <strong>The</strong> “Xanadu” <strong>of</strong> Samuel Taylor Coleridge fame<br />
was actually Kublai’s palace at K’ai-p’ing. Incidentally,<br />
Kublai was also known as Setsen Khan (“Wise Khan”).<br />
alexander nevsky (1220-63)<br />
Alexander <strong>of</strong> Novgorod has been something <strong>of</strong> a<br />
Russian national hero, generally known in <strong>the</strong> west due to<br />
Sergei Eisenstein’s 1938 movie Alexander Nevsky about his<br />
struggle against <strong>the</strong> Teutonic Knights. Alexander began his<br />
career when elected prince <strong>of</strong> Novgorod, one <strong>of</strong> <strong>the</strong> leading<br />
Russian principalities <strong>of</strong> <strong>the</strong> time. In 1240 he commanded<br />
<strong>the</strong> Russian army that defeated a Swedish incursion at <strong>the</strong><br />
River Neva, hence his title “Nevsky.” Two years later,<br />
<strong>the</strong> Teutonic Knights, a Crusader order based in Prussia,<br />
marched into Novgorod’s lands. Alexander mobilized<br />
ano<strong>the</strong>r army and won a great victory over <strong>the</strong>m at Lake<br />
Peipus. His use <strong>of</strong> cavalry envelopment tactics in that battle<br />
showed <strong>the</strong> influence <strong>of</strong> centuries <strong>of</strong> steppe warfare, and<br />
once again demonstrated <strong>the</strong> vulnerability <strong>of</strong> heavy knights<br />
against more mobile foes.<br />
In dealing with <strong>the</strong> threat from <strong>the</strong> east, Alexander relied<br />
on diplomacy ra<strong>the</strong>r than military skill. Bowing to <strong>the</strong><br />
inevitable, he played politics in several visits to <strong>the</strong> Golden<br />
Horde and in return <strong>the</strong> <strong>Mongols</strong> appointed him prince <strong>of</strong><br />
Kiev and grand prince <strong>of</strong> Vladimir. Alexander generally<br />
ruled well and reconstructed Russia after <strong>the</strong> devastation <strong>of</strong><br />
decades <strong>of</strong> warfare. He frequently interceded on <strong>the</strong> behalf<br />
<strong>of</strong> <strong>the</strong> Russian people against <strong>the</strong> khans, and <strong>the</strong> <strong>Mongols</strong><br />
apparently liked him as he kept <strong>the</strong> peace on <strong>the</strong>ir northwest<br />
frontier. While Alexander was a Mongol vassal, he did much<br />
to make <strong>the</strong> best <strong>of</strong> a bad deal. He was later canonized by <strong>the</strong><br />
Russian Orthodox Church.<br />
Prester John<br />
One <strong>of</strong> <strong>the</strong> more curious beliefs <strong>of</strong> Europeans in <strong>the</strong> middle<br />
ages was that <strong>of</strong> Prester John. Prester John was supposedly<br />
<strong>the</strong> king <strong>of</strong> a Christian kingdom located somewhere in central<br />
Asia. <strong>The</strong> legend probably got its start in <strong>the</strong> 12 th century<br />
with a confusion <strong>of</strong> various tales combining everything from<br />
<strong>the</strong> historic Alexander <strong>the</strong> Great to <strong>the</strong> legend <strong>of</strong> Parsifal and<br />
quest for <strong>the</strong> Holy Grail. It got a boost with <strong>the</strong> Crusaders,<br />
who claimed that a Christian monarch was marching out<br />
<strong>of</strong> Asia to link up with <strong>the</strong>ir own anti-Moslem efforts from<br />
Europe in a grand strategic envelopment <strong>of</strong> <strong>the</strong> Holy Land.<br />
Oddly enough, <strong>the</strong>re actually was a great monarch sweeping<br />
out <strong>of</strong> Asia, smashing Moslem states along <strong>the</strong> way—<br />
Genghis Khan<br />
<strong>The</strong> <strong>Mongols</strong>, with <strong>the</strong>ir more tolerant attitudes towards<br />
religion, were open to Christian missionaries and <strong>the</strong>y did,<br />
on occasion, ally <strong>the</strong>mselves with <strong>the</strong> Crusaders. By forcing<br />
Moslem attention elsewhere, <strong>the</strong>y probably saved <strong>the</strong><br />
Crusader States and <strong>the</strong> Byzantine Empire from destruction<br />
in <strong>the</strong> 13 th century.<br />
Of course, with <strong>the</strong> invasion <strong>of</strong> Europe <strong>the</strong> belief <strong>the</strong><br />
<strong>Mongols</strong> were a lost Christian host coming to <strong>the</strong> rescue<br />
<strong>of</strong> <strong>the</strong> west went out <strong>the</strong> window. Odoricus de Foro Julii, a<br />
monk who did missionary work in central Asia and who had<br />
occasion to know <strong>the</strong> situation firsthand, would write “that<br />
not a hundredth part <strong>of</strong> <strong>the</strong> things related <strong>of</strong> Prester John<br />
were true.” None<strong>the</strong>less, <strong>the</strong> legend <strong>of</strong> Prester John would<br />
persist for centuries afterward.
(though that <strong>of</strong>ten did <strong>the</strong> local populace little good). And,<br />
no doubt, <strong>the</strong> heavy-handed peace did much to discourage<br />
local revolts.<br />
Following <strong>the</strong> death <strong>of</strong> Genghis in 1227, <strong>the</strong> Mongol<br />
Empire was divided into four khanates: <strong>the</strong> Golden Horde<br />
(under Genghis’ grandson Batu, in Russia), Chagadai<br />
(Central Asia, named after one <strong>of</strong> Genghis’ sons), <strong>the</strong><br />
Ilkhans (literally, “Glorious Rulers,” built around Persia by<br />
Hulegu), and <strong>the</strong> Great Khan (China, where Kublai Khan<br />
later established <strong>the</strong> Yuan dynasty). Each khanate had its<br />
own khan, capital and army, along with a ruling Mongol<br />
elite.<br />
<strong>The</strong> great khan was supposedly ruler <strong>of</strong> <strong>the</strong>m all, and<br />
Kublai Khan’s writ <strong>the</strong>oretically ran <strong>the</strong> length <strong>of</strong> <strong>the</strong><br />
entire empire, but for practical purposes each khanate was<br />
an independent kingdom. Probably, <strong>the</strong> khanates were as<br />
large as a pre-modern state could be, given limitations<br />
on communications and <strong>the</strong> span <strong>of</strong> control in which<br />
administrations could function. Still, <strong>the</strong> regions covered<br />
were immense. <strong>The</strong> Golden Horde was as large as western<br />
Europe.<br />
<strong>The</strong> <strong>Mongols</strong> also appeared to become rapidly civilized.<br />
Kublai Khan made a genuine attempt to establish himself as<br />
a legitimate Chinese ruler under <strong>the</strong> “Mandate <strong>of</strong> Heaven,”<br />
with some respect for <strong>the</strong> citizenry. <strong>The</strong> lkhanates and<br />
Golden Horde <strong>Mongols</strong> would, once <strong>the</strong>y had settled in,<br />
convert to Islam and fit in with <strong>the</strong>ir subject peoples.<br />
continued on page 18<br />
<strong>The</strong> Moguls<br />
While <strong>the</strong> <strong>Mongols</strong> were no longer a world-shaking power in<br />
<strong>the</strong> 16th century, Genghis’ name could still inspire <strong>the</strong> peoples <strong>of</strong><br />
<strong>the</strong> steppes. In 1526 Zahir-ud-Din Babur, a prince <strong>of</strong> Samarkand<br />
in central Asia who was descended from both Genghis Khan<br />
and Tamerlane, set himself up as King <strong>of</strong> Kabul with an army<br />
based in Afghanistan (a major crossroads for trade routes at<br />
<strong>the</strong> time). Invading nor<strong>the</strong>rn India in 1525, he quickly carved<br />
out an empire. His successors, notably Akbar, consolidated <strong>the</strong><br />
empire on a sound administrative and military basis. In <strong>the</strong> great<br />
city <strong>of</strong> Agra <strong>the</strong>y would build <strong>the</strong> wondrous palace and garden<br />
called <strong>the</strong> Taj Mahal. Babur’s empire would become known as<br />
<strong>the</strong> Mogul, from <strong>the</strong> Persian word for Mongol. Mogul dynasties<br />
lasted well into <strong>the</strong> 19 th century, finally being dissolved into <strong>the</strong><br />
British Empire in India.<br />
strategy & tactics 15
16 #229<br />
<strong>The</strong> Opposition<br />
It’s easy to list <strong>the</strong> <strong>Mongols</strong> military advantages: unity<br />
<strong>of</strong> command, superior mobility, exploitation <strong>of</strong> intelligence,<br />
psychological warfare, etc., as if <strong>the</strong>y were unique in <strong>the</strong><br />
annals <strong>of</strong> medieval warfare. Yet all <strong>of</strong> <strong>the</strong>se things were<br />
practiced by armies for millennia. Military treatises such as<br />
Stratagems (by <strong>the</strong> Roman Sextus Julius Frontinus), <strong>the</strong> Art<br />
<strong>of</strong> War (by <strong>the</strong> Chinese Sun Tzu) and Strategikon (by <strong>the</strong><br />
Byzantine Leo) all provide similar expositions on strategy<br />
and tactics. Why, <strong>the</strong>n, were <strong>the</strong> <strong>Mongols</strong>’ enemies unable to<br />
mount a successful defense?<br />
As this narrative has indicated, <strong>the</strong> opposition was <strong>of</strong>ten<br />
busy fighting among <strong>the</strong>mselves instead <strong>of</strong> against <strong>the</strong><br />
<strong>Mongols</strong>; so many advantages that would have accrued to<br />
more civilized armies were lost. <strong>The</strong> horse-archer tactic <strong>of</strong><br />
feigned retreat followed by an ambush had been known for<br />
centuries. <strong>The</strong> Chinese had fought nomadic people since <strong>the</strong><br />
days <strong>of</strong> <strong>the</strong> Hsiung-Niu (known in <strong>the</strong> west as <strong>the</strong> Huns) and<br />
worked out counter-tactics such as advancing with infantry<br />
formed in great hollow squares, cavalry and baggage in<br />
<strong>the</strong> center. Foot archers, especially crossbowmen, would<br />
keep horse archers at bay, and <strong>the</strong>n <strong>the</strong> cavalry would make<br />
short, controlled charges to force back <strong>the</strong> lighter nomadic<br />
horsemen without <strong>the</strong>mselves falling into traps.<br />
Similarly, <strong>the</strong> Hungarians and o<strong>the</strong>r eastern Europeans<br />
had a long history <strong>of</strong> not only fighting against nomadic<br />
raiders from <strong>the</strong> eastern steppes but also <strong>of</strong> employing such<br />
tactics <strong>the</strong>mselves. But <strong>the</strong>y had long since converted <strong>the</strong>ir<br />
armies to <strong>the</strong> western European feudal model, with a core<br />
<strong>of</strong> heavy cavalry backed by infantry levies and mercenaries.<br />
<strong>The</strong>y proved less than adequate for dealing with Mongol<br />
style warfare.<br />
Where <strong>the</strong> <strong>Mongols</strong> were effective was in integrating<br />
many diverse practices into a single military system. <strong>The</strong>y<br />
combined both traditional nomadic light cavalry with heavy<br />
cavalry tactics, creating a force on <strong>the</strong> battlefield whose<br />
syn<strong>the</strong>sis was greater than <strong>the</strong> impact <strong>of</strong> its individual arms.<br />
In many ways, <strong>the</strong> rise <strong>of</strong> <strong>the</strong> Mongol military system<br />
is not unlike <strong>the</strong> French system that crystallized around<br />
Napoleon Bonaparte in 1800-05. Napoleon syn<strong>the</strong>sized<br />
military developments from <strong>the</strong> late 18 th century (combined<br />
arms divisions, skirmishers, massed battlefield artillery)<br />
with his own particular genius for war to create <strong>the</strong> kind<br />
<strong>of</strong> organization that is in many ways <strong>the</strong> antecedent for all<br />
modern armies. <strong>The</strong> <strong>Mongols</strong> did <strong>the</strong> same, and <strong>the</strong>ir system<br />
worked—until <strong>the</strong>ir enemies relearned.<br />
Chinese<br />
At <strong>the</strong> time <strong>of</strong> <strong>the</strong> Mongol invasions, China was divided<br />
into several independent kingdoms. <strong>The</strong> two main states<br />
were <strong>the</strong> Chi’in in <strong>the</strong> north and <strong>the</strong> Sung in <strong>the</strong> south. <strong>The</strong><br />
Chi’in dynasty had its origins with <strong>the</strong> Jurchin tribes <strong>of</strong><br />
nor<strong>the</strong>rn Manchuria. who invaded China proper in <strong>the</strong> 12 th<br />
century. <strong>The</strong> Sung Empire had emerged during <strong>the</strong> confused<br />
fighting <strong>of</strong> <strong>the</strong> 10 th century, when China was rent by both<br />
internal struggle and external invasion. While <strong>the</strong> Chi’in had<br />
a cavalry tradition, it had declined by <strong>the</strong> time <strong>of</strong> <strong>the</strong> Mongol<br />
invasions. And <strong>the</strong> territory <strong>of</strong> <strong>the</strong> Sung Empire was not<br />
suited for war-horse breeding; so both <strong>of</strong> those states were<br />
unable to counter <strong>the</strong> Mongol cavalry armies in <strong>the</strong> field.<br />
Defense was emphasized over <strong>of</strong>fense, facilitated by China’s<br />
numerous fortified cities and <strong>the</strong> deployment <strong>of</strong> “high-tech”<br />
weapons such as gunpowder.<br />
<strong>The</strong> Chinese had several echelons <strong>of</strong> forces, all subject to<br />
<strong>the</strong> central government. At <strong>the</strong> top was <strong>the</strong> imperial guard,<br />
an army in its own right, with units stationed in <strong>the</strong> capital<br />
and at various strategic points around <strong>the</strong> realm. <strong>The</strong> militia<br />
was responsible for local defense and <strong>of</strong>ten recruited from<br />
military colonists. At <strong>the</strong> bottom was a labor corps. <strong>The</strong>re<br />
were also mercenaries and auxiliaries, <strong>of</strong>ten recruited from<br />
<strong>the</strong> steppe nomads, as well as river flotillas. China’s great<br />
rivers were natural lines <strong>of</strong> communications and centers for<br />
economic activity. Several great battles <strong>of</strong> <strong>the</strong> era took place<br />
between riverine forces.<br />
<strong>The</strong> Chinese had a long tradition <strong>of</strong> military analysis<br />
going back to Sun Tzu and his classic Art <strong>of</strong> War, but <strong>the</strong>re<br />
was also a tendency for Chinese military pr<strong>of</strong>iciency to<br />
deteriorate <strong>the</strong> longer a dynasty remained in power. Troops<br />
lost <strong>the</strong>ir skills in peacetime and corruption became endemic.<br />
A good ruler was supposed to govern by political skill and<br />
consensus, not military force. That worked when dealing<br />
with internal threats, but proved less than efficient when<br />
repelling foreign invaders.<br />
Incidentally, <strong>the</strong> current Great Wall <strong>of</strong> China was not<br />
built until later in <strong>the</strong> Ming dynasty, after <strong>the</strong> <strong>Mongols</strong><br />
had been overthrown in China. While <strong>the</strong>re was a chain <strong>of</strong><br />
nor<strong>the</strong>rn frontier fortifications in <strong>the</strong> 13 th century, <strong>the</strong>y were<br />
outflanked by <strong>the</strong> <strong>Mongols</strong> who invaded from <strong>the</strong> west.<br />
Moslems<br />
<strong>The</strong>re were two competing Caliphates, <strong>the</strong> Ayyubid based<br />
in Egypt, and <strong>the</strong> Abbasid in Iraq. Both claimed <strong>the</strong> rule <strong>of</strong><br />
<strong>the</strong> entire Islamic world, and both were highly developed<br />
civilizations. Troops were raised by a quasi-feudal system<br />
called <strong>the</strong> iqta’, in which amirs (noblemen) provided troops<br />
in return for grants <strong>of</strong> land or sometimes cash. <strong>The</strong> grants<br />
were not heredity, so <strong>the</strong> system remained more flexible than<br />
<strong>the</strong> European and was more responsive to central control.<br />
And, as was typical <strong>of</strong> most armies in that era, <strong>the</strong>re was<br />
also <strong>the</strong> usual plethora <strong>of</strong> auxiliaries drawn from nomadic<br />
tribesmen, militias and freebooters. Often, armies could<br />
be raised to incredibly large sizes, but with a simultaneous<br />
decline in efficiency.<br />
<strong>The</strong> Mamluks were unique, originally elite slave-soldiers<br />
who were subject only to <strong>the</strong> state, but eventually <strong>the</strong>y<br />
became a force in <strong>the</strong>ir own right. <strong>The</strong>y were usually cavalry<br />
and also usually well trained. In <strong>the</strong> mid-13 th century, <strong>the</strong><br />
Mamluks would take over Egypt and make <strong>the</strong>mselves into<br />
a new military aristocracy.<br />
<strong>The</strong> ghazis were warrior bro<strong>the</strong>rhoods who frequently<br />
undertook <strong>the</strong>ir own version <strong>of</strong> <strong>the</strong> crusades.<br />
Turks<br />
Turkic tribes, some <strong>of</strong> <strong>the</strong>m well organized (such as <strong>the</strong><br />
Seljuks and Ottomans), roamed between Central Asia and<br />
<strong>the</strong> Balkans, frequently carving out kingdoms such as <strong>the</strong><br />
Khwarizm Empire based in Persia. <strong>The</strong> Turks fought in a<br />
manner similar to <strong>the</strong> <strong>Mongols</strong>, though without <strong>the</strong> same<br />
degree <strong>of</strong> military efficiency. <strong>The</strong>y frequently made use <strong>of</strong><br />
<strong>the</strong> iqta’ organization and employed Mamluks.
<strong>The</strong> assassins<br />
<strong>The</strong> Assassins had <strong>the</strong>ir origins in <strong>the</strong> humble Ismaili<br />
sect <strong>of</strong> Islam. <strong>The</strong> Ismailis tended to have some unorthodox<br />
beliefs, including <strong>the</strong> rejection <strong>of</strong> much <strong>of</strong> Islamic law and<br />
<strong>the</strong> adoption <strong>of</strong> some Gnostic-style practices. That made<br />
<strong>the</strong> Ismailis less than popular, and so in <strong>the</strong> 11 th century<br />
one <strong>of</strong> <strong>the</strong>ir splinter groups established a chain <strong>of</strong> mountain<br />
fortresses scattered throughout <strong>the</strong> Middle East, where <strong>the</strong>y<br />
could more properly defend <strong>the</strong>mselves. <strong>The</strong> tactic <strong>the</strong>y are<br />
most well known for was assassination. Assassins killed<br />
quite a few leaders <strong>of</strong> <strong>the</strong> time, Moslem, Crusader and<br />
Mongol, <strong>the</strong> last including Genghis’ son Chagadai.<br />
When <strong>the</strong> <strong>Mongols</strong> attacked and destroyed <strong>the</strong> Ismaili<br />
stronghold <strong>of</strong> Alamut in 1256, <strong>the</strong>re was much rejoicing in<br />
<strong>the</strong> Islamic world, though it was short-lived as <strong>the</strong> <strong>Mongols</strong><br />
<strong>the</strong>n turned on <strong>the</strong> Caliphates. Interestingly, <strong>the</strong> assassins<br />
sent an envoy to appeal for help from <strong>the</strong> Europeans, though<br />
he was met with scorn.<br />
<strong>The</strong> origin <strong>of</strong> <strong>the</strong> word assassin is usually given as<br />
coming from Hashishin (Arabic Hashishiyun), meaning a<br />
user <strong>of</strong> hashish, under <strong>the</strong> influence <strong>of</strong> which <strong>the</strong> Ismailis<br />
supposedly conducted <strong>the</strong>ir campaigns <strong>of</strong> terror. <strong>The</strong>re is<br />
some dispute as to whe<strong>the</strong>r <strong>the</strong>y actually operated under<br />
<strong>the</strong> influence, though hashish was widely used at <strong>the</strong> time.<br />
One rumor was that, while on crusade, <strong>the</strong> Knights Templars<br />
learned forbidden secrets <strong>of</strong> eastern mysticism from <strong>the</strong><br />
Ismailis, something that later led to <strong>the</strong> persecution <strong>of</strong> <strong>the</strong><br />
Templars in Europe. While <strong>the</strong> <strong>Mongols</strong> had destroyed all<br />
<strong>of</strong> <strong>the</strong> assassin’s fortresses by <strong>the</strong> end <strong>of</strong> <strong>the</strong> 13 th century, <strong>the</strong><br />
Ismaili sect survived and still exists today, albeit in a more<br />
peaceful form.<br />
Japan<br />
Japan in <strong>the</strong> 13 th century was more or less under <strong>the</strong> control<br />
<strong>of</strong> <strong>the</strong> Hojo family Shogunate. “Shogun” translates roughly<br />
as “Supreme Barbarian Fighting General,” and fight <strong>the</strong><br />
barbarians <strong>the</strong> Japanese did, defeating two Mongol invasions<br />
in 1274 and 1281. <strong>The</strong> Japanese response to Mongol envoys<br />
demanding submission was to execute <strong>the</strong> ambassadors, a<br />
<strong>the</strong>n common on-<strong>the</strong>-job hazard for Mongolian diplomats<br />
and one which inevitably led to terrible follow-on invasions,<br />
though this time <strong>the</strong> defenders won <strong>the</strong> day.<br />
While <strong>the</strong> Japanese paid lip service to Confucian ideals,<br />
<strong>the</strong>re was no Chinese style central bureaucracy and army. At<br />
<strong>the</strong> top was <strong>the</strong> Shogun as supreme warlord. <strong>The</strong> mainstay<br />
<strong>of</strong> any army were <strong>the</strong> samurai (“one who serves”), feudal<br />
troops who owed allegiance to daimyos (barons). Levies <strong>of</strong><br />
peasant troops, usually poorly trained and armed, filled out<br />
<strong>the</strong> rank-and-file. <strong>The</strong>re’s some debate about <strong>the</strong> extent <strong>of</strong><br />
samurai organization. <strong>The</strong> general belief is in that period<br />
<strong>the</strong>y fought in bands under <strong>the</strong> leadership <strong>of</strong> <strong>the</strong>ir daimyos.<br />
<strong>The</strong> invasion scrolls, painted to commemorate <strong>the</strong> Japanese<br />
victory, show Japanese troops fighting in ordered ranks even<br />
though <strong>the</strong>re is little o<strong>the</strong>r evidence for regularly formed<br />
units. Regardless, <strong>the</strong> samurai were supremely trained,<br />
armed and motivated warriors. <strong>The</strong>y also had <strong>the</strong> advantage<br />
<strong>of</strong> fighting from fixed defenses that pinned in <strong>the</strong> invading<br />
army against <strong>the</strong> coast, negating <strong>the</strong> usual Mongol advantage<br />
in mobility.<br />
Europe and <strong>the</strong> Crusaders<br />
In <strong>the</strong>ory, <strong>the</strong> Holy Roman Emperor (usually a German)<br />
ruled all <strong>of</strong> Germany, Italy and adjoining regions. But <strong>the</strong> reality<br />
was Europe was divided into numerous warring entities; so no<br />
single grand army could be mustered. <strong>The</strong> Europeans relied on<br />
<strong>the</strong> feudal system to raise armies, with <strong>the</strong> nobility responsible<br />
for providing contingents <strong>of</strong> troops. <strong>The</strong>re was <strong>the</strong> occasional<br />
diet, or assembly, which had <strong>the</strong> power to vote funds to create an<br />
imperial army. But that rarely happened, since <strong>the</strong> nobility did<br />
not want to give <strong>the</strong> emperor any more power than he already<br />
possessed.<br />
One <strong>of</strong> <strong>the</strong> shortfalls created by <strong>the</strong> feudal system was troops<br />
were required to serve for only a limited time each year. While<br />
that worked in inter-European conflicts where everyone was<br />
playing by <strong>the</strong> same rules (more or less), it proved disastrous<br />
against <strong>the</strong> <strong>Mongols</strong> who campaigned year-round. <strong>The</strong> lack<br />
<strong>of</strong> unity extended to <strong>the</strong> battlefield, where armies might <strong>of</strong>ten<br />
be composed <strong>of</strong> several different contingents,not trained to<br />
maneuver and fight toge<strong>the</strong>r.<br />
<strong>The</strong> mainstay <strong>of</strong> European armies was <strong>the</strong> heavily armored<br />
cavalryman or knight. <strong>The</strong> knights were backed up by small<br />
numbers <strong>of</strong> pr<strong>of</strong>essional infantry, large numbers <strong>of</strong> peasant<br />
levies and, in <strong>the</strong> east, light cavalry auxiliaries. <strong>The</strong>re were<br />
town-based militias, some <strong>of</strong> which also proved effective in <strong>the</strong><br />
field. <strong>The</strong> military orders, such as <strong>the</strong> Teutonic Knights, Knights<br />
Hospitallars and Knights Templars, operated outside normal<br />
feudal arrangements and could take independent action, but<br />
<strong>the</strong>re never were enough <strong>of</strong> <strong>the</strong>m.<br />
<strong>The</strong> Europeans had considerable experience in dealing with<br />
eastern-style armies from <strong>the</strong> Crusades. Formations had been<br />
developed to counter horse archers and repel heavy cavalry<br />
attacks. So <strong>the</strong> disastrous defeats at Leignitz and Mohi are<br />
inexcusable. It is fascinating to speculate on <strong>the</strong> outcome <strong>of</strong> <strong>the</strong><br />
1241-42 campaign had not <strong>the</strong> <strong>Mongols</strong> turned back following<br />
<strong>the</strong> death <strong>of</strong> Ogedai. Perhaps <strong>the</strong> density <strong>of</strong> western European<br />
castles, forests and cultivated fields would have countered<br />
Mongol mobility.<br />
Castles and o<strong>the</strong>r fortifications were central to <strong>the</strong> European<br />
system. <strong>The</strong>y served not only as centers <strong>of</strong> defense, but political<br />
rallying points. This was especially true in <strong>the</strong> Crusader States.<br />
Those miniature kingdoms had been established by <strong>the</strong> Crusaders<br />
during <strong>the</strong> 12 th century in Palestine and Syria to hold <strong>the</strong> Holy<br />
Land against <strong>the</strong> Moslems. <strong>The</strong> survival <strong>of</strong> those states, located<br />
along a narrow strip on <strong>the</strong> eastern Mediterranean littoral, was<br />
precarious at best, and <strong>the</strong>ir defense was a careful balancing act<br />
combining military campaigns, diplomacy and treachery.<br />
One curious episode occurred when <strong>the</strong> Ilkhan Khan Hulegu<br />
launched his invasion <strong>of</strong> <strong>the</strong> Abbasid Caliphate in 1258. <strong>The</strong>re<br />
was no small rejoicing among <strong>the</strong> Crusader States, as well as <strong>the</strong><br />
numerous Christian communities scattered throughout Anatolia<br />
and <strong>the</strong> Caucasus. Encouraged by tales <strong>of</strong> Prester John and by<br />
Mongol religious tolerance, some <strong>of</strong> those communities even<br />
provided contingents <strong>of</strong> troops to fight alongside <strong>the</strong> Ilkhanate<br />
armies. Christians were present when <strong>the</strong> <strong>Mongols</strong> stormed<br />
such great Islamic cities as Baghdad and Damascus, converting<br />
mosques into churches. While it seemed Islam was going to be<br />
swept away and <strong>the</strong> Holy Land finally liberated, saner heads<br />
prevailed among Crusader state leaders. <strong>The</strong>y realized when<br />
<strong>the</strong> <strong>Mongols</strong> had finished with <strong>the</strong> Muslims, <strong>the</strong>y would no<br />
doubt turn on <strong>the</strong> Christian world. So <strong>the</strong> Crusaders agreed to<br />
a quiet alliance with <strong>the</strong> Mamluks as <strong>the</strong> latter launched <strong>the</strong><br />
counter<strong>of</strong>fensive that defeated <strong>the</strong> <strong>Mongols</strong> at Ain Jalut. For<br />
once, <strong>the</strong> enemies <strong>of</strong> <strong>the</strong> <strong>Mongols</strong> had united—and won.<br />
strategy & tactics 17
18 #229<br />
Somewhere in inner Asia: Mongol cavalry clashes with a foe.<br />
<strong>The</strong> inherent flaw to <strong>the</strong> Mongol system was it relied<br />
on a small ruling elite. That led to <strong>the</strong> usual problems<br />
<strong>of</strong> <strong>the</strong> elite being ei<strong>the</strong>r assimilated into <strong>the</strong> populace,<br />
and thus losing <strong>the</strong>ir unique Mongol characteristics,<br />
or maintaining <strong>the</strong>mselves separate and apart from <strong>the</strong><br />
ruled, becoming isolated and unable to deal with new<br />
foes.<br />
In <strong>the</strong> Great Khan’s Shadow<br />
<strong>The</strong> Golden Horde remained <strong>the</strong> chief power in<br />
eastern Europe well into <strong>the</strong> 14 th century. <strong>The</strong> <strong>Mongols</strong><br />
would establish Russian Prince Ivan in Moscow as <strong>the</strong>ir<br />
chief vassal, thus beginning that city’s rise to power.<br />
But Batu’s old khanate was disintegrating. Toktamish,<br />
khan <strong>of</strong> <strong>the</strong> White Horde (emerging around <strong>the</strong> Aral<br />
Sea in central Asia), made a bid for empire, sweeping<br />
westward into <strong>the</strong> Golden Horde and <strong>the</strong>n engaging<br />
in a disastrous war with Tamerlane’s new empire. <strong>The</strong><br />
devastation was too much for <strong>the</strong> khanates. In 1380,<br />
<strong>the</strong> Moscovites would defeat <strong>the</strong> <strong>Mongols</strong> at <strong>the</strong> Battle<br />
<strong>of</strong> Kulikovo, leading to a chain <strong>of</strong> events in which <strong>the</strong><br />
Russians finally destroyed <strong>the</strong> Golden Horde in 1502.<br />
Later in <strong>the</strong> 16 th century, Ivan IV, <strong>the</strong> “Terrible,” would<br />
sweep up <strong>the</strong> last remnants <strong>of</strong> Mongol Europe when he<br />
conquered Kazan.<br />
Still, <strong>the</strong>re was some life left in <strong>the</strong> <strong>Mongols</strong>. In<br />
1369, a Turkic tribesman by <strong>the</strong> name <strong>of</strong> Timur Lenk<br />
(or Tamerlane) seized control <strong>of</strong> <strong>the</strong> Chagadai khanate.<br />
Leading a coalition <strong>of</strong> steppe tribesman, he carved out<br />
an empire based in Persia and made a general nuisance<br />
<strong>of</strong> himself in <strong>the</strong> surrounding lands. Among o<strong>the</strong>r<br />
things, he defeated <strong>the</strong> armies <strong>of</strong> <strong>the</strong> Golden and White<br />
Hordes (1395), pillaged nor<strong>the</strong>rn India (1399), and<br />
invaded Syria and Anatolia (1400) before dying on his<br />
way to attack China (1405). With <strong>the</strong> <strong>Mongols</strong> fighting<br />
each o<strong>the</strong>r, <strong>the</strong> central political strength <strong>of</strong> Genghis<br />
Khan’s empire—unity—was lost. Upon his death,<br />
Tamerlane’s empire fell apart as warring factions vied<br />
for power and <strong>the</strong> loot.<br />
In 1356, an anti-Mongol revolt broke out in China,<br />
lead by Chu Yuan-Chang, a Buddhist monk. By that<br />
time, <strong>the</strong> Mongol overlords were divided among<br />
<strong>the</strong>mselves and unable to maintain order. After more<br />
than a decade <strong>of</strong> fighting, <strong>the</strong> rebels gained control <strong>of</strong><br />
<strong>the</strong> country, and in 1368 Chu Yuan-Chang proclaimed<br />
<strong>the</strong> Ming dynasty. <strong>The</strong> denouement came in 1388,<br />
when <strong>the</strong> Mings invaded once-impenetrable Mongolia<br />
and took Karakorum. And so <strong>the</strong> empire that had once<br />
spanned all <strong>of</strong> Eurasia faded into <strong>the</strong> tales told around<br />
<strong>the</strong> campfires <strong>of</strong> <strong>the</strong> steppes.
If you want to know more—try <strong>the</strong> issue game:<br />
KHAN: THE RISE OF THE MONGOL EMPIRE<br />
KHAN: THE RISE OF THE MONGOL EMPIRE, A.D. 1206 – 1295, is a wargame simulating <strong>the</strong> rise <strong>of</strong><br />
<strong>the</strong> <strong>Mongols</strong> from <strong>the</strong>ir origins as a minor nomadic tribe through <strong>the</strong>ir sweep across Eurasia, during which <strong>the</strong>y<br />
conquered <strong>the</strong> prominent empires <strong>of</strong> <strong>the</strong> age and established a vast realm that stretched from China to Russia and<br />
<strong>the</strong> Middle East. <strong>The</strong> game has several scenarios, representing <strong>the</strong> initial Mongol explosion out <strong>of</strong> Central Asia,<br />
<strong>the</strong> later campaigns <strong>of</strong> consolidation in <strong>the</strong> era <strong>of</strong> Kublai Khan, and a grand scenario representing <strong>the</strong> entire era.<br />
KHAN is a two-player game. <strong>The</strong> Mongol player controls <strong>the</strong> forces <strong>of</strong> <strong>the</strong> <strong>Mongols</strong> <strong>the</strong>mselves, as well<br />
as <strong>the</strong>ir various subject peoples. <strong>The</strong> Kingdoms player controls various independent states and rebels who are<br />
opposed to <strong>the</strong> <strong>Mongols</strong>. <strong>The</strong> Mongol player, representing a single, centralized empire, has more direct control<br />
over his forces. <strong>The</strong> Kingdoms player, representing a range <strong>of</strong> sometimes competing powers, will find <strong>the</strong> game<br />
system causes various subordinate forces to enter and exit from his control at different times. Both player’s forces<br />
are represented by military units and stratagem markers. Players must use a combination <strong>of</strong> military strength and<br />
cunning strategy to expand <strong>the</strong>ir power or defend <strong>the</strong>ir independence.<br />
Each game turn represents five years. Each hex is approximately 100 miles across. Each military unit represents<br />
10,000 – 100,000 troops, plus pack animals, camp followers, bureaucrats, etc. Each leader represents a single<br />
great person or cadre <strong>of</strong> generals and <strong>of</strong>ficials, plus an elite bodyguard.<br />
To purchase <strong>the</strong> game that covers <strong>the</strong> battles featured<br />
in this issue send your name and address along with:<br />
$22 US Customers<br />
$25 Canadian Customers<br />
$28 Overseas Customers<br />
All prices include postage for first class or airmail<br />
shipping. CA residents add ($1.09) sales tax.<br />
Send to:<br />
Decision Games<br />
ATTN: S&T Game Offer<br />
PO Box 21598<br />
Bakersfield CA 93390<br />
strategy & tactics 19
Allied ships are in bold.<br />
<strong>The</strong> Baltic<br />
Strategic Background<br />
<strong>The</strong> Baltic Sea was a more complex front in World<br />
War I than is generally appreciated. <strong>The</strong>re were major<br />
geographic considerations that affected activities for both<br />
<strong>the</strong> Allies and Central Powers. Oddly enough, both sides felt<br />
<strong>the</strong>y were <strong>the</strong> inferior force. Overall <strong>the</strong> Imperial German<br />
Navy was vastly superior to <strong>the</strong> Russian fleet in 1914. But<br />
Germany’s attention was on <strong>the</strong> North Sea with <strong>the</strong> Royal<br />
Navy as <strong>the</strong> main adversary. <strong>The</strong> Baltic had a low priority,<br />
and German naval forces <strong>the</strong>re were actually weak. <strong>The</strong><br />
Germans could, however, quickly transfer ships from <strong>the</strong><br />
North Sea in an emergency. Thus, while <strong>the</strong> Russians had<br />
local superiority, <strong>the</strong>y knew if <strong>the</strong>y ever became a threat<br />
<strong>the</strong> Germans could bring in reinforcements.<br />
20 #229<br />
<strong>The</strong> Russian Navy in World War I<br />
By Steve Thomas<br />
<strong>The</strong> Goeben and Breslau on patrol.<br />
<strong>The</strong> Russians operated under a number <strong>of</strong><br />
constraints. <strong>The</strong>ir major fear was <strong>of</strong> an invasion that<br />
would threaten St Petersburg, Russia’s capital. <strong>The</strong><br />
position <strong>of</strong> Sweden also had to be considered, as <strong>the</strong>re<br />
was a serious concern it might abandon its neutrality<br />
and side with Germany. So <strong>the</strong> Russians had to tread<br />
cautiously in <strong>the</strong> north to avoid provoking Stockholm.<br />
Finally, <strong>the</strong> Japanese naval victory at Tsushima in<br />
1905, where a Russian fleet had been destroyed, was<br />
a shattering blow to <strong>the</strong> Tsar’s navy and <strong>the</strong> fleet high<br />
command was not prepared to risk ano<strong>the</strong>r such loss.<br />
So Russian naval strategy was primarily defensive.<br />
Accordingly <strong>the</strong> Russians built a network <strong>of</strong> protective<br />
minefields in <strong>the</strong> Gulf <strong>of</strong> Finland, supplemented by<br />
shore batteries, and waited.
Operations<br />
At <strong>the</strong> start <strong>of</strong> <strong>the</strong> Great War <strong>the</strong> Germans mined<br />
parts <strong>of</strong> <strong>the</strong> Kattegat to prevent Allied ships from<br />
sailing into <strong>the</strong> Baltic. Meanwhile, <strong>the</strong> Danes and<br />
Swedes, concerned over <strong>the</strong>ir neutrality, mined<br />
o<strong>the</strong>r sections <strong>of</strong> <strong>the</strong> Baltic. Fairly soon <strong>the</strong> sea<br />
channels became virtually impassable for Allied<br />
surface ships, though <strong>the</strong> British were able to slip in<br />
a few submarines.<br />
<strong>The</strong> Russian commander in <strong>the</strong> Baltic, Adm.<br />
Essen, did his best to pursue an aggressive naval<br />
policy. Given <strong>the</strong> relatively low number <strong>of</strong> ships<br />
available, he had a limited capacity to exercise<br />
control <strong>of</strong> <strong>the</strong> sea. <strong>The</strong> Germans were faced with<br />
<strong>the</strong> same problem. Missions on both sides were<br />
mainly minelaying, convoy raiding and shore<br />
bombardment, punctuated by <strong>the</strong> occasional surface<br />
engagement between a few cruisers and destroyers.<br />
Generally damage was light in those clashes, but<br />
overall <strong>the</strong> Russians were getting <strong>the</strong> better <strong>of</strong> <strong>the</strong><br />
encounters as 1914 closed.<br />
<strong>The</strong> Germans responded by bringing some <strong>of</strong><br />
<strong>the</strong>ir capital ships into <strong>the</strong> Baltic. A major push”came<br />
in August 1915, when <strong>the</strong> Germans dispatched 11<br />
dreadnoughts into <strong>the</strong> Gulf <strong>of</strong> Riga along with <strong>the</strong><br />
usual support ships. It took <strong>the</strong>m several days to<br />
clear <strong>the</strong> minefields covering <strong>the</strong> entrance to <strong>the</strong><br />
gulf. Poor wea<strong>the</strong>r and repeated Russian minelaying<br />
compelled <strong>the</strong> Germans to withdraw. And, as <strong>the</strong>y<br />
did, a British submarine torpedoed and damaged<br />
<strong>the</strong> Moltke.<br />
Despite this dramatic turn <strong>of</strong> events, <strong>the</strong> Russians<br />
failed to exploit <strong>the</strong> situation. Adm. Essen died in<br />
1915 and his successor, Adm. Kanin, lacked drive<br />
and was in turn replaced by <strong>the</strong> more energetic<br />
Adm. Nepenin <strong>the</strong> following year.<br />
Under Baltic Seas<br />
At <strong>the</strong> start <strong>of</strong> <strong>the</strong> war <strong>the</strong> Russians had 11<br />
submarines in <strong>the</strong> Baltic. Subsequently ano<strong>the</strong>r 23<br />
were completed, but many arrived too late to be <strong>of</strong><br />
use. That did not matter much, as <strong>the</strong>y were all <strong>of</strong><br />
inferior design and achieved little.<br />
<strong>The</strong> British managed to get two E-class<br />
submarines through <strong>the</strong> Kattegat in October 1914.<br />
<strong>The</strong> whole affair was amateurish, and <strong>the</strong> Royal<br />
Navy did not even bo<strong>the</strong>r to tell <strong>the</strong> Russians <strong>the</strong><br />
submarines were coming. Four more subs made <strong>the</strong><br />
difficult journey in <strong>the</strong> autumn <strong>of</strong> 1915, one being<br />
sunk in transit. In July 1916 <strong>the</strong> British also sent<br />
four small C-class submarines to <strong>the</strong> White Sea<br />
port <strong>of</strong> Archangel. From <strong>the</strong>re <strong>the</strong>y were shipped on<br />
barges by canal to <strong>the</strong> Baltic, arriving in September.<br />
When eventually put into service, <strong>the</strong>y were too<br />
old and small to be <strong>of</strong> much use, but <strong>the</strong>ir presence<br />
caused <strong>the</strong> Germans concern.<br />
<strong>The</strong> latter half <strong>of</strong> 1915 was <strong>the</strong> high point for <strong>the</strong><br />
undersea warriors. In October 1915 <strong>the</strong> British E-8<br />
torpedoed <strong>the</strong> cruiser Prinz Adalbert <strong>of</strong>f Libau. Prinz<br />
Adalbert’s magazines blew up and virtually all her crew<br />
were lost. <strong>The</strong> following month E-19 torpedoed <strong>the</strong><br />
light cruiser Undine in <strong>the</strong> western Baltic. In addition,<br />
14 merchant ships were sunk enroute from Sweden to<br />
Germany.<br />
While those sinkings represented only a small fraction<br />
<strong>of</strong> <strong>the</strong> fleet, <strong>the</strong> effect <strong>of</strong> <strong>the</strong>ir loss was significant. <strong>The</strong><br />
Germans suspended shipping and transferred destroyers<br />
from <strong>the</strong> High Seas Fleet to provide escorts. Cruisers and<br />
destroyers were sent out on anti-submarine patrols, which<br />
proved fairly useless, it being difficult to find and destroy<br />
submarines given <strong>the</strong> level <strong>of</strong> technology. Some naval<br />
staff <strong>of</strong>ficers sensibly suggested sailing merchant vessels<br />
in convoys, but that option was resisted because it would<br />
disrupt shipping schedules. In <strong>the</strong> end, it was <strong>the</strong> Swedes<br />
who took <strong>the</strong> lead by running <strong>the</strong>ir own ships in convoys<br />
for mutual protection. With that example, <strong>the</strong> Germans<br />
switched to running <strong>the</strong>ir merchant ships in convoys as<br />
well. As a result, shipping losses dropped.<br />
<strong>The</strong> Germans deployed some U-boats into <strong>the</strong> Baltic,<br />
but <strong>the</strong>ir only real success came in October 1914.<br />
strategy & tactics 21
22 #229<br />
While patrolling <strong>the</strong> mouth <strong>of</strong> <strong>the</strong> Gulf <strong>of</strong> Riga, U-26<br />
torpedoed <strong>the</strong> Russian armored cruiser Pallada. Her<br />
magazines blew up and she sank with no survivors.<br />
In 1916, <strong>the</strong> Russians used <strong>the</strong>ir surface ships to<br />
raid German merchant shipping. But that effort was<br />
hampered by <strong>the</strong> fact <strong>the</strong> merchant ships could spend<br />
most <strong>of</strong> <strong>the</strong> trip in Swedish waters, where <strong>the</strong> Russians<br />
could not operate without violating neutrality.<br />
Things started to fall apart for <strong>the</strong> Russian Navy<br />
in March 1917 as <strong>the</strong> revolution swept <strong>the</strong> Czar from<br />
power. Nepenin never got a chance to achieve much as<br />
he became a casualty, being killed in March. Morale<br />
among Russian sailors collapsed, and most <strong>of</strong> <strong>the</strong> fleet<br />
became useless as sailors’ committees concentrated on<br />
politics and not fighting.<br />
Operation Albion<br />
<strong>The</strong> collapse <strong>of</strong> <strong>the</strong> Russian army in 1917 brought<br />
about <strong>the</strong> biggest single naval action <strong>of</strong> <strong>the</strong> Baltic<br />
war. <strong>The</strong> German capture <strong>of</strong> Riga in September gave<br />
<strong>the</strong> Kaiser a real incentive to open <strong>the</strong> Gulf <strong>of</strong> Riga<br />
to shipping, as that port would allow resupply for<br />
army units in northwest Russia. So in October 1917<br />
<strong>the</strong> German Navy launched Operation Albion. Aside<br />
from <strong>the</strong> military considerations, <strong>the</strong> German High<br />
Command needed to give <strong>the</strong> increasingly restive<br />
fleet something to do. Years <strong>of</strong> inaction as well as<br />
revolutionary agitation, were undermining <strong>the</strong> morale<br />
<strong>of</strong> <strong>the</strong> sailors. Eleven battleships with auxiliaries were<br />
detached to support <strong>the</strong> landings.<br />
<strong>The</strong> Russians realized <strong>the</strong> strategic importance<br />
<strong>of</strong> <strong>the</strong> islands, so <strong>the</strong>y defended <strong>the</strong>m with a large<br />
garrison, minefields and shore batteries. Several<br />
German ships ran aground during <strong>the</strong> operation due<br />
to <strong>the</strong> tricky currents, narrow channels and shallow<br />
waters along <strong>the</strong> approach route. <strong>The</strong> Germans also<br />
found it difficult to clear <strong>the</strong> minefields covering <strong>the</strong><br />
north <strong>of</strong> Osel Island. While moving to bombard <strong>the</strong><br />
shore batteries, two battleships, Bayern and Grosser<br />
Kurfurst, struck mines and were damaged, <strong>the</strong> former<br />
severely. Despite all that, <strong>the</strong> German warships carried<br />
out <strong>the</strong> bombardment and <strong>the</strong> transports moved in with<br />
assault troops.<br />
<strong>The</strong> initial landings on 12 October at Tagga Bay<br />
met little resistance. To cut <strong>of</strong>f <strong>the</strong> islands <strong>the</strong> Germans<br />
also needed to control <strong>the</strong> approaches from <strong>the</strong> Gulf<br />
<strong>of</strong> Finland. German light ships tried to force <strong>the</strong>ir way<br />
through <strong>the</strong> shallow Soela Sound between Dago and<br />
Osel Islands into Moon Sound. Over <strong>the</strong> next few days<br />
<strong>the</strong>re was a series <strong>of</strong> skirmishes between destroyers<br />
and torpedo boats. <strong>The</strong> Russians bought up <strong>the</strong> predreadnoughts<br />
Slava and Grazhdanin, plus some<br />
cruisers, but were unable to drive back <strong>the</strong> Germans.<br />
Meanwhile, German minesweepers spent several<br />
days clearing a passage through <strong>the</strong> Irben Straits.<br />
Again, several battleships were needed to suppress <strong>the</strong><br />
Russian shore batteries covering <strong>the</strong> minefields. After<br />
three days <strong>the</strong> Germans broke through into <strong>the</strong> gulf.<br />
Those ships <strong>the</strong>n attempted to clear <strong>the</strong> channel north<br />
from <strong>the</strong> Gulf into Moon Sound, with minesweepers<br />
having to move under fire from <strong>the</strong> Slava. <strong>The</strong>y were<br />
supported by Koenig and Kronprinz, and those two<br />
dreadnoughts should easily have been able to neutralize<br />
<strong>the</strong> Slava. Much to <strong>the</strong> Germans’ surprise, <strong>the</strong> old<br />
Slava’s guns outranged <strong>the</strong>ir own. Braving incoming<br />
shells, <strong>the</strong> minesweepers pushed forward clearing a<br />
channel. <strong>The</strong> Koenig and Kronprinz managed to close<br />
into range and scored several hits on <strong>the</strong> Slava. On fire<br />
and listing, <strong>the</strong> Russian pre-dreadnought was scuttled<br />
in an attempt to block <strong>the</strong> channel.<br />
Faced with even more minefields, <strong>the</strong> Germans<br />
decided not to push <strong>the</strong>ir ships into fur<strong>the</strong>r danger.<br />
By that stage <strong>of</strong> <strong>the</strong> operation, <strong>the</strong>y had achieved<br />
<strong>the</strong>ir objectives anyway. <strong>The</strong> demoralized Russian<br />
defenders crumpled with hardly a fight, most <strong>of</strong> <strong>the</strong><br />
troops being evacuated. By <strong>the</strong> 20 th <strong>the</strong> Germans had<br />
occupied all <strong>the</strong> islands.<br />
Overall, Operation Albion had been a strategic<br />
success for Germany. <strong>The</strong> loss <strong>of</strong> <strong>the</strong> islands opened<br />
up a large section <strong>of</strong> <strong>the</strong> Russian coast to invasion;<br />
however, <strong>the</strong> battleship Markgraf was damaged by a<br />
mine on its way back to port<br />
After Operation Albion, significant naval<br />
operations ceased in <strong>the</strong> Baltic. <strong>The</strong> Russians still<br />
held behind Petrograd’s defenses, and <strong>the</strong> Germans<br />
had little incentive to risk more <strong>of</strong> <strong>the</strong>ir strength. With<br />
<strong>the</strong> Russian collapse in March 1918, <strong>the</strong> Baltic was<br />
secure for Berlin, and <strong>the</strong> only activity was a German<br />
operation to occupy several strategic points in <strong>the</strong> Gulf<br />
<strong>of</strong> Finland during April 1918.<br />
<strong>The</strong> Black Sea<br />
Background<br />
Because <strong>of</strong> <strong>the</strong> aura surrounding <strong>the</strong> German<br />
battlecruiser Goeben and <strong>the</strong> epic <strong>of</strong> its escape to<br />
Constantinople (Istanbul) at <strong>the</strong> outbreak <strong>of</strong> <strong>the</strong> war in<br />
1914, <strong>the</strong>re is <strong>of</strong>ten an assumption <strong>the</strong> Central Powers<br />
dominated <strong>the</strong> Black Sea. <strong>The</strong> Goeben certainly was<br />
important, but <strong>the</strong> reality was <strong>the</strong> Russians had <strong>the</strong><br />
upper hand <strong>the</strong>re—and exploited <strong>the</strong>ir advantage.<br />
Turkish entry into World War I is a complex and<br />
<strong>of</strong>ten misunderstood topic. <strong>The</strong> main factor was <strong>the</strong><br />
Ottoman government decided to back <strong>the</strong> seeming<br />
winners, when <strong>the</strong>y saw <strong>the</strong>ir traditional enemy Russia<br />
being beaten by Central Powers’ armies in <strong>the</strong> east<br />
front battles <strong>of</strong> 1914. It was <strong>the</strong> German-led Turkish<br />
navy that opened hostilities for Constantinople, with a<br />
surprise attack on <strong>the</strong> Russians on 29 th October.<br />
Turkish ships laid mines at key ports, including <strong>the</strong><br />
main Russian naval base at Sevastopol. <strong>The</strong> German<br />
light cruiser Breslau, two old Turkish cruisers and<br />
some destroyers, attacked Russian shipping and shelled<br />
harbor installations. Goeben led a major attack on <strong>the</strong><br />
harbor at Sevastopol with a dawn bombardment. <strong>The</strong><br />
intention was presumably to draw out <strong>the</strong> Russian fleet<br />
into <strong>the</strong> minefields. Instead; <strong>the</strong> Goeben took three
<strong>The</strong> Navies<br />
At <strong>the</strong> higher levels <strong>of</strong> command <strong>the</strong> Russians <strong>of</strong>ten had<br />
second-rate leadership, factional infighting, and indecisive<br />
strategies. <strong>The</strong> navy suffered because Russian leaders<br />
always saw fleet operations as secondary to those on land.<br />
Grand Duke Nikolai, supreme commander <strong>of</strong> <strong>the</strong> Russian<br />
forces, did not think much <strong>of</strong> <strong>the</strong> navy and downgraded<br />
its representation at Stavka, <strong>the</strong> Russian supreme military<br />
staff.<br />
Too much attention was given to building new ships and<br />
not enough effort was put into training <strong>the</strong> <strong>of</strong>ficers and men<br />
to crew <strong>the</strong>m. <strong>The</strong> ordinary sailors were treated appallingly.<br />
Discipline was harsh and living conditions were miserable.<br />
Little was done to keep up morale, particularly during <strong>the</strong><br />
long Baltic winters. British submarine crew who served in<br />
<strong>the</strong> Baltic were amazed at <strong>the</strong> harsh treatment endured by <strong>the</strong><br />
Russian sailors.<br />
Still, <strong>the</strong> Russians had some good fleet commanders<br />
who performed well and to a large degree overcame <strong>the</strong><br />
deficiencies. And <strong>the</strong> Russian navy was also fairly efficient in<br />
a number <strong>of</strong> areas. Signals intelligence was good. On several<br />
occasions signal interception gave <strong>the</strong>m an advantage and<br />
enabled <strong>the</strong>m to engage or avoid German forces in <strong>the</strong> Baltic<br />
at will. Gunnery control was also sophisticated, particularly<br />
in <strong>the</strong> use <strong>of</strong> radio to coordinate fires.<br />
<strong>The</strong> Russian Baltic Fleet was not particularly powerful,<br />
but had local superiority for much <strong>of</strong> <strong>the</strong> war. <strong>The</strong>re were a<br />
few pre-dreadnoughts and a collection <strong>of</strong> older cruisers and<br />
destroyers. A building program was underway during <strong>the</strong><br />
war, and <strong>the</strong> Russians turned out four powerful dreadnoughts<br />
and several good destroyers.<br />
<strong>The</strong> balance <strong>of</strong> power was initially fairly even in <strong>the</strong><br />
Black Sea, as nei<strong>the</strong>r side really had <strong>the</strong> strength to dominate<br />
<strong>the</strong>re. As <strong>the</strong> war progressed, however, <strong>the</strong> Russian building<br />
program gave <strong>the</strong>m a navy that tipped <strong>the</strong> balance <strong>of</strong> power.<br />
<strong>The</strong> Turks had two old pre-dreadnoughts battleships that<br />
were virtually useless for operations. <strong>The</strong>se ships spent most<br />
<strong>of</strong> <strong>the</strong> war in <strong>the</strong> Dardanelles. In <strong>the</strong> Black Sea <strong>the</strong> Turks could<br />
deploy a motley collection <strong>of</strong> old cruisers and destroyers.<br />
Crews were poorly trained, <strong>of</strong>ficers ineffective, and in some<br />
cases <strong>the</strong> ships did not have all <strong>of</strong> <strong>the</strong>ir guns. <strong>The</strong> Turks’<br />
strength lay in <strong>the</strong> Goeben, a German battlecruiser faster,<br />
better gunned and more heavily armored than anything <strong>the</strong><br />
Russians had.<br />
In August 1914 <strong>the</strong> Goeben and light cruiser Breslau,<br />
under command <strong>of</strong> Adm. Souchon, had arrived in <strong>the</strong><br />
Bosphorus. In <strong>the</strong>ory, <strong>the</strong> Goeben and <strong>the</strong> Breslau were<br />
transferred to <strong>the</strong> Turkish navy. <strong>The</strong> two ships retained <strong>the</strong>ir<br />
German crews and <strong>the</strong>ir sailors continued to refer to <strong>the</strong><br />
ships by <strong>the</strong>ir German names. Adm. Souchon was attached<br />
to <strong>the</strong> Turkish Navy and became its commander, but he took<br />
his orders from both Berlin and Constantinople.<br />
<strong>The</strong> Russians only had five pre-dreadnoughts in <strong>the</strong> Black<br />
Sea, which individually were no match for Goeben. But as<br />
a combined force <strong>the</strong>y could fight something <strong>of</strong> an equal<br />
battle. Most <strong>of</strong> <strong>the</strong> lighter Russians ships, while old, were in<br />
better condition than <strong>the</strong>ir Turkish counterparts. <strong>The</strong> Russian<br />
crews were also better trained than <strong>the</strong>ir Turkish counterparts.<br />
<strong>The</strong> Russian navy’s strong point was its advanced building<br />
program, which included three powerful dreadnoughts in <strong>the</strong><br />
works for <strong>the</strong> Black Sea. <strong>The</strong> Russians also had fast, modern<br />
destroyers and some good submarines.<br />
<strong>The</strong> Baltic<br />
<strong>The</strong>re is only one sea entrance to <strong>the</strong> Baltic, and that’s<br />
through <strong>the</strong> Kattegat between Denmark and Sweden. That<br />
strait was within range <strong>of</strong> <strong>the</strong> German High Seas Fleet;<br />
as well as being <strong>the</strong> site <strong>of</strong> extensive minefields, <strong>the</strong>se<br />
effectively made it impossible any for Allied surface ships<br />
to get in or out <strong>of</strong> <strong>the</strong> Baltic. A fur<strong>the</strong>r complication was<br />
<strong>the</strong> wea<strong>the</strong>r. Even in summer, conditions were rarely good.<br />
During winter <strong>the</strong> wea<strong>the</strong>r was atrocious, with most nor<strong>the</strong>rn<br />
ports closed by ice. Russian crews particularly were crowded<br />
toge<strong>the</strong>r for long months <strong>of</strong> inactivity and boredom. Those<br />
conditions proved to be ideal breeding grounds for sedition.<br />
<strong>The</strong> sailors <strong>of</strong> <strong>the</strong> Russian Baltic Fleet were some <strong>of</strong> <strong>the</strong> first<br />
to mutiny in 1917.<br />
<strong>The</strong> Baltic has numerous islands, particularly along <strong>the</strong><br />
Swedish coast. Large sections are shallow and not suitable<br />
for navigation by big ships. <strong>The</strong> shallow waters and difficult<br />
wea<strong>the</strong>r led to high number <strong>of</strong> ships running aground, which<br />
had interesting implications. On 26 August, Magdeburg ran<br />
aground <strong>of</strong>f <strong>the</strong> Estonian coast. In an attempt to prevent her<br />
from being captured by <strong>the</strong> Russians, <strong>the</strong> Germans blew up<br />
<strong>the</strong> ship’s forward magazine. A Russian force later boarded<br />
and searched <strong>the</strong> wreck. Amazingly <strong>the</strong>y found <strong>the</strong> secret<br />
German naval code books. <strong>The</strong>se were passed to <strong>the</strong> British<br />
and enabled <strong>the</strong> Royal Navy to gain a major intelligence<br />
advantage.<br />
<strong>The</strong> Black Sea<br />
Conditions in <strong>the</strong> Black Sea were far better, a large,<br />
generally deep sea with good wea<strong>the</strong>r for most <strong>of</strong> <strong>the</strong> year.<br />
Again, <strong>the</strong>re is only one passage through to <strong>the</strong> outside—<strong>the</strong><br />
Bosphorus—and that was controlled by Turkey. <strong>The</strong> Allies<br />
conducted a major amphibious operation at Gallipoli in<br />
1915 to attempt to force <strong>the</strong> strait, but it was repulsed by <strong>the</strong><br />
Turks. No Allied ships could get in to help <strong>the</strong> Russians but,<br />
at <strong>the</strong> same time, due to Allied control <strong>of</strong> <strong>the</strong> Mediterranean,<br />
no German ships o<strong>the</strong>r than submarines could get in to help<br />
Turkey. <strong>The</strong> Bosphorus did make a safe refuge for Turkish<br />
and Germans ships but, on <strong>the</strong> o<strong>the</strong>r hand, it made it easier<br />
for <strong>the</strong>m to be bottled up with minefields.<br />
Minelaying<br />
Mines, while an <strong>of</strong>ten unsung weapons system, were widely used in<br />
<strong>the</strong> Baltic both defensively and <strong>of</strong>fensively. <strong>The</strong>y inflicted some damage<br />
on both sides’ light shipping, including destroyers. <strong>The</strong> Germans lost <strong>the</strong><br />
armored cruiser Friederich Carl in a minefield <strong>of</strong>f Pillau in November<br />
1914, and in December 1915 <strong>the</strong> light cruiser Bremen was sunk by mines<br />
<strong>of</strong>f Windau. A fur<strong>the</strong>r three German cruisers were damaged that way<br />
during <strong>the</strong> war.<br />
A German destroyer raid in <strong>the</strong> Gulf <strong>of</strong> Finland turned into a disaster in<br />
November 1916. A squadron <strong>of</strong> 11 destroyers ran into a minefield and two<br />
were sunk. <strong>The</strong> destroyers pushed on to execute a shore bombardment. On<br />
<strong>the</strong>ir return <strong>the</strong>y ran into <strong>the</strong> minefields again and a fur<strong>the</strong>r five were lost.<br />
<strong>The</strong> loss <strong>of</strong> seven modern destroyers to a relatively low pr<strong>of</strong>ile weapons<br />
system—<strong>the</strong> mine—was remarkable.<br />
strategy & tactics 23
24 #229<br />
hits from Russian shore batteries and had to fight <strong>of</strong>f<br />
aggressive Russian torpedo boats.<br />
<strong>The</strong> attack on Sevastopol achieved little <strong>of</strong> real<br />
value. A few transports, a gunboat and a minelayer<br />
were sunk, and <strong>the</strong>re was damage to some shore<br />
installations, but it was just <strong>the</strong> beginning <strong>of</strong> <strong>the</strong> naval<br />
war.<br />
Russian Response<br />
In <strong>the</strong> early stages <strong>of</strong> <strong>the</strong> war <strong>the</strong> Russian high<br />
command was concerned about <strong>the</strong> Turks landing<br />
around <strong>the</strong> vital Black Sea port <strong>of</strong> Odessa. It is doubtful<br />
<strong>the</strong> Central Powers could have seized Odessa, but<br />
Petrograd pressured <strong>the</strong> Russian commander in <strong>the</strong><br />
Black Sea, Adm. Ebergard, to act cautiously. That was<br />
a shortsighted policy, as <strong>the</strong> Russian pre-dreadnoughts<br />
were only effective if <strong>the</strong>y concentrated for striking<br />
a major blow on <strong>the</strong> <strong>of</strong>fensive. Dispersed to defend<br />
different harbors along <strong>the</strong> littoral, <strong>the</strong>y would have<br />
been easy targets had <strong>the</strong> Goeben led <strong>the</strong> Turkish<br />
navy on a sweep <strong>of</strong> <strong>the</strong> Black Sea. Ebergard thought<br />
<strong>the</strong> better option was to pressure <strong>the</strong> Turks, and his<br />
objective was to blockade <strong>the</strong> Bosphorus and cut<br />
Turkish sea communications.<br />
<strong>The</strong> Russians, however, did not have <strong>the</strong> resources<br />
for a permanent blockade <strong>of</strong> <strong>the</strong> Turkish coast. <strong>The</strong><br />
pre-dreadnoughts had a limited range <strong>of</strong> operations,<br />
only being able to remain at sea for about four<br />
days. It would take <strong>the</strong>m a day to get to <strong>the</strong> Turkish<br />
coast, which meant only two days on blockade duty.<br />
Ebergard’s plan was <strong>the</strong>refore to establish minefields<br />
at key points.<br />
<strong>The</strong> Battle <strong>of</strong> Cape Sarych<br />
On 17 November, Ebergard was at sea with his<br />
five pre-dreadnoughts, shelling <strong>the</strong> port <strong>of</strong> Trebizond.<br />
Goeben sailed, hoping to pick <strong>of</strong>f isolated Russian<br />
ships as <strong>the</strong>y were returning to <strong>the</strong> Crimea. Instead,<br />
on <strong>the</strong> 18 th , she encountered <strong>the</strong> squadron <strong>of</strong>f Cape<br />
Sarych. Visibility was poor, and when <strong>the</strong> Russian<br />
flagship Evstafi, leading <strong>the</strong> line, finally spotted <strong>the</strong><br />
Goeben <strong>the</strong>y were only 8,000 yards apart. None <strong>of</strong><br />
<strong>the</strong> ships following could spot <strong>the</strong> target, and finally<br />
Evstafi opened fire on her own.<br />
It came down to a brief skirmish between <strong>the</strong> Goeben<br />
and <strong>the</strong> Evstafi. <strong>The</strong> Goeben was hit at least once,<br />
probably from Evstafi’s first salvo. That hit knocked<br />
out a port secondary gun and started an ammunition
fire that caused a magazine to flood. Goeben altered<br />
course and steamed away at full speed. Evstafi took<br />
four hits but was not seriously damaged<br />
Russia on <strong>the</strong> Offensive<br />
In December <strong>the</strong> Russians launched naval<br />
operations against both <strong>the</strong> Bosphorus and Songuldak.<br />
Extensive minelaying took place <strong>of</strong>f <strong>the</strong> former, and<br />
<strong>the</strong>y attempted to block <strong>the</strong> harbor <strong>of</strong> <strong>the</strong> latter with<br />
four old ships. Breslau was on patrol and, learning <strong>of</strong><br />
<strong>the</strong> raid, moved to intercept. Two <strong>of</strong> <strong>the</strong> Russian ships<br />
were sunk and <strong>the</strong> o<strong>the</strong>rs were scuttled.<br />
Goeben had led a lucky life so far, but that was about<br />
to change. She was also out at sea and returning to <strong>the</strong><br />
Bosphorus when she hit two mines on 26 December.<br />
Damage was considerable and <strong>the</strong> ship spent three<br />
months undergoing repairs, which was not helped by<br />
<strong>the</strong> absence <strong>of</strong> a suitable dry dock. Engineers were sent<br />
from Germany to facilitate <strong>the</strong> repairs, filling breaches<br />
in <strong>the</strong> hull with concrete.<br />
1915 also saw two Russian seaplane carriers in<br />
action. While relatively ineffectual as attack aircraft,<br />
<strong>the</strong> seaplanes proved useful for reconnaissance. In<br />
response to <strong>the</strong> increased Russian aggressiveness,<br />
<strong>the</strong> Germans and Turks launched a major raid on<br />
Russian shipping. <strong>The</strong> raid backfired, as <strong>the</strong> old cruiser<br />
Medjidieh hit a mine <strong>of</strong>f Odessa and was sunk. <strong>The</strong><br />
Russians actually managed to salvage that ship and put<br />
it back into service in October as <strong>the</strong> Prut.<br />
In February 1915 <strong>the</strong> British and French launched<br />
<strong>the</strong>ir operation against Gallipoli. <strong>The</strong> Allied objective<br />
was to force <strong>the</strong> Bosphorus, make an amphibious<br />
landing outside <strong>the</strong> Ottoman capital, and <strong>the</strong>n seize<br />
Constantinople. Unfortunately for <strong>the</strong> Allies, <strong>the</strong><br />
operation quickly bogged down as Turkish resistance<br />
stiffened. Throughout April and May 1915, <strong>the</strong><br />
Russians raided <strong>the</strong> area around <strong>the</strong> Bosphorus in<br />
support <strong>of</strong> <strong>the</strong> operation.<br />
Goeben came out again on 9 May to try to pick<br />
<strong>of</strong>f isolated ships, and on <strong>the</strong> 10 th nearly caught two<br />
pre-dreadnoughts, two seaplane carriers and some<br />
light ships that were engaged in bombardment<br />
<strong>The</strong> Imperatritsa Mariia battle ship.<br />
operations. But <strong>the</strong> German ship was spotted by a<br />
screening cruiser, and <strong>the</strong> Russians concentrated two<br />
pre-dreadnoughts against her. <strong>The</strong> Goeben ought to<br />
have had <strong>the</strong> upper hand, but German gunnery did<br />
not live up to its reputation and, amazingly, failed to<br />
score a single hit on <strong>the</strong> Russian ships, despite ideal<br />
conditions. With considerable skill, Ebergard brought<br />
two more pre-dreadnoughts to bear, and <strong>the</strong> Goeben<br />
took several more hits before fleeing.<br />
In October 1915, <strong>the</strong> Russians brought into service<br />
<strong>the</strong> first <strong>of</strong> <strong>the</strong>ir eagerly awaited modern battleships,<br />
followed three months later by a second. Each was a<br />
match for <strong>the</strong> Goeben, well armored and with heavy<br />
firepower. <strong>The</strong> Goeben’s only advantage was her<br />
superior speed, which gave her <strong>the</strong> opportunity to<br />
avoid combat. <strong>The</strong> Russians now formed two battle<br />
groups, one around each <strong>of</strong> <strong>the</strong> new battleships and a<br />
third based on <strong>the</strong> pre-dreadnoughts. <strong>The</strong> balance was<br />
turning.<br />
<strong>The</strong> Shipping War<br />
Sea transport in <strong>the</strong> Black Sea was important for <strong>the</strong><br />
Turks due to <strong>the</strong> lack <strong>of</strong> roads and rail lines along <strong>the</strong>ir<br />
coasts. <strong>The</strong>re was extensive commercial shipping, and<br />
sea transport was also essential for moving troops and<br />
supplies to <strong>the</strong> Caucasus front. <strong>The</strong> port <strong>of</strong> Songuldak<br />
on <strong>the</strong> Black Sea shipped most <strong>of</strong> <strong>the</strong> coal used in<br />
Constantinople. So <strong>the</strong> Russians devoted much effort<br />
to raiding shipping along those routes. <strong>The</strong> Turks could<br />
do little about it as <strong>the</strong>ir navy was unsuited for escort<br />
duties.<br />
<strong>The</strong> Russians started raiding with four large, fast<br />
destroyers, and by 1915 more were entering service.<br />
<strong>The</strong> Turkish merchant fleet was steadily worn down<br />
and <strong>the</strong> loss <strong>of</strong> coal in particular was a major setback<br />
to <strong>the</strong> economy. That, in turn, limited naval operations<br />
as <strong>the</strong> Central Powers’ ships needed coal to fire <strong>the</strong>ir<br />
boilers.<br />
Convoy raiding was not entirely one sided. Goeben<br />
and Breslau were occasionally sent out to attack<br />
Russian shipping or to bombard enemy ports. Those<br />
raids achieved little except to act as a morale boost.<br />
strategy & tactics 25
<strong>The</strong> Commanders<br />
Russian<br />
Nikolai Essen. Born in 1860 in St Petersburg, Essen graduated<br />
from <strong>the</strong> Russian Naval Cadet Corps in 1880. During<br />
<strong>the</strong> Russo-Japanese War he proved to be an aggressive<br />
commander. While o<strong>the</strong>r Russian warships in <strong>the</strong> harbor were<br />
being sunk by Japanese artillery, he moved his battleship<br />
outside and set up minefields and torpedo nets. From 1906<br />
to 1911 he held a succession <strong>of</strong> senior naval posts and was<br />
finally appointed to command <strong>the</strong> Baltic Fleet. As Baltic<br />
commander he implemented a series <strong>of</strong> reforms, encouraging<br />
initiative, improving training, and emphasizing minelaying.<br />
Essen was a hard worker, even when sick. That proved to be<br />
his undoing, for when he neglected a cold it developed into<br />
pneumonia. He died in May 1915. Essen was probably one<br />
<strong>of</strong> <strong>the</strong> best naval leaders Russia ever produced, but he did not<br />
have <strong>the</strong> resources to demonstrate his full potential.<br />
Andrei Ebergard (Eberhardt). In 1904, Ebergard was appointed<br />
commander <strong>of</strong> <strong>the</strong> battleship Potemkin following <strong>the</strong> famous<br />
mutiny <strong>of</strong> its crew. In 1912, he was appointed to command<br />
<strong>the</strong> Black Sea Fleet. <strong>The</strong>re he put considerable effort into<br />
developing ships’ ability to coordinate with each o<strong>the</strong>r. In two<br />
years he transformed <strong>the</strong> fleet, making it into a disciplined,<br />
competent and aggressive force. Ebergard did much to<br />
encourage initiative among his <strong>of</strong>ficers, and had a sound grasp<br />
<strong>of</strong> strategic realities, but he could have done more to defend<br />
coastal shipping from German submarines. His rivals within<br />
<strong>the</strong> Russian navy charged he was inefficient. Dismissed in<br />
1916, Ebergard was appointed as a member <strong>of</strong> <strong>the</strong> council<br />
<strong>of</strong> state. He was arrested during <strong>the</strong> 1917 revolution but later<br />
released. In <strong>the</strong> chaos <strong>of</strong> <strong>the</strong> Civil War he died <strong>of</strong> starvation in<br />
St Petersburg in 1922.<br />
Aleksandr Kolchak. Born in 1874 in St Petersburg, Kolchak<br />
graduated from <strong>the</strong> Naval College in 1894. His first few years<br />
as a naval <strong>of</strong>ficer were spent with <strong>the</strong> Vladivostok Fleet.<br />
Returning to St Petersburg in 1899, he managed to obtain a<br />
place in a major Arctic expedition and gained something <strong>of</strong><br />
a reputation as an explorer. When <strong>the</strong> Russo-Japanese War<br />
broke out in 1904, he was given command <strong>of</strong> a destroyer at<br />
Port Arthur. During <strong>the</strong> Japanese siege he showed himself to<br />
be a brave, intelligent and aggressive commander. He served<br />
in various positions between 1906 and 1912 and was active in<br />
<strong>the</strong> move to reform <strong>the</strong> navy.<br />
With <strong>the</strong> outbreak <strong>of</strong> <strong>the</strong> Great War, Kolchak became<br />
a leading figure in <strong>the</strong> naval planning staff. In 1916 he was<br />
promoted to vice admiral<br />
and took over command<br />
<strong>of</strong> <strong>the</strong> Black Sea Fleet.<br />
When <strong>the</strong> Bolsheviks<br />
seized power, he joined<br />
with <strong>the</strong> anti-Bolshevik<br />
forces, eventually heading<br />
up White Russian forces in<br />
Siberia. He soon found he<br />
had taken on a hopeless task<br />
and, after a series <strong>of</strong> defeats,<br />
his government fell apart.<br />
In January 1920, he was<br />
captured by <strong>the</strong> Bolsheviks<br />
and quickly executed by<br />
firing squad.<br />
26 #229<br />
Admiral Kolchak<br />
Admiral Essen<br />
German<br />
Wilhelm Souchon. Born 1864 in Leipzig, Souchon went to<br />
<strong>the</strong> Kiel Naval School in 1881. A steady climb through<br />
<strong>the</strong> ranks bought him to <strong>the</strong> rank <strong>of</strong> rear admiral and, in<br />
1913, command <strong>of</strong> <strong>the</strong> Mediterranean Squadron. On his<br />
arrival at Constantinople he became a major influence on<br />
Turkey’s entry into <strong>the</strong> war. In September 1917, Souchon<br />
was recalled to take command <strong>of</strong> <strong>the</strong> Fourth Battleship<br />
Squadron in Germany. He was in action right away, as<br />
Fourth Squadron was part <strong>of</strong> <strong>the</strong> naval forces assigned to<br />
Operation Albion. A talented <strong>of</strong>ficer, Souchon was noted<br />
for his even temper and adaptability. What he achieved<br />
was limited partly by <strong>the</strong> resources available, but it was<br />
still remarkable.<br />
Final Voyage <strong>of</strong> <strong>the</strong> Goeben<br />
Souchon’s replacement felt a more aggressive policy was<br />
needed. In January 1918 he took Goeben and Breslau out <strong>of</strong> <strong>the</strong><br />
Dardanelles to raid British naval forces. On <strong>the</strong> way out, Goeben hit<br />
a mine but suffered only minor damage. After sinking two British<br />
monitors, both German ships set out to seek o<strong>the</strong>r targets. <strong>The</strong>y ran<br />
into a major minefield in which Breslau hit four mines and sank.<br />
Goeben also hit a mine and headed back into Dardanelles, where<br />
she hit her third mine for <strong>the</strong> day. Limping back, she was attacked<br />
by British aeroplanes and, while turning to avoid <strong>the</strong>m, she ran hard<br />
aground in <strong>the</strong> narrows. British aircraft continued <strong>the</strong> attack on <strong>the</strong><br />
Goeben for days, but <strong>the</strong>ir light bombs proved ineffective against<br />
her armor. <strong>The</strong> battlecruiser was towed back to Constantinople, but<br />
for lack <strong>of</strong> adequate repair facilities was effectively out <strong>of</strong> action<br />
for <strong>the</strong> remainder <strong>of</strong> <strong>the</strong> war.<br />
<strong>The</strong> Goeben sailed to Sevastopol in July 1918 and was partly<br />
repaired <strong>the</strong>re. She was finally handed over to <strong>the</strong> Turks in November<br />
1918. Neglected after <strong>the</strong> war, <strong>the</strong> Goeben was left abandoned<br />
in a small bay where she eventually sank owing to accumulated<br />
damage. In 1927 she was salvaged and underwent a major refit,<br />
re-emerging on <strong>the</strong> seas in 1930. <strong>The</strong> Goeben served until 1950,<br />
when she was decommissioned<br />
and turned into a museum as one<br />
<strong>of</strong> <strong>the</strong> last surviving major ships<br />
<strong>of</strong> World War I.
<strong>The</strong> war on land<br />
<strong>The</strong> Baltic<br />
During 1914 and 1915 <strong>the</strong> Russians suffered a series<br />
<strong>of</strong> defeats fighting against <strong>the</strong> Germans. Despite some<br />
success against <strong>the</strong> Austrians, <strong>the</strong> Russians were forced<br />
back deep into <strong>the</strong>ir own territory. By September 1915<br />
<strong>the</strong> Germans flank had pushed up <strong>the</strong> Baltic coast to Riga<br />
where <strong>the</strong>y were stopped at <strong>the</strong> river Dvina. Control <strong>of</strong><br />
<strong>the</strong> Gulf <strong>of</strong> Riga now became important. <strong>The</strong> Russians<br />
were able to protect <strong>the</strong>ir naval flank and bring in some<br />
supplies by sea. <strong>The</strong> Germans were unable to threaten<br />
<strong>the</strong> Russians with any kind <strong>of</strong> amphibious landing to<br />
turn <strong>the</strong> line. This situation changed in September 1917<br />
when General Hutier launched in <strong>of</strong>fensive which broke<br />
through <strong>the</strong> Russian lines and took <strong>the</strong> city.<br />
<strong>The</strong> Black Sea<br />
<strong>The</strong> Turkish-Russian border along <strong>the</strong> Caucuses was<br />
<strong>the</strong> scene <strong>of</strong> much bitter fighting. Given <strong>the</strong> ruggedness<br />
<strong>of</strong> <strong>the</strong> terrain, <strong>the</strong> region was easy to defend and made<br />
communication difficult. An initial Russian probe in<br />
November 1914 was repulsed. Encouraged, <strong>the</strong> Turks<br />
launched a foolhardy, unprepared attack towards<br />
Sarikamis in <strong>the</strong> depth <strong>of</strong> winter. This <strong>of</strong>fensive turned<br />
into a disaster, with <strong>the</strong> Turkish Army losing nearly<br />
70,000 dead. Most <strong>of</strong> <strong>the</strong> casualties simply froze to death.<br />
<strong>The</strong> front remained quiet until <strong>the</strong> Russians launched a<br />
carefully prepared winter assault, and took Erzerum in<br />
February 1916. <strong>The</strong> Russians <strong>the</strong>n launched an <strong>of</strong>fensive<br />
along <strong>the</strong> Black Sea coast, backed up with amphibious<br />
landings behind <strong>the</strong> Turkish lines. <strong>The</strong>y took Trebizond<br />
in April 1916, but afterwards <strong>the</strong> front stabilized. <strong>The</strong><br />
Turks took advantage <strong>of</strong> <strong>the</strong> chaos following <strong>the</strong> Russian<br />
Revolution to regain lost territories and even push into<br />
Russia itself. <strong>The</strong> great war in <strong>the</strong> east.<br />
Some relief came with <strong>the</strong> arrival, in June 1915, <strong>of</strong><br />
several German U-boats in Constantinople. Fearing<br />
<strong>the</strong>ir pre-dreadnoughts were vulnerable to undersea<br />
attack, <strong>the</strong> Russians pulled back. As a result, Ebergard<br />
was dismissed from his command in July. But that was<br />
no help for <strong>the</strong> Central Powers, as his replacement was<br />
<strong>the</strong> highly competent and even more aggressive Adm.<br />
Kolchak.<br />
Kolchak launched a major minelaying campaign<br />
that severely restricted U-boat access to <strong>the</strong> Black<br />
Sea. Goeben narrowly avoided being torpedoed by a<br />
Russian submarine in November 1915. That incident<br />
made Souchon even more reluctant to risk his ship<br />
unless it was for a vital mission. That led to some<br />
friction with <strong>the</strong> Turkish command as <strong>the</strong>y wanted a<br />
more aggressive role for <strong>the</strong> German battlecruiser.<br />
<strong>The</strong> Russians launched a seaplane carrier raid<br />
against Songuldak on 6 February 1916, sinking a large<br />
collier. <strong>The</strong> coal crisis became so critical Goeben spent<br />
an increasing amount <strong>of</strong> its time at sea on convoy<br />
escort. On 8 January 1916, Goeben was pursuing<br />
two Russian destroyers when she ran into one <strong>of</strong> <strong>the</strong> new<br />
Russian dreadnoughts, <strong>the</strong> Imperatritsa Ekaterina. <strong>The</strong><br />
Russian gunnery was good and bracketed <strong>the</strong> German ship<br />
with shells at a range <strong>of</strong> 20,000 yards. Unable to challenge<br />
<strong>the</strong> far more powerful Russian ship, <strong>the</strong> Goeben fled<br />
undamaged.<br />
Russian Dominance<br />
As 1916 opened, <strong>the</strong> Russian navy focused on supporting<br />
army operations on <strong>the</strong> Caucasus front. <strong>The</strong>re <strong>the</strong>y built<br />
up Batum as a base for small warships. In January 1916,<br />
<strong>the</strong> Rostislav and some light escorts bombarded Turkish<br />
positions on <strong>the</strong> coast. <strong>The</strong> Turks, outgunned, had to fall<br />
back. <strong>The</strong>re were also destroyer raids between Trebizond<br />
and Batum.<br />
Interestingly, while <strong>the</strong> disastrous Allied Gallipoli<br />
operation has gotten much historical attention, Russian<br />
amphibious operations proved much more successful. <strong>The</strong><br />
Russians adapted coastal merchant vessels <strong>the</strong>n operating<br />
in <strong>the</strong> shallow waters <strong>of</strong> <strong>the</strong> Sea <strong>of</strong> Azov into landing craft.<br />
continued on page 30<br />
strategy & tactics 27
Baltic Sea forces<br />
Germany Displacement Speed Guns Armor Completed<br />
Tons knots inches belt Date<br />
Battleships<br />
Koenig Jan 1915<br />
Kronprinz 25,390 21 10 x 12 14in - 3.2in Feb 1915<br />
14 x 5.9<br />
No German battleships were stationed in <strong>the</strong> Baltic, however, ships were detached from <strong>the</strong> High Seas Fleet for short<br />
term missions. Those listed above took part in Operation Albion in 1917. <strong>The</strong> few pre-dreadnoughts allocated to <strong>the</strong> Baltic<br />
saw little action o<strong>the</strong>r than carrying out some shore bombardment. <strong>The</strong> cruisers listed below were permanently stationed in<br />
<strong>the</strong> Baltic as were a number <strong>of</strong> destroyers. During <strong>the</strong> war, various cruisers and destroyers were temporarily detached from<br />
<strong>the</strong> High Seas Fleet to carry out specific operations.<br />
Heavy cruisers Displacement Speed Guns Armor Completed<br />
Tons knots inches belt Date<br />
Roon 10,104 21 4 x 8.25 5 April 1906<br />
Prinz Heinrich 9,652 20 4 x 9.5 11 March 1902<br />
Prinz Adalbert 12 Jan 1904<br />
Friedrich Carl 9,719 20 4 x 8.25 12 Dec 1903<br />
Light Cruisers<br />
Magdeburg 4,570 27.6 10 x 4.1 20 Aug 1912<br />
Augsburg 4,362 26 12 x 4.1 1 Nov 1910<br />
<strong>The</strong>tis 14 Sept 1901<br />
Gazelle 6 Oct 1900<br />
Amazone 15 Nov 1901<br />
Undine 3,033 21 10 x 4.1 5 Jan 1904<br />
Bremen 19 May 1904<br />
Danzig 1 Feb 1907<br />
Lubeck 3,756 23 10 x 4.1 26 April 1904<br />
Russia<br />
Battleships<br />
Gangut Poltava<br />
Petropavlosk Sevastopol<br />
All commissioned in 1914 but saw no action, being retained for <strong>the</strong> defence <strong>of</strong> <strong>the</strong> Gulf <strong>of</strong> Finland.<br />
Old battleships Displacement Speed Guns Armor Completed<br />
Tons knots inches belt Date<br />
Slava 13,516 17.5 4 x 12 7.5 - 6 June 1905<br />
12 x 6<br />
Tsesarevitch 12,195 18.5 4 x 12 10 - 7 August 1903<br />
(Grazhdanin) 12 x 6<br />
Andrei Pervozvanny<br />
Imperator Pavel I<br />
Nei<strong>the</strong>r saw action during <strong>the</strong> war, being retained for <strong>the</strong> defence <strong>of</strong> <strong>the</strong> Gulf <strong>of</strong> Finland.<br />
Armored cruisers<br />
Admiral Makarov April 1908<br />
Pallada Feb 1911<br />
Bayan 7,775 21 2 x 8 Dec 1911<br />
8 x 6<br />
Gromoboi 13,220 20 4 x 8 1900<br />
16 x 6<br />
Rurik 15,190 21 4 x 10 Sept 1908<br />
8 x 8<br />
Armored cruiser (served primarily as a minelayer)<br />
Rossija 13,675 20 4 x 8 1897<br />
16 x 6<br />
Protected cruisers<br />
Diana 1902<br />
Aurora 6,823 19 8 x 6 1903<br />
Bogatyr 1902<br />
Oleg 6,645 23 12 x 6 1904<br />
28 #229
Modern destroyers<br />
Start <strong>of</strong> <strong>the</strong> war 1<br />
Commissioned during war 26<br />
Old, light destroyers<br />
Start <strong>of</strong> <strong>the</strong> war 27<br />
Black Sea forces<br />
Russia Displacement Speed Guns Armor Completed<br />
Tons knots inches belt (in) Date<br />
Many ships were renamed after <strong>the</strong> Russian Revolution. <strong>The</strong> later names are shown in brackets.<br />
Battleships<br />
Imperatritsa Mariya 6 July 1915<br />
Imperator Alexander III (Volya) 28 June 1917<br />
Imperatritsa Ekaterina 22,600 21 12 x 12 18 Oct 1915<br />
Velikaya (Svobodnaya Rossiya) 18 x 5 10.5 - 4<br />
Old battleships<br />
Evstafi 5 Nov 1910<br />
Ioann Zlatoust 12,840 16.5 4 x 12 9 - 5 11 Nov 1910<br />
4 x 8<br />
Pantelimon* 12,582 16.6 4 x 12 9 - 5 Nov 1903<br />
(Boretz za Svobodu) 16 x 6<br />
*Originally named ‘Kniaz Potemkin Tavritcheski’ but renamed after <strong>the</strong> notorious mutiny.<br />
Rostislav 8,880 15.6 4 x 10 14 - 5 1898<br />
8 x 6<br />
Tri Svititelia 13,318 17 4 x 12 18 - 9 1898<br />
8 x 6<br />
Protected cruisers<br />
Kagul 1905<br />
Pamiat Merkuria 6,645 23 12 x 6 1907<br />
Modern destroyers<br />
Start <strong>of</strong> <strong>the</strong> war 4<br />
Commissioned during war 9<br />
Old, light destroyers<br />
Start <strong>of</strong> <strong>the</strong> war 13<br />
Turkey<br />
Battlecruisers Displacement Speed Guns Armor Completed<br />
Tons knots inches belt (in) Date<br />
Goeben 22,600 21 12 x 12 10.5 - 4 28 Aug 1912<br />
18 x 5.<br />
Protected cruisers<br />
Medjidieh 3,330 22 2 x 6 1903<br />
8 x 4.7<br />
Hamidieh 3,830 22 2 x 6 1903<br />
8 x 4.7<br />
Light cruisers<br />
Breslau 4,570 27.5 12 x 4.1 12 May 1912<br />
Old, light destroyers<br />
Start <strong>of</strong> <strong>the</strong> war 8<br />
strategy & tactics 29
30 #229<br />
Using those ships, <strong>the</strong>y landed 2,100 men behind <strong>the</strong><br />
Turkish lines in March 1916. Again, Rostislav and<br />
escorting ships provided gunfire support. And again, <strong>the</strong><br />
operation forced <strong>the</strong> Turks to pull back. Following up,<br />
<strong>the</strong> Russians seized <strong>the</strong> small port <strong>of</strong> Rize. While nei<strong>the</strong>r<br />
<strong>of</strong> those operations encountered much opposition, <strong>the</strong>y<br />
were well executed and a fine example <strong>of</strong> <strong>the</strong> Russian<br />
ability to exploit naval superiority and mobility.<br />
During April <strong>the</strong> Russians shipped into Rize major<br />
reinforcements from Novorossiysk. It was a well<br />
organized operation involving 22 transports with<br />
proper beach control, clearly marked channels swept<br />
for mines, aerial reconnaissance from seaplane carriers,<br />
anti-submarine patrols, and <strong>of</strong>fshore screening battle<br />
groups. <strong>The</strong> pressure was sufficient to force <strong>the</strong> Turks<br />
to abandon Trebizond, and Russian troops seized that<br />
town in May.<br />
Things Go Wrong<br />
<strong>The</strong> Russians suffered a major setback in October<br />
1916 with <strong>the</strong> loss <strong>of</strong> Imperatritsa Maria. <strong>The</strong> battleship<br />
was moored in Sevastopol when an explosion in <strong>the</strong><br />
forward magazine tore through her hull. <strong>The</strong> ship was<br />
scuttled at her mooring to prevent fur<strong>the</strong>r explosions.<br />
<strong>The</strong>re were <strong>the</strong> inevitable claims <strong>of</strong> sabotage, but <strong>the</strong><br />
explosion was probably an accident.<br />
<strong>The</strong> strategic situation as 1917 opened was not<br />
good for <strong>the</strong> Allies in <strong>the</strong> East. <strong>The</strong> Russian army<br />
was beginning to disintegrate in <strong>the</strong> face <strong>of</strong> massive<br />
casualties and battlefield defeat. Talk <strong>of</strong> revolution<br />
spread throughout <strong>the</strong> ranks, and plans for a new<br />
<strong>of</strong>fensive against <strong>the</strong> Ottoman Empire had to be<br />
scrapped. <strong>The</strong> first Russian revolution overthrew <strong>the</strong><br />
Czar in March 1917, replacing <strong>the</strong> Romanovs with a<br />
provisional government. <strong>The</strong> provisional government<br />
wanted to stay in <strong>the</strong> war, and <strong>the</strong> fleet continued to<br />
operate, albeit at a lower level <strong>of</strong> efficiency.<br />
In April 1917 <strong>the</strong> Russians carried out mine laying<br />
and a series <strong>of</strong> bombing attacks around Sinope in<br />
Rumania. <strong>The</strong> latter were launched from an expanded<br />
fleet <strong>of</strong> seaplane carriers. While <strong>the</strong> raids were too weak<br />
to do much damage, <strong>the</strong>y were a harbinger <strong>of</strong> things to<br />
come and demonstrated <strong>the</strong> willingness <strong>of</strong> <strong>the</strong> navy to<br />
adopt new techniques.<br />
Disintegration in <strong>the</strong> East<br />
Despite its relatively successful operations, <strong>the</strong><br />
morale and discipline <strong>of</strong> <strong>the</strong> Russian Black Sea Fleet<br />
started to collapse. It is a measure <strong>of</strong> <strong>the</strong> leadership<br />
<strong>of</strong> Ebergard and Kolchak that <strong>the</strong> fleet’s sailors were<br />
among <strong>the</strong> last to give way to <strong>the</strong> November revolution,<br />
which swept <strong>the</strong> Bolsheviks into power and triggered<br />
<strong>the</strong> great Russian Civil War. As a result, <strong>the</strong> Russians<br />
continued to dominate <strong>the</strong> Black Sea throughout <strong>the</strong><br />
year and Goeben and Breslau could still venture out<br />
only for <strong>the</strong> occasional raid.<br />
<strong>The</strong> final Russian collapse came just in time to<br />
save <strong>the</strong> Turks. <strong>The</strong>ir economy was crumbling under<br />
<strong>the</strong> pressure <strong>of</strong> <strong>the</strong> blockade and defeats on land.<br />
From late 1917 <strong>the</strong> Germans and Austro-Hungarians<br />
steadily occupied Russia, and in May 1918 <strong>the</strong>y entered<br />
Sevastopol. <strong>The</strong> best <strong>of</strong> <strong>the</strong> Russian warships fled to o<strong>the</strong>r<br />
ports, while <strong>the</strong> Germans captured some <strong>of</strong> <strong>the</strong> older<br />
ships. In June 1918 some <strong>of</strong> <strong>the</strong> newer Russian ships,<br />
including <strong>the</strong> Volya, were taken over by <strong>the</strong> Germans<br />
and sailed back to Sevastopol. <strong>The</strong> rest were scuttled,<br />
including <strong>the</strong> Svobodnaya Rossiya. <strong>The</strong> Germans never<br />
had <strong>the</strong> chance to use <strong>the</strong> captured ships, as <strong>the</strong>ir own<br />
collapse in November 1918 ended <strong>the</strong> war. It would not<br />
have made much <strong>of</strong> a difference anyway—<strong>the</strong> German<br />
navy did not have <strong>the</strong> crews to man captured vessels.<br />
Conclusion<br />
<strong>The</strong> Russian Navy started with a marginal superiority<br />
at sea, but it engaged in an aggressive campaign that<br />
caused <strong>the</strong> Central Powers considerable inconvenience.<br />
Essen was determined to take <strong>the</strong> war to <strong>the</strong> enemy, and<br />
in doing so he dictated <strong>the</strong> course <strong>of</strong> naval events.<br />
<strong>The</strong> Germans kept <strong>the</strong>ir High Seas Fleet largely in<br />
port, achieving little <strong>the</strong>re o<strong>the</strong>r than <strong>the</strong> indecisive Battle<br />
<strong>of</strong> Jutland. Operation Albion demonstrated <strong>the</strong> potential<br />
for amphibious operations, and more German attention<br />
on <strong>the</strong> Baltic might have led to a quicker victory over<br />
Russia.<br />
In <strong>the</strong> Black Sea, <strong>the</strong> Germans had a brilliant leader<br />
in Souchon, but he lacked <strong>the</strong> resources to do much.<br />
And <strong>the</strong> Russians had commanders who were his match.<br />
<strong>The</strong> key to naval dominance proved to be determined,<br />
aggressive leadership. Ebergard and Kolchak seized <strong>the</strong><br />
initiative but were not overly reckless.<br />
<strong>The</strong> Russian navy performed well throughout<br />
<strong>the</strong> war. <strong>The</strong>ir destroyers conducted a relentless and<br />
devastating campaign <strong>of</strong> raiding and mine laying. <strong>The</strong>ir<br />
achievements were limited more by a lack <strong>of</strong> targets<br />
ra<strong>the</strong>r than resources. Turkish shipping was crippled and<br />
<strong>the</strong> Goeben was forced to respond to Russian initiatives.<br />
<strong>The</strong> great tragedy, <strong>of</strong> course, was in <strong>the</strong> end <strong>the</strong> heroism<br />
<strong>of</strong> both Russian and German navies did not outlast <strong>the</strong><br />
revolutions that brought down <strong>the</strong>ir governments in<br />
1918.<br />
Bibliography<br />
A naval history <strong>of</strong> World War I. P G Halpern. University College<br />
London, London, 1994. Originally published by United States Naval<br />
Institute.<br />
North <strong>of</strong> Gallipoli. G Nekrasov. East European Monographs, distributed<br />
by Columbia University <strong>Press</strong>, New York, 1992<br />
Decline & Fall <strong>of</strong> <strong>the</strong> Ottoman Empire. A Palmer. John Murray<br />
(Publishers) Ltd, London, 1993<br />
History <strong>of</strong> <strong>the</strong> First World War, various authors. BPC Publishing Ltd,<br />
London for Purnell, 1966?<br />
All <strong>the</strong> worlds fighting ships. R Gardiner, Volumes 1860-1905 and 1905-<br />
1922. Conway Maritime <strong>Press</strong><br />
Action <strong>of</strong>f Cape Sarych. Steve McLaughlin .<br />
Biographies <strong>of</strong> Russian naval leaders. Steve McLaughlin<br />
Unpublished articles<br />
<strong>The</strong> Ship that Changed <strong>the</strong> World. D van der Vat. Baltic Assignment.<br />
Michael Wilson.
game<br />
Qty priCe total<br />
Signature<br />
Name<br />
address<br />
City, state Zip<br />
phoNe email<br />
Visa/mC (oNly)#<br />
expiratioN date<br />
sigNature<br />
Game Scale<br />
Units: Primarily brigade/divisional<br />
1000 to 1500 men per strength point for<br />
infantry, 450 to 900 men per strength<br />
point <strong>of</strong> cavalry, 2 to 3 batteries per<br />
strength point <strong>of</strong> artillery.<br />
Time: Weekly turns composed <strong>of</strong> two to<br />
three impulses.<br />
Map: 5 miles per hex.<br />
Cossacks are Coming $60.00<br />
Cossacks are Coming & $49.95<br />
Pledge for Clash <strong>of</strong> Eagles<br />
(est. retail $150; est. Pledge $110)*<br />
*Clash will not be charged at this time, only Cossacks.<br />
<strong>The</strong> Cossacks Are Coming! 2nd Edition is a brigade/division level<br />
model <strong>of</strong> <strong>the</strong> Russian invasion <strong>of</strong> Germany in August and September <strong>of</strong> 1914.<br />
<strong>The</strong> design is a revision <strong>of</strong> <strong>the</strong> original “<strong>The</strong> Cossacks are Coming!” (People’s<br />
War Games 1982). Based on <strong>the</strong> 3rd edition Death <strong>of</strong> Empires rules system <strong>the</strong><br />
five scenarios include an introductory scenario, three individual battle scenarios<br />
(Gumbinnen, Tannenberg and First Masurian) and a campaign game scenario.<br />
<strong>The</strong> Cossacks Are Coming! 2nd Edition links with its companion game Clash<br />
<strong>of</strong> Eagles: <strong>The</strong> Battle for Galicia and Poland, 1914, to model <strong>the</strong> entire WW1<br />
Eastern Front in 1914.<br />
s&H<br />
totAl ordEr<br />
Available through:<br />
Game Contents<br />
• 840 two sided die cut counters<br />
• One 22” x 34” Map<br />
• Standard and Exclusive Rule Booklets<br />
• 4 Player Aid Charts<br />
• 6 Strategic and Army Charts<br />
• 8 Campaign Scenario Set-up Charts<br />
• Two 6-sided dice<br />
PO Box 21598<br />
Bakersfield CA 93390<br />
661/587-9633 • fax 661/587-5031 • www.decisiongames.com<br />
shipping Charges<br />
1st item Adt’l items Type <strong>of</strong> Service<br />
$8 $2 UPS Ground/US Mail Domestic Priority<br />
15(20) 4 UPS 2nd Day Air (Metro AK & HI)<br />
14(10) 2(7) Canada, Mexico (Express)<br />
17(25) 7(10) Europe (Express)<br />
20(25) 9(10) Asia, Africa, Australia (Express)<br />
strategy & tactics 31
32 #229<br />
EXCAL Alien Contact $25<br />
EXCAL Caen (zip) 15<br />
EXCAL Cassino (zip) 15<br />
EXCAL Crimea (zip) 15<br />
EXCAL Cyborg (zip) 12<br />
EXCAL Eastfront (zip) 85<br />
EXCAL Escape from Colditz 42<br />
EXCAL Ironclads (2nd ed) 42<br />
EXCAL Ironclads Exp (2nd ed) 36<br />
EXCAL Iron Horse 15<br />
EXCAL Kaiserschlact 1918 85<br />
EXCAL Koniggratz (zip) 20<br />
EXCAL Mukden (zip) 15<br />
EXCAL Panzer (2nd ed) 40<br />
EXCAL Quazer (zip) 30<br />
EXCAL Quest (zip) 12<br />
EXCAL Sidi Rezegh (zip) 15<br />
EXCAL Sovereign <strong>of</strong> <strong>the</strong> Seas 22<br />
EXCAL Tannenburg (zip) 20<br />
EXCAL To <strong>the</strong> Green Fields 44<br />
EXCAL Total War (zip) 15<br />
EXCAL Trax 13<br />
EXCAL Wings (2nd ed.) 40<br />
3W Gulf War Book 20<br />
NAme<br />
ADDreSS<br />
CiTy, STATe ZiP<br />
PhONe emAil<br />
ViSA/mC (ONly)#<br />
exPirATiON DATe<br />
SiGNATUre<br />
METGM Dragons <strong>of</strong> Underearth $12<br />
METGM Fire When Ready 8<br />
METGM Fury <strong>of</strong> Norsemen 14<br />
METGM Grail Quest 10<br />
METGM Lords <strong>of</strong> Underearth 10<br />
METGM Ram Speed 8<br />
METGM Rivets 8<br />
METGM Rommel’s Panzers 8<br />
METGM Stalins Tanks 8<br />
METGM Trailblazer 8<br />
METGM Warp War 8<br />
3W 1944: Second Front 38<br />
3W Aachen 28<br />
3W Aces High (2nd ed) 25<br />
3W American Aces 25<br />
3W Ancients 40<br />
3W Barbarians 46<br />
3W Battle <strong>of</strong> <strong>the</strong> Alma 33<br />
3W Blitzkrieg in <strong>the</strong> South 35<br />
3W Campaigns <strong>of</strong> Civil War 27<br />
3W Chinese Civil War 20<br />
3W Crimean Shield 35<br />
3W Crossbow & Cannon 2 33<br />
Some games are limited supply; please list alternate games when possible.<br />
Iss #/tItle<br />
QtY PrIce tOtAl<br />
S&H<br />
$<br />
TOTAL ORDER<br />
Shipping Charges<br />
3W Defense <strong>of</strong> Rorke’s Drift $30<br />
3W Duel for Kharkov 40<br />
3W Frederick <strong>the</strong> Great 28<br />
3W Fury on Champlain 33<br />
3W Give me Liberty 35<br />
3W Guadalcanal 36<br />
3W Ironsides 36<br />
3W Last Battles: Prussia 30<br />
3W Light Division 28<br />
3W Nap. at Austerlitz 28<br />
3W Napoleons Later Bat. 35<br />
3W Panzerkrieg 33<br />
3W Raid on Richmond 36<br />
3W Royalists & Roundheads III 30<br />
3W Run Silent Run Deep 33<br />
3W Salvo 40<br />
3W Salvo II 28<br />
3W Scratch One Flat Top 32<br />
3W Sink <strong>the</strong> Bismarck 28<br />
3W Spitfire 36<br />
3W Spires <strong>of</strong> <strong>the</strong> Kremlin 42<br />
3W Star Force Terra 20<br />
3W Tahiti 27<br />
3W Tarawa 28<br />
3W Tide <strong>of</strong> Fortune 30<br />
3W To <strong>the</strong> Far Shore 36<br />
Send To: Decision Games,<br />
PO Box 21598,<br />
Bakersfield CA 93390<br />
• 661/587-9633 •<br />
Fax- 661/587-5031<br />
www.decisiongames.com<br />
05/05<br />
Ziplocks count as 2 for 1 for<br />
shipping.<br />
1st item Adt’l items Type <strong>of</strong> Service<br />
$8 $2 UPS Ground/US Mail Domestic Priority<br />
15(20) 4 UPS 2nd Day Air (Metro AK & HI)<br />
14(10) 2(7) Canada, Mexico (Express)<br />
17(25) 7(10) Europe (Express)<br />
20(25) 9(10) Asia, Africa, Australia (Express)
Did you Know?<br />
➢ After <strong>the</strong> Battle <strong>of</strong> Lutzen, 2 May<br />
1813, Napoleon was shocked<br />
when he saw Marshal Ney, one<br />
<strong>of</strong> his favorites, covered in blood.<br />
Ney calmly responded to <strong>the</strong><br />
emperor’s concern, commenting<br />
about <strong>the</strong> gore: “It isn’t mine…except<br />
where that dammed bullet<br />
passed through my leg.”<br />
➢ During 2005 <strong>the</strong> US plans to spend<br />
some $200 billion fighting in Iraq<br />
and Afghanistan. In comparison,<br />
Americans annually spend about<br />
$43 billion on lottery tickets,<br />
roughly ano<strong>the</strong>r $35 billion<br />
playing on-line poker, and about<br />
$2 billion more on home décor<br />
candles.<br />
➢ <strong>The</strong> arquebus, a light musket, became<br />
one <strong>of</strong> <strong>the</strong> samurai’s favorite<br />
weapons during <strong>the</strong> 16th century.<br />
➢ <strong>The</strong> Osage tribe, which lived along<br />
<strong>the</strong> lower Missouri River, began<br />
to acquire firearms through trade<br />
during <strong>the</strong> second half <strong>of</strong> <strong>the</strong><br />
17th century. By 1750 <strong>the</strong>y had<br />
obtained so many that modern<br />
archaeological digs show gun<br />
parts outnumbering arrowheads<br />
and spear points. In <strong>the</strong>ir own<br />
language, <strong>the</strong> Osage called gunpowder<br />
weapons Wa-ho-to’n-<strong>the</strong>,<br />
which translates as “[that] which<br />
causes things to cry out.”<br />
➢ During <strong>the</strong> Vietnam War, sappers<br />
were elite communist assault<br />
units.<br />
➢ <strong>The</strong> poet Samuel Taylor Coleridge,<br />
author <strong>of</strong> Xanadu, enlisted in<br />
Britain’s 15th Light Dragoon regiment<br />
in 1794.<br />
➢ In June 1763, a combined effort<br />
by <strong>the</strong> Ottawa and Ojibwe tribes<br />
captured British occupied Fort<br />
Michilimackinac, which was located<br />
near <strong>the</strong> point where Lakes<br />
Superior, Huron and Michigan<br />
come toge<strong>the</strong>r. To do so <strong>the</strong>y used<br />
a ploy that might be termed <strong>the</strong><br />
“Trojan Lacrosse Game.” Posing<br />
as non-warring Indians, <strong>the</strong>y<br />
staged a heated match <strong>of</strong> that sport<br />
in front <strong>of</strong> <strong>the</strong> fort. <strong>The</strong>ir play<br />
engrossed <strong>the</strong> soldiers’ attention<br />
such that <strong>the</strong>y dropped <strong>the</strong>ir<br />
guard. <strong>The</strong> Indian players <strong>the</strong>n<br />
pursued a purposefully aimed ball<br />
through <strong>the</strong> open gate, quickly<br />
rushed in, and seized <strong>the</strong> fort.<br />
➢ Since <strong>the</strong> turn <strong>of</strong> <strong>the</strong> 21st century,<br />
<strong>the</strong> number <strong>of</strong> Israeli-born Moslems<br />
volunteering to serve in that<br />
nation’s defense forces has gone<br />
up 64 percent.<br />
➢ About 90 percent <strong>of</strong> American<br />
soldiers wounded in combat in<br />
Afghanistan or Iraq survived. <strong>The</strong><br />
comparable figure for <strong>the</strong> Vietnam<br />
War was 75 percent. Reasons<br />
include improved body armor and<br />
even more rapid medical evacuation.<br />
fallujah footnotes<br />
During <strong>the</strong> days prior to <strong>the</strong> start<br />
<strong>of</strong> <strong>the</strong> November 2004 US <strong>of</strong>fensive<br />
into <strong>the</strong> Iraqi insurgent stronghold <strong>of</strong><br />
Fallujah, satellite photography was<br />
used to keep track <strong>of</strong> <strong>the</strong> cars parked<br />
along that city’s streets. On <strong>the</strong> first<br />
day <strong>of</strong> <strong>the</strong> <strong>of</strong>fensive, those vehicles<br />
<strong>the</strong> photos showed to have remained<br />
stationary for <strong>the</strong> previous three or<br />
more days were targeted as likely<br />
explosive devices. That amounted to<br />
roughly 650 vehicles, almost all <strong>of</strong><br />
which did give <strong>of</strong>f huge secondary<br />
explosions when struck during <strong>the</strong> 12<br />
hours <strong>of</strong> preliminary airstrikes that<br />
began <strong>the</strong> battle.<br />
<strong>The</strong> three most common types<br />
<strong>of</strong> materiel found by advancing US<br />
forces in Fallujah were small arms<br />
We need writers for this FYI column.<br />
If you can write tight, pithy articles <strong>of</strong><br />
nomorethan2,000wordsoninteresting,obscure,oro<strong>the</strong>rwiselittleknown<br />
aspects <strong>of</strong> military history, contact<br />
<strong>the</strong> FYI editor, Ty Bomba, in care <strong>of</strong><br />
this magazine, or by emailing him at:<br />
<br />
FYI<br />
For Your Information<br />
and ammunition, bomb making tools,<br />
and suicide-bomber supplies, such<br />
as explosive-carrying vests. <strong>The</strong> next<br />
most common items were caches <strong>of</strong><br />
drugs (mostly amphetamines and<br />
cocaine) and pornography.<br />
During <strong>the</strong> actual Battle <strong>of</strong> Fallujah<br />
<strong>the</strong> US lost over 50 soldiers KIA,<br />
including one company commander,<br />
a sergeant major and eight platoon<br />
leaders. In return, <strong>the</strong> Americans<br />
killed some 1,600 armed insurgents<br />
and took prisoner roughly ano<strong>the</strong>r<br />
1,000. <strong>The</strong> nationalities among <strong>the</strong><br />
insurgents included men from Iraq,<br />
Chechnya, Syria, Libya, Saudi Arabia,<br />
Jordan and Afghanistan.<br />
Of <strong>the</strong> 100 mosques that lay within<br />
<strong>the</strong> enemy held areas <strong>of</strong> Fallujah at<br />
<strong>the</strong> start <strong>of</strong> <strong>the</strong> November battle, 60 <strong>of</strong><br />
<strong>the</strong>m were used as firing points by <strong>the</strong><br />
insurrectionists.<br />
After <strong>the</strong> November fighting in<br />
Fallujah, every resident head-<strong>of</strong>household<br />
who was cleared through<br />
Iraqi government security was given<br />
a check for USD $2,500 in order to<br />
help reestablish his family’s home<br />
<strong>the</strong>re.<br />
—Ty Bomba<br />
l.m.f.<br />
Aircrews in World War II’s<br />
strategic bombing campaigns suffered<br />
a significant amount <strong>of</strong> stress during<br />
combat. Flying bombers deep into<br />
enemy territory, <strong>of</strong>ten without fighter<br />
escort and against targets heavily<br />
defended by enemy interceptors and<br />
antiaircraft guns, could and did lead<br />
to men cracking under <strong>the</strong> pressure.<br />
One US bomber crewman remembered:<br />
“<strong>The</strong> worst part was being<br />
awakened for a briefing, sullenly<br />
eating breakfast, going to <strong>the</strong> briefing,<br />
and awaiting <strong>the</strong> moment when <strong>the</strong><br />
blue curtain was pulled back [on <strong>the</strong><br />
briefing room stage], revealing our<br />
target and <strong>the</strong> route to it. When it was<br />
France or <strong>the</strong> Lowlands, instant relief<br />
occurred. When <strong>the</strong> target was deep in<br />
strategy & tactics 33
34 #229<br />
From <strong>the</strong> dustbin <strong>of</strong> History<br />
“If you will not fight for <strong>the</strong> right when you can easily win…if you<br />
will not fight when your victory will be sure and not too costly, you<br />
may come to <strong>the</strong> moment when you will have to fight with <strong>the</strong> odds<br />
against you and only a precarious chance <strong>of</strong> survival.”<br />
Germany, utter terror [followed].”<br />
<strong>The</strong> Royal Air Force’s (RAF)<br />
Bomber Command had <strong>the</strong> additional<br />
stress <strong>of</strong> flying its missions at night<br />
against <strong>of</strong>ten unseen German radarequipped<br />
fighters that could wreak terrific<br />
damage on <strong>the</strong> bombers. <strong>The</strong> occurrence<br />
<strong>of</strong> neurosis cases in Bomber<br />
Command was about four times higher<br />
than <strong>the</strong> rest <strong>of</strong> <strong>the</strong> RAF. Naturally, <strong>the</strong><br />
stress was directly related to <strong>the</strong> crews’<br />
fear <strong>of</strong> death. Bomber Command missions<br />
suffered an average five percent<br />
loss rate. Though a five percent loss<br />
rate doesn’t sound high, it is analogous<br />
to playing Russian roulette 30 times<br />
with a gun that has 20 chambers, one<br />
<strong>of</strong> which is loaded. A crew had only<br />
about a 25 percent chance <strong>of</strong> surviving<br />
a full 30-mission tour. Even <strong>the</strong><br />
non-ma<strong>the</strong>matically inclined crewmen<br />
realized <strong>the</strong>ir odds <strong>of</strong> survival were not<br />
good.<br />
<strong>The</strong> <strong>of</strong>ficial RAF term for crewmembers<br />
who wouldn’t go on flying<br />
was: “Lack <strong>of</strong> Moral Fibre.” That term<br />
carried with it harsh connotations. In<br />
essence, those men were being called<br />
cowards. LMF symptoms were usually<br />
diagnosed in crews who dropped <strong>the</strong>ir<br />
bombs early so <strong>the</strong>y would obtain a<br />
higher altitude when <strong>the</strong>y actually<br />
did pass over <strong>the</strong> target (if <strong>the</strong>y even<br />
reached it), and in crews who had a<br />
high incidence <strong>of</strong> early return to base<br />
for “mechanical troubles.”<br />
<strong>The</strong> LMF regulations were harsh,<br />
bordering on draconian. Crewmen<br />
were sometimes drummed out <strong>of</strong> <strong>the</strong><br />
service and <strong>the</strong>reafter prevented from<br />
obtaining good jobs in <strong>the</strong> civilian<br />
world. Later <strong>the</strong>y were more likely<br />
to be reassigned to <strong>the</strong> army or navy.<br />
<strong>The</strong> main objective was to make being<br />
branded “LMF” so repugnant <strong>the</strong> men<br />
would ra<strong>the</strong>r die than become such<br />
<strong>of</strong>ficially declared outcasts. In some<br />
cases <strong>the</strong> program worked; in o<strong>the</strong>r<br />
cases it didn’t.<br />
Aircrew Losses in Bomber Command<br />
for 1939-45 by Percentage<br />
Killed on Operations: 51%<br />
Killed in Crashes in Britain: 9%<br />
Seriously Injured in Crashes: 3%<br />
Prisoners <strong>of</strong> War: 12%<br />
Shot Down and Evaded escape: 1%<br />
Survived Unharmed: 24%<br />
—Gregory M. Smith<br />
Data file:<br />
Confederate indian units<br />
in <strong>the</strong> american Civil War<br />
During <strong>the</strong> American Civil War<br />
nearly 7,000 American Indians fought<br />
in units organized by both <strong>the</strong> Union<br />
and Confederacy. Some Indian units<br />
battled in <strong>the</strong> eastern <strong>the</strong>aters, but<br />
most fought west <strong>of</strong> <strong>the</strong> Mississippi.<br />
<strong>The</strong>y campaigned in western Arkansas,<br />
southwestern Missouri and sou<strong>the</strong>rn<br />
Kansas, but mainly in <strong>the</strong> Indian<br />
Territory – <strong>the</strong> region now <strong>the</strong> state<br />
<strong>of</strong> Oklahoma. In 1851 it became <strong>the</strong><br />
preserve <strong>of</strong> sovereign Indian nations,<br />
including <strong>the</strong> “Five Civilized Tribes”:<br />
Choctaw, Chickasaw, Cherokee, Creek<br />
and Seminole.<br />
Those tribes actively allied with <strong>the</strong><br />
Confederacy formally declared war on<br />
<strong>the</strong> United States and raised military<br />
units set up on European patterns:<br />
regiments and battalions organized by<br />
companies and troops. Some <strong>of</strong> those<br />
independent regiments and battalions<br />
were in turn organized into ad-hoc<br />
brigades, generally named for <strong>the</strong>ir<br />
commanders.<br />
Individual tribes raised <strong>the</strong> units<br />
and organized <strong>the</strong>m as “mounted<br />
rifles.” Armed with rifles and traveling<br />
on horseback, <strong>the</strong>y could fight ei<strong>the</strong>r as<br />
cavalry or infantry. With one exception:<br />
<strong>the</strong> men elected <strong>the</strong>ir <strong>of</strong>ficers in<br />
<strong>the</strong> same manner as American militia<br />
units <strong>of</strong> that era.<br />
While Confederate tribal units<br />
never totaled more than 3,500 men at<br />
—Sir Winston Churchill, 1948<br />
any one time, some 5,000 Indians<br />
belonged to those units over <strong>the</strong> course<br />
<strong>of</strong> <strong>the</strong> Civil War. Many <strong>of</strong> those same<br />
men later joined <strong>the</strong> Union Indian<br />
home guard regiments. <strong>The</strong> units<br />
<strong>the</strong>mselves also changed during <strong>the</strong><br />
war. Battalions grew into regiments;<br />
regiments split into new regiments or<br />
simply disappeared. In order <strong>of</strong> <strong>the</strong>ir<br />
formation, <strong>the</strong> tribal units that served<br />
<strong>the</strong> Confederacy in <strong>the</strong> Civil War were<br />
as follows.<br />
Chickasaw & Choctaw 1st Cavalry<br />
Regiment, Mounted Rifles. First<br />
commanded by Douglas H. Cooper, a<br />
former Indian agent, this was <strong>the</strong> first<br />
and longest-lived American Indian<br />
regiment. Formed in <strong>the</strong> early summer<br />
<strong>of</strong> 1861, it surrendered only on 26 May<br />
1865, when Kirby-Smith, commander<br />
<strong>of</strong> <strong>the</strong> CSA’s Trans-Mississippi<br />
Department, ordered his forces to<br />
“disperse.” <strong>The</strong> only regiment built<br />
along mixed tribal lines, it was made<br />
up <strong>of</strong> members <strong>of</strong> both <strong>the</strong> Chickasaw<br />
and Choctaw tribes. (O<strong>the</strong>r tribal<br />
regiments sometimes organizationally<br />
attached smaller units from o<strong>the</strong>r<br />
tribes, and brigade-sized units<br />
frequently combined tribes.) This unit<br />
fought at Round Mountain (11/19/61),<br />
Chusto-Talasah (12/9/61), Newtonia<br />
(11/30/62), Honey Springs (7/17/63)<br />
and Poison Springs (4/18/64).<br />
1st Cherokee Mounted Volunteers<br />
(later Cherokee 2nd Cavalry Regiment,<br />
Mounted Rifles, and renamed <strong>the</strong><br />
Cherokee 1st Cavalry Regiment,<br />
Mounted Rifles, when <strong>the</strong> original 1st<br />
Mounted Rifles dissolved in 1862). <strong>The</strong><br />
regiment’s commander, Stand Watie,<br />
became <strong>the</strong> war’s only native American<br />
brigadier general. Raised for a<br />
one-year tour <strong>of</strong> duty on 12 July 1861,<br />
<strong>the</strong> regiment was reenlisted on 12 July<br />
1862 for two more years or <strong>the</strong><br />
duration. Stand Watie finally surrendered<br />
<strong>the</strong> unit on 23 June 1865 at<br />
Doakeville, Oklahoma, while commanding<br />
all Confederate forces, white
and Indian, in <strong>the</strong> Indian Territory.<br />
<strong>The</strong> unit was raised from <strong>the</strong><br />
“treaty faction” <strong>of</strong> <strong>the</strong> Cherokee<br />
Nation, which supported slavery and<br />
was led by Stand Watie. Though it<br />
was <strong>the</strong> first Cherokee regiment raised<br />
for <strong>the</strong> Confederacy, it became <strong>the</strong><br />
“2nd” Mounted Rifles due to tribal<br />
politics. <strong>The</strong> Cherokee Nation<br />
declared war on <strong>the</strong> United States on<br />
26 August 1861, six weeks after <strong>the</strong><br />
1st Cherokee Mounted Volunteers had<br />
organized, and two weeks after it<br />
fought at Wilson’s Creek. In October,<br />
<strong>the</strong> Cherokee Nation authorized a<br />
regiment that became <strong>the</strong> Cherokee<br />
1st Mounted Rifles. <strong>The</strong> 1st Cherokee<br />
Mounted Volunteers <strong>the</strong>n became <strong>the</strong><br />
Cherokee 2nd Mounted Rifles.<br />
It fought at Wilson’s Creek<br />
(8/10/61), Chustenahalan (12/26/61),<br />
Pea Ridge (3/6-8/62), Old Fort Wayne<br />
(10/22/62), Honey Springs (7/17/63),<br />
Fort Gibson (9/16/64), and Cabin<br />
Creek (9/19/64).<br />
Creek 1st Cavalry Regiment. Also<br />
known as <strong>the</strong> Creek 1st Mounted<br />
Rifles and <strong>the</strong> Creek 1st Mounted<br />
Volunteers, this unit was raised for a<br />
one-year term <strong>of</strong> service on 17 August<br />
1861, and was reenlisted for a two<br />
year term on 17 August 1862 and<br />
again on that date in 1864. <strong>The</strong> first<br />
colonel was Daniel N. McIntosh (a<br />
Creek, despite <strong>the</strong> name). It surrendered<br />
on 26 May 1865.<br />
Along with <strong>the</strong> 1st Creek Cavalry<br />
Battalion, it was initially employed in<br />
<strong>the</strong> Opothleyahola campaign against<br />
<strong>the</strong> pro-Union Creeks and Seminoles<br />
led by <strong>the</strong> Creek Chief Opothleyahola.<br />
Opothleyahola’s force was made<br />
up <strong>of</strong> traditionalist Indians and<br />
runaway slaves who fought in ad hoc<br />
units. <strong>The</strong>y were driven from <strong>the</strong><br />
Indian Territory in December 1861.<br />
<strong>The</strong> Creek 1st Cavalry Regiment<br />
fought at Round Mountain (11/19/61),<br />
Chusto-Talasah (12/9/61), Chustenahalan<br />
(12/26/61), Pea Ridge (3/6-<br />
8/62), Honey Springs (7/17/63), Fort<br />
Gibson (9/16/64), and Cabin Creek<br />
(9/19/64).<br />
Creek 1st Cavalry Battalion (later<br />
Creek 2nd Cavalry Regiment). Raised<br />
in August 1861, after <strong>the</strong> Creek 1st<br />
Cavalry Regiment, it was initially<br />
paired with <strong>the</strong> 1st Seminole Cavalry<br />
Battalion. <strong>The</strong> first commander was<br />
Chilly McIntosh. In late 1862 this<br />
battalion was expanded into a<br />
regiment and designated <strong>the</strong> Creek<br />
2nd Cavalry Regiment. It surrendered<br />
on 26 May 1865.<br />
As 1st Cavalry Battalion it fought<br />
at Round Mountain (11/19/61),<br />
Chusto-Talasah (12/9/61), Chustenahalan<br />
(12/26/61) and Pea Ridge (3/6-<br />
8/62). As <strong>the</strong> 2nd Cavalry Regiment it<br />
fought at Old Fort Wayne (10/22/62),<br />
Honey Springs (7/17/63), Fort Gibson<br />
(9/16/64), and Cabin Creek (9/19/64).<br />
Seminole 1st Cavalry Battalion<br />
(later Seminole 1st Cavalry Regiment).<br />
This battalion was raised on 19<br />
September 1861, with six companies.<br />
Maj. (later Col.) John Jumper was its<br />
first commander. Early in 1863 it was<br />
expanded into a full regiment, but <strong>the</strong><br />
documentation showing <strong>the</strong> exact date<br />
is missing. It surrendered on 2 June<br />
1865.<br />
As <strong>the</strong> 1st Cavalry Battalion it<br />
fought at Round Mountain (11/19/61),<br />
Chusto-Talasah (12/9/61), Chustenahalan<br />
(12/26/61) and Pea Ridge (3/6-<br />
8/62). As <strong>the</strong> 1st Cavalry Regiment it<br />
fought at Cabin Creek (9/19/64).<br />
Cherokee 1st Cavalry Regiment,<br />
Mounted Rifles (Drew’s Mounted<br />
Rifles). This regiment was raised on 4<br />
October 1861, by <strong>the</strong> Cherokee Tribal<br />
Government at <strong>the</strong> direction <strong>of</strong><br />
Principal Chief John Ross. He also<br />
appointed <strong>the</strong> <strong>of</strong>ficers <strong>of</strong> <strong>the</strong> regiment<br />
based on <strong>the</strong>ir loyalty to him,<br />
including its commander John Drew.<br />
Most <strong>of</strong> <strong>the</strong> Ross-loyalist <strong>of</strong>ficers<br />
were mixed-blood slaveholders, but<br />
<strong>the</strong> troops were mostly full-blood<br />
Cherokee. Many also belonged to <strong>the</strong><br />
Keetoowah, a secret society opposed<br />
to slavery and that fostered traditional<br />
Indian ways. <strong>The</strong> regiment thus<br />
identified itself as “Indian,” not<br />
“Confederate.” While <strong>the</strong> unit<br />
acquitted itself well fighting white<br />
troops, it suffered mass desertions<br />
whenever it faced pro-Union Indians.<br />
A third <strong>of</strong> <strong>the</strong> unit deserted to<br />
Opothleyahola on <strong>the</strong> eve <strong>of</strong> Chusto-<br />
Talasah. Virtually everyone – except<br />
<strong>the</strong> senior <strong>of</strong>ficers – deserted to <strong>the</strong><br />
Union in June 1862, when <strong>the</strong> Ross<br />
faction <strong>of</strong> <strong>the</strong> Cherokee Nation<br />
declared for <strong>the</strong> Union after a US<br />
Army expeditionary force reached <strong>the</strong><br />
Cherokee capitol <strong>of</strong> Talequah. <strong>The</strong><br />
Confederate regiment was <strong>the</strong>n<br />
<strong>of</strong>ficially dissolved. Stand Watie’s<br />
2nd Mounted Rifles <strong>the</strong>n became <strong>the</strong><br />
1st Cherokee Mounted Rifles.<br />
<strong>The</strong> Cherokee 1st Cavalry<br />
Regiment, Mounted Rifles; fought at<br />
Chusto-Talasah (12/9/61) and Pea<br />
Ridge (3/6-8/62).<br />
Choctaw Deneale’s Cavalry<br />
Battalion (also known as Choctaw<br />
Deneale’s Cavalry Regiment, and<br />
later <strong>the</strong> Choctaw 2nd Cavalry<br />
Regiment). Raised on 14 July 1862,<br />
with five companies and George<br />
Deneale as its Lt. Col., <strong>the</strong> battalion<br />
was disbanded on 5 May 1862. Its<br />
record <strong>the</strong>n becomes cloudy. <strong>The</strong><br />
troops were absorbed into o<strong>the</strong>r units,<br />
but it’s also possible it was reformed<br />
as Choctaw Deneale’s Cavalry<br />
Regiment. Ei<strong>the</strong>r way, nei<strong>the</strong>r<br />
Deneale’s Cavalry Regiment or <strong>the</strong><br />
Choctaw 2nd Cavalry Regiment<br />
played an active part in <strong>the</strong> war.<br />
Choctaw 1st Cavalry Battalion<br />
(also called Folsum’s Choctaw<br />
Cavalry Battalion). This battalion was<br />
raised in ei<strong>the</strong>r March or April 1862,<br />
with Simpson Folsum as its commander.<br />
Initially it seemed to have<br />
been raised as <strong>the</strong> 1st Cavalry<br />
Regiment, Mounted Rifles, but that<br />
unit disappears from <strong>the</strong> records after<br />
May 1862. It’s likely Folsum failed to<br />
recruit enough men for a regiment,<br />
and <strong>the</strong> unit was <strong>the</strong>refore reorganized<br />
as a battalion with Folsum still<br />
commanding, but as a major ra<strong>the</strong>r<br />
than a lieutenant colonel. In any case,<br />
it was expanded into <strong>the</strong> 1st Choctaw<br />
War Regiment (or <strong>the</strong> Choctaw 1st<br />
Cavalry Regiment) in February 1864.<br />
<strong>The</strong> 1st Choctaw War Regiment<br />
surrendered on 26 May 1865. This<br />
unit served in <strong>the</strong> sou<strong>the</strong>rn Indian<br />
Territory as well as in southwestern<br />
Arkansas and nor<strong>the</strong>rn Louisiana.<br />
As Folsum’s Battalion it fought at<br />
Newtonia (9/30/62) and operations in<br />
Cherokee County (12/4-12/62). At <strong>the</strong><br />
1st Choctaw War Regiment it<br />
participated in <strong>the</strong> Camden Expedition<br />
(Mar-May/64), and fought at<br />
Poison Springs (4/18/64) and<br />
Massard’s Prairie (6/27/64).<br />
Chickasaw 1st Cavalry Battalion.<br />
Organized in April 1862, with Lt. Col.<br />
Joseph D. Harris as its commander.<br />
<strong>The</strong> battalion surrendered on 26 May<br />
1865. It served brigaded with o<strong>the</strong>r<br />
Choctaw and Chickasaw units in <strong>the</strong><br />
sou<strong>the</strong>rn Indian Territory and<br />
Arkansas. It participated in <strong>the</strong><br />
Arkansas campaign <strong>of</strong> April 1864.<br />
Cherokee 1st Cavalry Battalion,<br />
Partisan Rangers (Bryan’s Cherokee<br />
Cavalry Battalion). It was organized<br />
with five companies on 3 September<br />
1862, and was expanded into a<br />
regiment (2nd Cherokee Mounted<br />
Volunteers) by combining five<br />
companies <strong>of</strong> Stand Watie’s Cherokee<br />
Mounted Rifles into <strong>the</strong> new formation.<br />
Maj. J. M. Bryan commanded<br />
strategy & tactics 35
36 #229<br />
<strong>the</strong> Partisan Ranger Battalion. William<br />
P. Adair served as <strong>the</strong> first colonel <strong>of</strong><br />
<strong>the</strong> 2nd Cherokee Mounted Volunteers.<br />
This regiment was also called <strong>the</strong><br />
Cherokee 2nd Cavalry Regiment,<br />
Mounted Rifles, after <strong>the</strong> original 2nd<br />
Mounted Rifles was redesignated <strong>the</strong><br />
Cherokee 1st Cavalry Regiment,<br />
Mounted Rifles.<br />
As Bryan’s Cavalry Battalion it<br />
fought at Newtonia (9/30/62), Grandby<br />
(10/4/62) and participated in operations<br />
in Cherokee County (12/4-12/62).<br />
As <strong>the</strong> 2nd Cherokee Mounted Rifles, it<br />
fought at Honey Springs (7/17/63).<br />
Osage (Broke Arm’s) Cavalry<br />
Battalion. Commanded by Maj. Broke<br />
Arm (an Osage), it was organized in<br />
March 1863, with three companies. It<br />
was <strong>the</strong> only Confederate unit<br />
organized by a tribe o<strong>the</strong>r than <strong>the</strong> five<br />
principal Indian nations. At <strong>the</strong> end <strong>of</strong><br />
<strong>the</strong> war it served with Stand Watie’s<br />
brigade, but didn’t participate in any<br />
major battles. <strong>The</strong> unit surrendered on<br />
23 June 1865.<br />
Chickasaw 1st Cavalry Regiment<br />
(or Chickasaw 1st Infantry Regiment).<br />
Raised on 23 October 1863 for local<br />
defense <strong>of</strong> <strong>the</strong> Chickasaw Nation.<br />
Once organized, a shortage <strong>of</strong> horses<br />
led to confusion as to whe<strong>the</strong>r it would<br />
be employed as an infantry or cavalry<br />
unit, but cavalry’s prestige held sway.<br />
William L. Hunter was <strong>the</strong> first<br />
colonel. <strong>The</strong> unit surrendered 26 May<br />
1865.<br />
Choctaw 1st Cavalry Battalion<br />
(also called McCurtain’s Battalion).<br />
This unit was raised in August 1864,<br />
with Jackson McCurtain as Lt. Col.<br />
Increased to a regiment in February<br />
1865, it became <strong>the</strong> Choctaw 3rd Cavalry<br />
Regiment. Provided local defense<br />
<strong>of</strong> <strong>the</strong> Choctaw Nation, surrendered 26<br />
May 1865.<br />
—Mark N. Lardas<br />
<strong>the</strong> rise & fall <strong>of</strong><br />
alexius Ducas<br />
Nothing epitomizes <strong>the</strong> tragedy <strong>of</strong><br />
medieval ambition more than <strong>the</strong> rule<br />
in 1204 <strong>of</strong> Alexius Ducas as Byzantine<br />
emperor. He briefly led <strong>the</strong> Byzantine<br />
Greeks against <strong>the</strong> Fourth Crusade in<br />
<strong>the</strong>ir attempt to control Constantinople<br />
and subvert <strong>the</strong> ancient Eastern Orthodox<br />
realm.<br />
What later historians call <strong>the</strong><br />
Byzantine Empire was <strong>the</strong> successor<br />
to <strong>the</strong> Roman Empire in <strong>the</strong> east. At its<br />
highpoint, <strong>the</strong> Byzantine writ ran from<br />
Rome to Alexandria, but successive<br />
waves <strong>of</strong> invaders had forced it back to<br />
its core in <strong>the</strong> Balkans and <strong>the</strong> Anatolian<br />
coastlines.<br />
Ducas was born into a noble family<br />
<strong>of</strong> Greek origin where he found himself<br />
near <strong>the</strong> center <strong>of</strong> political power.<br />
In <strong>the</strong> labyrinthine and unstable system<br />
<strong>of</strong> that time, he was <strong>of</strong>ten drawn into<br />
<strong>the</strong> political machinations <strong>of</strong> those who<br />
sought to wear <strong>the</strong> purple <strong>of</strong> imperial<br />
Byzantium, machinations that <strong>of</strong>ten led<br />
to civil war.<br />
After <strong>the</strong> blinding and imprisonment<br />
<strong>of</strong> Emperor Isaac Angelos, Ducas<br />
found himself imprisoned for seven<br />
years by <strong>the</strong> new emperor, Alexius<br />
III. In 1203, Alexius III was in turn<br />
faced with concerted opposition from<br />
a Frankish army, a Venetian navy and<br />
Isaac’s son (also named Alexius).<br />
While <strong>the</strong> Fourth Crusaders were <strong>the</strong>oretically<br />
supposed to be marching on<br />
<strong>the</strong> Holy Land to free Jerusalem from<br />
<strong>the</strong> Muslims, <strong>the</strong>y had decided taking<br />
control <strong>of</strong> <strong>the</strong> rich metropolis <strong>of</strong> Constantinople<br />
would be more pr<strong>of</strong>itable.<br />
Despite a strong military position and<br />
<strong>the</strong> command <strong>of</strong> a large army, Alexius<br />
III chose to flee <strong>the</strong> imperial capital<br />
when <strong>the</strong> Crusaders placed a puppet on<br />
<strong>the</strong> throne.<br />
<strong>The</strong> ascension <strong>of</strong> Isaac’s son<br />
Alexius IV led Ducas to regain his<br />
freedom and assume a position <strong>of</strong><br />
power within <strong>the</strong> new regime. He was<br />
soon appointed to <strong>the</strong> post <strong>of</strong> protovestarius,<br />
or chamberlain, a high <strong>of</strong>ficial<br />
in <strong>the</strong> court. As such he had <strong>the</strong> ear <strong>of</strong><br />
<strong>the</strong> young emperor, who was trying<br />
hard to fulfill <strong>the</strong> generous promises<br />
he’d made to <strong>the</strong> Crusader allies who’d<br />
secured him his throne. As tensions<br />
rose between <strong>the</strong> new emperor and <strong>the</strong><br />
Crusaders, Ducas found himself firmly<br />
in <strong>the</strong> anti-Crusader camp, criticizing<br />
Alexius for having mortgaged lands to<br />
pay <strong>the</strong> Crusaders, and urging him to<br />
make <strong>the</strong>m leave.<br />
On 7 January 1204, as tension<br />
continued to escalate between <strong>the</strong> Byzantine<br />
court and <strong>the</strong> Crusader camp,<br />
Ducas, a man <strong>of</strong> some military skill,<br />
led a group <strong>of</strong> horsemen out <strong>of</strong> <strong>the</strong><br />
city to confront <strong>the</strong> Westerners. In <strong>the</strong><br />
skirmish that followed, he was nearly<br />
captured when toppled from his horse.<br />
<strong>The</strong> action, while militarily insignificant,<br />
gained him popularity among <strong>the</strong><br />
Greeks as a man willing to stand up to<br />
<strong>the</strong> Crusaders and ignore <strong>the</strong> emperor’s<br />
prohibitions on such conduct.<br />
Fed up with <strong>the</strong> misrule <strong>of</strong> Alexius<br />
IV, <strong>the</strong> populace sought ano<strong>the</strong>r leader.<br />
<strong>The</strong> Constantinople citizenry soon put<br />
forward one <strong>of</strong> <strong>the</strong>ir own, a hapless<br />
Nicholas Kannovos, as rival emperor.<br />
Though <strong>the</strong>re was little doubt<br />
<strong>the</strong> reluctant appointee would not be<br />
able to assume power, that development<br />
convinced Ducas <strong>the</strong> time had<br />
come to remove Alexius IV. When <strong>the</strong><br />
still-grasping Alexius went so far as<br />
to <strong>of</strong>fer <strong>the</strong> Crusaders control over his<br />
own palace if <strong>the</strong>y would maintain him<br />
in power <strong>the</strong>re, Ducas decided to act.<br />
On <strong>the</strong> night <strong>of</strong> 27-28 January, Ducas<br />
and <strong>the</strong> palace guards crept into <strong>the</strong><br />
emperor’s room, captured Alexius III<br />
and imprisoned him in <strong>the</strong> dungeon.<br />
Shortly <strong>the</strong>reafter, Ducas brazenly proclaimed<br />
himself as Emperor Alexius V.<br />
His first task was to solidify his<br />
position by removing <strong>the</strong> many threats<br />
to his power. Whe<strong>the</strong>r by natural<br />
causes or treachery, <strong>the</strong> aged Isaac<br />
Angelos became ill and died shortly<br />
after Alexius V’s ascension. Nicholas<br />
Kannavos, who’d meanwhile lost <strong>the</strong><br />
support <strong>of</strong> <strong>the</strong> people who had appointed<br />
him, was soon arrested at <strong>the</strong> Hagia<br />
Sophia ca<strong>the</strong>dral and quickly <strong>the</strong>reafter<br />
decapitated. Alexius IV also soon met<br />
his doom at <strong>the</strong> hands <strong>of</strong> <strong>the</strong> man who<br />
had removed him from power.<br />
With control over Constantinople’s<br />
political machine firmly in his hands,<br />
Alexius V <strong>the</strong>n took steps to remove<br />
<strong>the</strong> threat posed by <strong>the</strong> Crusaders encamped<br />
outside <strong>the</strong> city. Ordering <strong>the</strong>m<br />
to depart or face death, he incurred <strong>the</strong><br />
wrath <strong>of</strong> <strong>the</strong> Westerners. After participating<br />
in several skirmishes with <strong>the</strong>m,<br />
he decided to sortie and attack <strong>the</strong>ir<br />
camp.<br />
Alexius’s forces, bearing <strong>the</strong> venerated<br />
icon <strong>of</strong> <strong>the</strong> Virgin Mary, set out to<br />
meet <strong>the</strong> Western invaders. <strong>The</strong> presence<br />
<strong>of</strong> that revered relic displayed <strong>the</strong><br />
new emperor’s confidence in his task.<br />
Unfortunately for him, that confidence<br />
was greater than his ability to lead<br />
troops. <strong>The</strong> Crusaders beat back his<br />
forces and captured <strong>the</strong> relic. Alexius<br />
abandoned <strong>the</strong> imperial standard and<br />
fled back into <strong>the</strong> city.<br />
<strong>The</strong> Crusaders, <strong>the</strong>ir morale<br />
boosted, were encouraged to attempt<br />
outright capture <strong>of</strong> Constantinople.<br />
At <strong>the</strong> same time, Greek morale was<br />
undermined. <strong>The</strong> situation wasn’t<br />
helped much when Alexius attempted<br />
to mislead <strong>the</strong> people into believing<br />
he had won an imperial victory. <strong>The</strong><br />
Crusaders were more than happy to<br />
refute <strong>the</strong> fabrication, displaying <strong>the</strong><br />
captured icon and standard on <strong>the</strong> prow<br />
<strong>of</strong> a Venetian vessel that sailed back<br />
and forth in <strong>the</strong> waters just outside <strong>the</strong><br />
city.
On 9 April <strong>the</strong> Crusaders began<br />
<strong>the</strong>ir attack, but Alexius rallied his<br />
troops and led <strong>the</strong>m in a spirited<br />
resistance. <strong>The</strong> Crusaders’ first attack<br />
failed when <strong>the</strong>ir galleys were<br />
hampered by strong cross winds that<br />
prevented <strong>the</strong>m from drawing close to<br />
<strong>the</strong> fortifications. But <strong>the</strong> great prize<br />
lay in front <strong>of</strong> <strong>the</strong>m and, when <strong>the</strong>y<br />
renewed <strong>the</strong>ir efforts on <strong>the</strong> 12th, it<br />
was with a new sense <strong>of</strong> dedication<br />
with rousing sermons and benedictions.<br />
<strong>The</strong> wea<strong>the</strong>r, which previously<br />
assisted <strong>the</strong> Byzantines, turned in<br />
<strong>the</strong> Crusaders’ favor. <strong>The</strong> shifting<br />
winds allowed <strong>the</strong> Venetian ships to<br />
get close to <strong>the</strong> city walls and an amphibious<br />
assault captured two towers.<br />
<strong>The</strong> Crusaders <strong>the</strong>n forced open two<br />
gates, allowing <strong>the</strong> rest <strong>of</strong> <strong>the</strong>ir army<br />
to stream into Constantinople itself.<br />
Frankish horsemen charged <strong>the</strong><br />
emperor’s tents and Alexius, abandoned<br />
by his guard, fled to Bucoleon<br />
Place. Faced with <strong>the</strong> fury <strong>of</strong> <strong>the</strong><br />
Western warriors, <strong>the</strong> entire Byzantine<br />
army routed. <strong>The</strong> Crusaders <strong>the</strong>n<br />
began an orgy <strong>of</strong> pillage. Constantinople,<br />
<strong>the</strong> great Christian defense <strong>of</strong><br />
<strong>the</strong> East, had finally fallen.<br />
While <strong>the</strong> city burned, <strong>the</strong> emperor<br />
commandeered a fishing boat and<br />
escaped across <strong>the</strong> Bosphorous. <strong>The</strong><br />
tragedy <strong>of</strong> Alexius V had, however,<br />
only just begun.<br />
<strong>The</strong> Crusaders, now in control,<br />
appointed one <strong>of</strong> <strong>the</strong>ir own, Baldwin<br />
<strong>of</strong> Flanders, to lead what was to be<br />
called <strong>the</strong> Latin Empire <strong>of</strong> Constantinople.<br />
At <strong>the</strong> same time, Alexius III,<br />
in a gesture <strong>of</strong> reconciliation, <strong>of</strong>fered<br />
to give his daughter in marriage to<br />
Alexius V (she was already romantically<br />
linked with him), and suggested<br />
a formal alliance. As <strong>the</strong> Crusader<br />
army advanced in all directions from<br />
Constantinople, <strong>the</strong> two emperors met<br />
in <strong>the</strong> Thracian town <strong>of</strong> Mosynopolis,<br />
ostensibly to cement <strong>the</strong>ir new understanding.<br />
During that meeting, however,<br />
Alexius III had his men seize Ducas<br />
and blind him. By Roman/Byzantine<br />
custom, blinding would prevent<br />
someone from being able to rule.<br />
Shortly <strong>the</strong>reafter Ducas was turned<br />
over to <strong>the</strong> Crusaders, who returned<br />
him to Constantinople where he was<br />
promptly tried and sentenced to death.<br />
<strong>The</strong> elderly doge (ruler) <strong>of</strong> Venice<br />
suggested <strong>the</strong> sentence: since Ducas<br />
was <strong>of</strong> high birth, he should be given<br />
“high justice.” Elaborating on his<br />
idea, <strong>the</strong> doge suggested Ducas be<br />
made to climb one <strong>of</strong> <strong>the</strong> high towers<br />
<strong>of</strong> <strong>the</strong> city and <strong>the</strong>n “be thrown to <strong>the</strong><br />
ground.”<br />
Thus <strong>the</strong> one-time ruler <strong>of</strong> <strong>the</strong><br />
ancient Byzantine Empire was flungfrom<br />
<strong>the</strong> column <strong>of</strong> <strong>The</strong>odosius in <strong>the</strong><br />
heart <strong>of</strong> <strong>the</strong> ancient capital. <strong>The</strong> Latin<br />
Empire, which he had attempted to<br />
forestall, was established and lasted<br />
for 57 years. In his brief rule as Alexius<br />
V, Ducas had organized Byzantine<br />
resistance against <strong>the</strong> avarice <strong>of</strong> <strong>the</strong><br />
Crusaders. Unfortunately for him and<br />
his empire, he lacked <strong>the</strong> ability to<br />
avoid <strong>the</strong> treachery <strong>of</strong> those vying for<br />
<strong>the</strong> same increasingly meaningless<br />
power.<br />
— Darin Levil<strong>of</strong>f<br />
<strong>the</strong> australian Conquest<br />
<strong>of</strong> Kaiser<br />
Wilhelm’s land<br />
When <strong>the</strong> Great War broke out in<br />
1914, <strong>the</strong> British government requested<br />
<strong>the</strong> Australian military remove<br />
<strong>the</strong> threat <strong>of</strong> German wireless radio<br />
stations in <strong>the</strong> Pacific. Such stations<br />
were on islands in German colonial<br />
territories called Kaiser Wilhelm’s<br />
Land. <strong>The</strong> German Pacific Territories<br />
included nor<strong>the</strong>ast New Guinea,<br />
New Britain, New Ireland, Manus,<br />
Bougainville, Nauru and numerous<br />
islands in Micronesia including Yap,<br />
Ponape and Angaur. <strong>The</strong> administration<br />
<strong>of</strong> Kaiser Wilhelm’s Land was<br />
conducted from Rabaul on <strong>the</strong> island<br />
<strong>of</strong> New Britain. Kaiser Wilhem’s<br />
Land abutted <strong>the</strong> old Queensland and<br />
<strong>the</strong> <strong>the</strong>n-Australian territory <strong>of</strong> Papua,<br />
which was centered on Port Moresby.<br />
<strong>The</strong> Germans had gained control<br />
<strong>of</strong> those territories during <strong>the</strong><br />
scramble for colonies in <strong>the</strong> late<br />
19th century. <strong>The</strong>y had stationed a<br />
small contingent <strong>of</strong> police and native<br />
troops to defend <strong>the</strong> region. With <strong>the</strong><br />
outbreak <strong>of</strong> war, <strong>the</strong> Germans passed<br />
a new law allowing commanders<br />
in overseas territories to recall to<br />
<strong>the</strong> colors all Germans belonging to<br />
<strong>the</strong> Landwehr, <strong>the</strong>ir army’s secondline<br />
reserve. When that was done in<br />
Kaiser Wilhelm’s Land, <strong>the</strong> Germans<br />
were able to mobilize a defense force<br />
<strong>of</strong> seven German <strong>of</strong>ficers, 52 German<br />
enlisted, and 240 native soldiers.<br />
It did not seem to be a particularly<br />
formidable force to defend an island<br />
empire.<br />
<strong>The</strong> Australians, meanwhile,<br />
raised <strong>the</strong> 20,000 man Australian<br />
Imperial Force (1st AIF) for service<br />
in Europe. To fight in <strong>the</strong> Pacific <strong>the</strong>y<br />
formed a separate unit called <strong>the</strong><br />
Australian Naval and Military Expeditionary<br />
Force (AN & MEF). That<br />
expeditionary force came to consist <strong>of</strong><br />
a mixed battalion <strong>of</strong> army troops and<br />
naval reservists, as well as several<br />
ships <strong>of</strong> <strong>the</strong> Royal Australian Navy<br />
(RAN). <strong>The</strong> whole force was under<br />
<strong>the</strong> command <strong>of</strong> Rear Adm. George<br />
Patey, with <strong>the</strong> land component led by<br />
a Col. Howes.<br />
On 19 August 1914, a RAN<br />
squadron raided Blanche Bay, <strong>the</strong> inlet<br />
on which Rabaul is situated. That<br />
move temporarily shut down <strong>the</strong> radio<br />
station <strong>the</strong>re, disrupting communications<br />
with Germany. As a result, <strong>the</strong><br />
Germans moved <strong>the</strong>ir administration<br />
inland from Rabaul to Toma.<br />
That same day <strong>the</strong> AN&MEF<br />
steamed in <strong>the</strong> transport Berrima<br />
escorted by submarines and destroyers<br />
<strong>of</strong> <strong>the</strong> RAN. <strong>The</strong> combined force<br />
refueled at an island <strong>of</strong>f Milne Bay<br />
and <strong>the</strong>n proceeded to Rabaul. At<br />
3:30 a.m. on 11 September, HMA<br />
ships Sydney and Parramatta entered<br />
Blanche Bay, swept <strong>the</strong> waterway for<br />
enemy ship only to find <strong>the</strong> entire area<br />
empty. At 6:00 a.m. HMAS Australia,<br />
Encounter and Berrima arrived and<br />
made ready to land troops.<br />
<strong>The</strong> Australians were aware<br />
<strong>the</strong> main radio station was inland<br />
on <strong>the</strong> south side <strong>of</strong> <strong>the</strong> bay near<br />
Herbertshohe, and so landed a naval<br />
party to occupy that area. Part <strong>of</strong> <strong>the</strong><br />
force landed at Herbertshohe and<br />
part at Kabakaul Bay. <strong>The</strong> plan was<br />
to use <strong>the</strong> local piers and jetties as<br />
debarkation points, as <strong>the</strong> Australian<br />
commanders expected and indeed<br />
encountered no resistance at <strong>the</strong> shore<br />
line. Rear Adm. Patey <strong>the</strong>n sent a note<br />
to <strong>the</strong> German governor asking for his<br />
surrender. When no response came,<br />
one Australian contingent began moving<br />
inland from Kabakaul Bay under<br />
command <strong>of</strong> a Lt. Bowen, while <strong>the</strong><br />
o<strong>the</strong>r started from Herbertshohe.<br />
<strong>The</strong>ir mission was to capture <strong>the</strong> radio<br />
station known to have been moved<br />
inland.<br />
Two miles inland, Bowen’s<br />
advance party encountered a group<br />
<strong>of</strong> German troops holding a position<br />
in <strong>the</strong> bush along a bend in <strong>the</strong><br />
road. A Petty Officer Palmer opened<br />
fire on <strong>the</strong> Germans and hit one <strong>of</strong><br />
in <strong>the</strong> hand. <strong>The</strong> wounded man was<br />
Sgt. Maj. Mauderer, commander <strong>of</strong><br />
<strong>the</strong> detachment. <strong>The</strong> Australians had<br />
strategy & tactics 37
38 #229<br />
some good luck <strong>the</strong>re, as Mauderer<br />
promptly came forward to surrender<br />
himself. <strong>The</strong> o<strong>the</strong>r Germans, though,<br />
weren’t as cooperative and opened fire.<br />
Bowen soon realized he was outnumbered,<br />
but he still managed to convince<br />
Mauderer <strong>the</strong> Australians were moving<br />
up a whole battalion in support. With<br />
that, Mauderer called out and soon<br />
convinced <strong>the</strong> o<strong>the</strong>rs to surrender.<br />
That action set <strong>the</strong> tone for <strong>the</strong><br />
fighting throughout <strong>the</strong> area. Brief<br />
firefights were followed quickly by<br />
German surrenders. <strong>The</strong> Australians<br />
continued to use Mauderer and o<strong>the</strong>r<br />
cooperative prisoners <strong>of</strong> war to convince<br />
more defenders to cease fighting.<br />
<strong>The</strong> Germans were a long way from<br />
home and in no position to gain any<br />
support. It is <strong>the</strong>refore not surprising<br />
<strong>the</strong>y proved willing to quit <strong>the</strong> fight.<br />
By <strong>the</strong> end <strong>of</strong> that day <strong>the</strong> Australians<br />
were in possession <strong>of</strong> <strong>the</strong> radio<br />
transmitter. Thus ended <strong>the</strong> fighting on<br />
11 September.<br />
<strong>The</strong> broader situation was that<br />
Toma was isolated, radio station taken,<br />
and Rabaul’s coast under Australian<br />
occupation. On <strong>the</strong> afternoon <strong>of</strong> 12<br />
September, <strong>the</strong> troop transport Berrima<br />
sailed into Simpson Harbor<br />
and took up position along <strong>the</strong> docks<br />
near Rabaul. At 6:00 p.m. it tied up<br />
alongside <strong>the</strong> wharf and began landing<br />
troops. With that, for all practical<br />
purposes, <strong>the</strong> conquest <strong>of</strong> Kaiser<br />
Wilhelm’s Land was complete. <strong>The</strong><br />
<strong>of</strong>ficial ceremonies transferring authority<br />
to Holmes as governor took place<br />
on <strong>the</strong> 13th.<br />
Over <strong>the</strong> next few weeks, small<br />
detachments <strong>of</strong> Australians secured <strong>the</strong><br />
o<strong>the</strong>r parts <strong>of</strong> Kaiser Wilhelm’s Land,<br />
including that portion on New Guinea<br />
itself. No German troops actively defended<br />
any portion <strong>of</strong> <strong>the</strong> colony. Thus<br />
ended <strong>the</strong> Australian military’s first<br />
amphibious operations.<br />
HMA Ships Involved<br />
HMAS Australia battle cruiser (RAN<br />
flagship), HMAS Sydney cruiser,<br />
HMAS Melbourne cruiser, HMAS<br />
Encounter cruiser, HMAS Berrima<br />
auxiliary cruiser, HMAS Parramatta<br />
destroyer, HMAS Warrago destroyer,<br />
HMAS Yarra destroyer, AE 1 submarine,<br />
AE 2 submarine.<br />
— Peter Wyche<br />
Data file<br />
World War ii electronic<br />
Warfare<br />
World War II saw dramatic increases<br />
in electronic warfare technology.<br />
One <strong>of</strong> <strong>the</strong> primary battlegrounds<br />
for electronic warfare was in <strong>the</strong> skies<br />
over <strong>the</strong> Third Reich as Royal Air<br />
Force intruders sought to penetrate<br />
Luftwaffe defenses. Some <strong>of</strong> <strong>the</strong> more<br />
significant developments included<br />
<strong>the</strong> following codenamed devices and<br />
projects.<br />
Royal Air Force<br />
Airborne Cigar (ABC) – a jammer<br />
that worked against German receiver/transmitter<br />
(R/T) transmissions.<br />
<strong>The</strong> jamming signal sent out was<br />
a musical sounding warbling tone<br />
with a range <strong>of</strong> about 50 miles. It<br />
had maintenance problems, being<br />
affected by icing and vibration.<br />
This device was installed in <strong>the</strong><br />
US-manufactured B-17s <strong>of</strong> Bomber<br />
Command’s 100 Group.<br />
AI Mark IV – An early British airborne<br />
intercept (AI) radar, it was<br />
first developed in 1940. It had a<br />
maximum range <strong>of</strong> 6,400 meters<br />
and a minimum range <strong>of</strong> 300. It<br />
had two CRT displays to give<br />
azimuth and elevation, and was<br />
reasonably successful.<br />
AI Mark VIII – Developed in 1942,<br />
AI Mk VIII was a 10 centimeter radar<br />
with maximum range increased<br />
to about 10 kilometers.<br />
Boozer – This was a tail warning<br />
device that gave visual indications<br />
<strong>of</strong> Wurzburg GCI, FuG202 or 212<br />
‘painting’ <strong>of</strong> <strong>the</strong> bomber. Boozer<br />
was not well liked, as it gave <strong>of</strong>f<br />
numerous false alarms due to <strong>the</strong><br />
large amount <strong>of</strong> radar and radio<br />
frequency transmissions in <strong>the</strong><br />
skies over Germany. Fine in <strong>the</strong>ory,<br />
it proved almost useless in practice.<br />
Corona – Corona was ano<strong>the</strong>r jamming<br />
system used against German<br />
R/T transmissions. Instead <strong>of</strong><br />
merely jamming enemy frequencies,<br />
<strong>the</strong> system attempted to give<br />
false and misdirecting information<br />
by using German speaking operators.<br />
Corona was ground based in<br />
sou<strong>the</strong>astern England.<br />
Ground Cigar – This was <strong>the</strong> ground<br />
based jammer version <strong>of</strong> Airborne<br />
Cigar. Obviously, <strong>the</strong> main limitation<br />
was <strong>the</strong> range from bases in<br />
England; however, because it used<br />
larger, more powerful transmitters<br />
it had a more powerful signal.<br />
Ground Grocer – A land based jamming<br />
system that interfered with<br />
German FuG202 and FuG212 sets.<br />
It was phased out after Window<br />
came into use.<br />
H2S – This radar was carried by aircraft<br />
and actually ‘looked down’ to<br />
identify ground targets. It was used<br />
as a navigation aid by <strong>the</strong> British<br />
in night bombing over targets too<br />
far for Oboe navigation. It used a<br />
10 centimeter magnetron and was<br />
extremely useful. Unfortunately,<br />
it was compromised early and<br />
<strong>the</strong> Germans developed a homing<br />
device with which to guide <strong>the</strong>ir<br />
interceptors toward <strong>the</strong> bombers<br />
using it.<br />
Mandrel – Mandrel was a jammer <strong>the</strong><br />
RAF used to limit <strong>the</strong> effectiveness<br />
<strong>of</strong> <strong>the</strong> FuGM 80 Freya series<br />
<strong>of</strong> early warning radars, including<br />
Wasserman and Mammut. Mandrel<br />
at first jammed only frequencies in<br />
<strong>the</strong> 118-128 MHz band, but later<br />
versions covered <strong>the</strong> 68-78 and<br />
138-148 MHz bands. Though with<br />
experience <strong>the</strong> Germans learned to<br />
work around this jamming, overall<br />
it was considered moderately successful.<br />
Monica – Ano<strong>the</strong>r tail warning device,<br />
this was an active system compromised<br />
when a downed bomber revealed<br />
its existence. <strong>The</strong> Germans<br />
<strong>the</strong>n developed a detector for it.<br />
Serrate – Serrate was a device that<br />
homed in on German nightfighter<br />
radar transmissions, specifically<br />
FuG202, FuG212 and FuG220. It<br />
was used in British intruder Mosquito<br />
escort fighters to good effect.<br />
Tinsel – An air based jamming system<br />
that used a microphone placed in<br />
<strong>the</strong> engine nacelle <strong>of</strong> <strong>the</strong> bomber.<br />
When an enemy R/T frequency<br />
was found, Tinsel was switched<br />
on, transmitting continuous engine<br />
noise.<br />
Window – <strong>The</strong> British name for chaff,<br />
<strong>the</strong> ‘secret’ weapon both sides<br />
were initially afraid to use. Both<br />
<strong>the</strong> RAF and Luftwaffe realized<br />
how devastating it might be to<br />
radar, and <strong>the</strong>refore didn’t want to<br />
alert <strong>the</strong> o<strong>the</strong>r side to its existence,<br />
since <strong>the</strong>y didn’t want it being<br />
used against <strong>the</strong>mselves. Bomber<br />
Command’s losses, however, soon<br />
convinced <strong>the</strong> British that Window<br />
had to be employed to prevent a<br />
disaster. <strong>The</strong> initial Window system<br />
was composed <strong>of</strong> aluminum strips,<br />
2,000 to <strong>the</strong> bundle, cut to 27cm
(11.5 inches) in length. It was capable <strong>of</strong> jamming<br />
FuG202, FuG212 and Wurzburg GCI radars.<br />
Luftwaffe<br />
FuG 202 Lichtenstein BC – <strong>The</strong> Germans’ first airborne<br />
intercept radar, it was built by Telefunken and entered<br />
service in 1942. Normally this radar used <strong>the</strong> quadruple<br />
Mattress aerial installation in <strong>the</strong> nose <strong>of</strong> <strong>the</strong> aircraft,<br />
along with a triple cathode ray tube (CRT) display to<br />
show altitude, azimuth and range. It had maximum and<br />
minimum ranges <strong>of</strong> 3,500 and 200 meters, respectively.<br />
FuG 212 Lichtenstein C-1 – A slightly improved version<br />
<strong>of</strong> <strong>the</strong> FuG202, <strong>the</strong> wide-angle radar had a single pole<br />
antenna that branched out into four dipoles and four<br />
reflectors. Later <strong>the</strong> frequency was altered to overcome<br />
jamming.<br />
FuG 220 Lichtenstein SN-2 – <strong>The</strong> Germans developed<br />
this airborne radar in a crash program after <strong>the</strong> Window<br />
jamming <strong>of</strong> July 1943. First available in September, it<br />
was reasonably immune to Window due to <strong>the</strong> different<br />
wavelength on which it operated. Unfortunately for<br />
<strong>the</strong> Germans, its minimum range was between 300-500<br />
meters, so early versions included Lichtenstein C-1 to<br />
compensate. SN-2 radar featured <strong>the</strong> recognizable “stag<br />
antler” antenna array in <strong>the</strong> nose <strong>of</strong> aircraft in which it<br />
was mounted.<br />
FuG 221a Rosendaal-Halbe – This homing device was<br />
developed by Siemens and detected Monica transmissions.<br />
FuG 227 Flensburg – This improved homing device<br />
detected Monica and Mandrel transmissions. Mounted<br />
in nightfighters, Flensburg remained effective well into<br />
1944, when <strong>the</strong> British discovered its existence and<br />
were forced to remove Monica from its bombers.<br />
FuG 350 Naxos Z – Ano<strong>the</strong>r German airborne homing<br />
device, Naxos Z detected transmissions from H2S and<br />
o<strong>the</strong>r British centimetric radars, such as <strong>the</strong> AI Mark<br />
VIII. <strong>The</strong> RAF responded by instructing crews to<br />
use H2S as little as possible. <strong>The</strong> Naxos ZR version,<br />
mounted in Ju88s, also featured a tail warning radar that<br />
could detect British nightfighter centimetric radars.<br />
FuMG 80 Freya – This was <strong>the</strong> standard German early<br />
warning radar. Later versions included upgrades to <strong>the</strong><br />
Freya itself, as well as new types such as <strong>the</strong> FuMo<br />
51 Mammut and FuMG 402 Wasserman. <strong>The</strong>se radars<br />
generally had a range <strong>of</strong> 125 miles or more, depending<br />
on <strong>the</strong> altitude <strong>of</strong> incoming contacts.<br />
FuMG 62D Wurzburg – This was <strong>the</strong> standard German<br />
ground control intercept (GCI) and Gun Laying (GL)<br />
radar. Two Wurzburg radars were used in <strong>the</strong> “Himmelbett”<br />
(four-post bed) system <strong>of</strong> nightfighting. One<br />
kept track <strong>of</strong> <strong>the</strong> intruder bomber, and one kept track <strong>of</strong><br />
<strong>the</strong> intercepting nightfighter. Wurzburg was also used to<br />
help direct FLAK defenses.<br />
Spanner – This device deserves mention because it was<br />
probably <strong>the</strong> world’s first operationally used infrared<br />
homing device. <strong>The</strong> first version had an infrared searchlight,<br />
but later versions were passive and homed in on<br />
a targeted bomber’s engine heat. It was not produced in<br />
large numbers due to its limited range and o<strong>the</strong>r technical<br />
problems. Still, it was a harbinger <strong>of</strong> future infrared<br />
systems.<br />
—Gregory M. Smith<br />
<strong>the</strong> long tradition:<br />
50 issues ago, S&t 179:<br />
first afghan War. Joseph Miranda<br />
design marches to <strong>the</strong> Khyber<br />
Pass and back, 1839-42. Bryan<br />
Booker sweeps across Persia<br />
with Nadir Shah. And Brian<br />
Train heads for apocalypse in<br />
Peru with <strong>the</strong> Shining Path guerrillas.<br />
100 issues ago, S&t 129:<br />
Harvest <strong>of</strong> Death. Martin and Milman<br />
simulate <strong>the</strong> bloodbath at<br />
Gettysburg. <strong>The</strong>n an eclectic mix<br />
<strong>of</strong> articles on Angola, Logistics,<br />
Sevastapol, German war plans,<br />
and dispatches from <strong>the</strong> Soviet<br />
army.<br />
150 issues ago, S&t 79:<br />
berlin 85. Jim Dunnigan, Dave<br />
Ritchie, Kerry Pendergast and<br />
Redmond Simonsen create a<br />
classic Cold War simulation with<br />
Battle for Berlin, 1985. Dave<br />
Parham goes east for more house<br />
to house fighting at <strong>the</strong> Battle <strong>of</strong><br />
Stalingrad. Plus For Your Eyes<br />
Only and Briefings.<br />
200 issues ago, S&t 29:<br />
uSN. Epic simulation <strong>of</strong> <strong>the</strong> war in<br />
<strong>the</strong> Pacific, 1941-43 (Jim Dunnigan,<br />
John Young, R. Champer<br />
and Al N<strong>of</strong>i). Victor Madej analyzes<br />
blitzkrieg warfare. Plus Jim<br />
Flanagan, John Young and Rod<br />
Walker review games and books.<br />
strategy & tactics 39
x<br />
15 11I<br />
I<br />
6 (3) 6<br />
4<br />
9I<br />
x<br />
9I<br />
6 (2) 6<br />
i i i<br />
i i i<br />
22 18<br />
2 (6) 7<br />
i i i<br />
21 21<br />
2 (3) 6<br />
i i<br />
4<br />
2 (5) 6<br />
5th Air Grp<br />
2<br />
1<br />
USaaF<br />
1A<br />
i i<br />
2 12<br />
1<br />
2 (3) 10<br />
92<br />
CA<br />
40 #229<br />
New Classics from Decision Games<br />
Pacific Battles<br />
Volume 1, <strong>The</strong> Rising Sun<br />
Pacific Battles is a wargame series covering <strong>the</strong><br />
great land battles <strong>of</strong> <strong>the</strong> Pacific <strong>the</strong>ater in WWII.<br />
Units are battalions, with companies and regiments.<br />
Most games in <strong>the</strong> series have players commanding<br />
anywhere from a division to a corps worth <strong>of</strong> forces,<br />
and employment <strong>of</strong> combined arms tactics becomes<br />
critical. <strong>The</strong> system shows <strong>the</strong> evolution <strong>of</strong> tactical<br />
doctrine in both <strong>the</strong> Japanese and Allied armies<br />
with Banzai charges, superior U.S. fire coordination,<br />
naval bombardment, airpower, amphibious<br />
landings, and engineer operations. Games in this<br />
volume include:<br />
<strong>The</strong> Fall <strong>of</strong> Singapore from December <strong>of</strong> 1941<br />
to February <strong>of</strong> 1942, a Japanese force <strong>of</strong> three<br />
divisions under General Yamashita would force<br />
<strong>the</strong> British <strong>of</strong>f <strong>the</strong> Malay Peninsula and seize <strong>the</strong><br />
island fortress <strong>of</strong> Singapore.<br />
Struggle on Bataan recreates <strong>the</strong> desperate U.S.<br />
and Filipino defense <strong>of</strong> <strong>the</strong> Bataan Peninsula between<br />
9 January and 9 April 1942.<br />
Turning Point: Guadalcanal is <strong>the</strong> struggle<br />
between <strong>the</strong> United States and Japan for possession<br />
<strong>of</strong> <strong>the</strong> island <strong>of</strong> Guadalcanal in <strong>the</strong> sou<strong>the</strong>rn<br />
Solomons chain. <strong>The</strong> battle lasted from August<br />
1942 until early February 1943 and resulted in a<br />
strategic defeat for Japan.<br />
Components: 2 34 x 22 inch mapsheet, rules booklet,<br />
player aid cards, 460 die cut counters, storage bags<br />
and 1 die.<br />
$48. 00<br />
Drive on Stalingrad<br />
38 (3) 8<br />
i i<br />
B<br />
37 Advanced European <strong>The</strong>ater <strong>of</strong> Operations<br />
This is an update <strong>of</strong> <strong>the</strong> European <strong>The</strong>ater <strong>of</strong> Operations game published by TSR/SPI.<br />
SPA It is a corps-level simulation <strong>of</strong> <strong>the</strong> battle in Europe during World War II.<br />
(4) 12Advanced<br />
ETO contains almost twice as many pieces <strong>the</strong> original ETO (over 2200!),<br />
including new mechanized, mountain, commando and cavalry units, additional naval and<br />
aircraft types, more Generals and even Admirals. For you naval buffs; Advanced ETO now<br />
contains absolutely every capital ship that existed during World War II, including additional<br />
aircraft carriers, battleships, cruisers and raiders. Advanced ETO even includes numerous<br />
naval vessels that were planned but never completed—allowing <strong>the</strong> players some very<br />
interesting “what if” possibilities. If air power is your forte, Advanced ETO includes just<br />
about every type <strong>of</strong> combat air unit that saw action in Europe during World War II.<br />
Virtually every aspect <strong>of</strong> World War II in Europe is here. Best <strong>of</strong> all, Advanced ETO can<br />
be played as an exciting grand strategic game (from <strong>the</strong> beginning <strong>of</strong> <strong>the</strong> war to <strong>the</strong> end), or<br />
as one <strong>of</strong> <strong>the</strong> many quick campaigns or scenarios.<br />
$110. 00<br />
ships as 3 items on ship chart<br />
Contents: 2240 die cut counters, 7 Player Aid cards, 2 Rules<br />
Books, 2 34” x 22” maps, 3 dice & Storage bags.<br />
Drive on Stalingrad is a two-player strategic-level<br />
simulation <strong>of</strong> Fall Blau (Operation Blue), <strong>the</strong> German attempt<br />
to conquer Stalingrad and <strong>the</strong> Caucasus area <strong>of</strong> <strong>the</strong><br />
southwest Soviet Union in 1942. <strong>The</strong> German player is on<br />
<strong>the</strong> <strong>of</strong>fensive, attempting to win by seizing key areas on <strong>the</strong><br />
map. <strong>The</strong> Soviet player is primarily on <strong>the</strong> defensive in <strong>the</strong><br />
first scenario, but he is also given <strong>the</strong> chance to run a fullblown<br />
counter-<strong>of</strong>fensive in <strong>the</strong> second, “Operation Uranus,”<br />
scenario.<br />
Game play <strong>of</strong> <strong>the</strong> main scenario encompasses <strong>the</strong> period<br />
that began with <strong>the</strong> Germans’launching <strong>of</strong> “Operation Blue,”<br />
<strong>the</strong>ir <strong>of</strong>fensive toward Stalingrad and <strong>the</strong> Caucasus on 28<br />
June 1942. That scenario ends on 15 September, after 11<br />
weekly game turns. <strong>The</strong> second scenario starts on 19 November<br />
1942, with <strong>the</strong> launching <strong>of</strong> <strong>the</strong> Soviet “Operation<br />
Uranus” counter-<strong>of</strong>fensive, and continues for six weekly<br />
turns to <strong>the</strong> end <strong>of</strong> December, when historically <strong>the</strong> German<br />
attempt to free <strong>the</strong>ir encircled 6thArmy at Stalingrad ground<br />
to a halt.<br />
Each hexagon on <strong>the</strong> map represents approximately 16<br />
miles (26 kilometers) from side to opposite side. <strong>The</strong> units<br />
<strong>of</strong> maneuver for both sides are primarily divisions, along<br />
with what were actually similarly sized Soviet tank and<br />
mechanized “corps.” Air power is represented abstractly.<br />
Components: 2 34 x 22 inch mapsheet, rules booklet, 420 die<br />
cut counters, storage bags and 1 die.<br />
$48. 00
Ano<strong>the</strong>r Classic Game from Decision Games<br />
Wacht Am Rhein<br />
<strong>The</strong> Battle <strong>of</strong> <strong>the</strong> Bulge,<br />
16 Dec 44 – 2 Jan 45 (New Edition)<br />
On 16 December 16 1944, Hitler’s armies suddenly<br />
seemed to regain <strong>the</strong> insurmountable skill that<br />
brought <strong>the</strong>m victory in <strong>the</strong> first years <strong>of</strong> <strong>the</strong> war. For<br />
months,Hitlerhadworkedtoreorganizeandre-equip<br />
<strong>the</strong>beatendivisionsstreamingbacktowardGermany.<br />
Amassivesurprisecounterattack—code-named“Wacht<br />
am Rhein”—against <strong>the</strong> weak Ardennes sector<br />
<strong>of</strong> <strong>the</strong> American front was prepared.<br />
Wacht am Rhein, 2nd Edition, is a tactical simulation<br />
<strong>of</strong> that enormous battle. <strong>The</strong> 2,380 counters<br />
represent every formation, at company and battalion<br />
levels, which fought in both armies. Infantry, armor, anti-tank, recon, engineer, assault gun, howitzer, rocket, parachute, ranger, glider<br />
and headquarters are all included. <strong>The</strong> four maps are an accurate representation <strong>of</strong> <strong>the</strong> Ardennes. Compiled from 1944 German staff<br />
maps and <strong>the</strong> 1943-1944 1:50,000 US Army maps, <strong>the</strong>y show primary and secondary roads, trails and o<strong>the</strong>r terrains in relation to <strong>the</strong>ir<br />
suitability for armor and infantry. Towns and villages, bastions <strong>of</strong> <strong>the</strong> American defense, as well as creeks and rivers, which can’t be<br />
crossed by vehicles without a bridge, are accurately positioned.<br />
Players use single maps for small scenarios, or fight a campaign game that utilizes all four maps and portrays all three weeks. In<br />
it, <strong>the</strong> Germans race attack in <strong>the</strong> face <strong>of</strong> ever-increasing concentrations <strong>of</strong> Allied infantry, armor and air power. Extensive supply,<br />
wea<strong>the</strong>r and air power rules are included.<br />
WaR2 has undergone modification to its combat, artillery and supply subsystems<br />
to accurately depict tactical warfare. An exploitation mode has been created for<br />
mechanized units to take advantage <strong>of</strong> breakthroughs in <strong>the</strong> enemy line during<br />
<strong>the</strong> combat phase. That movement is mixed with <strong>the</strong> opponent’s to recreate <strong>the</strong><br />
fluidity that existed during <strong>the</strong> first week. Fur<strong>the</strong>r changes include <strong>the</strong> addition <strong>of</strong><br />
high-ground vantage points, which enable units to more effectively spot for artillery,<br />
as well as constricted terrain, which represents steep gullies and ravines.<br />
<strong>The</strong> order <strong>of</strong> battle has also been revamped to provide an accurate depiction <strong>of</strong><br />
<strong>the</strong> armies. Units are in <strong>the</strong> organizations within which <strong>the</strong>y actually fought, not<br />
<strong>the</strong> administrative formations that were quickly discarded due to <strong>the</strong> demands <strong>of</strong><br />
battle.<br />
Contents: 422x34inchmaps,2380die-cutcounters,rulebooklet,scenariobooklet,<br />
player aid cards, and dice.<br />
Name<br />
address<br />
City, state Zip<br />
phoNe email<br />
Visa/mC (oNly)#<br />
expiratioN date<br />
sigNature<br />
$150.00<br />
PO Box 21598<br />
Bakersfield CA 93390<br />
661/587-9633 • fax 661/587-5031 • www.decisiongames.com<br />
shipping Charges<br />
*ships as 3 units on ship chart.<br />
1st item Adt’l items Type <strong>of</strong> Service<br />
$8 $2 UPS Ground/US Mail Domestic Priority<br />
15(20) 4 UPS 2nd Day Air (Metro AK & HI)<br />
14(10) 2(7) Canada, Mexico (Express)<br />
17(25) 7(10) Europe (Express)<br />
20(25) 9(10) Asia, Africa, Australia (Express)<br />
strategy & tactics 41
<strong>The</strong> Lion Conquers Bavaria:<br />
42 #229<br />
<strong>The</strong> Battle <strong>of</strong> <strong>the</strong> Lech, April 1632<br />
by William E. Welsh<br />
Midway through <strong>the</strong> Thirty Years<br />
War <strong>of</strong> 1618-48 <strong>the</strong> Swedish army,<br />
commanded by King Gustavus<br />
Adolphus, swept down on <strong>the</strong><br />
Kingdom <strong>of</strong> Bavaria. <strong>The</strong> Swedish king hoped to<br />
use Bavaria as <strong>the</strong> staging area for a final assault on<br />
Austria, political center <strong>of</strong> <strong>the</strong> Holy Roman Empire.<br />
At Donauworth, on <strong>the</strong> border <strong>of</strong> Bavaria, <strong>the</strong> 37-yearold<br />
Gustavus Adolphus found his opponent, Johan<br />
Tserclaes, Count <strong>of</strong> Tilly, had left <strong>the</strong> front door to <strong>the</strong><br />
region wide open.<br />
Donauworth, a small town on <strong>the</strong> north bank <strong>of</strong><br />
<strong>the</strong> Danube, was held by a small imperial garrison <strong>of</strong><br />
2,000 men under Duke Rudolph <strong>of</strong> Saxe-Lauenberg.<br />
Though vastly outnumbered by <strong>the</strong> 37,000-strong<br />
Swedish army when it attacked on 5 April 1632, <strong>the</strong><br />
duke resisted until he found out Tilly was not coming<br />
to his assistance.<br />
<strong>The</strong> Swedes methodically set about reducing <strong>the</strong><br />
garrison. Lennart Torstensson, Gustavus’ artillery chief,<br />
arrayed a portion <strong>of</strong> his guns on <strong>the</strong> high ground around<br />
<strong>the</strong> town. He <strong>the</strong>n treated its garrison to a terrifying<br />
display <strong>of</strong> firepower with a non-stop bombardment.<br />
During <strong>the</strong> night, one-third <strong>of</strong> <strong>the</strong> Imperialists managed<br />
to cut <strong>the</strong>ir way out <strong>of</strong> <strong>the</strong> Swedish encirclement, but<br />
<strong>the</strong> o<strong>the</strong>r two-thirds were not as fortunate. <strong>The</strong>y ended<br />
up ei<strong>the</strong>r dead or prisoners.<br />
Leaving 2,000 men behind to garrison <strong>the</strong> town,<br />
Gustavus entered Bavaria proper. He found Tilly<br />
strongly entrenched behind <strong>the</strong> Lech River, a tributary
<strong>of</strong> <strong>the</strong> Danube. He spent <strong>the</strong> next week securing <strong>the</strong><br />
countryside on <strong>the</strong> river’s left bank. By 12 April,<br />
Gustavus had brushed aside <strong>the</strong> remaining resistance<br />
and assembled his entire army opposite Tilly.<br />
Gustavus carefully reconnoitered Tilly’s position<br />
along <strong>the</strong> Lech. For his part, Tilly had taken <strong>the</strong><br />
necessary precautions to thwart Gustavus’ advance<br />
into Bavaria. He had destroyed <strong>the</strong> main bridge over<br />
<strong>the</strong> Danube, which might have been used to turn his<br />
flank, as well as <strong>the</strong> bridge over <strong>the</strong> Lech at <strong>the</strong> town<br />
<strong>of</strong> Rain. He <strong>the</strong>n selected a position behind <strong>the</strong> Lech<br />
from which he could react to any crossing.<br />
Gustavus initially contemplated rebuilding <strong>the</strong><br />
bridge at Rain, but <strong>the</strong>n dismissed <strong>the</strong> idea. Next, he<br />
made a brief demonstration to see whe<strong>the</strong>r Tilly’s<br />
soldiers guarding <strong>the</strong> most obvious crossings were<br />
alert. When <strong>the</strong> probe was repulsed, Gustavus<br />
undertook a more comprehensive reconnaissance. <strong>The</strong><br />
king, accompanied by his aides, rode up and down <strong>the</strong><br />
Lech surveying every bend and possible crossing in<br />
strategy & tactics 43
44 #229<br />
<strong>the</strong> river. It was on one <strong>of</strong> his stops along <strong>the</strong> river<br />
that he had a brief encounter with <strong>the</strong> enemy. As he<br />
surveyed <strong>the</strong> enemy position with his escort, Gustavus<br />
was hailed by sentries on <strong>the</strong> o<strong>the</strong>r side <strong>of</strong> <strong>the</strong> river.<br />
“Where’s your king?” <strong>the</strong>y cried. <strong>The</strong> imperialist<br />
pickets did not recognize <strong>the</strong> “Lion <strong>of</strong> <strong>the</strong> North” in<br />
his elk-skin buffcoat and plumed hat.<br />
“Nearer than you think,” Gustavus shouted back,<br />
before spurring his horse and riding <strong>of</strong>f.<br />
Taking in all he had seen during his long<br />
reconnaissance, Gustavus devised a clever plan.<br />
Confrontation<br />
<strong>The</strong> Lech has its source in <strong>the</strong> higher elevations <strong>of</strong><br />
<strong>the</strong> Alps. From <strong>the</strong>re, it flows north through Bavaria<br />
until it joins <strong>the</strong> Danube. When Gustavus arrived<br />
before <strong>the</strong> Lech, he found it swollen from a mixture<br />
<strong>of</strong> spring rain and melting snow. Tilly’s force <strong>of</strong> more<br />
than 22,000 men was entrenched on <strong>the</strong> o<strong>the</strong>r side<br />
in <strong>the</strong> town <strong>of</strong> Rain, not far from <strong>the</strong> Danube. <strong>The</strong><br />
countryside through which <strong>the</strong> Lech flows is low-lying<br />
ground with occasional marshes. <strong>The</strong> western bank,<br />
which is higher than <strong>the</strong> eastern bank, would afford<br />
Gustavus a significant advantage if he chose to use<br />
his artillery to s<strong>of</strong>ten <strong>the</strong> enemy before launching an<br />
assault across <strong>the</strong> river.<br />
To many generals <strong>of</strong> <strong>the</strong> day, Tilly’s position would<br />
have seemed impregnable, and <strong>the</strong> risk <strong>of</strong> attacking<br />
it hardly worth taking. To delay <strong>the</strong> Swedes and <strong>the</strong>ir<br />
allies, Tilly ordered <strong>the</strong> destruction <strong>of</strong> every one <strong>of</strong> <strong>the</strong><br />
bridges along a 30-mile stretch <strong>of</strong> <strong>the</strong> Lech between<br />
<strong>the</strong> Danube and Augsburg, and stationed his troops to<br />
guard all possible crossings. In <strong>the</strong> vicinity <strong>of</strong> Rain, he<br />
had constructed a large redoubt about 1,200 feet back<br />
from <strong>the</strong> river. He had at his disposal about 20 cannon,<br />
most <strong>of</strong> which he placed inside <strong>the</strong> redoubt. <strong>The</strong> army’s<br />
main camp was located on firmer ground in woods<br />
behind <strong>the</strong> redoubt. <strong>The</strong> camp was separated from <strong>the</strong><br />
redoubt by a small stream known as <strong>the</strong> Ach. Tilly was<br />
not seeking a decisive victory, he was merely trying to<br />
hold back <strong>the</strong> Swedish juggernaut until reinforcements<br />
could arrive.<br />
Ra<strong>the</strong>r than moving upstream in hope <strong>of</strong> finding<br />
a river crossing that was unguarded, Gustavus chose<br />
instead to dislodge <strong>the</strong> enemy from <strong>the</strong> vicinity <strong>of</strong> Rain<br />
before Wallenstein could arrive with reinforcements.<br />
Gustavus hoped to mislead Tilly into believing that<br />
he was going to cross <strong>the</strong> river and attack <strong>the</strong> redoubt<br />
in a direct assault. To carry out his plan, Gustavus<br />
deployed his artillery in a bend along <strong>the</strong> river so he<br />
would be able to bring converging fire on <strong>the</strong> redoubt.<br />
<strong>The</strong> artillery bombardment would serve primarily as<br />
a diversion so his engineers could construct sections<br />
for a bridge. <strong>The</strong> makeshift bridge would enable his<br />
infantry to cross just upstream <strong>of</strong> <strong>the</strong> redoubt where<br />
a small island divided <strong>the</strong> Lech into two narrow<br />
channels. Just south <strong>of</strong> Rain, <strong>the</strong> Lech made a sharp<br />
turn to <strong>the</strong> west before turning abruptly east again.<br />
Along <strong>the</strong> outside <strong>of</strong> river bend, Gustavus planned to<br />
erect three large gun emplacements—one in <strong>the</strong> center<br />
and one on each end—with 24 guns in each battery.<br />
In a council <strong>of</strong> war, Horn argued against <strong>the</strong> plan on<br />
<strong>the</strong> grounds it was too risky, but <strong>the</strong> king was adamant<br />
<strong>the</strong> maneuver could be carried out. Horn argued <strong>the</strong><br />
imperialist position was too strong, but Gustavus<br />
countered <strong>the</strong> opposing army was comprised mostly<br />
<strong>of</strong> raw recruits who could not stand up to Swedish<br />
veterans. Horn argued that <strong>the</strong> army would have<br />
to cross a river in <strong>the</strong> face <strong>of</strong> strong opposition, but<br />
Gustavus noted <strong>the</strong> army had done just that in previous<br />
campaigns.<br />
On 13 April, Swedish engineers and gunners began<br />
constructing <strong>the</strong> emplacements and deploying <strong>the</strong><br />
guns in <strong>the</strong> manner outlined by Gustavus. Meanwhile,<br />
<strong>the</strong> king ordered <strong>the</strong> army to deploy in battle formation<br />
directly opposite <strong>the</strong> imperialist redoubt to give <strong>the</strong><br />
impression <strong>the</strong> enemy strongpoint was his main<br />
objective. <strong>The</strong> Swedish deployment was similar to<br />
that <strong>of</strong> Breitenfeld. Twelve infantry brigades were in<br />
two lines with cavalry on both wings. As in <strong>the</strong> earlier<br />
battle, <strong>the</strong> cavalry was streng<strong>the</strong>ned with detachments<br />
<strong>of</strong> musketeers. <strong>The</strong> only thing missing was artillery.<br />
Nearly all <strong>of</strong> <strong>the</strong> Swedish pieces, barring some shortrange<br />
guns, had been run up to <strong>the</strong> river’s edge. And<br />
<strong>the</strong> two sides proceeded to shell each o<strong>the</strong>r throughout<br />
<strong>the</strong> day <strong>of</strong> 14 April.<br />
<strong>The</strong> heavy Swedish guns not only had <strong>the</strong> range to<br />
strike <strong>the</strong> redoubt, but also <strong>the</strong> imperial camp behind<br />
it. <strong>The</strong>ir 24 pound shells crashed into <strong>the</strong> woods,<br />
shattering trunks and tree limbs and sending <strong>the</strong>m<br />
crashing down on <strong>the</strong> troops below. Just as Gustavus<br />
had hoped, <strong>the</strong> bombardment had a devastating effect<br />
on <strong>the</strong> morale <strong>of</strong> Tilly’s recruits. <strong>The</strong> imperial gunners<br />
fired back, but failed to silence <strong>the</strong> Swedish artillery.<br />
Though Tilly had destroyed all <strong>of</strong> <strong>the</strong> boats in <strong>the</strong><br />
vicinity <strong>of</strong> Rain, Gustavus’s soldiers returned to <strong>the</strong><br />
Danube for boats that might be used for <strong>the</strong> crossing.<br />
To keep <strong>the</strong> enemy from detecting <strong>the</strong> crossing, <strong>the</strong><br />
Swedish king ordered his troops to generate thick<br />
smoke by burning a mixture <strong>of</strong> green wood, wet straw<br />
and gunpowder. <strong>The</strong> Swedish army also completed<br />
earthworks and trenches at <strong>the</strong> crossing site. During<br />
<strong>the</strong> night, <strong>the</strong> engineers carried <strong>the</strong> bridge in sections<br />
to <strong>the</strong> bank, so <strong>the</strong> crossing could begin <strong>the</strong> following<br />
morning.<br />
Combat Crossing<br />
<strong>The</strong> main assault began at 8:00 a.m., when <strong>the</strong> 334<br />
Finns <strong>of</strong> <strong>the</strong> Hastfer Infantry crossed to <strong>the</strong> island by<br />
boat. Serving as combat engineers, <strong>the</strong> Finns quickly<br />
assembled <strong>the</strong> bridge from <strong>the</strong> west bank to <strong>the</strong> island.<br />
Once <strong>the</strong> bridge to <strong>the</strong> island was completed, Gustavus<br />
sent infantry and light artillery across to support <strong>the</strong><br />
final assault on <strong>the</strong> east bank. As those troops arrived<br />
on <strong>the</strong> island, <strong>the</strong> Finns returned to <strong>the</strong>ir boats and<br />
crossed to <strong>the</strong> eastern bank under cover <strong>of</strong> ano<strong>the</strong>r<br />
smokescreen. As soon as <strong>the</strong> Finns landed, Gustavus<br />
extended <strong>the</strong> final section to <strong>the</strong>m. <strong>The</strong> bridge was flush
Background to Battle<br />
<strong>The</strong> Thirty Years War had dragged on for 14 years by <strong>the</strong><br />
time Gustavus Adolphus arrived on <strong>the</strong> border <strong>of</strong> Bavaria in<br />
<strong>the</strong> spring <strong>of</strong> 1632. Initially a religious conflict, <strong>the</strong> war had<br />
begun in Bohemia when Protestant nobles revolted against <strong>the</strong><br />
Austrian branch <strong>of</strong> <strong>the</strong> Hapsburg dynasty that controlled <strong>the</strong><br />
Holy Roman Empire. <strong>The</strong> Protestants wanted Frederick V <strong>of</strong><br />
Palatine elected emperor, while <strong>the</strong> Catholics sought to have<br />
Ferdinand II <strong>of</strong> Austria elected to <strong>the</strong> same <strong>of</strong>fice.<br />
From Bohemia, <strong>the</strong> war spread from one principality to <strong>the</strong><br />
next, burning brightest in such highly fractious areas as <strong>the</strong><br />
Rhineland. <strong>The</strong> early years <strong>of</strong> <strong>the</strong> war were marked by a string<br />
<strong>of</strong> Catholic League victories. <strong>The</strong> League had been founded<br />
by a group <strong>of</strong> pro-Catholic German princes backed by <strong>the</strong><br />
Austrian Hapsburgs. But <strong>the</strong> conflict gradually pulled in o<strong>the</strong>r<br />
nations that bordered <strong>the</strong> empire. France, England and <strong>the</strong><br />
United Ne<strong>the</strong>rlands were willing to back ei<strong>the</strong>r <strong>the</strong> Danes or<br />
<strong>the</strong> Swedes against <strong>the</strong> imperialist Hapsburgs, more to maintain<br />
<strong>the</strong> balance <strong>of</strong> power than for any religious motivation.<br />
In 1625, Danish King Christian IV attempted unsuccessfully<br />
to counter <strong>the</strong> imperial forces, whose armies by <strong>the</strong>n controlled<br />
most <strong>of</strong> Germany. During Christian’s foray into Germany,<br />
Gustavus was content to sit on <strong>the</strong> sidelines, still more interested<br />
in Poland than central Europe. But once <strong>the</strong> Danish king was<br />
defeated by <strong>the</strong> imperialists, Gustavus resolved to support <strong>the</strong><br />
Protestants in Germany. Imperial armies on <strong>the</strong> Baltic coast<br />
would have been a threat to Sweden’s control <strong>of</strong> that lucrative<br />
region, as well as to <strong>the</strong> existence <strong>of</strong> Protestantism in Europe.<br />
In July 1630, Gustavus and his army landed at Peenemunde<br />
on <strong>the</strong> island <strong>of</strong> Usedom. In less than a week’s time, <strong>the</strong><br />
Swedes marched unopposed into Stettin, capital <strong>of</strong> Pomerania.<br />
An experienced and able commander, Gustavus faced two<br />
formidable foes in Germany— Johan Tserclaes, Count <strong>of</strong> Tilly<br />
and Duke Albert Wallenstein <strong>of</strong> Friedland and Mechlenberg,<br />
both <strong>of</strong> whom were veteran imperial generals.<br />
From his base in Pomerania, Gustavus waged a war <strong>of</strong><br />
maneuver against Tilly, forcing <strong>the</strong> septuagenarian count to<br />
fall back toward sou<strong>the</strong>rn Germany. At Werben, Gustavus<br />
showed he had a good eye for defense. He set his men to work<br />
fortifying a position on <strong>the</strong> Elbe River with strong earthworks<br />
and redoubts. With <strong>the</strong> river on both flanks, Tilly was left with<br />
no choice but to hurl his army against <strong>the</strong> Swedish fortifications.<br />
After two days <strong>of</strong> unsuccessful attacks, Tilly withdrew leaving<br />
Gustavus in possession <strong>of</strong> <strong>the</strong> battlefield.<br />
<strong>The</strong> following year, Gustavus recruited a key ally in<br />
Johan Georg, elector <strong>of</strong> Saxony, a move which substantially<br />
augmented his army. On 17 September 1631, Gustavus won a<br />
clear victory over Tilly at Breitenfeld. <strong>The</strong> superior firepower<br />
and tactical flexibility <strong>of</strong> <strong>the</strong> Swedes, both direct results <strong>of</strong> <strong>the</strong><br />
tactical reforms instituted by Gustavus during <strong>the</strong> previous<br />
decade, played a major role in his victory.<br />
After Breitenfeld, Gustavus turned west to liberate <strong>the</strong><br />
Rhineland and tap <strong>the</strong> wealth <strong>of</strong> <strong>the</strong> Catholic church lands<br />
that lay along <strong>the</strong> way. He wintered in Mainz, from where<br />
he embarked in March 1632 for what he hoped would be <strong>the</strong><br />
conquest <strong>of</strong> Bavaria and Austria. Gustavus’s past military<br />
experience was crucial to his performance in <strong>the</strong> Thirty Years<br />
War. Born in 1594, he was 11-years-old when he entered<br />
military service. When his fa<strong>the</strong>r Charles IX died in 1611,<br />
Gustavus inherited his crown as well as his wars against<br />
Russia, Poland and Denmark.<br />
Gustavus resolved <strong>the</strong> disputes with Russia and Denmark,<br />
but <strong>the</strong> Polish situation was not so easily concluded. Sigismund<br />
Vasa, King <strong>of</strong> Poland, was Gustavus’ cousin. Sigismund was<br />
determined to assert <strong>the</strong> claim he had to <strong>the</strong> Swedish throne.<br />
A truce, however, gave <strong>the</strong> young Gustavus a chance to enact<br />
reforms that would enable his army to triumph on <strong>the</strong> battlefields<br />
<strong>of</strong> Germany. In a move that turned <strong>the</strong> recruiting practice <strong>of</strong><br />
<strong>the</strong> day on its head, which relied on mercenaries, Gustavus<br />
molded his regiments, recruited mainly from <strong>the</strong> Swedish<br />
peasant militia, into a regular army. He also adopted <strong>the</strong> tactics<br />
and reforms <strong>of</strong> <strong>the</strong> renowned Dutch military strategist Maurice<br />
<strong>of</strong> Orange, which emphasized flexible tactical units and <strong>the</strong><br />
exploitation <strong>of</strong> firepower. During that time, Dutch military<br />
experts also traveled to Sweden to instruct Gustavus and his<br />
<strong>of</strong>ficers in <strong>the</strong> optimum use <strong>of</strong> artillery and <strong>the</strong> craft <strong>of</strong> siege<br />
warfare.<br />
<strong>The</strong> Polish wars were concluded in 1629, with <strong>the</strong> signing<br />
<strong>of</strong> a treaty that granted Sweden control <strong>of</strong> Livonia as well as a<br />
number <strong>of</strong> key Baltic ports. This left Gustavus free to enter <strong>the</strong><br />
Thirty Years War on <strong>the</strong> side <strong>of</strong> <strong>the</strong> Protestant princes.<br />
Gustavus had an impressive record. Since his accession to<br />
<strong>the</strong> throne, he had fought six campaigns against Poland and<br />
two against Denmark and Russia. During <strong>the</strong> Polish wars, <strong>the</strong><br />
king had been wounded in <strong>the</strong> hip and neck, and had narrowly<br />
escaped capture at <strong>the</strong> Battle <strong>of</strong> Honigfelde on 27 June 1629.<br />
In <strong>the</strong> Polish wars, Gustavus worked with <strong>the</strong> same circle<br />
<strong>of</strong> generals—Gustav Horn, Johan Baner, Karl Wrangel and<br />
Torstensson—who would serve under him in <strong>the</strong> coming<br />
conflict. Gustavus also learned from his enemies, adopting <strong>the</strong><br />
fierce Polish cavalry charge to his own Swedish horsemen.<br />
Gustavus’s reforms would ensure success throughout his<br />
advance through Germany until his untimely death in battle.<br />
Swedish Lion King: King Gustavus Adolphus<br />
strategy & tactics 45
46 #229<br />
with <strong>the</strong> water, making it difficult for enemy gunners<br />
to hit. It was not long before <strong>the</strong> last section was in<br />
place. Three infantry brigades crossed and established<br />
a bridgehead on <strong>the</strong> far bank. <strong>The</strong>re, <strong>the</strong>y braced for<br />
a counterattack as <strong>the</strong>y watched <strong>the</strong> imperial army<br />
forming in <strong>the</strong> distance.<br />
As soon as he discovered a crossing was in progress,<br />
Tilly swung into action. He set his troops to work<br />
streng<strong>the</strong>ning <strong>the</strong> earthworks nearest <strong>the</strong> crossing site.<br />
At <strong>the</strong> same time, he organized a detachment and sent<br />
it <strong>of</strong>f in <strong>the</strong> direction <strong>of</strong> <strong>the</strong> crossing. That detachment<br />
included infantry, cavalry and two artillery batteries.<br />
<strong>The</strong> artillerists established <strong>the</strong>ir guns in <strong>the</strong> marsh<br />
and proceeded to bombard <strong>the</strong> Swedish troops at <strong>the</strong><br />
bridgehead. To Tilly’s disappointment, <strong>the</strong> fire had<br />
little effect because <strong>of</strong> <strong>the</strong> low ground on which <strong>the</strong><br />
guns were placed. Despite this ineffective fire, <strong>the</strong><br />
imperialists still had several advantages. One was <strong>the</strong>y<br />
could feed troops into <strong>the</strong> fight faster than <strong>the</strong> Swedes,<br />
who were constricted by <strong>the</strong> bridge in moving up<br />
reinforcements. Ano<strong>the</strong>r advantage was <strong>the</strong> marsh at<br />
<strong>the</strong> river’s edge would slow <strong>the</strong> Swedish advance.<br />
A fierce battle soon raged as both sides rushed in<br />
reinforcements. <strong>The</strong> Swedes, for whom retreat across<br />
<strong>the</strong> narrow bridge was not an option, fought with<br />
desperation. At one point <strong>the</strong>y were forced back into<br />
<strong>the</strong> shallows at <strong>the</strong> river’s edge. By mid-afternoon <strong>the</strong><br />
action at <strong>the</strong> bridge was stalemated, with each side<br />
suffering upward <strong>of</strong> 1,000 casualties.<br />
<strong>The</strong> imperial army’s superiority in numbers<br />
prevented <strong>the</strong> Swedes from breaking out <strong>of</strong> <strong>the</strong><br />
bridgehead. For that reason, Gustavus ordered Duke<br />
Wilhelm Saxe-Weimer to lead 2,000 cavalry two miles<br />
fur<strong>the</strong>r south and ford <strong>the</strong> river. At <strong>the</strong> same time,<br />
he ordered ano<strong>the</strong>r 400 horsemen to move an equal<br />
distance north and swim <strong>the</strong>ir horses across a deeper<br />
section <strong>of</strong> <strong>the</strong> river.<br />
About 4:00 p.m., <strong>the</strong> main body <strong>of</strong> cavalry under<br />
Saxe-Weimer splashed through <strong>the</strong> ford and thundered<br />
Vile Gunpowder: Weapons <strong>of</strong> <strong>the</strong> Thirty Years’ War<br />
across <strong>the</strong> flat plain beyond. Moving to contest <strong>the</strong>ir<br />
advance was Tilly’s 3,000-strong cavalry reserve.<br />
Though outnumbered, Saxe-Weimer ordered <strong>the</strong><br />
attack. After just two charges, <strong>the</strong> imperialist cavalry<br />
withdrew to <strong>the</strong> safety <strong>of</strong> <strong>the</strong>ir camp; however, <strong>the</strong><br />
o<strong>the</strong>r Swedish troop that had crossed upstream was<br />
easily held in check by <strong>the</strong> imperialists.<br />
While <strong>the</strong> flanks were being contested, Tilly ordered<br />
Gen. Johan von Aldringer to form his cavalry for an<br />
attack on <strong>the</strong> bridgehead. Aldringer was to circumvent<br />
<strong>the</strong> marsh and attack <strong>the</strong> enemy from firmer ground.<br />
Skirting <strong>the</strong> marsh, Aldringer personally led his men<br />
in a valiant but futile charge against <strong>the</strong> Swedish<br />
infantry. After <strong>the</strong>ir first unsuccessful attack, <strong>the</strong><br />
imperial troopers fell back, regrouped, and <strong>the</strong>n<br />
charged a second time. <strong>The</strong> second charge was also<br />
thrown back. Aldringer himself was struck in <strong>the</strong> head<br />
by a cannon ball. Having lost <strong>the</strong>ir commander and<br />
under heavy fire from both musket and cannon fire, <strong>the</strong><br />
imperial cavalry fled in disorder. Aldringer, who lay<br />
unconscious on <strong>the</strong> battlefield, was taken to <strong>the</strong> rear by<br />
his men.<br />
With Aldringer wounded, Tilly had no o<strong>the</strong>r choice<br />
but to lead <strong>the</strong> next attack himself. So, with a fresh<br />
contingent <strong>of</strong> veterans, he emerged from <strong>the</strong> woods<br />
and advanced against <strong>the</strong> bridgehead. <strong>The</strong> combat<br />
reached new heights as <strong>the</strong> cream <strong>of</strong> <strong>the</strong> imperial army<br />
crashed into <strong>the</strong> Swedish line in a final attempt to<br />
destroy <strong>the</strong> bridgehead. For his part, Tilly fought with<br />
ardor despite his age. About 20 minutes into that last<br />
round <strong>of</strong> fighting, <strong>the</strong> imperial commander crumpled<br />
to <strong>the</strong> ground when a cannon ball fired from a falconet<br />
struck his knee, shattering <strong>the</strong> bone. Though he did<br />
not die on <strong>the</strong> battlefield, <strong>the</strong> wound ultimately proved<br />
fatal.<br />
<strong>The</strong> command now devolved upon Duke<br />
Maximilian <strong>of</strong> Bavaria. Maximilian faced a Hobson’s<br />
choice: he could fight <strong>the</strong> following day and risk <strong>the</strong><br />
destruction <strong>of</strong> his army or he could withdraw while his<br />
Cannon Weight Bore Length Round Effective Range<br />
(kg) (cm) (m) (kg) (m)<br />
4 pounder 350 4.0 2.0 1.8 200-250<br />
6 pounder 550 8.5 2.4 2.7 450-500<br />
12 pounder 1400 11.5 3.0 5.4 600-700<br />
24 pounder 2200 15.0 4.0 10.8 1200-1700<br />
48 pounder 3200 20.0 4.5 21.6 1500-1700<br />
Firearm Weight Bore Length Round Effective Range<br />
(kg) (cm) (m) (grams) (m)<br />
Pistol 2.5 1.5 0.5 20 20-30<br />
Arquebus 5.0 2.0 1.5 28 75-100<br />
Dutch Musket 6.0 2.0 2.0 37 100-150<br />
Spanish Musket 8.0 2.5 2.0 57 100-150
Weapons & <strong>Tactics</strong> <strong>of</strong> <strong>the</strong> Thirty Years War 1618-48<br />
<strong>The</strong> 17 th century brought pr<strong>of</strong>ound changes in military weapons.<br />
A large number <strong>of</strong> hand-to-hand weapons popular during medieval<br />
combat were deemed obsolete, and <strong>the</strong>refore put in permanent storage.<br />
Infantry and cavalry increasingly armed <strong>the</strong>mselves with firearms, as<br />
gunpowder weapons grew both in efficiency and killing power.<br />
<strong>The</strong> infantry during <strong>the</strong> Thirty Years War was composed <strong>of</strong><br />
musketeers (“shot”) and pikemen. <strong>The</strong> pikemen were armed with a<br />
long spear and sword. <strong>The</strong>y were clad in partial armor which consisted<br />
<strong>of</strong> a helmet, breastplate and backplate. <strong>The</strong> pikes <strong>the</strong>mselves were <strong>of</strong><br />
varying lengths, depending on <strong>the</strong> army, and <strong>of</strong>ten were cut down by<br />
<strong>the</strong> troops for ease <strong>of</strong> handling. <strong>The</strong> musketeers were armed with <strong>the</strong><br />
matchlock musket. <strong>The</strong> matchlock was a cumbersome firearm that,<br />
initially at least, required a forked rest as a platform from which to fire.<br />
For his army, though, Swedish King Gustavus Adolphus eventually<br />
introduced a lighter musket that could achieve a higher rate <strong>of</strong> fire. <strong>The</strong><br />
matchlock, as <strong>the</strong> name indicates, used a trigger mechanism containing<br />
a burning match that detonated <strong>the</strong> priming powder. That was somewhat<br />
cumbersome; however, <strong>the</strong> weapon was simple enough and recruits<br />
could be trained in its used in a few weeks. Some specialists were also<br />
armed with <strong>the</strong> firelock, an early form <strong>of</strong> <strong>the</strong> flintlock. Despite <strong>the</strong><br />
myth, Gustavus did not arm <strong>the</strong> bulk <strong>of</strong> his infantry with wheel-lock<br />
muskets; however, he probably did standardize weapons which made<br />
supply that much easier.<br />
Like <strong>the</strong>ir infantry counterparts, <strong>the</strong> cavalry were undergoing<br />
pr<strong>of</strong>ound change. During <strong>the</strong> Thirty Years War cavalry carried one form<br />
<strong>of</strong> firearm or ano<strong>the</strong>r. Those weapons usually consisted <strong>of</strong> wheel-lock<br />
pistols and various shortened muskets. <strong>The</strong> wheel-lock mechanism,<br />
similar to a modern cigarette lighter, was expensive and subject to<br />
breakdown but was much more efficient than <strong>the</strong> matchlock for a<br />
horseman. <strong>The</strong> heavy cavalry, <strong>of</strong>ten referred to as cuirassiers, were<br />
armed with two or three pistols and a sword. <strong>The</strong> light cavalry, called<br />
arquebusiers, were armed with a carbine, a pistol and a sword. <strong>The</strong><br />
cuirassiers donned a complete suit <strong>of</strong> plate armor and helmet for battle,<br />
while <strong>the</strong> arquebusiers simply wore an open helmet, breastplate and<br />
backplate. <strong>The</strong>re were also dragoons, who at <strong>the</strong> time were mounted<br />
infantry and frequently used for outpost duties.<br />
<strong>The</strong> job <strong>of</strong> <strong>the</strong> cavalry during battle was to defeat <strong>the</strong> enemy’s<br />
mounted troops and <strong>the</strong>n exploit vulnerabilities in <strong>the</strong> enemy line,<br />
particularly by attacking <strong>the</strong> enemy in <strong>the</strong> flank or rear. For <strong>the</strong> most<br />
part, cavalry used <strong>the</strong> caracole, a maneuver whereby each horseman<br />
fired his weapon and <strong>the</strong>n rode to <strong>the</strong> rear to reload. If an enemy<br />
formation was shaken, <strong>the</strong> horsemen would charge forward. Those<br />
tactics are sometimes criticized as being uninspired but, given <strong>the</strong><br />
immense defensive power <strong>of</strong> infantry squares, <strong>the</strong>y were an efficient<br />
use <strong>of</strong> <strong>the</strong> horsemen. Gustavus found <strong>the</strong> caracole too passive for his<br />
tastes and abolished it. Instead, he ordered his cavalry to charge <strong>the</strong><br />
enemy and discharge <strong>the</strong>ir gunpowder weapons at <strong>the</strong> foe during <strong>the</strong><br />
subsequent melee. <strong>The</strong> Swedish horsemen were assisted by small bodies<br />
<strong>of</strong> detached musketeers who would provide additional firepower.<br />
Gustavus is credited with introducing mobile field artillery during<br />
his campaigns on <strong>the</strong> continent. That contrasted with <strong>the</strong> usual<br />
practice <strong>of</strong> an army emplacing its guns at <strong>the</strong> start <strong>of</strong> a battle and <strong>the</strong>ir<br />
remaining in position until <strong>the</strong> fray ended or <strong>the</strong>y were captured. <strong>The</strong><br />
Swedes deployed 1½ pounders and 3 pounders organic to infantry<br />
formations. Those light guns were moved across <strong>the</strong> battlefield ei<strong>the</strong>r<br />
by horsepower or manpower. <strong>The</strong> larger guns, such as <strong>the</strong> 12 and 20<br />
pounders, were deployed in fixed positions in <strong>the</strong> line <strong>of</strong> battle.<br />
A typical line <strong>of</strong> battle consisted <strong>of</strong> infantry in <strong>the</strong> center with<br />
cavalry on each wing. <strong>The</strong>re was <strong>of</strong>ten more than one line, and reserve<br />
contingents to boot. <strong>The</strong> prevailing “Spanish” style <strong>of</strong> deployment had<br />
<strong>the</strong> infantry in dense blocks <strong>of</strong> tercios (regiments, but <strong>the</strong> term tercio<br />
has come to mean a particular tactical style). Within each tercio block,<br />
<strong>the</strong> pikemen formed up in <strong>the</strong> center and were flanked by “sleeves” <strong>of</strong><br />
musketeers. <strong>The</strong> pikes defended against enemy cavalry and pushed<br />
forward for shock effect, while <strong>the</strong> musketeers provided firepower.<br />
<strong>The</strong> front rank men in <strong>the</strong> musketeer column would discharge <strong>the</strong>ir<br />
pieces in <strong>the</strong> direction <strong>of</strong> <strong>the</strong> enemy, <strong>the</strong>n retire to reload as <strong>the</strong> next<br />
rank came forward to repeat <strong>the</strong> process. It was also common to<br />
detach small parties <strong>of</strong> musketeers to act as skirmishers and to deploy<br />
in rough terrain where <strong>the</strong> pikes could not close up.<br />
Maurice <strong>of</strong> Nassau made a critical reform in reducing <strong>the</strong> size<br />
<strong>of</strong> <strong>the</strong> basic infantry unit to <strong>the</strong> battalion, 500 or so men, which<br />
was much more flexible in combat. <strong>The</strong> battalions could maneuver<br />
independently and, with more men “up front,” could deliver more<br />
firepower per unit. That system was adopted by Gustavus. Two or<br />
three battalions comprised a regiment, though <strong>of</strong>ten battalions were<br />
formed up into brigades on <strong>the</strong> battlefield. <strong>The</strong> Swedes tended to<br />
keep <strong>the</strong>ir brigades toge<strong>the</strong>r, which did much to improve tactical<br />
control as <strong>the</strong> <strong>of</strong>ficers and men were used to working with each o<strong>the</strong>r.<br />
Gustavus also made his artillerists regular soldiers, breaking with<br />
<strong>the</strong> contemporary practice <strong>of</strong> considering gunners hired technicians.<br />
Those reforms, combined with a strict but fair (or “fairer” for <strong>the</strong><br />
period) discipline, resulted in a more cohesive army on <strong>the</strong> battlefield,<br />
though later in <strong>the</strong> war <strong>the</strong> Swedes would rely upon mercenaries like<br />
everyone else.<br />
At Breitenfeld, 17 September 1631, Tilly deployed his infantry<br />
in phalanxes 40 or 50 men deep. Gustavus arranged <strong>the</strong> Swedes in<br />
ranks six to 10 deep. <strong>The</strong> Swedes also used <strong>the</strong> much more efficient<br />
volley system to deliver fire. That gave <strong>the</strong> Swedish battalions more<br />
firepower, albeit at <strong>the</strong> expense <strong>of</strong> all around-defense. <strong>The</strong> result<br />
was a decisive Swedish victory and Gustavus’ nomination to “great<br />
captain” status; however, <strong>the</strong> imperials learned and in later battles<br />
used much less dense formations.<br />
strategy & tactics 47
48 #229<br />
army was still intact, exposing Bavaria to <strong>the</strong> enemy.<br />
After holding council <strong>of</strong> war and consulting with <strong>the</strong><br />
wounded Tilly, Maximilian gave <strong>the</strong> order to withdraw<br />
during <strong>the</strong> dark <strong>of</strong> night. <strong>The</strong> imperialists managed to<br />
slip away to Ingolstadt unnoticed. It was not until <strong>the</strong><br />
following day that <strong>the</strong> Swedes realized <strong>the</strong> enemy had<br />
abandoned <strong>the</strong>ir works and <strong>the</strong>y were in possession<br />
<strong>of</strong> <strong>the</strong> battlefield. <strong>The</strong> Swedes lost about 2,000 men<br />
in <strong>the</strong> fight, while <strong>the</strong> imperialists took about 3,000<br />
casualties.<br />
When he discovered that <strong>the</strong> imperialists had<br />
withdrawn, Gustavus ordered his cavalry to pursue<br />
in <strong>the</strong> hope <strong>of</strong> overtaking <strong>the</strong> enemy’s rearguard. To<br />
his disappointment, <strong>the</strong> Swedish cavalry were only<br />
able to capture a few <strong>of</strong> <strong>the</strong> enemy’s supply wagons.<br />
Meanwhile, <strong>the</strong> king rode over to inspect <strong>the</strong> redoubt<br />
that was <strong>the</strong> centerpiece <strong>of</strong> <strong>the</strong> imperial defense.<br />
Unable to fathom what would compel Maximilian to<br />
withdraw from such a formidable position, Gustavus<br />
exclaimed, “Had I been <strong>the</strong> Bavarian, I would not have<br />
abandoned <strong>the</strong>se works even if <strong>the</strong> ball had carried <strong>of</strong>f<br />
my chin as well as my beard!”<br />
Aftermath<br />
After <strong>the</strong> battle <strong>of</strong> Lech, Gustavus and Maximilian<br />
marched in opposite directions. <strong>The</strong> Swedish army<br />
turned south toward Augsburg, while <strong>the</strong> imperial army<br />
marched north to Ingolstadt. Maximillian eventually<br />
fled to Austria where he stayed for three years until it<br />
was safe for him to return to Bavaria.<br />
A month after <strong>the</strong> battle, Gustavus marched<br />
victoriously into Munich where he plundered <strong>the</strong><br />
duke’s treasure. <strong>The</strong> Swedes proceeded to lay waste to<br />
Bavaria in retribution for previous atrocities inflicted<br />
by <strong>the</strong> Catholics on German Protestant towns earlier in<br />
<strong>the</strong> war. <strong>The</strong> sack <strong>of</strong> Bavaria was a devastating blow<br />
to <strong>the</strong> Catholic cause, since <strong>the</strong> region was considered<br />
<strong>the</strong> heart and soul <strong>of</strong> Catholic Germany.<br />
Gustavus was distracted by <strong>the</strong> movement <strong>of</strong><br />
Wallenstein’s army to his north. Fearing his lines <strong>of</strong><br />
communication would be cut, he turned north to meet<br />
Wallenstein <strong>the</strong>reby abandoning an advance deep into<br />
Austria. In changing his axis <strong>of</strong> advance, he ignored<br />
<strong>the</strong> advice <strong>of</strong> Swedish Chancellor Axel Oxenstierna<br />
who urged him to head for <strong>the</strong> imperial center <strong>of</strong><br />
gravity at Vienna. Fully aware <strong>of</strong> Gustavus’ tactical<br />
genius, Wallenstein avoided open battle and was<br />
content instead to entrench in <strong>the</strong> hope that Gustavus<br />
would squander his manpower with costly attacks.<br />
Summer turned to fall with <strong>the</strong> two armies still<br />
facing each o<strong>the</strong>r until, having exhausted <strong>the</strong> supplies<br />
that could be squeezed from <strong>the</strong> land, both forces<br />
shifted north. <strong>The</strong> two adversaries finally met outside<br />
<strong>the</strong> Saxon town <strong>of</strong> Luetzen on 16 November 1632.<br />
Luetzen was to be Gustavus’ last battle. While leading<br />
a Swedish cavalry charge on <strong>the</strong> right flank, <strong>the</strong> Lion<br />
<strong>of</strong> <strong>the</strong> North was slain by enemy cavalry.<br />
It was an undignified, but perhaps fitting end, to<br />
an exemplary military career. <strong>The</strong> king’s body was<br />
recovered by <strong>the</strong> Swedes during <strong>the</strong> night and returned<br />
to Stockholm. <strong>The</strong> Thirty Years War would drag on for<br />
ano<strong>the</strong>r 16 years.<br />
Sources<br />
Bonney, Richard. <strong>The</strong> Thirty Years’ War 1618-1648. Oxford,<br />
England: Osprey Publishing Ltd., 2002.<br />
Guthrie, William P. Battles <strong>of</strong> <strong>the</strong> Thirty Years’ War: From White<br />
Mountain to Nordlingen, 1618-1635. Westport, Connecticut:<br />
Greenwood <strong>Press</strong>, 2002.
Order <strong>of</strong> Battle: Battle <strong>of</strong> <strong>the</strong> Lech<br />
Swedish<br />
Commander-in-chief<br />
Gustav II, King <strong>of</strong> Sweden<br />
Infantry<br />
Hand Infantry Regiment (Swedish)<br />
Hard Infantry Regiment (Swedish)<br />
Hastfer Infantry Regiment (Finnish)<br />
Royal Guard Coy (Mixed)<br />
N. Brahe Infantry Regiment (German)<br />
Winckel Infantry Regiment (German)<br />
Thurn Infantry Regiment (German)<br />
Baner Infantry Regiment (German)<br />
Bernard Saxe-Weimar Infantry Regiment (German)<br />
Burt Infantry Regiment (German)<br />
Chemnitz Infantry Regiment (German)<br />
Forbes Infantry Regiment (German)<br />
Horn Infantry Regiment (German)<br />
Kagge Infantry Regiment (German)<br />
Kan<strong>of</strong>fsky Infantry Regiment (German)<br />
Liebenstein Infantry Regiment (German)<br />
Mitschefall Infantry Regiment (German)<br />
Mitzlaff Infantry Regiment (German)<br />
Monro <strong>of</strong> Fowles Infantry Regiment (German)<br />
Riese Infantry Regiment (German)<br />
Schaffalitsky Infantry Regiment (German)<br />
B. Schlammersdorf Infantry Regiment (German)<br />
T. Schlammersdorf Infantry Regiment (German)<br />
Schneidwinds Infantry Regiment (German)<br />
Truchsess Infantry Regiment (German)<br />
Wildenstein Infantry Regiment (German)<br />
Hepburn Infantry Regiment (Scottish)<br />
Mackay Infantry Regiment (German)<br />
Spens (German)<br />
Cavalry<br />
Stenbock Cuirassier (Swedish)<br />
Soop Cuirassier (Swedish)<br />
Silversparre Squadron (Swedish)<br />
Sack Squadron (Swedish)<br />
Sperreuter Squadron (Swedish)<br />
Stahlhansk Cuirassier (Finn)<br />
Tiesenhaussen (Livonian)<br />
Domh<strong>of</strong>f Squadron (Kurland)<br />
Baudissin Cuirassier (German)<br />
B. Saxe-Weimer Cuirassier (German)<br />
Courville Cuirassier (German)<br />
E. Saxe-Weimer Cuirassier (German)<br />
Horn Cuirassier (German)<br />
Kotchtitzky Cuirassier (German)<br />
Baden Cuirassier (German)<br />
Monro <strong>of</strong> Fowles Cuirassier (German)<br />
Schonberg Cuirassier (German)<br />
Solms Squadron (German)<br />
Sperreuter Cuirassier (German)<br />
Streiff Squadron (German)<br />
Tott Cuirassier (German)<br />
Truchsess Cuirassier (German)<br />
Uslar Cuirassier (German)<br />
Wedel Cuirassier (German)<br />
W. Saxe-Weimer Cuirassier (German)<br />
Ohm Cuirassier (German)<br />
Horn Leib Coy (German)<br />
Free Coy (German)<br />
Du Menys Dragoon (German)<br />
Taupadel Dragoon (German)<br />
Imperial-Catholic League Army<br />
Commander:<br />
John Tserclaes, Count <strong>of</strong> Tilly<br />
Infantry<br />
Alt-Tilly Infantry Regiment (Catholic League-Wurzburg)<br />
Reinach Infantry Regime (Catholic League-High German)<br />
Comargo Infantry Regiment (Catholic League-High German)<br />
Pappenheim Infantry Regiment<br />
(Catholic League-High German)<br />
Wahl Infantry Regiment (Catholic League-High German)<br />
Jung-Furstenberg Infantry Regiment<br />
(Catholic League-High German)<br />
Free Companies Infantry Regiment<br />
(Catholic League-High German)<br />
Beck Infantry Regiment (Imperialist-Walloon)<br />
Conteras Infantry Regiment (Imperialist-German)<br />
Savelli Infantry Regiment (Imperialist-Low German)<br />
Witzleban Infantry Regiment (Imperialist-German)<br />
Baldiron Infantry Regiment (Imperialist-Spanish)<br />
Fahrenbach Infantry Regiment (Imperialist-High German)<br />
Rittberg Infantry Regiment (Imperialist-German)<br />
Cavalry<br />
Cronberg Heavy Cavalry (Catholic League-High German)<br />
Billehe Heavy Cavalry (Catholic League-High German)<br />
J. Fugger Cuirassier (Catholic League-Low German)<br />
Blankhart Cuirassier (Catholic League-Low German)<br />
D’Espagne Cuirassier (Catholic League-Low German)<br />
Cratz Cuirassier (Catholic League-High German)<br />
Hasslang Cuirassier (Catholic League-High German)<br />
Merode Cuirassier (Catholic League-High German)<br />
Free Coy (Catholic League-High German)<br />
Dragoons (Catholic League-High German)<br />
O.H. Fugger Croats (Catholic League-High German)<br />
Merode Arquebussier (Imperialist-Walloon)<br />
Bucquoy Heavy Cavalry (Imperialist-Walloon)<br />
Free Coy (Imperialist-High German)<br />
Croats Light Cavalry (Imperialist-Croatian)<br />
Source: Guthrie, William P. Battles <strong>of</strong> <strong>the</strong> Thirty Years’ War: From<br />
White Mountain to Nordlingen, 1618-1635. Westport, Connecticut:<br />
Greenwood <strong>Press</strong>, 2002.<br />
Comparisons <strong>of</strong> opposing forces engaged in key battles <strong>of</strong><br />
Gustavus Adolphus<br />
Total Infantry Cavalry Guns<br />
Breitenfeld 1631<br />
Imperialist 31,000 21,000 10,000 30<br />
Swedish 41,000 27,800 13,200 70<br />
Lech 1632<br />
Imperialist 22,100 16,800 5,300 72<br />
Swedish 37,500 22,640 14,860 20<br />
Luetzen 1632<br />
Imperialist 19,000 9,800 9,200 60<br />
Swedish 18,900 12,700 6,200 38<br />
strategy & tactics 49
Desert Fox<br />
Games<br />
exTremely rAre iTemS<br />
DG BWIE Rolled maps (no discount) $99<br />
GDW Eagles (zip/P) 175<br />
GDW Pharsalus (zip) 145<br />
GDW Red Star/White Eagle (dmg box) 130<br />
NVA Battle for Factories 200<br />
NVA Fire on Volga 200<br />
OBRG Camden 90<br />
SPI Great War in <strong>the</strong> East P200<br />
Unpunched Games<br />
AH Acquire (2nd) $35<br />
AH Axis & Allies: D-Day 55<br />
AH Axis & Allies: Europe 55<br />
AH Axis & Allies: Pacific 55<br />
AH Axis & Allies: Revised 55<br />
AH B-1 Nuclear Bomber (comp) 20<br />
AH Bitter Woods 39<br />
AH Deluxe Diplomacy 55<br />
AH Diplomacy P40<br />
AH Cosmic Encounter 40<br />
AH CMPTR-Fifth Fleet (IBM) 40<br />
AH Firepower P35<br />
AH Foreign Exchange 50<br />
AH GI Doz Scenario Bundle 12<br />
AH Global Survival 65<br />
AH History <strong>of</strong> <strong>the</strong> World 55<br />
AH Maharaja 30<br />
AH Napoleon (blocks) 45<br />
AH CMPTR-Op. Crusader (IBM) 30<br />
AH Risk 2210 AD 55<br />
AH Risk Lord <strong>of</strong> <strong>the</strong> Rings 55<br />
AH Risk Godstorm 50<br />
AH Stonewall Jacksons Way 40<br />
AH Stonewalls Last Battle 35<br />
AH Strat. Legends bstr (red/bl) 7<br />
AH Strat. Legends Qa'ans Resurg 20<br />
AH Strat. Legends Cel. Veng. 20<br />
AH Wrasslin 35<br />
ADG2000 Update WIF 50<br />
ADGAfrica Aflame (zip) 20<br />
ADGAsia Aflame (zip) 20<br />
ADG Days <strong>of</strong> Decision III 70<br />
ADG Days <strong>of</strong> Decision III update 50<br />
ADGPlanes in Flames (zip) 25<br />
ADGRubout 20<br />
ADGShips in Flames (zip) 30<br />
ADGWorld in Flames Dlx (5th) 120<br />
ADGWorld Cup Football 35<br />
AD TCH Fighting Gen Patton 225<br />
ATG Lunch Money 20<br />
ATG Lunch Money Exp Sticks 10<br />
ATG Beer Money 20<br />
ATL Corruption (card) 19<br />
ATTX Fight for <strong>the</strong> Sky 40<br />
AVP Avalanche: Salerno 38<br />
AVP AirLines (card game) 38<br />
AVP AirLines 2 (card game) 38<br />
AVP America Triumphant: Bulge 30<br />
AVP Blood on Snow 28<br />
AVP Chickamauga & Chattanoga 50<br />
AVP Defiant Russia 20<br />
AVP Digging (card) 18<br />
AVP Eagles: Eylau 42<br />
AVP Eagles: Nap Desert 35<br />
AVP Gettysburg 1863 50<br />
AVP Granada 40<br />
AVP Great Pacific War 65<br />
AVP Great War @ Sea-Cruiser War 50<br />
P Indicates that <strong>the</strong>re is a punched copy available<br />
for 40% OFF <strong>of</strong> <strong>the</strong> regular price.<br />
Z Indicatesthat<strong>the</strong>reisaziplockcopyavailable<br />
for 10% <strong>of</strong>f <strong>the</strong> regular price.<br />
50 #229<br />
Unpunched Games<br />
AVP Great War @ Sea-Dreadnt $20<br />
AVP Gr War @ Sea-Grt White Flt 17<br />
AVP Gr War @ Sea-Med (2nd ed) 60<br />
AVP Gr War @ Sea 2-North Sea 75<br />
AVP Gr War @ Sea-Plan Black 42<br />
AVP Gr War @ Sea-Plan Orange 38<br />
AVP Gr War @ Sea-Plan Red 45<br />
AVP Gr War @ Sea-1904-05 38<br />
AVP Gr War @ Sea-1898 45<br />
AVP Imperium 3rd Mil. 35<br />
AVP Last Days Constan. (RPG d20) 10<br />
AVP MacArthur's Return 42<br />
AVP Op. Cannibal 24<br />
AVP Panzer Grenadier 48<br />
AVP Panzer Grenadier: Airborne 30<br />
AVP Panzer Grenadier: Afrika 60<br />
AVP Panzer Grenadier: Bulge 60<br />
AVP Panzer Grenadier: Desert Rats 65<br />
AVP Panzer Grenadier: HOTSU 45<br />
AVP PG Semper Fi: Guadalcanal 50<br />
AVP Panzer Grenadier: Tank Battles 20<br />
AVP Red Parachutes 42<br />
AVP Red Steel 38<br />
AVP Res Publica (card) 28<br />
AVP Rome at War: Hannibal 45<br />
AVP Rome at War: Fade Legions 50<br />
AVP Scotland <strong>the</strong> Brave 28<br />
AVP 2WW@ Sea: Bomb Alley 60<br />
AVP 2WW@ Sea: Distant Oceans 20<br />
AVP 2WW@ Sea: East Fleet 45<br />
AVP 2WW@ Sea: Midway 50<br />
AVP Soldier Emperor 65<br />
AVP Soldier Kings 40<br />
AVP Soldier Raj 40<br />
AVP SOPAC 48<br />
AVP Survival <strong>of</strong> Witless 21<br />
AVP Tears <strong>of</strong> <strong>the</strong> Dragon 20<br />
AVP Third Reich 60<br />
AVP Winter Fury 30<br />
BAL H Hour 50<br />
BGC Bounty 45<br />
BTL Airforce 40<br />
BOHN Op. Husky: Sicily 40<br />
CAM Barbarians 45<br />
CENT Silo 14 35<br />
CHG America's Challenge (zip) 7<br />
CHG Gettysburg 30<br />
CHG PiQadilly Circus 30<br />
CHG Underground Railroad (zip) 7<br />
CHX Glass Stones 4" tube-asstd colors 3<br />
CHX Battlemat Vinyl- 1" squares 14<br />
CHX Battlemat Vinyl- 1" hexes 14<br />
CHX Battlemat Vinyl- 1" Num. hex 14<br />
CHX Megamat Vinyl- 1" squares 30<br />
CHX Megamat Vinyl- 1" hexes 30<br />
CHX Megamat Vinyl- 1" Num hex 30<br />
CMD/GEN War in France P60<br />
COA 6 Days <strong>of</strong> Glory 36<br />
COA 1777 Year <strong>of</strong> Hangman 44<br />
COA 1807: Eagles East 54<br />
COA Achtung Spitfire 40<br />
COA Africa 50<br />
COA Army <strong>of</strong> Heartland 60<br />
COA Autumn <strong>of</strong> Glory 28<br />
COA Azteca 45<br />
COA Baron's War 40<br />
COA Brandywine & Germantown 80<br />
COA Borodino ‘41 34<br />
COA Brute Force 70<br />
COA Castle Lords 20<br />
COA Chancellorsville 40<br />
COA Chariot Lords 56<br />
COA Charmed: Book <strong>of</strong> Shadows 35<br />
COA Clash <strong>of</strong> Armor Rules(WWII) 19<br />
COA Close Action 48<br />
COA Courtisans <strong>of</strong> Versailles 48<br />
COA Dawn <strong>of</strong> Rising Sun 80<br />
COA Devil to Pay (zip) 18<br />
COA Emperor Returns 34<br />
COA Fear God/Dreadnaught 95<br />
Unpunched Games Unpunched Games<br />
COA Golan to Sinai<br />
(Clash Armor exp) $20<br />
COA Grand Alchemist 40<br />
COA Harpoon 4 56<br />
COA Harpoon Naval Rev 2003 30<br />
COA High Tide 80<br />
COA Infernal Machines (Landships) 30<br />
COA Jena 44<br />
COA King's War 36<br />
COA La Bat. Armee Nord<br />
(2nd ed/zip) 44<br />
COA La Bat. de Corunna 44<br />
COA La Bat. Mont St. Jean 40<br />
COA La Bat. Or<strong>the</strong>z 60<br />
COA La Bat. Talavera (zip) 48<br />
COA La Bat. Wavre 60<br />
COA Landships 46<br />
COA Lee Takes Command 30<br />
COA Leu<strong>the</strong>n 56<br />
COA Metro 38<br />
COA Mighty Midgets 30<br />
COA Miss. Fortress 32<br />
COA Napoleon at Leipzig 40<br />
COA Operation Spark 42<br />
COA PanzerKampfe (module) 16<br />
COA Prelude to Disaster 42<br />
COA Rebel Seas (mini rules) 25<br />
COA Rising Sun 66<br />
COA Samurai & Katana 48<br />
COA Sea <strong>of</strong> Dragons (H4 exp.) 46<br />
COA Snail Race 20<br />
COA Snail Pace 20<br />
COA So Atlantic War 32<br />
COA Space Pigs 50<br />
COA Speed <strong>of</strong> Heat 48<br />
COA Summer Storm 80<br />
COA Supermarina I 56<br />
COA Supermarina II 20<br />
COA Tales <strong>of</strong> Ulysses 30<br />
COA <strong>The</strong> Apprentice (kid) 20<br />
COA Thieves <strong>of</strong> Bagdad 48<br />
COA Valmy to Waterloo 36<br />
COA Vox Populi 48<br />
COA War Without Mercy 64<br />
COA White Ensign (Harpoon rules) 22<br />
COA Whistling Death 80<br />
COA Zorndorf 48<br />
CG Bobby Lee 45<br />
CG Dixie/Bull Run (card packs) 8<br />
CG Dixie/Shiloh (card packs) 8<br />
CG Eagles (card packs) 10<br />
CG EastFront 59<br />
CG EuroFront 35<br />
CG Hammer <strong>of</strong> <strong>the</strong> Scots 50<br />
CG MasterFront 25<br />
CG MedFront 40<br />
CG Mid-East Peace 20<br />
CG Napoleon (2nd ed.) 40<br />
CG Pacific Victory 60<br />
CG Quebec 1759 36<br />
CG Sam Grant 49<br />
CG Victory 39<br />
CG Victory Desert maps (5 & 6) 10<br />
CG Victory Island maps (7 & 8) 10<br />
CG Victory Ocean maps (9 & 10) 10<br />
CG Victory Steppe maps (11 & 12) 10<br />
CG Victory Alpine maps (13 & 14) 10<br />
CG Victory Forestmaps (15 & 16) 10<br />
CG Victory blocks (red) 12<br />
CG Victory blocks (black) 12<br />
CG Victory blocks (blue) 12<br />
CG Victory blocks (gray) 12<br />
CG Victory blocks (green) 12<br />
CG Victory blocks (orange) 12<br />
CG Victory Elite blocks (red) 12<br />
CG Victory Elite blocks (blue) 12<br />
CG Victory Elite blocks (black) 12<br />
CG Victory Elite blocks (gray) 12<br />
CG Victory Elite blocks (green) 12<br />
CG Victory Elite blocks (orange) 12<br />
CG Volga Front 25<br />
CG WWII Logistics Set (mrkrs) $10<br />
CG War <strong>of</strong> 1812 36<br />
CG WestFront 50<br />
CG Wizard Kings 40<br />
CONF Overlord P75<br />
CRH Dien Bien Phu 50<br />
CRWN TAC High Ground 40<br />
DGA Battlecards West Eur. 19<br />
DGA Battlecards West Eur. booster 4<br />
DGA Battlecards Pacific/Jap. 13<br />
DGA Battlecards Pacific/US 13<br />
DGA Battlecards Pacific booster 2<br />
DGA Battlecards Russian Fr/Ger 13<br />
DGA Battlecards Russian Fr/Sov 13<br />
DGA Battlecards Russian Fr. booster 2<br />
DGA Battlecards N Africa Camp 19<br />
DGA Battlecards N Africa booster 2<br />
DG Across Suez (SPI) 10<br />
DG Adv. ETO (ships @ 4 items) 110<br />
DG <strong>The</strong> Alamo (SPI) 15<br />
DG Antietam Campaign 35<br />
DG Battle Cry <strong>of</strong> Freedom (card) 50<br />
DG Battles <strong>of</strong> Ancient World, all 70<br />
DG Battles/Ardennes(SPI) 38<br />
DG Battle for Germany (SPI) 15<br />
DG Beyond <strong>the</strong> Urals (zip) 25<br />
DG Blue & Gray (SPI) 35<br />
DG Captivation! 25<br />
DG Cherkassy Pocket: Korsun 45<br />
DG Drive on Stalingrad (SPI) 48<br />
DG Emperor’s First Battles 35<br />
DG Empire <strong>of</strong> Middle Ages (SPI) 100<br />
DG Empires at War 35<br />
DG Forgotten War: Korea 40<br />
DG Gettysburg (WotR/zip) 20<br />
DG Leningrad (SPI) 14<br />
DG Lightning D-Day (card) 20<br />
DG Lightning Midway (card) 20<br />
DG Lords <strong>of</strong> <strong>the</strong> Sierra Madre 40<br />
DG Nap’s 1st/Emp 1st Battles 40<br />
DG Napoleon’s Last Battles (SPI) 35<br />
DG NUTS (N/S, card) 40<br />
DG Oper. Kremlin 35<br />
DG Over <strong>the</strong> Top! 38<br />
DG Over <strong>the</strong> Top! w/Mons & Marne 49<br />
DG Pacific Battles, vol. 1 48<br />
DG Rebels & Redcoats I 35<br />
DG Rebels & Redcoats III 50<br />
DG Seven Days Battles 28<br />
DG <strong>The</strong> Sun Never Sets 40<br />
DG Sun Never Sets w/FFL 60<br />
DG <strong>The</strong> ‘45 35<br />
DG 30 Years War Quad (SPI) 35<br />
DG Totaler Krieg! (ships @ 3 units) 80<br />
DG USN Deluxe (SPI) 70<br />
DG War Between <strong>the</strong> States (3 units) 110<br />
DG War <strong>of</strong> <strong>the</strong> Rebellion 35<br />
DG Wold War I (SPI) 30<br />
DIPCO Chart Wars 35<br />
DOW Fist <strong>of</strong> Drangonstones 25<br />
DOW Gang <strong>of</strong> Four 20<br />
DOW Memoir 44 50<br />
DOW Mystery <strong>of</strong> <strong>the</strong> Abbey 45<br />
DOW Pirate's Cove 50<br />
DOW Queen's Necklace 25<br />
DOW Ticket to Ride 40<br />
EGD A Dogs Life 35<br />
EGD Armada 45<br />
EGD Atlas & Zeus 20<br />
EGD Castle 17<br />
EGD China Moon 25<br />
EGD Civilization (w/Eng. rules) 60<br />
EGD Clippers 45<br />
EGD Condottierre (2nd ed) 25<br />
EGD Democrazy 15<br />
EGD Draco & Co 17<br />
EGD Dragon Delta 30<br />
EGD Dragon's Gold 17<br />
EGD Drake & Drake 15<br />
EGD Dune (w/English rules) 60<br />
EGD Empires <strong>of</strong> Ancient World 40
Unpunched Games Unpunched Games<br />
EGD Europa 1945-2030 $40<br />
EGD EVO 35<br />
EGD Fantasy Business 17<br />
EGD Formula 1 Race 40<br />
EGD Formula 1 Race Mini 35<br />
EGD Formula 1 Pewter Cars 9<br />
EGD Formula 1 Dice Set 8<br />
EGD Formula 1 Race Sheets 5<br />
EGD Formula 1-Circuit 3 & 4 20<br />
EGD Formula 1-Circuit 5 & 6 20<br />
EGD Formula 1-Circuit 7 & 8 20<br />
EGD Formula 1-Circuit 9 & 10 20<br />
EGD Formula 1-Circuit 11 & 12 20<br />
EGD Formula 1-Circuit 13 & 14 20<br />
EGD Formula 1-Circuit 15 & 16 20<br />
EGD Formula 1-Circuit 17 & 18 20<br />
EGD Formula 1-Circuit 19 & 20 20<br />
EGD Formula 1-Circuit 21 & 22 20<br />
EGD Formula 1-USA Pak-1 (23-26) 30<br />
EGD Formula 1-USA Pak-2 (27-30) 30<br />
EGD Formula 1-Circuit 31 & 32 20<br />
EGD Formula 1-10th Anniv pack 20<br />
EGD Gouda! Gouda! 20<br />
EGD Halloween Party 17<br />
EGD Knights Brave & Bold (w/Eng) 20<br />
EGD Lawless 18<br />
EGD Liberte 45<br />
EGD Mare Nostrum 50<br />
EGD Montgolfiere (2nd ed) 25<br />
EGD Mystery on <strong>the</strong> Nile 27<br />
EGD Phoenix 20<br />
EGD Savanah Cafe 25<br />
EGD Serenissima 50<br />
EGD Tony & Tino 15<br />
EGD Tyrus 35<br />
EGD Valley <strong>of</strong> Mammoths 30<br />
EGD Vinci 45<br />
EGD War & Sheep 15<br />
EGD Way out West 35<br />
EGL Age <strong>of</strong> Imperialism (Xtra ship$) 50<br />
EGL Age Imper. Mini 1 (Bl/Red) 15<br />
EGL Age Imper. Mini 2 (Gre/Yel) 15<br />
EGL Age Imper. Mini 3 (Pur/Gry) 15<br />
EGL Age <strong>of</strong> Mythology (Xtra ship$) 45<br />
EGL American Civil War (Xtra ship$) 50<br />
EGL ACW Mini (Dk Bl/Gry) 1 15<br />
EGL ACW Mini (Mid Bl/BN) 2 15<br />
EGL Attack! (Xtra ship$) 30<br />
EGL Attack! Expan. 30<br />
EGL Bootleggers 40<br />
EGL S.Meier's Civilization (Xtra ship$) 60<br />
EGL Horses Set 1 15<br />
EGL Lord <strong>of</strong> Rings Children's 30<br />
ENDGM $25,000 Pyramid 10<br />
ENDGM Price is Right 16<br />
EXCAL 1944 (zip) 30<br />
EXCAL Alien Contact 20<br />
EXCAL East Front (zip) 100<br />
EXCAL Escape from Colditz 42<br />
EXCAL Gettysburg High Tide P29<br />
EXCAL Great Western Rails 42<br />
EXCAL To Green Fields Beyond 44<br />
EXCAL Ironclads (2nd ed) 42<br />
EXCAL Ironclads Exp (2nd ed) 36<br />
EXCAL Koniggratz (zip) 15<br />
EXCAL Panzer (2nd ed.) 40<br />
EXCAL Plague 42<br />
EXCAL Sovereign <strong>of</strong> Seas 22<br />
EXCAL Trax 13<br />
EXCAL Trajan Dlx Exp (box) 50<br />
EXCAL Wings (2nd ed.) 40<br />
FASA Taipan 35<br />
FFG Doom Boardgame 55<br />
FFG <strong>The</strong> Hobbit 43<br />
FFG LoTR: Friends & Foes expan 22<br />
FFG LoTR: Confrontation 20<br />
FFG LoTR: Sauron 25<br />
FFG LoTR: Trvia Game 40<br />
FFG Wings <strong>of</strong> War: Aces 30<br />
FFG Wings <strong>of</strong> War: Back 30<br />
FGI Stargate SG1 35<br />
FLY BF Complete Brigadier $45<br />
FMG Rainforest (Insecta exp) 15<br />
FMG Trilobyte (Insecta exp) 15<br />
FPL Iron & Fire 30<br />
FRP Btl Beiden Pass (cards) 25<br />
GAL ATC Moonshot 40<br />
GDW 1815 (zip) P75<br />
GDW Battle for Moscow (zip) 15<br />
GDW Beda Fomm (series 120) 40<br />
GDW Beltstrike 25<br />
GDW Blood & Thunder 40<br />
GDW Capt Ed Harpoon P40<br />
GDW Command Decision 45<br />
GDW Double Star 50<br />
GDW Harpoon 30<br />
GDW House Divided (1st) P40<br />
GDW Mansassas (zip) 60<br />
GDW Marita-Merkur 75<br />
GDW Mayday (series 120) 25<br />
GDW Narvik (zip/1st ed) 75<br />
GDW Race for Tunis 25<br />
GDW SSN (zip) 75<br />
GDW Tarsus 40<br />
GDW Team Yankee 30<br />
GDW Traveller 40<br />
GDW Unetsch. (zip) 70<br />
GMR A Frozen Hell 59<br />
GMR Crusader 38<br />
GMR Gaine's Mill 49<br />
GMR GD 40 40<br />
GMR Hunters from Sky 43<br />
GMR No Better Place-Murfree. 29<br />
GMR Op. Michael: Watchtower 35<br />
GMR This Terrible Sound 132<br />
GMSCN Twerps (zip) 10<br />
GMSMTH Pan<strong>the</strong>on 30<br />
GMT Across <strong>the</strong> Rap. 65<br />
GMT Africanus (zip) 16<br />
GMT Airbridge Victory 25<br />
GMT Ardennes 44 55<br />
GMT Attila (zip) 16<br />
GMT Austerlitz 65<br />
GMT Battle Line (reprint) 20<br />
GMT Blue vs. Gray Dlx 29<br />
GMT Borodino 40<br />
GMT Brandywine 38<br />
GMT Caratacus (zip) 16<br />
GMT Caesar in Alexandria 40<br />
GMT Clash <strong>of</strong> Giants 50<br />
GMT Crisis: Sinai 1973 40<br />
GMT Deluxe Alexander 65<br />
GMT Devils Horsemen 70<br />
GMT DiF: Corsairs & Hellcats 45<br />
GMT Downtown 59<br />
GMT 8th Airforce 40<br />
GMT Europe Engulfed 99<br />
GMT Flagship: Coyote (cards) 20<br />
GMT Flagship: Promo. (cards) 20<br />
GMT Formula One Motor (cards) 16<br />
GMT Gringo 50<br />
GMT Guilford Courthouse 40<br />
GMT Ivanhoe (card) 20<br />
GMT Juluis Caesar-Civil Wars 50<br />
GMT Kasserine 50<br />
GMT Lost Victory 32<br />
GMT Medieval 29<br />
GMT Paths <strong>of</strong> Glory 55<br />
GMT Prussia's Glory 55<br />
GMT Red Badge <strong>of</strong> Courage 55<br />
GMT <strong>Rise</strong> <strong>of</strong> Roman Repub (zip) 50<br />
GMT Risorgimento 65<br />
GMT River <strong>of</strong> Death 79<br />
GMT ROME 39<br />
GMT Salamis (War Galley/zip) 20<br />
GMT Santa Fe Rails 40<br />
GMT Silver Bayonet 30<br />
GMT Simple GBoH Guide 20<br />
GMT SPQR Player's Guide 20<br />
GMT Sweden Fights On 55<br />
GMT Sword <strong>of</strong> Rome 65<br />
GMT Thirty Years War 50<br />
Unpunched Games<br />
GMT This Accursed Civil War $55<br />
GMT Three Days Gettysburg (reprint) 89<br />
GMT Tyrant (zip) 20<br />
GMT Veni, Vedi, Vici (zip) 10<br />
GMT Von Manstein's Back Blow 40<br />
GMT Wilderness War 55<br />
GMT World at War (xtra ship$) 175<br />
GMT Zero 45<br />
GPG Rebel Yell 35<br />
GREN Journey 20<br />
GRNFLD Sword & Flame 60<br />
HBO Lord <strong>of</strong> <strong>the</strong> Rings 55<br />
HBO Pass <strong>the</strong> Pigs 12<br />
HBO Mille Bornes Coll Ed 16<br />
HJ Norway 1940 200<br />
HTB Pirates Plunder 18<br />
HTG MDL MTB (zip) 40<br />
ING One World Dom. (Risk var) 6<br />
JOL Victory & Honor (card) 18<br />
L2DG Street <strong>of</strong> Stalingrad (Xtra ship$) 170<br />
Lion Ramp Challenge 45<br />
LOO Chrononauts 20<br />
LOO Lost Ident/Chrono. bstr. 3<br />
LOO Fluxx (3.0) 12<br />
MB Battleship 19<br />
MED <strong>The</strong> Preventor 25<br />
MEN Pirateer 22<br />
METGM Dimension Demons 8<br />
METGM Fire When Ready 8<br />
METGM Gev (zip) 15<br />
METGM Grail Quest 8<br />
METGM Holy War (zip) 15<br />
METGM Hot Spot (zip) 15<br />
METGM Lords <strong>of</strong> Underearth 8<br />
METGM Ogre (zip) 15<br />
METGM Ram Speed 8<br />
METGM Rivets 8<br />
METGM Rommel's Panzers 8<br />
METGM Stalin's Tanks 8<br />
METGM Stellar Conquest 50<br />
METGM Trailblazer 8<br />
METGM Warp War 8<br />
METGM Warp War (zip) 15<br />
MFG 1835 45<br />
MFG 1856 45<br />
MFG 1870 45<br />
MFG Alexander & Cheops 18<br />
MFG Australian Rails (tube) 25<br />
MFG Bang! (card) 10<br />
MFG British Rails (tube) 25<br />
MFG Dancing Dice 25<br />
MFG Dodge City (Bang exp) 10<br />
MFG Domaine 49<br />
MFG Dos Rios: Valley 2 Rivers 49<br />
MFG Empire Builder 38<br />
MFG Euphrate & Tigris 50<br />
MFG Eurorails 30<br />
MFG Express 13<br />
MFG Family Business (2nd ed) 15<br />
MFG Freight Train 20<br />
MFG India Rails 35<br />
MFG Iron Dragon 30<br />
MFG King Me! 25<br />
MFG Lunar Rails 38<br />
MFG Manhattan 30<br />
MFG More Cosmic Encounter 35<br />
MFG Nippon Rails (tube) 25<br />
MFG Pyramids 25<br />
MFG Quo Vadis-Roman Senate 35<br />
MFG Russian Rails 38<br />
MFG Settlers <strong>of</strong> Canaan 30<br />
MFG Kids <strong>of</strong> Catan 49<br />
MFG Settlers <strong>of</strong> Catan 38<br />
MFG SoC/ 5&6 expan 20<br />
MFG SoC/Scenario box (Ger) 25<br />
MFG SoC/Seafarers 35<br />
MFG SoC/Seafarers expan 20<br />
MFG SoC/Cities & Knights expan 38<br />
MFG SoC/Cities & Knights-5&6 20<br />
MFG SoC/replacement cards 9<br />
MFG SoC/Travel ed 25<br />
Unpunched Games<br />
MFG Settlers <strong>of</strong> Stone Age 49<br />
MFG Starfarers Catan/Germ 60<br />
MFG Starfarers Catan/Eng 60<br />
MFG Starfarers Catan-5&6 30<br />
MFG Starship Catan (2 player) 30<br />
MFG Silverton (2nd ed) 45<br />
MFG Simply Cosmic 20<br />
MFG Streetcar 30<br />
MFG <strong>The</strong>ophrastus 25<br />
MFG Uncle Happy's Train Gm 15<br />
MIH Fields <strong>of</strong> Glory P44<br />
MIH In Flanders Field (zip) 30<br />
MIH Iron Bottom Sound II 42<br />
MIH Lodz 1914 (zip) 49<br />
MIH Pierce <strong>the</strong> Reich 35<br />
MIH Tunisia 43 44<br />
MIH Turning <strong>the</strong> Tables 30<br />
MIH Velikye Luki (zip) 32<br />
MIH White Ensign (zip) 35<br />
MKD Barnet (zip) 20<br />
MKD Mortimer's Cross (zip) 20<br />
MKD Tewkesbury (zip) 20<br />
MWF Master <strong>of</strong> Wars 30<br />
NES Battle for Dresden 30<br />
NES Killing Ground 60<br />
NVA Ace <strong>of</strong> Aces 40<br />
NVA Bounty Hunter 45<br />
NVA Battle for Factories 200<br />
NVA Fire on Volga 200<br />
NVA Jet Eagles 35<br />
OMGA 1864 35<br />
OMGA Carrier War 40<br />
OMGA Carrier War Expan. (zip) 20<br />
OMGA Desert Victory 40<br />
OMGA Victory in Europe (2nd /zip) 40<br />
OMGA War to Death (1st ed) 30<br />
OMGA War to Death (2nd ed/zip) 25<br />
OOB Apples to Apples 20<br />
OOB Apples to Apples exp. 1 13<br />
OOB Apples to Apples exp. 2 13<br />
OOB Apples to Apples exp. 3 15<br />
OOB Apples to Apples exp. 4 15<br />
OOB Apples to Apples exp. 5 15<br />
OOB Apples to Apples Jr. 16<br />
OOB Apples to Apples Jr. 9+ 17<br />
OOB Apples to Apples Party bx 30<br />
OOB Apples to Apples Crate 30<br />
OOB Apples to Apples Crate Exp 25<br />
OOB Qwitch 10<br />
OOB Shipwrecked 16<br />
OOB Squint 20<br />
OSS Jaunty Jalopies 25<br />
OSS Mill. Wars- Iraq 20<br />
OSS Mill. Wars- Kashmir 20<br />
OSS Mill. Wars- America 20<br />
OSS Mill. Wars- Ukraine 20<br />
OSS Mill. Wars- Korea 20<br />
OSS Mill. Wars- Air Wars expan 20<br />
OSG 1806: Rossbach 48<br />
OSG Bonaparte in Italy 39<br />
OSG Devils Den 40<br />
OSG Highway to <strong>the</strong> Kremlin 48<br />
OSG Hundred Days Battle (zip) P40<br />
OSG La Guerre de l'Emperor 48<br />
OSG Last Days -Grand Armee 36<br />
OSG Napoleon at Bay (2nd ed) 48<br />
OSG Sun <strong>of</strong> Austerlitz 46<br />
OSG Rommel @ Tunisia 60<br />
PB Lionheart 36<br />
PRP Frozen Chosin 30<br />
PHA A House Divided 45<br />
PHA Waterloo 45<br />
PWG Kanev 45<br />
QD Grant Moves South P75<br />
QD Incredible Victory P60<br />
QD Ironbottom Sound 75<br />
Quan Fire & Fury ACW Rules 23<br />
Quan Great Western Battles Scen 15<br />
RAND Omaha Beach (folio) 50<br />
RAV Shark 40<br />
RIO GR Africa 40<br />
strategy & tactics 51<br />
Desert Fox<br />
Games
Desert Fox<br />
Games<br />
Unpunched Games<br />
RIO GR Age <strong>of</strong> Napoleon $45<br />
RIO GR Aladdin's Dragon 40<br />
RIO GR Alexandros 33<br />
RIO GR Amun Re 38<br />
RIO GR Andromeda 40<br />
RIO GR Around World 80 38<br />
RIO GR Attika 33<br />
RIO GR Babel 23<br />
RIO GR Balloon Cup 20<br />
RIO GR Barnyard Critters (card) 10<br />
RIO GR Bean Trader 38<br />
RIO GR Bohnanza 18<br />
RIO GR Bohnanza Bonaparte exp 15<br />
RIO GR Bucket King 25<br />
RIO GR Cabale 40<br />
RIO GR Caesar & Cleopatra 23<br />
RIO GR Canyon 25<br />
RIO GR Cape Horn 30<br />
RIO GR Caprice 40<br />
RIO GR Capt'n Clever 25<br />
RIO GR Carcassone 23<br />
RIO GR Carcassone Castle 23<br />
RIO GR Carcassone City 50<br />
RIO GR Carcassone Count 6<br />
RIO GR Carc Hunters & Ga<strong>the</strong>rers 23<br />
RIO GR Carc exp./I&C 13<br />
RIO GR Carc exp./T&B 13<br />
RIO GR Carc exp./King & Scout 5<br />
RIO GR Carolus Magnus 40<br />
RIO GR Caribbean 28<br />
RIO GR Cartagena 25<br />
RIO GR Chicken Cha Cha Cha 38<br />
RIO GR Clans 25<br />
RIO GR Clash <strong>of</strong> Gladiators 30<br />
RIO GR Coloretto (card) 12<br />
RIO GR Corsairs 20<br />
RIO GR Corsari (card) 12<br />
RIO GR Crocodile Pool Party 23<br />
RIO GR Dawn Under 45<br />
RIO GR Doge 40<br />
RIO GR Dracula 23<br />
RIO GR Dragonland 35<br />
RIO GR <strong>The</strong> Duell 25<br />
RIO GR Dvonn 30<br />
RIO GR Edison & Co. 40<br />
RIO GR El Grande 40<br />
RIO GR Evergreen 30<br />
RIO GR FBI (card) 13<br />
RIO GR Fossil 30<br />
RIO GR Frank's Zoo (card) 10<br />
RIO GR Galloping Pigs (card) 10<br />
RIO GR Gargon (card) 10<br />
RIO GR Ghost Chase 40<br />
RIO GR Gipf 25<br />
RIO GR Gnummies (card) 10<br />
RIO GR Goa 33<br />
RIO GR Goldbrau 38<br />
RIO GR Gone Fishing 23<br />
RIO GR Gulo Gulo 38<br />
RIO GR Halli Galli 18<br />
RIO GR Hare & Tortise 25<br />
RIO GR Heart <strong>of</strong> Africa 45<br />
RIO GR Heave Ho 23<br />
RIO GR Hector & Achilles 30<br />
RIO GR Hellas 23<br />
RIO GR Hera & Zeus 23<br />
RIO GR Ido 50<br />
RIO GR Igloo Pop 33<br />
RIO GR Industrial Waste 30<br />
RIO GR Jambo 23<br />
RIO GR Java 38<br />
RIO GR Kahuna 20<br />
RIO GR Katzenjammer Blues (card) 10<br />
RIO GR King's Breakfast (card) 12<br />
RIO GR Klunker (card) 10<br />
RIO GR La Citta 40<br />
RIO GR LotR <strong>The</strong> Search 23<br />
RIO GR Landlord (card) 10<br />
RIO GR Lowenherz 40<br />
RIO GR Lost Cities 23<br />
RIO GR Marco Polo<br />
52 #229<br />
38<br />
Unpunched Games Unpunched Games Unpunched Games<br />
RIO GR Magna Grecia $38<br />
RIO GR Maharaja 45<br />
RIO GR Mall World 33<br />
RIO GR Mama Mia (card) 10<br />
RIO GR Mammoth Hunters 35<br />
RIO GR Maya 28<br />
RIO GR Medici 30<br />
RIO GR Medina 40<br />
RIO GR Medeival Merchant 40<br />
RIO GR Merchant <strong>of</strong> Amsterdam 45<br />
RIO GR Meridian 40<br />
RIO GR Message to Czar 25<br />
RIO GR Mexica 35<br />
RIO GR Mississippi Queen 40<br />
RIO GR Mü & More (card) 12<br />
RIO GR Nero 45<br />
RIO GR Niagara 45<br />
RIO GR Odin's Ravens 20<br />
RIO GR O Zoo le Mio 33<br />
RIO GR Paris, Paris 25<br />
RIO GR Pick Picknic 16<br />
RIO GR Pizarro & Co. 25<br />
RIO GR Power Grid 45<br />
RIO GR Princes <strong>of</strong> Florence 40<br />
RIO GR Pueblo 40<br />
RIO GR Puerto Rico 38<br />
RIO GR Richochet Robots 25<br />
RIO GR Samarkand 30<br />
RIO GR Samurai 40<br />
RIO GR San Juan 25<br />
RIO GR Secrets <strong>of</strong> Tombs 35<br />
RIO GR Shadow <strong>of</strong> Emp. 28<br />
RIO GR Siesta 40<br />
RIO GR 6 Billion 25<br />
RIO GR St Petersburg 28<br />
RIO GR Submarine 28<br />
RIO GR Tally Ho 23<br />
RIO GR Tamsk 50<br />
RIO GR Tayu 60<br />
RIO GR <strong>The</strong> Prince 30<br />
RIO GR <strong>The</strong> Reef 20<br />
RIO GR Tikal 45<br />
RIO GR Time Pirates 30<br />
RIO GR Top Secret Spies 30<br />
RIO GR Torres 40<br />
RIO GR Toscana 30<br />
RIO GR T-Rex (card) 10<br />
RIO GR Traders <strong>of</strong> Genoa 40<br />
RIO GR Transamerica 28<br />
RIO GR Trias 23<br />
RIO GR Trick R. Treat (card) 10<br />
RIO GR Vampire 35<br />
RIO GR Vino 40<br />
RIO GR Yeti Slalom 20<br />
RIO GR Yinsh 33<br />
RIO GR Where's Bob Hat? (card) 10<br />
RIO GR Wyatt Earp 23<br />
RIO GR Zertz 30<br />
SDI 1862 40<br />
SJG Awful Green Things 20<br />
SJG Car Wars 25<br />
SJG Coup 30<br />
SJG FRAG 35<br />
SJG FRAG Deadlands 35<br />
SJG FRAG Exp 1 Death Match 15<br />
SJG FRAG Exp 2 Fire Zone 7<br />
SJG Munchkin 25<br />
SJG Munchkin Blender 17<br />
SJG Munchkin Fu 25<br />
SJG Munchkin Fu 2: Monky 17<br />
SJG Munchkin Players Guide 20<br />
SJG Munchkin miniatures 25<br />
SJG Munchkin 2: Unnatural Axe 17<br />
SJG Munchkin 3: Clerical Errors 17<br />
SJG Munchkin T-Shirt 22<br />
SJG Snits Revenge 20<br />
SJG Star Munchkin 25<br />
SJG Star Munchkin 2: Clown War 17<br />
SLS Bells <strong>of</strong> War 50<br />
SMCN Assault on Tobruk (zip) 25<br />
SMCN Battle Ship (zip) 25<br />
SMCN Battlestations (zip) $25<br />
SMCN Divine Wind (zip) P25<br />
SMCN Kriegsmarine (zip) 25<br />
SMCN Line <strong>of</strong> Battle (zip) 25<br />
SMCN Man <strong>of</strong> War (zip) 25<br />
SMCN Ortona 30<br />
SMCN Power & Resloution (zip) P25<br />
SMCN Wilderness (zip) 25<br />
SMG Material World 40<br />
SMGC Amer. Megafauna (box) 40<br />
SMGC Amer. Megafauna (zip) 16<br />
SMGM Kesserling 40<br />
SMTC Sagunto 90<br />
SPI Across Suez P/Z40<br />
SPI Air War P70<br />
SPI Alma (zip) P40<br />
SPI Ardennes Offensive Z/P50<br />
SPI Austerlitz (zip) P75<br />
SPI Barbarossa 60<br />
SPI Bulge (zip) P40<br />
SPI Bundeswehr (Conf Series) P40<br />
SPI Cassino Z40<br />
SPI Cauldron (zip) 25<br />
SPI China War (box) 40<br />
SPI Chinese Farm (zip) 25<br />
SPI Cobra (zip) 40<br />
SPI Combined Arms P40<br />
SPI Commando Z50<br />
SPI Dallas (RPG) 30<br />
SPI Delta-Vee (zip) 25<br />
SPI East is Red Z/P60<br />
SPI Firefight Z/P40<br />
SPI Flying Circus Z/P100<br />
SPI Freedom in Galaxy 50<br />
SPI Grunt (wh. box) 90<br />
SPI Island War quad 125<br />
SPI Kharkov Z/P60<br />
SPI Lee at Gettysburg (zip) 75<br />
SPI Leningrad 25<br />
SPI Modern Battles P90<br />
SPI Mod Btl-Mukden (zip) 35<br />
SPI Mod Btl-Wurzburg(zip) 40<br />
SPI Mod Btl2-Jerusalem (zip) 35<br />
SPI Napoleon @ Waterloo P75<br />
SPI Nap @ War-Marengo (zip) P45<br />
SPI Napoleon’s Last Battles<br />
(zip/missing Quatre Bras) 55<br />
SPI NLB-Wavre (folio) 35<br />
SPI Ney vs. Wellington (zip) 65<br />
SPI Nordlingen (folio) 50<br />
SPI October War Z60<br />
SPI Oil War (zip/copy'd rules) P40<br />
SPI Panzer Battles Z50<br />
SPI PanzerArmee Afrika P50<br />
SPI Paratroop Z40<br />
SPI Patton’s 3rd Army Z40<br />
SPI Plot to Assn. Hitler Z70<br />
SPI Raid Z/P45<br />
SPI Red Star/White Star (wh box) 45<br />
SPI Rescue from Hive 30<br />
SPI Rifle & Saber Z/P100<br />
SPI Scrimmage Z/P50<br />
SPI Sixth Fleet 75<br />
SPI Spies Z50<br />
SPI Spitfire Z/P75<br />
SPI Starforce Z/P50<br />
SPI Stargate (folio) 25<br />
SPI Starsoldier Z/P60<br />
SPI Strike Force One (zip) 20<br />
SPI Titan Strike (folio) 25<br />
SPI To <strong>the</strong> Green Fields (FT) 85<br />
SPI Up Scope Z/P75<br />
SPI Vector 3 (folio) 25<br />
SPI War in <strong>the</strong> Pacific (FT) 600<br />
SPI World Killer 40<br />
SPRHD Bloodiest Day/Antietam 35<br />
SPRHD Bodyguard Overlord 35<br />
SPRHD Met at Gettysburg 35<br />
SPRT Gettysburg:3 days/July 40<br />
SPW Italian Front 40<br />
SPW Serbia & Romania 40<br />
SPW Tannenberg & Galicia $40<br />
SPW Western Front 70<br />
SSI Great Naval Bat.II (IBM) 40<br />
STGM Cry Havoc Scen BK 1 6<br />
STGM Dark Blades 35<br />
STGM Starship Captain 30<br />
STGM Thunder-rin Guns 30<br />
TTC Central Powers-WWI<br />
Axis & Allies Access. 35<br />
TTC New World Order-Mod<br />
Axis & Allies Access. 35<br />
TTC Risk 2042 Variant 35<br />
TAUR Raiders <strong>of</strong> North 50<br />
TF Ceberus (folio) 30<br />
TF Columbus (Viceroy expan) 13<br />
TF Grand Army <strong>of</strong> <strong>the</strong> Republic 40<br />
TF King's Bounty 25<br />
TF Op. Pegasus (folio) 30<br />
TF Starfire (folio) 30<br />
TF Viceroys 30<br />
TGC Red Christmas P30<br />
TLC Haunting House 23<br />
TLC Haunting House 2 10<br />
TLC Say What? 10<br />
TLC Bag <strong>of</strong> Zombies! 10<br />
TLC Zombies! 20<br />
TLC Zombies! 2 expan 15<br />
TLC Zombies! 3 Mall/expan 15<br />
TLC Zombies! 3.5/expan 10<br />
TLC Zombies! 4 <strong>The</strong> End 25<br />
TMJM 2038: Tycoon <strong>of</strong> Asteroid 50<br />
Tsk Hob Lepoard II 90<br />
TSR Air War (zip) 45<br />
TSR Barbarossa P45<br />
TSR Battle Over Britain Z20<br />
TSR Best <strong>of</strong> Dragon Games 35<br />
TSR Buck Rogers Hi Adv. 25<br />
TSR Cobra 50<br />
TSR Firefight Z15<br />
TSR Hetzer: Sniper 45<br />
TSR Icebergs (zip) 25<br />
TSR Line in Sand 45<br />
TSR Spies Z20<br />
TSR Twilight War (zip) 30<br />
TSR Wellington's Victory 55<br />
UBR Alhambra 35<br />
UBR Ark <strong>of</strong> <strong>the</strong> Covenant 25<br />
UBR Hoity Toity 35<br />
UBR New England 45<br />
UBR Shakespeare <strong>the</strong> Bard 40<br />
UBR Sunken City 40<br />
UGG Ashes <strong>of</strong> Empire 10<br />
UGG Blitzkreig Gen (2nd ed) 39<br />
UGG Cold Days in Hell 59<br />
UGG Morsecode 59<br />
UGG Parasan 29<br />
UGG <strong>The</strong> Hell Game 65<br />
UGG Triumph & Fall (zip) 25<br />
VG Central America 40<br />
VG Gulf Strike (1st ed) 50<br />
VG Hell's Highway P45<br />
VG James Bond/007 Goldfinger 10<br />
VG Open Fire 45<br />
VG Panzer Command 45<br />
VNGRD Pas de Calais 60<br />
VPG Vanished Planet 45<br />
WE Against <strong>the</strong> Reich P30<br />
WE Air Cav P25<br />
WE Air & Armor (1st ed) P25<br />
WE Killer Angels 40<br />
WE Soldiers 40<br />
WE Tank Leader 40<br />
WHY Tenjo 50<br />
WIN Colorado Rails 20<br />
WIN Ferrocarriles Pampas 20<br />
WIN MINE! 15<br />
WIN TRANSSIB-Russ Mafia 40<br />
WIN Trainsport Austria 20<br />
WIN Tracks to Titicaca 40<br />
WIN Tracks to Telluride 50<br />
WIN Adv. Tracks/Telluride exp. 25<br />
WOLF Swords <strong>of</strong> Glory 35<br />
WOTC Filthy Rich 45
Unpunched Games Punched Games<br />
WOTC Guillotine (card) $13<br />
3W 1944: Second Front 38<br />
3W Aachen 28<br />
3W Aces High (box) 60<br />
3W Aces High (zip) 50<br />
3W Aces High (2nd ed) 25<br />
3W American Aces 25<br />
3W Ancients II 40<br />
3W Arabian Nightmare (zip) 25<br />
3W Army <strong>of</strong> <strong>the</strong> Tenn. 75<br />
3W Barbarians 46<br />
3W Battle <strong>of</strong> <strong>the</strong> Alma 33<br />
3W Battle Cry 50<br />
3W Blitzkrieg in <strong>the</strong> South 35<br />
3W Blood & Iron 35<br />
3W Campaigns <strong>of</strong> Civil War 27<br />
3W Crimean Shield 35<br />
3W Crossbow & Cannon 2 33<br />
3W Dark Crusade 45<br />
3W Defense <strong>of</strong> Rorke's Drift 34<br />
3W Duel for Kharkov 40<br />
3W Frederick <strong>the</strong> Great 28<br />
3W Fury on Champlain 33<br />
3W Give Me Liberty 35<br />
3W Ironsides 36<br />
3W Last Blitzkrieg 30<br />
3W Last Battles: Prussia 30<br />
3W Light Division P28<br />
3W Napoleon at Aust. 28<br />
3W Napoleons Later Bat. 35<br />
3W Never Call Retreat 50<br />
3W Panzerkrieg 33<br />
3W Raid on Richmond 36<br />
3W Royalists & Roundheads I (zip) 40<br />
3W Royalists & Roundheads III 30<br />
3W Run Silent, Run Deep 33<br />
3W SS Amerika 75<br />
3W Salvo 40<br />
3W Salvo II 28<br />
3W Scratch One Flat Top 32<br />
3W Sink <strong>the</strong> Bismarck 28<br />
3W Spitfire 36<br />
3W Spires <strong>of</strong> <strong>the</strong> Kremlin 42<br />
3W Star Force Terra 20<br />
3W <strong>Strategy</strong> (zip) 10<br />
3W Tahiti 27<br />
3W Tarawa 28<br />
3W Tide <strong>of</strong> Fortune 30<br />
3W To <strong>the</strong> Far Shore 36<br />
XNO Cent. <strong>of</strong> Glory (min. rules) 14<br />
XNO Europe at War 40<br />
XNO Florida 30<br />
XTR Back to Iraq (zip) 20<br />
XTR Black Gold (zip) 40<br />
XTR Miss. Banzai (zip) 50<br />
XTR NATO, Nukes & Nazis (zip) 60<br />
XTR Red Sky Morning (zip) 60<br />
XTR Seven Seas to Victory (zip) 50<br />
XTR Smi<strong>the</strong>reens (zip) 30<br />
XTR Wahoo! (zip) 20<br />
YAQ Apache 60<br />
YAQ Asteroid Pirates 50<br />
YAQ Attack <strong>of</strong> Mutants 55<br />
YAQ Battle 45<br />
YAQ Beachhead 40<br />
YAQ Beastlord 50<br />
YAQ Demons Run 30<br />
YAQ Fast Attack Boats 50<br />
YAQ Ironbottom Sound 75<br />
YAQ Marine 2002 P60<br />
YAQ Murfreesboro 50<br />
YAQ Neck & Neck 50<br />
YAQ Raider 40<br />
YAQ Superiority P40<br />
YAQ Timeship 45<br />
AH Amoeba War $24<br />
AH Raid on St Nazaire 27<br />
AH <strong>Tactics</strong> II 36<br />
AH Verdict II 80<br />
ADV GMS Johnny Reb 40<br />
ATTX 8th Army 25<br />
BTL Airforce & Dauntless 50<br />
BTL Dauntless 24<br />
BTL Flat Top 36<br />
BTL Submarine 36<br />
CONF Overlord (1st) 30<br />
FASA Battlespace 35<br />
GDW 1815 (box) 27<br />
GxD Star Fighter 36<br />
HG Campaign 30<br />
HISTO GM Eagle Day (zip) 24<br />
Rhino Legend Begins (zip) 25<br />
SDC Hue (zip) 30<br />
SMCN DAK 25<br />
ST COLE Poland 39 (zip) 35<br />
SPI Big Red One 24<br />
SPI Bull Run 33<br />
SPI CA (zip) 30<br />
SPI Fast Carriers 48<br />
SPI Frigate 30<br />
SPI Lee Moves North Z48<br />
SPI Legion 60<br />
SPI Moscow Camp. 48<br />
SPI Musket & Pike 60<br />
SPI Napoleons Last Battles (box) 50<br />
SPI Sniper 24<br />
SPI Sorceror 30<br />
SPI Tannenberg (box) 27<br />
SPI Tank 36<br />
SPI Wacht am Rhein 180<br />
SPI Westwall-Bastogne (zip) 18<br />
SPI Wilderness Camp. Z48<br />
TSR Boot Hill 24<br />
TSR Onslaught 24<br />
3M Breakthru 30<br />
3M Executive Decision 50<br />
3M Foil 50<br />
3M Oh Wah Ree 35<br />
3M Point <strong>of</strong> Law 40<br />
3M Quinto 50<br />
VG Ambush 24<br />
VG Battle Hymn 24<br />
WE Marlborough 36<br />
YAQ CV 36<br />
YAQ Great Redoubt 30<br />
StrateGy & taCtiCS<br />
Iss # Title Price<br />
30 Combat Command $80<br />
32 Borodino 90<br />
34 Armageddon 60<br />
37 Scrimmage 30<br />
38 CA 50<br />
39 Fall <strong>of</strong> Rome P60<br />
40 Panzer Armee Afrika 50<br />
41 Kampfpanzer 50<br />
42 <strong>The</strong> East is Red P45<br />
43 American Civil War P35<br />
44 Tank! 45<br />
45 Operation Olympic 50<br />
46 Combined Arms P40<br />
47 Wolf Pack 55<br />
48 Sixth Fleet P60<br />
49 Frederick <strong>the</strong> Great P55<br />
50 Battle for Germany P65<br />
51 World War I P60<br />
52 Oil War P40<br />
53 Punic Wars P55<br />
54 Dixie P35<br />
55 Breitenfeld P50<br />
56 Revolt in <strong>the</strong> East P40<br />
57 Panzergruppe 50<br />
58 Conquistador P40<br />
59 Plot to Assassinate Hitler 30<br />
60 <strong>The</strong> Road to Richmond P50<br />
61 October War 45<br />
62 South Africa P35<br />
63 Veracruz 1847 25<br />
64 Raid! P25<br />
65 Cobra P45<br />
66 Constantinople 45<br />
67 Stonewall P50<br />
68 Kharkov P40<br />
69 Tannenberg P40<br />
70 Crusades 55<br />
StrateGy & taCtiCS<br />
Iss # Title Price<br />
71 Cassino $P25<br />
72 Armada 30<br />
73 Panzer Battles 30<br />
74 Ney vs. Wellington P50<br />
75 Napoleon’s Art <strong>of</strong> War P45<br />
76 China War 25<br />
77 Paratroop 30<br />
78 Patton’s 3rd Army 25<br />
79 Berlin ’85 P30<br />
80 Wilson’s Creek P50<br />
81 Tito P20<br />
82 Fifth Corps P25<br />
83 Kaiser’s Battles P30<br />
84 Operation Grenade 30<br />
85 Fighting Sail P30<br />
86 Cedar Mountain P50<br />
87 Desert Fox P55<br />
88 BAOR 35<br />
89 Sicily: Race to Messina 35<br />
90 Monmouth 30<br />
91 RDF 50<br />
92 Iwo Jima 45<br />
93 American Civil War 40<br />
94 Nordkapp 40<br />
95 Soldiers <strong>of</strong> Queen 50<br />
96 Singapore 45<br />
97 Trail <strong>of</strong> Fox 40<br />
98 Central Command 40<br />
99 Thunder at Luetzen 40<br />
100 Super Powers 40<br />
101 Cromwell’s Victory 40<br />
102 Monty’s D-Day 50<br />
103 Road to Vicksburg 40<br />
104 Colonies Revolt 60<br />
105 Ruweisat Ridge 25<br />
106 Pleasant Hill 40<br />
107 Warsaw Rising P30<br />
108 Remember <strong>the</strong> Maine 40<br />
109 Target: Libya 40<br />
110 Hastings, 1066 40<br />
111 Korea 40<br />
112 Patton to War 30<br />
113 Battle <strong>of</strong> Abensberg 40<br />
114 Battle <strong>of</strong> Eckmuhl 40<br />
115 Kanev 30<br />
116 Manchu 30<br />
117 North German Plain 30<br />
118 <strong>The</strong> Tigers are Burning 30<br />
119 Horse Soldiers 40<br />
120 Nicaraugua 25<br />
121 Indian Mutiny 25<br />
122 Pegasus Bridge P30<br />
123 Campaign in Valley 30<br />
125 Far Seas 50<br />
126 Beirut ’82 20<br />
127 Rush for Glory 20<br />
128 Africa Orientale 30<br />
129 Harvest <strong>of</strong> Death 30<br />
130 Tsushima 25<br />
131 Donau Front 20<br />
132 Iron Cross 25<br />
133 Baton Rouge 20<br />
136 Borodino: Doomed Victory 40<br />
137 Men at Arms 40<br />
138 Eylau 25<br />
139 Arabian Nightmare 30<br />
140 Objective Tunis 20<br />
142 Red Beach One:Tarawa 20<br />
143 Rio Grande:Valverde 15<br />
144 Chad: <strong>The</strong> Toyota Wars 15<br />
146 Italian Camp: Sicily 25<br />
147 Holy War: Afghanistan 25<br />
148 Cropredy Bridge 15<br />
150 Italian Camp: Salerno 50<br />
151 Vittoria/Friedland 20<br />
152 Case Green P15<br />
153 Felix/ZAMA 25<br />
155 Italian Camp: Anzio 20<br />
156 White Eagle Eastward 20<br />
159 Zeppelin 25<br />
160 Italian Camp: MedWar 16<br />
161 Successors 25<br />
162 Clontarf/Saipan 20<br />
163 Seven Years War 25<br />
166 Savage Station 40<br />
168 Operation Shock Troop 30<br />
169 Battles <strong>of</strong> Atlanta I 25<br />
170 Battles <strong>of</strong> Atlanta II 25<br />
172 Molotov's War 25<br />
175 Germania 20<br />
Desert Fox<br />
Games<br />
Buy • Sell • Trade<br />
One <strong>of</strong> a Kind Games<br />
ARIEL Mystic Wood $75<br />
ARIEL Seastrike 50<br />
ARIEL <strong>The</strong> English Civil War 50<br />
ARIEL Historical Pastime 50<br />
ADI Four Kingdoms 45<br />
CADACO Fighter Bomber 65<br />
CADACO King Tuts Game 50<br />
CADACO Wizard <strong>of</strong> Oz 45<br />
COM Trial <strong>of</strong> Century 30<br />
GLDN Solarquest 40<br />
HAN Backgammon 30<br />
HAN 221-B Baker St 30<br />
HAN Time <strong>the</strong> Game 30<br />
HAS Trivia 30<br />
INT TM Conquistodors 40<br />
LIT GMS Danger Island 45<br />
MB Pathfinder 45<br />
MB Power Barons 45<br />
MB Shogun 65<br />
MB Pokemon Trainer 40<br />
MB Jumanji 40<br />
MB Go to <strong>the</strong> Head <strong>of</strong> Class 25<br />
MB Game <strong>of</strong> <strong>the</strong> States 25<br />
NAID Trade Wars 35<br />
NGS Global Pursuit 15<br />
PB Calling All Cars (metal) 65<br />
PB Camelot 50<br />
PB Pit w/bell 25<br />
PGA In Pursuit <strong>of</strong> Par 35<br />
RAV Enchanted Forest 20<br />
RAV Journey thru Europe 25<br />
SELRITE Meet <strong>the</strong> Presidents (1960s) 45<br />
UNV Harry Potter: Sorcerer's Stone 20<br />
UNV Harry Potter: Quidditch 20<br />
WAD Campaign 40<br />
WAD Rat Race 40<br />
PUNCHED<br />
PB Risk (wood pcs) 35<br />
StrOMat Hockey 30<br />
StrOMat Basketball 30<br />
STATPRO Baseball, 1956 75<br />
strategy & tactics 53
Desert Fox<br />
Games<br />
StrateGy & taCtiCS<br />
Iss # Title Price<br />
179 First Afghan War $20<br />
180 Reinforce <strong>the</strong> Right! 20<br />
182 Balkans 1941 25<br />
190 <strong>The</strong> Gauntlet: Korea 30<br />
196 Vietnam Battles 25<br />
198 OTT: Lemberg/Verdun 30<br />
199 Forgotten Axis: Finnish 20<br />
201 Crimean War (SPI) 20<br />
208 Back to Iraq 25<br />
212 Rough & Ready: Mex-Am. War 20<br />
213 Span. Civil War Bat. vol 1 25<br />
214 BAW: Marathon & Granicus 25<br />
216 Asia Crossroads: Great Game 22<br />
217 <strong>The</strong> Lost Battlion 25<br />
218 Chancellorsville/Plevna 22<br />
219 Span. Civil War Bat, vol 2 22<br />
220 Grp Sov Forces (GSOFG) 22<br />
221 7 Years World War 22<br />
222 <strong>The</strong> Ottomans 22<br />
223 1918 22<br />
224 <strong>The</strong> Sedan Camp, 1970 22<br />
225 Twilight's Last Gleaming 2 22<br />
226 Middle East Battles 22<br />
227 Vinegar Joe's War:CBI 22<br />
228 Old Contemptibles 22<br />
229 Khan: <strong>Mongols</strong> 22<br />
S&T Special Edition #1-4 20/ea.<br />
S&T iSSUeS PUNCheD<br />
35 Year <strong>of</strong> Rat $42<br />
S&T iSSUeS PUNCheD<br />
NO mAG<br />
63 Veracruz 1847 $25<br />
64 Raid 20<br />
67 Stonewall 25<br />
S&T iSSUeS miNT<br />
GAme Only-nO mAG<br />
56 Revolt in East $30<br />
76 China War 20<br />
81 Tito 15<br />
86 Cedar Mountain 45<br />
94 Nordkapp 35<br />
115 Kanev 15<br />
146 It. Camp: Sicily 10<br />
163 Seven Years War 15<br />
168 Oper. Shock Troop 15<br />
186, 191, 194, 198,<br />
199, 201, 204, 207-210 15<br />
212-214, 216 17<br />
217 22<br />
218 to current* 17<br />
*Not all issues available.<br />
S&T iSSUeS w/O GAmeS<br />
183-187, 190-210<br />
211-current* $5<br />
*Not all issues available.<br />
54 #229<br />
wArGAmer Vol.1<br />
Iss # Title Price<br />
7 Marston Moor $60<br />
10 Chinese Civil War 45<br />
12 Aces High 40<br />
13 Forward to Richmond 40<br />
16 Carrier Strike 60<br />
18 Birth <strong>of</strong> a Nation P40<br />
19 Sturm Nach Osten 50<br />
20 Little Round Top 50<br />
22 No Trumpets No Drums 50<br />
23 Decision @ Kasserine 60<br />
24 Lawrence <strong>of</strong> Arabia 50<br />
25 Never Call Retreat 30<br />
26 Race to <strong>the</strong> Meuse P15<br />
27 Peter <strong>the</strong> Great P20<br />
29 Lodz: Blitz in <strong>the</strong> East 15<br />
30 Stars and Bars 30<br />
31 Clash <strong>of</strong> Steel 20<br />
32 Napoleon at Lutzen 30<br />
34 Khyber Rifles 40<br />
35 West Wall 25<br />
36 Unconditional Surrender 30<br />
37 China Incident 25<br />
38 Hath No Fury 25<br />
39 Hellfire Pass 20<br />
40 Fight on <strong>the</strong> Beaches 15<br />
41 O’Conner’s Offensive 15<br />
42 End <strong>of</strong> Iron Dream 30<br />
43 Wellington 25<br />
44 MacArthur 25<br />
45 Custer’s Luck 40<br />
46 House <strong>of</strong> Sa’ud 15<br />
47 Struggle for Stalingrad 35<br />
48 <strong>The</strong> Red Baron 30<br />
49 Napoleon vs. Charles 30<br />
50 Knights <strong>of</strong> Justice 40<br />
51 Duel in <strong>the</strong> Desert 15<br />
52 Glory Road P20<br />
53 Dunkirk 30<br />
54 Condottieri 15<br />
56 First Team 20<br />
57 Race for Tunis P25<br />
58 Empires: 1914 20<br />
59 Bloody Keren 15<br />
60 Anvil-Dragoon 15<br />
62 Fallen Eagle 25<br />
AGAiNST <strong>The</strong> ODDS<br />
1.2 $30<br />
2.2 Go Tell Spartans 30<br />
2.3 Dark & Bloody Ground 35<br />
3.1 Suleimann 35<br />
3.2 Bear Trap 35<br />
3.3 <strong>The</strong> Big Push 35<br />
AreS<br />
1 World Killer $P30<br />
7 Rescue from <strong>the</strong> Hive P25<br />
15 Nightmare House (no mag) 20<br />
15 Nightmare House 25<br />
17 Mongoose & Cobra (RPG) 25<br />
Spec Ed #2 15<br />
BATTle FlAG<br />
3, 4, 5, 8-11 $10 each<br />
BATTlePlAN<br />
6 Central America $10<br />
8 Deluxe Third Reich 10<br />
9 Air Superiority 10<br />
BOArDGAme JOUrNAl<br />
1 $5<br />
BrOG NewSleTTer<br />
vol 2 nos 7-12 $5 each<br />
C3I 1, 3, 6, 8, 9 $10 each<br />
CAmPAiGN mAGAZiNe<br />
99 Origins ’80 $10<br />
101 1942 Cross <strong>of</strong> Iron 10<br />
111 Origins Reports 10<br />
COmmAND<br />
1 Blitzkrieg ’41 $100<br />
2 Sunrise <strong>of</strong> Victory 100<br />
5 Hamburger Hill 50<br />
6 Krim 60<br />
7 Battle <strong>of</strong> Kadesh 60<br />
8 Victory at Midway 60<br />
9 Inchon 40<br />
11 Hougoumont P25<br />
13 Desert Storm P40<br />
15 I Am Sparatcus 50<br />
16 1918 40<br />
17 Gettysburg 40<br />
18 Tet 40<br />
19 Port Arthur 40<br />
21 Blood & Iron 40<br />
22 Antietam 40<br />
23 Sekigahara 45<br />
24 Czech ’38 40<br />
27 Proud Monster 2 40<br />
29 1914 25<br />
30 Across Potomac 20<br />
34 Death & Destruction 35<br />
35 Mason-Dixon 35<br />
36 SS Panzer P35<br />
37 Mukden & Moscow Option 35<br />
39 World War 1862 35<br />
40 Moscow Burning 35<br />
41 Battle <strong>of</strong> Bulge 35<br />
42 Hell B4 Night/Blitz 40 35<br />
43 Chattanooga 35<br />
44 Dark Victory 35<br />
45 Op. Sea Lion/Yarmuk 30<br />
50 Back to Iraq (2nd) 25<br />
51 Meuse-Argonne 35<br />
COmmAND (GAme ONly)<br />
11 Hougomount $15<br />
42 Hell B4 Night/Blitz 42 25<br />
52 Grunwald 15<br />
COmmAND<br />
(PUNCheD ONly)<br />
17 Gettysburg $15<br />
COmmAND<br />
(mAGAZiNe ONly)<br />
19-23, 25-31, 33-35, 42, 49<br />
COmPeTiTiVe eDGe<br />
$10<br />
1-4, 6, 8-9, 12<br />
CONFliCT<br />
$7<br />
5 Nomonhan $75<br />
6 War in Indochina<br />
COUNTerATTACk<br />
75<br />
1, 4<br />
Fire & mOVemeNT<br />
$15<br />
1 $40<br />
2-7, 9-10, 30<br />
8, 21,<br />
11-15,17-20, 37-38, 41, 45,<br />
25<br />
48, 53, 83<br />
22-27, 29-32, 36, 39-40, 42-44, 46-47<br />
15<br />
49-52, 54-56, 59, 73,77<br />
33-35, 57-58, 60-72, 74-76,<br />
10<br />
78-82,84-122 6<br />
123-132 7<br />
133 to current<br />
GAme NewS<br />
8<br />
2-6, 8, 11 $7<br />
<strong>The</strong> GeNerAl<br />
19:4-6, 20:3,1, 3,5-6, 21:1,<br />
27:1, 3, 5, 6, 28:5, 6<br />
29:2, 6, 30:2, 31:5 $7<br />
GreNADier<br />
1 DNO/UNT $40<br />
6 Operation Crusader 20<br />
7 Marita Merkur 20<br />
8 Marita-Merkur 20<br />
9 White Death 20<br />
10 French Navy/WWII 15<br />
11 Narvik 15<br />
12 Dutch in Fall <strong>of</strong> France 15<br />
13 French Armor in BoF 15<br />
14 Fall <strong>of</strong> France 15<br />
15 Streets <strong>of</strong> Stalingrad 15<br />
16 Kanev 12<br />
17 Fall Blau 12<br />
18 Bomber 12<br />
22 Battle Over Britain 10<br />
24 Games <strong>of</strong> ACW 10<br />
26 Wargaming w/o Intell 10<br />
29 World in Flames 10<br />
30 Gleam <strong>of</strong> Bayonets 10<br />
31 Ambush 10<br />
JAGDPAN<strong>The</strong>r<br />
12 Anvil-Dragoon $40<br />
15 Jacksonville 40<br />
mOVeS<br />
1 $25<br />
2, 4, 33, 34, 39, 49,56 20<br />
89, 90 12<br />
6-8, 11-32, 35-38, 40-48,<br />
50-55, 57-59, 62, 78 10<br />
61, 63-77, 79-88 6<br />
91-108 7<br />
NexUS<br />
8, 13, 14 $6<br />
OPerATiONS<br />
18, 19 $4<br />
PyrAmiD<br />
2, 4, 8 $4<br />
O<strong>The</strong>r mAGAZiNeS<br />
SE #1 Assault on Sevastapol $6<br />
ViP OF wArGAmiNG<br />
1, 3, 5 $10<br />
wArGAmer VOl. 2<br />
14 $15<br />
1-13, 15-25 2<br />
Complete Set (1-25) 79
Game<br />
Supplies<br />
Counter Ziplock Bags<br />
3 x 5 inch ziplock counter bags.<br />
Holds up to 100 counters per bag.<br />
Only $5 for a roll <strong>of</strong> 100 bags.<br />
magazine Ziplock Bags<br />
10 x 12 inch ziplock bags.<br />
Only $10 for a roll <strong>of</strong> 50 bags.<br />
Name<br />
addreSS<br />
City, State ZiP<br />
PhONe email<br />
ViSa/mC (ONly)#<br />
exPiratiON date<br />
SiGNatUre<br />
Blank mapsheets & Counters<br />
for all your game design needs<br />
<strong>The</strong> maps (22 x34) are large (19mm) or small<br />
hex (16mm) in long (length <strong>of</strong> paper) or short<br />
grain (width <strong>of</strong> paper).<br />
(Please specify <strong>the</strong> style you want.)<br />
Additional shipping charge for mailing in tubes.<br />
$6 each or 4 maps for $20*<br />
Counters are 1/2 inch and 280 per sheet on<br />
white only.<br />
$5 each or 5 sheets for $20*<br />
If your order is this If you subscribe to If you subscribe to If you subscribe to<br />
amount or more: F&M or S&T Mag S&T w/Game S&T and F&M<br />
discount is: discount is: discount is:<br />
$100 $5 $10 $15<br />
$200 $20 $30 $40<br />
$300 $35 $50 $65<br />
$400 $50 $70 $90<br />
$500 $75 $100 $125<br />
Notes: F&M= Fire & Movement magazine; S&T Mag= <strong>Strategy</strong> & <strong>Tactics</strong> magazine (no game/newsstand edition);<br />
S&T w/Game= <strong>Strategy</strong> & <strong>Tactics</strong> with game (hobby edition). Discount for current subscribers. Subscriptions can be<br />
started or renewed at <strong>the</strong> time an order is placed with Desert Fox to receive <strong>the</strong> discount.<br />
iSS #/TiTle<br />
QTy PriCe TOTAl<br />
04/05<br />
Counter magnets<br />
<strong>The</strong>se magnetic counter holders make playing on<br />
a vertical surface a perfect alternative for gamers<br />
with limited playing areas, small children or<br />
pets. Counter Magnets can be stacked 8-12 high<br />
and come in: 5/8 inch (only) for Panzerblitz size<br />
counters (55/box)<br />
SUB To Ta l<br />
TaX (Ca. RES.)<br />
$<br />
S&H<br />
$<br />
ToTal oRDER<br />
$<br />
Shipping Charges<br />
$10.00 per box<br />
Tweezers<br />
Surgical steel 6 inch pliers.<br />
$7.00<br />
tO Order:<br />
Discount as shown on <strong>the</strong> chart, no o<strong>the</strong>r <strong>of</strong>fers<br />
or discounts can be applied. If <strong>the</strong> order<br />
ismorethan$100include$2.00forinsurance.<br />
Shippingchargesarebasedon<strong>the</strong>chartbelow;<br />
ordersshippedUPSunlesso<strong>the</strong>rwisespecified.<br />
Some items are one <strong>of</strong> a kind, please list alternateswheneverpossible.Creditmemosissued<br />
on items out <strong>of</strong> stock.Any product return must<br />
be pre-authorized in writing. We encourage<br />
you to call and place your order by phone or<br />
visit our website. Prices are subject to change<br />
without prior notice.All payments in check or<br />
money order must be in U.S. funds drawn on a<br />
U.S. bank (please no Canadian Bank checks)<br />
and payable to Desert Fox Games. Credit card<br />
orders accepted for VISAor MasterCard with<br />
aminimumchargeorder<strong>of</strong>$40.00.California<br />
residents add 7.25% or applicable tax for <strong>the</strong>ir<br />
county. Please allow 4 weeks for delivery.<br />
Send name, address and order to:<br />
Desert Fox Games<br />
PO Box 21598<br />
Bakersfield CA 93390<br />
661/587-9633<br />
Fax- 661/587-5031<br />
Desert Fox listing at<br />
www.decisiongames.com<br />
Hours: 9:00am-4:00pm (PDT),<br />
Mon.- Fri.<br />
Magazines count as 2 for 1<br />
for shipping.<br />
1st unit Adt'l units Type <strong>of</strong> Service<br />
$8 $2 UPS Ground/US Mail Domestic Priority<br />
15(20) 4 UPS 2nd Day Air (Metro AK & HI)<br />
14(10) 2(7) Canada, Mexico (Express)<br />
17(25) 7(10) Europe (Express)<br />
20(25) 9(10) Asia, Africa, Australia (Express)<br />
strategy & tactics 55
56 #229<br />
Works in<br />
Progress<br />
<strong>the</strong> triple alliance War, 1865-1870<br />
Designer: Javier Romero<br />
This conflict was a classic contest between quality<br />
and quantity. <strong>The</strong> Paraguayans have a better army, with<br />
excellent morale and cohesion, but <strong>the</strong>ir manpower<br />
pool was much smaller than that <strong>of</strong> <strong>the</strong>ir enemies, <strong>the</strong><br />
Brazilians and Argentineans. <strong>The</strong> latter two countries<br />
had major reserves <strong>of</strong> manpower, but were still in <strong>the</strong><br />
process <strong>of</strong> nation-building; so <strong>the</strong>ir troop morale was<br />
<strong>of</strong>ten poor.<br />
<strong>The</strong>re will be several scenarios, including an<br />
1865 “On to Uruguay!” scenario, and a campaign game<br />
(1865-1869). <strong>The</strong> Paraguayans start with a large army<br />
that’s better trained and armed than its foes. Against it<br />
are a loose confederacy <strong>of</strong> Argentine provinces and <strong>the</strong><br />
Brazilian Empire, nei<strong>the</strong>r <strong>of</strong> which has fully mobilized.<br />
<strong>The</strong> Paraguayan player can try to win big by inflicting<br />
enough casualties to demoralize <strong>the</strong> Argentineans or<br />
force Corrientes and Entrerrios (<strong>the</strong> two provinces<br />
historically opposed to Buenos Aires’ hegemony) to<br />
defect. But an early <strong>of</strong>fensive may run up losses <strong>the</strong><br />
Paraguayans can’t replace.<br />
<strong>The</strong> Allied (Argentine-Brazil-Uruguay)<br />
counterattack starts in 1866 as those countries mobilize.<br />
<strong>The</strong> Paraguayans must fight a protracted campaign<br />
around <strong>the</strong> fortress at Humaítá, <strong>the</strong> key <strong>of</strong> <strong>the</strong> defense<br />
<strong>of</strong> Asunción, <strong>the</strong> final objective <strong>of</strong> <strong>the</strong> Allies. Asunción,<br />
with its shipyards, iron works and armaments factories,<br />
was <strong>the</strong> great prize. If <strong>the</strong> Paraguayan player can’t<br />
grab a quick victory in <strong>the</strong> opening <strong>of</strong>fensive, he can<br />
still win by controlling Asunción, Humaítá and o<strong>the</strong>r<br />
strategic objectives at <strong>the</strong> end <strong>of</strong> <strong>the</strong> game. After <strong>the</strong><br />
fall <strong>of</strong> Asunción (historically, January 1869), <strong>the</strong> game<br />
ends. Organized resistance ceased and <strong>the</strong> war turned<br />
into <strong>the</strong> manhunt <strong>of</strong> Solano López, <strong>the</strong> Paraguayan<br />
dictator.<br />
Turns represent three months each, from April-<br />
June 1865 to October-December 1868. Players<br />
alternate activations (up to three per turn) during<br />
each turn. To use an “activation,” a player must spend<br />
national morale points (NMP). <strong>The</strong> use <strong>of</strong> NMP<br />
simulates <strong>the</strong> shift between periods <strong>of</strong> swift mobile<br />
operations and longer stretches <strong>of</strong> positional warfare.<br />
If one player doesn’t attack during a given turn, he<br />
may recover a certain amount <strong>of</strong> NMP. If a country’s<br />
morale collapses, it withdraws from <strong>the</strong> war. A single<br />
bloody defeat, as happened at Curupaytí in 1866, will<br />
force a player to cease operations for a few turns as his<br />
forces recuperate.<br />
<strong>The</strong> Paraguayans don’t have a national morale track.<br />
Historically, <strong>the</strong>y believed <strong>the</strong>y were fighting for<br />
national survival, and <strong>the</strong>ir sense <strong>of</strong> nationhood was<br />
much more developed than that <strong>of</strong> <strong>the</strong>ir neighbors.<br />
Ninety percent <strong>of</strong> <strong>the</strong>ir male population was lost in<br />
<strong>the</strong> war, and still <strong>the</strong> Paraguayans kept on fighting. In<br />
<strong>the</strong> game, <strong>the</strong>refore, <strong>the</strong> Paraguayan have a Manpower<br />
Track. When <strong>the</strong> last levies are recruited and <strong>the</strong> track<br />
reaches <strong>the</strong> “Children and Old Men” space, Paraguayan<br />
units start to lose effectiveness.<br />
<strong>The</strong>re will be a random events phase at <strong>the</strong><br />
beginning <strong>of</strong> each turn. Politics, diplomacy and <strong>of</strong>fmap<br />
events will be handled <strong>the</strong>re. Unit types include<br />
infantry, cavalry, mobile artillery, siege artillery,<br />
engineers, fortresses, river flotillas, logistic columns<br />
and leaders.<br />
next Issue<br />
S&T 230 Downfall: If <strong>the</strong> US had invaded Japan,<br />
1945. Hit <strong>the</strong> beaches in this great “what if” campaign.<br />
Future articles: Air-land operations in <strong>the</strong> Battle <strong>of</strong> <strong>the</strong><br />
Bulge;Allenby’swarin<strong>the</strong>desert,Musashi’ssamuraitac-<br />
S&t upcoming features<br />
tics, and <strong>the</strong> Warsaw Ghetto uprising against <strong>the</strong> Nazis.<br />
#230 Downfall: If <strong>the</strong> US had Invaded Japan, 1945.<br />
#231 French & Indian War: <strong>The</strong> Struggle for North America, 1754-62.<br />
#232 Ca<strong>the</strong>rine <strong>the</strong> Great: Solitaire game <strong>of</strong> <strong>the</strong> Russian Empire vs. Europe.<br />
#233 Dagger Thrusts: Montgomery & Patton, September 1944.<br />
#234 Lest Darkness Fall: Rome in Crisis, A.D. 235-285.<br />
#235 Cold War Battles: Budapest 1956 & Angola 1987.
est <strong>of</strong> <strong>Strategy</strong> & tactics 2004<br />
A new annual survey ran in issue #226 to select <strong>the</strong> best three articles<br />
and best game from <strong>Strategy</strong> & <strong>Tactics</strong> in 2004. Thanks to all <strong>the</strong> readers<br />
who sent in <strong>the</strong>ir selections. What was not announced ahead <strong>of</strong> time was <strong>the</strong><br />
publisher provided certificates for <strong>the</strong> best article and best game and $500 in<br />
cash awards for <strong>the</strong>se outstanding efforts. This year, <strong>the</strong> winner <strong>of</strong> <strong>the</strong> best<br />
game will receive $200, and <strong>the</strong> best three articles will receive awards <strong>of</strong><br />
$150, $100 and $50, respectively. Here are <strong>the</strong> results.<br />
<strong>The</strong>re is a tie for second best <strong>Strategy</strong> & <strong>Tactics</strong> article between three<br />
articles: “Seven Years World War: <strong>The</strong> First Global Crisis,” by Lt. Col. Alistair<br />
Pope; “<strong>The</strong> Greatest Tank Battle: <strong>The</strong> Kursk-Orel Salients,” by William<br />
Sariego, and “Middle East Battles: Clash <strong>of</strong> Arms in <strong>the</strong> Sinai Campaigns <strong>of</strong><br />
1956 & 1967,” by Joseph Miranda. Each author will receive $50.<br />
<strong>The</strong> best <strong>Strategy</strong> & <strong>Tactics</strong> article <strong>of</strong> 2004 is “<strong>The</strong> World War That<br />
Never Was: NATO vs. <strong>the</strong> Warsaw Pact,” by Col. Wilbur Gray.<br />
<strong>The</strong> best <strong>Strategy</strong> & <strong>Tactics</strong> game <strong>of</strong> 2004 is “Middle East Battles” by<br />
designer Joseph Miranda.<br />
Congratulations to <strong>the</strong> authors and designer on being selected as<br />
<strong>the</strong> best <strong>of</strong> <strong>Strategy</strong> & <strong>Tactics</strong> 2004!<br />
To purchase <strong>the</strong> game that covers <strong>the</strong><br />
battles featured in this issue, Khan: rise<br />
<strong>of</strong> <strong>the</strong> mogols, send:<br />
$22 US Customers<br />
$25 Canadian Customers<br />
$28 Overseas Customers<br />
All prices include postage for first class or airmail shipping.<br />
CA residents add ($1.09) sales tax. Send to:<br />
Decision Games<br />
ATTN: S&T Game Offer<br />
PO Box 21598<br />
Bakersfield CA 93390<br />
NAme<br />
ADDreSS<br />
CiTy, STATe ZiP<br />
PhONe emAil<br />
ViSA/mC (ONly)#<br />
exPirATiON DATe<br />
SiGNATUre<br />
strategy & tactics 57
58 #229<br />
hexwar ad
to <strong>the</strong> Green Fields Beyond<br />
“Through <strong>the</strong> mud and <strong>the</strong> blood to <strong>the</strong> green fields beyond.” This<br />
quote, attributed to Brigadier General Hugh Elles, who led <strong>the</strong> Tank<br />
Corps into action at Cambrai, succinctly states <strong>the</strong> British objective—to<br />
penetrate <strong>the</strong> German trenches and break into <strong>the</strong>ir rear areas. <strong>The</strong> idea<br />
<strong>of</strong> a breakthrough to <strong>the</strong> green fields beyond had dominated Allied<br />
thinking since 1915. Cambrai was to be as close as <strong>the</strong>y were to come<br />
before <strong>the</strong> final breakthrough <strong>of</strong> 1918.<br />
To <strong>the</strong> Green Fields Beyond is an operational level simulation <strong>of</strong><br />
<strong>the</strong> Battle <strong>of</strong> Cambrai which lasted from 20 November to 7 December,<br />
1917. <strong>The</strong>re are two players, one commanding <strong>the</strong> British and <strong>the</strong> o<strong>the</strong>r<br />
<strong>the</strong> German forces. <strong>The</strong> game consists <strong>of</strong> three scenarios and a campaign<br />
game. <strong>The</strong> players should start with a scenario— <strong>the</strong> British Breakthrough is best— before attempting <strong>the</strong><br />
full 17 turns <strong>of</strong> <strong>the</strong> campaign game. Players should note that each game turn in To <strong>the</strong> Green Fields Beyond<br />
requires many decisions, and will probably take between 30 and 75 minutes to play.<br />
To <strong>the</strong> Green Fields Beyond is uncommon amongst games in that both players get <strong>the</strong> opportunity to take<br />
<strong>the</strong> <strong>of</strong>fensive. <strong>The</strong> campaign game provides opportunities for both<br />
sides to attack. <strong>The</strong> British Breakthrough and Battle for Bourlon<br />
scenarios have <strong>the</strong> British attacking, while <strong>the</strong> German Counterattack<br />
scenario obviously has <strong>the</strong>m as defenders, although <strong>the</strong>y can still <strong>of</strong>ten<br />
mount attacks as well.<br />
Each hex on <strong>the</strong> mapsheet represents 1250 yards from side to side.<br />
Each Game Turn is equivalent to 24 hours. Contents: Rules booklet,<br />
420 Die cut counters, 1 34” x 22” Map, 1 Die and Storage bags.<br />
title<br />
Qty priCe total<br />
shipping Charges<br />
Ziplocks count as 2 for 1<br />
for shipping.<br />
1st item Adt’l items Type <strong>of</strong> Service<br />
$8 $2 UPS Ground/US Mail Domestic Priority<br />
15(20) 4 UPS 2nd Day Air (Metro AK & HI)<br />
14(10) 2(7) Canada, Mexico (Express)<br />
17(25) 7(10) Europe (Express)<br />
20(25) 9(10) Asia, Africa, Australia (Express)<br />
sUB to tA l<br />
tAX (CA. rEs.)<br />
$<br />
s&H<br />
$<br />
$44<br />
totAl ordEr<br />
$<br />
72/24<br />
HT Bridge<br />
x<br />
3-3-8<br />
0832<br />
B/C 1424<br />
i<br />
44<br />
4Lg/4<br />
2-1-8<br />
0-0-8<br />
1324<br />
(2)b1<br />
i i i<br />
DH4<br />
1-2-12<br />
2f1<br />
4 Cav<br />
1123<br />
Camel<br />
3<br />
64<br />
121<br />
2-2-5<br />
2-12<br />
1f2<br />
2-1-9<br />
2-10<br />
XXI<br />
DH5<br />
46R/119<br />
14Br/9BR<br />
i i i<br />
2-4-8<br />
i i i<br />
2-3-8<br />
9<br />
send to: decision games,<br />
po Box 21598, Bakersfield Ca<br />
93390 • 661/587-9633<br />
Fax- 661/587-5031<br />
www.decisiongames.com click on<br />
Excalibre Games banner<br />
25<br />
15<br />
44/214<br />
(1)r0<br />
1f1<br />
1-1-6<br />
1-10<br />
strategy & tactics 59
1513<br />
Tenn<br />
e<br />
1313<br />
1113<br />
1413<br />
1213<br />
1013<br />
Rebels & Redcoats, vol. I<br />
American Revolutionary battles <strong>of</strong><br />
Bunker Hill, Brandywine, Germantown and<br />
Monmouth. <strong>The</strong> game system simply but accurately<br />
recreates <strong>the</strong> battlefield conditions<br />
with a move-fight-rally play sequence to simulate<br />
<strong>the</strong> grand tactics <strong>of</strong> <strong>the</strong> American Revolution. Ad-<br />
Portrfld<br />
Irish<br />
ditional rules cover command control, morale, artillery, light infantry and Vol<br />
6 7<br />
dragoons. Each battle is represented by its own units and map along with<br />
2 4 6 4<br />
exclusive rules to recreate <strong>the</strong> unique conditions <strong>of</strong> each battle. Units are<br />
generally regiments rated for combat strength, morale and march capabilities.<br />
Components: 16 page Rules Booklet, 2 PlayerAid Cards, 440 die-cut<br />
counters, Two 22” x 34” Maps, 1 Ten-sided die. $35.00<br />
Rebels & Redcoats, vol. III<br />
American Revolutionary battles <strong>of</strong> Brooklyn, Harlem Heights, White<br />
Plains, Trenton, Princeton, Stony Point and King’s Mountain. <strong>The</strong> game<br />
system is <strong>the</strong> same as that in Volume One. Components: 16 page Rules<br />
Booklet, 1 Player Aid Card, 560 die-cut counters, Two 22” x 34” Maps,<br />
1 Ten-sided die. $49. 95<br />
1514<br />
1414<br />
Name<br />
1515<br />
address<br />
City, state Zip<br />
phoNe email<br />
Visa/mC (oNly)#<br />
expiratioN date<br />
sigNature<br />
60 #229 #228<br />
1415<br />
<strong>The</strong> Alamo<br />
Aldama <strong>The</strong> famous battle from <strong>the</strong><br />
Texas Revolution 8 1 Line in 1836. With updated<br />
Cemetery<br />
graphics and revised map. $15.00<br />
War <strong>of</strong> <strong>the</strong> Rebellion<br />
This game uses <strong>the</strong><br />
8<br />
originalSouth Mountainsystemwith<strong>the</strong><br />
1<br />
addition <strong>of</strong> a unique division/corps/army<br />
activation system. <strong>The</strong> battles include:<br />
South Mountain, Chickamauga, Gettysburg, and Shiloh.<br />
Components: 80 page illustrated Wellrules<br />
booklet, four player-aid cards<br />
Aldama<br />
Lou<br />
and two folders for rules 8 referencing, 880 die-cut counters, 4 22” x 34”<br />
8<br />
9 1 Scouts 2<br />
mapsheets, six-sided and ten-sided die. $35.00<br />
1314<br />
1114<br />
1214<br />
1315<br />
1115<br />
1215<br />
Blue & Gray9<br />
1014<br />
1015<br />
1516<br />
1316<br />
1116<br />
1416<br />
1216<br />
1016<br />
1317<br />
1117<br />
7 MD<br />
8<br />
2 4<br />
6<br />
8 4<br />
Refight five <strong>of</strong> <strong>the</strong> crucial battles <strong>of</strong>8 1 Line <strong>the</strong> American Civil War: First Bull<br />
amo Plaza<br />
Run (new), Shiloh, Second Bull Run (new), Mo Cemetery Hill, and Chicka-<br />
8<br />
mauga. Brigades and divisions slug it out—bro<strong>the</strong>r 8 against bro<strong>the</strong>r. This<br />
2<br />
updated edition <strong>of</strong> <strong>the</strong> SPI classic makes for an enjoyable set <strong>of</strong> games<br />
for an afternoon or evening <strong>of</strong> fun. Components: 8 page Rules Booklet,<br />
360 die-cut counters, 4 22” x 17” Maps, 1 Die. $35.00<br />
0913<br />
0813<br />
0914<br />
0814<br />
Convent<br />
inside<br />
Aldama<br />
8 1 Line<br />
0915<br />
Aldama<br />
8 1 Line<br />
7<br />
Forgn<br />
0815<br />
10<br />
3<br />
Penn<br />
0916<br />
7<br />
7<br />
1<br />
Decision Games<br />
Americana Collection<br />
Unkn<br />
0816<br />
1517<br />
0917<br />
1417<br />
1217<br />
1017<br />
0817<br />
Aldama<br />
1518<br />
1318<br />
1118<br />
0918<br />
1418<br />
1218<br />
1018<br />
0818<br />
1519<br />
1319<br />
1119<br />
0919<br />
3 NC<br />
Dixon<br />
1/23<br />
8<br />
3 4<br />
Legion<br />
7<br />
3 6<br />
Seven Days Battles<br />
<strong>The</strong> Seven Days Battles includes four battles <strong>of</strong> <strong>the</strong> American Civil<br />
War, plus a campaign game that combines all four maps into one game.<br />
<strong>The</strong> battles are: Seven Pines, Gaines Mill, Frayser’s Farm, and Malvern<br />
Hill. Components:400 die-cut counters, 1 rules booklet and 2 34” by<br />
22” maps. $28.00<br />
Antietam Campaign<br />
Each unit and commander which could<br />
have fought in <strong>the</strong> campaign is rated for<br />
movement, combat, and leadership capabilities.Battlescenariosinclude:Antietam,<br />
South Mountain, and Harper’s Ferry. All<br />
canbelinkedtoge<strong>the</strong>rtore-create<strong>the</strong>entire<br />
campaign. Will your bold gamble end up<br />
like Lee’s?<br />
Components: 8 page Rules Booklet, 280 die-cut counters, 2 Player Aid<br />
cards, Two 22” x 34” Maps, 1 die. $35.00<br />
Lords <strong>of</strong> <strong>the</strong> Sierra Madre<br />
Nor<strong>the</strong>rn Mexico, 1898- An economic<br />
boom, a dictator that encourages foreign investment,<br />
and wide-open land—<strong>the</strong> stage is set<br />
for one <strong>of</strong> <strong>the</strong> greatest capitalistic free-for-alls<br />
in history!<br />
In Lords <strong>of</strong> <strong>the</strong> Sierra Madre,<br />
2-8 players take <strong>the</strong> roles <strong>of</strong> hacendados<br />
(great landowning entrepreneurs).<br />
Players vie to build economic<br />
empires <strong>of</strong> railroads, mines,<br />
ranches, and o<strong>the</strong>r businesses to<br />
earn pr<strong>of</strong>its, however this is not a<br />
simple empire or railroad game.<br />
Twin Buttes<br />
1<br />
SAN<br />
XAVIER<br />
Reservation<br />
C34 Mine 10<br />
Lawson & Qtrs<br />
Rockefeller<br />
Twin Buttes<br />
Mine<br />
Senator Morgan Shaft,<br />
Amalgamated Copper<br />
Corporation<br />
THIS IS A<br />
GOLD/SILVER<br />
MINE<br />
Players may employ bandidos, strikers, and o<strong>the</strong>r<br />
sneaky maneuvers to tax, bribe, raid, and destroy <strong>the</strong><br />
RR8<br />
7[4]<br />
University<br />
<strong>of</strong> Arizona<br />
MERCENARY<br />
MACHINE GUN<br />
5<br />
SANTA<br />
CRUZ<br />
COUNTY Nogales<br />
Nogales<br />
E10 Huelguistas<br />
VETORR13<br />
Naco Bullring<br />
[4]<br />
Municipal 4<br />
2 Land Law<br />
NOGALES Widespread 1<br />
tax riots. 1<br />
Cananea<br />
best laid plans <strong>of</strong> <strong>the</strong>ir opponents. Victory goes to <strong>the</strong> player who survives<br />
to <strong>the</strong> end with <strong>the</strong> most gold.<br />
Components: 352 counters, 200 Playing Cards, Player Calendars, 22” x<br />
34” mapsheet, 28 page rules booklet. $39.95<br />
ASSAY<br />
San Xavier,<br />
Arizona<br />
MINE<br />
THIS IS A<br />
COPPER<br />
7<br />
Empire<br />
STRIKER<br />
+1 to End Game<br />
Roll a die for each Mexican C or RR<br />
Card. A 1 or 2 = place strike counter on<br />
it. Strikers will burn at <strong>the</strong> end<br />
<strong>of</strong> every round after being attacked.<br />
PO Box 21598<br />
Bakersfield CA 93390<br />
661/587-9633 • fax 661/587-5031 • www.decisiongames.com<br />
shipping Charges<br />
1st item Adt’l items Type <strong>of</strong> Service<br />
$8 $2 UPS Ground/US Mail Domestic Priority<br />
15(20) 4 UPS 2nd Day Air (Metro AK & HI)<br />
14(10) 2(7) Canada, Mexico (Express)<br />
17(25) 7(10) Europe (Express)<br />
20(25) 9(10) Asia, Africa, Australia (Express)<br />
RR9<br />
[3]<br />
Fort<br />
Huachuca<br />
C 1<br />
San Rafael<br />
Can<br />
R
Emperor’s First Battles Deluxe<br />
6<br />
Includes Austerlitz and Jena-Auerstadt, in which <strong>the</strong><br />
French Emperor, Napoleon Bonaparte, won smashing<br />
victories against <strong>the</strong> armies <strong>of</strong> <strong>the</strong> old regime <strong>of</strong> Europe.<br />
Emperor’s First Battles game system is based on <strong>the</strong><br />
DecisionGames’releaseNapoleon’s First Battles. It includes<br />
rules for elan, command control, and functional differences<br />
between infantry, cavalry, artillery and field engineers. <strong>The</strong><br />
game also includes cavalry rules, allowing it to perform historical<br />
screening functions. Units are regiments and brigades,<br />
with historical leaders.<br />
Components: 16 page Rules Booklet, Player Aid Card, 2 22” x 34” Maps,<br />
480 die-cut counters, die.<br />
Now includes Napoleon’s First Battles which covers four <strong>of</strong> Napoleon<br />
Bonaparte’s earliest victories—Montenotte, Arcola, <strong>The</strong> Pyramids, &<br />
Marengo. Components: 400 die-cut counters, rules booklet and 4 17” by<br />
22” maps. $40.00<br />
Napoleon’s Last Battles<br />
June 1815 finds a triumphant, but beleaguered Napoleon again on <strong>the</strong><br />
throne.Napoleonisoutnumberedandvirtuallysurrounded;hisonlychance<br />
to maintain <strong>the</strong> throne and <strong>the</strong> position <strong>of</strong> France is to gain a significant<br />
military victory. To succeed against <strong>the</strong>se overwhelming odds, Napoleon<br />
boldly decides on an <strong>of</strong>fensive designed to destroy two <strong>of</strong> his opponents<br />
and drive <strong>the</strong> English from <strong>the</strong> continent. <strong>The</strong> games include Ligny, Quatre<br />
Bras, Wavre, and La Belle Alliance. <strong>The</strong> game system utilizes leaders and<br />
brigade level units, with cavalry, infantry and artillery. <strong>The</strong>re are three<br />
new scenarios in addition to <strong>the</strong> four scenarios and <strong>the</strong> campaign game<br />
published in <strong>the</strong> SPI original.<br />
Components: 24 page Rules Booklet, 340 die-cut counters, 2 22” x 34”<br />
mapsheets, 1 Die. $35.00<br />
Empires at War<br />
A simulation <strong>of</strong> four <strong>of</strong> <strong>the</strong> battles <strong>of</strong> <strong>the</strong> 19th century. <strong>The</strong> battles<br />
include: Inkerman, Königgratz, Gravelotte and Solferino. Rules include<br />
provisions for command control, morale, fog <strong>of</strong> war, and mitrailleuse<br />
(early machine guns). Components: 16 page Rules Booklet, 400 die-cut<br />
counters, 4 Maps on Two 22” x 34” mapsheets, die. $35.00<br />
Name<br />
address<br />
City, state Zip<br />
phoNe email<br />
Visa/mC (oNly)#<br />
expiratioN date<br />
sigNature<br />
Decision Games<br />
Gunpowder & Napoleonic<br />
Collection<br />
NAPOLEON<br />
3<br />
1-8<br />
GRENADIERS<br />
G 3<br />
3-4<br />
Thirty Years War Quad<br />
PICARD<br />
IM GD<br />
KUTUSOV GUSTAVUS<br />
Consists <strong>of</strong>fourbattles: 2<br />
Lutzen, 4 Nordlingen,<br />
Rocroi,andWhiteMountain(newscenario)each<br />
1-7<br />
9-3<br />
with its own map, counters and Exclusive Rules.<br />
<strong>The</strong>Standardrulesarecommontoallfourgames<br />
2 *<br />
3 6 23<br />
1-8<br />
MAXIMILLIAN<br />
8<br />
in this update <strong>of</strong> 3/6an<br />
SPI classic. 8<br />
Components: 2 24 page Rules Booklet, 2 22” 1 x<br />
34” Maps, 420 die-cut counters, die.<br />
2 8 3<br />
$35.00<br />
E<br />
2-6<br />
4-4<br />
1-3<br />
<strong>The</strong> ‘45<br />
9 3 5 8<br />
In 1745 Charles Stuart or ‘Bonnie Prince Charlie’ set sail from France<br />
to capture <strong>the</strong> throne <strong>of</strong> England for <strong>the</strong> deposed house <strong>of</strong> Stuart. It was a<br />
gamble at long odds, for Charles sailed with few companions and faced<br />
uncertain reception in <strong>the</strong> Highlands <strong>of</strong> Scotland. But <strong>the</strong> events that followed<br />
became legend as Charles and his army <strong>of</strong> Highlanders overran<br />
Scotland and marched to London.AFrench naval force failed to invade and<br />
Charles was forced to retreat to Scotland. In <strong>the</strong> following year <strong>the</strong> bloody<br />
battle <strong>of</strong> Culloden smashed <strong>the</strong> Clans and ended <strong>the</strong> Jacobite Rebellion.<br />
<strong>The</strong> game is played on a point-to-point map <strong>of</strong> England with units that are<br />
regimental in scale with detached companies and squadrons <strong>of</strong> ships.<br />
Components: 24 page Rules Booklet, 3 Player Aid Cards, 352 (5/8”)<br />
die-cut counters, 1 22” x 34” Map, Die. $35.00<br />
<strong>The</strong> Sun Never Sets<br />
3510<br />
<strong>The</strong> Sun Never Sets covers <strong>the</strong> campaigns <strong>of</strong><br />
3710<br />
3910<br />
3410<br />
March to Peking, Zulu War andSudan: <strong>The</strong> River 3610<br />
3810<br />
War. Players can march to <strong>the</strong> far flung frontiers 3511<br />
3711<br />
3911<br />
<strong>of</strong> British civilization, engage vast hordes 3411 <strong>of</strong> 3611<br />
3811<br />
“natives,” and plant <strong>the</strong> British flag in Khartoum, 3512<br />
Peking and Ulundi! <strong>The</strong> game emphasizes lead-<br />
3712<br />
Isandhlwana<br />
3912<br />
3412<br />
ership, with commanders having a major role in<br />
3513<br />
marchesandbattles(Gordon,Kitchener,Wolseley,<br />
3612<br />
helpmakaar<br />
3812<br />
roarke's drift<br />
3713<br />
3913<br />
3413<br />
3613<br />
and<strong>the</strong>Mahdiareincluded).Battlesareresolved WOLSELEY<br />
35143<br />
through a multi-phase system with units (regi-<br />
2 10<br />
ment/battalion/battery)ratedforstrength,type<strong>of</strong><br />
3414<br />
3614<br />
EMPEROR HSIEN<br />
FENG<br />
03714<br />
0 10<br />
3813<br />
KHARTOUM<br />
3914 R<br />
(4)n - 4<br />
3814<br />
weapon and elan. Leader counters will influence C<br />
3515<br />
V<br />
tactical and strategic situations. <strong>The</strong>re are also<br />
3415 1 F -3615 6<br />
rules for relief forces being dispatched, riverine<br />
HUNAN<br />
3715<br />
l<br />
4 M -6<br />
Umsinga<br />
1/CC<br />
3915<br />
l<br />
3815 1 F -10<br />
gunboats and <strong>the</strong> building <strong>of</strong> railroads.<br />
3516 ANSAR<br />
F<br />
3716 USMC<br />
l<br />
CETSHWAYO 3916<br />
1<br />
3416 10 s - 3616 6 3 R - 6 3816<br />
Components: 620 counters, 2 34” x 22” mapsheets, 16 page rules booklet, 2 8<br />
3517<br />
3717<br />
3917<br />
and Player Aid Cards. NGWEKWE $40.00<br />
shipping Charges<br />
Tugela R.<br />
1 POL<br />
1 NEAP<br />
Buffalo R.<br />
V<br />
5 s - 8<br />
PO Box 21598<br />
Bakersfield CA 93390<br />
661/587-9633 • fax 661/587-5031 • www.decisiongames.com<br />
1st item Adt’l items Type <strong>of</strong> Service<br />
$8 $2 UPS Ground/US Mail Domestic Priority<br />
15(20) 4 UPS 2nd Day Air (Metro AK & HI)<br />
14(10) 2(7) Canada, Mexico (Express)<br />
17(25) 7(10) Europe (Express)<br />
20(25) 9(10) Asia, Africa, Australia (Express)<br />
STENB<br />
strategy & tactics 61<br />
KYLE<br />
GD du COR<br />
8<br />
4-6<br />
4<br />
1 SPAN<br />
8 3<br />
4010<br />
4011<br />
4012<br />
4014<br />
4015<br />
4016<br />
Coun
62 #229<br />
Der Weltkrieg SerieS<br />
<strong>the</strong> Western Front:<br />
1914-1918<br />
Der Weltkrieg series #6. <strong>The</strong> Western<br />
Front: 1914-1918, contains six scenarios,<br />
each covering a major WWI campaign<br />
fought in France or Belgium. It can also<br />
be played as a start-to-finish simulation<br />
<strong>of</strong> <strong>the</strong> entire western front, or linked with<br />
o<strong>the</strong>r games in <strong>the</strong> series into a grandcampaigncoveringall<strong>the</strong>Europeanfronts.<br />
<strong>The</strong> scenarios are: “August 1914: <strong>The</strong> Schlieffen Plan;” “May 1915:<br />
Ypres;” “February 1916: Verdun;” “July 1916: <strong>The</strong> Somme;” “April<br />
1917: Nivelle’s Offensive;” “March 1918: <strong>The</strong> Kaiser’s Battle.”<br />
Components: one 22” x 34” mapsheet, 1,680 die-cut counters, standard and<br />
scenario books, corps displays, and player aid cards.<br />
taNNeNBerG & GaliCia<br />
Der Weltkrieg series #2. This is a division/brigade level WW1 game<br />
that covers <strong>the</strong> campaign in East Prussia and sou<strong>the</strong>rn Poland in 1914.<br />
You assume <strong>the</strong> role <strong>of</strong> <strong>the</strong> commander <strong>of</strong> ei<strong>the</strong>r <strong>the</strong> German or Allied<br />
armies. <strong>The</strong> forces available to you are<br />
<strong>the</strong> same ones commanded by <strong>the</strong> historic<br />
participants.<br />
Components: 560 counters, two 22x 34” mapsheets,<br />
player aid cards, standard and scenario<br />
rule books.<br />
SerBia & rOmaNia<br />
Der Weltkriegseries#3.Covers<strong>the</strong>World<br />
War I campaigns in Serbia and Romania<br />
with links between <strong>the</strong> two campaigns as<br />
well as to <strong>the</strong> previous volumes.<br />
Components: two 22x 34” mapsheets, one<br />
11x17” mapsheet, 560 die-cut counters, standard and scenario rule books, player<br />
aid cards.<br />
$69. 95<br />
<strong>the</strong> SChlieFFeN PlaN<br />
Der Weltkrieg series #1. This game covers <strong>the</strong> fluid warfare <strong>of</strong> <strong>the</strong><br />
western front from 1 August to 15 November 1914. You assume <strong>the</strong><br />
role <strong>of</strong> commander <strong>of</strong> ei<strong>the</strong>r <strong>the</strong> German or Allied armies. <strong>The</strong> forces<br />
available to you are <strong>the</strong> same as those commanded by <strong>the</strong> historic participants,<br />
but it is up to you to make your own strategic decisions and<br />
execute your own plans as you see fit.<br />
Components: one 22 x 34 inch mapsheet, a rule book and player aid cards, 560<br />
die-cut counters and one die.<br />
$39. 95<br />
$39. 95<br />
$39. 95<br />
Don’t forget to pledge for <strong>the</strong> next two games:<br />
grand Campaign (#13) and middle east Campaigns (#17). information<br />
on <strong>the</strong> Pledge page on <strong>the</strong> Decision games website.<br />
Send To: Decision Games,<br />
PO Box 21598, Bakersfield CA 93390<br />
661/587-9633<br />
Fax- 661/587-5031<br />
www.decisiongames.com click on WWI Games<br />
or use <strong>the</strong> order form on page 55<br />
italiaN FrONt: 1915-1918<br />
Der Weltkrieg series #5. This wargame contains five separate scenarios,<br />
and can be linked with East Front (and later West Front)<br />
games <strong>of</strong> <strong>the</strong> series for duration games.<br />
May 1915: 1st Isonzo<br />
<strong>The</strong> first battles along <strong>the</strong> Isonzo are a futile foreshadowing<br />
<strong>of</strong> what is to come.<br />
May 1916: Strafexpedition<br />
<strong>The</strong> Chief <strong>of</strong> Staff <strong>of</strong> <strong>the</strong> Austro Hungarian army, Conrad von<br />
Hotzendorff, feels <strong>the</strong> time is right to strike a blow against Italy.<br />
He ignores <strong>the</strong> advice <strong>of</strong> German Chief <strong>of</strong> staff von Falkenhayn,<br />
who sees <strong>the</strong> main threat coming from <strong>the</strong> Russian front.<br />
<strong>The</strong> Italians in <strong>the</strong> sou<strong>the</strong>rnTyrol have neglected <strong>the</strong>ir rear area<br />
defenses. That, and <strong>the</strong> fury <strong>of</strong> <strong>the</strong> Austro-Hungarian attack, puts<br />
<strong>the</strong> Italian army in peril. Cadorna, its commanding general, rushes<br />
reinforcements to <strong>the</strong> front. It is a dicey affair, but <strong>the</strong> Italian lines<br />
hold; <strong>the</strong> threat along <strong>the</strong> Isonzo is checked.<br />
May 1917: 10th Isonzo<br />
In endless <strong>of</strong>fensives, valiant Italian infantry go over <strong>the</strong> top<br />
and into <strong>the</strong> maelstrom <strong>of</strong> <strong>the</strong> Isonzo. Each battle differs from <strong>the</strong><br />
last only by its increasing intensity and skyrocketing casualty list.<br />
In <strong>the</strong> end, both armies are exhausted. <strong>The</strong> Italians have become<br />
weary <strong>of</strong> <strong>the</strong> war, but <strong>the</strong> Austrians believe one more effort on <strong>the</strong><br />
Isonzo can break through.<br />
October 1917: Caporreto<br />
When <strong>the</strong> Central Powers strike, <strong>the</strong>y break through <strong>the</strong> Italian<br />
linesalong<strong>the</strong>headwaters <strong>of</strong><strong>the</strong>Isonzo. GermanandAustrian units<br />
pour through <strong>the</strong> mountain passes and into <strong>the</strong> Italian rear areas.<br />
Caporreto is an overwhelming victory for Germany and Austria;<br />
but Italy is not fully defeated, and her citizens rally.<br />
June 1918: Albrecht & Radetzky<br />
Conrad’s attacks across <strong>the</strong> Piave are initially successful, but<br />
his divisions <strong>the</strong>n bog down. <strong>The</strong>Austrians are unable to push <strong>the</strong>ir<br />
bridgeheads far enough forward to keep <strong>the</strong>ir pontoon bridges out<br />
<strong>of</strong> range <strong>of</strong> Italian artillery. Unable to reinforce <strong>the</strong>ir spearheads<br />
or maintain viable supply lines, <strong>the</strong> Austro-Hungarian armies fall<br />
back, awaiting <strong>the</strong> inevitable Italian counterattack.<br />
Components: one 22” x 34” mapsheet, 560 die-cut counters, standard and<br />
scenario books, player aid cards.<br />
$39. 95
Decision Games… home <strong>of</strong> fine publications and games<br />
Highlights <strong>of</strong> <strong>the</strong> 2005 Conventions and Events Decision Games will be attending.<br />
8-12 june Consimworld expo in tempe aZ<br />
This major event is <strong>the</strong> home <strong>of</strong> MosterGame.con. Decision Games will be<br />
<strong>the</strong>re with games <strong>of</strong> Wacht am Rhein, War Between <strong>the</strong> States, Totaler<br />
Krieg and demos <strong>of</strong> upcoming games including Atlantic Wall, Storm <strong>of</strong><br />
Steel, Panzers East and Ty Bomba’s Kursk.<br />
30 june - 3 july origins in Columbus oH<br />
Come be a member <strong>of</strong> <strong>the</strong> War Room and see all <strong>the</strong> latest games and participate<br />
in some special tournaments and demonstration games.<br />
Special tournaments include:<br />
Lightning Midway—winner recieves a copy <strong>of</strong> <strong>the</strong> new War in <strong>the</strong> Pacific<br />
(a $400 value)*.<br />
<strong>The</strong> Sedan Campaign (S&T #224)—winner recieves a copy <strong>of</strong> <strong>the</strong> new<br />
War Between <strong>the</strong> States (a $110 value)**.<br />
* Minimum attendance <strong>of</strong> 200 particpants.<br />
** Minimum attendance <strong>of</strong> 60 particpants.<br />
2-7 august World boardgaming Championships in lancaster Pa<br />
Visit scenic Amish country and be a part <strong>of</strong> this annual gaming extravaganza.<br />
Decision Games will sponsor an exclusive 2,000 square foot play and demonstration<br />
area <strong>the</strong> first three days <strong>of</strong> <strong>the</strong> convention for published games<br />
along with previews <strong>of</strong> some upcoming products. (Attendees are welcome<br />
to contact Doc to request events and demos for this exclusive time.)<br />
Links for <strong>the</strong> websites to <strong>the</strong>se conventions are on <strong>the</strong> Decision Games homepage (www.decisiongames.<br />
com) or contact us directly for more information.<br />
SPeCiAl PreView<br />
War in <strong>the</strong> Pacific<br />
On Sunday, 7 December 1941, <strong>the</strong> US naval base at Pearl Harbor, Hawaii, was attacked by Japanese aircraft. For <strong>the</strong> next<br />
four years, Allied task forces engaged elements <strong>of</strong> <strong>the</strong> Imperial Japanese fleet throughout <strong>the</strong> ocean. Marines and army units<br />
began <strong>the</strong>ir program <strong>of</strong> island-hopping, wresting from <strong>the</strong> Japanese <strong>the</strong> empire that <strong>the</strong>y had expanded in every direction.<br />
War in <strong>the</strong> Pacific is a multi-level simulation <strong>of</strong> <strong>the</strong> Pacific <strong>the</strong>ater <strong>of</strong> operations during World War II. <strong>The</strong> game enables<br />
players to recreate <strong>the</strong> entire course <strong>of</strong> <strong>the</strong> war, form <strong>the</strong> opening Japanese attack on 7 December, 1941 to <strong>the</strong> climatic Allied<br />
assaults in <strong>the</strong> closing days <strong>of</strong> 1945. Representing some 30% <strong>of</strong> <strong>the</strong> globe, <strong>the</strong> strategic maps let players move and engage in<br />
combat on all levels: air, ground and naval. War in <strong>the</strong> Pacific is <strong>the</strong> most detailed board game <strong>of</strong> <strong>the</strong> Pacific <strong>The</strong>ater ever<br />
created. <strong>The</strong>re are a number <strong>of</strong> rules and concepts that will, at first, be unfamiliar to a majority <strong>of</strong> players. But playing through<br />
smaller map sections and scenarios enables <strong>the</strong> player to become familiar with <strong>the</strong> mechanincs <strong>of</strong> <strong>the</strong> game.<br />
Components: 7 full size strategic maps in full color, new tactical maps with nearly 150 individual islands for new ground units to fight over,<br />
32 die-counter sheets, nearly 9,000 counters showing all types <strong>of</strong> units from <strong>the</strong> Pacific <strong>The</strong>ater, rule books and assorted displays and player<br />
aid charts. Est. price $440 (Est. Pledge $330). Projected release date is September 2005.<br />
Pledge for this game (#49) on <strong>the</strong> Decision Games Pledge page on <strong>the</strong> web.<br />
www.decisiongames.com<br />
strategy & tactics 63
64 #229