

Nissan 240SX 1989 Service Manual - 240SXTechDVDs
Nissan 240SX 1989 Service Manual - 240SXTechDVDs
Nissan 240SX 1989 Service Manual - 240SXTechDVDs

You also want an ePaper? Increase the reach of your titles
YUMPU automatically turns print PDFs into web optimized ePapers that Google loves.
~.,,-,<br />
,<br />
f<br />
\<br />
, ,,"'.,. ".' ,- ,<br />
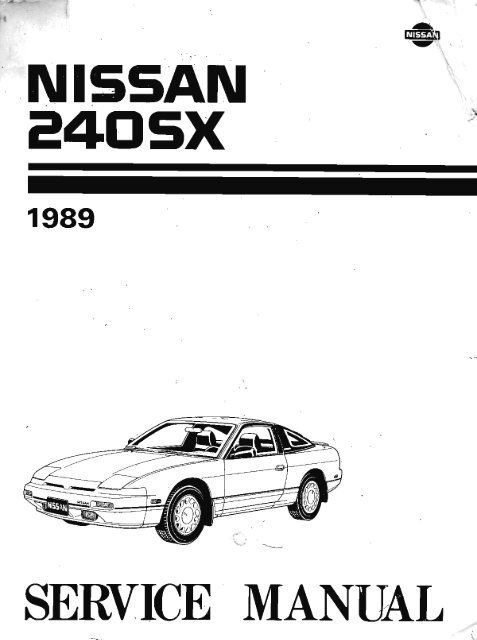
, "NI5SAN<br />
<strong>240SX</strong><br />
- ,<br />
<strong>1989</strong><br />
.<br />
..<br />
t":"',<br />
V .~<br />
'.<br />
~\<br />
'.~«J..<br />
\<br />
\ ,'.<br />
~.<br />
\<br />
h \<br />
)<br />
SERVICE
~<br />
j<br />
..<br />
<<br />
""<br />
NISSAN<br />
24DSX<br />
MODEL S13 SERIES<br />
-<br />
,<br />
QUICK REFERENCE INDEX<br />
GENERALINFORMATION GI<br />
MAINTENANCE<br />
ENGINEMECHANICAL<br />
ENGINELUBRICATION& COOLINGSYSTEMS-<br />
ENGINEFUEL& EMISSIONCONTROLSYSTEM-<br />
ENGINECONTROL, FUEL& EXHAUSTSYSTEM-<br />
CLUTCH<br />
MANUALTRANSMISSION<br />
AUTOMATICTRANSMISSION<br />
. PROPELLERSHAFT& DIFFERENTIAL CARRIER-<br />
FRONTAXLE& FRONTSUSPENSION<br />
REARAXLE& REARSUSPENSION<br />
BRAKESYSTEM<br />
STEERINGSYSTEM<br />
BODY<br />
HEATER& AIRCONDITIONER<br />
ELECTRICALSYSTEM<br />
cg 1988 NISSAN MOTOR CO., LTD. Printed in U.S.A.<br />
Not to be reproduced in who~e or in part without the prior written permission of Ni~n Motor Company Ltd., Tokyo, Japan.<br />
MA<br />
EM<br />
LC<br />
EF &EC<br />
FE<br />
CL<br />
MT<br />
AT<br />
PD<br />
FA<br />
RA<br />
SR<br />
ST<br />
SF<br />
HA<br />
EL
FOREWORD<br />
This manual contains maintenance and repair procedures for the <strong>1989</strong><br />
<strong>Nissan</strong> <strong>240SX</strong>.<br />
In order to assure your safety and the efficient functioning of the<br />
vehicle, this manusl should be read thoroughly. It is especially important<br />
that the PRECAUTIONS in the GI section be completely understood<br />
before starting any repair task.<br />
All information in this manual is based on the latest product information<br />
at the time of publication. The right is reserved to make changes in<br />
specifications and methods at a~y time without notice.<br />
IMPORTANTSAFETYNOTICE<br />
The proper performance of service is essential for both the safety of the<br />
technician and the efficient functioning of the vehicle.<br />
The service methods in this <strong>Service</strong> <strong>Manual</strong> are described in such a<br />
manner that the service may be performed safely and accurately.<br />
<strong>Service</strong> varies with the procedures used, the skills of the technician and<br />
the tools and parts available. Accordingly, anyone using service procedures,<br />
tools or parts which are not specifically recommended by<br />
NISSAN must first completely satisfy himself that neither his safety<br />
nor the vehicle's safety will be jeopardiz~d by the service method<br />
selected.<br />
.NISSAN MOTORCo.,LTD.<br />
Overseas <strong>Service</strong> Department<br />
Tokyo, Japan<br />
.
CONTENTS<br />
GENERALINFORMATION<br />
I<br />
SECTIONGI<br />
PRECAUTIONS GI- 2<br />
HOW TO USE THIS MANUAL GI- 5<br />
HOW TO READ WIRING DIAGRAMS ~ GI- 7<br />
HOW TO FOLLOW FLOW CHART IN TROUBLE DIAGNOSES GI-10<br />
IDENTIFICATION INFORMATION """'''''''''''''''''''''''''''''''''''''''''''''''''''''''''''''''''''''''''''''''''''' GI-13<br />
LIFTING POINTS AND TOW TRUCK TOWING GI-17<br />
TIGHTENING TORQUE OF STANDARD BOLTS GI-20<br />
-
-<br />
SGI285<br />
SGI231<br />
SGI232<br />
SGI233<br />
PRECAUTIONS<br />
Observe the following precautions ~o ensure safe and proper<br />
servicing. These precautions are not described in each individual<br />
section.<br />
1. Do not operate the engine for an extended period of time<br />
without proper exhaust ventilation.<br />
Keep the work area well ventilated and free of any inflammable<br />
materials. Special care should be taken when handling<br />
any inflammable or poisonous materials, such as<br />
gasoline, refrigerant gas, etc. When working in a pit or other<br />
enclosed area, be sure to properly ventilate the area before<br />
working with hazardous materials.<br />
Do not smoke while working on the vehicle.<br />
2. Before jacking up the vehicle, apply wheel chocks or other<br />
tire blocks to the wheels to prevent the vehicle from moving.<br />
After jacking up the vehicle, support the vehicle weight with<br />
safety stands at the points designated for proper lifting and<br />
towing before working on the vehicle.<br />
These operations should be done on a level surface.<br />
3. When removing a heavy component such as the engine or<br />
transaxle/transmission, be careful not to lose your balance<br />
and drop them. Also, do not allow them to strike adjacent<br />
parts, especially the brake tubes and master cylinder.<br />
4. Before starting repairs which do not require battery power,<br />
always turn off the ignition switch, then disconnect the<br />
ground cable from the battery to prevent accidental short<br />
circuit.<br />
5. To prevent serious burns, avoid contact with hot metal parts<br />
such as the radiator, exhaust manifold, tail pipe and muffler.<br />
Do not remove the radiator cap when the engine is hot.<br />
GI-2
SGI234<br />
SGI291<br />
PRECAUTIONS<br />
6. Before servicing the vehicle, protect fenders, upholstery and<br />
carpeting with appropriate covers.<br />
Take caution that keys, buckles or buttons on your person<br />
do not scratch the paint.<br />
7. Clean all disassembled parts in the designated liquid or<br />
solvent prior to inspection or assembly.<br />
8. Replace oil seals, gaskets, packings, O-rings, locking<br />
washers, cotter pins, self-locking nuts, etc. with new ones.<br />
9. Replace inner and outer races of tapered roller bearings and<br />
needle bearings as a set.<br />
10. Arrange the disassembled parts in accordance with their<br />
assembled locations and sequence.<br />
11. Do not touch the terminals of electrical components which<br />
use microcomputers (such as electronic control units).<br />
Static electricity may damage internal electronic components.<br />
12. After disconnecting vacuum or air hoses, attach a tag to<br />
indicate the proper connection.<br />
13. Use only the lubricants specified in MA section.<br />
14. Use approved bonding agent, sealants or their equivalents<br />
when required.<br />
15. Use tools and recommended special tools where specified<br />
for safe and efficient service repairs.<br />
16. When repairing the fuel, oil, water, vacuum or exhaust<br />
systems, check all affected lines for leaks.<br />
17. Dispose of drained oil or the solvent used for cleaning parts<br />
in an appropriate manner.<br />
Precautions for E.F.I. or E.C.C.S. Engine<br />
1. Before connecting or disconnecting E.F.I. or E.C.C.S. harness<br />
connector to or from any E.F.I. or E.C.C.S. control unit,<br />
be sure to turn the ignition switch to the "OFF" position and<br />
disconnect the negative battery terminal.<br />
Otherwise, there may be damage to control unit.<br />
2. Before disconnecting pressurized fuel line from fuel pump to<br />
injectors,<br />
danger.<br />
be sure to release fuel pressure to eliminate<br />
3. Be careful not to jar components<br />
air flow meter.<br />
such as control unit and<br />
GI-3
Clean floor<br />
SG 1290<br />
PRECAUTIONS<br />
Precautions for Catalyst<br />
If a large amount of unburned fuel flows into the converter, the<br />
converter temperature will be excessively high. To prevent this,<br />
follow the procedure below:<br />
1. Use unleaded gasoline only. Leaded gasoline will seriously<br />
damage the catalytic converter.<br />
2. When checking for ignition spark or measuring engine<br />
compression, make tests quickly and only when necessary.<br />
3. Do not run engine when the fuel tank level is low, otherwise<br />
the engine may misfire causing damage to the converter.<br />
4. Do not place the vehicle on inflammable material. Keep<br />
inflammable material off the exhaust pipe.<br />
Precautions for Fuel<br />
Unleaded gasoline of<br />
at least 87 AKI number (RON 91)<br />
GI-4
HOW TO USE THIS MANUAL<br />
1. A QUICK REFERENCE INDEX, a black tab (e.gJ18) is provided on the first page. You can quickly find<br />
the first page of each section by mating it to the section's black tab.<br />
2. THE CONTENTS are listed on the first page of each section.<br />
3. THE TITLE is indicated on the upper portion of each page and shows the part or system.<br />
4. THE PAGE NUMBER of each section consists of two letters which designate the particular section and<br />
a number (e.g. "BR-5").<br />
5. THE lARGE IllUSTRATIONS are exploded views (See below) and contain tightening torques,<br />
lubrication points and other information necessary to perform repairs.<br />
The illustrations should be used in reference to service matters only. When ordering parts, refer to the<br />
appropriate PARTS CATALOG.<br />
"Example" Pad retainer<br />
J~ r;~'~ 5~ 641556.5.40 471<br />
~ ~ ~ r- Main pin<br />
Torque ~ ~. . / IE! to sliding portion<br />
member ,/<br />
I<br />
::;:;::: Pin boot<br />
/<br />
Outer shim<br />
SBR364A<br />
6. THE SMAll IllUSTRATIONS show the important steps such as inspection, use of special tools,<br />
knacks of work and hidden or tricky steps which are not shown in the previous large illustrations.<br />
Assembly, inspection and adjustment procedures for the complicated units such as the automatic<br />
transaxle or transmission, etc. are presented in a step-by-step format where necessary.<br />
7. The followings SYMBOLS AND ABBREVIATIONS are used:<br />
~<br />
E1I<br />
~ rJ<br />
~<br />
~<br />
EaI~<br />
@> :<br />
*<br />
"f:l :<br />
S.O.S.<br />
L.H., R.H. .<br />
Tightening torque<br />
Should be lubricated with grease.<br />
Unless otherwise indicated, use<br />
recommended multi-purpose grease.<br />
Should be lubricated with oil.<br />
Sealing point<br />
Checking point<br />
Always replace after every disassembly.<br />
Apply petroleum jelly.<br />
Apply A.T.F.<br />
Select with proper thickness.<br />
Adjustment is required.<br />
<strong>Service</strong> Data and Specifications<br />
Left-Hand, Right-Hand<br />
GI-5<br />
M/T<br />
A/T<br />
Tool<br />
L.H.D.<br />
R.H.D.<br />
A.T.F.<br />
0,<br />
02<br />
03<br />
D.<br />
0.0.<br />
22<br />
2,<br />
12<br />
1,<br />
<strong>Manual</strong> Transaxle/Transmission<br />
Automatic Transaxle/Transmission<br />
Special <strong>Service</strong> Tools<br />
Left-Hand Drive<br />
Right-Hand Drive<br />
Automatic Transmission Fluid<br />
Drive range 1st gear<br />
Drive range 2nd gear<br />
Drive range 3rd gear<br />
Drive range 4th gear<br />
Overdrive<br />
2nd range 2nd gear<br />
2nd range 1st gear<br />
1st range 2nd gear<br />
1st range 1st gear<br />
",.
HOW TO USE THIS MANUAL<br />
8. The UNITS given in this manual are primarily expressed as the SI UNIT (International System of Unit),<br />
and alternatively expressed<br />
"Example"<br />
Tightening torque:<br />
in the metric system and in the yard/pound system.<br />
59 - 78 Nom (6.0 - 8.0 kg-m, 43 - 58 ft-Ib)<br />
9. TROUBLE DIAGNOSES are included in sections dealing with complicated components.<br />
10. SERVICE DATA AND SPECIFICATIONS are contained at the end of each section for quick reference of<br />
data.<br />
11. The captions WARNING and CAUTION warn you of steps that must be followed to prevent personal<br />
injury and/or damage to some part of the vehicle.<br />
. WARNING indicates the possibility of personal injury if instructions are not followed.<br />
. CAUTION indicates the possibility of component damage if instructions are not followed.<br />
. BOLD TYPEDSTATEMENTSexcept WARNING and CAUTIONgive you helpfulinformation.<br />
GI-6
Example<br />
BRANCH<br />
nM/T model<br />
~~<br />
~ lG~<br />
~B~<br />
A/T model<br />
~<br />
~ CLG~<br />
~B-S<br />
~ : MfT model<br />
@ : AfT model<br />
t<br />
ABBREVIATIONS<br />
........<br />
.<br />
HOW TO READ WIRING DIAGRAMS<br />
'-LAMP-!<br />
WIRING DIAGRAM<br />
Symbols used in WIRING DIAGRAM are shown below:<br />
CONNECTOR<br />
Th is shows that these con nectors are<br />
white 6 terminal connectors.<br />
1mI ><br />
""'=<br />
POWER SUPPLY<br />
-This shows the ignition<br />
switch position<br />
in which the system<br />
can be ope rated.<br />
- See POWER SUPPLY<br />
ROUTING in EL<br />
section for the detai led<br />
wiring<br />
.<br />
diagram.<br />
SWITCH<br />
This shows that continuity<br />
exists between<br />
terminals CD and CID,<br />
when the switch is<br />
turned to ON position.<br />
~~<br />
I . ~ 2 ~Whi"~ lyw IiliJ<br />
~ ml-l<br />
G SWITCH<br />
.rn '""".~ 'WIRE COLOR CODING<br />
'"" ~ g BR ~ Brown<br />
--- ~ -b B -BI,,' OR ~ LOCATION NUMBER<br />
Orange<br />
- W ~ White P ~ This number shows where the<br />
Pink<br />
BODY D R ~ Red PU ~ connector is located. See<br />
Purple<br />
HARNESS LAYOUT in EL GROUN G ~ Green GY ~ Gray<br />
section. The number is<br />
Y L ~ Blue Yellow<br />
SB ~<br />
.<br />
Sky Blue<br />
identical with the one in<br />
ht Green<br />
HARNESS LAYOUT.<br />
LG ~ Llg .<br />
I<br />
d the base<br />
I<br />
is stripe, .<br />
When. the iven wirefirst, co or followe d by the stripe<br />
color as IS gshown below:<br />
Example: L/W ~ Blue with Whtte Stripe<br />
~@! ~M:<br />
I: Instrument<br />
harness<br />
Main harness<br />
S G 1543<br />
Normally open<br />
= ~ 0---<br />
Normally closed<br />
, ~<br />
SEL764E<br />
SWITCH POSITIONS<br />
Wiring diagram switches are shown with the vehicle in the<br />
following condition.<br />
. Ignition switch "OFF",<br />
. Doors, hood and trunk lid/back door closed.<br />
. Pedals are not depressed and parking brake is released.<br />
GI-7
Example<br />
Example<br />
EE<br />
.<br />
Connector symbol<br />
Efj<br />
Connector symbol<br />
Example<br />
-B/Y<br />
..4: Connector<br />
M.~ te,m;nal ~<br />
G";d'-[~<br />
Female terminal<br />
Guide<br />
-W/B<br />
-R.<br />
B E 1 5<br />
-L/Y C (f) @ 2<br />
-B.<br />
-yo<br />
HOW TO READ WIRING DIAGRAMS<br />
SG 1362<br />
Connector<br />
Connector<br />
SG 1363<br />
WIPER SWITCH<br />
CONNECTOR SYMBOLS<br />
. All connector symbols in wiring diagrams are shown from<br />
the terminal side.<br />
. Male and female terminals<br />
Connector guides for male terminals are shown in black and<br />
female terminals in white in wiring diagrams.<br />
MULTIPLESWITCH<br />
The continuity of the multiple switch is identified in the switch<br />
chart in wiring diagrams.<br />
Continuity circuit of wiper switch<br />
Example: Wiper switch in LO position<br />
Continuity circuit: Red wire - @ terminal - CID terminal - Wiperswitch (@ - @:<br />
LO) - @ terminal - CD terminal - Black wire<br />
GI-8<br />
SWITCH POSITION CONTINUITY CIRCUIT<br />
OFF 3-4<br />
INT 3 - 4,5 - 6<br />
LO 3-6<br />
HI 2.6<br />
WASH 1 - 6<br />
SG 1365
Example<br />
r-R~<br />
(<br />
~B<br />
(Main harness)<br />
STARTING SYSTEM<br />
Wiring Diagram<br />
[<br />
HOW TO READ WIRING DIAGRAMS<br />
Ww g 0<br />
rnIJ<br />
0<br />
~ FF<br />
- Dm3<br />
SUPER<br />
. The<br />
MULTIPLE JUNCTION (S.M.J.)<br />
"S.M.J." indicated in wiring diagrams is shown in a<br />
simplified form. The terminal arrangement should therefore<br />
be referred to in the foldout at the end of the <strong>Service</strong><br />
<strong>Manual</strong>.<br />
. The foldout<br />
diagram.<br />
should be spread to read the entire wiring<br />
STARTING SYSTEM<br />
Check<br />
~ '" ,~ crhKk<br />
], r- ,=fd:0CI~0<br />
liJ ¥ j 0 .-:: :=<br />
.-<br />
S.M.J.<br />
't<br />
Refer to last page<br />
(Foldout page).<br />
J<br />
DO<br />
y--R<br />
L---1 +-+<br />
BR~<br />
(Instrument<br />
harness)<br />
r-B<br />
(Main harness)<br />
GI-9<br />
SUPER MULTIPLE JUNCTION (S.M.J.)<br />
Super Multiple Junction<br />
(S.M.J.)<br />
T..minal A"angament<br />
(Instrument harness)<br />
L--S<br />
BR---l.<br />
SEL653F
m"<br />
iii ~<br />
_MECT<br />
lu [ill<br />
HOW TO FOLLOW FLOW CHART IN TROUBLE DIAGNOSES<br />
-=-<br />
~ ~<br />
SG I561<br />
00 SG 1562<br />
( INSPECTION START)<br />
~m ~ rill I<br />
CHECK POWER SUPPLY.<br />
1) Turn ignition switch "ON" IN.G.<br />
.~ [<br />
2) Check voltage between<br />
terminal @ and ground.<br />
T~Battery voltage should exist.<br />
iii<br />
2<br />
O.K.<br />
CHECK GROUND CIRCUIT.<br />
1) Turn ignition switch "OFF".<br />
2) Disconnect crank angle I N.G~<br />
sensor harness connector.<br />
3) Check resistance betWeen<br />
terminal @ and ground.<br />
Resistance:<br />
Approximately on<br />
I<br />
O.K.<br />
Check the following items.<br />
1) Harness continuity betWeen<br />
crank angle sensor and battery.<br />
2) E.C.C.S. relay-1 (See page EF &<br />
EC-106.)<br />
3) "BR" fusible link<br />
4) Power source for E.C.U.<br />
(See page EF & EC-104.)<br />
5) Ignition switch<br />
Check the following items.<br />
1) Harness continu ity betWeen<br />
crank angle sensor and<br />
grou nd<br />
2) Ground circuit for E.C.U.<br />
(See page EF & EC-104.)<br />
NOTICE<br />
The flow chart indicates work procedures required to diagnose<br />
problems effectively. Observe the following instructions before<br />
diagnosing.<br />
1) Use the flow chart after locating probable causes of a<br />
problem following the "Preliminary Check"<br />
tom Chart".<br />
or the "Symp-<br />
2) After repairs, re-check that the problem has been com-<br />
3)<br />
pletely eliminated.<br />
Refer to Component Parts Location and Harness Layout<br />
for the Systems described in each section for<br />
identification/location<br />
nectors.<br />
of components and harness con-<br />
4) Refer to the Circuit Diagram for Quick Pin Point Check.<br />
If you must perform circuit continuity between harness<br />
connectors more detail, such as in case of sub harness is<br />
used, refer to Wiring Diagram and Harness Layout in EL<br />
section for identification of harness connectors.<br />
5) When checking<br />
"OFF" .<br />
circuit continuity, ignition switch should be<br />
6) Before<br />
voltage.<br />
checking voltage at connectors, check battery<br />
7) After accomplishing the Diagnostic Procedures and Electrical<br />
Components Inspection, make sure that all harness<br />
connectors are reconnected as it was.<br />
GI-10
Example<br />
View from terminal side<br />
View from harness side<br />
Connector<br />
HOW TO FOllOW FLOW CHART IN TROUBLE DIAGNOSES<br />
Connector symbol<br />
~Direction<br />
~<br />
mark<br />
~<br />
Connector symbol<br />
Direction mark<br />
[it<br />
SGI364<br />
HOW TO FOllOW THIS FLOW CHART<br />
ITJ Work and diagnostic procedure<br />
Start to diagnose a problem using procedures indicated in<br />
enclosed blocks, as shown in the following example.<br />
m<br />
I<br />
...<br />
CHECK POWER SUPPLY.<br />
1) Turn ignition switch "ON".<br />
.-- Check item being performed.<br />
2) Check voltage between Procedure, steps or<br />
terminal @ and ground.<br />
Battery voltage should exist. }<br />
measurement results<br />
O.K.<br />
I2J Measurement results<br />
Required results are indicated in bold type in the corresponding<br />
block, as shown below.<br />
These have the following meanings:<br />
Battery voltage ~ 11 - 14V or approximately 12V<br />
Voltage: Approximately OV ~ Less than 1V<br />
~ Cross reference of work symbols in the text and<br />
illustrations<br />
Illustrations are provided as visual aids for work procedures.<br />
For example, symbol m indicated in the left upper portion<br />
of each illustration corresponds with the symbol in the<br />
flowchart for easy identification. More precisely, the procedure<br />
under the "CHECK POWER SUPPLY" outlined previously<br />
is indicated by an illustration m .<br />
@] Symbols used in illustrations<br />
Symbols included in illustrations refer to measurements or<br />
procedures. Before diagnosing a problem, familiarize yourself<br />
with each symbol.<br />
Direction mark<br />
A direction mark is shown to clarify the side of connector (terminal<br />
side or harness side).<br />
Direction marks are mainly used in the illustrations indicating<br />
terminal inspection.<br />
~: View f,om lermlnel side n' r.s.<br />
. All connector symbols shown from the terminal side are<br />
enclosed by a single line.<br />
~:<br />
. All connector<br />
Viewf,omhernessside .n H.S.<br />
symbols shown from the harness side are<br />
enclosed by a double line.<br />
GI-11
HOW TO FOLLOW FLOW CHART IN TROUBLE DIAGNOSES<br />
Key to symbols signifying measurements or procedures<br />
Symbol Symbol explanation Symbol Symbol explanation<br />
..-cT<br />
IV Check after disconnecting the AIC switch is "OFF".<br />
connector to be measured.<br />
£)<br />
CONNECT<br />
Check after connecting the<br />
connector to be measured.<br />
GI-12<br />
AIC switch is "ON".<br />
@- Insert key into ignition switch. REC switch is "ON".<br />
00<br />
00<br />
OOACC<br />
F<br />
Turn ignition switch to "OFF"<br />
position.<br />
Turn ignition switch to "ON"<br />
position.<br />
REC switch is "OFF".<br />
DEF switch is "ON".<br />
Turn ignition switch to "START" VENT switch is "ON".<br />
position.<br />
Turn ignition switch from "OFF" to Fan switch is "ON". (At any posi-<br />
"ACC" position. tion except for "OFF" position)<br />
Turn ignition switch from "ACC" to<br />
"OFF" position.<br />
"cfi1234.<br />
Fan switch is "OFF".<br />
Turn ignition switch from "OFF" to Apply battery voltage directly to<br />
"ON" position. components.<br />
OOF<br />
Turn ignition switch from "ON" to<br />
"OFF" position. 7 Drivevehicle.<br />
0 Do not start engine,or check<br />
with engine stopped.<br />
Disconnect battery negative cable.<br />
trJ<br />
CffH<br />
l!V<br />
La)<br />
Le1J<br />
Start<br />
running.<br />
engine. or check with engine<br />
Depress brake pedal.<br />
Apply parking brake. Release brake pedal.<br />
Release parking brake. Depress accelerator pedal.<br />
Check after engine is warmed up<br />
sufficiently.<br />
Release accelerator pedal.<br />
Voltage should be measured with a<br />
voltmeter.<br />
II CIUIIT foi--<br />
-<br />
€<br />
Pin terminal check for S.M.J.<br />
II<br />
type E.C.U.and AIT control<br />
unit connectors.<br />
For details regarding the<br />
Circuit resistance should be<br />
measured with an ohmmeter. -<br />
terminal arrangement, refer<br />
to the foldout page.<br />
'<br />
Currentshould be measuredwith<br />
an ammeter.
IDENTIFICATION INFORMATION<br />
Model Variation<br />
Destination Body Model Engine Transmission<br />
Non-California<br />
Coupe<br />
HLS13FU<br />
Fastback RHLS13FU<br />
Coupe<br />
HLS13AU<br />
Fastback RHLS13AU<br />
Prefix and suffix designations:<br />
R H L S13 A N (R)<br />
L (R) : With A.B.S.<br />
0: Coope T<br />
N : Canada<br />
R : Fastba~<br />
V : California<br />
H: KA24E engine<br />
U: Non-California<br />
L: L.H. drive A : Automatic transmission<br />
0 : means no indication.<br />
F : 5-speed manual transmission<br />
GI-13<br />
FS5W71C<br />
RE4R01A<br />
Differential<br />
carrier<br />
Coupe<br />
HLS13FV<br />
FS5W71C<br />
Fastback RHLS13FV<br />
California KA24E R200<br />
Coupe<br />
HLS13AV<br />
RE4R01A<br />
Fastback RHLS13AV<br />
Canada<br />
Coupe<br />
Fastback<br />
Coupe<br />
HLS13FN<br />
RHLS13FN<br />
HLS13AN<br />
Fastback RHLS13AN<br />
FS5W71 C<br />
RE4R01A
IDENTIFICATION INFORMATION<br />
Identification Number<br />
Vehicle identification plate<br />
VEHICLE IDENTIFICATION NUMBER ARRANGEMENT<br />
Manufacturer<br />
IN 1: N issan passenger vehicle<br />
Engine type<br />
H: KA24E<br />
. Vehicle line<br />
S: NISSAN <strong>240SX</strong><br />
Model change (0 to 91<br />
Body type<br />
4: Coupe<br />
6: Fastback<br />
IN 1 H S 3 6 P X K<br />
I<br />
Vehicle identification number (Chassis number)<br />
GI-14<br />
W 000051<br />
IT<br />
F.M.V .5.5. certification label<br />
Vehicle identification number plate<br />
Vehicle serial number<br />
Manufacture plant<br />
W: Kyushu<br />
Model year<br />
K: <strong>1989</strong> year model<br />
SGI547<br />
Check digit (0 to 9 or XI<br />
The code for the check digit is<br />
determined by mathematical<br />
computation.<br />
Restraint system<br />
S: Standard<br />
P: Automatic
NISSAN MOTORCO.,LTD. JAPAN<br />
~:it ~i:J ill<br />
CHASSIS NO<br />
NO DE CHASIS<br />
&"<br />
MODEL<br />
MOOElO<br />
.&<br />
0 ",-COlORTRiM<br />
f 'Jk COlOR GUMNICION<br />
I ;,.0 ENGIN[<br />
'/;,.0 MOTOR<br />
ffi&<br />
&&<br />
;; ';~: :::; ~ElE & &<br />
I tf; ::::A<br />
S jJt ~ ItJ :if[** :it ~ U MADEINJAPAN SGI315<br />
ENGINE SERIAL NUMBER<br />
KA24E engine<br />
IDENTIFICATION INFORMATION<br />
0<br />
CC<br />
Identification Number (Cont'd)<br />
IDENTIFICATION PLATE<br />
TL 1006M<br />
1 Type<br />
2 Vehicle identification number (Chassis numbed<br />
3 Model<br />
4 Body color code<br />
5 Trim color code<br />
6 Engine model<br />
7 Engine displacement<br />
8 Transmission model<br />
9 Axle model<br />
MANUAL TRANSMISSION NUMBER AUTOMATIC TRANSMISSION NUMBER<br />
SGI274 SGI513<br />
GI-15
IDENTIFICATION INFORMATION<br />
Dimensions<br />
Overall length<br />
Overall width<br />
Overall height<br />
Front tread<br />
Rear tread<br />
Wheelbase<br />
Wheels and Tires<br />
*: Option<br />
GI-16<br />
Unit: mm (in)<br />
Coupe Fastback<br />
4,520 (178.0)<br />
1,690 (66.5)<br />
1,290 (50.8)<br />
1,465 (57.7)<br />
1,460 (57.5)<br />
2,475 (97.4)<br />
Road wheel Steel 6-JJx 15<br />
Aluminum 6-JJx 15<br />
Offset mm (in) 40 (1.57)<br />
4,520 (178.0)<br />
1,690 (66.5)<br />
1,290 (50.8)<br />
1,465 (57.7)<br />
1,460 (57.5)<br />
2,475 (97.4)<br />
Tire size Conventional 195/60R 15 86H<br />
205/60R 15 89H *<br />
Spare T125/70D 15
LIFTING POINTS AND TOW TRUCK TOWING<br />
Garage Jack and Safety Stand<br />
WARNING:<br />
. Never get under the vehicle while it is supported only by<br />
the jack. Always use safety stands to support the frame<br />
when you have to get under the vehicle.<br />
. Place wheel chocks at the front wheels when the rear<br />
wheels are raised and place wheel chocks at the rear<br />
wheels when the front wheels are raised.<br />
CAUTION:<br />
Place a wooden or rubber block between safety stand and<br />
vehicle body when the supporting body is flat.<br />
Garage jack points<br />
GI-17<br />
SGI552
Sill ~<br />
lift<br />
LIFTING POINTS AND TOW TRUCK TOWING<br />
pad<br />
~'i::ij,iiii.2ii;~1',,,';1tiii:.;<br />
-.<br />
~ SG 1383<br />
2-pole Lift<br />
WARNING:<br />
When lifting the vehicle, open the lift arms as wide as<br />
possible and ensure that the front and rear of the vehicle are<br />
well balanced.<br />
When setting the lift arm, do not allow the arm to contact the<br />
brake tubes and fuel lines.<br />
Put the sill in the slit of the lift pad to prevent<br />
the sill from deforming. If the pad does not have<br />
/ / the slit, prepare a suitable attachment with slit.<br />
Note:<br />
Lift-up points<br />
are the same as<br />
pantograph jack<br />
points.<br />
SGI553<br />
Tow Truck Towing<br />
CAUTION:<br />
. All applicable state or Provincial (in Canada) laws and<br />
.<br />
local laws regarding the towing operation must be obeyed.<br />
It is necessary to use proper towing equipment to avoid<br />
possible damage to the vehicle during towing operation.<br />
Towing is in accordance with Towing Procedure <strong>Manual</strong> at<br />
dealer.<br />
. When towing with the rear wheels on the ground, release<br />
the parking brake and move the gearshift lever to neutral<br />
(UN" position).<br />
NISSAN recommends that vehicle be towed with the driving<br />
(rear) wheels off the ground as illustrated.<br />
GI-18
Front<br />
Rear<br />
LIFTING POINTS AND TOW TRUCK TOWING<br />
CE1 DD9M<br />
Tow Truck Towing (Cont'd)<br />
TOWING AN AUTOMATIC TRANSMISSION MODEL WITH<br />
FOUR WHEELS ON GROUND OR TOWING WITH FRONT<br />
WHEELS RAISED (With rear wheels on ground)<br />
Observe the following restricted towing speeds and distances.<br />
Speed:<br />
Below 50 km/h (30 MPH)<br />
Distance:<br />
Less than 65 km (40 miles)<br />
If the speed or distance must necessarily be greater, remove<br />
the propeller shaft beforehand to prevent damage to the<br />
transmission.<br />
TOWING POINT<br />
Alwayspull the cable straightout from the vehicle.Never pull<br />
on the hook at a sidewaysangle.<br />
GI-19
TIGHTENINGTORQUE OF STANDARD BOLTS<br />
Grade Bolt size<br />
Bolt diameter*<br />
mm<br />
Pitch mm<br />
Tightening torque (Without lubricant)<br />
Hexagon head bolt Hexagon flange bolt<br />
N.m kg-m ft-Ib N.m kg-m ft-Ib<br />
M6 6.0 1.0 5.1 0.52 3.8 6.1 0.62 4.5<br />
M8 8.0<br />
4T M10 10.0<br />
M12 12.0<br />
1. Special parts are excluded.<br />
2. This standard is applicable to bolts havingthe following<br />
marks embossed on the bolt head. *: Nominal diameter<br />
Grade Mark<br />
4T 4<br />
7T 7<br />
9T 9<br />
1.25 13 1.3 9 15 1.5 11<br />
1.0 13 1.3 9 16 1.6 12<br />
1.5 25 2.5 18 29 3.0 22<br />
1.25 25 2.6 19 30 3.1 22<br />
1.75 42 4.3 31 51 5.2 38<br />
1.25 46 4.7 34 56 5.7 41<br />
M14 14.0 1.5 74 7.5 54 88 9.0 65<br />
M6 6.0 1.0 8.4 0.86 6.2 10 1.0 7<br />
M8 8.0<br />
7T M10 10.0<br />
M12 12.0<br />
1.25 21 2.1 15 25 2.5 18<br />
1.0 22 2.2 16 26 2.7 20<br />
1.5 41 4.2 30 48 4.9 35<br />
1.25 43 4.4 32 51 5.2 38<br />
1.75 71 7.2 52 84 8.6 62<br />
1.25 77 7.9 57 92 9.4 68<br />
M14 14.0 1.5 127 13.0 94 147 15.0 108<br />
M6 6.0 1.0 12 1.2 9 15 1.5 11<br />
M8 8.0<br />
9T M10 10.0<br />
M12 12.0<br />
1.25 29 3.0 22 35 3.6 26<br />
1.0 31 3.2 23 37 3.8 27<br />
1.5 59 6.0 43 70 7.1 51<br />
1.25 62 6.3 46 74 7.5 54<br />
1.75 98 10.0 72 118 12.0 87<br />
1.25 108 11.0 80 137 14.0 101<br />
M14 14.0 1.5 177 18.0 130 206 21.0 152<br />
GI-20<br />
M<br />
1 6<br />
""""L- Nominal diameter of bolt threads (Unit: mm)<br />
Metric screw threads
CONTENTS<br />
'..~<br />
.J<br />
MAINTENANCE<br />
SECTIONMAI<br />
PERIODIC MAINTENANCE ... MA- 2<br />
GENERAL MAINTENANCE. MA- 4<br />
RECOMMENDED LUBRICANTS AND FLUIDS MA- 6<br />
ENGINE MAINTENANCE "'"'''''''''''' MA- 8<br />
CHASSIS AND BODY MAINTENANCE MA-14<br />
SERVICE DATA AND SPECIFICATIONS (S.D.S.) :" MA-20",<br />
l1li
PERIODIC MAINTENANCE<br />
The following charts show the normal maintenance schedule. Under severe driving conditions, additional or<br />
more frequent maintenance will be required. Refer to "Maintenance under severe driving conditions".<br />
The periodic maintenance schedule is repeated beyond the last mileage and period shown by returning to the<br />
first 15,000 miles (24,000 km) or 12 months.<br />
EMISSION CONTROL SYSTEM MAINTENANCE<br />
MAINTENANCE. OPERATION<br />
Perform at number of miles,<br />
Miles x 1,000<br />
kilometers or months, whichever<br />
comes first.<br />
(km x 1,000)<br />
Months<br />
Drive belts See NOTE (1).<br />
Air cleaner filter<br />
Vapor lines<br />
Fuel lines<br />
Fuel filter<br />
Engine coolant<br />
Egnine oil<br />
Engine oil filter<br />
(Use <strong>Nissan</strong> PREMIUM<br />
type or equivalent.)<br />
Spark plugs<br />
Ignition wires<br />
See NOTE (2)*.<br />
CHASSIS AND BODY MAINTENANCE<br />
MAINTENANCE OPERATION<br />
Perform at number of miles,<br />
Miles x 1,000<br />
kilometers or months, whichever<br />
comes first.<br />
Break lines & cables<br />
Brake pads & discs<br />
(km x 1,000)<br />
Months<br />
<strong>Manual</strong> and automatic transmission & differential gear oil<br />
Steering gear & linkage, and axle & suspension parts<br />
Exhaust system<br />
MAINTENANCE INTERVAL<br />
7.5 15 30 45 60<br />
(12) (24) (48) (72) (96)<br />
6 12 24 36 48<br />
1*<br />
Replace every 30,000 miles<br />
(48,000 km).<br />
1* 1*<br />
1* 1*<br />
R<br />
R<br />
R R<br />
Then replace every 7,500 .<br />
miles (12,000 km) or<br />
6 months.<br />
Then replace every<br />
second oil change.<br />
Replace every 30,000 miles<br />
(48,000 km).<br />
Inspect every 3 years. *<br />
15<br />
(24)<br />
12<br />
I<br />
I<br />
I<br />
MAINTENANCE<br />
INTERVAL<br />
30 45<br />
(48) (72)<br />
24 36<br />
I I<br />
I I<br />
I I<br />
I<br />
I<br />
60<br />
(96)<br />
48<br />
I<br />
I<br />
I<br />
I<br />
I<br />
MA-8<br />
Reference page<br />
MA-10<br />
MA-13<br />
MA-9<br />
MA-10<br />
MA-8<br />
MA-11<br />
MA-11<br />
MA-12<br />
MA-12<br />
Reference page<br />
MA-16<br />
MA-17<br />
MA-14,15,16<br />
MA-18, FA-4,RA-4<br />
MA-14<br />
NOTE:<br />
(1) After 60,000 miles (96,000 km) or 48 months, inspect every 15,000 miles (24,000 km).<br />
(2) If vehicle is operated under extremely adverse weather conditions or in arees where ambient temperatures are either<br />
extremely low or extremely high, the filters might become clogged. In such an event, replace them immediately.<br />
(3) Maintenance items and intervals with "." are recommended by NISSANfor reliable vehicle operation. The owner need<br />
not perform such maintenance in order to ~aintain the emission warranty or manufacturer recall liability. Other maintenance<br />
items and intervals are required.<br />
Abbreviations: R = Replace. I = Inspect. Correct or replace if necessary.<br />
MA-2
PERIODIC MAINTENANCE<br />
MAINTENANCE UNDER SEVERE DRIVING CONDITIONS<br />
The maintenance intervals shown on the preceding pages are for normal operating conditions. If the vehicle<br />
is mainly operated under severe driving conditions as shown below, more frequent maintenance is required to.<br />
be performed on the following items as shown in the table.<br />
Severe driving conditions<br />
A - Repeated short trips less than 5 miles (8 km) and outside temperatures remain below freezing<br />
B - Extensive idling and/or low speed driving for a long distance such as police, taxi or door-to-door delivery<br />
use<br />
C - Driving in dusty conditions<br />
D - Driving on rough, muddy, or salt spread roads<br />
E - Towinga trailer, usinga camper or a car-top carrier<br />
Driving condition Maintenance item<br />
Maintenance<br />
operation<br />
Maintenance<br />
interval<br />
C Air cleaner filter R More frequently' MA-10<br />
ABC DE Engine oil & oil filter R Every 3,000 miles<br />
(5,000 km) or 3 months<br />
A. C D E Brake pads & discs Every 7,500 miles<br />
(12,000 km) or 6 months<br />
D E <strong>Manual</strong> and automatic transmission<br />
& differential gear oil<br />
D . Steering gear & linkage, and<br />
axle & suspension parts<br />
. . CD. Steering linkage ball joints<br />
& front suspension ball joints<br />
R Every 30,000 miles<br />
(48,000 km) or 24 months<br />
Every 7,500 miles<br />
(12,000 km) or 6 months<br />
MA-11<br />
MA-17<br />
Reference page<br />
MA-14, 15, 16<br />
MA-18, FA-4, RA-4<br />
MA-18,FA-4<br />
A. . D E Exhaust system MA-14<br />
Maintenance operations: I =Inspect. Correct or replace if necessary. R =Replace.<br />
MA-3
GENERAL MAINTENANCE<br />
General maintenance includes those items which should be checked during the normal day-to-dayoperation<br />
of the vehicle.They are essential if the vehicl~isto continue operating properly. The owners can perform the<br />
checksand inspectionsthemselvesor they can havetheir NISSANdealers do them for a nominal charge.<br />
Item Reference page<br />
OUTSIDE THE VEHICLE<br />
The ma!ntenance items listed here should be performed from time to time, unless otherwise<br />
specified.<br />
Tires Check the pressure with a gauge periodically when at a service station, including the<br />
spare, and adjust to the specified pressure if necessary. Check carefully for damage, cuts or<br />
excessivewear.<br />
Wheel nuts When checking the tires, make sure no nuts are missing,and check for any loose<br />
nuts. Tighten if necessary.<br />
Tire rotation Tires should be rotated every 12,000 km (7,500 miles.)<br />
MA-18<br />
Wheel alignment and balance If the vehicle should pull to either side while driving on a<br />
MA.17<br />
straight and level road, or if you detect uneven or abnormal tire wear, there may be a need<br />
FA-6<br />
for wheel alignment. If the steering wheel or seat vibrates at normal highway speeds, wheel<br />
RA-6<br />
balancing may be needed.<br />
Windshieldwiper blades Check for cracks or wear if they do not wipe properly.<br />
Doors and engine hood Check that all doors and the engine hood operate smoothly as well as<br />
the trunk lid and back hatch. Also ensure, that all latches lock securely. Lubricate if necessary.<br />
Make sure that the secondary latch keeps the hood from opening when the primary<br />
latch is released.<br />
When driving in areas using road salt or other corrosive materials, check lubrication frequently.<br />
INSIDE THE VEHICLE<br />
The maintenance items listed here should be checked on a regular basis, such as when<br />
performing periodic maintenance, cleaning the vehicle, etc.<br />
Lights Makesure that the headlights, stop lights, taillights, tUrn signal lights, and other lights<br />
are all operating properly and installed securely. Also check headlight aim.<br />
Warning lights and buzzers/chimes Make sure that all warning lights and buzzers/chimes are<br />
operating properly.<br />
MA-19<br />
Windshield wiper and washer Check that the wipers and washer operate properly and that<br />
the wipers do not streak.<br />
Windshield defroster Check that the air comes out of the defroster outlets properly and in<br />
sufficient quantity when operating the heater or air conditioner.<br />
Steering wheel Check that it has the specified free play. Be sure to check for changes in the<br />
steering condition, such as excessivefree play, hard steering or strange noises.<br />
Free play: Lessthan 35 mm (1.38 in)<br />
Seats Check seat position controls such as seat adjusters, seatback recliner, etc. to ensure<br />
they operate smoothly and that all latches lock securely in every position. Check that the<br />
head restrains move up and down smoothly and that the locks (if so equipped) hold securely<br />
in all latched positions. Check that the latches lock securely for folding-down rear seatbacks.<br />
.<br />
Seat belts Check that all parts of the seat belt system (e.g. buckles, anchors, adjusters and<br />
retractors) operate properly and smoothly, and are installed securely. Check the belt<br />
webbing for cuts, fraying, wear or damage.<br />
MA-4<br />
MA-19
GENERAL MAINTENANCE<br />
Item<br />
Clutch pedal Make sure the pedal operates smoothly and check that it has the proper free<br />
travel.<br />
Brakes Check that the brake does not pull the vehicle to one side when applied.<br />
Brake pedal Check the pedal for smooth operation and make sure it has the proper distance<br />
under it when depressed fully. Check the brake booster function.<br />
Parking brake Check that the lever has the proper travel and confirm that your vehicle is<br />
held securely on a fairly steep hill with only the parking brake applied.<br />
Automatic transmission "Park" mechanism Check that the lock release button on the<br />
selector lever operates properly and smoothly. On a fairly steep hill check that your vehicle<br />
is held securely with the selector lever in the "P" position without applying any brakes.<br />
UNDER THE HOOD AND VEHICLE<br />
The maintenance items listed here should be checked periodically (e.g. each time you check<br />
the engine oil or refuel).<br />
Windshieldwasher fluid Check that there is adequate fluid in the tank.<br />
Engine coolant levelCheck the coolant levelwhen the engine is cold.<br />
Radiator and hoses Check the front of the radiator and clean off any dirt, insects, leaves,<br />
etc., that may have accumulated. Make sure the hoses have no cracks, deformation, rot or<br />
loose connections.<br />
Brake and clutch fluid levelsMakesure that the brake and clutch fluid levelsare between the<br />
"MAX" and "MIN" lines on the reservoir.<br />
Engine drive belts Makesure that no belt is frayed, worn, cracked or oily.<br />
Engine oil level Check the level on the dipstick after parking the vehicle on a levelspot and<br />
turning off the engine.<br />
Power steering fluid level and lines Check the levelwhen the fluid is cold and the engine is<br />
turned off. Check the lines for proper attachment, leaks, cracks, etc.<br />
Automatic transmission fluid level Check the level on the dipstick after putting the selector<br />
lever in "P" with the engine idling.<br />
Exhaust system Make sure there are no loose supports, cracks or holes. If the sound of the<br />
exhaust seems unusual or there is a smell of exhaust fumes, immediately locate the trouble<br />
and correct it.<br />
Underbody The underbody is frequently exposed to corrosive substances such as those used<br />
on icy roads or to control dust. It is very important to remove these substances, otherwise<br />
rust will form on the floor pan, frame, fuel lines and around the exhaust system. At the end<br />
of winter, the underbody should be thoroughly flushed with plain water, being careful to<br />
clean those areas where mud and dirt can easily accumulate.<br />
Fluid leaks Check under the vehicle for fuel, oil, water or other fluid leaks after the vehicle<br />
has been parked for a while. Water dripping from the air conditioner after use is normal. If<br />
you should notice any leaks or gasoline fumes are evident, check for the cause and correct it<br />
immediately.<br />
MA-5<br />
Reference page<br />
CL-5<br />
BR-7<br />
BR-23<br />
MA-9<br />
MA-14,16<br />
MA-8<br />
MA-11<br />
MA-18<br />
MA-15<br />
MA-14
RECOMMENDED LUBRICANTS AND FLUIDS<br />
US<br />
measure<br />
Engine oil (Refill)<br />
With oil filter 3-3/4 qt<br />
Without oil filter<br />
Cooling system (with reservoir tank)<br />
Reservoir tank<br />
3-3/8 qt<br />
7-1/8 qt<br />
3/4 qt<br />
<strong>Manual</strong> transmission oil 5-1/8 pt<br />
Differential gear oil<br />
2-3/4 pt<br />
Automatic transmission fluid 8-3/4 qt<br />
Power steering fluid 1 qt<br />
Brake fluid<br />
Multi-purpose grease<br />
Lubricants and Fluids<br />
Capacity (Approximate)<br />
Imp<br />
measure<br />
3-1/8 qt<br />
2-7/8 qt<br />
5-7/8 qt<br />
5/8 qt<br />
4-1/4 pt<br />
Liter<br />
3.5<br />
3.2<br />
6.7<br />
0.7<br />
2.4 API GL-4*2<br />
2-1/4 pt 1.3 API GL-5*2<br />
7-1/4 qt<br />
8.3<br />
3/4 qt 0.9 Type DEXRON TM<br />
Recommended lubricants and fluids<br />
Genuine <strong>Nissan</strong> Motor Oil*1 or equivalent<br />
(Energy Conserving Oils of API SF or SG)*2, *3<br />
Anti-freeze coolant (Ethylene glycol base)<br />
Genuine <strong>Nissan</strong> ATF*1 or equivalent<br />
Type DEXRON TM<br />
Genuine <strong>Nissan</strong> Brake Fluid*1 or equivalent<br />
DOT 3 (US FMVSS No. 116)<br />
NLGI No.2 (Lithium soap base)<br />
*1: Available in mainland U.S.A. through you <strong>Nissan</strong> dealer.<br />
*2: For further details, see "SAE Viscosity Number".<br />
*3: Energy Conserving Oils<br />
These oils can be identified by such labels as energy conserving, energy saving, improved fuel economy, etc.<br />
MA-6
ENGINE OIL<br />
Outside Temperature Range<br />
RECOMMENDED LUBRICANTS AND FLUIDS<br />
Anticipated Before Next Oil Change<br />
+16111+60---<br />
0111+32<br />
-181110<br />
-29111-20- --<br />
5W-30<br />
SAE Viscosity Number<br />
Outside Temperature Range<br />
Anticipated Before Next Oil Change<br />
GEAROIL<br />
°C",OF<br />
----- +4011+104"'- ---<br />
T10002<br />
10W-30 is preferable if the ambient temperature is<br />
above -18°C (0° F). 20W-40 and 20W-50 are<br />
usable if the ambient temperature is above 10°C<br />
(50° F) for all seasons.<br />
MA-7<br />
+30111+86 -<br />
+10111 +50<br />
140 .<br />
~<br />
T10003<br />
8OW-90 is preferable if the ambient temperature is<br />
below 40°C (104°F).
"'.<br />
lAJQ'<br />
Power steering oil pump<br />
IAJ Water pump<br />
l:~:o, I lAJA;,,ood;,;oo",<br />
Crank pulley compressor<br />
T : Tension checking points<br />
8MAOO2C<br />
IAJ: Adjusting bolts<br />
~~~<br />
[~O1234 m<br />
~<br />
m<br />
.-<br />
8M AOO3C<br />
ENGINE MAINTENANCE<br />
Checking Drive Belts<br />
1, Inspect for cracks, fraying, wear or oil adhesion, If necessary,<br />
replace with a new one.<br />
2. Inspect drive belt deflections by pushing on the belt midway<br />
between pulleys.<br />
Adjust if belt deflections exceed the limit.<br />
Belt deflection:<br />
Inspect drive belt deflections when engine is cold.<br />
Unit: mm (in)<br />
Changing Engine Coolant<br />
WARNING:<br />
To avoid being scalded, never change the coolant when the<br />
engine is hot.<br />
1. Move heater "TEMP" control lever all the way to "HOT"<br />
position.<br />
2. Open drain cock at the bottom of radiator, and remove<br />
radiator cap.<br />
MA-8<br />
Used belt deflection<br />
Limit<br />
Alternator 11 (0.43)<br />
Air conditioner<br />
compressor<br />
Power steering<br />
oil pump<br />
Applied pushing<br />
force<br />
12 (0.47)<br />
13 (0.51)<br />
Adjusted<br />
deflection<br />
.<br />
Set deflection<br />
of<br />
new belt<br />
7-8 6-7<br />
(0.28 - 0.31) (0.24 - 0.28)<br />
7-8 6.7<br />
(0.28 -0.31) (0.24 - 0.28)<br />
8-9 7-8<br />
(0.31 -0.35) (0.28 -0.31)<br />
98 N (10 kg, 22 Ib)
J<br />
L<br />
MAX.<br />
MIN.<br />
SMA412B<br />
ENGINE MAINTENANCE<br />
Changing Engine Coolant (Cont'd)<br />
3. Remove cylinder block drain plug.<br />
4. Close drain cock and tighten drain plug securely.<br />
. Apply sealant to the thread of drain plug.<br />
to;J:34 - 44 N.m<br />
(3.5 - 4.5 kg-m, 25 - 33 ft-Ib)<br />
5. Open air relief plug. .<br />
6. Fill radiator with water and close air relief plug and radiator<br />
cap.<br />
7. Run engine and warm it up sufficiently.<br />
8. Race engine 2 or 3 times under no-load.<br />
9. Stop engine and wait until it cools down.<br />
10. Repeat step 2 through step 9 until clear water begins to<br />
drain from radiator.<br />
11. Drain water.<br />
12. Open radiator cap and air relief plug.<br />
13. Fill rafdiator with coolant up to specified level.<br />
Follow instructions attached to anti-freeze container for<br />
mixing ratio of anti-freeze to water.<br />
Coolant capacity. (With reservoir tank)<br />
6.7 Q (7-1/8 US qt, 5-7/8 Imp qt)<br />
Pour coolant through coolant filler neck slowly to allow air in<br />
system to escape.<br />
14. Close air relief plug.<br />
15. Remove reservoir tank, drain coolant, then clean reservoir<br />
tank.<br />
16. Install reservoir tank and fill it with coolant up to "MAX"<br />
level and then install radiator cap.<br />
17. Run engine and warm it up sufficiently.<br />
18. Race engine 2 or 3 times under no-load.<br />
19. Stop engine and cool it down, then add coolant as necesary.<br />
Checking Fuel Lines<br />
Inspect fuel lines and tank for improper attachment and for<br />
leaks, cracks, damage, loose connections, chafing and deterioration.<br />
If necessary, repair or replace faulty parts.<br />
MA-9
3 mm 10.12 in)<br />
, ~--,'-' ,<br />
--T-+-+---<br />
J__J.-_J<br />
.<br />
SMA804A<br />
ENGINE MAINTENANCE<br />
Checking Fuel Lines (Cont'd)<br />
CAUTION:<br />
Tightenhigh-pressurerubber hose clamp so that clamp end is<br />
3 mm (0.12 in) from hose end.<br />
Ensure that screw does not contact adjacent parts.<br />
Changing Fuel Filter<br />
WARNING:<br />
Before removing fuel filter, release fuel pressure from fuel line.<br />
1. Remove fuse for fuel pump.<br />
2. Start engine.<br />
3. After engine stalls, crank engine two or three times to make<br />
sure that fuel pressure is released.<br />
4. Turn. ignition switch off and install fuse for fuel pump.<br />
5. Loosen fuel hose clamps.<br />
6. Replace fuel filter.<br />
. Be careful not to spill fuel over engine compartment. Place<br />
a shop towel to absorb fuel.<br />
. Use a high-pressure type fuel filter. Do not use a synthetic<br />
resinous fuel filter.<br />
. Whentighteningfuel hose clamps, refer to "CheckingFuel<br />
Lines".<br />
Changing Air Cleaner Filter<br />
The viscous paper type filter does not need cleaning between<br />
renewals.<br />
MA-10
~<br />
Front<br />
SMAOO9C<br />
SMA042C<br />
~ SMA010<br />
---<br />
ENGINE MAINTENANCE<br />
Changing Engine Oil<br />
WARNING:<br />
Be careful not to burn yourself, as the engine 011Is hot.<br />
1. Warm up engine, and check for oil leakage from engine<br />
components.<br />
2. Remove drain plug and oil filler cap.<br />
3. Drain oil and refill with new engine oil.<br />
Refill oil capacity (Approximate):<br />
Unit: liter (USqt, Imp qt)<br />
With oil filter change 3.5 (3.3/4,3-1/8)<br />
Without oil filter change<br />
3.2 (3-3/8,2-7/8)<br />
CAUTION:<br />
. Be sure to clean drain plug and Install with new washer.<br />
Drain plug:<br />
tOJ:29 - 39 N.m .<br />
(3.0 - 4.0 kg-m, 22 - 29 ft-Ib)<br />
. Use recommended engine 011.<br />
4. Check oil level.<br />
5. Start engine and check area around drain plug and oil filter<br />
for oil leakage.<br />
6. Run engine for a few minutes, then turn it off. After several<br />
minutes, check oil level.<br />
Changing Oil Filter<br />
1. Remove oil filter with a suitable tool.<br />
WARNING:<br />
Be careful not to burn yourself, as the engine and the engine<br />
oil are hot.<br />
2. Before installing new oil filter, clean the oil filter mounting<br />
surface on cylinder block, and coat the rubber seal of oil<br />
filter with a little engine oil.<br />
MA-11
2/3 of a turn<br />
O.K.<br />
R 16mmV1<br />
'o.um~<br />
~<br />
N.G.<br />
SMA229B<br />
SMA017<br />
SEM294A<br />
Side electrode<br />
iii<br />
SMA476<br />
SMA015A<br />
ENGINE MAINTENANCE<br />
Changing Oil Filter (Cont'd)<br />
3. Screw in the oil filter until a slight resistance is felt, then<br />
tighten additionally more than 2/3 turn.<br />
4. Add engine oil.<br />
Refer to Changing Engine Oil.<br />
Changing Spark Plugs<br />
1. Disconnect ignition wires from spark plugs at boot.<br />
Do not pull on the wire.<br />
2. Remove spark plugs with spark plug wrench.<br />
Spark plug:<br />
Standard type<br />
ZFR5D-11<br />
Hot type<br />
ZFR4D-11<br />
Cold type<br />
ZFR6D-11<br />
3. Check plug gap of each new spark plug.<br />
Gap: 1.0 - 1.1 mm (0.039 - 0~043 in)<br />
4. Install spark plugs. Reconnect ignition wires<br />
nos. indicated on them.<br />
Spark plug:<br />
~:20 -29 N.m<br />
(2.0 - 3.0 kg-m, 14 - 22 ft-Ib)<br />
Checking Ignition Wires<br />
according to<br />
1. Inspect wires for cracks, damage, burned terminals and for<br />
improper fit.<br />
2. Measure the resistance of wires and check for intermittent<br />
breaks by shaking them.<br />
Resistance: Less than 30 kil<br />
.If it exceeds the limit, replace the ignition wire with a new<br />
one.<br />
MA-12
"<br />
"<br />
ENGINE MAINTENANCE<br />
Checking Vapor Lines<br />
1. Visually inspect vapor lines for. improper attachment and for<br />
cracks, damage, loose connections, chafing and deteriora- .<br />
tion.<br />
2. Inspect vacuum relief valve of fuel tank filler cap for clogging,<br />
sticking, etc.<br />
Refer to EVAPORATIVE EMISSION CONTROL SYSTEM<br />
INSPECTION in EF & EC section.<br />
MA-13
,<br />
K<br />
Max.<br />
Min.<br />
CHASSIS AND BODY MAINTENANCE<br />
SMA211A<br />
SMA941B<br />
SMA429A<br />
SMA103<br />
~~~<br />
~.;. ~"~.,. SMA255A<br />
Checking Exhaust System<br />
. Check exhaust pipes, muffler and mounting for improper<br />
attachment and for leaks, cracks, damage, loose connections,<br />
chafing and deterioration.<br />
Checking Clutch Fluid Level and Leaks<br />
. If fluid level is extremely low, check clutch system for leaks.<br />
Checking M/T Oil<br />
1. Check for oil leakage.<br />
2. If leakage is found, check oil level.<br />
Never start engine while checking oil level.<br />
Filler plug:<br />
~: 25 - 34 N.m (2.5 - 3.5 kg-m, 18 - 25 ft-Ib)<br />
Changing M/T Oil<br />
1. Drain oil and refill with new gear oil.<br />
2. Check oil level.<br />
Oil capacity:<br />
2.4 Q (5-1/8 US pt, 4-1/4 Imp pt)<br />
Drain plug:<br />
~: 25 - 34 N.m (2.5 - 3.5 kg-m, 18 - 25 ft-Ib)<br />
MA-14
.<br />
. Front side<br />
Hot: 50 - aooc O.K.<br />
(122 - 176°F)<br />
Add"<br />
~<br />
CHASSIS AND BODY MAINTENANCE<br />
.<br />
SMA430A<br />
Check fluid for contamination. SMA853B<br />
~ SMA921B<br />
Checking AIT Fluid<br />
1. Check for fluid leakage.<br />
2. If leakage is found, check fluid level.<br />
Fluid level should be checked using "HOT" range on<br />
dipstick at fluid temperatures of 50 to 80°C (122 to 176°F)<br />
after vehicle has been driven approximately 5 minutes in<br />
urban areas after engine is warmed up. But it can be<br />
checked at fluid temperatures of 30 to 50°C (86 to 122°F)<br />
using "COLD" range on dipstick for reference after engine<br />
is warmed up and before driving. However, fluid level must<br />
be rechecked using "HOT" range.<br />
1) Park vehicle on level surface and set parking brake.<br />
2) Start engine and then move selector lever through each<br />
gear range, ending in "P".<br />
3) Check fluid level with engine idling.<br />
4) Remove dipstick and wipe it clean with lint-free paper.<br />
5) Reinsert dipstick into charging pipe as far as it will go.<br />
6) Remove dipstick and note reading. If level is at low side of<br />
either range, add fluid to the charging pipe.<br />
Do not overfill.<br />
3. Check fluid condition.<br />
Check fluid for contamination. If fluid is very dark or smells<br />
burned, or contains frictional material (clutches, band, etc.),<br />
check operation of AlT.<br />
Refer to section AT for checking operation of AlT.<br />
Changing AIT Fluid<br />
1. Drain fluid by removing oil pan.<br />
2. Replace gasket with new one.<br />
3. Refill with fluid and then check fluid level.<br />
Oil capacity (With torque converter):<br />
8.3 Q (8-3/4 US qt, 7-1/4 Imp qt)<br />
MA-15
CHASSIS AND BODY MAINTENANCE<br />
SMA012C<br />
SMA257 A<br />
~~0,,;" PI~ SMA363A<br />
= MAX<br />
= MIN<br />
SMA732A<br />
Checking Differential Gear Oil<br />
1. Check differential carrier for oil leakage.<br />
2. If leakage is found, check oil level.<br />
Filler plug:<br />
~: 59 -98 N.m (6 - 10 kg-m, 43 - 72 ft-Ib)<br />
Changing Differential Gear Oil<br />
1. Drain oil and refill with new gear oil.<br />
2. Check oil level.<br />
Oil capacity:<br />
1.3 Q (2-3/4 US pt, 2-1/4 Imp pt)<br />
Drain plug:<br />
~: 59 -98 N.m (6 - 10 kg-m, 43 - 72 ft-Ib)<br />
Checking Brake Fluid Level and Leaks<br />
. If fluid level is extremely low, check brake system for leaks.<br />
Checking Brake Lines and Cables<br />
. Check brake fluid lines and parking brake cables for improper<br />
attachment and for leaks, chafing, abrasions, deterioration,<br />
etc.<br />
MA-16
CHASSIS AND BaDY MAINTENANCE<br />
SMA260A<br />
SMA922A<br />
SMA847B<br />
Checking Disc Brake<br />
. Check condition of disc brake components.<br />
ROTOR<br />
. Check condition and thickness.<br />
Disc brake type<br />
Standard thickness<br />
Front<br />
CL22VB<br />
20.0 (0.787)<br />
Minimum thickness 18.0 (0.709)<br />
CALIPER<br />
. Checkoperationand for leakage.<br />
PAD<br />
. Check for wear or damage.<br />
Disc brake type<br />
Standard thickness<br />
Front<br />
CL22VB<br />
10.0 (0.394)<br />
Minimum thickness 2.0 (0.079)<br />
Balancing Wheels<br />
. Adjust wheel balance using road wheel center.<br />
Wheel balance (Maximum allowable unbalance<br />
at rim flange):<br />
Refer to S.D.S.<br />
Tire balancing weight: Refer to S.D.S.<br />
MA-17<br />
Unit: mm (in)<br />
Rear<br />
CL9H<br />
9.0 (0.354)<br />
8.0 (0.315)<br />
Unit: mm (in)<br />
Rear<br />
CL9H<br />
9.5 (0.374)
FRONT<br />
! A!<br />
0 0 SMA650B<br />
Q : Check grease leakage<br />
.: Check tightening torque SMA851 B<br />
CHASSIS AND BODY MAINTENANCE<br />
SMA940B<br />
SST107B<br />
Tire Rotation<br />
. Do not include the T-type spare tire when rotating the tires.<br />
Wheel nuts:<br />
~: 98 - 118 N.m<br />
(10.0 - 12.0 kg-m, 72 - 87 ft-Ib)<br />
Checking Steering Gear and Linkage<br />
STEERING GEAR<br />
. Check gear housing and boots for looseness, damage or<br />
grease leakage.<br />
. Check connection with steering column for looseness.<br />
STEERING LINKAGE<br />
. Check ball joint, dust cover and other component parts for<br />
looseness, wear, damage or grease leakage.<br />
Checking Power Steering Fluid and Lines<br />
. Check fluid level, when the fluid is cold.<br />
. Check lines for improper attachment, leaks, cracks, damage,<br />
loose connections, chafing and deterioration.<br />
MA-18
CHASSIS AND BODY MAINTENANCE<br />
LUBRICATING LOCKS, HINGES AND HOOD LATCHES<br />
=~~<br />
lEI<br />
m.<br />
m<br />
Fastback<br />
CHECKING SEAT BELTS, BUCKLES, RETRACTORS, ANCHORS AND ADJUSTERS<br />
CAUTION:<br />
1. AUseat bait a..mblies, including retractors and<br />
attaching hardwares such as guida rail set, etc"<br />
should ba inspacted after any collision. Ni...n<br />
recommends that aUseet bait ...amblies in use<br />
during a collision ba replaced unless the collision<br />
was minor and the baits show no damage<br />
and continue to operete properly. Seat bait<br />
assemblies not in use during a collision should<br />
allO ba inspacted and replaced if eithar damage<br />
or improper operation is noted.<br />
2. If tha condition of any component of a seat<br />
bait is questionable, do not have seat bait<br />
repaired, but raplaced as a bait 8118mbly.<br />
3. If wabbing is cut, frayed, or damaged, replace<br />
bait assembly.<br />
4. Do not spill drinks, oil, etc. on inner lap bait<br />
buckle. Never oil tongue and buckle.<br />
5. Use a NISSAN genuine ..at bait assembly.<br />
~ Anchor bolt<br />
24-31 N.m<br />
(2.4 - 3.2 kg-m, 17 - 23 ft-Ib)<br />
For automatic seat bait, refer to BF section.<br />
Check function of<br />
buckles and tongues<br />
when buckled and<br />
released.<br />
Front seat belt<br />
MA-19<br />
-------<br />
Rear seat belt<br />
SMA999B<br />
SMAOO1C
INSPECTION AND ADJUSTMENT<br />
Drive belt deflection<br />
Alternator<br />
Air conditioner<br />
compressor<br />
Power steering<br />
oil pump<br />
Applied pushing force<br />
Oil capacity (Refill)<br />
With oil filter<br />
Without oil filter<br />
Coolant capacity<br />
With reservoir tank<br />
SERVICE DATA AND SPECIFICATIONS (S.D.S.)<br />
Used belt deflection<br />
Limit<br />
11 (0.43)<br />
12 (0.47)<br />
Adjusted<br />
deflection<br />
Engine Maintenance<br />
Unit: mm (in)<br />
Set deflection<br />
of<br />
new belt<br />
7-8 6-7<br />
(0.28 - 0.311 I (0.24 - 0.28)<br />
7-8 6-7<br />
(0.28 - 0.311 I (0.24 - 0.28)<br />
8-9 7-8<br />
13(0.511 1(0.31-0.35) I (0.28- 0.31)<br />
98 N (10 kg, 22 Ib)<br />
Unit: 2 (US qt, Imp qt)<br />
3.5 (3-3/4,3-1/8)<br />
3.2 (3-3/8,2-7/8)<br />
Unit: 2 (US qt, Imp qt)<br />
6.7 (7-118,5-7/8)<br />
MA-20<br />
Spark plug<br />
Standard type ZFR5D-11<br />
Hot type ZFR4D-11<br />
Cold type ZFR6D.11<br />
Plug gap 1.0 - 1.1 mm (0.039 . 0.043 in)<br />
Ignition wire<br />
Resistance kS1 Less than 30<br />
TIGHTENING TORQUE<br />
Unit N'm kg-m ft-Ib<br />
Spark plug 20- 29 2.0- 3.0 14- 22<br />
Drainplug<br />
Engine block 34 -44 3.5-4.5 25 - 33<br />
Oil pan 29-39 3.0-4.0 22.29
INSPECTION AND ADJUSTMENT<br />
Clutch<br />
Pedal free height "H"<br />
Pedal free play" A"<br />
SERVICE DATA AND SPECIFICATIONS (S.D.S.)<br />
186 - 196 (7.32.7.72)<br />
Chassis and Body Maintenance<br />
Unit: mm (in)<br />
1.0 - 3.0 (0.039 .0.118)<br />
Front axle and front suspension(Unladen)*<br />
Camber degree<br />
Caster degree<br />
Toe-in mm (in)<br />
(Total toe-in) degree<br />
Kingpin inclination degree<br />
Front wheel turning angle<br />
Full turn d<br />
Inside/outside egree<br />
-1°30' to 0°<br />
6°00' . ~30'<br />
0 - 2 (0 - 0.08)<br />
0' - 12'<br />
12°30'- 14°00'<br />
39° -43° /33°<br />
*: Tankful of fuel, radiator coolant and engine oil full. Spare tire,<br />
jack, hand tools, mats in designated position.<br />
Rear axle and rear suspension (Unladen)*<br />
Camber degree -1°36' to -0°36'<br />
Toe-out mm (in) 0 - 5 (0 . 0.20)<br />
(Total toe.out) degree I 0' - 28'<br />
*: Tankful of fuel, radiator coolant and engine oil full. Spare tire,<br />
jack, hand tools, mats in designated position.<br />
Wheel bearing<br />
Front Rear<br />
Wheel bearing axle end 0.03 (0.0012) 0.05 (0.0020)<br />
play mm (in) or less or less<br />
Wheel bearing lock nut<br />
Tightening torque<br />
N.m (kg-m, ft-Ib)<br />
147 -216 235 -314<br />
(15 -22, (24-32,<br />
108- 159) 174- 231)<br />
MA-21<br />
Brake<br />
Disc brake<br />
Pad<br />
Standard thickness<br />
CL22VB 10.0 (0.394)<br />
Wheel balance<br />
Wheel balance<br />
(Maximum allowable unbalance<br />
at rim flange) g (OZ)<br />
Tire balance weight<br />
CL9H 9.5 (0.374)<br />
Minimum thickness<br />
CL22VB 2.0 (0.079)<br />
CL9H 2.0 (0.079)<br />
Rotor<br />
Standard th ickness<br />
CL22VB 20.0 (0.787)<br />
CL9H 9.0 (0.354)<br />
Minimum thickness<br />
CL22VB 18.0 (0.709)<br />
CL9H 8.0 (0.315)<br />
g (OZ)<br />
10 (0.35)<br />
5.60 (0.18 -2.12)<br />
Spacing 5 (0.18)<br />
Unit: mm (in)<br />
Pedal<br />
Free height<br />
M/T 177 - 187 (6.97 - 7.36)<br />
A/T 186 - 196 (7.32 - 7.72)<br />
Free play 1 - 3 (0.04 - 0.12)<br />
Depressed hElight<br />
[under force of 490 N<br />
(50 kg, 110 Ib) with<br />
engine running]<br />
100 (3.94) or more<br />
Parking brake<br />
Number of notches<br />
[at pulling force 196 N 6-8<br />
(20 kg, 44 Ib)]
TIGHTENING TORQUE<br />
SERVICE DATA AND SPECIFICATI'ONS(S.D.S.)<br />
Unit N'm kg-m ft-Ib<br />
Clutch<br />
Pedalstopper lock nut 16 -22 1.6 - 2.2 12 - 16<br />
Clutch switch lock nut 12 -15 1.2 - 1.5 9 - 11<br />
<strong>Manual</strong> transmission<br />
Drainand filler plugs<br />
Final drive<br />
25 -34 2.5 - 3.5 18 - 25<br />
Drainplug 59 -98 6 - 10 43-72<br />
Filler plug<br />
Front axle and front<br />
suspension<br />
59 -98<br />
.<br />
6 - 10 43-72<br />
Tie-rod lock nut 37 - 46 3.8 - 4.7 27 - 34<br />
Camber adjusting pin<br />
Rear axle and rear<br />
suspension<br />
124 - 143 12.6 - 14.6 91 - 106<br />
Toe adjusting pin 69 -88 7.0-9.0 51 - 65<br />
Camber adjusting pin 69 -88 7.0-9.0 51 -65<br />
Brake system<br />
Air bleed valve 7-9 0.7 - 0.9 5.1 -6.5<br />
Brake lamp switch lock<br />
nut<br />
12 - 15 1.2 - 1.5 9 - 11<br />
Brake booster input<br />
rod lock nut<br />
Wheel and tire<br />
16 -22 1.6 - 2.2 12 - 16<br />
Wheel nut 98 - 118 10.0 - 12.0 72 -87<br />
Chassis and Body Maintenance (Cont'd)<br />
MA-22
CONTENTS<br />
ENGINEMECHANICAL<br />
SECTIONEM EM<br />
PRECAUTION EM- 2<br />
PREPARATION EM- 3<br />
OUTER COMPONENT PARTS EM- 6<br />
COMPRESSION PRESSURE EM- 7<br />
OIL PAN EM- 8<br />
TIMING CHAIN EM-10<br />
OIL SEAL REPLACEMENT EM-16<br />
CYLINDER HEAD EM-18<br />
ENGINE REMOVAL EM-32<br />
CYLINDER BLOCK EM-34<br />
SERVICE DATA AND SPECIFICATIONS (S.D.S.) """''''''''''''''''''''''''''''''''''''''''''''''''''''''''''''''''<br />
EM-46
. Side ~~'<br />
Groove Bolt hole<br />
.<br />
I~r<br />
SEM371C<br />
PRECAUTION<br />
LIQUID GASKET APPLICATION PROCEDURE<br />
a. Before applying liquid gasket, remove all traces of old liquid<br />
gasket from mating surface using a scraper.<br />
b. Apply a continuous bead of liquid gasket to mating surface.<br />
c.<br />
(Use Genuine Liquid Gasket or equivalent.)<br />
Be sure liquid gasket is 3.5 to 4.5 mm (0.138 to 0.177 in)<br />
wide (for oil pan).<br />
Be sure liquid gasket is 2.0 to 3.0 mm (0.079 to 0.118 in)<br />
wide (in areas except oil pan).<br />
d. Apply liquid gasket to inner sealing surface around hole<br />
e.<br />
perimeter area.<br />
(Assembly should be done within 5 minutes after coating.)<br />
Wait at least 30 minutes before refilling engine oil and engine<br />
coolant.<br />
EM-2
Tool number<br />
(Kent.Moore No.)<br />
Tool name<br />
ST0501S000<br />
( - )<br />
Engine stand<br />
assembly<br />
CDST05011 000<br />
( - )<br />
Engine stand<br />
@ ST05012000<br />
( - )<br />
Base<br />
KV10105001<br />
( - )<br />
Engine attachment<br />
KV101092SO<br />
( - )<br />
Valve spring<br />
compressor<br />
CD KV10109210<br />
( - )<br />
Compressor<br />
@KV10109220<br />
( - )<br />
Adapter<br />
KV109B0010<br />
( - )<br />
Valve oil seal drift<br />
KV10110300<br />
( - )<br />
Piston pin press stand<br />
assembly<br />
CD KV10110310<br />
(<br />
Cap<br />
- )<br />
@ KV10110330<br />
( - )<br />
Spacer<br />
@ ST13030020<br />
( - )<br />
Press stand<br />
@ ST13030030<br />
( - )<br />
@<br />
Spring<br />
KV10110340<br />
(<br />
Drift<br />
- )<br />
@ KV10110320<br />
( - )<br />
Center shaft<br />
Description<br />
PREPARATION<br />
SPECIAL SERVICE TOOLS<br />
~<br />
~<br />
~CI<<br />
3<br />
?~~<br />
EM-3<br />
~<br />
Disassembling and assembling<br />
Disassembling and assembling<br />
valve components<br />
Installing valve oil seal<br />
Disassembling and assembling<br />
piston with connecting rod
Tool number<br />
(Kent-Moore No.) Description<br />
Tool name<br />
EM03470000<br />
~<br />
(J8037)<br />
Piston ring compressor<br />
(J36467)<br />
Valveoil<br />
seal remover<br />
KV10111100<br />
( - )<br />
Seal cutter<br />
WS39930000<br />
( - )<br />
Tube presser<br />
ST1661 0001<br />
(J23907)<br />
Pilot bushing puller<br />
PREPARATION<br />
~ ~<br />
T ~<br />
EM-4<br />
Installing piston assembly<br />
into cylinder bore<br />
Displacement valve oil seal<br />
Removing oil pan<br />
Pressing the tube of liquid<br />
gasket
Tool name<br />
Spark plug wrench<br />
Pulley holder<br />
Valve seat cutter set<br />
Piston ring expander<br />
Valve guide drift<br />
Valve guide reamer<br />
Description<br />
Q16mm<br />
(0.63 in)<br />
r --<br />
PREPARATION<br />
COMMERCIAL SERVICE TOOLS<br />
c:Y<br />
~.-<br />
~<br />
\ - ~<br />
~~.-<br />
~<br />
A¥:~<br />
~- @<br />
D.<br />
EM;.5<br />
Removingand installing<br />
spark plug<br />
Holding camshaft pulley while<br />
tightening or loosening camshaft<br />
bolt<br />
Finishing valve seat dimensions<br />
Removing and installing piston ring<br />
Removing and installing valve guide<br />
Diameter:<br />
---- Intake<br />
mm (in)<br />
Exhaust<br />
A 10.5 (0.413) 11.5 (0.453)<br />
B 6.6 (0.260) 7.6 (0.299)<br />
Reaming valve guide (CD) or<br />
hole for oversize valve guide (@)<br />
Diameter: mm (in)<br />
Intake Exhaust<br />
01 7 (0.28) 8 (0.31)<br />
Os 11.2 (0.441) 12.2'(0.480)
,r"<br />
KA24E ENGINE<br />
Adjusting bar<br />
~ 16 -21 (1.6.2.1_,12 -15)<br />
OUTER COMPONENT PARTS<br />
21 12-15)<br />
~ 16 -21 (1.6 - . ,<br />
B.P.T. valve .<br />
I A A umt<br />
L- I.-L rA'..<br />
I-I~~ ~ (0.5-0.6,<br />
3.6-4.3)<br />
~~ 10-12 (1.0-1.2,7 - 9)<br />
~ 142 -152(14.5- 15.5,105- 112)<br />
EM-6<br />
~ : N.m (kg-m, ft-Ib)<br />
rJ : Apply liquid gasket.<br />
SEM336C
Q)<br />
SEM 113B<br />
COMPRESSION PRESSURE<br />
Measurement of Compression Pressure<br />
1. Warm up engine.<br />
2. Turn ignition switch off.<br />
3. Disconnect fusible link for injectors.<br />
4. Remove all spark plugs.<br />
5. Disconnect distributor center cable.<br />
6. Attach a compression tester to NO.1 cylinder.<br />
7. Depress accelerator pedal fully to keep throttle valve wide<br />
open.<br />
8. Crank engine and record highest gauge indication.<br />
9. Repeat the measurement on each cylinder as shown above.<br />
. Always use a fully-charged battery to obtain specified<br />
engine revolution.<br />
Compression pressure:<br />
kPa (kg/cm2,. psi)/rpm<br />
Standard<br />
1,324 (13.5, 192)/300<br />
Minimum<br />
981 (10, 142)/300<br />
Difference limit between cylinders<br />
98 (1.0, 14)/300<br />
10. If cylinder compression in one or more cylinders is loyi. pour<br />
a small amount of engine oil into cylinders through spark<br />
plug holes and retest compression. .<br />
. If. adding oil helps compression, piston rings may be worn<br />
or damaged. If' so, replace piston rings after checking<br />
piston.<br />
. If pressure stays low, a valve may be sticking or seating<br />
improperly. Inspect and repair valve and valve seat. (Refer<br />
to S.D.S.) If valve or valve seat Is damaged excessively,<br />
replace them.<br />
. If compression in any two adjacent cylinders is low and if<br />
adding oil does not help compression, there is I,akage<br />
past the gasket surface. If so, replace cylinder head<br />
gasket.<br />
EM-7
Front<br />
0<br />
@<br />
@<br />
0<br />
...Q...<br />
@<br />
(jJ)<br />
0<br />
2-<br />
@<br />
Loosen bolts in reverse order. SEM337C<br />
SEM884A<br />
OIL PAN<br />
Removal<br />
1. Raise vehicle and support it with safety stands.<br />
2. Drain engine oil.<br />
3. Remove front stabilizer bar securing bolts and<br />
side member.<br />
4. Lift engine.<br />
5. Remove oil pan bolts.<br />
nuts from<br />
6.<br />
.<br />
Remove oil pan.<br />
(1) Insert Tool between cylinder block and oil pan.<br />
.<br />
Do not drive seal cutter into oil pump or rear oil seal<br />
retainer portion, or aluminum mating face will be damaged.<br />
Do not insert screwdriver, or oil pan flange will be<br />
deformed.<br />
(2) Slide Tool by tapping its side with a hammer, and remove oil<br />
pan.<br />
7. Pull out oil pan from front side.<br />
EM-8
Cut here.<br />
~ Liquid<br />
Scraper<br />
Groove<br />
gasket<br />
SEM338C<br />
SEM339C<br />
:J<br />
SLC906<br />
7 mm 10.28 in)<br />
--Lt-.<br />
Inner<br />
side<br />
Bolt hole SEM909B<br />
OIL PAN<br />
Installation<br />
1. Before installing oil pan, remove all traces of liquid gasket<br />
from mating surface using a scraper. .<br />
. Also remove traces of liquid gasket from mating surface of<br />
cylinder block.<br />
2. Apply a continuous bead of liquid gasket to mating surface<br />
of oil pan.<br />
. Use Genuine Liquid Gasket or equivalent.<br />
. Be sure liquid gasket is 3.5 to 4.5 mm (0.138 to 0.177 in)<br />
wide.<br />
3. Apply liquid gasket to inner sealing surface as shown in<br />
figure.<br />
. Attaching should be done within 5 minutes after coating.<br />
4. Install oil pan.<br />
. Wait at least 30 minutes before refilling engine oil.<br />
EM-9
TIMING CHAIN<br />
Camshaft sprocket<br />
~ 118. '<br />
, 65787 - 1161<br />
~ ~<br />
(1:~ain'tenSioner<br />
~<br />
~ 7-8<br />
08 5.'-5.81 ~ I<br />
L---<br />
(0.7. . , ~<br />
.<br />
Front cover<br />
~ : N.m (kg-m, ft-Ibl<br />
rJ : ApplV liquid gasket.<br />
\ EM-10<br />
rJ<br />
Qj<br />
. Crankshaft<br />
sprocket<br />
r<br />
.~<br />
.,13-1.<br />
(1.3 -1.9,<br />
9 -141 .<br />
L.<br />
SEM578C<br />
. CAUTION:<br />
After removing timing chain, do not turn crankshaft and<br />
camshaft separately, or valves will strike piston heads.
Q Front<br />
SEM199C<br />
SEM200C<br />
SEM201C<br />
TIMING CHAIN<br />
Removal<br />
1. Disconnect battery terminal.<br />
2. Drain coolant from radiator.<br />
3. Remove radiator shroud and cooling fan.<br />
4. Remove the following belts.<br />
. Power steering drive belt<br />
. Compressor drive belt<br />
. Alternator drive belt<br />
5. Remove all spark plugs.<br />
6. Set NO.1 piston,at T.D.C. on its compression stroke.<br />
7. Remove the following parts.<br />
. Power steering pump, idler pulley and power steering pump<br />
brackets<br />
. Compressor idler pulley<br />
. Crankshaft pulley<br />
. Oil pump with pump drive spindle<br />
. Rocker cover .<br />
EM-"
Crank~h3ft<br />
sprocket<br />
SEM203C<br />
Jf)<br />
~ '<br />
,~<br />
SEM202C<br />
SEM204C<br />
TIMING CHAIN<br />
Removal (Cont'd)<br />
8. Remove oil pan. (Refer to OIL PAN.)<br />
9. Remove front cover.<br />
10. Remove the following parts.<br />
. Chain tensioner<br />
. Chain guides<br />
. Timing chain and sprocket<br />
. Oil thrower, oil pump drive gear and crankshaft sprocket<br />
Inspection<br />
Check for cracks and excessivewear at roller links. Replace<br />
if necessary.<br />
EM-12
crankShaft<br />
Crankshaft ~prOCket<br />
~ ~"4~<br />
.<br />
O;I:;:~~~'\<br />
Front. n ~<br />
~~~<br />
'/0 ~<br />
(O@<br />
\000<br />
~.<br />
'~ " ~<br />
0 SEM205C<br />
\\ II ~ Can ,",ocke<<br />
)) "<br />
ii ~r C"ok.p-"<br />
"<br />
e: Punchmark<br />
SEM206C<br />
TIMING CHAIN<br />
Installation<br />
1. Install crankshaft sprocket, oil pump drive gear and oil<br />
thrower.<br />
. Make sure that mating marks of crankshaft sprocket face<br />
engine front. .<br />
2. Install camshaft sprocket.<br />
3. Confirm that NO.1 piston is set at T.D.C. on its compression<br />
stroke.<br />
4. Install timing chain.<br />
. Set timing chain by al.igning its mating marks with those of<br />
crankshaft sprocket and camshaft sprocket.<br />
5. Tighten camshaft sprocket bolt.<br />
6. Install chain guide and chain tensioner.<br />
EM-13
SEM453C<br />
~<br />
2.0 -3.0 mm<br />
(0.079 . 0.118inl die.<br />
~ Punchmark<br />
SEM212C<br />
TIMING CHAIN<br />
Installation (Cont'd)<br />
7. Apply liquid'gasket to front cover.<br />
8. Apply lithium grease to sealing lip of crankshaft oil seal.<br />
9. Install front cover.<br />
. Be careful not to damage cylinder head gasket.<br />
. Do not forget 011seal.<br />
10. Install rubber plug. (Refer to "Installation" of CYLINDER<br />
HEAD.)<br />
11. Install oil pan. (Refer to Oil PAN.)<br />
12. Install oil pump and distributor driving spindle with new<br />
gasket in front cover.<br />
(1) Assemble oil pump and driving spindle, aligning punchmark<br />
on driving spindle with oil hole.<br />
EM-14
Front Q<br />
SEM136C<br />
Q<br />
Front<br />
SEM199C<br />
TIMING CHAIN<br />
Installation (Cont'd)<br />
(2) Make sure that driving spindle is set as shown in figure.<br />
13. Install distributor.<br />
14. Make sure that NO.1 piston is set at T.D.C. and that<br />
distributor rotor is set at NO.1 cylinder spark position.<br />
EM-15
KV10980010<br />
( - )<br />
Valve<br />
spring seat<br />
(J36467)<br />
15.6. 16.2<br />
(0.614.0.638)<br />
Unit: mm (in) SEM246C<br />
Engine.<br />
inside<br />
Oil seal lip<br />
Engine<br />
outside<br />
Dust seal lip<br />
SEM715A<br />
OIL SEAL REPLACEMENT<br />
-<br />
VALVE OIL SEAL<br />
1. Remove rocker cover.<br />
2. Remove rocker shaft assembly.<br />
3. Remove valve spring and valve oil seal with Tool or suitable<br />
tool.<br />
Piston concerned should be set at T.D.C. to prevent valve<br />
from falling.<br />
4. Apply engine oil to new valve oil seal and install it with Tool.<br />
Before installing valve oil seal, install valve spring seat.<br />
OIL SEAL INSTALLING DIRECTION<br />
FRONT OIL SEAL<br />
1. Remove radiator shroud and crankshaft pulley.<br />
2. Remove front oil seal.<br />
Be careful not to damage crankshaft.<br />
EM-16
SEM115B<br />
Diameter of<br />
Iiqu id gasket:<br />
2.0 - 3.0 mm<br />
~ (0.079 -<br />
0.118 in)<br />
9i- SEAL REPLACEMENT<br />
3. Apply engine oil to new oil seal and install it using suitable<br />
tool.<br />
REAR OIL SEAL<br />
1.<br />
2.<br />
Remove flywheel or drive plate.<br />
Remove rear oil seal retainer.<br />
3. Remove traces of liquid gasket using scraper.<br />
4. Remove rear oil seal from retainer.<br />
5. Apply engine oil to new oil seal and install it using suitable<br />
tool.<br />
l<br />
.J'I;<br />
it<br />
6. Apply liquid gasket to rear oil seal retainer.<br />
EM-17
Spring<br />
Intake<br />
----<br />
Valve and spring<br />
CYLINDER HEAD<br />
Valve rocker cover-<br />
Rocker cover gasket<br />
~ 37 - 41<br />
(3.8 - 4.2, 27 - 30)<br />
E'M":~<br />
retainer ~ @ ,<br />
Valve ~~<br />
, '~w,<br />
Oilseal~ \;~ ~ .<br />
@ ~<br />
\<br />
springseatA<br />
,\J @
O.K.<br />
N.G.<br />
Ii<br />
SEM878B<br />
SEM868B<br />
CYLINDER HEAD<br />
CAUTION:<br />
. When installing sliding parts such as rocker arms, camshaft<br />
and oil seal, be sure to apply new engine oil on their<br />
sliding surfaces.<br />
. When tightening cylinder head bolts and rocker shaft bolts,<br />
apply new engine oil to thread portions and seat surfaces<br />
of bolts.<br />
. Hydraulic valve lifters are installed in each rocker arm. If<br />
hydraulic valve lifter is kept on its side, even when<br />
installed in rocker arm, there is a possibility of air entering<br />
it. After removal, always set rocker arm straight up, or<br />
when laying it on its side, have it soak in new engine oil.<br />
. Do not disassemble hydraulic valve lifter.<br />
. Attach tags to valve lifters so as not to mix them up.<br />
Removal<br />
1. Drain coolant from radiator and drain plug of block.<br />
2. Remove the following parts.<br />
. Power steering drive belt<br />
. Power steering pump, idler pulley and power steering<br />
brackets<br />
. Vacuum hoses of S.C.v. and pressure control solenoid valve<br />
. Accelerator wire bracket<br />
3. Disconnect E.G.R. tube from exhaust manifold.<br />
4. Remove bolts which hold intake manifold collector to intake<br />
manifold.<br />
5. Remove bolts which hold intake manifold to cylinder head<br />
6.<br />
while raising collector upwards.<br />
Remove rocker cover.<br />
When removing rocker cover, do not hit rocker cover against<br />
rocker arm.<br />
EM-19
~<br />
-5/0° 5° 10° 15° 20°<br />
Red painted /<br />
~ Front<br />
SEM199C<br />
SEM218C<br />
CYLINDER HEAD<br />
Removal (Cont'd)<br />
7. Set NO.1 piston at T.D.C. on its compression stroke.<br />
8. Loosen camshaft sprocket bolt.<br />
. Support timing chain by using Tool as shown in figure.<br />
9. Remove camshaft sprocket.<br />
EM-20
(Q<br />
@<br />
~<br />
(])<br />
~<br />
@<br />
~<br />
@<br />
KV10109210<br />
( - )<br />
SEM2106<br />
~<br />
~~~<br />
SEM549A<br />
"<br />
CYLINDER HEAD<br />
Inspection<br />
CYLINDER HEAD DISTORTION<br />
Head surface flatness:<br />
Less than 0.1 mm (0.004 in)<br />
If beyond the specified limit, replace it or resurface it.<br />
Resurfacing limit:<br />
The resurfacing limit of cylinder head is determined by the<br />
cylinder block resurfacing in an engine.<br />
Amount of cylinder head resurfacing is "A"<br />
Amount of cylinder block resurfacing is "B"<br />
The maximum limit is as follows:<br />
A + B = 0.2 mm (0.008 in)<br />
After resurfacing cylinder head, check that camshaft rotates<br />
freely by hand. If resistance is felt, cylinder head must be<br />
replaced.<br />
Nominal cylinder head height:<br />
98.8 - 99.0mm (3.890 - 3.898 in)<br />
CAMSHAFTVISUAL CHECK<br />
Check camshaft for scratches, seizure and wear.<br />
CAMSHAFT RUNOUT<br />
1. Measure camshaft runout at the center journal.<br />
Runout (Total indicator reading):<br />
0 - 0.02mm (0 - 0.0008 in)<br />
2. If it exceeds the limit, replace camshaft.<br />
CAMSHAFT CAM HEIGHT<br />
1. Measure camshaft cam height.<br />
Standard cam height:<br />
44.839 - 45.029 mm (1.7653- 1.7728 in)<br />
Cam wear limit:<br />
0.2 mm (0.008'in)<br />
2. If wear is beyond the limit, replace camshaft.<br />
CAMSHAFT JOURNAL CLEARANCE<br />
1, Install camshaft bracket and rocker shaft and tighten bolts<br />
to the specified torque.<br />
2. Measure inner diameter of camshaft bearing.<br />
Standard inner diameter:<br />
33.000 - 33.025 mm (1.2992 - 1.3002 in)<br />
EM-22
SEM228C<br />
SEM232C<br />
SEM449C<br />
CYLINDER HEAD<br />
Inspection (Cont'd)<br />
3. Measure outer diameter of camshaft journal.<br />
Standard outer diameter:<br />
32.935 - 32.955 mm (1.2967 - , .2978 in)<br />
4. If clearance exceeds the limit, replace camshaft<br />
cylinder head. -<br />
Camshaft journal clearance:<br />
Standard<br />
0.045 - 0.090 mm (0.0018 - 0.0035 in)<br />
Limit<br />
0.12 mm (0.0047 in)<br />
CAMSHAFT END PLAY<br />
1. Install camshaft in cylinder head.<br />
2. Measure camshaft end play.<br />
Camshaft end play:<br />
Standard<br />
0.07 - 0.15 mm (0.0028 - 0.0059 in)<br />
Limit<br />
0.2 mm (0.008 in)<br />
CAMSHAFT SPROCKET RUNOUT<br />
1. Install sprocket on camshaft.<br />
2. Measure camshaft sprocket runout.<br />
Runout (Total indicator reading):<br />
Limit 0.12 mm (0.0047 in)<br />
3. If it exceeds the limit, replace camshaft sprocket.<br />
VALVE GUIDE CLEARANCE<br />
and/or<br />
1. Measure valve deflection in a right-angled direction with<br />
camshaft. (Valve and valve guide mostly wear in this direction.)<br />
.<br />
Valve deflection limit (Dial gauge reading):<br />
0.15 mm (0.0059 in)<br />
2. If it exceeds the limit, check valve to valve guide clearance.<br />
a. Measure valve stem diameter and valve guide inner diameter.<br />
b. Check that clearance is within specification.<br />
Valve to valve guide clearance:<br />
Standard<br />
0.020 - 0.053 mm<br />
(0.0008 - 0.0021 in) (Intake)<br />
0.040 - 0.070 mm<br />
(0.0016 - 0.0028 in) (Exhaust)<br />
Limit<br />
0.1 mm (0.004 in)<br />
c. If it exceeds the limit, replace'valve or valve guide.<br />
EM-23<br />
i
\ \\<br />
SEM223C<br />
SEM225C<br />
. CYLINDER HEAD<br />
Inspection (Cont'd)<br />
VALVE GUIDE REPLACEMENT<br />
1. To remove valve guide, heat cylinder head to 150 to 160°C<br />
(302 to 320°F).<br />
2. Drive out valve guide with a press [under a 20 kN (2 t, 2.2<br />
US ton, 2.0 Imp ton) pressure] or hammer and suitable tool.<br />
3. Ream cylinder head valve guide hole.<br />
Valve guide hole diameter<br />
(for service parts):<br />
Intake<br />
.'<br />
11.175 - 11.196 mm (0.4400 - 0.4408 in)<br />
Exhaust<br />
12.175 - 12.196 mm (0.4793 - 0.4802 in)<br />
4. Heat cylinder head to 150 to 160°C (302 to 320°F) and<br />
press service valve guide onto cylinder head.<br />
Projection "L":<br />
14.9 - 15.1 mm (0.587 - 0.594 in)<br />
5. Ream valve guide.<br />
Finished size:<br />
Intake<br />
EM-24<br />
7.000 - 7.018 mm (0.2756 - 0.2763 in)<br />
Exhaust<br />
8.000 - 8.018 mm (0.3150 - 0.3157 in)<br />
"
I<br />
Recess diameter<br />
I<br />
~ "::I<br />
SEM795A<br />
SEMOO8A<br />
SEM892B<br />
CYLINDER HEAD<br />
Inspection (Cont'd)<br />
VALVESEATS<br />
Check valve seats for any evidence of pitting at valve contact<br />
surface, and reseat or replace if it has worn out excessively.<br />
. Before repairing valve seats, check valve and valve guide.<br />
for wear. If they have worn, replace them. Then correct<br />
valve seat.<br />
. Cut with both hands to uniform the cutting surface.<br />
REPLACING VALVE SEAT FOR SERVICE PARTS<br />
1. Bore out old seat until it collapses. The machine depth stop<br />
should be set so that boring cannot continue beyond the<br />
2.<br />
bottom face of the seat recess in cylinder head.<br />
Ream cylinder head recess.<br />
Reaming bore for service valve seat<br />
Oversize [0.5 mm (0.020 in)):<br />
Intake<br />
36.500 - 36.516 mm (1.4370 - 1.4376 in)<br />
Exhaust<br />
42.500 - 42.516 mm (1.6732 - 1.6739 in)<br />
Reaming should be done to the concentric circles to valve<br />
guide center so that valve seat will have the correct fit.<br />
3. Heat cylinder head to 150 to 160°C (302 to 320°F).<br />
4. Cut or grind valve seat using suitable tool at the specified<br />
dimensions as shown in S.o.S.<br />
5. After cutting, lap valve seat with abrasive compound.<br />
6. Check valve seating condition.<br />
Seat face angle" a ":<br />
45 deg.<br />
Contacting width "W"<br />
Intake<br />
1.6 - 1.7 mm (0.063 - 0.067 in)<br />
Exhaust<br />
1.7 - 2.1 mm (0.067 - 0.083 in)<br />
EM-25
T (Margin thickness)<br />
cr<br />
Jdi-<br />
------<br />
d<br />
L<br />
SEM188A<br />
SEM288A<br />
EM113<br />
CYLINDER HEAD<br />
Inspection (Cont'd)<br />
VALVE DIMENSIONS<br />
Check dimensions in each valve. For dimensions, refer to S.O.S.<br />
When valve head has been worn down to 0.5 mm (0.020 in) in<br />
margin thickness, replace\lalve.<br />
Grinding allowance for valve stem tip is 0.2 mm (0.008 in) or<br />
less.<br />
VALVE SPRING<br />
Squareness<br />
1. Measure "s" dimension.<br />
Out-of-square:<br />
Outer<br />
Intake<br />
Less than 2.5 mm (0.098 in)<br />
Exhaust<br />
Less than 2.3 mm (0.091 in)<br />
Inner<br />
Intake<br />
Less than 2.3 mm (0.091 in)<br />
Exhaust<br />
Less than 2.1 mm (0.083 in)<br />
2. If it exceeds the limit, replace spring.<br />
Pressure<br />
Check valve spring pressure.<br />
Pressure: N (kg, Ib) at height mm (in)<br />
Standard<br />
Outer<br />
Intake<br />
604.1 (61.6, 135.8) at 37.6 (1.480)<br />
Exhaust<br />
640.4 (65.3, 144.0) at 34.1 (1.343)<br />
Inner<br />
Intake<br />
284.4 (29.0, 63.9) at 32.6 (1.283)<br />
Exhaust<br />
328.5 (33.5, 73.9) at 29.1 (1.146)<br />
Limit<br />
Outer<br />
Intake<br />
567.8 (57.9, 127.7) at 37.6 (1.480)<br />
Exhaust<br />
620.8 (63.3, 139.6) at 34.1 (1.343)<br />
Inner.<br />
Intake<br />
266.8 (27.2, 60.0) at 32.6 (1.283)<br />
Exhaust<br />
318.7 (32.5, 71.7) at 29.1 (1.146)<br />
If it exceeds the limit, replace spring.<br />
EM-26
Wide pitch<br />
SEM234C<br />
. Cylinder head side SEM6388<br />
Place<br />
upside.<br />
Narrow pitch<br />
SE M236C<br />
SEM273C<br />
CYLINDER HEAD<br />
Inspection (Cont'd)<br />
ROCKER SHAFT AND ROCKER ARM<br />
1. Check rocker shafts for scratches, seizure and wear.<br />
2. Check outer diameter of rocker shaft.<br />
Diameter mm (in):<br />
21.979 - 22.000 mm (0.8653- 0.8661 in)<br />
3. Check inner diameter of rocker arm.<br />
Diameter mm (in):<br />
22.012 - 22.029 mm (0.8666 - 0.8673 in)<br />
Rocker arm to shaft clearance mm (in):<br />
0.012 - 0.050 mm (0.0005 - 0.0020 in)<br />
. Keep rocker arm with hydraulic valve lifter<br />
prevent air from entering hydraulic valve<br />
checking.<br />
Assembly<br />
1. Install valve component parts.<br />
standing to<br />
lifter when<br />
. Always use new valve oil seal. Refer to OIL SEAL RE-<br />
PLACEMENT. .<br />
. Before installing valve oil seal, install inner valve spring<br />
seat.<br />
. Install outer valve spring (uneven pitch type) with its<br />
narrow pitch side toward cylinder head side.<br />
. After installing valve component parts, use plastic hammer<br />
to lightly tap valve stem tip to assure a proper fit.<br />
2. Mount camshaft onto cylinder head, placing knock pin at<br />
front end to top position.<br />
Apply engine oil to camshaft when mounting onto cylinder<br />
head.<br />
3. Install camshaft brackets.<br />
Front mark is punched on the camshaft bracket.<br />
EM-27
Front<br />
Front<br />
(j)<br />
~ @ 0<br />
[Q:<br />
@<br />
.Q.<br />
0<br />
'"<br />
/<br />
CD<br />
0<br />
.Q.<br />
0<br />
Exhaust<br />
@<br />
0<br />
.Q.<br />
@<br />
Intake<br />
Exhaust<br />
SEM579C<br />
Cutout<br />
SEM274C<br />
@<br />
Q)<br />
QJ<br />
@)<br />
SEM445C<br />
CYLINDER HEAD<br />
Assembly (Cont'd)<br />
4. Install rocker shaft with rocker arms.<br />
. Install retainer with cutout facing direction shown in figure at<br />
left.<br />
5. Tighten bolts as shown in figure at left.<br />
EM-28
-5~ 0°:5° 10° 15° 20°<br />
Red painted /<br />
Q Front<br />
(j) CID @ @<br />
SEM199C<br />
SEM442C .<br />
CYLINDER HEAD<br />
Installation<br />
1. Set No.1 piston at T.D.C. on its compression stroke as<br />
follows:<br />
(1) Align mark on crankshaft pulley with "0°" position and<br />
confirm that distributor rotor head is set as shown in figure.<br />
(2) Confirm that knock pin on camshaft is set at the top.<br />
2. Install cylinder head with new gasket and tighten cylinder<br />
CD @ head bolts in numerical order.<br />
I I<br />
. Do not rotate crankshaft and camshaft separately, or<br />
valves will hit piston heads.<br />
. Tightening procedure<br />
(1) Tighten all bolts to 29 Nom (3.0 kg-m, 22 ft-Ib).<br />
(2) Tighten all bolts to 78 Nom (8.0 kg-m, 58 ft-Ib).<br />
(3) Loosen all bolts completely.<br />
(4) Tighten all bolts to 29 Nom (3.0 kg-m, 22 ft-Ib).<br />
(5) Turn all bolts 80 to 85 degrees clockwise with an angle<br />
@SEM238C I wrench, or if an angle wrench is not available, tighten all<br />
bolts to 74 to 83 Nom (7.5 to 8.5 kg-m, 54 to 61 ft-Ib).<br />
EM-29
Silver<br />
--- o/!I!IIJl<br />
N.G. Good<br />
SEM933B<br />
CYLINDER HEAD<br />
Installation (Cont'd)<br />
3. Set chain on camshaft sprocket by aligning each mating<br />
mark. Then install camshaft sprocket to camshaft.<br />
4. Tighten camshaft sprocket bolt.<br />
5. Install rubber plugs as follows:<br />
(1) Apply liquid gasket to rubber plugs.<br />
. Rubberplugsshouldbe replacedwithnewones.<br />
.Rubber plugs should be installed within 5 minutes of<br />
applying liquid gasket.<br />
(2) Install rubber plugs. then move them with your fingers to<br />
uniformly spread the gasket on cylinder head surface.<br />
.Rubber plugs should be installed flush with the surface.<br />
.Do not start the engine for 30 minutes after installing<br />
rocker cover.<br />
.Wipe clean excessive liquid gasket from cylinder head top<br />
surface.<br />
EM-30
~:J@<br />
@ 0<br />
@\<br />
@ @<br />
0 @<br />
.g,<br />
-""6'-<br />
CD<br />
@<br />
-<br />
,0,<br />
SEM546C<br />
.-JJ@<br />
SEM547C<br />
CYLINDER HEAD<br />
Installation (Cont'd)<br />
6. Check hydraulic valve lifter.<br />
(1) Push hydraulic valve lifter forcefully with your finger.<br />
. Be sure to check It with rocker arm In Its free position.<br />
(2) If valve lifter moves more than 1 mm (0.04 in), air may be<br />
inside of it.<br />
(3) Bleed air off by running engine at 1,000 rpm under no-load<br />
for about 20 minutes.<br />
(4) If hydraulic valve lifters are still noisy, replace them and<br />
bleed air off again in the same manner as in step (3).<br />
7. Install rocker cover.<br />
. Be sure to avoid Interference<br />
rocker arm.<br />
between rocker cover and<br />
8. Tighten bolts as follows:<br />
(1) Tighten 2 bolts to 3 N.m (0.3 kg-m, 2.2 ft-Ib) temporarily in<br />
order shown in figure.<br />
(2) Then tighten bolts to 7 to 10 N.m (0.7 to 1.0 kg-m, 5.1 to 7.2<br />
ft-Ib) in order shown in figure.<br />
9. Install any parts removed.<br />
EM-31
ENGINE REMOVAL<br />
M/T model<br />
~<br />
tC!]43-55<br />
M43.~ . 1<br />
(4.4.5.6.32 - 41)<br />
(4.4 - 5.6. 32 - 41)<br />
tC!]22 -28<br />
0 ~ r (2.2 -2.9.<br />
~<br />
~ ~ 16.21)<br />
//' , '-, .I?:<br />
tC!]43-55 j<br />
~<br />
(4A-5.6.32-41) '''"' ~/<br />
EM-32<br />
tC!]13 -16<br />
(1.3- 1.6.9.12)<br />
I<br />
~ !<br />
/ L~ 43-55<br />
LtC!] 22 -28 (4.4 -5.6.32-41)<br />
(2.2 - 2.9.16 - 21)<br />
lOJ : N.m (kg-m. ft-Ib)<br />
SEM271C
.. ENGINE REMOVAL<br />
WARNING:<br />
a. Situate vehicle on a flat and solid surface.<br />
b. Place chocks at front and back of rear wheels.<br />
c. Do not remove engine until exhaust system has completely<br />
cooled off.<br />
Otherwise, you may burn yourself and/or fire may break<br />
out in fuel line.<br />
d. For safety during subsequent steps, the tension of wires<br />
should be slackened against the engine.<br />
e. Before disconnecting fuel hose, release fuel pressure from<br />
fuel line.<br />
Refer to "Releasing Fuel Pressure" in section EF & EC.<br />
f. Be sure to hoist engine and transmission in a safe manner.<br />
g. For engines not equipped with engine slingers, attach<br />
proper slingers and bolts described in PARTS CATALOG.<br />
CAUTION:<br />
. When lifting engine, be careful not to strike adjacent parts,<br />
especially accelerator wire casing, brake lines, and brake<br />
master cylinder.<br />
. In hoisting the<br />
safe manner.<br />
engine, always use engine slingers in a<br />
EM-33<br />
. ,"'"<br />
:1,;<br />
",.<br />
"«5
CYLINDER BLOCK<br />
Main bearing<br />
cg£<br />
Drain plug ~<br />
~ 29-39 (3.0-4.0, 22- 291~ A : N'm (kg-m, ft-Ib)<br />
EM-34<br />
. rJ : Apply liquid ga§\et.<br />
SEM247C
q<br />
/;~y<br />
,<br />
I I.~'<br />
~<br />
~\ ~105~O1<br />
~ ST0501 5000<br />
II I~( -) SEM744<br />
KV10110300<br />
( - )<br />
SEM877B<br />
EM156<br />
SEM149B<br />
CYLINDER BLOCK<br />
Disassembly<br />
PISTON AND CRANKSHAFT<br />
1. Place engine on a work stand.<br />
2. Remove timing chain.<br />
3. Drain coolant and remove water pump.<br />
4. Drain oil.<br />
5. Remove oil pan and oil pump.<br />
6. Remove cylinder head.<br />
7. Remove pistons.<br />
. When disassembling piston and connecting. rod, remove<br />
snap rings, then heat piston to 60 to 70°C (140 to 158°F) or<br />
use piston pin press stand at room temperature.<br />
8. Remove main bearing beam and crankshaft.<br />
. Before removing main bearing beam, measure crankshaft<br />
end play.<br />
. Bolts should be loosened in two or three steps.<br />
Inspection<br />
PISTON AND PISTON PIN CLEARANCE<br />
1. Measure inner diameter of piston pin hole "dp".<br />
Standard diameter "dp": ;<br />
20.987 - 20.999 mm (0.8263 - 0.8267 in)<br />
EM-35<br />
..
SEM249C<br />
SEM250C<br />
SEM821 B<br />
CYLINDER BLOCK<br />
Inspection (Cont'd)<br />
2. Measure outer diameter of piston pin "Dp".<br />
Standard diameter "Dp":<br />
20.989 - 21.001 mm (0.8263- 0.8268 in)<br />
3. Calculate interference fit of piston pin to piston.<br />
dp - Dp = 0 - 0.004mm (0 - 0.0002In)<br />
If it exceeds the above value, replace pi!3ton assembly with pin.<br />
PISTON RING SIDE CLEARANCE<br />
Side clearance:<br />
Top ring<br />
0.04 - 0.08mm (0.0016- 0.0031 In)<br />
2nd ring<br />
0.03 - 0.07 mm (0.0012 - 0.0028 In)<br />
011 ring<br />
0.065 - 0.135 mm (0.0026 - 0.0053 in)<br />
Max. limit of side clearance:<br />
0.1 mm (0.004 in)<br />
If out of specification, replace piston and/or piston ring assembly.<br />
PISTON RING END GAP<br />
End gap:<br />
Top ring<br />
0.28 - 0.43 mm (0.0110 - 0.0169 in)<br />
2nd ring<br />
0.45 - 0.60 mm (0.0177 - 0.0236 in)<br />
(R or T is punched on- the ring.)<br />
0.55 - 0.70 mm (0.0217 - 0.0276 in)<br />
(N is punched on the ring.)<br />
Oil ring<br />
0.20 - 0.60 mm (0.0079 - 0.0236 in)<br />
Max. limit of ring gap:<br />
0.5 mm (0.020 In)<br />
If out of specification, replace piston ring. If gap still exceeds the<br />
limit even with a new ring, rebore cylinder and use oversized piston<br />
and piston rings. I<br />
Refer to S.D.S.<br />
EM-36<br />
.
Measuring points<br />
Distortion:<br />
Less than 0.10 mm (0.0039 in)<br />
ffi<br />
I I<br />
SEM150B<br />
SEM255C<br />
-_N<br />
MM . . ~ .<br />
O!CD""<br />
ON-<br />
--0<br />
I '00 N<br />
, I ... CD ...<br />
I I,<br />
I ,<br />
Unit: mm (in)<br />
CYLINDER BLOCK<br />
Inspection (Cont'd)<br />
CONNECTING ROD BEND AND TORSION<br />
Bend:<br />
Limit 0.15 mm (0.0059 in)<br />
per 100 mm (3.94 in) length<br />
Torsion:<br />
Limit 0.30 mm (0.0118 in)<br />
per 100 mm (3.94 in) length<br />
If it exceeds the limit, replace connecting rod assembly.<br />
CYLINDER BLOCK DISTORTION AND WEAR<br />
1. Clean upper face of cylinder block and measure the distortion.<br />
Limit:<br />
0.10 mm (0.0039 in)<br />
2. If out of specification, resurface.it.<br />
The resurfacing limit is determined by cylinder head resurfacing<br />
in engine.<br />
Amount of cylinder head resurfacing is "A"<br />
Amount of cylinder block resurfacing is "B"<br />
The maximum limit is as follows:<br />
A + B = 0.2 mm (0.008 in)<br />
Nominal cylinder block height<br />
from crankshaft center:<br />
246.95- 247.05mm (9.7224- 9.7264 in)<br />
3. If necessary, replace cylinder block.<br />
PISTON-TO-BORE CLEARANCE<br />
1. Using a bore gauge, measure cylinder bore for wear,<br />
out-of-round and taper.<br />
Standard inner diameter:<br />
89.000 - 89.030 mm (3.5039 - 3.5051 in)<br />
Wear limit:<br />
0.2 mm (0.008 in)<br />
Out-of-round (X-V) limit:<br />
0.015 mm (0.0006 in)<br />
Taper (A-B) limit:<br />
0.015 mm (0.0006 in)<br />
If it exceeds the limit, rebore all cylinders. Replace cylinder<br />
block if necessary.<br />
2. Check for scratches and seizure. If seizure is found, hone it.<br />
EM-37
Q Front<br />
A B<br />
SEM257C<br />
a<br />
SEM258C<br />
Taper: A - B<br />
Out-of-round: X - Y<br />
SEM316A<br />
y<br />
x<br />
CYLINDER BLOCK<br />
Inspection (Cont'd)<br />
. If both cylinder block and piston are replaced with new<br />
ones, select piston of the same grade number punched on<br />
cylinder block upper surface.<br />
3. Measure piston skirt diameter.<br />
Piston diameter" A":<br />
Refer to S.D.S.<br />
Measuring point "a" (Distance from the top):<br />
52 mm (2.05 in)<br />
4. Check that piston-to-bore clearance is within specification.<br />
Piston-to-bore clearance "B": .<br />
0.020 - 0.040 mm (0.0008- 0.0016 in)<br />
5. Determine piston oversize according to amount of cylinder<br />
wear.<br />
Oversize pistons are available for service. Refer to S.D.S.<br />
6. Cylinder bore size is determined by adding piston-to-bore<br />
clearance to piston diameter "A".<br />
Rebored size calculation:<br />
D= A+B-C<br />
where,<br />
D: Bored diameter<br />
A: Piston diameter as measured<br />
B: Piston-to-bore clearance<br />
C: Honing allowance 0.02 mm (0.0008 in)<br />
7. Install main bearing caps, and tighten to the specified torque<br />
to prevent distortion of cylinder bores in final assembly.<br />
8. Cut cylinder bores.<br />
. When any cylinder needs boring, all other cylinders must<br />
also be bored.<br />
. Do not cut too much out of cylinder bore at a time. Cut<br />
only 0.05 mm (0.0020 in) or so in diameter at a time.<br />
9. Hone cylinders to obtain specified piston-to-bore clearance.<br />
10. Measure finished cylinder bore for out-of-round and taper.<br />
. Measurement should be done after cylinder bore cools<br />
down.<br />
CRANKSHAFT<br />
1. Check crankshaft main and pin journals for score, wear or<br />
cracks.<br />
2. With a micrometer, measure journals for taper and out-ofround.<br />
Out-of-round (X-Y):<br />
Main journal Less than 0.01 mm (0.0004 in)<br />
Crank pin Less than 0.005 mm (0.0002 in)<br />
Taper (A-B):<br />
Main journal Less than 0.01 mm (0.0004 in)<br />
Crank pin Less than 0.005 mm (0.0002 in)<br />
EM-38
SEM448C<br />
SEM964<br />
CYLINDER BLOCK<br />
Inspection (Cont'd)<br />
3. Measure crankshaft runout.<br />
Runout (Total indicator reading):<br />
Less than 0.10 mm (0.0039 in)<br />
BEARING CLEARANCE<br />
Method A (Using bore gauge and micrometer)<br />
Main bearing<br />
1. Set main bearings in their proper positions on cylinder block<br />
and main bearing cap.<br />
2. Install main bearing cap to cylinder block.<br />
Tighten all bolts in correct order in two or three stages. Refer<br />
to "Assembly".<br />
3. Measure inner diameter "A" of each main bearing.<br />
4. Measure outer diameter "Dm" of each crankshaft main<br />
journal.<br />
5. Calculate main bearing clearance.<br />
Main bearing clearance = A - Dm<br />
Standard:<br />
0.020 - 0.047 mm (0.0008 - 0.0019 in)<br />
Limit: 0.1 mm (0.004 in)<br />
6. If it exceeds the limit, replace bearing.<br />
7. If clearance cannot be adjusted within the standard of any<br />
bearing, grind crankshaft journal and use undersized bearing.<br />
a. When grinding crankshaft journal, confirm that "L" dImension<br />
In fillet roll is more than the specified limit.<br />
"L": 0.1 mm (0.004 In)<br />
b. Refer to S.D.S. for grinding crankshaft and available<br />
service parts.<br />
EM-39
y<br />
SEM266C Journal grade number<br />
0<br />
,Q<br />
0<br />
rg<br />
Q<br />
Front bl roJ [5j rd<br />
SEM272C<br />
CYLINDER BLOCK<br />
Inspection (Cont'd)<br />
8. ;If crankshaft is reused, measure main bearing clearance and<br />
select thickness of main bearing.<br />
If crankshaft is replaced with a new one, it is necessary to<br />
select thickness of main bearings as follows:<br />
a. Grade number of each cylinder block main journal is punched<br />
on the respective cylinder block.<br />
b. Grade number of each crankshaft main journal is punched<br />
on crankshaft.<br />
c. Select main bearing with suitable thickness according to the<br />
following table.<br />
Main bearing grade number:<br />
Crankshaft<br />
journal grade number<br />
0<br />
2<br />
For example:<br />
Main journal grade number: 1<br />
Crankshaft journal grade number: 2<br />
Main bearing grade number = 1 + 2<br />
=3<br />
Connecting rod bearing (Big end)<br />
1. Install connecting rod bearing to connecting rod and cap.<br />
2. Install connecting rod cap to connecting rod.<br />
Tighten bolts to the specified torque.<br />
3. Measure inner diameter "C" of each bearing.<br />
EM-40<br />
0 1 2<br />
0 1 2<br />
1 2 3<br />
2 3 4
SEM567B<br />
EM142<br />
SEM151B<br />
CYLINDER BLOCK<br />
Inspection (Cont'd)<br />
4. Measure outer diameter "Dp" of each crankshaft pin journal.<br />
5. Calculate connecting rod bearing clearance.<br />
Connecting rod bearing clearance = C - Dp<br />
Standard: '<br />
0.010 - 0.035 mm (0.0004 - 0.0014 in)<br />
Limit: 0.09 mm (0.0035 in)<br />
6. If it exceeds the limit, replace bearing.<br />
7. If clearance cannot be adjusted within the standard of any<br />
bearing, grind crankshaft journal and use undersized bearing.<br />
Refer to step 7 of "BEARING CLEARANCE - Main bearing".<br />
8. If crankshaft is replaced with a new one, select connecting rod<br />
bearing according to the following table.<br />
Connecting rod bearing grade number:<br />
Crank pin grade number<br />
Connecting rod bearing<br />
grade number<br />
0 0<br />
2 2<br />
Method B (Using plastigauge)<br />
CAUTION:<br />
. -Do not turn crankshaft or connecting rod while plastigage<br />
is being inserted.<br />
. When bearing clearance exceeds the specified limit, en-<br />
sure that the proper bearing has been installed. Then if<br />
excessive bearing clearance exists, use a thicker main<br />
bearing or undersized bearing so that the specified bearing<br />
clearance is obtained.<br />
CONNECTING ROD BUSHING CLEARANCE (Small end)<br />
1. Measure inner diameter "c" of bushing.<br />
EM-41
SEM261 C<br />
Micrometer<br />
Dial gauge<br />
Cylinder number<br />
SEM903A<br />
SEM062A<br />
SEM166B<br />
SEM262C<br />
CYLINDER BLOCK<br />
Inspection (Cont'd)<br />
2. Measure outer diameter "Dp" of piston pin.<br />
3. Calculate connecting rod bearing clearance.<br />
C - Dp =<br />
0.005 - 0.017 mm (0.0002 - 0.0007 in) (Standard)<br />
0.023 mm (0.0009 in) (Limit)<br />
If it exceeds the limit, replace connecting rod assembly<br />
and/or piston set with pin.<br />
REPLACEMENT OF CONNECTING ROD BUSHING<br />
(Small end)<br />
1. Drive in small end bushing<br />
of rod.<br />
until it is flush with end surface<br />
Be sure to align the oil holes.<br />
2. After driving in small end bushing, ream the bushing so that<br />
clearance between small end bushing and piston pin is<br />
specified valve.<br />
Clearance between small end bushing and piston pin:<br />
0.005 - 0.017 mm (0.0002 - 0.0007 in)<br />
FLYWHEEL/DRIVE PLATE RUNOUT<br />
Runout (Total indicator reading):<br />
Flywheel (M/T model)<br />
Less than 0.1 mm (0.004 in)<br />
Drive plate (A/T model)<br />
Less than 0.1 mm (0.004 in)<br />
Assembly<br />
PISTON<br />
1. Install new snap ring on one side of piston pin hole.<br />
2. Heat piston to 60 to lOoC (140 to 158°F) and assemble<br />
piston, piston pin, connecting rod and new snap ring.<br />
. Align the direction of piston and connecting rod.<br />
. Numbers stamped on connecting rod and cap correspond<br />
to each cylinder. I<br />
. After assembly, make sure connecting rod swings<br />
smoothly.<br />
EM-42
KV10110300<br />
( - )<br />
*<br />
Oil ring<br />
expander V-<br />
..<br />
Front i?<br />
g;r<br />
p~markSide<br />
1""""- ' J rn::::<br />
,'-<br />
EM156<br />
..." .<br />
SEM264C<br />
8 Top ring<br />
~ .8 Ojl ring<br />
-""'-.) K' upper rail<br />
!/<br />
Oil<br />
ring<br />
/"')<br />
-::: "- ~ lower rail<br />
SEM 1606<br />
~~<br />
~ ~~:O.5<br />
50 ~ No.3<br />
t2 ~ No.2<br />
Front No.1 SEM44BC<br />
CYLINDER BLOCK<br />
Assembly (Cont'd)<br />
3. Set piston rings as shown.<br />
CRANKSHAFT<br />
1. Set main bearings in their proper positions on cylinder block<br />
and main bearing beam.<br />
. Confirm that correct main bearings are used. Refer to<br />
"Inspection" of this section.<br />
2. Install crankshaft and main bearing beam and tighten bolts<br />
to the specified torque.<br />
. Prior to tightening bearing cap bolts, place bearing cap in<br />
its proper position by shifting crankshaft in the axial<br />
direction. '.<br />
. Tighten bearing cap bolts gradually in two or three stages.<br />
Start with center bearing and move outward sequentially.<br />
. After securing bearing cap bolts, make sure crankshaft<br />
turns smoothly by hand.<br />
EM-43
J<br />
~ SEM159B<br />
CYLINDER BLOCK<br />
Assembly (Cont'd)<br />
3. Measure crankshaft end play.<br />
Crankshaft end play:<br />
Standard<br />
0.05 - 0.18 mm (0.0020 - 0.0071 in)<br />
Limit<br />
0.3 mm (0.012 in)<br />
If beyond the limit, replace bearing with a new one.<br />
4. Install connecting rod bearings in connecting rods and<br />
connecting rod caps.<br />
. Confirm that correct bearings are used.<br />
Refer to "Inspection".<br />
. Install bearings so that oil hole in connecting rod aligns with<br />
oil hole of bearing.<br />
5. Install pistons with connecting rods.<br />
a. Install them into corresponding cylinders with Tool.<br />
. Be careful not to scratch cylinder wall by connecting rod.<br />
. Arrange so that front mark on piston head faces toward<br />
front of engine.<br />
b. Install connecting rod bearing caps.<br />
Tighten connecting rod bearing cap nuts to the spe.cified<br />
torqu~. .<br />
Connecting rod bearing nut:<br />
(1) Tighten to 14 to 16 N.m<br />
(1.4 to 1.6 kg-m, 10 to 12 ft-Ib).<br />
(2) Tighten bolts 60 to 65 degrees clockwise<br />
with an angle wrench, or if an angle wrench<br />
is not available, tighten them to<br />
38 to 44 N.m (3.9 to 4.5 kg-m, 28 to 33 ft-Ib).<br />
6. Measure connecting rod side clearance.<br />
Connecting rod side clearance:<br />
Standard<br />
0.2 - 0.4 mm (0.008 - 0.016 in)<br />
Limit<br />
0.6 mm (0.024 in)<br />
If beyond the limit, replace connecting rod and/or crankshaft.<br />
EM-44
ST16610001<br />
(J23907)<br />
or su itable tool<br />
M/T<br />
..<br />
Crankshaft side<br />
A/T<br />
SEM163.B<br />
CYLINDER BLOCK<br />
Assembly (Cont'd)<br />
REPLACING PILOT BUSHING<br />
1. Remove pilot bushing (M/T) or pilot convertor (A/T).<br />
2. Install pilot bushing (M/T) or pilot convertor (A/T).<br />
EM-45
Engine model<br />
Cylinder arrangement<br />
Compression pressure<br />
Standard<br />
Minimum<br />
Differential limit between<br />
cylinders<br />
SERVICE DATA AND SPECIFICATIONS (S.D.S.)<br />
KA24E<br />
4, in-line<br />
Displacement cm' (cu in) 2,389 (145.78)<br />
Bore x stroke mm (in) 89 x 96 (3.50 x 3.78)<br />
Valve arrangement<br />
Firing order<br />
Number of piston rings<br />
Compression<br />
Oil<br />
Number of main bearings<br />
Compression ratio<br />
O.H.C.<br />
1-3-4-2<br />
2<br />
1<br />
5<br />
9.1<br />
Unit: kPa (kg/cm2 ,psi)/rpm<br />
1,324 (13.5, 192) /300<br />
981 (10,142)/300<br />
98 (1.0, 14)/300<br />
General Specifications<br />
EM-46
CYLINDER BLOCK<br />
* Wear limit<br />
SERVICE DATA AND SPECIFICATIONS (S.D.S.)<br />
Inspection and Adjustment<br />
10<br />
(0.39) 60 (2.36)<br />
** Total amount of cylinder head resurfacing and cylinder block resurfacing<br />
CYLINDER HEAD<br />
Unit: mm (in)<br />
* Total amount of cylinder head resurfacing and cylinder block<br />
resurfacing<br />
EM-47<br />
120 (4.72)<br />
H<br />
SEM447C<br />
Standard Limit<br />
Distortion - 0.1 (0.004)<br />
Grade 1 89.000 - 89.010 (3.5039 - 3.5043)<br />
Inner diameter Grade 2 89.010 - 89.020 (3.5043 - 3.5047) 0.2 (0.008)*<br />
Cylinder bore Grade 3 89.020 - 89.030 (3.5047 - 3.5051)<br />
Out-of-round (X-V) Less than 0.015 10.0006) -<br />
Taper (A-B) Less than 0.010 (0.0004) -<br />
Difference in inner diameter between cylinders Less than 0.05 (0.0020) 0.2 (0.008)<br />
Piston-to-cylinder clearance 0.020 - 0.040 (0.0008 - 0.0016) -<br />
Cylinder block height<br />
(From crankshaft cented<br />
Height (H)<br />
Standard Limit<br />
98.8 - 99.0<br />
(3.890 - 3.898)<br />
0.2 10.008)*<br />
Surface distortion 0.03 (0.0012) 0.1 (0.004)<br />
246.95 - 247.05 (9.7224 - 9.7264) 0.2 (0.008)**<br />
Unit: mm (in)
VALVE GUIDE<br />
t-<br />
SERVICE DATA AND SPECIFICATIONS (S.D.S.)<br />
L<br />
Inspection and Adjustment (Cont'd)<br />
D<br />
SEM571 B<br />
Standard <strong>Service</strong> Limit<br />
Intake Exhaust Intake Exhaust -<br />
Length (L) 52.6 (2.071) 56.0 (2.205) 52.6 (2.071) 56.0 (2.205) -<br />
Outer diameter (D)<br />
11.023 - 11.034 12.023 - 12.034 11.223 - 11.234 12.223 - 12.234<br />
(0.4340 - 0.4344) (0.4733 - 0.4738) (0.4418 - 0.4423) (0.4812 - 0.4817)<br />
Inner diameter (d) 7.000 - 7.018 8.000 - 8.Q18 7.000 - 7.018 8.000 - 8.Q18<br />
(Finished size) (0.2756 - 0.2763) (0.3150 - 0.3157) (0.2756 - 0.2763) (0.3150 - 0.3157)<br />
Cylinder head hole diameter<br />
10.975 - 10.996 11.975 - 11.996 11.175-11.196 12.175 - 12.196<br />
(0.4321 - 0.4329) (0.4715 - 0.4723) (0.4400 - 0.4408) (0.4793 - 0.4802)<br />
Interference fit 0.027 - 0.059 (0.0011 - 0.0023) -<br />
Stem to guide clearance<br />
0.020 - 0.053 0.040 - 0.070 0.020 - 0.053 0.040 - 0.070<br />
(0.0008 - 0.0021) (0.0016 - 0.0028) (0.0008 - 0.0209) (0.0016 - 0.0028)<br />
Tapping length (Q) 14.9 - 15.1 (0.587 - 0.594) -<br />
EM-48<br />
SEM225C<br />
Unit: mm (in)<br />
-<br />
-<br />
-<br />
0.1 (0.004)
Q<br />
SERVICE DATA AND SPECIFICATIONS (S.O.S.)<br />
Inspection and Adjustment (Cont'd)<br />
Standard <strong>Service</strong><br />
I<br />
D1<br />
SEM177<br />
Standard<br />
EM-49<br />
a<br />
I<br />
D1<br />
<strong>Service</strong><br />
Intake Exhaust Intake Exhaust<br />
SEM178<br />
Unit: mm (in)<br />
Cylinder head seat recess 36.000 - 36.016 42.000 - 42.016 36.500 - 36.516 42.500 - 42.516<br />
diameter (1.4173 - 1.4179) (1.65:35 - 1.6542) (1.4370 - 1.4376) (1.6732 - 1.6739)<br />
Valve seat outer diameter (D1 )<br />
36.080 - 36.096 42.080 - 42.096 36.580 - 36.596 42.580 - 42.596<br />
(1.4205 - 1.4211) (1.6567 -1.6573) (1.4402 - 1.4408) (1.6764 - 1.6770)<br />
Face angle (a) 45° 45° 45° 45°<br />
Contacting width (W)<br />
1.6 - 1.7 1.7 - 2.1 1.6 - 1.7 1.7- 2.1<br />
(0.063 - 0.067) (0.067 - 0.083) (0.063 - 0.067) (0.067 - 0.083)
VALVE<br />
T (Margin thickness)<br />
Q<br />
SERVICE DATA AND SPECIFICATIONS (S.D.S.)<br />
L<br />
Inspection and Adjustment (Cont'd)<br />
SEM188A<br />
---- Unit: mm (in)<br />
Standard<br />
Valvehead diameter (D)<br />
Valvelength (LI<br />
Valvestem diameter (d)<br />
Valve face angle (01)<br />
VALVE SPRING<br />
In. 34.0-34.2<br />
(1.339- 1.346)<br />
Ex.<br />
In.<br />
Ex.<br />
In.<br />
Ex.<br />
40.0 - 40.2<br />
(1.575 - 1.583)<br />
119.9- 120.2<br />
(4.720-4.732)<br />
120.67 - 120.97<br />
(4.7508 - 4.7626)<br />
6.965 - 6.980<br />
(0.2742 - 0.2748)<br />
7.948 - 7.960<br />
(0.3129 - 0.3134)<br />
In. 45°30' -<br />
Ex. 45° 30' -<br />
In.<br />
1.15 - 1.45<br />
(0.0453 - 0.0571)<br />
Limit<br />
Valve head margi n (T) 0.5 (0.020)<br />
Free height (H)<br />
Ex.<br />
1.35 - 1.65<br />
(0.0531 - 0.0650)<br />
-<br />
-<br />
-<br />
-<br />
-<br />
-<br />
Standard Limit<br />
Intake Exhaust Intake Exhaust<br />
Outer 57.44 (2.2614) 53.21 (2.0949) - -<br />
Inner 53.34 (2.1000) 47.95 (1.8878) - -<br />
EM-50<br />
Unit: mm (in)<br />
Pressu re<br />
N (kg,lb)<br />
Outer<br />
604.1 (61.6, 135.8)<br />
at 37.6 (1.480)<br />
640.4 (65.3, 144.0)<br />
at 34.1 (1.343)<br />
567.8 (57.9,127.7)<br />
at 37.6 (1.480)<br />
620.8 (63.3, 139.6)<br />
at34.1 (,.343)<br />
at height Inner 284.4 (29.0,63.9)<br />
at 32.6 (1.283)<br />
328.5 (33.5, 73.9)<br />
at 29.1 (1.146)<br />
266.8 (27.2,60.0)<br />
at 32.6 (1.283)<br />
318.7 (32.5,71.7)<br />
at 29.1 (1.146)<br />
Out-of-square<br />
Outer - - 2.5 (0.098) 2.3 (0.091)<br />
Inner - - 2.3 (0.091) 2.1 (0.083)
SERVICE DATA AND SPECIFICATIONS (S.D.S.)<br />
Inspection and Adjustment (Cont'd)<br />
CAMSHAFT AND CAMSHAFT BEARING<br />
A<br />
0<br />
SEM568A<br />
I<br />
..<br />
;#<br />
~<br />
Standard limit<br />
Cam height (A) 44.839 - 45.029 (1.7653 - 1.7728) -<br />
Valve lift (h) 10.4 (0.409) -<br />
Wear limit of cam height - 0.2 (0.008)<br />
Camshaft journal to bearing clearance 0.045 - 0.090 (0.0018 - 0.0035) 0.12 (0.0047)<br />
Inner diameter of camshaft bearing 33.000 - 33.025 (1.2992 - 1.3002) -<br />
Outer diameter of camshaft journal (D) 32.935 - 32.955 (1.2967 - 1.2974) -<br />
Camshaft f1Inout 0 -0.02(0 -0.0008) -<br />
Camshaftend play 0.07 - 0.15 (0.0028 - 0.0059) 0.2 (0.008)<br />
)<br />
Valvetiming (Degreeon crankshaft!<br />
ROCKER ARM AND ROCKER SHAFT<br />
Unit: mm (in)<br />
Rocker arm to shaft clearance<br />
Rocker shaft diameter<br />
Rocker arm rocker shaft hole<br />
diameter<br />
0.012 - 0.050<br />
(0.0005 - 0.0020)<br />
21.979 - 22.000<br />
(0.8653 - 0.8661)<br />
22.012 - 22.029<br />
(0.8666 - 0.8673)<br />
EM-51<br />
. DC<br />
a 248 -<br />
b 240 -<br />
c 3 -<br />
d 57 -<br />
e 12 -<br />
f 56 -<br />
EM120<br />
Unit: mm (in)
SERVICE DATA AND SPECIFICATIONS (S.D.S.)<br />
Inspection and Adjustment (Cont'd)<br />
PISTON, PISTON RING AND PISTON PIN Pistonring<br />
Piston<br />
Piston pin<br />
a<br />
Standard<br />
d<br />
SEM444C<br />
Unit: mm (in)<br />
Grade 88.970 -88.980<br />
No.1 (3.5027 - 3.5031)<br />
Grade 88.980 -88.990<br />
No.2 (3.5031 - 3.5035)<br />
Piston skirt Grade 88.990 -89.000<br />
diameter (A) No.3 (3.5035 - 3.5039)<br />
<strong>Service</strong><br />
(Oversize)<br />
0.5 89.470 - 89.500<br />
(0.020) (3.5224 - 3.5236)<br />
1.0 89.970 - 90.000<br />
(0.039) (3.5421 - 3.5433)<br />
Dimension (a) Approximately 52 (2.05)<br />
Piston pin hole diameter<br />
(d)<br />
Piston-to-c:ylinderbore<br />
clearance/'<br />
Piston pin outer<br />
20.989-21.001<br />
diameter (0.8263.0.8268)<br />
Interference fit of piston<br />
pin to piston pin hole<br />
20.987 - 20.999(0.8263- 0.8267)<br />
0.020 - 0.040 (0.0008 - 0.0016)<br />
Standard limit<br />
0 - 0.004<br />
(0 -0.0002)<br />
Unit: mm (in)<br />
Piston pin to connecting 0.005 -0.017 0.023<br />
rod bearingclearance (0.0002 -0.0007) (0.0009)<br />
-<br />
-<br />
EM-52<br />
=::::::::::::= Standard limit<br />
*1: R or T is punched on the ring.<br />
*2: N is punched on the ring.<br />
CONNECTING ROD<br />
* Without bearing<br />
Top<br />
0.040 - 0.080<br />
(0.0016 - 0.0031)<br />
Side 0.030 - 0.070<br />
2nd<br />
clearance<br />
(0.0012 -0.0028)<br />
Ring gap<br />
=::::::::::::=<br />
Oil<br />
Top<br />
2nd<br />
Center distance IS)<br />
Bend<br />
[per 100 mm (3.94 in)]<br />
Torsion<br />
[per 100 mm (3.94 in)]<br />
0.065 - 0.135<br />
(0.0026 -0.0053)<br />
0.28 -0.43<br />
(0.0110 -0.0169)<br />
0.45 - 0.60<br />
10.0177 - 0.0236)*1<br />
0.55 -0.70<br />
10.0217-0.0276)*2<br />
Oil 0.20 - 0.60<br />
Irail ring) (0.0079 -0.0236)<br />
S<br />
Unit: mm (in)<br />
0.1 (0.004)<br />
0.1 (0.004)<br />
0.1 (0.004)<br />
0.5 (0.020)<br />
0.5 10.020)<br />
0.5 (0.020)<br />
Standard limit<br />
SEM570A<br />
Unit: mm (in)<br />
164.95 - 165.05 -<br />
16.4941- 6.4980)<br />
- 0.1510.0059)<br />
Piston pin bushing inner 21.000 - 21.012<br />
diameter (d)* 10.8268 - 0.8272)<br />
Connecting rod big end 53.000 - 53.013<br />
iner diameter (D)* 12.0866 -2.0871)<br />
Side clearance<br />
- 0.3 (0.012)<br />
0.2 -0.4<br />
10.008 - 0.016)<br />
-<br />
L<br />
0.6 10.024)
CRANKSHAFT<br />
* Total indicator reading<br />
BEAR ING CLEARANCE<br />
SERVICE DATA AND SPECIFICATIONS (S.D.S.)<br />
Inspection and Adjustment (Cont'd)<br />
Out-of-round @- Ci)<br />
Taper@ .@ @ @<br />
~.<br />
\J57<br />
Om EM715<br />
Op<br />
SEM394<br />
No.O 59.967 - 59.975 (2.3609 - 2.3612)<br />
Main journal diameter (Dm) Grade No.1 59.959 - 59.967 (2.3606 - 2.3609)<br />
No.2 59.951 - 59.959 (2.3603 - 2.3606)<br />
No.O 49.968 - 49.974 (1.9672 - 1.9675)<br />
Pin journal diameter (Op) Grade No.1 49.962 - 49.968 (1.9670 - 1.9672)<br />
No.2 49.956 - 49.962 (1.9668 - 1.9670)<br />
Center distance (r) 47.97 - 48.03 (1.8886 - 1.8909)<br />
Taper of journal and pin I@ - @]<br />
Unit: mm (in)<br />
EM-53<br />
Standard Limit<br />
Journal - 0.01 (0.0004)<br />
Pin - 0.005 (0.0002)<br />
Out-of-round of journal and pin<br />
Journal - 0.01 (0.0004)<br />
I@ -Ci)]<br />
,<br />
Runout IT.I.R.] *<br />
---- Pin -<br />
-<br />
0.005 (0.0002)<br />
0.10 (0.0039)<br />
Free end play 0.05 - 0.18 (0.0020 - 0.0071) 0.3 (0.012)<br />
Fillet roil More than 0.1 (0.004)<br />
Main bearing clearance<br />
Standard limit<br />
0.020 - 0.047<br />
(0.0008 - 0.0019)<br />
Connecting rod bearing 0.010 - 0.035<br />
clearance (0.0004 - 0.0014)<br />
0.1 (0.004)<br />
0.09 (0.0035)<br />
Unit: mm (in)
AVAILABLE MAIN BEARING<br />
Standard<br />
Grade<br />
number<br />
0<br />
2<br />
3<br />
4<br />
Undersize (service)<br />
0.25<br />
10.0098)<br />
Thickness<br />
mm (in)<br />
1.821 - 1.825<br />
10.0717 - 0.0719)<br />
1.825 - 1.829<br />
10.0719 - 0.0720)<br />
1.829 - 1.833<br />
10.0720 - 0.0722)<br />
1.833 - 1.837<br />
10.0722 - 0.0723)<br />
1.837 - 1.841<br />
10.0723 - 0.0725)<br />
Thickness<br />
1.952 - 1.960<br />
10.0769- 0.0772)<br />
SERVICE DATA AND SPECIFICATIONS (S.D.S.)<br />
Identification<br />
color<br />
Black<br />
Brown<br />
Green<br />
Yellow<br />
Blue<br />
Inspection and Adjustment (Cont'd)<br />
AVAILABLE CONNECTING ROD BEARING<br />
Unit: mm (in)<br />
Mein journal<br />
diameter "Dm"<br />
Grind so that bearing<br />
clearance is the<br />
specified value.<br />
EM-54<br />
Standard<br />
Grade<br />
number<br />
0<br />
2<br />
Undersize (service)<br />
0.08<br />
10.0031 )<br />
0.12<br />
(0.0047)<br />
0.25<br />
10.0098)<br />
Thickness<br />
mm (in)<br />
1.505 - 1.508<br />
(0.0593 - 0.0594)<br />
1.508 - 1.511<br />
(0.0594 - 0.0595)<br />
1.511 - 1.514<br />
10.0595 - 0.0596)<br />
Thickness<br />
1.540 - 1.548<br />
(0.0606 - 0.0609)<br />
1.560 - 1 .568<br />
10.0614 - 0.0617)<br />
1.625 - 1.633<br />
10.0640 - 0.0643)<br />
MISCELLANEOUS COMPONENTS<br />
Camshaft sprocket runout<br />
[T.I.R.] *<br />
Flywheel runout [T.I.R.] *<br />
Drive plate runout<br />
* Total indicator reading<br />
Identification<br />
color<br />
Brown<br />
Green<br />
Unit: mm (in)<br />
Crank pin journal<br />
diameter "Dp"<br />
Grind so that bearing<br />
clearance is the<br />
specified value.<br />
Unit: mm (in)<br />
less than 0.12 (0.0047)<br />
less than 0.1 (0.004)<br />
[T.I.R.] * less than 0.1 10.004)
CONTENTS<br />
ENGINELUBRICATION&<br />
COOLINGSYSTEMS<br />
I<br />
SECTIONLC -<br />
PREPARATION ... ;..... lC- 2<br />
ENGINElUBRICATIONSYSTEM" .".. "" ,.. lC- 3<br />
ENGINE COOLING SYSTEM ""''''''''''''''''''''''''''''''''''''''''''''''''''''''''''''''''"""'''''''''''''''''''''''''''''''' lC- 7<br />
CONDENSER FAN MOTOR ELECTRICAL CIRCUIT '''''''''''''''''''''''''''''''''''''''''''''''''''''''''''''''''' lC-12<br />
SERVICE DATA AND SPECIFICATIONS (S.O.S.) lC-16
Tool number<br />
(Kent-Moore No.)<br />
Tool name<br />
ST25051 001<br />
(J25695-1 )<br />
Oil pressure gauge<br />
ST25052000<br />
(J25695-2)<br />
Hose<br />
EG17650301<br />
( - )<br />
Radiator cap tester<br />
adapter<br />
Description<br />
PREPARATION<br />
SPECIAL SERVICE TOOLS<br />
U!!<br />
a<br />
[j I<br />
LC-2<br />
Adapting oil pressure gauge<br />
to cylinder block<br />
Adapting radiator cap tester<br />
to radiator filler neck
0-<br />
O I<br />
W<br />
'" r(')<br />
co<br />
I\)<br />
:r><br />
+-<br />
Oil gallery in<br />
cylinder block<br />
-..- By-passpassage<br />
----<br />
ST25051 001<br />
(J25695-1)<br />
ENGINE LUBRICATION SYSTEM<br />
SLC926<br />
Oil Pressure Check<br />
WARNING:<br />
. Be careful not to burn yourself, as the engine and 011may<br />
hoL /<br />
. 011 pressure check should be done in "Neutral" gear<br />
position.<br />
1. Check oil level.<br />
2. Remove oil pressure switch.<br />
3. Install pressure gauge.<br />
4. Start engine and warm it up to normal operating<br />
ture.tempera-<br />
5. Check oil pressure with engine running under no-load.<br />
Engine rpm<br />
Idle speed<br />
3,000<br />
Approximate discharge pressure<br />
kPa (kg/cm2, psi)<br />
More than 78 (0.8, 11)<br />
412-481 (4.2-4.9,60-70)<br />
If difference is extreme, check oil passage and oil pump for<br />
oil leaks.<br />
6. Install oil pressure switch with sealant.<br />
LC-4
Punch-<br />
.mark<br />
iT. Oil<br />
hole ~<br />
Front<br />
Drive spindle<br />
~~1~<br />
~AU)<br />
.<br />
ENGINE LUBRICATION SYSTEM<br />
~~"4A<br />
Oil Pump<br />
~tOJ 6. 10 (0.6 - 1.0,4.3.7.2)<br />
--.::>/pump body<br />
Gasket ~<br />
EL076<br />
\<br />
tOJ: N.m (kg-m, ft-Ib)<br />
SLC945<br />
. Always replace with new oil seal and gasket.<br />
When removing oil pump, turn crankshaft so that No.1<br />
piston is at T.D.C. on its compression stroke.<br />
. When installing oil pump, align punchmark on drive spindle<br />
and oil hole on oil pump.<br />
REGULATOR VALVE INSPECTION<br />
1. Visually inspect components for wear and damage.<br />
2. Check oil pressure regulator valve sliding surface and valve<br />
spring.<br />
3. Coat regulator valve with engine oil and check that it falls<br />
smoothly into the valve hole by its own weight.<br />
If damaged, replace regulator valve set or oil pump assembly.<br />
LC-5
CD<br />
-<br />
ENGINE LUBRICATION SYSTEM<br />
SLC732<br />
Oil Pump (Cont'd) ~<br />
OIL PRESSURE RELIEF VALVE INSPECTION<br />
Inspect oil pressure relief valve for movement, cracks and<br />
breaks by pushing the ball. If replacement is necessary, remove<br />
valve by prying it out with suitable tool.<br />
Install a new valve in place by tapping it.<br />
OIL PUMP INSPECTION<br />
Using a feeler gauge, check the following clearance.<br />
Unit: mm (in)<br />
Rotor tip clearance CD<br />
Outer rotor to body clearance @<br />
Side clearance (with gasket) CID<br />
Less than 0.12 (0.0047)<br />
0.15 - 0.21 (0.0059 - 0.0083)<br />
0.04 - 0.08 (0.0016 - 0.0031)<br />
If it exceeds the limit, replace gear set or entire oil pump<br />
assembly.<br />
LC-6
~ Thermostat: Open<br />
~ Thermostat: Closed<br />
Intake man ifold<br />
ENGINE COOLING SYSTEM<br />
Cooling Circuit<br />
System Check<br />
WARNING:<br />
Radiator<br />
Thermostat<br />
SLC186A<br />
Never remove the radiator cap when the engine is hot;<br />
serious burns could be caused by high pressure fluid escaping<br />
from the radiator.<br />
Wrap a thick cloth around cap and carefully remove the cap<br />
by turning it a quarter turn to allow built-up pressure to<br />
escape and then turn the cap all the way off.<br />
CHECKING COOLING SYSTEM HOSES<br />
Check hoses for improper attachment, leaks, cracks, damage,<br />
loose connections, chafing and deterioration.<br />
LC-7
~<br />
ENGINE COOLING SYSTEM<br />
SMA990A<br />
SLC613<br />
~ ::~~~.~.~.m~<br />
12'~' .<br />
\ )!!7<br />
~',P/ SLC187A<br />
(f<br />
SLC738<br />
SLC188A<br />
System Check (Cont'd)<br />
CHECKING COOLING SYSTEM FOR lEAKS<br />
To check for leakage. apply pressure to the cooling system with<br />
a tester.<br />
Testing pressure:<br />
98 kPa (1.0 kg/cm2, 14 psi)<br />
CAUTION:<br />
Higher than the specified pressure may cause radiator damage.<br />
CHECKING RADIATORCAP<br />
To check radiator cap, apply pressure to cap with a tester.<br />
Radiator cap relief pressure:<br />
78 -98 kPa (0.8 - 1.0 kg/cm2,11 - 14 psi)<br />
Water Pump<br />
INSPECTION<br />
Check for excessive end play and rough operation.<br />
INSTAllATION<br />
. Remove liquid gasket from mating surface of pump housing<br />
using a scraper.<br />
Be sure liquid gasket in grooves Is also removed. ,<br />
. Remove liquid gasket from mating surface of cylinder block.<br />
. Clean all traces of liquid gasket using white gasoline.<br />
LC-8
Cut here.<br />
~ ]<br />
KP510-00150<br />
Diameter of liquid gasket:<br />
2.0.3.0 mm 10.079.0.118 in)<br />
Water inlet<br />
Upward<br />
ENGINE COOLING SYSTEM<br />
SLC822<br />
SLC189A<br />
SLC192A<br />
.Jiggle valve ~<br />
A~ ~~ --~<br />
SLC097<br />
SLC343<br />
Water Pump (Cont'd)<br />
. Cut off tip of nozzle of liquid gasket tube at point shown in<br />
figure.<br />
. Use Genuine Liquid Gasket or equivalent.<br />
. Apply a continuous bead of liquid gasket to mating surface<br />
of pump housing as shown.<br />
a. Be sure diameter of liquid gasket Is within 2.0 to 3.0 mm<br />
(0.079 to 0.118 In) dla. range.<br />
b. Attach pump housing to cylinder block within five minutes<br />
of applying liquid gasket.<br />
c. After Installing pump housing, walt at least 30 minutes<br />
before starting engine.<br />
Thermostat<br />
INSPECTION<br />
1. Check for valve seating condition at ordinary temperatures.<br />
It should sea.ttightly.<br />
2. Check valve opening temperature and maximum valve lift.<br />
Valveopening temperature<br />
°c (oF)<br />
Max.valve lift<br />
mmfC (infF)<br />
76.5 (170)<br />
8/90 (0.31/194)<br />
3. Then check if valve closes at 5°C (9°F) below valve opening<br />
temperature. .<br />
. After Installation, run engine for a few minutes, and check>.,<br />
for leaks.<br />
LC-9
SLC790<br />
Cut here.<br />
~ ]<br />
KP510.()0150<br />
SLC822<br />
SLC824<br />
ENGINE COOLING SYSTEM<br />
Thermostat (Cont'd)<br />
INSTAllATION<br />
. Remove liquid gasket<br />
using a scraper.<br />
from mating surface<br />
(<br />
of thermostat<br />
. Similarly, remove liquid gasket from mating surface of<br />
cylinder block.<br />
. Clean all traces of liquid gasket using white gasoline.<br />
. Cut off tip of nozzle of liquid gasket tube at point shown in<br />
figure.<br />
. Use Genuine LiqLJidGasket or equivalent.<br />
..~<br />
. Apply a continuous bead of liquid gasket to mating surface<br />
of water inlet.<br />
a. Be sure diameter of liquid gasket is within 2.0 to 3.0 mm<br />
(0.079 to 0.118 in).<br />
b. Attach water inlet to cylinder block within five minutes<br />
after applying liquid gasket.<br />
c. After installing water inlet, wait at least 30 minutes before<br />
refilling coolant and starting engine.<br />
LC -1 0<br />
'(<br />
.~
~3 2 -4.2<br />
10.33-0.43,<br />
2.4-3.1)<br />
7<br />
~ @I<br />
~: N-mIkg-m,ft-lb)<br />
-~ '\" ~ Fan<br />
-<br />
(")<br />
I<br />
~<br />
N<br />
!II<br />
r<br />
0<br />
I\,)<br />
w<br />
m<br />
»<br />
41<br />
0<br />
36<br />
I GNITI ON SWITCH<br />
ON or- START<br />
36<br />
t'1<br />
P<br />
P<br />
!fI<br />
n<br />
a<br />
z<br />
-I<br />
::0<br />
a<br />
r<br />
c<br />
....<br />
z<br />
-I<br />
11<br />
41<br />
To ther-mo contro I amp.<br />
I GNI TI ON SWITCH<br />
ACC or- ON<br />
FUSE<br />
@D~<br />
@4Ib<br />
BATTERY<br />
fus Ib I e<br />
AIR<br />
CONDI TI ON<br />
RELAY<br />
THERMO-<br />
SWITCH<br />
M CONDENSER<br />
FAN MOTOR<br />
-=
(Sub-h<br />
arness)<br />
~<br />
CONDENSER FAN MOTOR ELECTRICAL CIRCUIT<br />
AIR<br />
Wiring Diagram<br />
= Ie Ilnk-<br />
CONNECTOR-ll - @) lR;l ~ Ii [!t<br />
CONDENSER<br />
F<br />
~ 't1H<br />
AN ~ °"<br />
I<br />
MOTOR ~ mIi] I ~::;CD<br />
Ii]<br />
~<br />
CONNECTOR-I y..>r;;;,<br />
m<br />
m<br />
[!]<br />
Ii]<br />
Ii<br />
@i5<br />
CONDENSER FAN MOTOR ELECTRICAL CIRCUIT<br />
00<br />
L:::<br />
'+<br />
000 -=<br />
@i5<br />
'<br />
.<br />
-<br />
_MEeT<br />
Iu<br />
[ill<br />
[]I]<br />
DISCONNECT<br />
lu<br />
00<br />
-<br />
i5<br />
iJ<br />
0 00 -=<br />
SLC239A<br />
SLC240A<br />
-<br />
SLC241A<br />
SLC242A<br />
SLC243A<br />
Trouble Diagnosis<br />
Even though air conditioner operates normally under high<br />
engine temperature conditions [above 9SoC (20SoF)] the<br />
condenser fan motor does not rotate.<br />
m 1 m<br />
CHECK POWER SUPPLY CHECK CONDENSER FAN<br />
(Motor side). MOTOR.<br />
1) Disconnect condenser fan 1) Turn ignition and air condimotor<br />
harness connector-H. tioner switch "OFF".<br />
2) Turn ignition switch, air con- O.K. 2) Disconnect condenser fan<br />
ditioner switch and blower motor harness connector-I.<br />
switch "ON".<br />
3) Check continuity between<br />
3) Check voltage between fan connector-H terminal @ and<br />
motor harness connector-II connector-I terminal @.<br />
terminal @ and ground. Continuity should exist.<br />
Battery voltage should exist. If N.G. replace condenser<br />
motor-.<br />
fan<br />
N.G.<br />
Ii<br />
CHECK POWER SUPPLY<br />
(Motor side).<br />
O.K.<br />
[!]<br />
CHECK GROUND CIRCUIT.<br />
Check harness continuity between<br />
motor harness connector-I<br />
1) Turn ignition switch "OFF"<br />
2) Disconnector fan motor<br />
harness connector-I.<br />
3) Turn ignition switch "ON".<br />
4) Check voltage between<br />
terminal @ and<br />
ground.<br />
Battery voltage should exist.<br />
terminal @ and ground.<br />
Continuity should exist.<br />
If N.G., repair harness.<br />
O.K.<br />
Ii]<br />
CHECK THERMOSWITCH.<br />
Check continuity between<br />
thermoswitch terminals @ and<br />
lo.K.<br />
CD.<br />
N.G. Repair or replace harness<br />
between terminals @<br />
and @.<br />
Condition<br />
Above<br />
92 -98°C (198 -2OS°F)<br />
Below<br />
92 -98°C (198 -2OS°F)<br />
ContinuitY<br />
Yes<br />
No I<br />
CHECK POWER SUPPLY<br />
(Relay side).<br />
1) Turn ignition "OFF".<br />
O.K.<br />
Check sub-harness for thermoswitch<br />
continuity. If N.G., repair<br />
or replace them.<br />
2) Disconnect air conditioner<br />
relay. Check the followings:<br />
3) Turn ignition "ON". @is 8 Harness continuity between<br />
4) Check voltage between<br />
terminals @, @ and ground.<br />
N.G. terminal @ and battery EB<br />
L--to terminal.<br />
Battery voltage should exist. 8 "G" fusible link<br />
If N.G. replace them.<br />
O.K.<br />
I<br />
CHECK RELAY.<br />
Refer to HA section.<br />
@is<br />
Check the followings:<br />
8 Harness continuity between<br />
terminal @ and battery EB<br />
O.K. l. N.G.<br />
8<br />
terminal<br />
Fuse<br />
E r Replace relay.<br />
8 Ignition switch<br />
iii<br />
LC-14
iii<br />
[it<br />
34<br />
i5l<br />
0 -=<br />
[R]<br />
CONDENSER FAN MOTOR ELECTRICAL CIRCUIT<br />
SLC244A<br />
~i5@ SLC245A<br />
Trouble Diagnosis (Cont'd)<br />
~ lOK<br />
CHECK HARNESS<br />
CONTINUITY,<br />
1) Turn ignition switch "OFF",<br />
2) Check continuity between N.G.<br />
relay harness connector<br />
terminal @ and fan motor<br />
harness connector-I terminal<br />
@.<br />
Continuity should exist.<br />
LC-15<br />
Repair or replace harness or<br />
connectors between terminals<br />
@ and (d) .<br />
"-
Oil pressure check<br />
Engine rpm<br />
Idle speed<br />
3.000<br />
Thermostat<br />
SERVICE DATA AND SPECIFICATIONS (S.D.S.)<br />
Approximate discharge pressure<br />
kPa (kg/em' , psi)<br />
More than 78 (0.8, 11)<br />
412.481 (4.2.4.9,60 - 70)<br />
Valve opening temperature °c (OF) 76.5 (170)<br />
Max. valve lift mmfc (infF) 8/90 (0.31/194)<br />
Engine Lubrication System<br />
Oil pump<br />
Unit: mm (in)<br />
Rotor tip clearance Less than 0.12 (0.0047)<br />
Outer rotor to body clearance 0.15 - 0.21 (0.0059 - 0.0083)<br />
Side clearance (with gasket)<br />
Engine Cooling System<br />
. lC-16<br />
Radiator<br />
Cap relief pressure<br />
Leakage test pressure<br />
0.04 - 0.08 (0.0016.0.0031)<br />
Unit: kPa (kg/em' .psi)<br />
78 -98 (0.8 - 1.0, 11 - 14)<br />
98 (1.0, 14)
"<br />
CONTENTS<br />
ENGINEFUEL&<br />
EMISSION-CONTROLSYSTEM<br />
SECTIONEF &EC<br />
PREPARATION ... EF & EC- 2<br />
PRECAUTIONS """""""""""""""'"'''''''''''''''''''''''''''''''''''' EF & EC- 3<br />
ENGINE AND EMISSION CONTROL OVERALL SYSTEM EF & EC- 4<br />
ENGINE AND EMISSION CONTROL PARTS DESCRIPTION EF & EC- 9<br />
ENGINE AND EMISSION CONTROL SYSTEM DESCRIPTION EF & EC- 16<br />
IDLE SPEED/IGNITION TIMING/IDLE MIXTURE RATIO INSPECTION EF & EC- 26<br />
TROUBLE DIAGNOSES EF & EC- 31<br />
FUEL INJECTION CONTROL SYSTEM INSPECTION EF & EC-153<br />
EVAPORATIVE EMISSION CONTROL SYSTEM EF & EC-155<br />
CRANKCASE EMISSION CONTROL SYSTEM EF & EC-157<br />
SERVICE DATA AND SPECIFICATIONS (S.D.S.) EF & EC-158<br />
When you read wiring diagrams:<br />
. Read GI section, "HOW TO READ WIRING DIAGRAIVIS".<br />
. See El section, "POWER SUPPLY ROUTING" for power distribution circuit.<br />
When you perform trouble diagnoses, read GI section, "HOW TO FOllOW<br />
FLOW CHART IN TROUBLE DIAGNOSES".<br />
E.C.C.S. Wiring Diagram - See pull-out following EL section.<br />
-
Tool number<br />
(Kent-Moore No.)<br />
Tool name<br />
Description<br />
EG11160000<br />
~<br />
( - )<br />
Ignition coil adapter<br />
harness<br />
PREPARATION<br />
SPECIAL SERVICE TOOL<br />
EF & EC-2<br />
Measuring<br />
engine speed
E.C.U.<br />
. Do not disassemble E.C.C.S.<br />
control unit. (E.C.U.)<br />
. Do not turn diagnosis mode<br />
selector forcibly.<br />
. If a batteryterminalis disconnected,<br />
the memory will return<br />
to the ROM value. The E.C.C.S.'<br />
will now start to self-control at<br />
its initial value. Engine operation<br />
can vary slightly when the<br />
terminal is disconnected. However,<br />
this is not an indication<br />
of a problem. Do not replace<br />
parts because of a slight variation.<br />
BATTERY<br />
. Always use a 12 volt battery as<br />
a power source.<br />
. Do not disconnectbattery<br />
cables while the engine is running.<br />
. Do not reverse polarity of battery<br />
when connecting it. Otherwise,<br />
E.C.U. and/or injectors<br />
may be burned.<br />
E.C.C.S. PARTS HANDLING<br />
. Handle air flow meter carefully<br />
to avoid damage.<br />
. Do not disassemble air flow<br />
meter.<br />
. Do not clean air flow meter<br />
with detergent.<br />
. Do not jolt or jar the crank<br />
angle sensor.<br />
SEF121H<br />
PRECAUTIONS<br />
. Do not apply undue force to<br />
mounting bracket.<br />
. Before connecting or disconnecting<br />
E.C.U. connector, make<br />
sure red and green LEOs are<br />
off after turning ignition key off.<br />
. Always install the properly<br />
specified E.C.U. on car; otherwise,<br />
erroneous engine operation<br />
may result.<br />
. Disconnect connector by pulling<br />
it (not the harness) straight<br />
out.<br />
. Before connecting connector,<br />
make sure all pins are straight.<br />
INJECTOR<br />
. Do not disconnect injector har~<br />
ness connectors with engine<br />
running.<br />
. Do not apply battery power directly<br />
to injectors; otherwise<br />
injectors will be damaged.<br />
~~<br />
WHEN STARTING<br />
. Do not depress accelerator<br />
pedal when starting.<br />
. Immediately after starting, do<br />
not rev up engine unnecessarily.<br />
. Do not rev up engine just prior<br />
to shutdown.<br />
EF & EC-3<br />
WIRELESS EQUIPMENT<br />
. When installing a C.B. ham<br />
radio or a mobile phone, be<br />
sure to observe the following,<br />
as installation location may affect<br />
the electronic<br />
tems.<br />
control sys-<br />
1) Keep antenna as far as possible<br />
away from electronic<br />
trol units.<br />
con-<br />
2) Keep antenna feeder line more<br />
than 20 cm (7.9 in) away from<br />
harness of electronic controls.<br />
Do not let them run parallel for<br />
a long distance.<br />
3) Adjust antenna and feeder line<br />
so that standing-wave<br />
be kept smaller.<br />
ratio can<br />
4) Be sure to ground radio to vehicle<br />
body.<br />
FUEL PUMP<br />
. Do not operate fuel pump<br />
when there is no fuel in lines.<br />
. Do not reuse fuel hose clamps.<br />
. Tighten fuel hose clamps to<br />
the specified torque.<br />
E.C.C.S. HARNESS HANDLING<br />
. Securely connect E.C.C.S. harness<br />
connectors.<br />
A poor connection can cause<br />
extremely high voltage to develop<br />
in the coil and condenser,<br />
resulting in damage to ICs.<br />
. Keep E.C.C.S. harness at least<br />
10 cm (3.9 in) away from adjacent<br />
harnesses, to prevent an<br />
E.C.C.S. systerri malfunction<br />
due to receiving external noise,<br />
degraded operation of ICs, etc.<br />
. Keep E.C.C's' parts and harnesses<br />
dry.<br />
. Before removing parts, turn off<br />
ignition switch and then disconnect<br />
battery ground cable.
. E.C.C.S.relay<br />
. Fuelpumprelay<br />
LA.A. unit<br />
Fuel efilter<br />
ENGINE AND EMISSION CONTROL OVERALL SYSTEM<br />
Exhaust gas<br />
temperature sensor<br />
(For California model)<br />
~ -.w~<br />
~ ..f E. GR . . control sensor .<br />
solenoid valve<br />
E.C.C.S./Component Parts Location<br />
E.G.R. control valve Pressure regulator<br />
~~b<br />
~~;:~~<br />
~<br />
Distributor<br />
EF & EC-4<br />
Fuel pump<br />
--<br />
Pressure<br />
regu lator control<br />
solenoid valve<br />
~ S.C.V.control<br />
~'iWIW<br />
~.~,<br />
~<br />
A'I'V'<br />
. control<br />
solenoid<br />
~ I valve<br />
.<br />
0<br />
a<br />
"<br />
Ignition coil and<br />
power transistor<br />
~.,~.<br />
~" A;,flowm.'"<br />
Exhaust gas<br />
sensor<br />
SEF122H
m<br />
"TI<br />
J20<br />
m<br />
(")<br />
I<br />
C1I<br />
en m<br />
"TI<br />
-'"w<br />
:I<br />
Transmission<br />
Ignition switch<br />
Crank angle sensor<br />
built-in distributor<br />
~ Vehicle<br />
lSJ speed sensor<br />
~<br />
Q: Intake air flow<br />
...: Exhaustgasflow<br />
Exhaust gas temperature sensor I.<br />
(For California model) \<br />
\ \"\<br />
\<br />
!..<br />
!<br />
Engine<br />
temperatu re C.<br />
sensor<br />
Exhaust<br />
gas sensor<br />
A.I.V.<br />
I'.<br />
\'1'<br />
\<br />
Throttle<br />
valve<br />
sensol . 7<br />
L- : ~ -'<br />
r---~--<br />
lFuel pressure<br />
regulator<br />
E.G.R. control<br />
solenoid valve7<br />
/<br />
\.Spark plug<br />
\1 '11<br />
Carbon<br />
canister<br />
A.I.V. control<br />
solenoid valve<br />
B<br />
Air flow me
E.C.C.S. CONTROL SYSTEM<br />
I Crankanglesensor I<br />
[ Air flow meter<br />
! Engine temperature sensor<br />
[ Exhaust gas sensor<br />
[ Ignition switch<br />
1 Starter switch<br />
[ Idle switch<br />
! Throttle sensor<br />
[ Air conditioner switch<br />
Neutral switch (M/T)<br />
Inhibitor switch (AiT)<br />
[ Vehicle speed sensor<br />
Power steering oil pressure<br />
switch<br />
[ Battery<br />
Exhaust gas temperature sensor<br />
(For California model)<br />
ENGINE AND EMISSION CONTROL OVERALL SYSTEM<br />
"<br />
~<br />
r<br />
.1<br />
.<br />
.<br />
.<br />
.<br />
.<br />
.<br />
Fail-safe function<br />
System Chart<br />
.<br />
E.C.C.S.<br />
control<br />
unit<br />
,"<br />
.<br />
.<br />
.<br />
EF & EC-6<br />
Fuel injection &<br />
mixture ratio control<br />
Ignition timing control<br />
Idle speed control<br />
A.I.V. control<br />
E.G.R. control &<br />
Canister control<br />
Fuel pump control -<br />
.~<br />
Air regulator control<br />
Acceleration cut<br />
control<br />
S.C.V. (Swirl control<br />
valve)control<br />
Exhaust gas sensor<br />
monitor & self-diagnosis<br />
Pressu re regu lator<br />
control<br />
. Airflowmeter<br />
. Throttle sensor<br />
. Enginetemperaturesensor<br />
Injectors<br />
Power transistor<br />
Auxiliary air control<br />
(A.A.CJ valve<br />
A:I.V. control solenoid valve<br />
E.G.R. control solenoid<br />
valve<br />
Fuel pump<br />
Air regulator<br />
Air conditioner relay<br />
S.C.V. control<br />
solenoid valve<br />
Inspection lamps<br />
(On the control unit)<br />
Pressu re regulator control<br />
solenoid valve
~TWI~<br />
@ @<br />
ENGINE AND EMISSION CONTROL OVERALL SYSTEM<br />
@-b<br />
Air regurator<br />
tJi)<br />
@ ./"'1<br />
Air duct<br />
Vacuum Hose Drawing<br />
@ s.c. V. actuator<br />
-@-a<br />
E.G.R. control<br />
valve<br />
EF 8r. EC- 7<br />
@/<br />
Vacuum tubes-1<br />
1<br />
Canister<br />
@<br />
SEF355H
m<br />
."<br />
f20<br />
m<br />
(")<br />
I<br />
co<br />
(/)<br />
m<br />
"<br />
w<br />
0<br />
.....<br />
:x:<br />
FUSIBLE<br />
LINK<br />
-c8J-<br />
I GNITION SWITCH<br />
OFFACCON ST<br />
(<br />
(<br />
(<br />
FUSE<br />
CK<br />
= Ij/]<br />
CONNECTOR<br />
'-:::./<br />
CHECK<br />
J-----rs}<br />
rJ 116 --<<br />
3<br />
>J<br />
I en 45<br />
6 ("") 0 43<br />
13 Z<br />
-i<br />
;0<br />
0 44<br />
r 33<br />
c<br />
Z<br />
.... 35<br />
-i<br />
41<br />
II<br />
ENGINE@ LI GHT C<br />
PRESSURE REGULATOR<br />
CONTROL<br />
SOLENOID VALVE<br />
E. G. R. CONTROL<br />
SOLENOID VALVE<br />
L.:::T<br />
A. 1. V. CONTROL<br />
SOLENOID VALVE<br />
L..::..:J<br />
S. C. V. CONTROL<br />
SOLENOID VALVE<br />
L::...J<br />
A. A. C. VALVE<br />
L..::J<br />
AIR REGULATOR<br />
FUELL..:....J<br />
PUMP M<br />
::-<br />
=<br />
M 5TH POSITION<br />
- SWITCH<br />
= -<br />
POWER<br />
OIL PRESSURE<br />
STEERING<br />
::- SWI TCH<br />
I<br />
rm<br />
J>r<br />
-< :[ "U<br />
c :] lIB;!:<br />
::I<br />
"U ...----J<br />
ISWITCH NHI BIT<br />
I NHI B<br />
RELAY<br />
r-=<br />
I NHIB<br />
RELA<br />
-=<br />
THROTTLE<br />
VALVE<br />
SWITCH<br />
-v<br />
Photo diode<br />
Wave<br />
forming circuit<br />
SEF613B<br />
ENGINE AND EMISSION CONTROL PARTS DESCRIPTION<br />
1800 signal slit for No.1 cylinder<br />
Rotor plate<br />
Temperature<br />
compensation resistor<br />
Rotor plate<br />
SEF853B<br />
A<br />
Battery<br />
sou rce<br />
16<br />
Air flow<br />
meter<br />
B<br />
c<br />
Output voltage<br />
Ground<br />
E.C.C.S.<br />
17 control<br />
unit<br />
109<br />
SEF285H<br />
I<br />
.. r-f<br />
RH;:~-Hot wire<br />
RH : Hot wire resistance<br />
RK : Temperature compensation resistance<br />
RA. RB : Constant resistance SEF617B<br />
E.C.C.S. Control Unit (E.C.U.)<br />
The EC.U. consists of a microcomputer, inspection lamps, a.<br />
diagnostic mode selector, and connectors for signal input and<br />
output and for power supply. The unit controls the engine.<br />
Crank Angle Sensor<br />
The crank angle sensor is a basic component of the entire<br />
EC.C.S. It monitors engine speed and piston position, and<br />
sends signals to the E.C.U. to control fuel injection, ignition<br />
timing and other functions.<br />
The crank angle sensor has a rotor plate and a wave-forming<br />
circuit. The rotor plate has 360 slits for 10 signal and 4 slits for<br />
1800 signal. Light Emitting Diodes (L.ED.) and photo diodes are<br />
built in the wave-forming circuit.<br />
When the rotor plate passes between the L.E.D. and the photo<br />
diode, the slits in the rotor plate continually cut the light being<br />
transmitted to the photo diode from the L.ED. This generates<br />
rough-shaped pulses which are converted into on-off signals by<br />
the wave-forming circuit, which are then sent to the E.C.U.<br />
Air Flow Meter<br />
The air flow meter measures the mass flow rate of intake air.<br />
Measurements are made so that the control circuit will emit an<br />
electrical output signal corresponding to the amount of heat<br />
dissipated from a hot wire placed in the stream of intake air.<br />
The airflow past the hot wire removes the heat from the hot<br />
wire. The temperature of the hot wire is very sensitive to the<br />
mass flow rate. The higher the temperature of the hot wire, the<br />
greater its resistance value. This temperature change (resistance)<br />
is determined by the mass air flow rate. The control<br />
circuit accurately regulates current (I) in relation to the varying<br />
resistance value (RH) so that VA always equals VB.The air flow<br />
meter transmits a voltage value VAto the control unit where the<br />
output is converted into an intake air signal.<br />
EF & EC-9
ENGINE AND EMISSION CONTROL PARTS DESCRIPTION<br />
SEF903D<br />
SEF359H<br />
Engine Temperature Sensor<br />
The engine temperature sensor detects the engine temperature,<br />
which is dependent on engine coolant temperature, and transmits<br />
a signal to the E.C.U.<br />
The temperature sensing unit employs a thermistor which is<br />
sensitive to the change in temperature. Electrical resistance of<br />
the thermistor decreases in response to the temperature rise.<br />
Throttle Sensor & Soft/Hard Idle Switch<br />
The throttle sensor responds to the accelerator pedal movement.<br />
This sensor is a kind of potentiometer which transforms<br />
the throttle valve position into output voltage, and emits the<br />
voltage signal to the E.C.U. In addition, the sensor detects the<br />
opening and closing speed of the throttle valve and feeds the<br />
voltage signal to the E.C.U.<br />
Idle position of the throttle valve is determined by the E.C.U.<br />
receiving the signal from the throttle sensor. This system is<br />
called "soft idle switch" and controls engine operation such as<br />
fuel cut. On the other hand, "hard idle switch", which is built in<br />
the throttle sensor unit, is used not for engine control but for<br />
self-diagnosis.<br />
Not used<br />
><br />
~<br />
.,---0'---<br />
2<br />
(Full throttle<br />
switch)<br />
Idle<br />
:5 ~ 6.0<br />
0<br />
Z<br />
~<br />
~ 3 ) switch ~<br />
E:<br />
Throttle .§ 4.0<br />
sensor ~ '"<br />
6 } ! '"<br />
-0<br />
f2.0<br />
~<br />
5<br />
...<br />
g<br />
"<br />
6 9-<br />
"<br />
0 0<br />
0<br />
Supply voltage:<br />
5V (Applied between terminal NO.4 and 6)<br />
Output voltage between<br />
terminal NO.4 and 5<br />
45 90<br />
Throttle valve opening angle (deg)<br />
135<br />
SEF287D<br />
Fuel Injector<br />
The fuel injector is a small, elaborate solenoid valve. As the<br />
E.C.U. sends injection signals to the injector, the coil in the<br />
injector pulls the needle valve back and fuel is released ,into the<br />
intake manifold through the nozzle. The injected fuel is controlled<br />
by the E.C.U. in terms of injection pulse duration.<br />
Brass wire is used in the injector coil and thus the resistance is<br />
higher than a conventional injector.<br />
EF &. EC-10
Air chamber<br />
ENGINE AND EMISSION CONTROL PARTS DESCRIPTION<br />
0 Intake manifold<br />
vacuum<br />
Fuel chamber Fuel return<br />
from injector<br />
To<br />
fuel tank Q<br />
SEF6058<br />
Holder<br />
Louver<br />
?: 1<br />
;;<br />
'"0><br />
~ 0>...<br />
Q<br />
Isolation bushing<br />
Contact plate<br />
:J<br />
C.<br />
8 0I ~ I<br />
Rich --- Ideal ratio --Lean<br />
Connector<br />
SEC336A<br />
Mixture ratio SEF288D<br />
Outlet<br />
0<br />
1)<br />
Inlet<br />
Fuel damper<br />
Motor<br />
SEF043C<br />
SEF125H<br />
Pressure Regulator<br />
The pressure regulator maintains the fuel pressure at 299.1 kPa<br />
(3.05 kg/cm2, 43,4 psi). Since the injected fuel amount depends<br />
on injection pulse duration, it is necessary to maintain the<br />
pressure at the above value.<br />
Exhaust Gas Sensor<br />
The exhaust gas sensor, which is placed into the exhaust<br />
manifold, monitors the amount of oxygen in the exhaust gas.<br />
The sensor has a closed-end tube made of ceramic zirconia.<br />
The outer surface of the tube is exposed to exhaust gas, and<br />
the inner surface to atmosphere. The zirconia of the tube<br />
compares the oxygen density of exhaust gas with that of<br />
atmosphere, and generates electricity. In order to improve the<br />
generating power of the zirconia, its tube is coated with<br />
pratinum. The voltage is approximately 1V in a richer condition<br />
of the mixture ratio than the ideal air-fuel ratio, while approximately<br />
OV in leaner conditions. The radical change from 1V to<br />
OV occurs at around the ideal mixture ratio. In this way, the<br />
exhaust gas sensor detects the amount of oxygen in the<br />
exhaust gas and sends the signal of approximately 1V or OV to<br />
the E.C.U.<br />
Fuel Pump<br />
The fuel pump with a fuel damper is a submergible type, and<br />
are located in the fuel tank.<br />
Power Transistor<br />
The ignition signal from the E.C.U. is amplified by the power<br />
transistor, which turns the ignition coil primary circuit on and off,<br />
inducing the proper high voltage in the secondary circuit. The<br />
ignition coil is a small, molded type.<br />
EF & EC-11
Idle<br />
adjusting<br />
screw<br />
Magnetic line<br />
ENGINE AND EMISSION CONTROL PARTS DESCRIPTION<br />
Air<br />
SEF636B<br />
SEF126H<br />
SEF040E<br />
SEF286H<br />
\ /' Reed Reed<br />
~SWitch (s N) switch<br />
N S S N<br />
// M;;Qnetic<br />
I<br />
. \<br />
0 G:<br />
\<br />
"{ t;\<br />
I me I<br />
y-/<br />
Fieldplate Fieldplate<br />
SEF624B<br />
Air Regulator -<br />
The air regulator provides an air by-pass when the engine is<br />
cold for a fast idle during warm-up.<br />
A bimetal, heater and rotary shutter are built into the air<br />
regulator. When the bimetal temperature is low, the air by-pass<br />
port opens. As the engine starts and electric current flows<br />
through a heater, the bimetal begins to turn the shutter to close<br />
the by-pass port. The air passage remains closed until the<br />
engine stops and the bimetal temperature drops.<br />
Idle Air Adjusting (I.A.A.) Unit<br />
The I.A.A. unit is made up of the AA.C. valve, F.I.C.D. solenoid<br />
valve and idle adjust screw. It receives the signal from the E.C.U.<br />
and controls the idle speed at the preset value.<br />
The F.I.C.D. solenoid valve compensates for changes in idle<br />
speed caused by the operation of. the air compressor. A<br />
vaCl/um control valve is also installed in this unit to prevent an<br />
abnd'rmal rise in intake<br />
celeratton.<br />
manifold vacuum pressure during de-<br />
Auxiliary Air Control (A.A. C.) Valve<br />
The E.C.U. actuates the A.A.C. valve by an ON/OFF pulse. The<br />
longer that ON pulse is received, the larger the amount- of air<br />
that will flow through the A.A.C. valve.<br />
Power Steering Oil Pressure Switch<br />
The power steering oil pressure switch is attached to the power<br />
steering high-pressure tube and detects the power steering<br />
load, sending the load signal to the E.C.U. The E.C.U. then<br />
sends the idle-up signal to the I.S.C. valve.<br />
Vehicle Speed Sensor<br />
The vehicle speed sensor provides a vehicle speed signal to the<br />
E.C.U.<br />
The speed sensor consists of a reed switch, which is installed<br />
on the transmission<br />
pulse signal.<br />
unit and transforms vehicle speed into a<br />
EF & EC-12
To E.G.A.<br />
control valve<br />
Air<br />
filter<br />
ENGINE AND EMISSION CONTROL PARTS DESCRIPTION<br />
SEF632B<br />
Vacuum signal source<br />
t<br />
Exhaust pressure EC344A<br />
SEF127H<br />
E.G.R. Control Valve<br />
The E.G.R. control valve controls the quantity of exhaust gas to.<br />
be led to the intake manifold through vertical movement of the<br />
taper valve connected to the diaphragm, to which vacuum is<br />
applied in response to the opening of the throttle valve.<br />
B.P.T. Valve<br />
".'.1'<br />
~~~'ff'<br />
The B.P.T. valve monitors exhaust pressure to activate' the<br />
diaphragm, controlling throttle chamber vacuum applied to the<br />
E.G.R. control valve. In other words, recirculated exhaust gas is<br />
controlled in response to positioning of the E.G.R. control valve<br />
or to engine operation.<br />
Air Induction Valve (AJ.V.)<br />
The air induction valve sends secondary air to the exhaust<br />
manifold, using a vacuum created by exhaust pulsation in the<br />
exhaust manifold. When the exhaust pressure is below atmospheric<br />
pressure (negative pressure), secondary air is sent to the<br />
exhaust manifold. When the exhaust pressure is above atmospheric<br />
pressure, the reed valves prevent secondary air from<br />
being sent back to the air cleaner.<br />
EF & EC-13<br />
\.
ENGINE AND EMISSION CONTROL PARTS DESCRIPTION<br />
SEF287H<br />
SEF256A<br />
A.I.V. Control Solenoid Valve<br />
The A.LV. control solenoid valve cuts the intake manifold<br />
vacuum signal for A.I.V. control. It responses to the ON/OFF<br />
signal from the E.C.U: When the solenoid is off, the vacuum<br />
signal from the intake manifold is cut. When the control unit<br />
sends an ON signal, the coil pulls the plunger downward and<br />
feeds the vacuum signal to the A.I.V. control valve.<br />
E.G.R. Control Solenoid Valve<br />
The E.G.R. system is controlled only by the E.C.U. At both lowand<br />
high-speed engine revolutions, the solenoid valve turns on<br />
and accordingly the E.G.R. valve cuts the exhaust gas leading<br />
to the intake manifold.<br />
Pressure Regulator (P.R.) Control Solenoid<br />
Valve<br />
The solenoid valve responds to the ON/OFF signal from the<br />
E.C.U. When it is off, a vacuum signal from the intake manifold<br />
is fed into the pressure regulator. When the control unit sends<br />
an ON signal, the coil pulls the plunger downward and cuts the<br />
vacuum signal. .<br />
S.C.V. Control Solenoid Valve<br />
The S.C.V. control solenoid valve cuts the intake manifold<br />
vacuum signal for swirl control valve. It responds to the<br />
ON/OFF signal from the E.C.U. When the solenoid is off, the<br />
vacuum signal from the intake manifold is cut. When the control<br />
unit sends an ON signal the coil pulls the plunger and feeds the<br />
vacuum signal to the swirl control valve actuator.<br />
Fuel Filter<br />
The specially designed fuel filter has a metal case in order to<br />
withstand high fuel pressure.<br />
Carbon Canister<br />
The carbon canister is filled with active charcoal to absorb<br />
evaporative gases produc~d in Jhe fuel tank. These absorbed<br />
gases are then delivered to the intake manifold by ,manifold<br />
vacuum for combustion purposes.<br />
The vacuum in the intake passage upstream of the throttle valve<br />
increases in response to the amount of the intake air.<br />
When the vacuum of the intake passage is higher than a preset<br />
value, the 2nd purge control valve opens and the absorbed<br />
gases are sucked into the intake passage for combustion<br />
purposes.<br />
EF & EC-14
SEF296H<br />
ENGINE AND EMISSION CONTROL PARTS DESCRIPTION<br />
SEF072G<br />
Check Connector for E.C.C.S. Checker Box<br />
The check connector for E.C.C.S. checker box is beside fuse<br />
box. .<br />
Exhaust Gas Temperature Sensor<br />
(For California model)<br />
The exhaust gas temperature sensor monitors in exhaust gas<br />
temperature and transmits a signal to the E.C.U. The temperature<br />
sensing unit employs a thermistor whi~h is sensitive to the<br />
change in temperature. Electric resistance of the thermistor<br />
decreases in response to the temperature rise.<br />
EF &. EC-15<br />
\.
ENGINE AND EMISSION CONTROL SYSTEM DESCRIPTION<br />
INPUT/OUTPUT SIGNAL 'LINE<br />
Crank angle sensor<br />
Air flow meter<br />
Engine temperature sensor<br />
Exhaust gas sensor<br />
Throttle sensor<br />
Idle switch<br />
Neutral switch (MfT)<br />
Inhibitor switch (AfT)<br />
Vehicle speed sensor<br />
Ignition switch<br />
Battery<br />
~i<br />
Low -<br />
Water temperature<br />
Fuel Injection Control<br />
Engine speed and piston position<br />
Amount of intake air<br />
Engine temperature<br />
Density of oxygen in exhaust gas<br />
Throttle valve position<br />
Throttle valve idle position<br />
Gear position<br />
Vehicle speed<br />
Start signal<br />
Battery voltage<br />
High<br />
SEF923C<br />
.<br />
E.C.C.S.<br />
control<br />
unit<br />
Injector<br />
BASIC FUEL INJECTION CONTROL<br />
The amount of fuel injected from the fuel injector, or the length<br />
of time the valve remains open, is determined by the E.C.U. The<br />
basic amount of fuel injected is a programmable value mapped<br />
in the E.C.U. ROM memory. In other words, the programmable<br />
value is preset by engine operating conditions determined by<br />
input signals (for engine rpm and air intake) from both the crank<br />
angle sensor and the air flow meter.<br />
VARIOUS FUEL INJECTION INCREASE/DECREASE<br />
COMPENSATION<br />
In addition, the amount of fuel injection is compensated for to<br />
improve engine performan~e<br />
as listed below:<br />
under various operating conditions<br />
<br />
1) During warm-up<br />
2) When starting the engine<br />
3) During acceleration<br />
4) Hot-engine operation<br />
<br />
1) During deceleration<br />
EF & EC-16
ENGINE AND EMISSION CONTROL SYSTEM DESCRIPTION<br />
CLOSED LOOP ~<br />
CONTROL<br />
) E.C:C.S.'<br />
control<br />
~nit / .<br />
pulse<br />
FeedAgnal ~ InJection<br />
Exhaust<br />
(gas t\ Injector<br />
sensor)<br />
combusti~ injection<br />
~ SEF639B<br />
No.1 CYlinder fL Injection pulse<br />
No.2 cylinder<br />
No.3 cylinder<br />
No.4 cylinder<br />
n<br />
n<br />
rL<br />
SEF976E 1---1 enginecycle--j<br />
No.1 cylinderJl<br />
No.2 cylinder.Jl<br />
No.3 cylinder.Jl<br />
n<br />
n<br />
n<br />
1L-<br />
1LfL-<br />
4 I . d J1 n f"L-<br />
No. cy In er<br />
~ 1 enginecycle j<br />
SEF841D<br />
Fuel Injection Control (Cont'd)<br />
MIXTURE RATIO FEEDBACK CONTROL<br />
Mixture ratio feedback system is designed to precisely control<br />
the mixture ratio to the stoichiometric point so that the<br />
three-way catalyst can reduce CO, HC and NOx emissions. This<br />
system uses an exhaust gas sensor in the exhau,st manifold to<br />
check the air-fuel ratio. The control unit adjusts the injection<br />
pulse width according to the sensor voltage so the mixture ratio<br />
will be within the range of the stoichiometric air-fuel ratio.<br />
This stage refers to the closed-loop control condition. The<br />
open-loop control condition refers to that under which the<br />
E,C.U. detects any of the following conditions and feedback<br />
control stops in order to maintain stabilized fuel combustion.<br />
1) Deceleration<br />
2) High-load, high-speed operation<br />
3) Engine idling<br />
4) Malfunctioning of exhaust gas sensor or its circuit<br />
5) Insufficient activation of exhaust gas sensor at low engine<br />
temperature<br />
6) Engine starting<br />
MIXTURE RATIO SELF-LEARNING CONTROL<br />
The mixture ratio feedback control system monitors the mixture<br />
ratio signal transmitted from the exhaust gas sensor. This<br />
feedback signal is then sent to the E.C.U: to control the amount<br />
of fuel injection to provide a basic mixture ratio as close to the<br />
theoretical mixture ratio as possible. However, the basic mixture<br />
ratio is not necessarily controlled as originally designed. This is<br />
due to manufacturing errors (e.g., air flow meter hot wire) and<br />
changes during operation (injector clogging, etc.) of E.C.C.S.<br />
parts which directly affect the mixture ratio.<br />
Accordingly, a difference between the basic and theoretical<br />
mixture ratios is quantitatively monitored in this system. It is<br />
then computed in terms of "fuel injection duration" to automatically<br />
compensate for the difference between the two ratios.<br />
FUEL INJECTION TIMING<br />
Fuel is injected once a cycle for each cylinder in the firing order.<br />
When engine starts, fuel is injected into all four cylinders<br />
simultaneously twice a cycle.<br />
EF & EC-17<br />
,
ENGINE AND EMISSION CONTROL SYSTEM DESCRIPTION<br />
INPUT/OUTPUT SIGNAL LINE<br />
Crank angle sensor<br />
Air flow meter<br />
Enginetemperature sensor<br />
Idle switch<br />
Throttle sensor<br />
Neutral switch (MfT)<br />
Inhibitor switch (AfT)<br />
Ignition switch<br />
Fuel Injection Control (Cont'd)<br />
FUEL SHUT-OFF<br />
Fuel to all cylinders is cut off during deceleration or high-speed<br />
operation.<br />
Ignition Timing Control<br />
Engine speed and piston position<br />
Amount of intake air<br />
Engine temperature<br />
Throttle valve idle position E.C.C.S.<br />
control<br />
unit<br />
Throttle valve opening angle<br />
Neutral position<br />
Start signal<br />
EF & EC-18<br />
,<br />
E.<br />
Power transistor
ENGINE AND EMISSION CONTROL SYSTEM DESCRIPTION<br />
SYSTEM DESCRIPTION<br />
The ignition timing is controlled by the E.C.U. in<br />
order to maintain the best air-fuel ratio in response<br />
to every running condition of the engine.<br />
The ignition timing data is stored in the ROM<br />
located in the E.C.U., in the form of the map<br />
shown below.<br />
The E.C.U. detects information such as the injection<br />
pulse width and crank angle sensor signal<br />
which varies every moment. Then responding to<br />
this information, ignition signals are transmitted to<br />
the power transistor.<br />
e.g. N: 1,800 rpm, Tp: 1.50 msec<br />
A °S.T.D.C.<br />
Tp<br />
(msec)<br />
1.75I<br />
1.50I<br />
Injection<br />
pulse<br />
width 1.25I<br />
1.00I<br />
0.75I<br />
Ignition Timing Control (Co nt' d)<br />
600 1,000<br />
I<br />
--- - --- - ---<br />
In addition to this,<br />
1 At starting<br />
2 During warm-up<br />
3 At idle<br />
4 At low battery voltage<br />
5 During swirl control valve operates<br />
6 Hot engine operation<br />
7 At acceleration<br />
the ignition timing is revised by the E.C.U. according<br />
to the other data stored in the ROM.<br />
1,400<br />
Engine speed (rpm)<br />
EF & EC-19<br />
A<br />
1,800 2,200<br />
N<br />
SEC750A
ENGINE AND EMISSION CONTROL SYSTEM DESCRIPTION<br />
INPUT/OUTPUT SIGNAL LINE<br />
I Crank angle sensor I<br />
I Enginetemperature sensor<br />
-<br />
I Ignition switch I<br />
I<br />
Idle switch<br />
SYSTEM DESCRIPTION<br />
Engine speed<br />
1 Engine temperature<br />
I<br />
This system automatically controls engine idle<br />
speed to a specified level. Idle speed is controlled<br />
through fine adjustment of the amount of air<br />
which by-passes the throttle valve via AAC. valve.<br />
The A.AC. valve repeats ON/OFF operation at a<br />
rate of 100 to 200 Hz according to the signal sent<br />
from the E.C.U. The crank angle sensor detects<br />
the actual engine speed and sends a signal to the<br />
I<br />
Idle Speed Control<br />
Start signal .<br />
Throttle valve idle position .<br />
I Neutral Inhibitorswitch switch (M/T) (A/T)<br />
1 Neutral<br />
I<br />
position<br />
I Air conditioner switch<br />
1 Air conditioner operation<br />
I<br />
I Powersteeringoil pressureswitchI .<br />
I<br />
Battery<br />
I Vehicle speed sensor<br />
I<br />
Battery voltage<br />
1 Vehicle speed<br />
I<br />
EF & EC-20<br />
.1<br />
I<br />
E.C.C.S.<br />
control<br />
I A.A.C. valve I<br />
unit I<br />
I F.I.C.D. solenoid valve 1<br />
E.C.U. The E.C.U. then controls the ON/OFF time<br />
of the A.AC. valve so that engine speed coincides<br />
with the target value memorized in ROM. The<br />
target engine speed is the lowest speed at which<br />
the engine can operate steadily. The optimum<br />
value stored in the ROM is determined by taking<br />
into consideration various engine conditions, such<br />
as noise and vibration transmitted to the compartment,<br />
fuel consumption, and engine load.
ENGINE AND EMISSION CONTROL SYSTEM DESCRIPTION<br />
INPUT/OUTPUT SIGNAL LINE<br />
I Crank angle sensor<br />
] Engine speed<br />
I Ignition switch 1 Start signal<br />
SYSTEM DESCRIPTION<br />
The E.C.U. activates the fuel pump for several<br />
seconds after the ignition switch is turned on to<br />
improve engine startability. If the E.C.U. receives a<br />
1° signal from the crank angle sensor, it knows<br />
that the engine is rotating, and causes the pump<br />
to perform. If the 1° signal is not received when<br />
the ignition switch is on, the engine stalls. The<br />
E.C.U. stops pump operation and prevents battery<br />
discharging, thereby improving safety. The E.C.U.<br />
does not directly drive the fuel pump. It controls<br />
the ON/OFF fuel pump<br />
trols the fuel pump.<br />
relay, which in turn con-<br />
INPUT/OUTPUT SIGNAL LINE<br />
[ Crank angle sensor<br />
Ignition switch<br />
Engine speed<br />
Start signal<br />
SYSTEM DESCRIPTION<br />
The air regulator is controlled by the E.C.U. at the<br />
same time as fuel pump ON-OFF control.<br />
Fuel Pump Control<br />
. E.C.C.S.<br />
control<br />
unit<br />
1-Fuel pump relay I<br />
Condition Fuel pump operation<br />
Ignition switch is tunred to ON.<br />
Air Regulator Control<br />
EF 8r. EC-21<br />
Operates for<br />
5 seconds<br />
Engine running and cranking Operates<br />
When engine is stopped Stops in 1 second<br />
Except as shown above Stops<br />
.<br />
E.C.C.S.<br />
control<br />
unit<br />
Condition<br />
Ignition switch is turned to ON<br />
While engine is running and<br />
cranking<br />
When engine is stopped<br />
Air regulator<br />
Air regulator<br />
operation<br />
Operates for<br />
5 seconds<br />
Operates<br />
OFF in 1 second<br />
Except as shown above OFF
ENGINE AND EMISSION CONTROL SYSTEM DESCRIPTION<br />
INPUT/OUTPUT SIGNAL LINE<br />
Enginetemperature<br />
Engine temperature sensor<br />
Idle switch<br />
Crank angle sensor<br />
Vehicle speed sensor<br />
SYSTEM DESCRIPTION<br />
Air Induction Valve (A.I.V.) Control<br />
Throttle valve idle position<br />
Engine speed<br />
Vehicle speed<br />
The air induction system is designed to send<br />
secondary air to the exhaust manifold, utilizing the<br />
vacuum caused by exhaust pulsation in the exhaust<br />
manifold.<br />
The exhaust pressure in the exhaust manifold<br />
usually pulsates in response to the opening and<br />
closing of the exhaust valve and decreases below<br />
atmospheric pressure periodically.<br />
If a secondary air intake pipe is opened to the<br />
atmosphere under vacuum conditions, secondary<br />
Enginecondition<br />
Idle or deceleration<br />
EF 8r. EC-22<br />
E.C.C.S.<br />
control<br />
unit<br />
Water temperature A.LV. control solenoid<br />
°c (oF) valve<br />
Between 28 (82) and<br />
115 (239)<br />
A.LV. control<br />
solenoid valve<br />
air can be drawn into the exhaust manifold in<br />
proportion to the vacuum.<br />
The air induction valve is controlled by the E.C.C.S.<br />
control unit, corresponding to the engine temperature.<br />
When the engine is cold, the A.I.V. control<br />
system operates to reduce HC and CO.<br />
In extremely cold conditions, A.I.V. control system<br />
does not operate to reduce after-burning. This<br />
system also operates during deceleration for the<br />
purpose of blowing off water around the air<br />
induction valve.<br />
A.LV. control system<br />
ON Operates
I Crank<br />
ENGINE AND EMISSION CONTROL SYSTEM DESCRIPTION<br />
INPUT/OUTPUT SIGNAL LINE<br />
angle sensor I<br />
I Air flow meter I<br />
I Enginetemperature sensor<br />
I<br />
Ignition switch<br />
Engine speed<br />
SYSTEM DESCRIPTION<br />
In addition, a system is provided which precisely<br />
cuts and controls port vacuum applied to the<br />
E.G.R. valve to suit engine operating conditions.<br />
This cut-and-control operation is accomplished<br />
through the E.C.U. When the E.C.U. detects any of<br />
the following conditions, current flows through the<br />
solenoid valve in the E.G.R. control vacuum line.<br />
E.G. R. control solenoid valve operation<br />
When starting<br />
Amount of intake air<br />
1 Engine temperature<br />
I<br />
I<br />
Start signal<br />
Condition<br />
E.G.R. system operation<br />
E.G. R. system operates under only the following conditions.<br />
E.G.R. (Exhaust Gas Recirculation) Control<br />
-.<br />
EF & EC-23<br />
.<br />
..,..<br />
.<br />
E.C.C.S.<br />
control<br />
unit<br />
This causes the port vacuum to<br />
into the atmosphere so that the<br />
valve remains closed.<br />
1) Low engine temperature<br />
2) Engine starting<br />
3) High-speed engine operation<br />
4) Engine idling<br />
I<br />
E.G.R. control<br />
solenoid valve<br />
E.G. R. control solenoid valve<br />
Below 60 (140)<br />
Water temperature °c (oF) ON<br />
Above 105 (221)<br />
Idle & heavy load conditions<br />
Other conditions<br />
Water temperature<br />
°c (oF)<br />
Above 60 (140)<br />
Below 105 (221)<br />
Exhaust gas<br />
pressure<br />
B.P.T. valve<br />
Operation<br />
Throttle position<br />
E.G.R. control<br />
solenoid valve<br />
OFF<br />
be discharged<br />
E.G.R. control<br />
E.G.R. system<br />
High Closed Partially open OFF Operates
ENGINE AND EMISSION CONTROL SYSTEM DESCRIPTION<br />
INPUT/OUTPUT SIGNAL LINE<br />
Engine temperature sensor<br />
Ignition switch<br />
Crank angle sensor<br />
Engine temperature<br />
Start signal<br />
Engine speed<br />
SYSTEM DESCRIPTION<br />
The fuel "pressure-up" control system briefly increases<br />
fuel pressure for improved starting performance<br />
of a hot engine. Under normal operating<br />
conditions, manifold vacuum is applied to the fuel<br />
pressure regulator. When starting the engine,<br />
however, the E.C.U. allows current to flow through<br />
the ON/OFF solenoid valve in the control vacuum<br />
line, opening this line to the atmosphere. As a<br />
result, atmospheric pressure is applied, throttling<br />
the fuel passage to increase fuel pressure.<br />
I<br />
0
ENGINE AND EMISSION CONTROL SYSTEM DESCRIPTION<br />
INPUT IOUTPUT SIGNAL LINE<br />
[ Air conditioner system<br />
Throttle sensor<br />
SYSTEM DESCRIPTION<br />
A/C ON signal<br />
Acceleration Cut Control<br />
Throttle valve opening angle<br />
When accelerator pedal is fully depressed, air<br />
conditioner is turned off for a few seconds.<br />
This system improves acceleration when air conditioner<br />
is used.<br />
AIR FLOW METER MALFUNCTION<br />
If the air flow meter output voltage is above or<br />
below the specified value, the E.C.U. senses an air<br />
flow meter malfunction. In case of a malfunction,<br />
the throttle sensor substitutes for the air flow<br />
meter.<br />
Though air flow meter is malfunctioning, it is<br />
possible to drive the vehicle and start the engine.<br />
But engine speed will not rise more than 2,400<br />
rpm in order to inform the driver of fail-safe<br />
system operation while driving.<br />
Operation<br />
System<br />
Fixed condition<br />
E.G.R. control system OFF<br />
Idle speed control system<br />
Fuel injection control<br />
system<br />
A duty ratio is fixed at<br />
the preprogrammed value.<br />
Fuel is shut off above<br />
2,400 rpm.<br />
(Engine speed does not<br />
exceed 2,400 rpm.)<br />
Fail-safe System<br />
. E.C.C.S.<br />
control<br />
unit<br />
Air conditioner<br />
relay<br />
ENGINE TEMPERATURE SENSOR<br />
MALFUNCTION<br />
When engine temperature sensor output voltage is<br />
below or above the specified value, water temperature<br />
is fixed at the preset value as follows:<br />
Operation<br />
EF & EC-25<br />
Condition<br />
Just as ignition switch is<br />
turned ON or Start<br />
More than 6 minutes after<br />
ignition ON or Start<br />
Except as shown above<br />
Engine<br />
temperature decided<br />
20°C (68°F)<br />
80°C (176°F)<br />
20. 80°C (68 - 176°F)<br />
(Depends on the time)<br />
THROTTLE SENSOR MALFUNCTION<br />
When throttle sensor output voltage is below or<br />
above the specified value, throttle sensor output<br />
is fixed at the preset value.
PREPARATION<br />
IDLE SPEED/IGNITION TIMING/IDLE MIXTURE RATIO INSPECTION<br />
1. Make sure that the following parts are in<br />
good order.<br />
. Battery<br />
. Ignition system .<br />
. Engine oil and coolant levels<br />
. Fuses<br />
. E.C.U.harnessconnector<br />
. Vacuumhoses<br />
. Air intakesystem<br />
(Oil filler cap, oil level gauge, etc.)<br />
. Fuel pressure<br />
. A.I.V. hose<br />
. Engine compression<br />
. E.G.R. control valve operation<br />
. Throttle valve and throttle valve switch<br />
Overall inspection sequence<br />
INSPECTION START<br />
Perform self-diagnosis.<br />
O.K.<br />
Check or adjust idle speed and<br />
ignition timing.<br />
Check ex haust<br />
gas sensor<br />
function by using E.C.U. inspection<br />
lamp (Green).<br />
O.K.<br />
Check idle mixture ratio by<br />
using E.C.U. inspection lamps<br />
(Red and Green) [in diagnostic<br />
mode II] .<br />
O.K.<br />
INSPECTION END<br />
N.G.<br />
I N.G.<br />
N.G.<br />
/<br />
.<br />
Repair or replace.<br />
Check exhaust gas sensor<br />
harness.<br />
O.K.<br />
N.G.<br />
Check base idle CO.<br />
N.G.<br />
2. On air conditioner equipped models, checks<br />
should be carried out while the air conditioner<br />
is "OFF".<br />
3. On automatic transmission equipped models,<br />
when checking idle rpm, ignition timing and<br />
mixture ratio, checks should be carried out<br />
while shift lever is in "N" position.<br />
4. When measuring "CO" percentage, insert<br />
probe more than 40 em (15.7 in) into tail pipe.<br />
WARNING:<br />
a. When checking or adjustment, move selector<br />
lever to "N" position,<br />
chock rear wheels.<br />
set parking brake and<br />
b. After the adjustment<br />
wheel chocks.<br />
has been made, remove<br />
O.K.<br />
Check emission control parts<br />
and repair or replace if<br />
necessary.<br />
EF & EC-26<br />
I Repair or replace harness. ~<br />
Replace exhaust gas sensor.<br />
N.G., Check exhaust gas sensor<br />
function.<br />
1
~ ~<br />
IDLE SPEED/IGNITION TIMING/IDLE MIXTURE RATIO INSPECTION<br />
SEF457C<br />
3 4<br />
2~,~,,\""\""L"""):<br />
"'~ ...'.«6<br />
1{ "!:-\<br />
0; ~1<br />
.1OOO,/m," f I<br />
-8<br />
SEF477B<br />
SMA189A<br />
INSPECTION START<br />
Visually check the following:<br />
. Air cleaner clogging<br />
. Hoses and ducts for leaks<br />
. E.G.R. control valveoperation<br />
. Electrical connectors<br />
. Gaskets<br />
. Throttle valveand throttle valveswitch operation<br />
Start engine and warm it up until water temperature<br />
indicator points to the middle of gauge.<br />
Open engine hood and run engine at about 2,000<br />
rpm for about 2 minutes under no-load.<br />
O.K.<br />
Check, correct or replace malfunctioning parts.<br />
Does engine run smoothly?<br />
Yes I<br />
Check and clean injectors, and replace injectors if<br />
necessary.<br />
Race engine two or three times under no-load,<br />
then run engine at idle speed.<br />
Check idle speed.<br />
M/T: 750:!:50 rpm<br />
AfT: 750:!:50 rpm (in "N" position)<br />
O.K. .<br />
Check ignition timing with<br />
a timing light.<br />
O.K.<br />
15°:!:2° B.T.D.C.<br />
N.G.<br />
N.G.<br />
Ensure that engine speed is below 800 rpm.<br />
.<br />
O.K.<br />
Adjust idle speed to less than 800 rpm<br />
by turning idle speed adjusting screw.<br />
@ @ c<br />
EF & EC-27
IDLE SPEED/IGNITION TIMING/IDLE MIXTURE RATIO INSPECTION<br />
3 4<br />
2<br />
~<br />
'*"""~"""'" 5<br />
'~"-.(6<br />
~<br />
1'1' \<br />
0= ~7<br />
,'000""';" ~ I 1.8<br />
SEF477B<br />
~r\<br />
~V~~J<br />
~/~<br />
SEF450H<br />
~r\<br />
~V '--'~Jf))<br />
r,' ~~/-i~/ J~<br />
, ' ~ "-'"<br />
iDIY<br />
@<br />
SEF292H<br />
A C<br />
Check ignition timing with<br />
a timing light.<br />
1S°:t2° B.T.D.C.<br />
O.K. N.G.<br />
Adjust ignition timing by turning distributor<br />
after loosening bolt which secures distributor.<br />
1S°:t2° B.T.D.C.<br />
Adjust idle speed by turning idle speed adjusting<br />
screw.<br />
Run engine at about 2,000 rpm for about 2<br />
minutes under no-load.<br />
M/T: 700:tSOrpm<br />
AfT: 70O:tSOrpm (in "N" position)<br />
Make sure that inspection lamp (Green) on E.C.U. goes IN.G.<br />
on and off periodically more than 5 times during 10<br />
seconds at 2,000 rpm under no-load.<br />
O.K.<br />
Set the diagnosis mode of E.C.U.to mode II.<br />
Check inspection lamps (Red and Green) on<br />
E.C.U. blink at 2,000 rpm.<br />
They should blink simultaneously.<br />
Yes<br />
INSPECTION END<br />
EF &. EC-28<br />
No<br />
D' E C'
Exhaust gas sensor<br />
~~'! - .<br />
E.C.C.S. harness<br />
nl'-'~'<br />
IDLE SPEED/IGNITION TIMING/IDLEMIXTURERATIO INSPECTION<br />
19<br />
SEF353H<br />
~i<br />
Check exhaust gas sensor harness:<br />
1) Turn off engine and disconnect battery ground<br />
cable.<br />
@<br />
2) Disconnect harness connector from E.C.U.<br />
3) Disconnect exhaust gas sensor harness connector<br />
and connect terminal for exhaust gas sensor<br />
harness connector to ground with a jumping<br />
wire.<br />
4) Check for continuity between terminal No. 19<br />
of E.C.U. harness connector and ground metal<br />
on vehicle body.<br />
Continuity exists. O.K.<br />
Continuity does not exist """"""''''''''' N.G.<br />
O.K.<br />
N.G.<br />
Repair or replace E.C.C.S.harness<br />
and connect battery ground cable.<br />
Connect harness connector to E.C.U. and disconnect<br />
jumping wire from exhaust gas sensor.<br />
. Disconnect engine temperature sensor harness<br />
connector.<br />
. Connect a resistor (2.5 kil) between terminals<br />
of engine temperature sensor harness connector.<br />
. Disconnect A.I.V. hose and install a suitable<br />
plug in A.I.V. pipe.<br />
. Connect battery ground cable.<br />
Start engine and warm it up until water temperature<br />
indicator points to the middle of gauge.<br />
(Waitmore than 5 minutes after starting.)<br />
Race engine two or three times under no-load then<br />
run engine at idle speed.<br />
Check "CO"% and if engine runs smoothly.<br />
Idle CO: Less than 5%<br />
After checking CO%<br />
1) Turn off engine.<br />
2) Disconnect the resistor from terminals of engine<br />
temperature sensor harness connector.<br />
3) Connect engine temperature sensor harness connector<br />
to engine temperature sensor.<br />
4) Connect A.I.V. hose.<br />
EF & EC-29<br />
O.K.<br />
D c<br />
G c
IDLE SPEED/IGNITION TIMING/IDLE MIXTURE RATIO INSPECTION<br />
Connect exhaust gas sensor harness to exhaust gas<br />
sensor.<br />
Check fuel pressure regulator.<br />
(See page EF & EC-124.)<br />
Check air flow meter.<br />
(See page EF & EC-88.)<br />
Check injector.<br />
(See page EF & EC-126.)<br />
Clean or replace if necessary.<br />
Check engine temperature sensor.<br />
(See page EF & EC-90.)<br />
@ G' c<br />
Replace exhaust gas sensor.<br />
N.G. Run engine at 2,000 rpm and make sure that green<br />
inspection lamp on E.C.U.goes ON and OFF more<br />
than 5 times during 10 seconds.<br />
. O.K.<br />
EF & EC-30
TROUBLE DIAGNOSES<br />
Contents<br />
How to PerformTrouble Diagnosesfor Quick and Accurate Repair " EF & EC- 33<br />
Diagnostic Table , EF & EC- 37<br />
1. Impossible to start - no combustion EF & EC- 38<br />
2. Impossible to start - partial combustion EF & EC- 39<br />
3. Impossible to start - partial combustion (not affected by throttle position) EF & EC- 40<br />
4. Impossible to start - partial combustion (throttle position changes<br />
5. Hard to start<br />
6. Hard to start<br />
7. Hard to start<br />
8. Hard to start<br />
9. Abnormal idling<br />
10. Abnormal idling<br />
11. Abnormal idling<br />
12. Unstable idling<br />
13. Unstable idling<br />
14. Poor driveability<br />
15. Poor driveability<br />
16. Poor driveability<br />
17. Poor driveability<br />
18. Engine stall<br />
19. Engine stall<br />
20. Engine stall<br />
21. Engine stall<br />
22. Engine" stall<br />
23. Engine stall<br />
combustion quality) EF & EC- 41<br />
- before warm-up EF & EC- 42<br />
- after warm-up EF & EC- 43<br />
- every time EF & EC- 44<br />
- morning after a rainy day EF & EC- 45<br />
- no fast idle EF & EC- 46<br />
- low idle (after warm-up) EF & EC- 47<br />
- high idle (after warm-up) EF & EC- 48<br />
- before warm-up EF & EC- 49<br />
- after warm-up EF & EC- 50<br />
- stumble (while accelerating) EF & EC- 51<br />
- surge (while cruising) EF & EC- 52<br />
- lack of power EF & EC- 53<br />
- detonation EF & EC- 54<br />
- during start-up EF & EC- 55<br />
- while idling EF & EC- 56<br />
- while accelerating EF & EC- 57<br />
- while cruising EF & EC- 58<br />
- while decelerating/just after stopping " EF & EC- 59<br />
- while loading (power steering, air conditioner,<br />
headlamps, etc.) EF & EC- 60<br />
24. Backfire - through the intake EF & EC- 61<br />
25. Backfire - through the exhaust EF & EC- 62<br />
Self-diagnosis- Description ..".. EF & EC- 63<br />
Self-diagnosis -- Mode I (Exhaust gas sensor monitor) " EF & EC- 67<br />
Self-diagnosis - Mode II (Mixture ratio feedback control monitor) " EF & EC- 67<br />
Self-diagnosis - Mode III (Self-diagnostic system) : EF & EC- 68<br />
Self-diagnosis - Mode IV (Switches ON/OFF diagnostic system) " EF & EC- 74<br />
Self-diagnosis - Mode V (Real-time diagnostic system) EF & EC- 76<br />
Diagnostic Procedure EF & EC- 82<br />
Diagnostic Procedure 1<br />
MAIN POWER SUPPLY AND GROUND CIRCUIT EF & EC- 84<br />
Self-diagnostic item<br />
Diagnostic Procedure 2<br />
CRANK ANGLE SENSOR EF & EC- 86<br />
Diagnostic Procedure 3<br />
~ AIR FLOW METER , EF & EC- 88<br />
Diagnostic Procedure 4<br />
~ ENGINE TEMPERATURE SENSOR EF & EC- 90<br />
Diagnostic Procedure 5<br />
~ VEHICLE SPEED SENSOR EF & EC- 92<br />
Diagnostic Procedure 6 .<br />
IGNITION SIGNAL EF & EC- 94<br />
Diagnostic Procedure 7<br />
~ ENGINE CONTROL UNIT.: EF & EC~ 98<br />
Diagnostic Procedure 8<br />
~ E.G.R. FUNCTION " EF & EC-100<br />
Diagnostic Procedure 9<br />
~ EXHAUST GAS SENSOR EF & EC-104<br />
Diagnostic Procedure 10<br />
~ EXHAUST GAS TEMPERATURE SENSOR EF & EC-106<br />
EF & EC-31
TROUBLE DIAGNOSES<br />
Contents (Cont'd)<br />
Diagnostic Procedure 11<br />
~ THROTTLE SENSOR EF & EC-110<br />
DiagnosticProcedure12 .<br />
~ INJECTOR LEAK EF & EC-114<br />
Switch ON/OFF diagnostic item<br />
Diagnostic Procedure 13<br />
IDLE SWITCH EF & EC-116<br />
Diagnostic Procedure 14<br />
START SWITCH EF & EC-118<br />
Not self-diagnostic item<br />
Diagnostic Procedure 15<br />
FUEL PUMP EF & EC-120<br />
Diagnostic Procedure 16<br />
PRESSURE REGULATOR (P.R.) CONTROL SOLENOID VALVE EF & EC-124<br />
Diagnostic Procedure 17<br />
INJECTORS EF & EC-126<br />
Diagnostic Procedure 18<br />
SWIRL CONTROL VALVE (S.C.v.) CONTROL SOLENOID VALVE EF & EC-128<br />
Diagnostic Procedure 19<br />
AIR REGULATOR EF & EC-130<br />
Diagnostic Procedure 20<br />
AUXILIARY AIR CONTROL (A.A.C.) VALVE " EF & EC-134<br />
Diagnostic Procedure 21<br />
LA.A. CONTROL (F.LC.D. CONTROL) EF & EC-136<br />
Diagnostic Procedure 22<br />
AIR INDUCTION VALVE (A.LV.) CONTROL SOLENOID VALVE EF & EC-138<br />
DiagnosticProcedure23 .<br />
NEUTRALSWITCH,INHIBITORSWITCHAND INHIBITORRELAY ; EF & EC-140<br />
Electrical Components Inspection EF & EC-142<br />
EF 8r. 'EC-32
~ ~wol<br />
.~.~ :A<br />
"""<br />
~~ SEF232G<br />
SE F234G<br />
TROUBLE DIAGNOSES<br />
How to Perform Trouble Diagnoses for Quick<br />
and Accurate Repair<br />
INTRODUCTION<br />
The engine has an electronic control unit to control major systems<br />
such as fuel control, ignition control, idle speed control,<br />
etc. The control unit accepts input signals from sensors and<br />
instantly drives actuators. It is essential that both kinds of signals<br />
are proper and stable. At the same time, it is important that<br />
there are no conventional problems such as vacuum leaks, fouled<br />
spark plugs, or other problems with the engine.<br />
It is much more difficult to diagnose a problem that occurs<br />
intermittently rather than continuously. Most intermittent<br />
problems are caused by poor electric connections or faulty<br />
wiring. In this case, careful checking of suspicious circuits may<br />
help prevent the replacement of good parts.<br />
A visual check only may not find the cause of the problems.<br />
A road test with a circuit tester connected to a suspected circuit<br />
shou Id be performed.<br />
Before undertaking actual checks, take just a few minutes to<br />
talk with a customer who approaches with a driveability complaint.<br />
The customer is a very good supplier of information on<br />
such problems, especially intermittent ones. Through the talks<br />
with the customer, find out what sy.mptoms are present and<br />
under what conditions they occur.<br />
Start your diagnosis by looking for "conventional" problems<br />
first. This is one of the best ways to troubleshoot driveability<br />
problems on an electronically controlled engine vehicle.<br />
EF & EC-33
CHECK IN<br />
TROUBLE DIAGNOSES<br />
STEP 1 LISTEN TO CUSTOMERCOMPLAINTS ------<br />
STEP 2<br />
KEY POINTS<br />
WHAT Vehicle & engine model<br />
WHEN Date, Frequencies<br />
WHERE Road conditions<br />
HOW Operating conditions,<br />
Weather conditions,<br />
Symptoms<br />
TROUBLE DIAGNOSES<br />
How to Perform Trouble Diagnoses for Quick<br />
and Accurate Repair (Cont'd)<br />
DIAGNOSTIC WORKSHEET<br />
There are many kinds of operating conditions that lead to malfunctions<br />
on engine components.<br />
A good grasp of such conditions can make trouble-shooting faster<br />
and more accurate.<br />
In general, feelings for a problem depend on each customer. It is<br />
important to fully understand the symptoms or under what conditions<br />
a customer complains..<br />
Make good use of a diagnostic worksheet such as the one shown<br />
below in order to utilize all the complaints for trouble-shooting.<br />
Worksheet sample<br />
Customer name MR/MS Model & Year VIN<br />
Engine # Trans. Mileage<br />
Incident Date Manuf. Date In <strong>Service</strong> Date<br />
0 Impossible to start 0 No combustion 0 Partial combustion<br />
0 Startability<br />
0<br />
0<br />
Partial combustion<br />
Partial combustion<br />
affected by throttle position<br />
NOT affected by throttle position<br />
0 Possible but hard to start 0 Othl!rs [ ]<br />
Symptoms<br />
0 Idling<br />
0<br />
0<br />
0<br />
No fast id Ie<br />
Others [<br />
Stumble 0<br />
0 Unstable<br />
Surge 0<br />
0 High idle<br />
]<br />
Detonation 0<br />
0 Low idle<br />
Lack of power<br />
0 Driveability 0 Intake backfire 0 Exhaust backfire<br />
0 Others [ ]<br />
0 At the time of start 0 While idling<br />
0 Engine stall 0 While accelerating 0 While decelerating<br />
0 Just after stopping 0 - While loading<br />
Incident occurrence<br />
0<br />
0<br />
Just after delivery<br />
In the morning 0<br />
0 Recently<br />
At night 0 In the daytime<br />
Frequency 0 All the time 0 Under certain conditions 0 Sometimes<br />
Weather conditions 0 Not effected<br />
Weather 0 Fine 0 Raining 0 Snowing 0 Others [ ]<br />
Temperature 0 Hot 0 Warm 0 Cool 0 Cold 0 Humid of<br />
Engine conditions 0 Cold 0 During warm-up 0 After warm-up<br />
E. d<br />
ngme spee<br />
I<br />
0<br />
I I<br />
2,000<br />
I I<br />
4,000<br />
I I<br />
6,000<br />
I J<br />
8,000 rpm<br />
Road conditions 0 In town 0 In suburbs 0 Highway 0 Off road (up/down)<br />
Driving conditions 0 Not affected<br />
0 At starting 0 While idling 0 At racing<br />
0 While accelerating 0 While cruising<br />
0 While decelerating 0 While turning (RH/LH)<br />
Vehicle speed<br />
Check engine light 0 Turned on 0 Not turned on<br />
' I , I , I . I . I . I<br />
10 20 30 40 50 60 MPH<br />
EF & EC-35
'<br />
TROUBLE DIAGNOSES<br />
How to Perform Trouble Diagnoses for Quick<br />
and Accurate Repair (Cont'd)<br />
INTERMITTENT PROBLEM SIMULATION<br />
In order to duplicate an intermittent problem, it is effective to<br />
create similar conditions for component parts, under which the<br />
problem might occur.<br />
Perform the activity listed under <strong>Service</strong> procedure and note the<br />
resuIt.<br />
Variable factor Influential part Target condition <strong>Service</strong> procedure<br />
1 Mixture ratio Pressure regulator<br />
2 Ignition timing Distributor<br />
3<br />
Made lean Remove vacuum hose and apply vacuum.<br />
Made rich Remove vacuum hose and apply pressure.<br />
Advanced Rotate distributor clockwise.<br />
Retarded Rotate distributor counterclockwise.<br />
Mixture ratio Exhaust gas sensor Suspended Disconnect exhaust gas sensor harness connector.<br />
feedback control<br />
Control unit Operation check Perform self-diagnosis (Mode I/II) at 2,000 rpm.<br />
4 Idle speed I.A.A. unit<br />
5<br />
Raised Turn idle adjusting screw counterclockwise.<br />
Lowered Turn idle adjusting screw clockwise.<br />
Electric<br />
Poor electric Tap or wiggle.<br />
connection Harness connectors<br />
connection or<br />
(Electric and wires Race engine rapidly. See if the torque reaction of<br />
faulty wiring<br />
continuity)<br />
the engine unit causes electric breaks.<br />
6 Temperature Control unit<br />
Cooled Cool with an icing spray or similar device.<br />
Warmed<br />
EF &. EC-36<br />
Heat with a hair drier.<br />
[WARNING: Do not overheat the unit.]<br />
Wet.<br />
7 Moisture Electric parts Damp [WARNING: Do not directly pour water on<br />
components. Use a mist sprayer.!<br />
8 Electric loads Load switches Loaded<br />
9<br />
Idle switch<br />
condition<br />
Turn on head lights, air conditioner, rear defogger,<br />
etc.<br />
Control unit ON-OFF switching Perform self-diagnosis (Mode IV).<br />
10 Ignition spark Timing light Spark power check Try to flash timing light for each cylinder.
TROUBLE DIAGNOSES<br />
Diagnostic Table<br />
To assist with your trouble diagnoses,some typical diagnostic procedures for the following symptoms are.<br />
described.<br />
REMARKS<br />
In the following pages, the numbers such as 0, . in the above chart correspond to those in the<br />
serviceprocedure described below.<br />
Possiblecausescan be checked through the serviceprocedure shown by the mark "0".<br />
EF 8r. EC-37
SYMPTOM & CONDITION<br />
SERVICE PROCEDURE<br />
.<br />
I ~~ ../ Fuel pump<br />
, SEF279G<br />
Listen for fuel pump<br />
operating sound.<br />
TROUBLE DIAGNOSES<br />
Diagnostic Table (Cont'd)<br />
1 II mpossible to start - no combustion I<br />
POSSIBLECAUSES .. 8 8 0 " 0 8<br />
SPECIFICATIONS Mixture ratio (too lean) 0 0<br />
LISTEN<br />
N.G.<br />
---+ Check fuel pump and/or<br />
related circuits.<br />
[See page EF & EC-120.J<br />
f)<br />
LISTEN<br />
~//11 . II<br />
'- . ,<br />
Injector<br />
SE F280G<br />
Listen for injector<br />
CHECK<br />
8 N.G<br />
START -.:<br />
2l'<br />
@<br />
[0 .! Timinglight<br />
. CHECK<br />
operating sound.<br />
MEASURE<br />
N.G. --+ ,.<br />
~ \UyJ<br />
I.*<br />
,,\ ' 5 ~<br />
o-~ -6 /.<br />
Tachometer Ignition<br />
switch<br />
\. SEF281G)<br />
SEF283G<br />
SEF315G<br />
Make sure tachometer<br />
Check flashes of timing<br />
Measure resistance of<br />
needle moves when cranking. light for weak ness.<br />
.~<br />
CHECK<br />
N.G. ' ..<br />
--+ AdJust Ignition timing.<br />
[See page EF & EC-26.J<br />
suspect wires.<br />
((@S""~G<br />
Check ignition timing.<br />
Ignition sparks (weak, missing) 0 0 0<br />
FUEL SYSTEM<br />
Ignition timing<br />
Fuel pump (no operation) 0<br />
Fuel pump relay (open circuited)<br />
0<br />
Injectors (no operation, clogged) 0<br />
IGNITION SYSTEM Ignition switch 0 0 0 0 0<br />
Main relay 0 0 0 0 0<br />
Power transistor 0 0 0<br />
Ignition coil 0 0<br />
Center cable (ignition leaks) 0 0<br />
Ignition wires (ignition leaks) 0 0<br />
Spark plugs<br />
0<br />
CONTROL SYSTEM Crank angle sensor 0 0 0 0<br />
EF &. EC-38<br />
0<br />
N.G.<br />
--+Check injector circuit.<br />
[See page EF & EC-126.J<br />
N.G.<br />
--+ Replace the wire.<br />
O.K. ,0<br />
---+<br />
CHECK<br />
Remove spark plugs and<br />
check their ignition sparks.
TROUBLE DIAGNOSES<br />
Diagnostic Table (Cont'd)<br />
SYMPTOM & CONDITION 21 Impossibleto start - partial combustion<br />
POSSIBLE CAUSES 0 f) " 0 "<br />
SPECI FICA nONS Mixture ratio 0 0 0<br />
SERVICE PROCEDURE<br />
.<br />
I-.~ .1 Fuel pump<br />
SEF279G<br />
L~sten for fuel ~ump<br />
L<br />
operating sou, ~K<br />
LISTEN<br />
N.G.<br />
Check fuel pump and/or<br />
related circuits.<br />
[See page EF & EC-120.J<br />
f)<br />
LISTEN<br />
. CHECK<br />
~~~:ng<br />
. -<br />
, ~ sm~G<br />
Check ignition timing.<br />
Fuel pressure (too low) 0<br />
FUEL SYSTEM<br />
Ignition timing<br />
Fuel pump 0<br />
Fuel pump relay (open circuited) 0<br />
Injectors (clogged) 0<br />
APPL Y<br />
8<br />
.1 ,.<br />
~.VACUUM<br />
~ PRESSURE<br />
\. SEF291G..I<br />
Remove vacuum hose from<br />
pressure regulator, and<br />
apply vacuum and/or<br />
pressure, and try to start.<br />
Adjust ignition timing.<br />
[See page EF & EC-26.J<br />
~//11 Injector<br />
. II<br />
~ . . SEF280G<br />
Listen for injector operating<br />
sound.<br />
Improved<br />
EF & EC-39<br />
:J<br />
0<br />
N.G.<br />
- Checkinjectorcircuit.<br />
[See page EF & EC-126.J<br />
"<<br />
.<br />
r. MEASURE<br />
D Fuel pressure gauge<br />
t~<br />
, 'SE".6G<br />
Connect vacuum hose to<br />
pressure regulator and<br />
measure fuel pressure.<br />
1<br />
Check mixture ratio<br />
feedback system.<br />
[See page EF & EC-26.J
TROUBLE DIAGNOSES<br />
Diagnostic Table (Cont'd)<br />
SYMPTOM& CONDITION 31Impossible to start - partial combustion (not affected by throttle position)<br />
POSSIBLECAUSES . . ... . . . . 0 .<br />
SPECIFICATIONS Mixture ratio 0 0 0<br />
Fuel pressure (too low) 0 0 0<br />
Ignition timing<br />
0<br />
FUEL SYSTEM Fuel filter (clogged) 0<br />
Fuel line (clogged)<br />
0<br />
Injectors (clogged)<br />
0<br />
Pressure regulator<br />
0<br />
Pressure regulator vacuum hose (clogged)<br />
0<br />
IGNITION SYSTEM Ignition wires (ignition leaks) 0 0<br />
Spark plugs (wet with fuel) 0<br />
Ignition switch 0 0 0<br />
INTAKE SYSTEM Throttle chamber (with ports clogged) 0<br />
Throttle valve (clogged) 0<br />
CONTROL SYSTEM Engine temperature sensor<br />
Crank angle sensor 0 0<br />
.<br />
SERVICE PROCEDURE<br />
LISTEN<br />
~//11 InJ'ector<br />
, "<br />
. , SEF280G<br />
Listen for injector operating<br />
sound. . lo.K.<br />
CHECK<br />
8<br />
SEF287G<br />
Check vacuum hose of pressure<br />
regulator for clogging.<br />
1 N.G.<br />
Repair or replace the hose.<br />
0<br />
N.G.<br />
Check injector circuit.<br />
[See page EF & EC-126.J<br />
'A REMOVE<br />
O.K.<br />
[ V<br />
1---+ Pressureregulator<br />
2. SEF291G<br />
Remove vacuum hose from<br />
pressure regulator, and try<br />
to start.<br />
CHECK . CHECK<br />
., Timing light<br />
~<br />
(r@.
TROUBLE DIAGNOSES<br />
Diagnostic Table (Cont'd)<br />
SYMPTOM & CONDITION<br />
41 Impossibleto start - partial combustion (throttle position changes<br />
POSSIBLE CAUSES<br />
combustion qu~lity)<br />
10 . . 8<br />
INTAKE SYSTEM Throttle chamber (with ports clogged) 0<br />
Throttle valve (clogged)<br />
0<br />
Air regulator (stuck closed) 0<br />
IdIe speed control valve 0<br />
CONTROL SYSTEM Enginetemperature sensor 0<br />
Idle switch 0<br />
Neutral switch 0<br />
SERVICE PROCEDURE<br />
0 CHECK<br />
Throttle chamber<br />
N.G.<br />
- Cleantheports.<br />
. r. CHECK<br />
Throttle chamber<br />
~.<br />
..~ SEF290G<br />
Check throttle chamber<br />
ports for clogging.<br />
- r. CHECK<br />
.. .<br />
I<br />
N.G.<br />
Check air regulator and/or<br />
jj<br />
its circuit.<br />
[See page EF & EC-130.J<br />
, SEF293G<br />
Make sure air regulator stays<br />
open before warm-up<br />
CHECK<br />
8<br />
,-N.G. START C.hec~ idle speed control<br />
.,~" Circuit.<br />
@* [See page EF & EC-134.J<br />
SEFOO6H<br />
Check terminal voltage of<br />
A.A.C. valve while cranking.<br />
EF & EC-41<br />
Check throttle valvefor<br />
clogging.<br />
N.G.<br />
---+ Cleanthe valve.
SYMPTOM & CONDITION<br />
SERVICE PROCEDURE<br />
TROUBLE DIAGNOSES<br />
Diagnostic Table (Cont'd)<br />
51 Hard to start - before warm-up I<br />
POSSIBLE CAUSES 0 f) 8 0 0<br />
SPECIFICATIONS Mixture ratio 0 0<br />
IGNITION SYSTEM Ignition switch (no start signal) 0 0<br />
INTAKE SYSTEM Air regulator 0<br />
CONTROL SYSTEM Engine temperature sensor 0<br />
Idle switch 0<br />
Neutral switch 0<br />
OTHERS Starter (operation too slow) 0<br />
Battery (voltage too low) 0 0<br />
0<br />
CHECK<br />
N.G.<br />
START 1 +<br />
f)<br />
MEASURE<br />
N.G. (less than 12V)<br />
--+Charge the battery.<br />
"i,.<br />
@ I.*<br />
"<br />
o-~<br />
;5 ~<br />
-6 ~<br />
Tachometer Ignition<br />
switch<br />
SEF281G<br />
SEF296G<br />
Make sure tachometer<br />
Measure battery voltage.<br />
indicates about 300 rpm<br />
while cranking.<br />
'0 CHECK<br />
ifSEF293G<br />
Make sure air regulator stays<br />
open before warm-up.<br />
N.G. + Check air regulator and/or<br />
its circuit.<br />
[See page EF & EC-130.J<br />
" gCRANK<br />
N.G.<br />
START ~Check sensor circuit.<br />
I * [See page EF & EC-90.J<br />
i)~ ~ @<br />
. ~ Ignition<br />
Engine tempera- switch<br />
-!ure sensor SEF292G.<br />
Start with engine temperature<br />
sensor connector<br />
disconnected.<br />
e<br />
EF & .EC-42<br />
PERFORM<br />
Self-diagnosis<br />
Mode IV<br />
SEF285G<br />
Perform self-diagnosis<br />
Mode IV (for start signal<br />
and idle switch!.<br />
N.G.<br />
--+ Check the malfunctioning<br />
switches and/or circuits.<br />
[See page EF & EC-118<br />
(start signal).<br />
page EF & EC-116<br />
(idle switch).]
SYMPTOM & CONDITION<br />
SERVICE PROCEDURE<br />
'0<br />
CHECK<br />
N.G.<br />
STARTI~<br />
2~'<br />
,,' I ",5 ~<br />
o-~ -6 /.<br />
@ ,*<br />
Tachometer Ignition<br />
switch<br />
SEF281G<br />
Make sure tachometer<br />
indicates about 300 rpm<br />
while cranking.<br />
, PERFORM<br />
0 S If<br />
Mode IV<br />
' ,<br />
e -diagnosIs<br />
~<br />
171~<br />
SEF285G<br />
Perform self-diagnosis<br />
Mode IV (for start signal),<br />
. CHECK<br />
SEF287G<br />
Check vacuum hose of<br />
pressure regulator for<br />
clogging. 1 N.G.<br />
Repair or replace the hose.<br />
TROUBLE DIAGNOSES<br />
Diagnostic Table (Cont'd)<br />
61 Hard to start - after warm-up I<br />
POSSIBLE CAUSES 0 . . 0 0 . .<br />
SPECIFICATIONS Mixture ratio 0 0<br />
Fuel pressure 0 0 0<br />
FUEL SYSTEM Fuel line (hot fuel) 0<br />
Pressure regulator (low fuel pressure) 0<br />
Pressure regulator vacuum hose (clogged) 0<br />
Pressure regulator control solenoid 0 0<br />
Pressure regulator control solenoid vacuum hose<br />
Fuel temperature sensor (open circuited)<br />
IGNITION SYSTEM Ignition switch (no start signal) 0 0<br />
CONTROL SYSTEM Engine temperature sensor<br />
Air flow meter<br />
OTHERS Starter (operation too slow) 0<br />
Battery (voltage too low) 0 0<br />
N.G.<br />
f)<br />
MEASURE .<br />
SEF296G<br />
Measure battery voltage.<br />
!N.G. (less than 12V)<br />
Charge the battery.<br />
. Checkstarter circuit.<br />
[See page EF & EC-118.]<br />
CHECK<br />
¥<br />
START<br />
i;.~<br />
Ignition<br />
'-SEF294G switch<br />
Check terminal voltage of<br />
pressure regulator control<br />
solenoid while cranking.<br />
O.K. (pressure regulator<br />
--+ control solenoid<br />
CRANK<br />
No<br />
change<br />
~ Proceed to other steps.<br />
FUEL LINES<br />
SEF374G<br />
Cool fuel lines with wet<br />
rags, etc. and try to start.<br />
LISTEN<br />
0\ N.G. ( Pressure regulator<br />
--+ control solenoid<br />
0'<br />
Listen for clicking sound<br />
from pressure regulator<br />
control solenoid when<br />
applying battery voltage.<br />
~ N.G.<br />
l o.K.<br />
Replace the solenoid.<br />
Check the solenoid circuit.<br />
[See page EF & EC-124.]<br />
EF & EC-43<br />
0<br />
Improved<br />
+ Proceed to other steps.<br />
If everything is O.K.,<br />
check fuel vapor pressure.
TROUBLE DIAGNOSES<br />
Diagnostic Table (Cont'd)<br />
SYMPTOM & CONDITION<br />
71 Hard to start - every time I<br />
POSSIBLE CAUSES . . . o. (I). G. . . .<br />
SPECIFICATIONS Mixture ratio 0 0 0<br />
Fuel pressure 0 0<br />
Ignition sparks (missing) 0 0 0<br />
Ignition timing 0<br />
FUEL SYSTEM Fuel pump (improper operation) 0<br />
Fuel line (clogged) 0<br />
Canister (air leaks) 0<br />
Pressure regulator (low fuel pressure) 0<br />
IGNITION SYSTEM Ignition wires (ignition leaks) 0 0<br />
Spark plugs (improper gap) 0<br />
CONTROL SYSTEM Crank angle sensor<br />
Enginetemperature sensor<br />
0 0<br />
Idleswitch 0<br />
Neutral switch 0<br />
OTHERS Starter (operation too slow) 0<br />
Battery (voltagetoo low) 0 0<br />
SERVICE PROCEDURE<br />
LISTEN<br />
0<br />
~<br />
, SEF279G<br />
Listen for f.uel pump<br />
operating sound.<br />
N.G.<br />
---+Check fuel pump and/or<br />
related circuits.<br />
[See page EF &I;C-120.]<br />
CRANK<br />
8 No change<br />
Distributor<br />
Advance<br />
-+<br />
START<br />
Retard ~<br />
~<br />
Proceed to other steps.<br />
~ ~*<br />
Ignition switch<br />
Check mixture ratiO<br />
;]<br />
SEF297G feedback system.<br />
Advance/retard ignition [See page EF & EC-26.]<br />
timing and try to start. Improved<br />
.-- REMOVE ro---MEASURE,<br />
. +\ - Fuel pressure<br />
~ - Pressure<br />
reguIat or<br />
Connect vacuum hose to<br />
pressure regulator and<br />
measure fuel pressure.<br />
Replace the wires.<br />
~ SEF291 G<br />
Remove vacuum hose<br />
from pressure regulator,<br />
and try to start.<br />
CHECK-<br />
«3 1 Timing light<br />
,<br />
SEF283G<br />
Check flashes of timing<br />
light for weakness.<br />
tN,G.<br />
MEASURE<br />
N.G. [ O<br />
--+ Ignition wire<br />
if?rn<br />
-~<br />
SEF315G<br />
Measure resistance of<br />
suspect ignition wires.<br />
O.K.<br />
--+<br />
START --+<br />
It 2i' CHECK /.*<br />
,,\ ',5 N.G.<br />
~<br />
~ ~ 0- ~ -" @<br />
Battery<br />
rMEASUREl<br />
Measurebattery voltage.<br />
Tachometer Ignition<br />
I N.G.<br />
switch<br />
SEF281G<br />
Make sure tachometer<br />
indicates about 300 rpm<br />
while cranking.<br />
Charge the battery.<br />
..<br />
CHECK<br />
N.G.<br />
.Repair or replace the hose.<br />
~";~<br />
, SEF298G<br />
Checkvacuum hose of<br />
canister for air leaks.<br />
..<br />
PERFORM<br />
Self-diagnosis<br />
Mode IV<br />
Perform self-diagnosis<br />
Mode IV (for idle switch).<br />
I><br />
EF &. EC-44<br />
MEASURE<br />
S~'k'~G~<br />
eSEF299G<br />
Remove spark plugs and<br />
measure their 9
SYMPTOM & CONDITION<br />
SERVICE PROCEDURE<br />
8"<br />
CHECK<br />
Check flashes of timing<br />
Iight for weak ness.<br />
J DRY<br />
8<br />
Distributor<br />
~~,<br />
~0<br />
Ignition coil SEF3~9G<br />
Dry distributor and/or<br />
ignition coil and try to<br />
start.<br />
'- -<br />
N.G.r.<br />
---+,<br />
TROUBLE DIAGNOSES<br />
Diagnostic Table (Cont'd)<br />
81 Hardto start - morning after a rainy day I<br />
POSSIBLECAUSES 8 f) 8 0 "<br />
SPECIFICATIONS Ignition sparks (weak) 0 0 0<br />
IGNITIONSYSTEM Power transistor 0 0<br />
Ignition coil 0 0 0<br />
Center cable (ignition leaks) 0 0<br />
Ignition wires (ignition leaks) 0 0 0<br />
Distributor cap (ignition leaks) 0 0 0<br />
Spark plugs (improper gap) 0 0<br />
MEASURE<br />
Ignition wire<br />
~rn<br />
.~<br />
SEF315G<br />
Measure resistance of<br />
suspect wires.<br />
jO.K.<br />
Can start<br />
---+ Replace the parts.<br />
No<br />
change (0<br />
---+<br />
MEASURE<br />
1 1<br />
Gap<br />
~~pa'k P'"'<br />
SEF299G<br />
Remove spark plugs and<br />
measu re thei r gaps.<br />
N.G.<br />
--+ Replace the wires.<br />
O.K. Ie<br />
---+<br />
EF & EC-45<br />
CHECK<br />
SEF282G<br />
Check ignition sparks.
SYMPTOM & CONDITION<br />
SERVICE PROCEDURE<br />
. CHECK<br />
~SEF293G<br />
Make sure air regulator<br />
stays open before warm-up.<br />
. APPLY<br />
~~~:ng . -<br />
, ~ ""9~G<br />
Check ignition timing.<br />
N.G.<br />
TROUBLE DIAGNOSES<br />
Diagnostic Table (Cont'd)<br />
91 Abnormalidling- no fast idle I<br />
POSSIBLECAUSES 0 f) . 0 0<br />
SPECIFICATIONS Mixture ratio 0 0 0<br />
" ~CRANK<br />
.<br />
g<br />
START !<br />
9 Ignition<br />
Engine tempera- switch<br />
tu~e sensor SEF292G<br />
Start with engine tem.<br />
perature sensor connector<br />
disconnected.<br />
is; ~ ~.<br />
Ignition timing 0<br />
INTAKE SYSTeM Blow-by hose (clogged) 0<br />
Air regulator (stuck closed) 0<br />
CONTROLSYSTEM Enginetemperature sensor 0<br />
Check air regulator and/or<br />
its circuit.<br />
[See page EF & EC-130.J<br />
Improved<br />
Adjust ignition timing.<br />
[See page EF & EC-26.J<br />
N.G.<br />
Check sensor circuit.<br />
... [SeepageEF & EC-90.J<br />
EF & EC-46<br />
. CHECK ., N.G.<br />
~<br />
BIOW-bY'<br />
~~ I SEF300G<br />
Check blow-by hose for<br />
clogging.<br />
Clean or replace the hose.<br />
CHECK<br />
1) N.G.<br />
VACUUM Check mixture ratio<br />
PRESSURE feedback system.<br />
[See page EF & EC-26.J<br />
~ .<br />
Pressu re<br />
regu lator<br />
'- SEF284G<br />
Apply vacuum pressure to<br />
pressure regulator after<br />
disconnecting vacuum<br />
hose, and check idling.
TROUBLE DIAGNOSES<br />
Diagnostic Table (Cont' d)<br />
SYMPTOM & CONDITION 10 Abnormal idling - low idle (after warm-up)<br />
POSSIBLE CAUSES 0 f) 8 0 0 0 .<br />
SPECIFICATIONS Mixture ratio 0 0<br />
Ignition timing (too retarded)<br />
0<br />
INTAKE SYSTEM Throttle chamber (with ports clogged) 0<br />
Throttle valve (clogged) \ 0<br />
CONTROL SYSTEM Crank angle sensor 0<br />
Air flow meter 0<br />
Engine temperature sensor<br />
Loadswitches(remainingOFF)<br />
0<br />
SERVICE PROCEDURE<br />
0<br />
CHECK<br />
~~~;ng<br />
, -<br />
, ~ m~~G<br />
Check ignition timing.<br />
IN.G.<br />
Adjust ignition timing.<br />
[See page EF & EC-26.1<br />
"<br />
f)<br />
CHECK<br />
~ rmBIOW-bY<br />
,SEF300G I .<br />
Check blow-by hose for<br />
clogging.<br />
N.G.<br />
1<br />
Clean or replace the hose.<br />
APPLY -<br />
Improved<br />
~<br />
+ Check mixture ratio<br />
1 . VACUUM feedback system.<br />
PRESSURE [See page EF & EC-26.J<br />
- Pressure No change<br />
regulator<br />
+ Check load signal circuit.<br />
- SEF291G j [SeeELsection.]<br />
Apply vacuum pressure to<br />
pressure regulator after<br />
disconnecting vacuum<br />
hose, and check idling.<br />
.. CHECK<br />
Throttle chamber<br />
.,~<br />
Check throttle chamber<br />
ports for clogging.<br />
IN.G.<br />
Clean the ports.<br />
PERFORM<br />
0<br />
~<br />
Self-diagnosis<br />
Mode V<br />
SEF285G<br />
Perform self-diagnosis Mode<br />
V (for air flow meter).<br />
'A<br />
v<br />
~<br />
~'<br />
RUN<br />
g START<br />
~ :: \ t" N.G.<br />
,~ ~page<br />
IT 1<br />
II @ Ignition<br />
lNG<br />
Checkthe malfunctioning<br />
parts and/or circuits.<br />
[See page EF & EC-88<br />
(air flow meter),<br />
EF & EC-90<br />
(engine temperature sensod']<br />
Engine tempera- switch<br />
ture sensor SEF292G .<br />
Start and run engine with<br />
engine temperature sensor<br />
connector disconnected.<br />
EF & EC-47<br />
.. CHECK<br />
Throttle chamber<br />
~. -SEF290G<br />
Check throt<br />
clOgging.,,;<br />
.J{fAr<br />
Clean the valve:-
TROUBLE DIAGNOSES<br />
Diagnostic Table (Cont'd)<br />
SYMPTOM & CONDITION 11 Abnormal idling- high idle (after warm-up)<br />
SERVICE PROCEDURE<br />
.-CHECK<br />
~~~tg<br />
~ -<br />
~sm~<br />
Check ignitiontiming.<br />
1 N.G.<br />
Adjust ignition timing.<br />
[See page EF & EC-26.]<br />
REMOVE<br />
0<br />
~ .<br />
Pressu re<br />
regulator<br />
. SEF291G -<br />
Remove vacuum hose from<br />
pressure regulator, and try to start.<br />
C)<br />
CHECK<br />
SEF981 F<br />
Check terminal voltage of<br />
F.I.C.D. solenoid while<br />
idling. 1<br />
Check the part and/or circuit.<br />
[See HA section.]<br />
POSSIBLE CAUSES . . . 8 e 0 . 0 G><br />
SPECIFICATIONS Mixture ratio 0 0 0 0 0<br />
Ignition timing (too advanced) 0<br />
INTAKE SYSTEM Air duct (leaks) 0<br />
Throttle chamber (air leaks)<br />
Throttle valve(stuck control wire)<br />
\<br />
\<br />
0<br />
0<br />
Intake manifold (gasket) (air leaks) 0<br />
Air regulator (stuck open) 0<br />
Idle speed control valve (remaining ON) 0<br />
F.I.C.D. solenoid (remaining ON) 0<br />
CONTROL SYSTEM Engine temperature sensor 0<br />
Idle switch (remaining OFF) 0 0<br />
Load switches (remaining ON) 0 0<br />
OTHERS Battery (voltage too low)<br />
f)<br />
CHECK<br />
leak<br />
Engine ()<br />
~<br />
III~<br />
SE F301 G<br />
Check intake system for<br />
N.G' air leaks. ~O.K.<br />
Check throttle wire for<br />
l rough sliding.<br />
Repair/replace the part.<br />
MEASURE<br />
Fuel pressure<br />
Connect vacuum hose to<br />
pressure regulator and<br />
measure fuel pressure.<br />
~.<br />
Check mixture ratio<br />
feedback system.<br />
[See page EF & EC-26.]<br />
PERFORM<br />
Self-diagnosis<br />
Mode IV<br />
Perform self-diagnosis<br />
Mode IV (for idle switch).<br />
1 N.G.<br />
Check the idle switch circuit.<br />
[See page EF & EC-116.]<br />
EF & EC-48<br />
. CHECK<br />
SEF293G<br />
Make sure air regulator<br />
stays closed after warm-up.<br />
~N.G.<br />
Check air regulator and/or<br />
its circuit.<br />
[See page EF & EC-130.J<br />
CHECK<br />
.<br />
SEFOO7H<br />
Check terminal voltage of<br />
A.A.C. valve while idling.<br />
0 CHECK<br />
Throttle chamber<br />
s~<br />
Check throttle chember<br />
ports and valve for clogging.<br />
~ N.G.<br />
Clean the ports and/or<br />
throttle valve.<br />
N.G.<br />
--+ Check the part and/or circuit.<br />
[See page EF & EC-134.J<br />
I) N.G.<br />
CRANK<br />
Check sensor circuit.<br />
(( START ~ [See page EF & EC-90.J<br />
i5 ;U~ ~ (l] Ignition<br />
Engine tempera- switch<br />
ture sensor SEF292G<br />
Start with engine temperature<br />
sensor connector<br />
disconnected.
SYMPTOM & CONDITION<br />
SERVICE PROCEDURE<br />
.-CHECK<br />
~~~:ng<br />
~ -<br />
~ ""':G<br />
Check ignition timing.<br />
8<br />
APPLY<br />
~ . VACUUM<br />
PRESSURE<br />
- Pressu re<br />
regu lator<br />
SEF291G<br />
Apply vacuum pressure to<br />
pressure regulator after<br />
disconnecting vacuum<br />
hose, and check idling.<br />
CHECK<br />
~ Stays /A<br />
~...<br />
0<br />
~<br />
a ~rw<br />
, ~<br />
~<br />
(j"E.G.R.<br />
I! control<br />
valve<br />
, SEF547A...J<br />
Check E.G.R. control valve<br />
for operation.<br />
TROUBLE DIAGNOSES<br />
Diagnostic Table (Cont'd)<br />
121 Unstableidling- before warm-up I<br />
POSSIBLE CAUSES 0 f) 8 0 0 0 0<br />
SPECIFICATIONS Mixture ratio 0 0<br />
Ignition timing 0<br />
INTAKE SYSTEM Air regulator (not open enough) 0<br />
Idle speed control valve (remaining OFF) 0<br />
CONTROL SYSTEM Engine temperature sensor 0<br />
E.G.R. SYSTEM E.G.R. control valve (stuck open) 0<br />
E.G.R. solenoid (remaining OFF) 0 0<br />
N.G.<br />
--+Adjust ignition timing.<br />
[SeepageEF & EC-26.J<br />
Improved<br />
-- Checkmixtureratio<br />
feedback system.<br />
[See pageEF & EC-26.J<br />
CHECK<br />
E.G.R. solenoid<br />
~Ui6~<br />
u ~"~<br />
SEF303G<br />
Check terminal voltage of<br />
E.G.R. solenoid while<br />
idling.<br />
N.G.<br />
1<br />
Check the solenoid circuit.<br />
[Seepage EF & EC-100.J<br />
f)<br />
CHECK<br />
iitSEF293G<br />
Make sure air regulator<br />
stays open before warm-up.<br />
0<br />
EF & EC-49<br />
CHECK<br />
- SEFOO7H<br />
Check terminal voltage of<br />
A.A.C. valve while idling.<br />
N.G.<br />
~Check air regulatorand/or<br />
its circuit.<br />
[See page EF & EC-130.J<br />
Does not turn ON<br />
+Check its circuit.<br />
[See page EF & EC-134.J<br />
'0<br />
g<br />
RUN<br />
N.G<br />
' "<br />
r<br />
]<br />
" ST ART ~ Check senso<br />
,l:c;\ ::: / ~* [S CircUit<br />
S'J ~ :.Ji!J $ p'" EF & EC-90.]<br />
pera- S "<br />
Engine tem<br />
t ure sensor<br />
Ignition<br />
SEF292G witch<br />
Start and run engine with<br />
engine temperature sensor<br />
connector disconnected.
SYMPTOM & CONDITION<br />
SEF283G<br />
Check flashes of timing<br />
light for weakness.<br />
0<br />
MEASURE<br />
COMPRESSION<br />
PRESSURE<br />
SEF309G<br />
Measure compression<br />
pressu reo<br />
N.G.<br />
1<br />
Check cylinder head and<br />
gasket.<br />
[See EM section.]<br />
TROUBLE DIAGNOSES<br />
Diagnostic Table (Cont'd)<br />
131 Unstable idling - after warm-up I<br />
POSSIBLE CAUSES 0 8 8 0 0 0 8 0 0 G) 4D f)<br />
SPECIFICAnONS Mixture ratio 0 0 0 0<br />
Ignition sparks 0 0 0<br />
Ignition timing<br />
0<br />
Compression pressure<br />
0<br />
FUEL SYSTEM Fuel line (clogged)<br />
Canister (air leaks)<br />
0<br />
Pressure regulator control solenoid<br />
0<br />
IGNITION SYSTEM Power transistor 0 0<br />
Ignition coil 0 0<br />
Ignition wires 0 0 0<br />
INTAKE SYSTEM Blow-byhose (leaks) 0<br />
Air duct (leaks) 0<br />
CONTROL SYSTEM Idle switch<br />
Load switches<br />
0<br />
E.G.R. SYSTEM E.G. R. control valve 0<br />
E.G.R. solenoid 0 0<br />
SERVICE PROCEDURE<br />
CHECK<br />
0<br />
~<br />
BIOW_bY<br />
~<br />
hose<br />
, I SEF300G<br />
. CHECK<br />
Leak<br />
~<br />
r~<br />
Engine 11/"-'<br />
SEF301G<br />
. CHECK<br />
~";f:t<br />
SEF298G<br />
CHECK<br />
e Pressure regulator<br />
control solenoid<br />
~<br />
U - ~.=. SEF303G<br />
Check blow-by hose for<br />
Check intake system for<br />
air leaks.<br />
Check purge line for leaks.<br />
Check terminal voltage.of<br />
the solenoid while idling.<br />
leaks. 1 N.G.<br />
Repair/replace the hose.<br />
1 N.G.<br />
Repair/replace the part.<br />
1 N.G.<br />
Repair/replace the hose.<br />
+ N.G.<br />
Check the solenoid circuit.<br />
. CHECK<br />
0., Timing light N.G.<br />
--+<br />
0<br />
I<br />
MEASURE<br />
'. .<br />
IgOitlon<br />
wIre<br />
O.K. .0<br />
, +<br />
CHECK<br />
[See page EF & EC-124.J<br />
CHECK<br />
SEF315G<br />
~ru<br />
~~<br />
Measure resistance of<br />
suspect wires.<br />
~ N.G.<br />
Replace the wire.<br />
.<br />
~ 6~<br />
CHECK ~ Stays ( ~<br />
I~'"<br />
, ~<br />
~<br />
E.G.R'<br />
n control<br />
valve<br />
, SEF547A/<br />
Check E.G.R. control valve<br />
for operation.<br />
EF & EC-50<br />
- SEF282G<br />
Remove spark plugs and<br />
check their ignition sparks.<br />
CHECK<br />
E.G.R. solenoid<br />
~fii6~<br />
u ~.~<br />
SEF303G<br />
Check terminal voltage of<br />
E.G.R. solenoid while idling.<br />
~ N.G.<br />
Check the solenoid circu it.<br />
[See page EF & EC-100.J<br />
o~<br />
~"""~G<br />
Check ignition timing.<br />
~ N.G.<br />
Adjust ignition timing.<br />
[See page EF & EC-26.J<br />
PERFORM<br />
f)<br />
Self-diagnosis<br />
Mode IV<br />
~<br />
SEF285G<br />
Perform self-diagnosis<br />
Mode IV (for idle switch).<br />
1 N.G.<br />
Check the idle switch circuit.<br />
[See page EF & EC-116.J
TROUBLE DIAGNOSES<br />
Diagnostic Table (Cont'd)<br />
SYMPTOM & CONDITION 14<br />
POSSIBLECAUSES<br />
Poor driveability - stumble (while accelerating)<br />
. f) 8 0 (;) . . 0 0<br />
SPECIFICATIONS Mixture ratio 0 0 0 0<br />
Fuel pressure 0 0<br />
FUEL SYSTEM Fuel filter (clogged) 0<br />
Fuel line (clogged) 0<br />
Injectors (clogged) 0<br />
IGNITION SYSTEM Power transistor 0 0<br />
SERVICE PROCEDURE<br />
.<br />
" CHECK<br />
0, Timing light<br />
SEF283G<br />
Check flashes of timing<br />
light for weakness.<br />
~CHECK<br />
Engine<br />
~ SEF301G<br />
Leak<br />
() III~<br />
Check intake system for<br />
air leaks.<br />
N.G. --<br />
MEASURE<br />
Ignition wire<br />
\{I i GJ<br />
@<br />
-'}<br />
SEF315G<br />
Measure resistance of<br />
suspect wires.<br />
N.G.<br />
.-- REMOVE-<br />
Pressu re regu lator<br />
~. SEF291G<br />
Remove vacuum hose from<br />
pressure regulator, and try to drive.<br />
PERFORM<br />
~V<br />
U%'~<br />
Self-diagnosis<br />
SEF285G<br />
Perform self-diagnosis Mode<br />
V (for air flow meter).<br />
Ignition coil 0 0<br />
Ignition wires (ignition leaks) 0 0 0<br />
Spark plugs (ignition leaks, improper gap) 0<br />
INTAKE SYSTEM Air'duct (leaks) 0<br />
CONTROL SYSTEM Crank angle sensor 0 0<br />
Air flow meter 0<br />
Engine temperature sensor 0 0<br />
Exhaust gas sensor 0<br />
Idle switch (remaining OFF) 0<br />
OTHERS Fuel (poor quality)<br />
N.G.<br />
-- Replacethewires.<br />
O.K.<br />
0<br />
PERFORM<br />
-- Repair/replacethe part. Self-diagnosis<br />
ModeIV<br />
~<br />
SEF285G<br />
Perform self-diagnosis<br />
Mode IV (for idle switch).<br />
" MEASURE<br />
Improved I0 Fuel pressure gauge<br />
. . Check mixture ratio<br />
feedback system.<br />
[See page EF & EC-26.J<br />
Connect vacuum hose to<br />
pressure regulator and<br />
measure fuel pressure while<br />
driving.<br />
«!) 0<br />
N.G.<br />
. Check the malfunctioning<br />
parts and/or circuits.<br />
[See page EF & EC.88<br />
(air flow meter).]<br />
EF & EC-51<br />
DISCONNECT<br />
-.."<br />
1:8<br />
II!<br />
sensor<br />
('.,~ ~;<br />
~~. E'h,"~";~'/'>=<br />
- SEF307G<br />
Disconnect exhaust gas<br />
sensor con nector, and try<br />
to drive.<br />
8<br />
CHECK<br />
SEF282G<br />
Remove spark plugs and<br />
check their ignition sparks.<br />
N.G.<br />
Check the idle switch<br />
circuit.<br />
[See page EF & EC-116.J<br />
Improved . Replace the sensor.<br />
No change . Check mixture ratio<br />
feedback system.<br />
[See page EF & EC-26.]
SYMPTOM & CONDITION<br />
SERVICE PROCEDURE<br />
~CHECK<br />
Engine<br />
~ SEF301 G<br />
leak<br />
() 11/<br />
Check intake system for<br />
air leaks.<br />
lN.G.<br />
Repair/replace the part.<br />
REMOVE<br />
.Pressure regulator<br />
~.SEF291G<br />
Remove vacuum hose<br />
from pressure regulator,<br />
and try to drive.<br />
PERFORM<br />
0'<br />
~<br />
Self-diagnosis<br />
SEF285G<br />
Perform self-diagnosis Mode<br />
V (for crank angle sensor,<br />
air flow meter, ignition<br />
signal.!<br />
TROUBLE DIAGNOSES<br />
Diagnostic Table (Cont'd)<br />
15 Poor driveability - surge (while cruising)<br />
POSSIBLE CAUSES<br />
. ...<br />
0 f) . e 0 0 8 fi)"<br />
SPECI FICA TIONS Mixture ratio (too lean) 0 0 0 0<br />
Fuel pressure (low) 0 0<br />
Ignition timing<br />
0<br />
IGNITION SYSTEM (missing) 0<br />
INTAKE SYSTEM Air duct (leaks) 0<br />
Throttle chamber (air leaks) 0<br />
Intake manifold (gasket) (air leaks) 0<br />
CONTROL SYSTEM Crank angle sensor 0<br />
Air flow meter 0<br />
Exhaust gas sensor<br />
Idle switch 0<br />
E.G.R. SYSTEM E.G. R. control valve (stuck open) 0<br />
E.G.R. solenoid (remaining OFF) 0 0<br />
E.G.R. vacuum hose (removed)<br />
.~<br />
CHECK<br />
(t@s"'~a<br />
Check ignition timing.<br />
1 N.G.<br />
Adjust ignition timing.<br />
[See page EF & EC-26.1<br />
Improved .<br />
N.G.<br />
. MEASURE<br />
0 Fuel pressure gauge<br />
t~<br />
, '",,,.,a<br />
Connect vacuum hose to<br />
pressure regulator and<br />
measure fuel pressure while<br />
driving,<br />
. Check the malfunctioning<br />
parts and/or circuits.<br />
[See page EF & EC-86<br />
(crank angle sensor),<br />
page EF & EC-88<br />
(air flow meter),<br />
page EF & EC-94<br />
(ignition signa!).!<br />
8<br />
~CHEC~ '<br />
"\ :::"./:<br />
, p!<br />
° E.G.R.<br />
II control<br />
valve<br />
SEF547 A./<br />
Check E.G.R. control valve<br />
for operation.<br />
EF & EC-52<br />
0<br />
. Check mixture ratio<br />
feedback system.<br />
[See page EF & EC-26.1<br />
'0 DISCONNEC!.-"<br />
10<br />
,"<br />
~/'~<br />
CHECK<br />
Stays lifted ( . e<br />
E.G.R. solenoid<br />
iki<br />
U ~-~- SEF303G<br />
Check terminal Voltage of<br />
E.G.R. solenoid.<br />
~N.G.<br />
Check the solenoid circuit.<br />
[See page EF & EC-100.J<br />
fj<br />
PERFORM<br />
Self
SYMPTOM & CONDITION<br />
SERVICE PROCEDURE<br />
. CHECK<br />
AIR CLEANER<br />
ELEMENT<br />
SEF320G<br />
Check air cleaner element<br />
for clogging.<br />
IN.G.<br />
Replace the part.<br />
. MEASURE<br />
COMPRESSION<br />
PRESSUR-E<br />
Measure compression<br />
pressure.<br />
SEF309G<br />
G REMOVE<br />
Pressu re regu lator<br />
~.SEF291G<br />
Remove vacuum hose from<br />
pressure regulator. and try<br />
to drive.<br />
TROUBLE DIAGNOSES<br />
Diagnostic Table (Cont'd)<br />
161 Poor driveability - lack of power I<br />
POSSIBLECAUSES . . . 0 . .. . .. 0 . .<br />
SPECIFICATIONS Fuel pressure 0 0<br />
Ignition timing<br />
0<br />
Compression pressure (too low) 0<br />
FUEL SYSTEM Fuel pump (low fuel output) 0<br />
Fuel filter (clogged)<br />
0<br />
Fuel line (clogged)<br />
0<br />
Injectors (clogged) 0<br />
IGNITION SYSTEM Ignition wires (ignition leaks) 0 0 0<br />
Spark plugs (improper gap) 0<br />
INTAKE SYSTEM Air cleaner element (clogged) 0<br />
Throttle chamber (clogged) 0<br />
Throttle valve (not open enough) 0<br />
CONTROL SYSTEM Air flow meter 0<br />
Exhaust gas sensor<br />
.<br />
CHECK<br />
~~~tg<br />
~ -<br />
, ~ ."':0-<br />
Check ignition timing with<br />
a timing light.<br />
~ N.G.<br />
Adjust ignition timing.<br />
(See page EF & EC-26.J<br />
--+ Check cylinder head and<br />
gasket.<br />
[See EM section.]<br />
Improved .<br />
MEASURE<br />
CD Fuel pressure gauge<br />
SEF286G<br />
Connect vacuum hose to<br />
pressure regulator and<br />
measure fuel pressure while<br />
driving. 1<br />
Check mixture ratio<br />
feedback system.<br />
[See page EF & EC-26.]<br />
. CHECK<br />
Throttle chamber<br />
~~<br />
~SEF290G<br />
Check throttle valve for<br />
rough movement.<br />
lN.G.<br />
Repair/replace the part.<br />
. CHECK<br />
SEF282G<br />
Remove spark plugs and<br />
check their ignition sparks.<br />
PERFORM .<br />
Self-diagnosis<br />
c5:<br />
71~<br />
SEF285G<br />
EF & EC-53<br />
Perform self-diagnosis Mode<br />
V (for air flow meter).<br />
~ N.G.<br />
Check the malfunctioning<br />
parts and/or circuit.<br />
[See page EF & EC-88.J<br />
O.K. I<br />
0<br />
SEF283G<br />
Check flashes of timing<br />
light for weakness.<br />
.<br />
~N.G.<br />
MEASURE<br />
@lgnitionWire<br />
.-- G:I<br />
@<br />
SEF315G<br />
Measure resistance of<br />
suspect.wires.<br />
+ N.G.<br />
Replace<br />
.<br />
the wires.<br />
.-- DISCONNECT<br />
-.<br />
~ ~<br />
Exhaustges IIP=<br />
sensor<br />
~4"l<br />
lv.iU )<br />
.,<br />
'.'<br />
~ SEF307G<br />
Disconnect exhaust gas<br />
sensor connector,<br />
to drive.<br />
and try<br />
Nochange<br />
l'<br />
mproved<br />
Replace the sensor.<br />
1<br />
Check mixture ratio<br />
feedback system.<br />
[See page EF & EC-26.]
SYMPTOM & CONDITION<br />
SERVICE PROCEDURE<br />
CHECK<br />
0 Water temperature<br />
~r;~~<br />
,.<br />
SEF312G<br />
TROUBLE DIAGNOSES<br />
Diagnostic Table (Cont'd)<br />
171 Poor driveability - detonation I<br />
POSSIBLECAUSES o . 6) e -<br />
SPECIFICATIONS Mixture ratio (too lean) 0 0<br />
Fuel pressure (low)<br />
0<br />
Ignition timing (too advanced)<br />
0<br />
FUEL SYSTEM Fuel filter (clogged) 0<br />
Fuel line (clogged)<br />
0<br />
Injectors (clogged)<br />
0<br />
CONTROL SYSTEM Crank angle sensor (improper 1°-signals) 0<br />
Too high<br />
~ Check cooling system.<br />
[See LC section.]<br />
CHECK<br />
8~<br />
~"'.~~<br />
Check water temperature. Check ignition timing.<br />
. Pressu<br />
REMOVE MEASURE<br />
re regu lator<br />
~.SEF291G<br />
Remove vacuum hose from<br />
pressure regulator, and try<br />
to drive.<br />
. PERFORM<br />
~<br />
Self-diagnosis<br />
_SEF285G ~<br />
Perform self-diagnosis<br />
Mode V (for crank angle<br />
sensor and air flow meter).<br />
Air flow meter 0<br />
Engine temperature sensor 0<br />
OTHERS Water temperature (too high) 0<br />
Fuel (low octane rating, poor quality)<br />
.<br />
Improved I 0 Fuel pressure gauge<br />
N.G.<br />
Connect vacuum hose to<br />
pressure regulator, and<br />
measure fuel pressure while<br />
driving.<br />
. Check the malfunctioning<br />
parts.<br />
[See page EF & EC-86<br />
(crank angle sensor).<br />
page EF & EC-88<br />
(air flow meter).]<br />
EF &. EC-54<br />
N.G.<br />
~ Adjust ignition timing.<br />
[See page EF & EC-26.]
SYMPTOM & CONDITION<br />
SERVICE PROCEDURE<br />
CHECK<br />
0 Timing<br />
~i9ht<br />
, -<br />
, ~ sm.:G<br />
Check ignition timing.<br />
CHECK<br />
C) , Timinglight<br />
,<br />
SEF283G<br />
Check flashes of timing<br />
Iight<br />
.<br />
for weak ness.<br />
-TRY<br />
TROUBLE DIAGNOSES<br />
Diagnostic Table (Cant' d)<br />
181 Enginestall - during start-up I<br />
POSSIBLECAUSES 0 f) 8 e 41) 0 . (i) 0<br />
SPECIFICATIONS Mixture ratio (too rich/too lean) 0 0 0<br />
Ignition sparks (weak) 0 0<br />
Ignition timing<br />
0<br />
Compression pressure (too low) 0<br />
FUEL SYSTEM Canister (too much evaporation to intake) 0<br />
IGNITION SYSTEM Ignition wires (ignition leaks) 0 0 0<br />
Spark plugs (wet with fuel, improper gap) 0<br />
INTAKE SYSTEM Throttle valve (not open enough) 0<br />
N.G.<br />
--+ Adjust ignition timing.<br />
[See page EF & EC-26.]<br />
MEASURE<br />
N.G. °<br />
--+ ' Ignition wire<br />
~rn<br />
-~<br />
SEF315G -<br />
Measure resistance of<br />
ignition wires.<br />
Improved<br />
--+ Replace the canister and/or<br />
the hoses.<br />
No<br />
change<br />
L1X J<br />
Canister purge<br />
'- SEF314G<br />
APPLY<br />
Shut evaporated fuel to 0<br />
~<br />
intake valve and try to drive.<br />
VACUUM<br />
PRESSURE<br />
- Pressu re<br />
regulator<br />
SEF291G<br />
Apply vacuum pressure to<br />
pressure regulator after<br />
disconnecting vacuum<br />
hose, and try to drive.<br />
CHECK<br />
'8 Throttle chamber<br />
~~ttl: valve<br />
SEF290G<br />
Check throttle valve for<br />
rough movement.<br />
N.G.<br />
--+Replace the wires.<br />
--+ O.K. ,.<br />
CHECK<br />
Spark plug<br />
SEF282G<br />
Remove spark plugs and<br />
check their ignition sparks.<br />
Improved No change f.,<br />
. Check mixture ratio .feedback<br />
system.<br />
[See page EF & EC-26.]<br />
EF & EC-55<br />
Replace the sensor..<br />
N.G.<br />
--+Repair/replace the part.<br />
Improved<br />
0<br />
MEASURE<br />
COMPRESSION<br />
. PRESSURE<br />
- SEF309G<br />
Measure compression<br />
pressu reo 1<br />
Check cylinder head and<br />
gasket.<br />
[See EM section.]<br />
sensor<br />
1<br />
DISCONNECT<br />
CJQu<br />
E'h,""'i~'f"=<br />
ij<br />
\11<br />
~ SEF307G<br />
Disconnect exhaust gas<br />
sensor connector and try<br />
to drive.
TROUBLE DIAGNOSES<br />
Diagnostic Table (Cont'd)<br />
SYMPTOM & CONDITION<br />
191 Engine stall-<br />
POSSIBLECAUSES<br />
while idling<br />
.<br />
I<br />
f). e 8 . . .. .<br />
SPECIFICATIONS Mixture ratio (too rich/too lean) 0 0<br />
Fuel pressure (low) 0 0<br />
Ignition sparKs(weak, missing)<br />
0<br />
Idle speed (low)<br />
0<br />
FUEL SYSTEM Fuel line (clogged) 0<br />
IGNITION SYSTEM SparKplugs (wet with fuel, improper gap) 0 0<br />
INTAKE SYSTEM Idle speed control valve (improper operation) 0 0<br />
F.I.C.D. solenoid (improper operation) 0 0<br />
CONTROL SYSTEM Idle switch (remaining OFF) 0<br />
Neutral switch (remaining OFF)<br />
0<br />
Loadswitches(remainingOFF) 0 0<br />
SERVICE PROCEDURE<br />
REMOVE<br />
'. Pressure regulator<br />
~.SEF291G<br />
Remove vacuum hose from<br />
pressure regulator, and<br />
check idling.<br />
.<br />
MEASURE<br />
Tachometer<br />
2 3 .<br />
1\ I I 5<br />
'" ,<br />
o-~ -6<br />
Measure idle speed.<br />
SEF316G<br />
!N..G.<br />
Adjust idle speed.<br />
[See page EF & EC-26.J<br />
. CHECK<br />
SEFOO7H -<br />
Check terminal voltages of<br />
A.A.C. valve.<br />
~ N.G.<br />
Check the part and/or circuit.<br />
[See page EF & EC-134.J<br />
Improved .<br />
MEASURE<br />
'f) Fuel pressure gauge<br />
t~<br />
, '."286G<br />
Connect vacuum hose to<br />
pressure regulatorand<br />
measure fuel pressure.<br />
. CHECK<br />
,<br />
Timinglight N.G.<br />
SEF283G<br />
Check flashes of timing<br />
light for weakness.<br />
C)<br />
CHECK<br />
SEF981 F<br />
Check terminal voltage of<br />
F.I.C.D. solenoid.<br />
~ N.G.<br />
Check the part and/or circuit.<br />
[See HA section.]<br />
.1<br />
EF & EC-56<br />
. Check mixture ratio<br />
feedback system.<br />
[See page EF & EC-26.J<br />
. . Spark<br />
CHECK<br />
PERFORM<br />
4;) Self-diagnosis<br />
Mode IV<br />
~ SEF285G<br />
Perform self-diagnosis<br />
Mode IV (for idle switch).<br />
CHECK.<br />
plug<br />
r<br />
and/or<br />
ark plug<br />
SEF299G !.EF8G<br />
Remove spark plugs and<br />
check their gaps and tips.<br />
Check spark plugs for<br />
being foul or wet with fuel.<br />
N.G.<br />
- Checkthe idleswitchcircuit.<br />
[See page EF & EC-116.J
SYMPTOM & CONDITION<br />
SERVICE PROCEDURE<br />
.<br />
, CHECK<br />
0 , Timing light<br />
SEF283G<br />
Check flashes of timing<br />
light for weakness during<br />
acceleration.<br />
0<br />
MEASURE<br />
COMPRESSION<br />
PRESSURE<br />
SEF309G<br />
Measure compression pressure.<br />
'0 .CHECK<br />
Self-diagnosis Mode II<br />
5 times or '<br />
!"ore/10 sec. SEF373G<br />
Check mixture ratio by flashes<br />
of inspection lamps.<br />
N.G.<br />
N.G.<br />
TROUBLE DIAGNOSES<br />
Diagnostic Table (Cont'd)<br />
20 I Engine stall - while accelerating I<br />
POSSIBLE CAUSES 0 f} 8 0 0 0 8<br />
SPECIFICATIONS Mixture ratio 0 0<br />
Ignition sparks (weak, missing) 0 0 0<br />
Compression pressure (low) 0<br />
CONTROL SYSTEM Crank angle sensor 0 0<br />
Air flow meter 0<br />
Exhaust gas sensor 0 0<br />
'.<br />
f)<br />
MEASURE<br />
Ignition wire<br />
N.G.<br />
. Replacethe wires.<br />
~Hjl<br />
SEF31~<br />
Measure resistance of<br />
suspect wires.<br />
Check cylinder head and<br />
gasket.<br />
[See EM section.!<br />
IV<br />
.<br />
O.K. 8<br />
N.G. 0 DISCONNECT PERFORM<br />
Cf<br />
.<br />
sensor<br />
C10u Exhoon ~r,fF<br />
'"<br />
~ SEF307G<br />
Disconnect exhaust gas<br />
sensor connector, and try<br />
to drive. I<br />
.lmprOVed<br />
No change Replace the sensor.<br />
1<br />
Check mixture ratio<br />
feedback system.<br />
[See page EF & EC-26.]<br />
EF & EC-57<br />
CHECK<br />
SEF282G<br />
Remove spark plugs and<br />
check their ignition sparks.<br />
~<br />
7I~<br />
Self-diagnosis<br />
SEF285G<br />
Perform self-diagnosis Mode<br />
V (for cra nk ang Ie senso r<br />
and air flow meter!.<br />
0 N.G.<br />
. Check the malfunctioning<br />
parts and/or circuits.<br />
[See page EF & EC~6<br />
(crank angle sensor).<br />
page EF & EC-88<br />
(air flow meter).]
SYMPTOM & CONDITION<br />
SERVICE PROCEDURE<br />
CHECK.<br />
'0 Timing light<br />
.!<br />
SEF283G<br />
Check flashes of timing<br />
light for weakness at<br />
constant engine revolution.<br />
(1,000 - 2,000 rpm).<br />
.-CHECK ,<br />
Self-diagnosisModeII<br />
SEF285G<br />
PERFORM .<br />
Self-diagnosis<br />
Move V<br />
Perform self-diagnosis<br />
Mode V (for air flow meter<br />
and crank angle sensor).<br />
TROUBLE DIAGNOSES<br />
Diagnostic Table (Cont'd)<br />
21 I Engine stall - while cruising I<br />
POSSIBLE CAUSES 0 8 . 0 . .<br />
SPECIFICATIONS Mixture ratio 0 0<br />
Ignition sparks (weak, missing) 0 0 0<br />
CONTROL SYSTEM Crank angle sensor 0<br />
Air flow meter<br />
0<br />
N.G.<br />
N.G.<br />
N.G.<br />
. . MEASURE<br />
Ignitio n wire<br />
N.G.<br />
. Replace the wires.<br />
~rn<br />
-~<br />
SEF315G<br />
O.K.<br />
.<br />
Measure resistance of<br />
suspect wires.<br />
" Improved<br />
DISCONNECT- ED<br />
~"~<br />
11\<br />
Exhaust gas<br />
sensor<br />
{'')~ ,:<br />
l-.,~-<br />
SEF307G<br />
Disconnect exhaust gas<br />
sensor connector, and try<br />
to drive.<br />
.Check the circuits.<br />
[See page EF & EC-86<br />
(crank angle sensor),<br />
page EF & EC-88<br />
(air flow meter).]<br />
EF 8r. EC-58<br />
. Replace the sensor.<br />
No change<br />
. Check mixture ratio<br />
feedback system.<br />
[See page EF & EC-26.]<br />
.<br />
CHECK<br />
SEF282G<br />
Remove spark plugs and<br />
check their ignition sparks.
TROUBLE DIAGNOSES<br />
Diagnostic Table (Cont'd)<br />
SYMPTOM & CONDITION 22 Engine stall - while decelerating/just after stopping<br />
POSSIBLE CAUSES 0 f) . 0 0 0<br />
SPECIFICATIONS Mixture ratio 0 0<br />
Ignition sparks (missing)<br />
0<br />
Idle speed (too low)<br />
0<br />
IGNITION SYSTEM (m issing) 0 0<br />
INTAKE SYSTEM Idle speed control valve (remaining OFF) 0 0<br />
CONTROL SYSTEM Exhaust gas sensor (malfunctioning feedback control) 0 0<br />
Crank angle sensor<br />
0<br />
Idle switch (remaining OF F) 0<br />
SERVICE PROCEDURE<br />
." CHECK<br />
SEF283G<br />
Check flashes of timing<br />
light while decreasing<br />
engine speed.<br />
8<br />
MEASURE<br />
Tachometer<br />
" ... I ",5<br />
2 i '<br />
0-&..<br />
~ -6<br />
SE F316G<br />
Measure idle speed.<br />
N.G.<br />
( V<br />
+ Self-diagnosis<br />
Mode V<br />
'Q PERFORM<br />
SEF285G<br />
Perform self-diagnosis<br />
Mode V (for ignition signal<br />
and crank angle sensor).<br />
N.G.<br />
~ Adjust idle speed.<br />
[See page EF & EC-26.J<br />
. CHECK ~DISCONNECT<br />
N.G. 8 """"'''<br />
Self-diagnosisModeI~ + 18<br />
5 times or (~)<br />
more/10 sec.'-.J<br />
,-SEF373G<br />
Check mixture ratio by<br />
flashesof inspection<br />
lamps.<br />
Load switches (remaining OFF) 0 0<br />
.<br />
~\I~<br />
11\<br />
Exhaust gas<br />
sensor<br />
C~,.:<br />
,<br />
SEF307G<br />
Disconnect exhaust gas<br />
sensor connector, and try<br />
to drive.<br />
N.G.<br />
~ Check the malfunctioning<br />
parts and/or circuits.<br />
[See page EF & EC-94<br />
(ignition siglal),<br />
page EF & EC-86<br />
(crank angle sensor).]<br />
0<br />
CHECK<br />
SEFOO7H<br />
Check terminal voltage of<br />
A.A.C. valve.<br />
Improved<br />
+ Replace the sensor.<br />
No change<br />
--+ Checkmixtureratio<br />
feedback system.<br />
[See page EF & EC-26.J<br />
EF & EC-59<br />
Left OFF<br />
--+ Check the circuit.<br />
[See page EF & EC-134.J
TROUBLE DIAGNOSES<br />
Diagnostic Table (Cont'd)<br />
SYMPTOM & CONDITION 231 Engine stall - while loading I<br />
POSSIBLECAUSES .. f) 8 o .<br />
SPECIFICATIONS Ignition timing 0<br />
Idle speed (too low)<br />
0<br />
INTAKE SYSTEM Idle speed control valve (remaining OFF) 0 0<br />
F.I.C.D. solenoid (remaining OFF) 0 0<br />
CONTROLSYSTEM Idle switch (remaining OFF) 0 0<br />
SERVICE PROCEDURE<br />
MEASURE CHECK<br />
0 N.G.<br />
Tachometer<br />
2 ~ 4<br />
I \ I<br />
... ,,'<br />
0-&..<br />
~ -6<br />
Measure idle speed.<br />
8<br />
SEF316G<br />
---+Adjust idle speed.<br />
[See page EF & EC-26.]<br />
.<br />
~~~tg<br />
~ -<br />
, ~ ""~G<br />
Check ignition timing.<br />
CHECK CHECK<br />
N.G.<br />
~ Check the part and/or circuit.<br />
[See page EF & EC-134.]<br />
SEFOO7H<br />
Check terminal voltage of<br />
A.A.C. valve.<br />
.<br />
PERFORM<br />
Self-diagnosis<br />
Mode IV<br />
~)<br />
SEF285G<br />
Perform self-diagnosis<br />
Mode IV (for idle switch).<br />
Load switches (remaining OFF) 0 0 0<br />
N.G.<br />
. Check the idleswitch circuit.<br />
[See page EF & EC-116.]<br />
"<br />
e<br />
SEF981F<br />
EF &. EC-60<br />
Check terminal voltage of<br />
F.I.C.D. solenoid.<br />
N.G.<br />
---+Adjust ignition timing.<br />
[See page EF & EC-26.]<br />
Check the part and/or circuit.<br />
[See HA section.]
SYMPTOM& CONDITION 24 I<br />
SERVICE PROCEDURE<br />
0<br />
TROUBLE DIAGNOSES<br />
Diagnostic Table (Cont'd)<br />
Backfire - through the intake I<br />
POSSIBLE CAUSES 0 f) 8 8 . 0 .<br />
SPECIFICATIONS Mixture ratio (too lean) 0 0 0 0<br />
Ignition timing (too retarded)<br />
0<br />
FUEL SYSTEM Injectors (clogged) 0<br />
INTAKE SYSTEM Air duct (air leaks) 0<br />
Intake manifold (gaskets) (air leaks) 0<br />
CONTROL SYSTEM Air flow meter 0<br />
CHECK CHECK<br />
Leak<br />
Engine<br />
~<br />
(')<br />
s:1i~ duct~<br />
Check intake system for air<br />
leaks.<br />
. REMOVE<br />
.Pressu<br />
~.<br />
re regu lato r<br />
SEF291G<br />
Remove vacuum hose from<br />
pressure regulator, and try<br />
to drive.<br />
No change<br />
1<br />
.-- PERFORM-------N.G.<br />
Self
TROUBLE DIAGNOSES<br />
Diagnostic Table (Cont'd)<br />
SYMPTOM& CONDITION 25 I Backfire - through the exhaust I<br />
POSSIBLE CAUSES . 8 .. 0 0 ..<br />
SPECIFICATIONS Mixture ratio (too rich) 0 0<br />
FUEL SYSTEM Injectors (fuel leaks) 0<br />
IGNITION SYSTEM (missing) 0<br />
INTAKE SYSTEM Air cleaner element (clogged) 0<br />
SERVICE PROCEDURE<br />
0<br />
CHECK<br />
AIR CLEANER<br />
ELEMENT<br />
SEF320G<br />
Check air cleaner element<br />
for clogging.<br />
.<br />
PERFORM<br />
Self-diagnosis<br />
Mode IV<br />
~ SEF285G<br />
Perform self-diagnosis<br />
Mode IV (for idle switch).<br />
0<br />
N.G.<br />
---+ Replace the element.<br />
N.G.<br />
. Check idle switchand/or<br />
its circuit.<br />
[See page EF & EC-116.J<br />
-<br />
CHECK Keeps<br />
CHECK<br />
flowing (0: 0 .' A.I.V. solenoid<br />
~<br />
SEF375G<br />
u t~"~mG<br />
Check secondary air to<br />
exhaust system.<br />
A.I.V. (always operating) 0<br />
A.I.V. solenoid (remaining ON) 0 0<br />
CONTROL SYSTEM Idle switch (remaining OFF) 0<br />
Check terminal voltage of<br />
A.I.V. solenoid.<br />
8<br />
APPLY<br />
PRESSURE<br />
~.P'~M'<br />
Improved<br />
-+ Check mixture ratio<br />
feedback system.<br />
[See page EF & EC-26.1<br />
~ regulator<br />
SEF291G<br />
Apply pressure to pressure<br />
regulator after disconnecting<br />
vacuum hose, and try to<br />
drive.<br />
8<br />
EF & EC-62<br />
PERFORM<br />
Self-diagnosis<br />
Mode V<br />
~ SEF285G<br />
Perform self-diagnosis<br />
Mode V (for ignition signal!.<br />
"<br />
Left ON<br />
. Check the solenoid circuit.<br />
[See page EF & EC-138.1<br />
N.G.<br />
-+ Check the malfunctioning<br />
part and/or circuit.<br />
[See page EF & EC-94<br />
(ignition signal).J
SEF297H<br />
TROUBLE DIAGNOSES<br />
Self-diagnosis - Description<br />
The self-diagnosis is useful to diagnose malfunctions. in major<br />
sensors and actuators of the E.C.C.S. system. There are 5<br />
modes in the self-diagnosis system.<br />
1. Mode I (Exhaust gas sensor<br />
. During closed-loop operation:<br />
monitor)<br />
The green inspection lamp turns ON when a lean condition<br />
is detected and goes OFF under rich condition.<br />
. During open-loop operation condition:<br />
The green inspection lamp remains OFF or ON.<br />
2. Mode n (Mixture ratio feedback control monitor)<br />
The green inspection lamp function is t!1e same as Mode 1.<br />
. During closed-loop operation:<br />
The red inspection lamp turns ON and OFF simultaneously<br />
with the green inspection lamp when the mixture ratio is<br />
controlled within the specified value.<br />
. During open-loop operation:<br />
The red inspection lamp remains ON or OFF.<br />
3. Mode In (Self-diagnostic system)<br />
This mode is the same as the former self-diagnosis in<br />
self-diagnosis mode.<br />
4. Mode N (Switches ON/OFF diagnostic system)<br />
During this mode, the inspection<br />
ON-OFF condition.<br />
. Idle switch<br />
. Starter switch<br />
. Vehicle speed sensor<br />
lamps monitor the switch<br />
5. Mode V (Real-time diagnostic system)<br />
The moment the malfunction is detected, the display will be<br />
presented immediately. That is, the condition at which the<br />
malfunction occurs can be found by observing the inspection<br />
lamps during driving test.<br />
..<br />
EF &. EC-63
Q .~<br />
Gr'<br />
r:~i'--~Cij'\<br />
~/~)jFlashin gNt '<br />
Imes<br />
Mode N ( )<br />
SE F288H<br />
TROUBLE DIAGNOSES<br />
Self-diagnosis - Description (Cont'd)<br />
HOW TO SWITCH THE DIAGNOSTIC MODES<br />
1. Turn ignition switch "ON".<br />
2. Turn diagnostic mode selector to E.C.U. (fully clockwise)<br />
and wait for inspection lamps to flash.<br />
3. Count the number of flashes, and after the inspection lamps<br />
have flashed the number of the required mode, immediately<br />
turn diagnostic mode selector fully counterclockwise.<br />
SEF989D<br />
. When the ignition switch Is turned off during diagnosis In<br />
any mode and then turned on again (after power to the<br />
E.C.U. has dropped completely), the diagnosis will automatically<br />
return to Mode L<br />
The stored memory will be lost if:<br />
1. Battery terminal is disconnected.<br />
2. After selecting Mode ill, Mode IV is selected.<br />
However, if the diagnostic mode selector is kept turned fully<br />
clockwise, it will continue to change in the order of Mode I<br />
~ IT~ ill ~ IV ~ V ~ I ... etc., and in this state the stored<br />
memory will not be erased.<br />
This unit serves as an idle rpm feedback control. When the<br />
diagnostic mode selector is turned within the "diagnostic<br />
mode OFF" range, a target engine speed can be selected.<br />
Mark the original position of the selector before conducting<br />
self-diagnosis. Upon completion of self-diagnosis, return the<br />
selector to the previous position. Otherwise, engine speed<br />
may change before and after conducting self-diagnosis.<br />
EF & EC-64
~~E~<br />
CHECK ENGINE LIGHT<br />
'SEF924F<br />
TROUBLE DIAGNOSES<br />
Self-diagnosis<br />
CHECK ENGINE<br />
- Description (Cont'd)<br />
LIGHT ~ (For California only)<br />
This vehicle has a check engine light on the instrument panel.<br />
This light comes ON under the following conditions:<br />
1) When ignition switch is turned "ON" (for bulb check).<br />
2) When systems related to emission performance malfunction<br />
in Mode I (with engine running).<br />
. This check engine light always illuminates and Is synchronous<br />
with red L.E.D.<br />
. Malfunction systems related to emission performance can<br />
be detected by self-diagnosis, and they are clarified as<br />
self-diagnostic codes in Mode IlL<br />
3) Check engine light will come "ON" only when malfunction is<br />
sensed.<br />
The check engine light will turn off when normal operation is<br />
resumed. Mode ill memory must be cleared as the contents<br />
remain stored.<br />
Code No. Malfunction<br />
12<br />
13<br />
14<br />
31<br />
32<br />
33<br />
35<br />
43<br />
45<br />
Air flow meter circuit<br />
Enginetemperature sensor circuit<br />
Vehicle speed sensor circuit<br />
E.C.U. (E.C.C.S.control unit)<br />
E.G.R. function<br />
Exhaust gas sensor circuit<br />
Exhaust gas temperature sensor circuit<br />
Throttle sensor circuit<br />
Injector leak<br />
Use the following diagnostic flowchart to check and repair a<br />
malfunctioning system.<br />
DIAGNOSIS START<br />
( )<br />
Turn ignition switch "ON" and make sure<br />
that check engine light comes "ON".<br />
O.K.<br />
r<br />
Perform self-diagnosis and check which code<br />
is displayed in Mode III.<br />
Check electronic control system of affected<br />
code No. to locate faulty part.<br />
Repair or replace faulty part.<br />
Reinstall any part removed.<br />
Ii.<br />
EF & EC-65<br />
N.G.<br />
Replace bulb.
TROUBLE DIAGNOSES<br />
Self-diagnosis - Description (Cont'd)<br />
@<br />
Erase the self-diagnosis memory.<br />
Perform driving test.<br />
Make sure that check engine light does not<br />
come "ON" during this test.<br />
1<br />
DIAGNOSIS END<br />
EF & EC-66<br />
. Methods of erasing memories<br />
differ with systems. Read the<br />
manual before diagnosing<br />
systems:<br />
. After repairs, test drive to check<br />
that check engine light does not<br />
come on.<br />
. Test driving modes differ with<br />
systems. Read the manual before<br />
test driving.
Mode L.E.D.<br />
Engine<br />
stopped<br />
(Ignition<br />
switch<br />
"ON")<br />
*: Maintains conditions just before switching to open loop<br />
*: Maintains conditions just before switching to open loop<br />
TROUBLE DIAGNOSES<br />
Self-diagnosis - Mode I (Exhaust gas sensor<br />
monitor)<br />
This mode checks the exhaust gas sensor for proper functioning.<br />
The operation of the E.C.U. L.E.D. in this mode differs with<br />
mixture ratio control conditions as follows:<br />
Open loop condition<br />
EXHAUST GAS SENSOR FUNCTION CHECK<br />
If the number of L.E.D. blinks is less than that specified, replace<br />
the exhaust gas sensor.<br />
If the L.E.D. does not blink, check exhaust gas sensor circuit.<br />
EXHAUST GAS SENSOR CIRCUIT CHECK<br />
See page EF & EC-104.<br />
Self-diagnosis - Mode II (Mixture ratio<br />
feedback control monitor)<br />
This mode checks, through the E.C.U. L.ED., optimum control<br />
of the mixture ratio. The operation of the L.E.D., as shown<br />
below, differs with the control conditions of the mixture ratio<br />
(for example, richer or leaner mixture ratios, etc., which are<br />
controlled by the E.C.U.).<br />
If the red L.E.D. remains on or off during the closed-loop<br />
operation, the mixture ratio may not be controlled properly.<br />
Using the following procedures, check the related components<br />
or adjust the mixture ratio.<br />
COMPONENT<br />
ADJUSTMENT<br />
CHECK OR MIXTURE RATIO<br />
See page EF & EC-26.<br />
EF & EC-67<br />
Engine running<br />
Closed loop condition<br />
Green ON *Remains ON or OFF Blinks<br />
Mode I Except for California For California model<br />
(Monitor A) Red ON<br />
model<br />
8 OFF<br />
8 ON: when the CHECK ENGINE LIGHT ITEMS<br />
are stored in the E.C.U.<br />
8 OFF: except for the above condition<br />
Mode L.E.D.<br />
Engine<br />
stopped<br />
(Ignition<br />
switch<br />
"ON")<br />
Engine running<br />
Open loop condition Closed loop condition<br />
Green ON *Remains ON or OFF Blinks<br />
Compensating mixture ratio<br />
Mode II<br />
(Monitor B) Red OFF<br />
*Remains ON or OFF<br />
(synchronous with green<br />
More than<br />
5% rich<br />
Between 5%<br />
lean and 5% rich<br />
L.E.D.)<br />
OFF<br />
Synchronized<br />
with green L.E.D.<br />
More<br />
Remains ON
TROUBLE DIAGNOSES<br />
Self-diagnosis - Mode III (Self-diagnostic<br />
system)<br />
The EC.U. constantly monitors the function of these sensors<br />
and actuators, regardless of ignition key position. If a malfunction<br />
occurs, the information is stored in the E.C.U. and can be<br />
retrieved from the memory by turning on the diagnostic mode<br />
selector, located on the side of the EC.U. When activated, the<br />
malfunction is indicated by flashing a red and a green L.E.D.<br />
(Light Emitting Diode), also located on the E.C.U. Since all the<br />
self-diagnostic results are stored in the E.C.U.'s memory even<br />
intermittent malfunctions can be diagnosed.<br />
A malfunction is indicated by the number of both red and green<br />
flashing L.ED.s. First, the red L.ED. flashes and the green<br />
flashes follow. The red L.E.D. corresponds to units of ten and<br />
the green L.ED. corresponds to units of one. For example,<br />
when the red L.ED. flashes once and the green L.ED. flashes<br />
twice, this signifies the number "12", showing that the air flow<br />
meter signal is malfunctioning. All problems<br />
code numbers in this way.<br />
. When the engine fails to start, crank<br />
are classified by<br />
it two or more<br />
seconds before beginning self-diagnosis.<br />
. Before starting self-diagnosis, do not erase the stored<br />
memory before beginning self-diagnosis. If it is erased, the<br />
self-diagnosis function for intermittent malfunctions will be<br />
lost.<br />
DISPLAY CODE TABLE<br />
Non-<br />
Califor-<br />
Code No. Detected items California<br />
nia<br />
11 Crank angle sensor circuit X X<br />
12 Air flow meter circuit X X<br />
13 Enginetemperature sensor circuit X X<br />
14 Vehicle speed sensor circuit X X<br />
21 Ignition signalmissing in primary coil X X<br />
31 E.C.U. IE.C.C.S.control unit) X X<br />
32 E.G.R. function X -<br />
33<br />
35<br />
Exhaust gas sensor circuit<br />
Exhaust gas temperature sensor circuit<br />
X<br />
X<br />
X<br />
-<br />
43 Throttle sensor circuit X X<br />
45 Injector leak X -<br />
55 No malfunction in the above circuit X X<br />
X: Available -: Not available<br />
EF 8r. EC-68
RETENTION TERM CHART (Example)<br />
I I<br />
Code<br />
No. I 50<br />
I<br />
CRANK ANGLE<br />
SENSOR<br />
I 11<br />
I'<br />
50 times<br />
--------------<br />
ENGINE<br />
TEMPERATURE<br />
SENSOR<br />
13<br />
If the same diagnostic item is<br />
judged to be malfunctioning before<br />
the starter is operated fifty times,<br />
it will be stored in E.C.U. memory<br />
until the starter is operated fifty<br />
times from this point in time.<br />
TROUBLE DIAGNOSES<br />
Self-diagnosis - Mode III (Self-diagnostic<br />
system) (Cont'd)<br />
RETENTION OF DIAGNOSTIC RESULTS<br />
The diagnosticresults will remain in E.C.U. memory until the<br />
starter is operated fifty times after a diagnostic item has been<br />
judged to be malfunctioning. The diagnostic result will then be<br />
cancelled automatically. If a diagnostic item which has been<br />
judged to be malfunctioning and stored in memory is again<br />
judged to be malfunctioning before the starter is operated fifty<br />
times, the second result will replace the previous one. It will be<br />
stored in E.C.U. memory until the starter is operated fifty times<br />
more.<br />
STARTER OPERATING TIMES<br />
t?//////// J'd : Retention term<br />
100 150 200<br />
-------------------------<br />
A : Malfunctiondetecting point<br />
EF &. EC-69<br />
SEF793D
~ ..~<br />
~r\<br />
&i~~)<br />
\~t Flashin ~~ g 4 t . Imes<br />
( Mode IV )<br />
CAUTION:<br />
SEF288H<br />
TROUBLE DIAGNOSES<br />
Self-diagnosis - Mode III (Self-diagnostic<br />
system) (Cont'd)<br />
SELF-DIAGNOSTIC PROCEDURE<br />
DIAGNOSIS START<br />
Pull out E.C.U. from under the assist kick panel.<br />
Start engine and warm it up to normal engine<br />
operating temperature.<br />
(Drive vehicle for about 10 min.)<br />
Turn diagnostic mode selector on E.C.U.<br />
fully clockwise.<br />
After the inspection lamps have flashed 3<br />
times, turn diagnostic mode selector fully<br />
counterclockwise.<br />
Make sure that inspection lamps are displaying<br />
Code No. 55.<br />
O.K.<br />
~ .~<br />
Flashing 3 times<br />
( Mode III )<br />
SEF288H .<br />
Write down the malfunctioning<br />
Code No.<br />
- - -- - -- - -- ~- - _Memoryerasingprocedure-- -- -- -- -- ---- I<br />
I<br />
Turn diagnostic mode selector on E.C.U. fully clockwise.<br />
After the inspection lamps have flashed 4 times, turn diagnostic mode selector<br />
on E.C.U. fully countercl.ockwise.<br />
---------<br />
- - - - - - - --- -1-_- - - -_J<br />
Turn ignition switch "OFF". Turn ignition switch "OFF".<br />
Reinstall the E.C.U. in place. See decoding chart.<br />
( DIAGNOSIS END ) Check malfunctioning parts<br />
and/or perform real time<br />
diagnosis system inspection.<br />
If malfunction part is found,<br />
repair or replace it.<br />
. During display of a code number In self-diagnosis mode (Mode m), If another diagnostic mode is to be performed,<br />
be sure to note the malfunction code number before turning diagnostic mode selector on E.C.U.<br />
fully clockwise. When selecting an alternative, select the diagnosis mode after turning switch "OFF". Other-<br />
. wise, self-diagnosis Information in the E.C.U. memory will be lost.<br />
Return the DIAGNOSTICMODE selector to the previous position.<br />
EF & EC-70<br />
I<br />
I<br />
I<br />
, IIII
TROUBLE DIAGNOSES<br />
DISPLAY CODE MALFUNCTIONING CIRCUIT OR<br />
PARTS<br />
Code No. 11<br />
ENGINE TEMPERATURE ~<br />
Self-diagnosis - Mode III (Self-diagnostic<br />
system) (Cont'd)<br />
DECODING CHART<br />
.Q (0. -\<br />
Crank angle sensorcircuit<br />
Red<br />
.<br />
Green<br />
(I<br />
SYSTEM<br />
EF & EC-71<br />
-V<br />
CONTROL UNIT SHOWS A<br />
MALFUNCTION SIGNAL WHEN<br />
THE FOllOWING CONDITIONS<br />
ARE DETECTED.<br />
. Either 10 or 1800 signal is not entered<br />
for the first few secondsduring engine<br />
cranking.<br />
. Either 10 or 1800 signal is not input<br />
often enough whilethe enginespeed<br />
is higher than the specifiedrpm.<br />
INSPECTION<br />
See page EF & EC.g6.<br />
. The air flow meter circuit is open or<br />
shorted.<br />
(An abnormally high or lowvoltage<br />
Code No. 12 is entered.)<br />
. """. --.. '",,,' .Q b ,<br />
-\<br />
Air flow meter circuit<br />
Red<br />
..<br />
Green<br />
(I<br />
Code No. 13<br />
SYSTEM<br />
{iQ) - ,-<br />
Red<br />
...<br />
Green<br />
(I<br />
,m"D --.. "!!'"<br />
CodeNo. 14<br />
-<br />
Enginetemperature sensor circuit<br />
{fQ) ,"",D '''''' ---.. (Qit 0,,,,,,, , .<br />
Vehicle speed sensorcircuit<br />
. ....<br />
Red Green<br />
SYSTEM<br />
-V<br />
)<br />
V<br />
-'\<br />
vi<br />
SYSTEM INSPECTION<br />
See page EF & EC.g8.<br />
SEF042F<br />
SEF043F<br />
. The enginetemperature sensorcircuit<br />
is open or shorted.<br />
(An abnormally high or low output<br />
voltage is entered.)<br />
INSPECTION<br />
See page EF & EC-90.<br />
. Signalcircuit is open.<br />
INSPECTION<br />
See page EF & EC-92.<br />
SEF044F<br />
SEF074G
TROUBLE DIAGNOSES<br />
DISPLAY CODE MALFUNCTIONING CIRCUIT OR<br />
PARTS<br />
Code No. 21<br />
E.G.R. function ~<br />
Code No. 32<br />
... .. SYSTEM<br />
'iiii" ~ 'mii' {f0 . » 0-. ,<br />
Red Green<br />
Self-diagnosis - Mode III (Self-diagnostic<br />
system) (Cont'd)<br />
Q CO$ -\<br />
Ignition signal circuit<br />
mm<br />
..<br />
,iiim<br />
.".<br />
.<br />
,.....<br />
Red Green<br />
SYSTEM<br />
CodeNo.31<br />
...<br />
{tQ) .,=,<br />
.<br />
CQ'j) ,<br />
Red Green<br />
".,. '. ..<br />
SYSTEM<br />
.;,. .,.".<br />
CodeNo.33<br />
-<br />
-<br />
E.C.U.calculation function<br />
E.G.R. function<br />
...<br />
''''O {iQ)<br />
...<br />
'ii'" , "",.<br />
Exhaust gas sensor circuit<br />
Red Green<br />
SYSTEM<br />
EF &. EC-72<br />
.-VI<br />
)<br />
~ -I<br />
)<br />
CONTROL UNIT SHOWS A<br />
MALFUNCTION SIGNAL WHEN<br />
THE FOLLOWING CONDITIONS<br />
ARE DETECTED.<br />
. The ignition signalin primary circuit<br />
does not enter to E.C.U.duringengine<br />
cranking or running.<br />
INSPECTION<br />
See page EF & EC-94.<br />
. Signal is beyond "normal" range.<br />
INSPECTION<br />
See page EF & EC-100.<br />
. Signal circuit is open.<br />
SEF045F<br />
INSPECTION<br />
See page EF & EC-98.<br />
SE F076G<br />
. E.G.R. valve does not operate.<br />
(E.G.R. valve spring does not lift.)<br />
INSPECTION<br />
See page EF & EC-104.<br />
SEF077G<br />
SEF078G
TROUBLE DIAGNOSES<br />
DISPLAY CODE MALFUNCTIONING CIRCUIT OR<br />
PARTS<br />
.<br />
Code No. 45<br />
D»<br />
~<br />
CodeNo.35<br />
.0<br />
...<br />
"H'"<br />
.....<br />
O:H:<br />
, ...<br />
Red Green<br />
SYSTEM<br />
.0 Code No. 43<br />
b<br />
.... ...<br />
Throttle<br />
Red Green<br />
SYSTEM<br />
Self-diagnosis - Mode III (Self-diagnostic<br />
system) (Cont'd)<br />
CONTROL UNIT SHOWS A<br />
MALFUNCTION SIGNAL WHEN<br />
THE FOLLOWING CONDITIONS<br />
ARE DETECTED.<br />
. Signalcircuit is open.<br />
INJECTOR LEAK ~ . Fuel leak from injector.<br />
.... SYSTEM<br />
Code No. 55<br />
.....<br />
"''''. ~ ""'"<br />
«[)- ~ ,..,..<br />
Red Green<br />
{fQ ~ « 0 ~ '$ ,..<br />
Red Green<br />
...€9.<br />
CQ:t Exhaust gas temperature sensor circ),Jit<br />
sensor circuit<br />
Injector leak<br />
EF &. EC-73<br />
11<br />
INSPECTION<br />
See page EF & EC-106.<br />
INSPECTION<br />
See page EF & EC-114.<br />
SEF393G<br />
. Throttle sensorcircuit isopen or<br />
short.<br />
(Output voltage is too highor too<br />
low.1<br />
INSPECTION<br />
I See page EF & EC-110.<br />
SEF079G<br />
SEFOSOG<br />
SEF984F
"<br />
TROUBLE DIAGNOSES<br />
Self-diagnosis - Mode IV (Switches ON/OFF<br />
diagnostic system)<br />
In switches ON/OFF diagnosis system, ON/OFF operation of<br />
the following switches can be detected continuously.<br />
. Idle switch<br />
. Starter switch<br />
. Vehicle speed sensor<br />
(1) Idle switch & Starter switch<br />
The switches ON/OFF status in mode IV is stored in E.C.U.<br />
memory. When either switch is turned from "ON" to "OFF"<br />
or "OFF" to "ON", the red L.E.D. on E.C.U. alternately<br />
comes on and goes off each time switching is performed.<br />
(2) Vehicle Speed Sensor<br />
The switches ON/OFF status in mode IV is selected is<br />
stored in E.C.U. memory. The green L.E.D. on E.C.U.<br />
remains off when vehicle speed is 20 km/h (12 MPH or<br />
below), and comes ON at higher speeds.<br />
EF & EC-74
~<br />
~C"<br />
~ ~0 )<br />
~r\<br />
~V '-~C0 )<br />
CAUTION:<br />
~(~~<br />
SE F292 H<br />
(<br />
TROUBLE DIAGNOSES<br />
Self-diagnosis - Mode V (Real-time diagnostic<br />
system)<br />
In real-time diagnosis, ifthe following items are judged to be<br />
working incorrectly,a malfunction willbe indicated immediately.<br />
. Crank angle sensor (180° signal & 1° signal) output signal<br />
. Ignition signal<br />
. Air flow meter output signal<br />
Consequently, this diagnosis very effectively determines whether<br />
the above systems cause the malfunction, during driving test.<br />
Compared with self-diagnosis, real-time diagnosis is very sensitive<br />
and can detect malfunctions instantly. However, items<br />
regarded as malfunctions in this diagnosis are not stored in<br />
E.C.U. memory.<br />
SELF-DIAGNOSTIC PROCEDURE<br />
DIAGNOSIS START<br />
I<br />
Pull out E.C.U. from under the assist seat.<br />
Start engine.<br />
Turn diagnostic mode selector on E.C.U.<br />
fullyclockwise.<br />
After the inspection lamps have flashed 5<br />
times, turn diagnostic mode selectorfully<br />
counterclockwise.<br />
Make sure that inspection lamps are not<br />
flashing for 5 min. when idling or racing.<br />
O.K.<br />
Turn ignition switch "OFF".<br />
Reinstallthe E.C.U. in place.<br />
( DIAGNOSIS END<br />
)<br />
)<br />
N.G.<br />
( Mode V )<br />
SEF288H<br />
Ifflashing,count no. of<br />
flashes.<br />
Turn ignition switch "OFF".<br />
See decoding chart.<br />
Perform real-time diagnosis<br />
system inspection.<br />
If malfunction part is found,<br />
repair or replace it.<br />
In real-time diagnosis, pay attention to inspectio.n lamp flashing. E.C.U. displays the malfunction code only once<br />
and does not memorize the inspection.<br />
EF &. EC-76
DISPLAY CODE<br />
CRANK ANGLE SENSOR<br />
RED L.E.D. 3.2<br />
'9' ON-[<br />
0 OFF<br />
IGNITIONSIGNAL<br />
3.2<br />
GREEN 3.2 3.2 ~~<br />
"L.E.D. r- T r<br />
'9,: ON --<br />
0 OFF<br />
Unit: sec<br />
3.2<br />
Unit: sec<br />
0.2<br />
1.8<br />
TROUBLE DIAGNOSES<br />
Self-diagnosis - Mode V (Real-time diagnostic<br />
system) (Cont'd)<br />
DECODING CHART<br />
MALFUNCTIONING CIRCUIT<br />
OR PARTS<br />
Malfunction of crank angle sensor circuit<br />
Malfunction of ignition signal<br />
EF & EC-77<br />
CONTROL UNIT SHOWS A<br />
MALFUNCTION SIGNAL WHEN<br />
THE FOLLOWING CONDITIONS<br />
ARE DETECTED.<br />
(Compare with Self-diagnosis<br />
- ModeIII.)<br />
. The 10 or 1800 signal is momentarily<br />
missing, or, multiple, momentary<br />
noise signals enter.<br />
REAL-TIME<br />
INSPECTION<br />
DIAGNOSTIC<br />
See page EF & EC-86.<br />
SEF047F<br />
AIR FLOW METER<br />
. Abnormal, momentary increasein air<br />
Unit: sec<br />
GREEN<br />
flow meter output signal<br />
LED 3.2 3.2 3.2<br />
..<br />
:0: ON<br />
','<br />
0 OFF<br />
Malfunctionof air flow meter circuit<br />
LI1.6lnl1.61 1.6<br />
0.60.4 V--0.6 0.4 0.6 0.4 REAL-TIME DIAGNOSTIC<br />
-V<br />
INSPECTION<br />
See page EF & EC-88.<br />
SEF048F<br />
. Signalfrom the primary ignition coil<br />
momentarily drops off.<br />
REAL-TIME DIAGNOSTIC<br />
INSPECTION<br />
See page EF & EC-94.<br />
SEF049F
I Crank Angle Sensor I<br />
CJ<br />
L J<br />
TROUBLE DIAGNOSES<br />
Self-diagnosis- Mode V (Real:-timediagnostic<br />
system) (Cont'd) X A . : vallab Ie<br />
REAL-TIME DIAGNOSTIC INSPECTION -: Not available<br />
EF & EC-78<br />
Check parts<br />
Check Check E.C.U. If malfunction, perform<br />
sequence<br />
Check items<br />
conditions Middle Sensor &<br />
harness the following items.<br />
connectors actuator<br />
connector<br />
Tap harness connector or During<br />
1 component during real- real-time X X X Go to check item 2.<br />
time diagnosis. diagnosis<br />
2<br />
3<br />
Check harness continuity Engine<br />
at connector. stopped<br />
Disconnect harness connector,<br />
and then check Engine<br />
dust adhesion to harness stopped<br />
connector.<br />
4 Check pin terminal bend.<br />
5<br />
Engine<br />
stopped<br />
Reconnect harness connector<br />
and then recheck Engine<br />
harness continuity at stopped<br />
connector.<br />
X - - Go to check item 3.<br />
X - X Clean terminal surface.<br />
- -<br />
X Take out bend.<br />
X - - Replace terminal.<br />
Tap harness connector or During If malfunction codes are<br />
6 component during real- real-time X X X displayed during real-time<br />
time diagnosis. diagnosis diagnosis, replace terminal.<br />
-E.C.U. harness connector<br />
SEF130H
I Air Flow Meter I<br />
r =-l<br />
TROUBLE DIAGNOSES<br />
Self-diagnosis- Mode V (Real-time diagnostic<br />
system) (Cont'd)<br />
x: Available<br />
-: Notavailable<br />
EF & EC-79<br />
Check parts<br />
Check Check<br />
sequence<br />
Check items<br />
conditions Middle Sensor &<br />
connectors actuator<br />
.. I"~<br />
,
I Ignition Signal I<br />
TROUBLE DIAGNOSES<br />
Self-diagnosis- Mode V (Real-time diagnostic<br />
system) (Cont'd)<br />
X: Available<br />
-: Not available<br />
EF & EC-80<br />
Check parts<br />
Check Check<br />
sequence<br />
Check items<br />
conditions Middle Sensor &<br />
, connectors actuator<br />
E.C.U. If malfunction, perform<br />
harness<br />
connector<br />
the following items.<br />
Tap harness connector or During<br />
1 component during real- real-time X X X Go to check item 2.<br />
time diagnosis. diagnosis<br />
2<br />
3<br />
Check harness continuity Engine<br />
at connector. stopped<br />
Disconnect harness connector,<br />
and then check Engine<br />
dust adhesion to harness stopped<br />
connector.<br />
4 Check pin terminal bend.<br />
5<br />
Engine<br />
stopped<br />
Reconnect harness connector<br />
and then recheck Engine<br />
harness continuity at stopped<br />
connector.<br />
X - - Go to check item 3.<br />
X - X Clean terminal surface.<br />
- -<br />
X Take out bend.<br />
X - - Replace terminal.<br />
Tap harness connector or During If malfunction codes are<br />
6 component during real- real-time X X X displayed during real-time<br />
time diagnosis. diagnosis diagnosis, replace terminal.<br />
LE.C.U. harness connector<br />
L Ignition coil and power transistor<br />
harness con nector<br />
SEF132H
NOTE<br />
TROUBLE DIAGNOSES<br />
EF &. EC-81
SEF330D<br />
SEF289H<br />
SEF290H<br />
SEF291H<br />
SEF292H<br />
TROUBLE DIAGNOSES<br />
Diagnostic Procedure<br />
CAUTION:<br />
1. Before connecting or disconnecting the E.C.U. harness<br />
connector to or from any E.C.U., be sure to turn the<br />
ignition switch to the "OFF" position and disconnect the<br />
negative battery terminal in order not to damage E.C.U. as<br />
battery voltage is applied to E.C.U. even if ignition switch<br />
is turned off. Failure to do so may damage the E.C.U.<br />
2. When performing E.C.U. input/output signal inspection,<br />
remove connector protector to insert tester probe into<br />
connector.<br />
3. When connecting or disconnecting pin connectors into or<br />
from E.C.U., take care not to damage pin terminals.<br />
4. Make sure that there are not any bends or breaks on<br />
E.C.U. pin terminal, when connecting pin connectors.<br />
5. Before replacing E.C.U., perform E.C.U. input/output signal<br />
inspection and make sure whether the E.C.U. unit functions<br />
properly or not. (See page EF & EC-142.)<br />
6. After performing this "Diagnostic Procedure", perform<br />
E.C.C.S. self-diagnosis and driving test.<br />
EF & EC-82
Solenoid valve<br />
SEF599D<br />
TROUBLE DIAGNOSES<br />
Diagnostic Procedure (Cont'd)<br />
7. When measuring E.C.U. controlled components supply<br />
voltage with a circuit tester, separate one tester probe<br />
from the other.<br />
If the two tester probes accidentally make contact with<br />
each other during measurement, the circuit will be shorted, '<br />
resulting in damage to the control unit power transistor.<br />
EF 8r. EC-83
TROUBLE DIAGNOSES<br />
Diagnostic Procedure 1<br />
MAIN POWERSUPPLYAND GROUNDCIRCUIT<br />
@ , With head-up display<br />
~, Without head-up display<br />
E. C. C S r-t 1:1 r.iiI ~<br />
CONTR'OL'<br />
UNIT<br />
@<br />
'1:<br />
"481391<br />
'1!<br />
1391481<br />
Component location<br />
I \<br />
/"BR;' fusible link<br />
~"G" fusible link<br />
~.<br />
;;<br />
107-B.'---<br />
108-B<br />
116-B<br />
4-R/B<br />
6-B<br />
13-B<br />
24-R<br />
36-B/R<br />
39-B<br />
47-B/W<br />
48-B<br />
@) ~~ @)<br />
ENGINE<br />
GROUND<br />
I GNI T! ON SWITCH<br />
ON or START<br />
FUSE BLOCK<br />
(Refer to "POWER<br />
SUPPL Y ROUT! NG"<br />
In EL section.)<br />
@ Iii<br />
~ ~ottt-O<br />
(E. F. J.<br />
harness)<br />
COMBINATION METER<br />
CHECK<br />
ENGINE<br />
LIGHT<br />
CHECK<br />
ENGINE<br />
LIGHT<br />
I<br />
17o--@--I6, 2' 0---@ 05<br />
[rmef-H-iJ I [gOO:!] ~<br />
~<br />
- jtWh I te) ~ CID~ ~~<br />
1""'00 arness) G<br />
G .. ~ ~<br />
I<br />
@)eo@<br />
12 I (~~strument<br />
'Fi'r;;n'\ rness)<br />
"II"<br />
@@<br />
- ~I"I~<br />
B/W~ ~~~~ine room<br />
:~:---,,:~:~<br />
@@) 1111<br />
~.. ~<br />
EF & EC-84<br />
" ....<br />
@)lMJ<br />
~<br />
harness)<br />
OFFACCON ST<br />
1 J J<br />
2 J J<br />
3 J<br />
4<br />
5<br />
E. C. C. S.<br />
RELAY I GNI T! ON<br />
SWITCH<br />
Iffl ~~ ~ ~@)<br />
..<br />
~<br />
ITiJ~<br />
FUSIBLE<br />
LINK<br />
FUSE AND<br />
FUSI BLE LI NK<br />
11m (Jn RELAY BOX)<br />
~<br />
BATTERY<br />
EE<br />
UTI<br />
~<br />
~:~ ~<br />
SEF261H
m "- ='<br />
Ii)<br />
- II Cl'UNIT Ef CONNECTOR II<br />
~ is 3647<br />
[i<br />
00<br />
iZJ<br />
00<br />
SEF259H<br />
II c..'UN1T ~ CONNECTOR ~ ~ e\<br />
116107108136 3948 ~ srt.J<br />
00<br />
SEF260H<br />
TROUBLE DIAGNOSES<br />
Diagnostic Procedure 2<br />
CRANK ANGLE SENSOR (Code No. 11)<br />
E. C. C. S.<br />
CONTROL<br />
UNIT<br />
fF2\<br />
I...:::..)<br />
147<br />
:47<br />
~m<br />
Component location<br />
4-R/B<br />
(E. F. 1harness)<br />
B/W~ ~B/W<br />
@@)<br />
22-G/B<br />
30- G/B "<br />
,- - - ,<br />
R/B~ ~R/B<br />
31-G/Y<br />
40-G/Y<br />
47-B/W<br />
-Crank angle sensor<br />
~<br />
~harness connector ~-'<br />
SEF147H ~<br />
"<br />
\ . I:<br />
,, ,<br />
d.<br />
.. jij ,.. ~<br />
"'..'" , , .. ,<br />
i@)<br />
ENGINE<br />
GROUND<br />
@)~<br />
@@)<br />
161~ m IiIln1<br />
CRANK<br />
ANGLE<br />
SENSOR<br />
EF & EC-86<br />
(Eng Ine room harness)<br />
~..<br />
"<br />
..0: 0:0:<br />
@lMJ<br />
~<br />
E. C. C. S.<br />
RELAY<br />
~<br />
@)~<br />
~<br />
-<br />
W<br />
R<br />
@<br />
BATTERY<br />
~'<br />
~<br />
:G~ ~<br />
~:~ ~<br />
~~<br />
FUSIBLE<br />
LINK<br />
FUSE AND<br />
FUS IBLE LI NK<br />
(ln RELA Y BOX)<br />
SEF221H
fa<br />
~COIIIET<br />
£)<br />
@J<br />
~0<br />
~~<br />
Ii]<br />
(lli)<br />
~ i5 22303140<br />
II ClUNIT 8' CONNECTOR II<br />
00<br />
SEF143H<br />
[!J<br />
(!1<br />
~_T<br />
IV<br />
00 f~ ~<br />
[:tI~<br />
DlSCGIINt:CT<br />
lu<br />
~<br />
SEF146H<br />
i5~<br />
CYJ<br />
:£<br />
[ill<br />
+:<br />
[ill<br />
SEF142H<br />
SEF144H<br />
TROUBLE DIAGNOSES<br />
INSPECTION START<br />
fa<br />
CHECK E.C.U. INPUT<br />
SIGNAL<br />
side).<br />
(Crank angle sensor<br />
1) Start engine.<br />
2) Check that pulse signals exist<br />
in crank angle sensor harness<br />
connector terminals @ and<br />
@ with logic probe.<br />
Pulse signals should exist.<br />
@: 1800 signal<br />
@: 10 signal<br />
[!J<br />
N.G.<br />
CHECK POWER SUPPLY<br />
(Crank angle sensor side).<br />
1) Stop engine.<br />
2) Disconnect crank angle sensor<br />
harness connector.<br />
3) Turn ignition switch "ON".<br />
4) Check voltage between<br />
terminal @ and ground.<br />
Battery voltage should exist.<br />
O.K.<br />
(!1<br />
I .<br />
CHECK GROUND CIRCUIT.<br />
1) Turn ignition switch "OFF".<br />
2) Check resistance between<br />
terminal @ and ground.<br />
Continuity should exist.<br />
O.K.<br />
CHECK COMPONENTS.<br />
Check crank angle sensor.<br />
(See page EF & EC-147.)<br />
. O.K.<br />
Reinstall any part removed.<br />
Era~e the self-diagnosis memory.<br />
Perform driving test and then<br />
perform self-diagnosis(Mode-III)<br />
again.<br />
O.K.<br />
INSPECTION END (<br />
EF & EC-87<br />
)<br />
O.K.<br />
Ii]<br />
I<br />
CHECK HARNESS CON-<br />
TINUITY BETWEEN CRANK<br />
ANGLE SENSOR AND<br />
E.C.U.<br />
1) Stop engine.<br />
2) Disconnect crank angle<br />
sensor harness connector.<br />
3) Disconnect E.C.U. harness<br />
connector.<br />
4) Check continuity between<br />
terminals @ and @. @.<br />
5) Check continuity between<br />
terminals @ and @. @.<br />
Continuity should exist.<br />
N.G.<br />
Repair harness or connectors<br />
between crank angle sensor and<br />
E.C.U.<br />
N.G.<br />
Repair or replace harness or<br />
connectors between crank angle<br />
sensor harness connector terminal<br />
@ and E.C.U. harness connector<br />
terminal @.<br />
N.G. 1) Repair harness or connectors.<br />
2) Check engine ground.<br />
N.G.<br />
N.G.<br />
Replace crank angle sensor.<br />
1) Perform E.C.U. input/output<br />
signal inspection test.<br />
2) If N.G., recheck the E.C.U.<br />
pin terminals for damage or<br />
the connection of E.C.U.<br />
har~ess connector.
AIR FLOW METER (C-adeNo. 12)~<br />
E.c. c. s.<br />
CONTROL<br />
UNIT @2<br />
III'<br />
f1<br />
Component location<br />
Ii)<br />
1D9-8/W<br />
4-R/8<br />
CE.F. 1hsrness)<br />
"<br />
,<br />
,<br />
I ,<br />
I<br />
,<br />
,<br />
I<br />
,<br />
I<br />
, I<br />
I I<br />
I ,<br />
I ,<br />
,<br />
,<br />
,<br />
I<br />
,<br />
I<br />
,<br />
I<br />
, I<br />
I ,<br />
I<br />
,<br />
,<br />
16-W<br />
17-8 -<br />
' ,<br />
uJ -J:<br />
~@)<br />
ENGINE<br />
GROUND<br />
TROUBLE DIAGNOSES<br />
AIR<br />
FLOW<br />
METER<br />
Diagnostic Procedure 3<br />
g,.?7I!i1Ii1IUJ<br />
~@)<br />
~"'.<br />
'"<br />
fff1 I ~ ~ (Engine room hsrnes~<br />
8/W$ '1:IL B/W<br />
@@<br />
R/8--; ~R/8<br />
@@<br />
EF &. EC-88<br />
~~ "'''' "''''<br />
@)lMJ<br />
;1 E.C.C.S.<br />
RELAY<br />
.<br />
@)~<br />
~<br />
w<br />
@)<br />
BATTERY<br />
FUSE<br />
Wd<br />
WJ<br />
~~<br />
FUSIBLE<br />
LINK<br />
FUSE AND<br />
FUSI BLE LI NK<br />
m~-<br />
CONNECT<br />
E)<br />
@)<br />
f<br />
.~r,<br />
,IV~<br />
I;]<br />
~u<br />
_IECT<br />
IU<br />
00<br />
SEF137H<br />
[!J~~<br />
CONNECT<br />
E)<br />
@)<br />
{D<br />
Ii]<br />
~<br />
_IECT<br />
lu<br />
00<br />
SEF141 H<br />
[Y]<br />
:E<br />
c,lUNI T "8 CONNECTOR II<br />
16<br />
~<br />
[ill<br />
i5~~<br />
[Y]<br />
:E<br />
[ill<br />
SEF136H<br />
SEF138H<br />
TROUBLE DIAGNOSES<br />
m<br />
INSPECTION START<br />
CHECK E.C.U. INPUT<br />
SIGNAL (Air flow meter side).<br />
1) Start engine.<br />
2) Check that voltage between<br />
air flow meter harness connector<br />
terminal @ and<br />
ground changes by racing<br />
engine with accelerator pedal.<br />
Output voltage should change.<br />
1.0 -Approximately 3.0V<br />
[!J<br />
N.G.<br />
CHECK POWER SUPPLY<br />
(Air flow meter side).<br />
1) Stop engine.<br />
2) Disconnect air flow meter<br />
harness connector.<br />
3) Turn ignition switch "ON".<br />
4) Check voltage between<br />
terminal @ and ground.<br />
Battery voltage should exist.<br />
Ii]<br />
O.K.<br />
I<br />
CHECK GROUND CIRCUIT.<br />
1) Turn ignition switch "OFF".<br />
2) Check resistance between<br />
terminal @ and ground.<br />
Resistance:<br />
Approximately on<br />
O.K.<br />
CHECK COMPONENTS.<br />
Check air flow meter.<br />
(See page EF & EC-147.)<br />
,<br />
O.K.<br />
Reinstall any part removed.<br />
Erase the self-diagnosis memory.<br />
Perform driving test and then<br />
perform self-diagnosis again.<br />
. O.K.<br />
INSPECTIONEND<br />
EF & EC-89<br />
O.K.<br />
N.G.<br />
N.G.<br />
N.G.<br />
N.G.<br />
I;]<br />
CHECK HARNESS CON.<br />
TINUITY BETWEEN AIR<br />
FLOW METER AND E.C.U.<br />
1) Stop engine.<br />
2) Disconnectairflowmeter<br />
harness connector.<br />
3) DisconnectE.C.U.harness<br />
connector.<br />
4) Check continuity between<br />
terminals @ and @.<br />
Continuity should exist.<br />
N.G.<br />
Repair or replace harness or<br />
connectors between terminals @<br />
and @.<br />
Repair or replace harness or<br />
connectors between air flow<br />
meter harness connector terminal<br />
@ and E.C.U. harness connector<br />
terminal ~.<br />
1) Repair or replace harness or<br />
connectors between terminals<br />
@ and @.<br />
2) Check engine ground.<br />
Replace air flow meter.<br />
1) Perform E.C.U. input/output<br />
signal inspection test.<br />
2) If N.G., recheck the E.C.U.<br />
pin terminals for damage or<br />
the connection of E.C.U.<br />
harness connector.
TROUBLE DIAGNOSES<br />
Diagnostic Procedure 4<br />
ENGJNE TEMPERATURE SENSOR (CodeNo. 13) ~<br />
E. c. c. S.<br />
CONTROL<br />
UNIT @<br />
18- L/OR<br />
21-8<br />
29-8<br />
\mm<br />
Component location<br />
SEF150H<br />
(E. F. I.<br />
harness)<br />
EF & EC-90<br />
m[;]<br />
jf!<br />
.rb@)<br />
~<br />
ENGINE<br />
TEMPERATURE<br />
SENSOR<br />
SEF223H
Fa ~<br />
r1I°<br />
~<br />
eJ<br />
~ i5[II u<br />
Ii]<br />
a<br />
00<br />
~i5u<br />
[ill<br />
r1I i5<br />
[ill<br />
C;'UNIT<br />
21 29<br />
E CONNECTOR<br />
SEF148H<br />
II<br />
r-- 18<br />
ClUNIT E CONNECTOR II<br />
SEF149H<br />
TROUBLE DIAGNOSES<br />
INSPECTION START<br />
CHECK COMPONENTS. I N.G.<br />
Check engine temperature sensor.<br />
(See page EF & EC-147.)<br />
Fa<br />
O.K.<br />
CHECK GROUND CIRCUIT.<br />
1) Disconnect E.C.U. harness<br />
connector.<br />
2) Check continuity bet~<br />
engine temperature sensor<br />
terminal @ and E.C.U.terminals<br />
@,~.<br />
Continuity should exist.<br />
Ii]<br />
O.K.<br />
CHECK INPUT SIGNAL<br />
CIRCUIT.<br />
Check continuity between terminals<br />
@ and @.<br />
Continuity should exist.<br />
O.K.<br />
Reinstall any part removed.<br />
Erase the self-diagnosis memory.<br />
Perform driving test and then<br />
perform self-diagnosis(Mode-<br />
III) again.<br />
O.K.<br />
INSPECTION END<br />
EF & EC-91<br />
N.G.<br />
N.G.<br />
Replace engine temperature<br />
sensor.<br />
1) Repair harnessor connectors<br />
between terminals @ and<br />
@,~.<br />
2) Check engine ground.<br />
Repair or replace harnessor<br />
connectors between terminals @<br />
and @.<br />
N.G. 1) Perform E.C.U. input/output<br />
signal inspection test.<br />
2) If N.G.; recheck the E.C.U.<br />
pin terminals for damage or<br />
the connection of E.C.U.<br />
harness connector.
TROUBLE DIAGNOSES ~<br />
Diagnostic Procedure 5<br />
VEHICLE SPEED SENSOR (SwitchON/OFF diagno~tic item) (Code No. 14) ~<br />
I!]<br />
~<br />
IGNITION SWITCH<br />
ON or START<br />
~Ii<br />
§I@<br />
~ FUSE BLOCK<br />
(Refer to "POWER<br />
SUPPL Y ROUT I NG"<br />
E. C. C. S.<br />
I<br />
8S7iROL @ In EL sect Ion.)<br />
3'- Y/G<br />
@@<br />
".II,~.<br />
(E. F. I.<br />
harness)<br />
~ ~@ .....<br />
HEAD-UP DISPLAY<br />
CONTROL UNIT<br />
" " "<br />
'" >->.<br />
>iiD<br />
... , , ..<br />
[t!J<br />
r-=-.<br />
COMBINATION METER<br />
U I'<br />
28<br />
~~~<br />
~ GD~~ @"..QD<br />
>- >- >-<br />
@@<br />
~<br />
1<br />
@~
PI<br />
SEF804F<br />
Ii]<br />
II ClUNIT §]CONNECTORII<br />
~i5 32<br />
SEF151H<br />
&a<br />
[ill<br />
TROUBLE DIAGNOSES<br />
INSPECTION START<br />
Is speedometer working properly?<br />
PI<br />
Yes<br />
CHECK INPUT SIGNAL.<br />
1) Perform switch ON/OFF<br />
diagnosis (in Mode IV).<br />
2) Make sure green inspection<br />
lamp on E.C.U. comes "ON"<br />
when vehicle speed reaches 20<br />
km/h (12 MPH).<br />
, N.G.<br />
Ii]<br />
CHECK CONTINUITY<br />
BETWEEN E.C.U. AND<br />
VEHICLE SPEED SENSOR.<br />
1) Turn ignition switch "OFF".<br />
2) Disconnect E.C.U. harness<br />
connector.<br />
3) Check continuity between<br />
E.C.U. terminal @ and<br />
ground by rotating rear wheel<br />
by hand.<br />
Continuity should come and<br />
go.<br />
O.K.<br />
Reinstall any part removed.<br />
Erase the self-diagnosis memory.<br />
Make sure Code No. 55 is displayed<br />
in Mode III.<br />
1) Perform switch ON/OFF<br />
diagnosis (in Mode IV) again.<br />
2) Make sure green inspection<br />
lamp on E.C.U. comes "ON"<br />
when vehicle speed reaches<br />
20 km/h (12 MPH).<br />
O.K.<br />
INSPECTION END<br />
EF & EC-93<br />
- No<br />
CHECK VEHICLE SPEED<br />
SENSOR AND SPEEDOMETER<br />
UNIT.<br />
(See EL section.)<br />
O.K. ( INSPECTION END )<br />
N.G. Repair or replace harness or<br />
connectors.<br />
N.G.<br />
1) Perform self-diagnosis and<br />
find malfunction code.<br />
2) According to displayed code<br />
No., perform diagnosis.
IGNITION SIGNAL (Code No. 21)<br />
.<br />
E.C.C.S.<br />
CONTROL r.11;:t<br />
TROUBLE DIAGNOSES<br />
Diagnostic Procedure 6<br />
UNIT @ p:leJ ~ FUSE AND<br />
FUSI BlE LI NK<br />
<br />
-w<br />
'"<br />
'\ ~<br />
III<br />
111]<br />
SE F34 7H<br />
@)g<br />
@)!<br />
I"<br />
BATTERY<br />
I GNI TI ON SWITCH<br />
FUSE<br />
bill<br />
bID<br />
fJ G<br />
cn<br />
G<br />
FUSIBLE<br />
LINK<br />
OFFACe ON ST<br />
1 c 0<br />
2 C :J<br />
3<br />
4<br />
5<br />
0<br />
SEF225H
mLit~<br />
CGIIBT<br />
~<br />
00<br />
IE)<br />
[!]<br />
Ii]<br />
ID<br />
~<br />
~i5<br />
[ill<br />
Battery ---.<br />
<br />
e<br />
SEF370H<br />
n ~Jur CCNECTOR II~i5 SEF444H<br />
~[<br />
CONIIECT<br />
~<br />
00.<br />
tID<br />
Ii!lCoili~i5<br />
SEF154H<br />
CGIIBT<br />
00 1$ 81 I'<br />
ID e<br />
SEF152H<br />
ClUNIT '8 CONNECTOR II<br />
1<br />
Logic probe<br />
w<br />
::E<br />
Battery<br />
<br />
e<br />
00<br />
~<br />
~<br />
SEF153H<br />
TROUBLE DIAGNOSES<br />
".. ....,<br />
INSPECTION START<br />
./<br />
I<br />
CHECK E.C.U. INPUT<br />
O.K.<br />
CHECK E.C.U. INPUT LINE.<br />
SIGNAL (Power transistor side). 1) Stop engine.<br />
1) Start engine. 2) Disconnect harness con.<br />
2) Verify that pulse signal exists nectors from power transistor<br />
between power transistr<br />
and E.C.U.<br />
harness connector terminal 3) Check continuity between<br />
@ and ground with logic terminals @ and @.<br />
probe. Continuity should exist.<br />
Pulse signal should exist. If N.G., check following.<br />
8 Resistor<br />
N.G. 8 Harness or connector<br />
[!] Ii]<br />
CHECK E.C.U. OUTPUT<br />
N.G.<br />
CHECK E.C.U. OUTPUT<br />
SIGNAL (Power transistor side). SIGNAL (E.C.U. side).<br />
Verify that pulse signalexists Verify that pulse signalexists<br />
between power transistor<br />
harness connector terminal<br />
between E.C.U. harness con-<br />
nectorterminalCD andground<br />
@ and ground with logic<br />
probe.<br />
Pulse signalshould exist.<br />
with logicprobe.<br />
Pulse signal should exist.<br />
If N.G., check the E.C.U. pin<br />
O.K.<br />
terminals for damage or the<br />
E.C.U. harness connection.<br />
EF & EC-95<br />
lo.K.<br />
Repair harness, connector, or<br />
resistor between terminals @<br />
and CD.<br />
II<br />
CHECK POWER SUPPLY.<br />
N.G.<br />
CHECKHARNESSCON-<br />
1) Stop engine. TINUITY BETWEEN<br />
2) Disconnect harness connector BATTERY AND IGNITION<br />
from ignition coil. COIL.<br />
3) Turn ignition switch "ON". Check the following items.<br />
4) Check voltage between igni- 8 Harness<br />
tion coil harness connector<br />
terminal @ and ground.<br />
Battery voltage should exist.<br />
-<br />
8<br />
8<br />
"G" fusible link<br />
Ignition switch<br />
E<br />
O.K.
Ii<br />
[!1<br />
SEF156.H<br />
cilltv~i5<br />
[ill<br />
~i5~ SEF366H<br />
cillE>~i5~<br />
[ill<br />
-=-<br />
TROUBLE DIAGNOSES<br />
Ii<br />
ffi<br />
CHECK HARNESS CON-<br />
TINUITY BETWEEN<br />
IGNITION COIL AND POWER<br />
TRANSISTOR.<br />
1) Turn ignition switch "OF F".<br />
2) Disconnect power transistor<br />
harness connector.<br />
3) Che9k continuity between<br />
ignition coil harness connector<br />
terminal @ and power<br />
transistor harness connector<br />
terminal @.<br />
[!1<br />
O.K.<br />
CHECK GROUND CIRCUIT.<br />
Check continuity between power<br />
transistor harness connector<br />
terminal @ and ground.<br />
Continuity should exist.<br />
O.K.<br />
CHECK COMPONENTS.<br />
Check ignition coil and power<br />
transistor.<br />
(See page EF & EC-148.)<br />
O.K.<br />
Reinstall any part removed.<br />
Erase the self-diagnosis memory.<br />
Perform driving test and then<br />
perform self-diagnosisagain.<br />
O.K.<br />
INSPECTION END<br />
EF & EC-96<br />
N.G.<br />
Repair or replace harness<br />
between @ and @.<br />
N.G. I 1) Repair harness or connectors.<br />
2) Check continuity.<br />
3) Check engine ground.<br />
N.G. Replace ignition coil or power<br />
transistor.<br />
N.G.<br />
1) Perform E.C.U. input/output<br />
signal inspection test.<br />
2) If N.G.. recheck the E.C.U.<br />
pin terminals for damage or<br />
the connection of E.C.U.<br />
harness connector.
NOTE<br />
TROUBLE DIAGNOSES<br />
EF & EC-97
TROUBLE DIAGNOSES<br />
Diagnostic Procedure 7<br />
ENGINE CONTROL UNIT (CodeNo. 31)Q<br />
INSPECTIONSTART<br />
1) Turn ignition switch "ON".<br />
2) Erasethe self-diagnosis<br />
memory.<br />
Perform self-diagnosis again.<br />
Does E.C.U. display Code No.<br />
31 again?<br />
No<br />
INSPECTION END<br />
( )<br />
EF & EC-98<br />
Yes<br />
Replace E.C.U.
NOTE<br />
TROUBLE DIAGNOSES<br />
EF & EC-99
TROUBLE DIAGNOSES<br />
Diagnostic Procedure 8<br />
E.G.R. FUNCTION (CodeNo. 32) Q [Not self-diagnosticitem (For non-California models))<br />
E. C. C. s.<br />
CONTROL<br />
UNIT @<br />
P<br />
81<br />
105- LG<br />
E.G.R.<br />
CONTROL<br />
SOLENOID<br />
VALVE<br />
~<br />
@)W - Ii]<br />
"'II::<br />
...I"<br />
(E. F. I.<br />
harness)<br />
]<br />
@@)<br />
8R-' '-B<br />
EF & EC-100<br />
(Eng I ne room<br />
harness)<br />
OFFACC ON ST<br />
1 J C<br />
2<br />
3<br />
4<br />
5<br />
:J (<br />
c<br />
I GNITI ON<br />
SWITCH<br />
~<br />
~ ~ @)Q<br />
..<br />
~<br />
=~~<br />
B/R<br />
BR<br />
FUSE<br />
till<br />
W G R<br />
w B~ ~<br />
~:~ ~<br />
(ill) [IJI ~<br />
FUSIBLE<br />
LINK<br />
BATTERY<br />
F~SI FUS Bt~D LI NK<br />
Un RELA Y BOJO<br />
SE F269H
m<br />
Ii]<br />
/<br />
[i<br />
Ii]<br />
=='--<br />
~-<br />
~~<br />
Clagg'og ~<br />
SEF445H<br />
SEF157H<br />
.:C\ . Improperconnection<br />
~ "" SEF816F<br />
(I<br />
CONNECT<br />
£)<br />
001<br />
trJ<br />
, C.f'H<br />
100<br />
SEF158H<br />
II C;'UNI T §fCONNECTOR II<br />
CONNECT<br />
105<br />
£)<br />
00 UW<br />
! tD C.f'H<br />
SEF159H<br />
TROUBLE DIAGNOSES<br />
m<br />
INSPECTION START<br />
CHECK E.G.R. CONTROL<br />
VALVE OPERATION.<br />
1) Start engine and warm it up<br />
sufficiently.<br />
2) Makesure E.G.R. control<br />
valvespring responds to<br />
your touch (use your<br />
fingers) and also when<br />
engine is raced.<br />
Ii]<br />
Does not respond<br />
CHECK VACUUM SOURCE<br />
TO E.G.R. CONTROL<br />
VALVE.<br />
1) Stop engine.<br />
2) Disconnect vacuum hose<br />
connected to E.G.R. control<br />
valve and B.P.T. valve.<br />
3) Start engine.<br />
4) Make sure vacuum exists<br />
when racing engine.<br />
[i<br />
N.G.<br />
CHECK VACUUM HOSE.<br />
1) Stop engine.<br />
2) Check vacuum hose for clogging,<br />
cracks, and proper<br />
connections.<br />
O.K.<br />
Ii]<br />
I .<br />
CHECK E.C.U. OUTPUT<br />
SIGNAL (Solenoid side).<br />
1) Start engine and warm it up<br />
sufficiently.<br />
2) Check voltage betwen E.G.R.<br />
control solenoid valve harness<br />
connector terminal @ and<br />
ground.<br />
Engine<br />
condition<br />
Voltage<br />
Idle Battery voltage<br />
Racing<br />
Temporarily<br />
drops to 0 - 1V<br />
O.K.<br />
EF &. EC-101<br />
Responds<br />
( INSPECTION END )<br />
O.K. CHECK COMPONENT.<br />
Check E.G.R. control valve.<br />
(See page EF & EC-148J<br />
I<br />
N.G.<br />
Replace E.G.R. control valve.<br />
N.G. If necessary, replace vacuum<br />
hose or reconnect vacuum hose<br />
firmly.<br />
(I<br />
N.G. CHECK E.C.U. OUTPUT<br />
SIGNAL (E.C.U. side).<br />
Check voltage between E.C.U.<br />
harness connector terminal @)<br />
and ground.<br />
Engine<br />
condition<br />
Voltage<br />
Idle Battery voltage<br />
Raci ng<br />
Temporarily<br />
dropstoO-1V<br />
If N.G., check the E.C.U. pin<br />
terminals for damage or the<br />
connection of E.C.U. harness<br />
connector.<br />
O.K.<br />
Repair harness or connectors<br />
between terminals @ and @.
Ii Test condition<br />
Drive vehicle under the following conditions<br />
with a suitable shift position.<br />
. Engine speed:<br />
3,100:1:300 rpm (AfT)<br />
3,000:1:400 rpm (MfT)<br />
. Intake manifoldvacuum:<br />
-42.7:1:8.0kPa<br />
(-320:1:60 mmHg, -12.60:1:2.36 inHg)<br />
Driving mode<br />
Vehicle<br />
driving<br />
Idling ----.<br />
Test condition<br />
16 seconds<br />
@<br />
or more<br />
Ignition'JLj<br />
switch: I IC)) Time<br />
0 FF -+-t-----<br />
Until green and red inspection lamps go off.<br />
CD Start engine and warm it up sufficiently.<br />
@ Turn off ignition switch and keep it off<br />
until green and red inspection lamps go off.<br />
CID Start engine and make sure that air conditioner<br />
switch and rear defogger are turned<br />
"OFF" during driving test.<br />
@ Shift to suitable gear position and drive<br />
in "Test condition" for at least 16 seconds.<br />
CID Decrease engine revolution to less than<br />
2,000 rpm.<br />
@ Repeat steps @ through CID at least 1<br />
time.<br />
[!1<br />
~~E~<br />
CHECK ENGINE LIGHT<br />
SEF037H<br />
SEF924F<br />
TROUBLE DIAGNOSES<br />
1<br />
CHECK COMPONENT.<br />
1) Stop engine.<br />
2) Check E.G.R. control solenoid<br />
valve. (See page EF &<br />
EC-149J<br />
O.K.<br />
CHECK COMPONENT.<br />
Check E.G.R. control valveand<br />
B.P.T. valve.<br />
(See page EF & EC-148J<br />
O.K.<br />
For California<br />
Check resistance of exhaust gas<br />
temperature sensor.<br />
(See page EF & EC-149.)<br />
Reinstall any part removed.<br />
Erase the self-diagnosis memory.<br />
Make sure Code No. 55 is displayed<br />
in Mode III.<br />
Ii<br />
Perform driving test under the<br />
following conditions.<br />
1) Warm up engine sufficiently.<br />
2) Use test driving modes<br />
indicated in figure Ii.<br />
N.G. Replace E.G.R. control solenoid<br />
valve.<br />
N.G.<br />
O.K.<br />
For non-California<br />
[!1 Comes<br />
Makesure check engine light does I"ON"<br />
not come "ON" during driving<br />
test.<br />
INSPECTION END<br />
EF & EC-102<br />
Does not come "ON"<br />
Valve spring may be stuck.<br />
Clean if necessary.<br />
If this does not correct trouble,<br />
replace E.G. R. control valve.<br />
INSPECTION END<br />
Perform self-diagnosis and find<br />
malfunction code. According to<br />
displayed code No., perform<br />
diagnosis.
NOTE<br />
TROUBLE DIAGNOSES<br />
EF &. EC-103
TROUBLE DIAGNOSES<br />
Diagnostic Procedure 9<br />
EXHAUST GAS SENSOR (CodeNo. 33) ~<br />
E. C. c. S.<br />
CONTROL<br />
UNIT<br />
Component location<br />
19-W<br />
(E. F. 1harness)<br />
:~: nnn nnnnnnnnn_nn i<br />
,m mmmm m__m m m_:::::::::~I<br />
m<br />
i@<br />
"::"<br />
ENGINE<br />
GROUND<br />
EF & EC-104<br />
i<br />
I I<br />
I I<br />
I I<br />
I I<br />
I I<br />
I I<br />
I I<br />
1:_'<br />
~<br />
(ill) @-=Ii]<br />
0<br />
EXHAUST<br />
GAS<br />
SENSOR<br />
SEF226H
m ':)<br />
~<br />
I;] .-cT<br />
~<br />
eJ II<br />
Exheust<br />
ges sensor<br />
= connector<br />
([IT))<br />
SEF153D<br />
~IT '8 CONNECTOR II<br />
19<br />
~ .-cT<br />
[ill eJ<br />
~ SEF446H<br />
TROUBLE DIAGNOSES<br />
m<br />
INSPECTION START<br />
CHECK INPUT SIGNAL.<br />
1) Start engine and warm it up<br />
sufficiently.<br />
2) Makesure green inspection<br />
lamp on E.C.U. blinks at<br />
2,000 rpm.<br />
I;]<br />
N.G.<br />
CHECK EXHAUST GAS<br />
SENSOR CIRCUIT.<br />
1) Stop engine.<br />
2) Disconnect E.C.U. harness<br />
connector.<br />
3) Disconnect exhaust gas<br />
sensor harness connector.<br />
4) Connect a jumper wire from<br />
exhaust gassensor harness<br />
connector to ground.<br />
5) Check continuity between<br />
E.C.U. harness connector<br />
terminal @ and ground.<br />
Continuity should exist.<br />
O.K.<br />
Replace exhaust gas sensor.<br />
Reinstall any part removed.<br />
Erase the self-diagnosis memory.<br />
Make sure Code No. 55 is displayed<br />
in Mode III.<br />
1) Start engine and warm it up<br />
sufficiently.<br />
2) Set diagnosis mode to Mode<br />
I.<br />
3) Makesure that green inspection<br />
lamp on E.C.U. goes on<br />
and off periodically more<br />
than 5 times during 10<br />
seconds at 2,000 rpm.<br />
O.K.<br />
INSPECTION END<br />
EF & EC-105<br />
O.K.<br />
INSPECTION END<br />
N.G. Repair or replace harness.<br />
N.G. . Perform IDLESPEED/IGNI-<br />
TION TIMING/IDLE MIXTURE<br />
RATION INSPECTION.<br />
(See page EF & EC-26J
TROUBLE DIAGNOSES<br />
Diagnostic Procedure 10<br />
EXHAUST GAS TEMPERATURE SENSOR (CodeNo. 35) ~<br />
E. C. c. S.<br />
CONTROLf'"F2I<br />
UNI T ~<br />
Component location<br />
A/T mOde;<br />
(/ /rv<br />
-<br />
8-R/L<br />
21-8<br />
(E. F. 1harness)<br />
~ 1i1[!] 0 :A/T mode I<br />
@ :M/T model<br />
@ @<br />
R/~j t:/L<br />
(Eng I ne room<br />
EF & EC-106<br />
harness) @ @<br />
R/L]tiJ ~R/LI<<br />
m~~<br />
CONNECT<br />
£)<br />
~<br />
~0<br />
I~~<br />
Ii) ~~i5<br />
[ill<br />
'+:. ,-<br />
00<br />
~i{)u<br />
[i ~ ~i5<br />
00<br />
~i5u<br />
~<br />
[Y]<br />
:+:<br />
SEF201 H<br />
CIUN!:!:8COtNECTOR II<br />
[ill<br />
'+<br />
, 21<br />
SEF202H<br />
ClUNIT :EI CONNECTORII<br />
SEF203H<br />
TROUBLE DIAGNOSES<br />
m<br />
INSPECTION START<br />
CHECK INPUT SIGNAL<br />
(Exhaust gas temperature sensor<br />
side).<br />
1) Start engine and warm it up<br />
sufficiently.<br />
2) Keep engine speed at approximately<br />
2,000 rpm.<br />
3) Check voltage between<br />
exhaust gas temperature<br />
sensor harness connector<br />
terminal @ and ground under<br />
the following conditions.<br />
Condition Voltage<br />
Wh~n vacuum is not<br />
applied to E.G.R.<br />
control valve<br />
When vacuum is<br />
applied to E.G.R.<br />
control valve<br />
1.0- 2.0V<br />
0 - 1.0V<br />
A sufficient vacuum applied<br />
with a hand vacuum pump may<br />
cause the engine to stall.<br />
Ii)<br />
[i<br />
N.G.<br />
CHECK HARNESS CON-<br />
TINUITY BETWEEN E.C.U.<br />
AND EXHAUST GAS TEM-<br />
PERATURE SENSOR.<br />
1) Stop engine.<br />
2) Disconnect E.C.U. harness<br />
connector.<br />
3) Disconnect exhaust gas<br />
temperature sensor harness<br />
connector.<br />
4) Check continuity between<br />
'terminals @ and @.<br />
Continuity should exist.<br />
O.K.<br />
CHECK GROUND CIRCUIT.<br />
Check continuity between<br />
terminals @ and @.<br />
Continuity should exist.<br />
EB<br />
O.K.<br />
EF & EC..'07<br />
O.K. EBEB<br />
N.G.<br />
N.G.<br />
1) Check harness and middle<br />
harness connector connection<br />
between terminals @ and<br />
@.<br />
2) If necessary, repair or replace<br />
harness.<br />
1) Check middle harness connector<br />
connection.<br />
2) If necessary, repair or replace<br />
harness.
TROUBLE DIAGNOSES<br />
CHECK COMPONENTS.<br />
Check exhaust gas temperature<br />
sensor. (Seepage EF & EC-149.)<br />
O.K.<br />
Reinstall any part removed.<br />
Erase the self-diagnosis memory.<br />
Make sure Code No. 55 is<br />
displayed in Mode III.<br />
Perform driving test, then<br />
perform self-diagnosis.<br />
.....--<br />
O.K.<br />
INSPECTION END<br />
EF & EC-108<br />
N.G. Replace exhaust gas temperature<br />
sensor.<br />
N.G.<br />
1) Perform E.C.U. input/output<br />
signal inspection test.<br />
2) If N.G., recheck the E.C.U.<br />
pin terminals for damageor<br />
the connection of E.C.U.<br />
harnessconnector.
NOTE<br />
TROUBLE DIAGNOSES<br />
EF & EC-109
THROTTLESENSOR (Code No. 43) ~<br />
E.C.c. S.<br />
CONTROL f
m<br />
d§b ~ i)<br />
i3~<br />
[2]<br />
:f<br />
IIISCOIIIlECT<br />
r;) cllitD ~ 18<br />
~<br />
~i5[[<br />
[ill<br />
SEF207H<br />
r---o 37<br />
ClUNIT E CONNECTOR II<br />
SEF208H<br />
[i1 ~ ~ CONNECT<br />
~.£)<br />
i3~<br />
[Y]<br />
+<br />
Ii] II c.;uNIT § CONNECTOR ~<br />
riI i) 20<br />
00.<br />
i3<br />
81 clliID~ i5<br />
00<br />
i5~[[<br />
[ill<br />
[Y]<br />
+, ,-<br />
r---o 21 29<br />
SEF209H<br />
SEF367H<br />
ClUNIT E CONNECTOR II<br />
SEF210H<br />
TROUBLE DIAGNOSES<br />
,- ......<br />
INSPECTION START<br />
./<br />
CHECK POWER SOURCE.<br />
N.G.<br />
HARNESS CONTINUITY<br />
1) Turn ignition switch "ON".<br />
BETWEEN THROTTLE<br />
2) Check voltage between<br />
SENSOR HARNESS CONterminal<br />
@ and ground.<br />
NECTOR AND E.C.U.<br />
Voltage: 1) Turn ignition switch "OF F".<br />
Approximately 5.0V<br />
2) Disconnect throttle sensor<br />
harness connector.<br />
O.K. 3) Disconnect E.C.U. harness<br />
connector.<br />
4) Check continuity between<br />
terminals @ and @.<br />
Continuity should exist.<br />
If N.G., repair or replace<br />
harness or connector.<br />
[i1 Ii]<br />
CHECK INPUT SIGNAL<br />
(Throttle sensor side).<br />
O.K.<br />
r----+<br />
CHECK INPUT SIGNAL<br />
(E.C.U. side).<br />
Makesure that voltage between Makesure that voltage between<br />
terminal @ and ground changes terminal @ and ground changes<br />
when accelerator pedal is de- when accelerator pedal isdepressed.<br />
pressed.<br />
Voltage:<br />
Approximately 0.5 -4.0V<br />
Voltage:<br />
Approximately 0.5 - 4.0V<br />
N.G.<br />
lo.K.<br />
Repair or replace harnessor<br />
connectors between terminals @<br />
and @.<br />
81<br />
CHECK GROUND CIRCUIT.<br />
N.G.<br />
1) Check harnesscontinuity<br />
1) Turn ignition switch "OF F"<br />
between throttle sensor and<br />
and disconnect E.C.U. har- ground.<br />
ness connector.<br />
2) Disconnect throttle sensor<br />
harness connector.<br />
3) Check continuity between<br />
terminal CD and E.C.U.<br />
terminals @, @.<br />
Continuity should exist.<br />
2) E.C.U.ground circuit.<br />
Ej<br />
O.K.<br />
EF & EC-111
SE F346H<br />
TROUBLE DIAGNOSeS<br />
CHECK COMPONENT.<br />
Check throttle sensor.<br />
(See page EF & EC-149.)<br />
.<br />
O.K.<br />
iii<br />
CHECK IDLE SWITCH OFF<br />
-+ ON SPEED.<br />
1) Reconnect throttle valve<br />
switch harness connector.<br />
2) Disconnect idle switch<br />
harness connector.<br />
3) Start and warm up engine<br />
sufficiently.<br />
4) Check idle switch OFF -+ ON<br />
speed with circuit tester,<br />
closing throttle valve<br />
manually.<br />
Idle switch OFF -+ ON speed:<br />
M/T: 1,oOO:t150 rpm<br />
AJT: 1~O:t150rpm<br />
(UN" range)<br />
O.K.<br />
Reinstall any part removed.<br />
Erase the self-diagnosis memory.<br />
Perform drivingtest and then<br />
perform self-diagnosis(ModeIII)<br />
again.<br />
O.K.<br />
INSPECTION END<br />
EF & EC-112<br />
N.G.<br />
N.G.<br />
Replace throttle sensor.<br />
N.G.<br />
ADJUST IDLE SWITCH OFF<br />
-+ ON SPEED.<br />
1) Loosen throttle<br />
securing screws.<br />
sensor<br />
2) Set idle switch OF F -+ ON<br />
speed to the specified value<br />
by turning throttle<br />
body.<br />
sensor<br />
1) Perform E.C.U. input/output<br />
signal inspection test.<br />
2) If N.G., recheck the E.C.U.<br />
pin terminals for damage or<br />
the connection of E.C.U.<br />
harness connector.
NOTE<br />
TROUBLE DIAGNOSES<br />
EF & EC-113
INJECTOR LEAK (Code No. 45) ~<br />
m<br />
Ii)<br />
2,000 rpm<br />
Idling<br />
Ignition<br />
switch: .<br />
OFF<br />
Wet with fuel?<br />
SEF832F<br />
CD Start engine and warm it up sufficiently.<br />
@ Race engine revolution higher than 2,000 rpm<br />
under no-load.<br />
CID Keep engine at idle speed for at least 10<br />
seconds.<br />
@ Repeat steps @ through CIDat least 10 times.<br />
[+J<br />
Engine racing mode<br />
@ : 10 seconds or more<br />
~~E~<br />
CHECK ENGINE LIGHT<br />
Time<br />
SEF392G<br />
SEF924F<br />
TROUBLE DIAGNOSES<br />
Diagnostic Procedure 12<br />
INSPECTION START<br />
Start engine and warm it up<br />
sufficiently.<br />
Make sure engine runs smoothly<br />
at idle after warming.<br />
Does not run<br />
" smoothly<br />
Set the diagnosis mode selector<br />
of E.C.U. to Mode I.<br />
Check if the green inspection<br />
lamp stays off during 10 seconds<br />
at idle condition.<br />
m<br />
Stays off Does not<br />
" stay off<br />
Check mixture ratio<br />
feedback system.<br />
(See page EF & EC-26.)<br />
1) Stop engine.<br />
2) Remove all spark plugs from<br />
intake manifold. Are plugs<br />
wet with fuel?<br />
No<br />
Remove injector assembly.<br />
(See page EF & EC-154,)<br />
Keep all injectors connected to<br />
injector tube.<br />
Runs smoothly<br />
Yes<br />
Turn ignition switch "ON". IDrips<br />
Makesure fuel does not drip from<br />
injector.<br />
Does not drip<br />
Reinstall any part removed.<br />
EF & EC-114<br />
Race enginetwo or three times<br />
under no-load, then run engine<br />
at idle speed.<br />
Set diagnosisto ModeII and<br />
check that red and green inspection<br />
lamps on E.C.U. blink<br />
almost simultaneously at 2,000<br />
rpm under no-load.<br />
Do not blink<br />
Check idle CO%.<br />
(See page EF & EC-26.)<br />
( INSPECTION END)<br />
Replace the injector in which<br />
cylinder spark plug is wet with<br />
fuel.<br />
Replace the injectors where fuel<br />
is dripping from.
TROUBLE DIAGNOSES<br />
r<br />
Erasethe self-diagnosismemory<br />
by following the procedure.<br />
1) Start engine and warm it up<br />
sufficiently.<br />
2) First disconnect air flow<br />
meter connector, and start<br />
and run engine for at least<br />
30 secondsat 2,000 rpm.<br />
3) Stop engine and reconnect air<br />
flow meter connector.<br />
4) Make sure Code No. 12 is<br />
displayed in Mode III.<br />
5) Erasethe self-diagnosis<br />
memory. Make sure Code<br />
No. 55 is displayed in Mode<br />
III.<br />
Ii]<br />
[i<br />
Perform engine racing by the use<br />
of indicated in figure Ii].<br />
Comes<br />
Make sure check engine light does I "ON"<br />
not come "ON" during engine<br />
racing.<br />
Doesnot<br />
come "ON"<br />
INSPECTION END<br />
EF & EC-115<br />
1) Perform self-diagnosis and<br />
find malfunction code.<br />
2) According to displayed Code<br />
No., perform diagnosis.<br />
3) If Code No. 45 is displayed<br />
again, replace all injectors,<br />
then perform diagnosis.
TROUBLE DIAGNOSES<br />
Diagnostic Procedure 13<br />
IDLE SWITCH (Switch ON/OFF diagnostic item)<br />
E. C. C. S.<br />
CONTROL f"F2\<br />
UNIT ~<br />
44 TI' H-Y<br />
33- Y/W<br />
(E.F. 1harness)<br />
SEF212H<br />
J nmm<br />
@)r@~<br />
THROTTLE m<br />
VALVE j W<br />
SWI TCH::J ..J<br />
LL 0-<br />
EF & EC-116<br />
SEF369H
m[lt-<br />
CONNECT<br />
~<br />
@J<br />
~<br />
I!J~ .--r<br />
IV<br />
00<br />
~<br />
@ID<br />
[Y]<br />
[Y]<br />
SEF375H<br />
-=<br />
SEF449H<br />
TROUBLE DIAGNOSES<br />
INSPECTION START<br />
Perform switch ON/OFF diagnosis<br />
(in Mode IV).<br />
m<br />
N.G.<br />
CHECK E.C.U. INPUT<br />
SIGNAL.<br />
1) Turn ignition switch "ON".<br />
2) Check voltage between<br />
throttle valveswitch harness<br />
connector terminal @ and<br />
ground.<br />
I!J<br />
Accelerator<br />
pedal<br />
condition<br />
Fully closed<br />
Open<br />
Voltage<br />
Approximately<br />
8- 10V<br />
OV<br />
N.G.<br />
CHECK POWER SUPPLY.<br />
1) Turn ignition switch "OFF".<br />
2) Disconnect throttle valve<br />
switch harness connector.<br />
3) Turn ignition switch "ON".<br />
4) Check voltage terminal @<br />
and ground.<br />
Batteryvoltageshould exist.<br />
N.G.<br />
+<br />
CHECK COMPONENT.<br />
Check idle switch.<br />
O.K.<br />
ADJUST IDLE SWITCH.<br />
(See page EF & EC-112.)<br />
Perform switch ON/OFF diagnosis<br />
(in Mode IV).<br />
I<br />
O.K.<br />
INSPECTION END<br />
EF 8r.EC-117<br />
O.K.(<br />
O.K.<br />
O.K.<br />
INSPECTION END )<br />
Repair or replace harnessor<br />
connector between throttle valve<br />
switch harness connector terminal<br />
@ and E.C.U. harness<br />
connector terminal @.<br />
Check continuity of harnessor<br />
connectors between throttle<br />
valve switch harness connector<br />
terminal @ and E.C.U. harness<br />
connector terminal @.<br />
If N.G., repair or replace them.<br />
Replace throttle valve sensor/<br />
switch.<br />
Replace E.C.U.
TROUBLE DIAGNOSES<br />
Diagnostic Procedure 14<br />
START SIGNAL (Switch ON/OFF diagnostic item)<br />
E.C.C.S.<br />
~<br />
CONTROL<br />
UNIT ~<br />
tf2'I<br />
m<br />
34-0R<br />
(E. F. 1.<br />
harness)<br />
FUSE BLOCK<br />
I<br />
(Refer to npOWER<br />
SUPPLY ROUTINGn<br />
In El sect Ion. )<br />
@@ @<br />
J I<br />
(Ma In h arness )<br />
OR OR<br />
S.M. J. @<br />
~efer to last f age :<br />
(FoIdout page). ...<br />
@])<br />
>-,m<br />
cD<br />
>-<br />
,<br />
m<br />
I<br />
>-<br />
, ~<br />
m<br />
~~<br />
1m<br />
OFFACC ON ST<br />
I c 0<br />
2<br />
3<br />
4<br />
5<br />
c 0<br />
0<br />
I GNITI ON<br />
SWITCH<br />
EF & EC-118<br />
~nglne room harnes~<br />
>-,m<br />
~<br />
@)g<br />
UP<br />
..<br />
~-<br />
BATTERY<br />
w<br />
w<br />
@)<br />
FUSE<br />
rnJ<br />
~<br />
BR~ ~<br />
~:~ ~<br />
~~<br />
FUSIBLE<br />
LINK<br />
,<br />
FUSE AND<br />
FUS IBlE LI NK<br />
(In RElA Y BOX)<br />
SEF214H
m -<br />
II CAJNIT 8 CONNECTORII<br />
lit is 34<br />
00<br />
SEF213H<br />
TROUBLE DIAGNOSES<br />
INSPECTION START<br />
Perform switch ON/OFF diagnosis<br />
(in Mode IV).<br />
N.G.<br />
m<br />
CHECK INPUT SIGNAL.<br />
1) Turn ignition switch<br />
"START".<br />
2) Check voltage between terminal<br />
@ and ground.<br />
Battery voltage should exist.<br />
If N.G., repair harness and<br />
connectors.<br />
O.K.<br />
INSPECTION END<br />
EF & EC-119<br />
N.G.<br />
INSPECTION END<br />
Check the following items.<br />
1) "G" fusible link<br />
2) Ignition switch<br />
3) Middle harness connector
FUEL PUMP (Not self-diagnosticitem)<br />
E.C.C.S.<br />
CONTROL~ r=I r=I<br />
UNIT @~....<br />
Component location<br />
IU-8/P<br />
107-8<br />
>-<br />
.... ,<br />
£@)<br />
(E. F. 1.<br />
harness)<br />
~AIR<br />
REGULATOR<br />
SEF268H<br />
TROUBLE DIAGNOSES<br />
@J){i@5)<br />
BODY<br />
GROUND<br />
Diagnostic Procedure 15<br />
FUEL<br />
PUMP<br />
G;J ..?7 iii Inl<br />
rffi3l~<br />
>-<br />
.. ,<br />
--1 ..<br />
I (Ma I n harness)<br />
>-<br />
,..<br />
@<br />
m S.M.J.<br />
0 >-<br />
,..<br />
- [Refer to 'ast page - (Fa I dout page).)<br />
@@ (Eng I ne room<br />
harness)<br />
8/P-ffi. .tB- 8/P<br />
8/Y~ ~8/Y<br />
,~ ~~<br />
....<br />
@lMJ<br />
IIlnii if Ifm<br />
FUEL<br />
PUMP<br />
RELAY<br />
g<br />
EF & EC-120<br />
1<br />
2<br />
3<br />
4<br />
5<br />
@Y~<br />
0:<br />
, .. ~<br />
III<br />
OFFACC N ST<br />
I GNI TI ON<br />
SWITCH<br />
@)Q<br />
I' ~<br />
~<br />
BATTERY<br />
8/R<br />
8/W<br />
w<br />
FUSE<br />
~<br />
8~ ~<br />
~:~ ~<br />
[DJ~<br />
~ \!!!I I FUSI LI NKBlE<br />
FUSE AND<br />
FUSI BlE LI NK<br />
(I n RElA Y BOX)<br />
SEF236H
m~~ ~tttill1<br />
i5<br />
~<br />
(2J<br />
I!J<br />
[!J<br />
00<br />
[:iI<br />
.--r<br />
10<br />
Ii]<br />
~_r<br />
IV<br />
~~_r<br />
IImtalV<br />
lZJOO<br />
00<br />
illTI:-<br />
0"'lII<br />
:filiL<br />
@"l)]<br />
[ill<br />
[Y]<br />
rnJ<br />
[Y]<br />
SEF264H<br />
SEF266H<br />
=<br />
SE F377H<br />
i5[:i1~<br />
SEF379H<br />
TROUBLE DIAGNOSES<br />
INSPECTION START<br />
m .<br />
CHECK POWER SUPPLY<br />
(Fuel pump side).<br />
1) Disconnect fuel pump harness<br />
connector.<br />
2) Turn ignition switch "ON".<br />
3) Check voltage between<br />
terminal @ and ground.<br />
Battery voltage indication<br />
should appear for 5 seconds<br />
after turning ignition switch<br />
"ON".<br />
N.G.<br />
[!J<br />
CHECK POWER SUPPLY<br />
(Relay side).<br />
1) Turn ignition switch "OFF".<br />
2.) Disconnect fuel pu,,",prelay.<br />
3) Turn ignition switch "ON".<br />
4) Check voltage between terminals<br />
@, @ and ground.<br />
Battery voltage should exist.<br />
O.K.<br />
CHECK COMPONENTS.<br />
1) Turn ignition "OFF".<br />
2) Check fuel pump relay.<br />
(See page EF & EC-150,)<br />
O.K.<br />
Ii]<br />
CHECK HARNESS CON-<br />
TINUITY.<br />
Check continuity between relay<br />
harnessconnectorterminalCD<br />
and fuel pump harness connector<br />
terminal @.<br />
O.K.<br />
EF & EC-121<br />
O.K. CHECK COMPON~NTS.<br />
1) Turn ignition "OFF".<br />
2) Check fuel pump.<br />
(See page EF & EC-149,)<br />
If N.G., replace fuel pump.<br />
I!J L O.K.<br />
CHECK GROUND CIRCUIT.<br />
Check continuity between terminal<br />
@ and ground.<br />
Continuity should exist.<br />
If N.G., repair harness or connectors.<br />
N.G. CHECKHARNESSCON-<br />
TINUITY BETWEEN<br />
BATTERYAND FUEL PUMP<br />
RELAY.<br />
Check following.<br />
. Harness or connectors<br />
. "BR" fusiblelink<br />
N.G. Replace fuel pump relay.<br />
N.G.<br />
Repair or replace harness or<br />
connectors<br />
CD and @.<br />
between terminals
Ii<br />
SEF266H<br />
Ii - _r<br />
II ClUNrT §J CONNECTORIII/!.r:!:\ ~<br />
104 'liiV ~<br />
SEF267H<br />
CONNECT 104<br />
If) -<br />
00 l<br />
0<br />
[ill<br />
IT B" CONNECTORII<br />
1211<br />
4R3<br />
00<br />
~_r<br />
IV<br />
TROUBLE DIAGNOSES<br />
Ii<br />
CHECK E.C.U. OUTPUT<br />
SIGNAL (E.C.U.side).<br />
1) Reconnect fuel pump harness<br />
connector and fuel pump<br />
relay.<br />
2) Turn ignition switch "ON".<br />
3) Check voltage between E.C.U.<br />
harness connector ~ and<br />
ground.<br />
Battery voltage indication<br />
should appear after 5 seconds.<br />
O.K.<br />
INSPECTION END<br />
EF & EC-122<br />
N.G.<br />
Ii<br />
CHECK HARNESS CON-<br />
TINUITY.<br />
1) Turn ignition switch "OFF".<br />
2) Disconnect E.C.U. harness<br />
connector.<br />
3) Check continuity between<br />
terminal (jQ!) and relay harness<br />
connector terminal @.<br />
Continuity should exist.<br />
If N.G., repair or replace<br />
harness and connectors<br />
between terminals ~ and<br />
@.<br />
O.K.<br />
Recheck the E.C.U. pin terminals<br />
for damage or the connection of<br />
E.C.U. harness connector.
NOTE<br />
TROUBLE DIAGNOSES<br />
EF & EC-123
TROUBLE DIAGNOSES<br />
,<br />
Diagnostic Procedure 16<br />
PRESSURE REGULATOR (P.R.) CONTROL SOLENOID VALVE (Not self-diagnostic item)<br />
go~'T~;l /7 [;]<br />
UNIT @~<br />
Component location<br />
I06-PU<br />
PRESSURE<br />
REGULATOR<br />
CONTROL<br />
SOLENOID<br />
VALVE<br />
~<br />
@W~ml!J[;]<br />
LID<br />
(E. F. 1.<br />
harness)<br />
]<br />
@@)<br />
8RJ t8R<br />
EF &. EC-124<br />
(Eng Ine room<br />
harness)<br />
I'\. OFFACC ON ST<br />
1 r<br />
2 c ::><br />
3 ::><br />
4<br />
5<br />
I GNITI ON<br />
SWIT CH<br />
~ ~ @)~<br />
ID<br />
=~~<br />
8/R<br />
8R<br />
FUSE<br />
~<br />
(=m::~<br />
I@l~~ ~<br />
~ ~<br />
FUSIBLE<br />
,<br />
LINK<br />
BATTERY<br />
FUSE AND<br />
FUSI BLE LI NK<br />
m<br />
Ii] [11<br />
~<br />
SEF256H<br />
IllsalllllECT<br />
18<br />
.q:ffip<br />
@) LjCYJ<br />
0<br />
CONNECT<br />
£)<br />
00 UCYJ<br />
UID CfH<br />
[f] IllsalllllECT<br />
ffiiJ) cc 18<br />
[ill<br />
[I<br />
SEF253H<br />
SEF255H<br />
[1I_T<br />
106 18<br />
CoIUNIT ~ CONNECTOR II<br />
TROUBLE DIAGNOSES<br />
INSPECTION START<br />
m<br />
I<br />
CHECK POWER SOURCE.<br />
1) Disconnect P.R. control<br />
solenoid valve harness con.<br />
nector.<br />
2) Turn ignition switch "ON".<br />
3) Check voltage between terminal<br />
@ and ground.<br />
Battery voltage should exist.<br />
O.K.<br />
CHECKCOMPONENTS.<br />
1) Turn ignition switch "OFF".<br />
2) Check P.R. control solenoid<br />
valve. (See page EF & EC-149J<br />
O.K.<br />
Ii]<br />
CHECK OUTPUT SIGNAL.<br />
1) Reconnect P.R. control<br />
solenoid valve harness connector.<br />
2) Start engine and warm it up<br />
sufficiently [until more than<br />
90°C (194° F) of c'oolant<br />
temperature] .<br />
3) Turn ignition switch "OFF"<br />
and then start engine again.<br />
4) Check voltage between<br />
terminals @ and ground.<br />
Voltage:<br />
0.5 - 1.0V (for 3 minutes<br />
after starting)<br />
O.K.<br />
INSPECTION END<br />
EF & EC-125<br />
N.G.I CHECKHARNESSCON-<br />
TINUITY BETWEENP.R.<br />
CONTROL SOLENOID VALVE<br />
AND BATTERY.<br />
Check following.<br />
. Fuse<br />
. Ignitionswitch<br />
. Harnessor connectors<br />
[f]<br />
Replace P.R. control solenoid<br />
valve.<br />
N.G. ~HECK HARNESS CON-<br />
TINUITY BETWEEN P.R.<br />
CONTROL SOLENOID VALVE<br />
AND E.C.U.<br />
1) Stop engine.<br />
2) Disconnect P.R. control<br />
solenoid valveharness connector.<br />
3) Disconnect E.C.U. harness<br />
connector.<br />
4) Check continuity between<br />
terminals @ and @.<br />
Continuity should exist.<br />
If N.G.. repair harness or<br />
connector.<br />
O.K.<br />
1) Perform E.C.U. input/output<br />
signal inspection test.<br />
2) If N.G., recheck the E.C.U.<br />
pin terminal @ for damage<br />
or the connection of E.C.U.<br />
harness connector.
INJECTORS (Not self-diagnosticitem)<br />
E. C. C. S.<br />
CONTROL f'""F2I<br />
UNI T ~<br />
i46<br />
!!L 1<br />
(61<br />
jJ<br />
(iJIJ<br />
101-W/B<br />
103- G/B<br />
110- Y/B<br />
112-L/B<br />
H-R<br />
Component location -<br />
------<br />
Harness connector<br />
TROUBLE DIAGNOSES<br />
Diagnostic Procedure 17<br />
INJECTOR<br />
A-<br />
NO.1 NO.2 NO.3 NO.4<br />
~ ~ ~ ~<br />
@)W @W W@ W@<br />
::;t m -;! m m m~<br />
L..i "'~ V "'~ d "'ci "'~ ~<br />
mIJ IImIJ IIm[ill II mIJ<br />
(E.F. I.<br />
harness)<br />
RiiR<br />
@ @)<br />
EF & EC-126<br />
(Eng I ne room<br />
harness)<br />
@)~<br />
~<br />
~ -<br />
BAHERY<br />
W<br />
@)<br />
FUSE<br />
rnJ<br />
UTI<br />
[TI]~<br />
FUSIBLE<br />
LINK<br />
FUSE AND<br />
FUSI BLE LI NK<br />
(1 n RELA Y BOX)<br />
SEF251H
m<br />
I;) ~ ~ ClUNIT ~ CONNECTOR ~<br />
II No.1<br />
~<br />
eJ<br />
OO<br />
~ 19111,0193112<br />
~<br />
eJ<br />
00<br />
I~~<br />
~~<br />
No.2<br />
~<br />
No.3<br />
~<br />
-CSZJ<br />
'+<br />
[Y]<br />
:+:..-<br />
SE F247 H<br />
SEF249H<br />
No.4~ ~-.r<br />
~[ill<br />
eo -.r ~ ~ 101110 II c.1INJT '03112~ fol CClNNECTCIR II<br />
SEF250H<br />
TROUBLE DIAGNOSES<br />
INSPECTION START<br />
m<br />
I CHECK POWER SOURCE<br />
(Injector side).<br />
1) Disconn,ect injector harness<br />
connectors.<br />
2) Turn ignition switch "ON".<br />
3) Check voltage between terminal<br />
@ and ground.<br />
Battery voltage should exist.<br />
O.K.<br />
CHECKCOMPONENTS.<br />
1) Turn ignition "OFF".<br />
2) Check injectors.<br />
(See page EF & EC-150.)<br />
O.K.<br />
Ii)<br />
CHECK OUTPUT SIGNAL.<br />
1) Reconnect injector harness<br />
connector.<br />
2) Start engine and warm it up<br />
sufficiently.<br />
3) Check voltage between E.C.U.<br />
terminals
TROUBLE DIAGNOSES<br />
Diagnostic Procedure 18<br />
SWIRL CONTROL VALVE (S.C.V.) CONTROL SOLENOID VALVE (Not self-diagnostic item)<br />
ECC.S.<br />
C'ONTROL f"'F2'\<br />
UNI T ~<br />
Component location<br />
~<br />
[iJ<br />
S. C. V.<br />
CONTROL<br />
SOLENOID<br />
VALVE<br />
~ f!ruuI<br />
Weill)<br />
>-'"<br />
"CD<br />
@ @) ~nglne room harnes~<br />
12-GY 8RJP '-BR 8R<br />
~. F. 1.<br />
harness)<br />
'"<br />
, ~ CD<br />
(illY~<br />
1m<br />
OFFACC ON ST<br />
1 c<br />
2 c J<br />
3<br />
J<br />
4<br />
5<br />
1 GN1TI ON<br />
SWI TCH<br />
EF & EC-128<br />
~<br />
@)~<br />
~<br />
-<br />
BATTERY<br />
8/R<br />
w<br />
w<br />
@) I<br />
[ll)<br />
.<br />
FUSE<br />
rnJ<br />
8q] ~<br />
~:~ ~<br />
~<br />
FUSIBLE<br />
LINK<br />
FUSE AND<br />
FUSI BLE LI NK<br />
(1 n RELA Y BOX)<br />
SEF231H
m<br />
1!1<br />
eJ.<br />
CIIIIET<br />
IJ ~~i5[ID<br />
00'<br />
~i511<br />
[Y]<br />
€ -<br />
L.:::<br />
£) l YJ<br />
00 +<br />
ID CH<br />
12<br />
SEF227H<br />
SEF229H<br />
CAJN~ CONtECTaR II<br />
SEF230H<br />
TROUBLE DIAGNOSES<br />
INSPECTION START<br />
m<br />
CH ECK POWE R SOU RCE.<br />
1)Disconnect S.C.V. control<br />
solenoid valve harness connector.<br />
2) Turn ignition switch "ON".<br />
3) Check voltage between terminal<br />
@ and ground.<br />
Battery voltage should exist.<br />
O.K.<br />
CHECKCOMPONENTS. .N.G.<br />
1) Turn ignition switch "OFF".<br />
21 Check S.C.V. control solenoid<br />
valve. (See page EF & EC-149.)<br />
O.K.<br />
Ii)<br />
CHECK OUTPUT SIGNAL.<br />
1) Reconnect S.C.V. control<br />
solenoid valveharness connector.<br />
2) Start engine and warm it up<br />
sufficiently.<br />
3) Check voltage between terminal<br />
@ and ground.<br />
Engine speed<br />
Lass than<br />
"approx. 1,400 rpm<br />
More than<br />
approx. 1,400 ';Pm<br />
O.K.<br />
Voltage<br />
between<br />
terminal @<br />
and grou nd<br />
0.5 - 1.0V<br />
Battery<br />
voltage<br />
CHECK COMPONENT.<br />
Check swirlcontrol valve and<br />
actuator. (See page<br />
I<br />
EF & EC-150.)<br />
O.K.<br />
(<br />
INSPECTION END<br />
EF & EC-129<br />
)<br />
N.G.<br />
N.G.<br />
CHECK HARNESS CON-<br />
TINUITY FOR POWER<br />
SOURCE.<br />
Check following.<br />
. "G" fusiblelink<br />
. Ignitionswitch<br />
. Harness<br />
Replace S.C.V. control solenoid<br />
valve.<br />
[!J<br />
CHECK HARNESS CON-<br />
TINUITY BETWEEN<br />
SOLENOID AND E.C.U.<br />
11 Stop engine.<br />
2) Disconnect S.C.V. control<br />
solenoid valve harness connector<br />
and E.C.U. harness<br />
connector.<br />
3) Check continuity between<br />
terminals @ and @ .<br />
Continuity should exist.<br />
If N.G., repair or replace<br />
harness or connector.<br />
O.K.<br />
1) Perform E.C.U. input/output<br />
signal inspection test.<br />
(Terminal @)<br />
2) If N.G., recheck the E.C.U.<br />
pin terminals for damage or<br />
the connection of E.C.U.<br />
harness connector.<br />
Replace swirl control valve or<br />
actuator.
TROUBLE DIAGNOSES<br />
Diagnostic Procedure 19<br />
AIR REGULATOR (Not self-diagnosticitem)<br />
E. C. C. S.<br />
CONTROL fM\ nil nil<br />
UNIT ~~~U8<br />
Component location<br />
'I<br />
10'-B/P<br />
107-B<br />
@D~@])<br />
~~<br />
(E. F. r.<br />
harness)<br />
BODY<br />
GROUND<br />
...<br />
,<br />
.0.0<br />
@)£<br />
d;fh .<br />
m(;]1] WJ @i<br />
. ENGINE<br />
~~§UlA TOR GROUND<br />
FUEL<br />
PUMP<br />
~<br />
rffBl@) ...<br />
,.0<br />
@<br />
@iD<br />
I (Ma I n ... harness)<br />
,.0<br />
S. M. J.<br />
- ffiefer to last page<br />
- (Fo I dout page).]<br />
GJ<br />
...<br />
,.0<br />
@@ (Eng I ne room<br />
harness)<br />
B/P-ffi ffi-B/P<br />
B/Y~ ~B/Y<br />
[!]1]1i<br />
g<br />
S\<br />
@lMJ<br />
...Q. ;t;t " .0.0 .0.0 "<br />
;1<br />
FUEL<br />
PUMP<br />
RELAY<br />
EF & EC-130<br />
0:<br />
, ;t ..<br />
~~ 1m<br />
OFF ACC ON ST<br />
1 :) :)<br />
2<br />
3<br />
4<br />
5<br />
:J<br />
I GNITI ON<br />
SWITCH<br />
@)~<br />
I" ;t<br />
~<br />
-<br />
BATTERY<br />
B/R<br />
B/W<br />
W<br />
FUSE<br />
~<br />
BR~ ~<br />
~:; ~<br />
cn~<br />
rru\ I FUSI BlE<br />
~ LI NK<br />
FUSE AND<br />
FUSI BlE LI NK<br />
11<br />
[;]<br />
[!J<br />
[:it~<br />
_CT<br />
eJ<br />
@a<br />
8<br />
[:it<br />
..-cT<br />
10<br />
00<br />
[:it<br />
_T<br />
eJ<br />
I]<br />
~~<br />
-IV<br />
00<br />
a<br />
.'2J1l<br />
m=ru<br />
~oo<br />
[Y]<br />
[ill<br />
00<br />
:+'<br />
SEF236H<br />
-=<br />
SEF237H<br />
-=<br />
SEF377H<br />
-[:it<br />
~IV<br />
SE F380H<br />
TROUBLE DIAGNOSES<br />
C 11<br />
INSPECTION START<br />
CHECK POWER SUPPLY<br />
(Air regulator side).<br />
1) Disconnect air regulator harness<br />
connector.<br />
2) Turn ignition switch "ON".<br />
3) Check voltage between terminal<br />
@ and ground.<br />
Battery voltage indication<br />
should appear for 5 seconds<br />
after turning ignition switch<br />
"ON".<br />
[!J<br />
N.G.<br />
CHECK POWER SUPPLY<br />
(Relay side).<br />
1) Turn ignition switch "OFF".<br />
2) Disconnect fuel pump relay.<br />
3) Turn ignition switch "ON".<br />
4) Check voltage between terminals<br />
@, @ and ground.<br />
Battery voltage should exist.<br />
O.K.<br />
CHECK COMPONENTS.<br />
1) Turn ignition "OF F"<br />
2) Check fuel pump relay.<br />
(See page EF & EC-150.)<br />
I]<br />
I O.K.<br />
CHECK HARNESS CON-<br />
TINUITY.<br />
Check continuity between relay<br />
harnessconnectorterminalCD<br />
-and fuel pump harness connector<br />
terminal @.<br />
EB<br />
O.K.<br />
EF &. EC-131<br />
O.K.<br />
CHECK COMPONENTS.<br />
1) Turn ignition "OFF".<br />
2) Check fuel pump relay.<br />
(See page EF & EC-150.)<br />
If N.G. replace air regulator.<br />
[;] 1<br />
CHECK GROUND CIRCUIT.<br />
1) Turn ignition switch "OFF".<br />
2) Check continuity between<br />
terminal @ and ground.<br />
Continuity should exist.<br />
If N.G., repair harnessor<br />
connectors.<br />
N.G. CHECKHARNESSCON-<br />
TINUITY BETWEEN<br />
BATTERYAND FUEL PUMP<br />
RELAY. .<br />
Checkfollowing.<br />
. Harnessor connectors<br />
. "BR" fusiblelink<br />
. Fuse<br />
N.G.J 1 Replacefuel pump relay.<br />
N.G. Repair or replace harness or<br />
connectors between terminals<br />
CDand @.
iii [1t [[<br />
COllECT<br />
U<br />
00<br />
~<br />
ClUNIT §f CONNECTOR II<br />
104<br />
[SLJ<br />
+,<br />
SEF238H<br />
Ii II CIWIIT"8 CONNECTORII~ rw<br />
104 St:J I..dI<br />
I - [ill<br />
SEF267H<br />
1211<br />
4R3<br />
00<br />
~<br />
IIISaIIIIECT<br />
I()<br />
TROUBLE DIAGNOSES<br />
iii<br />
ffi<br />
1<br />
CHECK E.C.U. OUTPUT<br />
SIGNAL (E.C.U. side).<br />
1) Reconnect fuel pump harness<br />
connector and fuel pump<br />
relay.<br />
2) Turn ignition switch "ON".<br />
3) Check voltage between E.C.U.<br />
harness connector C@ and<br />
ground.<br />
Battery voltage indication<br />
should appear after 5 seconds.<br />
O.K.<br />
INSPECTION END<br />
EF & EC-132<br />
N.G. Ii<br />
I<br />
CHECK HARNESS CON-<br />
TINUITY.<br />
1) Turn ignition switch "OFF".<br />
2) Disconnect<br />
connector.<br />
E.C.U. harness<br />
3) Check continuity between<br />
terminal ~ and relay hatness<br />
connector terminal @.<br />
Continuitysho\lldexist.<br />
If N.G., repair or replace<br />
harness and connectors<br />
between terminal ~<br />
@.<br />
and<br />
O.K.<br />
Recheck the E.C.U.pin terminals<br />
for damage or the connection of<br />
E.C.U. harness connector.
NOTE<br />
TROUBLE DIAGNOSES<br />
EF &. EC-133
TROUBLE DIAGNOSES<br />
Diagnostic Procedure 20<br />
AUXILIARYAIR CONTROL (A.A.C.) VALVE (Not self-diagnosticitem)<br />
E C c. S.<br />
A.A.C.<br />
SOLENOID<br />
VALVE<br />
~<br />
CON'TROl @
m<br />
~~i5<br />
[Y]<br />
o~ -=<br />
Ii] CONNECT<br />
~[11£)<br />
~ +<br />
SEF215H<br />
t\\-Y1 ~<br />
~~ ~ Cf'~H ';<br />
[I ~ ~i5<br />
ill]<br />
I<br />
~<br />
SEF217H<br />
IW ~c;\ _CT II 113 c.-uNIT E8 CONNECTORI I<br />
L.dIIWiiV SEF452H<br />
TROUBLE DIAGNOSES<br />
INSPECTION START<br />
CHECK COMPONENTS.<br />
Check A.A.C. valve.<br />
(See page EF & EC-150J<br />
I<br />
O.K.<br />
m<br />
CHECK POWER SOURCE.<br />
1) Disconnect A.A.C. valve harness<br />
connector.<br />
2) Turn ignition switch "ON".<br />
3) Check voltage between terminal<br />
@ and ground.<br />
Battery voltage should exist.<br />
If N.G., repair harness or<br />
connectors.<br />
Ii]<br />
O.K.<br />
CHECK INPUT SIGNAL.<br />
1) Turn ignition switch "OF F".<br />
2) Reconnect A.A.C. valve harness<br />
connector.<br />
3) Start engine and warm it up<br />
sufficiently.<br />
4) Check voltage between<br />
terminal @ and ground.<br />
"voltage:<br />
Approximately 7 -10V<br />
O.K.<br />
INSPECTION END<br />
EF & EC-135<br />
N.G.<br />
. Replace A.A.C. valve.<br />
[<br />
N.G. CHECKCONTINUITY<br />
BETWEENA.A.C. VALVE<br />
AND BATTERY.<br />
Check following.<br />
. Fuse<br />
. "G"fusiblelink<br />
. Ignitionswitch<br />
. Harnessorconnectors<br />
[I<br />
N.G. CHECK CONTINUITY BE-<br />
TWEEN E.C.U. AND A.A.C.<br />
VALVE.<br />
1) Stop engine.<br />
2) Disconnect E.C.U.harness<br />
connector.<br />
3) Disconnect A.A.C.valveharness<br />
connector.<br />
4) Check continuity between<br />
terminals @ and @.<br />
Continuity should exist.<br />
If N.G., repair or replace harness<br />
connectors.<br />
O.K.<br />
1) Perform E.C.U. input/output<br />
signal inspection test.<br />
(Terminal @.)<br />
2) If N.G. recheck the E.C.U.<br />
pin terminals for damage or<br />
the connection of E.C.U.<br />
harness connector.
TROUBLE DIAGNOSES<br />
Diagnostic Procedure 21<br />
I.A.A. CONTROL (F.I.C.D. CONTROL) (Not self-diagnosticitem)<br />
f<br />
IiJ<br />
F. 1. C. D.<br />
SOLENOID<br />
VALVE<br />
~<br />
E.C.C.S.<br />
CONTROL .<br />
UNI T @ @)~ - 1!1[!J<br />
Component location<br />
ll-G/Y<br />
.J<br />
i@)<br />
ENGINE<br />
GROUND<br />
(E. F. 1.<br />
harness) @@<br />
G/Y~ ~G/Y<br />
L/G e:r w L/G<br />
EF 8r. EC-136<br />
-<br />
BATTERY<br />
(Ma In<br />
harness)<br />
(ill)<br />
!Eng I ne room<br />
harness)<br />
I GNI TI ON SWITCH<br />
ACC or ON<br />
'" a,.J<br />
I<br />
'"a,.J<br />
cD<br />
ffi '" a,.J<br />
'" "",<br />
, '"<br />
@~<br />
a >-"'0<br />
.J "'.J.J<br />
I. AIR<br />
CONDI TI ONER<br />
RELAY<br />
II:<br />
I UP<br />
FUSE BLOCK<br />
!Refer to 'POWER<br />
SUPPLY ROUTI NG'<br />
In EL section.)<br />
S.M.J.<br />
N [Refer to last r age<br />
:: (Fo I dout page).<br />
SEF270H
m<br />
r;]<br />
[i<br />
TROUBLE DIAGNOSES<br />
\.<br />
INSPECTION START<br />
A/C m<br />
CHECK<br />
..<br />
INPUT SIGNAL.<br />
Yes<br />
CHECK IDLE SPEED WHEN<br />
AIR CONDITIONER SWITCH<br />
1) Start engine and warm it up<br />
IS "ON".<br />
PU sufficiently.<br />
2) Doesengine revolution rise<br />
M/T: 1,OOO:t50rpm<br />
A/T: 1,OOO:t50rpm<br />
when air conditioner switch is (at uN" range)<br />
turned "ON"? If out of specification, adjust<br />
SEF129GI<br />
idle speed.<br />
No (See page EF & EC-26J<br />
!f<br />
eJ<br />
oo<br />
I I<br />
I I<br />
r;]<br />
CHECK POWERSOURCE.<br />
I O.K.<br />
( INSPECTIONEND<br />
O.K.<br />
CHECK COMPONENTS.<br />
ilJ 7<br />
1) Stop engine.<br />
2) Disconnect F.I.C.D. solenoid<br />
valve harness connector.<br />
Check F.I.C.D. solenoid valve.<br />
(See page EF & EC-151J<br />
If N.G., repair or replace F.I.C.D.<br />
SEF447H 3) Turn ignition switch and air solenoid valve.<br />
- , [:it<br />
eJ<br />
rEIDl<br />
conditioner switch "ON".<br />
4) Check voltage betWeenterminal<br />
@ andground.<br />
Battery voltage should exist.<br />
N.G. .<br />
IO.K.<br />
[i<br />
HECKGROUNDCIRCUIT.<br />
1) Turn ignition switch "OFF".<br />
2) Check continuity between<br />
terminal@ andground.<br />
00<br />
' I I I<br />
EF & EC-137<br />
Continuityshouldexist.<br />
If N.G.,repairharnessor<br />
connectors.<br />
7<br />
SEF448H<br />
I;]<br />
filii ClUNIT 8 CONNECTOR II<br />
CONNECT<br />
11<br />
£)<br />
00 lEL<br />
I I CHECK COMPONENTS.<br />
1) Turn ignition switc'. h .OFF"<br />
II 2) Check (See HAairsection.) conditioner relay.<br />
O.K.<br />
I;]<br />
CHECK OUTPUT SIGNAL.<br />
1) Reconnect F.I.C.D.solenoid<br />
valveharness connector.<br />
N.G.<br />
Replace air conditioner relay.<br />
CHECK HARNESS CON-<br />
TINUITY BETWEEN<br />
BATTERYAND E.C.U.<br />
Check following.<br />
8 Fuse<br />
0<br />
JJ 2) Turn ignition switch "ON". 3) Check voltage between E.C.U.<br />
terminal (jJ) and ground.<br />
A/C switch Voltage<br />
ON 0.5 - 1.0V<br />
I<br />
8 Ignition switch<br />
8 Harness or connectors.<br />
I O.K.<br />
Recheck the E.C.U. pin terminals<br />
for damage or the con-<br />
OFF Battery voltage<br />
O.K.<br />
nection of E.C.U. harness<br />
connector.<br />
C<br />
INSPECTIONEND )
TROUBLE DIAGNOSES<br />
Diagnostic Procedure 22<br />
AIR INDUCTION VALVE (A.I.V.) CONTROL SOLENOID VALVE (Notself-diagnosticitem)<br />
E.C.c. s. [i<br />
CONTROLtf2) ~<br />
UNIT ~ /' 102-P P<br />
Component location<br />
(E. F. 1.<br />
harness)<br />
ii<br />
@ @)<br />
P<br />
@)&<br />
'"<br />
lDo.<br />
rims? ~<br />
A. 1. V.<br />
CONTROL<br />
SOLENOID<br />
VALVE<br />
EF & EC-138<br />
~nglne room harnes~<br />
(@)~<br />
'"<br />
, ~<br />
ID<br />
1m<br />
OFFACCON ST<br />
1 0<br />
2 C<br />
3 c<br />
4<br />
5<br />
IGNITION<br />
SWITCH<br />
@<br />
BATTERY<br />
~<br />
B/R<br />
BR<br />
FUSE<br />
:re q]<br />
G=I]<br />
G=I]<br />
[ll]<br />
(ill) FUSIBLE<br />
LINK<br />
FUSE AND<br />
FUSI BLE LI NK<br />
(1 n RELAY BOX)<br />
SEF234H
II<br />
I;]<br />
-<br />
18<br />
m -<br />
W<br />
COllECT<br />
if)<br />
ool<br />
tID , CYH<br />
[!] @} l1ti5<br />
[ill<br />
[Y]<br />
&<br />
SEF227H<br />
SEF229H<br />
~ ~ DlSCGltIlt:CT 102<br />
~ 1811 ClUNIT Ef C~CTOR II<br />
SEF233H<br />
TROUBLE DIAGNOSES<br />
II<br />
INSPECTION START<br />
CHECK POWER SOURCE.<br />
1) Disconnect A.I.V. control<br />
solenoid valve harness connector.<br />
2) Turn ignition switch "ON".<br />
3) Check voltage between terminal<br />
@ and ground.<br />
Voltage: Battery voltage<br />
O.K.<br />
CHECK COMPONENTS. ' N.G.<br />
1) Turn ignition switch "OFF".<br />
2) Check A.I.V. control solenoid<br />
I;]<br />
valve. (See page EF & EC-149.)<br />
O.K.<br />
CHECK OUTPUT SIGNAL.<br />
1) Reconnect A.I.V. control<br />
solenoid valve harness connector.<br />
2) Start engine and warm it up<br />
sufficiently.<br />
3) Check voltage between<br />
terminal @ and ground.<br />
N.G.<br />
Accelerator<br />
pedal position<br />
Voltage<br />
Released 0.5 - 1.0V<br />
Depressed Battery voltage<br />
O.K.<br />
CHECK COMPONENT.<br />
Check air induction valve.<br />
(See page EF & EC-151.)<br />
,<br />
O.K.<br />
( INSPECTION END<br />
EF & EC-139<br />
)<br />
N.G.<br />
N.G.<br />
CHECKHARNESSCON-<br />
TINUITY BETWEENA.I.V.<br />
CONTROL SOLENOID<br />
VALVEAND BATTERY.<br />
Check harness or connector.<br />
Replace A.I.V. control solenoid<br />
valve.<br />
[!]<br />
CHECK HARNESS CON-<br />
TINUITY BETWEEN A.I.V.<br />
CONTROL SOLENOID<br />
VALVE AND E.C.U.<br />
1) Stop engine.<br />
2) Disconnect A.I.V. control<br />
solenoid valve harnessconnector.<br />
3) Disconnect E.C.U.harness<br />
connector.<br />
4) Check continuity between<br />
terminals @ and @.<br />
Continuity should exist.<br />
If N.G., repair harness or<br />
connector.<br />
1) Perform E.C.U. input/output<br />
signal inspection test.<br />
2) If N.G., recheck the E.C.U.<br />
pin terminals for damage or<br />
the connection of E.C.U.<br />
harness connector.<br />
Replace air induction valve.
TROUBLE DIAGNOSES<br />
Diagnostic Procedure 23<br />
NEUTRAL SWITCH, INHIBITOR SWITCH AND INHIBITOR RELAY (Not self-diagnosticitem)<br />
E. C. c. S.<br />
CONTROL<br />
UNIT @<br />
35<br />
t 1;]81<br />
m -<br />
i5 [:it<br />
0 :A/T model<br />
@ :M/T mode I<br />
@ :A/T model<br />
@ :A/T mode I<br />
(~a~;"' I:Ss)<br />
j[<br />
G/OR-Im<br />
[<br />
35- G/OR --"<br />
with A. S. C. D.<br />
without A. S. C. D.<br />
@)@)<br />
W-G/OR<br />
A<br />
::r-<br />
'0: 0: r:=I<br />
"ID ID ell QD<br />
m[l
I;]<br />
[!J<br />
SEF243H<br />
(;]<br />
~[@b)<br />
IIISCOIIIlECT<br />
EO<br />
~<br />
[ill<br />
~~_IIECT~<br />
~ taEO~<br />
~C@Th)<br />
[ill<br />
IIISCOIIIlECT<br />
EO [ill<br />
~ i5~[[<br />
131~<br />
i5<br />
SEF242H<br />
r="' 35<br />
Cf'UNI T B CONNECTOR II<br />
SEF244H<br />
I00<br />
1Cf'U NI " ~i5<br />
131 For A/T model<br />
with A.S.C.D.<br />
T §T CONNECTOR II SEF245H<br />
~-~ n ; i5 ~<br />
[ill<br />
~ liI<br />
SEF349H u<br />
35 IIISCOIIIlECT<br />
ClUNJ T ~ CONNECTOR II E0<br />
TROUBLE DIAGNOSES<br />
INSPECTION START<br />
CHECK COMPONENTS.<br />
Check neutral switch (M/T) or<br />
inhibitor switch and inhibitor<br />
relay (A/T).<br />
(Seepage EF & EC-152.)<br />
O.K. (M/T)<br />
CHECK CONTINUITY<br />
BETWEEN SWITCH AND<br />
GROUND.<br />
I;] M/T model<br />
Check continuity between<br />
terminal @ and ground.<br />
[!J A/T model<br />
1) Turn ignition switch "OFF".<br />
2) Check continuity betWeen<br />
terminals @, CDand ground.<br />
Continuity should exist.<br />
O.K.<br />
CHECK CONTINUITY<br />
BETWEEN SWITCH (M/T),<br />
RELAY (A/T) AND E.C.U.<br />
(;] M/T model<br />
Check continuity between @<br />
and @.<br />
131A/T model<br />
Check continuity between<br />
inhibitor relay connector<br />
CDand @<br />
@ and @. (A.S.C.D. model)<br />
Continuity should exist<br />
O.K.<br />
INSPECTION END<br />
EF &. EC-141<br />
N.G.<br />
O.K. (A/T)<br />
O.K.<br />
[<br />
Replace switch or relay.<br />
m .<br />
, CHECK POWER SUPPLY FOR<br />
INHIBITOR SWITCH.<br />
1) Turn ignition switch "ON".<br />
2) Check voltage between terminal<br />
@ and ground.<br />
Battery voltage should exist.<br />
N.G.<br />
Check the following.<br />
. Harnesscontinuity<br />
. Fuse<br />
. S.M.J.<br />
If N.G., repair or replace.<br />
N.G. Repair or replace harness or<br />
N.G.<br />
connector.<br />
Repair or replace harness or<br />
connector.
TROUBLE DIAGNOSES<br />
Electrical Components Inspection<br />
E.C.U. INPUTIOUTPUT SIGNAL INSPECTION<br />
E.C.U. Inspection table *Dataare referencevalues.<br />
TERMI.<br />
NAL<br />
NO.<br />
Ignition signal<br />
ITEM CONDITION *DATA<br />
Engine speed is 2,000 rpm<br />
0.3 -0.6V<br />
1.2 - 1.5V<br />
3 Ignition check 9 - 12V<br />
4<br />
E.C.C.S.relay<br />
(Mainrelay)<br />
Within approximately 1 second<br />
after turning ignition switch "OF F"<br />
For approximately 1 second<br />
after turning ignition switch<br />
"OFF"<br />
0 -1V<br />
8<br />
Exhaustgastemperature I<br />
I sensor(Onlyfor California<br />
model) ,.<br />
L Idle speed<br />
- - , ,<br />
1.0 - 2.0V<br />
0 -1.0V<br />
E.G.R. system is operating.<br />
11 I Air conditioner relay<br />
12<br />
S.C.V. control solenoid<br />
valve<br />
BothA/Cswitchand blower I 0 -1.0V<br />
I switch are "ON"<br />
A/C switch is "OFF".<br />
Engine speed is 2,000 rpm.<br />
EF & EC-142<br />
BATTERY VOLTAGE<br />
(11.14V)<br />
BATTERY VOLTAGE<br />
(11.14V)<br />
0 - 1.0V<br />
BATTERY VOLTAGE<br />
(11 . 14V)
TROUBLE DIAGNOSES<br />
Electrical Components Inspection (Cont'd)<br />
*Data are reference values.<br />
EF & EC-143
TERMI-<br />
NAL<br />
NO.<br />
36<br />
37<br />
38<br />
47<br />
ITEM<br />
Ignition switch<br />
Throttle sensor power<br />
supply<br />
Power supply for E.C.U.<br />
41 I Air conditioner switch II u<br />
TROUBLE DIAGNOSES<br />
Electrical Components Inspection (Cont'd)<br />
*Data are reference values.<br />
Ignition switch "OFF"<br />
.~~o~ers~~~chlare<br />
CONDITION *DATA<br />
OV<br />
Both air conditioner switch and I OV<br />
"ON". I<br />
BATTERY VOLTAGE<br />
(11 - 14V)<br />
Approximately 5V<br />
Air conditioner switch is "OFF". (11 - 14V)<br />
ne is running.1<br />
S . 0.1 - 0.3V<br />
43 I Power steering oil<br />
pressure switch<br />
I teenng wheel is being turned.<br />
I 11::11\:1"'1:: I~IUII'"II\:I.I I<br />
.<br />
Steenng wheel is not being turned. .<br />
8-9V<br />
44 I Idle switch (EB side)<br />
BATTERY VOLTAGE<br />
(11-14V)<br />
BATTERY VOLTAGE<br />
tch "ON" I I<br />
Approximately 9 -10V<br />
I<br />
Throttle valve: .idle position<br />
I I Ignnlon SWIl:cnVI'II<br />
Throttle valve:<br />
I I<br />
BATTERY VOLTAGE<br />
I (11 - 14V)<br />
Except idle position<br />
~ r-<br />
G<br />
.. OV<br />
45 15th position switch<br />
(M/T models)<br />
I ear ISIn 5th position.<br />
I I Ignl1lon SWltcn VI'll I I<br />
6-8V<br />
Gear is except in 5th position.<br />
46 I Power supply (Back-up) I IIgnition switch "OFF"I I BATTERY VOLTAGE<br />
(11 - 14V)<br />
EF & EC-144
TERMI.<br />
NAL I ITEM<br />
NO.<br />
102<br />
104<br />
105<br />
Injector No.1<br />
103 Injector No.3<br />
110 Injector No.2<br />
112 I Injector No.4<br />
A.I.V. control solenoid<br />
valve<br />
Fuel pump relay<br />
E.G. R. control solenoid<br />
valve<br />
TROUBLE DIAGNOSES<br />
Electrical Components Inspection (Cont'd)<br />
*Data are reference values.<br />
Engine is running.<br />
CONDITION<br />
Accelerator pedal is depressed.<br />
After warming up<br />
For 5 seconds after turning<br />
ignition switch "ON"<br />
I Engine is running. I<br />
Within 5 seconds after turning<br />
ignition switch "ON"<br />
Engine is cold.<br />
[<br />
Water temperature is below<br />
60°C (140°F).<br />
]<br />
After warming up<br />
Water temperature is between<br />
60°C (140°F) and 105°C<br />
(221°F).<br />
[<br />
EF & EC-145<br />
]<br />
"<br />
*DATA<br />
BATTERY VOLTAGE<br />
(11.14V)<br />
0.1.0V<br />
BATTERY VOLTAGE<br />
(11.14V)<br />
0.7.0.9V<br />
BATTERY VOLTAGE<br />
(11.14V)<br />
0.7.0.9V<br />
BATTERY VOLTAGE<br />
(11.14V)
TERMI-<br />
NAL<br />
NO.<br />
106<br />
113<br />
ITEM<br />
Pressure regulator control<br />
solenoid valve<br />
A.A.C. valve<br />
TROUBLE DIAGNOSES<br />
Electrical Components Inspection (Cont'd)<br />
*Data are reference values.<br />
CONDITION *DATA<br />
Stop and restart engine after<br />
warming it up.<br />
E.C.U. PIN CONNECTOR TERMINAL LAYOUT<br />
Water temperature is above<br />
90°C (194°F)<br />
0 - 1.0V<br />
(for 3 minutes after ignition switch<br />
is turned off.)<br />
BATTERY VOLTAGE<br />
(After 3 minutes)<br />
Stop and restart engine after<br />
warming it up. BATTERY VOLTAGE<br />
(11 - 14V)<br />
Water temperature is below<br />
90°C (194°F)<br />
Steering wheel is being turned.<br />
Air conditioner is operating.<br />
Rear defogger is "ON".<br />
Headlamps are in high position.<br />
EF & EC-146<br />
~i)<br />
7 -10V<br />
4-7V<br />
SEF419H
(I<br />
=<br />
~<br />
[ill<br />
SEF054F<br />
SEF364H<br />
SEF176E<br />
SEF365H<br />
SE F536H<br />
TROUBLE DIAGNOSES<br />
Electrical Components Inspection (Cont'd)<br />
E.C.C.S.RELAY<br />
Check continuity between terminals CID and CID.<br />
Condition Continuity<br />
12V direct current supply<br />
between term inals CD and c:v<br />
No supply<br />
CRANK ANGLE SENSOR<br />
1. Remove distributor from engine. (crank angle sensor harness<br />
connector is connected.)<br />
2. Turn ignition switch "ON",<br />
3. Rotate crank angle sensor shaft slowly and check voltage<br />
between terminals @, @ and ground.<br />
Yes<br />
4. Visually check rotor plate for damage or dust.<br />
AIR FLOW METER<br />
. Visually check hot wire air passage for dust.<br />
ENGINE TEMPERATURE SENSOR<br />
Check engine temperature sensor resistance.<br />
Temperature °c (F) Resistance kQ<br />
20 (68)<br />
80 (176)<br />
EF & EC-147<br />
No<br />
2.1 - 2.9<br />
0.30 - 0.33
SEF820F<br />
t<br />
[ill<br />
[ill<br />
SEF332H<br />
SEF333H<br />
13<br />
EC381A<br />
TROUBLE DIAGNOSES<br />
Electrical Components Inspection (Cont'd)<br />
IGNITION COIL<br />
Check ignition coil resistance.<br />
Terminal Resistance<br />
@-@ Approximately O.7il<br />
POWER TRANSISTOR<br />
Check continuity between power transistor terminals.<br />
Terminal No. Tester polarity Continuity<br />
@ EB<br />
@ 8<br />
@ 8<br />
@ EB<br />
@ EB<br />
@ 8<br />
@ 8<br />
@ EB<br />
E.G.R. CONTROL VALVE<br />
Apply vacuum to E.G.R.vacuum port with a hand vacuum pump.<br />
E.G.R. controlvalve spring should lift.<br />
B.P.T. VALVE<br />
Plug one of two ports of B.P.T. valve.<br />
Apply a pressure above 0.490 kPa (50 mmH20, 1.97 inH2O) to<br />
check for leakage. If a leak is noted, replace valve.<br />
EF & EC~148<br />
No<br />
Yes<br />
No<br />
Yes
@<br />
SEF335H<br />
TROUBLE DIAGNOSES<br />
Electrical Components Inspection (Cont'd)<br />
E.G.R. CONTROL SOLENOID VALVE, A.I.V. CONTROL<br />
SOLENOID VALVE, P.R. CONTROL SOLENOID-VALVE<br />
AND S.C.V. CONTROL SOLENOID VALVE<br />
Check air passages continuity.<br />
Air passage Air passage<br />
Condition continuity continuity<br />
between @ and @ between @ and @<br />
12V direct cu rrent<br />
supply between Yes No<br />
terminals CD and @<br />
No supply No Yes<br />
EXHAUST GAS TEMPERATURE SENSOR<br />
Check resistance change and resistance value at 100°C (212°F).<br />
. Resistance should decrease in response to temperature<br />
increase.<br />
Resistance: 100°C (212°F)<br />
85.3 :t 8.53 k n<br />
THROTTLE SENSOR<br />
Make sure that resistance between terminals @ and CD<br />
changes when opening throttle valve manually.<br />
Resistance should change.<br />
FUEL PUMP<br />
Check continuity between terminals @ and @.<br />
Continuity should exist.<br />
EF & EC-149
[ill<br />
SEF538H A~ve'--GV<br />
=<br />
-SEF537H<br />
-------<br />
~<br />
~ SEF371H<br />
SEF339H<br />
TROUBLE DIAGNOSES<br />
Electrical Components, Inspection (Cont'd)<br />
FUEL PUMP RELAY<br />
Check continuity between terminals CD and @.<br />
Condition Continuity<br />
12V direct current supply<br />
betweenterminalsCID and @<br />
No supply<br />
Yes<br />
INJECTORS<br />
. Check injector resistance.<br />
Resistance:<br />
Approximately 10 - 15n<br />
. Remove injector and check nozzle for clogging.<br />
SWIRL CONTROL VALVE<br />
Supply vacuum to actuator and check swirl control valve<br />
operation.<br />
Condition<br />
Supply vacuum to actuator<br />
No<br />
Swirl control valve<br />
Close<br />
No supply Open<br />
AIR REGULATOR<br />
. Check air regulator resistance.<br />
Resistance:<br />
Approximately 75 n<br />
. Check air regulator for clogging.<br />
A.A.C. VALVE<br />
. Check A.A.C. valve resistance.<br />
Resistance:<br />
Approximately 10 n<br />
EF & EC-150
L l:I"(~<br />
Plunger<br />
SEF381H<br />
SEF341H<br />
~<br />
SEF342H<br />
TROUBLE DIAGNOSES<br />
Electrical Components Inspection (Cont'd)<br />
. Check plunger for seizure or sticking.<br />
. Checkspringfor broken.<br />
F.I.C.D. SOLENOID VALVE<br />
. Check that clicking sound is heard when applying 12V dirct<br />
current to terminals.<br />
. Checkplungerfor seizure or sticking.<br />
. Check for broken spring.<br />
AIR INDUCTION VALVE<br />
Apply vacuum to vacuum motor, suck or blow hose to make<br />
sure that air flows only towards the air induction side.<br />
IDLE SWITCH<br />
. Check continuity between terminals @ and @ while<br />
moving throttle valve.<br />
Accelerator pedal condition Continuity<br />
Fully closed<br />
Open<br />
EF & EC-151<br />
Yes<br />
No
For A/T model<br />
without A.S.C.D.<br />
For AlT model<br />
with A.S.C.D.<br />
[:it<br />
b<br />
[ill c;JJ<br />
~~<br />
SEF344H<br />
Battery<br />
SEF345H<br />
[ill Battery<br />
SEF348H<br />
TROUBLE DIAGNOSES<br />
Electrical Components Inspection (Co nt' d)<br />
NEUTRAL SWITCH<br />
. Check continuity between terminals @ and @.<br />
Shift to Neutral<br />
Shift to other position<br />
Conditions Continuity<br />
Yes<br />
INHIBITOR SWITCH<br />
Check continuity between terminals @ and @. CD.<br />
INHIBITOR RELAY<br />
. Check continuity between terminals @ and CD (Without<br />
A.S.C.D.), @ and @ (With A.S.C.D.).<br />
Condition<br />
12V direct current supply<br />
between terminals<br />
CD and W (WithoutA.S.C.D.),<br />
@ and CD (Without A.S.C.D.)<br />
No supply<br />
Conditions<br />
EF & EC-152<br />
No<br />
Continuity between Continuity between<br />
terminals @ and @ terminals @ and CD<br />
Shift to "P" position Yes No<br />
Shift to "N" position No Yes<br />
Shift to positions<br />
other than "P" and "N"<br />
No No<br />
Continuity between terminals<br />
@ and @ (Without A.S.C.D.).<br />
@ and @ (With A.S.C.D.)<br />
Yes<br />
No
SEF892D<br />
FUEL INJECTION CONTROL SYSTEM INSPECTION<br />
Pressure regulator<br />
Fuel pump and damper<br />
Fuel tank<br />
SEF135H<br />
Releasing Fuel Pressure<br />
Before disconnecting fuel line, release fuel pressure from fuel<br />
line to eliminate danger.<br />
1. Remove fuel pump fuse.<br />
2. Start engine.<br />
3. After engine stalls, crank it two or three times to release all<br />
fuel pressure.<br />
4. Turn ignition switch off and reconnect fuel pump fuse.<br />
Fuel Pressure Check<br />
a. When reconnecting fuel line, always use new clamps.<br />
b. Make sure that clamp screw does not contact adjacent<br />
parts.<br />
c. Use a torque driver to tighten clamps.<br />
d. Use Pressure Gauge to check fuel pressure.<br />
e. Do not perform fuel pressure check while fuel pressure<br />
regulator control system is operating; otherwise, fuel<br />
pressure gauge might indicate incorrect readings.<br />
1. Release fuel pressure to zero.<br />
2. Disconnect fuel hose between fuel filter and fuel tube (engine<br />
side).<br />
3. Install pressure gauge between fuel filter and fuel tube.<br />
4. Start engine and check for fuel leakage.<br />
5. Read the fuel pressure gauge indication.<br />
At idling:<br />
When fuel pressure regulator valve<br />
vacuum hose is connected.<br />
More than 226 kPa (2.3 kg/cm2, 33 psi)<br />
When fuel pressure regulator valve<br />
vacuum is disconnected.<br />
Approximately 294 kPa (3.0 kg/cm2, 43 psi)<br />
6. Stop engine and disconnect fuel pressure regulator vacuum<br />
hose from intake manifold.<br />
7. Plug intake manifold with a rubber cap.<br />
8. Connect variable vacuum source to fuel pressure regulator.<br />
EF & EC-153
Vacuum<br />
topressure regulator<br />
FUEL INJECTION CONTROL SYSTEM INSPECTION<br />
Fuel pressu re<br />
SEF718B<br />
Fuel Pressure Check (Cont'd)<br />
9. Start engine and read fuel pressure gauge indication as<br />
. vacuum changes.<br />
Fuel pressure should decrease as vacuum increases. If<br />
results are unsatisfactory, replace fuel pressure regulator.<br />
Injector Removal and Installation<br />
1. Release fuel pressure to zero.<br />
2. Remove or disconnect the following:<br />
. B.P.T. valve<br />
. Fuel tube securing bolts<br />
3. Remove injectors with. fuel tube assembly.<br />
4. Remove injector from fuel tube.<br />
5. Install injector as follows:<br />
1) Clean exterior of injector tail piece.<br />
2) Use new O-rings.<br />
CAUTION:<br />
After properly connecting injectors to fuel tube, check connection<br />
for fuel leakage.<br />
6. Assemble injectors with fuel pipe to intake manifold.<br />
EF & EC-154
- -<br />
Fuel tank<br />
@c)<br />
EVAPORATIVE EMISSION CONTROL SYSTEM<br />
Vapor vent line<br />
Q@<br />
~<br />
Description<br />
Throttle chamber<br />
Main purge<br />
orifice<br />
Purge control<br />
valve<br />
() 0 ~ Carbon canister<br />
Q : Air<br />
.. : Fuelvapor<br />
SEC544A<br />
The evaporative emission control system is used to reduce<br />
hydrocarbons emitted to the atmosphere from the fuel system.<br />
This reduction of hydrocarbons is accomplished by activated<br />
charcoals in the carbon canister.<br />
The fuel vapor from the sealed fuel tank is led into the canister<br />
which contains activated carbon and the vapor is stored there<br />
when the engine is not running.<br />
The canister retains the fuel vapor until the canister is purged<br />
by the air drawn through the bottom of the canister to the<br />
intake manifold when the engine is running. When the engine<br />
runs at idle, the purge control valve is closed.<br />
Only a small amount of stored vapor flows into the intake<br />
manifold through the constant purge orifice. As the engine<br />
speed increases, and the throttle vacuum increases, the purge<br />
control valve opens and the vapor is sucked into the intake<br />
manifold through both the main purge orifice and the constant<br />
purge orifice.<br />
Inspection<br />
CARBON CANISTER<br />
Check carbon canister as follows:<br />
@: Blow air and ensure that there is no leakage.<br />
@: Blow air and ensure that there is leakage.<br />
EF &. EC-155
~<br />
-<br />
\<br />
\<br />
l'<br />
\<br />
~<br />
EVAPORATIVE EMISSION CONTROL SYSTEM<br />
SEC308A<br />
..<br />
~<br />
Q Air<br />
.. Fuel vapor<br />
SEC309A<br />
Inspection (Cont'd)<br />
FUELTANKVACUUM RELIEF VALVE<br />
1. Wipe valve housing clean.<br />
2. Inhale air through the cap. A slight resistance accompanied<br />
by valve clicks indicates that valve is in good mechanical<br />
condition. Note also that, by further inhaling air, the resistance<br />
should disappear with valve clicks.<br />
3. If valve is clogged or if no resistance is felt, replace cap as<br />
an assembly.<br />
FUEL CHECK VALVE<br />
1. Blow air through connector on fuel tank side.<br />
A considerable resistance should be felt and a portion of air<br />
flow should be directed toward the canister.<br />
2. Blow air through connector on canister side.<br />
Air flow should be smoothly directed toward fuel tank.<br />
3. If fuel check valve is suspected of not properly functioning<br />
in steps 1 and 2 above, replace it.<br />
EF & EC-156
Steel net<br />
Baffle plate<br />
SEF156E<br />
ET277<br />
lBJ<br />
CRANKCASE EMISSION CONTROL SYSTEM<br />
- {t9t=R:/lL '--Seal type oil<br />
u lever gauge<br />
.. C:? ~ : Fresh air<br />
.. : Blow-by gas<br />
SEC137A<br />
Description<br />
This system returns blow-by gas to both the intake manifold<br />
and air cleaner.<br />
The positive crankcase ventilation (P.C.V.) valve is provided to<br />
conduct crankcase blow-by gas to the intake manifold.<br />
During partial throttle operation of the engine, the intake<br />
manifold sucks the blow-by gas through the P.C.V. valve.<br />
Normally, the capacity of the valve is sufficient to handle any<br />
blow-by and a small amount of ventilating air.<br />
The ventilating air is then drawn from the air cleaner, through<br />
the hose connecting the air cleaner to rocker cover, into the<br />
crankcase.<br />
Under full-throttle condition, the manifold vacuum is insufficient<br />
to draw the blow-by flow through the valve, and its flow goes<br />
through the hose connection in the reverse direction.<br />
On vehicles with an excessively high blow-by some of the flow<br />
will go through the hose connection to the air cleaner under all<br />
conditions.<br />
Inspection<br />
P.C.V. (Positive Crankcase Ventilation)<br />
With engine running at idle, remove ventilation hose from P.C.V.<br />
valve; if valve is working properly, a hissing noise will be heard<br />
as air passes through it and a strong vacuum should be felt<br />
immediately when a finger is placed over valve inlet.<br />
VENTILATION HOSE<br />
1. Check hoses and hose connections for leaks.<br />
2. Disconnect all hoses and clean with compressed air. If any<br />
hose cannot be freed of obstructions, replace.<br />
EF &. EC-157<br />
, '1
IGNITION TIMING °S.T.D.C. 15%2<br />
IDLE SPEED rpm<br />
,<br />
ENGINE TEMPERATURE SENSOR<br />
Thermistor resistance k11<br />
SERVICE DATA AND SPECIFICATIONS (S.D.S.)<br />
M/T 750%50<br />
A/T 750%50 (in uNu position)<br />
20°C (68°F) 80°C (176°F)<br />
2.1 -2.9 0.30 - 0.33<br />
IDLE SWITCH<br />
Engine speed when idle switch M/T 1,000% 150<br />
is changed from "OFF" to A/T 1 ,000% 150<br />
"ON" rpm (in uN" position)<br />
FUEL PRESSURE at idling<br />
(Measuring point: between fuel<br />
filter and fuel pipe)<br />
Vacuum hose is connected Approximately<br />
kPa (kg/em' ,psi) 226 (2.3,33)<br />
Vacuum hose is disconnected Approx imately<br />
kPa (kg/em' , psi) 294 (3.0,43)<br />
FUEL INJECTOR<br />
Coil resistance 11 Approximately 10 -15<br />
AIR REGULATOR<br />
Resistance 11 Approximately 75<br />
EXHAUST GAS TEMPERATURE<br />
SENSOR<br />
Therm istor resistance k11<br />
100°C (212°F)<br />
85.3:t8.53<br />
General Specifications<br />
Inspection and Adjustment<br />
EF & EC-158
ENGINECONTROL, FUEL"<br />
EXHAUSTSYSTEMS<br />
I<br />
SECTIONFE<br />
~~I~~~~!~ SYSTEM FE-2-<br />
FUEL SYSTEM '... FE-3<br />
EXHAUST SYSTEM , .<br />
FE-4
ENGINE CONTROL SYSTEM<br />
Accelerator Control System<br />
. When removing accelerator wire, make a mark to indicate lock nut's initial position.<br />
. Check that throttle valve fully opens when accelerator pedal is fully depressed and that it returns to idle<br />
position when pedal is released.<br />
. Adjust accelerator wire according to the following procedure.<br />
Tighten "adjusting nut" until "throttle drum" starts to move.<br />
From that position turn back "adjusting nut" 1.5 to 2 turns, and fasten it with a lock nut.<br />
. Check accelerator control parts for improper contact with any adjacent parts.<br />
. When connecting accelerator wire, be careful not to twist or scratch its inner wire.<br />
Adjusting nut<br />
Throttle drum<br />
Adjusting nut<br />
Accelerator wire bracket<br />
wire<br />
Lock nut<br />
tOJ 8 - 11 (0.8 -1.1,5.8 - 8.01<br />
Adjusting nut<br />
tOJ8 -11 (0.8 -1.1,5.8 -8.01<br />
tOJ3 -4 ~-.<br />
,... .OA,22 -2..,\<br />
.~.~<br />
o:~ m<br />
FE-2<br />
Accelerator<br />
pedal<br />
A.S.C.D. actuator<br />
Locknut<br />
tOJ 8 -12<br />
(0.8 -1.2,<br />
5.8 -8.7)<br />
tOJ : N.m (kg-m, ft-Ibl<br />
SFE012A
FUEL SYSTEM<br />
WARNING:<br />
When replacing fuel line parts, be sure to observe the following:<br />
. Put a "CAUTION: INFLAMMABLE" sign in workshop.<br />
. Do not smoke while servicing fuel system. Keep open flames and sparks away from work area.<br />
. Be sure to disconnect battery ground cable before conducting operations.<br />
. Put drained fuel in an explosion-proof container and put licit on securely.<br />
CAUTION:<br />
. For electric fuel pump model, before disconnecting fuel hose, release fuel pressure from fuel line.<br />
Refer to "Fuel Filter Replacement" in MA section.<br />
. Do not disconnect any fuel line unless absolutely necessary.<br />
. Plug hose and pipe openings to prevent entry of dust or dirt.<br />
. Always replace O-ring and clamps with new ones.<br />
. Do not kink or twist hose and tube when they are installed.<br />
. Do not tighten hose clamps excessively to avoid damaging hoses.<br />
. When installing fuel check valve, be careful of its designated direction. (Refer to section EF & EC.)<br />
. Run engine and check for leaks at connections.<br />
I<br />
A<br />
~ 26<br />
I<br />
!<br />
U<br />
:"i<br />
l .<br />
~~~<br />
L! ~26-36<br />
12.7 - 3 7<br />
20 - 27j ,<br />
-36 12.7 -3.7,20 -27)<br />
FE-3<br />
tDJ 2.0 - 2.5<br />
10.20 - 0.26'<br />
1.4 -1.9)<br />
7<br />
~<br />
Fuel return hose<br />
"-tDJ 3.2 - 4.310.33 - 0.44, 2.4 - 3.2)<br />
tDJ : N.m (kg-m, ft-Ib)<br />
SFE013A
EXHAUST SYSTEM<br />
CAUTION:<br />
. Always replace exhaust gaskets with new ones when disassembling.<br />
. Check all tube connections for exhaust gas leaks, and entire system for unusual noises, with engine<br />
running.<br />
. After installation, check that mounting brackets and mounting Insulator are free from undue stress.<br />
If any of above parts are not installed properly, excessive noise or vibration may be transmitted to<br />
vehicle body.<br />
Catalytic conve'rter<br />
~ 13-16(1.3-1.6,9-121<br />
FE-4<br />
~ : N.m (kg.m, ft-Ib)<br />
SFE014A
CONTENTS<br />
CLUTCH I<br />
SECTIONCL<br />
PRECAUTIONSAND PREPARATION , CL- 2<br />
CLUTCH SYSTEM CL- 4<br />
INSPECTION AND ADJUSTMENT CL- 5<br />
HYDRAULICCLUTCH CONTROL ,. CL- 7<br />
CLUTCH RELEASE MECHANISM CL-10<br />
CLUTCH DISC AND CLUTCH COVER CL-12<br />
SERVICE DATA AND SPECIFICATIONS (S.D.S.) CL-14<br />
III
Tool number<br />
(Kent-Moore No.)<br />
Tool name<br />
,<br />
ST20050010<br />
( - )<br />
Base plate<br />
ST20050100<br />
( - )<br />
Distance piece<br />
GG9431 0000<br />
( - )<br />
Flare nut torque<br />
wrench<br />
GG9431 0000<br />
( - )<br />
PRECAUTIONS AND PREPARATION<br />
~<br />
Description<br />
SBR500<br />
Precautions<br />
. Recommended fluid is brake fluid "DOT 3".<br />
. Never reuse drained brake fluid.<br />
. Be careful not to splash brake fluid on painted areas.<br />
. When removing and installing clutch piping, use Tool.<br />
. Use new brake fluid to clean or wash all parts of master<br />
cylinder, operating cylinder and clutch damper.<br />
. Never use mineral oils such as gasoline or kerosene. It<br />
will ruin the rubber parts of the hydraulic system.<br />
WARNING:<br />
After cleaning the clutch disc, wipe it with a dust collector. Do<br />
not use compressed air,<br />
Preparation<br />
SPECIAL SERVICE TOOLS<br />
~".,<br />
. - ~ . , "<br />
., :', ~'::..<br />
. -,:, ,.- :<br />
, , .'. :. ,',' :/.<br />
, , =<br />
-@:j<br />
@~<br />
\!II t"'<br />
~m .<br />
ST20600000<br />
~<br />
(J26366)<br />
Clutch aligning bar<br />
ST20050240<br />
( - )<br />
Diaphragm spring<br />
adjusting wrench ~<br />
. -~<br />
==-p<br />
~<br />
CL-2<br />
Inspecting diaphragm spring of clutch<br />
cover<br />
Inspecting diaphragm spring of clutch<br />
cover<br />
Removing and installing each clutch piping<br />
Installing clutch cover and clutch disc<br />
Adjusting unevenness of diaphragm spring<br />
of clutch cover
Tool name Description<br />
Bearing puller<br />
Bearing drift<br />
PRECAUTIONS AND PREPARATION<br />
Preparation (Cont'd)<br />
COMMERCIAL SERVICE TOOLS<br />
~<br />
V In".mn,<br />
Removing release bearing<br />
"I be,,;n,<br />
a~ a:50 mm (1.97 in) dia.<br />
CL-3
0 r-<br />
I<br />
~<br />
III<br />
(')<br />
r to)<br />
en<br />
I\)<br />
c'"";, p;" m~-//<br />
.A: N'm (kg-m, ft-Ib)<br />
EI Cb):Apply lithium-based grease<br />
including molybdenum disulphide.<br />
,~<br />
r~ 16- 22<br />
~ (1.6-2.2,12- 161<br />
~<br />
h ~~8-11<br />
c ~ (0.8- 1.1,5.8-8.01<br />
~<br />
Return spring<br />
~---",. Lock nut ~ . Clutch switch<br />
~<br />
12-15 (1.2-1.5,9-111<br />
. Pedal stopper<br />
~-- -~ 16-22(1_6-2.2,1<br />
1/ ~ Clutch switch<br />
0~ ~ f -<br />
, '~ Pedalstopper<br />
Clutch pedal<br />
EI(b)<br />
Release<br />
bearing
Push rod<br />
Clutch switch or pedal<br />
Lock nut 1/ stopper lock nut<br />
~ 8 -11 ~ . Clutch switch<br />
INSPECTION AND ADJUSTMENT<br />
Pedal bracket<br />
(0.8 -1.1, 5.8 - 8.0) 12.15 (1.2 .1.5,9.11)<br />
.Pedal stopper<br />
16 -22 11.6.2.2,12 - 16)<br />
).
INSPECTION AND ADJUSTMENT<br />
SCL288<br />
/<br />
SCL203<br />
Bleeding Procedure<br />
Bleed air according to the following procedure.<br />
Clutch damper -+ Clutch operating cylinder<br />
. Carefully monitor fluid level at master cylinder during bleeding<br />
operation.<br />
1. Top up reservoir with recommended brake fluid.<br />
2. Connect a transparent vinyl tube to air bleeder valve.<br />
3. Fully depress clutch pedal several times.<br />
4. With clutch pedal depressed, open bleeder valve to release<br />
air.<br />
5. Close bleeder valve.<br />
6. Repeat steps 3 through 5 above until brake fluid flows from<br />
air bleeder valve without air bubbles.<br />
CL-6
Reservoir cap<br />
Reservoir<br />
Reservoir band<br />
Cylinder body<br />
EI @ Rubbing<br />
surface<br />
to piston<br />
assembly<br />
Packing<br />
. Apply brake fluid when assembling.<br />
Valvestopper ~<br />
A 1.6 - 2.9 (0.16 - 0.3,1.1 - 2.21<br />
. Remove this stopper, when<br />
removing piston and return spring.<br />
IJJJ.JJJJJJJJJj em -- - - ~11J)<br />
Groove<br />
n<br />
HYDRAULIC CLUTCH CONTROL<br />
Return spring<br />
SCL214<br />
Clutch Master Cylinder<br />
Piston assembly<br />
Push rod<br />
lEI @ Contact surface to piston assembly<br />
Dust cover<br />
lEI @ Rubbing surface to<br />
push rod<br />
Stopper ring 0<br />
EI @ : Apply rubber grease.<br />
A: N.m (kg-m, ft-lbl<br />
SCL348<br />
DISASSEMBLY AND ASSEMBLY<br />
. Push piston into cylinder body with screwdriver when<br />
removing and installing valve stopper.<br />
. Align groove of piston assembly and valve stopper when<br />
installing valve stopper.<br />
. Check direction of piston cups.<br />
CL-7
HYDRAULIC CLUTCH CONTROL<br />
Piston assembly<br />
Clutch Master Cylinder (Cont'd)<br />
INSPECTION<br />
. Check cylinder and piston rubbing surface for uneven wear,<br />
rust or damage. Replace if necessary.<br />
. Check piston with piston cup for wear or damage. Replace if<br />
necessary.<br />
. Check return spring for wear or damage. Replace if necessary.<br />
. Check reservoir for deformation or damage. Replace if<br />
necessary.<br />
. Check dust cover for cracks, deformation or damage.<br />
Replace if necessary.<br />
Operating Cylinder<br />
~ ~I<br />
l<br />
Operating cylinder<br />
lEI @ Rubbing surface to piston assembly<br />
Piston spring<br />
Piston cup IEI@<br />
lEI @ : Apply rubber grease.<br />
SCL356<br />
INSPECTION<br />
. Check rubbing surface of cylinder for wear, rust or damage.<br />
Replace if necessary.<br />
. Check piston with piston cup for wear or damage. Replace if<br />
necessary.<br />
. Check piston spring for wear or damage. Replace if necessary.<br />
. Check dust cover for cracks, deformation or damage.<br />
Replace if necessary.<br />
CL-8
HYDRAULIC CLUTCH CONTROL<br />
Clutch Damper<br />
Damper cover<br />
~~~I[';:':<br />
\ \ ~ ..,., ,.o.U-721<br />
L Bleeder screw<br />
\ \ lEI @ Rubbing surface to<br />
~ Spring piston assembly<br />
Piston cupEI @<br />
Piston assembly<br />
Contact surface to piston assembly<br />
Damper rubber EI @<br />
EI @ : Apply rubber grease.<br />
~: N.m (kg-m,ft-Ib)<br />
SCL363<br />
INSPECTION<br />
. Check cylinder and piston rubbing surface for uneven wear,<br />
rust or damage. Replace if necessary.<br />
. Check damper rubber and piston cup for cracks, deformation<br />
or damage. Replace if necessary.<br />
CL-9
CLUTCH RELEASE MECHANISM<br />
:;:d'~"7 r~~~:~?~ c;7<br />
;6e:z .<br />
m(Q ---<br />
m(Q<br />
~ ~<br />
'<br />
~ ~ Release sleeve<br />
~ Release bearing<br />
~-. -~-<br />
-~ -. 10 (')<br />
~~!£)<br />
U)o///~.. .J<br />
Drift<br />
SCL217<br />
CL145<br />
SC L222<br />
m (b): Apply lithium-based grease including molybdenum disulphide.<br />
REMOVAL AND INSTAllATION<br />
. Install retainer spring and holder spring.<br />
. Remove release bearing.<br />
. Install release bearing with suitable drift.<br />
CL-10<br />
SCL326
Pack this recess<br />
.IEEI(!): Apply lithium-based grease including<br />
mOlybdenum disulphide. SCL223<br />
CLUTCH RELEASE MECHANISM<br />
INSPECTION<br />
. Check release bearing to see that it rolls freely and is free<br />
from noise, cracks, pitting or wear. Replace if necessary.<br />
. Check release sleeve and withdrawal lever rubbing surface<br />
for wear, rust or damage. Replace if necessary.<br />
LUBRICATION<br />
. Apply recommended<br />
surface.<br />
grease to contact surface and rubbing<br />
Too much lubricant might damage clutch disc facing.<br />
CL-11
~<br />
i sa jJ:<br />
.<br />
I<br />
E<br />
! E<br />
C')<br />
ci<br />
CLUTCH DISC AND CLUTCH COVER<br />
SCL229<br />
SCL221<br />
m Cbi: Apply lithium-basedgreaseincluding<br />
molybdenum disulphide.<br />
Clutch Disc<br />
INSPECTION<br />
. Check clutch disc for wear of facing.<br />
Wear limit of facing surface to rivet head:<br />
0.3 mm (0.012 in)<br />
SC L354<br />
. Check clutch disc for backlash of spline and runout of<br />
facing.<br />
Maximum backlash of spline (at outer edge of disc):<br />
0.9 mm (0.035 in)<br />
Runout limit:<br />
1.0 mm (0.039 in)<br />
Distance of runout check point (from hub center):<br />
107.5 mm (4.23 in)<br />
. Check clutch disc for burns, discoloration or oil or grease<br />
leakage. Replace if necessary.<br />
INSTAllATION<br />
. Apply recommended<br />
portion.<br />
grease to contact surface of spring<br />
Too much lubricant might damage clutch disc facing.<br />
CL-12
(c)<br />
~ Q)J<br />
ST20050240<br />
H<br />
CLUTCH DISC AND CLUTCH COVER<br />
A<br />
SCL219<br />
Flywheel<br />
SCL349<br />
Clutch Cover and Flywheel<br />
INSPECTION AND ADJUSTMENT<br />
. Set Tool and check height and unevenness of diaphragm<br />
spring.<br />
Diaphragm spring height "A":<br />
33.0 - 35.0 mm (1.299 - 1.378 in)<br />
. Check thrust rings for wear or damage by shaking cover<br />
assembly and listening for chattering noise, or lightly hammering<br />
on rivets for a slightly cracked noise. Replace clutch<br />
cover assembly if necessary.<br />
. Check pressure plate and clutch disc contact surface for<br />
slight burns or discoloration. Repair pressure plate with<br />
emery paper.<br />
. Check pressure plate and clutch disc contact surface for<br />
deformation or damage. Replace if necessary.<br />
. Adjust unevenness of diaphragm spring with Tool.<br />
Uneven limit:<br />
0.7 mm (0.028 in)<br />
FLYWHEEL INSPECTION<br />
. Check contact surface of flywheel for slight<br />
discoloration. Repair flywheel with emery paper.<br />
. Check flywheel runout.<br />
Runout (Total indicator reading):<br />
Less than 0.15 mm (0.0059 in)<br />
burns or<br />
INSTAllATION<br />
. Insert Tool into clutch disc hub when installing clutch cover<br />
and disc.<br />
CL-13
. CLUTCH CONTROL SYSTEM<br />
SERVICE DATA AND SPECIFICATIONS (S.O.S.)<br />
General Specifications<br />
CLUTCH DISC<br />
Type of clutch control Hydraulic Model 225 LTD<br />
CLUTCH MASTER CYLINDER<br />
Inner diemeter mm (In) 15.87 (5/8)<br />
CLUTCH OPERATING CYLINDER<br />
Facing size<br />
(Outer dia. x inner dia.<br />
x thickness) mm (in)<br />
Thickness of disc assembly<br />
With loed mm (in)<br />
. Inner diameter mm (In) 17.46 (11/16) CLUTCH COVER<br />
CLUTCH DAMPER Fuilioed N (kg,lb)<br />
Inner diameter mm (in) 19.05 (3/4)<br />
CLUTCH PEDAL<br />
Model<br />
Inspection and Adjustment<br />
225 x 150 x 3.5<br />
(8.86 x 5.91 x 0.138)<br />
7.6.8.0 (0.299 - 0.315)<br />
with 5,394 N<br />
(550 kg, 1,213 Ib)<br />
C225S<br />
4.413 (450,992)<br />
CLUTCH COVER<br />
Unit: mm (in) Unit: mm (in)<br />
Pedal height "H*" 186.196 (7.32.7.72) Model C225S<br />
Pedal free play<br />
(8acklash at clevis)<br />
Clearence between pedel<br />
stopper rubber and threeded<br />
end of clutch interlock<br />
1.0 . 3.0 (0.039 .0.118)<br />
1.0-2.0 (0.039.0.079)<br />
*: Measured from surfece of melt sheet to pedal ped<br />
CLUTCH DISC<br />
Model 225L TD<br />
Wear limit of facing surface to<br />
rivet heed<br />
Aunout limit of facing<br />
Distance of runout check<br />
point (from the hub center)<br />
Maximum beck lash of spline<br />
(at outer edge of disc)<br />
0.3 (0.012)<br />
1.0 (0.039)<br />
107.5 (4.23)<br />
0.9 (0.035)<br />
Unit: mm (In)<br />
CL-14<br />
Diaphragm spring height<br />
Uneven limit of diaphragm<br />
spring toe height<br />
33.0.36.0 (1299 - 1.378)<br />
0.7 (0.028)
CONTENTS<br />
MANUALTRANSMISSION<br />
.<br />
SECTIONMT<br />
PREPARATION MT- 2<br />
ON-VEHICLE SERVICE ""'"'''''''''''''''''''''''''''''''''''''''''''''''''''''''''''''''''''''''''''''''''''''' MT- 4<br />
REMOVAL AND INSTAllATION... MT- 5<br />
MAJOR OVERHAUL MT- 6<br />
DISASSEMBLY MT- 9<br />
INSPECTION MT-14<br />
ASSEMBLY MT-16<br />
SERVICE DATA AND SPECIFICATIONS (S.O.S.) MT-26<br />
-
Tool number<br />
(Kent-Moore No.)<br />
Tool name<br />
ST2381 0001<br />
( - )<br />
Adapter setting plate<br />
KV31100401<br />
( - )<br />
Transmission press<br />
stand<br />
ST22520000<br />
(J26348)<br />
Wrench<br />
ST23540000<br />
(J25689-A)<br />
Pin punch<br />
ST30031 000<br />
(J22912-01 )<br />
Puller<br />
ST23860000<br />
( - )<br />
Drift<br />
ST22360002<br />
(J25679-01 )<br />
Drift<br />
ST22350000<br />
(J25678-01 )<br />
Drift<br />
ST23800000<br />
(J25691-01)<br />
Drift<br />
Description<br />
PREPARATION<br />
SPECIAL SERVICE TOOLS<br />
9 ..<br />
. . .<br />
VW<br />
~ w<br />
~<br />
~<br />
~ 'Or;",~ mm11.50I.' do.<br />
::: :mm (1.30 in)dia.<br />
a: 29 mm (1.14 in) dia.<br />
b: 23 mm (0.91 in) dia.<br />
a: 34 mm (1.34 in) dia.<br />
b: 28 mm (1.10 in) die.<br />
a: 44 mm (1.73 in) dia.<br />
b: 31 mm (1.22 in) dia.<br />
MT-2<br />
Fixing adapter plate with gear assembly<br />
Pressing counter gear and mainshaft<br />
Tightening mainshaft lock nut<br />
Removing and installing fork rod retaining<br />
pin<br />
Removing and installing 1st gear bushing<br />
Removing main drive gear bearing<br />
Measuring wear of baulk rings<br />
Installing counter drive gear<br />
Installing counter gear front and rear end<br />
bearings<br />
Installing O.D. gear bushing<br />
Installing front cover oil seal
Tool number<br />
(Kent-Moore No.)<br />
Tool name<br />
ST33400001<br />
(J26082)<br />
Drift ~<br />
ST33290001<br />
(J25810-A)<br />
Puller<br />
ST30720000<br />
( - )<br />
Drift<br />
ST30613000<br />
(J25742-3)<br />
Drift<br />
ST33200000<br />
(J26082)<br />
Drift<br />
Description<br />
~<br />
Tool name Description<br />
Puller<br />
~LS r~7mmC3'.3;")d'"<br />
b:<br />
iJ a:<br />
;!V/<br />
PREPARATION<br />
a: 60 mm (2.36 in) dia.<br />
b: 47 mm (1.85 in) dia.<br />
55.5 mm (2.185 inl dia.<br />
71.5 mm (2.815 in) dia.<br />
b: 47.5 mm (1.870 in) dia.<br />
a: 60 mm (2.36 in) dia.<br />
b: 44.5 mm 11.752 in) die.<br />
COMMERCIAL SERVICE TOOL<br />
MT-3<br />
Installing rear oil seal<br />
Removing rear oil seal<br />
Install ing mainshaft ball bearing<br />
Installing main drive gear bearing<br />
Installing counter rear bearing<br />
Installing 3rd & 4th synchronizer<br />
assembly<br />
Removing counter bearings, counter drive<br />
and O.D. gears
~ST33400001<br />
,(J26082) ----<br />
SMT477A ~<br />
SMT384B<br />
ON-VEHICLE SERVICE<br />
Replacing Rear Oil Seal<br />
REMOVAL<br />
INSTAllATION<br />
Check of Position Switch<br />
BACK-UPlAMP SWITCH<br />
. Check continuity.<br />
Gear position Continuity<br />
Reverse Yes<br />
Except reverse<br />
NEUTRAL SWITCH<br />
. Check continuity.<br />
No<br />
Gear position Continuity<br />
Neutral Yes<br />
Except neutral<br />
O.D. SWITCH<br />
. Check continuity.<br />
MT-4<br />
No<br />
Gear position Continuity<br />
5th Yes<br />
Except 5th<br />
No
~~<br />
@<br />
REMOVAL AND INSTAllATION<br />
~<br />
SMT381 B<br />
Removal<br />
. Remove shift lever.<br />
. Remove propeller shaft. - Refer to section PD.<br />
. Insert plug into rear oil seal after removing propeller shaft.<br />
. Be careful not to damage spline, sleeve yoke and rear oil<br />
seal, when removing propeller shaft.<br />
. Support engine by placing a jack under oil pan.<br />
. Do not place jack under oil pan drain plug.<br />
. Remove transmission from engine.<br />
. Support manual transmission, while removing it.<br />
Installation<br />
. Tighten all transmission bolts.<br />
Bolt No. Tightening torque N.m (kg-m,ft-Ib) Qmm(in)<br />
1 39 - 49 (4.0 - 5.0, 29 - 36) 70 (2.76)<br />
2 39 - 49 (4.0 - 5.0, 29 - 36) 60 (2.36)<br />
3 29 - 39 (3.0 - 4.0, 22 - 29) 30 (1.18)<br />
4 39 - 49 (4.0 - 5.0, 29 - 36) 25 (0.98)<br />
Gusset to<br />
engine<br />
MT-5<br />
29 - 39 (3.0 - 4.0, 22 - 29)<br />
-
3:<br />
-I I<br />
~<br />
C/)<br />
s:<br />
-i<br />
w<br />
to<br />
(II<br />
to<br />
",.<br />
Neutral switch<br />
(OJ 20 -29 (2.0 . 3.0, 14 -22)<br />
r4 Thread of bolts<br />
Drain plug<br />
(OJ 25. 34 (2.5 . 3.5, 18 . 25)<br />
(OJ: N'm (kg-m,<br />
r4: Apply reco<br />
genuine par<br />
equivalent.
Main drive gear ~ '.<br />
MAJOR OVERHAUL<br />
Gear Components<br />
---------------------<br />
sh''''n''n~7i~-J<br />
.j~\~~3ro&4Oh<br />
Spread sprin g<br />
~ " synchronizer
s:<br />
-I<br />
I<br />
00<br />
II)<br />
s:<br />
-I<br />
w<br />
C»<br />
'-I<br />
C»<br />
Select check plunger<br />
Return spring<br />
RM"';~~??\<br />
If)<br />
Striking arm J ~ rr@<br />
Return spring plug<br />
f.4 Thread of bolts<br />
~ 20 -29 (2.0 - 3.0, 14.221<br />
~ Bushing<br />
m Mating surfece to control lever<br />
- Returnspring<br />
\~<br />
SMT035<br />
SMT982<br />
Soft hammer<br />
SMT320B<br />
')<br />
//<br />
0~ SMT011<br />
TM753<br />
DISASSEMBLY<br />
Case Components<br />
1. Remove rear extension.<br />
a. Remove control housing, check ball, return<br />
select check plunger and return springs.<br />
b. Remove rear extension by lightly tapping it.<br />
spring plug,<br />
2. Remove front cover, gasket, shim of countershaft front<br />
bearing, and snap ring of main drive gear ball bearing.<br />
3. Remove transmission case by tapping lightly.<br />
4. Remove front cover oil seal.<br />
MT-9<br />
:r<br />
,.<br />
~.
ST23540000<br />
(J25689-A)<br />
ST2381 0001<br />
( - )<br />
TM754<br />
SMT984<br />
DISASSEMBLY<br />
Shift Control Components<br />
1. Set up Tool on adapter plate.<br />
2. Remove check ball plugs, check springs, and check balls.<br />
3. Drive out retaining pins. Then drive out fork rods and<br />
remove interlock balls.<br />
4. Remove lever bracket securing bolt.<br />
5. Draw out 3rd-4th fork rod.<br />
6. Remove E-ring from 0.0. and reverse fork rod.<br />
MT -1 0<br />
""
SMT025<br />
~EndPlaY<br />
Gear<br />
Mainshaft or ~,<br />
bushing ~<br />
Suitable puller<br />
.~<br />
SMT792A<br />
SMT174A<br />
DISASSEMBLY<br />
Shift Control Components (Cont'd)<br />
7. Draw out 0.0. and reverse fork shaft by rotating 0.0. and<br />
reverse bracket counterclockwise. . .<br />
Gear Components<br />
_1<br />
1. Before removiQg gears and shafts, measure each gear end<br />
play.<br />
Gear end play: Refer to S.D.S.<br />
If not within specification, disassemble and check contact<br />
surface of gear to hub, washer, bushing, needle bearing and<br />
shaft.<br />
2. Mesh 2nd and reverse gear, then draw out counter front<br />
bearing with suitable puller.<br />
3. Remove snap ring and then remove sub-gear bracket,<br />
sub-gear spring and sub-gear.<br />
4. Draw out counter drive gear with main drive gear assembly<br />
with suitable puller.<br />
. When drawing out main drive gear assembly, be careful<br />
not to drop pilot bearing and baulk ring.<br />
5. Remove<br />
gear.<br />
rear side components on mainshaft and counter<br />
a. Release staking on countershaft<br />
loosen these nuts.<br />
nut and mainshaft nut and<br />
Mainshaft nut: Left-hand thread<br />
MT -11
Suitable puller<br />
SMT040B<br />
ST30031000<br />
SMT751A<br />
(J22912-01 )<br />
SMT384A<br />
DISASSEMBLY<br />
Gear Components (Cont'd)<br />
b. Pull out 0.0. counter gear with bearing with suitable puller.<br />
c. Draw out reverse counter gear and spacer.<br />
d. Remove snap rings from reverse idler shaft and draw out<br />
reverse idler gear, thrust washers and reverse idler gear<br />
bearing.<br />
e. Remove speedometer drive gear and steel ball.<br />
f. Remove snap ring and pull out overdrive mainshaft bearing,<br />
then remove snap ring.<br />
g. Remove mainshaft nut.<br />
h. Remove steel roller and washer.<br />
i. Remove roller bearing and washer.<br />
j. Remove 0.0. main gear, needle bearing and baulk ring (0.0.).<br />
k. Remove 0.0. coupling sleeve, shifting inserts and shifting<br />
insert springs.<br />
. I. Press out mainshaft and counter gear alternately.<br />
Makesure to alternate pressing of mainshaftand counter<br />
gear so as not to allow the frontsurface of one to contact<br />
the rear surface of the other.<br />
6. Remove front side components on mainshaft.<br />
a. Remove 1st gear washer and steel ball.<br />
b. Remove 1st main gear and 1st gear needle bearing.<br />
c. Press out 2nd main gear together with 1st gear bushing and<br />
1st & 2nd synchronizer assembly.<br />
d. Remove mainshaft front snap ring.<br />
MT-12
SMT385A<br />
SMT420A<br />
DISASSEMBLY<br />
Gear Components (Cont'd)<br />
e. Press out 3rd main gear together with 3rd & 4th synchronizer<br />
assembly and 3rd gear needle bearing.<br />
7. Remove main drive gear bearing.<br />
a. Remove main drive gear snap ring and spacer.<br />
b. Press out main drive gear bearing.<br />
MT -13
~<br />
Counter gear<br />
Shifting insert<br />
~<br />
SMT387A<br />
t<br />
~ 6<br />
SMT137<br />
SMT386A<br />
SMT550A<br />
-<br />
INSPECTION<br />
Shift Control Components<br />
. Check contact surface and sliding surface for wear,<br />
scratches, projections or other damage.<br />
Gear Components<br />
GEAR AND SHAFT<br />
. Check shafts for cracks, wear or bending.<br />
. Check gears for excessive wear, chips or cracks.<br />
SYNCHRONIZERS<br />
. Check spline portion of coupling sleeves, hubs and gears<br />
for wear or cracks.<br />
. Check baulk rings for cracks or deformation.<br />
. Check shifting inserts for wear or deformation.<br />
. Check insert springs for deformation.<br />
MT -14
SMT140<br />
bulk ring<br />
Inner<br />
\<br />
a. er<br />
2nd Inn<br />
baulk ring.<br />
. hr onizer cone<br />
~~r<br />
~<br />
ST30031000<br />
~Dial indicator<br />
(J22912-01) ST30031OO0<br />
SMT041 B<br />
(J22912-01 )<br />
Outer baulk ring<br />
~<br />
B<br />
Synchronizer cone<br />
2nd outer baulk ring<br />
Feeler gauge<br />
!5"<br />
""<br />
SMT042B<br />
SMT418A<br />
INSPECTION<br />
Gear Components (Cont'd)<br />
. Measure clearance between baulk ring and gear.<br />
Clearance between baulk ring and gear<br />
(1st, 3rd, main drive and O.D. baulk ring):<br />
Unit: mm (in)<br />
Dimension Standard Wear limit<br />
1st<br />
3rd and main drive<br />
a.D.<br />
1.2 - 1.6<br />
(0.047 - 0.063)<br />
1.2 - 1.6<br />
(0.047 - 0.063)<br />
1.2 - 1.4<br />
(0.047 - 0.055)<br />
0.8 (0.031)<br />
If the clearance is smaller than the wear limit, replace baulk ring.<br />
. Measure wear of 2nd baulk ring.<br />
a. Place baulk rings in position on synchronizer cone.<br />
b. While holding baulk rings against synchronizer cone as far<br />
as it will go, measure dimensions "A" and "B" Unit: mm (in)<br />
Dimension Standard Wear limit<br />
A<br />
B<br />
c. If dimension "A" or "B" is smaller than the wear limit,<br />
replace baulk ring.<br />
BEARINGS<br />
. Make sure bearings roll freely and are free from noise, crack,<br />
pitting or wear.<br />
MT -1 5<br />
0.6 - 1.1<br />
(0.024 - 0.043)<br />
0.7 - 0.9<br />
(0.028 - 0.035)<br />
0.2 (0.008)
Mainshaft ball bearing in adapter plate<br />
lJ') ST30720000<br />
( - )<br />
Counter rear bearing in adapter plate<br />
~"- ~ ~<br />
Upper<br />
~<br />
'*<br />
Front<br />
SMT028<br />
ASSEMBL Y<br />
Gear Components<br />
1. Install bearings into case components.<br />
2. Assemble adapter plate parts.<br />
. Install oil gutter on adapter plate and expand on rear side.<br />
. Install bearing retainer.<br />
a.. Insert reverse shaft, then install bearing retainer.<br />
b. Tighten each screw, then stake each at two points.<br />
MT-16
Hub Ind coupling .leeve<br />
CoupJ.ing sleeve<br />
SM T 426A<br />
1 ~Insert spring<br />
H<br />
~ j<br />
Front.id. SMT045B<br />
ASSEMBL Y<br />
Gear Components (Cont'd)<br />
3. Install main drive gear bearing.<br />
a. Press main drive gear bearing.<br />
b. Install main drive gear spacer.<br />
c. Select proper main drive gear snap ring to minimize clearance<br />
of groove and install it. .<br />
Allowable clearance of groove:<br />
0 - 0.13mm (0 - 0.0051 In)<br />
Main drive gear snap ring:<br />
Refer to S.D.S.<br />
4. Assemble synchronizers.<br />
. 1st & 2nd synchronizer<br />
. Check coupling sleeve and synchronizer hub orientation.<br />
MT -1 7
SMT046B<br />
SMT047B<br />
Coupling sleeve<br />
Synchronizer hub<br />
/<br />
/ ,<br />
( I<br />
~ - -,<br />
Shi~t~g}l!sert<br />
O.D. (5th) synchronizer<br />
hub SMT095A<br />
\ 1st gear<br />
thrust washer<br />
\ SMT752A<br />
ASSEMBL Y<br />
Gear Components (Cont'd)<br />
. 3rd & 4th synchronizer<br />
. 0.0. synchronizer<br />
5. Install front side components on main shaft.<br />
a. Assemble 2nd main gear, needle bearing and 1st & 2nd<br />
synchronizer assembly, then press 1st gear bushing on<br />
mainshaft.<br />
b. Install 1st main gear.<br />
MT -1 8
I<br />
ST33200000<br />
(J26082)<br />
KV31100401<br />
( - )<br />
I<br />
KV31100401<br />
( )<br />
\<br />
\<br />
SMT403A<br />
TM439<br />
Coupling sleeve<br />
Synchronizer hub<br />
/<br />
/ ,<br />
r I<br />
~ - --,<br />
Shi!ti~9_il}sert<br />
TM441<br />
ASSEMBL Y<br />
Gear Components (Cont'd)<br />
c. Install steel ball and 1st gear washer.<br />
Apply multi-purpose grease to steel<br />
washer before installing.<br />
ball and 1st gear<br />
6. Install mainshaft and counter gear on adapter plate and main<br />
drive gear on mainshaft.<br />
a. Press mainshaft assembly to adapter plate with Tool.<br />
b. Press counter gear into adapter plate with Tool.<br />
c. Install 3rd main gear and then press 3rd & 4th synchronizer<br />
assembly.<br />
. Pay attention to direction of 3rd & 4th synchronizer.<br />
d. Install thrust washer on mainshaft and secure it with<br />
mainshaft front snap ring.<br />
Select proper snap ring to minimize clearance of groove in<br />
mainshaft.<br />
Allowable clearance of groove:<br />
0 - 0.18mm (0 - 0.0071 in)<br />
Mainshaft front snap ring:<br />
Refer to S.D.S.<br />
e. Apply gear oil to mainshaft pilot bearing and install it on<br />
mainshaft.<br />
MT -1 9
KV311OO401<br />
( - ),<br />
Front.<br />
ST22360002<br />
(J25679-01 )<br />
KV311OO401<br />
( - )<br />
TM442<br />
SMT620A<br />
TM366<br />
TM443<br />
ASSEMBLY<br />
Gear Components (Cont'd)<br />
f. Press counter drive gear with main drive gear with Tool.<br />
. Pay attention to direction of counter drive gear.<br />
g. Install sub-gear components.<br />
(1) Install sub-gear and sub-gear bracket on counter drive gear<br />
and then select proper snap ring to minimize clearance of<br />
groove in counter gear.<br />
Allowable clearance of groove:<br />
0 - 0.18mm (0 - 0.0071 In)<br />
Counter drive gear snap ring: Refer to S.D.S.<br />
(2) Remove snap ring, sub-gear bracket and sub-gear from<br />
counter gear.<br />
(3) Reinstall sub-gear, sub-gear spring and sub-gear bracket.<br />
h. Install selected counter drive gear snap ring.<br />
i. Press counter gear front bearing onto counter gear.<br />
MT-20
-Front I I<br />
L-~<br />
0.0. 15thl synchronizer<br />
hub<br />
Gear bushing<br />
ST22520000<br />
IJ263481<br />
TM451<br />
SMT095A<br />
SMT531<br />
SMT043<br />
SMTOO3A<br />
ASSEMBL Y<br />
Gear Components (Cont'd)<br />
7. Install rear side components on mainshaft and counter gear.<br />
a. Install reverse idler gear to reverse idler shaft with spacers, .<br />
snap rings and needle bearing.<br />
b. Install insert retainer and 0.0. synchronizer to mainshaft.<br />
. Pay attention to direction of hub.<br />
c. Install 0.0. gear bushing with Tool.<br />
d. Install 0.0. main gear and needle bearing.<br />
e. Install spacer, reverse counter gear and 0.0. counter gear.<br />
. O.D. main gear and O.D. counter gear should be handled<br />
as a matched set.<br />
f. Install washer, roller bearing, steel roller and thrust washer.<br />
g. Tighten mainshaft lock nut temporarily.<br />
. Always use new lock nut.<br />
h. Install countershaft rear end bearing with Tool.<br />
8. Mesh 2nd and reverse gears, then tighten mainshaft lock<br />
nut with Tool.<br />
MT - 21
Tool c<br />
Torque wrench<br />
0.10 m'<br />
(0.33 ft) N.m<br />
(ft-lbI ~ 157(kg-m)<br />
(16)<br />
(110)<br />
147<br />
'" (15)<br />
::J<br />
co<br />
137<br />
i '" (100) f (14)<br />
a:<br />
'"<br />
SMTOO4A<br />
L m (ft)<br />
0.6 0.7 0.8<br />
. I I m<br />
(1.5) (2.0) (2.5) (h)<br />
L: Length of torque wrench<br />
Mainshaft Countershaft<br />
Fork rod<br />
(1st & 2nd)<br />
Fork rod<br />
(3rd & 4th)<br />
Interlock plunger<br />
Interlock<br />
ball<br />
SMT992<br />
SMT989<br />
ASSEMBLY<br />
Gear Components (Cont'd)<br />
. Use the left chart when deciding the reading torque.<br />
(Length of torque wrench vs. setting or reading torque)<br />
9. Tighten countershaft lock nut.<br />
. Always use new lock nut.<br />
10. Stake mainshaft lock nut and countershaft lock nut with a<br />
punch.<br />
11. Measure gear end play. For the description, refer to DIS-<br />
ASSEMBLY for Gear Components.<br />
Shift Control Components<br />
1. Install shift rods, interlock plunger, interlock balls and check<br />
balls.<br />
a. 1st-2nd shift fork<br />
MT-22
SMT990<br />
SMT991<br />
SMT791 A<br />
ASSEMBL V<br />
Shift Control Components (Cont'd)<br />
b. 3rd-4th shift fork<br />
c. a.D.-reverse shift fork or reverse shift fork.<br />
2. Install 0.0. and reverse fork shaft by rotating 0.0. and<br />
reverse bracket clockwise.<br />
3. Install E-ring on 0.0. and reverse fork rod.<br />
4. Install lever bracket securing bolt.<br />
MT-23
SMT036<br />
SMT013<br />
ASSEMBLY<br />
Case Components<br />
1. Install front cover oil seal.<br />
. Apply multi-purpose grease to seal lip of 011seal before<br />
installing.<br />
2. Apply sealant to mating surface of transmission case.<br />
3. Install gear assembly onto transmission case.<br />
4. Install snap ring of main drive bearing.<br />
5. Apply sealant to mating surface of adapter plate.<br />
6. Install rear extension.<br />
MT-24
A: Distance from bearing<br />
surface to transmission<br />
@ case<br />
1 Transmission case<br />
2 Counter gear front bearing<br />
3 Counter gear<br />
TM371<br />
SMT982<br />
ASSEMBL Y<br />
Case Components (Cont'd)<br />
7. Select counter front bearing shim.<br />
Counter front bearing shim: Refer to S.D.S.<br />
8. Install gasket and front cover.<br />
9. Install return spring plugs, check ball, return springs and<br />
select check plunger.<br />
10. Install control housing and gasket.<br />
MT-25
SERVICE DATA AND SPECIFICATIONS (S.D.S)<br />
General Specifications<br />
Transmission model FS5W71C<br />
Number of speeds 5<br />
Shift patern<br />
MT-26<br />
1 3 5<br />
I<br />
I.<br />
. 2 4 R<br />
Synchromesh type Warner<br />
Gear ratio 1st 3.321<br />
2nd 1.902<br />
3rd 1.308<br />
4th 1.000<br />
O.D. 0.759<br />
Reverse 3.382<br />
Number of teeth<br />
Mainshaft Drive 22<br />
1st 33<br />
2nd 27<br />
3rd 26<br />
O.D. 21<br />
Reverse 36<br />
Countershaft Drive 31<br />
1st 14<br />
2nd 20<br />
3rd 28<br />
O.D. 39<br />
Reverse 15<br />
Reverse idler gear 21<br />
Oil capacity Q (US pt, Imp pt) 2.4 (5-1/8, 4-1/4)<br />
Remarks<br />
Sub-gear 0<br />
Mainshaft braking<br />
mechanism<br />
Double baulk ring<br />
type synchronizer<br />
0<br />
2nd synchronizer
GEAR END PLAY<br />
SERVICE DATA AND SPECIFICATIONS (S.D.S)<br />
Gear End play mm (in)<br />
1st gear<br />
2nd gear<br />
3rd gear<br />
O.D. gear<br />
0.31 -0.41 (0.0122 -0.0161)<br />
0.11 -0.21 (0.0043 -0.0083)<br />
0.11 -0.21 (0.0043 -0.0083)<br />
0.24 - 0.41 (0.0094 - 0_01611<br />
CLEARANCE BETWEEN BAULK RING<br />
AND GEAR<br />
1st, 3rd, main drive and O.D. baulk ring<br />
1st<br />
3rd and main drive<br />
O.D.<br />
Inspection and Adjustment<br />
Unit: mm (in)<br />
Standard Wear limit<br />
1.2-1.6<br />
(0.047 - 0_063)<br />
1.2 - 1.6<br />
(0.047 - 0.0631<br />
1.2- 1.4<br />
(0.047- 0.055)<br />
0.8 (0.031)<br />
2nd baulk ring Unit: mm (in)<br />
Outer baulk ring<br />
AVAILABLE SNAP RINGS<br />
Main drive gear bearing<br />
B<br />
Inner baulk ring<br />
Synchronizer cone SMT0448<br />
Dimension Standard Wear limit<br />
A<br />
B<br />
Allowable clearance 0 - 0.13 mm (0 - 0.0051 in)<br />
Thickness mm (in) Part number<br />
1.73 (0.0681)<br />
1.80 (0.0709)<br />
1.87 (0.0736)<br />
1.94 (0.0764)<br />
2.01 (0.0791)<br />
2.08 (0.0819)<br />
0.6 - 1.1<br />
(0.024 - 0.043)<br />
0.7 - 0.9<br />
(0.028 - 0.035)<br />
32204-78005<br />
32204-78000<br />
32204-78001<br />
32204-78002<br />
32204-78003<br />
32204-78004<br />
0.2 (0.008)<br />
MT-27<br />
Mainshaft front<br />
Allowable clearance<br />
0 -0.18 mm (0 -0.0071 in)<br />
Thickness mm (in) Part number<br />
2.4 (0.094)<br />
2.5 (0.098)<br />
2.6 (0.102)<br />
Mainshaft rear end bearing<br />
32263-V5200<br />
32263-V5201<br />
32263-V5202<br />
Allowable clearance 0 - 0.14 mm (0 - 0.0055 in)<br />
Thickness mm (in) Part number<br />
1.1 (0.043)<br />
1.2 (0.047)<br />
1.3 (0.0511<br />
1.4 (0.055)<br />
Counter drive gear<br />
32228-20100<br />
32228-20101<br />
32228-20102<br />
32228-20103<br />
Allowable clearance 0 -0.18 mm (0 -0.0071 in)<br />
Thickness mm (in) Part number<br />
1.4 (0.055)<br />
1.5 (0.059)<br />
1.6 (0.063)<br />
AVAILABLE SHIMS<br />
Counter front bearing<br />
CD<br />
@<br />
TM371<br />
32215-E9000<br />
32215-E9001<br />
32215-E9002<br />
Unit: mm (in)<br />
A: Distance from bearing<br />
surface to transmission<br />
case<br />
1 Transmission case<br />
2 Counter gear front bearing<br />
3 Counter gear<br />
Thickness<br />
"A" Part number<br />
of shim<br />
4.52 -4.71 (0.1780 -0.1854) Not necessary<br />
4.42 -4.51 (0.1740 -0.1776)<br />
4.32 -4.41 (0.1701 -0.1736)<br />
4.22 -4.3110.1661 -0.1697)<br />
4.12 -4.21 (0.1622 -0.1657)<br />
4.02 -4.11 (0.1583 -0.1618)<br />
3.92 -4.01 (0.1543 - 0.1579)<br />
0.1 (0.004)<br />
0.2 (0.008)<br />
0.3 (0.012)<br />
0.4 (0.016)<br />
0.5 (0.020)<br />
0.6 (0.024)<br />
32218-V5000<br />
32218-V5001<br />
32218-V5002<br />
32218-V5003<br />
32218-V5004<br />
32218-V5005
CONTENTS<br />
AUTOMATICTRANSMISSION<br />
SECTIONAT /<br />
PREPARATION. . . . . . . . . . . . . . . . . . . . . . . . . . . . . . . . . . . . .-. . . . . . . . . . . . . . . . . . . .. AT- 2<br />
PRECAUTIONS. . . . . . . . . . . . . . . . . . . . . . . . . . . . . . . . . . . . . . . . . . . . . . . . . . . . . . . . .. AT- 3<br />
AfT CONTROL DIAGRAM AT- 4<br />
ON-VEHICLE SERVICE... . . . . . . . . . . . . . . . . . . . . . . . . . . . . . . . . .. . . . . . . . . . . . . . . AT- 7<br />
TROUBLE DIAGNOSES AT- 11<br />
REMOVAL AND INSTALLATION AT- 85<br />
MAJOR OVERHAUL " AT- 86<br />
DISASSEMBLY. . . ., . . . . . . . . . . . . . . . . . . . . . . . . . . . . . . . . . . . . . . . . . . . . . . . . . . . . . AT- 90<br />
REPAIR FOR COMPONENTPARTS. . . . . . . . . . . . . . . . . . . . . . . . . . . . . . . . . . . . . . . . AT-101<br />
ASSEMB LY . . . . . . . . . . . . . . . . . . . . . . . . . . . . . . . . . . . . . . . . . . . . . . . . . . . . . . . . . . . . . AT -146<br />
SERVICE DATA AND SPECIFICATIONS (S.D.S.) AT-165-<br />
When you read wiring diagrams:<br />
. Read GI section, "HOW TO READ WIRING DIAGRAMS".<br />
. See EL section, "POWER SUPPLY ROUTING.. for power distribution circuit.<br />
When you perform trouble diagnoses, read GI section, "HOW TO FOLLOW FLOW<br />
CHART IN TROUBLE DIAGNOSES".<br />
/ /
Tool number<br />
(Kent-Moore No.)<br />
Tool name<br />
ST2505S001<br />
(J25695-A)<br />
Oil pressure gaugeset<br />
CD ST25051001<br />
( - )<br />
Oil pressure gauge<br />
@ ST25052000 '<br />
( - )<br />
Hose<br />
CID ST25053000<br />
( - )<br />
Joint pipe<br />
@ ST25054000<br />
( - )<br />
Adapter<br />
CID ST25055000<br />
( - )<br />
Adapter<br />
ST07870000<br />
(J37068)<br />
Transmission case<br />
stand<br />
KV31102100<br />
(J37065)<br />
Torque converter oneway<br />
clutch check tool<br />
ST25850000<br />
(J25721-A)<br />
Sliding hammer<br />
KV31102400<br />
(J34285 and<br />
J34285-87)<br />
Clutch spring<br />
compressor<br />
ST33200000<br />
(J37067)<br />
Drift<br />
(J34291 )<br />
Shim setting gauge<br />
set<br />
,<br />
Description<br />
/f<br />
PREPARATION<br />
SPECIALSERVIC~ TOOLS<br />
/CD CID<br />
U!!<br />
~.:. ~<br />
" ~<br />
o/~~<br />
~,<br />
~<br />
0<br />
@<br />
----<br />
a: 60 mm (2.36 in) dia.<br />
b: 44.5 mm (1.752 in) dia.<br />
~ Ir;==:J<br />
~T~t~~<br />
1?1/li ~~<br />
AT-2<br />
Measuring line pressure<br />
Disassembling and assembling<br />
AfT<br />
Checking one-way clutch in<br />
torque converter<br />
Removing oil pump assembly<br />
Removing and installing clutch<br />
return springs.<br />
Installing oil pump housing<br />
oil seal<br />
Installing rear oil seal<br />
Selecting oil pump cover<br />
bearing race and oil pump<br />
thrust washer
.<br />
.<br />
.<br />
.<br />
.<br />
.<br />
~ <strong>Service</strong><br />
PRECAUTIONS<br />
Notice<br />
Before proceeding with disassembly, thorough- . It is very important to perform functional tests.<br />
Iy clean the outside of the transmission. It is whenever they are indicated.<br />
important to prevent the internal parts from . The valve body contains precision parts and rebecoming<br />
contaminated by dirt or other quires extreme care when parts are removed<br />
foreign matter. and serviced. Place removed parts in order on a<br />
Disassembly should be done in a clean work parts rack so they can be put back in the valve<br />
area. body in the same positions and sequences. Care<br />
Use lint-free cloth or towels for .wiping parts will also prevent springs and small parts from ~<br />
clean. Common shop rags can leave fibers that becoming scattered or lost.<br />
could interfere with the operation of the trans- . Properly installed valves, sleeves, plugs,~ will<br />
mission. slide along their bores in the valve body under<br />
When disassembling parts, place them in order their own weight.<br />
in a parts rack so that they can be put back . Before assembly, apply a coat of recommended<br />
into the unit in their proper positions. A.T.F. to all parts. Petroleum jelly may be<br />
All parts should be carefully cleaned with a - applied to O-rings and seals and used to hold<br />
general purpose, non-flammable solvent before small bearings and washers in place during reinspection<br />
or reassembly. assembly. Do not use grease.<br />
Gaskets, seals and O-rings should be replaced. Extreme care should be taken to avoid damage<br />
any time the transmission is disassembled. to O-rings, seals and gaskets when assembling.<br />
. After overhaul, refill the transmission with new<br />
A.T.F.<br />
AT-3<br />
~<br />
)
~ I<br />
~<br />
»<br />
I/)<br />
~<br />
~ - Co)<br />
m<br />
I<br />
/'011 ,<br />
[cooler<br />
~~~,~<br />
converter<br />
relielvalve /-<br />
L';;;'t<br />
lubrlcalion<br />
/<br />
L~r<br />
lubrication<br />
1<br />
1<br />
1<br />
I<br />
I<br />
I<br />
I<br />
I<br />
I<br />
I<br />
I<br />
I<br />
I ,<br />
'-<br />
II=::II"<br />
Modifier<br />
accunlulator<br />
I~'ve<br />
Ii Ii<br />
-- Feedback<br />
accumulator<br />
piston<br />
L -- - n -- J<br />
x<br />
9<br />
Pressure<br />
modifier<br />
valve<br />
Servo<br />
changer<br />
valve<br />
m,<br />
~~<br />
I<br />
~:~<br />
I Pilot valve<br />
I<br />
I<br />
I<br />
I<br />
I<br />
Lock-up<br />
solenoid<br />
g<br />
I=;<br />
~ r<br />
Line pressure<br />
solenolo<br />
II<br />
m<br />
"R" line pressure'<br />
check port<br />
JlIT:Jill:JUL<br />
J[<br />
--'~<br />
USh~<br />
solenOIOB<br />
-J~<br />
~~~~<br />
1m;~~oiO A<br />
II"Lr<br />
~ Z Overrun<br />
solenoid<br />
PRND21<br />
"~"<br />
w<br />
r~<br />
'<strong>Manual</strong> valve<br />
~~-<br />
i,'<br />
,
Vehicle signal<br />
Speed sensor Engine<br />
Overdrive<br />
switch<br />
Kickdown switch<br />
Power supply<br />
Idle switch<br />
Full-throttle<br />
switch<br />
Throttle sensor<br />
Engine rpm<br />
signal<br />
AfT CONTROL DIAGRAM<br />
r-----<br />
I<br />
I<br />
I<br />
I<br />
I<br />
I<br />
I<br />
I<br />
Electrical Control Chart<br />
- . Electrical singnal<br />
~ : Hydraulic pressure<br />
Vehicle signal<br />
AfT Overdrive off<br />
indicator lamp<br />
----------<br />
Inhibitor switch<br />
Fluid temperature<br />
. sensor<br />
Revolution<br />
sensor<br />
Shift solenoid A<br />
Shift solenoid B<br />
Overrun clutch<br />
solenoid<br />
lock-up solenoid<br />
Control signal'<br />
L__-- --------- - - - - _.~<br />
AfT control unit<br />
Mechnical Operation<br />
Band servo<br />
Shift Reverse High Forward Overrun<br />
position clutch clutch clutch clutch 2nd 3rd 4th<br />
apply release apply<br />
* 1. Operates when overdrive switch is set to "OFF".<br />
*2. Oil pressure is applied to both 2nd "apply" side and 3rd "release" side of band servo piston.<br />
"release" side is greater than that on the "apply" side, brake band does not contract.<br />
*3. Oil pressure is applied to 4th "apply" side in condition *2 above, and brake band contracts.<br />
*4. A/T will not shift to 4th when overdriveswitch isset to "OFF" position.<br />
0 . Operates.<br />
0 . Operates when throttle opening is less than 1/16. Engine brake activates.<br />
. . Operates during "progressive" acceleration.<br />
~ . Operates but does not affect power transmission.<br />
e . Operates4l/llhen throttle opening is less than 1/16 but does not affect engine brake.<br />
AT-5<br />
SAT8178<br />
Forward Low Low &<br />
one-way one-way reverse Lock-up Remarks<br />
clutch clutch brake<br />
p PARK<br />
R 0 0 REVERSE<br />
N<br />
1st<br />
D<br />
0<br />
.,<br />
. .<br />
NEUTRAL<br />
2nd *4<br />
3rd 0<br />
0<br />
0<br />
0<br />
*20 0<br />
.<br />
Automatic shift<br />
1-2-3-4<br />
4th<br />
1st<br />
0 0<br />
0<br />
*30 0 0<br />
. .<br />
0<br />
2<br />
1<br />
Automaticshift<br />
2nd 0 0 0 . 1-2<br />
1st 0 0 . 0 Locks (held sta-<br />
2nd 0 0 0 .<br />
tionary) in 1st<br />
speed 1 ..... 2<br />
However, because oil pressure area on the
~ I<br />
0)<br />
en<br />
:I><br />
j<br />
I\J<br />
C1<br />
III<br />
Lock-up piston<br />
Torque converter<br />
Converter housing<br />
Front planetary gear<br />
~<br />
Transmission case<br />
Brake band<br />
Rear planetary<br />
Forward<br />
gear<br />
clutch<br />
Reverse clutch<br />
Forward one-way clutch<br />
Overrun clutch<br />
Low & reverse brake<br />
Input shaft<br />
High clutch Low one-way clu<br />
\00 \0 \<br />
\<br />
010<br />
Oil pumlJ Control valve<br />
Outpu<br />
0<br />
/~
ON-VEHICLE SERVICE<br />
Control Valve Assembly and Accumulators<br />
Inspection<br />
1. Remove oil pan and gasket and drain A.T.F.<br />
2. Remove oil strainer.<br />
3. Remove control valve assembly by removing fixing bolts and<br />
disconnecting harness connector.<br />
Bolt length and location<br />
Bolt symbol Length mm (in) ""<br />
@<br />
37 (1.46)<br />
@<br />
50 (1.97)<br />
4. Remove solenoids and valves frbm valve body if necessary.<br />
5. Remove terminal cord assembly if necessary.<br />
6. Remove accumulator A, S, C and D by applying compressed<br />
. air if necessary.<br />
Hold each piston with rag.<br />
. 7. Reinstall any part removed.<br />
Always use new sealing parts.<br />
AT-7<br />
I
ON-VEHICLE SERVICE<br />
Revolution Sensor Replacement<br />
1. Remove rear engine mounting member from body panel<br />
while supporting AIT with jack.<br />
2. Lower AIT assembly as much as possible.<br />
3. Remove revolution sensor from AIT assembly.<br />
4. Reinstall any part removed.<br />
. Always use new sealing parts.<br />
Rear Oil Seal Replacement<br />
1. Remove propeller shaft from vehicle. - Refer to section PD.<br />
2. Remove rear oil seal.<br />
3. Install rear oil seal.<br />
. Apply A.T.F. before installing.<br />
4. Reinstall any part removed.<br />
Parking Components Inspection<br />
1. Remove propeller shaft from vehicle. - Refer to section PD.<br />
2. Remove rear engine mounting member from AIT assembly.<br />
AT-8<br />
'\
,\<br />
--1\<br />
SAT081B<br />
SAT133B<br />
Lock nut (!)<br />
Luck nut @<br />
SAT788B<br />
ON-VEHICLE SERVICE<br />
Parking Components Inspection (Cont'd)<br />
3. Remove rear extension from transmission case.<br />
4. Replace parking components if necessary.<br />
5. Reinstall any part removed.<br />
. Always use new sealing parts.<br />
Inhibitor Switch Adjustment<br />
1. Remove manual control<br />
assembly.<br />
linkage from manual shaft of AIT<br />
2. Set manual shaft of AIT assembly in "N" position.<br />
3. Loosen inhibitor switch fixing bolts.<br />
4. Insert pin into adjustment holes in both inhibitor switch and<br />
manual shaft of AIT assembly as near vertical as possible.<br />
5. Reinstall any part removed.<br />
6. Check continuity of inhibitor switch. - Refer to "Electrical<br />
Components Inspection".<br />
<strong>Manual</strong> Control Linkage Adjustment<br />
Move selector lever from "P" range to "1" range. Y~hould<br />
be able to feel the detents in each range.<br />
If the detents cannot be felt or the pointer indicating the range<br />
is improperly aligned, the linkage needs adjustment.<br />
1.<br />
2:<br />
Place selector lever in "P"<br />
Loosen lock nuts.<br />
range.<br />
3. Tighten lock nut @ until it touches trunnion pulling selector<br />
lever toward "R" range side without pushing button.<br />
4. Back off lock nut @<br />
specified torque.<br />
Lock nut:<br />
1 turn and tighten lock nut (!) to the<br />
~: 11 - 15 N.m (1.1 - 1.5 kg-m, 8 - 11 ft-Ib)<br />
5. Move selector lever from "P" range to "1" range. Make sure<br />
that selector lever can move smoothly.<br />
AT-9
NOTE<br />
ON-VEHICLE SERVICE<br />
AT-'O
TROUBLE DIAGNOSES<br />
Contents<br />
How to Perform Trouble Diagnoses for Quick and Accurate Repair AT-13<br />
Preliminary Check : AT-14<br />
AfT Electrical Parts Location AT-25<br />
Circuit Diagram for Quick Pin Point Check AT-27<br />
Wiring Diagram AT-28<br />
Self-diagnosis '''''''''''''' AT-30<br />
SELF-DIAGNOSTIC PROCEDURE AT-30<br />
JUDGEMENT OF SELF-DIAGNOSIS CODE : AT-32<br />
REVOLUTION SENSOR CIRCUIT CHECK """'"'''''''''''''''''''''''''''''''''''''''''''''''''''''''''''''''''''''''' AT-36<br />
SPEED SENSOR CIRCUIT CHECK ; AT-36<br />
THROTTLE SENSOR CIRCUIT CHECK AT-37<br />
SHIFT SOLENOID A CIRCUIT CHECK ( AT-38<br />
SHIFT SOLENOID B CIRCUIT CHECK j AT-39<br />
OVERRUN CLUTCH CIRCUIT CHECK AT-40<br />
LOCK-UP SOLENOID CIRCUIT CHECK AT-41<br />
FLUID TEMPERATURE SENSOR CIRCUIT AND A/T CONTROL UNIT<br />
POWER'SOURCE CIRCUIT CHECKS AT-42<br />
ENGINE REVOLUTION SIGNAL CIRCUIT CHECK AT-43<br />
LINE PRESSURE SOLENOID CIRCUIT CHECK ; AT-44<br />
INHIBITOR, OVERDRIVE, KICKDOWN AND IDLE SWITCH CIRCUIT CHECKS<br />
Diagnostic Procedure 1<br />
AT-45<br />
(SYMPTOM: 0.0. OFF indicator lamp does not come on for about 2 seconds<br />
when turning ignition switch to "ON".) AT-47<br />
Diagnostic Procedure 2<br />
(SYMPTOM: Engine cannot be 'Started with selector lever in "P" or "N" range or<br />
engine .can be started with selector<br />
Diagnostic Procedure 3<br />
lever in "0", "2", "1" or "R" range.) AT-48<br />
(SYMPTOM: Vehicle moves when it is pushed forward or backward<br />
with selector lever in "P" range.) """"""""""'" AT-48<br />
Diagnostic Procedure 4<br />
(SYMPTOM: Vehicle moves forward when setting "N"<br />
Diagnostic Procedure 5<br />
range.) AT-49<br />
(SYMPTOM: There is large shock when changing from "N"<br />
Diagnostic Procedure 6<br />
to "R" range.) AT-50<br />
(SYMPTOM: vehicle does not creep backward when selecting<br />
Diagnostic Procedure 7<br />
"R" range.) AT-51<br />
(SYMPTOM: Vehicle does not creep forward when selecting<br />
Diagnostic Procedure 8<br />
"0" , "2" and "1" range.) AT-52<br />
(SYMPTOM: Vehicle cannot be started from 01 on Cruise test-Part<br />
Diagnostic Procedure 9<br />
1.) """'''''''''''''''''''''''''''''''''' AT-53<br />
(SYMPTOM: A/T does not shift from 01 to 02 at specified speed.<br />
A/T does not shift from 04 to O2when depressing accelerator pedal fully at<br />
the specified speed.) . AT-54<br />
Diagnostic Procedure 10<br />
(SYMPTOM: A/T does not shift from 02 to 03 at the specified speed.)<br />
Diagnostic Procedure 11<br />
AT-55<br />
(SYMPTOM: A/T does not shift from 03 to 04 at the specified<br />
Diagnostic Procedure 12<br />
speed.) ""'"'''''''''''''''''''''''''''''''''''' AT-56<br />
(SYMPTOM: A/T does not perform lock-up<br />
Diagnostic Procedure 13<br />
at the specified speed.) AT-57<br />
(SYMPTOM: A/T does not hold lock-up condition<br />
Diagnostic Procedure 14<br />
for more than 30 seconds.) AT-58<br />
(SYMPTOM: Lock-up is not released when accelerator pedal is released.) ""'"'''''''''''''''''''''''''''''' AT-58<br />
AT-11
TROUBLE DIAGNOSES<br />
Contents (Cont'd)<br />
Diagnostic Procedure 15<br />
(SYMPTOM: Engine speed does not return to idle smoothly when AfT is shifted<br />
from D4 to D3with accelerator pedal released.<br />
Vehicle does not decelerate by engine brake when changing overdrive switch<br />
to "OFF" position with accelerator pedal released.<br />
Vehicle does not decelerate by engine brake when changing selector lever<br />
from "D" to "2" range with accelerator pedal released.) AT-59<br />
Diagnostic Procedure 16<br />
(SYMPTOM: Vehicle does<br />
Diagnostic Procedure 17<br />
not start from D1 on Cruise test - Part 2.) """""""""""'"'''''''''''''''''' AT-60<br />
(SYMPTOM: Vehicle does not shift from D4 on D3 when changing overdrive switch<br />
to "OFF" position.)<br />
Diagnostic Procedure 18<br />
""""""""""" "'"'''''''''''''''''''''''''''' """'"'''''''''''' """"'" AT-'60<br />
(SYMPTOM:AfT does not shift from D3on D2when changing selector lever<br />
from" D" to "2" range.)<br />
Diagnostic Procedure 19<br />
"""""""""" """'''''''' ""'''''''''''''''''''''' """""""""" AT-61<br />
(SYMPTOM: Vehicle does not shift from 22 on 11when changing selector lever<br />
from "2" to ",1" range.)<br />
Diagnostic Procedure 20<br />
"""" AT-61<br />
(SYMPTOM: Vehicle does not decelerate<br />
Electrical Components Inspection<br />
by enigne brake when shifting from 22 (12) to 1,.) AT-61<br />
AT-62<br />
Final Check """"""""""""""" . AT-68<br />
Symptom Chart ...<br />
AIT Shift Lock System<br />
""""""'" """"""""'" "" """"""""""""""<br />
,. ,<br />
AT-72<br />
AT-75<br />
SHIFT LOCK SYSTEM ELECTRICAL PARTS LOCATION AT-75<br />
CIRCUIT DIAGRAM FOR QUICK PIN POINT CHECK AT-76<br />
WIRING DIAGRAM<br />
DIAGNOSTIC PROCEDURE 1<br />
AT-77<br />
(SYMPTOM: Selector lever cannot be moved from "P" range when applying<br />
brake pedal or can be moved when releasing brake pedal.) AT-78<br />
DIAGNOSTIC PROCEDURE 2<br />
(SYMPTOM: Ignition key cannot be removed when selector lever is set to "P" position<br />
or can be removed when selector lever is set to any position except "P".) \ AT-80<br />
SHIFT LOCK CONTROL UNIT INSPECTION AT-82<br />
SHIFT LOCK CONTROL UNIT INSPECTION TABLE AT-83<br />
COMPONENT CHECK '"'''''''''''''''''''''''''''''''' '"'''''''' AT-84<br />
AT-12<br />
\
WORK FLOW<br />
r------<br />
I -- --~I<br />
I<br />
I<br />
I<br />
I<br />
I IIIIIIIIIIIIIIIIII<br />
L- --------- N.G.<br />
TROUBLE DIAGNOSES<br />
How to Perform Trouble Diagnoses for Quick<br />
and Accura,e Repair<br />
CHECK IN<br />
LISTEN TO CUSTOMER<br />
COMPLAINTS.<br />
CHECK A/T FLUID LEVEL<br />
AND CONDITION.<br />
. PERFORM ROAD TESTING.<br />
. PERFORM SELF-DIAGNOSIS.<br />
INSPECT MALFUNCTION ON<br />
THE BASIS OF EACH COM-<br />
PONENTS CONDITION.<br />
REPAI R/REPLACE.<br />
FINAL CHECK<br />
AT-13<br />
< Reference item<br />
AfT FLUID CHECK<br />
(SeepageAT-14.)<br />
ROAD TESTING<br />
(SeepageA T-15.)<br />
Self-diagnosis<br />
(See page AT-30.)<br />
Self-diagnosis<br />
(See page AT -30.)<br />
Diagnostic Procedure<br />
(See page AT -47.)<br />
Symptom Chart<br />
(SeepageAT -72.)<br />
Final Check<br />
(See page AT -68.)<br />
~<br />
Preliminary<br />
Check
~ 81<br />
~~ e<br />
~Q ~ SAT767B<br />
,<br />
SAT801A<br />
SA T638A<br />
TROUBLE DIAGNOSES<br />
Preliminary Check<br />
AIT FLUID CHECK<br />
Fluid leakage check<br />
1. Clean area suspected of leaking, - for example, mating<br />
surface of converter housing and transmission case.<br />
2. Start engine, apply foot brake, place selector lever in "0"<br />
range and wait a few minutes.<br />
3. Stop engine.<br />
4. Check for fresh leakage.<br />
Fluid condition check<br />
Fluid color Suspected problem<br />
Dark or black with burned odor Wear of frictional material<br />
Milky pink<br />
Varnished fluid, light to dark<br />
brown and tacky<br />
Fluid level check<br />
Refer to section MA.<br />
AT-14<br />
Water contamination<br />
- Road water entering through<br />
filler tube or breather<br />
Oxidation<br />
-<br />
-<br />
Over or under filling<br />
Overheating I
ROAD TEST PROCEDURE<br />
1. Check before engine is started.<br />
0<br />
I 2. Check at idle.<br />
I 3. Cruise test.<br />
0<br />
SAT786A<br />
SA T639A<br />
TROUBLE DIAGNOSES<br />
Preliminary Check (Cont'd)<br />
ROAD TESTING<br />
Description<br />
. The purpose of this road test is to determine overall<br />
performance of automatic transmission and analyze causes<br />
of problems.<br />
. The road test consists of the following three parts:<br />
1. Check before engine is started<br />
2. Check at idle<br />
3. Cruise test<br />
. Before road test, familiarize yourself with all test procedures<br />
and items to check.<br />
. Conduct tests on all items. Troubleshoot items which check<br />
out No Good after road test. Refer to "Self-diagnosis" and<br />
"Diagnostic Procedure".<br />
AT-15<br />
~
0<br />
fA<br />
SAT787A<br />
SA T768B<br />
SAT836B<br />
TROUBLE DIAGNOSES<br />
Preliminary Check (Cont'd)<br />
1. Check before engine is started<br />
0<br />
fA<br />
Park vehicle on flat surface.<br />
Move selector lever to "P"<br />
range.<br />
fir:)<br />
~<br />
IJ<br />
. Does O.D. OFF indicator lamp.<br />
come on for about 2 seconds?<br />
Yes<br />
Does O.D. OFF indicator lamp<br />
flicker for about 8 seconds?<br />
I<br />
No<br />
a:J\<br />
~<br />
Perform self-diagnosis.<br />
- Refer to SELF-DIAGNOSIS<br />
PROCEDURE and note N.G.<br />
items.<br />
Go to "ROAD TESTING<br />
- 2. Check at idle".<br />
AT-16<br />
Perform self-diagnosis. .<br />
- Refer to SELF-DIAGNOSIS<br />
PROCEDURE.<br />
--
0<br />
6<br />
BJ<br />
II<br />
m<br />
SA T787 A<br />
SAT7698<br />
SAT7708<br />
SA T7688<br />
SAT796A<br />
TROUBLE DIAGNOSES,<br />
Preliminary Check (Cont'd)<br />
2. Check at idle<br />
0 Park vehicle on flat surface.<br />
6 Move selector lever to "P" or<br />
"N" range.<br />
Is engine started? . Yes<br />
BJ<br />
Moveselector leverto "D", "1",<br />
"2" or "R" range.<br />
II Move selector lever to "P" range.<br />
~<br />
m<br />
Push vehicle forward or back-<br />
ward.<br />
Does vehicle move when it is<br />
pushed forward or backward?<br />
I<br />
No<br />
AT-17<br />
A<br />
N°I Go to Diagnostic Procedure 2.1<br />
Yes<br />
Yes<br />
Go to Diagnostic Procedure 2.<br />
Go to DiagnosticProcedure 3.
m<br />
fJ<br />
m<br />
m<br />
iii]<br />
Brake peda I<br />
Brake pedal<br />
For several seconds<br />
SAT771B<br />
SA T797 A<br />
SAT772B<br />
SAT799A<br />
SAT773B<br />
TROUBLE DIAGNOSES<br />
Preliminary Check (Cont'd)<br />
:A)<br />
~<br />
m Move selector lever to "N" range.<br />
I<br />
~."';"";"<br />
~t,ST<br />
~~<br />
Does vehicle move forward or<br />
backward?<br />
fJ [NO<br />
Appl'Y'foot brake.<br />
m<br />
Move selector lever to "R" range.<br />
Is there large shock when<br />
changing from "N" to "R"<br />
range?<br />
m No<br />
Release foot brake for several<br />
seconds.<br />
iii]<br />
Does vehicle creep backward<br />
when foot brake is released?<br />
Yes<br />
Move selector lever to "D", "1"<br />
and "2" range and check if<br />
vehicle creeps forward.<br />
Does vehicle creep forward in all<br />
three ranges?<br />
No<br />
I Go to Diagnostic.Procedure 7.<br />
AT-18<br />
Yes I Go to Diagnostic Procedure 4.1<br />
Yes<br />
I Go to Diagnostic Procedure 5.1<br />
Go to Diagnostic Procedure 6.<br />
I
\t half throttle open<br />
AfT<br />
~<br />
control~it terminal<br />
~<br />
\Atfull<br />
\throttleopen<br />
0<br />
~~I.J~<br />
II i]<br />
SAT802A<br />
Cruisetest - Part 1<br />
SAT779A<br />
-. SAT7748<br />
II<br />
SA T803A<br />
G<br />
SAT7758<br />
TROUBLE DIAGNOSES<br />
Preliminary Check (Cont'd)<br />
3. Cruise test<br />
. Check all items listed in Parts 1 through 3.<br />
. Throttle position can be controlled by voltage across termi-.<br />
nals (jJ)and @ of AfT control unit.<br />
0<br />
Warm up engine until engine oil<br />
and A.T. F. reach operating temperature<br />
after vehicle has been<br />
driven approx. 10 minutes.<br />
A.T.F. operating temperature:<br />
50 -80°C (122 -176°F)<br />
Park vehicle on flat surface. /<br />
II Set overdrive switch to "ON"<br />
ID<br />
II<br />
m<br />
position.<br />
Move selector lever to "P" range.<br />
~<br />
Move selector lever to "D" range.<br />
Accelerate vehicle by constantly<br />
depressing accelerator pedal halfway.<br />
Does vehicle start from D1?<br />
AT-19<br />
@<br />
Yes<br />
~<br />
Go to Diagnostic Procedure 8.
m 6<br />
8/8<br />
'll N<br />
0/8 .. , ..<br />
~~<br />
0/8 l~ ~I u ~l<br />
SAT805A<br />
IEm<br />
~ 81)<br />
1 1<br />
» T-------------<br />
0/8 0 If<br />
SA T806A<br />
IEII]<br />
8/8<br />
0/8<br />
("<br />
I<br />
I<br />
I<br />
~ 8,<br />
I<br />
,.. ,.."<br />
" ,..'"<br />
,.. ,..<br />
,..<br />
.,..<br />
...-<br />
...- ,..-<br />
,<br />
----<br />
(" -- --- --<br />
'I<br />
_..?l<br />
'I)<br />
II<br />
SAT804A<br />
m m<br />
8/811 II I U ?l<br />
O~O ~)<br />
SA T807 A<br />
TROUBLE DIAGNOSES<br />
Preliminary Check (Cont'd)<br />
~<br />
m ,...-<br />
Does AfT shift from D1 to D2<br />
at the specified speed?<br />
Specified speed when shifting<br />
from D1 to D2:<br />
Refer to Shift schedule.<br />
.<br />
Yes<br />
6<br />
Does AfT shift from D2 to D3<br />
at the specified speed?<br />
Specified speed when shifting<br />
from D2 to D3 :<br />
Refer to Shift schedule.<br />
Yes<br />
m.<br />
Does AfT shift from D3 to D4<br />
at the specified speed?<br />
Specified speed when shifting<br />
from D3 to D4 :<br />
Refer to Shift schedule.<br />
.<br />
Yes<br />
m<br />
Does AfT perform lock-up at<br />
the specified speed?<br />
Specified speed when lock-up<br />
occurs:<br />
Refer to Shift schedule.<br />
, Yes<br />
Does AfT hold lock-up condition<br />
for more than 30 seconds?<br />
IE I Yes<br />
m<br />
Release accelerator pedal.<br />
Is lock-up released when<br />
accelerator pedal is released?<br />
IE IYes<br />
I<br />
II]<br />
Decelerate vehicle by applying<br />
foot brake lightly.<br />
Does engine speed return to idle<br />
smoothly when AfT is shifted<br />
from D4 to D3 ?<br />
Yes<br />
I Stop vehicle.<br />
.<br />
I<br />
I Go to "Cruise test - Part 2".<br />
AT-20<br />
No Go to Diagnostic Procedure 9.<br />
Nb<br />
No<br />
Go to Diagnostic Procedure 10.<br />
Go to Diagnostic Procedure 11.<br />
No Go to Diagnostic Procedure 12.<br />
No<br />
No<br />
Go to Diagnostic Procedure. 13.<br />
Go to Diagnostic Procedure 14.<br />
Go to DiagnosticProcedure 15.<br />
~
SA T803A Hlilf-way<br />
6 8/8<br />
0/8<br />
II Accelerato~ pedal II<br />
8/8 I<br />
Release .!}<br />
m<br />
8/81,<br />
[;)6<br />
Accelerator<br />
pedal<br />
SAT808A<br />
O ta<br />
O-.!.:T 21W /<br />
Depress<br />
fully<br />
/<br />
/.<br />
Release<br />
------<br />
8/8 Sr- I~~j_._m__-<br />
--<br />
0/8 S~<br />
C -- n 1W<br />
SAT810A<br />
II<br />
~ ~<br />
03 04<br />
0» ~s<br />
SATB11A<br />
TROUBLE DIAGNOSES<br />
Preliminary Check (Cont'd)<br />
Cruise test - Part 2<br />
Confirm overdrive switch is in<br />
"ON" position.<br />
Confirm selector lever is in "D"<br />
range.<br />
0.<br />
Accelerate vehicle by half<br />
6<br />
II<br />
throttle again.<br />
Does vehicle start from D1 ?<br />
Yes<br />
Accelerate vehicle to A kmfh as<br />
shown in illustration.<br />
Release accelerator pedal and<br />
then quickly depress it fully.<br />
Does AfT shift from D4 to D2<br />
as soon as accelerator pedal is<br />
depressed fully?<br />
Yes<br />
m<br />
6<br />
Does AfT shift from D2 to D3<br />
at the specified speed?<br />
Specified speed when<br />
shifting from D2 to 03 :<br />
Refer to Shift schedule.<br />
Yes<br />
Release accelerator pedal after<br />
shifting from D2 to D3.<br />
Does AfT shift from D3 to D4<br />
and does vehicle decelerate by<br />
engine brake?<br />
Yes<br />
Stop vehicle.<br />
I Go to "Cruise test - Part 3".<br />
AT-21<br />
No . . .<br />
Go to Diagnostic Procedure 16.<br />
No Go to Diagnostic Procedure 9.<br />
No Go to Diagnostic Procedure 10.<br />
No ,+j Go to Diagnostic Procedure 11.<br />
/<br />
/
0<br />
fA<br />
I]<br />
"ED<br />
G) 6(;]<br />
.0<br />
SAT812A<br />
.'-<br />
@.<br />
SAT813A<br />
( D3 (O.D. OFF))<br />
Engine brake<br />
. @<br />
SAT776B<br />
CD3 (0.D.OFF0<br />
Engine brake<br />
m IIDII @<br />
,~ 0 ~<br />
~19 ~<br />
~ I @<br />
SAT777B<br />
....SAT778B<br />
TROUBLE DIAGNOSES<br />
Preliminary Check (Cont'd)<br />
Cruisetest- Part3<br />
Confirm overdrive switch is in<br />
"ON" position.<br />
Confirm selector lever is in "D"<br />
range.<br />
Accelerate vehicle using halfthrottle<br />
to D4.<br />
fA<br />
Release accelerator pedal.<br />
I]<br />
Set overdrive switch to "OFF"<br />
position while driving in D4<br />
range.<br />
II<br />
I<br />
Does AfT shift from D4 to D3 ?<br />
~ +- Yes<br />
Does vehicle decelerate by<br />
engine brake?<br />
m<br />
Yes<br />
Moveselector leverfrom "D" to<br />
"2" range while driving in D3.<br />
6 ~ Yes<br />
I<br />
Does AfT shift from D3 to 22 ?<br />
m<br />
m<br />
Yes<br />
Does vehicle decelerate by engine<br />
brake?<br />
Yes<br />
Move selector lever from "2" to<br />
. "1" range while ~riving in 22,<br />
II!]<br />
.<br />
Does AfT shift from 22 to 11<br />
range?<br />
Yes<br />
...<br />
Doe's vehicle decelerate by engine<br />
brake?<br />
Yes<br />
I Stop vehicle.<br />
!<br />
Perform self-diagnosis.- Refer<br />
to SELF-DIAGNOSISPRO-<br />
CEDURE.<br />
AT-22<br />
No Go to Diagnostic Procedure 17.<br />
No<br />
Go to Diagnostic Procedure 15.<br />
Go to Diagnostic Procedure 18.<br />
Go to Diagnostic Procedure 15.<br />
Go to Diagnostic Procedure 19.<br />
Go to Diagnostic Procedure 20.
Vehicle speed when shifting gears<br />
Throttle position<br />
Full throttle<br />
Half throttle<br />
Vehicle speed when performing and releasing<br />
lock-up<br />
TROUBLE DIAGNOSES<br />
Preliminary Check (Cont'd)<br />
Vehicle speed km/h (MPH)<br />
D, -+ D, D, -->D, D, -+ D. D. -+ D, D, -+ D. D, -+ D, 1, -+ 1,<br />
52 - 56 95 - 101 146 - 156 140 - 150 89 - 95 40- 44 53 - 57<br />
(32 - 35) (59 - 63) (91 - 97) (87 - 93) (55 - 59) (25- 27) (33 - 35)<br />
38 - 42 72 -78 111-121 55 - 65 33 - 39 10 - 14 53 - 57<br />
(24 - 26) (45-48) (69 -75) (34-40) (21 - 24) (6-9) (33 - 35)<br />
Throttle O.D. switch -<br />
Vehicle speed km/h (MPH)<br />
position [Shift range] Lock-up<br />
"ON"<br />
Lock-up<br />
"OFF"<br />
Full throttle<br />
Half throttle<br />
ON 146 - 156 140 - 150<br />
[D.] (91 - 97) (87 - 93)<br />
OFF 95 - 101 89 -95<br />
[D,] (59 - 63) (55 - 59)<br />
ON 112 - 120 102-110<br />
[D.] (70 -75) (63 - 68)<br />
OFF 76 - 84 71 - 79<br />
[D.] (47 - 52) (44-49)<br />
AT-23<br />
\
Shift schedule (Overdrive ON)<br />
8/8 I<br />
,<br />
7/8<br />
0<br />
~<br />
(0)<br />
Kickdownrange<br />
I<br />
6/8 I- I<br />
I<br />
1--r-2<br />
g> 5/8<br />
'c<br />
CD<br />
8- 4/8<br />
CD<br />
t:<br />
.c e 3/8<br />
I-<br />
2/8 I-<br />
I<br />
I<br />
I<br />
I<br />
I<br />
I<br />
I<br />
L-.I<br />
I<br />
/<br />
I<br />
I<br />
I<br />
/,<br />
/<br />
/<br />
1/81-<br />
0/8<br />
I<br />
I<br />
I<br />
10 20 30 40 50 60 70 80<br />
r L, I r ~ +<br />
(10) (20) (30) (40) (50)<br />
Shift schedule (Overdrive OFF)<br />
8/8. I Kickdownrange<br />
7/8 ,<br />
I<br />
6/81-- I<br />
I<br />
I<br />
""<br />
c:<br />
6/8 1-;-2<br />
'c I<br />
CD<br />
8- 4/8 I<br />
CD<br />
.. I /<br />
e 3/8 I I<br />
.c<br />
I- I I<br />
I<br />
2/8 L_I<br />
/<br />
/,<br />
1/8I-<br />
0/8<br />
I<br />
I<br />
II<br />
TROUBLE DIAGNOSES<br />
Preliminary Check (Cont'd)<br />
Upshift<br />
---- - Downshift<br />
90 100<br />
. I'<br />
110<br />
"<br />
120<br />
'<br />
130<br />
.'<br />
140<br />
"<br />
150<br />
'<br />
160<br />
I<br />
170<br />
','<br />
180 190<br />
, ,<br />
200<br />
'<br />
(60) (70) (80) (90) (100) (110) (120)<br />
Vehicle speed km/h (MPH)<br />
Lock~p "ON"<br />
0<br />
I<br />
10<br />
'<br />
20<br />
,<br />
'<br />
30<br />
"<br />
40<br />
I<br />
60<br />
'<br />
I<br />
60<br />
'<br />
,<br />
70<br />
'<br />
80<br />
I<br />
90<br />
"<br />
100<br />
I<br />
110<br />
'<br />
r<br />
120<br />
I<br />
130<br />
I<br />
I<br />
(0) (10) (20) (30) (40) (60) (60) (70) (80)<br />
Vehicle speed km/h (MPH)<br />
AT-24<br />
Upshift<br />
- -- -- Downshift<br />
SAT804B<br />
140 160 160 170 180 190 200<br />
" ' I I I' " '<br />
(90) (100) (110) (120)<br />
SA T805B
( Control valve<br />
upper body<br />
)<br />
TROUBLE DIAGNOSES.<br />
AIT Electrical Parts Location<br />
AT-25<br />
SAT806B
switch<br />
~1;Inhibitor<br />
~ harness connectorrf'<br />
:. AfT solenoid<br />
,:;?harness connector<br />
~ 0<br />
~~<br />
TROUBLE DIAGNOSES<br />
AfT Electrical Parts Location (Cont'd)<br />
AT -26<br />
SAT8258
~ I<br />
N<br />
......<br />
I/)<br />
»<br />
-I<br />
00<br />
-w<br />
00<br />
a@0~<br />
we<br />
~(t)<br />
s~<br />
@~<br />
0 [SIEE]<br />
0 ffiHBJ<br />
O. D. OFF<br />
INDICATOR<br />
~v.XcgONTROL<br />
S E!!3 ION IOFF<br />
6<br />
8<br />
9<br />
lGNI TI ON SWITCH<br />
ON or START<br />
INHIBITOR<br />
SWITCH<br />
26 19 20 I 2<br />
23 7<br />
@; @)<br />
-= -=<br />
A-(")<br />
01 6 @<br />
m ~<br />
-i<br />
(")<br />
:I<br />
@ @<br />
35213<br />
'211215<br />
."<br />
r<br />
db<br />
m<br />
:u<br />
c -0 -i<br />
@I m<br />
::I<br />
"lJ<br />
m<br />
:u<br />
»<br />
@T 2:u m<br />
<<br />
0<br />
r<br />
c<br />
-i -<br />
0<br />
Z<br />
(fI<br />
m<br />
r.-:1t; 0<br />
I 1;U<br />
(fI<br />
m<br />
Z<br />
(fI<br />
0<br />
;U<br />
I<br />
I -<br />
r<br />
I<br />
I<br />
24 29 30 28 12 16<br />
A/T CONTROL UNIT<br />
@<br />
crb<br />
THROTTLE<br />
SENSOR<br />
15 10<br />
36 35 22 21 34<br />
,/<br />
@!j ~ IGNITION COIL<br />
To distributor<br />
@~<br />
.:;;<br />
~c<br />
..-<br />
0<br />
:r..<br />
-or<br />
,<br />
Q<br />
..<br />
..<br />
(fI<br />
:I -." @<br />
(fI<br />
:I - ."<br />
@<br />
r<br />
0<br />
(")<br />
A<br />
@<br />
0<br />
<<br />
m<br />
;U<br />
;U<br />
C<br />
Z<br />
r-<br />
Z<br />
m<br />
"lJ<br />
;U<br />
(")<br />
-i<br />
(fI<br />
0<br />
r<br />
m<br />
Z<br />
0 - 0<br />
tD<br />
-i<br />
(fI<br />
0<br />
r<br />
m<br />
Z<br />
-0 0<br />
»<br />
I<br />
C<br />
"lJ<br />
(fI<br />
0<br />
r<br />
m<br />
Z- 0<br />
0<br />
r<br />
C<br />
-i<br />
(")<br />
:I<br />
(fI<br />
0<br />
r<br />
m<br />
Z<br />
0<br />
@<br />
m<br />
(fI<br />
(fI<br />
C<br />
;U<br />
m<br />
(fI<br />
0<br />
r<br />
m<br />
Z<br />
0<br />
-= -= -= -=<br />
0<br />
-=<br />
0<br />
-.<br />
POWER<br />
TRANSISTOR<br />
@crb<br />
-=<br />
17 4<br />
33<br />
r-<br />
@<br />
6<br />
7<br />
COMBINATION METER<br />
ELECTRIC<br />
SPEED-<br />
OMETER<br />
[Jffi@II] [J-t-W.H-t-j]~<br />
~~ll~o~~<br />
" , co ID<br />
>->- >-<br />
IGNITION SWITCH<br />
ON or START<br />
Vi<br />
(J nstrument harness)<br />
@<br />
11S-L<br />
1-W<br />
3- Y/R<br />
18-L/OR<br />
21-8 -<br />
28-W/L<br />
29-8<br />
2D-W<br />
32-Y/G<br />
33-Y/W<br />
37-LG/R<br />
44-Y<br />
E. C. C. S.<br />
CONTROL UNIT<br />
(Refer to "E. C. C. S.<br />
SYSTEM" In<br />
EF&EC sect Ion. )<br />
@)ii<br />
24<br />
ENGINE<br />
GROUND<br />
TROUBLE DIAGNOSES<br />
Wiring Diagram<br />
IGNITION SWITCH<br />
ON or START<br />
12<br />
28 HEAD-UP<br />
CONTROL<br />
DI SPLA Y<br />
UNIT<br />
:::::::::::::<br />
GD<br />
~ @<br />
~<br />
f)3\ I FUSE BLOCK<br />
\.!::.J co (Refer toP POWER ;;:~<br />
SUPPLY ROUTINGp co",<br />
co -'III I in EL section.)<br />
III'<br />
>-<br />
co "<br />
>->-<br />
Y/G Y/G.<br />
II@<br />
Y/8 o. Y/8.<br />
Y/L Y/L.<br />
G G<br />
MIh i te)<br />
C?JI~<br />
(Black)<br />
@IIIII~I~<br />
--_n<br />
nn<br />
:1 , : ,<br />
,"<br />
_n n_n_' '<br />
nn__nn_n<br />
" "<br />
,<br />
'<br />
, ,<br />
n_nnnn-<br />
1111<br />
, 1 ~<br />
-,<br />
.<br />
"<br />
,<br />
" , ,<br />
" ,<br />
,<br />
,<br />
,<br />
,<br />
,<br />
, ,<br />
,<br />
,<br />
'"<br />
I<br />
~<br />
I 0<br />
co<br />
~<br />
@ 11111~11IIl<br />
~@)<br />
00<br />
III ~ I~ ~ : co<br />
..JID~ bJ~@)<br />
~@)<br />
~<br />
POWER<br />
RESISTOR<br />
TRANSISTOR<br />
To distributor<br />
AT-28<br />
co<br />
~<br />
O. D.<br />
CONTROL<br />
SWITCH<br />
n<br />
Effi<br />
0EW '"<br />
ID'<br />
co<br />
iii<br />
@jj)fi@}}<br />
BODY<br />
GROUND<br />
co , co ,<br />
@) ..J>->- @ ..J~ID @ III..J<br />
$.~ ~<br />
~" ~ m<br />
KICK-<br />
O. D. OFF DOWN<br />
I NDI CATOR SWITCH<br />
~t;J @)~<br />
@~ '"<br />
co, co<br />
~<br />
..<br />
.. ..<br />
IDIII<br />
L<br />
@fi~<br />
- -<br />
BODY<br />
GROUND<br />
(E. F. 1. harness) @<br />
L -{]II<br />
I<br />
LG/R<br />
Y/W<br />
Y/G<br />
W/L<br />
8<br />
LG/8<br />
L<br />
Y/R<br />
@<br />
::><br />
...<br />
c - THROTTLE ENGI NE<br />
SENSOR TEMPERA TURE<br />
THROTTLE<br />
VALVE<br />
SWITCH<br />
SENSOR
-5B<br />
-G/R<br />
-G/R<br />
-R/B<br />
-G/L<br />
-Y/B<br />
-Y/L<br />
@ S. M. J.<br />
!Refer to<br />
(Fo Idout<br />
REVOLUTI ON<br />
SENSOR<br />
b<br />
"'''' .E~~E<br />
! ~<br />
TROUBLE DIAGNOSES<br />
Wiring Diagram (Cont'd)<br />
- -<br />
DROPPING<br />
RESISTOR<br />
A/T CONTROL UNIT<br />
@m :Wlth head-up display<br />
~ :Wlthout head-up display<br />
~ :Wlth anti-lock braking<br />
system<br />
~ :Wlthout anti-lock braking<br />
system<br />
in!<br />
@)~@I~II~I<br />
~ ~ E. '" EE~<br />
I ~~'~E'" ~ L'~"" """"~L"'''''''~''<br />
~ 1 a . a.. ..a E"''''o ~~L~~"<br />
B9<br />
B7<br />
CB<br />
AB<br />
ClD<br />
Hll<br />
111<br />
5B<br />
G/R<br />
G/R<br />
R/B<br />
G/L<br />
Y/B<br />
Y/L<br />
(@)<br />
last page<br />
page). )<br />
1'i"W (Eng Ine room<br />
~ harness)<br />
a:::J- L<br />
ILG/R<br />
Y/W<br />
. Y/B<br />
W/L<br />
B<br />
LB/B<br />
L<br />
(§)<br />
Y/R<br />
J<br />
L___n_-- -<br />
......<br />
".....<br />
l6!B@)<br />
~(@)<br />
......<br />
".....<br />
(EngI ne ess room no. 2)<br />
harn Y/L-Lh<br />
Y/B-G"<br />
(@)<br />
@)!i@)<br />
€==O<br />
BODY GROUND<br />
AT-29<br />
SPEED<br />
SENSOR<br />
,@)<br />
...<br />
L' E0<br />
I<br />
BRG/W<br />
BR<br />
G/W<br />
BR<br />
G/L<br />
G/B<br />
(ill)<br />
To back-up lamp<br />
INHIBITOR SWITCH<br />
=...<br />
=N<br />
=0<br />
=0..<br />
@)<br />
I<br />
G~W<br />
rJil ~~!~Dr<br />
@ lJU<br />
i i<br />
GY<br />
P/L<br />
OR/L R<br />
B B<br />
PU W<br />
GY/R L<br />
L/Y Y<br />
L/W G<br />
=Z '---<br />
(Subharness)<br />
:;a "E ..<br />
~ ~ ~ ~<br />
~<br />
It:<br />
0<br />
U)<br />
-= -= -= Z<br />
1: UI<br />
U UI U)<br />
I- It:<br />
::I ::I W<br />
..J < m U) It:<br />
U U) 0::1<br />
0 0 0 0 UlO ...1n....<br />
z... ... ... It:... ::1<<br />
::10 ::10 0 0 0..0 ..J1t:<br />
IZ It:Z I-Z I-Z Z U.UI<br />
)lUl It:W U.UI u.w UIUI a..<br />
u..J UI..J .....J .....J Z..J 1-:1:<br />
'")0 >0 1:0 1:0 ...0<br />
'JI OU) U)U) U)U) ..JU)<br />
SAT101C<br />
I
0<br />
~-<br />
(g<br />
m<br />
6<br />
m<br />
II<br />
m<br />
m<br />
SAT774B<br />
SAT779B<br />
-CD SA T780B<br />
#~ 0 ~~<br />
..&\ OVER DRIVE,<br />
I . \ 'ON OOFF<br />
~ I."<br />
m<br />
Depress<br />
Accelerator pedal<br />
;;;:<br />
Release<br />
SAT781 B<br />
SAT754A<br />
TROUBLE DIAGNOSES<br />
Self-diagnosis<br />
SELF-DIAGNOSTIC PROCEDURE<br />
0<br />
DIAGNOSIS START<br />
Start engine and warm it up to normal engine operating temperature.<br />
fa<br />
, Set overdrive switch in "ON" position.<br />
PJ<br />
Move selector lever to "P" range.<br />
I]<br />
fifif:j<br />
~<br />
Does 0.0. OFF indicator lamp come on for about 2 seconds?<br />
~. i.<br />
.'<br />
. ~<br />
Yes fNo<br />
' ' I I Go to Diagnostic Procedure 1.1<br />
Move selector lever to "0" range.<br />
II Set overdrive switch in "OFF" position.<br />
m<br />
fifif:j<br />
~<br />
Wait for more than 2 seconds<br />
after ignition switch "ON".<br />
~ve selector lever to "2" range.<br />
fit Set overdrive switch in "ON" position.<br />
6<br />
Move selector<br />
m<br />
lever to "1" range.<br />
Set overdrive switch in "OF F" position.<br />
m<br />
Depress accelerator pedal fully and release it.<br />
AT-30<br />
@
II!]<br />
~-<br />
SAT782B<br />
TROUBLE DIAGNOSES<br />
Self-diagnosis (Cont'd)<br />
A<br />
II!]<br />
. Set overdrive switch in "ON" position.<br />
Check O.D. OFF indicator lamp.<br />
Refer to JUDGEMENTOF SELF-DIAGNOSISCODEon next page.<br />
DIAGNOSIS END<br />
AT-31<br />
I<br />
'---
TROUBLE DIAGNOSES<br />
Self-diagnosis (Cont'd)<br />
JUDGEMENT OF SELF-DIAGNOSIS CODE.<br />
0.0. OFF indicator lamp:<br />
,& OlD<br />
//1\' OFF<br />
Self-diagnosis<br />
start<br />
All judgement flickers are same.<br />
I<br />
Start -- signal - 1Q-judgement - flickers- - Light<br />
f--<br />
- -<br />
tl t, t,t, t, t, t, t, t, t, t, t,<br />
~~ OlD<br />
//1\ OFF<br />
~()~ OlD<br />
//1\' OFF<br />
Shade<br />
SAT723B<br />
1st judgement flicker is longer than<br />
others.<br />
--,..--- - --<br />
r-- -- \<br />
Lig ht<br />
Shade<br />
SAT724B<br />
2nd judgement flicker is longer than<br />
others.<br />
- - .....--.- - - Light<br />
1---1- ,-' Shade<br />
~).l(~ OlD<br />
/)r\' OFF<br />
SAT726B<br />
3rd judgement flicker is longer than<br />
others.<br />
--- R-M-.- - - Light<br />
- Shade<br />
tl =2.5 seconds t2 =2.0 seconds t3 =1.0 second<br />
\<br />
SA T726B<br />
AT-32<br />
Damaged circuit<br />
All circuits that can be confirmed by self-diagnosis are<br />
O.K.<br />
Revolution sensor circuit is short-circuited or disconnected.<br />
16 15<br />
Arr control unit<br />
Revolution sensor<br />
.. Go to REVOLUTION SENSOR CIRCUIT CHECK.<br />
SAT140B<br />
Speed sensor circuit is short-circuited or disconnected.<br />
24<br />
Arr control unit<br />
Speed sensor<br />
.. Goto SPEEDSENSORCIRCUITCHECK. SAT760A<br />
Throttle sensor circuit is short-circuited or disconnected.<br />
..<br />
Throttle sensor<br />
15 11 10<br />
AfT control unit<br />
Goto THROTTLESENSORCIRCUITCHECK'sAT761A<br />
.",.
O.D. OFF indicator lamp:<br />
4th judgement flicker is longer than<br />
others.<br />
~()~ OlD<br />
/11\' OFF<br />
Self-diagnosis<br />
start<br />
TROUBLE DIAGNOSES<br />
- -- Light<br />
Self-diagnosis (Cont'd)<br />
- Shade<br />
5th judgement flicker is longer than<br />
others.<br />
':()/ OlD<br />
:;/1\' OFF<br />
- - - - - Light<br />
--<br />
'<br />
- Shade<br />
SA T727 B<br />
SAT728B<br />
6th judgement flicker is longer than<br />
others.<br />
,\I~ OlD<br />
:;g, OFF<br />
----- --- Light<br />
- - \<br />
- Shade<br />
SA T729B<br />
7th judgement flicker is longer than<br />
others.<br />
~~ OlD<br />
//1\' OFF<br />
--<br />
---<br />
\<br />
-- Light<br />
- Shade<br />
SAT730B<br />
AT-33<br />
Damagedcircuit<br />
Shift solenoid A circuit is short-circuited or disconnected.<br />
35<br />
Shift solenoid A<br />
Terminal<br />
cord<br />
assembly<br />
A/T control unit<br />
.Go to SHIFT SOLENOID A CIRCUIT CHECK.<br />
SAT766A<br />
Shift solenoid B circuit is short-circuited or disconnected. -----<br />
Shift solenoid B<br />
Terminal<br />
cord assembly<br />
36<br />
Arr control unit<br />
.Go to SHIFT SOLENOID B CIRCUIT CHECK.<br />
SAT767A<br />
Overrun clutch solenoid circuit is short-circuited or disconnected.<br />
Overrunclutch<br />
solenoid<br />
21<br />
Arr control unit<br />
Terminal cord<br />
assembly<br />
.Go to OVERRUN CLUTCHSOLENOID<br />
CIRCUIT CHECK.<br />
-=<br />
SAT768A<br />
Lock-up solenoid circuit is short-circuited or disconnected.<br />
Look-up<br />
solenoid<br />
22<br />
Terminal<br />
Arr control unit<br />
cord assembly -=<br />
.Go to LOCK-UPSOLENOID CIRCUIT CHECK.<br />
SAT769A
t4 = 1.0 second<br />
0.0. OFF indicator lamp:<br />
8th judgement flicker is longer than<br />
others.<br />
\ II<br />
..:xk OlD<br />
/11\ OFF<br />
Self-diagnosis<br />
start<br />
TROUBLE DIAGNOSES<br />
Self-diagnosis (Cont'd)<br />
-- - Light<br />
Shade<br />
9th judgement flicker is longer than<br />
others.<br />
,\1// OlD<br />
-0-<br />
//1\' OFF<br />
- -....--.- - - Light<br />
~- +-Shade<br />
SAT731 B<br />
SAT733B<br />
10th judgement flicker is longer than<br />
others.<br />
..:::()~ OlD<br />
/11\' OFF<br />
- - ...--.- - Light<br />
I ' 4-- Shade<br />
Flickers as shown below:<br />
~O/D<br />
~' OFF<br />
t.<br />
- Light<br />
- - Shade<br />
SAT732B<br />
SAT734B<br />
AT-34<br />
Damaged circuit<br />
Fluid temperature sensor is disconnected or AfT control<br />
unit power source circuit is damaged.<br />
Terminal cord<br />
assembly<br />
..<br />
Go to FLUID TEMPERATURE SENSOR CIRCUIT<br />
AND AfT CONTROL UNIT POWER SOURCE CIRCUIT<br />
CHECK. SAT143B<br />
Engine revolution signal circuit is short-circuited or disconnected.<br />
..<br />
Resistor<br />
25<br />
AfT control unit<br />
Go to ENGINE REVOLUTION SIGNAL CIRCUIT<br />
CHECK. SAT624B<br />
Line pressure solenoid circuit is short-circuited or disconnected.<br />
~ Line p~essure<br />
solenoid<br />
Terminal<br />
cord<br />
assembly<br />
34 33<br />
AfT control unit<br />
Dropping<br />
resistor<br />
.. Go to LINE PRESSURE SOLENOID CIRCUIT<br />
CHECK. SAT776A<br />
Battery power is low.<br />
Battery has been disconnected for a long time.<br />
Battery is connected conversely.<br />
(When reconnecting AfT control unit connectors. - This<br />
is not a problem.)
)<br />
\<br />
O.D. OFF indicator lamp:<br />
Does not come on.<br />
0 010<br />
OFF<br />
Self-cliagnosls<br />
start<br />
- - - - - - - - - - -.- - - Light<br />
TROUBLE DIAGNOSES<br />
--- Shade<br />
Self-diagnosis (Cont'd)<br />
SAT157C<br />
AT-35<br />
Dama~ed circuit<br />
Inhibitor switch, overdrive switch, kickCtownSWltchOT<br />
idle switch circuit isdisconnected or AIT control unit is<br />
damaged.<br />
Over- ION<br />
drive<br />
switch<br />
-<br />
Throttle<br />
valve<br />
switch<br />
Kickdown<br />
switch.<br />
.
m<br />
-=-<br />
PI<br />
.-~<br />
-~,<br />
/<br />
00<br />
16 15<br />
Arr control unit<br />
Revolution sensor<br />
Speed<br />
sensor<br />
24<br />
A/T contrOl unit<br />
-=<br />
SAT140B<br />
SAT737B<br />
SA T738B<br />
TROUBLE DIAGNOSES<br />
PI<br />
Self-diagnosis (Cont'd) .<br />
REVOLUTIONSENSORCIRCUIT CHECK<br />
CHECK REVOLUTION<br />
SENSOR.- Refer to "Electrical<br />
.Components Inspection".<br />
O.K.<br />
PI<br />
CHECK INPUT SIGNAL.<br />
1. I<br />
~f" .' .-'<br />
trJ<br />
t:;! ST '<br />
I' ~ I!<br />
",:"",.,. , >}<br />
2. Check voltage between A/T<br />
control unit terminal @ and<br />
ground while driving. .<br />
~Measure with A.C. range.)<br />
Voltage:<br />
At Okm/h (0 MPH): OV<br />
At 30 km/h (19 MPH):<br />
1V or more<br />
(Voltage rises gradually in<br />
response to vehicle speed)<br />
O.K.<br />
Perform self-diagnosis again after<br />
driving for a while.<br />
.O;K.<br />
INSPECTION END<br />
SPEED SENSOR CIRCUIT CHECK<br />
CHECK INPUT SIGNAL.<br />
1.<br />
'(,~I<br />
~I<br />
2.' Check voltage between A/T<br />
control unit terminal @ and<br />
ground while driving at 2 to 3<br />
km/h (1 to 2 MPH)for 1 m<br />
(3 ft) or more.<br />
Voltage: Varies from OV<br />
, t05V<br />
---.-- O.K.<br />
Perform self-diagnosis again after<br />
driving for a while.<br />
. O.K.<br />
INSPECTION END<br />
AT-36 .<br />
N.G.<br />
N.G.<br />
N.G.<br />
Repair or replace revolution<br />
sensor.<br />
Check the following .items.<br />
. Harnesscontinuitybetween<br />
A/T control unit and revolution<br />
sensor (Main hamess)<br />
. Harnesscontinuitybetween<br />
revolution sensor andE.C.U.<br />
(Mainharness)<br />
. Ground circuit for E.C.U.<br />
- Refer to section EF & EC.<br />
1. Perform A/T control unit<br />
input/output signal inspecti~n.<br />
2. If N.G., recheck AfT control,<br />
unit pin terminals for damage<br />
or connection of A/T cORtrol<br />
unit harness connector.<br />
N.G. Check the following items.<br />
. Speed sensor and ground<br />
circuit for speed sensor<br />
- Refer to section El.<br />
. Harnesscontinuity between<br />
A/T control unit and speed<br />
sensor (Main harn,ss)<br />
N.G.<br />
1. Perform A/T controlu~it<br />
input/output signal inspection.<br />
2. If N.G., recheck AfT control<br />
unit pin terminals for damage<br />
or connection of A/T control<br />
unit harness connector.<br />
'/<br />
"
II<br />
[iI<br />
COllET<br />
£)<br />
Throttle sensor<br />
15 11 10<br />
AfT control unit<br />
";"<br />
SAT761A<br />
SA T739B<br />
TROUBLE DIAGNOSES<br />
Self-.diagnosis .(Cont'd)<br />
-THROTTLESENSOR CIRCUIT CHECK<br />
Perform self-diagnosis(Mode N.G. Check throttle sensor circuit for<br />
III) for engine control. engine control. - Refer to sec-<br />
O.K.<br />
tion EF & EC.<br />
II<br />
I ~<br />
CHECK INPUT SIGNAL.<br />
1.1 13<br />
2. Check voltage between AlT<br />
controlunit terminals @ and<br />
@ while accelerator pedal is<br />
depressed slowly.<br />
Voltage:<br />
Fully-closed throttle:<br />
0.2-0.6V<br />
Fully-open throttle:<br />
2.9-3.9V<br />
(Voltage rises gradually in<br />
response to throttle valve<br />
opening.)<br />
O.K.<br />
Perform self-diagnosisagain after<br />
driving for a while.<br />
'O.K.<br />
INSPECTION END<br />
AT-37<br />
N.G.<br />
Check harness continuity<br />
between E.C.U. and A/T control<br />
unit regarding throttle sensor<br />
circuit. (Main harness)<br />
N.G. 1. Perform A/T control unit<br />
input/output signal inspection.<br />
2. If N.G.. recheck A/T control<br />
unit pin terminals for damage<br />
or connection of A/T control<br />
unit harnessconnector.
m Sub-harness<br />
connector<br />
I!)<br />
-=-<br />
[:it<br />
[ill<br />
35<br />
Shift solenoid A<br />
Terminal<br />
cord<br />
assembly<br />
AfT control unit<br />
DISCONNECT<br />
18<br />
(@)~<br />
is<br />
SAT766A<br />
SA T740B<br />
AfT control unit<br />
terminal<br />
SAT741B<br />
TROUBLE DIAGNOSES<br />
Self-diagnosis (Cont'd)<br />
SHIFTSOLENblDA CIRCUITCHECK<br />
m<br />
CHECK GROUND CIRCUIT.<br />
N.G.<br />
1. Remove control valve assem-<br />
1.1 13<br />
2. Disconnect terminal cord<br />
I<br />
bly. - Referto "ON-VEHI-<br />
CLE SERVICE".<br />
2. Check the following items.<br />
8 Shift solenoid A- Referto<br />
assembly connector in engine<br />
"Electrical Components<br />
compartment.<br />
Inspection".<br />
3. Check resistance between 8 Harnesscontinuity of terminal<br />
terminal @ and ground.<br />
Resistance: 20. 30il<br />
cord assembly<br />
I!) 1 O.K.<br />
CHECK POWERSOURCE<br />
CIRCUIT.<br />
N.G.<br />
Repair or replace harness<br />
betweenA/Tcontrolunit and<br />
terminal cord assembly. (Main<br />
harness)<br />
1.1 13 I<br />
2. Disconnect A/T control unit<br />
16-pin connector. ."<br />
3. Check resistance between<br />
terminal @ and A/T control<br />
unit terminal @.<br />
Resistance:<br />
Approximately Oil<br />
4. Reinstall any part removed.<br />
1 O.K.<br />
Perform self-diagnosisafter N.G. 1. Perform A/T control unit<br />
driving for a while. input/output signal inspection.<br />
2. If N.G., recheck AfT control<br />
lo.K.<br />
unit pin terminals for damage<br />
INSPECTION END or connection of AfT control<br />
unit harness connector.<br />
AT-38
[;]<br />
~<br />
-;:-<br />
36<br />
Shift solenoid B<br />
AfT control unit<br />
_IIECT<br />
IV<br />
Terminal<br />
cord assembly<br />
~<br />
IIIKOIIIIECT<br />
lu<br />
SAT767A<br />
SAT742B<br />
SAT743B<br />
TROUBLE DIAGNOSES<br />
Self-diagnosis (Cont'd)<br />
SHIFT SOLENOID B CIRCUIT CI:IECK<br />
m<br />
CHECK GROUND CIRCUIT. N.G.<br />
1. Remove control valve assembly.<br />
- Refer to "ON-VEHI-<br />
CLE SERVICE".<br />
1.1<br />
2. Disconnect terminal cord<br />
I 2. Check the following items.<br />
8 Shift solenoid B- Referto<br />
assembly connector in engine<br />
"Electrical Components<br />
compartment. Inspection".<br />
3. Check resistance between 8 Harnesscontinuity of terminal<br />
terminal @ and ground.<br />
Resistance: 20 -30n<br />
cord assembly<br />
[;] l O.K.<br />
CHECK POWERSOURCE<br />
N.G.<br />
Repair or replace harness<br />
CIRCUIT. between A/T control unit and<br />
terminal cord assembly. (Main<br />
"1<br />
2. Disconnect A/T control unit<br />
16-pin connector.<br />
3. Check resistance between<br />
terminal @ and A/T control<br />
unit terminal @.<br />
Resistance:<br />
Approximately on<br />
4. Reinstall any part removed.<br />
l O.K.<br />
I<br />
harness)<br />
Perform self-diagnosis after N.G.<br />
1. Perform A/T control unit<br />
driving for a while. input/output signal inspection.<br />
2. If N.G., recheck AfT control<br />
lO.K.<br />
unit pin terminals for damage<br />
INSPECTION END<br />
or connection of A/T control<br />
I<br />
unit harness connector.<br />
I<br />
AT-39<br />
/
m<br />
-=<br />
[ill<br />
21<br />
Arr control unit<br />
I!] - eJ<br />
Overrun clutch<br />
solenoid<br />
@ Subharness<br />
connector<br />
Terminal cord<br />
assembly<br />
~<br />
~<br />
IV<br />
SAT768A<br />
SAT744B<br />
P/L<br />
SAT745B<br />
TROUBLE DIAGNOSES<br />
m<br />
Self-diagnosis -(Cont'd)<br />
OVERRUNCLUTCH SOLENOIDCIRCUIT CHECK<br />
CHECKGROUNDCIRCUIT. N.G. 1. Removecontrolvalveassem-<br />
1.1 18 I<br />
2. Disconnect terminal cord<br />
assembly connector in engine<br />
compartment.<br />
3. Check resistance between<br />
bly.- Referto "ON-VEHI.<br />
CLE SERVICE".<br />
2. Check the following items.<br />
8 Overrunclutch solenoid. -<br />
Refer to liElectrical Com-<br />
ponents Inspection".<br />
8 Harnesscontinuity of terminal<br />
terminal @ and ground.<br />
Resistance:20 -30n<br />
cord assembly<br />
I!] 1 O.K.<br />
I CHECK POWERSOURCE N.G.<br />
Repair or replace harness<br />
CIRCUIT. betweenAlTcontrolunit and<br />
terminal cord assembly. (Main<br />
harness)<br />
1.1 18 I<br />
2. Disconnect AIT control unit<br />
16-pin connector.<br />
3. Check resistance between<br />
terminal @ and AIT control<br />
unit terminal @.<br />
Resistance:<br />
Approximately on<br />
4. Reinstall any part removed.<br />
1 O.K.<br />
Perform self-diagnosisafter N.G.<br />
1. Perform AfT control unit<br />
driving for a while. input/output signal inspection.<br />
lo.K.<br />
2. If N.G.. recheck AfT control<br />
unit pin terminals for damage<br />
INSPECTION END<br />
or connection of AfT control<br />
unit harnessconnector.<br />
AT-40
m<br />
Ii]<br />
[:iI<br />
-=-<br />
22<br />
AfT control unit<br />
IV<br />
IIISCONIIECT<br />
fm'I<br />
~ harness<br />
Look-up<br />
solenoid<br />
E1tE1 Sub-<br />
22<br />
J<br />
connector<br />
GY/R<br />
[ill<br />
SA T769A<br />
IIISQIIIIECT<br />
EO<br />
SA T746B<br />
[:ill{)<br />
EEfHm<br />
SAT747B<br />
TROUBLE DIAGNOSES<br />
Self-diagnosis (Cont'd)<br />
LOCK-UP SOLENOID CIRCUIT CHECK<br />
m<br />
CHECK GROUND CIRCUIT.<br />
1.<br />
Ia<br />
2. Disconnect terminal cord<br />
assembly connector in engine<br />
compartment.<br />
3. Check resistance between<br />
terminal @ and ground.<br />
Resistance: 2.5 -5n<br />
O.K.<br />
Ii)<br />
CHECK POWER SOURCE<br />
CIRCUIT.<br />
1.<br />
~<br />
2. Disconnect AfT control unit<br />
16-pin connector.<br />
3. Check resistance between<br />
terminal @ and AfT control<br />
unit terminal @.<br />
Resistance:<br />
Approximately on<br />
4. Reinstall any part removed.<br />
O.K.<br />
Perform self-diagnosis after<br />
driving for a while.<br />
.O.K.<br />
INSPECTION END<br />
AT-41<br />
N.G.<br />
1. Removeoil pan.- Refer to<br />
"ON-VEHICLESERVICE".<br />
2. Check the following items.<br />
. Lock-upsolenoid - Refer to<br />
liElectrical Components<br />
Inspection" .<br />
. Harnesscontinuityof terminal<br />
cord assembly<br />
N.G. Repair or replace harness<br />
between AfT control unit and<br />
terminal cord assembly. (Main<br />
harness)<br />
N.G.<br />
1. Perform AfT control unit<br />
input/output signal inspection.<br />
2. If N.G., recheck AfT control<br />
unit pin terminals for damage<br />
or connection of AfT control<br />
unit harness connector.
I!]<br />
Subharness<br />
EW3 12 15 @<br />
yo ~ ~<br />
connector<br />
w<br />
[ill<br />
B<br />
Fluid temperature<br />
sensor<br />
Terminal cord<br />
assembly<br />
SAT143B<br />
~<br />
CIINNECT<br />
£)<br />
AfT control unit<br />
terminal<br />
~<br />
IIISCOIINECT<br />
18<br />
SAT748B<br />
SAT749B<br />
TROUBLE DIAGNOSES<br />
Self-diagnosis (Cont'd)<br />
FLUID TEMPERATURE SENSOR CIRCUIT AND AIT<br />
CONTROL UNIT POWER SOURCE CIRCUIT CHECKS<br />
m<br />
CHECK AfT CONTROL<br />
UNIT POWER SOURCE.<br />
1. I<br />
2. Check voltage between AfT<br />
control unit terminals @ , @<br />
and ground.<br />
Battery voltage should exist.<br />
O.K.<br />
I!]<br />
CHECK FLUID TEMPERA.<br />
TURE SENSOR WITH<br />
TERMINAL CORD ASSEMBLY<br />
1.<br />
~<br />
2. Discpnnect terminal cord<br />
assembly connector in engine<br />
compartment.<br />
3. Check resistance between<br />
terminals @ and @ when<br />
AfT is cold.<br />
Resistance:<br />
Cold [20°C (6SoF)]<br />
Approximately 2.5 kil<br />
4. Reinstall any part removed.<br />
O.K.<br />
A<br />
AT-42<br />
N.G.<br />
Check the following items.<br />
. Harnesscontinuity between<br />
ignition switch and AfT con.<br />
trol unit (Mainharness)<br />
. Ignition switch and fuse<br />
- Refer to section EL.<br />
N.G. 1. Removeoil pan.<br />
2. Check the following items.<br />
. Fluid temperature sensor<br />
- Refer to "Electrical Com.<br />
ponents Inspection".<br />
. Harnesscontinuity of terminal<br />
cord assembly
"::"<br />
~<br />
CONNECT<br />
£)<br />
25<br />
Resistor<br />
AfT control unit<br />
m~ 0HHm:B<br />
AfT control unit<br />
terminal<br />
-=-<br />
AfT control unit<br />
terminal<br />
l1t<br />
SAT750B<br />
SA T624B<br />
CONNECT<br />
£)<br />
SAT751B<br />
TROUBLE DIAGNOSES<br />
[i<br />
Self-diagnosis (Cont'd)<br />
@<br />
CHECK INPUT SIGNAL OF<br />
FLUID TEMPERATURE<br />
SENSOR.<br />
1.1<br />
"'i"<br />
G ' ON ,!, ",<br />
'}<br />
'<br />
:," ~.' 2;II<br />
lD'"<br />
,)I;,<br />
13<br />
2. Check voltage between A/T<br />
control unit terminal @ and<br />
ground while warming up A/T.<br />
Voltage:<br />
Cold [20°C (6SoF)] -+<br />
Hot [SO°C (176°F)] :<br />
1.56V -+ O.45V<br />
O.K.<br />
Perform self-diagnosis after<br />
driving for a while.<br />
. O.K.<br />
INSPECTION END<br />
N.G. Check the following items.<br />
. Harness continuity between<br />
A/T control unit and terminal<br />
cord assembly (Mainharness)<br />
N.G. 1. Perform A/T control unit<br />
input/output signal inspection.<br />
2. If N.G., recheck AfT control<br />
unit pin terminals for damage<br />
or connection of A/T control<br />
unit harness connector.<br />
ENGINE REVOLUTION SIGNAL CIRCUIT CHECK<br />
Perform self-diagnosis (Mode<br />
III) for engine control. Check<br />
ignition signal circuit condition.<br />
O.K.<br />
m<br />
CHECK INPUT SIGNAL.<br />
"13<br />
2. Check voltage between A/T<br />
control unit terminal @ and<br />
ground.<br />
Voltage: 9.5 - 12V<br />
. O.K.<br />
Perform self-diagnosisagain after IN.G.<br />
driving for a while.<br />
. O.K.<br />
INSPECTION END<br />
AT-43<br />
N'~I Check ignition signal circuit for<br />
engine control. - Refer to section<br />
EF & EC.<br />
N.G. Check the followingitems.<br />
. Harnesscontinuity between<br />
A/T control unit and ignition<br />
coil.<br />
. Resistor<br />
. Ignitioncoil- Refer to<br />
sectionEF&EC.<br />
1. Perform A/T control unit<br />
input/output signal inspection.<br />
2. If N.G., recheck AfT control<br />
unit pin terminals for damage<br />
or connection of AfT control<br />
unit harness connector.
m Subharness<br />
connector<br />
1!1[!]<br />
=-<br />
Terminal<br />
cord assembly<br />
34 33<br />
AfT control unit<br />
~i5<br />
em<br />
Dropping<br />
resistor<br />
34\ @ID) ~<br />
Li ne pressu re<br />
solenoid<br />
~<br />
IV<br />
SA T776A<br />
SAT762B<br />
A/T control<br />
unit terminal<br />
p<br />
SA T763B<br />
TROUBLE DIAGNOSES<br />
Self-diagnosis (Cont'd)<br />
LINE PRESSURE SOLENOID CIRCUIT CHECK<br />
m<br />
-..<br />
CHECK GROUND CIRCUIT. N.G. 1. Removecontrol valve assem-<br />
1<br />
1.1<br />
2. Disconnect terminal cord<br />
assembly connector in engine<br />
compartment.<br />
3. Check resistance between<br />
bly.- Refer to "ON-VEHI-<br />
CLE SERVICE".<br />
2. Check the following items.<br />
8 Line pressure solenoid-<br />
Refer to "Electrical Com-<br />
ponents Inspection"-.<br />
8 Harnesscontinuity of terminal<br />
terminal @ and ground.<br />
Resistance: 2.5- 5il<br />
cord assembly<br />
1!1 !O.K.<br />
CHECK POWERSOURCE<br />
CIRCUIT.<br />
N.G.<br />
Checkthe following items.<br />
8 Dropping resistor - Referto<br />
I<br />
1.1<br />
2. DisconnectAfTcontrolunit<br />
16-pinconnector.<br />
3. Checkresistance between<br />
terminal@ and AfTcontrol<br />
unit terminal@.<br />
Resistance:11.2- 12.ail<br />
AT-44<br />
"ElectricalComponents<br />
Inspection".<br />
8 Harnesscontinuity between<br />
AfTcontrolunit @ and<br />
terminalcordassembly<br />
(Mainharness)<br />
[!] 1O.K.<br />
CHECK POWERSOURCE<br />
CIRCUIT<br />
N.G. Repair or replace harness<br />
betweenAfTcontrolunit @<br />
and terminal cord assembly.<br />
1.1 I<br />
2. Check resistance between<br />
terminal @ and AfT control<br />
unit terminal @.<br />
Resistance:<br />
Approximately Oil<br />
3. Reinstall any part removed.<br />
1 O.K.<br />
Performself-diagnosisafter N.G. 1. PerformAfT control unit<br />
driving for a while. input/output signal inspection.<br />
2. If N.G., recheck AfT control<br />
!O.K.<br />
INSPECTION END<br />
unit pin terminals for damage<br />
or connection of AfT control<br />
unit harness connector.
m<br />
1!1<br />
-=-<br />
-=-<br />
SAT7368<br />
A/T control<br />
unit terminal<br />
BR<br />
~-<br />
*<br />
_caD<br />
lit<br />
CIIIIIECT<br />
~<br />
SAT7838<br />
BR/W<br />
~10~<br />
IV n A/T control unit ~G/R<br />
e (t'l terminal<br />
SA T7848<br />
TROUBLE DIAGNOSES<br />
m<br />
Self-diagnosis (Cont'd)<br />
INHIBITOR, OVERDRIVE, KICKDOWN AND IDLE SWITCH<br />
CIRCUIT CHECKS<br />
CHECK INHIBITOR SWITCH<br />
CIRCUIT.<br />
~ 1. I fi/f:J..<br />
2. Check voltage between AfT<br />
control unit terminals CD.@.<br />
@. @, @ and ground while<br />
moving selector leverthrough<br />
each range.<br />
Voltage:<br />
B: Battery voltage<br />
0: OV<br />
No.<br />
Lever<br />
position<br />
@ @ @ CD CV<br />
P,N B 0 0 0 0<br />
R 0 B 0 0 0<br />
0 0 0 B 0 0<br />
2 0 0 0 B 0<br />
1 0 0 0 0 B<br />
1!1<br />
O.K.<br />
CHECK OVER~RIVE SWITCH IN.G.<br />
CIRCUIT.<br />
1.<br />
~<br />
t!(g<br />
2. Check voltage between AfT<br />
control unit terminal @ and<br />
ground when overdrive switch<br />
is in "ON" position and in<br />
"OFF" position.<br />
Switch position Voltage<br />
ON Battery voltage<br />
OFF<br />
1V or less<br />
AT-45<br />
A<br />
O.K.<br />
N.G. Check the following items.<br />
. Inhibitorswitch- Refer to<br />
"Electrical Components<br />
Inspection".<br />
. Harnesscontinuity between<br />
ignition switch and inhibitor<br />
switch (Mainharness)<br />
. Harnesscontinuity between<br />
inhibitor switch and AfT<br />
control unit (Mainharness)<br />
Check the following items.<br />
. Overdriveswitch - Refer to<br />
"Electrical Components<br />
Inspection".<br />
. Harness continuity between<br />
AfT control unit and overdrive<br />
switch (Main harness)<br />
. Harnesscontinuity of ground<br />
circuit for overdrive switch<br />
(Main harness)
[!II!]<br />
~<br />
0<br />
CONNECT<br />
t£)<br />
TROUBLE DIAGNOSES<br />
[!1<br />
Self-diagnosis (Cont'd)<br />
@<br />
CHECK KICKDOWN<br />
CIRCUIT.<br />
~<br />
1.1<br />
SWITCH<br />
2. Check voltage between AfT<br />
control unit terminal (j) and<br />
ground while depressing<br />
accelerator pedal slowly.<br />
(after warming up engine)<br />
Voltage:<br />
When releasing accelerator<br />
pedal: 3 -8V<br />
When depressing accelerator<br />
pedal fully: 1V or less<br />
,<br />
O.K.<br />
I!]<br />
INSPECTION END<br />
AT-46<br />
N.G.<br />
CHECK IDLE<br />
CI RCUIT.<br />
SWITCH IN.G.<br />
SAT754S1 I. Check voltage between AfT<br />
control unit terminal @ and<br />
ground in the same way as<br />
kickdown switch circuit.<br />
Voltage:<br />
When releasing accelerator<br />
pedal: 8 - 15V<br />
When depressing accelerator<br />
pedal fully: 1V or less<br />
,<br />
O.K.<br />
Perform self-diagnosis again after I N.G.<br />
drivingfor a while.<br />
. O.k.<br />
Check the following items.<br />
. Kickdown switch<br />
. Harnesscontinuity between<br />
AfT control unit and kick.<br />
down switch (Mainharness)<br />
. Harnesscontinuity of ground<br />
circuit for kickdown switch<br />
Perform self-diagnosis (Mode<br />
IV) for engine control.<br />
Check idle switch circuit.<br />
O.K. N.G.<br />
Check harness<br />
continuity<br />
between AfT<br />
control unit<br />
and idle switch.<br />
(Main harness)<br />
Check id Ie<br />
switch circuit<br />
for engine<br />
control. -<br />
Refer to sec.<br />
tion EF & EC.<br />
1. Perform AfT control unit<br />
input/output signal inspection.<br />
2. If N.G., recheck AfT control<br />
- unit pin terminals for damage<br />
or connection of AfT control<br />
unit harness connector.
11<br />
I]<br />
-=-<br />
Ignition<br />
switch<br />
[ill<br />
Fuse<br />
([ill)<br />
-=-<br />
AfT control unit<br />
[:tI<br />
SAT755B<br />
SAT756B<br />
0.0. OFF<br />
indicator<br />
lamp<br />
CONNECT<br />
£)<br />
TROUBLE DIAGNOSES<br />
Diagnostic Procedure 1<br />
SYMPTOM: 0.0. OFF indicator lamp does not come on<br />
for about 2 seconds when turning ignition<br />
switch to "ON".<br />
0<br />
, CHECK AfT CONTROL<br />
UNIT POWER SOURCE.<br />
1.<br />
t8<br />
2. Check voltage between AfT<br />
control unit terminals @, ~<br />
and ground.<br />
Battery voltage should exist.<br />
O.K.<br />
6<br />
I<br />
CHECK AfT CONTROL UNIT<br />
GROUND CIRCUIT.<br />
1.<br />
~<br />
2. Disconnect AfT control unit<br />
16-pin connector.<br />
3. Check resistance between AfT<br />
control unit terminals @ , @<br />
and ground.<br />
Resistance:<br />
Approximately on<br />
I]<br />
I CHECK<br />
1.<br />
O.K.<br />
LAMP CIRCUIT.<br />
~<br />
2. Disconnect AfT control unit<br />
. 16-pin connector.<br />
3. Check resistance between<br />
AfT control unit terminals<br />
@ and @.<br />
Resistance: 50 -100n<br />
4. Reinstall any part removed.<br />
Check again.<br />
O.K.<br />
O.K.<br />
INSPECTION END<br />
AT-47<br />
N.G.<br />
N.G.<br />
N.G.<br />
N.G.<br />
Check the following items.<br />
. Harness continuity between<br />
ignition switch and AfT control<br />
unit (Main harness)<br />
. Ignition switch and fuse<br />
- Refer to section EL.<br />
Check harness continuity<br />
between AfT control unit and<br />
ground.<br />
Check the following items.<br />
. 0.0. OFF indicator lamp<br />
- Refer to section EL.<br />
. Harnesscontinuity between<br />
ignition switch and 0.0. OFF<br />
indicator lamp (Main<br />
harness)<br />
. Harnesscontinuity between<br />
0.0. OFF indicator lamp<br />
and AfT control unit<br />
1. Perform AfT control unit<br />
input/output signal inspection.<br />
2. If N.G., recheck AfT control<br />
unit pin terminals for damage<br />
or connection of AfT control<br />
unit harness connector.
D 0 OlD<br />
OFF<br />
D<br />
Self-diagnosis<br />
start<br />
- - - - - - - - - - - - - - Light<br />
--- Shade<br />
SAT157C<br />
SAT838B<br />
SAT133B<br />
TROUBLE DIAGNOSES<br />
D<br />
Diagnostic Procedure 2<br />
SYMPTOM: Enginecannot be started with selector<br />
lever in "P" or "N" range or engine can be<br />
started with selector lever in "0", "2", "1"<br />
or "R" range.<br />
Does self-diagnosis show damage<br />
to inhibitor switch circuit?<br />
fA<br />
No<br />
Check continuity of inhibitor<br />
switch 2-pin connector. - Refer<br />
to "Electrical Components<br />
Inspection".<br />
O.K.<br />
Check starting system. - Refer<br />
to sectionEL.<br />
O.K.<br />
D<br />
INSPECTIONEND<br />
Yes Check inhibitor switch circuit.<br />
- Refer to "Self-diagnosis".<br />
N.G. Repair or replace inhibitor switch.<br />
Repair or replace damaged parts.<br />
Diagnostic Procedure 3<br />
SYMPTOM: Vehicle moves when it is pushed forward<br />
or backward with selector lever in "P"<br />
range.<br />
Check parking components. -<br />
Refer to "ON-VEHICLE<br />
SERVICE".<br />
O.K.<br />
INSPECTIONEND<br />
AT-48<br />
Repair or replace damaged parts.<br />
N.G'I I
0<br />
m<br />
11<br />
II<br />
0 010<br />
OFF<br />
Self -diagnosis<br />
start<br />
- - - - - - - - - - - - - - Light<br />
- - Shade<br />
SAT157C<br />
"P" range<br />
Lock nut 00<br />
LCiCk nut @<br />
SA T788B<br />
SA T638A<br />
SAT171 B<br />
TROUBLE DIAGNOSES<br />
0<br />
Diagnostic Procedure 4<br />
SYMPTOM: Vehicle moves forward or backward when<br />
selecting "N" range.<br />
Does self-diagnosisshow damage<br />
to inhibitor switch after cruise<br />
test ?<br />
No<br />
Check manual control linkage.<br />
- Refer to "ON.VEHICLE<br />
SERVICE".<br />
O.K.<br />
Check AfT fluid levelagain.<br />
O.K.<br />
II<br />
1. Removeoil pan.<br />
2. Check AfT fluid condition.<br />
. O.K.<br />
Check again.<br />
O.K.<br />
INSPECTIONEND<br />
AT-49<br />
Yes<br />
f)<br />
N.G. Adjust manual control linkage.<br />
- Refer to "ON.VEHICLE<br />
SERVICE".<br />
N.G.<br />
Check inhibitor switch circuit.<br />
- Refer to "Self.diagnosis".<br />
Refill A.T.F.<br />
1. DisassembleAfT.<br />
2. Check the following items.<br />
. Forward clutch assembly<br />
. Overrun clutch assembly<br />
. Reverseclutch assembly<br />
. Accumulator piston D<br />
1. Perform A/T control unit<br />
input/output signalinspection.<br />
2. If N.G., recheck A/T control<br />
unit pin terminals for damage<br />
or connection of A/T control<br />
unit harnessconnector.
0 \1// %<br />
~O \' OFF<br />
/1<br />
fJ<br />
Self-diegnosis<br />
start<br />
Fluid<br />
'temperature<br />
sensor<br />
0<br />
m<br />
Throttle sensor circuit<br />
Fluid temperature<br />
sensor circuit<br />
Line pressu re<br />
solenoid<br />
circuit<br />
._-----<br />
E.C.U.<br />
Dropping resistor<br />
Light<br />
Shade<br />
TROUBLE DIAGNOSES<br />
0<br />
Diagnostic Procedure 5<br />
SYMPTOM: There Is large shock when changingfrom<br />
"N" to "R" range.<br />
Does self-diagnosis show damage<br />
to throttle sensor, line pressure<br />
solenoid or fluid temperature<br />
sensor circuit?<br />
No<br />
SAT7588, I)<br />
. .<br />
Check throttle sensor. - Refer<br />
to section EF & EC.<br />
SA T0888<br />
SA T643A<br />
m<br />
O.K.<br />
Check line pressure at idle with<br />
selector lever in "0" range.<br />
- Refer to "PRESSURE<br />
TESTING".<br />
O.K.<br />
Check again.<br />
O.K.<br />
INSPECTIONEND<br />
AT-50<br />
Yes<br />
N.G.<br />
N.G.<br />
che~ damaged circuit. - Refer<br />
to "Self-diagnosis".<br />
Repair or replace throttle sensor.<br />
1. Remove control valve assembly.<br />
- Refer to "ON-VEHI-<br />
CLE SERVICE".<br />
2. Check the following items.<br />
. Valves to control line pressure<br />
~Pressure regulator valve,<br />
modifier valve, pilot valve and<br />
pilot filter)<br />
. Linepressuresolenoid<br />
1. Perform AfT control unit<br />
input/output signal inspection.<br />
2. If N.G., recheck AfT control<br />
unit pin terminals for damage<br />
or connection of AfT control<br />
unit harness connector.
0<br />
II<br />
m<br />
SA T638A<br />
SA T642A<br />
SA T643A<br />
SAT171B<br />
TROUBLE DIAGNOSES<br />
0<br />
Diagnostic Procedure 6<br />
SYMPTOM:"Vehicledoes not creep backwardwhen<br />
.~~~ "R" range.<br />
Check A/T fluid levelagain.<br />
: N.G'.f RefillA.T.F.<br />
O.K.<br />
N.G. in both "1"<br />
and" R" range<br />
fA<br />
r<br />
Check stall revolution with<br />
selector lever in" 1" and" R"<br />
1. Remove.control valveassembly.<br />
- Refer to "ON-VEHI-<br />
CLE SERVICE".<br />
range. 2. Check the following items.<br />
O.K.<br />
O.K. in "1" range<br />
N.G. in "R" range.<br />
II<br />
Check line pressure at idle with<br />
8 Valvesto control line pressure<br />
(Pressure regulator valve,pilot<br />
valveand pilot filter)<br />
8 Line pressure solenoid<br />
N.G.<br />
3. Disassemble A/T.<br />
selector lever in "R" range.<br />
- Refer to "PRESSURE<br />
TESTING".<br />
4. Check the following items.<br />
8 Oil pump assembly<br />
m<br />
O.K.<br />
8<br />
8<br />
Torque converter<br />
Reverseclutch assembly<br />
1. Removeoil pan. N.G. 8 Highclutch assembly<br />
2. Check fluid condition. 8 Low & reverse brake assembly<br />
O.K. 8 Low one-way clutch<br />
r Check again.<br />
O.K.<br />
IN.G.,<br />
r 1. Perform AfT control unit<br />
input/output signal inspection.<br />
2. If N.G., recheck A/T control<br />
r<br />
INSPECTION END<br />
I<br />
unit pin terminals for damage<br />
or connection of A/T control<br />
unit harness connector.<br />
AT-51
0<br />
B1<br />
II<br />
SA T638A<br />
SA T642A<br />
SAT171B<br />
TROUBLE DIAGNOSES<br />
Diagnostic Procedure 7<br />
SYMPTOM:Vehicle does not creep forward when<br />
selecting "D", "2" and "1" range.<br />
0<br />
I<br />
Check A/T fluid levelagain.<br />
O.K.<br />
B1<br />
Check stall revolution with<br />
selector lever in "0" range.<br />
- Refer to "STALL TESTING".<br />
.<br />
O.K.<br />
B1<br />
IA II<br />
Check line pressure at idle with<br />
selector lever in "0" range.<br />
- Refer to "PR.ESSU RE<br />
TESTING".<br />
O.K.<br />
1. Removeoil pan.<br />
2. Check A/T fluid condition.<br />
Check again.<br />
O.K.<br />
O.K.<br />
INSPECTION END<br />
AT-52<br />
N.G. .1 Refill A.T.F.<br />
N.G.<br />
N.G.<br />
N.G.<br />
N.G.<br />
1. Removecontrol valveassembly.<br />
- Refer to "ON-VEHI-<br />
CLE SERVICE".<br />
2. Check the following items.<br />
. Valvesto control line pressure<br />
(Pressureregulator valve,<br />
modifier valve, pilot valveand<br />
pilot filter)<br />
. Linepressuresolenoid<br />
3. DisassembleA/T<br />
4. Check the following items.<br />
. Oil pump assembly<br />
. Forwardclutchassembly<br />
. Forwardone-wayclutch<br />
. , Lowone-wayclutch<br />
. Torqueconverter<br />
1. Perform A/T control unit<br />
input/output signal inspection.<br />
2. If N.G., recheck A/T control<br />
unit pin terminals for damage<br />
or connection of A/T control<br />
unit harnessconnector.
D<br />
0<br />
I]<br />
II<br />
~~ OlD<br />
/11\' OFF<br />
Self-diagnosis<br />
start<br />
--- --~-<br />
Revolution sensor<br />
Speed sensor<br />
Shift solenoid A<br />
Shift solenoid B<br />
-<br />
Light<br />
Shade<br />
SA T760B<br />
SA T643A<br />
SAT171B<br />
TROUBLE DIAGNOSES<br />
D<br />
Diagnostic Procedure 8 ~<br />
SYMPTOM: Vehicle cannot be started from D1on<br />
Cruise test - Part 1.<br />
Is Diagnostic Procedure 7 O.K.?<br />
Yes<br />
Does self-diagnosis show damage<br />
to revolution sensor, speed<br />
sensor, shift solenoid A or B<br />
after cruise test?<br />
No<br />
Check throttle sensor. 7"" Refer to I N.G.<br />
section EF & EC.<br />
O.K.<br />
Check line pressure at stall point<br />
with selector lever in "D" range.<br />
- Refer to "PRESSU RE<br />
TESTING".<br />
II<br />
O.K.<br />
1. Removeoil pan.<br />
2. Check A/T fluid condition.<br />
N.G.<br />
Check again.<br />
O.K.<br />
INSPECTIONEND<br />
AT-53<br />
Yes<br />
N.G.<br />
O.K.<br />
O.K.<br />
O.K.<br />
N.G.<br />
Go to Diagnostic Procedure 7.<br />
Check damaged circuit. - Refer<br />
to "Self-diagnosis".<br />
Repair or replace throttle sensor.<br />
1. Removecontrol valveassembly.<br />
- Refer to "ON-VEHI-<br />
CLE SERVICE".<br />
2. Check the following items.<br />
. ShiftvalveA<br />
. ShiftvalveB<br />
. ShiftsolenoidA<br />
. ShiftsolenoidB<br />
. Pilotvalve<br />
. Pilotfilter<br />
3. DisassembleA/T.<br />
4. Check the following items.<br />
. Forward clutch assembly<br />
. Forward one-way clutch<br />
. Low one-way clutch<br />
. Highclutch assembly<br />
. Torque converter<br />
. Oil pump assembly<br />
1. Perform A/T control unit<br />
input/output signal inspection.<br />
2. If N.G., recheck AfT control<br />
unit pin terminals for damage<br />
or connection of A/T control<br />
unit harness connector.
D 0 OlD<br />
OFF<br />
m<br />
0<br />
m<br />
~<br />
8/8<br />
0/8<br />
Self-diagnosis<br />
start<br />
Speed<br />
sensor<br />
SAT118B<br />
- - - - - - - - - - - - - - Light<br />
Speedometer<br />
6)<br />
- - Shade<br />
SAT157C<br />
Revolution sensor<br />
8/8 , +".<br />
SA T629B<br />
SAT171B<br />
Dl.:TD2"/<br />
D27D3<br />
(<br />
0/8<br />
~<br />
Depress<br />
fully<br />
/ /( Release<br />
0<br />
TROUBLE DIAGNOSES<br />
Diagnostic Procedure 9<br />
SYMPTOM: AfT does not shift from D, to D2at the<br />
specified speed.<br />
AfT does not shift from D4to D2when<br />
depressing accelerator pedal fully at the<br />
specified speed.<br />
Are Diagnostic Procedures 7 and<br />
8 O.K.?<br />
D<br />
Yes<br />
Does self-diagnosis show damage<br />
to inhibitor<br />
test?<br />
switch after cruise<br />
m<br />
No<br />
Check revolution sensor and<br />
speed sensor circuit. - Refer to<br />
"Self-diagnosis" .<br />
O.K.<br />
iJ<br />
Check throttle sensor.- Refer<br />
to section EF & EC.<br />
0 O.K.<br />
1. Remove oil pan.<br />
2. Check AfT fluid condition.<br />
I<br />
O.K.<br />
m<br />
Check again.<br />
O.K.<br />
INSPECTION END<br />
AT-54<br />
Yes<br />
N.G.<br />
N.G.<br />
O.K. I<br />
O.K.<br />
N.G.<br />
Go to Diagnostic Procedure 7 or :<br />
8.<br />
Check inhibitor switch circuit.<br />
- Refer to "Self-diagnosis".<br />
Repair or replace revolution<br />
sensor and speed sensor circuits.<br />
Repair or replace throttle sensor.<br />
1. Removecontrol valve.-<br />
Referto "ON-VEHICLE<br />
SERVICE".<br />
2. Checkthe following items.<br />
. Shift valveA<br />
. Shift solenoidA<br />
. Pilot valve<br />
. Pilot filter<br />
3. DisassembleA/T.<br />
4. Check the following items.<br />
. Servo piston 'assembly<br />
. Brake band<br />
. Oil pump assembly<br />
1. Perform AfT control unit<br />
input/output signal inspection.<br />
.2. If N.G., recheck AfT control<br />
unit pin terminals for damage<br />
or connection of AfT control<br />
unit harnessconnector.
D 0 DID<br />
OFF<br />
0<br />
BJ<br />
II<br />
5elf-diagnosis<br />
start<br />
- - - - - - - - - - - - - - Light<br />
8/8 II Jl<br />
0/8 l<br />
0<br />
- - Shade<br />
SAT157C<br />
'1<br />
SAT1718<br />
SAT1198<br />
TROUBLE DIAGNOSES<br />
Diagnostic Procedure 10<br />
SYMPTOM: AIT does not shift from D2to D3at the<br />
specified speed.<br />
Are Diagnostic Procedures 7 and<br />
BO.K.?<br />
Yes<br />
D<br />
Does self-diagnosis show damage<br />
to inhibitor switch after cruise<br />
test?<br />
Check throttle sensor. - Refer<br />
to section EF & EC.<br />
O.K.<br />
1. Removeoil pan.<br />
2. Check A/T fluid condition.<br />
. O.K.<br />
II<br />
Check again.<br />
O.K.<br />
INSPECTION END<br />
AT-55<br />
Yes<br />
N.G.<br />
O.K. I<br />
O.K.<br />
N.G.<br />
Go to Diagnostic Procedure 7 or<br />
B.<br />
Check inhibitor switch circuit.<br />
- Refer to "Self-diagnosis".<br />
Repair or replace throttle sensor.<br />
1. Removecontrol valveassembly.<br />
- Refer to "ON-VEHI.<br />
CLE SERVICE".<br />
2. Check the following items.<br />
. ShiftvalveB<br />
. Shift solenoid B<br />
. Pilot valve<br />
. Pilotfilter<br />
3. DisassembleAlT.<br />
4. Check the following items.<br />
. Servo piston assembly<br />
. Highclutch assembly<br />
. Oil pump assembly<br />
1. Perform AfT control unit<br />
input/output signal inspection.<br />
2. If N.G., recheck A/T control<br />
unit pin terminals for damage<br />
or connection of AfT control<br />
unit harness connector.
D \1/ OlD<br />
TROUBLE DIAGNOSES<br />
Revolution sensor Diagnostic Procedure 11<br />
r:<br />
/~ OFF I spee~sensor. SYMPTOM: AIT does not shift from D3to D4at the<br />
start<br />
Shift solenoid A<br />
Shift s?lerioid B<br />
.- Fluid<br />
specified speed.<br />
. Self-diagnosis<br />
I / / / r<br />
::;;~ature<br />
Light<br />
Are<br />
8 O.K..<br />
Di~gnostic Procedures 7 and II I No -' Go 8. to Diagnostic Procedure 7 or<br />
I<br />
- ---_M_M_-M-M---M--uShadel D Yes<br />
.<br />
light<br />
SAT761B I I<br />
Does self-diagnosisshow damage<br />
to inhibitor switch, overdrive<br />
. .<br />
h h<br />
.<br />
SWltC,s Ift soIenol, d A B,<br />
revolution sensor, speed sensor<br />
or fluid temperature sensor<br />
. .<br />
t f . "1<br />
Yes<br />
I<br />
Ch~ck da~aged ~~~cUit.to<br />
Self-diagnosIs.<br />
Refer<br />
10 - T ~ " - mUH H ~. . ClrcUi a ter crUise test.<br />
No<br />
+<br />
Checkthrottle sensor.- Refer ~ Repair or replace throttle sensor.<br />
to section EF & EC.<br />
. O.K.<br />
1. Removeoil pan.<br />
2. Check AlT fluid condition.<br />
N.G.<br />
1. Removecontrol valveassem-<br />
1:01<br />
I!I ./ /' I<br />
O.K. 11<br />
bly. - Refer to "ON-VEHI-<br />
CLE SERVICE".<br />
. 2. Checkthe followingitems.<br />
. ShiftvalveB<br />
O.K. ~ .<br />
.<br />
Overrunclutchcontrolvalve<br />
ShiftsolenoidB<br />
O.K. II. Pilotvalve<br />
. Pilotfilter<br />
SAT171BI I<br />
3. DisassembleA/T.<br />
4. Checkthe followingitems.<br />
I.<br />
. Servopistonassembly<br />
. Brakeband<br />
II<br />
. 8/8 U II I I I . Torqueconverter<br />
II<br />
Check again.<br />
I<br />
I0 K<br />
. . ~<br />
I<br />
. Oilpumpassembly<br />
1. Perform AfT control unit<br />
input/output signal inspection.<br />
2. If N.G., recheck AfT control<br />
unit pin terminals for damage<br />
or connection of AfT control<br />
I INSPECTIONEND I<br />
0/8 II U SAT120B I I unit harness connector.<br />
AT -56
D ,\1// OlD<br />
:;8,'" OFF<br />
0<br />
Self.
0<br />
fA<br />
0<br />
fA<br />
~C5~ 010<br />
/11\' OFF<br />
Self-diagnosis<br />
start<br />
010<br />
0 OFF<br />
Self-diagnosis<br />
start<br />
- - Light<br />
- Shade<br />
SAT171B<br />
- - - - - - - - - - - - - - Light<br />
- - Shade<br />
SAT157C<br />
~<br />
-'1'- -------------<br />
~ j~ .<br />
ff<br />
0/8 SA T806A<br />
TROUBLE DIAGNOSES<br />
0<br />
Diagnostic Procedure 13<br />
SYMPTOM: AIT does not hold lock-up condition for<br />
more than 30 seconds.<br />
Does self-diagnosis show damage<br />
to engine revolution signal circuit<br />
after cruise test?<br />
fA ,No<br />
. 1. Removeoil pan.<br />
2. Check A/T fluid condition.<br />
. O.K.<br />
Check again.<br />
O.K.<br />
INSPECTION END<br />
Yes<br />
N.G.<br />
O.K.<br />
O.K.<br />
N.G.<br />
Check engine revolution signal<br />
circuit.<br />
- Refer to "Self-diagnosis",<br />
1. Removecontrol valveassembly.<br />
- Refer to "ON-VEHI-<br />
CLE SERVICE".<br />
2. Check the following items.<br />
. Lock-upcontrol valve<br />
. Pilot valve<br />
. Pilotfilter<br />
3. Disassemble A/T.<br />
4. Check torque converter and<br />
oil pump assembly.<br />
1. Perform AfT control unit<br />
input/output signal inspection.<br />
2. If N.G., recheck AfT control<br />
unit pin terminals for damage<br />
or connection of A/T control<br />
unit harness connector.<br />
Diagnostic Procedure 14<br />
SYMPTOM: Lock-up is not released when accelerator<br />
pedal is released.<br />
0<br />
Does self-diagnosis show damage<br />
to idle switch circuit after cruise<br />
test?<br />
fA<br />
Check again.<br />
No<br />
O.K.<br />
INSPECTION END<br />
AT-58<br />
Yes<br />
N.G.<br />
Check idle switch circuit. - Refer<br />
to "Self-diagnosis".<br />
1. Perform AfT control unit<br />
input/output signal inspection.<br />
2. If N.G.. recheck A/T control<br />
unit pin terminals for damage<br />
or connection of A/T control<br />
unit harness connector.
D ~\ O l/-::: 010<br />
/11'-- OFF<br />
0<br />
II<br />
II 8/8<br />
Self-diagnosis<br />
stert<br />
...//<br />
...'"<br />
(<br />
I II<br />
//<br />
//<br />
.../<br />
,..."'" ---<br />
. 1""-<br />
8~O<br />
/'"<br />
""<br />
no Light<br />
I<br />
--<br />
--Shade<br />
SA T7648<br />
SAT1718<br />
....<br />
"'"<br />
~<br />
"" ~<br />
"'" --~(<br />
0/8 ~<br />
( D3 (O.D. OFF))<br />
+<br />
C0<br />
Engine brake<br />
SAT7658<br />
TROUBLE DIAGNOSES<br />
Diagnostic Procedure 15<br />
SYMPTOM: Engine speed does not return to idle<br />
smoothly when AfT is shifted from D4to D3<br />
with accelerator pedal released.<br />
Vehicle does not decelerate by engine<br />
brake when changing overdrive switch to<br />
"OFF" position with accelerator pedal<br />
released.<br />
Vehicle does not decelerate by engine<br />
brake when changing selector lever from<br />
"D" to "2" range with accelerator pedal<br />
released.<br />
Does self-diagnosis show damage<br />
to overrun clutch solenoid circuit<br />
after cru ise test?<br />
No<br />
Check throttle sensor. - Refer<br />
to section EF & EC.<br />
. O.K.<br />
1. Remove oil pan.<br />
2. Check AIT fluid condition.<br />
O.K.<br />
II<br />
Check again.<br />
O.K.<br />
INSPECTION END<br />
AT -59<br />
Yes<br />
N.G.<br />
O.K. I<br />
O.K.<br />
Check overrun clutch solenoid<br />
circuit. - Refer to "Self.<br />
diagnosis".<br />
Repair or replace throttle sensor.<br />
1. Removecontrol valveassem.<br />
bly. - Refer to "ON-VEHI.<br />
CLE SERVICE".<br />
2. Check the following items.<br />
. Overrun clutch control valve<br />
. Overrun clutch reducing valve<br />
. Overrun clutch solenoid<br />
3. DisassembleAlT.<br />
4. Check the following items.<br />
. Overrun clutch assembly<br />
. Oil pump assembly<br />
N.G. 1. Perform AfT control unit<br />
input/outPut signal inspection.<br />
2. If N.G., recheck AfT control<br />
unit pin terminals for damage<br />
or conneCtion of AfT control<br />
unit harness conneCtor.
D '\ O l/~ OlD<br />
/II\~ OFF<br />
D 0 010<br />
OFF<br />
Self-diagnosis<br />
start<br />
Revolution sensor<br />
Speed sensor<br />
Shift solenoid A<br />
Shift solenoid B<br />
- - light<br />
-- Shade<br />
SAT7668<br />
- - - - - - - - - - - - - - light<br />
--- Shade<br />
SAT157C<br />
TROUBLE DIAGNOSES<br />
Diagnostic Procedure 16<br />
SYMPTOM:Vehicle does not start from 01 on Cruise<br />
test - Part 2.<br />
D<br />
Does self-diagnosis show damage<br />
to revolution sensor, speed sensor,<br />
shift solenoid A or B after cruise<br />
test?<br />
Diagnostic Procedure 17<br />
SYMPTOM: AIT does not shift from 04 to 03 when<br />
changing<br />
position.<br />
D<br />
overdrive switch to "OFF"<br />
Does self-diagnosis show damage<br />
to overdrive switch circuit after<br />
cruise test?<br />
No<br />
Go to Diagnostic Procedure 10.<br />
AT-GO<br />
Yes Check damaged circuit. -<br />
to "Self-diagnosis".<br />
Refer<br />
1 No<br />
Check again.<br />
1 N.G.<br />
I<br />
1. Perform AfT control unit<br />
input/output signal inspection.<br />
lo.K.<br />
2. If N.G., recheck AfT control<br />
unit pin terminals for damage<br />
I Go to Diagnostic Procedure 8. I<br />
or connection of AfT control<br />
unit harness connector.<br />
Check overdrive switch circuit.<br />
- Refer to "Self-diagnosis".
D 0 OlD<br />
OFF<br />
Self-diagnosis<br />
start<br />
D 0 OlD<br />
OFF<br />
11<br />
- - - - - - - - - - - - - - Light<br />
Self-diagnosis<br />
start<br />
- - Shade<br />
SAT157C<br />
- - - - - - - - - - - - - - Light<br />
@<br />
,~ 0 ~<br />
- - Shade<br />
SAT157C<br />
~~<br />
~ I<br />
~<br />
@<br />
Engine brake<br />
SAT778B<br />
TROUBLE DIAGNOSES<br />
Diagnostic Procedure 18<br />
SYMPTOM: AfT does not shift from D3to 22 when<br />
changing selector lever from "D" to "2"<br />
range.<br />
D<br />
Does self-diagnosis show damage<br />
to inhibitor switch circuit after<br />
cruise test?<br />
D<br />
No<br />
.<br />
Go to Diagnostic Procedure 9.<br />
Yes<br />
Check inhibitorswitch circuit.<br />
- Refer to "Self-diagnosis".<br />
Diagnostic Procedure 19<br />
SYMPTOM: AfT does not shift from 22to 11when<br />
changing selector lever from "2" to "1"<br />
range.<br />
Does self-diagnosis show damage<br />
to inhibitor switch after cruise<br />
test?<br />
11<br />
I Check again.<br />
No<br />
rO.K.<br />
INSPECTION END<br />
~.<br />
Yes<br />
Check inhibitorswitch circuit.<br />
- Refer to "Self-diagnosis".<br />
f fT I<br />
~ I 1. Per orm A contro Unit<br />
input/outputsignalinspection.<br />
2. If N.G.. recheck AfT control<br />
unit pin terminals for damage<br />
or connection of AfT control<br />
unit harness connector.<br />
Diagnostic Procedure 20<br />
SYMPTOM: Vehicle does not decelerate by engine<br />
brake when shifting from 22(12)to 11.<br />
Is diagnostic procedure 6 0. K.? Go to Diagnostic Procedure 6.<br />
Yes<br />
Go to Diagnostic Procedure 15.<br />
AT-61<br />
.
.,<br />
CONNECT<br />
.u<br />
SA T842 B<br />
20-pin connector 16-pin connector<br />
SAT818A<br />
AfT CONTROL UNIT INSPECTION TABLE<br />
(Data are referencevalues.)<br />
T"<br />
No.<br />
Item<br />
2<br />
3<br />
I<br />
Inhibitor "2' range<br />
switch<br />
Inhibitor "1" range<br />
switch<br />
--1<br />
Idle switch<br />
4 I {inthrottle valve<br />
switch}<br />
-+- 5<br />
A.S.C.O. D.O.<br />
cut signal<br />
TROUBLE DIAGNOSES<br />
Electrical Components Inspection<br />
INSPECTIONOF AfT CONTROLUNIT<br />
. Measure voltage between each terminal and terminal @ or<br />
@ by following "AfT CONTROL UNIT INSPECTION TABLE".<br />
. Pin connector terminal layout.<br />
~ When<br />
AT-62<br />
Condition<br />
When setting selector lever to "0"<br />
range.<br />
When setting selector lever to other<br />
ranges.<br />
setting selector lever to "1"<br />
range.<br />
When setting selector lever to other<br />
ranges.<br />
When releasing accelerator pedal<br />
after warming up engine.<br />
When depressing accelerator pedal<br />
after warming up engine.<br />
When releasing" ACCE L" set switch<br />
on A.S.C.O. cruise.<br />
When applying" ACCE L" set switch<br />
on A.S.C.O. cruise.<br />
~<br />
Judgement<br />
standard<br />
Battery voltage<br />
1V or less<br />
Battery voltage<br />
)<br />
1V or less<br />
8 -15V<br />
1Vorless<br />
5-8V<br />
1V or less
Terminal I<br />
TROUBLE DIAGNOSES<br />
Electrical Components Inspection (Cont'd)<br />
Item<br />
Condition<br />
Judgement<br />
No. I<br />
standard<br />
7 I Kickdown switch , .""'_..,,<br />
AT-63<br />
When releasing accelerator pedal after<br />
warming up engine.<br />
When depressing accelerator pedal<br />
fully after warming up engine.<br />
I IWhen ("CRUISE" performing light comes A.S.C.D. on.) cruise.<br />
S I A.S.C.D. cruise<br />
1<br />
signal I '\ - 0<br />
3-SV<br />
I 1V or less<br />
I Battery voltage<br />
I When ("CRUISE" not performing light does A.S.C.D.cruise. not come on.) I 1V or Iess<br />
When setting overdrive switch in<br />
"ON" position.<br />
9 I Overdrive switch I I When setting overdrive switch in<br />
I Battery voltage<br />
10 I Throttle sensor<br />
(Power source)<br />
I<br />
"OF F" position.<br />
I<br />
I<br />
-<br />
I 1V or less<br />
I 4.5 - 5.5V<br />
When depressing accelerator pedal Fully-closed<br />
slowly after warming up engine. throttle:<br />
11 I Throttle sensor I I<br />
Voltage rises gradually in<br />
response to throttle opening<br />
angle.<br />
,<br />
0.2 - 0.6V<br />
Fully-open<br />
throttle:<br />
2.9 - 3.9V<br />
12 I Fluid temperature<br />
sensor<br />
I<br />
I<br />
When A.T.F. temperature is 20°C<br />
I (6SoF).<br />
I WhenA.T.F.temperatureisSO°C<br />
(176°F).<br />
I<br />
I<br />
1.56V<br />
0.45V<br />
13<br />
- 14<br />
I I I-<br />
15 I Throttle sensor<br />
(Ground)<br />
l When vehicle cruises at 30 km/h Voltage rises gradu-<br />
(19 MPH). ally in response to<br />
C no," )<br />
16 I Revolution sensor<br />
(Measure in AC range) vehicle speed.<br />
I<br />
When vehicle parks.<br />
OV
Terminal<br />
No.<br />
Item<br />
17 Full throttle switch<br />
18<br />
19<br />
20<br />
21<br />
Inhibitor "N" and "P"<br />
range switch<br />
Inhibitor "D" range<br />
switch<br />
Overrun clutch<br />
solenoid<br />
22 Lock-up solenoid<br />
23<br />
O.D. OFF indicator<br />
lamp<br />
24 Speed sensor<br />
25<br />
26<br />
27<br />
Engine revolution<br />
signal<br />
Inhibitor "R" range<br />
switch<br />
TROUBLE DIAGNOSES<br />
~<br />
~<br />
Electrical Components Inspection (Cont'd)<br />
AT-64<br />
Condition<br />
When depressing accelerator pedal<br />
more than half-way after warming<br />
up engine.<br />
When releasing accelerator pedal<br />
after warming up engine.<br />
When setting selector lever to "N"<br />
or "P" range.<br />
When setting selector lever to other<br />
ranges.<br />
When setting selector lever to "2"<br />
range.<br />
When setting selector lever to other<br />
ranges.<br />
When overrun clutch solenoid<br />
operates.<br />
When overrun clutch solenoid does<br />
not operate.<br />
When AfT performs lock-up.<br />
When AfT does not perform lock-up.<br />
When setting overdrive switch to<br />
"ON" position.<br />
When setting overdrive switch to<br />
"OFF" position.<br />
When moving vehicle at 2 to 3 kmfh<br />
(1 to 2 MPH) for 1 m (3 ft) or<br />
more.<br />
When engine runs at idle speed.<br />
When engine runs at 2,500 rpm.<br />
When setting selector lever to"R"<br />
range.<br />
When setting selector lever to other<br />
ranges.<br />
Judgement<br />
standard<br />
8 - 15V<br />
1Vorless<br />
Battery voltage<br />
1Vorless<br />
Battery voltage<br />
1Vorless<br />
Battery voltage<br />
1V or less<br />
8- 15V<br />
1V or less<br />
Battery voltage<br />
1V or less<br />
Vary from 0 to<br />
5V<br />
9.5 - 12V<br />
Approximately<br />
10V<br />
Battery voltage<br />
1V or less
Terminal<br />
No.<br />
28<br />
29<br />
30<br />
3f<br />
32<br />
33<br />
Item<br />
Power sou rce<br />
(Back-up)<br />
I Power sou ree<br />
Ground<br />
Linepressuresolenoid<br />
(with dropping resistor)<br />
34 Line pressure solenoid<br />
35 Shift solenoid A<br />
36 Shift solenoid B<br />
~o,<br />
SAT785 8<br />
TROUBLE DIAGNOSES<br />
Electrical Components Inspection (Cont'd)<br />
Condition<br />
When turning ignition switch to<br />
"OFF".<br />
When turning ignition switch to<br />
"ON".<br />
When turning ignition switch to<br />
"ON".<br />
When turning ignition switch to<br />
"OFF".<br />
When releasing accelerator pedal<br />
after warming up engine.<br />
When depressing accelerator pedal<br />
fully after warming up engine.<br />
When releasing accelerator pedal<br />
after warming up engine.<br />
When depressing accelerator pedal<br />
fully after warming up engine.<br />
When shift solenoid A operates.<br />
(When driving in "01" or "04 ".)<br />
When shift solenoid A does not<br />
operate.<br />
(When driving in "02" or "03",)<br />
When shift solenoid B operates.<br />
(When driving in "01" or "02 ".)<br />
When shift solenoid B does not<br />
operate.<br />
(When driving in "03" or "04 ".)<br />
OVERDRIVE SWITCH<br />
. Check continuity between two terminals.<br />
Judgement<br />
standard<br />
Battery voltage<br />
Battery voltage<br />
Battery voltage<br />
1V or less<br />
5 -14V<br />
O.5V or less<br />
1.5 - 2.5V<br />
O.5V or less<br />
Battery voltage<br />
lV or less<br />
Battery voltage<br />
lV or less<br />
0.0. switch position Continuity<br />
AT-6S<br />
ON No<br />
OFF<br />
Yes
.~- - ~{I<br />
~~~~~~tr ~{~c@<br />
'uP~,..~o,.}!//<br />
~,~ SAT067 B<br />
SAT843B<br />
p::-~<br />
e~ ~[ill<br />
~\ OJ:<br />
~ GPt)<br />
SA T844B<br />
SAT851 B<br />
TROUBLE DIAGNOSES<br />
Electrical Components Inspection (Cont'd)<br />
INHIBITOR SWITCH<br />
1. Check continuity between terminals CD and @ and between<br />
terminals @ and @, @, @, 0, @, @ while moving selector<br />
lever through each range.<br />
Leverposition<br />
2. If N.G., check again with manual control linkage disconnected<br />
from manual shaft of AIT assembly. - Refer to step<br />
1.<br />
3. If O.K. on step 2, adjust manual control linkage. - Refer to<br />
"ON-VEHICLE SERVICE".<br />
4. If N.G. on step 2, remove inhibitor switch from AIT and<br />
check continuity of inhibitor switch terminal. - Refer to<br />
step 1.<br />
5. If O.K. on step 4, adjust inhibitor switch. - Refer to "ON-<br />
VEHICLE SERVICE".<br />
6. If N.G. on step 4, replace inhibitor switch.<br />
REVOLUTION SENSOR<br />
. For removal and installation, refer to "ON-VEHICLE SERV-<br />
ICE".<br />
. Check resistance between terminals CD,@ and @.<br />
AT-66<br />
CD CV @ @ @ @ (j) @ @<br />
p 0- -0<br />
R v -0<br />
N<br />
0 -0<br />
2 0 -0<br />
1 0<br />
Terminal No. Resistance<br />
CD @ 500- 650n<br />
CV @ No continuity<br />
CD @ No continuity
~ _tT<br />
_T~<br />
IV~<br />
/'<br />
/ /<br />
"<br />
,','<br />
I<br />
I<br />
I<br />
/<br />
/, , ~<br />
// ,I mJ<br />
I<br />
"'-'<br />
( ,<br />
"'---<br />
18 '<br />
~<br />
SAT846B<br />
Ground<br />
SAT847B<br />
l:tI<br />
SAT848B<br />
TROUBLE DIAGNOSES<br />
Electrical Components Inspection (Cont'd)<br />
FLUID TEMPERATURE SENSOR<br />
. For removal and installation, refer to "ON-VEHICLE SERV-<br />
ICE".<br />
. Check resistance between two terminals while changing<br />
temperature as shown at left.<br />
Temperature °c tF) Resistance<br />
20 (68)<br />
80 (176)<br />
Approximately 2.5 kn<br />
Approximately 0.3 kn<br />
LOCK-UP SOLENOID AND LINE PRESSURE SOLENOID<br />
. For removal and installation, refer to "ON-VEHICLE SERV-<br />
ICE".<br />
. Check resistance between two terminals.<br />
Resistance:<br />
Lock-up solenoid 10 - 16n<br />
Line pressure solenoid 2.5 - Sfl<br />
3-UNIT SOLENOID ASSEMBLY<br />
(Shift solenoid A, B and overrun clutch solenoid)<br />
. For removal and installation, refer to "ON-VEHICLE SERV-<br />
ICE".<br />
. Check resistance between terminals of each solenoid.<br />
Solenoid Terminal No. Resistance<br />
Shift solenoid A @<br />
Shift solenoid B @<br />
Overrun clutch solenoid @<br />
DROPPING RESISTOR<br />
. Check resistance between two terminals.<br />
Resistance: 11.2 - 12.Sfl<br />
AT-67<br />
Ground<br />
terminal<br />
20 -30n
~ ~~).-<br />
SA T779A<br />
': I<br />
~~- ~<br />
SA T597<br />
G<br />
~Q SAT767B<br />
SA T598<br />
SAT771B<br />
TROUBLE DIAGNOSES<br />
Final Check<br />
STALL TESTING<br />
Stall test procedure<br />
1. Check AIT and engine fluid levels. If necessary, add.<br />
2. Warm up engine until engine oil and A.T.F. reach operating<br />
temperature<br />
utes.<br />
after vehicle has been driven approx. 10 min-<br />
A.T.F. operating temperature:<br />
50 - 80°C (122 - 176°F)<br />
3. Set parking brake and block wheels.<br />
4. Install a tachometer where it can be seen by driver during<br />
test.<br />
. It is good practice to put a mark on point of specified<br />
engine rpm on indicator.<br />
5. Start engine, apply foot brake, and place selector lever in "0"<br />
range.<br />
6. Accelerate to wide-open throttle gradually while applying<br />
foot brake.<br />
7. Quickly note the engine stall revolution and immediately<br />
release throttle.<br />
. During test, never hold throttle wide-open for more than 5<br />
seconds.<br />
Stall revolution:<br />
2,050 - 2,250 rpm<br />
8. Shift selector lever to "N".<br />
9. Cool off A.T.F.<br />
. Run engine at idle for at least one minute.<br />
10. Perform stall tests in the same manner as in steps 5<br />
through 9 with selector lever in "2", "1" and" R", respectively.<br />
AT-68
Judgement of stall test<br />
Damaged components<br />
Selector lever position Judgement<br />
TROUBLE DIAGNOSES<br />
Final Check (Cont'd)<br />
D L 0 H<br />
2 L 0 H 0 : Stall revolution is normal.<br />
H : Stall revolution is higher<br />
1 L 0 0 than specified.<br />
/ L : Stall revolution is lower<br />
R L H H than specified.<br />
L ---1<br />
AT-69<br />
/ Forward clutch<br />
----=> / . / Overrun clutch<br />
/ / Forward one-way clutch<br />
,-- '"<br />
bUW L- - .<br />
f J .. .<br />
- - t- --:511 -<br />
p<br />
;=<br />
j:: '>i
~~'I<br />
~~-=~<br />
Front<br />
SAT782A<br />
SAT779A<br />
ST2505S001<br />
(J25695-AI<br />
SAT180B<br />
SA T597<br />
TROUBLE DIAGNOSES<br />
Final Check (Cont'd)<br />
PRESSURE TESTING<br />
. Location of line pressure test port<br />
. Line pressure plugs are hexagon headed bolts.<br />
. Always replace line pressure plugs as they are selfsealing<br />
bolts.<br />
Line pressure test procedure<br />
1. Check AfT and engine fluid levels. If necessary, add.<br />
2. Warm up engine until engine oil and A.T.F. reach operating<br />
temperature after vehicle has been driven approx. 10 minutes.<br />
A.T.F. operating temperature:<br />
50 - BOoC (122 - 176°F)<br />
3. Install pressure gauge to line pressure port.<br />
- D, 2 and 1.ranges -<br />
- R range -<br />
4. Set parking brake and block wheels.<br />
. Continue to depress brake pedal fully while line pressure<br />
test at stall speed is performed.<br />
AT-70
SA T643A<br />
JUDGEMENT OF LINE PRESSURE TEST<br />
TROUBLE DIAGNOSES<br />
Final Check (Cont'd)<br />
5. Start engine and measure line pressure at idle and stall<br />
speed.<br />
. When measuring line pressure at stall speed, follow the<br />
stall test procedure.<br />
Line pressure:<br />
Engine speed<br />
rpm<br />
Idle<br />
Stall<br />
AT-71<br />
Line pressure kPa (kg/cm2, psi)<br />
D, 2 and 1 ranges R range<br />
Judgement Suspected parts<br />
471 -510 657 -696<br />
(4.8 - 5.2, 68 - 74) (6.7 -7.1, 95 -101)<br />
1,020 - 1,098 1.422 - 1,500<br />
(10.4 - 11.2, 148 - 159) (14.5 - 15.3,206 - 218)<br />
Line pressu re is low in all ranges. 8 Oil pump wear<br />
8 Control piston damage<br />
8 Pressure regulator valve or plug sticking<br />
8 Spring for pressure regulator valve damaged<br />
8 Fluid pressure leakage between oil strainer and pressure regulator<br />
valve<br />
Line pressure is low in particular range. 8 Fluid pressure leakage between manual valve and particular clutch.<br />
.!!:!<br />
32<br />
....<br />
«<br />
8 For example;<br />
If line pressure is low in "R" and "1" ranges but is normal in<br />
"D" and "2" range, fluid leakage exists at or around low & reverse<br />
brake circuit.<br />
Line pressure is high. 8 Mal-adjustment of throttle sensor<br />
8 Fluid temperature sensor damaged<br />
. 8 Line pressure solenoid sticking<br />
8 Short circuit of line pressure solenoid circuit<br />
8 Pressure modifier valve sticking<br />
8 Pressure regulator valve or plug sticking<br />
Line pressure is low. 8 Mal-adjustment of throttle sensor<br />
CI><br />
a.<br />
~<br />
Aeference pege (AT-)<br />
- Numben ere arrenged in order of probability.<br />
~ ..W..<br />
:I<br />
c<br />
!<br />
~<br />
Perform inspections starting with number one<br />
end working up. Circled numben indicate thet<br />
the transmillion must be removed from the<br />
vehicle.<br />
48 Engine does not start in "N", "P" ranges.<br />
48 Engina sterts in range other than "N" and "P",<br />
- Transmillion noise in "P" and "N" rang8l,<br />
48<br />
Vehicle moves when chenging into "P" renge<br />
or parking geer does not disengege when<br />
shifted out of "P" range.<br />
49 Vahicle runs in "N" range,<br />
Vehicle will not run in "A" range (but runs<br />
61 in "0", "2" and "1" ranges), Clutch slips.<br />
-<br />
Very poor acceleration.<br />
Vehicle braked when shifting into "A" range,<br />
-<br />
-<br />
Sharp shock in shifting from "N" to "0"<br />
range,<br />
Vehicle will not run in "0" end "2" ranges<br />
(but runs in "1" and "A" renge).<br />
Vehicle will not run in "0", "1", "2" ranges<br />
62 (but runs in "A" range), Clutch slips.<br />
Very poor acceleretion,<br />
- Clutches or brakes slip somewhat in starting.<br />
- Excellive creep.<br />
61,62 No creep at all,<br />
- Failure to change gear from "0, " to "0, ".<br />
- Failure to change gear from "0," to "0.".<br />
- Failure to change gear from "O~" to "0. ",<br />
64,<br />
66,<br />
66<br />
-<br />
TO'ohigh e geer change point from "0, " to<br />
"0, ", from "0," to "0, ", from "0,"<br />
to "°.",<br />
Gaar change directly from "0, " to "0,"<br />
occu rs,<br />
- Engine stopswhan shifting lever into "A", "0",<br />
"2" and "1", ,<br />
-<br />
-<br />
Too sharp a shock in change from "0, " to<br />
"0,".<br />
Too sharp a shock in changa from "0, " to<br />
"0,<br />
TROUBLE DIAGNOSES<br />
Symptom Chart<br />
9,<br />
14 66 66<br />
!5<br />
!<br />
- I<br />
C<br />
E 1 -<br />
,! ~ ~<br />
'tI .. '..<br />
.c ~ § 6 E<br />
s.~!5c';;~<br />
..= ';;! I.=~!<br />
-c .1 cs? .-::1<br />
E=!5.. .ge:gi!<br />
-e,~E.=!!!i<br />
~c ~e ~'6> '6>!<br />
u::8.E~et:.:i.jj:J<br />
213<br />
11 2<br />
1 314 6<br />
1<br />
1<br />
1<br />
1 2<br />
1<br />
1<br />
. 2 61 1 31 7<br />
1 .<br />
1<br />
. 1<br />
70<br />
ON vehicle<br />
67,<br />
106<br />
67<br />
:? :!1<br />
.D g<br />
ic( ID~<br />
::!1 :!1!<br />
z g g::l<br />
~.!! .!! i!<br />
o~ ~!i<br />
h: :;!<br />
8~ ~:J<br />
2 .<br />
. .<br />
214<br />
31 6<br />
. 214<br />
1 3<br />
AT-72<br />
214<br />
214 .<br />
3<br />
4, .<br />
6, .<br />
. 3,.<br />
67<br />
7,<br />
67<br />
:!1 i<br />
g.. cI<br />
:!1S ~iii<br />
O.c ~z<br />
~ ~ 1!!5<br />
'§.= &~<br />
U E-<br />
.. c ..::I<br />
~ ~ ~<br />
g ~ ] H<br />
...IOILc(<br />
~<br />
7<br />
7<br />
~<br />
..<br />
it-<br />
, 1;:<br />
90,<br />
101 120' 1<br />
~~<br />
... M 't.. i<br />
':'NM.ct: .c<br />
!5!5!5,~~ 5.c<br />
]1!!]11 8.. u~<br />
::1::1 ::I C .. E I.i!<br />
~~ ~,g &~ i~<br />
II II H'c !5:: i:.!!'<br />
c(c( c(!!! 1-0 et:J:<br />
. . 1..<br />
. .
~<br />
-<br />
~<br />
i<br />
fI<br />
c:<br />
!<br />
of.<br />
II::<br />
Reference pege (A T-<br />
Numbers are arranged in order of probability.<br />
Perform inspections starting with number one<br />
and working up. Circled numbers indicate thet<br />
the trensmission must be removed from the<br />
vehicle.<br />
- Too sharp a shock in change from "D," to<br />
"D."<br />
- Almost no shock or clutches slipping in change<br />
from "D," to "D, ".<br />
- Almost no shock or slipping in change from<br />
"D," to "D,".<br />
- Almost no shock or slipping in change from<br />
"D,"to"D.".<br />
- Vehiclebrakedby gear change from "D." to<br />
"D,".<br />
- Vehicle braked by gear change from "D, .. to<br />
"D,".<br />
- Vehicle braked by gear change from "D,"<br />
"D.".<br />
to<br />
-<br />
Maximum speed not attained. Acceleration poor.<br />
-<br />
Failure to change gear from "D." to "D,"<br />
- Failure to change gear from "D," to "D,"<br />
Or from "D." to "D, ".<br />
- Failure to change gear from "D," to "D."<br />
Or from "D," to "D. ".<br />
-<br />
Gear change shock felt during deceleration<br />
by releasing accelerator pedal.<br />
- Too high a change point from ~'D." to "D, ",<br />
from "D," to "D, ", from "D," to "D, ".<br />
- Kickdown does not operate when depressing<br />
pedal in "D." within kickdowII vehicle speed.<br />
-<br />
Kickdown operates or engine overruns when<br />
depressing pedal in "D. " beyond<br />
vehicle speed limit.<br />
k ickdown<br />
- Races extremely fast or slips in changing<br />
from "D." to "D," when depressing pedal.<br />
- Races extremely fast or slips in changing<br />
from "D." to "D," when depressing pedal.<br />
- Races extremely fast or slips in changing<br />
from "D," to "D," when depressing pedal.<br />
- Races extremely fast or slips in changing from<br />
"D." or "D," to "D," when depressing pedal.<br />
- Vehicle will not run in any range.<br />
- Transmission noise in "D", "2", "1" and "R"<br />
ranges.<br />
TROUBLE DIAGNOSES<br />
.<br />
9,<br />
14<br />
Symptom Chart (Cont'd)<br />
66<br />
§<br />
c:<br />
- S<br />
t: i<br />
~ 8.-<br />
1;; .:!<br />
.:!. "2 '"<br />
'Q ..;;<br />
« ~ c:<br />
& -fi ~ ~.g<br />
11 ."'!! 51.:!<br />
-~~lIg~<br />
I-o.';:;~<br />
~g~=~.~<br />
':;C::E1~~<br />
ii:8.E~lI::w<br />
1 2<br />
1<br />
1<br />
112<br />
211<br />
2<br />
1 2<br />
1 2<br />
1 2<br />
1 2<br />
1<br />
1<br />
1 2<br />
1 2<br />
1 2<br />
1<br />
-<br />
1<br />
-<br />
1<br />
$1 . . 2<br />
1 . . 2<br />
66<br />
2<br />
70<br />
ON vehicle<br />
67,<br />
106<br />
67<br />
> :!!<br />
:0 :!! g<br />
g.!!<br />
E II 0<br />
0. «IIIO:!!.<br />
i<br />
~ . .. °.c<br />
~!~:2:!!!!S<br />
=!1~~!au<br />
:2 0.c:<br />
!~eaa~:;02<br />
's.! t::!::!:! ij:;;<br />
,jj::;8~~::;3o<br />
214<br />
31 5<br />
31 5<br />
31 5<br />
AT-73<br />
5 3 4<br />
31 4<br />
31 4<br />
67<br />
6 4 5 3<br />
7,<br />
67<br />
. 15 3 4 .<br />
5 3 4 .<br />
2 4 3<br />
3 5 4<br />
3 6 5 4<br />
7<br />
~<br />
~ .<br />
i - 1::<br />
c: ~ .<br />
S z 1;;<br />
; 9 <<br />
~ I!!<br />
.:! .0<br />
~ ~ !<br />
.:!i ."2<br />
~!~.!<br />
2 0 4111 II<br />
~ ~ ~~<br />
~-' -'III<br />
@ @<br />
@I<br />
.
~ -..:.<br />
~..<br />
i'<br />
a.<br />
8<br />
c:<br />
!<br />
of<br />
..<br />
tr<br />
61<br />
-<br />
61<br />
-<br />
-<br />
-<br />
-<br />
-<br />
-<br />
-<br />
-<br />
57<br />
-<br />
-<br />
Reference pege (A T-<br />
Numbers ere errenge '"<br />
~ 0 ~ i<br />
.'<br />
I<br />
120'<br />
OFF vehicle<br />
126'<br />
126'1130<br />
1 124 137, 1 134<br />
.c:<br />
~<br />
.: .c:"<br />
u u '"<br />
~ ~ E<br />
"5 ~ .c: u 01<br />
~.. ~ > t:<br />
~g~~i"2<br />
'E'E c:! ~.!<br />
2 0 015 01<br />
~ ~ ~~ ~e<br />
ILIL O..J ..Ja)<br />
@.<br />
@.I@.<br />
.. @ .Icv<br />
@cvl@@I@.I@ .I@@<br />
@
TROUBLE DIAGNOSES<br />
AfT Shift Lock System<br />
SHIFT LOCK SYSTEM ELECTRICAL PARTS LOCATION<br />
/---------<br />
/<br />
AT-75<br />
"'- "'-<br />
Key switch harness<br />
cOnnector ",<br />
~ \ ,<br />
~<br />
SAT8358
TROUBLE DIAGNOSES<br />
AIT Shift Lock System (Cont'd)<br />
CIRCUIT DIAGRAM FOR QUICK PIN POINT CHECK<br />
I GN IT ION SWITCH<br />
ON or START<br />
FUSE<br />
@!!I KEY SWITCH<br />
till<br />
S KEY LOCK<br />
SOLENOID<br />
SHIFT r<br />
8 LOCK<br />
m" 5 1 9 SOLENOID,<br />
AT-76<br />
DETENTI ON<br />
SWITCH<br />
~~<br />
~~<br />
To time control unit<br />
To stop lamp<br />
8<br />
...<br />
~<br />
@<br />
"<br />
11<br />
5<br />
2<br />
3<br />
6<br />
B<br />
10<br />
I-<br />
...,<br />
Z<br />
::J<br />
...J<br />
0<br />
0::<br />
I-<br />
Z<br />
0<br />
U<br />
:.::<br />
u<br />
0<br />
...J<br />
l-<br />
LL<br />
...,<br />
:I:<br />
II)<br />
9<br />
"::"<br />
SAT815B
!i<br />
I<br />
.....<br />
.....<br />
I GNI TI ON SWI TCH<br />
ON or START<br />
@ I<br />
.~<br />
KEYLOCK~ r::o- L<br />
SOLENOID ~ ~L/R<br />
!II<br />
J><br />
-I<br />
Q)<br />
..<br />
01<br />
Q)<br />
G @J)<br />
KEY<br />
SWITCH ~ . ~~~:<br />
I BA<br />
TTERY I<br />
UP<br />
*<br />
GI:U<br />
FUSE BLOCK ~~<br />
(Refer to "POWER<br />
SUPPL Y ROUTI NG"<br />
in EL section.)<br />
(Eng ine room harness)<br />
~<br />
[§ FUSE<br />
:u<br />
,~<br />
@)<br />
1 BA TTERY I<br />
L<br />
[C]] [C]]<br />
~~~~~<br />
GI ~ ~ GI GI<br />
~ II II III<br />
FUSI BLE LI NK<br />
FUSI BLE LINK BOX<br />
(Refer to "POWER SUPPLY<br />
ROUTING" in EL section.)<br />
@D@<br />
R/W 9 R/W<br />
L He" L<br />
L/R G9 L/R<br />
Y/R H9 Y/R<br />
ill<br />
S. M. J.<br />
ffieferto last page<br />
(Fo Idout page).]<br />
p<br />
~<br />
(Ma In harness)<br />
To time control unit<br />
ID<br />
@fi@J)<br />
BODY GROUND<br />
L<br />
L Y
0<br />
6<br />
I]<br />
-=-<br />
-=-<br />
-=-<br />
[Y]<br />
~<br />
R/W<br />
SAT818B<br />
@i)[9<br />
~EIDJ<br />
Control unit<br />
terminal<br />
LIB<br />
SAT819B<br />
RIG' Control unit<br />
terminal<br />
SA T820B<br />
TROUBLE DIAGNOSES<br />
0<br />
6<br />
I]<br />
AfT Shift Lock System (Cont'd)<br />
DIAGNOSTIC PROCEDURE 1<br />
SYMPTOM: Selector lever cannot be moved from "P"<br />
range when applying brake pedal or can be<br />
moved when releasing brak,epedal.<br />
CHECK POWER SOURCE.<br />
1.1<br />
~<br />
2. Check voltage between<br />
control unit terminals @ , @ ,<br />
@ and ground.<br />
Battery voltage should exist.<br />
CHECK INPUT SIGNAL<br />
(Detention switch).<br />
1.1 OJ<br />
2. Check voltage between control<br />
unit terminal @ and<br />
ground while setting selector<br />
lever in "P" position.<br />
Selector lever<br />
release butto n<br />
Not pressed<br />
Voltage<br />
Battery voltage<br />
CHECK INPUT SIGNAL<br />
(STOP LAMP SWITCH).<br />
1. ~ I fI!if::j<br />
2. Check voltage between<br />
control unit terminal @ and<br />
ground while applying brake<br />
pedal.<br />
Battery voltage should exist.<br />
AT-78<br />
@<br />
O.K.<br />
N.G.<br />
Check the following items:<br />
. Harnesscontinuitybetween<br />
batteryand control unit<br />
. Fuse<br />
. Ignitionswitch<br />
N.G. Check the following items:<br />
. Detention switch - Refer to<br />
"COMPONENTCHECK".<br />
. Key switch - Refer to<br />
"COMPONENTCHECK".<br />
. Harnesscontinuity between<br />
detention switch and<br />
control unit.<br />
N.G.<br />
Check the following items:<br />
. Stop lampswitch<br />
. Harnesscontinuitybetween<br />
stop lampswitchand control<br />
unit
II<br />
-<br />
!YJ<br />
'"<br />
i5~<br />
Shift lock ~<br />
harness I2
D<br />
6<br />
I]<br />
-=-<br />
[Y)<br />
:+'<br />
@i)~<br />
R/W<br />
SAT818B<br />
mm~<br />
Control unit<br />
terminal<br />
VIR<br />
-=- SAT822B<br />
-::-<br />
[Y)'<br />
:+:<br />
@i)[iI<br />
rtiBL~<br />
Control unit<br />
terminal<br />
LIB<br />
SAT819B<br />
TR~OUBLE DIAGNOSES<br />
, 'AIT Shift Lock System (Cont'd)<br />
DIAGNOSTICPROCEDURE2<br />
SYMPTOM: . Ignition key cannot be removed when<br />
selector lever is set to lOP"position or can<br />
be removed when selector lever Is set to<br />
any position except lOP".<br />
D<br />
6<br />
N.G..<br />
CHECK POWER<br />
.1<br />
SOURCE.<br />
1.<br />
(g<br />
2. Check voltage between<br />
control unit terminals @, @,<br />
@ and ground.<br />
Battery voltage should exist.<br />
O.K.<br />
CHECK INPUT SIGNAL<br />
(Key switch).<br />
1. Insert ignition key into<br />
ignition .switch.<br />
2. Check voltage between<br />
control unit terminal (j]) and<br />
ground.<br />
Battery voltage should exist.<br />
O.K.<br />
I]<br />
CHECK INPUT SIGNAL<br />
(Detention switch).<br />
"I (g. I<br />
2. Check voltage between<br />
control unit terminal @ and<br />
ground while setting selector<br />
lever in "P" position.<br />
Selector lever<br />
release button<br />
Release<br />
Voltage<br />
Battery voltage<br />
3. Check voltage between<br />
control unit terminal @ and<br />
ground while setting selector<br />
lever in any position except<br />
"P" .<br />
ov<br />
AT-SO<br />
A<br />
O.K.<br />
.<br />
Check the following items:<br />
. Harnesscontinuity between<br />
battery and control unit<br />
. Fuse<br />
. Ignitionswitch<br />
N.G.<br />
Check the following items:<br />
. Key switch - Refer to<br />
"COMPONENT CHECK".<br />
. HarnesscontinuitybetWeen<br />
key switchandcontrolunit.<br />
N.G. Check the following items:<br />
. Detention switch - Refer to<br />
"COMPONENTCHECK".<br />
. Harnesscontinuity'betWeen<br />
detention switch and<br />
control unit.
II<br />
iVr:it<br />
~<br />
[Y]<br />
SA T823B<br />
TROUBLE DIAGNOSES.<br />
II<br />
AfT Shift Lock System (Cont'd)<br />
i<br />
N.G.<br />
CHECK OUTPUT SIGNAL.<br />
1.<br />
Ia<br />
2. Check voltage between terminals<br />
@ and @ of key<br />
lock solenoid harnessconnector<br />
when turning detention<br />
switch ON and OFF.<br />
Battery voltageis momentarily<br />
produced.<br />
(Refer to "SH IFT LOCK<br />
CONTROL UNIT INSPEC-<br />
TION TABLE".)<br />
O.K.<br />
Check key lock solenoid.<br />
(Refer to "COMPONENT<br />
CHECK".)<br />
O.K.<br />
Recheck key lock operation.<br />
O.K.<br />
( INSPECTION END<br />
AT-81<br />
)<br />
N.G'<br />
N.G.<br />
I<br />
Check harness.continuity<br />
between control unit and key<br />
lock solenoid.<br />
Replace key lock solenoid.<br />
1. Perform control unit input/<br />
output signal inspection test.<br />
2. If N.G., recheck harness<br />
connector connection.
12-pin connector<br />
ITIiliI::QJ:ill<br />
~<br />
~<br />
SA T824B<br />
TROUBLE DIAGNOSES<br />
AfT Shift Lock System (Cont'd)<br />
SHIFT LOCK CONTROL UNIT INSPECTION<br />
. Measure voltage between each terminal and terminal @ by<br />
following "SHIFT LOCK CONTROL UNIT INSPECTION<br />
TABLE".<br />
. Pin connector terminal layout.<br />
AT-82
TROUBLE DIAGNOSES<br />
SHIFT LOCK CONTROL UNIT INSPECTION TABLE<br />
(Data are reference values.)<br />
Terminal No.<br />
i5~ Shift lock<br />
harness connector<br />
[ill<br />
~ Key<br />
lock<br />
solenoid<br />
harness<br />
connector<br />
i5~<br />
~ ~ Key switch<br />
[ill<br />
G~~--<br />
SAT832B<br />
SAT833B<br />
SAT834B<br />
TROUBLE DIAGNOSES<br />
AIT Shift Lock System (Cont'd)<br />
COMPONENT CHECK<br />
Shift lock solenoid<br />
. Check operation by applying battery voltage to shift lock<br />
harness connector.<br />
Detentionswitch<br />
. Check continuity between terminals @ and @ of shift lock<br />
harness connector.<br />
Condition Continuity<br />
When setting shift leverto "P" position with<br />
release button released.<br />
Except the above No<br />
Key lock solenoid<br />
. Check operation by applying battery voltage to key lock<br />
solenoid harness connector.<br />
Operating sound must be emitted.<br />
Yes<br />
Key switch<br />
. Check continuity between terminals @ and CDof key switch<br />
harness connector.<br />
When inserting key into key cylinder<br />
When removing key from key cylinder<br />
AT-84<br />
Condition Continuity<br />
Yes<br />
No
CD<br />
~~~<br />
J~Q~<br />
REMOVAL AND INSTAllATION<br />
SA T718<br />
CD ~: AfT -+ Engine<br />
@'\ ~ : Engine (gusset)<br />
to AfT<br />
SAT111C<br />
SA T638A<br />
Removal<br />
. Remove fluid charging pipe from A/T assembly.<br />
. Remove bolts securing torque converter to drive plate.<br />
. Remove those bolts by turning crankshaft.<br />
. Plug up opening such as oil charging pipe hole, etc.<br />
Installation<br />
. Drive plate runout<br />
Maximum allowable runout:<br />
0.5 mm (0.020 in)<br />
If this runout is out of allowance,<br />
ring gear.<br />
replace drive plate with<br />
. When connecting torque converter to transmission, measure<br />
distanc:;e"A"<br />
Distance<br />
to be certain that they are correctly assembled.<br />
"A":<br />
26 mm (1.02 in) or more<br />
. Install converter to drive plate.<br />
. Reinstall any part removed.<br />
. After converter is installed to drive plate, rotate crankshaft<br />
several turns. and check to be sure that transmission<br />
rotates freely without binding.<br />
. Tighten bolts securing transmission.<br />
Bolt No. Tightening torque N.m (kg-m,ft.lb)<br />
Gusset to<br />
29 . 39 (3.0 . 4.0, 22 . 29)<br />
engine<br />
. Reinstall any part removed.<br />
. Check fluid level in transmission.<br />
. Move selector lever through all positions<br />
20 (0.79)<br />
to be sure that<br />
transmission operates correctly.<br />
With parking brake applied, rotate engine at idling. Move<br />
selector lever through "N" to "D", to "2", to "1" and to "R".<br />
A slight shock should be felt by hand gripping selector each<br />
time transmission is shifted.<br />
. Perform road test. - Refer to "ROAD TESTING".<br />
AT-85<br />
Bolt length "L"<br />
mm (in)<br />
1 39 -49 (4.0 - 5.0, 29 - 36) 40 (1.57)<br />
2 39.49 (4.0. 5.0, 29 - 36) 50 (1.97)<br />
3 29 - 39 (3.0.4.0,22.29) 25 (0.98)
~:<br />
~:<br />
MAJOR OVERHAUL<br />
N.m (kg-m, ft-Ib)<br />
S ' lde seal S .<br />
Apply recommended sealant<br />
pnng seat<br />
. .<br />
(<strong>Nissan</strong> genuine part: Side seal Cam nng return spnng<br />
~ l<br />
KP610.(0250) or equivalent. Pivot Pin--v>~ ~. ~/./ .<br />
~: Apply A.T.F. Control piston ~\\}) I<br />
* : Select with proper thickness.<br />
R iP':>..~ ..~<br />
'-. Cam ring i<br />
* : Adjustment is req~ired. '- , '\.. O-ring ~ EI ~<br />
~ :i~~ / 1\ o.,;",~/ ~~ I<br />
~~~ \~ , ~J'coo,.";;::':,~ ~o~~ R.,,;";", ~...*<br />
~ ~TOrqUeConverter<br />
~ -<br />
~ ,~ )<br />
(4.0-5.0,2~361 /<br />
~<br />
~.~,' bilseal~~./ ~ ' D-ring~~.<br />
"~16-21 (1'6_2'1'<br />
/<br />
. 12- 151 : . \ /<br />
A 39 -49 / . . '<br />
q» Needle"<br />
\ - Needle bearing / "" '<br />
B Eli><br />
~<br />
I<br />
~~~~OiIPumpcoverbearingrace*EI '<br />
.tJPJ m q» . eanng race 'D /<br />
. ,. J ~ .' '''ko~y ~ ,~ .<br />
I ~' ~~ ~JJ~.) Gasket ~/<br />
.. .~1~ Y\S";';"'~EI~ ~.<br />
. onp"mp"m" ';"h" *JaI(Ij1 f'\~f::\ Fmm"'"...' J<br />
r.t\ Needle bearing m q»/<br />
011pump cover / - .<br />
\. , ,./..<br />
:\~ \ \ ~'<br />
~<br />
~W~ \ Needle bearing EI ~<br />
~ ... . Beari~grace' /<br />
~<br />
Overrunclutch hUb ~<br />
m q». / Thrust washermq» ~,<br />
1<br />
1<br />
Retainingplate*/ ~<br />
//<br />
~~ ~~S""';"'<br />
, E.nd bearing<br />
./ ~ (i Forward one-way clutch<br />
Ealq» - B'l~\ -<br />
BearingraceElq»<br />
~~~\ -<br />
\ Snap ring \ Forward clutc hub<br />
./ Thrust washer m q»<br />
Rear internal gear<br />
(with Front rear internal planetary gear carrier)<br />
~<br />
h<br />
Output shaft front snap ring ~<br />
~<br />
I<br />
. Rear sun gear :e<br />
~7 I ~ ~Needlebearingmq»<br />
. .X~)~<br />
L Front planetary carrier<br />
AT-86
MAJOR OVERHAUL<br />
D-ring ~~<br />
Oilseal~~ '1«<br />
_~~I ~«f/1<br />
- ...,ffi\)<br />
~~}" ~.<br />
(~~'J ), OilN" t:!"'Ti"<br />
~"} // O-no't:!@) "'=<br />
I I ./" I Overrun clutch<br />
(~~~y LnwO",~"".":::~::'"<br />
r~~~ ""<br />
~;.,. ~<br />
'<br />
no. t:!EI ~ .nog..,EI
3 -+ 4 & N -+ R accumulator shoulder pressure<br />
--- -<br />
3 -+ 4 & N -+ R accumulator back pressure<br />
Servo 2nd apply chamber pressure<br />
Servo 3rd release chamber pressure<br />
-Oil pump feedback pressure<br />
Servo 4th apply chamber pressure<br />
Oil pump discharge pressure<br />
Front lubricating hole<br />
High-clutch pressure<br />
-Torque converter pressure (lock-up released)<br />
Reverse clutch pressure'<br />
'Torque converter pressure (lock-up applied)-<br />
High-clutch pressure<br />
Front lubricating hole<br />
Oil pump discharge hole<br />
MAJOR OVERHAUL<br />
Oil Channel<br />
1 -+ 2 accumulator drain<br />
Oil pump suction hole<br />
~<br />
Torque converter pressure (lock-up released)<br />
Reverse clutch pressure<br />
Torque converter pressure<br />
(lock-up applied)<br />
Oil pump feedback pr.essUre<br />
Oil pump suction hole<br />
Oil pump discharge hole<br />
Front lubricating hole<br />
High-clutch pressure -<br />
Torque converter pressure<br />
/lock-up released) .<br />
Forward clutch pressure<br />
-~r/<br />
-==-.S/<br />
Forward clutch pressure Servo 3rd chamber pressure<br />
~<br />
AT-SS<br />
2 -+ 3 accumulator back pressure<br />
1 -+ 2 accumulator back pressure<br />
N -+ D accumulator back pressure<br />
2 -+ 3 accumulator shoulder pressure<br />
N -+ D accumulator shoulder pressure<br />
Low & reverse brake pressure<br />
Overrun clutch pressure<br />
Forward clutch pressure<br />
Oil pump suction hole<br />
Torque converter pressure<br />
(lock-up applied)<br />
Reverse clutch pressure<br />
L Oil cooler tube (OUT)<br />
and rear lubricating hole<br />
3 -+ 4 & N -+ R accumulator back pressure<br />
Servo 4th apply chamber pressure<br />
Servo 2nd apply<br />
chamber pressure<br />
SAT186B
~I<br />
co<br />
CD<br />
en<br />
»<br />
-i 0'1<br />
....<br />
»<br />
CD<br />
~<br />
/<br />
@ @ (j)<br />
@ @<br />
_._~ ._~- ._-~--<br />
II-:cr.IWl-.<br />
SAT0198<br />
SAT1868<br />
SAT1878<br />
DISASSEMBLY!<br />
Disassembly<br />
1. Remove torque converter by holding it firmly and turning<br />
while pulling straight out.<br />
2. Check torque converter one-way clutch.<br />
a. Insert Tool into spline of one-way clutch inner race.<br />
b. Hook bearing support unitized with one-way clutch outer<br />
race with suitable wire.<br />
c. Check that one-way clutch inner race rotates only clockwise<br />
with Tool while holding bearing support with wire.<br />
3. Remove inhibitor switch from transmission case.<br />
4. Remove oil pan.<br />
a. Drain A.T.F. from rear extension.<br />
b. Raise oil pan by placing wooden blocks under converter<br />
housing and rear extension.<br />
c. Separate the oil pan and transmission case.<br />
. Always place oil pan. straight down so that foreign particles<br />
inside will not move.<br />
5. Place transmission into Tool with the control valve facing up.<br />
AT-90
Screen Screen<br />
~---~<br />
SAT171B<br />
V(g)<br />
SATOO8B<br />
SAT025B<br />
~~~I SATOO9B<br />
DISASSEMBLY<br />
Disassembly (Cont'd)<br />
6. Check oil pan and oil stra,inerfor accumulation of foreign<br />
particles.<br />
. If materials of clutch facing are found, clutch plates may be<br />
worn.<br />
. If metal filings are found, clutch plates, brake bands, etc.<br />
/ may be worn.<br />
. If aluminum filings are found, bushings or aluminum cast<br />
parts may be worn.<br />
In above cases, replace torque converter and check unit for<br />
cause of particle accumulation.<br />
7. Remove lock-up solenoid' and fluid temperature sensor<br />
connectors.<br />
. Be careful not to damage connector.<br />
8. Remove oil strainer.<br />
a. Remove oil strainer from control valve assembly.<br />
Then remove O-ring from oil strainer.<br />
b. Check oil strainer screen for damage.<br />
9. Remove control valve assembly.<br />
a. Straighten terminal clips to free terminal cords then remove<br />
terminal clips.<br />
AT-91<br />
'-.
DISASSEMBLY<br />
Disassembly (Cont'd)<br />
b. Remove bolts @ and @,<br />
sembly from transmission.<br />
Bolt Length<br />
@<br />
@<br />
and remove control valve as-<br />
37 mm (1.46 in)<br />
50 mm (1.97 in)<br />
c. Remove solenoid connector.<br />
. Be careful not to damage connector.<br />
d. Remove manual valve from control valve assembly.<br />
10. Remove terminal cord assembly from transmission case<br />
while pushing on stopper.<br />
. Be careful not to damage cord.<br />
. Do not remove terminal cord assembly unless It Is damaged.<br />
AT-92
SA T027 B<br />
SAT999A<br />
SAT995A<br />
DISASSEMBLY<br />
Disassembly (Cont'd)<br />
11. Remove converter housing.<br />
a. Remove converter housing from transmission case.<br />
b. Remove O-rings from converter housing.<br />
c. Remove traces of sealant.<br />
. Be careful not to scratch converter housing.<br />
12. Remove O-ring from input shaft.<br />
13. Remove oil pump assembly.<br />
a. Attach Tool to oil pump assembly and extract it evenly from<br />
transmission case.<br />
b. Remove O-ring from oil pump assembly.<br />
c. Remove traces of sealant from oil pump housing.<br />
. Be careful not to scratch pump housing.<br />
AT-93
SAT108B<br />
SAT029B<br />
SA T655<br />
DISASSEMBLY<br />
Disassembly (Cont' d)<br />
d. Removeneedle bearing<br />
assembly.<br />
14. Remove input shaft and oil pump gasket.<br />
and thrust washer from oil pump<br />
15. Remove brake band and band strut.<br />
a. Loosen lock nut and remove band servo anchor end pin<br />
from transmission case.<br />
b. Remove brake band and band strut from transmission case.<br />
c. Hold brake band in a circular shape with clip.<br />
AT-94
Ir~ ~<br />
~--(-<br />
lf}<br />
~~ .. ... l~/<br />
~ ~c o~S<br />
~c:::-'::'<br />
')" ,',,;:;:.-,,,.:(ll<br />
\~ r ~"~\~) .~~~.<br />
1~' '" Oil groove
~<br />
SA T190B<br />
DISASSEMBLY<br />
Disassembly (Cont'd)<br />
17. Remove rear extension.<br />
a. Remove rear extension from transmission case.<br />
b. Remove rear extension gasket from transmission case.<br />
c. Remove oil seal from rear extension.<br />
. Do not remove oil seal unless it is to be replaced.<br />
d. Remove revolution sensor from rear extension.<br />
e. Remove O-ring from revolution sensor.<br />
18. Remove output shaft and parking gear.<br />
a. Remove rear snap ring from output shaft.<br />
b. Slowly push output shaft all the way forward.<br />
. Do not use excessive force.<br />
c. Remove snap ring from output shaft.<br />
AT-96
~<br />
----<br />
DISASSEMBLY<br />
Disassembly (Cont'd)<br />
d. Remove output shaft and parking gear<br />
transmission case.<br />
e. Remove parking gear from output shaft.<br />
f. Remove needle bearing from transmission case.<br />
19. Remove rear side clutch and gear components.<br />
a. Remove front internal gear.<br />
b. Remove bearing race from front internal gear.<br />
c. Remove needle bearing from rear internal gear.<br />
AT-97<br />
as a unit from
SAT951A<br />
0<br />
SA T034B<br />
SAT035B<br />
SAT037B<br />
DISASSEMBLY<br />
Disassembly (Cont'd)<br />
d. Remove rear internal gear, forward clutch hub and overrun<br />
clutch hub as a set from transmission case.<br />
e. Remove needle bearing from overrun clutch hub.<br />
f. Remove overrun clutch hub from rear internal gear and<br />
forward clutch hub.<br />
g. Remove thrust washer from overrun clutch hub.<br />
h. Remove forward clutch assembly from transmission case.<br />
AT-98
SAT038B<br />
A 8 c D SAT040B<br />
(2~3) Front.<br />
Accumulator (3--+4,N--->R)<br />
p ~fi t? (1~2) ~~b'<br />
Accumulator<br />
piston A<br />
Accumulator<br />
piston C<br />
SA T937 A<br />
DISASSEMBLY<br />
Disassembly (Cont'd)<br />
20. Remove band servo and accumulator components.<br />
a. Remove band servo retainer from transmission case.<br />
b.<br />
.<br />
Apply compressed air to oil hole until band servo piston<br />
comes out of transmission case.<br />
Hold piston with a rag and gradually direct air to oil hole.<br />
c. Remove return springs.<br />
d. Remove springs from accumulator pistons S, C and D.<br />
e. Apply compressed air to each oil hole until piston comes<br />
out.<br />
. Hold piston with a rag and gradually direct air to oil hole.<br />
Identification of accumulator pistons A B C D<br />
Identification of oil holes a b c d<br />
f. Remove O-ring from each piston.<br />
21. Remove manual shaft components, if necessary.<br />
a. Hold width across flats of manual shaft (outside the transmission<br />
case) and remove lock nut from shaft.<br />
AT.. 99
\<br />
-In~<br />
\:<br />
Transmission case<br />
~~.~<br />
'0_L ~<br />
-/ @~~\I<br />
I \<br />
Oil seal<br />
SA T042 B<br />
-~j-/c r<br />
~ ,) yj- ~<br />
SAT044B<br />
DISASSEMBLY<br />
Disassembly (Cont'd)<br />
b. Remove retaining pin from transmission case.<br />
c. While pushing detent spring down, remove manual plate and<br />
parking rod from transmission case.<br />
d. Remove manual shaft from transmission case.<br />
e. Remove spacer and detent spring from transmission case.<br />
f. Remove oil seal from transmission case.<br />
AT -1 00
Oil seal ,~~<br />
O-ring ~
REPAIR FOR COMPONENT PARTS<br />
SAT655A<br />
SA T656A<br />
Oil Pump (Cont'd)<br />
4. While holding cam ring and spring lift out cam ring spring.<br />
. Be careful not to damage oil pump housing.<br />
. Hold cam ring spring to prevent it from jumping.<br />
5. Remove cam ring and cam ring spring from oil pump<br />
housing.<br />
6. Remove pivot pin from control piston and remove control<br />
piston assembly.<br />
7. Remove oil seal from oil pump housing.<br />
. Be careful not to scratch oil pump housing.<br />
INSPECTION<br />
Oil pump cover, rotor, vanes, control piston, side seals, cam<br />
ring and friction ring<br />
. Check for wear or damage.<br />
AT -1 02
Vane<br />
Clearance l<br />
r Seal<br />
Dial indicator<br />
ring<br />
~<br />
REPAIR FOR COMPONENT PARTS<br />
SAT657A<br />
SA T658A<br />
Oil Pump (Cont'd)<br />
Side clearances<br />
. Measure side clearances between end of oil pump housing<br />
and cam ring, rotor, vanes and control piston in at least four<br />
places along their circumferences. Maximum measured values<br />
should be within specified ranges.<br />
. Before measuring side clearance, check that friction rins~,<br />
O-ring, control piston side seals and cam ring sprinb are<br />
removed.<br />
Standard clearance:<br />
Cam ring<br />
0.01 - 0.024 mm (0.0004 - 0.0009 in)<br />
Rotor, vanes, control piston<br />
0.03 - 0.044 mm (0.0012 - 0.0017 in)<br />
. If not within standard clearance, replace oil pump assembly<br />
except oil pump cover assembly.<br />
Seal ring clearance<br />
. Measure clearance between seal ring and ring groove.<br />
Standard clearance:<br />
0.10 - 0.25 mm (0.0039 - 0.0098 in)<br />
Wear limit:<br />
0.25 mm (0.0098 in)<br />
. If not within wear limit, replace oil pump cover assembly.<br />
ASSEMBLY<br />
1. Drive oil seal into oil pump housing.<br />
. Apply A.T.F. to outer periphery and lip surface.<br />
2. Install cam ring in oil pump housing by the following stops.<br />
a. Install side seal on control piston.<br />
. Pay attention to its direction - Black surface goes toward<br />
control piston.<br />
. Apply petroleum jelly to side seal.<br />
b. Install control piston on oil pump<br />
AT-1 03
REPAIR FOR COMPONENT PARTS<br />
SAT662A<br />
Oil Pump (Cont'd)<br />
c. Install O-ring and friction ring on cam ring.<br />
. Apply petroleum jelly to O-ring.<br />
d. Assemble cam ring, cam ring spring and spring seat. Install<br />
spring by pushing it against pump housing.<br />
e. While pushing on cam ring install pivot pin.<br />
3. Install rotor, vanes and vane rings.<br />
. Pay attention to direction of rotor.<br />
4. Install oil pump housing and oil pump cover.<br />
a. Wrap masking tape around splines of oil pump cover<br />
assembly to protect seal. Position oil pump cover assembly<br />
in oil pump housing assembly, then remove masking tape.<br />
b. Tighten bolts in a criss-cross pattern.<br />
AT-104
E!!I@<br />
Small dia. -<br />
seal rings<br />
E!!I@<br />
Large dia.<br />
seal rings<br />
j~~~<br />
~~<br />
~--:-,<br />
YL~ ==,/-<br />
-<br />
--::::~> . . ~ £j<br />
REPAIR FOR COMPONENT PARTS<br />
SA T663A<br />
Oil Pump (Cont'd)<br />
5. Install seal rings carefully after packing ring grooves with<br />
petroleum jelly. Press rings down into jelly to a close fit.<br />
. Sealrings come in two different diameters. Check fit<br />
carefully in each groove.<br />
Small dia. seal ring:<br />
No mark<br />
Large dia. seal ring:<br />
Yellow mark in area shown by arrow<br />
. Do not spread gap of seal ring excessively while installing.<br />
It may deform ring.<br />
AT -1 05
Harness clips<br />
Reamer bolt<br />
Pilot filter<br />
Side plate<br />
REPAIR FOR COMPONENT PARTS<br />
Control Valve Assembly<br />
~. -' ~<br />
- ~.<br />
Harness clips<br />
\- -~ -;~<br />
\ \ O-'og~<br />
'~ .<br />
\ O-"og~<br />
~~-~<br />
Q<br />
\<br />
wOO'CO""" ,o'oooid .<br />
3-00"<br />
Lower body<br />
Orifice check spring<br />
Orifice check valve<br />
Reamer bolt<br />
Lower separate gasket ~<br />
Separator plate<br />
Upper separate gasket ~<br />
Upper body<br />
(overrun clutch solenoid and<br />
,o'oooid ,,,"mb'y<br />
~<br />
I ~. 0 shift solenoids A and B)<br />
AT-106<br />
~ : N.m (kg-m, ft-Ib)<br />
SAT1938
REPAIR FOR COMPONENT PARTS<br />
SAT194B<br />
SA T667 A<br />
SAT668A<br />
SA T670A<br />
Control Valve Assembly (Cont'd)<br />
DISASSEMBLY<br />
1. Remove solenoids.<br />
a. Remove lock-up solenoid and side plate from lower body.<br />
b. Remove a-ring from solenoid.<br />
c. Remove line pressure solenoid from upper body.<br />
d. Remove a-ring from solenoid.<br />
e. Remove 3-unit solenoid assembly from upper body.<br />
f. Remove a-rings from solenoids.<br />
2. Disassemble upper and lower bodies.<br />
a. Place upper body facedown, and remove bolts, reamer bolts<br />
and support plates.<br />
b. Remove lower body, separator plate and separate gasket as<br />
a unit from upper body.<br />
. Be careful not to drop pilot filter, orifice check valve,<br />
spring and steel balls.<br />
c. Place lower body facedown, and remove separate gasket<br />
and separator plate.<br />
d. Remove pilot filter, orifice check valve and orifice check<br />
spring.<br />
AT-107
Tube<br />
connector<br />
0<br />
0 O'o'--.r o~<br />
00 0000 o~-<br />
REPAIR FOR COMPONENT PA.RTS<br />
SAT671A<br />
SAT672A<br />
SAT673A<br />
) ~ 00 0 0 0 0 0 oo ~<br />
g,oooo 0<br />
0 6' 00' 0 0 00 0<br />
0 - 0 0 0 ~ '0 0 0<br />
0 C ' 00 cc" " 00 C '0 0 .<br />
'0 0 0' 0 'b 0 015 00<br />
'0 a = 0, 0 c"g 0 ,0 0<br />
0 Do 00 g °c? 0 00 OC "go ~ 0 0<br />
0 0 = OC 0 "",,,00 "0 0<br />
0 '" 0 = 0 0 gD "5 0 Co 0 0<br />
0 0",", o~ 0 0 ° 0 "c 0 " 0 000 o()o0<br />
g<br />
0 00 0 0' 0 c go:sO<br />
0 0 0 ,[l<br />
I 0 , 0 0 0 DOO 0 0 0<br />
0<br />
0<br />
~ 0 .0 0 ~o .0.<br />
00 0<br />
SAT675A<br />
Control Valve Assembly (Cont'd)<br />
e. Check to see that steel balls are properly positioned in<br />
upper body and then remove them from upper body.<br />
INSPECTION<br />
Lower and upper bodies<br />
. Check to see that there are pins and retainer plates in lower<br />
body.<br />
. Check to see that there are pins and retainer plates in upper<br />
body.<br />
. Be careful not to lose these parts.<br />
. Check to make sure that oil circuits are clean and free from<br />
damage.<br />
. Check tube brackets and tube connectors for damage.<br />
Separator plates<br />
. Check to make sure that separator plate is free of damage<br />
and not deformed and oil holes are clean.<br />
AT - t08
SAT092B<br />
REPAIR FOR COMPONENT PARTS<br />
SA T676A<br />
SAT091 B<br />
SAT095B<br />
SAT196B<br />
Control Valve Assembly (Cont'd)<br />
Pilot filter<br />
. Check to make sure that filter is not clogged or damaged.<br />
Lock-up solenoid<br />
. Check that filter is not clogged or damaged.<br />
. Measure resistance. - Refer to "Electrical Components<br />
Inspection".<br />
Line pressure solenoid<br />
. Check that filter is not clogged<br />
. Measure resistance. - Refer<br />
Inspection".<br />
or damaged.<br />
to "Electrical Components<br />
3-unit solenoid assembly (Overrun clutch solenoid and shift<br />
solenoids A and B)<br />
. Measure resistance of each solenoid. - Refer to "Electrical<br />
Components Inspection".<br />
Fluid temperature sensor<br />
. Measure resistance. - Refer to "Electrical Components<br />
Inspection" .<br />
AT -1 09
Reamer bolt (short)<br />
REPAIR FOR COMPONENT PARTS<br />
SAT681A<br />
SAT682A<br />
Unit: mm (in)<br />
SAT197B<br />
Control Valve Assembly (Cont'd)<br />
ASSEMBLY<br />
1. Install upper and lower bodies.<br />
a. Place oil circuit of upper body face up. Install steel balls in<br />
their proper positions.<br />
b. Install reamer bolts from bottom of upper body and install<br />
separate gaskets.<br />
c. Place oil circuit of lower body face up. Install orifice check<br />
spring, orifice check valve and pilot filter.<br />
d. Install lower separate gaskets and separator plates on lower<br />
body.<br />
e. Install and temporarily tighten support plates, fluid temperature<br />
sensor and tube brackets.<br />
AT-110
SAT667A<br />
@-- Side plate<br />
REPAIR FOR COMPONENT PARTS<br />
SAT198B<br />
SA T200B<br />
SAT668A<br />
Control Valve Assembly (Cont'd)<br />
f. Temporarily assemble lower and upper bodies, using reamer<br />
bolt as a guide.<br />
. Be careful not to dislocate or drop steel balls, orifice<br />
check spring, orifice check valve and pilot filter.<br />
g. Install and temporarily tighten bolts and tube brackets in<br />
their proper locations.<br />
Bolt length and location:<br />
Item<br />
Bolt length<br />
mm (in)<br />
a<br />
70<br />
(2.76)<br />
b c d<br />
50<br />
(1.97)<br />
33<br />
(1.30)<br />
27<br />
(1.06)<br />
2. Install solenoids.<br />
a. Attach a-ring and install lock-up solenoid and side plates<br />
onto lower body.<br />
b. Attach a-rings and install 3-unit solenoids assembly onto<br />
upper body.<br />
c. Attach a-ring and install line pressure solenoid onto upper<br />
body.<br />
3. Tighten all bolts.<br />
AT-111
!i<br />
I<br />
II<br />
II<br />
N<br />
!II<br />
~<br />
~CD<br />
W<br />
....<br />
CD<br />
Sleeve<br />
Lock-up control valve Upper body<br />
~13 Return spring<br />
1;<br />
0'<br />
Torque converter relief valve<br />
\<br />
CD R<br />
e<br />
/<br />
!~ct<br />
.~<br />
-r<br />
,<br />
CV Return s<br />
1P",~""",~" "',,<br />
,<br />
Pin . ,r-'-~ '«««(Cf)<br />
\ \ \ \ ~~Pi<br />
e~/~?7<br />
Pressure modifier valve CID Return Plug<br />
/1'<br />
crm1rn ~ ' «~«9--' "W~#' cV / spnng<br />
\ J - cJI-/<br />
i\ @"'7/ /0~ I ~/ ~<br />
~((((O ' ~ '" --.I \ 0Cf m ~ P<br />
eeve Plug<br />
// ~ ~ ~ G 1 . SI Accumulator control Plug'<br />
Retainer Plate/<br />
@ Return spring<br />
PI'ot"'"<br />
'\)<br />
0<br />
~<br />
~<br />
~fjYP<br />
C-L-. CL.'<br />
;; 77 Z.<br />
Shuttle shift valve S<br />
(j])Return spring<br />
Plug<br />
Pin-~\<br />
~~/ ~ ~~~GG/~/<br />
/ 4-2 sequence valve@Returnspring\PIU9<br />
\<br />
/ . . '\<br />
;t<br />
crnQ<br />
. ~12 . L!: @R"'" ~o \ p j@R"''''':",<br />
P'" Sho<br />
I~ ~ mk«co ~ . ~<br />
Ar<br />
' fl.<br />
#. Shift valve B Retainer pl<br />
.r-..,~ / Pin<br />
/ amL~<br />
1;«(««
REPAIR FOR COMPONENT PARTS<br />
SAT834A<br />
~ J-42/b4Q)2)0;,)y<br />
~---~~0<br />
~<br />
/e~~~I\\~,-,<br />
,u§--"u!(-'l--.l~~<br />
-<br />
/ u -7~::: i::::/-S-,Y I v( /-C:::;' §~'-<br />
.,
Soft hammer<br />
REPAIR FOR COMPONENT PARTS<br />
SA T826A<br />
SAT827A<br />
I~ Parallel pin<br />
:r--~//(.<br />
(<br />
- '~~ i§ ~<br />
.--::.-~ /~..- ~l ( '(0:;'<br />
u~-:S?u;JI/-S/~ v,:::--::::::./.
~<br />
(jj<br />
E'"<br />
i5<br />
~<br />
:;<br />
0<br />
0<br />
-<br />
~--r\<br />
\\ \ \<br />
- -<br />
Inspection standard<br />
Parts<br />
Q . Free length<br />
REPAIR FOR COMPONENT PARTS<br />
SAT829A<br />
Control Valve Upper Body (Cont'd)<br />
INSPECTION<br />
Valve springs<br />
. Measure free length and outer diameter of each valve spring.<br />
Also check for damage or deformation.<br />
. Numbers of each valve spring listed in table below are the<br />
same as those in the figure on AT-112.<br />
Item<br />
. Replace valve springs if deformed or fatigued.<br />
Control valves<br />
. Check sliding surfaces of valves, sleeves and plugs.<br />
AT -11 5<br />
Part No. Q D<br />
Unit: mm (in)<br />
CD Torque converter relief valve spring 31742-41X18 32.3 (1.272) 9.0 (0.354)<br />
CV Pressure regulator valve spring 31742-41X16 61.5 (2.421) 8.9 (0.350)<br />
CID Pressure modifier valve spring 31742-41 X19 31.95 (1.2579) 6.8 (0.268)<br />
@ Shuttle shift valve D spring 31762-41XOO 26.5 (1.043) 6.0 (0.236)<br />
CID 4-2 sequence valve spring 31756-41 XOO 29.1 (1.146) 6.95 (0.2736)<br />
II<br />
~<br />
~I I Sleeve<br />
.<br />
~ ' -<br />
':;'" - ~~<br />
I r Y-'--"';<br />
~ --.J:::: ~.<br />
~<br />
~ 0 ij ~,-,='7S"S Ughtly<br />
~ P<br />
p.,'h',"~<br />
~ ~II in while turning It.<br />
C)J~" - ':::-i)<br />
) If /<br />
I IIu71)) 7~ ~ - ! I ""'l7
~. Parallel<br />
I, ,<br />
. - ,~}p!n<br />
rE~<br />
. ) . :::2...y-/---uO-..:::::J<br />
':>~<br />
v/:- ~<br />
u~...:::;::-u;J~~:>'''> v, ~r.:::--';:::::::::;; I.//. '--<br />
':::::::::::<br />
~<br />
~,.~~~~k/$~' ~-:<br />
~(j~~~~;:;fS<br />
Cj\\C) ~ \ if1-J-:G.<br />
Wire II GG \I<br />
~':J ~-'--& ,:J,,&~<br />
Retainer plate<br />
00<br />
REPAIR FOR COMPONENT PARTS<br />
SAT835A<br />
SAT836A<br />
Control Valve Upper Body (Cont'd)<br />
. Whilepushingplug,installparallelpin.<br />
4-2 sequence valve and relay valve<br />
. Push 4-2 sequence valve and relay valve with wire wrapped<br />
in vinyl tape to prevent scratching valve body. Install parallel<br />
pins.<br />
. Insert retainer plate while pushing spring.<br />
AT-117
!i<br />
I<br />
...<br />
...<br />
co<br />
Pin<br />
~<br />
Retainer plate<br />
3-2 timing valve<br />
en<br />
~<br />
-i<br />
(I)<br />
to><br />
"<br />
~ Apply A.T.F. to all components before their installation.<br />
@ Return spring--,<br />
RetainerPlate---\cl<br />
Lower body<br />
<strong>Manual</strong> valve<br />
~--<br />
~ CD<br />
f!!!j-- Plug<br />
~Pin<br />
Numbers preceding valve springs correspond with t<br />
page AT-119.
:;;<br />
Qj<br />
Eas<br />
'6<br />
:;;<br />
'5<br />
0<br />
0<br />
-<br />
.~<br />
~<br />
\\ \ \<br />
. - -<br />
Inspection standard:<br />
Parts<br />
Q : Free length<br />
REPAIR FOR COMPONENT PARTS<br />
SA T838A<br />
SAT829A<br />
SAT838A<br />
Control Valve Lower Body (Cont'd)<br />
DISASSEMBLY<br />
1. Remove valves at parallel pins.<br />
2. Remove valves at retainer plates.<br />
For removal procedures, refer to "DISASSEMBLY" of Control<br />
Valve Upper Body.<br />
INSPECTION<br />
Valve springs<br />
. Check each valve spring for damage or deformation. Also<br />
measure free length and outer diameter.<br />
. Numbers of each valve spring listed in table below are the<br />
same as those in the figure on AT-118.<br />
Item<br />
Unit: mm (in)<br />
@ Servo charger valve spring 31742-41X06 23.0 (0.906) 6.7 (0.264)<br />
. Replace valve springs if deformed or fatigued.<br />
Control valves<br />
. Check sliding surfaces of control valves, sleeves and plugs<br />
for damage.<br />
ASSEMBLY<br />
. Install control valves.<br />
For installation procedures,<br />
Valve Upper Body.<br />
refer to "ASSEMBLY" of Control<br />
AT -11 9<br />
Part No. Q D<br />
CD Modifier accumulator piston spring 31742-41X15 30.5 (1.201) 9.8 (0.386)<br />
'@ 1st reducing valve spring 31756-41X05 25.4 (1.000) 6.75 (0.2657)<br />
CID 3-2 timing valve spring 31742-41 X08 20.55 (0.8091) 6.75 (0.2657)
For the number of clutch sheets (drive plate and<br />
driven platel. refer to the below cross-58ction.<br />
Direction of oil seal<br />
R.~~. d"Iohd,"m~<br />
REPAIR FOR COMPONENT PARTS<br />
SAT840A<br />
SAT841A<br />
Reverse Clutch<br />
DISASSEMBLY<br />
~: Apply A.T.F.<br />
* : Select with proper thickness.<br />
Dish plate<br />
Retaining plate<br />
Snap ring<br />
'-- Driven plate<br />
1. Remove reverse clutch assembly from clutch pack.<br />
SAT839A<br />
2. Check operation of reverse clutch.<br />
a. Install seal ring onto oil pump cover and install reverse<br />
clutch. Apply compressed air to oil hole.<br />
b. Check to see that retaining plate moves to snap ring.<br />
c. If retaining plate does not move to snap ring, D-ring or oil<br />
seal may be damaged or fluid may be leaking at piston<br />
check ball.<br />
AT -1 20
...<br />
Q)<br />
Q;<br />
E<br />
No air leakage<br />
Check ball<br />
i<br />
SAT847A<br />
Air leakage is present.<br />
Check ball<br />
REPAIR FOR COMPONENT PARTS<br />
SA T846A<br />
Oil seal C@<br />
~<br />
@)<br />
SA T848A<br />
SAT849A<br />
SAT843A<br />
Reverse Clutch (Cont'd)<br />
Reverseclutch piston<br />
. Shake piston to assure that balls are not seized.<br />
. Apply compressed air to check ball oil hole opposite the<br />
return spring to assure that there is no air leakage.<br />
. Also apply compressed air to oil hole on return spring side<br />
to assure that air leaks past ball.<br />
ASSEMBLY<br />
. 1. Install O-ring and oil seal on piston.<br />
Apply A.T.F. to both parts.<br />
. 2. Install piston assembly by turning it slowly and evenly.<br />
Apply A.T.F.to inner surface of drum.<br />
3. Install return springs and spring retainer.<br />
4. Install snap ring while compressing clutch springs.<br />
AT-122
Snap ring [;';':;[<br />
Retaining plate<br />
Drive plate<br />
REPAIR FOR COMPONENT PARTS<br />
SA T850A<br />
Driven plate<br />
Di,hPI'''/\:~~J! SAT851A<br />
SAT841A<br />
Reverse Clutch (Cont'd)<br />
. Do not align snap ring gap with spring retainer stopper.<br />
5. Install drive plates, driven plates, retaining plate and dish<br />
plate.<br />
6. Install snap ring.<br />
7. Measure clearance between retaining plate and snap ring. If<br />
not within allowable limit, select proper retaining plate.<br />
Specified clearance:<br />
Standard<br />
0.5 - 0.8 mm (0.020 - 0.031 in)<br />
Allowable limit<br />
1.2 mm (0.047 in)<br />
/ Retaining plate:<br />
Refer to S.D.S.<br />
8. Check operation of reverse clutch.<br />
Refer to "DISASSEMBLY" of Reverse Clutch.<br />
AT-123
For the number of clutch sheets (drive plate and<br />
driven plate), refer to the below cross-section.<br />
High clutch drum ~<br />
I" D-ring(Large)~ @<br />
~ : ApplyA.T.F.<br />
* : Selectwith proper thickness.<br />
REPAIR FOR COMPONENT<br />
I I D-ring (Small) ~ ~<br />
I ~<br />
R"um",,;,,)<br />
Clutch<br />
piston<br />
,. '"<br />
High Clutch<br />
Spring retainer<br />
Snap ring ~<br />
PARTS<br />
Driven plate<br />
Drive plate<br />
<strong>Service</strong> procedures for high clutch are essentially the<br />
those for reverse clutch, with the following exception:<br />
. Check of high clutch operation<br />
AT -1 24<br />
same as
....<br />
CI)<br />
Q;<br />
E<br />
01<br />
'i'i<br />
....<br />
CI)<br />
'5<br />
0<br />
c<br />
SA T858A<br />
-<br />
~-~ . .<br />
\\<br />
\ I<br />
\ ,<br />
.- -<br />
Thickness<br />
I. KV31102400<br />
(J34285 and<br />
J34285-87)<br />
Q : Free length<br />
Facing<br />
Core plate<br />
REPAIR FOR COMPONENT PARTS<br />
High Clutch (Cont'd)<br />
Removal and installation of return spring<br />
SA T855A<br />
SAT829A<br />
SA T845A<br />
. Inspection of high clutch return springs<br />
Inspection standard: Unit: mm (in)<br />
Part No. Q<br />
31505-21 X03<br />
22.06 (0.8685)<br />
. Inspection of high clutch drive plate<br />
Thickness of drive plate:<br />
Standard<br />
1.6 mm (0.063 in)<br />
Wear limit<br />
1.4 mm (0.055 in)<br />
D<br />
11.6 (0.457)<br />
. Measurement 9f clearance between retaining plate and snap<br />
ring<br />
Specified clearance:<br />
Standard<br />
1.8 - 2.2 mm (0.071 - 0.087 in)<br />
Allowable limit<br />
3.0 mm (0.118 in)<br />
Retaining plate:<br />
Refer to S.D.S.<br />
AT -1 25
For the number of clutch sheets (drive plate and<br />
driven plate), refer to the below cross-section.<br />
Snap ring<br />
~lutchPlate<br />
Retainingplate *<br />
Drive plate ~<br />
I,<br />
- I<br />
REPAIR FOR COMPONENT PARTS<br />
Forward and Overrun Clutches<br />
Direction of dish plate<br />
D<br />
,<br />
Snap ring<br />
Retaining plate *<br />
Drive plate @t><br />
- Driven plate<br />
---IJ<br />
Overrun clutch plate<br />
Direction of dish plate<br />
0<br />
1<br />
Dish plate<br />
'<br />
Forwad<br />
' O"_I~""""- 0 ' ' "~"hdrum~<br />
O"'o,~@P "=-' r
REPAIR FOR COMPONENT PARTS<br />
SAT862A<br />
SA T863A<br />
Forward and Overrun Clutches (Cont'd)<br />
<strong>Service</strong> procedures for forward and overrun clutches are essentially<br />
the same as those for reverse clutch, with the following<br />
exception:<br />
. Check of forward clutch operation.<br />
. Check of overrun clutch operation.<br />
. Removal of forward clutch drum<br />
Remove forward clutch drum from transmission case by<br />
holding snap ring.<br />
. Removal of forward clutch and overrun clutch pistons<br />
1. While holding overrun clutch piston, gradually apply compressed<br />
air to oil hole.<br />
2. Remove overrun clutch from forward clutch.<br />
AT -127
...<br />
Q)<br />
Q;<br />
E
'<br />
REPAIR FOR COMPONENT PARTS<br />
SA T867 A<br />
SA T868A<br />
Forward and Overrun Clutches (Cont'd)<br />
. Align notch in forward clutch piston with groove in forward<br />
clutch drum.<br />
2. Install overrun clutch by turning it slowly and evenly.<br />
. Apply A.T.F. to inner surface of forward clutch piston.<br />
. Measurement of clearance between retaining plate and snap<br />
ring of overrun clutch<br />
Specified clearance:<br />
Standard<br />
1.0 - 1.4 mm (0.039 - 0.055 in)<br />
Allowable limit<br />
2.0 mm (0.079 in)<br />
Retaining plate:<br />
Refer to S.D.S.<br />
. Measurement of clearance between retaining plate and snap<br />
ring of forward clutch<br />
Specified clearance:<br />
Standard<br />
0.45 - 0.85 mm (0.0177 - 0.0335 in)<br />
Allowable limit<br />
1.85 mm (0.0728 in)<br />
Retaining plate:<br />
Refer to S.D.S.<br />
AT -1 29
For the number of clutch sheets (drive plate and<br />
driven plate), refer to the below cross-section.<br />
Snap ring<br />
Retaining plate *<br />
REPAIR FOR COMPONENT PARTS<br />
Driven plate<br />
~ : Apply A.T.F. Driveplate<br />
m~: Apply petroleum jelly.<br />
* : Select with proper thickness.<br />
SAT873A<br />
Low & Reverse Brake<br />
DISASSEMBLY<br />
Direction of oil seal<br />
SAT811B<br />
1. Check operation of low and reverse brake.<br />
a. Install seal ring onto oil pump cover and install reverse<br />
clutch. Apply compressed air to oil hole.<br />
b. Check to see that retaining plate moves to snap ring.<br />
c. If retaining plate does not move to snap ring, D-ring or oil<br />
seal may be damaged or fluid may be leaking at piston<br />
check ball.<br />
2. Remove snap ring, low and reverse brake drive plates,<br />
driven plates and dish plate.<br />
AT-130
t<br />
OJ<br />
E'"<br />
'5<br />
t<br />
:;<br />
0<br />
0<br />
-<br />
~~ . .<br />
\\<br />
\ ~<br />
Thickness<br />
Q : Free length<br />
Facing<br />
Core plate<br />
REPAIR FOR COMPONENT PARTS<br />
SAT875A<br />
SAT829A<br />
SAT845A<br />
Low & Reverse Brake (Co nt' d)<br />
3. Remove low one-way clutch inner race, spring retainer and<br />
return spring from transmission case.<br />
4. Remove seal rings from low one-way~clutch inner race.<br />
5. Remove needle bearing from low one-way clutch inner race.<br />
6. Remove low and reverse brake piston using compressed air.<br />
7. Remove oil seal and O-ring from piston.<br />
INSPECTION<br />
Low and reverse brake snap ring and spring retainer<br />
. Check for deformation, or damage.<br />
Low and reverse brake return springs<br />
. Check for deformation or damage. Also measure free length<br />
and outside diameter.<br />
Inspection standard: Unit: mm (in)<br />
Part No. Q<br />
0<br />
- 31521-21XOO<br />
23.7 (0.933)<br />
11.6 (0.457)<br />
Low and reverse brake drive plates<br />
. Check facing for burns, cracks or damage.<br />
. Measure thickness of facing.<br />
Thickness of drive plate:<br />
Standard value<br />
2.0 mm (0.079 in)<br />
Wear limit<br />
1.8 mm (0.071 in)<br />
. If not within wear limit, replace.<br />
AT-131
~ng<br />
1<br />
r Clearance<br />
REPAIR FOR COMPONENT PARTS<br />
SAT877A<br />
SAT878A<br />
C)-m (!>J<br />
...<br />
@<br />
D-ring
Driven plate<br />
Drive plate SAT812B<br />
REPAIR FOR COMPONENT PARTS<br />
SAT872A<br />
- -<br />
"<br />
~ J<br />
- I -(<br />
=~ ~<br />
, ,<br />
/\ ~~ ,<br />
- ..<br />
(<br />
'<br />
"<br />
I<br />
~'- /" f ~ , 17 '\:I C<br />
~- U<br />
/ ~I t/. ~ = ~ ~\ :<br />
,<br />
'\ ,,*'/,~. I~ " \<br />
, "<br />
I<br />
, \ ". ~ . . \ r<br />
I<br />
' (;-~ ",]<br />
- "<br />
/1<br />
(<br />
I~N (<br />
~r ;;'.- ~ . .. I. \<br />
[\ \ \ r. \ I, I I SAT884A ! ( \0<br />
Low & Reverse Brake (Cont'd)<br />
4. Install return springs, spring retainer and low one-way clutch<br />
inner race onto transmission case.<br />
5. Install dish plate, low and reverse brake drive plates, driven<br />
plates and retaining plate.<br />
6. Install snap ring on transmission case.<br />
7. Check operation of low and reverse brake clutch piston.<br />
Refer to "DISASSEMBLY".<br />
8. Measure clearance between retaining plate and snap ring.<br />
If not within allowable limit, select proper retaining plate.<br />
Specified clearance:<br />
Standard<br />
1.1 - 1.5 mm (0.043 - 0.059 in)<br />
Allowable limit<br />
2.5 mm (0.098 in)<br />
Retaining plate:<br />
Refer to S.D.S.<br />
9. Install low one-way clutch inner race seal ring.<br />
. Apply petroleum jelly to seal ring.<br />
. Make sure seal rings are pressed firmly into place and<br />
held by petroleum jelly.<br />
AT -1 33
Forward clutch drum assembly<br />
~ ~"<br />
~ ~<br />
-''''''''<br />
0.., -. .., I<br />
J;J-. -. '><br />
-. -.<br />
(<br />
0 .<br />
-!.<br />
REPAIR FOR COMPONENT PARTS<br />
SA T888A<br />
\/ SA T889A<br />
Forward Clutch Drum Assembly<br />
Needle bearing<br />
DISASSEMBLY<br />
Snap ring<br />
Low one-way clutch<br />
Side plate<br />
Snap ring<br />
1. Remove snap ring from forward clutch drum.<br />
2. Remove side plate from forward clutch drum.<br />
3. Remove low one-way clutch from forward ciutci. drum.<br />
AT -1 34<br />
SAT886A
~<br />
~~<br />
...~<br />
REPAIR FOR COMPONENT PARTS<br />
SAT891A<br />
SAT892A<br />
SAT893A<br />
SAT113B<br />
Forward Clutch Drum Assembly (Cont'd)<br />
4. Remove snap ring from forward clutch drum.<br />
5. Remove needle bearing from forward clutch drum.<br />
INSPECTION<br />
Forward clutch drum<br />
. Check spline portion for wear or damage.<br />
. Check frictional surfaces of low one-way clutch and needle<br />
bearing for wear or damage.<br />
Needle bearing and low one-way clutch<br />
. Check frictional surface for wear or damage.<br />
ASSEMBLY<br />
1. Install needle bearing in forward clutch drum.<br />
AT-135
SAT895A<br />
)<br />
REPAIR FOR COMPONENT PARTS<br />
SAT894A<br />
Forward Clutch Drum Assembly (Cont'd)<br />
2. Install snap ring onto forward clutch drum.<br />
3. Install low one-way clutch onto forward clutch drum by<br />
pushing the roller in evenly.<br />
. Install low one-way clutch with flange facing rearward.<br />
4. Install side plate onto forward clutch drum.<br />
5. Install snap ring onto forward clutch drum.<br />
AT -1 36
REPAIR FOR COMPONENT PARTS<br />
Rear internal gear (with forward one-way clutch inner race)<br />
f) n<br />
Thrust washer lEI @<br />
SA T897 A<br />
SAT898A<br />
SAT899A<br />
Rear Internal Gear and Forward Clutch Hub<br />
Forward clutch hub (with forward one-way clutch outer race)<br />
DISASSEMBLY<br />
Snap ring<br />
Forward one-way clutch<br />
End bearing<br />
6ri~<br />
lEI @: Apply petroleum jelly.<br />
SA T896A<br />
1. Remove rear internal gear by pushing forward clutch hub<br />
forward.<br />
2. Remove thrust washer from rear internal gear.<br />
3. Remove snap ring from forward clutch hub.<br />
AT-137
0<br />
~...~<br />
~<br />
B/<br />
IIT'n,,, ~ -~0'GIi)~ SAT900A<br />
8<br />
... "-<br />
~ :::=-~!)<br />
Illh I-~~,f),<br />
.. ..<br />
..<br />
REPAIR FOR COMPONENT PARTS<br />
SAT955A<br />
SAT901A<br />
oc)<br />
00 SAT903A<br />
SAT902A<br />
Rear Internal Gear and Forward Clutch Hub<br />
(Cont' d)<br />
4. Remove end bearing.<br />
5. Remove forward one-way clutch and end bearing as a unit<br />
from forward clutch hub.<br />
6. Remove snap ring from forward clutch hub.<br />
INSPECTION<br />
Rear internal gear and forward clutch hub<br />
. Check gear for excessive wear, chips or cracks.<br />
. Check frictional surfaces of forward one-way<br />
thrust washer for wear or damage.<br />
. Check spline for wear or damage.<br />
clutch and<br />
Snap ring and end bearing<br />
. Check for deformation or damage.<br />
AT -1 38
REPAIR FOR COMPONENT PARTS<br />
SAT901A<br />
SAT905A<br />
Rear Internal Gear and Forward Clutch Hub<br />
(Cont'd)<br />
ASSEMBLY<br />
1. Install snap ring onto forward clutch hub.<br />
2. Install end bearing.<br />
3. Install forward one-way clutch onto clutch hub.<br />
. Install forward one-way clutch with flange facing rearward.<br />
4. Install end bearing.<br />
5. Install snap ring onto forward clutch hub.<br />
6. Install thrust washer onto rear internal gear.<br />
. Apply petroleum jelly to thrust washer.<br />
. Securely insert pawls of thrust washer into holes in rear<br />
internal gear.<br />
7. Position forward clutch hub in rear internal gear.<br />
8. After installing, check to assure that forward clutch hub<br />
rotates clockwise.<br />
AT-1 39
Return spring A<br />
Return spring B<br />
Piston stem<br />
REPAIR FOR COMPONENT PARTS<br />
O-ring ~
"e<br />
SAT914A<br />
..<br />
n_@ SAT912A<br />
REPAIR FOR COMPONENT PARTS<br />
SAT913A<br />
~<br />
....<br />
.. f<br />
Servo cushion spring retainer<br />
SAT915A<br />
Spring B<br />
Spring A<br />
SAT916A<br />
Band Servo Piston Assembly (Cont'd)<br />
6. Remove servo piston spring retainer, return spring<br />
piston stem from band servo piston.<br />
7. Remove E-ring from band servo piston.<br />
C and<br />
8. Remove servo cushion spring retainer from band servo<br />
piston.<br />
9. Remove O-rings from band servo piston.<br />
10. Remove Q-rings from servo piston retainer.<br />
INSPECTION<br />
Pistons, retainers and piston stem<br />
. Check frictional surfaces for abnormal wear or damage.<br />
Return springs<br />
. Check for deformation or damage. Measure free length and<br />
outer diameter.<br />
Inspectionstandard: Unit: mm (in)<br />
Parts Free length Outer diameter<br />
Spring A 45.6 (1.795) 3.3 (1.350)<br />
Spring B 53.8 (2.118) 40.3 (1.587)<br />
Spring C 29.0 (1.142) 27.6 (1.087)<br />
AT-141
REPAIR FOR COMPONENT PARTS<br />
SAT919A<br />
'@& ~@SAT912A<br />
Band Servo Riston Assembly (Cont'd)<br />
ASSEMBLY<br />
1. Install O-rings onto servo piston retainer.<br />
. Apply A.T.F. to O-rings.<br />
. Pay attention to position of each O-ring.<br />
2. Install servo cushion spring retainer onto band servo piston.<br />
3. Install E-ring onto servo cushion spring retainer.<br />
4. Install D-rings onto band servo piston.<br />
. Apply A.T.F. to D-rings.<br />
5. Install servo piston spring retainer, return spring C and<br />
piston stem onto band servo piston.<br />
AT-142
SAT922A<br />
REPAIR FOR COMPONENT PARTS<br />
SAT921 A<br />
SAT923A<br />
SAT924A<br />
Band Servo Piston Assembly (Cont'd)<br />
6. Place piston stem end on a wooden block. While<br />
servo piston spring retainer down, install E-ring.<br />
pushing<br />
7. Install band servo piston assembly onto servo piston retainer<br />
by pushing it inward.<br />
8. Install O-ring on 0.0. band servo piston.<br />
. Apply A.T.F. to D-ring.<br />
9. Install 0.0. band servo piston onto servo piston retainer by<br />
pushing it inward.<br />
AT-143
SAT927A<br />
Parking rod<br />
REPAIR FOR COMPONENT PARTS<br />
Output shaft<br />
Parking Pawl Components<br />
~ 24 - 29 N.m<br />
(2.4- 3.0kg-m, 17 - 22 ft-Ib)<br />
Parking actuator support<br />
Parking pawl shaft<br />
DISASSEMBLY<br />
Rear extension<br />
SA T205B<br />
1. Slide return spring to the front of rear extension flange.<br />
2. Remove return spring, pawl spacer and parking pawl from<br />
rear extension.<br />
3. Remove parking pawl shaft from rear extension.<br />
4. Remove parking actuator support and rod guide from rear<br />
extension.<br />
AT-144
SAT927A<br />
'"<br />
REPAIR FOR COMPONENT PARTS<br />
SAT929A<br />
Parking Pawl Components (Cont'd)<br />
INSPECTION<br />
Parking pawl and parking actuator support<br />
. Check contact surface of parking rod for wear.<br />
ASSEMBLY<br />
1. Install rod<br />
extension.<br />
guide and parking actuator support onto rear<br />
2. Insert parking pawl shaft into rear extension.<br />
3. Install return spring, pawl spacer and parking pawl onto<br />
parking pawl shaft.<br />
4. Bend return spring upward and install it onto rear extension.<br />
AT-145
SAT931 A<br />
\<br />
SA T933A<br />
ASSEMBL Y<br />
Assembly<br />
1. Install manual shaft components.<br />
a. Install oil seal onto manual shaft.<br />
. Apply A.T.F. to oil seal.<br />
. Wrap threads of manual shaft with masking tape.<br />
b. Insert manual shaft and oil seal as a unit into transmission<br />
case.<br />
c. Remove masking tape.<br />
d. Push oil seal evenly and install it onto transmission case.<br />
e. Align groove in shaft with drive pin hole, then drive pin into<br />
position as shown in figure at left.<br />
f. Install detent spring and spacer.<br />
g. While pushing detent spring down, install manual plate onto<br />
manual shaft.<br />
AT -146
SAT936A<br />
Front..<br />
Accumulator<br />
piston B Accumulator<br />
AE..o,tJ tr{'Ob<br />
Accumulator<br />
piston A<br />
piston C<br />
SAT941 A<br />
SA T937 A<br />
ASSEMBL Y<br />
Assembly (Cont'd)<br />
h. Install lock nuts onto manual shaft.<br />
2. Install accumulator piston.<br />
a. Install O-rings onto accumulator piston.<br />
. Apply A.T.F. to O-rings.<br />
Accumulator piston O-rings: Unit: mm (in)<br />
Accumulator A B C D<br />
Small diameter end 29 (1.14) 32 (1.26) 45 (1.77) 29 (1.14)<br />
Largediameter end 45 (1.77) 50 (1.97) 50 (1.97) 45 (1.77)<br />
b. Install return spring for accumutator A onto transmission<br />
case.<br />
Free length of return spring:<br />
Accumulator<br />
Free length<br />
c. Install accumulator pistons A, S, C and D.<br />
. ApplyA.T.F.to transmission case.<br />
3. Install band servo piston.<br />
a. Install return springs onto servo piston.<br />
AT -14 7<br />
A<br />
43 (1.69)<br />
Unit: mm (in)
-----------------<br />
. ST07870000<br />
(J37068)<br />
SAT943A<br />
.;:I Forward clutch drum<br />
SAT944A<br />
, SAT945A<br />
ASSEMBLY<br />
Assembly (Cont'd)<br />
b. Install band servo piston onto transmission case.<br />
. Apply A.i.F. to O-ring of band servo piston and transmission<br />
case.<br />
c. Install gasket for band servo onto transmission case.<br />
d. Install band servo retainer onto transmission case.<br />
4. Install rear side clutch and gear components.<br />
a. Place transmission case in vertical position.<br />
b. Slightly lift forward clutch drum assembly and slowly rotate it<br />
clockwise until its hub passes fully over the clutch inner<br />
race inside transmission case.<br />
c. Check to be sure that rotation direction of forward clutch<br />
assembly is correct.<br />
AT ~ 148
Hole for<br />
pawl<br />
SAT946A<br />
SAT947A<br />
SAT948A<br />
SAT949A<br />
SAT950A<br />
ASSEMBL Y<br />
Assembly (Cont'd)<br />
d. Install thrust washer onto front of overrun clutch hub.<br />
. Apply petroleum jelly to the thrust washer.<br />
. Insert pawls of thrust washer securely into holes in<br />
overrun clutch hub.<br />
e. Install overrun clutch hub onto rear internal gear assembly.<br />
f. Install needle bearing onto rear of overrun clutch hub.<br />
. Apply petroleum jelly to needle bearing.<br />
g. Check that overrun clutch hub rotates as shown while<br />
holding forward clutch hub.<br />
h. Place transmission case into horizontal position.<br />
AT-149
ASSEMBLY<br />
Assembly (Cont'd)<br />
i. Install rear internal gear, forward clutch hub<br />
clutch hub as a unit onto transmission case.<br />
j. Install needle bearing onto rear internal gear.<br />
. Apply petroleum jelly to needle bearing.<br />
and overrun<br />
k. Install bearing race onto rear of front internal gear.<br />
. Apply petroleum jelly to bearing race.<br />
. Securely engage pawls of bearing race with holes in front<br />
internal gear.<br />
I. Install front internal gear on transmission case.<br />
AT -1 50
SAT967A<br />
ASSEMBL Y<br />
Adjustment<br />
When any parts listed in the following table are replaced, total<br />
end play or reverse clutch end play must be adjusted.<br />
Reverse clutch<br />
Part name<br />
Total end play<br />
end play<br />
Transmission case 8 8<br />
Low one-way clutch inner race 8 8<br />
Overrun clutch hub 8 8<br />
Rear internal gear 8 8<br />
Rear planetary carrier 8 8<br />
Rear sun gear 8 8<br />
Front planetary carrier 8 8<br />
Front sun gear 8 8<br />
High clutch hub 8 8<br />
High clutch drum 8 8<br />
Oil pump cover 8 8<br />
Reverse clutch drum - 8<br />
1. Install front side clutch and gear components.<br />
a. Install rear sun gear on transmission case.<br />
. Pay attention to its direction.<br />
b. Install needle bearing on front of front planetary carrier.<br />
. Apply petroleum jelly to needle bearing.<br />
c. Install needle bearing on rear of front planetary carrier.<br />
. Apply petroleum jelly to bearing.<br />
. Pay attention to its direction - Black side goes to front.<br />
AT -151
.., SAT969A<br />
F rant planetary carrier<br />
, '.-=<br />
.:':.. ,..: '.. .., ...:::.'.<br />
Portion A Forward clutch drum<br />
SAT973A<br />
Portion B<br />
O---El~<br />
~~<br />
~f}Jj ~ "--~-L<br />
SAT970A<br />
r~:<br />
" /<br />
' // SA T204B<br />
ASSEMBL Y<br />
Adjustment (Cont'd)<br />
d. While rotating forward clutch drum clockwise,<br />
planetary carrier on forward clutch drum.<br />
install front<br />
. Check that portion A of front planetary carrier protrudes<br />
approximately 2 mm (0.08 in) beyond portion B of forward<br />
clutch assembly.<br />
e. Install bearing races on rear of clutch pack.<br />
. Apply petroleum jelly to bearing races.<br />
. Securely engage pawls of bearing race with hole In clutch<br />
pack.<br />
f. Place transmission case in vertical position.<br />
g. Install clutch pack into transmission case.<br />
AT -1 52
SAT979A<br />
ASSEMBLY<br />
Adjustment (Cont' d)<br />
2. Adjust tetalend play.<br />
Total end play "T,":<br />
0.25 - 0.55 mm (0.0098 - 0.0217 in)<br />
a. With needle bearing installed, place J34291-1 (bridge),<br />
J34291-2 (legs) and the J34291-5 (gauging cylinder) ente eil<br />
pump. The leng ends ef legs sheuld be placed firmly en<br />
machined surface ef eil pump assembly and gauging cylinder<br />
sheuld rest en tep ef the needle bearing. Leck gauging<br />
cylinder in place with set screw.<br />
b. Install J34291-23 (gauging plunger) into. gauging cylinder.<br />
c. With eriginal bearing race installed inside reverse clutch<br />
drum, place shim selecting gauge with its legs en machined<br />
surface ef transmissien case (no. gasket) and allew gauging<br />
plunger to. rest en bearing race. Leck gauging plunger in<br />
place with set screw.<br />
d. Remeve To.el and use feeler gauge to. measure gap between<br />
gauging cylinder and gauging plunger. This measurement<br />
sheuld give exact tetal end play.<br />
Total end play "T,":<br />
0.25 - 0.55 mm (0.0098 - 0.0217 in)<br />
. If end play is eut ef specificatien, decrease er increase<br />
thickness ef eil pump cever bearing race as necessary.<br />
Available oil pump cover bearing race:<br />
Refer to S.D.S.<br />
AT -1 53
SAT981A<br />
Lock<br />
Feeler gauge<br />
SAT984A<br />
ASSEMBL Y<br />
Adjustment (Cont'd)<br />
3. Adjust reverse clutch drum end play.<br />
Reverse clutch drum end play "12":<br />
0.55 - 0.90 mm (0.0217 - 0.0354 in)<br />
a. Place J34291-1 (bridge), J34291-2 (legs) and J34291-5<br />
(gauging cylinder) on machined surface of transmission case<br />
(no gasket) and allow gauging cylinder to rest on front<br />
thrust surface of reverse clutch drum. Lock cylinder in place<br />
with set screw.<br />
b. Install J34291-23 (gauging plunger) into gauging cylinder.<br />
c. With original thrust washer installed on oil pump, place shim<br />
setting gauge legs onto machined surface of oil pump<br />
assembly and allow gauging plunger to rest on thrust<br />
washer. Lock plunger in place with set screw.<br />
d. Use feeler gauge to measure gap between gauging plunger<br />
and gauging cylinder. This measurement should give you<br />
exact reverse clutch drum and play.<br />
Reverse clutch drum end play "12":<br />
0.55 - 0.90 mm (0.0217 - 0.0354 in)<br />
. If end play is out of specification, decrease or increase<br />
thickness of oil pump thrust washer as necessary.<br />
Available oil pump thrust washer:<br />
Refer to S.D.S.<br />
AT-154
~<br />
/ ;~T216B<br />
SA T960A<br />
ASSEMBL Y<br />
Assembly<br />
1. Install output shaft and parking gear.<br />
a. Insert output shaft from rear of transmission case while<br />
slightly lifting front internal gear.<br />
. Do not force output shaft against front of transmission<br />
case.<br />
b. Carefully push output shaft against front of transmission<br />
case. Install snap ring on front of output shaft.<br />
. Check to be sure output shaft cannot be removed in rear<br />
direction.<br />
c. Install needle bearing on transmission case.<br />
. Pay attention to its direction - Black side goes to front.<br />
. Apply petroleum jelly to needle bearing.<br />
d. Install parking gear on transmission case.<br />
e. Install snap ring on rear of output shaft.<br />
. Check to be sure output shaft cannot be removed in<br />
forward direciton.<br />
AT -1 55
SAT191B<br />
SA T963A<br />
SAT219B<br />
SAT189B<br />
ASSEMBL Y<br />
Assembly (Cont'd)<br />
2. Install rear extension.<br />
a. Install oil seal on rear extension.<br />
. Apply A.T.F.to oil seal.<br />
b. Install O-ring on revolution sensor.<br />
. Apply A.T.F. to O-ring.<br />
c. Install revolution 'sensor on rear extension.<br />
d. Install rear extension gasket on transmission case.<br />
e. Install parking rod on transmission case.<br />
f. Install rear extension on transmission case.<br />
AT-156
Portion A<br />
Portion B<br />
/ ~<br />
SAT967A<br />
SAT969A<br />
Front planetary carrier<br />
Front Rear<br />
SAT970A<br />
SAT971A<br />
ASSEMBL Y<br />
Assembly (Cont' d)<br />
3. Install front side clutch and gear components.<br />
a. Install rear sun gear on transmission case.<br />
. Pay attention to its direction.<br />
b. Make sure needle bearing is on front of front planetary<br />
carrier.<br />
. Apply petroleum jelly to needle bearing.<br />
c. Make sure needle bearing is on rear of front planetary<br />
carrier.<br />
. Apply petroleum jelly to bearing.<br />
. Pay attention to its direction - Black side goes to front.<br />
d. While rotating forward clutch drum clockwise, install front<br />
planetary carrier on forward clutch drum.<br />
. Check that portion A of front planetary carrier protrudes<br />
approximately 2 mm (0.08 in) beyond po.rtion B of forward<br />
clutch assembly.<br />
e. Make sure bearing races are on front and<br />
pack.<br />
. Apply petroleum jelly to bearing races.<br />
. Securely engage pawls of bearing races<br />
clutch pack.<br />
AT-157<br />
rear of clutch<br />
with holes in
SAT220B<br />
SAT985A<br />
ASSEMBLY<br />
Assembly (Cont'd)<br />
f. Install clutch pack into transmission case.<br />
4. Install brake band and band strut.<br />
a. Install band strut on brake band.<br />
. Apply petroleum jelly to band strut.<br />
b. Place brake band on periphery of reverse clutch drum, and<br />
insert band strut into end of band servo piston stem.<br />
c. Install anchor end bolt on transmission case. Then, tighten<br />
anchor end bolt just enough so that reverse clutch drum<br />
(clutch pack) will not tilt forward.<br />
5. Install input shaft on transmission case.<br />
. Pay attention to its direction - O-ring groove side is front.<br />
6. Install gasket on transmission case.<br />
AT-158
SAT992A<br />
SA T989A<br />
Seal ring<br />
m~<br />
a-ring lEI ~<br />
SAT991A<br />
SAT993A<br />
ASSEMBLY<br />
Assembly (Cont'd)<br />
7. Install oil pump assembly.<br />
a. Install needle bearing on oil pump assembly.<br />
. Apply petroleum jelly to the needle bearing.<br />
b. Install selected thrust washer on oil pump assembly.<br />
. Apply petroleum jelly to thrust washer.<br />
c. Carefully install seal rings into grooves and press them into<br />
the petroleum jelly so that they are a tight fit.<br />
d. Install O-ring on oil pump assembly.<br />
. Apply petroleum jelly to O-ring.<br />
e. Apply petroleum jelly to mating surface of transmission case<br />
and oil pump assembly.<br />
f. Install oil pump assembly.<br />
. Install two converter housing securing bolts in bolt holes<br />
in oil pump assembly as guides.<br />
AT-159
Transmission case Oil pump assembly<br />
SAT114B<br />
SAT997A<br />
SA T998A<br />
ASSEMBL Y<br />
Assembly (Cont'd)<br />
. Insert oil pump assembly to<br />
transmission, as shown at left.<br />
8. Install O-ring on input shaft.<br />
. Apply A.T.F. to O-rings.<br />
9. Install converter housing.<br />
a. Install O-rings on converter housing.<br />
the specified position in<br />
b. Apply recommended sealant (<strong>Nissan</strong> genuine part:<br />
KP610-00250 or equivale.nt) to outer periphery of bolt holes<br />
in converter housing.<br />
. Do not apply too much sealant.<br />
c. Apply recommended sealant (<strong>Nissan</strong> genuine part:<br />
KP610-00250 or equivalent) to seating surfaces of bolts that<br />
secure front of converter housing.<br />
AT -1 60
ASSEMBL Y<br />
Assembly (Cont'd)<br />
d. Install converter housing on transmission case.<br />
10.Adjust brake band.<br />
a. Tighten anchor end bolt to specified torque.<br />
Anchor end bolt:<br />
~: 4 -6 N.m<br />
(0.4 - 0.6 kg-m, 2.9 - 4.3 ft-Ib)<br />
b. Back off anchor end bolt two and a half turns.<br />
c. While holding anchor end pin, tighten lock nut.<br />
11. Install terminal cord assembly.<br />
a. Install O-ring on terminal cord assembly.<br />
. Apply petroleum jelly to O-ring.<br />
b. Compress terminal cord assembly stopper and<br />
minal cord assembly on transmission case.<br />
12. Install control valve assembly.<br />
a. Install accumulator piston return springs B, C and D.<br />
install ter-<br />
Free length of return springs: Unit: mm (in)<br />
Item<br />
8 c D<br />
Free length 66 (2.60) 45 (1.77) 58.4 (2.299)<br />
AT-161
SATOO58<br />
SAT2218<br />
ASSEMBL Y<br />
Assembly (Cont'd)<br />
b. Install manual valve on control valve.<br />
. Apply A.T.F. to manual valve.<br />
c. Place control valve assembly on transmission case. Connect<br />
solenoid connector for upper body.<br />
d. Install connector clip.<br />
e. Install control valve assembly on transmission case.<br />
f. Install connector tube brackets and tighten bolts @ and @.<br />
. Check that terminal assembly harness does not catch.<br />
Bolt Length<br />
@<br />
@<br />
g. Install O-ring on oil strainer.<br />
. Apply petroleum jelly to O-ring.<br />
h. Install oil strainer on control valve.<br />
AT -1 62<br />
37 mm (1.46 in)<br />
50 mm (1.97 in)
tI::~~1 SATOO98<br />
II<br />
Connector<br />
SAT0118<br />
SAT0128<br />
SAT0138<br />
ASSEMBLY<br />
Assembly (Cont'd)<br />
i. Securely fasten terminal harness with clips.<br />
j. Install lock-up solenoid and fluid temperature sensor connectors.<br />
13. Install oil pan.<br />
a. Attach a magnet to oil pan.<br />
b. Install oil pan gasket on transmission case.<br />
c. Install oil pan and bracket on transmission case.<br />
. Tighten four bolts In a criss-cross pattern to prevent<br />
dislocation of gasket.<br />
14. Install inhibitor switch.<br />
a. Check that manual shaft is in "1" range.<br />
b. Temporarily install inhibitor switch on manual shaft.<br />
c. Move manual shaft to "N".<br />
AT -163
-<br />
\\<br />
--\\<br />
SAT014B<br />
SAT015B<br />
SAT016B<br />
ASSEMBL Y<br />
Assembly (Cont'd)<br />
d. Tighten bolts while inserting 4.0 mm (0.157 in) dia. pin<br />
vertically into locating holes in inhibitor switch and manual<br />
shaft.<br />
15. Install torque converter.<br />
a. Pour A.T.F. into torque converter.<br />
. Approximately 2 liters (2-1/8 US qt, 1-3/4 Imp qt) of fluid<br />
are required for a new torque converter.<br />
. When reusing old torque converter, add the same amount<br />
of fluid as was drained.<br />
b. Install torque converter while aligning notches and oil pump.<br />
c. Measure distance A to check that torque converter is in<br />
proper position.<br />
Distance "A":<br />
26 mm (1.02 in) or more<br />
AT-164
Engine KA24E<br />
Autorriatic transmission model RE4R01A<br />
Transmission model code number 45X06<br />
Stall torque ratio 2.0: 1<br />
Transmission gear ratio<br />
1st . 2.785<br />
2nd 1.545<br />
Top 1.000<br />
O.D. 0.694<br />
Reverse 2.272<br />
Recommended oil<br />
SERVICE DATA AND SPECIFICATIONS (S.D.S.)<br />
Automatic transmission<br />
fluid Type DEXRONTM<br />
Oil capacity II (US qt, Imp qt) 8.3 (8-3/4,7-1/4)<br />
VEHICLE SPEED WHEN SHIFTING GEARS<br />
Throttle position<br />
Full throttle<br />
Half throttle<br />
VEHICLE SPEED WHEN PERFORMING AND<br />
RELEASING LOCK-UP<br />
General Specifications<br />
Specifications and Adjustment<br />
Vehiclespeed km/h (MPH)<br />
DI ->D, D, -> D. D. ->D. D. ->D. D. ->D, D, ->DI 1,->11<br />
52 -56 95 - 101 146 - 156 140 - 150 89-95 40-44 53 - 57<br />
(32 - 35) (59 - 63) (91 -97) (87 - 93) (55- 59) (25 -27) (33 - 35)<br />
38-42 72 -78 111-121 55-65 33 - 39 10 - 14 53 - 57<br />
(24 - 26) (45-48) (69 -75) (34 - 40) (21 - 24) (6-9) (33 - 35)<br />
Vehicle speed km/h (MPH)<br />
Throttle O.D. switch<br />
position [Shift range] Lock-up<br />
"ON"<br />
Lock-up<br />
"OFF"<br />
Full throttle<br />
Half throttle<br />
ON 146 - 156 140 - 150<br />
[D.] (91 -97) (87 -93)<br />
OFF 95 -101 89-95<br />
[D.] (59-63) (55-59)<br />
ON 112-120 102-110<br />
[D.] (70 -75) (63 -68)<br />
OFF 76 -84 71 -79<br />
[D.] (47 - 52) (44 -49)<br />
AT-165<br />
STALL REVOLUTION<br />
LINE PRESSURf;<br />
Stall revolution rpm<br />
2,050 -2,250<br />
Engine speed line pressure kPa (kg/em' , psi)<br />
rpm<br />
D,2 and 1 ranges R range<br />
Idle<br />
Stall<br />
471 .510 ' 657 . 696<br />
(4.8 - 5.2, 68 - 74) (6.7 -7.1,95 -101)<br />
1,020 . 1,098 1.422 - 1,500<br />
(10.4 -11.2,148 -159) (14.5 - 15.3,206 - 218)
RETURN SPRINGS<br />
Parts<br />
Control<br />
valve<br />
Upper<br />
body<br />
Lower<br />
body<br />
SERVICE DATA AND SPECIFICATIONS (S.D.S.)<br />
Specifications and Adjustment (Cont'd)<br />
Item<br />
AT-166<br />
Unit: mm (in)<br />
Part No. Free length Outer diameter<br />
Torque converter relief valve spring 31742-41X18 32.3 (1272) 9.0 (0.354)<br />
Pressure regulator valve spring 31742-41X16 61.5 (2.4211 8.9 (0.350)<br />
Pressure modifier valve spring 31742-41 X19 31.95 (12579) 6.8 (0268)<br />
Shuttle shift valve D spring 31762-41XOO 26.5 (1.043) 6.0 (0.236)<br />
4-2 sequence valve spring 31756-41XOO 29.1 (1.146) 6.95 (02736)<br />
Shift valve B spring 31762-41 X01 25.0 (0.984) 7.0 (0.276)<br />
4-2 relay valve spring 31756 -41XOO 29.1 (1.146) 6.95 (0.2736)<br />
Shift valve A spring 31762-41X01 25.0 (0.984) 7.0 (0276)<br />
Overrun clutch control valve spring 31762-41X03 23.6 (0.929) 7.0 (0276)<br />
Overrun clutch reducing valve spring 31742-41X20 32.5 (1280) 7.0 (0.276)<br />
Shuttle shift valve S spring 31762-41 X04 51.0 (2.008) 5.65 (0.2224)<br />
Pilot valve spring 31742-41 X13 25.7 (1.012) 9.1 (0.358)<br />
Lock-up control valve spring 31742-41X22 18.5 (0.728) 13.0 (0.512)<br />
Modifier accumulator piston spring 31742-41X15 30.5 (1201) 9.8 (0.386)<br />
1st reducing valve spring 31756-41X05 25.4 (1.000) 6.75 (02657)<br />
3-2 timing valve spring 31742-41 X08 20.55 (0.8091) 6.75 (02657)<br />
Servo charger valve spring 31742-41X06 23.0 (0.906) 6.7 (0264)<br />
Reverse clutch 16 pcs 30505-41 X02 19.69 (0.7752) 11.6 (0.457)<br />
High clutch 16 pes 31505-21X03 22.06 (0.8685) 11.6 (0.457)<br />
Forward clutch<br />
(Oiierrun clutch)<br />
Low & reverse<br />
brake<br />
20 pes 31505-41X01 35.77 (1.4083) 9.7 (0.382)<br />
18 pcs 31521-21XOO 23.7 (0.933) 11.6 (0.457)<br />
Spring A 31605-41X05 45.6 (1.795) 34.3 (1.350)<br />
Band servo Spring B 31605-41XOO 53.8 (2.118) 40.3 11.587)<br />
Accumulator<br />
Spring C 31605-41X01 29.0 (1.142)<br />
-----<br />
27.6 (1.087)<br />
Accumulator A 31605-41X02 43.0 (1.6931<br />
------<br />
Accumulator B 31605-41X10 66.0(2.598)<br />
------<br />
Accumulator C 31605-41X09 45.0(1.772)<br />
-----<br />
Accumulator D 31605-41X06 58.0(2283)
ACCUMULATOR O-RING<br />
CLUTCHES AND BRAKES<br />
SERVICE DATA AND SPECIFICATIONS (S.O.S.)<br />
Diameter mm (in)<br />
Accumulator A B C D<br />
Small diameter end 29 (1.14) 32 (1.26) 45 (1.77) 29 (1.14)<br />
Large diameter end 45(1.77) 50 (1.97) 50 (1.97) 45 (1.77)<br />
IReverse clutch/<br />
Number of drive plates 2<br />
Number of driven plates 2<br />
Thickness of drive plate<br />
mm(in)<br />
Standard 2.0 (0.079)<br />
Wear limit 1.8 (0.071)<br />
Clearance mm (in)<br />
Standard 0.5 - 0.8 (0.020 - 0.031)<br />
Allowable limit 1.2 (0.047)<br />
Thickness of retaining plate<br />
IHigh clutch I<br />
Number of drive plates<br />
Number of driven plates<br />
Thickness<br />
mm (in)<br />
Specifications and Adjustment (Cont'd)<br />
Part number<br />
4.6 (0.181) 31537-21XOO<br />
4.8 (0.189) 31537-21 X01<br />
5.0 (0.197) 31537-21X02<br />
5.2 (0.205) 31537 -21X03<br />
5.4 (0.213) 31537-21X04<br />
5.6 (0.220) 31567-41X13<br />
5.8 (0.228) 31567-41 X14<br />
Thickness of drive plate<br />
mm (in)<br />
Standard 1.6 (0.063)<br />
Wear limit 1.4 (0.055)<br />
Clearance mm(in)<br />
Standard 1.8 - 2.2 (0.071 - 0.087)<br />
Allowable limit 3.0 (0.118)<br />
Thickness<br />
mm(in)<br />
4<br />
4<br />
Part number<br />
3.6 (0.142) 31537.41X61<br />
3.8 (0.150) 31537-41X62<br />
Thickness of retaining plate 4.0 (0.157) 31537-41X63<br />
4.2 (0.165) 31537-41X64<br />
4.4 (0.173) 31537-41 X65<br />
4.6 (0.181) 31537-41X66<br />
4.8 (0.189) 31537-41 X67<br />
5.0 (0.197) 31537-41X68<br />
AT-167<br />
IForward clutch I<br />
Number of drive plates 5<br />
Number of driven plates 5<br />
Thickness of drive plate<br />
mm(in)<br />
Standard 2.0 (0.079)<br />
Wear limit 1.8 (0.0711<br />
Clearance mm (in)<br />
Standard 0.45 - 0.85 (0.0177 - 0.0335)<br />
Allowable limit 1.85 (0.0728)<br />
Thickness<br />
mm (in)<br />
Part number<br />
8.0 (0.315) 31537-41 XOO<br />
Thickness of retaining plate<br />
8.2 (0.323)<br />
8.4 (0.331)<br />
31537-41X01<br />
31537-41 X02<br />
8.6 (0.339) 31537-41X03<br />
8.8 (0.346) 31537-41 X04<br />
9.0 (0.354) 31537-41X05<br />
IOverrun clutch I<br />
9.2 (0.362) 31537-41X06<br />
Number of drive plates 3<br />
Number of driven plates 5<br />
Thickness of drive plate<br />
mm (in)<br />
Standard 2.0 (0.079)<br />
Wear limit 1.8 (0.071)<br />
Clearance mm(in)<br />
Standard 1.0 - 1.4 (0.039 - 0.055)<br />
Allowable limit 2.0 (0.079)<br />
Thickness of retaining plate<br />
Thickness<br />
mm (in)<br />
Part number<br />
4.0 (0.157) 31537-41X79<br />
4.2 (0.165) 31537-41 X80<br />
4.4 (0.173) 31537-41X81<br />
4.6(0.181) 31537-41 X82<br />
4.8 (0.189) 31537-41X83<br />
5.0 (0.197) 31537-41 X84<br />
5.2 (0.205) 31537-41 X20
ILow & reverse brake I<br />
Number of drive plates 5<br />
Number of driven plates 7<br />
Thickness of drive plate<br />
mm (in)<br />
Standard 2.0 (0.079)<br />
Wear limit. 1.8 (0.071)<br />
SERVICE DATA AND SPECIFICATIONS (S.D.S.)<br />
Clearance mm lin)<br />
Standard 1.1 - 1.5 (0.043 - 0.059)<br />
Allowable limit 2.5 (0.098)<br />
Thickness of retaining plate<br />
Oil PUMP AND lOW ONE-WAY CLUTCH<br />
Oil pump clearance mm (in)<br />
Cam ring - oil pump housing<br />
Standard 0.Q1- 0.024 (0.0004 - 0.0009)<br />
Rotor, vanes and control<br />
piston - oil.pump housing<br />
Standard 0.03 - 0.044 (0.0012 - 0.0017)<br />
Seal ring clearance mm (in)<br />
Standard<br />
Allowable limit<br />
TOTAL END PLAY<br />
Total e~ play "T I "<br />
Thickness of oil pump<br />
cover bearing race<br />
Thickness<br />
mm (in)<br />
0.10 - 0.25 (0.0039 - 0.0098)<br />
0.25 (0.0098)<br />
0.25 -0.55 mm<br />
(0.0098 -0.0217 in)<br />
Thickness<br />
mm (in)<br />
0.8 (0.031)<br />
1.0 (0.039)<br />
1.2 (0.047)<br />
1.4 (0.0551<br />
1.6 (0.063)<br />
1.8 (0.071)<br />
2.0 (0.079)<br />
Specifications and Adjustment (Cont'd)<br />
Part number<br />
8.6 (0.339) 31667-41X03<br />
8.8 (0.346) 31667-41X04<br />
9.0 (0.354) 31667-41X05<br />
9.2 (0.362) 31667-41X06<br />
9.4 (0.370) 31667-41X09<br />
9.6 (0.378) 31667-41 X10<br />
I Brake band I<br />
Anchor end bolt tightening 4.6<br />
torque N.m (kg-m, ft-Ib) (0.4 - 0.6, 2.9 - 4.3)<br />
Number of returning<br />
revolutions for anchor 2.5<br />
end bolt<br />
Part number<br />
31429-21 XOO<br />
31429-21 X01<br />
31429-21 X02<br />
31429-21 X03<br />
31429-21X04<br />
31429-21 X05<br />
31429-21 X06<br />
AT-168<br />
REVERSE CLUTCH DRUM END PLAY<br />
Reverse clutch drum end play 0.55 - 0.90 mm<br />
(0.0217 - 0.0354 in)<br />
"Ta ..<br />
Thickness of oil pump thrust<br />
washer<br />
Thickness<br />
mm (in)<br />
0.7 (0.028)<br />
0.9 (0.035)<br />
1 ..1 (0.043)<br />
1.3 (0.051)<br />
1.5 (0.059)<br />
1.7 (0.067)<br />
1.9 (0.075)<br />
REMOVAL AND INSTAllATION<br />
I<br />
<strong>Manual</strong> control linkage<br />
Number of returning<br />
revolutions for lock nut<br />
Lock nut tightening torque<br />
Distance between end of clutch<br />
housing and torque converter<br />
Part number<br />
31528-21 XOO'<br />
31528-21 X01<br />
31528-21X02<br />
31528-21 X03<br />
31528-21 X04<br />
31528-21 X05<br />
31528-21 X06<br />
11 -15 N.m<br />
(1.1-1.5 kg-m, 8 -11 ft-Ib)<br />
26.0 mm (1.024 in) or more<br />
Drive plate runout limit 0.5 mm (0.020 in)
PROPELLERSHAFT&<br />
DIFFERENTIALCARRIER<br />
I<br />
SECTIONPD<br />
CONTENTS ."<br />
PREPARATION... """"""""""" "'..0 0'"'''' 0" 0 0.. 0 PD- 2<br />
PROPELLER SHAFT ""'''''''''''''''''''0'''''''''''''''''''' """'"'''''''''''''''''''' 0 0"'" PD- 5<br />
ON-VEHICLE SERVICE (Final drive) .. PD- 9<br />
REMOVAL AND INSTALLATION '''''''''''''''''''''''''''''''''''''''''''''''''''''' 0''''' 0...0"""0" PD-11<br />
FRONT FINAL DRIVE "'"'''''''''''''''''''''''''''''''''''''' 0 PD-12<br />
DISASSEMBLY """"'''''''''''''''''''''''''''' """""'''''''''''''...0 0'"''''''''''''0''' ...". PD-13<br />
INSPECTION 0 """"""'"'''''''''' "'''''''''''''''''''''' 0. PD-17<br />
ADJUSTMENT 0 """''''''0'''''''''''''0'''''''' '"'''''''''''' 0'"'''' 0'0'"'''''''''''''' PD-18<br />
ASSEMBLY 0 o.0 0..""'''''''...0.0 0 PD-25<br />
SERVICE DATA AND SPECIFICATIONS (S.D.S.) PD-30<br />
-<br />
~<br />
.
Tool number<br />
(Kent-Moore No.) Description<br />
Tool name<br />
ST38060002<br />
~<br />
(J34311)<br />
Drivepinion flange<br />
wrench<br />
KV38100800<br />
( - )<br />
Equivalent tool<br />
(J25604-D 1)<br />
Differential<br />
attachment<br />
ST309OS000<br />
( - )<br />
Drive pinion rear inner<br />
race puller set<br />
CD ST30031000<br />
(J22912-D1)<br />
Puller<br />
@ ST30901000<br />
( - )<br />
Equivalent tool<br />
(J26010-D1)<br />
Base<br />
ST3306S001<br />
( - )<br />
Differential side<br />
bearing puller set<br />
CD ST33051001<br />
( - )<br />
Equivalent tool<br />
(J22888)<br />
Body<br />
@ ST33061 000<br />
(J8107-2)<br />
Equivalent tool<br />
(J26010-D1)<br />
Adapter<br />
ST30611000<br />
(J25742-1)<br />
Drift<br />
PREPARATION<br />
SPECIAL SERVICE TOOLS<br />
~<br />
V<br />
a: 152 mm (5.98 in)<br />
~ ~<br />
Q}fi~~<br />
~~ ~~\~.;II';~J..i'Hi1tlI'itr;;;'WJJ<br />
PD-2<br />
Removing and installing propeller shaft<br />
lock nut, and drive pinion lock nut.<br />
Mounting final drive<br />
(To use, make a new hole.)<br />
Removing and installing drive pinion<br />
rear cone<br />
Removing and installing differential side<br />
bearing inner cone<br />
Installing pinion rear bearing outer race
Tool number<br />
(Kent-Moore No.)<br />
Tool name<br />
ST30613000<br />
(J25742-3)<br />
Drift<br />
ST30701000<br />
(J25742-2)<br />
Drift<br />
KV381 00200<br />
(J26233)<br />
Gear carrier<br />
side oil seal<br />
drift<br />
KV38100500<br />
( - )<br />
Gear carrier front<br />
oil seal drift<br />
KV381 00300<br />
(J25523)<br />
Differential side<br />
bearing inner cone<br />
KV38100600<br />
(J25267)<br />
Side bearing spacer<br />
drift<br />
ST3127S000<br />
(See J25765-A)<br />
Preload gauge -<br />
CD GG91030000<br />
(J25765)<br />
Torque wrench<br />
@ HT62940000<br />
( - )<br />
@<br />
Socket adapter<br />
HT62900000<br />
( - )<br />
Socket adapter<br />
HT72400000<br />
( - )<br />
Slide hammer<br />
Description<br />
PREPARATION<br />
~.<br />
~<br />
c<br />
~ roo<br />
~ ~<br />
CD r;==~ D<br />
~ ~-~<br />
~ ~<br />
PD-3<br />
Installing pinion rear bearing outer race<br />
Installing pinion front bearing outer race<br />
Installing side oil seal<br />
Installing front oil seal<br />
Installing side bearing inner cone<br />
Installing side bearing spacer<br />
Measuring pinion bearing preload<br />
and total preload<br />
Removing differential case assembly
Tool number<br />
(Kent-Moore No.)<br />
Tool name<br />
(J34309)<br />
Differential shim<br />
selector<br />
(J25269-4)<br />
Side bearing discs<br />
(2 Req'd)<br />
(J8129)<br />
Spring gauge<br />
Description<br />
PREPARATION<br />
@<br />
~<br />
PD-4<br />
Adjusting bearing<br />
preload and gear height<br />
Selecting pinion height<br />
adjusting washer<br />
Measuring carrier turning<br />
torque
3S63A-T<br />
Washer<br />
Apply a coat of multi-purpose lithium grease<br />
containing molybdenum disulfide to the end<br />
face of the center bearing and both sides of<br />
the washer.<br />
3S63A-R<br />
Washer<br />
~<br />
~ 25-39<br />
12.6- 4.0, 19 - 29)<br />
Apply a coat of multi-purpose lithium grease<br />
containing molybdenum disulfide to the end<br />
face of the center bearing and both sides of<br />
the washer.<br />
PROPELLER SHAFT<br />
Lock nut ~<br />
~245 -294<br />
125- 30, 181 - 217)<br />
.~<br />
'fh
3S63A- T Center<br />
~i"' ~~"m"<br />
ABC<br />
3S63A-R<br />
Coupling. Center Journal<br />
~ABC<br />
/<br />
Transmission<br />
SPD872<br />
SPD359<br />
PROPELLER SHAFT<br />
,~<br />
On-vehicle <strong>Service</strong><br />
PROPELLER SH~FT VIBRATlON (<br />
If vibration is present at high spee,d, inspect propeller shaft<br />
runout first.<br />
1. Raise rear wheels.<br />
2. Measure propeller shaft runout at indicated points by rotating<br />
final drive companion flange with hands.<br />
Runoutlimit: 0.6 mm (0.024 in)<br />
Propeller shaft runout measuring points: Unit: mm (in)<br />
Distance<br />
Model<br />
3S63A-T<br />
A 175 (6.89)<br />
3S63A-R<br />
155 (6.10)<br />
B<br />
165 (6.50)<br />
'165 (6.50)<br />
c 185 (7.28) 185 (7.28)<br />
3. If runout exceeds specifications, disconnect propeller shaft<br />
at final drive companion flange; then rotate companion<br />
flange 180 degrees and reconnect propeller shaft.<br />
Runout limit: 0.6mm (0.024 in)<br />
4. Check runout again. If runout still exceeds specifications,<br />
replace propeller shaft assembly.<br />
5. Perform road test.<br />
APPEARANCE CHECKING<br />
. Inspect propeller shaft tube surface for dents or cracks.<br />
If damaged, replace propeller shaft assembly.<br />
. If center bearing is noisy o~ damaged, replace center<br />
bearing.<br />
Removal<br />
. Draw out propeller shaft from transmission and plug up rear<br />
end of transmission rear extension housing.<br />
PD-6
~nted ~rk-j~<br />
Painted mark;;::<br />
~ ~<br />
/~~<br />
SPD106<br />
//<br />
SPD874<br />
/\<br />
SPD109<br />
SPD110<br />
PROPELb.ER SHAFT<br />
.-<br />
Installation.<br />
. Temporarily install differential companion flange and flange<br />
yoke so that their alignment marks are located as close to<br />
each other as possible.<br />
. Turn propeller shaft until alignment marks face straight<br />
upward. Securely fasten propeller shaft so that lower side<br />
wall of concave flange yoke will touch lower side wall of<br />
convex companion flange.<br />
~<br />
Inspection<br />
. Inspect propeller shaft run'out. If runout exceeds specifications,<br />
replace propeller shaft assembly.<br />
Runout limit: 0.6 mm (0.024 in)<br />
. Inspect journal axial play.<br />
If the play exceeds specifications,<br />
assembly.<br />
Journalaxial play:<br />
0 mm (0 in)<br />
Disassembly<br />
CENTER BEARING<br />
replace propeller shaft<br />
1. Put matchmarks on flanges, and separate 2nd tube from 1st<br />
tube. .<br />
2. Put matchmarks on the flange and shaft.<br />
PD-7
SPD 111<br />
SPD112<br />
SPD117<br />
PROPELLER SHAFT<br />
Disassembly (Cont'd)<br />
3. Remove locking nut with Tool.<br />
Tool number:<br />
ST38060002 (J34311)<br />
4. Remove companion flange with puller.<br />
5. Remove center bearing with Tool and press.<br />
Tool number: ST30031000 (J22912-01)<br />
Assembly<br />
CENTER BEARING<br />
. When installing center bearing, position the "F" mark on<br />
center bearing toward front of vehicle.<br />
. Apply a coat of multi-purpose lithium grease containing<br />
molybdenum disulfide to the end face of the center<br />
bearing and both sides of the washer.<br />
. Stake the nut. Always use new one.<br />
. Align matchmarks when assembling tubes.<br />
~'\<br />
\ ~<br />
pl1:8
ON..VEHICLESERVICE (Final drive)<br />
Front Oil Seal Replacement<br />
1. Remove propeller shaft.<br />
2. Loosen drive pinion nut with Tool.<br />
Tool number: 5T38060002 (J34311)<br />
3. Remove companion flange.<br />
4. Remove front oil seal.<br />
5. Apply multi-purpose grease to sealing lips of oil seal. Press<br />
front oil seal into carrier.<br />
6. Install companion flange and drive pinion nut.<br />
7. Install propeller shaft.<br />
Side Oil Seal Replacement<br />
1. Remove drive shafts.<br />
Refer to RA section.<br />
2. Remove oil seal.<br />
P.D-9
~<br />
\<br />
-) ON-VEHICLE SERVICE (Final drive)<br />
Side Oil Seal Replacement (Cont'd)<br />
3. Apply multi-purpose grease. to sealing lips<br />
Press-fit oil seal into carrier with Tool.<br />
Tool number: KV38100200 (J26233)<br />
4. Install drive shafts.<br />
PD-'O<br />
of oil seal.
~<br />
:C!;' :<br />
Filler opening SPD882<br />
REMOVAL AND INSTAllATION<br />
Removal<br />
. Remove propeller shaft.<br />
Insert plug into rear oil seal after removing<br />
. Remove drive shafts.<br />
propeller shaft.<br />
Refer to RA section.<br />
. Pull off final drive backward together with jack.<br />
CAUTION:<br />
. Be careful not to damage spline, sleeve yoke and front oil<br />
seal, when removing propeller shaft.<br />
. After final drive is removed, support suspension. member<br />
on a stand to prevent<br />
damaged.<br />
its insulators from being twisted or<br />
Installation<br />
. Fill final drive with recommended gear oil.<br />
PD-11
"'0<br />
C I<br />
~<br />
N<br />
en<br />
"1)<br />
0<br />
IX)<br />
IX)<br />
w<br />
Side oil seal~<br />
,"'" -<br />
Side bearing spacer<br />
Pinion Breath<br />
,8'do "',,'"' "" J"~'''' ", " ' , , t"J 88. . "8(9.<br />
'<br />
,h,f
0- ../"/11<br />
SPD884<br />
SPD513<br />
Runo~ ~m~: ~.~ m~~O.OO20in) SPD886<br />
SPD887<br />
DISASSEMBLY<br />
Pre-inspection<br />
Before disassembling final drive, perform the following inspection.<br />
. Total preload<br />
1) Turn drive pinion in both directions several times to set<br />
bearing rollers.<br />
2) Check total preload with Tool.<br />
Tool number: ST3127S000 (See J25765-A.)<br />
Total preload:<br />
1.4 - 1.7 N.m<br />
(14 - 17 kg-em, 12 - 15 in-Ib)<br />
. Ring gear to drive pinion backlash<br />
Check ring gear-to-drive pinion backlash with a dial indicator<br />
at several points.<br />
Ring gear-to-drive pinion backlash:<br />
0.10 - 0.15 mm (0.0039 - 0.0059in)<br />
. Ring gear runout<br />
Check runout of ring gear with a dial indicator.<br />
Runout limit:<br />
0.05 mm (0.0020 in)<br />
. Tooth contact<br />
Check tooth contact. (Refer to Adjustment.)<br />
. Side gear to pinion mate gear backlash<br />
Measure clearance between side gear thrust washer and<br />
differential case with a feeler gauge.<br />
Clearance between side gear thrust washer and<br />
differential case:<br />
0.1 - 0.2 mm (0.004 - 0.008 in)<br />
Differential Carrier<br />
1. Using two 45 mm (1.77 in) spacers, mount carrier on Tool.<br />
Tool number: KV38100800 ( - )<br />
PD-13
SP D889<br />
PD344<br />
6 ?~.<br />
SPD527<br />
SPD890<br />
DISASSEMBLY<br />
Differential Carrier (Cont'd)<br />
2. Paint or punch match marks on one side of the side bearing<br />
cap so itcan be properly reinstalled.<br />
Bearing caps are line-board during manufacture. Replace<br />
them in their proper positions.<br />
3. Remove side bearing caps.<br />
4. Lift differential case assembly out with Tool.<br />
Tool number: HT72400000 ( - )<br />
Keep the side bearing outer races together with inner cone -<br />
do not mix them up.<br />
5. Loosen drive pinion nut and pull off companion flange.<br />
PD-14
_H- .--.<br />
.. . -<br />
- -~ I<br />
\ ""'-7 /.'- ./<br />
SPD529<br />
SPD022<br />
SPD025<br />
DISASSEMBLY<br />
Differential Case<br />
1. Remove side bearing inner cones.<br />
To prevent damage to bearing, engage puller jaws in groove.<br />
Tool number:<br />
@ ST33051001( - )<br />
Equivalent tool (J22888)<br />
@ ST33061000 (J8107-2)<br />
Be careful not to confuse left- and right-hand parts.<br />
2. Loosen ring gear bolts in a criss-cross fashion.<br />
3. Tap ring gear off the differential case with a soft hammer.<br />
Tap evenly all around to keep ring gear from binding.<br />
4. Drive out pinion mate shaft lock pin, with punch from ring<br />
gear side.<br />
Lock pin is calked at pin hole mouth on differential case.<br />
PD-16
SPD909<br />
SPD715<br />
INSPECTION<br />
Ring Gear and Drive Pinion<br />
Check gear teeth for scoring, cracking or chipping. If any part is<br />
damaged, replace ring gear and drive pinion as a set (hypoid<br />
gear set).<br />
Differential Case Assembly<br />
Check mating surfaces of differential case, side gears, pinion<br />
mate gears, pinion mate shaft and thrust washers.<br />
Bearing<br />
1. Thoroughly clean bearing.<br />
2. Check bearings for wear, scratches, pitting or flaking.<br />
Check tapered roller bearing for smooth rotation. If damaged,<br />
replace outer race and inner cone as a set.<br />
PD-17
~<br />
6<br />
011 ~<br />
SPD527<br />
ADJUSTMENT<br />
For quiet and reliable final drive operation, the following five<br />
adjustments must be made correctly.<br />
1. Side bearing preload<br />
2. Pinion gear height<br />
3. Pinion bearing preload<br />
4. Ring gear-to-pinion backlash (Refer to ASSEMBLY.)<br />
5. Ring and pinion gear tooth contact pattern<br />
Side Bearing Preload<br />
A selection of carrier side bearing preload shims is required<br />
for successful completion of this procedure.<br />
1. Make sure all parts are clean and that the bearings are well<br />
lubricated with light oil or DexronTMtype automatic transmission<br />
fluid.<br />
2. Place the differential carrier, with side bearings and bearing<br />
races installed, into the final drive housing.<br />
3. Put the side bearing spacer in place on the ring gear end of<br />
the carrier.<br />
4. Using the. J-25267 side bearing spacer drift, place both of<br />
the original carrier side bearing preload shims on the carrier<br />
end, opposite the ring gear.<br />
PD-18
L-- I<br />
I<br />
I<br />
.---i., ,'-, ,<br />
- iPt= I<br />
I- ~<br />
PD344<br />
I!DIiIIIIIIIIII<br />
18 !:J<br />
SPD769<br />
ADJUSTMENT<br />
Side Bearing Preload (Cont'd)<br />
5. Install the side bearing caps in their correct locations and<br />
torque the bearing cap retaining bolts.<br />
Specification:<br />
88 - 98 N.m<br />
(9 - 10 kg-m, 65 - .72 ft-Ib)<br />
6. Turn the carrier several times to seat the bearings.<br />
7. Measure the turning torque of the carrier at the ring gear<br />
retaining bolts with a spring gauge, J-8129.<br />
Specification:<br />
34.3 - 39.2 N<br />
(3.5 - 4 kg, 7.7 - 8.8 Ib)<br />
of pulling force at the ring gear bolt.<br />
8. If the carrier turning torque is not within the specification<br />
range, increase or decrease the total thickl1ess of the side<br />
bearing adjusting washers until the turning torque is correct.<br />
If the turning torque is less than the specified range, install<br />
washers of greater thickness; if the turning torque is greater<br />
than the specification, install thinner washers. See the S.O.S.<br />
section for washer dimensions and part numbers.<br />
9. Record the total amount of washer thickness required for<br />
the correct carrier side bearing preload.<br />
10. Remove the carrier from the final drive housing, saving the<br />
selected preload washers for later use during the assembly<br />
of the final drive unit.<br />
Pinion Gear Height and Pinion Bearing Preload<br />
1. Make sure all parts are clean and that the bearings are well<br />
lubricated.<br />
2. Assemble the pinion gear bearings into the pinion preload<br />
shim selector Tool, J-34309.<br />
PD-19
~!<br />
C'<br />
/'<br />
1\1 SPD893<br />
SPD770<br />
ADJUSTMENT<br />
Pinion Gear Height and Pinion Bearing Preload<br />
(Cont'd)<br />
. Front pinion bearing - make sure the J-34309-3 front<br />
pinion bearing seat is secured tightly against the J-34309-2<br />
gauge anvil. Then turn the front pinion bearing pilot,<br />
J-34309-5, to secure the bearing in its proper position.<br />
. Rear pinion bearing - the rear pinion bearing pilot,<br />
J-34309-8, is used to center the rear pinion bearing only.<br />
The rear pinion bearing locking seat, J-34309-4, is used to<br />
lock the bearing to the assembly.<br />
3. Place the pinion preload shim selector Tool, J-34309-1,<br />
gauge screw assembly with the pinion rear bearing inner<br />
cone installed into the final drive housing.<br />
4. Assemble the front, pinion bearing inner cone and the<br />
J-34309-2 gauge anvil together with the J-34309-1 gauge<br />
screw in the final drive housing. Make sure that the pinion<br />
height gauge plate, J-34309-16, will turn a full 360 degrees,<br />
and tig<br />
hten the two sections together by hand.<br />
5. Turn the assembly several times to seat the bearings.<br />
6. Measure the turning torque at the end of<br />
gauge anvil using torque wrench J-25765A.<br />
'Turning torque specification:<br />
1.0 - 1.3 N.m<br />
(10 - 13 kg-em, 8.7 - 11.3 in-Ib)<br />
PD-20<br />
the J-34309-2
SPD774<br />
ADJUSTMENT<br />
Pinion Gear Height and Pinion Bearing Preload<br />
(Cont'd)<br />
7. Place the J-34309-11 "R200A" pinion height adapter onto<br />
the gauge plate and tighten it by hand.<br />
CAUTION:<br />
Make sure all machined surfaces are clean.<br />
- PINION BEARING PRELOAD WASHER SELECTION -<br />
8. Place the solid pinion bearing spacer, small end first, over<br />
the J-34309-2 gauge anvil and seat the small end squarely<br />
against the tip of the J-34309-1 gauge screw in the tool<br />
recessed portion.<br />
9. Select the correct thickness of pinion bearing preload<br />
adjusting washer using a standard gauge of 3.5 mm (0.138<br />
in) and your J-34309-101 feeler gauge. The exact measure<br />
you get with your gauges is the thickness of the adjusting<br />
washer required. Select the correct washer from the<br />
following chart.<br />
Drive pinion bearing preload adjusting washer:<br />
Refer to S.D:S.<br />
10. Set your selected, correct pinion bearing preload adjusting,<br />
washer aside for use when assembling the pinion gear and<br />
bearings into the final drive.<br />
PD-21
SPD775<br />
SPD542<br />
ADJUSTMENT<br />
Pinion Gear Height and Pinion Bearing Preload<br />
(Cont'd)<br />
- PINION HEIGHT ADJUSTING WASHER SELECTION -<br />
11. Now, position the side bearing discs, J-25269-4, and arbor<br />
firmly into the side bearing bores.<br />
Install the side bearing caps and tighten the cap bolts to<br />
proper torque.<br />
12. Select the correct standard pinion height adjusting washer<br />
thickness using a standard gauge of 3 mm (0.12 in) and<br />
your J-34309-101 feeler gauge. Measure the distance between<br />
the J-34309-10 pinion height adapter and the arbor.<br />
13. Write down your exact total measurement.<br />
14. Correct the pinion height washer size by referring to the<br />
"pinion head number."<br />
There are two numbers painted on the pinion gear. The first<br />
one refers to the pinion and ring gear as a matched set and<br />
should be the same as the number on the ring gear. The<br />
second number is the "pinion head height number," and it<br />
refers to the ideal pinion height from standard for quietest<br />
operation. Use the following chart to determine the correct<br />
pinion height washer.<br />
PD-22
ADJUSTMENT<br />
Pinion Gear Height and Pinion Bearing Preload<br />
(Cont'd)<br />
Add or remove from the standard<br />
Pinion head height number pinion height washer thickness<br />
measurement<br />
15. Select the correct pinion height washer from the following<br />
chart.<br />
Drive pinion height adjusting washer (R200):<br />
16. Remove the J-34309 pinion preload shim selector Tool from<br />
the final drive housing and disassemble to retrieve the<br />
pinion bearings.<br />
PD-23<br />
-6 Add 0.06 mm (0.0024 in)<br />
-5 Add 0.05 mm (0.0020 in)<br />
-4 Add 0.04 mm (0.0016 in)<br />
-3 Add 0.03 mm (0.0012 in)<br />
-2 Add 0.02 mm (0.0008 in)<br />
-1 Add 0.01 mm (0.0004 in)<br />
0 Use the selectedwasher th ickness<br />
+1 Subtract 0.01 mm (0.0004 in)<br />
+2 Subtract 0.02 mm (0.0008 in)<br />
+3 Subtract 0.03 mm (0.0012 in)<br />
+4 Subtract 0.04 mm (0.0016 in)<br />
+5 Subtract 0.05 mm (0.0020 in)<br />
+6 Subtract 0.06 mm (0.0024 in)<br />
Thickness mm (in) Part No.<br />
3.09 (0.1217) 38164-P60 17<br />
3.12 (0.1228) 38154-P6Q 18<br />
3.15 (0.1240) 38154-P60 19<br />
3.18 (0.1252) 38154-P6020<br />
3.21 (0.1264) 381 54-P6021<br />
3.24 (0.1276) 38154-P6022<br />
3.27 (0.1287) 38154-P6023<br />
3.30 (0.1299) 38164-P6024<br />
3.33 (0.1311)<br />
38154-P6025<br />
3.36 (0.1323) 38154-P6026<br />
3.39 (0.1335) 38154-P6027<br />
3.42 (0.1346) 38154-P6028<br />
3.45 (0.1358)<br />
38154-P6029<br />
3.48 (0.1370) 38154-P6030<br />
3.51 (0.1382) 38154-P6031<br />
3.54.(0.1394)<br />
38154-P6032<br />
3.57 (0.1406)<br />
38154-P6033<br />
3.60 (0.1417) 38154-P6034<br />
3.63 (0.1429) 38154-P6035<br />
3.66 (0.1441)<br />
38164-P6036
SPD357<br />
ADJUSTMENT<br />
Tooth Contact<br />
Gear tooth contact pattern check is necessary to verify correct<br />
relationship between ring gear and drive pinion.<br />
Hypoid gear sets which are not positioned properly may be<br />
noisy, or have short life, or both. Low noise and a long life can<br />
be assured with a pattern check.<br />
1. Thoroughly clean ring gear and drive pinion teeth.<br />
2. Sparingly apply a mixture of powdered ferric oxide and oil or<br />
equivalent to 3 or 4 teeth of ring gear drive side.<br />
3. Hold companion flange steady and turn the ring gear in both<br />
directions.<br />
Usually the pattern will be correct if you have calculated the shims correctly and the backlash is correct.<br />
However, in rare cases you may have to use trial-and-errorprocessas until you get a good tooth contact pattern.<br />
The tooth pattern is the best indication of how well a differential has been set up.<br />
~~ ~~<br />
Heel contact Face contact Toe contact Flank contact<br />
To correct, increase thickness of pinion<br />
height adjusting washer in order to bring<br />
drive pinion close to ring gear.<br />
~ .<br />
When adjustment is completed, be sure to wipe<br />
off completely the ferric oxide and oil or their<br />
equivalent. ~<br />
To correct, reduce thickness of pinion<br />
height adjusting washer in order to make<br />
drive pinion go away from ring gear.<br />
v-t~<br />
/ CM""-.. ~<br />
SPDOO7<br />
PD-24
SPD552<br />
SPD553<br />
SPD828<br />
SPD030<br />
Gear oil<br />
SPD322<br />
ASSEMBLY<br />
Differential Case<br />
1. Install side gears, pinion mate gears, thrust washers and<br />
thrust block into differential case.<br />
2. Fit pinion mate shaft to differential case so that 'it meets<br />
lock pin holes.<br />
3. Adjust clearance between rear face of side gear and thrust<br />
washer by selecting side gear thrust washer. Refer to S.O.S.<br />
Clearance between side gear thrust washer and<br />
differential case:<br />
0.10 - 0.20 mm (0.0039 - 0.0079 in)<br />
4. Install pinion mate shaft lock pin with a punch.<br />
Make sure lock pin is flush with case.<br />
5. Apply oil to gear tooth surfaces and thrust surfaces and<br />
check that they turn properly.<br />
PD-25
w~ @<br />
Press<br />
Pinion front<br />
bearing outer race<br />
Tool@<br />
Tool @ PD353<br />
~/~<br />
if<br />
Adjusting<br />
washer<br />
SPD679<br />
SPD377<br />
ASSEMBLY<br />
Differential Case (Cont'd)<br />
6. Apply locking sealant to ring gear bolts, and install them.<br />
Tighten bolts in a criss-cross fashion, lightly tapping bolt<br />
head with a hammer.<br />
7. Press~fit side bearing inner cones on<br />
Tool.<br />
Tool number:<br />
@ KV38100300 (J25523)<br />
@ ST33061000 (J8107-2)<br />
Differential Carrier<br />
differential case with<br />
1. Press-fit front and rear bearing outer races with Tools.<br />
Tool number:<br />
@ 5T30611000 (J25742-1)<br />
@ 5T30613000 (J25742-3)<br />
@ 5T30701000 (J25742-2)<br />
2. Select pinion bearing adjusting washer and drive pinion<br />
bearing spacer, referring to Adjustment.<br />
3. Install drive pinion height adjusting washer in drive pinion,<br />
and press-fit pinion rear bearing inner cone in it, using press<br />
and Tool.<br />
Tool number: 5T30901000 (<br />
PD-26
~r-"<br />
)~<br />
~<br />
0 I<br />
E!!I<br />
SPD581<br />
~<br />
Pinion be'arlng adjDrive ust' lng JPinion<br />
spacer<br />
Pinion be'<br />
ad' arlng<br />
~JuH;"~~'~~ '<br />
@<br />
E:<br />
~ .<br />
Pinion fron t bearln<br />
g . Inner race lIE! SPD897<br />
Tool<br />
SPD896<br />
SPD557<br />
PD416<br />
ASSEMBL Y<br />
Differential Carrier (Cont'd)<br />
4. Place pinion front bearing inner cone in final drive housing.<br />
5. Set drive pinion assembly (as shown in figure at left) in<br />
differential carrier and install drive pinion, with press and<br />
suitable tool.<br />
Stop when drive pinion touches bearing.<br />
Apply multi-purpose grease to pinion rear bearing inner race,<br />
pinion front bearing inner race and front pilot bearing.<br />
6. Apply multi-purpose grease to cavity at sealing lips of oil<br />
seal. Install front oil seal with Tool.<br />
Tool number: KV38100500 (<br />
7.: Install companion flange, and tighten pinion nut to specified<br />
torque with Tool.<br />
Ascertain that threaded portion of drive pinion and pinion nut<br />
are free from oil or grease.<br />
Tool number: ST38060002 (J34311)<br />
PD-27
~~~<br />
~ ( ::;..;;-..f\:i{;! , Tool<br />
SP D884<br />
Q<br />
5'<br />
SPD527<br />
~bo,,'"<br />
~~'<br />
SPD559<br />
ASSEMBLY<br />
Differential Carrier (Cont'd)<br />
8. Turn drive pinion in both directions several times, and<br />
measure pinion bearing preload.<br />
Pinion bearing preload:<br />
1.1 - 1.4 N.m<br />
(11 - 14 kg-em, 9.5 - 12.2 In-Ib)<br />
When pinion bearing preload is outside the specifications,<br />
replace pinion bearing adjusting washer and spacer with a<br />
different thickness.<br />
9. Select side bearing adjusting washer.<br />
Refer to Adjustment.<br />
10. Install differential case assembly with side bearing outer<br />
races into gear carrier.<br />
11. Insert left and right side bearing adjusting washers in place<br />
between side bearings and carrier.<br />
12. Drive in side bearing spacer with Tool.<br />
Tool number: KV38100600 (J25267)<br />
13. Align mark on bearing cap with that on gear carrier and<br />
install bearing cap on gear carrier.<br />
PD-28
SP0560<br />
SP0513<br />
SP 0884<br />
SP0524<br />
ASSEMBL Y<br />
Differential Carrier (Cont'd)<br />
14. Apply multi-purpose grease to cavity at<br />
seal. Install side oil seal.<br />
Tool number: KV38100200 (J26233)<br />
sealing lips of oil<br />
15. Measure ring gear-to-drive pinion backlash with a dial<br />
indicator.<br />
Ring gear-to-drive pinion backlash:<br />
0.10 - 0.15 mm<br />
(0.0039 - 0.0059 in)<br />
. If backlash is too small, decrease thickness of left shim and<br />
increase thickness of right shim by the same amount.<br />
If backlash is too great, reverse the above procedure.<br />
Never change the total amount of shims as it will change the<br />
bearing preload.<br />
16. Check total preload with Tool.<br />
When checking preload, turn drive pinion in both directions<br />
several times to seat bearing rollers correctly.<br />
Total preload:<br />
Value more than 0.29 N.m (3.0 kg-em, 2.6 in-Ib)<br />
added on measured value of drive pinion preload<br />
. If preload is too great, remove the same amount of shim to<br />
each side.<br />
. If preload is too small, add the same amount of shim to<br />
each side.<br />
Never add or remove a different number of shims for each<br />
side as it will change ring gear-to-drive pinion backlash.<br />
17. Recheck ring gear-to-drive pinion backlash because increase<br />
or decrease in thickness of shims will cause change<br />
of ring gear-to-pinion backlash.<br />
18. Check runout of ring gear with a dial indicator.<br />
Runout limit:<br />
0.05 mm (0.0020 in)<br />
. If backlash varies excessively in different places, foreign<br />
matter may be caught between the ring gear and the<br />
differential case.<br />
. If the backlash varies greatly when the ring gear runout is<br />
within a specified range, replace the hypoid gear set or<br />
differential case.<br />
19. Check tooth contact.<br />
Refer to Adjustment.<br />
20. Install rear cover and gasket.<br />
PD-29
~<br />
GENERAL SPECIFICATIONS<br />
Applied model<br />
Transmission<br />
type<br />
Propeller shaft<br />
model<br />
Number of joints<br />
Coupling method<br />
with transmission<br />
Type of journal<br />
bearings<br />
Distance between<br />
yokes<br />
Shaft length<br />
(Spider to spider)<br />
1st<br />
SERVICE DATA AND SPECIFICATIONS (S.O.S.)<br />
M/T A/T<br />
3S63A-R 3S63A-T<br />
3<br />
Sleeve type<br />
Propeller Shaft<br />
Unit: mm (in)<br />
Shell type (Non-disassembly type)<br />
63.0 (2.480)<br />
395.0 (15.55) 432.0 (17.011<br />
2nd 605.0 (23.82) 605.0 (23.82)<br />
Shaft outer<br />
diameter<br />
1st<br />
2nd<br />
75.0 (2.953)<br />
75.0 (2.953)<br />
75.0 (2.953)<br />
... Large side<br />
63.5 (2.500)<br />
... Small side<br />
PD-30<br />
SPECIFICATIONS AND ADJUSTMENT<br />
Unit: mm (in)<br />
Propeller shaft model 3S63A-R<br />
Propeller shaft runout limit<br />
1<br />
0.6 (0.024)<br />
Journal axial play 0 (0)<br />
3S63A- T
GENERAL SPECIFICATIONS<br />
Final drive model R200<br />
Ring gear pitch diameter<br />
mm (in)<br />
SERVICE DATA AND SPECIFICATIONS (S.D.S.)<br />
205 (8.07)<br />
Gear ratio 4.083<br />
Number of teeth<br />
(Ring gear/Drive pinion)<br />
Oil capacity (approx.)<br />
Q(US pt, Imp pt)<br />
49/12<br />
1.8 (3-7/8,3-1/8)<br />
SPECIFICATIONS AND ADJUSTMENT (R200)<br />
Drive pinion adjustment<br />
Drive pinion bearing<br />
adjusting method<br />
Drive pinion to ring gear backlash<br />
mm (in)<br />
AvaUable pinion height adjusting washer<br />
Pinion bearing adjusting washer<br />
0.10 - 0.15 (0.0039 - 0.0059)<br />
Thickness mm (in) Part number<br />
3.09 (0.1217)<br />
3.12 (0.1228)<br />
3.15 (0.1240)<br />
3.18 (0.1252)<br />
3.21 (0.1264)<br />
3.24 (0.1276)<br />
3.27 (0.1287)<br />
3.30 (0.1299)<br />
3.33 (0.1311)<br />
3.36 (0.1323)<br />
3.39 (0.1335)<br />
3.42 (0.1346)<br />
3.45 (0.1358)<br />
3.48 (0.1370)<br />
3.51 (0.1382)<br />
3.54 (0.1394)<br />
3.57 (0.1406)<br />
3.60 (0.1417)<br />
3.63 (0.1429)<br />
3.66 (0.1441)<br />
38154-P6017<br />
38154-P60 18<br />
38154-P6019<br />
38154-P6020<br />
38154-P6021<br />
38154-P6022 ,<br />
38154-P6023<br />
38154-P6024<br />
38154-P6025<br />
38154-P6026<br />
38154-P6027<br />
38154-P6028<br />
38154-P6029<br />
38154-P6030<br />
38154-P6031<br />
38154-P6032<br />
38154-P6033<br />
38154-P6034<br />
38154-P6035<br />
38154-P6036<br />
Final Drive<br />
PD-31<br />
Drive pinion preload adjustment<br />
Drive pinion preload<br />
N.m (kg-em, in-Ib)<br />
With front oil seal 1.1 - 1.4 (11 - 14,9.5 -12.2)<br />
Available drive pinion bearing preload adjusting washer<br />
Thickness mm (in) Part number<br />
3.80 - 3.82 (0.1496 - 0.1504)<br />
3.82 - 3.84 (0.1504 - 0.1512)<br />
3.84-3.86 (0.1512 -0.1520)<br />
3.86 - 3.88 (0.1520 - 0.1528)<br />
3.88 - 3.90 (0.1528 - 0.1535)<br />
3.90 - 3.92 (0.1535 - 0.1543)<br />
3.92 - 3.94 (0.1543 - 0.1551)<br />
3.94-3.96 (0.1551-0.1559)<br />
3.96 - 3.98 (0.1559 - 0.1567)<br />
3.98 - 4.00 (0.1567 - 0.1575)<br />
4.00-4.02 (0.1575-0.1583)<br />
4.02 - 4.04 (0.1583 - 0.1591)<br />
4.04 - 4.06 (0.1591 - 0.1598)<br />
4.06 - 4.08 (0.1598 - 0.1606)<br />
4.08 - 4.10 (0.1606 - 0.1614)<br />
38125-61001<br />
38126-61001<br />
38127-61001<br />
38128-61001<br />
38129-61001<br />
38130-61001<br />
38131-61001<br />
38132-61001<br />
38133-61001<br />
38134-61001<br />
38135-61001<br />
38136-61001<br />
38137-61001<br />
38138-61001<br />
38139-61001<br />
Available drive pinion bearing preload adjusting spacer<br />
Length mm (in) Part number<br />
55.10 (2.1693)<br />
55.40 (2.1811)<br />
55.70 (2.1929)<br />
56.00 (2.2047)<br />
56.25 (2.2146)<br />
38165-B4002<br />
38165-B4003<br />
38165-B4004<br />
38165-61001<br />
38166-61001
---------<br />
SERVICE DATA AND SPECIFICATIONS (S.D.S.)<br />
Final Drive (Cont'd)<br />
Total preload adjustment Side bearing adjustment<br />
Total preload<br />
Available side bearing adjusting washer<br />
Value more than<br />
0.29 N.m 13.0 kg-cm, 2.6 in-Ibl<br />
added on measured -value<br />
of drive pinion preload<br />
Side bearing adjusting method Adjusting shim<br />
Side gear to pinion mate gear<br />
backlash IClearance betWeen<br />
side gear to differential easel<br />
mm Iinl<br />
Thickness mm Iinl Part number Available side gear thrust washer<br />
2.00 10.07871<br />
2.0510.08071<br />
2.1010.0827)<br />
2.1510.08461<br />
2.20 10.08661<br />
2.25 10.08861<br />
2.30 10.09061<br />
2.35 10.09251<br />
2.40 10.0945)<br />
2.45 10.09651<br />
2.50 10.09841<br />
2.55 10.10041<br />
2.6010.10241<br />
2.65 (0.10431<br />
38453-N3100<br />
38453-N3101<br />
38453-N3102<br />
38453-N31 03<br />
38453-N3104<br />
38453-N3105<br />
38453-N3106<br />
38453-N3107<br />
38453-N3108<br />
38453-N3109<br />
38453-N3110<br />
38453-N3111<br />
38453-N3112<br />
38453-N3113<br />
PD-32<br />
0.03 -0.0910.0012 - 0.00351<br />
Thickness mm Iinl Part number<br />
0.80 10.03151<br />
0.85 10.03351<br />
0.90 10.03541<br />
0.95 10.03741<br />
1.00 10.03941<br />
1.0510.04131<br />
1.1010.0433)<br />
1.1510.04531<br />
1.2010.04721<br />
1.25 10.04921<br />
1.3010.05121<br />
1.3510.05311<br />
1.4010.05511<br />
1.4510.05711<br />
1.5010.05911<br />
Ring gear runout<br />
38424-40FOO<br />
38424-40F08<br />
38424-40F01<br />
38424-40F09<br />
38424-40F02<br />
38424-40F10<br />
38424-40F03<br />
38424-40F 11<br />
38424-40F04<br />
38424-40F12<br />
38424-40F05<br />
38424-40F13<br />
38424-40F06<br />
38424-40F 14<br />
38424-40F07<br />
Ring gear runout limit mm Iinl 0.05 10.00201
CONTENTS<br />
FRONTAXLE&<br />
FRONT~USPENSION<br />
~ I<br />
,<br />
SECTIONFA<br />
PRECAUTIONS AND PREPARATION ... """""'"'' "'"'' FA- 2<br />
FRONT AXLE AND FRONT SUSPENSION " FA- 4<br />
CHECK AND ADJUSTMENT - On-vehicle FA- 5<br />
FRONT AXLE FA- 9<br />
FRONT AXLE - Wheel Hub and Knuckle FA-10<br />
FRONT AXLE - Baffle Plate " FA-13<br />
FRONT SUSPENSION FA-14<br />
FRONT SUSPENSION - Coil Spring and Strut Assembly FA-15<br />
FRONT SUSPENSION- Tension Rod and Stabilizer Bar ; ,' FA-17<br />
FRONT SUSPENSION - Transverse Link and Lower Ball Joint FA-18<br />
SERVICE DATA AND SPECIFICATIONS (S.O.S.) """"""V"""'"'''''''''''''''''''''''''''''''''''''''''''''''' FA-19<br />
-
Tool number<br />
(Kent-Moore No.)<br />
Tool name<br />
HT72520000<br />
(J25730-A)<br />
Balljoint remover<br />
HT71780000<br />
( - )<br />
Spring compressor<br />
ST35652000<br />
( - )<br />
Strut attachment<br />
GG94310000<br />
( - )<br />
Flare nut torque<br />
wrench<br />
Description<br />
PRECAUTIONS AND PREPARATION<br />
SBR500<br />
Precautions<br />
. When installing each rubber part, final tightening must be<br />
carried out under unladen condition * with tires on ground.<br />
* Fuel, radiator coolant and eRg!ne oil full. Spare tire,<br />
jack, hand tools and mats in designated positions.<br />
. When removing each suspension part, check wheel alignment<br />
and adjust if necessary.<br />
. Use Tool when removing or installing brake tubes.<br />
Preparation<br />
SPECIALSERVICETOOLS<br />
~<br />
e5E<br />
~ ~~<br />
~<br />
FA-2<br />
Removing tie-rod outer end and lower<br />
ball joint<br />
Removing and installing coil spring<br />
Fixing strut assembly<br />
Removing and installing brake piping
Tool name<br />
Wheel bearing drift<br />
Wheel bearing drift<br />
Baffle plate drift<br />
Teosion rod bushing<br />
drift<br />
Description<br />
PRECAUTIONS AND PREPARATION<br />
OO)!<br />
~ ~<br />
Preparation (Cont'd)<br />
COMMERCIAL SERVICE TOOLS<br />
B<br />
~<br />
A: 45 mm (1.77 in) dia.<br />
B: 30 mm (1.18 in) dia.<br />
2J<br />
A: 68 mm (2~68 in) dia.<br />
B: 60 mm (2.36 in) dia.<br />
A: 88 mm (3.46 in) dia.<br />
B: 68 mm (2.68 in) dia.<br />
A: 75 mm (2.95 in) dia.<br />
B: 66 mm (2.60 in) dia.<br />
c: 62 mm (2.44 in) dia.<br />
D: 25.55 mm (0.98.2.17 in) dia.<br />
FA-3<br />
Removing wheel bearing<br />
~<br />
Installing wheel bearing<br />
Installing baffle plate<br />
Removing and installing<br />
tension rod bushing
Final tightening for rubber parts requires to be carried<br />
out under unladen condition* with tires on ground.<br />
* Fuel, radiator coolant and engine oil full.<br />
Spare tire, jack, hand tools and mats in designated positions.<br />
c:::?<br />
Front<br />
FRONT AXLE AND FRONT SUSPENSION<br />
"'.$. ~<br />
I,<br />
~<br />
~39-49<br />
(4.0-5.0,<br />
29 -36)<br />
Strut mounting insulator<br />
(with strut mounting bearingl<br />
Spring upper seat<br />
Coil spring<br />
Strut assembly<br />
Front suspension member<br />
Tension rod<br />
FA~4<br />
~ 46 -52<br />
(4.7- 5.3,<br />
34- 38)<br />
Transverse<br />
link assembly<br />
~<br />
I<br />
Brake disc roter<br />
~ : N.m (kg-m, ft-Ib)<br />
SFA640A
CHECK AND ADJOSTMENT - On-vehicle<br />
SMA525A<br />
SFA541A<br />
Front Axle and Front Suspension Parts<br />
. Check front axle and front suspension parts for looseness,<br />
cracks, wear or other damage.<br />
(1) Shake each front wheel.<br />
/<br />
(2) Retighten all nuts and bolts to the specified torque.<br />
Tightening torque: Refer to S.O.S.<br />
(3) Make sure that cotter pin is inserted.<br />
(4) Check front axle and front suspension parts for wear, cracks<br />
or other damage.<br />
. Check strut (shock absorber) for oil leakage or other<br />
damage.<br />
. Check suspension ball joint for grease leakage and ball joint<br />
dust cover for cracks or other damage.<br />
FA'" 5
90°<br />
CHECK AND ADJUSTMENT - On-vehicle<br />
"<br />
\<br />
SFA543A<br />
Inside<br />
~.<br />
SFA575S<br />
SFA894<br />
SFA573B<br />
Front Wheel Bearing<br />
. Check tightening torque of wheel bearing lock nut.<br />
tOJ:147 -216 N.m<br />
(15 - 22 kg-m, 108 - 159 ft-Ib)<br />
. Check that wheel bearings operate smoothly.<br />
. Check axial end play.<br />
Axial end play: 0.03 mm (0.0012 in) or less<br />
. If axial end play is not within specification or wheel bearing<br />
does not turn smoothly, replace wheel bearing assembly.<br />
Refer to FRONT AXLE - Wheel Hub and Knuckle.<br />
Front Wheel Alignment<br />
Before checking front wheel alignment, be sure to make a<br />
preliminary inspection.<br />
PRELIMINARY INSPECTION<br />
Make following checks. Adjust, repair or replace if necessary.<br />
. Check tires for wear and improper inflation.<br />
. Check front wheel bearings for looseness.<br />
. Check wheel runout.<br />
Refer to S.D.S.<br />
. Check front suspension for looseness.<br />
. Check steering linkage for looseness.<br />
. Check that front shock absorbers work properly.<br />
. Check vehicle posture (Unladen):<br />
"Unladen"<br />
Fuel, radiator coolant and engine oil full. Spare tire, jack,<br />
hand tools and mats in designated positions.<br />
CAMBER, CASTER AND KINGPIN INCLINATION<br />
. Caster and kingpin inclination are preset at factory and<br />
.<br />
cannot be adjusted.<br />
Measure camber, caster and kingpininclinationof both<br />
right and left wheels with a suitable alignment gauge, and<br />
adjust in accordance with the following procedures.<br />
Kingpin inclination:<br />
12°30' - 14°00'<br />
FA-6
Adjusting<br />
pin<br />
CHECK AND ADJUSTMENT - On-vehicle<br />
Camber<br />
90°<br />
SFA103A<br />
SFA574A<br />
SFA105A<br />
SFA106A<br />
SMA123<br />
Front Wheel Alignment (Cont'd)<br />
Caster:<br />
6°00' -7°30'<br />
Camber:<br />
-1°30' to 0°<br />
If camber is not within specification, adjust by turning adjusting<br />
pin as follows:<br />
(1) Remove adjusting pin<br />
Adjusting pin is installed with flat portion facing downward.<br />
(2) Next replace adjusting pin with flat portion facing upward.<br />
(3) Turn adjusting pin to adjust.<br />
Camber changes about 5' with each graduation of adjusting<br />
pin.<br />
(4) Tighten adjusting pin to specified torque.<br />
~: 124 - 143 N.m (12.6 - 14.6 kg-m, 91 - 106 ft-Ib)<br />
TOE-IN<br />
1. Draw a base line on tread surface of tires.<br />
After lowering front of vehicle, move it up<br />
eliminate friction, and set steering wheel in<br />
position.<br />
FA-7<br />
and down to<br />
straight-ahead
8M~<br />
Front<br />
t#<br />
SFA234A<br />
9<br />
CHECK AND ADJUSTMENT - On-vehicle<br />
Toe-in =A - B<br />
Total toe-in =29<br />
r L -,<br />
~, -~ ~<br />
't Front<br />
A: Inside<br />
B: Outside<br />
SFA545A<br />
SMA 127<br />
SFA898<br />
Front Wheel Alignment (Cont'd)<br />
2. Measure toe-in.<br />
Measure distance "A" and "B" at same height as hub center.<br />
Toe-in:<br />
A - B 0.3- 2.3mm(O.012- 0.091in)<br />
2e (Totaltoe-in) l' - 6.5'<br />
3. Adjust toe-in by varying length of steering tie-rods.<br />
(1) Loosen lock nuts.<br />
(2) Adjust toe-in by turning forward and reverse tie-rod.<br />
Make sure both tie-rods are the same length.<br />
Standard length "L" - reference data:<br />
174.8 mm (6.88 in)<br />
(3) Fix lock nuts, then tighten them designed torque.<br />
~: 37 - 46 N.m<br />
(3.8- 4.7 kg-m,27 - 34 ft-Ib)<br />
FRONT WHEEL TURNING ANGLE<br />
1. Set wheels in straight-ahead position and then move vehicle<br />
forward<br />
properly.<br />
until front wheels rest on turning radius gauge<br />
2. Rotate fully steering wheel to the right or left; measure<br />
turning angle.<br />
Wheel turning angle:<br />
Full turns<br />
FA-8<br />
Inside wheel: A 39° -43°<br />
Outside wheel: B<br />
33°
tOJ : N.m (kg-m, tt-Ib)<br />
Knuckle spindle<br />
FRONT AXLE<br />
Suttle plate<br />
Snap ring<br />
Wheel hub<br />
FA-'9<br />
SFA546A
~<br />
Adjusting'pin<br />
FRONT AXLE - Wheel Hub and Knuckle<br />
SFA090A<br />
SFA547A<br />
SF,o,571 B<br />
Removal<br />
. Remove wheel bearing lock nut.<br />
. Remove brake caliper assembly.<br />
Brake hose need not be disconnected from brake caliper. Be<br />
careful not to depress brake pedal, or piston will pop out.<br />
Make sure brake hose is not twisted.<br />
. Remove rotor and wheel hub from spindle.<br />
. Remove tie-rod ball joint and lower ball joint.<br />
. Remove bolts and nuts as shown at left.<br />
Make matchmarksbefore removingadjustingpin.<br />
FA-10
.press.<br />
FRONT AXLE - Wheel Hub and Knuckle<br />
SFA114A<br />
SFA543A<br />
SFA215A<br />
Installation<br />
. Install wheel hub.<br />
. Tighten wheel bearing lock nut.<br />
tOJ:147 - 216 N.m<br />
(15 - 22 kg-m, 108 - 159 ft-Ib)<br />
. Check wheel bearing axial end play.<br />
Axial end play: 0.03 mm (0.0012 In) or less<br />
Disassembly<br />
CAUTION:<br />
When removing wheel bearing from wheel hub, replace wheel<br />
bearing assembly (outer race, inner races and grease seal)<br />
with a new one.<br />
. Remove circular clip with suitable tool.<br />
. Press out wheel bearing assembly from wheel hub.<br />
Inspection<br />
WHEEL HUB<br />
. Check wheel hub for any cracks by using a magnetic<br />
exploration or dyeing test.<br />
CIRCULAR CLIP<br />
. Check circular clip for wear or cracks.<br />
Replace if necessary.<br />
FA-11
Grease sealm Circular clip<br />
FRONT AXLE - Wheel Hub and Knuckle<br />
SFA218A<br />
Assembly<br />
1. Press new wheel bearing assembly into wheel hub from<br />
inside of rotor disc (with wheel hub).<br />
Maximum load P:<br />
29 kN (3 t, 3.3 US ton, 3.0 Imp ton)<br />
CAUTION:<br />
. Do not press inner race of wheel bearing assembly.<br />
. Do not apply oil or grease to mating surfaces of wheel<br />
bearing outer race and wheel hub.<br />
Be careful not to damage grease seal.<br />
2. Install circular clip into groove of wheel hub.<br />
3. Apply multi-purpose grease to sealing lip.<br />
FA-12
Matchmarks<br />
SFA548A<br />
SFA549A<br />
FRONT AXLE - Baffle Plate<br />
Removal<br />
. Mark match marks on baffle plate before removing.<br />
. If baffle plate raplacement requires removal of<br />
spindle. separate it equally using a screwdriver.<br />
Be careful not to scratch knuckle spindle.<br />
knuckle<br />
Installation<br />
. Align matchmarks previously marked on baffle plate and<br />
install baffle plate by lightly tapping with a copper hammer<br />
and suitable tool.<br />
FA-13
FRONT SUSPENSION<br />
cap<br />
~<br />
~ ~ 59 -78 (6.0 -8.0,~"( ~~ ~ 39 -54 (4.0 -5.5,29- 40)<br />
43 - 58) ~<br />
GaSket~<br />
Strut mounting insulator ~~<br />
PI..,;, d;P\<br />
Front<br />
Lock washer~<br />
u""''''''~<br />
Coil spring<br />
fi<br />
suspension I /<br />
member V<br />
~~88-108<br />
~ ~-J(9.0-11.0,<br />
65-SO)<br />
f)~<br />
}~"""J ~ "J) ~ L~~46-52<br />
(4.7-5.3,<br />
34-38)<br />
39 -49 (4.0 -5.0,~<br />
~ ~88 - 108 r'<br />
29 - 36) (9.0.11.0,65-80)<br />
Bound bumper<br />
Strut assembly<br />
Transverse link<br />
with ball joint<br />
Tension rod<br />
bracket<br />
"~:J<br />
If ~<br />
4-/r/~>\<br />
~\ @ "-Tension rod<br />
a~~\ ' ",<br />
l'\1~<br />
/ When inStalling Stabilizer bar, tension rod and transverse<br />
link, final tightening requires to be carried out under unladen<br />
condition* with tires on the ground.<br />
~: N.m (kg-m, ft-Ib)<br />
* Fuel, radiator coolant and engine oil full. Spare tire, jack,<br />
hand tools and mats in designated position.<br />
FA-14<br />
SFA550A
Suitable<br />
bar<br />
HT71780000<br />
( - )<br />
FRONT SUSPENSION - Coil Spring and Strut Assembly<br />
Strut upper portion<br />
I~<br />
Adjusting pin<br />
SFA134A<br />
SFA135A<br />
ST35652000<br />
( - )<br />
SFA136A<br />
Removal<br />
. Remove strut assembly fixing bolts and nuts (to hoodledge).<br />
. Do not remove piston rod lock nut on vehicle.<br />
. Put match marks on strut lower bracket and camber adjusting<br />
pin.<br />
Disassembly<br />
1. Set strut assembly on vise with Tool, then loosen piston rod<br />
lock nut.<br />
. Do not remove piston rod lock nut.<br />
2. Compress spring with a Tool so that strut mounting insulator<br />
can be turned by hand.<br />
3. Remove piston rod lock nut.<br />
Inspection<br />
STRUT ASSEMBLY<br />
. Check for smooth operation through a full stroke, both<br />
compression and extension.<br />
. Check for oil leakage occuring on welded or gland packing<br />
portion.<br />
. Check piston rod for cracks, deformation<br />
Replace if necessary.<br />
.<br />
or other damage.<br />
FA-15
Left<br />
~<br />
FRONT SUSPENSION -Coil Spring and Strut Assembly<br />
Top<br />
Bottom SFA760<br />
r=sA" Fl.. .."<br />
\, \<br />
~"'"d SFA'"<br />
{}<br />
Front<br />
Cutout "<br />
(Inner side of vehicle)<br />
Right<br />
Upper seat SFA576A<br />
Inspection (Cont'd)<br />
STRUT MOUNTING INSULATOR<br />
. Check cemented rubber-to-metal portion for separation or<br />
cracks. Check rubber parts for deterioration.<br />
. Checkthrust bearingparts for abnormalnoise or excessive<br />
rattle in axial direction.<br />
Replace if necessary.<br />
LOCK WASHER<br />
. Check for cracks, deformation or other damage. Replace if<br />
necessary.<br />
COIL SPRING<br />
. Check for cracks, deformation or other damage. Replace if<br />
necessary.<br />
Assembly<br />
. When installing coil spring, be careful not to reverse top and<br />
bottom direction. (Top end is flat.)<br />
. When installing coil spring on strut, it must be positioned as<br />
shown in figure at left.<br />
. Install upper spring seat with its cutout facing the inner side<br />
of vehicle.<br />
FA-16
~D"ft<br />
Front ~<br />
FRONT SUSPENSION - Tension Rod and Stabilizer Bar<br />
View from B<br />
mA~ ~~<br />
~~ O.K. N.G.<br />
SFA552A<br />
Press.<br />
,<br />
SF A553A<br />
SFA554A<br />
SFA555A<br />
SFAOO2A<br />
Removal and Installation<br />
. Remove tension rod and stabilizer bar.<br />
. When removing tension rod bushing, place one drift on<br />
lower side of bushing and the other on upper side, as<br />
shown at left, and press bushing out.<br />
. Place arrow mark on bushing facing tension rod before<br />
installing bushing.<br />
. Install stabilizer rear side bushings, then install front side<br />
bushings.<br />
When installing stabilizer bar clamp, make sure direction is<br />
correct (as shown at left.)<br />
. When removing and installing stanbilizer bar, fix portion A.<br />
. Install stabilizer bar with ball joint socket properly placed.<br />
FA-17
FRONT SUSPENSION - Transverse Link and Lower Ball Joint<br />
Measuring swing force<br />
Measuring turning torque<br />
Cotter pin hole<br />
SFA552A<br />
SFA756<br />
SFA757<br />
/<br />
Dial<br />
~\( indicator<br />
~ lower //:%<br />
Pry bar / SFA556A<br />
Removal and Installation<br />
. Remove stabilizer, tension rod, ball joint and transverse link<br />
assembly.<br />
. During installation, final tightening must be carried out at<br />
curb weight with tires on ground.<br />
. After installation, check wheel alignment.<br />
Refer to "Front Wheel Alignment" of CHECK AND AD-<br />
JUSTMENT - On-vehicle.<br />
Inspection<br />
TRANSVERSE LINK<br />
. Check transverse link for damage, cracks or deformation.<br />
Replace it if necessary.<br />
. Check rubber bushing for damage, cracks and deformation.<br />
Replace transverse link if necessary.<br />
LOWER BALL JOINT<br />
. Check ball joint for play. If ball stud is worn, play in axial<br />
direction is excessive or joint is hard to swing, replace<br />
transverse link assembly if necessary.<br />
Swing force and turning torque<br />
Before checking, turn ball joint at least 10 revolutions so that<br />
ball joint is properly broken in.<br />
Swing force:<br />
(measure point: cotter pin hole of ball stud)<br />
7.8 - 55.9 N (0.8 - 5.7 kg, 1.8 - 12.6 Ib)<br />
Turning torque:<br />
0.49 - 3.43 N.m (5.0 - 35 kg-em, 4.3 - 30.4 in-Ib)<br />
Vertical end play (On-vehicle)<br />
(1) Jack up front of vehicle and set the stands.<br />
(2) Clamp dial indicator onto transverse link and place indicator<br />
tip on lower edge of brake caliper.<br />
(3) Make sure front wheels are straight and brake pedal is<br />
depressed.<br />
(4) Place a pry bar between<br />
road wheel.<br />
transverse link and inner rim of<br />
(5) While pushing and releasing pry bar, observe maximum dial<br />
indicator value.<br />
Vertical end play: 0 mm (0 In)<br />
(6) If not within above specification, replace transverse link.<br />
FA-18
...<br />
COIL SPRING<br />
Item<br />
Model<br />
Wire diameter mm (in)<br />
Coil diameter mm (in)<br />
Free length<br />
Spring constant<br />
mm (in)<br />
N/mm (kg/mm, Ib/in)<br />
Identification color<br />
STRUT<br />
Item<br />
Model<br />
Piston rod diameter<br />
mm (in)<br />
Stroke mm (in)<br />
Damping force<br />
[at 0.1 m (0.3 ft)/sec.]<br />
Expansion<br />
Compression<br />
N (kg,lb)<br />
Damping force<br />
[at 0.3 m (1.0 h)/sec.]<br />
N (kg,lb)<br />
Expansion<br />
Compression<br />
SERVICE DATA AND SPECIFICATIONS (S.D.S.)<br />
Except Sports Sports<br />
package package<br />
13.3 (0.524) 13.5 (0.531)<br />
170 (6.69) 170 (6.69)<br />
326 (12.83) 311 (12.24)<br />
19.6 (2.0, 112) 21.6 (2.2, 123)<br />
Orange x 1, Pink x 1,<br />
Purple x 1 Purple x 1<br />
Except Sports<br />
package<br />
412-608<br />
20.0 (0.787)<br />
160 (6.30)<br />
General Specifications<br />
Sports<br />
package<br />
471-706<br />
(42 - 62,93 - 137) I (48 -72,106 - 159)<br />
206 - 304<br />
(21 - 31, 46 - 68)<br />
235 - 353<br />
(24 - 36, 53 - 79)<br />
912 - 1,245 (93 - 127,205 - 280)<br />
392 - 588 (40 - 60,88 - 132)<br />
FA-19<br />
FRONT STABILIZER Bi'R<br />
Item<br />
Model<br />
Stabilizer diameter<br />
mm (in)<br />
Identification color<br />
Except Sports<br />
package<br />
24 (0.94)<br />
White<br />
Sports<br />
package<br />
25 10.98)<br />
Orange
.<br />
WHEEL ALIGNMENT (Unladen*1)<br />
Camber -1°30' to 0°<br />
degree<br />
Caster 6° 00' -7°30'<br />
degree<br />
Toe-in (Total)<br />
SERVICE DATA AND SPECIFICATIONS (S.D.S.)<br />
mm (in) 0.3 - 2.3 (0.012 - 0.091)<br />
degree<br />
Kingpin inclination degree<br />
Front wheel turning angle<br />
Full turn*2 d<br />
inside/outside egree<br />
l' - 6.5'<br />
12°30' - 14°00'<br />
39° -43° /33°<br />
*1: Tankful of fuel, radiator coolant and engine oil full. Spare tire,<br />
jack, hand tools, mats in designated position.<br />
*2: On power steering models, wheel turning force (at circumference<br />
of steering wheel) .of 98 to 147 N (10 to 15 kg,<br />
22 to 33'lb) with engine idle.<br />
WHEEL BEARING<br />
Wheel bearing axial end play<br />
mm (in)<br />
Wheel bearing lock nut<br />
Tightening tirque<br />
N'm (kg-m, ft-Ib)<br />
0.03 (0.0012) or less<br />
147- 216 (15- 22,108 - 159)<br />
Inspection and Adjustment<br />
FA-20<br />
LOWER BALL JOINT<br />
Swing force<br />
(Measuring point: cotter pin<br />
hole of ball stud)<br />
Turning torque<br />
Vertical end play<br />
N (kg, Ib)<br />
N'm (kg-cm, in-Ib)<br />
7.8 - 55.9<br />
(0.8 - 5.7,1.8 - 12.6)<br />
0.49 - 3.43<br />
(5.0 - 35, 4.3 - 30.4)<br />
mm (in) 0 (0)<br />
WHEEL RUNOUT (Radial and lateral)<br />
Wheel type<br />
Aluminum wheel<br />
mm (in)<br />
Steel wheel<br />
mm (in)<br />
Radial runout I lateral runout<br />
0.3 (0.012) or less<br />
0.5 (0.020) or less1o.8 (0.031) or less
.<br />
CONTENTS<br />
REARAXLE&<br />
REARSUSPENSION<br />
,<br />
SECTIONRA<br />
PRECAUTIONS AND PREPARATION "'"''.''''''''''''''''''''''''''''''' RA- 2<br />
REAR AXLE AND REAR SUSPENSION RA- 4<br />
CHECK AND ADJUSTMENT - On-vehicle " RA- 5<br />
REAR 'AXLE AND REAR SUSPENSION ASSEMBLY RA- 8<br />
REAR AXLE - Wheel Hub and Axle Housing RA- 9<br />
REAR AXLE - Drive Shaft RA-13<br />
REAR SUSPENSION RA-19<br />
REAR SUSPENSION - Coil Spring and Shock Absorber ""'"'''''''''''''''''''''''''''''''''''''''''''''' RA-20<br />
REAR SUSPENSION - Stabilizer Bar RA-22<br />
REAR SUSPENSION - Multi-link and Lower Ball Joint RA-23<br />
SERVICE DATA AND SPECIFICATIONS (S.D.S.) RA-24<br />
III
Tool number<br />
(Kent-Moore No.)<br />
Tool name<br />
HT71780000<br />
( - )<br />
Spring compressor<br />
ST35652000<br />
( -. )<br />
Strut attachment<br />
GG94310000<br />
( - )<br />
Flare nut torque<br />
wrench<br />
ST30031 000<br />
(J22912-01 )<br />
Bearing puller<br />
ST38280000<br />
( - )<br />
Arm bushing remover<br />
GG9431 0000<br />
( - )<br />
Description<br />
PRECAUTIONS AND PREPARATION<br />
~,<br />
SBR500<br />
Precautions<br />
. When installi~ each rubber part, final tightening must be<br />
carried out under unladen condition. with tires on ground.<br />
. Fuel, radiator coolant and .engine oil full. Spare tire, jack,<br />
hand tools, and mats in designated positions.<br />
. Use Tool when removing or installing brake tubes.<br />
. When removing each suspension part, check wheel alignment<br />
and adjust if necessarY.<br />
. Do not jack up at the lower arm.<br />
Preparation<br />
SPECIALSERVICETOOLS<br />
~<br />
~----.<br />
~<br />
~<br />
~<br />
~<br />
RA-2<br />
Removing and installing coil spring<br />
Fixing strut assembly<br />
Removingand installing brake piping<br />
Removing inner race of wheel bearing<br />
Removing and installing bushing<br />
of rear axle housing
Tool name<br />
Attachment<br />
Wheelalignment<br />
Rear wheel hub drift<br />
Wheel bearing drift<br />
Rear drive shaft plug<br />
seal drift<br />
Description<br />
PRECAUTIONS AND PREPARATION<br />
.<br />
Precautions (Cont'd)<br />
COMMERCIAL SERVICE TOOLS<br />
~<br />
}aJJ}<br />
lIID)<br />
1:EID<br />
rED<br />
RA-3<br />
J<br />
Measure rear wheel alignment<br />
A: Screw M24 x 1.5<br />
B: 35 (1.38) dia.<br />
e: 65 (2.561 dia.<br />
D: 56 (2.20)<br />
E: 12 (0.47) Unit: mm (in)<br />
Installing wheel bearing<br />
A: 41 mm (1.61 in) dia.<br />
B: 49 mm (1.93 in) dia.<br />
Removing rear wheel hub<br />
A: 26 mm (1.02 in) dia.<br />
B: 40 mm (1.57 in) dia.<br />
I nstalling rear driVe shaft plug seal<br />
A: 67 mm (2.64 in) dia.<br />
B: 85 mm (3.35 in) dia.
@<br />
~<br />
l L~43<br />
It<br />
Spring upper seat<br />
Dust cover ~<br />
Coil spring<br />
Shock absorber<br />
-55<br />
. (4.4 - 5.6,32 -41)<br />
~98-118 I<br />
110.0 - 12.0,72 -871<br />
REAR AXLE AND REAR SUSPENSION<br />
Final tightening for rubber parts requires to be carried<br />
out under unladen condition* with tires on ground.<br />
* Fuel, radiator coolant and engine oil full.<br />
Spare tire, jack, hand tools and mats in designated positions.<br />
~ 69 -88<br />
(7.0 -9.0, 51 - 651<br />
~ 69 -88<br />
Lower link (7.0 - 9.0, 51 -651<br />
~ 77 -98<br />
(7.9 - 10.0,57 -721<br />
~ 9-12<br />
(0.9 -12,6.5 -8.71.<br />
RA-4<br />
;:.E-<br />
19<br />
~-1S.'2-14)<br />
Upper link front<br />
I~ 77 -98<br />
(7.9 -10.0,<br />
57 -721<br />
~: N.m (kg-m,ft-Ib)<br />
Upper link<br />
rear<br />
SRA093A
!<br />
v<br />
CHECK ANDADJtlSTMENT - On-vehicle<br />
SMA525A<br />
SMA113<br />
Rear Axle and Rear Suspension Parts<br />
. Check axle and suspension parts for looseness, wear or<br />
damage.<br />
(1) Shake each rear wheel.<br />
(2) Retighten all nuts and bolts to the specified torque.<br />
Tighteningtorque:<br />
Refer to S.D.S.<br />
(3) Make sure that cotter pin is inserted.<br />
(4) Check rear axle and rear suspension parts for wear, cracks<br />
or other damage.<br />
(5) Check shock absorber for oil leakage or other damage.<br />
. Check suspension ball joint for grease leakage and ball joint<br />
dust cover for cracks or other damage.<br />
RA-5
CHECK AND ADJUSTMENT - On-vehicle<br />
SRA107A<br />
Inside<br />
~.<br />
SFA575S<br />
SRA096A<br />
'/ SRA097A<br />
Rear Wheel Bearing<br />
. Check tightening torque of wheel bearing lock nut.<br />
~: 235 -314 N.m<br />
(24 -32 kg-m, 174 - 231 ft-Ib)<br />
. Check that wheel bearings op'erates smoothly.<br />
. Check axial end play.<br />
Axial end play:<br />
0.05 mm (0.0020 in) or less<br />
If axial end play is not within specification or wheel bearing<br />
does not turn smoothly, replace wheel bearing assembly.<br />
Refer to REAR AXLE - Wheel Hub and Axle Housing.<br />
Rear Wheel Alignment<br />
Before checking rear wheel alignment, be sure to make a<br />
preliminary inspection.<br />
PRELIMINARY INSPECTION<br />
Make following checks. Adjust, repair or replace if necessary.<br />
. Check tires for wear and for improper inflation.<br />
. Check rear wheel bearings for looseness.<br />
. Check wheel runout.<br />
Refer to S.D.S.<br />
. Check that rear shock absorber works properly.<br />
. Check rear axle and rear suspension parts for looseness.<br />
. Check vehicle posture (Unladen). '<br />
"Unladen" :<br />
Fuel tank, radiator and engine oil full. Spare tire, jack, hand<br />
tools and mats in designated positions.<br />
CAMBER<br />
. Measure camber of both right and left wheels with a<br />
suitable alignment gauge and adjust in accordance with<br />
the following procedures.<br />
Camber:<br />
-1°36' to -0°36'<br />
RA-6
Front<br />
~<br />
SFA234A<br />
Lines parallel to<br />
center line of body<br />
6<br />
CHECK AND ADJUSTMENT - On-vehicle<br />
SRA098A<br />
SMA123<br />
Toe-in = A - B<br />
Total toe-in = 26<br />
SRA796<br />
Rear Wheel Alignment (Cont'd)<br />
If camber is not within specification, adjust by turning the<br />
adjusting pin.<br />
(1) Turn the adjusting pin to adjust.<br />
Camber changes about 5' with each graduation of the<br />
adjusting pin.<br />
(2) Tighten to the specified torque.<br />
~:69 - 88 N.m<br />
(7.0- 9.0 kg-m,51 - 65 ft-Ib)<br />
TOE-IN<br />
1. Draw a base line across the tread.<br />
After lowering rear of vehicle, move it up and down to<br />
eliminate friction.<br />
2. Measure toe-in.<br />
Measure distance "A" and "B" at the same height as hub<br />
center.<br />
Toe-in:<br />
A-B<br />
0.5 - 4.5 mm (0.020 - 0.177 in)<br />
2 () (Total toe-in)<br />
1.5' - 12.5'<br />
3. Adjust toe-in by turning adjusting pins.<br />
Toe changes about 1.5 mm (0.059 in) [One side]<br />
graduation of the adjusting pin.<br />
4. Tighten to the specified torque.<br />
~:69 -88 N.m<br />
(7.0 - 9.0 kg-m, 51 - 65 ft-Ib)<br />
Drive Shaft<br />
with each<br />
Check boot and drive shaft for cracks, wear, damage or grease<br />
leakage.<br />
RA-7
REAR AXLE AND REAR SUSPENSION ASSEMBLY<br />
SFA110A<br />
SRA101A<br />
Removal and Installation<br />
. Remove exhaust tube.<br />
. Disconnect propeller shaft rear end.<br />
SRA 100A<br />
. Remove brake caliper assembly.<br />
Brake hose need not be disconnected from brake caliper.<br />
Be careful not to depress brake pedal, or piston will pop out.<br />
Make sure brake hose is not twisted.<br />
. Remove upper end nuts of shock absorber.<br />
Do not remove piston rod lock nut.<br />
. Remove suspension member fixing nuts. Then draw out rear<br />
axle and rear suspension assembly.<br />
RA-8
I<br />
L.~<br />
REAR AXLE - Wheel Hub and Axle Housing<br />
SFA110A<br />
Wheel bearing<br />
withflange~<br />
Removal<br />
. Remove wheel bearing lock nut.<br />
Adjusting cap<br />
~ : N'm(kg-m,ft-Ib)<br />
SRA102A<br />
. Remove brake caliper assembly and rotor.<br />
Brake hose need not be disconnected from brake caliper. Be<br />
careful not to depress brake pedal, or piston will pop out.<br />
Make sure brake hose is not twisted.<br />
RA-9
REAR AXLE - Wheel Hub and Axle Housing<br />
SFA181A<br />
SRA104A<br />
SRA105A<br />
SRA106A<br />
SRA107A<br />
Removal (Cont'd)<br />
. Separate drive shaft from axle housing by slightly tapping it.<br />
When removing drive shaft, cover boots with waste cloth to<br />
prevent them from being damaged.<br />
. Remove axle housing.<br />
. Remove wheel bearing with flange, and wheel hub from axle<br />
housing.<br />
Installation<br />
. Install axle housing with wheel hub.<br />
. Tighten wheel bearing lock nut.<br />
tOJ:235 - 314N.m<br />
(24 - 32 kg-m, 174 - 231 ft-Ib)<br />
. Check wheel bearing axial end play.<br />
Axial end play: 0.05 mm (0.0020 in) or less<br />
RA-10
ST30031 000<br />
(J22912-01 )<br />
. Press.<br />
REAR AXLE - Wheel Hub and Axle Housing<br />
SRA108A<br />
SRA109A<br />
SRA110A<br />
Disassembly<br />
CAUTION:<br />
Wheel bearing with flange usually does not require maintenance.<br />
If any of the following symptoms are noted, replace<br />
wheel bearing assembly (including flange, and inner and outer<br />
seals).<br />
. Growling noise is emitted from wheel bearing during<br />
operation.<br />
. Wheel bearing drags or turns roughly when hub is turned<br />
with your hand after bearing lock nut is tightened<br />
specified torque.<br />
. After wheel bearing is removed from hub.<br />
to<br />
WHEEL HUB<br />
. Remove wheel bearing (with flange) and wheel hub as one<br />
unit from axle housing before disassembling.<br />
WHEEL BEARING<br />
. Using a press and drift as shown in figure at left, press<br />
wheel bearing out. . Discard old wheel bearing assembly. Replace with a new<br />
wheel assembly.<br />
. Remove inner race from hub using a bearing replacer/puller.<br />
CAUTION:<br />
a. Do not reuse o!d inner race although it is of the same<br />
brand as the bearing assembly.<br />
b. Do not replace grease seals as single parts.<br />
RA-11
Drift<br />
Drift<br />
REAR AXLE - Wheel Hub and Axle Housing<br />
Axle housing<br />
Block<br />
SRA111A<br />
SRA112A<br />
SRA113A<br />
Disassembly (Cont'd)<br />
AXLE HOUSING<br />
. Attach a drift on outer shell of bushing as shown in figure at<br />
left, remove bushing using arm bushing remover.<br />
When placing axle housing In a vise, use wooden blocks or<br />
copper plates as pads.<br />
. Ensure axle housing bore is free from scratches or deformities<br />
before pressing bushing into it.<br />
. Attach bushing to chamfered bore end of axle housing and<br />
press it until it is flush with end face of axle housing.<br />
Inspection<br />
WHEEL HUB AND AXLE HOUSING<br />
. Check wheel hub and axle housing for cracks by using a<br />
magnetic exploration or dyeing test.<br />
. Check wheel bearing for damage, seizure, rust or rough<br />
operation. .<br />
. Check rubber bushing for wear or other damage.<br />
Replace If necessary.<br />
Assembly<br />
. Place hub on a block. Attach a drift to inner race of wheel<br />
bearing and press it into hub as shown in figure at left.<br />
Be carefulnot to damage grease seal.<br />
RA-12
~ : N.m (kg-m, ft-Ib)<br />
REAR AXLE - Drive Shaft<br />
Drive shaft<br />
Removal<br />
~ ~"'''~-~<br />
J<br />
235.314 (24.32, 174 - 231) @)~<br />
Insulator<br />
Adjusting cap<br />
~I<br />
I<br />
SRA114A<br />
When removing drive shaft, cover boots with waste cloth to<br />
prevent damage to them.<br />
FINAL DRIVE SIDE<br />
. Remove side flange mounting bolt and separate shaft.<br />
WHEEL SIDE<br />
. Remove drive shaft by lightly tapping it with a copper<br />
hammer.<br />
To avoid damaging threads of drive shaft, install a nut while<br />
removing drive shaft.<br />
Installation<br />
. Insert drive shaft from wheel hub and temporarily tighten<br />
wheel bearing lock nut.<br />
. Tighten side flange mounting bolts to specified torque.<br />
. Tighten wheel bearing lock nut to specified torque.<br />
RA-13
Final drive side<br />
Slide joint<br />
housing<br />
Plug seal ~<br />
SRA118A<br />
REAR AXLE - Drive Shaft<br />
Boot band ~<br />
Disassembly<br />
FINAL DRIVE SIDE<br />
Snap ring "A" ~<br />
Housing m<br />
inner<br />
side<br />
~<br />
;><br />
Spider assembly IE!<br />
Snap ring "B" ~<br />
Wheel hub side<br />
SRA117A<br />
1. Remove plug seal from slide joint housing by lightly tapping<br />
around slide joint housing.<br />
2. Remove boot bands.<br />
3. Put match marks on slide joint housing and drive shaft<br />
4.<br />
before separating joint assembly.<br />
Put match marks on spider assembly and drive shaft.<br />
RA-14
SRA119A<br />
SFA963<br />
SRA120A<br />
SFA964<br />
REAR AXLE -Drive Shaft<br />
Disassembly (Cont'd)<br />
5. Pry off snap ring, then remove spider assembly.<br />
CAUTION:<br />
Do not disassemble spider assembly.<br />
6. Draw out slide joint housing.<br />
7. Draw out boot.<br />
Cover drive shaft serration with tape to prevent damage to<br />
the boot.<br />
WHEEL SIDE<br />
1. Remove boot bands.<br />
2. Put matchmarks on housing together with shaft and drive<br />
shaft before separating joint assembly.<br />
3. Put matchmarks on spider assembly and drive shaft.<br />
4. Pry off snap ring "A" with a screwdriver, and pull out slide<br />
joint housing.<br />
5. Pry off snap ring "B", then remove spider assembly.<br />
CAUTION:<br />
Do not disassemble spider assembly.<br />
6. Draw out boot.<br />
Cover drive shaft serration with tape to prevent damage to<br />
the boot.<br />
Inspection<br />
Thoroughly clean all parts in cleaning solvent, and dry with<br />
compressed air. Check parts for deformation<br />
DRIVE SHAFT<br />
or other damage.<br />
Replace drive shaft if it is twisted<br />
BOOT<br />
or cracked.<br />
Check boot for fatigue, cracks, or wear. Replace boot with new<br />
boot bands.<br />
RA-15
~<br />
Tape<br />
Slide joint<br />
SRA121A<br />
SFA800<br />
REAR AXLE - Drive Shaft<br />
Inspection (Cont'd)<br />
JOINT ASSEMBLY<br />
. Check spider assembly for bearing, roller and<br />
. damage. Replace spider assembly if necessary.<br />
. Check housing for any damage. Replace housing<br />
spider assembly, if necessary.<br />
washer<br />
set and<br />
. When replacing only spider assembly, select a new spider<br />
assembly from among those listed in table below. Ensure<br />
the number stamped on sliding joint is the same as that<br />
stamped on new part.<br />
Housing alone cannot be replaced. It must be replaced<br />
together with spider assembly.<br />
Stamped number Part No.<br />
00<br />
01<br />
3972010V10<br />
39720 10V11<br />
02 3972010V12<br />
Assembly<br />
. After drive shaft has been assembled, make sure it moves<br />
smoothly over its entire range without binding.<br />
. Use <strong>Nissan</strong> Genuine Grease or equivalent after every<br />
overhaul.<br />
FINAL DRIVE SIDE<br />
1. Install new small boot band, boot and slide joint housing to<br />
drive shaft.<br />
Cover drive shaft serration with tape to prevent damage to<br />
boot during installation.<br />
RA-16
*"{E;=<br />
{r ~ ~<br />
. .<br />
< Su itable tool<br />
Chamfer<br />
LI<br />
SFA397<br />
SRA123A<br />
I<br />
SRA124A<br />
SFA395<br />
REAR AXLE - Drive Shaft<br />
Assembly (Cont'd)<br />
2. Install spider assembly securely, making sure marks are<br />
properly aligned.<br />
. Press-fit with spider assembly serration chamfer facing shaft.<br />
3. Install new snap ring.<br />
4. Install coil spring, spring cap and new plug seal to slide joint<br />
housing. Press plug seal.<br />
Apply sealant to mating surface of plug seal.<br />
CAUTION:<br />
a. When pressing plug seal into place, hold it horizontal so<br />
that spring inside it does not tilt or fall down.<br />
b. Move shaft in axial direction to ensure that spring is<br />
installed properly. If shaft drags or if spring is not installed<br />
properly, remove plug seal and install a new one. Discard<br />
plug seal after removal.<br />
5. Pack drive shaft with specified amount of grease.<br />
Specified amount of grease:<br />
185 - 195 g (6.52 - 6.88 oz)<br />
6. Set boot so that it does not swell and deform when its<br />
length is "L,".<br />
Length" L1":<br />
110.5 - 112.5 mm (4.35 - 4.43 in)<br />
Make sure that boot is properly installed on the drive shaft<br />
groove.<br />
RA-17
Suitable<br />
tool<br />
~ Tape<br />
~"05=<br />
{I ~ ~<br />
0~<br />
Suitable tool<br />
Chamfer<br />
SFA472<br />
SFA800<br />
SFA397<br />
SRA125A<br />
SFA395<br />
REAR AXLE - Drive Shaft<br />
Assembly (Cont'd)<br />
7. Lock new larger boot band securely<br />
then lock new smaller boot band.<br />
with a suitable tool,<br />
WHEEL SIDE<br />
1. Install new small boot band and boot on drive shaft.<br />
Cover drive shaft serration with tape to prevent damage to<br />
boot during installation.<br />
2. Install spider assembly securely, making sure marks are<br />
properly aligned.<br />
. Press-fit with spider assembly serration chamfer facing shaft.<br />
3. Install new snap ring.<br />
4. Pack drive shaft with specified amount of grease.<br />
Specified amount of grease:<br />
145 - 155 g (5.11 - 5.47 oz)<br />
5. Install slide joint housing, then install new snap ring "A".<br />
6. Set boot so that it does not swell and deform whe'n its<br />
length is "L2".<br />
Length "L2":<br />
110.5 - 112.5 mm (4.35 - 4.43 in)<br />
Make sure that boot is properly installed on the drive shaft<br />
groove.<br />
7. Lock new larger and smaller boot bands securely with a<br />
suitable tool.<br />
RA-18
~21 26<br />
8 / N--- Mem';',- ~ .<br />
REAR SUSPENSION<br />
Upper link rear<br />
~<br />
69.88<br />
C;~ 17,.,"..".061- Ao'I'<br />
Suspension m ~ 43.55<br />
~<br />
ember (4.4 . 5,6,<br />
~<br />
,<br />
A 11. 98<br />
32- 41) (1.9.10,51.12)<br />
'" \ ~' ] C;~ ~ 11. 77.9817.9".,'7.721<br />
98<br />
~'~~i ~Dustcover<br />
1' 0<br />
c;~I:~"~,2.6," 8.7~<br />
. >< B~§ ~<br />
7 ~<br />
~ e<br />
@~~ ~ 9.12<br />
235 -314<br />
A J<br />
(24.32,114.231) ! I<br />
Insulator<br />
AdjustingJ<br />
(0.9.1.2,6.5.8.1) cap ~ I<br />
RA-19<br />
Shock absorber<br />
Axle assembly<br />
A : N.m (kg-m, ft-Ib)<br />
SAA 132A
REAR SUSPENSION - Coil Spring and Shock Absorber<br />
SRA782<br />
SRA783<br />
SRA784<br />
Removal<br />
. Remove shock absorber upper and lower fixing nuts.<br />
. Do not remove piston rod lock nut on vehicle.<br />
Disassembly<br />
1. Set shock absorber on vise with attachment, then loosen<br />
piston rod lock nut.<br />
. Do not removepiston rod lock nut.<br />
2. Compress spring with Tool so that the strut upper spring<br />
seat can be turned by hand.<br />
3. Remove piston rod lock nut.<br />
Inspection<br />
SHOCK ABSORBER ASSEMBLY<br />
. Check for smooth operation through a full stroke, both<br />
compression and extension.<br />
. Check for oil leakage occuring<br />
portion.<br />
on welded or gland packing<br />
. Check piston rod for cracks, deformation or other damage.<br />
Replace if necessary.<br />
UPPER RUBBER SEAT AND BUSHING<br />
. Check rubber parts for deterioration or cracks.<br />
Replace if necessary.<br />
RA-20
RI;ARSUSPENSION -Coil Spring and Shock Absorber<br />
Top<br />
Bottom SFA760<br />
~<br />
r==A,.FI"""<br />
\, \<br />
~"~d ,,,.,,<br />
Bigger inner diameter<br />
side of lower<br />
bushing<br />
Outside of<br />
vehicle<br />
Vehicle front<br />
Smaller inner<br />
diameter side<br />
of lower<br />
bushing<br />
SRA126A<br />
Inspection (Cont'd)<br />
COIL SPRING<br />
. Check for cracks, deformation or other damage. Replace if<br />
necessary.<br />
Assembly<br />
. When installing coil spring, be careful not to reverse top and<br />
bottom direction. (Top end is flat.)<br />
. When installing coil spring on strut, it must be positioned as<br />
shown in figure at left.<br />
. When installing upper spring seat, make sure that it is<br />
positioned as shown.<br />
RA-21
REAR SUSPENSION - Stabilizer Bar<br />
Connecting rod<br />
Stabil izer<br />
SRA128A<br />
Removal<br />
. Remove connecting rod and clamp.<br />
Inspection<br />
. Check stabilizer bar for deformation or cracks. Replace if<br />
necessary.<br />
. Check rubber bushings for deterioration<br />
if necessary.<br />
or cracks. Replace<br />
Installation<br />
. When installing connecting rod, make sure direction is<br />
correct (as shown at left).<br />
RA-22
REAR SUSPENSION - Multi-link and Lower Ball Joint<br />
Swing force<br />
Vertical end play<br />
SRA129A<br />
SRA131A<br />
J;<br />
Removal and Installation<br />
. Refer to "Removal and Installation" of REAR AXLE AND<br />
REAR SUSPENSION ASSEMBLY.<br />
Before removing, put matchmarks on adjusting pin.<br />
. When installing, final tightening must be carried out at curb<br />
weight with tires on ground.<br />
. After installation, check wheel alignment.<br />
Refer to "Rear Wheel Alignment" of CHECK AND ADJUST-<br />
MENT - On vehicle.<br />
Inspection<br />
REAR SUSPENSION MEMBER<br />
. Replace suspension member assembly if cracked or deformed<br />
or if any part (insulator, for example) is damaged.<br />
UPPER AND LOWER LINKS<br />
. Replace upper or lower link as required if cracked or<br />
deformed or if bushing is damaged.<br />
SUSPENSION LOWER BALL JOINT<br />
. Measure swing force, turning torque and vertical end play in<br />
axial direction. (Use same measurement procedures as that<br />
of FA section.)<br />
. If ball stud is worn, play in axial direction is excessive, or<br />
joint is hard to swing, replace lower arm.<br />
RA-23<br />
Swing force<br />
Ball joint<br />
specifications Turning torque<br />
12.7 - 90.2 N<br />
(1.3 - 9.2 kg, 2.9 - 20.3 Ib)<br />
0.5 - 3.4 N.m<br />
(5 - 35 kg-em, 4.3 - 30.4 in-Ib)<br />
Vertical end play 0 mm (0 in)
COIL SPRING<br />
Item<br />
Model<br />
Wire diameter mm (in)<br />
Coil diameter mm (in)<br />
Free length<br />
SERVICE DATA AND SPECIFICATIONS (S.D.S.)<br />
Except Sports<br />
package<br />
mm (in) I 367.5 (14.47) 355 (13.98)<br />
General Specifications<br />
SHOCKABSORBER<br />
Sports<br />
package<br />
11.0 (0.433) 11.3 (0.445)<br />
90 - 100 (3.54 - 3.94)<br />
Spring constant<br />
N/mm (kg/mm, Ib/in) 119.6 (2.0, 112) 121.6 (2.2, 123)<br />
Identification color<br />
DRIVE SHAFT<br />
Joint type<br />
Final drive side<br />
Wheel side<br />
Diameter<br />
Wheel side DI<br />
Grease name<br />
Final drive side<br />
Wheel side<br />
mm (in)<br />
Specified amount of grease<br />
g (oz)<br />
Final drive side<br />
Wheel side<br />
Boot length mm (in)<br />
Final drive side (LI)<br />
Wheelside (L2 )<br />
REAR STABILIZER BAR<br />
Item<br />
Model<br />
Pink x 2 Ught green x 2<br />
TS82F<br />
TS82C<br />
30 (1.18)<br />
<strong>Nissan</strong> genuine grease<br />
or equivalent<br />
<strong>Nissan</strong> genuine grease<br />
or equivalent<br />
185 - 195 (6.52 - 6.88)<br />
145 -155 (5.11 -5.47)<br />
110.5 -112.5 (4.35 -4.43)<br />
. Except Sports Sports<br />
package package<br />
Stabilizer diameter mm (in) 15 (0.59) 17 (0.67)<br />
Identification color Ught green Light blue<br />
Item<br />
RA-24<br />
Model<br />
Piston rod diameter mm (in)<br />
Stroke 'mm (in)<br />
Damping force N (kg, Ib)<br />
[at 0.1 m (0.3 ftl/sec.]<br />
Expansion<br />
Compression<br />
Damping force N (kg,lb)<br />
[at 0.3 m (1.0 ftl/sec.]<br />
Expansion<br />
Compression<br />
Final drive side<br />
SRA133A<br />
Wheel side<br />
SRA134A<br />
Except Sports<br />
package<br />
314 - 471<br />
(32 -48,<br />
71 - 106)<br />
157 - 235<br />
(16 -24,<br />
35 -53)<br />
12.5 (0.492)<br />
155 (6.10)<br />
Sports<br />
package<br />
392 . 588<br />
(40 -60,<br />
88 - 132).<br />
196 - 294<br />
(20 -30,<br />
44 -66)<br />
647 - 902 (66 .92, 146 - 203)<br />
363 - 539 (37 - 55, 82 -1211<br />
L2
WHEEL ALIGNMENT (Unladen*)<br />
SERVICE DATA AND SPECIFICATIONS (S.O.S.)<br />
Camber degree -1°36' to -0°36' Wheel type<br />
Inspection and Adjustment<br />
WHEEL RUNOUT (Radial and lateral)<br />
Toe-out Aluminum wheel .mm (in)<br />
mm (in) 0.5 - 4.5 (0.020 - 0.177)<br />
(Total) degree<br />
1.5' -12.5'<br />
Steel wheel mm (in)<br />
* Tankful of fuel, radiator coolant and engine oil full.<br />
Spare tire, jack, hand tools, mats in designated position.<br />
WHEEL BEARING<br />
Wheel bearing axial end play<br />
mm(in) 0.05 (0.0020) or less<br />
Wheel bearing lock nut<br />
LOWER BALL JOINT<br />
Swing force<br />
(Measuring point: cotter pin<br />
hole of ball stud) N (kg, Ib)<br />
Turning torque<br />
N.m (kg-cm, in-Ib)<br />
Radial runout I<br />
Lateral runout<br />
0.3 (0.012) or less<br />
0.5 (0.020) 0.8 (0.0311<br />
or less or less<br />
12.7 -90.2<br />
(1.3 - 9.2,2.9 - 20.3)<br />
0.5 - 3.4 (5 - 35, 4.3 - 30.4)<br />
Tightening torque I 235 -314 (24 -32, 174.231)<br />
N.m (kg-m, ft-Ib) Vertical end play mm (in) 0 (0)<br />
RA-25<br />
I
CONTENTS<br />
BRAKESYSTEM I<br />
SECTIONBR<br />
PRECAUTIONS AND PREPARATION BR- 2<br />
CHECK AND ADJUSTMENT BR- 3<br />
BRAKE HYDRAULIC LINE """"""".'.""'.'"''''''''''''.''''''''''''''''''' BR- 4<br />
BRAKE PEDAL AND BRACKET BR- 6<br />
BRAKE BOOSTER '''''''''''''''''' BR- 8<br />
VACUUM PIPING "'"'''' """"""""""""",.",.,.,.,.",,,,,,,,,,,,,..., BR-10<br />
MASTER CYLINDER BR-12<br />
FRONT DISC BRAKE (CL22VB, CL25VA) - Caliper BR-13<br />
FRONT DISC BRAKE (CL22VB, CL25VA) - Rotor BR-17<br />
REAR DISC BRAKE (CL9H) - Caliper BR-18<br />
REAR DISC BRAKE (CL9H) - Rotor BR-22<br />
PARKING BRAKE CONTROL : BR-23<br />
ANTI-LOCK BRAKING SYSTEM BR-25<br />
TROUBLE DIAGNOSES BR-29<br />
SERVICE DATA AND SPECIFICATIONS (S.D.S.) BR-54<br />
all
Tool number<br />
(Kent-Moore No.)<br />
Tool name<br />
GG94310000<br />
( - )<br />
Flare nut torque<br />
wrench<br />
KV991V0010<br />
( - )<br />
Brake fluid<br />
pressure gauge<br />
KV999P1000<br />
( - )<br />
A.B.S. checker<br />
KV999P1010<br />
( - )<br />
A.B.S. checker adapter<br />
harness<br />
Description<br />
PRECAUTIONS AND PREPARATION<br />
SBR500<br />
Precautions<br />
. Recommended fluid is brake fluid "DOT 3".<br />
. Never reuse drained brake fluid.<br />
. Be careful not to splash brake fluid on painted areas.<br />
. To clean or wash all parts of master cylinder, disc brake<br />
caliper and wheel cylinder, use clean brake fluid.<br />
. Never use minerai oils such as gasoline or kerosene. They<br />
will ruin rubber parts of hydraulic system.<br />
. Use Tool when removing and Installing brake tube.<br />
WARNING:<br />
. Clean brake pads and shoes with a waste cloth, then<br />
collect dust with a dust collector.<br />
Preparation<br />
SPECIAL SERVICE TOOL<br />
~<br />
~<br />
@ @ @<br />
0 o.<br />
c 0<br />
BR-2<br />
0<br />
Removing and ins~alling<br />
each brake piping<br />
Measuring brake fluid pressure<br />
Checking brake fluid pressure of<br />
A.B.S. actuator<br />
Checking brake fluid pressure of<br />
A.B.S. actuator
*" SMA<br />
= MAX<br />
= MIN<br />
6/@<br />
732A<br />
SBR992<br />
CHECK AND ADJUSTMENT<br />
Checking Brake Fluid Level<br />
. Check fluid level in reservoir tank. It should be between Max.<br />
and Min. lines on reservoir tank.<br />
. If fluid level is extremely low, check brake system for leaks.<br />
Checking Brake System<br />
. Check brake lines (tubes and hoses) for cracks, deterioration<br />
or other damage. Replace any damaged parts.<br />
If leakage occurs around joints, retighten or, if necessary,<br />
replace damaged parts.<br />
. Check for oil leakage by fully depressing brake pedal.<br />
Changing Brake Fluid<br />
1. Drain brake fluid in each air bleeder valve.<br />
2. Refill until new brake fluid comes out of each air bleeder<br />
valve. .<br />
Use same procedure as in bleeding hydraulic system to refill<br />
brake fluid.<br />
Refer to Bleeding Procedure.<br />
. Refill with recommended brake fluid "DOT 3".<br />
. Never reuse drained brake fluid.<br />
. Be careful not to splash brake fluid on painted areas.<br />
BR-3
Front brake (CL22VB)<br />
: Primary line<br />
: Secondary<br />
line<br />
SBR995<br />
SBR992<br />
BRAKE HYDRAULIC LINE<br />
Proportioning valve<br />
(Do not disassemble.)<br />
~ : N.m (kg-m, ft-Ib)<br />
0 : Flare nut<br />
15 -18 /1.5 -1.8, 11 -13)<br />
. : Connecting bolt<br />
17 .20/1.7 - 2.0,12.14)<br />
SBR471A<br />
Bleeding Procedure<br />
CAUTION:<br />
. Carefully monitor brake fluid<br />
during bleeding operation.<br />
. Fill reservoir with r~commended<br />
level at master cylinder<br />
brake fluid. Make sure it<br />
.<br />
is full at all times while bleeding air out of system.<br />
Place a container beneath master cylinderto avoid spillage<br />
of brake fluid.<br />
. Bleed air according to the following procedure.<br />
Without Anti-lock Braking System:<br />
Left rear caliper<br />
,j,<br />
Right rear caliper<br />
t<br />
Left front caliper<br />
,j,<br />
Right front caliper<br />
With Anti-lock Braking System:<br />
Left rear caliper<br />
,j,<br />
Right rear caliper<br />
,j,<br />
Left front caliper<br />
,j,<br />
Right front caliper<br />
t<br />
Front side air bleeder on A.B.S. actuator<br />
,j,<br />
Rear side air bleeder on A.B.S. actuator<br />
BR-4
SBR500<br />
BRAKE HYDRAULIC LINE<br />
Removal and Installation<br />
1. To remove brake hose, first remove flare nut securing brake<br />
tube to hose, then withdraw lock spring.<br />
2. Cover openings to prevent entrance of dirt whenever disconnecting<br />
hydraulic line.<br />
3. All hoses must be free from excessive bending, twisting and<br />
pulling.<br />
4. After installing brake lines, check for oil leakage by fully<br />
depressing brake pedal.<br />
Inspection<br />
Check brake lines (tubes and hoses) for cracks, deterioration or<br />
other damage. Replace any damaged parts.<br />
If leakage occurs around joints, retighten or, if necessary,<br />
replace damaged parts.<br />
BR-5
. Replaceclevis pin if plastic stopper.<br />
which is located at the end of clevis<br />
pin, is deformed or damaged.<br />
BRAKE PEDAL AND BRACKET<br />
Removal and. Installation<br />
Brake pedal<br />
/,/<<br />
~16 -22<br />
(1.6-2.2 12<br />
S; !@j" ,-161<br />
Inspection<br />
Check brake pedal for following items.<br />
. Brake pedal bend<br />
. Clevis pin deformation<br />
. Crackof anyweldedportion<br />
BR-6<br />
Stop lamp switch<br />
[.q]12-15<br />
(1.2 -1.5,<br />
9 -111<br />
A.S.C.D. cancet<br />
switch<br />
A 12-15<br />
(1.2-1.5,9-111<br />
A : N.m (kg-m, ft-Ibl<br />
SBR472A
Floor carpet<br />
Dash insulator<br />
Melt sheet<br />
~: N'm (kg.m, ft.lbl<br />
SBR153A<br />
BRAKE PEDAL AND BRACKET<br />
SBR930<br />
Adjustment<br />
Check brake pedal free height from dash reinforcement panel.<br />
Adjust if necessary.<br />
H: Free height<br />
Refer to S.D.S.<br />
D: Depressed height<br />
Refer to S.D.S.<br />
Under force of 490 N (50 kg, 110 Ib)<br />
with engine running<br />
C1: Clearance between pedal stopper and threaded<br />
end of stop lamp switch<br />
0.3 - 1.0 mm (0.012 - 0.039 in)<br />
C2: Clearance between pedal stopper and threaded<br />
end of A.S.C.D. switch<br />
0.3 - 1.0 mm (0.012 - 0.039 in)<br />
A: Pedal free play<br />
1 - 3 mm (0.04 - 0.12 in)<br />
1. Adjust pedal free height with brake booster input rod. Then<br />
tighten lock nut.<br />
Make sure that tip of input rod stays inside.<br />
2. Adjust clearance "C1" and "C2" with stop lamp switch and<br />
A.S.C.D. switch respectively. Then tighten lock nuts.<br />
3. Check pedal free play.<br />
Make sure that stop lamp is off when pedal is released.<br />
4. Check brake pedal's depressed height while engine is<br />
running.<br />
If depressed height is below specified value, check brake<br />
system for leaks, accumulation of air or any damage to<br />
components (master cylinder, wheel cylinder, etc.); then<br />
make necessary repairs.<br />
BR-7
SBROO2A<br />
"<br />
// ),<br />
I ,<br />
I / ,\<br />
\. .../ / \ -<br />
~ / v..~,'"..-, ......-<br />
~---- \ ).-'~,\"......-<br />
\ ..., \' \ .<br />
\ ,:..~ ~'\.<br />
,... ~:>\ , \ / ./ f,'~\ , ,~ J -...--<br />
(~'>r--- /-
~<br />
BRAKE BOOSTER<br />
Inspection (Cont'd)<br />
3. Adjust rod length if necessary.<br />
4. If rod length is without specification, replace brake booster.<br />
BR-9
DJIJ.<br />
Intake manifold<br />
'''_J)-=-<br />
I<br />
More than 24 mm 10.94 in)<br />
SBROO4A<br />
4 E=;=-;=:3<br />
.. Brakebooster Intakemanifold ..<br />
side or vacuum pump side<br />
SBR202A<br />
VACUlfM PIPING<br />
Removal and Installation<br />
\Chod
..<br />
Manifold<br />
side<br />
SBR475A<br />
V~CUUM PIPING<br />
Inspection (Cont'd)<br />
CHECK VALVE<br />
. When pressure is applied to brake booster side of check<br />
valve and valve does not open, replace check valve with a<br />
new one.<br />
BR-11
Reservoir~<br />
cap ~<br />
0;'fil'''~<br />
Float~<br />
Reservoir<br />
tank<br />
MASTER CYLINDER<br />
~<br />
- ~<br />
Seal<br />
(Do not reuse.) ~ \<br />
Dual proportioning<br />
valve<br />
(Do not disassemble.)<br />
Secondary piston<br />
~<br />
.";<br />
~. I \ ':<br />
'<br />
.. f 1 I !;<br />
. !. . .<br />
. ) ':<br />
Primary piston<br />
. ,. ..,.<br />
; I '"<br />
11II=II...<br />
. ,. I 'Ii<br />
SBR011A<br />
SBR012A<br />
Removal and Installation<br />
\<br />
);.<br />
Primary piston assembly<br />
Piston cup.<br />
*: Lubricate piston cup with brake<br />
fluid or rubber grease when<br />
assembling master cylinder.<br />
. Replace stopper cap if claw is damaged or deformed.<br />
. Bend clawsinwardwheninstallingstopper cap.<br />
SBR476A<br />
. Pay attention to direction of piston cups in figure at left.<br />
. Check parts for wear or damage. Replace if necessary.<br />
BR-12
CL22VB<br />
CL25V A<br />
lEI ~ :<br />
lEI ~:<br />
A:<br />
Dust seal~lEI@<br />
Outer<br />
shim<br />
FRONT DISC BRAKE (CL22VB, CL25VA) - Caliper<br />
IEI@<br />
Torque member<br />
fixing bolt<br />
A 72 -97<br />
(7.3 -9.9, 53 - 721<br />
BR-13<br />
Torque member<br />
fixting bolt<br />
~ 72 -97<br />
(7.3 -9.9, 53 -72)<br />
Pin bolt lEI @<br />
~ 22 -31<br />
(2.2 -3.2,<br />
16 -23)<br />
A: N.m (kg-m, ft-Ib)<br />
lEI @ : P.B.C. (Poly Butyl Cuprysil)grease or<br />
silicone-based \lrease point<br />
IE! @ : Rubber grease points<br />
.~ @ : Brake fluid point SBR477A<br />
Main pin bolt A 22 -31 (2.2 -3.2, 16 -23)<br />
Air<br />
bleeder<br />
A7-9<br />
(0.7.0.9,<br />
5.1 -6.5)<br />
Connecting bolt<br />
A17-20<br />
(1.7 - 2.0,12 - 14)<br />
Brake<br />
hose
FRONT DISC BRAKE (CL22VB, CL25VA) - Caliper<br />
SBR453A<br />
SBR220A<br />
SBR772<br />
Pad Replacement<br />
1. Remove pin bolt.<br />
2. Swing cylinder body upward. Then remove pad retainer, and<br />
inner and outer shims.<br />
CAUTION:<br />
. When cylinder body is swung up, do not depress brake<br />
pedal because piston will pop out.<br />
. Be careful not to damage dust seal or get oil on rotor.<br />
Always replace shims when replacing pads.<br />
Removal and Installation<br />
. Remove torque member fixing bolts and union bolt.<br />
. Install brake hose to caliper at protrusions securely.<br />
Disassembly<br />
Push out piston with dust seal using compressed air.<br />
BR-14
FRONT DISC BRAKE (CL22VB, CL25V A) - Caliper<br />
SBR480A<br />
SBR456A<br />
SBR457A<br />
Inspection<br />
CYLINDER BODY<br />
. Check inside surface of cylinder for scoring, rust, wear,<br />
damage or foreign materials. Replace if any such condition<br />
exists. .<br />
. Eliminate minor damage from rust or foreign materials by<br />
polishing surface with fine emery paper.<br />
CAUTION:<br />
Use brake fluid to clean.<br />
PISTON<br />
Check piston for scoring, rust, wear, damage or foreign materials.<br />
Replace if any condition<br />
CAUTION:<br />
exists.<br />
Piston sliding surface is plated. Do not polish with emery<br />
paper even if rust or foreign materials are stuck to sliding<br />
surface.<br />
PIN, PIN BOLT AND PIN BOOT<br />
Check for wear,<br />
condition exists.<br />
cracks or other damage. Replace if any<br />
Assembly<br />
. Place piston boot over rear of piston. Fit piston boot's lip<br />
properly in corresponding groove on cylinder body.<br />
. Insert piston into cylinder body and fit boot's lip properly in<br />
corresponding groove on piston.<br />
Inspection (On-vehicle)<br />
INSPECTION OF BRAKE DRAG FORCE<br />
1. Swing cylinder body upward.<br />
2. Make sure that wheel bearing is adjusted properly. Refer to<br />
section FA.<br />
3. Measure rotating force (F1).<br />
4. Install caliper with pads to original position.<br />
5. Depress brake pedal for 5 seconds.<br />
6. Release brake pedal and rotate disc rotor 10 revolutions.<br />
7. Measure rotating force (F2).<br />
8. Calculate brake drag force by subtracting F, from F2.<br />
Maximum brake drag force (F2- F1):<br />
59.8 N (6.1 kg, 13.5 Ib)<br />
If it is not within specification, check main pins and retainer<br />
boots in caliper.<br />
BR-15
FRONT DISC BRAKE (CL22VB, CL25VA) - Caliper<br />
SMA364A<br />
DISC PAD<br />
Check disc pad for wear or damage.<br />
Pad standard thickness (A):<br />
10.0 mm (0.394 in)<br />
Pad wear limit (A):<br />
2.0 mm (0.079 in)<br />
BR-16
FRONT DISC BRAKE (CL22VB, CL25VA) - Rotor<br />
SBR826<br />
SBR827<br />
Inspection<br />
RUBBING SURFACE<br />
Check rotor for roughness, cracks or chips.<br />
RUNOUT<br />
Adjust wheel bearing preload. Check runout using a dial<br />
indicator.<br />
Rotor repair limit:<br />
Maximum runout<br />
(Total indicator reading at center of rotor pad<br />
contact surface)<br />
0.07 mm (0.0028 in)<br />
THICKNESS<br />
Standard thickness:<br />
20.0 mm (0.787 in)<br />
Minimum thickness:<br />
18.0 mm (0.709 in)<br />
BR-11
REAR DISC BRAKE (CL9H) - Caliper<br />
Copper washer ~ j--~ 17 -20 (1.7.2.0,12 -14)<br />
Air bleeder<br />
~ 7 .9 (0.7 .0.9,5.1 - 6.5)<br />
}<br />
~ 22 -31 (2.2 -3.2, /<br />
Pin bolt ~ 0<br />
~ e -<br />
r- Brake hose<br />
16-23) /' ":>, ,/<br />
Cam m@<br />
~ -<br />
\)' ~. Cam bolt<br />
Cylinder body (v Gl..// 1. Lever Return spring<br />
tC:J : N.m (kg-m, ft-Ib) "I ~ dI Spring washer<br />
B~: P.B.C.(PolyButYICuprysil) ,S2)'" I tC:J22-31 (2.2-3.2, '" Y .(/ ~ ~ rr-,,25.29(2.5-3.0'<br />
. '<br />
1 b d - /' .<br />
~<br />
16-23) ~-"<br />
grease or Sl Icon- ase 18 22)<br />
I ~, -<br />
grease point ,~ ! '<br />
B"'@:Brakefluid @ : Rubber grease point point /'. (!, Cable stay<br />
/'<br />
\ '~ Rod m U<br />
~<br />
@ Torquemember<br />
!--tC:J26 -36 (2.7 -3.7,20 - 27) fixingbolt<br />
O-ringm@ - /'---<br />
~ 38 -52 (3.9 -5.3,28-38)<br />
~ Push rod IE!I@ , . > Inner shim<br />
J..~ . Key plate ,/ ~ Piston seal ~ m@<br />
~ 0<br />
~ RlngC Seat >-.J) i~~RingA ~<br />
~.: - Spring ,~Spacer / -<br />
~<br />
Pin E!@<br />
~~Spring /<br />
~<br />
A~wavewasher padr;.tainerm~R<br />
In<br />
SBR482A<br />
/<br />
REAR DISC BRAKE (CL9H) - Caliper<br />
SBR646<br />
SBR648<br />
SBR891<br />
SBR485A<br />
Removal and Installation<br />
Disconnect parking brake cable and brake hose, then remove<br />
caliper assembly.<br />
Disassembly<br />
1. Remove piston by turning it counterclockwise with suitable<br />
longnose pliers.<br />
2. Pry off ring A from piston with suitable pliers and remove<br />
adjusting nut.<br />
3. Disassemble cylinder body.<br />
. Pry off rings Band C with pliers, then remove spring cover,<br />
spring and seat.<br />
. Remove piston seal.<br />
Be careful not to damage cylinder body.<br />
BR-19<br />
.
::::::::::::::<br />
~f\t1t<br />
I:::::::::::::: 1<br />
REAR DISC BRAKE (CL9H) - Caliper<br />
SBR877<br />
SBR849<br />
Convex portion<br />
@<br />
SBR893<br />
Disassembly (Cont'd)<br />
4. Remove return spring and lever.<br />
Inspection<br />
CYLINDER BODY<br />
. Check inside surface of cylinder for score, rust, wear or<br />
other damage.<br />
. Minor damage from rust of foreign materials may be eliminated<br />
by polishing surface with a fine emery paper. Replace<br />
if necessary.<br />
CAUTION:<br />
Use brake fluid to clean.<br />
TORQUE MEMBER<br />
Check for wear, cracks or other damage. Replace if necessary.<br />
PISTON<br />
Check piston for score, rust, wear or other damage. Replace if<br />
necessary .<br />
CAUTION:<br />
Piston sliding surface is plated. Do not polish with emery<br />
paper even if rust or foreign matter is stuck to sliding surface.<br />
PIN AND PIN BOOT<br />
Check for wear, cracks or other damage. Replace if necessary.<br />
Assembly<br />
. Install cup securely in the specified direction.<br />
. Fit push rod into square hole in key plate. Also match<br />
convex portion of key plate with concave portion of cylinder.<br />
BR-20<br />
..
Ringc~<br />
Keyplate "1B'><br />
~.h ,oo-j<br />
Rod fi)<br />
Tool<br />
.FI<br />
REAR DISC BRAKE (CL9H) - Caliper<br />
SB R878<br />
SBR492A<br />
SBR227A<br />
SMA364A<br />
Assembly (Cont'd)<br />
. Install ring C with suitable tool.<br />
. Install seat, spring, spring cover and ring B with suitable<br />
press and drift.<br />
Inspection (On-vehicle)<br />
INSPECTION OF BRAKE DRAG FORCE<br />
1. Swing cylinder body upward.<br />
2. Make sure that wheel bearing is adjusted properly. Refer to<br />
section RA.<br />
3. Measure rotating force (F,).<br />
4. Install caliper with pads to original position.<br />
5. Depress brake pedal for 5 seconds.<br />
6. Release brake pedal, rotate disc rotor 10 revolutions.<br />
7. Measure rotating force (F2).<br />
8. Calculate brake drag force by subtracting F, from F2.<br />
Maximum brake drag force (F2- F,):<br />
86.3 N (8.8 kg, 19.4 Ib)<br />
If it is not within specification, check pins and pin boots in<br />
caliper.<br />
DISC PAD<br />
Check disc pad for wear or damage.<br />
Standard thickness (A):<br />
9.5 mm (0.374 in)<br />
Pad wear limit (A):<br />
2.0 mm (0.079 in)<br />
BR-21<br />
.
REAR DISC BRAKE (CL9H) - Rotor<br />
SBR845<br />
SBR847<br />
Inspection<br />
RUBBING SURFACE<br />
Check rotor for roughness, cracks or chips.<br />
RUNOUT<br />
. Check runout using a dial indicator.<br />
. Make sure that axial end play is within the specifications<br />
before measuring. Refer to section RA.<br />
Rotor repair limit:<br />
Maximum runout<br />
(Total Indicator reading at center of rotor pad<br />
contact surface)<br />
0.07 mm (0.0028 In)<br />
THICKNESS<br />
Rotor repair limit:<br />
Minimum thickness<br />
8.0 mm (0.315 In)<br />
BR-22<br />
..
Matchmark<br />
SBR488A<br />
Cableguide<br />
SBR489A<br />
PARKING BRAKE CONTROL<br />
Removal and Installation<br />
~<br />
m<br />
~ l. H. rear<br />
cable<br />
Ell<br />
.<br />
SBR487A<br />
REMOVAL<br />
. Before removing parking brake control, remove console box.<br />
. Loosen cable using control lever adjuster, and separate<br />
front and rear cables.<br />
. Break clinched portion of control lever using a hammer and<br />
chisel as shown in figure at left, and replace cables with new<br />
parts.<br />
Apply multi-purpose grease to areas between control lever<br />
drum and cables.<br />
INSTALLATION<br />
Be careful not to damage boot and inner cable.<br />
. When installing parking brake cable at rear caliper, make<br />
sure to align matchmark on parking cable stay and cable.<br />
Inspection<br />
1. Check control lever for wear or other damage. Replace if<br />
necessary.<br />
2. Check parking brake cables, lamp and switch. Replace if<br />
necessary .<br />
3. Check parts at each connecting portion for deformation or<br />
damage. If found, replace.<br />
BR-23
SBR493A<br />
Box wrench<br />
SBR490A<br />
SBR491 A<br />
Parking brake<br />
warning lamp switch<br />
plate<br />
PARKING BRAKE CONTROL<br />
Adjustment<br />
1. Ensure that parking brake releases when control lever is<br />
pulled down completely. If control lever does not release<br />
parking brake, proceed as follows:<br />
. Pull control lever up by 4 or 5 notches.<br />
. Insert a box wrench into opening in control lever and loosen.<br />
self-lock adjusting nut to slacken cables. Completely push<br />
control lever down.<br />
2. Forcefully depress brake pedal about five times (so that<br />
caliper is automatically set in position.).<br />
3. Pull lever up by 4 or 5 notches.<br />
4. Turn adjusting nut as shown in figure at left and adjust lever<br />
stroke to specified value.<br />
5. Completely push control lever down and ensure that:<br />
. Parking brake is released completely.<br />
. Rear brakes are free from dragging.<br />
6. Pull control lever with specified amount of force. Check lever<br />
stroke and ensure smooth operation.<br />
Number of notches:<br />
Center lever type 6 - 8<br />
7. Bend parking brake warning lamp switch plate so that brake<br />
warning light comes on when ratchet at parking brake lever<br />
is pulled "A" notches and goes out when fully released.<br />
Number of "A" notches: 1<br />
BR-24
Front R.H. wheel<br />
,-<br />
'<br />
I<br />
ANTI-LOCK BRAKING SYSTEM<br />
Check valve<br />
(Front L.H.)<br />
Front wheel sensor<br />
System Components<br />
Hydraulic Circuit<br />
Proportioning valve<br />
(Do not disassemble.)<br />
Master cylinder<br />
---<br />
Feeling<br />
valve<br />
(Front)<br />
BR-25<br />
Warning lamp<br />
-~<br />
Feeling<br />
valve Check valve<br />
(Read (Read<br />
: Harness<br />
: Piping<br />
Rear R.H. wheel<br />
SBR516A<br />
SBR517 A
OJ<br />
:IJ<br />
I<br />
N<br />
en<br />
4<br />
::-<br />
ACTUATOR<br />
]0 6 5<br />
0 0 ;01/1<br />
mo<br />
rr<br />
»m<br />
I: : :<br />
-<br />
;r ;r<br />
6 6 6 6<br />
8 ]1 3 2 ] 21 9 7<br />
n<br />
"0 ..,r:-<br />
, "',...,...<br />
..."',<br />
"..<br />
....<br />
@<br />
"'..,.....<br />
",.. ,...<br />
@<br />
@ "'.. .."''''<br />
m<br />
1 FUSE [§j<br />
FUSIBLE<br />
FUSE AND FUSIBLE LINK<br />
(J n RELAY BOX)<br />
FRONT<br />
WHEEL<br />
SENSOR<br />
R. H.<br />
~ BODY<br />
GROUND<br />
@~ P II 9@<br />
..~<br />
I<br />
I I<br />
I ,<br />
I ,<br />
I ,<br />
~ngine room harnes~<br />
:IE:IE<br />
VJ<br />
CD<br />
:0<br />
0><br />
II)<br />
U1<br />
:I><br />
BATTERY<br />
.. :IE<br />
I GNI TI ON SWI TCH<br />
ON or START<br />
UP*<br />
: : (E.F. 1-<br />
: : harness)<br />
I I<br />
~r<br />
Ii @ @<br />
: l_mn<br />
@<br />
o. ' I<br />
I I<br />
I I<br />
I I<br />
I I<br />
lmum- : : --: i<br />
rnnn~<br />
I<br />
I rn-<br />
I I<br />
I I<br />
I I<br />
I I<br />
I I<br />
I I<br />
I I<br />
I I<br />
I I<br />
I I<br />
~ .~ ~~<br />
BODY II<br />
GROUND c;;p<br />
- ,...,...<br />
@£<br />
I I<br />
: I (Main<br />
S. M. J. I : harness)<br />
[Refer to Iast page: I<br />
(FaIdout page).] ,"-un_un_nnn-<br />
~<br />
ANTI-LOCK BRAKING SYSTEM<br />
Removal and Installation<br />
CAUTION:<br />
Be careful not to damage sensor edge and sensor ro,or teeth.<br />
FRONT WHEEL SENSOR<br />
...,<br />
-_or -r-'-"<br />
I~:-- -L_,,-_!J<br />
"<br />
~ : N.m(kg-m,ft-Ib) SBR519A<br />
Drive pinion nut<br />
~<br />
tOJ : N.m (kg-m,ft-Ib)<br />
Rear speed<br />
seflsor<br />
tOJ18.26~-<br />
(1.8 - 2.7, 13. 20) ~<br />
tOJ 186 -294 //<br />
(19 -30,137.217) .-/<br />
REAR SENSOR<br />
Sensor rotor<br />
Companion flange<br />
SBR520A<br />
. Remove rear sensor rotor with companion flange after<br />
propeller shaft removal.<br />
Refer to PD section.<br />
BR-27
ANTI-LOCK BRAKING SYSTEM<br />
Removal and Installation (Cont'd)<br />
ACTUATOR<br />
. Disconnect 3 connectors and brake tubes.<br />
. Remove relay bracket.<br />
. Remove actuator by removing 3 nuts fixing actuator to<br />
bracket.<br />
BR~28
TROUBLE DIAGNOSES<br />
Contents<br />
How to Perform Trouble Diagnoses for Quick and Accurate Repair BR-30<br />
Symptom Chart BR-33<br />
Preliminary Check 1 ... BR-34<br />
PreliminaryCheck2 BR-35<br />
Preliminary Check 3, 4 ... ...... BR-36<br />
Self-diagnosis BR-37<br />
Component Parts Location ... ... ...: BR-38<br />
Harness Connector Location BR-39<br />
Ground Circuit Check ""'''.' , BR-40<br />
Circuit Diagram for Quick Pinpoint Check BR-41<br />
Diagnostic Procedure 1 .. BR-42<br />
Diagnostic Procedure 2 . BR-43<br />
DiagnosticProcedure3 ."."."""""""""'.""""".'."""""""'.'...'..'."...' '..'...".."""""""""'.""'.""."" BR-44<br />
Diagnostic Procedure 4 """.. ... ... BR-44<br />
Diagnostic Procedure 5 ... BR-45<br />
Diagnostic Procedure 6 BR-45<br />
Diagnostic Procedure 7 ... ... ... ...... BR-46<br />
Diagnostic Procedure 8 BR-47<br />
Diagnostic Procedure 9 ... ... ... ... BR-48<br />
Diagnostic Procedure 10 . BR-49<br />
Diagnostic Procedure 11 ... ... BR-50<br />
Diagnostic Procedure 12 BR-51<br />
Electrical Components Inspection ... BR-52<br />
BR-29
SEF234G<br />
TROUBLE DIAGNOSES<br />
How to Perform Trouble Diagnoses for Quick<br />
and Accurate Repair<br />
INTRODUCTION<br />
The A.B.S. system has an electronic control unit to control<br />
major functions. The control unit accepts input signals from'<br />
sensors and instantly drives actuators. It is essential that both<br />
kinds of signals are proper and stable. At the same time, it is<br />
important that there are no conventional problems such as air<br />
leaks in the booster or lines, lack of brake fluid, or other<br />
problems with brake system.<br />
It is much more difficult to diagnose a problem that occurs<br />
intermittently rather than continuously. Most intermittent problems<br />
are caused by poor electric connections or faulty wiring. In<br />
this case, careful checking of suspicious circuits may help<br />
prevent the replacement of good parts.<br />
A visual check only may not find the cause of the problems, so<br />
a road test should be performed.<br />
Before undertaking actual checks, take just a few minutes to<br />
talk with a customer who approaches with a A.B.S. complaint.<br />
The customer is a very good source of information on such<br />
problems; especially intermittent ones. Through the talks with<br />
the customer, find out what symptoms are present and under<br />
what conditions they occur.<br />
Start your diagnosis by looking for "conventional" problems first.<br />
This is one of the best ways to troubleshoot brake problems on<br />
an A.B.S. controlled vehicle.<br />
BR..30
"<br />
r--------------------<br />
I<br />
I<br />
I<br />
I<br />
I<br />
I<br />
I<br />
I<br />
I<br />
I<br />
I<br />
I<br />
,<br />
I<br />
I<br />
I<br />
I<br />
I<br />
I<br />
I<br />
I<br />
I<br />
I<br />
I<br />
I<br />
I<br />
I<br />
I<br />
I<br />
I<br />
I<br />
I<br />
I<br />
I<br />
I<br />
I<br />
I<br />
. . DIAGNOSTIC<br />
WORKSHEET<br />
(Seepage BR-32.)<br />
. Diagnostic Procedure(s)<br />
(See pages BR-42 - 45.)<br />
. Circuit Diagramfor Quick<br />
'Pinpoint Check<br />
(See page BR-41.)<br />
-- -- -- -----<br />
1 N.G.<br />
TROUBLE DIAGNOSES<br />
How to Perform Trouble Diagnoses for Quick<br />
and Accurate Repair (Cont'd)<br />
WORK FLOW<br />
CHECK IN<br />
LISTEN TO CUSTOMER<br />
COMPLAINTS<br />
INVESTIGATE ITEMS YOU<br />
SHOULD CAR RY OUT<br />
RELATED TO EACH<br />
SYMPTOM AND NOTE<br />
ELIMINATE GOOD SYSTEMS<br />
ON GOOD PARTS<br />
Not self-diagnostic item Self-diagnostic item<br />
DETERMINE MALFUNCTION-<br />
ING CIRCUIT(S) OR PART(S)<br />
Self-diagnosis<br />
ELIMINATE GOOD PART(S),<br />
HARNESS(ES) OR CONNEC-<br />
TOR(S) THROUGH ELEC-<br />
TRICALL Y TESTING<br />
Malfunctioning<br />
harness(es) and<br />
connector(s)<br />
Malfunctioning parts<br />
INSPECTION<br />
ON THE BASE<br />
OF EACH COMPONENT<br />
REPAIR OR REPLACE<br />
FINAL CHECK<br />
BR-31<br />
KEY POINTS<br />
WHAT Vehicle model<br />
WHEN Date, Frequencies<br />
WHERE Road conditions<br />
HOW Operating conditions,<br />
Weather conditions,<br />
Symptoms<br />
TROUBLE DIAGNOSES<br />
How to Perform Trouble Diagnoses for Quick<br />
and Accurate Repair (Cont'd)<br />
DIAGNOSTIC WORKSHEET<br />
There are many kinds of operating conditions that lead. to<br />
customer complaints, even if the system is normal.<br />
A good grasp of such conditions can make trouble-shooting<br />
faster and more accurate.<br />
In general, feelings for a problem depend on each customer's<br />
information. It is therefore important to fully understand the<br />
symptoms or under what conditions a customer complains.<br />
Make good use of a diagnostic worksheet such as the one<br />
shown below in order to utilize all the complaints for troubleshooting.<br />
Worksheet sample<br />
Customer name MRIMS Model & Year VIN<br />
Engine # Trans. Mileage<br />
Incident Date Manuf. Date In <strong>Service</strong> Date<br />
Symptoms 0 Pedal vibration and 0 0 0 0 0 0<br />
noise Warning Long Abnormal A.B.S. A.B.S. A.B.S.<br />
activates stopping pedal doesn't works works<br />
distance action work but warning frequently<br />
activates<br />
Engine conditions 0 When starting 0 After starting<br />
0 Engine speed: 5,000 rpm or more<br />
Road conditions 0 Low friction road (0 Snow 0 Gravel 0 Other)<br />
0 Protrusion<br />
Drivingconditions 0 Highspeed cornering<br />
0 Vehicle speed: Greater than 10 kmlh (6 MPH)<br />
0 Vehicle speed: 10 km/h (6 MPH) or less<br />
0 Vehicle is stopped<br />
Applying brake conditions 0 Suddenly<br />
0 Gradually<br />
Other conditions 0 Operation of electrical equipment<br />
0 Large pedal stroke<br />
0 Operation of clutch<br />
BR-32
» I» n » ,<br />
tJ:J ~. < OJ .<br />
~ I» .. en .<br />
~0... m~<br />
0...<br />
7':'<br />
'" '" 7':'<br />
-... CT<br />
.c<br />
CD .. c::<br />
c::<br />
CD ~<br />
I»<br />
::I ...<br />
.. ::I<br />
CHECK<br />
= MAX<br />
= MIN<br />
Check brake fluid level in reservoir tank.<br />
CHECK<br />
SMA364A<br />
Check brake pads and rotor.<br />
Refer to "Inspection" of FRONT and REAR<br />
DISC BRAKE.<br />
TROUBLE DIAGNOSES<br />
Preliminary Check 1<br />
N.G.<br />
--+ Fill up brake fluid.<br />
O.K.<br />
.<br />
.<br />
b k<br />
N.G.<br />
Repair ra e system. +--<br />
.<br />
N.G.<br />
Repalr<br />
or rep Iace b ooster system. +--<br />
..<br />
O.K.<br />
."<br />
CHECK<br />
&@<br />
Check brake system.<br />
Refer to CHECK AND ADJUSTMENT.<br />
SBROO2A<br />
10K<br />
CHECK<br />
SMA732A<br />
Check brake booster operation<br />
ness.<br />
and airtight-<br />
Refer to "Inspection"<br />
N.G. . .<br />
+ Replace malfunctioning parts.<br />
of BRAKE BOOSTER.<br />
BR-34
Check sensor clearance.<br />
Front wheel sensor<br />
Rear sensor<br />
SBR522A<br />
CHECK.<br />
Clearance mm (in)<br />
0.275-0.75<br />
(0.010B - 0.0295)<br />
0.35 - 0.625<br />
(0.0138 - 0.0246)<br />
Check sensor rotor for teeth damage.<br />
SBR525A<br />
TROUBLE DIAGNOSES<br />
Preliminary Check 2<br />
N.G.<br />
A - B = Clearance<br />
SBR523A<br />
N.G.<br />
---+ Replace sensor rotor with wheel hub or<br />
companion flange as a set.<br />
BR-35<br />
. Check sensor for the following items:<br />
. Dust, foreign materials, etc., at<br />
fastening portion<br />
. Improper installation<br />
. Breakage<br />
O.K. N.G.<br />
Repair or replace malfunctioning sensor.<br />
/
Measureeachsensor resistance.<br />
0.8 -1.2 kQ<br />
CHECK<br />
SBR529A<br />
Check warning lamp for deactivation.<br />
When engine starts, warning lamp deactivates.<br />
~O.K.<br />
DRIVE<br />
~__FF<br />
Drivevehicleat 30km/h (19 MPH)for at<br />
least one minute. SBR530A<br />
L<br />
HECK<br />
TROUBLE DIAGNOSES<br />
Preliminary Check 3, 4 Preliminary Check 4<br />
CHECK<br />
N.G.<br />
~ RepIace. c=<br />
O.K.<br />
N.G. .<br />
N.G.<br />
.<br />
SBR528A<br />
Check warning lamp activation.<br />
When ignition switch is turned on, warning<br />
lamp turns on.<br />
O.K. 1 N.G.<br />
Check fuse.<br />
Check bulb condition and remedy.<br />
L.E.D.<br />
Controller<br />
CHECK<br />
SBR681A<br />
. Keep engine on and running.<br />
. Remove rear side finisher.<br />
. Count the number of L.E.D. flashes during<br />
5 to 10 second "OFF" period.<br />
1<br />
Go to Self-diagnosis.<br />
(See page 8R-37.)<br />
O.K.<br />
---+ If Preliminary Check 2 is not performed<br />
and there is abnormal A.8.S. operation,<br />
SBR529A<br />
perform Preliminary Check 2.<br />
Ensure warning lamp remains off while driving.<br />
BR-36
TROUBLE DIAGNOSES<br />
Self-diagnosis<br />
CHECKING THE NUMBER OF L.E.D. FLASHES<br />
When a problem occurs in the A.B.S., the warning light on the instrument panel comes on. As shown in<br />
the Table, the control unit performs self-diagnosis.<br />
To obtain satisfactory self-diagnosing results, the vehicle must be driven above 30 km/h (19 MPH) for at<br />
least one minute before the self-diagnosis is performed. After the vehicle is stopped, the number of L.E.D.<br />
flashes is counted while the engine is running.<br />
The L.E.D. is located on the control unit, identifying a malfunctioning part or unit by the number of flashes.<br />
Both the warning light and the L.E.D. persistently activate, even after a malfunctioning part or unit has<br />
been repaired, unless the ignition switch is turned "OFF". After repairs, turn the ignition switch "OFF".<br />
Then start the engine and drive the vehicle over 30 km/h (19 MPH) for at least one minute to ensure that<br />
the malfunctioning part or unit has been repaired properly.<br />
If more than two circuits malfunction at the same time, the L.E.D. will flash to indicate one of the<br />
malfunctioning circuits. After the circuit has been repaired, the L.E.D. will then flash to indicate that the<br />
other circuit is malfunctioning.<br />
No. of l.E.D.<br />
flashes<br />
Power supply or ground circuit for control unit<br />
Example<br />
Improper operation of left front rotor sensor circuit<br />
L.E.D. "ON"<br />
L.E.D. "OFF"<br />
Malfunctioning part or unit<br />
1 Left front actuator solenoid circuit<br />
2 Right front actuator solenoid circuit<br />
30r4 Rear actuator solenoid circuit<br />
5 Left front rotor sensor circuit<br />
6 Right front rotor sensor circuit<br />
7 or 8 Rear rotor sensor circuit<br />
9 Actuator motor, motor relay circuit<br />
10 Actuator solenoid valve relay<br />
16 Control unit<br />
Warningactivates<br />
and<br />
l.E.D.<br />
"OFF"<br />
1 - 2 sec.<br />
1 cycle<br />
5 - 10 sec.<br />
Go to Diagnostic Procedure from 7 to 10, where malfunction portion is concerned.<br />
BR-37<br />
n- Repeat<br />
SBR631A
TROUBLE DIAGNOSES<br />
Component Parts Location<br />
//<br />
BR-38<br />
SBR532A
TROUBLE DIAGNOSES<br />
Harness Connector Location<br />
BR-39<br />
SBR533A
TROUBLE DIAGNOSES<br />
Ground Circuit Check<br />
FRONT WHEEL SENSOR L.H. SHIELDED WIRE GROUND<br />
. Check resistance between both terminals.<br />
Resistance: on<br />
FRONT WHEEL SENSOR R.H. SHIELDED WIRE<br />
GROUND<br />
. Check resistance between both terminals.<br />
Resistance: on<br />
ACTUATOR MOTOR GROUND<br />
. Check resistance between both terminals.<br />
Resistance: on<br />
BR-40
~ ~ To stop lamp<br />
t'fD ~<br />
FRONT<br />
L H.<br />
REAR<br />
TROUBLE DIAGNOSES<br />
Circuit Diagram for Quick Pinpoint Check<br />
STOP LAMP<br />
SWITCH I GNI TJ ON SWI TCH<br />
ON or START<br />
SA TTERY<br />
FRONT<br />
R.H. -=<br />
FRONT<br />
~<br />
L H.<br />
@<br />
~<br />
FRONT<br />
R. H.<br />
REAR<br />
SOLENOID ~.~<br />
-=<br />
-=<br />
ALTERNATOR<br />
BR-41<br />
8The unit side connectors with a double<br />
clrcle"~"are connected to the harness<br />
side connectors shown in the"Harness<br />
Connector Locat ion". (See page BR-39.)<br />
8The terminal numbers in the connector<br />
coincide with the circuit numbers<br />
surrounded by a single circlepO".<br />
-=<br />
SBR698A<br />
~
Brake pedal<br />
Speedometer<br />
Brake pedal<br />
SA T797 A<br />
SBR539A<br />
--=-<br />
SBR530A<br />
SA T797 A<br />
TROUBLE DIAGNOSES<br />
Diagnostic Procedure 1<br />
SYMPTOM: Pedal vibration and noise<br />
Refer to worksheet results.<br />
Check whether brake is applied<br />
suddenly in normal driving<br />
conditions.<br />
No<br />
Check whether the symptom<br />
appeared when engine is started.<br />
00 00<br />
~~<br />
No<br />
Check whether the symptom<br />
appeared when the vehicle speed<br />
is within 10 km/h (6 MPH) after<br />
starting engine.<br />
No<br />
Check whether the symptom<br />
appeared while the vehicle was<br />
driven.<br />
BR-42<br />
@<br />
Yes When brake is normally applied,<br />
A.B.S. works and produces pedal<br />
vibration or noise.<br />
Yes<br />
Yes<br />
No<br />
Refer to Preliminary Check 4<br />
resuIt.<br />
Check whether the symptom<br />
disappeared within 5 seconds.<br />
. ,.<br />
Yes<br />
A.B.S. may sometimes operate<br />
when load is high and voltage<br />
is low due to insufficient alternator<br />
output.<br />
1 Yes<br />
I No Check if there were any condi-<br />
I gradually. Check whether b'rake is applied I tions, amongthoselistedbelow,<br />
Yes whensymptomappeared.<br />
. Shifting<br />
. Operating clutch<br />
. Passingprotrusion<br />
NO Yes<br />
@<br />
For such condition, if there is<br />
considerable wheel speed<br />
variation and, A.B.S.will work<br />
normally.<br />
Check if there were any conditions,<br />
among those listed below,<br />
when symptom appeared.<br />
. Low friction road<br />
. High speed cornering<br />
. Passingprotrusion<br />
Yes<br />
For such conditions, if wheel<br />
speed is considerably different<br />
between front and rear or left<br />
and right, A.B.S. will work<br />
normally.
--===-<br />
SBR530A<br />
TROUBLE DIAGNOSES<br />
Diagnostic Procedure 1 (Cont'd)<br />
T<br />
Check whether engine speed is<br />
over 5,000 rpm with vehicle<br />
stopped.<br />
No<br />
Check whether electrical equipment<br />
switchesare operated.,'<br />
No<br />
Refer to Preliminary Check 4<br />
resuIt.<br />
Go to Self-diagnosis. (See page<br />
BR-37.)<br />
Yes Vibration related to sensor may<br />
cause A.B.S. operation.<br />
Yes<br />
Check front wheel sensor shielded<br />
ground.<br />
Refer to Ground Circuit Check.<br />
N.G. O.K.<br />
I Remedy.<br />
Diagnostic Procedure 2<br />
SYMPTOM: Long stopping distance<br />
Refer to worksheet results.<br />
BR-43<br />
Replace<br />
control<br />
unit.<br />
Check if road condition is Yes<br />
Stopping distance may be<br />
slippery with snow or gravel. longer than vehicleswhich are<br />
No<br />
not equipped wih A.B.S.<br />
Disconnect actuator connector<br />
and check whether stopping<br />
Yes<br />
Refer to Preliminary Check 4<br />
result.<br />
distance is still long. Go to Self-diagnosis. (See page<br />
1 No<br />
Perform Preliminary Check 1<br />
and air bleeding.<br />
BR-37.)<br />
'--<br />
~
s<br />
IEJ<br />
(I Solenoid valve<br />
indicator<br />
......... -<br />
'~ KIf'<br />
.<br />
SBR540A<br />
SBR541A<br />
TROUBLE DIAGNOSES<br />
Diagnostic Procedure 3<br />
SYMPTOM: Abnormal pedal action<br />
Refer to worksheet results.<br />
Perform Preliminary Check 1.<br />
Diagnostic Procedure 4<br />
SYMPTOM: A.B.S. doesn't work.<br />
C:I Refer to worksheet results.<br />
SBR52BA<br />
Motor relay indicator<br />
Power supply<br />
indicator<br />
" ,\L.."<br />
(5) [ Main<br />
switch<br />
ALL .'L<br />
. l<br />
Checker: KV999P1000<br />
( - )<br />
Harness: KV999P1010<br />
Motor switch ( - )<br />
3.4 select switch<br />
SBR660A<br />
Check whether brake pedal Yes Vehicle equipped with A.B.S.<br />
stroke is abnormally large. may have a tendency for large<br />
No<br />
pedal strokes.<br />
S<br />
Checkthat brakepedalforceis .<br />
firmbut brakeiseffective.<br />
IEJ<br />
Check whether warning activates.<br />
No<br />
Check whether vehicle speed is<br />
under 10 km/h (6 MPH).<br />
. No<br />
Refer to Preliminary Check 2<br />
result.<br />
(I<br />
Check actuator by referring to<br />
Electrical Components Inspection<br />
- ACTUATOR.<br />
(See page BR-52.)<br />
BR-44<br />
No<br />
Yes<br />
O.K. but<br />
A.B.S. still doesn't work.<br />
Normalcondition.<br />
Yes I I<br />
Disconnect actuator connector Yes Refer to Preliminary Check 4<br />
and check whether brake is<br />
result.<br />
effective. Go to Self-diagnosis. (See page<br />
No<br />
BR-37.)<br />
Refer to Preliminary Check 4<br />
result.<br />
Go to Self-diagnosis. (See page<br />
BR-37.)<br />
A.B.S. doesn't work in this<br />
condition.<br />
~
B<br />
nn~ ~ l L~_--_---<br />
.5:-<br />
:0 .>l<br />
.. "<br />
a:~<br />
I!J<br />
I<br />
I<br />
I<br />
I<br />
~<br />
PI kPa (kg/em'. psi)<br />
Front brake fluid pressure<br />
SBR643A<br />
SMA626A<br />
TROUBLE DIAGNOSES<br />
Diagnostic Procedure 5<br />
SYMPTOM: A.B.S. works but warning activates.<br />
Check whether alternator<br />
produces proper output.<br />
Refer to EL section.<br />
.<br />
Yes<br />
Check whether battery has<br />
enough voltage.<br />
Refer to EL section.<br />
. Yes<br />
Refer to Preliminary Check 4<br />
result.<br />
Go to Self-diagnosis. (Seepage<br />
BR-37.)<br />
No<br />
No<br />
Remedy.<br />
Remedy.<br />
Diagnostic Procedure 6<br />
SYMPTOM: A.B.S. works frequently.<br />
B<br />
CHECK BRAKE FLUID<br />
~\<br />
--d--.<br />
77<br />
Q Front<br />
PR ESSU R E.<br />
Check whether brake fluid<br />
pressuredistribution is normal.<br />
D2/D1: 52 - 56n5<br />
..~)<br />
SBR642A<br />
O.K.<br />
I!J<br />
B..<br />
:; '"<br />
.. "'-<br />
.. .- '" Q,Q,<br />
'tJ ,," D,<br />
-- E 5<br />
PI =P,<br />
\""<br />
, ,,'<br />
,,'<br />
Check whether front axles have<br />
excessive looseness.<br />
.<br />
No<br />
Perform Preliminary Check 2 and<br />
Ground Circuit Check.<br />
BR-45<br />
N.G.<br />
Yes<br />
Perform Preliminary Check 1.<br />
Remedy.<br />
( \
m<br />
Control unit connector<br />
[ill<br />
iii Actuator connector<br />
.(§)<br />
-)J _T<br />
eJ<br />
~<br />
SBR544A<br />
@<br />
~ \:ill!<br />
SBR545A<br />
TROUBLE DIAGNOSES<br />
Diagnostic Procedure 7<br />
ACTUATOR SOLENOID (L.E.D. flashing number 1 - 4)<br />
INSPECTIONSTART<br />
Remove battery negative<br />
terminal connector.<br />
m .<br />
I<br />
CHECK SOLENOID VALVE<br />
RESISTANCE.<br />
Disconnect control unit connector.<br />
Check resistance between control<br />
unit connector (vehicle side)<br />
terminals.<br />
Flashing number 1:<br />
Terminals @ and (t)<br />
Flashing number 2:<br />
Terminals @ and @<br />
Flashing number 3 or 4:<br />
Terminals @ and @<br />
Resistance: 0.7 - 1.60<br />
. N.G.<br />
iii Disconnect actuator connector.<br />
Check resistance between<br />
actuator connector (actuator<br />
side) terminals.<br />
Flashing number 1:<br />
Terminals @ and CD<br />
Flashing number 2:<br />
Terminals @ and (t)<br />
Flashing number 3 or 4:<br />
Terminals @ and @<br />
Resistance: 0.7 - 1.60<br />
I Replace actuator.<br />
BR-46<br />
N.G.<br />
O.K. Replace control unit.<br />
O.K. Repair harness between actuator<br />
connector and control unit connector.
m<br />
Control unit connector<br />
~<br />
)J<br />
[:iIi5<br />
SBR546A<br />
tROUBLE DIAGNOSES<br />
m<br />
Diagnostic Procedure 8<br />
WHE~LSPEED SENSOR (L.E.D. flashing number 5 - 8)<br />
INSPECTION START<br />
Remove battery negative<br />
terminal connector.<br />
CHECK SPEED SENSOR<br />
RESISTANCE<br />
Disconnect control unit connector.<br />
Check resistance between control<br />
unit connector (vehicle side)<br />
terminals.<br />
Flashing number 5:<br />
Terminals @ and @<br />
Flashing number 6:<br />
Terminals @ and @<br />
Flashing number 7 or 8:<br />
Terminals (j) and @<br />
Resistance: 0.8 - 1.2 kil<br />
N.G.<br />
Refer to Preliminary Check 3<br />
result.<br />
Check whether sensor has 0.8 -<br />
1.2 kQ resistance.<br />
N.G.<br />
Re~air harness between sensor<br />
connector and control unit connector.<br />
BR-47<br />
O.K.<br />
Replace control unit.<br />
N.G. Replace sensor.
m Control unit connector @<br />
I<br />
~i5<br />
Ii) Actuator connector<br />
@<br />
Effij i5 ~ ~<br />
[i]<br />
0<br />
~-,<br />
eJ<br />
[ill<br />
@<br />
~~<br />
\:mEY<br />
[ill<br />
SBR547 A<br />
- SBR548A<br />
SBR550A<br />
~<br />
~ ~<br />
Motor rela;0<br />
SBR688A<br />
TROUBLE DIAGNOSES<br />
Fa<br />
Diagnostic Procedure 9<br />
ACTUATOR MOTOR RELAY (L.E.D. flashing number 9)<br />
INSPECTION START<br />
Remove battery negative<br />
terminal connector.<br />
CHECK MOTOR RELAY<br />
SOLENOID RESISTANCE.<br />
Disconnect control unit connector.<br />
Check resistance between control<br />
unit connector (vehicle side)<br />
terminals @ and @.<br />
Resistance:38 -45n<br />
. Ii)<br />
CHECK MOTOR RELAY<br />
DEACTIVATION.<br />
Disconnect actuator connector.<br />
Check continuity between<br />
actuator connector (actuator<br />
side) terminals @ and @.<br />
No<br />
Check if motor's fusible link<br />
is blown.<br />
Resistance:<br />
Approximately on<br />
. Yes<br />
Replace fusible link.<br />
BR-48<br />
[i]<br />
N.G. ~isconnect actuator connector.<br />
Check resistance between<br />
actuator connector (actuator<br />
side) terminals @ and @.<br />
Resistance: 38 - 45n<br />
No<br />
Repair harness<br />
between<br />
actuator and<br />
control unit.<br />
O.K. N.G.<br />
II<br />
Replace<br />
motor<br />
relay.<br />
Perform Electrical Components<br />
Inspection - ACTUATOR.<br />
(See page BR-52.)<br />
.O.K. N.G.<br />
Replace<br />
actuator.
m<br />
[<br />
Control unit connector ~<br />
rnJ<br />
~~_CT<br />
18<br />
Ii) Actuator connector<br />
@)<br />
~ ~) IVr:II ~<br />
Ii Actuator connector<br />
-,<br />
@~eo~<br />
[ill<br />
[illI<br />
SBR552A<br />
SBR553A<br />
SBR556A<br />
TROUBLE DIAGNOSES<br />
m<br />
Diagnostic Procedure 10<br />
ACTUATOR SOLENOID VALVE RELAY (L.E.D. flashing<br />
number 10)<br />
INSPECTION START<br />
Remove battery negative<br />
terminal connector.<br />
CHECK SOLENOID VALVE<br />
RELAY RESISTANCE.<br />
Disconnect control unit connector.<br />
Check resistance between control<br />
unit connector (vehicle side)<br />
terminals @ and @.<br />
Resistance. 80 - 90Q<br />
Ii)<br />
CHECK SOLENOID VALVE<br />
RELAY MOVEMENT.<br />
Disconnect actuator connector.<br />
Check continuity between<br />
actuator connector (actuator<br />
side) terminals @ and @.<br />
No<br />
Check if solenoid valve relay<br />
fuse is blown.<br />
I Replacefuse.<br />
BR-49<br />
Yes<br />
Ii<br />
N.G. rcheck resistance between<br />
actuator connector (actuator<br />
side) terminals (j) and 00.<br />
Resistance: 80 - 90Q<br />
Repair harness<br />
between<br />
actuator and<br />
control unit<br />
O.K. N.G.<br />
[i<br />
Replacesolenoid<br />
valve<br />
relay.<br />
[i<br />
Yes r~<br />
L~eplace solenoid valverelay.<br />
No<br />
Perform Electrical Components<br />
Inspection - ACTUATOR.<br />
(See page BR-52.)<br />
. N.G. O.K.<br />
Replace<br />
controlunit.
TROUBLE DIAGNOSES<br />
Diagnostic Procedure 11<br />
CONTROL UNIT (L.E.D. flashing number 16)<br />
INSPECTION START<br />
Control unit malfunction.<br />
Replace control unit.<br />
BR-50
m Control unit connector (§)<br />
Ii) Control unit connector<br />
I~<br />
[Y]<br />
(!J Control unit connector<br />
)J<br />
ij~<br />
(§)<br />
(§)<br />
-=-<br />
SBR557A<br />
1 [:iI ij<br />
SBR55BA<br />
SBR559A<br />
TROUBLE DIAGNOSES<br />
PI<br />
Diagnostic Procedure 12<br />
CONTROLUNITOR POWERSUPPLYANDGROUND<br />
CIRCUIT(Warning activates but L.E.D.comes off.)<br />
INSPECTION START<br />
CHECK CONTROL UNIT<br />
POWER SUPPLY.<br />
Disconnect control unit connector.<br />
Check voltage between control<br />
unit connector (vehicle side)<br />
terminal CD and body ground<br />
with ignition switch turned on.<br />
O.K.<br />
Ii)<br />
CHECK ALTERNATOR L<br />
TER~INAL VOLTAGE.<br />
Disconnect control unit connector.<br />
Check voltage between control<br />
unit connector (vehicleside)<br />
terminal @ and body ground<br />
after engine starting.<br />
Voltage: 6V or more<br />
O.K.<br />
(!J<br />
Check continuity between<br />
control unit connector (vehicle<br />
side) terminal @ and body<br />
ground with ignition switch<br />
"OFF" .<br />
O.K.<br />
Replace control unit.<br />
BR-51<br />
N.G. Check if control unit "10A" fuse<br />
is blown.<br />
N.G.<br />
N.G.<br />
Repair harness<br />
between alternator<br />
and<br />
control unit.<br />
Repair ground harness.<br />
Malfunctioning<br />
alternator.<br />
',.,
'"'$SUR'<br />
DEC<br />
'NC~ ....<br />
~<br />
Motor relay indicator<br />
Power supply<br />
indicator<br />
in switch<br />
"" ".' .'" ~/<br />
mt5)." W ,<br />
Checker~" KV999P1000<br />
( - )<br />
Harness: KV999P1010<br />
( - )<br />
Motor<br />
3,4 select<br />
switch<br />
switch<br />
SBR560A<br />
~.~ ~~R691A<br />
TROUBLE DIAGNOSES<br />
Electrical Components Inspection<br />
ACTUATOR (Not self-diagnostic item)<br />
INSPECTION START<br />
Connect A.B.S. checker to<br />
actuator connector and vehicle<br />
harness with battery terminal<br />
connected and all checker switch<br />
turning off. Check that battery'<br />
voltage is at least 12 volts.<br />
Use harness for 3 channel.<br />
Set select switch to 3 channel.<br />
Turn checker power supply<br />
switch on.<br />
Check power supply indicator<br />
for coming on.<br />
Yes<br />
Check checker valve relay<br />
indicator for coming on.<br />
Yes<br />
Select one valve.<br />
Select pressure decreasing<br />
position by switch then turn<br />
motor switch on.<br />
Turn motor switch off.<br />
Select pressure increasing<br />
position.<br />
Check motor relay indicator<br />
for coming on while motor<br />
switch is turned on.<br />
Yes<br />
No<br />
~<br />
Repeat so that all<br />
valve will be performed.<br />
Check motor for operational<br />
sound beside the actuator in a<br />
quiet place.<br />
Yes<br />
Bring checker in the vehicle and<br />
depress the brake pedal.<br />
Repeat step ~<br />
@<br />
BR-52<br />
No<br />
No<br />
Replace battery with fully<br />
charged new one, if checker<br />
connection is correct.<br />
Replace solenoid valve relay.<br />
if checker connection is correct.<br />
CAUTION:<br />
Do not hold switch at the<br />
pressure decreasing position<br />
for more than 5 seconds.<br />
Otherwise, solenoid valve<br />
may be overheated and<br />
damaged.<br />
Replace motor relay. if checker<br />
connection is correct.<br />
Replace actuator as assembly.<br />
if Diagnostic Procedures 7 - 12 are<br />
already performed and checker<br />
connection is correct.<br />
Valve select switch position RR<br />
is used for 4 channel checking.<br />
In the case of 3 channels, brake<br />
pedal vibration or depression<br />
will not occur in position RR. It<br />
will occur, however, in position<br />
RL.
TROUBLE DIAGNOSES<br />
Electrical Components Inspection (Cont'd)<br />
Ii:<br />
Check brake pedal for vibration<br />
while motor switch is turned on,<br />
. O.K.: Vibration<br />
Check brake pedal for depression<br />
when select pressure increases.<br />
O.K.<br />
Actuator works normally.<br />
BR-53<br />
O.K.: Vibration<br />
N.G.: No vibration<br />
. Change operating valve~,th<br />
motor switch "ON" and check<br />
for pedal vibration.<br />
I<br />
N G N I' .<br />
..: 0 VIb ration<br />
Replace actuator as assembly.<br />
Replace actuator as assembly.
SERVICE DATA AND SPECIFICATIONS (S.D.S.)<br />
General-Specifications<br />
Front brake<br />
Brake model CL22VB CL25VA<br />
Cylinder bore diameter mm (in) 54.0 (2.126) 57.2 (2.252)<br />
Pad length x width x thickness<br />
Rotor outer diameter x thickness<br />
mm lin)<br />
mm lin)<br />
112.8 x 44.8 x 10.0 134.1 x45.3x 11.0<br />
(4.44 x 1.764 x 0.394) (5.28 x 1.783 x 0.433)<br />
252 x 20 (9.92 x 0.79) 257 x 22 (10.12 x 0.87)<br />
Rear .brake<br />
Brake model CL9H<br />
Cylinder bore diameter mm lin) 33.96 (1.3370)<br />
Pad length x width x thickness mm lin) 75.0 x 40.0 x 9.5 (2.953 x 1.575 x 0.374)<br />
Rotor outer diameter x thickness<br />
mm (in)<br />
BR-54<br />
258 x 9 (10.16 x 0.35)<br />
Master cylinder<br />
Cylinder bore diameter mm lin) 22.22 (7/8) 23.81 (15/16)<br />
Control valve<br />
Valve model Proportioning valve (within master cylinder)<br />
Sprit point x reducing ratio<br />
kPa (kg/em' , psi)<br />
3,923 (40, 569) x ().4<br />
Brake booster<br />
Booster model M23 M195T<br />
Diaphragm diameter mm lin) 230 (9.06)<br />
Brake fluid<br />
Recommended brake fluid DOT3<br />
Parking brake<br />
Control type<br />
Center lever<br />
Primary 205 (8.07)<br />
Secondary 180 (7.09)
FRONT DISC BRAKE<br />
Item<br />
Pad wear limit<br />
Minimum thickness<br />
mm(in)<br />
Rotor repair limit<br />
Minimum thickness<br />
mm (in)<br />
Maximum runout<br />
mm (in)<br />
REAR DISC BRAKE<br />
Item<br />
Pad wear limit<br />
Minimum thickness<br />
mm(in)<br />
Rotor repair limit<br />
Minimum thickness<br />
mm (in)<br />
Maximum runout<br />
mm (in)<br />
SERVICE DATA AND SPECIFICATIONS (S.D.S.)<br />
CL22VB<br />
18.0 (0.709)<br />
2.0 (0.079)<br />
0.07 (0.0028)<br />
CL9H<br />
2.0 (0.079)<br />
8.0 (0.315)<br />
0.07 (0.0028)<br />
CL25VA<br />
20.0 (0.787)<br />
Inspection and Adjustment<br />
BR-55<br />
BRAKE PEDAL<br />
Free height<br />
MfT<br />
AfT<br />
mm (in)<br />
Depressed height<br />
[under force of 490 N<br />
(50 kg, 110 Ib) with<br />
engine running)<br />
mm (in)<br />
Clerance between pedal<br />
stopper and threeded end<br />
of stop lamp switch<br />
mm (in)<br />
Clearance between pedal<br />
stopper and threaded end<br />
of A.S.C.D. switch<br />
mm (In)<br />
Pedal free plav at clevis<br />
mm (in)<br />
PARKING BRAKE<br />
Item<br />
Number of notches<br />
[under force of 196 N<br />
(20 kg, 44 Ib))<br />
Number of notches<br />
(when warning switch<br />
comes on)<br />
177.0 -187.0 (6.97.7.36)<br />
186.0 -196.0 (7.32 .7.72)<br />
100 (3.94) or more<br />
0.3 - 1.0 (0.012 - 0.039)<br />
0.3 . 1.0 (0.012 - 0.039)<br />
1.3 (0.04.0.12)<br />
Center lever<br />
6-8
CONTENTS<br />
STEERINGSYSTEM<br />
SECTIONST<br />
PRECAUTIONS """"""'"'' ST- 2<br />
PREPARATION " ST- 3<br />
ON-VEHICLE INSPECTION ST- 5<br />
ON-VEHICLE INSPECTION (Power steering) ST- 7<br />
STEERING WHEEL AND STEERING COLUMN ST-10<br />
POWER STEERING GEAR AND LINKAGE (Model PR24SC) ST-14<br />
POWER STEERING OIL PUMP ST-27<br />
SERVICE DATA AND SPECIFICATIONS (S.O.S.) ST-31<br />
IDI
PRECAUTIONS<br />
. Before disassembly, thoroughly clean the outside of the unit.<br />
. Disassembly should be done in a clean work area. It is<br />
important to prevent the internal parts from becoming<br />
contaminated by dirt or other foreign matter.<br />
. When disassembling parts, be sure to place them in order "in<br />
a parts rack so they can be reinstalled in their proper<br />
positions.<br />
. Use nylon cloths or paper towels to clean the parts;<br />
common shop rags can leave lint that might interfere with<br />
their operation.<br />
. Before inspection or reassembly, carefully clean all parts<br />
with a general purpose, non-flammable solvent.<br />
. Before assembly, apply a coat of recommended A.T.F.* to<br />
hydraulic parts. Vaseline may be applied to a-rings and<br />
seals. Do not use any grease.<br />
. Replace all gaskets, seals and a-rings. Avoid damaging<br />
a-rings, seals and gaskets during installation. Perform<br />
*:<br />
functional tests whenever designated.<br />
Automatic transmission fluid<br />
ST-2
Tool number<br />
(Kent-Moore No.)<br />
Tool name<br />
KV48100700<br />
(J26364)<br />
Torque adapter<br />
ST27180001<br />
(J25726-A)<br />
Steering wheel puller<br />
HT72520000<br />
(J25730-A)<br />
Balljoint remover<br />
ST27091000<br />
(J26357)<br />
Pressure gauge<br />
KV48102500<br />
( - )<br />
Pressure gauge adapter<br />
ST3127S000<br />
(See J25765-A)<br />
ill GG91030000<br />
(J25765-A)<br />
Torque wrench<br />
@ HT62940000<br />
( - )<br />
Socket adapter<br />
@ HT62900000<br />
( - )<br />
Socket adapter<br />
KV481 04400<br />
( - )<br />
Rack seal ring<br />
reformer<br />
Description<br />
PREPARATION<br />
SPECIAL SERVICE TOOLS<br />
~<br />
~n<br />
~<br />
~@<br />
~@<br />
~ CJI@<br />
CD-fJ<br />
@~<br />
@-o<br />
ST-3<br />
~<br />
Measuring pinion rotating<br />
torque<br />
Removing and installing<br />
steering wheel<br />
Removingball joint<br />
Measuring oil pressure<br />
Measuring oil pressure<br />
Measuring turning<br />
torque<br />
Reforming teflon ring
Tool name Description<br />
Rear oil sealdrift<br />
Pinion oil sealdrift<br />
Oil pump attachment<br />
PREPARATION<br />
COMMERCIAL SERVICE TOOLS<br />
~"'di'<br />
v:2.,.,dg<br />
Unit: mm lin)<br />
ST-4<br />
Welding \O.a.1\<br />
,\1- 40<br />
11.57)<br />
12<br />
.;.~fb~10.47)<br />
~ "".<br />
,,\~ ~o.\<br />
,~.<br />
qp<br />
SST481 A<br />
Installing rear oil seal<br />
Installing pinion oil seal<br />
Disassembling and<br />
assembling oil pump
O.K. N.G.<br />
L<br />
SST104B<br />
SMA 127<br />
SST086B<br />
ON-VEHICLE INSPECTION<br />
Checking Steering Wheel Play<br />
. With wheels in a straight-aheadposition,check steering<br />
wheel play.<br />
Steering wheel play:<br />
35 mm (1.38 in) or less<br />
. If it is not within specification, check rack' and pinion<br />
assembly.<br />
Checking Neutral Position on Steering Wheel<br />
Pre-checking<br />
. Verify that the steering gear is centered before removing the<br />
steering wheel.<br />
Checking<br />
. Check that the steering wheel is in the neutral position when<br />
driving straight ahead.<br />
. If it is not in the neutral position, remove the steering wheel<br />
and reinstall it correctly.<br />
. If the neutral position is between two serrated teeth, loosen<br />
tie-rod lock nut and move tie-rod in the opposite direction<br />
by the same amount on both left and right sides to<br />
compensate for error in the neutral position.<br />
Front Wheel Turning Angle<br />
. Rotatesteeringwheel all the way right and left;measure<br />
turning angle.<br />
Turning angle of full turns:<br />
Refer to section FA forS.D.S.<br />
. If it is not within specification, check rack stroke.<br />
Measured length "L":<br />
Refer to S.D.S.<br />
ST-5
ON-VEHICLE INSPECTION<br />
Checking Gear Housing<br />
. Check the movement of<br />
Movement<br />
steering gear housing during<br />
stationary<br />
follows:<br />
steering. The maximum allowable movement is as<br />
Movement of gear housing: .<br />
:t 2 mm (:t 0.08 in) (on dry paved surface) or less<br />
Apply a force of 49 N (5 kg, 11 Ib) to steering wheel to check<br />
the gear housing movement.<br />
On models equipped with power steering, turn off ignition key<br />
while checking.<br />
. If movement exceeds the limit, replace mount insulator after<br />
confirming proper installation of gear housing clamps.<br />
Adjusting Rack Retainer<br />
. Perform this driving test on a flat road.<br />
1. Check whether vehicle moves in a straight line when<br />
steering wheel is released.<br />
2. Check whether steering wheel returns to neutral position<br />
when steering wheel is released from a slightly turned (approx.<br />
20°) position.<br />
. If any abnormality is found, correct it by resetting adjusting<br />
screw.<br />
ST~6
ON-VEHICLEINSPECTION (Power steering)<br />
SST107B<br />
Checking and Adjusting Drive Belts<br />
Refer to section MAfor DriveBelt Inspection.<br />
Checking Fluid Level<br />
Check the level when the fluid is cold.<br />
CAUTION:<br />
. Do not overfill.<br />
. Recommended fluid is Automatic Transmission Fluid<br />
"DEXRONTMType".<br />
Checking Fluid Leakage<br />
Check the lines for improper attachment and for leaks, cracks,<br />
damage, loose connections, chafing or deterioration.<br />
1. Run engine at idle speed or 1,000 rpm.<br />
Make sure temperature of fluid in oil tank rises to 60 to<br />
80°C (140 to 176°F).<br />
2. Turn steering wheel right-to-Ieft several times.<br />
3. Hold steering wheel at each "lock" position for five seconds<br />
and carefully check for fluid leakage.<br />
CAUTION:<br />
Do not hold the steering wheel in a locked position for more<br />
than 15 seconds.<br />
4. If fluid leakage at connectors is noticed, loosen flare nut and<br />
then retighten.<br />
Do not overtighten connector as this can damage O-ring,<br />
washer and connector.<br />
Bleeding Hydraulic System<br />
1. Raise front end of vehicle until wheels clear ground.<br />
2. Add fluid into oil tank to specified level. Meanwhile,quickly<br />
turn steering wheel fully to right and left and lightly touch<br />
steering stoppers.<br />
Repeat steering wheel operation until fluid level no longer<br />
decreases.<br />
3. Start engine.<br />
Repeat step 2 above.<br />
. Incompleteair bleedingwillcause the followingto occur.<br />
When this happens, bleed air again.<br />
ST-7
ON-VEHICLE INSPECTION (Power steering)<br />
Bleeding Hydraulic System (Cont'd)<br />
a. Generation of air bubbles in reservoir tank<br />
b. Generation of clicking noise in oil pump<br />
c. Excessive buzzing in oil pump<br />
While the vehicle is stationary or while turning the steering<br />
wheel slowly, fluid noise may occur in the valve or oil. pump.<br />
This noise is inherent in this steering system, and it will not<br />
affect performance or durability of the system.<br />
Checking Steering Wheel Turning Force<br />
1. Park vehicle on a level, dry surface and set parking brake.<br />
2. Start engine.<br />
3. Warm up power<br />
perature.<br />
steering fluid to adequate operating tem-<br />
Temperature of fluid:<br />
Approximately 60 - 80°C (140 - 176°F).<br />
Tires need to be inflated to normal pressure.<br />
4. Check steering wheel turning force with engine idling when<br />
steering wheel has been turned 360° from neutral position.<br />
Steering wheel turning force:<br />
39 N (4 kg, 9 Ib) or less<br />
Checking Hydraulic System<br />
Before starting, check belt tension, driving pulley and tire<br />
pressure.<br />
1. Set Tool. Open shut-off<br />
ing Hydraulic System".)<br />
valve. Then bleed air. (See "Bleed-<br />
2. Run engine.<br />
Make sure temperature of fluid In tank rises to 60 to 80°C<br />
(140 to 176°F).<br />
ST-8
ST27091000(J26357)<br />
... : Directionof oil flow<br />
ON-VEHICLEINSPECTION (Power steering)<br />
Low-pressure<br />
hose<br />
SST834<br />
Checking Hydraulic System (Cont'd)<br />
WARNING:<br />
Warm up engine with shut-off valve fully opened. If engine is<br />
started with shut-off valve closed, oil pressure in oil pump will<br />
increase to relief pressure, resulting in an abnormal rise in oil<br />
temperature.<br />
3. Check pressure with steering wheel fully turned to left and<br />
right positions with engine idling at 1,000 rpm.<br />
CAUTION:<br />
Do not hold the steering<br />
than 15 seconds.<br />
wheel in a locked position for more<br />
Oil pump maximum standard pressure:<br />
6,865 kPa (70 kg/cm2, 995 psi)<br />
at idling<br />
4. If oil pressure is below the standard pressure, slowly close<br />
shut-oft valve and check pressure.<br />
. When pressure reaches standard pressure, gear is damaged.<br />
. When pressure remains below standard pressure, pump is<br />
damaged.<br />
CAUTION:<br />
Do not close shut-off valve for more than 15 seconds.<br />
5. If oil pressure<br />
damaged.<br />
is higher than standard pressure, pump is<br />
6. After checking hydraulic system, remove Tool and add fluid<br />
as necessary, then completely bleed air out of system.<br />
ST-9
STEERING WHEEL AND STEERING COLUMN<br />
Steering tube assembly<br />
SST110B<br />
SST275B<br />
~~~ ~<br />
to.) 13.1811.3.1.8,9.13)<br />
Removal<br />
~N~<br />
\L"!] 13' - 19 (1~ -»>,9 -13]<br />
~L"!]~:'o ~.o. 22 -291<br />
to.) : N.m (kg-m, ft-Ib)<br />
SST109B<br />
STEERING WHEEL<br />
. Pull out horn pad.<br />
If it is hard to pull out horn pad, temporarily loosen fixing screw<br />
of horn pad retaining spring.<br />
. Remove steering wheel with Tool.<br />
ST -1 0
Ell<br />
Cutout port '<br />
Ion<br />
STEERING WHEEL AND STEERING COLUMN<br />
SST112B<br />
Lower joint SST800A<br />
Installation<br />
STEERING WHEEL<br />
. When installing steering wheel, apply multi-purpose grease<br />
to entire surface of turn signal cancel pin (both portions)<br />
and also to horn contact slip ring.<br />
STEERING COLUMN<br />
. When installing steering column, fingertighten all lower<br />
bracket and clamp retaining bolts; then tighten them securely.<br />
Do not apply undue stress to steering column.<br />
. When attaching coupling joint, be sure tightening bolt faces<br />
cutout portion.<br />
CAUTION:<br />
After installing steering column, turn steering wheel to make<br />
sure it moves smoothly and that the number of turns from the<br />
straight forward position to left and right locks are equal.<br />
Be sure that the steering wheel is in a neutral position when<br />
driving straight ahead.<br />
ST -11
Hole cover<br />
STEERING WHEEL AND STEERING COLUMN<br />
SST428A<br />
---n Upper shaft<br />
SST770A<br />
Disassembly and Assembly<br />
Steering column<br />
upper shaft<br />
~ : N.m (kg-m, ft-Ib)<br />
SST113B<br />
. When disassembling and assembling, unlock steering lock<br />
with key.<br />
. Ensure that rounded surface of snap ring faces toward<br />
bearing when snap ring is installed.<br />
. Install snap ring CD before inserting shaft into jacket tube.<br />
. Instal1 snap ring on upper shaft with box wrench.<br />
ST -1 2
F~-<br />
SST116B<br />
L2<br />
STEERING WHEEL AND STEERING COLUMN<br />
SST114B<br />
~~<br />
i<br />
Self-shear screw<br />
SST742A<br />
L, :1<br />
SST098B<br />
SST115B<br />
Disassembly and Assembly (Cont'd)<br />
. Tilt mechanism<br />
Tighten adjusting nut to specification.<br />
~: 4 - 5 N.m<br />
(0.4 - 0.5 kg-m, 2.9 - 3.6 ft-Ib)<br />
. Steering lock<br />
a) Break self-shear type screws with a drill or other appropriate<br />
tool.<br />
b) Install self-shear type screws and then cut off self-shear<br />
type screw heads.<br />
Inspection<br />
. When steering wheel can not be rotated smoothly, check<br />
the steering column for the following matters and replace<br />
damaged parts.<br />
a. Check column bearings for damage or unevenness. Lubricate<br />
with recommended multi-purpose grease or replace<br />
steering column as an assembly, if ecessary.<br />
b. Check steering column lower<br />
breakage. Replace if necessary.<br />
sh ft for<br />
1<br />
deformation or<br />
. When the vehicle is involved in a light collision, check<br />
steering column length "L1" and steering column lower shaft<br />
length "L2". If it is not within specifications, replace steering<br />
column as an assembly.<br />
Steering column length "L1":<br />
653.1- 654.5 mm (25.71 - 25.77 in)<br />
Steering column lower shaft length "L2":<br />
323.7 - 325.3 mm (12.74 - 12~81in)<br />
L. . After installing steering column, check tilt mechanism operation.<br />
L1: 9.8 mm (0.386 in)<br />
L2: 19.5 mm (0.768 in) .<br />
L3:29.3 mm (1.154 in)<br />
L.: 58.2 mm (2.291 in)<br />
ST -1 3
SST080B<br />
..,.I><br />
18<br />
I<br />
POWER STEERING GEAR AND LINKAGE (Model PR24SC)<br />
Rack mounting insulator<br />
G." hoo.'ooonO.M'OOb~,k..~<br />
~<br />
tOJ 24.29 (2.4 - 3.0,<br />
17.22) ~<br />
V,",". "00' ~o : '<br />
~ ~ I .<br />
Gear and linkage<br />
Removal and Installation<br />
~ G.."<br />
ho",'" onOOM'", "''''''..<br />
~I\ .<br />
."P<br />
[qJ 29 . 39 (3 -4,<br />
22 .29)<br />
assembly tOJ 88 . 108 (9.0 . 11.0,<br />
66 .80) tDJ: N.m (kg-m, ft.lb)<br />
SST783A<br />
. Detach tie-rod outer sockets from knuckle arms with Tool.<br />
. Install pipe connector.<br />
CD Low-pressure side<br />
tOJ: 27 -39 N.m (2.8 - 4.0 kg-m, 20 - 29 ft-Ib)<br />
@ High-pressure side .<br />
tOJ:15 - 25 N.m (1.5 - 2.5 kg-m, 11 - 18 ft-Ib)<br />
ST -14<br />
124B
POWER STEERING GEAR AND LINKAGE (Model PR24SC)<br />
arm SST824A<br />
Removal and Installation (Cont'd)<br />
. Observe specified tightening torque when tightening highpressure<br />
and low-pressure pipe connectors. Excessive<br />
tightening can damage threads or damaged connector<br />
O-ring.<br />
. The O-ring in low-pressure pipe connector is larger than that<br />
in high-pressure connector. Take care to install the proper<br />
O-ring. .<br />
. Initially, tighten nut on tie-rod outer socket and knuckle arm<br />
to 29 to 39 N.m (3 to 4 kg-m, 22 to 29 ft-Ib). Then tighten<br />
further to align nut groove with first pin hole so that cotter<br />
pin can be installed.<br />
CAUTION:<br />
Tightening torque must not exceed 49 N.m (5 kg-m, 36 ft-Ib).<br />
. Before removing lower joint from gear, set gear in neutral<br />
(wheels in straight-ahead position). After removing lower<br />
joint, put matching mark on pinion shaft and pinion housing<br />
to record neutral position of gear.<br />
. To install, set left and right dust boots to equal deflection,<br />
and attach lower joint by aligning matching ~arks of pinion<br />
shaft and pinion housing. \<br />
ST -1 5
POWER STEERING GEAR AND LINKAGE (Model PR24SC)<br />
Disassembly and Assembly<br />
The table below lists four ways to repair oil leaks in the steering gear, depending on the location of the leak.<br />
See the following figure for oil leak locations.<br />
Operation<br />
Procedure<br />
CD Rear housing<br />
cover and rear<br />
housing<br />
. Replacement<br />
. Rear oil seal<br />
.Pinion oil seal<br />
.O-ring<br />
.Snap ring<br />
Replaceparts described<br />
above,<br />
<strong>Service</strong> parts<br />
to be prepared<br />
.Pinion seal kit<br />
@ Boot @ Boot @ Cylinder tube<br />
. Replacement<br />
.Rack oil seal<br />
.Boot clamp<br />
I I Replacerack oil seal.<br />
I<br />
I<br />
. Replacement<br />
.Rack oil seals<br />
.Rack oil seal<br />
. O-ring<br />
.Back-up collar<br />
.Boot clamp<br />
Remove gear from vehicle.<br />
Measure rack starting 'force<br />
and pinion rotating torque.<br />
Adjust adjusting screw.<br />
Measure rack starting force and<br />
pinion rotating torque.<br />
. Gearhousing seal<br />
kit<br />
ST -1 6<br />
.Rack oil seal<br />
.Pinion seal kit<br />
. Replacement<br />
.Cylinder tube<br />
. Copperwasher<br />
I I Replacecylinder tube.<br />
I<br />
I<br />
.Gearhousing sealkit<br />
SST117B
POWER STEERING GEAR AND LINKAGE (Model PR24SC)<br />
be<br />
~-<br />
~<br />
r~ R~<br />
I<br />
lAdjusting screw m<br />
-<br />
---~:9n_U~9<br />
~<br />
(40-6.0,<br />
0SP~;r~ng<br />
1J<br />
~ 1<br />
@<br />
~.<br />
O'@J<br />
~@ ~16-21 (1.6-2. , 12-15)<br />
r<br />
disc<br />
29-43) rWasher<br />
%@@<br />
~<br />
evli.",,," "'"<br />
40"""\ / So"og -.! ~<br />
Retainer ~ jt;;g<br />
R~kO'I_'~<br />
CenterbUShing\<br />
Rack oil seal~ ~ \\\)~<br />
'-E. 43-54' rn:<br />
~ '9 -74.. -7.5. :~O,~ ~JL. Bo",",m,<br />
Tie-rod<br />
Bro,"'d~ ~<br />
~<br />
\ ~~ Rack spacer<br />
\ '\-.LOCkPlate ~<br />
\ rJ . socket<br />
.<br />
~ Tie-rod 78 -98 Inner. (8.0 - 10" 0 58 - 72)<br />
~37 .46 (3.8- 4. 7, 27 - 34)<br />
Tie-rod outer<br />
Do not disassemble.<br />
m<br />
ST -1 7<br />
l<br />
~<br />
;<br />
Pinion<br />
seal<br />
ring<br />
Pinion assembly m I<br />
--O-ring ~ J<br />
~Shirr:~<br />
~ >< Pinion oil seal~ m<br />
~: N.m (kg-rn,ft-Ib)<br />
ssn1SB
Rack seal<br />
ring<br />
POWER STEERING GEAR AND LINKAGE (Model PR24SC)<br />
.<br />
SST1198<br />
SST881<br />
SST450A<br />
SST0818<br />
SST0828<br />
Disassembly<br />
1. Prior to disassembling, measure pinion rotating torque.<br />
Record the pinion rotating torque as a reference.<br />
. Before measuring, disconnect cylinder tube and drain fluid.<br />
. Use soft jaws when holding steering gear housing. Han(lle<br />
gear housing carefully, as it is made of aluminum. Do not<br />
grip cylinder in a vise.<br />
2. Remove pinion gear.<br />
. Be careful not to damage<br />
pinion seal ring.<br />
pinion gear when removing<br />
3. Remove tie-rod outer sockets and boots.<br />
4. Loosen tie-rod inner socket by prying up<br />
and remove socket.<br />
5. Remove retainer.<br />
6. Remove pinion assembly.<br />
staked portion,<br />
7. Drill staked portion of cylinder end cover with drill of 2 to 2.5<br />
mm (0.079 to 0.098 in) diameter, until the staking is<br />
eliminated.<br />
8. Remove gear housing end cover assembly with Tool.<br />
9. Draw out rack assembly.<br />
10. Remove rack seal ring.<br />
. Using a heat gun, heat rack seal to approximately 40°C<br />
(104°F).<br />
. Remove rack seal ring. Be careful not to damage rack.<br />
. Replace rack seal ring and O-ring with new ones.<br />
ST -18
POWER STEERING GEAR AND LINKAGE (Model PR24SC)<br />
+1:''''°0 "" 29mm..ok"<br />
~R"'k ",' cO",<br />
Rack teeth<br />
~lIJIfi11lJJJ11II11IIiIJ!I.<br />
KV481 04400<br />
( - )<br />
Position and<br />
secu re seal.<br />
.~<br />
~ .~--<br />
Film~~<br />
Rack oil seal j<br />
SST472A<br />
SST083B<br />
SST084B<br />
SST201A<br />
SST830A<br />
Disassembly (Cont'd)<br />
11. Remove center bushing and rack oil seal using tape wrapped<br />
socket and extension bar.<br />
Do not scratch inner surfaces of pinion housing.<br />
Assembly<br />
1. Using a heat gun, heat rack seal ring (made of Teflon) to<br />
approximately 40°C (104°F) and install it onto rack with your<br />
hand.<br />
. Using Tool, compress periphery of rack seal ring (made of<br />
Teflon) to position and secure it on rack.<br />
Always insert the tool from the rack gear side.<br />
2. Insert rack oil seal.<br />
. Place plastic film into rack oil seal to prevent damage by<br />
rack teeth.<br />
. Always remove plastic film after rack oil seal is positioned<br />
properly.<br />
. Make sure lips of rack oil seal face each other.<br />
3. Install center bushing and rack oil seal with rack assembly.<br />
ST -1 9
POWER STEERING GEAR AND LINKAGE (Model PR24SC)<br />
.<br />
2-3mm<br />
CO.08- 0.12 in)<br />
End cover<br />
assembly<br />
L L<br />
...<br />
Suitable tool<br />
Oil seal<br />
SST081B<br />
SST073B<br />
SST086B<br />
SST381 A<br />
SST074B<br />
Assembly (Cont'd)<br />
4. Tighten cylinder end cover assembly with Tool.<br />
5. Fasten cylinder end cover assembly to gear housing by<br />
staking.<br />
6. Set rack gear in neutral position.<br />
Measured length "L":<br />
Refer to S.D.S.<br />
7. Coat seal lip of oil seal with multi-purpose grease and install<br />
new pinion oil seal to pinion housing with suitable tool.<br />
. Make sure lip of oil seal faces up when installed.<br />
8. Install pinion bearing adjusting shim(s).<br />
. Whenever pinion assembly, gear housing and rear housing<br />
are disassembled, replace shim(s) with new ones. Always<br />
use the same number of shim(s) when replacing.<br />
ST -20
POWER STEERING GEAR AND LINKAGE (Model PR24SC)<br />
- Protrusion<br />
SST085B<br />
SST075B<br />
SST552<br />
Gear housing<br />
SST121B<br />
Assembly (Cont'd)<br />
9. Install pinion seal ring on pinion gear assembly.<br />
. Using a heat gun, heat pinion seal ring to approximately<br />
40°C (104°F) before installing it onto pinion gear assembly.<br />
. Make sure pinion seal ring is properly settled in valve groove.<br />
10. Apply a coat of multi-purpose grease to needle bearing<br />
roller and oil seal lip before installing pinion assembly in<br />
gear housing.<br />
11. Install pinion assembly to pinion housing.<br />
Be careful not to damage pinion oil seal.<br />
12. Apply a coat of multi-purpose grease to rear oil seal lip<br />
before installing rear housing.<br />
13. Install rear cover cap so that protrusion of rear housing<br />
cover is positioned as shown in figure at left.<br />
Be careful not to damage worm ring and oil seal.<br />
ST -21
~
5 - 15 mm<br />
(0.20 - 0.59 in)<br />
y<br />
Vehicle<br />
front<br />
POWER STEERING GEAR AND LINKAGE (Model PR24SC)<br />
SST967A<br />
Q.~<br />
~ SST097B<br />
98 N (10 kg, 22 Ib)<br />
/t",<br />
~<br />
\.<br />
0 CI<br />
M<br />
SST125B<br />
SST440A<br />
SST126B<br />
Assembly (Cont'd)<br />
19. Before installing boot, coat the contact surfaces between<br />
boot and tie-rod with grease.<br />
20. Install boot clamps.<br />
. To install, wrap boot clamp around boot groove twice.<br />
Tighten clamp by twisting rings at both ends 4 to 4-1/2 turns<br />
with screwdriver<br />
(10 kg, 22 Ib).<br />
while pulling with a force of approx. 98 N<br />
. Install boot clamp so that it is to the rear of the vehicle<br />
when gear housing is attached to the body. (This will<br />
prevent interference with other parts.)<br />
. Twist boot clamp in the direction shown in figure at left.<br />
. After twisting boot clamp, bend twisted and diagonallyso it<br />
does not contact boot.<br />
ST-23<br />
\
Adjusting screw<br />
POWER STEERING GEAR AND LINKAGE (Model PR24SC)<br />
Lock nut<br />
SSTOB9B<br />
ST3127S000<br />
-(See J25765.A) SST072B<br />
SST557A<br />
SST090B<br />
ST3127SQOO<br />
- (See J25765.A) SST072B<br />
Adjustment<br />
Adjust pinion rotating torque as follows:<br />
1. Set gears to Neutral without fluid in the gear.<br />
2. Coat the adjusting screw with locking sealant and screw it in.<br />
3. Lightly tighten lock nut.<br />
4. Tighten adjusting screw to a torque of 4.9 to 5.9 Nom (50 to<br />
60 kg-em, 43 to 52 in-Ib).<br />
5. Loosen adjusting screw, then retighten it to 0.05 to 0.20<br />
Nom (0.5 to 2 kg-em, 0.43 to 1.74 in-Ib).<br />
6. Move rack over its entire stroke several times.<br />
7. Measure pinion rotating torque within the range of 1800 from<br />
neutral position.<br />
Stop the gear at the point of maximum torque.<br />
8. Loosen adjusting screw, then retighten it to 4.9 to 5.9 Nom<br />
(50 to 60 kg-em, 43 to 52 in-Ib).<br />
9. Loosen adjusting screw by 40° to 60°.<br />
10. Prevent adjusting screw from turning, and tighten lock nut<br />
to specified torque.<br />
11. Check steering gear for rack sliding frictional force.<br />
Around neutral point of rack stroke<br />
:t5.5 mm (:to.217 in):<br />
122.6 - 166.7 N (12.5 - 17 kg, 27.6 - 37.5 Ib)<br />
Except for neutral point:<br />
122.6 - 186.3 N (12.5 - 19 kg, 27.6 - 41.9 Ib)<br />
If sliding frictional force is out of specification, repeat the<br />
adjustment procedure, starting from NO.4.<br />
After the readjustment, if sliding force is still out of specification,<br />
steering gear is damaged.<br />
12. Measure pinion rotating torque within the range of :t 100°<br />
from the neutral point.<br />
Average rotating torque<br />
[(Max. measured value + Min. measured value) x 0.5]:<br />
0.8 - 1.3 Nom(8 - 13 kg-em, 6.9 - 11.3 In-Ib)<br />
Maximum torque increment:<br />
Less than 0.4 Nom (4 kg-em, 3.5 in-Ib)<br />
Except for above mentioned measuring range:<br />
Maximum rotating torque<br />
1.9 Nom (19 kg-em, 16 in-Ib)<br />
Maximum torque incremen~<br />
Less than 0.6 Nom (6 kg~m, 5.2 In-Ib)<br />
ST -24
POWER STEERING GEAR AND LINKAGE (Model PR24SC)<br />
Ci<br />
CO)<br />
ri<br />
0<br />
CD ~! Unit: mm (in)<br />
*: Measuring points<br />
SST750A<br />
SST751A<br />
Adjustment (Cont'd)<br />
. If pinion rotating torque is not within specification, readjust it.<br />
. After the readjustment, if pinion rotating torque is still out of<br />
specification, steering gear is damaged.<br />
Inspection<br />
Thoroughly clean all parts in cleaning<br />
transmission fluid "DEXRONTMType",<br />
compressed air, if available.<br />
solvent or automatic<br />
and blow dry with<br />
BOOT<br />
Check condition of boot. If cracked excessively, replace it.<br />
RACK<br />
Thoroughly examine rack gear. If damaged, cracked or worn,<br />
replace it.<br />
PINION ASSEMBLY<br />
. Thoroughly examine pinion gear. If pinion gear is damaged,<br />
cracked<br />
. Inspect<br />
or worn, replace it.<br />
bearings to see that they roll freely and are free<br />
from cracked, pitted, or worn balls, rollers and races.<br />
Replace if necessary.<br />
TIE-ROD OUTER AND INNER SOCKET<br />
. Check ball joint for swinging force.<br />
Tie-rod outer ball joint:<br />
9.12 - 91.30 N<br />
(0.93 - 9.31 kg, 2.05 - 20.53 Ib)<br />
Tie-rod inner ball joint:<br />
8.14 - 122.6 N<br />
(0.83 - 12.5 kg, 1.83 - 27.6 Ib)<br />
. Check ball joint for rotating torque.<br />
Tie-rod outer ball joint:<br />
0.29 - 2.94 N.m<br />
(3.0 - 30.0 kg-em, 2.~ - 26.0 in-Ib)<br />
Tie-rod inner ball joint:<br />
7.4 N.m (75 kg-em, 65 in-Ib) or less<br />
ST -25<br />
\
POWER STEERING GEAR AND LINKAGE (Model PR24SC)<br />
Axial end<br />
plav<br />
SST435A<br />
Inspection (Cont'd)<br />
. Check ball joint for axial end play.<br />
Tie-rod outer ball joint:<br />
0.5 mm (0.020 in) or less<br />
Tie-rod inner ball joint:<br />
0 mm (0 in)<br />
. Check condition of dust cover. If cracked excessively,<br />
replace it.<br />
CYLINDER TUBES<br />
Check cylinder tubes for scratches<br />
necessary.<br />
or other damage. Replace if<br />
ST -26
SST12BB<br />
POWER STEERING OIL PUMP<br />
Disassembly and Assembly<br />
Oil seal ~ lEI<br />
(qJ 27 . 35<br />
(2.8 -3.6, 20 . 261<br />
(qJ: N.m (kg-rn,ft-Ibl<br />
m: lubrication points<br />
(With automatic transmission fluid "Type DEXRON TM" 1<br />
Pre-disassembly Inspection<br />
SST127B<br />
Disassemble the power steering oil pump only if the following<br />
items are found.<br />
. Oil leak from any point shown in the figure.<br />
. Deformed or damaged pulley.<br />
ST-27
of<br />
Front housing<br />
~<br />
Extension bar<br />
POWER STEERING OIL PUMP<br />
SST010B<br />
SST034A<br />
SST036A<br />
Disassembly<br />
CAUTION:<br />
. Parts which can be disassembled are strictly limited.<br />
Never disassemble parts other than those specified.<br />
. Disassemble in as clean a place as possible.<br />
. Clean your hands before disassembly.<br />
. Do not use rags; use nylon cloths or paper towels.<br />
. Follow the procedures and cautions in the <strong>Service</strong> <strong>Manual</strong>. .<br />
. When disassembling and reassembling, do not let foreign<br />
matter enter or contact the parts.<br />
. Remove snap ring, then draw pulley shaft out.<br />
Be careful not to drop pulley shaft.<br />
. Remove oil seal.<br />
Be careful not to damage front housing.<br />
. Remove connector.<br />
Be careful not to drop spool.<br />
Inspection<br />
PULLEY AND PULLEY SHAFT<br />
. If pulley is cracked or deformed, replace it.<br />
. If an oil leak is found around pulley shaft oil seal, replace the<br />
seal.<br />
. If serration<br />
replace it.<br />
of pulley or pulley shaft is deformed or worn,<br />
ST-28
Reer cover side<br />
Faces inside<br />
SST536A<br />
Flat portion<br />
Spring<br />
POWER STEERING OIL PUMP<br />
SST289A<br />
SST843A<br />
SST499A<br />
Assembly<br />
Assemble oil pump in the reverse order of disassembly, noting<br />
the following instructions.<br />
. Before installation, coat the a-rings and oil seal with A.T.F.*<br />
. Make sure a-rings and oil seal are properly installed.<br />
. When assembling vanes to rotor, rounded surfaces of vanes<br />
must face cam case side.<br />
. Always install new a-rings and oil seal.<br />
. Be careful of oil seal direction.<br />
*: Automatic Transmission Fluid<br />
. Pay attention to the direction of rotor.<br />
. Install vanes properly.<br />
CAUTION:<br />
Do not remove spool valve from connector.<br />
. ApplyA.T.F.*to a-ring.<br />
*: Automatic Transmission Fluid<br />
ST-29
D,<br />
POWER STEERING OIL PUMP<br />
2<br />
SST497A<br />
Assembly (Cont'd)<br />
. Insert pin @ into pin groove CD of front housing and rotor.<br />
Then install earn ring CID as shown at left.<br />
ST -30
Steering model Power steering<br />
Steering gear type<br />
Steering overall gear ratio<br />
Turn of steering wheel<br />
(Lo'ck to lock)<br />
SERVICE DATA AND SPECIFICATIONS (S.D.S.)<br />
PR24SC<br />
16.8<br />
Steering column type Collapsible, tilt<br />
GENERAL<br />
Steering wheel axial play<br />
mm (in)<br />
3.1<br />
0 (0)<br />
General Specifications<br />
Inspection and Adjustment<br />
STEERINGGEAR AND LINKAGE<br />
Steering wheel play mm (in) 0 - 35 (0 - 1.38) Tie-f'od outer ball joint<br />
Item<br />
N (kg,lb)<br />
STEERING COLUMN Rotating torque<br />
N'm (kg-em, in-Ib)<br />
Steering column length "L, "<br />
mm (in)<br />
Steering column lower<br />
shaft length "L2" mm (in)<br />
F)1~J L,<br />
L2<br />
653.1 - 654.5 (25.71 - 25.77) Axial end play mm(in)<br />
323.7 - 325.3 (12.74 - 12.81)<br />
SST098B<br />
SST115B<br />
ST-31<br />
Tie-f'od inner ball joint<br />
Swinging force* N (kg, Ib)<br />
Rotating torque<br />
N'm (kg-em, in-Ib)<br />
Axial end play<br />
mm (in)<br />
Tie-f'od standard length "L"<br />
mm (in)<br />
*: Measuring point<br />
~'L~"J<br />
Pinion gear preload (Average)<br />
N'm (kg-em, in-Ib)<br />
Rack stroke "L" mm (in)<br />
~~<br />
,'\ ".' --, ',,',', d:P ~:- ", 'p'<br />
L L<br />
PR24SC<br />
9.12- 91.30<br />
(0.93-9.31;2.05- 20.53)<br />
0.29-2.94<br />
(3.0-30.0,2.6-26.0)<br />
0.5 (0.020)<br />
8.14 - 122.6<br />
(0.83 - 12.5, 1.83 - 27.6)<br />
7.4 (75,65) or less<br />
0 (0)<br />
176.8 (6.96)<br />
~<br />
SST093B<br />
0.78 - 1.27<br />
(8.0 - 13.0,6.9 - 11.3)<br />
68.5 (2.697)<br />
SST086B
POWER STEERING<br />
Rack sliding force N (kg, Ib)<br />
Steering wheel turning force<br />
(Mesured at one full turn from<br />
neutral) N (kg, Ib)<br />
Normal operating temperature<br />
of power steeringfluid 0 C (0 F)<br />
Fluid capacity (Approximate)<br />
J2(US qt, Imp qt)<br />
Oil pump maximum presure<br />
kPa (kg/cm2, psi)<br />
SERVICE DATA AND SPECIFICATIONS (S.D.S.)<br />
166.7 - 255.6<br />
(17.0 - 23..0, 37.5 - 50.7)<br />
39 (4,9) or less<br />
60 -80 (140 -176)<br />
0.9 (1,3/4)<br />
6,865 (70, 995)<br />
Inspection and Adjustment (Cont'd)<br />
ST -32
CONTENTS<br />
.<br />
I .<br />
GENERAL SERVICING<br />
(Including all clips & fasteners) """""""""""""""""""""'" BF- 2<br />
BODY<br />
DOOR<br />
END BF- 6<br />
(Including "Power Window" & "Power Door Lock") . . . . . . . . . . . . . . . . . . . . . . . . . . . . . BF-12<br />
INSTRUMENT PANEL. . . . . . . . . . . . . . . . . . . . . . . . . . . . . . . . . . . . . . . . . . . . . . . . . . . . . BF-18<br />
INTERIOR AND EXTERIOR<br />
(In EXTERIOR, including "Weatherstrips") ...................................<br />
BF-20<br />
SEAT . BF-30<br />
AUTOMATIC SEAT BELT SYSTEM. . . . . . . . . . . . . . . . . . . . . . . . . . . . . . . . . . . . . . . . . BF-32<br />
TROUBLE DIAGNOSES...................................................<br />
BF-39<br />
SUN ROOF..............................................................<br />
BF-66<br />
WINDSHIELDAND WINDOWS.............................................<br />
BF-70<br />
MIRROR - DoorMirror...................................................<br />
BF-77<br />
REAR COMBINATION LAMP...............................................<br />
BF-78<br />
FRONT AND REAR AIR SPOILER .........................................<br />
BF-79<br />
BODY ALIGNMENT . . . . . . . . . . . . . . . . . . . . . . . . . . . . . . . . . . . . . . . . . . . . . . . . BF-80<br />
When you read wiring diagrams:<br />
. Read GI section, "HOW TO READ<br />
. See EL section, "POWER SUPPLY<br />
WIRING DIAGRAMS".<br />
ROUTING" for power distribution circuit.<br />
When you perform trouble diagnoses, read GI section, "HOW TO FOLLOW<br />
FLOW CHART IN TROUBLE DIAGNOSES".<br />
* For conventional seat belt, refer to MA section.<br />
.<br />
--
GENERAL SERVICING<br />
Precautions<br />
. When removing or installing various parts, place a cloth or padding onto the vehicle body to prevent<br />
scratches.<br />
. Handle trim, molding, instruments, grille, etc. carefully during removing or .installation. Be careful not<br />
to soil or damage them.<br />
. Apply sealing compound where necessary when installing parts.<br />
. When applying sealing compound, be careful that the sealing compound does not protrude from parts.<br />
. When replacing any metal parts (for example body outer panel, members, etc.), be sure to take rust<br />
prevention measures.<br />
.<br />
Clip and Fastener<br />
Clips and fasteners in BF section correspond to the following numbers and symbols.<br />
Replace any clips and/or fasteners which are damaged during removal or installation.<br />
No. Symbol Shape Removal & Installation<br />
BF-2<br />
Removal:<br />
Remove by bending up with<br />
a flat.bladed scr_driv8l'.<br />
C§D t ='0=<br />
C§D T<br />
SBF092B SBF109B SBF094B<br />
SBF114B<br />
1f -<br />
b<br />
SBF113B 5."3'.<br />
Removal:<br />
Pull up by rotating.<br />
SBF115B<br />
W y<br />
::<br />
Removal:<br />
Tilt clip as indicated by<br />
- rrow. then draw out.<br />
SBF141B SBF142B SBF143B
No. I Symbol I<br />
GENERAL SERVICING<br />
(§VI W o "t<br />
2j)DI<br />
c£O]) I<br />
$<br />
Clip and Fastener (Cont'd)<br />
BF-3<br />
Shape<br />
I I Removal:<br />
CS@<br />
SBFOS9B I I SBF090B<br />
E !<br />
SBF31SC<br />
SBF103B<br />
I<br />
,<br />
-!-<br />
SBF319C<br />
SBF104B<br />
I /\) / I<br />
SBF653B<br />
No.<br />
GENERAL SERVICING<br />
No. Symbol<br />
Clip and Fastener (Cont' d)<br />
Shape Removal& Installation<br />
CfO:V<br />
t<br />
i T<br />
SBF361B SBF362B<br />
BF-5<br />
Removal:<br />
Screwout with a Phillips<br />
screwdriver.<br />
iSBF140B
. Hood adjustment: Adjust at hinge portion.<br />
BODY END<br />
Body Front End<br />
. Hood lock adjustment: After adjusting, check hood lock control operation. Apply a coat of grease to<br />
hood locks engaging mechanism.<br />
. Hood opener: Do not attempt to bend cable forcibly.<br />
Bumber height<br />
At vehicle center<br />
512 . 562 mm<br />
(20.16 .22.13 in)<br />
~<br />
Ground<br />
Energy absorber form<br />
Condition:<br />
Curb weight & normal<br />
tire pressure on level<br />
grou nd<br />
Bumper reinforcement<br />
BF-6<br />
@@@ @@<br />
.~
Hood lock adjustment<br />
. Adjust lock so that hood primary lock meshes at a position<br />
where hood is 1 to 1.5 mm (0.039 to 0.059 in) lower than<br />
fender.<br />
. After hood lock adjustment, adjust bumper rubber.<br />
. When securing hood lock, ensure it does not tilt. Striker must<br />
be positioned at the center of hood primary lock.<br />
. After adjustment, ensure that hood primary and secondary<br />
lock operate properly.<br />
Hood lock secondary latch hooking length<br />
More th8n<br />
5 mm Hood<br />
(0.20 inl<br />
C1G:<br />
~ Secondary latch<br />
Bumper rubber adjustment<br />
. Adjust so that hood is aligned with<br />
fender. [Bumper rubber free height<br />
is approx. 20 mm (0.79 in).]<br />
BODY END<br />
Body Front End (Cont' d)<br />
BF-7<br />
Hood adjustment<br />
* : Bumper assembly mounting bolts and nuts<br />
tOJ : N.m (kg-m, ft-Ib)<br />
SBF174E
B,ODY END<br />
Body Rear End and Opener<br />
. Back door adjustment: Adjust at hinge-body portion for proper back door fit.<br />
. Back door lock system adjustment: Adjust lock & striker so that they are in the center. After<br />
adjustment, check back door lock operation.<br />
. Trunk lid adjustment:Adjust at hinge-trunk lid portion for proper trunk lid fit.<br />
. Trunk lid lock system adjustment: Adjust striker so that it is in the center of the lock. After adjustment,<br />
check trunk lid lock operation.<br />
/ WARNING:<br />
a. Be careful not to scratch back door stay when installing back door. A scratched stay may cause<br />
gas leakage.<br />
b. The contents of the back door stay are under pressure. Do not take apart, puncture, apply heat or<br />
allow fire near it.<br />
. Opener cable: do not attempt to bend cable using excessive force.<br />
. After installation, make sure that trunk lid/back door and fuel filler lid open smoothly.<br />
FASTBACK<br />
. Before removing rear bumper, remove right drafter which is secured with two upper nuts and butyl seal.<br />
Ii1<br />
k door]<br />
[Hinge-bac rn'I 21 - 26<br />
"'----- I<br />
~-.. 12.1-2.7,<br />
15-20)<br />
\<br />
""\".<br />
\<br />
[Hinge-body (Behind rear roof<br />
rail garnish)]<br />
c,.~<br />
~<br />
/ ~ 21 -26<br />
~12.1-2.7,15-20)<br />
m<br />
Bumper height<br />
572.1 - 622.1 mm<br />
122.52 - 24.49 in)<br />
BF-8<br />
Fuel filler lid<br />
opener & control
Energy absorber form<br />
BODY END<br />
Body Rear End and Opener (Cont' d)<br />
BF-9<br />
\<br />
* : Bumper assembly mounting<br />
bolts and nuts<br />
tOJ: N.m (kg-m. ft-Ibl<br />
SBF176E
COUPE<br />
\"" ~ iii // ~~'<br />
~ //<br />
I<br />
Trunk lid torsion bar removal & installation iii<br />
WARNING:<br />
When removing and installing<br />
torsion bar, be careful as it is<br />
under tension.<br />
/<br />
BODY END<br />
Body Rear End and Opener (Cont'd)<br />
BF-10<br />
Trunk lid lock m<br />
Trunk lid hinge<br />
adjustment II<br />
Trunk lid striker &<br />
opener cable adjustment 1!1
m<br />
Ii]<br />
~d<br />
~ t;r~ 7<br />
~/~ \/ I<br />
. ~~:::~~<br />
Bumper height<br />
". Trunk lid lock<br />
TI<br />
556.7 -606.7 mm<br />
(21.92.23.89 in)<br />
1<br />
,-- Striker<br />
adjustment<br />
Ii)<br />
BODY END<br />
Body Rear End and Opener (Cont'd)<br />
[!J<br />
SF-11<br />
Ii<br />
\OCk nu~ ~<br />
.l~ Fuel filler lid<br />
opener & control<br />
SBF~
DOOR<br />
. After adjusting door or door lock, check door lock operation.<br />
Bencrank<br />
adjustment<br />
~ 5.1 -6.5<br />
(0.52-0.66,3.8 -4.8)<br />
Door glass stopper<br />
adjustment<br />
Outside handla<br />
adjustment Ii)<br />
~~5.1-6.5<br />
(0.52-0.66,<br />
3.8 -4.8)<br />
Regulator assembly<br />
adjustment Ii]<br />
BF-12<br />
tOJ 5.1 -6.5<br />
(0.52 -0.66, 3.8 .4.8)<br />
Door<br />
adjustment Fa<br />
tOJ : N'm (kg-m, ft-Ib)
[+J<br />
Ii]<br />
. Removeweatherstrip from retainer.<br />
. Door glass-to-retainer clearances A and B<br />
Adjust so that clearances A and B are equal.<br />
. Ensure door glass is not tilted.<br />
Weatherstrip<br />
retainer<br />
Ii) Outside<br />
handle<br />
escutcheo~)-<br />
//<br />
1/ '<br />
U--<br />
DOOR<br />
BF-13<br />
Holder<br />
I<br />
.<br />
0.5 - 1.5 mm<br />
(0.020 - 0.059 in)<br />
Outside handle adjustment<br />
(Turn holder 8Sthe clearance -"<br />
between holder and rod is<br />
specifiedvalue.)<br />
Striker adjustment<br />
t<br />
tOj13-16<br />
(1.3_1.6'<br />
9 -12)<br />
~~<br />
t~ ..<br />
°-<br />
... . @ .<br />
'{~d~";~"~:'m<br />
(0.039 in)]<br />
Glass portion D . Adjust to provide proper light surface<br />
contact of glass and retainer.<br />
Glass portion fA<br />
Outside<br />
c=><br />
SBF177
g,<br />
." I<br />
~<br />
~<br />
CJI<br />
m<br />
"11<br />
w<br />
W<br />
I'J<br />
m<br />
~@<br />
r-",<br />
POWER WINDOW REGULATOR (Driver side)<br />
.@<br />
r- r-~~ ~<br />
,,,,r-"'OI'<br />
POWER<br />
WINDOW<br />
AMPLI F I ER<br />
Upward<br />
Downward<br />
(Door harness L.H.) @<br />
W/B<br />
~@.<br />
~:a~:ar-r-<br />
01"""<br />
:a0l0l~0I~<br />
R~B~<br />
R/W~<br />
DRIVER SIDE LOCK PASSEN-<br />
ONE- MANUAL SWITCH GER<br />
TOUCH<br />
SIDE<br />
U N 0 U N D ON OFF U N 0<br />
1 a<br />
2 a a<br />
:3<br />
4 a 0 0<br />
a<br />
5<br />
<br />
6 0 0<br />
7<br />
a<br />
POWER WINDOW MAIN SWITCH<br />
(Main<br />
@ harness)<br />
~<br />
W/B<br />
. R~B<br />
R/W<br />
@ii(§)<br />
- -<br />
BODY GROUND<br />
@<br />
.<br />
IGNITION SWITCH<br />
ON or START<br />
BA HERY (V ia<br />
fusible I Ink-Gree~<br />
~ W/R"""4..l.I L/R-;::n, BREAKER<br />
@<br />
:;!~I~:U~I<br />
II<br />
@ 8 (Door<br />
~ ~<br />
R/W<br />
R/W<br />
R/B . D R/B<br />
W/B W/B<br />
CIRCUIT<br />
I GN I TI ON<br />
RELAY<br />
harness<br />
R. H. ) ~<br />
R/W<br />
W~B<br />
R/B<br />
L<br />
POWER W<br />
(Passen<br />
MOTOR<br />
CIRCUIT<br />
BREAKER<br />
Wi<br />
ope<br />
di
POWER WINDOW AMP. INSPECTION<br />
IGNITION SWITCH ON or ST<br />
(Via power window relay)<br />
Window<br />
operating<br />
direction<br />
Upward f I Current<br />
flow<br />
Downward I\.1 direction<br />
Time (sec.)<br />
100<br />
50<br />
20<br />
10 8<br />
5<br />
FRONT DRIVER<br />
SIDE POWER WINDOW<br />
REGULATOR<br />
1<br />
0 10 20 30 40 50 60 70<br />
SBF284E Current (A)<br />
DOOR<br />
Power Window (Cont'd)<br />
VOLTMETER<br />
AMP. OPERATION -<br />
\<br />
Connections<br />
<strong>Manual</strong> operation<br />
Operations<br />
One-touch (Autol Operation<br />
51 Power source OGNI 12V 12V 12V 12V 12V 12V<br />
52 Ground Gmund Ground Gmund Gmund Gmund Ground<br />
-53<br />
From ignition SW(ON or STI ON or ST ON or ST ON or ST ON or ST ON or ST ON or ST<br />
54<br />
-<br />
55<br />
-<br />
56<br />
'0;<br />
,<br />
To FR driver side power<br />
window SW (AUTO) Q)<br />
To FR driver side power<br />
window SW (UP) @<br />
To FR driver side power<br />
window SW(DOWN)CV<br />
OFF<br />
OFF<br />
OFF<br />
OFF<br />
ON<br />
OFF<br />
OFF<br />
OFF<br />
ON<br />
OFF<br />
OFF<br />
OFF<br />
ON<br />
OFF<br />
ON<br />
OFF<br />
OFF<br />
OFF<br />
57<br />
-<br />
58<br />
FR driver side regulator<br />
. (Upward power source)<br />
I FR driver side regulator<br />
(Downward power source)<br />
Approx,<br />
OV<br />
Approx.<br />
OV<br />
Approx.<br />
over 9V<br />
Approx.<br />
OV<br />
Approx.<br />
OV<br />
Appmx.<br />
over 9V<br />
Approx.<br />
OV<br />
Approx.<br />
OV<br />
Approx.<br />
OV<br />
Aprrox.<br />
over 9V<br />
Approx.<br />
OV<br />
Approx.<br />
over 9V<br />
Regulator Operating Condition Stop<br />
Upward<br />
opera-<br />
tion<br />
Carry out this operation check in this chart from left to right continuously,<br />
-=-<br />
FRONT DRIVER SIDE POWEfI<br />
WINDOW SWITCH<br />
I POWERWINDOW AMP. -IFront driver sidedoor (Behind door trim)<br />
Connections<br />
From power window AMP ~~<br />
From power window AMP 9<br />
From power window AMP ~<br />
Ground<br />
SBF789C<br />
CIRCUIT BREAKER INSPECTION<br />
For example, when current is 30A, the circuit is broken within 8<br />
to 20 seconds. '<br />
This circuit breaker is also used in the power door lock system.<br />
BF-15<br />
Keeping opera.<br />
Down. tion until fully<br />
ward<br />
opera.<br />
tion<br />
Stop<br />
Starting open, then<br />
"ops<br />
automatically.<br />
Downward operation
gJ<br />
." I<br />
~<br />
0')<br />
(II<br />
m<br />
."<br />
w<br />
W<br />
w<br />
m<br />
BATTERY (V I a<br />
fus I b I e I Ink-Green)<br />
@<br />
CIRCUIT~ rn::;-L/R<br />
BREAKER~ ~W/R<br />
(Sub harness) @<br />
1~~~1<br />
~ ~~~<br />
~"''''''<br />
.,.,....<br />
~@)<br />
W(GR<br />
j<br />
ORs"B C<br />
[:J<br />
DOOR LOCK TIMER<br />
(FrontR. H. dash s I de)<br />
@<br />
(Main<br />
harness)<br />
~W(GR<br />
. ORs"B<br />
LG/B<br />
OR/L<br />
@@D<br />
",{eli",{e<br />
LG<br />
~ ~<br />
LG<br />
ORB'L~ t<br />
.<br />
PASSENGER SID~ D<br />
DOORLOCK CO<br />
Between<br />
Lock lock"<br />
un lock<br />
Fom I n<br />
lock to a<br />
un lock<br />
([ill)<br />
Fom<br />
un lock<br />
to lock<br />
I<br />
PASSENGER SIDE<br />
POSISTOR
DOOR LOCK TIMER INSPECTION<br />
DOOR<br />
Power Door Lock (Cont'd)<br />
TESTING OPERATION<br />
SW-A OFF<br />
Turns<br />
ON Turns<br />
OFF OFF OFF Turns ON Turns<br />
Ii<br />
c:<br />
0><br />
.;;;<br />
...<br />
0.<br />
.=<br />
operation<br />
SW-B<br />
operation<br />
OFF<br />
ON<br />
OFF OFF<br />
OFF<br />
OFF<br />
Turns<br />
ON<br />
ON<br />
Turns<br />
OFF<br />
OFF<br />
After SW-A<br />
operation,<br />
Turns<br />
immediately<br />
OFF<br />
turns ON<br />
... - ON ON<br />
0.- Test lamp<br />
OFF (Approx. OFF OFF (Approx. ON... OFF<br />
...c: operation OFF OFF OFF<br />
.2'<br />
1.0 sec.) 1.0 sec.} ... ON... OFF<br />
0" ... OFF -+ OFF<br />
. Carry out the complete inspection in this chart from left to<br />
right.<br />
. Do not carry out any switch operations that are not described<br />
in the above chart so as to avoid breaking the door lock timer.<br />
INSPECTION CIRCUIT (This test circuit must be wired by the technician.)<br />
BATTERY<br />
- + + -<br />
Lighting period of test lamp differs according to SW-B operation.<br />
Moreover, test lamp may come on once or it may not come on<br />
at all. If this occurs, do not judge it fau Ity solely from th is step.<br />
--- TESTLAMP<br />
-=- =<br />
DOOR LOCK TIMER<br />
BF-17<br />
SW-B<br />
=<br />
SW-A<br />
31 Power source (BAT)<br />
CIRCUIT CONNECTIONS<br />
32 To/From actuators (Lock power source & Unlock<br />
ground)<br />
33 To/From<br />
source)<br />
actuators (Unlock ground & Lock power<br />
34 To lock-unlock switches (Input signal for lock)<br />
35 Ground<br />
39 To lock-unlock switches (Input signal for unlock)<br />
-::-<br />
-<br />
SBF377E
f<br />
INSTRUMENT PANEL<br />
. When removing instrument panel assembly, remove defroster grille, combination meter, A/C or heater<br />
control, cluster lid C and S.M.J. first.<br />
HEAD-UP DISPLAY (H.U.D.)<br />
. When removing H.U.D. finisher, be extremely careful not to scratch H.U.D.'s reflective surface. To avoid<br />
scratching, cover H.U.D.'s reflective surface or finisher with a cloth or vinyl sheet. II<br />
Super Mutiple<br />
Junction<br />
CS-M.J.) Fa<br />
Combination meter<br />
~.-<br />
* : Instrument panel assembly mounting bolts<br />
~Defro ster grille<br />
Pewl Ii)<br />
.<br />
-~ -~*<br />
~ I<br />
~<br />
Metal<br />
cliPIJ<br />
'1- ~/<br />
'"<br />
BF-18<br />
;;;. .'<br />
* rPawl (I<br />
/~ ~<br />
~<br />
~~<br />
~~<br />
Cluster lid C<br />
~<br />
. ~P8WI<br />
Ii]
m<br />
--<br />
' /<br />
Super Multiple<br />
Junction (S.M.J.I<br />
-:- Instrument<br />
harness<br />
Fuse block<br />
Ii] Pawl (2 places each for<br />
upper and lower surface)<br />
[!1<br />
IJ<br />
Metalclip<br />
INSTRUIYIENT PANEL<br />
(j]<br />
II Pawl (4 places each for<br />
upper and lower surface)<br />
1:1<br />
Ia<br />
Pawl (To head up display assembly)<br />
BF-19<br />
@J<br />
Ii<br />
0<br />
II<br />
Cloth<br />
or vinyl sheet<br />
Tape H.U.D.'s<br />
reflective surface<br />
rWindshield<br />
SBF178E
INTERIOR AND EXTERIOR<br />
Interior<br />
SIDE, LUGGAGE AND FLOOR TRIM - Fastback<br />
Door corner<br />
finisher [i]<br />
Metal clip iii<br />
~<br />
U-:!<br />
BF-20<br />
~-;?o,;', Speaker panel Ii]<br />
--~:. ~<br />
."."- fT<br />
0<br />
\I<br />
Assist grip<br />
removal [!I
m<br />
;t=.~~~<br />
Garnish<br />
Ii]<br />
[!I<br />
Pawl<br />
INTERIOR AND EXTERIOR<br />
Ii]<br />
(I<br />
Pawl<br />
Interior (Co,nt' d)<br />
Pawl<br />
BF-21<br />
[!]<br />
Ii<br />
SBF179E
SIDE TRIM - Coupe<br />
~=,1J~\<br />
Garnish<br />
LUGGAGE ROOM TRIM - Coupe<br />
INTERIOR AND EXTERIOR<br />
x<br />
Interior (Cont'd)<br />
x<br />
x<br />
Clip removal Ii)<br />
Bf=-22<br />
Ii)<br />
J-~<br />
Removal<br />
SBF180E<br />
SBF181E
ROOF TRIM<br />
Fastback<br />
Coupe<br />
m Back door<br />
weatherstrip<br />
Roof rear garnish"""<br />
INTERIOR AND EXTERIOR<br />
Interior (Cont'd)<br />
Ii) Back door window 1ass<br />
Roof g<br />
7<br />
panel ~<br />
HoodnO;"'<br />
~<br />
\ r)}. 0-<br />
~<br />
M""
INTERIORAND EXTERIOR<br />
Exterior<br />
BF-24<br />
@ @ @ @> (j)<br />
@ @ @<br />
SBF192E
CD Windshield upper and side molding<br />
Method 1 Cut off top portion of molding<br />
and clean glass and panel<br />
surfaces.<br />
~"~, ~.q~<br />
.<br />
Apply sealant to top portion of<br />
molding.<br />
~()<br />
~9<br />
~.,.,.,.,.,.,..:<br />
~~;~<br />
':1:--4 ~<br />
Cut off lower portion<br />
of new molding. ...<br />
SEV 'r"~<br />
Finish<br />
.',','.'.','. ."<br />
':i/":::: 'J<br />
well to give it a<br />
good appearance.<br />
Method 2<br />
1. Cut off sealant at glass end.<br />
2. Clean the side on which panel was mounted.<br />
3. Set molding fastener and apply sealant &<br />
primer to body panel, and apply primer to<br />
molding.<br />
~<br />
Apply primer."\ (<br />
Glass~ ~<br />
-, ~<br />
Dam rubber<br />
INTERIOR AND EXTERIOR<br />
Double-faced adhesive tape<br />
Apply sealant.<br />
4. Install molding by aligning the molding mark<br />
located on center with vehicle center.<br />
Be sure to install tightly so that there is no gap<br />
around the corner.<br />
SBF519B<br />
CV Windshield lower molding<br />
It is mounted with screws.<br />
Exterior (Cont'd)<br />
CID,@ Cowltop grilleand hood rear sealingrubber<br />
BF-25<br />
INTERIOR AND EXTERIOR<br />
Exterior (Cont' d)<br />
(j) , @ Body side weatherstrip and weatherstrip retainer<br />
II m<br />
Double-faced<br />
adhesive tape<br />
ButYl tape<br />
Ii] Windshield<br />
piliar garn ish<br />
Body side welt<br />
II Weatherstrip<br />
retainer<br />
Body side<br />
weatherstrip<br />
BF-26<br />
~ : Butyl tape<br />
[!) Coupe<br />
Removal<br />
.--;<br />
Ii<br />
Body side<br />
weatherstrip<br />
Seal<br />
SBF214E
@ Door weatherstrip<br />
Apply butyl sealant where necessary<br />
while installing the weatherstrip.<br />
\<br />
SBF215E<br />
@ Back window upper and side molding (Coupe)<br />
Basically the same as windshield upper and side<br />
molding.<br />
(j]) Back window lower molding (Coupe)<br />
It is mounted with screws.<br />
@ Trunk lid weatherstrip<br />
~ . .<br />
"<br />
Trunk lid<br />
' weatherst .<br />
.;. np<br />
There is a marking<br />
at vehicle center. SBF216E<br />
INTERIOR AND EXTERIOR<br />
Exterior (Cont' d)<br />
@ Rear sight shield<br />
BF-27<br />
t""h" W,""<br />
@ Back door window upper and side molding<br />
(Fastback)<br />
Bonded on back door glass side.<br />
@ Back door window lower molding<br />
(Fastback)<br />
SBF401B<br />
Moldingclip ~<br />
(9 places)<br />
SBF217E<br />
adhesive tape<br />
(When install<br />
ing fastener.<br />
heat<br />
body panel<br />
and fastener<br />
to approx.<br />
30 to 40°C<br />
(86 to<br />
104° F)).
@ Back door weatherstrip<br />
Body<br />
panel<br />
@ Rear panel finisher (Fastback)<br />
INTERIOR AND EXTERIOR<br />
Exterior (Cont' d)<br />
(j]) Sun roof lid weatherstrip<br />
Butyl seal<br />
SBF424D<br />
SBF218E<br />
@ Sun roof lid weatherstrip and sun roof frame<br />
weatherstrip (Coupe)<br />
Sun roof lid weatherstrip is bonded to lid.<br />
Apply primer before bonding it.<br />
Front<br />
Roof panel<br />
// ./ Sun roof lid<br />
' I<br />
.///j weatherstrip Sun roof rd I<br />
SBF824D<br />
BF-28<br />
<strong>Manual</strong> sun roof<br />
Sealant<br />
@ Sun roof weatherstrip<br />
SBF757Q<br />
SBF873C
NOTE<br />
INTERIOR AND EXTERIOR<br />
BF-29
IRJ 43 -55<br />
(4.4.5.6,32.41)<br />
SEAT<br />
Front Seat<br />
BF-30<br />
IRJ : N.m (kg-m, ft-Ib)<br />
SBF183E
m ~<br />
SBF184E<br />
I<br />
Striker<br />
installation m<br />
SEAT<br />
Rear Seat<br />
~ : N.m (kg-m. ft-Ib)<br />
BF-31<br />
~Grommet<br />
I!J<br />
Bushing<br />
Seat back<br />
adjustment I!J<br />
~ '3.,.~1-::lli<br />
(1.3-1.6j -<br />
9-12)' -<br />
~ (10<br />
..<br />
)
Control unit<br />
Lap belt<br />
(Installation Ii) )<br />
. Control unit is located under<br />
center console box.<br />
oD<br />
AUTOMATIC SEAT BELT SYSTEM<br />
Unit Location<br />
Guide rail assembly<br />
BF-32<br />
Rear limit switch &<br />
shoulder belt buckle switch [!J<br />
i~.<br />
Lap belt buckle switch<br />
(L.H. only)<br />
Pawl<br />
Drive motor<br />
~43 -55<br />
14.4- 5.6,32 - 411<br />
Shoulder belt assembly<br />
(Installation m)<br />
~~43-55<br />
~. 14.4- 5.6, 32 - 41)<br />
~43-55<br />
14.4 - 5.6, 32 - 411
AUTOMATIC SEAT BELT SV;STEM<br />
Unit Location (Cont'd)<br />
m Ii]<br />
[!J<br />
- - rA 43-55<br />
I~ (4.4-5.6,32 -41)<br />
~~t~<br />
(4.4 - 5.6, 32 - 41)<br />
Shoulder belt<br />
buckle assembly<br />
Guide rail assembly<br />
~~I<br />
A43 -55<br />
(4.4 - 5.6, 32 - 41)<br />
Guide cable<br />
BF-33<br />
Rear limit switch<br />
(Bottom color: Green)<br />
Lapbelt<br />
retractor<br />
~ ~J>ff<br />
.~.~<br />
A : N.m (kg-m. ft-Ib)<br />
SBF185E
I GNI TI ON<br />
SWITCH<br />
ON or SART<br />
AUTOMATIC SEAT BELT SYSTEM<br />
BATTERY (V I a<br />
fus i b I e I Ink-Green)<br />
~. R/B<br />
@<br />
G<br />
FUSE BLOCK<br />
(Refer to npOWER SUPPLY<br />
ROUTINGnln EL section.)<br />
Wiring Diagram<br />
S. M.J.<br />
[Refer to<br />
(Fo Idout<br />
(Eng i ne room<br />
harness)<br />
'"<br />
~@})<br />
I ast page u:<br />
m<br />
page) . J '" @D<br />
,..J<br />
I<br />
(Mai n harness)<br />
CIRCUIT<br />
BREAKER<br />
E1<br />
@r7<br />
, ,<br />
..J ~<br />
'" ..J<br />
j<br />
WARNING<br />
CHIME<br />
~<br />
@~ ~'"<br />
"''''<br />
I ..J<br />
'III<br />
>-<br />
(Ma I n harness) ~@<br />
'" '" , >-<br />
EEIBHEE @ @<br />
CWhi te)<br />
@<br />
'"<br />
(B lack)<br />
tHHHffil@ '" , >-<br />
(J nstrument<br />
harness)<br />
~@<br />
WI) EW ~@<br />
I 0<br />
'" ,>- '" '"<br />
"" >-<br />
~QD<br />
~<br />
91 o @-- 92 :<br />
SEAT BELT<br />
WARNING<br />
LAMP<br />
I<br />
[Sffi:B]@<br />
~<br />
91 o @ o 92<br />
SEAT BELT<br />
WARNING<br />
LAMP<br />
COMBINATION METER<br />
BF-34<br />
..J<br />
'III<br />
>-<br />
..J ~<br />
'III<br />
>-<br />
'iii<br />
U)<br />
Q)<br />
c<br />
'-<br />
III<br />
.c<br />
Q.<br />
E<br />
III<br />
E<br />
0<br />
0<br />
0:<br />
1<br />
[g<br />
R. H. SIDE<br />
FRONT LIMIT SWITCH
171<br />
AUTOMATIC SEAT BELT CONTROL UNIT<br />
~<br />
m' ~<br />
~<br />
~~@V<br />
m~~~~~~ m ~m ~~~~ ~~<br />
""",m ~ ,~~ ',m"~~m"<br />
~~~~~~~ ~ ~~ ~~~~ ~~<br />
~ ,m<br />
~<br />
@Y~<br />
~ @~<br />
~<br />
1121 1<br />
LAP BELT<br />
BUCKLE SWITCH<br />
(L. H. s I de on I y)<br />
L. H. SI DE FRONT<br />
LI MIT SWITCH<br />
AUTOMATIC SEAT BELT SYSTEM<br />
~~~<br />
Wiring Diagram (Cont'd)<br />
~<br />
j1<br />
G;R D<br />
G/B<br />
~~~<br />
@E)<br />
jl<br />
LG;R D<br />
LG/B<br />
dIdI<br />
j<br />
@})<br />
BODY<br />
GROUND<br />
m<br />
@<br />
~L/W~~<br />
R. H. SIDE<br />
~Lr~ y w<br />
L. H. SIDE<br />
CD<br />
CD~<br />
~ti~R~ ~L/W J<br />
~ L~ "'~Rl<br />
i-.I ~<br />
ii<br />
@D(@@~<br />
BODY GROUND<br />
B<br />
~:With head-up display<br />
~:Without head-up display<br />
Shoulder belt<br />
buckIe condItlon<br />
REAR ~<br />
LIMIT FRIFR and RRIRR<br />
SWITCH '53<br />
rst<br />
~<br />
Shoulder belt<br />
SHOULDER \ buck Ie condl t Ion<br />
BELT Fastened IUnfastened<br />
BUCKLE 55 :J I<br />
SWITCH 54 :J I<br />
J IIB W<br />
REAR<br />
LIMIT<br />
SWITCH<br />
Belt<br />
ope rat In9<br />
dl rect Ion<br />
rlFrontward<br />
Raarward<br />
Shoul der belt<br />
SHOULDER buckle condition<br />
BELT Fastened Unfastened<br />
BUCKLE 55<br />
SWI TCH 54<br />
~<br />
L L ~<br />
B<br />
BF-35<br />
~<br />
. 0 i=9 11<br />
~<br />
Door condition<br />
ODen Close<br />
~ FID R. H. SIDE<br />
~ ~ (R.H.side DOOR LATCH SWITCH<br />
door harness)<br />
~<br />
R . 0 R:~ 11<br />
1: IIB @D<br />
Door condition<br />
-0..<br />
ODen Close<br />
~ 12<br />
~ M18<br />
~<br />
fn.) DI<br />
~ (L.H.sIde<br />
door harness)<br />
L. H. SIDE<br />
DOOR LATCH SWITCH<br />
SBF784E
FUNCTION<br />
AUTOMATIC SEAT BELT SYSTEM<br />
Description<br />
Shoulder belt buckle is mainly operated while ignition switch is "ON".<br />
Condition (A): Ignition switch is "ON".<br />
When door is opened, shoulderbelt buckle is moved frontward and when pp,eri~closed,buckle is moved<br />
rearward.<br />
Condition (B): Ignition switch is "OFF".<br />
When door is opened, shoulder belt buckle is moved frontward. When the door is closed, buckle will<br />
remain in this position.<br />
IVolt- of output signal is approximate valueJ<br />
1';;; :; 0.<br />
o!:<br />
Ignition switch<br />
Door latch switch<br />
Front limit switch<br />
OFF<br />
OFF<br />
OFF<br />
OFF<br />
ON<br />
OFF<br />
ON<br />
OFF<br />
OFF<br />
ON<br />
OFF<br />
ON<br />
ON<br />
OFF<br />
ON<br />
ON<br />
ON<br />
ON<br />
ON<br />
ON<br />
ON<br />
ON<br />
ON<br />
OFF<br />
ON<br />
OFF<br />
OFF<br />
ON<br />
OFF<br />
ON<br />
ON<br />
OFF<br />
ON<br />
OFF<br />
OFF<br />
ON<br />
OFF<br />
ON<br />
ON<br />
OFF<br />
ON<br />
ON<br />
OFF<br />
ON<br />
OFF<br />
OFF<br />
OFF<br />
OFF<br />
Rear limit switch ON ON ON ON OFF OFF ON ON ON ON OFF OFF OFF ON ON ON<br />
Drive motor power<br />
source for frontward 1';;; operation<br />
:;<br />
0.<br />
:; Drivemotor power<br />
0 source for rearward<br />
operation<br />
OV<br />
OV<br />
OV<br />
OV<br />
OV<br />
12V<br />
OV<br />
12V<br />
OV<br />
OV<br />
12V<br />
OV<br />
12V<br />
OV<br />
OV<br />
OV<br />
OV<br />
12V<br />
OV<br />
12V<br />
OV<br />
OV<br />
OV<br />
OV<br />
12V<br />
OV<br />
12V<br />
OV<br />
OV<br />
OV<br />
OV<br />
OV<br />
Shoulder belt<br />
Function Stop Stop<br />
Start to<br />
move<br />
Moving Stop<br />
Start to<br />
move<br />
Mov ing Stop<br />
Start to<br />
move<br />
Moving Stop Stop<br />
Start to<br />
move<br />
Moving Stop Stop<br />
buckle<br />
Position Front Front Front<br />
Between<br />
Front& Rear Rear<br />
Between<br />
Front & Front Front<br />
Between<br />
Front & Rear Rear Rear<br />
Between<br />
Front & Front Front<br />
Rear Rear Rear Rear<br />
TIMER (Ignition switch either "ON" or "OFF")<br />
If limit switch does not operate (when accomplishing frontward operation, front limit switch can not be<br />
turned "OFF" or when accomplishing rearward operation, rear limit switch can not be turned "OFF"),<br />
control unit will continue to supply power to drive motor for 15 secondsand control unit will stop supplying<br />
power.<br />
QUICK WARNING (Ignition switch "ON")<br />
If front limit switch is not turned "OFF" after accomplishingfrontward operation, control unit will stop<br />
supplying power 15 seconds later and warning lamp will flash and chime will operate rapidly for approximately<br />
6 seconds.<br />
REAR LOCK<br />
If quick warning functions twice successivelywhile ignition switch is "ON", shoulder belt buckle will move<br />
to rear position when the door is closed as normal but will remain in rear position even if door is opened.<br />
This function is canceledwhen ignition switch is "OFF".<br />
BF-36
WARNING<br />
AUTOMATIC SEAT BELT SYSTEM<br />
Description (Cont'd)<br />
Priority Warningitem Ignition switch Indication of warning (Indicating time is approximate value.)<br />
Shoulder anchors ON<br />
are not at rear I Lamp<br />
lock position.<br />
Chime<br />
OFF -* ON<br />
I<br />
I<br />
Lamp<br />
Chime<br />
.<br />
And,", R'~I n..- _h"<br />
Lamp<br />
Chime<br />
Ancho, R'~t::<br />
Within 6 sec.<br />
ON<br />
Lamp<br />
OFF<br />
ON<br />
are not fastened.<br />
I<br />
I<br />
ON<br />
Chime OFF<br />
2 I Shoulder belts<br />
Belts Unfastened<br />
Fastened I 100 sec.<br />
Lamp ON<br />
OFF<br />
'<br />
Ch<br />
.me<br />
ON<br />
OFF<br />
Belts Unfastened<br />
Fastened<br />
3 I Driver side lap OFF -* ON Lamp O~~<br />
belt is not ON<br />
fastened. Chime OFF<br />
Belts Unfastened<br />
Lamp<br />
Chime<br />
Belts<br />
Fasten~~.I~ec.<br />
Fin 6 sec.<br />
r-aSIenea~Within 6 sec.<br />
4 I Normal (Allbelts<br />
are fastened and<br />
OFF -* ON Lamp OFF ON<br />
shoulder anchors<br />
are in rear lock<br />
..<br />
position. )<br />
Chime O~~<br />
I 6<br />
BF-37<br />
sec.
NOTE<br />
AUTOMATIC SEAT BELT SYSTEM<br />
BF-38
TROUBLE DIAGNOSES<br />
Contents<br />
Symptom Chart BF-40<br />
Preliminary Check BF-41<br />
Main Power Supplyand Ground Circuit Check , BF-45<br />
Harness Layout BF-46<br />
Circuit Diagram for Quick Pin Point Check BF-48<br />
Diagnostic Procedure 1<br />
(Check motor circuit and stop signals.) BF-49<br />
Diagnostic Procedure 2<br />
(Check door switch circuit) BF-52<br />
Diagnostic Procedure 3<br />
(Check front limit switch circuit) BF-54<br />
Diagnostic Procedure 4<br />
(Check rear limit switch circuit) BF-56<br />
Diagnostic Procedure 5<br />
(Check shoulder belt switch circuit) ..".. BF-58<br />
Diagnostic Procedure 6<br />
(Check lap belt switch circuit) BF-60<br />
Diagnostic Procedure 7<br />
(Check warning chime circuit) BF-62<br />
Diagnostic Procedure 8<br />
(Check warning lamp circuit.) BF-63<br />
Electrical Components Inspection BF-64<br />
Since left and right component parts are basically the same, harness layout and methods for electronic<br />
components inspection are shown for one side only.<br />
Although methods for checking component parts on both sides are described in the flow chart, making it<br />
easier to trouble-shoot, apply checking procedures to either side that have problems during trouble diagnoses.<br />
For those methods enclosed by double rectangulars,however,component parts on both sidesmust be<br />
checked as problems occurring on either side cannot be easily determined by a symptom.<br />
BF-39
'<br />
BF-64<br />
TROUBLE DIAGNOSES<br />
Symptom Chart<br />
Motor 0 0<br />
BF-64 co Shoulder belt buckle switch 0 0<br />
BF-64<br />
:i<br />
Ii<br />
Door latch switch<br />
0<br />
BF-40<br />
0 0<br />
c:<br />
0<br />
BF-64 Rear limit switch 0 0 0 0<br />
of;<br />
co<br />
a<br />
=<br />
... ..<br />
c:<br />
..<br />
c:<br />
R<br />
E<br />
BF.64<br />
BF-65<br />
BF-64<br />
Front limit switch<br />
Lap belt switch<br />
Motor<br />
0<br />
0<br />
0<br />
0<br />
0<br />
0<br />
0<br />
0<br />
8<br />
BF-64 " -0 Shoulder belt buckle switch 0 0<br />
0;;;<br />
t..<br />
:i<br />
iii BF-64 ....i Door latch switch 0 0 0<br />
BF-64 Rear limit switch 0 0 0 0<br />
BF-64 Front limit switch 0 0 0 0<br />
BF-65 Warning chime 0 0<br />
- Warning lamp 0 0<br />
BF-63 Procedure 8 0<br />
BF-62 Procedure 7 0<br />
f<br />
;,<br />
i<br />
u<br />
a. e<br />
u<br />
BF-60<br />
BF-58<br />
Procedure 6<br />
Procedure 5<br />
0<br />
0<br />
°ji;<br />
0<br />
c:<br />
i<br />
i5<br />
BF-56<br />
BF.54<br />
Procedure<br />
Procedure<br />
4<br />
3<br />
0<br />
0<br />
0<br />
0<br />
0<br />
0<br />
0<br />
0<br />
BF-52 Procedure 2 0 0<br />
BF-49 Procedure 1 0 0<br />
:D"E BF-45 Procedure 2 0<br />
.. "E o.><<br />
a.;'G<br />
c: 0. e o!::6<br />
-0.00 BF-45 Procedure 1 0<br />
.><<br />
.-<br />
E<br />
BF-43<br />
Procedure 2<br />
'f°<br />
a.<br />
BF-41 Procedure 1 0 0 0<br />
£ .. >-<br />
..<br />
-8i i .!! ..c ..<br />
...<br />
.. 1ii '>< 0 E - c:<br />
E u ij 0 g ..<br />
.. 0- u co u.. 0.<br />
co co-0 0 .0.- ;'-0 ;'''-<br />
.&11_<br />
0<br />
o:;;;<br />
.011"<br />
i ... .. ""<br />
... .. 11 .2.. '"<br />
c: "':>< 0. a;:i !11 -0 ° c:<br />
0.<br />
.. 02 c: u ... .c. .. c: .. -!.. £ > e .a..!<br />
of<br />
u 0 1iiC ;, c: ..a: ai ° .. . co<br />
;, c: I- .... .0.. ".. ...:.. :De g '" c:<br />
i " a. coco° E E :2.. f -0.." .: 02<br />
u j! g- c: ° :J: ... ;, ... 3:: E 0 u<br />
0 .. >- 0°-00 . 0 000 000 05<br />
Q: a: CI) zE<br />
CI)..Jc: EE EE ;:£...<br />
.. u ;, 0<br />
.<br />
0<br />
...
PROCEDURE 1<br />
Turn ignition switch and all other electrical switches<br />
"OFF", and close door.<br />
Disconnect negative cable from battery.<br />
Open door.<br />
Move shoulder belt buckle to center (not rear lock<br />
position and not front stop position) by wrench<br />
supplied in tool bag or equivalent.<br />
I Closedoor.<br />
Connect battery cable.<br />
STEP 1<br />
Does shoulder belt buckle move frontwards?<br />
I Open door.<br />
STEP 2<br />
r<br />
I<br />
No<br />
Does shoulder belt buckle move frontwards?<br />
Yes<br />
Close door, and turn ignition switch "ON".<br />
STEP 3<br />
Does shoulder belt buckle move rearwards?<br />
END<br />
Yes<br />
'fROUBLE DIAGNOSES<br />
Preliminary Check<br />
Yes<br />
No<br />
No<br />
BF-41<br />
Go to Diagnostic Procedure 2.<br />
(See page SF.52.)<br />
(Go to @ on next page.)<br />
Go to Diagnostic Procedure 4.<br />
(See page SF-56.)
Turn ignition switch "ON".<br />
STEP 4<br />
Does shoulder belt buckle move rearwards?<br />
Close door.<br />
STEP 5<br />
No<br />
Does shoulder belt buckle move rearwards?<br />
Go to Diagnostic Procedure 3.<br />
(See page BF-54.)<br />
Yes<br />
TROUBLE DIAGNOSES<br />
Preliminary Check (Cont'd)<br />
Yes<br />
No<br />
BF-42<br />
Go to Diagnostic Procedure 2.<br />
(See page BF-52.)<br />
Go to PROCEDURE 2 of Main<br />
Power Supply and Ground<br />
Circuit Check.<br />
(See page BF-45.)<br />
Then go to Diagnostic<br />
Procedure 1.<br />
(See page BF-49.)<br />
...
PROCEDURE 2<br />
Fasten all seat belt and open both doors.<br />
Turn ignition switch "ON".<br />
STEP 1<br />
Does warning chime sound for 6 seconds after<br />
switch is turned on?<br />
Yes<br />
STEP 2<br />
Is warning lamp flashing now?<br />
Close both doors.<br />
Yes<br />
STEP 3<br />
I<br />
Is warning lamp flashing although shoulder belt<br />
buckles reached rear lock position?<br />
No<br />
Unfasten L.H. shoulder belt.<br />
Does warning chime sound for 6 seconds and<br />
warning lamp glow after belt is unfastened?<br />
. . Yes<br />
Fasten L.H. shoulder belt.<br />
Unfasten R.H. shoulder belt.<br />
STEP 5<br />
Does warning chime sound for 6 seconds and<br />
warning lamp glow after belt is unfastened?<br />
Yes<br />
Fasten R.H. shoulder belt.<br />
Unfasten L.H. lap belt, and turn ignition switch<br />
"OFF".<br />
(Go to @ on next page.)<br />
TROUBLE DIAGNOSES<br />
Preliminary Check (Cont'd)<br />
No<br />
No<br />
Yes<br />
No<br />
No<br />
Bf-43<br />
Go to Diagnostic Procedure 7.<br />
(See page BF-62.)<br />
Go to Diagnostic Procedure 8.<br />
(See page BF-63.)<br />
Go to Diagnostic Procedure 4.<br />
(See page BF-56.)<br />
Go to Diagnostic Procedure 5.<br />
(See page BF-58.)<br />
Go to Diagnostic Procedure 5.<br />
(See page BF-58.)
Turn ignition switch "ON".<br />
Does warning chime sound and warning lamp glow<br />
for 6 seconds after the switch is turned on?<br />
. Yes<br />
END<br />
TROUBLE DIAGNOSES<br />
Preliminary Check (Cont'd)<br />
No<br />
BF-44<br />
Go to Diagnostic Procedure 6.<br />
(See page SF-60.)
RIB<br />
i5~<br />
I~I<br />
~ C.U.<br />
connectors<br />
_T<br />
IV<br />
SBF33BE<br />
[it<br />
~ C.U. 10-pin connector<br />
B<br />
W/L<br />
- SBF336E<br />
l~ B<br />
-=-<br />
SBF337E<br />
Terminal<br />
L.H. side: ~ and @<br />
R.H. side: @ and @<br />
-<br />
-=-<br />
TROUBLE DIAGNOSES<br />
Main Power Supply and Ground Circuit Check<br />
PROCEDURE 1<br />
Main power supply<br />
Terminals<br />
@ - Ground<br />
@ -Ground<br />
m<br />
@ R.H. front<br />
limit switch<br />
I;]<br />
[!1<br />
m Room lamp<br />
harness<br />
r.<br />
~18 Warning lamp<br />
(without<br />
. head-up<br />
@ display)<br />
Warning lamp<br />
(with head-up display)<br />
~<br />
@Dl.H. door latch switch L<br />
J@])R.H. door latch switch- .<br />
/~<br />
i' \<br />
@!I<br />
TROUBLE DIAGNOSES<br />
@<br />
Warning<br />
chime<br />
Harness Layout<br />
B F -46<br />
---------------------<br />
@ Body<br />
ground
Ii<br />
TROUBLE DIAGNOSES<br />
Harness Layout (Cont'd)<br />
\<br />
BF-47<br />
SBF368E
(WIth<br />
head-up d I sp lay)<br />
0~<br />
(WI thout<br />
head-up d I sp lay)<br />
0~<br />
30<br />
22 34<br />
29<br />
37 46 25 26<br />
TROUBLE DIAGNOSES<br />
I GNI TI ON SWITCH<br />
ON or START<br />
@!D-::!:~ @-::!:@Y @!D-::!:~<br />
Circuit Diagram for Quick Pin Point Check<br />
FUSE 1/1 FUSE G)@<br />
CIRCUIT ; BREAKER<br />
S@<br />
@ @<br />
@! 52 \5<br />
SEAT<br />
51 w6<br />
en:<br />
BELT WARNING -<br />
WARNING ' CHIME<br />
[IJ<br />
LAMP<br />
M I/)W I- .><br />
.11::<br />
@! @<br />
11::0<br />
I<br />
/<br />
I<br />
BF-48<br />
AUTOMATIC SEAT BELT<br />
CONTROL UNIT<br />
2] 33 39 44<br />
26 9 0 '36<br />
.<br />
3 9 H3'<br />
@nlO1 '0 HH<br />
4]<br />
45<br />
40<br />
38<br />
42 43 3] 32 36 35<br />
I<br />
11::0 I<br />
0 @@<br />
I--<br />
G) 5...J : CD -<br />
- -<br />
@ 51/) @<br />
I--<br />
@Y @}) I I I I ,1/);2<br />
- I/)W<br />
WO IW Ei<br />
W:E<br />
O:J -m 0- M I- .><br />
-...J .11::<br />
I/) @ @ 11l...JO<br />
I/) .1-- .11::<br />
I...J I«<br />
.W .w<br />
...Jm ...JII::<br />
@ i @<br />
I<br />
0<br />
I<br />
0<br />
I-- -<br />
0@<br />
I<br />
11::0<br />
WI--<br />
I<br />
0<br />
0-<br />
U<br />
@<br />
I/)<br />
I/)<br />
(0<br />
@<br />
I-- -:E w-<br />
O...J -1/)1-- @<br />
...J<br />
:JI/)<br />
0<br />
IW<br />
I/)...J<br />
WO<br />
O:J -m I/)<br />
0@<br />
Ei<br />
@<br />
I--<br />
I-- -<br />
W:E<br />
0- -...J<br />
I/)<br />
I<br />
0<br />
I-<br />
I<br />
.II::<br />
IO<br />
.0<br />
-10<br />
.Z<br />
IO<br />
.11::<br />
-ILL<br />
.1--<br />
I...J<br />
.W<br />
!r:m<br />
.11::<br />
I«<br />
.W<br />
!r:1I::<br />
I<br />
0<br />
I<br />
0<br />
I--<br />
I--<br />
@i) @) i @<br />
@ OC @ I/) (0<br />
@I<br />
I -<br />
:JO I--<br />
:<br />
...J-<br />
Will<br />
m.<br />
@<br />
0<br />
WI--<br />
0«<br />
-...J<br />
:E<br />
W-<br />
O...J<br />
-<br />
I/)<br />
I<br />
Q...<br />
.11::<br />
IO<br />
.0<br />
11::0<br />
@<br />
1/)1--<br />
.Z<br />
IO<br />
.11::<br />
II::LL<br />
5d<br />
@<br />
SBF7B5E
Fa _T<br />
@p C.U. 10-pin connector IU ~<br />
LHo"iwl ~40 aH°Ho"d' tt4~<br />
~'Gm<br />
m ~ ~<br />
@p C.U. 10-pin connector IU ~<br />
Terminal<br />
L.H. side: @<br />
R.H. side: @<br />
LG/S<br />
SBF340E<br />
[!]I~ C.U.10-pin<br />
connector "IJ i5~<br />
Frontward<br />
operation<br />
G/R<br />
Rearward<br />
operation<br />
LG/R<br />
Rearward<br />
GIS operation<br />
SBF339E<br />
-<br />
SBF341E<br />
TROUBLE DIAGNOSES<br />
Fa<br />
Diagnostic Procedure 1<br />
START<br />
CHECK MOTOR CIRCUIT.<br />
1) Disconnect 10-pin connector<br />
from control unit.<br />
2) Check continuity.<br />
L.H. side<br />
R.H. side<br />
Terminals<br />
@-@<br />
@-@<br />
Continuity should exist.<br />
m<br />
O.K.<br />
Does continuity exist?<br />
Terminals<br />
L.H.side @ -Ground<br />
R.H. side<br />
@ -Ground<br />
[!]I<br />
I<br />
CHECK MOTOR<br />
No<br />
OPERATION.<br />
Check shoulder<br />
movement.<br />
belt buckle<br />
N.G.<br />
Go to DRIVE MOTOR ASSEM-<br />
SLY of Electrical Components<br />
Inspection. (See page SF-64.)<br />
. O.K.<br />
Replace guide rail assembly.<br />
BF-49<br />
N.G.<br />
Yes<br />
O.K.<br />
N.G.<br />
(Go to @ on next page.)<br />
(Go to @ on next page.)<br />
(Go to @ on page SF-51.)<br />
Replace drive motor assembly.
1i]@P C.U.<br />
10-pin connector<br />
LG/B<br />
~c.u.<br />
10-pin connector<br />
G/R<br />
L.H. side<br />
R.H. side<br />
~ Drive<br />
motor connector<br />
LG/R<br />
~ Drive<br />
motorconnector<br />
~i5<br />
SBF342E<br />
r.I_CT ~ -.Eer ~<br />
ellU ~ L.H. side IV ~R.H. sidelll<br />
fill<br />
D ~<br />
52 Drivemotor<br />
D<br />
52<br />
~<br />
Drivemotor<br />
LG/B4~' connectorG/Bhi' connector<br />
SBF343E<br />
":"<br />
tEJ<br />
-=-<br />
TROUBLE DIAGNOSES<br />
Ii]<br />
Diagnostic Procedure 1 (Cont'd)<br />
@<br />
1) Disconnect connector from<br />
drive motor assembly.<br />
2) Check continuity.<br />
L.H. side<br />
R.H. side<br />
Continuity should exist.<br />
Terminals<br />
O.K.<br />
@-
Ii
m _IECT ~ lu ~<br />
~ C.U. 16-pin<br />
connector<br />
Terminal<br />
L.H. side: @<br />
RH. side: @<br />
SBF346E<br />
L<br />
Ii)~ C.U. 16-pin IIISCIIIIIECT<br />
I~R.H.side &<br />
SBF348E<br />
_IECT<br />
12J<br />
~<br />
Harness color<br />
L.H. side: R<br />
R.H. side: L<br />
L rmJ<br />
~<br />
1 Ug~IJ~<br />
SBF347E<br />
CQD)or <br />
~ Doorlatchswitch<br />
~ connector Connector<br />
L.H. side:<br />
-::-<br />
-=<br />
L<br />
TROUBLE DIAGNOSES<br />
(<br />
m<br />
Diagnostic Procedure 2<br />
START<br />
r<br />
CHECK DOOR SWITCH<br />
CIRCUIT.<br />
1) Disconnect 16-pin connector<br />
from control unit.<br />
2) Check continuity.<br />
Ii)<br />
N.G.<br />
1) Disconnect door latch ~witch<br />
connector.<br />
2) Check continuity.<br />
~<br />
L.H.<br />
side<br />
R.H.<br />
side<br />
Terminals<br />
@-@<br />
@ - Ground (eM§!>,€~J§»<br />
@-@<br />
@ - Ground (~, €J]:»<br />
Continuity should exist.<br />
O.K.<br />
[;]<br />
Ter- Door Conminals<br />
condition tinuity<br />
L.H. @- Open Yes<br />
side Ground Close No<br />
RH. @- Open Yes<br />
side Ground Close No<br />
Does continuity exist?<br />
Connector Terminals<br />
L.H. side C!ill> @ - Ground<br />
RH. side @ - Ground<br />
Go to DOOR LATCHSWITCH<br />
of Electrical Components<br />
Inspection. (See page BF-64.)<br />
. N.G.<br />
Check door latch switch harness<br />
for open and short circuit.<br />
. O.K.<br />
Replace door lock assembly.<br />
BF-52<br />
)<br />
O.K.<br />
N.G.<br />
Yes<br />
(Go to @ on next page.)<br />
Repair harness.<br />
Repair harness.<br />
There will be incorrect grounding<br />
between terminals @ and (j]) or<br />
@ and (j]).<br />
O.K. Reinstall any part removed.<br />
Go to PROCEDURE 1 (START)<br />
of Preliminary Check.<br />
(See page BF-41.)<br />
Repair door latch switch harness.
TROUBLE DIAGNOSES<br />
Diagnostic Procedure 2 (Cont'd)<br />
@<br />
1<br />
Is this the second time?<br />
No<br />
Reinstall any part removed.<br />
Go to PROCEDURE 1 (START)<br />
of Preliminary Check.<br />
(See page BF-41.)<br />
SF-53<br />
- Yes<br />
Replace control unit.
m<br />
Y/R<br />
SBF344E<br />
R.H. side<br />
_CT<br />
~C.U.10-pin ,8:~<br />
connector WiV<br />
Terminal<br />
L.H. side: @<br />
R.H. side: @<br />
i5~<br />
Frontward<br />
operation<br />
Rearward<br />
operation<br />
LG/R<br />
~-¥~~NB<br />
G/RUW/L \:.J<br />
[!]
Ii] _MECT<br />
':c;\ ~ ~ Front limit switch<br />
~V ~ connector<br />
C@Front limit switch connector<br />
SBF350E<br />
-::"<br />
-=-<br />
TROUBLE DIAGNOSES<br />
Ii]<br />
Diagnostic Procedure 3 (Cont'd)<br />
A)<br />
Does continuity exist?<br />
No<br />
Go to FRONT LIMIT SWITCH<br />
of Electrical Components<br />
Inspection. (SeepageBF-64.)<br />
I<br />
N.G.<br />
Check front limit switch harness<br />
for open and short circuit.<br />
O.K.<br />
Replace front limit switch.<br />
Is this the second time?<br />
No<br />
Reinstall any part removed.<br />
Go to PROCEDURE 1 (START)<br />
of Preliminary Check.<br />
(See page BF-41.)<br />
Connector Terminals<br />
L.H. side @g) CD -Ground<br />
R.H. side @) CD- Ground<br />
BF-55<br />
Yes<br />
O.K.<br />
N.G.<br />
Yes<br />
Repair harness.<br />
There will be incorrect grounding<br />
between terminals @ and CD or<br />
@ and CD.<br />
Replace guide rail assembly.<br />
Repair front limit switch harness.<br />
Replace control unit.
m<br />
C~V<br />
C.U. 16-pin<br />
connector<br />
R.H. side<br />
[it Terminal<br />
L.H. side: @<br />
R.H. side: @<br />
-=- SBF345E<br />
Rearward<br />
operation<br />
LG/R<br />
Frontward<br />
GtB operation<br />
Rearward<br />
operation<br />
SBF341E<br />
[!J (Q) Rear switch<br />
IIISC8IIIECT assembly IIISC8IIIECT<br />
EO [it connector 12J [it<br />
I~<br />
_CT<br />
[it<br />
~o<br />
I rn ~<br />
(§) Rear switch IIISQIIIIIECT<br />
,£0;\ assembly,£o;\<br />
~ connector Wis.J<br />
I~J 0<br />
[it<br />
~ ~<br />
[ill tfj<br />
fJ<br />
~~j)CU.I.~;" LlLillJ oonMctor LM<br />
SBF352E = L<br />
TROUBLE DIAGNOSES<br />
Diagnostic Procedure 4<br />
START<br />
m<br />
CHECK REAR LIMIT<br />
SWITCH CIRCUIT.<br />
1) Disconnect 16-pin connector<br />
frdm control unit.<br />
2) Check continuity.<br />
[!J<br />
N.G.<br />
1) Disconnect connector from<br />
rear switch assembly.<br />
2) Check continuity.<br />
~<br />
L.H.<br />
side<br />
R.H.<br />
side<br />
Shoulder<br />
Terminals<br />
buckle I belt<br />
position<br />
tinuity<br />
I Con-<br />
L.H. @ o<br />
side I GrOud<br />
at rear<br />
Yes<br />
R.H.<br />
side@-<br />
Ground<br />
At rear<br />
Not<br />
at rear<br />
I<br />
No<br />
Yes<br />
iii Refer to figure iii to move<br />
shoulder belt buckle.<br />
Terminals<br />
@-(@<br />
@-Ground (~.<br />
~)<br />
@-(@<br />
@ . Ground (~.<br />
)<br />
Continuity should exist.<br />
O.K.<br />
(Go to @ on next page.)<br />
BF-56<br />
O.K.<br />
(Go to @B<br />
on next page.)<br />
N.G.<br />
Repair harness.
Ii]<br />
SBF353E<br />
mo i5~<br />
CIDor(§)<br />
~3 Rear switch<br />
assembly<br />
connector<br />
LID<br />
Connector<br />
L.H. side: CID<br />
R.H. side: (§)<br />
Harness color<br />
L.H. side: L/W<br />
R.H. side: L/W<br />
-=-<br />
TROUBLE DIAGNOSES<br />
Ii]<br />
DiagnosticProcedure4 (Cont'd)<br />
1<br />
Does continuity exist?<br />
----- Connector Terminals<br />
L.H. side CID - Ground<br />
R.H. side CID - Ground<br />
No<br />
Go to REAR LIMIT SWITCH of<br />
Electrical Components<br />
Inspection. (See page BF-64.)<br />
~<br />
Check rear limit switch harness<br />
for open or short circuit.<br />
O.K.<br />
I Replace rear switch assembly.<br />
1<br />
Is this the second time?<br />
No<br />
Reinstall any part removed.<br />
Go to PROCEDURE 1 (STEP 3)<br />
(See page BF-41.) or PRO-<br />
CEDURE 2 (STEP 3) (See page<br />
BF-43.) of Preliminary Check.<br />
BF-57<br />
Yes Repair harness.<br />
There will be incorrect grounding<br />
between terminals @ and ~ or<br />
@ and ~.<br />
O.K. (Go to @ below.)<br />
Repair rear limit switch harness.<br />
Replace control unit.
-,<br />
m rw Terminal<br />
~<br />
C.U. 16-pin<br />
connector<br />
[<br />
IV<br />
~ l.H. si.de:<br />
R.H. side:<br />
1 Y/B<br />
@<br />
@<br />
-::- SBF354E<br />
Ii1 ~:!!>j) C.U. 10-pinconnector<br />
i5~<br />
l.H. side RH. side<br />
~ C.U. 16-pin<br />
connector<br />
Ii]<br />
SBF357E<br />
(IDor CID<br />
Rear switch<br />
assembly<br />
connector<br />
~ [JlJ<br />
SBF355E<br />
CID Rear switch<br />
assembly<br />
connector<br />
Connector<br />
l.H. side: CID<br />
R.H. side: CID<br />
Harness color<br />
l.H. side: B<br />
R.H. side: B<br />
-=<br />
TROUBLE DIAGNOSES<br />
Diagnostic Procedure 5<br />
START<br />
m .<br />
, CHECK SHOULDER BELT<br />
BUCKLE SWITCH CIRCUIT.<br />
1) Disconnect 16-pin connector<br />
from control unit.<br />
2) Check continuity when<br />
shoulder belt buckle is at<br />
rear lock position.<br />
Ter-Shoulder Conminals<br />
beit tinuity<br />
l.H. @-<br />
Fasten Yes<br />
side Ground Unfasten No<br />
R.H. @- Fasten Yes<br />
side Ground Unfasten No<br />
[;) If shoulder belt buckle is<br />
not rear lock position, do as<br />
figure Ii1 to move it to rear.<br />
N.G.<br />
[i<br />
1) Disconnect connector from<br />
rear switch assembly.<br />
2) Check continuity.<br />
~<br />
l.H.<br />
side<br />
RH.<br />
side<br />
Ii]<br />
Terminals<br />
@-~<br />
@- Ground (~,<br />
~)<br />
@-~<br />
@ - Ground ~,<br />
~)<br />
Continuityshouldexist.<br />
O.K.<br />
Does continuity exist?<br />
--- ConnectorTerminals<br />
l.H. side
TROUBLE DIAGNOSES<br />
DiagnosticProcedure5 (Cont'd)<br />
T<br />
Check shoulder belt buckle<br />
switch harness for open or short<br />
circuit.<br />
O.K.<br />
Replace rear switch assembly.<br />
Is this the second time?<br />
No<br />
Reinstall any part removed.<br />
Go to PROCEDURE2 (STEP4)<br />
of Preliminary Check.<br />
(See page BF-43.)<br />
BF-59<br />
N.G. Repair shoulder belt buckle<br />
switch harness.<br />
Replace control unit.<br />
~
m _T ~<br />
,£c:;>, ~ ~C.U.16-pin<br />
1I8v ~ connector<br />
SBF358E<br />
[;)i5 ~<br />
~E§)<br />
Lap belt DISCONNECT<br />
~ ~;..h V l.oIIIIB<br />
18 ~<br />
~<br />
boo". connector E" ~1J' ~ fQ;,j<br />
c§V<br />
C.U. 16-pin L/R []l]<br />
connector L/R<br />
S8"S9' ~<br />
[!] ~ ~ ~~~ Lap belt switch<br />
1180 l..m connector<br />
SBF360E<br />
~<br />
L/R<br />
[ill<br />
-=-<br />
-=<br />
TROUBLE DIAGNOSES<br />
( m<br />
Diagnostic Procedure 6<br />
START<br />
I<br />
CHECK LAP BELT BUCKLE<br />
SWITCH CIRCUIT (L.H.only).<br />
1) Disconnect 16-pin connector<br />
from control unit.<br />
2) Check continuity.<br />
Terminals Lap belt<br />
Continuity<br />
Fasten No<br />
@ - Ground<br />
Unfasten Yes<br />
Ii]<br />
[!]<br />
N.G.<br />
1) Disconnect lap belt switch<br />
connector.<br />
2) Check continuity.<br />
Terminals<br />
@-@<br />
@-Ground~.~)<br />
Continuity should exist.<br />
O.K.<br />
Does continuity exist?<br />
Terminals<br />
@ -Ground<br />
No<br />
Go to LAP BELT BUCKLE<br />
SWITCH of Electrical Com-<br />
ponents Inspection.<br />
(See page BF-65.)<br />
N.G.<br />
Check lap belt buckle switch<br />
harness for open and short<br />
circuit.<br />
O.K.<br />
Replace shoulder belt<br />
buckle assembly.<br />
BF-60<br />
)<br />
O.K.<br />
N.G.<br />
(Go to @ on next page.)<br />
Repair harness.<br />
Yes Repair harness.<br />
There will be incorrect grounding.<br />
O.K.<br />
N.G.<br />
(Go to @ on next page.)<br />
Repair lap belt buckle switch<br />
harness.
TROUBLE DIAGNOSES<br />
Diagnostic Procedure 6 (Cont'd)<br />
T<br />
Is this the second time?<br />
No<br />
Reinstall any part removed.<br />
Go to PROCEDURE 2 (STEP 6)<br />
of Preliminary Check.<br />
(See page BF-44.)<br />
BF-61<br />
Replace control unit.<br />
../
m
m DISCOIINECT<br />
E<br />
SBF365E<br />
~ ~ QiljQv C.U. 16-pin<br />
,° ~ connector<br />
I~<br />
T'G<br />
Ii) ~ C.U. 16-pin connector<br />
SBF366E -=-<br />
[ii5~ ~<br />
0 connector [tmOO 91<br />
Combination meter<br />
~CIDforW/D S ~VJ<br />
rR=fcHEl<br />
~forE/D<br />
SBF367E<br />
ffiJl f Y/G<br />
[ill<br />
i5l11<br />
i5l11<br />
_IIECT~<br />
IU~<br />
L.H.side Push<br />
~/.SBF369E<br />
Bottom<br />
color:<br />
Black<br />
Bottom<br />
color:<br />
Black<br />
i5r:i1<br />
i5~ ~-52~---<br />
[ill<br />
1511!~ "\ 1 IIIIIIIIII<br />
-~<br />
SBF371E<br />
SBF290E<br />
SBF373E<br />
TROUBLE DIAGNOSES<br />
Electrical Components Inspection<br />
FRONT LIMIT SWITCH<br />
Condition Continuity<br />
Pushed<br />
Released<br />
REAR LIMIT SWITCH<br />
No<br />
Yes<br />
Condition Continuity<br />
Pushed<br />
Released<br />
SHOULDER BELT BUCKLE SWITCH<br />
/<br />
No<br />
Yes<br />
Condition Continuity<br />
Pushed<br />
Released<br />
DOOR LATCH SWITCH<br />
(Built-in door lock assembly)<br />
Yes<br />
Door condition Continuity<br />
Open<br />
Closed<br />
DRIVE MOTOR ASSEMBLY<br />
BF-64<br />
Terminals<br />
EB e<br />
No<br />
Yes<br />
No<br />
Drivebelt operation<br />
(@ @ Lengthen<br />
@ (@ Shorten
i5~<br />
184is6!.<br />
i5~<br />
~<br />
[ill<br />
A<br />
SBF373E<br />
SBF374E<br />
TROUBLE DIAGNOSES<br />
Electrical Components Inspection (Cont'd)<br />
WARNING CHIME<br />
Condition Operation<br />
Connect and disconnect harness<br />
A as shown at left<br />
LAP BELT BUCKLE SWITCH<br />
(Built-in lap belt buckle for L.H. side)<br />
SF-6S<br />
Sounds<br />
Condition Continuity<br />
Fastened<br />
Unfastened<br />
No<br />
Yes
SUN ROOF<br />
Electrical Sun Roof<br />
. Do not move or remove limit switch unless it is necessary.<br />
. After any adjustment, check sun roof operation and lid alignment.<br />
m: Grease-u points<br />
1:~<br />
Sun roof mounting<br />
adjustment<br />
BF-66<br />
Link guide bracket<br />
~GUide rail<br />
(Attached with<br />
screws and sealant)<br />
Urethane forming
Finisher plate removal & installation<br />
m Remove guide rail cover and pull up pawl, then<br />
draw out finisher plate with sun roof lid open.<br />
Link & wire assembly<br />
SUN ROOF<br />
l<br />
Draw out<br />
Pulling up pawl<br />
.c- plate.<br />
Finisher plate<br />
Retainer bracket<br />
0<br />
Removal:<br />
Raise pawl of retainer bracket,<br />
shift finisher plate and remove<br />
locating pins from retainer<br />
bracket.<br />
Then remove finisher plate.<br />
Link & wire adjustment<br />
Electrical Sun Roof (Cont'd)<br />
" ~ finisher<br />
Link & wire removal & installation<br />
I!J . Whenreplacingwire, remove<br />
rai I first and then link &<br />
wire assembly.<br />
. Be sure to lubricate.<br />
Glass lid adjustment<br />
Ii] Movelink & wire assemblyto closed lid position and after closingfully (asshown in figure below). install motor.<br />
Link & wire assembly<br />
Front stoppe~<br />
rLink guide<br />
bJ.i bracket<br />
BF-67<br />
..<br />
[;)<br />
SBF187E
(Ma i n harness)<br />
I~u:~1/i::~!* W:BD<br />
@@<br />
J:EI]W/B -CI II:]- W/B<br />
~~<br />
fi156\<br />
r.;;) (Raom I amp<br />
@M9<br />
~ ~ harness)<br />
IGNITION RELAY<br />
I GNITI ON SWITCH<br />
ON or START<br />
BATTERY (Via<br />
fusible Iink-Gree~<br />
SUN ROOF SWITCH<br />
SLI DE<br />
0 en N C ose<br />
0 0 I<br />
0 2 3<br />
SAFETY RELAY<br />
!:l@<br />
~~'~1<br />
@~@})<br />
!t!t<br />
- -<br />
BODY GROUND<br />
@<br />
e-B<br />
I2f3:: C P/B SB<br />
@)<br />
SUN ROOF<br />
Wiring Diagram<br />
BF-68<br />
(Sun roo f<br />
harness)<br />
@<br />
~:'i~<br />
R/L<br />
SLI DE<br />
RELAY-Close<br />
@<br />
B-[Jp}-, BODY<br />
-~ -:!:- GROUND<br />
SUN ROOF MOTOR<br />
'\ rI RCUIT<br />
\REAKER<br />
@)<br />
~: R~L::!;DJ<br />
~y::ent<br />
I ~ direction<br />
@<br />
PU8'W~ i<br />
W/B<br />
'i~<br />
B SLI DE<br />
:~: P ~ RELAY-Open<br />
@<br />
LIMIT SWITCHCSafety)<br />
OUTER LID POSITION<br />
Lid<br />
operBt in9<br />
direct Ion<br />
\ Openward<br />
i CIoseward<br />
Between Between<br />
Fully<br />
opened<br />
approx.<br />
IODmm<br />
(3.94InJ<br />
opened<br />
and<br />
Approx.<br />
IOOmm<br />
(3.94InJ<br />
opened<br />
fully<br />
closed<br />
and<br />
approx.<br />
IOOmm<br />
Fully<br />
closed<br />
fully<br />
(3. 941nJ<br />
opened opened<br />
II 0 0 0<br />
12 6
Handle adjustment<br />
Female hinge<br />
Hinge bracket<br />
Air deflector adjustment<br />
SUN ROOF<br />
<strong>Manual</strong> Sun Roof<br />
Drain hose<br />
. After installation of drain<br />
hoses, make sure water<br />
drains smoothly.<br />
BF-69<br />
Handle base adjustment<br />
SBF186E
REMOVAL<br />
After removing moldings,<br />
remove glass.<br />
CAUTION:<br />
Be careful<br />
removing.<br />
not to scratch glass when<br />
Install spacers to panel with<br />
double-feced tape.<br />
WINDSHIELD AND WINDOWS<br />
~spacer<br />
Windshield<br />
INSTALLATION<br />
. Use genuine <strong>Nissan</strong> Sealant kit or equivalent. Follow instructions furnished with<br />
it.<br />
. After installation, the vehicle should remain stationary for about 24 hours.<br />
. Do not use sealant which is more than 12 months past its production date.<br />
. Do not leavecartridge unattended with its cap open.<br />
. Keep primers and sealant in a cool, dry place. <strong>Nissan</strong>recommendsthat they are<br />
stored in a refrigerator.<br />
. Be lure to install moldings.<br />
Clean bonding surface thoroughly.<br />
Body<br />
panel<br />
Body side<br />
Unit: mm (in)<br />
(19.09)<br />
i~OO .I.~ Vehicle center<br />
SBF196E<br />
Install molding fastener.<br />
When installing it, heat body panel and<br />
afastener to approx. 30 to 40°C (86 to<br />
104°F).<br />
. .<br />
upper & side molding<br />
fastener<br />
,/1~Fastener<br />
SBF197E '<br />
( "- / Panel<br />
Double-faced<br />
adhesive tape<br />
Glass side<br />
SBF413B<br />
Body side Glass side<br />
WARNING:<br />
Keep heat or open flames away as<br />
primers are flammable. .I<br />
Install dam rubber & specers with double-faced adhesive tape.<br />
~<br />
vehicle<br />
center<br />
~<br />
~ ~~~<br />
~m rubber<br />
joint portion<br />
: Spacer mounting<br />
portion<br />
(Spacer should be installed<br />
at slit portion of dam rubber.)<br />
SBF198E<br />
Apply primer A.<br />
of glass<br />
A B<br />
BF- 70<br />
SBF719C<br />
CAUTION:<br />
Allow primers to dry for 10 to 15<br />
minutes<br />
step.<br />
before proceeding to the next
WINDSHIELD AND WINDOWS<br />
Windshield (Cont' d) @<br />
1<br />
Apply primer E. Apply sealant evenly.<br />
CAUTION:<br />
Allow primers to dry for 10 to 15<br />
minute, before proceeding to the next<br />
step.<br />
SBF038B<br />
Set glass in position and<br />
press glass lightly and evenly.<br />
Glass<br />
Unit: mm (in)<br />
Apply sealant additionally to Io_r portion of gland<br />
make it uniform as shown below:<br />
Glass<br />
Check for water leakage.<br />
SBF720C<br />
Apply sealant to upper & side molding<br />
fixing portion.<br />
Install moldings.<br />
(For details, refer to "Exterior".)<br />
BF-71<br />
Morethan<br />
12 (0.471<br />
SBF199E<br />
CAUTION:<br />
Windshield glass should be installed<br />
within 15 minu18sof applying 88alant<br />
88alant starts to harden 15 minu18l<br />
at18r it is applied.<br />
CAUTION:<br />
For sealant drying time, refer to<br />
"Drying Time for Sealant".<br />
CAUTION:<br />
Molding must be installed securely 10<br />
that it is in position and I88V8Ino gap.
.<br />
.<br />
m<br />
WINDSHIELD AND WINDOWS<br />
Back Window-Coupe<br />
Construction and removal/reinstallation methods of back window are basically the same as those of<br />
windshield.<br />
For details of service procedures, refer to "Windshield".<br />
The difference between windshield and back window is as follows:<br />
For sealant drying period, refer to "Drying Time for Sealant",<br />
For details of moldings, refer to "Exterior",<br />
More than<br />
12 (0,471<br />
~N_'<br />
Unit: mm (in)<br />
More than<br />
7 (0281<br />
"<br />
/ --<br />
Ii] Install dam rubber and spacers with<br />
double-faced adhesive tape. (Body side)<br />
Vehicle<br />
center<br />
,(<br />
Lbem rubber<br />
joint portion<br />
"<br />
~-<br />
'I<br />
: I<br />
II<br />
1 I<br />
II<br />
II<br />
I I<br />
II<br />
II<br />
1 I<br />
I I<br />
II ~<br />
I ,<br />
'- ,-----------------<br />
----<br />
Ii) Vehicle<br />
~420i<br />
(16,54)<br />
Unit: mm (in)<br />
Upper and side portion<br />
Double-faced<br />
adhesive tape<br />
I<br />
Spacer<br />
BF-72<br />
Sealant quantity m<br />
Dam rubber and spacer Ii]<br />
riJ Install molding fastener,<br />
When installing it, heat body panel and<br />
fastener to approx. 30 to 40°C (86 to<br />
104° F).<br />
Lower portion<br />
SBF200E
.<br />
.<br />
.<br />
1m<br />
xx: Spacer<br />
.: Locatingpin<br />
0: Molding clip<br />
Locating pin<br />
(Left and right) 1m<br />
Back door glass<br />
Ii] Backdoor side<br />
~mOlding// =<br />
Morethan ~u_~ Backdoor glass<br />
12 (0.47) ~n 7 (0,28)<br />
0 Welt<br />
Back door panel<br />
Unit: mm (in)<br />
WINDSHIELD AND WINDOWS<br />
Back Door Window-Fastback<br />
Construction and removal/reinstallation method of back door window are basically the same as those of<br />
windshield.<br />
Major differences are that sealant & dam rubber are instailed to back door panel instead of glass surface.<br />
Spacer position is also changed. Moreover, there are locating pins in lower portion of glass. For details,<br />
refer to following figure.<br />
For sealant drying period, refer to "Drying Time for Sealant".<br />
For details of moldings, refer to "Exterior",<br />
(;J Molding fastener<br />
When installing it, heat body<br />
panel & fastener to approx.<br />
30 to 40°C (86 to 104°FI.<br />
Spacer<br />
BF- 73<br />
Unit: mm (in)<br />
[!)<br />
Lower molding<br />
and spacer (;J<br />
Back door upper molding<br />
Back door glass<br />
Unit: mm (in)<br />
SBF201E
Body<br />
panel<br />
FASTBACK<br />
m<br />
Wire<br />
Side<br />
window<br />
Wire<br />
More than<br />
7 (0.28)<br />
WINDSHIELD AND WINDOWS<br />
SBF376E<br />
Side Window<br />
Side window is a molded type. During;removal or installation,<br />
observe the followinginstructions.<br />
1. Cut sealant in the same manner as that outlined under<br />
"Windshield.".<br />
2. Be careful not to scratch molding when cutting sealant. If<br />
molding is scratched, repair.<br />
3. Remove clips and locating pins which have been exposed<br />
from vehiclebody.<br />
Sealant portion I§)<br />
I§) (;]<br />
More than<br />
7 (0.28)<br />
Body panel<br />
Morethan<br />
'12 (0.47)<br />
Double-faced<br />
adhesive tape<br />
Body panel<br />
Unit: mm (in) Unit: mm (in) Unit: mm (in) J<br />
SBF203E<br />
BF- 74
COUPE<br />
E1<br />
I]<br />
WINDSHIELD AND WINDOWS<br />
Side Window (Cont' d)<br />
Clip Ii]<br />
Ii] [I<br />
Clip<br />
(Bonded to glassl<br />
Sealant quantity<br />
Morethen<br />
710.281<br />
BF- 75<br />
Unit: mm (in)<br />
Seelent portion I]<br />
"<br />
Dam rubber 30<br />
(1.181<br />
Unit: mm (in)<br />
SBF202E
WINDSHIELD AND WINDOWS<br />
Drying Time for Sealant \<br />
Reference: Time required for sealant to dry to desired hardness.<br />
CAUTION:<br />
Advise the user of the fact that vehicle should not be driven on<br />
rough roads or surfacesuntil sealant has properly vulcanized.<br />
Repairing Water leaks for Windshield and<br />
Back Window (Coupe)/Back Door Window<br />
(Fastback)<br />
leaks can be repaired without removing and reinstalling glass.<br />
If water is leaking between caulking material and body or between glass and caulking material, determine the<br />
extent of the leak by applying water while pushing glass outward.<br />
To stop the leak, apply primer and then sealant to the leak point.<br />
T,;m~<br />
. ~<br />
.-Flat stick<br />
Apply sealant.<br />
..,. .. 4~60<br />
,V,,: 4' /~<br />
"" 1!f!/<br />
POlysulphide or polyurethane sealant<br />
Afterwards, install molding securely.<br />
BF-76<br />
'c (oF)<br />
Unit: days<br />
90 50 25<br />
40 (104) 1.5 2.5 5.0<br />
25 (77) 2.5 4.0 7.5<br />
5 (41) 5.0 13.0 20.5<br />
Work into joints.<br />
SBF543B
WIRING DIAGRAM<br />
I GNI TI ON SWITCH<br />
ACC or ON<br />
Mirror removal Fa<br />
ITIIJI]]]<br />
II<br />
Y/B<br />
PU/W<br />
~.. @ L/B<br />
6<br />
7<br />
~ ~'" _JlI>O:<br />
III' ~, '"<br />
...J J >-> J<br />
~~<br />
~~15~~1<br />
MIRROR SW. CHANGE<br />
OVER SW.<br />
~<br />
MIRROR<br />
Door Mirror<br />
('<br />
) Fa<br />
FUSE BLOCK<br />
(Refer to "POWER<br />
SUPPLY ROUTING"<br />
In EL sect ion. )<br />
L/W<br />
(Main<br />
harness)<br />
(1)A~<br />
~~<br />
DOOR MIRROR SWITCH BODY GROUND<br />
Y/L<br />
PU/W<br />
L/R I<br />
@ @<br />
@<br />
Y/B ,-PyU::<br />
Pu/w====-.r- L/B<br />
L/B ~<br />
Mirror<br />
(Door harness R. H. )<br />
@ @<br />
I<br />
Y/L<br />
PU/W===-.s- L/R<br />
@<br />
,- PyU:;::<br />
L/R ~<br />
BF-77<br />
(Ooor harness L. H. )<br />
R. H. SIDE<br />
DOOR MIRROR<br />
L. H. SIDE<br />
DOOR MIRROR<br />
SBF188E<br />
Mirror<br />
operat Ing<br />
dl rectlon<br />
~ Leftward<br />
i Rightward<br />
Mirror<br />
ope rat Ing<br />
direct Ion<br />
~ Leftward<br />
i Rightward<br />
Mirror<br />
operat Ing<br />
dl rect Ion<br />
~ Downward<br />
i Upward<br />
SBF335E
REAR COMBINATIONLAMP<br />
. Rear combination lamps are installed with nuts and butyl sealant.<br />
Removal<br />
. Warmup lamp assemblyarea to a<br />
tem~ratu~ of a little below 60°C (140°F).<br />
~<br />
BF-78<br />
Installation<br />
Butyl seal<br />
. Apply butyl seal evenlyas it tends to<br />
become thin in the corners.<br />
. Warmup lamp assemblyarea to a<br />
tem~rature of a little below 60°C (140°F).<br />
SBF189E
FRONT AND REAR AIR SPOILER<br />
. When installing, make sure that there are not gaps or waves at ends of air spoiler.<br />
. Before installing spoiler, clean and remove oil from surface where spoiler will be mounted.<br />
/<br />
FRONT AIR SPOILER<br />
Double-faced<br />
adhesive tape<br />
REAR AIR SPOILER - Fastback<br />
r;7~~~<br />
'----.<br />
~<br />
'-~<br />
~~~_/-o<br />
I~J<br />
r;1;:;;J/<br />
~/~<br />
.L ~"'" ""'<br />
I<br />
, , W~- r;-r r-.~<br />
BF- 79<br />
Double-faced<br />
adhesive tape<br />
!<br />
SBF190E<br />
SBF191E
.<br />
.<br />
.<br />
BODY ALIGNMENT<br />
All dimensions indicated in figures are actual ones.<br />
When a tram tracking gauge is used, adjust both pointers to equal length and check the/pointers and<br />
gauge itself to make sure there is no free play.<br />
When a measuring tape is used, check to be sure there is no elongation, twisting or bending.<br />
Measurements should be taken at the center of the mounting holes.<br />
An asterisk (*) following the value at the measuring point indicates that the measuring point on the other<br />
side is symmetrically the same value.<br />
The coordinates of the measurement points are the distances measured from the standard line of "X",<br />
"Y" and "Z".<br />
@<br />
(:J<br />
@: L.H.side<br />
@: R.H. side<br />
MEASUREMENT<br />
"X"<br />
=JQ<br />
@) @<br />
"Z"<br />
Q<br />
"V"<br />
"X" I-) ... I ... 1+1<br />
''V''<br />
Engine Compartment<br />
BF-80<br />
"Z"<br />
"X" : Vehicle center<br />
"V" : Center line of front axle<br />
"Z" : Imaginary base line<br />
[200 mm below datum line<br />
I"OZ" at design plan)]<br />
Unit: mm<br />
SBF193E
MEASUREMENT POINTS<br />
Cowl top side<br />
7<br />
CJ<br />
Radiator core side<br />
BODY ALIGNMENT<br />
Engine Compartment (Cont' d)<br />
SBF220E<br />
SBF221E<br />
SBF222E<br />
SF-81<br />
I'<br />
Front side member<br />
SBF225E<br />
' 'CID1<br />
()
MEASUREMENT<br />
8 1<br />
*<br />
cq.~<br />
... 'It.<br />
..., *<br />
i<br />
* *<br />
coM<br />
... GI<br />
'It 1 M<br />
:2 *<br />
MEASUREMENT POINTS<br />
CD<br />
"0<br />
~y .J<br />
~~.<br />
BODY ALIGNMENT<br />
0<br />
0<br />
§J::<br />
Underbody (Cont'd)<br />
~u<br />
0 0<br />
J~<br />
..@<br />
0 0<br />
~0<br />
u.<br />
BF-83<br />
0<br />
0<br />
CD<br />
~; a::<br />
/<br />
SBF196E
Front and rear strut tower centers<br />
Coordinates:<br />
@,@<br />
X: 542.2<br />
Y: 63.5<br />
z: 725.7<br />
CD ,CD<br />
X: 474.5<br />
Y: 2,500<br />
z: 658.9<br />
I<br />
F~n1::!/<br />
Rear: CD. CD 48 die.<br />
Rear suspension member rear mounting bolt threaded<br />
end<br />
Coordinates:<br />
Q),CD<br />
X: 303<br />
Y: 2,635<br />
z: 65.8<br />
BODY ALIGNMENT<br />
Underbody (Cont'd)<br />
SBF226E<br />
SBF227E<br />
BF-84<br />
Front side member and front extension<br />
Coordinates:<br />
@,@<br />
X: 132.9<br />
Y: -582<br />
z: 189<br />
@,@<br />
X: 370<br />
Y: -304<br />
z: 255<br />
@,@<br />
X: 384.2<br />
Y: 32<br />
z: 255<br />
@.@<br />
X: 375<br />
Y: 700<br />
z: 106.2<br />
~,@<br />
X: 420<br />
Y: 1,150<br />
z: 1'06.2<br />
]D<br />
~ ~<br />
Unit: mm<br />
SBF271E<br />
Center side member. rear side member and rear extension<br />
Coordinates:<br />
@,CD<br />
X: 422.5<br />
Y: 1,650<br />
Z: 104<br />
@'@<br />
380<br />
X:<br />
:nO<br />
~ U /~ ~ r'<br />
ChJ CD r.1', I I<br />
, L ),~) I<br />
12 die. 1/ I \<br />
rK' ~ r.1',~_1<br />
\!y.'JY L , \" \<br />
16 die. '" \<br />
Y: 2 ,030 ~\ - \<br />
z: 195.8<br />
@,@<br />
x: 520<br />
~ ~<br />
.;;; /-1<br />
Y: 3,050 ~ '-y--J<br />
z:<br />
ChJ<br />
398.8 ...J<br />
X: 528<br />
Y: 3,221<br />
z:<br />
(1)<br />
386<br />
X: 528<br />
Y: 3,200<br />
z: 400<br />
\<br />
0<br />
0
CONTENTS<br />
HEATER&<br />
AIR CONDITIONER<br />
I<br />
SECTIONHA<br />
AIR FLOW AND COMPONENT LAYOUT HA- 2<br />
DOOR CONTROL HA- 5<br />
DESCRIPTION - PushControl. . . . . . . . . . . . . . . . . . . . . . . . . . . . . . . . . . . . . . . . . . . . . . . HA- 7<br />
PUSH CONTROL UNIT HA- 9<br />
HEATER ELECTRICAL CIRCUIT . . . . . . . . .. . . . . . . . . . . . . . . . . . . . . . .. . . . . . . HA-12<br />
PRECAUTIONS. . . . . . . . . . . . . . . . . . . . . . . . . . . . . . . . . . . . . . . . . . . . . . . . . . . . . . . . . . . HA-13<br />
PRECAUTIONS FOR REFRIGERANT CONNECTION. . . . . . . . . . . .. . . . . . . .. . . . . . . HA-14<br />
PREPARATION. . . . . . . . . . . . . . . . . . . . . . . . . . . . . . . . . . . . . . . . . . . . . . . . . . . . . . . . . . . HA-15<br />
DISCHARGING, EVACUATING, CHARGING AND CHECKING HA-17<br />
DESCRIPTION OF AIR CONDITIONER HA-24<br />
SERVICE PROCEDURES HA-25<br />
AIC PERFORMANCE TEST HA-28<br />
COMPRES5>OROIL - For NVR 140S(ATSUGI make) HA-33<br />
COMPRESSOR- Model NVR 140S (ATSUGI make) " . . . .. .. . .. .. . .. . .. .. . HA-35<br />
AIC ELECTRICALCIRCUIT . . . . . . . . . . . . . . . . . . . . . . . . . . . . . . . . . . HA-40<br />
AIC COMPONENT LAYOUT HA-42<br />
TROUBLE DIAGNOSES HA-44<br />
SERVICE DATA AND SPECIFICATIONS(S.D.S.). . . . . . . . . . . . . . . . . . . . . . . .. . . . . . HA-73<br />
When you read wiring diagrams:<br />
. Read GI section, "HOW TO READ WIRING DIAGRAMS".<br />
. See EL section, "POWER SUPPLY ROUTING" for power distribution circuit.<br />
Whenyou perform trouble diagnoses,read GI section, "HOW TO FOLLOW FLOW<br />
CHART IN TROUBLE DIAGNOSES".<br />
mil
@<br />
CD To ventilator<br />
Bi-Ievel<br />
'O~~~<br />
~..~<br />
CD To ventilator<br />
@ To floor :><br />
AIR FLOW AND COMPONENT LAYOUT<br />
~<br />
@<br />
.'"";'<br />
if<br />
Air Flow<br />
.Ie<br />
HA-2<br />
Flooranddefroster<br />
~~~<br />
0123~1 ~ 10<br />
@ To floor<br />
@ To defroster<br />
if<br />
if<br />
if<br />
... : Airpassedthroughheatercore<br />
AIR DISTRIBUTION RATIOS<br />
AIR FLOW AND COMPONENT LAYOUT<br />
Air Flow (Cont'd)<br />
.. .. J<br />
VENT B/L FOOT F/D DEF<br />
" ".. '4;1<br />
,<br />
HA-3<br />
. (%)<br />
I<br />
I<br />
I<br />
I<br />
I<br />
I<br />
I<br />
I<br />
I<br />
I<br />
I VENT<br />
I<br />
I<br />
I<br />
I<br />
I<br />
I DEF<br />
I<br />
I<br />
-<br />
I<br />
I<br />
I<br />
I<br />
I<br />
-<br />
-<br />
I<br />
I<br />
I<br />
I<br />
I<br />
I<br />
I<br />
I<br />
I<br />
I<br />
80<br />
50<br />
40<br />
I I<br />
I I<br />
I I<br />
I I<br />
I I<br />
I<br />
I<br />
I<br />
I<br />
0<br />
100<br />
RHA372A
J:<br />
»I<br />
~<br />
:II<br />
:r<br />
~<br />
w<br />
....<br />
w<br />
~<br />
Side defroster duct'<br />
~ .'<br />
~--~..<br />
': For removal, it is necessary to remove<br />
instrument assembly.<br />
. Jl I<br />
\H."""""<br />
Side ventilator duct<br />
Cooling unit<br />
(Air conditioner)
~<br />
.<br />
/PuSh.<br />
~<br />
~<br />
Mode door motor<br />
~<br />
CONNECT<br />
£)<br />
(2J RHA894A<br />
~ '" . door lever<br />
Air mix ~<br />
~ Link lever<br />
r----<br />
1 J<br />
(<br />
w---<br />
/\\U\\<<br />
/ RHA375A<br />
Air mix door lever<br />
" \ \ '-. RHA376A<br />
DOOR CONTROL<br />
Control Cable Adjustment<br />
. When disconnecting control cable, remove E-ring and take off<br />
cable while pushing cable outer.<br />
MODE DOOR<br />
1. Move side link with hand and hold mode door in VENT mode.<br />
2. Install mode door motor on heater unit and connect it to<br />
3.<br />
4.<br />
body harness.<br />
Turn ignition switch to ACC.<br />
Turn VENT switch ON.<br />
5. Attach mode door motor rod to side link rod holder.<br />
6. Turn DEF switch ON. Check that side link operates at the<br />
fully-open position. Also turn VENT switch ON to check that<br />
side link operates at the fully-open position.<br />
WATER COCK CONTROL ROD<br />
. When adjusting water cock control rod, first disconnect<br />
temperature control cable from air mix door lever. Reconnect<br />
and readjust temperature control cable.<br />
1. Push air mix door lever in direction of arrow.<br />
2. Pull control rod of water cock in direction of arrow so as to<br />
give a clearance of about 2 mm (0.08 in) between ends of rod<br />
and link lever. Connect control rod to door lever.<br />
After connecting control rod, check it operates properly.<br />
TEMPERATURE CONTROL CABLE<br />
. Clamp cable while pushing cable outer and air mix door lever in<br />
direction of arrow.<br />
After positioning control cable, check it operates properly.<br />
"<br />
HA-5
RHA895A<br />
DOOR CONTROL<br />
Control Cable Adjustment (Cont'd)<br />
INTAKE DOOR<br />
1. Connect intake door motor harness connector before installing<br />
on intake door motor.<br />
2. Turn ignition switch to ACC.<br />
3. Turn REC switch ON.<br />
4. Install intake door lever.<br />
5. Set intake door rod in REC and secure door rod to holder. .<br />
6. Check that intake door operates properly when REC switch is<br />
turned ON and OFF.<br />
HA-6
m<br />
~<br />
§<br />
FUSE<br />
RES! S TOR<br />
@<br />
@<br />
@<br />
From<br />
{ .<br />
I I I umInat Ion<br />
system .<br />
-~<br />
DESCRIPTION - Push Control<br />
Push Control System<br />
DUAL-<br />
PRESSURE~<br />
SW!TCH @W<br />
:2'8= I[j<br />
. ,These swl tches are bu i I t I nto push contro I un I t<br />
and mechanically I inked to corresponding switches.<br />
THERMO CONTROL AMP.<br />
122161514~ 11>
To<br />
push<br />
control<br />
~<br />
To push<br />
control.<br />
{<br />
Mode door motor<br />
-<br />
MP---1 door<br />
- I ~llntake motor<br />
DESCRIPTION - Push Control<br />
RHA379A<br />
12216151413~111>
~gj"<br />
fR92~1<br />
BB8<br />
0,<br />
~<br />
/ ,<br />
Cluster lid C<br />
\ / RHA384A<br />
Push If control asse'mbly )U[f ===1,<br />
Control knob<br />
(<br />
PUSH CONTROL UNIT<br />
Removal and Installation<br />
1. Remove cluster lid C.<br />
2. Remove audio (radio).<br />
3. Remove four screws of push control unit.<br />
4. Remove temperature control cable.<br />
5. Disconnect push control unit harness connectors.<br />
6.<br />
7.<br />
Remove push control unit.<br />
Installation is in the reverse order of removal.<br />
Refer to Control Cable Adjustment for temperature<br />
cable.<br />
Overhaul - Push control unit assembly<br />
Co""o' "..~<br />
i<br />
control<br />
J<br />
1- - Coa,ro' ,,,...<br />
1/'1 A<br />
v' ~ ,~84 '\ Temperature control cable<br />
',- ~~ L E-ring<br />
"- Control ~ L<br />
box '/L 0 Temperaturecontrollever<br />
'",,-- Finisher ! Diode Temperature control lever assembly<br />
plate<br />
HA-9<br />
RHA386A
AHA390A<br />
Small flat-bladed<br />
, screwdriver<br />
:J~ Illumination<br />
harness<br />
"-<br />
Smail flat-b<br />
'aded"
~<br />
,<br />
\<br />
"<br />
-.<br />
PUSH CONTROL UNIT<br />
'"<br />
Overhaul - Push controlunit assembly(Cont'd)<br />
6. Remove control knobs.<br />
Wrap finisher with a cloth and remove knobs using pliers or .<br />
similar tool. Be careful not to scratch finisher's surface.<br />
7. Re ove control case.<br />
8. Rem ve illumination plate.<br />
Be care ul not to scratch control amp. when removing illumination<br />
plat " .<br />
9. Remov finisher plate.<br />
10. Remov control amp.<br />
Be careful not to damage substrate when removing,<br />
'11. Discon -ect temperature control cable.<br />
12. Install tion is in reverse order of removal.<br />
..<br />
HA-11<br />
,.,..
To A/C system[<br />
1J 0:: >-11><br />
"" ..J..J..J..J<br />
@lffiJ<br />
[]<br />
RESISTOR<br />
HEATER ELECTRICAL CIRCUIT<br />
BLOWER<br />
MOTOR<br />
~<br />
@)~<br />
1J 0:: , , ..J ..J<br />
~1J0::>-II><br />
~~~~~II><br />
@)~~~<br />
~~~<br />
'" OFF 1 2 3 4<br />
4<br />
25<br />
26<br />
27<br />
23<br />
28<br />
21<br />
20<br />
)-<br />
1<br />
If<br />
l<br />
I LLUMI NA TI ON<br />
Wiring Diagram<br />
li)<br />
UI<br />
Q)<br />
cc<br />
.- L<br />
alai<br />
5.£:<br />
(Subharness)<br />
FAN<br />
SWITCH<br />
HA-12<br />
II><br />
@)~(@)<br />
L/R<br />
L/R<br />
L/OR<br />
@<br />
BODY GROUND<br />
Iii<br />
FUSE BLOCK<br />
(Refer to "POWER<br />
SUPPLY ROUTING"<br />
in EL section.)<br />
G/Y<br />
G/B 0<br />
L/OR<br />
G/Y<br />
i<br />
L/~ 0<br />
L/W<br />
L/R<br />
L/Y<br />
L/OR B<br />
j<br />
@<br />
@<br />
G/Y<br />
R/Y<br />
-LG<br />
LG/B<br />
L/OR<br />
G/Y<br />
G/B<br />
R/L<br />
- B<br />
- G<br />
L/Y<br />
L/W<br />
- L<br />
L/B<br />
L/R<br />
L/OR<br />
I GNIT ION SWITCH<br />
ACC or ON<br />
MODE DOOR MOTOR<br />
@)<br />
V<br />
B/L<br />
FOOT<br />
F/D<br />
DEF<br />
INTAKE<br />
DOOR MOTOR<br />
1314<br />
1211<br />
169<br />
815<br />
.17<br />
7<br />
65<br />
43<br />
2 I<br />
o~J ~ 8<br />
19<br />
20<br />
21<br />
PUSH<br />
CONTROL<br />
UNIT<br />
} From illumination<br />
system<br />
~<br />
RHA392A
N.G. \3 SHA919A<br />
PRECAUTIONS<br />
WARNING:<br />
. Always<br />
system.<br />
wear eye protection when working around the<br />
. Always be careful that refrigerant does not come in<br />
contact with your skin.<br />
. Keep refrigerant containers stored below 40°C (104°F) and<br />
never drop them from high places.<br />
. Work in well-ventilated area because refrigerant gas<br />
evaporates quickly and breathing may become difficult due<br />
.<br />
to lack of oxygen.<br />
Keep refrigerantaway fromopen flames because poisonous<br />
gas will be produced if it burns.<br />
. Do not increase can temperature beyond 40°C (104°F) in<br />
charging.<br />
. Do not heat refrigerant can with an open flame. There is a<br />
danger that can will explode.<br />
CAUTION:<br />
. Do not use steam to clean surface of condenser or<br />
evaporator. Be sure to use cold water or compressed air.<br />
. Compressed air must never be used to clean a dirty line.<br />
Clean with refrigerant gas.<br />
. Do not use manifoldgauge whose press point shape Is<br />
different from that shown. Otherwise, insufficient evacuation<br />
may occur.<br />
. Do not over-tighten service valve cap.<br />
. Do not allow refrigerant to rush out. Otherwise, compressor<br />
oil will be discharged along with refrigerant.<br />
HA-13
Plug<br />
PRECAUTIONS FOR REFRIGERANT CONNECTION<br />
SHA896A<br />
SHA058<br />
Apply o,rin~ not apply<br />
oom".~,oil.w.,nw, 011.<br />
N.G.<br />
N.G.<br />
O.K.<br />
unlo@ ~<br />
Inflated portion<br />
No'<br />
SHA897A<br />
~~~<br />
D<br />
~<br />
&<br />
I~<br />
~<br />
~4) SHA898A<br />
WARNING:<br />
Gradually loosen discharge side hose fitting, and remove It<br />
after remaining pressure has been released.<br />
CAUTION:<br />
When replacing or ,cleaning refrigerant cycle components,<br />
observe the following.<br />
. Do not leave compressor on its side or upside down for<br />
more than 10 minutes, as compressor 011will enter low<br />
pressure chamber.<br />
. Whenconnectingtubes, alwaysuse a torque wrench.<br />
. After disconnecting tubes, plug all openings Immediately<br />
to prevent entrance of dirt and moisture.<br />
. Alwaysreplace used O-rings.<br />
. When connecting tube, apply compressor oil to portions<br />
shown in illustration. Be careful not to apply 011 to<br />
threaded portion.<br />
. O-ring must be closely attached to Inflated portion of tube.<br />
. After inserting tube into union until O-ring is no longer<br />
visible, tighten nut to specified torque.<br />
. After connecting line, conduct leak test and make sure<br />
that there is no leakage from connections. When the gas<br />
leaking point is found, disconnect that line and replace the<br />
O-ring. Then tighten connections of seal seat to the<br />
specified torque.<br />
HA-14
Tool number<br />
(Kent-Moore No.)<br />
Tool name<br />
KV998VROO1<br />
( - )<br />
Clutch disc puller ~<br />
KV99231010<br />
( - )<br />
Clutch disc wrench<br />
Description<br />
PREPARATION<br />
SPECIAL SERVICE TOOLS<br />
~<br />
KV99235160<br />
(J29751 )<br />
Nut wrench \\Y<br />
HA-15<br />
Removing clutch disc<br />
Removing shaft nut and clutch disc<br />
Removinglock nut<br />
~
PREPARATION<br />
SERVICE TOOLS "<br />
Toolname Description<br />
Manifoldgauge Dischargingand charging refrigerant<br />
Charginghose<br />
. .;<br />
0<br />
Charge valve Discharging and charging refrigerant<br />
HA-16<br />
Discharging, evacuating and checking<br />
refrigerant<br />
Thermometer Checking temperature<br />
C'-<br />
Vacuum pump Evacuating refrigerant<br />
Electric leak detector<br />
Nomineillftlitivity:<br />
1..25. '0.53."" UII<br />
..<br />
-3<br />
Checking refrigerant leaks
*1: Depending on the det<br />
*2: Working operation dep<br />
pump and the weather.<br />
When servicing AIC sys<br />
done under any condition.<br />
DISCHARGING, EVACUATING,CHARGING AND CHECKING<br />
*1<br />
In service AIC system<br />
When it is necessary to replace When it is not necessary to<br />
pa rts replace parts<br />
+ +<br />
Check the spot where mal- Check the spot where<br />
function<br />
Point-'<br />
occurs. refrigerant leaks.<br />
Discharging<br />
i.<br />
I<br />
t<br />
Replace parts.<br />
I<br />
HA-17<br />
I<br />
I<br />
Repair.<br />
Add refrigerant -<br />
New AIC system<br />
J I<br />
Point-2<br />
Evacuating<br />
Run pump for over 5 minutes.<br />
Point-g !<br />
Checking airtightness<br />
I N.G.<br />
I<br />
Point-4<br />
Repair. I<br />
*2<br />
O.K.<br />
Once evacuating Twice evacuating<br />
On condition that pump operates On condition that pump operates<br />
over -98.6 kPa (-740 mmHg, below -98.6 kPa (-740 mmHg,<br />
-29.13 inHg) and with low -29.13 inHg)and with high<br />
humidity on a clear day. humidity on a rainy day.<br />
Point-5 ! Point-6<br />
Evacuating Charging<br />
Run pump for over 20 minutes.<br />
I<br />
In<br />
Open high-pressure valve of mani-<br />
, fold gauge and charge refrigerant<br />
into system. When low-pressure<br />
gauge reading is 98 kPa (1.0<br />
kg/cm2 , 14 psi), completely<br />
close high-pressure valve of manifold<br />
gauge and stop charging.<br />
Point-3<br />
Checking airtightness<br />
Point-5 1 O.K.<br />
Evacuating<br />
Run pump for over 20 minutes.<br />
Point-7<br />
. Charging<br />
Checkingrefrigerantleaks I<br />
l O.K.<br />
Checkoperationof AICsystem.<br />
I<br />
I<br />
N.G.<br />
N.G.
-,<br />
To low-pressure<br />
service valve<br />
.<br />
.<br />
To low-pressure<br />
service valve<br />
Low<br />
DISCHARGING, EVACUATING, CHARGING AND CHECKING<br />
To high-pressure<br />
service valve<br />
SHA240B<br />
.<br />
To high-pressure<br />
service valve<br />
~I<br />
. -<br />
Vacuum pump SHA241 B<br />
Elevation<br />
m (ft)<br />
Vacuum of system*<br />
kPa (mmHg, inHg)<br />
0 (0) 101.3 (760,29.92)<br />
300 (1,000)<br />
600 (2,000)<br />
900 (3,000)<br />
98.0 (735,28.94)<br />
94.61710,27.95)<br />
91.3 (685,26.97)<br />
*: Values show reading of the low-pressure gauge.<br />
I Point-1 I<br />
Discharging<br />
Slowly open the valves to discharge only refrigerant. If they are<br />
opened quickly, compressor oil will also be discharged.<br />
I Point-21<br />
Evacuating the System<br />
1. Start pump, then open both valves and run pump for over 5<br />
minutes.<br />
2. When low gauge has reached approx. 98.6 to 101.3 kPa (740<br />
to 760 mmHg, 29.13 to 29.92 inHg), completely close both<br />
valves of gauge and stop vacuum pump.<br />
a. The low-pressure gauge reads lower by 3.3 kPa (25 mmHg,<br />
0.98 inHg) per 300 m (1,000 ft) elevation. Perform evacuation<br />
according to the following table.<br />
b. The rate ascension of the low-pressure gauge should be<br />
less than 3.3 kPa (25 mmHg, 0.98 inHg) in 5 minutes.<br />
I Point-3 I<br />
Checking Airtightness<br />
1. Close both low and high-pressure valves and leave them<br />
unattended for approx. 5 to 10 minutes.<br />
2. Make sure the pointer of the low-pressure gauge does not<br />
deflect toward the "0" direction.<br />
3. If the pointer deflects, gas leakage is present. Repair as<br />
outlined under I POint-41.<br />
I Point-4 I<br />
Repair<br />
If a problem is noticed under IPoint-31 above, locate and repair<br />
the leaking point using the following table as a guide.<br />
Leak at/around pipe connection Leak at/around gauge manifold<br />
. a-ring fouled, damaged or<br />
deformed<br />
. Oil not applied to pipe connections<br />
during installation<br />
. Pipe connections not properly<br />
tightened (too tight or too loose)<br />
HA-18<br />
. Malfunctioningcharging hose<br />
. Gauge improperly installed<br />
. Malfunctioning valve<br />
. Malfunctioning packing, etc.<br />
\
To low-pressure<br />
service valve .<br />
DISCHARGING, EVACUATING, CHARGING AND CHECKING<br />
To high-pressure<br />
service valve .<br />
10 ~I:<br />
. =' )<br />
Vacuum pump SHA241B<br />
Close<br />
fU<br />
To low-pressure<br />
service valve<br />
LR~<br />
To low-pressure<br />
service valve<br />
~<br />
~<br />
Close<br />
SHA242B<br />
To high-pressure<br />
service valve .<br />
Open<br />
RHA278<br />
To high-pressure<br />
service valve<br />
SHA244B<br />
I pOint-51<br />
Evacuating the System<br />
1. Close manifold gauge valve securely and disconnect charging<br />
hose from refrigerant can.<br />
2. Connect center charging hose to vacuum pump.<br />
3. Start pump, then open both valves and run pump for over 20<br />
minutes.<br />
I Point-61<br />
Charging<br />
1. Close manifold gauge valves securely and disconnect<br />
charging hose from vacuum pump.<br />
2. Purge air from center charging hose.<br />
1) Connect center charging hose to refrigerant can through<br />
charge valve.<br />
2) Break seal of refrigerant can and purge air.<br />
3. Charge refrigerant into system.<br />
WARNING:<br />
Ensure that engine is off.<br />
1) Open high-pressure valve of manifold gauge and charge<br />
refrigerant into system.<br />
CAUTION:<br />
If charging liquefied refrigerant into the system with the can<br />
turned upside down to reduce charging time, charge it only<br />
through high-pressure (discharge) service valve. After charging,<br />
the compressor should always be turned several times<br />
manually.<br />
2) When low-pressure gauge reading is 98 kPa (1.0 kg/cm2,14<br />
psi), completely close high-pressure valve of manifold gauge<br />
and stop charging.<br />
HA-19
DISCHARGING, EVACUATING, CHARGING AND CHECKING<br />
Run engine at idll<br />
(Below 1,500 rpmle<br />
To low-pressure To high-pressure<br />
service valve . lI\ service valve<br />
Turn<br />
I In or out<br />
#>~f<br />
r<br />
-.. Ii:) Close<br />
SHA245B<br />
L~ n ~ H.h II<br />
Fan lever mode and<br />
temperature dial:<br />
Maximum cold and speed<br />
RHA504<br />
I Point-71<br />
Charging<br />
1. Open manifold gauge low-pressure<br />
erant into system.<br />
WARNING:<br />
Ensure that engine is off.<br />
valve and charge refrig-<br />
2. When refrigerant charging speed slows down, start engine -<br />
air conditioning system ON, maximum cold temperature<br />
maximum blower speed set, can in upright position.<br />
set,<br />
Monitor sight glass. Charge is complete when sight glass is<br />
clear.<br />
Cycling clutch systems will produce bubbles in sight glass<br />
when clutch engages. Therefore, allow 5 seconds after clutch<br />
engages to determine if bubbles continue, and, if so, add<br />
refrigerant to clear sight glass.<br />
WARNING:<br />
Never charge refrigerant through high-pressure side (discharge<br />
side) of system since this will force refrigerant back into<br />
refrigerant can and it may explode.<br />
3. Charge refrigerant while controlling low-pressure gauge<br />
reading at 275 kPa (2.8 kg/cm2,40 psi) or less by turning in<br />
or out low-pressure valve of manifold gauge.<br />
. Be sure to purge air from charging hose when replacing<br />
can with a new one.<br />
4. Charge the specified amount of refrigerant into system by<br />
weighing charged refrigerant with scale. Overcharging will<br />
cause discharge pressure to rise.<br />
Refrigerant amount:<br />
0.9 - 1.0 kg (2.0 - 2.2 Ib)<br />
HA-20
DISCHARGING, EVACUATING, CHARGING AND CHECKING<br />
IPoint-71<br />
Charging (Cont' d)<br />
The state of the bubbles in the sight glass can only be used for<br />
checking whether the amount of charged refrigerant is small or<br />
not. The amount of charged refrigerant should be correctly<br />
judged by means of the discharge pressure.<br />
5. After charging, be sure to install valve cap on service valve.<br />
6. Confirm that there are no leaks in system by checking with a<br />
leak detector.<br />
. When refrigerant charging is performed with a charging cylinder,<br />
charging station, or automatic charging equipment with engine<br />
off, charge only through high pressure side. After specified<br />
refrigerant amount has entered the system, close high-pressure<br />
valve on gauge set. Start engine, return to idle speed, operate<br />
AIC at maximum temperature setting, high blower. Observe<br />
sight glass to confirm complete charge.<br />
Overcharging will result in increased high pressures, and reduced<br />
performance.<br />
HA-21
Check item<br />
Temperature of highpressure<br />
and lowpressure<br />
lines.<br />
State in sight glass.<br />
Pressure of system.<br />
Repair.<br />
a.<br />
DISCHARGING, EVACUATING, CHARGING AND CHECKING<br />
Almost no refrigerant<br />
Almost no difference between<br />
high-pressure and<br />
low-pressure side<br />
temperature.<br />
Bubbles flow continuously.<br />
Bubbles will<br />
disappear al)d something<br />
like mist will flow when<br />
refrigerant is nearly gone.<br />
AC256<br />
High-pressure side is abnormally<br />
low.<br />
Stop compressor immediately<br />
and conduct<br />
an overall check.<br />
The bubbles seen through the sight glass are<br />
influenced by the ambient temperature. Since<br />
the bubbles are hard to show up in comparatively<br />
low temperatures below 20° C (68° F), it<br />
is possible that a slightly larger amount of refrigerant<br />
would be filled, if supplied according<br />
to the sight glass. Recheck the amount when it<br />
Checking Refrigerant level<br />
CONDITION<br />
. Door window:<br />
. A/C switch:<br />
. TEMP. lever position:<br />
. FAN lever position:<br />
. Check sight glass after<br />
minutes.<br />
Insufficient<br />
High-pressure side ,is warm<br />
and low-pressure side is<br />
fairly cold.<br />
The bubbles are seen<br />
at intervals of 1 - 2<br />
seco nd s.<br />
AC257<br />
Both pressures on high<br />
and low-pressure sides are<br />
slightly low.<br />
Check for gas leakage, repair<br />
as required, replenish<br />
and charge system.<br />
HA-22<br />
Open<br />
ON<br />
Max. COLD<br />
4<br />
a lapse of about five<br />
Suitable Too much refrigerant<br />
High-pressure side is hot<br />
and low-pressure side is<br />
cold.<br />
AImost transparent.<br />
Bubbles may appear when<br />
engine speed is raised and<br />
lowered.<br />
High-pressure side is abnormally<br />
hot.<br />
No bubbles can be seen.<br />
No clear difference exists between these two conditions.<br />
Both pressures on high<br />
and low-pressu re sides are<br />
normal.<br />
AC258<br />
Both pressures on high<br />
and low-pressure sides are<br />
abnormally high.<br />
Discharge refrigerant from<br />
service valve of lowpressure<br />
side.<br />
exceeds 20°C (68° F). In higher temperature<br />
b.<br />
the bubbles are easy to show up.<br />
When the screen in the receiver drier is clogged,<br />
the bubbles will appear even if the amount<br />
or refrigerant is normal. In this case, the outlet<br />
side pipe of ,~he receiver drier becomes considerably<br />
cold. '~
UNION TYPE<br />
PLATE TYPE<br />
DISCHARGING, EVACUATING, CHARGING AND CHECKING<br />
~~L<br />
SHA733A<br />
RHA279<br />
RHA280<br />
Checking Refrigerant Leaks<br />
ELECTRIC LEA~ DETECTOR<br />
The leak detector is a delicate device that detects small<br />
amounts of halogen.<br />
To use the device properly, read the manufacturer's manuals.<br />
Also perform the specified maintenance and inspections.<br />
GENERAL PRECAUTIONS FOR HANDLING LEAK<br />
DETECTOR<br />
Place the probe on connection fitting and wait for 5 seconds or<br />
more.<br />
To check coolingunit,wait for 10 secondsor more.<br />
If a leak is detected, keep the probe as still as possible for one<br />
more minute.<br />
When testing single-bolt flange, place the probe on the<br />
opposite side of the fitting.<br />
MEASUREMENT STAN.DARD<br />
If any leak is noted with a detector having a nominal<br />
sensitivity of 15 to 25 g (0.53 to 0.88 oz)/year, that leak must<br />
be repaired.<br />
. The nominal sensitivity of the detector is determined under<br />
the assumption that all the leaking gas is collected by the<br />
detector. Accordingly, the quantity of gas actually leaking<br />
can. amount to five to ten times the indicated value.<br />
Generally speaking, leakage of 150 to 200 g (5.29 to 7.05 oz)<br />
of refrigerant can cause insufficient cooling.<br />
. Oil deposited during assembling must be wiped off before<br />
inspection. Refrigerant easily dissolves in oil, and the presence<br />
of oil can cause an error in measurement.<br />
This precaution is important when checking a used car for<br />
refrigerant leakage.<br />
. If oil is noted at or around connections, it indicates that<br />
refrigerant is leaking.<br />
HA-23
COMPRESSOR<br />
DESCRIPTION OF AIR CONDITIONER<br />
To condenser<br />
fan motor<br />
via thermoswitch<br />
ENGINE<br />
TEMPERATURE<br />
SENSOR<br />
~ ' For U.S.A.<br />
~ ' For Canada<br />
RHA517A<br />
Acceleration Cut System<br />
This system is controlled by the E.C.C.S. control unit.<br />
When the engine is heavily over loaded (throttle sensor judges<br />
that throttle valve is at full throttle position), the compressor is<br />
turned off for approx. 4 seconds to reduce overloading.<br />
Additionally when the temperature of engine coolant rises above<br />
approx. 113°C (235°F), the compressor is turned off.<br />
HA-24
REFRIGERANT FLOW<br />
SERVICE PROCEDURES<br />
Refrigeration Cycle<br />
The refrigerant flows in the standard pattern, that is, through the compressor, the condenser, the receiver<br />
drier, through the evaporator, and back to the compressor. "-<br />
The refrigerant evaporation through the evaporator coil is controlled by an externally equalized expansion<br />
valve, located inside the evaporator case.<br />
FREEZE PROTECTION<br />
The compressor cycles on and off to maintain the evaporator temperature within a specified range. When<br />
the evaporator coil temperature falls below a specified point, the thermo control amplifier interrupts the<br />
compressor operation. When the evaporator coil temperature rises above the specification, the thermo<br />
control amplifier allows compressor operation.<br />
REFRIGERANT SYSTEM PROTECTION<br />
Dual-pressure switch<br />
The refrigerant system is protected against excessively high or low pressures by the dual-pressure switch,<br />
located on the receiver drier. If the system pressure rises above, or falls below the specifications, the<br />
dual-pressure switch opens to interrupt the compressor operation.<br />
Fusible plug<br />
Open at temperature above 105°C (221°F), thereby discharging refrigerant to the atmosphere. If this plug<br />
is melted and opened, check the refrigerant line and replace receiver drier.<br />
Pressure relief valve<br />
The refrigerant system is also protected by a pressure relief valve, located on the end of high flexible hose<br />
near compressor. When the pressure of refrigerant in the system increases to an abnormal level [more<br />
than 3,727 kPa (38 kg/cm2, 540 psi)], the release port on the pressure relief valve automatically opens and<br />
releases refrigerant into the atmosphere.<br />
Pressu re<br />
relief valve<br />
Outside air<br />
u Compressor<br />
lill<br />
s<br />
Condenser<br />
.<br />
Receiver drier<br />
Fusible plug Dual-pressure switch<br />
HA-25<br />
~ gas<br />
High-pressure<br />
.<br />
t ' 'j High-pressu re<br />
liquid<br />
t ~ u<br />
0<br />
Expansion valve<br />
Blower motor<br />
~<br />
liquid<br />
Low-pressure<br />
I,':':':':':':':d Low-pressu<br />
gas<br />
re<br />
RHA393A
Condenser fan<br />
motor* (U.S.A. only)<br />
Expansion valve<br />
SERVICE PROCEDURES<br />
Refrigerant Lines<br />
~ 10.20 (1.0.2.0,<br />
7.14)<br />
~ 15.25 (1.5.2.5,<br />
11 -18)<br />
Ie]<br />
~~<br />
*: For removal, it is necessary to remove condenser.<br />
HA-26<br />
rg<br />
[]]J[1J<br />
Low-pressure<br />
(Suction)<br />
service valve<br />
Pressure relief valve<br />
~7-17 (0.7 -1.7,5;1 -12.3)<br />
D (Tightening torque)<br />
0 0 (Wrench size)<br />
!AJ 20 -29 (2.0 -3.0, 14 -22)<br />
Ie] 15 -25 (1.5-2.5,11-18)<br />
[g 10 -20 (1.0-2.0,7 - 14)<br />
~: N.m (kg-m,ft-Ib)<br />
RHA394A
co;J: N'm (kg-m, ft-Ib)<br />
RHA396A<br />
SERVICE PROCEDURES<br />
Compressor Mounting<br />
co;J 45 -60<br />
(4.6.6.1,33.44)<br />
. co;J 45 - 60<br />
~. ~- (4.6-6.1,33-44)<br />
" ~~<br />
, "- co;J45.60 (4.6 - 6.1, 33 - 44)<br />
RHA395A<br />
Remove screws, which secure thermistor locating stay, from<br />
front of cool~ng unit. Replace thermo control amp. assembly<br />
with a new one. (Without removing cooling unit, thermo control<br />
amp. can be replace.)<br />
Belt Tension<br />
. Refer to MA section.<br />
Fast Idle Control Device (F.I.C.D.)<br />
. Refer to EF & EC section.<br />
HA-27
TEST CONDITION<br />
AIC PERFORMANCE TEST<br />
Performance Chart<br />
Testing must be performed as follows:<br />
Vehicle location: Indoors or in the shade (in a well ventilated place)<br />
Doors: Closed<br />
Door window: Open<br />
Hood: Open<br />
TEMP. lever position: Max. COLD<br />
MODE switch: -; (Ventilation) set<br />
REC switch: ~- (Recirculation) set<br />
FAN lever position: Max. position<br />
Engine speed: 1,500 rpm<br />
Time required before starting testing after air conditioner starts operating: More than 10 minutes<br />
For U.S.A. model, make sure that condenser fan motor does not operate during the following tests.<br />
TEST READING<br />
Recirculating-to-discharge air temperature table<br />
Inside air (Recirculating air)<br />
at blower assembly inlet<br />
Relative humidity Air temperature<br />
% °c (oF)<br />
Ambient air temperature-to-compressor pressure table<br />
HA-28<br />
Dischargeair temperature at center ventilator<br />
°c tF)<br />
20 (68) 1.6 -2.7 (35 -37)<br />
25 (77) 4.4 - 6.0 (40 - 43)<br />
50 - 60 30 (86) 9.2 - 11.3 (49 - 52)<br />
35 (95) 14.8 - 17.0 (59 - 63)<br />
40 (104) 18.1 - 20.3 (65 - 69)<br />
20 (68) 2.7 -4.3 (37 - 40)<br />
25 (77) 6.0 - 8.2 (43 - 47)<br />
60 -70 30 (86) 11.3 - 13.8 (52 - 57)<br />
35 (95) 17.0 - 19.5 (63- 67)<br />
40 (104) 20.3 - 22.8 (69 - 73)<br />
Ambient air<br />
High-pressure (Discharge side) Low-pressure (Suction side)<br />
Relative humidity<br />
%<br />
Air temperature<br />
°c tF)<br />
kPa (kg/cm2 , psi) kPa (kg/cm2 , psi)<br />
20 (68) 1,030 - 1,255 (10.5 - 12.8, 149 - 182) 98.1 - 142.2 (1.0 - 1.45, 14.2 - 20.6)<br />
25 (77) 1,196 - 1,471 (12.2 - 15.0, 173 - 213) 122.6 - 171.6 (1.25- 1.75,17.8- 24.9)<br />
50 -70 30 (86) 1,402 - 1,706 (14.3 - 17.4,203 - 247) 161.8 - 210.9 (1.65 - 2.15, 23.5 - 30.6)<br />
35 (95) 1,608 - 1,971 (16.4 - 20.1, 233 - 286) 205.9 - 259.9 (2.1 - 2.65, 29.9 - 37.7)<br />
40 (104) 1,844 - 2,256 (18.8 - 23.0, 267 - 327) 259.9 - 318.7 (2.65 - 3.25, 37.7 - 46.2)
Characteristics revealed by the manifold gauge<br />
readings for the air conditioning system are shown<br />
in the following table.<br />
For how to do the performance test, refer to the<br />
item "Performance Chart".<br />
Condition<br />
I INSUFFICIENT 'REFRIGERANT CHARGE I.<br />
AC352A<br />
I ALMOST NO REFRIGERANT I<br />
AC353A<br />
AIC PERFORMANCE TEST<br />
Insufficient cool ing.<br />
I MALFUNCTIONING EXPANSION VALVE I<br />
AC354A<br />
Bubbles appear in sight<br />
glass.<br />
No cooling action.<br />
A lot of bubbles or<br />
something like mist<br />
appears in sight glass.<br />
Slight cooling.<br />
Sweat or frosting on<br />
expansion valve inlet.<br />
Performance Test Diagnoses<br />
HA-29<br />
In the following table, the portion smeared with<br />
ink on each gauge scale indicates the range showing<br />
that the air conditioning system is in good order.<br />
This range is described in Performance Chart.<br />
Probable cause<br />
Refrigerant is low, or<br />
leaking slightly.<br />
Serious refrigerant leak.<br />
Expansion valve restricts<br />
refrigerant flow.<br />
. Expansion valve is<br />
clogged.<br />
. Expansion valve is inoperative.<br />
Valve stuck closed.<br />
Thermal bulb has<br />
lost charge.<br />
Corrective action<br />
1. Leaktest.<br />
2. Repair leak.<br />
3. Charge system.<br />
Evacuate, as necessary, and<br />
recharge system.<br />
Stop compressor immediately.<br />
1. Leak test.<br />
2. Dischargesystem.<br />
3. Repair leak(s).<br />
4. Replace receiver drier if<br />
necessary.<br />
5. Check oil level.<br />
6. Evacuate and recharge<br />
system.<br />
If valve inlet reveals sweat<br />
or frost:<br />
1. Discharge system.<br />
2. Remove valve and clean<br />
it. Replace it if necessary.<br />
3. Evacuate system.<br />
4. Charge system.<br />
If valve does not operate:<br />
1. Discharge system.<br />
2. Replace valve.<br />
3. Evacuate and charge<br />
system.
IAIR IN SYSTEM I<br />
I MOISTURE IN SYSTEM I<br />
Condition<br />
AC356A<br />
AC359A<br />
AC360A<br />
AIC PERFORMANCE TEST<br />
Insufficient cooling.<br />
Sweat on suction line.<br />
No cooling.<br />
Sweat or frosting on<br />
suction line.<br />
Insufficient cool ing.<br />
Performance Test Diagnoses (Cont'd)<br />
Sight glass shows occasional<br />
bubbles.<br />
After short operation,<br />
suction side may show<br />
vacuum pressure reading.<br />
During this condition,<br />
discharge air will be warm.<br />
As a warning of this,<br />
reading vibrates around<br />
39 kPa (0.4 kg/cm2 ,<br />
6 psi).<br />
HA-30<br />
Probable cause<br />
Expansion valve allows too<br />
much refrigerant through<br />
evaporator.<br />
Malfunctioning expansion<br />
valve.<br />
Air mixed with refrigerant<br />
in system.<br />
Drier is saturated with<br />
moisture. Moisture has<br />
frozen in expansion valve.<br />
Refrigerant flow is restricted.<br />
Corrective action<br />
Check valve for operation.<br />
If suction side does not<br />
show a pressure decrease.<br />
replace valve.<br />
1. Dischargesystem.<br />
2. Replacevalve.<br />
3. Evacuate and charge<br />
system.<br />
1. Dischargesystem.<br />
2. Replacereceiver drier.<br />
3. Evacuat~and charge<br />
system.<br />
1. Discharge system.<br />
2. Replace receiver drier<br />
(twice if necessary).<br />
3. Evacuate system completely.<br />
(Repeat 30minutes<br />
evacuating<br />
three times.)<br />
4. Recharge system.
Condition<br />
I MALFUNCTIONING CONDENSER I<br />
@ @<br />
AC361A<br />
I HIGH PRESSURE LINE BLOCKED I<br />
AC362A<br />
I MALFUNCTIONING COMPRESSOR I<br />
AC363A<br />
AIC PERFORMANCE TEST<br />
Performance Test Diagnoses (Cont'd)<br />
No cooling action: engine<br />
may overheat.<br />
Bubbles appear in sight<br />
glass of drier.<br />
Suction line is very hot.<br />
Insufficient cooling.<br />
Frosted high-pressure<br />
liquid line.<br />
Insufficient cooling.<br />
HA-31<br />
Probable cause<br />
Usually a malfunctioning<br />
condenser.<br />
"<br />
Drier clogged, or restriction<br />
in high-pressure line.<br />
Interr1'alproblem in compressor.<br />
or damaged gasket<br />
and valve.<br />
Corrective action<br />
. Check fan belt and fluid<br />
coupling<br />
. Check condenser fan<br />
motor. (U.S.A. model<br />
only)<br />
. Check condenser for dirt<br />
accumulation.<br />
. Check engine cooling<br />
system for overheating.<br />
. Check for refrigerant<br />
overchargi ng.<br />
If pressure remains high in<br />
spite of all above actions<br />
taken, remove and inspect<br />
the condenser for possible<br />
oil clogging.<br />
1. Dischargesystem.<br />
2. Removereceiver drier<br />
or strainer and replace<br />
it.<br />
3. Evacuate and charge<br />
system.<br />
1. Discharge system.<br />
2. Remove and check compressor.<br />
3. Repair or replace compressor.<br />
4. Check oil level.<br />
5. Replace receiver drier.<br />
6. Evacuate and charge<br />
system.
TOO MUCH 01 L IN<br />
SYSTEM (Excessive)<br />
Condition<br />
AC364A<br />
AIC PERFORMANCE TEST<br />
Insufficient cooling.<br />
Performance Test Diagnoses (Cont'd,)<br />
HA-32<br />
Probable cause<br />
Too much oil circulates<br />
with refrigerant, causing<br />
the cooling capacity of the<br />
system to be reduced.<br />
Corrective action<br />
Refer to COMPRESSOR01L<br />
for correcting oilleve!.
COMPRESSOR OIL - For NVR 140S (ATSUGI make)<br />
The oil used<br />
'I<br />
to lubricate I the<br />
Checking<br />
compressor is<br />
and Adjusting<br />
4. Check the purity of the oil and then adjust oil<br />
circulating<br />
Whenever<br />
with the refrigerant.<br />
replacing any component of the sys-<br />
level following the procedure<br />
(a) When oil is clean;<br />
below.<br />
tem or a large amount of gas leakage occurs,<br />
Unit: mQ (US fl OZ,Imp fl oz)<br />
add oil to maintain the original amount of oil.<br />
OIL CAPACITY<br />
Applied model<br />
Unit: mQ (US fl OZ, Imp fl oz)<br />
All models<br />
Capacity<br />
Total in system 200 (6.8, 7.0)<br />
\<br />
Amount of oil which can<br />
be drained<br />
Compressor (<strong>Service</strong><br />
parts) charging amount<br />
*: All oil cannot be drained from system.<br />
Approx. 100<br />
(3.4,3.5)*<br />
200 (6.8, 7.0)<br />
OIL RETURN OPERATION<br />
Before checking and adjusting oil level, operate<br />
compressor at engine idling speed, with controls<br />
set for maximum cooling and high blower speed,<br />
for 20 to 30 minutes in order to return oil to<br />
compressor.<br />
CHECKING AND ADJUSTING FOR USED<br />
COMPRESSOR<br />
1. After oil return operation, stop the engine and<br />
discharge refrigerant, and then remove compressor<br />
from the vehicle.<br />
2. Drain compressor oil from compressor discharge<br />
port and measure the amount.<br />
Oil is sometimes hard to extract when compressor<br />
is cooled. Remove oil while compressor<br />
is warm [maintained to 40 to 50°C (104 to 122°F».<br />
3. If the amount is less than 90 m Q (3.0 US fl OZ,<br />
3.2 Imp fl oz), some refrigerant may have leaked<br />
out. Conduct leak tests on connections of each<br />
system, and if necessary, repair or replace malfunctioning<br />
parts.<br />
HA-33<br />
Amount of oil drained Adjusting procedure<br />
Above 90 (3.0, 3.2) *<br />
Below90 (3.0, 3.2)<br />
Oil level is right.<br />
Pour in same amount of oil<br />
as was drained out.<br />
Oil levelmay be low.<br />
Pour in 90 mQ(3.0 USfl OZ,<br />
3.2 Imp fl oz) of oil.<br />
*: If amount of oil drained is much greater than under<br />
normal circumstances, flush air conditioner system<br />
with refrigerant. Then pour in 200 mQ (6.8 US fl OZ,<br />
7.0 Imp fl oz) of oil into air conditioner system.<br />
(b) When oil contains chips or other foreign<br />
material; .<br />
After air conditioner system has been<br />
flushed with refrigerant, replace receiver<br />
drier. Then pour in 200 m Q (6.8 US fl oz,<br />
7.0 Imp fl oz) of oil into air conditioner<br />
system.<br />
CHECKING AND ADJUSTING FOR<br />
COMPRESSOR REPLACEMENT<br />
200 m Q (6.8 USfl OZ, 7.0 Imp fl oz) of oil is<br />
charged in compressor (service parts). So it is<br />
necessary to drain the proper amount of oil from<br />
new compressor. Follow the procedure below.<br />
1. After oil return operation, drain compressor oil<br />
from used<br />
amount.<br />
compressor and measure the<br />
(It is the same procedure as CHECKING AND<br />
ADJUSTING FOR USED COMPRESSOR.)
COMPRESSOR OIL - For NVR 140S (ATSUGI make)<br />
2. Check the purity of the oil and then adjust oil<br />
level following the procedure below.<br />
(a) When oil is clean;<br />
Amount of oil drained<br />
from usedcompressor<br />
Above 90 (3.0, 3.2) ~<br />
Below 90 (3.0,- 3.2)<br />
Unit: mi! (USfl oz, Imp fl oz)<br />
Draining amount of oil<br />
from new compressor<br />
200 (6.8, 7.0) - [Amount of<br />
oil drained + 20 (0.7, 0.7)]<br />
90 (3.0, 3.2)<br />
*: If amount of oil. drained is greater than under<br />
". normal circumstances, flush air conditioner system with<br />
refrigerant. Then install new compressor. [200 mi! (6.8<br />
US fl oz, 7.0 Imp fl oz) of oil is charged compressor<br />
service parts.] .<br />
Example:<br />
Amount of oil drained<br />
from usedcompressor<br />
. "<br />
110 (3.7, 3.9)<br />
70 (2.4, 2.5)<br />
Unit: mi! (US fl OZ,Imp fl oz)<br />
Draining amount of oil<br />
from new compressor<br />
70 (2.4,2.5)<br />
90 (3.0, 3.2)<br />
(b) When oil contains chips or foreign material;<br />
After air conditioner system has been<br />
flushed with refrigerant,. replace receiver<br />
drier. Then install new compressor. [200 m<br />
Q (6.8 US fl OZ, 7.0 Imp fl oz) of oil is<br />
charged in compressor service parts.]<br />
CheckinSl and Adjusting (Cont'd)<br />
HA-34<br />
~
COMPRESSOR - Model NVR140S (ATSUGI make)<br />
Precautions<br />
. Plug all openings<br />
from entering.<br />
to prevent moisture and foreign matter<br />
.Do not leave compressor on its side or upside down for<br />
more than 10 minutes.<br />
. When replacing or repairing compressor, check compressor<br />
oil level in system.<br />
. When replacing with a new compressor, drain specified oil<br />
from new compressor. Refer to COMPRESSOR OIL.<br />
. Be sure there is no oil or dirt on frictional surface of<br />
clutch disc and pulley.<br />
. When replacing compressor clutch, be careful not to<br />
scratch shaft or bend pulley.<br />
. When replacing compressor clutch assembly, do not forget<br />
BREAK-IN OPERATION.<br />
. Whel\ s~ring a compressor, be sure to fill it with refrig-<br />
erant \to prevent rust formation. Add refrigerant at the<br />
low-pressure side and purge air at the high-pressure side,<br />
while rotating shaft by hand.<br />
HA-35<br />
~
Adjusting shim 1<br />
Center bolt<br />
tOJ 9.1 . 11.8 (0.93 - 1.2,6.7 - 8.71<br />
tOJ: N.m (kg-m, ft-Ibl<br />
COMPRESSOR - Model NVR 1408 (ATSUGI make)<br />
tOJ 29 -39 (3.0 - 4.0, 22 - 291<br />
HA-36<br />
Key<br />
Thermal protector<br />
tOJ 10. 15<br />
11.0. 1.5,<br />
7.111<br />
RHA283
COMPRESSOR - Model NVR 1408 (ATSUGI make)<br />
SHA052B<br />
~ c::t<br />
After flattening lock washer tab,<br />
loosen lock nut. SHA053B<br />
Clutch disc<br />
Pulley<br />
Coil<br />
~<br />
SHA703B<br />
0.3 -0.6 Adjusting shim<br />
(0.012 -0.024) [Thickness- 0.1, 0.3, 0.5, 0.8<br />
(0.004,0.012,0.020,0.031)]<br />
~<br />
* Spark plug gap gauge<br />
~<br />
~<br />
Unit: mm (in) RHA843<br />
Compressor Clutch<br />
REPLACEMENT<br />
. When removing center bolt, hold clutch disc with clutch disc<br />
wrench.<br />
. Using clutch disc puller, clutch disc can be removed.<br />
. Bend down pawl of lock washer.<br />
. When removing pulley, remove lock nut with nut wrench.<br />
INSPECTION<br />
Clutch disc<br />
If the contact surface shows signs of damage due to excessive<br />
heat, the drive plate and pulley should be replaced.<br />
Pulley<br />
Check the appearance of the pulley assembly. If the contact<br />
surface of the pulley shows signs of excessive grooving due to<br />
slippage, both the pulley and drive plate should be replaced.<br />
The contact surfaces of the pulley assembly should be cleaned<br />
with a suitable solvent before reinstallation.<br />
Coil<br />
Check coil for loose connection or cracked insulation.<br />
ADJUSTMENT<br />
. When assembling clutch disc, adjust disc-to-pulley clearance<br />
with shims.<br />
BREAK-IN OPERATION<br />
When replacing compressor clutch assembly, do not forget<br />
break-in operation, accomplished<br />
the clutch about thirty times.<br />
by engaging and disengaging<br />
Break-in operation raises the level of transmitted torque.<br />
HA-37
COMPRESSOR - Model NVR 140S (ATSUGI make)<br />
Thermal protector<br />
SHA055B<br />
Thermal Protector<br />
. When servicing, do not allow foreign matter to get into<br />
compressor. ,<br />
. Check continuity between two terminals.<br />
HA-38
NOTE<br />
COMPRESSOR - Model NVR140S (ATSUGI make)<br />
/<br />
HA-39
n<br />
U<br />
THERMO-<br />
SWITCH<br />
~<br />
THERMAL<br />
PROTEC1OR<br />
"<br />
7<br />
~<br />
~(SUb h.cn.s~ ~i0 (J<br />
~<br />
I'"<br />
@)<br />
S. M.J.<br />
ffiefer to last r age<br />
(Fo I dout page).<br />
(@) @) (Main<br />
harness)<br />
-L/OR 112 L/OR<br />
-LG HI2 LG -<br />
-LG/R HID LG/R<br />
31'1>:>-'"<br />
'\'\'\'\<br />
..J..J..J..J<br />
@~<br />
RESISTOR<br />
~<br />
AIC ELECTRICAL CIRCUIT<br />
BLOWER<br />
~<br />
@~ 31' I>:<br />
'\ '\<br />
..J ..J<br />
@)<br />
~3:I>:>-'"<br />
~~~<br />
~~~<br />
Wiring Diagram (Cont'd)<br />
(Subharness)<br />
'\. OFF 1<br />
24<br />
2<br />
26<br />
2 3 4<br />
27<br />
2<br />
8<br />
21<br />
20<br />
1<br />
1<br />
FAN<br />
SWITCH<br />
(<br />
(tJ-<br />
(tl-\-<br />
....,<br />
I LLUMI NATI ON<br />
HA-41<br />
'"<br />
@@~<br />
L/R<br />
L/R<br />
L/OR<br />
@<br />
BODY GROUND<br />
Iii<br />
FUSE BLOCK<br />
(Refer to "POWER<br />
SUPPLY ROUTING"<br />
in EL sect ion. )<br />
j<br />
G/Y<br />
G/B 0<br />
L/OR<br />
@<br />
G/Y G<br />
@<br />
L/G<br />
LG/B<br />
L/OR<br />
0<br />
:W<br />
@<br />
IGNITION SWITCH<br />
ACC or ON<br />
MODE DOOR MOTOR<br />
V<br />
B/L<br />
FOOT<br />
F/D<br />
DfF<br />
INTAKE<br />
DOOR MOTOR<br />
THERMO<br />
CONTROL AMP.<br />
~RM'STOR<br />
(§)<br />
G/Y-<br />
R/Y-<br />
- LG 1314<br />
LG/B<br />
L/OR<br />
1211<br />
G/Y 169<br />
G/B<br />
R/L<br />
815<br />
- B 17<br />
- G<br />
L/Y<br />
87<br />
L/W 65<br />
- L<br />
L/B<br />
43<br />
L/R 2 1<br />
L/OR<br />
O<br />
From illumination<br />
} system<br />
~: For U. S. A.<br />
(CAN): For Canada<br />
,19<br />
0<br />
21<br />
PUSH<br />
CONTROL<br />
UNIT<br />
RHA398A
Passenger compartment<br />
Engine compartment<br />
\ Ther';'oswitch\<br />
(U:S.A.<br />
-'.~:<br />
\<br />
:: \<br />
onl\) \ ...1.--\'~<br />
AIC COMPONENT LAYOUT<br />
Condenser fan motor<br />
(U.S.A. only)<br />
HA-42<br />
~/<br />
Resistor<br />
Inteke door motor<br />
RHA403A
NOTE<br />
t<br />
AIC COMPONENT LAYOUT<br />
/<br />
HA-43<br />
~
TROUBLE DIAGNOSES<br />
Contents<br />
How to Perform Trouble Diagnoses for Quick and Accurate Repair HA-45<br />
Symptom Chart HA-46<br />
Preliminary Check HA-48<br />
PRELIMINARY CHECK 1<br />
(Intake door is not set at "FRESH" in DEF or FOOT mode.) HA-48<br />
PRELIMINARY CHECK 2<br />
(A/C does not blow cold air.) '"'''''''''''''''''''''''''''''''''''''''''''''''''''''''''''''''''''''''''''''''''''''''''''' HA-49<br />
PRELIMINARY CHECK 3 "<br />
(Magnet clutch does not engage in DEF mode.) HA-50<br />
PRELIMINARY CHECK 4<br />
(Air outlet does not change.) HA-51<br />
PRELIMINARY CHECK 5<br />
(Noise) HA-52<br />
Main Power Supply and Ground Circuit Check HA-53<br />
Harness Layout for AIC System HA-55<br />
Circuit Diagram for Quick Pin Point Check HA-56<br />
Diagnostic Procedure 1<br />
(SYMPTOM: Blower motor does not rotate.) HA-57<br />
Diagnostic Procedure 2<br />
(SYMPTOM: Air outlet does not change.) HA-59<br />
Diagnostic Pfocedure 3<br />
(SYMPTOM: Intake door does not change in VENT, B/L or FOOT mode.) HA-61<br />
Diagnostic Procedure 4<br />
(SYMPTOM: Magnet clutch does not engage with A/C switch and fan switch are ON.) HA-62<br />
Diagnostic Procedure 5<br />
(SYMPTOM: Illumination or indicators of push control unit do not come on.) HA-66<br />
Electrical Components Inspection HA-70<br />
HA-44
1<br />
WORK FLOW<br />
-----------------<br />
I<br />
I<br />
I<br />
I<br />
I<br />
I<br />
I<br />
I<br />
I<br />
I<br />
I<br />
I<br />
I<br />
I<br />
I<br />
I<br />
I<br />
I<br />
I<br />
I<br />
I<br />
I<br />
I<br />
I<br />
I<br />
I<br />
I<br />
I<br />
I<br />
I<br />
I<br />
I<br />
I<br />
I<br />
I<br />
. Diagnostic procedure(s)<br />
(See page<br />
HA-57 - 69.)<br />
. Circuit diagram<br />
for quick pin<br />
point check (See<br />
page HA-56.)<br />
I<br />
I ----<br />
L -- -- - - N.G.<br />
TROUBLE DIAGNOSES<br />
How to Perform Trouble Diagnoses<br />
for Quick and Accurate Repair<br />
LISTEN TO CUSTOMER<br />
COMPLAINTS AND CONFIRM.<br />
INVESTIGATE ITEMS YOU<br />
SHOULD CARRY OUT RELATED<br />
TO EACH SYMPTOM.<br />
ELIMINATE GOOD SYSTEM(S)/<br />
PART(S).<br />
CHECK MAIN POWER SUPPLY<br />
AND GROUND CIRCUITS.<br />
ELIMINATE GOOD PART(S)/<br />
HARNESS(ES)/CONNECTOR(S)<br />
ELECTRICALLY.<br />
Malfunctioning<br />
harness(es)/<br />
connector(s)<br />
Malfunctioning<br />
part(s)<br />
REPAIR/<br />
REPLACE.<br />
O.K.<br />
CHECK OUT<br />
HA-45<br />
< Reference item<br />
Symptom Chart<br />
(See page HA-46 - 47.)<br />
Preliminary Check<br />
(See page HA-48- 52.)<br />
Main Powerf.;upplY<br />
and Ground Circuit<br />
Check<br />
(See page HA-53- 54.)<br />
. Harness Layout<br />
for A/C System<br />
(See page HA-55.)<br />
Electrical Components<br />
Inspection<br />
(See page HA-70- 72.)
DIAGNOSTIC TABLE<br />
/<br />
PROCEDURE<br />
TROUBLE DIAGNOSES<br />
Symptom Chart<br />
(<br />
0, ..: Thenumbermeanscheckingorder,<br />
0 : Asfor checkingorder, referto eachflowchart, (It dependson malfunctioningportion.)<br />
HA-46<br />
Main Power<br />
Preliminary Diagnostic Supply and<br />
Check Procedure Ground Circuit<br />
Check<br />
a) 0 It)<br />
It)
::I:<br />
» I<br />
~<br />
"'-01<br />
\<br />
\<br />
0 0 Blowermotor<br />
0 0 Resistor<br />
0 0 0 A/C switch<br />
0 0 0 RECswitch<br />
0 0 VENTswitch<br />
0 0 BILswitch Push<br />
control<br />
0 0 FOOTswitch unit<br />
0 0 FID switch<br />
0 0 0 DEF switch<br />
0 0 0 0 0 Fanswitch<br />
0 Modedoor motor<br />
0 0 Intakedoor motor<br />
0 0 0 A/C relay<br />
0 0 0 Thermo control amp.<br />
0 0 0 0 Dual-pressur, switch<br />
0 0 0 Compressor (Magnetclutch)<br />
0 0 0 Thermal protector<br />
Compressor<br />
0<br />
0 0 0 E.C.C.S.control unit<br />
Illumination system<br />
&<br />
R<br />
E<br />
0 Knob illumination<br />
0 0 0 0 0 0 0 0 Harness
PRELIMINARY CHECK 1<br />
Intake door is set at "FRESH" in DEF or F/D mode.<br />
/<br />
TROUBLE DIAGNOSES<br />
Preliminary Check<br />
Is intake door in "Fresh" position<br />
when REC switch is turned from<br />
ON to OFF at VENT, B/L or<br />
FOOT mode with ignition switch<br />
at. ACe and fan speed at 4?<br />
(Can you hear air movingfrom<br />
the intake unit?)<br />
Yes<br />
Is intake door in "REC" position<br />
when REC switch is turned from<br />
OFF to ON at VENT, B/L or<br />
FOOT mode with ignition switch<br />
at ACC and fan speed at 4?<br />
(Can you hear air moving from<br />
the intake unit?<br />
Yes<br />
Is intake door in "Fresh" positionl No<br />
when F/D switch or DEF switch<br />
is pushed?<br />
(Can you hear air moving from<br />
the intake unit?)<br />
Yes<br />
INSPECTION END<br />
HA-48<br />
No<br />
No<br />
I<br />
Go to DiagnosticProcedure 3.<br />
Go to Diagnostic Procedure 3.<br />
Replace control amp. built-in<br />
push control unit.
PRELIMINARY CHECK 2<br />
A/C does not blow cold air.<br />
CHECK COMPRESSOR BELT<br />
TENSION.<br />
Refer to MA section.<br />
TN.G.<br />
Adjust or replace<br />
compressor belt<br />
CHECK REFRIGERANT.<br />
Connect manifold gaugethen<br />
check system pressure.<br />
O.K.<br />
O.K. N.G.<br />
CHECK FOR<br />
REFRIGERANT<br />
LEAKS<br />
[ Go to Diagnostic Procedure 4<br />
CHECK AIR MIX DOOR<br />
ADJUSTMENT.<br />
Refer to DOOR CONTROL.<br />
N.G.<br />
TROUBLE DIAGNOSES<br />
Preliminary Check (Cont'd)<br />
"<br />
DOES AIR FLOW FROM<br />
VENTS?<br />
Condition<br />
. Ignition switch, AIC switch,<br />
and fan switch are ON.<br />
. Modeswitch isin VENT<br />
mode and temperature lever<br />
is in full cold position.<br />
O.K.<br />
N.G.<br />
IS BLOWER MOTOR OPERAT.<br />
ING NORMALLY?<br />
Yes<br />
No<br />
CHECK BLOWER<br />
MOTOR<br />
OPERATION.<br />
Go to Diagnostic<br />
Procedure 1.<br />
CHECK COMPRESSOR<br />
OPERATION. CHECK FOR EVAPORATOR<br />
O.K.<br />
I- COIL FREEZE UP.<br />
Remove intake unit. Check if<br />
CHECK REFRIGERATION<br />
CYCLE PRESSURE WITH<br />
MANIFOLD GAUGE<br />
CONNECTED.<br />
Refer to Performance Chart.<br />
N.G.<br />
Go to Performance Test<br />
Diagnoses.<br />
I.O.K. I CHECK EVAPORATOR<br />
OUTLET AIR TEMPERA-<br />
TURE.<br />
Refer to Performance Chart.<br />
N.G.<br />
CHECK THERMO CONTROL<br />
AMP. OPERATION.<br />
Refer to Electrical<br />
Inspection.<br />
Components<br />
HA-49<br />
O.K.<br />
evaporator freezes.<br />
N.G.<br />
(Freezeup)<br />
.<br />
O.K.<br />
(Does not<br />
freeze up)<br />
CHECK VENTILA. ,.<br />
TOR DUCT FOR<br />
AIR LEAKS.<br />
CHECK THERMO CONTROL<br />
AMP. OPERATION.<br />
Refer to Electrical Components<br />
Inspection.
TROUBLE DIAGNOSES<br />
Preliminary Check (Co nt' d)<br />
PRELIMINARY CHECK 3<br />
Magnet clu,ch does not engage In DEF mode.<br />
. Perform PRELIMINARYCHECK2 before referring to the following flow chart.<br />
~<br />
With engine running, does<br />
magnet clutch engage normally<br />
when A/C switch and fan switch<br />
are ON?<br />
Yes<br />
Push A/C switch and turn A/C<br />
system OFF. Make sure that<br />
magnet clutch is disengaged.<br />
With engine running, does<br />
magnet clutch engagenormally<br />
when DEF switch and fan switch<br />
are ON?<br />
Yes<br />
INSPECTION END<br />
HA-50<br />
No<br />
Go to Diagnostic Procedure 4.<br />
No Replace control amp. built-in<br />
push control unit.<br />
(
PRELIMINARY CHECK 4<br />
Air outlet does not change.<br />
TROUBLE DIAGNOSES<br />
Preliminary Check (Cont'd)<br />
DOES AIR COME OUT FROM EACH DUCT NORMALLY WHEN<br />
EACH MODE SWITCH IS PUSHED WITH IGNITION SWITCH AT<br />
ACC?<br />
... 0<br />
Indicator illuminates<br />
... ... . . Air outlet<br />
,1 ,.. ....1 ........<br />
Q) " 0<br />
,1<br />
...<br />
,..<br />
.<br />
....I<br />
.<br />
........<br />
0<br />
0<br />
0<br />
VENT<br />
FOOT & VENT<br />
FOOT & DEF<br />
FOOT & DEF<br />
0 DEF<br />
Airdistributionratios<br />
VENT S/L FOOT F/D DEF<br />
... ...<br />
.. .,... ...<br />
; s.<br />
.<br />
I<br />
I<br />
I<br />
I<br />
I<br />
I<br />
I<br />
I<br />
I<br />
I<br />
I VENT<br />
I<br />
I<br />
I<br />
I<br />
I<br />
I<br />
I<br />
I<br />
I<br />
I<br />
' ''' I<br />
I<br />
f I I<br />
I<br />
Yes<br />
INSPECTION END<br />
(%)<br />
100<br />
80<br />
50<br />
40<br />
0<br />
HA- 51<br />
No<br />
I Go to Diagnostic Procedure2.<br />
!<br />
/
PRELIMINARY CHECK 5<br />
Noise<br />
Replace<br />
expansion valve.<br />
~<br />
Replace<br />
compressor.<br />
TROUBLE DIAGNOSES<br />
, ------<br />
Preliminary Check (Cont'd)<br />
Check where noise<br />
comes from.<br />
The line is fixed<br />
straight to the body.<br />
Fix the line with<br />
rubber or some vibration<br />
absorbing material.<br />
Readjust belt tension.<br />
Refer to ENGINE<br />
MAINTENANCE<br />
in MAsection.<br />
HA-52<br />
The line is not<br />
fixed.<br />
The pully center does<br />
not match.<br />
Readjust the pully<br />
center.<br />
(<br />
Belt
Thermo control amp.<br />
connector @<br />
~~<br />
L/OR<br />
Thermo con trol amp.<br />
nector @<br />
'O"~ LG/B ~<br />
[ill<br />
i5<br />
.~<br />
-= Continuity exists: O.K.<br />
i5<br />
00<br />
':" RHA406A<br />
00<br />
§<br />
RHA509A<br />
TROUBLE DIAGNOSES<br />
Main Power Supply and Ground Circuit Check<br />
POWER SUPPLY CIRCUIT CHECK FOR AIC SYSTEM<br />
Check power supply circuit for air conditioning system.<br />
Refer to "POWER SUPPLY ROUTING" in EL section and AIC<br />
ELECTRICAL CIRCUIT.<br />
THERMO CONTROL AMP. CHECK<br />
Check power supply circuit for thermo control amp. with ignition<br />
switch ON.<br />
1. Disconnect thermo control amp. harness connector.<br />
2. Connect voltmeter from harness side.<br />
3. Measure voltage across terminal No. @ and body ground.<br />
EB<br />
@<br />
Voltmeter terminal<br />
8<br />
Voltage<br />
Body ground Approx. 12V ~<br />
.,<br />
Check body ground circuit for thermo control amp. with ignition<br />
switch OFF, AIC switch ON and fan switch ON.<br />
1.<br />
2.<br />
Disconnect thermo control amp. harness connector.<br />
Connect ohmmeter from harness side.<br />
3. Check<br />
ground.<br />
for continuity between terminal No. @ and body<br />
EB<br />
@<br />
HA-53<br />
Ohmmeter terminal<br />
8<br />
Body ground<br />
Continuity<br />
Yes<br />
(
lit<br />
..-cT<br />
IV 00<br />
Push control unit<br />
connector @<br />
~ ~n<br />
RHA431A ~!<br />
litij~<br />
Push control unit<br />
connector @<br />
IBffiEHEI<br />
B<br />
[ID<br />
::<br />
RHAB96A<br />
TROUBLE DIAGNOSES<br />
Main Power Supply and Ground Circuit Check<br />
(Cont'd)<br />
PUSH CONTROL UNIT CHECK<br />
Check power supply circuit for push control unit with ignition<br />
switch at ACC.<br />
1.<br />
2.<br />
Disconnect push control unit harness connector.<br />
Connect voltmeter from harness side.<br />
3. Measure voltage across terminal No. @ and body ground.<br />
Ei1<br />
@<br />
Voltmeter terminal<br />
e<br />
I<br />
Voltage<br />
Body ground Approx.12V<br />
Check body ground circuit for push control unit with ignition<br />
switch OFF.<br />
1. Disconnect push control unit harness connector.<br />
2. Connect ohmmeter from harness side.<br />
3. Check for continuity between terminal No. @ and body<br />
ground.<br />
HA-54<br />
\<br />
(
Passenger compartment<br />
Engine compartment<br />
@<br />
:;r.<br />
~/<br />
Condenser fan motor (U.S.A. only)<br />
Engine room harness<br />
@):<br />
@):<br />
@):<br />
@)-1:<br />
@)-2:<br />
Dual-pressure switch<br />
Condenser fan motor<br />
AIC relay<br />
Compressor (Magnet clutch)<br />
Compressor (Thermal protector)<br />
TROUBLE DIAGNOSES<br />
Harness Layout for A/C System<br />
HA-55<br />
Main harness<br />
@:<br />
@) :<br />
@:<br />
@:<br />
@:<br />
@:<br />
@:<br />
Mode door motor<br />
Push control unit<br />
Fan switch<br />
Thermo control amp.<br />
Resistor<br />
Blower motor<br />
Intake door motor<br />
@<br />
'.<br />
RHA404A
::E:<br />
»I<br />
U1<br />
en<br />
:D<br />
:I<br />
~ 0<br />
(,II<br />
~<br />
30<br />
FUSE<br />
I'm M BLOWER<br />
'N MOTOR<br />
@€3<br />
m<br />
@<br />
Fa<br />
\&",l1tis<br />
Blower motor<br />
connector @<br />
[;J<br />
~<br />
"cfi' 2 3 4,<br />
RHA407A<br />
;l1tiJ<br />
Blower4m~1 II Q I<br />
connector @ 00<br />
Continuity exists: O.K.<br />
RHA510A<br />
[i] Resistor@<br />
~m l1t i)<br />
Ii]<br />
INCIDENT<br />
-<br />
"~~<br />
l1tu<br />
Blower motor Resistor<br />
connector @ connector @<br />
Flow chart<br />
No.<br />
1 Fan fails to rotate. rn<br />
2<br />
3<br />
4<br />
5<br />
Fan does not rotate at<br />
1 peed.<br />
Fan does not otate at<br />
2peed.<br />
Fan does not rotate at<br />
3peed.<br />
Fan does not rotate at<br />
4peed.<br />
L1J<br />
00<br />
-=<br />
(<br />
"0' 23 . 4<br />
RHA408A<br />
Y~~lfOO<br />
L/W [ill L/W<br />
RHA518A<br />
TROUBLE DIAGNOSES<br />
Diagnostic Procedure 1<br />
SYMPTOM:<br />
. Perform<br />
Blower motor<br />
PRELIMINARY<br />
does not rotate. !<br />
CHECK 2 befor~ referring to the<br />
following flow chart.<br />
Check if blower motor rotates<br />
properly at eachfan speed.<br />
Conduct check asper flow chart<br />
at left.<br />
Fa rn ~ ~ L1J ~<br />
CHECK POWER SUPPLY<br />
FOR BLOWER MOTOR.<br />
Disconnect blower motor<br />
harnessconnector.<br />
Do approx. 12 volts exist between<br />
blower motor harness<br />
terminal No. @ and body<br />
ground?<br />
[;J<br />
[i]<br />
O.K.<br />
Check circuit continuity between<br />
blower motor harness<br />
terminal No. @ and body<br />
ground.<br />
O.K.<br />
CHECK BLOWER MOTOR.<br />
(Refer to Electrical<br />
Components Inspection.)<br />
N.G.<br />
Replace blower motor.<br />
CHECK BLOWER MOTOR<br />
CIRCUIT BETWEEN BLOWER<br />
MOTOR AND RESISTOR.<br />
Do approx. 12 volts exist between<br />
resistor harnessterminal<br />
No. @ and body ground?<br />
O.K.<br />
A<br />
(Goto next page.)<br />
N.G.<br />
B) ~ (Q) (g<br />
(Go to next page.)<br />
Check 15A fusesat fuse block.<br />
(Refer to "POWER SUPPLY<br />
ROUTING" in EL section and<br />
AIC ELECTRICAL CIRCUIT.)<br />
N.G. Reconnect blower motor harness<br />
connector.<br />
N.G. Disconnect blower motor and<br />
resistor harness connectors.<br />
Ii] Note<br />
Check circuit continuity between<br />
blower motor harness<br />
terminal No. @ and resistor<br />
harness terminal No. @.<br />
Note:<br />
If the result is N.G. after checking circuit continuity, repair harnessor<br />
connector.<br />
HA-57<br />
)
RHA409A<br />
iii<br />
II<br />
':"<br />
Fan switch<br />
connector @<br />
~~i5B<br />
Continuity exists: O.K.<br />
Fan switch<br />
L/R connector @<br />
L/Y<br />
LIB [itij<br />
Lffl<br />
':"<br />
--,<br />
.-. 27---, -'<br />
~<br />
-eft' 2 3 .<br />
00<br />
AHA897 A<br />
00<br />
L/R L/Y<br />
Resistor connector @ RHA519A<br />
TROUBLE DIAGNOSES<br />
Diagnostic Procedure 1 (Cont'd) B' c D' E<br />
CHECK RESISTOR AFTER<br />
DISCONNECTING IT.<br />
(Refer to Electrical Components<br />
Inspection.)<br />
O.K.<br />
Reconnect resistor harness con-<br />
nector.<br />
[]J ~ ~ ~ ~<br />
II<br />
I<br />
CHECK FAN SWITCH<br />
CIRCUIT.<br />
Do approx. 12 volts exist between<br />
eachfan switch harness<br />
terminal and body ground?<br />
Terminal No.<br />
Flow chart<br />
No.<br />
Voltage<br />
O.K.<br />
~<br />
~<br />
[2]<br />
CHECK FAN SWITCH<br />
AFTER DISCONNECTING IT.<br />
(Refer to Electrical Components<br />
Inspection.)<br />
iii O.K. Note<br />
Check circuit continuity between<br />
fan switch harness<br />
terminal No. @and body<br />
ground.<br />
O.K.<br />
Replace blower motor.<br />
N.G.<br />
II<br />
~ ~ ~ ~<br />
N.G.<br />
Check circuit continuity between<br />
fan switch and resistor.<br />
Replace fan switch.<br />
Note:<br />
If the result is N.G. after checking circuit continuity, repair harnessor<br />
connector.<br />
HA~58<br />
e<br />
@<br />
@ Body Approx.<br />
@ ground 12V<br />
@<br />
/<br />
~<br />
Note
m<br />
Push control unit<br />
connector @)<br />
(;) Modedoor motor<br />
connector@<br />
II<br />
,-,.-r-r --- ,---,<br />
\ , , \ ,.<br />
,(.., ,~\(' ,<br />
'O\(..,'-,~ Q>' > ,<br />
00<br />
~~~:,<br />
654 321 7 8<br />
Mode door motor<br />
connector @ SHA297C<br />
t-=<br />
I<br />
_lET<br />
eJ<br />
00<br />
RHA410A<br />
.-r<br />
Eu<br />
00<br />
RHA411 A<br />
TROUBLE DIAGNOSES<br />
m<br />
Diagnostic Procedure 2<br />
SYMPTOM: Air outlet does not change.<br />
. Perform PRELIMINARYCHECK 4 and M;:ttnPower Supply<br />
and Ground Circuit Check before referrir:tg to the following<br />
flow chart.<br />
CHECK MODE DOOR MO-<br />
TOR POSITION SWITCH.<br />
1. Turn VENT switch ON with<br />
ignition switch at ACC<br />
position.<br />
2. Turn ignition switch OFF.<br />
Disconnect push control unit<br />
connector.<br />
3. Check if continuity exists<br />
between terminal No. CD or<br />
@ of push control unit harness<br />
connector and body<br />
ground.<br />
4. Usingabove procedures,<br />
check for continuity in any<br />
other mode. as indicated in<br />
chart.<br />
Mode<br />
switch<br />
VENT CD or @<br />
Terminal No.<br />
Conti-<br />
(f) e nuity<br />
B/L @ or CID<br />
FOOT CIDor @ Body<br />
ground<br />
F/D @ or
IJ]<br />
lit<br />
Push control unit<br />
connector @ G/Y<br />
I~G<br />
COI8ECT<br />
£)<br />
CSZJ<br />
00<br />
~<br />
[2J<br />
RHA412A<br />
TROUBLE DIAGNOSES<br />
Diagnostic Procedure 2 (Cont'd)<br />
@<br />
Reconnect push control unit and<br />
mode door motor harness connectors.<br />
IJ] .<br />
CHECK FOR OUTPUT OF<br />
PUSH CONTROL UNIT.<br />
Do approx.12voltsexist between<br />
push control unit harness<br />
terminal No. (j) and @when<br />
modeisswitchedfrom "VENT"<br />
to "DEF" or when mode is<br />
switched from "DEF" to<br />
"VENT"?<br />
Terminal<br />
No.<br />
-<br />
(]) @<br />
8 8 Stop<br />
8 ffi<br />
ffi 8<br />
O.K.<br />
J Replace mode door motor.<br />
HA-60<br />
Mode door motor<br />
Mode doo r Direction<br />
of linkage<br />
operation<br />
rotation<br />
Stop<br />
VENT Clock-<br />
-- DEF wise<br />
DEF<br />
--VENT<br />
-<br />
Counterclockwise<br />
-<br />
N.G.<br />
Replace control amp. built-in<br />
push control unit.<br />
/<br />
( \<br />
----------
m<br />
I;]<br />
Intake door motor<br />
connector @<br />
dih G/B<br />
.eJ<br />
Continuity should exist when<br />
test leads are connected as<br />
s~own. it should not exist when ":"<br />
test leads are reversed.<br />
[!] Push contr ol<br />
connector @<br />
'<br />
Unit<br />
-=<br />
~<br />
~<br />
RHA415A<br />
[8E5J;i8]~ ij<br />
Intake door GI r<br />
motorconnector@Bf ,G/YIIQ II 00<br />
~kill I<br />
G~~~<br />
,.<br />
_r<br />
IV<br />
00<br />
1 RHA414A<br />
RHA898A<br />
TROUBLE DIAGNOSES<br />
Diagnostic Procedure 3<br />
SYMPTOM: Intake door does not change in VENT, B/L or<br />
FOOT mode. !<br />
. Perform PRELIMINARYCHECK 1 and Main ~ower Supply<br />
and Ground Circuit Check before referring to 'the following<br />
flow chart.<br />
m<br />
CHECK POWER SUPPLY<br />
FOR INTAKE<br />
MOTOR.<br />
DOOR<br />
Disconnect intake door motor<br />
harness connector.<br />
Do approx. 12 volts exist betWeen<br />
intake door motor harness<br />
terminal<br />
ground?<br />
No. @and body<br />
I;]<br />
O.K.<br />
CHECK BODY GROUND<br />
CIRCUIT FOR INTAKE<br />
DOOR MOTOR.<br />
Does continuity exist betWeen<br />
intake door motor harness terminal<br />
No. @ and body ground<br />
when REC switch is ON?<br />
Does continuity exist betWeen<br />
intake door motor harness<br />
terminal No. (j])and body<br />
ground when REC switch is<br />
OFF?<br />
O.K.<br />
Replace intake door motor.<br />
N.G. ICheck 10Afuses at fuse block.<br />
(Referto "POWER SUPPLY<br />
ROUTING" in ELsectionandAIC<br />
ELECTRICALCIReUIT.)<br />
N.G. Disconnect push control unit<br />
harness connector.<br />
[!] Note<br />
Check circuit continuity be 'tWeen<br />
push control unit harness<br />
terminal No. @ ((j])) and intake<br />
door motor harness terminal<br />
No. @ ((j])).<br />
O.K.<br />
Replace control amp. built-in<br />
push control unit.<br />
Note:<br />
If the result is N.G. after checking circuit continuity, repair harness or<br />
connector.<br />
HA-61
m Compressor<br />
connector @-1<br />
~ litis<br />
L/G<br />
1!1 Thermal protector<br />
connector @-2<br />
1~i5~<br />
B<br />
[ill<br />
00<br />
~§ RHA416A<br />
" RHA899A<br />
TROUBLE DIAGNOSES<br />
Diagnostic Procedure 4<br />
SYMPTOM: Magnet clutch does not operate when A/Q switch<br />
and fan switch are ON. (<br />
. Perform PRELIMINARY CHECK 2 before referring" to the<br />
following flow chart.<br />
m<br />
I<br />
CHECKPOWERSUPPLY<br />
FOR COMPRESSOR.<br />
Disconnect compressor harness<br />
connector.<br />
Do approx. 12 volts exist betWeencompressor<br />
harness terminal<br />
No. @ and body ground?<br />
1!1<br />
O.K.<br />
CHECK THERMAL<br />
PROTECTOR.<br />
Disconnect thermal protector<br />
harness connector.<br />
Does continuity exist betWeen<br />
thermal protector harness<br />
terminal No. @ and body<br />
ground?<br />
O.K.<br />
Check magnet clutch coil.<br />
O.K.<br />
Replace magnet clutch.<br />
Refer to COMPRESSOR - Model<br />
NVR 140S (ATSUGI make).<br />
HA~62<br />
N.G.<br />
5<br />
(Goto !)extpage.)<br />
N.G. Replace thermal protector.
m1 ~COIIIfCT<br />
E)<br />
~<br />
For U.S.A.<br />
~ L/G<br />
A/C relay<br />
connector 42-<br />
@)<br />
For Canada<br />
RHA418A<br />
~LIG<br />
~<br />
Ii] A/C relay<br />
connector @)<br />
For U.S.A.<br />
~ LIG<br />
Compressor<br />
connector @<br />
181 LIG<br />
~<br />
II IIISCIIIIIIECT<br />
~eJ<br />
A/C relay @)<br />
conm.- L/OR<br />
~~~.A. ~<br />
iii<br />
RHA419A<br />
L/OR<br />
~i)<br />
~[§<br />
[Y]<br />
rl;]or Canada<br />
L/G~ _T<br />
eJ<br />
00<br />
00<br />
((g~<br />
RHA523A<br />
RHA522A<br />
II !:.IUNIT fof CONNECTORII<br />
43 E.C.C.S.control unit<br />
GIY connector<br />
TROUBLE DIAGNOSES<br />
Diagnostic Procedure 4 (Cont'd)<br />
i<br />
m1 II<br />
CHECK AIC RELAY OPERA-<br />
TION.<br />
Do approx. 12 volts exist between<br />
AIC relay harness terminal<br />
No. @ and body ground?<br />
O.K.<br />
Disconnect AIC relay harness<br />
connector.<br />
Ii]<br />
Check circuit continuity between<br />
AIC relay harness terminal<br />
No. @ and compressor<br />
harness terminal No. @.<br />
Note<br />
CHECKAIC RELAY AFTER<br />
DISCONNECTINGIT. (Refer<br />
to Electrical Components<br />
Inspection.)<br />
O.K.<br />
Reconnect AIC relay.<br />
iii .<br />
I<br />
CHECK COIL SIDE CIRCUIT<br />
OF AIC RELAY.<br />
Do approx. 12 volts exist between<br />
E.C.C.S.control unit<br />
harness terminal No. @ and<br />
body ground?<br />
O.K.<br />
N.G. 'CHECK POWE~UPPL Y FOR<br />
AIC RELAY.<br />
0 isconnect AIC relay.<br />
Do approx. 12 volts exist between<br />
AIC relay harness terminal<br />
No. @. @J and body<br />
ground?<br />
N.G.<br />
N.G.<br />
@ (C<br />
(Go to next page.)<br />
O.K. N.G.<br />
CHECK POWER SUPPLY<br />
CIRCUIT AND10A FUSE"<br />
AT FUSE BLOCK.<br />
Refer to "Power Supply<br />
ROUNTING" in EL section<br />
and AIC ELECTRICAL<br />
CIRCUIT.)<br />
Replace AIC relay.<br />
Note:<br />
If the result is N.G. after checking circuit continuity, repair harness or<br />
connector.<br />
HA-63<br />
~
[!1<br />
RHA420A<br />
D<br />
IJ<br />
II<br />
E.C.C.S.controlunit<br />
tft\I<br />
I ~<br />
connector @ ,<br />
G/Y<br />
43<br />
II CIIJIIIT fo1 CONNECTOR II<br />
Thermo control amp.<br />
connector @<br />
~~i)<br />
L/G<br />
Thermo control amp.<br />
connector @<br />
&] [It i5 ~<br />
LGtB<br />
E C.C.E. control LtG<br />
unit connector - 44<br />
RHA524A<br />
00<br />
[§<br />
"o,,~~<br />
=u ' ~<br />
RHA900A<br />
~ ,<br />
IV<br />
00<br />
II ClUNIT 101 COIMCTOR II<br />
Thermo control<br />
6o~amp. 1,3 @ connector<br />
LGtB<br />
Push control unit<br />
connector @<br />
0<br />
113<br />
RHA525A<br />
lit ,<br />
lu<br />
00<br />
RHA901 A<br />
TROUBLE DIAGNOSES<br />
Diagnostic Procedure 4 (Cont'd)<br />
B<br />
III<br />
I<br />
CHECK VOLTAGE FOR<br />
THERMO CONTROL AMP.<br />
Do approx. 8 to 9 volts exist between<br />
thermo control amp.<br />
harnessterminal No. @ and<br />
body ground?<br />
O.K.<br />
CHECK POWER SUPPLY<br />
FOR THERMO CONTROL<br />
AMP.<br />
Go to Main Power Supply and<br />
Ground Circuit Check.<br />
D<br />
CHECK BODY GROUND<br />
CIRCUIT FOR THERMO<br />
CONTROL AMP.<br />
Disconnect thermo control amp.<br />
harnessconnector.<br />
Does continuity exist between<br />
thermo control amp. harness<br />
terminal No. @ and body<br />
ground?<br />
I Replace thermo control amp.<br />
[!1<br />
Check circuit continuity between<br />
AIC relay harness terminal<br />
No.@ and E.C.C.S. control<br />
unit harness terminal No. @.<br />
IJ<br />
Note<br />
N.G.r:: .. ..<br />
Check circuit continuity be<br />
tween E.C.C.S.control unit<br />
harnessterminal No.@ and<br />
thermo control amp. harnessterminal<br />
No. @.<br />
O.K. /<br />
CHECK E.C.C.S. CONTROL<br />
UNIT.<br />
Refer to EF & EC section.<br />
N.G.<br />
Disconnect push control unit<br />
harness connector.<br />
II Note<br />
Check circuit continuity between<br />
thermo control amp.<br />
harness terminal No. @<br />
and push control unit harness<br />
terminal No. @.<br />
O.K. O.K.<br />
Q,<br />
(Go to next page.)<br />
Note:<br />
If the result is N.G. after checking circuit continuity, repair harness or<br />
connector.<br />
HA-64
II<br />
~i5(§<br />
Push control unit<br />
terminal<br />
1'2113<br />
[ill<br />
RHA422A<br />
III Dual-pressure<br />
switch connector<br />
~ @) [1t<br />
~ij<br />
~oo<br />
lEEHEHB<br />
Push control unit<br />
connector @ RHA902A<br />
III ~i5<br />
m ~ Dual-pressure<br />
U~ switch connector<br />
LG/R @)<br />
Ii<br />
::-<br />
[ill<br />
Continuity<br />
exists: O.K.<br />
[it<br />
-,<br />
eJ<br />
RHA423A<br />
RHA903A<br />
RHA904A<br />
TROUBLE DIAGNOSES<br />
II<br />
DiagnosticProcedure4 (Cont'd)<br />
D<br />
CHECK PUSH CONTROL<br />
UNIT.<br />
Does continuity exist between<br />
push control unit terminals<br />
No. @ and @?<br />
Disconnect<br />
lO.K.<br />
dual-pressure switch.<br />
III Note<br />
Check circuit continuity between<br />
dual-pressure switch<br />
harness terminal No. @ and<br />
push control unit harness terminal<br />
No. @.<br />
N.G. Replace control amp. built-in<br />
push control unit<br />
O.K.<br />
III<br />
CHECK DUAL-PRESSURE<br />
SWITCH<br />
N.G.<br />
[<br />
Replace dual-pressure switch.<br />
Does continuity exist between<br />
dual-pressure switch terminals?<br />
O.K. )<br />
Disconnect<br />
connector.<br />
fan switch harness<br />
m<br />
Check circuit continuity between<br />
dual-pressure switch<br />
Note<br />
harness terminal No. @ and fan<br />
switch harness terminal No. @.<br />
Ii<br />
O.K.<br />
Note<br />
CHECK BODY GROUND O.K.I CHECK FAN SWITCH<br />
CIRCUIT FOR FAN SWITCH. (Refer to Electrical Components<br />
Does continuity exist between<br />
Inspection.)<br />
fan switch harness terminal<br />
No. @ and body ground?<br />
N.G.<br />
Replace fan switch.<br />
Note:<br />
If the result is N.G. after 'checkingcircuit continuity, repair harnessor<br />
connector.<br />
HA-65<br />
I<br />
/<br />
..<br />
'\
m<br />
KNOB ILL.<br />
RHA427A<br />
TROUBLE DIAGNOSES<br />
Diagnostic Procedure 5<br />
SYMPTOM: Illumination or indicators of push control unit do<br />
not come on.<br />
. Perform Main Power Supply and Ground Circuit<br />
before referringto the followingflowchart.<br />
Check<br />
)/<br />
Turn ignition switch and lighting<br />
switch ON.<br />
CHECK IllUMINATION AND INDICATORS.<br />
. Turn A/C, REC and fan switches ON.<br />
. Push VENT, B/l, FOOT, F/D and DEF switches in order.<br />
. Check for incidents and follow the repairing methods as shown:<br />
0: Illumination orindicator comeson,<br />
X: Illumination or indicator does not come on.<br />
D.: Some indicators for VENT, B/L, FOOT, FID, DEF or REC come on,<br />
DIAGNOSTIC PROCEDURE 5-1<br />
CHECK THE OTHER I llU-<br />
MINATION SYSTEMS<br />
EXCEPT FOR A/C SYSTEM.<br />
Do the other illumination come<br />
on with ignition switch and<br />
lighting switch ON? . O.K.<br />
Turn ignition switch and lighting<br />
switch OFF.<br />
m<br />
I<br />
CHECK IllUMINATION<br />
BULB.<br />
Remove push control unit and<br />
disconnect,harness connectors-.<br />
Remove illumination bulb(s) and<br />
check them.<br />
HA-66<br />
INCIDENTS<br />
ILL.VENT B/L FOOT FID DEF REC<br />
X 0 0 0 0 0 0<br />
'\<br />
0 0 0 0 0 0 X<br />
0 X X X X X X<br />
'\<br />
D.<br />
0 X X X X X X 0<br />
X X X X X X 0<br />
N.G.<br />
CHECK IllUMINATION<br />
SYSTEM.<br />
Refer to illumination/Wiring<br />
Diagram in E l section.<br />
N.G. Replace illumination bulb(s).<br />
O.K.<br />
"Ho to repair"<br />
AIC /<br />
Go to DIAGNOSTIC<br />
PROCEDURE 5-1.<br />
Go toDIAGNOSTIC<br />
PROCEDURE 5-2. ...<br />
Go toDIAGNOSTIC<br />
PROCEDURE 5-3.<br />
Replacecontrolamp, built-in<br />
push control unit.<br />
Replacecontrolamp, built-in<br />
push controlnit.<br />
Go toDIAGNOSTIC<br />
PROCEDURE 5-4.<br />
A<br />
(Go to next page.)<br />
/
[E)<br />
AH A428A<br />
~<br />
~<br />
IV<br />
Push control unit<br />
connector @<br />
~<br />
[I<br />
[It 15<br />
m<br />
Push control unit<br />
connector @ I'R/Y<br />
IEEEEmm<br />
~i5<br />
Push control unit<br />
connector<br />
~<br />
I<br />
00<br />
"<br />
[ill<br />
::-<br />
00<br />
RHA429A<br />
[ill<br />
Continuity should exist when test leads are<br />
connected as shown, it should not<br />
exist when test leads are reversed.<br />
RHA430A<br />
TROUBLE DIAGNOSES<br />
[E)<br />
Diagnostic Procedure 5 (Cont'd)<br />
T<br />
CHECK POWER SUPPLY<br />
FOR ILLUMINATION WITH<br />
LIGHTING SWITCH ON.<br />
Do approx. 12 volts exist between<br />
push control unit harness<br />
terminal No. @ and body<br />
ground?<br />
O.K.<br />
Note<br />
CHECK BODY GROUND<br />
CIRCUIT FOR ILLUMI-<br />
NATION.<br />
Does contunity exist between<br />
push control unit harness term i-<br />
[I<br />
:/<br />
N.G.<br />
nal No. @ and body ground?<br />
O.K.<br />
J /<br />
Replace control amp. built-in<br />
push control unit.<br />
CHECK POWER SUPPLY<br />
FOR AIC tLLUMINATION<br />
SYSTEM. !<br />
Refer to Illumintion/Wiring<br />
Diagram in EL section.<br />
DIAGNOSTIC PROCEDURE 5-2<br />
r CHECK MAGNET CLUTCH Go to Diagnostic Procedure 4.<br />
OPERATION.<br />
1<br />
Does magnet clutch operate normaly<br />
when engine ON, AIC<br />
switch, fan switch are ON?<br />
m<br />
O.K.<br />
Check circuit continuity of<br />
L.E.D.<br />
N.G.<br />
Replace control amp. built-in<br />
push control unit.<br />
Note:<br />
If the result is N.G. after checking circuit continuity, repair harness or.<br />
connector.<br />
HA-67<br />
'-
_IIECT<br />
eJ 00<br />
Push control unit<br />
~<br />
connector @<br />
~n<br />
~!<br />
RHA431A<br />
m ~<br />
I!)<br />
~i5~<br />
Push control unit<br />
connector @<br />
IEHBHEBI<br />
B<br />
[JlJ<br />
::<br />
RHAB96A<br />
TROUBLE DIAGNOSES<br />
Diagnostic Procedure 5 (Cont'd)<br />
DIAGNOSTICPROCEDURE5-3<br />
Turn ignition switch and lighting<br />
switch OFF.<br />
Disconnect push control unit<br />
harness connector.<br />
m<br />
CHECK POWER SUPPLY<br />
FOR PUSH CONTROL UNIT.<br />
Do approx. 12 volts exist between<br />
push control unit harness<br />
terminal No. @ and body<br />
ground?<br />
O.K.<br />
Note<br />
CHECK BODY GROUND<br />
CIRCUIT FOR PUSH CON-<br />
TROL UNIT.<br />
Does continuity exist between<br />
push control unit harness terminal<br />
No. @ and body ground?<br />
O.K.<br />
I!)<br />
Replace control amp. built-in<br />
push control unit.<br />
N G r- ..\ .<br />
. . Check 10t fuse at fuse block.<br />
(Referto 'POWERSUPPLY<br />
ROUTING" in EL section and<br />
AIC ELECTRICALCIRCUIT.)<br />
Note:<br />
If the result is N.G. after checking circuit continuity, repair harness or<br />
connector.<br />
HA-68<br />
~<br />
----
m<br />
~ij~<br />
Push control unit<br />
connector @<br />
IEHffiHEI<br />
B<br />
[ill<br />
-=<br />
RHA896A<br />
TROUBLE DIAGNOSES<br />
Diagnostic Procedure 5 (Cont'd)<br />
DIAGNOSTIC PROCEDURE 5-4<br />
Turn ignition switch and lighting<br />
switch OFF.<br />
Disconnect push control unit<br />
harness connector.<br />
m Note<br />
CHECK BODY GROUND<br />
CIRCUIT FOR PUSH CON-<br />
TROL UNIT.<br />
Does continuity exist between<br />
push control unit harness terminal<br />
No. @ and body ground? \<br />
O.K.<br />
Replace control amp. built-in<br />
push control unit.<br />
Note:<br />
If the result is N.G. after checking circuit continuity, repair harness or<br />
connector.<br />
HA-69<br />
~
Coh"h";" oh~k 1<br />
2 I 3 I 4<br />
RHA399A<br />
TROUBLE DIAGNOSES<br />
Electrical Components Inspection<br />
FAN SWITCH<br />
Check continuity between terminals at each switch position.<br />
BLOWER MOTOR<br />
Confirm smooth rotation of the blower motor.<br />
. Ensure that there are no foreign particles inside the intake<br />
unit.<br />
BLOWER RESISTOR<br />
Check continuity between terminals.<br />
HA- 70
1 iiI<br />
/<br />
'rY '--<br />
., In ~ ~ ..<br />
Push control unit I: ~<br />
connector ~ ~<br />
~<br />
LElJ<br />
~<br />
Switch condition Terminal No. Conti-<br />
AIC DEF 0 e nuity<br />
ON ON<br />
ON OFF @ @ Yes<br />
OFF ON<br />
RHA469A<br />
TROUBLE DIAGNOSES<br />
Electrical Components Inspection (Cont'd)<br />
A/C SWITCH<br />
Check continuity between terminals at each switch position.<br />
DUAL-PRESSURE SWITCH<br />
High-pressure side line pressure<br />
kPa (kg/cm2, psi)<br />
Decreasing to<br />
177 -216 (1.8 - 2.2, 26 - 31)<br />
Increasingto<br />
2,452 . 2,844 (25 . 29, 356 . 412)<br />
Increasingto<br />
177 - 235 (1.8 - 2.4, 26 - 34)<br />
Decreasingto<br />
1,863 . 2,256 (19 . 23, 270 - 327)<br />
THERMAL PROTECTOR<br />
Temperature of compressor<br />
°c (oF)<br />
Increasingto approx. 135-145 (275.293)<br />
Decreasingto approx. 120-130 (248.266)<br />
HA-71<br />
Operation Continuity<br />
Turn OFF Does not exist<br />
Turn ON Exists<br />
Operation<br />
Turn OFF<br />
Turn ON
I II I<br />
Thermo control<br />
amp. connector<br />
~I~/G<br />
~)<br />
~<br />
£)<br />
1 1<br />
\<br />
For<br />
Canada<br />
I<br />
II I<br />
Voltmeter<br />
~ 1111 II II 1---------<br />
'1; Y Thermo I I 11I control\'-am~. '- RHA402A<br />
I<br />
~<br />
For U.S.A.<br />
[ill<br />
r CD<br />
SHA128C<br />
~ Thermoswitch<br />
~connector<br />
~_"CT<br />
~eJ SHA129C<br />
TROUBLE DIAGNOSES<br />
Electrical Components Inspection (Cont'd)<br />
THERMO CONTROL AMP.<br />
1. Run engine, and operate AIC system.<br />
2. Connect the voltmeter from harness side.<br />
3. Check thermo control amp. operation shown in the table.<br />
Evaporator outlet air temperature Thermo amp.<br />
°c (oF) operation<br />
A/C RELAY<br />
Check circuit continuity between terminals by supplying 12 volts<br />
to coil side terminal of AIC relay.<br />
THERMOSWITCH<br />
HA- 72<br />
Tester<br />
Decreasingto 1.5 - 2.5 (35 - 37) Turn OFF Approx.12V<br />
Increasing to 3.0 - 4.0 (37 - 39) Turn ON Approx.OV<br />
Water temperature<br />
°c tF)<br />
Decreasingto<br />
85 -91 (185 - 196)<br />
Increasingto<br />
92 -98 (198 -208)<br />
Operation Continuity<br />
Turn OFF Does not exist<br />
Turn ON Exists
SERVICE DATA AND SPECIFICATIONS (S.D.S.)<br />
General Specifications<br />
~MPRESSOR LUBRICATION OIL<br />
Model<br />
ATSUGI meke<br />
NVR 140S<br />
Model<br />
ATSUGI make<br />
NVR 140S<br />
Type Vane rotary Type SUNlsa 5GS<br />
Displacement cm' (cu inllRev. 140 (8.54) Capacity<br />
Direction of rotation /<br />
Clockwise<br />
(Viewed from drive end)<br />
Drive belt Poly V<br />
ENGINE IDLING SPEED (When A/C is ON.)<br />
. Refer to EF & EC section.<br />
BELT TENSION<br />
.. Refer to Checking Drive Belts (MA section).<br />
mQ (US fl oz, Imp fl oz)<br />
Total in system 200 (6.8,7.0)<br />
Amount of oil which<br />
can be drained<br />
Compressor (<strong>Service</strong> parts)<br />
charging amount<br />
REFRIGERANT<br />
Type<br />
Approx. 100 (3.4,3.5)<br />
200 (6.8,7.0)<br />
R-12<br />
Capacity kg (lb) 0.9 . 1.0 (2.0. 2.2)<br />
Inspection and Adjustment<br />
HA- 73<br />
COMPRESSOR<br />
Model NVR 140S<br />
Clutch disc-pulley clearance<br />
mm lin)<br />
0.3 -0.6<br />
(0.012.0.0241<br />
'--...
~<br />
~~<br />
CONTENTS<br />
ELECTRICALSYSTEMI<br />
SECTIONEL<br />
When you read wiring diagrams:<br />
. Read GI section, "HOW TO READ WIRING DIAGRAMS".<br />
HARNESS CONNECTOR... . . . . . . . . . . . . . . . . . . . . . . . . . . . . .'. . . . . . . . . . . . . . . . . .<br />
STANDARDIZEDRELAY.................................................<br />
POWERSUPPLYROUTING...............................................<br />
BATTERY.. .,. . .. . ., . . . . .. ... .. . .. . .. . .. . . .. .. . . .. . . . . . .'. . . . .. . . . ..<br />
STARTINGSYSTEM.....................................................<br />
STARTINGSYSTEM-Starter - '...<br />
CHARGINGSYSTEM . . . . . . . . . . . . . . . . . . . . .<br />
CHARGING SYSTEM -Alternator -........................................<br />
COMBINATIONSWITCH..................................................<br />
-<br />
HEADLAMP , ';"""""""""""""""""<br />
EXTERlOR LAMP ~..................................<br />
;"<br />
INTERIORLAMP ~. . .. .. . . .. . . . . .. . . . . .. . . .<br />
METERAND GAUGES...................................................<br />
WARNING LAMPS AND CHIME . . . . . . . . . . . . . . . . . . . . . . . . . . . . . . . . . . .<br />
TIME CONTROL SYSTEM.. . . . . . . . . . . . . . . . . . . . . . . . . . . . . . . . . . . . . . . . . . . . . . .<br />
WIPER AND WASHER. . . . . . . . . . . . . . . . . . . . . . . . . . . . . . . . . . . . .,. . . . . . . . . . . . . .<br />
HORN, CIGARETTE LIGHTER AND CLOCK 1 .~,: . . . . . . .<br />
REAR WINDOW DEFOGGER..............................................<br />
AUDIO AND ANTENNA . . . . . . . . . . . . . . . . . . . . . . . . . . . . . . . . . . . . . . . . . . .<br />
..~ .<br />
AUTOMATICSPEED CONTROL DEVICE (A.S.C.D.) """"""" .,/t.;. . .\ . . .<br />
LOCATION OF ELECTRICAL UNITS . ... . . . . . .. . . . . ., . . . .~ -:"'..'... .~.. . .<br />
HARNESS LAYOUT .\.. . .J...,<br />
.<br />
SUPER MULTIPLEJUNCTION(S.M.J.) , " ..;..; . . . . . . . .<br />
WIRING DIAGRAM REFERENCE CHART<br />
E.C.C.S. . . . . . . . . . . . . . . . . . . . . . . . . . . . . . . PULL-OUT FOLLOWING PAGE EL-118<br />
LOCK-UPCONTROL. . . . . . . . . . . . . . . . . . . . . . AT SECTION<br />
Q.D.CONTROL. . . . . . . . . . . . . . . . . . . . . . . . . AT SECTION<br />
ELECTRIC DOOR MIRROR,SUN ROOF, DOOR LOCK,<br />
POWER WINDOW AND AUTOMATIC SEAT BELT. . . . BF SECTION<br />
HEATER AND AIR CONDITIONER. . . . . . . . . . . . . HASECTION<br />
EL- 2<br />
EL- 3<br />
EL- 5<br />
EL- 7<br />
EL- 15<br />
EL- 17<br />
EL-.23<br />
EL- 25<br />
EL- 33<br />
EL- 35<br />
EL- 46<br />
EL- 52<br />
EL- 54<br />
EL- 61<br />
EL- 65<br />
EL- 75<br />
EL- 81<br />
EL- 82<br />
EL- 85<br />
EL- 88<br />
EL- 97<br />
EL- 99<br />
EL-117<br />
I!II
'----<br />
HARNESS CONNECTOR<br />
. All harness connectors have been modified to prevent accidental looseness or disconnection.<br />
~ARNESS CONNECTOR<br />
Description<br />
The connector can be disconnected by pushing or lifting the locking section.<br />
CAUTION: ~<br />
Do not pull the harness when disconnecting the connector.<br />
[Example]<br />
LIFT PUSH<br />
~<br />
PUSH<br />
PUSH<br />
PUSH<br />
(For combinetion met...) (For r.l.y)<br />
EL-2<br />
/'<br />
PUSH<br />
$J<br />
SEL769D
STANDARDIZED RELAY<br />
Description<br />
NORMAL OPEN, NORMAL CLOSED AND MIXED TYPE RELAYS<br />
Relays can mainly be divided into three types: normal open, normal closed and mixed type relays..<br />
u.<br />
u.<br />
9 -<br />
Z<br />
9 - I<br />
NORMAL OPEN RELAY NORMAL CLOSED RELAY MIXED TYPE RELAY<br />
Flows<br />
Flows<br />
. .<br />
Does not<br />
I flow Q I =<br />
I I =<br />
) 0<br />
SW 1 BATTERY<br />
Flows<br />
I I -<br />
TYPE OF STANDARDIZED RELAYS<br />
.<br />
IL'<br />
-1'""1<br />
sw 1 BATTERY<br />
1M<br />
I<br />
1T<br />
'-\'<br />
I' '<br />
, \<br />
I \<br />
I I<br />
\<br />
I<br />
\ I<br />
... '<br />
? ---<br />
,<br />
1M 1 Make<br />
1T 1 Transfer<br />
Does not c:><br />
flow<br />
2M 2 Make<br />
1M.l B 1 Make 1 Break<br />
1M 2M<br />
1T<br />
=<br />
EL-3<br />
I.-J I<br />
::> 0 0<br />
SW 1 BATTERY<br />
Does not<br />
Does not flow<br />
flow<br />
=<br />
I<br />
SW 1 BATTERY<br />
I'<br />
2M<br />
,---<br />
, . r',<br />
" (<br />
,<br />
I<br />
'. (<br />
...<br />
...<br />
lM.1B<br />
~ ~~) ,<br />
----<br />
"<br />
'-r, ' 1 '<br />
t 0','- \<br />
: ~<br />
\ 1\<br />
\ , \<br />
" "<br />
SW 1 BATTERY<br />
SW 1<br />
BATTERY<br />
1B<br />
1M<br />
s<br />
SEL881H<br />
SE L882H
Type Outer view<br />
1T<br />
1M<br />
2M<br />
1M.1B<br />
"-<br />
m r-<br />
I<br />
U1<br />
rn mren<br />
....<br />
Q)<br />
s:<br />
Bulb CheCk )<br />
relay<br />
Fue I pump.<br />
All' regulator<br />
Sh I ft lac k<br />
contra I u~ if"<br />
Key swl tCh/<br />
Retract relay<br />
AII' conditioneI'<br />
Head Iamp L H.<br />
Head Iamp R. H.<br />
Front fog lamp<br />
Horn. A. S. C. D.<br />
-c<br />
'"<br />
~."<br />
:J(I)<br />
m<br />
;>J<br />
m»<br />
r-z<br />
»0<br />
-<<br />
."<br />
tDC<br />
0(1) x-<br />
~tD<br />
:;;@)<br />
r- -z<br />
"<br />
)<br />
]<br />
/--~<br />
OFFACC ON ST<br />
I 0 0<br />
2 0 0<br />
'"<br />
ACCESSORY RE<br />
I GNITI ON ~ ci'<br />
'" .."', ""H = "''''1'' \,<br />
IIIIIIi r,." '''' ~ "'<br />
'"'' 8m I-I<br />
3 0<br />
4<br />
5<br />
@)~@)<br />
~<br />
BODY<br />
GROUND<br />
FUSE<br />
T ~LAY ~~<br />
JON = RELAY- -<br />
!\W1@i)1WJ T~::II @~ ~!<br />
... ~ .-'" @, r.;;;;-, ~~<br />
..,c ... l'fl'l ~<br />
'" ~ '" @ '"<br />
I11R?1I ~ @fIR:iJ ... 33 ~.<br />
I '""'''' , ",<br />
~ ~ 1 '" ~~~ '"<br />
~'"<br />
.,~<br />
~ 1>\<br />
\SJ<br />
(!---,;w<br />
'"<br />
(@) @<br />
W~L~ IQ£:W~L<br />
(Blue)<br />
W~B~ IQ£:W~B<br />
@(B s. Iac M.J. k)@) I<br />
[Refer to<br />
(Fa Idout<br />
I ast page<br />
page).]<br />
L<br />
Bn<br />
B/R<br />
L/R<br />
E1'<br />
Ell<br />
FII<br />
Fl'<br />
(@) @)<br />
"'''' I<br />
U.f<br />
r=r ...", " " ~... ~~ » 0<br />
~@ ~@ . ~~<br />
~ ~<br />
~o<br />
~@~@ n<br />
~<br />
.. U3<br />
CJ RCUJ T BREAKER ~ ;<br />
-<br />
@@j)~<br />
4<br />
- BODY 3<br />
BATTERY GROUND<br />
G/Y - A. S<br />
G - Me<br />
disp<br />
Aut<br />
con<br />
G/W- Tur<br />
L - Hea<br />
Tim<br />
Rea<br />
Met<br />
crys<br />
L/W- Rea<br />
was<br />
lG - Win<br />
OR/B- Ciga<br />
l/OR- Heat<br />
t~~ ~ IBlo<br />
.~<br />
FUSE -<br />
BLOCK<br />
l -<br />
.l -<br />
R/B- IRe<br />
Jnte<br />
~~~<br />
chim<br />
cont<br />
cont<br />
belt<br />
Rn - Stop<br />
unit.<br />
G/l - Haza<br />
SB - Head<br />
Not<br />
G/R - Exter<br />
Lice<br />
Illum<br />
Head<br />
unit<br />
OR - E. C<br />
G/l - Bac<br />
A/T<br />
cont<br />
A. B
-----<br />
O.K.<br />
Blown<br />
SEL954J<br />
SEL387L<br />
POWER SUPPLY ROUTING<br />
Fuse<br />
a. If fuse is blown, be sure to eliminate cause of problem<br />
before installing new fuse.<br />
b. Use fuse of specified rating. Never use fuse of more than<br />
specified rating.<br />
c. Do not install fuse in oblique direction; always insert It<br />
into fuse holder properly.<br />
d. Remove fuse for clock if vehicle is not used for a long<br />
period of time.<br />
Fusible Link<br />
A melted fusible link can be detected either by visual inspection<br />
or by feeling with finger tip. If its condition is questionable, use<br />
circuit tester<br />
CAUTION:<br />
or test lamp.<br />
a. If fusible link should melt, it is possible that critical circuit<br />
(power supply or large current carrying circuit) is shorted.<br />
In such<br />
problem.<br />
a case, carefully check and eliminate cause of<br />
b. Never wrap periphery of fusible link with vinyl tape.<br />
Extreme care should be taken with this link to ensure that<br />
it does not come into contact with any other wiring<br />
harness or vinyl or rubber parts.<br />
FUSIBLE LINK VARIATION<br />
Color Maximum amperage (A)<br />
Brown<br />
Green<br />
Red<br />
Black<br />
Gray<br />
*Temperature condition: Less than ao°c (176°F)<br />
El-6<br />
15<br />
20<br />
30<br />
35<br />
40
\<br />
Keep clean and dry.<br />
Hydrometer<br />
SEL711E<br />
SEL712E<br />
a SEL442D<br />
BATTERY<br />
CAUTION:<br />
a. If it becomes necessary to start the engine with a booster<br />
battery and jumper cables, use a 12-volt booster battery.<br />
b. After connecting battery cables, ensure that they are tightly<br />
clamped to battery terminals for good contact.<br />
c. Never add distilled water through the hole used to check<br />
specific gravity.<br />
How to Handle Battery<br />
METHODS OF PREVENTING OVER-DISCHARGE<br />
The following precautions must be taken to prevent over-discharging<br />
a battery.<br />
. The battery surface (particularly its top) should always be<br />
kept clean and dry.<br />
If the top surface of a battery is wet with electrolyte or<br />
water, leakage current will cause the battery to discharge.<br />
Always keep the battery clean and dry.<br />
. When the vehicle is not going to be used over a long period<br />
of time, disconnect the negative battery terminal. (If the<br />
vehicle has an extended storage switch, turn it off.)<br />
. Check the charge condition of the battery.<br />
Periodically check the specific gravity of the electrolyte.<br />
Keep a close check on charge condition to prevent overdischarge.<br />
EL-7<br />
/
'\<br />
/<br />
SELOO1K<br />
Charging<br />
- Normal battery<br />
~<br />
Sulphated battery<br />
voltage<br />
1 "-' Charging voltage<br />
Charging current<br />
--. Charging current<br />
Read top level<br />
with scale<br />
a<br />
Duration of charge SEL709E<br />
SE L442D<br />
BATTERY<br />
How to Handle Battery (Cont'd)<br />
CHECKING<br />
WARNING:<br />
ELECTROLYTE LEVEL<br />
Do not allow battery fluid to come in contact with skin, eyes,<br />
fabrics, or painted surfaces. After touching a battery, do not<br />
touch or rub your eyes until you have thoroughly washed your<br />
hands. If the acid contacts the eyes, skin or clothing, immediately<br />
flush with water for 15 minutes and seek medical attention.<br />
Normally the battery does not require additional water. However,<br />
when the battery is used under severe conditions, adding<br />
distilled water may be necessary during the battery life.<br />
. Removethe cell plug usinga suitable tool.<br />
Add distilled water up to the MAXlevel.<br />
SULPHATION<br />
When a battery has been left unattended for a long period of<br />
time and has a specific gravity of less than 1.100, it will be completely<br />
discharged, resulting in sulphation on the cell plates.<br />
Compared with a battery discharged under normal c.onditions,<br />
the current flow in a "sulphated" battery is not as smooth<br />
although its voltage is high during the initial stage of charging,<br />
as shown in the f~gureat the left.<br />
SPECIFIC GRAVITY CHECK<br />
1. Read hydrometer and thermometer indications at eye level.<br />
EL-8
'<br />
Hydrometer ~I~<br />
TI"~o-' 1<br />
_/<br />
~<br />
1.30<br />
en 1.28<br />
II<br />
a 1.26<br />
I!<br />
II<br />
Q<br />
E<br />
><br />
1.2"<br />
1.22<br />
e 1.20<br />
ti<br />
II<br />
.. - 1.18<br />
..<br />
?;<br />
'><br />
1.16<br />
..<br />
;;.<br />
1.1"<br />
.!:!<br />
- 'u<br />
II<br />
Q<br />
I/)<br />
1.12<br />
1.10<br />
SEL710E<br />
-30<br />
1-221<br />
-20<br />
1-"1<br />
BATTERY<br />
How to Handle Battery (Cont'd)<br />
. When electrolyte level is too low, tilt battery case to raise it<br />
for easy measurement.<br />
2. Convert into specific gravity at 20° C (68° F).<br />
Example:<br />
. When electrolyte temperatu re is 35° C (95° F) and specific<br />
gravity of electrolyte is 1.230, converted specific gravity at<br />
20° C (68° F) is 1.240.<br />
. When electrolyte temperature is 0° C (32° F) and specific<br />
gravity of electrolyte is 1.210, converted specific gravity at<br />
20°C (68°F) is 1.196.<br />
-10<br />
11..1<br />
Converted specific gravity (5201<br />
0<br />
1321<br />
10<br />
1501<br />
20<br />
1681<br />
Electrolyte temperature °c (0 F)<br />
EL-9<br />
SE L042D
Chart I<br />
/<br />
SLOW CHARGE<br />
Refer to "A: Slow<br />
Charge" .<br />
CAPACITY TEST<br />
Refer to "Chart II".<br />
O.K.<br />
Reacty<br />
for use<br />
Replace<br />
battery.<br />
~<br />
BATTERY<br />
Battery Test and Charging Chart<br />
VISUAL INSPECTION<br />
. Check battery case for cracks or bends.<br />
. Check battery terminals for damage.<br />
. If the difference between the max. and min. electrolyte level in cells is within 10 mm (0.39 in),<br />
it is O.K.<br />
N.G.<br />
~<br />
.<br />
STANDARD CHARGE<br />
Refer to "B: Standard<br />
Charge" .<br />
O.K.<br />
CHECKING SPECIFIC GRAVITY<br />
Refer to "Specific Gravity Check".<br />
Ready for use<br />
QUICK CHARGE<br />
Refer to "C: Quick<br />
Charge" .<br />
CAPACITY TEST<br />
Refer to "Chart II".<br />
CHECKING SPECIFIC GRAVITY<br />
Refer to "Specific Gravity Check".<br />
RECHARGE<br />
Refer to "C: Quick Charge".<br />
.If battery temperatUre rises above 60°C<br />
C14O"F), stop charging. Always charge<br />
battery when its temperatUre is below<br />
60°C (140°FI.<br />
CAPACITY TEST<br />
Refer to "Chart II".<br />
O.K. N.G.<br />
Ready<br />
for use<br />
.<br />
Replace<br />
battery.<br />
. "STANDARDCHARGE" is recommended in - that the vehicl. is in storageafter charging.<br />
EL-10<br />
N.G.<br />
CAPACITY TEST<br />
Refer to "Chart II".<br />
N.G.<br />
Ready for use<br />
. Mount battery again<br />
and check loose ter.<br />
minals. Also, check<br />
other related circuits.<br />
Replace battery .<br />
QUICK CHARGE<br />
Refer to "C: Quick<br />
Charge" .<br />
. Time required: 45 min.<br />
CAPACITY TEST<br />
Refer to "Chart II".<br />
O.K. N.G.<br />
Ready Replace<br />
for use battery.
Chart II<br />
1// ~<br />
Test using battery<br />
checker.<br />
Follow manufacturer's<br />
instructions to check and<br />
determine<br />
serviceable.<br />
if battery is<br />
O.K.<br />
N.G.<br />
Ready for use Go to next step.<br />
BATTERY<br />
Battery Test and Charging Chart (Cont'd)<br />
Test using load tester.<br />
Read load tester voltage<br />
when specified discharging<br />
current (Refer to Fig. 1.1<br />
flows through battery for<br />
15 seconds.<br />
Ready for use Go to next step.<br />
EL-11<br />
/"<br />
. Check<br />
battery type and<br />
determine the specified<br />
current using the following<br />
table.<br />
Fig. 1 DISCHARGING CURRENT<br />
(load tester)<br />
Type Current (A)<br />
28B19R(l) 90<br />
34B19R(l) 99<br />
46B24R(l)<br />
135<br />
55B24R(l)<br />
135<br />
50D23R(L)<br />
150<br />
55D23R(l)<br />
180<br />
65D26R(l) 195<br />
80D26R(l) 195<br />
75031 R(L) 210<br />
95031 R(L) 240<br />
95E41 R(l) 300<br />
130E41R(L) 330<br />
~~<br />
0 .. 6°010<br />
SE L697 B
A: SLOW CHARGE<br />
.~<br />
Determine initial charging current from<br />
specific gravity referring to Fig. 2.<br />
. Charge battery.<br />
. Check charging voltage 30 minutes after<br />
starting the battery charge.<br />
O.K.<br />
Continue to charge for<br />
12 hours.<br />
CHECKING SPECIFIC GRAVITY<br />
Refer to "Specific Gravity Check".<br />
Conduct additional charge as per<br />
Fig 3. if necessary.<br />
Go to "CAPACITY TEST".<br />
N.G.<br />
Replace battery.<br />
BATTERY<br />
Battery Test and Charging Chart (Cont'd)<br />
Fig. 2 INITIAL CHARGING CURRENT SETTING (Slow charge)<br />
BATTERYT TYPE -== -==<br />
a:a:<br />
0101<br />
- -<br />
IDID<br />
:i:i<br />
a:a:<br />
..,...,.<br />
NN<br />
IDID<br />
~<br />
B: STANDARD CHARGE<br />
~<br />
Determine initial charging current from<br />
specific gravity. referring to Fig. 4.<br />
Charge battery for 8 hours.<br />
CHECKING SPECIFIC GRAVITY<br />
Refer to "Specific Gravity Check".<br />
Conduct additional charge as per<br />
Fig. 5. if necessary.<br />
Go to "CAPACITY TEST"<br />
BATTERY<br />
Battery Test and Charging Chart (Cont'd)<br />
Fig.4 INITIAL CHARGING CURRENT SETTING<br />
(Standard charge)<br />
. Checkbattery type and determine the specifiedcurrent usingthe table<br />
shown above.<br />
. After starting charging,adjustment of chargingcurrent is not necessary.<br />
Charge for 3.5 hours<br />
at initial charging<br />
current setting.<br />
Fig.5 ADDITIONAL CHARGE (Standard charge)<br />
~<br />
Charge for 2.5 hours<br />
at initial charging<br />
current setting.<br />
Go to "CAPACITY TEST".<br />
Charge for 1.5 hours<br />
at initial charging<br />
current setting.<br />
Above 1.240<br />
CAUTION:<br />
a. Do not use standard charge method on a battery whose specific gravity is less than 1.100.<br />
b. Set charging current to value specified in Fig. .4. If charger is not capable of producing specified current<br />
value, set its charging current as close to that value as possible.<br />
c. Keep battery away from open flame while it is being charged.<br />
d. When connecting charger, connect leads first, then turn on charger. Do not turn on charger first, as this<br />
may cause a spark.<br />
e. If battery temperature rises above 60°C (140° F), stop charging. Always charge battery when its temperature<br />
is below 60° C (140° F).<br />
EL-13<br />
::;::;<br />
TYPE ::;::; ::;::; ::;::; ::; ::;::; ::!<br />
a:a: a:a: a:a: a:a: a: a:a: a:<br />
CDN- mm vv MM coco "'''' M ;<br />
...... NN NN NN Mv<br />
VERTED<br />
W<br />
SPECIFIC<br />
GRAVITY<br />
alai alai 00 00 0 Ow<br />
COLtl OLtl LtlO LtI LtILtI<br />
VLtl LtILtI COal ,.. mm -<br />
1.100 -1.130 4.0 (A) 5.0 (A) 6.0 (A) 7.0 (A) 8.0 (A) 9.0 (A) 13.0 (A)<br />
1.130 -1.160 3.0 (A) 4.0 (A) 5.0 (A) 6.0 (A) 7.0 (A) 8.0 (A) 11.0 (AI<br />
1.160-1.190 2.0 (A) 3.0 (A) 4.0 (A) 5.0 (A) 6.0 (A) 7.0 (A) 9.0 (A)<br />
1.190 - 1.220 2.0 (A) 2.0 (A) 3.0 (A) 4.0 (A) 5.0 (A) 5.0 (A) 7.0 (A)
C: OOICK CHARGE<br />
Determine initial charging current setting and<br />
charging time from specific gravity. referring<br />
to Fig. 6.<br />
Charge battery<br />
Go to "CAPACITY TEST".<br />
BATTERY<br />
Battery Test and Charging Chart (Cont'd)<br />
Fig.6 INITIAL CHARGING CURRENT SETTING AND<br />
CHARGING TIME (Quick charge)<br />
10 (A) 15 (A) 20 (A) 30 (A) 40 (A)<br />
1.100-1.130 2.5 hours<br />
1 . 130 - 1.160 2.0 hours<br />
1.160 - 1.190 1.5 hours<br />
1.190-1.220 1.0 hours<br />
Above 1.220 0.75 hours (45 minJ<br />
. Check battery type and determine the specifiedcurrent using the table<br />
shown above.<br />
. After starting charging.adjustment of chargingcurrent is not necessary.<br />
CAUTION:<br />
a. Do not use quick charge method on a battery whose specific gravity is less than 1.100.<br />
b. Set initial charging current to value specified in Fig. 6. If charger is not capable of producing specified<br />
current value, set its charging current as close to that value as possible.<br />
c. Keep battery away from open flame while it is being charged.<br />
d. When connecting charger, connect leads first, then turn on charger. Do not turn on charger first, as this<br />
may cause a spark.<br />
e. Be careful of a rise in battery temperature<br />
operation.<br />
because a large current flow is required during quick-charge<br />
If battery temperature rises above 60°C (140° F), stop charging. Always charge battery when its temperatu<br />
re is below 60° C (140° F).<br />
f. . Do not exceed the charging time specified in Fig. 6, because charging battery over the charging time can<br />
cause deterioration of the battery.<br />
<strong>Service</strong> Data and Specifications (S. D. S.)<br />
EL-14<br />
:J:J :J:J:J :J:J:J :J:J:J<br />
:J<br />
a: a: Iilili a: a: a: a: a: a:<br />
a:<br />
-- mm VvM MCOCO --- ;<br />
NNN NNN MMv W<br />
IDID IDIDO 000 Oow<br />
IDv coono onono on on on !i!<br />
NM vonon onCOID r-mm -<br />
Applied area U,S.A. Canada<br />
Type 55D23R 65D26R<br />
CapaciW V-AH 12-60 12-65
MfT MODEL<br />
AfT MODEL<br />
/<br />
IGNITI ON<br />
SWITCH<br />
OFFACC ON ST<br />
1 :J<br />
2<br />
0<br />
3 :J<br />
4<br />
5<br />
@, For U. S. A.<br />
@), For Canada<br />
FUSI BlE<br />
LINK<br />
WI<br />
~@Y<br />
~~<br />
'"<br />
FUSE AND FUSIBLE lINK<br />
CIn RElAY BOX)<br />
IGNITION<br />
SWITCH<br />
OFFACC ON ST<br />
1 :J C<br />
2<br />
3<br />
4<br />
5<br />
FUSI BlE<br />
LINK<br />
()<br />
WI<br />
~@Y<br />
~~<br />
'"<br />
FUSE AND FUSIBLE lINK<br />
(J n RELAY BOX) (ill)<br />
I<br />
STARTING SYSTEM<br />
Wiring Diagram<br />
INTERLOCK CLUTCH<br />
Q ~"<br />
-<br />
""''''<br />
888 88J § §]<br />
cr:=::o cr:=::o FUSE<br />
I<br />
(ill)<br />
888 88J § §]<br />
cr:=::o cr:=::o FUSE<br />
W@<br />
~~<br />
"",0:<br />
'"<br />
~(@)<br />
~<br />
~'"<br />
'"<br />
(Eng i ne room<br />
harness) @)@)<br />
~8/Y...o,.0<br />
~8/W-'Q' "O-8/Y<br />
EL-15<br />
~@<br />
~~<br />
....<br />
@)g<br />
~<br />
~M<br />
BATTERY<br />
INHIBITOR SWITCH<br />
N IP P<br />
~@)<br />
@)1f2W<br />
(Eng Ine room ~<br />
harness) en ~<br />
8/Y-o' "O-8/Y<br />
@)Q<br />
]<br />
~<br />
7<br />
8/R<br />
'"<br />
@)ft@)<br />
BODY GROUND<br />
(Eng i ne room<br />
harness no. 2)<br />
>-<br />
,'"<br />
@.?)O<br />
STARTER MOTOR 7<br />
(Eng I ne room<br />
harness no. 2)<br />
>-<br />
,'"<br />
@.?)O<br />
SA HERY STARTER MOTOR 7<br />
,<br />
SEl466L<br />
SE L67BM
m<br />
r-<br />
I<br />
....<br />
0')<br />
VIS<br />
Starter motor does not<br />
stop if ignition switch<br />
is turned off.<br />
N.G. (Turns slowly.)<br />
Does starter motor turn?<br />
Check pinion rollar clutch for damage.<br />
Replace if necessery.<br />
No<br />
Check reduction geer. armature and gear<br />
shaft for damage.<br />
Replace if necessary.<br />
Check battery for charging condition<br />
and battery terminals for connections<br />
and corrosion.<br />
O.K.<br />
Does engine turn by replacing starter<br />
motor with a new one7<br />
No<br />
Check inside of engine.<br />
N.G.<br />
Ves<br />
.,<br />
Check Fuse and Fusible link<br />
O.K.<br />
Check battery for charging condition<br />
and battery terminals for connections and<br />
corrosion.<br />
O.K.<br />
Check wir ing of starting system.<br />
O.K.<br />
Can you hear magnetic switch of<br />
starter motor operating?<br />
Ves<br />
Is meshing condition of pinion and ring<br />
gear O.K.7<br />
O.K.<br />
Remove starter motor from engine.<br />
Does starter motor turn under no load<br />
by connecting battery (jJ terminal to M<br />
terminal of starter motor and battery<br />
e terminal to starter motor body?<br />
Ves<br />
Repair or replace starter motor.<br />
Repair or replace ignition switch,<br />
starter relay or magnetic switch.<br />
N.G.<br />
I Replace<br />
.1<br />
N.G. . Ch<br />
. Re<br />
batt<br />
N.G.<br />
Repair<br />
. Ign<br />
. Clut<br />
swit<br />
. Star<br />
. Con<br />
. Rep<br />
N.G. . Adju<br />
. Che<br />
retu<br />
for<br />
. Cor<br />
and<br />
1<br />
. Ch<br />
and<br />
Re<br />
Ch<br />
Re<br />
i <<br />
I Che<br />
I If an<br />
~:on
m r-<br />
I<br />
~<br />
'"<br />
A 6.4-8.3<br />
(0.65 - 0.85. 4.7 - 6.1)<br />
c
m<br />
~ I-'<br />
CO<br />
Sleeve bearing<br />
mCBJ<br />
Gear case<br />
Adjusting plate<br />
Plate thickness:<br />
0.25 (0.00981<br />
0.50 (0.01971<br />
~ Unit: mm (inl<br />
[;; co:J : N'm (kg-m. ft-Ibl<br />
~ m CBJ: High-temperature grease point<br />
Pinion stopper<br />
Stopper clip<br />
mCBJ<br />
Pinion assembly<br />
Magnetic switch assembly<br />
Packing<br />
mCBJ<br />
Armature<br />
Brush (+)<br />
Brush
~<br />
~<br />
Ohmmeter<br />
QJ<br />
- Vernier caliper<br />
STARTING SYSTEM - Starter ~<br />
SEL036H<br />
SEL038H<br />
~- -<br />
SEL626B<br />
Magnetic Switch Check<br />
. Before starting to check, disconnect battery ground cable.<br />
. Disconnect "M" terminal of starter motor.<br />
1. Continuity test (between "8" terminal and switch body).<br />
. No continuity... Replace.<br />
2. Continuity test (between "8" terminal and "M" terminal).<br />
. No continuity... Replace.<br />
Pinion/Clutch Check<br />
1. Inspect pinion teeth.<br />
. Replace pinion if teeth are worn or damaged. (Also check<br />
condition of ring gear teeth.)<br />
2. Check to see if pinion locks in one direction and rotates<br />
smoothly in the opposite direction.<br />
. If it does not lock (or locks) in either direction or unusual<br />
resistance is evident. ... Replace.<br />
Brush Check<br />
BRUSH<br />
Check wear of brush.<br />
Wear limit length:<br />
Refer to S.D.S.<br />
. Excessive wear ... Replace.<br />
EL-19 ,
J<br />
;<br />
M1T72781<br />
S114-519A<br />
.SEL558E<br />
Ohmmeter<br />
STAFtTING SYSTEM - Starter -<br />
SEL568B<br />
SE L625B<br />
SEL 104E<br />
Brush Check (Cont'd)<br />
. BRUSH HOLDER\ -.<br />
1. Perform insulation test between brush holder (positive side)<br />
and its base (negative side).<br />
. Continuity exists. ... Replace.<br />
2. Check brush to see if it moves smoothly.<br />
. If brush holder is bent, replace it; if sliding surface is dirty,<br />
clean.<br />
Pole Piece Check<br />
Pole piece is secured to yoke by bonding agent. Check pole<br />
piece to see that it is secured to yoke and for any cracks.<br />
Replace malfunctioning parts as an assembly.<br />
Holder may move slightly as it is only inserted and not bonded.<br />
Armature Check<br />
1. Continuity test (between two segments<br />
. No continuity... Replace.<br />
side by side).<br />
2. Insulation test (between each commutator bar and shaft).<br />
. Continuity exists. ... Replace.<br />
EL-20<br />
,<br />
\
'.<br />
STARTING SYSTEM - Starter -<br />
Vernier caliper<br />
Commutator<br />
SEL418A<br />
u""'"'",..OC"'"'..~ 0.5 . 0.8 mm<br />
Round 10.020.0.031 inl<br />
~Correct<br />
-e=\. Commutator<br />
~~Old<br />
Incorrect EE021<br />
Armature Check (Cont'd)<br />
3. Check commutator surface.<br />
8 Rough ... Sand lightlywith No. 500 to 600 sandpaper.<br />
4. Check diameter of commutator.<br />
Commutator minimum diameter:<br />
Refer to S.D.S.<br />
8 Less than specified value ... Replace.<br />
5. Check depth of insulating mold from commutator surface.<br />
8 Less than 0.2 mm (0.008 in) ... Undercut to. 0.5 to 0.8 mm<br />
(0.020 to 0.031 in)<br />
Assembly<br />
Apply high-temperature grease to lubricate the bearing,<br />
and frictional surface when assembling the starter.<br />
Carefully observe the following instructions.<br />
8 Gear case metal<br />
8 Moving portion of shift lever<br />
8 Plunger of magnetic switch<br />
8 Internal gear<br />
8 Planetary gear<br />
8 Shaft<br />
EL-21<br />
\<br />
/<br />
gears
)<br />
Switch<br />
rT<br />
IBattery<br />
-'-<br />
SE L299E<br />
Adjusting plate ~ ~I<br />
STARTING SYSTEM - Starter -<br />
Clearance "Q"<br />
SEL633B<br />
Assembly (Cont'd)<br />
PINION PROTRUSION LENGTH ADJUSTMENT<br />
With pinion driven out by magnetic switch, push pinion back to<br />
remove slack and measure clearance" Q" between the front<br />
edge of the pinion and the pinion stopper.<br />
Clearance" Q":<br />
Refer to S.D.S.<br />
. Not in the specified value ... Adjust by adjusting plate.<br />
<strong>Service</strong> Data and Specifications (S.D.S.)<br />
STARTER<br />
EL-22 ,<br />
S114-519A M1T72781<br />
Type HITACHI make MITSUBISHI make<br />
Applied model<br />
Reduction gear type<br />
System voltage V 12<br />
No-load<br />
Terminal voltage V 11.0<br />
Current A Less than 85 50 -75<br />
Revolution rpm More than 2,750 3,000 -4,000<br />
Minimum diameter of commutator<br />
mm (In)<br />
Minimum length of brush<br />
mm (in)<br />
Brush spring tension N (kg, Ib)<br />
Clearance of bearing metal and<br />
armatUre shaft mm (in)<br />
All<br />
32.0 (1.260) 28.8 (1.134)<br />
11.0 (0.433) 12.0 (0.472)<br />
17.7-21.6 13.7 -25.5<br />
(1.8 - 2.2,4.0 - 4.9) (1.4 -2.6,3.1 -5.7)<br />
0.2 10.008)<br />
Clearance "Q" between pinion front 0.3 -1.5 0.5-2.0<br />
edge and pinion stopper mm(in) (0.012 - 0.059) (0.020 - 0.079)<br />
\<br />
-
m<br />
r-<br />
I<br />
N<br />
W<br />
rJJ<br />
m<br />
r<br />
(IT<br />
CD<br />
~<br />
~<br />
::- BATTERY<br />
FUSE AND FUSIBLE LINK<br />
(Jn RELA Y BOX)<br />
J:1~<br />
:(<br />
@c;9<br />
@9~ :(<br />
i@ (@)~<br />
BODY GROUND ..:(<br />
@V<br />
ij<br />
.~<br />
CHARGING SYSTEM<br />
Trouble-shooting<br />
Bef~re conducting an alternator test, make sure that the battery is fully charged. A 3D-volt voltmeter and<br />
suitcible test probes are necessary for the test. The alternator can be checked easily by referring to the<br />
Inspection Table.<br />
Before starting trouble-shooting, inspect the fusibl~ link.<br />
WITH IC REGULATOR<br />
@<br />
Ignition<br />
switch "ON"<br />
With alternator side L terminal<br />
grounded, internal short occurs<br />
when + diode is short-circuited.<br />
Disconnect<br />
connector (5.<br />
U and ground<br />
L lead wire.<br />
Dim light<br />
Light fl ickers<br />
Bright light<br />
1) Use fully charged battery.<br />
2) Light: Charge warning light<br />
A.C.G. : Alternator parts except IC regulator<br />
IC-RG : IC regulator<br />
O.K. : IC alternator is in good condition.<br />
3) When reaching "Damaged A.C.G.", remove<br />
alternator from vehicle and disassemble, inspect<br />
and correct or replace faulty parts.<br />
4) *Method of grounding F terminal (HITACHI make<br />
only)<br />
Gasoline engine model<br />
Contact tip of wire with brush and attach<br />
wire to alt~rnator body.<br />
I<br />
I<br />
I<br />
I<br />
Check or replace<br />
drive belt.<br />
Connect connector<br />
(5, LI<br />
and ground F<br />
terminal<br />
Burned-out<br />
bulb. Replace<br />
and Proceed<br />
to "A".<br />
- ~Damaged IC-RG.<br />
Replace.<br />
I (MITSUBISHI IDamaged IC-RG<br />
:~a~e~ or A.C.G.<br />
Engine idling<br />
Engine speed:<br />
1 ,500 rpm<br />
Lighting<br />
switch "ON" Engine speed:<br />
1,500 rpm<br />
(Measure B<br />
terminal voltage.)<br />
SEL766D<br />
5) Terminals "S", "L", "8" and "E" are marked on<br />
rear cover of alternator.<br />
EL-24<br />
Make sure connector<br />
(5, U is connected<br />
correctl V.<br />
More than 15.5V )-1 Damaged IC-RG.<br />
Replace.<br />
-- --E.<br />
r
Condensor~ "<br />
CHARGING SYSTEM - Alternator -<br />
Construction<br />
Front cover<br />
~K~. ~--<br />
g<br />
8,",h"_bS-<br />
Rotor<br />
~,:;~(<br />
Front bearing<br />
A2T14094 Rotor<br />
*Rear bearing<br />
CAUTION:<br />
Stator<br />
-<br />
..,-.<br />
IC voltage regulator<br />
assembly<br />
*Rear bearing<br />
~hrOU9h-bOlt<br />
A 3.1-3.9<br />
10.32- 0 40<br />
--," -'->- i . .2.3. 2,91<br />
.'-./, ' --<br />
Rear cover<br />
A : N.m Ikg-m. ft-Ib)<br />
I~~<br />
t:><br />
SEL834H<br />
A: N'm Ikg-m.ft-Ib)<br />
SEL695L<br />
Rear cover may be hard to remove because a ring is used to lock outer race of rear bearing. Be careful not to<br />
lose this ringduring removal. '<br />
EL-25
2 mm 10.08 inl<br />
CHARGING SYSTEM - Alternator -<br />
SEL628D<br />
Ohmmeter<br />
Ohmmeter<br />
SE L630D<br />
SE L631 D<br />
E E049<br />
Disassembly<br />
REAR COVER REMOVAL<br />
CAUTION:<br />
Rear cover may be hard to remove because a ring is used to<br />
lock outer race of rear bearing. To facilitate removal of rear<br />
cover, heat just bearing box section with a 200W soldering<br />
iron.<br />
Do not use a heat gun, as it can damage diode assembly.<br />
Rotor Slip Ring Check<br />
1. Continuity test<br />
. No continuity... Replace rotor.<br />
2. Insulator test<br />
. Continuityexists. ... Replacerotor.<br />
3. Check slip ring for wear.<br />
Slip ring minimum outer diameter:<br />
Refer to S.D.S.<br />
Brush Check<br />
1. Check smooth movement of brush.<br />
. Not smooth ... Check brush holder and clean.<br />
2. Check brush for wear.<br />
. Replace brush if it is worn down to the limit line.<br />
3. Check brush lead wire for damage.<br />
. Damaged... Replace.<br />
4. Check brush spring pressure.<br />
Measure brush spring pressure with brush projected ap-<br />
.<br />
proximately 2 mm (0.08 in) from brush holder.<br />
Spring pressure:<br />
Refer to S.D.S.<br />
Not within the specified values ... Replace.<br />
EL-26
~ CHARGING,SYSTEM - AI.ternator -<br />
[MITSUBISHI make]<br />
Long nose pliers<br />
used as a heat sink<br />
!<br />
[HITACHI make]<br />
[MITSUBISHI make]<br />
SE L587 A<br />
~<br />
Stator Check<br />
To test the stator or diode, separate them by unsoldering the<br />
connecting wires.<br />
CAUTION:<br />
Use only as much heat as required to melt solder. Otherwise,<br />
diodes will be damaged by excessive heat.<br />
1. Continuity test<br />
. No continuity... Replace stator.<br />
EL-27
CHARGING SYSTEM - Alternator<br />
SE L384L<br />
Stator Check (Cont'd)<br />
2. Groundtest<br />
. Continuity exists. '" Replace stator.<br />
EL-28
-~<br />
CHARGING SYSTEM - Alternator -<br />
Diode Check<br />
MAIN DIODES<br />
. Use an ohmmeter to check condition of diodes as indicated in chart below:<br />
. If any opthe test results is not satisfactory, replace diode assembly.<br />
Diodes check (Positive side)<br />
Diodes check (Negative side)<br />
Ohmmeter probes<br />
Positive (fJ Negative<br />
Continuity<br />
Positive diode plate Diode terminals Yes<br />
Diode terminals Positive diode plate No<br />
Negative diode plate Diode terminals No<br />
Diode terminals Negative diode plate Yes<br />
[HITACHI make] [MITSUBISHI make]<br />
Negative diode<br />
plate SE L768D<br />
EL-29<br />
Positive<br />
diode plate<br />
Sub-diodes<br />
Diode terminals<br />
/<br />
SEL385L
--~<br />
[MITSUBISHI make]<br />
[HITACHI make]<br />
CHARGING SYSTEM - Alternator -<br />
SE L494H<br />
~.~ .<br />
(~:1 . ~<br />
\ ! I ( J<br />
-(]Do<br />
{( 1/) ;'//.' ~ - 0<br />
,J / -/.- .4..L c--<br />
Wear<br />
limit line-,<br />
SEL386L<br />
SEL595A<br />
Diode Check (Cont'd)<br />
SUB-DIODES<br />
. Attach ohmmeter's probe to each end of diode to check for<br />
continuity.<br />
. Continuity is N.G. ... Replace diode assembly.<br />
Assembly<br />
Carefully observe the following<br />
. When soldering each stator<br />
instructions.<br />
coil lead wire to diode assembly<br />
terminal, carry out the operation as fast as possible.<br />
WHEN SOLDERING BRUSH LEAD WIRE<br />
[MITSUBISHI make]<br />
. Position brush so that its wear limit line protrudes 2 mm<br />
(0.08 in) beyond end face of brush holder.<br />
[HITACHI make]<br />
(1) Position brush so that it extends 10.5 to 11.5 mm (0.413 to<br />
0.453 in) from brush holder.<br />
EL-30
~<br />
~<br />
/<br />
After soldering.<br />
place insulating tube<br />
on terminal.<br />
Soldering points<br />
1 mm 10.04 inl<br />
CHARGING SYSTEM - Alternator -<br />
SE L596A<br />
SE L766D<br />
Assembly (Cont'd)<br />
(2) Coil lead wire 1.5 times around terminal groove. Solder<br />
outside of terminal.<br />
When soldering, be careful not to let solder adhere to<br />
insulating tube as it will weaken the tube and cause it to<br />
break.<br />
RING FITTING IN REAR BEARING<br />
. Fix ring into groove in rear bearing so that it is as close to<br />
the adjacent area as possible.<br />
REAR COVER INSTAllATION<br />
(1) Before installing front cover with pulley and rotor with rear<br />
cover, push brush up with fingers and retain brush by<br />
inserting brush lift wire into brush lift hole from outside.<br />
(2) After installing front and rear sides of alternator,<br />
lift wire by pushing toward the center.<br />
pull brush<br />
Do not pull brush lift wire by pushing toward outside of rear<br />
cover as it will damage slip ring sliding surface.<br />
EL-31
CHARGING SYSTEM -"- Alternator -<br />
<strong>Service</strong> Data and Specifications (S.D.S.)<br />
ALTERNATOR<br />
Type LR180-715 A2T14094<br />
Applied model All<br />
Nominal rating V-A 12-80<br />
Groung polaritY Negative<br />
Minimum revolution under no-load<br />
(When 13.5 volts is applied) rpm<br />
Hot output current Alrpm<br />
More than 22/1,300<br />
More than 58/2,500<br />
More than 17/5,000<br />
EL-32<br />
Less than 950 Less than 1,100<br />
Regulated output voltage V 14.1 -14.7<br />
More than 21/1 ,300<br />
More than 60/2,500<br />
Minimum length of brush mm (in) 6.0 (0236) 8.0 (0.315)<br />
1.471 - 3.334 3.040 -4217<br />
Brush spring pressure N (g, oz) (150 -340, (310-430,<br />
5.29 - 11.99) 10.93 -15.17)<br />
Slip ring minimum outer diameter<br />
mm (in)<br />
26.8 (1.055) 22.1 (0.870)
LIGHT<br />
TURN SIGNAL<br />
R<br />
{[<br />
A, B n:,(j<br />
" 2nd p OFF<br />
C
,~<br />
,<br />
Wiper and<br />
washer switch l .~<br />
Lighting switch<br />
Attaching screw<br />
SEL389L<br />
SE L390L<br />
COMBINATIONSWITCH<br />
Replacement<br />
. Each switch can be replaced without removing combination<br />
switch base.<br />
. To remove combination switch base, remove base attaching<br />
screw and turn after pushing on it.<br />
EL-34
m<br />
r-<br />
I<br />
W<br />
(J'I<br />
RETRACT<br />
RELAY-l<br />
-<br />
cnc<br />
::Err<br />
~~<br />
~rr,<br />
nn ~ :r~<br />
, ~<br />
ZG1<br />
I~A TTERY I<br />
\ ~ HEADLA~P<br />
m MOTOR L.H.<br />
r<br />
~OJ<br />
..L-<br />
~<br />
.-<br />
-0<br />
~<br />
,---<br />
IS 5'<br />
-=-<br />
FUSE<br />
[of I<br />
RE TRAC T<br />
H RELAY-2<br />
-l--<br />
~~--<br />
1 -<br />
l<br />
-~,<br />
1- 1<br />
I ~-<br />
--4--<br />
--d,<br />
~~~<br />
~D~W~ ~P~ ~U~ -~O~N ~ ~ ~~<br />
4 4'~ G1<br />
3 3<br />
[L1J :<br />
I<br />
RETRACT<br />
I~<br />
6<br />
RELAY-4 <br />
1-<br />
-=-<br />
3<br />
t I<br />
- 4<br />
> f<br />
:~f*<br />
~! , - C<br />
..L ~ I L-- -<br />
-~~ HEAD LAMP TIMER<br />
HEADLAMP<br />
MOTOR R. H.<br />
r1S<br />
7<br />
-<br />
RETRACTOR<br />
SWITCH<br />
To i I Ium inat<br />
OFFI ON I ...<br />
I r+- } system<br />
I--<br />
@5 f--<br />
-<br />
RETRACT<br />
RELAY-3<br />
.--vm=;:<br />
-=-<br />
~<br />
t1!<br />
@t, ---<br />
<<br />
« ~<br />
-<br />
<<br />
-~<br />
I<br />
I
m r-<br />
I<br />
W<br />
en<br />
en mrUI<br />
CIO<br />
UI<br />
s:<br />
HEADLAMP MOTOR R. H.<br />
(D<br />
~<br />
@)<br />
@<br />
@<br />
O~<br />
BR/W<br />
PU/W<br />
OR<br />
B<br />
BR<br />
P/B<br />
HEADLAMP ~G/l<br />
R. H. 't}: R/G<br />
rE~?LAMP ~<br />
P<br />
~G/Y<br />
HEADLAMP MOTOR L. H.<br />
~R/B<br />
@<br />
BR/Y<br />
(D1.~P:f<br />
RETRACT RETRACT RETRACT RETRACT<br />
RELAY-] RELAY-2 RELAY-3 RELAY-4<br />
iii[l@~<br />
~@) ~@) ~@) rftl@ ~> ~~~:"<br />
.. .. c..<br />
..~ ~~ ..:~ ~~ ~~~ ..:~<br />
~ ". .. .....<br />
LIGHTING<br />
SWITCH<br />
cc<br />
..,,"'''' ..,". ......<br />
~@!)<br />
Ii<br />
FUSE AND<br />
FUSI BLE LI NK '"<br />
(J n RELA Y BOX)<br />
FUSE<br />
[§3[§ ~~<br />
~<br />
@<br />
jj<br />
To<br />
Illumination<br />
system<br />
@])@)<br />
RETRACTOR<br />
SWI TCH<br />
OFF ON<br />
1 a<br />
2 a<br />
3<br />
4<br />
5<br />
6<br />
B<br />
X 9<br />
'iff!:2 EA PU B R<br />
- OR<br />
mBR/W<br />
OR<br />
P/B<br />
P/B<br />
R/G<br />
m BR/Y<br />
R/l<br />
G/R<br />
R/B<br />
OR/B<br />
58<br />
BR<br />
PU .... BR/W<br />
BR/Y<br />
E2<br />
FI<br />
"'<br />
01<br />
A2<br />
AS<br />
C3<br />
Cl<br />
El<br />
02<br />
F2<br />
..<br />
B2<br />
Bl<br />
A'<br />
C'<br />
C'<br />
C2<br />
BR<br />
PU EA<br />
OR-<br />
BR/W m<br />
OR<br />
P/B<br />
P/B<br />
R/G<br />
BR/ Y .ffi<br />
R/l<br />
G/R<br />
R/B<br />
OR/B<br />
'B<br />
SR<br />
PU<br />
BR/W""<br />
8R/Y<br />
(Eng I ne<br />
harness)<br />
room<br />
S. M. J.<br />
(Ma in harness)<br />
ffiefer to last<br />
(FoIdout page).<br />
page<br />
]<br />
HEADLAMP TJ MER<br />
1.1<br />
-~@)<br />
@ ~,,~~~..~~~~ ~~<br />
". ~.. ..<br />
'" "''''<br />
~~@)<br />
~BATTERY<br />
Ii<br />
@)@)<br />
BODY<br />
GROUND<br />
@<br />
@
BASIC OPERATION<br />
*: Referto CIRCUIT OPERATION.<br />
/<br />
HEADLAMP<br />
Description<br />
Cond ition Operation<br />
Lighting switch Retractor switch C/O* Headlamp motor Headlamps<br />
OFF 1ST OFF No operation OFF<br />
1ST 2ND OFF [A) Open<br />
EL-37<br />
ON after headlamp motor reaches<br />
fully open position.<br />
2ND 1ST OFF Held to open position OFF<br />
1ST OFF OFF [B) Closed OFF<br />
Momentarily turned<br />
to PASSING<br />
OFF [C)<br />
Opened and closed after<br />
headlamps go off.<br />
Momentarily ON after headlamp<br />
motor reaches fully open position,<br />
and go off.<br />
OFF ON [D) Open OFF<br />
/
CIRCUIT OPERATION<br />
HEADLAMP<br />
Description (Cont'd)<br />
[A] When lightingswitch is switched from "1ST" ~ "2ND"<br />
A-1: While operating the headlamp motor to open position<br />
I<br />
RETRACT<br />
RELAY-!<br />
~~<br />
MEADLAMP<br />
MOTOR L. H.<br />
FUSE<br />
RETRACT<br />
RELA Y-2<br />
I<br />
HEADLAMP 7!J HEADLAMP<br />
MOTOR R. H.<br />
RETRACT<br />
RELAY-4<br />
Tl MER<br />
A-2: After the head lamp motor reaches fully open position<br />
/<br />
I<br />
RETRACT<br />
RELAY-!<br />
~~<br />
HEADLAMP<br />
MOTOR L. H.<br />
FUSE<br />
RETRACT<br />
RELAY-2<br />
I<br />
RETRACT<br />
RELA Y- 4<br />
~!J<br />
HEADLAMP<br />
HEADLAMP TIMER<br />
MOTOR R. H.<br />
EL-38<br />
---~<br />
) To Illumination<br />
system<br />
RETRACT<br />
RELA Y-3<br />
I<br />
--.J '<br />
To Illumination<br />
Jsystem RETRACT<br />
RELAY-3<br />
I<br />
c-"<br />
.m<br />
,,><br />
.~ ""<br />
"'"<br />
~~<br />
':">"<br />
""<br />
..." 0"<br />
~<br />
~~<br />
ij"<br />
""<br />
..." 0"<br />
~<br />
'"<br />
...m<br />
»<br />
"" "<br />
SEL657L<br />
SEL658L
[B]<br />
[C]<br />
C-1:<br />
HEADLAMP<br />
Description (Cont'd)<br />
When lightingswitch is switchedfrom "1ST" ~ "OFF"<br />
(While operating the head lamp motor to closed position)<br />
RETRACT<br />
RELAY-I<br />
HEADLAHP<br />
MDTDR L. H.<br />
FUSE<br />
RETRACT<br />
RELAY-2<br />
HEADLAMP<br />
MOTOR R. H.<br />
RETRAC T<br />
RELAY-4<br />
HEADLAHP TIHER<br />
When lighting switch is switched to "PASSING"<br />
While operating the head lamp motor to open position<br />
RETRACT<br />
RELA Y-I<br />
HEADLAMP<br />
MDTDR L. H.<br />
FUSE<br />
RETRACT<br />
RELAY-2<br />
HEADLAMP<br />
MOTOR R. H.<br />
RETRACT<br />
RElAY-4<br />
EL-39<br />
_.~<br />
} To Illumination<br />
system<br />
RETRACT<br />
RELAY-3<br />
I<br />
+oJ .<br />
} To Illumination<br />
system<br />
RETRACT<br />
RELAY-3<br />
I<br />
--.J .<br />
.:J<br />
I<br />
I<br />
r~<br />
.m<br />
~»<br />
.~ »"..<br />
r~<br />
.m<br />
~»<br />
.~ »<br />
~<br />
LI GHT! NG<br />
SWI T CH<br />
0<br />
"'~<br />
;,~<br />
.0r»""<br />
"'~<br />
;,~<br />
.~»"..<br />
..~<br />
r~<br />
~~<br />
..<br />
;:~<br />
"" ..<br />
..~<br />
r~<br />
~~ ..<br />
;:~<br />
""<br />
..<br />
SEL659L<br />
SEL660L
HEADLAMP<br />
Description (Cont'd)<br />
C-2: After the head lamp reaches fully open position<br />
[D]<br />
RETRACT<br />
RELAY-I<br />
HEADlAHP<br />
HDTDR l. H.<br />
FUSE<br />
RETRACT<br />
RElAY-2<br />
I<br />
~!J<br />
HEADlAHP<br />
HDTDR R. H.<br />
RETRACT<br />
RELAY-'<br />
L-_~-<br />
HEADlAHP TI HER<br />
When retractor switch is turned ON<br />
(While operating the headlamp motor to open position)<br />
RETRACT<br />
RElA Y-I<br />
HEADlAMP<br />
HDTDR l. H.<br />
FUSE<br />
~!J<br />
HEADlAMP<br />
HDTDR R. H.<br />
I<br />
RETRACT<br />
RELAY-'<br />
HEADLAHP T)MER<br />
EL-40<br />
) To Illuolna
~<br />
Headlamp motor<br />
. Headlamp motor should<br />
be removed together with<br />
the headlamp bracket as<br />
an assembly.<br />
~<br />
Finisher<br />
HEADLAMP<br />
-" ...~tin"e.<br />
Lid<br />
.Lid can be removed<br />
after removing finisher<br />
only.<br />
Link B<br />
EL-41<br />
c::=<br />
\-~:w, 1---<br />
~-~- -~<br />
I<br />
!<br />
\<br />
Headlamp bracket<br />
~<br />
SEL391 L
*1: 150 mm (5.91 inl<br />
*2: 50 mm (1.97 inl<br />
SEL392L<br />
Lock nut<br />
Motor side SEL393L<br />
Approx.6.0<br />
(0.236)<br />
~<br />
Approx. 6.8 (0.2681<br />
I,<br />
Approx.6.0<br />
(0.236)<br />
~~I<br />
~ Unit: mm (inl<br />
~ SEL394L<br />
---------<br />
-----------<br />
I<br />
lllll.<br />
Ill<br />
lllllllllllli<br />
LLLlLllllll [<br />
I<br />
\.\.\.\\\\\\\,,~ llllll<br />
lLLllLlllllllllllllllll<br />
SEL395L<br />
~- Ad;""ro,,4<br />
~~_isflush. S~L396L<br />
/<br />
HEADLAMP<br />
Assembly<br />
1. Install headlamp motor, ball joint and link A (as one unit) on<br />
headlamp bracket.<br />
2. While turning link S, install link A's ball joint on headlamp<br />
housing's ball joint.<br />
3. Set distance between centers of upper and lower ball joints<br />
as shown in figure at left, and tighten lock nuts.<br />
4. Assemble head lamp, finisher and lid.<br />
Installation and Adjustment<br />
Before doing this, be sure to disconnect battery ground cable.<br />
1. Install head lamp bracket to body temporarily.<br />
1) Determine headlamp bracket location on body so that<br />
alignment between lid, hood, and fender looks straight.<br />
2) After adjusting alignment, tighten head lamp bracket to body.<br />
2. Adjust lid alignment.<br />
. Adjust lid, hood and fender for alignment while opening and<br />
closing headlamp with motor manual knob.<br />
Use motor manual knob to open and close headlamp, and<br />
adjust alignment<br />
with hood.<br />
while checking that lid is not interfering<br />
EL-42<br />
~
L-<br />
Up<br />
Bulb<br />
SE L399 L<br />
SEL495G<br />
~ Press<br />
SEL841 H<br />
HEADLAMP<br />
Installation and Adjustment (Cont'd)<br />
3. Adjust stopper.<br />
1) Loosen lock nut on stopper.<br />
2) Turn motor manual knob to open headlamp assembly completely.<br />
3) Adjust stopper screw.<br />
Headlamp Motor Check<br />
1. Disconnect battery ground cable.<br />
2. Disconnect the headlamp motor connector.<br />
3. Use an ohmmeter to check for continuity in headlamp motor<br />
circuit while rotating motor with manual knob.<br />
INSTALLING HEADlAMP RUBBER CAP<br />
When installing the rubber cap, set the "TOP" or " ..." mark so<br />
that it is facing up.<br />
Press the rubber cap firmly so that the lip makes contact with<br />
the head lamp body.<br />
EL-43<br />
/<br />
~
WL = 1.067 (42.01)<br />
H<br />
"H" : Horizontal center line<br />
of head lamps<br />
Vertical centerline I"': ~pper edge of<br />
ahead of head lamps 7lZ. ~igh intensitY zone<br />
Height of / / '" ""<br />
lamp centers I 1100<br />
(4) 100 (4)<br />
100 100 (4)<br />
(4)<br />
f.iOOfWo<br />
(4) (4)<br />
~ = ACCEPTABLE RANGE<br />
Unit: mm lin)<br />
=-- 1~IWl~~~ll lll<br />
Left edge of high<br />
intensitY zone<br />
lUlU<br />
=l\~\\\\\\~~\~ nUl<br />
7.) \\1illtlllllllllllllllll i<br />
~<br />
SEL914D<br />
SEL400L<br />
HEADLAMP<br />
Aiming Adjustment<br />
When performing headlamp aiming adjustment, use an aiming<br />
machine, aiming wall screen or headlamp tester. For operating<br />
instructions of any aimer, it should be in good repair, calibrated<br />
and used according to respective operation manuals supplied<br />
with the unit.<br />
If any aimer is not available, aiming adjustment can be done as<br />
follows:<br />
For details, refer to the regulations in your own country.<br />
CAUTION:<br />
a. Keep all tires inflated to correct pressures.<br />
b. Place vehicle and tester on one and same flat surface.<br />
c. See that there is no-load in vehicle (coolant, engine oil<br />
filled up to correct level and full fuel tank) other than the<br />
driver (or equivalent weight placed in driver's position).<br />
. Adjust headlamps so that upper edge and left edge of<br />
high intensity zone are within the acceptable range as<br />
shown.<br />
. Dotted lines in illustration show center of headlamp.<br />
ADJUSTING SCREWS<br />
EL-44<br />
------
SE L401 L<br />
HEADLAMP<br />
Aiming Adjustment (Cont'd)<br />
AlMER ADJUSTMENT MARK<br />
When using a mechanical aimer, adjust adapter legs to the data<br />
marked on the headlamps.<br />
Example:<br />
4H2V<br />
1LHorizontal side: 4<br />
EL-45<br />
LVertlcal side: 2<br />
\<br />
---------
~<br />
m r-<br />
I<br />
~<br />
en<br />
(fj<br />
m<br />
r :.<br />
-.j<br />
...<br />
r<br />
FRONT<br />
COMBI NATI ON<br />
LAMP R. H.<br />
I"..can,.~~,<br />
FRONT<br />
COMBI NATI ON<br />
LAMP L. H.<br />
I "..c.n,. ~<br />
~,<br />
I<br />
'"<br />
@)~@)<br />
BODY<br />
GROUND<br />
FRONT SIDE<br />
MARKER<br />
LAMPR.H.<br />
@) '" 'III ,..<br />
0 @)<br />
B<br />
harness) - G/R F2 G/R<br />
~<br />
m r-<br />
I<br />
~<br />
"<br />
en<br />
m<br />
r<br />
"...<br />
I\)<br />
r<br />
FRONT<br />
COMBI NA TI ON<br />
LAMP R. H.<br />
Clearance ~R:L<br />
I ~@<br />
FRONT<br />
COMBINATI ON<br />
LAMP L. H.<br />
~@<br />
Clearance ~ R:L<br />
@)~@)<br />
BODY<br />
GROUND<br />
FRONT SIDE<br />
MARKER<br />
LAMP R. H.<br />
FUSE BLOCK ~'"<br />
(Referto "POWER ~~<br />
SUPPLY ROUTING".) I l<br />
@D@<br />
(Eng i ne room<br />
§<br />
harness) - G/R F2 G/R - R/L D2 R/L<br />
S. M. J.<br />
[Re fer to Iast page<br />
(Fo Idout page).]<br />
'"<br />
III'<br />
r-<br />
~@<br />
~<br />
FRONT SIDE<br />
MARKER<br />
LAMP L. H.<br />
*<br />
INHIBITOR SWITCH<br />
0: A/T model<br />
@: M/T model<br />
@: Fastback<br />
. @: Coupe<br />
@)~ ~ ~<br />
'" '"<br />
(Eng Ine room<br />
harness)<br />
@)~<br />
(@)~<br />
!1<br />
~~<br />
"''''<br />
~~<br />
"''''<br />
II<br />
EXTERIOR LAMP<br />
Back-up Lamp/Wiring Diagram<br />
il<br />
I GNI TI ON SWI TCH<br />
ON or START<br />
l<br />
@I FUSE BLOCK<br />
(Refer to "POWER ..J<br />
SUPPL Y ROUTING".) ~<br />
J<br />
<br />
~rii@<br />
BODY GROUND<br />
@!)<br />
_G/w-Q ~ BACK-UP<br />
'z:1B --E:J~ LAMP R. H.<br />
(§)<br />
~IG;I~-UP I<br />
REAR<br />
COMB I NA TI ON<br />
LAMP R. H.<br />
@D<br />
G/w-p~ BACK-UP<br />
B --E:J ~ LAMP L K<br />
(@)<br />
I~IG;I~-UP I<br />
REAR<br />
COMB I NA TI ON<br />
LAMP L H.<br />
SEL679M<br />
--------
m<br />
r-<br />
I<br />
~<br />
CD<br />
(f)<br />
m<br />
r '"<br />
...,<br />
'"<br />
r<br />
-g-<br />
9"<br />
TO<br />
H<br />
25<br />
26<br />
27<br />
I28<br />
@<br />
0<br />
. c G/L R/W<br />
ir~R/G<br />
@<br />
FOG<br />
LAMP n OR/L<br />
RELAY U G/L<br />
D~OR/B<br />
OR<br />
~ ~<br />
FRONT FOG<br />
LAMPR. H.<br />
FRONT FOG<br />
~<br />
\bL<br />
~<br />
trn'I<br />
CI[8:: Ot/B<br />
J= OR~B~<br />
[8::<br />
rr;;;\<br />
[8::ot/B<br />
B<br />
LAMP L.H. \bL CI OR/B<br />
~ (Sub-harness)<br />
~<br />
@ii@)<br />
BODY GROUND<br />
@D@)<br />
R/G~ R/G<br />
(Eng Ine<br />
harness)<br />
room OR/L~OR/L<br />
I S.<br />
ffiefer to<br />
(Fo I dout<br />
M. J.<br />
last page<br />
page).]<br />
::IE<br />
DIODE<br />
.~@<br />
'" , '" , '" -<<br />
(MaIn<br />
harness)<br />
Ifr Ifr Ifr rr rr<br />
"'co co"''''<br />
~~<br />
'" '"<br />
USE AND FUSIBLE LINK<br />
(I n RELAY BOX)<br />
t
m r-<br />
I<br />
c.n<br />
0<br />
en mrUI<br />
(X)<br />
01<br />
~<br />
IGNITION SWITCH<br />
ON or START<br />
C/15J<br />
CtO<br />
"U...TI<br />
"Un C<br />
r..,C/1<br />
-< m<br />
ct<br />
;00tD<br />
0 r<br />
c>o<br />
-i"Uo<br />
-0:>\<br />
z:E<br />
[;)m<br />
.';0 '"<br />
,<br />
:e @) '",<br />
r<br />
0--<<br />
00<br />
:J<br />
ct-.<br />
..,-<br />
0-<br />
-c 3<br />
UJ-<br />
'<br />
ctct<br />
to-.<br />
30 :J<br />
@ii(§)<br />
I~@<br />
FRONT TURN B<br />
COMBINATION J{:G/Y<br />
LAMP R. H. 't::J<br />
I~@<br />
FRONT TURN B<br />
COMBI NATION J{: G/B<br />
LAMP L. H. 't::J<br />
OFF ON<br />
1 L<br />
2 c<br />
3<br />
4<br />
5<br />
6<br />
7<br />
IX (D<br />
B<br />
HAZARD<br />
SWITCH<br />
.<br />
-@<br />
",:;; ",,,,,,,,,,<br />
~~~~~~~~<br />
rr",,,,<br />
"''''"<br />
~~-c..<br />
S.M.J.<br />
[Refer to Iast page E!81:;?;<br />
GEJ<br />
(Main<br />
harness)<br />
(Fa Idout page). J ~ ~<br />
@)ii@)<br />
- -<br />
BODY GROUND<br />
rr<br />
",,,,"'''' ,," c..<br />
@<br />
";1<br />
.r (Eng Ine room<br />
harness)<br />
@'<br />
@:<br />
@:<br />
@:<br />
@'<br />
@'<br />
Fast Back<br />
Coupe<br />
COMBI NATI ON<br />
FLASHER UNIT<br />
~ m@<br />
r<br />
~ ~ ..<br />
.. ..<br />
0<br />
m-<br />
G/Y<br />
G/B<br />
LG/B Jj<br />
With head-up display<br />
Without head-up display<br />
TURN R. H.<br />
:~3<br />
TURN L. H.<br />
~'P¥H<br />
@ QD ~oW1@<br />
COMBINATION M<br />
,~,f'i * .~, G/B~ ~G/B~<br />
(J nstrument harness)<br />
TURN SIGNAL<br />
SWITCH<br />
1m<br />
With anti-lock braking system<br />
Without anti-lock braking system<br />
0ii@<br />
- -<br />
BODY GROUND<br />
/<br />
~. ~<br />
IjIG~Y=EfI<br />
@ill)<br />
@<br />
-ffi ~<br />
~t:Y~ 4J<br />
~<br />
jIG~B=EfI ~ .<br />
@IV<br />
@<br />
-ffi~<br />
~IG:B~~
Test lamp (27W)<br />
Battery SEL122E<br />
EXTERIOR LAMP<br />
Combination Flasher Unit Check<br />
. Before checking, ensure that bulbs meet specifications.<br />
. Connect a battery and test lamp to the combination flasher<br />
unit, as shown. Combination flasher unit is properly functioning<br />
if it blinks when power is supplied to the circuit.<br />
---<br />
Bulb Specifications<br />
Item Wattage (W)<br />
Headlamp (Sealed) 65/35<br />
Front clearance lamp<br />
Front turn signal lamp<br />
Front side marker lamp<br />
Rear side marker lamp<br />
Turn signal lamp<br />
Stop/Tail lamp 27/8<br />
Back-up lamp<br />
License plate lamp<br />
Interior lamp<br />
Spot lamp 8<br />
Trunk room lamp<br />
Foot well lamp 3<br />
Luggagecompartment lamp<br />
High-mounted stop lamp<br />
EL-51<br />
8<br />
27<br />
3.8<br />
3.8<br />
27<br />
27<br />
7.5<br />
10<br />
3.4<br />
5<br />
18<br />
)
m<br />
r-<br />
I<br />
(J1<br />
N<br />
en<br />
m<br />
G;<br />
01<br />
01<br />
~<br />
BATTERY<br />
r FUSE BLOCK ~<br />
(Refer to "POWER'"<br />
SUPPLY<br />
ROUTI NG", )<br />
n<br />
"''''<br />
~@)<br />
8 GLOVE<br />
(Sub-harness)<br />
GLOVE BOX<br />
LAMP SWITCH<br />
1<br />
BOX<br />
LAMP<br />
UP<br />
*<br />
@<br />
IR~L=83 ffi::=/L<br />
I @)@<br />
'"<br />
""<br />
~@)<br />
~<br />
TIME CONTROL UNIT<br />
(Refer to I1TIME<br />
CONTROL SYSTEMI1.)<br />
ffi¥H31<br />
~M<br />
(Main<br />
harness)<br />
ii<br />
@~<br />
BODY<br />
GROUND<br />
"'., "<br />
~:u<br />
'THII<br />
0... -n<br />
r", g~en<br />
::: rtO'<br />
C'11 ::I<br />
"'''' "0-'<br />
IDIDL<br />
:;; GD (C en' ~ - (1Irt<br />
(ill?)<br />
"'., ~<br />
" '"0<br />
r", ~ID<br />
dBim R/L W<br />
n<br />
~G/R<br />
j ] o;z::I:<br />
m \ -t<br />
z m<br />
z<br />
1<br />
2<br />
3 )<br />
4<br />
X ( D<br />
5<br />
III~@ ~<br />
"',,'"<br />
r ,c:", @ ,"'''''''''''' -< '" I~>"'c:<br />
"''''<br />
"r-<<br />
EffiJ@?)<br />
,~~<br />
r-t<br />
c<br />
::I<br />
....<br />
Z<br />
»<br />
-t<br />
....<br />
0<br />
z<br />
@) @<br />
R/y<br />
R/L R/L<br />
L L<br />
. ~ 0<br />
rt<br />
r,R/Y<br />
~<br />
j i<br />
iD<br />
. CD0<br />
S6 ~ S6<br />
PU ~ PU<br />
@) (IT)<br />
HEAD-UP<br />
DISPLAY<br />
CONTROL UNIT<br />
~<br />
@. "'" "''''<br />
,c: III'<br />
-< r<br />
COMBINATION METER<br />
ILLUMINATION<br />
1'1'~<br />
lD~*1<br />
~-<br />
QD r ~ 'iT' \!.:J' ",r<br />
I LLUMI NA TI ON<br />
(L I qu I d crysta I><br />
~ ~<br />
y.;j' r<br />
Unstrument harnes~<br />
CASSETTE<br />
DECK<br />
~: With<br />
~: Witho<br />
*1 : Conn<br />
displ<br />
100 ~I ~<br />
@~ ~@ ~<br />
,-<<br />
"'''' '" '" '" '" "''''<br />
@~ @~ @~ @~ @<br />
~~m~EI<br />
HAZARD<br />
SWITCH<br />
FRONT FOG REAR<br />
~PER REAR WI NDOW<br />
LAMP SWI TCH AND W SHER DEFOGGER<br />
SWITCH SWITCH
m<br />
r-<br />
I<br />
(J1<br />
W @<br />
A<br />
UP,I<br />
:lFUSE BLOCK<br />
(Refer to "POWER :G<br />
SUPPL Y ROUTI NG". ) ~<br />
FOOT R.H. LAMP ~ .I9I:D=R/W R/B<br />
@<br />
FOOT L. H. LAMP ~ .I9I:D=R/W R/B<br />
!II<br />
m<br />
r<br />
CI<br />
CI<br />
.....<br />
s:<br />
DOOR SWI TCH<br />
(Or I ver s I de)<br />
INTERIOR<br />
LAMP<br />
@:@~<br />
@:@;o;a "..'"<br />
EH<br />
(Ma In r.ct\ f'Dt\ (Room I amp<br />
~ . ~ 0<br />
harness) ~ ~ harness)<br />
:G,'"<br />
~0<br />
-=-<br />
R/B<br />
R/B<br />
R/W R/W<br />
B B<br />
:G,'"<br />
Q@V<br />
-=-<br />
@~(§)<br />
@<br />
INTERIOR<br />
LAMP<br />
w@<br />
:G "<br />
,.., '" ..<br />
tiS<br />
SPO<br />
~<br />
!g)R/B-'1 R ={j ~<br />
9 :G,.S<br />
[ R -c:IJ~<br />
[<br />
~<br />
@})<br />
:gf)R/B-'1 R ={j ~<br />
(§Y<br />
:~~<br />
I @:<br />
@l) 1 @]) @:<br />
@ @:<br />
BODY GROUND BODY-GRO~<br />
~:<br />
~:<br />
@:
NEEDLE TYPE<br />
20 11 3 17<br />
:J<br />
«<br />
ZI-<br />
01/)<br />
....>- Z<br />
1-0:: 0<br />
«u ....<br />
Z<br />
....0<br />
1:....<br />
:J:J<br />
-lei<br />
-I....<br />
""d<br />
Ii<br />
I I<br />
Hl ....<br />
(!) I- I- 1il2<br />
I<br />
8 4 18<br />
14 16 30 6 12 24<br />
I I I I I<br />
METER AND GAUGES<br />
Combination Meter<br />
=<br />
C3 0<br />
m Z Z 0 I<br />
-I<br />
u<br />
«<br />
I gj gj U I- LL<br />
6 6<br />
15 28 7<br />
-I a:<br />
w<br />
:J<br />
J<br />
6 6 6 1<br />
19 10 26 25 21<br />
EL-54<br />
"BRAKE" or " (CD) "<br />
0<br />
-~<br />
@: For- Cal i for-nia<br />
m :':z<br />
I- U....<br />
« W(!)<br />
W IZ<br />
I/) UW<br />
i] g] ] ]<br />
22 23 5 1<br />
i] ] I]<br />
)<br />
)<br />
:.:<br />
u<br />
0<br />
-I<br />
I<br />
....<br />
I-<br />
Z<br />
«<br />
6<br />
9 27 2<br />
SEL577M
DIGITAL TYPE<br />
10<br />
0<br />
Head-up display unit<br />
Y Y<br />
)<br />
*1<br />
.<br />
Z<br />
0<br />
1,14 23<br />
CJ<br />
[ 10 0 0 03 21 10 0 0101 ]<br />
2 4<br />
~<br />
Y Y Y ?<br />
0<br />
3<br />
if<br />
if<br />
METER AND GAUGES<br />
Combination Meter (Cont'd)<br />
= =<br />
(j;) (j;) (j;)<br />
21 18 17<br />
0 0<br />
20 8<br />
? ?<br />
8) (FUel~<br />
d-up display<br />
*1:To con I unit @:<br />
6 6<br />
9 15<br />
EL-55<br />
@)<br />
u....,<br />
0<br />
For Ca I Iforn Ia<br />
W(!J<br />
IZ<br />
uw<br />
6 §I j gj j Ij j<br />
19 7 13 11 16 12 24<br />
W<br />
:I
DIGITAL<br />
COMBINATION METER<br />
HEAD-UP Dl SPLA Y<br />
ON-OFF SWITCH<br />
MPH<br />
km/h<br />
-=<br />
METER AND GAUGES<br />
Combination Meter (Cont'd)<br />
HEAD-UP DISPLAY<br />
r---,<br />
Inn<br />
I,u,-, I<br />
~--j<br />
HEAD-UP<br />
DISPLAY<br />
UNIT<br />
HEAD-UP DISPLAY II<br />
CONTROL UNIT<br />
5 1 7 6 2 3 8 9 4<br />
SPEED<br />
SENSOR<br />
EL-56<br />
II<br />
FUSE<br />
}<br />
To Illumination<br />
control system<br />
To ~ ~ ~ & control unit<br />
SEL480L
m<br />
r-<br />
I<br />
C1'I<br />
.....<br />
I GNITI ON SWITCH<br />
ON or START<br />
I GNI TI ON SWI TCH<br />
ACC or ON<br />
III<br />
m<br />
r<br />
OJ<br />
OJ<br />
IX)<br />
~<br />
~nga Ine room<br />
Frness) Y/L<br />
r-- Y/B HII<br />
(Re~~~E BLOCK<br />
SUPPLyt~O~POWER TING" )<br />
(@Y @) .<br />
B (Main<br />
III Y/L harness)<br />
I Y/B<br />
" S.M J<br />
r'"<br />
~<br />
. . [Refer t<br />
page). J<br />
@ . (FaIdout Iast page<br />
@@~<br />
:rm<br />
ED::I<br />
"1(c<br />
::1-<br />
!II::I<br />
01 !II<br />
01<br />
"1<br />
::10<br />
00<br />
. 3<br />
~<br />
-
m ~I<br />
en<br />
CO<br />
UP<br />
*<br />
I GNI TI ON SWITCH<br />
ON or START<br />
A I@<br />
FUEL TANK<br />
GAUGE UNIT<br />
FUSE BLOCK<br />
'" (Refer to "POWER<br />
SUPPLY ROUTING".) @E)$ '" ,'" ,...<br />
I GNI TI ON SWI TCH<br />
ON or START<br />
[!]<br />
@<br />
[Q]<br />
- --nnn,<br />
(E.F. I.<br />
harness)<br />
IW<br />
~rm<br />
3-Y/R n__- m__mn--:lf<br />
:<br />
I I<br />
I I<br />
32-Y/G<br />
-< ,... , ::0'"<br />
'"<br />
@tb l{j@)<br />
~<br />
,...<br />
~"':e<br />
'"<br />
@)CtP<br />
~ ~<br />
'"<br />
0h~<br />
!9!!9!<br />
BODY<br />
GROUND<br />
@@<br />
HEAD-UP<br />
DISPLAY<br />
CONTROL<br />
UNIT<br />
L/BIIL/B<br />
Y/R Y/R<br />
Y/G Y/G<br />
,...<br />
",'"<br />
"",::0<br />
Q~@<br />
E. C. C. S<br />
CONTROL' UNIT<br />
ENGI NE<br />
GROUND IGNITION COIL<br />
00 ffiefer to ~ C C S<br />
m SYSTEMin' . .<br />
b; EF&EC sect ion, ) SPARK I<br />
m<br />
~<br />
RESISTOR POWER<br />
TRANSISTOR<br />
PLUG<br />
HEAD-UP<br />
DISPLAY<br />
r ,<br />
I/DDI<br />
~<br />
.<br />
1<br />
HEAD-UP<br />
DISPLAY<br />
UNIT<br />
~@) ~~<br />
17<br />
"'\ '" \\ @ \'" \ '" ~ @<br />
"',...'" ::0 '" ,...<br />
- we<br />
::- - -<br />
(Ma i n harness)<br />
@'" \<br />
ENGINE ~ @~<br />
GROUND<br />
::-<br />
'"<br />
-u<br />
m -i<br />
-i<br />
m ><br />
>c >m<br />
0 C1<br />
cm C:J:<br />
0 :I<br />
r "U<br />
:J:<br />
:J:<br />
m m'<br />
m<br />
-i m<br />
m -i<br />
::u m<br />
::u<br />
~;u<br />
~C'D<br />
0-..<br />
-(11 -
Needle type<br />
~@ (Temp.)~<br />
o.<br />
~<br />
@ (Temp.)<br />
~<br />
0<br />
-<br />
SEL404L<br />
~E!) (Fuel)<br />
oo<br />
~<br />
- ~~<br />
. [Y] \tt:m:IU<br />
~ - -<br />
. @ and @: Fuel gauge -<br />
~C)(..."<br />
@ and@: Watertemperature gauge SEL405L<br />
~<br />
@ (Temp.)<br />
.@ and @: Fuel gauge<br />
@ and @: Watertemperature gauge SEL406L<br />
METER AND GAUGES<br />
Inspection/Fuel Gauge and Water Temperature<br />
Gauge<br />
INSPECTION START<br />
O.K.<br />
CHECK POWER SOURCE.<br />
1) Turn ignition switch "ON".<br />
2) Check voltage between<br />
terminal @ and ground.<br />
Battery voltage should exist.<br />
O.K.<br />
CHECK GAUGE OPERATION.<br />
1) Turn ignition switch "ON".<br />
2) Connect terminals @ (Fuel).<br />
@ (Temp.) and ground with<br />
wire for less than 10 seconds.<br />
3) Check operation of gauge.<br />
Gauge should move smoothly<br />
to full scale.<br />
O.K.<br />
Check harness continuity<br />
between component and<br />
combination meters @ (Fuel).<br />
@ (Temp.).<br />
O.K.<br />
CHECK COMPONENT.<br />
Check gauge units and harness.<br />
Refer to "Fuel Tank Gauge Unit<br />
Check" or "Th~rmal<br />
Transmitter Check".<br />
O.K.<br />
Reinstall any part removed.<br />
(<br />
I<br />
.Y.<br />
INSPECTION END<br />
EL-59<br />
)<br />
'\<br />
Check the following items.<br />
N.G.I 1) Harness continuity between<br />
battery terminal and<br />
combination meter<br />
2) Ignition relay ----------<br />
3) Fusible link and fuse<br />
4) Ignition switch<br />
N.G.<br />
N.G.<br />
Repair or replace gauge.<br />
Repair or replace.<br />
N.G. Repair or replace.<br />
Refer to FE section. (Fuel gauge)
Ohmmeter<br />
':'<br />
*3<br />
Voltmeter<br />
~ ~<br />
SEL407L<br />
EF329A<br />
SEL748K<br />
Speed<br />
sensor<br />
pinion<br />
+ - [Alternating<br />
current (A.C.)]<br />
11 rId M App
J:<br />
tJ<br />
1-1-<br />
...It:<br />
~<<br />
"'I-<br />
'"<br />
Z<br />
at.<br />
...0<br />
I-<br />
...z<br />
ZO<br />
(!J<br />
...<br />
E<br />
41<br />
+'<br />
In<br />
>-<br />
In<br />
C!<br />
m<br />
ro-<br />
I<br />
en<br />
N<br />
en<br />
m<br />
r U1<br />
....<br />
ID<br />
s:<br />
BULB CHECK<br />
RELAY TIME CONTROLUNIT<br />
B CONTROLSYSTEM'.)SWITCH<br />
I ~ = I i ..,.,'".n" I~I "" ,m<br />
AUTOMATICSEAT BELT<br />
(Refer to BF sect Ion.)<br />
CO""" ""n<br />
@)IWI ~ ~ @ ~ ~ ICI:I?PI 11,119~~ I@<br />
":::~III:. ~ ,III en.." ", ,<br />
B .@IIII\II~~~II UP<br />
~ ~ o:n:B:r:m ¥ ~ .<br />
~ I ~ ~ ~ I ~ I<br />
..<br />
PARKI NG<br />
@ @ frili6I ~ BRAKE SWITCH<br />
BO~Y-=- ~ ~<br />
GROUND ~~ IT:rY/pu<br />
-=-<br />
r.Cr-R/L (!!,<br />
WASHE~G ~ "0- G \0<br />
WARNI -..<br />
LAMP @ ~~ I~,~<br />
-n.. ..,.. "<br />
0 ... ~rc:~~<br />
~<br />
IGNITION<br />
SSWITCHh<br />
-I> g."en -<br />
ON or<br />
TART C
m<br />
r-<br />
I<br />
0)<br />
W<br />
f/)<br />
m<br />
,en<br />
.....<br />
0 s:<br />
LI GHTI NG SWITCH<br />
OFF 1ST 2ND<br />
A B C A B C A B C<br />
5<br />
6<br />
I lie<br />
7<br />
Inl<br />
B<br />
9<br />
10<br />
11<br />
12<br />
2S<br />
26<br />
27<br />
28<br />
I I(<br />
KEY SWITCH<br />
~~0<br />
m' ~R/L G/R<br />
~@V<br />
tl ~~~~<br />
@<br />
(Eng i ne room<br />
harness)<br />
I GNI TI ON SWITCH<br />
ON or START<br />
UP<br />
t-<br />
@<br />
A<br />
IDA<br />
'" FUSE BLOCK "'~<br />
(Refer to pPOWER \.\.<br />
SUPPL Y ROUTI NGp. ) ~'"<br />
S. M. J.<br />
ffiefer to last page<br />
(Fa I dout page).]<br />
G/R02<br />
G/R<br />
R/L D2 R/L<br />
Y/R H9 Y/R<br />
@D@<br />
(Ma i n<br />
harness)<br />
$E<br />
I<br />
\.<br />
$E<br />
I<br />
I I<br />
$E$E<br />
II $E<br />
a::::IJ o::::::IJ .L1 I g@<br />
CB[EE<br />
I!I<br />
'" '" LINK<br />
Hr<br />
FUSE OJ<br />
-<<br />
FUSE AND FUSIBLE LINK<br />
(J n RELAY BOX)<br />
FUSIBLE<br />
I<br />
; BATTERY<br />
TIME CONTROL UNIT<br />
(Refer to pTIME<br />
CONTROL SYSTEMp.)<br />
I~I<br />
~@ ~-< ",r -
w<br />
Needle type model<br />
Digital type model<br />
.<br />
0<br />
WARNING LAMPS AND CHIME<br />
SEL901F<br />
~JJl Diode<br />
=:I<br />
SEL409L<br />
Diode Check<br />
. Check continuity using an ohmmeter.<br />
. Diode is functioning properly if test results are as shown in<br />
the figure at left.<br />
\<br />
. Diodes for warning la~s are built into the combination<br />
meter printed circuit.<br />
Warning Chime Check<br />
EL-64
I<br />
U<br />
1-1-<br />
~o::<br />
=:~<br />
V) I-<br />
V)<br />
Z<br />
OL<br />
~o<br />
I-<br />
~Z<br />
ZO<br />
t!I<br />
>-<br />
0::<br />
W l-<br />
I-<br />
~<br />
aJ<br />
I<br />
U<br />
I-<br />
~Z<br />
=:0<br />
V) L<br />
Zo<br />
0<br />
~U<br />
I-U<br />
~~<br />
Z<br />
t!I<br />
\<br />
lJJ<br />
V)<br />
::J<br />
LL<br />
lJJ<br />
V)<br />
::J<br />
LL<br />
=<br />
=<br />
KEY SWITCH<br />
LI GHTI NG SWI TCH<br />
(J LL. )<br />
TIME CONTROL SYSTEM<br />
REAR WINDOW<br />
DEFOGGER<br />
R~LAY<br />
WARNING<br />
CHIME<br />
Schematic<br />
SEAT BELT<br />
SWITCH<br />
I LLUMI NA TI ON<br />
L<br />
FRONT<br />
WASHER<br />
MOTOR.<br />
FRONT<br />
WIPER<br />
AMP.<br />
0<br />
To rear window defogger<br />
I'<br />
--t<br />
If'I REAR WINDOW<br />
DEFOGGER SWITCH<br />
=<br />
I')<br />
>D<br />
If'I<br />
C\J INTERMI TTENT<br />
WIPER VOLUME<br />
C\J<br />
I')<br />
INTERMITTENT<br />
SWITCH<br />
~IO:<br />
~<br />
EL-65<br />
0' D<br />
-<br />
I'<br />
--t<br />
DOOR SWITCH<br />
(Driver side)<br />
I. .<br />
FRONT<br />
WASHER<br />
SWITCH<br />
=<br />
(0<br />
u (0<br />
C<br />
(0<br />
U<br />
L<br />
0<br />
LL<br />
@<br />
ILLUMINATION<br />
0 CONTROL SWITCH<br />
lJJ<br />
I:<br />
m<br />
r-<br />
I<br />
en<br />
en<br />
III<br />
m<br />
r<br />
C11<br />
OJ<br />
-.J<br />
s:<br />
LI GHTI NG SWI TCH<br />
1\ OFF 1ST 2ND<br />
ABC ABC ABC<br />
5<br />
6<br />
7<br />
8<br />
9<br />
10<br />
11<br />
12<br />
25<br />
26<br />
27<br />
8<br />
FUSE AND FUSIBLE LINK<br />
(j n RELAY BOX)<br />
~~<br />
cen<br />
m<br />
~ ~8GRdJ<br />
~ ~:R~<br />
~<br />
FUSIBLE ::j=<br />
LINK<br />
J<br />
~ -=- BATTERY<br />
ID-w<br />
@<br />
To front wiper motor [<br />
a<br />
DOOR SWI TCH SEA T WARNI NG I LLUMI NATION<br />
(Or i ver side) BEL T CHI ME CONTROL<br />
SWI TCH<br />
~ T<br />
SWI TCH ~ ~<br />
DIODE<br />
M ;0 OJ<br />
AzI<br />
imWmI<br />
~ . @~<br />
~I<br />
~ rri<br />
I z<br />
g: ~<br />
@J)~ .... ~@~ ~@ i<br />
~<br />
~ , GH "" I<br />
1 1<br />
'"<br />
'" "'~<br />
4<br />
~<br />
Ii<br />
cEtE~<br />
\ @j)~<br />
28 '-!.<br />
~ 0 3'" R/l BODY GROUND<br />
G/R<br />
@})<br />
KEY SWITCH<br />
~~ ~Y/R R/W<br />
@)<br />
W<br />
R/W<br />
"''''<br />
c<br />
S. M.J.<br />
ffieferto last page<br />
(Eng ine room (FaIdout page). J<br />
harness) r---l (Main harness)<br />
R/l 02 R/l<br />
G/R F2 G/R<br />
Y/R H9 Y/R<br />
PU 812 PU<br />
P Al1 P<br />
l/Y 811 l/Y<br />
lG/8 AIO l G/8<br />
8 810 8<br />
lG 012 lG<br />
@)Ii@)<br />
@<br />
BODY GROUND<br />
0 @<br />
_L<br />
Ii<br />
5<br />
@(§)<br />
@<br />
(Main<br />
harness)<br />
I~I<br />
TIME CONTROL UNIT<br />
I~I<br />
l p--.riTl G-'::j"JJ ~ WASHER FRONT<br />
MOTOR<br />
1111~II1JJ~~D<br />
(BIackJ<br />
8 BODY<br />
lE~81<br />
1"'~"9@<br />
8R IIBJI EE "'" WIPER<br />
AMP. "'"" (jnstrument ~<br />
harness)<br />
@'@<br />
@'@<br />
[<br />
eft<br />
8R<br />
I .@<br />
-<<br />
""<br />
FRONT<br />
WASHERW1:fR AND<br />
\G:'<br />
lG/R OFFINT La HI WASH<br />
~ 0 t 13<br />
TCH<br />
8<br />
PU<br />
14<br />
15<br />
([ill) 16<br />
..n ~<br />
17 t r<br />
18<br />
t<br />
120<br />
19 6 T "YJ -<br />
~,'"<br />
~~, '"<br />
'"<br />
~@<br />
[liHE3ifI]<br />
24 0---@---02 3 ' 17 o---@---o 13<br />
SEAT BELT<br />
WARNING LAMP I<br />
SEA T BEL T<br />
WARNING LAMP<br />
COMBINATION METER<br />
--i<br />
ilia<br />
3<br />
TI -.<br />
C<br />
3<br />
OJ<br />
"<br />
...<br />
a<br />
OJ<br />
" @<br />
~,<br />
~,<br />
@'<br />
@'
FUNCTION<br />
. Time control unit has the following functions.<br />
OPERATING CONDITIONS<br />
TIME CONTROL SYSTEM<br />
Description<br />
Item Details of control<br />
1 Intermittent wiper control Regulates intermittent time from approximately 3 to 12 seconds<br />
depending on the intermittent wiper volume setting.<br />
2 Washer and wiper combination control Wiper is operated in cojunction with washer switch.<br />
3 Illumination control Regulates brightness of illumination in 16 stages depending on the<br />
illumination control switch setting.<br />
4 Light warning chime timer When driver's door is opened with ti9ht switch ON and ignition switch<br />
OFF, warning chime sounds.<br />
5 Seat belt warning lamp timer Seat-belt warning lamp blinks for about 7 seconds when ignition<br />
switch is turned to "ON"<br />
6 Seat belt warning chime timer Sounds warning chime for about 7 seconds if ignition switch is turned<br />
"ON" when seat belt switch is "ON" (seat belt is unfastened).<br />
OOt/) tertrJifli31<br />
°t ter.<br />
Item trJ/fli31<br />
Intermittent wiper<br />
control<br />
Washerand wiper<br />
combination control<br />
,' Power<br />
Driver's side Seat belt Illumination<br />
Ignition Light Wiper switch Washer<br />
source from<br />
door switch switch control<br />
switch switch "INT"<br />
battery switch ------ *1 *2 switch<br />
*1 Door switch is turned ON when door is opened.<br />
*2 Seat belt switch is turned ON when driver's side seat belt is unfastened.<br />
@ @or@ @ @ @ \@ @ (j) or @<br />
CD ON ACC or ON ON<br />
@ ON ACC or ON ON<br />
Illumination control (fJ) ON ON ON<br />
Light warning chime<br />
timer<br />
Seat belt warning lamp<br />
OFACC<br />
@ ON<br />
timer ON<br />
@ ON OFF or ACC ON ON<br />
Seat belt warning chime<br />
OFF or ACC<br />
@ ON<br />
timer ON<br />
EL-67<br />
/<br />
ON
@'@~<br />
9<br />
[it<br />
- SEL689L<br />
~<br />
SEL690L<br />
TIME CONTROL SYSTEM<br />
Symptom<br />
Trouble-shooting<br />
PREPARATION FOR TROUBLE-SHOOTING<br />
1. Remove driver's side dash side cover.<br />
2. Remove time control unit with harness connected.<br />
POWER SUPPLY CIRCUIT CHECK<br />
1. Connect ohmmeter from harness side.<br />
2. Check continuity between terminal @ and body ground.<br />
~<br />
Ohmmeter terminals<br />
(+)<br />
@<br />
(-)<br />
Continuity<br />
Body ground Yes<br />
3. Connect voltmeter from harness side.<br />
4. Measure voltage across terminal @ and terminals @, @ or<br />
@.<br />
EL-68<br />
DIAGNOSTIC<br />
PROCEDURE<br />
Intermittent wiper does not operate. 1<br />
Wiper & washer Intermittent time of wiper cannot be adjusted. 2<br />
Wiper and washer activate individually but not in combination 3<br />
Illumination Illumination control system does not actuate. 4<br />
Warning<br />
Light warning chime does not activate.<br />
Seat belt warning chime does not activate.<br />
Seat belt warning lamp does not go off nor come on.<br />
Ignition key warning chime does not activate.<br />
Rear defogger Rear defogger does not activate, or does not go off. 9<br />
Voltmeter terminals Ignition switch position<br />
(+) (-) OFF ACC ON<br />
@ @ Approx. 12V Approx. 12V Approx. 12V<br />
@ @ OV OV Approx. 12V<br />
@ @ OV Approx. 12V Approx. 12V<br />
5<br />
6<br />
7<br />
8<br />
/
m T.C.U. OUTPUT FOR WIPER RELAY<br />
CIRCUIT CHECK<br />
Measure voltage across CDand @.<br />
0<br />
~<br />
@)<br />
[Y]<br />
+ -<br />
8191101<br />
~<br />
1<br />
1181i915
)<br />
m T.C.U. OUTPUT FOR liGHT SWITCH<br />
CIRCUIT CHECK<br />
~oo<br />
@ ~ Light switch ...ON<br />
Approx.12V<br />
SEL648L<br />
[1100<br />
kJLight switch ... OFF<br />
SEL649L<br />
[!] IllUMINATION CONTROL CIRCUIT<br />
CHECK 1E5L---, III00<br />
0<br />
@@<br />
[aJ [ill<br />
+ -<br />
Ohmmeter lIIum;nat;oncontrol .wltch<br />
(+1 (-I OARK BRIGHT<br />
@ @ on Except on<br />
!J) @ Excep. on on ISEL650L<br />
TIME CONTROL SYSTEM<br />
Trouble-shooting (Cont'd)<br />
DIAGNOSTIC PROCEDURE-3<br />
Wiper and washer activate individually but not in combination.<br />
Check washer switch circuit.<br />
O.K.<br />
Check T.C.U. output for wiper<br />
motor.<br />
O.K.<br />
I Replace wiper relay.<br />
m<br />
N.G. Check harness betWeen<br />
T.C.U. and washer switch.<br />
N.G.<br />
[<br />
Replace T.C.U.<br />
DIAGNOSTIC PROCEDURE-4<br />
Illuminationcontrol system does not actuate.<br />
Check T.C.U. output for light<br />
switch circuit.<br />
O.K.<br />
Check IIIumi nati on circuit.<br />
O.K.<br />
Check illumination control<br />
circuit.<br />
Replace T.C.U.<br />
EL- 70<br />
O.K.<br />
Check harness betWeen T.C.U.<br />
and light switch.<br />
Check for loose harness<br />
connector.<br />
Check illumination control<br />
switch.
T.C.U. OUTPUT FOR CHIMECIRCUIT CHECK<br />
Measure voltage across (j]) and @ when driver's<br />
door is opened and closed.<br />
~oo<br />
@<br />
~<br />
@ . Light switch ... 1ST<br />
Approx.12Vwhen<br />
driver's side door is closed.<br />
f\Tl . Voltmeter needle swings<br />
LY'.J (0 -12V) when driver's<br />
+ - side door is opened.<br />
SEL642L<br />
SEAT BELT SWITCHCIRCUIT CHECK<br />
1. Unfasten driver's seat belt.<br />
2. Check continuity between (j]) and @.<br />
3. Fasten driver's seat belt.<br />
4. Check to determine if continuity does not<br />
exist between (j]) and@.<br />
~oo<br />
W .<br />
[ill<br />
+ -<br />
SEL643L<br />
TIME CONTROL SYSTEM<br />
Trouble-shooting (Co nt' d)<br />
DIAGNOSTIC PROCEDURE-5<br />
Light warningchime does not activate.<br />
Do other warning chimes<br />
activate?<br />
N.G.<br />
Go to "PowerSupply Circuit<br />
Check".<br />
O.K.<br />
Check T.C.U. output for chime<br />
circuit.<br />
Go to "T.C.U. output for light<br />
switch circuit check".<br />
(Refer to back page.)<br />
I Replace T.C.U.<br />
O.K.<br />
DIAGNOSTIC PROCEDURE-6<br />
O.K.<br />
Seat belt warning chime does not activate.<br />
Go to "Power Supply Circuit<br />
Check".<br />
O.K.<br />
Check T.C.U. output for chime<br />
circuit.<br />
N.G.<br />
Check seat belt switch circuit.<br />
Replace T.C.U.<br />
EL-71<br />
O.K.<br />
Check harness for T.C.U.<br />
power supply circuit.<br />
Check chime, and harness<br />
between T.C.U. and chime.<br />
Check harness between<br />
T.C.U. and light switch.<br />
Check harness for T.C.U. power<br />
supply circuit. .<br />
Check chime, and harness<br />
between T.C.U. and chime.<br />
Check harness between T.C.U.<br />
and seat belt switch.
T.C.U. OUTPUT FOR BELT WARNING LAMP<br />
CIRCUIT CHECK<br />
Measure voltage across @ and @ when<br />
ignition switch is "ON".<br />
@<br />
~oo<br />
~ooJil~SEL651L<br />
TIME CONTROL SYSTEM<br />
Trouble-shooting (Cont'd)<br />
DIAGNOSTIC PROCEDURE-7<br />
Seat belt warning lamp does not go off nor comes on.<br />
Go to "Power Supply Circuit<br />
N.G.<br />
Check harness for T.C.U. power<br />
Check". supply circuit.<br />
1 O.K.<br />
Check T.C.U. oUtpUtfor belt<br />
warning lamp circuit.<br />
N.G.<br />
Replace T.C.U.<br />
Voltmeter needle keeps sWinging<br />
(approx. 0 +-+ 12V) for about<br />
7 seconds after ignition switch<br />
is turned ON.<br />
1 O.K.<br />
Check warning lamp, and<br />
harness between T.C.U. and<br />
warning lamp.<br />
EL-72
T.C.U. OUTPUT FOR CHIME CIRCUIT CHECK<br />
Measurevoltageacross@ and@ when driver's<br />
door is opened and closed.<br />
~oo<br />
w. Approx. 12Vwhen<br />
driver's side door is opened.<br />
SEL639L<br />
DRIVER'S DOOR SWITCH CI RCUIT CHECK<br />
Check continuity between @ and @.<br />
~oo<br />
LaJDriver's side door ... Open<br />
KEY SWITCH CIRCUIT CHECK<br />
Measure voltage across @ and@.<br />
[it<br />
SEL640L<br />
@ @ @-~<br />
laJ<br />
SEL641L<br />
TIME CONTROL SYSTEM<br />
Trouble-shooting (Cont'd)<br />
DIAGNOSTIC PROCEDURE-8<br />
Ignition key warning chime does not activate.<br />
Go to "Power Supply Circuit<br />
Check".<br />
O.K.<br />
Check key switcQ circuit~<br />
O.K.<br />
Check T.C.U. output for chime<br />
circuit.<br />
N.G.<br />
Check driver's door switch<br />
circuit.<br />
Replace T.C.U. /<br />
EL-73<br />
O.K.<br />
'A<br />
N.G.I<br />
I<br />
O.K., .<br />
Check harness for T.C.U. power<br />
supply circuit.<br />
Checkeyswitch or harness. I I<br />
Check chime and harness<br />
between T.C.U. and chime.<br />
N.G '<br />
. ~ I<br />
.<br />
Check harness between T.C.U.<br />
and seat belt switch.<br />
\
T.C.U. OUTPUT FOR REAR DEFOGGER<br />
CIRCUIT CHECK<br />
Measure voltage across @ and @ while operating<br />
rear defogger switch.<br />
=<br />
1 2 3 4 5 6 7 8 9 10<br />
111213141516 1819 ~<br />
00<br />
@ @ Rear defogger switch ~ ON<br />
. Rear defoggerswitch<br />
"N": Approx. 12V<br />
lNJ [Y] . Reardefogger switch<br />
+ -<br />
"TIMER": Approx.OV<br />
SEL644L<br />
DEFOGGER SWITCH CIRCUIT CHECK<br />
0 @.<br />
t ~d- j .<br />
[ilOO<br />
Rear defogger switch<br />
"OFF": Except on<br />
Rear defogger switch<br />
"TIMER": on<br />
SEL645L<br />
TIME CONTROL SYSTEM<br />
Trouble-shooting (Co nt' d)<br />
DIAGNOSTIC PROCEQURE-9<br />
Rear defogger does not activate, or does not go off.<br />
Go to "Power Supply Circuit<br />
Check".<br />
O.K.<br />
Check T.C.U. output for rear<br />
defogger circuit.<br />
N.G.<br />
Check defogger switch circuit.<br />
I Replace T.C.U.<br />
EL-74<br />
"f'<br />
O.K.<br />
N.G. Check harness for T.C.U. power<br />
supply circuit.<br />
O.K.<br />
N.G.<br />
Check rear defogger relay, and<br />
harness between T.C.U. and rear<br />
defpgger relay.<br />
Check defogger switch, and<br />
harness between T.C.U. and<br />
defogger switch.<br />
-,
m<br />
r-<br />
I<br />
.....<br />
UI<br />
en mrU1<br />
OJ<br />
OJ<br />
s:<br />
WIPER<br />
.r<br />
-=<br />
/<br />
~<br />
~: With anti-lockbraking<br />
system<br />
~: Without anti-lock braking<br />
system<br />
@<br />
~LG<br />
OR<br />
@<br />
~LG<br />
WASHER MOTOR ~M<br />
~ P<br />
LG~B<br />
LG/R<br />
111<br />
@)@@)<br />
BODY GROUND<br />
WIPER<br />
~<br />
Cill:@ ~<br />
@:@I~I<br />
r<br />
o",rlll<br />
111"'"'''<br />
111<br />
I J<br />
(MaIn<br />
harness)<br />
(Eng I ne<br />
S. M.J.<br />
ffiefer to last<br />
(Fo I dout page).<br />
room<br />
page<br />
J<br />
harness) LG/B<br />
LG<br />
PU<br />
PAIl<br />
B<br />
L/Y<br />
AI0<br />
012<br />
BI2<br />
BIO<br />
BII<br />
LG/B<br />
LG<br />
PU<br />
P<br />
B<br />
L/Y<br />
([@)<br />
BR<br />
LG/B<br />
L/Y<br />
I LGfR []<br />
PU<br />
i<br />
i<br />
@])@<br />
WIPER<br />
WASHER<br />
AND<br />
SWITCH<br />
OFFINT LO HI WASH<br />
13 0<br />
14 0 (<br />
IS<br />
16<br />
17<br />
18<br />
,....<br />
(<br />
c<br />
c<br />
0<br />
19 i' 1<br />
20 0<br />
I<br />
UP<br />
* LG<br />
L<br />
, L
m<br />
r-<br />
I<br />
.....<br />
en<br />
L<br />
(/)<br />
m<br />
r<br />
a><br />
"~<br />
~<br />
UP<br />
*<br />
I GNI T1 ON SWITCH<br />
ACC or ON<br />
r-<br />
,~<br />
IDA<br />
(Eng I ne room<br />
harness)<br />
rr-",<br />
"~...<br />
~@<br />
REAR WASHER<br />
MOTOR<br />
I @<br />
FUSE BLOCK<br />
(Refer to "POWER<br />
SUPPLY ROUTING".)<br />
L/W I::"l<br />
(@})@)<br />
L/W<br />
LG/B~LG/B<br />
S. M.J.<br />
ffiefer to last page<br />
(Fo I dout page). J<br />
'<br />
To I I I um I nat Ion<br />
contro I system,<br />
[<br />
(Main<br />
harness)<br />
REAR WIPER<br />
AMP.<br />
[;]<br />
~~ r-r-r-r-<br />
... °"',,'"<br />
::a~u~<br />
(Main<br />
harness)<br />
@])A~@A(@)<br />
~~ ~~<br />
- -<br />
BODY GROUND<br />
@ill) ~ (Back door<br />
L/W<br />
L/W harness)<br />
Lg~R . 0 Lg~R<br />
~ l?§:<br />
:[L~W<br />
@<br />
B -B.3 ffi- B Lg~R<br />
~@ @@<br />
@<br />
L/R<br />
R/Y le.~ 2<br />
LGB"B<br />
R/LI ~ ~ 3<br />
4
Pull<br />
straight<br />
ahead.<br />
..<br />
l ,<br />
Wiper /'<br />
motor ~<br />
""<br />
~<br />
\<br />
Cowltop<br />
frontpanel<br />
~.:. Insert securely.<br />
SEL411L<br />
link SEL412L<br />
WIPER AND WASHER<br />
Wiper Removal and Installation<br />
rP.J : N.m (kg-m, ft-Ib)<br />
SEL410L<br />
FRONTWIPER REMOVAL ';<br />
Before removing front wiper motor link, turn wiper switch OFF<br />
and disconnect motor leads at connectors.<br />
1. Remove wiper ,arm.<br />
2. Remove cowl cover.<br />
3. Remove bolts which secure wiper motor. ,<br />
4. Extract wiper motor so that wiper motor link comes out of<br />
hole in front cowl top panel. Then, pull motor straight;out to<br />
disconnect ball joint which connects motor link and wiper<br />
link. Wiper motor can then be removed.<br />
5. Remove wiper link pivot blocks on driver and passenger<br />
sides. ~<br />
6. Extract wiper link and pivot blocks (as one unit) from oblong<br />
hole on left side of cowl top.<br />
FRONT WIPER INSTAllATION<br />
1. Position wiper link and pivot blocks (as one unit) in cowl top<br />
through oblong hole.<br />
2. Before installing pivot blocks on cowl top, hold end (motor<br />
link side) of wiper link at hole in front cowl top panel and<br />
insert motor link's ball pin into hole in wiper link.<br />
3. Install front wiper in reverse order of above removal procedures.<br />
. Apply a small amount of grease to ball joints before<br />
installation.<br />
EL- 77<br />
r
~ 3.7 -5.0 N.m 1<br />
(0.38 - 0.5f kg-m,<br />
2.7 - 3.7 ft-Ibl /~<br />
INSTAllATION<br />
/ Rear wiper<br />
-"-"~ motor<br />
SEL413L<br />
WIPER AND WASHER<br />
Wiper and Washer Adjustment J<br />
1. Prior to wiper arm installation, turn on wiper switch to operate wiper motor and then turn it "OFF"<br />
(Auto Stop).<br />
2. Lift the blade up and then set it down onto glass surface to set the blade center to clearance "L1" &<br />
"L2" immediately before tightening nut.<br />
3. Eject washer fluid. Turn on wiper switch to operate wiper motor and then turn it "OFF".<br />
4. Ensure that wiper blades stop within clearance "L1" & "L2".<br />
Clearance "L/': 17.5 - 32.5 mm (0.689 - 1.280 in)<br />
Clearance "L2": 25 - 35 mm (0.98 - 1.38 in)<br />
. Tighten wiper arm nuts to specified torque.<br />
Front wiper: 17 - 23 N.m (1.7 - 2.3 kg-m, 12 - 17 ft-Ib)<br />
Rear wiper: 13 - 18 N.m (1.3 - 1.8 kg-m, 9 - 13 ft-Ib)<br />
*1: 50 (1.971<br />
*2: 28 (1.101<br />
*3: 43 (1.691<br />
*4: 21 (0.831<br />
*5: 144 (5.671<br />
*6: 155 (6.101<br />
*7: 273 (10.751<br />
*8: 385 (15.161<br />
Unit: mm (in)<br />
*All the diameters of these circles are<br />
less than 80 (3.151.<br />
*1: 93 (3.661<br />
*2: 85 (3.351<br />
*3: 38 (1.501<br />
*4: 25 (0.981<br />
Unit: mm {inl<br />
Nozz~e1~b<br />
*7 '8<br />
Glass end<br />
EL- 78<br />
0 Clearance" L1" £ ~<br />
Clearance "L," rt ~<br />
rr~~. Glass end SEL425L<br />
SEL414L
SEL024J<br />
SEL117K<br />
reservoir To<br />
F'om ':;0 . c~ .. D";'e<br />
".I~<br />
SEL411H<br />
WIPER AND WASHER<br />
Wiper and Washer Adjustment (Cont'd)<br />
SEL415L<br />
. Before reinstalling wiper arm, clean up the pivot area as<br />
illustrated. This will reduce possibility of wiper arm<br />
looseness.<br />
Washer Nozzle Adjustment<br />
. UsingTool (J36126),adjustwindshieldwashernozzleto<br />
correct its spray pattern.<br />
Before attempting to turn the nozzle, gently tap the end of the<br />
tool to free the nozzle. (<br />
This will prevent "rounding out" the small female square in<br />
the center of the nozzle.<br />
Check Valve<br />
. A check valve is provided in the washer fluid line. Be careful<br />
not to connect check valve to washer tube in the wrong<br />
dir~ction.<br />
EL- 79
Wiper relay<br />
~~:4;<br />
Test<br />
lamp<br />
SEL6S1 I<br />
WIPER AND WASHER<br />
Wiper Amplifier Check<br />
1. Connect as shown in the figure at left.<br />
2. If test lamp comes on when connected to terminal @ and<br />
battery ground, wiper relay is normal.<br />
EL-80
m<br />
r- I<br />
00<br />
~<br />
en<br />
m<br />
r<br />
0><br />
....<br />
"-I<br />
s=<br />
HORN- HIGH<br />
rr\--.@)<br />
~[D-G<br />
-=<br />
rr\--. [D- G<br />
~@)<br />
HORN- LOW<br />
HORN<br />
RELAY<br />
~<br />
@~"''''''' , , :E'III<br />
~. I<br />
A. S. C. D. STEERING SWI TCH<br />
~ +t<br />
I<br />
~ - -- ~<br />
RES~ME/ACCEL<br />
' ~~~~~~~ . (3<br />
= SWITCH 0 . ,<br />
SET/COAST<br />
SLl P : :, = SWI TCH . (<br />
RI NG : : 0 HORN 2<br />
4 0 I<br />
~ - n . ~ ~=SWITCH-<br />
~ I<br />
P0<br />
'",:E<br />
,.<br />
en<br />
(Eng Ine room<br />
harness)<br />
'"<br />
:E , III<br />
ii<br />
(Ma In harness)<br />
III<br />
ii<br />
@J) @~ @)<br />
BODY GROUND<br />
.~<br />
@<br />
'"<br />
,<br />
:E<br />
:E<br />
o=:::IJo::::IJ<br />
Q0<br />
FUSE<br />
[§ '"<br />
III '"<br />
:oJ<br />
'"<br />
HORN<br />
SWITCH FUSIBLE<br />
LlNK<br />
FUSE AND FUSIBLE LINK<br />
m<br />
r- I<br />
co<br />
N<br />
!II<br />
m<br />
r '"-.I<br />
W<br />
~<br />
I GNITI ON SWITCH<br />
ON or START<br />
UP<br />
*<br />
FUSE BLOCK<br />
(Refer to "POWER<br />
SUPPLY ROUTING".)<br />
t<br />
G<br />
G/Y<br />
L/G<br />
@<br />
TIME CONTROL UNIT<br />
(Refer to "TIME<br />
CONTROL SYSTEM".)<br />
B<br />
@<br />
Ii1<br />
A<br />
2<br />
@~(§<br />
(1-<br />
rr<br />
BODY GROUND<br />
@<br />
REAR WINDOW<br />
DEFOGGER RELAY<br />
~.<br />
r ;o;or<br />
'IDID'"<br />
I~@<br />
r Ii1 r<br />
'rli1 ,r'<br />
;0 -
[+] I-]<br />
6 volts (normal filamentl SE L263<br />
[+] [-J<br />
[V]<br />
12 volts<br />
[+]<br />
0 volts<br />
[+]<br />
(VI<br />
~<br />
r'n<br />
~<br />
~<br />
I<br />
H<br />
SEL264<br />
Burned-out point<br />
H<br />
SE L265<br />
S E L266<br />
REAR WINDOW DEFOGGER<br />
Filament Check<br />
1. Attach probe circuit tester (in volt range) to middle portion<br />
of each filament.<br />
2. If a filament is burned out, circuit tester registers 0 or 12<br />
volts.<br />
3. To locate burned out point, move probe to left and right<br />
along filament to determine point where tester needle<br />
swings abruptly.<br />
EL-83<br />
r/
SE L013D<br />
Heat wire<br />
Drawing pen<br />
Repaired point<br />
[0 @<br />
Repaired point<br />
Unit: mm (in)<br />
REAR WINDOW DEFOGGER<br />
BE540<br />
SEL012D<br />
Filament Repair<br />
REPAIR EQUIPMENT<br />
1. Conductive silver composition<br />
lent)<br />
2. Ruler 30 cm (11.8 in) long<br />
3. Drawing pen<br />
4. Heat gun<br />
5. Alcohol<br />
6. Cloth<br />
(Dupont No. 4817 or equiva-<br />
REPAIRING PROCEDURE<br />
1. Wiper broken heat wire and its surrounding area clean with<br />
a cloth dampened in alcohol. .<br />
2. Apply a small amount of conductive silver composition to tip<br />
of drawing pen.<br />
Shake silver composition container before use.<br />
3. Place ruler on glass along broken line. Deposit conductive<br />
silver composition on break with drawing pen. Slightly<br />
overlap existing heat wire on both sides [preferably 5 mm<br />
(0.20 in)] of the break.<br />
4. After repair has been completed, check repaired wire for<br />
continuity. This check should be conducted 10 minutes after<br />
silver composition is deposited.<br />
Do not touch repaired area while test is bei",gconducted.<br />
~<br />
5. Apply a constant stream of hot air directly to the repaired<br />
area for approximately 20 minutes with a heat gun. A<br />
minimum distance of 3 cm (1.2 in) should be kept between<br />
repaired area and hot air outlet. If a heat gun is not available,<br />
let the repaired area dry for 24 hours.<br />
EL-84
m<br />
r-<br />
I<br />
co<br />
c.n<br />
en mr01<br />
....<br />
~<br />
~<br />
UP<br />
*<br />
,...<br />
@:<br />
@):<br />
@:<br />
@:<br />
I GNITI ON SWITCH<br />
ACC or ON<br />
:0 "..<br />
FUSE BLOCK<br />
(Refer to "POWER<br />
SUPPLY ROUTING".)<br />
@<br />
Radio only type<br />
Cassette deck type<br />
Active speaker type<br />
Except @ @)ii@JJ<br />
BODY<br />
GROUND<br />
[D=ru<br />
@<br />
[ '<br />
DOOR L/W m'<br />
L. SPEAKER H. ~L/Y1 tl.j-<br />
@<br />
~I<br />
L. H. . LG<br />
L/W<br />
L/Y<br />
SPEAKER DOOR AMP.. UNIT<br />
0 i l';'<br />
0-1<br />
00<br />
:J<br />
c+-.<br />
,-<br />
0-<br />
-c<br />
3<br />
1/)-<br />
',... ~ ~~~ ,...~g g<br />
co<br />
@ill)<br />
~<br />
DOOR<br />
mBR/W~<br />
BR R ~<br />
U ~ SPEAKER<br />
@ill)<br />
LG<br />
I~<br />
.:1 ~ o. AMP.<br />
BR/W UNI T<br />
BR
~ ~2N~<br />
~ (0.2 kg-m.1.4 ft-ibi<br />
Loosen~~ --<br />
J<br />
~ ,-(<br />
\ \<br />
~1<br />
\ \<br />
\ \<br />
\ \<br />
\ \<br />
\ \<br />
\ \<br />
\ \<br />
)f/~.<br />
r[~<br />
Radio<br />
(For AM/FM electronic tuning)<br />
AUDIO AND ANTENNA<br />
Location of Antenna<br />
Radio Fuse Check<br />
EL-86<br />
L Main feeder cable<br />
~<br />
\<br />
SEL416L
Ohmmeter<br />
[TI<br />
@<br />
Ohmmeter<br />
[TI<br />
@.<br />
---'<br />
No continuity<br />
SEL2501<br />
SEL251\<br />
Continuity exist SEL2521<br />
Ohmmeter<br />
[TI<br />
@<br />
SEL2531<br />
AUDIO AND ANTENNA<br />
Window Antenna Repair<br />
ELEMENT CHECK<br />
1. Attach probe circuit tester<br />
terminal on each side.<br />
(in ohm range) to antenna<br />
2. If an element is broken, no continuity will exist.<br />
3. To locate broken point, move probe to left and right along<br />
element to determine point where tester needle swings<br />
abruptly.<br />
ELEMENT REPAIR<br />
Refer to REAR WINDOW DEFOGGER "Filament Repair".<br />
EL-87
m<br />
r-<br />
I<br />
co<br />
co<br />
) ~<br />
rJ)<br />
m<br />
r<br />
I<br />
0<br />
>--<br />
~Z<br />
:;:0<br />
V)<br />
L<br />
ZO<br />
0<br />
~O<br />
>--0<br />
~..<br />
Z<br />
CJ<br />
I<br />
0<br />
>-->--<br />
~'"<br />
V)>--<br />
:;:..<br />
V)<br />
Z<br />
OL<br />
~o<br />
>--<br />
~z<br />
zo<br />
CJ<br />
~ V) ~ ~<br />
WI..JI OI I<br />
I LO UJO 00 0 11<br />
>-- ~<br />
'<br />
' ~~~~;::,~~<br />
;;:: UJ:;:..:;: UJ:;:0:;:<br />
(<br />
~ "'~O~V)r~<br />
L ~<br />
AUTOMATIC SPEED CONTROL DEVICE (A.S.C.D.)<br />
d .~ ~ @)<br />
~<br />
t<br />
~' ~ . , " G/Y<br />
.. ,: G/W<br />
Ln.'<br />
[;!J SLIP<br />
RING<br />
IUB-<br />
, . G/OR<br />
O..J G/Y-<br />
o~ ~~~:<br />
- G/R-<br />
~~~ O:::J G/L- L/W- [1]<br />
Y -<br />
>-- G/W-<br />
~ L- B~<br />
5<br />
..J '<br />
( j<br />
\;,;;!<br />
~~! '-"''' I<br />
Y 1<<br />
@<br />
..~ G/W<br />
~<br />
0<br />
0<br />
~ E - E<br />
0 V 'v<br />
OP .-p<br />
-", P",<br />
,>- c >-<br />
-", "'"'<br />
P<br />
C C1 +' C1<br />
'" C :J C<br />
0'-<br />
.c~ .c~<br />
+'''' P'"<br />
.- L .- L<br />
:;:D :;:D<br />
@@<br />
HEAD-UP 01SPLA Y<br />
CONTROL UNI T<br />
I~I<br />
@~<br />
.", "~~m<br />
~ :i ~~<br />
~ . N .<br />
I U;<br />
z<br />
<br />
W I,<br />
0<br />
Z<br />
0<br />
I<br />
0<br />
>--<br />
..J<br />
W<br />
ti >--<br />
I'<br />
LL<br />
LL<br />
<br />
< -NO U"> X-c<br />
I<br />
)<br />
"<br />
~ G/OR<br />
~~I<br />
@m~<br />
0<br />
u;<br />
<<br />
"""<br />
Wiring Diagram<br />
CRUISE<br />
3<br />
1_~~<br />
~<br />
ILL<br />
10 .1<br />
ILL (LIQUID CRYSTAL><br />
COMBINATIONMETER<br />
~<br />
CRUISE<br />
3<br />
'<br />
II ILL.<br />
20 .<br />
ILL. (LIQUID CRYSTAL><br />
~~~--~ ~ ~<br />
0~ ~ 0~l~~ >m~<br />
~<br />
m" m<br />
0<br />
~ ~ ~ ~ m ~,,~ ~<br />
, - " , , '" - , ~-<br />
~~- ~bJ ~J -TrT--<br />
-. J<br />
III .<br />
@<br />
@ '"<br />
.<br />
'-a.<br />
I I I U :J<br />
I V<br />
- - U .c<br />
v v '"<br />
U U V +-'<br />
(J nstrument harness) ~ ~ r is<br />
rr<br />
m m ::; >-->-- P P<br />
0<br />
~Til- . lid n<br />
, , J ~ ~ ~<br />
@~! bIIII J<br />
(White)<br />
U 111'4 b II E:j<br />
(Black)<br />
" ., " .,<br />
@@@@<br />
@~I,~II,II~<br />
~~~~ ~m ~ m<br />
~111,d~IIE:j<br />
m 8<br />
Y/G @ @ Y/G<br />
:i:ild,,~~ ~ I I ~<br />
EL-89<br />
---------<br />
~<br />
II<br />
. 0<br />
r<br />
G/W G/W<br />
~ R/G R/G<br />
. -- - G/R '--- G/R<br />
@<br />
,G/L--{'k~<br />
A, S, C, 0,<br />
r O/B---o'" . CLUTCH<br />
O/B--o..<br />
0O/R---o'"<br />
.<br />
Z N ~<br />
>-:::J @Ii'!<br />
SWI T CH<br />
A, S, C. 0,<br />
U CANCEL SWITCH<br />
@~ffi<br />
'~I'<br />
'-~I'<br />
Q Q<br />
~ffim~<br />
,{K)!j)Y/G-l3::! 'B:L '/G<br />
@ @ @<br />
Ai:<br />
u; "' v<br />
C<br />
L<br />
'"<br />
r<br />
u:<br />
!!!<br />
('
~<br />
AUTOMATIC SPEED CONTROL DEVICE (A.S.C.D.)<br />
.~r<br />
f".-<br />
A.S.C.D. Wire Adjustment<br />
A.S.C.D. wire<br />
--<br />
SEL419L<br />
CAUTION:<br />
. Be careful not to twist A.S.C.D. wire when removing it.<br />
. Do not tense A.S.C.D. wire excessively during adjustment.<br />
After confirming that accelerator wire is properly adjusted,<br />
adjust the tension of A.S.C.D. wire in the following manner.<br />
(1) After adjusting the length of the accelerator wire, turn a<br />
securing nut by 1/2 to 1 turn from throttle open starting<br />
position to the wire loosening direction to fix. (Must be<br />
securing carried out to prevent response delay of operation<br />
of the A.S.CD.)<br />
(2) Securely tighten lock nut to hold adjusting nut in place.<br />
. For A.S.C.D. stop switch and clutch switch adjustment, refer<br />
to SR and CL sections.<br />
EL-90
A.S.C.D. control unit cannot be set properly.<br />
Resume switch will not operate.<br />
Cancel switch will not operate.<br />
Engine hunts.<br />
AUTOMATICSPEED CONTROL DEVICE (A.S.C.D.)<br />
Symptom<br />
Large difference between set vehicle speed and actual speed.<br />
Set speed cannot be cancelled.<br />
A/T model<br />
only<br />
Trouble Diagnoses<br />
PREPARATION FOR TROUBLE-SHOOTING<br />
1. Remove R.H. dash side cover.<br />
2. Remove A.S.C.D. control unit with harness connected.<br />
3. Perform check from harness side using circuit tester, with harness connector connected.<br />
GROUND CIRCUIT CHECK<br />
. Check continuity between CID and body ground.<br />
EL-91<br />
~<br />
A.S.C.D. control unit<br />
Q)I ~<br />
DIAGNOSTIC<br />
PROCEDURE<br />
8 When A.S.C.D. is set while vehicle is operating in "0.0." range, 0.0.<br />
will be cancelled and shifting to 0.0. cannot be made thereafter.<br />
8 0.0. will not be cancelled even if actual vehicle speed is 6 km/h 7<br />
(4 MPH) lower than set speed. (Set speed cannot be ,maintained.)<br />
8 0.0. will not be cancelled even if accelerator switch is turned "ON".<br />
1<br />
2<br />
3<br />
4<br />
5<br />
6<br />
R.H. dash<br />
side<br />
SEL418L
POWER SUPPLY CIRCUIT CHECK<br />
1. Turn A.S.C.D. main switch to "ON".<br />
2. Check voltage between @ and CID.<br />
Approx. (4) @<br />
12V<br />
[Y]<br />
Voltmeter<br />
AUTOMATIC SPEED CONTROL DEVICE (A.S.C.D.)<br />
~oo<br />
CUT-OFF CIRCUIT CHECK<br />
1. Step on brake pedal.<br />
2. Turn A.S.C.D. main switch to "ON".<br />
3. Check voltage between (j]) and CID.<br />
:11<br />
Approx.<br />
12V<br />
Voltmeter<br />
[ilOO<br />
Brake pedal Step on.<br />
SET SWITCH CIRCUIT CHECK<br />
1. Push A.S.C.D. set switch.<br />
2. Check voltage between @ and CID.<br />
@ Approx. @<br />
l5J<br />
Voltmeter<br />
SEL629L<br />
[iI@a<br />
SPEED SENSOR CIRCUIT CHECK<br />
1. Disconnect speed sensor from transmission.<br />
2. Connect a voltmeter between (j) and CID.<br />
3. Slowly turn speed sensor by hand to make<br />
sure voltmeter pointer deflects.<br />
. Voltmeter pointer deflects twice per<br />
rotation of pinion.<br />
~@a<br />
J~\<br />
Lfi-J Approx.O.5V<br />
Voltmeter<br />
SEL630L<br />
Trouble Diagnoses (Cont'd)<br />
DIAGNOSTICPROCEDURE-1<br />
A.S.C.D.control unit cannot be set properly.<br />
Turn A.S.C.D. main switch<br />
"OFF" and then "ON" to make<br />
sure indicator illuminates.<br />
O.K.<br />
Check power supply circuit for<br />
A.S.C.D. control unit.<br />
O.K.<br />
Check cut-off circuit for<br />
A.S.C.D. control unit.<br />
O.K.<br />
Check A.S.C.D. set switch<br />
circuit for A.S.C.D. control unit.<br />
O.K.<br />
Check speed sensor circuit.<br />
O.K.<br />
Check actuator. Refer to<br />
"Actuator Check".<br />
O.K.<br />
Replace A.S.C.D. control unit.<br />
EL-92<br />
N.G.<br />
N.G.<br />
Check indicator bulb, A.S.C.D..<br />
main switch and hold relay.<br />
Check AS.C.D. power supply<br />
harness.<br />
Check AS.C.D. cancel switch,<br />
clutch switch (M/T model),<br />
inhibitor relay and inhibitor<br />
switch (A/T model).<br />
Check AS.C.D. set switch and<br />
harness betWeen control unit<br />
and set switch.<br />
Check speed sensor and harness<br />
betWeen A.S.C.D. control unit<br />
and speed sensor signal output<br />
terminal of combination meter.<br />
Replace actuator.
PRESUME SWITCH CI RCUI T CHECK<br />
1. Turn resume switch to "ON".<br />
2. Check voltage between CD and@ .<br />
Q)<br />
1 ::~rox. @<br />
lilJ + -<br />
Voltmeter<br />
AUTOMATIC SPEED CONTROL DEVICE (A.S.C.D.)<br />
rilOO<br />
[YJ Resume-switch - ON<br />
CANCEL SWITCH CIRCUIT CHECK<br />
1. Turn cancel switch to "ON".<br />
2. Check voltage between @ and @ or<br />
CD and @ .<br />
Q)or@ Approx. @<br />
l ~~~ j<br />
Voltmeter<br />
SEL636L<br />
riI~<br />
Cancel switch - ON<br />
SEL637L<br />
Trouble Diagnoses (Cont'd)<br />
DIAGNOSTIC PROCEDURE-2<br />
Resume switch will not operate.<br />
N.G.<br />
Check resume switch circuit.<br />
O.K.<br />
Replace A.S.C.D.control unit.<br />
DIAGNOSTIC PROCEDURE-3<br />
Cancel switch will not operate.<br />
Check cancel switch circuit.<br />
O.K.<br />
Replace A.S.C.D.control unit.<br />
EL-93<br />
Check resume switch.<br />
/<br />
Check cancel switch.
AUTOMATIC SPEED CONTROL DEVICE (A.S.C.D.)<br />
Trouble Diagnoses (Cont'd)<br />
DIAGNOSTIC PROCEDURE-4<br />
Engine hunts.<br />
Check vacuum hose for<br />
L breakage, cracks or fracture.<br />
I<br />
O.K.<br />
Does A.S.C.D.wire move<br />
smoothly?<br />
O.K.<br />
Go to "Actuator Check".<br />
O.K.<br />
Replace A.S.C.D.control unit.<br />
Repair or replace hose.<br />
Repair or replace wire.<br />
N.G. [<br />
4 Replace actuator.<br />
DIAGNOSTIC PROCEDURE-5<br />
Large difference between set vehicle speed and actual speed.<br />
Check A.S.C.D.wire and<br />
actuator move smoothl y.<br />
O.K.<br />
Check vacuum hose for<br />
breakage, cracks or fracture.<br />
O.K.<br />
Go to "Actuator Check".<br />
O.K.<br />
Replace A.S.C.D.control unit.<br />
EL-94<br />
N.G.<br />
Replace wire or actuator.<br />
Repair or replace hose.<br />
I~<br />
I~ Replace actuator.<br />
/
CUT-OFF CIRCUIT CHECK<br />
1. Turn A.S.C.D. main switch to "ON".<br />
2. Turn A.S.C.D. main switch to "ON" again.<br />
3. Step on brake pedal.<br />
4. Step on clutch pedal (M/T) or shift in "N"<br />
range (A/T).<br />
5. Checkvoltagebetween CID and CID.<br />
\<br />
AUTOMATIC SPEED CONTROL DEVICE (A.S.C.D.)<br />
~oo<br />
~<br />
3 Brake pedal-> Step on.<br />
OV Clutch pedal<br />
(M/T)-> Step on.<br />
Voltmeter<br />
[JZJ AfT control-> "N" range<br />
lever (A/T)<br />
+ -<br />
STOP LAMP CIRCUIT CHECK<br />
1. Step on brake pedal.<br />
2. Check voltage between @ and CID .<br />
~<br />
@ Approx.<br />
12V<br />
[JZJ<br />
Voltmeter SEL631L<br />
O.D. CANCEL CIRCUIT CHECK FOR A.S.C.D.<br />
CONTROL UNIT<br />
1. Turn 0.0. control switch to "ON"<br />
2. MeasurevOltageacross @ and CID.<br />
Voltmeter<br />
0.0. control<br />
switch -> ON<br />
SEL640M<br />
Trouble Diagnoses (Cont'd)<br />
DIAGNOSTIC PROCEDURE-6<br />
Set speed cannot be canceled.<br />
N.G.<br />
Check cut-off circuit. Check A.S.C.O. cancel switch,<br />
clutch switch (M/T model),<br />
O.K.<br />
inhibitor relay and inhibitor<br />
switch (A/T model).<br />
Check stop lamp circuit.<br />
O.K.<br />
Check actuator. Refer to<br />
"Actuator Check".<br />
O.K.<br />
Replace A.S.C.O. control unit<br />
N.G. Check stop lamp switch and<br />
power supply harness.<br />
Replace actuator.<br />
DIAGNOSTIC PROCEDURE-7<br />
AfT model only:<br />
. When A.S.C.D. is set while vehicle is operating in "O.D."<br />
range, O.D. will be cancelled and shifting to O.D. cannot<br />
be made thereafter.<br />
. O.D. will not be cancelled even if actual vehicle speed is 6<br />
kmfh (4 MPH) lower than set speed. (Set speed cannot be<br />
maintained.)<br />
. O.D. will not be cancelled even if accelerator switch is<br />
turned "ON".<br />
Check 0.0. cancel circuit for<br />
A.S.C.O. control unit.<br />
O.K.<br />
Replace A.S.C.O.control unit.<br />
EL-95<br />
N.G.<br />
Check harness betWeen0.0.<br />
cancel solenoid, 0.0. control<br />
switch and A.S.C.O.control<br />
unit.<br />
~
~'~~<br />
[ill<br />
- +<br />
m<br />
I;)<br />
[!)<br />
(;]<br />
~234<br />
-1'0<br />
AUTOMATIC SPEED CONTROL DEVICE (A.S.C.D.)<br />
18<br />
DISCONNECT<br />
/ \ /J<br />
~ ~ Release valve<br />
'\ ~ Air valve<br />
~ Vacuum valve SEL423L<br />
~<br />
SE L691 L<br />
~SEL692L<br />
~<br />
~<br />
SEL693L<br />
SE L694L<br />
m<br />
Actuator Check<br />
1. Disconnect connector of actuator from main harness.<br />
2. Check actuator operations as shown.<br />
Check actuator.<br />
O.K.<br />
Check to see if motor starts<br />
when 12V D.C. is applied across<br />
CD and @.<br />
Ii)<br />
O.K.<br />
Check to see if A.S.C.D. wire is<br />
pulled when 12V D.C. is applied<br />
across CD. CV.:IDand @ .<br />
N.G. Replace actuator.<br />
N.G.<br />
Replace actuator.<br />
O.K. (Wireis pulled.)<br />
[!)<br />
N.G.<br />
Check to see if A.S.C.D. wire ~ Replace actuator.<br />
!<br />
returns to original position 50 to I<br />
60 seconds after disconnecting<br />
lead from @ .<br />
(;]<br />
O.K. (Wire does<br />
not return.)<br />
Disconnect lead from CDto see<br />
if A.S.C.D. wire returns<br />
immediately.<br />
Actuator is O.K.<br />
EL-96<br />
O.K. (Wirereturns.)<br />
N.G.<br />
[<br />
Replace actuator.<br />
1/
[AJ<br />
LOCATION OF ELECTRICAL UNITS<br />
Fuse block<br />
Engine Compartment<br />
EL-97<br />
~ FRONT<br />
Accessory relay-2 (Blue) [eJ<br />
A.S.C.D. hold relay (Blue)<br />
Air conditioner relay<br />
( U.S.A.: BrOwn<br />
Canada: Blue )<br />
Z<br />
~ '~<br />
~<br />
~";'<br />
/ ' 11 E:~eadlamp retract relay-2<br />
~ f?' I ~<br />
,/<br />
"/ (Black)<br />
Headlamp retract<br />
(Black)<br />
relay-1<br />
Headlamp retract relay-3<br />
I<br />
Horn relay (Black)<br />
SEL420L<br />
(
LOCATION OF ELECTRICAL UNITS<br />
Circuit breaker<br />
Ignition relay<br />
( With power window: Brown \ I<br />
Without power window: Blue)<br />
Bulb check relay (Blue)<br />
Rear window defogger<br />
relay (Black)<br />
S.M.J.<br />
Chime<br />
Headlamp timer<br />
Passenger Compartment<br />
Accessory relay-1 (Blue) E.C.C.S. control unit<br />
Time control unit<br />
Q<br />
Combination flasher unit<br />
A.S.C.D. cancel switch<br />
Stop lamp switch<br />
Shift lock control unit<br />
EL-98<br />
A.S.C.D. control unit<br />
AfT control unit<br />
Door lock timer<br />
~<br />
Automatic seat belt<br />
control unit<br />
/ -<br />
SEL421L
Fastback<br />
Engine room harness<br />
Engine room harness no. 2<br />
Room lamp harness<br />
Doo~ harness R.H. .<br />
Instrument harness<br />
E.F.I. harness.<br />
HARNESS LAYOUT<br />
Outline<br />
Coupe Sun roof harness<br />
Engine room harness<br />
.D<br />
Engine room harness no. 2<br />
Room lamp harness.<br />
Door harness R.H.<br />
Instrument harness<br />
Back door harness Rear wiper sub-harness<br />
EL-99<br />
Door harness L.H.<br />
\<br />
SEL496L<br />
SEL496L
HARNESS LAYOUT<br />
Main Harness<br />
EL-100<br />
/
m<br />
r-<br />
I<br />
~<br />
0 ~<br />
en<br />
m<br />
r<br />
CD<br />
UI<br />
~s:<br />
@ : Time control unit<br />
@ : Headlamptimer<br />
@ : Checkconnector<br />
@ : Warningchime<br />
@) : Fuse block<br />
@ : Accessoryrelay-'<br />
@ : Circuit breaker (Modelwith powerwindow system)<br />
@ : Circuit breaker (For U.S.A.I<br />
@ : Ignition relay (Modelwith power window system)<br />
@ : Ignition relay (Modelwithout powerwindow system)<br />
@ : To engine room harness 0<br />
@ : To engine room harness 0 (Blue)<br />
@ : To engine room harness ([ill) (Black)<br />
@ : Bulb check relay<br />
@ : Rear window defoggerrelay<br />
@ : A.S.C.D.clutch switch (M/T modelwith A.S.C.D.I<br />
@ : To door harness L.H. @)<br />
@ : To door harness L.H. @<br />
@ : Drillerside front limit switch (For U.S.A.)<br />
@ : Kickdownswitch (A/T model)<br />
@) : A.S.C.D.cancel switch (Modelwith A.S.C.D.I<br />
@ : Stop lamp switch<br />
@ : A.S.C.D.main switch (Modelwith A.S.C.D.I<br />
@ : Headlampretractor switch<br />
@ : Illuminationcontrol switch<br />
@ : Front fog lamp switch<br />
@ : Shift lock control unit (A/T model)<br />
@ : Combination flasherunit<br />
@ : Modedoor motor<br />
@ : Foot lamp L.H.<br />
@ : O.D. off indicator lamp (A/T model)<br />
@ : Rear wiperand washer switch<br />
@ : Rear window defoggerswitch<br />
@ : Hazardswitch<br />
@ : Radio<br />
@) : Radio<br />
@ : Cassettedeck<br />
@ : Cassettedeck<br />
@ : Push control unit<br />
@ : Fan switch<br />
@ : Diode<br />
@ : To sub-harness @<br />
@ : To main harness @<br />
@ : Glovebox lamp<br />
@ : Glovebox lamp switch<br />
@ : To instrument harness @ (Black)<br />
@ : To instrument harness @(White)<br />
@) : Thermo control amplifier<br />
@ : Heater resistor<br />
@ : Blowermotor<br />
@ : Foot lamp R.H.<br />
@ : To E.F.I. harness @<br />
@ : To door harness R.H. @ill)<br />
@ : To door harness R.H. @ill)<br />
@ : To room lamp harness @<br />
@ : Body ground<br />
@ : Intake door motor<br />
@ : To sub-harness @<br />
@) : To main harness @<br />
@ : Door lock timer<br />
@ : Washerwarninglamp (Modelwith Anti-lockBrak<br />
Diode @<br />
I Retractor re<br />
Lighting switch ~ Headlamp ti<br />
Front fog lamp switch ~ Lighting swi<br />
L- Headlamp R<br />
Brake warning lampr Bulb check<br />
Brake fluid level switch<br />
Parking brake switch<br />
Seat belt warning lamp ~ Time control<br />
L- Seat belt sw<br />
/
m<br />
r-<br />
I<br />
...a<br />
0 N<br />
Bodygro""~ \<br />
~
m<br />
r-<br />
I<br />
...a<br />
0 Co\)<br />
C/J<br />
m<br />
r-<br />
U1<br />
II)<br />
0<br />
s:<br />
Body ground<br />
: Lap belt buckle switch (For U.S.A.)<br />
: Seat belt switch (For Canada)<br />
: Ash tray illumination<br />
: Cigarette lighter<br />
: Door mirror control switch<br />
: Automatic seat belt control unit (For U.S.A.)<br />
: Parking brake switch<br />
: AfT device (AfT illumination and O.D. control switch) (AfT model)<br />
: Shift lock solenoid (AfT model)<br />
: Door switch L.H.<br />
: Automatic seat belt motor assembly L.H. (For U.S.A.)<br />
: Body ground (For U.s.A.)<br />
: Body ground<br />
: Rear speaker L.H.<br />
: Rear side marker lamp L.H.<br />
: Rear combination lamp L.H.<br />
~<br />
(§Y: Rear combination lamp L.H.<br />
(§j) : Back-uplamp L.H.<br />
(§3) : Rear wiper amplifier<br />
@@): Licenselamp L.H.<br />
(§9 : Licenselamp R.H.<br />
~ : Body ground<br />
e : Luggageroom lamp switch<br />
(§V : Back-uplamp R.H.<br />
~ : Luggageroom lamp<br />
(§V : Rearcombination lamp R.H.<br />
~ : Rear combination lamp R.H.<br />
(§D : Rear side marker lamp R.H.<br />
§ : Fuel tank gaugeunit<br />
@9 : Rear speaker R.H.<br />
~ : To back door harness @ill)<br />
~ : To back door harness ~<br />
@ill) : To back door harness @<br />
~ : Automatic seat belt motor assemblyR.<br />
(§!) : Door switch R.H.<br />
~ : A.B.S.control unit (For Anti-lock Brak<br />
@£) : Body ground (For Anti-lock BrakingSy<br />
~ : Rear sensor (For Anti-lockBrakingSys
m r-<br />
I<br />
...\<br />
0 ~<br />
--
m<br />
,...<br />
I<br />
~<br />
0 U'I<br />
en<br />
m r(II<br />
00<br />
-<br />
s:<br />
@:<br />
~<br />
@B)<br />
~<br />
@9<br />
@lJ<br />
~ @V<br />
~<br />
@i)<br />
@3)<br />
@ill)<br />
(§)<br />
@l7)<br />
Body ground<br />
Lap belt buckle switch (For U.S.A.)<br />
Seat belt switch (For Canada)<br />
: Ash tray illumination<br />
: Cigarette lighter<br />
: Door mirror control switch<br />
: Automatic seat belt control unit (For U.S.A.)<br />
: Parking brake switch<br />
: AfT device (AfT illumination and a.D. control switch) (AfT model)<br />
: Shift lock solenoid (AfT model)<br />
: Door switch L.H.<br />
: Automatic seat belt motor assembly L.H. (For U.S.A)<br />
: Body ground (For U.S.A.)<br />
: Body ground<br />
: Rear speaker L.H.<br />
--------<br />
~ : Rear side marker lamp L.H.<br />
~ : Licenselamp L.H.<br />
~ : Licenselamp R.H.<br />
~ : Body ground<br />
@ill) : Rear side marker lamp R.H.<br />
(§3) : Fuel tank gaugeunit<br />
@ill) : Rear speaker R.H.<br />
~ : Automatic seat belt motor assembly<br />
@B) : Door switch R.H.<br />
@@): Trunk room lamp switch<br />
§ : Trunk room lamp<br />
0 : High-mountedstop lamp<br />
@ : Rear window defogger<br />
~ : Rear combination lamp L.H.<br />
@ : Rear combination lamp R.H.<br />
~ : Not used
CID : To main harness @ (Black)<br />
@ : To main harness @ (White)<br />
@ : Head-updisplaycontrol unit<br />
@:<br />
@:<br />
@:<br />
Combination meter<br />
(Model with head-up display)<br />
Combination meter<br />
(Model without head-up display)<br />
Combi nation meter<br />
(Model with head-up display)<br />
HARNESS LAYOUT<br />
Instrument Harness<br />
QD : Combination meter<br />
(Model without head-up display)<br />
@ : Combination meter<br />
(Model without head-up display) SE L501 L<br />
EL-106
NOTE<br />
HARNESS LAYOUT<br />
EL-107<br />
~
'U<br />
C::I<br />
0.. 01<br />
><br />
'U<br />
0<br />
ID<br />
HARNESS LAYOUT<br />
Engine Room Harness<br />
EL-108
m<br />
r-<br />
I<br />
~<br />
0<br />
CD<br />
en<br />
m<br />
r<br />
UI<br />
(XI<br />
I\)<br />
~<br />
@ : Windshield wiper motor<br />
@ : A.S.C.D. actuator (Model without Anti-lock Braking System)<br />
@ : Rear washer motor<br />
@ : Front washer motor<br />
@ : Washer fluid level switch<br />
@ : To E.F.I. harness @ (White)<br />
. @ : To E.F.I. harness @ (Brown)<br />
@D : To engine room harness no. 2 (@D (MfT model)<br />
@ : Inhibitor switch (AfT model)<br />
@ : Revolution sensor (AfT model)<br />
@ : Inhibitor switch (AfT model) (Gray)<br />
@) : To solenoid valve sub-harness (AfT model) (Brown)<br />
@ : Relay box (Refer to page EL-97.J<br />
@ : To engine room harness no. 2 0<br />
@ : To engineroom harness no. 2 @<br />
@ : To engine room harness no. 2 ~<br />
@ : Body ground<br />
@D : Low.pressureswitch<br />
@) : Battery<br />
@ : .Battery<br />
@ : Bodyground<br />
@ : Clutch interlock relay (MfTmodelfor U.S.A.)<br />
@ : Front side marker lamp R.H.<br />
~<br />
@ : To front fog lamp sub-harness@<br />
@ : HeattlampR.H.<br />
@) : Headlampmotor R.H.<br />
@ : Front combination lamp R.H.<br />
@ : Horn-high<br />
@ : Condenserfan motor<br />
@ : Horn-low<br />
@': Headlampmotor L.H.<br />
@ : Headlamp L.H.<br />
@ : Front combination lamp L.H.<br />
@ : Front side marker lamp L.H.<br />
@ : Body ground<br />
@ : Relay box (Referto page EL~7.1<br />
@ : Droppingresistor (AfT model.)<br />
@ : Compressor<br />
@ : A.I.V. control solenoidvalve<br />
@ : Brakefluid levelswitch<br />
@ : Windshieldwiperamplifier (Modelwithout A<br />
@ : To engine room harness @<br />
@ : Front fog lamp R.H.<br />
@ : Front fog lamp L.H.<br />
@ : Front wheel sensor L.H.(For Anti-lockBra<br />
@ : Body ground (For Anti-lockBrakingSystem<br />
@) : Actuator (For Anti-lockBrakingSystem)<br />
@ : Windshieldwiperamplifier(Modelwith Ant<br />
@ : A.S.C.D.actuator (Modelwith Anti-lockBr
m r-<br />
I<br />
..a<br />
..a<br />
0<br />
(fJ<br />
m<br />
r-<br />
UI<br />
CD<br />
N<br />
~<br />
0<br />
~<br />
,"'P<br />
~ E112 El11<br />
@)<br />
~1t.7ii'\<br />
~<br />
@j)<br />
@3)<br />
0<br />
0<br />
B<br />
: To main harness @<br />
: To main harness @ (Blue)<br />
: To main harness @ (Black)<br />
: Clutch switch (M/T model for U.S.AJ<br />
: Key lock solenoid<br />
(AfT model)<br />
@!) : Key switch<br />
(@Y :<br />
~<br />
gnition switch<br />
0: ombination switch<br />
@ : C mbination switch<br />
(@j)<br />
0<br />
0<br />
([8)<br />
0<br />
~<br />
0 @Y
m<br />
r-<br />
I-'<br />
-'<br />
en<br />
m<br />
r<br />
UI<br />
co<br />
W<br />
;:<br />
Body ground<br />
@ : To main<br />
@ : E.C.C.S<br />
@ : To engi<br />
(AfT mo<br />
@ : To engin<br />
(MfT mo<br />
: To engine<br />
: To engin<br />
: To engin<br />
: F.I.C.D.<br />
/<br />
@) : A.A.C.va<br />
@ : Injector n<br />
@ : Air regula<br />
@ : Injector n<br />
@) : Pressurere<br />
@ : S.C.V. con<br />
@ : Exhaust g<br />
@ : Injector n<br />
@ : Injector no<br />
@ : Enginegro<br />
@ : Crankang<br />
@) : Enginetem<br />
@) : Thermal tr<br />
@ : Throttle v<br />
@ : Throttle se<br />
@ : E.G.R. con<br />
@) : Air flow m<br />
@ : Resistor<br />
@ : Condenser<br />
@ : Ignition co<br />
@ : Powertran<br />
@ : Front whe<br />
(For Anti-l<br />
@ : Body groun<br />
@ : Air tempera
m r-<br />
I<br />
...a<br />
...a<br />
N<br />
en<br />
m<br />
r 01<br />
0<br />
....<br />
r<br />
@D : To engine room harness @D<br />
(M/T model!<br />
~ : To engine room harness @<br />
~ : To engine room harness @<br />
@! : To engine room harness @<br />
~ : Battery<br />
@) : Power steering oil pressure switch<br />
@V : Alternator<br />
~ : Oil pressure switch<br />
@J : Starter motor<br />
@!9 : Exhaust gas temperature sensor<br />
@ : Vehicle speed sensor<br />
~ : Back-up lamp switch<br />
(M/T model!<br />
~ : Neutral switch<br />
(M/T model!<br />
@!9 : 5th position switch<br />
(M/T model!
@D : To main harness @ill)<br />
(Qlli) : To main harness ~<br />
@ill) : To main harness @E)<br />
~ : Rear window defogger<br />
~ : High-mounted stop lamp<br />
~ : To rear wiper sub-harness @D (White)<br />
@ : To rear wiper sub-harness ~ (Brown)<br />
@D : To back door harness ~ (White)<br />
~ : To back door harness @ (Brown)<br />
@ill) : Rear window wiper motor<br />
HARNESS LAYOUT<br />
Back Door Harness<br />
EL-113<br />
SEL505L
m r-<br />
I-'<br />
-'<br />
~<br />
In<br />
m<br />
r U1<br />
0<br />
~<br />
r<br />
Body ground<br />
)<br />
Room lamp harness<br />
@ : To main harness @<br />
@) : To sun roof harness @<br />
@ : Spot lamp (Model with sun roof)<br />
@ : Interior lamp (Model without sun roof)<br />
(~ : Interior lamp (Fastback with sun rootl<br />
@ : Interior lamp (Coupe with sun roof)<br />
@ : Automatic seat belt front limit switch (For U.S.A.)<br />
Sun ro<br />
@ :<br />
@ :<br />
@ :<br />
@ :<br />
@ :<br />
@ :<br />
@ :<br />
@ :
L.H.<br />
R.H.<br />
@ : To main harness @<br />
@ : To main harness @<br />
@ : Door speaker (Active speaker type)<br />
@ : Door speaker (Standard speaker type)<br />
@ : Door mirror motor<br />
@ : Power window regulator<br />
~<br />
~8<br />
.@ill)~<br />
@B : To main harness @<br />
@§) : To main harness @<br />
@§) : Door speaker<br />
(Active speaker type)<br />
8 : Door speaker<br />
(Standard speaker type)<br />
~ : Door mirror motor<br />
HARNESS LAYOUT<br />
Door Harness<br />
EL-115<br />
@)<br />
0<br />
@ : Power window main switch<br />
@ : Power window amplifier<br />
@ ; Door lock actuator<br />
@ : Door lock switch<br />
@D : Door latch switch (For U.S.A.)<br />
SEL503L<br />
@ : Power window regulator<br />
~ : Power window sub switch<br />
.~ : Door lock actuator<br />
@:IV : Door lock switch<br />
@IV : Door latch switch<br />
(For U.S.A.) SEL504L
l,<br />
~<br />
r<br />
l,<br />
I,<br />
~ rI<br />
I<br />
NOTE<br />
j<br />
HARNESS LAYOUT<br />
EL-116
S.M.J.<br />
SUPER MULTIPLE JUNCTION (S.M.J.)<br />
SEL422L<br />
Disconnecting and Connecting<br />
. S.M.J. is located on left side of dash.<br />
. To disconnect S.M.J., loosen fixing bolt.<br />
. To install S.M.J., tighten bolts until orange "full-tight" mark<br />
appears and then retighten to specified torque as required.<br />
~:<br />
CAUTION:<br />
3 - 5 N.m<br />
(0.3 - 0.5 kg-m, 2.2 - 3.6 ft-Ib)<br />
Do not overtighten bolts, otherwise, they may be damaged.<br />
EL-117<br />
~
SUPER MULTIPLE JUNCTION (S.M.J.)<br />
Terminal Arrangement<br />
MAIN HARNESS<br />
/ \<br />
AlA2A3A4ASA6 A7A8A9AliA11A12<br />
BIB2B3B4BsB6 B7B8B9BIDB11B12<br />
CIC2C3C4CsC6 C7C8C9CIDC11C12<br />
01 02<br />
011 012<br />
El E2 Ell E12<br />
Fl F2 LJ F11F12<br />
GlG2G3G4GsG6 G7G8G9GlDG 11612<br />
HIH21H3H4HsH6 H7H8H9HIDH11H12<br />
11121314IS16 171819IIDI11112<br />
~<br />
~ /<br />
ENGINE ROOM HARNESS<br />
E.C.C.S. CONTROL UNIT<br />
View from harness side<br />
EL-118<br />
[11<br />
l
INCHTOMETRICCONVERSIONTABLE<br />
;& /<br />
\ \<br />
~.<br />
OUiCKREFERENCECHART:<br />
/ '<br />
I ENGINE TUNE-U,P DATA~<br />
Engine model KA24E<br />
Firing order<br />
1.3-4-2<br />
Idle speed rpm<br />
MfT 750tSO<br />
AfT tin "N" position) 750tSO<br />
Ignition timing<br />
(degree B. T.D.C. at idle speed) . .<br />
I<br />
15'2<br />
Idle "CD" (% at idle speed I Idle mixtUre screw is preset and sealed at facto,:\"<br />
Valve clearance (Hod mmtinl .", Non-adjustable<br />
; High tension c,able resistance<br />
kn h" Less than 30<br />
,; Spark plug<br />
Type<br />
Standard<br />
Hot<br />
.'ii".<br />
ZFR5D-11<br />
ZFR4D-11<br />
cl<br />
.<br />
I Cold ZFR6D-11<br />
Gap ::..m tin) 1.0. 1.1 (0.039. 0.O43) .<br />
Drivebelt deflection (Cold) mmtinl<br />
.'<br />
..<br />
.,<br />
if<br />
I,<br />
Used belt deflection<br />
Adjusted<br />
Limit<br />
dellection<br />
Set dellection<br />
of new belt<br />
Alternator<br />
I<br />
.,<br />
11 (0.43)<br />
7.8<br />
(0.28 . 0.31)<br />
6.7<br />
(0.24 . 0.28)<br />
Air conditioner<br />
compressor<br />
'<br />
)'<br />
12 (0.47)<br />
7,,8<br />
(0.28 - 0.311<br />
6.7<br />
(0.24.0.281<br />
Power It;'ering<br />
pump I, 13 (0.511<br />
8.9<br />
(0.31 . 0.35)<br />
7.8<br />
(0.28 . 0.311<br />
) Applied pressed force<br />
{ : Tightening torque<br />
N (kg,lb,!'<br />
N.m<br />
98 (10, 22)<br />
kg.m ft.lb<br />
Spark plug<br />
Oil pan drain plug<br />
<<br />
20-29<br />
29-39 I<br />
2.0.3.0<br />
3.0.4.0<br />
14,.22<br />
22.29<br />
,j<br />
I'CLUTCHPE"AL ~<br />
,,'( . 1''-<br />
., Unit: mm (in I<br />
Ped~!."e~<br />
.I' Pedal free play<br />
186 -196 (7.32 - 7.721<br />
1- 3 (0.04- 0.12)<br />
.J FRONTWHEE,L ALIGNMENT (Unladen-) ~<br />
Camber<br />
Caster<br />
degree<br />
degree<br />
-1°30' to 0°<br />
6°00'-7°30'<br />
Toe-in<br />
Full turns<br />
"<br />
J<br />
,'/<br />
mmtin}<br />
degree<br />
0.3 - 2.3 (0.012 - 0.091)<br />
l' - 6.5' (Total toe-inl<br />
Innerwheel i<br />
38°.43°<br />
Outer wheel I 33°<br />
. : Tankful of fuel, radiator coolant and engine oil full.<br />
Spare tire, jack, hand tools,and mats. in designated positions.<br />
~!<br />
.~'<br />
. I I<br />
I<br />
,I<br />
---<br />
"';"1\ ~~ISSA~ MOTOR CO., LTD.<br />
\ O\yerseas <strong>Service</strong> Department<br />
Tpkyo, Japan<br />
1<br />
24081 I I <strong>1989</strong><br />
I,'FRONTWH-EELBEARING----<br />
Wheel bearing lock nut<br />
Tightening torque<br />
N.m (kg-m, ft-Ib) ,. 147 - 216 (15 . 22, 108 - 159)<br />
Wheel bearing end pray<br />
mmtinl<br />
0.03 (0:00121 or less<br />
IREARWHEELALIGNMENT(Unladen.).<br />
Camber degree -1°36' to -0°36'<br />
Toe-in<br />
mmtinl<br />
degree<br />
0.5 - 4.5 (0.020 - 0.177)<br />
1.5'.12.5'<br />
': Tankful of fuel, rediator coolant and engine oil full.<br />
Spare tire, jack, hand tools, and mats in designated positions.<br />
I REAR WHEEL BEARING ~<br />
Wheel bearing lock nut<br />
Tightening torque<br />
Wheel bearing end play<br />
N.m (kg-m, ft-Ib)<br />
mmtinl<br />
235.314 (24 ..3~. 174.2311<br />
0.05 (0.00201 or Ie..<br />
I BRAKE"<br />
Disc brake .<br />
Unit: mm tinl<br />
" i<br />
Pad repair limit 2.0 (0.019!<br />
Rotor thickness Front side 18.0 (0.709)<br />
..I!'pairlimit<br />
Pedal free height<br />
Rear side 8.0 (0.315)<br />
MIT model 177. 187 (6.97 - 7.36)<br />
AIT model . 186 - 196 (7.32 -7.721<br />
Pedal depressed height' 1 / 100 (3.841or more I ,<br />
Parking brake<br />
Number of notches'2<br />
;<br />
6-8<br />
'1: Under foree of 490 N (50 kg, 110 Ib) with engine running<br />
'2: At pulling force: 196 N (20 kg, 44lb)<br />
1 REFILL<br />
CAPACIT'ES,.'<br />
Unit<br />
Engine model<br />
Fuel tank<br />
Coolant With reservoir tank<br />
With oil filter<br />
Engine<br />
Without<br />
MIT<br />
oil filter<br />
Transmission<br />
Differential carrier<br />
AIT<br />
R200<br />
Power steering system<br />
Air conditioning system Refrigerant<br />
Edition~ August 1988<br />
Printing~ February <strong>1989</strong> (02)<br />
Publication No. SM9E.OS13UO<br />
Printed in U.S.A.<br />
KA24E<br />
60 15-7/8 gal<br />
6.7 7-1/8 qt<br />
3.&'- 3-3/4 qt<br />
3.2 3.3/8 t<br />
2.4 5-1/8 P.<br />
8.3 8-3/4 qt<br />
1.3 2-3/4pt .,<br />
0.9 1 qt<br />
0.9 - 1.0 kg 2.0 - 2.21b
~.<br />
mmm!I<br />
,..<br />
~ '<br />
J'SERVICE BULLETIN<br />
~<br />
~<br />
':><br />
Classification:<br />
EF&EC89-004<br />
Section: Engine<br />
Emission<br />
Fuel &<br />
Control<br />
Models:<br />
Reference: Date:<br />
TECHNICAL BULLETIN TS89-072<br />
~-- --<br />
....<br />
NISSAN MOTOR CORPORATION IN U:S.A. "~<br />
<strong>1989</strong> <strong>240SX</strong><br />
Mav 18. <strong>1989</strong><br />
KA24E ENGINE CHANGE<br />
APPLIED MODEL: <strong>1989</strong> <strong>240SX</strong> (S13) from engine number KA24-012039*<br />
SERVICE INFORMATION<br />
Post Office Box 191<br />
Gardena, California 90247-7638<br />
Telephone: (213) 532-3111 '<br />
To improve driveability<br />
as follows:<br />
the KA24Eengine on the applied model has been changed<br />
. Compressionratio has been changed (9.1<br />
. Air temperature sensor has been added.<br />
. E.C:U. has been changed.<br />
. Idle speed.<br />
. Self-diagnosis ~or E.G.R.<br />
to 8.6).<br />
The following pages reflect these changes.<br />
CONTENTS<br />
Compression Pressure - Measurement 2<br />
- General Specifications 3<br />
Engine and Emission Control Overall System<br />
E. C.C.S. Canponent Parts Location ! 4<br />
Sys tem Diagram" , 5<br />
Sys tem Chart " ................................... 6<br />
~, Circui t Diagram 7<br />
Engine and Emission Control Parts Description<br />
Air Temperature Sensor ~.........................\........... 8<br />
Engine and Emtssion Control System Description<br />
Igni tioll Timing Control 9<br />
Swirl Control Valve" (S.C. V.) Control .11<br />
Fail-safe System .12<br />
Idle Speed/Ignition Timing/Idle Mixture Ratio Inspection 13<br />
Trouble Diagnoses<br />
Self-diagnosis - Mode III (Self-diagnostic System) 15<br />
Diagnostic Procedure 8 16<br />
Diagnostic Procedure 24 .,.19<br />
~lectrical Components Inspection ~ 21<br />
<strong>Service</strong> Data and Specifications ..~ ;... .23<br />
Please reference this Bulletin on the Contents pages of the EM and EF&EC<br />
Sections of the <strong>1989</strong> 24USX<strong>Service</strong> <strong>Manual</strong>.<br />
*Vehicles with an Air Temperature Sensor on the air cleaner box have the<br />
.modified engine.<br />
1/23<br />
f'<br />
I ~<br />
, t
-It' COMPRESSION PRESSURE<br />
g<br />
SEM113B<br />
Measurement of Compression Pressure<br />
1. Warm up engine.<br />
2. Turn igr;1itionswitch off.<br />
'3. Disconnect fusible link for injectors.<br />
4. Remove all spark plugs.<br />
5. Disconnect distributor center cable.<br />
6. Attach a compression tester to NO.1 cylinder.<br />
7. Depress accelerator<br />
open.<br />
pedal fully to keep throttle valve wide<br />
8. Crank engine and record highest gauge indication.<br />
9. Repeat the measurement on each cylinder as shown above.<br />
. Always use a fully-charged battery to obtain specified<br />
engine revolution.<br />
I Compression pressure:<br />
kPa (kg/cm2, psi)/rpm<br />
Standard<br />
1,206 (12.3, 175)/250<br />
Minimum<br />
1,010 (10.3, 146)/250<br />
Difference limit between cylinders<br />
98 (1.0, 14)/250<br />
10. If cylinder compression in one or more cylinders is low, pour<br />
a small amount of engine oil into cylinders through spark<br />
plug holes and retest compression.<br />
. If adding oil helps compression, piston rings may be worn<br />
or damaged. If so, replace piston rings after checking<br />
piston.<br />
. If pressure stays low, a valve may be sticking or seating<br />
improperly. Inspect and repair valve and valve seat. (Refer<br />
to S.D.S.) If valve or valve seat is damaged excessively,<br />
replace them.<br />
. If compression in any two adjacent cylinders is low and if<br />
adding oil does not help compression, there is leakage<br />
past the gasket surface. If so, replace cylinder head<br />
gasket. '<br />
. 2/23<br />
f<br />
I<br />
",.
~<br />
"<br />
~<br />
Engine model<br />
SERVICE DATA AND SPECIFICATIONS (S.D.S.)<br />
KA24E<br />
Cylinder arrangement 4, in-line<br />
Displacement em' leu in) 2,3891145.78)<br />
Bore x stroke mm lin) 89 x 9613.50 x 3.78)<br />
Valve arrangement<br />
Firing order<br />
Number of piston rings<br />
Compression<br />
O.H.C.<br />
1-3-4.2<br />
Oil 1<br />
Number of main bearings<br />
ICompression ratio<br />
2<br />
5<br />
Unit: kPa (kg/em' , psil/rpm<br />
General Specifications<br />
8.6 I<br />
Compression pressure<br />
Standard 1,206 112.3, 175)/250<br />
Minimum 1,010 (10.3,146)/250<br />
Differential limit between<br />
cylinders<br />
98 (1.0,14)/250<br />
3/23<br />
oil'<br />
L
v.:<br />
0\;, ;j<br />
. E.C.C.S.relay,<br />
. Fuel pump relay<br />
I.A.A. un"it<br />
Fuel filter<br />
ENGINE AND EMISSION CONTROL OVERALL SYSTEM<br />
E.C.C.S.control unit<br />
t9 ~<br />
Throttle sensorl<br />
Throttle valve switch<br />
Throttle chamber<br />
Exhaust gas<br />
temperature sensor<br />
(For Californiamodel)<br />
E.C.C.S. Component Parts Location<br />
E.G.R. control valve<br />
Pressure regulator<br />
t~ ~<br />
~ ~ cr<br />
~<br />
ankangle<br />
o;?J<br />
, iT ~"'o,<br />
) Engine<br />
t'"~ ~ 0<br />
temperatu re Jec or<br />
E.G.R. control sensor Exhaust gas Air flow meter<br />
solenoid valve sensor<br />
4/23<br />
Fuelpump<br />
Pressure control solenol regUla.~Or<br />
valve'<br />
~ s.c.v.contrOI<br />
.fijif~<br />
~"o,<br />
Ignition coil and<br />
power transistor<br />
Air temperature sensor<br />
SEF4601<br />
~<br />
~<br />
1
(<br />
01<br />
---<br />
N<br />
W<br />
en<br />
m "~C><br />
--<br />
Ignition<br />
coil<br />
Ignition switch<br />
Cran k angle sensor<br />
built-in distributor<br />
Neutral switch (M/T)<br />
Exhaust gas temperature sensor \<br />
(For California model) \<br />
r Air regulator<br />
, , ,<br />
S.C.V. control--solenoid<br />
valve ,<br />
Inhibitor switch (AfT) / / '\<br />
Swirl control""'"<br />
valve<br />
Engine<br />
temperaturej<br />
Transmission<br />
g= ':;. speed sensor<br />
Vehicle<br />
Q : Intake air flow<br />
.. : Exhaustgasflow<br />
sensor<br />
"<br />
Exhaust<br />
gas sensor<br />
I ,<br />
A.I.V.<br />
"- Spark plug<br />
Carbon<br />
canister<br />
Throttle<br />
valve<br />
sensoi<br />
-)"<br />
E.G.R. control<br />
solenoid valve 7<br />
: r--- --<br />
L J<br />
Fuel pressure<br />
regulator<br />
/<br />
{}<br />
,<br />
8 a<br />
A.I. V. control<br />
solenoid valve Air flow me<br />
-
ENGINE AND EMISSION CONTROL OVERALL SYSTEM<br />
E.C.C.S. CONTROLSYSTEM System Chart '-<br />
~ I Crank anglesensor I .1 I Fuel injection&<br />
mixture ratio control<br />
I I<br />
Injectors<br />
I<br />
I Air flow meter I . I I Ignition timing control )f Power transistor<br />
I<br />
Engine temperature sensor<br />
I I I<br />
I<br />
I I ~ I<br />
Exhaust gassensor I .1 I Idle speed control )1 Auxiliary (A.A.CJ valve air control<br />
Air temperature sensor I ~.<br />
I Ignition switch --1<br />
~I<br />
I I )I AJ.V. control solenoidvalve<br />
AJ.V. control<br />
[ Starter switch J ~I I E.G.R. Canister control control& ~ E.G.R.control valve solenoid<br />
I Idle switch I ~<br />
~ control<br />
I Throttle sensor I E.C.C.S. I<br />
unit<br />
Fuel pump control ,/1 Fuel pump I f<br />
I Air conditioner switch I ~ I Air regulator control ~ Air regulator<br />
I<br />
Neutral Inhibitor switch (M/T) (A/T) I<br />
~<br />
I I Acceleration cut ~<br />
control Air conditioner relay<br />
I Vehicle speedsensor I ~I I<br />
S.C.V.(Swirl control ~ S.C.V.control<br />
Power steering oil pressure I I I valve) control solenoid valve<br />
switch ~<br />
,<br />
[Battery I ~I I monitor Exhaust gas & self-diagnosis sensor ~ (On Inspection the control lampsunit)<br />
r--<br />
Exhaust gas temperature sensor<br />
(For California model) I ~I I Pressu rereguIator Pressure regulator control<br />
control solenoid valve<br />
8 Air flow meter<br />
8 Throttle sensor<br />
Fail-safe function 8 Engine temperature sensor<br />
8 Air temperature sensor<br />
6/23<br />
~<br />
-<br />
I (
(<br />
'-.I<br />
-....<br />
I\.)<br />
W<br />
en<br />
m<br />
"T1<br />
~<br />
C'I<br />
'"<br />
I ...:-.<br />
1<br />
FUSIBLE<br />
LINK<br />
{8J-<br />
IGNITION SWITCH<br />
OFFIACCION I ST<br />
FUSE<br />
f--1S}<br />
-0 INJECTOR<br />
~<br />
E. C. C. s.<br />
iii RELAY U<br />
SATTERY<br />
-<br />
-=-<br />
To tachometer<br />
ffi3<br />
~<br />
~ ~<br />
I A~~E~LOW I ~--_m-7<br />
-=-<br />
~<br />
EXHAUST<br />
GAS n----<br />
SENSOR __n_-1...<br />
RESISTORm _n--nn n_-<br />
$ CONDENSER<br />
-= -= -= -=<br />
SPARK PLUG<br />
0 cn__m_-T<br />
CRANK 34 382336<br />
46 5<br />
24<br />
10 I<br />
25<br />
110<br />
106<br />
103<br />
112<br />
4<br />
47<br />
109<br />
16<br />
17<br />
39<br />
19<br />
3<br />
1<br />
3D<br />
31<br />
i-+-I 22<br />
40<br />
!'1<br />
P<br />
P<br />
Y'<br />
6 n 0<br />
13 Z<br />
--i<br />
;u<br />
0<br />
r<br />
c<br />
z<br />
--i<br />
115 28<br />
II<br />
105<br />
102<br />
12<br />
113<br />
104<br />
107<br />
1] 6<br />
"'p<br />
45<br />
43<br />
44<br />
33<br />
35<br />
4]<br />
11<br />
21LL<br />
29<br />
18<br />
I I H<br />
20<br />
37<br />
32<br />
26<br />
8<br />
-<br />
CHECK CONNECTOR<br />
r-<br />
-@<br />
CHECK<br />
ENGINE<br />
LI GHT@<br />
PRESSURE REGULATOR<br />
CONTROL<br />
SOLENOID VALVE a<br />
E. G. R. CONTROL<br />
SOLENOID VALVE a<br />
A. 1. V. CONTROL<br />
SOLENOID VALVE a<br />
S. C. V. CONTROL<br />
SOLENOID VALVE a<br />
A.A.C. VALVE -a<br />
AIR REGULAT~<br />
FUEL<br />
PUMP'R<br />
~=~ 5TH POSITION<br />
~SWITCH<br />
=<br />
-=-<br />
POWER STEERING<br />
OIL PRESSURE<br />
-=- SWITCH<br />
~:~[ff:i!I:i:<br />
~~ INHIBITOR<br />
SWI TCH @<br />
THROTTLE<br />
VALVE<br />
SWITCH<br />
~LL IDLE<br />
ENGINE<br />
~ TEMPERATURE<br />
..:::::::.J S ENS 0 R<br />
~ EXHAUST GAS<br />
TEMPERAl.URE<br />
SENSOR (g<br />
--~:::::::::::::::~ I] I~~~~6~LE<br />
~ AIR<br />
0<br />
TEMPERATURE<br />
SENSOR<br />
A/T<br />
CONTRQL SPEED<br />
UNIT ~ SENSOR<br />
L-><br />
RELAY<br />
INHIBIr<br />
HEAO-IE<br />
01SPLAY eo<br />
UNIT<br />
I'.tI<br />
-
+~I<br />
ENGINE AND EMISSION CONTROL PARTS DESCRIPTION<br />
SEF1651<br />
Air Temperature Sensor<br />
The air temperature sensor is used to control ignition timing when<br />
the temperature of the intake air is extremely high, in order not to<br />
cause predetonation.<br />
8/23<br />
~<br />
~ .<br />
~
~<br />
~<br />
~<br />
ENGINE AND EMISSION CONTROL SYSTEM DESCRIPTION<br />
Ignition Timing Control<br />
INPUT/OUTPUT SIGNAL LINE<br />
E . d d Dist 'ti on<br />
I<br />
I<br />
I<br />
Crank angle sensor<br />
Air flow meter<br />
Engine temperature sensor<br />
Air temperature sensor<br />
Idle switch<br />
I Throttle sensor I<br />
Neutral switch (M/T)<br />
Inhibitor switch (A/T)<br />
I Ignition switch I<br />
I<br />
I<br />
I<br />
Amount of intake air<br />
Engine temperature<br />
Intake air temperature<br />
Throttle valve idle position<br />
Throttle valveopening angle<br />
Neutral position<br />
Start signal<br />
9/23<br />
E.C.C.S.<br />
control<br />
unit<br />
Power transistor<br />
'-- /
SYSTEM DESCRIPTION<br />
ENGINE AND EMISSION CONTROL SYSTEM DESCRIPTION<br />
The ignition timing is controlled by the E.C.U. in<br />
order to maintain the best air-fuel ratio in response<br />
to every running condition of the engine.<br />
The ignition timing data is stored in the ROM<br />
located in the E.C.U., in the form of the map<br />
shown below.<br />
The E.C.U. detects information such as the injection<br />
pulse width and crank angle sensor signal<br />
which varies every moment. Then responding to<br />
this information, ignition signals are transmitted to<br />
the power transistor.<br />
e.g. N: 1,800 rpm, Tp: 1.50 msec<br />
A °S.T.D.C.<br />
Tp<br />
(msec)<br />
1.75i<br />
1.50I<br />
Injection<br />
pulse<br />
width 1.25i<br />
1.00I<br />
0.75<br />
600<br />
Ignition Timing Control (Cont'd)<br />
In addition to this,<br />
1 At starting<br />
2 During warm-up<br />
3 At idle<br />
4 At low battery voltage<br />
5 During swirl control valve operates<br />
6 Hot engine operation<br />
7 At acceleration<br />
8 When intake air temperature is extremely high<br />
the ignition timing is revised by the E.C.U. according<br />
to the other data stored in the ROM.<br />
- - --- -<br />
1,000 1,400 1,800 2,200<br />
Engine speed (rpm)<br />
10/23<br />
A<br />
N<br />
SEC750A<br />
~
~<br />
~<br />
~<br />
I<br />
ENGINE AND EMISSION CONTROL SYSTEM DESCRIPTION<br />
INPUT/OUTPUT SIGNAL LINE<br />
Idle switch<br />
I Ignition switch I<br />
Crank angle sensor<br />
Engine temperature sensor<br />
SYSTEM DESCRIPTION<br />
This system has a swirl control valve (S.C.V.) in<br />
the intake passage of each cylinder.<br />
While idling the S.C.V. closes. Thus the velocity of<br />
the air in the intake passage increases, promoting<br />
the vaporization of the fuel and producing a swirl<br />
in the combustion chamber.<br />
Because of this operation, this system tends to<br />
increase the burning speed of the gas mixture,<br />
I<br />
Swirl Control Valve (S.C.V.) Control<br />
Idle signal .<br />
Start signal .<br />
E.C.C.S.<br />
control<br />
Engine speed<br />
unit<br />
Enginetemperature<br />
improve fuel consumption, and increase the stability<br />
in running conditions.<br />
The solenoid valve controls S.C.V.'s shut/open<br />
condition. This solenoid valve is operated by the<br />
E.C.U.<br />
. This table shows the control when starting enginetemperatureis above 10°C (50°F).<br />
11/23<br />
S.C.V. control<br />
solenoid valve<br />
Idle switch Water temperature Engine rpm Solenoid valve S.C.V.<br />
ON Above 3SoC (9SoF) Below 1,800 ON Close<br />
Except above OFF Open
ENGINE AND EMISSION CONTROL SYSTEM DESCRIPTION<br />
AIR FLOW METER MALFUNCTION<br />
If the air flow meter output voltage is above or<br />
below the specified value, the E.C.U. senses an air<br />
flow meter malfunction. In case of a malfunction,<br />
the throttle sensor substitutes for the air flow<br />
meter.<br />
Though air flow meter is malfunctioning, it is<br />
possible to drive the vehicle and start the engine.<br />
But engine speed will not rise more than 2,400<br />
rpm in order to inform the driver of fail-safe<br />
system operation while driving.<br />
Operation<br />
System<br />
E.G.R. control system<br />
Idle speed control system<br />
Fuel injection control<br />
system<br />
Fixed condition<br />
OFF<br />
A duty ratio is fixed at<br />
the preprogrammed value.<br />
Fuel is shut off above<br />
2,400 rpm.<br />
(Engine speed does not<br />
exceed 2,400 rpm.)<br />
Fail-safe System<br />
12/23<br />
ENGINE TEMPERATURE SENSOR<br />
MALFUNCTION<br />
When engine temperature sensor output voltage is<br />
below or above the specified value, water temperature<br />
is fixed at the preset value as follows:<br />
Operation<br />
Condition<br />
Just as ignition switch is<br />
turned ON or Start<br />
More than 6 minutes after<br />
ignition ON or Start<br />
Except as shown above<br />
Engine<br />
temperature decided<br />
20°C (68°F)<br />
80°C (176°F)<br />
20. 80°C (68. 176°F)<br />
(Depends on the time)<br />
THROTTLE SENSOR MALFUNCTION<br />
When throttle sensor output voltage is below or<br />
above the specified value, throttle sensor output<br />
is fixed at the preset value.<br />
AIR TEMPERATURE SENSOR<br />
MALFUNCTION<br />
When air temperature sensor is below or above the<br />
specified value, air temperature value is fixed at the<br />
preset value [20°C (68°F)].<br />
~<br />
~<br />
~
..<br />
IDLE SPEED/IGNITION TIMING/IDLE MIXTURE RATIO INSPECTION<br />
I~~I<br />
SEF457C<br />
3 4<br />
2 ~,."..~",L../" 5<br />
~"" '~
3 4<br />
IDLE SPEED/IGNITION TIMING/IDLE MIXTURE RATIO INSPECTION<br />
2 >,.",,,,,,~,,,,,,. 5<br />
~ 'v"-(6<br />
~ \<br />
1~ = ~<br />
0: ~1<br />
.""""Im;n ~8 ~ I<br />
SEF477B<br />
~~\<br />
~V j\.(r)J<br />
~/~ SEF450H<br />
~r\<br />
~~ '--~(r) )<br />
d~,/i~~<br />
~ SEF292H<br />
A<br />
1<br />
~<br />
Check ignition timing with<br />
a timing light.<br />
15°:t2° B.T.D.C.<br />
O.K. N.G.<br />
Adjust ignition timing by turning distributor<br />
after loosening bolt which secures distributor.<br />
15°:t2° B.T.D.C.<br />
Adjust idle speed by turning idle speed adjusting<br />
screw.<br />
Run engine at about 2,000 rpm for about 2<br />
minutes under no.load.<br />
M/T: 650:t50 rpm<br />
A/T: 70O:t50 rpm (in "N" position)<br />
Makesure that inspection lamp (Green) on E.C.U. goes IN.G.<br />
on and off periodically more than 5 times during 10<br />
seconds at 2,000 rpm under no.load.<br />
O.K.<br />
Set the diagnosismode of E.C.U.to mode II.<br />
Check inspection lamps (Red and Green) on<br />
E.C.U. blink at 2,000 rpm.<br />
They should blink simultaneously.<br />
Yes<br />
INSPECTION END<br />
14/23<br />
No<br />
--<br />
@<br />
D @ c<br />
j
,<br />
TROUBLE DIAGNOSES<br />
Self-diagnosis - Mode III (Self-diagnostic<br />
system)<br />
The E.C.U. constantly monitors the function of these sensors<br />
and actuators, regardless of ignition key position. If a malfunction<br />
occurs, the information is stored in the EC.U. and can be<br />
retrieved from the memory by turning on the diagnostic mode<br />
selector, located on the side of the E.C.U. When activated, the<br />
malfunction is indicated by flashing a red and a green L.ED.<br />
(Light Emitting Diode), also located on the E.C.U. Since all the<br />
self-diagnostic results are stored in the E.C.U.'s memory even<br />
intermittent malfunctions can be diagnosed.<br />
A malfunctionis indicated by the number of both red and green<br />
flashing L.ED.s. First, the red L.ED. flashes and the green<br />
flashes follow. The red L.ED. corresponds to units of ten and<br />
the green L.ED. corresponds to units of one. For example,<br />
when the red L.E.D.flashes once and the green L.ED. flashes<br />
twice, this signifies the number "12", showing that the air flow<br />
meter signal is malfunctioning. All problems are classified by<br />
code numbers in this way.<br />
. When the engine fails to start, crank it two or more<br />
seconds before beginning self-diagnosis.<br />
. Before starting self-diagnosis, do not erase the stored<br />
memory before beginning self-diagnosis. If it is erased, the<br />
self-diagnosis function for intermittent malfunctions will be<br />
lost.<br />
DISPLAY CODE TABLE<br />
Code No.<br />
X: Available -: Not available<br />
15/23<br />
Detected items<br />
California<br />
Non-<br />
California<br />
11 Crank angle sensor circuit X X<br />
12 Air flow meter circuit X X<br />
13 Engine temperature sensor circuit X X<br />
14 Vehicle speed sensor circuit X X<br />
21 Ignition signal missing in primary coil X X<br />
31 E.C.U. IE.C.C.S. control unit) X X<br />
32 E.G.R. function X -<br />
I<br />
33<br />
35<br />
41<br />
Exhaust gas sensor circuit<br />
Exhaust gastemperature sensor circuit<br />
Air temperature sensor circuit<br />
X<br />
X<br />
X<br />
X<br />
-<br />
X I<br />
43 Throttle sensor circuit X X<br />
45 Injector leak X -<br />
55 No malfunction in the above circuit X X
TROUBLE DIAGNOSES<br />
Diagnostic Procedure 8<br />
E.G.R. FUNCTION(CodeNo.32) ~ [Not self-diagnosticitem (For non-Californiamodels)]<br />
E. G.R.<br />
CONTROL<br />
SOLENOID<br />
VALVE<br />
~<br />
E. C. C. S.<br />
P Iij<br />
CONTROL<br />
UNI T @) @)W -=Ii]<br />
IDS-LG<br />
Component location<br />
(E. F. I.<br />
harness)<br />
"''''<br />
_"XI<br />
I<br />
@)@)<br />
BR-' tBR<br />
16/23<br />
(Eng I ne room<br />
harness)<br />
" OFF ACC ON ST<br />
1<br />
2<br />
3<br />
4<br />
5<br />
n<br />
-('r<br />
0<br />
--0<br />
:J<br />
I GNITI ON<br />
SWITCH<br />
~<br />
~ ~ @g<br />
B<br />
[!)<br />
=='---<br />
~-<br />
~$\<br />
aoggi., ~<br />
--'-<br />
SEF445H<br />
. -::C'\ Improperconnection<br />
"- " SEF816F<br />
Ii]<br />
CONNECT<br />
£)<br />
oo<br />
tD CfH ":"<br />
SEF158H<br />
~~u<br />
CONNECT<br />
£)<br />
00<br />
?~<br />
~L:t-r-J<br />
ClUNIT '8 CONNECTOR II<br />
105<br />
Cf~H<br />
[Y]<br />
+'<br />
SEF159H<br />
TROUBLE DIAGNOSES<br />
Diagnostic Procedure 8 (Cont'd)<br />
INSPECTION START<br />
B CHECK E.G.R. CONTROL<br />
VALVE OPERATION.<br />
1) Start engine and warm it up<br />
sufficiently.<br />
2) Make sure E.G.R. control<br />
valve spring responds to<br />
your touch (use your<br />
fingers) and also when<br />
engine is raced.<br />
Does not respond<br />
O.K.<br />
(;]<br />
CHECK VACUUM SOURCE<br />
TO E.G.R. CONTROL<br />
VALVE.<br />
1) Stop engine.<br />
2) Disconnect vacuum hose<br />
connected to E.G.R. control<br />
valve and B.P.T. valve.<br />
3) Start engine.<br />
4) Make sure vacuum exists<br />
when racing engine.<br />
[!)<br />
N.G.<br />
CHECK VACUUM HOSE.<br />
1) Stop engine.<br />
2) Check vacuum hose for clogging,<br />
cracks, and proper.<br />
connections.<br />
Ii]<br />
I<br />
CHECK<br />
O.K.<br />
.<br />
E.C.U. OUTPUT<br />
SIGNAL (Solenoid side).<br />
1) Start engine and warm it up<br />
sufficiently.<br />
2) Check voltage betwen E.G.R.<br />
control solenoid valve harness<br />
connector<br />
ground.<br />
terminal @ and<br />
Engine<br />
condition<br />
Voltage<br />
Idle Battery voltage<br />
Racing<br />
17/23<br />
Temporarily<br />
drops to 0 - 1V<br />
O.K.<br />
Responds<br />
N.G.<br />
N.G.<br />
INSPECTION END ( )<br />
~<br />
CHECK COMPONENT.<br />
Check E.G.R. control valve.<br />
(See page EF & EC-148.)<br />
I<br />
N.G.<br />
Replace E.G.R. control valve.<br />
If necessary, replace vacuum<br />
hose or reconnect vacuum hose<br />
firmly.<br />
CHECK E.C.U. OUTPUT<br />
SIGNAL (E.C.U.side).<br />
Check voltage between E.C.U.<br />
harness connector terminal @§)<br />
and ground.<br />
Engine<br />
condition<br />
If N.G., check the E.C.U. pin<br />
terminals for damageor the<br />
connection of E.C.U. harness<br />
connector.<br />
O.K.<br />
Voltage<br />
Idle Battery voltage<br />
Racing I Temporarily<br />
drops to 0 -1V<br />
Repair harness or connectors<br />
between terminals @ and @.<br />
'1
(j<br />
Test condition<br />
Drive vehicle under the following conditions<br />
with a suitable shift position. . Engine speed:<br />
13,200:1;400 rpm I . Intake manifold vacuum:<br />
-42.7:1;8.0 kPa<br />
(-320:1;60 mmHg, -12.60:1;2.36 inHg)<br />
Driving mode<br />
Vehicle<br />
driving<br />
Idling ---u<br />
Test condition<br />
16 seconds or more<br />
@<br />
@<br />
Ignition l.ILJ<br />
switch: I I,'f Time<br />
OF F +---+--<br />
Until green and red inspection lamps go off.<br />
CD Start engine and warm it up sufficiently.<br />
@ Turn off ignition switch and keep it off<br />
until green and red inspection lamps go off.<br />
@ Start engine and make sure that air conditioner<br />
switch and rear defogger are turned<br />
"OFF" during driving test.<br />
@ Shift to suitable gear position and drive<br />
in "Test condition" for at least 16 seconds.<br />
TROUBLE DIAGNOSES<br />
Diagnostic Procedure 24<br />
AIR TEMPERATURESENSOR(Code No. 41)<br />
E. C.C.S.<br />
CONTROL<br />
UNIT @<br />
Component location<br />
~<br />
26-L<br />
21-B<br />
2'-B<br />
~ ala]<br />
(E. F. I.<br />
harness)<br />
19/23<br />
~mf<br />
~@)<br />
~<br />
AIR<br />
TEMPERATURE<br />
SENSOR<br />
at;]<br />
SEF4641
m<br />
I;]<br />
~ (bla<br />
,<br />
lu<br />
~<br />
i5~u<br />
bla<br />
~ ~i5n<br />
~i5 [ill<br />
""'" -<br />
E.C.U. INPUT/OUTPUT SIGNAL INSPECTION<br />
E.C.U. inspection table<br />
TERMI-<br />
NAL<br />
NO.<br />
16<br />
18<br />
19<br />
20<br />
22<br />
30<br />
26<br />
28<br />
31<br />
40<br />
33<br />
34<br />
35<br />
ITEM<br />
Air flow meter<br />
Engine temperature sensor<br />
Exhaust gas sensor<br />
Throttle sensor<br />
Crank angle sensor<br />
(Reference signal)<br />
Air temperature sensor<br />
Throttle opening signal<br />
Crank angle sensor<br />
(Position signal)<br />
Idle switch (e side)<br />
Start signal<br />
Neutral switch &<br />
Inhibitor switch<br />
TROUBLE DIAGNOSES<br />
Electrical Components Inspection<br />
CONDITION<br />
I Engine is running. I<br />
I Engine is running. I<br />
After warming up sufficiently.<br />
Ignition switch "ON"<br />
I Engineis running.I<br />
Do not run engine at high speed<br />
under no-load.<br />
Air temperature is 20°C (68°F).<br />
Air temperature is 80°C (17SoF).<br />
I Ignition switch "ON" I<br />
I Engine is running. I<br />
Do not run engine at high speed<br />
under no-load.<br />
Cranking<br />
Throttle valve: idle position<br />
Throttle valve:<br />
Any position except idle position<br />
Except the above gear position<br />
21/23<br />
*Data are reference values.<br />
*DATA<br />
1.0-3.0V<br />
Output voltage varies with engine<br />
revolution.<br />
1.0-5.0V<br />
Output voltage varies with engine<br />
water temperature.<br />
0 -Approximately 1.0V<br />
0.4 -Approximately 4V<br />
Output voltage varies with the<br />
throttle valve opening angle.<br />
0.2 - 0.5V<br />
1.0 - 1.5V<br />
Approximately 0.3V<br />
0.3 - Approximately3V<br />
2.0 - 3.0V<br />
Approximately9 - 10V<br />
OV<br />
8 - 12V<br />
OV<br />
6-7V
+<br />
SEF2651<br />
TROUBLE DIAGNOSES<br />
Electrical Components Inspection (Cont'd)<br />
AIR TEMPERATURE SENSOR<br />
Check air temperature sensor resistance.<br />
Temperature °c (oF) Resistance kn<br />
22/23<br />
20 (68)<br />
-<br />
80 (176)<br />
/<br />
2.1 -2.9<br />
0.27 - 0.38<br />
4
~<br />
IGNITION TIMING °B.T.D.C. 15:t2<br />
IDLE SPEED rpm<br />
ENGINE TEMPERATURE SENSOR<br />
Therm istor resistance kn<br />
AIR TEMPERATURE SENSOR<br />
Resistance kn<br />
SERVICE DATA AND SPECIFICATIONS (S.D.S.)<br />
M/T 700:t50<br />
A/T 750:t50 (in "N" position)<br />
20°C (68°F) 80°C (176°F)<br />
2.1 -2.9 0.30 -0.33<br />
20°C (68°F) 80°C (176°F)<br />
2.1.2.9 0.27 - 0.38<br />
IDLE SWITCH<br />
Engine speed when idle switch M/T 1,OOO:t150<br />
is changed from "OFF" to A/T 1 ,OOO:t 150<br />
"ON" rpm (in "N" position)<br />
FUEL PRESSURE at idling<br />
(Measuring point: between fuel<br />
filter and fuel pipe)<br />
Vacuum hose is connected Approx imately<br />
kPa (kg/cm' ,psi! 226 (2.3,33)<br />
Vacuum hose is disconnected Approximately<br />
kPa (kg/cm' , psi) 294 (3.0,43)<br />
FUEL INJECTOR<br />
Coil resistance n Approximately 10 -15<br />
AIR REGULATOR<br />
Resistance n Approximately 75<br />
EXHAUST GAS TEMPERATURE<br />
SENSOR<br />
Therm istor resistance kn<br />
100°C (212°F)<br />
85.3:1:8.53<br />
NISSAN MOTORCORPORATION IN U.S.A.<br />
Technical Publications Department<br />
General Specifications<br />
Inspection and Adjustment<br />
23/23<br />
~