Edirol PCR-M30/M50/M80 TurboStart - Roland
Edirol PCR-M30/M50/M80 TurboStart - Roland
Edirol PCR-M30/M50/M80 TurboStart - Roland

Create successful ePaper yourself
Turn your PDF publications into a flip-book with our unique Google optimized e-Paper software.
e<br />
<strong>PCR</strong>-<br />
<strong>M30</strong>/<strong>M50</strong>/<strong>M80</strong><br />
USB/MIDI Keyboard<br />
Controller<br />
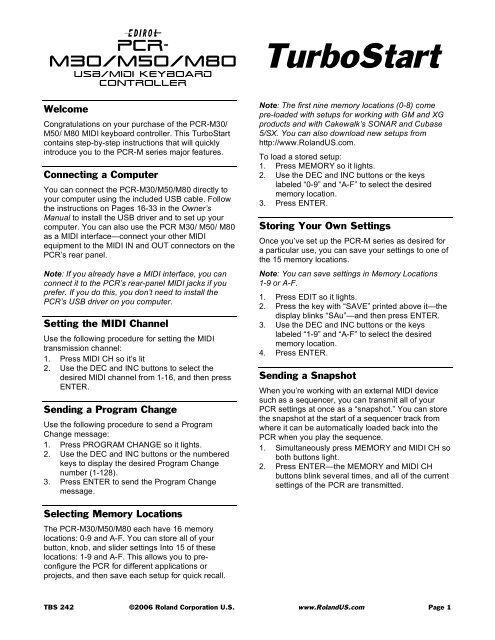
Welcome<br />
Congratulations on your purchase of the <strong>PCR</strong>-<strong>M30</strong>/<br />
<strong>M50</strong>/ <strong>M80</strong> MIDI keyboard controller. This <strong>TurboStart</strong><br />
contains step-by-step instructions that will quickly<br />
introduce you to the <strong>PCR</strong>-M series major features.<br />
Connecting a Computer<br />
You can connect the <strong>PCR</strong>-<strong>M30</strong>/<strong>M50</strong>/<strong>M80</strong> directly to<br />
your computer using the included USB cable. Follow<br />
the instructions on Pages 16-33 in the Owner’s<br />
Manual to install the USB driver and to set up your<br />
computer. You can also use the <strong>PCR</strong> <strong>M30</strong>/ <strong>M50</strong>/ <strong>M80</strong><br />
as a MIDI interface—connect your other MIDI<br />
equipment to the MIDI IN and OUT connectors on the<br />
<strong>PCR</strong>’s rear panel.<br />
Note: If you already have a MIDI interface, you can<br />
connect it to the <strong>PCR</strong>’s rear-panel MIDI jacks if you<br />
prefer. If you do this, you don’t need to install the<br />
<strong>PCR</strong>’s USB driver on you computer.<br />
Setting the MIDI Channel<br />
Use the following procedure for setting the MIDI<br />
transmission channel:<br />
1. Press MIDI CH so it’s lit<br />
2. Use the DEC and INC buttons to select the<br />
desired MIDI channel from 1-16, and then press<br />
ENTER.<br />
Sending a Program Change<br />
Use the following procedure to send a Program<br />
Change message:<br />
1. Press PROGRAM CHANGE so it lights.<br />
2. Use the DEC and INC buttons or the numbered<br />
keys to display the desired Program Change<br />
number (1-128).<br />
3. Press ENTER to send the Program Change<br />
message.<br />
Selecting Memory Locations<br />
The <strong>PCR</strong>-<strong>M30</strong>/<strong>M50</strong>/<strong>M80</strong> each have 16 memory<br />
locations: 0-9 and A-F. You can store all of your<br />
button, knob, and slider settings Into 15 of these<br />
locations: 1-9 and A-F. This allows you to preconfigure<br />
the <strong>PCR</strong> for different applications or<br />
projects, and then save each setup for quick recall.<br />
<strong>TurboStart</strong><br />
Note: The first nine memory locations (0-8) come<br />
pre-loaded with setups for working with GM and XG<br />
products and with Cakewalk’s SONAR and Cubase<br />
5/SX. You can also download new setups from<br />
http://www.<strong>Roland</strong>US.com.<br />
To load a stored setup:<br />
1. Press MEMORY so it lights.<br />
2. Use the DEC and INC buttons or the keys<br />
labeled “0-9” and “A-F” to select the desired<br />
memory location.<br />
3. Press ENTER.<br />
Storing Your Own Settings<br />
Once you’ve set up the <strong>PCR</strong>-M series as desired for<br />
a particular use, you can save your settings to one of<br />
the 15 memory locations.<br />
Note: You can save settings in Memory Locations<br />
1-9 or A-F.<br />
1. Press EDIT so it lights.<br />
2. Press the key with “SAVE” printed above it—the<br />
display blinks “SAu”—and then press ENTER.<br />
3. Use the DEC and INC buttons or the keys<br />
labeled “1-9” and “A-F” to select the desired<br />
memory location.<br />
4. Press ENTER.<br />
Sending a Snapshot<br />
When you’re working with an external MIDI device<br />
such as a sequencer, you can transmit all of your<br />
<strong>PCR</strong> settings at once as a “snapshot.” You can store<br />
the snapshot at the start of a sequencer track from<br />
where it can be automatically loaded back into the<br />
<strong>PCR</strong> when you play the sequence.<br />
1. Simultaneously press MEMORY and MIDI CH so<br />
both buttons light.<br />
2. Press ENTER—the MEMORY and MIDI CH<br />
buttons blink several times, and all of the current<br />
settings of the <strong>PCR</strong> are transmitted.<br />
TBS 242 ©2006 <strong>Roland</strong> Corporation U.S. www.<strong>Roland</strong>US.com Page 1
e<br />
<strong>PCR</strong>-<br />
<strong>M30</strong>/<strong>M50</strong>/<strong>M80</strong><br />
USB/MIDI Keyboard<br />
Controller<br />
Panic Mode<br />
Use the Panic feature if MIDI notes become stuck or<br />
if other sound problems occur.<br />
1. Simultaneously press PROGRAM CHANGE and<br />
EDIT so both are lit.<br />
2. Press ENTER—the PROGRAM CHANGE and<br />
EDIT buttons blink several times and the<br />
following messages are transmitted on all MIDI<br />
channels: All Sound Off, and Reset All<br />
Controllers.<br />
Assigning Controllers<br />
There are 27 knobs, buttons and sliders on the<br />
<strong>PCR</strong>-<strong>M30</strong>/ <strong>M50</strong>/ <strong>M80</strong> that can be assigned to almost<br />
any MIDI Control Change (CC) message.<br />
Note: Some commonly used MIDI controllers are<br />
1 Modulation, 5 Portamento, 7 Volume, 10 Pan, and<br />
11 Expression.<br />
1. Press the EDIT button—the display shows<br />
“EDT.”<br />
2. Slightly move the knob or slider to which you<br />
want to assign a Control Change message. In<br />
the case of a button, press the button.<br />
3. Press the ENTER button—the display shows the<br />
name of the knob, slider, or button you’ve<br />
selected. If you’d like to set up another one,<br />
repeat Step 2.<br />
4. Press the CONTROL CHANGE key—the display<br />
shows “CC0,” and the ENTER button flashes.<br />
5. Press ENTER, and then select the desired MIDI<br />
channel using the DEC and INC buttons.<br />
6. Press the ENTER button, and then use the DEC<br />
INC buttons to select the desired CC number.<br />
7. Press the ENTER button.<br />
Note: If you’re assigning a CC message to a button,<br />
you’ll want to specify the button mode. Refer to Page<br />
59 in the Owners Manual for details.<br />
<strong>TurboStart</strong><br />
TBS 242 ©2006 <strong>Roland</strong> Corporation U.S. www.<strong>Roland</strong>US.com Page 2