Deploying Windows 7 - Bandwidthco Computer Security
Deploying Windows 7 - Bandwidthco Computer Security
Deploying Windows 7 - Bandwidthco Computer Security

Create successful ePaper yourself
Turn your PDF publications into a flip-book with our unique Google optimized e-Paper software.
<strong>Deploying</strong> <strong>Windows</strong> 7<br />
By Mitch Tulloch<br />
(<strong>Windows</strong>Networking.com)<br />
Part 1: <strong>Windows</strong> AIK 2.0 Enhancements<br />
<strong>Windows</strong> 7 deployment: examining the enhancements made in version 2.0 of the <strong>Windows</strong><br />
Automated Installation Kit.<br />
Introduction<br />
My previous series of articles titled; <strong>Deploying</strong> Vista, covered the basic concepts and tasks for<br />
automating the deployment of <strong>Windows</strong> Vista SP1 Enterprise using the following tools:<br />
<strong>Windows</strong> Automated Installation Kit (<strong>Windows</strong> AIK) version 1.1<br />
<strong>Windows</strong> Deployment Services (<strong>Windows</strong> DS) server role for <strong>Windows</strong> Server 2008<br />
Microsoft Deployment Toolkit (MDT) 2008 Update 1<br />
Now that <strong>Windows</strong> 7 has reached Release Candidate stage, many enterprises who passed on<br />
migrating their desktop computers to <strong>Windows</strong> Vista are taking a hard look at migrating them to<br />
<strong>Windows</strong> 7. This is a good idea for two important reasons:<br />
Mainstream support for <strong>Windows</strong> XP is now ended, so it's definitely time to think about upgrading<br />
your desktops to a newer version of <strong>Windows</strong> to ensure support.<br />
The general consensus is that <strong>Windows</strong> 7 is everything that <strong>Windows</strong> Vista should have been—a<br />
lean, reliable, high-performing operating system with exciting new features that makes end-users<br />
more productive and the job of IT administrators easier.<br />
But instead of rewriting all thirty-one (!) of my <strong>Deploying</strong> Vista articles in order to update them for<br />
<strong>Windows</strong> 7, the path I have decided to follow in this new series of articles is to focus on the deltas<br />
between deploying the two platforms. This approach should make this current series much shorter<br />
than the previous one, while still covering all the new features of <strong>Windows</strong> 7 deployment.<br />
So let us begin by looking at the newest version of the <strong>Windows</strong> AIK and how this has changed in<br />
<strong>Windows</strong> 7.<br />
Note #1: I will be referring you back to specific articles in my <strong>Deploying</strong> Vista series wherever this is<br />
helpful.<br />
Note #2: This article is based on the Release Candidate (RC) version of <strong>Windows</strong> 7 and will be<br />
updated later if necessary to reflect any changes made in RTM.<br />
<strong>Windows</strong> AIK 2.0 Enhancements<br />
In article 1 of my <strong>Deploying</strong> Vista series, we learned about version 1.1 of the <strong>Windows</strong> AIK, which<br />
included various tools, documentation, and other stuff that formed the foundation for automating Vista<br />
deployment. <strong>Windows</strong> 7 has a new version of the <strong>Windows</strong> AIK that includes new deployment tools<br />
but also deprecates some older tools.<br />
First, here are some of the tools that were in <strong>Windows</strong> AIK 1.1 and are still in <strong>Windows</strong> AIK 2.0 but<br />
may have changed somewhat:<br />
<strong>Windows</strong> System Image Manager (<strong>Windows</strong> SIM) is pretty much unchanged (see article 6 of my<br />
<strong>Deploying</strong> Vista series) although there are some new answer file settings, some existing answer<br />
file settings that have changed, and some deprecated answer file settings in <strong>Windows</strong> 7. We'll<br />
examine these changes to answer file settings changes in a future article of this series.<br />
Revised June 14, 2009 Page 1 of 231
<strong>Deploying</strong> <strong>Windows</strong> 7<br />
By Mitch Tulloch<br />
(<strong>Windows</strong>Networking.com)<br />
ImageX, the command-line tool for offline servicing of <strong>Windows</strong> image (WIM) files is still present<br />
but has been enhanced with several new command-line options. We learned about ImageX in<br />
article 12 of my earlier series and saw how to use this tool in article 13 of that series; we'll learn<br />
more about the changes to ImageX in a future article of this present series.<br />
Several other command-line tools that were included in the <strong>Windows</strong> AIK 1.1 are also still included<br />
in the <strong>Windows</strong> AIK 2.0. These tools include Bootsect, Drvload, Oscdimg, and so on.<br />
Now here are a few tools that are new to <strong>Windows</strong> AIK 2.0:<br />
Deployment Image Servicing and Management Tool (DISM) is a new command-line tool in<br />
<strong>Windows</strong> AIK 2.0 that combines the functionality three tools found in the <strong>Windows</strong> AIK 1.1:<br />
Package Manager (Pkgmgr.exe), the International Settings Configuration Tool (Intlcfg.exe) and<br />
the <strong>Windows</strong> Preinstallation Environment (PEimg.exe) tools. DISM.exe also includes basic image<br />
management capabilities and can be used to mount <strong>Windows</strong> images in order to add device<br />
drivers, packages, and perform other image servicing tasks. We will examine DISM.exe in more<br />
detail in the next article of this series.<br />
BCDboot is a new command-line tool that can be used to quickly set up a system partition of<br />
repair the computer's boot environment (which is located on the system partition). BCDboot is<br />
typically run from <strong>Windows</strong> PE and we will examine it in more detail in a future article of this series.<br />
User State Migration Tool (USMT) 4.0 is a new version of USMT for <strong>Windows</strong> 7 (the old version<br />
3.0.1 was used with Vista) can be used for migrating user profiles during large-scale deployments<br />
where you want to maintain existing user data and settings. USMT 4.0 is now included in the<br />
<strong>Windows</strong> AIK 2.0 (with <strong>Windows</strong> AIK 1.1, you had to separately download USMT 3.0.1) and has<br />
some cool new features such as hardlink migration that make migrating user profiles easier than<br />
ever. We'll examine USMT 3.0 in a future article of this series.<br />
Volume Activation Management Tool (VAMT) lets you automate and centrally manage the volume<br />
activation of <strong>Windows</strong> clients using a Multiple Activation Key (MAK). In <strong>Windows</strong> Vista, this tool<br />
was part of Microsoft Volume Activation 2.0 and had to be separately downloaded; in <strong>Windows</strong> 7<br />
however, the new version 1.2 of VAMT is now included as part of the <strong>Windows</strong> AIK 2.0.<br />
Finally, the following tools that were part of the <strong>Windows</strong> AIK 1.1 are now deprecated in the <strong>Windows</strong><br />
AIK 2.0:<br />
Package Manager (Pkgmgr.exe) is still included in <strong>Windows</strong> AIK 1.1 (and also in a default<br />
<strong>Windows</strong> 7 install) but is no longer needed because its functionality is now included in DISM.exe<br />
International Settings Configuration Tool (Intlcfg.exe) has been removed because its functionality<br />
is now included in DISM.exe<br />
<strong>Windows</strong> Preinstallation Environment (PEimg.exe) has been removed because its functionality is<br />
now included in DISM.exe<br />
PostReflect.exe and VSP1CLN.exe have also been removed.<br />
Revised June 14, 2009 Page 2 of 231
<strong>Deploying</strong> <strong>Windows</strong> 7<br />
By Mitch Tulloch<br />
(<strong>Windows</strong>Networking.com)<br />
Installing the <strong>Windows</strong> AIK 2.0<br />
Whilst writing the RC version of <strong>Windows</strong> AIK 2.0, it was only available on Microsoft Connect or as<br />
part of your MSDN or TechNet subscription. When <strong>Windows</strong> 7 is released to manufacturing, <strong>Windows</strong><br />
AIK 2.0 will be available from the Microsoft Download Center as an .iso image file you can mount or<br />
burn to DVD media.<br />
You can install the <strong>Windows</strong> AIK 2.0 onto a technician computer running any of the following<br />
operating systems:<br />
<strong>Windows</strong> XP SP3<br />
<strong>Windows</strong> Server 2003 R2 SP3<br />
<strong>Windows</strong> Vista<br />
<strong>Windows</strong> Server 2008<br />
<strong>Windows</strong> 7<br />
<strong>Windows</strong> Server 2008 R2<br />
If you install the <strong>Windows</strong> AIK 2.0 on a pre-Vista operating system, you must make sure that you<br />
download and install the .NET Framework 2.0 and MSXML 6.0 first on the system.<br />
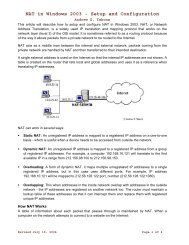
Figure 1 below shows the splash screen when you install the <strong>Windows</strong> AIK 2.0. Note that you can use<br />
this screen to download the following additional tools you may need for performing your deployment:<br />
Application Compatibility Toolkit (ACT) 5.5 which can be used to evaluate and mitigate application<br />
compatibility issues before migrating your desktops to <strong>Windows</strong> 7.<br />
Microsoft Assessment and Planning (MAP) is an inventory, assessment and reporting tool that<br />
does not use agent software and can be used to securely assess your environment prior to<br />
beginning your migration to <strong>Windows</strong> 7.<br />
Microsoft Deployment Toolkit (MDT) 2010 which helps to automate desktop deployment using<br />
scripts, a unified Deployment Workbench, and other resources. We looked at how to use the<br />
earlier MDT 2008 beginning with article 24 of my <strong>Deploying</strong> Vista series; MDT 2010 includes many<br />
new features and enhancements and we'll be examining them in future articles of this series.<br />
Figure 1: Splash screen when you insert the <strong>Windows</strong> AIK 2.0 DVD<br />
Revised June 14, 2009 Page 3 of 231
<strong>Deploying</strong> <strong>Windows</strong> 7<br />
By Mitch Tulloch<br />
(<strong>Windows</strong>Networking.com)<br />
Once you have installed the <strong>Windows</strong> AIK 2.0 on your technician computer, you can use it to deploy<br />
the following operating systems:<br />
<strong>Windows</strong> XP SP3<br />
<strong>Windows</strong> Server 2003 R2 SP2<br />
<strong>Windows</strong> Vista SP1 or later<br />
<strong>Windows</strong> Server 2008<br />
<strong>Windows</strong> 7<br />
<strong>Windows</strong> Server 2008 R2<br />
Additional Resources<br />
More information concerning the <strong>Windows</strong> AIK 2.0 can be found in the <strong>Windows</strong> Automated<br />
Installation Kit User's Guide (WAIK.chm) which can be accessed by clicking Start | All Programs |<br />
Microsoft <strong>Windows</strong> AIK on a technician computer on which you have installed the <strong>Windows</strong> AIK 2.0.<br />
By the time this article appears on <strong>Windows</strong>Networking.com you should also be able to view this<br />
User's Guide on Microsoft TechNet in the <strong>Windows</strong> 7 section of the <strong>Windows</strong> Client Tech Center.<br />
Part 2: Using DISM<br />
<strong>Windows</strong> 7 deployment; continuing by examining how to use the Deployment Image Servicing and<br />
Management(DISM)Tool.<br />
Note: This article is based on the Release Candidate (RC) version of <strong>Windows</strong> 7 and will be updated<br />
later if necessary to reflect any changes made in RTM.<br />
Understanding DISM<br />
DISM.exe is a new command-line tool that is included both in a default install of the <strong>Windows</strong> 7<br />
operating system and also as part of version 2.0 of the <strong>Windows</strong> Automated Installation Kit (<strong>Windows</strong><br />
AIK).<br />
Note: Support for VHD files as bootable <strong>Windows</strong> images is new in <strong>Windows</strong> 7 and is described in a<br />
later article of this series.<br />
You can use DISM.exe service <strong>Windows</strong> images, including both <strong>Windows</strong> image (WIM) files and<br />
virtual hard disk (VHD) files. While DISM.exe is primarily intended for servicing offline (not running)<br />
<strong>Windows</strong> images, some of its functionality can also be utilized to service online (running) <strong>Windows</strong><br />
operating systems. By servicing an image we mean doing things like adding or removing device<br />
drivers, adding or removing operating system packages, adding hotfixes, configuring international<br />
settings, and performing similar types of actions on the image. DISM can also be used to upgrade a<br />
<strong>Windows</strong> image to a different edition (for example, to upgrade from Business to Ultimate) and to<br />
prepare a <strong>Windows</strong> PE image for use.<br />
You can use DISM.exe to service images of the following <strong>Windows</strong> versions:<br />
<strong>Windows</strong> Vista SP1 or later<br />
<strong>Windows</strong> Server 2008<br />
<strong>Windows</strong> 7<br />
<strong>Windows</strong> Server 2008 R2<br />
Revised June 14, 2009 Page 4 of 231
<strong>Deploying</strong> <strong>Windows</strong> 7<br />
By Mitch Tulloch<br />
(<strong>Windows</strong>Networking.com)<br />
Using DISM<br />
In <strong>Windows</strong> Vista (or using the <strong>Windows</strong> AIK 1.1) servicing an image required using several different<br />
tools. For example, let us say you wanted to install an out-of-box device driver on an image you<br />
captured previously from a master installation. To do this in Vista, you had to:<br />
Mount the image using ImageX<br />
Add the device driver using Package Manager (Pkgmgr.exe)<br />
Unmount the image using ImageX<br />
In addition, if your image was a <strong>Windows</strong> PE image then you also need to use the <strong>Windows</strong><br />
Preinstallation Environment (PEimg.exe) tool to prepare the image. And finally, if you needed to<br />
modify the language and locate settings of the image, you had to use the International Settings<br />
Configuration Tool (Intlcfg.exe).<br />
Beginning with <strong>Windows</strong> 7 however, DISM.exe now replaces the Pkgmgr.exe, Intlcfg.exe and<br />
PEimg.exe tools found in the earlier 1.1 version of the <strong>Windows</strong> AIK. In addition, DISM also includes<br />
functionality for mounting and unmounting images so you can service them.<br />
A typical use for DISM might be to add a device driver to an offline <strong>Windows</strong> image prior to deploying<br />
the image onto hardware that requires that driver. Let's walk through such a scenario to learn how to<br />
use DISM from the command-line.<br />
First, in the C:\Images folder on our <strong>Windows</strong> AIK 2.0 technician computer is a <strong>Windows</strong> install image<br />
(install.wim file) for <strong>Windows</strong> 7:<br />
C:\Program Files\<strong>Windows</strong> AIK\Tools\PETools>dir C:\Images<br />
Volume in drive C has no label.<br />
Volume Serial Number is 1C9A-D699<br />
Directory of C:\Images<br />
05/03/2009 12:46 PM .<br />
05/03/2009 12:46 PM ..<br />
04/22/2009 07:28 AM 2,218,242,699 install.wim<br />
1 File(s) 2,218,242,699 bytes<br />
2 Dir(s) 180,411,486,208 bytes free<br />
Note:<br />
Remember from article 17 of my <strong>Deploying</strong> Vista series that there are two types of<br />
<strong>Windows</strong> images: boot and install images :)<br />
Next, in the C:\Drivers folder are the <strong>Windows</strong> 7 beta drivers (version 2.91) for<br />
Microsoft LifeCam hardware:<br />
C:\Program Files\<strong>Windows</strong> AIK\Tools\PETools>dir C:\Drivers<br />
Volume in drive C has no label.<br />
Volume Serial Number is 1C9A-D699<br />
Directory of C:\Drivers<br />
05/03/2009 01:19 PM .<br />
05/03/2009 01:19 PM ..<br />
05/03/2009 01:19 PM VX6000<br />
0 File(s) 0 bytes<br />
3 Dir(s) 180,411,486,208 bytes free<br />
We will be mounting our image to an empty folder named C:\Servicing. Let's begin by using the<br />
DISM.exe command with the /get-wiminfo parameter to display a list of all the <strong>Windows</strong> images<br />
Revised June 14, 2009 Page 5 of 231
<strong>Deploying</strong> <strong>Windows</strong> 7<br />
By Mitch Tulloch<br />
(<strong>Windows</strong>Networking.com)<br />
contained in the install.wim file. Remember that an install image can contain more than one <strong>Windows</strong><br />
image.<br />
C:\Program Files\<strong>Windows</strong> AIK\Tools\PETools>dism /get-wiminfo<br />
/wimfile:C:\Images\install.wim<br />
Deployment Image Servicing and Management tool<br />
Version: 6.1.7100.0<br />
Details for image : C:\Images\install.wim<br />
Index : 1<br />
Name : <strong>Windows</strong> 7 STARTER<br />
Description : <strong>Windows</strong> 7 STARTER<br />
Size : 7,927,317,234 bytes<br />
Index : 2<br />
Name : <strong>Windows</strong> 7 HOMEBASIC<br />
Description : <strong>Windows</strong> 7 HOMEBASIC<br />
Size : 7,983,232,406 bytes<br />
Index : 3<br />
Name : <strong>Windows</strong> 7 HOMEPREMIUM<br />
Description : <strong>Windows</strong> 7 HOMEPREMIUM<br />
Size : 8,422,988,972 bytes<br />
Index : 4<br />
Name : <strong>Windows</strong> 7 PROFESSIONAL<br />
Description : <strong>Windows</strong> 7 PROFESSIONAL<br />
Size : 8,303,245,818 bytes<br />
Index : 5<br />
Name : <strong>Windows</strong> 7 ULTIMATE<br />
Description : <strong>Windows</strong> 7 ULTIMATE<br />
Size : 8,461,373,562 bytes<br />
The operation completed successfully.<br />
Let us say that we are going to deploy <strong>Windows</strong> 7 Professional, in which case we can see from the<br />
above command output that the index number is 4 for this particular image. So, let us mount this<br />
particular <strong>Windows</strong> image to the empty C:\Servicing folder using the /mount-wim parameter of the<br />
DISM.exe command:<br />
C:\Program Files\<strong>Windows</strong> AIK\Tools\PETools>dism /mount-wim<br />
/wimfile:C:\Images\install.wim /index:4 /mountdir:C:\Servicing<br />
Deployment Image Servicing and Management tool<br />
Version: 6.1.7100.0<br />
Mounting image<br />
[==========================100.0%==========================]<br />
The operation completed successfully.<br />
To verify whether the image has been mounted successfully we can use the /get-mountedinfo<br />
parameter like this:<br />
C:\Program Files\<strong>Windows</strong> AIK\Tools\PETools>dism /get-mountedwiminfo<br />
Deployment Image Servicing and Management tool<br />
Version: 6.1.7100.0<br />
Mounted images:<br />
Mount Dir : C:\Servicing<br />
Image File : C:\Images\install.wim<br />
Image Index : 4<br />
Mounted Read/Write : Yes<br />
Revised June 14, 2009 Page 6 of 231
Status : Ok<br />
The operation completed successfully.<br />
<strong>Deploying</strong> <strong>Windows</strong> 7<br />
By Mitch Tulloch<br />
(<strong>Windows</strong>Networking.com)<br />
If we examine the contents of the C:\Servicing directory, we can see the files and directories of our<br />
mounted image:<br />
C:\Program Files\<strong>Windows</strong> AIK\Tools\PETools>dir C:\Servicing<br />
Volume in drive C has no label.<br />
Volume Serial Number is 1C9A-D699<br />
Directory of C:\Servicing<br />
04/22/2009 03:36 AM .<br />
04/22/2009 03:36 AM ..<br />
03/20/2009 10:42 AM 24 autoexec.bat<br />
03/20/2009 10:42 AM 10 config.sys<br />
04/22/2009 01:17 AM PerfLogs<br />
04/22/2009 05:26 AM Program Files<br />
04/22/2009 03:27 AM Users<br />
04/22/2009 05:29 AM <strong>Windows</strong><br />
2 File(s) 34 bytes<br />
6 Dir(s) 180,321,382,400 bytes free<br />
Now let's view what kinds of servicing actions we can perform on our mounted image:<br />
C:\Program Files\<strong>Windows</strong> AIK\Tools\PETools>dism /image:C:\Servicing /?<br />
Deployment Image Servicing and Management tool<br />
Version: 6.1.7100.0<br />
Image Version: 6.1.7100.0<br />
The following commands may be used to service the image:<br />
WINDOWS EDITION SERVICING COMMANDS:<br />
/Set-ProductKey - Populates the product key into the offline image.<br />
/Get-TargetEditions - Displays a list of <strong>Windows</strong> editions that an image can<br />
be upgraded to.<br />
/Get-CurrentEdition - Displays the editions of the specified image.<br />
/Set-Edition - Upgrades the <strong>Windows</strong> image to a higher edition.<br />
UNATTEND SERVICING COMMANDS:<br />
/Apply-Unattend - Applies an unattend file to an image.<br />
DRIVER SERVICING COMMANDS:<br />
/Remove-Driver - Removes driver packages from an offline image.<br />
/Add-Driver - Adds driver packages to an offline image.<br />
/Get-DriverInfo - Displays information about a specific driver in an<br />
offline image or a running operating system.<br />
/Get-Drivers - Displays information about all drivers in an offline<br />
image or a running operating system.<br />
INTERNATIONAL SERVICING COMMANDS:<br />
/Set-LayeredDriver - Sets keyboard layered driver.<br />
/Set-UILang - Sets the default system UI language that is used in<br />
the mounted offline image.<br />
/Set-UILangFallback - Sets the fallback default language for the system UI<br />
in the mounted offline image.<br />
/Set-UserLocale - Sets the user locale in the mounted offline image.<br />
Revised June 14, 2009 Page 7 of 231
<strong>Deploying</strong> <strong>Windows</strong> 7<br />
By Mitch Tulloch<br />
(<strong>Windows</strong>Networking.com)<br />
/Set-SysLocale - Sets the language for non-Unicode programs (also<br />
called system locale) and font settings in the mounted offline image.<br />
/Set-InputLocale - Sets the input locales and keyboard layouts to use in<br />
the mounted offline image.<br />
/Set-TimeZone - Sets the default time zone in the mounted offline image.<br />
/Set-AllIntl - Sets all international settings in the mounted offline image.<br />
/Set-SKUIntlDefaults - Sets all international settings to the default values<br />
for the specified SKU language in the mounted offline image.<br />
/Gen-LangIni - Generates a new lang.ini file.<br />
/Set-SetupUILang - Defines the default language that will be used by<br />
setup.<br />
/Get-Intl - Displays information about the international settings and languages.<br />
APPLICATION SERVICING COMMANDS:<br />
/Check-AppPatch - Displays information if the MSP patches are<br />
applicable to the mounted image.<br />
/Get-AppPatchInfo - Displays information about installed MSP patches.<br />
/Get-AppPatches - Displays information about all applied MSP patches for all<br />
installed applications.<br />
/Get-AppInfo - Displays information about a specific installed MSI application.<br />
/Get-Apps - Displays information about all installed MSI applications.<br />
PACKAGE SERVICING COMMANDS:<br />
/Add-Package - Adds packages to the image.<br />
/Remove-Package - Removes packages from the image.<br />
/Enable-Feature - Enables a specific feature in the image.<br />
/Disable-Feature - Disables a specific feature in the image.<br />
/Get-Packages - Displays information about all packages in the image.<br />
/Get-PackageInfo - Displays information about a specific package.<br />
/Get-Features - Displays information about all features in a package.<br />
/Get-FeatureInfo - Displays information about a specific feature.<br />
/Cleanup-Image - Performs cleanup and recovery operations on the image.<br />
For more information about these servicing commands and their arguments, specify a<br />
command immediately before /?.<br />
Examples:<br />
DISM.exe /Image:C:\test\offline /Apply-Unattend /?<br />
DISM.exe /Image:C:\test\offline /Get-Features /?<br />
DISM.exe /Online /Get-Drivers /?<br />
The parameters we want to use are found under DRIVER SERVICING COMMANDS above. Let's use<br />
the /get-drivers parameter to display a list of drivers already installed in the mounted image:<br />
C:\Program Files\<strong>Windows</strong> AIK\Tools\PETools>dism /image:C:\Servicing /get-drivers<br />
Deployment Image Servicing and Management tool<br />
Version: 6.1.7100.0<br />
Image Version: 6.1.7100.0<br />
Obtaining list of 3rd party drivers from the driver store...<br />
Driver packages listing:<br />
Published Name : oem0.inf<br />
Original File Name : prnms001.inf<br />
Inbox : No<br />
Class Name : Printer<br />
Provider Name : Microsoft<br />
Revised June 14, 2009 Page 8 of 231
Date : 6/21/2006<br />
Version : 6.1.7100.0<br />
The operation completed successfully.<br />
<strong>Deploying</strong> <strong>Windows</strong> 7<br />
By Mitch Tulloch<br />
(<strong>Windows</strong>Networking.com)<br />
Let us now use the /add-driver parameter to add our LifeCam driver to the mounted image:<br />
C:\Program Files\<strong>Windows</strong> AIK\Tools\PETools>dism /image:C:\Servicing /add-driver<br />
/driver:C:\Drivers\VX6000\vx6000.inf<br />
Deployment Image Servicing and Management tool<br />
Version: 6.1.7100.0<br />
Image Version: 6.1.7100.0<br />
Found 1 driver package(s) to install.<br />
Installing 1 of 1 - C:\Drivers\VX6000\vx6000.inf: The driver package was<br />
successfully installed.<br />
The operation completed successfully.<br />
Let's use /get-drivers again to verify that the LifeCam driver has been successfully added to the<br />
mounted image:<br />
C:\Program Files\<strong>Windows</strong> AIK\Tools\PETools>dism /image:C:\Servicing /get-drivers<br />
Deployment Image Servicing and Management tool<br />
Version: 6.1.7100.0<br />
Image Version: 6.1.7100.0<br />
Obtaining list of 3rd party drivers from the driver store...<br />
Driver packages listing:<br />
Published Name : oem0.inf<br />
Original File Name : prnms001.inf<br />
Inbox : No<br />
Class Name : Printer<br />
Provider Name : Microsoft<br />
Date : 6/21/2006<br />
Version : 6.1.7100.0<br />
Published Name : oem1.inf<br />
Original File Name : vx6000.inf<br />
Inbox : No<br />
Class Name : Image<br />
Provider Name : Microsoft<br />
Date : 7/18/2008<br />
Version : 5.5.3.74<br />
The operation completed successfully.<br />
We now finish servicing the image by unmounting it:<br />
C:\Program Files\<strong>Windows</strong> AIK\Tools\PETools>dism /unmount-wim<br />
/mountdir:C:\Servicing /commit<br />
Deployment Image Servicing and Management tool<br />
Version: 6.1.7100.0<br />
Image File : C:\Images\install.wim<br />
Image Index : 4<br />
Saving image<br />
[==========================100.0%==========================]<br />
Unmounting image<br />
[==========================100.0%==========================]<br />
The operation completed successfully.<br />
Revised June 14, 2009 Page 9 of 231
<strong>Deploying</strong> <strong>Windows</strong> 7<br />
By Mitch Tulloch<br />
(<strong>Windows</strong>Networking.com)<br />
Additional Resources<br />
For more information on using DISM.exe, type dism /? in the Deployment Tools Command Prompt on<br />
your technician computer. You can also find detailed information concerning DISM.exe in the<br />
Deployment Tools Technical Reference section of the <strong>Windows</strong> Automated Installation Kit User's<br />
Guide (WAIK.chm) which can be accessed by clicking Start | All Programs | Microsoft <strong>Windows</strong> AIK<br />
on your technician computer.<br />
Finally, check out the free e-learning Clinic 10077: What's New in <strong>Windows</strong> 7 for IT Pros on the<br />
<strong>Windows</strong> 7 Learning Portal section of the Microsoft Learning web site. I was the one who developed<br />
the content for these three clinics, and the IT Pro clinic has a short video demonstration of using DISM<br />
to service an image by adding drivers to the image.<br />
Part 3: Understanding MAP 4.0<br />
The Microsoft Assessment and Planning Toolkit (MAP), allows organizations to assess their current IT<br />
infrastructure (hardware and software) in order to determine what Microsoft technologies can help<br />
them meet their business needs. MAP evolved from the earlier <strong>Windows</strong> Vista Hardware Assessment<br />
Solution Accelerator, which was designed to help organizations assess the readiness of their desktop<br />
computing infrastructure for the deployment of <strong>Windows</strong> Vista and Microsoft Office 2007. MAP is a<br />
Solution Accelerator, a set of automation tools and a form of guidance that helps accelerate the<br />
adoption of Microsoft technologies by helping organizations during the planning phase of desktop or<br />
server migration or consolidation. A complete list of available Solution Accelerators can be found here.<br />
The current version of MAP (version 3.2) allows organizations to:<br />
Perform secure agent-less network-wide hardware and software inventory of <strong>Windows</strong> computers<br />
and their devices by using WMI, SNMP, and other mechanisms.<br />
Perform comprehensive data analysis of hardware and device compatibility in order to determine<br />
readiness of migration systems for <strong>Windows</strong> Vista, <strong>Windows</strong> Server 2008, Microsoft Office 2007<br />
and Microsoft Application Virtualization and to assist in planning for consolidation of physical<br />
computers onto Hyper-V or Virtual Server 2005 R2.<br />
Generate in-depth readiness reports containing both summary and detailed assessment results for<br />
different migration scenarios that include recommendations for migration or server consolidation.<br />
The next version of MAP (version 4.0) will be released later this year and includes these new features:<br />
An improved, simpler user interface that makes it easier than ever to inventory your infrastructure,<br />
assess readiness for different scenarios, and generate reports and recommendations.<br />
Support for readiness assessment for <strong>Windows</strong> 7 and <strong>Windows</strong> Server 2008 R2.<br />
Expanded support for readiness assessment for different server consolidation scenarios.<br />
Improved experience to calculate Return on Investment (ROI) for server virtualization project by<br />
using MAP and the Integrated Virtualization ROI Tool.<br />
Revised June 14, 2009 Page 10 of 231
<strong>Deploying</strong> <strong>Windows</strong> 7<br />
By Mitch Tulloch<br />
(<strong>Windows</strong>Networking.com)<br />
Support for OEM and Partner customization of the MAP user interface and migration proposal<br />
documents.<br />
The focus of this present series is on deploying <strong>Windows</strong> 7 and MAP 4.0 is a terrific tool to help you<br />
plan your desktop migration. Even so, MAP 4.0 can do far more than just assess whether your<br />
desktop computers can run <strong>Windows</strong> 7. Using MAP 4.0, you can:<br />
Perform a comprehensive inventory of PC hardware and software including SQL Server instances.<br />
Assess whether your servers are ready for migration to <strong>Windows</strong> Server 2008 R2.<br />
Discover server roles on your network.<br />
Find physical computers that are potential candidates for virtualization using Hyper-V.<br />
Discover VMware virtual machines for potential migration to Hyper-V.<br />
Assess possible candidates for App-V virtualization.<br />
Perform readiness assessments for Microsoft Forefront and implementing Network Access<br />
Protection (NAP).<br />
Estimate potential power savings when different power management settings are implemented on<br />
clients and servers.<br />
MAP 4.0 and <strong>Windows</strong> 7 Deployment<br />
MAP 4.0 is one of three key tools from Microsoft that organizations typically will need to use when<br />
preparing to migrate their desktops to <strong>Windows</strong> 7:<br />
1. MAP 4.0 – Use this tool first to assess the readiness of your environment to migrate your desktop<br />
computers to <strong>Windows</strong> 7.<br />
2. ACT 5.5 – Use the Application Compatibility Toolkit 5.5 next to test your existing applications for<br />
possible compatibility issues when running them on <strong>Windows</strong> 7 and for mitigating such issues by<br />
creating application shims for problem apps.<br />
3. MDT 2010 – Use the Microsoft Deployment Toolkit 2010 to deploy <strong>Windows</strong> 7 once you have<br />
assessed that your desktop computers are ready for <strong>Windows</strong> 7 and that your legacy line-ofbusiness<br />
(LoB) applications can be shimmed to run properly under <strong>Windows</strong> 7.<br />
A product manager on the MAP team told me that internally they like to refer to these tools as "The<br />
Three Musketeers". Personally, I like to refer to them as MAPACTMDT :)<br />
Installing MAP 4.0<br />
To obtain the beta version of MAP 4.0, you must join the MAP 4.0 beta program. Once you have<br />
downloaded MAP 4.0 you can install it on:<br />
<strong>Windows</strong> XP SP2 or later<br />
<strong>Windows</strong> Vista Ultimate, Enterprise or Business<br />
<strong>Windows</strong> 7 Professional, Enterprise or Business<br />
Revised June 14, 2009 Page 11 of 231
<strong>Windows</strong> Server 2003 SP1 or later<br />
<strong>Windows</strong> Server 2003 R2<br />
<strong>Windows</strong> Server 2008<br />
<strong>Windows</strong> Server 2008 R2<br />
<strong>Deploying</strong> <strong>Windows</strong> 7<br />
By Mitch Tulloch<br />
(<strong>Windows</strong>Networking.com)<br />
There are versions of MAP for the x86 and x64 architectures. Before installing MAP 4.0 you must ensure<br />
that you have the following additional software installed:<br />
.NET Framework 3.5 SP1<br />
<strong>Windows</strong> Installer 4.5<br />
Microsoft Office Word 2007 or Microsoft Word 2003 SP2<br />
Microsoft Office Excel 2007 or Microsoft Excel 2003 SP2<br />
During installation of MAP 4.0, the setup will download and install SQL Server 2008 Express Edition<br />
on your computer. Once installation of MAP 4.0 is completed, you will be prompted to create an<br />
instance of a SQL Server 2008 Express database for storing the inventory information MAP acquires<br />
during the assessment process (see Figure 1):<br />
Figure 1: Creating a SQL Server 2008 Express database instance for use by MAP<br />
Examining MAP 4.0<br />
Once MAP 4.0 has been installed on a computer, you can launch the program from the Start menu.<br />
The MAP console displays a navigation pane on the left that has three buttons at the bottom:<br />
Inventory and Assessment, Surveys, and Reference Material. Selecting the Inventory and<br />
Assessment button displays a tree view of options you can choose from:<br />
Discovery and Readiness<br />
Server Consolidation<br />
Selecting the Discovery and Readiness option as shown in Figure 2 below lets you perform inventory<br />
and assess readiness for:<br />
Migrating client computers to <strong>Windows</strong> 7, <strong>Windows</strong> Vista or Office 2007.<br />
Revised June 14, 2009 Page 12 of 231
<strong>Deploying</strong> <strong>Windows</strong> 7<br />
By Mitch Tulloch<br />
(<strong>Windows</strong>Networking.com)<br />
Discovering server roles and SQL Server instances, and migrating servers to <strong>Windows</strong> Server<br />
2008 or <strong>Windows</strong> Server 2008 R2.<br />
Discovering virtual machines present on your network.<br />
Figure 2: The Discovery and Readiness option under Inventory and Assessment<br />
Selecting the Server Consolidation option as shown in Figure 3 below lets you perform the following<br />
server consolidation tasks:<br />
Inventory your server environment for physical servers that can be consolidated as virtual<br />
machines on Hyper-V.<br />
Gather performance metrics for server consolidation.<br />
Configure host machine equivalents and make recommendations concerning placement of guest<br />
machines.<br />
Calculate the potential return on investment (ROI) your organization can achieve through<br />
implementing a Microsoft integrated virtualization solution.<br />
Revised June 14, 2009 Page 13 of 231
<strong>Deploying</strong> <strong>Windows</strong> 7<br />
By Mitch Tulloch<br />
(<strong>Windows</strong>Networking.com)<br />
Figure 3: The Server Consolidation option under Inventory and Assessment<br />
Selecting the Survey button in the bottom portion of the navigation pane allows you to:<br />
Use an online survey to evaluate the migration of your existing messaging infrastructure to the<br />
Microsoft Exchange Hosted Services available from Microsoft Online Services (click here for more<br />
information).<br />
Download the Infrastructure Planning and Design (IPD) assessment guide and scenario selection<br />
tool for <strong>Windows</strong> Optimized Desktop Scenarios, which you can use to evaluate the implementation<br />
of different Microsoft desktop virtualization technologies that could provide extra benefits to your<br />
desktop users, including rich and thin client solutions such as <strong>Windows</strong> Vista, App-V, VDI and<br />
more.<br />
Revised June 14, 2009 Page 14 of 231
<strong>Deploying</strong> <strong>Windows</strong> 7<br />
By Mitch Tulloch<br />
(<strong>Windows</strong>Networking.com)<br />
Figure 4: The Surveys option provides links to an online survey and a Solution Accelerator<br />
you can download<br />
The final button (Reference Material) found at the bottom of the navigation pane takes you to a page<br />
that has links to other useful planning and assessment tools available from Microsoft. It will also direct<br />
you to various documentation pages on Microsoft TechNet that can help you during the planning<br />
phases (Figure 5):<br />
Figure 5: Links to additional reference material are available from within the MAP<br />
Revised June 14, 2009 Page 15 of 231
<strong>Deploying</strong> <strong>Windows</strong> 7<br />
By Mitch Tulloch<br />
(<strong>Windows</strong>Networking.com)<br />
Conclusion<br />
In this article we have looked at what MAP 4.0 is and what it can be used for. We also examined the<br />
installation requirements and provided a brief overview of the MAP 4.0 console. In the next article of<br />
this series, I will help you set up a <strong>Windows</strong> 7 Readiness assessment. For more information about<br />
MAP and to obtain the latest version of the toolkit, click here.<br />
Part 4: Using MAP 4.0<br />
Preparing to Run the <strong>Windows</strong> 7 Readiness Assessment<br />
Before you use MAP to assess the readiness of your desktop computers for a migration to <strong>Windows</strong> 7,<br />
you need to make sure they can be assessed. The great thing about MAP is that it is agent less,<br />
which means that you do not need to deploy a software agent to each desktop machine that you want<br />
to assess. Instead of using agents, MAP uses <strong>Windows</strong> Management Instrumentation (WMI) to collect<br />
hardware devices and software information from the computers on your network. In order for WMI to<br />
be able to do this, your desktop computers must be configured to allow remote WMI queries. This<br />
means that you have to enable the Remote Administration and the File & Printer Sharing exceptions<br />
in <strong>Windows</strong> Firewall on all your desktop computers. You can use Group Policy to enable <strong>Windows</strong><br />
Firewall exceptions in an Active Directory-based network (in a workgroup you have to do this<br />
manually on each computer). Also, in a domain environment, you need to run MAP on a computer on<br />
which you have logged on as a member of the Domain Admins security group (in a workgroup<br />
environment you need to provide MAP with local Administrator credentials for each computer).<br />
Additional configuration steps may need to be performed in order to prepare your desktop computers<br />
for assessment by MAP. For more information, see the Getting Started Guide for MAP 4.0, which is<br />
available from Start | All Programs | Microsoft Assessment and Planning Toolkit. Be sure also to<br />
review the MAP FAQ before using MAP.<br />
Performing a <strong>Windows</strong> 7 Readiness Assessment<br />
To perform your <strong>Windows</strong> 7 Readiness assessment, open the MAP console, select the Inventory and<br />
Assessment button at the bottom portion of the navigation pane, expand Discover and Readiness in<br />
the top portion of the navigation pane, and select <strong>Windows</strong> 7 Readiness (Figure 1):<br />
Figure 1: Running a <strong>Windows</strong> 7 Readiness assessment using MAP 4.0<br />
Revised June 14, 2009 Page 16 of 231
<strong>Deploying</strong> <strong>Windows</strong> 7<br />
By Mitch Tulloch<br />
(<strong>Windows</strong>Networking.com)<br />
Click the Inventory and Assessment Wizard link in the right pane to launch the Inventory and<br />
Assessment Wizard. On the first page of this wizard you can specify which method(s) you would like<br />
to use in order to locate the computers on your network (Figure 2). The supported methods in MAP<br />
4.0 include:<br />
Querying Active Directory for computer accounts in domains or OUs you specify<br />
Using Win32 LAN Manager APIs to query the <strong>Computer</strong> Browser service to find computers<br />
belonging to workgroups<br />
Importing a list of computer names (NetBIOS or FQDNs) from a text file<br />
Scanning a specified IP address range for computers<br />
Manually specifying computer names (NetBIOS or FQDNs) if you only have a few computers to<br />
assess<br />
Discover <strong>Windows</strong> virtual machines running on VMware servers<br />
By default, Active Directory and <strong>Windows</strong> network protocols are used, but to keep things simple in this<br />
example, we will clear the second option and only query Active Directory.<br />
Note: Selecting different options on this page may result in additional wizard pages being displayed<br />
later on.<br />
Figure 2: Choosing which methods to use to discover computers on your network<br />
Revised June 14, 2009 Page 17 of 231
<strong>Deploying</strong> <strong>Windows</strong> 7<br />
By Mitch Tulloch<br />
(<strong>Windows</strong>Networking.com)<br />
On the next page of the wizard we specify the Domain Admin credentials MAP can use to query<br />
Active Directory (Figure 3):<br />
Figure 3: Specify Domain Admin credentials for MAP to query Active Directory<br />
On the next wizard page, we will specify that MAP should only query for computer accounts in the<br />
Seattle <strong>Computer</strong>s OU since those will be the computers we will pilot <strong>Windows</strong> 7 on (Figure 4):<br />
Figure 4: Specify the domain and organizational units where the computers reside<br />
Revised June 14, 2009 Page 18 of 231
<strong>Deploying</strong> <strong>Windows</strong> 7<br />
By Mitch Tulloch<br />
(<strong>Windows</strong>Networking.com)<br />
The next wizard page asks us for credentials MAP can use to remotely connect to each computer<br />
using WMI (Figure 5):<br />
Figure 5: MAP needs credentials to remotely connect to computers using WMI<br />
Clicking New Account opens the Inventory Account dialog box (Figure 6). Specify a Domain Admin<br />
account for the inventory account:<br />
Figure 6: Specify a Domain Admin account for WMI connections to remote computers<br />
Revised June 14, 2009 Page 19 of 231
<strong>Deploying</strong> <strong>Windows</strong> 7<br />
By Mitch Tulloch<br />
(<strong>Windows</strong>Networking.com)<br />
Clicking Save adds the specified account to the WMI Credentials page of the wizard (Figure 7):<br />
Figure 7: Credentials for remote WMI connections have been specified<br />
The final page of the wizard summarizes the choices you have made (Figure 8):<br />
Figure 8: Summary page of wizard<br />
Revised June 14, 2009 Page 20 of 231
<strong>Deploying</strong> <strong>Windows</strong> 7<br />
By Mitch Tulloch<br />
(<strong>Windows</strong>Networking.com)<br />
Clicking Finish starts the inventory process and displays a Status dialog box (Figure 9):<br />
Figure 9: Status of the inventory process is displayed<br />
Once the assessment is finished, click Close. After a few moments MAP will display the results of the<br />
assessment. Figure 10 shows that two client computers were found in the specified OU and that both<br />
of them were ready for <strong>Windows</strong> 7:<br />
Figure 10: Summary results of the <strong>Windows</strong> 7 Readiness assessment<br />
Revised June 14, 2009 Page 21 of 231
<strong>Deploying</strong> <strong>Windows</strong> 7<br />
By Mitch Tulloch<br />
(<strong>Windows</strong>Networking.com)<br />
Scrolling down the middle pane of MAP shows additional details of the assessment. For instance, we<br />
can see in Figure 11 that there are a few device incompatibility issues that we will need to resolve with<br />
device manufacturers before we migrate the computers to <strong>Windows</strong> 7.<br />
Figure 11: Note that 6% of the devices on the assessed computers may be incompatible with <strong>Windows</strong> 7<br />
Changing the Hardware Requirements<br />
Let us examine what hardware requirements were used during the above assessment as a basis for<br />
determining whether our computers are ready for <strong>Windows</strong> 7. In the Actions pane at the right side of<br />
the above figure, click Set Assessment Properties to open the Assessment Properties dialog box<br />
(Figure 12):<br />
Figure 12: Default hardware values used by MAP for assessing <strong>Windows</strong> 7 readiness<br />
Revised June 14, 2009 Page 22 of 231
<strong>Deploying</strong> <strong>Windows</strong> 7<br />
By Mitch Tulloch<br />
(<strong>Windows</strong>Networking.com)<br />
By default, MAP uses the following minimum hardware requirements for <strong>Windows</strong> 7 readiness (these<br />
values are preliminary and are subject to change at RTM):<br />
CPU minimum speed 1.0 GHz<br />
Minimum free disk space 20 GB for x64 systems and 16 GB for x86 systems<br />
Minimum RAM of 2 GB for x64 systems and 1 GB for x86 systems<br />
What if these hardware requirements are not sufficient for the needs of our business? For example,<br />
since we plan on using our two computers in Seattle for some fairly intensive work, such as video<br />
processing, let us increase these minimum requirements and see if our computers will still be ready<br />
for <strong>Windows</strong> 7. To do this, select Use Custom Settings and specify the new requirements shown in<br />
Figure 13:<br />
Figure 13: Specifying more stringent hardware requirements for <strong>Windows</strong> 7<br />
Now click Run Assessment to re-run the <strong>Windows</strong> 7 Readiness assessment using these more<br />
stringent hardware requirements (Figure 14):<br />
Figure 14: Re-running the assessment<br />
Revised June 14, 2009 Page 23 of 231
<strong>Deploying</strong> <strong>Windows</strong> 7<br />
By Mitch Tulloch<br />
(<strong>Windows</strong>Networking.com)<br />
Generating Proposals and Reports<br />
We have now run two assessments that basically answer the following two questions:<br />
How many computers at Seattle are ready for <strong>Windows</strong> 7?<br />
Will these computers still be ready for <strong>Windows</strong> 7 given our more stringent hardware<br />
requirements?<br />
Let us generate reports we can share and review with our IT team and later with management. To<br />
generate reports, click Generate Report/Proposal in the Action pane at the right of Figure 11 shown<br />
previously. When you do this, MAP generates a proposal (Word doc) and an Excel workbook<br />
containing various reports (Figure 15):<br />
Figure 15: Reports and proposals are being generated<br />
Let us look at the Excel workbook first as it contains the detailed information our IT staff will need to<br />
review. To find our proposals and reports, select View | Saved Reports and Proposals to open the<br />
folder where the proposals and reports are found (Figure 16):<br />
Figure 16: Proposals and Reports generated by MAP<br />
Revised June 14, 2009 Page 24 of 231
<strong>Deploying</strong> <strong>Windows</strong> 7<br />
By Mitch Tulloch<br />
(<strong>Windows</strong>Networking.com)<br />
We will open the Excel workbook and look at each worksheet. The first worksheet provides a<br />
summary of <strong>Windows</strong> 7 readiness information for computers that are already running a Microsoft<br />
<strong>Windows</strong> client (Figure 17):<br />
Figure 17: <strong>Windows</strong> 7 Assessment Summary for Client <strong>Computer</strong>s worksheet<br />
The next worksheet shows the system requirements provided by Microsoft in addition to any<br />
recommended settings that were used in the assessment (Figure 18):<br />
Figure 18: System Requirements Used in the Assessment worksheet<br />
Revised June 14, 2009 Page 25 of 231
<strong>Deploying</strong> <strong>Windows</strong> 7<br />
By Mitch Tulloch<br />
(<strong>Windows</strong>Networking.com)<br />
The next worksheet provides a summary of <strong>Windows</strong> 7 readiness information for computers that are<br />
already running a Microsoft <strong>Windows</strong> client operating system. For rows that report "Insufficient Data"<br />
refer to the WMI Status column for more information about why inventory data could not be collected<br />
(Figure 19):<br />
Figure 19: <strong>Windows</strong> 7 Assessment Results for Client <strong>Computer</strong>s worksheet<br />
The next worksheet is a summary of the hardware devices found on the computers. It identifies<br />
whether a driver is available on the <strong>Windows</strong> 7 DVD, from <strong>Windows</strong> Update, or if you need to contact<br />
the hardware manufacturer to identify if a driver is available for <strong>Windows</strong> 7. This summary worksheet<br />
has a row for each discovered device and provides the number of computers where the device was<br />
found. To identify the specific devices on each computer, refer to the Device Inventory Details<br />
Worksheet (Figure 20):<br />
Figure 20: Device Assessment Summary worksheet<br />
Revised June 14, 2009 Page 26 of 231
<strong>Deploying</strong> <strong>Windows</strong> 7<br />
By Mitch Tulloch<br />
(<strong>Windows</strong>Networking.com)<br />
The next worksheet describes the hardware devices discovered on each specific computer. It<br />
identifies whether a driver is available on the <strong>Windows</strong> 7 DVD, from <strong>Windows</strong> Update, or if you need<br />
to contact the hardware manufacturer to identify if a driver is available for <strong>Windows</strong> 7 (Figure 21):<br />
Figure 21: Device Assessment Details worksheet<br />
The next worksheet describes computers that are not currently able to run <strong>Windows</strong> 7 and the<br />
hardware upgrades required for them to meet the minimum system requirements for <strong>Windows</strong> 7<br />
(Figure 22):<br />
Figure 22: <strong>Windows</strong> 7 Minimum Ready <strong>Computer</strong>s After Hardware Upgrades worksheet<br />
Revised June 14, 2009 Page 27 of 231
<strong>Deploying</strong> <strong>Windows</strong> 7<br />
By Mitch Tulloch<br />
(<strong>Windows</strong>Networking.com)<br />
The next worksheet describes computers that are not currently able to run <strong>Windows</strong> 7 or meet the<br />
minimum system requirements. It provides the hardware upgrades required for the computers to be<br />
ready for <strong>Windows</strong> 7 using the recommended hardware requirements selected for this assessment<br />
(Figure 23):<br />
Figure 23: <strong>Windows</strong> 7 Recommended Ready <strong>Computer</strong>s After Hardware Upgrades worksheet<br />
The eighth and final worksheet describes up to 60,000 applications discovered through the inventory<br />
process on client machines and provides a count of the number of times a particular version of the<br />
software was found. The data in this sheet is based solely upon computers where a successful<br />
inventory was performed (Figure 24):<br />
Figure 24: Discovered Applications worksheet<br />
Revised June 14, 2009 Page 28 of 231
<strong>Deploying</strong> <strong>Windows</strong> 7<br />
By Mitch Tulloch<br />
(<strong>Windows</strong>Networking.com)<br />
Finally, let us examine the Word doc generated by MAP, which summarizes the results of our<br />
<strong>Windows</strong> 7 Readiness assessment (Figure 25):<br />
Figure 25: MAP generates a proposal you can present to management<br />
As you can see from the outline on the left, this document contains both the results of your<br />
assessment and also some additional information concerning the benefits of deploying <strong>Windows</strong> 7<br />
Enterprise edition in your organization. You can use this document as the basis for the proposal you<br />
will present to management. Lastly, MAP 4.0 will give you the ability to insert your own text and logos<br />
within the Word template, allowing users such as consultants to customize the outputs with their own<br />
“branding” in future scans.<br />
Conclusion<br />
MAP 4.0 is a powerful tool for assessing whether your desktop infrastructure is ready to migrate to<br />
<strong>Windows</strong> 7. There are other capabilities in MAP 4.0 that can help you plan a server migration and<br />
consolidation. We will examine these capabilities in a future article on this site. For more information<br />
about MAP and to download the latest released version, click here. You can also join the MAP 4.0<br />
beta program on Microsoft Connect here.<br />
Part 5: MDT 2010 Enhancements<br />
Introduction<br />
My previous series of articles titled <strong>Deploying</strong> Vista described how to deploy <strong>Windows</strong> Vista SP1<br />
Enterprise edition using Microsoft Deployment Toolkit (MDT) 2008 Update 1 together with the<br />
Revised June 14, 2009 Page 29 of 231
<strong>Deploying</strong> <strong>Windows</strong> 7<br />
By Mitch Tulloch<br />
(<strong>Windows</strong>Networking.com)<br />
<strong>Windows</strong> Automated Installation Kit (<strong>Windows</strong> AIK) version 1.1. This present series of articles about<br />
deploying <strong>Windows</strong> 7 will now continue by focusing on how to deploy <strong>Windows</strong> 7 Enterprise edition<br />
using MDT 2010 and the <strong>Windows</strong> AIK 2.0. Later on we will also examine how to bring <strong>Windows</strong><br />
Deployment Services in <strong>Windows</strong> Server 2008 R2 into the mix of things, and afterwards we will look<br />
at how to use MDT 2010 together with Microsoft System Center Configuration Manager 2007 SP2.<br />
But first let us get the basics of using MDT 2010 under our belt.<br />
In article 24 of my previous series <strong>Deploying</strong> Vista you learned about:<br />
The history of Microsoft deployment solution accelerators<br />
The difference between Light-Touch Installation (LTI) and Zero-Touch Installation (ZTI)<br />
deployments<br />
Four possible deployment scenarios: new computer, refresh computer, replace computer, and<br />
upgrade computer<br />
How to install MDT 2008<br />
The Deployment Workbench<br />
If you have forgotten any of this, you may want to review the earlier article before proceeding further.<br />
MDT 2010 Enhancements<br />
MDT 2010 is the next version of MDT and has a lot of changes over the previous version MDT 2008<br />
Update 1. Let us examine some of these changes now.<br />
First of all, you can now deploy <strong>Windows</strong> 7 and <strong>Windows</strong> Server 2008 R2. The previous version of<br />
MDT (MDT 2008 Update 1) cannot deploy <strong>Windows</strong> 7—you must use MDT 2010 to do this.<br />
Specifically, you can use MDT 2010 to deploy the following <strong>Windows</strong> operating systems:<br />
Client OSes: <strong>Windows</strong> 7, <strong>Windows</strong> Vista SP1+ and <strong>Windows</strong> XP SP3.<br />
Server OSes: <strong>Windows</strong> Server 2008 R2, <strong>Windows</strong> Server 2008 and <strong>Windows</strong> Server 2003 R2.<br />
In MDT 2008 Update 1 you had to create and configure distribution shares and deployment points.<br />
You may recall that a distribution share was the folder that contained the source files for an operating<br />
system such as <strong>Windows</strong> Vista that you planned on deploying using MDT 2008 Update 1. The<br />
distribution share also contained any packages, drivers, or applications you wanted to include in your<br />
install. A deployment point on the other hand was a folder that contained all the files needed to deploy<br />
your Vista image together with any drivers, packages and applications needed for the install. A big<br />
change in MDT 2010 is that these two things (distribution shares and deployment points) are now<br />
combined into a single thing called a deployment share. This change simplifies the process of<br />
preparing and using your MDT-based deployment infrastructure.<br />
Here are some additional enhancements concerning deployment shares:<br />
Deployment shares can be hosted on local drives, network shares, or in a standalone DFS<br />
namespace<br />
Multiple deployment shares can be opened at the same time in the Deployment Workbench<br />
Revised June 14, 2009 Page 30 of 231
<strong>Deploying</strong> <strong>Windows</strong> 7<br />
By Mitch Tulloch<br />
(<strong>Windows</strong>Networking.com)<br />
Deployment shares can be managed from any machine where the Deployment Workbench is<br />
installed—provided the NTFS and shared folder permissions are appropriate on the share<br />
Deployment shares can be linked so that when the content of one share is updated the content in<br />
the other share is also updated<br />
Another big change in this version of MDT is that the underlying scripting logic has been migrated<br />
from VBScript to <strong>Windows</strong> PowerShell. In other words, most of the tasks you perform using the<br />
Deployment Workbench are actually accomplished using <strong>Windows</strong> PowerShell commands. In addition,<br />
you can use <strong>Windows</strong> PowerShell commands directly to perform various MDT configuration and<br />
management tasks and automate them, something that was difficult to do in previous versions of MDT<br />
as it required editing complex scripts. In other words, anything you can do using the Deployment<br />
Workbench can now also be done using <strong>Windows</strong> PowerShell commands and scripts. See this post<br />
on Michael Niehaus's blog for a quick look at some of the powerful new capabilities added to MDT<br />
2010 using <strong>Windows</strong> PowerShell.<br />
The Deployment Workbench, which is the integrated workspace from which you can perform all of<br />
your deployment-related tasks, has also been enhanced in MDT 2010. For example, you can now<br />
create a hierarchical tree of folders in each deployment share in order to help you organize items such<br />
as operating systems, device drivers, and task sequences for that share. Plus you can cut/copy/paste<br />
and drag/drop items within these folder trees. And you can use selection profiles to manage groups of<br />
similar items (such as device drivers for a specific type of machine) as a single item. These changes<br />
all make it easier than ever to manage your deployment resources and tasks.<br />
Finally, there are a number of other enhancements in MDT 2010 relating to security, stability and<br />
performance. For example, you can now refresh a computer that has a volume protected by <strong>Windows</strong><br />
BitLocker Drive Encryption without having to decrypt and re-encrypt the protected volume. This makes<br />
this particular refresh scenario more secure and much faster than before. There's lots more added in<br />
MDT 2010—see Michael Niehaus's blog for a series of articles examining in detail some of the<br />
exciting new features found in this new version of MDT.<br />
Installing MDT 2010<br />
You can install MDT 2010 on x86 or x64 systems running the following operating systems:<br />
<strong>Windows</strong> Server 2008 or <strong>Windows</strong> Server 2008 R2<br />
<strong>Windows</strong> 7 or <strong>Windows</strong> Vista SP1<br />
<strong>Windows</strong> Server 2003 SP2 (requires .NET Framework 2.0 and MSXML 6.0)<br />
Before you install MDT 2010 make sure you have installed the <strong>Windows</strong> AIK 2.0 on your technician<br />
computer. You can download both the <strong>Windows</strong> AIK 2.0 and MDT 2010 from the Microsoft Download<br />
Center. MDT 2010 is available in two forms:<br />
MicrosoftDeploymentToolkit_x64.msi<br />
MicrosoftDeploymentToolkit_x86.msi<br />
I recommend you install the 64-bit version of MDT 2010 on a 64-bit system such as an x64 version of<br />
<strong>Windows</strong> Server 2008 R2. Double-clicking on the <strong>Windows</strong> installer package launches the setup<br />
process (Figure 1):<br />
Revised June 14, 2009 Page 31 of 231
<strong>Deploying</strong> <strong>Windows</strong> 7<br />
By Mitch Tulloch<br />
(<strong>Windows</strong>Networking.com)<br />
Figure 1: Installing MDT 2010 on a technician computer<br />
You should generally perform a complete install (Figure 2):<br />
Figure 2: Installing all components of MDT 2010<br />
Revised June 14, 2009 Page 32 of 231
<strong>Deploying</strong> <strong>Windows</strong> 7<br />
By Mitch Tulloch<br />
(<strong>Windows</strong>Networking.com)<br />
Examining the Deployment Workbench<br />
Once you have installed MDT 2010 you can launch the Deployment Workbench (Figure 3):<br />
Figure 3: The re-vamped Deployment Workbench in MDT 2010<br />
If you compare Figure 3 above with Figure 3 from article 24 of my <strong>Deploying</strong> Vista series, you can see<br />
some obvious differences. Specifically, the old Deployment Workbench had four main subnodes on<br />
the left:<br />
Information Center<br />
Distribution Share<br />
Task Sequences<br />
Deploy<br />
The new one still has the Information Center node, but the other three have now been combined into<br />
a single Deployment Shares node. We will learn how to create a deployment share in the next article<br />
of this series.<br />
Upgrading to MDT 2010<br />
You can also upgrade to MDT 2010 from the following earlier Microsoft deployment solution<br />
accelerators:<br />
MDT 2008 Update 1<br />
BDD 2007 Update 2<br />
Revised June 14, 2009 Page 33 of 231
<strong>Deploying</strong> <strong>Windows</strong> 7<br />
By Mitch Tulloch<br />
(<strong>Windows</strong>Networking.com)<br />
For information on upgrading to MDT 2010, see the Microsoft Deployment Toolkit Documentation<br />
Library, a <strong>Windows</strong> Help (.chm) file installed when you install MDT 2010 on a system.<br />
Conclusion<br />
In this article we have examined the new features of MDT 2010 and how to install MDT 2010 on a<br />
technician computer. In the next article of this series we will examine how to prepare MDT 2010 for<br />
deploying <strong>Windows</strong> 7 Enterprise edition using LTI.<br />
Part 6: Lite Touch using MDT 2010<br />
Introduction<br />
In the previous article of this series we examined the new features of MDT 2010, the latest version of<br />
Microsoft Deployment Toolkit. We also looked at how to install MDT 2010 and examined the basic<br />
layout of the updated Deployment Workbench. In this article we will examine how to manually perform<br />
a basic Lite Touch Installation (LTI) deployment of <strong>Windows</strong> 7 Enterprise using MDT 2010. The tasks<br />
we are going to perform include:<br />
Preparing the environment<br />
Creating a deployment share<br />
Configuring the deployment share<br />
Creating a task sequence<br />
Updating the deployment share<br />
Performing the install<br />
Before you continue reading, you may want to refer back to the following two articles from my<br />
previous series <strong>Deploying</strong> Vista:<br />
Part 25: Preparing Microsoft Deployment Toolkit for <strong>Deploying</strong> Vista<br />
Part 26: <strong>Deploying</strong> Vista Using Microsoft Deployment<br />
Preparing the Environment<br />
To follow along through this walkthrough, make sure you have the following environment (or<br />
something similar) set up:<br />
Domain controller for the contoso.com domain.<br />
DHCP server with a scope configured for leasing addresses to client computers.<br />
Technician computer with MDT 2010 and <strong>Windows</strong> AIK 2.0 installed.<br />
In my own test environment, one computer running <strong>Windows</strong> Server 2008 R2 Enterprise x64 fulfills all<br />
of these roles.<br />
Creating a Deployment Share<br />
Open the Deployment Workbench on your technician computer, then right-click on the Deployment<br />
Shares node and select New Deployment Share. The New Deployment Share wizard starts. Click the<br />
Browse button and create a folder named DeploymentShare$ in the root of your disk volume as<br />
shown in Figure 1:<br />
Revised June 14, 2009 Page 34 of 231
<strong>Deploying</strong> <strong>Windows</strong> 7<br />
By Mitch Tulloch<br />
(<strong>Windows</strong>Networking.com)<br />
Figure 1: Specify the name and path to the deployment share folder<br />
Click Next and the share name will automatically be populated and the UNC path to the share will be<br />
displayed (Figure 2):<br />
Figure 2: The share name and UNC path for the deployment share are displayed<br />
Revised June 14, 2009 Page 35 of 231
<strong>Deploying</strong> <strong>Windows</strong> 7<br />
By Mitch Tulloch<br />
(<strong>Windows</strong>Networking.com)<br />
Click Next and give your deployment share a descriptive name (Figure 3):<br />
Figure 3: Name the deployment share<br />
Click Next and choose whether you want to be able to capture an image after deploying it to a<br />
computer (Figure 4). We will leave this option enabled so we can use it if we deploy a reference<br />
(master) computer and capture its image for deployment onto multiple target (end-user) computers:<br />
Figure 4: Specify whether the option to capture an image will be displayed when the <strong>Windows</strong><br />
Deployment Wizard runs during an install<br />
Revised June 14, 2009 Page 36 of 231
<strong>Deploying</strong> <strong>Windows</strong> 7<br />
By Mitch Tulloch<br />
(<strong>Windows</strong>Networking.com)<br />
Click Next and specify whether the user should be allowed to set the password for the local<br />
Administrator account on their computer (Figure 5). We'll leave this option unchecked:<br />
Figure 5: The Allow Admin Password option<br />
Click Next and specify whether the user should be asked to enter a product key (Figure 6). We will<br />
leave this unchecked because we are deploying <strong>Windows</strong> 7 Enterprise, which means that activation is<br />
typically performed using Key Management Service (KMS):<br />
Figure 6: Choose whether the user is prompted to enter a product key during the install<br />
Revised June 14, 2009 Page 37 of 231
<strong>Deploying</strong> <strong>Windows</strong> 7<br />
By Mitch Tulloch<br />
(<strong>Windows</strong>Networking.com)<br />
Now finish the wizard and review the Confirmation page to ensure everything was done as expected.<br />
Figure 7 shows the newly created deployment share and its folder structure in the Deployment<br />
Workbench:<br />
Figure 7: The newly created deployment share<br />
Configuring the Deployment Share<br />
Once you have created your deployment share, you need to configure it as follows:<br />
Add the operating system you wish to deploy<br />
Add any out-of-box device drivers needed for installing the operating system on the target<br />
computers<br />
Add any applications you want to install on the target computers during the install<br />
Add any packages such as hotfixes or security updates you want to install on the target computers<br />
during the install<br />
For simplicity we are only going to add an operating system (<strong>Windows</strong> 7 Enterprise) to the<br />
deployment share. In future articles we will examine how to add drivers, packages and applications to<br />
deployment shares.<br />
Revised June 14, 2009 Page 38 of 231
<strong>Deploying</strong> <strong>Windows</strong> 7<br />
By Mitch Tulloch<br />
(<strong>Windows</strong>Networking.com)<br />
To add an operating system, right-click on the Operating Systems node in the deployment share and<br />
select Import Operating System. This starts the Import Operating System Wizard. On the first page of<br />
the wizard, specify that you want to import a full set of source files (Figure 8):<br />
Figure 8: Importing a full set of <strong>Windows</strong> 7 operating system files into the deployment share<br />
Insert your <strong>Windows</strong> 7 Enterprise product media into the DVD drive of your technician computer and<br />
browse to select the DVD (Figure 9):<br />
Figure 9: Importing the OS source files from the product DVD<br />
Revised June 14, 2009 Page 39 of 231
<strong>Deploying</strong> <strong>Windows</strong> 7<br />
By Mitch Tulloch<br />
(<strong>Windows</strong>Networking.com)<br />
Click Next and the wizard skips ahead to the Destination page (Figure 10). Specify a descriptive name<br />
for the folder where the source files will be imported to on your technician computer (note that I have<br />
imported the x86 version of the OS in this example):<br />
Figure 10: Specify the name of the folder where the OS source files will be imported to<br />
Finish the wizard. The import process may take several minutes to complete. Once it is done and you<br />
select the Operating Systems folder in your deployment share, the imported OS is displayed (Figure<br />
11).<br />
Figure 11: <strong>Windows</strong> 7 Enterprise source files have been imported into the deployment share<br />
Revised June 14, 2009 Page 40 of 231
<strong>Deploying</strong> <strong>Windows</strong> 7<br />
By Mitch Tulloch<br />
(<strong>Windows</strong>Networking.com)<br />
At this point you would add out-of-box drivers, packages and applications to your deployment share<br />
as needed.<br />
Creating a Task Sequence<br />
Now let us create a task sequence. A task sequence is a series of steps that are performed during<br />
deployment. We want to create a task sequence that will install <strong>Windows</strong> 7 Enterprise onto a baremetal<br />
target computer. To do this, right-click on the Task Sequences folder in your deployment share<br />
and select New Task Sequence. This launches the New Task Sequence Wizard. On the first page of<br />
the wizard, specify a task sequence ID (no spaces), task sequence name, and comments as desired<br />
(Figure 12):<br />
Figure 12: Creating a new task sequence for deploying <strong>Windows</strong> 7<br />
Click Next and select Standard Client Task Sequence from the list of available task sequence<br />
templates (Figure 13):<br />
Figure 13: Base the new task sequence on the Standard Client template<br />
Revised June 14, 2009 Page 41 of 231
<strong>Deploying</strong> <strong>Windows</strong> 7<br />
By Mitch Tulloch<br />
(<strong>Windows</strong>Networking.com)<br />
Click Next and select <strong>Windows</strong> 7 Enterprise, which is the only imported OS at this point (Figure 14):<br />
Figure 14: Select an operating system to deploy using the task sequence<br />
Click Next and select the option to not specify a product key in the task sequence (Figure 15):<br />
Figure 15: Do not specify a product key in the task sequence when deploying volume-licensed<br />
media and using KMS activation<br />
Revised June 14, 2009 Page 42 of 231
<strong>Deploying</strong> <strong>Windows</strong> 7<br />
By Mitch Tulloch<br />
(<strong>Windows</strong>Networking.com)<br />
Click Next and specify the name of the user who will be using the computer and your organization<br />
name and website/internet (Figure 16):<br />
Figure 16: The OS Settings wizard page<br />
Click Next and specify a password for the local Administrator account on the target computer (Figure<br />
17):<br />
Figure 17: Specify a password for the local Administrator account on the user's computer<br />
Revised June 14, 2009 Page 43 of 231
<strong>Deploying</strong> <strong>Windows</strong> 7<br />
By Mitch Tulloch<br />
(<strong>Windows</strong>Networking.com)<br />
Finish the wizard. The new task sequence is displayed in the Task Sequences folder of your<br />
deployment point (Figure 18):<br />
Figure 18: The new task sequence is displayed in the Deployment Workbench<br />
Updating the Deployment Share<br />
Now we need to update our deployment share. Updating a deployment share does several things,<br />
one of which being the creation of customized version of the <strong>Windows</strong> Preinstallation Environment<br />
(<strong>Windows</strong> PE) that can be used to deploy the operating system using the task sequence. Specifically,<br />
updating the deployment share in this example creates the following <strong>Windows</strong> PE images in the<br />
C:\DeploymentShare$\Boot folder on your technician computer:<br />
LiteTouchPE_x64.iso – Used to manually deploy <strong>Windows</strong> 7 Enterprise x64 onto a bare-metal<br />
system.<br />
LiteTouchPE_x64.wim – Used to deploy <strong>Windows</strong> 7 Enterprise x64 onto a bare-metal system<br />
using <strong>Windows</strong> Deployment Services.<br />
LiteTouchPE_x86.iso – Used to manually deploy <strong>Windows</strong> 7 Enterprise x86 onto a bare-metal<br />
system.<br />
LiteTouchPE_x86.wim – Used to deploy <strong>Windows</strong> 7 Enterprise x86 onto a bare-metal system<br />
using <strong>Windows</strong> Deployment Services.<br />
Revised June 14, 2009 Page 44 of 231
<strong>Deploying</strong> <strong>Windows</strong> 7<br />
By Mitch Tulloch<br />
(<strong>Windows</strong>Networking.com)<br />
To update your deployment share, right-click on it and select Update Deployment Share. This<br />
launches the Update Deployment Share Wizard (Figure 19):<br />
Figure 19: Updating the deployment share<br />
Leave the default options selected and finish the wizard. It may take some time to create the <strong>Windows</strong><br />
PE images on your technician computer. Once the wizard finishes, burn the LiteTouchPE_x86.iso file<br />
onto a CD as you will need it to deploy <strong>Windows</strong> 7 Enterprise x86 onto your target computer.<br />
Note: As shown in Figure 20, on the Confirmation page of this wizard (and on all MDT 2010 wizards)<br />
there are two buttons:<br />
Save Output – saves the output of the wizard to a text file (actually it's better to save it as .rtf as it's<br />
more readable that way).<br />
View Script – displays the underlying <strong>Windows</strong> PowerShell commands that are executed by the<br />
wizard.<br />
As an example of the second, the View Script output from the Update Deployment Share Wizard<br />
looks like this:<br />
Revised June 14, 2009 Page 45 of 231
<strong>Deploying</strong> <strong>Windows</strong> 7<br />
By Mitch Tulloch<br />
(<strong>Windows</strong>Networking.com)<br />
Add-PSSnapIn Microsoft.BDD.PSSnapIn New-PSDrive -Name "DS001" -PSProvider<br />
MDTProvider -Root "C:\DeploymentShare$" update-MDTDeploymentShare -path "DS001:" -<br />
Verbose<br />
Figure 20: Confirmation page of the wizard<br />
Performing the Install<br />
At this point, you are ready to deploy <strong>Windows</strong> 7 using MDT. Turn on your bare-metal (i.e. no OS<br />
installed) target computer and put your customized <strong>Windows</strong> PE CD into the CD drive on the<br />
computer. After a short time the <strong>Windows</strong> Deployment Wizard will start and you can follow the<br />
prompts almost exactly as shown in my earlier article <strong>Deploying</strong> Vista Part 26: <strong>Deploying</strong> Vista Using<br />
Microsoft Deployment Toolkit. The differences between what you will see when you do this using MDT<br />
2010 and what this earlier article shows for MDT 2008 are basically only cosmetic in nature.<br />
Part 7: Automated LTI Deployment<br />
Introduction<br />
In the previous article of this series we learned how to manually perform a basic Lite Touch<br />
Installation (LTI) deployment of <strong>Windows</strong> 7 Enterprise using MDT 2010. In this article we will learn<br />
how to complete and automate this process.<br />
Automating LTI deployment of <strong>Windows</strong> 7 using MDT 2010 involves the following steps:<br />
1. Create a deployment share using the Deployment Workbench.<br />
Revised June 14, 2009 Page 46 of 231
2. Import <strong>Windows</strong> 7 source files into the share.<br />
<strong>Deploying</strong> <strong>Windows</strong> 7<br />
By Mitch Tulloch<br />
(<strong>Windows</strong>Networking.com)<br />
3. Add packages, drivers, and applications to your share as needed.<br />
4. Create a basic task sequence based on the Standard Client Task Sequence template.<br />
5. Edit the CustomSettings.ini and BootStrap.ini configuration files as needed to automate the LTI<br />
deployment process.<br />
6. Update the deployment share to create <strong>Windows</strong> PE boot images (.iso and .wim files) and burn<br />
the .iso file to CD or DVD media.<br />
7. Boot the destination computer using the <strong>Windows</strong> PE boot image and let the install proceed<br />
entirely unattended.<br />
We have already performed steps 1-4 in the previous article of this series, so all we need to do here is<br />
perform steps 5-7, so here goes.<br />
Editing the Configuration Files<br />
As in the previous version MDT 2008 Update , MDT 2010 uses configuration files to control the LTI<br />
deployment process. These configuration files provide input for the scripts that MDT uses to perform<br />
the install. There are two configuration files you must edit to perform a fully automated LTI<br />
deployment: CustomSettings.ini and BootStrap.ini. We have briefly examined these two files in Part<br />
27 of my <strong>Deploying</strong> Vista series. Let us review what these files are for and dig into them a bit deeper<br />
this time.<br />
To begin with, let us examine the default CustomSettings.ini file that MDT creates for the deployment<br />
share we created in the previous article. To view the contents of CustomSettings.ini, we will open the<br />
Deployment Workbench, right-click on the deployment share and select Properties, then select the<br />
Rules tab as shown in Figure 1:<br />
Figure 1: The default CustomSettings.ini file for a new deployment share<br />
Revised June 14, 2009 Page 47 of 231
<strong>Deploying</strong> <strong>Windows</strong> 7<br />
By Mitch Tulloch<br />
(<strong>Windows</strong>Networking.com)<br />
Notice that this default CustomSettings.ini file does not contain any information concerning which<br />
operating system image is to be deployed, which task sequence will be used, and so on. If this is the<br />
CustomSettings.ini file then information like that will need to be supplied during deployment, that is, by<br />
sitting at the destination computer and responding to the prompts of the <strong>Windows</strong> Deployment Wizard<br />
(see Part 26 of my <strong>Deploying</strong> Vista series for examples of such wizard prompts). Of course, that is not<br />
what we want to do—we want to automate the install.<br />
Let us also examine the default BootStrap.ini file for our new deployment share, which is shown in<br />
Figure 2:<br />
Figure 2: The default BootStrap.ini file for a new deployment share<br />
Notice that this default BootStrap.ini file contains information about the network location of the<br />
deployment share, but it does not contain information concerning the credentials to be used in order<br />
to connect to this share. This is why one of the first things you are prompted to supply when you<br />
perform a manual LTI deployment is the credentials that the <strong>Windows</strong> Deployment Wizard will use to<br />
connect to the share. And of course, we do not want to have to supply this prompt or any prompt<br />
during installation—we want to fully automate the LTI deployment.<br />
To do this, we need to make some changes to these two configuration files. But before we do this we<br />
need to ask ourselves some questions, such as:<br />
What time zone do we want to configure for the destination computer?<br />
What locale do we want to configure?<br />
Do we want to specify a computer name or let one be randomly assigned during installation?<br />
Do we want to join the computer to a domain or leave it in a workgroup?<br />
And so on.<br />
Revised June 14, 2009 Page 48 of 231
<strong>Deploying</strong> <strong>Windows</strong> 7<br />
By Mitch Tulloch<br />
(<strong>Windows</strong>Networking.com)<br />
The answers you provide for these questions and other questions will determine what property/value<br />
pairs you include in your CustomSettings.ini file. As an example of how to perform a fully automated<br />
LTI deployment, let's change the default CustomSettings.ini to the following:<br />
[Settings]<br />
Priority=Default<br />
Properties=MyCustomProperty<br />
[Default]<br />
OSInstall=YES<br />
SkipAdminPassword=YES<br />
SkipApplications=YES<br />
SkipAppsOnUpgrade=YES<br />
SkipBDDWelcome=YES<br />
SkipBitLocker=YES<br />
SkipCapture=YES<br />
Skip<strong>Computer</strong>Name=YES<br />
Skip<strong>Computer</strong>Backup=YES<br />
SkipDeploymentType=YES<br />
DeploymentType=NEWCOMPUTER<br />
SkipDomainMembership=YES<br />
JoinDomain=CONTOSO<br />
DomainAdmin=Administrator<br />
DomainAdminDomain=CONTOSO<br />
DomainAdminPassword=Pa$$w0rd<br />
SkipFinalSummary=YES<br />
SkipLocaleSelection=YES<br />
KeyboardLocale=en-US<br />
UserLocale=en-US<br />
UILanguage=en-US<br />
SkipPackageDisplay=YES<br />
SkipProductKey=YES<br />
SkipSummary=YES<br />
SkipTaskSequence=YES<br />
TaskSequenceID=WIN7_001<br />
SkipTimeZone=YES<br />
TimeZoneName=Central Standard Time<br />
SkipUserData=Yes<br />
Note: The blank lines in the listing above are there only to make the contents of the file more readable,<br />
and they can be omitted if desired.<br />
Figure 3 shows what this looks like after we have copied and pasted this into the Rules tab:<br />
Revised June 14, 2009 Page 49 of 231
<strong>Deploying</strong> <strong>Windows</strong> 7<br />
By Mitch Tulloch<br />
(<strong>Windows</strong>Networking.com)<br />
Figure 3: Example of a CustomSettings.ini file for a fully automated LTI deployment<br />
We will also need to make changes to the default BootStrap.ini file in order to automate our<br />
deployment. Figure 4 shows what our new BootStrap.ini file will need to look like:<br />
Figure 4: Example of a BootStrap.ini file for a fully automated LTI deployment<br />
Revised June 14, 2009 Page 50 of 231
<strong>Deploying</strong> <strong>Windows</strong> 7<br />
By Mitch Tulloch<br />
(<strong>Windows</strong>Networking.com)<br />
In the next article we will examine these two edited files line by line to understand them. But for now, if<br />
you have completed the walkthrough in the previous article, just make the changes indicated to these<br />
two files and save them. Then complete the steps in the two sections that follow.<br />
Updating the Deployment Share<br />
Updating a deployment share creates <strong>Windows</strong> PE boot images we can use for initiating deployment.<br />
We learned how to update a deployment share in the previous article of this series. In fact, we<br />
updated our deployment share in the previous article, so why do we have to update it again? Because<br />
we made changes to the BootStrap.ini file. Any time you make a change to your BootStrap.ini file, you<br />
must update your deployment share. So if you're following along, update your deployment share now,<br />
then burn the LiteTouchPE_x86.iso file to CD-R/W media using third-party CD/DVD-burning software.<br />
Launching the Unattended Install<br />
Now turn on your bare-metal (no OS or partitions) destination computer, making sure it is connected<br />
to the network where your MDT computer resides. Insert the <strong>Windows</strong> PE CD you burned in the<br />
previous step, and sit back and watch. <strong>Windows</strong> PE will boot and display a blue screen with a<br />
Solution Accelerators banner across the bottom. Behind the scenes, <strong>Windows</strong> PE will establish a<br />
connection to your deployment share using the credentials provided in your BootStrap.ini file. Once<br />
this connection has been established, the installation will begin and an Installation Progress dialog<br />
box will be displayed. Your computer will reboot several times until finally, without the need of you<br />
supplying any further keystrokes, the <strong>Windows</strong> 7 desktop will appear and your install will be finished.<br />
Conclusion<br />
This article walked you through the steps for performing a fully automated LTI deployment using MDT<br />
2010. The next article in this series will dig deeper into the CustomSettings.ini and BootStrap.ini<br />
property/value pairs you can use for automating LTI deployment.<br />
Part 8: Understanding LTI Configuration Files<br />
In the previous article of this series we learned how to modify the CustomSettings.ini and<br />
BootStrap.ini files of MDT 2010 in order to fully automate a Lite Touch Installation (LTI) of <strong>Windows</strong> 7<br />
Enterprise. In this article we will dig deeper into modifying these two files to control the LTI process.<br />
Understanding BootStrap.ini<br />
BootStrap.ini is one of two configuration files used by MDT for controlling the deployment process (the<br />
other configuration file is CustomSettings.ini). Both of these files are located in the Control folder of<br />
the deployment share. This means that these files are specific to the deployment share. In other<br />
words, if you have more than one deployment share, each share will have its own configuration files<br />
for controlling deployments made using that share.<br />
BootStrap.ini is used during the initial connection process when the destination computer, booted<br />
using the LiteTouch <strong>Windows</strong> PE image, connects to the deployment share to begin the installation<br />
process. This means that BootStrap.ini must contain any information needed to successfully establish<br />
a connection between the destination computer and the deployment share.<br />
The BootStrap.ini file used in the previous article of this series looked like this:<br />
[Settings]<br />
Revised June 14, 2009 Page 51 of 231
Priority=Default<br />
[Default]<br />
DeployRoot=\\SEA-DC1\DeploymentShare$<br />
UserID=Administrator<br />
UserDomain=CONTOSO<br />
UserPassword=Pa$$w0rd<br />
KeyboardLocale=en-US<br />
SkipBDDWelcome=YES<br />
<strong>Deploying</strong> <strong>Windows</strong> 7<br />
By Mitch Tulloch<br />
(<strong>Windows</strong>Networking.com)<br />
You can see that BootStrap.ini consists of two sections: Settings and Default. The Settings section is<br />
required and contains only one property called Priority. This property tells MDT the order in which to<br />
parse the remaining sections of the configuration file. Since there is only one remaining section<br />
(Default) that is the value assigned to Priority.<br />
The Default section is where the work gets done. Specifically:<br />
The DeployRoot property specifies the UNC path to the deployment share that will be used for the<br />
install. This is required information.<br />
The UserID, UserDomain and UserPassword specify the credentials that the destination computer<br />
running <strong>Windows</strong> PE will used to connect to the deployment share. This is required information. In<br />
the sample BootStrap.ini file above, the domain Administrator account is used. For security<br />
reasons, in a real-world environment you would not use this account. Instead, you should create a<br />
new user account used solely for deployment purposes (no one should log on to a computer using<br />
this account). For example, you could create a domain account named MDT for this purpose.<br />
Because of the NTFS and shared folder permissions assigned to the deployment share, the MDT<br />
account only needs to be a member of the Domain Users group—it doesn't need to be a member<br />
of the Domain Admins group. Note that the password for this account is stored in unencrypted<br />
form in the BootStrap.ini file.<br />
The KeyboardLocale property specifies the locale for the keyboard attached to the destination<br />
computer. The keyboard locale can be specified either in text (for example, en-us) or hexadecimal<br />
(for example, 0409:00004009) form. You can specify multiple values by separating them with<br />
semicolons. If this property is omitted from BootStrap.ini, the <strong>Windows</strong> Deployment Wizard will<br />
use the keyboard locale configured in the image being deployed.<br />
SkipBDDWelcome = YES prevents the opening screen ("Welcome <strong>Windows</strong> Deployment") of the<br />
<strong>Windows</strong> Deployment Wizard from being displayed. This is required if you want to fully automate<br />
LTI.<br />
The above six properties are the only properties that can be included in BootStrap.ini.<br />
Remember—if you change anything in your BootStrap.ini file, you must update your deployment<br />
share in order to regenerate the LiteTouch <strong>Windows</strong> PE images contained in the Boot folder of the<br />
share.<br />
Revised June 14, 2009 Page 52 of 231
<strong>Deploying</strong> <strong>Windows</strong> 7<br />
By Mitch Tulloch<br />
(<strong>Windows</strong>Networking.com)<br />
Understanding CustomSettings.ini<br />
CustomSettings.ini is the other configuration file and is also specific to each deployment share. Once<br />
BootStrap.ini has done its work, CustomSettings.ini takes over and controls the rest of the deployment<br />
process. The CustomSettings.ini file used in the previous article of this series looked like this:<br />
[Settings]<br />
Priority=Default<br />
Properties=MyCustomProperty<br />
[Default]<br />
OSInstall=YES<br />
SkipAdminPassword=YES<br />
SkipApplications=YES<br />
SkipAppsOnUpgrade=YES<br />
SkipBDDWelcome=YES<br />
SkipBitLocker=YES<br />
SkipCapture=YES<br />
Skip<strong>Computer</strong>Name=YES<br />
Skip<strong>Computer</strong>Backup=YES<br />
SkipDeploymentType=YES<br />
DeploymentType=NEWCOMPUTER<br />
SkipDomainMembership=YES<br />
JoinDomain=CONTOSO<br />
DomainAdmin=Administrator<br />
DomainAdminDomain=CONTOSO<br />
DomainAdminPassword=Pa$$w0rd<br />
SkipFinalSummary=YES<br />
SkipLocaleSelection=YES<br />
KeyboardLocale=en-US<br />
UserLocale=en-US<br />
UILanguage=en-US<br />
SkipPackageDisplay=YES<br />
SkipProductKey=YES<br />
SkipSummary=YES<br />
SkipTaskSequence=YES<br />
TaskSequenceID=WIN7_001<br />
SkipTimeZone=YES<br />
TimeZoneName=Central Standard Time<br />
SkipUserData=Yes<br />
The above CustomSettings.ini file contains the same two sections (Settings and Default) that<br />
BootStrap.ini contains. CustomSettings.ini can contain additional sections however. For example, you<br />
can include additional sections for deploying <strong>Windows</strong> to specific makes and models of computers or<br />
specific locations on your network. We'll examine this in a later article of this series.<br />
The Default section in the above example contains a number of different property/value pairs. This is<br />
only a small subset however of the almost 300 different properties you can specify to control various<br />
aspects of the deployment process. There are essentially two types of properties used in the example<br />
above: "skip" properties and other properties.<br />
Revised June 14, 2009 Page 53 of 231
<strong>Deploying</strong> <strong>Windows</strong> 7<br />
By Mitch Tulloch<br />
(<strong>Windows</strong>Networking.com)<br />
The "skip" properties are those that determine whether a particular page of the <strong>Windows</strong> Deployment<br />
Wizard is displayed or not during installation on the destination computer. For example, if<br />
Skip<strong>Computer</strong>Name=YES is specified, the Configure The <strong>Computer</strong> Name page of the wizard is not<br />
displayed during installation; if Skip<strong>Computer</strong>Name=NO, the page is displayed and a user sitting at<br />
the destination computer will have to respond in order to proceed with the installation. If you want to<br />
fully automate an installation, you need to specify YES for all possible skip properties, and the<br />
example above does this. In other words, the full list of skip properties is as follows:<br />
SkipAdminPassword=YES<br />
SkipApplications=YES<br />
SkipAppsOnUpgrade=YES<br />
SkipBDDWelcome=YES<br />
SkipBitLocker=YES<br />
SkipCapture=YES<br />
Skip<strong>Computer</strong>Name=YES<br />
Skip<strong>Computer</strong>Backup=YES<br />
SkipDeploymentType=YES<br />
SkipDomainMembership=YES<br />
SkipFinalSummary=YES<br />
SkipLocaleSelection=YES<br />
SkipPackageDisplay=YES<br />
SkipProductKey=YES<br />
SkipSummary=YES<br />
SkipTaskSequence=YES<br />
SkipTimeZone=YES<br />
SkipUserData=Yes<br />
The advantage of including all of these lines in your CustomSettings.ini file is that you can change any<br />
of them to NO if you want the user involved at some point during deployment. For example, if you<br />
want the user to choose whether or not to enable BitLocker Drive Encryption on the computer, all you<br />
need to do is change the line SkipBitLocker=YES to SkipBitLocker=NO in your CustomSettings.ini file<br />
and the Specify The BitLocker Configuration page of the <strong>Windows</strong> Deployment Wizard will be<br />
displayed during installation.<br />
If you are only interested in fully automating LTI however, you can replace all of the above skip<br />
properties with the following two lines lines:<br />
SkipWizard=YES<br />
SkipFinalSummary=YES<br />
The first line causes the entire <strong>Windows</strong> Deployment Wizard to be skipped (almost). The second line<br />
causes the final Operating System Deployment Completed Successfully line to be skipped so that the<br />
user doesn't have to click OK to end the install.<br />
In other words, our previous and somewhat long CustomSettings.ini file is now reduced to this:<br />
[Settings]<br />
Priority=Default<br />
Properties=MyCustomProperty<br />
[Default]<br />
Revised June 14, 2009 Page 54 of 231
OSInstall=YES<br />
SkipWizard=YES<br />
SkipFinalSummary=YES<br />
DeploymentType=NEWCOMPUTER<br />
JoinDomain=CONTOSO<br />
DomainAdmin=Administrator<br />
DomainAdminDomain=CONTOSO<br />
DomainAdminPassword=Pa$$w0rd<br />
KeyboardLocale=en-US<br />
UserLocale=en-US<br />
UILanguage=en-US<br />
TaskSequenceID=WIN7_001<br />
TimeZoneName=Central Standard Time<br />
<strong>Deploying</strong> <strong>Windows</strong> 7<br />
By Mitch Tulloch<br />
(<strong>Windows</strong>Networking.com)<br />
What about the remaining properties in the Default section of this shortened CustomSettings.ini file?<br />
These "other" properties provide the information that the user would have had to manually enter if the<br />
pages of the <strong>Windows</strong> Deployment Wizard were displayed during installation. Specifically:<br />
OSInstall=YES<br />
This line indicates that deployment is authorized to proceed. If you omit this line, deployment will<br />
proceed anyways by default.<br />
DeploymentType=NEWCOMPUTER<br />
This line indicates the destination computer is a new computer that has never been a member of the<br />
network. Other possible values for this property are REFRESH, REPLACE and UPGRADE.<br />
JoinDomain=CONTOSO<br />
DomainAdmin=Administrator<br />
DomainAdminDomain=CONTOSO<br />
DomainAdminPassword=Pa$$w0rd<br />
These lines indicate that the computer will be joined to the CONTOSO domain during installation.<br />
Note that this example uses the domain Administrator account for this purpose, but you can use a<br />
member of the Domain Users account for this purpose such as the MDT user account created earlier<br />
for BootStrap.ini.<br />
KeyboardLocale=en-US<br />
UserLocale=en-US<br />
UILanguage=en-US<br />
These lines indicate the keyboard locale and the user locale and language settings. I think the first<br />
line is optional since it is also specified in BootStrap.ini, but if you don't include the other two lines the<br />
Locale Selection page of the <strong>Windows</strong> Deployment Wizard will be displayed during installation.<br />
TaskSequenceID=WIN7_001<br />
This line indentifies the task sequence that will be used for the installation.<br />
Revised June 14, 2009 Page 55 of 231
TimeZoneName=Central Standard Time<br />
<strong>Deploying</strong> <strong>Windows</strong> 7<br />
By Mitch Tulloch<br />
(<strong>Windows</strong>Networking.com)<br />
This line indicates the time zone to be configured on the computer.<br />
Are these the only properties you need to include in CustomSettings.ini to fully automate LTI? It<br />
depends, if you are not installing any packages or applications as part of your installation, and if you<br />
are not migrating user state information during the installation, and if you are not configuring BitLocker<br />
on the destination computer, then the above shortened CustomSettings.ini file is probably all you<br />
need.<br />
For example, what if you want to install a language pack as part of your installation? To do this, you<br />
must first add the language pack to the Packages folder of your deployment share. Then you examine<br />
the Packages.xml file in the Control folder of your deployment share to determine the GUID<br />
associated with the language pack. Finally, you include the line LanguagePacks001=value in your<br />
CustomSettings.ini file where value is the GUID of the language pack. We'll walk through this process<br />
and other customizations of automated LTI in future articles in this series.<br />
One final question: How did I know that I needed to include the line LanguagePacks001=value in my<br />
CustomSettings.ini file if I wanted to include a language pack in my install? Simple—read the manual!<br />
You should familiarize yourself with the following topics in the Microsoft Deployment Toolkit 2010<br />
Documentation Library, a Help (.chm) file installed as part of MDT 2010:<br />
Providing Properties for Skipped <strong>Windows</strong> Deployment Wizard Pages – This topic lists the<br />
properties you need to include in CustomSettings.ini when you skip various pages of the <strong>Windows</strong><br />
Deployment Wizard.<br />
Property Definition – This topic lists all the various properties you can include in<br />
CustomSettings.ini and what they are used for.<br />
Both of these topics can be found in the Help file under Microsoft Deployment Toolkit<br />
Reference\Properties and we'll be referring to the information they contain frequently in future articles<br />
of this series.<br />
Part 9: <strong>Deploying</strong> 32-bit vs. 64-bit <strong>Windows</strong><br />
In the previous articles of this series we have looked at what is new in MDT 2010 and how to<br />
automate basic deployments of <strong>Windows</strong> 7 Enterprise edition using MDT 2010. In this article we are<br />
going to pause for a moment and consider the pros and cons of deploying 32-bit vs. 64-bit <strong>Windows</strong>.<br />
Is Now The Time To Deploy 64-bit <strong>Windows</strong>?<br />
The <strong>Windows</strong> client operating system has had a 64-bit version available since <strong>Windows</strong> XP<br />
Professional x64 Edition was released in 2004. Unfortunately third-party driver support for this version<br />
of <strong>Windows</strong> was limited at the time, which meant that users who installed it were often unable to use<br />
their printers, scanners, and other peripherals. When <strong>Windows</strong> Vista became available in early 2007,<br />
it boasted much improved third-party 64-bit driver support, and some organizations who decided to<br />
deploy Vista chose to deploy an x64 edition instead of an x86 version to take advantage of the ability<br />
of 64-bit <strong>Windows</strong> to run more applications at the same time and to use more than the 3 GB of RAM<br />
that 32-bit <strong>Windows</strong> is capable of using. Unfortunately some organizations which chose this path<br />
without proper planning soon discovered that older 64-bit AMD and Intel systems on which Vista x64<br />
was installed were only able to use 3 GB of RAM even when 4 GB or more RAM was installed in them.<br />
Revised June 14, 2009 Page 56 of 231
<strong>Deploying</strong> <strong>Windows</strong> 7<br />
By Mitch Tulloch<br />
(<strong>Windows</strong>Networking.com)<br />
In other words, organizations sometimes discovered that the promised performance benefits of using<br />
64-bit <strong>Windows</strong> were not achieved.<br />
So where does this leave us today? <strong>Windows</strong> 7 has been released to manufacturing (RTM) and is<br />
already available for volume-licensed customers. If your organization is currently running <strong>Windows</strong> XP<br />
on your client computers and you are eager to move forward with migrating your client computers to<br />
<strong>Windows</strong> 7, should you take the plunge and deploy only 64-bit <strong>Windows</strong> 7 if the chipsets in all your<br />
systems support it? My answer is a resounding YES and I suggest that there is virtually no reason any<br />
longer to prefer 32-bit over 64-bit <strong>Windows</strong>, provided you are going to deploy <strong>Windows</strong> 7 on x64<br />
systems that are only a year or two old.<br />
Here is my short list of reasons why you should choose a 64-bit <strong>Windows</strong> 7 edition over its<br />
corresponding 32-bit edition:<br />
If you want to get the best performance possible, there are three things you can do: use a faster<br />
processor, add more RAM, or replace your drive with a Solid State Disk (SSD) drive. Processors<br />
are often tied to motherboards, so replacing them is not trivial. RAM is cheap now, and boosting<br />
your system's memory to 4, 8 or even 16 GB will not empty your bank account. Good SSDs are<br />
still very expensive however—much more so than RAM. So if you want to boost your performance<br />
while keeping your budget under your control, adding lots of RAM is the way to go, and 64-bit<br />
Window 7 Ultimate edition can use up to 192 GB of RAM if your system's motherboard can hold<br />
that much. So if you want the best performance at the best price, go with 64-bit <strong>Windows</strong> over 32bit<br />
provided your system hardware supports addressing more than 4 GB of RAM. And which<br />
systems support this today? Almost anything you can buy. For example, the Intel x58 workstation<br />
chipset includes 6 DRAM sockets, and 12 6 x 2 GB = 12 GB of DDR3 DRAM costs less than $200.<br />
Even quad-core I7 processors are only about $250.<br />
The 64-bit version of <strong>Windows</strong> 7 only occupies a couple of more GB on your hard drive than the<br />
32-bit version. If you are really constrained for hard drive space (i.e. hard drive 32 GB or less) then<br />
you might prefer installing 32-bit <strong>Windows</strong> over 64-bit. But if your system has such a small hard<br />
drive, you're better off buying a large one. Even large SSDs are beginning to rapidly fall in price<br />
these days.<br />
If your users rely on some mission-critical 16-bit applications then you might consider installing the<br />
32-bit version of <strong>Windows</strong> 7 instead of the 64-bit version. That's because 64-bit <strong>Windows</strong> 7<br />
doesn't support running 16-bit applications. However, you can get around this issue by using<br />
<strong>Windows</strong> Virtual PC and the <strong>Windows</strong> XP Mode environment, which lets users run a virtual<br />
instance of a 32-bit <strong>Windows</strong> XP operating system on their <strong>Windows</strong> 7 computers so that users<br />
can run older applications that are incompatible with <strong>Windows</strong> 7 (or with 64-bit <strong>Windows</strong> 7) while<br />
still being able to take advantage of the many enhancements and new features of <strong>Windows</strong> 7.<br />
There's one catch however: the user's system must support hardware virtualization (Intel VT or<br />
AMD-V) in order to run <strong>Windows</strong> Virtual PC and the <strong>Windows</strong> XP Mode environment, and usually<br />
only higher-end client systems less than about a year old include support for hardware<br />
virtualization. And if you need a more centralized and manageable way of mitigating application<br />
compatibility issues on desktop computers using virtualization, be sure to check out Microsoft<br />
Enterprise Desktop Virtualization (MED-V), a core component of the Microsoft Desktop<br />
Optimization Pack (MDOP) for Software Assurance (SA). MED-V uses Microsoft Virtual PC to<br />
create, deliver and manage corporate Virtual PC images on any <strong>Windows</strong>-based desktop. On the<br />
other hand, now may be the time when you should finally get serious about recoding your old<br />
mission-critical 16-bit applications as 64-bit applications.<br />
Revised June 14, 2009 Page 57 of 231
<strong>Deploying</strong> <strong>Windows</strong> 7<br />
By Mitch Tulloch<br />
(<strong>Windows</strong>Networking.com)<br />
Virtually all peripherals sold in the last couple of years have 64-bit drivers available for them. Most<br />
peripherals these days use USB as their interface with the computer. <strong>Windows</strong> Virtual PC and the<br />
<strong>Windows</strong> XP Mode environment supports USB. The result? No problem!<br />
If your organization is really constrained in their budget—which may be typical during a recession<br />
or downturn like the one much of the world is currently experiencing—then you may be able to<br />
make a case for keeping your older computer systems and migrating them to 32-bit <strong>Windows</strong> 7.<br />
On the other hand, when you make your case you should consider the cost of lost productivity<br />
caused by the poor performance of these older systems. And if your business is that fiscally<br />
constrained, maybe you should just stay with <strong>Windows</strong> XP or <strong>Windows</strong> 2000 or <strong>Windows</strong> 98 or<br />
whatever you're currently using.<br />
Finally, if you are a developer and your dev system uses 32-bit <strong>Windows</strong>, you can only do 32-bit<br />
development on your system. If your dev system is 64-bit, you can do both 32- and 64-bit<br />
development. I have heard of some issues when debugging applications using Visual Studio on<br />
64-bit <strong>Windows</strong> that were more complicated and required workarounds compared with running<br />
Visual Studio on 32-bit <strong>Windows</strong>, but I'm not a developer and I can't understand these issues in<br />
any depth. If you want to learn more, read Visual Studio: Why is there no 64 bit version? (yet).<br />
Considerations when using MDT 2010 with 64-bit <strong>Windows</strong> 7<br />
MDT 2010 comes in two versions: x64 and x86. Both versions of MDT 2010 support deploying both<br />
x86 and x64 <strong>Windows</strong> operating systems. And both versions of MDT 2010 require version 2.0 of the<br />
<strong>Windows</strong> AIK.<br />
<strong>Windows</strong> AIK 2.0 however also comes in both x86 and x64 versions. And as the Deployment Guys<br />
have pointed out, if you are running the 32-bit version of <strong>Windows</strong> AIK 2.0 on a 32-bit <strong>Windows</strong> 7<br />
technician computer, you can create catalogs and answer files for both x64 and x86 custom images.<br />
On the other hand, if you are running 64-bit version of <strong>Windows</strong> AIK 2.0 on a 64-bit <strong>Windows</strong> 7<br />
computer, you cannot create catalogs or answer files for x86 custom images. And you can not run the<br />
64-bit version of <strong>Windows</strong> AIK 2.0 on a 32-bit <strong>Windows</strong> 7 computer.<br />
On the other hand, if you are only deploying 64-bit <strong>Windows</strong> 7, you can install MDT 2010 x64 and<br />
<strong>Windows</strong> AIK 2.0 x64 on a technician computer running <strong>Windows</strong> 7 x64 and not worry about any of<br />
this!<br />
Conclusion and Additional Resources<br />
Clearly in most cases the pros of migrating your client computers to 64-bit <strong>Windows</strong> 7 outweigh the<br />
cons in most cases. Because of this, the remaining articles in this <strong>Deploying</strong> <strong>Windows</strong> 7 series will<br />
focus on deploying <strong>Windows</strong> 7 Enterprise x64 using MDT 2010. Finally, here are a few resources you<br />
should check out concerning 64-bit <strong>Windows</strong>:<br />
64-bit System Design on <strong>Windows</strong> Hardware Developer Central<br />
32-bit and 64-bit <strong>Windows</strong>: frequently asked questions<br />
Memory Management - Dude where's my RAM?<br />
<strong>Windows</strong> Vista SP1 includes reporting of Installed System Memory (RAM)<br />
XP Mode vs. Med-V on the Springboard Series blog<br />
How MED-V v2 Helps You Manage <strong>Windows</strong> XP Mode<br />
Revised June 14, 2009 Page 58 of 231
<strong>Deploying</strong> <strong>Windows</strong> 7<br />
By Mitch Tulloch<br />
(<strong>Windows</strong>Networking.com)<br />
Part 10: Capturing and <strong>Deploying</strong> an Image of a Reference <strong>Computer</strong><br />
Introduction<br />
In articles 6 and 7 of this series we examined how to perform a simple, automated deployment of<br />
<strong>Windows</strong> 7 Enterprise by performing a Lite Touch Installation (LTI) using MDT 2010. Then in article 8<br />
we examined the CustomSettings.ini and Bootstrap.ini files in detail and how these two configuration<br />
files can be used to customize the deployment process by making it more automated. In larger<br />
organizations however, performing one-off installs of <strong>Windows</strong> is too simplistic. Instead, you will want<br />
to do first create a reference computer, that is, a computer that is configured exactly how you want<br />
your users' computers to be configured. Then you will want to capture the image of this reference<br />
computer and import the captured image into your deployment share. Finally, you will want to deploy<br />
this captured image to your users' computers, that is, the target computers for the deployment. This is<br />
what we will look at in this present article.<br />
Step 1: Install the Reference <strong>Computer</strong> and Capture its Image<br />
After your planning work has been done, the first step in image-based deployment is to install your<br />
reference computer. As discussed in article 9 of this series, we are going to focus here on deploying<br />
<strong>Windows</strong> 7 Enterprise x64 edition from here on out in this series of articles. So begin by opening the<br />
Deployment Workbench on your technician computer, expand your deployment share, right-click on<br />
the Operating Systems folder, and select Import Operating System. Then follow the steps of the<br />
Import Operating System wizard to import a full set of source files from your <strong>Windows</strong> 7 Enterprise<br />
X64 DVD. Once you have finished the import process, your Deployment Workbench will look like<br />
Figure 1 below:<br />
Figure 1: <strong>Windows</strong> 7 Enterprise x64 edition has been imported into the deployment share<br />
Tip: To speed the OS import process, first copy all the files and folders from the <strong>Windows</strong> DVD to a<br />
local folder on your technician computer, then import the OS from this local folder instead of from the<br />
DVD itself.<br />
Revised June 14, 2009 Page 59 of 231
<strong>Deploying</strong> <strong>Windows</strong> 7<br />
By Mitch Tulloch<br />
(<strong>Windows</strong>Networking.com)<br />
Next, create a new task sequence for deploying <strong>Windows</strong> onto your reference computer. In your<br />
deployment share, right-click on the Task Sequences node and select New Task Sequence to start<br />
the wizard. Type WIN7EX64_REF_001 as the task sequence ID and give the task sequence a<br />
descriptive name as shown in Figure 2 below:<br />
Figure 2: Creating a task sequence for deploying <strong>Windows</strong> onto the reference computer<br />
On the next page, select the Standard Client Task Sequence template. Then on the Select OS page,<br />
select the <strong>Windows</strong> 7 Enterprise x64 source files you previously imported (Figure 3):<br />
Figure 3: Associating an operating system with the task sequence<br />
Revised June 14, 2009 Page 60 of 231
<strong>Deploying</strong> <strong>Windows</strong> 7<br />
By Mitch Tulloch<br />
(<strong>Windows</strong>Networking.com)<br />
Complete the New Task Sequence Wizard in the usual way. Your new task sequence will be<br />
displayed in Deployment Workbench along with other task sequences you previously created (see<br />
Figure 4):<br />
Figure 4: There are two task sequences in this deployment share<br />
Now, before you deploy <strong>Windows</strong> to your reference computer, you need to make some changes to<br />
the CustomSettings.ini file on your technician computer. Right-click on your deployment share and<br />
select Properties, then select the Rules tab to display the contents of CustomSettings.ini. Modify what<br />
you see here so that it looks like Figure 5 below:<br />
Figure 5: Modifying the CustomSettings.ini file for deploying <strong>Windows</strong> to the reference computer<br />
Revised June 14, 2009 Page 61 of 231
<strong>Deploying</strong> <strong>Windows</strong> 7<br />
By Mitch Tulloch<br />
(<strong>Windows</strong>Networking.com)<br />
Let us compare our new CustomSettings.ini file with the one we previously used in article 7 of this<br />
series for performing a completely unattended install. The table below shows these two configuration<br />
files side by side with the new file on the left and with differences highlighted in bold:<br />
CustomSettings.ini file for deploying <strong>Windows</strong> Customsettings.ini file for performing a<br />
to reference computer<br />
completely automated LTI<br />
[Settings]<br />
[Settings]<br />
Priority=Default<br />
Priority=Default<br />
Properties=MyCustomProperty<br />
Properties=MyCustomProperty<br />
[Default]<br />
[Default]<br />
OSInstall=YES<br />
OSInstall=YES<br />
SkipAdminPassword=YES<br />
SkipAdminPassword=YES<br />
SkipApplications=YES<br />
SkipApplications=YES<br />
SkipAppsOnUpgrade=YES<br />
SkipAppsOnUpgrade=YES<br />
SkipBDDWelcome=YES<br />
SkipBDDWelcome=YES<br />
SkipBitLocker=YES<br />
SkipBitLocker=YES<br />
SkipCapture=NO<br />
SkipCapture=YES<br />
Skip<strong>Computer</strong>Name=YES<br />
Skip<strong>Computer</strong>Name=YES<br />
Skip<strong>Computer</strong>Backup=YES<br />
Skip<strong>Computer</strong>Backup=YES<br />
SkipDeploymentType=YES<br />
SkipDeploymentType=YES<br />
DeploymentType=NEWCOMPUTER<br />
DeploymentType=NEWCOMPUTER<br />
SkipDomainMembership=YES<br />
SkipDomainMembership=YES<br />
SkipFinalSummary=YES<br />
JoinDomain=CONTOSO<br />
SkipLocaleSelection=YES<br />
DomainAdmin=Administrator<br />
KeyboardLocale=en-US<br />
DomainAdminDomain=CONTOSO<br />
UserLocale=en-US<br />
DomainAdminPassword=Pa$$w0rd<br />
UILanguage=en-US<br />
SkipFinalSummary=YES<br />
SkipPackageDisplay=YES<br />
SkipLocaleSelection=YES<br />
SkipProductKey=YES<br />
KeyboardLocale=en-US<br />
SkipSummary=YES<br />
UserLocale=en-US<br />
SkipTaskSequence=NO<br />
UILanguage=en-US<br />
SkipTimeZone=YES<br />
SkipPackageDisplay=YES<br />
TimeZoneName=Central Standard Time SkipProductKey=YES<br />
SkipUserData=Yes<br />
SkipSummary=YES<br />
SkipTaskSequence=YES<br />
TaskSequenceID=WIN7_001<br />
SkipTimeZone=YES<br />
TimeZoneName=Central Standard Time<br />
SkipUserData=Yes<br />
First, note that the value of the SkipTaskSequence property has been changed from YES to NO, and<br />
there is now no TaskSequenceID property. Making this change means that the Select A Task<br />
Sequence To Execute On This <strong>Computer</strong> page of the <strong>Windows</strong> Deployment Wizard will be displayed<br />
on the client (the reference computer) when the install is performed.<br />
Second, note that the value of SkipCapture has been changed from YES to NO. This means that the<br />
Specify Whether To Capture An Image page of the <strong>Windows</strong> Deployment Wizard will also be<br />
displayed on the client when the install is performed.<br />
Also, note that the JoinDomain and related properties are no longer specified. This is important. If you<br />
do not omit these lines, the Specify Whether To Capture An Image page of the wizard would not be<br />
displayed.<br />
Revised June 14, 2009 Page 62 of 231
<strong>Deploying</strong> <strong>Windows</strong> 7<br />
By Mitch Tulloch<br />
(<strong>Windows</strong>Networking.com)<br />
Now update your deployment share to create a LiteTouchPE_x64.iso file you can burn to a CD so you<br />
can boot your reference computer. To speed this up, you can clear the x86 checkbox on the General<br />
tab of the properties of your deployment share as shown in Figure 6 below. When you do, this MDT<br />
will only create a LiteTouchPE_x64.iso file when you update your deployment share and will not<br />
create a LiteTouchPE_x86.iso file. This will speed up the process of updating your deployment share<br />
if you are only deploying the 64-bit version of <strong>Windows</strong>.<br />
Figure 6: Configuring MDT to only create a 64-bit <strong>Windows</strong> PE image<br />
At this point, you will want to add applications, packages and (if needed) out-of-box drivers to your<br />
deployment share. The goal here is to perform any customizations needed before you deploy<br />
<strong>Windows</strong> onto your reference computer. We will examine how to perform such customizations in a<br />
later article of this series.<br />
At this point you are ready to deploy <strong>Windows</strong> onto your reference computer, so boot your reference<br />
computer, insert the 64-bit WinPE CD created by MDT, and wait for MDT to do its magic. When the<br />
Select A Task Sequence To Execute On This <strong>Computer</strong> page of the <strong>Windows</strong> Deployment Wizard<br />
appears, select the WIN7EX64_REF_001 task sequence from the list of task sequences displayed.<br />
Then when the Specify Whether To Capture An Image page appears, select the Capture An Image Of<br />
This <strong>Computer</strong> option and accept the default capture location and file name, which in this example will<br />
be:<br />
Revised June 14, 2009 Page 63 of 231
<strong>Deploying</strong> <strong>Windows</strong> 7<br />
By Mitch Tulloch<br />
(<strong>Windows</strong>Networking.com)<br />
Location: \\SEA-DC1\DeploymentShare$\Captures<br />
File name: WIN7EX64_REF_001<br />
The install will then proceed. Note that the install will take quite a bit longer than a simple LTI because<br />
once <strong>Windows</strong> has been installed on the reference computer and has been sysprepped, MDT will<br />
capture the image and upload it to the Captures folder of your deployment share, and capturing the<br />
image as a .wim file and copying it over the network to the deployment share can take some time.<br />
When the capture process is completed, the OOBE will be displayed on your reference computer<br />
(since it was sysprepped by MDT).<br />
Step 2: Importing the Captured Image<br />
The next step is to import the captured image of the reference computer. This captured image has<br />
been uploaded to the Captures folder of the deployment share as shown in Figure 7 next:<br />
Figure 7: The captured image of the reference computer<br />
To import this captured image into MDT, right-click on the Operating Systems folder in your<br />
deployment share and select Import Operating System. On the Source page of the Import Operating<br />
System Wizard, select Custom Image as shown in Figure 8:<br />
Revised June 14, 2009 Page 64 of 231
<strong>Deploying</strong> <strong>Windows</strong> 7<br />
By Mitch Tulloch<br />
(<strong>Windows</strong>Networking.com)<br />
Figure 8: Importing a custom image<br />
Click Next. On the Image page, browse to select the captured image (Figure 9). If you need to<br />
conserve disk space on the technician computer, you can select the checkbox to move the captured<br />
image instead of copying it.<br />
Figure 9: Selecting a custom image to import<br />
Revised June 14, 2009 Page 65 of 231
<strong>Deploying</strong> <strong>Windows</strong> 7<br />
By Mitch Tulloch<br />
(<strong>Windows</strong>Networking.com)<br />
Click Next. On the Setup page, leave the default option of Setup And Sysprep Files Are Not Needed<br />
selected (Figure 10):<br />
Figure 10: The Setup page of the Import Operating System Wizard<br />
Now finish the wizard, accepting the defaults, to import the captured image into your deployment<br />
share. The captured image will be displayed in the Operating Systems folder of your deployment<br />
share (Figure 11) which means you can now deploy it to your target computers:<br />
Figure 11: The captured image is ready to be deployed<br />
Revised June 14, 2009 Page 66 of 231
<strong>Deploying</strong> <strong>Windows</strong> 7<br />
By Mitch Tulloch<br />
(<strong>Windows</strong>Networking.com)<br />
Step 3: <strong>Deploying</strong> the Captured Image to Target <strong>Computer</strong>s<br />
You are now ready to deploy the captured image to target computers. Begin by creating a new task<br />
sequence with WIN7EX64_TARGET as its task sequence ID (Figure 12):<br />
Figure 12: Creating a task sequence for deploying the captured image of the reference<br />
computer to your target computers<br />
Select the Standard Client Task Sequence template, then associate the captured image with the task<br />
sequence as shown in Figure 13:<br />
Figure 13: Associating the captured image of the reference computer with the task sequence<br />
Revised June 14, 2009 Page 67 of 231
<strong>Deploying</strong> <strong>Windows</strong> 7<br />
By Mitch Tulloch<br />
(<strong>Windows</strong>Networking.com)<br />
Now you will probably want to fully automate the deployment of the captured image of your reference<br />
computer to your target computers. To do this, open the Rules tab of the properties of your<br />
Deployment Share and restore the CustomSettings.ini file to the way it was before (see the right side<br />
of the table earlier in this article) with the exception that the TaskSequenceID property should have<br />
WIN7EX64_TARGET as its value (Figure 14):<br />
Figure 14: CustomSettings.ini file for fully automating the deployment of the captured image of<br />
the reference computer to target computers<br />
Once you have modified your CustomSettings.ini file like this, boot one of your bare-metal target<br />
computers, insert your WinPE CD, and watch the captured image of your reference computer being<br />
automatically deployed to the target computer with no other intervention on your part.<br />
Part 11: Capturing an Existing Installation<br />
Introduction<br />
In the previous article of these series we saw how to use MDT 2010 to deploy <strong>Windows</strong> 7 to a<br />
reference computer and then capture an image of this reference computer so you can deploy it to<br />
multiple target computers. The steps involved were as follows:<br />
Revised June 14, 2009 Page 68 of 231
<strong>Deploying</strong> <strong>Windows</strong> 7<br />
By Mitch Tulloch<br />
(<strong>Windows</strong>Networking.com)<br />
1. Step 1: Install the reference computer and capture its Image<br />
2. Step 2: Import the captured Image<br />
3. Step 3: <strong>Deploying</strong> the captured image to target computers<br />
All three steps can be performed using MDT 2010 alone, that is, without needing <strong>Windows</strong><br />
Deployment Services or System Center Configuration Manager. This procedure lets you build and<br />
deploy a customized <strong>Windows</strong> 7 image using Lite Touch Installation (LTI) for small- and mid-sized<br />
deployments.<br />
But there is another way you can use MDT 2010 to build, capture and deploy customized <strong>Windows</strong> 7<br />
images and that is to capture an existing installation of <strong>Windows</strong> 7 that you have manually customized.<br />
The steps for doing this are as follows:<br />
1. Step 1: Install the reference computer and manually customize it<br />
2. Step 2: Capture an image of the reference computer<br />
3. Step 3: Import the captured Image<br />
4. Step 4: <strong>Deploying</strong> the captured image to target computers<br />
Note the difference:<br />
In the first approach, which is outlined in article 10 of this series, you customize your reference<br />
computer using MDT alone. This means you use MDT to deploy the operating system,<br />
applications, drivers, and software updates. And if you want to further customize the operating<br />
system you can open <strong>Windows</strong> System Image Manager (<strong>Windows</strong> SIM) from within MDT to<br />
customize the unattend.xml answer file for your installation. Customizing applications however<br />
may require some advanced tricks involving your answer file. You have to carefully plan all your<br />
customizations ahead of time as the process of using MDT to deploy and capture an image of<br />
your reference computer is automated.<br />
In the second approach, which is outlined below in this article, you use MDT to deploy <strong>Windows</strong><br />
(and if desired applications, drivers and software updates) to create your reference computer.<br />
Then you log on to your reference computer and manually perform any additional customizations<br />
that may be needed. Finally, once your reference computer is fully customized, you use MDT<br />
again to capture its image. This capability of using MDT to capture the image of a <strong>Windows</strong><br />
installation that has already been deployed is new in MDT 2010 and was not possible in MDT<br />
2008 (with MDT 2009 you had to use <strong>Windows</strong> Deployment Services to create a capture image as<br />
described in my earlier article <strong>Deploying</strong> Vista – Part 21: Working With Capture Images).<br />
Let us examine the second approach now.<br />
Step 1: Install the reference computer and manually customize it<br />
Begin by creating your reference computer. You can do this either by manually installing <strong>Windows</strong> 7<br />
and the needed applications, drivers and software updates on a system, or you can use MDT 2010 to<br />
perform these tasks either manually or by automating them. See my article <strong>Deploying</strong> <strong>Windows</strong> 7 –<br />
Part 6: Light Touch using MDT 2010 for how to manually deploy an image using MDT and my article<br />
<strong>Deploying</strong> <strong>Windows</strong> 7 – Part 7: Automated LTI Deployment for how to automate LTI using MDT. Once<br />
your reference computer has been deployed, log on to it and customize the operating system and<br />
applications as desired.<br />
Revised June 14, 2009 Page 69 of 231
<strong>Deploying</strong> <strong>Windows</strong> 7<br />
By Mitch Tulloch<br />
(<strong>Windows</strong>Networking.com)<br />
Step 2: Capture an image of the reference computer<br />
Now you are ready to capture an image of your reference computer. To do this, you are going to use<br />
the Sysprep and Capture task sequence template, a new type of task sequence template included in<br />
MDT 2010. This task sequence does not install <strong>Windows</strong> on a computer. Instead, it syspreps an<br />
existing <strong>Windows</strong> installation on a computer, reboots the computer into <strong>Windows</strong> PE, captures a .wim<br />
image file of the installation and uploads the captured image to a network share you specify.<br />
To create a task sequence for doing this, open the Deployment Workbench, expand your deployment<br />
share, right-click on the Task Sequences folder and select New Task Sequence. The New Task<br />
Sequence wizard opens displaying the General Settings page. Specify a task sequence ID and task<br />
sequence name as shown in Figure 1:<br />
Figure 1: Creating a new task sequence for capturing an existing installation of <strong>Windows</strong> 7<br />
Enterprise Edition<br />
On the Select Template page of the wizard, select Sysprep and Capture as the task sequence<br />
template to use for creating the new task sequence (Figure 2):<br />
Revised June 14, 2009 Page 70 of 231
<strong>Deploying</strong> <strong>Windows</strong> 7<br />
By Mitch Tulloch<br />
(<strong>Windows</strong>Networking.com)<br />
Figure 2: Select the Sysprep and Capture template<br />
On the Select OS wizard page, select the image of the operating system you are going to capture<br />
(Figure 3). Why do you need to do this if you are not going to install the selected image? Because<br />
MDT needs this information to get the appropriate unattend.xml answer file needed to perform the<br />
sysprep and capture process.<br />
Figure 3: Select an image of the OS you are going to capture<br />
Revised June 14, 2009 Page 71 of 231
<strong>Deploying</strong> <strong>Windows</strong> 7<br />
By Mitch Tulloch<br />
(<strong>Windows</strong>Networking.com)<br />
For the remaining steps of the wizard it does not matter what information you provide—just provide<br />
something when prompted.<br />
Now before you use this new task sequence to sysprep and capture an image of your reference<br />
computer, I recommend that you restore the CustomSettings.ini and Bootstrap.ini files for your<br />
deployment share to their original values. Specifically, change your CustomSettings.ini file back to<br />
this:<br />
[Settings]<br />
Priority=Default<br />
Properties=MyCustomProperty<br />
[Default]<br />
OSInstall=Y<br />
SkipAppsOnUpgrade=YES<br />
SkipCapture=NO<br />
SkipAdminPassword=YES<br />
SkipProductKey=YES<br />
And then change your BootStrap.ini file back to this:<br />
[Settings]<br />
Priority=Default<br />
[Default]<br />
DeployRoot=\\SEA-DC1\DeploymentShare$<br />
I recommend these changes because of my own personal experience trying to get the Sysprep and<br />
Capture task sequence template working properly.<br />
Now boot your reference computer normally and log on using an administrator account. Do NOT boot<br />
your reference computer using your LiteTouchPE_x64.iso CD or a <strong>Windows</strong> PE bootable CD—you<br />
are not trying to install an image, just sysprep and capture it. Once you have logged on, open a<br />
command prompt window and type the following command to manually start the <strong>Windows</strong><br />
Deployment Wizard on the computer:<br />
\\\\Scripts\LiteTouch.vbs<br />
Here \\\ is the UNC path to your deployment share. Figure 4 shows this<br />
command in my test environment:<br />
Revised June 14, 2009 Page 72 of 231
<strong>Deploying</strong> <strong>Windows</strong> 7<br />
By Mitch Tulloch<br />
(<strong>Windows</strong>Networking.com)<br />
Figure 4: Manually launching the <strong>Windows</strong> Deployment Wizard from the reference computer<br />
After a few moments the <strong>Windows</strong> Deployment Wizard will open and you'll be prompted to specify<br />
credentials for connecting to your deployment share (Figure 5):<br />
Figure 5: Supply credentials to connect to your deployment share from your reference<br />
computer<br />
Revised June 14, 2009 Page 73 of 231
<strong>Deploying</strong> <strong>Windows</strong> 7<br />
By Mitch Tulloch<br />
(<strong>Windows</strong>Networking.com)<br />
Now, if when you click Next you get an error message like that shown in Figure 6 below, you can try<br />
and resolve this issue by either:<br />
Replacing in the command described above with the IP address of the<br />
computer on which your deployment share resides.<br />
Applying the fix described in Fix for "Multiple connections to a server or shared resource by the<br />
same user, using more than one user name, are not allowed" problem with MDT 2010 found on<br />
the Microsoft Deployment Toolkit Team Blog.<br />
Figure 6: Credentials error<br />
I have personally tried the first approach and got it working. The fix described in the second approach<br />
was just published the day before writing this article so I have not had time to test it yet.<br />
Anyways, assuming that the credentials you supplied are accepted, clicking Next displays the wizard<br />
page asking you select a task sequence. Choose the task sequence you created earlier for<br />
sysprepping and capturing an existing installation (Figure 7).<br />
Revised June 14, 2009 Page 74 of 231
<strong>Deploying</strong> <strong>Windows</strong> 7<br />
By Mitch Tulloch<br />
(<strong>Windows</strong>Networking.com)<br />
Figure 7: Select your sysprep and capture task sequence<br />
On the next wizard page, select Capture An Image Of This Reference <strong>Computer</strong> and accept the<br />
default image upload location (\\\\Captures) and name for the captured<br />
image (.wim) as shown in Figure 8 below. Note that if you replaced<br />
with on the credentials page you should do the same here as well.<br />
Figure 8: Specifying a name and upload location for image to be captured<br />
Revised June 14, 2009 Page 75 of 231
<strong>Deploying</strong> <strong>Windows</strong> 7<br />
By Mitch Tulloch<br />
(<strong>Windows</strong>Networking.com)<br />
Click Next and review the summary page (Figure 9).<br />
Figure 9: Summary of what your sysprep and capture task sequence will do<br />
Now click Begin, and shortly you should see a progress indicator showing the image being<br />
sysprepped (Figure 10).<br />
Figure 10: The reference computer is being sysprepped and captured<br />
If sysprep fails with an error, go back and try one of the fixes described earlier. Otherwise, everything<br />
should work and the captured image of your reference computer will be uploaded to the Captures<br />
folder in your deployment share.<br />
Revised June 14, 2009 Page 76 of 231
<strong>Deploying</strong> <strong>Windows</strong> 7<br />
By Mitch Tulloch<br />
(<strong>Windows</strong>Networking.com)<br />
Steps 3 and 4 : Import The Captured Image and Deploy It To Target <strong>Computer</strong>s<br />
Now you can import the captured image of your reference computer using the process outlined in<br />
"Step 2: Import the captured Image" of my previous article (<strong>Deploying</strong> <strong>Windows</strong> 7 - Part 10: Capturing<br />
and <strong>Deploying</strong> an Image of a Reference <strong>Computer</strong>). Once this is done, you can automatically deploy<br />
the captured image to your target computers using the procedure outlined in my article <strong>Deploying</strong><br />
<strong>Windows</strong> 7 - Part 7: Automated LTI Deployment.<br />
Part 12: Planning for Application Compatibility<br />
An important issue to consider when planning any kind of desktop deploying is application<br />
compatibility. If you are upgrading to <strong>Windows</strong> 7 from <strong>Windows</strong> Vista, this will hopefully not be a Bit<br />
issue because applications designed for <strong>Windows</strong> Vista should, in almost all cases, work properly on<br />
<strong>Windows</strong> 7. If you are migrating desktop computers from <strong>Windows</strong> XP to <strong>Windows</strong> 7 however, you will<br />
need to take time to give careful consideration to what you may need to do in order to ensure your<br />
applications will function properly on the new operating system.<br />
Why Applications Break<br />
What are the reasons applications designed for <strong>Windows</strong> XP sometimes “break” when you try and run<br />
them on <strong>Windows</strong> 7? A couple of the main problem areas are:<br />
User Account Control – Applications that require administrative privileges and which were<br />
designed for <strong>Windows</strong> XP may not work properly on <strong>Windows</strong> 7 even if the user is a member of<br />
the local Administrators group on his computer. Microsoft has tried to minimize this issue by<br />
including application compatibility shims in <strong>Windows</strong> 7 for many common applications, and these<br />
shims will often even allow users to run such applications as standard users instead of<br />
administrators. Some older applications however simply will not work on <strong>Windows</strong> 7, even when<br />
the user is a local admin. In such a case you may need to use one of the following tools described<br />
below to run your older application separately from the <strong>Windows</strong> 7 operating system: Virtual PC<br />
2007 SP1, <strong>Windows</strong> Virtual PC with <strong>Windows</strong> XP Mode, Microsoft Enterprise Desktop<br />
Virtualization, or Microsoft Application Virtualization.<br />
User profile structure and versioning – The user profile structure was redesigned in <strong>Windows</strong> Vista<br />
to make it more rational. If an older application was designed to access user profile files in the<br />
correct way using API function calls and environment variables, these user profile changes should<br />
not impact whether the application will run or not in <strong>Windows</strong> 7 since <strong>Windows</strong> 7 includes directory<br />
junctions for common <strong>Windows</strong> XP profile folders like My Documents. If however an older<br />
application has <strong>Windows</strong> XP-style profile folders hard-coded into the application's code, then the<br />
application could fail under <strong>Windows</strong> 7 for this reason. Another issue that can prevent an older<br />
application from running is if the application is confused by the version number of <strong>Windows</strong> 7. In<br />
other words, when you try and start the application, it checks the OS version number, finds this is<br />
6.1, and was coded not to know what this means and therefore does not start. In such cases as<br />
these where only a few users are affected, these users can try using the Program Compatibility<br />
Troubleshooter in <strong>Windows</strong> 7 and see if this resolves the issue. If a lot of users will be affected,<br />
you can try using the Application Compatibility Toolkit to try and analyze the problem and develop<br />
a “fix” you can deploy to the affected computers.<br />
Revised June 14, 2009 Page 77 of 231
<strong>Deploying</strong> <strong>Windows</strong> 7<br />
By Mitch Tulloch<br />
(<strong>Windows</strong>Networking.com)<br />
Tools for Mitigating Application Compatibility Issues<br />
Microsoft provides a number of tools you can use to ensure you can still use your older applications<br />
after upgrading or migrating to <strong>Windows</strong> 7. These tools are basically of three types and these are my<br />
own "friendly" names for each category:<br />
One-off tools – Try using these tools first if only a few users are going to be affected.<br />
Large-scale tools – Large-scale enterprise environments should consider using these tools first.<br />
Virtualization tools – When all else fails, virtualize.<br />
Let us briefly examine each category.<br />
One-Off Tools for Running Older Applications<br />
Let us say you are retiring your old <strong>Windows</strong> XP computers for newer ones running <strong>Windows</strong> 7.<br />
Afterwards, several users indicate they need an older program installed on their computers. You try<br />
installing the program and something like this appears (Figure 1):<br />
Figure 1: Warning from Program Compatibility Assistant<br />
If you see a warning like this when installing an older program on <strong>Windows</strong> 7, you can click Check For<br />
Solutions Online and see if Microsoft has previously identified this issue and has created a fix for it.<br />
If the older program seemed to install OK on <strong>Windows</strong> 7 but problems arise when users try and run it,<br />
they can click Start, type program compatibility in the Start menu search box, and press ENTER to<br />
launch the Program Compatibility Troubleshooter (Figure 2). Doing this will cause <strong>Windows</strong> to try and<br />
find issues with installed applications, determine whether fixes are available, and apply the fixes to try<br />
and resolve the issues.<br />
Revised June 14, 2009 Page 78 of 231
<strong>Deploying</strong> <strong>Windows</strong> 7<br />
By Mitch Tulloch<br />
(<strong>Windows</strong>Networking.com)<br />
Figure 2: Running the Program Compatibility Troubleshooter<br />
If this does not work the user can right-clicking on the executable program file in <strong>Windows</strong> Explorer,<br />
selecting Properties, selecting the Compatibilty tab, and manually trying different program<br />
compatibility modes to try and get the application to work properly (Figure 3).<br />
Figure 3: Selecting a program compatibility mode<br />
Revised June 14, 2009 Page 79 of 231
<strong>Deploying</strong> <strong>Windows</strong> 7<br />
By Mitch Tulloch<br />
(<strong>Windows</strong>Networking.com)<br />
If none of these approaches work, see Virtualization Tools below.<br />
Large-Scale Tools for Analyzing and Mitigating Application Compatibility Issues<br />
If your organization has hundreds or thousands of users running dozens of different applications on<br />
their computers, you will definitely need to take a more proactive approach than the after-the-fact<br />
method described in the previous section above. In this case the tool you will want to use is the<br />
Application Compatibility Toolkit (ACT) version 5.5. ACT is a collection of tools and documentation<br />
that you can use to evaluate and mitigate application compatibility issues prior to beginning the<br />
deployment of <strong>Windows</strong> 7 in your environment. ACT helps you understand your application<br />
compatibility situation by identifying which of your existing applications are compatible with <strong>Windows</strong> 7<br />
and which might require further testing. ACT can also help you develop compatibility fixes for problem<br />
applications which you can then deploy as application mitigation packages to affected systems. ACT<br />
is a complex tool that takes some getting used to—for more information on using ACT see Chapter 5<br />
of the <strong>Windows</strong> 7 Resource Kit from Microsoft Press. And you can download ACT 5.5 from here.<br />
Virtualization Tools for Running Older Applications<br />
Whether you are a smaller shop that has found that the built-in application compatibility tools in<br />
<strong>Windows</strong> 7 are not sufficient, or a large enterprise that has discovered that application compatibility<br />
issues for certain older business-critical applications cannot be resolved using ACT, you still have<br />
several ways you can proceed in order to keep those older applications running for users who need<br />
them. Virtualization is the key here, and your choices from Microsoft are as follows:<br />
Virtual PC 2007 SP1 – If you migrated older computers to <strong>Windows</strong> 7 you can install Virtual PC 2007<br />
SP1 on these computers so the users of these computers can install their problematic older<br />
applications in a separate instance of <strong>Windows</strong> XP (or an older version of <strong>Windows</strong>) running in a<br />
separate virtual machine. Note that this solution has some limitations. For example, Virtual PC does<br />
not include support for USB devices. You can download Virtual PC 2007 SP1 from here.<br />
<strong>Windows</strong> XP Mode and <strong>Windows</strong> Virtual PC - <strong>Windows</strong> Virtual PC lets you run multiple <strong>Windows</strong><br />
environments including <strong>Windows</strong> XP Mode from your <strong>Windows</strong> 7 desktop. By installing your<br />
problematic older applications into the <strong>Windows</strong> XP Mode environment, users can run these<br />
applications directly from the Start menu. The advantages of this virtualization approach over Virtual<br />
PC 2007 SP1 are:<br />
No separate virtual desktop for running the older applications—they are integrated into the<br />
<strong>Windows</strong> 7 desktop.<br />
Support for USB devices such as printers, scanners and so on.<br />
The disadvantage of this approach is that <strong>Windows</strong> Virtual PC requires processors that support<br />
hardware virtualization (Intel-VT or AMD-V). Only desktop computers a year or so old typically support<br />
such technologies. So if you migrated older systems from <strong>Windows</strong> XP to <strong>Windows</strong> 7 you won't be<br />
able to use this method. But if you purchased brand new <strong>Windows</strong> 7 systems to replace your older<br />
<strong>Windows</strong> XP computers, you may be able to use this approach to run problematic older applications<br />
on these computers. You can download <strong>Windows</strong> XP Mode and <strong>Windows</strong> Virtual PC from here.<br />
Microsoft Enterprise Desktop Virtualization – MED-V is an enterprise tool that can be used to<br />
deliver Virtual PC images to computers from a central repository where you can create and manage<br />
these images. MED-V thus helps reduce application-to-OS compatibility issues, but in a more scalable<br />
Revised June 14, 2009 Page 80 of 231
<strong>Deploying</strong> <strong>Windows</strong> 7<br />
By Mitch Tulloch<br />
(<strong>Windows</strong>Networking.com)<br />
and managed way than simply installing Virtual PC on each user's computer. Using MED-V, you can<br />
manage the entire life cycle of virtual images, provision them to authenticated users in an Active<br />
Directory environment, monitor their usage, and more. The user remains unaware of the virtualization<br />
running in the background and sees only one desktop environment. MED-V is part of the Microsoft<br />
Desktop Optimization Pack (MDOP). For a look at how MED-V works and how you can use it, see<br />
Chapter 6 of my free ebook Understanding Microsoft Virtualization Solutions: From the Desktop to the<br />
Datacenter from Microsoft Press.<br />
Microsoft Application Virtualization – Microsoft App-V is an enterprise tool that can be used to<br />
centralize the management of the entire application life cycle. Using App-V, administrators can<br />
dynamically deliver applications on-demand to users who need them instead of installing them on<br />
each user's computer. App-V helps reduce application-to-application conflicts, for example when a<br />
user needs to run two different versions of the same application and are unable to install both<br />
versions locally on the same machine. App-V also simplifies software update management and makes<br />
application compatibility regression testing easier. App-V is also part of MDOP. For a look at how<br />
App-V works and how you can use it, see Chapter 4 of my free ebook Understanding Microsoft<br />
Virtualization Solutions: From the Desktop to the Datacenter from Microsoft Press.<br />
Part 13: Manual Migration from <strong>Windows</strong> XP to <strong>Windows</strong> 7<br />
Understanding the Refresh <strong>Computer</strong> Deployment Scenario<br />
So far we've looked at how to use MDT 2010 to deploy a <strong>Windows</strong> 7 image onto bare-metal target<br />
computers. This is known as the New <strong>Computer</strong> deployment scenario, whereby a new installation of<br />
<strong>Windows</strong> 7 is deployed to a new computer. In the New <strong>Computer</strong> scenario, there are no existing user<br />
settings or data that need to be migrated, and the Standard Client Task Sequence is used to deploy<br />
the captured image of your reference computer onto the target computer.<br />
But what if our target computers are already in use and are running <strong>Windows</strong> XP and have user<br />
settings and data stored on them? And what if we want to migrate these computers to <strong>Windows</strong> 7<br />
while retaining the existing user settings and data on each computer? In that case, the user settings<br />
and data on each computer must first be saved, then the computer must be wiped, the new operating<br />
system is laid down, and finally the user settings and data are restored. This is known as the Refresh<br />
<strong>Computer</strong> deployment scenario, and in addition to using this approach to migrate computers from<br />
<strong>Windows</strong> XP to <strong>Windows</strong> 7 you can also use it to "repair" user's <strong>Windows</strong> 7 computers by re-imaging<br />
them when they become corrupted.<br />
Note: Why can't one use the Upgrade <strong>Computer</strong> deployment scenario to migrate computers from<br />
<strong>Windows</strong> XP to <strong>Windows</strong> 7? Because there is no supported upgrade path from <strong>Windows</strong> XP to<br />
<strong>Windows</strong> 7, take a look at this link for a list of supported upgrade scenarios. For more information on<br />
deployment scenarios, see my earlier article Understanding Deployment Scenarios in my series of<br />
articles on deploying Vista.<br />
Verifying Migration Readiness<br />
Before you migrate a <strong>Windows</strong> XP computer to <strong>Windows</strong> 7, you should make sure the computer is<br />
able to run the new operating system. If you are only migrating a small number of computers, you can<br />
use the <strong>Windows</strong> 7 Upgrade Advisor, available from here. For larger migrations however, you should<br />
use the Microsoft Assessment and Planning Tool (MAP) 4.0 described in article 3 and article 4 of this<br />
series.<br />
Revised June 14, 2009 Page 81 of 231
<strong>Deploying</strong> <strong>Windows</strong> 7<br />
By Mitch Tulloch<br />
(<strong>Windows</strong>Networking.com)<br />
Migrating User Settings and Data<br />
MDT 2010 includes the User State Migration Tool (USMT) 4.0 and uses this tool to migrate user<br />
settings and data during a Refresh or Replace <strong>Computer</strong> deployment scenario. A new feature of<br />
version 4.0 of USMT is support for hard-link migration, which allows user settings and data to remain<br />
stored on the computer during a Refresh <strong>Computer</strong> deployment scenario. With earlier versions of<br />
USMT, user state information (user settings and data) had to be copied to a network share or<br />
removable media because the computer was wiped during a Refresh <strong>Computer</strong> deployment scenario,<br />
then after the operating system is installed the user state information is restored by copying it back to<br />
the computer from the network share or removable media where it was saved.<br />
With hard-link migration however, the user state remains where it is on the user's computer, hard links<br />
are created for the user settings and data files. A hard link is a directory entry for a file on an NTFS file<br />
system. Usually each file has a single hard link, meaning the file appears in a single directory on the<br />
file system. With hard-link migration however, USMT creates an additional hard link for each user<br />
setting or data file so that the file also appears to reside in the temporary C:\MININT folder created by<br />
MDT during deployment. Then, instead of wiping the file system from the computer in order to reimage<br />
it, MDT 2010 simply deletes all operating system folders and files from the computer—the boot<br />
volume is not formatted—while the MININT folder ensures that the user state information is not<br />
deleted from the computer. After installation is complete, the user state information is restored to its<br />
proper locations by rebuilding the links to the files, and the MININT folder together with its hard links is<br />
deleted.<br />
The benefits of this approach for migrations are threefold:<br />
1. The migration is faster because the file system does not need to be wiped and recreated during<br />
deployment.<br />
2. The migration is faster because the user state information doesn't need to be copied to a network<br />
location, deleted from the computer, and restored.<br />
3. The deployment is simpler because you do not need to create a separate network share for<br />
storing saved user state information.<br />
Manually Migrating <strong>Windows</strong> XP <strong>Computer</strong>s to <strong>Windows</strong> 7<br />
Now let us try manually migrating a <strong>Windows</strong> XP computer to <strong>Windows</strong> 7 using MDT 2010. Begin by<br />
customizing the computer, for example by saving a bitmap image file in the My Pictures folder of user<br />
Karen Berg (CONTOSO\kberg) as shown in Figure 1:<br />
Figure 1: Karen's computer is currently running <strong>Windows</strong> XP and has a photo in her My Pictures folder<br />
Revised June 14, 2009 Page 82 of 231
<strong>Deploying</strong> <strong>Windows</strong> 7<br />
By Mitch Tulloch<br />
(<strong>Windows</strong>Networking.com)<br />
Now on the technician computer, open the properties of your deployment share and configure the<br />
BootStrap.ini file to read as follows:<br />
[Settings]<br />
Priority=Default<br />
[Default]<br />
DeployRoot=\\SEA-DC1\DeploymentShare$<br />
UserID=Administrator<br />
UserDomain=CONTOSO<br />
UserPassword=Pa$$w0rd<br />
KeyboardLocale=en-US<br />
SkipBDDWelcome=YES<br />
Then configure the CustomSettings.ini file to read as follows:<br />
[Settings]<br />
Priority=Default<br />
Properties=MyCustomProperty<br />
[Default]<br />
OSInstall=YES<br />
SkipAdminPassword=YES<br />
SkipApplications=YES<br />
SkipAppsOnUpgrade=YES<br />
SkipBDDWelcome=YES<br />
SkipBitLocker=YES<br />
SkipCapture=YES<br />
Skip<strong>Computer</strong>Name=NO<br />
Skip<strong>Computer</strong>Backup=NO<br />
<strong>Computer</strong>BackupLocation=AUTO<br />
SkipDeploymentType=NO<br />
SkipDomainMembership=YES<br />
JoinDomain=CONTOSO<br />
DomainAdmin=Administrator<br />
DomainAdminDomain=CONTOSO<br />
DomainAdminPassword=Pa$$w0rd<br />
SkipFinalSummary=NO<br />
SkipLocaleSelection=YES<br />
KeyboardLocale=en-US<br />
UserLocale=en-US<br />
UILanguage=en-US<br />
SkipPackageDisplay=YES<br />
SkipProductKey=YES<br />
SkipSummary=NO<br />
SkipTaskSequence=NO<br />
SkipTimeZone=YES<br />
TimeZoneName=Central Standard Time<br />
SkipUserData=NO<br />
UserDataLocation=AUTO<br />
Then create a new task sequence based on the Standard Client Task Sequence and configure the<br />
task sequence to deploy <strong>Windows</strong> 7 Enterprise edition.<br />
Now log onto Karen's computer as Administrator, open a command prompt, and type the following<br />
command to launch the <strong>Windows</strong> Deployment Wizard on the computer:<br />
Revised June 14, 2009 Page 83 of 231
<strong>Deploying</strong> <strong>Windows</strong> 7<br />
By Mitch Tulloch<br />
(<strong>Windows</strong>Networking.com)<br />
\\SEA-DC1\DeploymentShare$\Scripts\LiteTouch.vbs<br />
The wizard will begin by prompting you to select a task sequence (Figure 2):<br />
Figure 2: Select the task sequence for migrating from XP to <strong>Windows</strong> 7<br />
Next, you will be prompted to select the Refresh <strong>Computer</strong> deployment scenario (Figure 3):<br />
Figure 3: Note that the Upgrade <strong>Computer</strong> deployment scenario is not available for <strong>Windows</strong> XP<br />
Revised June 14, 2009 Page 84 of 231
<strong>Deploying</strong> <strong>Windows</strong> 7<br />
By Mitch Tulloch<br />
(<strong>Windows</strong>Networking.com)<br />
Next, you will be prompted to specify a new name for the computer or accept the existing name<br />
(Figure 4):<br />
Figure 4: Specify the computer name<br />
Next, you are prompted to specify how to handle user state information. Leave this set at the default<br />
of automatically determining the location and storing the information locally on the computer (Figure<br />
5):<br />
Figure 5: Using hard-link migration to store user state information locally on the computer<br />
Revised June 14, 2009 Page 85 of 231
<strong>Deploying</strong> <strong>Windows</strong> 7<br />
By Mitch Tulloch<br />
(<strong>Windows</strong>Networking.com)<br />
Next, you are prompted to make an image backup of your computer in case the migration fails. You<br />
should always do this, but for this walkthrough we will omit the part where you create the backup to<br />
speed things up (Figure 6):<br />
Figure 6: You should back up the computer before migrating it to <strong>Windows</strong> 7 (though we are<br />
not doing this here)<br />
Next, review the choices you have made (Figure 7):<br />
Figure 7: Review your selections<br />
Revised June 14, 2009 Page 86 of 231
<strong>Deploying</strong> <strong>Windows</strong> 7<br />
By Mitch Tulloch<br />
(<strong>Windows</strong>Networking.com)<br />
Now click Begin, and soon a progress bar will indicate that user state information is being captured<br />
(Figure 8):<br />
Figure 8: User state information is being captured and saved on the computer<br />
After a short time, the computer will reboot and MDT will begin applying the <strong>Windows</strong> 7 image to the<br />
computer. Once <strong>Windows</strong> 7 has been installed and the computer reboots for the last time, the<br />
progress bar will indicate that the captured user state information is being restored (Figure 9).<br />
Figure 9: User state information is being restored<br />
This may take a few minutes. Once this is done, Karen Berg can log onto her refreshed computer and<br />
when she opens her Pictures library, she sees that the photo is still present, which indicates that her<br />
user state information has been successfully migrated (Figure 10):<br />
Figure 10: The migration of user state information was successful during the XP to Win7 migration<br />
Revised June 14, 2009 Page 87 of 231
<strong>Deploying</strong> <strong>Windows</strong> 7<br />
By Mitch Tulloch<br />
(<strong>Windows</strong>Networking.com)<br />
In the next article of this series we'll examine how to automate this whole process.<br />
Part 14: Automated Migration from <strong>Windows</strong> XP to <strong>Windows</strong> 7<br />
Tip: You can find more information about automating LTI deployment in the <strong>Windows</strong> 7 Resource Kit<br />
from Microsoft Press. I'm the lead author for this Resource Kit and I also maintain the Unofficial<br />
Support Site for the <strong>Windows</strong> 7 Resource Kit where you will find the latest updates and other useful<br />
information.<br />
In the previous article of this series, we examined how MDT 2010 together with USMT 4.0 can be<br />
used to manually migrate a <strong>Windows</strong> XP computer to <strong>Windows</strong> 7 while maintaining the user settings<br />
and data on the computer. In this article we are going to fully automate the migration process.<br />
To do this, use the Deployment Workbench on your MDT computer to open the properties of your<br />
deployment share. If you have worked through the previous article of this series then the Bootstrap.ini<br />
file for this share will look like this:<br />
[Settings]<br />
Priority=Default<br />
[Default]<br />
DeployRoot=\\SEA-DC1\DeploymentShare$<br />
UserID=Administrator<br />
UserDomain=CONTOSO<br />
UserPassword=Pa$$w0rd<br />
KeyboardLocale=en-US<br />
SkipBDDWelcome=YES<br />
This is fine as is. We do not need to modify Bootstrap.ini any further.<br />
Now examine the CustomSettings.ini file for your deployment share, which should currently look like<br />
this:<br />
[Settings]<br />
Priority=Default<br />
Properties=MyCustomProperty<br />
[Default]<br />
OSInstall=YES<br />
SkipAdminPassword=YES<br />
SkipApplications=YES<br />
SkipAppsOnUpgrade=YES<br />
SkipBDDWelcome=YES<br />
SkipBitLocker=YES<br />
SkipCapture=YES<br />
Skip<strong>Computer</strong>Name=NO<br />
Skip<strong>Computer</strong>Backup=NO<br />
<strong>Computer</strong>BackupLocation=AUTO<br />
SkipDeploymentType=NO<br />
SkipDomainMembership=YES<br />
JoinDomain=CONTOSO<br />
DomainAdmin=Administrator<br />
DomainAdminDomain=CONTOSO<br />
DomainAdminPassword=Pa$$w0rd<br />
Revised June 14, 2009 Page 88 of 231
SkipFinalSummary=NO<br />
SkipLocaleSelection=YES<br />
KeyboardLocale=en-US<br />
UserLocale=en-US<br />
UILanguage=en-US<br />
SkipPackageDisplay=YES<br />
SkipProductKey=YES<br />
SkipSummary=NO<br />
SkipTaskSequence=NO<br />
SkipTimeZone=YES<br />
TimeZoneName=Central Standard Time<br />
SkipUserData=NO<br />
UserDataLocation=AUTO<br />
<strong>Deploying</strong> <strong>Windows</strong> 7<br />
By Mitch Tulloch<br />
(<strong>Windows</strong>Networking.com)<br />
Here is where we need to make several changes in order to automate the migration process.<br />
First, change this line: Skip<strong>Computer</strong>Name=NO<br />
to the following: Skip<strong>Computer</strong>Name=YES<br />
Doing this means you won't be prompted to rename the computer during the migration.<br />
Next, change these two lines:<br />
Skip<strong>Computer</strong>Backup=NO<br />
<strong>Computer</strong>BackupLocation=AUTO<br />
to the following:<br />
Skip<strong>Computer</strong>Backup=YES<br />
<strong>Computer</strong>BackupLocation=NONE<br />
Of course, not backing up the computer before migrating it is not a good idea, but we will do this to<br />
speed up the walkthrough.<br />
Next, change this line: SkipDeploymentType=NO<br />
to this: SkipDeploymentType=YES<br />
and add the following line below it: DeploymentType=REFRESH<br />
Doing this means that you won't be prompted to choose the type of deployment scenario to perform.<br />
Next, change this line: SkipTaskSequence=NO<br />
to this: SkipTaskSequence=YES<br />
Then under this line add another line specifying the task sequence you will use for the migration,<br />
which in my own lab environment is the following: TaskSequenceID=XP_TO_W7<br />
Next, change this line: SkipUserData=NO<br />
to this: SkipUserData=YES<br />
Leave this line unchanged: UserDataLocation=AUTO<br />
Revised June 14, 2009 Page 89 of 231
<strong>Deploying</strong> <strong>Windows</strong> 7<br />
By Mitch Tulloch<br />
(<strong>Windows</strong>Networking.com)<br />
This will cause user state information to be captured and restored using hard-line migration.<br />
Finally, change these two lines:<br />
SkipFinalSummary=NO<br />
SkipSummary=NO<br />
to read as follows:<br />
SkipFinalSummary=YES<br />
SkipSummary=YES<br />
Doing this will hide the final summary screen of the <strong>Windows</strong> Deployment Wizard from the computer's<br />
user.<br />
Having made all of these changes, your CustomSettings.ini file should now look like this:<br />
[Settings]<br />
Priority=Default<br />
Properties=MyCustomProperty<br />
[Default]<br />
OSInstall=YES<br />
SkipAdminPassword=YES<br />
SkipApplications=YES<br />
SkipAppsOnUpgrade=YES<br />
SkipBDDWelcome=YES<br />
SkipBitLocker=YES<br />
SkipCapture=YES<br />
Skip<strong>Computer</strong>Name=YES<br />
Skip<strong>Computer</strong>Backup=YES<br />
<strong>Computer</strong>BackupLocation=NONE<br />
SkipDeploymentType=YES<br />
DeploymentType=REFRESH<br />
SkipDomainMembership=YES<br />
JoinDomain=CONTOSO<br />
DomainAdmin=Administrator<br />
DomainAdminDomain=CONTOSO<br />
DomainAdminPassword=Pa$$w0rd<br />
SkipFinalSummary=YES<br />
SkipLocaleSelection=YES<br />
KeyboardLocale=en-US<br />
UserLocale=en-US<br />
UILanguage=en-US<br />
SkipPackageDisplay=YES<br />
SkipProductKey=YES<br />
SkipSummary=YES<br />
SkipTaskSequence=YES<br />
TaskSequenceID=XP_TO_W7<br />
SkipTimeZone=YES<br />
TimeZoneName=Central Standard Time<br />
SkipUserData=YES<br />
UserDataLocation=AUTO<br />
Revised June 14, 2009 Page 90 of 231
<strong>Deploying</strong> <strong>Windows</strong> 7<br />
By Mitch Tulloch<br />
(<strong>Windows</strong>Networking.com)<br />
Before you perform the deployment, make sure that you have customized the users’ computer, for<br />
example, by copying a photo file to the My Pictures folder in her user profile as we did in the previous<br />
article of this series.<br />
Now log onto the user's computer as Administrator, open a command prompt, and type the following<br />
command to launch the <strong>Windows</strong> Deployment Wizard on the computer:<br />
\\SEA-DC1\DeploymentShare$\Scripts\LiteTouch.vbs<br />
Instead of having to respond to various prompts of the wizard, the progress bar will immediately be<br />
displayed indicating that the user state information on the computer is being captured (Figure 1):<br />
Figure 1: User state information is being captured<br />
After a short time, the computer will reboot and MDT will begin applying the <strong>Windows</strong> 7 image to the<br />
computer. Once <strong>Windows</strong> 7 has been installed and the computer reboots for the last time, the<br />
progress bar will indicate that the captured user state information is being restored (Figure 2):<br />
Figure 2: User state information is being restored<br />
Once this is done, the user can log onto her refreshed computer and when she opens her Pictures<br />
library, she sees that the photo is still present, which indicates that her user state information has<br />
been successfully migrated (Figure 3):<br />
Revised June 14, 2009 Page 91 of 231
<strong>Deploying</strong> <strong>Windows</strong> 7<br />
By Mitch Tulloch<br />
(<strong>Windows</strong>Networking.com)<br />
Figure 3: The migration succeeded<br />
Considerations when Migrating from <strong>Windows</strong> XP to <strong>Windows</strong> 7<br />
Before you jump in and begin migrating all your <strong>Windows</strong> XP computers to <strong>Windows</strong> 7, you need to<br />
consider a few things.<br />
First, if your <strong>Windows</strong> XP computers are old and do not have the hardware to properly support<br />
running <strong>Windows</strong> 7 on them, consider using the Replace <strong>Computer</strong> deployment scenario instead of<br />
the Refresh <strong>Computer</strong> scenario. In the Replace <strong>Computer</strong> scenario, MDT first uses USMT to capture<br />
user state information and save it to a network share. Then MDT performs a clean installation of<br />
<strong>Windows</strong> 7 on a brand-new computer. Finally, MDT uses USMT to restore the user state information<br />
to the new computer. In this scenario, the user gets a new computer and a new operating system but<br />
retains her existing user settings and data. Afterwards you send the users' old computers to the<br />
recycle mart.<br />
Second, if your <strong>Windows</strong> XP computers have older applications that aren't compatible with <strong>Windows</strong> 7<br />
then you'll need to use the application compatibility tools and strategies outlined in part 12 of this<br />
series before you can consider migrating the computers to <strong>Windows</strong> 7.<br />
Third, if you plan on upgrading the applications on your <strong>Windows</strong> XP computers to newer versions of<br />
these applications, and if all important user data is redirected for storage on the network, then maybe<br />
you shouldn't migrate the computers at all. Instead, consider using the New <strong>Computer</strong> deployment<br />
scenario to deploy <strong>Windows</strong> 7 together with new applications onto either new or existing hardware,<br />
and forget about migrating user settings and data. After all, what better time to start from scratch than<br />
when you are migrating your desktop computers from an operating system that is approaching end of<br />
life?<br />
Finally, if you want to customize which user settings and data are migrated and which are not<br />
migrated (for example to avoid migrating settings for older applications that are no longer needed)<br />
then you need to learn how to customize the XML migration files that govern how USMT works. In this<br />
Revised June 14, 2009 Page 92 of 231
<strong>Deploying</strong> <strong>Windows</strong> 7<br />
By Mitch Tulloch<br />
(<strong>Windows</strong>Networking.com)<br />
case, you can begin learning more by reading Chapter 7 of the <strong>Windows</strong> 7 Resource Kit from<br />
Microsoft Press. This will give you a good introduction to how USMT can be customized, and if you<br />
need to dig deeper into this topic then see the User State Migration Tool 4.0 User's Guide in the<br />
TechNet Library here.<br />
Part 15: Configuring the MDT Database<br />
Understanding the MDT Database<br />
So far in this series of articles we have learned how to use MDT 2010 to perform a Lite Touch (LTI)<br />
deployment of <strong>Windows</strong> 7 onto a single computer, either manually or fully-automated. But what if you<br />
need to deploy <strong>Windows</strong> 7 onto dozens or even hundreds of computers? What if you want specific<br />
names assigned to each computer? What if you want one group of computers to have one set of<br />
<strong>Windows</strong> features installed, another group to have other features, and so on? What if you want<br />
computers at one location to have one set of applications installed, and those at a different location to<br />
have a different set of applications installed?<br />
If you want to perform mass deployments like this and customize what drivers, features or<br />
applications are installed according to the computer's hardware, location or role, you can accomplish<br />
this with MDT by using the MDT database. The MDT database is basically a Microsoft SQL Serverbased<br />
version of the CustomSettings.ini file that can be used as a central repository for storing the<br />
configuration settings used to deploy multiple computers using MDT. Without the MDT database, you<br />
would need to create a separate CustomSettings.ini file for each computer you want to deploy using<br />
MDT and then copy/paste this file into MDT each time you deploy a new computer. With the MDT<br />
database, you only have one CustomSettings.ini file for all computers, plus a SQL database that<br />
contains the customizations specific to each computer.<br />
Installing SQL Server 2008 Express<br />
Before you can create and configure the MDT database, you must prepare your environment by<br />
installing and configuring one of the following versions of SQL Server in your environment:<br />
SQL Server 2005<br />
SQL Server 2008<br />
SQL Server 2008 Express<br />
You can install SQL Server either on the MDT computer itself or on a separate computer on your<br />
network.<br />
For this example, we will install SQL Server 2008 Express on our MDT computer which is a domain<br />
controller SEA-DC1.contoso.com in our test environment running <strong>Windows</strong> Server 2008 R2. If you<br />
install your SQL Server 2008 Express instance on a different platform such as <strong>Windows</strong> Server 2008<br />
or <strong>Windows</strong> Server 2003 SP2, you will first need to install the following two items which are<br />
prerequisites for installing SQL Server 2008 Express:<br />
Microsoft .NET Framework 3.5 SP1<br />
<strong>Windows</strong> Installer 4.5 Redistributable<br />
Begin by downloading SQL Server 2008 Express SP1 from the Microsoft Download Center. Then<br />
double-click on SQLEXPR_platform_ENU.exe where platform is either x64 or x86 (for <strong>Windows</strong><br />
Server 2008 R2 platform must be x64) to open the SQL Server Installation Center (Figure 1):<br />
Revised June 14, 2009 Page 93 of 231
<strong>Deploying</strong> <strong>Windows</strong> 7<br />
By Mitch Tulloch<br />
(<strong>Windows</strong>Networking.com)<br />
Figure 1: The SQL Server Installation Center<br />
Next, click Installation on the left to display the various installation options (Figure 2):<br />
Figure 2: Options for installing SQL Server 2008 Express<br />
Revised June 14, 2009 Page 94 of 231
<strong>Deploying</strong> <strong>Windows</strong> 7<br />
By Mitch Tulloch<br />
(<strong>Windows</strong>Networking.com)<br />
Next, click "New SQL Server stand-alone installation or add Features to an existing installation" to<br />
launch the SQL Server 2008 Setup wizard. Skip the product key page since the Express version is<br />
free and doesn't require you to specify a product key, then accept the EULA. At this point the page for<br />
installing the Setup Support Files is displayed (Figure 3):<br />
Figure 3: Installing the Setup Support Files<br />
Click Install to install the Setup Support files. Once these are installed, the Setup Support Rules run to<br />
check whether your computer can support installation of SQL Server 2008 Express (Figure 4):<br />
Figure 4: Verifying the computer supports installing SQL Server 2008 Express<br />
Revised June 14, 2009 Page 95 of 231
<strong>Deploying</strong> <strong>Windows</strong> 7<br />
By Mitch Tulloch<br />
(<strong>Windows</strong>Networking.com)<br />
Note that we get two warnings in this example. First, installing SQL Server on a domain controller is<br />
not recommended, but it is actually fine to do this for a test environment like the one we are using<br />
here. And second, <strong>Windows</strong> Firewall is currently blocking remote computers from being able to<br />
access the SQL Server instance we are going to install—we will deal with this later in this article.<br />
On the Feature Selection page, select Database Engine Services (Figure 5):<br />
Figure 5: Selecting features to install<br />
Accept the defaults on the Instance Configuration page (Figure 6):<br />
Figure 6: Installing a new instance of SQL Server 2008 Express<br />
Revised June 14, 2009 Page 96 of 231
<strong>Deploying</strong> <strong>Windows</strong> 7<br />
By Mitch Tulloch<br />
(<strong>Windows</strong>Networking.com)<br />
On the Disk Space Requirements page, verify that the computer has sufficient disk space for the<br />
install (Figure 7):<br />
Figure 7: Disk Space Requirements page<br />
The Server Configuration page lets you specify a service account for each SQL Server service (Figure<br />
8).<br />
Figure 8: Server Configuration page<br />
Revised June 14, 2009 Page 97 of 231
<strong>Deploying</strong> <strong>Windows</strong> 7<br />
By Mitch Tulloch<br />
(<strong>Windows</strong>Networking.com)<br />
For our test environment, we will use the same account for each SQL Server service. To do this, click<br />
"Use the same account for all SQL Server services" and type CONTOSO\Administrator and the<br />
password for the account (Figure 9):<br />
Figure 9: Specifying a service account for all SQL Server services<br />
On the Database Engine Configuration page, add the CONTOSO\Administrator account to the list of<br />
SQL Server administrators (Figure 10). Since we are logged onto the computer using this account,<br />
you can add it to the list by clicking Add Current User. Leave the remaining settings as they are.<br />
Figure 10: Adding CONTOSO\Administrator to the list of SQL Server administrators<br />
Revised June 14, 2009 Page 98 of 231
<strong>Deploying</strong> <strong>Windows</strong> 7<br />
By Mitch Tulloch<br />
(<strong>Windows</strong>Networking.com)<br />
Accept the defaults on the Error and Usage Reporting page, then click Next to run the Installation<br />
Rules to determine whether the installation will succeed (Figure 11):<br />
Figure 11: The installation will succeed<br />
On the Ready to Install page, verify the installation options you have selected (Figure 12):<br />
Figure 12: Verify installation options<br />
Revised June 14, 2009 Page 99 of 231
<strong>Deploying</strong> <strong>Windows</strong> 7<br />
By Mitch Tulloch<br />
(<strong>Windows</strong>Networking.com)<br />
Now click Install and view the progress of the installation. When the installation has finished, click<br />
Close to close the wizard.<br />
Configuring SQL Server 2008 Express<br />
Once SQL Server 2008 has been installed, it needs to be configured so that MDT can use it. To do<br />
this, begin by clicking Start, All Programs, Microsoft SQL Server 2008, Configuration Tools, SQL<br />
Server Configuration Manager. This opens the SQL Server Configuration Manager console which you<br />
can use to configure SQL Server protocols, services, and other features. Expand the local server<br />
node, then expand SQL Server Network Configuration, and select Protocols for SQLEXPRESS. Then<br />
right-click on Named Pipes and select Enabled (Figure 13):<br />
Figure 13: Enabling named pipes for the SQLEXPRESS instance<br />
Enabling Named Pipes like this for SQL Server is needed so that the Deployment Workbench can<br />
connect to the database, and also to enable client computers to connect to the database.<br />
Next, select the SQL Server Services node beneath the root node (Figure 14):<br />
Figure 14: Configuring SQL Server services<br />
Revised June 14, 2009 Page 100 of 231
<strong>Deploying</strong> <strong>Windows</strong> 7<br />
By Mitch Tulloch<br />
(<strong>Windows</strong>Networking.com)<br />
Note that the SQL Server Browser services is currently stopped and in fact is disabled. Right-click on<br />
this service and select Properties, select the Service tab, and change the Start Mode of the service<br />
from Disabled to Automatic (Figure 15):<br />
Figure 15: Enabling the SQL Server Browser service<br />
Next, right-click on the SQL Server Browser service and select Start to start the service. Then rightclick<br />
on the SQL Server (SQLEXPRESS) service and select Restart. These service modifications are<br />
needed in order that client computers can make a connection to the named instance "SQLEXPRESS".<br />
Next, open <strong>Windows</strong> Firewall from Control Panel and click "Allow a program or feature through<br />
<strong>Windows</strong> Firewall." Then click Allow Another Program and browse as shown in Figure 16 until you can<br />
select the following executable:<br />
C:\Program Files\Microsoft SQL Server (x86)\90\Shared\sqlbrowser.exe<br />
Figure 16: Opening a program exception in <strong>Windows</strong> Firewall: step 1<br />
Revised June 14, 2009 Page 101 of 231
<strong>Deploying</strong> <strong>Windows</strong> 7<br />
By Mitch Tulloch<br />
(<strong>Windows</strong>Networking.com)<br />
Once you have selected this executable, click Open to return to the Add A Program dialog box (Figure<br />
17):<br />
Figure 17: Opening a program exception in <strong>Windows</strong> Firewall: step 2<br />
Then click Add and the new program exception is displayed in <strong>Windows</strong> Firewall (Figure 18):<br />
Figure 18: Opening a program exception in <strong>Windows</strong> Firewall: step 3<br />
Revised June 14, 2009 Page 102 of 231
<strong>Deploying</strong> <strong>Windows</strong> 7<br />
By Mitch Tulloch<br />
(<strong>Windows</strong>Networking.com)<br />
Finally, do the same to add another program exception for the following executable:<br />
C:\Program Files\Microsoft SQL Server\MSSQL10.SQLEXPRESS\binn\sqlservr.exe<br />
These firewall exceptions are necessary to allow client computers to establish a connection to the<br />
SQL Server and SQL Browser services.<br />
Tip: Instead of creating exceptions manually like this, you can use the batch script of netsh commands<br />
found in KB 968872 to open the necessary firewall ports for SQL Server.<br />
Creating the MDT Database<br />
At this point, SQL Server Express is installed and configured. The final step is to create a new<br />
database in MDT. To do this, open the Deployment Workbench and under your deployment share<br />
expand Advanced Configuration to display Database. Then right-click on Database and select New<br />
Database (Figure 19):<br />
Figure 19: Creating a new MDT database: step 1<br />
On the SQL Server Details page of the New DB Wizard, type the name of the SQL Server (here the<br />
same as the MDT computer) and the database instance (SQLEXPRESS) and make sure Named<br />
Pipes is selected as the network library (Figure 20):<br />
Revised June 14, 2009 Page 103 of 231
<strong>Deploying</strong> <strong>Windows</strong> 7<br />
By Mitch Tulloch<br />
(<strong>Windows</strong>Networking.com)<br />
Figure 20: Creating a new MDT database: step 2<br />
On the Database wizard page, select Create A New Database and specify a name for your new<br />
database (Figure 21):<br />
Figure 21: Creating a new MDT database: step 3<br />
Revised June 14, 2009 Page 104 of 231
<strong>Deploying</strong> <strong>Windows</strong> 7<br />
By Mitch Tulloch<br />
(<strong>Windows</strong>Networking.com)<br />
On the SQL Share page, type the share name of your deployment share so that WinPE can establish<br />
a connection to your SQL Server database using <strong>Windows</strong> integrated authentication (Figure 22):<br />
Figure 22: Creating a new MDT database: step 4<br />
Once you have finished the wizard without errors, the Database page will look something like Figure<br />
23:<br />
Figure 23: The new MDT database has been created<br />
Revised June 14, 2009 Page 105 of 231
<strong>Deploying</strong> <strong>Windows</strong> 7<br />
By Mitch Tulloch<br />
(<strong>Windows</strong>Networking.com)<br />
Conclusion<br />
This article examined how to install SQL Server 2008 Express SP1 on your MDT computer and create<br />
a new MDT database. In the articles that follow, we will look at how to use this database to centrally<br />
store configuration settings for deploying <strong>Windows</strong> 7 to multiple computers using MDT.<br />
In the previous article of this series you learned how to create and configure the MDT database using<br />
Microsoft SQL Server 2008 Express. In this article and ones following we will examine how to use the<br />
MDT database to customize how <strong>Windows</strong> 7 is deployed based on the properties of the target<br />
computers, their intended roles, their locations, and their make/model. This present article focuses on<br />
the first method, that is, customizing how <strong>Windows</strong> 7 is deployed based on the properties of the target<br />
computer.<br />
Part 16: Using the MDT Database<br />
Configuring MDT Database Rules<br />
As explained in the previous article of this series, the MDT database lets you store many of the<br />
configuration settings used for customizing deployment in a single, central database. These<br />
configuration settings are essentially the same as those that can be stored in the CustomSettings.ini<br />
file, and using the database allows you to have only one, generic CustomSettings.ini file while the<br />
remaining settings are stored in the database. Furthermore, by using the MDT database you can often<br />
perform all of your deployments using only a handful of images (such as x86 client, x64 client and x64<br />
server) and only two task sequences (Standard Client and Standard Server). Clearly, being able to<br />
understand and use the MDT database is an essential key for simplifying Lite Touch (LTI)<br />
deployments.<br />
Let us begin by picking up where we left off from the previous article in this series where you learned<br />
how to create the MDT database in SQL Server 2008 Express. Figure 1 shows the properties of the<br />
MDT database we created in that article:<br />
Figure 1: Properties of MDT database created in previous article of this series<br />
Revised June 14, 2009 Page 106 of 231
<strong>Deploying</strong> <strong>Windows</strong> 7<br />
By Mitch Tulloch<br />
(<strong>Windows</strong>Networking.com)<br />
Let us also examine our CustomSettings.ini file again, which is configured to perform fully automated<br />
deployments of <strong>Windows</strong> 7 Enterprise edition (Figure 2):<br />
Figure 2: CustomSettings.ini file configuring MDT database rules<br />
Now before we can use the MDT database to deploy <strong>Windows</strong> 7 based on the properties, intended<br />
roles, locations or make/model of our target computers, we need to configure our CustomSettings.ini<br />
file so that it can use settings we choose to store in this database. To do this, right-click on Database<br />
in the Deployment Workbench and select Configure Database Rules. This launches the Configure DB<br />
Wizard, which is a bit of a misnomer because it does not configure the database but instead<br />
configures your CustomSettings.ini file by adding additional rules to it so that MDT can query the<br />
database during deployment. The first screen of this wizard enables MDT to query the database for<br />
computer-specific settings and for roles, applications, packages and administrators assigned to the<br />
computer (Figure 3):<br />
Figure 3: Enabling MDT to query the database using computer options<br />
Revised June 14, 2009 Page 107 of 231
<strong>Deploying</strong> <strong>Windows</strong> 7<br />
By Mitch Tulloch<br />
(<strong>Windows</strong>Networking.com)<br />
Note that for each item selected in this wizard, MDT will use a script to perform the corresponding<br />
database query. That means the more items you select, the more queries will be performed and the<br />
longer it will take to perform the deployment. This added delay happens right after logging into the<br />
<strong>Windows</strong> Deployment Wizard using the credentials you specified, that is, it happens during the<br />
beginning "blue screen" portion of the deployment. On the other hand, the more items you select in<br />
the wizard, the more options you will have later for customizing how your deployments can be<br />
performed. Personally, I simply recommend you leave all checkboxes selected in this wizard, which is<br />
what I'm doing here in this article.<br />
The next wizard page enables MDT to query the database for location names based on default<br />
gateways, for location-specific settings, and for roles, applications, packages and administrators<br />
assigned to the location (Figure 4):<br />
Figure 4: Enabling MDT to query the database using location options<br />
The next wizard page enables MDT to query the database for model-specific settings, and for roles,<br />
applications, packages and administrators assigned to the specified make and model (Figure 5):<br />
Revised June 14, 2009 Page 108 of 231
<strong>Deploying</strong> <strong>Windows</strong> 7<br />
By Mitch Tulloch<br />
(<strong>Windows</strong>Networking.com)<br />
Figure 5: Enabling MDT to query the database using make/model options<br />
The next wizard page enables MDT to query the database for role-specific settings, and for<br />
applications, packages and administrators assigned to the role (Figure 6):<br />
Figure 6: Enabling MDT to query the database using role options<br />
Revised June 14, 2009 Page 109 of 231
<strong>Deploying</strong> <strong>Windows</strong> 7<br />
By Mitch Tulloch<br />
(<strong>Windows</strong>Networking.com)<br />
The next wizard page presents a summary of your selections - verify and complete the wizard. Now<br />
open the CustomSettings.ini file for your deployment share and examine the changes (Figure 7):<br />
Figure 7: CustomSettings.ini file after configuring MDT database rules<br />
The new sections in this file are parsed and actions taken in the order specified by the Priority=<br />
statement in the initial Settings section. For example, the first section used is CSettings, which queries<br />
the contents of the MDT database for computer-specific information concerning the target computer<br />
such as the computer's Universally Unique Identifier (UUID), asset tag, serial number, or Media<br />
Access Control (MAC) address.<br />
Customizing Deployment Based on the Target <strong>Computer</strong>'s MAC Address<br />
To see how this works in practice, let us add a new entry to the MDT database that specifies the MAC<br />
address of a particular computer on our network so that MDT can install <strong>Windows</strong> 7 onto this<br />
computer and assign the computer a pre-specified computer name. In other words, we're going to use<br />
the MDT database to identify a particular computer in our organization on which we want to perform a<br />
certain type of customized deployment of <strong>Windows</strong> 7 - this is the essence of what you can do using<br />
the MDT database. To do this, right-click on the <strong>Computer</strong>s node in your database and select New to<br />
identify a particular computer you want to deploy to by adding a new record concerning the computer<br />
to your database (Figure 8):<br />
Revised June 14, 2009 Page 110 of 231
<strong>Deploying</strong> <strong>Windows</strong> 7<br />
By Mitch Tulloch<br />
(<strong>Windows</strong>Networking.com)<br />
Figure 8: Step 1 of identifying a particular computer on which you want to perform a<br />
customized deployment of <strong>Windows</strong> 7<br />
In the Properties sheet that opens up for the computer you are going to define in the database, type<br />
the MAC address for the computer (Figure 9). The MAC address for the computer can be determined<br />
by using Ipconfig (if the computer already has an operating system installed) and possibly also from<br />
its accompanying documentation or by using a network card configuration utility that might have been<br />
included with the computer's documentation.<br />
Figure 9: Step 2 of identifying a particular computer on which you want to perform a<br />
customized deployment of <strong>Windows</strong> 7<br />
Revised June 14, 2009 Page 111 of 231
<strong>Deploying</strong> <strong>Windows</strong> 7<br />
By Mitch Tulloch<br />
(<strong>Windows</strong>Networking.com)<br />
Tip: The MAC address must be specified in the format XX:XX:XX:XX:XX:XX. If you use any other<br />
format such as XX-XX-XX-XX-XX-XX, MDT will flash a red exclamation point icon, and hovering your<br />
mouse pointer over this icon will display a tip telling you the mistake you made. So watch out for these<br />
flashing red exclamation point icons!<br />
Now let us indicate what type of customization will be performed when <strong>Windows</strong> 7 is deployed to the<br />
computer having this particular MAC address. To do this, select the Details tab, scroll down to the<br />
Identification section, and type SEA-DESK-299 as the value for the OSD<strong>Computer</strong>Name property<br />
(Figure 10). Note that you must use the OSC<strong>Computer</strong>Name property for doing this - the<br />
<strong>Computer</strong>Name property several lines above this is deprecated and should not be used.<br />
Figure 10: Step 3 of identifying a particular computer on which you want to perform a<br />
customized deployment of <strong>Windows</strong> 7<br />
Click OK to close the Properties sheet and create the new record in the MDT database. The result is<br />
shown in Figure 11:<br />
Figure 11: A new record has been created in the MDT database that identifies a computer and<br />
allows deployment to be customized for this computer<br />
Revised June 14, 2009 Page 112 of 231
<strong>Deploying</strong> <strong>Windows</strong> 7<br />
By Mitch Tulloch<br />
(<strong>Windows</strong>Networking.com)<br />
Now when we boot the computer having this MAC address using my LiteTouch_x64 CD, the<br />
computer boots to <strong>Windows</strong> PE, connects to MDT and the database is queried and the record<br />
returned. MDT then uses CustomSettings.ini together with the results of the query to install <strong>Windows</strong><br />
7 on the computer and configure the computer's name as we intended, which can be verified by<br />
opening the System properties on the computer after MDT finishes the install (Figure 12):<br />
Figure 12: Verifying that the computer has been named SEA-DESK-299 as specified in the MDT database<br />
Customizing Deployment Based on the Target <strong>Computer</strong>'s UUID<br />
As a second example, we can also use MDT to customize how <strong>Windows</strong> 7 is deployed based on the<br />
UUID of the target computer. The UUID of a computer (sometimes called the computer's Globally<br />
Unique Identifier or GUID) is a hexadecimal string of the form XXXXXXXX-XXXX-XXXX-XXXX-<br />
XXXXXXXXXXXX that may be listed on a label on the outside of the computer's case or on a label<br />
inside the case. It may also be specified in the BIOS settings or displayed by the BIOS when the<br />
computer is starting up. If none of these helps and you already have a <strong>Windows</strong> operating system<br />
installed on the computer, you can use the following <strong>Windows</strong> Management Instrumentation (WMI)<br />
script that I wrote which lists the computer's UUID along with other information gleaned from the<br />
Win32_<strong>Computer</strong>SystemProduct WMI class:<br />
' DisplayClassProperties.vbs<br />
' Used to find the UUID of a specific desktop computer<br />
' By Mitch Tulloch (www.mtit.com)<br />
Option Explicit<br />
On Error Resume Next<br />
Dim str<strong>Computer</strong><br />
Dim strWMINamespace<br />
Dim strWMIQuery<br />
Dim objWMIService<br />
Dim colItems<br />
Dim objItem<br />
str<strong>Computer</strong> = "."<br />
strWMINamespace = "\root\CIMV2"<br />
strWMIQuery = ":Win32_<strong>Computer</strong>SystemProduct.IdentifyingNumber='MXG5380254<br />
Revised June 14, 2009 Page 113 of 231
<strong>Deploying</strong> <strong>Windows</strong> 7<br />
By Mitch Tulloch<br />
(<strong>Windows</strong>Networking.com)<br />
NA540',Name='PY196AV-ABA a1130e',Version='0n31211CT101AMBEM00'"<br />
Set objWMIService = GetObject("winmgmts:\\" & str<strong>Computer</strong> & strWMINamespace &<br />
strWMIQuery)<br />
WScript.Echo "Number of properties of " & strWMIQuery & " class is " &<br />
objWMIService.Properties_.count<br />
For Each objItem in objWMIService.Properties_<br />
Wscript.Echo "Property: " & objItem.name & vbTab & "Value: " & objItem.value<br />
Next<br />
Note that you'll have to customize the following line for your particular computer before the script can<br />
work:<br />
strWMIQuery = ":Win32_<strong>Computer</strong>SystemProduct.IdentifyingNumber='MXG5380254<br />
NA540',Name='PY196AV-ABA a1130e',Version='0n31211CT101AMBEM00'"<br />
Specifically, you'll need to use wbemtest.exe to determine how to modify the above line for a<br />
particular computer. To learn how to do this, see the earlier article by me on <strong>Windows</strong>Networking.com<br />
called Managing <strong>Windows</strong> Networks Using Scripts - Part 13: A Handy Return-All-Values Script.<br />
For example, when I run cscript DisplayClassProperties.vbs on a particular computer where the line<br />
identified has been customized appropriately, the results returned look like this:<br />
Microsoft (R) <strong>Windows</strong> Script Host Version 5.8<br />
Copyright (C) Microsoft Corporation. All rights reserved.<br />
Number of properties of :Win32_<strong>Computer</strong>SystemProduct.IdentifyingNumber='MXG5380254<br />
NA540',Name='PY196AV-ABA a1130e',Version='0n31211CT101AMBEM00' class is 8<br />
Property: Caption Value: <strong>Computer</strong> System Product<br />
Property: Description Value: <strong>Computer</strong> System Product<br />
Property: IdentifyingNumber Value: MXG5380254 NA540<br />
Property: Name Value: PY196AV-ABA a1130e<br />
Property: SKUNumber Value:<br />
Property: UUID Value: 843E4800-986A-1010-9814-8CFE95F168A8<br />
Property: Vendor Value: HP Pavilion 061<br />
Property: Version Value: 0n31211CT101AMBEM00<br />
From the above script output you can see that this particular computer's UUID is 843E4800-986A-<br />
1010-9814-8CFE95F168A8. Now, if I create a new <strong>Computer</strong> record in the MDT database that<br />
specifies this UUID, I can perform a customized deployment of <strong>Windows</strong> 7 to this particular computer<br />
in a similar way as if I had specified the MAC address of the computer.<br />
Part 17: <strong>Deploying</strong> Applications Based on Make and Model<br />
Tip: You can find more information about automating LTI deployment in the <strong>Windows</strong> 7 Resource Kit<br />
from Microsoft Press. I am the lead author for this Resource Kit and I also maintain the Unofficial<br />
Support Site for the <strong>Windows</strong> 7 Resource Kit where you will find the latest updates and other useful<br />
information.<br />
In the previous article of this series you learned how to use the MDT database to customize the<br />
deployment of <strong>Windows</strong> 7 based on computer properties such as the MAC address or UUID of the<br />
target computer. In this article we'll learn how to use the MDT database to deploy <strong>Windows</strong> 7<br />
Enterprise edition together with an application (Microsoft Office 2007 Enterprise edition) based on the<br />
make and model of the target computer.<br />
Revised June 14, 2009 Page 114 of 231
<strong>Deploying</strong> <strong>Windows</strong> 7<br />
By Mitch Tulloch<br />
(<strong>Windows</strong>Networking.com)<br />
Adding Office 2007 as an Application<br />
The powerful thing about Microsoft Deployment Toolkit is that you can use it to deploy <strong>Windows</strong><br />
operating system images together with any applications, packages and drivers that may be needed by<br />
your users on their target computers. For this walkthrough, we're going to deploy Microsoft Office<br />
2007 Enterprise edition together with <strong>Windows</strong> 7 Enterprise edition, which is a typical scenario for<br />
information workers (IWs). Begin by inserting your Office DVD into the DVD drive of your MDT<br />
technician computer. Then open Deployment Workbench, expand your deployment share, right-click<br />
on the Applications node and select New Application (Figure 1):<br />
Figure 1: Step 1 of adding a new application to a deployment share<br />
Doing this launches the New Application Wizard as shown in Figure 2 below. We will choose the first<br />
option here, which copies the Office installation files from the Office DVD into a folder in our<br />
deployment share.<br />
Figure 2: Step 2 of adding a new application to a deployment share<br />
Revised June 14, 2009 Page 115 of 231
<strong>Deploying</strong> <strong>Windows</strong> 7<br />
By Mitch Tulloch<br />
(<strong>Windows</strong>Networking.com)<br />
On the next wizard page, we'll type Microsoft as the publisher and Office 2007 Enterprise as the<br />
descriptive name for the application; we'll leave the other two fields blank (Figure 3):<br />
Figure 3: Step 3 of adding a new application to a deployment share<br />
On the next page, we will browse to select our DVD drive as the source directory where the<br />
installation files currently reside. Note that the option to move the files to the deployment share<br />
instead of copying them is grayed out—this is because you can not move files from a DVD, you have<br />
to copy them (Figure 4):<br />
Figure 4: Step 4 of adding a new application to a deployment share<br />
Revised June 14, 2009 Page 116 of 231
<strong>Deploying</strong> <strong>Windows</strong> 7<br />
By Mitch Tulloch<br />
(<strong>Windows</strong>Networking.com)<br />
On the next page, we will accept Microsoft Office 2007 Enterprise as the name of the folder that will<br />
be created within our deployment share to host the application's installation files (Figure 5):<br />
Figure 5: Step 5 of adding a new application to a deployment share<br />
On the next page, we will type setup.exe as the command that will be used to install the application on<br />
our target computers (Figure 6):<br />
Figure 6: Step 6 of adding a new application to a deployment share<br />
Revised June 14, 2009 Page 117 of 231
<strong>Deploying</strong> <strong>Windows</strong> 7<br />
By Mitch Tulloch<br />
(<strong>Windows</strong>Networking.com)<br />
Once we have finished walking through the wizard, the new application is displayed in the<br />
Deployment Workbench within the Applications folder of our deployment share (Figure 7):<br />
Figure 7: Office has been added to the deployment share as an application to be deployed<br />
You are done adding Office as an application in MDT.<br />
Customizing Office 2007 for Installation<br />
Before you deploy an application using MDT, you may need to further configure the application by<br />
opening its properties from the Workbench. This is particularly true for Office 2007, which includes its<br />
own special Office Customization Tool (OCT) you can use to customize your installation Office prior to<br />
deploying it. The OCT lets you customize Office and save your customizations in a <strong>Windows</strong> Installer<br />
(MSI) Patch file having an .msp file extension. Once you create this .msp file, you then save it in the<br />
Updates folder of your deployment share. Then, when Office is being installed on the target computer,<br />
the Office installation program (setup.exe) looks for an .msp file in the Updates folder of your<br />
deployment share, and if it finds one it applies the customizations contained in the .msp file during the<br />
installation of Office. For more detailed information concerning customizing Office 2007 installations<br />
using the OCT, see this article on Microsoft TechNet.<br />
To customize how Office will be deployed by MDT, right-click on the application in the Applications<br />
folder in the previous screenshot and select Properties. This opens the application's properties sheet,<br />
which has several different tabs. We'll learn more about what these tabs can be used for in a future<br />
article, but for now let's select the Office Products tab as shown in Figure 8:<br />
Figure 8: Step 1 of configuring Office for deployment using the OCT<br />
Revised June 14, 2009 Page 118 of 231
<strong>Deploying</strong> <strong>Windows</strong> 7<br />
By Mitch Tulloch<br />
(<strong>Windows</strong>Networking.com)<br />
Now, on the Office Products tab, click the Office Customization Tool button. An information dialog box<br />
will be displayed indicating where you need to save the .msp file you will create using the OCT (Figure<br />
9):<br />
Figure 9: Step 2 of configuring Office for deployment using the OCT<br />
Clicking OK closes the dialog box and opens the OCT, which prompts you to create a new .msp file or<br />
open an existing one. We'll select the first option to create a new .msp file (Figure 10):<br />
Figure 10: Step 3 of configuring Office for deployment using the OCT<br />
When you click OK, the Select Product box closes and you're presented with the main screen of the<br />
OCT (see Figure 11). By clicking on various items on the left, you will be able to customize many<br />
different aspects of how Office will be customized during its deployment.<br />
Revised June 14, 2009 Page 119 of 231
<strong>Deploying</strong> <strong>Windows</strong> 7<br />
By Mitch Tulloch<br />
(<strong>Windows</strong>Networking.com)<br />
Figure 11: Step 4 of configuring Office for deployment using the OCT<br />
To deploy Office unattended using MDT, we only need to configure the Licensing And User Interface<br />
page of the OCT. To do this, make the following customizations as shown in Figure 12 below:<br />
Type your Office 2007 product key into the textbox.<br />
Select the checkbox for accepting the EULA.<br />
Change the Display Level to None, which enables Office Setup to run silently without displaying<br />
any user interface.<br />
Make sure the Completion Notice checkbox is cleared—doing this will prevent Office Setup from<br />
displaying a message to the user when the installation is finished.<br />
Make sure the Suppress Modal checkbox is selected—doing this will prevent Setup from<br />
displaying error messages or other dialog boxes that could interrupt the installation.<br />
The No Cancel checkbox can be used to prevent the user from being able to cancel the<br />
installation by clicking the close gadget on the installation UI, but since the Display Level is set to<br />
None in this example, there is no installation UI so it doesn't really matter whether you select or<br />
clear this checkbox (we'll clear it anyways).<br />
Revised June 14, 2009 Page 120 of 231
<strong>Deploying</strong> <strong>Windows</strong> 7<br />
By Mitch Tulloch<br />
(<strong>Windows</strong>Networking.com)<br />
Figure 12: Step 5 of configuring Office for deployment using the OCT<br />
Now let's save our customizations as an .msp file. To do this, select File, Save As from the OCT menu.<br />
Then, in the Save As dialog, browse to the following folder:<br />
\DeploymentShare$\Applications\Microsoft Office 2007 Enterprise\Updates<br />
Now type custom as the name for the .msp file you will create (Figure 13):<br />
Figure 13: Step 6 of configuring Office for deployment using the OCT<br />
Revised June 14, 2009 Page 121 of 231
You are done customizing Office for deployment.<br />
<strong>Deploying</strong> <strong>Windows</strong> 7<br />
By Mitch Tulloch<br />
(<strong>Windows</strong>Networking.com)<br />
Determining the Make/Model of a Target <strong>Computer</strong><br />
Now remember that our goal is to deploy <strong>Windows</strong> 7 together with Office 2007 to computers that have<br />
a certain make and model. How can you determine the make and model of a specific computer? If this<br />
information has not been provided to you by the vendor or displayed on a sticker on the outside or<br />
inside of the case, and if a <strong>Windows</strong> operating system is already installed on the computer you can<br />
customize the DisplayClassProperties.vbs script used in the previous article of this series to do this.<br />
Simply take the script in that article and replace the following line:<br />
strWMIQuery = ":Win32_<strong>Computer</strong>SystemProduct.IdentifyingNumber='MXG5380254<br />
NA540',Name='PY196AV-ABA a1130e',Version='0n31211CT101AMBEM00'"<br />
with this instead:<br />
strWMIQuery = ":Win32_<strong>Computer</strong>System.Name='INSERT'"<br />
Next, substitute INSERT with the actual computer name of the computer, which can be found using<br />
the System utility in Control Panel and for this example is SEA-DESK-115.<br />
Now use cscript to run the script to display the values of all the properties of the<br />
Win32_<strong>Computer</strong>System WMI class:<br />
c:\scripts>cscript DisplayClassProperties.vbs<br />
Microsoft (R) <strong>Windows</strong> Script Host Version 5.8<br />
Copyright (C) Microsoft Corporation. All rights reserved.<br />
Number of properties of :Win32_<strong>Computer</strong>System.Name='SEA-DESK-115' class is 58<br />
Property: AdminPasswordStatus Value: 3<br />
Property: AutomaticManagedPagefile Value: True<br />
Property: AutomaticResetBootOption Value: True<br />
Property: AutomaticResetCapability Value: True<br />
Property: BootOptionOnLimit Value:<br />
Property: BootOptionOnWatchDog Value:<br />
Property: BootROMSupported Value: True<br />
Property: BootupState Value: Normal boot<br />
Property: Caption Value: SEA-UUID-TEST<br />
Property: ChassisBootupState Value: 3<br />
Property: CreationClassName Value: Win32_<strong>Computer</strong>System<br />
Property: CurrentTimeZone Value: -360<br />
Property: DaylightInEffect Value: False<br />
Property: Description Value: AT/AT COMPATIBLE<br />
Property: DNSHostName Value: SEA-UUID-TEST<br />
Property: Domain Value: contoso.com<br />
Property: DomainRole Value: 1<br />
Property: EnableDaylightSavingsTime Value: True<br />
Property: FrontPanelResetStatus Value: 3<br />
Property: InfraredSupported Value: False<br />
Property: InitialLoadInfo Value:<br />
Property: InstallDate Value:<br />
Property: KeyboardPasswordStatus Value: 3<br />
Property: LastLoadInfo Value:<br />
Property: Manufacturer Value: HP Pavilion 061<br />
Revised June 14, 2009 Page 122 of 231
<strong>Deploying</strong> <strong>Windows</strong> 7<br />
By Mitch Tulloch<br />
(<strong>Windows</strong>Networking.com)<br />
Property: Model Value: PY196AV-ABA a1130e<br />
Property: Name Value: SEA-UUID-TEST<br />
Property: NameFormat Value:<br />
Property: NetworkServerModeEnabled Value: True<br />
Property: NumberOfLogicalProcessors Value: 1<br />
Property: NumberOfProcessors Value: 1<br />
Property: OEMLogoBitmap Value:<br />
Property: PartOfDomain Value: True<br />
Property: PauseAfterReset Value: -1<br />
Property: PCSystemType Value: 1<br />
Property: PowerManagementCapabilities Value:<br />
Property: PowerManagementSupported Value:<br />
Property: PowerOnPasswordStatus Value: 3<br />
Property: PowerState Value: 0<br />
Property: PowerSupplyState Value: 3<br />
Property: PrimaryOwnerContact Value:<br />
Property: PrimaryOwnerName Value: <strong>Windows</strong> User<br />
Property: ResetCapability Value: 1<br />
Property: ResetCount Value: -1<br />
Property: ResetLimit Value: -1<br />
Property: Status Value: OK<br />
Property: SupportContactDescription Value:<br />
Property: SystemStartupDelay Value:<br />
Property: SystemStartupOptions Value:<br />
Property: SystemStartupSetting Value:<br />
Property: SystemType Value: x64-based PC<br />
Property: ThermalState Value: 3<br />
Property: TotalPhysicalMemory Value: 2078859264<br />
Property: UserName Value: SEA-UUID-TEST\Administrator<br />
Property: WakeUpType Value: 6<br />
Property: Workgroup Value:<br />
Now, from the above script output of property/value pairs, examine these two lines:<br />
Property: Manufacturer Value: HP Pavilion 061<br />
Property: Model Value: PY196AV-ABA a1130e<br />
The Win32_<strong>Computer</strong>System.Manufacturer WMI property corresponds to the Make property in MDT,<br />
and the Win32_<strong>Computer</strong>System.Model WMI property corresponds to the Model property in MDT. In<br />
other words, the Make of this particular computer is HP Pavilion 061 and its Model is PY196AV-ABA<br />
a1130e as far as MDT is concerned.<br />
Customizing Deployment Based on Make/Model<br />
To make use of such Make/Model information and deploy <strong>Windows</strong> 7 together with Office 2007 to<br />
computers having this particular Make and Model, we now need to create a new Make And Model<br />
record in the MDT database that specifies this particular Make and Model and is configured to deploy<br />
Office 2007 to these computers. To do this, expand the Database node for your deployment share in<br />
the Workbench, right-click on Make And Model, and select New (Figure 14):<br />
Revised June 14, 2009 Page 123 of 231
<strong>Deploying</strong> <strong>Windows</strong> 7<br />
By Mitch Tulloch<br />
(<strong>Windows</strong>Networking.com)<br />
Figure 14: Step 1 of creating a MDT DB record for Make/Model deployment of Office<br />
In the Properties sheet for the new record, type the Make and Model of the target computers (Figure<br />
15):<br />
Figure 15: Step 2 of creating a MDT DB record for Make/Model deployment of Office<br />
Revised June 14, 2009 Page 124 of 231
Next, click the Applications tab (Figure 16):<br />
<strong>Deploying</strong> <strong>Windows</strong> 7<br />
By Mitch Tulloch<br />
(<strong>Windows</strong>Networking.com)<br />
Figure 16: Step 3 of creating a MDT DB record for Make/Model deployment of Office<br />
Click Add and select Microsoft Office 2007 Enterprise from the list of applications you can deploy to<br />
computers that match the Make/Model specified in this record (Figure 17):<br />
Figure 17: Step 4 of creating a MDT DB record for Make/Model deployment of Office<br />
Revised June 14, 2009 Page 125 of 231
<strong>Deploying</strong> <strong>Windows</strong> 7<br />
By Mitch Tulloch<br />
(<strong>Windows</strong>Networking.com)<br />
Click OK to return to the Applications tab which will now show Microsoft Office 2007 Enterprise<br />
(Figure 18):<br />
Figure 18: Step 5 of creating a MDT DB record for Make/Model deployment of Office<br />
Click OK to apply the changes and create the new record in the MDT DB. The new record will now be<br />
displayed under Make And Model in the Workbench (Figure 19):<br />
Figure 19: A new MDT DB record for Make/Model deployment of Office has been created<br />
At this point we are ready to begin our deployment. Insert your LiteTouch_x64 CD into a computer<br />
having the specified Make/Model and turn the computer on. The <strong>Windows</strong> Deployment Wizard will run<br />
Revised June 14, 2009 Page 126 of 231
<strong>Deploying</strong> <strong>Windows</strong> 7<br />
By Mitch Tulloch<br />
(<strong>Windows</strong>Networking.com)<br />
completely unattended and <strong>Windows</strong> 7 will be installed on the computer in the usual way. Once<br />
<strong>Windows</strong> 7 has been installed, the desktop will be displayed and a progress dialog will indicate that<br />
Office is being installed (Figure 20):<br />
Figure 20: Office is installed after <strong>Windows</strong> has been installed<br />
When Office Setup is finished, you should be able to launch Office programs from your Start menu<br />
(Figure 21):<br />
Figure 21: Office 2007 has been deployed together with <strong>Windows</strong> 7 using MDT<br />
Revised June 14, 2009 Page 127 of 231
<strong>Deploying</strong> <strong>Windows</strong> 7<br />
By Mitch Tulloch<br />
(<strong>Windows</strong>Networking.com)<br />
Final Note<br />
Using Make and Model to deploy <strong>Windows</strong> using MDT is not as simple as using <strong>Computer</strong> and<br />
specifying the UUIDs or MAC addresses as described in the previous article of this series. To<br />
understand some of the complexities involved in using Make/Model for MDT deployment and to learn<br />
about some workarounds, see this article on The Deployment Guys blog.<br />
Part 18: Determining the UUID of a <strong>Computer</strong><br />
Tip: You can find more information about automating LTI deployment in the <strong>Windows</strong> 7 Resource Kit<br />
from Microsoft Press. I am the lead author for this Resource Kit and I also maintain the Unofficial<br />
Support Site for the <strong>Windows</strong> 7 Resource Kit where you will find the latest updates and other useful<br />
information.<br />
In Part 16 of this series you learned how to use the MDT database to customize the deployment of<br />
<strong>Windows</strong> 7 based on the UUID of each target computer. In that article you also learned how to use<br />
WMI to determine the UUID of a computer if this UUID is not displayed in the system's BIOS or<br />
accompanying documentation. The method we used to do this however was a bit messy, plus the<br />
computer whose UUID you want to determine must already have had a <strong>Windows</strong> operating system<br />
installed on it.<br />
This brings up a question: Can you use WMI to determine the UUID of a computer if there is no<br />
operating system installed on it? The answer is Yes. To do this, we first need to clean up the scripting<br />
stuff we did in the last two articles. Then we need to build a custom <strong>Windows</strong> Preinstallation<br />
Environment (WinPE) image, add the scripts to this image, and burn the image to CD media. You can<br />
then use this CD to boot a bare-metal computer into WinPE and run the script to determine the<br />
system's UUID.<br />
And that's what this present article and the next one are all about. First, in this article we'll create a<br />
clean little script that will display a computer's UUID without any fiddling around. Then in the next<br />
article we'll learn how to create a customized WinPE "tools" CD you can use to run the script on a<br />
bare-metal system that has no operating system installed in order to determine the system's UUID.<br />
Once you've used your WinPE CD to run the script on a number of target computers, you can enter<br />
these UUIDs into the MDT database and deploy customized <strong>Windows</strong> images to each computer as<br />
desired.<br />
Tip: If you are new to WMI scripting, check out my 14-part introductory series of articles on<br />
<strong>Windows</strong>Networking.com titled Managing <strong>Windows</strong> Networks Using Scripts.<br />
Script to Determine the UUID of a <strong>Computer</strong><br />
In Part 16 of this series we saw how we could determine the UUID of a computer using WMI as<br />
follows:<br />
1. We began with the DisplayClassProperties.vbs script from Part 13 of my earlier series of<br />
scripting articles that displays the names of all the properties of a WMI class together with the<br />
values of these properties.<br />
2. Next we ran WBEMTEST on the computer to determine how we need to customize the<br />
strWMIQuery = line of our script so that the script will work on that particular computer.<br />
Revised June 14, 2009 Page 128 of 231
<strong>Deploying</strong> <strong>Windows</strong> 7<br />
By Mitch Tulloch<br />
(<strong>Windows</strong>Networking.com)<br />
The actual steps to do this are: (a) run WBEMTEST (b) connect to root\cimv2 namespace (c)<br />
click Enum Instances (d) type Win32_<strong>Computer</strong>SystemProduct (e) press OK. The resulting<br />
output from WBEMTEST is then used as the value of in the above line of our script.<br />
And this must be done manually as WBEMTEST output doesn't support copy to clipboard!<br />
3. Then once the script was customized, we ran it on the computer and included as part of the<br />
script's output was the computer's UUID.<br />
This was all a bit messy of course—we'd rather not have to run WBEMTEST on the computer or have<br />
to customize the script each time we have to run it. And we'd rather just get the script to output the<br />
computer's UUID and not a bunch of other stuff as well.<br />
Here's how we can do this. We'll begin with the modified DisplayClassProperties.vbs script taken from<br />
Part 16 of this series:<br />
' DisplayClassProperties.vbs<br />
' Used to find the UUID of a specific desktop computer<br />
' By Mitch Tulloch (www.mtit.com)<br />
Option Explicit<br />
On Error Resume Next<br />
Dim str<strong>Computer</strong><br />
Dim strWMINamespace<br />
Dim strWMIQuery<br />
Dim objWMIService<br />
Dim colItems<br />
Dim objItem<br />
str<strong>Computer</strong> = "."<br />
strWMINamespace = "\root\CIMV2"<br />
strWMIQuery = ":Win32_<strong>Computer</strong>SystemProduct.IdentifyingNumber='MXG5380254<br />
NA540',Name='PY196AV-ABA a1130e',Version='0n31211CT101AMBEM00'"<br />
Set objWMIService = GetObject("winmgmts:\\" & str<strong>Computer</strong> & strWMINamespace &<br />
strWMIQuery)<br />
WScript.Echo "Number of properties of " & strWMIQuery & " class is " &<br />
objWMIService.Properties_.count<br />
For Each objItem in objWMIService.Properties_<br />
Wscript.Echo "Property: " & objItem.name & vbTab & "Value: " & objItem.value<br />
Next<br />
Now, to accomplish what WBEMTEST does and return the instances of the<br />
Win32_<strong>Computer</strong>SystemProduct class, we'll need to use the SWbemServices.InstancesOf method of<br />
the SWbemServices object. To figure out how to do this, I simply adapted the following script from a<br />
page of the good old <strong>Windows</strong> 2000 Scripting Guide (see here):<br />
str<strong>Computer</strong> = "."<br />
Set objSWbemServices = GetObject("winmgmts:\\" & str<strong>Computer</strong> & "\root\cimv2")<br />
Set colSWbemObjectSet = objSWbemServices.ExecQuery _<br />
("SELECT * FROM Win32_Service")<br />
For Each objSWbemObject In colSWbemObjectSet<br />
Wscript.Echo "Name: " & objSWbemObject.Name<br />
Next<br />
My customized version of the above script looks like this:<br />
Revised June 14, 2009 Page 129 of 231
<strong>Deploying</strong> <strong>Windows</strong> 7<br />
By Mitch Tulloch<br />
(<strong>Windows</strong>Networking.com)<br />
str<strong>Computer</strong> = "."<br />
Set objSWbemServices = GetObject("winmgmts:\\" & str<strong>Computer</strong> & "\root\cimv2")<br />
Set colSWbemObjectSet = objSWbemServices.ExecQuery _<br />
("SELECT * FROM Win32_<strong>Computer</strong>SystemProduct")<br />
For Each objSWbemObject In colSWbemObjectSet<br />
strIdentifyingNumber = objSWbemObject.IdentifyingNumber<br />
strName = objSWbemObject.Name<br />
strVersion = objSWbemObject.Version<br />
Next<br />
Wscript.Echo "IdentifyingNumber: " & strIdentifyingNumber<br />
Wscript.Echo "Name: " & strName<br />
Wscript.Echo "Version: " & strVersion<br />
The reason I need the above script to determine the values of the three properties IdentifyingNumber,<br />
Name and Version is because the Win32_<strong>Computer</strong>SystemProduct class has three key properties,<br />
namely (you guessed it) IdentifyingNumber, Name and Version. To see this, refer to the<br />
documentation page for this class on MSDN. Remember that a key property is a property that<br />
provides a unique identifier for an instance of a class, and to connect to an instance of a class, you<br />
need to specify a particular instance by using the key property of the class. Key properties are marked<br />
with the "Key" qualifier in MSDN documentation—refer back to Part 13 of my earlier series of scripting<br />
articles for more information concerning key properties.<br />
Now I simply need to merge the above customized script with my earlier DisplayClassProperties.vbs<br />
script in order to create the following new script which I've named UUID.vbs (note that I've simplified<br />
this script by omitting variable definitions and error handling):<br />
'UUID.vbs<br />
'Displays the UUID of a computer<br />
'By Mitch Tulloch (www.mtit.com)<br />
str<strong>Computer</strong> = "."<br />
strWMINamespace = "\root\CIMV2"<br />
Set objSWbemServices = GetObject("winmgmts:\\" & str<strong>Computer</strong> & "\root\cimv2")<br />
Set colSWbemObjectSet = objSWbemServices.ExecQuery("SELECT * FROM<br />
Win32_<strong>Computer</strong>SystemProduct")<br />
For Each objSWbemObject In colSWbemObjectSet<br />
strIdentifyingNumber = objSWbemObject.IdentifyingNumber<br />
strName = objSWbemObject.Name<br />
strVersion = objSWbemObject.Version<br />
Next<br />
strWMIQuery = ":Win32_<strong>Computer</strong>SystemProduct.IdentifyingNumber='" &<br />
strIdentifyingNumber _<br />
& "',Name='" & strName & "',Version='" & strVersion & chr(39)<br />
Set objWMIService = GetObject("winmgmts:\\" & str<strong>Computer</strong> & strWMINamespace &<br />
strWMIQuery)<br />
For Each objItem in objWMIService.Properties_<br />
If objItem.name = "UUID" Then<br />
Wscript.Echo objItem.name & " = " & objItem.value<br />
End If<br />
Next<br />
Note that the tricky part here is making sure the quotes are correct in the strWMIQuery = <br />
statement. For instance, the statement ends with & chr(39) which appends the single quote needed to<br />
properly complete the syntax of the statement. It took some fiddling to get this to work—the trick that<br />
helped me was to temporarily insert a Wscript.echo strWmiQuery statement immediately after the<br />
Revised June 14, 2009 Page 130 of 231
<strong>Deploying</strong> <strong>Windows</strong> 7<br />
By Mitch Tulloch<br />
(<strong>Windows</strong>Networking.com)<br />
strWMIQuery = statement so I could run the script and output the contents of the string to see<br />
whether the string had the correct syntax, then make a change and run the script again, and so on<br />
until I got the syntax right.<br />
Testing the Script<br />
Now let's see if our script works by running it from the command-line on a computer that has <strong>Windows</strong><br />
XP installed on it (Figure 1):<br />
Figure 1: Running UUID.vbs on a computer that has an operating system<br />
Let us make our script even easier to run by creating an accompanying batch file named UUID.bat<br />
that reads as follows:<br />
@ECHO OFF<br />
cscript.exe //nologo UUID.vbs<br />
This makes it easier to run the script and also makes the output cleaner (Figure 2):<br />
Figure 2: Running UUID.bat on a computer that has an operating system<br />
Revised June 14, 2009 Page 131 of 231
<strong>Deploying</strong> <strong>Windows</strong> 7<br />
By Mitch Tulloch<br />
(<strong>Windows</strong>Networking.com)<br />
Conclusion<br />
Now that our script is ready, we need to build a WinPE image and include our script in this image so<br />
we can run our script on bare-metal systems. You will learn how to do this in the next article of this<br />
series.<br />
Part 19: Building a Custom WinPE Tools CD<br />
Tip: You can find more information about automating LTI deployment in the <strong>Windows</strong> 7 Resource Kit<br />
from Microsoft Press. I am the lead author for this Resource Kit and I also maintain the Unofficial<br />
Support Site for the <strong>Windows</strong> 7 Resource Kit with answers to questions posted by readers, as well as<br />
links to the latest resources on <strong>Windows</strong> 7 deployment, administration and troubleshooting.<br />
In Part 18 of this series you learned how to create a WMI script that can be used to determine the<br />
UUID of a computer. The reason you may want to do this is because you wish to use the MDT<br />
database to customize the deployment of <strong>Windows</strong> 7 based on the UUID of each target computer<br />
(see Part 16 of this series for how to do this). Now, you can of course run this script on a computer<br />
that has a <strong>Windows</strong> operating system installed, but how can you determine the UUID of a bare-metal<br />
system, that is, a computer that has no operating system? The simple answer is to build a <strong>Windows</strong><br />
PE "tools" CD that includes the script. Then, using this CD you can boot a bare-metal system, run the<br />
script, and display the system's UUID. And that is what this article is about.<br />
Note: The steps for building a custom <strong>Windows</strong> PE image have changed in <strong>Windows</strong> 7 from <strong>Windows</strong><br />
Vista. To learn how to build <strong>Windows</strong> PE 2.1 (<strong>Windows</strong> Vista SP1 and later) see my earlier article<br />
titled <strong>Deploying</strong> Vista – Part 11: Working with <strong>Windows</strong> PE.<br />
Step 1: Create the Build Environment<br />
To create the <strong>Windows</strong> PE 3.0 build environment, log on to a technician computer on which <strong>Windows</strong><br />
AIK 2.0 has been installed. Then click Start, All Programs, <strong>Windows</strong> AIK, right-click on Deployment<br />
Command Prompt and select Run As Administrator. The Deployment Tools Command Prompt opens<br />
(Figure 1):<br />
Figure 1: The Deployment Tools Command Prompt<br />
Revised June 14, 2009 Page 132 of 231
<strong>Deploying</strong> <strong>Windows</strong> 7<br />
By Mitch Tulloch<br />
(<strong>Windows</strong>Networking.com)<br />
In this walkthrough, we will set up a build environment for creating a 64-bit <strong>Windows</strong> PE image. To do<br />
this, type the following command:<br />
copype.cmd amd64 C:\BUILDPE<br />
Here \BUILDPE is a folder that will be created on the root of C: drive on our technician computer. This<br />
folder will be used to contain our build environment. The output of the command is shown in Figure 2:<br />
Figure 2: Creating a Folder to Contain the Build Environment<br />
Let us examine the build environment in <strong>Windows</strong> Explorer (Figure 3):<br />
Revised June 14, 2009 Page 133 of 231
<strong>Deploying</strong> <strong>Windows</strong> 7<br />
By Mitch Tulloch<br />
(<strong>Windows</strong>Networking.com)<br />
Figure 3<br />
The folders and files in the root of our build folder are as follows:<br />
\ISO folder contains the files needed to build an .iso file of <strong>Windows</strong> PE that we can burn to a CD<br />
\mount folder is an empty folder where we will mount our image using DISM.exe so we can<br />
service it<br />
etfsboot is a program we can use to create the boot sector for our <strong>Windows</strong> CD<br />
efisys.bin is used instead of etfsboot on systems that boot using Extensible Firmware Interface<br />
(EFI)<br />
efisys_noprompt.bin is used instead of etfsboot on IA64 systems<br />
winpe.wim is a base <strong>Windows</strong> PE image file which we can customize as desired<br />
To finish setting up our <strong>Windows</strong> PE build environment, use the copy command like this:<br />
copy C:\BUILDPE\winpe.wim C:\BUILDPE\ISO\sources\boot.wim<br />
This command copies the base <strong>Windows</strong> PE image (winpe.wim) from the root folder \BUILDPE to the<br />
\ISO\sources folder and renames it boot.wim (Figure 4):<br />
Revised June 14, 2009 Page 134 of 231
<strong>Deploying</strong> <strong>Windows</strong> 7<br />
By Mitch Tulloch<br />
(<strong>Windows</strong>Networking.com)<br />
Figure 4: Copying the Base <strong>Windows</strong> PE Image to the \ISO\sources Folder and Renaming it boot.wim<br />
Let us verify the result using <strong>Windows</strong> Explorer (Figure 5):<br />
Figure 5: Copy of the <strong>Windows</strong> PE Base Image.<br />
Step 2: Mount the Base Image<br />
Before you can service your <strong>Windows</strong> PE image, you need to mount it using the DISM command. To<br />
do this, we use the /mount-wim command-line option as follows:<br />
Revised June 14, 2009 Page 135 of 231
<strong>Deploying</strong> <strong>Windows</strong> 7<br />
By Mitch Tulloch<br />
(<strong>Windows</strong>Networking.com)<br />
dism /mount-wim /wimfile:C:\BUILDPE\ISO\sources\boot.wim /index:1<br />
/mountdir:C:\BUILDPE\mount<br />
The above command mounts the <strong>Windows</strong> image contained in the boot.wim file to the \mount folder of<br />
our build environment (Figure 6):<br />
Figure 6: Mounting the <strong>Windows</strong> PE Base Image So You Can Service It<br />
Tip: For more information about the DISM command which is new in <strong>Windows</strong> 7, see Part 2 of this<br />
series.<br />
Let us examine the mounted base <strong>Windows</strong> PE image in <strong>Windows</strong> Explorer (Figure 7):<br />
Figure 7: The Mounted Base <strong>Windows</strong> PE Image<br />
Revised June 14, 2009 Page 136 of 231
<strong>Deploying</strong> <strong>Windows</strong> 7<br />
By Mitch Tulloch<br />
(<strong>Windows</strong>Networking.com)<br />
Note that the folder structure of a mounted <strong>Windows</strong> image looks just like that of an installed <strong>Windows</strong><br />
operating system.<br />
Next, we are going to service (customize) our mounted base <strong>Windows</strong> PE image in two ways:<br />
By adding support for running WMI scripts<br />
By adding our UUID scripts to the image<br />
Step 3: Add Support for Running WMI Scripts<br />
Before you can run WMI scripts from within <strong>Windows</strong> PE, you must add packages that provide such<br />
functionality to <strong>Windows</strong> PE. We will begin by adding the WinPE-WMI Feature Pack, which provides<br />
support for <strong>Windows</strong> Management Instrumentation (WMI) from within <strong>Windows</strong> PE. To do this, you<br />
need to use the /add-package command-line option of DISM. You also need to know where this<br />
package is located within the <strong>Windows</strong> AIK folder structure on your technician computer. Here is the<br />
command you use to do this:<br />
dism /image:C:\BUILDPE\mount /add-package /packagepath:"C:\Program Files\<strong>Windows</strong><br />
AIK\Tools\PETools\amd64\WinPE_FPs\winpe-wmi.cab"<br />
This command adds the package contained in the file winpe-wmi.cab to your mounted <strong>Windows</strong> PE<br />
image. Figure 8 shows the result of running this command:<br />
Figure 8: Adding WMI Support to <strong>Windows</strong> PE (step 1)<br />
In addition to adding the package, you must also add the corresponding Language Pack (winpewmi_en-us.cab)<br />
for that package. For US English (en-us) this is done as follows:<br />
dism /image:C:\BUILDPE\mount /add-package /packagepath:"C:\Program Files\<strong>Windows</strong><br />
AIK\Tools\PETools\amd64\WinPE_FPs\en-us\winpe-wmi_en-us.cab"<br />
Figure 9 shows this being done:<br />
Revised June 14, 2009 Page 137 of 231
<strong>Deploying</strong> <strong>Windows</strong> 7<br />
By Mitch Tulloch<br />
(<strong>Windows</strong>Networking.com)<br />
Figure 9: Adding WMI Support to <strong>Windows</strong> PE (step 2)<br />
Although we have now finished adding WMI support to our <strong>Windows</strong> PE image, we still won't be able<br />
to run WMI scripts from within <strong>Windows</strong> PE unless we also add the WinPE-Scripting Feature Pack<br />
(winpe-scripting.cab) and its corresponding Language Pack (winpe-scripting_en-us.cab) to our image.<br />
Figure 10 shows how this is done:<br />
Figure 10: Adding Scripting Support to <strong>Windows</strong> PE<br />
We can use the /get-packages command-line option of DISM to verify that the packages have in fact<br />
been added to the image (Figure 11):<br />
Revised June 14, 2009 Page 138 of 231
<strong>Deploying</strong> <strong>Windows</strong> 7<br />
By Mitch Tulloch<br />
(<strong>Windows</strong>Networking.com)<br />
Figure 11: Verifying that the Packages have been added to the Image<br />
Note that the state of each package is displayed as Install Pending. This is because the changes we<br />
are making have not yet been committed to the image.<br />
Step 4: Adding the Scripts to the Image<br />
Let's now add the two scripts (UUID.vbs and UUID.bat) we created in the previous article of this series<br />
to our mounted <strong>Windows</strong> PE image. We can use the copy command to do this by copying the scripts<br />
from a USB flash drive to the \<strong>Windows</strong>\System32 folder within our mounted image (Figure 12):<br />
Figure 12: Copying the Scripts to the Mounted <strong>Windows</strong> PE Image<br />
Revised June 14, 2009 Page 139 of 231
<strong>Deploying</strong> <strong>Windows</strong> 7<br />
By Mitch Tulloch<br />
(<strong>Windows</strong>Networking.com)<br />
We can use <strong>Windows</strong> Explorer to verify that the scripts have been copied to our mounted image<br />
(Figure 13):<br />
Figure 13: The Two Scripts have been Copied to the \<strong>Windows</strong>\System32 Folder of the Mounted<br />
<strong>Windows</strong> PE Image<br />
Why copy these scripts to the \<strong>Windows</strong>\System32 folder? Because that way the scripts will be<br />
included as part of the <strong>Windows</strong> PE RAM disk that is loaded into memory and accessible as X: drive<br />
from the <strong>Windows</strong> PE command prompt. If we copied the scripts instead to the \ISO folder of our build<br />
environment, the scripts would be included as part of the <strong>Windows</strong> PE CD and we would need to<br />
change to the CD drive letter before we could run the scripts from within <strong>Windows</strong> PE. So copying<br />
them to the \<strong>Windows</strong>\System32 folder makes it easier to run the scripts from within <strong>Windows</strong> PE.<br />
Note: If the scripts or tools you are adding to <strong>Windows</strong> PE require additional memory, use the /setscratchspace<br />
command-line option of DISM to allocate 64, 128, 256 or even 512 MB of additional<br />
memory to <strong>Windows</strong> PE (the default allocation is 32 MB).<br />
Step 5: Commit Changes and Dismount the Image<br />
We have now serviced (customized) the base <strong>Windows</strong> PE image by adding packages and scripts to<br />
the image. We can use the \unmount-wim command-line option of DISM to do this:<br />
dism /unmount-wim /mountdir:C:\BUILDPE\mount /commit<br />
Revised June 14, 2009 Page 140 of 231
<strong>Deploying</strong> <strong>Windows</strong> 7<br />
By Mitch Tulloch<br />
(<strong>Windows</strong>Networking.com)<br />
Figure 14 shows the result of running this command:<br />
Figure 14: Dismounting the Image after Committing the Changes<br />
Step 6: Create the <strong>Windows</strong> PE .iso Image<br />
We now need to transform our customized <strong>Windows</strong> PE image in the \BUILDPE folder into an .iso file<br />
that we can burn onto writable CD media. To do this, we can use the oscdimg command as follows:<br />
oscdimg –n –bC:\BUILDPE\etfsboot.com C:\BUILDPE\ISO C:\BUILDPE\WMI-PE-CD.iso<br />
This adds the CD volume boot sector to the <strong>Windows</strong> PE image and transforms it into an .iso file,<br />
which we have here named WMI-PE-CD.iso (Figure 15):<br />
Figure 15: Using oscdimg to Create an .iso file of <strong>Windows</strong> PE<br />
Revised June 14, 2009 Page 141 of 231
<strong>Deploying</strong> <strong>Windows</strong> 7<br />
By Mitch Tulloch<br />
(<strong>Windows</strong>Networking.com)<br />
Use <strong>Windows</strong> Explorer to verify that the .iso image has been created (Figure 16):<br />
Figure 16: An .iso Image File has been Created Using oscdimg from the Customized <strong>Windows</strong><br />
PE Build Environment<br />
Now copy this .iso file to a computer that has a CD burner and burn it the file to the CD.<br />
Step 7: Testing the Result<br />
We are finally ready to test our custom WinPE "tools" CD. Turn on a bare-metal system, insert the CD<br />
and press a key when asked whether you want to boot the system from its CD drive. Once <strong>Windows</strong><br />
PE has loaded and initialized, you will be presented with an X:\<strong>Windows</strong>\System32> command prompt.<br />
Simply type uuid at this command prompt and watch the UUID of the computer suddenly appear<br />
(Figure 17):<br />
Figure 17: Using UUID.bat and UUID.vbs on a Custom <strong>Windows</strong> PE Tools CD to Display the<br />
UUID of a Bare-metal System<br />
Revised June 14, 2009 Page 142 of 231
<strong>Deploying</strong> <strong>Windows</strong> 7<br />
By Mitch Tulloch<br />
(<strong>Windows</strong>Networking.com)<br />
After performing Step 7 on a bunch of systems and copying down the results, you can create new<br />
entries in the MDT 2010 database that let you deploy customized <strong>Windows</strong> PE images to your<br />
computers—see Part 16 of this series for how to do this.<br />
Part 20: Securing MDT (Part 1)<br />
Tip: You can find more information about automating LTI deployment in the <strong>Windows</strong> 7 Resource Kit<br />
from Microsoft Press. I am the lead author for this Resource Kit and I also maintain the Unofficial<br />
Support Site for the <strong>Windows</strong> 7 Resource Kit with answers to questions posted by readers, as well as<br />
links to the latest resources on <strong>Windows</strong> 7 deployment, administration and troubleshooting.<br />
Credentials in Bootstrap.ini<br />
I'll return to explaining how to configure and use the MDT database soon, but at this point I would like<br />
to bring up the issue of MDT security. So far in this series of articles on deploying <strong>Windows</strong> 7 we<br />
haven't been very concerned about security. For instance, the Bootstrap.ini file we have been using<br />
for our deployment share in these articles looks like this:<br />
[Settings]<br />
Priority=Default<br />
[Default]<br />
DeployRoot=\\SEA-DC1\DeploymentShare$<br />
UserID=Administrator<br />
UserDomain=CONTOSO<br />
UserPassword=Pa$$w0rd<br />
KeyboardLocale=en-US<br />
SkipBDDWelcome=YES<br />
The user account specified by the UserID, UserPassword and UserDomain properties in Bootstrap.ini<br />
is used by the <strong>Windows</strong> Deployment Wizard running on the target computer to connect to the<br />
deployment share on the MDT server and access the contents of this share. Until now we have been<br />
using the default Administrator account in the domain for this purpose. There are two reasons why<br />
this is not a good idea.<br />
First, if you are initiating your Lite Touch (LTI) deployment manually by booting your target computers<br />
using your LiteTouchPE CD, you should be aware of the fact that your Bootstrap.ini file is actually<br />
present on this CD. To see this, let's begin by examining the contents of a LiteTouchPE CD in<br />
<strong>Windows</strong> Explorer (Figure 1):<br />
Revised June 14, 2009 Page 143 of 231
<strong>Deploying</strong> <strong>Windows</strong> 7<br />
By Mitch Tulloch<br />
(<strong>Windows</strong>Networking.com)<br />
Figure 1: Contents of a LiteTouchPE CD as viewed in in <strong>Windows</strong> Explorer<br />
Note that most of the CD consists of a <strong>Windows</strong> image file Boot.wim, which is found in the \sources<br />
folder on your CD. (The \boot folder contains only some files used to enable the CD to boot and<br />
mount this image.) Now, let us say you left your LiteTouchPE CD lying around and someone stole it.<br />
The thief could then install <strong>Windows</strong> AIK 2.0 on a computer and mount the Boot.wim file on this CD to<br />
an empty folder using the Imagex command as follows (Figure 2):<br />
Figure 2: Mounting the Boot.wim file from a LiteTouchPE CD<br />
Revised June 14, 2009 Page 144 of 231
<strong>Deploying</strong> <strong>Windows</strong> 7<br />
By Mitch Tulloch<br />
(<strong>Windows</strong>Networking.com)<br />
Once the Boot.wim file has been mounted to the empty folder (here named C:\PEbootfiles) the thief<br />
could then browse the contents of the mounted image using <strong>Windows</strong> Explorer (Figure 3):<br />
Figure 3: Your Bootstrap.ini file is present in the Boot.wim file of your LiteTouchPE CD<br />
The thief could then open Bootstrap.ini in Notepad (Figure 4):<br />
Figure 4: This Bootstrap.ini file contains administrative credentials for your domain!<br />
Revised June 14, 2009 Page 145 of 231
<strong>Deploying</strong> <strong>Windows</strong> 7<br />
By Mitch Tulloch<br />
(<strong>Windows</strong>Networking.com)<br />
At this point your entire <strong>Windows</strong> infrastructure has been compromised since the thief has obtained<br />
Domain Admins credentials. So, if you are going to use Domain Admin credentials in your<br />
Bootstrap.ini file, you obviously need to protect your LiteTouchPE CD (or DVD or USB flash drive<br />
depending on the boot media you are using to initiate LTI deployment). In other words, do not let<br />
unauthorized persons have access to such media.<br />
The other security issue concerns transmissions of credentials over the network. When you boot a<br />
target computer into <strong>Windows</strong> PE using your LiteTouchPE boot media, the computer typically<br />
acquires an IP from a DHCP server and then tries to establish a connection with the deployment<br />
share on your MDT server. Now, if you are using MDT in a New <strong>Computer</strong> scenario (that is, to<br />
perform a bare metal deployment onto a target computer that currently has no operating system) then<br />
Kerberos or NTLM authentication is used to securely pass the credentials indicated in the<br />
Bootstrap.ini file from the target computer to the MDT server, and someone sniffing the network would<br />
not be able to steal these credentials. But if you using MDT in a Refresh <strong>Computer</strong> scenario (that is,<br />
to re-image an existing computer and save/restore user state information) then Bootstrap.ini is<br />
processed from the deployment share and the credentials are passed over the network in clear text.<br />
This means that someone sniffing the network in this scenario could steal the credentials specified in<br />
Bootstrap.ini, and if these are Domain Admins credentials then your network is compromised.<br />
Of course, if you're using MDT in a test environment or in a secure lab that mirrors your production<br />
network but has a different domain, then it's fine to leave the default Administrator account for the<br />
domain in Bootstrap.ini as shown in Figure 4 above. If you're using MDT in a production environment<br />
however, you probably don’t want to do this. We'll see one possible solution to this issue in a<br />
moment.<br />
Credentials in CustomSettings.ini<br />
The other place credentials are specified in MDT is in the CustomSettings.ini file for your deployment<br />
share. Specifically, the following portion of a CustomSettings.ini file is used to automate the process<br />
of joining target computers to the domain during the final phase of deployment:<br />
JoinDomain=CONTOSO<br />
DomainAdmin=Administrator<br />
DomainAdminDomain=CONTOSO<br />
DomainAdminPassword=Pa$$w0rd<br />
Note that we have been using the same account (CONTOSO\Administrator) in these articles for both<br />
Bootstrap.ini (to allow the target computer to access the deployment share) and CustomSettings.ini<br />
(to join the target computer to the domain once the install has completed). Now your<br />
CustomSettings.ini file is not present on your LiteTouchPE boot media, your Boostrap.ini file, so that's<br />
not an issue. But in all deployment scenarios where automated domain-join is performed, the above<br />
info contained in CustomSettings.ini is transmitted over the network from the MDT server to the target<br />
machine in clear text. This means that if you use a Domain Admins account to automatically join<br />
deployed computers to your domain, someone sniffing your network could easily compromise the<br />
security of your entire network. The problem however is that, generally speaking, admin-level<br />
credentials are required if you want to join a computer to a domain. There are some workarounds to<br />
this issue however as we'll shortly see. Once again however, if you're using MDT in a test<br />
environment or in a secure lab, you can leave the default Administrator account for the domain in<br />
CustomSettings.ini as shown above.<br />
Revised June 14, 2009 Page 146 of 231
<strong>Deploying</strong> <strong>Windows</strong> 7<br />
By Mitch Tulloch<br />
(<strong>Windows</strong>Networking.com)<br />
Using Separate Build and Join Accounts<br />
If we are going to use our MDT server to deploy <strong>Windows</strong> in a production environment, the first thing<br />
we can do to make MDT more secure is to use separate user accounts for connecting to the<br />
deployment share and for joining computers to the domain. In this example we will create two new<br />
user accounts:<br />
mdt_build This "build" account will be used to enable target computers to connect to our<br />
deployment share.<br />
mdt_join This "join" account will be used to automatically join target computers to the domain as<br />
the deployment process finishes on the computers.<br />
When you create these accounts in Active Directory Users and <strong>Computer</strong>s, they are automatically<br />
assigned membership in the Domain Users group. Let's leave it at that for the moment—do not add<br />
these accounts to the Domain Admins group.<br />
Now let us examine the ACLs on our deployment share. Figure 5 indicates that the Users group on<br />
the MDT server, which includes the Domain users group as a member, has Read & Execute<br />
permission on the share:<br />
Figure 5: ACL of Users group for a deployment share<br />
Revised June 14, 2009 Page 147 of 231
<strong>Deploying</strong> <strong>Windows</strong> 7<br />
By Mitch Tulloch<br />
(<strong>Windows</strong>Networking.com)<br />
Now if all you are using this deployment share is for installing <strong>Windows</strong> on target computers, then<br />
Read & Execute permission is sufficient since it allows the target computer to read files contained in<br />
the share and run scripts and programs in the share. In other words, our build account, which is<br />
specified in Bootstrap.ini, can be a simple Domain Users account—it does not have to be a Domain<br />
Admins account. That is good news! So let's go ahead and change the account specified by the<br />
UserID property in our Bootstrap.ini file from Administrator to mdt_build. Once we've done this, our<br />
new Bootstrap.ini file looks like Figure 6:<br />
Figure 6: Bootstrap.ini now specifies a Domain Users account<br />
Do not forget that after you make changes to your Bootstrap.ini file you need to update your<br />
deployment share (Figure 7):<br />
Figure 7: Always update your deployment share after modifying Bootstrap.ini<br />
Revised June 14, 2009 Page 148 of 231
<strong>Deploying</strong> <strong>Windows</strong> 7<br />
By Mitch Tulloch<br />
(<strong>Windows</strong>Networking.com)<br />
And do not forget also that after updating your deployment share you'll need to burn a new<br />
LiteTouchPE CD since the Bootstrap.ini file is included on it.<br />
So far, so good. Now the issue of using the join account is a bit more complicated, so we'll get to this<br />
later. Meanwhile, I need to mention to you that the change you've just made in your Bootstrap.ini file<br />
has broken something for if you now try and configure your MDT database to deploy <strong>Windows</strong><br />
differently to different computers based on the computer's UUID, MAC address, or other machine<br />
property as described earlier in Part 16 and Part 17 of this series, you'll discover that this no longer<br />
works! Specifically, you'll be able to deploy <strong>Windows</strong> 7 using MDT but any customizations you've<br />
specified in the MDT database won't be applied (and the target computer won't join the domain either).<br />
You may or may not see an error message displayed at the end of the deployment process, but either<br />
way if you later examine the BDD.log in the %WINDIR%\Temp\Deployment logs folder on a deployed<br />
target computer, you'll see the following error:<br />
ZTI error opening SQL Connection: Cannot open database "MDT" requested by<br />
the login. The login failed. (-2147467259)<br />
We will see how to fix this issue in the next article of this series where we'll also examine the issue of<br />
securely joining the domain as well.<br />
Part 21: Securing MDT (Part 2)<br />
Tip: You can find more information about automating LTI deployment in the <strong>Windows</strong> 7 Resource Kit<br />
from Microsoft Press. I am the lead author for this Resource Kit and I also maintain the Unofficial<br />
Support Site for the <strong>Windows</strong> 7 Resource Kit with answers to questions posted by readers, as well as<br />
links to the latest resources on <strong>Windows</strong> 7 deployment, administration and troubleshooting.<br />
In the previous article of this series, we examined the security issues involving two user accounts<br />
used by MDT:<br />
The account specified in Bootstrap.ini that is used by target computers to connect to the<br />
deployment share on your MDT server<br />
The account specified in CustomSettings.ini that is used by target computers to join the domain at<br />
the completion of the install.<br />
I indicated that in a simple lab environment it's OK to use the default Administrator account for the<br />
domain for both of these purposes. However, for security reasons in your production environment you<br />
will probably want to use separate accounts for each of these purposes, and preferably ordinary<br />
Domain Users accounts instead of Domain Admins accounts. So what we did in the previous article is<br />
create two new Domain Users accounts: mdt_build for our Bootstrap.ini file and mdt_join for our<br />
CustomSettings.ini file. After doing this we updated our deployment share because our Bootstrap.ini<br />
file had changed, and then we burned the resulting LiteTouchPE_x64.iso file to CD media. If we then<br />
boot our target computers using this CD, MDT will deploy <strong>Windows</strong> 7 to them but any customizations<br />
entered into the MDT database won't be applied and an SQL Connection error will result. The problem<br />
is that our new account CONTOSO\mdt_build has not been granted rights to access our MDT<br />
database using <strong>Windows</strong> Integrated <strong>Security</strong>. This present article shows you how to resolve this SQL<br />
issue, and it also describes how to ensure your domain-joins are (reasonably) secure.<br />
Revised June 14, 2009 Page 149 of 231
<strong>Deploying</strong> <strong>Windows</strong> 7<br />
By Mitch Tulloch<br />
(<strong>Windows</strong>Networking.com)<br />
Installing SQL Server Management Studio<br />
To modify access rights to the MDT database on our SQL Server, we can use SQL Server<br />
Management Studio. In this series of articles we are using SQL Server 2008 Express Edition SP1<br />
which we installed on our MDT server in article 15 of this series. To do this, we will install Microsoft<br />
SQL Server 2008 Management Studio Express on an administrator workstation running <strong>Windows</strong> 7<br />
and the use it to grant the necessary rights to our CONTOSO\mdt_build account. Microsoft SQL<br />
Server 2008 Management Studio Express is a free download from Microsoft.<br />
Begin by double-clicking on the downloaded installation file SQLManagementStudio_x64_ENU.exe.<br />
Doing this brings up a warning dialog that you will need to install Service Pack 1 afterwards (Figure 1):<br />
Figure 1: Step 1 of installing SQL Server 2008 Management Studio Express<br />
Clicking Run Program opens the SQL Server Installation Center (Figure 2):<br />
Figure 2: Step 2 of installing SQL Server 2008 Management Studio Express<br />
Revised June 14, 2009 Page 150 of 231
<strong>Deploying</strong> <strong>Windows</strong> 7<br />
By Mitch Tulloch<br />
(<strong>Windows</strong>Networking.com)<br />
Click Installation at the left to display the installation options (Figure 3):<br />
Figure 3: Step 3 of installing SQL Server 2008 Management Studio Express<br />
Clicking the first option on this page runs the Setup Support Rules to verify the install can proceed<br />
(Figure 4):<br />
Figure 4: Step 4 of installing SQL Server 2008 Management Studio Express.<br />
Revised June 14, 2009 Page 151 of 231
<strong>Deploying</strong> <strong>Windows</strong> 7<br />
By Mitch Tulloch<br />
(<strong>Windows</strong>Networking.com)<br />
The next screen indicates that no product key is required for the install (Figure 5):<br />
Figure 5: Step 5 of installing SQL Server 2008 Management Studio Express<br />
Accept the EULA next, then click Install. The Setup Support Rules are installed (Figure 6):<br />
Figure 6: Step 6 of installing SQL Server 2008 Management Studio Express<br />
Revised June 14, 2009 Page 152 of 231
<strong>Deploying</strong> <strong>Windows</strong> 7<br />
By Mitch Tulloch<br />
(<strong>Windows</strong>Networking.com)<br />
On the Feature Selection page, make sure Management Studio – Basic is selected (Figure 7):<br />
Figure 7: Step 7 of installing SQL Server 2008 Management Studio Express<br />
Proceed through the remaining steps until the install is complete (Figure 8):<br />
Figure 8: Step 8 of installing SQL Server 2008 Management Studio Express<br />
Revised June 14, 2009 Page 153 of 231
<strong>Deploying</strong> <strong>Windows</strong> 7<br />
By Mitch Tulloch<br />
(<strong>Windows</strong>Networking.com)<br />
Now download SQL Server 2008 Service Pack 1 and double-click on the installation file<br />
SQLServer2008SP1-KB968369-x64-ENU to begin the installation. Once again the SQL Server<br />
Installation Center is displayed, and after clicking on the first option the Welcome page is displayed<br />
and Setup the Support Rules run (Figure 9):<br />
Figure 9: installing SQL Server 2008 Service Pack 1<br />
Then proceed through the installation of SP1 accepting all the defaults until the service pack has been<br />
installed.<br />
Configuring Access Rights Using SQL Server Management Studio<br />
Now let us use SQL Server Management Studio to configure the appropriate database access rights<br />
for the CONTOSO\mdt_build account. Begin by launching SQL Server Management Studio from the<br />
Start menu (Figure 10):<br />
Figure 10: Launching SQL Server Management Studio<br />
Revised June 14, 2009 Page 154 of 231
<strong>Deploying</strong> <strong>Windows</strong> 7<br />
By Mitch Tulloch<br />
(<strong>Windows</strong>Networking.com)<br />
When the Connect To Server dialog appears, leave the Authentication method set at <strong>Windows</strong><br />
Authentication (Figure 11):<br />
Figure 11: The Connect To Server dialog<br />
Click the Server Name field and then click Browse For More (Figure 12):<br />
Figure 12: Selecting the server name<br />
Revised June 14, 2009 Page 155 of 231
<strong>Deploying</strong> <strong>Windows</strong> 7<br />
By Mitch Tulloch<br />
(<strong>Windows</strong>Networking.com)<br />
When the Browse For Servers dialog displays the available SQL Servers, select the local instance<br />
SQLEXPRESS that is installed on your MDT server (Figure 13):<br />
Figure 13: Select the local instance SQLEXPRESS<br />
Click OK to close the Browse For Servers dialog and return to the Connect To Server dialog. The<br />
instance SQLEXPRESS will be displayed as the SQL Server name (Figure 14):<br />
Figure 14: The instance SQLEXPRESS is selected as the SQL Server name<br />
Clicking Connect causes SQL Server Management to connect to the SQLEXPRESS instance on your<br />
MDT server and opens the Microsoft SQL Server Management Studio console (Figure 15):<br />
Revised June 14, 2009 Page 156 of 231
<strong>Deploying</strong> <strong>Windows</strong> 7<br />
By Mitch Tulloch<br />
(<strong>Windows</strong>Networking.com)<br />
Figure 15: The Microsoft SQL Server Management Studio console<br />
In the Management Studio console, expand <strong>Security</strong> and then right-click on Logins and select New<br />
Login from the shortcut menu (Figure 16):<br />
Figure 16: Creating a new login for your SQL Server<br />
Revised June 14, 2009 Page 157 of 231
<strong>Deploying</strong> <strong>Windows</strong> 7<br />
By Mitch Tulloch<br />
(<strong>Windows</strong>Networking.com)<br />
On the General page of the Login – New dialog, click Search and select the CONTOSO\mdt_build<br />
account from Active Directory. Once this is done, the account will be displayed in the Login Name field<br />
of this page. In addition, change the Default Database setting at the bottom of the page from master<br />
to MDT (since MDT was the name we gave to our database when we created it back in article 15 of<br />
this series). The General page of the Login – New dialog should now look like Figure 17:<br />
Figure 17: General page after settings have been configured<br />
Do not make any changes to the Server Roles page. On the User Mappings page, select the<br />
checkbox for MDT, then click the button and add CONTOSO\mdt_build as a user mapped to this login.<br />
Then select the checkbox for db_datareader to assign the db_datareader fixed database role to the<br />
CONTOSO\mdt_build account (Figure 18):<br />
Revised June 14, 2009 Page 158 of 231
<strong>Deploying</strong> <strong>Windows</strong> 7<br />
By Mitch Tulloch<br />
(<strong>Windows</strong>Networking.com)<br />
Figure 18: Assigning the db_datareader fixed database role for MDT to CONTOSO\mdt_build<br />
Since members of the db_datareader fixed database role can read all data from all user tables, doing<br />
the above enables your target computers to access customizations in your MDT database.<br />
Do not make any changes to the remaining two pages (Securables and Status) of the Login – New<br />
dialog. Clicking OK displays the new login you created (Figure 19):<br />
Revised June 14, 2009 Page 159 of 231
<strong>Deploying</strong> <strong>Windows</strong> 7<br />
By Mitch Tulloch<br />
(<strong>Windows</strong>Networking.com)<br />
Figure 19: The account CONTOSO\mdt_build has been granted read access to your MDT database<br />
You can now use the MDT database again to deploy <strong>Windows</strong> 7 in a customized fashion to your<br />
target computers as described in earlier articles in this series.<br />
Tip: If you need to grant multiple user accounts access to you MDT database, you can create a<br />
security group to contain these accounts and then use the above procedure to assign the<br />
db_datareader fixed database role to the group.<br />
Tip: For more information concerning SQL Server database-level roles, see this page on MSDN.<br />
Performing Domain-Joins Securely<br />
Let us finish off by addressing the issue of the mdt_join account which we have specified in<br />
CustomSettings.ini and which is used by MDT to join the target computer to the domain. If we leave<br />
this account as an ordinary Domain User, then MDT will be able to join the first few computers it<br />
installs into the domain but then will fail to join any others. This is because by default any user<br />
account that belongs to the Authenticated Users built-in identity (such as mdt_join) has the Add<br />
Workstations To A Domain user right assigned to it, which means the account can create up to 10<br />
computer accounts in the domain. So if you're only deploying 10 computers, you're in luck. Otherwise,<br />
to perform your domain-joins securely you can choose from one of the following ways to proceed:<br />
Revised June 14, 2009 Page 160 of 231
<strong>Deploying</strong> <strong>Windows</strong> 7<br />
By Mitch Tulloch<br />
(<strong>Windows</strong>Networking.com)<br />
Method 1: Make your mdt_join account a member of the Domain Admins group. Then remove the<br />
DomainAdminPassword = line from your CustomSettings.ini file. The result will be that<br />
your Lite Touch installs will no longer be completely automated, and you'll have to walk around to<br />
each machine and type in the password for your mdt_join account when prompted for this (make sure<br />
no one is looking over your shoulder when you do this). More hassle, but more secure.<br />
Method 2: Make your mdt_join account a member of the Domain Admins group, do not make any<br />
changes to your CustomSettings.ini file, and ignore the security consequences that the domain-join<br />
credentials are transmitted in clear text over the network (and are temporarily stored in obfuscated<br />
form on each target computer during installation). If you choose this approach, it might be best to do<br />
your deployment on a weekend or evening when others aren't around. For extra security, change the<br />
password of your mdt_join immediately after you've finished your deployment. Don't forget to change<br />
the password in both Active Directory and in your CustomSettings.ini file.<br />
Method 3: Make your mdt_join account a member of the Domain Admins group. Omit the entire<br />
domain-join section (four lines) in your CustomSettings.ini file. Then in Deployment Workbench open<br />
the properties of the task sequence you are using, select the OS Info tab, and click Edit Unattend.xml<br />
to open the answer file MDT uses for deploying <strong>Windows</strong> using this task sequence. In the specialize<br />
pass, expand the Microsoft-<strong>Windows</strong>-UnattendedJoin component and configure the necessary<br />
settings in Identification and Credentials to join the target computer to the domain. The password you<br />
specify for the domain-join account here will be obfuscated but not encrypted, and the unattend.xml<br />
file will be cached on the target computer anyway during deployment, so this approach doesn't make<br />
deployment any more secure.<br />
Method 4: Omit the entire domain-join section (four lines) in your CustomSettings.ini file and deploy<br />
your target computers into a workgroup instead of a domain. Then join the machines to the domain<br />
later on either by doing it manually on each machine (if you only deployed a dozen or so computers)<br />
or by running a netdom join script using Group Policy (if you have lots of computers) or by some other<br />
method.<br />
Method 5: Grant the appropriate permissions for the mdt_join account to create and update computer<br />
accounts in Active Directory. This approach allows you to leave the mdt_join account as an ordinary<br />
Domain Users account which solves our security problems, but it takes some careful work in order to<br />
implement. Briefly, the steps you will need to perform are as follows:<br />
1. Open the Active Directory Users and <strong>Computer</strong>s console.<br />
2. Select the View menu, then toggle on Advanced Features.<br />
3. Create an organizational unit (for example Deployed<strong>Computer</strong>s) that will contain the computer<br />
accounts of newly deployed computers. (This way you won't have to modify the permissions<br />
on the default <strong>Computer</strong>s container.)<br />
4. Open the properties of the Deployed<strong>Computer</strong>s OU and select the <strong>Security</strong> tab.<br />
5. Click Advanced to open the Advanced <strong>Security</strong> Settings dialog for the OU.<br />
6. Click Add and add an ACE for your mdt_join account to the ACLs for this OU.<br />
Revised June 14, 2009 Page 161 of 231
<strong>Deploying</strong> <strong>Windows</strong> 7<br />
By Mitch Tulloch<br />
(<strong>Windows</strong>Networking.com)<br />
7. In the Permission Entry dialog, assign Allow permissions (with scope set to This Object And All<br />
Descendant Objects) as follows:<br />
Create computer objects<br />
Delete computer objects<br />
8. Click OK, then click Add again and add a second ACE for your mdt_join account that assigns<br />
Allow permissions (with scope set to Descendant <strong>Computer</strong> Objects) as follows:<br />
Read all properties<br />
Write all properties<br />
Read permissions<br />
Write permissions<br />
Change password<br />
Reset password<br />
Validated write to DNS host name<br />
Validated write to service principal name<br />
9. Click OK repeatedly to close all open dialogs.<br />
Your mdt_join account should now be able to create new computer accounts and update these<br />
accounts as needed even though mdt_join is not a member of the Domain Admins group. Finally, in<br />
order to fully automate domain-joins using MDT you will need to add the following line to your<br />
CustomSettings.ini file:<br />
MachineObjectOU=OU= Deployed<strong>Computer</strong>s,DC=CONTOSO,DC=COM<br />
One final approach you could follow would be to carry all the client computers on your production<br />
network into your secure lab, deploy <strong>Windows</strong> on them, and then carry them back into the offices<br />
where they belong. If you decide upon this approach however, be careful you do not injure your back!<br />
Part 22: Bulk Populating the MDT Database Using PowerShell<br />
Tip: You can find more information about automating LTI deployment in the <strong>Windows</strong> 7 Resource Kit<br />
from Microsoft Press. I am the lead author for this Resource Kit and I also maintain the Unofficial<br />
Support Site for the <strong>Windows</strong> 7 Resource Kit with answers to questions posted by readers, as well as<br />
links to the latest resources on <strong>Windows</strong> 7 deployment, administration and troubleshooting.<br />
In previous articles of this series we have examined how to configure and use the MDT database for<br />
Lite Touch deployments. For example, in article 16 we saw how you can use the Deployment<br />
Workbench to add new target computers to the database so you can customize deployment of<br />
<strong>Windows</strong> 7 based on the MAC address or UUID of each target computer. Doing this manually using<br />
the Deployment Workbench is tedious however—what if you have dozens or hundreds of computers<br />
you want to add to the database?<br />
That's where <strong>Windows</strong> PowerShell can be useful since it allows you to write scripts to automate<br />
tedious administrative tasks. While MDT 2010 now includes built-in PowerShell support, it doesn't<br />
include cmdlets for manipulating the MDT database. However, Michael Niehaus the developer of MDT<br />
has created a separate PowerShell module you can use to add PowerShell support for manipulating<br />
the MDT database. This article shows how to import this module and use PowerShell to take a<br />
Revised June 14, 2009 Page 162 of 231
<strong>Deploying</strong> <strong>Windows</strong> 7<br />
By Mitch Tulloch<br />
(<strong>Windows</strong>Networking.com)<br />
spreadsheet of target computer information and bulk import this information into the MDT database as<br />
new computer items.<br />
Note: This article assumes that you're a PowerShell beginner with only minimal prior experience<br />
writing PowerShell scripts but with a bit of other programming experience.<br />
Installing the PowerShell Module for MDT<br />
Begin by downloading the compressed PowerShell module file named MDTDB.zip from this blog post<br />
by Michael Niehaus or by using this direct link. Right-click on the downloaded file, select Properties,<br />
and click Unblock. Then unzip the MDTDB.psm1 script file and copy it to a folder (here assumed to be<br />
C:\Scripts) on your MDT server.<br />
Now open the PowerShell command shell and type Get-ExecutionPolicy to view the current execution<br />
policy on your server (see here for more information):<br />
Figure 1: Viewing the current execution policy<br />
If the current execution policy is Restricted, the MDTDB.psm1 script won't run, so use the Set-<br />
ExecutionPolicy Unrestricted command to change the execution policy to Unrestricted like this:<br />
Figure 2: Changing the execution policy to Unrestricted.<br />
Revised June 14, 2009 Page 163 of 231
<strong>Deploying</strong> <strong>Windows</strong> 7<br />
By Mitch Tulloch<br />
(<strong>Windows</strong>Networking.com)<br />
Now type Import-Module –name C:\Scripts\MDTDB.psm1 to add the MDT PowerShell module to the<br />
current PowerShell session as shown here:<br />
Figure 3: Importing the MDT PowerShell module.<br />
Note that the output from running the Import-Module command lists all the new PowerShell cmdlets<br />
we now have available for manipulating the MDT database. For example, in the figure above you can<br />
see the New-MDT<strong>Computer</strong> cmdlet which we'll be using later in this article to add new computers to<br />
the database.<br />
To verify that the module has been imported, type Get-Module as shown here:<br />
Figure 4: Verifying that the module has been imported<br />
Revised June 14, 2009 Page 164 of 231
<strong>Deploying</strong> <strong>Windows</strong> 7<br />
By Mitch Tulloch<br />
(<strong>Windows</strong>Networking.com)<br />
Connecting to the MDT Database<br />
Now we need to connect our PowerShell session to the MDT database. To do this, we will use the<br />
Connect-MDTDatabase cmdlet. To view the syntax for this cmdlet, type Get-Help Connect-<br />
MDTDatabase as shown here:<br />
Figure 5: Viewing the syntax for Connect-MDTDatabase<br />
To connect to a MDT database named MDT on a SQL Server instance named SQLEXPRESS on a<br />
MDT server named SEA-MDT-01, type this command:<br />
Connect-MDTDatabase –sqlServer SEA-MDT-01 –instance SQLEXPRESS –database MDT<br />
Figure 6: Connecting to the MDT database<br />
Revised June 14, 2009 Page 165 of 231
<strong>Deploying</strong> <strong>Windows</strong> 7<br />
By Mitch Tulloch<br />
(<strong>Windows</strong>Networking.com)<br />
Working with <strong>Computer</strong> Items<br />
Let us begin by seeing whether there are already any computer items in the MDT database. To do<br />
this, we are going to use the Get-MDT<strong>Computer</strong> cmdlet, so let us use Get-Help to view the syntax for<br />
this cmdlet:<br />
Figure 7: Viewing the syntax for Get-MDT<strong>Computer</strong><br />
To list all existing computer items in the database, simply type Get-MDT<strong>Computer</strong> like this:<br />
Figure 8: Listing computers in the MDT database<br />
Revised June 14, 2009 Page 166 of 231
<strong>Deploying</strong> <strong>Windows</strong> 7<br />
By Mitch Tulloch<br />
(<strong>Windows</strong>Networking.com)<br />
The Get-MDT<strong>Computer</strong> cmdlet shows that there is one computer item in the database and that this<br />
computer item has a MAC address of EE:EE:EE:FF:FF:FF and ID number 2. The ID number is the<br />
key field for computer items. In other words, each computer item in the database will have a unique ID<br />
number.<br />
If we open the Deployment Workbench we can see this computer item:<br />
Figure 9: Viewing a computer item using the Workbench<br />
We could delete this computer item using the Workbench, but let's do this using PowerShell instead. If<br />
desired type Get-Help Remove-MDT<strong>Computer</strong> to display the syntax for deleting computer items. then<br />
type Remove-MDT<strong>Computer</strong> –id 2 –verbose to delete the computer item and display verbose<br />
details concerning the operation:<br />
Figure 10: Removing a computer item from the database<br />
Revised June 14, 2009 Page 167 of 231
<strong>Deploying</strong> <strong>Windows</strong> 7<br />
By Mitch Tulloch<br />
(<strong>Windows</strong>Networking.com)<br />
Importing <strong>Computer</strong>s into the Database<br />
Now let us bulk import some computers into the database. Begin by creating an Excel spreadsheet<br />
with various columns for the name, UUID, MAC address and other properties of these computers.<br />
Each row of the spreadsheet will correspond to a single computer. For this walkthrough I've created a<br />
spreadsheet of a few computers in my lab:<br />
Figure 11: Create a spreadsheet for your target computers<br />
Now export this spreadsheet as a comma-delimited (CSV) text file (named C:\Data\machines.txt)<br />
which you can open in Notepad to view:<br />
Figure 12: CSV file for target computers<br />
Now use Import-Csv cmdlet to import the CSV file and assign it to the variable $machines like this:<br />
$machines = Import-Csv C:\Data\machines.txt<br />
Revised June 14, 2009 Page 168 of 231
<strong>Deploying</strong> <strong>Windows</strong> 7<br />
By Mitch Tulloch<br />
(<strong>Windows</strong>Networking.com)<br />
Figure 13: Importing the CSV file into a variable<br />
Typing $machines displays the imported information, which is stored as an array:<br />
Figure 14: The computer information is stored as an array<br />
Revised June 14, 2009 Page 169 of 231
<strong>Deploying</strong> <strong>Windows</strong> 7<br />
By Mitch Tulloch<br />
(<strong>Windows</strong>Networking.com)<br />
You can type $machines.count to display the number of elements in this array:<br />
Figure 15: The array has 3 elements, one for each computer<br />
To display the first element of the array, you can type $machines[0] like this:<br />
Figure 16: Displaying the first element of the array<br />
Revised June 14, 2009 Page 170 of 231
<strong>Deploying</strong> <strong>Windows</strong> 7<br />
By Mitch Tulloch<br />
(<strong>Windows</strong>Networking.com)<br />
As you can see from the figure above, the first element of the array contains the information about the<br />
first computer. To display only the name of this computer, type $machines[0].name like this:<br />
Figure 17: Displaying the name of the first computer<br />
Adding the Imported <strong>Computer</strong>s to the Database<br />
Now that we know a bit about manipulating arrays, we are ready to import the information stored in<br />
the array variable $machines into our MDT database. To do this, we are going to be using the New-<br />
MDT<strong>Computer</strong> cmdlet so let's display the syntax for this cmdlet:<br />
Figure 18: View the syntax for New-MDT<strong>Computer</strong><br />
Revised June 14, 2009 Page 171 of 231
<strong>Deploying</strong> <strong>Windows</strong> 7<br />
By Mitch Tulloch<br />
(<strong>Windows</strong>Networking.com)<br />
Remember from article 16 that computer items must be uniquely identified in the database using one<br />
(or more) of the following fields:<br />
Universally Unique Identifier (UUID)<br />
Asset tag<br />
Serial number<br />
MAC address<br />
Let us add a computer item for the first computer in our spreadsheet using its MAC address as the<br />
identifier. To do this, we type the following command:<br />
New-MDT<strong>Computer</strong> –macAddress $machines[0].mac –settings @{OSInstall='YES'}<br />
Figure 19: Adding the first computer to the database using its MAC address as identifier<br />
Close and re-open the Workbench to refresh it and you should see the new computer item:<br />
Figure 20: The new computer item has been added to the database<br />
Revised June 14, 2009 Page 172 of 231
<strong>Deploying</strong> <strong>Windows</strong> 7<br />
By Mitch Tulloch<br />
(<strong>Windows</strong>Networking.com)<br />
If you double-click on this computer item you can display its properties:<br />
Figure 21: Properties of the new computer item<br />
Selecting the Details tab shows that the OSinstall property has been set to YES as expected:<br />
Figure 22: Detailed properties of the new computer item<br />
Revised June 14, 2009 Page 173 of 231
<strong>Deploying</strong> <strong>Windows</strong> 7<br />
By Mitch Tulloch<br />
(<strong>Windows</strong>Networking.com)<br />
However, note in the figure above that the OSD<strong>Computer</strong>Name property of the new computer item<br />
has no value. The OSDComptuerName property specifies the name you want MDT to assign to the<br />
target computer, and if you refer back to Figure 11 you will see that we wanted this property set to<br />
DESK-A for this particular computer.<br />
Let us see how to add a new computer to the database while also specifying the computer's name. To<br />
show how to do this, let's add a computer item for the second computer in our spreadsheet using its<br />
MAC address as the identifier and also specifying its name (which as you can see from the previous<br />
Figure 11 should be DESK-B). To do this, we type the following command:<br />
New-MDT<strong>Computer</strong> –macAddress $machines[1].mac –settings<br />
@{OSInstall='YES';OSD<strong>Computer</strong>Name=$machines[1].name}<br />
Figure 23: Adding the second computer to the database using its MAC address as identifier<br />
and specifying the computer's name<br />
If you close and reopen the Workbench, open the properties for the new computer, and select the<br />
Details tab, you can see that this time the OSD<strong>Computer</strong>Name property has the expected value<br />
DESK-B assigned to it:<br />
Revised June 14, 2009 Page 174 of 231
<strong>Deploying</strong> <strong>Windows</strong> 7<br />
By Mitch Tulloch<br />
(<strong>Windows</strong>Networking.com)<br />
Figure 24: Detailed properties of the new computer item<br />
Let us try one more example and add a computer item for the third computer in our spreadsheet using<br />
its MAC address as the identifier while also specifying the computer name, organization name, and<br />
user's full name. To do this, we'll type a single PowerShell command but continue it across several<br />
lines to make it more readable:<br />
New-MDT<strong>Computer</strong> –macAddress $machines[2].mac –settings @{<br />
OSInstall='YES';<br />
OSD<strong>Computer</strong>Name=$machines[2].name;<br />
FullName='Michael Allen';<br />
OrgName='Contoso Ltd.'}<br />
Figure 25: Adding the third computer to the database with several properties being specified<br />
Revised June 14, 2009 Page 175 of 231
<strong>Deploying</strong> <strong>Windows</strong> 7<br />
By Mitch Tulloch<br />
(<strong>Windows</strong>Networking.com)<br />
Note that in PowerShell you do not have to use any special line continuation character if the<br />
command breaks across an array specified by curly braces.<br />
Close and reopen the Workbench, open the properties for the new computer, and select the Details<br />
tab to see that the expected properties have been configured:<br />
Figure 26: Detailed properties of the new computer item<br />
Bulk Creation of <strong>Computer</strong> Items in the Database<br />
We now know how to use a single PowerShell command to create a new computer item in the MDT<br />
database and configure various properties of that item. Now let's see how we can use a script to<br />
automate this process so we can bulk create lots of computers in the database in one step.<br />
First, instead of typing separate commands to create each computer in the database, let's use a For<br />
loop to iterate through the elements of the $machines array like this:<br />
For ($i=1; $i -le $machines.count; $i++)<br />
{<br />
New-MDT<strong>Computer</strong> -macAddress $machines[$i-1].mac -settings @{ OSInstall='YES';<br />
OSD<strong>Computer</strong>Name=$machines[$i-1].name;}<br />
}<br />
Revised June 14, 2009 Page 176 of 231
<strong>Deploying</strong> <strong>Windows</strong> 7<br />
By Mitch Tulloch<br />
(<strong>Windows</strong>Networking.com)<br />
Figure 27: Using a For loop to add computers to the database<br />
Note that the loop does not execute until you finish typing the closing brace—you do not need to use<br />
any line continuation characters like in VBScript.<br />
The result of running this command can be seen by opening the Workbench:<br />
Figure 28: Three computer items have been created using a single command<br />
Now let's turn all this into a script that does the following:<br />
Revised June 14, 2009 Page 177 of 231
Installs the MDT PowerShell module<br />
Connects to the MDT database<br />
Imports the CSV file of target computer info<br />
<strong>Deploying</strong> <strong>Windows</strong> 7<br />
By Mitch Tulloch<br />
(<strong>Windows</strong>Networking.com)<br />
Creates computer items in the database including the names of the computers and the<br />
organization name Contoso Ltd.<br />
To do this, type the following PowerShell script into Notepad:<br />
Import-Module –name C:\Scripts\MDTDB.psm1<br />
Connect-MDTDatabase –sqlServer SEA-MDT-01 –instance SQLEXPRESS –database MDT<br />
$machines = Import-Csv C;\Data\machines.txt<br />
For ($i=1; $i -le $machines.count; $i++)<br />
{<br />
New-MDT<strong>Computer</strong> -macAddress $machines[$i-1].mac -settings @{<br />
OSInstall='YES';<br />
OSD<strong>Computer</strong>Name=$machines[$i-1].name;<br />
OrgName='Contoso Ltd.'<br />
}<br />
}<br />
Now save this text file as Create.ps1 since PowerShell scripts must have the .ps1 file extension. Open<br />
the Workbench and delete any existing computer items in the database, then close the Workbench.<br />
Now browse to your Create.ps1 file, right-click on it and select Run With PowerShell. The PowerShell<br />
command shell will be displayed for a moment and then will close. As an alternative to double-clicking<br />
on the .ps1 file, you can open the PowerShell command shell, change to the directory where the<br />
Create.ps1 file is located, and type Create.ps1 to run your script.<br />
Now open the Workbench and you should see your new computer items. We've achieved our goal of<br />
being able to populate the MDT database with multiple computer items in one step.<br />
Here's a bonus for you. Administrators often want to name computers using some standard naming<br />
convention, and let's say we want to name these three computers SEA-CLI-001, SEA-CLI-002 and<br />
SEA-CLI-003 instead of DESK-A, DESK-B and DESK-E. We can do this by modifying the above script<br />
with a bit of fancy string manipulation as follows:<br />
Import-Module –name C:\Scripts\MDTDB.psm1<br />
Connect-MDTDatabase –sqlServer SEA-MDT-01 –instance SQLEXPRESS –database MDT<br />
$machines = Import-Csv C;\Data\machines.txt<br />
For ($i=1; $i -le $machines.count; $i++)<br />
{<br />
$n = "{0:D3}" -f $i<br />
New-MDT<strong>Computer</strong> -macAddress $machines[$i-1].mac -settings @{<br />
OSInstall='YES';<br />
OSD<strong>Computer</strong>Name='SEA-CLI-' + $n<br />
OrgName='Contoso Ltd.'<br />
}<br />
}<br />
Revised June 14, 2009 Page 178 of 231
<strong>Deploying</strong> <strong>Windows</strong> 7<br />
By Mitch Tulloch<br />
(<strong>Windows</strong>Networking.com)<br />
Save this script as Create2.ps1 and then run the script. When you example the Details tab of the<br />
properties of the computer items created by the script, you'll see that the computers are named using<br />
the specified naming convention:<br />
Figure 29: Creating computer items using a naming convention<br />
Additional Resources<br />
There are lots of good PowerShell resources out there, but for beginners I recommend you check out<br />
Chapter 13 of the <strong>Windows</strong> 7 Resource Kit which has a good introductory tutorial written by Ed Wilson<br />
a.k.a. The Scripting Guy.<br />
Part 23: Managing Drivers – Introduction<br />
Tip: You can find more information about automating LTI deployment in the <strong>Windows</strong> 7 Resource Kit<br />
from Microsoft Press. I am the lead author for this Resource Kit and I also maintain the Unofficial<br />
Support Site for the <strong>Windows</strong> 7 Resource Kit with answers to questions posted by readers, as well as<br />
links to the latest resources on <strong>Windows</strong> 7 deployment, administration and troubleshooting.<br />
Injecting Boot-Critical Device Drivers: A Story<br />
Here's a simple example of how device drivers can add complexity to even a simple deployment<br />
scenario. I have an old Dell PowerEdge 800 server in my lab, and a while back I wanted to repurpose<br />
Revised June 14, 2009 Page 179 of 231
<strong>Deploying</strong> <strong>Windows</strong> 7<br />
By Mitch Tulloch<br />
(<strong>Windows</strong>Networking.com)<br />
this server by installing <strong>Windows</strong> Server 2008 R2 on it. The server has an integrated Dell CERC 6channel<br />
SATA hardware RAID controller with three 80 GB SATA hard drives configured as a RAID 0<br />
array (i.e. stripe set). So I put the <strong>Windows</strong> Server 2008 R2 product media into the DVD drive in the<br />
server, booted the server, and proceeded through the installation steps. When I got to the screen<br />
titled "Where do you want to install <strong>Windows</strong>?" a message was displayed saying "No drives were<br />
found. Click Load Driver to provide a mass storage driver for installation."<br />
What's the problem here? It seems that <strong>Windows</strong> Server 2008 R2 does not include an inbox driver for<br />
this particular hardware RAID controller because the PowerEdge 800 server is an older model that<br />
was designed for <strong>Windows</strong> Server 2003. Now at the time I was doing this there was no <strong>Windows</strong><br />
Server 2008 R2 certified driver for the controller, but there was a 64-bit <strong>Windows</strong> Server 2003 driver<br />
available and a quick chat with a Dell support technician suggested that this driver "hasn't been<br />
validated but seems to work" with <strong>Windows</strong> Server 2008 R2. So I downloaded the self-extracting<br />
<strong>Windows</strong> Server 2003 x64 driver package and extracted the files from the package, which look like<br />
this:<br />
Figure 1: <strong>Windows</strong> Server 2003 x64 driver files for Dell CERC 6-channel SATA hardware RAID<br />
controller<br />
Note: While writing this article I checked the Dell Support site and discovered that they have now<br />
released a certified <strong>Windows</strong> Server 2008 driver for their CERC 6-channel SATA hardware RAID<br />
controller, which breathes new life into my old PowerEdge 800 server.<br />
Revised June 14, 2009 Page 180 of 231
<strong>Deploying</strong> <strong>Windows</strong> 7<br />
By Mitch Tulloch<br />
(<strong>Windows</strong>Networking.com)<br />
So I copied these mass storage controller driver files to a flash drive, rebooted my server with the<br />
<strong>Windows</strong> Server 2008 R2 product media in the DVD drive, and walked through Setup again. This time<br />
when I got to the screen titled "Where do you want to install <strong>Windows</strong>?" I inserted my flash drive and<br />
clicked Load Driver, then I clicked Browse and selected the folder on my flash drive where the driver<br />
files were stored. At that point the "Select the driver to be installed" screen showed the following mass<br />
storage driver available for installation:<br />
DELL CERC SATA 1.5/6ch RAID Controller (C:\\cercsr6.inf)<br />
I clicked selected the driver, clicked Next and continued with a successful installation of <strong>Windows</strong><br />
Server 2008 R2 on the machine.<br />
Now, most administrators have gone through this kind of procedure before, but the question is: How<br />
does this work with Microsoft Deployment Toolkit?<br />
Injecting Mass Storage Drivers Using MDT 2010<br />
First, what happens if you try using MDT to deploy <strong>Windows</strong> on a system for which there is no in-box<br />
mass storage controller driver available? In my scenario above, this would mean first importing<br />
<strong>Windows</strong> Server 2008 R2 into the Operating Systems node in the Deployment Workbench and then<br />
creating a new task sequence based on the Standard Server Task Sequence template. Then take my<br />
existing Lite Touch <strong>Windows</strong> PE CD, boot my server with it, and wait for MDT to perform the install.<br />
What happens when I do this is that when the wizard begins to gather information concerning the<br />
local disk system on the server, the wizard fails with an error screen that says "Operating system<br />
deployment did not complete successfully." Expanding the details on this screen indicates that "Disk<br />
(0) was not found. Unable to continue. Possible cause: Missing Storage Driver." That's pretty<br />
informative, and it's just what we would expect in this scenario.<br />
What I need to do now is to add the driver I downloaded to MDT as an out-of-box driver. To do this,<br />
begin by right-clicking on the Out-Of-Box Drivers folder in the Workbench and select Import Drivers:<br />
Figure 2: Step 1 of adding an out-of-box driver into the Deployment Workbench<br />
Revised June 14, 2009 Page 181 of 231
<strong>Deploying</strong> <strong>Windows</strong> 7<br />
By Mitch Tulloch<br />
(<strong>Windows</strong>Networking.com)<br />
In the Import Driver Wizard that appears, click Browse to select the folder where the mass storage<br />
driver is located:<br />
Figure 3: Step 2 of adding an out-of-box driver into the Deployment Workbench<br />
Click Next and review the information on the Summary page:<br />
Figure 4: Step 3 of adding an out-of-box driver into the Deployment Workbench<br />
Revised June 14, 2009 Page 182 of 231
<strong>Deploying</strong> <strong>Windows</strong> 7<br />
By Mitch Tulloch<br />
(<strong>Windows</strong>Networking.com)<br />
Click Next and verify on the Confirmation page that the driver files have been successfully imported<br />
into the Workbench:<br />
Figure 5: Step 4 of adding an out-of-box driver into the Deployment Workbench<br />
Figure 6 below shows that the driver files for the mass storage controller have been successfully<br />
imported into the Workbench:<br />
Figure 6: The driver files have been successfully imported into the Deployment Workbench<br />
Revised June 14, 2009 Page 183 of 231
<strong>Deploying</strong> <strong>Windows</strong> 7<br />
By Mitch Tulloch<br />
(<strong>Windows</strong>Networking.com)<br />
The file we are mainly interested in is the cercsr6.inf file; double-clicking on this file displays its<br />
properties:<br />
Figure 7: General tab of the driver's properties<br />
As expected, the General tab shows that this driver is intended only for x64 systems and not x86. If<br />
desired I could add a comment here like "This old driver for <strong>Windows</strong> Server 2003 x64 is reported to<br />
work with <strong>Windows</strong> Server 2008 R2 so I'm going to try it" or something similar.<br />
Clicking the Details tab displays additional read-only information concerning the driver:<br />
Figure 8: Details tab of the driver's properties<br />
Revised June 14, 2009 Page 184 of 231
<strong>Deploying</strong> <strong>Windows</strong> 7<br />
By Mitch Tulloch<br />
(<strong>Windows</strong>Networking.com)<br />
Are we finished? No, not quite. We have imported the driver into the Workbench, so the driver is now<br />
available for installation on the target computer but it hasn't yet been incorporated into our Lite Touch<br />
<strong>Windows</strong> PE image files, that is into the files LiteTouchPE_x64.wim and LiteTouchPE_x64.iso. What<br />
we need to do is to inject the driver into our image files so that the driver will be available during the<br />
initial WinPE phase of Setup, otherwise Setup will fail because WinPE would not be able to see the<br />
hard drives in the system. Fortunately, MDT makes injecting drivers into WinPE images a snap—<br />
simply right-click on your deployment share and select Update Deployment Share and any changes<br />
made to your environment will be injected if required into your WinPE images. Figure 9 shows the<br />
results from doing this, and you can see that the boot image (.wim) file was mounted, the mass<br />
storage driver was injected, and the.iso file associated with the boot image was re-created:<br />
Figure 9: Injecting the mass storage driver into the WinPE boot image by updating the<br />
deployment share<br />
Now I simply burn my LiteTouchPE_x64.iso file onto recordable CD media and use it to boot my old<br />
PowerEdge server. When I do this, the installation proceeds normally and <strong>Windows</strong> Server 2008 R2 is<br />
successfully installed on the system.<br />
Conclusion<br />
This article examined how to add an out-of-box driver to MDT in order to deploy <strong>Windows</strong> onto a<br />
system for which no in-box mass storage controller driver was present. But what if you need to add<br />
dozens, hundreds or thousands of out-of-box drivers to MDT for different operating systems you need<br />
to deploy, for different system architectures (x86 or x64), and for different makes and models of<br />
systems? In the next article we'll learn how you can use two new features of MDT 2010, namely<br />
custom folders and select profiles, to manage complex driver scenarios.<br />
Revised June 14, 2009 Page 185 of 231
<strong>Deploying</strong> <strong>Windows</strong> 7<br />
By Mitch Tulloch<br />
(<strong>Windows</strong>Networking.com)<br />
Part 24: Managing Drivers – Issues and Approaches<br />
Tip: You can find more information about automating LTI deployment in the <strong>Windows</strong> 7 Resource Kit<br />
from Microsoft Press. I am the lead author for this Resource Kit and I also maintain the Unofficial<br />
Support Site for the <strong>Windows</strong> 7 Resource Kit with answers to questions posted by readers, as well as<br />
links to the latest resources on <strong>Windows</strong> 7 deployment, administration and troubleshooting.<br />
In the previous article of this series we saw how to use MDT 2010 to inject a boot-critical out-of-box<br />
mass storage driver into a Lite Touch <strong>Windows</strong> PE boot image in order to deploy <strong>Windows</strong> onto a<br />
system for which no in-box mass storage controller driver was present. We also learned the steps for<br />
importing drivers into the Out-Of-Box Drivers folder of your deployment share. But what if you need to<br />
add dozens, hundreds or even thousands of out-of-box drivers to MDT for different operating systems<br />
you need to deploy, for different system architectures (x86 or x64), and for different makes and<br />
models of systems? In this article and the next few we'll learn how to use new features in MDT 2010<br />
to manage complex driver scenarios.<br />
Why Drivers Complicate Deployment<br />
Anything but the most simple deployment scenario involves deploying more than just an operating<br />
system. Real-world deployment scenarios usually involve deploying all of the following to target<br />
computers:<br />
Operating system<br />
Device drivers<br />
Applications<br />
Language packs<br />
Patches for OS and apps<br />
Customizations for OS and apps<br />
<strong>Deploying</strong> drivers is one of the more difficult tasks of real-world deployment scenarios. One reason for<br />
this is because organizations with large numbers of computers tend to purchase them over time. The<br />
result is often a plethora of different makes and models of systems from different manufacturers and<br />
may even include custom-built white-box systems. The result is that many different drivers are needed<br />
to support all the different systems in your organization.<br />
Another reason drivers add complexity to deployments is because drivers may not only be needed for<br />
the installed operating system to work properly, they may also be needed just to boot the system to<br />
start the installation process. As we saw in the previous article of this series, sometimes drivers<br />
(especially mass storage drivers but sometimes network interface card drivers also) need to be<br />
injected into the Lite Touch <strong>Windows</strong> PE boot media, otherwise you won't even be able to boot the<br />
target computer to start deploying <strong>Windows</strong> to the computer. Fortunately with desktop computers, the<br />
generic Lite Touch <strong>Windows</strong> PE boot image created by MDT is usually able to boot the computer,<br />
connect to the deployment share over the network, and continue with the installation. For servers<br />
however, with their RAID cards and other goodies, you may need to add additional drivers to<br />
<strong>Windows</strong> PE just to get the installation started.<br />
Another reason drivers make deployment difficult is because incompatibilities can sometimes arise.<br />
For instance, there are situations where installing the wrong driver on a system can cause the system<br />
to “bluescreen”. This can particularly be an issue with mass storage drivers. Or sometimes installing<br />
two similar drivers (one recent, one older) for the same hardware can cause the wrong driver to be<br />
installed because the vendor designed one driver poorly (e.g. malformed INF). Or sometimes the<br />
vendor releases a new driver for an updated version of the hardware and says that the new driver still<br />
Revised June 14, 2009 Page 186 of 231
<strong>Deploying</strong> <strong>Windows</strong> 7<br />
By Mitch Tulloch<br />
(<strong>Windows</strong>Networking.com)<br />
supports the older version of the hardware, but when you try it you find out that the old hardware<br />
doesn't work properly with the new driver.<br />
Finally, when you are deploying the latest version of <strong>Windows</strong> such as <strong>Windows</strong> 7, both very new and<br />
very old hardware can often have driver problems. While <strong>Windows</strong> 7 has tons of in-box drivers, it may<br />
not have suitable drivers for hardware that was released after <strong>Windows</strong> 7 RTM'd. And <strong>Windows</strong> 7 may<br />
not include suitable drivers for hardware from the XP or earlier era. Unfortunately it can sometimes be<br />
difficult to find the right driver for your hardware on the vendor's website (assuming the vendor is still<br />
around for older hardware). Then, once you have downloaded the driver, you may need to jump<br />
through hoops to extract the driver files so you can import them into your deployment share. That is<br />
because the Import Driver Wizard you saw in the previous article can only import drivers that have<br />
INF files available. Unfortunately, some vendors like to release additional device management<br />
software bundled along with their drivers, with the result that these drivers may have to be installed at<br />
the end of the deployment process by running the vendor's Setup routine, which requires extra fiddling<br />
with your task sequence.<br />
Different Approaches to Managing Drivers for Deployment<br />
Then there's the question of whether to try and control which specific drivers get deployed to which<br />
specific target computers during deployment, or whether you just want to let <strong>Windows</strong> use Plug and<br />
Play to decide which drivers should be installed on any particular target computer. In other words,<br />
there are basically two different approaches you can follow for managing drivers during deployment:<br />
the "let me decide" approach vs. the "let <strong>Windows</strong> decide" approach. We'll look at the second<br />
approach first since it's the simpler approach to implement. But before we do this, a little history.<br />
An Outdated Approach to Managing Drivers<br />
Most organizations perform their desktop deployments by building a master installation image and<br />
then deploying this master image to their target computers. We saw in article 10 of this series how<br />
you could use MDT to create a master image by deploying <strong>Windows</strong> (along with applications,<br />
language packs, patches and other customizations) onto a master (or reference) computer and then<br />
capturing a sysprepped image of that computer and uploading it to your deployment share. And in<br />
article 11 of this series we saw another way of creating a master image by starting with a<br />
preinstalled/preconfigured computer and using the new Sysprep and Capture task sequence to<br />
capture a master image from this computer. Either way, you first build your master image (or two if<br />
you need to deploy both x64 and x86 <strong>Windows</strong>) using an MDT server in your lab environment, and<br />
then you deploy your master image(s) to target computers using a separate MDT server on your<br />
production network.<br />
Now when you build your master computer using your lab MDT server, you generally won't want to<br />
inject any additional out-of-box drivers into your master image. Years ago, administrators building<br />
master images often used to add all the drivers all their different types of target computers needed to<br />
their master images. The result of baking all these extra drivers into their master image was often<br />
problematic—images were huge and difficult to maintain, and driver conflicts often caused problems—<br />
sometimes as severe as bluescreens.<br />
Then BDD (the precursor to MDT) came along, and when BDD 2007 added support for Plug and Play<br />
enumeration the need for baking all your out-of-box drivers into the master image disappeared.<br />
Instead, you could now let <strong>Windows</strong> decide during deployment which drivers to pull down from the<br />
deployment share and install on each target system. Let's see how to implement this approach now.<br />
Revised June 14, 2009 Page 187 of 231
<strong>Deploying</strong> <strong>Windows</strong> 7<br />
By Mitch Tulloch<br />
(<strong>Windows</strong>Networking.com)<br />
Using the "Let <strong>Windows</strong> Decide" Approach to Managing Drivers<br />
In the "let <strong>Windows</strong> decide" approach you simply import all the drivers your different types of target<br />
computers will need into your deployment share. Then, when you use MDT to deploy your master<br />
image onto a particular system using MDT, <strong>Windows</strong> will use Plug and Play to determine which<br />
additional out-of-box drivers will need to be installed on each system by matching the PnP IDs of each<br />
hardware component with the PnP IDs supported by available drivers—in other words, by using Plug<br />
and Play enumeration.<br />
The main advantage of this approach is simplicity. Since this is the way MDT performs Lite Touch<br />
deployment by default, there's less initial time and effort needed for planning how to manage drivers<br />
for your deployment—you just dump them all into your deployment share and let MDT and PnP do<br />
their magic. And since almost no up-front planning or preparation is needed, you can get up and going<br />
very quickly by following this approach.<br />
Here's how it can work in practice. Let's say your organization is in the process of transitioning from<br />
<strong>Windows</strong> XP to <strong>Windows</strong> 7 and has the following desktop systems:<br />
Dell Optiplex 580 systems that will need either <strong>Windows</strong> 7 x64 or <strong>Windows</strong> 7 x86 installed on<br />
them<br />
Dell Precision T3500 systems that will need <strong>Windows</strong> 7 x64 installed on them<br />
Hewlett-Packard Pro 3015 Microtower systems that will need either <strong>Windows</strong> 7 x64, <strong>Windows</strong> 7<br />
x86 or <strong>Windows</strong> XP SP3 installed on them.<br />
Once you've downloaded all the drivers for these systems, copy them to a folder such as C:\Drivers<br />
on your production MDT server:<br />
Figure 1: Dell and HP drivers to be imported into your deployment share<br />
Revised June 14, 2009 Page 188 of 231
<strong>Deploying</strong> <strong>Windows</strong> 7<br />
By Mitch Tulloch<br />
(<strong>Windows</strong>Networking.com)<br />
In this example, your downloaded driver files are organized into two folders (Dell and HP) with<br />
subfolders named after models. Then beneath each model folder are various subfolders for operating<br />
system (e.g. <strong>Windows</strong> 7 x64 vs. x86) or device (e.g. audio) or driver package ID number (for HP<br />
drivers).<br />
To import all of these drivers into your deployment share, open the Deployment Workbench, right-click<br />
on the Out-Of-Box Drivers folder, and select Import Drivers to launch the Import Drivers Wizard. Then<br />
click Browse on the Specific Directory page and select the root C:\Drivers folder:<br />
Figure 2: Select the root folder where all your drivers are stored<br />
Click OK to return to the Specify Directory page:<br />
Figure 3: Importing all drivers found under C:\Drivers<br />
Revised June 14, 2009 Page 189 of 231
<strong>Deploying</strong> <strong>Windows</strong> 7<br />
By Mitch Tulloch<br />
(<strong>Windows</strong>Networking.com)<br />
Note that what this does is it imports all drivers in C:\Drivers and in any subfolders beneath this folder.<br />
Click through the remaining steps of the wizard. The result will look something like this:<br />
Figure 4: All the drivers needed for desktop deployment have been imported into the Out-Of-<br />
Box Drivers folder<br />
Note that the import process may take some minutes to perform since there are hundreds of<br />
megabytes of drivers to import—and that's only for three different make/models with a couple of<br />
different operating systems!<br />
Now that all the drivers have been imported into your deployment share, you can use MDT to deploy<br />
your master image to your target computers. As the master image is being deployed, <strong>Windows</strong> will<br />
use PnP enumeration to determine which additional drivers in the deployment share will need to be<br />
installed on the target computer to ensure its hardware components function as designed.<br />
This "let <strong>Windows</strong> decide" approach has the virtue of simplicity—are there any caveats? There's really<br />
only one—driver conflicts may occur for certain types of hardware, especially if you're deploying<br />
multiple operating systems from your deployment share. But if you're only deploying a single<br />
operating system, for example <strong>Windows</strong> 7 x64, and you only have a few different makes and models<br />
of target computers, then this "let <strong>Windows</strong> decide" approach of simply dumping all your out-of-box<br />
drivers into your deployment share and letting PnP enumeration decide who gets what usually works<br />
just fine. On the other hand, if you test this approach in your MDT lab environment and you find that<br />
some systems get the wrong drivers installed on them (for example, a <strong>Windows</strong> XP Professional<br />
driver gets installed on a system you are deploying <strong>Windows</strong> 7 x86 onto), then you'll need a different<br />
Revised June 14, 2009 Page 190 of 231
<strong>Deploying</strong> <strong>Windows</strong> 7<br />
By Mitch Tulloch<br />
(<strong>Windows</strong>Networking.com)<br />
approach to managing drivers for deployment. That's where selection profiles are useful, which is<br />
what we'll look at in the next article of this series.<br />
Part 25: Managing Drivers – Selection Profiles<br />
Tip: You can find more information about automating LTI deployment in the <strong>Windows</strong> 7 Resource Kit<br />
from Microsoft Press. I am the lead author for this Resource Kit and I also maintain the Unofficial<br />
Support Site for the <strong>Windows</strong> 7 Resource Kit with answers to questions posted by readers, as well as<br />
links to the latest resources on <strong>Windows</strong> 7 deployment, administration and troubleshooting.<br />
In the previous two articles of this series we began discussing how to use MDT 2010 to manage outof-box<br />
drivers needed for Lite Touch deployment. We learned why drivers complicate deployment and<br />
examined a simple "let <strong>Windows</strong> decide" of importing all your out-of-box drivers into the Out-of-Box<br />
Drivers folder of your deployment share and letting PnP enumeration on the target computers decide<br />
which drivers need to be downloaded from the deployment share and installed. If you are deploying<br />
<strong>Windows</strong> to only a few different makes and models of computers, this simple approach generally<br />
works fine. However, if you are deploying <strong>Windows</strong> to lots of different makes/models of computers,<br />
and particularly if you are deploying multiple versions of <strong>Windows</strong> (e.g. <strong>Windows</strong> 7 and <strong>Windows</strong> XP)<br />
from the same deployment share, then problems can sometimes occur with this approach because of<br />
driver conflicts. For example, you might find that some computers end up installing the wrong drivers,<br />
such as a <strong>Windows</strong> XP Professional driver getting installed on a system you are deploying <strong>Windows</strong> 7<br />
x86 onto.<br />
The possibility of driver conflicts is one reason why it's important to set up a separate MDT server for<br />
your lab environment before you use MDT for deployment on your production network. In particular,<br />
your MDT lab environment should include one target computer of each make/model of computer that<br />
is present on your production network. That way, you can first try the "let <strong>Windows</strong> decide" approach<br />
to managing drivers in your lab and see if any driver conflicts result. If you don't see any conflicts, you<br />
can then use this simple approach for managing drivers for your production deployment. If you do see<br />
conflicts however, then your production deployment will need a more controlled approach to<br />
managing drivers, which I call the "let me decide" approach. This approach uses two new features<br />
introduced in MDT 2010, namely custom folders and selection profiles. We'll learn about these two<br />
features as we examine how the "let me decide" approach to managing drivers works.<br />
Using the "Let Me Decide" Approach to Managing Drivers<br />
In this approach to managing drivers for deployment, you exercise control over which drivers are<br />
installed for different deployment scenarios. To do this, you begin by creating a hierarchical folder<br />
structure within your deployment share to contain the different drivers needed for each scenario. For<br />
example, let's say you plan on deploying the following three versions of <strong>Windows</strong> to different target<br />
computers:<br />
<strong>Windows</strong> 7 Enterprise edition x64 architecture for newer systems<br />
<strong>Windows</strong> 7 Enterprise edition x86 architecture for older systems<br />
<strong>Windows</strong> XP Professional (x86) for specific users who still need this OS<br />
To avoid driver conflicts that might be caused by a 32-bit driver being installed on 64-bit hardware or<br />
vice versa, or which might be caused by a <strong>Windows</strong> XP driver being installed on <strong>Windows</strong> 7 or vice<br />
versa, begin by right-clicking on the Out-of-Box Drivers folder in your deployment share and select<br />
Revised June 14, 2009 Page 191 of 231
<strong>Deploying</strong> <strong>Windows</strong> 7<br />
By Mitch Tulloch<br />
(<strong>Windows</strong>Networking.com)<br />
New Folder from the context menu. This launches the New Folder wizard, in which you type a name<br />
for the new folder you are creating (see Figure 1):<br />
Figure 1: Creating a new folder named <strong>Windows</strong> 7 x64<br />
Finish the wizard to create the subfolder <strong>Windows</strong> 7 x64 beneath your Out-of-Box Drivers folder (see<br />
Figure 2). This subfolder is where you will store any drivers needed for deploying <strong>Windows</strong> 7 x64 to<br />
target computers.<br />
Figure 2: Custom folder for storing drivers needed for deploying <strong>Windows</strong> 7 x64<br />
Revised June 14, 2009 Page 192 of 231
<strong>Deploying</strong> <strong>Windows</strong> 7<br />
By Mitch Tulloch<br />
(<strong>Windows</strong>Networking.com)<br />
Once you have done the same for the other operating systems you plan to deploy, your folder<br />
hierarchy looks like that shown in Figure 3:<br />
Figure 3: Folder hierarchy for deploying drivers to different operating systems<br />
Now you use the Import Driver Wizard described in the previous article of this series to import the<br />
necessary drivers for each operating system. The result might look something like Figure 4:<br />
Figure 4: Drivers needed for <strong>Windows</strong> 7 x64 deployment have been imported<br />
Revised June 14, 2009 Page 193 of 231
<strong>Deploying</strong> <strong>Windows</strong> 7<br />
By Mitch Tulloch<br />
(<strong>Windows</strong>Networking.com)<br />
Custom folders are a powerful new feature in MDT 2010 and you can use them to create folder<br />
hierarchies for applications, operating systems, drivers, packages and task sequences. The more<br />
complex the folder structure you create, the more control you will have over your deployment—that's<br />
the plus side of custom folders. But complex folder structures are usually more difficult and timeconsuming<br />
to manage—that's the minus side. Custom folders can also be moved around by dragging<br />
and dropping within your deployment share. Note however that moving a custom folder does not<br />
really move any of the underlying files stored in the file system folder where the contents of your<br />
deployment share are located. In other words, custom folders are simply a logical way of organizing<br />
your applications, operating systems, drivers, packages and task sequences.<br />
Now we need to create our selection profiles. A selection profile simply lets you select one or more<br />
folders in your deployment share. Selection profiles are thus used to group items together, and this<br />
might be done for various reasons. For example, you can use selection profiles to inject the<br />
appropriate set of device drivers and packages into your <strong>Windows</strong> PE image or into your target<br />
computer's operating system. You can also use selection profiles for other purposes such as creating<br />
linked deployment shares (new in MDT 2010) or for creating specialized deployment media.<br />
MDT 2010 also includes some default selection profiles that can be used for general purpose<br />
deployment scenarios. Figure 5 below shows the default selection profiles—note that selection<br />
profiles are stored in the Selection Profiles folder beneath the Advanced Configuration folder in your<br />
deployment share.<br />
Figure 5: Default selection profiles included in MDT 2010<br />
The default selection profiles are as follows:<br />
All Drivers – This includes all folders beneath the Out-of-Box Drivers folder in your deployment<br />
share.<br />
All Drivers and Packages – This includes all folders beneath the Applications and Out-of-Box<br />
Drivers folder in your deployment share.<br />
All Packages – This includes all folders beneath the Packages folder in your deployment share.<br />
Revised June 14, 2009 Page 194 of 231
<strong>Deploying</strong> <strong>Windows</strong> 7<br />
By Mitch Tulloch<br />
(<strong>Windows</strong>Networking.com)<br />
Everything – This includes all applications, operating systems, device drivers, operating system<br />
packages, and task sequences in your deployment share.<br />
Nothing – This one doesn't include any folders from your deployment share.<br />
Sample – This is a sample selection profile that includes all packages and task sequences in your<br />
deployment share.<br />
To create a selection profile that includes only drivers for <strong>Windows</strong> 7 x64 systems, right-click on the<br />
Selection Profiles folder and select New Selection Profile. When the New Selection Profile Wizard<br />
begins, type a name for your new selection profile as shown in Figure 6:<br />
Figure 6: Step 1 of creating a selection profile that includes only drivers for <strong>Windows</strong> 7 x64 systems<br />
Click Next and then select the <strong>Windows</strong> 7 x64 subfolder beneath the Out-of-Box Drivers folder as<br />
shown in Figure 7:<br />
Figure 7: Step 2 of creating a selection profile that includes only drivers for <strong>Windows</strong> 7 x64 systems<br />
Revised June 14, 2009 Page 195 of 231
<strong>Deploying</strong> <strong>Windows</strong> 7<br />
By Mitch Tulloch<br />
(<strong>Windows</strong>Networking.com)<br />
Finish the wizard to create your new selection profile. Once you have repeated the steps above to<br />
create additional selection profiles for <strong>Windows</strong> 7 x86 and <strong>Windows</strong> XP Professional, your list of<br />
available selection profiles should look something like Figure 8:<br />
Figure 8: Three new selection profiles have been created<br />
Now let's make use of our three new selection profiles to control which drivers are deployed with<br />
which operating system. To do this, we'll create three new task sequences, one for each of our<br />
selection profiles. In other words, one task sequence will be used for deploying <strong>Windows</strong> 7 x64, one<br />
for deployment <strong>Windows</strong> 7 x86, and one for deploying <strong>Windows</strong> XP Professional. Figure 9 shows our<br />
three task sequences:<br />
Figure 9: Create a new task sequence for each new selection profile<br />
Revised June 14, 2009 Page 196 of 231
<strong>Deploying</strong> <strong>Windows</strong> 7<br />
By Mitch Tulloch<br />
(<strong>Windows</strong>Networking.com)<br />
To associate a particular task sequence with a particular selection profile, right-click on the task<br />
sequence and select Properties to open its properties page. Then select the Task Sequence tab.<br />
Since we want to use selection profiles to control which drivers are injected into our <strong>Windows</strong> PE boot<br />
images and into the operating system being deployed to the target computer, we need to configure<br />
the Inject Drivers task within the Preinstall task group in our task sequence. To configure this task,<br />
select it on the left and then click the Choose A Selection Profile list control to display the available<br />
selection profiles you can choose from (Figure 10):<br />
Figure 10: Choosing a selection profile for the Inject Drivers task within the Preinstall task<br />
group of a task sequence<br />
Note: Task sequences consist of various task groups (e.g. Initialization, Validation, State Capture,<br />
etc.) and tasks within these groups (e.g. Gather Local Only, Inject Drivers, Apply Patches, etc.). Task<br />
groups can also contain other task groups. You can create new task groups and tasks to customize<br />
how your deployments are performed. We will dig deeper into this in a future article of this series.<br />
Because the task sequence whose properties we opened is the one for installing <strong>Windows</strong> 7 x64, we<br />
need to associate the <strong>Windows</strong> 7 x64 Drivers selection profile with this task sequence as shown in<br />
Figure 11:<br />
Revised June 14, 2009 Page 197 of 231
<strong>Deploying</strong> <strong>Windows</strong> 7<br />
By Mitch Tulloch<br />
(<strong>Windows</strong>Networking.com)<br />
Figure 11: Associating the Window 7 x64 Drivers selection profile with the <strong>Windows</strong> 7 x64<br />
Enterprise task sequence<br />
Note in the above screenshot that when you choose a selection profile for injecting drivers, you have<br />
two options. The first is to only install matching drivers from the selection profile on the target<br />
computer. In other words, PnP enumeration runs on the target computer to determine which drivers<br />
contained in the folders indicated by the selection profile, and only those drivers actually needed by<br />
the target computer's hardware are installed. This is the default setting and you should usually leave it<br />
as is.<br />
The second option is to install all drivers from the selection profile, even if some of those drivers aren't<br />
actually needed by the target computer's hardware. You should only use this option if you have<br />
drivers that can't be identified properly using PnP enumeration on the target computer. Drivers for the<br />
Bluetooth wireless stack sometimes fall within this category, and by selecting the second option you<br />
can ensure that the Bluetooth drivers needed by your target computer's hardware get installed. Other<br />
examples of hardware/drivers where this option might be needed might be to pre-stage NIC drivers<br />
needed for laptop docking stations that are disconnected from their laptops and for printers that will be<br />
connected after deployment is finished. Just be careful if you select this option—if you install drivers<br />
that aren't needed by the target computer's hardware, some of these unnecessary drivers could<br />
conflict with drivers that are needed by the hardware, and this can sometimes cause unpredictable<br />
results.<br />
Anyways, now all you need to do is use your Lite Touch <strong>Windows</strong> PE CD (or your Lite Touch PE .iso<br />
with <strong>Windows</strong> Deployment Services) to boot a particular target computer, step through the <strong>Windows</strong><br />
Deployment Wizard, select the task sequence for the operating system you need to deploy on that<br />
Revised June 14, 2009 Page 198 of 231
<strong>Deploying</strong> <strong>Windows</strong> 7<br />
By Mitch Tulloch<br />
(<strong>Windows</strong>Networking.com)<br />
computer, and MDT will ensure that the correct drivers for that operating system are installed on the<br />
computer. You can of course automate all this to a certain extent (see the previous articles in this<br />
series for more information on how to do this by editing CustomSettings.ini or using the MDT<br />
database). Till next time!<br />
Part 26: Managing Drivers – By Make and Model<br />
Tip: You can find more information about automating LTI deployment in the <strong>Windows</strong> 7 Resource Kit<br />
from Microsoft Press. I am the lead author for this Resource Kit and I also maintain the Unofficial<br />
Support Site for the <strong>Windows</strong> 7 Resource Kit with answers to questions posted by readers, as well as<br />
links to the latest resources on <strong>Windows</strong> 7 deployment, administration and troubleshooting.<br />
In the last few articles of this series we have been discussing how to use MDT 2010 to manage outof-box<br />
drivers needed for Lite Touch deployment. We have learned why drivers complicate<br />
deployment and have examined two approaches to managing drivers:<br />
The "let <strong>Windows</strong> decide" approach where you import all your out-of-box drivers into the Out-of-<br />
Box Drivers folder of your deployment share and then let PnP enumeration on the target<br />
computers decide which drivers need to be downloaded from the deployment share and installed.<br />
The "let me decide" approach where you exercise control over which drivers are installed by<br />
creating a hierarchical folder structure within your deployment share to contain the different drivers<br />
needed for each deployment scenario.<br />
The "let <strong>Windows</strong> decide" approach has the advantage of simplicity, but in order to make it work you<br />
need to build a deployment test lab with one of every type of make and model of computer in your<br />
production environment. Then every time you add a new or updated driver to the Out-of-Box Drivers<br />
folder of your deployment share, you need to retest deploying to every make and model to make sure<br />
the new or updated driver doesn't cause problems with existing hardware. So the "let <strong>Windows</strong><br />
decide" approach is easy to set up but can involve a lot of ongoing maintenance.<br />
The "let me decide" approach on the other hand is more work to set up, especially if you create a<br />
complex folder structure and use lots of selection profiles and task sequences to manage how drivers<br />
are deployed to target computers. Once set up however, this approach can be easier to maintain in<br />
the long run since it can eliminate the kinds of problems that can occur when a computer ends up<br />
installing the wrong driver.<br />
There's a variation of the "let me decide" approach however that can make the job of managing<br />
drivers for your deployments even easier. This involves using driver groups instead of selection<br />
profiles, and that's what this article is about.<br />
Injecting Drivers by Make and Model<br />
In the previous version MDT 2008 you could use driver groups to logically organize out-of-box drivers<br />
you import into your deployment share. For example, you could create one driver group for mass<br />
storage drivers, another for <strong>Windows</strong> PE images, and so on. Then you could associate a particular<br />
driver group with a particular task sequence to control which drivers get deployed using that task<br />
sequence.<br />
Revised June 14, 2009 Page 199 of 231
<strong>Deploying</strong> <strong>Windows</strong> 7<br />
By Mitch Tulloch<br />
(<strong>Windows</strong>Networking.com)<br />
In MDT 2010, you can't create driver groups any longer using the Workbench because now you can<br />
create custom folders instead, which provide you with more flexibility that driver groups did previously.<br />
However, you can still define new driver groups using the DriverGroup property and use this property<br />
as a variable within your task sequence to control which drivers are deployed to a target computer<br />
based on the make and model of the computer.<br />
Tip: If you are unsure of the make/model of a particular computer, you can use the WMI script in Part<br />
17 of this series to determine this information.<br />
Here is how you can inject drivers during deployment based on the target computer's make and model.<br />
Begin by creating a custom folder hierarchy beneath the Out-Of-Box Drivers folder of your deployment<br />
share that has a structure that looks like this:<br />
Out-Of-Box Folders<br />
Operating System<br />
Make<br />
Make…<br />
Operating System…<br />
Model<br />
Model…<br />
For example, for the last few articles we imagined a company that needed to deploy different versions<br />
of <strong>Windows</strong> to the following desktop systems:<br />
Dell Optiplex 580 systems that will need either <strong>Windows</strong> 7 x64 or <strong>Windows</strong> 7 x86 installed on<br />
them<br />
Dell Precision T3500 systems that will need <strong>Windows</strong> 7 x64 installed on them<br />
Hewlett-Packard Pro 3015 Microtower systems that will need either <strong>Windows</strong> 7 x64, <strong>Windows</strong> 7<br />
x86 or <strong>Windows</strong> XP SP3 installed on them.<br />
Figure 1 shows what the folder structure should look like for deploying <strong>Windows</strong> 7 x64 to these<br />
different systems:<br />
Figure 1: Folder structure for deploying <strong>Windows</strong> 7 x64 by Make and Model<br />
Revised June 14, 2009 Page 200 of 231
<strong>Deploying</strong> <strong>Windows</strong> 7<br />
By Mitch Tulloch<br />
(<strong>Windows</strong>Networking.com)<br />
You would also create similar folder structures beneath the <strong>Windows</strong> 7 x86 and <strong>Windows</strong> XP<br />
Professional folders. Then you import the necessary out-of-box drivers for each system into the<br />
appropriate folder once you've obtained these drivers from each vendor's website. The result will look<br />
something like this (Figure 2):<br />
Figure 2: Imported out-of-box drivers for Dell Optiplex 580 systems<br />
Now open the properties of the task sequence used for deploying <strong>Windows</strong> 7 x64 to target computers.<br />
Under the Preinstall task group, select the task named Configure that is just before the Inject Drivers<br />
task. Then click Add, select General, and select Set Task Sequence Variable as shown in Figure 3:<br />
Figure 3: Create a task for setting a new task sequence variable just prior to the Inject Drivers task<br />
Revised June 14, 2009 Page 201 of 231
<strong>Deploying</strong> <strong>Windows</strong> 7<br />
By Mitch Tulloch<br />
(<strong>Windows</strong>Networking.com)<br />
Once the new Set Task Sequence Variable task has been created, specify DriverGroup001 as the<br />
name of the task sequence variable and assign this variable the value <strong>Windows</strong> 7<br />
x64\%make%\%model% as shown in Figure 4:<br />
Figure 4: The new task sequence variable DriverGroup001 has the value <strong>Windows</strong> 7<br />
x64\%make%\%model%<br />
What happens when this task runs is that target computers whose Make is Dell Inc. and Model is<br />
Optiplex 580 have drivers in the folder <strong>Windows</strong> 7 x64\Dell Inc.\Optiplex 580 injected during<br />
deployment, computers whose Make is Dell Inc. and Model is Precision T3500 have drivers in the<br />
folder <strong>Windows</strong> 7 x64\Dell Inc.\Precision T3500 injected during deployment, and computers whose<br />
Make is Hewlett-Packard and Model is HP Pro 3015 Microtower have drivers in the folder <strong>Windows</strong> 7<br />
x64\Hewlett-Packard\HP Pro 3015 Microtower injected during deployment. More accurately, only<br />
those drivers in these folders that PnP determines need to be injected are actually injected. But the<br />
bottom line is that using this approach, Dell Optiplex 580 systems cannot have Dell Precision T3500<br />
or Hewlett-Packard Pro 3015 Microtower drivers injected by mistake. Each make and model system<br />
will receive only the drivers that are designed for it.<br />
We're not quite done however, because the next task Inject Drivers has the All Drivers selected by<br />
default, and MDT injects drivers based on the addition of the applicable driver group and selection<br />
profile. So if the driver group says only Dell Optiplex 580 drivers should be installed but the selection<br />
Revised June 14, 2009 Page 202 of 231
<strong>Deploying</strong> <strong>Windows</strong> 7<br />
By Mitch Tulloch<br />
(<strong>Windows</strong>Networking.com)<br />
profile says all drivers should be installed, the result will be that all drivers are installed. Or more<br />
specifically, PnP will install drivers from the pool of all available drivers and not just those drivers<br />
designed for Dell Optiplex 580 systems, which means we're back to the "let <strong>Windows</strong> decide"<br />
approach unless we can prevent the All Drivers selection profile from being applied. This is simple to<br />
do however, just select the Inject Drivers task in the Preinstall task group and change the selection<br />
profile from All Drivers to Nothing as shown in Figure 5:<br />
Figure 5: Select the Nothing selection profile<br />
Now if the driver group says only Dell Optiplex 580 drivers should be installed and the selection profile<br />
says no drivers should be installed, the result will be that only Dell Optiplex 580 drivers are installed,<br />
which is just what we want.<br />
The key to making this approach work is that the custom folders you create for Make and Model must<br />
exactly match the Win32_<strong>Computer</strong>System WMI class properties Manufacturer and Model<br />
respectively for each system. In the example above, the folder named Dell Inc. matches the<br />
Manufacturer property for the two systems, but older Dell computers might return Dell <strong>Computer</strong><br />
Corporation or Dell <strong>Computer</strong> Corp. or some other value when the Manufacturer property is queried<br />
using WMI and if you were deploying to those systems you would have to create additional folders<br />
using these names.<br />
Revised June 14, 2009 Page 203 of 231
<strong>Deploying</strong> <strong>Windows</strong> 7<br />
By Mitch Tulloch<br />
(<strong>Windows</strong>Networking.com)<br />
Finally, the reason this approach is easier to maintain in the long run is because when, for example,<br />
an updated driver is released for Dell Optiplex 580 systems, you import the driver into the Optiplex<br />
580 folder and then you only need to perform one test deployment (to a Dell Optiplex 580 computer)<br />
in your deployment test lab to ensure the new driver does not cause problems with this type of system.<br />
Contrast this with the "let <strong>Windows</strong> decide" approach where each time you update even a single<br />
driver you need to perform test deployments to all of your different types of systems.<br />
Part 27: Managing Drivers – Tips and Tricks<br />
Tip: You can find more information about automating LTI deployment in the <strong>Windows</strong> 7 Resource Kit<br />
from Microsoft Press. I am the lead author for this Resource Kit and I also maintain the Unofficial<br />
Support Site for the <strong>Windows</strong> 7 Resource Kit with answers to questions posted by readers, as well as<br />
links to the latest resources on <strong>Windows</strong> 7 deployment, administration and troubleshooting.<br />
In the last few articles of this series we examined two approaches ("let <strong>Windows</strong> decide" and "let me<br />
decide") that you can use for managing out-of-box drivers when performing Lite Touch deployment<br />
using MDT 2010. This article wraps up our discussion of managing drivers with some tips, tricks and a<br />
story. First the story, which was submitted to me by reader Tim Lors and which illustrates well the kind<br />
of headaches you can have when trying to manage drivers during deployment:<br />
"More than a year ago, I wrote scripts that would install drivers on WinXP PCs. The problem I ran into<br />
choosing drivers was not related to the OS. It was a failure of the manufacturer to properly implement<br />
PnP between their driver inf file and the hardware itself. Specifically, the inf file would indicate it was<br />
the best driver for a certain piece of hardware when in fact it wouldn’t even function with that<br />
incarnation of hardware. The only method I found to actually get the right driver installed in these<br />
difficult cases was to compare the hardware PnP IDs to a list of known problematic drivers, and if I<br />
found a match I would manually chose the right driver based on additional criteria – usually the PC<br />
model number. The most common additional criteria needed for the "let me decide" choice was PC<br />
model number, but occasionally involved the BIOS version or the PnP subset ID, and in one rare case<br />
trial & error. Of course trial & error was difficult because once <strong>Windows</strong> installed what driver it<br />
believed to be the best choice, you had to isolate that ‘non-working’ driver from <strong>Windows</strong>, or it would<br />
just re-install it. Note this scenario occurred in an environment with almost 10,000 PCs covering more<br />
than 25 different models."<br />
Most IT pros I talk to who do deployments tell me that drivers are one of their biggest headaches, and<br />
the story above only serves to drive this point home. So having spent the last four articles in this<br />
series covering this subject, I'm going to end the discussion of drivers with some tips and tricks to help<br />
make things easier for you.<br />
Finding Drivers<br />
The first difficulty is to find the out-of-box drivers your systems might need. Some vendors make this<br />
job easier than others, and Dell is particularly to be commended in this respect because they make<br />
drivers available for each desktop system as a .cab file for each operating system. To download<br />
these .cab files, go to www.delltechcenter.com and in the scrolling menu listbox on the left select<br />
Home, Microsoft, Microsoft System Center, SCCM – System Center Configuration Manager, Dell<br />
Business Client Operating System Deployment, Dell Business Client Operating System Deployment –<br />
The .CAB Files and you'll see the page shown in Figure 1:<br />
Revised June 14, 2009 Page 204 of 231
<strong>Deploying</strong> <strong>Windows</strong> 7<br />
By Mitch Tulloch<br />
(<strong>Windows</strong>Networking.com)<br />
Figure 1: Download drivers for Dell client systems as .cab files<br />
Once you download a .cab file you can extract it into a folder, then you point to this folder when you<br />
import the driver into your deployment share.<br />
Other vendors also have tools for downloading drivers but in my opinion they're not as simple and<br />
helpful as Dell's approach. Here are a few examples of these tools and where to find them:<br />
HP SoftPaq Download Manager<br />
Lenovo Update Retriever<br />
Extracting INF files from EXEs<br />
Sometimes a system vendor provides drivers for a device in the form of an .exe file instead of a .cab<br />
file. In that case, a great tool to have in your toolset is WinRAR which lets you extract the driver files<br />
from the .exe file to a folder. Remember, in order to import a driver MDT needs the .inf file and related<br />
files for the driver—you can't import an .exe file as a driver.<br />
Preventing Drivers from Being Injected<br />
To prevent a particular driver you have imported from being injected (for example if your testing has<br />
determined that the driver causes problems when installed) just open the properties of the driver and<br />
clear the Enable This Driver checkbox (Figure 2):<br />
Revised June 14, 2009 Page 205 of 231
<strong>Deploying</strong> <strong>Windows</strong> 7<br />
By Mitch Tulloch<br />
(<strong>Windows</strong>Networking.com)<br />
Figure 2: You can enable or disable a driver to allow or prevent the driver being injected<br />
Note that the above driver was designed for both 32- and 64-bit <strong>Windows</strong>. If you determine that it<br />
doesn't work as intended for 64-bit <strong>Windows</strong>, you can leave the driver enabled but deselect the x64<br />
checkbox to prevent it from being injected during deployment of 64-bit <strong>Windows</strong>.<br />
If desired you can even disable all the drivers in a folder by disabling the folder (Figure 3):<br />
Figure 3: You can disable a custom folder in your deployment share<br />
Revised June 14, 2009 Page 206 of 231
<strong>Deploying</strong> <strong>Windows</strong> 7<br />
By Mitch Tulloch<br />
(<strong>Windows</strong>Networking.com)<br />
Managing Boot Drivers Using Selection Profiles<br />
You can also use selection profiles to manage drivers during the <strong>Windows</strong> PE boot phase of LTI<br />
deployment. To do this, open the properties of your deployment share and select either the <strong>Windows</strong><br />
PE x64 Components or <strong>Windows</strong> PE x86 Components tab to manage drivers for the architecture you<br />
of the operating system you are deploying (Figure 4):<br />
Figure 4: Managing drivers during the boot process of LTI deployment<br />
By default, the All Drivers And Packages selection profile is selected here but only network and mass<br />
storage drivers from this selection profile are included in your <strong>Windows</strong> PE boot image. If needed you<br />
could create a custom selection profile that includes hardware-specific WinPE drivers for your target<br />
systems.<br />
Using Multiple Driver Groups to Deploy By Make and Model<br />
In the previous article of this series we saw how we could define a single driver group called<br />
DriverGroup001 and use this to manage drivers when deploying by make and model of the target<br />
computers. Keith Garner, a Deployment Specialist with Xtreme Consulting Group, has an excellent<br />
post that expands on this subject by showing how you can organize your drivers more efficiently and<br />
then use several driver groups to control how they are injected during deployment.<br />
Another good post to read is this one about using model aliases by Michael Murgolo, a Senior<br />
Consultant with Microsoft Consulting Services.<br />
Revised June 14, 2009 Page 207 of 231
<strong>Deploying</strong> <strong>Windows</strong> 7<br />
By Mitch Tulloch<br />
(<strong>Windows</strong>Networking.com)<br />
Adding Drivers to an Image<br />
You can use the DISM.exe command to add drivers to an offline image, just mount the image and use<br />
DISM with the /add-driver option (See article 2 in this series for information on how to use DISM.exe).<br />
To add drivers to the driver store (that is, to pre-stage drivers so that they'll be available when<br />
<strong>Windows</strong> detects a device has been attached which needs the driver) you can use the PnPutil.exe<br />
command. This can be useful for example if you have used the Microsoft Update Catalog to download<br />
a .cab file of drivers for a printer and want to pre-stage these drivers in your reference computer so<br />
that when you deploy it the drivers are available for installation. See here and here for more<br />
information on PnPutil.exe.<br />
Maintain Driver Configurations When Capturing a <strong>Windows</strong> Image<br />
Finally, if you are capturing a reference image and deploying onto identical hardware you can provide<br />
users with a faster first-boot experience by configuring the PersistAllDeviceInstalls setting in your<br />
answer file for sysprepping the reference computer. See this article on TechNet for details.<br />
Part 28: Managing Software Updates<br />
Tip: You can find more information about automating LTI deployment in the <strong>Windows</strong> 7 Resource Kit<br />
from Microsoft Press. I am the lead author for this Resource Kit and I also maintain the Unofficial<br />
Support Site for the <strong>Windows</strong> 7 Resource Kit with answers to questions posted by readers, as well as<br />
links to the latest resources on <strong>Windows</strong> 7 deployment, administration and troubleshooting.<br />
When you deploy <strong>Windows</strong> to target computers, you want those computers to be fully patched right<br />
after deployment so they can be secure from the start. This can be a challenge however because<br />
security updates and other types of updates are released by Microsoft on a regular basis for their<br />
products. Fortunately, you can use <strong>Windows</strong> Server Update Services (WSUS) to manage the<br />
distribution of such software updates during the LTI deployment process and afterwards as well. This<br />
article examines how to install and configure WSUS and how to incorporate WSUS into your MDT<br />
2010 deployment infrastructure.<br />
Using WSUS in Build vs. Production Environment<br />
You should use WSUS in both of your MDT deployment environments: build and production. Your<br />
build environment is the isolated lab where you deploy and capture images of your master (reference)<br />
computers and then test deploying the captured images to all the different types of PCs present in<br />
your production environment. Using WSUS in your build environment enables your master images to<br />
be patched up to the date of creation of the image. If you don't patch your master images like this,<br />
your production deployments will take longer to perform since all available updates will need to be<br />
applied to them during deployment.<br />
It can be a chore however to try and keep a master image up to date with patches after the image has<br />
been captured. You can use DISM for this purpose, but it takes time and effort to do this (see article 2<br />
in this series for how to use DISM). As a result, you'll probably also want to use WSUS in your<br />
production environment so that patches are applied to target computers as they are deployed by MDT.<br />
That way, whatever patches aren't already present in the image will be applied during the deployment<br />
process so that once deployment is finished the computers are fully patched and secure. On the other<br />
hand, another approach you can follow is to use MDT to recreate all your master images each time<br />
new software updates are released by Microsoft. If you only have a few master images to maintain,<br />
this might be the best approach to follow. In that case, you only need to use WSUS in your build<br />
environment and not your production environment. Either way, the steps that follow for installing and<br />
Revised June 14, 2009 Page 208 of 231
<strong>Deploying</strong> <strong>Windows</strong> 7<br />
By Mitch Tulloch<br />
(<strong>Windows</strong>Networking.com)<br />
configuring WSUS and configuring MDT to use WSUS apply to both build and production deployment<br />
environments.<br />
Installing WSUS<br />
On the <strong>Windows</strong> Server 2008 R2 platform, WSUS is available as an installable server role. For earlier<br />
<strong>Windows</strong> Server platforms, you must obtain WSUS from the Microsoft Download Center. In this<br />
walkthrough we're going to install the WSUS role on a member server named SEA-MDT-01 in the<br />
CONTOSO domain, which is the server we've been using as our MDT 2010 server throughout this<br />
series of articles. Before you install WSUS, you need to install a database for use by the service. This<br />
can be either Microsoft SQL Server 2008 Express or the Standard or Enterprise Edition of SQL Server<br />
2005 SP2 or SQL Server 2008. If you don't have an SQL Server or SQL Server Express database<br />
available, WSUS will automatically install the minimal <strong>Windows</strong> Internal Database for its use. Because<br />
we'll be installing the WSUS role on our MDT server SEA-MDT-01, which already has SQL Server<br />
2008 Express SP1 installed on it for hosting the MDT database, we'll use this existing database during<br />
our installation of WSUS. See article 15 in this series for details on how we installed SQL Server<br />
Express on our MDT server.<br />
Begin by launching the Add Roles wizard from either the oobe.exe screen or Server Manager, and<br />
select the WSUS role at the bottom of the list of available roles (doing this also automatically installs<br />
the Web Server role on your server):<br />
Figure 1: Step 1 of installing the WSUS server role<br />
Revised June 14, 2009 Page 209 of 231
<strong>Deploying</strong> <strong>Windows</strong> 7<br />
By Mitch Tulloch<br />
(<strong>Windows</strong>Networking.com)<br />
Begin the WSUS Setup wizard by selecting a location where downloaded updates will be stored on<br />
the server (in this walkthrough we are using volume U which is a dedicated volume for storing<br />
updates):<br />
Figure 2: Step 2 of installing the WSUS server role<br />
Select the installed SQL Server Express database instance on the server:<br />
Figure 3: Step 3 of installing the WSUS server role<br />
Revised June 14, 2009 Page 210 of 231
<strong>Deploying</strong> <strong>Windows</strong> 7<br />
By Mitch Tulloch<br />
(<strong>Windows</strong>Networking.com)<br />
The next screen shows that the WSUS Setup wizard has successfully connected to the SQL server<br />
instance SQLEXPRESS:<br />
Figure 4: Step 4 of installing the WSUS server role<br />
We'll use the Default Web Site for the WSUS role:<br />
Figure 5: Step 5 of installing the WSUS server role<br />
Revised June 14, 2009 Page 211 of 231
<strong>Deploying</strong> <strong>Windows</strong> 7<br />
By Mitch Tulloch<br />
(<strong>Windows</strong>Networking.com)<br />
Click Next on the confirmation page to finish installing WSUS:<br />
Figure 6: Step 6 of installing the WSUS server role<br />
Configuring WSUS<br />
Once WSUS has finished installing on your server, the WSUS Configuration wizard automatically<br />
launches:<br />
Figure 7: Step 7 of installing the WSUS server role<br />
Revised June 14, 2009 Page 212 of 231
<strong>Deploying</strong> <strong>Windows</strong> 7<br />
By Mitch Tulloch<br />
(<strong>Windows</strong>Networking.com)<br />
Click Next and optionally join the Microsoft Update Improvement Program if desired:<br />
Figure 8: Step 1 of configuring the WSUS server role<br />
The default configuration is for WSUS to download updates from the Microsoft Update (MU) website:<br />
Figure 9: Step 2 of configuring the WSUS server role<br />
Revised June 14, 2009 Page 213 of 231
<strong>Deploying</strong> <strong>Windows</strong> 7<br />
By Mitch Tulloch<br />
(<strong>Windows</strong>Networking.com)<br />
Large companies may choose to set up a hierarchy of WSUS servers so that servers at branch offices<br />
obtain their updates from a server at headquarters, which obtains its updates from MU.<br />
Moving forward, specify a proxy server if you have one:<br />
Figure 10: Step 3 of configuring the WSUS server role<br />
Click the Start Connecting button to connect your WSUS server to an upstream server, which in this<br />
case will be the MU website:<br />
Figure 11: Step 4 of configuring the WSUS server role<br />
Revised June 14, 2009 Page 214 of 231
<strong>Deploying</strong> <strong>Windows</strong> 7<br />
By Mitch Tulloch<br />
(<strong>Windows</strong>Networking.com)<br />
Now select the language(s) for the updates you will be downloading:<br />
Figure 12: Step 5 of configuring the WSUS server role<br />
Select only those Microsoft products for which you want to apply updates during the deployment<br />
process. In this walkthrough, we will only download updates for <strong>Windows</strong> 7:<br />
Figure 13: Step 6 of configuring the WSUS server role<br />
Revised June 14, 2009 Page 215 of 231
<strong>Deploying</strong> <strong>Windows</strong> 7<br />
By Mitch Tulloch<br />
(<strong>Windows</strong>Networking.com)<br />
By default all critical and security updates are downloaded, plus definition updates which apply to<br />
WSUS itself:<br />
Figure 14: Step 7 of configuring the WSUS server role<br />
If desired, you can download other types of updates to install during the deployment process. A good<br />
choice here would be the last two items in the list above, namely Update Rollups and Updates.<br />
The next screen indicates that the default configuration is for you to manually synchronize WSUS<br />
when desired:<br />
Figure 15: Step 8 of configuring the WSUS server role<br />
Revised June 14, 2009 Page 216 of 231
<strong>Deploying</strong> <strong>Windows</strong> 7<br />
By Mitch Tulloch<br />
(<strong>Windows</strong>Networking.com)<br />
If you want, you can change the option in the previous screen so that WSUS synchronizes on a<br />
schedule, for example each night at 2 am.<br />
The next screen is configured by default to begin synchronization immediately, but we're going to<br />
deselect the checkbox so that we can perform further configuration:<br />
Figure 16: Step 9 of configuring the WSUS server role<br />
Once the wizard is finished, open the WSUS admin console from Administrative Tools and select<br />
Options:<br />
Figure 17: Step 10 of configuring the WSUS server role<br />
Revised June 14, 2009 Page 217 of 231
<strong>Deploying</strong> <strong>Windows</strong> 7<br />
By Mitch Tulloch<br />
(<strong>Windows</strong>Networking.com)<br />
Click the Automatic Approvals link on the right hand side of the above screen to open the Automatic<br />
Approvals dialog:<br />
Figure 18: Step 11 of configuring the WSUS server role<br />
Click the Edit button to edit the Default Automatic Approval Rule:<br />
Figure 19: Step 12 of configuring the WSUS server role<br />
Revised June 14, 2009 Page 218 of 231
<strong>Deploying</strong> <strong>Windows</strong> 7<br />
By Mitch Tulloch<br />
(<strong>Windows</strong>Networking.com)<br />
Click the first hyperlink in the Step 2 box at the bottom. This opens a new dialog that lets you choose<br />
which updates should be automatically approved so you don't have to manually approve them.<br />
Automatic Approval will be the best choice for organizations that don't have the IT staff resources to<br />
be able to verify and test every released update against the matrix of all installed applications (in<br />
reality this is most organizations). By default, only critical and security updates are approved<br />
automatically:<br />
Figure 20: Step 13 of configuring the WSUS server role<br />
If you configured WSUS earlier to download Update Rollups and Updates, then you will probably want<br />
to select the last two checkboxes in the above dialog as well. Click OK to return to the Automatic<br />
Approvals dialog, and select the checkbox indicated to enable the rule that automatically approves the<br />
types of updates you have specified:<br />
Figure 21: Step 14 of configuring the WSUS server role<br />
Revised June 14, 2009 Page 219 of 231
Click OK to finish configuring WSUS.<br />
<strong>Deploying</strong> <strong>Windows</strong> 7<br />
By Mitch Tulloch<br />
(<strong>Windows</strong>Networking.com)<br />
Synchronizing WSUS<br />
The next step is to synchronize your WSUS server with the upstream server, which in this case is the<br />
MU website. In the WSUS admin console, right-click on the Synchronization node and select<br />
Synchronize Now:<br />
Figure 22: Synchronizing WSUS<br />
When synchronization is complete, you'll see the result in the details pane of the console:<br />
Figure 23: Results of synchronizing WSUS<br />
Revised June 14, 2009 Page 220 of 231
<strong>Deploying</strong> <strong>Windows</strong> 7<br />
By Mitch Tulloch<br />
(<strong>Windows</strong>Networking.com)<br />
Note that "Succeeded" does not mean that all updates have been downloaded. Because WSUS uses<br />
BITS to download updates in the background, this can take some time. To check on the progress of<br />
downloading updates, select the All Updates node under Updates. Any updates that have an icon in<br />
the first column like the bottom two in the figure below are still being downloaded from MU and are not<br />
yet available for deployment:<br />
Figure 24: Updates have been downloaded and approved<br />
By selecting the Updates node you can get a quick picture of different categories of updates:<br />
Figure 25: Overview of updates<br />
Revised June 14, 2009 Page 221 of 231
<strong>Deploying</strong> <strong>Windows</strong> 7<br />
By Mitch Tulloch<br />
(<strong>Windows</strong>Networking.com)<br />
Additional information can be generated from the Reports node if desired:<br />
Figure 26: Generating reports<br />
At this point WSUS has been configured and updates for <strong>Windows</strong> 7 have been downloaded.<br />
Configuring MDT to Use WSUS<br />
Now we need to configure MDT so that our target computers will pull updates from WSUS during the<br />
LTI deployment process. Open the Deployment Workbench and select a task sequence for either<br />
build or production deployment, depending on which environment you are working in. Open the<br />
properties of the task sequence and select the Task Sequence tab. Select the <strong>Windows</strong> Update (Pre-<br />
Application Installation) task within the State Restore task group, and on the Options tab for this task<br />
clear the checkbox indicated below to enable the use of WU (or WSUS in this case) to patch the<br />
target computer during the deployment process:<br />
Figure 27: Configuring a task sequence to use WSUS<br />
Revised June 14, 2009 Page 222 of 231
<strong>Deploying</strong> <strong>Windows</strong> 7<br />
By Mitch Tulloch<br />
(<strong>Windows</strong>Networking.com)<br />
Apply the change, then do the same for the <strong>Windows</strong> Update (Post-Application Installation) task two<br />
steps down in the task group, then close the task sequence properties.<br />
Now open the CustomSettings.ini file for your deployment share and add the following line to the<br />
[Default] section:<br />
WSUSServer=http://SEA-MDT-01<br />
This tells the target computers which server they should pull updates from during the deployment<br />
process:<br />
Figure 28: Configuring CustomSettings.ini so that target computers will use WSUS during the<br />
deployment process<br />
Click OK to apply the change and we are done. Now try using MDT to deploy <strong>Windows</strong> 7 to a target<br />
computer, and after deployment is finished open Programs and Features from Control Panel, click the<br />
View Installed Updates link on the left, and you should see that a bunch of updates have been<br />
installed on the computer during the deployment process:<br />
Revised June 14, 2009 Page 223 of 231
<strong>Deploying</strong> <strong>Windows</strong> 7<br />
By Mitch Tulloch<br />
(<strong>Windows</strong>Networking.com)<br />
Figure 29: Updates were installed on a target computer during LTI deployment<br />
Conclusion<br />
In the next and final article of this series, we will add <strong>Windows</strong> Deployment Services into the mix and<br />
tie everything together for our LTI deployment infrastructure.<br />
Part 29: Completing the LTI Deployment Infrastructure<br />
Tip: You can find more information about automating LTI deployment in the <strong>Windows</strong> 7 Resource Kit<br />
from Microsoft Press. I am the lead author for this Resource Kit and I also maintain the Unofficial<br />
Support Site for the <strong>Windows</strong> 7 Resource Kit with answers to questions posted by readers, as well as<br />
links to the latest resources on <strong>Windows</strong> 7 deployment, administration and troubleshooting.<br />
Deployment is a huge subject and there's still lots to explore on the subject, but for now at least it's<br />
time to draw this series to a close and move on to other topics. If you've been following along you<br />
should now be able to use MDT to do the following:<br />
Install, configure, secure and use MDT to perform Lite Touch Installation (LTI) deployments of<br />
<strong>Windows</strong> 7.<br />
Perform a manual or automated LTI deployment of <strong>Windows</strong> 7 by booting target computers using<br />
a LTI WinPE CD.<br />
Revised June 14, 2009 Page 224 of 231
<strong>Deploying</strong> <strong>Windows</strong> 7<br />
By Mitch Tulloch<br />
(<strong>Windows</strong>Networking.com)<br />
Capture and deploy a reference or master installation of <strong>Windows</strong> 7.<br />
Use the MDT database to deploy a customized installation of <strong>Windows</strong> 7 together with<br />
applications like Microsoft Office to specific target computers that are identified by their UUID,<br />
MAC address, or other characteristics.<br />
Inject out-of-box drivers into the deployment process in ways appropriate for your environment.<br />
Use WSUS to ensure target computers are fully patched as part of the deployment process.<br />
There's one thing we still need to take care of however: How can we start the deployment process<br />
automatically instead of having to boot target computers using the LTI WinPE CD? It would be nice if<br />
we could just turn on a computer that has no operating system installed and watch MDT deploy<br />
<strong>Windows</strong> 7 onto the computer without our need of doing anything other than pressing the power<br />
button on the computer. Well, you can in fact do this by using <strong>Windows</strong> Deployment Services (WDS),<br />
which was described in detailed in my earlier <strong>Deploying</strong> Vista series of articles right here on<br />
<strong>Windows</strong>Networking.com beginning with article 18 of that series.<br />
So let's now add WDS to our LTI deployment infrastructure to make our MDT deployments even more<br />
automated (and save us from the cost and effort having to burn a bunch of CDs). To review, our LTI<br />
deployment infrastructure currently has two servers both running <strong>Windows</strong> Server 2008 R2 and<br />
configured as shown in Table 1 below:<br />
Name of server Roles and software installed<br />
SEA-DC-01 AD DS server role (domain controller)<br />
DSN server role<br />
DHCP server role<br />
SEA-MDT-01 <strong>Windows</strong> AIK 2.0<br />
MDT 2010<br />
SQL Server Express SP1<br />
WSUS 3.0 SP2<br />
We will now complete our LTI deployment infrastructure by adding the WDS role to server SEA-MDT-<br />
01.<br />
Installing and Configuring WDS<br />
Begin by launching the Add Roles wizard and select the WDS role:<br />
Revised June 14, 2009 Page 225 of 231
<strong>Deploying</strong> <strong>Windows</strong> 7<br />
By Mitch Tulloch<br />
(<strong>Windows</strong>Networking.com)<br />
Figure 1: Step 1 of installing and configuring WDS<br />
Finish the wizard until the role has been installed. Then open the WDS admin console from<br />
Administrative Tools and note that WDS still needs to be configured on the server:<br />
Figure 2: Step 2 of installing and configuring WDS<br />
Revised June 14, 2009 Page 226 of 231
<strong>Deploying</strong> <strong>Windows</strong> 7<br />
By Mitch Tulloch<br />
(<strong>Windows</strong>Networking.com)<br />
Right-click on the server node under “Servers” (as shown above) and select Configure Server from<br />
the shortcut menu. This launches the WDS Configuration wizard which asks you to specify a location<br />
for storing images and other files. We'll choose disk volume W on our server, which is dedicated for<br />
this purpose:<br />
Figure 3: Step 3 of installing and configuring WDS<br />
On the PXE Server Initial Settings wizard page, we'll select "Respond to all client computers (known<br />
and unknown)" which allows any computer with no operating system installed to PXE boot from our<br />
WDS computer:<br />
Figure 4: Step 4 of installing and configuring WDS<br />
Revised June 14, 2009 Page 227 of 231
Finish the WDS Configuration wizard.<br />
<strong>Deploying</strong> <strong>Windows</strong> 7<br />
By Mitch Tulloch<br />
(<strong>Windows</strong>Networking.com)<br />
Adding the LTI Boot Image to WDS<br />
Once WDS has been configured on our MDT server, we need to import the LTI WinPE image as a<br />
boot image in WDS. Remember, MDT can create two types of LTI WinPE images:<br />
ISO files you can burn to CDs which you can then use to boot your bare-metal target systems<br />
WIM files, which is the type of image you can import into WDS<br />
Open the WDS admin console, right-click on the Boot Images node, and select Add Boot Image:<br />
Figure 5: Step 1 of adding the LTI boot image to WDS<br />
The wizard prompts you for the location of the boot image you want to import:<br />
Figure 6: Step 2 of adding the LTI boot image to WDS<br />
Revised June 14, 2009 Page 228 of 231
<strong>Deploying</strong> <strong>Windows</strong> 7<br />
By Mitch Tulloch<br />
(<strong>Windows</strong>Networking.com)<br />
Click Browse and open the Boot folder of your deployment share, and select the<br />
LiteTouchPE_x64.wim file:<br />
Figure 7: Step 3 of adding the LTI boot image to WDS<br />
Click Open in the above dialog and then either accept the default name for the image or give it a new<br />
name:<br />
Figure 8: Step 4 of adding the LTI boot image to WDS<br />
Revised June 14, 2009 Page 229 of 231
<strong>Deploying</strong> <strong>Windows</strong> 7<br />
By Mitch Tulloch<br />
(<strong>Windows</strong>Networking.com)<br />
Finish the steps of the Add Image wizard. The WDS admin console should now display the imported<br />
LTI WinPE boot image:<br />
Figure 9: Step 5 of adding the LTI boot image to WDS.<br />
Configuring WDS to Ensure PXE Boot<br />
One final step you should perform is to open the properties of your WDS server, select the Boot tab,<br />
and select the second (middle) option to ensure PXE boot is always used for both known and<br />
unknown clients:<br />
Figure 10: Configuring WDS to ensure PXE boot<br />
Revised June 14, 2009 Page 230 of 231
<strong>Deploying</strong> <strong>Windows</strong> 7<br />
By Mitch Tulloch<br />
(<strong>Windows</strong>Networking.com)<br />
WDS is now installed and configured on your MDT server. Your LTI WinPE boot image has now been<br />
imported into WDS. All you need to do now is ensure that the BIOS of your target computers is<br />
configured for PXE booting (typically in the order CD, HD, network, floppy) and then you can turn your<br />
target computers on and sit back and watch as they PXE boot from WDS, download a boot image,<br />
boot into WinPE, and begin installing <strong>Windows</strong> 7.<br />
Conclusion<br />
To review, our complete LTI deployment infrastructure has two servers both running <strong>Windows</strong> Server<br />
2008 R2 and configured as shown in Table 2 below:<br />
Name of server Roles and software installed<br />
SEA-DC-01 AD DS server role (domain controller)<br />
DSN server role<br />
DHCP server role<br />
SEA-MDT-01 <strong>Windows</strong> AIK 2.0<br />
MDT 2010<br />
SQL Server Express SP1<br />
WSUS 3.0 SP2<br />
<strong>Windows</strong> Deployment Services<br />
You can use such an infrastructure in either your build and/or production environments to create and<br />
maintain your master images and/or deploy <strong>Windows</strong> 7 to target computers across your network.<br />
There’s a lot more you can do with deployment, such as using System Center Configuration Manager<br />
(ConfigMgr) together with WDS and MDT to perform both LTI and Zero-Touch Installation (ZTI)<br />
deployments, but for now we'll bring this series to a close and move on. I hope you've found these<br />
articles useful!<br />
Revised June 14, 2009 Page 231 of 231