Create VxWorks System Image - Xilinx
Create VxWorks System Image - Xilinx
Create VxWorks System Image - Xilinx

You also want an ePaper? Increase the reach of your titles
YUMPU automatically turns print PDFs into web optimized ePapers that Google loves.
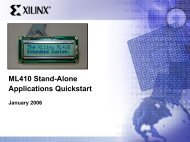
ML410<br />
Creating a <strong>VxWorks</strong> BSP and <strong>System</strong><br />
<strong>Image</strong> for the BSB Design<br />
January 2006
Overview<br />
• Hardware Setup<br />
• Software Setup & Requirements<br />
• Generate <strong>VxWorks</strong> BSP<br />
• <strong>Create</strong> <strong>VxWorks</strong> Project<br />
• <strong>Create</strong> <strong>VxWorks</strong> <strong>System</strong> <strong>Image</strong><br />
• Generate and Run an ACE File
ML410 BSB Hardware<br />
• The ML410 BSB design<br />
hardware includes:<br />
– 64 KB BRAM<br />
– DDR1 Interface (64 MB)<br />
– UART<br />
– Interrupt Controller<br />
– <strong>System</strong> ACE Interface<br />
– IIC<br />
– GPIO (LEDs and LCD)<br />
– PLB2OPB Bridge<br />
– PLB and OPB Arbiters<br />
– Networking
Additional Setup Details<br />
• Refer to ml410_overview_setup.ppt for details on:<br />
– Software Requirements<br />
– ML410 Board Setup<br />
• Equipment and Cables<br />
• Software<br />
• Network<br />
– Terminal Programs<br />
• This presentation requires the<br />
9600-8-N-1 Baud terminal setup
Hardware Setup<br />
• Connect the <strong>Xilinx</strong> Parallel<br />
Cable IV (PC4) to the<br />
ML410 board<br />
• Connect the RS232 null<br />
modem cable to the<br />
ML410 board
Software Setup<br />
• Install Wind River <strong>System</strong>s Tornado 2.2<br />
– (1) CD part number TDK-14620-ZC-01<br />
– (2) CD part number TDK-14630-ZC-01<br />
– Download and install<br />
Patch T22CP1: Tornado 2.2<br />
Cumulative Patch 1 "CP-1”<br />
– The patch files:<br />
• T22CP1_install.html<br />
• (3) t22-cp1-ppc.tar<br />
• (4) t22-cp1-drivers.tar<br />
– Install order (1), (2)…<br />
– Details on the installed products<br />
can be found by clicking on<br />
Help → About Tornado → Details
ISE Software Requirement<br />
• <strong>Xilinx</strong> ISE 7.1i SP4 software<br />
– ISE 7.1i Service Pack 4 can be found here
EDK Software Requirement<br />
• EDK 7.1i SP2<br />
– EDK 7.1i Service Pack 2 can be found here
Extracting the Design<br />
• Unzip the ml410_bsb_design.zip file<br />
– This creates ISE and EDK project directories
Extracting the Design<br />
• Rename the project directory to<br />
ml410_bsb_vxworks
Extracting the Design<br />
• Unzip the ml410_bsb_vxworks_overlay.zip file<br />
– Unzip to the ml410_bsb_vxworks directory (overwrite existing files)<br />
– This adds the <strong>VxWorks</strong> XMP and MSS files, ELF files, SW source,<br />
and ACE files
Generate <strong>VxWorks</strong> BSP in EDK<br />
• Parameters preset for <strong>VxWorks</strong> in ml410_bsb_vxworks.xmp<br />
– Common hardware design (ml410_bsb_system.mhs) across<br />
software apps<br />
– Software Platform Settings<br />
• OS selection set to <strong>VxWorks</strong> 5.5<br />
• Bus Speed<br />
• Peripheral for Standard Input<br />
• Peripheral for Standard Output<br />
• Select peripherals connected for OS interface
Generate <strong>VxWorks</strong> BSP in EDK<br />
• Launch EDK project<br />
\<br />
ml410_bsb_vxworks.xmp<br />
• Select Project →<br />
Software Platform<br />
Settings… (1)<br />
1
Generate <strong>VxWorks</strong> BSP in EDK<br />
• In the “Kernel<br />
and Operating<br />
<strong>System</strong>s”<br />
verify that<br />
vxworks5_5<br />
is selected for<br />
ppc405_0 (1)<br />
• Select the<br />
“Library/OS<br />
Parameters"<br />
tab (2)<br />
2<br />
1
Generate <strong>VxWorks</strong> BSP in EDK<br />
• Ensure these fields are set as follows (1):<br />
– STDIN = RS232_Uart_1<br />
– STDOUT = RS232_Uart_1<br />
• Click the connected_periphs button (2)<br />
1<br />
2
Generate <strong>VxWorks</strong> BSP in EDK<br />
• Verify four peripherals are included in the pop-up dialog box (2)<br />
– RS232_Uart_1<br />
– RS232_Uart_2<br />
– SysACE_CompactFlash<br />
– Ethernet_MAC<br />
2
Generate <strong>VxWorks</strong> BSP in EDK<br />
• Select OK<br />
(1) to save<br />
the settings<br />
1
• Select :<br />
– Tools → Clean →<br />
Software (1)<br />
– Tools → Generate<br />
Libraries and BSPs (2)<br />
• The generated <strong>VxWorks</strong><br />
BSP will be:<br />
\ppc405_0<br />
\bsp_ppc405_0<br />
Generate BSP in EDK<br />
2<br />
1
• As the <strong>VxWorks</strong> BSP is<br />
being generated,<br />
informational messages<br />
will be sent to the output<br />
window (1)<br />
Generate BSP in EDK<br />
1
Optional Installation<br />
• Bypass the <strong>VxWorks</strong> BSP and Project creation steps in this<br />
presentation by using the pre-built BSP and Project:<br />
• BSP: Unzip the file ml410_bsb_vxworks_bsp.zip to the<br />
\target\config directory
Optional Installation<br />
• Project: Unzip the ml410_bsb_vxworks_proj.zip file to the<br />
\target\proj directory<br />
• Skip slides 22 through 55 if doing the Optional Installation
Copy Updated BSP to Tornado Tree<br />
• Copy<br />
\ml410_bsb_vxworks\ppc405_0\bsp_ppc405_0<br />
To:<br />
\target\config\<br />
– Hold down the while dragging to copy instead of move
Rename BSP in Tornado Tree<br />
• In \target\config rename the bsp directory:<br />
bsp_ppc405_0<br />
to:<br />
ml410_bsb_vxworks_bsp
Update BSP Configuration<br />
• Update these lines in the \target\config\<br />
ml410_bsb_vxworks_bsp\config.h file:<br />
– Set LOCAL_MEM_SIZE to 0x04000000<br />
– Set RAM_HIGH_ADRS to 0x04000000
Update BSP Configuration<br />
• Update this line in the \target\config\<br />
ml410_bsb_vxworks_bsp\Makefile file:<br />
– Set RAM_HIGH_ADRS to 0x04000000
Update BSP Configuration<br />
• Update the splash message in the \target\config\<br />
ml410_bsb_vxworks_bsp\sysLib.c file:<br />
– From: ppc405_0 VirtexII Pro PPC405<br />
– To: <strong>Xilinx</strong> Virtex-4 FX PPC405
<strong>Create</strong> <strong>VxWorks</strong> Project<br />
• Launch Tornado and select File → New Project<br />
• Choose “<strong>Create</strong> a bootable <strong>VxWorks</strong> image...”
<strong>Create</strong> <strong>VxWorks</strong> Project<br />
• Set the project name to ml410_bsb_vxworks_proj (1)<br />
• Update the Location and Workspace entries with this project<br />
name (2) , (3)<br />
1<br />
3<br />
2
<strong>Create</strong> <strong>VxWorks</strong> Project<br />
• Base the project on a BSP (1), (2)<br />
– Select the ml410_bsb_vxworks_bsp just added to the Tornado tree<br />
• Select gnu from the Tool drop-down menu (3)<br />
1 2<br />
3
<strong>Create</strong> <strong>VxWorks</strong> Project<br />
• Select Finish to create the Bootable project (1)<br />
• New Tornado Project available after BSP processed (2)<br />
1<br />
2
Configure <strong>System</strong> <strong>Image</strong><br />
• To reproduce the pre-compiled<br />
BSB <strong>VxWorks</strong> system image<br />
– Components must be<br />
Included or Excluded<br />
• Select the “<strong>VxWorks</strong>” tab (1)<br />
• Right-click on the desired<br />
components and select<br />
“Include ” (2)<br />
– In some cases you will<br />
select “Exclude ”<br />
1<br />
2
Configure <strong>System</strong> <strong>Image</strong><br />
• Include: C++ Components<br />
– Some components are “pre-checked” - leave these checked (1)<br />
– Check “C++ standard template library” (2)<br />
– Check “core C++ iostreams” (2)<br />
– Click OK in the respective dialog boxes (3)<br />
1<br />
3<br />
2<br />
3
Configure <strong>System</strong> <strong>Image</strong><br />
• Include: WDB agent components<br />
– Uncheck “WDB network connection” (1)<br />
– Check “WDB task breakpoints” (2)<br />
– Check “WDB END driver connection”(3)<br />
1<br />
2<br />
3
Configure <strong>System</strong> <strong>Image</strong><br />
• Include: development tool components > loader components<br />
– Check “target unloader” (1)<br />
– Check “module manager” (1)<br />
– Click OK in the respective dialog boxes<br />
1
Configure <strong>System</strong> <strong>Image</strong><br />
• Include: development tool components > target shell components<br />
– Use default includes of the first 3 check boxes (1)<br />
1
Configure <strong>System</strong> <strong>Image</strong><br />
• Include: network components > networking protocols<br />
> network filesystems<br />
– Check “FTP server” (1)<br />
– Click OK in the respective dialog boxes<br />
1
Configure <strong>System</strong> <strong>Image</strong><br />
• Include: development tool components > show routines<br />
> symbol table show routine
Configure <strong>System</strong> <strong>Image</strong><br />
• Include: operating system components > IO system components<br />
> File <strong>System</strong> and Disk Utilities
Configure <strong>System</strong> <strong>Image</strong><br />
• Include: operating system components > IO system components<br />
> dosFs File <strong>System</strong> Components<br />
– Check all boxes, except (1):<br />
• File <strong>System</strong> Backup and Archival<br />
• DOS File <strong>System</strong> Old Directory Format Handler<br />
1
Configure <strong>System</strong> <strong>Image</strong><br />
1<br />
2<br />
• Set Parameter:<br />
– Right-click on hardware and select Params<br />
for ‘hardware’ (1)<br />
– Click on CONSOLE_BAUD_RATE (2)<br />
then enter 9600 to set the baud rate
Configure <strong>System</strong> <strong>Image</strong><br />
• Do this step last, after adding other components<br />
– Exclude: hardware > memory > enable caches
Configure <strong>System</strong> <strong>Image</strong><br />
• The next several slides graphically compare the differences between:<br />
– A default Workspace, based on the BSP(left side)<br />
– A modified Workspace after system configuration (right side)<br />
• Your included components should match the screenshots on the right<br />
• Blue boxes on the right side show components included<br />
• Red boxes on the left side show components excluded<br />
– Either because it was initially included or was added as a result of a dependency<br />
• Note: If you have made any errors in configuring the system, the items<br />
may corrected (included or excluded) individually at this time
<strong>Create</strong> <strong>VxWorks</strong> <strong>System</strong> <strong>Image</strong><br />
• Select the Files tab and perform a<br />
“Rebuild All (vxWorks)”<br />
– This creates a <strong>VxWorks</strong> system<br />
image<br />
1
<strong>Create</strong> <strong>VxWorks</strong> <strong>System</strong> <strong>Image</strong><br />
• A successful compile creates a <strong>VxWorks</strong> ELF filesystem image<br />
• \target\proj\ml410_bsb_vxworks_proj\default\vxWorks
<strong>Create</strong> <strong>VxWorks</strong> <strong>Image</strong><br />
• Copy<br />
\target\proj\ml410_bsb_vxworks_proj\default\vxWorks<br />
to:<br />
\ml410_bsb_design\ppc405_0\default<br />
– Use key while dragging to make a copy (overwrite existing file)
Download Bootloop Bitstream<br />
• Open an command shell<br />
– Tools → <strong>Xilinx</strong><br />
Command Shell<br />
1
Download Bootloop Bitstream<br />
• Download the pre-built bootloop bitstream using this<br />
command:<br />
impact -batch etc/bootloop.cmd
Verify Bootloop Bitstream<br />
• A memory read can be<br />
executed to test if the<br />
bootloop was<br />
successfully loaded<br />
– Select Tools → XMD (1)<br />
– Select ppc405_0 (2)<br />
2<br />
1
XMD Setup<br />
• The first time XMD runs on a<br />
project, the options will be set<br />
– Click OK (1)<br />
– Click Save (2)<br />
1<br />
1
Verify Bootloop in BRAM<br />
• XMD opens and connects to the processor, using<br />
the default options
Verify Bootloop in BRAM<br />
• To verify existence of bootloop inside of Block RAM:<br />
mrd 0xfffffffc<br />
• This will read the memory address at the reset vector; the<br />
value should be 0x48000000 as shown below (1)<br />
1
Download ELF File<br />
• Download the vxworks ELF file from XMD<br />
cd ppc405_0/default<br />
rst<br />
dow vxworks (1)<br />
1
Run <strong>VxWorks</strong><br />
• Open a terminal program<br />
• Enter con in the XMD window to start <strong>VxWorks</strong> (1)<br />
1
Run <strong>VxWorks</strong><br />
• View the output in the terminal program<br />
• <strong>VxWorks</strong> running in external memory of ML410 (below)
Target Shell Task Listing<br />
• After the <strong>VxWorks</strong> banner screen, type i (1)<br />
• View a list of tasks running on the ML410 (2)<br />
1<br />
2
Network Statistics<br />
• Type ifShow "xemac" (1)<br />
• Note the number of packets (2)<br />
1<br />
2
Ping ML410 Target from Host<br />
• Open a DOS window on the PC Host<br />
(Start → Programs → Accessories → Command Prompt)<br />
• Type ping 192.168.0.2 (1)<br />
– Ping from PC host 192.168.0.1 to ML410 target 192.168.0.2<br />
1
Ping Host from ML410 Target<br />
• Type ping "192.168.0.1" (1)<br />
– Ping from ML410 target 192.168.0.2 to PC host 192.168.0.1<br />
• Note: <strong>VxWorks</strong> requires double quotes on the IP address<br />
– Type to end ping<br />
1
Network Statistics<br />
• Type ifShow "xemac" again (1)<br />
• Number of packets has increased after pinging (2)<br />
1<br />
2
Mounting a Local File <strong>System</strong><br />
• Mount the <strong>System</strong> ACE CF file system to prepare for transferring files via ftp<br />
– Type sys<strong>System</strong>AceMount(0,"/cf0",1) (1)<br />
– Type cd "/cf0" (2)<br />
2<br />
1
List Directory<br />
• The <strong>System</strong> ACE CF provides DOS FAT16 access<br />
• Type ll to see a listing of files (1)<br />
– Wait for disk check to complete after the initial mount<br />
1
FTP to <strong>VxWorks</strong> Target<br />
• From the DOS window, perform an FTP transfer of any<br />
file to the ML410 CompactFlash Disk:<br />
cd <br />
copy vxWorks <br />
ftp 192.168.0.2<br />
<br />
<br />
binary<br />
put <br />
quit<br />
* When prompted for a user name and password, hit the enter key
FTP to <strong>VxWorks</strong> Target<br />
• In the target server window, type ll again (1)<br />
• The file (2) was transferred via ftp from the host to the<br />
CompactFlash card using the <strong>System</strong> ACE CF controller<br />
1<br />
2
<strong>Create</strong> an Executable File<br />
• These commands use I/O redirection with a file:<br />
– Type printf"ll\n">mycmd (1) which “prints” the mycmd file<br />
– Type
Delete Files<br />
• Delete the two new files with these commands (1):<br />
rm "vxWorks_deleteme"<br />
rm "mycmd"<br />
• Type ll and verify files are deleted (2)<br />
1<br />
2
Establish a Tornado Tools<br />
Connection<br />
• With the <strong>VxWorks</strong> demo running, launch Tornado 2.2<br />
• Launch the target server (1)<br />
• Double-click on the target server icon in the systray to view the<br />
target server console (2)<br />
• If it does not connect, you will<br />
see this icon: 1<br />
2<br />
Note: The vxWorks ELF file pointed to by the target server must be identical to the one running in the processor
Host Shell<br />
• Launch a host shell in Tornado and click OK<br />
1
• Type i in the<br />
host shell<br />
• Also type i<br />
in the target<br />
shell<br />
• See the same<br />
task listings<br />
in both shells 1<br />
Host Shell
Tornado Info Browser<br />
• Select Tools → Browser and do a “Stack Check”
Software-Initiated Reboot<br />
• Perform a software-initiated reboot from the target shell<br />
• Reboot using configuration 2, the ml410_bsb_vxworks.ace file<br />
– Type sys<strong>System</strong>AceSetJtagConfigAddr(2)<br />
– Type sys<strong>System</strong>AceJtagReboot(0x41800000)<br />
– Reboot address (0x41800000) is the opb_sysace base address<br />
1<br />
2
• Open an <strong>Xilinx</strong><br />
command shell:<br />
– The xygwin shell is used<br />
for entering and<br />
executing the commands<br />
to create a concatenated<br />
(HW+SW ) ACE file<br />
– Select Tools → <strong>Xilinx</strong><br />
Command Shell (1)<br />
<strong>Create</strong> an ACE File<br />
1
<strong>Create</strong> an ACE File<br />
• At the xygwin prompt, type (1):<br />
cd ace<br />
./genace_vxworks.sh<br />
1
<strong>Create</strong> an ACE File<br />
• This creates a concatenated (HW+SW) ACE file<br />
– Input: vxWorks ELF file, ml410_bsb_bootloop.bit (bsb hardware build)<br />
• genace.sh uses XMD and a genace.tcl script with ML410<br />
appropriate options to generate an ACE file (1)<br />
1
Run ACE File<br />
• Copy ml410_bsb_vxworks.ace to the xilinx\cf7<br />
directory on your CompactFlash card<br />
– Important: Delete any existing ace files<br />
in this cf7 directory<br />
– Note: Use a CompactFlash reader to<br />
mount the CompactFlash as a disk drive
Run ACE File<br />
• Eject the CompactFlash from your PC and insert it back into<br />
the ML410<br />
• Type 7 to run the newly created ACE file and load vxWorks
Using the ACE File<br />
• Target shell output after booting ACE file
Target Shell Task Listing<br />
• After the <strong>VxWorks</strong> banner screen, type i (1)<br />
• View a list of tasks running on the ML410 (2)<br />
1<br />
2