VxWorks 5.x automatic Generation of Tornado 2.x - Xilinx
VxWorks 5.x automatic Generation of Tornado 2.x - Xilinx
VxWorks 5.x automatic Generation of Tornado 2.x - Xilinx

Create successful ePaper yourself
Turn your PDF publications into a flip-book with our unique Google optimized e-Paper software.
EDK 7.1i, February 15, 2005<br />
R<br />
Automatic <strong>Generation</strong> <strong>of</strong> <strong>Tornado</strong> <strong>2.x</strong><br />
(<strong>VxWorks</strong> <strong>5.x</strong>) Board Support Packages<br />
Summary This document describes the <strong>automatic</strong> generation <strong>of</strong> a<strong>Tornado</strong> <strong>2.x</strong> Board Support Package<br />
(BSP) using <strong>Xilinx</strong>® Platform Studio (XPS). The document contains the following sections.<br />
• “Overview”<br />
• “Generating the <strong>Tornado</strong> BSP”<br />
• “The <strong>Tornado</strong> <strong>2.x</strong> BSP”<br />
• “Booting <strong>VxWorks</strong>”<br />
Overview One <strong>of</strong> the key embedded system development activities is the development <strong>of</strong> the BSP.<br />
Creation <strong>of</strong> a BSP can be a lengthy and tedious process that must be incurred every time the<br />
microprocessor complex (processor plus associated peripherals) changes. While managing<br />
these changes applies to any microprocessor-based project, the changes can come about more<br />
rapidly than ever with the advent <strong>of</strong> programmable System-on-Chip (SoC) hardware.<br />
This document describes <strong>automatic</strong> generation <strong>of</strong> a customized <strong>Tornado</strong> <strong>2.x</strong> BSP (for <strong>Tornado</strong><br />
2.0.2, 2.2, and 2.2.1) for the IBM PowerPC 405 microprocessor and its peripherals as defined<br />
within a <strong>Xilinx</strong>® FPGA. An <strong>automatic</strong>ally generated BSP enables embedded system designers<br />
to:<br />
• Substantially decrease development cycles (decrease time-to-market)<br />
• Create a BSP which matches the hardware and application (customized BSP)<br />
• Eliminate BSP design bugs (<strong>automatic</strong>ally created based on certified components)<br />
• Enable application s<strong>of</strong>tware development (don't have to wait for BSP development)<br />
The <strong>Tornado</strong> <strong>2.x</strong> BSP is generated from XPS, an IDE delivered as part <strong>of</strong> the <strong>Xilinx</strong>® Embedded<br />
Development Kit (EDK), and used to create an embedded system within a <strong>Xilinx</strong>® FPGA. The<br />
BSP contains all the necessary support s<strong>of</strong>tware for a system, including boot code, device<br />
drivers, and RTOS initialization. The BSP is customized based on the peripherals chosen and<br />
configured by the user for the FPGA-based embedded system.<br />
Experienced BSP designers should have little trouble getting a generated BSP integrated into<br />
their target system. Novices may have difficulties because even though XPS can generate an<br />
operational BSP for a given set <strong>of</strong> IP hardware, there will always be some extra configuration<br />
and tweaking required to get the best performance out <strong>of</strong> the target system. It is highly<br />
recommended that the user have on hand the <strong>Tornado</strong> BSP Developer’s Kit for <strong>VxWorks</strong> User’s<br />
Guide and the <strong>VxWorks</strong> Programmer’s Guide available from Wind River. Wind River also <strong>of</strong>fers<br />
classes on BSP design at additional cost.<br />
Requirements<br />
The user should have either <strong>Tornado</strong> 2.0.2 or <strong>Tornado</strong> 2.2 or 2.2.1 development kit installed on<br />
their host computer. It is recommended the user go with <strong>Tornado</strong> 2.2.1 due to the many bug<br />
fixes and easier installation. It is not required for the host computer to have both the <strong>Xilinx</strong><br />
© 2005 <strong>Xilinx</strong>, Inc. All Rights Reserved. XILINX, the <strong>Xilinx</strong> logo, and other designated brands included herein are trademarks <strong>of</strong> <strong>Xilinx</strong>, Inc. All other trademarks are the property<br />
<strong>of</strong> their respective owners.<br />
NOTICE OF DISCLAIMER: <strong>Xilinx</strong> is providing this design, code, or information "as is." By providing the design, code, or information as one possible implementation <strong>of</strong> this<br />
feature, application, or standard, <strong>Xilinx</strong> makes no representation that this implementation is free from any claims <strong>of</strong> infringement. You are responsible for obtaining any rights you<br />
may require for your implementation. <strong>Xilinx</strong> expressly disclaims any warranty whatsoever with respect to the adequacy <strong>of</strong> the implementation, including but not limited to any<br />
warranties or representations that this implementation is free from claims <strong>of</strong> infringement and any implied warranties <strong>of</strong> merchantability or fitness for a particular purpose.<br />
EDK 7.1i, February 15, 2005 www.xilinx.com 1<br />
1-800-255-7778
Generating the<br />
<strong>Tornado</strong> BSP<br />
R<br />
Generating the <strong>Tornado</strong> BSP<br />
EDK and <strong>Tornado</strong> installed because XPS generates relocatable BSPs that are compiled and<br />
configured outside the EDK environment.<br />
<strong>Tornado</strong> 2.0.2<br />
Patches required that can be found at Wind River’s Windsurf technical support web site:<br />
• SPR67953 Cumulative patch<br />
• DosFs 2.0 DOS file system support<br />
Note that some <strong>of</strong> these patches may no longer be available. Contact your Wind River FAE for<br />
more information.<br />
<strong>Tornado</strong> 2.2<br />
This is an updated <strong>Tornado</strong> release with many bug fixes to the development environment. No<br />
patches are required.<br />
SingleStep<br />
The SingleStep debugger must be aware <strong>of</strong> the PowerPC405 processor inside the Virtex-II<br />
Pro or Virtex4 FPGA. This debugger works in concert with the VisionProbe debugger pod.<br />
Microprocessor Library Definition<br />
XPS supports a plug-in interface for 3rd party libraries and operating systems through the<br />
Microprocessor Library Definition (MLD) interface. This allows 3rd party vendors to have<br />
their s<strong>of</strong>tware available to XPS users, and provides the vendors a means to tailor their libraries<br />
or BSPs to the FPGA-based embedded system created within XPS. Since the system can change<br />
easily, this capability is paramount to properly supporting embedded systems in FPGAs.<br />
<strong>Xilinx</strong> develops and maintains the <strong>VxWorks</strong> <strong>5.x</strong> MLD in its EDK releases. The MLD is used to<br />
<strong>automatic</strong>ally generate the <strong>Tornado</strong> <strong>2.x</strong> BSP.<br />
Template-Based Approach<br />
A set <strong>of</strong> <strong>Tornado</strong> BSP template files are released with the EDK. These template files are used<br />
during <strong>automatic</strong> generation <strong>of</strong> the BSP and appropriate modifications are made based on the<br />
makeup <strong>of</strong> the FPGA-based embedded system.<br />
If the user chooses not to <strong>automatic</strong>ally generate a BSP, these template files could be used as a<br />
reference for building a BSP from scratch.<br />
Device Drivers<br />
A set <strong>of</strong> device driver source files are released with the EDK and reside in an installation<br />
directory. During creation <strong>of</strong> a customized BSP, device driver source code is copied from this<br />
installation directory to the BSP directory. Only the source code pertaining to the devices built<br />
into the FPGA-based embedded system are copied. This copy provides the user with a selfcontained,<br />
standalone BSP directory which can be modified by the user if necessary and/or<br />
relocated if necessary. If the user makes changes to the device driver source code for this BSP<br />
and sometime later wishes to back those changes out, the user can use the EDK tools to<br />
regenerate the BSP. Device driver source files are then recopied from the installation directory<br />
to the BSP.<br />
Using XPS<br />
XPS is available in the EDK and is a graphical design entry and implementation tool for a<br />
PowerPC405- or MicroBlaze-based embedded system. This section describes the steps<br />
needed to create a <strong>Tornado</strong> BSP using XPS. These steps pertain to EDK 6.2i and later. It is<br />
assumed that a valid hardware design has been entered into XPS.<br />
2 www.xilinx.com EDK 7.1i, February 15, 2005<br />
1-800-255-7778
The <strong>Tornado</strong> <strong>2.x</strong> BSP<br />
The <strong>Tornado</strong> <strong>2.x</strong><br />
BSP<br />
1. Select the operating system and core clock frequency<br />
In the s<strong>of</strong>tware settings for the PowerPC instance, select the operating system using the<br />
S<strong>of</strong>tware Platform tab. In this case, we want to select a <strong>VxWorks</strong>5_x operating system. In<br />
addition, the <strong>Tornado</strong> BSP needs to know the frequency <strong>of</strong> the CPU. In the Processor and<br />
Drivers Parameters tab, enter the Core Clk Freq field (in Hz) under the Processor<br />
Parameters fields.<br />
2. Configure the <strong>VxWorks</strong> console device<br />
If a serial device such as a Uart is intended to be used as the <strong>VxWorks</strong> console, select or<br />
enter the instance name <strong>of</strong> the serial device as the STDIN/STDOUT peripheral in the<br />
Library/OS Parameters tab. It is important to enter the same device for both STDIN and<br />
STDOUT. Currently, only the Uart 16550/16450 and UartLite devices are supported as<br />
<strong>VxWorks</strong> console devices.<br />
3. Integrate the device drivers<br />
a. Configure all drivers with Level 1 interface<br />
This step is no longer necessary for projects created with EDK 6.2 or later. Driver levels<br />
may exist in the Processor and Drivers Parameters tab if an EDK 6.2 (or later) project was<br />
originally created in EDK 6.1 or earlier. In general, all drivers that are to be accessible from<br />
the <strong>VxWorks</strong> application or tightly integrated into <strong>VxWorks</strong> need to be configured as Level<br />
1 drivers. Only if there is no Level 1 interface for a driver will its Level 0 interface be made<br />
available in the <strong>Tornado</strong> BSP.<br />
b. Connect to <strong>VxWorks</strong><br />
There is a Connected Peripherals dialog box available in the Library/OS Parameters tab.<br />
Use this dialog box to Add those peripherals to be tightly integrated with the OS, including<br />
the device that was selected as the STDIN/STDOUT peripheral. See the section “Device<br />
Integration” for more details on tight integration <strong>of</strong> devices.<br />
c. Overwrite MDD Parameters<br />
In the Processor and Drivers Parameters tab, under Driver Parameters, there may be<br />
parameter values that need to be overridden. Look at the value <strong>of</strong> these parameters and<br />
determine the values that fit your needs.<br />
4. Generate the <strong>Tornado</strong> BSP<br />
In the Tools menu <strong>of</strong> XPS, the menu item "Generate Libraries and BSPs" can be selected to<br />
generate the BSP. The output <strong>of</strong> this invocation is shown in the XPS output window. Once<br />
done, the resulting <strong>Tornado</strong> BSP will exist under the PowerPC405 instance subdirectory<br />
<strong>of</strong> the user’s EDK project. For example, if in XPS the user has named their PowerPC405<br />
instance myppc405, then the <strong>Tornado</strong> BSP will reside at /myppc405/bsp_myppc405.<br />
Backups<br />
If the directory location <strong>of</strong> the BSP contains existing files, these files are copied into a<br />
backup directory before being overwritten. This prevents the inadvertent loss <strong>of</strong> changes<br />
made by the user to BSP source files. The backup directory resides within the BSP directory<br />
and is named backup, where represents the current date and time.<br />
Note that the BSP generated by XPS is relocatable, so it is recommended to relocate the BSP<br />
from the XPS project directory to an appropriate BSP development directory as soon as the<br />
hardware platform is stable.<br />
This section assumes the reader is familiar with Wind River’s <strong>Tornado</strong> 2.0.2 or 2.<strong>2.x</strong> IDE. It<br />
describes the <strong>Tornado</strong> BSP output by XPS.<br />
The <strong>automatic</strong>ally generated BSP is integrated into the <strong>Tornado</strong> IDE and Project facility. The<br />
BSP can be compiled from the command-line using the <strong>Tornado</strong> make tools, or from the<br />
EDK 7.1i, February 15, 2005 www.xilinx.com 3<br />
1-800-255-7778<br />
R
R<br />
The <strong>Tornado</strong> <strong>2.x</strong> BSP<br />
<strong>Tornado</strong> Project facility (also referred to as the <strong>Tornado</strong> IDE). Once the BSP has been generated,<br />
the user can simply type make vxWorks from the command-line to compile a bootable RAM<br />
image. This assumes the <strong>Tornado</strong> environment has been previously set up, which can be done<br />
via the command-line using the host/x86-win32/bin/torVars.bat script if on a Windows platform.<br />
If using the <strong>Tornado</strong> Project facility, the user can create a project based on the newly generated<br />
BSP, then use the build environment provided through the IDE to compile the BSP.<br />
In <strong>Tornado</strong> 2.<strong>2.x</strong>, the diab compiler is supported in addition to the gnu compiler. The <strong>Tornado</strong><br />
BSP created by XPS has a Makefile that can be modified by the command-line user to use the<br />
diab compiler instead <strong>of</strong> the gnu compiler. Look for the make variable named TOOLS and set<br />
the value to "diab" instead <strong>of</strong> "gnu". If using the <strong>Tornado</strong> Project facility, the user can select the<br />
desired tool when the project is first created.<br />
Driver Organization<br />
This section briefly discusses how the <strong>Xilinx</strong> drivers are compiled and linked and eventually<br />
used by <strong>Tornado</strong> makefiles to be included into the <strong>VxWorks</strong> image.<br />
<strong>Xilinx</strong> drivers are implemented in "C" and can be distributed among several source files unlike<br />
traditional <strong>VxWorks</strong> drivers, which consist <strong>of</strong> single "C" header and implementation files.<br />
There are up to three components for <strong>Xilinx</strong> drivers:<br />
• Driver source inclusion.<br />
• OS independent implementation<br />
• OS dependent implementation (optional).<br />
"Driver source inclusion" refers to how <strong>Xilinx</strong> drivers are compiled. For every driver, there is a<br />
file named _drv__.c. This file #include’s each driver<br />
source file(s) (*.c) for the given device.<br />
This process is analogous to how <strong>VxWorks</strong>’ sysLib.c #include’s source for Wind River<br />
supplied drivers. The reason why <strong>Xilinx</strong> files are not simply included in sysLib.c like the rest <strong>of</strong><br />
the drivers is due to namespace conflicts and maintainability issues. If all <strong>Xilinx</strong> files were part<br />
<strong>of</strong> a single compilation unit, static functions and data are no longer private. This places<br />
restrictions on the device drivers and would negate their operating system independence.<br />
The OS independent part <strong>of</strong> the driver is designed for use with any operating system or any<br />
processor. It provides an API that utilizes the functionality <strong>of</strong> the underlying hardware. The OS<br />
dependent part <strong>of</strong> the driver adapts the driver for use with <strong>VxWorks</strong>. Such examples are SIO<br />
drivers for serial ports, or END drivers for ethernet adapters. Not all drivers require the OS<br />
dependent drivers, nor is it required to include the OS dependent portion <strong>of</strong> the driver in the<br />
<strong>VxWorks</strong> build.<br />
Device Driver Location<br />
The <strong>automatic</strong>ally generated BSP resembles most other <strong>Tornado</strong> BSPs except for the placement<br />
<strong>of</strong> device driver code. Off-the-shelf device driver code distributed with the <strong>Tornado</strong> IDE<br />
typically resides in the target/src/drv directory in the <strong>Tornado</strong> distribution directory. Device<br />
driver code for a BSP that is <strong>automatic</strong>ally generated resides in the BSP directory itself. This<br />
minor deviation is due to the dynamic nature <strong>of</strong> FPGA-based embedded system. Since the<br />
FPGA-based embedded system can be reprogrammed with new or changed IP, the device<br />
driver configuration can change, calling for a more dynamic placement <strong>of</strong> device driver source<br />
files.<br />
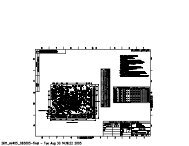
The directory tree for the <strong>automatic</strong>ally generated BSP is shown in Figure 1-1.<br />
4 www.xilinx.com EDK 7.1i, February 15, 2005<br />
1-800-255-7778
The <strong>Tornado</strong> <strong>2.x</strong> BSP<br />
Figure 1-1: Driver Directory Location<br />
The top-level directory is named according to the name <strong>of</strong> the processor instance in the XPS<br />
design project. The customized BSP source files reside in this directory. There is a subdirectory<br />
within the BSP directory named according to the processor instance with _drv_csp as a suffix.<br />
The driver directory contains two subdirectories. The xsrc subdirectory contains all the device<br />
driver related source files. The out subdirectory is created during the build process and only<br />
exists if building from the command-line. It contains files generated during the compilation or<br />
build process (e.g., the .o files for each driver source file). If building from the <strong>Tornado</strong> Project<br />
facility, the files generated during the build process reside at $PRJ_DIR/$BUILD_SPEC.<br />
Configuration<br />
XPS BSPs are configured just like any other <strong>Tornado</strong> <strong>2.x</strong> BSP. There is little configurability to<br />
<strong>Xilinx</strong> drivers since the IP hardware has been pre-configured in most cases by XPS. The only<br />
configuration available generally is whether the driver is included in the <strong>VxWorks</strong> build at all.<br />
How to go about including/excluding drivers depends on whether the Project facility or the<br />
command-line method is being used to perform the configuration activities.<br />
Note that simply by including a <strong>Xilinx</strong> device driver does not mean that driver will be<br />
<strong>automatic</strong>ally utilized. Most drivers with <strong>VxWorks</strong> adapters have initialization code. In some<br />
cases the user may be required to add the proper driver initialization function calls to the BSP.<br />
When using XPS to generate a BSP, the resulting BSP files may contain “TODO” comments.<br />
These comments, many <strong>of</strong> which originate from the PowerPC405 BSP template provided by<br />
Wind River, provide hints <strong>of</strong> what the user must provide in order to configure the BSP for their<br />
target board. The <strong>Tornado</strong> BSP Developer’s Kit for <strong>VxWorks</strong> User’s Guide and <strong>VxWorks</strong><br />
Programmer’s Guide are very good resources for BSP configuration.<br />
Command-Line Driver Inclusion/Exclusion<br />
Within the BSP, a set <strong>of</strong> constants (one for each driver) are defined in<br />
_drv_config.h and follow the format:<br />
#define INCLUDE_<br />
This file is included near the top <strong>of</strong> config.h. By default all drivers are included in the build.<br />
To exclude a driver, add the following line in config.h after the inclusion <strong>of</strong> the<br />
_drv_config.h header file.<br />
#undef INCLUDE_<br />
<br />
_csp<br />
This will prevent the driver from being compiled and linked into the build. To re-instate the<br />
driver, remove the #undef line from config.h. Some care is required for certain drivers. For<br />
example, Ethernet may require that a DMA driver be present. Undefining the DMA driver will<br />
cause the build to fail.<br />
EDK 7.1i, February 15, 2005 www.xilinx.com 5<br />
1-800-255-7778<br />
out<br />
xsrc<br />
R
R<br />
The <strong>Tornado</strong> <strong>2.x</strong> BSP<br />
Project Facility Driver Inclusion/Exclusion<br />
The file 50.cdf resides in the BSP directory and is tailored during creation <strong>of</strong> the BSP.<br />
This file integrates the <strong>Xilinx</strong> device drivers into the <strong>Tornado</strong> IDE. The <strong>Xilinx</strong> device drivers are<br />
hooked into the IDE at the hardware/peripherals sub-folder <strong>of</strong> the <strong>VxWorks</strong> tab. Below this are<br />
individual device driver folders. Figure 1-2 shows an example <strong>of</strong> the GUI with <strong>Xilinx</strong> drivers.<br />
To add/delete <strong>Xilinx</strong> drivers, simply include or exclude driver components just as you would<br />
with any other <strong>VxWorks</strong> component<br />
Figure 1-2: <strong>Tornado</strong> <strong>2.x</strong> Project IDE - <strong>VxWorks</strong><br />
Note that whatever configuration has been specified in _drv_config.h and<br />
config.h will be overridden by the project facility<br />
Building <strong>VxWorks</strong><br />
The <strong>automatic</strong>ally generated BSPs follow the standard <strong>Tornado</strong> conventions when it comes to<br />
creating <strong>VxWorks</strong> images. Refer to <strong>Tornado</strong> documentation on how to make a <strong>VxWorks</strong> image.<br />
6 www.xilinx.com EDK 7.1i, February 15, 2005<br />
1-800-255-7778
The <strong>Tornado</strong> <strong>2.x</strong> BSP<br />
Command-Line BSP Build Extensions<br />
The <strong>Xilinx</strong> drivers are compiled/linked with the same toolchain <strong>VxWorks</strong> is built with. Minor<br />
additions to the Makefile were required to help <strong>Tornado</strong> find the location <strong>of</strong> driver source<br />
code files.<br />
Project BSP Build Extensions<br />
The Files tab <strong>of</strong> the <strong>Tornado</strong> Project IDE will also show a number <strong>of</strong> new files used to integrate<br />
the <strong>Xilinx</strong> device drivers into the <strong>Tornado</strong> build process. Once again, these files are<br />
<strong>automatic</strong>ally created by XPS. The user need only be aware <strong>of</strong> that the files exist. These files are<br />
prefixed with the name <strong>of</strong> the processor instance in the XPS design project. Figure 1-3 shows an<br />
example <strong>of</strong> the driver build files.<br />
Device Integration<br />
Figure 1-3: <strong>Tornado</strong> <strong>2.x</strong> Project IDE - Files<br />
Devices in the FPGA-based embedded system have varying degrees <strong>of</strong> integration with the<br />
<strong>VxWorks</strong> operating system. The degree <strong>of</strong> integration is selectable by the XPS user in the<br />
EDK 7.1i, February 15, 2005 www.xilinx.com 7<br />
1-800-255-7778<br />
R
R<br />
The <strong>Tornado</strong> <strong>2.x</strong> BSP<br />
Connected Peripherals dialog box <strong>of</strong> the Library/OS Parameters tab. Below is a list <strong>of</strong> currently<br />
supported devices and their level <strong>of</strong> integration.<br />
• One or more UART 16450/16550/Lite devices can be integrated into the <strong>VxWorks</strong> Serial<br />
I/O (SIO) interface. This makes a UART available for file I/O and printf/stdio. Only one<br />
UART device can be selected as the console, where standard I/O (stdin, stdout, and<br />
stderr) is directed. A UART device, when integrated into the SIO interface, must be<br />
capable <strong>of</strong> generating an interrupt. Reference the sysSerial.c file <strong>of</strong> the BSP to see details <strong>of</strong><br />
this integration.<br />
• Ethernet 10/100 MAC, Ethernet Lite 10/100, and Gigabit Ethernet MAC devices can be<br />
integrated into the <strong>VxWorks</strong> Enhanced Network Driver (END) interface. This makes the<br />
device available to the <strong>VxWorks</strong> network stack and thus socket-level applications. An<br />
Ethernet device, when integrated into the END interface, must be capable <strong>of</strong> generating<br />
interrupts. Reference the configNet.h and sysNet.c files <strong>of</strong> the BSP to see details <strong>of</strong> this<br />
integration. Also, the user might need to modify the default bootline values in config.h for<br />
the Ethernet device to be used as the boot device.<br />
• An Interrupt controller can be connected to the <strong>VxWorks</strong> intLib exception handling and<br />
the PowerPC 405 external non-critical interrupt pin. The generated BSP does not currently<br />
handle interrupt controller integration for the critical interrupt pin <strong>of</strong> the PowerPC405,<br />
nor does it support direct connection <strong>of</strong> a single interrupting device (other than the intc) to<br />
the processor. However, the user is always free to manually add this integration in the<br />
sysInterrupt.c file <strong>of</strong> the BSP.<br />
• A System ACE controller can be connected to <strong>VxWorks</strong> as a block device, allowing the<br />
user to attach a filesystem to the CompactFlash device connected to the System ACE<br />
controller. The user must manually call BSP functions to initialize the System<br />
ACE/CompactFlash as a block device and attach it to the DOS operating system. The<br />
functions currently available to the user are: sysSystemAceInitFS() and<br />
sysSystemAceMount(). A system ACE controller, when integrated into the block device<br />
interface, must be capable <strong>of</strong> generating an interrupt. Reference the file sysSystemAce.c in<br />
the BSP for more details. The BSP will mount the CF as a DOS FAT disk partition using<br />
Wind River’s DosFs2.0 add-on. To get the required <strong>VxWorks</strong> libraries into the image, the<br />
following packages must be defined in config.h or by the Project Facility:<br />
- INCLUDE_DOSFS_MAIN<br />
- INCLUDE_DOSFS_FAT<br />
- INCLUDE_DISK_CACHE<br />
- INCLUDE_DISK_PART<br />
- INCLUDE_DOSFS_DIR_FIXED<br />
- INCLUDE_DOSFS_DIR_VFAT<br />
- INCLUDE_CBIO<br />
Programmatically, an application can mount the DOS file system using the following API<br />
calls:<br />
FILE *fp;<br />
sysSystemAceInitFS();<br />
if (sysSystemAceMount("/cf0", 1) != OK)<br />
{<br />
/* handle error */<br />
}<br />
fp = fopen("/cf0/myfile.dat","r");<br />
• A PCI bridge can be initialized and made available to the standard <strong>VxWorks</strong> PCI driver<br />
and configuration functions. The user is encouraged to edit the config.h and sysBusPci.c<br />
8 www.xilinx.com EDK 7.1i, February 15, 2005<br />
1-800-255-7778
The <strong>Tornado</strong> <strong>2.x</strong> BSP<br />
BSP files to tailor the PCI memory addresses and configuration for their target system.<br />
Note that PCI interrupts are not <strong>automatic</strong>ally integrated into the BSP.<br />
• All other devices and associated device drivers are not tightly integrated into a <strong>VxWorks</strong><br />
interface. Instead, they are loosely integrated and access to these devices is available by<br />
directly accessing the associated device drivers from the user’s application.<br />
• User cores and associated device drivers, if included in the EDK project, are supported<br />
through the BSP generation flow. The user core device drivers will be copied into the BSP<br />
in the same way the <strong>Xilinx</strong> device drivers are copied. This assumes the directory structure<br />
<strong>of</strong> the user core device driver matches the structure <strong>of</strong> the <strong>Xilinx</strong> device drivers. The /data<br />
and /build sub-directories <strong>of</strong> the device driver must exist and be formatted in the same<br />
way as the <strong>Xilinx</strong> device drivers. This includes the CDF snippet and xtag files in the<br />
/build/vxworks5_4 sub-directory. User device drivers are not <strong>automatic</strong>ally integrated into<br />
any OS interface (e.g., SIO), but they are available for direct access by an application.<br />
Deviations<br />
The following list summarizes the differences between XPS generated BSPs and traditional<br />
BSPs.<br />
• An extra directory structure is added to the root BSP directory to contain the device driver<br />
source code files.<br />
• To keep the BSP buildable while maintaining compatibility with the <strong>Tornado</strong> Project facility,<br />
a set <strong>of</strong> files named _drv__.c populate the BSP<br />
directory that simply #include the source code from the driver subdirectory <strong>of</strong> the BSP.<br />
• The BSP Makefile has been modified so that the compiler can find the driver source code.<br />
The Makefile contains more information about this deviation and its implications.<br />
• SystemACE usage may require changes to <strong>VxWorks</strong> source code files found in the<br />
<strong>Tornado</strong> distribution directory. See Bootrom with SystemACE as the Boot Device,.<br />
Limitations<br />
The <strong>automatic</strong>ally generated BSP should be considered a good starting point for the user, but<br />
should not be expected to meet all the user’s needs right out <strong>of</strong> the box. Due to the potential<br />
complexities <strong>of</strong> a BSP, the variety <strong>of</strong> features that can be included in a BSP, and the support<br />
necessary for board devices external to the FPGA, the <strong>automatic</strong>ally generated BSP will likely<br />
require enhancements by the user. However, the generated BSP will be compilable and will<br />
contain the necessary device drivers represented in the FPGA-based embedded system. Some<br />
<strong>of</strong> the commonly used devices are also integrated with the operating system. Specific<br />
limitations are listed below.<br />
• An interrupt controller connected to the PowerPC405 critical interrupt pin is not<br />
<strong>automatic</strong>ally integrated into <strong>VxWorks</strong>’ interrupt scheme. Only the external interrupt is<br />
currently supported.<br />
• Bus error detection from bus bridges or arbiters is not supported.<br />
• The command-line <strong>Tornado</strong> BSP defaults to use the GNU compiler. The user must<br />
manually change the Makefile to use the DIAB compiler, or specify the DIAB compiler<br />
when creating a <strong>Tornado</strong> project based on the BSP.<br />
• Memory address ranges might need to be tailored in config.h to match specific memory<br />
devices and their address ranges.<br />
• PowerPC405 caches are disabled by default. The user must enable caches manually<br />
through the config.h file or the <strong>Tornado</strong> project menu.<br />
• When System ACE is setup disabled by default.<br />
• When SystemACE is setup to download <strong>VxWorks</strong> images into RAM via JTAG, all boots<br />
are cold (i.e., no warm boots). This is because the System ACE controller resets the<br />
EDK 7.1i, February 15, 2005 www.xilinx.com 9<br />
1-800-255-7778<br />
R
Booting<br />
<strong>VxWorks</strong><br />
R<br />
Booting <strong>VxWorks</strong><br />
processor whenever it performs an ace file download. An effect <strong>of</strong> this could cause<br />
exception messages generated by <strong>VxWorks</strong> to not be printed on the console when the<br />
system is rebooted due to an exception in an ISR or a kernel panic.<br />
• No compressed images can be used with SystemACE. This applies to standard<br />
compressed images created with <strong>Tornado</strong> such as “bootrom”. Compressed images cannot<br />
be placed on SystemACE as an ace file. System ACE cannot decompress data as it<br />
writes it to RAM. Starting such an image will lead to a system crash.<br />
• A command-line build can’t initialize the network when SystemACE is the boot device.<br />
This requires that the application provide code to initialize the network when SystemACE<br />
is the boot device. To get around this issue see the discussion <strong>of</strong> $WIND_BASE/target<br />
/src/config/usrNetwork.c in section Bootrom with SystemACE as the Boot<br />
Device.<br />
• On the PowerPC405 processor, the reset vector is at physical address 0xFFFFFFFC.<br />
There is a short time window where the processor will attempt to fetch and execute the<br />
instruction at this address while SystemACE processes the ace file. The processor needs<br />
to be given something to do during this time even if it is a spin loop:<br />
FFFFFFFC b .<br />
If BRAM occupies this address range, then the designer who creates the bitstream should<br />
place instructions here with the elf to BRAM utility found in the <strong>Xilinx</strong> ISE tools.<br />
<strong>VxWorks</strong> Bootup Sequence<br />
There are many variations <strong>of</strong> <strong>VxWorks</strong> images with some based in RAM, some in ROM.<br />
Depending on board design, not all these images are supported. The following list discusses<br />
various image types:<br />
• ROM compressed images - These images begin execution in ROM and decompress the<br />
BSP image into RAM, then transfer control to the decompressed image in RAM. This<br />
image type is not compatible with SystemACE because SystemACE doesn’t know the<br />
image is compressed and will dutifully place it in RAM at an address that will be<br />
overwritten by the decompression algorithm when it begins. It may be possible to get this<br />
type <strong>of</strong> image to work if modifications are made to the standard <strong>Tornado</strong> makefiles to<br />
handle this scenario.<br />
• RAM based images - These images are loaded into RAM by a bootloader, SystemACE, or<br />
an emulator. These images are fully supported.<br />
• ROM based images - These images begin execution in ROM, copy themselves to RAM<br />
then transfer execution to RAM. In designs with SystemACE as the bootloader, the image<br />
is <strong>automatic</strong>ally copied to RAM. The handcoded BSP examples short-circuit the <strong>VxWorks</strong><br />
copy operation so that the copy does not occur again after control is transferred to RAM<br />
by SystemACE (see romInit.s).<br />
• ROM resident images - These images begin execution in ROM, copy the data section to<br />
RAM, and execution remains in ROM. In systems with only a SystemACE, this image is<br />
not supported. Theoretically BRAM could be used as a ROM, however, the current Virtex-<br />
II Pro parts being used in evaluation boards do not have the capacity to store a <strong>VxWorks</strong><br />
image which could range in size from 200KB to over 700KB.<br />
"vxWorks" Boot Sequence<br />
This standard image is designed to be downloaded to the target RAM space by some device.<br />
Once downloaded, the processor is setup to begin execution at function _sysInit at address<br />
RAM_LOW_ADRS. (this constant is defined in config.h and Makefile). Most <strong>of</strong> the time, the<br />
device performing the download will do this <strong>automatic</strong>ally as it can extract the entry point<br />
from the image.<br />
10 www.xilinx.com EDK 7.1i, February 15, 2005<br />
1-800-255-7778
Booting <strong>VxWorks</strong><br />
1. _sysInit : This assembly language function running out <strong>of</strong> RAM performs low level<br />
initialization. When completed, this function will setup the initial stack and invoke the first<br />
"C" function usrInit(). _sysInit is located in source code file<br />
2.<br />
/sysALib.s.<br />
usrInit() : This “C” function running out <strong>of</strong> RAM sets up the “C” runtime environment<br />
and performs pre-kernel initialization. It invokes sysHwInit() (implemented in<br />
sysLib.c) to place the HW in a quiescent state. When completed, this function will call<br />
kernelInit() to bring up the <strong>VxWorks</strong> kernel. This function will in turn invoke<br />
usrRoot() as the first task.<br />
3. usrRoot() : Performs post-kernel initialization. Hooks up the system clock, initializes the<br />
TCP/IP stack, etc. It invokes sysHwInit2() (implemented in sysLib.c) to attach and<br />
enable HW interrupts. When complete, usrRoot() invokes user application startup code<br />
usrAppInit() if so configured in the BSP.<br />
Both usrInit() and usrRoot() are implemented by Wind River. The source code files they<br />
exist in are different depending on whether the command line or the <strong>Tornado</strong> Project facility is<br />
being used to compile the system. Under the command line interface, they are implemented at<br />
$WIND_BASE/target/config/all/usrConfig.c. Under the project facility, they are<br />
maintained in the user’s project directory.<br />
"bootrom_uncmp" Boot Sequence<br />
This standard image is ROM based but in reality it is linked to execute out <strong>of</strong> RAM addresses.<br />
While executing from ROM, this image uses relative addressing tricks to call functions for<br />
processing tasks before jumping to RAM.<br />
1. Power on. Processor vectors to 0xFFFFFFFC where a jump instruction should be located<br />
that transfers control to the bootrom at address _romInit.<br />
2. _romInit : This assembly language function running out <strong>of</strong> ROM notes that this is a cold<br />
boot then jumps to start. Both _romInit and start are located in source code file<br />
/romInit.s.<br />
3. start : This assembly language function running out <strong>of</strong> ROM sets up the processor,<br />
invalidates the caches, and prepares the system to operate out <strong>of</strong> RAM. The last operation<br />
is to invoke “C” function romStart() which is implemented by Wind River and is<br />
located in source code file $WIND_BASE/target/config/ all/bootInit.c.<br />
4. romStart() : This “C” function running out <strong>of</strong> ROM copies <strong>VxWorks</strong> to its RAM start<br />
address located at RAM_HIGH_ADRS (this constant is defined in config.h and Makefile).<br />
After copying <strong>VxWorks</strong>, control is transferred to function usrInit() in RAM.<br />
5. Follows steps 2 & 3 <strong>of</strong> the "vxWorks" bootup sequence.<br />
"bootrom_uncmp" Boot Sequence with SystemACE<br />
This non-standard image is similar to the image discussed in the previous section except that<br />
SystemACE is used to load it. Several changes have to be made to the boot process. More<br />
information can be found in section Bootrom with SystemACE as<br />
the Boot Device, page 13<br />
1. Power on. SystemACE loads the image into RAM at RAM_HIGH_ADRS (this constant is<br />
defined in config.h and Makefile) and sets the processor to begin fetching instructions at<br />
address _romInit.<br />
2. _romInit : This assembly language function running out <strong>of</strong> RAM notes that this is a cold<br />
boot then jumps to start. Both _romInit and start are located in source code file<br />
/romInit.s.<br />
EDK 7.1i, February 15, 2005 www.xilinx.com 11<br />
1-800-255-7778<br />
R
R<br />
Booting <strong>VxWorks</strong><br />
3. start : This assembly language function running out <strong>of</strong> RAM simply jumps to function<br />
_sysInit. The call to romStart() is bypassed because SystemACE has already loaded<br />
the bootrom into it’s destination RAM address.<br />
4. Follow steps 1, 2, & 3 <strong>of</strong> the “vxWorks” bootup sequence.<br />
Bootroms<br />
The bootrom is a scaled down <strong>VxWorks</strong> image that operates in much the same way a PC BIOS<br />
does. Its primary job is to find and boot a full <strong>VxWorks</strong> image. The full <strong>VxWorks</strong> image may<br />
reside on disk, in flash memory, or on some host via the Ethernet. The bootrom must be<br />
compiled in such a way that it has the ability to retrieve the image. If the image is retrieved<br />
from an Ethernet network, then the bootrom must have the TCP/IP stack compiled in, if the<br />
image is on disk, then the bootrom must have disk access support compiled in, etc. The<br />
bootroms do little else than retrieve and start the full image and maintain a bootline. The<br />
bootline is a text string that set certain user characteristics such as the target’s IP address if<br />
using Ethernet and the file path to the <strong>VxWorks</strong> image to boot.<br />
Bootroms are not a requirement. They are typically used in a development environment then<br />
replaced with a production <strong>VxWorks</strong> image.<br />
Creating Bootroms<br />
At a command shell in the BSP directory, issue the following command to create an<br />
uncompressed bootrom image (required for SystemACE):<br />
make bootrom_uncmp<br />
or<br />
make bootrom<br />
to create a compressed image suitable for placing in a flash memory array.<br />
Bootrom Display<br />
Upon cycling power, if the bootroms are working correctly, output similar to the following<br />
should be seen on the console serial port:<br />
<strong>VxWorks</strong> System Boot<br />
Copyright 1984-1998 Wind River Systems, Inc.<br />
CPU: ML300 VirtexII Pro PPC405 Rev D<br />
Version: 5.4.2<br />
BSP version: 1.2/0<br />
Creation date: July 26 2002, 12:51:32<br />
Press any key to stop auto-boot...<br />
3<br />
[<strong>VxWorks</strong> Boot]:<br />
Typing the "help" at this prompt lists the available commands.<br />
Bootline<br />
The bootline is a text string that defines user serviceable characteristics such as the IP address<br />
<strong>of</strong> the target board and how to find a vxWorks image to boot. The bootline is maintained at<br />
runtime by the bootrom and is typically kept in some non-volatile (NVRAM) storage area <strong>of</strong><br />
the system such as an EEPROM or flash memory. If there is no NVRAM, or an error occurs<br />
12 www.xilinx.com EDK 7.1i, February 15, 2005<br />
1-800-255-7778
Booting <strong>VxWorks</strong><br />
reading it, then the bootline is hard-coded with DEFAULT_BOOT_LINE defined in the BSP’s<br />
config.h source code file. In brand new systems where NVRAM has not been initialized,<br />
then the bootline may be gibberish.<br />
The bootline can be changed if the auto-boot countdown sequence is interrupted by entering a<br />
character on the console serial port. The "c" command can then be used to interactively edit the<br />
bootline. Enter "p" to view the bootline. On a non-bootrom image, you can still change the<br />
bootline by entering the bootChange command at a host or target shell prompt.<br />
The following list goes over the meanings <strong>of</strong> the bootline fields:<br />
- boot device : Device to boot from. This could be Ethernet, or a local disk. Note that<br />
when changing the bootline, the unit number may be shown appended to this field<br />
("xemac0" or "sysace=10) when prompting for the new boot device. This number can<br />
be ignored.<br />
- processor number : Always 0 with single processor systems.<br />
- host name : Name as needed.<br />
- file name : The <strong>VxWorks</strong> image to boot.<br />
- inet on ethernet (e) : The IP internet address <strong>of</strong> the target. If there is no<br />
-<br />
network interface, then this field can be left blank.<br />
host inet (h) : The IP internet address <strong>of</strong> the host. If there is no network interface,<br />
then this field can be left blank.<br />
- user (u) : Username for host file system access. Pick whatever name suites you.<br />
Your ftp server must be setup to allow this user access to the host file system.<br />
- ftp password (pw) : Password for host file system access. Pick whatever name<br />
-<br />
suites you. Your ftp server must be setup to allow this user access to the host file<br />
system.<br />
flags (f) : For a list <strong>of</strong> options, enter the "help" command at the [<strong>VxWorks</strong> Boot]:<br />
prompt.<br />
- target name (tn) : Name as needed. Set per network requirements.<br />
- other (o) : This field is useful when you have a non-Ethernet device as the boot<br />
-<br />
device. When this is the case, <strong>VxWorks</strong> will not start the network when it boots.<br />
Specifying an Ethernet device here will enable that device at boot time with the<br />
network parameters specified in the other bootline fields.<br />
inet on backplane (b) : Typically left blank if the target system is not on a VME<br />
or PCI backplane.<br />
- gateway inet (g) : Enter an IP address here if you have to go through a gateway<br />
to reach the host computer. Otherwise leave blank.<br />
- startup script (s) : Path to a file on the host computer containing shell<br />
commands to execute once bootup is complete. Leave blank if not using a script.<br />
Examples:<br />
SystemACE resident script: /cf0/vxworks/scripts/myscript.txt<br />
Host resident script: c:/temp/myscript.txt<br />
Bootrom with SystemACE as the Boot Device<br />
SystemACE enabled bootroms are capable <strong>of</strong> booting <strong>VxWorks</strong> images directly <strong>of</strong>f the<br />
Compact Flash device either as a regular elf file or an ace file.<br />
Required Mods to <strong>VxWorks</strong> Source<br />
While the EDK is capable <strong>of</strong> generating a BSP that uses SystemACE in a “vxWorks” image that<br />
can open and close files in a DOS filesystem, it cannot generate a BSP that uses SystemACE as<br />
a “bootrom” boot device. To use SystemACE in this way requires extensive modifications to<br />
bootrom code provided by Wind River. Wind River allows BSP developers to change <strong>Tornado</strong><br />
source code files provided they keep the changes local to the BSP and leave the original code as<br />
is. The two files that have to be modified from their original version are:<br />
EDK 7.1i, February 15, 2005 www.xilinx.com 13<br />
1-800-255-7778<br />
R
R<br />
Booting <strong>VxWorks</strong><br />
1. $WIND_BASE/target/config/all/bootConfig.c: This file is overridden with one<br />
found in the directory. The changes needed are to add code to properly parse<br />
the bootline and to initialize and use SystemACE as a JTAG and DOS boot device. To<br />
override the default bootConfig.c, the following line must be added to the BSP’s<br />
Makefile:<br />
BOOTCONFIG = ./bootConfig.c.<br />
2. $WIND_BASE/target/config/comps/src/net/usrNetBoot.c: This file is<br />
overridden with one found in the /net/usrNetBoot.c directory. The<br />
changes needed are to add code to make <strong>VxWorks</strong> aware that SystemACE is a disk based<br />
system like IDE, SCSI, or floppy drives. This change allows a BSP built from the <strong>Tornado</strong><br />
Project downloaded with a SystemACE enabled bootrom to properly process the "other"<br />
field <strong>of</strong> the bootline. The existence <strong>of</strong> the modified file in the BSP directory <strong>automatic</strong>ally<br />
overrides the original.<br />
Neither <strong>of</strong> these files are provided by the EDK because they are maintained in their original<br />
form by Wind River. The ML300 reference BSP contains versions <strong>of</strong> these files with the<br />
modifications to support SystemACE as a boot device. Those versions can be copied to the<br />
developer’s BSP.<br />
A third file, $WIND_BASE/target/src/config/usrNetwork.c, cannot be overridden<br />
due to the architecture <strong>of</strong> the command line BSP build process. This affects network capable<br />
BSPs built from the command line that are downloaded with a SystemACE enabled bootrom.<br />
Without modifying usrNetwork.c, affected BSPs are unable to initialize their network device<br />
and must rely on application code to perform this function. If the user desires, they can make<br />
the change to this file in their <strong>Tornado</strong> installation. There are disadvantages to this approach<br />
because any edits made to this file affect all users <strong>of</strong> that installation and may be lost if the user<br />
upgrades or re-installs <strong>Tornado</strong>. For the adventurous, the change to usrNetwork.c occurs in<br />
function usrNetInit().<br />
from:<br />
if ((strncmp (params.bootDev, "scsi", 4) == 0) ||<br />
(strncmp (params.bootDev, "ide", 3) == 0) ||<br />
(strncmp (params.bootDev, "ata", 3) == 0) ||<br />
(strncmp (params.bootDev, "fd", 2) == 0) ||<br />
(strncmp (params.bootDev, "tffs", 4) == 0))<br />
to<br />
if ((strncmp (params.bootDev, "scsi", 4) == 0) ||<br />
(strncmp (params.bootDev, "ide", 3) == 0) ||<br />
(strncmp (params.bootDev, "ata", 3) == 0) ||<br />
(strncmp (params.bootDev, "fd", 2) == 0) ||<br />
(strncmp (params.bootDev, "sysace", 6) == 0) ||<br />
(strncmp (params.bootDev, "tffs", 4) == 0))<br />
Edit this code at your own risk.<br />
Special Configuration<br />
Preparing a bootrom_uncmp image downloadable by SystemACE as an ace file requires<br />
special configuration. These changes are required because the bootrom is linked to begin<br />
running out <strong>of</strong> a non-volatile memory device, copy itself to RAM, then transfer control to the<br />
RAM copy. The changes will prevent the copy operation since SystemACE has already place<br />
the bootrom into a RAM device at reset.<br />
a. Change the definitions <strong>of</strong> ROM_TEXT_ADRS and ROM_WARM_ADRS to a value<br />
equivalent to RAM_HIGH_ADRS in both config.h and Makefile.<br />
b. Change the assembly language code at the “start” label in romInit.s to simply<br />
jump to function _sysInit (note, an example <strong>of</strong> this usage is available in the romInit.s<br />
14 www.xilinx.com EDK 7.1i, February 15, 2005<br />
1-800-255-7778
Booting <strong>VxWorks</strong><br />
source code file in the ML300 reference BSP):<br />
start:<br />
LOADPTR (r1, _sysInit)<br />
mtlr r1<br />
blrl<br />
Bootline Format<br />
The "boot device" field <strong>of</strong> the bootline is specified using the following syntax:<br />
sysace=<br />
where is the partition to boot from. Normally, this value is set to 1, but<br />
some CF devices do not have a partition table and are formatted as if they were a large floppy<br />
disk. In this case, specify 0 as the partition number. Failure to get the partition number correct<br />
will lead to errors being reported by VxWork’s dosFS libraries when the drive is mounted.<br />
The "file name" field <strong>of</strong> the bootline is set depending on how the System ACE is to boot the<br />
system. There are two boot methods:<br />
1. Boot from a regular file. This is similar to network booting in that the vxWorks image<br />
resides in the SystemACE compact flash storage device instead <strong>of</strong> the host file system. The<br />
compact flash device is a DOS FAT file system partition. Simply build vxWorks using the<br />
<strong>Tornado</strong> tools then copy the resulting image file to the compact flash device using a USB<br />
card reader or similar tool. Then specify that file in the "file name" field <strong>of</strong> the boot rom.<br />
The "file name" must have the following syntax:<br />
/cf0/<br />
where cf0 is the mount point. should provide the complete<br />
path to the <strong>VxWorks</strong> image to boot. When being specified in this way, the bootrom will<br />
mount the drive as a FAT formatted disk, load the file into memory and begin execution.<br />
2. Boot from an ace file. The ace file can contain HW only, SW only, or HW + SW. When<br />
booting from an ace file with HW, the FPGA is reprogrammed. If the ace file contains SW,<br />
then it is loaded into the memory, the processor’s PC is set to the entry point and released<br />
to begin fetching instructions. This boot method is flexible in that a totally different HW<br />
pr<strong>of</strong>ile can be "booted" from a <strong>VxWorks</strong> bootrom.<br />
The "file name" must have the following syntax:<br />
cfgaddr[x]<br />
where [X] is a number between 0 and 7 that corresponds to one <strong>of</strong> the configuration<br />
directories specified in the XILINX.SYS file resident in the root directory <strong>of</strong> the compact<br />
flash device. If [X] is omitted, then the default configuration is used. The default<br />
configuration is typically selected by a rotary switch mounted somewhere on the<br />
evaluation board. The bootrom will trigger a JTAG download <strong>of</strong> the ace file pointed to by<br />
the specified config address. There should be only a single file with an .ace extension in the<br />
selected configuration directory.<br />
In either boot scenario, if you want an Ethernet device started when the downloaded <strong>VxWorks</strong><br />
starts, then modify the "other" field <strong>of</strong> the bootline to contain the name <strong>of</strong> the network device.<br />
Bootrom with 10/100 Ethernet (EMAC) as the Boot Device<br />
XPS will generate a BSP that is capable <strong>of</strong> being built as a bootrom using the EMAC as a boot<br />
device. Very little user configuration is required. The MAC address is hard coded in the source<br />
EDK 7.1i, February 15, 2005 www.xilinx.com 15<br />
1-800-255-7778<br />
R
R<br />
Booting <strong>VxWorks</strong><br />
file sysNet.c. The BSP can be used with the default MAC as long as the target is on a private<br />
network and there is no more than one target on that network with the same default MAC<br />
address. Otherwise the designer should replace this MAC with a function to retrieve one from<br />
a non-volatile memory device on their target board.<br />
To specify the EMAC as the boot device in the bootrom, change the "boot device" field in the<br />
bootline to "xemac". If there is a single EMAC, then set the "unit number" to 0.<br />
Bootrom with 1 Gigabit Ethernet (GEMAC) as the Boot Device<br />
XPS will generate a BSP that is capable <strong>of</strong> being built as a bootrom using the GEMAC as a boot<br />
device. Very little user configuration is required. The MAC address is hard coded in the source<br />
file sysNet.c. The BSP can be used with the default MAC as long as the target is on a private<br />
network and there is no more than one target on that network with the same default MAC<br />
address. Otherwise the designer should replace this MAC with a function to retrieve one from<br />
a non-volatile memory device on their target board.<br />
To specify the GEMAC as the boot device in the bootrom, change the "boot device" field in the<br />
bootline to "xgemac". If there is a single GEMAC, then set the "unit number" to 0.<br />
Bootline Examples<br />
The following example boots from the ethernet using the <strong>Xilinx</strong> "xemac" as the boot device. The<br />
image booted is on the host file system on drive C.<br />
boot device : xemac<br />
unit number : 0<br />
processor number : 0<br />
host name : host<br />
file name : c:/tornado/target/config/ML300/vxWorks<br />
inet on ethernet (e) : 192.168.0.2<br />
host inet (h) : 192.168.0.1<br />
user (u) : xemhost<br />
ftp password (pw) : whatever<br />
flags (f) : 0x0<br />
target name (tn) : vxtarget<br />
other (o) :<br />
The following example boots from a file resident on the first partition <strong>of</strong> the SystemACE’s<br />
compact flash device. If the file booted from /cf0/vxworks/images/vxWorks utilizes the<br />
network, then the "xemac" device is initialized.<br />
boot device : sysace=1<br />
unit number : 0<br />
processor number : 0<br />
host name : host<br />
file name : /cf0/vxworks/images/vxWorks<br />
inet on ethernet (e) : 192.168.0.2<br />
host inet (h) : 192.168.0.1<br />
user (u) : xemhost<br />
ftp password (pw) : whatever<br />
flags (f) : 0x0<br />
target name (tn) : vxtarget<br />
other (o) : xemac<br />
The following example boots from an ace file resident on the first partition <strong>of</strong> the SystemACE’s<br />
compact flash device. The location <strong>of</strong> the ace file is set by XILINX.SYS located in the root<br />
directory <strong>of</strong> the compact flash device. If the ace file contains a <strong>VxWorks</strong> SW image that utilizes<br />
the network, then the "xemac" device is initialized for that image.<br />
boot device : sysace=1<br />
unit number : 0<br />
processor number : 0<br />
host name : host<br />
16 www.xilinx.com EDK 7.1i, February 15, 2005<br />
1-800-255-7778
Booting <strong>VxWorks</strong><br />
file name : cfgaddr2<br />
inet on ethernet (e) : 192.168.0.2<br />
host inet (h) : 192.168.0.1<br />
user (u) : xemhost<br />
ftp password (pw) : whatever<br />
flags (f) : 0x0<br />
target name (tn) : vxtarget<br />
other (o) : xemac<br />
Caches<br />
The instruction and data caches are managed by <strong>VxWorks</strong> proprietary libraries. They are<br />
enabled by modifying the following constants in config.h or by using the <strong>Tornado</strong> Project<br />
facility to change the constants <strong>of</strong> the same name:<br />
• INCLUDE_CACHE_SUPPORT - If defined, the <strong>VxWorks</strong> cache libraries are linked into the<br />
image. If caching is not desired, then #undef this constant.<br />
• USER_I_CACHE_ENABLE - If defined, <strong>VxWorks</strong> will enable the instruction cache at<br />
boottime. Requires INCLUDE_CACHE_SUPPORT be defined to have any effect.<br />
• USER_D_CACHE_ENABLE - If defined, <strong>VxWorks</strong> will enable the data cache at boottime.<br />
Requires INCLUDE_CACHE_SUPPORT be defined to have any effect.<br />
MMU<br />
If the MMU is enabled, then the cache control discussed in the previous section may not have<br />
any effect. The MMU is managed by <strong>VxWorks</strong> proprietary libraries but the initial setup is<br />
defined in the BSP. To enable the MMU, the constant INCLUDE_MMU_BASIC should be defined<br />
in config.h or by using the Project Facility. The constant USER_D_MMU_ENABLE and<br />
USER_I_MMU_ENABLE control whether the instruction and/or data MMU is utilized.<br />
<strong>VxWorks</strong> initializes the MMU based on data in the sysPhysMemDesc structure defined in<br />
sysCache.c. Amongst other things, this table configures memory areas with the following<br />
attributes:<br />
• Whether instruction execution is allowed.<br />
• Whether data writes are allowed<br />
• Instruction & data cacheability attributes.<br />
• Translation <strong>of</strong>fsets used to form virtual addresses.<br />
The PPC405 is capable <strong>of</strong> other attributes including zone protection, however, Wind River<br />
documentation is rather deficient in this area and it is unclear whether the basic MMU package<br />
supports them. An add-on is available from Wind River for advanced MMU operations.<br />
When <strong>VxWorks</strong> initializes the MMU, it takes the definitions from sysPhysMemDesc and<br />
creates page table entries (PTEs) in RAM. Each PTE describes 4KB <strong>of</strong> memory area (even<br />
though the processor is capable <strong>of</strong> representing up to 16MB per PTE) Beware that specifying<br />
large areas <strong>of</strong> memory uses substantial amounts <strong>of</strong> RAM to store the PTEs. To map 4MB <strong>of</strong><br />
contiguous memory space takes 8KB <strong>of</strong> RAM to store the PTEs.<br />
To increase performance with the <strong>VxWorks</strong> basic MMU package for the PPC405 processor, it<br />
may be beneficial to not enable the instruction MMU and rely on the cache control settings in<br />
the ICCR register. This strategy can dramatically reduce the number <strong>of</strong> page faults while still<br />
keeping instructions in cache. The initial setting <strong>of</strong> the ICCR is defined in the .h<br />
header file.<br />
Without the MMU enabled, the following rules apply to configuring memory access attributes<br />
and caching:<br />
• There is no address translation, all effective addresses are physical.<br />
• Cache control granularity is 128MB.<br />
EDK 7.1i, February 15, 2005 www.xilinx.com 17<br />
1-800-255-7778<br />
R
R<br />
Booting <strong>VxWorks</strong><br />
• The guarded attribute applies only to speculative instruction fetches on the PPC405.<br />
18 www.xilinx.com EDK 7.1i, February 15, 2005<br />
1-800-255-7778