SJ7002 Series Inverters Instruction Manual : Hitachi America, Ltd.
SJ7002 Series Inverters Instruction Manual : Hitachi America, Ltd.
SJ7002 Series Inverters Instruction Manual : Hitachi America, Ltd.

Create successful ePaper yourself
Turn your PDF publications into a flip-book with our unique Google optimized e-Paper software.
Cover<br />
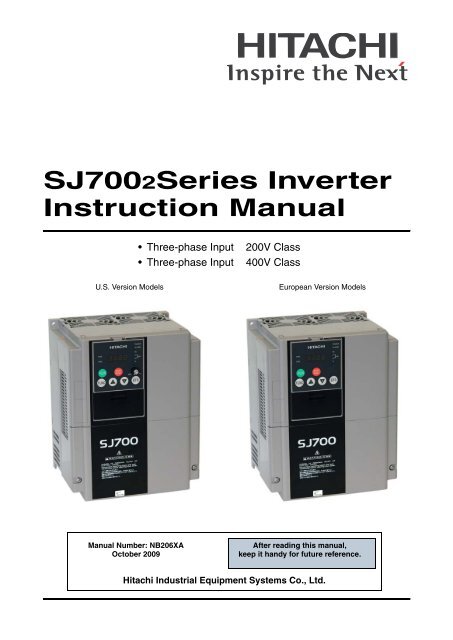
<strong>SJ7002</strong><strong>Series</strong> Inverter<br />
<strong>Instruction</strong> <strong>Manual</strong><br />
• Three-phase Input 200V Class<br />
Three-phase Input 400V Class<br />
U.S. Version Models European Version Models<br />
<strong>Manual</strong> Number: NB206XA<br />
October 2009<br />
After reading this manual,<br />
keep it handy for future reference.<br />
<strong>Hitachi</strong> Industrial Equipment Systems Co., <strong>Ltd</strong>.
Safety Messages<br />
Definitions and<br />
Symbols<br />
<strong>SJ7002</strong> Inverter<br />
For the best results with the <strong>SJ7002</strong> <strong>Series</strong> inverter, carefully read this manual and all of the<br />
warning labels attached to the inverter before installing and operating it, and follow the instructions<br />
exactly. Keep this manual handy for quick reference.<br />
A safety instruction (message) includes a hazard alert symbol and a signal word, WARNING or<br />
CAUTION. Each signal word has the following meaning:<br />
This symbol indicates HIGH VOLTAGE. It calls your attention to items or operations<br />
that could be dangerous to you and other persons operation this equipment. Read the<br />
message and follow the instructions carefully.<br />
Hazardous High Voltage<br />
This symbol is the “Safety Alert Symbol.” It occurs with either of two signal words:<br />
CAUTION or WARNING, as described below.<br />
WARNING: Indicates a potentially hazardous situation that, if not avoided, can result<br />
in serious injury or death.<br />
CAUTION: Indicates a potentially hazardous situation that, if not avoided, can result<br />
in minor to moderate injury, or serious damage to the product. The situation described<br />
in the CAUTION may, if not avoided, lead to serious results. Important safety<br />
measures are described in CAUTION (as well as WARNING), so be sure to observe<br />
them.<br />
STEP: A step is one of a series of action steps required to accomplish a goal. The<br />
number of the step will be contained in the step symbol.<br />
NOTE: Notes indicate an area or subject of special merit, emphasizing either the<br />
product’s capabilities or common errors in operation or maintenance.<br />
TIP: Tips give a special instruction that can save time or provide other benefits<br />
while installing or using the product. The tip calls attention to an idea that may not<br />
be obvious to first-time users of the product.<br />
HIGH VOLTAGE: Motor control equipment and electronic controllers are connected to hazardous<br />
line voltages. When servicing drives and electronic controllers, there may be exposed<br />
components with housings or protrusions at or above line potential. Extreme care should be<br />
taken to protect against shock.<br />
Stand on an insulating pad and make it a habit to use only one hand when checking components.<br />
Always work with another person in case an emergency occurs. Disconnect power before<br />
checking controllers or performing maintenance. Be sure equipment is properly grounded.<br />
Wear safety glasses whenever working on electronic controllers or rotating machinery.<br />
i
ii<br />
General Precautions - Read These First!<br />
WARNING: This equipment should be installed, adjusted, and serviced by qualified electrical<br />
maintenance personnel familiar with the construction and operation of the equipment and the<br />
hazards involved. Failure to observe this precaution could result in bodily injury.<br />
WARNING: The user is responsible for ensuring that all driven machinery, drive train mechanism<br />
not supplied by <strong>Hitachi</strong> Industrial Equipment Systems Co., <strong>Ltd</strong>., and process line material<br />
are capable of safe operation at an applied frequency of 150% of the maximum selected<br />
frequency range to the AC motor. Failure to do so can result in destruction of equipment and<br />
injury to personnel should a single-point failure occur.<br />
WARNING: For equipment protection, install a ground leakage type breaker with a fast<br />
response circuit capable of handling large currents. The ground fault protection circuit is not<br />
designed to protect against personal injury.<br />
HIGH VOLTAGE: HAZARD OF ELECTRICAL SHOCK. DISCONNECT INCOMING<br />
POWER BEFORE WORKING ON THIS CONTROL.<br />
WARNING: Wait at least ten (10) minutes after turning OFF the input power supply before<br />
performing maintenance or an inspection. Otherwise, there is the danger of electric shock.<br />
CAUTION: These instructions should be read and clearly understood before working on<br />
<strong>SJ7002</strong> series equipment.<br />
CAUTION: Proper grounds, disconnecting devices and other safety devices and their location<br />
are the responsibility of the user and are not provided by <strong>Hitachi</strong> Industrial Equipment Systems<br />
Co., <strong>Ltd</strong>.<br />
CAUTION: Be sure to connect a motor thermal disconnect switch or overload device to the<br />
<strong>SJ7002</strong> series controller to assure that the inverter will shut down in the event of an overload or<br />
an overheated motor.<br />
HIGH VOLTAGE: Dangerous voltage exists until power light is OFF. Wait at least 10 minutes<br />
after input power is disconnected before performing maintenance.<br />
CAUTION: This equipment has high leakage current and must be permanently (fixed) hardwired<br />
to earth ground via two independent cables.<br />
WARNING: Rotating shafts and above-ground electrical potentials can be hazardous. Therefore,<br />
it is strongly recommended that all electrical work conform to the National Electrical<br />
Codes and local regulations. Installation, alignment and maintenance should be performed only<br />
by qualified personnel.<br />
Factory-recommended test procedures included in the instruction manual should be followed.<br />
Always disconnect electrical power before working on the unit.
<strong>SJ7002</strong> Inverter<br />
CAUTION:<br />
a) Motor must be connected to protective ground via low resistive path (< 0.1Ω)<br />
b) Any motor used must be of a suitable rating.<br />
c) Motors may have hazardous moving parts. In this event suitable protection must be provided.<br />
CAUTION: Alarm connection may contain hazardous live voltage even when inverter is<br />
disconnected. When removing the front cover for maintenance or inspection, confirm that<br />
incoming power for alarm connection is completely disconnected.<br />
CAUTION: Hazardous (main) terminals for any interconnection (motor, contact breaker, filter,<br />
etc.) must be inaccessible in the final installation.<br />
CAUTION: The end application must be in accordance with BS EN60204-1. Refer to the<br />
section “Step-by-Step Basic Installation” on page 2–6. The diagram dimensions are to be<br />
suitably amended for your application.<br />
CAUTION: Connection to field wiring terminals must be reliably fixed having two independent<br />
means of mechanical support. Using a termination with cable support (figure below), or<br />
strain relief, cable clamp, etc.<br />
Terminal (ring lug) Cable support<br />
Cable<br />
CAUTION: A three-pole disconnection device must be fitted to the incoming main power<br />
supply close to the inverter. Additionally, a protection device meeting IEC947-1/IEC947-3<br />
must be fitted at this point (protection device data shown in “Determining Wire and Fuse Sizes”<br />
on page 2–18).<br />
NOTE: The above instructions, together with any other requirements are highlighted in this<br />
manual, and must be followed for continued LVD (European Low Voltage Directive) compliance.<br />
iii
iv<br />
Index to Warnings and Cautions in This <strong>Manual</strong><br />
Installation—Cautions for Mounting Procedures<br />
CAUTION: Be sure to install the unit on flame-resistant material such as a<br />
steel plate. Otherwise, there is the danger of fire.<br />
CAUTION: Be sure not to place any flammable materials near the inverter.<br />
Otherwise, there is the danger of fire.<br />
CAUTION: Be sure not to let the foreign matter enter vent openings in the<br />
inverter housing, such as wire clippings, spatter from welding, metal<br />
shavings, dust, etc. Otherwise, there is the danger of fire.<br />
CAUTION: Be sure to install the inverter in a place that can bear the weight<br />
according to the specifications in the text (Chapter 1, Specifications Tables).<br />
Otherwise, it may fall and cause injury to personnel.<br />
CAUTION: Be sure to install the unit on a perpendicular wall that is not<br />
subject to vibration. Otherwise, it may fall and cause injury to personnel.<br />
CAUTION: Be sure not to install or operate an inverter that is damaged or<br />
has missing parts. Otherwise, it may cause injury to personnel.<br />
CAUTION: Be sure to install the inverter in a well-ventilated room that<br />
does not have direct exposure to sunlight, a tendency for high temperature,<br />
high humidity or dew condensation, high levels of dust, corrosive gas,<br />
explosive gas, inflammable gas, grinding-fluid mist, salt air, etc. Otherwise,<br />
there is the danger of fire.<br />
CAUTION: Be sure to maintain the specified clearance area around the<br />
inverter and to provide adequate ventilation. Otherwise, the inverter may<br />
overheat and cause equipment damage or fire.<br />
Wiring—Warnings for Electrical Practices and Wire Specifications<br />
............... 2–6<br />
............... 2–6<br />
............... 2–6<br />
............... 2–6<br />
............... 2–6<br />
............... 2–6<br />
............... 2–6<br />
............... 2–8<br />
WARNING: Use 75°C Cu wire only or equivalent. ............. 2–17<br />
WARNING: Open Type Equipment. For models SJ700–750H to SJ700–<br />
4000H.<br />
............. 2–17<br />
WARNING: A Class 2 circuit wired with Class 1 wire or equivalent. ............. 2–17<br />
WARNING: Suitable for use on a circuit capable of delivering not more<br />
than 100,000 rms symmetrical amperes, 240 V maximum. For models with<br />
suffix L.<br />
WARNING: Suitable for use on a circuit capable of delivering not more<br />
than 100,000 rms symmetrical amperes, 480 V maximum. For models with<br />
suffix H.<br />
............. 2–17<br />
............. 2–17
HIGH VOLTAGE: Be sure to ground the unit. Otherwise, there is a danger<br />
of electric shock and/or fire.<br />
HIGH VOLTAGE: Wiring work shall be carried out only by qualified<br />
personnel. Otherwise, there is a danger of electric shock and/or fire.<br />
HIGH VOLTAGE: Implement wiring after checking that the power supply<br />
is OFF. Otherwise, you may incur electric shock and/or fire.<br />
HIGH VOLTAGE: Do not connect wiring to an inverter or operate an<br />
inverter that is not mounted according the instructions given in this manual.<br />
Otherwise, there is a danger of electric shock and/or injury to personnel.<br />
Wiring—Cautions for Electrical Practices<br />
CAUTION: Be sure that the input voltage matches the inverter specifications:<br />
Three phase 200 to 240V 50/60Hz Three phase 380 to 480V 50/<br />
60Hz<br />
CAUTION: Be sure not to power a three-phase-only inverter with single<br />
phase power. Otherwise, there is the possibility of damage to the inverter<br />
and the danger of fire.<br />
CAUTION: Be sure not to connect an AC power supply to the output terminals.<br />
Otherwise, there is the possibility of damage to the inverter and the<br />
danger of injury and/or fire.<br />
Power Input Power Output<br />
L1 L2<br />
L3<br />
R S T<br />
T1 T2 T3<br />
U V W<br />
<strong>SJ7002</strong> Inverter<br />
............. 2–17<br />
............. 2–17<br />
............. 2–17<br />
............. 2–17<br />
............. 2–25<br />
............. 2–25<br />
............. 2–25<br />
NOTE:<br />
L1, L2, L3: Three-phase 200 to 240V 50/60 Hz<br />
Three-phase 380 to 480V 50/60 Hz<br />
v
vi<br />
CAUTION: Fasten the screws with the specified fastening torque in the<br />
table below. Check for any loosening of screws. Otherwise, there is the<br />
danger of fire.<br />
CAUTION: Remarks for using ground fault interrupter breakers in the main<br />
power supply: Adjustable frequency inverters with CE-filters (RFI-filter)<br />
and shielded (screened) motor cables have a higher leakage current toward<br />
Earth GND. Especially at the moment of switching ON this can cause an<br />
inadvertent trip of ground fault interrupter breakers. Because of the rectifier<br />
on the input side of the inverter there is the possibility to stall the switch-off<br />
function through small amounts of DC current. Please observe the following:<br />
Use only short time-invariant and pulse current-sensitive ground fault<br />
interrupter breakers with higher trigger current. Other components should<br />
be secured with separate ground fault interrupter breakers. Ground fault<br />
interrupter breakers in the power input wiring of an inverter are not an<br />
absolute protection against electric shock.<br />
CAUTION: Be sure to install a fuse in each phase of the main power supply<br />
to the inverter. Otherwise, there is the danger of fire.<br />
CAUTION: For motor leads, ground fault interrupter breakers and electromagnetic<br />
contactors, be sure to size these components properly (each must<br />
have the capacity for rated current and voltage). Otherwise, there is the<br />
danger of fire.<br />
CAUTION: Failure to remove all vent opening covers before electrical<br />
operation may result in damage to the inverter.<br />
Powerup Test Caution Messages<br />
CAUTION: The heat sink fins will have a high temperature. Be careful not<br />
to touch them. Otherwise, there is the danger of getting burned.<br />
CAUTION: The operation of the inverter can be easily changed from low<br />
speed to high speed. Be sure to check the capability and limitations of the<br />
motor and machine before operating the inverter. Otherwise, there is the<br />
danger of injury.<br />
CAUTION: If you operate a motor at a frequency higher than the inverter<br />
standard default setting (50Hz/60Hz), be sure to check the motor and<br />
machine specifications with the respective manufacturer. Only operate the<br />
motor at elevated frequencies after getting their approval. Otherwise, there<br />
is the danger of equipment damage and/or injury to personnel.<br />
CAUTION: Check the following before and during the powerup test. Otherwise,<br />
there is the danger of equipment damage. Is the shorting bar between<br />
the [P] and [PD] terminals installed? DO NOT power or operate the inverter<br />
if the jumper is removed. Is the direction of the motor rotation correct?<br />
Did the inverter trip during acceleration or deceleration? Were the rpm and<br />
frequency meter readings as expected? Were there any abnormal motor<br />
vibrations or noise?<br />
............. 2–20<br />
............. 2–25<br />
............. 2–25<br />
............. 2–25<br />
............. 2–26<br />
............. 2–27<br />
............. 2–27<br />
............. 2–28<br />
............. 2–28
Warnings for Operations and Monitoring<br />
WARNING: Be sure to turn ON the input power supply only after closing<br />
the front case. While the inverter is energized, be sure not to open the front<br />
case. Otherwise, there is the danger of electric shock.<br />
WARNING: Be sure not to operate electrical equipment with wet hands.<br />
Otherwise, there is the danger of electric shock.<br />
WARNING: While the inverter is energized, be sure not to touch the<br />
inverter terminals even when the motor is stopped. Otherwise, there is the<br />
danger of electric shock.<br />
WARNING: If the Retry Mode is selected, the motor may suddenly restart<br />
after a trip stop. Be sure to stop the inverter before approaching the machine<br />
(be sure to design the machine so that safety for personnel is secure even if<br />
it restarts.) Otherwise, it may cause injury to personnel.<br />
WARNING: If the power supply is cut OFF for a short period of time, the<br />
inverter may restart operation after the power supply recovers if the Run<br />
command is active. If a restart may pose danger to personnel, so be sure to<br />
use a lock-out circuit so that it will not restart after power recovery. Otherwise,<br />
it may cause injury to personnel.<br />
WARNING: The Stop Key is effective only when the Stop function is<br />
enabled. Be sure to enable the Stop Key separately from the emergency<br />
stop. Otherwise, it may cause injury to personnel.<br />
WARNING: During a trip event, if the alarm reset is applied and the Run<br />
command is present, the inverter will automatically restart. Be sure to apply<br />
the alarm reset only after verifying the Run command is OFF. Otherwise, it<br />
may cause injury to personnel.<br />
WARNING: Be sure not to touch the inside of the energized inverter or to<br />
put any conductive object into it. Otherwise, there is a danger of electric<br />
shock and/or fire.<br />
WARNING: If power is turned ON when the Run command is already<br />
active, the motor will automatically start and injury may result. Before<br />
turning ON the power, confirm that the RUN command is not present.<br />
WARNING: When the Stop key function is disabled, pressing the Stop key<br />
does not stop the inverter, nor will it reset a trip alarm.<br />
WARNING: Be sure to provide a separate, hard-wired emergency stop<br />
switch when the application warrants it.<br />
WARNING: If the power is turned ON and the Run command is already<br />
active, the motor starts rotation and is dangerous! Before turning power ON,<br />
confirm that the external Run command is not active.<br />
WARNING: After the Reset command is given and the alarm reset occurs,<br />
the motor will restart suddenly if the Run command is already active. Be<br />
sure to set the alarm reset after verifying that the Run command is OFF to<br />
prevent injury to personnel.<br />
WARNING: You may need to disconnect the load from the motor before<br />
performing auto-tuning. The inverter runs the motor forward and backward<br />
for several seconds without regard to load movement limits.<br />
<strong>SJ7002</strong> Inverter<br />
............... 4–3<br />
............... 4–3<br />
............... 4–3<br />
............... 4–3<br />
............... 4–3<br />
............... 4–3<br />
............... 4–3<br />
............... 4–3<br />
............... 4–3<br />
............... 4–3<br />
............... 4–3<br />
............. 4–15<br />
............. 4–24<br />
............. 4–71<br />
vii
viii<br />
Cautions for Operations and Monitoring<br />
CAUTION: The heat sink fins will have a high temperature. Be careful not<br />
to touch them. Otherwise, there is the danger of getting burned.<br />
CAUTION: The operation of the inverter can be easily changed from low<br />
speed to high speed. Be sure check the capability and limitations of the<br />
motor and machine before operating the inverter. Otherwise, it may cause<br />
injury to personnel.<br />
CAUTION: If you operate a motor at a frequency higher than the inverter<br />
standard default setting (50Hz/60Hz), be sure to check the motor and<br />
machine specifications with the respective manufacturer. Only operate the<br />
motor at elevated frequencies after getting their approval. Otherwise, there<br />
is the danger of equipment damage.<br />
CAUTION: It is possible to damage the inverter or other devices if your<br />
application exceeds the maximum current or voltage characteristics of a<br />
connection point.<br />
CAUTION: Be careful not to turn PID Clear ON and reset the integrator<br />
sum when the inverter is in Run Mode (output to motor is ON). Otherwise,<br />
this could cause the motor to decelerate rapidly, resulting in a trip.<br />
CAUTION: When the motor runs at lower speeds, the cooling effect of the<br />
motor’s internal fan decreases.<br />
CAUTION: If the inverter capacity is more than twice the capacity of the<br />
motor in use, the inverter may not achieve its full performance specifications.<br />
Warnings and Cautions for Troubleshooting and Maintenance<br />
WARNING: Wait at least ten (10) minutes after turning OFF the input<br />
power supply before performing maintenance or an inspection. Otherwise,<br />
there is the danger of electric shock.<br />
WARNING: Make sure that only qualified personnel will perform maintenance,<br />
inspection, and part replacement. Before starting to work, remove<br />
any metallic objects from your person (wristwatch, bracelet, etc.). Be sure<br />
to use tools with insulated handles. Otherwise, there is a danger of electric<br />
shock and/or injury to personnel.<br />
WARNING: Never remove connectors by pulling on its wire leads (wires<br />
for cooling fan and logic P.C. board). Otherwise, there is danger of fire due<br />
to wire breakage and/or injury to personnel.<br />
CAUTION: Do not connect the megger to any control circuit terminals such<br />
as intelligent I/O, analog terminals, etc. Doing so could cause damage to the<br />
inverter.<br />
CAUTION: Never test the withstand voltage (HIPOT) on the inverter. The<br />
inverter has a surge protector between the main circuit terminals above and<br />
the chassis ground.<br />
............... 4–2<br />
............... 4–2<br />
............... 4–2<br />
............... 4–7<br />
............. 4–26<br />
............. 4–52<br />
............. 4–74<br />
............... 6–2<br />
............... 6–2<br />
............... 6–2<br />
............. 6–19<br />
............. 6–19
WARNING: The screws that retain the capacitor bank assembly are part of<br />
the electrical circuit of the high-voltage internal DC bus. Be sure that all<br />
power has been disconnected from the inverter, and that you have waited at<br />
least 10 minutes before accessing the terminals or screws. Be sure the<br />
charge lamp is extinguished. Otherwise, there is the danger of electrocution<br />
to personnel.<br />
CAUTION: Do not operate the inverter unless you have replaced the two<br />
screws that connect the capacitor bank assembly to the internal DC bus.<br />
Otherwise, damage to the inverter may occur.<br />
HIGH VOLTAGE: Be careful not to touch wiring or connector terminals<br />
when working with the inverters and taking measurements. Be sure to place<br />
the measurement circuitry above in an insulated housing before using them.<br />
General Warnings and Cautions<br />
<strong>SJ7002</strong> Inverter<br />
............. 6–21<br />
WARNING: Never modify the unit. Otherwise, there is a danger of electric shock and/or<br />
injury.<br />
CAUTION: Withstand voltage tests and insulation resistance tests (HIPOT) are executed<br />
before the units are shipped, so there is no need to conduct these tests before operation.<br />
CAUTION: Do not attach or remove wiring or connectors when power is applied. Also, do not<br />
check signals during operation.<br />
CAUTION: Do not stop operation by switching OFF electromagnetic contactors on the<br />
primary or secondary sides of the inverter.<br />
Power<br />
Input<br />
L1, L2, L3<br />
MCCB GFI<br />
Ground fault<br />
interrupter<br />
R, S, T<br />
FW<br />
Inverter<br />
U, V, W<br />
............. 6–21<br />
............. 6–26<br />
Motor<br />
When there has been a sudden power failure while a Run command is active, then the unit may<br />
restart operation automatically after the power failure has ended. If there is a possibility that<br />
such an occurrence may harm humans, then install an electromagnetic contactor on the power<br />
supply side, so that the circuit does not allow automatic restarting after the power supply recovers.<br />
If an optional remote operator is used and the retry function has been selected, this will also<br />
allow automatic restarting when a Run command is active. So, please be careful.<br />
ix
x<br />
CAUTION: Do not insert leading power factor capacitors or surge absorbers between the<br />
output terminals of the inverter and motor.<br />
Power<br />
Input<br />
L1, L2, L3<br />
Ground fault<br />
interrupter<br />
GFI<br />
R, S, T<br />
Inverter<br />
GND lug<br />
U, V, W<br />
CAUTION: Be sure to connect the grounding terminal to earth ground.<br />
Surge absorber<br />
Motor<br />
Leading power<br />
factor capacitor<br />
CAUTION: When inspecting the unit, be sure to wait 10 minutes after tuning OFF the power<br />
supply before opening the cover.<br />
CAUTION: SUPPRESSION FOR NOISE INTERFERENCE FROM INVERTER<br />
The inverter uses many semiconductor switching elements such as transistors and IGBTs.<br />
Thus, a radio receiver or measuring instrument located near the inverter is susceptible to noise<br />
interference.<br />
To protect the instruments from erroneous operation due to noise interference, they should be<br />
used well away from the inverter. It is also effective to shield the whole inverter structure.<br />
The addition of an EMI filter on the input side of the inverter also reduces the effect of noise<br />
from the commercial power line on external devices.<br />
Note that the external dispersion of noise from the power line can be minimized by connecting<br />
an EMI filter on the primary side of inverter.<br />
EMI filter<br />
Inverter<br />
L1<br />
R1 R2<br />
R U<br />
T1<br />
Power L2<br />
S1 S2<br />
S V<br />
T2<br />
source<br />
Motor<br />
L3<br />
T1 T2<br />
T W<br />
T3<br />
noise<br />
Completely ground the enclosed<br />
panel, metal screen, etc. with as<br />
short a wire as possible.<br />
EMI filter<br />
Inverter<br />
Remote<br />
operator<br />
Motor<br />
Grounded frame<br />
Conduit or shielded cable—<br />
to be grounded
General Caution<br />
<strong>SJ7002</strong> Inverter<br />
CAUTION: MOTOR TERMINAL VOLTAGE SURGE SUPPRESSION FILTER<br />
(For 400 V CLASS <strong>Inverters</strong>)<br />
In a system using an inverter with the voltage control PWM system, a voltage surge caused by<br />
the cable constants such as the cable length (especially when the distance between the motor<br />
and inverter is 10 m or more) and cabling method may occur at the motor terminals. A<br />
dedicated filter of the 400 V class for suppressing this voltage surge is available. Be sure to<br />
install a filter in this situation. (See “LCR filter” on page 5–2, part type HRL–xxxC.)<br />
CAUTION: EFFECTS OF POWER DISTRIBUTION SYSTEMS ON INVERTERS<br />
In the cases below involving a general-purpose inverter, a large peak current can flow on the<br />
power supply side, sometimes destroying the converter module:<br />
1. The unbalance factor of the power supply is 3% or higher.<br />
2. The power supply capacity is at least 10 times greater than the inverter capacity (or the<br />
power supply capacity is 500 kVA or more).<br />
3. Abrupt power supply changes are expected, due to conditions such as:<br />
a. Several inverters are interconnected with a short bus.<br />
b. A thyristor converter and an inverter are interconnected with a short bus.<br />
c. An installed phase advance capacitor opens and closes.<br />
Where these conditions exist or when the connected equipment must be highly reliable, you<br />
MUST install an input-side AC reactor of 3% (at a voltage drop at rated current) with respect to<br />
the supply voltage on the power supply side. Also, where the effects of an indirect lightning<br />
strike are possible, install a lightning conductor.<br />
CAUTION: EFFECTS OF SHARING POWER SOURCE BETWEEN INVERTER AND<br />
OTHER MOTORS<br />
An electric cooling fan for the motor shall be powered from another system. A motor directly<br />
connected to the power source shall also be power from another system. If they are powered<br />
from the same system as the inverter, an insufficient voltage protection error (E09)or an instantaneous<br />
power failure protection error (E16) may occur when the inverter is turned OFF.<br />
CAUTION: Do not install inverters in a corner-grounded Delta distribution system. The resulting<br />
line imbalance will cause premature line fuse failure and failure of the inverter input bridge<br />
rectifier. Install in a balanced Delta or Wye distribution system only.<br />
CAUTION: When the EEPROM error E8 occurs, be sure to confirm the setting values again.<br />
CAUTION: When using normally closed active state settings (C011 to C019) for externally<br />
commanded Forward or Reverse terminals [FW] or [RV], the inverter may start automatically<br />
when the external system is powered OFF or disconnected from the inverter! So, do not use<br />
normally closed active state settings for Forward or Reverse terminals [FW] or [RV] unless<br />
your system design protects against unintended motor operation.<br />
CAUTION: Do not discard the inverter with household waste. Contact an<br />
industrial waste management company in your area who can treat industrial<br />
waste without polluting the environment.<br />
CAUTION: In all the illustrations in this manual, covers and safety devices are occasionally<br />
removed to describe the details. While operating the product, make sure that the covers and<br />
safety devices are placed as they were specified originally and operate it according to the<br />
instruction manual.<br />
xi
xii<br />
UL ® Cautions, Warnings, and <strong>Instruction</strong>s<br />
Wiring Warnings<br />
for Electrical<br />
Practices and<br />
Wire Sizes<br />
The Cautions, Warnings, and instructions in this section summarize the procedures necessary to<br />
ensure an inverter installation complies with Underwriters Laboratories ® guidelines.<br />
The <strong>SJ7002</strong> series inverter family is an open-type and/or Enclosed Type 1 (when employing<br />
accessory Type 1 Chassis Kit) AC inverter with 3-phase input and 3-phase output. The inverter<br />
are intended for use in an enclosure. The inverter supplies adjustable voltage and adjustable<br />
frequency to an AC motor. The inverter can automatically maintain a constant volts/Hz ratio to<br />
enhance the motor capability throughout its entire speed range.<br />
WARNING: Use 65/75°C Cu wire only or equivalent. For SJ700 series except SJ700-300Lxx<br />
and SJ700-370Lxx.<br />
WARNING: Use 75°C Cu wire only or equivalent. For SJ700-300Lxx and SJ700-370Lxx.<br />
WARNING: Suitable for use on a circuit capable of delivering not more than 100,000 rms<br />
symmetrical amperes with 240 V maximum. For models with suffix L (200V class).<br />
WARNING: Suitable for use on a circuit capable of delivering not more than 100,000 rms<br />
symmetrical amperes with 480 V maximum. For models with suffix H (400V class).<br />
WARNING: The inverter must be installed in an environment that is rated for at least Pollution<br />
Degree 2 or equivalent.<br />
WARNING: The ambient temperature must not exceed 50°C.<br />
WARNING: The capacitor discharge time is 10 minutes or more. (Caution: Care must be taken<br />
to avoid the risk of electric shock.)<br />
WARNING: Each model of the inverter has a solid-state overload protection circuit or an<br />
equivalent feature for the motor.
Terminal Tightening<br />
Torque and<br />
Wire Size<br />
Input<br />
Voltage<br />
400V<br />
<strong>SJ7002</strong> Inverter<br />
The wire size range and tightening torque for field wiring terminals are presented in the table<br />
below.<br />
Input<br />
Voltage<br />
200V<br />
Motor<br />
Output 200V<br />
Inverter Model<br />
Wire Size Range (AWG)<br />
Torque<br />
HP kW ft-lbs (N-m)<br />
0.5 0.4 SJ700–004LFU2 14 (stranded only) 1.3 1.8<br />
1 0.75 SJ700–007LFU2 14 (stranded only) 1.3 1.8<br />
2 1.5 SJ700–015LFU2 14 (stranded only) 1.3 1.8<br />
3 2.2 SJ700–022LFU2 14 (stranded only) 1.3 1.8<br />
5 3.7 SJ700–037LFU2 10 (stranded only) 1.3 1.8<br />
7.5 5.5 SJ700-055LFU2 8 3.0 4.0<br />
10 7.5 SJ700-075LFU2 6 3.0 4.0<br />
15 11 SJ700-110LFU2 6–4 3.0 4.0<br />
20 15 SJ700-150LFU2 2 3.6 4.9<br />
25 18.5 SJ700-185LFU2 1 3.6 4.9<br />
30 22 SJ700-220LFU2 1 or 1/0 6.5 8.8<br />
40 30 SJ700-300LFU2 2/0 or 1/0 || 1/0 6.5 8.8<br />
50 37 SJ700-370LFU2 4/0 (prepared wire only) or<br />
1/0 || 1/0<br />
14.8 20.0<br />
60 45 SJ700-450LFU2 4/0 (prepared wire only) or<br />
1/0 || 1/0<br />
14.8 20.0<br />
75 55 SJ700-550LFU2 350 kcmil (prepared wire<br />
only) or 2/0 || 2/0 (prepared<br />
wire only<br />
14.5 19.6<br />
Motor<br />
Output 400V<br />
Inverter Model<br />
Power Terminals Wire Size Range (AWG)<br />
Torque<br />
HP kW ft-lbs (N-m)<br />
0.5 0.75 SJ700–007HFU2/E (All) 14 (stranded only) 1.3 1.8<br />
1 1.5 SJ700–015HFU2/E (All) 14 (stranded only) 1.3 1.8<br />
2 2.2 SJ700–022HFU2/E (All) 14 (stranded only) 1.3 1.8<br />
3 4.0 SJ700–040HFU2/E (All) 14 (stranded only) 1.3 1.8<br />
7.5 5.5 SJ700-055HFU2/E (All) 12 3.0 4.0<br />
10 7.5 SJ700-075HFU2/E (All) 10 3.0 4.0<br />
15 11 SJ700-110HFU2/E (All) 8 3.0 4.0<br />
20 15 SJ700-150HFU2/E (All) 6 3.6 4.9<br />
25 18.5 SJ700-185HFU2/E (All) 6 3.6 4.9<br />
30 22 SJ700-220HFU2/E (All) 6 or 4 6.5 8.8<br />
40 30 SJ700-300HFU2/E (All) 3 6.5 8.8<br />
50 37 SJ700-370HFU2/E (All) 1 14.8 20.0<br />
60 45 SJ700-450HFU2/E (All) 1 14.8 20.0<br />
75 55 SJ700-550HFU2/E (All) 2/0 14.5 19.6<br />
xiii
xiv<br />
Input<br />
Voltage<br />
400V<br />
Motor<br />
Output 400V<br />
Inverter Model<br />
Power Terminals Wire Size Range (AWG)<br />
Torque<br />
HP kW ft-lbs (N-m)<br />
100 75 SJ700–750HFU2/E (All) 1/0 || 1/0 14.8 20.0<br />
125 90 SJ700–900HFU2/E (All) 1/0 || 1/0 14.8 20.0<br />
150 110 SJ700–1100HFU2/E (All) 3/0 || 3/0 25.8 35.0<br />
150 132 SJ700–1320HFE2,<br />
SJ700–1500HFU2<br />
(All) 3/0 || 3/0 25.8 35.0<br />
250 185 SJ700–1850HFU2/E [R, S, T, U, V, W] 250 kcmil x 2 55.3 75.0<br />
[P, PD, N] 300 kcmil x 2 6.0 8.1<br />
[P, N] Braking unit 1 55.3 75.0<br />
Earth GND 250 kcmil 28.9 39.2<br />
400 315 SJ700–3150HFU2/E [R, S, T, U, V, W] 400 kcmil x 2 32.5 44.0<br />
[P, PD, N] 500 kcmil x 2 14.8 20<br />
[P, N] Braking unit 250 kcmil 32.5 44.0<br />
Earth GND 400 kcmil 28.9 39.2<br />
500 400 SJ700–4000HFU2/E [R, S, T, U, V, W] 600 kcmil x 2 38.4 52.0<br />
[P, PD, N] 800 kcmil x 2 14.8 20<br />
[P, N] Braking unit 250 kcmil x 2 38.4 52.0<br />
Earth GND 600 kcmil 28.9 39.2
Fuse and Circuit<br />
Breaker Sizes<br />
Input<br />
Voltage<br />
200V<br />
<strong>SJ7002</strong> Inverter<br />
The inverter’s input power wiring must include UL Listed, dual-element, 600V fuses, or UL<br />
Listed, inverse-time, 600V circuit breakers.<br />
Motor<br />
Ampere Rating<br />
Motor<br />
Output 200V<br />
Input Output 400V<br />
for Fuse or<br />
Inverter Model<br />
Voltage<br />
Inverter Model<br />
HP kW<br />
Breaker<br />
HP kW<br />
Ampere Rating<br />
for Fuse or<br />
Breaker<br />
0.5 0.4 SJ700–004LFU2 5A<br />
— — — —<br />
1 0.75 SJ700–007LFU2 10A 1 0.75 SJ700–007HFU2/E 5A<br />
2 1.5 SJ700–015LFU2 15A 2 1.5 SJ700–015HFU2/E 10A<br />
3 2.2 SJ700–022LFU2 20A 3 2.2 SJ700–022HFU2/E 10A<br />
5 3.7 SJ700–037LFU2 30A 5 3.7 SJ700–037HFU2/E 15A<br />
7.5 5.5 SJ700-055LFU2 30A 7.5 5.5 SJ700-055HFU2/E 15A<br />
10 7.5 SJ700-075LFU2 40A 10 7.5 SJ700-075HFU2/E 20A<br />
15 11 SJ700-110LFU2 60A 15 11 SJ700-110HFU2/E 30A<br />
20 15 SJ700-150LFU2 80A 20 15 SJ700-150HFU2/E 40A<br />
25 18.5 SJ700-185LFU2 100A 25 18.5 SJ700-185HFU2/E 50A<br />
30 22 SJ700-220LFU2 125A 30 22 SJ700-220HFU2/E 60A<br />
40 30 SJ700-300LFU2 150A 400V 40 30 SJ700-300HFU2/E 70A<br />
50 37 SJ700-370LFU2 175A 50 37 SJ700-370HFU2/E 90A<br />
60 45 SJ700-450LFU2 225A 60 45 SJ700-450HFU2/E 125A<br />
75 55 SJ700-550LFU2 250A 75 55 SJ700-550HFU2/E 125A<br />
100 75 SJ700-750HFU2/E 225A<br />
125 90 SJ700-900HFU2/E 225A<br />
150 110 SJ700-1100HFU2/E 300A<br />
200 150 SJ700-1320HFE2<br />
SJ700-1500HFU2<br />
300A<br />
250 185 SJ700-1850HFU2/E 400A<br />
400 315 SJ700-3150HFU2/E 700A<br />
55 400 SJ700-4000HFU2/E 1000A<br />
xv
xvi<br />
Wire Connectors<br />
Motor Overload<br />
Protection<br />
WARNING: Field wiring connections must<br />
be made by a UL Listed and CSA Certified<br />
ring lug terminal connector sized for the<br />
wire gauge being used. The connector must<br />
be fixed using the crimping tool specified by<br />
the connector manufacturer.<br />
Terminal (ring lug) Cable support<br />
Cable<br />
<strong>Hitachi</strong> <strong>SJ7002</strong> inverters provide solid state motor overload protection, which depends on the<br />
proper setting of the following parameters:<br />
B012 “electronic overload protection”<br />
B212 “electronic overload protection, 2nd motor”<br />
B312 “electronic overload protection, 3rd motor”<br />
Set the rated current [Amperes] of the motor(s) with the above parameters. The setting range is<br />
0.2 * rated current to 1.2 * rated current.<br />
WARNING: Integral solid state short circuit protection does not provide branch circuit<br />
protection. Branch circuit protection must be provided in accordance with the NEC and any<br />
additional local codes.<br />
WARNING: When two or more motors are connected to the inverter, they cannot be protected<br />
by the electronic overload protection. Install an external thermal relay on each motor.
Table of Contents<br />
<strong>SJ7002</strong> Inverter<br />
Safety Messages<br />
Hazardous High Voltage i<br />
General Precautions - Read These First! ii<br />
Index to Warnings and Cautions in This <strong>Manual</strong> iv<br />
General Warnings and Cautions ix<br />
UL® Cautions, Warnings, and <strong>Instruction</strong>s xii<br />
Table of Contents<br />
Revisions xix<br />
Contact Information xx<br />
Chapter 1: Getting Started<br />
Introduction 1–2<br />
Inverter Specifications 1–6<br />
Introduction to Variable-Frequency Drives 1–14<br />
Frequently Asked Questions 1–18<br />
Chapter 2: Inverter Mounting and Installation<br />
Orientation to Inverter Features 2–2<br />
Basic System Description 2–5<br />
Step-by-Step Basic Installation 2–6<br />
Powerup Test 2–27<br />
Using the Front Panel Keypad 2–29<br />
Emergency Stop Function 2–37<br />
Chapter 3: Configuring Drive Parameters<br />
Choosing a Programming Device 3–2<br />
Using Keypad Devices 3–3<br />
“D” Group: Monitoring Functions 3–6<br />
“F” Group: Main Profile Parameters 3–9<br />
“A” Group: Standard Functions 3–10<br />
“B” Group: Fine-Tuning Functions 3–30<br />
“C” Group: Intelligent Terminal Functions 3–50<br />
“H” Group: Motor Constants Functions 3–66<br />
“P” Group: Expansion Card Functions 3–69<br />
“U” Group: User-selectable Menu Functions 3–74<br />
Programming Error Codes 3–75<br />
Chapter 4: Operations and Monitoring<br />
Introduction 4–2<br />
Optional Controlled Decel and Alarm at Power Loss 4–4<br />
Connecting to PLCs and Other Devices 4–7<br />
Using Intelligent Input Terminals 4–13<br />
Using Intelligent Output Terminals 4–43<br />
Analog Input Operation 4–63<br />
Analog Output Operation 4–66<br />
Setting Motor Constants for Vector Control 4–69<br />
PID Loop Operation 4–75<br />
Configuring the Inverter for Multiple Motors 4–76<br />
xvii
xviii<br />
Chapter 5: Inverter System Accessories<br />
Introduction 5–2<br />
Component Descriptions 5–3<br />
Dynamic Braking 5–6<br />
Chapter 6: Troubleshooting and Maintenance<br />
Troubleshooting 6–2<br />
Monitoring Trip Events, History, & Conditions 6–5<br />
Restoring Factory Default Settings 6–16<br />
Maintenance and Inspection 6–17<br />
Warranty 6–29<br />
Appendix A: Glossary and Bibliography<br />
Glossary A–2<br />
Bibliography A–6<br />
Appendix B: Serial Communications<br />
Introduction B–2<br />
ASCII Mode Communications B–5<br />
Communications Reference Information B–18<br />
ModBus Mode Communications B–21<br />
ModBus Data Listing B–33<br />
Appendix C: Drive Parameter Settings Tables<br />
Introduction C–2<br />
Parameter Settings for Keypad Entry C–2<br />
Appendix D: CE–EMC Installation Guidelines<br />
CE–EMC Installation Guidelines D–2<br />
Precautions for EMC, Models SJ700-004 to -1500 D–4<br />
Precautions for EMC, Models SJ700-1850 to -4000 D–5<br />
Index
Revisions<br />
Revision History Table<br />
No. Revision Comments Date of Issue<br />
<strong>SJ7002</strong> Inverter<br />
Operation<br />
<strong>Manual</strong> No.<br />
Initial release of manual NB206X August 2008 NB206X<br />
A Add new inverter models from -004xxx to 037xxx, and models<br />
-750Hxx to -4000Hxx<br />
Numerous additions and corrections throughout manual<br />
October 2009 NB206XA<br />
xix
xx<br />
Contact Information<br />
<strong>Hitachi</strong> <strong>America</strong>, <strong>Ltd</strong>.<br />
Industrial Sales Division<br />
50 Prospect Avenue<br />
Tarrytown, NY 10591<br />
U.S.A.<br />
Phone: +1-914-631-0600<br />
Fax: +1-914-631-3672<br />
Web site: www.hitachi-america.us/inverters<br />
<strong>Hitachi</strong> Europe GmbH<br />
Am Seestern 18<br />
D-40547 Düsseldorf<br />
Germany<br />
Phone: +49-211-5283-0<br />
Fax: +49-211-5283-649<br />
Web site: www.hitachi-ds.com/en/product/inv/<br />
<strong>Hitachi</strong> Asia <strong>Ltd</strong>.<br />
16 Collyer Quay<br />
#20-00 <strong>Hitachi</strong> Tower, Singapore 049318<br />
Singapore<br />
Phone: +65-538-6511<br />
Fax: +65-538-9011<br />
<strong>Hitachi</strong> Asia (Hong Kong) <strong>Ltd</strong>.<br />
7th Floor, North Tower<br />
World Finance Centre, Harbour City<br />
Canton Road, Tsimshatsui, Kowloon<br />
Hong Kong<br />
Phone: +852-2735-9218<br />
Fax: +852-2735-6793<br />
<strong>Hitachi</strong> Australia <strong>Ltd</strong>.<br />
Level 3, 82 Waterloo Road<br />
North Ryde, N.S.W. 2113<br />
Australia<br />
Phone: +61-2-9888-4100<br />
Fax: +61-2-9888-4188<br />
<strong>Hitachi</strong> Industrial Equipment Systems Co., <strong>Ltd</strong>.<br />
AKS Building, 3, Kanda Neribei-cho<br />
Chiyoda-ku, Tokyo, 101-0022<br />
Japan<br />
Phone: +81-3-4345-6910<br />
Fax: +81-3-4345-6067<br />
<strong>Hitachi</strong> Industrial Equipment Systems Co, <strong>Ltd</strong>.<br />
Narashino Division<br />
1-1, Higashi-Narashino 7-chome<br />
Narashino-shi, Chiba 275-8611<br />
Japan<br />
Phone: +81-47-474-9921<br />
Fax: +81-47-476-9517<br />
Web site: www.hitachi-ies.co.jp/english/<br />
NOTE: To receive technical support for the <strong>Hitachi</strong> inverter you purchased, contact the <strong>Hitachi</strong><br />
inverter dealer from whom you purchased the unit, or the sales office or factory contact listed<br />
above. Please be prepared to provide the following inverter nameplate information:<br />
1. Model<br />
2. Date of purchase<br />
3. Manufacturing number (MFG No.)<br />
4. Symptoms of any inverter problem<br />
If any inverter nameplate information is illegible, please provide your <strong>Hitachi</strong> contact with any<br />
other legible nameplate items. To reduce unpredictable downtime, we recommend that you<br />
stock a spare inverter.
Getting Started<br />
1<br />
In This Chapter.... page<br />
— Introduction ....................................................................................... 2<br />
— Inverter Specifications....................................................................... 6<br />
— Introduction to Variable-Frequency Drives...................................... 14<br />
— Frequently Asked Questions........................................................... 18
Geting Started 1–2<br />
Introduction<br />
Introduction<br />
Main Features Congratulations on your purchase of an <strong>SJ7002</strong><br />
<strong>Series</strong> <strong>Hitachi</strong> inverter! This inverter drive features<br />
state-of-the-art circuitry and components to provide<br />
high performance. The housing footprint is exceptionally<br />
small, given the size of the corresponding<br />
motor. The <strong>Hitachi</strong> <strong>SJ7002</strong> product line includes<br />
more than twenty inverter models to cover motor<br />
sizes from 1/2 horsepower to 500 horsepower, in<br />
either 230 VAC or 480 VAC power input versions.<br />
The main features are:<br />
200V Class and 400V Class inverters<br />
U.S. or European version available<br />
Sensorless vector control<br />
Regenerative braking circuit<br />
Different operator keypads available for RUN/<br />
STOP control and setting parameters<br />
Built-in RS-422 communications interface to<br />
allow configuration from a PC and for field bus<br />
external modules<br />
Sixteen programmable speed levels<br />
Motor constants are programmable, or may be set<br />
via auto-tuning<br />
PID control adjusts motor speed automatically to<br />
maintain a process variable value<br />
The design of <strong>Hitachi</strong> inverters overcomes many of<br />
the traditional trade-offs between speed, torque and<br />
efficiency. The performance characteristics are:<br />
High starting torque of 150% rating or greater<br />
Continuous operation at 100% rated torque<br />
within a 1:10 speed range (6/60 Hz / 5/50 Hz)<br />
without motor derating<br />
Models from 0.4–22kW (1/2 to 30hp) have builtin<br />
dynamic braking circuits<br />
Models from 0.4–11kW (1/2 to 15hp) have<br />
optional built-in dynamic braking resistor<br />
Cooling fan has ON/OFF selection to provide<br />
longer life<br />
A full line of accessories from <strong>Hitachi</strong> is available<br />
to complete your motor control application.<br />
These include:<br />
Digital remote operator keypad<br />
Expansion card for sensor feedback<br />
Braking resistors<br />
Radio noise filters<br />
Built-in CE compliance filters<br />
Additional factory I/O network interface cards<br />
(to be announced)<br />
Model SJ700-110HFUF2 (U.S. version)<br />
Model SJ700-037HFEF2<br />
(European version)<br />
Expansion Card - Encoder Input
Digital Operator<br />
Interface<br />
Components<br />
<strong>SJ7002</strong> Inverter<br />
The <strong>SJ7002</strong> <strong>Series</strong> inverters have a detachable keypad (called a digital operator) on the front<br />
panel of the housing. The particular keypad that comes with the inverter depends on the country<br />
or continent corresponding to the particular model number. The standard digital operators<br />
occupy just part of the keypad recess in the panel. Therefore, the inverter comes with a snap-in<br />
panel filler plate that mounts below the keypad as shown.<br />
These detachable keypads can be mounted in a NEMA cabinet panel door cut-out, for example.<br />
Threaded metal inserts on the rear of the keypads facilitate this external mounting configuration.<br />
A short cable then connects the keypad unit to the connector in the inverter keypad recess.<br />
See Chapter 3 for information on how to install and use these keypads and cables.<br />
Digital Operator OPE-SRE<br />
standard for -LFU and -HFU models<br />
The digital operator / copy unit is optional, and<br />
occupies the entire keypad recess when mounted. It<br />
has the additional capability of reading (uploading)<br />
the parameter settings in the inverter into its memory.<br />
Then you can install the copy unit on another inverter<br />
and write (download) the parameter settings into that<br />
inverter. OEMs will find this unit particularly useful,<br />
as one can use a single copy unit to transfer parameter<br />
settings from one inverter to many.<br />
Other digital operator interfaces may be available<br />
from your <strong>Hitachi</strong> distributor for particular industries<br />
or international markets. Contact your <strong>Hitachi</strong><br />
distributor for further details.<br />
Digital Operator OPE-S<br />
standard for -HFE models<br />
Optional Digital Operator / Copy Unit<br />
SRW-0EX<br />
1–3<br />
Getting Started
Geting Started 1–4<br />
Introduction<br />
Removable<br />
Components<br />
The <strong>SJ7002</strong> <strong>Series</strong> inverters are designed for long life and ease of service. Several components<br />
are removable as shown below, aiding installation or parts replacement. Details on how and<br />
when to remove these parts are in the referenced chapters.<br />
Fan Unit<br />
(See Chapter 6 for servicing)<br />
Capacitor Bank for DC Link<br />
(See Chapter 6 for servicing)<br />
Digital Operator and Panel Filler Plate<br />
(See Chapter 3 for instructions)<br />
Auxiliary fan (on some models)<br />
Control Signal Terminal Block<br />
(See Chapter 4 for wiring)<br />
Cable entry/exit plate<br />
(See Chapter 2 for instructions)
Specifications<br />
Label and Agency<br />
Approvals<br />
Model Number<br />
Convention<br />
<strong>SJ7002</strong> Inverter<br />
The <strong>Hitachi</strong> <strong>SJ7002</strong> inverters have product specifications labels located on the front and the<br />
right side of the housing, as shown below. The director reactor filters also have a product label.<br />
Be sure to verify that the specifications on the labels match your power source, motor, and<br />
application safety requirements.<br />
Inverter model number<br />
Motor capacity for this model<br />
Power Input Rating:<br />
frequency, voltage, phase, current<br />
Output Rating:<br />
frequency, voltage, current<br />
Manufacturing codes:<br />
lot number,<br />
Product label<br />
Product label<br />
Model: SJ700-3150HFE2<br />
INVERTER<br />
kW/(HP): 315/(420)<br />
Input/Entree: 50Hz,60Hz V 1 Ph A<br />
50Hz,60Hz 380-480V 3 Ph 630A<br />
Output/Sortie: 0 -120Hz 380-480V 3 Ph 600A<br />
MFGNo. 79A T27453AA001 Date: 0709<br />
<strong>Hitachi</strong> Industrial Equipment<br />
Systems Co.,<strong>Ltd</strong>. MADE IN JAPAN NE17914-45<br />
AMP'S 680 A<br />
TYPE DCL-H-315<br />
INS H CLASS<br />
DRW. NO Production number<br />
NO Serial number<br />
DATE NE17653<br />
<strong>Hitachi</strong> Industrial Equipment Systems Co.,<strong>Ltd</strong>.<br />
MADE IN JAPAN<br />
The model number for a specific inverter contains useful information about its operating<br />
characteristics. Refer to the model number legend below:<br />
SJ700 004 H F U F 2<br />
<strong>Series</strong><br />
name<br />
004 = 0.4 kW<br />
007 = 0.75 kW<br />
015 = 1.5 kW<br />
022 = 2.2 kW<br />
037 = 3.7 kW<br />
055 = 5.5 kW<br />
075 = 7.5 kW<br />
110 = 11 kW<br />
150 = 15 kW<br />
185 = 18.5 kW<br />
Version number (_, 2, 3, ...)<br />
EMC filter installed at factory:<br />
F=installed (without F=not installed)<br />
Restricted distribution:<br />
E=Europe, U=U.S.<br />
Configuration type<br />
F = with digital operator (keypad)<br />
Input voltage:<br />
H = three-phase 400V class<br />
L = three phase only, 200V class<br />
Applicable motor capacity in kW<br />
220 = 22 kW<br />
300 = 30 kW<br />
370 = 37 kW<br />
450 = 45 kW<br />
550 = 55 kW<br />
1850 = 185 kW<br />
3150 = 315 kW<br />
4000 = 400 kW<br />
1–5<br />
Getting Started
Geting Started 1–6<br />
Inverter Specifications<br />
Inverter Specifications<br />
Tables for 200V<br />
class inverters<br />
Note that “General Specifications” on page 1–10 covers all <strong>SJ7002</strong> inverters, followed by<br />
footnotes for all specifications tables. The 200V models from –004 to –220LFU2<br />
(0.5 to 30 HP) include internal dynamic braking units (see “Dynamic Braking” on page 5–6).<br />
Item 200V Class Specifications<br />
<strong>SJ7002</strong>, 200V models, U.S. version 004LFUF2 007LFUF2 015LFUF2 022LFUF2 037LFUF2<br />
Applicable motor size, 4-pole *2 HP 0.5 1 2 3 5<br />
kW 0.4 0.75 1.5 2.2 3.7<br />
Rated capacity, kVA, 200V / 240V 1.0 / 1.2 1.7 / 2.0 2.5 / 3.1 3.6 / 4.3 5.7 / 6.8<br />
Rated input voltage 3-phase: 200 to 240V +10%/-15%, 50/60 Hz ±5%<br />
Rated input current (A) 3.3 5.5 8.3 12 18<br />
Rated output voltage *3 3-phase (3-wire) 200 to 240V (corresponding to input voltage)<br />
Rated output current (A) 3 5 7.5 10.5 16.5<br />
Overload capacity, output current (A) 150% for 60 sec., 200% for 3 sec.<br />
Efficiency at 100% rated output, % 85.1 89.5 92.3 93.2 94.0<br />
Watt loss,<br />
at 70% output 64 76 102 127 179<br />
approximate (W)<br />
at 100% output 70 88 125 160 235<br />
Dynamic braking internal chopper 20 20 20 20 20<br />
approx. % torque,<br />
short time stop *7<br />
with external res. >150 >150 >150 >150 110<br />
Min. external braking resistance Ω 50 50 35 35 35<br />
DC braking Variable operating frequency, time, and braking force<br />
Electrical filtering Built-in EMC filter and built-in zero-phase reactor<br />
Weight kg / lb 3.5 / 7.7 3.5 / 7.7 3.5 / 7.7 3.5 / 7.7 3.5 / 7.7<br />
Item 200V Class Specifications<br />
<strong>SJ7002</strong>, 200V models, U.S. version 055LFUF2 075LFUF2 110LFUF2 150LFUF2 185LFU2 220LFU2<br />
Applicable motor size, 4-pole *2 HP 7.5 10 15 20 25 30<br />
kW 5.5 7.5 11 15 18.5 22<br />
Rated capacity, kVA, 200V / 240V 8.3 / 9.9 11.0 / 13.3 15.9 / 19.1 22.1 / 26.6 26.3 / 31.5 32.9 / 39.4<br />
Rated input voltage 3-phase: 200 to 240V +10%/-15%, 50/60 Hz ±5%<br />
Rated input current (A) 26 35 51 70 84 105<br />
Rated output voltage *3 3-phase (3-wire) 200 to 240V (corresponding to input voltage)<br />
Rated output current (A) 24 32 46 64 76 95<br />
Overload capacity, output current (A) 150% for 60 sec., 200% for 3 sec.<br />
Efficiency at 100% rated output, % 94.4 94.6 94.8 94.9 95.0 95.0<br />
Watt loss,<br />
at 70% output 242 312 435 575 698 820<br />
approximate (W)<br />
at 100% output 325 425 600 800 975 1150<br />
Dynamic braking internal chopper 20 20 10 10 10 10<br />
approx. % torque,<br />
short time stop *7<br />
with external res. 140 >150 110 110 90 110<br />
Min. external braking resistance Ω 16 10 10 7.5 7.5 5<br />
DC braking Variable operating frequency, time, and braking force<br />
Electrical filtering Built-in EMC filter and built-in zero-phase reactor<br />
Weight kg / lb 6 / 13.2 6 / 13.2 6 / 13.2 14 / 30.8 14 / 30.8 14 / 30.8
Tables for 400V<br />
class inverters<br />
<strong>SJ7002</strong> Inverter<br />
Item 200V Class Specifications, continued<br />
<strong>SJ7002</strong>, 200V models, U.S. version 300LFU2 370LFU2 450LFU2 550LFU2<br />
Applicable motor size *2 HP 40 50 60 75<br />
kW 30 37 45 55<br />
Rated capacity, kVA, 200V / 240V 41.9 / 50.2 50.2 / 60.2 63.0 / 75.6 76.2 / 91.4<br />
Rated input voltage 3-phase: 200 to 240V +10/-15%, 50/60 Hz ±5%<br />
Rated input current (A) 133 160 200 242<br />
Rated output voltage *3 3-phase (3-wire) 200 to 240V (corresponding to input voltage)<br />
Rated output current (A) 121 145 182 220<br />
Overload capacity, output current (A) 150% for 60 sec., 200% for 3 sec.<br />
Efficiency at 100% rated output, % 95.0 95.1 95.1 95.1<br />
Watt loss,<br />
at 70% output 1100 1345 1625 1975<br />
approximate (W)<br />
at 100% output 1550 1900 2300 2800<br />
Dynamic braking w/o braking unit 10 10 10 10<br />
approx. % torque,<br />
short time stop *7<br />
with braking unit 55–110% 45–90% 35–75% 30–60%<br />
DC braking Variable operating frequency, time, and braking force<br />
Electrical filtering Built-in EMC filter and built-in zero-phase reactor<br />
Weight kg / lb 22 / 48.4 30 / 66 30 / 66 43 / 94.6<br />
Note that “General Specifications” on page 1–10 covers all <strong>SJ7002</strong> inverters, followed by<br />
footnotes for all specifications tables. The 400V models from –007 to –220HFU2<br />
(7.5 to 30 HP) include internal dynamic braking units (see “Dynamic Braking” on page 5–6).<br />
Item 400V Class Specifications<br />
<strong>SJ7002</strong> inverters, U.S. version 007HFUF2 015HFUF2 022HFUF2 040HFUF2 055HFUF2<br />
400V models<br />
European ver. 007HFEF2 015HFEF2 022HFEF2 040HFEF2 055HFEF2<br />
Applicable motor size *2 HP 1 2 3 5 7.5<br />
kW 0.75 1.5 2.2 4 5.5<br />
Rated capacity, kVA, 400 / 480V 1.7 / 2.0 2.5 / 3.1 3.6 / 4.3 5.7 / 6.8 9.7 / 11.6<br />
Rated input voltage 3-phase (3-wire) 380 to 480V +10/-15%, 50/60 Hz ±5%<br />
Rated input current (A) 2.8 4.2 5.8 9.9 13<br />
Rated output voltage *3 3-phase (3-wire): 380 to 480V (corresponding to input voltage)<br />
Rated output current (A) 2.5 3.8 5.3 9.0 14<br />
Overload capacity, output current (A) 150% for 60 sec., 200% for 3 sec.<br />
Efficiency at 100% rated output, % 89.5 92.3 93.2 94.0 94.4<br />
Watt loss,<br />
at 70% output 76 102 127 179 242<br />
approximate (W)<br />
at 100% output 88 125 160 235 325<br />
Dynamic braking internal chopper 20 20 20 20 20<br />
approx. % torque,<br />
short time stop *7<br />
with external res. >150 >150 >150 >150 130<br />
Min. external braking resistance Ω 100 100 100 70 70<br />
DC braking Variable operating frequency, time, and braking force<br />
Electrical filtering Built-in EMC filter and built-in zero-phase reactor<br />
Weight kg / lb 3.5 / 7.7 3.5 / 7.7 3.5 / 7.7 3.5 / 7.7 6 / 13.2<br />
1–7<br />
Getting Started
Geting Started 1–8<br />
Inverter Specifications<br />
Item 400V Class Specifications<br />
<strong>SJ7002</strong> inverters, U.S. version 075HFUF2 110HFUF2 150HFUF2 185HFU2 220HFU2<br />
400V models<br />
European ver. 075HFEF2 110HFEF2 150HFEF2 185HFE2 220HFE2<br />
Applicable motor size *2 HP 10 15 20 25 30<br />
kW 7.5 11 15 18.5 22<br />
Rated capacity, kVA, 400 / 480V 11 / 13.3 15.9/19.1 22.1 / 26.6 26.3 / 31.5 33.2 / 39.9<br />
Rated input voltage 3-phase (3-wire) 380 to 480V +10/-15%, 50/60 Hz ±5%<br />
Rated input current (A) 18 25 35 42 53<br />
Rated output voltage *3 3-phase (3-wire): 380 to 480V (corresponding to input voltage)<br />
Rated output current (A) 16 23 32 38 48<br />
Overload capacity, output current (A) 150% for 60 sec., 200% for 3 sec.<br />
Efficiency at 100% rated output, % 94.6 94.8 94.9 95.0 95.0<br />
Watt loss,<br />
at 70% output 312 435 575 698 820<br />
approximate (W)<br />
at 100% output 425 600 800 975 1150<br />
Dynamic braking internal chopper 20 10 10 10 10<br />
approx. % torque,<br />
short time stop *7<br />
with external res. >150 130 140 140 110<br />
Min. external braking resistance Ω 35 35 24 24 20<br />
DC braking Variable operating frequency, time, and braking force<br />
Electrical filtering Built-in EMC filter and built-in zero-phase reactor<br />
Weight kg / lb 5 / 11 5 / 11 12 / 26.4 12 / 26.4 12 / 26.4<br />
Item 400V Class Specifications<br />
<strong>SJ7002</strong> inverters, U.S. version 300HFU2 370HFU2 450HFU2 550HFU2 750HFU2<br />
400V models<br />
European ver. 300HFE2 370HFE2 450HFE2 550HFE2 750HFE2<br />
Applicable motor size *2 HP 40 50 60 75 100<br />
kW 30 37 45 55 75<br />
Rated capacity, kVA, 400 / 480V 40.1 / 48.2 51.9 / 62.3 62.3 / 74.8 76.2/91.4 103.2/<br />
123.8<br />
Rated input voltage 3-phase (3-wire) 380 to 480V +10/-15%, 50/60 Hz ±5%<br />
Rated input current (A) 64 83 99 121 164<br />
Rated output voltage *3 3-phase (3-wire): 380 to 480V (corresponding to input voltage)<br />
Rated output current (A) 58 75 90 110 149<br />
Overload capacity, output current (A) 150% for 60 sec., 200% for 3 sec.<br />
Efficiency at 100% rated output, % 95.1 95.1 95.1 95.1 95.2<br />
Watt loss,<br />
at 70% output 1100 1345 1625 1975 2675<br />
approximate (W)<br />
at 100% output 1550 1900 2300 2800 3800<br />
Dynamic braking w/o braking unit 10% 10% 10% 10% 8%<br />
approx. % torque,<br />
short time stop *7<br />
with braking unit Refer to separate DB Unit instruction manual or contact your<br />
<strong>Hitachi</strong> distributor<br />
DC braking Variable operating frequency, time, and braking force<br />
Electrical filtering Built-in EMC filter and built-in zero-phase reactor<br />
Weight kg / lb 22 / 48.4 30 / 66 30 / 66 50 / 110 55 / 121
<strong>SJ7002</strong> Inverter<br />
The 400V models from –1850 to –4000HFU2/HFE2 (250 to 525 HP) include a DC reactor and<br />
ferrite core.<br />
Item 400V Class Specifications<br />
<strong>SJ7002</strong> inverters, U.S. version 900HFU2 1100HFU2 1500HFU2 1850HFU2 3150HFU2 4000HFU2<br />
400V models<br />
European ver. 9000HFE2 1100HFE2 1320HFE2 1850HFE2 3150HFE2 4000HFE2<br />
Applicable motor size *2 HP 125 150 200 250 425 525<br />
kW 90 110 150 185 315 400<br />
Rated capacity, kVA, 400 / 480V 121.9/146.3 150.3/180.4 180.1/216.1 256 / 308 416 / 499 554 / 665<br />
Rated input voltage 3-phase (3-wire) 380 to 480V +10/-15%, 50/60 Hz ±5%<br />
Rated input current (A) 194 239 286 389 630 840<br />
Rated output voltage *3 3-phase (3-wire): 380 to 480V (corresponding to input voltage)<br />
Rated output current (A) 176 217 260 370 600 800<br />
Overload capacity, output current (A) 50% for 60 sec., 200% for 0.5 sec. 50% for 60 sec., 180% for 0.5 sec.<br />
Inv. efficiency at 100% rated output, % 95.2 95.2 95.2 96.5 96.2 96.3<br />
Inverter Watt loss, at 70% output 3375 3900 4670 4700 8000 10500<br />
approximate (W)<br />
at 100% output 4800 5550 6650 6700 11500 15000<br />
DCL efficiency at 100% rated output, % — — — 99.9 99.9 99.9<br />
DCL Watt loss, at 70% output — — — 0.1 0.1 0.1<br />
approximate (kW)<br />
at 100% output — — — 0.2 0.2 0.2<br />
Dynamic braking w/o braking unit 8% 8% 8% 10% 10% 10%<br />
approx. % torque,<br />
short time stop *7<br />
with braking unit Refer to separate DB Unit instruction manual or contact your <strong>Hitachi</strong> distributor<br />
DC braking Variable operating frequency, time, and braking force<br />
Electrical filtering Built-in EMC filter and zero-phase reactor External DC reactor and ferrite core<br />
Weight kg / lb 55 / 121 55 / 121 70 / 54 140 / 308 210 / 463 360 / 792<br />
Footnotes for the preceding tables and the table that follows:<br />
Note 1: The protection method conforms to JEM 1030.<br />
Note 2: The applicable motor refers to <strong>Hitachi</strong> standard 3-phase motor (4-pole). When using<br />
other motors, care must be taken to prevent the rated motor current (50/60 Hz) from<br />
exceeding the rated output current of the inverter.<br />
Note 3: The output voltage decreases as the main supply voltage decreases (except when<br />
using the AVR function). In any case, the output voltage cannot exceed the input<br />
power supply voltage.<br />
Note 4: To operate the motor beyond 50/60 Hz, consult the motor manufacturer for the<br />
maximum allowable rotation speed.<br />
Note 5: When SLV is selected, please set the carrier frequency higher than 2.1 kHz.<br />
Note 6: At the rated voltage when using a <strong>Hitachi</strong> standard 3-phase, 4-pole motor (when<br />
selecting sensorless vector control—SLV).<br />
Note 7: The braking torque via capacitive feedback is the average deceleration torque at the<br />
shortest deceleration (stopping from 50/60 Hz as indicated). It is not continuous<br />
regenerative braking torque. The average decel torque varies with motor loss. This<br />
value decreases when operating beyond 50 Hz. If a large regenerative torque is<br />
required, the optional regenerative braking resistor should be used.<br />
Note 8: The frequency command will equal the maximum frequency at 9.8V for input voltage<br />
0 to 10 VDC, or at 19.6 mA for input current 4 to 20 mA. If this characteristic is not<br />
satisfactory for your application, contact your <strong>Hitachi</strong> sales representative.<br />
Note 9: The storage temperature refers to the short-term temperature during transport.<br />
Note 10: Conforms to the test method specified in JIS C0050 (1999). For the model types<br />
excluded in the standard specifications, contact your <strong>Hitachi</strong> sales representative.<br />
Note 11: NEMA 1 applies up to 22kW. An optional wire-entry conduit box is required for<br />
0.4kW to 55kW models to meet NEMA 1 rating.<br />
1–9<br />
Getting Started
Geting Started 1–10<br />
Inverter Specifications<br />
General<br />
Specifications<br />
The following table (continued on next page) applies to all <strong>SJ7002</strong> inverter models.<br />
Item General Specifications<br />
Protective enclosure *1, *11 IP20 (NEMA 1); models -750xFU2 to -4000xFU2 is IP00<br />
Control method Line-to-line sine wave pulse-width modulation (PWM) control<br />
Output frequency range *4 0.1 to 400 Hz<br />
Frequency accuracy Digital command: ± 0.01% of the maximum frequency<br />
Analog command: ± 0.2% (at 25°C ± 10°C)<br />
Frequency setting resolution Digital: ± 0.01 Hz; Analog: (max. frequency)/4000, [O] terminal: 12-bit 0 to 10V;<br />
[OI] terminal: 12-bit, 4-20mA; [O2] terminal: 12-bit –10 to +10V<br />
Volt./Freq. characteristic *5 V/F optionally variable (30 to 400Hz base frequency), V/F control (constant torque,<br />
reduced torque), sensorless vector control, 0-Hz-range sensorless vector control<br />
Speed fluctuation ± 0.5% (sensorless vector control or 0-Hz range sensorless vector control)<br />
Acceleration/deceleration time 0.01 to 3600 sec., (linear curve profiles, accel./decel. selection), two-stage accel./decel.<br />
Starting Torque *6 200% at 0.3 Hz (SLV or 0Hz-range SLV), 150% at 0 Hz-range SLV, with motor one<br />
frame size down)<br />
For -750Hxx to -1500Hxx: 180% at 0.3Hz<br />
150% at 0 Hz range with feedback board (with 0Hz-range sensorless vector control or<br />
with motor one frame size down)<br />
For -750Hxx to -1500Hxx: 130% at 0.3Hz<br />
Carrier frequency range Models -004xFU2 to -550xFU2: 0.5 to 15.0 kHz;<br />
Models -750xFU2 to -1500xFU2: 0.5 to 10.0 kHz;<br />
Models -1850HFU2 to -4000HFU2: 0.5 to 3.0 kHz<br />
DC braking Performs at start under set frequency at declaration, via an external input (braking force,<br />
time, and operating frequency)<br />
Overload capacity (output current) 150% for 60 seconds, 200% (180% for 75kW / 100HP and larger) for 0.5 seconds<br />
Freq. Operator keypad Up and Down keys / Value settings<br />
setting<br />
Potentiometer Analog setting via potentiometer on operator keypad<br />
External signal *8 0 to 10 VDC and –10 to +10 VDC (input impedance 10k Ohms), 4 to 20 mA (input<br />
impedance 250 Ohms), Potentiometer (1k to 2k Ohms, 2W)<br />
Serial port RS485 interface<br />
FW/RV Operator panel Run key / Stop key (change FW/RV by function command)<br />
Run<br />
External signal FW Run/Stop (NO contact), RV set by terminal assignment (NC/NO),<br />
3-wire input available<br />
Serial port RS485 interface<br />
Intelligent Input<br />
RV (reverse run/stop), CF1~CF4 (multi-speed select), JG (jogging), DB (external DC<br />
terminals (assign eight braking), SET (set 2nd motor data), 2CH (2-stage accel./decel.), FRS (free-run stop),<br />
Input<br />
signal<br />
functions to terminals) EXT (external trip), USP (unattended start protection), CS (commercial power source),<br />
SFT (software lock), AT (analog input voltage/current select), SET3 (set 3rd motor<br />
data), RS (reset inverter), STA (start, 3-wire interface), STP (stop, 3-wire interface),<br />
F/R (FW/RV 3-wire interface), PID (PID ON/OFF), PIDC (PID reset), CAS (control<br />
gain setting), UP (remote control Up function, motorized speed pot.), DWN (remote<br />
control Down function, motorized speed pot.), UDC (remote control data clearing),<br />
OPE (Operator control), SF1-SF7 (Multispeed bits 0-7), OLR (Overload limit change),<br />
TL (torque limit enable), TRQ1 (torque limit selection bit 1, LSB), TRQ2 (torque limit<br />
selection bit 2, MSB), PPI (Proportional / Proportional/Integral mode selection), BOK<br />
(Brake confirmation signal), ORT (Orientation – home search), LAC (LAC: LAD<br />
cancel), PCLR (Position deviation reset), STAT (pulse train position command input<br />
enable), ADD (trigger for frequency addition), F-TM (forcible-terminal operation),<br />
ATR (permission of torque commend input), KHC (cumulative power clearance), SON<br />
(servo ON), FOC (pre-excitation), MI1 (general-purpose input 1), MI2 (generalpurpose<br />
input 2), MI3 (general-purpose input 3), MI4 (general-purpose input 4), MI5<br />
(general-purpose input 5), MI6 (general-purpose input 6), MI7 (general-purpose input<br />
7), MI8 (general-purpose input 8), AHD (analog command holding), NO (not selected)<br />
Thermistor input One terminal (PTC characteristics)
Output<br />
signal<br />
Item General Specifications<br />
Intelligent Output terminals<br />
(assign six functions to five<br />
open collector outputs and<br />
one relay NO-NC contact)<br />
Intelligent monitor output<br />
terminals<br />
<strong>SJ7002</strong> Inverter<br />
RUN (run signal), FA1 (Frequency arrival type 1 – constant speed), FA2 (Frequency<br />
arrival type 2 – over-frequency), OL (overload advance notice signal 1), OD (Output<br />
deviation for PID control), AL (alarm signal), FA3 (Frequency arrival type 3 – atfrequency),<br />
OTQ (over-torque signal), IP (Instantaneous power failure signal), UV<br />
(Under-voltage signal), TRQ (In torque limit), RNT (Run time over), ONT (Power-ON<br />
time over), THM (thermal alarm), BRK (Brake release signal), BER (Brake error<br />
signal), ZS (Zero speed detect), DSE (speed deviation maximum), POK (Positioning<br />
completion), FA4 (Frequency arrival type 4 – over-frequency 2), FA5 (Frequency arrival<br />
type 5 – at-frequency 2), OL2 (Overload notice advance signal 2), FBV (PID feedback<br />
comparison), NDc (communication line disconnection), LOG1 (logical operation result<br />
1), LOG2 (logical operation result 2), LOG3 (logical operation result 3), LOG4 (logical<br />
operation result 4), LOG5 (logical operation result 5), LOG6 (logical operation result<br />
6), WAC (capacitor life warning), WAF (cooling fan speed drop), FR (starting contact<br />
signal), OHF (heat sink overheat warning), LOC (low-current indication signal), MO1<br />
(general-purpose output 1), MO2 (general-purpose output 2), MO3 (general-purpose<br />
output 3), MO4 (general-purpose output 4), MO5 (general-purpose output 5), MO6<br />
(general-purpose output 6), IRDY (inverter ready), FWR (forward rotation signal), RVR<br />
(reverse rotation signal), MJA (major failure signal), Terminals 11-13 or 11-14 automatically<br />
configured as AC0-AC2 or AC0-AC3 per alarm code output selection<br />
Analog voltage monitor, analog current monitor (8-bit resolution), and PWM output, on<br />
terminals [AM], [AMI], [FM]<br />
Display monitor Output frequency, output current, motor torque, scaled value of output frequency, trip<br />
history, I/O terminal condition, electrical power and other parameters<br />
Other user-settable parameters V/F free-setting (up to 7 points), freq. upper/lower limit, freq. jump, accel/decel curve<br />
selection, manual torque boost value and freq. adjustment, energy saving operation,<br />
analog meter tuning, start frequency, carrier frequency, electronic thermal protection<br />
level, external frequency output zero/span reference, external frequency input bias start/<br />
end, analog input selection, retry after trip, restart after instantaneous power failure,<br />
various signal outputs, reduced voltage start, overload restriction, default value setting<br />
(US, Europe, Japan), automatic deceleration at power failure, AVR function, fuzzy<br />
accel/decel, auto-tuning (on-line/off-line), high-torque multi-motor operation (sensorless<br />
vector control of two motors by one inverter)<br />
Protective functions Over-current, overload, braking resistor overload, over voltage, EEPROM error, undervoltage<br />
error, CT (current transformer) error, CPU error, external trip, USP error,<br />
ground fault, input over voltage, instantaneous power failure, expansion card 1 error,<br />
expansion card 2 error, inverter thermal trip, phase failure detection, IGBT error, thermistor<br />
error<br />
Temperature (*9) Operating (ambient): -10 to 50°C / Storage: -20 to 65°C<br />
Humidity 20 to 90% relative humidity (non-condensing)<br />
Environment<br />
Vibration *10 Models SJ700–004xxx to 220xxx: 5.9 m/s 2 (0.6G), 10 to 55 Hz<br />
Models SJ700–300xx to 1500xxx: 2.94 m/s 2 (0.3G), 10 to 55 Hz<br />
Models SJ700–3150xx to 4000xxx: 1.96 m/s 2 (0.2G), 10 to 55 Hz<br />
Location Altitude 1,000 m or less, indoors (no corrosive gasses or dust)<br />
Coating color Gray<br />
Feedback expansion card SJ-FB (vector control loop speed sensor)<br />
Digital input exp. card SJ-DG (4-digit BCD / 16-bit binary)<br />
DeviceNet expansion card Option to support the open-network DeviceNet function<br />
Accessories LonWorks expansion card Option to support the open-network LonWorks function<br />
Profibus-DP option Option to support the open-network Profibus-DP function<br />
Other optional accessories EMI filter, AC reactor, DC reactor, radio noise filter, braking resistors, braking units,<br />
LCR filter, communication cables<br />
Operator input devices OPE–SRE (4-digit LED with potentiometer) / OPE–S (4-digit LED w/o potentiometer),<br />
Optional: OPE-SR (4-digit LED with potentiometer, Japanese/English overlay),<br />
SRW–0EX Multilingual operator with copy function (English, Spanish, French,<br />
German, Italian, and Portuguese)<br />
1–11<br />
Getting Started
Geting Started 1–12<br />
Inverter Specifications<br />
Signal Ratings Detailed ratings are in “Specifications of Control and Logic Connections” on page 4–9.<br />
DCL Filter<br />
Specifications<br />
Carrier<br />
Frequency<br />
Derating<br />
Signal / Contact Ratings<br />
Built-in power for inputs 24VDC supply, 100 mA maximum<br />
Intelligent (programmable) logic inputs 27VDC maximum, 4.7kΩ input impedance<br />
Intelligent (programmable) logic outputs Open collector type, 50mA max. ON state current, 27 VDC maximum OFF state voltage<br />
Thermistor input Minimum thermistor power 100mW<br />
PWM output 0 to 10VDC, 1.2 mA max., 50% duty cycle<br />
Voltage analog output 0 to 10VDC, 2 mA max.<br />
Current analog output 4-20 mA, nominal load impedance 250Ω<br />
Analog input, current 4 to 19.6 mA range, 20 mA nominal<br />
Analog input, voltage unipolar 0 to 9.6 VDC range, 10VDC nominal, 12VDC max., input impedance 10 kΩ<br />
Analog input, voltage bipolar –9.6 to 9.6 VDC range, ±10VDC nominal, ±12VDC max., input impedance 10 kΩ<br />
+10V analog reference 10VDC nominal, 10 mA maximum<br />
Alarm relay, normally closed contacts Maximum loads: 250VAC, 2A; 30VDC, 8A resistive load<br />
250VAC, 0.2A; 30VDC, 0.6A inductive load<br />
Minimum loads: 100 VAC, 10mA; 5VDC, 100mA<br />
Alarm relay, normally open contacts 250VAC, 1A; 30VDC 1A max. resistive load /<br />
250VAC, 0.2A; 30VDC, 0.2A max. inductive load<br />
Min. loads: 100 VAC, 10mA; 5VDC, 100mA<br />
Direct reactor filters (DCL) are available for the <strong>Hitachi</strong> high-capacity <strong>SJ7002</strong> inverters, models<br />
-1850HFU2 to -4000HFU2. The DCL specifications are in the following table.<br />
Item DCL Specifications<br />
DCL models, DCL-H-xxx 185 315 400<br />
Rated current (A) 515.0 680 1042<br />
Insulation class Type H<br />
Weight kg / lb. 65 75 90<br />
The maximum carrier frequency F cthat provides full inverter rated output depends on the<br />
particular inverter model. However, you may operate an inverter at the maximum settable F c<br />
with an output derating. Refer to the table below for the carrier frequency values and output<br />
deratings.<br />
Capacity<br />
(kW)<br />
Maximum<br />
F c (kHz)<br />
Derating at<br />
Fc = 15 kHz<br />
200V Class <strong>Inverters</strong><br />
Capacity<br />
(kW)<br />
Maximum<br />
F c (kHz)<br />
Derating at<br />
Fc = 15 kHz<br />
0.4 15 100% 15 12 95% (60.8A or less)<br />
0.75 15 100% 18.5 10 90% (68.4A or less)<br />
1.5 15 100% 22 7 70% (66.5A or less)<br />
2.2 15 100% 30 5 80% (96.8A or less)<br />
3.7 / 4.0 15 100% 37 10 75% (108.7A or less)<br />
5.5 15 100% 45 5 70% (127.4A or less)<br />
7.5 15 100% 55 5 70% (154.0A or less)<br />
11 12 90% (41.4A or less) — — —
Capacity<br />
(kW)<br />
Maximum<br />
F c (kHz)<br />
Derating at<br />
Maximum Fc<br />
400V Class <strong>Inverters</strong><br />
Capacity<br />
(kW)<br />
Maximum<br />
F c (kHz)<br />
<strong>SJ7002</strong> Inverter<br />
Derating at<br />
Maximum Fc<br />
0.75 15 100% 37 8 80% (60.0A or less)<br />
1.5 15 100% 45 9 75% (68.2A or less)<br />
2.2 15 100% 55 6 60% (67.2A or less)<br />
3.7 15 100% 75 6 85% (126.7A or less)<br />
5.5 15 100% 90 4 75% (132.0A or less)<br />
7.5 15 100% 110 6 70% (151.9A or less)<br />
11 15 100% 150 3 60% (156.0A or less)<br />
15 14 95% (30.4A or less) 185 3 100%<br />
18.5 10 90% (34.2A or less) 315 3 100%<br />
22 6 75% (36.0A or less) 400 3 80% (640.0A or less)<br />
30 10 75% (43.5A or less) — — —<br />
NOTE: When replacing an SJ300 inverter combined with LCR filter, please check the type<br />
code of LCR filter and consult for compatibility (75 to132kW).<br />
1–13<br />
Getting Started
Geting Started 1–14<br />
Introduction to Variable-Frequency Drives<br />
Introduction to Variable-Frequency Drives<br />
The Purpose of<br />
Motor Speed<br />
Control for<br />
Industry<br />
What is an<br />
Inverter?<br />
Power<br />
Input<br />
Torque and<br />
Constant Volts/<br />
Hertz Operation<br />
L1/R<br />
L2/S<br />
L3/T<br />
<strong>Hitachi</strong> inverters provide accurate speed control for 3-phase AC induction motors. You connect<br />
AC power to the inverter, and connect the inverter to the motor. Many applications can benefit<br />
from the use of variable-speed drives in several ways:<br />
Energy savings - HVAC<br />
Need to coordinate speed with an adjacent process - textiles and printing presses<br />
Need to control acceleration and deceleration (torque)<br />
Sensitive loads - elevators, food processing, pharmaceuticals<br />
The term inverter and variable-frequency drive are related and somewhat interchangeable. An<br />
electronic drive for an AC motor controls the motor’s speed by varying the frequency of the<br />
power sent to the motor.<br />
An inverter, in general, is a device that converts DC power to AC power. The figure below<br />
shows how the variable-frequency drive employs an internal inverter. The drive first converts<br />
incoming AC power to DC through a rectifier bridge, creating an internal DC bus voltage. Then<br />
the inverter circuit converts the DC back to AC again to power the motor. The special inverter<br />
can vary its output frequency and voltage according to the desired motor speed.<br />
Converter<br />
Rectifier<br />
Variable-frequency Drive<br />
Internal DC Bus<br />
The simplified drawing of the inverter shows three double-throw switches. In <strong>Hitachi</strong> inverters,<br />
the switches are actually IGBTs (isolated gate bipolar transistors). Using a commutation<br />
algorithm, the microprocessor in the drive switches the IGBTs ON and OFF at a very high<br />
speed to create the desired output waveforms. The inductance of the motor windings helps<br />
smooth out the pulses.<br />
In the past, AC variable speed drives used an<br />
open loop (scalar) technique to control speed.<br />
The constant-volts-per-hertz operation<br />
maintains a constant ratio between the applied<br />
voltage and the applied frequency. With these<br />
conditions, AC induction motors inherently<br />
delivered constant torque across the operating<br />
speed range. For some applications, this scalar<br />
technique was adequate.<br />
+<br />
–<br />
+<br />
Inverter<br />
Output<br />
voltage<br />
100%<br />
U/T1<br />
Motor<br />
Today, with the advent of sophisticated micro-<br />
f<br />
0<br />
processors and digital signal processors<br />
Output frequency 100%<br />
(DSPs), it is possible to control the speed and<br />
torque of AC induction motors with unprecedented<br />
accuracy. The <strong>SJ7002</strong> utilizes these devices to perform complex mathematical calculations<br />
required to achieve superior performance. The technique is referred to as sensorless<br />
vector control. It allows the drive to continuously monitor its output voltage and current, and<br />
their relationship to each other. From this it mathematically calculates two vector currents. One<br />
V<br />
V/T2<br />
W/T3<br />
Constant torque
Inverter Input and<br />
Three-Phase<br />
Power<br />
Inverter Output to<br />
the Motor<br />
<strong>SJ7002</strong> Inverter<br />
vector is related to motor flux current, and the other to motor torque current. The ability to<br />
separately control these two vectors is what allows the <strong>SJ7002</strong> to deliver extraordinary lowspeed<br />
performance and speed control accuracy.<br />
The <strong>Hitachi</strong> <strong>SJ7002</strong> <strong>Series</strong> of inverters includes two sub-groups: the 200V class and the 400V<br />
class inverters. The drives described in this manual may be used in either the United States or<br />
Europe, although the exact voltage level for commercial power may be slightly different from<br />
country to country. Accordingly, a 200V class inverter requires (nominal) 200 to 240VAC, and<br />
a 400V class inverter requires from 380 to 480VAC. All <strong>SJ7002</strong> inverters require three-phase<br />
input power, whether 200V or 400V class.<br />
TIP: If your application only has single phase power available, refer to the <strong>Hitachi</strong> SJ100<br />
<strong>Series</strong> inverters. SJ100 inverters of 3HP or less can accept single phase input power.<br />
The common terminology for single phase power is Line (L) and Neutral (N). Three-phase<br />
power connections are usually labeled Line 1 (L1), Line 2 (L2) and Line 3 (L3). In any case,<br />
the power source should include a ground connection. That ground connection will need to<br />
connect to the inverter chassis and to the motor frame (see “Wire the Inverter Output to Motor”<br />
on page 2–26).<br />
The AC motor must be connected only to the inverter’s<br />
output terminals. The output terminals are uniquely<br />
labeled (to differentiate them from the input terminals)<br />
with the designations U/T1, V/T2, and W/T3. This<br />
corresponds to typical motor lead connection designations<br />
T1, T2, and T3. It is often not necessary to connect<br />
a particular inverter output to a particular motor lead for<br />
a new application. The consequence of swapping any<br />
two of the three connections is the reversal of the motor<br />
direction. In applications where reversed rotation could<br />
cause equipment damage or personnel injury, be sure to<br />
verify direction of rotation before attempting full-speed<br />
operation. For safety to personnel, you must connect the<br />
motor chassis ground to the ground connection at the<br />
bottom of the inverter housing.<br />
U/T1<br />
W/T3<br />
3-Phase<br />
AC Motor<br />
V/T2<br />
Earth<br />
GND<br />
Notice the three connections to the motor do not include one marked “Neutral” or “Return.”<br />
The motor represents a balanced “Y” impedance to the inverter, so there is no need for a<br />
separate return. In other words, each of the three “Hot” connections serves also as a return for<br />
the other connections, because of their phase relationship.<br />
The <strong>Hitachi</strong> inverter is a rugged and reliable device. The intention is for the inverter to assume<br />
the role of controlling power to the motor during all normal operations. Therefore, this manual<br />
instructs you not to switch OFF power to the inverter while the motor is running (unless it is an<br />
emergency stop). Also, do not install or use disconnect switches in the wiring from the inverter<br />
to the motor (except thermal disconnect). Of course, safety-related devices such as fuses must<br />
be in the design to break power during a malfunction, as required by NEC and local codes.<br />
1–15<br />
Getting Started
Geting Started 1–16<br />
Introduction to Variable-Frequency Drives<br />
Intelligent<br />
Functions and<br />
Parameters<br />
Much of this manual is devoted to describing how<br />
to use inverter functions and how to configure<br />
inverter parameters. The inverter is microprocessor-controlled,<br />
and has many independent<br />
functions. The microprocessor has an on-board<br />
EEPROM for parameter storage. The inverter’s<br />
front panel keypad provides access to all<br />
functions and parameters, which you can access<br />
through other devices as well. The general name<br />
for all these devices is the digital operator, or<br />
digital operator panel. Chapter 2 will show you<br />
how to get a motor running, using a minimal set<br />
of function commands or configuring parameters.<br />
The optional read/write programmer will let you<br />
read and write inverter EEPROM contents from<br />
the programmer. This feature is particularly<br />
useful for OEMs who need to duplicate a particular<br />
inverter’s settings in many other inverters in<br />
assembly-line fashion.<br />
Braking In general, braking is a force that attempts to slow or stop motor rotation. So it is associated<br />
with motor deceleration, but may also occur even when the load attempts to drive the motor<br />
faster than the desired speed (overhauling). If you need the motor and load to decelerate<br />
quicker than their natural deceleration during coasting, we recommend installing a braking<br />
resistor. The dynamic braking unit (built into certain <strong>SJ7002</strong> models) sends excess motor<br />
energy into a resistor to slow the motor and load (see “Introduction” on page 5–2 and<br />
“Dynamic Braking” on page 5–6 for more information). For loads that continuously overhaul<br />
the motor for extended periods of time, the <strong>SJ7002</strong> may not be suitable (contact your <strong>Hitachi</strong><br />
distributor).<br />
The inverter parameters include acceleration and deceleration, which you can set to match the<br />
needs of the application. For a particular inverter, motor, and load, there will be a range of<br />
practically achievable accelerations and decelerations.<br />
Velocity Profiles The <strong>SJ7002</strong> inverter is capable of sophisticated<br />
speed control. A graphical representation<br />
of that capability will help you<br />
understand and configure the associated<br />
parameters. This manual makes use of the<br />
velocity profile graph used in industry<br />
(shown at right). In the example, the acceleration<br />
is a ramp to a set speed, and the deceleration<br />
is a decline to a stop.<br />
Speed<br />
Fixed speed<br />
Accel Decel<br />
Velocity Profile<br />
t
Acceleration and deceleration settings<br />
specify the time required to go from a stop to<br />
maximum frequency (or visa versa). The<br />
resulting slope (speed change divided by<br />
time) is the acceleration or deceleration. An<br />
increase in output frequency uses the acceleration<br />
slope, while a decrease uses the<br />
deceleration slope. The accel or decel time a<br />
particular speed change depends on the<br />
starting and ending frequencies. However,<br />
the slope is constant, corresponding to the<br />
full-scale accel or decel time setting.<br />
For example, the full-scale acceleration<br />
setting (time) may be 10 seconds—the time<br />
required to go from 0 to 60 Hz.<br />
The <strong>SJ7002</strong> inverter can store up to 16 preset<br />
speeds. And, it can apply separate acceleration<br />
and deceleration transitions from any<br />
preset to any other preset speed. A multispeed<br />
profile (shown at right) uses two or<br />
more preset speeds, which you can select via<br />
intelligent input terminals. This external<br />
control can apply any preset speed at any<br />
time. Alternatively, the selected speed is<br />
infinitely variable across the speed range.<br />
You can use the potentiometer control on the<br />
keypad for manual control. The drive<br />
accepts analog 0-10V signals and 4-20 mA<br />
control signals as well.<br />
The inverter can drive the motor in either<br />
direction. Separate FW and RV commands<br />
select the direction of rotation. The motion<br />
profile example shows a forward motion<br />
followed by a reverse motion of shorter<br />
duration. The speed presets and analog<br />
signals control the magnitude of the speed,<br />
while the FW and RV commands determine<br />
the direction before the motion starts.<br />
Speed<br />
<strong>SJ7002</strong> Inverter<br />
NOTE: The <strong>SJ7002</strong> can move loads in both directions. However, it is not designed for use in<br />
servo-type applications that use a bipolar velocity signal that determines direction.<br />
0<br />
Speed<br />
Speed<br />
Maximum speed<br />
Acceleration<br />
Acceleration (time) setting<br />
Speed 1<br />
Speed 2<br />
Multi-speed Profile<br />
Forward move<br />
Reverse move<br />
Bi-directional Profile<br />
t<br />
t<br />
t<br />
1–17<br />
Getting Started
Geting Started 1–18<br />
Frequently Asked Questions<br />
Frequently Asked Questions<br />
Q. What is the main advantage in using an inverter to drive a motor, compared to alternative<br />
solutions?<br />
A. An inverter can vary the motor speed with very little energy loss, unlike mechanical<br />
or hydraulic speed control solutions. The resulting energy savings can often pay for<br />
the inverter in a relatively short time.<br />
Q. The term “inverter” is a little confusing, since we also use “drive” and “amplifier” to<br />
describe the electronic unit that controls a motor. What does “inverter” mean?<br />
A. The terms are used somewhat interchangeably in industry. Nowadays, the terms<br />
drive, variable-frequency drive, variable-speed drive, and inverter are generally used<br />
to describe electronic, microprocessor-based motor speed controllers. In the past,<br />
variable speed drive also referred to various mechanical means to vary speed. Amplifier<br />
is a term almost exclusively used to describe drives for servo or stepper motors.<br />
Q. Although the <strong>SJ7002</strong> inverter is a variable speed drive, can I use it in a fixed-speed application?<br />
A. Yes, sometimes an inverter can be used simply as a “soft-start” device, providing<br />
controlled acceleration and deceleration to a fixed speed. Other functions of the<br />
<strong>SJ7002</strong> may be useful in such applications, as well. However, using a variable speed<br />
drive can benefit many types of industrial and commercial motor applications, by<br />
providing controlled acceleration and deceleration, high torque at low speeds, and<br />
energy savings over alternative solutions.<br />
Q. Can I use an inverter and AC induction motor in a positioning application?<br />
A. That depends on the required precision, and the slowest speed the motor must turn<br />
and still deliver torque. The <strong>SJ7002</strong> inverter will deliver 200% rated torque while<br />
turning the motor at only 0.3 Hz. DO NOT use an inverter if you need the motor to<br />
stop and hold the load position without the aid of a mechanical brake (use a servo or<br />
stepper motion control system).<br />
Q. Does the optional digital operator interface or the PC software (DOP Professional)<br />
provide features beyond what is available from the keypad on the unit?<br />
A. Yes. However, note first that the same set of parameters and functions are equally<br />
accessible from either the unit’s keypad or from remote devices. The DOP Professional<br />
PC software lets you save or load inverter configurations to or from a disk file.<br />
And, the hand-held digital operator provides hard-wired terminals, a safety requirement<br />
for some installations.<br />
Q. Why does the manual or other documentation use terminology such as “200V class”<br />
instead of naming the actual voltage, such as “230 VAC?”<br />
A. A specific inverter model is set at the factory to work across a voltage range particular<br />
to the destination country for that model. The model specifications are on the label on<br />
the side of the inverter. A European 200V class inverter (“EU” marking) has different<br />
parameter settings than a USA 200V class inverter (“US” marking). The initialization<br />
procedure (see “Restoring Factory Default Settings” on page 6–16) can set up the<br />
inverter for European or US commercial voltage ranges.<br />
Q. Why doesn’t the motor have a neutral connection as a return to the inverter?<br />
A. The motor theoretically represents a “balanced Y” load if all three stator windings<br />
have the same impedance. The Y connection allows each of the three wires to alternately<br />
serve as input or return on alternate half-cycles.<br />
Q. Does the motor need a chassis ground connection?<br />
A. Yes, for several reasons. Most importantly, this provides protection in the event of a<br />
short in the motor that puts a hazardous voltage on its housing. Secondly, motors<br />
exhibit leakage currents that increase with aging. Lastly, a grounded chassis generally<br />
emits less electrical noise than an ungrounded one.
<strong>SJ7002</strong> Inverter<br />
Q. What type of motor is compatible with the <strong>Hitachi</strong> inverters?<br />
A. Motor type – It must be a three phase AC induction motor. Use an inverter-grade<br />
motor that has 800V insulation for 200V class inverters, or 1600V insulation for<br />
400V class.<br />
Motor size – In practice, it’s better to find the right size motor for your application;<br />
then look for the inverter to match the motor.<br />
NOTE: There may be other factors that will affect motor selection, including heat dissipation,<br />
motor operating speed profile, enclosure type, and cooling method.<br />
Q. How many poles should the motor have?<br />
A. <strong>Hitachi</strong> inverters can be configured to operate motors with 2, 4, 6, or 8 poles. The<br />
greater the number of poles, the slower the top motor speed will be, but it will have<br />
higher torque at the base speed.<br />
Q. Will I be able to add dynamic (resistive) braking to my <strong>Hitachi</strong> <strong>SJ7002</strong> drive after the<br />
initial installation?<br />
A. Yes. Models SJ700-004XXX through SJ700-220XXX have built-in dynamic braking<br />
units. You can add an external resistor to these models to improve braking performance.<br />
Models SJ700-300XXX through SJ700-4000XXX require you to add an<br />
external braking unit. The braking resistor connects to the external braking unit for<br />
those models. More information on dynamic braking is located in Chapter 5.<br />
Q. How will I know if my application will require resistive braking?<br />
A. For new applications, it may be difficult to tell before you actually test a motor/drive<br />
solution. In general, some applications can rely on system losses such as friction to<br />
serve as the decelerating force, or otherwise can tolerate a long decel time. These<br />
applications will not need dynamic braking. However, applications with a combination<br />
of a high-inertia load and a required short decel time will need dynamic braking.<br />
This is a physics question that may be answered either empirically or through<br />
extensive calculations.<br />
Q. Several options related to electrical noise suppression are available for the <strong>Hitachi</strong> inverters.<br />
How can I know if my application will require any of these options?<br />
A. The purpose of these noise filters is to reduce the inverter electrical noise so the<br />
operation of nearby electrical devices is not affected. Some applications are governed<br />
by particular regulatory agencies, and noise suppression is mandatory. In those cases,<br />
the inverter must have the corresponding noise filter installed. SJ700 models from<br />
-004XXX (0.4kW) to -1500XXX (150kW) have built-in EMC filters. Other applications<br />
may not need noise suppression, unless you notice electrical interference with<br />
the operation of other devices.<br />
Q. The <strong>SJ7002</strong> features a PID loop feature. PID loops are usually associated with chemical<br />
processes, heating, or process industries in general. How could the PID loop feature be<br />
useful in my application?<br />
A. You will need to determine the particular main variable in your application the motor<br />
affects. That is the process variable (PV) for the motor. Over time, a faster motor<br />
speed will cause a faster change in the PV than a slow motor speed will. By using the<br />
PID loop feature, the inverter commands the motor to run at the optimal speed<br />
required to maintain the PV at the desired value for current conditions. Using the PID<br />
loop feature will require an additional sensor and other wiring, and is considered an<br />
advanced application.<br />
1–19<br />
Getting Started
Inverter Mounting<br />
and Installation<br />
2<br />
In This Chapter.... page<br />
— Orientation to Inverter Features........................................................ 2<br />
— Basic System Description ................................................................. 5<br />
— Step-by-Step Basic Installation ......................................................... 6<br />
— Powerup Test .................................................................................. 27<br />
— Using the Front Panel Keypad........................................................ 29<br />
— Emergency Stop Function............................................................... 37
2–2<br />
Inverter Mounting<br />
and Installation<br />
Orientation to Inverter Features<br />
Orientation to Inverter Features<br />
Unpacking and<br />
Inspection<br />
Main Physical<br />
Features<br />
Please take a few moments to unpack your new <strong>SJ7002</strong> inverter and perform these steps:<br />
1. Look for any damage that may have occurred during shipping.<br />
2. Verify the contents of the box include:<br />
a. One <strong>SJ7002</strong> inverter<br />
b. One <strong>Instruction</strong> <strong>Manual</strong> (supplied by printed book for –FU2/–FF2 models, supplied on<br />
CR-ROM for –FE2 models)<br />
c. One <strong>SJ7002</strong> Quick Reference Guide<br />
d. One packet of desiccant—discard (not for human consumption)<br />
3. Inspect the specifications label on the front or side of the inverter. Make sure it matches the<br />
product part number you ordered.<br />
The <strong>SJ7002</strong> <strong>Series</strong> inverters vary in size according to the current output rating and motor size<br />
for each model number. All feature the same basic keypad and connector interface for<br />
consistent ease of use. The inverter construction has a heat sink at the back of the housing. The<br />
fans enhance heat sink performance. Mounting holes are pre-drilled in the heat sink for your<br />
convenience. Never touch the heat sink during or just after operation; it can be very hot.<br />
The electronics housing and front panel are built onto the front of the heat sink. The front panel<br />
has three levels of physical access designed for convenience and safety:<br />
First-level access – for basic use of inverter and editing parameters during powered<br />
operation (power is ON)<br />
Second-level access – for wiring the inverter power supply or motor (power is OFF)<br />
Third-level access – for accessing the expansion bay for adding/removing expansion boards<br />
(power is OFF)<br />
1. First-level Access - View the unit just as it<br />
came from the box as shown. The<br />
OPE-SRE or OPE-S digital operator<br />
keypad comes installed in the inverter. The<br />
four-digit display can show a variety of<br />
performance parameters. LEDs indicate<br />
whether the display units are Hertz, Volts,<br />
Amperes, or kW. Other LEDs indicate<br />
Power (external), and Run/Stop Mode and<br />
Program/Monitor Mode status. Membrane<br />
keys Run and Stop/Reset, and a Min/Max<br />
frequency control knob (OPE-SRE only)<br />
control motor operation. These controls<br />
and indicators are usually the only ones<br />
needed after the inverter installation is<br />
complete.<br />
The FUNC., 1 , 2<br />
, and STR keys<br />
allow an operator to change the inverter’s<br />
functions and parameter values, or to select<br />
the one monitored on the 4-digit display.<br />
Note that some parameters may not be<br />
edited if the inverter is in Run mode.
2. Second-level access - First, ensure no<br />
power source of any kind is connected<br />
to the inverter. If power has been<br />
connected, wait 10 minutes after powerdown<br />
and verify the Charge Lamp<br />
indicator is OFF to proceed. Then locate<br />
the two screws at the bottom corners of<br />
the main front panel. Use a Phillips<br />
screwdriver to loosen the screws and tilt<br />
the cover outward for removal. (The<br />
screws are retained in the cover.)<br />
<strong>SJ7002</strong> Inverter<br />
Notice the large power terminals at the bottom of the wiring area. The rubber grommets<br />
below the power terminals are for wire entry/exit to the power source and motor. Never<br />
operate the inverter with the front panel removed.<br />
The control terminals connect logic or analog signals for control and monitoring of the<br />
inverter. The nearby alarm relay provides both normally-open and normally-closed logic for<br />
interface to an external alarm. The alarm circuit may carry hazardous live voltages even<br />
when the main power to the inverter is OFF. So, never directly touch any terminal or circuit<br />
component.<br />
Logic connector<br />
Power terminals<br />
Wire entry/exit plate<br />
Retention screws<br />
Charge lamp<br />
indicator<br />
WARNING: Be sure to wait 10 minutes after powerdown and verify the charge lamp indicator<br />
is OFF to proceed. Otherwise there is the risk of electric shock.<br />
2–3<br />
Inverter Mounting<br />
and Installation
Inverter Mounting<br />
and Installation 2–4<br />
Orientation to Inverter Features<br />
3. Third-level access - The <strong>SJ7002</strong><br />
provides for field installation of<br />
interface circuits. These circuits are<br />
on expansion cards, to be installed in<br />
the expansion bay. To access the<br />
expansion bay, you will need to<br />
remove the upper front panel. Use<br />
the latch to release the digital<br />
operator (the panel filler plate may<br />
remain). Remove the two retention<br />
screws the bottom corners of the<br />
upper front panel. Lift up at the<br />
bottom, then disengage the two<br />
hinge latches at the top.<br />
The expansion bay has two sites for<br />
adding expansion cards. Each card<br />
connects via the interface connector,<br />
and mounts using three standoff<br />
screw locations. Further details on<br />
accessories are in Chapter 5. You<br />
may also refer to the instruction<br />
manual that comes with each type of<br />
expansion card.<br />
Latch to release digital operator<br />
Retention screws<br />
Expansion bay Expansion connectors<br />
The following sections will describe the system design and guide you through a step-by-step<br />
installation process. After the section on wiring, this chapter will show how to use the front<br />
panel keys to access functions and edit parameters.
Basic System Description<br />
Breaker,<br />
MCCB or<br />
GFI<br />
Inverter<br />
R0<br />
T0<br />
Thermal switch<br />
<strong>SJ7002</strong> Inverter<br />
A motor control system will obviously include a motor and inverter, as well as a breaker or<br />
fuses for safety. If you are connecting a motor to the inverter on a test bench just to get started,<br />
that’s all you may need for now. But a system can also have a variety of additional components.<br />
Some can be for noise suppression, while others may enhance the inverter’s braking performance.<br />
The figure and table below show a system with all the optional components you may<br />
need in your finished application.<br />
Power source<br />
L1 L2 L3<br />
R S T<br />
T1 T2 T3<br />
Motor<br />
PD(+1)<br />
P(+)<br />
RB<br />
N(–)<br />
U V<br />
GND<br />
W<br />
Name Function<br />
Breaker /<br />
disconnect<br />
Input side<br />
AC Reactor<br />
A molded-case circuit breaker (MCCB), ground<br />
fault interrupter breaker (GFI), or a fused disconnect<br />
device. NOTE: The installer must refer to the NEC<br />
and local codes to ensure safety and compliance.<br />
This is useful in suppressing harmonics induced on<br />
the power supply lines, or when the main power<br />
voltage imbalance exceeds 3% (and power source<br />
capacity is more than 500 kVA), or to smooth out<br />
line fluctuations. It also improves the power factor.<br />
Radio noise filter Electrical noise interference may occur on nearby<br />
equipment such as a radio receiver. This magnetic<br />
choke filter helps reduce radiated noise (can also be<br />
used on output).<br />
EMI filter (for<br />
CE applications,<br />
see Appendix D)<br />
Radio noise filter<br />
(use in non-CE<br />
applications)<br />
This filter reduces the conducted noise in the power<br />
supply wiring between the inverter and the power<br />
distribution system. Connect it to the inverter<br />
primary (input side).<br />
This capacitive filter reduces radiated noise from the<br />
main power wires in the inverter input side.<br />
DC link choke The choke suppresses harmonics generated by the<br />
inverter. However, it will not protect the input diode<br />
bridge rectifier. A DCL reactor is required for<br />
models -185xxx to -4000xxx<br />
Braking resistor Braking components are useful for increasing the<br />
inverter’s control torque for high duty-cycle (ON-<br />
Braking unit OFF) applications, and improving the decelerating<br />
capability.<br />
Radio noise filter Electrical noise interference may occur on nearby<br />
equipment such as a radio receiver. This magnetic<br />
choke filter helps reduce radiated noise (can also be<br />
used at input).<br />
Output side<br />
AC reactor<br />
This reactor reduces the vibrations in the motor<br />
caused by the inverter’s switching waveform, by<br />
smoothing the waveform to approximate commercial<br />
power quality. It is also useful to reduce<br />
harmonics when wiring from the inverter to the<br />
motor is more than 10m in length.<br />
LCR filter Sine wave shaping filter for output side. The LCR<br />
filter is not required for models -1850xxx to -<br />
4000xxx.<br />
NOTE: Some components are required for regulatory agency compliance (see Chapter 5 and<br />
Appendix D).<br />
2–5<br />
Inverter Mounting<br />
and Installation
Inverter Mounting<br />
and Installation 2–6<br />
Step-by-Step Basic Installation<br />
Step-by-Step Basic Installation<br />
1<br />
Choosing a<br />
Mounting<br />
Location<br />
This section will guide you through the following basic steps of installation:<br />
1. Study the warnings associated with mounting the inverter.<br />
2. Transport or lift the inverter (and DC reactor, if used) in a safe manner.<br />
3. Select a suitable mounting location.<br />
NOTE: If the installation is in an EU country, study the EMC installation guidelines in<br />
Appendix D.<br />
4. Cover the inverter’s top ventilation openings to prevent debris from falling inside.<br />
5. Check the inverter mounting dimensions for footprint and mounting hole locations.<br />
6. Study the caution and warning messages associated with wiring the inverter.<br />
7. Connect wiring for the inverter power input.<br />
8. Connect wiring to the motor.<br />
9. Uncover the inverter’s ventilation openings that were covered in Step 3.<br />
10. Perform a powerup test.<br />
11. Make observations and check your installation.<br />
Step 1: Study the following caution messages associated with mounting the inverter. This is the<br />
time when mistakes are most likely to occur that will result in expensive rework, equipment<br />
damage, or personal injury.<br />
CAUTION: Be sure to install the unit on flame-resistant material such as a steel plate. Otherwise,<br />
there is the danger of fire.<br />
CAUTION: Be sure not to place any flammable materials near the inverter. Otherwise, there is<br />
the danger of fire.<br />
CAUTION: Be sure not to let the foreign matter enter vent openings in the inverter housing,<br />
such as wire clippings, spatter from welding, metal shavings, dust, etc. Otherwise, there is the<br />
danger of fire.<br />
CAUTION: Be sure to install the inverter in a place that can bear the weight according to the<br />
specifications in the text (Chapter 1, Specifications Tables). Otherwise, it may fall and cause<br />
injury to personnel.<br />
CAUTION: Be sure to install the unit on a perpendicular wall that is not subject to vibration.<br />
Otherwise, it may fall and cause injury to personnel.<br />
CAUTION: Be sure not to install or operate an inverter that is damaged or has missing parts.<br />
Otherwise, it may cause injury to personnel.<br />
CAUTION: Be sure to install the inverter in a well-ventilated room that does not have direct<br />
exposure to sunlight, a tendency for high temperature, high humidity or dew condensation, high<br />
levels of dust, corrosive gas, explosive gas, inflammable gas, grinding-fluid mist, salt air, etc.<br />
Otherwise, there is the danger of fire.
2<br />
Transport or Lift<br />
in Safe Manner<br />
Air flow<br />
<strong>SJ7002</strong> Inverter<br />
The position and orientation of the inverter are very important. Install the inverter vertically and<br />
securely with screws or bolts on a surface that is free from vibrations and that can bear the<br />
inverter’s weight. If the inverter is not installed vertically, its cooling performance may be<br />
degraded and trip events or inverter damage may result. If the inverter requires an external DC<br />
reactor, do not install the reactor directly under the inverter.<br />
Heated air<br />
Heated air<br />
<strong>SJ7002</strong> <strong>Series</strong> inverter models -1850hFx2 to -4000hFx2are very heavy. For example, the<br />
315kW inverter weighs about 463 lbs. (210kg). Therefore, be careful when loading and<br />
transporting these inverters. Use the eyebolts on the inverter housing and frame to lift the<br />
inverter. The diagrams below show different lifting configurations to fit the orientations you<br />
may need.<br />
Eyebolts<br />
Upright inverter lifting:<br />
Use eyebolts at top of inverter<br />
Eyebolts<br />
Horizontal inverter lifting: Use eyebolts<br />
at front corners of inverter<br />
Eyebolts<br />
DC reactor lifting:<br />
Use bolts at top of frame<br />
2–7<br />
Inverter Mounting<br />
and Installation
2–8<br />
Inverter Mounting<br />
and Installation<br />
Step-by-Step Basic Installation<br />
3<br />
Ensure Adequate<br />
Ventilation<br />
4<br />
Keep Debris Out<br />
of Inverter Vents<br />
Step 2: To summarize the caution messages—you will need to find a solid, non-flammable,<br />
vertical surface that is in a relatively clean and dry environment. In order to ensure enough<br />
room for air circulation around the inverter to aid in cooling, maintain the specified clearance<br />
around the inverter specified in the diagram.<br />
Clear area<br />
5 cm (1.97”)<br />
minimum<br />
10 cm (3.9”) min., models -004 to -550;<br />
30 cm (11.8”) min., models -750 to -4000<br />
SJ700<br />
5 cm (1.97”)<br />
minimum<br />
10 cm (3.9”) min., models -004 to -550;<br />
30 cm (11.8”) min., models -750 to -4000;<br />
Clearance to replace DC bus capacitors<br />
with inverter in place:<br />
22 cm (8.7”) min., models -150 to -550,<br />
30 cm (11.8”) min., models -750 to -4000;<br />
CAUTION: Be sure to maintain the specified clearance area around the inverter and to provide<br />
adequate ventilation. Otherwise, the inverter may overheat and cause equipment damage or fire.<br />
Step 3: Before proceeding to the wiring section, it’s a<br />
good time to temporarily cover the inverter’s ventilation<br />
openings. Paper and masking tape are all that is needed.<br />
This will prevent harmful debris such as wire clippings<br />
and metal shavings from entering the inverter during<br />
installation.<br />
Please observe this checklist while mounting the<br />
inverter:<br />
1. The ambient temperature must be in the range of<br />
-10 to 40°C. If the range will be up to 50°C<br />
(maximum rating), you will need to refer to derate<br />
the output current performance of the inverter.<br />
2. Keep any other heat-producing equipment as far<br />
away from the inverter as possible.<br />
3. When installing the inverter in an enclosure,<br />
maintain the clearance around the inverter and verify<br />
that its ambient temperature is within specification<br />
when the enclosure door is closed.<br />
4. Do not open the main front panel door at any time<br />
during operation.<br />
Exhaust<br />
Air intake<br />
Cover the fan outlet vents<br />
Cover the ventilation slots,<br />
both sides
5<br />
Check Inverter<br />
Dimensions<br />
<strong>SJ7002</strong> Inverter<br />
Step 4: Locate the applicable drawing on the following pages for your inverter.<br />
Dimensions are given in millimeters (inches) format. Smaller models come equipped with<br />
NEMA1 adapter (conduit box) for wire entry for U.S. models (LFU and HFU). The NEMA 1<br />
adapter is optional for larger models as indicated in the drawings.<br />
Model<br />
SJ700 -004LFUF2<br />
-007LFUF2<br />
-007HFUF2/HFEF2<br />
-015LFUF2<br />
-015HFUF2/HFEF2<br />
-022LFUF2<br />
-022HFUF2/HFEF2<br />
-037LFUF2<br />
-040HFUF2/HFEF2<br />
Model<br />
SJ700 -055LFUF2<br />
-055HFUF2/HFEF2<br />
-075LFUF2<br />
-075HFUF2/HFEF2<br />
-110LFUF2<br />
-110HFUF2/HFEF2<br />
6 (0.24)<br />
7 (0.28)<br />
150 (5.91)<br />
130 (5.12)<br />
143 (5.63)<br />
2 - φ 6 (0.24)<br />
255 (10.04)<br />
241 (9.49)<br />
62 (2.44)<br />
140 (5.51)<br />
210 (8.27)<br />
189 (7.44) 2 - φ 7 (0.28)<br />
203 (7.99)<br />
246 (9.69)<br />
260 (10.24)<br />
3 places 33 x 28 (1.30 x 1.10 )<br />
170 (6.69)<br />
82 (3.23)<br />
NOTE: Be sure to use lock washers or other means to ensure screws do not loosen<br />
due to vibration.<br />
13.6 (0.54)<br />
Exhaust<br />
Air intake<br />
Exhaust<br />
Air intake<br />
2–9<br />
Inverter Mounting<br />
and Installation
Inverter Mounting<br />
and Installation<br />
2–10<br />
Step-by-Step Basic Installation<br />
Model<br />
Dimensional drawings, continued...<br />
SJ700 -150LFUF2<br />
-150HFUF2/HFEF2<br />
-185LFU2<br />
-285HFU2/HFE2<br />
-220LFU2<br />
-220HFU2/HFE2<br />
Model<br />
SJ700 -300LFU2<br />
-300HFU2/HFE2<br />
250 (9.84)<br />
229 (30.78) 2 - φ 7 (0.28)<br />
7 (0.28)<br />
244 (9.60)<br />
2 - 10 (0.39)<br />
265 (10.43)<br />
310 (12.20)<br />
510 (20.08)<br />
540 (21.26)<br />
195 (7.68)<br />
376 (14.8)<br />
390 (15.35)<br />
3 places 42 x 42.5<br />
(1.65 x 1.67 )<br />
9.5 (0.37)<br />
83 (3.27)<br />
190 (7.48)<br />
2 - φ 10 (0.39)<br />
5 places φ 25 (0.98)<br />
Exhaust<br />
Air intake<br />
Exhaust<br />
Air intake
Dimensional drawings, continued...<br />
Model<br />
SJ700 -370LFU2<br />
-370HFU2/HFE2<br />
-450LFU2<br />
-450HFU2/HFE2<br />
-550HFU2/HFE2<br />
Model<br />
SJ700 -550LFU2<br />
2 - 12 (0.47)<br />
300 (11.81)<br />
390 (15.35)<br />
2 - φ 12 (0.47)<br />
380 (14.96)<br />
480 (18.90)<br />
2 - φ 12 (0.47)<br />
520 (20.47)<br />
550 (21.65)<br />
5 places φ 41 (1.61)<br />
250 (9.84)<br />
2 - φ 12 (0.47)<br />
248 (9.76) 670 (26.38)<br />
700 (27.56)<br />
5 places φ 41 (1.61)<br />
<strong>SJ7002</strong> Inverter<br />
Exhaust<br />
Air intake<br />
Exhaust<br />
Air intake<br />
2–11<br />
Inverter Mounting<br />
and Installation
Inverter Mounting<br />
and Installation<br />
2–12<br />
Step-by-Step Basic Installation<br />
Dimensional drawings, continued...<br />
Model<br />
SJ700 -750HFU2/HFE2<br />
-900HFU2/HFE2<br />
Model<br />
SJ700 -1100HFU2/HFE2<br />
-1320HFE2<br />
-1500HFU2<br />
2 - 12 (0.47)<br />
2 -12 (0.47)<br />
390 (15.35)<br />
300 (11.81) 2 - φ 12 (0.47)<br />
480 (18.90)<br />
380 (14.96)<br />
670 (26.38)<br />
700 (27.56)<br />
270 (10.63)<br />
2 - φ 12 (0.47)<br />
710 (27.95)<br />
740 (29.13)<br />
270 (10.63)<br />
Exhaust<br />
Air intake<br />
Exhaust<br />
Air intake
Inverter model<br />
SJ700 -1850HFU2/HFE2<br />
DC reactor model<br />
DCL-H-185<br />
For M16<br />
Dimensional drawings, continued...<br />
290 (11.41)<br />
15 (0.59)<br />
57.5 (2.26)<br />
200 (7.87)<br />
695 (27.36)<br />
300 (11.81)<br />
270 (10.62) max.<br />
P PD<br />
NP<br />
290 (11.41)<br />
57.5 (2.26)<br />
500 (19.68) max.<br />
170 (6.69)<br />
200 (7.87)<br />
15 (0.59)<br />
965 (37.99)<br />
15<br />
(0.59)<br />
3 - φ 15 (0.59)<br />
2 - M12 Eyebolts<br />
995 (39.17)<br />
4 - 11x18 (0.43x0.70)<br />
M6 Grounding terminal<br />
240 (9.44) max.<br />
<strong>SJ7002</strong> Inverter<br />
370 (14.56)<br />
Exhaust<br />
Air intake<br />
4 - M12 Threaded holes for eyebolts<br />
2–13<br />
Inverter Mounting<br />
and Installation
Inverter Mounting<br />
and Installation<br />
2–14<br />
Step-by-Step Basic Installation<br />
Model<br />
R38 - 8<br />
Model<br />
R38 - 8<br />
Dimensional drawings, continued...<br />
NOTE: The following crimp terminals are included with UL Listed inverter models<br />
SJ700-1850HFU2/HFE2.<br />
Terminal<br />
Type<br />
Corresponding<br />
StrandedWire Size, (mm 2 )<br />
Corresponding<br />
Screw Size<br />
R38–8 R26, 66–42, 42 M8<br />
38–16 R26, 66–42, 42 M16<br />
R150–16 117, 2–152, 05 M16<br />
φ 8.4 (0.33)<br />
22<br />
(0.87)<br />
17.7 (0.70)<br />
t1.8<br />
(0.07)<br />
φ 17 (0.67)<br />
36<br />
(1.42)<br />
t3.2<br />
(0.13)<br />
42.7 (1.68)<br />
14<br />
(0.55)<br />
68 (2.68)<br />
23 27<br />
(0.90) (1.06)<br />
φ 9.4 (0.37)<br />
φ 19.5 (0.77)<br />
φ 13.3 (0.52)<br />
φ 26.5 (1.04)<br />
Model<br />
R38 - 16<br />
φ 17 (0.67) 52.5 (2.07)<br />
30<br />
(1.18)<br />
23.5 (0.93)<br />
t1.8<br />
(0.07)<br />
14<br />
(0.55)
Inverter model<br />
SJ700 -3150HFU2/HFE2<br />
DC reactor model<br />
DCL-H-315<br />
Dimensional drawings, continued...<br />
680 (26.77)<br />
290 (11.41) 290 (11.41)<br />
15 (0.59)<br />
15 (0.59)<br />
50 (1.96) 50 (1.96)<br />
325 (12.79)<br />
285 (11.22)<br />
NP<br />
4 - φ 10 (0.39)<br />
285 (11.22)<br />
325 (12.79)<br />
100 (3.93) 100 (3.93)<br />
2x2 - φ 14 (0.55)<br />
50 50<br />
(1.96) (1.96)<br />
P PD<br />
36 (1.41)<br />
15 (0.59)<br />
1300 (51.18)<br />
1270 (50.0)<br />
15<br />
(0.59)<br />
3 - φ 15 (0.59)<br />
2 - M12 Eyebolts<br />
M10 Grounding terminal<br />
6 (0.23)<br />
393 (15.47)<br />
M10 Grounding terminal<br />
2 - M12 Threaded holes<br />
430 (16.92) max.<br />
<strong>SJ7002</strong> Inverter<br />
450 (17.71)<br />
Exhaust<br />
Air intake<br />
4 - M12 Threaded holes for eyebolts<br />
2 - M10 Eyebolts<br />
41.5<br />
(1.63)<br />
294 (11.57)<br />
2–15<br />
Inverter Mounting<br />
and Installation
Inverter Mounting<br />
and Installation<br />
2–16<br />
Step-by-Step Basic Installation<br />
Inverter model<br />
SJ700 -4000HFU2/HFE2<br />
DC reactor model<br />
DCL-H-400<br />
75 (2.95)<br />
Dimensional drawings, continued...<br />
300 (11.81)<br />
15 (0.59)<br />
325 (12.79)<br />
285 (11.22)<br />
100 (3.93) 100 (3.93)<br />
50<br />
(1.96)<br />
50<br />
(1.96)<br />
P PD<br />
1050 (41.33)<br />
300 (11.81) 300 (11.81)<br />
4 - φ 10 (0.39)<br />
2x2 - φ 14 (0.55)<br />
36 (1.41)<br />
285 (11.22)<br />
325 (12.79)<br />
15 (0.59)<br />
1670 (65.74)<br />
15 (0.59)<br />
15<br />
(0.59)<br />
NP M10 Grounding terminal<br />
6 (0.23)<br />
430 (16.92)<br />
1700 (66.92)<br />
75 (2.95)<br />
4 - φ 15 (0.59)<br />
2 - M16 Eyebolts<br />
450 (17.71) max.<br />
2 - M16<br />
Threaded holes<br />
450 (17.71)<br />
Exhaust<br />
Air intake<br />
4 - M16 Threaded holes for eyebolts<br />
2 - M8 Eyebolts<br />
331 (13.03) 41.5<br />
(1.63)
6<br />
Prepare for<br />
Wiring<br />
<strong>SJ7002</strong> Inverter<br />
Step 5: The wiring enters the inverter through an entry/exit plate. For plastic plates, remove the<br />
knockout portions of the plate. For metal plates with rubber grommets, cut an “X” in the center<br />
of the grommet as shown. Be especially careful to avoid cutting into the thick outer ring, so that<br />
the wiring will have a cushion from contacting the metal plate.<br />
Knockout area for logic/signal wiring<br />
Knockout areas for power wiring<br />
NOTE: Some inverter models will have a wiring box for NEMA rating compliance. Make sure<br />
the wire entry to the NEMA box also has protective cushion from chaffing of insulation.<br />
Before proceeding, please study the caution and warning messages below.<br />
WARNING: Use 75°C Cu wire only or equivalent.<br />
WARNING: Open Type Equipment. For models SJ700–750H to SJ700–4000H.<br />
WARNING: A Class 2 circuit wired with Class 1 wire or equivalent.<br />
Cut grommet(s) for use as shown<br />
WARNING: Suitable for use on a circuit capable of delivering not more than 100,000 rms<br />
symmetrical amperes, 240 V maximum. For models with suffix L.<br />
WARNING: Suitable for use on a circuit capable of delivering not more than 100,000 rms<br />
symmetrical amperes, 480 V maximum. For models with suffix H.<br />
HIGH VOLTAGE: Be sure to ground the unit. Otherwise, there is a danger of electric shock<br />
and/or fire.<br />
HIGH VOLTAGE: Wiring work shall be carried out only by qualified personnel. Otherwise,<br />
there is a danger of electric shock and/or fire.<br />
HIGH VOLTAGE: Implement wiring after checking that the power supply is OFF. Otherwise,<br />
you may incur electric shock and/or fire.<br />
HIGH VOLTAGE: Do not connect wiring to an inverter or operate an inverter that is not<br />
mounted according the instructions given in this manual. Otherwise, there is a danger of electric<br />
shock and/or injury to personnel.<br />
2–17<br />
Inverter Mounting<br />
and Installation
Inverter Mounting<br />
and Installation<br />
2–18<br />
Step-by-Step Basic Installation<br />
Determining Wire<br />
and Fuse Sizes<br />
This section includes tables for 200V class and 400V class inverters (on the next page). The<br />
following notes will help you read the tables in this section:<br />
Locate the row corresponding to the motor size and particular inverter in your application.<br />
The maximum motor current determines the recommended wire sizes.<br />
The length column specifies that some inverters can optionally use a smaller wire gauge if<br />
the wires are shorter than 10m and the inverter is located in an enclosure.<br />
Power Lines columns include wires connecting to terminals [R, S, T, U, V, W, P, PD, and N].<br />
Only power input and motor leads will be fused: [R, S, T, U, V, and W]. The breaker ratings<br />
(GFI—ground fault interrupter) are slightly higher than fuse ratings to allow for nominal<br />
surges without tripping.<br />
The chassis ground columns list the <strong>Hitachi</strong>-recommended AWG and the minimal AWG for<br />
UL conformity.<br />
The optional external braking resistor wiring only applies to a few models that have a builtin<br />
braking unit. The other models use an optional external braking unit.<br />
Parallel wires increase effective wire gauge, and are denoted by “||” in the tables.<br />
Signal Lines, not listed in these tables, connect to the removable logic connector. The recommended<br />
wire gauge for all wiring to the logic connector is 28 AWG (0.75 mm 2 ). Be sure to<br />
use shielded wire for any analog signals.<br />
Motor<br />
Output<br />
HP kW<br />
200V<br />
Inverter<br />
Models<br />
AWG mm 2<br />
* See notes for wiring tables on the following page.<br />
Wiring *1<br />
Power Lines *3 Chassis Ground Brake Res.<br />
Fuse<br />
(ULrated,<br />
class J,<br />
600V)<br />
Breaker<br />
(GFI<br />
type) *2<br />
AWG,<br />
rec.<br />
AWG,<br />
UL<br />
mm 2 AWG mm 2<br />
0.5 0.4 SJ700–004LFUF2 20 1.25 10A 10A 20 20 1.25 20 1.25<br />
1 0.75 SJ700–007LFUF2 18 1.25 10A 10A 20 20 1.25 20 1.25<br />
2 1.5 SJ700–015LFUF2 14 2 10A 10A 14 14 2 14 2<br />
3 2.2 SJ700–022LFUF2 14 2 15A 15A 14 14 2 14 2<br />
5 3.7 SJ700–037LFUF2 10 3.5 20A 20A 10 10 3.5 10 3.5<br />
7.5 5.5 SJ700–055LFUF2 8 5.5 30A 30A 8 10 5.5 8 5.5<br />
10 7.5 SJ700–075LFUF2 6 8 40A 40A 8 10 8 6 8<br />
15 11 SJ700–110LFUF2 4 14 60A 60A 4 10 14 10 14<br />
20 15 SJ700–150LFUF2 2 22 80A 80A 3 8 22 8 22<br />
25 18.5 SJ700–185LFU2 1 30 100A 100A 3 8 22 8 30<br />
30 22 SJ700–220LFU2 1 38 125A 125A 2 8 30 6 38<br />
40 30 SJ700–300LFU2 2/0 60 or<br />
22 || 22<br />
150A 150A 2 6 30 — —<br />
50 37 SJ700–370LFU2 4/0 100 or<br />
38 || 38<br />
175A 175A 1/0 6 38 — —<br />
60 45 SJ700–450LFU2 4/0 100 or<br />
38 || 38<br />
225A 225A 3/0 6 38 — —<br />
75 55 SJ700–550LFU2 2/0 || 2/0 150 or<br />
60 || 60<br />
250A 250A 3/0 4 60 — —
Motor<br />
Output<br />
HP kW<br />
Determining wire and fuse sizes, continued...<br />
400V<br />
Inverter Models<br />
AWG/<br />
kcmil<br />
Wiring *1<br />
<strong>SJ7002</strong> Inverter<br />
Power Lines *3 Chassis Ground Brake Res.<br />
mm 2<br />
Fuse<br />
(ULrated,<br />
class J,<br />
600V)<br />
Breaker<br />
( GFI<br />
type) *2<br />
AWG/<br />
kcmil,<br />
rec.<br />
AWG/<br />
kcmil,<br />
UL<br />
mm 2 AWG mm 2<br />
0.5 0.75 SJ700–007HFUF2/E 20 1.25 10A 10A 20 20 1.25 20 1.25<br />
1 1.5 SJ700–015HFUF2/E 18 2 10A 10A 18 18 2 18 2<br />
2 2.2 SJ700–022HFUF2/E 16 2 10A 10A 18 18 2 18 2<br />
3 4.0 SJ700–040HFUF2/E 14 2 15A 15A 18 18 2 18 2<br />
7.5 5.5 SJ700–055HFUF2/E 12 3.5 *5 15A 15A 10 12 3.3 10 3.5<br />
*5<br />
*5<br />
10 7.5 SJ700–075HFUF2/E 10 3.5 20A 20A 10 12 3.5 10 3.5<br />
15 11 SJ700–110HFUF2/E 8 5.5 30A 30A 8 10 5.5 8 5.5<br />
20 15 SJ700–150HFUF2/E 6 8 40A 40A 8 10 8 10 8<br />
25 18.5 SJ700–185HFU2/E 6 14 50A 50A 4 10 14 10 14<br />
30 22 SJ700–220HFU2/E 4 14 60A 60A 4 10 14 10 14<br />
40 30 SJ700–300HFU2/E 3 22 70A 70A 3 10 22 — —<br />
50 37 SJ700–370HFU2/E 1 38 90A 90A 3 8 38 — —<br />
60 45 SJ700–450HFU2/E 1 || 1 *6 38 125A 125A 1 8 38 — —<br />
75 55 SJ700–550HFU2/E 2/0 60 125A 125A 1 6 60 — —<br />
100 75 SJ700–750HFU2/E 1 || 1 *6 100 or<br />
38 || 38<br />
175A 175A 3 8 38 — —<br />
125 90 SJ700–900HFU2/E 1 || 1 *6 100 or<br />
38 || 38<br />
200A 200A 3 8 38 — —<br />
150 110 SJ700–1100HFU2/E 1/0 || 1/0 150 or<br />
60 || 60<br />
250A 250A 1 6 60 — —<br />
150 132 SJ700–1320HFE2,<br />
SJ700–1500HFU2<br />
3/0 || 3|0 80 || 80 300A 300A 3/0 3/0 80 — —<br />
250 185 SJ700–1850HFU2/E 300 || 152 || 400A 400A 250 250 127 — —<br />
300 152<br />
400 315 SJ700–3150HFU2/E 500 || 253 || 700A 700A 400 400 203 — —<br />
500 253<br />
500 400 SJ700–4000HFU2/E 800 || 405 || 1000A 1000A 600 600 304 — —<br />
800 405<br />
Note 1: Field wiring must be made by a UL-listed and CSA certified ring lug terminal<br />
connector sized for the wire gauge involved. The connector must be fixed by using<br />
the crimping tool specified by the connector manufacturer.<br />
Note 2: Be sure to consider the capacity of the circuit breaker to be used.<br />
Note 3: Be sure to use a larger wire gauge if power line length exceeds 66 ft (20m).<br />
Note 4: Prepackaged (included) square washer is to be used when the bare wire is directly<br />
connected to terminal without using crimp contact (such as ring lug connector).<br />
Note 5: When replacing J300-055HF or SJ300-055HFF2 inverter with SJ700-055HFF2,<br />
you may use power wiring size 2mm 2 .<br />
Note 6: Wire must be rated for operation up to 75°C.<br />
2–19<br />
Inverter Mounting<br />
and Installation
Inverter Mounting<br />
and Installation<br />
2–20<br />
Step-by-Step Basic Installation<br />
Terminal<br />
Dimensions and<br />
Torque Specs<br />
The following tables list the screw size of terminal and recommended torque for tightening for<br />
each of the <strong>SJ7002</strong> inverter models (400V models are on the next page).<br />
CAUTION: Fasten the screws with the specified fastening torque in the table below. Check for<br />
any loosening of screws. Otherwise, there is the danger of fire.<br />
200V Class <strong>Inverters</strong><br />
Motor<br />
Output<br />
Inverter Model<br />
Screw size of terminal<br />
Ring lug<br />
connector *1<br />
Torque<br />
HP kW AWG-bolt Metric ft-lbs N-m<br />
0.5 0.4 SJ700–004LFUF2 20–#10 M4 1.25–4 0.9 1.2<br />
1 0.75 SJ700–007LFUF2 20–#10 M4 1.25–4 0.9 1.2<br />
2 1.5 SJ700–015LFUF2 20–#10 M4 2–4 0.9 1.2<br />
3 2.2 SJ700–022LFUF2 20–#10 M4 2–4 0.9 1.2<br />
5 3.7 SJ700–037LFUF2 20–#10 M4 3.5–4 0.9 1.2<br />
7.5 5.5 SJ700-055LFUF2 8–#12 M5 R5.5–5 1.8 2.4<br />
10 7.5 SJ700-075LFUF2 8–#12 M5 R8–5 1.8 2.4<br />
15 11 SJ700-110LFUF2 4–1/4 M6 R14–6 3.0 4.0<br />
20 15 SJ700-150LFUF2 2–1/4 M6 22–6 3.3 4.5<br />
25 18.5 SJ700-185LFU2 1–1/4 M6 30–S6 3.3 4.5<br />
30 22 SJ700-220LFU2 1/0–5/16 M8 38–8 6.0 8.1<br />
40 30 SJ700-300LFU2 2–5/16 M8 60–8 6.0 8.1<br />
50 37 SJ700-370LFU2 1–5/16 M8 *2 100–8 6.0 8.1<br />
60 45 SJ700-450LFU2 1–5/16 M8 *2 100–8 6.0 8.1<br />
75 55 SJ700-550LFU2 2/0–1/2 M10 150–10 14.5 19.6<br />
Note 1: The recommended ring lug connector listing consists of wire size – screw size<br />
format. The wire sizes are in AWG or mm 2 format. For AWG wire sizes, bolt sizes<br />
for the ring lug centers are: #10, #12, 1/4”, 5/16”, and 1/2”. For metric wire sizes,<br />
bolt sizes for the ring lug centers are: 6 = 6M, 8 = 8M, 10 = 10M.<br />
Note 2: Prepackaged square washer is to be used when the bare wire is directly connected to<br />
terminal without using crimp contact (such as ring lug connector).<br />
Note 3: [N] terminal for braking unit is common to [N] terminal of power lines.<br />
TIP: AWG = <strong>America</strong>n Wire Gauge. Smaller numbers represent increasing wire thickness.<br />
kcmil = 1,000 circular mils, a measure of wire cross-sectional area<br />
mm 2 = square millimeters, a measure of wire cross-sectional area
Terminal dimensions and torque specs, continued...<br />
400V Class <strong>Inverters</strong><br />
<strong>SJ7002</strong> Inverter<br />
Motor<br />
Power Screw size of terminal<br />
Torque<br />
Output<br />
Ring lug<br />
Inverter Model connector<br />
connector *1<br />
terminals<br />
HP kW (AWG-bolt) Metric ft-lbs N-m<br />
0.5 0.75 SJ700–007HFUF2/E (All) 20–#10 M4 1.25–4 0.9 1.2<br />
1 1.5 SJ700–015HFUF2/E (All) 20–#10 M4 1.25–4 0.9 1.2<br />
2 2.2 SJ700–022HFUF2/E (All) 20–#10 M4 1.25–4 0.9 1.2<br />
3 4.0 SJ700–040HFUF2/E (All) 20–#10 M4 1.25–4 0.9 1.2<br />
7.5 5.5 SJ700-055HFUF2 (All) 8–#12 M5 5.5–5 1.8 2.4<br />
10 7.5 SJ700-075HFUF2 (All) 8–#12 M5 8–5 1.8 2.4<br />
15 11 SJ700-110HFUF2 (All) 4–1/4 M6 14–6 3.0 4.0<br />
20 15 SJ700-150HFUF2/E (All) 6–1/4 M6 8–6 3.3 4.5<br />
25 18.5 SJ700-185HFU2/E (All) 4–1/4 M6 14–6 3.3 4.5<br />
30 22 SJ700-220HFU2/E (All) 4–1/4 M6 14–6 3.3 4.5<br />
40 30 SJ700-300HFU2/E (All) 2–1/4 M6 22–6 3.3 4.5<br />
50 37 SJ700-370HFU2/E (All) 1/0–5/16 M8 *2 38–8 6.0 8.1<br />
60 45 SJ700-450HFU2/E (All) 1/0–5/16 M8 *2 38–8 6.0 8.1<br />
75 55 SJ700-550HFU2/E (All) 2–5/16 M8 *2 60–8 6.0 8.1<br />
100 75 SJ700–750HFU2/E (All) 1/0–1/2 M10 100–10 14.8 20.0<br />
125 90 SJ700–900HFU2/E (All) 1/0–1/2 M10 100–10 14.8 20.0<br />
150 110 SJ700–1100HFU2/E (All) 2/0–1/2 M10 150–10 14.8 20.0<br />
150 132 SJ700–1320HFE2,<br />
SJ700–1320HFU2<br />
(All) 2/0–1/2 M10 150–10 14.8 20.0<br />
250 185<br />
SJ700–1850HFU2/E<br />
*3<br />
400 315 SJ700–3150HFU2/E<br />
500 400 SJ700–4000HFU2/E<br />
R, S, T, U, V, W 127 mm 2 x 2 M16 R150–16 55.3 75.0<br />
P, PD, N 152 mm 2 x 2 M16 R150–16 55.3 75.0<br />
R, S, T, U, V, W 203 mm 2 x 2 M16 200–16 32.5 44.0<br />
P, PD, N 253 mm 2 x 2 M16 325–16 55.3 75.0<br />
R, S, T, U, V, W 304 mm 2 x 2 M12 325–12 32.5 44.0<br />
P, PD, N 405 mm 2 x 2 M12 *4 38.4 52.0<br />
Note 1: The recommended ring lug connector listing consists of wire size – screw size<br />
format. The wire sizes are in AWG or mm 2 format. For AWG wire sizes, bolt sizes<br />
for the ring lug centers are: #10, #12, 1/4”, 5/16”, and 1/2”. For metric wire sizes,<br />
bolt sizes for the ring lug centers are: 6 = 6M, 8 = 8M, 10 = 10M.<br />
Note 2: Prepackaged (included) square washer is to be used when the bare wire is directly<br />
connected to terminal without using crimp contact (such as ring lug connector).<br />
Note 3: For 1850HF model, use wires with the prepackaged (included) ring lug terminals<br />
when connecting the wires to the main circuit terminals.<br />
Note 4: [N] terminal for braking unit is common to [N] terminal of power lines.<br />
2–21<br />
Inverter Mounting<br />
and Installation
Inverter Mounting<br />
and Installation<br />
2–22<br />
Step-by-Step Basic Installation<br />
7<br />
Wire the Inverter<br />
Input to a Supply<br />
Step 6: In this step, you will connect wiring to the<br />
input of the inverter. All models have the same<br />
power connector terminals [R(L1)], [S(L2)], and<br />
[T(L3)] for three-phase input. The three phases<br />
may be connected in any order, as they are isolated<br />
from chassis ground and do not determine motor<br />
direction of rotation. Please refer to the specifications<br />
label (on the front or side of the inverter)<br />
for the acceptable input voltage ranges!<br />
NOTE: The wiring example to the right shows<br />
an SJ700-110LFU2 inverter. The terminal<br />
locations will vary, depending on the inverter<br />
model (see below). Note the use of ring lug<br />
connectors for a secure connection.<br />
Use the terminal arrangement below corresponding<br />
to your inverter model.<br />
NOTE: Be sure that the power is OFF before changing the jumper settings for [P]/[PD] or for<br />
the EMC filter selection.<br />
Inverter models: –004 to –037LFUF2, –007 to –037HFUF2/HFEF2<br />
R0<br />
T0<br />
J62<br />
R<br />
(L1)<br />
PD<br />
(+1)<br />
S<br />
(L2)<br />
P<br />
(+)<br />
T<br />
(L3)<br />
N<br />
U<br />
(T1)<br />
RB<br />
V<br />
(T2)<br />
W<br />
(T3)<br />
(–) (RB) (G) (G)<br />
Jumper bar<br />
EMC filter selection<br />
Enable (default for xFEF2)<br />
Jumper<br />
plug<br />
Cover plug<br />
(green)<br />
Disable (default for xFUF2)<br />
Cover plug<br />
(green)<br />
Jumper<br />
plug<br />
NOTE: For -055xxx and -075xxx (5.5–7.5kW) inverter models: The washer on the main<br />
terminal screw (R, S, T, PD, P, N, U, V, W, RB) has two cutouts. To prevent the cable clamping<br />
portion of crimp terminal from going under the washer, align the cutouts with the cable as<br />
shown below. Otherwise, you run the risk of a loose connection and fire.<br />
Washer under terminal screw<br />
J61
(Terminal diagrams, continued....)<br />
Inverter models: –055 to –110LFUF2, –055 to –110HFUF2/HFEF2<br />
R<br />
(L1)<br />
S<br />
(L2)<br />
T<br />
(L3)<br />
PD<br />
(+1)<br />
Inverter models: –150LFUF2 to 220LFU2, –150HFUF2 to –220HFU2/HFE2<br />
Inverter models: –300 to –370LFU2,<br />
–300 to –550HFU2/HFE2<br />
Enable<br />
EMC filter selection<br />
Disable<br />
(default)<br />
EMC filter selection<br />
Inverter models: –450LFU2<br />
R<br />
(L1)<br />
(G)<br />
S<br />
(L2)<br />
T<br />
(L3)<br />
Enable<br />
Disable<br />
(default)<br />
EMC filter selection<br />
Enable Disable<br />
(default)<br />
PD<br />
(+1)<br />
Inverter models: –550LFU2<br />
R<br />
(L1)<br />
(G)<br />
S<br />
(L2)<br />
T<br />
(L3)<br />
P<br />
(+)<br />
(G)<br />
PD<br />
(+1)<br />
N<br />
(–)<br />
Jumper<br />
bar<br />
R<br />
(L1)<br />
R0 T0<br />
P<br />
(+)<br />
U<br />
(T1)<br />
N<br />
(–)<br />
(G)<br />
R<br />
(L1)<br />
(G)<br />
S<br />
(L2)<br />
Jumper<br />
bar<br />
V<br />
(T2)<br />
R0 T0<br />
U<br />
(T1)<br />
S<br />
(L2)<br />
T<br />
(L3)<br />
W<br />
(T3)<br />
(G)<br />
V<br />
(T2)<br />
T<br />
(L3)<br />
PD<br />
(+1)<br />
(G)<br />
(G)<br />
W<br />
(T3)<br />
(G)<br />
PD<br />
(+1)<br />
P<br />
(+)<br />
P<br />
(+)<br />
P<br />
(+)<br />
N<br />
N<br />
(–)<br />
U<br />
<strong>SJ7002</strong> Inverter<br />
R0<br />
U<br />
(T1)<br />
Jumper bar<br />
V<br />
V<br />
(T2)<br />
W<br />
RB<br />
(RB)<br />
W<br />
(T3)<br />
(G)<br />
(–) (T1) (T2) (T3) (G)<br />
Jumper<br />
bar<br />
N<br />
(–)<br />
R0<br />
Jumper<br />
bar<br />
R0 T0<br />
Enable<br />
T0<br />
T0<br />
U<br />
(T1)<br />
V<br />
(T2)<br />
RB<br />
(RB)<br />
EMC filter selection<br />
Disable<br />
(default)<br />
EMC filter selection<br />
Enable<br />
Disable<br />
(default)<br />
W<br />
(T3)<br />
(G)<br />
2–23<br />
Inverter Mounting<br />
and Installation
Inverter Mounting<br />
and Installation<br />
2–24<br />
Step-by-Step Basic Installation<br />
Internal<br />
EMC Filter<br />
Status<br />
Inverter model: –750 to 1500HFU2<br />
Inverter model: –1850HFU2, HFE2<br />
(G)<br />
R<br />
(L1)<br />
R0 T0<br />
S<br />
(L2)<br />
T<br />
(L3)<br />
PD<br />
(+1)<br />
Inverter model: –3150HFU2, HFE2<br />
(G)<br />
R<br />
(L1)<br />
R0 T0<br />
S<br />
(L2)<br />
T<br />
(L3)<br />
PD<br />
(+1)<br />
Inverter model: –4000HFU2, HFE2<br />
P<br />
(+)<br />
P<br />
(+)<br />
P(+)<br />
The table below lists the nominal current that may leak from only the inverter when the internal<br />
EMC filter is enabled or disabled. Leakage current is in proportion to input power voltage and<br />
frequency. The values do not exclude current leakage from external devices and equipment<br />
(e.g., power cables). Inverter models from 75 kW to 132 kW does not have a switch to enable/<br />
disable the internal EMC filter. This complies EMC directive C3 level in standard condition.<br />
Units<br />
(G)<br />
R<br />
(L1)<br />
S<br />
(L2)<br />
R<br />
(L1)<br />
(G)<br />
R0 T0<br />
T<br />
(L3)<br />
S<br />
(L2)<br />
Jumper<br />
bar<br />
T<br />
(L3)<br />
PD<br />
(+1)<br />
200V Class <strong>Inverters</strong><br />
(Input voltage = 200VAC, 50 Hz)<br />
PD<br />
(+1)<br />
P<br />
(+)<br />
P<br />
(+)<br />
P<br />
(+)<br />
P<br />
(+)<br />
N<br />
U<br />
V<br />
W<br />
(–) (T1) (T2) (T3) (G)<br />
N<br />
(–)<br />
N<br />
U<br />
(T1)<br />
U<br />
V<br />
(T2)<br />
V<br />
W<br />
(T3)<br />
W<br />
(G)<br />
(–) (T1) (T2) (T3) (G)<br />
Jumper<br />
bar<br />
N<br />
(–)<br />
Jumper<br />
bar<br />
U<br />
(T1)<br />
V<br />
(T2)<br />
R0 T0<br />
W<br />
(T3)<br />
(G)<br />
400V Class <strong>Inverters</strong><br />
(Input voltage = 400VAC, 50 Hz)<br />
kW 0.4 – 3.7 5.5 – 11 15–37 45–55 .75–3.7 5.5–11 15–37 45–55 75–132<br />
Disabled ~mA 0.1 0.1 0.1 0.1 0.2 0.2 0.2 0.2 0.2<br />
Enabled ~mA 2.5 48 23 23 5 95 56 56 —
<strong>SJ7002</strong> Inverter<br />
NOTE: An inverter powered by a portable or emergency diesel power generator may result in a<br />
distorted power waveform, overheating the generator. In general, the generator capacity should<br />
be at least five times that of the inverter (kVA).<br />
CAUTION: Be sure that the input voltage matches the inverter specifications:<br />
Three phase 200 to 240V 50/60Hz<br />
Three phase 380 to 480V 50/60Hz<br />
CAUTION: Be sure not to power a three-phase-only inverter with single phase power. Otherwise,<br />
there is the possibility of damage to the inverter and the danger of fire.<br />
CAUTION: Be sure not to connect an AC power supply to the output terminals. Otherwise,<br />
there is the possibility of damage to the inverter and the danger of injury and/or fire.<br />
Power Input<br />
L1 L2 L3<br />
R S T<br />
Power Output<br />
T1 T2 T3<br />
U V W<br />
NOTE:<br />
L1, L2, L3:<br />
Three-phase 200 to 240V 50/60 Hz<br />
Three-phase 380 to 480V 50/60 Hz<br />
CAUTION: Remarks for using ground fault interrupter breakers in the main power supply:<br />
Adjustable frequency inverters with CE-filters (RFI-filter) and shielded (screened) motor<br />
cables have a higher leakage current toward Earth GND. Especially at the moment of switching<br />
ON this can cause an inadvertent trip of ground fault interrupter breakers. Because of the rectifier<br />
on the input side of the inverter there is the possibility to stall the switch-off function<br />
through small amounts of DC current. Please observe the following:<br />
Use only short time-invariant and pulse current-sensitive ground fault interrupter<br />
breakers with higher trigger current.<br />
Other components should be secured with separate ground fault interrupter breakers.<br />
Ground fault interrupter breakers in the power input wiring of an inverter are not an<br />
absolute protection against electric shock.<br />
CAUTION: Be sure to install a fuse in each phase of the main power supply to the inverter.<br />
Otherwise, there is the danger of fire.<br />
CAUTION: For motor leads, ground fault interrupter breakers and electromagnetic contactors,<br />
be sure to size these components properly (each must have the capacity for rated current<br />
and voltage). Otherwise, there is the danger of fire.<br />
2–25<br />
Inverter Mounting<br />
and Installation
Inverter Mounting<br />
and Installation<br />
2–26<br />
Step-by-Step Basic Installation<br />
8<br />
Wire the Inverter<br />
Output to Motor<br />
Logic Control<br />
Wiring<br />
9<br />
Uncover the<br />
Inverter Vents<br />
Step 7: The process of motor selection is beyond the scope of this manual. However, it must be<br />
a three-phase AC induction motor. It should also come with a chassis ground lug. If the motor<br />
does not have three power input leads, stop the installation and verify the motor type. Other<br />
guidelines for wiring the motor include:<br />
Use an inverter-grade motor for maximum motor life (1600V insulation).<br />
For standard motors, use an output filter if the wiring between the inverter and motor<br />
exceeds 10 meters in length.<br />
Simply connect the motor to the terminals<br />
[U/T1], [V/T2], and [W/T3] indicated on the<br />
inverter to the right. This is a good time to<br />
connect the chassis ground lug on the drive as<br />
well. The motor chassis ground must also<br />
connect to the same point. Use a star ground<br />
(single-point) arrangement, and never daisychain<br />
the grounds (point-to-point).<br />
Inverter<br />
Inverter<br />
Inverter<br />
Inverter<br />
Inverter<br />
Inverter<br />
User<br />
grounding<br />
bolt<br />
Use the same wire gauge on the motor and<br />
chassis ground wiring as you used on the<br />
power input wiring in the previous step. After<br />
completing the wiring:<br />
Check the mechanical integrity of each wire crimp and terminal connection.<br />
Replace the front panel and secure the retention screw firmly.<br />
After completing the initial installation and powerup test in this chapter, you may need to wire<br />
the logic signal connector for your application. For new inverter users/applications, we highly<br />
recommend that you first complete the powerup test in this chapter without adding any logic<br />
control wiring. Then you will be ready to set the required parameters for logic control as<br />
covered in Chapter 4, Operations and Monitoring.<br />
Step 8: After mounting and wiring the inverter,<br />
remove any protective material covering the<br />
inverter ventilation openings from Step 3. This<br />
includes covers over the side ventilation ports as<br />
well as the fan outlet area.<br />
CAUTION: Failure to remove all vent opening<br />
covers before electrical operation may result in<br />
damage to the inverter.<br />
To power<br />
source<br />
To chassis<br />
ground<br />
To motor<br />
Uncover the fan outlet vents<br />
Uncover the ventilation slots, both sides
Powerup Test<br />
10<br />
Perform the<br />
Powerup Test<br />
Goals for the<br />
Powerup Test<br />
Pre-test and<br />
Operational<br />
Precautions<br />
<strong>SJ7002</strong> Inverter<br />
Step 9: After wiring the inverter and motor, you’re ready to do a powerup test. The procedure<br />
that follows is designed for the first-time use of the drive. Please verify the following conditions<br />
before conducting the powerup test:<br />
You have followed all the steps in this chapter up to this step.<br />
The inverter is new, and is securely mounted to a non-flammable vertical surface<br />
The inverter is connected to a power source and motor.<br />
No additional wiring of inverter connectors or terminals has been done.<br />
The power supply is reliable, and the motor is a known working unit, and the motor<br />
nameplate ratings match the inverter ratings.<br />
The motor is securely mounted, and is not connected to any load.<br />
If there are any exceptions to the above conditions at this step, please take a moment to take any<br />
measures necessary to reach this basic starting point. The specific goals of this powerup test<br />
are:<br />
1. Verify that the wiring to the power supply and motor is correct.<br />
2. Demonstrate that the inverter and motor are generally compatible.<br />
3. Give a brief introduction to the use of the built-in operator keypad.<br />
The powerup test gives you an important starting point to ensure a safe and successful application<br />
of the <strong>Hitachi</strong> inverter. We highly recommend performing this test before proceeding to the<br />
other chapters in this manual.<br />
The following instructions apply to the powerup test, or to any time the inverter is powered and<br />
operating. Please study the following instructions and messages before proceeding with the<br />
powerup test.<br />
1. The power supply must have fusing suitable for the load. Check the fuse size chart<br />
presented in Step 5, if necessary.<br />
2. Be sure you have access to a disconnect switch for the drive input power if necessary.<br />
However, do not turn OFF power to the inverter during its operation unless it is an<br />
emergency.<br />
3. Turn the inverter’s front panel potentiometer (if it exists) to the MIN position (fully counterclockwise).<br />
CAUTION: The heat sink fins will have a high temperature. Be careful not to touch them.<br />
Otherwise, there is the danger of getting burned.<br />
CAUTION: The operation of the inverter can be easily changed from low speed to high speed.<br />
Be sure to check the capability and limitations of the motor and machine before operating the<br />
inverter. Otherwise, there is the danger of injury.<br />
2–27<br />
Inverter Mounting<br />
and Installation
Inverter Mounting<br />
and Installation<br />
2–28<br />
Powerup Test<br />
Powering the<br />
Inverter<br />
CAUTION: If you operate a motor at a frequency higher than the inverter standard default<br />
setting (50Hz/60Hz), be sure to check the motor and machine specifications with the respective<br />
manufacturer. Only operate the motor at elevated frequencies after getting their approval.<br />
Otherwise, there is the danger of equipment damage and/or injury to personnel.<br />
CAUTION: Check the following before and during the powerup test. Otherwise, there is the<br />
danger of equipment damage.<br />
Is the shorting bar between the [P] and [PD] terminals installed? DO NOT power or<br />
operate the inverter if the jumper is removed.<br />
Is the direction of the motor rotation correct?<br />
Did the inverter trip during acceleration or deceleration?<br />
Were the rpm and frequency meter readings as expected?<br />
Were there any abnormal motor vibrations or noise?<br />
If you have followed all the steps, cautions and warnings up to this point, you’re ready to apply<br />
power. After doing so, the following events should occur:<br />
The POWER LED will illuminate.<br />
The numeric (7-segment) LEDs will display a test pattern, then stop at 0.0.<br />
The Hz LED will be ON.<br />
If the motor starts running unexpectedly or any other problem occurs, press the STOP key. Only<br />
if necessary should you remove power to the inverter as a remedy.<br />
NOTE: If the inverter has been previously powered and programmed, the LEDs (other than the<br />
POWER LED) may illuminate differently than as indicated above. If necessary, you can initialize<br />
all parameters to the factory default settings. See “Restoring Factory Default Settings” on<br />
page 6–16.
Using the Front Panel Keypad<br />
Front Panel<br />
Introduction<br />
Parameter Editing<br />
and Controls<br />
<strong>SJ7002</strong> Inverter<br />
Please take a moment to familiarize yourself with the keypad layout shown in the figure below.<br />
Run/Stop LED<br />
Program/Monitor LED<br />
Run Key Enable LED<br />
Run Key<br />
Parameter Display<br />
RUN<br />
PRG<br />
RUN<br />
HITACHI<br />
60.0<br />
STOP<br />
RESET<br />
FUNC. 1 2 STR<br />
Stop/Reset Key<br />
POWER<br />
ALARM<br />
The display is used in programming the inverter’s parameters, as well as monitoring specific<br />
parameter values during operation. Many functions are applicable only during the initial installation,<br />
while others are more useful for maintenance or monitoring.<br />
The front panel controls and indicators are described as follows:<br />
Run/Stop LED – ON when the inverter output is ON and the motor is developing torque,<br />
and OFF when the inverter output is OFF (Stop Mode).<br />
Program/Monitor LED – This LED is ON when the inverter is ready for parameter editing<br />
(Program Mode). It is normally OFF when the parameter display is monitoring data<br />
(Monitor Mode). However, the PRG LED will be ON whenever you are monitoring the<br />
value of parameter D001. (When the keypad is enabled as the frequency source via<br />
A001=02, you can edit the inverter frequency directly from D001 monitor display by using<br />
the Up/Down keys.)<br />
Run Key Enable LED – is ON when the inverter is ready to respond to the Run key, OFF<br />
when the Run key is disabled.<br />
Run Key – Press this key to run the motor (the Run Enable LED must be ON first). Parameter<br />
F004, Keypad Run Key Routing, determines whether the Run key generates a Run FWD<br />
or Run REV command.<br />
Stop/Reset Key – Press this key to stop the motor when it is running (uses the programmed<br />
deceleration rate). This key will also reset an alarm that has tripped.<br />
Potentiometer (OPE–SRE only) – allows an operator to directly set the motor speed when<br />
the potentiometer is enabled for output frequency control.<br />
Potentiometer Enable LED – ON when the potentiometer is enabled for value entry.<br />
(OPE–SRE only).<br />
Parameter Display – a 4-digit, 7-segment display for parameters and function codes.<br />
Display Units: Hertz/Volts/Amperes/kW/% – These LEDs indicate the units associated<br />
with the parameter display. When the display is monitoring a parameter, the appropriate<br />
LED is ON. In the case of kW units, both Volts and Amperes LEDs will be ON. An easy<br />
way to remember this is that kW = (V x A)/1000.<br />
Power LED – This LED is ON when the power input to the inverter is ON.<br />
Alarm LED – This LED is ON when an alarm condition has tripped the inverter. Clearing<br />
the alarm will turn this LED OFF again. See Chapter 6 for details on clearing alarms.<br />
HZ<br />
V<br />
A<br />
%<br />
kW<br />
MIN MAX<br />
Power LED<br />
Alarm LED<br />
Display Units LEDs<br />
Hertz<br />
Volts or Amperes<br />
(kW = both ON)<br />
Percent<br />
Potentiometer Enable LED<br />
Potentiometer<br />
2–29<br />
Inverter Mounting<br />
and Installation
Inverter Mounting<br />
and Installation<br />
2–30<br />
Using the Front Panel Keypad<br />
Keys, Modes, and<br />
Parameters<br />
Function Key – This key is used to navigate<br />
through the lists of parameters and functions<br />
for setting and monitoring parameter values.<br />
Up/Down ( 1 , 2 ) Keys – Use these<br />
keys alternately to move up or down the lists<br />
of parameter and functions shown in the<br />
display, and increment/decrement values.<br />
Store ( STR ) Key – When the unit is in<br />
Program Mode and the operator has edited a<br />
parameter value, press the Store key to write<br />
the new value to the EEPROM. This parameter<br />
is then displayed at powerup by default.<br />
If you want to change the powerup default,<br />
navigate to a new parameter value and press<br />
the Store key.<br />
Purpose of the keypad is to provide a way to change modes and parameters. The term function<br />
applies to both monitoring modes and parameters. These are all accessible through function<br />
codes that are primarily 3 or 4-character codes. The various functions are separated into related<br />
groups identifiable by the left-most character, as the table shows.<br />
Function<br />
Group<br />
For example, function “A004” is the base frequency setting for the motor, typically 50 Hz or<br />
60 Hz. To edit the parameter, the inverter must be in Program Mode (PGM LED will be ON).<br />
You use the front panel keys to first select the function code “A004.” After displaying the value<br />
for “A004,” use the Up/Down ( 1 or 2 ) keys to edit the value.<br />
NOTE: The inverter 7-segment display shows lower case “b” and “d”, meaning the same as the<br />
upper case letters “B” and “D” used in this manual (for uniformity “A to F”).<br />
The inverter automatically switches into Monitor<br />
Mode when you access “D” Group functions. It<br />
switches into Program Mode when you access<br />
any other group, because they all have editable<br />
parameters. Error codes use the “E” Group, and<br />
appear automatically when a fault event occurs.<br />
Refer to “Monitoring Trip Events, History, &<br />
Conditions” on page 6–5 for error code details.<br />
RUN<br />
PRG<br />
Function<br />
key<br />
RUN<br />
HITACHI<br />
60.0<br />
STOP<br />
RESET<br />
POWER<br />
ALARM<br />
HZ<br />
V<br />
A<br />
%<br />
kW<br />
MIN MAX<br />
FUNC. 1 2 STR<br />
Up/Down<br />
keys<br />
Type (Category) of Function Mode to Access<br />
Store<br />
key<br />
PGM LED<br />
Indicator<br />
“D” Monitoring functions Monitor or<br />
“F” Main profile parameters Program<br />
“A” Standard functions Program<br />
“B” Fine tuning functions Program<br />
“C” Intelligent terminal functions Program<br />
“H” Motor constant functions Program<br />
“P” Expansion card functions Program<br />
“U” User-selectable menu functions Monitor<br />
“E” Error codes — —<br />
MONITOR PROGRAM<br />
“D” Group<br />
“A” Group<br />
“B” Group<br />
“C” Group<br />
“H” Group<br />
“P” Group<br />
“U” Group<br />
“F” Group
Keypad<br />
Navigational Map<br />
Display Data<br />
D002–D104<br />
<strong>SJ7002</strong> Inverter<br />
The <strong>SJ7002</strong> <strong>Series</strong> inverter drives have many programmable functions and parameters.<br />
Chapter 3 will cover these in detail, but you need to access just a few items to perform the<br />
powerup test. The menu structure makes use of function codes and parameter codes to allow<br />
programming and monitoring with only a 4-digit display and a few keys and LEDs. So, it is<br />
important to become familiar with the basic navigational map of parameters and functions in<br />
the diagram below. You can later use this map as a reference.<br />
0.00<br />
Increment/<br />
decrement<br />
value<br />
1<br />
Edit<br />
D001<br />
STR<br />
Store as<br />
powerup<br />
default<br />
2<br />
PRG LED<br />
0.00<br />
STR<br />
Write data<br />
to F001,<br />
store D001<br />
as powerup<br />
default<br />
Monitor Mode Program Mode<br />
FUNC.<br />
FUNC.<br />
Select Function<br />
1<br />
d 104<br />
1<br />
1<br />
1<br />
1<br />
1<br />
1<br />
1<br />
2<br />
2<br />
d00 1<br />
2<br />
U---<br />
2<br />
P---<br />
2<br />
H---<br />
2<br />
C---<br />
1<br />
2<br />
b---<br />
1<br />
2<br />
A---<br />
2<br />
F004<br />
2<br />
F00 1<br />
FUNC.<br />
FUNC.<br />
FUNC.<br />
Select Parameter<br />
U0 12<br />
FUNC. FUNC.<br />
1 2<br />
1<br />
1<br />
1<br />
1<br />
1<br />
1<br />
1<br />
1<br />
1<br />
1<br />
2<br />
2<br />
2<br />
2<br />
2<br />
2<br />
2<br />
2<br />
2<br />
2<br />
FUNC.<br />
FUNC.<br />
Edit Parameter<br />
U00 1 d00 1<br />
P 13 1<br />
P00 1<br />
H073<br />
H001<br />
C 168<br />
C00 1<br />
b 134<br />
b00 1<br />
A 153<br />
A00 1<br />
P 13 1<br />
1<br />
Increment/<br />
decrement<br />
value<br />
1<br />
Return to<br />
parameter<br />
list<br />
2<br />
FUNC.<br />
Edit<br />
2<br />
PRG LED<br />
123.4<br />
STR<br />
Write<br />
data to<br />
EEPROM,<br />
store as<br />
powerup<br />
default<br />
2–31<br />
Inverter Mounting<br />
and Installation
Inverter Mounting<br />
and Installation<br />
2–32<br />
Using the Front Panel Keypad<br />
Selecting<br />
Functions and<br />
Editing Parameters<br />
In order to run the motor for the powerup test, this section will show how to:<br />
select the inverter’s maximum output frequency to the motor<br />
select the keypad potentiometer as the source of motor speed command<br />
select the keypad as the source of the RUN command<br />
set the number of poles for the motor<br />
enable the RUN command<br />
The following series of programming tables are designed for successive use. Each table uses<br />
the previous table’s final state as the starting point. Therefore, start with the first and continue<br />
programming until the last one. If you get lost or concerned that some of the other parameters<br />
settings may be incorrect, refer to “Restoring Factory Default Settings” on page 6–16.<br />
CAUTION: If you operate a motor at a frequency higher than the inverter standard default<br />
setting (50Hz/60Hz), be sure to check the motor and machine specifications with the respective<br />
manufacturer. Only operate the motor at elevated frequencies after getting their approval.<br />
Otherwise, there is the danger of equipment damage.<br />
Setting the Motor Base Frequency -The motor is designed to operate at a specific AC<br />
frequency. Most commercial motors are designed for 50/60 Hz operation. First, check the<br />
motor specifications. Then follow the steps in the table below to verify the setting or correct for<br />
your motor. DO NOT set it for greater than 50/60 Hz unless the motor manufacturer<br />
specifically approves operation at the higher frequency.<br />
Press the key.<br />
Action Display Func./Parameter<br />
Press the or keys until -><br />
Press the key.<br />
FUNC. d00 1<br />
1 2 A---<br />
FUNC. A00 1<br />
Press the 1 key twice. A003<br />
Press the FUNC. key.<br />
60<br />
or<br />
50<br />
Press the 1 or 2 key as needed. 60<br />
Press the STR key. A003<br />
Monitor functions<br />
“A” Group selected<br />
First “A” parameter<br />
Base frequency setting<br />
Default value for base frequency<br />
US = 60 Hz, Europe = 50 Hz<br />
Set to your motor specs (your<br />
display may be different)<br />
Stores parameter, returns to “A”<br />
Group list<br />
TIP: If you need to scroll through a function or parameter list, press and hold the<br />
key to auto-increment through the list.<br />
1 or 2
<strong>SJ7002</strong> Inverter<br />
Select the Potentiometer for Speed Command - The motor speed may be controlled from the<br />
following sources:<br />
Potentiometer on front panel keypad (if present)<br />
Control terminals<br />
Remote panel<br />
Then follow the steps in the table below to select the potentiometer for the speed command (the<br />
table resumes action from the end of the previous table).<br />
Press the key twice.<br />
Press the key.<br />
Action Display Func./Parameter<br />
Press the 2 key.<br />
00<br />
Press the key.<br />
Speed command source setting<br />
0 = potentiometer<br />
1 = control terminals (default)<br />
2 = keypad<br />
0 = potentiometer (selected)<br />
Stores parameter, returns to “A”<br />
Group list<br />
Select the Keypad for the RUN Command - The RUN command causes the inverter to accelerate<br />
the motor to the selected speed. You can program the inverter to respond to either the<br />
control terminal signal or the keypad RUN key. Follow the steps in the table below to select the<br />
front panel RUN key as the source for the RUN Command (the table resumes action from the<br />
end of the previous table).<br />
Action Display Func./Parameter<br />
Press the 1 key. A002<br />
Run command source<br />
Press the key.<br />
2 A00 1<br />
FUNC. 0 1<br />
Press the 1 key.<br />
02<br />
Press the key.<br />
STR A00 1<br />
FUNC. 0 1<br />
STR A002<br />
1 = control terminals (default)<br />
2 = keypad<br />
2 = keypad (selected)<br />
Stores parameter, returns to “A”<br />
Group list<br />
NOTE: When you press the STR key in the last step above (and the display = 02), the Run<br />
Enable LED above the RUN switch on the keypad will turn ON. This is normal, and does not<br />
mean the motor is trying to run. It means that the RUN key is now enabled.<br />
DO NOT press the RUN key at this time—finish out the programming exercise first.<br />
2–33<br />
Inverter Mounting<br />
and Installation
Inverter Mounting<br />
and Installation<br />
2–34<br />
Using the Front Panel Keypad<br />
Configure the Inverter for the Number of Motor Poles- The number of magnetic poles of a<br />
motor is determined by the motor’s internal winding arrangement. The specifications label on<br />
the motor usually indicates its number of poles. For proper operation, verify the parameter<br />
setting matches the motor poles. Many industrial motors have four poles, corresponding to the<br />
default setting in the inverter.<br />
Follow the steps in the table below to verify the motor poles setting and change it if necessary<br />
(the table resumes action from the end of the previous table.)<br />
Press the key.<br />
Press the key three times.<br />
Press the key.<br />
Action Display Func./Parameter<br />
FUNC. A---<br />
1 H---<br />
Press the 1 or 2 key as needed. 4<br />
Press the key.<br />
FUNC. H00 1<br />
Press the 1 key five times. H004<br />
Press the FUNC. key.<br />
4<br />
STR H004<br />
“A” Group selected<br />
“H” Group selected<br />
First “H” parameter<br />
Motor poles parameter<br />
2 = 2 poles<br />
4 = 4 poles (default)<br />
6 = 6 poles<br />
8 = 8 poles<br />
Set to match your motor (your<br />
display may be different)<br />
Stores parameter, returns to “H”<br />
Group list<br />
This step concludes the parameter setups for the inverter. You are almost ready to run the motor<br />
for the first time!<br />
TIP: If you became lost during any of these steps, first observe the state of the PRG LED. Then<br />
study the “Keypad Navigational Map” on page 2–31 to determine the current state of the<br />
keypad controls and display. As long as you do not press the STR key, no parameters will be<br />
changed by keypad entry errors. Note that power cycling the inverter will not cause it to reset to<br />
a particular programming state.<br />
The next section will show you how to monitor a particular parameter from the display. Then<br />
you will be ready to run the motor.
Monitoring<br />
Parameters with<br />
the Display<br />
Running the<br />
Motor<br />
After using the keypad for parameter<br />
editing, it’s a good idea to switch the<br />
inverter from Program Mode to Monitor<br />
Mode. This will turn out the PRG LED, and<br />
the Hertz, Volt, Ampere, or % LED<br />
indicates the display units.<br />
<strong>SJ7002</strong> Inverter<br />
For the powerup test, monitor the motor speed indirectly by viewing the inverter’s output<br />
frequency. The output frequency must not be confused with base frequency (50/60 Hz) of the<br />
motor, or the carrier frequency (switching frequency of the inverter, in the kHz range). The<br />
monitoring functions are in the “D” list, located near the top left of the diagram in the “Keypad<br />
Navigational Map” on page 2–31.<br />
Output frequency (speed) monitor - Resuming the keypad programming from the previous<br />
table, follow the steps in the table below.<br />
Press the key.<br />
Press the key.<br />
Press the key.<br />
Action Display Func./Parameter<br />
FUNC. H---<br />
1 d00 1<br />
FUNC. 0.00<br />
FUNC. 1 2 STR<br />
“H” Group selected<br />
Output frequency selected<br />
Output frequency displayed<br />
When the d001 function code appeared, the PRG LED went OFF. This confirms the inverter is<br />
no longer in programming mode, even while you are selecting the particular monitoring parameter.<br />
After pressing the FUNC. key, the display shows the current speed (is zero at this point).<br />
If you have programmed all the parameters up to this point, you’re ready to run the motor!<br />
First, review this checklist:<br />
1. Verify the Power LED is ON. If not, check the power connections.<br />
2. Verify the Run Key Enable LED is ON. If not, review the programming steps to find the<br />
problem.<br />
3. Verify the PRG LED is OFF. If it is ON, review the instructions above.<br />
4. Make sure the motor is disconnected from any mechanical load.<br />
5. Turn the potentiometer to the MIN position (completely counterclockwise).<br />
6. Now, press the RUN key on the keypad. The RUN LED will turn ON.<br />
7. Slowly increase the potentiometer setting in clockwise fashion. The motor should start<br />
turning when the indicator is in the 9:00 position and beyond.<br />
8. Press the STOP key to stop the motor rotation.<br />
RUN<br />
PRG<br />
RUN<br />
HITACHI<br />
50.0<br />
STOP<br />
RESET<br />
POWER<br />
ALARM<br />
HZ<br />
V<br />
A<br />
%<br />
kW<br />
MIN MAX<br />
2–35<br />
Inverter Mounting<br />
and Installation
Inverter Mounting<br />
and Installation<br />
2–36<br />
Using the Front Panel Keypad<br />
11<br />
Powerup Test<br />
Observations and<br />
Summary<br />
Step 10: Reading this section will help you make some useful observations when first running<br />
the motor.<br />
Error Codes - If the inverter displays an error code (LED format is “E--”), see “Monitoring<br />
Trip Events, History, & Conditions” on page 6–5 to interpret and clear the error.<br />
Acceleration and Deceleration - The <strong>SJ7002</strong> inverter has programmable acceleration and<br />
deceleration values. The test procedure left these at the default value, 10 seconds. You can<br />
observe this by setting the potentiometer at about half speed before running the motor. Then<br />
press RUN, and the motor will take 5 seconds to reach a steady speed. Press the STOP key to<br />
see a 5 second deceleration to a stop.<br />
State of Inverter at Stop - If you adjust the motor’s speed to zero, the motor will slow to a near<br />
stop, and the inverter turns the outputs OFF. The high-performance <strong>SJ7002</strong> can rotate at a very<br />
slow speed with high torque output, but not zero (must use servo systems with position<br />
feedback for that feature). This characteristic means you must use a mechanical brake for some<br />
applications.<br />
Interpreting the Display - First, refer to the output frequency display readout. The maximum<br />
frequency setting (parameter A004) defaults to 50 Hz or 60 Hz (Europe and United States,<br />
respectively) for your application.<br />
Example: Suppose a 4-pole motor is rated for 60 Hz operation, so the inverter is configured to<br />
output 60 Hz at full scale. Use the following formula to calculate the RPM.<br />
RPM<br />
Frequency 60 × Frequency × 120 60 × 120<br />
= ---------------------------------------- = ------------------------------------------- = -------------------- = 1800RPM<br />
Pairs of poles # of poles 4<br />
The theoretical speed for the motor is 1800 RPM (synchronous speed). However, an induction<br />
motor cannot generate torque unless its shaft turns at a slightly different speed. This difference<br />
is called slip. So it’s common to see a rated speed of approximately 1750 RPM on a 60 Hz,<br />
4-pole motor. Using a tachometer to measure shaft speed, you can see the difference between<br />
the inverter output frequency and the actual motor speed. The slip increases slightly as the<br />
motor’s load increases. This is why the inverter output value is called “frequency,” since it is<br />
not exactly equal to motor speed. You can program the inverter to display output frequency in<br />
units more directly related to the load speed by entering a constant (discussed more in depth on<br />
page 3–45).<br />
Run/Stop Versus Monitor/Program Modes –<br />
The Run LED on the inverter is ON in Run Mode,<br />
STOP<br />
and OFF in Stop Mode. The Program LED is ON<br />
RESET<br />
Run Stop<br />
when the inverter is in Program Mode, and OFF for<br />
RUN<br />
Monitor Mode. All four mode combinations are<br />
possible. The diagram to the right depicts the<br />
modes and the mode transitions via keypad.<br />
FUNC.<br />
Monitor Program<br />
NOTE: Some factory automation devices such as PLCs have alternate Run/Program modes;<br />
the device is in either one mode or the other. In the <strong>Hitachi</strong> inverter, however, Run Mode alternates<br />
with Stop Mode, and Program Mode alternates with Monitor Mode. This arrangement<br />
lets you program some values while the inverter is operating—providing flexibility for<br />
maintenance personnel.
Emergency Stop Function<br />
<strong>SJ7002</strong> Inverter<br />
Introduction The SJ700 series inverter has the function of “uncontrolled stopping by removal of motor<br />
power” in accordance with Stop Category 0 defined by EN60204-1. The inverter is also<br />
designed to comply with Safety Category 3 of EN954-1. This function is generally called Safe<br />
Stop function. The emergency stop function shuts off the inverter output (i.e. stops the switching<br />
operation of the main circuit elements) in response to a command from a hardware circuit<br />
via an intelligent input terminal without the operation by internal CPU software.<br />
Carefully note the following points when installing or using the Emergency Stop Function:<br />
The emergency stop function does not electrically shut off the inverter but merely stops the<br />
switching operation of the main circuit elements. Therefore, do not touch any terminals of<br />
the inverter or any power lines, e.g., motor cables. Otherwise, electric shock, injury, or<br />
ground fault may result.<br />
All systems that include an inverter must comply with the requirements of EN60204-1<br />
(safety of machinery) and other applicable standards. You must confirm the contents of<br />
standards applicable to your system.<br />
Before installing a system using Safe Stop function, you must fully examine whether Safe<br />
Stop function and the safety category to be applied are adequate for your system. For details,<br />
refer to the standards required for your system.<br />
Every system must be configured with an inverter, a motor, and an external shutoff device.<br />
The external shutoff device must at least comply with Safety Category 3 of EN954-1.<br />
Safe Stop function is not intended for electrical insulation between the inverter and motor. If<br />
necessary, connect a shut off device (e.g., contactor) to the motor connection cable.<br />
Safe Stop function is not designed to prevent malfunctions in drive process control and<br />
application functions.<br />
Carefully note that digital outputs (i.e., relay and open collector outputs) are not regarded as<br />
the safety-related signals described here. The signals output from externally installed safety<br />
relays must be used for the safety-related control circuits installed for your system.<br />
Inverter<br />
Configuration<br />
To enable the emergency stop function, set the slide lever of slide switch SW1 to ON. The<br />
factory default SW1 setting is OFF (Emergency Stop disabled).<br />
NOTE: Before operating slide switch SW1, make sure that the input power supply is off.<br />
NOTE: Carefully note that improperly turning slide switch SW1 ON or OFF will automatically<br />
change function assignments to the control terminals of the inverter.<br />
Slide switch SW1<br />
ON<br />
Slide lever (factory setting: OFF)<br />
OFF ON<br />
2–37<br />
Inverter Mounting<br />
and Installation
Inverter Mounting<br />
and Installation<br />
2–38<br />
Emergency Stop Function<br />
SW1 Switch<br />
Setting<br />
OFF – Emergency<br />
Stop disabled<br />
(factory setting)<br />
ON – Emergency<br />
Stop enabled<br />
ON (after set to<br />
OFF once) –<br />
Emergency Stop<br />
disabled *3, *5<br />
When the emergency stop function is enabled, intelligent input terminals [1] and [3] are used<br />
exclusively for this function, and no other functions can be assigned to these terminals. Even if<br />
other functions have been assigned to these terminals, these are automatically disabled and<br />
these terminals are used exclusively for the emergency stop function.<br />
Terminal [1] function – This terminal always serves as the “a” (N.O.) contact for the reset<br />
[RS] signal. This signal resets the inverter and releases the inverter from the trip due to<br />
emergency stop (error code E37).<br />
Terminal [3] function – This terminal always serves as the “b” (N.C.) contact for the<br />
emergency stop [EMR] signal. This signal shuts off the inverter output without the operation by<br />
internal CPU software. This signal makes the inverter trip due to emergency stop (error<br />
code E37).<br />
NOTE: If intelligent input terminal [3] is left unconnected, the cable connected to the terminal<br />
is disconnected, or the signal logic is improper, the inverter trips due to emergency stop (E37).<br />
If this occurs, check and correct the wiring and signal logic, and then input the reset [RS]<br />
signal. Only the reset [RS] signal input from intelligent input terminal [1] can release the<br />
inverter from tripping due to emergency stop (E37). The inverter cannot be released from the<br />
E37 trip status by any operation from the digital operator.<br />
Intelligent input terminal [1] Intelligent input terminal [3]<br />
Function selection<br />
(normally C001)<br />
a/b (N.O./N.C.)<br />
selection (use C011) *1<br />
Function selection<br />
(normally C003)<br />
a/b (N.O./N.C.)<br />
selection (use C013)<br />
*1, *2<br />
User selectable *4 User selectable *4 User selectable *4 User selectable *4<br />
Factory<br />
setting<br />
[RS],<br />
code 18<br />
Factory<br />
setting<br />
N.O.,<br />
code 00<br />
Factory<br />
setting<br />
[JG],<br />
code 06<br />
Factory<br />
setting<br />
N.O.,<br />
code 00<br />
Automatic assignment of functions to intelligent input terminals [1] and [3] and the terminal assigned<br />
[RS] (code 18) *3<br />
Fixed<br />
(cannot be<br />
changed)<br />
[RS],<br />
code 18<br />
Fixed<br />
(cannot be<br />
changed)<br />
N.O.,<br />
code 00<br />
Fixed<br />
(cannot be<br />
changed)<br />
[EMR],<br />
code 64<br />
Fixed<br />
(cannot be<br />
changed)<br />
N.C.,<br />
code 01<br />
User selectable *4 User selectable *4 User selectable *4 User selectable *4<br />
Setting<br />
retained<br />
when SW1<br />
is set ON<br />
[RS],<br />
code 18<br />
Setting<br />
retained<br />
when SW1<br />
is set ON<br />
N.O.,<br />
code 00<br />
Released<br />
from<br />
emergency<br />
stop<br />
function<br />
(No<br />
function<br />
assigned)<br />
Setting<br />
retained<br />
when SW1<br />
is set ON<br />
N.C.,<br />
code 01<br />
Note 1: When function [RS] (code 18) is assigned to the input terminal, “a/b (N.O./N.C.)”<br />
selection is always 00 (N.O.).<br />
Note 2: When terminal setting C003 is [EMR] (code 64), terminal setting C013 is always<br />
01 (N.C.).<br />
Note 3: If function [RS] (code18) has been assigned to an intelligent input terminal other than<br />
intelligent input terminals [1] and [3] before slide switch SW1 is set to ON, the input<br />
terminal setting for that terminal is automatically changed to NO (no function<br />
assigned) when slide switch SW1 is set to ON. This prevents any duplication of<br />
terminal functions. Even if slide switch SW1 is subsequently turned OFF, the original<br />
function setting for the terminal will not be restored. If necessary, the original<br />
function will have to be reassigned to the terminal.<br />
Example – If slide switch SW1 is set to ON when function [RS] (code18) has been<br />
assigned to input terminal 2 (by terminal setting C002), terminal setting C002 is<br />
changed to NO (no function assigned), and function [RS] (code 18) is assigned to<br />
input terminal 1 (by terminal setting C001). Even if slide switch SW1 is subsequently
Copying Inverter<br />
Data<br />
<strong>SJ7002</strong> Inverter<br />
turned OFF, terminal [2] function C002 and terminal [1] function C001 will remain<br />
as NO (no function assigned) and [RS] (code 18), respectively.<br />
Note 4: Function [EMR] (code 64) cannot be assigned to input terminal 3 by an operation<br />
from the digital operator. The function is automatically assigned to the terminal when<br />
slide switch SW1 is set to ON.<br />
Note 5: After slide switch SW1 has been set to ON once, function assignments to intelligent<br />
input terminals [1] and [3] are not returned to their original assignments. If necessary,<br />
reassign original functions to the intelligent input terminals.<br />
Note that data from an inverter configured for the emergency stop function can affect copy<br />
operations when using an optional operator (SRW or SRW-EX).<br />
If operator data is copied to a SJ700 series inverter that has slide switch SW1 in the ON<br />
position from another SJ700 series inverter whose slide switch SW1 is OFF or an SJ300 series<br />
inverter, the digital operator on your SJ700 series inverter may display [R-ERROR COPY<br />
ROM] for a moment. This event may occur because the data on intelligent input terminals [1]<br />
and [3] cannot be copied since, on your inverter, exclusive functions have already been<br />
assigned to intelligent input terminals [1] and [3] due to the slide switch SW1 setting to ON.<br />
Note that other data is copied. If this event occurs, check the settings on both copy-source and<br />
copy-destination inverters.<br />
NOTE: To use the copied data in inverter operation, power OFF and ON again after the copy<br />
operation is complete.<br />
Safety Categories The following Safety Categories are defined by EN954-1 (JIS B 9705).<br />
Category Safety requirement System behavior<br />
B<br />
Components, safety-related parts of control<br />
system, and protective equipment must be<br />
designed, manufactured, selected, assembled,<br />
and combined in accordance with related<br />
standards to ensure resistance to the anticipated<br />
adverse effects of faults.<br />
1 The requirements of Category B must be<br />
applied. Proven components and safety<br />
principles must be applied.<br />
2 The requirements of Category B and proven<br />
safety principle specifications must be applied.<br />
The safety function must be checked by the<br />
machine control system at appropriate intervals.<br />
The requirements of category B and<br />
proven safety principle specifications must be<br />
applied. Safety-related parts must be designed<br />
to meet the following requirements:<br />
• Any single defect (fault) in a part must not<br />
cause any loss of the safety functions.<br />
• If a single defect (fault) occurs, it must<br />
always be detected when the safety function<br />
can be reasonably implemented.<br />
A defect (fault) may cause a loss<br />
of the safety function.<br />
A defect (fault) may cause a loss<br />
of the safety function. However,<br />
the probability of loss is less than<br />
that specified for Category B.<br />
• A defect (fault) occurring<br />
during checking may cause a<br />
loss of the safety function.<br />
• A loss of the safety function is<br />
detected by checking.<br />
Principle for<br />
achieving<br />
safety<br />
Characterized<br />
mainly by the<br />
selection of<br />
components<br />
Characterized<br />
mainly by the<br />
structure<br />
2–39<br />
Inverter Mounting<br />
and Installation
Inverter Mounting<br />
and Installation<br />
2–40<br />
Emergency Stop Function<br />
Category Safety requirement System behavior<br />
3 The requirements of category B and proven<br />
safety principle specifications must be applied.<br />
Safety-related parts must be designed to meet<br />
the following requirements:<br />
• The safety function always operates when a<br />
single defect (fault) occurs.<br />
• Each single defect (fault) is eventually<br />
detected to prevent the loss of the safety<br />
function.<br />
4 The requirements of category B and proven<br />
safety principle specifications must be applied.<br />
Safety-related parts must be designed to meet<br />
the following requirements:<br />
• Any single defect (fault) in a part must not<br />
cause any loss of the safety function.<br />
• If a single defect (fault) occurs, it must<br />
be detected when or before the next<br />
operation request is made to the safety<br />
function. If single defects (faults) cannot<br />
be detected, the accumulation of defects<br />
(faults) must not cause any loss of the<br />
safety function.<br />
• The safety function always<br />
operates when a single defect<br />
(fault) occurs.<br />
• Almost all defects (faults) are<br />
detected.<br />
• Accumulation of undetected<br />
defects (faults) may cause a<br />
loss of the safety function.<br />
• The safety function always<br />
operates when a single defect<br />
(fault) occurs.<br />
• Each single defect (fault) is<br />
eventually detected to prevent<br />
the loss of the safety function.<br />
NOTE: The system manufacturer is responsible for selecting the level of risk factors in<br />
accordance with EN954-1. (Stop categories are defined by EN60204-1.)<br />
Wiring Examples The examples of wiring shown below are based on the three stop categories compliant with<br />
European Machinery Directive EN60204-1.<br />
Category 0: (Uncontrolled) stopping by immediate removal of power to machine actuators<br />
Category 1: Stopping by removal of power after controlled stopping with power to machine<br />
actuators retained<br />
Category 2: Controlled stopping with power to machine actuators retained<br />
NOTE: The Safe Stop function must be activated at least once a year for preventive<br />
maintenance purposes.<br />
Principle for<br />
achieving<br />
safety<br />
Characterized mainly<br />
by the structure<br />
NOTE: Before preventive maintenance, the machine must be turned off. If the power supply to<br />
the motor is not turned off during testing, the Safe Stop function will not operate. In such case,<br />
the inverter must be replaced.<br />
The examples of wiring below are intended to implement the Safe Stop function through safety<br />
input of the EMR signal by the method complying with EN954-1 Category 3.<br />
The emergency stop circuit is monitored via an external safety relay (safety switching<br />
device).<br />
One safety relay (safety switching device) can be used for multiple inverters.
Example with<br />
sourcing logic<br />
Example with<br />
sinking logic<br />
Emergency<br />
stop<br />
Emergency<br />
stop<br />
R +<br />
T –<br />
S13<br />
S14<br />
R +<br />
T –<br />
S13<br />
S14<br />
Safety switching device<br />
S22<br />
S12<br />
S11<br />
S33<br />
S34<br />
PNOZ X5<br />
13<br />
14<br />
23<br />
24<br />
Safety switching device<br />
S22<br />
S12<br />
S11<br />
S33<br />
S34<br />
PNOZ X5<br />
13<br />
14<br />
23<br />
24<br />
R<br />
S<br />
T<br />
G<br />
R<br />
S<br />
T<br />
G<br />
Inverter<br />
<strong>SJ7002</strong><br />
<strong>SJ7002</strong> Inverter<br />
NOTE: The safety relay (safety switching device) used in these examples is the PNOZ X5<br />
made by Pilz. Use a safety switching device equivalent to the PNOZ X5.<br />
R<br />
S<br />
T<br />
G<br />
P24<br />
PLC<br />
CM1<br />
1<br />
2<br />
3<br />
4<br />
5<br />
6<br />
7<br />
8<br />
1<br />
2<br />
3<br />
4<br />
5<br />
6<br />
7<br />
8<br />
[RS]<br />
[EMR]<br />
Inverter<br />
U<br />
V<br />
W<br />
G<br />
SW1<br />
ON<br />
<strong>SJ7002</strong><br />
R U<br />
S V<br />
T W<br />
G<br />
P24<br />
PLC<br />
CM1<br />
[RS]<br />
[EMR]<br />
G<br />
SW1<br />
ON<br />
Motor<br />
Motor<br />
2–41<br />
Inverter Mounting<br />
and Installation
Inverter Mounting<br />
and Installation<br />
2–42<br />
Emergency Stop Function<br />
S13 Emergency stop button – Switches the inverter into safe stop mode and the motor into<br />
free-running status<br />
S14 Start/stop button – Switches the inverter into safe stop mode by [EMR] signal input to a<br />
digital input terminal and sets the motor into free-running status. (This operation corresponds<br />
to EN60204-1 Stop Category 0.)<br />
Safe stop mode continues as long as the [EMR] signal is input or until the [RS] signal is<br />
input even after the [EMR] signal is canceled.<br />
To use the inverter for an application in which a mechanical brake (such as a crane or<br />
elevator) must be controlled, the safety output from an external safety relay must be serially<br />
connected to the brake control circuit.<br />
NOTE: The cables used for safety relay wiring, the EMR signal, and RS signal must be<br />
shielded coaxial cables, such as type RG174/U complying with MIL-C17 (made by LAPP) or<br />
KX3B complying with NF C 93-550. Each cable must be 2.8 mm in outer diameter and 2 m or<br />
less in length. The cable shielding must be grounded.<br />
NOTE: Every inductor-related device, such as a relay or contactor, must have an over-voltage<br />
protection circuit.
Configuring<br />
Drive Parameters<br />
3<br />
In This Chapter.... page<br />
— Choosing a Programming Device ..................................................... 2<br />
— Using Keypad Devices...................................................................... 3<br />
— “D” Group: Monitoring Functions ...................................................... 6<br />
— “F” Group: Main Profile Parameters.................................................. 9<br />
— “A” Group: Standard Functions ....................................................... 10<br />
— “B” Group: Fine-Tuning Functions .................................................. 30<br />
— “C” Group: Intelligent Terminal Functions ....................................... 50<br />
— “H” Group: Motor Constants Functions ........................................... 66<br />
— “P” Group: Expansion Card Functions............................................ 69<br />
— “U” Group: User-selectable Menu Functions .................................. 74<br />
— Programming Error Codes.............................................................. 75
Configuring Drive<br />
Parameters 3–2<br />
Choosing a Programming Device<br />
Choosing a Programming Device<br />
Introduction <strong>Hitachi</strong> variable frequency drives (inverters) use the latest electronics technology for getting the<br />
right AC waveform to the motor at the right time. The benefits are many, including energy<br />
savings and higher machine output or productivity. The flexibility required to handle a broad<br />
range of applications has required ever more configurable options and parameters—inverters<br />
are now a complex industrial automation component. And this can make a product seem difficult<br />
to use, but the goal of this chapter is to make this easier for you.<br />
As the powerup test in Chapter 2 demonstrated, you do not have to program very many parameters<br />
to run the motor. In fact, most applications would benefit only from programming just a<br />
few, specific parameters. This chapter will explain the purpose of each set of parameters, and<br />
help you choose the ones that are important to your application.<br />
If you are developing a new application for the inverter and a motor, finding the right parameters<br />
to change is mostly an exercise in optimization. Therefore, it is okay to begin running the<br />
motor with a loosely tuned system. By making specific, individual changes and observing their<br />
effects, you can achieve a finely tuned system. And, the <strong>SJ7002</strong> <strong>Series</strong> inverters have a built-in<br />
auto-tuning algorithm to set certain motor parameters.<br />
Inverter<br />
Programming<br />
Keypads<br />
The front panel keypad is the first and best way to get to know the inverter’s capabilities. Every<br />
function or programmable parameter is accessible from the keypad. All keypads have the same<br />
basic layout, but with different features. The OPE–SRE has a potentiometer knob for frequency<br />
setting input. The SRW–0EX Read/write Copy Unit has the ability to upload (copy) or<br />
download (write) all inverter parameter data to/from memory in the copy unit itself. This unit is<br />
useful in transferring one inverter’s settings to another.<br />
The following table shows various programming options, the features unique to each device,<br />
and the cables required.<br />
Device<br />
Inverter keypad,<br />
U.S. version<br />
Inverter keypad,<br />
European version<br />
Read/write Copy<br />
Unit with Keypad<br />
Part<br />
Number<br />
Parameter<br />
Access<br />
OPE–SRE Monitor and<br />
program<br />
OPE–S Monitor and<br />
program<br />
SRW–0EX Monitor and<br />
program; read or<br />
write all data<br />
Parameter<br />
setting<br />
storage<br />
EEPROM in<br />
inverter<br />
EEPROM in<br />
inverter<br />
EEPROM in<br />
inverter or in<br />
copy unit<br />
Cables (for optional<br />
external mounting)<br />
Part<br />
number<br />
Length<br />
ICS–1 1 meter<br />
ICS–3 3 meters<br />
Use same two cables as<br />
above<br />
Use same two cables as<br />
above<br />
TIP: Other special-purpose keypads are available, such as ones to serve the needs of the HVAC<br />
market (heating, ventilating & air conditioning). Please contact your <strong>Hitachi</strong> distributor for<br />
details.
Using Keypad Devices<br />
Inverter Front<br />
Panel Keypad<br />
Key and<br />
Indicator Legend<br />
<strong>SJ7002</strong> Inverter<br />
The <strong>SJ7002</strong> <strong>Series</strong> inverter front keypad contains all the elements for both monitoring and<br />
programming parameters. The keypad layout (OPE–SRE) is shown below. All other<br />
programming devices for the inverter have a similar key arrangement and function.<br />
Run/Stop LED<br />
Program/Monitor LED<br />
Run Key Enable LED<br />
Run Key<br />
Stop/Reset Key<br />
Parameter Display<br />
RUN<br />
PRG<br />
RUN<br />
HITACHI<br />
60.0<br />
STOP<br />
RESET<br />
POWER<br />
ALARM<br />
FUNC. 1 2 STR<br />
Run/Stop LED – ON when the inverter output is ON and the motor is developing torque,<br />
and OFF when the inverter output is OFF (Stop Mode).<br />
Program/Monitor LED – This LED is ON when the inverter is ready for parameter editing<br />
(Program Mode). It is normally OFF when the parameter display is monitoring data<br />
(Monitor Mode). However, the PRG LED will be ON whenever you are monitoring the<br />
value of parameter D001. (When the keypad is enabled as the frequency source via<br />
A001=02, you can edit the inverter frequency directly from D001 monitor display by using<br />
the Up/Down keys.)<br />
Run Key – Press this key to run the motor (the Run Enable LED must be ON first). Parameter<br />
F004, Keypad Run Key Routing, determines whether the Run key generates a Run FWD<br />
or Run REV command.<br />
Run Key Enable LED – is ON when the inverter is ready to respond to the Run key, OFF<br />
when the Run key is disabled.<br />
Stop/Reset Key – Press this key to stop the motor when it is running (uses the programmed<br />
deceleration rate). This key will also reset an alarm that has tripped.<br />
Potentiometer (OPE–SRE only) – allows an operator to directly set the motor speed when<br />
the potentiometer is enabled for output frequency control<br />
Potentiometer Enable LED – ON when the potentiometer is enabled for value entry<br />
(OPE–SRE only).<br />
Parameter Display – a 4-digit, 7-segment display for parameters and function codes.<br />
Display Units: Hertz/Volts/Amperes/kW/% – These LEDs indicate the units associated<br />
with the parameter display. When the display is monitoring a parameter, the appropriate<br />
LED is ON. In the case of kW units, both Volts and Amperes LEDs will be ON. An easy<br />
way to remember this is that kW = (V x A)/1000.<br />
Power LED – This LED is ON when the power input to the inverter is ON.<br />
Alarm LED – This LED is ON when an alarm condition has tripped the inverter. Clearing<br />
the alarm will turn this LED OFF again. See Chapter 6 for details on clearing alarms.<br />
Function Key – This key is used to navigate through the lists of parameters and functions<br />
for setting and monitoring parameter values.<br />
Up/Down ( 1 , 2 ) Keys – Use these keys to alternately move up or down the lists of<br />
parameter and functions shown in the display, and increment/decrement values.<br />
Store ( STR<br />
) Key – When the unit is in Program Mode and the operator has edited a parameter<br />
value, press the Store key to write the new value to the EEPROM. This parameter is then<br />
displayed at powerup by default. If you want to change the powerup default, navigate to a<br />
new parameter value and press the Store key.<br />
HZ<br />
V<br />
A<br />
%<br />
kW<br />
MIN MAX<br />
Power LED<br />
Alarm LED<br />
Display Units LEDs<br />
Hertz<br />
Volts or Amperes<br />
(kW = both ON)<br />
Percent<br />
Potentiometer Enable LED<br />
Potentiometer<br />
3–3<br />
Configuring Drive<br />
Parameters
Configuring Drive<br />
Parameters 3–4<br />
Using Keypad Devices<br />
Keypad<br />
Navigational Map<br />
Display Data<br />
D002–D104<br />
Whether you use the keypad on the inverter or the read-write copy unit, each navigates the same<br />
way. The diagram below shows the basic navigational map of parameters and functions.<br />
0.00<br />
Increment/<br />
decrement<br />
value<br />
1<br />
Edit<br />
D001<br />
STR<br />
Store as<br />
powerup<br />
default<br />
2<br />
PRG LED<br />
0.00<br />
STR<br />
Write data<br />
to F001,<br />
store D001<br />
as powerup<br />
default<br />
Monitor Mode Program Mode<br />
FUNC.<br />
FUNC.<br />
Select Function<br />
1<br />
d 104<br />
1<br />
1<br />
1<br />
1<br />
1<br />
1<br />
1<br />
2<br />
2<br />
d00 1<br />
2<br />
U---<br />
2<br />
P---<br />
2<br />
H---<br />
2<br />
C---<br />
1<br />
2<br />
b---<br />
1<br />
2<br />
A---<br />
2<br />
F004<br />
2<br />
F00 1<br />
FUNC.<br />
FUNC.<br />
FUNC.<br />
Select Parameter<br />
U0 12<br />
FUNC. FUNC.<br />
1 2<br />
Increment/<br />
decrement<br />
value<br />
NOTE: The inverter 7-segment display shows lower case “b” and “d”, meaning the same as the<br />
upper case letters “B” and “D” used in this manual (for uniformity “A to F”).<br />
1<br />
1<br />
1<br />
1<br />
1<br />
1<br />
1<br />
1<br />
1<br />
1<br />
2<br />
2<br />
2<br />
2<br />
2<br />
2<br />
2<br />
2<br />
2<br />
2<br />
FUNC.<br />
FUNC.<br />
Edit Parameter<br />
U00 1 d00 1<br />
P 13 1<br />
P00 1<br />
H073<br />
H001<br />
C 168<br />
C00 1<br />
b 134<br />
b00 1<br />
A 153<br />
A00 1<br />
P 13 1<br />
1<br />
1<br />
Return to<br />
parameter<br />
list<br />
2<br />
FUNC.<br />
Edit<br />
2<br />
PRG LED<br />
123.4<br />
STR<br />
Write<br />
data to<br />
EEPROM,<br />
store as<br />
powerup<br />
default
Operational<br />
Modes<br />
The RUN and PGM LEDs tell just part of the story;<br />
Run Mode and Program Modes are independent<br />
modes, not opposite modes. In the state diagram to<br />
the right, Run alternates with Stop, and Program<br />
Mode alternates with Monitor Mode. This is a very<br />
important ability, for it shows that a technician can<br />
approach a running machine and change some<br />
parameters without shutting down the machine.<br />
The occurrence of a fault during operation will<br />
cause the inverter to enter the Trip Mode as shown.<br />
An event such as an output overload will cause the<br />
inverter to exit the Run Mode and turn OFF its<br />
output to the motor. In the Trip Mode, any request<br />
to run the motor is ignored. You must clear the<br />
error by pressing the Stop/Reset switch. See<br />
“Monitoring Trip Events, History, & Conditions”<br />
on page 6–5.<br />
<strong>SJ7002</strong> Inverter<br />
Run Mode Edits The inverter can be in Run Mode (inverter output is controlling motor) and still allow you to<br />
edit certain parameters. This is useful in applications that must run continuously, yet need some<br />
inverter parameter adjustment.<br />
Control<br />
Algorithms<br />
The parameter tables in this chapter have a column titled “Run Mode<br />
Edit.” An Ex mark ✘ means the parameter cannot be edited; a Check<br />
mark ✔ means the parameter can be edited. You’ll notice in the table<br />
example to the right the two adjacent marks: “✘ ✔”. The two marks<br />
(that can also be “✘ ✘” or “✔ ✔”) correspond to these levels of access<br />
to editing:<br />
Low-access level to Run Mode edits (indicated by left-most mark)<br />
High-access level to Run Mode edits (indicated by right-most mark)<br />
The Software Lock Setting (parameter B031) determines the particular access level that is in<br />
effect during Run Mode and access in other conditions, as well. It is the responsibility of the<br />
user to choose a useful and safe software lock setting for the inverter operating conditions and<br />
personnel. Please refer to “Software Lock Mode” on page 3–38 for more information.<br />
The motor control program in the <strong>SJ7002</strong><br />
inverter has several sinusoidal PWM<br />
switching algorithms. The intent is that you<br />
select the best algorithm for the motor<br />
characteristics in your application. Each<br />
algorithm generates the frequency output in<br />
a unique way. Once configured, the<br />
algorithm is the basis for other parameter<br />
settings as well (see “Torque Control<br />
Algorithms” on page 3–14). Therefore,<br />
choose the best algorithm early in your<br />
application design process.<br />
STOP<br />
RESET<br />
Run Stop<br />
RUN<br />
Monitor Program<br />
Fault<br />
STOP<br />
RESET<br />
FUNC.<br />
Run Stop<br />
RUN<br />
STOP<br />
RESET<br />
Trip Fault<br />
Run<br />
Mode<br />
Edit<br />
Lo Hi<br />
✘ ✔<br />
Inverter Control Algorithms<br />
V/f control,<br />
constant torque<br />
V/f control,<br />
variable torque<br />
V/f control, freesetting<br />
curve<br />
Sensorless vector<br />
(SLV) control<br />
SLV control,<br />
0Hz domain<br />
Vector control with<br />
sensor<br />
Output<br />
3–5<br />
Configuring Drive<br />
Parameters
Configuring Drive<br />
Parameters 3–6<br />
“D” Group: Monitoring Functions<br />
“D” Group: Monitoring Functions<br />
Parameter<br />
Monitoring<br />
Functions<br />
You can access important system parameter values with the “D” Group monitoring functions,<br />
whether the inverter is in Run Mode or Stop Mode. After selecting the function code number<br />
for the parameter you want to monitor, press the Function key once to show the value on the<br />
display. In Functions D005 and D006 the intelligent terminals use individual segments of the<br />
display to show ON/OFF status.<br />
Func.<br />
Code<br />
Name Description Units<br />
D001 Output frequency monitor Real-time display of output frequency to<br />
motor, from 0.0 to 400.0 Hz<br />
D002 Output current monitor Filtered display of output current to motor<br />
(100 mS internal filter time constant)<br />
0.0 to 400.0<br />
Hz<br />
D003 Rotation direction monitor Three different indications: —<br />
D004 Process variable (PV), PID<br />
feedback monitor<br />
D005 Intelligent input terminal<br />
status<br />
D006 Intelligent output terminal<br />
status<br />
D007 Scaled output frequency<br />
monitor<br />
Displays the scaled PID process variable<br />
(feedback) value (A75 is scale factor)<br />
Displays the state of the intelligent input<br />
terminals:<br />
8<br />
FW<br />
Forward Stop Reverse<br />
Displays the state of the intelligent output<br />
terminals:<br />
Displays the output frequency scaled by the<br />
constant in B0086. Decimal point indicates<br />
range:<br />
XX.XX 0.00 to 99.99<br />
XXX.X 100.0 to 999.9<br />
XXXX. 1000 to 9999<br />
XXXX 10000 to 99990<br />
D008 Actual frequency monitor Displays the actual shaft speed of the motor,<br />
converted to frequency<br />
D009 Torque command monitor Displays the level of the torque command<br />
when the inverter is set to torque control mode<br />
D010 Torque bias monitor Displays the level of the torque bias, if<br />
enabled, when the inverter is in vector control<br />
mode with feedback<br />
7<br />
6<br />
5<br />
4<br />
3<br />
Terminal symbols<br />
AL<br />
15 14 13 12 11<br />
Terminal symbols<br />
2<br />
1<br />
ON<br />
OFF<br />
ON<br />
OFF<br />
A<br />
—<br />
—<br />
—<br />
Userdefined<br />
Hz<br />
%<br />
%
Func.<br />
Code<br />
<strong>SJ7002</strong> Inverter<br />
D012 Torque monitor Estimated output torque value, range is -300.0<br />
to +300.0%<br />
%<br />
D013 Output voltage monitor Voltage of output to motor,<br />
range is 0.0 to 600.0V<br />
VAC<br />
D014 Power monitor Input power to inverter, range is 0.0 to 999.9 kW<br />
D015 Cumulative power monitor Displays cumulative input power to inverter;<br />
B079 selects the multiplier for units. Range is<br />
0.0 to 999.9, 1000 to 9999, or 100 to 999<br />
kW/h<br />
D016 Cumulative operation RUN<br />
time monitor<br />
D017 Cumulative power-on time<br />
monitor<br />
D018 Heat sink temperature<br />
monitor<br />
Displays total time the inverter has been in<br />
RUN mode in hours.<br />
Range is 0 to 9999 / 1000 to 9999/<br />
100 to 999 (10,000 to 99,900) hrs.<br />
Displays total time the inverter has had input<br />
power (ON) in hours. Range is:<br />
0 to 9999 / 100.0 to 999.9 /<br />
1000 to 9999 / 100 to 999 hrs.<br />
Displays the temperature of the inverter’s heat<br />
sink<br />
D019 Motor temperature monitor Displays motor internal temperature (requires<br />
an NTC thermistor installed in the motor and<br />
connected to [TH] and [CM1]).<br />
D022 Component life monitor Displays estimated life status of DC bus<br />
capacitors and cooling fans<br />
D023 Program counter Displays the current program step being<br />
executed when the inverter is operating under<br />
the control of an EZ Sequence program<br />
D024 Program number counter Displays the EZ Sequence program identification<br />
number, if defined in the program, when a<br />
program is loaded in the inverter<br />
hours<br />
hours<br />
°C<br />
°C<br />
—<br />
Programs<br />
Program<br />
D025 User monitor 0 Displays state of internal EZ Sequence register<br />
User Monitor 0<br />
—<br />
D026 User monitor 1 Displays state of internal EZ Sequence register<br />
User Monitor 1<br />
—<br />
D027 User monitor 2 Displays state of internal EZ Sequence register<br />
User Monitor 2<br />
—<br />
D028 Pulse counter Displays accumulated pulse count of [PCNT]<br />
intelligent input terminal (option code 74)<br />
Pulses<br />
D029 Position setting monitor Displays absolute position command for<br />
motor shaft in absolute position control mode<br />
Pulses<br />
D030 Position feedback monitor Displays absolute position of motor shaft<br />
when in absolute position control mode<br />
Pulses<br />
D102 DC voltage monitoring Displays the DC Bus voltage V<br />
D103 BRD load factor monitoring Displays the running average Dynamic<br />
Braking usage ratio (%ED)<br />
%<br />
D104 Electronic thermal overload<br />
monitoring<br />
Name Description Units<br />
Displays the motor electronic thermal<br />
overload estimated temperature ratio. If the<br />
value reaches 100%, the inverter will trip<br />
(E05).<br />
%<br />
3–7<br />
Configuring Drive<br />
Parameters
Configuring Drive<br />
Parameters 3–8<br />
“D” Group: Monitoring Functions<br />
Trip Event and<br />
Programming<br />
Error Monitoring<br />
The trip event and history monitoring feature lets you cycle through related information using<br />
the keypad. See “Monitoring Trip Events, History, & Conditions” on page 6–5 for more details.<br />
Programming errors generate an error code that begins with the special character. See<br />
“Programming Error Codes” on page 3–75 for more information.<br />
Func.<br />
Code<br />
Name Description Units<br />
D080 Trip Counter Number of trip events —<br />
D081<br />
to<br />
D086<br />
Trip monitor 1 to 6 Displays trip event information —<br />
D090 Programming error<br />
monitor<br />
Displays programming error code —
“F” Group: Main Profile Parameters<br />
Func.<br />
Code<br />
Name/<br />
Description<br />
The basic frequency (speed) profile is<br />
defined by parameters contained in the<br />
“F” Group as shown to the right. The<br />
output frequency is set in Hz, but acceleration<br />
and deceleration are specified<br />
seconds (the time to ramp from zero to<br />
maximum frequency, or from maximum<br />
frequency to zero). The motor direction<br />
parameter determines whether the<br />
keypad Run key produces a FW or RV<br />
command. This parameter does not<br />
Output<br />
frequency<br />
F001<br />
<strong>SJ7002</strong> Inverter<br />
F002 F003<br />
affect the [FW] terminal or [RV] intelligent terminal function, which you configure separately.<br />
Acceleration 1 and Deceleration 1 are the standard default accel and decel values for the main<br />
profile. Accel and decel values for an alternative profile are specified by using parameters Ax92<br />
through Ax93. The motor direction selection (F004) determines the direction of rotation as<br />
commanded only from the keypad. This setting applies to any motor profile (1st, 2nd, or 3rd) in<br />
use at a particular time.<br />
Keypad<br />
SRW OPE<br />
Range and Settings<br />
FEF2<br />
FE2<br />
(EU)<br />
Defaults<br />
FUF2<br />
FU2<br />
(USA)<br />
F001 Output frequency setting<br />
Standard default target frequency that determines<br />
constant motor speed<br />
— — 0 to 400 (Hz) 0.00 0.00 0.00 ✔ ✔<br />
F002 Acceleration (1) time setting<br />
Standard default acceleration<br />
— — 0.01 to 3600 (seconds) 30.0 30.0 30.0 ✔ ✔<br />
F202 Acceleration (1) time setting, 2nd motor<br />
Standard default acceleration, 2nd motor<br />
— — 0.01 to 3600 (seconds) 30.0 30.0 30.0 ✔ ✔<br />
F302 Acceleration (1) time setting, 3rd motor<br />
Standard default acceleration, 3rd motor<br />
— — 0.01 to 3600 (seconds) 30.0 30.0 30.0 ✔ ✔<br />
F003 Deceleration (1) time setting<br />
Standard default deceleration<br />
— — 0.01 to 3600 (seconds) 30.0 30.0 30.0 ✔ ✔<br />
F203 Deceleration (1) time setting, 2nd motor<br />
Standard default deceleration, 2nd motor<br />
— — 0.01 to 3600 (seconds) 30.0 30.0 30.0 ✔ ✔<br />
F303 Deceleration (1) time setting, 3rd motor<br />
Standard default deceleration, 3rd motor<br />
— — 0.01 to 3600 (seconds) 30.0 30.0 30.0 ✔ ✔<br />
F004 Keypad Run key routing FW 00 Forward 00 00 00 ✘ ✘<br />
RV 0 1 Reverse<br />
FF2<br />
F2<br />
(Jpn)<br />
t<br />
Run<br />
Mode<br />
Edit<br />
Lo Hi<br />
3–9<br />
Configuring Drive<br />
Parameters
Configuring Drive<br />
Parameters<br />
3–10<br />
“A” Group: Standard Functions<br />
“A” Group: Standard Functions<br />
Basic Parameter<br />
Settings<br />
Func.<br />
Code<br />
Name/<br />
Description<br />
These settings affect the most fundamental behavior of the inverter—the outputs to the motor.<br />
The frequency of the inverter’s AC output determines the motor speed. You may select from<br />
three different sources for the reference speed. During application development you may prefer<br />
using the potentiometer, but you may switch to an external source (control terminal setting) in<br />
the finished application, for example.<br />
The base frequency and maximum frequency settings interact according to the graph below<br />
(left). The inverter output operation follows the constant V/f curve until it reaches the full-scale<br />
output voltage. This initial straight line is the constant-torque part of the operating characteristic.<br />
The horizontal line over to the maximum frequency serves to let the motor run faster, but at<br />
a reduced torque. This is the constant-horsepower part of the characteristic. If you want the<br />
motor to output constant torque over its entire operating range (limited to the motor nameplate<br />
voltage and frequency rating), then set the base frequency and maximum frequency equal as<br />
shown (below right).<br />
V<br />
V<br />
A003 A004<br />
100% 100%<br />
t<br />
0 0<br />
Base<br />
Frequency<br />
Maximum<br />
Frequency<br />
Constant torque<br />
A003<br />
A004<br />
Base frequency =<br />
maximum frequency<br />
NOTE: The “2nd motor” and “3rd motor” settings in the tables in this chapter store an alternate<br />
set of parameters for additional motors. The inverter can use the 1st, 2nd, or 3rd set of<br />
parameters to generate the output frequency to the motor. See “Configuring the Inverter for<br />
Multiple Motors” on page 4–76.<br />
Keypad<br />
SRW OPE<br />
Range and Settings<br />
FEF2<br />
FE2<br />
(EU)<br />
Defaults<br />
FUF2<br />
FU2<br />
(USA)<br />
A001 Frequency source setting VR 00 Keypad potentiometer 01 01 02 ✘ ✘<br />
TRM 0 1 Control terminal<br />
REM 02 Function F001 setting<br />
RS485 03 RS485 serial command<br />
OP1 04 Expansion board 1<br />
OP2 05 Expansion board 2<br />
PLS 06 Pulse train input<br />
PRG 07 Easy sequence<br />
MATH 10 Calculate function input<br />
A002 Run command source setting TRM 0 1 Input terminal [FW] or [RV] (assignable) 01 01 02 ✘ ✘<br />
REM 02 Run key on keypad of digital operator<br />
RS485 03 RS485 serial command<br />
OP1 04 Start/Stop, expansion card #1<br />
OP2 05 Start/Stop, expansion card #2<br />
FF2<br />
F2<br />
(Jpn)<br />
t<br />
Run<br />
Mode<br />
Edit<br />
Lo Hi
Func.<br />
Code<br />
Name/<br />
Description<br />
Analog Input and<br />
Miscellaneous<br />
Settings<br />
Keypad<br />
SRW OPE<br />
<strong>SJ7002</strong> Inverter<br />
A003 Base frequency setting 30. to maximum frequency (Hz) 50. 60. 60. ✘ ✘<br />
A203 Base frequency setting, 2nd motor 30. to maximum frequency (Hz) 50. 60. 60. ✘ ✘<br />
A303 Base frequency setting, 3rd motor 30. to maximum frequency (Hz) 50. 60. 60. ✘ ✘<br />
A004 Maximum frequency setting 30. to 400. (Hz) 50. 60. 60. ✘ ✘<br />
A204 Maximum frequency setting, 2nd motor 30. to 400. (Hz) 50. 60. 60. ✘ ✘<br />
A304 Maximum frequency setting, 3rd motor 30. to 400. (Hz) 50. 60. 60. ✘ ✘<br />
NOTE: Intelligent terminals [OPE] (option code 31) or [F-TM] (option code 51) can override<br />
settings A001 and A002 when either terminal is ON and the operation commands for that<br />
terminal is enabled.<br />
NOTE: When using a remote operator (SRW) to operate the inverter, the REMT (remote) key<br />
allows you to enter the frequency setting and operation commands remotely.<br />
NOTE: When the DeviceNet option board (SJ-DN) is installed, you may keep the A002<br />
default setting because the Run Command Source is automatically set via DeviceNet. Otherwise,<br />
only use settings A002 = 01, 02, or 03.<br />
NOTE: The base frequency must be less than or equal to the maximum frequency (ensure that<br />
A003 ≤ A004).<br />
The inverter has the capability to accept external analog inputs that can command the output<br />
frequency to the motor. Signals including voltage input (0 to +10V) at terminal [O], bipolar<br />
input (-10 to +10V) at terminal [O2], and current input (4 to 20mA) at terminal [OI] are available.<br />
Terminal [L] serves as signal ground for the three analog inputs. The analog input settings<br />
adjust the curve characteristics between the analog input and the frequency output.<br />
Adjusting [O–L] characteristics – In the<br />
graph to the right, A013 and A014 select<br />
the active portion of the input voltage<br />
range. Parameters A011 and A012 select<br />
the start and end frequency of the<br />
converted output frequency range, respectively.<br />
Together, these four parameters<br />
define the major line segment as shown.<br />
When the line does not begin at the origin<br />
(A011 and A013 > 0), then A015 defines<br />
whether the inverter outputs 0Hz or the<br />
A011-specified frequency when the<br />
analog input value is less than the A013<br />
setting. When the input voltage is greater<br />
than the A014 ending value, the inverter<br />
outputs the ending frequency specified by<br />
A012.<br />
Range and Settings<br />
f<br />
A012<br />
A011<br />
0%<br />
0V<br />
FEF2<br />
FE2<br />
(EU)<br />
max. frequency<br />
A015=0<br />
A015=1<br />
A013 A014<br />
Defaults<br />
FUF2<br />
FU2<br />
(USA)<br />
FF2<br />
F2<br />
(Jpn)<br />
Run<br />
Mode<br />
Edit<br />
Lo Hi<br />
% input<br />
100%<br />
10V<br />
3–11<br />
Configuring Drive<br />
Parameters
Configuring Drive<br />
Parameters<br />
3–12<br />
Func.<br />
Code<br />
“A” Group: Standard Functions<br />
Name/<br />
Description<br />
Adjusting [OI–L] characteristics – In<br />
the graph to the right, A103 and A104<br />
select the active portion of the input<br />
current range. Parameters A101 and A102<br />
select the start and end frequency of the<br />
converted output frequency range, respectively.<br />
Together, these four parameters<br />
define the major line segment as shown.<br />
When the line does not begin at the origin<br />
(A101 and A103 > 0), then A105 defines<br />
whether the inverter outputs 0Hz or the<br />
A101-specified frequency when the<br />
analog input value is less than the A103<br />
setting. When the input voltage is greater<br />
than the A104 ending value, the inverter outputs the ending frequency specified by A102.<br />
Adjusting [O2–L] characteristics – In<br />
the graph to the right, A113 and A114<br />
select the active portion of the input<br />
voltage range. Parameters A111 and<br />
A112 select the start and end frequency of<br />
the converted output frequency range,<br />
respectively. Together, these four parameters<br />
define the major line segment as<br />
shown. When the input voltage is less<br />
than the A113 input starting value, the<br />
inverter outputs the starting frequency<br />
specified by A111. When the input<br />
voltage is greater than the A114 ending<br />
value, the inverter outputs the ending<br />
frequency specified by A112.<br />
Keypad<br />
SRW OPE<br />
f<br />
A102<br />
A101<br />
–100%<br />
-10V<br />
0%<br />
4mA<br />
Range and Settings<br />
max. frequency<br />
A105=0<br />
A113<br />
A105=1<br />
A103 A104<br />
f<br />
A112<br />
max. rev frequency<br />
0<br />
FEF2<br />
FE2<br />
(EU)<br />
% input<br />
100%<br />
20mA<br />
max. fwd frequency<br />
A111<br />
f<br />
Defaults<br />
FUF2<br />
FU2<br />
(USA)<br />
A114<br />
FF2<br />
F2<br />
(Jpn)<br />
% input<br />
+100%<br />
+10V<br />
A005 [AT] selection O/OI 00 Select between [O] and [OI] at [AT] 00 00 00 ✘ ✘<br />
O/O2 0 1 Select between [O] and [O2] at [AT]<br />
O/VR 02 Select between [O] and keypad pot.<br />
OI/VR 03 Select between [OI] and keypad pot.<br />
O2/VR 04 Select between [O2] and keypad pot.<br />
A006 [O2] selection O2 00 No summing, [O2] and [OI] 03 03 03 ✘ ✘<br />
O/OI-P 0 1 Sum of [O2] and [OI], neg. sum (reverse<br />
speed reference) inhibited<br />
O/OI-PM 02 Sum of [O2] and [OI], neg. sum (reverse<br />
speed reference) allowed<br />
OFF 03 Disable [O2] input<br />
A011 [O]–[L] input active range start frequency 0.00 to 99.99, 100.0 to 400.00 (Hz); 0.00 0.00 0.00 ✘ ✔<br />
The output frequency corresponding to the<br />
voltage input range starting point<br />
model -4000HFx2 is 0.00 to 120.00 (Hz)<br />
A012 [O]–[L] input active range end frequency 0.00 to 99.99, 100.0 to 400.00 (Hz); 0.00 0.00 0.00 ✘ ✔<br />
The output frequency corresponding to the<br />
voltage input range ending point<br />
model -4000HFx2 is 0.00 to 120.00 (Hz)<br />
Run<br />
Mode<br />
Edit<br />
Lo Hi
Func.<br />
Code<br />
Name/<br />
Description<br />
Multi-speed and<br />
Jog Frequency<br />
Settings<br />
<strong>SJ7002</strong> Inverter<br />
A013 [O]–[L] input active range start voltage 0. to [O]-[L] input active range end 0. 0. 0. ✘ ✔<br />
The starting point for the voltage input range<br />
voltage (%)<br />
A014 [O]–[L] input active range end voltage [O]-[L] input active range start voltage to 100. 100. 100. ✘ ✔<br />
The ending point for the voltage input range<br />
100. (%)<br />
A015 [O]–[L] input start frequency 0-EXS 00 Use A011 start value 01 01 01 ✘ ✔<br />
enable<br />
OHz 0 1 Use 0 Hz<br />
A016 External frequency filter time constant n = 1 to 30 (where n = number of<br />
samples for average); 31=500ms filter<br />
8. 8. 8. ✘ ✔<br />
A017 Easy sequence function<br />
enable<br />
Func.<br />
Code<br />
Name/<br />
Description<br />
A019 Multi-speed operation selection<br />
Keypad<br />
SRW OPE<br />
OFF 00 Disable 00 00 00 ✘ ✘<br />
ON 0 1 Enable<br />
Range and Settings<br />
FEF2<br />
FE2<br />
(EU)<br />
Defaults<br />
FUF2<br />
FU2<br />
(USA)<br />
FF2<br />
F2<br />
(Jpn)<br />
Run<br />
Mode<br />
Edit<br />
Lo Hi<br />
The <strong>SJ7002</strong> inverter has the capability to store and output up to 16 preset frequencies to the<br />
motor (A020 to A035). As in traditional motion terminology, we call this multi-speed profile<br />
capability. These preset frequencies are selected by means of digital inputs to the inverter. The<br />
inverter applies the current acceleration or deceleration setting to change from the current<br />
output frequency to the new one. The first multi-speed setting is duplicated for the second<br />
motor settings (the remaining 15 multi-speeds apply only to the first motor).<br />
The jog speed setting is used whenever the Jog command is active. The jog speed setting range<br />
is arbitrarily limited to 10 Hz to provide safety during manual operation. The acceleration to the<br />
jog frequency is instantaneous, but you can choose from six modes for the best method for<br />
stopping the jog operation.<br />
Keypad<br />
SRW OPE<br />
Range and Settings<br />
BINARY 00 Binary; up to 16-stage speed using<br />
4 intelligent terminals<br />
BIT 0 1 Single-bit; up to 8-stage speed using<br />
7 intelligent terminals<br />
A020 Multi-speed frequency setting 0 to 360 (Hz)<br />
Defines the first speed of a multi-speed profile<br />
A020 = Speed 0 (1st motor)<br />
A220 Multi-speed frequency setting, 2nd motor 0 to 360 (Hz)<br />
Defines the first speed of a multi-speed profile<br />
for 2nd motor<br />
A220 = Speed 0 (2nd motor)<br />
A320 Multi-speed frequency setting, 3rd motor 0 to 360 (Hz)<br />
Defines the first speed of a multi-speed profile<br />
for 3rd motor<br />
A320 = Speed 0 (3rd motor)<br />
A021 Multi-speed frequency settings<br />
0 to 360 (Hz)<br />
to (for multiple motors)<br />
A021 = Speed 1...<br />
A035<br />
Defines 15 additional speeds<br />
A035 = Speed 15<br />
FEF2<br />
FE2<br />
(EU)<br />
Defaults<br />
FUF2<br />
FU2<br />
(USA)<br />
FF2<br />
F2<br />
(Jpn)<br />
Run<br />
Mode<br />
Edit<br />
Lo Hi<br />
00 00 00 ✘ ✘<br />
0.00 0.00 0.00 ✔ ✔<br />
0.00 0.00 0.00 ✔ ✔<br />
0.00 0.00 0.00 ✔ ✔<br />
0.00 0.00 0.00 ✔ ✔<br />
3–13<br />
Configuring Drive<br />
Parameters
Configuring Drive<br />
Parameters<br />
3–14<br />
Func.<br />
Code<br />
“A” Group: Standard Functions<br />
Name/<br />
Description<br />
A038 Jog frequency setting 0.5 to 9.99 (Hz) 1.00 1.00 1.00 ✔ ✔<br />
A039<br />
Defines limited speed for jog<br />
Jog stop mode FRS 00 Free-run stop, jogging disabled during<br />
motor run<br />
Defines how end of jog stops<br />
the motor<br />
Torque Control<br />
Algorithms<br />
Keypad<br />
SRW OPE<br />
DEC 0 1 Controlled deceleration, jogging<br />
disabled during motor run<br />
DB 02 DC braking to stop, jogging disabled<br />
during motor run<br />
R-FRS 03 Free-run stop, jogging always enabled<br />
R-DEC 04 Controlled deceleration, jogging always<br />
enabled<br />
R-DB 05 DC braking to stop, jogging always<br />
enabled<br />
The inverter generates the motor output<br />
according to the V/f algorithm or the<br />
sensorless vector control algorithm. Parameter<br />
A044 selects the inverter torque control<br />
algorithm for generating the frequency<br />
output, as shown in the diagram to the right<br />
(A244 and A344 for 2nd and 3rd motors,<br />
respectively). The factory default is 00<br />
(constant torque V/f control).<br />
Review the following descriptions to help<br />
you choose the best torque control<br />
algorithm for your application.<br />
The built-in V/f curves are oriented<br />
toward developing constant torque or<br />
variable torque characteristics (see<br />
graphs below).<br />
The free-setting curve provides an even<br />
more flexible characteristic, but it<br />
requires more parameter settings.<br />
Sensorless vector control calculates an<br />
ideal torque vector based on current<br />
motor position, winding currents, and so<br />
Range and Settings<br />
FEF2<br />
FE2<br />
(EU)<br />
Defaults<br />
FUF2<br />
FU2<br />
(USA)<br />
FF2<br />
F2<br />
(Jpn)<br />
Run<br />
Mode<br />
Edit<br />
Lo Hi<br />
00 00 00 ✘ ✔<br />
Inverter Torque Control Algorithms<br />
V/f control,<br />
constant torque<br />
V/f control,<br />
variable torque<br />
V/f control, freesetting<br />
curve<br />
Sensorless vector<br />
(SLV) control<br />
Sensorless vector,<br />
0Hz domain<br />
Vector control with<br />
sensor<br />
Output<br />
on. It is a more robust control method than the V/f control methods. However, it is more<br />
dependent on actual motor parameters and will require you to set these values carefully or to<br />
perform the auto-tuning procedure (see “Auto-tuning of Motor Constants” on page 4–71) to<br />
obtain optimum performance.<br />
Sensorless vector control, 0Hz domain increases the low-speed torque performance (0–<br />
2.5Hz) via an advanced <strong>Hitachi</strong> torque control algorithm. However, you will need to size the<br />
inverter for one frame size larger than the motor for proper operation.<br />
Vector control with sensor requires expansion card SJ–FB encoder feedback board and a<br />
motor shaft encoder. Choose this method when precise position/velocity control is required.<br />
00<br />
01<br />
02<br />
03<br />
04<br />
05<br />
A044
<strong>SJ7002</strong> Inverter<br />
Constant and Variable Torque – The graph below (left) shows the constant torque characteristic<br />
from 0Hz to the base frequency A003. The voltage remains constant for output frequencies<br />
higher than the base frequency.<br />
Output<br />
voltage<br />
100%<br />
Constant torque Output<br />
voltage<br />
100%<br />
Variable torque<br />
0 0<br />
Base<br />
frequency<br />
Maximum<br />
frequency<br />
10% of<br />
base<br />
frequency<br />
The graph above (right) shows the general characteristic for variable torque. The curve may be<br />
best described in three sections, as follows:<br />
a. The range from 0Hz to 10% of the base frequency is the constant torque characteristic.<br />
For example, a base frequency of 60Hz ends the constant torque characteristic segment<br />
at 6Hz.<br />
b. The range from 10% of the base frequency to the base frequency is the variable<br />
(reduced) torque characteristic. The voltage is output in the curve of frequency to the 1.7<br />
power.<br />
c. After reaching the base frequency, the characteristic maintains a constant output voltage<br />
for higher frequencies.<br />
Using parameter A045 you can modify the voltage gain of the inverter. This is specified as a<br />
percentage of the full-scale setting AVR (Automatic Voltage Regulation) in parameter A082.<br />
The gain can be set from 20% to 100%. It must be adjusted in accordance with the motor<br />
specifications.<br />
Torque Boost – The Constant and<br />
Variable Torque algorithms feature an<br />
adjustable torque boost curve. When the<br />
motor load has a lot of inertia or starting<br />
V<br />
100%<br />
A042 = 10<br />
Torque boost<br />
friction, you may need to increase the<br />
low frequency starting torque characteristics<br />
by boosting the voltage above the<br />
normal V/f ratio (shown at right). The<br />
10%<br />
A<br />
boost is applied from zero to 1/2 the<br />
base frequency. You set the breakpoint<br />
of the boost (point A on the graph) by<br />
0<br />
6.0Hz 30.0Hz<br />
using parameters A042 and A043. The<br />
manual boost is calculated as an<br />
A043 = 10%<br />
addition to the standard straight V/f line (constant torque curve).<br />
Base<br />
frequency<br />
Maximum<br />
frequency<br />
Be aware that running the motor at a low speed for a long time can cause motor overheating.<br />
This is particularly true when manual torque boost is ON or if the motor relies on a built-in fan<br />
for cooling.<br />
NOTE: <strong>Manual</strong> torque boost applies only to constant torque (A044=00) and variable torque<br />
(A044=01) V/f control.<br />
NOTE: The motor stabilization parameter H006 is effective for constant torque (A044=00) and<br />
variable torque (A044=01) V/f control.<br />
a.<br />
b. c.<br />
frequency<br />
f base =<br />
60Hz<br />
3–15<br />
Configuring Drive<br />
Parameters
Configuring Drive<br />
Parameters<br />
3–16<br />
“A” Group: Standard Functions<br />
V/f Free-setting – The free-setting V/f inverter mode of operation uses voltage and frequency<br />
parameter pairs to define seven points on a V/f graph. This provides a way to define a multisegment<br />
V/f curve that best suits your application.<br />
The frequency settings do require that<br />
F1 ≤ F2 ≤ F3 ≤ F4 ≤ F5 ≤ F6 ≤ F7; their<br />
values must have this ascending order<br />
relationship. However, the voltages V1<br />
to V7 may either increase or decrease<br />
from one to the next. The example to the<br />
right shows the definition of a complex<br />
curve by following the setting requirements.<br />
Free-setting f7 (B112) becomes the<br />
maximum frequency of the inverter.<br />
Therefore, we recommend setting f7<br />
first, since the initial value of all default<br />
frequencies f1–f7 is 0Hz.<br />
NOTE: The using of V/f free-setting operation specifies parameters that override (make<br />
invalid) certain other parameters. The parameters that become invalid are torque boost (A041/<br />
A241), base frequency (A003/A203/A303), and maximum frequency (A004/A204/A304). In<br />
this case, we recommend leaving their settings at the factory default values.<br />
The V/f free-setting endpoint f7/V7<br />
parameters must stay within the more<br />
basic inverter limits in order for the<br />
specified free-setting characteristic<br />
curve to be achieved. For example, the<br />
inverter cannot output a higher voltage<br />
than the input voltage or the AVR<br />
setting voltage (Automatic Voltage<br />
Regulation), set by parameter A082.<br />
The graph to the right shows how the<br />
inverter input voltage would clip (limit)<br />
the characteristic curve if exceeded.<br />
Output voltage<br />
V7<br />
V6<br />
V4<br />
V1<br />
V2, V3<br />
B101 to<br />
Output<br />
frequency<br />
B113<br />
(odd)<br />
0 f1 f2 f3 f4 f5 f6 f7 Hz<br />
B100 to B112 (even)<br />
Sensorless Vector Control and, Sensorless Vector Control, 0Hz Domain – These advanced<br />
torque control algorithms improve the torque performance at very low speeds:<br />
Sensorless Vector Control – improved torque control at output frequencies down to 0.5 Hz<br />
Sensorless Vector Control, 0Hz Domain – improved torque control at output frequencies<br />
from 0 to 2.5 Hz.<br />
These low-speed torque control algorithms must be tuned to match the characteristics of the<br />
particular motor connected to your inverter. Simply using the default motor parameters in the<br />
inverter will not work satisfactorily for these control methods. Chapter 4 discusses motor/<br />
inverter size selection and how to set the motor parameters either manually or by using the<br />
built-in auto-tuning. Before using the sensorless vector control methods, please refer to<br />
“Setting Motor Constants for Vector Control” on page 4–69.<br />
NOTE: When the inverter is in SLV (sensorless vector) mode, use B083 to set the carrier<br />
frequency greater than 2.1 kHz for proper operation.<br />
NOTE: You must disable sensorless vector operation when two or more motors are connected<br />
(parallel operation) to the inverter.<br />
V5<br />
Output voltage<br />
B101 to<br />
B113<br />
(odd)<br />
V7<br />
V6<br />
Voltage to output or AVR voltage<br />
B100 to B112<br />
(even)<br />
Output<br />
frequency<br />
0 f6 f7 Hz
Func.<br />
Code<br />
Name/<br />
Description<br />
<strong>SJ7002</strong> Inverter<br />
Vector Control with Encoder Feedback – This method of torque control uses an encoder as a<br />
motor shaft position sensor. Accurate position feedback allows the inverter to close the velocity<br />
loop and provide very accurate speed control, even with variations in motor loads. To use<br />
encoder feedback you will need to add an SJ–FB Encoder Feedback Card in the inverter’s<br />
expansion bay. Please refer to “Expansion Cards” on page 5–5 in this manual or the SJ–FB<br />
manual for details. The following table shows the methods of torque control selection.<br />
Keypad<br />
SRW OPE<br />
Range and Settings<br />
FEF2<br />
FE2<br />
(EU)<br />
Defaults<br />
FUF2<br />
FU2<br />
(USA)<br />
FF2<br />
F2<br />
(Jpn)<br />
Run<br />
Mode<br />
Edit<br />
Lo Hi<br />
A041 Torque boost method selection MANUAL 00 <strong>Manual</strong> torque boost 00 00 00 ✘ ✘<br />
AUTO 0 1 Automatic torque boost<br />
A241 Torque boost method selection, 2nd MANUAL 00 <strong>Manual</strong> torque boost 00 00 00 ✘ ✘<br />
motor<br />
AUTO 0 1 Automatic torque boost<br />
A042 <strong>Manual</strong> torque boost value 0.0 to 20.0 (%) 1.0 1.0 1.0 ✔ ✔<br />
A242<br />
Can boost starting torque between 0 and 20% above<br />
normal V/f curve<br />
<strong>Manual</strong> torque boost value, 2nd motor<br />
Can boost starting torque between 0 and 20% above<br />
normal V/f curve<br />
0.0 to 20.0 (%) 1.0 1.0 1.0 ✔ ✔<br />
A342 <strong>Manual</strong> torque boost value, 3rd motor<br />
Can boost starting torque between 0 and 20% above<br />
normal V/f curve<br />
0.0 to 20.0 (%) 1.0 1.0 1.0 ✔ ✔<br />
A043 <strong>Manual</strong> torque boost frequency adjustment<br />
Sets the frequency of the V/f breakpoint A in graph (top of<br />
previous page) for torque boost<br />
0.0 to 50.0 (%) 5.0 5.0 5.0 ✔ ✔<br />
A243 <strong>Manual</strong> torque boost frequency adjustment, 2nd motor<br />
Sets the frequency of the V/f breakpoint A in graph (top of<br />
previous page) for torque boost<br />
0.0 to 50.0 (%) 5.0 5.0 5.0 ✔ ✔<br />
A343 <strong>Manual</strong> torque boost frequency adjustment, 3rd motor<br />
Sets the frequency of the V/f breakpoint A in graph (top of<br />
previous page) for torque boost<br />
0.0 to 50.0 (%) 5.0 5.0 5.0 ✔ ✔<br />
A044 V/f characteristic curve selection,<br />
1st motor<br />
VC 00 V/f constant torque 00 00 00 ✘ ✘<br />
Torque control modes VP 0 1 V/f variable torque<br />
FREE-V/F 02 V/f free-setting curve<br />
SLV 03 Sensorless vector SLV<br />
0SLV 04 0Hz domain SLV<br />
V2 05 Vector control with encoder<br />
feedback<br />
A244 V/f characteristic curve selection,<br />
2nd motor<br />
VC 00 V/f constant torque 00 00 00 ✘ ✘<br />
Torque control modes VP 0 1 V/f variable torque<br />
FREE-V/F 02 V/f free-setting curve<br />
SLV 03 Sensorless vector SLV<br />
0SLV 04 0Hz domain SLV<br />
3–17<br />
Configuring Drive<br />
Parameters
Configuring Drive<br />
Parameters<br />
3–18<br />
Func.<br />
Code<br />
“A” Group: Standard Functions<br />
A344 V/f characteristic curve<br />
selection, 3rd motor<br />
VC 00 V/f constant torque 00 00 00 ✘ ✘<br />
Torque control modes VP 0 1 V/f variable torque<br />
A045 V/f gain setting<br />
Sets voltage gain of the inverter<br />
0. to 255. 100. 100. 100. ✔ ✔<br />
A046 Automatic torque boost voltage gain 0. to 255. 100. 100. 100. ✔ ✔<br />
A246<br />
Voltage compensation gain for automatic torque boost<br />
Automatic torque boost voltage gain, 2nd motor<br />
Voltage compensation gain for automatic torque boost<br />
0. to 255. 100. 100. 100. ✔ ✔<br />
A047 Automatic torque boost slip gain<br />
Slip compensation gain for automatic torque boost<br />
0. to 255. 100. 100. 100. ✔ ✔<br />
A247 Automatic torque boost slip gain, 2nd motor<br />
Slip compensation gain for automatic torque boost<br />
0. to 255. 100. 100. 100. ✔ ✔<br />
DC Braking<br />
Settings<br />
Name/<br />
Description<br />
Keypad<br />
SRW OPE<br />
The DC braking feature can provide additional stopping torque when compared to a normal<br />
deceleration to a stop. It can also ensure the motor and load are stopped before acceleration.<br />
When decelerating – DC braking is<br />
particularly useful at low speeds when<br />
normal deceleration torque is minimal.<br />
During deceleration, the inverter injects<br />
a DC voltage into the motor windings<br />
during deceleration below a frequency<br />
you can specify (A052). The braking<br />
power (A054) and duration (A055) can<br />
both be set. You can optionally specify a<br />
wait time before DC braking (A053),<br />
during which the motor will free run<br />
(coast).<br />
When starting – You can also apply<br />
DC braking upon the application of a<br />
Run command, specifying both the DC<br />
braking force level (A057) and the<br />
duration (A058). This will serve to stop<br />
the rotation of the motor and the load,<br />
when the load is capable of driving the<br />
motor. This effect, sometimes called<br />
“windmilling,” is common in fan applications.<br />
Often, air moving in duct work<br />
will drive the fan in a backward direc-<br />
Range and Settings<br />
+<br />
0<br />
–<br />
+<br />
0<br />
–<br />
Output<br />
voltage<br />
Output<br />
voltage<br />
Running<br />
FEF2<br />
FE2<br />
(EU)<br />
Free run<br />
Defaults<br />
FUF2<br />
FU2<br />
(USA)<br />
FF2<br />
F2<br />
(Jpn)<br />
tion. If an inverter is started into such a backward-rotating load, over-current trips can occur.<br />
Use DC braking as an “anti-windmilling” technique to stop the motor and load, and allow a<br />
normal acceleration from a stop. See also the “Acceleration Pause Function” on page 3–21.<br />
Run<br />
Mode<br />
Edit<br />
Lo Hi<br />
DC braking<br />
A054<br />
A053 A055<br />
DC braking Running<br />
A057<br />
A058<br />
You can configure the inverter to apply DC braking at stopping only, at starting only, or both.<br />
DC braking power (0–100%) can be set separately for stopping and starting cases.<br />
t<br />
t
Func.<br />
Code<br />
Name/<br />
Description<br />
<strong>SJ7002</strong> Inverter<br />
You can configure DC braking to initiate in one of two ways:<br />
1. Internal DC braking – Set A051=01 to enable internal braking. The inverter automatically<br />
applies DC braking as configured (during stopping, starting, or both).<br />
2. External DC braking – Configure an input terminal with option code 7 [DB] (see “External<br />
Signal for DC Injection Braking” on page 4–19 for more details). Leave A051=00,<br />
although this setting is ignored when a [DB] input is configured. The DC braking force<br />
settings (A054 and A057) still apply. However, the braking time settings (A055 and A058)<br />
do not apply (see level and edge triggered descriptions below). Use A056 to select level or<br />
edge detection for the external input.<br />
a. Level triggered – When the [DB] input signal is ON, the inverter immediately applies<br />
DC injection braking, whether the inverter is in Run Mode or Stop Mode. You control<br />
DC braking time by the duration of the [DB] pulse.<br />
b. Edge triggered – When the [DB] input transitions OFF-to-ON and the inverter is in Run<br />
Mode, it will apply DC braking only until the motor stops... then DC braking is OFF.<br />
During Stop Mode, the inverter ignores OFF-to-ON transitions. Therefore, do not use<br />
edge triggered operation when you need DC braking before acceleration.<br />
CAUTION: Be careful to avoid specifying a braking time that is long enough to cause motor<br />
overheating. If you use DC braking, we recommend using a motor with a built-in thermistor<br />
and wiring it to the inverter’s thermistor input (see “Thermistor Thermal Protection” on page 4–<br />
25). Also refer to the motor manufacturer’s specifications for duty-cycle recommendations<br />
during DC braking.<br />
Keypad<br />
SRW OPE<br />
Range and Settings<br />
FEF2<br />
FE2<br />
(EU)<br />
Defaults<br />
FUF2<br />
FU2<br />
(USA)<br />
A051 DC braking enable OFF 00 Disable 00 00 00 ✘ ✔<br />
ON 0 1 Enable ✘ ✔<br />
DON 02 Brake at set frequency only ✘ ✔<br />
A052 DC braking frequency setting 0.00 to 60.00 (Hz) 0.50 0.50 0.50 ✘ ✔<br />
Frequency at which DC braking activates during decel. ✘ ✔<br />
A053 DC braking wait time 0.0 to 5.0 (seconds) 0.0 0.0 0.0 ✘ ✔<br />
The delay after reaching the DC braking frequency, or<br />
[DB] signal, before DC braking begins<br />
✘ ✔<br />
A054 DC braking force during deceleration 0. to 80. (%) 0. 0. 0. ✘ ✔<br />
Variable DC braking force ✘ ✔<br />
A055 DC braking time for deceleration 0.0 to 60.0 (seconds) 0.0 0.0 0.0 ✘ ✔<br />
Sets the duration for DC braking during decel ✘ ✔<br />
A056 DC braking / edge or level detection EDGE 00 Edge detection 01 01 01 ✘ ✔<br />
for [DB] input<br />
LEVEL 0 1 Level detection<br />
A057 DC braking force for starting<br />
Variable DC braking force<br />
0. to 80. (%) 0. 0. 0. ✘ ✔<br />
A058 DC braking time for starting 0.0 to 60.0 (seconds) 0.0 0.0 0.0 ✘ ✔<br />
A059<br />
Sets the duration for DC braking before accel.<br />
DC braking carrier frequency setting 0.5 to 15 (kHz) up to SJ700-1500;<br />
0.5 to 3.0kHz for models SJ700-<br />
1850 to SJ700-4000<br />
3.0 3.0 3.0 ✘ ✘<br />
FF2<br />
F2<br />
(Jpn)<br />
Run<br />
Mode<br />
Edit<br />
Lo Hi<br />
3–19<br />
Configuring Drive<br />
Parameters
Configuring Drive<br />
Parameters<br />
3–20<br />
“A” Group: Standard Functions<br />
Max. 100<br />
braking<br />
90<br />
ratio (%)<br />
80<br />
70<br />
60<br />
50<br />
40<br />
30<br />
20<br />
10<br />
Frequencyrelated<br />
Functions<br />
Func.<br />
Code<br />
Derating of DC Braking – The inverter uses an internal carrier frequency (set by A059) to<br />
generate a DC braking voltage (do not confuse with main inverter output carrier frequency set<br />
by B083). The maximum DC braking force available to the inverter is more limited with higher<br />
DC braking carrier frequency settings for A059 according to the graphs below.<br />
(46)<br />
(34)<br />
(22)<br />
3 5 7 9 11 13<br />
Name/<br />
SRW Display<br />
Models 0.4 – 55kW<br />
(75)<br />
(10)<br />
DC braking carrier frequency<br />
Max.<br />
braking<br />
ratio (%)<br />
15<br />
70<br />
60<br />
50<br />
40<br />
30<br />
20<br />
10<br />
Frequency Limits – Upper and lower<br />
limits can be imposed on the inverter<br />
output frequency. These limits will apply<br />
regardless of the source of the speed<br />
reference. You can configure the lower<br />
frequency limit to be greater than zero as<br />
shown in the graph to the right. The upper<br />
limit must not exceed the rating of the<br />
motor or capability of the machinery.<br />
Keypad<br />
SRW OPE<br />
kHz<br />
Models 75 – 150kW<br />
100<br />
90<br />
80<br />
(60)<br />
(40)<br />
(20)<br />
(10)<br />
3 5 7 9 10 kHz<br />
DC braking carrier frequency<br />
Output frequency<br />
A061<br />
A062<br />
Upper<br />
limit<br />
Lower<br />
limit<br />
Range and settings<br />
Max.<br />
braking<br />
ratio (%)<br />
FEF2<br />
FE2<br />
(EU)<br />
Models 185 – 4000kW<br />
100<br />
90<br />
80<br />
70<br />
60<br />
50<br />
40<br />
30<br />
20<br />
10<br />
(35)<br />
3<br />
kHz<br />
DC braking<br />
carrier frequency<br />
Settable<br />
range<br />
Frequency command<br />
Defaults<br />
FUF2<br />
FU2<br />
(USA)<br />
A061 Frequency upper limit setting 0000.00 0.00 Setting is disabled 0.00 0.00 0.00 ✘ ✔<br />
Sets a limit on output frequency less<br />
than the maximum frequency (A004)<br />
A261 Frequency upper limit setting, 2nd<br />
motor<br />
Sets a limit on output frequency less<br />
than the maximum frequency (A004)<br />
0000.50 >0.50 Setting is enabled,<br />
0.50 to 400.0 (Hz)<br />
FF2<br />
F2<br />
(Jpn)<br />
Run<br />
Mode<br />
Edit<br />
Lo Hi<br />
✘ ✔<br />
0000.00 0.00 Setting is disabled 0.00 0.00 0.00 ✘ ✔<br />
0000.50 >0.50 Setting is enabled,<br />
0.50 to 400.0 (Hz)<br />
A062 Frequency lower limit setting 0000.00 0.00 Setting is disabled 0.00 0.00 0.00 ✘ ✔<br />
Sets a limit on output frequency<br />
greater than zero<br />
A262 Frequency lower limit setting, 2nd<br />
motor<br />
Sets a limit on output frequency<br />
greater than zero<br />
0000.50 >0.50 Setting is enabled,<br />
0.50 to 400.0 (Hz)<br />
✘ ✔<br />
✘ ✔<br />
0000.00 0.00 Setting is disabled 0.00 0.00 0.00 ✘ ✔<br />
0000.50 >0.50 Setting is enabled,<br />
0.50 to 400.0 (Hz)<br />
✘ ✔
Func.<br />
Code<br />
A063<br />
A065<br />
A067<br />
A064<br />
A066<br />
A068<br />
Acceleration<br />
Pause Function<br />
Func.<br />
Code<br />
<strong>SJ7002</strong> Inverter<br />
Jump Frequencies – Some motors or machines exhibit resonances at particular speed(s),<br />
which can be destructive for prolonged running at those speeds. The inverter has up to three<br />
jump frequencies as shown in the graph. The hysteresis around the jump frequencies causes the<br />
inverter output to skip around the sensitive frequency values.<br />
Output<br />
frequency<br />
A067<br />
A065<br />
A063<br />
Name/<br />
Description<br />
Jump frequencies<br />
The acceleration pause function can be<br />
used to minimize the occurrence of<br />
over-current trips when accelerating<br />
high inertia loads. It introduces a dwell<br />
or pause in the acceleration ramp. You<br />
can control the frequency at which this<br />
dwell occurs (A069), and the duration<br />
of the pause time (A070). This function<br />
can also be used as an anti-windmilling<br />
tool, when the load might have a<br />
tendency to drive the motor in a reverse<br />
A064<br />
A064<br />
Range and Settings<br />
A066<br />
A066<br />
Jump (center) frequency setting 0.00 to 400.0 (Hz);<br />
model -4000HFx2 is 0.00 to 120.0 (Hz)<br />
Up to three output frequencies can be defined for the output to jump past to<br />
avoid motor resonances (center frequency)<br />
A068<br />
A068<br />
Hysteresis values<br />
Frequency command<br />
FEF2<br />
FE2<br />
(EU)<br />
Defaults<br />
FUF2<br />
FU2<br />
(USA)<br />
FF2<br />
F2<br />
(Jpn)<br />
Run<br />
Mode<br />
Edit<br />
Lo Hi<br />
0.00 0.00 0.00 ✘ ✔<br />
Jump (hysteresis) frequency width<br />
setting<br />
Range is 0.0 to 10.0 Hz 0.50 0.50 0.50 ✘ ✔<br />
Defines the distance from the center frequency at which the jump occurs ✘ ✔<br />
Output<br />
frequency<br />
A069<br />
Accel pause<br />
period<br />
A070<br />
Set frequency<br />
direction while the inverter is in a Stop mode. Initiating a normal acceleration in such a situation<br />
may result in over-current trips. This function can be used to keep the inverter output<br />
frequency and voltage at low levels long enough to bring the load to a stop, and commence<br />
turning in the desired direction before the acceleration ramp resumes. See also “DC Braking<br />
Settings” on page 3–18.<br />
Name/<br />
Description<br />
0<br />
Range and Settings<br />
FEF2<br />
FE2<br />
(EU)<br />
Defaults<br />
FUF2<br />
FU2<br />
(USA)<br />
FF2<br />
F2<br />
(Jpn)<br />
✘ ✔<br />
3–21<br />
t<br />
Run<br />
Mode<br />
Edit<br />
Lo Hi<br />
A069 Acceleration pause frequency setting 0.00 to 400.0 (Hz);<br />
model -4000HFx2 is 0.00 to 120.0 (Hz)<br />
0.00 0.00 0.00 ✘ ✔<br />
A070 Acceleration pause time setting 0.0 to 60.0 (seconds) 0.0 0.0 0.0 ✘ ✔<br />
Configuring Drive<br />
Parameters
Configuring Drive<br />
Parameters<br />
3–22<br />
“A” Group: Standard Functions<br />
PID Control When enabled, the built-in PID loop calculates an ideal inverter output value to cause a loop<br />
feedback process variable (PV) to move closer in value to the setpoint (SP). The current<br />
frequency command serves as the SP. The PID loop algorithm will read the analog input for the<br />
process variable (you specify either current or voltage input) and calculate the output.<br />
A scale factor in A075 lets you multiply the PV by a factor, converting it into engineering<br />
units for the process.<br />
Proportional, integral, and derivative gains are all adjustable.<br />
Optional – You can assign an intelligent input terminal the option code 23, PID Disable.<br />
When active, this input disables PID operation. See “Intelligent Input Terminal Overview”<br />
on page 3–51.<br />
See “PID Loop Operation” on page 4–75 for more information.<br />
Func.<br />
Code<br />
Name/<br />
Description<br />
Keypad<br />
SRW OPE<br />
Range and Settings<br />
FEF2<br />
FE2<br />
(EU)<br />
Defaults<br />
FUF2<br />
FU2<br />
(USA)<br />
FF2<br />
F2<br />
(Jpn)<br />
NOTE: The setting A073 for the integrator is the integrator’s time constant Ti, not the gain.<br />
The integrator gain Ki = 1/Ti. When you set A073 = 0, the integrator is disabled.<br />
Run<br />
Mode<br />
Edit<br />
Lo Hi<br />
A071 PID Enable OFF 00 PID operation OFF 00 00 00 ✘ ✔<br />
ON 0 1 PID operation ON ✘ ✔<br />
R-ON 02 PID operation ON with inverted output ✘ ✔<br />
A072 PID proportional gain 0.2 to 5.0 1.0 1.0 1.0 ✔ ✔<br />
A073 PID integral time constant 0.0 to 999.9, 1000. to 3600. (seconds) 1.0 1.0 1.0 ✔ ✔<br />
A074 PID derivative time constant 0.0 to 99.99, 100.0 (seconds) 0.0 0.0 0.0 ✔ ✔<br />
A075 PV scale conversion 0.01 to 99.99, 100.0 (seconds) 1.00 1.00 1.00 ✘ ✔<br />
Process Variable (PV) scale factor (multiplier) ✘ ✔<br />
A076 PV source setting OI 00 [OI] terminal (current input) 00 00 00 ✘ ✔<br />
Selects source of Process O 0 1 [O] terminal (voltage input) ✘ ✔<br />
Variable (PV)<br />
COM 02 Communication input ✘ ✔<br />
PLS 03 Pulse train frequency input ✘ ✔<br />
MATH 1 0 CALCULATE function output ✘ ✔<br />
A077 Reverse PID Action OFF 00 PID input = SP – PV (normal) 00 00 00 ✘ ✔<br />
Changes response to error ON 0 1 PID input = –(SP – PV) (reverse) ✘ ✔<br />
A078 PID output limit Range is 0.0 to 100.0 0.00 0.00 0.00 ✘ ✔<br />
A079 PID feed forward select no 00 Disable 00 00 00 ✘ ✔<br />
O 0 1 [O] terminal (voltage input) ✘ ✔<br />
OI 02 [OI] terminal (current input) ✘ ✔<br />
O2 03 [O2] terminal (voltage input) ✘ ✔
Automatic<br />
Voltage<br />
Regulation (AVR)<br />
Function<br />
Func.<br />
Code<br />
Energy Savings<br />
Mode / Optimal<br />
Accel/Decel<br />
Name/<br />
Description<br />
<strong>SJ7002</strong> Inverter<br />
The Automatic Voltage Regulation (AVR) feature keeps the inverter output voltage at a<br />
relatively constant amplitude during power input fluctuations. This can be useful if the installation<br />
is subject to input voltage disturbances. However, the inverter cannot boost its motor<br />
output to a voltage higher than the power input voltage. If you enable this feature, be sure to<br />
select the proper voltage class setting for your motor.<br />
Keypad<br />
SRW OPE<br />
Range and Settings<br />
FEF2<br />
FE2<br />
(EU)<br />
Defaults<br />
FUF2<br />
FU2<br />
(USA)<br />
FF2<br />
F2<br />
(Jpn)<br />
Energy Savings Mode – This function allows the inverter to deliver the minimum power<br />
necessary to maintain speed at any given frequency. This works best when driving variable<br />
torque characteristic loads such as fans and pumps. Parameter A085=01 enables this function<br />
and A086 controls the degree of its effect. A setting of 0.0 yields slow response but high<br />
accuracy, while a setting of 100 will yield a fast response with lower accuracy.<br />
Optimal Accel/Decel Operation – This feature uses “fuzzy” logic to optimize acceleration<br />
and deceleration curves in real time. It is enabled by A085=02. Optimal accel/decel operation<br />
automatically adjusts the acceleration and deceleration times in response to changes in load or<br />
inertia to take advantage of the maximum output current capability of the inverter. In general,<br />
optimal accel/decel will allow for the shortest accel and decel times based on the actual load<br />
conditions. The function continuously monitors output current and DC bus voltage to avoid<br />
reaching their respective trip levels.<br />
NOTE: In this mode, the settings of acceleration and deceleration times (F002 and F003) are<br />
disregarded.<br />
The acceleration time is controlled to maintain output current below the level set by the<br />
Overload Restriction Function if enabled (Parameters B021/B024, B022/B025, and B023/<br />
B026). If Overload Restriction is not enabled, then the current limit used is 150% of the<br />
inverter’s rated output current.<br />
The deceleration time is controlled so that the output current is maintained below 150% of<br />
the inverter’s rated current, and the DC bus voltage is maintained below the OV Trip level<br />
(358V or 770V).<br />
Run<br />
Mode<br />
Edit<br />
Lo Hi<br />
A081 AVR function select ON 00 AVR enabled 00 00 02 ✘ ✘<br />
Automatic (output) voltage OFF 0 1 AVR disabled<br />
regulation<br />
DOFF 02 AVR enabled except during deceleration<br />
A082 AVR voltage select 200V class inverter settings:<br />
230/ 230/ 200/ ✘ ✘<br />
200/215/220/230/240 (V)<br />
400V class inverter settings:<br />
380/400/415/440/460/480 (V)<br />
400 460 400<br />
Func.<br />
Code<br />
Name/<br />
Description<br />
Keypad<br />
SRW OPE<br />
Range and Settings<br />
FEF2<br />
FE2<br />
(EU)<br />
Defaults<br />
FUF2<br />
FU2<br />
(USA)<br />
FF2<br />
F2<br />
(Jpn)<br />
Run<br />
Mode<br />
Edit<br />
Lo Hi<br />
A085 Operation mode selection NOR 00 Normal operation 00 00 00 ✘ ✘<br />
ECO 0 1 Energy-saver operation ✘ ✘<br />
FUZZY 02 Optimal accel/decel operation ✘ ✘<br />
A086 Energy saving mode tuning 0.0 to 100 (seconds) 50.0 50.0 50.0 ✔ ✔<br />
3–23<br />
Configuring Drive<br />
Parameters
Configuring Drive<br />
Parameters<br />
3–24<br />
“A” Group: Standard Functions<br />
Second<br />
Acceleration and<br />
Deceleration<br />
Functions<br />
Func.<br />
Code<br />
frequency<br />
2CH<br />
input<br />
Name/<br />
Description<br />
NOTE: DO NOT use Optimal Accel/Decel (A085 = 02) when an application...<br />
has a requirement for constant acceleration or deceleration<br />
has a load inertia more than (approx.) 20 times the motor inertia<br />
uses internal or external regenerative braking<br />
uses any of the vector control modes (A044 = 03, 04, or 05). This function is ONLY<br />
compatible with V/F control.<br />
NOTE: If the load exceeds the rating of the inverter, the acceleration time may be increased.<br />
NOTE: If using a motor with a capacity that is one size smaller than the inverter rating, enable<br />
the Overload Restriction function (B021/B024) and set the Overload Restriction Level (B022/<br />
B025) to 1.5 times the motor nameplate current.<br />
NOTE: Be aware that the acceleration and deceleration times will vary, depending on the<br />
actual load conditions during each individual operation of the inverter.<br />
The <strong>SJ7002</strong> inverter features two-stage acceleration and deceleration ramps. This gives flexibility<br />
in the profile shape. You can specify the frequency transition point, the point at which the<br />
standard acceleration (F002) or deceleration (F003) changes to the second acceleration (A092)<br />
or deceleration (A093). These profile options are also available for the second motor settings<br />
and third motor settings. All acceleration and deceleration times are time to ramp from zero<br />
speed to full speed or full speed to zero speed. Select a transition method via A094 as depicted<br />
below. Be careful not to confuse the second acceleration/deceleration settings with settings for<br />
the second motor!<br />
1<br />
0<br />
Accel 1<br />
A094=00 frequency A094=01<br />
Accel 2<br />
Keypad<br />
SRW OPE<br />
Range and Settings<br />
A092 Acceleration (2) time setting 0.01 to 99.99, 100.0 to 999.9,<br />
Duration of 2nd segment of acceleration<br />
1000. to 3600. (seconds)<br />
A292 Acceleration (2) time setting, 2nd motor 0.01 to 99.99, 100.0 to 999.9,<br />
Duration of 2nd segment of acceleration, 2nd motor<br />
1000. to 3600. (seconds)<br />
A392 Acceleration (2) time setting, 3rd motor 0.01 to 99.99, 100.0 to 999.9,<br />
Duration of 2nd segment of acceleration, 3rd motor<br />
1000. to 3600. (seconds)<br />
t<br />
A095<br />
0<br />
Accel 1<br />
Accel 2<br />
FEF2<br />
FE2<br />
(EU)<br />
Defaults<br />
FUF2<br />
FU2<br />
(USA)<br />
Frequency<br />
transition point<br />
FF2<br />
F2<br />
(Jpn)<br />
Run<br />
Mode<br />
Edit<br />
Lo Hi<br />
15.0 15.0 15.0 ✔ ✔<br />
15.0 15.0 15.0 ✔ ✔<br />
15.0 15.0 15.0 ✔ ✔<br />
t
Func.<br />
Code<br />
Name/<br />
Description<br />
Keypad<br />
SRW OPE<br />
Range and Settings<br />
<strong>SJ7002</strong> Inverter<br />
A093 Deceleration (2) time setting — — 0.01 to 99.99, 100.0 to 999.9, 15.0 15.0 15.0 ✔ ✔<br />
Duration of 2nd segment of deceleration<br />
1000. to 3600. (seconds)<br />
A293 Deceleration (2) time setting, 2nd motor — — 0.01 to 99.99, 100.0 to 999.9, 15.0 15.0 15.0 ✔ ✔<br />
Duration of 2nd segment of deceleration,<br />
2nd motor<br />
1000. to 3600. (seconds)<br />
A393 Deceleration (2) time setting, 3rd motor — — 0.01 to 99.99, 100.0 to 999.9, 15.0 15.0 15.0 ✔ ✔<br />
Duration of 2nd segment of deceleration,<br />
3rd motor<br />
1000. to 3600. (seconds)<br />
✔ ✔<br />
A094 Select method to switch to Acc2/Dec2 TM 00 [2CH] input from terminal 00 00 00 ✘ ✘<br />
profile<br />
FREE 0 1 transition frequency<br />
F-R 02 when motor direction reverses<br />
A294 Select method to switch to Acc2/Dec2 TM 00 [2CH] input from terminal 00 00 00 ✘ ✘<br />
profile, 2nd motor<br />
FREE 0 1 transition frequency<br />
F-R 02 when motor direction reverses<br />
A095 Acc1 to Acc2 frequency transition point 0.00 to 400.0 (Hz); model 0.0 0.0 0.0 ✘ ✘<br />
Output frequency at which Accel1 switches to Accel2<br />
-4000HFx2 is 0.00 to 120.0 (Hz)<br />
A295 Acc1 to Acc2 frequency transition point, 2nd motor 0.00 to 400.0 (Hz); model 0.0 0.0 0.0 ✘ ✘<br />
Output frequency at which Accel1 switches to Accel2<br />
-4000HFx2 is 0.00 to 120.0 (Hz)<br />
A096 Dec1 to Dec2 frequency transition point 0.00 to 400.0 (Hz); model 0.0 0.0 0.0 ✘ ✘<br />
Output frequency at which Decel1 switches to Decel2<br />
-4000HFx2 is 0.00 to 120.0 (Hz)<br />
A296 Dec1 to Dec2 frequency transition point, 2nd motor 0.00 to 400.0 (Hz); model 0.0 0.0 0.0 ✘ ✘<br />
Output frequency at which Decel1 switches to Decel2<br />
-4000HFx2 is 0.00 to 120.0 (Hz)<br />
FEF2<br />
FE2<br />
(EU)<br />
Defaults<br />
FUF2<br />
FU2<br />
(USA)<br />
FF2<br />
F2<br />
(Jpn)<br />
Run<br />
Mode<br />
Edit<br />
Lo Hi<br />
NOTE: For A095 and A096 (and for 2nd motor settings), if you set a very rapid Acc1 or Dec1<br />
time (less than 1.0 second), the inverter may not be able to change rates to Acc2 or Dec2 before<br />
reaching the target frequency. In that case, the inverter decreases the rate of Acc1 or Dec1 in<br />
order to achieve the second ramp to the target frequency.<br />
3–25<br />
Configuring Drive<br />
Parameters
Configuring Drive<br />
Parameters<br />
3–26<br />
“A” Group: Standard Functions<br />
Accel/Decel<br />
Characteristics<br />
Func.<br />
Code<br />
Set value<br />
Curve<br />
Accel<br />
A97<br />
Decel<br />
A98<br />
Typical<br />
applications<br />
Standard (default) acceleration and deceleration is linear with time. The inverter CPU can also<br />
calculate other curves shown in the graphs below. The sigmoid, U-shape, and reverse U-shape<br />
curves are useful for favoring the load characteristics in particular applications. Curve settings<br />
for acceleration and deceleration are independently selected via parameters A097 and A098,<br />
respectively. You can use the same or different curve types for acceleration and deceleration.<br />
00<br />
Output frequency<br />
Output frequency<br />
Linear Sigmoid U-shape Reverse U-shape<br />
time<br />
time<br />
Linear acceleration<br />
and deceleration for<br />
general-purpose use<br />
Name/<br />
Description<br />
Output frequency<br />
Output frequency<br />
01 02 03<br />
time<br />
time<br />
Avoid jerk on start/stop<br />
for elevators; use for<br />
delicate loads on conveyors<br />
Keypad<br />
SRW OPE<br />
Output frequency<br />
Output frequency<br />
time<br />
time<br />
Output frequency<br />
Output frequency<br />
Tension control for winding applications, web<br />
presses, roller/accumulators<br />
Range and Settings<br />
xFE2<br />
(EU)<br />
time<br />
time<br />
Defaults Run<br />
xFU2<br />
(USA)<br />
A097 Acceleration curve selection Linear 00 Linear 00 00 00 ✘ ✘<br />
Set the characteristic curve of S-curve 0 1 S-curve<br />
Accel1 and Accel2<br />
U-curve 02 U-shape<br />
RU-curve 03 Reverse U-shape<br />
EL-curve 04 EL-S curve<br />
A098 Deceleration curve selection Linear 00 Linear 00 00 00 ✘ ✘<br />
Set the characteristic curve of S-curve 0 1 S-curve<br />
Decel1 and Decel2<br />
U-curve 02 U-shape<br />
RU-curve 03 Reverse U-shape<br />
EL-curve 04 EL-S curve<br />
xFF2<br />
(Jpn)<br />
Mode<br />
Edit<br />
Lo Hi
Func.<br />
Code<br />
Additional<br />
Analog Input<br />
Settings<br />
Func.<br />
Code<br />
<strong>SJ7002</strong> Inverter<br />
The acceleration and deceleration curves can deviate from a straight line to a varying degree.<br />
Parameters A131 and A132 control the amount of deviation for the acceleration and deceleration<br />
curves respectively. The following graphs show intermediate output frequency points as a<br />
percentage of the target frequency, for 25%, 50%, and 75% acceleration time intervals.<br />
Output frequency<br />
% of target<br />
25 50 75<br />
Name/<br />
Description<br />
A131 Acceleration curve constants<br />
setting<br />
Sets the curve deviation from<br />
straight-line acceleration in<br />
10 levels<br />
A132 Deceleration curve constants<br />
setting<br />
Sets the curve deviation from<br />
straight-line deceleration in<br />
10 levels<br />
time<br />
Keypad<br />
SRW OPE<br />
01<br />
...<br />
0 1<br />
...<br />
Range and Settings<br />
FEF2<br />
FE2<br />
(EU)<br />
Defaults<br />
FUF2<br />
FU2<br />
(USA)<br />
FF2<br />
F2<br />
(Jpn)<br />
Run<br />
Mode<br />
Edit<br />
Lo Hi<br />
Smallest deviation 02 02 02 ✘ ✔<br />
10 10 Largest deviation ✘ ✔<br />
01<br />
...<br />
Output frequency<br />
% of target<br />
100 100 100<br />
96.9<br />
82.4<br />
17.6<br />
3.1<br />
0 1<br />
...<br />
25 50 75<br />
Smallest deviation 02 02 02 ✘ ✔<br />
10 10 Largest deviation ✘ ✔<br />
The parameters in the following table adjust the input characteristics of the analog inputs.<br />
When using the inputs to command the inverter output frequency, these parameters adjust the<br />
starting and ending ranges for the voltage or current, as well as the output frequency range.<br />
Related characteristic diagrams are located in “Analog Input and Miscellaneous Settings” on<br />
page 3–11.<br />
Name/<br />
Description<br />
99.6<br />
93.8<br />
87.5<br />
68.4<br />
64.6<br />
35.0<br />
Keypad<br />
SRW OPE<br />
time<br />
Range and Settings<br />
A101 [OI]–[L] input active range start frequency — — 0.00 to 400.0 (Hz);<br />
Output frequency corresponding to the current<br />
input range starting point<br />
model -4000HFx2 is<br />
0.00 to 120.0 (Hz)<br />
A102 [OI]–[L] input active range end frequency — — 0.00 to 400.0 (Hz);<br />
Output frequency corresponding to the current<br />
input range ending point<br />
model -4000HFx2 is<br />
0.00 to 120.0 (Hz)<br />
Output frequency<br />
% of target<br />
65.0<br />
35.4<br />
31.6<br />
12.5<br />
6.25<br />
0.39<br />
FEF2<br />
FE2<br />
(EU)<br />
25 50 75<br />
Defaults<br />
FUF2<br />
FU2<br />
(USA)<br />
FF2<br />
F2<br />
(Jpn)<br />
3–27<br />
time<br />
Run<br />
Mode<br />
Edit<br />
Lo Hi<br />
00.0 00.0 00.0 ✘ ✔<br />
00.0 00.0 00.0 ✘ ✔<br />
A103 [OI]–[L] input active range start current<br />
Starting point for the current input range<br />
— — 0 to 100% 20. 20. 20. ✘ ✔<br />
A104 [OI]–[L] input active range end current<br />
Ending point for the current input range<br />
— — 0 to 100% 100. 100. 100. ✘ ✔<br />
Configuring Drive<br />
Parameters
Configuring Drive<br />
Parameters<br />
3–28<br />
Func.<br />
Code<br />
“A” Group: Standard Functions<br />
A105 [OI]–[L] input start frequency enable OI-EXS 00 Use A101 start value 01 01 01 ✘ ✔<br />
0Hz 0 1 Use 0Hz<br />
A111 [O2]–[L] input active range start frequency — — –400. to 400. (Hz); 0.00 0.00 0.00 ✘ ✔<br />
Output frequency corresponding to the bipolar<br />
voltage input range starting point<br />
model -4000HFx2 is<br />
0.00 to 120.0 (Hz)<br />
A112 [O2]–[L] input active range end frequency — — –400. to 400. (Hz); 0.00 0.00 0.00 ✘ ✔<br />
Output frequency corresponding to the bipolar<br />
voltage input range ending point<br />
model -4000HFx2 is<br />
0.00 to 120.0 (Hz)<br />
A113 [O2]–[L] input active range start voltage<br />
Starting point for the bipolar voltage input range<br />
— — –100 to 100 (%) -100. -100. -100. ✘ ✔<br />
A114 [O2]–[L] input active range end voltage<br />
Ending point for the bipolar voltage input range<br />
— — –100 to 100 (%) 100. 100. 100. ✘ ✔<br />
Target Frequency<br />
Operation<br />
Func.<br />
Code<br />
Name/<br />
Description<br />
Name/<br />
Description<br />
A141 A input select for Calculate<br />
Function<br />
A142 B input select for Calculate<br />
Function<br />
Keypad<br />
SRW OPE<br />
Range and Settings<br />
FEF2<br />
FE2<br />
(EU)<br />
Defaults<br />
FUF2<br />
FU2<br />
(USA)<br />
FF2<br />
F2<br />
(Jpn)<br />
Analog Input Calculate Function – The inverter can mathematically combine two input<br />
sources into one value. The Calculate function can either add, subtract, or multiply the two<br />
selected sources. This provides the flexibility needed by various applications.You can use the<br />
result for the output frequency setting (use A001=10) or for the PID Process Variable (PV)<br />
input (use A075=03).<br />
Keypad<br />
SRW OPE<br />
Range and Settings<br />
FEF2<br />
FE2<br />
(EU)<br />
Defaults<br />
FUF2<br />
FU2<br />
(USA)<br />
FF2<br />
F2<br />
(Jpn)<br />
Run<br />
Mode<br />
Edit<br />
Lo Hi<br />
Run<br />
Mode<br />
Edit<br />
Lo Hi<br />
REM 00 Digital operator (A020/A220/A320) 02 02 02 ✘ ✔<br />
VR 0 1 Keypad potentiometer<br />
O 02 [O] input<br />
OI 03 [OI] input<br />
COM 04 Comm. port<br />
OP1 05 Expansion card 1<br />
OP2 06 Expansion card 2<br />
PLS 07 Pulse train frequency train input<br />
REM 00 Digital operator (A020/A220/A320) 03 03 03 ✘ ✔<br />
VR 0 1 Keypad potentiometer<br />
O 02 [O] input<br />
OI 03 [OI] input<br />
COM 04 Comm. port<br />
OP1 05 Expansion card 1<br />
OP2 06 Expansion card 2<br />
PLS 07 Pulse train frequency train input
Func.<br />
Code<br />
Elevator Accel/<br />
Decel Curves<br />
Name/<br />
Description<br />
Keypad<br />
SRW OPE<br />
Range and Settings<br />
<strong>SJ7002</strong> Inverter<br />
Defaults<br />
A143 Calculation symbol ADD 00 ADD (A input + B input) 00 00 00 ✘ ✔<br />
Calculates a value based on SUB 0 1 SUB (A input – B input)<br />
the A input (A141 selects)<br />
and the B input (A142<br />
selects)<br />
MUL 02 MUL (A input x B input)<br />
A145 ADD frequency — — 0.00 to 99.99, 100.0 to 400.0 (Hz) 0.00 0.00 0.00 ✘ ✔<br />
A146 ADD direction select FW 00 Plus (adds A145 value to output<br />
frequency)<br />
00 00 00 ✘ ✔<br />
RV 0 1 Minus (subtracts A145 value from output<br />
frequency)<br />
FEF2<br />
FE2<br />
(EU)<br />
FUF2<br />
FU2<br />
(USA)<br />
FF2<br />
F2<br />
(Jpn)<br />
Run<br />
Mode<br />
Edit<br />
Lo Hi<br />
Parameters A150 to A153 affect the slope of the acceleration and deceleration for the elevatorrelated<br />
S curves.<br />
Func.<br />
Code<br />
Name/<br />
Description<br />
Range and Settings<br />
FEF2<br />
FE2<br />
(EU)<br />
Defaults<br />
FUF2<br />
FU2<br />
(USA)<br />
FF2<br />
F2<br />
(Jpn)<br />
Run<br />
Mode<br />
Edit<br />
Lo Hi<br />
A150 EL-S curve accel. ratio 1 Range is 0. to 50. (%) 25. 25. 25. ✘ ✘<br />
A151 EL-S curve accel. ratio 2 Range is 0. to 50. 25. 25. 25. ✘ ✘<br />
A152 EL-S curve decel. ratio 1 Range is 0. to 50. 25. 25. 25. ✘ ✘<br />
A153 EL-S curve decel. ratio 3 Range is 0. to 50. 25. 25. 25. ✘ ✘<br />
3–29<br />
Configuring Drive<br />
Parameters
Configuring Drive<br />
Parameters<br />
3–30<br />
“B” Group: Fine-Tuning Functions<br />
“B” Group: Fine-Tuning Functions<br />
Automatic<br />
Restart Mode and<br />
Phase Loss<br />
Func.<br />
Code<br />
Name/<br />
Description<br />
B001 Selection of automatic restart<br />
mode<br />
The “B” Group of functions and parameters adjust some of the more subtle but useful aspects<br />
of motor control and system configuration.<br />
The restart mode determines how the inverter will resume operation after a fault causes a trip<br />
event. The four options provide advantages for various situations. Frequency matching allows<br />
the inverter to read the motor speed by virtue of its residual magnetic flux and restart the output<br />
at the corresponding frequency. The inverter can attempt a restart a certain number of times<br />
depending on the particular trip event:<br />
Over-current trip, restart up to 3 times<br />
Over-voltage trip, restart up to 3 times<br />
Under-voltage trip, restart up to 16 times<br />
When the inverter reaches the maximum number of restarts (3 or 16), you must power-cycle the<br />
inverter to reset its operation.<br />
Other parameters specify the allowable under-voltage level and the delay time before restarting.<br />
The proper settings depend on the typical fault conditions for your application, the necessity of<br />
restarting the process in unattended situations, and whether restarting is always safe.<br />
Input<br />
power<br />
Inverter<br />
output<br />
Motor<br />
speed<br />
Retry wait time<br />
Power failure < allowable power fail<br />
time (B002), inverter resumes<br />
free-running<br />
Input<br />
power<br />
Inverter<br />
output<br />
Motor<br />
speed<br />
Power failure > allowable power<br />
fail time (B002), inverter trips<br />
free-running<br />
0 Power failure t 0 Power failure t<br />
Allowable<br />
power fail time<br />
B002<br />
B002<br />
Allowable<br />
power fail time<br />
B003<br />
SRW OPE Range or Settings<br />
ALM 00 Alarm output after trip, automatic restart<br />
disabled<br />
ZST 0 1 Restart at 0Hz<br />
RST 02 Resume operation after frequency matching<br />
FTP 03 Resume previous freq. after freq. matching,<br />
then decelerate to stop and display trip info<br />
FIX 04 Restart with active matching frequency<br />
FEF2<br />
FE2<br />
(EU)<br />
Defaults<br />
FUF2<br />
FU2<br />
(USA)<br />
FF2<br />
F2<br />
(Jpn)<br />
Run<br />
Mode<br />
Edit<br />
Lo Hi<br />
00 00 00 ✘ ✔
Func.<br />
Code<br />
Name/<br />
Description<br />
SRW OPE Range or Settings<br />
<strong>SJ7002</strong> Inverter<br />
B002 Allowable under-voltage power failure time 0.3 to 25.0 (seconds) 1.0 1.0 1.0 ✘ ✔<br />
The amount of time a power input under-voltage can occur without tripping the power failure<br />
alarm. If under-voltage exists longer than this time, the inverter trips, even if the restart mode<br />
is selected. If it exists less than this time retry will be attempted.<br />
B003 Retry wait time before motor restart<br />
Time delay after a trip condition goes away<br />
before the inverter restarts the motor<br />
0.3 to 100 (seconds) 1.0 1.0 1.0 ✘ ✔<br />
B004 Instantaneous power failure / OFF 00 Disable 00 00 00 ✘ ✔<br />
under-voltage trip alarm<br />
enable<br />
ON 0 1 Enable<br />
DOFF 02 Disable during stop and ramp to stop<br />
B005 Number of restarts on power 16 00 Restart 16 times 00 00 00 ✘ ✔<br />
failure / under-voltage trip<br />
events<br />
FREE 0 1 Always restart<br />
B006 Phase loss detection enable OFF 00 Disable – no trip on phase loss 00 00 00 ✘ ✔<br />
ON 0 1 Enable – trip on phase loss<br />
B007 Restart frequency threshold 0.00 to 400.0 (Hz);<br />
0.00 0.00 0.00 ✘ ✔<br />
When the frequency of the motor is less than<br />
this value, the inverter will restart at 0 Hz<br />
model -4000HFx2 is 0.00 to 120.0 (Hz)<br />
B008 Retry after trip select ALM 00 Always retry after trip 00 00 00 ✘ ✔<br />
ZST 0 1 Start with 0 Hz<br />
RST 02 Start with frequency matching<br />
FTP 03 Retry after deceleration and stop with<br />
matching frequency<br />
FIX 04 Start with active matching frequency<br />
B009 Retry after undervoltage 16 00 16 times 00 00 00 ✘ ✔<br />
select<br />
FREE 0 1 Unlimited<br />
B010 Retry count select after over-voltage or<br />
overcurrent<br />
1 to 3 (times) 3 3 3 ✘ ✔<br />
B011 Retry wait time after trip 0.3 to 100.0 (seconds) 1.0 1.0 1.0 ✘ ✔<br />
FEF2<br />
FE2<br />
(EU)<br />
Defaults<br />
FUF2<br />
FU2<br />
(USA)<br />
FF2<br />
F2<br />
(Jpn)<br />
Run<br />
Mode<br />
Edit<br />
Lo Hi<br />
CAUTION: When a loss of phase occurs, increased ripple current will markedly reduce main<br />
capacitor life over time. Diode bridge failure can also result. If phase loss occurs under load,<br />
the inverter could be damaged. Please pay particular attention to the setting of function B006.<br />
3–31<br />
Configuring Drive<br />
Parameters
Configuring Drive<br />
Parameters<br />
3–32<br />
“B” Group: Fine-Tuning Functions<br />
Electronic<br />
Thermal Overload<br />
Alarm Setting<br />
The thermal overload detection protects<br />
the inverter and motor from overheating<br />
due to an excessive load. It uses a current/<br />
inverse time curve to determine the trip<br />
point. The thermal overload alarm [THM]<br />
is the resulting intelligent output.<br />
First, use B013 to select the torque<br />
characteristic that matches your load.<br />
This allows the inverter to utilize the best<br />
thermal overload characteristic for your<br />
application.<br />
The torque developed in a motor is<br />
directly proportional to the current in the<br />
windings, which is also proportional to the heat generated (and temperature, over time). Therefore,<br />
you must set the thermal overload threshold in terms of current (amperes) with parameter<br />
B012. The range is 50% to 120% of the rated current for each inverter model. If the current<br />
exceeds the level you specify, the inverter will trip and log an event (error E05) in the history<br />
table. The inverter turns the motor output OFF when tripped. Separate settings are available for<br />
the second and third motors (if applicable), as shown in the table below.<br />
Function<br />
Code<br />
B012 / B212<br />
/ B312<br />
Trip current<br />
reduction<br />
factor<br />
x 1.0<br />
x 0.8<br />
x 0.6<br />
Function/Description Data or Range<br />
Electronic thermal setting (calculated<br />
within the inverter from current output)<br />
Constant torque<br />
Reduced<br />
torque<br />
B013=01<br />
B013=00<br />
0 5 20 60<br />
Output frequency<br />
120 Hz<br />
Range is 0.2 x rated current to<br />
1.0 x rated current<br />
Example 1, setting for SJ700-110LFE2 (0.4 to 55kW) - The rated motor current is 64A. The<br />
setting range is (0.2 * 64) to rated current, or 12.8A to 64.0A. For a setting of B012 = 64A<br />
(current at 100% rated current), the curve is shown below.<br />
Example 2, setting for SJ700-750LFE2 (75 to 150 kW) - The rated motor current is 149A. The<br />
setting range is (0.2 * 149) to rated current, or 29.8A to 149A. For a setting of B012 = 149A<br />
(current at 100% rated current), the curve is shown below.<br />
Trip<br />
time (s)<br />
60<br />
3.0<br />
0<br />
SJ700-110LFE2 SJ700-750LFE2<br />
A<br />
53.4 69 92<br />
109% 150% 200%<br />
Trip current at 60 Hz<br />
Trip<br />
time (s)<br />
60<br />
5.0<br />
0<br />
A<br />
158 223.5 268<br />
106% 150% 180%<br />
Trip current at 60 Hz
Example 3, setting for SJ700-3150LFE2 (185 to<br />
400kW) - The rated motor current is 600A. The<br />
setting range is (0.2 * 64) to rated current, or 120A<br />
to 600A. For a setting of B012 = 600A (current at<br />
100% rated current), the curve is shown to the<br />
right.<br />
The electronic thermal characteristic adjusts the<br />
way the inverter calculates thermal heating, based<br />
on the type of load connected to the motor, as set<br />
by parameter B013.<br />
CAUTION: When the motor runs at lower<br />
speeds, the cooling effect of the motor’s internal<br />
fan decreases.<br />
The table below shows the torque profile settings.<br />
Use the one that matches your load.<br />
Reduced Torque Characteristic – The<br />
example below shows the effect of the<br />
reduced torque characteristic curve (for<br />
example motor and current rating). At 20Hz,<br />
the output current is reduced by a factor of<br />
0.8 for given trip times.<br />
<strong>SJ7002</strong> Inverter<br />
Function Code Data Function/Description<br />
B013 / B213 / B313<br />
Trip<br />
time (s)<br />
60<br />
0.5<br />
0<br />
SJ700-150LFE2;<br />
rated current is 64A<br />
55.8 76.8<br />
00 Reduced torque<br />
0 1 Constant torque<br />
02 Free-setting<br />
102.4<br />
87.2% 120% 160%<br />
Reduced trip current at 20 Hz<br />
A<br />
Trip<br />
time (s)<br />
60<br />
5.0<br />
0<br />
Trip current<br />
reduction<br />
factor<br />
x 1.0<br />
x 0.8<br />
x 0.6<br />
0<br />
Trip<br />
time (s)<br />
60<br />
0.5<br />
0<br />
SJ700-3150LFE2<br />
A<br />
636 900 1140<br />
106% 150% 190%<br />
Trip current at 60 Hz<br />
5 20 60<br />
SJ700-3150LFE2;<br />
rated current is 600A<br />
508.8 720<br />
912<br />
84.8% 120% 152%<br />
Reduced trip current at 20 Hz<br />
3–33<br />
Hz<br />
A<br />
Configuring Drive<br />
Parameters
Configuring Drive<br />
Parameters<br />
3–34<br />
“B” Group: Fine-Tuning Functions<br />
Constant Torque Characteristic – Selecting<br />
the constant torque characteristic for the<br />
example motor gives the curves below. At<br />
2.5 Hz, the output current is reduced by a<br />
factor of 0.9 for given trip times.<br />
Trip<br />
time (s)<br />
60<br />
0.5<br />
0<br />
A<br />
62.8 86.4 115.2<br />
98.1% 135% 180%<br />
Reduced trip current at 2.5 Hz<br />
Free Thermal Characteristic - It is possible to set the electronic thermal characteristic using a<br />
free-form curve defined by three data points, according to the table below.<br />
Function<br />
Code<br />
B015 / B017 /<br />
B019<br />
B016 / B018 /<br />
B020<br />
Name Description Range<br />
Free-setting electronic<br />
thermal frequency 1, 2, 3<br />
Free setting electronic<br />
thermal current 1, 2, 3<br />
Trip current<br />
reduction<br />
factor<br />
x 1.0<br />
x 0.9<br />
x 0.8<br />
Data point coordinates for<br />
Hz axis (horizontal) in the<br />
free-form curve<br />
Data point coordinates for<br />
Ampere axis (vertical) in the<br />
free-form curve<br />
0 to 400 (Hz);<br />
model -4000HFx2 is<br />
0.00 to 120.0 (Hz)<br />
0.0 = (disable)<br />
0.1 to 1000.<br />
The left graph below shows the region for possible free-setting curves. The right graph below<br />
shows an example curve defined by three data points specified by B015 – B020.<br />
Trip current<br />
reduction<br />
factor<br />
x 1.0<br />
x 0.8<br />
0<br />
SJ700-150LFE2;<br />
rated current is 64A<br />
Setting range<br />
5<br />
Output freq.<br />
400 Hz<br />
Output<br />
current (A)<br />
0<br />
Trip<br />
time (s)<br />
B020<br />
B018<br />
B016<br />
0<br />
60<br />
0.5<br />
0<br />
2.5 5 60<br />
SJ700-3150LFE2;<br />
rated current is 600A<br />
Hz<br />
A<br />
572 810 1026<br />
95.4% 135% 171%<br />
Reduced trip current at 2.5 Hz<br />
Hz<br />
B015 B017 B019 Ax04 max. freq.
Func.<br />
Code<br />
<strong>SJ7002</strong> Inverter<br />
Suppose the electronic thermal setting (B012) is set to 44 Amperes. The left graph below shows<br />
the effect of the free setting torque characteristic curve. For example, at (B017) Hz, the output<br />
current level to cause overheating in a fixed time period is reduced by a factor of (B018). The<br />
right graph below shows the reduced trip current levels in those conditions for given trip times.<br />
Trip<br />
time (s)<br />
60<br />
0.5<br />
0<br />
(x) (y) (z) A<br />
Reduced trip current at (B017) Hz<br />
(x) = B018 value x 116%<br />
(y) = B018 value x 120%<br />
(z) = B018 value x 150%<br />
Any intelligent output terminal may be programmed to indicate a thermal warning [THM].<br />
Parameter C061 determines the warning threshold. Please see “Thermal Warning Signal” on<br />
page 4–52 for more details.<br />
Name/<br />
Description<br />
Keypad<br />
SRW OPE<br />
Range and Settings<br />
FEF2<br />
FE2<br />
(EU)<br />
Defaults<br />
FUF2<br />
FU2<br />
(USA)<br />
FF2<br />
F2<br />
(Jpn)<br />
Run<br />
Mode<br />
Edit<br />
Lo Hi<br />
B012 Level of electronic thermal setting 0.20 x rated current) to<br />
(2.00 x rated current) (A)<br />
rated current of inverter ✘ ✔<br />
B212 Level of electronic thermal setting, 2nd motor 0.20 x rated current) to<br />
(2.00 x rated current) (A)<br />
rated current of inverter ✘ ✔<br />
B312 Level of electronic thermal setting, 3rd motor 0.20 x rated current) to<br />
(2.00 x rated current) (A)<br />
rated current of inverter ✘ ✔<br />
B013 Electronic thermal characteristic SUB 00 Reduced torque 01 01 00 ✘ ✔<br />
CRT 0 1 Constant torque<br />
FREE 02 V/f free-setting<br />
B213 Electronic thermal characteristic, SUB 00 Reduced torque 01 01 00 ✘ ✔<br />
2nd motor<br />
CRT 0 1 Constant torque<br />
FREE 02 V/f free-setting<br />
B313 Electronic thermal characteristic, SUB 00 Reduced torque 01 01 00 ✘ ✔<br />
3rd motor<br />
CRT 0 1 Constant torque<br />
FREE 02 V/f free-setting<br />
B015 Free setting, electronic thermal frequency (1) 0.0 to 400.0 (Hz);<br />
model -4000HFx2 is<br />
0.00 to 120.0 (Hz)<br />
0. 0. 0. ✘ ✔<br />
B016 Free setting, electronic thermal current (1) 0.0 to 1000. (A) 0.0 0.0 0.0 ✘ ✔<br />
B017 Free setting, electronic thermal frequency (2) 0.0 to 400.0 (Hz);<br />
model -4000HFx2 is<br />
0.00 to 120.0 (Hz)<br />
0. 0. 0. ✘ ✔<br />
B018 Free setting, electronic thermal current (2) 0.0 to 1000. (A) 0.0 0.0 0.0 ✘ ✔<br />
B019 Free setting, electronic thermal frequency (3) 0.0 to 400.0 (Hz);<br />
model -4000HFx2 is<br />
0.00 to 120.0 (Hz)<br />
0. 0. 0. ✘ ✔<br />
B020 Free setting, electronic thermal current (3) 0.0 to 1000. (A) 0.0 0.0 0.0 ✘ ✔<br />
3–35<br />
Configuring Drive<br />
Parameters
Configuring Drive<br />
Parameters<br />
3–36<br />
“B” Group: Fine-Tuning Functions<br />
Overload<br />
Restriction<br />
Func.<br />
Code<br />
Name/<br />
Description<br />
If the inverter’s output current exceeds a<br />
preset current level you specify during<br />
acceleration or constant speed, the<br />
overload restriction feature automatically<br />
reduces the output frequency to<br />
restrict the overload. This feature does<br />
not generate an alarm or trip event. You<br />
can instruct the inverter to apply<br />
overload restriction only during<br />
constant speed, thus allowing higher<br />
currents for acceleration. Or, you may<br />
use the same threshold for both acceleration<br />
and constant speed. In the case of<br />
Motor<br />
Current<br />
Output<br />
Frequency<br />
B023<br />
restriction area<br />
B022<br />
controlled deceleration, the inverter monitors both output current and DC bus voltage. The<br />
inverter will increase output frequency to try to avoid a trip due to over-current or over-voltage<br />
(due to regeneration).<br />
When the inverter detects an overload, it must decelerate the motor to reduce the current until it<br />
is less than the threshold. You can choose the rate of deceleration that the inverter uses to lower<br />
the output current.<br />
Keypad<br />
SRW OPE<br />
Range and Settings<br />
0<br />
FEF2<br />
FE2<br />
(EU)<br />
Defaults<br />
FUF2<br />
FU2<br />
(USA)<br />
FF2<br />
F2<br />
(Jpn)<br />
t<br />
t<br />
Run<br />
Mode<br />
Edit<br />
Lo Hi<br />
B021 Overload restriction<br />
operation mode<br />
OFF 00 Disable 01 01 01 ✘ ✔<br />
Select the operating ON 0 1 Enable for acceleration and constant speed<br />
mode during overload<br />
conditions<br />
CRT 02 Enable for constant speed only<br />
N-R 03 Enable for accel, decel, and constant speed<br />
B022 Overload restriction setting (0.20 x rated current) to (1.80 x rated<br />
current) (A)<br />
rated current times 1.50 ✘ ✔<br />
B023 Deceleration rate at overload restriction 0.10 to 30.00 (seconds) 1.00 1.00 1.00 ✘ ✔<br />
B024 Overload restriction<br />
operation mode (2)<br />
OFF 00 Disable 01 01 01 ✘ ✔<br />
Select the operating ON 0 1 Enable for acceleration and constant speed<br />
mode during overload<br />
conditions<br />
CRT 02 Enable for constant speed only<br />
N-R 03 Enable for accel, decel, and constant speed<br />
B025 Overload restriction setting (2) Models -004xxx to -550xxx: (0.20 x rated<br />
current) to (2.0 x rated current) (A);<br />
Models -750xxx to -4000xxx: (0.20 x rated<br />
current) to (1.80 x rated current) (A)<br />
rated current times 1.50 ✘ ✔<br />
B026 Deceleration rate at overload restriction (2) 0.10 to 30.00 (seconds) 1.00 1.00 1.00 ✘ ✔<br />
B027 Overcurrent suppres- OFF 00 Disable 01 01 01 ✘ ✔<br />
sion enable<br />
ON 0 1 Enable<br />
B028 Current limit for active frequency-matching Models -004xxx to -550xxx: (0.20 x rated rated current times 1.0 ✘ ✔<br />
restart<br />
current) to (2.0 x rated current) (A);<br />
Models -750xxx to -4000xxx: (0.20 x rated<br />
current) to (1.80 x rated current) (A)<br />
B029 Scan time constant for active freq. matching 0.10 to 30.00 (seconds) 0.50 0.50 0.50 ✘ ✔
Func.<br />
Code<br />
Name/<br />
Description<br />
B030 Restart freq. select for<br />
active freq. matching<br />
Keypad<br />
SRW OPE<br />
Range and Settings<br />
FEF2<br />
FE2<br />
(EU)<br />
<strong>SJ7002</strong> Inverter<br />
Defaults<br />
FUF2<br />
FU2<br />
(USA)<br />
FF2<br />
F2<br />
(Jpn)<br />
Run<br />
Mode<br />
Edit<br />
Lo Hi<br />
CUTOFF 00 Frequency at last shutoff 00 00 00 ✘ ✔<br />
MAX 0 1 Maximum frequency<br />
SET 02 Set frequency<br />
NOTE: Two sets of overload restriction parameters are available. The set that is in use may be<br />
selected by means of an intelligent input terminal (see “Overload Restriction” on page 4–29).<br />
3–37<br />
Configuring Drive<br />
Parameters
Configuring Drive<br />
Parameters<br />
3–38<br />
“B” Group: Fine-Tuning Functions<br />
Software Lock<br />
Mode<br />
Func.<br />
Code<br />
Name/<br />
Description<br />
B031 Software lock mode<br />
selection<br />
The software lock function keeps personnel from accidentally changing parameters in the<br />
inverter memory. Use B031 to select from various protection levels.<br />
The table below lists all combinations of B031 option codes and the<br />
ON/OFF state of the [SFT] input. Each Check ✔ or Ex ✘ indicates<br />
whether the corresponding parameter(s) can be edited. The Standard<br />
Parameters column below lists Low and High level access for some<br />
lock modes. These refer to the parameter tables throughout this<br />
chapter, each of which includes a column titled Run Mode Edit as<br />
shown to the right. The two marks (Check ✔ or Ex ✘) under the “Lo<br />
Hi” subtitle indicate whether Low-level and/or High-level access<br />
applies to each parameter as defined in the table below. In some lock modes, you can edit only<br />
F001 and the Multi-speed parameter group that includes A020, A220, A320, A021–A035, and<br />
A038 (Jog). However, it does not include A019, Multi-speed operation selection. The editing<br />
access to B031 itself is unique, and is specified in the right-most two columns below.<br />
B031 Lock<br />
Mode<br />
[SFT]<br />
Intelligent<br />
Input<br />
Standard Parameters<br />
F001 and<br />
Multi-speed<br />
Run<br />
Mode<br />
Edit<br />
Lo Hi<br />
B031<br />
Stop Run Stop or Run Stop Run<br />
00 OFF ✔ Low-level ✔ ✔ ✘<br />
ON ✘ ✘ ✘ ✔ ✘<br />
01 OFF ✔ Low-level ✔ ✔ ✘<br />
ON ✘ ✘ ✔ ✔ ✘<br />
02 (ignored) ✘ ✘ ✘ ✔ ✘<br />
03 (ignored) ✘ ✘ ✔ ✔ ✘<br />
10 (ignored) ✔ High-level ✔ ✔ ✔<br />
NOTE: Since the software lock function B031 is always accessible when the motor is stopped,<br />
this feature is not the same as password protection used in other industrial control devices.<br />
Keypad<br />
SRW OPE<br />
Range and Settings<br />
FEF2<br />
FE2<br />
(EU)<br />
Defaults<br />
FUF2<br />
FU2<br />
(USA)<br />
NOTE: To disable parameter editing when using B031 lock modes 00 and 01, assign the [SFT]<br />
function to one of the intelligent input terminals. See “Software Lock” on page 4–23.<br />
✘ ✔<br />
FF2<br />
F2<br />
(Jpn)<br />
Run<br />
Mode<br />
Edit<br />
Lo Hi<br />
MD0 00 Low-level access, [SFT] input blocks all edits 01 01 01 ✘ ✔<br />
MD1 0 1 Low-level access, [SFT] input blocks edits<br />
(except F001 and Multi-speed parameters)<br />
MD2 02 No access to edits<br />
MD3 03 No access to edits except F001 and Multi-speed<br />
parameters<br />
MD10 10 High-level access, including B031
Miscellaneous<br />
Settings<br />
Func.<br />
Code<br />
Function Display<br />
Settings<br />
<strong>SJ7002</strong> Inverter<br />
The miscellaneous settings include scaling factors, initialization modes, and others. This<br />
section covers some of the most important settings you may need to configure.<br />
Name/<br />
Description<br />
Keypad<br />
SRW OPE<br />
Range and Settings<br />
FEF2<br />
FE2<br />
(EU)<br />
Defaults<br />
FUF2<br />
FU2<br />
(USA)<br />
FF2<br />
F2<br />
(Jpn)<br />
The inverter has the (optional) capability to suppress the display and editing of certain parameters.<br />
Use B037 to select the display options. The purpose of this feature is to hide particular<br />
secondary parameters that become unused or not applicable based on more fundamental parameter<br />
settings. For example, setting A001 = 01 configures the inverter to get its frequency<br />
command from the front keypad potentiometer. In this case, the inverter will not use the analog<br />
inputs nor their adjustment parameters for an external frequency command.<br />
For example, you can set B037=01 to have the inverter suppress the displaying of all analog<br />
input parameters when A001=01, as shown in the first row of the following table.<br />
Run<br />
Mode<br />
Edit<br />
Lo Hi<br />
B034 Run/power-on warning time — — 0 to 9999. (0 to 99990), 1000 to<br />
6553 (10000 to 655300) (hours)<br />
0. 0. 0. ✘ ✔<br />
B035 Rotational direction restriction FREE 00 Enable for both directions 00 00 00 ✘ ✘<br />
FW 0 1 Enable for forward only ✘ ✘<br />
RV 02 Enable for reverse only ✘ ✘<br />
B036 Reduced voltage start selection — — 000 (short) to 255 (long) 06 06 06 ✘ ✔<br />
Func.<br />
Code<br />
Name/<br />
Description<br />
Keypad<br />
SRW OPE<br />
Range and Settings<br />
xFE2<br />
(EU)<br />
Defaults Run<br />
xFU2<br />
(USA)<br />
xFF2<br />
(Jpn)<br />
Mode<br />
Edit<br />
Lo Hi<br />
B037 Function code display ALL 00 Display all 04 04 04 ✘ ✔<br />
restriction<br />
FUNCTION 0 1 Display only utilized functions (see<br />
table on next page)<br />
USER 02 Display user-selected functions only<br />
(configure with U01 to U12)<br />
COMPARE 03 Data comparison display<br />
BASIC 04 Basic display<br />
B038 Initial display selection STR 00 Last value dislayed when STR key<br />
was pressed<br />
01 01 01 ✘ ✔<br />
FM 0 1 D001<br />
Iout 02 D002<br />
Dir 03 D003<br />
F-CNV 04 D007<br />
F-SET 05 F001<br />
B039 Automatic user parame- OFF 00 Disable 00 00 00 ✘ ✔<br />
ter function enable<br />
ON 0 1 Enable<br />
Function<br />
Code<br />
Data<br />
Resulting Non-displayed<br />
Functions (when B37 = 01)<br />
A001 01 A005, A006, A011 – A016, A101 –<br />
A114, C081 – C083, C121 – C123<br />
Notes<br />
[O], [OI], [O2] terminal<br />
functions<br />
3–39<br />
Configuring Drive<br />
Parameters
Configuring Drive<br />
Parameters<br />
3–40<br />
“B” Group: Fine-Tuning Functions<br />
Function<br />
Code<br />
A002 01, 03, 04,<br />
05<br />
B087 Stop key function<br />
A019 00 A028 – A035 Multi-speed function<br />
C001 – C008 02, 03, 04,<br />
05<br />
Function<br />
Code<br />
Data<br />
Resulting Non-displayed<br />
Functions (when B37 = 01)<br />
Notes<br />
A044, A244 02 B100 – B113 Control methods<br />
A051 01 A052 – A059 DC braking<br />
A071 01 A072 – A076, C044 PID function<br />
A094 01 A095 – A096 2-stage adjustable frequency<br />
A294 01 A0295 – A296<br />
B013, B213, 02 B015 – B020 Electric thermal characteris-<br />
B313<br />
tic<br />
B021 01, 02 B022, B023 Overload restriction<br />
B024 01, 02 B025, B026 Overload restriction 2<br />
B095 01, 02 B090 – B096 Dynamic braking function<br />
C001 – C008<br />
A044<br />
A244<br />
A044<br />
A244<br />
Data<br />
06 A038, A039 Jogging<br />
08<br />
Resulting Non-displayed<br />
Functions (when B37 = 01)<br />
F202, F203, A203, A204, A220,<br />
A241 – A244, A261, A262,<br />
A292 – A296, B212, B213, H202<br />
– H206, H220 – H224, H230 –<br />
H234, H250 – H252, H260<br />
2nd motor control<br />
11 B088 Free-run stop<br />
17 F302, F303, A303, A304, A320,<br />
A342 – A344, A392, A393,<br />
B312, B313, H306<br />
3rd motor control<br />
18 C102 Reset<br />
27, 28, 29 C101 UP/DWN<br />
00, 01 A041 – A043 Torque boost function<br />
04 H060 0Hz domain SLV limiter<br />
00, 01 A241 – A243 Torque boost function<br />
04 H260 0Hz SLV limiter<br />
03, 04, 05 B040 – B046, H001, H070 –<br />
H072, H002, H005, H020 –<br />
H024, H030 – H034, H050 –<br />
H052, H060<br />
03, 04 B040 – B046, H001, H070 –<br />
H072, H202, H205, H220 –<br />
H224, H230 – H234, H250 –<br />
H252, H260<br />
Vector control<br />
Vector control<br />
Notes<br />
A097 01, 02, 03 A131 Acceleration pattern constant<br />
A098 01, 02, 03 A132 Deceleration pattern constant
Func.<br />
Code<br />
Name/<br />
Description<br />
Function<br />
Code<br />
<strong>SJ7002</strong> Inverter<br />
B098 01, 02 B099, C085 Thermistor function<br />
B050 01 B051 – B054 Instantaneous power failure<br />
B120 01 B121 – B126 External brake control<br />
Function<br />
Code<br />
Data<br />
Data<br />
Resulting Non-displayed<br />
Functions (when B37 = 01)<br />
Resulting Non-displayed<br />
Functions (when B37 = 01)<br />
Notes<br />
Notes<br />
02, 06 C042, C043 Frequency arrival signal<br />
03 C040, C041 Overload advance notice<br />
C021 – C025, 07 C055 – C058 Over-torque<br />
C026 21 C063 Zero-speed detection signal<br />
24, 25 C045, C046 Frequency arrival signal<br />
26 C011 Overload advance notice 2<br />
H002 00 H020 – H024 Motor constant<br />
01, 02 H030 – H034 Motor constant (auto-tuning)<br />
H202 00 H220 – H224 Motor constant<br />
01, 02 H023 – H0234 Motor constant (auto-tuning)<br />
P010 01 P011 – P023, P025 – P027 Expansion card function<br />
Keypad<br />
SRW OPE<br />
Range and Settings<br />
FEF2<br />
FE2<br />
(EU)<br />
Defaults<br />
FUF2<br />
FU2<br />
(USA)<br />
B040 Torque limit selection 4-SET 00 4-quadrant mode 00 00 00 ✘ ✔<br />
TM 0 1 Selected by two input terminals (see<br />
p. 4–30)<br />
O2 02 From analog [O2] input (0 to 10V =<br />
0 to 200%)<br />
OP1 03 From expansion card 1<br />
OP2 04 From expansion card 2<br />
B041 Torque limit (1) (forward-driving in 150% 150 0. to 200. (%) 150. 150. 150. ✘ ✔<br />
4-quadrant mode)<br />
no no Disable torque limit<br />
B042 Torque limit (2) (reverse-regenerat- 150% 150 0. to 200. (%) 150. 150. 150. ✘ ✔<br />
ing in 4-quadrant mode)<br />
no no Disable torque limit<br />
B043 Torque limit (3) (reverse-driving in 150% 150 0. to 200. (%) 150. 150. 150. ✘ ✔<br />
4-quadrant mode)<br />
no no Disable torque limit<br />
B044 Torque limit (4) (forward-regenerat- 150% 150 0. to 200. (%) 150. 150. 150. ✘ ✔<br />
ing in 4-quadrant mode)<br />
no no Disable torque limit<br />
FF2<br />
F2<br />
(Jpn)<br />
Run<br />
Mode<br />
Edit<br />
Lo Hi<br />
3–41<br />
Configuring Drive<br />
Parameters
Configuring Drive<br />
Parameters<br />
3–42<br />
Func.<br />
Code<br />
“B” Group: Fine-Tuning Functions<br />
Name/<br />
Description<br />
Keypad<br />
SRW OPE<br />
Range and Settings<br />
B045 Torque limit LADSTOP enable OFF 00 Disable 00 00 00 ✘ ✔<br />
Temporarily stops accel/decel ramps<br />
during torque limit. Available for<br />
SLV, 0 Hz domain, or vector control<br />
with feedback mode<br />
ON 0 1 Enable ✘ ✔<br />
B046 Reverse Run protection enable OFF 00 Disable 00 00 00 ✘ ✔<br />
Prohibits reverse motor rotation ON 0 1 Enable<br />
FEF2<br />
FE2<br />
(EU)<br />
Defaults<br />
FUF2<br />
FU2<br />
(USA)<br />
FF2<br />
F2<br />
(Jpn)<br />
Run<br />
Mode<br />
Edit<br />
Lo Hi<br />
Controlled Deceleration at Power Loss – When enabled, this feature permits the inverter to<br />
control final motor deceleration upon loss of inverter input power. First, you must make a<br />
wiring change to the inverter. See “Optional Controlled Decel and Alarm at Power Loss” on<br />
page 4–4 for complete instructions including wiring and signal timing diagrams for using the<br />
controlled deceleration at power loss feature.<br />
After making the wiring change, use function B050 to enable the feature. Use B051 to determine<br />
the point at which a decaying DC bus voltage will trigger the controlled deceleration. Use<br />
parameter B054 to specify an initial step-wise deceleration at power loss, and B053 to specify<br />
the duration of the linear deceleration.<br />
During the controlled deceleration the inverter itself acts as a load to decelerate the motor. With<br />
either a high-inertia load or a short deceleration time (or both), it is possible that the inverter<br />
impedance will not be low enough to continue linear deceleration and avoid an over-voltage<br />
condition on the DC bus. Use parameter B052 to specify a threshold for the over-voltage. In<br />
this case, the inverter pauses deceleration (runs at constant speed). When the DC bus decays<br />
again below the threshold, linear deceleration resumes. The pause/resume process will repeat as<br />
necessary until the DC bus energy is depleted (under-voltage condition occurs).<br />
The case when setting B052 is lower than the inverter supply voltage has special considerations:<br />
If B052 Over-voltage Threshold During Power Loss is less than B051 DC Bus Voltage<br />
Trigger Level During Power Loss, the over-voltage threshold during power loss will be<br />
increased to the DC bus voltage trigger level with the stop level is applied. However, the<br />
parameter setting will not be changed.<br />
When B052 is less than the supply voltage (the rectified DC voltage or the AC voltage times<br />
square root of two), when power recovers the inverter will be in the LAD-stop state and<br />
cannot decelerate. (The Stop Command and frequency change command are ignored until<br />
deceleration is complete.) be sure to set B052 higher than the standard supply voltage.<br />
A non-stop deceleration function cannot be canceled until it is complete. To restart the<br />
inverter operations after power recovery, wait until the inverter stops. Then enter a Stop<br />
Command and then an operation command (FW, RV).<br />
Setting a higher value for B054 Initial Output Frequency Decrease During Power Loss<br />
results in an over-current trip due to sudden deceleration. Setting a lower value for B054 or<br />
larger value for B053 Deceleration Time Setting During Power Loss results in under-voltage<br />
trip due to reduced regenerative energy.<br />
Non-stop deceleration at instantaneous power failure (B050=01) has these characteristics:<br />
The nonstop deceleration at instantaneous power failure is the function making the inverter<br />
decelerate and stop the motor while maintaining the voltage below the overvoltage level<br />
(over-voltage threshold during power loss [b052]) when an instantaneous power failure<br />
occurs during the inverter operation.<br />
To use this function, remove the J51 connector cables from terminals R0 and T0, connect the<br />
main circuit terminals P and R0 to each other, and connect the main circuit terminals N and<br />
T0 to each other. Use 0.75 mm2 or heavier wires for the connections.
Func.<br />
Code<br />
<strong>SJ7002</strong> Inverter<br />
If an instantaneous power failure has occurred while the inverter is operating the motor and<br />
the output voltage falls to the DC bus voltage trigger level during power loss (b051) or less,<br />
the inverter reduces the output frequency by the initial output frequency decrease during<br />
power loss (b054) once, and then decelerates the motor for the deceleration time setting<br />
during power loss (b053).<br />
If the voltage increases to an overvoltage level (exceeding the over-voltage threshold during<br />
power loss [b052]) because of regeneration, the inverter enters the LAD stop state (decelerate<br />
to stop) until the voltage falls below the overvoltage level.<br />
If the over-voltage threshold during power loss (B052) is less than the DC bus voltage trigger<br />
level during power loss (B051), the over-voltage threshold during power loss will be increased<br />
to the DC bus voltage trigger level during power loss when the stop level is applied. (However,<br />
the stored setting will not be changed.) And, in case B052 is lower than the supply voltage<br />
(equivalent to rectified DC voltage which is square root of 2 times the supply AC voltage),<br />
when power recovers while this function is activated, inverter will be in the LAD stop status<br />
and cannot decelerate. (Stop command and frequency change command are not accepted until<br />
deceleration is complete). Be sure to set b052 higher than the normal supply voltage.<br />
Name/<br />
Description<br />
Keypad<br />
SRW OPE<br />
Range and Settings<br />
FEF2<br />
FE2<br />
(EU)<br />
Defaults<br />
FUF2<br />
FU2<br />
(USA)<br />
FF2<br />
F2<br />
(Jpn)<br />
Run<br />
Mode<br />
Edit<br />
Lo Hi<br />
B050 Controlled deceleration<br />
and stop on power loss<br />
OFF 00 Disable 00 00 00 ✘ ✘<br />
Allows inverter control DEC 0 1 Constant decel to stop ✘ ✘<br />
using regenerative energy<br />
to decelerate after loss of<br />
input power (requires<br />
NS1 02 Constant DC voltage control<br />
with resume<br />
✘ ✘<br />
jumper change)<br />
NS2 03 Constant DC voltage control ✘ ✘<br />
B051 DC bus voltage trigger level during power 0.0 to 999.9, 1000. (V) 220.0/ 220.0/ 220.0/ ✘ ✘<br />
loss<br />
Sets trigger for controlled deceleration and<br />
stop on power loss function<br />
440.0 440.0 440.0<br />
B052 Over-voltage threshold during power loss 0.0 to 999.9, 1000. (V) 360.0/ 360.0/ 360.0/ ✘ ✘<br />
Sets over-voltage threshold for controlled<br />
deceleration function<br />
720.0 720.0 720.0<br />
B053 Deceleration time setting during power loss 0.01 to 99.99, 100.0 to 999.9,<br />
1000 to 3600 (seconds)<br />
1.00 1.00 1.00 ✘ ✘<br />
B054 Initial output frequency decrease during<br />
power loss<br />
Sets the initial decrease in output frequency<br />
upon power loss<br />
0.00 to 10.00 (Hz) 0.00 0.00 0.00 ✘ ✘<br />
B055 Proportional gain setting for non-stop<br />
operation at power loss<br />
0.00 to 2.55 0.20 0.20 0.20 ✘ ✘<br />
B056 Integral time setting for non-stop operation<br />
at power loss<br />
0.0 to 9.999, 10.00 to 65.55 0.10 0.10 0.10 ✘ ✘<br />
3–43<br />
Configuring Drive<br />
Parameters
Configuring Drive<br />
Parameters<br />
3–44<br />
“B” Group: Fine-Tuning Functions<br />
Window<br />
Comparators<br />
Func.<br />
Code<br />
Miscellaneous<br />
Functions<br />
The window comparator function controls digital outputs based on the comparison of analog<br />
input values to user-defined upper and lower limits.<br />
Name/<br />
Description<br />
Keypad<br />
SRW OPE<br />
Range and Settings<br />
B060 [O] input maximum limit level of window comparator 0. to 100. (%)<br />
Lower limit = B061 + B062 x 2<br />
xFE2<br />
(EU)<br />
Defaults Run<br />
xFU2<br />
(USA)<br />
xFF2<br />
(Jpn)<br />
B083: Carrier frequency adjustment – The internal switching frequency of the inverter<br />
circuitry (also called the chopper frequency). It is called the carrier frequency because the<br />
lower AC output frequency of the inverter “rides” the carrier. The faint, high-pitched sound<br />
you hear when the inverter is in Run Mode is characteristic of switching power supplies in<br />
general. The carrier frequency is adjustable from 500 Hz to 15 kHz (the upper limit varies,<br />
depending on the inverter rating). The audible sound decreases at the higher frequencies, but<br />
RFI noise and leakage current may be increased. Refer to the specification derating curves in<br />
Chapter 1 to determine the maximum allowable carrier frequency setting for your particular<br />
inverter and environmental conditions.<br />
NOTE: When the inverter is in sensorless vector mode, use B083 to set the carrier frequency<br />
greater than 2.1 kHz for proper operation.<br />
NOTE: The carrier frequency setting must stay within specified limits for inverter-motor<br />
applications that must comply with particular regulatory agencies. For example, a European<br />
CE-approved application requires the inverter carrier to be less than 5 kHz.<br />
Mode<br />
Edit<br />
Lo Hi<br />
100 100 100 ✘ ✔<br />
B061 [O] input minimum limit level of window comparator 0. to 100. (%)<br />
Lower limit = B060 – B062 x 2<br />
0 0 0 ✘ ✔<br />
B062 [O] input hysteresis width of window comparator 0. to 10. (%)<br />
Lower limit = B061 – B062 x 2<br />
0 0 0 ✘ ✔<br />
B063 [OI] input maximum limit level of window comparator 0. to 100. (%)<br />
Lower limit = B064 + B066 x 2<br />
100 100 100 ✘ ✔<br />
B064 [OI] input minimum limit level of window comparator 0. to 100. (%)<br />
Lower limit = B063 – B066 x 2<br />
0 0 0 ✘ ✔<br />
B065 [OI] input hysteresis width of window comparator 0. to 10. (%)<br />
Lower limit = B063 – B064 x 2<br />
0 0 0 ✘ ✔<br />
B066 [O2] input maximum limit level of window comparator –100. to 100. (%)<br />
Lower limit = B067 + B068 x 2<br />
100 100 100 ✘ ✔<br />
B067 [O2] input minimum limit level of window comparator –100. to 100. (%)<br />
Lower limit = B066 – B068 x 2<br />
-100 -100 -100 ✘ ✔<br />
B068 [O2] input hysteresis width of window comparator 0. to 10. (%)<br />
Lower limit = B066 – B067 x 2<br />
0 0 0 ✘ ✔<br />
B070 [O] input disconnect threshold — — 0 to 100 (%) 255 255 255 ✘ ✔<br />
no 255 Ignore setting ✘ ✔<br />
B071 [OI] input disconnect threshold — — 0 to 100 (%) 255 255 255 ✘ ✔<br />
no 255 Ignore setting ✘ ✔<br />
B072 [O2] input disconnect threshold — — 0 to 100 (%) 127 127 127 ✘ ✔<br />
no 127 Ignore setting ✘ ✔
Func.<br />
Code<br />
Name/<br />
Description<br />
<strong>SJ7002</strong> Inverter<br />
B084, B085: Initialization codes – These functions allow you to restore the factory default<br />
settings. Please refer to “Restoring Factory Default Settings” on page 6–16.<br />
B086: Frequency display scaling – You can convert the output frequency monitor on D001 to<br />
a scaled number (engineering units) monitored at function D007. For example, the motor may<br />
run a conveyor that is monitored in feet per minute. Use this formula:<br />
Scaled output frequency (D007) = Output frequency (D001) × Factor (B086)<br />
Keypad<br />
SRW OPE<br />
Range and Settings<br />
FEF2<br />
FE2<br />
(EU)<br />
Defaults<br />
FUF2<br />
FU2<br />
(USA)<br />
FF2<br />
F2<br />
(Jpn)<br />
Run<br />
Mode<br />
Edit<br />
Lo Hi<br />
B078 Clear cumulative input power<br />
data<br />
CNT 00 No change 00 00 00 ✔ ✔<br />
Set = 01, press STR key to clear CLR 0 1 Clear the data<br />
B079 Cumulative input power display gain setting 1. to 1000. 1. 1. 1. ✔ ✔<br />
B082 Start frequency adjustment<br />
Sets the starting frequency for the inverter output<br />
0.10 to 9.99 (Hz) 0.50 0.50 0.50 ✘ ✔<br />
B083 Carrier frequency setting Most models, 0.5 to 15.0 (kHz);<br />
Sets the PWM carrier (internal switching freq.);<br />
all models are subject to derating<br />
-1850 and -3150 are 0.5 to 10 (kHz);<br />
-4000 is 0.5 to 3 (kHz)<br />
B084 Initialization mode (parameters TRP 00 Trip history clear 00 00 00 ✘ ✘<br />
or trip history)<br />
DATA 0 1 Parameter initialization<br />
TRP/<br />
DATA<br />
02 Trip history clear and parameter<br />
initialization<br />
B085 Country code for initialization JPN 00 Japan version 01 02 00 ✘ ✘<br />
Select default parameter values EUR 0 1 Europe version<br />
for country on initialization<br />
USA 02 USA version<br />
B086 Frequency scaling conversion factor<br />
Specify a constant to scale D007 to display in<br />
engineering units<br />
0.1 to 99.9 1.0 1.0 1.0 ✔ ✔<br />
B087 STOP key enable ON 00 Enable 00 00 00 ✘ ✔<br />
Select whether the STOP key on OFF 0 1 Disable<br />
the keypad is enabled (req.<br />
A002=01, 03, 04, or 05) S-OFF 02 Disable only the STOP function<br />
B091/B088: Stop Mode / Restart Mode Configuration – You can configure how the inverter<br />
performs a standard stop (each time Run FWD and REV signals turn OFF). Setting B091 determines<br />
whether the inverter will control the deceleration, or whether it will perform a free-run<br />
stop (coast to a stop). When using the free-run stop selection, it is imperative to also configure<br />
how you want the inverter to resume control of motor speed. Setting B088 determines whether<br />
the inverter will ensure the motor always resumes at 0 Hz, or whether the motor resumes from<br />
its current coasting speed (also called frequency matching). The Run command may turn OFF<br />
briefly, allowing the motor to coast to a slower speed from which normal operation can resume.<br />
In most applications a controlled deceleration is desirable, corresponding to B091=00.<br />
However, applications such as HVAC fan control will often use a free-run stop (B091=01). This<br />
practice decreases dynamic stress on system components, prolonging system life. In this case,<br />
you will typically set B088=01 in order to resume from the current speed after a free-run stop<br />
(see diagram below, right). Note that using the default setting, B088=00, can cause trip events<br />
when the inverter attempts to force the load quickly to zero speed.<br />
3.0<br />
2.1<br />
1.9<br />
3.0<br />
2.1<br />
1.9<br />
3.0<br />
2.1<br />
1.9<br />
✘ ✔<br />
✘ ✔<br />
3–45<br />
Configuring Drive<br />
Parameters
Configuring Drive<br />
Parameters<br />
3–46<br />
Func.<br />
Code<br />
“B” Group: Fine-Tuning Functions<br />
Motor<br />
speed<br />
[FW, RV]<br />
Name/<br />
Description<br />
NOTE: Other events can cause (or be configured to cause) a free-run stop, such as power loss<br />
(see “Automatic Restart Mode and Phase Loss” on page 3–30), and inverter trip events in<br />
general (see “Miscellaneous Functions” on page 3–62). If all free-run stop behavior is important<br />
to your application (such as HVAC), be sure to configure each event accordingly.<br />
Some additional parameters further configure all instances of a free-run stop. Parameter B003,<br />
Retry Wait Time Before Motor Restart, sets the minimum time the inverter will free-run. For<br />
example, if B003 = 4 seconds (and B091=01) and the cause of the free-run stop lasts 10<br />
seconds, the inverter will free-run (coast) for a total of 14 seconds before driving the motor<br />
again. Parameter B007, Restart Frequency Threshold, sets the motor frequency at which the<br />
inverter will no longer resume and accelerate, instead resuming from 0 Hz (complete stop).<br />
B091=01 Stop Mode = free-run stop<br />
B088=00 Resume from 0Hz<br />
Zero-frequency start<br />
Keypad<br />
SRW OPE<br />
t<br />
Motor<br />
speed<br />
[FW, RV]<br />
Range and Settings<br />
B091=01 Stop Mode = free-run stop<br />
B088=01 Resume from current speed<br />
FEF2<br />
FE2<br />
(EU)<br />
Defaults<br />
FUF2<br />
FU2<br />
(USA)<br />
B003<br />
FF2<br />
F2<br />
(Jpn)<br />
wait time<br />
B088 Restart mode after FRS ZST 00 Restart from 0Hz 00 00 00 ✘ ✔<br />
Selects how the inverter<br />
resumes operation when<br />
the free-run stop (FRS) is<br />
cancelled<br />
B089 Automatic carrier<br />
frequency reduction<br />
fST 0 1 Restart from frequency detected from<br />
actual speed of motor<br />
FIX 02 Restart from active matching frequency<br />
t<br />
Run<br />
Mode<br />
Edit<br />
Lo Hi<br />
OFF 00 Disable 00 00 00 ✘ ✔<br />
ON 0 1 Enable ✘ ✔<br />
B090 Dynamic braking usage ratio 0.0 to 100.0 (%)<br />
Set = 0.0 to disable dynamic braking<br />
00 00 00 ✘ ✔<br />
Selects the braking duty cycle for the dynamic braking resistor<br />
(total brake % ON-time per 100 second interval)<br />
✘ ✔<br />
B091 Stop mode selection DEC 00 DEC (decelerate and stop) 00 00 00 ✘ ✘<br />
Selects how the inverter<br />
stops the motor<br />
FRS 0 1 FRS (free run to stop) ✘ ✘<br />
B092 Cooling fan control OFF 00 Fan always ON 00 00 00 ✘ ✘<br />
(see note below)<br />
ON 0 1 Fan ON during RUN, OFF during STOP ✘ ✘<br />
B095 Dynamic braking control OFF 00 Disable 00 00 00 ✘ ✔<br />
ON<br />
STPOFF<br />
0 1 Enable during RUN only ✘ ✔<br />
ON<br />
STPON<br />
02 Enable always ✘ ✔
Func.<br />
Code<br />
B096 Dynamic braking activation level 330 to 380 (V) (200V class),<br />
660 to 760 (V) (400V class)<br />
B098 Thermistor for thermal<br />
protection control<br />
Free-setting<br />
V/f Pattern<br />
Name/<br />
Description<br />
Keypad<br />
SRW OPE<br />
Range and Settings<br />
<strong>SJ7002</strong> Inverter<br />
OFF 00 Disable 00 00 00 ✘ ✔<br />
PTC 0 1 Enable-PTC thermistor ✘ ✔<br />
NTC 02 Enable-NTC thermistor ✘ ✔<br />
B099 Thermal protection level setting 0.0 to 9999 Ohms 3000 3000 3000 ✘ ✔<br />
Thermistor resistance threshold at which trip occurs ✘ ✔<br />
Func.<br />
Code<br />
FEF2<br />
FE2<br />
(EU)<br />
B090: Dynamic braking usage ratio – This parameter limits the amount of time the inverter<br />
can use the dynamic braking accessory device without entering the Trip Mode. Please refer to<br />
“Dynamic Braking” on page 5–6 for more information on dynamic braking accessories.<br />
NOTE: When cooling fan control is enabled (B092=01) the inverter always turns the fan ON<br />
for five minutes immediately after powerup. This will cool the inverter in case the inverter /<br />
motor is still warm from prior running before a short power outage.<br />
The free-setting V/f inverter mode of operation uses voltage and frequency parameter pairs to<br />
define seven points on a V/f graph. This provides a way to define a multi-segment V/f curve<br />
that best suits your application.<br />
The frequency settings do require that F1 ≤ F2 ≤ F3 ≤ F4 ≤ F5 ≤ F6 ≤ F7; their values must have<br />
this ascending order relationship. To satisfy this criterion during initial parameter editing, set<br />
F7 (B112) and work backwards when setting these values, since the defaults are all 0 Hz.<br />
However, the voltages V1 to V7 may either increase or decrease from one to the next. Therefore,<br />
you may set these parameters in any order.<br />
Name/<br />
Description<br />
Range and Settings<br />
360/<br />
720<br />
FEF2<br />
FE2<br />
(EU)<br />
Defaults<br />
FUF2<br />
FU2<br />
(USA)<br />
360/<br />
720<br />
Defaults<br />
FUF2<br />
FU2<br />
(USA)<br />
FF2<br />
F2<br />
(Jpn)<br />
360/<br />
720<br />
FF2<br />
F2<br />
(Jpn)<br />
Run<br />
Mode<br />
Edit<br />
Lo Hi<br />
✘ ✔<br />
Run<br />
Mode<br />
Edit<br />
Lo Hi<br />
B100 Free-setting V/f frequency (1) 0. to Free-setting V/f frequency (2) (Hz) 0. 0. 0. ✘ ✘<br />
B101 Free-setting V/f voltage (1) 0.0 to 800.0 (V) 0.0 0.0 0.0 ✘ ✘<br />
B102 Free-setting V/f frequency (2) 0. to Free-setting V/f frequency (3) (Hz) 0. 0. 0. ✘ ✘<br />
B103 Free-setting V/f voltage (2) 0.0 to 800.0 (V) 0.0 0.0 0.0 ✘ ✘<br />
B104 Free-setting V/f frequency (3) 0. to Free-setting V/f frequency (4) (Hz) 0. 0. 0. ✘ ✘<br />
B105 Free-setting V/f voltage (3) 0.0 to 800.0 (V) 0.0 0.0 0.0 ✘ ✘<br />
B106 Free-setting V/f frequency (4) 0. to Free-setting V/f frequency (5) (Hz) 0. 0. 0. ✘ ✘<br />
B107 Free-setting V/f voltage (4) 0.0 to 800.0 (V) 0.0 0.0 0.0 ✘ ✘<br />
B108 Free-setting V/f frequency (5) 0. to Free-setting V/f frequency (6) (Hz) 0. 0. 0. ✘ ✘<br />
B109 Free-setting V/f voltage (5) 0.0 to 800.0 (V) 0.0 0.0 0.0 ✘ ✘<br />
B110 Free-setting V/f frequency (6) 0. to Free-setting V/f frequency (7) (Hz) 0. 0. 0. ✘ ✘<br />
B111 Free-setting V/f voltage (6) 0.0 to 800.0 (V) 0.0 0.0 0.0 ✘ ✘<br />
B112 Free-setting V/f frequency (7) 0. to 400.0 (Hz) 0. 0. 0. ✘ ✘<br />
B113 Free-setting V/f voltage (7) 0.0 to 800.0 (V) 0.0 0.0 0.0 ✘ ✘<br />
3–47<br />
Configuring Drive<br />
Parameters
Configuring Drive<br />
Parameters<br />
3–48<br />
“B” Group: Fine-Tuning Functions<br />
External Brake<br />
Control<br />
Func.<br />
Code<br />
Name/<br />
Description<br />
The brake control function in the inverter controls external braking used in systems such as<br />
elevators. The purpose of this function is to ensure the inverter is powering the motor before<br />
releasing external brakes that would permit the load to move or coast. This function requires the<br />
configuration and wiring of intelligent input and output terminals. See “External Brake Control<br />
Function” on page 4–32 for more information.<br />
Keypad<br />
SRW OPE<br />
Range and Settings<br />
FEF2<br />
FE2<br />
(EU)<br />
Defaults<br />
FUF2<br />
FU2<br />
(USA)<br />
B120 Brake Control Enable OFF 00 Disable 00 00 00 ✘ ✔<br />
ON 0 1 Enable<br />
B121 Brake Wait Time for Release 0.00 to 5.00 (seconds) 0.00 0.00 0.00 ✘ ✔<br />
Sets time delay between arrival at release frequency and the brake release signal<br />
B122 Brake Wait Time for Acceleration 0.00 to 5.00 (seconds) 0.00 0.00 0.00 ✘ ✔<br />
Sets time delay from receipt of brake confirmation signal to start of motor acceleration<br />
B123 Brake Wait Time for Stopping 0.00 to 5.00 (seconds) 0.00 0.00 0.00 ✘ ✔<br />
Sets time delay from brake confirmation signal turns OFF to inverter deceleration to 0 Hz<br />
B124 Brake Wait Time for Confirmation 0.00 to 5.00 (seconds) 0.00 0.00 0.00 ✘ ✔<br />
Sets the wait time for confirmation after turn ON/OFF of brake release. If confirmation is not<br />
received during the specified wait time, the inverter will trip with an external brake error.<br />
B125 Brake Release Frequency Setting 0.00 to 99.99, 100.0 to 400.0 (Hz) 0.00 0.00 0.00 ✘ ✔<br />
Sets the frequency of the brake release output signal after delay set by B121<br />
B126 Brake Release Current Setting 0 to 1.80 x rated current Rated current for ✘ ✔<br />
Sets the minimum inverter current level above which the brake release signal is permitted<br />
inverter<br />
B127 Braking Frequency 0.00 to 99.99, 100.0 to 400.0 (Hz) 0.00 0.00 0.00 ✘ ✔<br />
Inverter<br />
[BRK] Brake release<br />
[BOK] Brake confirmation<br />
[BER] Brake error<br />
FF2<br />
F2<br />
(Jpn)<br />
External Brake<br />
System<br />
Emergency Brake<br />
(or alarm, etc.)<br />
Run<br />
Mode<br />
Edit<br />
Lo Hi
Overvoltage<br />
Functions<br />
Func.<br />
Code<br />
<strong>SJ7002</strong> Inverter<br />
B130/B131: Over-voltage LADSTOP Enable / Over-voltage LADSTOP Level – The overvoltage<br />
LADSTOP function monitors the DC bus voltage and actively changes the output<br />
frequency profile to maintain the DC bus voltage within settable limits. Although “LAD” refers<br />
to “linear acceleration / deceleration,” the inverter only “STOPs” the deceleration slope so that<br />
regenerative voltage will not cause the DC bus to rise enough to cause an over-voltage trip<br />
event. Note that acceleration is not affected.<br />
The graph below shows an inverter output profile that starts decelerating to a stop. At two<br />
different points during the deceleration, regenerative voltage elevates the DC bus level, exceeding<br />
the LADSTOP threshold set by B131. When the Over-voltage LADSTOP feature is<br />
enabled by B130 = 01, the inverter stops the deceleration ramp in each case until the DC bus<br />
level is again less than the threshold value.<br />
B130=01<br />
Name/<br />
Description<br />
OVLADSTOP = enable<br />
Over-voltage protection<br />
trip threshold<br />
Over-voltage protection<br />
trip threshold<br />
DC bus level<br />
Keypad<br />
SRW OPE<br />
Output<br />
frequency<br />
Start deceleration<br />
Inverter stops deceleration<br />
Deceleration resumed<br />
Range and Settings<br />
FEF2<br />
FE2<br />
(EU)<br />
Defaults<br />
FUF2<br />
FU2<br />
(USA)<br />
B130 Over-voltage LADSTOP enable OFF 00 Disable 00 00 00 ✘ ✘<br />
Pauses deceleration ramp when<br />
DC bus voltage rises above<br />
threshold level, in order to avoid<br />
over-voltage trip<br />
t<br />
t<br />
FF2<br />
F2<br />
(Jpn)<br />
Run<br />
Mode<br />
Edit<br />
Lo Hi<br />
ON 0 1 Enable during deceleration and constant<br />
speed<br />
✘ ✘<br />
AON 02 Enable during acceleration ✘ ✘<br />
B131 Over-voltage LADSTOP level 330 to 390 (V) for 200V class,<br />
660 to 780 (V) for 400V class<br />
Sets the threshold level for over-voltage LADSTOP. When the DC bus voltage is above the<br />
threshold value, the inverter stops deceleration until the DC bus voltage is less than the<br />
threshold setting again.<br />
B132 Acceleration and deceleration rate at overvoltage<br />
suppression<br />
0.10 to 30.00 (seconds) 1.00 1.00 1.00 ✘ ✔<br />
B133 Overvoltage suppression proportional gain 0.00 to 2.55 0.50 0.50 0.50 ✘ ✘<br />
B134 Overvoltage suppression integral time 0.000 to 9.999, 10.00 to 63.53 (seconds) 0.060 0.060 0.060 ✘ ✘<br />
380/<br />
760<br />
380/<br />
760<br />
380/<br />
760<br />
✘ ✔<br />
✘ ✔<br />
3–49<br />
Configuring Drive<br />
Parameters
Configuring Drive<br />
Parameters<br />
3–50<br />
“C” Group: Intelligent Terminal Functions<br />
“C” Group: Intelligent Terminal Functions<br />
Input Terminal<br />
Configuration<br />
Func.<br />
Code<br />
Func.<br />
Code<br />
The eight input terminals [1], [2], [3], [4], [5], [6], [7], and [8] can be configured for any of 44<br />
different functions. The next two tables show how to configure the eight terminals. The inputs<br />
are logical, in that they are either OFF or ON. We define these states as OFF=0, and ON=1.<br />
The inverter comes with default options for the eight terminals. These default settings are<br />
initially unique, each one having its own setting. Note that European and US versions have<br />
different default settings. You can use any option on any terminal, and even use the same option<br />
twice to create a logical OR (though usually not required).<br />
Functions and Options –The function codes in the following table let you assign one of 44<br />
options to any of the eight logic inputs for the <strong>SJ7002</strong> inverters. The functions C001 through<br />
C008 configure the terminals [1] through [8] respectively. The “value” of these particular<br />
parameters is not a scalar value, but it is a discrete number that selects one option from many<br />
available options.<br />
For example, if you set function C001=01, you have assigned option 01 (Reverse Run) to<br />
terminal [1]. The option codes and the specifics of how each one works are in Chapter 4.<br />
Name/<br />
Description<br />
Range and Settings<br />
FEF2<br />
FE2<br />
(EU)<br />
Defaults<br />
FUF2<br />
FU2<br />
(USA)<br />
FF2<br />
F2<br />
(Jpn)<br />
Run<br />
Mode<br />
Edit<br />
Lo Hi<br />
C001 Terminal [1] function<br />
18 [RS] 18 [RS] 18 [RS] ✘ ✔<br />
C002 Terminal [2] function 16 [AT] 16 [AT] 16 [AT] ✘ ✔<br />
C003 Terminal [3] function 06 [JG] 06 [JG] 06 [JG] ✘ ✔<br />
C004<br />
C005<br />
Terminal [4] function<br />
Terminal [5] function<br />
63 programmable functions<br />
available for terminals (see<br />
next section)<br />
11 [FRS]<br />
09 [2CH]<br />
11 [FRS]<br />
09 [2CH]<br />
11 [FRS]<br />
09 [2CH]<br />
✘ ✔<br />
✘ ✔<br />
C006 Terminal [6] function 03 [CF2] 13 [USP] 03 [CF2] ✘ ✔<br />
C007 Terminal [7] function 02 [CF1] 02 [CF1] 02 [CF1] ✘ ✔<br />
C008 Terminal [8] function 01 [RV] 01 [RV] 01 [RV] ✘ ✔<br />
The input logic convention is programmable for each of the six inputs. Most inputs default to<br />
normally open (active high), but you can select normally closed (active low) in order to invert<br />
the sense of the logic.<br />
Name/<br />
Description<br />
Keypad<br />
SRW OPE<br />
Range and Settings<br />
FEF2<br />
FE2<br />
(EU)<br />
Defaults<br />
FUF2<br />
FU2<br />
(USA)<br />
FF2<br />
F2<br />
(Jpn)<br />
Run<br />
Mode<br />
Edit<br />
Lo Hi<br />
C011 Terminal [1] active state NO 00 Normally open (N.O.) 00 00 00 ✘ ✔<br />
NC 0 1 Normally closed (N.C.) ✘ ✔<br />
C012 Terminal [2] active state NO 00 Normally open (N.O.) 00 00 00 ✘ ✔<br />
NC 0 1 Normally closed (N.C.) ✘ ✔<br />
C013 Terminal [3] active state NO 00 Normally open (N.O.) 00 00 00 ✘ ✔<br />
NC 0 1 Normally closed (N.C.) ✘ ✔<br />
C014 Terminal [4] active state NO 00 Normally open (N.O.) 00 00 00 ✘ ✔<br />
NC 0 1 Normally closed (N.C.) ✘ ✔
Func.<br />
Code<br />
Intelligent Input<br />
Terminal<br />
Overview<br />
Option<br />
Code<br />
Name/<br />
Description<br />
Keypad<br />
SRW OPE<br />
Range and Settings<br />
FEF2<br />
FE2<br />
(EU)<br />
<strong>SJ7002</strong> Inverter<br />
Defaults<br />
FUF2<br />
FU2<br />
(USA)<br />
FF2<br />
F2<br />
(Jpn)<br />
C015 Terminal [5] active state NO 00 Normally open (N.O.) 00 00 00 ✘ ✔<br />
NC 0 1 Normally closed (N.C.) ✘ ✔<br />
C016 Terminal [6] active state NO 00 Normally open (N.O.) 00 00 00 ✘ ✔<br />
NC 0 1 Normally closed (N.C.) ✘ ✔<br />
C017 Terminal [7] active state NO 00 Normally open (N.O.) 00 00 00 ✘ ✔<br />
NC 0 1 Normally closed (N.C.) ✘ ✔<br />
C018 Terminal [8] active state NO 00 Normally open (N.O.) 00 00 00 ✘ ✔<br />
NC 0 1 Normally closed (N.C.) ✘ ✔<br />
C019 Terminal [FW] active state NO 00 Normally open (N.O.) 00 00 00 ✘ ✔<br />
NC 0 1 Normally closed (N.C.) ✘ ✔<br />
Terminal<br />
Symbol<br />
NOTE: An input terminal configured for option code 18 ([RS] Reset command) cannot be<br />
configured for normally closed operation.<br />
Run<br />
Mode<br />
Edit<br />
Lo Hi<br />
Each of the eight intelligent terminals may be assigned any of the options in the following<br />
table. When you program one of the option codes for terminal assignments C001 to C008, the<br />
respective terminal assumes the function role of that option code. The terminal functions have a<br />
symbol or abbreviation, which we use to label a terminal using that function. For example the<br />
“Reverse Run” command is [RV]. The physical label on the terminal block connector is simply<br />
1, 2, 3, 4, 5, 6, 7, or 8. However, schematic examples in this manual also use the terminal<br />
function symbol (such as [RV]) to show the assigned option. The option codes for C011 to<br />
C019 determine the active state of the logical input (active high or active low).<br />
Summary Table - This table shows all forty-four intelligent input functions at a glance.<br />
Detailed descriptions of these functions, related parameters and settings, and example wiring<br />
diagrams are in “Using Intelligent Input Terminals” on page 4–13.<br />
Input Function Summary Table<br />
Function Name Description<br />
01 RV Reverse Run/Stop Puts the inverter in Run Mode, motor runs reverse<br />
02 CF1 Multi-speed select,<br />
Bit 0 (LSB)<br />
Binary encoded speed select, Bit 0<br />
03 CF2 Multi-speed select,<br />
Bit 1<br />
Binary encoded speed select, Bit 1<br />
04 CF3 Multi-speed select,<br />
Bit 2<br />
Binary encoded speed select, Bit 2<br />
05 CF4 Multi-speed select,<br />
Bit 3 (MSB)<br />
Binary encoded speed select, Bit 3<br />
06 JG Jogging Puts the inverter in Run Mode, output to motor runs at jog<br />
parameter frequency A038<br />
07 DB External Signal for DC<br />
Injection Braking<br />
Applies DC braking during deceleration<br />
3–51<br />
Configuring Drive<br />
Parameters
Configuring Drive<br />
Parameters<br />
3–52<br />
“C” Group: Intelligent Terminal Functions<br />
Option<br />
Code<br />
Terminal<br />
Symbol<br />
08 SET Set (select) 2nd Motor<br />
Data<br />
09 2CH 2-stage Acceleration and<br />
Deceleration<br />
Switch from normal (1st) to 2nd motor parameters for generating<br />
frequency output to motor<br />
Frequency output uses 2nd-stage acceleration and deceleration<br />
values<br />
11 FRS Free-run Stop Causes output to turn OFF, allowing motor to free run (coast)<br />
to stop<br />
12 EXT External Trip At OFF to ON transition, inverter latches trip event and<br />
displays E12 (until a reset occurs)<br />
13 USP Unattended Start Protection<br />
14 CS Commercial Power<br />
Source<br />
On powerup, the inverter will not resume a Run command<br />
that was active before power loss (mostly used in the US)<br />
OFF-to-ON transition signals the inverter that the motor is<br />
already running at powerup (via bypass), thus suppressing the<br />
inverter’s motor output in Run Mode; ON-to-OFF transition<br />
signals the inverter to apply a time delay (B003), frequency<br />
match its output to existing motor speed, and resume normal<br />
Run Mode operation<br />
15 SFT Software Lock The keypad and remote programming devices are prevented<br />
from changing parameters<br />
16 AT Analog Input Voltage/<br />
current Select<br />
ON condition: If A005=00, terminal [OI] is enabled for<br />
input. If A005=01, terminal [O2] is enabled for input. (Use<br />
terminal [L] for signal return.)<br />
OFF condition: Terminal [O] is enabled for voltage input (use<br />
terminal [L] for signal return).<br />
17 SET3 Set (select) 3rd motor data Switch from normal (1st) to 3rd motor parameters for generating<br />
frequency output to motor<br />
18 RS Reset Inverter Resets the trip condition, turns OFF the motor output, and<br />
asserts powerup reset<br />
20 STA START<br />
(3-wire interface)<br />
Starts the motor rotation<br />
21 STP STOP<br />
(3-wire interface)<br />
Stops the motor rotation<br />
22 F/R FWD, REV<br />
(3-wire interface)<br />
Selects the direction of motor rotation: ON =FWD;<br />
OFF =REV. While the motor is rotating, a change of F/R will<br />
start a deceleration, followed by a change in direction.<br />
23 PID PID Disable Temporarily disables PID loop control. Inverter output turns<br />
OFF as long as PID Enable is active (A071=1).<br />
24 PIDC PID Reset Resets the PID loop controller. The main consequence is that<br />
the integrator sum is forced to zero.<br />
26 CAS Control gain setting To select the source of internal speed loop gain...<br />
OFF selects parameters H050 to H052 (or H250 to H252 for<br />
2nd motor); ON selects alternate parameters H070 to H072<br />
27 UP Remote Control<br />
UP Function (motorized<br />
speed pot.)<br />
28 DWN Remote Control DOWN<br />
Function (motorized<br />
speed pot.)<br />
Input Function Summary Table<br />
Function Name Description<br />
Accelerates (increases output frequency) motor from current<br />
frequency<br />
Decelerates (decreases output frequency) motor from current<br />
frequency
Option<br />
Code<br />
Terminal<br />
Symbol<br />
29 UDC Remote Control Data<br />
Clearing<br />
<strong>SJ7002</strong> Inverter<br />
Clears the UP/DWN frequency memory by forcing it to equal<br />
the set frequency parameter F001. Setting C101 must be<br />
set=00 to enable this function to work.<br />
31 OPE Operator Control Forces the source of the output frequency setting (A001) and<br />
the RUN command (A002) to be from the digital operator<br />
(F001 and the Run key, respectively)<br />
32 SF1 Multi-speed bit 1 Multiple speed select, Bit 1<br />
33 SF2 Multi-speed bit 2 Multiple speed select, Bit 2<br />
34 SF3 Multi-speed bit 3 Multiple speed select, Bit 3<br />
35 SF4 Multi-speed bit 4 Multiple speed select, Bit 4<br />
36 SF5 Multi-speed bit 5 Multiple speed select, Bit 5<br />
37 SF6 Multi-speed bit 6 Multiple speed select, Bit 6<br />
38 SF7 Multi-speed bit 7 Multiple speed select, Bit 7<br />
39 OLR Overload restriction Turn ON to select current overload parameter set 2<br />
(B024, B025, B026); OFF selects set 1(B021, B022, B023)<br />
40 TL Torque limit enable ON enables torque limit feature; OFF disables all torque limit<br />
sources and defaults to 200% of inverter rated torque output<br />
41 TRQ1 Torque limit selection, bit<br />
1<br />
Binary encoded torque limit select, Bit 1 (LSB)<br />
42 TRQ2 Torque limit selection, bit<br />
2<br />
Binary encoded torque limit select, Bit 2 (MSB)<br />
43 PPI Proportional /<br />
Proportional/Integral<br />
mode selection<br />
Input Function Summary Table<br />
Function Name Description<br />
ON selects Proportional-only control; OFF selects Proportional-Integral<br />
control<br />
44 BOK Brake confirmation signal Indicates external brake has released (used only for external<br />
brake control function)<br />
45 ORT Orientation (home search) The encoder is in the home (oriented) position<br />
46 LAC LAC: LAD cancel Disables the normal Linear Accel / Decel (LAD) mode<br />
47 PCLR Position deviation reset Clears the position deviation by setting the actual position<br />
equal to the desired position<br />
48 STAT Pulse train position<br />
command input enable<br />
Enables the pulse train control of motor<br />
50 ADD Add frequency enable Adds the A145 value (Add Frequency) to the output<br />
frequency<br />
51 F-TM Force terminal mode Force inverter to use input terminals for output frequency and<br />
Run command sources<br />
52 ATR Torque control enable Inverter operates by controlling torque instead of speed<br />
53 KHC Clear cumulative power<br />
value<br />
Clears cumulative power data displayed by parameter D015<br />
54 SON Speed servo ON Enables the inverter to accept FW/REV commands; for use<br />
with V/F curve vector control with sensor (A044=05)<br />
3–53<br />
Configuring Drive<br />
Parameters
Configuring Drive<br />
Parameters<br />
3–54<br />
“C” Group: Intelligent Terminal Functions<br />
Option<br />
Code<br />
Terminal<br />
Symbol<br />
55 FOC Current forcing Forces excitation current in motor at 0 speed; for use with V/f<br />
curve settings A044/A244 = 03, 04, and 05<br />
56 MI1 General-purpose input 1 Easy sequence function, general input 1<br />
57 MI2 General-purpose input 2 Easy sequence function, general input 2<br />
58 MI3 General-purpose input 3 Easy sequence function, general input 3<br />
59 MI4 General-purpose input 4 Easy sequence function, general input 4<br />
60 MI5 General-purpose input 5 Easy sequence function, general input 5<br />
61 MI6 General-purpose input 6 Easy sequence function, general input 6<br />
62 MI7 General-purpose input 7 Easy sequence function, general input 7<br />
63 MI8 General-purpose input 8 Easy sequence function, general input 8<br />
65 AHD Analog holding command Causes the inverter to sample and hold the analog speed input,<br />
maintaining constant speed while this signal is ON<br />
66 CP1 Multi-stage position<br />
select 1<br />
Binary-encoded position select, bit 1 (LSB)<br />
67 CP2 Multi-stage position<br />
select 2<br />
Binary-encoded position select, bit 2 (LSB)<br />
68 CP3 Multi-stage position<br />
select 3<br />
Binary-encoded position select, bit 3 (MSB)<br />
69 ORL Zero-return limit function Indicates that the load has reached the zero-return point, so<br />
the inverter stops the zero-return operation in progress<br />
70 ORG Zero-return trigger<br />
function<br />
Starts a zero-return operation (load moves toward the zeroreturn<br />
point)<br />
71 FOT Forward drive stop Limits the forward rotational torque to 10%; for use at the end<br />
of travel in position control mode<br />
72 ROT Reverse drive stop Limits the reverse rotational torque to 10%; for use at the end<br />
of travel in position control mode<br />
73 SPD Speed/position control<br />
select<br />
Input Function Summary Table<br />
Function Name Description<br />
74 PCNT Pulse counter input Pulse counter input<br />
75 PCC Pulse counter clear Clears the pulse count<br />
no — Not selected (input ignored)<br />
Causes the inverter to perform only speed control (ignores<br />
encoder pulses) while in position control mode
Output Terminal<br />
Configuration<br />
Func.<br />
Code<br />
Func.<br />
Code<br />
<strong>SJ7002</strong> Inverter<br />
The inverter provides configuration for logic (discrete) and analog outputs, shown in the table<br />
below.<br />
Name/<br />
Description<br />
Range and Settings<br />
FEF2<br />
FE2<br />
(EU)<br />
Defaults<br />
FUF2<br />
FU2<br />
(USA)<br />
FF2<br />
F2<br />
(Jpn)<br />
NOTE: *Terminals [11] – [13] or [11] – [14] are automatically configured as AC0 – AC2 or<br />
AC0 – AC3 when C62 is configured to enable alarm code output.<br />
The output logic convention is programmable for terminals [11] – [15], and the alarm relay<br />
terminals. The open-collector output terminals [11] – [15] default to normally open (active<br />
low), but you can select normally closed (active high) for the terminals in order to invert the<br />
sense of the logic. You can invert the logical sense of the alarm relay output as well.<br />
Run<br />
Mode<br />
Edit<br />
Lo Hi<br />
C021 Terminal [11] function *<br />
01 [FA1] 01 [FA1] 01 [FA1] ✘ ✔<br />
C022 Terminal [12] function * 00 [RUN] 00 [RUN] 00 [RUN] ✘ ✔<br />
C023<br />
C024<br />
Terminal [13] function *<br />
Terminal [14] function *<br />
51 programmable functions<br />
available for logic<br />
(discrete) outputs (see next<br />
03 [OL]<br />
07 [OTQ]<br />
03 [OL]<br />
07 [OTQ]<br />
03 [OL]<br />
07 [OTQ]<br />
✘ ✔<br />
✘ ✔<br />
C025 Terminal [15] function<br />
section)<br />
08 [IP] 08 [IP] 08 [IP] ✘ ✔<br />
C026 Alarm relay terminal<br />
function<br />
05 [AL] 05 [AL] 05 [AL] ✘ ✔<br />
C027 [FM] signal selection<br />
12 programmable functions<br />
00 (output freq.) ✘ ✔<br />
C028 [AM] signal selection available for analog outputs 00 (output freq.) ✘ ✔<br />
C029 [AMI] signal selection<br />
(see after next section)<br />
00 (output freq.) ✘ ✔<br />
C030 Digital current monitor 0.20 x rated current to 2.00 Rated current x 1.0 ✔ ✔<br />
reference value<br />
x rated current (A)<br />
Current with digital current monitor output at 1.44 kHz ✔ ✔<br />
Name/<br />
SRW Display<br />
Keypad<br />
SRW OPE<br />
Range and Settings<br />
FEF2<br />
FE2<br />
(EU)<br />
Defaults<br />
FUF2<br />
FU2<br />
(USA)<br />
FF2<br />
F2<br />
(Jpn)<br />
Run<br />
Mode<br />
Edit<br />
Lo Hi<br />
C031 Terminal [11] active state NO 00 Normally open (N.O.) 00 00 00 ✘ ✔<br />
NC 0 1 Normally closed (N.C.)<br />
C032 Terminal [12] active state NO 00 Normally open (N.O.) 00 00 00 ✘ ✔<br />
NC 0 1 Normally closed (N.C.)<br />
C033 Terminal [13] active state NO 00 Normally open (N.O.) 00 00 00 ✘ ✔<br />
NC 0 1 Normally closed (N.C.)<br />
C034 Terminal [14] active state NO 00 Normally open (N.O.) 00 00 00 ✘ ✔<br />
NC 0 1 Normally closed (N.C.)<br />
C035 Terminal [15] active state NO 00 Normally open (N.O.) 00 00 00 ✘ ✔<br />
NC 0 1 Normally closed (N.C.)<br />
C036 Alarm relay terminal active NO 00 Normally open (N.O.) 01 01 01 ✘ ✔<br />
state<br />
NC 0 1 Normally closed (N.C.)<br />
3–55<br />
Configuring Drive<br />
Parameters
Configuring Drive<br />
Parameters<br />
3–56<br />
“C” Group: Intelligent Terminal Functions<br />
Option<br />
Code<br />
Terminal<br />
Symbol<br />
Output Summary Table - This table shows all twenty-two functions for the logic output<br />
terminals [11] – [15] at a glance. Detailed function descriptions, related parameters, settings,<br />
and example wiring diagrams are in “Using Intelligent Output Terminals” on page 4–43.<br />
Output Function Summary Table<br />
Function Name Description<br />
00 RUN Run signal Inverter is in Run Mode, motor running<br />
01 FA1 Frequency arrival type 1 –<br />
constant speed<br />
When output to motor is at the standard set frequency F001<br />
02 FA2 Frequency arrival type 2 – Turns ON when output to motor is at or above the FA<br />
over-frequency<br />
Threshold 1 (C042) during accel; turns OFF when motor<br />
output goes below the threshold during decel<br />
03 OL Overload advance notice Output current is more than the set Threshold 1 for the<br />
signal (1)<br />
overload signal (set with C041)<br />
04 OD Output deviation for PID PID error is more than the set threshold for the deviation<br />
control<br />
signal<br />
05 AL Alarm signal Alarm condition has been met and not reset<br />
06 FA3 Frequency arrival type 3 – Output to motor is at the FA Threshold 1 (C042) during accel,<br />
at frequency<br />
or at C043 during decel<br />
07 OTQ Over-torque signal Over-torque feature is enabled and the motor is generating<br />
excess torque<br />
08 IP Instantaneous power Inverter input power has decreased below the acceptable input<br />
failure signal<br />
voltage level<br />
09 UV Under-voltage signal Inverter input power has decreased below the acceptable input<br />
voltage level<br />
10 TRQ In torque limit Output torque exceeds level set for the particular torque/<br />
frequency quadrant in effect during operation<br />
11 RNT Operation time over Inverter Run time exceeds the limit set by Run/power-on<br />
warning time (B034)<br />
12 ONT Plug-in time over Inverter plug-in time exceeds the set limit<br />
13 THM Thermal alarm signal Thermal limit for the motor is exceeded<br />
19 BRK Brake release signal ON when the inverter signals the external braking system to<br />
release (open) its brake; OFF when the inverter is not driving<br />
the motor and needs the external brake engaged<br />
20 BER Brake error signal ON when the output current is less than the set releasing<br />
current; OFF when the braking function is not in use, or when<br />
the output current to the motor is correct and it is safe to<br />
release the brake<br />
21 ZS Zero speed detect Encoder pulses of the motor have stopped<br />
22 DSE Speed deviation Velocity error exceeds the error threshold defined for the<br />
maximum<br />
encoder input<br />
23 POK Positioning completion Load position is at the target<br />
24 FA4 Frequency arrival type 4 – ON when output to motor is at or above the FA threshold 2<br />
over-frequency (2) (C045) during accel; OFF when the output to motor is below<br />
the FA threshold 2 (C046) during decel<br />
25 FA5 Frequency arrival type 5 – Output to motor is at the FA threshold 2 (C045) during accel<br />
at frequency (2) or at C046 during decel
Option<br />
Code<br />
Terminal<br />
Symbol<br />
26 OL2 Overload notice advance<br />
signal (2)<br />
27 Odc Analog [O] disconnect<br />
detect<br />
28 OIDc Analog [OI] disconnect<br />
detect<br />
29 O2Dc Analog [O2] disconnect<br />
detect<br />
31 FBV PID feedback second<br />
stage output<br />
<strong>SJ7002</strong> Inverter<br />
Output current is more than the set Threshold 2 for the<br />
overload signal (set with C111)<br />
Input signal level at terminal [O] is below threshold (set with<br />
B070)<br />
Input signal level at terminal [OI] is below threshold (set with<br />
B071)<br />
Input signal level at terminal [O2] is below threshold (set with<br />
B072)<br />
Stage #1 inverter is indicating to Stage # inverter that the<br />
Process Variable (PV) is in saturation. The system needs<br />
Stage #2 output contribution to stabilize system control.<br />
32 NDc Network detection signal The communications watchdog timer (period specified by<br />
C077) has timed out<br />
33 LOG1 Logic output 1 Boolean operation specified by C144 has a logical “1” result<br />
34 LOG2 Logic output 2 Boolean operation specified by C147 has a logical “1” result<br />
35 LOG3 Logic output 3 Boolean operation specified by C150 has a logical “1” result<br />
36 LOG4 Logic output 4 Boolean operation specified by C153 has a logical “1” result<br />
37 LOG5 Logic output 5 Boolean operation specified by C156 has a logical “1” result<br />
38 LOG6 Logic output 6 Boolean operation specified by C159 has a logical “1” result<br />
39 WAC Capacitor life warning Capacitor bank on the main board needs replacement<br />
40 WAF Low cooling fan speed Cooling fan is enabled but it is rotating below normal speed<br />
41 FR Starting contact signal ON while the inverter receives a FW or REV command<br />
42 OHF Heat sink overheat<br />
warning<br />
Output Function Summary Table<br />
Function Name Description<br />
Inverter heat sink temperature is above the threshold set by<br />
C064<br />
43 LOC Low output current signal Output current to motor is below threshold set by C039<br />
44 MO1 General output 1 Easy sequence function, general output 1<br />
45 MO2 General output 2 Easy sequence function, general output 2<br />
46 MO3 General output 3 Easy sequence function, general output 3<br />
47 MO4 General output 4 Easy sequence function, general output 4<br />
48 MO5 General output 5 Easy sequence function, general output 5<br />
49 MO6 General output 6 Easy sequence function, general output 6<br />
50 IRDY Inverter ready signal Inverter is ready to accept commands (FW, REV, JOG, etc.)<br />
51 FWR Forward rotation signal Inverter output is driving motor in forward direction<br />
52 RVR Reverse rotation signal Inverter output is driving motor in reverse direction<br />
53 MJA Major failure signal Inverter trip caused by internal hardware error<br />
54 WCO [O] terminal window<br />
comparator<br />
[O] input is within comparator window set by B060 and B061<br />
55 WCOI [OI] terminal window [OI] input is within comparator window set by B063 and<br />
comparator<br />
B064<br />
3–57<br />
Configuring Drive<br />
Parameters
Configuring Drive<br />
Parameters<br />
3–58<br />
“C” Group: Intelligent Terminal Functions<br />
Option<br />
Code<br />
Terminal<br />
Symbol<br />
56 WCO2 [O2] terminal window<br />
comparator<br />
Option<br />
Code<br />
Output Function Summary Table<br />
Function Name Description<br />
[O2] input is within comparator window set by B066 and<br />
B067<br />
Analog Summary Table - The following tables show all functions available for assignment to<br />
the three analog output terminals [FM], [AM], [AMI] at a glance. Detailed descriptions, related<br />
parameters, and settings are in “Analog Output Operation” on page 4–66.<br />
C027 Setting for Terminal FM<br />
Function Name Description<br />
Corresponding Signal<br />
Range<br />
00 Output frequency Actual motor speed, represented by PWM<br />
signal<br />
0 to max. frequency in Hz<br />
01 Output current Motor current (% of maximum rated output<br />
current), represented by PWM signal<br />
0 to 200%<br />
02 Output torque Rated output torque 0 to 200%<br />
03 Digital output<br />
frequency<br />
Output frequency (available only at FM<br />
output)<br />
0 to max. frequency in Hz<br />
04 Output voltage Rated output voltage to motor 0 to 100%<br />
05 Input power Rated input power 0 to 200%<br />
06 Electronic thermal<br />
overload<br />
Percentage of electronic overload attained 0 to 100%<br />
07 LAD frequency Internal ramp generator frequency 0 to max. frequency in Hz<br />
08 Digital current monitor Signal freq. = 1,440 Hz when<br />
0.2 x rated current to 2.0 x<br />
output current = C030 setting<br />
rated current (A)<br />
09 Motor temperature Thermistor input temp. reading in PWM<br />
format<br />
0 to 200°C<br />
10 Heat sink temperature Inverter heatsink temp. reading in PWM<br />
format<br />
0 to 200°C<br />
12 General YA(0) analog<br />
output<br />
Internal analog value from EZ-Sequence 0 to 100%<br />
Option<br />
Code<br />
C028 Setting for Terminal [AM]; C029 Setting for Terminal [AMI]<br />
Function Name Description<br />
Corresponding Signal<br />
Range<br />
00 Output frequency Actual motor speed, represented by PWM<br />
signal<br />
0 to max. frequency in Hz<br />
01 Output current Motor current (% of maximum rated output<br />
current), represented by PWM signal<br />
0 to 200%<br />
02 Output torque Rated output torque 0 to 200%<br />
03 Digital output<br />
frequency<br />
Output frequency (available only at FM<br />
output)<br />
04 Output voltage Rated output voltage to motor 0 to 100%<br />
0 to max. frequency in Hz
Option<br />
Code<br />
Output Function<br />
Adjustment<br />
Parameters<br />
C028 Setting for Terminal [AM]; C029 Setting for Terminal [AMI]<br />
Function Name Description<br />
The following parameters work in<br />
conjunction with the intelligent output<br />
function, when configured. The<br />
overload level parameter (C041) sets the<br />
motor current level at which the<br />
overload signal [OL] turns ON. The<br />
range of settings is from 0% to 200% of<br />
the rated current for the inverter. This<br />
function is for generating an early<br />
warning logic output, without causing<br />
either a trip event or a restriction of the<br />
motor current (those effects are available<br />
on other functions).<br />
The frequency arrival signal, [FA1] to<br />
[FA5], is intended to indicate when the<br />
inverter output has reached (arrived at)<br />
the target frequency. You can adjust the<br />
timing of the leading and trailing edges<br />
of the signal via two parameters specific<br />
to acceleration and deceleration ramps,<br />
C042 and C043.<br />
The Error for the PID loop is the magnitude<br />
(absolute value) of the difference<br />
between the Setpoint (desired value)<br />
and Process Variable (actual value). The<br />
PID output deviation signal [OD]<br />
(output terminal function option code<br />
04) indicates when the error magnitude<br />
has exceeded a magnitude you define.<br />
<strong>SJ7002</strong> Inverter<br />
Corresponding Signal<br />
Range<br />
05 Input power Rated input power 0 to 200%<br />
06 Electronic thermal<br />
overload<br />
Percentage of electronic overload attained 0 to 100%<br />
07 LAD frequency Internal ramp generator frequency 0 to max. frequency in Hz<br />
09 Motor temperature Thermistor input temp. reading in PWM<br />
format<br />
0 to 200°C<br />
10 Heat sink temperature Inverter heatsink temp. reading in PWM<br />
format<br />
0 to 200°C<br />
13 General YA(1) analog Internal analog value from EZ-Sequence 0 to 100% (output only from<br />
output<br />
terminal [AM])<br />
14 General YA(2) analog Internal analog value from EZ-Sequence 0 to 100% (output only from<br />
output<br />
terminal [AMI])<br />
Motor<br />
current<br />
Overload<br />
signal<br />
1<br />
0<br />
Output<br />
frequency<br />
Arrival<br />
signal<br />
1<br />
0<br />
PID Error<br />
(PV-SP)<br />
Deviation<br />
Signal<br />
1<br />
0<br />
SP<br />
C042<br />
C044<br />
C041<br />
t<br />
C043<br />
t<br />
t<br />
3–59<br />
Configuring Drive<br />
Parameters
Configuring Drive<br />
Parameters<br />
3–60<br />
Func.<br />
Code<br />
“C” Group: Intelligent Terminal Functions<br />
Name/<br />
Description<br />
C038 Low current indication<br />
output mode select<br />
Keypad<br />
SRW OPE<br />
Range and Settings<br />
ON 00 Output during acceleration/deceleration and<br />
constant speed operation<br />
CRT 0 1 Output only during constant speed<br />
FEF2<br />
FE2<br />
(EU)<br />
Defaults<br />
FUF2<br />
FU2<br />
(USA)<br />
FF2<br />
F2<br />
(Jpn)<br />
Run<br />
Mode<br />
Edit<br />
Lo Hi<br />
01 01 01 ✘ ✔<br />
C039 Low current indication detection level 0.0 to 1.80 x rated inverter current Rated current x 1.0 ✘ ✔<br />
Low current threshold, used for intelligent output [LOC] ✘ ✔<br />
C040 Overload signal output mode ON 00 During accel / decel / constant speed 01 01 01 ✘ ✔<br />
Choose when the overload<br />
signal is enabled<br />
CRT 0 1 During constant speed only<br />
C041 Overload level setting 1 0.00 x rated current to 1.80 x rated current Rated current for ✘ ✔<br />
(A)<br />
inverter<br />
C042 Frequency arrival setting for acceleration 0.00 to 99.99, 100.0 to 400.0 (Hz) 0.00 0.00 0.00 ✘ ✔<br />
Sets the frequency arrival setting threshold for the output frequency during acceleration<br />
C043 Arrival frequency setting for deceleration 0.00 to 99.99, 100.0 to 400.0 (Hz) 0.00 0.00 0.00 ✘ ✔<br />
Sets the frequency arrival setting threshold for the output frequency during deceleration<br />
C044 PID deviation level setting 0.0 to 100.0 (%) 3.0 3.0 3.0 ✘ ✔<br />
Sets the PID loop error threshold |SP - PV| (absolute value) to trigger intelligent output [OD]<br />
C045 Frequency arrival setting for acceleration (2) 0.0 to 99.99, 100.0 to 400.0 (Hz) 0.00 0.00 0.00 ✘ ✔<br />
C046 Frequency arrival setting for deceleration (2) 0.0 to 99.99, 100.0 to 400.0 (Hz) 0.00 0.00 0.00 ✘ ✔<br />
C052 Maximum PID feedback (PV) data 0.0 to 100.0 (%) 0.00 0.00 0.00 ✘ ✔<br />
C053 Minimum PID feedback (PV) data 0.0 to 100.0 (%) 100.0 100.0 100.0 ✘ ✔<br />
C055 Over-torque (forward-driving) level setting 0. to 180. (%) 100. 100. 100. ✘ ✔<br />
Threshold for intelligent output terminal [OTQ], quadrant I<br />
C056 Over-torque (reverse regenerating) level<br />
setting<br />
0. to 180. (%) 100. 100. 100. ✘ ✔<br />
Threshold for intelligent output terminal [OTQ], quadrant II<br />
C057 Over-torque (reverse driving) level setting 0. to 180. (%) 100. 100. 100. ✘ ✔<br />
Threshold for intelligent output terminal [OTQ], quadrant III<br />
C058 Over-torque (forward regenerating) level<br />
setting<br />
0. to 180. (%) 100. 100. 100. ✘ ✔<br />
Threshold for intelligent output terminal [OTQ], quadrant IV<br />
C061 Electronic thermal warning level setting<br />
Sets the threshold for intelligent output [THM]<br />
0. to 100. (%) 80. 80. 80. ✘ ✔<br />
C062 Alarm code output OFF 00 Disable 00 00 00 ✘ ✔<br />
Allows binary alarm codes to 3BIT 0 1 Enable – 3-bit code<br />
be output to intelligent<br />
terminals<br />
4BIT 02 Enable – 4-bit code<br />
C063 Zero speed detection level 0.00 to 99.99 / 100.0 (Hz) 0.00 0.00 0.00 ✘ ✔<br />
C064 Heatsink overheat warning level 0. to 200.0 (°C) 120 120 120 ✘ ✔<br />
Alarm temperature threshold for heatsink in inverter ✘ ✔
Serial<br />
Communications<br />
Func.<br />
Code<br />
Name/<br />
Description<br />
<strong>SJ7002</strong> Inverter<br />
The following table configures the communications port of the <strong>SJ7002</strong> inverter. You can have<br />
up to thirty-two devices on the serial communications network. The inverters are slaves and the<br />
computer or digital operator is the master. Thus, all inverters on the serial connection must use<br />
the same baud rate, data length, parity, and stop bits. However, each device on the serial<br />
network must have a unique node address. See “Serial Communications” on page B–1 for more<br />
information.<br />
Keypad<br />
SRW OPE<br />
Range and Settings<br />
xFE2<br />
(EU)<br />
Defaults Run<br />
xFU2<br />
(USA)<br />
C071 Communication speed TEST 02 Test 04 04 04 ✘ ✔<br />
selection<br />
2400bps 03 2400 (bps)<br />
4800bps 04 4800 (bps)<br />
9600bps 05 9600 (bps)<br />
19200bps 06 19200 (bps)<br />
C072 Node allocation 1. to 32. (node) 1. 1. 1. ✘ ✔<br />
Set the address of the inverter on the network<br />
C073 Communication data length 7BIT 07 7-bit data 07 07 07 ✘ ✔<br />
selection<br />
8BIT 08 8-bit data<br />
C074 Communication parity NO 00 No parity 00 00 00 ✘ ✔<br />
selection<br />
EVN 0 1 Even parity<br />
ODD 02 Odd parity<br />
C075 Communication stop bit 1BIT 0 1 1 Stop bit 1 1 1 ✘ ✔<br />
selection<br />
2BIT 02 2 Stop bits<br />
C076 Action upon communication TRP 00 Trip 02 02 02 ✘ ✔<br />
error selection<br />
DSTP 0 1 Trip after deceleration and stop<br />
NEG 02 No action (ignore errors)<br />
FRS 03 Free-run stop<br />
DTP 04 Decelerate and stop<br />
C077 Communication timeout before trip 0.00 to 99.99 (seconds) 0.00 0.00 0.00 ✘ ✔<br />
C078 Communication wait time 0.0 to 1000 (milliseconds) 0. 0. 0. ✘ ✔<br />
Time the inverter waits after receiving a message before it transmits<br />
C079 Communication protocol ASCII 00 ASCII 00 00 00 ✘ ✔<br />
select<br />
Modbus 0 1 ModBus RTU<br />
xFF2<br />
(Jpn)<br />
Mode<br />
Edit<br />
Lo Hi<br />
3–61<br />
Configuring Drive<br />
Parameters
Configuring Drive<br />
Parameters<br />
3–62<br />
“C” Group: Intelligent Terminal Functions<br />
Analog Signal<br />
Calibration<br />
Settings<br />
Func.<br />
Code<br />
Miscellaneous<br />
Functions<br />
Func.<br />
Code<br />
The functions in the following table configure the signals for the analog output terminals. Note<br />
that these settings do not change the current/voltage or sink/source characteristics – only the<br />
zero and span (scaling) of the signals.<br />
NOTE: See additional settings for analog calibration: Parameter B080 [AM] Terminal Analog<br />
Meter Adjustment (gain), parameter B081 [FM] Terminal Analog Meter Adjustment (gain).<br />
Name/<br />
Description<br />
Range and Settings<br />
FEF2<br />
FE2<br />
(EU)<br />
Defaults<br />
FUF2<br />
FU2<br />
(USA)<br />
NOTE: Settings C081, C082, C083, C121, C122, C123 are factory-calibrated for each inverter.<br />
Do not change these settings unless absolutely necessary. Note that if you restore factory<br />
defaults for all parameters, these settings will not change.<br />
The following table contains miscellaneous functions not in other function groups.<br />
FF2<br />
F2<br />
(Jpn)<br />
Run<br />
Mode<br />
Edit<br />
Lo Hi<br />
C081 [O] input span calibration 0. to 9999., 1000 to 6553<br />
(10000 to 65530)<br />
Factory-calibrated ✔ ✔<br />
C082 [OI] input span calibration 0. to 9999., 1000 to 6553<br />
(10000 to 65530)<br />
Factory-calibrated ✔ ✔<br />
C083 [O2] input span calibration 0. to 9999., 1000 to 6553<br />
(10000 to 65530)<br />
Factory-calibrated ✔ ✔<br />
C085 Thermistor input tuning (gain) 0.0 to 999.9., 1000 105.0 105.0 105.0 ✔ ✔<br />
C121 [O] input zero calibration 0. to 9999., 1000 to 6553<br />
(10000 to 65530)<br />
Factory-calibrated ✔ ✔<br />
C122 [OI] input zero calibration 0. to 9999., 1000 to 6553<br />
(10000 to 65530)<br />
Factory-calibrated ✔ ✔<br />
C123 [O2] input zero calibration 0. to 9999., 1000 to 6553<br />
(10000 to 65530)<br />
Factory-calibrated ✔ ✔<br />
Name/<br />
Description<br />
Keypad<br />
SRW OPE<br />
Range and Settings<br />
FEF2<br />
FE2<br />
(EU)<br />
Defaults<br />
FUF2<br />
FU2<br />
(USA)<br />
FF2<br />
F2<br />
(Jpn)<br />
Run<br />
Mode<br />
Edit<br />
Lo Hi<br />
C091 Debug mode enable MD0 00 No display 00 00 00 ✘ ✘<br />
MD1 0 1 Display<br />
C101 Up/Down memory mode NO-STR 00 Clear last frequency (return to 00 00 00 ✘ ✔<br />
selection<br />
default frequency F001)<br />
Controls speed setpoint for STR 0 1 Keep last frequency adjusted by<br />
the inverter after power cycle<br />
UP/DWN<br />
C102/C103: Reset Mode / Restart Mode – The reset mode selection, set via parameter C102,<br />
determines how the inverter responds to the [RS] intelligent input signal or keypad Stop/Reset<br />
key in a trip condition. The options allow you to cancel the trip on either the OFF-to-ON or<br />
ON-to-OFF transition of [RS], and if desired, stop the inverter if it is in Run Mode. A trip event<br />
causes the inverter output to the motor to turn OFF immediately. If in Run Mode when the trip
Func.<br />
Code<br />
Name/<br />
Description<br />
Output Terminal<br />
Signal Functions<br />
<strong>SJ7002</strong> Inverter<br />
occurred, the inverter and motor will enter free-run stop (coasting) operation. In some applications,<br />
the motor and load will still be coasting when the inverter returns to normal Run Mode<br />
operation. For that situation, you can configure the inverter output (C103=00) to resume operation<br />
from 0 Hz and accelerate normally. Or, you can configure the inverter (C103=01) to<br />
resume operation from the current speed of the motor (frequency matching)—often used in<br />
applications such as HVAC.<br />
Keypad<br />
SRW OPE<br />
Range and Settings<br />
C102 Reset mode selection ON 00 Cancel trip state, stop inverter output, reset<br />
CPU; clear position counter at ON transition<br />
Determines response to<br />
Reset input [RST]<br />
OFF 0 1 Cancel trip state, stop inverter output, reset<br />
CPU; clear position counter at OFF transition<br />
TRP 02 Cancel trip state and clear position counter;<br />
no effect if a trip does not exist<br />
EXT 03 Cancel trip state but does not clear position<br />
counter; no effect if a trip does not exist<br />
xFE2<br />
(EU)<br />
Defaults Run<br />
xFU2<br />
(USA)<br />
xFF2<br />
(Jpn)<br />
Mode<br />
Edit<br />
Lo Hi<br />
00 00 00 ✔ ✔<br />
C103 Restart mode after reset ZST 00 Restart at 0 Hz 00 00 00 ✘ ✔<br />
fST 0 1 Resume operation after frequency matching<br />
FIX 02 Restart with active matching frequency<br />
C105 FM gain adjustment 50. to 200. (%) 100. 100. 100. ✘ ✔<br />
C106 AM gain adjustment 50. to 200. (%) 100. 100. 100. ✘ ✔<br />
C107 AMI gain adjustment 50. to 200. (%) 100. 100. 100. ✔ ✔<br />
C109 AM bias adjustment 0. to 100. (%) 0. 0. 0. ✔ ✔<br />
C110 AMI bias adjustment 0. to 100. (%) 20. 20. 20. ✔ ✔<br />
C111 Overload setting (2) 0.00 x rated current to 1.80 x rated current Rated current for ✘ ✔<br />
(A)<br />
inverter<br />
Func.<br />
Code<br />
Name/<br />
Description<br />
Keypad<br />
SRW OPE<br />
Range and Settings<br />
FEF2<br />
FE2<br />
(EU)<br />
Defaults<br />
FUF2<br />
FU2<br />
(USA)<br />
FF2<br />
F2<br />
(Jpn)<br />
Run<br />
Mode<br />
Edit<br />
Lo Hi<br />
C130 Terminal [11] ON-delay time — — 0.0 to 100.0 (seconds) 0.0 0.0 0.0 ✘ ✔<br />
C131 Terminal [11] OFF-delay time — — 0.0 to 100.0 (seconds) 0.0 0.0 0.0 ✘ ✔<br />
C132 Terminal [12] ON-delay time — — 0.0 to 100.0 (seconds) 0.0 0.0 0.0 ✘ ✔<br />
C133 Terminal [12] OFF-delay time — — 0.0 to 100.0 (seconds) 0.0 0.0 0.0 ✘ ✔<br />
C134 Terminal [13] ON-delay time — — 0.0 to 100.0 (seconds) 0.0 0.0 0.0 ✘ ✔<br />
C135 Terminal [13] OFF-delay time — — 0.0 to 100.0 (seconds) 0.0 0.0 0.0 ✘ ✔<br />
C136 Terminal [14] ON-delay time — — 0.0 to 100.0 (seconds) 0.0 0.0 0.0 ✘ ✔<br />
C137 Terminal [14] OFF-delay time — — 0.0 to 100.0 (seconds) 0.0 0.0 0.0 ✘ ✔<br />
C138 Terminal [15] ON-delay time — — 0.0 to 100.0 (seconds) 0.0 0.0 0.0 ✘ ✔<br />
3–63<br />
Configuring Drive<br />
Parameters
Configuring Drive<br />
Parameters<br />
3–64<br />
Func.<br />
Code<br />
“C” Group: Intelligent Terminal Functions<br />
Name/<br />
Description<br />
Keypad<br />
SRW OPE<br />
Range and Settings<br />
Defaults<br />
C139 Terminal [15] OFF-delay time — — 0.0 to 100.0 (seconds) 0.0 0.0 0.0 ✘ ✔<br />
C140 Relay output ON-delay time — — 0.0 to 100.0 (seconds) 0.0 0.0 0.0 ✘ ✔<br />
C141 Relay output OFF-delay time — — 0.0 to 100.0 (seconds) 0.0 0.0 0.0 ✘ ✔<br />
C142 Logic output 1 function A — — All programmable output functions 00 (output frequency) ✘ ✔<br />
C143 Logic output 1 function B — —<br />
available (except LOG1 to LOG6)<br />
✘ ✔<br />
C144 Logic output 1 operator AND 00 AND 00 00 00 ✘ ✔<br />
OR 0 1 OR ✘ ✔<br />
XOR 02 XOR (exclusive OR) ✘ ✔<br />
C145 Logic output 2 function A — — All programmable output functions 00 (output frequency) ✘ ✔<br />
C146 Logic output 2 function B — —<br />
available (except LOG1 to LOG6)<br />
✘ ✔<br />
C147 Logic output 2 operator AND 00 AND 00 00 00 ✘ ✔<br />
OR 0 1 OR ✘ ✔<br />
XOR 02 XOR (exclusive OR) ✘ ✔<br />
C148 Logic output 3 function A — — All programmable output functions 00 (output frequency) ✘ ✔<br />
C149 Logic output 3 function B — —<br />
available (except LOG1 to LOG6)<br />
✘ ✔<br />
C150 Logic output 3 operator AND 00 AND 00 00 00 ✘ ✔<br />
OR 0 1 OR ✘ ✔<br />
XOR 02 XOR (exclusive OR) ✘ ✔<br />
C151 Logic output 4 function A — — All programmable output functions 00 (output frequency) ✘ ✔<br />
C152 Logic output 4 function B — —<br />
available (except LOG1 to LOG6)<br />
✘ ✔<br />
C153 Logic output 4 operator AND 00 AND 00 00 00 ✘ ✔<br />
OR 0 1 OR ✘ ✔<br />
XOR 02 XOR (exclusive OR) ✘ ✔<br />
C154 Logic output 5 function A — — All programmable output functions 00 (output frequency) ✘ ✔<br />
C155 Logic output 5 function B — —<br />
available (except LOG1 to LOG6)<br />
✘ ✔<br />
C156 Logic output 5 operator AND 00 AND 00 00 00 ✘ ✔<br />
OR 0 1 OR ✘ ✔<br />
XOR 02 XOR (exclusive OR) ✘ ✔<br />
C157 Logic output 6 function A — — All programmable output functions 00 (output frequency) ✘ ✔<br />
C158 Logic output 6 function B — —<br />
available (except LOG1 to LOG6)<br />
✘ ✔<br />
C159 Logic output 6 operator AND 00 AND 00 00 00 ✘ ✔<br />
OR 0 1 OR ✘ ✔<br />
XOR 02 XOR (exclusive OR) ✘ ✔<br />
FEF2<br />
FE2<br />
(EU)<br />
FUF2<br />
FU2<br />
(USA)<br />
FF2<br />
F2<br />
(Jpn)<br />
Run<br />
Mode<br />
Edit<br />
Lo Hi
Input Signal<br />
Terminal<br />
Functions<br />
Func.<br />
Code<br />
Name/<br />
Description<br />
Range and Settings<br />
FEF2<br />
FE2<br />
(EU)<br />
<strong>SJ7002</strong> Inverter<br />
Defaults<br />
FUF2<br />
FU2<br />
(USA)<br />
FF2<br />
F2<br />
(Jpn)<br />
Run<br />
Mode<br />
Edit<br />
Lo Hi<br />
C160 Terminal [1] input response time 0. to 200. (x 2 ms) 0.0 0.0 0.0 ✘ ✔<br />
C161 Terminal [2] input response time 0. to 200. (x 2 ms) 0.0 0.0 0.0 ✘ ✔<br />
C162 Terminal [3] input response time 0. to 200. (x 2 ms) 0.0 0.0 0.0 ✘ ✔<br />
C163 Terminal [4] input response time 0. to 200. (x 2 ms) 0.0 0.0 0.0 ✘ ✔<br />
C164 Terminal [5] input response time 0. to 200. (x 2 ms) 0.0 0.0 0.0 ✘ ✔<br />
C165 Terminal [6] input response time 0. to 200. (x 2 ms) 0.0 0.0 0.0 ✘ ✔<br />
C166 Terminal [7] input response time 0. to 200. (x 2 ms) 0.0 0.0 0.0 ✘ ✔<br />
C167 Terminal [8] input response time 0. to 200. (x 2 ms) 0.0 0.0 0.0 ✘ ✔<br />
C168 Terminal [FW] input response time 0. to 200. (x 2 ms) 0.0 0.0 0.0 ✘ ✔<br />
C169 Multistage speed/position<br />
determination time<br />
0. to 200. (x 10 ms) 0.0 0.0 0.0 ✘ ✔<br />
3–65<br />
Configuring Drive<br />
Parameters
Configuring Drive<br />
Parameters<br />
3–66<br />
“H” Group: Motor Constants Functions<br />
“H” Group: Motor Constants Functions<br />
Introduction The “H” Group parameters configure the<br />
inverter for the motor characteristics. You<br />
must manually set H003 and H004 values<br />
to match the motor. Most of the remaining<br />
parameters are related to vector control, and<br />
are in use only when function A044 is set<br />
for one of the vector control modes as<br />
shown in the diagram. The procedure<br />
in“Auto-tuning of Motor Constants” on<br />
page 4–71 automatically sets all the parameters<br />
related to vector control. If you<br />
configure the inverter to use vector control,<br />
we highly recommend letting the autotuning<br />
procedure derive the values for you.<br />
If you want to reset the parameters to the<br />
factory default settings, use the procedure<br />
in “Restoring Factory Default Settings” on<br />
page 6–16.<br />
Func.<br />
Code<br />
Name/<br />
Description<br />
Inverter Torque Control Algorithms<br />
V/f control,<br />
constant torque<br />
V/f control,<br />
variable torque<br />
V/f control, freesetting<br />
curve<br />
Sensorless vector<br />
(SLV) control<br />
Sensorless vector,<br />
0Hz domain<br />
Vector control with<br />
sensor<br />
Output<br />
NOTE: The auto-tuning procedure and related warning messages are in “Auto-tuning of Motor<br />
Constants” on page 4–71 . Please read these before trying to auto-tune the motor parameters.<br />
Keypad<br />
SRW OPE<br />
Range and Settings<br />
FEF2<br />
FE2<br />
(EU)<br />
00<br />
01<br />
02<br />
03<br />
04<br />
05<br />
Defaults<br />
FUF2<br />
FU2<br />
(USA)<br />
FF2<br />
F2<br />
(Jpn)<br />
A044<br />
Run<br />
Mode<br />
Edit<br />
Lo Hi<br />
H001 Auto-tuning Setting NOR 00 Auto-tuning OFF 00 00 00 ✘ ✘<br />
NRT 0 1 Auto-tune (measure motor resistance and<br />
inductance, without rotating)<br />
AUT 02 Auto-tune (rotate motor)<br />
H002 Motor data selection, 1st NOR 00 Standard motor data 00 00 00 ✘ ✘<br />
motor<br />
AUT 0 1 Auto-tuning data<br />
ON-<br />
AUT<br />
02 Adaptive tuning data<br />
H202 Motor data selection, 2nd NOR 00 Standard motor data 00 00 00 ✘ ✘<br />
motor<br />
AUT 0 1 Auto-tuning data<br />
ON-<br />
AUT<br />
02 Adaptive tuning data<br />
H003 Motor capacity, 1st motor 0.20 to 400. (kW) Factory set ✘ ✘<br />
H203 Motor capacity, 2nd motor 0.20 to 400 (kW) Factory set ✘ ✘<br />
H004 Motor poles setting, 1st motor 2, 4, 6, 8, 10 (poles) 4 4 4 ✘ ✘<br />
H204 Motor poles setting, 2nd motor 2, 4, 6, 8, 10 (poles) 4 4 4 ✘ ✘
Func.<br />
Code<br />
Name/<br />
Description<br />
Keypad<br />
SRW OPE<br />
Range and Settings<br />
FEF2<br />
FE2<br />
(EU)<br />
<strong>SJ7002</strong> Inverter<br />
Defaults<br />
FUF2<br />
FU2<br />
(USA)<br />
H005 Motor speed constant, 1st motor 0.001 to 9.999, 10.00 to 80.00 (10.000 to 1.590 1.590 1.590 ✔ ✔<br />
Motor proportional gain constant, factory set<br />
80.000)<br />
H205 Motor speed constant, 2nd motor 0.001 to 9.999, 10.00 to 80.00 (10.000 to 1.590 1.590 1.590 ✔ ✔<br />
Motor proportional gain constant, factory set<br />
80.000)<br />
H006 Motor stabilization constant, 1st motor 0. to 255. (factory set) 100. 100. 100. ✔ ✔<br />
H206 Motor stabilization constant, 2nd motor 0. to 255. (factory set) 100. 100. 100. ✔ ✔<br />
H306 Motor stabilization constant, 3rd motor 0. to 255. (factory set) 100. 100. 100. ✔ ✔<br />
H020 Motor constant R1, 1st motor 0.001 to 9.999, 10.00 to 65.53 (Ohms) According to inverter ✘ ✘<br />
H220 Motor constant R1, 2nd motor 0.001 to 9.999, 10.00 to 65.53 (Ohms)<br />
rating<br />
✘ ✘<br />
H021 Motor constant R2, 1st motor 0.001 to 9.999, 10.00 to 65.53 (Ohms) ✘ ✘<br />
H221 Motor constant R2, 2nd motor 0.001 to 9.999, 10.00 to 65.53 (Ohms) ✘ ✘<br />
H022 Motor constant L, 1st motor 0.01 to 99.99, 100.0 - 655.3 (mH) According to inverter ✘ ✘<br />
H222 Motor constant L, 2nd motor 0.01 to 99.99, 100.0 - 655.3 (mH)<br />
rating<br />
✘ ✘<br />
H023 Motor constant I0 , 1st motor 0.01 to 99.99, 100.0 - 655.3 (A) ✘ ✘<br />
H223 Motor constant I 0 , 2nd motor 0.01 to 99.99, 100.0 - 655.3 (A) ✘ ✘<br />
H024 Motor Constant J, 1st motor 0.001 to 9.999, 10.00 to 99.99, 100.0 to<br />
999.9, 1000 to 9999. (ratio, unit-less)<br />
H224 Motor constant J, 2nd motor 0.001 to 9.999, 10.00 to 99.99, 100.0 to<br />
999.9, 1000 to 9999. (ratio, unit-less)<br />
FF2<br />
F2<br />
(Jpn)<br />
According to inverter<br />
rating<br />
H030 Auto-tuned motor constant R1, 1st motor 0.001 to 9.999, 10.00 to 65.53 (Ohms) According to inverter ✘ ✘<br />
H230 Auto-tuned motor constant R1, 2nd motor 0.001 to 9.999, 10.00 to 65.53 (Ohms)<br />
rating<br />
✘ ✘<br />
H031 Auto-tuned motor constant R2, 1st motor 0.001 to 9.999, 10.00 to 65.53 (Ohms) According to inverter ✘ ✘<br />
H231 Auto-tuned motor constant R2, 2nd motor 0.001 to 9.999, 10.00 to 65.53 (Ohms)<br />
rating<br />
✘ ✘<br />
H032 Auto-tuned motor constant L, 1st motor 0.01 to 99.99, 100.0 to 655.3 (mH) According to inverter ✘ ✘<br />
H232 Auto-tuned motor constant L, 2nd motor 0.01 to 99.99, 100.0 to 655.3 (mH)<br />
rating<br />
✘ ✘<br />
H033 Auto-tuned motor constant I0 , 1st motor 0.01 to 99.99, 100.0 to 655.3 (mH) According to inverter<br />
rating<br />
✘ ✘<br />
H233 Auto-tuned motor constant I0 , 2nd motor 0.01 to 99.99, 100.0 to 655.3 (mH) ✘ ✘<br />
H034 Auto-tuned motor constant J, 1st motor 0.001 to 9.999, 10.00 to 99.99, 100.0 to<br />
999.9, 1000 to 9999. (ratio, unit-less)<br />
H234 Auto constant J, 2nd motor 0.001 to 9.999, 10.00 to 99.99, 100.0 to<br />
999.9, 1000 to 9999. (ratio, unit-less)<br />
According to inverter<br />
rating<br />
Run<br />
Mode<br />
Edit<br />
Lo Hi<br />
H050 PI proportional gain for 1st motor 0.0 to 999.9, 1000. 100.0 100.0 100.0 ✔ ✔<br />
H250 PI proportional gain for 2nd motor 0.0 to 999.9, 1000. 100.0 100.0 100.0 ✔ ✔<br />
H051 PI integral gain for 1st motor 0.0 to 999.9, 1000. 100.0 100.0 100.0 ✔ ✔<br />
H251 PI integral gain for 2nd motor 0.0 to 999.9, 1000. 100.0 100.0 100.0 ✔ ✔<br />
H052 P proportional gain setting for 1st motor 0.01 to 10.00 1.00 1.00 1.00 ✔ ✔<br />
H252 P proportional gain setting for 2nd motor 0.01 to 10.00 1.00 1.00 1.00 ✔ ✔<br />
H060 0Hz SLV limit for 1st motor 0.0 to 100.0 100. 100. 100. ✔ ✔<br />
✘ ✘<br />
✘ ✘<br />
✘ ✘<br />
✘ ✘<br />
3–67<br />
Configuring Drive<br />
Parameters
Configuring Drive<br />
Parameters<br />
3–68<br />
Func.<br />
Code<br />
“H” Group: Motor Constants Functions<br />
Name/<br />
Description<br />
Keypad<br />
SRW OPE<br />
Range and Settings<br />
Defaults<br />
H260 0Hz SLV limit for 2nd motor 0.0 to 100.0 100. 100. 100. ✔ ✔<br />
H061 0Hz SLV starting boost current for 1st motor 0. to 50. (%) 100. 100. 100. ✔ ✔<br />
H261 0Hz SLV starting boost current for 2nd<br />
motor<br />
0. to 50. (%) 100. 100. 100. ✔ ✔<br />
H070 Terminal selection PI proportional gain<br />
setting<br />
0.0 to 999.9, 1000 100.0 100.0 100.0 ✔ ✔<br />
H071 Terminal selection PI integral gain setting 0.00 to 999.9, 1000. 100.0 100.0 100.0 ✔ ✔<br />
H072 Terminal selection P proportional gain<br />
setting<br />
0.00 to 10.00 1.00 1.00 1.00 ✔ ✔<br />
H073 Gain switching time 0. to 999. (milliseconds) 100. 100. 100. ✔ ✔<br />
FEF2<br />
FE2<br />
(EU)<br />
FUF2<br />
FU2<br />
(USA)<br />
FF2<br />
F2<br />
(Jpn)<br />
Run<br />
Mode<br />
Edit<br />
Lo Hi
“P” Group: Expansion Card Functions<br />
Func.<br />
Code<br />
Name/<br />
Description<br />
P001 Operation mode on expansion<br />
card 1 error<br />
<strong>SJ7002</strong> Inverter<br />
The two (optional) expansion cards for the SJ700 have associated configuration data. The<br />
following table defines the functions and their value ranges. Please refer to the expansion card<br />
manual for more details.<br />
Keypad<br />
SRW OPE<br />
Range and Settings<br />
FEF2<br />
FE2<br />
(EU)<br />
Defaults<br />
FUF2<br />
FU2<br />
(USA)<br />
FF2<br />
F2<br />
(Jpn)<br />
3–69<br />
Run<br />
Mode<br />
Edit<br />
Lo Hi<br />
TRP 00 Trip (stop motor) 00 00 00 ✘ ✔<br />
RUN 0 1 Continuous operation<br />
P002 Operation mode on expan- TRP 00 Trip (stop motor) 00 00 00 ✘ ✔<br />
sion card 2 error<br />
RUN 0 1 Continuous operation<br />
P011 Encoder pulse-per-revolution (PPR) setting 128 to 65000 (pulses per revolution) 1024 1024 1024 ✘ ✘<br />
P012 Control pulse setting ASR 00 Automatic Speed Regulation (ASR) mode 00 00 00 ✘ ✘<br />
APR 0 1 Automatic Position Regulation (APR) mode ✘ ✘<br />
APR2 02 Absolute Position Control ✘ ✘<br />
HAPR 03 High-resolution Absolute Position Control ✘ ✘<br />
P013 Pulse input mode setting MD0 00 Quadrature mode 00 00 00 ✘ ✘<br />
MD1 0 1 Count and direction<br />
MD2 02 Separate forward and reverse pulse trains<br />
P014 Home search stop position setting 0. to 4095. (pulses) 0. 0. 0. ✘ ✔<br />
P015 Home search speed setting Start frequency to maximum frequency (up<br />
to 120.0) (Hz)<br />
5.00 5.00 5.00 ✘ ✔<br />
P016 Home search direction FW 00 Forward 00 00 00 ✘ ✘<br />
setting<br />
RV 0 1 Reverse ✘ ✘<br />
P017 Home search completion range setting 0. to 9999., 1000 (10,000) (pulses) 5 5 5 ✘ ✔<br />
P018 Home search completion delay time setting 0.00 to 9.99 (seconds) 0.00 0.00 0.00 ✘ ✔<br />
P019 Electronic gear set position FB 00 Position feedback side 00 00 00 ✘ ✔<br />
selection<br />
REF 0 1 Position command side ✘ ✔<br />
P020 Electronic gear ratio numerator setting 0. to 9999. 1. 1. 1. ✘ ✔<br />
P021 Electronic gear ratio denominator setting 1 to 9999 1. 1. 1. ✘ ✔<br />
P022 Feed-forward gain setting 0.00 to 99.99, 100.0 to 655.3 0.00 0.00 0.00 ✘ ✔<br />
P023 Position loop gain setting 0.00 to 99.99, 100.0 0.50 0.50 0.50 ✘ ✔<br />
P024 Position bias setting -204 (-2048) / -999. to 2048 0. 0. 0. ✘ ✔<br />
P025 Temperature compensation<br />
thermistor enable<br />
OFF 00 No compensation 00 00 00 ✘ ✔<br />
Allows for motor-mounted<br />
thermistor to calibrate output<br />
to motor temperature<br />
ON 0 1 With compensation<br />
P026 Over-speed error detection level setting 0.0 to 150.0 (%) 135.0 135.0 135.0 ✘ ✔<br />
P027 Speed deviation error detection level setting 0.00 to 99.99, 100.0 to 120.0 (Hz) 7.50 7.50 7.50 ✘ ✔<br />
P028 Motor gear ratio numerator setting 0. to 9999. 1. 1. 1. ✘ ✔<br />
Configuring Drive<br />
Parameters
Configuring Drive<br />
Parameters<br />
3–70<br />
Func.<br />
Code<br />
“P” Group: Expansion Card Functions<br />
Name/<br />
Description<br />
Keypad<br />
SRW OPE<br />
Range and Settings<br />
Defaults<br />
P029 Motor gear ratio denominator setting 1 to 9999 1. 1. 1. ✘ ✔<br />
P031 Accel/decel time input selec- REM 00 Inverter 00 00 00 ✘ ✘<br />
tion<br />
OP1 0 1 Expansion card 1<br />
OP2 02 Expansion card 2<br />
P032 Positioning command input REM 00 Inverter 00 00 00 ✘ ✔<br />
selection<br />
OP1 0 1 Expansion card 1<br />
OP2 02 Expansion card 2<br />
P033 Torque command input O 00 [O] terminal 00 00 00 ✘ ✘<br />
selection<br />
OI 0 1 [OI] terminal<br />
O2 02 [O2] terminal<br />
REM 03 Inverter keypad (P034)<br />
P034 Torque command setting 0. to 180. (%) 0. 0. 0. ✘ ✘<br />
P035 Torque command polarity NOR 00 Indicated by signal polarity at [O2] terminal 00 00 00 ✘ ✘<br />
select<br />
DIR 0 1 Depends on motor direction<br />
P036 Torque bias mode NO 00 Disable 00 00 00 ✘ ✘<br />
DIR 0 1 Inverter keypad (P037)<br />
NOR 02 [O2] terminal input<br />
P037 Torque bias value 0. to 180. (%) 0. 0. 0. ✘ ✘<br />
P038 Torque bias polarity NOR 00 Indicated by polarity 00 00 00 ✘ ✔<br />
DIR 0 1 Depends on motor direction<br />
P039 Forward speed limit for torque-control mode 0.00 to maximum frequency (Hz) 0.00 0.00 0.00 ✘ ✘<br />
P040 Reverse speed limit for torque-control mode 0.00 to maximum frequency (Hz) 0.00 0.00 0.00 ✘ ✘<br />
P044 DeviceNet comm watchdog timer 0.00 to 99.99 (seconds) 1.00 1.00 1.00 ✘ ✘<br />
P045 Inverter action on DeviceNet TRP 00 Trip 01 01 01 ✘ ✘<br />
comm error<br />
FTP 0 1 Decelerate and trip<br />
NO 02 Hold last speed<br />
FRS 03 Free run stop<br />
DEC 04 Decelerate and stop<br />
P046 DeviceNet polled I/O: Output instance<br />
number<br />
20, 21, 100 21 21 21 ✘ ✘<br />
P047 DeviceNet polled I/O: Input instance number 70, 71, 101 71 71 71 ✘ ✘<br />
P048 Inverter action on DeviceNet TRP 00 Trip 01 01 01 ✘ ✘<br />
idle mode<br />
FTP 0 1 Decelerate and trip<br />
NO 02 Hold last speed<br />
FRS 03 Free run stop<br />
DEC 04 Decelerate and stop<br />
P049 DeviceNet motor poles<br />
setting for RPM<br />
poles poles 00 to 38 (even numbers only) 0 0 0 ✘ ✘<br />
FEF2<br />
FE2<br />
(EU)<br />
FUF2<br />
FU2<br />
(USA)<br />
FF2<br />
F2<br />
(Jpn)<br />
Run<br />
Mode<br />
Edit<br />
Lo Hi
Func.<br />
Code<br />
Name/<br />
Description<br />
Keypad<br />
SRW OPE<br />
Range and Settings<br />
<strong>SJ7002</strong> Inverter<br />
P055 Pulse train frequency scale 1.0 to 50.0 (kHz) 25.0 25.0 25.0 ✘ ✔<br />
P056 Pulse train frequency filter time constant 0.01 to 2.00 (seconds) 0.10 0.10 0.10 ✘ ✔<br />
P057 Pulse train frequency bias -100. to 100. (%) 0. 0. 0. ✘ ✔<br />
P058 Pulse train frequency limit 0. to 100. (%) 100. 100. 100. ✘ ✔<br />
P060 Multi-stage position setting 0<br />
Reverse side to forward side (upper four 0 0 0 ✔ ✔<br />
to<br />
P067<br />
to Multi-stage position setting 7<br />
digits including sign “-”)<br />
P068 Zero-return mode selection LOW 00 Low speed 00 00 00 ✔ ✔<br />
Hi1 0 1 High speed<br />
Hi2 02 High speed 2<br />
P069 Zero return direction FW 00 Forward 00 00 00 ✔ ✔<br />
selection<br />
RW 0 1 Reverse<br />
P070 Low speed zero return frequency 0.00 to 10.00 (Hz) 0.00 0.00 0.00 ✔ ✔<br />
P071 High speed zero return frequency 0.00 to 99.99 / 100.0 to maximum frequency<br />
setting, 1st motor (Hz)<br />
0.00 0.00 0.00 ✔ ✔<br />
P072 Forward position range 0 to 268435455 (when P012 = 02),<br />
0 to 1073741823 (when P013 = 03) (upper<br />
four digits)<br />
268435455 ✔ ✔<br />
P073 Reverse position range -268435455 to 0 (when P012 = 02),<br />
1073741823 to 0 (when P013 = 03)<br />
(upper four digits)<br />
-268435455 ✔ ✔<br />
P074 Teaching selection X00 00 X00 00 00 00 ✔ ✔<br />
X01 0 1 X01<br />
X02 02 X02<br />
X03 03 X03<br />
X04 04 X04<br />
X05 05 X05<br />
X06 06 X06<br />
X07 07 X07<br />
P100 Easy sequence user parameters U(00) to 0. to 9999., 1000 to 6553 (10000 to 65535) 0. 0. 0. ✔ ✔<br />
to<br />
P131<br />
U(31)<br />
FEF2<br />
FE2<br />
(EU)<br />
Defaults<br />
FUF2<br />
FU2<br />
(USA)<br />
FF2<br />
F2<br />
(Jpn)<br />
NOTE: Parameters P044 to P049 are available only in inverters with manufacturing code<br />
x8K xxxxxx xxxxx or later. The manufacturing code is printed on the product specifications<br />
labels, located on the front and side of the inverter housing.<br />
3–71<br />
Run<br />
Mode<br />
Edit<br />
Lo Hi<br />
Configuring Drive<br />
Parameters
Configuring Drive<br />
Parameters<br />
3–72<br />
“P” Group: Expansion Card Functions<br />
Absolute Position<br />
Control Mode<br />
To use the absolute position control mode, set A044 V/F characteristic curve setting (1st motor)<br />
equal to “02” (V2) and set P012 Control Pulse Setting equal to “02” APR – Automatic Position<br />
Control Mode.<br />
If P012 = 03 (high-resolution absolute position control, the inverter quadruples the number<br />
of pulses used for positioning. In this case multiply the multistage position settings and<br />
position ranges by four.<br />
Position settings can be sequenced in up to eight stages in combination with control pulse<br />
settings. You can select zero-return mode from one low-speed and two high-speed modes.<br />
(The home search function cannot be used during a zero-return.)<br />
The teaching function allows you to set (store) position settings while actually running the<br />
machine (motor is turning).<br />
If intelligent terminal [SPD] Speed/position Control Select (option code 73) is assigned, you<br />
can switch between speed control and position control.<br />
Only the four high-order digits of data are displayed when the data (position setting) to be<br />
displayed consists of a large number of digits.<br />
In Absolute Position Control Mode, the inverter runs the motor until the machine reaches the<br />
target position according to the following settings, and then set the machine into the position<br />
servo-lock state (until the Stop Command occurs):<br />
1. Position setting<br />
2. Speed setting (output frequency)<br />
3. Acceleration and deceleration time<br />
In absolute position control mode, the frequency and accel/decel settings selected at absolute<br />
position control are applied. If the position setting value is small, the inverter may decelerate<br />
the motor for positioning before its speed reached the set speed setting. In absolute position<br />
control mode, the direction of the operations command (forward or reverse) is ignored. The<br />
operation command simply functions as a signal to run or stop the motor. Motor direction is<br />
determined by the algebraic sign of the difference between the current position and the target<br />
position.<br />
Operation command<br />
Output frequency<br />
Speed setting<br />
[POK]<br />
0<br />
1<br />
0<br />
Small position value<br />
causes decel before<br />
target speed is reached<br />
P017<br />
Home search<br />
completion range<br />
setting<br />
P018<br />
Home search completion<br />
delay time setting<br />
Position<br />
If zero return operation as described below is not performed, the motor position detected at<br />
powerup is assumed to be at the origin (position data = 0). When the operation commend is<br />
turned ON with zero specified as the position setting, positioning is completed without running<br />
the motor.<br />
Set C102 Reset Mode Selection = 03 so that the inverter only resets a trip condition (does not<br />
turn OFF the motor output). Otherwise, the current position counter is cleared when the inverter<br />
reset terminal turns ON. Be sure to set C102 = 03 if you intend to use the value of the current<br />
position counter for operation after recovering the inverter from a trip by turning ON the reset<br />
terminal (reset key).
Teaching<br />
Function<br />
<strong>SJ7002</strong> Inverter<br />
If intelligent terminal [PCLR] is assigned, when it is ON the current position counter is cleared<br />
and the position deviation counter is also cleared.<br />
When the inverter is in Absolute Position Control Mode, some functions are necessarily<br />
disabled:<br />
Intelligent terminal [ATR] is ignored (because torque control is disabled)<br />
Intelligent terminal [STAT] is ignored (because pulse train position control is disabled)<br />
Home search function is disabled<br />
The teaching function allows you to make the inverter run and stop the motor as desired and<br />
store current position data to a position command memory location that you select. Assign the<br />
[ORT] Orientation function (option code 45) to an intelligent input. The [ORT] terminal<br />
functions as the teaching input terminal when P012 Control Pulse Setting is set to 02 (Absolute<br />
Position Control) or 03 (High-resolution Absolute Position Control).<br />
The teaching procedure is as follows:<br />
1. Select the teaching position memory location by setting P074.<br />
2. Move the work piece or machine to the desired location. Enter an operation command while<br />
the [ORT] terminal is in the ON state. The speed and accel/decel settings selected at the<br />
operation command input are applied.<br />
[ORT]<br />
1<br />
0<br />
Operation command<br />
Output frequency<br />
0<br />
Speed setting selected<br />
at operation command<br />
input is applied<br />
Position<br />
Teaching operation can be performed when power is input to the power supply terminals [R0]<br />
and [T0] of the inverter control circuit. The current position counter also operates when an<br />
external device moves the work piece. Therefore, the teaching operation can also be performed<br />
when the inverter does not operate (move) the machine.<br />
NOTE: When teaching position data to an inverter that is not operating the machine, be sure to<br />
either disconnect input power terminals ([R], [S], and [T]) or disconnect the motor output<br />
terminals ([U], [V], and [W]). Otherwise, personal injury or damage to equipment may result.<br />
3. Press the STR key on the digital operator when the target position is reached.<br />
4. The current position data is stored to the memory area selected by parameter P074 teaching<br />
selection. (P074 value itself is not stored. After power OFF or reset, 00 is stored.)<br />
3–73<br />
Configuring Drive<br />
Parameters
Configuring Drive<br />
Parameters<br />
3–74<br />
“U” Group: User-selectable Menu Functions<br />
“U” Group: User-selectable Menu Functions<br />
The user-selectable menu functions allow you to configure (select) any twelve of the other<br />
functions in the inverter and place them together in a convenient list. This feature provides<br />
quick access for the most-used functions needed for your application. Each U Group function<br />
can serve as a pointer to any of the other parameters. You do not have to use the Store key to<br />
retain each association; just scroll to the desired standard parameter for each U Group function<br />
and leave it. The setting can point to a monitor-only parameter (such as D001), or point to<br />
editable parameters (such as A001). In the case of pointing to an editable functions, you use the<br />
Up/Down keys to change the value and the Store key to accept the change into memory—the<br />
same procedure as a normal parameter edit.<br />
Func.<br />
Code<br />
Name/<br />
Description<br />
Range and Settings<br />
FEF2<br />
FE2<br />
(EU)<br />
Defaults<br />
FUF2<br />
FU2<br />
(USA)<br />
FF2<br />
F2<br />
(Jpn)<br />
TIP: Function B037 selects which parameter groups are displayed. If you want to limit the<br />
displayed parameters to only the U Group functions, set B037=02.<br />
Run<br />
Mode<br />
Edit<br />
Lo Hi<br />
U001 User function 1<br />
no no no ✘ ✔<br />
U002 User function 2 no no no ✘ ✔<br />
U003 User function 3 no no no ✘ ✔<br />
U004 User function 4 no no no ✘ ✔<br />
U005 User function 5 no no no ✘ ✔<br />
U006 User function 6 “no” (disabled), or any of the no no no ✘ ✔<br />
U007 User function 7 functions D001 to P049 no no no ✘ ✔<br />
U008 User function 8 no no no ✘ ✔<br />
U009 User function 9 no no no ✘ ✔<br />
U010 User function 10 no no no ✘ ✔<br />
U011 User function 11 no no no ✘ ✔<br />
U012 User function 12 no no no ✘ ✔
Programming Error Codes<br />
Programming Error<br />
Code<br />
<strong>SJ7002</strong> Inverter<br />
The <strong>SJ7002</strong> inverter operator keypad displays a special code (begins with the character) to<br />
indicate a programming error. Programming errors exist when one parameter conflicts with the<br />
meaningful range permitted by related parameter(s). Note that particular real-time frequency<br />
(speed) input levels can cause a conflict in some situations. After a conflict exists, the error<br />
code will appear on the display, or you can view it later with D090 in Monitor Mode. Also, the<br />
PGM LED on the display will flash ON/OFF when programming. These indications are<br />
automatically cleared when the parameter is corrected to the allowed range.<br />
Parameter out of bounds Boundary defined by...<br />
Code Description Code Description<br />
001 201 A8061 / A261 Frequency upper limit<br />
setting; 1st, 2nd motor<br />
002 202 A062 / A262 Frequency lower limit<br />
setting; 1st, 2nd motor<br />
004 204<br />
304<br />
005 205<br />
305<br />
006 206<br />
306<br />
A003 / A203 /<br />
A303<br />
F001,<br />
A020 / A220 /<br />
A320<br />
Base frequency setting;<br />
1st, 2nd, 3rd motor (*1)<br />
Output frequency setting,<br />
Multi-speed freq. setting;<br />
1st, 2nd, 3rd motor (*2)<br />
A021 to A035 Multi-speed freq. settings ><br />
009 P015 Home search speed<br />
setting<br />
012 212 A062 / A262 Frequency lower limit<br />
setting; 1st, 2nd motor<br />
015 215<br />
F001,<br />
A020 / A220<br />
Output frequency setting,<br />
Multi-speed freq. setting;<br />
1st, 2nd motor<br />
016 216 A021 to A035 Multi-speed freq. settings ><br />
019 A061 / A261 Frequency upper limit<br />
setting; 1st, 2nd motor<br />
> A004 /<br />
A204 /<br />
A304<br />
><br />
><br />
><br />
><br />
Maximum frequency;<br />
1st, 2nd, 3rd motor<br />
> A061 / A261 Frequency upper limit setting;<br />
1st, 2nd motor<br />
><br />
< P015 Home search speed setting<br />
021 221 < A062 / A262 Frequency lower limit setting;<br />
1st, 2nd motor<br />
025 225<br />
<<br />
F001,<br />
A020 / A220<br />
Output frequency setting,<br />
Multi-speed freq. setting;<br />
1st, 2nd motor (*2)<br />
031 231 A061 / A261 Frequency upper limit<br />
setting; 1st, 2nd motor<br />
032 232 A062 / A262 Frequency lower limit<br />
setting; 1st, 2nd motor<br />
035 235<br />
335<br />
F001,<br />
A020 / A220 /<br />
A320<br />
Output frequency setting,<br />
Multi-speed freq. setting;<br />
1st, 2nd, 3rd motor<br />
036 A021 to A035 Multi-speed freq. settings <<br />
037 A038 Jog frequency setting <<br />
< B082 Start frequency adjustment<br />
<<br />
<<br />
3–75<br />
Configuring Drive<br />
Parameters
Configuring Drive<br />
Parameters<br />
3–76<br />
Programming Error Codes<br />
Programming Error<br />
Code<br />
085 285<br />
385<br />
F001,<br />
A020 / A220 /<br />
A320<br />
Output frequency setting,<br />
Multi-speed freq. setting;<br />
1st, 2nd, 3rd motor<br />
>f-x,<br />
f-x,<br />
<br />
110<br />
B100, B102,<br />
B104, B106,<br />
B108, B110<br />
B102, B104,<br />
B106, B108,<br />
B110<br />
Free V/f frequency ><br />
> B112 Free-setting V/f frequency (7)<br />
><br />
><br />
Free V/f frequency > B100 Free-setting V/f frequency (1)<br />
B100 Free V/f frequency < B102 Free-setting V/f frequency (2)<br />
B104, B106,<br />
B108, B110<br />
Free V/f frequency ><br />
B100, B102 Free V/f frequency < B104 Free-setting V/f frequency (3)<br />
B106, B108,<br />
B110<br />
Free V/f frequency ><br />
B100, B102,<br />
B104<br />
Free V/f frequency < B106 Free-setting V/f frequency (4)<br />
B108, B110 Free V/f frequency ><br />
B100, B102,<br />
B104, B106<br />
Free V/f frequency < B108 Free-setting V/f frequency (5)<br />
B110 Free V/f frequency ><br />
B100, B102,<br />
B104, B106,<br />
B108<br />
Free V/f frequency < B110 Free-setting V/f frequency (6)<br />
120 B017, B019 Free-setting electronic<br />
thermal frequency<br />
B015 Free-setting electronic<br />
thermal frequency<br />
B019 Free-setting electronic<br />
thermal frequency<br />
B015, B017 Free-setting electronic<br />
thermal frequency<br />
Parameter out of bounds Boundary defined by...<br />
Code Description Code Description<br />
< B015 Free-setting, electronic<br />
thermal frequency (1)<br />
> B017 Free-setting, electronic<br />
thermal frequency (2)<br />
<<br />
> B019 Free-setting, electronic<br />
thermal frequency (3)
<strong>SJ7002</strong> Inverter<br />
Note 1: The base frequency is written when you store the parameter. If the new base<br />
frequency value is outside the permissible range, a motor burnout may result.<br />
Therefore, if the warning occurs, change the base frequency to an appropriate value.<br />
Note 2: These parameters are checked even when the digital operator (option code 02) is not<br />
specified for the frequency source setting (A001).<br />
Note 3: Set frequency (speed) values are not permitted to be inside the jump frequency<br />
ranges, if defined. When a frequency reference value from a real-time source (such as<br />
keypad potentiometer or analog input) are inside a jump frequency range, the actual<br />
speed is automatically forced to equal the lowest point of the jump range.<br />
3–77<br />
Configuring Drive<br />
Parameters
Operations<br />
and Monitoring<br />
4<br />
In This Chapter.... page<br />
— Introduction ....................................................................................... 2<br />
— Optional Controlled Decel and Alarm at Power Loss........................ 4<br />
— Connecting to PLCs and Other Devices ........................................... 7<br />
— Using Intelligent Input Terminals..................................................... 13<br />
— Using Intelligent Output Terminals .................................................. 43<br />
— Analog Input Operation................................................................... 63<br />
— Analog Output Operation ................................................................ 66<br />
— Setting Motor Constants for Vector Control .................................... 69<br />
— PID Loop Operation ........................................................................ 75<br />
— Configuring the Inverter for Multiple Motors.................................... 76
Operations<br />
and Monitoring 4–2<br />
Introduction<br />
Introduction<br />
Cautions for<br />
Operating<br />
Procedures<br />
The previous material in Chapter 3 gave a reference listing of all the programmable functions<br />
of the inverter. We suggest that you first scan through the listing of inverter functions to gain a<br />
general familiarity. This chapter will build on that knowledge in the following ways:<br />
1. Related functions – Some parameters interact with or depend on the settings in other<br />
functions. This chapter lists “required settings” for a programmable function to serve as a<br />
cross-reference and an aid in showing how functions interact.<br />
2. Intelligent terminals – Some functions rely on an input signal from control logic terminals<br />
or generate output signals in other cases.<br />
3. Electrical interfaces – This chapter shows how to make connections between the inverter<br />
and other electrical devices.<br />
4. Auto-tuning – The <strong>SJ7002</strong> inverter has the ability to run a calibration procedure in which it<br />
takes measurements of the motor’s electrical characteristics. This chapter shows how to run<br />
the auto-tuning procedure to help the inverter run the motor more smoothly and efficiently.<br />
5. PID Loop Operation – The <strong>SJ7002</strong> has a built-in PID loop that calculates the optimal<br />
inverter output frequency to control an external process. This chapter shows the parameters<br />
and input/output terminals associated with PID loop operation.<br />
6. Multiple motors – A single <strong>SJ7002</strong> inverter may be used with two or more motors in some<br />
types of applications. This chapter shows the electrical connections and inverter parameters<br />
involved in multiple-motor applications.<br />
The topics in this chapter can help you decide the features that are important to your application,<br />
and how to use them. The basic installation covered in Chapter 2 concluded with the<br />
powerup test and running the motor. Now, this chapter starts from that point and shows how to<br />
make the inverter part of a larger control or automation system.<br />
Before continuing, please read the following Caution messages.<br />
CAUTION: The heat sink fins will have a high temperature. Be careful not to touch them.<br />
Otherwise, there is the danger of getting burned.<br />
CAUTION: The operation of the inverter can be easily changed from low speed to high speed.<br />
Be sure check the capability and limitations of the motor and machine before operating the<br />
inverter. Otherwise, it may cause injury to personnel.<br />
CAUTION: If you operate a motor at a frequency higher than the inverter standard default<br />
setting (50Hz/60Hz), be sure to check the motor and machine specifications with the respective<br />
manufacturer. Only operate the motor at elevated frequencies after getting their approval.<br />
Otherwise, there is the danger of equipment damage.
Warnings for<br />
Operating<br />
Procedures<br />
Before continuing, please read the following Warning messages.<br />
<strong>SJ7002</strong> Inverter<br />
WARNING: Be sure to turn ON the input power supply only after closing the front case. While<br />
the inverter is energized, be sure not to open the front case. Otherwise, there is the danger of<br />
electric shock.<br />
WARNING: Be sure not to operate electrical equipment with wet hands. Otherwise, there is<br />
the danger of electric shock.<br />
WARNING: While the inverter is energized, be sure not to touch the inverter terminals even<br />
when the motor is stopped. Otherwise, there is the danger of electric shock.<br />
WARNING: If the Retry Mode is selected, the motor may suddenly restart after a trip stop. Be<br />
sure to stop the inverter before approaching the machine (be sure to design the machine so that<br />
safety for personnel is secure even if it restarts.) Otherwise, it may cause injury to personnel.<br />
WARNING: If the power supply is cut OFF for a short period of time, the inverter may restart<br />
operation after the power supply recovers if the Run command is active. If a restart may pose<br />
danger to personnel, so be sure to use a lock-out circuit so that it will not restart after power<br />
recovery. Otherwise, it may cause injury to personnel.<br />
WARNING: The Stop Key is effective only when the Stop function is enabled. Be sure to<br />
enable the Stop Key separately from the emergency stop. Otherwise, it may cause injury to<br />
personnel.<br />
WARNING: During a trip event, if the alarm reset is applied and the Run command is present,<br />
the inverter will automatically restart. Be sure to apply the alarm reset only after verifying the<br />
Run command is OFF. Otherwise, it may cause injury to personnel.<br />
WARNING: Be sure not to touch the inside of the energized inverter or to put any conductive<br />
object into it. Otherwise, there is a danger of electric shock and/or fire.<br />
WARNING: If power is turned ON when the Run command is already active, the motor will<br />
automatically start and injury may result. Before turning ON the power, confirm that the RUN<br />
command is not present.<br />
WARNING: When the Stop key function is disabled, pressing the Stop key does not stop the<br />
inverter, nor will it reset a trip alarm.<br />
WARNING: Be sure to provide a separate, hard-wired emergency stop switch when the application<br />
warrants it.<br />
4–3<br />
Operations<br />
and Monitoring
Operations<br />
and Monitoring 4–4<br />
Optional Controlled Decel and Alarm at Power Loss<br />
Optional Controlled Decel and Alarm at Power Loss<br />
With the default <strong>SJ7002</strong> inverter configuration, a sudden power loss will cause the inverter to<br />
shut down immediately. If running at the time, the motor and load will coast to a stop. And<br />
without power, the inverter’s alarm output will not activate. This default performance may be<br />
fine for applications with loads such as fans and pumps. However, some loads may require<br />
controlled decelerations upon power loss, or you may want an alarm signal upon power loss.<br />
This section describes how to harness regenerative energy so that the motor/load actually<br />
powers the inverter long enough to control a final deceleration and power the alarm output.<br />
The diagram below shows the default configuration. Chapter 2 covered wiring the power source<br />
to the inverter input and the inverter output to the motor. By default, the inverter’s internal<br />
control circuit gets its power from two phases (R and T) from the input. The user-accessible<br />
2-wire jumper (R–R0 and T–T0) connects input power to the control circuit.<br />
Power source,<br />
3-phase<br />
L1<br />
L2<br />
L3<br />
Ferrite<br />
filter<br />
2-wire<br />
jumper<br />
J51<br />
R<br />
S<br />
T<br />
T<br />
R<br />
R0<br />
T0<br />
Converter<br />
DC bus<br />
+<br />
Rectifier Inverter<br />
–<br />
Control<br />
circuit<br />
To provide power to the control circuit after input power loss, you must change the control<br />
circuit wiring as shown below (steps provided on following page).<br />
Power source,<br />
3-phase<br />
L1<br />
L2<br />
L3<br />
2-wire<br />
jumper,<br />
20AWG<br />
Ferrite<br />
filter<br />
J51<br />
R<br />
S<br />
T<br />
T<br />
R<br />
R0<br />
T0<br />
+<br />
–<br />
<strong>SJ7002</strong><br />
Converter<br />
DC bus<br />
<strong>SJ7002</strong><br />
+<br />
Rectifier<br />
–<br />
Inverter<br />
Control<br />
circuit<br />
+<br />
–<br />
U<br />
V<br />
W<br />
P<br />
PD<br />
RB<br />
N<br />
AL1<br />
AL0<br />
AL2<br />
U<br />
V<br />
W<br />
P<br />
PD<br />
RB<br />
N<br />
AL1<br />
AL0<br />
AL2<br />
T1<br />
T2<br />
T3<br />
Motor<br />
To optional<br />
braking resistor /<br />
braking unit<br />
To external<br />
alarm circuit or<br />
interface<br />
Motor<br />
To optional<br />
braking resistor /<br />
braking unit<br />
To external<br />
alarm circuit or<br />
interface
<strong>SJ7002</strong> Inverter<br />
Follow the steps to implement the wiring change shown in the previous diagram.<br />
1. Remove the 2-wire jumper J51 (terminals [R0] and [T0] to connector J51).<br />
2. Procure several inches of multi-strand 20 AWG (0.5mm 2 ) or slightly heavier wire.<br />
3. Connect a wire to terminal [R0] that is long enough to connect to terminal [P] (do not<br />
connect to [P] yet).<br />
4. Connect a wire to terminal [T0] that is long enough to connect to terminal [N] (do not<br />
connect to [N] yet).<br />
5. Remove the ferrite filter from the original jumper wire and then slide it onto the new wires<br />
connecting to terminals [R0] and [T0]. (Be sure to save the original jumper in a safe place.)<br />
6. Connect the wire from [R0] to [P], and connect the wire from [T0] to [N] as shown.<br />
More information on power loss related alarm functions, see “Instantaneous Power Failure /<br />
Under-voltage Signal” on page 4–48.<br />
The following table lists the functions related to the controlled deceleration at power loss<br />
feature. After making the wiring change, use function B050 to enable the feature. Use B051 to<br />
determine the point at which a decaying DC bus voltage will trigger the controlled deceleration.<br />
Use parameter B054 to specify an initial step-wise deceleration at power loss, and B053 to<br />
specify the duration of the linear deceleration. Note that this feature also affects the output<br />
signals that indicate instantaneous power fail and under-voltage conditions (see “Instantaneous<br />
Power Failure / Under-voltage Signal” on page 4–48).<br />
Func.<br />
Code<br />
B050 Controlled deceleration and<br />
stop on power loss<br />
B051 DC bus voltage trigger level<br />
during power loss<br />
B052 Over-voltage threshold during<br />
power loss<br />
B053 Deceleration time setting<br />
during power loss<br />
B054 Initial output frequency<br />
decrease during power loss<br />
Name Description Range<br />
Allows inverter control using regenerative<br />
energy to decelerate after loss<br />
of input power (requires jumper<br />
change)<br />
Sets trigger for controlled deceleration<br />
and stop on power loss function<br />
Sets over-voltage threshold for<br />
controlled deceleration function<br />
Deceleration time inverter uses only<br />
at power loss<br />
Sets the initial decrease in output<br />
frequency upon power loss<br />
Two option codes:<br />
00Disable<br />
01Enable<br />
0.0 to 1000.V<br />
0.0 to 1000.V<br />
0.01 to 99.99 sec. /<br />
100.0 to 999.9 sec. /<br />
1000 to 3600 sec.<br />
0.00 to 10.00 Hz<br />
4–5<br />
Operations<br />
and Monitoring
Operations<br />
and Monitoring 4–6<br />
Optional Controlled Decel and Alarm at Power Loss<br />
The timing diagram below shows a power loss scenario and the related parameter settings.<br />
During the controlled deceleration the inverter itself acts as a load to decelerate the motor. With<br />
either a high-inertia load or a short deceleration time (or both), it is possible that the inverter<br />
impedance will not be low enough to continue linear deceleration and avoid an over-voltage<br />
condition on the DC bus. Use parameter B052 to specify a threshold for the over-voltage. In<br />
this case, the inverter pauses deceleration (runs at constant speed). When the DC bus decays<br />
again below the threshold, linear deceleration resumes. The pause/resume process will repeat as<br />
necessary until the DC bus energy is depleted (under-voltage condition occurs).<br />
DC bus (V)<br />
B052<br />
B051<br />
Under-voltage<br />
level<br />
Output<br />
Frequency<br />
0<br />
0<br />
B054<br />
B053<br />
NOTE: (1) Be sure to set the over-voltage threshold greater than the DC bus voltage trigger<br />
level (B052 > B051) for proper operation.<br />
(2) Once the power loss deceleration function starts, it will complete and stop the motor even if<br />
input power is restored. In that case, it automatically enables the Run mode again.<br />
t<br />
t
Connecting to PLCs and Other Devices<br />
<strong>SJ7002</strong> Inverter<br />
<strong>Hitachi</strong> inverters (drives) are useful in many types of applications. During installation, the<br />
inverter keypad (or other programming device) will facilitate the initial configuration. After<br />
installation, the inverter will generally receive its control commands through the control logic<br />
terminals or serial interface from another controlling device. In a simple application such as<br />
single-conveyor speed control, a Run/Stop switch and potentiometer will give the operator all<br />
the required control. In a sophisticated application, you may have a programmable logic<br />
controller (PLC) as the system controller with several connections to the inverter.<br />
It is not possible to cover all the possible types of application in this manual. It will be necessary<br />
for you to know the electrical characteristics of the devices you want to connect to the<br />
inverter. Then, this section and the following sections on I/O terminal functions can help you<br />
quickly and safely connect those devices to the inverter.<br />
CAUTION: It is possible to damage the inverter or other devices if your application exceeds<br />
the maximum current or voltage characteristics of a connection point.<br />
The connections between the inverter<br />
and other devices rely on the electrical<br />
input/output characteristics at both ends<br />
of each connection, shown in the<br />
diagram to the right. The inverter can<br />
accept either sourcing or sinking type<br />
inputs from an external device (such as<br />
a PLC). A terminal jumper configures<br />
the input type, connecting the input<br />
circuit common to the supply (+) or (–).<br />
Detailed wiring examples are in “Using<br />
Intelligent Input Terminals” on page 4–<br />
13. This chapter shows the inverter’s<br />
internal electrical component(s) at each<br />
I/O terminal and how to interface them<br />
with external circuits.<br />
In order to avoid equipment damage and<br />
get your application running smoothly,<br />
we recommend drawing a schematic of<br />
each connection between the inverter<br />
and the other device. Include the<br />
internal components of each device in<br />
the schematic, so that it makes a<br />
complete circuit loop.<br />
After making the schematic, then:<br />
1. Verify that the current and voltage<br />
for each connection is within the<br />
operating limits of each device.<br />
2. Make sure that the logic sense<br />
(active high or active low) of any<br />
ON/OFF connection is correct.<br />
Other device<br />
Input<br />
circuit<br />
Output<br />
circuit<br />
3. Verify inputs are configured<br />
correctly (sink/source) to interface<br />
to interface to any external devices (PLCs, etc.).<br />
4. Check the zero and span (curve end points) for analog connections, and be sure the scale<br />
factor from input to output is correct.<br />
5. Understand what will happen at the system level if any particular device suddenly loses<br />
power, or powers up after other devices.<br />
PLC<br />
Signal<br />
Return<br />
Signal<br />
Return<br />
Jumper<br />
P24<br />
1<br />
2<br />
3<br />
4<br />
5<br />
6<br />
7<br />
8<br />
<strong>SJ7002</strong> Inverter<br />
Output<br />
circuit<br />
Input<br />
circuit<br />
Inverter<br />
Common<br />
PLC<br />
CM1<br />
24VDC<br />
Input<br />
circuits<br />
+ –<br />
4–7<br />
Operations<br />
and Monitoring
Operations<br />
and Monitoring 4–8<br />
Connecting to PLCs and Other Devices<br />
Example Wiring<br />
Diagram<br />
Power source,<br />
3-phase<br />
Forward<br />
Reverse<br />
Intelligent inputs,<br />
8 terminals<br />
+ –<br />
+ –<br />
Thermistor<br />
FM output<br />
monitor<br />
AM output<br />
monitor<br />
AMI output<br />
monitor<br />
2-wire jumper<br />
Ferrite filter<br />
Default jumper position<br />
for –xFU/–xFF models<br />
(sourcing type inputs)<br />
Default jumper position<br />
for –xFE models<br />
(sinking type inputs)<br />
The schematic diagram below provides a general example of logic connector wiring, in<br />
addition to basic power and motor wiring covered in Chapter 2. The goal of this chapter is to<br />
help you determine the proper connections for the various terminals shown below for your<br />
specific application needs.<br />
L1<br />
L2<br />
L3<br />
0 – 10VDC<br />
J51<br />
+10VDC reference<br />
-10 / 0 / +10 VDC<br />
4 – 20mA<br />
Analog GND<br />
R<br />
S<br />
T<br />
T<br />
R<br />
R0<br />
T0<br />
P24<br />
PLC<br />
CM1<br />
FW<br />
8<br />
3<br />
2<br />
1<br />
CM1<br />
TH<br />
FM<br />
H<br />
O<br />
O2<br />
OI<br />
100Ω<br />
L<br />
AM<br />
AMI<br />
Converter<br />
DC bus<br />
Recti- +<br />
fier<br />
–<br />
Control<br />
circuit<br />
+ –<br />
Input<br />
circuits<br />
10kΩ<br />
10kΩ<br />
<strong>SJ7002</strong><br />
24VDC<br />
+<br />
–<br />
Output<br />
circuits<br />
Expansion<br />
Card #1<br />
(optional)<br />
Expansion<br />
Card #2<br />
(optional)<br />
+ –<br />
100Ω<br />
Inverter<br />
+10VDC<br />
reference<br />
U<br />
V<br />
W<br />
P<br />
PD<br />
RB<br />
N<br />
AL1<br />
AL0<br />
AL2<br />
15<br />
14<br />
13<br />
12<br />
11<br />
CM2<br />
SP<br />
SN<br />
RP<br />
SN<br />
T1<br />
T2<br />
T3<br />
Braking<br />
resistor<br />
(optional)<br />
Send/<br />
receive<br />
Jumper for<br />
termination<br />
Motor<br />
Intelligent relay output<br />
(alarm function default)<br />
Intelligent outputs,<br />
5 terminals,<br />
open-collector<br />
Braking<br />
unit<br />
(optional)<br />
(models with 22kW capacity or<br />
less have built-in braking unit)<br />
Signals for expanded<br />
features, including<br />
encoder feedback,<br />
digital I/O, and<br />
DeviceNet networking<br />
NOTE: For the wiring of intelligent<br />
I/O and analog inputs,<br />
be sure to use twisted pair /<br />
shielded cable. Attach the<br />
shield wire for each signal to<br />
its respective common terminal<br />
at the inverter end only.<br />
Type D grounding (200V class models);<br />
Type C grounding (400V class models)<br />
RS-485 serial<br />
communications
Specifications of<br />
Control and Logic<br />
Connections<br />
<strong>SJ7002</strong> Inverter<br />
The control logic connector board is removable for wiring convenience as shown below (first,<br />
remove two retaining screws). The small connector to the left is for serial communications.<br />
SP SN RP SN<br />
Serial<br />
communications<br />
Retaining screw locations Terminal screw size is M3<br />
Tightening torque is:<br />
0.7 N-m (0.5 ft.-lb.)<br />
Maximum torque is:<br />
0.8 N-m (0.6 ft.lb.)<br />
L<br />
H O2<br />
Analog<br />
inputs<br />
O OI<br />
AM<br />
Analog<br />
outputs<br />
Logic<br />
inputs<br />
5 3 1 14<br />
Specifications for the logic connection terminals are in the following table:<br />
FM<br />
TH<br />
FW<br />
Power<br />
8<br />
CM1<br />
13<br />
Logic<br />
outputs<br />
11<br />
AL1<br />
AMI P24 PLC CM1 7 6 4 2 15 CM2 12 AL0 AL2<br />
Terminal Name Description Ratings and Notes<br />
Alarm<br />
relay<br />
[P24] +24V power for inputs 24VDC supply, 100 mA max.<br />
[CM1] +24V common Common for 24V supply, [FW], [TH], inputs [1] to<br />
[8], and [FM]. (Note: Do not ground)<br />
[PLC] Common for logic inputs Common for input terminals [1] to [8], jumper to<br />
CM1 for sinking, jumper to P24 for sourcing<br />
[CM2] Common for logic outputs Common for output terminals [11] to [15]<br />
[1], [2], [3], [4], [5], Intelligent (programmable) 27VDC max. (use [P24] or an external supply refer-<br />
[6], [7], [8] discrete logic inputs enced to terminal [CM1]), 4.7kΩ input impedance<br />
[FW] Forward/stop command 27VDC max. (use [P24] or an external supply referenced<br />
to terminal [CM1]), 4.7kΩ input impedance<br />
[11], [12], [13], Intelligent (programmable) Open collector type, 50mA max. ON state current,<br />
[14], [15] discrete logic outputs 27 VDC maximum OFF state voltage<br />
[TH] Thermistor input Reference to [CM1], min. thermistor power 100mW<br />
[FM] PWM output 0 to 10VDC, 1.2 mA max., 50% duty cycle<br />
[AM] Voltage analog output 0 to 10VDC, 2 mA max.<br />
[AMI] Current analog output 4-20 mA, nominal load impedance 250Ω<br />
[L] Common for analog inputs Sum of [OI], [O], and [H] currents (return)<br />
[OI] Analog input, current 4 to 19.6 mA range, 20 mA nominal, 100Ω input<br />
impedance<br />
[O] Analog input, voltage 0 to 9.6 VDC range, 10VDC nominal, 12VDC<br />
max., input impedance 10 kΩ<br />
[O2] Analog input, voltage 2 –9.6 to 9.6 VDC range, ±10VDC nominal, ±12VDC<br />
max., input impedance 10 kΩ<br />
[H] +10V analog reference 10VDC nominal, 10 mA max.<br />
[AL0] Relay common contact Contacts AL0–AL1, maximum loads:<br />
[AL1] Relay contact, normally<br />
closed<br />
250VAC, 2A; 30VDC, 8A resistive load<br />
250VAC, 0.2A; 30VDC, 0.6A inductive load<br />
Contacts AL0–AL2, maximum loads:<br />
[AL2] Relay contact, normally<br />
open<br />
250VAC, 1A; 30VDC 1A max. resistive load<br />
250VAC, 0.2A; 30VDC, 0.2A max. inductive load<br />
Min. loads: 100 VAC, 10mA; 5VDC, 100mA<br />
4–9<br />
Operations<br />
and Monitoring
Operations<br />
and Monitoring<br />
4–10<br />
Connecting to PLCs and Other Devices<br />
Be sure to keep the control logic wiring separated from the power terminal wiring. In the case<br />
of model –3150Hxx, the drawing below shows how route control circuit wiring.<br />
1. Separate the control circuit wiring into two bundles to make use of available space.<br />
2. Route the wiring from the control terminal block to the wiring plate. Continue routing past<br />
the PCB attachment plate to the wiring exit area.<br />
3. Secure the control wiring to the PCB attachment plate with cable ties.<br />
Wiring plate<br />
Control circuit wiring<br />
PCB attachment plate
Input Terminal<br />
Listing<br />
<strong>SJ7002</strong> Inverter<br />
Use the following table to locate pages for intelligent input material in this chapter.<br />
Intelligent INPUTS Intelligent INPUTS<br />
Symbol Code Name Page Symbol Code Name Page<br />
RV 01 Reverse Run/Stop 4–15 TRQ2 42 Torque limit select, bit 2 (MSB) 4–30<br />
CF1 02 Multi-speed select, Bit 0 (LSB) 4–15 PPI 43 P / PI mode selection 4–26<br />
CF2 03 Multi-speed select, Bit 1 4–15 BOK 44 Brake confirmation signal 4–32<br />
CF3 04 Multi-speed select, Bit 2 4–15 ORT 45 Orientation (home search) 4–34<br />
CF4 05 Multi-speed select, Bit 3 (LSB) 4–15 LAC 46 LAC: LAD cancel 4–34<br />
JG 06 Jogging 4–18 PCLR 47 Position deviation reset 4–34<br />
DB 07 External signal for DC injection<br />
braking<br />
4–19 STAT 48 Pulse train position cmd enable 4–34<br />
ADD 50 ADD frequency enable 4–34<br />
SET 08 Set (select) second motor data 4–19 F-TM 51 Force terminal mode 4–35<br />
2CH 09 2-stage accel and decel 4–20 ATR 52 Torque control enable 4–35<br />
FRS 11 Free-run stop 4–20 KHC 53 Clear cumulative power value 4–36<br />
EXT 12 External trip 4–21 SON 54 Speed servo ON 4–37<br />
USP 13 Unattended start protection 4–21 FOC 55 Current forcing 4–37<br />
CS 14 Commercial power source enable 4–22 MI1 56 General-purpose input 1 4–38<br />
SFT 15 Software lock 4–23 MI2 57 General-purpose input 2 4–38<br />
AT 16 Analog input voltage/current sel. 4–24 MI3 58 General-purpose input 3 4–38<br />
SET3 17 Set (select) 3rd motor data 4–19 MI4 59 General-purpose input 4 4–38<br />
RS 18 Reset inverter 4–24 MI5 60 General-purpose input 5 4–38<br />
STA 20 Start (3-wire interface) 4–25 MI6 61 General-purpose input 6 4–38<br />
STP 21 Stop (3-wire interface) 4–25 MI7 62 General-purpose input 7 4–38<br />
F/R 22 FW, RV (3-wire interface) 4–25 MI8 63 General-purpose input 8 4–38<br />
PID 23 PID Disable 4–26 AHD 65 Analog holding command 4–38<br />
PIDC 24 PID Clear 4–26 CP1 66 Multi-stage position select 1 4–39<br />
CAS 26 Control gain setting 4–26 CP2 67 Multi-stage position select 2 4–39<br />
UP 27 Remote control Up func. 4–28 CP3 68 Multi-stage position select 3 4–39<br />
DWN 28 Remote control Down func. 4–28 ORL 69 Zero-return limit function 4–40<br />
UDC 29 Remote control data clearing 4–28 ORG 70 Zero-return trigger function 4–40<br />
OPE 31 Operator control 4–28 FOT 71 Forward drive stop 4–41<br />
SF1–7 32–38 Multi-speed bits 1 to 7 4–15 ROT 72 Reverse drive stop 4–41<br />
OLR 39 Overload restriction 4–29 SPD 73 Speed/position control select 4–41<br />
TL 40 Torque limit enable 4–30 PCNT 74 Pulse counter input 4–42<br />
TRQ1 41 Torque limit select, bit 1 (LSB) 4–30 PCC 75 Pulse counter clear 4–42<br />
4–11<br />
Operations<br />
and Monitoring
Operations<br />
and Monitoring<br />
4–12<br />
Connecting to PLCs and Other Devices<br />
Output Terminal<br />
Listing<br />
Use the following table to locate pages for intelligent output material in this chapter.<br />
Intelligent OUTPUTS Intelligent OUTPUTS<br />
Symbol Code Name Page Symbol Code Name Page<br />
RUN 00 Run signal 4–44 FBV 31 PID feedback second stage output 4–56<br />
FA1 01 Freq. arrival type 1 –<br />
constant speed<br />
FA2 02 Freq. arrival type 2 –<br />
over-frequency<br />
4–44 NDc 32 Network detection signal 4–57<br />
LOG1 33 Logic output 1 4–58<br />
4–44 LOG2 34 Logic output 2 4–58<br />
LOG3 35 Logic output 3 4–58<br />
OL 03 Overload advance notice signal 4–46 LOG4 36 Logic output 4 4–58<br />
OD 04 Output deviation for PID control 4–46 LOG5 37 Logic output 5 4–58<br />
AL 05 Alarm signal 4–47 LOG6 38 Logic output 6 4–58<br />
FA3 06 Freq. arrival type 3 – at freq. 4–44 WAC 39 Capacitor life warning 4–58<br />
OTQ 07 Over-torque signal 4–48 WAF 40 Low cooling fan speed 4–59<br />
IP 08 Instantaneous power failure signal 4–48 FR 41 Starting contact signal 4–59<br />
UV 09 Under-voltage signal 4–48 OHF 42 Heatsink overheat warning 4–59<br />
TRQ 10 In torque limit signal 4–51 LOC 43 Low output current signal 4–60<br />
RNT 11 Run time over 4–51 M01 44 General output 1 4–60<br />
ONT 12 Power-ON time over 4–51 MO2 45 General output 2 4–60<br />
THM 13 Thermal alarm signal 4–52 MO3 46 General output 3 4–60<br />
BRK 19 Brake release signal 4–54 MO4 47 General output 4 4–60<br />
BER 20 Brake error signal 4–54 MO5 48 General output 5 4–60<br />
ZS 21 Zero speed detect 4–54 MO6 49 General output 6 4–60<br />
DSE 22 Speed deviation maximum 4–54 IRDY 50 Inverter ready signal 4–61<br />
POK 23 Positioning completion 4–54 FWR 51 Forward rotation signal 4–61<br />
FA4 24 Freq. arrival type 4 –<br />
over-frequency (2)<br />
FA5 25 Freq. arrival type 5 –<br />
at frequency (2)<br />
OL2 26 Overload advance notice<br />
signal (2)<br />
Odc 27 Analog [O] disconnect detect 4–55<br />
OIDc 28 Analog [OI] disconnect detect 4–55<br />
O2Dc 29 Analog [O2] disconnect detect 4–55<br />
4–44 RVR 52 Reverse rotation signal 4–61<br />
MJA 53 Major failure 4–61<br />
4–44 WCO 54 [O] terminal window comparator 4–62<br />
WCOI 55 [OI] terminal window comparator 4–62<br />
4–46 WCO2 56 [O2] terminal window comparator 4–62
Using Intelligent Input Terminals<br />
Input Wiring<br />
Examples<br />
<strong>SJ7002</strong> Inverter<br />
Intelligent terminals [1], [2], [3], [4], [5], [6], [7], and [8] are identical, programmable inputs<br />
for general use. The input circuits can use the inverter’s internal (isolated) +24V field supply<br />
(P24) to power the inputs. The input circuits connect internally to [PLC] as a common point. To<br />
use the internal supply to power the inputs, use the jumper as shown. Remove the jumper to use<br />
an external supply, or to interface to a PLC system (or other) that has solid state outputs. If you<br />
use an external supply or PLC system, its power return must connect to the [PLC] terminal on<br />
the inverter to complete the input circuit.<br />
The following four input configurations are available to interface the inverter inputs to switches<br />
or the outputs of another system, such as a PLC.<br />
Sinking inputs,<br />
internal supply<br />
Jumpered for sinking<br />
inputs (default for<br />
–xFE models)<br />
Sourcing inputs,<br />
internal supply<br />
Jumpered for sourcing<br />
inputs (default for<br />
–xFU/–xFR models)<br />
Sinking inputs,<br />
external supply<br />
Sourcing inputs,<br />
external supply<br />
P24<br />
P24<br />
P24<br />
External<br />
power supply<br />
P24<br />
External<br />
power supply<br />
+ – 24VDC<br />
PLC CM1<br />
+ – 24VDC<br />
common<br />
common<br />
8<br />
<strong>SJ7002</strong> inverter<br />
Input circuits<br />
7 6 5 4 3 2 1<br />
<strong>SJ7002</strong> inverter<br />
Input circuits<br />
PLC CM1 8 7 6 5 4 3 2 1<br />
+ – 24VDC<br />
PLC CM1<br />
– +<br />
+<br />
–<br />
+ – 24VDC<br />
PLC CM1<br />
common<br />
common<br />
8<br />
8<br />
<strong>SJ7002</strong> inverter<br />
Input circuits<br />
7 6 5 4 3 2 1<br />
<strong>SJ7002</strong> inverter<br />
Input circuits<br />
7 6 5 4 3 2 1<br />
4–13<br />
Operations<br />
and Monitoring
Operations<br />
and Monitoring<br />
4–14<br />
Using Intelligent Input Terminals<br />
Wiring Diagram<br />
Conventions<br />
The input wiring diagrams in this chapter are examples only. Default and non-default input<br />
terminal assignments are noted throughout; your particular assignments may be different. The<br />
wiring diagrams show the –xFU/–xFR model default [P24]–[PLC] jumper position (U.S./Jpn<br />
versions), as shown below on the left. The common (return) for inputs is [CM1] in this case.<br />
The diagram on the right shows the default jumper position and example input wiring for –xFE<br />
models (Europe version). For this case, the common (return) for inputs is [P24]. Be sure the<br />
jumper position and return terminal used match your application wiring needs.<br />
–xFU/–xFR models (U.S./Jpn versions): –xFE models (Europe version):<br />
TH<br />
FW RV<br />
FW<br />
RV<br />
FW<br />
P24 PLC CM1<br />
5 4 3 2 1<br />
Default jumper<br />
position [P24]–[PLC]<br />
and wiring example<br />
(used throughout this<br />
chapter)<br />
TH<br />
FW<br />
P24 PLC CM1<br />
5 4 3 2 1<br />
return return<br />
Default jumper<br />
position [PLC]–[CM1]<br />
and wiring example
Forward Run/<br />
Stop and Reverse<br />
Run/Stop<br />
Commands<br />
Opt. Code<br />
and<br />
Symbol<br />
Valid for<br />
Inputs<br />
Required<br />
Settings<br />
Default<br />
terminal<br />
[FW]*<br />
01=[RV]<br />
[1] to [8]<br />
A002= 01<br />
[FW]<br />
* [FW] is a dedicated<br />
terminal<br />
Multi-Speed<br />
Select, Binary<br />
Encoded<br />
Opt. Code<br />
and<br />
Symbol<br />
Valid for<br />
Inputs<br />
Required<br />
Settings<br />
Default<br />
terminals<br />
Other<br />
terminals<br />
02 = [CF1]<br />
03 = [CF2]<br />
04 = [CF3]<br />
05 = [CF4]<br />
[1] to [8]<br />
F001, A020<br />
to A035,<br />
A019=00<br />
[7] = [CF1],<br />
[8]=[CF2]*<br />
Requires<br />
config.<br />
* default for -FE2 models<br />
only<br />
<strong>SJ7002</strong> Inverter<br />
When you input the Run command via the dedicated terminal [FW], the inverter executes the<br />
Forward Run command (high) or Stop command (low). When you input the Run command via<br />
the programmable terminal [RV], the inverter executes the Reverse Run command (high) or<br />
Stop command (low). Note the following:<br />
When the Forward Run and Reverse Run commands are active at the same time, the inverter<br />
enters the Stop Mode.<br />
When a terminal associated with either [FW] or [RV] function is configured for normally<br />
closed, the motor starts rotation when that terminal is disconnected or otherwise has no input<br />
voltage.<br />
The parameter F004, Keypad Run Key Routing, determines whether the single Run key<br />
issues a Run FWD command or Run REV command. However, it has no effect on the [FW]<br />
and [RV] input terminal operation.<br />
WARNING: If the power is turned ON and the Run command is already active, the motor<br />
starts rotation and is dangerous! Before turning power ON, confirm that the external Run<br />
command is not active.<br />
The inverter can store up to 16 different fixed target frequencies (speeds) in parameters A020<br />
to A035. Binary inputs select the speed through four of the intelligent terminals configured as<br />
binary-encoded inputs CF1 to CF4 per the table. These can be any of the eight inputs, and in<br />
any order. You can use fewer inputs if you need eight or fewer speeds.<br />
Symbol Function Name<br />
CF1 Binary speed select, Bit 0 (LSB)<br />
CF2 Binary speed select, Bit 1<br />
CF3 Binary speed select, Bit 2<br />
CF4 Binary speed select, Bit 3 (MSB)<br />
Multispeed<br />
Input Function<br />
Multi-<br />
Input Function<br />
CF4 CF3 CF2 CF1<br />
speed<br />
CF4 CF3 CF2 CF1<br />
Speed 0 0 0 0 0 Speed 8 1 0 0 0<br />
Speed 1 0 0 0 1 Speed 9 1 0 0 1<br />
Speed 2 0 0 1 0 Speed 10 1 0 1 0<br />
Speed 3 0 0 1 1 Speed 11 1 0 1 1<br />
Speed 4 0 1 0 0 Speed 12 1 1 0 0<br />
Speed 5 0 1 0 1 Speed 13 1 1 0 1<br />
Speed 6 0 1 1 0 Speed 14 1 1 1 0<br />
Speed 7 0 1 1 1 Speed 15 1 1 1 1<br />
NOTE: When choosing a subset of speeds to use, always start at the top of the table, and with<br />
the least-significant bit: CF1, CF2, etc.<br />
4–15<br />
Operations<br />
and Monitoring
Operations<br />
and Monitoring<br />
4–16<br />
Using Intelligent Input Terminals<br />
The example with eight speeds in the figure below shows how input switches configured for<br />
CF1 – CF3 functions can change the motor speed in real time.<br />
Speed<br />
3rd<br />
7th<br />
5th<br />
2nd<br />
1st<br />
6th<br />
4th<br />
0th<br />
Switches<br />
CF1<br />
CF2<br />
CF3<br />
Fwd Run<br />
Multi-speed Override Feature - The multi-speed function can selectively override the<br />
external analog speed reference input. When the Frequency Source Setting parameter<br />
A001=01, the control terminal inputs determine the output frequency. At the same time, the<br />
inverter can use multi-speed select for output frequency if one or more intelligent inputs are<br />
configured as a CF type (CF1 to CF4). When all CF input(s) are OFF, the control terminal input<br />
determines the output frequency normally. When one or more CF input(s) are ON, then the<br />
corresponding multi-speed setting (see the table above) overrides and becomes the output<br />
frequency.<br />
When programming the multi-speed settings, be sure to press the Store key each time and then<br />
set the next multi-speed setting. Note that when the Store key is not pressed, no data will be set.<br />
When a multi-speed setting more than 50Hz(60Hz) is to be set, it is necessary to program the<br />
maximum frequency A004 high enough to allow that speed.<br />
While using the multi-speed capability, you can monitor the output frequency with monitor<br />
function D001 during each segment of a multi-speed operation.<br />
There are two ways to program the speeds into the registers A020 to A035:<br />
1. Standard keypad programming:<br />
a. Select each parameter A020 to A035.<br />
b. Press the FUNC. key to view the parameter value.<br />
c. Use the 1 and 2 keys to edit the value.<br />
d. Use the STR key to save the data to memory.<br />
2. Programming using the CF switches:<br />
a. Turn the Run command OFF (Stop Mode).<br />
b. Turn inputs ON to select desired Multi-speed. Display the value of F001 on the digital<br />
operator.<br />
c. Set the desired output frequency by pressing the 1 and 2 keys.<br />
d. Press the STR key once to store the set frequency. When this occurs, F001 indicates the<br />
output frequency of the selected Multi-speed.<br />
e. Press the FUNC.<br />
key once to confirm that the indication is the same as the set frequency.<br />
f. Repeat operations in 2. a) to 2. e) to set the frequency of other Multi-speeds. It can be set<br />
also by parameters A020 to A035 in the first procedure 1. a) to 1. d).<br />
t
Multi-Speed<br />
Select, Bit-level<br />
Opt. Code<br />
and<br />
Symbol<br />
Valid for<br />
Inputs<br />
Required<br />
Settings<br />
Default<br />
terminals<br />
32 = [SF1]<br />
33 = [SF2]<br />
34 = [SF3]<br />
35 = [SF4]<br />
35 = [SF5]<br />
36 = [SF6]<br />
37 = [SF7]<br />
[1] to [8]<br />
F001, A020<br />
to A035,<br />
A019=01<br />
Requires<br />
config.<br />
The Bit-level method of speed control<br />
uses up to seven intelligent inputs to<br />
select from up to eight speeds. Since the<br />
all-switches-OFF combination selects<br />
the first speed, you only need N–1<br />
switches to select N speeds. With Bitlevel<br />
speed control, only one input is<br />
normally active at a time. If multiple<br />
switches are ON, the lower numbered<br />
input takes precedence (determines the<br />
speed). The table and figure below<br />
show how the input combinations work.<br />
Symbol Function Name<br />
SF1 Bit-level Speed Select 1<br />
SF2 Bit-level Speed Select 2<br />
SF3 Bit-level Speed Select 3<br />
SF4 Bit-level Speed Select 4<br />
SF5 Bit-level Speed Select 5<br />
SF6 Bit-level Speed Select 6<br />
SF7 Bit-level Speed Select 7<br />
Multispeed<br />
Input Function<br />
Speed<br />
7th<br />
6th<br />
5th<br />
4th<br />
3rd<br />
2nd<br />
1st<br />
0th<br />
Inputs<br />
SF1<br />
SF2<br />
SF3<br />
SF4<br />
SF5<br />
SF6<br />
SF7<br />
Fwd Run<br />
SF7 SF6 SF5 SF4 SF3 SF2 SF1<br />
Speed 0 0 0 0 0 0 0 0<br />
Speed 1 — — — — — — 1<br />
Speed 2 — — — — — 1 0<br />
Speed 3 — — — — 1 0 0<br />
Speed 4 — — — 1 0 0 0<br />
Speed 5 — — 1 0 0 0 0<br />
Speed 6 — 1 0 0 0 0 0<br />
Speed 7 1 0 0 0 0 0 0<br />
<strong>SJ7002</strong> Inverter<br />
4–17<br />
Operations<br />
and Monitoring
Operations<br />
and Monitoring<br />
4–18<br />
Using Intelligent Input Terminals<br />
Jogging<br />
Command<br />
Opt. Code 06<br />
Symbol [JG]<br />
Valid for<br />
Inputs<br />
Required<br />
Settings<br />
Default<br />
terminal<br />
[1] to [8]<br />
A002= 01,<br />
A038 >B082,<br />
A038 > 0,<br />
A039=00 to<br />
05<br />
[3]<br />
The Jog input [JG] is used to command the<br />
motor to rotate slowly in small increments<br />
for manual operation. The speed is limited<br />
to 10 Hz. The frequency for the jogging<br />
operation is set by parameter A038. Jogging<br />
does not use an acceleration ramp. Therefore<br />
setting the jogging frequency A038 too<br />
high will cause inverter tripping.<br />
A jog command may arrive while the motor<br />
is running. You can program the inverter to<br />
either ignore or respond to a jog command<br />
in this case by using function A039. The<br />
type of deceleration used to end a motor jog<br />
is also selectable by programming function A039. Six jog mode options are defined below:<br />
Jogging During Motor Operation<br />
Disabled, A039= Enabled, A039=<br />
Jog Deceleration Method<br />
00 03 Free-run stop (coasting)<br />
01 04 Deceleration (normal level) and stop<br />
02 05 Use DC braking and stop<br />
In the left example diagram below, the Jog command is ignored. In the right example diagram,<br />
a jog command interrupts a Run mode operation. However, if the Jog command turns ON<br />
before the [FW] or [RV] terminal turns ON, the inverter output turns OFF.<br />
[JG]<br />
[FW]<br />
Output<br />
frequency<br />
A039=00, 01, 02<br />
Decelerating stop (00) shown<br />
Note the following:<br />
Jogging is not performed when the value of A038 jogging frequency is smaller than the start<br />
frequency B082 or the value is 0 Hz.<br />
Be sure to turn ON [FW] or [RV] after the [JG] input turns ON for a jog operation.<br />
When setting A039 to 02 or 05, you must also set the DC braking parameters.<br />
[JG]<br />
[FW]<br />
[RV]<br />
A038<br />
Output<br />
frequency<br />
[JG]<br />
[FW]<br />
A038 A038<br />
t<br />
Jog decel type<br />
A039<br />
Output<br />
frequency<br />
A039=03, 04, 05<br />
Free-run stop (05) shown<br />
t<br />
t
External Signal<br />
for DC Injection<br />
Braking<br />
Opt. Code 07<br />
Symbol [DB]<br />
Valid for<br />
Inputs<br />
Required<br />
Settings<br />
Default<br />
terminal<br />
Set Second or<br />
Third Motors<br />
Opt. Code<br />
and<br />
Symbol<br />
Valid for<br />
Inputs<br />
Required<br />
Settings<br />
Default<br />
terminal<br />
[1] to [8]<br />
A053, A054<br />
Requires<br />
config.<br />
08=[SET]<br />
17=[SET3]<br />
[1] to [8]<br />
(none)<br />
Requires<br />
config.<br />
When the terminal [DB] is turned ON, the<br />
DC braking [DB] feature is enabled<br />
(regardless of A051 setting). Set the following<br />
parameters when the external DC<br />
braking terminal is to be used:<br />
A053 – DC braking delay time setting.<br />
The range 0.0 to 5.0 seconds.<br />
A054 – DC braking force setting. The<br />
range is 0 to 100% for models -004xxx<br />
to -1500xxx; 0 to 35% for models<br />
-1850xxx to -4000xxx.<br />
The scenarios to the right help show how<br />
DC braking works in various situations.<br />
1. Scenario 1 – The [FW] Run or [RV]<br />
Run terminal is ON. When the [DB]<br />
terminal turns ON, DC braking is<br />
applied. When the [DB] terminal turns<br />
OFF again, the inverter output ramps to<br />
the previous frequency.<br />
2. Scenario 2 – The Run command is<br />
applied from the operator keypad. When<br />
the [DB] terminal turns ON, DC braking<br />
is applied. When the [DB] terminal<br />
turns OFF again, the inverter output<br />
remains OFF.<br />
[FW, RV]<br />
Output<br />
frequency<br />
3. Scenario 3 – The Run command is<br />
applied from the operator keypad. When Output<br />
the [DB] terminal turns ON, DC braking frequency<br />
is applied after the delay time set by<br />
A053 expires. The motor is in a freerunning<br />
(coasting) condition during this<br />
delay time. When the [DB] terminal<br />
turns OFF again, the inverter output remains OFF.<br />
<strong>SJ7002</strong> Inverter<br />
Note the following:<br />
Do not use the [DB] input continuously or for a long time when the DC braking force setting<br />
A054 is high (depends on the motor application).<br />
Do not use the [DB] feature for continuous or high duty cycle as a holding brake. The [DB]<br />
input is designed to improve stopping performance. Use a mechanical brake for holding a<br />
stop position.<br />
If you assign the [SET] or [SET3] functions to an intelligent input terminal, you can select<br />
between two or three sets of motor parameters. You may assign one or both of these functions.<br />
These second and third parameters store alternate sets of motor characteristics. When terminal<br />
[SET] or [SET3] is turned ON, the inverter will use the second or third set of parameters<br />
accordingly, generating the frequency output to the motor. When changing the state of the<br />
[SET] or [SET3] input terminal, the change will not take effect until the inverter is stopped.<br />
When you turn ON the [SET] or [SET3] input, the inverter operates per the second or third set<br />
of parameters, respectively. When the terminal is turned OFF, the output function returns to the<br />
original settings (first set of motor parameters). Refer to “Configuring the Inverter for Multiple<br />
Motors” on page 4–76 for details.<br />
Note the following:<br />
If the terminal state is changed while the inverter is running, the inverter continues using the<br />
current set of parameters until the inverter is stopped.<br />
If both SET and SET3 are ON at the same time, SET prevails and the 2nd motor parameters<br />
are in effect.<br />
[DB]<br />
Run command<br />
from operator)<br />
[DB]<br />
Output<br />
frequency<br />
Run command<br />
from operator)<br />
[DB]<br />
Scenario 1<br />
Scenario 2<br />
Scenario 3<br />
delay<br />
A053<br />
4–19<br />
t<br />
t<br />
t<br />
Operations<br />
and Monitoring
Operations<br />
and Monitoring<br />
4–20<br />
Using Intelligent Input Terminals<br />
Two-stage<br />
Acceleration and<br />
Deceleration<br />
Opt. Code 09<br />
Symbol [2CH]<br />
Valid for<br />
Inputs<br />
Required<br />
Settings<br />
Default<br />
terminal<br />
[1] to [8]<br />
A092, A093,<br />
A094=0<br />
[5]<br />
When terminal [2CH] is turned ON, the<br />
inverter changes the rate of acceleration and<br />
deceleration from the initial settings (F002<br />
and F003) to use the second set of acceleration/deceleration<br />
values (A092 and A093).<br />
When the terminal is turned OFF, the<br />
inverter returns to the original acceleration<br />
and deceleration time (F002 acceleration<br />
time 1 and F003 deceleration time 1). Use<br />
A092 (acceleration time 2) and A093<br />
(deceleration time 2) to set the second stage<br />
acceleration and deceleration times.<br />
Output<br />
frequency<br />
Input<br />
signals<br />
[2CH]<br />
[FW, RV]<br />
target frequency<br />
In the graph shown above, the [2CH] signal becomes active during acceleration. This causes the<br />
inverter to switch from using acceleration 1 (F002) to acceleration 2 (A092).<br />
Note the following:<br />
Function A094 selects the method for second stage acceleration. It must be set = 00 to select<br />
the input terminal method in order for the [2CH] terminal assignment to operate.<br />
Free-run Stop When the terminal [FRS] is turned ON, the inverter turns OFF the output and the motor enters<br />
the free-run state (coasting). If terminal [FRS] is turned OFF, the output resumes sending power<br />
Opt. Code 11 to the motor if the Run command is still active. The free-run stop feature works with other<br />
Symbol<br />
Valid for<br />
Inputs<br />
[FRS]<br />
[1] to [8]<br />
parameters to provide flexibility in stopping and starting motor rotation.<br />
In the diagram below, parameter B088 selects whether the inverter resumes operation from<br />
0 Hz (left graph) or the current motor rotation speed (right graph) when the [FRS] terminal<br />
turns OFF. The application determines the best setting.<br />
Required<br />
Settings<br />
B003, B088,<br />
C011 to<br />
C018<br />
Parameter B003 specifies a delay time before resuming operation from a free-run stop. To<br />
disable this feature, use a zero delay time.<br />
Default<br />
terminal<br />
[4]<br />
Motor<br />
speed<br />
Switches<br />
FRS<br />
[FW, RV]<br />
Resume from 0Hz<br />
B088=00<br />
Zero-frequency start<br />
initial<br />
second<br />
Resume from current speed<br />
Motor<br />
speed<br />
t Switches<br />
t<br />
In the diagram above, [FRS] signal is active high. If you want the [FRS] terminal to be active<br />
low (normally closed logic), change the setting (C011 to C018) that corresponds to the input [1]<br />
to [8] that is assigned the [FRS] function (C001 to C008).<br />
FRS<br />
[FW, RV]<br />
B088=01<br />
B003<br />
t<br />
wait time
<strong>SJ7002</strong> Inverter<br />
External Trip When the terminal [EXT] transitions OFF-to-ON, the inverter enters the trip state, indicates<br />
error code E12, and stops the output. This is a general purpose interrupt type feature, and the<br />
Opt. Code 12 meaning of the error depends on what you connect to the [EXT] terminal. Even if [EXT] is<br />
Symbol [EXT]<br />
turned OFF, the inverter remains in the trip state. You must reset the inverter or cycle power to<br />
clear the error, returning the inverter to the Stop Mode.<br />
Valid for<br />
Inputs<br />
Required<br />
Settings<br />
Default<br />
terminal<br />
[1] to [8]<br />
(none)<br />
Requires<br />
config.<br />
Unattended Start<br />
Protection<br />
Opt. Code 13<br />
Symbol [USP]<br />
Valid for<br />
Inputs<br />
Required<br />
Settings<br />
Default<br />
terminal<br />
[1] to [8]<br />
(none)<br />
[6]*<br />
* Default for -FU2 models<br />
only; others require input<br />
configuration<br />
In the graph below, the [EXT] input turns ON during normal Run Mode operation. The inverter<br />
lets the motor free-run to a stop, and the alarm output turns ON immediately. When the<br />
operator initiates a Reset command, the alarm and error are cleared. When the Reset is turned<br />
OFF, the motor begins rotation since the Run command is already active.<br />
[EXT]<br />
Motor revolution speed<br />
[RS]<br />
Alarm output terminal<br />
[FW, RV]<br />
free run<br />
If the USP (Unattended Start Protection) feature is in use, the inverter will not automatically<br />
restart after cancelling the EXT trip event. In that case, it must receive either another Run<br />
command (OFF-to-ON transition), a keypad Reset command, or an [RS] intelligent terminal<br />
input signal.<br />
If the Run command is already present when power is turned ON, the inverter starts running<br />
immediately after powerup. The Unattended Start Protection (USP) function prevents that<br />
automatic startup. If the [USP] input is active, the inverter will not run without outside intervention.<br />
In this case, there are two ways to reset an alarm and resume running:<br />
1. Turn the Run command OFF, or<br />
2. Perform a reset operation by the terminal [RS] input or the keypad Stop/reset key<br />
The three examples below show how the USP function works in the scenarios described at the<br />
bottom of the diagram. The error code E13 indicates the USP trip state and corresponds to the<br />
Alarm signal in the diagram.<br />
Power<br />
supply<br />
[FW]<br />
[USP]<br />
[RS]<br />
Alarm<br />
Output<br />
frequency<br />
When USP is ON after powerup, the<br />
alarm (E13) will clear when the Run<br />
command (FW or RV) turns OFF.<br />
Example 1 Example 2 Example 3<br />
If the alarm is cleared<br />
during Run command,<br />
the inverter output<br />
restarts automatically.<br />
Note the following;<br />
Note that when a USP error occurs and it is canceled by a reset from the [RS] terminal input<br />
or keypad, the inverter restarts immediately.<br />
Even when the trip state is canceled by turning the terminal [RS] ON and OFF after an<br />
under- voltage trip E09 occurs, the USP function will be performed.<br />
t<br />
If the Run command is<br />
already OFF at powerup,<br />
the inverter output starts<br />
normally.<br />
t<br />
4–21<br />
Operations<br />
and Monitoring
Operations<br />
and Monitoring<br />
4–22<br />
Using Intelligent Input Terminals<br />
Commercial<br />
Power Source<br />
Enable<br />
Opt. Code 14<br />
Symbol [CS]<br />
Valid for<br />
Inputs<br />
Required<br />
Settings<br />
Default<br />
terminal<br />
L1<br />
L2<br />
L3<br />
[1] to [8]<br />
B003, B007<br />
Requires<br />
config.<br />
Power source, 3-phase<br />
MCCB<br />
When the Run command is active immediately after the power is turned ON, a USP error<br />
will occur. When this function is used, wait for at least three (3) seconds after powerup<br />
before applying a Run command.<br />
The commercial power source switching function is useful in systems with excessive starting<br />
torque requirements. This feature permits the motor to be started “across the line,” sometimes<br />
called a bypass configuration. After the motor is running, the inverter takes over to control the<br />
speed. This feature can eliminate the need to oversize the inverter, reducing cost. However,<br />
additional hardware such as magnetic contactors will be required to realize this function. For<br />
example, a system may require 55KW to start, but only 15KW to run at constant speed. Therefore,<br />
a 15KW rated inverter would be sufficient when using the commercial power source<br />
switching.<br />
The [CS] Commercial Power Source Enable input signal operation is as follows:<br />
OFF-to-ON transition signals the inverter that the motor is already running at powerup (via<br />
bypass), thus suppressing the inverter’s motor output in Run Mode.<br />
ON-to-OFF transition signals the inverter to apply a time delay (B003), frequency match its<br />
output to existing motor speed, and resume normal Run Mode operation<br />
The following block diagram shows an inverter system with bypass capability. When starting<br />
the motor directly across the line, relay contacts Mg2 are closed, and Mg1 and Mg3 are open.<br />
This is the bypass configuration, since the inverter is isolated from the power source and motor.<br />
Then Mg1 contacts close about 0.5 to 1 second after that, supplying power to the inverter.<br />
GFI<br />
Mg2<br />
Mg1<br />
R<br />
S<br />
T<br />
R0<br />
T0<br />
FW<br />
[RV]<br />
[CS]<br />
CM1<br />
H<br />
O<br />
L<br />
<strong>SJ7002</strong><br />
U<br />
V<br />
W<br />
AL1<br />
AL0<br />
AL2<br />
Mg3<br />
Thermal<br />
switch<br />
Motor
<strong>SJ7002</strong> Inverter<br />
Switching to inverter control occurs after the motor is running at full speed. First, Mg2 relay<br />
contacts open. Then about 0.5 to 1 seconds later, relay Mg3 contacts close, connecting the<br />
inverter to the motor. The following timing diagram shows the event sequence:<br />
Mg1<br />
Mg2<br />
Mg3<br />
FW<br />
[CS]<br />
Inverter<br />
output<br />
Set to 0.5 to 1 sec. typical<br />
B003 (Retry wait time<br />
before motor restart)<br />
Frequency matching<br />
Mg2/Mg3 delay time 0.5 to 1 sec.<br />
Normal operation<br />
In the previous timing diagram, when the motor has been started across the line, Mg2 is<br />
switched OFF and Mg3 is switched ON. With the Forward command to the inverter already<br />
ON, the [CS] terminal is switched ON and relay Mg1 contacts close. The inverter will then read<br />
the motor RPM (frequency matching). When the [CS] terminal is switched OFF, the inverter<br />
applies the Retry wait time before motor restart parameter (B003).<br />
Once the delay time has elapsed the inverter will then start and match the frequency (if greater<br />
than the threshold set by B007). If an over-current trip occurs during frequency matching,<br />
extend the retry wait time B003. If the ground fault interrupter breaker (GFI) trips on a ground<br />
fault, the bypass circuit will not operate the motor. When an inverter backup is required, take<br />
the supply from the bypass circuit GFI. Use control relays for [FW], [RV], and [CS].<br />
Software Lock When the terminal [SFT] is ON, the data of all the parameters and functions (except the output<br />
frequency, depending on the setting of B031) is locked (prohibited from editing). The keypad<br />
Opt. Code 15 and remote programming devices will be prevented from changing parameters. To edit parame-<br />
Symbol [SFT]<br />
ters again, turn OFF the [SFT] terminal input. Use parameter B031 to select whether the output<br />
frequency is excluded from the lock state or is locked as well. Note the following:<br />
Valid for<br />
Inputs<br />
[1] to [8] When the [SFT] terminal is turned ON, only the output frequency can be changed.<br />
Software lock can include the output frequency by setting B031.<br />
Required<br />
Settings<br />
B031<br />
(excluded<br />
from lock)<br />
Software lock by the operator is also possible without the [SFT] terminal being used (B031).<br />
Default<br />
terminal<br />
Requires<br />
config.<br />
4–23<br />
Operations<br />
and Monitoring
Operations<br />
and Monitoring<br />
4–24<br />
Using Intelligent Input Terminals<br />
Analog Input<br />
Current/Voltage<br />
Select<br />
Opt. Code 16<br />
Symbol [AT]<br />
Valid for<br />
Inputs<br />
Required<br />
Settings<br />
Default<br />
terminal<br />
[1] to [8]<br />
A001 = 01<br />
A005 = 00 /<br />
01<br />
A006 = 00 /<br />
01 / 02<br />
[2]<br />
The [AT] terminal operates in conjunction with parameter setting A005 to determine the analog<br />
input terminals that are enabled for current or voltage input. Setting A006 determines whether<br />
the signal will be bipolar, allowing for a reverse direction range. Note that current input signal<br />
cannot be bipolar and cannot reverse direction (must use [FW] and [RV] command with current<br />
input operation). The basic operation of the [AT] intelligent input is as follows:<br />
[AT] = ON and A005 = 00 – [AT] will enable terminals [OI]–[L] for current input,<br />
4to20mA<br />
[AT] = ON and A005 = 01 – [AT] will enable terminals [O2]–[L] for voltage input<br />
[AT] = OFF – Terminals [O]–[L] are enabled for voltage input (A005 may be equal to<br />
00 or 01) in this case<br />
Be sure to set the frequency source setting A001=01 to select the analog input terminals.<br />
Please refer to “Analog Input Operation” on page 4–63 for more information on bipolar input<br />
configuration, and the operating characteristics of analog inputs.<br />
Reset Inverter The [RS] terminal causes the inverter to<br />
Opt. Code 18<br />
Symbol [RS]<br />
Valid for<br />
Inputs<br />
Required<br />
Settings<br />
Default<br />
terminal<br />
[1] to [8]<br />
B003, B007,<br />
C102, C103<br />
[1]<br />
turn OFF the motor output and execute a<br />
powerup reset. If the inverter is in Trip<br />
Mode, the reset cancels the Trip state.<br />
When the signal [RS] is turned ON and<br />
OFF, the inverter executes the reset operation.<br />
The minimum pulse width for [RS]<br />
must be 12 ms or greater. The alarm output<br />
will be cleared within 30 ms after the onset<br />
of the Reset command. Note the following:<br />
When the control terminal [RS] input is already ON at powerup for more than 4 seconds, the<br />
remote operator display is “R-ERROR COMM” (the display of the digital operator is<br />
– – – –). However, the inverter has no error. To clear the digital operator error, turn OFF the<br />
terminal [RS] input and press one of the operator keys.<br />
The active edge (leading or trailing) of the [RS] signal is determined by the setting of C102.<br />
A terminal configured with the [RS] function can only be configured as a normally open<br />
contact. The terminal cannot be used in the normally closed contact state.<br />
When input power is turned ON, the inverter performs the same reset operation as it does<br />
when a pulse on the [RS] terminal occurs.<br />
NOTE: For inverter models –1850Hxx to –4000Hxx: After an external reset input [RS] occurs,<br />
the internal cooling fan turn ON after stopping once.<br />
WARNING: After the Reset command is given and the alarm reset occurs, the motor will<br />
restart suddenly if the Run command is already active. Be sure to set the alarm reset after<br />
verifying that the Run command is OFF to prevent injury to personnel.<br />
[RS]<br />
Alarm output<br />
12 ms<br />
minimum<br />
approx. 30 ms<br />
t
Thermistor<br />
Thermal<br />
Protection<br />
Opt. Code —<br />
Symbol [TH]<br />
Valid for<br />
Inputs<br />
Required<br />
Settings<br />
Default<br />
terminal<br />
Three-wire<br />
Interface<br />
Operation<br />
Opt. Code<br />
and<br />
Symbol<br />
Valid for<br />
Inputs<br />
Required<br />
Settings<br />
Default<br />
terminal<br />
[TH only]<br />
B098, B099,<br />
and C085<br />
[TH]<br />
20=[STA]<br />
21=[STP]<br />
22=F/R<br />
[1] to [8]<br />
A002=01<br />
Requires<br />
config.<br />
<strong>SJ7002</strong> Inverter<br />
Motors that are equipped with a thermistor can be protected from overheating. Input terminal<br />
[TH] is dedicated to sense thermistor resistance. The input can be set up (via B098 and B099)<br />
to accept a wide variety of NTC or PTC type thermistors. Use this function to protect the motor<br />
from overheating.<br />
When a thermistor is connected between terminals [TH]<br />
and [CM1], the inverter checks for over-temperature and<br />
will cause a trip (E35) and turn OFF the output to the<br />
TH<br />
TH FW 8 CM1 5 3 1<br />
motor. Be sure the thermistor is connected to terminals<br />
[TH] and [CM1]. If the resistance is above or below<br />
(depending on whether NTC or PTC) the threshold the<br />
inverter will trip. When the motor cools down enough, the<br />
thermistor resistance will change enough to permit you to<br />
P24 PLC CM1 7 6 4 2<br />
clear the error. Press the STOP/Reset key to clear the error. thermistor<br />
An open circuit in the thermistor causes a trip, and the<br />
inverter turns OFF the motor output.<br />
Motor<br />
The 3-wire interface is an industry standard motor control interface. This function uses two<br />
inputs for momentary contact start/stop control, and a third for selecting forward or reverse<br />
direction.<br />
Symbol Function Name Description<br />
STA Start Motor Start motor rotation on momentary contact (uses acceleration<br />
profile)<br />
STP Stop Motor Stop motor rotation on momentary open (OFF is active<br />
state), (uses deceleration profile)<br />
F/R Forward/Reverse ON = Reverse; OFF = Forward<br />
To implement the 3-wire interface, assign 20 [STA] (Start), 21 [STP] (Stop), and 22 [F/R]<br />
(Forward/Reverse) to three of the intelligent input terminals. Use momentary contacts for Start<br />
and Stop. Use a selector switch, such as SPST for the Forward/Reverse input. Be sure to set the<br />
operation command selection A002=01 for input terminal control of motor. Note the following:<br />
If you have a motor control interface that needs logic-level control (rather than momentary<br />
pulse control), use the [FW] and [RV] inputs instead.<br />
The STP logic is inverted. Normally the switch will be closed, so you open the switch to<br />
stop. In this way, a broken wire causes the motor to stop automatically (safe design).<br />
When you configure the inverter for 3-wire interface control, the dedicated [FW] terminal is<br />
automatically disabled. The [RV] intelligent terminal assignment is also disabled.<br />
The diagram below shows the use of 3-wire control. STA (Start Motor) is an edge-sensitive<br />
input; an OFF-to-ON transition gives the Start command. The control of direction is levelsensitive,<br />
and the direction may be changed at any time. STP (Stop Motor) is also a levelsensitive<br />
input.<br />
[STA] terminal<br />
[STP] terminal<br />
[F/R] terminal<br />
Motor revolution speed<br />
Forward<br />
Reverse<br />
t<br />
4–25<br />
Operations<br />
and Monitoring
Operations<br />
and Monitoring<br />
4–26<br />
Using Intelligent Input Terminals<br />
PID Disable<br />
and PID Clear<br />
Opt. Code<br />
and<br />
Symbol<br />
Valid for<br />
Inputs<br />
Required<br />
Settings<br />
Default<br />
terminal<br />
23=[PID]<br />
24=[PIDC]<br />
[1] to [8]<br />
A071<br />
Requires<br />
config.<br />
Internal Speed<br />
Loop Gain<br />
Settings<br />
Opt. Code<br />
and<br />
Symbol<br />
Valid for<br />
Inputs<br />
Required<br />
Settings<br />
Default<br />
terminal<br />
26=[CAS]<br />
43=[PPI]<br />
[1] to [8]<br />
A044 / A244<br />
/ A344 = 03,<br />
04, or 05<br />
Requires<br />
config.<br />
The PID loop function is useful for controlling motor speed to achieve constant flow, pressure,<br />
temperature, etc. in many process applications.<br />
PID Disable – This function temporarily suspends PID loop execution via an intelligent input<br />
terminal. It overrides the parameter A071 (PID Enable) to stop PID execution and return to<br />
normal motor frequency output characteristics. the use of PID Disable on an intelligent input<br />
terminal is optional. Of course, any use of the PID loop control requires setting PID Enable<br />
function A071=01.<br />
PID Clear – This function forces the PID loop integrator sum = 0. So, when you turn ON an<br />
intelligent input configured as [PIDC], the integrator sum is reset to zero. This is useful when<br />
switching from manual control to PID loop control and the motor is stopped.<br />
Note the following:<br />
The use of [PID] and [PIDC] terminals are optional. Use A071=01 if you want PID loop<br />
control enabled all the time.<br />
Do not enable/disable PID control while the motor is running (inverter is in Run Mode).<br />
Do not turn ON the [PIDC] input while the motor is running (inverter is in Run Mode).<br />
CAUTION: Be careful not to turn PID Clear ON and reset the integrator sum when the inverter<br />
is in Run Mode (output to motor is ON). Otherwise, this could cause the motor to decelerate<br />
rapidly, resulting in a trip.<br />
When sensorless vector control, 0Hz sensorless vector control, or vector control with sensor is<br />
selected for the control method, the Control Gain Switching function selects between two sets<br />
of gains in the internal speed loop. These gains are used in proportional and integral compensation.<br />
When Control Gain Switching is not selected for an intelligent input terminal, the default<br />
gains in effect correspond to the OFF state of [CAS].<br />
Use [PPI] P/PI Control Switching to select between proportional and proportional-integral<br />
control.<br />
Symbol Function Name<br />
Input<br />
State<br />
Description<br />
CAS Control Gain Switching ON Gains in parameters H070, H071, and H072<br />
are selected<br />
OFF Gains in parameters H050, H051, H052; or,<br />
H250, H251, H252 (2nd motor) are selected<br />
PPI P / PI Control Switching ON Selects Proportional control (P)<br />
OFF Selects Proportional-Integral control (PI)<br />
The table below lists the functions and parameter settings related to internal speed loop gains.<br />
Function Code Parameter Setting Range Description<br />
A044 / A244 /<br />
A344<br />
Control method<br />
selection<br />
03 SLV (does not use A344)<br />
04 0-Hz Domain SLV (does not<br />
use A344)<br />
05 V2 (does not use A244 or<br />
A344)<br />
C001 - C008 Intelligent input<br />
selection<br />
43 PPI : P/I switching<br />
H005 / H205 Speed response 0.001 to 65.53 No dimension
<strong>SJ7002</strong> Inverter<br />
Function Code Parameter Setting Range Description<br />
H050 / H250 PI proportional gain 0.0 to 999.9/1000 % gain<br />
H051 / H251 PI integral gain 0.0 to 999.9/1000 % gain<br />
H052 / H252 P proportional gain 0.01 to 10.00 No dimension<br />
H070 PI proportional gain<br />
for switching<br />
0.0 to 999.9/1000 % gain<br />
H071 PI integral gain for<br />
switching<br />
0.0 to 999.9/1000 % gain<br />
H072 P proportional gain<br />
for switching<br />
0.0 to 10.0 No dimension<br />
H073 Gain switching time 0. to 999. Millisceonds<br />
The speed control mode is normally proportionalintegral<br />
compensation (PI), which attempts to<br />
keep the deviation between the actual speed and<br />
speed command equal to zero. You can also select<br />
proportional (P) control function, which can be<br />
used for droop control (i.e. several inverters<br />
Torque<br />
P Control PI Control<br />
driving one load). Droop is the speed difference<br />
resulting from P control versus PI control at 100%<br />
output torque as shown in the graph. Set the P/PI<br />
switching function (option 43) to one of the intelligent<br />
input terminals [1] to [8]. When the P/PI<br />
input terminal is ON, the control mode becomes<br />
proportional control (P). When the P/PI input<br />
terminal is OFF, the control mode becomes<br />
100%<br />
Droop<br />
proportional-integral control.<br />
The proportional gain Kpp value determines the<br />
droop. Set the desired value using parameter<br />
0<br />
Speed of rotation<br />
H052. The relationship between the Kpp value and the droop is shown below:<br />
Droop<br />
10<br />
= ------------------------------- ( % )<br />
(Kpp Set Value)<br />
The relationship between the droop and the rated rotation speed is shown below:<br />
Speed error at rated torque<br />
Droop =<br />
---------------------------------------------------------------------<br />
Synchronous speed base frequency<br />
4–27<br />
Operations<br />
and Monitoring
Operations<br />
and Monitoring<br />
4–28<br />
Using Intelligent Input Terminals<br />
Remote Control<br />
Up and Down<br />
Functions<br />
Opt. Code<br />
and<br />
Symbol<br />
Valid for<br />
Inputs<br />
Required<br />
Settings<br />
Default<br />
terminal<br />
27=[UP]<br />
28=[DWN]<br />
29=[UDC]<br />
[1] to [8]<br />
A001 = 02;<br />
C101 = 01<br />
(enables<br />
memory)<br />
Requires<br />
config.<br />
Force Operation<br />
from Digital<br />
Operator<br />
Opt. Code 31<br />
Symbol [OPE]<br />
Valid for<br />
Inputs<br />
Required<br />
Settings<br />
Default<br />
terminal<br />
[1] to [8]<br />
A001,<br />
A002 (set not<br />
equal to 02)<br />
Requires<br />
config.<br />
The [UP] [DWN] terminal functions can adjust the output frequency for remote control while<br />
the motor is running. The acceleration time and deceleration time used with this function is the<br />
same as for normal operation ACC1 and DEC1 (2ACC1,2DEC1). The input terminals operate<br />
as follows:<br />
Symbol Function Name Description<br />
UP Remote Control UP Function Accelerates (increases output frequency) motor<br />
from current frequency<br />
DWN Remote Control DOWN<br />
Function<br />
Decelerates (decreases output frequency) motor<br />
from current frequency<br />
UDC Remote Control Data Clear Clears the Up/down frequency memory<br />
In the graph below, the [UP] and [DWN] terminals activate while the Run command remains<br />
ON. The output frequency responds to the [UP] and [DWN] commands.<br />
Output<br />
frequency<br />
[UP]<br />
[DWN]<br />
[FW, RV]<br />
It is possible for the inverter to retain the frequency set from the [UP] and [DWN] terminals<br />
through a power loss. Parameter C101 enables/disables the memory. If disabled, the inverter<br />
retains the last frequency before an UP/DWN adjustment. Use the [UDC] terminal to clear the<br />
memory and return to the original set output frequency.<br />
This function permits a digital operator interface to override the Run command source setting<br />
(A002) when it is configured for a source other than the operator interface. When the [OPE]<br />
terminal is ON, the operator interface Run command over-rides commands from input terminals<br />
(such as [FW], [RV]). The inverter will use the standard output frequency settings to<br />
operate the motor. When the [OPE] terminal is OFF, the Run command operates normally, as<br />
configured by A002.<br />
When changing the [OPE] state during Run Mode (inverter is driving the motor), the inverter<br />
will stop the motor before the new [OPE] state takes effect. If the [OPE] input turns ON and the<br />
digital operator gives a Run command while the inverter is already running, the inverter stops<br />
the motor. Then the digital operator can control the motor.<br />
t
Overload<br />
Restriction<br />
Opt. Code 39<br />
Symbol [OLR]<br />
Valid for<br />
Inputs<br />
Required<br />
Settings<br />
Default<br />
terminal<br />
[1] to [8]<br />
B021 – B023<br />
(Set 1),<br />
B024 – B026<br />
(Set 2)<br />
Requires<br />
config.<br />
<strong>SJ7002</strong> Inverter<br />
The inverter constantly monitors the motor current during acceleration, deceleration, and<br />
constant speed. If the inverter reaches the overload restriction level, it adjusts the output<br />
frequency automatically to limit the amount of overload. This function prevents an over-current<br />
trip by inertia during rapid acceleration or large changes in load at constant speed. It also<br />
attempts to prevent an over-voltage trip on deceleration due to regeneration. It accomplishes<br />
this by temporarily suspending deceleration and/or increasing the frequency in order to dissipate<br />
regenerative energy. Once the DC bus voltage falls sufficiently, deceleration will resume.<br />
OLR Parameter Selection – Two sets of overload restriction parameter settings and values are<br />
available as outlined in the table below.<br />
Symbol Function Name<br />
OLR Overload Restriction<br />
Selection<br />
Input<br />
State<br />
Description<br />
ON Selects Overload Restriction Set 2,<br />
B024, B025, B026 settings in effect<br />
OFF Selects Overload Restriction Set 1,<br />
B021, B022, B023 settings in effect<br />
Use the B021—B026 group of settings to configure the two set of parameters as needed. By<br />
assigning the Overload Restriction function [OLR] to an intelligent terminal, you can select the<br />
set of restriction parameters that is in effect.<br />
Function<br />
Overload Restriction<br />
Operation Mode<br />
Overload Restriction<br />
Setting<br />
Deceleration Rate at<br />
Overload Restriction<br />
Function Code<br />
Set 1 Set 2<br />
Data or Range Description<br />
B021 B024 00 Disable<br />
01 Enabled during accel<br />
and constant speed<br />
02 Enabled during constant<br />
speed<br />
03 Enabled during accel,<br />
constant speed, and<br />
decel<br />
B022 B025 Rated current * 0.5<br />
to rated current * 2<br />
Current value at which<br />
the restriction begins<br />
B023 B026 0.1 to 30 seconds Deceleration time when<br />
overload restriction<br />
operates<br />
Note the following:<br />
If the overload restriction constant (B023 or B026) is set too short, an over-voltage trip<br />
during deceleration will occur due to regenerative energy from the motor.<br />
When an overload restriction occurs during acceleration, the motor will take longer to reach<br />
the target frequency, or may not reach it. The inverter will make the following adjustments:<br />
a) Increase the acceleration time<br />
b) Raise torque boost<br />
c) Raise overload restriction level<br />
4–29<br />
Operations<br />
and Monitoring
Operations<br />
and Monitoring<br />
4–30<br />
Using Intelligent Input Terminals<br />
The figure below shows the operation during an overload restriction event. The overload<br />
restriction level is set by B022 and B025. The overload restriction constant is the time to decelerate<br />
to 0Hz from maximum frequency. When this function operates, the acceleration time will<br />
be longer than the normal acceleration time.<br />
Output<br />
frequency<br />
Overload<br />
restriction level<br />
Deceleration rate<br />
at overload restriction<br />
Maximum<br />
frequency<br />
B022 / B025<br />
A004<br />
B023 / B026<br />
NOTE: The Overload Advance Notice function for intelligent outputs is related to Overload<br />
Restriction operation, discussed in “Overload Advance Notice Signal” on page 4–46.<br />
Torque Limit The Torque Limit function limits the motor output torque for sensorless vector control, sensor-<br />
Opt. Code<br />
and<br />
Symbol<br />
Valid for<br />
Inputs<br />
Required<br />
Settings<br />
Default<br />
terminal<br />
40=[TL]<br />
41=[TRQ1]<br />
42=[TRQ2]<br />
[1] to [8]<br />
B040, B041,<br />
B042, B043,<br />
B044<br />
Requires<br />
config.<br />
less vector control 0Hz domain, or vector control with feedback. Three intelligent inputs<br />
control the Torque Limit function:<br />
In the torque limit function, the following operational modes are available (selected by B040):<br />
1. Four-quadrant individual setting mode – This mode sets torque limit in 4 zones, forward<br />
driving and regenerating, reverse driving and regenerating. Limits for each quadrant are set<br />
with B041 – B044 individually.<br />
2. Terminal selection mode – By use of torque limit<br />
select intelligent input terminals 1 and 2, this mode<br />
changes and uses torque limits 1 – 4 set in B041 –<br />
B044. Selected torque limit range is valid in all four<br />
quadrants. Inputs TRQ1 and TRQ2 apply only to<br />
terminal selection mode.<br />
3. Analog input mode – This mode sets torque limit value<br />
by the voltage applied to terminal [O2] (referenced to<br />
[L] for ground. An input of 0 – 10V corresponds to the<br />
torque limit value of 0 to 200%. The selected torque<br />
limit value is valid in all four quadrants (whether<br />
forward or reverse move, driving or regenerating).<br />
B022 / B025<br />
F001<br />
Target frequency<br />
Deceleration rate at overload restriction<br />
Symbol Function Name Description<br />
TL Torque limit enable Enables torque limit function when ON<br />
TRQ1 Torque limit select 1, Bit 1 (LSB) Binary encoded bit for quadrant select<br />
TRQ2 Torque limit select 2, Bit 2 (MSB) Binary encoded bit for quadrant select<br />
Intelligent<br />
Inputs Torque limit<br />
parameter<br />
TRQ2 TRQ1<br />
OFF OFF B041<br />
OFF ON B042<br />
ON OFF B043<br />
ON ON B044<br />
4. Expansion Cards 1 and 2 – This function is valid when using the expansion card (SJ-DG).<br />
Please refer to the SJ-DG instruction manual.<br />
t
<strong>SJ7002</strong> Inverter<br />
When the torque limit enable function [TL] is assigned to an intelligent input terminal, torque<br />
limiting occurs only when [TL] is ON. Both the 4-quadrant mode and terminal switching mode<br />
of torque limiting use input [TL] for enable/disable. When the [TL] input is OFF, the inverter<br />
always uses the default torque control limit of 200% maximum. That torque limit value corresponds<br />
to 200% of the maximum inverter output current. Therefore, the output torque also<br />
depends on the particular motor in use. When the over-torque output [OTQ] is assigned in the<br />
intelligent output selection, it turns ON when the inverter is performing torque limiting. When<br />
using the torque limit function at low speed, also use the overload restriction feature.<br />
Code Function Data or Range Description<br />
A044 /<br />
A244<br />
B040<br />
Control method<br />
selection<br />
Torque limit<br />
selection<br />
Note 1: Unavailable for A344<br />
Note 2: Unavailable for A244 and A344<br />
00<br />
01<br />
02<br />
03<br />
04<br />
05<br />
00<br />
01<br />
02<br />
03<br />
04<br />
The 4-quadrant operation mode for torque<br />
limiting (B040=00) is illustrated in the figure<br />
to the right. The instantaneous torque depends<br />
on inverter activity (acceleration, constant<br />
speed, or deceleration), as well as the load.<br />
These factors determine the operating quadrant<br />
at any particular time. The parameters in B041,<br />
B042, B043 and B044 determine the amount of<br />
torque limiting that the inverter applies.<br />
The terminal selection mode (B040=01) uses<br />
two intelligent inputs [TRQ1] and [TRQ2] for<br />
the binary-encoded selection of one of the four<br />
torque limit parameters B041, B042, B043 and<br />
B044.<br />
V/f Constant torque<br />
V/f Variable torque<br />
V/f Free-setting torque *1<br />
Sensorless vector *1<br />
Sensorless vector, 0 Hz domain *1<br />
Vector control with sensor *2<br />
4-quadrant individual setting<br />
Terminal selection<br />
Analog [O2] input<br />
Expansion card 1<br />
Expansion card 2<br />
B041 Torque limit 1 0 to 200% Forward-driving in 4-quadrant mode<br />
B042 Torque limit 2 0 to 200% Reverse-regenerating in 4-quadrant<br />
mode<br />
B043 Torque limit 3 0 to 200% Reverse-driving in 4-quadrant mode<br />
B044 Torque limit 4 0 to 200% Forward-regenerating in 4-quadrant<br />
mode<br />
C001 Intelligent input<br />
40 Torque limit enable<br />
to terminal [1] to [8]<br />
41 Torque limit selection, bit 1 (LSB)<br />
C008 function<br />
42 Torque limit selection, bit 2 (MSB)<br />
C021 Intelligent output<br />
10 In torque limit<br />
to terminal [11] to [15]<br />
C025 function<br />
Torque<br />
Reverse-regenerating Forward-driving<br />
B042 B041<br />
RV<br />
FW<br />
Reverse-driving Forward-regenerating<br />
+<br />
B043 B044<br />
B40=00<br />
4–31<br />
Operations<br />
and Monitoring
Operations<br />
and Monitoring<br />
4–32<br />
Using Intelligent Input Terminals<br />
External Brake<br />
Control Function<br />
Opt. Code 44<br />
Symbol [BOK]<br />
Valid for<br />
Inputs<br />
Required<br />
Settings<br />
Default<br />
terminal<br />
[1] to [8]<br />
B120=01;<br />
Set B121 to<br />
B127<br />
Requires<br />
config.<br />
The External Brake Control function enables the inverter to control external electromechanical<br />
brake systems with a particular safety characteristic. For example, elevator control systems<br />
maintain the brake on the load until the drive motor has reached a releasing frequency (point at<br />
which the external mechanical brake is released). This ensures that the load does not have an<br />
opportunity to begin coasting before the inverter begins driving the motor. The External Brake<br />
Control function can be enabled by setting parameter B120=01.<br />
The diagram below shows the signals that are important to the External Brake Control function.<br />
Inverter<br />
[BRK] Brake release<br />
[BOK] Brake confirmation<br />
[BER] Brake error<br />
External Brake<br />
System<br />
Emergency Brake<br />
(or alarm, etc.)<br />
Brake confirmation [BOK] turns ON to indicate that an external brake system has released<br />
(is not engaged). If external brake control is enabled (B120=01), then the [BOK] signal must<br />
work properly to avoid an inverter trip event.<br />
If [BOK] is not assigned to an intelligent input, then setting B124 is ignored.<br />
The steps below describe the timing diagram of events on the following page.<br />
1. When the Run command turns ON, the inverter begins to operate and accelerate to releasing<br />
frequency (B125).<br />
2. After the output frequency arrives at the set releasing frequency (B125), the inverter waits<br />
for the brake release confirmation, set by B121. The inverter outputs the braking release<br />
signal [BRK]. However, if the output current of the inverter is less than the releasing current<br />
set by B126, the inverter does not turn ON the brake release output [BRK]. The lack of the<br />
proper current level indicates a fault (such as open wire to motor). In this case, the inverter<br />
trips and outputs the braking error signal [BER]. This signal is useful to engage an<br />
emergency brake to ensure the load does not move, if the primary braking system has failed.<br />
3. While the brake release output [BRK] is ON, the inverter drives the motor but does not<br />
accelerate immediately. The inverter waits for confirmation from the external brake. When<br />
the external brake system properly releases, it signals the inverter by using the Brake OK<br />
input terminal [BOK]. If [BOK] is not assigned to an intelligent input, B124 is ignored.<br />
4. When the brake operates properly and signals with the [BOK] input, the inverter waits for<br />
the required time for acceleration (B122), and then begins to accelerate to the set target<br />
frequency. If [BOK] is not assigned to an intelligent input, acceleration begins after the<br />
delay time set by B122 after [BRK] signal occurs.<br />
5. When the Run command turns OFF, the procedure outlined above happens in reverse. The<br />
idea is to engage the brake before the motor comes completely to a stop. The inverter decelerates<br />
to the releasing frequency (B125) and turns the brake release output [BRK] OFF to<br />
engage the brake.<br />
6. The inverter does not decelerate further during just the waiting time for brake confirmation<br />
(B121). If the brake confirmation signal does not turn OFF within the waiting time for brake<br />
confirmation, the inverter causes a trip alarm and outputs the brake error signal [BER]<br />
(useful for engaging an emergency brake system).<br />
7. Normally, the brake confirmation signal [BOK] turns OFF, and the inverter waits the<br />
required waiting time. Then the inverter begins to decelerate again and brings motor and<br />
load to a complete stop (see timing diagram on next page).
<strong>SJ7002</strong> Inverter<br />
The following table lists the parameters related to the External Brake Control function.<br />
Code Function Data or Range Description<br />
B120 Brake control<br />
enable<br />
B121 Brake waiting<br />
time for release<br />
B122 Brake wait time<br />
for acceleration<br />
B123 Brake wait time<br />
for stopping<br />
B124 Brake wait time<br />
for confirmation<br />
B125 Break release<br />
frequency setting<br />
B126 Brake release<br />
current setting<br />
B127 Braking<br />
frequency<br />
00=Disable<br />
01=Enable<br />
Enables external brake control function within the<br />
inverter<br />
0.00 to 5.00 sec. Sets the time delay after arrival at release<br />
frequency (B125) before the inverter outputs brake<br />
release signal [BRK]<br />
0.00 to 5.00 sec. Sets time delay after brake confirmation signal<br />
[BOK] is received until the inverter begins to accelerate<br />
to the set frequency<br />
0.00 to 5.00 sec. Sets the time delay after brake confirmation signal<br />
[BOK] turns OFF (after [BRK] turns OFF) until<br />
decelerating the inverter to 0 Hz<br />
0.00 to 5.00 sec. Sets the wait time for [BOK] signal after turn ON/<br />
OFF of [BRK] signal. If [BOK] is not received<br />
during the specified time, the inverter will trip with<br />
an external brake error [BER].<br />
0.00 to 99.99 Hz /<br />
100.0 to 400.0 Hz<br />
Sets the frequency at which the inverter outputs the<br />
brake release signal [BRK] after delay set by B121<br />
The diagram below shows the event sequence described in the steps on the previous page.<br />
Output<br />
frequency<br />
Brake release<br />
frequency<br />
Run command<br />
0<br />
Brake release output [BRK]<br />
Brake OK input [BOK]<br />
Brake error output [BER]<br />
0% to 200% of<br />
rated current<br />
0 to 400 Hz<br />
(0 to 120 Hz for<br />
model -4000)<br />
Sets the minimum inverter current level above<br />
which the brake release signal [BRK] will be<br />
permitted<br />
Sets the frequency at which the inverter outputs the<br />
braking signal<br />
Brake wait time for accel Brake wait time for stopping<br />
B122 B123<br />
B125 B125<br />
B124<br />
B121<br />
Brake wait time to release<br />
Brake wait time<br />
for confirmation B124<br />
t<br />
4–33<br />
Operations<br />
and Monitoring
Operations<br />
and Monitoring<br />
4–34<br />
Using Intelligent Input Terminals<br />
Expansion Card<br />
Input Signals<br />
Opt. Code<br />
and<br />
Symbol<br />
Valid for<br />
Inputs<br />
Required<br />
Settings<br />
Wiring<br />
terminals<br />
45=[ORT]<br />
46=[LAC]<br />
47=[PCLR]<br />
48=[STAT]<br />
[1] to [8]<br />
B120=01;<br />
Set B121 to<br />
B126<br />
...on SJ-FB<br />
Expansion<br />
Card<br />
ADD Frequency<br />
Enable<br />
Opt. Code 50<br />
Symbol [ADD]<br />
Valid for<br />
Inputs<br />
Required<br />
Settings<br />
Default<br />
terminal<br />
[1] to [8]<br />
A145, A146<br />
Requires<br />
config.<br />
Other inputs listed below require the expansion card SJ-FB Encoder Feedback. Please see the<br />
SJ-FB manual for more information.<br />
Symbol Function Name Description<br />
ORT Orientation Orientation (home search sequence)<br />
LAC LAD Cancel Cancels the linear acceleration/deceleration position<br />
control in the feedback card<br />
PCLR Position deviation clear Forces the position error to zero<br />
STAT Pulse train input enable Starts the pulse train control of motor frequency<br />
The diagram below shows how the Input/Output connections for the SJ–FB feedback board.<br />
The inverter’s internal connections and parameter configuration make these signals available on<br />
intelligent input and output terminals.<br />
ORT<br />
LAC<br />
PCLR<br />
STAT<br />
<strong>SJ7002</strong> inverter<br />
SJ-FB Feedback<br />
Expansion Card<br />
Input assignments Output assignments<br />
Input<br />
terminals<br />
Output<br />
terminals<br />
Control and logic connector<br />
ZS<br />
DSE<br />
POK<br />
The information on outputs related to the SJ-FB expansion card is in “Expansion Card Output<br />
Signals” on page 4–54.<br />
The inverter can add or subtract an offset value to the output frequency setting which is specified<br />
by A001 (will work with any of the five possible sources). The ADD Frequency is a value<br />
you can store in parameter A145. The ADD Frequency is summed with or subtracted from the<br />
output frequency setting only when the [ADD] terminal is ON. Function A146 selects whether<br />
to add or subtract. By configuring an intelligent input as the [ADD] terminal, your application<br />
can selectively apply the fixed value in A145 to offset (positively or negatively) the inverter<br />
output frequency in real time.<br />
Keypad potentiometer<br />
Control terminal<br />
Function F001 setting<br />
Network variable F001<br />
Calculate function output A146<br />
ADD direction select<br />
A145 Add frequency<br />
Intelligent input [ADD]<br />
Σ<br />
A001 Frequency source setting<br />
+/–<br />
Output frequency setting
Force Terminal<br />
Mode<br />
Opt. Code 51<br />
Symbol [F–TM]<br />
Valid for<br />
Inputs<br />
Required<br />
Settings<br />
Default<br />
terminal<br />
[1] to [8]<br />
A001, A002<br />
Requires<br />
config.<br />
Torque Control<br />
Enable<br />
Opt. Code 52<br />
Symbol [ATR]<br />
Valid for<br />
Inputs<br />
Required<br />
Settings<br />
Monitor<br />
Settings<br />
Default<br />
terminal<br />
[1] to [8]<br />
A044 = 05,<br />
P033, P034,<br />
P035, P039,<br />
P040, P036,<br />
P037, P038<br />
D009, D010,<br />
D012<br />
Requires<br />
config.<br />
<strong>SJ7002</strong> Inverter<br />
The purpose of this intelligent input is to allow a device to force the inverter to allow control of<br />
the following two parameters via the control terminals:<br />
A001 - Frequency source setting (01 = control terminals [FW] and [RV])<br />
A002 - Run command source setting (01 = control terminals [O] or [OI])<br />
Some applications will require one or both settings above to use a source other than the<br />
terminals. You may prefer to normally use the inverter’s keypad and potentiometer, or to use the<br />
ModBus network for control, for example. However, an external device can turn ON the<br />
[F-TM] input to force the inverter to (temporarily) allow control (frequency source and Run<br />
command) via control terminals. When the [F-TM] input is OFF, then the inverter uses the<br />
regular sources specified by A001 and A002 again.<br />
When changing the [F-TM] state during Run Mode (inverter is driving the motor), the inverter<br />
will stop the motor before the new [F-TM] state takes effect.<br />
The torque control enable function is available in the vector control with encoder feedback<br />
mode (A044 = 05). You can use the inverter not only in speed control or pulse train position<br />
control but also with the torque control function. Suitable applications include material winding<br />
machines.<br />
The torque command input is enabled when the [ATR] intelligent input (assigned with option<br />
code 52) is ON. You can select one of four torque command input methods (digital operator<br />
and three analog input terminals) by the torque command input selection.<br />
Code Function Data or Range Description<br />
P033 Torque command input<br />
00 [O] terminal<br />
selection<br />
01 [OI] terminal<br />
02 [O2] terminal<br />
03 Inverter keypad (P034)<br />
P034 Torque command setting 0. to 200. (%) Torque setting for the input from<br />
the digital operator (P033 = 03)<br />
P035 Torque command polarity 00 Indicated by signal polarity at<br />
select<br />
[O2] terminal<br />
01 Depends on motor direction<br />
P039 Forward speed limit for 0.00 to maximum<br />
—<br />
torque-control mode frequency (Hz)<br />
P040 Reverse speed limit for 0.00 to maximum<br />
—<br />
torque-control mode frequency (Hz)<br />
P036 Torque bias mode 00 Disable<br />
01 Inverter keypad (P037)<br />
02 [O2] terminal input<br />
P037 Torque bias value -200. to 200. (%)<br />
P038 Torque bias polarity 00 Indicated by polarity<br />
01 Depends on motor direction<br />
4–35<br />
Operations<br />
and Monitoring
Operations<br />
and Monitoring<br />
4–36<br />
Using Intelligent Input Terminals<br />
Clear Cumulative<br />
Power Value<br />
The following block diagram shows the torque control operation. If the measured speed<br />
exceeds the speed limit, the motor speed is controlled in proportional control mode.<br />
Torque command input<br />
Intelligent input [ATR]<br />
Speed limit<br />
Measured<br />
speed<br />
Opt. Code 53<br />
Symbol [KHC]<br />
Valid for<br />
Inputs<br />
Required<br />
Settings<br />
Monitor<br />
Settings<br />
Default<br />
terminal<br />
[1] to [8]<br />
B078, B079<br />
D015<br />
Requires<br />
config.<br />
+<br />
Σ<br />
–<br />
Speed<br />
control<br />
Speed<br />
comparator<br />
+ +<br />
Σ<br />
+<br />
Torque bias<br />
When D015 cumulative power monitoring function is selected, the inverter displays the<br />
cumulative value of electric power input to the inverter. You can also convert the value to other<br />
engineering units by setting the related parameter gain (B079 cumulative input power display<br />
gain setting). The gain can be set within the range of 1 to 1000 (resolution = 1).<br />
There are two ways to clear the cumulative power data:<br />
Set B078 = 01 and press the STR key on the digital operator.<br />
Configure an intelligent input for the [KHC] function (option code = 53). Turn ON the input<br />
to clear the cumulative power data.<br />
When B079 cumulative input power display gain setting = 1000, cumulative power data up to<br />
999000 kW/h can be displayed.<br />
Σ<br />
+<br />
Torque command<br />
(inverter output)
<strong>SJ7002</strong> Inverter<br />
Speed Servo ON The servo-ON function allows you to set the inverter in a speed-servo-lock state with an<br />
intelligent input during operation. This function is available when A044=05 vector control with<br />
Opt. Code 54 sensor for the characteristic V/f curve.<br />
Symbol [SON]<br />
Valid for<br />
Inputs<br />
Required<br />
Settings<br />
Default<br />
terminal<br />
[1] to [8]<br />
A044<br />
Requires<br />
config.<br />
To use the servo-ON function, assign option code 54 to an intelligent input. After making the<br />
input assignment, the inverter will accept an operation command only when the [SON] terminal<br />
is ON.<br />
If the [SON] terminal is turned OFF during inverter operation, the inverter output enters FRS<br />
mode (free-run stop). If the [SON] is turned ON again, the inverter restarts the motor according<br />
to function B088, Restart Mode After FRS.<br />
The inverter does not allow [SON] terminal assignment and [FOC] (forcing function) assignment<br />
at the same time. If both are assigned, the [FOC] has priority (operates normally) and the<br />
[SON] function is not available.<br />
Output<br />
frequency<br />
Servo-ON [SON]<br />
FW/RV<br />
0<br />
Speed-servo lock states Free-run stop Restart after FRS (B088)<br />
Inverter does not follow FW/RV<br />
command because [SON] is OFF<br />
Current Forcing The current forcing function applies an excitation current to pre-build magnetic flux in the<br />
motor. The forcing function is available when one of the following vector control modes is<br />
Opt. Code 55 configured for use at the inverter output:<br />
Symbol [FOC] A044 = 03 sensorless vector control<br />
Valid for<br />
Inputs<br />
[1] to [8]<br />
A044 = 04 0Hz-range sensorless vector control<br />
A044 = 05 vector control with sensor<br />
Required<br />
Settings<br />
Default<br />
terminal<br />
A044, A244<br />
Requires<br />
config.<br />
To use current forcing, assign option code 55 to an intelligent input terminal. After making the<br />
input assignment, the inverter will accept an operation command only when the [FOC] terminal<br />
is ON.<br />
If the [FOC] terminal is turned OFF during inverter operation, the inverter output enters FRS<br />
mode (free-run stop). If the [FOC] is turned ON again, the inverter restarts the motor according<br />
to function B088, Restart Mode After FRS.<br />
Output<br />
frequency<br />
Current forcing [FOC]<br />
FW/RV<br />
0<br />
Excitation current flows Free-run stop Restart after FRS (B088)<br />
Inverter does not follow FW/RV<br />
command because [FOC] is OFF<br />
t<br />
t<br />
4–37<br />
Operations<br />
and Monitoring
Operations<br />
and Monitoring<br />
4–38<br />
Using Intelligent Input Terminals<br />
General Purpose<br />
Inputs 1–8<br />
Opt. Code<br />
and<br />
Symbol<br />
Valid for<br />
Inputs<br />
Required<br />
Settings<br />
Default<br />
terminal<br />
56=[MI1]<br />
57=[MI2]<br />
58=[MI3]<br />
59=[MI4]<br />
60=[MI5]<br />
61=[MI6]<br />
62=[MI7]<br />
63=[MI8]<br />
[1] to [8]<br />
See Easy<br />
Sequence<br />
Requires<br />
config.<br />
Analog Holding<br />
Command<br />
Opt. Code 65<br />
Symbol [AHD]<br />
Valid for<br />
Inputs<br />
Required<br />
Settings<br />
Default<br />
terminal<br />
[1] to [8]<br />
C101<br />
Requires<br />
config.<br />
Refer to the Easy Sequence <strong>Instruction</strong> <strong>Manual</strong> for information on how to configure and use the<br />
general purpose inputs MI1 to MI8.<br />
The analog holding function causes the inverter to sample and hold the analog command<br />
(external analog input). The hold operation begins when the intelligent input [AHD] (assign<br />
option code 65) turns ON. While [AHD] terminal is ON, the Up/Down function uses the held<br />
input level as the reference speed (frequency) value. Set parameter C101 (Up/Down memory<br />
Mode Selection) = 01 to store the last frequency adjusted by UP/DWN in memory.<br />
If the inverter power is cycled (OFF and ON) or the [RS] reset terminal receives a reset (ON<br />
and OFF) while [AHD] is ON (holding analog value), the data held at the moment of power<br />
OFF or Reset ON will be used.<br />
The wave form below shows a typical sequence for use of the Analog Holding Command.<br />
Analog input command<br />
Output frequency command<br />
0<br />
0<br />
1<br />
Analog Holding Command [AHD] Analog hold ON<br />
0<br />
NOTE: Frequent use of the Analog Hold function may damage the corresponding flash<br />
memory register in the inverter.<br />
t
Multi-stage<br />
Position Select<br />
1, 2, and 3<br />
Opt. Code<br />
and<br />
Symbol<br />
Valid for<br />
Inputs<br />
Required<br />
Settings<br />
Default<br />
terminal<br />
66=[CP1]<br />
67=[CP2]<br />
68=[CP3]<br />
[1] to [8]<br />
P060 to<br />
P067, C169<br />
Requires<br />
config.<br />
<strong>SJ7002</strong> Inverter<br />
Three Multi-stage Position Select inputs are binary-encoded to select one of eight settings,<br />
P060 to P067. Input [CP1] is the LSB; [CP3] is the MSB. If no position select inputs are<br />
assigned, P060 becomes the default position setting.<br />
Function<br />
Code<br />
Multi-Position<br />
Input Function<br />
[CF3] [CF2] [CF1]<br />
P060 Position setting 0 0 0 0<br />
P061 Position setting 1 0 0 1<br />
P062 Position setting 2 0 1 0<br />
P063 Position setting 3 0 1 1<br />
P064 Position setting 4 1 0 0<br />
P065 Position setting 5 1 0 1<br />
P066 Position setting 6 1 1 0<br />
P067 Position setting 7 1 1 1<br />
The three multi-stage position select inputs [CF1, [CF2], and [CF3] are binary-encoded. When<br />
more than one input changes state to select a position, it is possible that skewing of input<br />
transitions would briefly select undesired intermediate positions. To avoid this problem, a<br />
determination time feature is available. Parameter C169 sets a delay time that applies uniformly<br />
to all three inputs. It operates according to the following process:<br />
The determination timer is initialized upon an input transition. The transition is not yet<br />
transferred to the output.<br />
The timer is initialized again if an input transitions before the timer expires.<br />
When the timer expires, the state of all three position select inputs is transferred to the output<br />
(to generate a new position selection, P060 to P067).<br />
Position<br />
selection<br />
C169 Determination time = 0<br />
C169 Determination time > 0<br />
[CP1]<br />
[CP2]<br />
[CP3]<br />
7<br />
0<br />
1<br />
3<br />
7<br />
5 4<br />
Note that excessively long determination time settings will reduce the overall performance of<br />
the position select inputs.<br />
0<br />
t<br />
4–39<br />
Operations<br />
and Monitoring
Operations<br />
and Monitoring<br />
4–40<br />
Using Intelligent Input Terminals<br />
Zero-Return<br />
Functions<br />
Opt. Code<br />
and<br />
Symbol<br />
Valid for<br />
Inputs<br />
Required<br />
Settings<br />
Default<br />
terminal<br />
69=[ORL]<br />
70=[ORG]<br />
[1] to [8]<br />
P068, P069,<br />
P070, P071<br />
Requires<br />
config.<br />
A zero-return operation (also called a home-return) occurs when the motor moves the load to a<br />
particular starting position. Using parameter P068, you may select one of three possible types<br />
of zero-return operations. Parameter P069 selects the search direction. The zero pulse input<br />
(also called zone input) signals the arrival at the zero position.<br />
Code Function Data Description<br />
P068 Zero-return mode selection 00 Low speed<br />
01 High speed 1<br />
02 High speed 2<br />
P069 Zero return direction selection 00 Forward<br />
01 Reverse<br />
It is generally a requirement (or good practice) to perform a zero-return operation after every<br />
powerup of the inverter. It is possible that the previous power OFF occurred when the load was<br />
not at zero position. Or, it may be that an external force moved the load during the power OFF<br />
period. If you do not perform a zero-return operation after power ON, then the inverter uses the<br />
current position at powerup as the zero position.<br />
Zero-return limit [ORL]<br />
Zero-return trigger [ORG]<br />
Encoder Z pulses [Z]<br />
The three available zero-return modes differ in the overall search speed, final approach<br />
direction to the origin, and the limit switch input transition (or encoder pulse, if used) causing<br />
the final stop. Choose the zero-return mode that best fits your application.<br />
Low-speed Zero Return:<br />
1. Motor accelerates for the specified<br />
acceleration time to the low zeroreturn<br />
speed<br />
2. Motor runs at the low zero-return<br />
speed<br />
3. Inverter stops motor and sets position<br />
value to zero when [ORL] signal<br />
turns ON<br />
High-speed 1 Zero Return:<br />
1. Motor accelerates for specified<br />
acceleration time to high zero-return<br />
speed<br />
2. Motor runs at high zero-return speed<br />
3. Motor starts deceleration when<br />
[ORL] signal turns ON<br />
4. Motor runs in reverse direction at<br />
low-speed zero-return speed<br />
5. Inverter stops motor and sets<br />
position value to zero when [ORL]<br />
signal turns OFF<br />
Inverter<br />
Output<br />
frequency<br />
[ORG]<br />
[ORL]<br />
Output<br />
frequency<br />
[ORG]<br />
[ORL]<br />
0<br />
0<br />
Output to motor<br />
P070 Low-speed zero-return level<br />
1<br />
P071 High zero-return level<br />
1<br />
2<br />
2<br />
Origin<br />
P070<br />
5<br />
3<br />
Origin<br />
4<br />
Position<br />
Position<br />
Low-speed zeroreturn<br />
level
Forward/Reverse<br />
Drive Stop<br />
Opt. Code<br />
and<br />
Symbol<br />
Valid for<br />
Inputs<br />
Required<br />
Settings<br />
Default<br />
terminal<br />
71=[FOT]<br />
72=[ROT]<br />
[1] to [8]<br />
none<br />
Requires<br />
config.<br />
Speed/Position<br />
Control Select<br />
Opt. Code 73<br />
Symbol [SPD]<br />
Valid for<br />
Inputs<br />
Required<br />
Settings<br />
Default<br />
terminal<br />
[1] to [8]<br />
A044=05,<br />
P012<br />
Requires<br />
config.<br />
High-speed 2 Zero Return:<br />
1. Motor accelerates for specified<br />
acceleration time to high zeroreturn<br />
speed<br />
2. Motor runs at high zero-return<br />
speed<br />
3. Motor starts deceleration when<br />
[ORL] signal turns ON<br />
4. Motor runs in reverse direction at<br />
low-speed zero-return speed<br />
5. Motor starts deceleration to stop<br />
when [ORL] signal turns OFF<br />
Output<br />
frequency<br />
[ORG]<br />
<strong>SJ7002</strong> Inverter<br />
Position<br />
[ORL]<br />
6. Motor accelerates in forward<br />
direction to low-speed zero return level<br />
7. Inverter stops motor and sets position value to zero when next [Z] signal pulse occurs<br />
The forward/reverse drive stop function prevents the motor from moving a load outside a<br />
desired position range. The end of travel in each direction must cause the appropriate input<br />
signal, [FOT] or [ROT], to turn ON. Typically a limit switch or proximity switch is used to<br />
generate these signals.<br />
If the [FOT] turns ON during forward rotation (or [ROT] turns ON during reverse rotation), the<br />
inverter limits the motor torque to 10% in the current direction of travel.<br />
Forward drive stop [ORL]<br />
Reverse drive stop [ORG]<br />
Turn ON the [SPD] terminal input to perform speed control while in absolute position control<br />
mode. The direction of rotation depends on the operation command (FWD or REV). When<br />
switching from speed control to position control, be sure to verify the sign of the value set in<br />
the operation command.<br />
While the [SPD] terminal is OFF, the current position count remains at zero. If the [SPD]<br />
terminal is turned OFF during motor operation, the control mode switches to position control<br />
and pulse counting begins, starting from zero. If the target position value is also zero, the<br />
inverter stops the motor at the current position. Otherwise, rotation continues until motor<br />
rotation arrives at the target position.<br />
Output<br />
frequency<br />
Speed/position switching [SPD]<br />
0<br />
Inverter<br />
0<br />
Rev<br />
Speed control<br />
P071 High zero-return level<br />
1<br />
Output to<br />
motor<br />
Position control<br />
2<br />
5<br />
P070<br />
3<br />
6 7<br />
4<br />
Origin<br />
Low-speed zeroreturn<br />
level<br />
Load Fwd<br />
Start of position counting<br />
Target position<br />
t<br />
t<br />
4–41<br />
Operations<br />
and Monitoring
Operations<br />
and Monitoring<br />
4–42<br />
Using Intelligent Input Terminals<br />
Pulse Counter<br />
Signals<br />
Opt. Code<br />
and<br />
Symbol<br />
Valid for<br />
Inputs<br />
Monitor<br />
Settings<br />
Default<br />
terminal<br />
74=[PCNT]<br />
75=[PCC]<br />
[1] to [8]<br />
D028<br />
Requires<br />
config.<br />
The intelligent pulse counter input [PCNT] allows you to input a pulse train up to 100 Hz via an<br />
intelligent input terminal. (For high-speed applications, use the encoder input expansion card<br />
instead.) Monitor the cumulative count with D028, pulse counter function. The value of the<br />
cumulative count cannot be stored in a separate register or parameter. The counter value is<br />
cleared to zero when inverter power is turn ON or the inverter is reset. You may also use the<br />
[PCC] Pulse Counter Clear input to clear the cumulative count.<br />
The frequency resolution of the input pulse can be calculated by the formula shown below<br />
(assuming a pulse signal input with 50% duty cycle). Do not input higher frequencies than the<br />
calculated value.<br />
Frequency resolution (Hz) = 250 / input terminal response setting (C160 to C168) + 1)<br />
Example: When the input terminal response time = 1, the frequency resolution = 125 Hz<br />
Pulse counter<br />
input [PCNT]<br />
Filtered<br />
pulse train<br />
Counter value<br />
1 2<br />
3 4<br />
t<br />
t
Using Intelligent Output Terminals<br />
<strong>SJ7002</strong> Inverter<br />
The intelligent output terminals are programmable in a similar way to the intelligent input<br />
terminals. The inverter has several output functions that you can assign individually to five<br />
physical logic outputs. Along with these solid-state outputs, the alarm relay output has type<br />
Form C (normally open and normally closed) contacts. The relay is assigned the alarm function<br />
by default, but you can assign it to any of the functions that the open-collector outputs can use.<br />
Sinking outputs<br />
(open collector)<br />
External<br />
system<br />
common<br />
– +<br />
24VDC<br />
CM2<br />
TIP: The open-collector transistor outputs can handle up to 50mA each. We highly recommend<br />
that you use an external power source as shown. It must be capable of providing at least 250mA<br />
to drive the outputs at full load.<br />
If you need output current greater than 50mA, use the<br />
inverter output to drive a small relay. Be sure to use a<br />
diode across the coil of the relay as shown (reversebiased)<br />
in order to suppress the turn-off spike, or use a<br />
solid-state relay.<br />
<strong>SJ7002</strong> inverter<br />
Output circuits<br />
15 14 13 12 11<br />
L L L L<br />
CM2<br />
+ –<br />
RY<br />
L<br />
11<br />
4–43<br />
Operations<br />
and Monitoring
Operations<br />
and Monitoring<br />
4–44<br />
Using Intelligent Output Terminals<br />
Run Signal When the [RUN] signal is selected as an<br />
Opt. Code 00<br />
Symbol [RUN]<br />
Valid for<br />
Outputs<br />
Required<br />
Settings<br />
Default<br />
terminal<br />
[11 to [15],<br />
[ALx]<br />
(none)<br />
[12]<br />
Frequency Arrival<br />
Signals<br />
Opt. Code<br />
and<br />
Symbol<br />
Valid for<br />
Outputs<br />
Required<br />
Settings<br />
Default<br />
terminal<br />
Other<br />
terminals<br />
01=[FA1]<br />
02=[FA2]<br />
06=[FA3]<br />
24=[FA4]<br />
25=[FA5]<br />
[11 to [15],<br />
[ALx]<br />
F001 for FA1<br />
C042 and<br />
C043 for<br />
FA2 and FA3<br />
C045 and<br />
C046 for<br />
FA4 and FA5<br />
[11]=[FA1]<br />
Requires<br />
config.<br />
intelligent output terminal, the inverter<br />
outputs a signal on that terminal when it is<br />
in Run Mode. The output logic is active<br />
low, and is the open collector type (switch<br />
to common).<br />
The timing diagram to the right shows the<br />
Run Signal operation in detail. The inverter<br />
outputs the [RUN] signal whenever the<br />
inverter output exceeds the start frequency<br />
specified by parameter B082. The start<br />
[FW, RV]<br />
Motor<br />
speed<br />
B82<br />
Run<br />
Signal<br />
frequency is the initial inverter output frequency when it turns ON.<br />
start freq.<br />
NOTE: If you use an intelligent output to drive an external relay, be sure to connect a diode<br />
across the relay coil. This will prevent the negative-going turn-off spike generated by the coil<br />
from damaging the inverter’s output transistor.<br />
The Frequency Arrival group of outputs help coordinate external systems with the current<br />
velocity profile of the inverter. As the name implies, output [FA1] turns ON when the output<br />
frequency arrives at the standard set frequency (parameter F001). Outputs [FA2] through [FA5]<br />
provide variations on this function for increased flexibility, relying on two programmable accel/<br />
decel thresholds. For example, you can have an output turn ON at one frequency during acceleration,<br />
and have it turn OFF at a different frequency during deceleration. All transitions have<br />
hysteresis to avoid output chatter if the output frequency is near one of the thresholds.<br />
Symbol Function Name Description<br />
FA1 Frequency arrival type 1 –<br />
constant speed<br />
FA2 Frequency arrival type 2 –<br />
over-frequency<br />
FA3 Frequency arrival type 3 –<br />
at frequency<br />
FA4 Frequency arrival type 4 –<br />
over-frequency (2)<br />
FA5 Frequency arrival type 5 –<br />
at frequency (2)<br />
Note the following:<br />
For most applications you will need to use only one or two of the frequency arrival type<br />
outputs (see example). However, it is possible to assign all five output terminals to output<br />
functions [FA1] through [FA5].<br />
For each frequency arrival threshold, the output anticipates the threshold (turns ON early) by<br />
an amount equal to 1% of the maximum frequency set for the inverter.<br />
The output turns OFF as the output frequency moves away from the threshold, delayed by an<br />
amount equal to 2% of the max. frequency.<br />
ON<br />
ON when output to motor is at the standard set<br />
frequency F001<br />
ON when output to motor is at or above the FA<br />
threshold 1 (C042) during accel<br />
ON when output to motor is at the FA threshold 1<br />
(C042) during accel, or at C043 during decel<br />
ON when output to motor is at or above the FA<br />
threshold 2 (C045) during accel<br />
ON when output to motor is at the FA threshold 2<br />
(C045) during accel, or at C046 during decel<br />
t
Frequency arrival output [FA1] uses the<br />
standard output frequency (parameter F001)<br />
as the threshold for switching. In the figure<br />
to the right, the inverter accelerates to the<br />
set output frequency, which serves as the<br />
threshold for [FA1]. Parameters Fon and Foff illustrate the hysteresis that prevents output<br />
chatter near the threshold value.<br />
Fon is 1% of the max. output frequency<br />
Foff is 2% of the max. output frequency<br />
The hysteresis effect causes the output to<br />
turn ON slightly early as the speed<br />
approaches the threshold. Then the turn-<br />
OFF point is slightly delayed. The 1% and<br />
2% values also apply to the remaining<br />
Frequency arrival outputs, discussed below.<br />
Frequency Arrival outputs [FA2] and<br />
[FA4] work the same way; they just use<br />
two separate threshold pairs as shown in<br />
the figure. These provide for separate<br />
acceleration and deceleration thresholds<br />
to provide more flexibility than for<br />
[FA1]. [FA2] uses C042 and C045 for<br />
ON and OFF thresholds, respectively.<br />
[FA4] uses C043 and C046 for ON and<br />
OFF thresholds, respectively. Having<br />
different accel and decel thresholds<br />
provides an asymmetrical output<br />
function. However, you can use equal<br />
ON and OFF thresholds, if desired.<br />
<strong>SJ7002</strong> Inverter<br />
Frequency Arrival outputs [FA3] and [FA5] use the same threshold parameters as [FA2] and<br />
[FA4] above, but operate in a slightly different way. Refer to the diagram below. After the<br />
frequency arrives at the first threshold during acceleration and turns ON [FA3] or [FA5], they<br />
turn OFF again as the output frequency accelerates further. The second thresholds work<br />
similarly during deceleration. In this way, we have separate ON/OFF pulses for acceleration<br />
and deceleration.<br />
FA3/FA5<br />
Output<br />
frequency<br />
Hz<br />
Thresholds<br />
C043/C046<br />
C042/C045<br />
0<br />
F on<br />
Output<br />
frequency<br />
Hz<br />
Threshold<br />
F001<br />
FA1<br />
FA2/FA4<br />
0<br />
C042/C045<br />
C043/C046<br />
Output<br />
frequency<br />
Hz<br />
Thresholds<br />
0<br />
F off<br />
F on<br />
F on<br />
F on<br />
ON<br />
ON<br />
ON ON<br />
F off<br />
F off<br />
t<br />
F off<br />
t<br />
4–45<br />
t<br />
Operations<br />
and Monitoring
Operations<br />
and Monitoring<br />
4–46<br />
Using Intelligent Output Terminals<br />
Overload<br />
Advance Notice<br />
Signal<br />
Opt. Code<br />
and<br />
Symbol<br />
Valid for<br />
Outputs<br />
Required<br />
Settings<br />
Default<br />
terminal<br />
03=[OL]<br />
26=[OL2]<br />
[11 to [15],<br />
[ALx]<br />
C041, C111<br />
Requires<br />
config.<br />
Output Deviation<br />
for PID Control<br />
Opt. Code 04<br />
Symbol [OD]<br />
Valid for [11 to [15],<br />
Outputs [ALx]<br />
Required<br />
Settings<br />
Default<br />
terminal<br />
C044<br />
Requires<br />
config.<br />
When the output current exceeds a<br />
preset value, the [OL] or [OL2]<br />
terminal signal turns ON. Parameter<br />
C041 sets the overload threshold for<br />
[OL]; parameter C111 sets it for<br />
[OL2]. The overload detection circuit<br />
operates during powered motor operation<br />
and during regenerative braking.<br />
The output circuits use open-collector<br />
transistors, and are active low.<br />
Symbol Function Name Description<br />
OL Overload advance notice signal (1) ON when output current is more than the set<br />
threshold for the overload signal (C041)<br />
OL2 Overload advance notice signal (2) ON when output current is more than the set<br />
threshold for the overload signal (C111)<br />
Note the following:<br />
The default threshold value is 100%. To change the level from the default, set C041 or<br />
C111(overload level).<br />
The accuracy of this function is the same as the function of the output current monitor on the<br />
[FM] terminal (see “Analog Output Operation” on page 4–66).<br />
NOTE: If you use an intelligent output to drive an external relay, be sure to connect a diode<br />
across the relay coil. This will prevent the negative-going turn-off spike generated by the coil<br />
from damaging the inverter’s output transistor.<br />
The PID loop error is defined as the<br />
magnitude (absolute value) of the difference<br />
between the Setpoint (target value)<br />
and the Process Variable (actual value).<br />
When the error magnitude exceeds the<br />
preset value for C044, the [OD] terminal<br />
signal turns ON. The default deviation<br />
value is set to 3%. To change this value,<br />
change parameter C044 (deviation<br />
level). Refer to “PID Loop Operation”<br />
on page 4–75.<br />
Set<br />
value<br />
Set<br />
value<br />
Current threshold<br />
C041<br />
C041<br />
[OL]<br />
Signal<br />
Error<br />
(SP-PV)<br />
C044<br />
C044<br />
[OD]<br />
Signal<br />
power running<br />
regeneration<br />
threshold<br />
ON ON<br />
Process variable<br />
Setpoint<br />
ON ON<br />
NOTE: If you use an intelligent output to drive an external relay, be sure to connect a diode<br />
across the relay coil. This will prevent the negative-going turn-off spike generated by the coil<br />
from damaging the inverter’s output transistor.<br />
t<br />
t
<strong>SJ7002</strong> Inverter<br />
Alarm Signal The inverter Alarm Signal is active when a fault<br />
Opt. Code<br />
Symbol<br />
Valid for<br />
Outputs<br />
Required<br />
Settings<br />
Default<br />
05<br />
[AL]<br />
[11 to [15],<br />
[ALx]<br />
C026, C036<br />
Relay [AL0],<br />
has occurred and it is in the Trip Mode (refer to the<br />
diagram at right). When the fault is cleared the<br />
Alarm Signal becomes inactive.<br />
We must make a distinction between the Alarm<br />
Signal AL and the alarm relay contacts [AL0],<br />
[AL1] and [AL2]. The signal AL is a logic<br />
function, which you can assign to the open collector<br />
output terminals [11] to [15], or the relay<br />
outputs. The most common (and default) use of<br />
the relay is for AL, thus the labeling of its termi-<br />
Run<br />
Fault<br />
STOP<br />
RESET<br />
Stop<br />
RUN<br />
STOP<br />
RESET<br />
Trip Fault<br />
Alarm signal<br />
active<br />
terminals [AL1], [AL2] nals. Use an open collector output (terminals [11] to [15]) for a low-current logic signal interface<br />
or to energize a small relay (50 mA maximum). Use the relay output to interface to higher<br />
voltage and current devices (10 mA minimum). Note the following:<br />
When the alarm output is set to normally closed, a time delay of less than 2 seconds occurs<br />
until the contact is closed when the power is turned ON.<br />
Terminals [11] – [15] are open collector outputs, so the electrical specifications of [AL] are<br />
different from the contact output terminals [AL0], [AL1], [AL2].<br />
When the inverter power supply is turned OFF, the alarm signal output is valid as long as the<br />
external control circuit has power.<br />
This signal output has the delay time (300ms nominal) from the fault alarm output.<br />
The relay contact specifications are in “Specifications of Control and Logic Connections” on<br />
page 4–9. The contact diagrams for different conditions are on the next page.<br />
The alarm output terminals operate as shown below (left) by default. The contact logic can be<br />
inverted as shown (below right) by using the parameter setting C036. The relay contacts<br />
normally open (N.O.) and normally closed (N.O.) convention uses “normal” to mean the<br />
inverter has power and is in Run or Stop Mode. The relay contacts switch to the opposite<br />
position when it is in Trip Mode or when input power is OFF.<br />
Contact position after initialization Contact position inverted by C036 setting<br />
During normal running When an alarm occurs or<br />
power is turned OFF<br />
AL1<br />
AL0 AL2<br />
Contact Power<br />
N.C.<br />
(after<br />
initialize,<br />
C036=01)<br />
Run<br />
State<br />
AL1<br />
AL0 AL2<br />
AL0-<br />
AL1<br />
AL0-<br />
AL2<br />
ON Normal Closed Open<br />
ON Trip Open Closed<br />
OFF – Open Closed<br />
During normal running or<br />
power is turned OFF<br />
AL1<br />
AL0 AL2<br />
Contact Power<br />
N.O.<br />
(set<br />
C036=00)<br />
Run<br />
State<br />
When an alarm occurs<br />
AL1<br />
AL0 AL2<br />
AL0-<br />
AL1<br />
AL0-<br />
AL2<br />
ON Normal Open Closed<br />
ON Trip Closed Open<br />
OFF – Open Closed<br />
4–47<br />
Operations<br />
and Monitoring
Operations<br />
and Monitoring<br />
4–48<br />
Using Intelligent Output Terminals<br />
Over-torque<br />
Signal<br />
Opt. Code 07<br />
Symbol [OTQ]<br />
Valid for<br />
Outputs<br />
Required<br />
Settings<br />
Default<br />
terminals<br />
[11 to [15],<br />
[ALx]<br />
C055, C056,<br />
C057, C058<br />
A044 = 03 or<br />
04 or 05<br />
[14]<br />
Instantaneous<br />
Power Failure /<br />
Under-voltage<br />
Signal<br />
Opt. Code<br />
and<br />
Symbol<br />
Valid for<br />
Outputs<br />
Required<br />
Settings<br />
Default<br />
terminals<br />
08=[IP]<br />
09=[UV]<br />
[11 to [15],<br />
[ALx]<br />
B001, B002,<br />
B003, B004,<br />
B005, B007<br />
Requires<br />
config.<br />
The Over-torque function [OTQ] turns ON when the estimated value of output torque of motor<br />
increases more than the arbitrary level set for the output (see table below). Recall that the<br />
torque limit function, covered in “Torque Limit” on page 4–30, actually limits the torque<br />
during certain operating conditions. Instead, the over-torque output feature only monitors the<br />
torque, turning ON output [OTQ] if the torque is above programmable thresholds you set. The<br />
[OTQ] function is valid only for sensorless vector control, 0-Hz domain sensorless vector<br />
control, or vector control with sensor. Do not use the [OTQ] output except for these inverter<br />
operational modes.<br />
Code Function/Description Data or Range<br />
C055 Over-torque, forward-driving level setting 0 to 200%<br />
C056 Over-torque, reverse-regenerating, level setting 0 to 200%<br />
C057 Over-torque, reverse-driving, level setting 0 to 200%<br />
C058 Over-torque, forward-regenerating, level setting 0 to 200%<br />
C021 to C025 Intelligent output terminal [11] to [15] function 07<br />
The assignment of the Over-torque function to an output terminal [OTQ] is detailed in the table<br />
at the left.<br />
An instantaneous power failure (complete loss) or under-voltage condition (partial loss) of<br />
inverter input voltage can occur without warning. <strong>SJ7002</strong> <strong>Series</strong> inverters can be configured to<br />
respond to these conditions in different ways. You can select whether the inverter trips or retries<br />
(restart attempt) when an instantaneous power failure or under-voltage condition occurs. You<br />
can select the retry function with parameter B001.<br />
Symbol Function Name Description<br />
IP Instantaneous Power Failure ON when the inverter detects a loss of input<br />
power<br />
UV Under-voltage condition ON when the inverter input power is less<br />
than the specified input range<br />
When enabled, the Retry Function operates in the following ways:<br />
Under-voltage conditions – When an instantaneous power failure or under-voltage condition<br />
occurs, the inverter will attempt to restart up to 16 times. A trip condition will occur on the 17th<br />
attempt, which must be cleared with the Stop/Reset key. When connecting control power<br />
supply terminals [Ro]–[To] to the DC bus [P]–[N], an under-voltage may be detected at poweroff<br />
and cause a trip. If this is undesirable, set B004 to 00 or 02.<br />
Over-current/voltage conditions – When retry function is selected and an over-current or an<br />
over-voltage condition occurs, a restart is attempted 3 times. A trip will occur on the 4th failed<br />
restart attempt. Use parameter B004 to select the trip and alarm response to instantaneous<br />
power failure and under-voltage conditions.<br />
If an over-voltage or over-current trip occurs during the deceleration and an instantaneous<br />
power failure error (E16) is displayed the inverter goes into free-run stop. In this case make the<br />
deceleration time longer.
Power supply<br />
Inverter output<br />
Motor<br />
frequency<br />
<strong>SJ7002</strong> Inverter<br />
Use the parameters listed in the table below to define Instantaneous Power Failure and<br />
Under-voltage Signal operation.<br />
Code Function Data or Range Description<br />
B001 Selection of<br />
automatic restart<br />
mode<br />
B002 Allowable undervoltage<br />
power<br />
failure time<br />
B003 Retry wait time<br />
before motor<br />
restart<br />
B004 Instantaneous<br />
power failure /<br />
voltage trip alarm<br />
enable<br />
B005 Number of restarts<br />
on power failure /<br />
under-voltage trip<br />
events<br />
B007 Restart frequency<br />
threshold<br />
00 Alarm output after trip, automatic<br />
restart disabled<br />
01 Restart at 0 Hz<br />
02 Retry with frequency matching to<br />
present motor speed<br />
03 Retry with frequency matching<br />
followed by deceleration to stop— then<br />
trip alarm<br />
0.3 to 1.0 sec. The amount of time a power input<br />
under-voltage can occur without<br />
tripping the power failure alarm. If<br />
under-voltage exists longer than this<br />
time, the inverter trips, even if the restart<br />
mode is selected. If it exists less than<br />
this time retry will be attempted.<br />
0.3 to 100 sec. Time delay after a trip condition goes<br />
away before the inverter restarts the<br />
motor<br />
00 Disable<br />
01 Enable<br />
02 Disable during stop and ramp to stop<br />
00 Restart up to 16 times on instantaneous<br />
power failure or under-voltage<br />
01 Always restart on instantaneous power<br />
failure or an under-voltage condition<br />
0.00 to 400.0 Hz;<br />
model -4000HFx2<br />
is 0.00 to 120.0 Hz<br />
When frequency of the motor is less<br />
than this value, the inverter will restart<br />
at 0 Hz<br />
In the following examples, t 0 = instantaneous power failure time, t 1 = allowable under-voltage /<br />
power failure time (B002), and t 2 = retry wait time (B003).<br />
Example 1: Power failure within allowed limits; resume Example 2: Power failure longer than limits; trip<br />
t1 After waiting for t2 seconds when t0 < t1 ; restart<br />
t 0<br />
t 2<br />
Power supply<br />
Inverter output<br />
Free-run Free-run<br />
t<br />
Motor<br />
frequency<br />
t0 t<br />
t 1<br />
Inverter trips when t 0 > t 1<br />
4–49<br />
Operations<br />
and Monitoring
Operations<br />
and Monitoring<br />
4–50<br />
Using Intelligent Output Terminals<br />
Power supply<br />
Inverter output<br />
Motor<br />
frequency<br />
Examples 3 and 4 relate to configuring the inverter to retry upon power failure. Frequency<br />
matching is possible if the inverter frequency is greater than the B007 value. In this case, the<br />
inverter reads the motor RPM and direction. If this speed is higher than the matching setting<br />
(B007), the inverter waits until they are equal and then engages the output to drive the motor<br />
(example 3). If the actual motor speed is less than the restart frequency setting, the inverter<br />
waits for t 2 (value in B003) and restarts from 0 Hz (example 4). The display shows “0000”<br />
during an actual frequency matching event.<br />
Example 3: Motor resumes via frequency-matching Example 4: Motor restarts from 0Hz<br />
t 0<br />
Motor frequency > B007 value at t 2<br />
t 2<br />
Power supply<br />
Inverter output<br />
Free-run Free-run<br />
B007 Motor<br />
frequency<br />
B007<br />
t<br />
Frequency matching<br />
t0 t2 t<br />
0Hz restart<br />
Motor frequency < B007 value at t 2<br />
The Instantaneous Power Failure and Alarm output responses during various power loss conditions<br />
are shown in the diagram below. Use B004 to enable/disable the alarm output when<br />
instantaneous power failure or under-voltage occurs. The alarm output will continue while the<br />
control power of the inverter is present, even if the motor is stopped. Examples 5 to 7<br />
correspond to normal wiring of the inverter’s control circuit. Examples 8 to 10 correspond to<br />
the wiring of the inverter’s control circuit for controlled deceleration after power loss (see<br />
“Optional Controlled Decel and Alarm at Power Loss” on page 4–4).<br />
Instantaneous power failure operation with standard<br />
R0–T0 connections<br />
Example 5 Inverter : Stop<br />
Power<br />
1<br />
0<br />
Run command<br />
Output<br />
1<br />
0<br />
Alarm<br />
1<br />
0<br />
Inst. Power Fail<br />
1<br />
0<br />
Example 6 Inverter : Stop<br />
Power<br />
1<br />
0<br />
Run command<br />
Output<br />
1<br />
0<br />
Alarm<br />
1<br />
0<br />
Inst. Power Fail 1<br />
0<br />
Example 7 Inverter : Stop<br />
Power<br />
1<br />
0<br />
Run command<br />
Output<br />
1<br />
0<br />
Alarm<br />
Inst. Power Fail<br />
1<br />
0<br />
1<br />
0<br />
Power<br />
Run command<br />
Output<br />
Alarm<br />
Inst. Power Fail<br />
Power<br />
Run command<br />
Output<br />
Alarm<br />
Inst. Power Fail<br />
Power<br />
Run command<br />
Output<br />
Alarm<br />
Inst. Power Fail<br />
1<br />
0<br />
1<br />
0<br />
1<br />
0<br />
1<br />
0<br />
1<br />
0<br />
1<br />
0<br />
1<br />
0<br />
1<br />
0<br />
1<br />
0<br />
1<br />
0<br />
1<br />
0<br />
1<br />
0<br />
Inverter : Run<br />
Inverter : Run<br />
Inverter : Run<br />
Instantaneous power failure operation with R0–T0<br />
connected to P–N<br />
Example 8 Inverter : Stop<br />
Power<br />
1<br />
0<br />
Run command<br />
Output<br />
1<br />
0<br />
Alarm<br />
1<br />
0<br />
Inst. Power Fail<br />
1<br />
0<br />
Example 9 Inverter : Stop<br />
Power<br />
1<br />
0<br />
Run command<br />
Output<br />
1<br />
0<br />
Alarm<br />
1<br />
0<br />
Inst. Power Fail 1<br />
0<br />
(under-voltage)<br />
Example 10 Inverter : Stop<br />
Power<br />
1<br />
0<br />
Run command<br />
Output<br />
1<br />
0<br />
Alarm<br />
Inst. Power Fail<br />
1<br />
0<br />
1<br />
0<br />
Power<br />
Run command<br />
Output<br />
Alarm<br />
Inst. Power Fail<br />
Power<br />
Run command<br />
Output<br />
Alarm<br />
Inst. Power Fail<br />
Power<br />
Run command<br />
Output<br />
Alarm<br />
Inst. Power Fail<br />
1<br />
0<br />
1<br />
0<br />
1<br />
0<br />
1<br />
0<br />
1<br />
0<br />
1<br />
0<br />
1<br />
0<br />
1<br />
0<br />
1<br />
0<br />
1<br />
0<br />
1<br />
0<br />
1<br />
0<br />
Inverter : Run<br />
Inverter : Run<br />
Inverter : Run
Torque Limit<br />
Signal<br />
Opt. Code 10<br />
Symbol [TRQ]<br />
Valid for<br />
Outputs<br />
Required<br />
Settings<br />
Default<br />
terminals<br />
Run Time /<br />
Power-On Time<br />
Over Signals<br />
Opt. Code<br />
and<br />
Symbol<br />
Valid for<br />
Outputs<br />
Required<br />
Settings<br />
Default<br />
terminals<br />
[11 to [15],<br />
[ALx]<br />
B040... if<br />
B040=00<br />
then set<br />
B041, B042,<br />
B043, B044<br />
Requires<br />
config.<br />
11=[RNT]<br />
12=[ONT]<br />
[11 to [15],<br />
[ALx]<br />
B034<br />
Requires<br />
config.<br />
<strong>SJ7002</strong> Inverter<br />
The Torque Limit output [TRQ] works in conjunction with the torque limit function covered in<br />
the intelligent input section. The torque limit function limits the motor torque according to the<br />
criteria selected by parameter B040. When torque limiting occurs, the [TRQ] output turns ON,<br />
then turns OFF automatically when the output torque falls below the specified limits. Note that<br />
the Torque Limit input [TL] must be ON in order to enable torque limiting and its related<br />
output, [TRQ]. See “Torque Limit” on page 4–30 in the intelligent input section.<br />
<strong>SJ7002</strong> <strong>Series</strong> inverters accumulate the total hours in Run Mode (run time) and the total hours<br />
of power-ON time. You can set thresholds for these accumulating timers. Once the threshold is<br />
exceeded, an output terminal will turn ON. One use of this is for preventative maintenance. A<br />
signal light or audible alert could signal the need for servicing, calibration, etc.<br />
Symbol Function Name Description<br />
RNT Run Time Over ON when the accumulated time spent in<br />
Run Mode exceeds the limit (B034)<br />
ONT Power-ON Time Over ON when the accumulated power-ON time<br />
exceeds the limit (B034)<br />
The two outputs [RNT] and [ONT] share the same time threshold parameter, B034. Typically,<br />
you will use either the [RNT] or the [ONT] output only—not both at once. These outputs are<br />
useful for the notification that a preventative maintenance interval has expired.<br />
4–51<br />
Operations<br />
and Monitoring
Operations<br />
and Monitoring<br />
4–52<br />
Using Intelligent Output Terminals<br />
Thermal Warning<br />
Signal<br />
Opt. Code 10<br />
Symbol [THM]<br />
Valid for<br />
Outputs<br />
Required<br />
Settings<br />
Default<br />
terminals<br />
[11 to [15],<br />
[ALx]<br />
C061<br />
Requires<br />
config.<br />
The purpose of the electronic thermal setting is to protect the motor from overloading,<br />
overheating and being damaged. The setting is based on the rated motor current. The inverter<br />
calculates the thermal rise (heating) of the motor using the current output to the motor squared,<br />
integrated over the time spent at those levels. This feature allows the motor to draw excessive<br />
current for relatively short periods of time, allowing time for cooling.<br />
The Thermal Warning output [THM] turns ON to provide a warning before the inverter trips for<br />
electronic thermal protection. You can set a unique thermal protection level for each of the<br />
three motor profiles, as shown in the table below.<br />
Function<br />
Code<br />
B012 / B212<br />
/ B312<br />
B013 / B213<br />
/B313<br />
The electronic thermal overload function uses the output current and time to calculate<br />
thermal heating of the motor. Use parameter C061 to set the threshold from 0 to 100% of trip<br />
level for turning ON the intelligent output [THM] at that level.<br />
The thermistor input of the inverter is a separate function from the electronic thermal<br />
function. It has its own threshold to cause a trip alarm at a particular thermistor resistance.<br />
For example, suppose you have inverter model<br />
SJ700-110LFE2. The rated motor current is 46A.<br />
The setting range is (0.2 * 46) to (1.2 *46), or<br />
9.2A to 55.2A. For a setting of B012=46A<br />
(current at 100%), the figure to the right shows<br />
the curve.<br />
The electronic thermal characteristic adjusts the<br />
way the inverter calculates thermal heating,<br />
based on the type of torque control the inverter<br />
uses.<br />
CAUTION: When the motor runs at lower<br />
speeds, the cooling effect of the motor’s internal<br />
fan decreases.<br />
Function/Description Data or Range<br />
Electronic thermal setting (calculated<br />
within the inverter from current output)<br />
Electronic thermal characteristic (use<br />
the setting that matches your load)<br />
Trip<br />
time (s)<br />
Range is 0.2 * rated current to<br />
1.2 * rated current<br />
00 Reduced torque<br />
01 Constant torque<br />
02 Free-setting<br />
Trip current at 60 Hz<br />
Reduced Torque Characteristic – The example below shows the effect of the reduced torque<br />
characteristic curve (for example motor and current rating). At 20Hz, the output current is<br />
reduced by a factor of 0.8 for given trip times.<br />
Trip current<br />
reduction<br />
factor<br />
x 1.0<br />
x 0.8<br />
x 0.6<br />
0<br />
5 20 60<br />
60<br />
0.5<br />
0<br />
Trip<br />
time (s)<br />
60<br />
0.5<br />
A<br />
53.4 69 92<br />
116% 150% 200%<br />
Hz 0<br />
A<br />
42.7 55.2 73.6<br />
92.8% 120% 160%<br />
Reduced trip current at 20 Hz
<strong>SJ7002</strong> Inverter<br />
Constant Torque Characteristic – Selecting the constant torque characteristic for the example<br />
motor gives the curves below. At 2.5 Hz, the output current is reduced by a factor of 0.9 for<br />
given trip times.<br />
Trip current<br />
reduction<br />
factor<br />
x 1.0<br />
Free Thermal Characteristic - It is possible to set the electronic thermal characteristic using a<br />
free-form curve defined by three data points, according to the table below.<br />
Function<br />
Code<br />
B015 /<br />
B017 /<br />
B019<br />
B016 /<br />
B018 /<br />
B020<br />
x 0.9<br />
x 0.8<br />
0<br />
2.5 5 60<br />
Name Description Range<br />
Free-setting electronic<br />
thermal frequency 1, 2, 3<br />
Free setting electronic<br />
thermal current 1, 2, 3<br />
Trip<br />
time (s)<br />
Hz 0<br />
A<br />
47.8 62.1 82.8<br />
104% 135% 180%<br />
Reduced trip current at 2.5 Hz<br />
Data point coordinates for Hz axis<br />
(horizontal) in the free-form curve<br />
Data point coordinates for Ampere<br />
axis (vertical) in the free-form curve<br />
0 to 400Hz<br />
0.0 = (disable)<br />
0.1 to 1000.<br />
The left graph below shows the region for possible free-setting curves. The right graph below<br />
shows an example curve defined by three data points specified by B015 – B020.<br />
Trip current<br />
reduction<br />
factor<br />
x 1.0<br />
x 0.8<br />
0<br />
Setting range<br />
5<br />
Output freq.<br />
400 Hz<br />
Output<br />
current (A)<br />
B020<br />
B018<br />
B016<br />
Suppose the electronic thermal setting (B012) is set to 44 Amperes. The graph below shows the<br />
effect of the free setting torque characteristic curve. For example, at (B017) Hz, the output<br />
current level to cause overheating in a fixed time period is reduced to (B018) A. Points (x), (y),<br />
and (z) show the adjusted trip current levels in those conditions for given trip times.<br />
Trip<br />
time (s)<br />
60<br />
0.5<br />
0<br />
(x) (y) (z) A<br />
0<br />
60<br />
0.5<br />
Hz<br />
B015 B017 B019 Ax04 max. freq.<br />
(x) = B018 value x 116%<br />
(y) = B018 value x 120%<br />
(z) = B018 value x 150%<br />
Reduced trip current at (B017) Hz<br />
4–53<br />
Operations<br />
and Monitoring
Operations<br />
and Monitoring<br />
4–54<br />
Using Intelligent Output Terminals<br />
Brake Control<br />
Signals<br />
Opt. Code<br />
and<br />
Symbol<br />
Valid for<br />
Outputs<br />
Required<br />
Settings<br />
Default<br />
terminals<br />
19=[BRK]<br />
20=[BER]<br />
[11 to [15],<br />
[ALx]<br />
B120, B121,<br />
B122, B123,<br />
B124, B125,<br />
B126<br />
Requires<br />
config.<br />
Expansion Card<br />
Output Signals<br />
Opt. Code<br />
and<br />
Symbol<br />
Valid for<br />
Outputs<br />
Required<br />
Settings<br />
Default<br />
terminals<br />
21=[ZS]<br />
22=[DSE]<br />
23=[POK]<br />
[11 to [15],<br />
[ALx]<br />
C061<br />
Requires<br />
config.<br />
The Brake Control function enables the inverter to control external braking systems with a<br />
particular safety characteristic. The brake release logic convention is such that an open circuit<br />
fault (such as loose wire) causes the external brake to engage. A complete discussion of the<br />
operation of brake control is in “External Brake Control Function” on page 4–32. The diagram<br />
below shows the signals that are important to the External Brake Control function.<br />
Inverter<br />
Symbol Function Name<br />
[BRK] Brake release<br />
[BOK] Brake confirmation<br />
[BER] Brake error<br />
Input<br />
State<br />
Brake System<br />
Emergency Brake<br />
Description<br />
BRK Brake Release ON when the inverter signals the external brake<br />
system to release (open) its brake<br />
OFF when the inverter is not driving the motor, and<br />
needs the external brake engaged<br />
BER Brake Error ON when the output current is less than the set<br />
releasing current<br />
OFF when the brake function is not in use, or when<br />
the output current to the motor is correct and<br />
it is safe to release the brake<br />
Other outputs listed below require expansion card SJ-FB Encoder Feedback board. Please see<br />
the SJ-FB manual for more information.<br />
Opt.<br />
Code<br />
Symbol Function Name Description<br />
21 ZS Zero Speed Detect signal Signal indicates the encoder pulses of the<br />
motor have stopped<br />
22 DSE Speed Deviation Excessive Velocity error exceeds the error threshold<br />
defined by parameter P026<br />
23 POK Positioning Completion Indicates the load position is at the target
Analog<br />
Disconnect<br />
Detection<br />
Opt. Code<br />
and<br />
Symbol<br />
Valid for<br />
Outputs<br />
Required<br />
Settings<br />
Default<br />
terminal<br />
27=[Odc]<br />
28=[OIdc]<br />
29=[O2dc]<br />
[11 to [15],<br />
[ALx]<br />
B070, B071,<br />
B072<br />
Requires<br />
config.<br />
<strong>SJ7002</strong> Inverter<br />
The analog disconnect detection is useful when the inverter receives a speed reference from an<br />
external device. Upon input signal loss at either the [O], [OI], or [O2] terminal, the inverter<br />
normally just decelerates the motor to a stop. However, the inverter can use the intelligent<br />
output terminals [ODc], [OIdc], or [O2dc] to signal other machinery that a signal loss has<br />
occurred.<br />
Each analog disconnect output has independent thresholds, set by B070, B071, and B072.<br />
When the input is below the set threshold value, the inverter substitutes the threshold value for<br />
the input. Related parameters are given in the following tables.<br />
Opt.<br />
Code<br />
Symbol Function Name<br />
27 Odc Analog [O] disconnect detect<br />
28 OIdc Analog [OI] disconnect detect<br />
29 O2dc Analog [O2] disconnect detect<br />
Code Function Data or Range Description<br />
B070 [O] input disconnect<br />
threshold<br />
B071 [OI] input disconnect<br />
threshold<br />
B072 [O2] input disconnect<br />
threshold<br />
[O], [OI], or [O2]<br />
B070 B071 B072<br />
0<br />
[Odc], [OIdc], or [O2dc]<br />
0 to 100% If [O] value < B070, turn ON [Odc];<br />
substitute B070 value for [O] input<br />
no (255) Ignore B070 setting<br />
0 to 100% If [OI] value < B071, turn ON [Odc];<br />
substitute B071 value for [OI] input<br />
no (255) Ignore B071 setting<br />
0 to 100% If [O2] value < B072, turn ON [Odc];<br />
substitute B072 value for [O2] input<br />
no (255) Ignore B072 setting<br />
Value applied to input<br />
The inverter can also detect when an analog input value is within a range (or window) of values.<br />
See “Window Comparator Signals” on page 4–62.<br />
t<br />
t<br />
4–55<br />
Operations<br />
and Monitoring
Operations<br />
and Monitoring<br />
4–56<br />
Using Intelligent Output Terminals<br />
PID Feedback<br />
Second Stage<br />
Output<br />
Opt. Code 31<br />
Symbol [FBV]<br />
Valid for<br />
Outputs<br />
Required<br />
Settings<br />
Monitor<br />
Settings<br />
Default<br />
terminals<br />
[11 to [15],<br />
[ALx]<br />
C052, C053<br />
D004<br />
Requires<br />
config.<br />
The inverter has a built-in PID loop feature for two-stage control, useful for certain applications<br />
such as building ventilation or heating and cooling (HVAC). In an ideal control environment, a<br />
single PID loop controller (stage) would be adequate. However, in certain conditions, the<br />
maximum output energy from the first stage is not enough to maintain the Process Variable<br />
(PV) at or near the Setpoint (SP). And, the output of the first stage is in saturation. A simple<br />
solution is to add a second stage, which puts an additional and constant amount of energy into<br />
the system under control. When sized properly, the boost from the second stage brings the PV<br />
toward the desired range, allowing the first stage PID control to return to its linear range of<br />
operation.<br />
The two-stage method of control has some advantages for particular applications.<br />
The second stage is only ON in adverse conditions, so there is an energy savings during<br />
normal conditions.<br />
Since the second stage is simple ON/OFF control, it is less expensive to add than just duplicating<br />
the first stage.<br />
At powerup, the boost provided by the second stage helps the process variable reach the<br />
desired setpoint sooner than it would if the first stage acted alone.<br />
Even though the second stage is simple ON/OFF control, when it is an inverter you can still<br />
adjust the output frequency to vary the boost it provides.<br />
Refer to the example diagram below. Its two stages of control are defined as follows:<br />
Stage 1 - Inverter #1 operating in PID loop mode, with motor driving a fan<br />
Stage 2 - Inverter #2 operating as an ON/OFF controller, with motor driving a fan<br />
Stage #1 provides the ventilation needs in a building most of the time. On some days, there is a<br />
change in the building’s air volume because large warehouse doors are open. In that situation,<br />
Stage #1 alone cannot maintain the desired air flow (PV sags under SP). Inverter #1 senses the<br />
low PV and its PID Second Stage Output at [FBV] terminal turns ON. This gives a Run FWD<br />
command to Inverter #2 to provide the additional air flow.<br />
PV<br />
Fan #2<br />
Fan #1<br />
Stage #1 Stage #2<br />
Inverter #1<br />
[U, V, W]<br />
[O], [OI], or [O2]<br />
[FBV]<br />
PID Second Stage Output<br />
Process Variable<br />
Inverter #2<br />
[U, V, W]<br />
NOTE: The [FBV] is designed for implementing two-stage control. The PV high limit and PV<br />
low limit parameters, C052 and C053, do not function as process alarm thresholds. Terminal<br />
[FBV] does not provide a PID alarm function.<br />
[FW]<br />
Air flow Sensor
Network<br />
Detection Signal<br />
Opt. Code 32<br />
Symbol [Ndc]<br />
Valid for<br />
Outputs<br />
Required<br />
Settings<br />
Default<br />
terminals<br />
[11 to [15],<br />
[ALx]<br />
C076, C077<br />
Requires<br />
config.<br />
<strong>SJ7002</strong> Inverter<br />
To use the PID Second Stage Output feature, you will need to choose upper and lower limits for<br />
the PV, via C053 and C052 respectively. As the timing diagram below shows, these are the<br />
thresholds Stage #1 inverter uses to turn ON or OFF Stage #2 inverter via the [FBV] output.<br />
The vertical axis units are percent (%) for the PID setpoint, and for the upper and lower limits.<br />
The output frequency, in Hz, is superimposed onto the same diagram.<br />
When system control begins, the following events occur (in sequence in the timing diagram):<br />
1. Stage #1 inverter turns ON via the [FW] Run command.<br />
2. Stage #1 inverter turns ON the [FBV] output, because the PV is below the PV low limit<br />
C053. So, Stage #2 is assisting in loop error correction from the beginning.<br />
3. The PV rises and eventually exceeds the PV high limit C052. Stage #1 inverter then turns<br />
OFF the [FBV] output to Stage #2, since the boost is no longer needed.<br />
4. When the PV begins decreasing, only Stage #1 is operating, and it is in the linear control<br />
range. This region is where a properly configured system will operate most often.<br />
5. The PV continues to decrease until it crosses under the PV low limit (apparent external<br />
process disturbance). Stage #1 inverter turns ON the [FBV] output, and Stage #2 inverter is<br />
assisting again.<br />
6. After the PV rises above the PV low limit, the [FW] Run command to Stage #1 inverter<br />
turns OFF (as in a system shutdown).<br />
7. Stage #1 inverter enters Stop Mode and automatically turns OFF the [FBV] output, which<br />
causes Stage #2 inverter to also stop.<br />
PV high limit<br />
PV low limit<br />
Stage #1 [FW]<br />
[FBV] to Stage #2 [FW]<br />
C052<br />
C053<br />
1<br />
0<br />
1<br />
0<br />
PID setpoint (SP)<br />
PID feedback (PV)<br />
Output frequency<br />
Example: 1, 2 3 4 5<br />
6 7<br />
The intelligent output [Ndc] Network Detection Signal indicates the status of ModBus-RTU<br />
communications (not ASCII protocol). The [Ndc] terminal turns ON when the external device<br />
on the ModBus stops transmitting for a time that exceeds parameter C077, Communication<br />
Time-out Before Trip. If a time-out occurs, the output [Ndc] remains ON until ModBus-RTU<br />
communication resumes. Use parameter C076 Action Upon Communication Error Selection to<br />
select the desired inverter response to a time-out event.<br />
Master<br />
Slave (inverter)<br />
Watchdog timer<br />
C077 = xx.xx sec.<br />
1<br />
Network detection [Ndc]<br />
0<br />
Alarm output [ALx]<br />
C076 = 00 or 01 (trip)<br />
1<br />
0<br />
Time-out<br />
t<br />
t<br />
t<br />
4–57<br />
t<br />
Operations<br />
and Monitoring
Operations<br />
and Monitoring<br />
4–58<br />
Using Intelligent Output Terminals<br />
Logic Output<br />
Signals<br />
Opt. Code<br />
and<br />
Symbol<br />
Valid for<br />
Outputs<br />
Required<br />
Settings<br />
Default<br />
terminal<br />
33=[LOG1]<br />
34=[LOG2]<br />
35=[LOG3]<br />
36=[LOG4]<br />
37=[LOG5]<br />
38=[LOG6]<br />
[11 to [15],<br />
[ALx]<br />
C142 to<br />
C159<br />
Requires<br />
config.<br />
Capacitor Life<br />
Warning<br />
Opt. Code 39<br />
Symbol [WAC]<br />
Valid for<br />
Outputs<br />
Monitor<br />
Settings<br />
Default<br />
terminals<br />
[11 to [15],<br />
[ALx]<br />
D022<br />
Requires<br />
config.<br />
The Logic Output Function uses the inverter’s built-in logic feature. You can select any two of<br />
the other intelligent output options for use as internal inputs to the logic function. You may also<br />
select from three logical operators AND, OR, or XOR (exclusive OR), to be applied to the two<br />
inputs. A total of six outputs are available, shown in the following tables.<br />
Symbol Option<br />
Code<br />
Function A Input B Input Logical Operator<br />
LOG1 33 Logic Output 1 C142 C143 C144<br />
LOG2 34 Logic Output 2 C145 C146 C147<br />
LOG3 35 Logic Output 3 C148 C149 C150<br />
LOG4 36 Logic Output 4 C151 C152 C153<br />
LOG5 37 Logic Output 5 C154 C155 C156<br />
LOG6 38 Logic Output 6 C157 C158 C159<br />
The example below shows a configuration for [LOG1] Logic Output 1. Parameters C142 and<br />
C143 contain option codes for two outputs we select to be used as inputs to the logic operation.<br />
Parameter C144 contains the select code for the logic operation. 00=AND, 01=OR, and<br />
02=OR.<br />
Intelligent outputs used as internal<br />
inputs: RUN, FA1, FA2, OL, OD, etc.:<br />
[RUN] = option code 00<br />
[FA2] = option code 02<br />
C142<br />
A input<br />
C143<br />
B input<br />
Input States [LOGx] Output State<br />
A Input B Input AND (00) OR (01 XOR (02)<br />
0 0 0 0 0<br />
0 1 0 1 1<br />
1 0 0 1 1<br />
1 1 1 1 0<br />
C144<br />
Logic function<br />
AND, OR, XOR<br />
[LOG1]<br />
The inverter calculates the capacitor life remaining based on the internal temperature of the<br />
inverter and the cumulative power-ON time. The [WAC] Capacitor Life Warning output turns<br />
ON to indicate that the capacitors have reached end-of-life. If this event occurs, <strong>Hitachi</strong><br />
recommends that you replace the main circuit board and logic circuit board. You may also use<br />
monitor parameter D022 at the digital operator to monitor the status of capacitor life.
Low Cooling Fan<br />
Speed<br />
Opt. Code 40<br />
Symbol [WAF]<br />
Valid for<br />
Outputs<br />
Required<br />
Settings<br />
Monitor<br />
Settings<br />
Default<br />
terminals<br />
Starting Contact<br />
Signal<br />
Heatsink<br />
Overheat<br />
Warning<br />
[11 to [15],<br />
[ALx]<br />
B092<br />
D022<br />
Requires<br />
config.<br />
Opt. Code 41<br />
Symbol [FR]<br />
Valid for<br />
Outputs<br />
Required<br />
Settings<br />
Default<br />
terminals<br />
[11 to [15],<br />
[ALx]<br />
none<br />
Requires<br />
config.<br />
Opt. Code 42<br />
Symbol [OHF]<br />
Valid for<br />
Outputs<br />
Required<br />
Settings<br />
Default<br />
terminals<br />
[11 to [15],<br />
[ALx]<br />
C064<br />
Requires<br />
config.<br />
<strong>SJ7002</strong> Inverter<br />
The inverter monitors the heat sink cooling fan speed to help prevent overheating. If the speed<br />
of the fan(s) decreases to 75% or less of full speed, output [WAF] Low Cooling Fan Speed<br />
turns ON. Note that if you set parameter B092 Cooling Fan Control = 01 (Fan ON only during<br />
RUN), the inverter will not output the [WAF] signal when the cooling fan is stopped.<br />
If the [WAF] signal turns ON during operation, first check the cooling fan inlet for clogging by<br />
dust and debris. If the air circulation path is clear, the fans may need replacement. You may also<br />
use monitor parameter D022 at the digital operator to monitor the status of fan speed.<br />
The inverter generates [FR] Starting Contact Signal to correspond with Run (FW or RV) input<br />
commands. The source of the Run command does not matter (so the A002 setting is ignored). If<br />
both FW and RV inputs are ON, the inverter stops motor operation and turns OFF the [FR]<br />
output. The [FR] signal is useful for external devices that need a traditional starting contact<br />
signal to coordinate operation with the inverter.<br />
Forward command<br />
Reverse command<br />
Starting Contact Signal [FR]<br />
The inverter monitors its heatsink temperature to detect overheating. You can use parameter<br />
C064, Heatsink Overheat Warning Level, to set the over-temperature threshold for the heatsink<br />
in degrees C. The inverter will turn ON intelligent output [OHF] Heatsink Overheat Warning if<br />
the heatsink temperature exceeds the value in parameter C064.<br />
4–59<br />
Operations<br />
and Monitoring
Operations<br />
and Monitoring<br />
4–60<br />
Using Intelligent Output Terminals<br />
Low Output<br />
Current Signal<br />
Opt. Code 43<br />
Symbol [LOC]<br />
Valid for<br />
Outputs<br />
Required<br />
Settings<br />
Default<br />
terminals<br />
[11 to [15],<br />
[ALx]<br />
C038, C039<br />
Requires<br />
config.<br />
General Output<br />
Signals<br />
Opt. Code<br />
and<br />
Symbol<br />
Valid for<br />
Outputs<br />
Required<br />
Settings<br />
Default<br />
terminal<br />
44=[MO1]<br />
45=[MO2]<br />
46=[MO3]<br />
47=[MO4]<br />
48=[MO5]<br />
49=[MO6]<br />
[11 to [15],<br />
[ALx]<br />
See Easy<br />
Sequence<br />
Requires<br />
config.<br />
The inverter monitors the output current to the motor according to parameter C038, Low<br />
Current Indication Output Mode Select. Use parameter C039, Low Current Indication<br />
Detection Level, to set the low-current threshold. The Low Output Current Signal [LOC] will<br />
turn ON if the output current is less than the C038 threshold and motor operation corresponds<br />
to the selected monitoring mode.<br />
Code Function Data or Range Description<br />
C038 Low current indication<br />
output mode select<br />
C039 Low current indication<br />
detection level<br />
00 Output during acceleration/deceleration<br />
and constant speed operation<br />
01 Output only during constant speed *1<br />
0.0 to 2.0 x<br />
rated inverter<br />
current<br />
Low current threshold, used for<br />
intelligent output [LOC]<br />
Note 1: Note that when parameter A001 Frequency Source Setting = 01 (control terminal), it<br />
is possible that the inverter may not recognize a constant speed due to sampling, In<br />
this case, change C038 = 00 to include accel./decel., or increase the analog input filter<br />
A016 setting.<br />
Output current (A)<br />
C038<br />
Low output current [LOC]<br />
0<br />
Refer to the Easy Sequence <strong>Instruction</strong> <strong>Manual</strong> for information on how to configure and use the<br />
general purpose outputs MO1 to MO6.<br />
t<br />
t
Inverter Ready<br />
Signal<br />
Opt. Code 50<br />
Symbol [IRDY]<br />
Valid for<br />
Outputs<br />
Required<br />
Settings<br />
Default<br />
terminals<br />
[11 to [15],<br />
[ALx]<br />
none<br />
Forward/Reverse<br />
Rotation Signals<br />
Opt. Code<br />
and<br />
Symbol<br />
Valid for<br />
Ouputs<br />
Required<br />
Settings<br />
Default<br />
terminal<br />
Requires<br />
config.<br />
51=[FWR]<br />
52=[RVR]<br />
[11 to [15],<br />
[ALx]<br />
none<br />
Requires<br />
config.<br />
Major Failure<br />
Signal<br />
Opt. Code 53<br />
Symbol [MJA]<br />
Valid for<br />
Outputs<br />
Required<br />
Settings<br />
Default<br />
terminals<br />
[11 to [15],<br />
[ALx]<br />
none<br />
Requires<br />
config.<br />
<strong>SJ7002</strong> Inverter<br />
The inverter turns ON the Inverter Ready Signal [IRDY] output when it is ready to receive an<br />
operation command such as Run Forward, Run Reverse, or Jog. Otherwise, [IRDY] will be<br />
OFF and the inverter cannot accept operation commands. If [IRDY] is OFF, then check the<br />
input power supply voltage at the [R], [S], and [T] terminals to be sure the voltage is within the<br />
input specification range. The [IRDY] output is OFF when the input power is provided only to<br />
the control power supply,<br />
The Forward Rotation Signal [FWR] is ON only when the inverter is driving the motor in the<br />
foward direction. Similarly, the Reverse Rotation Signal [RVR] is ON only when the inverter is<br />
driving the motor in the reverse direction. Both signals are OFF when the motor is stopped.<br />
Output frequency (Hz)<br />
Forward Rotation Signal [FWR]<br />
Reverse Rotation Signal [RVR]<br />
0<br />
The Major Failure Signal [MJA] indicates that a particular type of error event has occurred,<br />
resulting in an inverter trip. In addition to causing the normal trip alarm, the following error<br />
events also will turn ON the [MJA] output, when assigned to an intelligent output terminal.<br />
Error<br />
Code<br />
E 10<br />
E 1 1<br />
E 14<br />
E20<br />
E23<br />
E25<br />
Name<br />
CT (current transformer) error<br />
CPU error<br />
Ground fault<br />
Inverter thermal trip with low fan speed<br />
Gate array error<br />
Main circuit error<br />
t<br />
t<br />
t<br />
4–61<br />
Operations<br />
and Monitoring
Operations<br />
and Monitoring<br />
4–62<br />
Using Intelligent Output Terminals<br />
Window<br />
Comparator<br />
Signals<br />
Opt. Code<br />
and<br />
Symbol<br />
Valid for<br />
Ouputs<br />
Required<br />
Settings<br />
Default<br />
terminal<br />
54=[WCO]<br />
55=[WCOI]<br />
56=[WCO2]<br />
[11 to [15],<br />
[ALx]<br />
none<br />
Requires<br />
config.<br />
The window comparator function outputs turn ON when You can also monitor each analog<br />
input by comparing it to a threshold value. This feature allows the inverter to detect disconnected<br />
signal wiring, loss of power at a signal transmitter, etc. When the input is below the set<br />
threshold value, the inverter substitutes the threshold value for the input. The related parameters<br />
are given in the following tables.<br />
Opt.<br />
Code<br />
Symbol Function Name<br />
54 WCO [O] terminal window comparator<br />
55 WCOI [OI] terminal window comparator<br />
54 WCO2 [O2] terminal window comparator<br />
Code Function Range Description<br />
B060 [O] input maximum limit level of<br />
window comparator<br />
B061 [O] input minimum limit level of<br />
window comparator<br />
B062 [O] input hysteresis width of<br />
window comparator<br />
B063 [OI] input maximum limit level<br />
of window comparator<br />
B064 [OI] input minimum limit level of<br />
window comparator<br />
B065 [OI] input hysteresis width of<br />
window comparator<br />
B066 [O2] input maximum limit level<br />
of window comparator<br />
B067 [O2] input minimum limit level<br />
of window comparator<br />
B068 [O2] input hysteresis width of<br />
window comparator<br />
0. to 100. (%) Lower limit = B061 + B062 x 2<br />
0. to 100. (%) Lower limit = B060 – B062 x 2<br />
0. to 10. (%) Lower limit = B061 – B062 x 2<br />
0. to 100. (%) Lower limit = B064 + B066 x 2<br />
0. to 100. (%) Lower limit = B063 – B066 x 2<br />
0. to 10. (%) Lower limit = B063 – B064 x 2<br />
–100. to 100. (%) Lower limit = B067 + B068 x 2<br />
–100. to 100. (%) Lower limit = B066 – B068 x 2<br />
0. to 10. (%) Lower limit = B066 – B067 x 2<br />
The following signal diagram shows the window comparator output generated from input<br />
signals and comparator settings listed along the Y axis.<br />
[O], [OI], or [O2]<br />
B060 B063 B066<br />
B062 B065 B068<br />
B061 B064 B067<br />
[WCO], [WCOI], or [WCO2]<br />
0<br />
Hysteresis region<br />
Hysteresis region<br />
t<br />
t
Analog Input Operation<br />
Input Terminal<br />
Signals<br />
<strong>SJ7002</strong> inverters provide for an external analog<br />
input to command the inverter frequency output<br />
value. The analog input terminal group includes<br />
the [L], [OI], [O], [O2], and [H] terminals on the<br />
control connector, which provide for Voltage [O]<br />
and [O2] or Current [OI] input. All analog input<br />
signals must use the analog ground [L].<br />
<strong>SJ7002</strong> Inverter<br />
If you use either the voltage or current analog<br />
input, you must select one of them using the logic -10 / 0 / +10V<br />
input terminal function [AT] analog type. If<br />
terminal [AT] is OFF, the voltage input [O] can<br />
4—20mA input<br />
command the inverter output frequency. If terminal<br />
[AT] is ON, the current input [OI] can command<br />
the inverter output frequency. The [AT] terminal function is covered in “Analog Input Current/<br />
Voltage Select” on page 4–24. Remember that you must also set A001 = 01 to select analog<br />
input as the frequency source.<br />
O2<br />
O<br />
OI<br />
O<br />
H O2 AM FM<br />
L O OI AMI<br />
OI<br />
O2<br />
O<br />
L<br />
1<br />
0<br />
1<br />
0<br />
+ –<br />
+ –<br />
4-20 mA<br />
-10 / 0 / +10V<br />
0 – 10V<br />
A GND<br />
+V Ref.<br />
AT<br />
1 V – I select<br />
0—10V input<br />
A005 A001=01<br />
AT=ON<br />
AT=ON<br />
AT=OFF<br />
A005=00<br />
A005=01<br />
H O2 AM FM<br />
L O OI AMI<br />
Frequency<br />
source setting<br />
Input Filter Parameter A016 adjusts an analog input sampling filter that evenly affects all analog inputs<br />
shown above. The parameter range is from 1 to 30. Before increasing the filter setting, we<br />
recommend trying to find the cause of input analog noise. Check for the following:<br />
Look for nearby high-current wiring—avoid any parallel runs to the analog signal wires<br />
Check the impedance between the chassis grounds of the inverter and the analog signal<br />
source equipment—a good connection will have a low impedance<br />
Check the analog signal ground impedance from the inverter to the analog signal source<br />
Avoid ground loops... measure the current (or voltage drop) on the chassis ground and signal<br />
ground connections; the ideal value is zero<br />
1<br />
0<br />
Terminals<br />
(Keypad)<br />
After taking steps to minimize the analog signal noise sources, increase the filter time constant<br />
(A016) until the motor output frequency (when commanded by analog inputs) becomes stable.<br />
1<br />
0<br />
Frequency setting<br />
4–63<br />
Operations<br />
and Monitoring
Operations<br />
and Monitoring<br />
4–64<br />
Analog Input Operation<br />
The following tables show the available analog input settings. Parameters A006, A005, and<br />
input terminal [AT] determine the External Frequency Command input terminals that are available<br />
and how they function. The Trim Frequency input [O2]—[L] is available (when check<br />
marked) for some settings. Other settings make the reverse direction (in addition to forward)<br />
available for bipolar input settings (when check marked). A bipolar input responds to positive<br />
input voltages with a forward motor rotation, and to negative input voltages with reverse motor<br />
rotation.<br />
A006 A005 [AT]<br />
External Frequency<br />
Command Input<br />
Trim Frequency<br />
Command Input<br />
Reverse avail.<br />
(bipolar input)<br />
00 00 OFF [O] ✘ ✘<br />
OR<br />
03<br />
ON [OI] ✘ ✘<br />
01 OFF [O] ✘ ✘<br />
ON [O2] ✘ ✔<br />
01 00 OFF [O] [O2] ✘<br />
Example<br />
1 ON [OI] [O2] ✘<br />
01 OFF [O] [O2] ✘<br />
ON [O2] ✘ ✔<br />
02 00 OFF [O] [O2] ✔<br />
Example<br />
2 ON [OI] [O2] ✔<br />
01 OFF [O] [O2] ✔<br />
ON [O2 ✘ ✔<br />
— 02 OFF [O] [O2] ✘<br />
ON Keypad pot. [O2] ✘<br />
03 OFF [OI] [O2] ✘<br />
ON Keypad pot. [O2] ✘<br />
04 OFF [O2] ✘ ✔<br />
ON Keypad pot. [O2] ✘<br />
The table below applies when the [AT] input function is not assigned to any intelligent input<br />
terminal. The A005 setting, normally used in conjunction with an [AT] input, is ignored.<br />
A006 A005 [AT]<br />
External Frequency<br />
Command Input<br />
Trim Frequency<br />
Command Input<br />
Reverse avail.<br />
(bipolar input)<br />
00 —<br />
[O2] ✘ ✔<br />
01 — (not<br />
assigned<br />
Summation of<br />
[O] and [OI]<br />
[O2] ✘<br />
02 — to any<br />
input<br />
terminal)<br />
Summation of<br />
[O] and [OI]<br />
[O2] ✔<br />
03 — Summation of<br />
[O] and [OI]<br />
✘ ✘<br />
CAUTION: Whenever the [AT] input function is not assigned to any input terminal and<br />
reverse rotation is not desired or is unsafe, be sure to set A006 = 01. This setting makes the<br />
[O2] input unipolar only.
[FW] terminal<br />
[AT] terminal<br />
External frequency<br />
command<br />
[O/OI] terminal 0<br />
Trim frequency<br />
command<br />
[O2] terminal<br />
Actual frequency<br />
command<br />
<strong>SJ7002</strong> Inverter<br />
The examples below show how the use of the [AT] input during operation enables/disables the<br />
Trim Frequency Command input [O2]—[L]. The [O2]—[L] input may be used alone, or as an<br />
offset control for the primary analog input.<br />
Example 1: Without reverse Example 2: With reverse<br />
0<br />
0<br />
F O + F O2<br />
Wiring Examples Using an external potentiometer is a common way to<br />
control the inverter output frequency (and a good way<br />
to learn how to use the analog inputs). The potentiometer<br />
uses the built-in 10V reference [H] and the analog<br />
ground [L] for excitation, and the voltage input [O] for<br />
the signal. By default, the [AT] terminal selects the<br />
voltage input when it is OFF. Take care to use the<br />
proper resistance for the potentiometer, which is<br />
1 to 2kΩ, 2 Watts.<br />
F OI<br />
F O<br />
F O2<br />
F OI + F O2<br />
[FW] terminal<br />
[AT] terminal<br />
External frequency<br />
command<br />
[O/OI] terminal 0<br />
Trim frequency<br />
command<br />
[O2] terminal<br />
Actual frequency<br />
command<br />
Voltage Input – The 0–10V voltage input circuit uses terminals [L] and [O]. Attach the signal<br />
cable’s shield wire to terminal [L] on the inverter only. DO NOT ground the shield at its other<br />
end. Maintain the voltage within specifications (do not apply negative voltage). Normally a<br />
full-span input level (10V) will give the maximum motor frequency. You can use parameter<br />
A014 to select a lower voltage for full output frequency (such as using a 5V input signal).<br />
Bipolar Voltage Input – The -10 / 0 / +10V voltage input circuit uses terminals [L] and [O2].<br />
Attach the cable’s shield wire to terminal [L] on the inverter only. Maintain the voltage within<br />
specifications. Only apply a negative voltage if this input is configured for bipolar use.<br />
Current Input – The current input circuit uses terminals [OI] and [L]. The current comes from<br />
a sourcing type transmitter; a sinking type will not work! This means the current must flow into<br />
terminal [OI], and terminal [L] is the return back to the transmitter. The input impedance from<br />
[OI] to [L] is 250 Ohms. Attach the cable’s shield wire to terminal [L] on the inverter only.<br />
0<br />
0<br />
F O + F O2<br />
F OI<br />
H O2 AM FM<br />
L O OI AMI<br />
L H<br />
F O<br />
F O2<br />
forward<br />
reverse<br />
F OI + F O2<br />
1 to 2 kΩ, 2W<br />
Standard Voltage Input Bipolar Voltage Input Current Input<br />
H O2 AM FM<br />
L O OI AMI<br />
+ –<br />
0 to 9.6 VDC,<br />
0 to 10V nominal<br />
H O2 AM FM<br />
L O OI AMI<br />
+ –<br />
-10 to 9.6 VDC,<br />
0 to 10V nominal<br />
See I/O specs on page 4–9.<br />
H O2 AM FM<br />
L O OI AMI<br />
4 to 19.6 mA DC,<br />
4 to 20 mA nominal<br />
4–65<br />
Operations<br />
and Monitoring
Operations<br />
and Monitoring<br />
4–66<br />
Analog Output Operation<br />
Analog Output Operation<br />
In the system design for inverter applications it is sometimes useful to monitor inverter operation<br />
from a remote location. In some cases, this requires only a panel-mounted analog meter<br />
(moving-coil type). In other cases, a controller device such as a PLC may monitor and<br />
command the inverter frequency and other functions. The inverter can transmit the (real-time)<br />
output frequency, current, torque, or other parameters to the controller to confirm actual<br />
operation. The monitor output terminal [FM] serves these purposes.<br />
[FM] Terminal The inverter provides an analog/digital output on<br />
terminal [FM] (frequency monitor). It uses<br />
terminal [CM1] as digital GND reference. While<br />
many applications use this terminal to monitor<br />
the output frequency, you can configure terminal<br />
[FM] to transmit one of several parameters.<br />
Most use pulse-width modulation (PWM) to<br />
represent the value, while one parameter uses<br />
frequency modulation (FM) to represent the<br />
value. Do not confuse the notation for terminal<br />
[FM] (with brackets) with FM signal type.<br />
The following table lists the configurations for terminal [FM]. Use function C027 to configure.<br />
Func. Code Description Waveform Full Scale Value<br />
C027<br />
Note 1: Display substitutes only during sensorless vector control, 0Hz domain sensorless<br />
vector control, and vector control<br />
PWM Signal Type The pulse-width modulated signal at terminal<br />
[FM] is primarily designed for driving a movingcoil<br />
meter. The pulse-width modulated signal is<br />
automatically averaged by the inertia of the<br />
moving-coil mechanism—converting the PWM<br />
signal to an analog representation. Be sure to use<br />
a 10V full-scale DC voltmeter.<br />
00 Output frequency PWM 0 – Max. frequency (Hz)<br />
01 Output current PWM 0 – 200%<br />
02 Output torque *1 PWM 0 – 200%<br />
03 Output frequency FM 0 – Max. frequency (Hz)<br />
04 Output voltage PWM 0 – 100%<br />
05 Input electric power PWM 0 – 200%<br />
06 Thermal load ratio PWM 0 – 100%<br />
07 LAD frequency PWM 0 – Max. frequency (Hz)<br />
The signal characteristics of terminal [FM] in<br />
PWM signal configuration is shown below<br />
[FM]<br />
10V<br />
0V<br />
t<br />
T<br />
Period T = 6.4ms constant (156 Hz)<br />
t<br />
Analog/digital Output<br />
D GND<br />
L<br />
H O2 AM FM<br />
O OI<br />
See I/O specs on page 4–9.<br />
L<br />
H O2 AM FM<br />
O OI<br />
0 to 10V,<br />
1 mA<br />
[FM] output value<br />
TH<br />
FW<br />
AMI P24 PLC CM1<br />
TH<br />
FW<br />
AMI P24 PLC CM1<br />
+ –<br />
=<br />
--<br />
t<br />
T<br />
B081 = [FM] terminal 8-bit gain setting<br />
C27=00, 01, 02, 04, 05, 06, 07<br />
Selects FM type output
<strong>SJ7002</strong> Inverter<br />
To calibrate the meter reading, generate a full-scale output (always ON) at terminal [FM]. Then<br />
use parameter B081(gain setting from 0 to 255) to adjust the corresponding full-scale reading<br />
of the meter. For example, when the inverter output frequency is 60 Hz, change the value of<br />
B081 so that the meter reads 60 Hz.<br />
TIP: When using the analog meter for monitoring, adjust the meter so it has a zero reading<br />
when the [FM] output is zero. Then use scale factor B081 to adjust the [FM] output so the<br />
maximum frequency in the inverter corresponds to a full-scale reading on the meter.<br />
NOTE: The indicator accuracy after adjustment is about ±5%. Depending on the motor, the<br />
accuracy may exceed this value.<br />
PWM Smoothing Circuit – Note that<br />
standard analog output signals are available<br />
on terminals [AM] and [AMI],<br />
covered in the next section. However, you<br />
may also wish to smooth the PWM signal<br />
at the [FM] terminal and convert it to an<br />
analog signal. The [FM] terminal will then<br />
generate a relatively stable DC analog<br />
voltage that represents the output value.<br />
To do this, use the circuit shown to the<br />
right. Note the output impedance of the<br />
circuit is at least 82kΩ, so the monitoring<br />
device needs an input impedance of 1MΩ<br />
or greater. Otherwise, the impedance of<br />
the smoothing circuit will cause a nonlinearity<br />
in the reading.<br />
FM Signal Type The frequency-modulated output at terminal [FM] varies its frequency with the inverter output<br />
frequency (when C027=03). The signal at [FM] uses the parameter A004 Maximum frequency<br />
setting. For example, if A004 = 60 Hz, then the maximum signal value at [FM] will be at<br />
60 Hz. This frequency is digitally controlled for accuracy, and does not use the B081 gain<br />
setting when C027=03 (frequency modulation).<br />
[FM]<br />
10V<br />
0V<br />
T<br />
T<br />
=<br />
50% fixed duty cycle<br />
--------------------------------------------------------<br />
1<br />
[FM] Output Frequency<br />
t<br />
L<br />
H O2 AM FM<br />
O OI<br />
TH<br />
FW<br />
AMI P24 PLC CM1<br />
+<br />
33kΩ<br />
–<br />
82kΩ<br />
1μF<br />
[FM] Output Frequency<br />
C027=03<br />
+<br />
=<br />
--<br />
1<br />
T<br />
+<br />
Volts<br />
Selects FM type output<br />
–<br />
4–67<br />
Operations<br />
and Monitoring
Operations<br />
and Monitoring<br />
4–68<br />
Analog Output Operation<br />
[AM] and [AMI]<br />
Terminals<br />
The [AM] and [AMI] terminals provide signals<br />
to monitor various inverter parameters such as<br />
output frequency, output current, and torque.<br />
The terminals provide these analog signal types:<br />
[AM] terminal: 0–10V analog output signal<br />
[AMI] terminal: 4–20mA analog output<br />
signal<br />
These signals both use the [L] terminal for signal<br />
return. Eight different inverter parameters may<br />
be monitored independently at either the [AM]<br />
or [AMI] terminal, as listed in the table below.<br />
Use C028 to configure terminal [AM], and C029<br />
to configure terminal [AMI].<br />
Func. Terminal Code Description Full Scale Value<br />
C028 /<br />
C029<br />
[AM] /<br />
[AMI]<br />
A GND<br />
0–10V analog output<br />
H O2 AM FM<br />
L O OI AMI<br />
4–20mA analog output<br />
See I/O specs on page 4–9.<br />
00 Output frequency 0 – Max. frequency (Hz)<br />
01 Output current 0 – 200%<br />
02 Output torque *1 0 – 200%<br />
04 Output voltage 0 – 100%<br />
05 Input electric power 0 – 200%<br />
06 Thermal load ratio 0 – 100%<br />
07 LAD frequency 0 – Max. frequency (Hz)<br />
Note 1: Display of torque is possible only during sensorless vector control, 0Hz domain<br />
sensorless vector control, and vector control with feedback<br />
The analog signals may need some adjustment for gain or offset to compensate for variances in<br />
the system. For example, the signals may drive a panel meter and require a full-scale gain<br />
adjustment. The table below lists the function codes and their descriptions. The [AM] and<br />
[AMI] terminals have separate gain and offset adjustments. Note the default values.<br />
Func. Terminal Description Range Default<br />
B080 [AM] Gain adjustment 0 – 255 180<br />
C086 [AM] Offset Adjustment 0.0 – 10.0V 0.0V<br />
C087 [AMI] Gain adjustment 0 – 255 80<br />
C088 [AMI] Offset Adjustment 0.0 – 20.0mA 0.0mA
Setting Motor Constants for Vector Control<br />
<strong>SJ7002</strong> Inverter<br />
Introduction These advanced torque control algorithms improve performance, particularly at low speeds:<br />
Sensorless Vector Control – improved torque control at output frequencies down to 0.5 Hz.<br />
Use A044=03 (1st motor) or A244=03 (2nd motor) to select sensorless vector control.<br />
Sensorless Vector Control, 0Hz Domain – improved torque control at output frequencies<br />
from 0 to 2.5 Hz. Use A044=04 (1st motor) or A244=04 (2nd motor) to select sensorless<br />
vector control, 0Hz domain.<br />
Vector Control with Feedback – improved torque control at all speeds, while providing the<br />
most accurate speed regulation of all torque control algorithms. Use A044=05 to select<br />
vector control with feedback.<br />
These three control algorithms require the inverter’s motor constants to accurately match the<br />
characteristics of the particular motor connected to your inverter. Simply using the inverter’s<br />
default parameters with the vector control modes may not produce satisfactory results. The<br />
auto-tuning procedure described later in this section is recommended for most applications<br />
needing vector control. It determines and records the characteristics of the attached motor.<br />
However, it is possible to enter the motor constants directly if the motor manufacturer has<br />
provided that data.<br />
After performing an initial auto-tuning procedure for your motor, you have an additional<br />
option: adaptive tuning. The adaptive tuning parameters use the auto-tuning procedure’s results<br />
as starting values. Then, each time the motor runs normally in your application, the inverter<br />
tunes the parameters again to match the motor. This compensates for temperature changes, etc.,<br />
further optimizing the values.<br />
The following table lists the parameters associated with motor constant settings. Function H002<br />
selects the set of motor constants that you want the inverter to use in normal use. Standard<br />
constants (select with H002=00) include H020 to H024. Auto-tuned constants (select with<br />
H002=01) include H030 to H034. Remember that you have to do the auto-tuning procedure in<br />
this section before using either auto-tuned constants or the adaptive mode (H002=02).<br />
Func. Name Data Notes<br />
00 V/f constant torque<br />
01 V/f variable torque<br />
A044 /<br />
A244 /<br />
A344<br />
V/f characteristic curve selection,<br />
1st / 2nd / 3rd motors<br />
02<br />
03<br />
V/f free-setting curve<br />
Sensorless vector control (SLV)<br />
04 Sensorless vector control, 0Hz domain<br />
05 Vector control with encoder feedback<br />
H002 Motor data selection, 1st motor 00 Standard motor parameters<br />
01 Auto-tuning parameters<br />
02 Adaptive tuning parameters<br />
H003<br />
Motor capacity, 1st motor 0.2 – 75,<br />
0.2 – 160<br />
H004 Motor poles setting, 1st motor 2 / 4 / 6 / 8 Units: poles<br />
H020 Motor constant R1, 1st motor 0.000–65.53 Units: ohms<br />
H021 Motor constant R2, 1st motor 0.000–65.53 Units: ohms<br />
H022 Motor constant L, 1st motor 0.00–655.3 Units: mH<br />
H023 Motor constant Io, 1st motor 0.00–655.3 Units: A<br />
H024 Motor constant J, 1st motor 0.001–9999 Units: kgm 2<br />
H030 Auto-tuned constant R1, 1st motor 0.000–65.53 Units: ohms<br />
kW, up to –550xxx models<br />
kW, –750xxx to –1500xxx models<br />
4–69<br />
Operations<br />
and Monitoring
Operations<br />
and Monitoring<br />
4–70<br />
Setting Motor Constants for Vector Control<br />
Func. Name Data Notes<br />
H031 Auto-tuned constant R2, 1st motor 0.000–65.53 Units: ohms<br />
H032 Auto-tuned constant L, 1st motor 0.00–655.3 Units: mH<br />
H033 Auto-tuned constant Io, 1st motor 0.00–655.3 Units: A<br />
H034 Auto-tuned constant J, 1st motor 0.001–9999 Units: kgm 2<br />
The inverter has three separate motor constant sets named 1st, 2nd, and 3rd. The 1st motor<br />
constant set is the default, while the SET and SET2 intelligent inputs select the 2nd and 3rd<br />
constant sets, respectively. The torque control methods are valid to use only if a particular<br />
motor constant set includes parameters for the selected control method. The following table<br />
lists the vector control methods and shows the ones that are valid for each motor constant set.:<br />
Vector Control Method 1st motor 2nd motor 3rd motor<br />
V/f constant torque ✔ ✔ ✔<br />
V/f variable torque ✔ ✔ ✔<br />
V/f free-setting curve ✔ ✔ ✘<br />
Sensorless vector control (SLV) ✔ ✔ ✘<br />
Sensorless vector control, 0Hz domain ✔ ✔ ✘<br />
Vector control with encoder feedback ✔ ✘ ✘<br />
The motor data selection is available only to the 1st motor constant set, selected by function<br />
H004. By default, the 2nd and 3rd motor constants sets only store standard motor parameters.<br />
The table below shows this arrangement.<br />
Motor data selection 1st motor 2nd motor 3rd motor<br />
Standard motor parameters ✔ ✔ ✔<br />
Auto-tuning parameters ✔ ✘ ✘<br />
Adaptive tuning parameters ✔ ✘ ✘<br />
When motor constant values are available from the motor manufacturer, you can enter them<br />
directly. The available motor constant parameters (storage locations) depend on the motor<br />
constant set (1st, 2nd, or 3rd) according to the following table.<br />
Motor data selection 1st motor 2nd motor 3rd motor<br />
Standard motor parameters H020 to H024 H220 to H224 —<br />
Auto-tuning parameters H030 to H034 — —<br />
Adaptive tuning parameters H030 to H034 — —
Auto-tuning of<br />
Motor Constants<br />
<strong>SJ7002</strong> Inverter<br />
The <strong>SJ7002</strong> inverter features auto-tuning, which detects and records the motor characteristic<br />
parameters to use in all vector control modes. Auto-tuning determines the resistance and<br />
inductance of motor windings. Therefore, the motor must be connected to the inverter for this<br />
procedure. Note that the auto-tuning feature is not associated with PID loop operation, which is<br />
common on some control devices. The auto-tuning procedure must be conducted while the<br />
inverter is stopped (not in Run mode), so it can use special output pulses to detect motor<br />
characteristics.<br />
When using the inverter in sensorless vector control, sensorless vector control - 0Hz domain, or<br />
vector control with encoder feedback, the motor circuit constants are important. If they are<br />
unknown, then you must first conduct the auto-tuning procedure. The inverter will determine<br />
the constants and write new values for the related “H” Group settings. The auto-tuning procedure<br />
requires that the inverter be configured to operate the 1st motor (do not set the inverter to<br />
use 2nd and 3rd motor data during an auto-tuning procedure).<br />
Func. Name Range Notes<br />
H001<br />
H002<br />
H003<br />
Auto-tuning setting 00 Disabled<br />
01 Enabled, without motor rotation<br />
02 Enabled, with motor rotation<br />
Motor data selection, 1st motor 00 Standard motor parameters<br />
01 Auto-tuning parameters<br />
02 Adaptive tuning parameters<br />
Motor capacity, 1st motor 0.2 – 75,<br />
0.2 – 160<br />
H004 Motor poles setting, 1st motor 2 / 4 / 6 / 8 Units: poles<br />
H030<br />
H031<br />
H032<br />
H033<br />
H034<br />
Auto-tuned motor constant R1,<br />
1st motor<br />
Auto-tuned motor constant R2,<br />
1st motor<br />
Auto-tuned motor constant L,<br />
1st motor<br />
Auto-tuned motor constant Io,<br />
1st motor<br />
Auto-tuned motor constant J, 1st<br />
motor<br />
— Units: ohms<br />
— Units: ohms<br />
— Units: mH<br />
— Units: A<br />
— Units: kgm 2<br />
A003 Base frequency setting 30 to maximum freq. Units: Hz<br />
A051<br />
A082<br />
kW, up to –550xxx models<br />
kW, –750xxx to –1500xxx<br />
models<br />
DC braking enable 00 Disabled (Disable during autotuning)<br />
01 Enabled<br />
AVR voltage select 200/215/220/230/240 Valid for 200V class inverters<br />
380/400/415/440/<br />
460/480<br />
Valid for 400V class inverters<br />
Please read the following Warning before running the auto-tuning procedure on the next page.<br />
WARNING: You may need to disconnect the load from the motor before performing autotuning.<br />
The inverter runs the motor forward and backward for several seconds without regard to<br />
load movement limits.<br />
4–71<br />
Operations<br />
and Monitoring
Operations<br />
and Monitoring<br />
4–72<br />
Setting Motor Constants for Vector Control<br />
Auto-tuning<br />
Procedure<br />
Preparation for Auto-tuning Procedure – Be sure to study the preparation items and verify<br />
the related inverter configuration before going further in this procedure.<br />
1. Adjust the motor base frequency (A003) and the motor voltage selection (A082) to match<br />
the specifications of the motor used in the auto-tuning procedure.<br />
2. Verify that the motor is not more than one frame size smaller than the rated size for he<br />
inverter. Otherwise, the motor characteristic measurements may be inaccurate.<br />
3. Be sure that no outside force will drive the motor during auto-tuning.<br />
4. If DC braking is enabled (A051=01), the motor constants will not be accurately set. Therefore,<br />
disable DC braking (A051=00) before starting the auto-tuning procedure.<br />
5. When auto-tuning with motor rotation (H001=02), take care to verify the following points:<br />
a. The motor will rotate up to 80% of the base frequency; make sure that this will not cause<br />
any problem.<br />
b. Do not attempt to either run or stop the motor during the auto-tuning procedure unless it<br />
is an emergency. If this occurs, initialize the inverter’s parameters to the factory default<br />
settings (see “Restoring Factory Default Settings” on page 6–16). Then reprogram the<br />
parameters unique to your application, and initiate the auto-tuning procedure again.<br />
c. Release any mechanical brake that would interfere with the motor rotating freely.<br />
d. Disconnect any mechanical load from the motor. The torque during auto-tuning is not<br />
enough to move some loads.<br />
e. If the motor is part of a mechanism with limited travel (such as lead screw or elevator),<br />
select H001=01 so that the auto-tuning will not cause motor rotation.<br />
6. Note that even when you select H001=01 for no rotation, sometimes the motor will rotate.<br />
7. When using a motor that is one frame size smaller than the inverter rating, enable the<br />
overload restriction function. Then set the overload restriction level to 1.5 times the rated<br />
output current of the motor.<br />
After the preparations above are complete, perform the auto-tuning procedure by following the<br />
steps below.<br />
1. Set H001=01 (auto-tuning without motor rotation) or H001=02 (auto-tuning with motor<br />
rotation).<br />
2. Turn the Run command ON. The inverter will then automatically sequence through the<br />
following actions:<br />
a. First AC excitation (motor does not rotate)<br />
b. Second AC excitation (motor does not rotate)<br />
c. First DC excitation (motor does not rotate)<br />
d. V/F running—this step occurs only if H001=02 (motor accelerates up to 80% of the<br />
base frequency)<br />
e. SLV running—this step occurs only if H001=02 (motor accelerates up to x% of the base<br />
frequency), where “x” varies with time T during this step:<br />
x=40% when T < 50s<br />
x=20% when 50s < T < 100s<br />
x=10% when T => 100s<br />
f. Second DC excitation<br />
g. Displays the pass/fail result of the auto-tuning (see next page)<br />
NOTE: During the AC and DC motor excitation steps above, you may notice that the motor<br />
makes a slight humming sound. This sound is normal.
Adaptive Autotuning<br />
of Motor<br />
Constants<br />
If the auto-tuning procedure is successful, the inverter updates<br />
the motor characteristic parameters and indicates normal termination<br />
of the procedure as shown. Pressing any key on the<br />
keypad will clear the result from the display.<br />
Trip during auto-tuning – A trip event will cause the autotuning<br />
sequence to quit. The display will show the error code<br />
for the trip rather than the abnormal termination indication.<br />
After eliminating the cause of the trip, then conduct the autotuning<br />
procedure again.<br />
<strong>SJ7002</strong> Inverter<br />
Normal termination<br />
Power loss or stop during auto-tuning – If the auto-tuning<br />
procedure is interrupted by power loss, the Stop key, or by<br />
Abnormal termination<br />
turning OFF the Run command, the auto-tuning constants<br />
may or may not be stored in the inverter. It will be necessary to restore the inverter’s factory<br />
default settings (see “Restoring Factory Default Settings” on page 6–16). After initializing<br />
the inverter, then perform the auto-tuning procedure again.<br />
Free V/F setting – The auto-tuning procedure will have an abnormal termination if the<br />
control mode of the inverter is set for free V/F setting.<br />
The adaptive auto-tuning feature refines the motor constants by checking the motor characteristic<br />
while it in the normal running temperature range.<br />
Preparation for Adaptive Auto-tuning – Be sure to study the preparation items and verify the<br />
related inverter configuration before going further in this procedure.<br />
1. It is necessary to first perform the auto-tuning procedure in the section above, since adaptive<br />
auto-tuning requires accurate initial constant values.<br />
2. Adaptive auto-tuning is valid only for the 1st motor data (do not use 2nd or 3rd motor data<br />
settings).<br />
3. The adaptive auto-tuning sequence actually begins as the motor decelerates to a stop from a<br />
Run command you initiate. However, the sequence still continues for five (5) more seconds.<br />
Giving another Run command during this 5-second time period will halt the adaptive autotuning.<br />
It will resume the next time the motor runs and decelerates to a stop.<br />
4. If DC braking is enabled, then the adaptive auto-tuning sequence executes after DC braking<br />
brings the motor to a stop.<br />
5. Note that when intelligent terminal [SON] Speed Servo ON or [FOC] Current Forcing is<br />
assigned, the online auto-tuning function is not available.<br />
After reading and following the preparation steps above, then configure the inverter for<br />
adaptive auto-tuning by following these steps:<br />
1. Set H002=02 for adaptive auto-tuning procedure<br />
2. Set H001=00 to disable the (manual) auto-tuning procedure<br />
3. Turn the Run command ON.<br />
4. Run the motor for an appropriate time until it reaches its normal operating temperature<br />
range. Remember that the purpose of adaptive auto-tuning is optimize the inverter for<br />
typical running conditions.<br />
5. Stop the motor (or turn the Run command OFF), which initiates an adaptive auto-tuning.<br />
Wait at least five (5) seconds before issuing any other command to the inverter.<br />
With the above configuration, the inverter automatically runs the adaptive auto-tuning sequence<br />
each time the motor runs and decelerates to a stop. This continuously adapts the SLV control<br />
algorithm to slight changes in the motor constants during operation.<br />
NOTE: It is not necessary to wait 5 seconds after each time the motor runs before running<br />
again. When the motor stops for less than 5 seconds before running again, the inverter stops the<br />
adaptive tuning sequence and keeps the current motor constant values in memory. The inverter<br />
will attempt the adaptive auto-tuning at the next run/stop event of the motor.<br />
4–73<br />
Operations<br />
and Monitoring
Operations<br />
and Monitoring<br />
4–74<br />
Setting Motor Constants for Vector Control<br />
<strong>Manual</strong> Setting of<br />
Motor Constants<br />
With vector control, the inverter uses the output current, output voltage, and motor constants to<br />
estimate the motor torque and speed. It is possible to achieve a high starting torque and accurate<br />
speed control at low frequency<br />
Sensorless Vector Control – improved torque control at output frequencies down to 0.5 Hz.<br />
Use A044=03 (1st motor) or A244=03 (2nd motor) to select sensorless vector control.<br />
Sensorless Vector Control, 0Hz Domain – improved torque control at output frequencies<br />
from 0 to 2.5 Hz. Use A044=04 (1st motor) or A244=04 (2nd motor). For this vector control<br />
method, we recommend using a motor that is one frame size smaller than the inverter size.<br />
Sensorless Vector Control with Feedback – improved torque control at all speeds, while<br />
providing the most accurate speed regulation<br />
If you do use any vector control methods, it is important that the motor constants stored in the<br />
inverter match the motor. We recommend first using the auto-tuning procedure in the previous<br />
section. If satisfactory performance through auto-tuning cannot be fully obtained, please adjust<br />
the motor constants for the observed symptoms according to the table below.<br />
CAUTION: If the inverter capacity is more than twice the capacity of the motor in use, the<br />
inverter may not achieve its full performance specifications.<br />
Operation Status Symptom Adjustment Parameter<br />
Powered running When the speed deviation<br />
is negative<br />
Regeneration<br />
(status with a decelerating<br />
torque)<br />
When the speed deviation<br />
is positive<br />
When low frequency (a<br />
few Hz) torque is insufficient<br />
During acceleration A sudden jerk at start of<br />
rotation<br />
Slowly increase the motor constant<br />
R2 in relation to auto-tuning data,<br />
within 1 to 1.2 times preset R2<br />
Slowly decrease the motor constant<br />
R2 in relation to auto-tuning data,<br />
within 0.8 to 1 times preset R2<br />
Slowly increase the motor speed<br />
constant R1 in relation to autotuning<br />
data within 1 to 1.2 times R1<br />
Slowly increase the motor constant<br />
IO in relation to auto-tuning data,<br />
within 1 to 1.2 times preset IO<br />
Increase motor constant J slowly<br />
within 1 to 1.2 times the preset<br />
constant<br />
H021 / H221<br />
H021 / H221<br />
H020 / H220<br />
H023 / H223<br />
H024 / H224<br />
During deceleration Unstable motor rotation Decrease the speed response H05, H205<br />
Set motor constant J smaller than<br />
the preset constant<br />
H024, H224<br />
During torque<br />
limiting<br />
At low-frequency<br />
operation<br />
Insufficient torque during<br />
torque limit at low speed<br />
Set the overload restriction level<br />
lower than the torque limit level<br />
Irregular rotation Set motor constant J larger than the<br />
preset constant<br />
B021,<br />
B041 to B044<br />
H024, H244<br />
When using a motor one frame size smaller than the inverter rating, the torque limit value<br />
(B041 to B044) is from the following formula and the value of the actual motor torque limit is<br />
calculated by the formula. Do not set a value in B041 to B044 that results in an actual torque<br />
greater than 200% or you risk motor failure.<br />
For example, suppose you have a 0.75kW inverter and a 0.4kW motor. The torque limit setting<br />
value that is for T=200% is set (entered) as 106%, shown by the following formula:<br />
Actual torque limit × Motor capacity 200% × 0.4kW<br />
Torque limit setting = -------------------------------------------------------------------------- =<br />
------------------------------ = 106%<br />
Inverter capacity<br />
0.75kW
PID Loop Operation<br />
OI<br />
<strong>SJ7002</strong> Inverter<br />
In standard operation, the inverter uses a reference source selected by parameter A001 for the<br />
output frequency, which may be a fixed value (F001), a variable set by the front panel potentiometer,<br />
or value from an analog input (voltage or current). To enable PID operation, set A071 =<br />
01. This causes the inverter to calculate the target frequency, or setpoint. An optional intelligent<br />
input assignment (code 23), PID Disable, will temporarily disable PID operation when active.<br />
A calculated target frequency can have a lot of advantages. It lets the inverter adjust the motor<br />
speed to optimize some other process variable of interest, potentially saving energy as well.<br />
Refer to the figure below. The motor acts upon the external process. To control that external<br />
process, the inverter must monitor the process variable. This requires wiring a sensor to either<br />
the analog input terminal [O] (voltage) or terminal [OI] (current).<br />
Setpoint<br />
SP<br />
PV<br />
Standard<br />
setting<br />
F001<br />
Multi-speed<br />
settings<br />
Potentiometer<br />
on keypad<br />
A GND<br />
L<br />
Current<br />
∑<br />
Error<br />
Analog input<br />
Inverter<br />
PID<br />
Calculation<br />
Freq. Inverter<br />
Output<br />
Motor<br />
Process Variable (PV)<br />
External<br />
Process<br />
Sensor<br />
When enabled, the PID loop calculates the ideal output frequency to minimize the loop error.<br />
This means we no longer command the inverter to run at a particular frequency, but we specify<br />
the ideal value for the process variable. That ideal value is called the setpoint, and is specified<br />
in the units of the external process variable. For a pump application it may be gallons/minute,<br />
or it could be air velocity or temperature for an HVAC unit. Parameter A075 is a scale factor<br />
that relates the external process variable units to motor frequency. The figure below is a more<br />
detailed diagram of the PID function.<br />
Setpoint<br />
(Target)<br />
Scale factor<br />
reciprocal<br />
1/A075<br />
A076<br />
PID V/I<br />
input select<br />
Frequency<br />
source select<br />
A001<br />
∑<br />
Scale factor<br />
P gain<br />
A020 to A035 A072<br />
V/I input<br />
select PV<br />
[AT]<br />
Process Variable<br />
(Feedback)<br />
Voltage<br />
O<br />
Analog input scaling<br />
A012<br />
A011<br />
A015<br />
SP<br />
A013 A014<br />
Error<br />
PID Enable<br />
A071<br />
A075 F001<br />
I gain<br />
A073<br />
D gain<br />
A074<br />
Scale factor<br />
PID Disable<br />
C023<br />
optional<br />
intelligent input<br />
∑<br />
Normal<br />
PID<br />
Frequency<br />
setting<br />
Monitor<br />
A075 D004<br />
4–75<br />
Operations<br />
and Monitoring
Operations<br />
and Monitoring<br />
4–76<br />
Configuring the Inverter for Multiple Motors<br />
Configuring the Inverter for Multiple Motors<br />
Simultaneous<br />
Connections<br />
Inverter<br />
Configuration for<br />
Multiple Motor<br />
Types<br />
For some applications, you may need to connect two<br />
or more motors (wired in parallel) to a single<br />
inverter’s output. For example, this is common in<br />
conveyor applications where two separate conveyors<br />
need to have approximately the same speed. The use<br />
of two motors may be less expensive than making the<br />
mechanical link for one motor to drive multiple<br />
conveyors.<br />
Some of the requirements when using multiple<br />
motors with one drive are:<br />
Inverter<br />
U/T1<br />
V/T2<br />
W/T3<br />
to Nth motor<br />
Motor 1<br />
Motor 2<br />
Use only V/F (variable-frequency) control; do not use SLV (sensorless vector control).<br />
The inverter output must be rated to handle the sum of the currents from the motors.<br />
You must use separate thermal protection switches or devices to protect each motor. Locate<br />
the device for each motor inside the motor housing or as close to it as possible.<br />
The wiring for the motors must be permanently connected in parallel (do not remove one<br />
motor from the circuit during operation).<br />
NOTE: The motor speeds are identical only in theory. That is because slight differences in<br />
their loads will cause one motor to slip a little more than another, even if the motors are identical.<br />
Therefore, do not use this technique for multi-axis machinery that must maintain a fixed<br />
position reference between its axes.<br />
Some equipment manufacturers may have a single type of machine that has to support three<br />
different motor types—and only one motor will be connected at a time. For example, an OEM<br />
may sell basically the same machine to the US market and the European market. Some reasons<br />
why the OEM needs two motor profiles are:<br />
The inverter power input voltage is different for these markets.<br />
The required motor type is also different for each destination.<br />
In other cases, the inverter needs two profiles because the machine characteristics vary according<br />
to these situations:<br />
Sometimes the motor load is very light and can move fast. Other times the motor load is<br />
heavy and must move slower. Using two profiles allows the motor speed, acceleration and<br />
deceleration to be optimal for the load and avoid inverter trip (fault) events.<br />
Sometimes the slower version of the machine does not have special braking options, but a<br />
higher performance version does have braking features.<br />
Having multiple motor profiles lets you store several “personalities” for motors in one<br />
inverter’s memory. The inverter allows the final selection between the three motor types to be<br />
made in the field through the use of intelligent input terminal functions [SET] and [SET3]. This<br />
provides an extra level of flexibility needed in particular situations. See the following page.
<strong>SJ7002</strong> Inverter<br />
Parameters for the second motor and third motors have function codes of the form x2xx and<br />
x3xx respectively. They appear immediately after the first motor’s parameter in the menu<br />
listing order. The following table lists the parameters that have the second/third parameter<br />
registers for programming.<br />
Function Name<br />
Parameter Codes<br />
1st motor 2nd motor 3rd motor<br />
Acceleration time setting (Acceleration 1) F002 F202 F302<br />
Deceleration time setting (Deceleration 1) F003 F203 F303<br />
Base frequency setting A003 A203 A303<br />
Maximum frequency setting A004 A204 A304<br />
Multi-speed frequency setting A020 A220 A320<br />
Torque boost method selection A041 A241 —<br />
<strong>Manual</strong> torque boost value A042 A242 A342<br />
<strong>Manual</strong> torque boost frequency adjustment A043 A243 A343<br />
V/F characteristic curve selection A044 A244 A344<br />
Automatic torque boost voltage gain A046 A246 —<br />
Automatic torque boost slip gain A047 A247 —<br />
Frequency upper limit setting A061 A261 —<br />
Frequency lower limit setting A062 A262 —<br />
Second acceleration time setting (Acceleration<br />
2)<br />
A092 A292 A392<br />
Second deceleration time setting (Deceleration<br />
2)<br />
A093 A293 A393<br />
Select method to use 2nd acceleration/deceleration<br />
A094 A294 —<br />
Acc1 to Acc2 frequency transition point A095 A295 —<br />
Dec1 to Dec2 frequency transition point A096 A296 —<br />
Level of electronic thermal setting B012 B212 B312<br />
Select electronic thermal characteristic B013 B213 B313<br />
Select motor constant H002 H202 —<br />
Motor capacity setting H003 H203 —<br />
Motor poles setting H004 H204 —<br />
Motor constant Kp setting (Standard, Auto<br />
tuning)<br />
H005 H205 —<br />
Motor stabilization constant H006 H206 —<br />
Motor constant R1 setting (Standard, Auto<br />
tuning)<br />
H020/H030 H220/H230 —<br />
Motor constant R2 setting (Standard, Auto<br />
tuning)<br />
H021/H031 H221/H231 —<br />
Motor constant L setting (Standard, Auto<br />
tuning)<br />
H022/H032 H222/H232 —<br />
Motor constant Io setting (Standard, Auto<br />
tuning)<br />
H023/H033 H223/H233 —<br />
4–77<br />
Operations<br />
and Monitoring
Operations<br />
and Monitoring<br />
4–78<br />
Configuring the Inverter for Multiple Motors<br />
Function Name<br />
Parameter Codes<br />
1st motor 2nd motor 3rd motor<br />
Motor constant J setting (Standard, Auto<br />
tuning)<br />
H024/H034 H224/H234 —<br />
PI proportional gain H050 H250 —<br />
P proportional gain setting H052 H252 —<br />
0Hz SLV limit for 1st motor H060 H260 —
Inverter System<br />
Accessories<br />
5<br />
In This Chapter.... page<br />
— Introduction ....................................................................................... 2<br />
— Component Descriptions .................................................................. 3<br />
— Dynamic Braking............................................................................... 6
Motor Control<br />
Accessories 5–2<br />
Introduction<br />
Introduction<br />
Switch<br />
Digital input<br />
expansion card<br />
Encoder input<br />
expansion card<br />
A B<br />
Encoder<br />
EMI filter<br />
A motor speed control system will obviously include a motor and inverter, as well as fuses for<br />
safety. If you are connecting a motor to the inverter on a test bench just to get started, that’s all<br />
you may need for now. But a fully developed system can also have a variety of additional<br />
components. Some can be for noise suppression, while others may enhance the inverter’s<br />
braking performance. The figure below shows a system with several possible optional components,<br />
and the table gives part number information.<br />
From power supply<br />
L1 L2 L3<br />
R S T<br />
Inverter<br />
+1<br />
Expansion bay<br />
T1 T2 T3<br />
Motor<br />
+<br />
RB<br />
–<br />
U V<br />
GND<br />
W<br />
AC reactor<br />
RF noise filter<br />
Capacitive filter<br />
RF noise<br />
filter<br />
AC reactor, or<br />
LCR filter<br />
Thermal switch<br />
Breaker,<br />
MCCB or<br />
GFI<br />
Ferrite core<br />
DC link choke<br />
Braking<br />
resistor<br />
Braking<br />
unit<br />
Name<br />
AC reactor, input<br />
side<br />
RF noise filter,<br />
input side<br />
EMI filter<br />
(EMC Class A)<br />
EMI filter<br />
(EMC Class B)<br />
Europe,<br />
Japan<br />
Part No. <strong>Series</strong><br />
USA<br />
See<br />
page<br />
ALI–xxx HRL–x 5–3<br />
ZCL–x ZCL–x 5–4<br />
NF–CEHx NF–CEHxx 5–4<br />
NF–CEHx,<br />
with FC–Hx<br />
NF–CEHxx,<br />
with FC–Hx<br />
5–4<br />
Capacitive filter CFI–x CFI–x 5–4<br />
DC link choke — HDC–xxx 5–4<br />
Braking resistor JRB–xxx–x,<br />
SRB–xxx–x<br />
Braking resistor,<br />
NEMA-rated<br />
Resistance braking<br />
unit<br />
RF noise filter,<br />
output side<br />
AC reactor, output<br />
side<br />
JRB–xxx,<br />
SRB–xxx<br />
DCL-x-xx HRB1-x,<br />
HRB2-x<br />
HRB3-x<br />
NOTE: The <strong>Hitachi</strong> part number series for accessories<br />
includes different sizes of each part type, specified by the<br />
–x suffix. <strong>Hitachi</strong> product literature can help match size<br />
and rating of your inverter to the proper accessory size.<br />
Each inverter accessory comes with its own printed<br />
instruction manual. Please refer to those manuals for<br />
complete installation details. This chapter gives only an<br />
overview of these optional system devices. For more information<br />
on <strong>Hitachi</strong> inverter system accessories, please<br />
contact your <strong>Hitachi</strong> sales office or distributor.<br />
—<br />
—<br />
BRD–xxx BRD–xxx —<br />
ZCL–xxx ZCL–xxx 5–4<br />
ALI–xxx HRL–xxx 5–3<br />
LCR filter — HRL–xxxC 5–3<br />
Encoder feed-back<br />
expansion<br />
Digital input<br />
expansion card<br />
SJ-FB 5–5<br />
SJ-DG 5–5
Component Descriptions<br />
AC Reactors,<br />
Input Side<br />
AC Reactor or<br />
LCR Filter,<br />
Output Side<br />
<strong>SJ7002</strong> Inverter<br />
This is useful in suppressing harmonics induced on the power supply lines, or when the main<br />
power voltage imbalance exceeds 3% (and power source capacity is more than 500 kVA), or to<br />
smooth out line fluctuations. It also improves the power factor.<br />
In the following cases for a general-purpose inverter, a large peak current flows on the main<br />
power supply side, and is able to destroy the inverter module:<br />
If the unbalanced factor of the power supply is 3% or higher<br />
If the power supply capacity is at least 10 times greater than the inverter capacity (the power<br />
supply capacity is 500 kVA or more)<br />
If abrupt power supply changes are expected<br />
Examples of these situations include:<br />
1. Several inverters are connected in parallel, sharing the same power bus<br />
2. A thyristor converter and an inverter are connected in parallel, sharing the same power bus<br />
3. An installed phase-advance (power factor correction) capacitor opens and closes<br />
Where these conditions exist or when the connected equipment must be highly reliable, install<br />
an AC reactor between the power supply and the inverter. Also, where the effects of an indirect<br />
lightning strike is possible, install a lightning conductor.<br />
Example calculation:<br />
VRS = 205V, VST = 203V, VTR = 197V,<br />
where VRS is R-S line voltage, VST is S-T line voltage, VTR is T-R line voltage<br />
Unbalance factor of voltage<br />
Max. line voltage (min.) Mean line voltage<br />
–<br />
= ----------------------------------------------------------------------------------------------------------- × 100<br />
Meanline voltage<br />
V<br />
RS<br />
– ( V<br />
RS<br />
+ V<br />
ST<br />
+ V<br />
TR<br />
) ⁄ 3<br />
-------------------------------------------------------------------------<br />
205 – 202<br />
=<br />
× 100 = ----------------------- × 100 =<br />
1.5%<br />
( V<br />
RS<br />
+ V<br />
ST<br />
+ V<br />
TR<br />
) ⁄ 3<br />
202<br />
Please refer to the documentation that comes with the AC reactor for installation instructions.<br />
This reactor reduces the vibrations in the motor caused by the inverter’s switching waveforms,<br />
by smoothing the waveforms to approximate commercial power quality. It is also useful to<br />
reduce the reflected voltage wave phenomenon when wiring from the inverter to the motor is<br />
more than 10m in length. Please refer to the documentation that comes with the AC reactor for<br />
installation instructions.<br />
5–3<br />
Motor Control<br />
Accessories
Motor Control<br />
Accessories 5–4<br />
Component Descriptions<br />
Zero-phase<br />
Reactor (RF<br />
Noise Filter)<br />
Electrical noise interference may occur<br />
on nearby equipment such as a radio<br />
receiver. The zero-phase reactor helps<br />
reduce radiated noise from the inverter<br />
wiring. It can be used on the input or<br />
output side of the inverter. The example<br />
zero-phase reactor shown to the right<br />
comes with a mounting bracket. The<br />
wiring must go through the opening to<br />
reduce the RF component of the electrical<br />
noise. Loop the wires three times<br />
(four turns) to attain the full RF filtering<br />
effect. For larger wire sizes, place<br />
multiple zero-phase reactors (up to<br />
four) side-by-side for a greater filtering<br />
effect.<br />
EMI Filter The EMI filter reduces the conducted noise on the power supply wiring generated by the<br />
inverter. Connect the EMI filter to the inverter primary (input side). The NF–CEH–x series<br />
filter is required for compliance to the EMC Class A directive (Europe) and C-TICK (Australia).<br />
See “CE–EMC Installation Guidelines” on page D–2.<br />
WARNING: The EMI filter has high internal leakage current from power wiring to the chassis.<br />
Therefore, connect the chassis ground of the EMI filter before making the power connections to<br />
avoid danger of shock or injury.<br />
Ferrite Core To meet EMC Class B limit an optional ferrite core (FC–Hx) must be inserted between the<br />
NF–CEHx filter (above) and the inverter.<br />
RF Noise Filter<br />
(Capacitive)<br />
NF–CEHxx<br />
ZCL–x<br />
This capacitive filter reduces radiated noise from the main power wires in the inverter input<br />
side. This filter is not for achieving CE compliance and is applicable only to the input side only<br />
of the inverter. It comes in two versions—for 200V class inverters or 400V class inverters.<br />
Please refer to the documentation that comes with the radio noise filter for installation instructions.<br />
DC Link Choke The DC choke (reactor) suppresses harmonics generated by the inverter. It attenuates the highfrequency<br />
components on the inverter’s internal DC bus (link). However, note that it does not<br />
protect the diode rectifiers in the inverter input circuit.
Expansion Cards The SJ–FB Encoder Feedback Board installs in<br />
the inverter’s expansion bay, which can accept<br />
up to two expansion cards. The encoder card<br />
accepts two-channel incremental encoder<br />
signals. Position feedback is essential for certain<br />
torque-control algorithms, and is useful for<br />
improving low-speed performance. The card can<br />
also generate linear acceleration/deceleration<br />
ramps for velocity control.<br />
All wiring associated with this card connects to<br />
its PWB connectors as shown. Some related<br />
signals may be assigned to the intelligent I/O<br />
terminals, as described in Chapter 4. For more<br />
information, refer to the SJ–FB manual.<br />
The SJ–DG Digital Input Card installs in the<br />
inverter’s expansion bay. This card accepts up to<br />
eight digital input signals, in addition to the intelligent<br />
inputs on the inverter’s control terminal<br />
connector. All wiring associated with card<br />
connects to its PWB connectors as shown.<br />
<strong>SJ7002</strong> Inverter<br />
PWB connector<br />
to external wiring<br />
SJ–FB Encoder Feedback Card<br />
PWB connector<br />
to external wiring<br />
SJ–DG Digital Input Card<br />
The SJ–DN DeviceNet Interface Card (not shown) installs in the inverter’s expansion bay. It<br />
connects directly to a DeviceNet network. Inverter parameters P044 to P049 configure the card.<br />
Only one DeviceNet card may be installed in an inverter. For more information, please refer to<br />
the DeviceNet Expansion Card <strong>Instruction</strong> <strong>Manual</strong>.<br />
5–5<br />
Motor Control<br />
Accessories
Motor Control<br />
Accessories 5–6<br />
Dynamic Braking<br />
Dynamic Braking<br />
Introduction The purpose of dynamic braking is to improve the ability of the inverter<br />
to stop (decelerate) the motor and load. This becomes necessary when an<br />
application has some or all of the following characteristics:<br />
High load inertia compared to the available motor torque<br />
The application requires frequent or sudden changes in speed<br />
System losses are not great enough to slow the motor as needed<br />
When the inverter reduces its output frequency to decelerate the load, the<br />
motor can temporarily become a generator. This occurs when the motor<br />
rotation frequency is higher than the inverter output frequency. This<br />
condition can cause the inverter DC bus voltage to rise, resulting in an<br />
over-voltage trip. In many applications, the over-voltage condition<br />
serves as a warning signal that we have exceeded the deceleration<br />
capabilities of the system. <strong>SJ7002</strong> inverters rated 15hp (11kW) and<br />
below have a built-in braking unit that sends the regenerative energy<br />
from the motor during deceleration to the optional braking resistor(s).<br />
External braking units may also be used if higher braking torques and/or<br />
duty cycles are required. The dynamic braking resistor serves as a load,<br />
developing heat to stop the motor just as brakes on an automobile<br />
develop heat during braking.<br />
The braking resistor is the main component of a braking resistor assembly,<br />
which includes an integral thermal fuse and thermally activated<br />
alarm relay for safety. However, be careful to avoid overheating its resistor.<br />
The thermal fuse and thermal relay are safeguards for extreme conditions,<br />
but the inverter can maintain braking usage in a safe zone.<br />
Dynamic Braking<br />
Usage Ratio<br />
Braking<br />
Resistor<br />
The inverter controls braking via a duty cycle BRD<br />
method (percent of the time braking is ON<br />
versus total time). Parameter B090 sets the<br />
t1 t2 t3<br />
dynamic braking usage ratio. In the graph to<br />
the right, the example shows three uses of<br />
dynamic braking in a 100-second period. The<br />
ON<br />
inverter calculates the average percentage<br />
usage in that time (duty cycle %). The<br />
OFF<br />
100s<br />
percentage of usage is proportional to the<br />
heat dissipated. If the duty cycle is greater<br />
than the B090 parameter setting, the inverter<br />
enters the Trip Mode and turns OFF the<br />
frequency output.<br />
B90 Duty cycle =<br />
t<br />
( t1 + t2 + t3 + ... )<br />
----------------------------------------- × 100<br />
100 seconds<br />
Please note the following (for SJ700–055xFU2 to SJ700–220xFU2).<br />
When B090 is set for 0%, dynamic braking is not performed.<br />
When the duty cycle value exceeds the limit set by B090, the inverter will trip (ending the<br />
dynamic braking).<br />
The cable from the external resistor to the inverter must not exceed 5 m (16 ft.) length.<br />
The wires from the DB resistor to the inverter must not be bundled together with control or<br />
signal wires.<br />
NOTE: <strong>Inverters</strong> rated 40hp (30kW) and above (SJ700–300xFU2 and larger models) do not<br />
include an internal braking unit. Parameters B090, B095, and B096 do not apply to these<br />
models.
Dynamic Braking<br />
Selection Tables<br />
1/2 to 30 HP (0.4 to 22 kW)<br />
Voltage<br />
Class<br />
200V<br />
400V<br />
Model Number<br />
<strong>SJ7002</strong> Inverter<br />
The <strong>SJ7002</strong> <strong>Series</strong> 200V and 400V class inverter models in the 1/2 to 30 HP range have internal<br />
braking units. Additional stopping torque is available by adding external resistors. The required<br />
braking torque depends on your particular application. Other tables in this section will help you<br />
choose the proper resistor.<br />
Motor<br />
HP<br />
Without<br />
External Resistor<br />
Braking<br />
Unit<br />
Braking<br />
Torque<br />
@ 60Hz,<br />
%<br />
Using Optional<br />
External Resistor<br />
External<br />
Resistance,<br />
Ohms<br />
Braking<br />
Torque<br />
@60Hz,<br />
%<br />
Performance @<br />
Minimum Resistance Minimum<br />
Resistance<br />
Minimum<br />
Resistance,<br />
Ohms<br />
Max.<br />
Braking<br />
Duty<br />
Cycle,<br />
%<br />
@ 100%<br />
Braking<br />
Duty<br />
Cycle,<br />
Ohms<br />
SJ700–004LFUF2 0.5 Built-in 20 48 150 48 10 150<br />
SJ700–007LFUF2 1 Built-in 20 48 150 48 10 150<br />
SJ700–015LFUF2 2 Built-in 20 32 150 32 10 110<br />
SJ700–022LFUF2 3 Built-in 20 32 150 32 10 110<br />
SJ700–037LFUF2 5 Built-in 20 32 110 32 10 110<br />
SJ700–055LFUF2 7.5 Built-in 20 16 140 16 10 50<br />
SJ700–075LFUF2 10 Built-in 20 10 150 10 10 50<br />
SJ700–110LFUF2 15 Built-in 10 10 110 10 10 50<br />
SJ700–150LFUF2 20 Built-in 10 7.5 110 7.5 10 35<br />
SJ700–185LFU2 25 Built-in 10 7.5 90 7.5 10 35<br />
SJ700–220LFU2 30 Built-in 10 5 110 5 10 35<br />
SJ700–007HFUF2<br />
SJ700–007HFEF2<br />
1 Built-in 20 100 150 70 10 300<br />
SJ700–015HFUF2<br />
SJ700–015HFEF2<br />
2 Built-in 20 100 150 70 10 300<br />
SJ700–022HFUF2<br />
SJ700–022HFEF2<br />
3 Built-in 20 70 150 70 10 300<br />
SJ700–040HFUF2<br />
SJ700–040HFEF2<br />
5 Built-in 20 70 150 70 10 200<br />
SJ700–055HFUF2<br />
SJ700–055HFEF2<br />
7.5 Built-in 20 70 130 70 10 200<br />
SJ700–075HFUF2<br />
SJ700–075HFEF2<br />
10 Built-in 20 70 150 35 10 150<br />
SJ700–110HFUF2<br />
SJ700–110HFEF2<br />
15 Built-in 10 50 130 35 10 150<br />
SJ700–150HFUF2<br />
SJ700–150HFEF2<br />
20 Built-in 10 35 140 24 10 100<br />
SJ700–185HFU2/E 25 Built-in 10 35 140 24 10 100<br />
SJ700–220HFU2/E 30 Built-in 10 35 110 20 10 100<br />
NOTE: For inverters larger than 30 HP (22kW), an external braking unit will be required.<br />
Contact your distributor or <strong>Hitachi</strong> for assistance.<br />
5–7<br />
Motor Control<br />
Accessories
Troubleshooting<br />
and Maintenance<br />
6<br />
In This Chapter.... page<br />
— Troubleshooting ................................................................................ 2<br />
— Monitoring Trip Events, History, & Conditions................................... 5<br />
— Restoring Factory Default Settings ................................................. 16<br />
— Maintenance and Inspection........................................................... 17<br />
— Warranty ......................................................................................... 29
Troubleshooting<br />
and Maintenance 6–2<br />
Troubleshooting<br />
Troubleshooting<br />
Safety Messages Please read the following safety messages before troubleshooting or performing maintenance<br />
on the inverter and motor system.<br />
General Precautions<br />
and Notes<br />
WARNING: Wait at least ten (10) minutes after turning OFF the input power supply before<br />
performing maintenance or an inspection. Otherwise, there is the danger of electric shock.<br />
WARNING: Make sure that only qualified personnel will perform maintenance, inspection,<br />
and part replacement. Before starting to work, remove any metallic objects from your person<br />
(wristwatch, bracelet, etc.). Be sure to use tools with insulated handles. Otherwise, there is a<br />
danger of electric shock and/or injury to personnel.<br />
WARNING: Never remove connectors by pulling on its wire leads (wires for cooling fan and<br />
logic P.C. board). Otherwise, there is danger of fire due to wire breakage and/or injury to<br />
personnel.<br />
Always keep the unit clean so that dust or other foreign matter does not enter the inverter.<br />
Take special care to avoid breaking wires or making connection mistakes.<br />
Firmly connect terminals and connectors.<br />
Keep electronic equipment away from moisture and oil. Dust, steel filings and other foreign<br />
matter can damage the inverter, causing unexpected accidents, so take special care.<br />
Inspection Items This chapter provides instructions or checklists for these inspection items:<br />
Daily inspection<br />
Periodic inspection (approximately once a year)<br />
Insulation resistance test
Troubleshooting<br />
Tips<br />
The table below lists typical symptoms and the corresponding solution(s).<br />
<strong>SJ7002</strong> Inverter<br />
Symptom/condition Probable Cause Solution<br />
The motor<br />
will not run.<br />
The inverter<br />
outputs U, V, W<br />
are not supplying<br />
voltage.<br />
Inverter outputs<br />
U, V, W are<br />
supplying voltage.<br />
The direction of the motor is<br />
reversed.<br />
• Is the frequency command source<br />
A001 parameter setting correct?<br />
• Is the Run command source A002<br />
parameter setting correct?<br />
• Is power being supplied to terminals<br />
[R], [S], and [T] ([L1], [L2], and<br />
[L3])? If so, the POWER lamp should<br />
be ON.<br />
• Is there an error code E--.-<br />
displayed?<br />
• Are the signals to the intelligent input<br />
terminals correct?<br />
• Is the Run Command active?<br />
• Is the [FW] terminal (or [RV])<br />
connected to P24 (via switch, etc.)<br />
• Has the frequency setting for F001<br />
been set greater than zero?<br />
• Are the control circuit terminals [H],<br />
[O], and [L] connected to the potentiometer?<br />
• Is the RS (reset) function or FRS (freerun<br />
stop) function ON?<br />
• Make sure the parameter setting<br />
A001 is correct.<br />
• Make sure the parameter setting<br />
A002 is correct.<br />
• Check terminals [R], [S], and [T]<br />
([L1], [L2], and [L3]), then [U], [V],<br />
and [W] ([T1], [T2], and [T3]).<br />
• Turn ON the power supply or check<br />
fuses.<br />
• Press the FUNC. key and determine<br />
the error type. Eliminate the error<br />
cause, then clear the error (Reset).<br />
• Verify the terminal functions for<br />
C001 - C008 are correct.<br />
• Turn ON Run command enable.<br />
• Supply 24V to [FW] or [RV] terminal,<br />
if configured.<br />
• Set the parameter for F001 to a safe,<br />
non-zero value.<br />
• If the potentiometer is the frequency<br />
setting source, verify voltage at<br />
[O] > 0V.<br />
• Turn OFF the command(s).<br />
• Is the motor load too heavy? • Reduce load or test the motor<br />
independently of the load.<br />
• Are the connections of output terminals<br />
[U/T1], [V/T2], and [W/T3]<br />
correct?<br />
• Is the phase sequence of the motor<br />
forward or reverse with respect to<br />
[U/T1],[V/T2], and [W/T3]?<br />
• Are the control terminals [FW] and<br />
[RV] wired correctly?<br />
• Is parameter F004 properly set?<br />
• Make connections according to the<br />
phase sequence of the motor. In<br />
general:<br />
FWD = U-V-W, and REV=U-W-V.<br />
• Use terminal [FW] for forward, and<br />
[RV] for reverse.<br />
• Set motor direction in F004.<br />
6–3<br />
Troubleshooting<br />
and Maintenance
Troubleshooting<br />
and Maintenance 6–4<br />
Troubleshooting<br />
Symptom/condition Probable Cause Solution<br />
The motor speed will not reach<br />
the target frequency (desired<br />
speed).<br />
The rotation is unstable.<br />
The RPM of the motor does not<br />
match the inverter output<br />
frequency setting.<br />
A parameter<br />
will not<br />
change after<br />
an edit<br />
(reverts to<br />
old setting).<br />
True for certain<br />
parameters<br />
True for all<br />
parameters<br />
• If using the analog input, is there<br />
current or voltage at [O] or [OI]?<br />
• Check the wiring.<br />
• Check the potentiometer or signal<br />
generating device.<br />
• Is the load too heavy? • Reduce the load.<br />
• Heavy loads activate the overload<br />
restriction feature (reduces output as<br />
needed).<br />
• Is the inverter internally limiting the<br />
output frequency?<br />
• Is the load fluctuation too great?<br />
• Is the supply voltage unstable?<br />
• Is the problem occurring at a particular<br />
frequency?<br />
• Is the maximum frequency setting<br />
A004 correct?<br />
• Does the monitor function D001<br />
display the expected output frequency?<br />
• Is the inverter in Run Mode? Some<br />
parameters cannot be edited during<br />
Run Mode.<br />
• If you’re using the [SFT] intelligent<br />
input (software lock function)—is the<br />
[SFT] input ON?<br />
• Check max frequency setting<br />
(A004)<br />
• Check frequency upper limit<br />
setting (A061)<br />
• If using analog inputs, check<br />
their settings (A101– A104) or<br />
(A111–A114), or (A011–A014)<br />
• Increase the motor capacity (both<br />
inverter and motor).<br />
• Fix power supply problem.<br />
• Change the output frequency<br />
slightly, or use the jump frequency<br />
setting to skip the problem<br />
frequency.<br />
• Verify the V/F settings match motor<br />
specifications.<br />
• Make sure all scaling (such as A011<br />
to A014) is properly set.<br />
• Put inverter in Stop Mode (press the<br />
Stop/reset key). Then edit the<br />
parameter.<br />
• Change the state of the SFT input,<br />
and check the B031 parameter (SFT<br />
mode).
<strong>SJ7002</strong> Inverter<br />
Monitoring Trip Events, History, & Conditions<br />
Fault Detection<br />
and Clearing<br />
Error Status<br />
Codes<br />
The microprocessor in the inverter detects a<br />
variety of fault conditions and captures the event,<br />
recording it in a history table. The inverter output<br />
turns OFF, or “trips” similar to the way a circuit<br />
breaker trips due to an over-current condition.<br />
Most faults occur when the motor is running (refer<br />
to the diagram to the right). However, the inverter<br />
could have an internal fault and trip in Stop Mode.<br />
In either case, you can clear the fault by pressing<br />
the Stop/Reset key. Additionally, you can clear the<br />
Fault<br />
STOP<br />
RESET<br />
Run Stop<br />
Trip Fault<br />
inverter’s cumulative trip history by performing the procedure “Restoring Factory Default<br />
Settings” on page 6–16 (setting B_84=00 will clear the trip history but leave inverter settings<br />
intact).<br />
The conditions at the time of an error provide important clues to help you understand the cause.<br />
The <strong>SJ7002</strong> inverter displays a “status at trip point” digit to the right of the decimal point for<br />
some error codes. For example, E07.2 means Error 7 occurred and the inverter status was<br />
condition # “2” when the error occurred.<br />
Status<br />
Codes<br />
Inverter Status<br />
Status<br />
Codes<br />
---.0 Reset ---.5<br />
---. 1 Stop ---.6 Starting<br />
---.2 Deceleration ---.7<br />
---.3 Constant speed ---.8<br />
---.4 Acceleration ---.9<br />
RUN<br />
STOP<br />
RESET<br />
Inverter Status<br />
Run Command active with 0 Hz<br />
speed reference<br />
DC braking<br />
Overload restriction<br />
SON or FOC operation in<br />
progress<br />
6–5<br />
Troubleshooting<br />
and Maintenance
Troubleshooting<br />
and Maintenance 6–6<br />
Monitoring Trip Events, History, & Conditions<br />
Error Codes An error code will appear on the display automatically when a fault causes the inverter to trip.<br />
The following table lists the cause associated with the error.<br />
OPE / SRW<br />
Display<br />
E0 1.-<br />
OC.Drive<br />
E02.-<br />
OC.Decel<br />
E03.-<br />
OC.Accel<br />
E04.-<br />
Over.C<br />
Name Description<br />
Over-current<br />
protection<br />
Over-current<br />
protection<br />
Over-current<br />
protection<br />
Over-current<br />
protection<br />
E05.- Overload<br />
protection<br />
OL.BRD (*1) (*4)<br />
E06.- Braking<br />
resistor<br />
OL.BRD<br />
overload<br />
protection<br />
If the motor is constrained<br />
or suddenly accelerated or<br />
decelerated, a high current<br />
will flow in the inverter<br />
and the inverter may fail.<br />
To avoid this problem, the<br />
inverter shuts off its output<br />
and displays the error code<br />
shown on the left when it<br />
detects a current higher<br />
than a specified level. This<br />
protective function uses a<br />
DC current detector (CT)<br />
to detect over-current.<br />
When a current as high as<br />
about 220% of the<br />
inverter's rated output<br />
current is detected, the<br />
protective circuit operates<br />
and the inverter trips.<br />
During<br />
constant<br />
speed<br />
operation<br />
During<br />
deceleration<br />
During<br />
acceleration<br />
Other<br />
conditions<br />
This protective function monitors the<br />
inverter output current, and shuts off the<br />
inverter output and displays the error code<br />
shown on the left when the internal<br />
electronic thermal protection circuit<br />
detects a motor overload. If the error<br />
occurs, the inverter will trip according to<br />
the setting of the electronic thermal<br />
function.<br />
When the BRD operation rate exceeds the<br />
setting of B090, this protective function<br />
shuts off the inverter output and displays<br />
the error code shown on the left.<br />
Troubleshooting and<br />
Corrective Action<br />
• Check whether the load has fluctuated<br />
sharply.<br />
• Check for the short circuit of output<br />
connections (check the output cables).<br />
• Check for a ground fault (check the<br />
output cables and motor).<br />
• Check whether the inverter has decelerated<br />
the motor quickly increase the deceleration<br />
time).<br />
• Check whether the inverter has accelerated<br />
the motor quickly (increase the<br />
acceleration time).<br />
• Check whether the motor has been locked<br />
(check the motor and wiring).<br />
• Check whether the torque boost current<br />
has been set too high (reduce the boost<br />
current).<br />
• Check whether the DC braking force is<br />
too high (reduce the braking force).<br />
• Check whether the current detector (CT)<br />
is normal (replace or repair the CT).<br />
• Check whether the motor load is too high.<br />
(reduce the load factor).<br />
• Check whether the thermal level is appropriate<br />
(adjust the level appropriately).<br />
Note: The electronic thermal protection is<br />
easily triggered when the output frequency is<br />
5 Hz or less. If the moment of inertia of the<br />
load is large, this protective function may<br />
operate when the inverter accelerates the<br />
motor and the acceleration may be disabled.<br />
If this problem occurs, increase the torque<br />
boost current or adjust other settings as<br />
needed.<br />
• Check whether the inverter has decreased<br />
the motor quickly (increase the deceleration<br />
time).<br />
• Check whether the operation cycle is too<br />
short (prolong the operation cycle)<br />
• Check whether the set BRD operation<br />
rate is too low (adjust the setting to an<br />
appropriate level).<br />
Note: Confirm the maximum allowable<br />
capacity of the resistor.
OPE / SRW<br />
Display<br />
E07.- Over-voltage<br />
protection<br />
Over.V<br />
E08.- EEPROM<br />
error<br />
EEPROM (*2) (*3)<br />
If the DC voltage across the P and N<br />
terminals rises too high, an inverter<br />
failure may result. To avoid this problem,<br />
this protective function shuts off the<br />
inverter output and displays the error code<br />
shown on the left when the DC voltage<br />
across the P and N terminals exceeds a<br />
specified level because of an increase in<br />
the energy regenerated by the motor or<br />
the input voltage (during operation). The<br />
inverter will trip if the DC voltage across<br />
the P and N terminals exceeds about 400<br />
VDC (in case of the 200 V class models)<br />
or about 800 VDC (in case of the 400 V<br />
class models).<br />
When an internal-EEPROM is caused by<br />
external noise or an abnormal temperature<br />
rise, the inverter shuts off its output and<br />
displays the error code shown on the left.<br />
Note: An EEPROM error may result in a<br />
CPU error.<br />
E09.- Under-voltage If the inverter input voltage drops, the<br />
control circuit of the inverter cannot<br />
Under.V<br />
function normally. Therefore, the inverter<br />
shuts off its output when the input voltage<br />
falls below a specified level. The inverter<br />
will trip if the DC voltage across the P<br />
and N terminals exceeds about 175 VDC<br />
(in case of the 200 V class models) or<br />
about 345 VDC (in case of the 400 V<br />
class models).<br />
E 10.- CT error If an error occurs in the internal current<br />
CT<br />
Name Description<br />
detector (CT), the inverter will shut off its<br />
output and display the error code shown<br />
on the left. The inverter will trip when the<br />
CT outputs about 0.6 V or more at<br />
power-on.<br />
<strong>SJ7002</strong> Inverter<br />
Troubleshooting and<br />
Corrective Action<br />
• Check whether the inverter has decreased<br />
the motor quickly (increase the deceleration<br />
time).<br />
• Check for a ground fault (check the<br />
output cables and motor).<br />
• Check whether the motor has been rotated<br />
by the action of the load (reduce the<br />
regenerative energy).<br />
• Check for the noise sources located near<br />
the inverter (remove noise sources).<br />
• Check whether the cooling efficiency has<br />
deteriorated (check the heat sink for<br />
clogging and clean it).<br />
• Check the cooling fan (replace if needed).<br />
• Check whether the power supply voltage<br />
has dropped (check the power supply).<br />
• Check whether the power supply capacity<br />
is sufficient (check the power supply).<br />
• Check whether the thyristor has been<br />
damaged (check the thyristor).<br />
• Check whether the inverter has failed<br />
(repair the inverter).<br />
Note 1: The inverter will not accept any reset command within about 90 seconds after<br />
tripping (i.e., after the protective function operates). Be sure to turn OFF the input<br />
power supply after waiting two minutes for cooling.<br />
Note 2: The inverter will not accept any reset command after an EEPROM error occurs with<br />
error code displayed. Turn off the inverter power once. If error code E08 is displayed<br />
when the inverter power is turned on subsequently, the internal memory device may<br />
have failed or parameters may have not been stored correctly. In such cases, initialize<br />
the inverter, and then reset the parameters.<br />
Note 3: The inverter will not accept reset commands input via the RS terminal or entered by<br />
the STOP/RESET key. Therefore, turn off the inverter power.<br />
Note 4: Be sure to reduce the inverter’s output current and the motor load before restarting<br />
after overload protection (E05). If the continuous reset/restart operations for error<br />
E05 could cause damage to the inverter.<br />
NOTE: If an EEPROM error E08 occurs, be sure to confirm the parameter data values are still<br />
correct.<br />
6–7<br />
Troubleshooting<br />
and Maintenance
Troubleshooting<br />
and Maintenance 6–8<br />
Monitoring Trip Events, History, & Conditions<br />
OPE / SRW<br />
Display<br />
Name Description<br />
E 1 1.- CPU error (*5) If the internal CPU malfunctions or an<br />
CPU<br />
error occurs in it, the inverter will shut<br />
OFF its output and display the error code<br />
shown on the left.<br />
Note: Reading abnormal data from the<br />
EEPROM may result in a CPU error.<br />
E 12.- External trip If an error occurs in the external equip-<br />
EXTERNAL<br />
ment or device connected to the inverter,<br />
the inverter will latch the error signal and<br />
shut off its output. (This protective<br />
function is active when the external trip<br />
function is enabled.)<br />
E 13.- USP error A USP error is indicated when the<br />
USP<br />
E 14.- Ground fault<br />
GND.Flt<br />
protection (*5)<br />
E 15.- Input over-<br />
OV.SRC<br />
voltage<br />
protection<br />
E 16.- Instantaneous<br />
Inst.P-F<br />
power failure<br />
protection<br />
E20.- Temperature<br />
error due to<br />
OH.stFAN low coolingfan<br />
speed<br />
E2 1.- Temperature<br />
OH.fin<br />
error<br />
inverter power is turned on with an input<br />
operation signal remaining in the inverter.<br />
(This protective function is active when<br />
the USP function is enabled.)<br />
When the inverter power is turned ON,<br />
this protective function detects the ground<br />
fault between the inverter output circuit<br />
and the motor to protect the inverter. (This<br />
function does not operate when a residual<br />
voltage remains in the motor.)<br />
This protective function determines an<br />
error if the input voltage is kept above the<br />
specification level for 100 seconds while<br />
the inverter is stopped. The inverter will<br />
trip if the DC voltage of the main circuit<br />
is kept above about 390 VDC (in case of<br />
the 200 V class models) or about 780<br />
VDC (in case of the 400 V class models).<br />
If an instantaneous power failure lasts<br />
15 ms or more, the inverter will shut off<br />
its output. When the power failure<br />
duration is long, the inverter assumes a<br />
normal power-OFF. If a restart mode has<br />
been selected and an operation command<br />
remains in the inverter, the inverter will<br />
restart after the power is recovered.<br />
The inverter will display the error code<br />
shown on the left if the lowering of<br />
cooling fan speed is detected at the occurrence<br />
of the temperature error described<br />
below.<br />
If the main circuit temperature rises<br />
because of a high ambient temperature or<br />
for other reasons, the inverter will shut<br />
OFF its output.<br />
Troubleshooting and<br />
Corrective Action<br />
• Check for the noise sources located near<br />
the inverter (remove noise sources).<br />
• Check whether the inverter has failed<br />
(repair the inverter).<br />
• If the inverter’s external trip function is<br />
enabled, check whether an error has<br />
occurred in external equipment (clear the<br />
error in the external equipment).<br />
• If the USP function has been enabled,<br />
check whether the inverter power has<br />
been turned on with an input operation<br />
signal remaining in the inverter (reset the<br />
operation command, and then turn ON the<br />
inverter power).<br />
• Check for the ground fault (check the<br />
output cables and motor).<br />
• Check the inverter itself for abnormality<br />
(remove the output cables from the<br />
inverter, and then check the inverter).<br />
• Check the main circuit for abnormality<br />
(use testing methods described in this<br />
chapter and repair the inverter).<br />
• Check whether the input voltage is high<br />
while the inverter is stopped (lower the<br />
input voltage, suppress the power voltage<br />
fluctuation, or connect an AC reactor<br />
between the power supply and the inverter<br />
input.)<br />
• Check whether the power supply voltage<br />
has dropped (recover the power supply).<br />
• Check the MCB and magnetic contactors<br />
for poor contacts (replace the MCB and<br />
the magnetic contactor).<br />
• Check whether the cooling efficiency has<br />
been lowered (replace the cooling fan).<br />
• Check the heat sink for clogging (clean<br />
the heat sink).<br />
• Check whether the inverter is installed<br />
vertically (check the installation.)<br />
• Check whether the ambient temperature<br />
is high (lower the ambient temperature).<br />
Note 5: The inverter will not accept reset commands input via the [RS] terminal or entered by<br />
the STOP/RESET key. Therefore, turn off the inverter power.
OPE / SRW<br />
Display<br />
Name Description<br />
E23.- Gate array<br />
communica-<br />
If an error occurs in the communication<br />
between the internal CPU and gate array,<br />
GA.COM tion error the inverter will trip.<br />
E24.- Phase loss<br />
input protec-<br />
PH.fail tion<br />
E25.- Main circuit<br />
error (*6)<br />
Main.Cir<br />
E30.- IGBT error<br />
(*7)<br />
IGBT<br />
E35.- Thermistor<br />
error<br />
TH<br />
When the phase loss input protection has<br />
been enabled (B006 = 01), the inverter<br />
will trip to avoid damage if an phase loss<br />
input is detected. The inverter trips when<br />
the phase loss input continues for about<br />
1 second or more.<br />
The inverter will trip if the gate array<br />
cannot confirm the ON/OFF state of<br />
IGBT because of a malfunction due to<br />
noise, short or damage to the main circuit<br />
element.<br />
If instantaneous over-current occurs, the<br />
main circuit element temperature is<br />
abnormal, or the main circuit element<br />
drive power drops, the inverter will turn<br />
OFF its output to protect the main circuit<br />
element. (After tripping because of this<br />
protective function, the inverter cannot<br />
retry the operation.)<br />
The inverter monitors the resistance of the<br />
thermistor (in the motor) connected to the<br />
inverter’s [TH] terminal, and will turn<br />
OFF the inverter output if the motor<br />
temperature rises.<br />
E36.- Braking error When “01” has been specified for B120<br />
BRAKE<br />
E37.- Emergency<br />
stop (*8)<br />
EMR<br />
E38.- Low-speed<br />
overload<br />
OL-LowSP<br />
protection<br />
Brake Control Enable, the inverter will<br />
trip if it cannot receive the braking confirmation<br />
signal within B124 Brake Wait<br />
Time for Confirmation after the output of<br />
the brake release signal.<br />
If the EMR signal (on three terminals) is<br />
turned ON when the slide switch (SW1)<br />
on the logic board is set to ON, the<br />
inverter hardware will turn OFF the<br />
inverter output and display the error code<br />
shown on the left. The malfunction is due<br />
to incoming noise when EMR terminal is<br />
not ON.<br />
If overload occurs during the motor<br />
operation at a very low speed at 0.2 Hz or<br />
less, the electronic thermal protection<br />
circuit in the inverter will detect the<br />
overload and shut off the inverter output<br />
(2nd electronic thermal control).<br />
Note: A high frequency may be recorded<br />
as the error history data.<br />
<strong>SJ7002</strong> Inverter<br />
Troubleshooting and<br />
Corrective Action<br />
• Check for the noise sources located near<br />
the inverter (remove noise sources).<br />
• Check whether the communication cable<br />
has been disconnected (check the connectors).<br />
• Check for the phase loss power input.<br />
(check the power supply input wiring).<br />
• Check the MCB and magnetic contactors<br />
for poor contacts (replace the MCB and<br />
magnetic contactors).<br />
• Check for the noise sources located near<br />
the inverter (remove noise sources.)<br />
• Check the main circuit element for<br />
damage. Check the output circuit for a<br />
short circuit (check the IGBT).<br />
• Check the inverter for abnormality (repair<br />
the inverter).<br />
• Check the output circuit for a short circuit<br />
(check the output cables).<br />
• Check for the ground fault (check the<br />
output cables and motor).<br />
• Check the main circuit element for<br />
damage (check the IGBT).<br />
• Check the heat sink for clogging (clean<br />
the heat sink).<br />
• Check whether the motor temperature is<br />
high (check the motor temperature).<br />
• Check whether the internal thermistor of<br />
the motor has been damaged (check the<br />
thermistor).<br />
• Check whether noise has been mixed in<br />
the thermistor signal (separate the thermistor<br />
wiring from other wirings).<br />
• Check whether the brake has been turned<br />
on and off or not (check the brake).<br />
• Check whether the wait time (B124) is<br />
too short (increase the wait time B124).<br />
• Check whether the braking confirmation<br />
signal has been input (check the wiring).<br />
• Check whether an error has occurred in<br />
the external equipment since the<br />
emergency stop function was enabled.<br />
(recover the external equipment from the<br />
error.)<br />
• Check for the noise sources located near<br />
the inverter (remove noise sources).<br />
• Check whether the motor load is too high<br />
(reduce the load factor).<br />
6–9<br />
Troubleshooting<br />
and Maintenance
Troubleshooting<br />
and Maintenance<br />
6–10<br />
Monitoring Trip Events, History, & Conditions<br />
OPE / SRW<br />
Display<br />
E41.-<br />
NET.ERR<br />
E60.to<br />
E69.-<br />
OP1-0<br />
OP1-9<br />
Name Description<br />
ModBus<br />
communication<br />
error<br />
If time-out occurs because of line disconnection<br />
during the communication in<br />
ModBus-RTU mode, the inverter will<br />
display the error code shown on the left.<br />
(The inverter will trip according to the<br />
setting of C076.)<br />
Option 1 error The inverter detects errors in the option<br />
board mounted in the optional slot 1. For<br />
details, refer to the instruction manual for<br />
the mounted option board.<br />
Troubleshooting and<br />
Corrective Action<br />
• Check whether the communication speed<br />
setting is correct.<br />
• Check whether the wiring distance is<br />
appropriate (check the connections).<br />
• Check whether the option board is<br />
mounted correctly (check the board<br />
mounting).<br />
• Check whether the option board is used<br />
correctly (refer to the instruction manual<br />
for the option board SJ-FB, SJ-DG, or<br />
SJ-DN).<br />
Note 6: The inverter will not accept reset commands input via the RS terminal or entered by<br />
the STOP/RESET key. Therefore, turn off the inverter power.<br />
Note 7: The inverter applied for 004 to 110L/H will not accept reset commands input via the<br />
RS terminal or entered by the STOP/RESET key. Therefore, turn off the inverter<br />
power.<br />
Note 8: The inverter will not accept the reset command entered from the digital operator.<br />
Therefore, reset the inverter by turning on the RS terminal.<br />
NOTE: If an EEPROM error (E08) occurs, be sure to confirm the parameter data values are<br />
still correct.
Expansion Card<br />
Error Codes<br />
<strong>SJ7002</strong> Inverter<br />
The inverter monitors the operation of the<br />
expansion cards (optional) that may be Error range:<br />
installed in the expansion bay.<br />
E6x or OP1<br />
On the inverter’s digital operator, error<br />
codes in the E60 range refer to the upper<br />
card position. Error codes in the E70 range E7x or OP2<br />
refer to the lower card position. For the<br />
remote operator display, error codes are in<br />
the OP1 or OP2 ranges, respectively. If an<br />
error occurs, the inverter trips (displays the<br />
corresponding error code and turns OFF the<br />
motor output).<br />
Encoder Input Card – Use the following<br />
table to diagnose errors caused by an<br />
encoder input expansion card. Each error<br />
will cause the inverter to trip, turning OFF its output and displaying an error code.<br />
Encoder Input Expansion Card Errors<br />
Error Code: OPE / SRW Name Probable Cause(s)<br />
E60.- E70.- Encoder disconnect Encoder wiring to the expansion card is<br />
disconnected<br />
OP1-0 OP2-0 The encoder is faulty<br />
The encoder type is not correct (no line<br />
driver output, etc.)<br />
E6 1.- E7 1.- Excessive speed The motor speed increased to the<br />
OP1-1 OP2-1<br />
maximum frequency (A004) times the<br />
over-speed error detection level (P026)<br />
E62.- E72.- Positioning error While in position control mode the<br />
OP1-2 OP2-2<br />
E63.- E73.-<br />
OP1-3 OP2-3<br />
E69.- E79.-<br />
OP1-9 OP2-9<br />
Position control<br />
range trip<br />
SJ-FB connection<br />
error<br />
position error (command minus actual)<br />
reached 1,000,000 pulses or more<br />
While in absolute position control mode,<br />
the actual position exceeded the forward<br />
(P072) or reverse (P073) position range<br />
value<br />
The SJ-FB expansion card is not mounted<br />
properly or the card is faulty<br />
If an encoder expansion card does not operate normally, use the following table to check the<br />
DIP switch settings on the card.<br />
DIP Switch<br />
SWENC<br />
SWR<br />
Switch<br />
Number<br />
Setting<br />
1 ON setting enables encoder disconnect function for loss of A<br />
or B channel<br />
2 ON setting enables encoder disconnect function for loss of Z<br />
channel<br />
1 ON setting connects the 150Ω termination resistor across<br />
terminals [SAP] and [SAN]<br />
2 ON setting connects the 150Ω termination resistor across<br />
terminals [SBP] and [SBP]<br />
6–11<br />
Troubleshooting<br />
and Maintenance
Troubleshooting<br />
and Maintenance<br />
6–12<br />
Monitoring Trip Events, History, & Conditions<br />
DIP Switch<br />
Digital Input Card – Use the following table to diagnose errors caused by a digital input<br />
expansion card. Each error will cause the inverter to trip, turning OFF its output and displaying<br />
an error code.<br />
Digital Input Expansion Card Errors<br />
Error Code: OPE / SRW Name Probable Cause(s)<br />
E60.- E70.-<br />
OP1-0 OP2-0<br />
Digital input<br />
expansion card error<br />
A communications time-out between the<br />
inverter and the digital input card has<br />
occurred<br />
The input mode is determined by a combination of DIP switch and rotary switch settings. If the<br />
expansion card does not operate normally, use the following table to check the DIP switch and<br />
rotary switch settings. The check marks indicate input modes specified by switch settings. For<br />
more details, refer to the expansion card instruction manual.<br />
Rotary<br />
Switch<br />
Frequency Setting, Hz<br />
Accel / Decel Time,<br />
Seconds<br />
Torque<br />
limit<br />
Setting<br />
Position<br />
Setting<br />
1 2 Code 0.01 0.1 1 Rate 0.01 0.1 1 1% 1 pulse<br />
OFF: BIN<br />
(binary input) /<br />
ON: BCD<br />
(binary coded<br />
decimal input)<br />
OFF: PAC<br />
(batch input<br />
mode)<br />
ON: DIV<br />
(divided input<br />
mode<br />
0<br />
1<br />
2<br />
3<br />
4 ✔<br />
5<br />
6 ✔<br />
0 ✔ ✔ ✔ ✔<br />
1 ✔<br />
2 ✔<br />
3 ✔ ✔<br />
4 ✔<br />
5 ✔<br />
6 ✔ ✔<br />
7 ✔<br />
8 ✔<br />
9 ✔ ✔<br />
A ✔<br />
B ✔
<strong>SJ7002</strong> Inverter<br />
DeviceNet Expansion Card – Use the following table to diagnose errors caused by a<br />
DeviceNet expansion card. Each error will cause the inverter to trip (according to parameter<br />
settings P045 and P048), turning OFF its output and displaying an error code.<br />
DeviceNet Expansion Card Errors<br />
Error Code: OPE / SRW Name Probable Cause(s)<br />
E60.- E70.-<br />
DeviceNet Communication<br />
Error<br />
The communication speed may be<br />
incorrect<br />
OP1-0 OP2-0 The network wiring length may<br />
not be appropriate<br />
A connector is loose (or wire not<br />
connected)<br />
E6 1.- E7 1.- Duplicate MAC ID Two or more devices on the<br />
OP1-1 OP2-1<br />
network have the same MAC ID<br />
E62.- E72.- External trip Check the Force Fault/Trip bit.<br />
OP1-2 OP2-2<br />
Attribute 17 in the Instance 1 of<br />
Class 19 may be set to 1. If so,<br />
clear the bit to 0.<br />
E69.- E79.-<br />
OP1-9 OP2-9<br />
If the expansion card does not operate normally, use the following diagrams to check the DIP<br />
switch settings. For more details, refer to the expansion card instruction manual.<br />
DR<br />
DR1 DR0<br />
Inverter communication<br />
error<br />
DeviceNet Baud Rate Setting<br />
125 kbps 250 kbps 500 kbps<br />
DIP switch example<br />
MAC ID<br />
DR<br />
DR1 DR0<br />
NA32 NA16 NA8 NA4 NA2 NA1<br />
DR<br />
DR1 DR0<br />
DeviceNet MAC ID Setting<br />
The expansion card may not be<br />
properly connected to the inverter<br />
Description of switch setting<br />
1 2 5 + 0 2 4 +1 2 3 +0 2 2 + 0 2 1 + 1 2 0<br />
= 29h (hex) = 41 (decimal)<br />
6–13<br />
Troubleshooting<br />
and Maintenance
Troubleshooting<br />
and Maintenance<br />
6–14<br />
Monitoring Trip Events, History, & Conditions<br />
Easy Sequence<br />
Error Codes<br />
Use the following table to diagnose errors related to Easy Sequence programming. The error<br />
code will appear when the related program runs.<br />
DeviceNet Expansion Card Errors<br />
Error Code: OPE / SRW Name Probable Cause(s)<br />
E43.- Invalid instruction A program contains an invalid instruction<br />
PRG.CMD The [PRG] terminal was turn ON but a<br />
program was not loaded<br />
E44.- Nesting count error Subroutines with FOR and NEXT<br />
PRG.NST<br />
instructions are nested more than eight<br />
levels<br />
E45.- Execution error 1 A FOR (or another) instruction to begin<br />
nesting is not found at the jump destination<br />
of a GO TO instruction, and the<br />
NEXT (or another) instruction to end<br />
nesting precedes the beginning of nesting<br />
PRG.ERR1 An arithmetic operation resulted in overflow<br />
or underflow, or a divide-by-zero was<br />
attempted<br />
A CHG PARAM or MON PARAM instruction<br />
attempts to:<br />
Reference an undefined parameter<br />
Set a value outside the range for a parameter<br />
Update a parameter that cannot be changed<br />
during inverter operation<br />
E50.- ... E59.- User trip event A TRIP instruction was executed in a<br />
PRG-0 ... PRG-9<br />
program
Trip History and<br />
Inverter Status<br />
<strong>SJ7002</strong> Inverter<br />
We recommend that you first find the cause of the fault before attempting clearing it. When a<br />
fault occurs, the inverter stores important performance data at the moment of the fault. To<br />
access the data, use the monitor functions (Dxxx) and select D081 for details about the present<br />
fault (En ). The previous five faults are stored in D081 to D086, with D (En-1 to En-5 ). Each error<br />
shifts D081–D085 to D082–D086, and writes the new error to D081.<br />
The following Monitor Menu map shows how to access the error codes. When fault(s) exist,<br />
you can review their details by first selecting the proper function: D081 is most recent, and<br />
D086 is the oldest.<br />
2 1<br />
1 2<br />
d08 1<br />
Error<br />
exists?<br />
Yes<br />
E07.2<br />
1<br />
60.00<br />
1<br />
4.00<br />
1<br />
270.0<br />
1<br />
15<br />
1<br />
18<br />
1<br />
2<br />
No<br />
Monitor Menu<br />
d086<br />
FUNC.<br />
2<br />
No error<br />
Current Trip<br />
Conditions<br />
Error Code<br />
Output frequency at<br />
trip point<br />
Motor current at<br />
trip point<br />
DC bus voltage at<br />
trip point<br />
Cumulative inverter<br />
operation time<br />
at trip point<br />
Cumulative power-<br />
ON time at trip point<br />
FUNC.<br />
Trip History<br />
d082<br />
FUNC.<br />
6–15<br />
Troubleshooting<br />
and Maintenance
Troubleshooting<br />
and Maintenance<br />
6–16<br />
Restoring Factory Default Settings<br />
Restoring Factory Default Settings<br />
You can restore all inverter parameters to the original factory (default) settings for the intended<br />
country of use. After initializing the inverter, use the powerup test in Chapter 2 to get the motor<br />
running again. To initialize the inverter, follow the steps below.<br />
No. Action Display Func./Parameter<br />
1<br />
2<br />
3<br />
Use the FUNC. , 1 , and 2 keys to b--navigate<br />
to the “B” Group.<br />
Press the key.<br />
Press and hold the key until -><br />
“B” Group selected<br />
First “B” parameter selected<br />
Country code for initialization<br />
selected<br />
4<br />
Press the key.<br />
00 = Japan, 01 = Europe,<br />
02 = U.S.<br />
5 Confirm the country code is correct. Do not change it unless you are absolutely sure<br />
the power input voltage range and frequency match the country code setting.<br />
To change the country code, press 1 or 2 to set; STR to store.<br />
6<br />
7<br />
8<br />
9<br />
10<br />
11<br />
Press the key.<br />
Press the 2 key. b084<br />
Press the key.<br />
Press the key.<br />
Press the key.<br />
FUNC. b00 1<br />
1 d 104<br />
FUNC. 02<br />
FUNC. b085<br />
FUNC. 00<br />
1 0 1<br />
STR b084<br />
Press and hold the 1 and 2<br />
keys together, and immediately<br />
press and hold the FUNC. key. Do not<br />
release these keys yet.<br />
12 Holding the keys above, press and<br />
STOP<br />
hold the RESET (STOP) key for 3 sec.<br />
13 When the b084 display begins<br />
STOP<br />
flashing, release the RESET key.<br />
b084<br />
b084<br />
0 EU<br />
14<br />
Release the 1 , 2 , and FUNC. d001<br />
keys together.<br />
or<br />
0USA<br />
Country code for initialization<br />
selected<br />
Initialization function selected<br />
00 = initialization disabled,<br />
clear trip history only<br />
01 = enable initialization<br />
Initialization now enabled to<br />
restore all defaults<br />
First part of special key<br />
sequence, the “B” in the<br />
display begins flashing<br />
Entire “B084” display will<br />
begin flashing<br />
Default parameter country<br />
code shown during initialization<br />
process (left-most character<br />
displays alternating<br />
pattern)<br />
Final part of key sequence,<br />
function code for output<br />
frequency monitor shown after<br />
initialization is complete
Maintenance and Inspection<br />
Monthly and<br />
Yearly Inspection<br />
Chart<br />
Item Inspected Check for...<br />
General Ambient<br />
environment<br />
Main<br />
circuits<br />
Cooling<br />
system<br />
Control<br />
circuit<br />
Extreme<br />
temperatures<br />
& humidity<br />
Major devices Abnormal<br />
vibration,<br />
noise<br />
Power supply<br />
voltage<br />
Ground<br />
Insulation<br />
Voltage<br />
tolerance<br />
Adequate<br />
resistance<br />
Mounting No loose<br />
screws<br />
Inspection<br />
Cycle<br />
Month Year<br />
✔ Thermometer,<br />
hygrometer<br />
<strong>SJ7002</strong> Inverter<br />
Inspection Method Criteria<br />
Ambient temperature<br />
between -10 to 50°C,<br />
non-condensing<br />
✔ Visual and aural Stable environment for<br />
electronic controls<br />
✔ Digital volt meter,<br />
measure between<br />
inverter terminals<br />
[L1], [L2], [L3]<br />
200V class:<br />
200 to 240V 50/60 Hz<br />
400V class:<br />
380 to 460V 50/60 Hz<br />
✔ Megger test 500VDC, reading of 5M<br />
ohms or greater, see next<br />
section for test details<br />
✔ Torque wrench M3: 0.5 – 0.6 Nm<br />
M4: 0.98 – 1.3 Nm<br />
M5: 1.5 – 2.0 Nm<br />
Components Overheating ✔ Thermal trip events No trip events<br />
Housing Dirt, dust ✔ Visual Vacuum dust and dirt<br />
Terminal block Secure<br />
connections<br />
Smoothing<br />
capacitor<br />
Leaking,<br />
swelling<br />
✔ Visual No abnormalities<br />
✔ Visual No abnormalities<br />
Relay(s) Chattering ✔ Aural Single click when<br />
switching ON or OFF<br />
Resistors Cracks or<br />
discoloring<br />
✔ Visual Use Ohm meter to check<br />
braking resistors<br />
Cooling fan Noise ✔ Power down,<br />
manually rotate<br />
Rotation must be smooth<br />
Heat sink Dust ✔ Visual Vacuum to clean<br />
General No odor,<br />
discoloring,<br />
corrosion<br />
✔ Visual No abnormalities<br />
Capacitor No leaks or<br />
deformation<br />
✔ Visual Undistorted appearance<br />
Display LEDs Legibility ✔ Visual All LED segments work<br />
6–17<br />
Troubleshooting<br />
and Maintenance
Troubleshooting<br />
and Maintenance<br />
6–18<br />
Maintenance and Inspection<br />
Item Inspected Check for...<br />
Motor General Vibration ✔ Visual, touch Ordinary range<br />
Insulation<br />
resistance<br />
Unusual odor ✔ Look for signs of<br />
overheating<br />
Isolation<br />
boundary<br />
fault<br />
Inspection<br />
Cycle<br />
Month Year<br />
Inspection Method Criteria<br />
✔ Disconnect motor<br />
from inverter, do<br />
megger test on<br />
motor<br />
Normal appearance<br />
500V class megger test<br />
must pass<br />
Note 1: The life of a capacitor is affected by the ambient temperature. See “Capacitor Life<br />
Curve” on page 6–20.<br />
Note 2: The inverter must be cleaned periodically. If dust accumulates on the fan and heat<br />
sink, it can cause overheating of the inverter.
<strong>SJ7002</strong> Inverter<br />
Megger Test The megger is a piece of test equipment that uses a high voltage to determine if an insulation<br />
degradation has occurred. For inverters, it is important that the power terminals be isolated<br />
from the Earth GND terminal via the proper amount of insulation.<br />
The circuit diagram below shows the inverter wiring for performing the megger test. Just follow<br />
the steps to perform the test:<br />
1. Remove power from the inverter and wait at least 10 minutes before proceeding.<br />
2. Open the front housing panel to access the power wiring.<br />
3. Remove all wires to terminals [R, S, T, PD, P, N, RB, U, V, and W]. Most importantly, the<br />
input power and motor wires will be disconnected from the inverter.<br />
4. Remove the jumper at connector J61. It is located on the main circuit board beside the<br />
power terminals.<br />
5. Use a bare wire and short terminals [R, S, T, PD, P, N, RB, U, V, and W] together as shown<br />
in the diagram.<br />
6. Connect the megger to the inverter Earth GND and to the shorted power terminals as shown.<br />
Then perform the megger test at 500 VDC and verify 5MΩ or greater resistance.<br />
Disconnect<br />
power source<br />
L1<br />
L2<br />
L3<br />
Disconnect jumper at<br />
J61 before performing<br />
the megger test<br />
R<br />
S<br />
T<br />
J61<br />
Earth<br />
GND<br />
<strong>SJ7002</strong><br />
7. After completing the test, disconnect the megger from the inverter.<br />
8. Reconnect the jumper at connector J61 as before.<br />
9. Reconnect the original wires to terminals [R, S, T, PD, P, N, RB, U, V, and W].<br />
CAUTION: Do not connect the megger to any control circuit terminals such as intelligent I/O,<br />
analog terminals, etc. Doing so could cause damage to the inverter.<br />
CAUTION: Never test the withstand voltage (HIPOT) on the inverter. The inverter has a surge<br />
protector between the main circuit terminals above and the chassis ground.<br />
U<br />
V<br />
W<br />
P<br />
PD<br />
RB<br />
N<br />
Add test<br />
jumper wire<br />
Disconnect<br />
motor wires<br />
Motor<br />
Megger, 500VDC<br />
6–19<br />
Troubleshooting<br />
and Maintenance
Troubleshooting<br />
and Maintenance<br />
6–20<br />
Maintenance and Inspection<br />
Spare parts We recommend that you stock spare parts to reduce down time, including parts listed below:<br />
Capacitor<br />
Life Curve<br />
Power<br />
Input<br />
L1/R<br />
L2/S<br />
L3/T<br />
Part description Symbol<br />
Quantity<br />
Used Spare<br />
Cooling fan FAN 1, 2, 3... (depends<br />
on model)<br />
Auxiliary cooling fan FAN 0 or 1... (depends<br />
on model)<br />
Notes<br />
1 or 2 Fan unit at top of housing<br />
in all models<br />
0 or 1 –150Lxx, –185Lxx, and<br />
–220Lxx models<br />
Capacitor bank CB 1 1 All models<br />
The DC bus inside the inverter uses a large capacitor as shown in the diagram below. The<br />
capacitor handles high voltage and current as it smooths the power for use by the inverter. So,<br />
any degradation of the capacitor will affect the performance of the inverter. The capacitor bank<br />
in <strong>SJ7002</strong> series inverters is replaceable. This section will show you how to replace it in the<br />
field.<br />
Converter<br />
Rectifier<br />
Variable-frequency Drive<br />
Internal DC Bus<br />
+<br />
–<br />
+<br />
Inverter<br />
U/T1<br />
Motor<br />
Capacitor life is reduced in higher ambient temperatures, as the graph below demonstrates. Be<br />
sure to keep the ambient temperature at acceptable levels, and perform maintenance inspections<br />
on the fan, heat sink, and other components. If the inverter is installed on a cabinet, the ambient<br />
temperature is the temperature inside the cabinet.<br />
Ambient<br />
temperature, °C<br />
50<br />
40<br />
30<br />
20<br />
10<br />
0<br />
-10<br />
Capacitor Life Curve<br />
V/T2<br />
W/T3<br />
24 hrs / day operation<br />
1 2 3 4 5 6 7 8 9 10<br />
Years
Capacitor<br />
Replacement<br />
<strong>SJ7002</strong> Inverter<br />
The DC section of the inverter main circuit uses high-capacity aluminum electrolytic capacitors<br />
as smoothing filter components. Since chemical reactions occur inside the capacitors, the<br />
service life of these parts depends mainly on the ambient temperature and operating conditions,<br />
Capacitors used in a standard operating environment must be replaced after about 10 years.<br />
However, each capacitor must me immediately replaced if it fails a visual inspection or if<br />
periodic inspections shows the capacity to be 80% or less of the component rating.<br />
WARNING: The screws that retain the capacitor bank assembly are part of the electrical<br />
circuit of the high-voltage internal DC bus. Be sure that all power has been disconnected from<br />
the inverter, and that you have waited at least 10 minutes before accessing the terminals or<br />
screws. Be sure the charge lamp is extinguished. Otherwise, there is the danger of electrocution<br />
to personnel.<br />
CAUTION: Do not operate the inverter unless you have replaced the two screws that connect<br />
the capacitor bank assembly to the internal DC bus. Otherwise, damage to the inverter may<br />
occur.<br />
For inverters above 11kW output with molded plastic housings...<br />
1. Loosen the two screws that secure the lower front panel. Remove the panel from the<br />
inverter.<br />
2. Turn OFF power to the inverter and confirm that the Charge Indicator LED is OFF.<br />
3. Remove the wiring entry/exit plate from the inverter.<br />
4. Remove the screws that connect the capacitor unit to the main circuit terminal block.<br />
5. Remove the screws that secure the capacitor mounting plate to the inverter casing.<br />
6. Pull down the capacitor mounting plate.<br />
7. Remove the capacitor unit from the capacitor mounting plate.<br />
To install the new capacitor unit:<br />
1. Place the capacitor unit on the mounting plate.<br />
2. Slide the capacitor mounting plate into the guides in the inverter housing. Push the capacitor<br />
unit until the metal plate is flush with the housing.<br />
3. Connect the capacitor unit to the main circuit terminal block by using the two (2) terminal<br />
screws.<br />
4. Secure the capacitor mounting plate to the inverter housing by using the screws.<br />
5. Replace the wire/entry plate.<br />
6. Replace the lower front panel cover and secure it with screws.<br />
6–21<br />
Troubleshooting<br />
and Maintenance
Troubleshooting<br />
and Maintenance<br />
6–22<br />
Maintenance and Inspection<br />
Lower screws, terminals [P] and [N]<br />
For inverters with sheet metal housings...<br />
1. Loosen the two screws that secure the lower front panel. Remove the panel from the<br />
inverter.<br />
2. Turn OFF power to the inverter and confirm that the Charge Indicator LED is OFF.<br />
3. Remove the lower screws from terminal block terminals [P] and [N].<br />
4. Remove the screws that secure the capacitor mounting plate.<br />
5. Pull down the capacitor mounting plate.<br />
6. Remove the bus bar and resistors. Then remove the capacitor unit from the capacitor<br />
mounting plate.<br />
Capacitor mounting plate<br />
Capacitor unit<br />
To install the new capacitor unit:<br />
1. Place the capacitor unit on the mounting plate and secure the unit with screws.<br />
2. Mount the bus bar and resistors in the original positions and secure them with screws.<br />
3. Slide the capacitor mounting plate into the inverter housing.<br />
4. Secure the capacitor mounting plate to the inverter housing by using the screws.<br />
5. Install the lower screws in the terminal block terminals [P] and [N].<br />
6. Mount the terminal block cover.
Fan Assembly<br />
Replacement<br />
<strong>SJ7002</strong> Inverter<br />
For inverters 11kW output and below with molded plastic housings...<br />
The inverters in this category do not have separate capacitor units. It is necessary to replace the<br />
main circuit board, accessible by following the steps below.<br />
1. Loosen the two screws that secure the lower front panel. Remove the panel from the<br />
inverter.<br />
2. Turn OFF power to the inverter and confirm that the Charge Indicator LED is OFF.<br />
3. Loosen the two screws that secure the upper front panel. Remove the panel from the<br />
inverter.<br />
4. Press the tabs inward on each side of the cooling fan unit and lift the unit away from the top<br />
of the inverter housing.<br />
5. Disconnect the fan unit wiring on the circuit board at the top of the inverter.<br />
6. Disconnect the ribbon cable that connects the control board and main board.<br />
7. Remove the wiring entry/exit plate and the jumper between terminal [P] and [PD] on the<br />
main board.<br />
8. Remove the two (2) screws in the plastic housing, and remove the top half of the housing.<br />
Be careful not to damage the plastic tabs at the top corners of the housing.<br />
The <strong>SJ7002</strong> <strong>Series</strong> inverters have field-replaceable fan units. The service life of the cooling fan<br />
bearings is approximately 100,000 hours. However, actual results vary with the inverter<br />
operating environment. <strong>Inverters</strong> running continuously usually need fan unit replacement at<br />
10-year intervals. In addition, fan unit replacement is required immediately if the fan has<br />
abnormal sound or vibration. The fan replacement procedure depends according to the model<br />
(housing type).<br />
For inverters with molded plastic housings...<br />
1. Loosen the two screws that secure the lower front panel.<br />
Remove the panel from the inverter.<br />
2. Turn OFF power to the inverter and confirm that the Charge<br />
Indicator LED is OFF.<br />
3. Loosen the two screws that secure the upper front panel.<br />
Remove the panel from the inverter.<br />
4. Press the tabs inward on each side of the cooling fan unit and<br />
lift the unit away from the top of the inverter housing.<br />
5. Disconnect the fan unit wiring on the circuit board at the top<br />
of the inverter.<br />
6. Remove the defective fan(s) from the cooling fan mounting<br />
plate.<br />
6–23<br />
Troubleshooting<br />
and Maintenance
Troubleshooting<br />
and Maintenance<br />
6–24<br />
Maintenance and Inspection<br />
To install the new fan(s):<br />
1. Slide the fan(s) into the mounting locations in the mounting<br />
plate. To ensure the correct airflow, be sure that the label on<br />
each fan faces toward the vent openings (top of inverter).<br />
2. Connect the fan wiring to terminals J21 or J22 (depending on<br />
the inverter model) on the main circuit board.<br />
3. Put the mounting plate in position on the top of the inverter.<br />
Press downward on the fan units until the retention tabs click<br />
into place.<br />
4. Replace the upper and lower front panel covers on the inverter,<br />
using two (2) screws for each panel.<br />
For inverters with sheet metal housings...<br />
1. Loosen the screws that secure the lower front panel. Remove the panel from the inverter.<br />
2. Turn OFF power to the inverter and confirm that the Charge Indicator LED is OFF.<br />
3. Loosen the two screws that secure the upper front panel. Remove the panel from the<br />
inverter.<br />
4. Remove the screws that secure the fan unit to the top of the inverter.<br />
5. Lift the cooling fan unit away from the top of the inverter housing.<br />
6. Remove the defective fan(s) from the cooling fan mounting plate.<br />
To install the new fan(s):<br />
1. Slide the fan(s) into the mounting<br />
locations in the mounting plate. To<br />
ensure the correct airflow, be sure that<br />
the label on each fan faces toward the<br />
vent openings (top of inverter).<br />
2. Connect the fan wiring to terminals J21,<br />
J22, or J23 (depending on the inverter<br />
model) on the main circuit board.<br />
3. Put the mounting plate in position on<br />
the top of the inverter housing and<br />
secure it with screws.<br />
4. Replace the upper and lower front panel covers on the inverter and secure them with screws.
General Inverter<br />
Electrical<br />
Measurements<br />
Parameter<br />
Supply voltage<br />
E 1<br />
Supply current<br />
I 1<br />
<strong>SJ7002</strong> Inverter<br />
The following table specifies how to measure key system electrical parameters. The diagrams<br />
on the next page show inverter-motor systems and the location of measurement points for these<br />
parameters.<br />
Circuit location<br />
of measurement<br />
E R – across L1 and L2<br />
E S – across L2 and L3<br />
E T – across L3 and L1<br />
Measuring<br />
instrument<br />
Moving-coil type<br />
voltmeter or rectifier<br />
type voltmeter<br />
I r – L1, I s – L2, I t – L3 Moving-coil type<br />
ammeter<br />
Supply power W 1 W 11 – across L1 and L2<br />
W 12 – across L2 and L3<br />
Supply power<br />
factor Pf 1<br />
Output voltage<br />
E 0<br />
Output current I o I U – U<br />
I V – V<br />
I W – W<br />
E U – across U and V<br />
E V – across V and W<br />
E W – across W and U<br />
Output power W o W 01 – across U and V<br />
W 02 – across V and W<br />
Output power<br />
factor Pf o<br />
Pf 1<br />
W 1<br />
Electronic type<br />
wattmeter<br />
= ----------------------------- × 100%<br />
3× E1× I1 Rectifier type<br />
voltmeter<br />
Moving-coil type<br />
ammeter<br />
Electronic type<br />
wattmeter<br />
Notes Reference Value<br />
Fundamental<br />
wave effective<br />
value<br />
Total effective<br />
value<br />
Total effective<br />
value<br />
Total effective<br />
value<br />
Total effective<br />
value<br />
Total effective<br />
value<br />
Calculate the output power factor from the output voltage E, output<br />
current I, and output power W.<br />
W0 Pf0 =<br />
----------------------------- × 100%<br />
3× E0× I0 Commercial supply<br />
voltage (200V class)<br />
200-240V, 50/60 Hz<br />
400V class 380-<br />
460V, 50/60 Hz<br />
Note 1: Use a meter indicating a fundamental wave effective value for voltage, and meters<br />
indicating total effective values for current and power.<br />
Note 2: The inverter output has a distorted waveform, and harmonic frequencies may cause<br />
erroneous readings. However, the measuring instruments and methods listed above<br />
provide reasonably accurate results.<br />
Note 3: A general-purpose digital volt meter (DVM) is not usually suitable to measure a<br />
distorted waveform (not pure sinusoid).<br />
—<br />
—<br />
—<br />
—<br />
—<br />
—<br />
—<br />
6–25<br />
Troubleshooting<br />
and Maintenance
Troubleshooting<br />
and Maintenance<br />
6–26<br />
Maintenance and Inspection<br />
L1<br />
L2<br />
L3<br />
Inverter Output<br />
Voltage Measurement<br />
Techniques<br />
L1/R<br />
L2/S<br />
L3/T<br />
The figure below shows measurement locations for voltage, current, and power measurements<br />
listed in the table on the previous page. The voltage to be measured is the fundamental wave<br />
effective voltage. The power to be measured is the total effective power.<br />
I 1<br />
I 2<br />
I 3<br />
E 1<br />
E 1<br />
E 1<br />
Three-phase measurement diagram<br />
W 01<br />
W 02<br />
Taking voltage measurements around drives equipment requires the right equipment and a safe<br />
approach. You are working with high voltages and high-frequency switching waveforms that<br />
are not pure sinusoids. Digital voltmeters will not usually produce reliable readings for these<br />
waveforms. And, it is usually risky to connect high voltage signals to oscilloscopes. The<br />
inverter output semiconductors have some leakage, and no-load measurements produce<br />
misleading results. So, we highly recommend using the following circuits to measure voltage<br />
for performing the equipment inspections.<br />
Voltage measurement with load<br />
Inverter<br />
U/T1<br />
V/T2<br />
W/T3<br />
220kΩ<br />
2W<br />
R<br />
S<br />
T<br />
Inverter<br />
+ –<br />
V class Diode bridge Voltmeter<br />
200V class 600V 0.01A min. 300V range<br />
400V class 1000V 0.1 A min. 600V range<br />
U<br />
V<br />
W<br />
HIGH VOLTAGE: Be careful not to touch wiring or connector terminals when working with<br />
the inverters and taking measurements. Be sure to place the measurement circuitry above in an<br />
insulated housing before using them.<br />
I 1<br />
I 1<br />
I 1<br />
L1/R<br />
L2/S<br />
L3/T<br />
E U-V<br />
E U-V<br />
E U-V<br />
220kΩ<br />
2W<br />
T1<br />
W01 T2<br />
W02 T3<br />
U/T1<br />
V/T2<br />
W/T3<br />
Motor<br />
Voltage measurement without load<br />
Inverter<br />
5kΩ<br />
30W<br />
+ –<br />
V class Diode bridge Voltmeter<br />
200V class 600V 0.01A min. 300V range<br />
400V class 1000V 0.1 A min. 600V range
<strong>SJ7002</strong> Inverter<br />
IGBT Test Method The following procedure will check the power module, including inverter transistors (IGBTs),<br />
IPM, diodes, and thyrister until replacement of inverter (1,000,000 start/stop cycles):<br />
1. Disconnect input power to terminals [R, S, and T] and motor terminals [U, V, and W].<br />
2. Disconnect any wires from terminals [P] and [RB] for regenerative braking.<br />
3. Use a Digital Volt Meter (DVM) and set it for 1 ohm resistance range. You can check the<br />
status of the charging state of terminals [R, S, T, U, V, W, RB, P, and N] of the inverter and<br />
the probe of the DVM by measuring the charging state.<br />
Almost infinite ohms = “non-conducting,” and 0 to 10 ohms = “conducting.”<br />
NOTE: The resistance values for the diodes or the transistors will not be exactly the same, but<br />
they will be close. If you find a significance difference, a problem may exist.<br />
NOTE: Before measuring the voltage between [P] and [N] with the DC current range, confirm<br />
that the smoothing capacitor is discharged fully, then execute the tests.<br />
PD P RB<br />
Converter Inverter<br />
R<br />
S<br />
T<br />
D1 D2 D3<br />
D4 D5 D6<br />
C<br />
+<br />
N<br />
TR7<br />
TR1 TR2 TR3<br />
TR4 TR5 TR6<br />
U<br />
V<br />
W<br />
Circuit Type<br />
Converter<br />
Inverter<br />
DVM Probe<br />
+ –<br />
Measured Value<br />
D1 R PD Non-conducting<br />
PD R Conducting<br />
D2 S PD Non-conducting<br />
PD S Conducting<br />
D3 T PD Non-conducting<br />
PD T Conducting<br />
D4 R N Conducting<br />
N R Non-conducting<br />
D5 S N Conducting<br />
N S Non-conducting<br />
D6 T N Conducting<br />
N T Non-conducting<br />
TR1 U P Non-conducting<br />
P U Conducting<br />
TR2 V P Non-conducting<br />
P V Conducting<br />
TR3 W P Non-conducting<br />
P W Conducting<br />
TR4 U N Conducting<br />
N U Non-conducting<br />
TR5 V N Conduct<br />
N V Non-conducting<br />
TR6 W N Conducting<br />
N W Non-conducting<br />
6–27<br />
Troubleshooting<br />
and Maintenance
Troubleshooting<br />
and Maintenance<br />
6–28<br />
Maintenance and Inspection<br />
Circuit Type<br />
Dynamic<br />
Braking<br />
(0.4kW–11kW)<br />
DVM Probe<br />
+ –<br />
Measured Value<br />
TR7 RB P Non-conducting<br />
P RB Conducting<br />
RB N Non-conducting<br />
N RB Non-conducting
Warranty<br />
<strong>SJ7002</strong> Inverter<br />
Warranty Terms<br />
The warranty period under normal installation and handling conditions shall be two (2)<br />
years from the date of manufacture (“DATE” on product nameplate), or one (1) year<br />
from the date of installation, whichever occurs first. The warranty shall cover the repair<br />
or replacement, at <strong>Hitachi</strong>'s sole discretion, of ONLY the inverter that was installed.<br />
1. Service in the following cases, even within the warranty period, shall be charged to<br />
the purchaser:<br />
a. Malfunction or damage caused by mis-operation or modification or improper<br />
repair<br />
b. Malfunction or damage caused by a drop after purchase and transportation<br />
c. Malfunction or damage caused by fire, earthquake, flood, lightning, abnormal<br />
input voltage, contamination, or other natural disasters<br />
2. When service is required for the product at your work site, all expenses associated<br />
with field repair shall be charged to the purchaser.<br />
3. Always keep this manual handy; please do not lose it. Please contact your <strong>Hitachi</strong><br />
distributor to purchase replacement or additional manuals.<br />
6–29<br />
Troubleshooting<br />
and Maintenance
Glossary and<br />
Bibliography<br />
A<br />
In This Appendix.... page<br />
— Glossary............................................................................................ 2<br />
— Bibliography ...................................................................................... 6
Appendix A A–2<br />
Glossary<br />
Glossary<br />
Ambient<br />
Temperature<br />
The air temperature in the chamber containing a powered electronic unit. A unit’s heat sinks<br />
rely on a lower ambient temperature in order to dissipate heat away from sensitive electronics.<br />
Arrival Frequency The arrival frequency refers to the set output frequency of the inverter for the constant speed<br />
setting. The arrival frequency feature turns ON an output when the inverter reaches the set<br />
constant speed. The inverter has various arrival frequencies and pulsed or latched logic options.<br />
Auto-tuning The ability of a controller to execute a procedure that interacts with a load to determine the<br />
proper coefficients to use in the control algorithm. Auto-tuning is a common feature of process<br />
controllers with PID loops. <strong>Hitachi</strong> inverters feature auto-tuning to determine motor parameters<br />
for optimal commutation. Auto-tuning is available as a special command from a digital<br />
operator panel. See also digital operator panel.<br />
Base Frequency The power input frequency for which an AC induction motor is designed to operate. Most<br />
motors will specify a 50 to 60 Hz value. The <strong>Hitachi</strong> inverters have a programmable base<br />
frequency, so you must ensure that parameter matches the attached motor. The term base<br />
frequency helps differentiate it from the carrier frequency. See also carrier frequency and<br />
frequency setting.<br />
Braking Resistor An energy-absorbing resistor that dissipates energy from a decelerating load. Load inertia<br />
causes the motor to act as a generator during deceleration. See also four-quadrant operation<br />
and dynamic braking.<br />
Break-away<br />
Torque<br />
Carrier<br />
Frequency<br />
The torque a motor must produce to overcome the static friction of a load in order to start the<br />
load moving.<br />
The frequency of the constant, periodic, switching waveform that the inverter modulates to<br />
generate the AC output to the motor. See also PWM.<br />
CE A regulatory agency for governing the performance of electronic products in Europe. Drive<br />
installations designed to have CE approval must have particular filter(s) installed in the application.<br />
Choke An inductor that is tuned to react at radio frequencies is called a “choke,” since it attenuates<br />
(chokes) frequencies above a particular threshold. Tuning is often accomplished by using a<br />
movable magnetic core. In variable-frequency drive systems, a choke positioned around highcurrent<br />
wiring can help attenuate harmful harmonics and protect equipment. See also harmonics.<br />
DC Braking The inverter DC braking feature stops the AC commutation to the motor, and sends a DC<br />
current through the motor windings in order to stop the motor. Also called “DC injection<br />
braking,” it has little effect at high speed, and is used as the motor is nearing a stop.<br />
DC Link The portion of the variable frequency drive between the input rectifiers and the output stages. It<br />
delivers smoothed DC power to the control and output stages of the drive.<br />
Deadband In a control system, the range of input change for which there is no perceptible change in the<br />
output. In PID loops, the error term may have a deadband associated with it. Deadband may or<br />
may not be desirable; it depends on the needs of the application.<br />
Digital Operator<br />
Panel<br />
For <strong>Hitachi</strong> inverters, “digital operator panel” (DOP) refers first to the operator keypad on the<br />
front panel of the inverter. It also includes hand-held remote keypads, which connect to the<br />
inverter via a cable. Finally, the DOP Professional is a PC-based software simulation of the<br />
keypad devices.
<strong>SJ7002</strong> Inverter<br />
Diode A semiconductor device that has a voltage-current characteristic that allows current to flow<br />
only in one direction, with negligible leakage current in the reverse direction. See also rectifier.<br />
Duty Cycle 1. The percent of time a square wave of fixed frequency is ON (high) versus OFF (low). 2. The<br />
ratio of operating time of a motor, braking resistor, etc. to its resting time. This parameter<br />
usually is specified in association with the allowable thermal rise for the device.<br />
Dynamic Braking The inverter dynamic braking feature shunts the motor-generated EMF energy into a special<br />
braking resistor. The added dissipation (braking torque) is effective at higher speeds, having a<br />
reduced effect as the motor nears a stop.<br />
Error In process control, the error is the difference between the desired value or setpoint (SP) and the<br />
actual value of a the process variable (PV). See also process variable and PID Loop.<br />
EMI Electromagnetic Interference - In motor/drive systems, the switching of high currents and<br />
voltages creates the possibility of generating radiated electrical noise that may interfere with<br />
the operation of nearby sensitive electrical instruments or devices. Certain aspects of an installation,<br />
such as long motor lead wire lengths, tend to increase the chance of EMI. <strong>Hitachi</strong><br />
provides accessory filter components you can install to decrease the level of EMI.<br />
Four-quadrant<br />
operation<br />
Referring to a graph of torque versus speed, a four-quadrant drive can turn the motor either<br />
forward or reverse, as well as decelerate in either direction (see also reverse torque). A load that<br />
has a relatively high inertia and must move in both directions and change directions rapidly<br />
requires four-quadrant capability from its drive.<br />
Free-run Stop A method of stopping a motor, caused when the inverter simply turns OFF its motor output<br />
connections. This may allow the motor and load to coast to a stop, or a mechanical brake may<br />
intervene and shorten the deceleration time.<br />
Frequency<br />
Setting<br />
While frequency has a broad meaning in electronics, it typically refers to motor speed for<br />
variable-frequency drives (inverters). This is because the output frequency of the inverter is<br />
variable, and is proportional to the attained motor speed. For example, a motor with a base<br />
frequency of 60 Hz can be speed controlled with an inverter output varying form 0 to 60 Hz.<br />
See also base frequency, carrier frequency, and slip.<br />
Harmonics A harmonic is a whole number multiple of a base of fundamental frequency. The square waves<br />
used in inverters produce high-frequency harmonics, even though the main goal is to produce<br />
lower-frequency sine waves. These harmonics can be harmful to electronics (including motor<br />
windings) and cause radiated energy that interferes with nearby electronic devices. Chokes, line<br />
reactors, and filters are sometimes used to suppress the transmission of harmonics in an electrical<br />
system. See also choke.<br />
Horsepower A unit of physical measure to quantify the amount of work done per unit of time. You can<br />
directly convert between horsepower and Watts as measurements of power.<br />
IGBT Insulated Gate Bipolar Transistor (IGBT) - A semiconductor transistor capable of conducting<br />
very large currents when in saturation and capable of withstanding very high voltages when<br />
it is OFF. This high-power bipolar transistor is the type used in <strong>Hitachi</strong> inverters.<br />
Inertia The natural resistance of an object to being accelerated or decelerated by an external force. See<br />
also momentum.<br />
Intelligent<br />
Terminal<br />
A configurable input or output logic function on the <strong>Hitachi</strong> inverters. Each terminal may be<br />
assigned one of several functions.<br />
Inverter A device that electronically changes DC to AC current through a alternating process of switching<br />
the input to the output, inverted and non-inverted. A variable speed drive such as the <strong>Hitachi</strong><br />
<strong>SJ7002</strong> is also called an inverter, since it contains three inverter circuits to generate 3-phase<br />
output to the motor.<br />
A–3<br />
Appendix A
Appendix A A–4<br />
Glossary<br />
Isolation<br />
Transformer<br />
Jogging<br />
Operation<br />
A transformer with 1:1 voltage ratio that provides electrical isolation between its primary and<br />
secondary windings. These are typically used on the power input side of the device to be<br />
protected. An isolation transformer can protect equipment from a ground fault or other<br />
malfunction of nearby equipment, as well as attenuate harmful harmonics and transients on the<br />
input power.<br />
Usually done manually, a jog command from an operator’s panel requests the motor/drive<br />
system to run indefinitely in a particular direction, until the machine operator ends the jog<br />
operation.<br />
Jump Frequency A jump frequency is a point on the inverter output frequency range that you want the inverter to<br />
skip around. This feature may be used to avoid a resonant frequency, and you can program up<br />
to three jump frequencies in the inverter.<br />
Line Reactor A three-phase inductor generally installed in the AC input circuit of an inverter to minimize<br />
harmonics and to limit short-circuit current.<br />
Momentum The physical property of a body in motion that causes it to continue to remain in motion. In the<br />
case of motors, the rotor and attached load are rotating and possess angular momentum.<br />
Multi-speed<br />
Operation<br />
The ability of a motor drive to store preset discrete speed levels for the motor, and control<br />
motor speed according to the currently selected speed preset. The <strong>Hitachi</strong> inverters have 16<br />
preset speeds.<br />
Motor Load In motor terminology, motor load consists of the inertia of the physical mass that is moved by<br />
the motor and the related friction from guiding mechanisms. See also inertia.<br />
NEC The National Electric Code is a regulatory document that governs electrical power and device<br />
wiring and installation in the United States.<br />
NEMA The National Electric Manufacturer’s Association. NEMA Codes are a published series of<br />
device ratings standards. Industry uses these to evaluate or compare the performance of devices<br />
made by various manufacturers to a known standard.<br />
Open-collector<br />
Outputs<br />
A common logic-type discrete output that uses an NPN transistor that acts as a switch to a<br />
power supply common, usually ground. The transistor’s collector is open for external connection<br />
(not connected internally). Thus, the output sinks external load current to ground.<br />
Orientation When using the expansion card SJ-FB with encoder feedback, the orientation feature is available.<br />
Also called home search in motion terminology, you can specify a search direction and a<br />
stop position. Typically the orientation procedure is necessary after each inverter powerup.<br />
Power Factor A ratio that expresses a phase difference (timing offset) between current and voltage supplied<br />
by a power source to a load. A perfect power factor = 1.0 (no phase offset). Power factors less<br />
than one cause some energy loss in power transmission wiring (source to load).<br />
PID Loop Proportional-Integral-Derivative – a mathematical model used for process control. A process<br />
controller maintains a process variable (PV) at a setpoint (SP) by using its PID algorithm to<br />
compensate for dynamic conditions and varies its output to drive the PV toward the desired<br />
value. See also error.<br />
Process Variable A physical property of a process that is of interest because it affects the quality of the primary<br />
task accomplished by the process. For an industrial oven, temperature is the process variable.<br />
See also PID Loop and error.<br />
PWM Pulse-width modulation: A type of AC adjustable frequency drive that accomplishes frequency<br />
and voltage control at the output section (inverter) of the drive. The drive output voltage<br />
waveform is at a constant amplitude, and by “chopping” the waveform (pulse-width-modulating),<br />
the average voltage is controlled. The chopping frequency is sometimes called the carrier<br />
frequency.
<strong>SJ7002</strong> Inverter<br />
Reactance The impedance of inductors and capacitors has two components. The resistive part is constant,<br />
while the reactive part changes with applied frequency. These devices have a complex impedance<br />
(complex number), where the resistance is the real part and the reactance is the imaginary<br />
part.<br />
Rectifier An electronic device made of one or more diodes that converts AC power into DC power.<br />
Rectifiers are usually used in combination with capacitors to filter (smooth) the rectified<br />
waveform to closely approximate a pure DC voltage source.<br />
Regenerative<br />
Braking<br />
A particular method of generating reverse torque to a motor, an inverter will switch internally to<br />
allow the motor to become a generator and will either store the energy internally, deliver the<br />
braking energy back to the main power input, or dissipate it with a resistor.<br />
Regulation The quality of control applied to maintain a parameter of interest at a desired value. Usually<br />
expressed as a percent (+/-) from the nominal, motor regulation usually refers to its shaft speed.<br />
Reverse Torque The torque applied in the direction opposite to motor shaft rotation. As such, reverse torque is a<br />
decelerating force on the motor and its external load.<br />
Rotor The windings of a motor that rotate, being physically coupled to the motor shaft. See also<br />
stator.<br />
Saturation<br />
Voltage<br />
Sensorless<br />
Vector Control<br />
For a transistor semiconductor device, it is in saturation when an increase in input current no<br />
longer results in an increase in the output current. The saturation voltage is the voltage drop<br />
across the device. The ideal saturation voltage is zero.<br />
A technique used in variable-frequency drives to rotate the force vector in the motor without the<br />
use of a shaft position sensor (angular). Benefits include an increase in torque at the lowest<br />
speed and the cost savings from the lack of a shaft position sensor.<br />
Setpoint (SP) The setpoint is the desired value of a process variable of interest. See also Process Variable<br />
(PV) and PID Loop.<br />
Single-phase<br />
Power<br />
An AC power source consisting of Hot and Neutral wires. An Earth Ground connection usually<br />
accompanies them. In theory, the voltage potential on Neutral stays at or near Earth Ground,<br />
while Hot varies sinusoidally above and below Neutral. This power source is named Single<br />
Phase to differentiate it from three-phase power sources. Some <strong>Hitachi</strong> inverters can accept<br />
single phase input power, but they all output three-phase power to the motor. See also threephase.<br />
Slip The difference between the theoretical (synchronous) speed of a motor at no load (determined<br />
by its inverter output waveforms) and the actual speed. Some slip is essential in order to<br />
develop torque to the load, but too much will cause excessive heat in the motor windings and/or<br />
cause the motor to stall.<br />
Squirrel Cage A “nick-name” for the appearance of the rotor frame assembly for an AC induction motor.<br />
Stator The windings in a motor that are stationary and coupled to the power input of the motor. See<br />
also rotor.<br />
Start Frequency The output frequency that the inverter first produces as the frequency command setting<br />
increases from zero. The start frequency is programmable, and is important to set properly for<br />
the load, etc.<br />
Tachometer 1. A signal generator usually attached to the motor shaft for the purpose of providing feedback<br />
to the speed controlling device of the motor. 2. A speed-monitoring test meter that may<br />
optically sense shaft rotation speed and display it on a readout.<br />
A–5<br />
Appendix A
Appendix A A–6<br />
Bibliography<br />
Thermal Switch An electromechanical safety device that opens to stop current flow when the temperature at the<br />
device reaches a specific temperature threshold. Thermal switches are sometimes installed in<br />
the motor in order to protect the windings from heat damage. The inverter can use thermal<br />
switch signals to trip (shut down) if the motor overheats. See also trip.<br />
Thermistor A type of temperature sensor that changes its resistance according to its temperature. The<br />
sensing range of thermistors and their ruggedness make them ideal for motor overheating<br />
detection. <strong>Hitachi</strong> inverters have built-in thermistor input circuits, which can detect an<br />
overheated motor and shut OFF (trip) the inverter output.<br />
Three-phase<br />
Power<br />
An AC power source with three Hot connections that have phase offsets of 120 degrees is a 3phase<br />
power source. Usually, Neutral and Earth Ground wires accompany the three Hot<br />
connections. Loads may be configured in a delta or Y configuration. A Y-connected load such<br />
as an AC induction motor will be a balanced load; the currents in all the Hot connections are the<br />
same. Therefore, the Neutral connection is theoretically zero. This is why inverters that<br />
generate 3-phase power for motors do not generally have a Neutral connection to the motor.<br />
However, the Earth Ground connection is important for safety reasons, and is provided.<br />
Torque A measure of rotational force. The units of measurement are the product of the distance (radius<br />
from shaft center axis) and force (weight) applied at that distance. Units are usually given as<br />
pound-feet, ounce-inches, or Newton-meters.<br />
Transistor A solid state, three-terminal device that provides amplification of signals and can be used for<br />
switching and control. While transistors have a linear operating range, inverters use them as<br />
high-powered switches. Recent developments in power semiconductors have produced transistors<br />
capable of handling high voltages and currents, all with high reliability. The saturation<br />
voltage has been decreasing, resulting in less heat dissipation. <strong>Hitachi</strong> inverters use state-ofthe-art<br />
semiconductors to provide high performance and reliability in a compact package. See<br />
also IGBT and saturation voltage.<br />
Trip An event that causes the inverter to stop operation is called a “trip” event (as in tripping a<br />
circuit breaker). The inverter keeps a history log of trip events. They also require an action to<br />
clear.<br />
Watt Loss A measure of the internal power loss of a component, the difference between the power it<br />
consumes and what its output delivers. An inverter’s watt loss is the input power minus the<br />
power delivered to the motor. The watt loss is typically highest when an inverter is delivering<br />
its maximum output. Therefore, watt loss is usually specified for a particular output level.<br />
Inverter watt loss specifications are important when designing enclosures.<br />
Bibliography<br />
Title Author and Publisher<br />
Variable Speed Drive Fundamentals, 2nd Ed. Phipps, Clarence A.<br />
The Fairmont Press, Inc. / Prentice-Hall, Inc. 1997<br />
ISBN 0-13-636390-3<br />
Electronic Variable Speed Drives Brumbach, Michael E.<br />
Delmar Publishers 1997<br />
ISBN 0-8273-6937-9<br />
<strong>Hitachi</strong> Inverter Technical Guide Book Published by <strong>Hitachi</strong>, <strong>Ltd</strong>. Japan 1995<br />
Publication SIG-E002
Serial<br />
Communications<br />
B<br />
In This Appendix.... page<br />
— Introduction ....................................................................................... 2<br />
— ASCII Mode Communications........................................................... 5<br />
— Communications Reference Information ........................................ 18<br />
— ModBus Mode Communications..................................................... 21<br />
— ModBus Data Listing....................................................................... 33
Appendix B B–2<br />
Introduction<br />
Introduction<br />
<strong>SJ7002</strong> inverters have a built-in RS485 serial communications interface. This serial communications<br />
function provides a way of controlling from 1 to 32 inverters on a common serial<br />
network. <strong>SJ7002</strong>, SJ300, and L300P inverters all have the same communications prototol. In a<br />
typical application, a host computer or controller is the master and each of the inverter(s) is a<br />
slave, as shown in the figure below.<br />
RS485 serial network<br />
SJ700 SJ700 SJ700<br />
1 2 32<br />
The specifications for <strong>SJ7002</strong> <strong>Series</strong> RS485 serial communications are in the following table:<br />
Item ASCII Mode ModBus RTU mode User-selectable<br />
Transmission speed 2400 / 4800 / 9600 / 19200 bps ✔<br />
Communication modes Half duplex (one device transmits at a time) ✘<br />
Synchronization Start/stop transmission Asychronous transmission ✘<br />
Character code ASCII code Binary code ✘<br />
LSB placement Transmits LSB first ✘<br />
Electrical interface RS485 differential transceiver ✘<br />
Data bits 7 or 8 bits 8 bits ✔<br />
Parity None / even / odd ✔<br />
Stop bits 1 or 2 bits ✔<br />
Start convention One-way start only by command from host device on network ✘<br />
Wait time for response 10 to 1,000 ms 0 to 1,000 ms ✔<br />
Connection format Station address numbers from 1 to 32 maximum ✔<br />
Error check Overrun, framing, BCC, vertical Overrun, framing, CRC-16, and ✘<br />
parity, and longitudinal parity<br />
errors<br />
longitudinal parity errors
Serial Connection<br />
Diagrams<br />
<strong>SJ7002</strong> Inverter<br />
The serial connector is to the left of the control logic connector as shown below:<br />
Serial<br />
Communications<br />
Connector<br />
SP SN RP SN<br />
Termination resistor (–)<br />
Termination resistor (+)<br />
Send/receive (–) Negative<br />
Send/receive (+) Positive<br />
Each device requires just two connections in parallel for data transmission and reception.<br />
Additionally, the device at each physical end of the wiring requires a termination resistor. The<br />
<strong>SJ7002</strong> has built-in termination resistors that become part of the circuit when you add a jumper<br />
as shown. The termination resistor helps to suppress electrical reflections.<br />
Send/receive (–)<br />
Send/receive (+)<br />
SJ700 SJ700 SJ700<br />
SP SN RP SN SP SN RP SN SP SN RP SN<br />
Termination jumper<br />
TIP: Each slave device on the serial network must have a unique node address, set by parameter<br />
C072. If this is a new application, we recommend connecting one new device at a time and<br />
checking the communications after each addition.<br />
B–3<br />
Appendix B
Appendix B B–4<br />
Introduction<br />
Serial Network<br />
Parameter<br />
Settings<br />
Communication<br />
Test Mode<br />
Several parameter settings are necessary to configure serial communications, listed below.<br />
Function<br />
Code<br />
C071 Baud rate<br />
C072 Node address<br />
C073 Data bits<br />
C074 Parity<br />
Item Value Description<br />
02 Loop-back test<br />
03 2400 bps<br />
04 4800 bps<br />
05 9600 bps<br />
06 19200 bps<br />
1 to 32,<br />
FF<br />
07 7 bits<br />
08 8 bits<br />
1 to 32 – Node or station address (unique<br />
to each inverter or device)<br />
FF – Automatic broadcast (to all nodes on<br />
transmit, allowed only on certain<br />
commands (refer to each command<br />
description in this appendix)<br />
00 none<br />
01 Even parity<br />
02 Odd parity<br />
C075 Stop bits<br />
01<br />
02<br />
1 bit<br />
2 bits<br />
C078 Wait time 0 to 1000 0 to 1000 ms time that the inverter waits<br />
to respond to network master<br />
C079 Communication 00 ASCII<br />
protocol select<br />
01 ModBus RTU<br />
For inverters on the same network, some settings must match from inverter to inverter. These<br />
include: Baud rate, data bits, parity, and stop bits. However, the node address on each inverter<br />
must be unique, used only once on the network.<br />
Use the communication test mode to check the RS485 serial port hardware on the inverter. Use<br />
the following procedure:<br />
1. Disconnect the wiring from the TM2 serial port terminal block on the inverter.<br />
2. Set parameter C071 = 02 (loopback test)<br />
3. Turn the inverter power OFF and then ON again to initiate the communication test.<br />
4. Check the pass/fail results according to the keypad display.<br />
Normal termination<br />
Abnormal termination<br />
5. Press the STOP/RESET key on the digital operator keypad (or the Reset button on the copy<br />
unit) to switch to the normal setting display.<br />
6. Set parameter C071 to the desired setting for normal operation.
ASCII Mode Communications<br />
Introduction to<br />
Command List<br />
The network master sends a frame to<br />
initiate communications with a slave, as<br />
shown in the figure to the right. After<br />
the set waiting time (per parameter<br />
C078, the inverter responds.<br />
<strong>SJ7002</strong> Inverter<br />
The following table lists the commands (single-character codes) sent to a particular device on<br />
the network. Some commands may be broadcast to all devices on the network.<br />
Command<br />
Code<br />
Description<br />
Transmitting<br />
device:<br />
Host<br />
(master)<br />
Inverter<br />
(slave)<br />
Broadcast to<br />
all devices<br />
00 Forward / Reverse / Stop command ✔<br />
01 Setting of frequency in standard profile ✔<br />
02 Setting of intelligent terminal state ✔<br />
03 Read all monitor data (block read) —<br />
04 Read inverter status —<br />
05 Read trip history —<br />
06 Read a single parameter value —<br />
07 Write a single parameter value ✔<br />
08 Set inverter parameters to default values ✔<br />
09 Verifies that the requested setting can be<br />
written to EEPROM.<br />
—<br />
0A Writes a parameter value to EEPROM ✔<br />
0B Requests the recalculation of internal constant ✔<br />
NOTE: Use of command 08 – set inverter parameters to default values first requires setting the<br />
initialization mode parameter B084 to 01 (initializes parameters only) or 02 (initializes parameters<br />
and clears the trip history).<br />
Command – 00 The 00 command controls the Forward, Reverse, and Stop mode of the inverter. You must set<br />
parameter A002=03 in order for serial communications control of the inverter to apply.<br />
The frame format of command 00 follows the<br />
timing diagram and specification table.<br />
Frame format<br />
STX Node Command Data BCC [CR]<br />
frame<br />
C078<br />
wait<br />
time<br />
frame<br />
B–5<br />
Appendix B
Appendix B B–6<br />
ASCII Mode Communications<br />
Element Description Size Value<br />
STX Control code (STart of TeXt) 1 byte STX (0x02)<br />
Node Node (station) address of inverter 2 bytes 01 to 32, and FF (broadcast to all<br />
nodes)<br />
Command Transmission command 2 bytes 00<br />
Data Transmission data 1 byte 00 = Stop command<br />
01 = Forward command<br />
02 = Reverse command<br />
BCC Block check sum code 2 bytes Exclusive OR of Node,<br />
Command, and Data<br />
[CR] Control code (carriage return) 1 byte [CR] (0x0D)<br />
The example below shows a transmission to the inverter at address Node 1 to rotate the motor<br />
in the forward direction.<br />
to ASCII<br />
(STX) | 01 | 00 | 1 | (BCC) | [CR]<br />
02 | 30 31 | 30 30 | 31 | 33 30 | 0D<br />
Command – 01 The 01 command sets the output frequency for the standard profile. You must set parameter<br />
A002=03 in order for serial communications control of the inverter to apply.<br />
The frame format of command 01 follows the<br />
timing diagram and specification table.<br />
Frame format<br />
STX Node Command Data BCC [CR]<br />
Element Description Size Value<br />
STX Control code (STart of TeXt) 1 byte STX (0x02)<br />
Node Node (station) address of inverter 2 bytes 01 to 32, and FF (broadcast to all<br />
nodes)<br />
Command Transmission command 2 bytes 01<br />
Data Transmission data 6 bytes ASCII code for ten times the<br />
frequency (accommodates two<br />
decimal places)<br />
BCC Block check sum code 2 bytes Exclusive OR of Node,<br />
Command, and Data<br />
[CR] Control code (carriage return) 1 byte [CR] (0x0D)<br />
The example below shows a transmission to the inverter at address Node 1 to set the output<br />
frequency for 5 Hz. We use a value of 500 in ASCII to represent 5.00 Hz.<br />
(STX) | 01 | 01 | 000500 | (BCC) | [CR]<br />
to ASCII<br />
02 | 30 31 | 30 31 | 30 30 30 35 30 30 | 30 35 | 0D<br />
When using the data as the feedback (process variable) for PID control, set the most significant<br />
byte to ASCII “1.” The following example transmits the data “5%.”<br />
(STX) | 01 | 01 | 000500 | (BCC) | [CR]<br />
to ASCII<br />
02 | 30 31 | 30 31 | 31 30 30 35 30 30 | 30 35 | 0D
Commands –<br />
02 and 12<br />
<strong>SJ7002</strong> Inverter<br />
The 02 command sets the logic state (ON or OFF) of the intelligent input terminals.<br />
The frame format of command 02 follows the<br />
timing diagram and specification table.<br />
Frame format<br />
STX Node Command Data BCC [CR]<br />
Element Description Size Value<br />
STX Control code (STart of TeXt) 1 byte STX (0x02)<br />
Node Node (station) address of inverter 2 bytes 01 to 32, and FF (broadcast to all)<br />
Command Transmission command 2 bytes 02 or 12<br />
Data Transmission data 16 bytes (see tables below)<br />
BCC Block check sum code 2 bytes Exclusive OR of Node,<br />
Command, and Data<br />
[CR] Control code (carriage return) 1 byte [CR] (0x0D)<br />
The 16-byte data string is specified in the following tables:<br />
Data (Hex) 02 Command Description Data (Hex) 02 CommandDescription<br />
0000000000000001 [FW] Forward command 0000000100000000 [SF1] Multi-speed bit-level<br />
0000000000000002 [RV] Reverse command 0000000200000000 [SF2] Multi-speed bit-level<br />
0000000000000004 [CF1] Multi-speed 1 0000000400000000 [SF3] Multi-speed bit-level<br />
0000000000000008 [CF2] Multi-speed 2 0000000800000000 [SF4] Multi-speed bit-level<br />
0000000000000010 [CF3] Multi-speed 3 0000001000000000 [SF5] Multi-speed bit-level<br />
0000000000000020 [CF4] Multi-speed 4 0000002000000000 [SF6] Multi-speed bit-level<br />
0000000000000040 [JG] Jog operation 0000004000000000 [SF7] Multi-speed bit-level<br />
0000000000000080 [DB] Dynamic braking 0000008000000000 [OLR] Overload restriction setting<br />
0000000000000100 [SET] set 2nd motor 0000010000000000 [TL] Torque limit<br />
0000000000000200 [2CH] 2-stage adjustable speed 0000020000000000 [TRQ1] Torque limit select 1<br />
0000000000000400 — 0000040000000000 [TRQ2] Torque limit select 2<br />
0000000000000800 [FRS] Free-run stop 0000080000000000 [PPI P/PI] inverter mode select<br />
0000000000001000 [EXP] External trip 0000100000000000 [BOK] Brake confirmation<br />
0000000000002000 [USP] Unattended start protection 0000200000000000 [ORT] Orientation (home) command<br />
0000000000004000 [CS] Commercial power change 0000400000000000 [LAC] Linear Accel/decel Cancel<br />
0000000000008000 [SFT] Software lock 0000800000000000 [PCLR] Position error clear<br />
0000000000010000 [AT] analog input voltage/current 0001000000000000 [STAT] Pulse train input enable<br />
0000000000020000 [SET3] Set 3rd motor 0002000000000000 —<br />
0000000000040000 [RS] Reset 0004000000000000 [ADD] Trigger for frequency addition<br />
0000000000080000 — 0008000000000000 [F-TM] Forcible terminal operation<br />
0000000000100000 [STA] 3-wire Start 0010000000000000 [ATR] Permission of torque command<br />
0000000000200000 [STP] 3-wire Hold 0020000000000000 [KHC] Cumulative power clearance<br />
0000000000400000 [F/R] 3-wire FWD/REV 0040000000000000 [SON] Servo ON<br />
0000000000800000 [PID] PID enable 0080000000000000 [FOC] Forcing<br />
0000000001000000 [PIDC] PID integrator reset 0100000000000000 [MI1] General-purpose input 1<br />
0000000002000000 — 0200000000000000 [MI2] General-purpose input 2<br />
B–7<br />
Appendix B
Appendix B B–8<br />
ASCII Mode Communications<br />
Data (Hex) 02 Command Description Data (Hex) 02 CommandDescription<br />
0000000004000000 [CAS] control gain switching function 0400000000000000 [MI3] General-purpose input 3<br />
0000000008000000 [UP] remote control increment speed 0800000000000000 [MI4] General-purpose input 4<br />
0000000010000000 [DWN] remote control decrement<br />
speed<br />
1000000000000000 [MI5] General-purpose input 5<br />
0000000020000000 [UDC] remote control clear up/down 2000000000000000 [MI6] General-purpose input 6<br />
0000000040000000 [OPE] Forcible operation 4000000000000000 [MI7] General-purpose input 7<br />
0000000080000000 — 8000000000000000 [MI8] General-purpose input 8<br />
Data (Hex) 12 Command Description Data (Hex) 12 CommandDescription<br />
0000000000000001 — 0000000100000000 —<br />
0000000000000002 [AHD] Analog command holding 0000000200000000 —<br />
0000000000000004 [CP1] Multi-stage position select 1 0000000400000000 —<br />
0000000000000008 [CP2] Multi-stage position select 2 0000000800000000 —<br />
0000000000000010 [CP3] Multi-stage position select 3 0000001000000000 —<br />
0000000000000020 [ORL] Zero-return limit function 0000002000000000 —<br />
0000000000000040 [ORG] Zero-return trigger function 0000004000000000 —<br />
0000000000000080 [FOT] Forward drive stop 0000008000000000 —<br />
0000000000000100 [ROT] Reverse drive stop 0000010000000000 —<br />
0000000000000200 [SPD] Speed / position switching 0000020000000000 —<br />
0000000000000400 [PCNT] Pulse counter 0000040000000000 —<br />
0000000000000800 [PCC] Pulse counter clear 0000080000000000 —<br />
0000000000001000 — 0000100000000000 —<br />
0000000000002000 — 0000200000000000 —<br />
0000000000004000 — 0000400000000000 —<br />
0000000000008000 — 0000800000000000 —<br />
0000000000010000 — 0001000000000000 —<br />
0000000000020000 — 0002000000000000 —<br />
0000000000040000 — 0004000000000000 —<br />
0000000000080000 — 0008000000000000 —<br />
0000000000100000 — 0010000000000000 —<br />
0000000000200000 — 0020000000000000 —<br />
0000000000400000 — 0040000000000000 —<br />
0000000000800000 — 0080000000000000 —<br />
0000000001000000 — 0100000000000000 —<br />
0000000002000000 — 0200000000000000 —<br />
0000000004000000 — 0400000000000000 —<br />
0000000008000000 — 0800000000000000 —<br />
0000000010000000 — 1000000000000000 —<br />
0000000020000000 — 2000000000000000 —<br />
0000000040000000 — 4000000000000000 —<br />
0000000080000000 — 8000000000000000 —
<strong>SJ7002</strong> Inverter<br />
The arrangement of the terminal assignment data permits you to assign all inputs in a single<br />
command. The example below shows a transmission to the inverter at address Node 1 to set the<br />
Forward command, Multi-speed 1 and Multi-speed 2.<br />
Sum the three data strings:<br />
(STX) | 01 | 02 | 0x000000000000000D | (BCC) | (CR)<br />
Command – 03 The 03 command reads the monitor data as a single block.<br />
The frame format of command 03 follows the<br />
diagram and specification table. The transmit<br />
Transmit frame format<br />
frame has no data field.<br />
STX Node Command BCC [CR]<br />
The receive frame has a 104-byte data field,<br />
containing values for 13 items.<br />
0x0000000000000001<br />
+ 0x0000000000000004<br />
+ 0x0000000000000008<br />
= 0x000000000000000D<br />
to ASCII<br />
02 | 30 31 | 30 31 | 30 30 30 30 30 30 30 30 30 30 30 30 30 30 30 68 | 30 35 | 0D<br />
Element Description Size Value<br />
STX Control code (STart of TeXt) 1 byte STX (0x02)<br />
Node Node (station) address of inverter 2 bytes 01 to 32<br />
Command Transmission command 2 bytes 03<br />
BCC Block check sum code 2 bytes Exclusive OR of Node,<br />
Command, and Data<br />
[CR] Control code (carriage return) 1 byte [CR] (0x0D)<br />
Receive frame format<br />
STX Node Data BCC [CR]<br />
Element Description Size Value<br />
STX Control code (STart of TeXt) 1 byte STX (0x02)<br />
Node Node (station) address of inverter 2 bytes 01 to 32<br />
Data Transmission data 104<br />
bytes<br />
(see next table)<br />
BCC Block check sum code 2 bytes Exclusive OR of Node,<br />
Command, and Data<br />
[CR] Control code (carriage return) 1 byte [CR] (0x0D)<br />
B–9<br />
Appendix B
Appendix B B–10<br />
ASCII Mode Communications<br />
The data in the receive frame contains 8-byte values for 13 items, listed in the table below:<br />
No. Monitor Item Units Multiplier<br />
Data<br />
Size<br />
Notes<br />
1 Output frequency Hz 100 8 bytes Dec. ASCII code<br />
2 Output current A 10 8 bytes Dec. ASCII code<br />
3 Direction of rotation — — 8 bytes 0 = Stop<br />
1 = FWD<br />
2 = REV<br />
4 PID feedback monitor % 100 8 bytes Dec. ASCII code<br />
5 Intelligent input monitor — — 8 bytes Dec. ASCII code<br />
6 Intelligent output monitor — — 8 bytes Dec. ASCII code<br />
7 Frequency converting monitor — 100 8 bytes Dec. ASCII code<br />
8 Output torque monitor % 1 8 bytes Dec. ASCII code<br />
9 Output voltage monitor V 10 8 bytes Dec. ASCII code<br />
10 Electric power monitor kW 10 8 bytes Dec. ASCII code<br />
11 Reserved — — 8 bytes = 00000000<br />
12 Run Mode time monitor hours 1 8 bytes Dec. ASCII code<br />
13 Power ON time monitor hours 1 8 bytes Dec. ASCII code<br />
The eight bytes for intelligent input or intelligent output data have a bit set in the data field for<br />
each I/O point that is ON, according to the following table:<br />
Terminal Monitor Item Data<br />
[1] Input 1 00000001<br />
[2] Input 2 00000002<br />
[3] Input 3 00000004<br />
[4] Input 4 00000008<br />
[5] Input 5 00000010<br />
[6] Input 6 00000020<br />
[7] Input 7 00000040<br />
[8] Input 8 00000080<br />
[FW] Forward input 00000100<br />
[11] Output 1 00000001<br />
[12] Output 2 00000002<br />
[13] Output 3 00000003<br />
[14] Output 4 00000008<br />
[15] Output 5 00000010<br />
[AL] Alarm relay 00000020
Command – 04 The 04 command reads the status of the inverter.<br />
The frame format of command 04 follows the<br />
diagrams and specification tables. The transmit<br />
frame has no data field.<br />
The receive frame has an 8-byte data field,<br />
containing values for three trip items (plus a<br />
reserved field).<br />
Trip data is organized as shown. The<br />
table below lists the codes and their<br />
meanings.<br />
Transmit frame format<br />
<strong>SJ7002</strong> Inverter<br />
STX Node Command BCC [CR]<br />
Element Description Size Value<br />
STX Control code (STart of TeXt) 1 byte STX (0x02)<br />
Node Node (station) address of inverter 2 bytes 01 to 32<br />
Command Transmission command 2 bytes 04<br />
BCC Block check sum code 2 bytes Exclusive OR of Node,<br />
Command, and Data<br />
[CR] Control code (carriage return) 1 byte [CR] (0x0D)<br />
Receive frame format<br />
Element Description Size Value<br />
STX Control code (STart of TeXt) 1 byte STX (0x02)<br />
Node Node (station) address of inverter 2 bytes 01 to 32<br />
Data Transmission data 8 bytes (see next table)<br />
BCC Block check sum code 2 bytes Exclusive OR of Node,<br />
Command, and Data<br />
[CR] Control code (carriage return) 1 byte [CR] (0x0D)<br />
Data field contents<br />
Status A<br />
STX Node Data BCC [CR]<br />
Status B<br />
Status C<br />
(reserved)<br />
Code Status A Definition Status B Definition Status C Definition<br />
00 Initial status On stopping —<br />
01 — On running Stop<br />
02 On Stopping On tripping Deceleration speed<br />
03 On running — Constant speed<br />
04 On free-run stop — Acceleration speed<br />
05 On jog — Forward<br />
06 On dynamic braking — Reverse<br />
07 On retry — Reverse from forward<br />
08 On trip — Forward from reverse<br />
09 On under-voltage — Forward start<br />
10 — — Reverse start<br />
B–11<br />
Appendix B
Appendix B B–12<br />
ASCII Mode Communications<br />
Command – 05 The 05 command reads the inverter’s trip history.<br />
The frame format of command 05 follows the<br />
diagrams and specification tables. The transmit<br />
frame has no data field.<br />
Element Description Size Value<br />
STX Control code (STart of TeXt) 1 byte STX (0x02)<br />
Node Node (station) address of inverter 2 bytes 01 to 32<br />
Command Transmission command 2 bytes 05<br />
BCC Block check sum code 2 bytes Exclusive OR of Node,<br />
Command, and Data<br />
[CR] Control code (carriage return) 1 byte [CR] (0x0D)<br />
The receive frame has a 440-byte data field. This<br />
consists of an 8-byte total accumulated number of<br />
trip events, followed by six 72-byte strings for the<br />
six most recent trip events as shown below.<br />
Data field contents<br />
Transmit frame format<br />
STX Node Command BCC [CR]<br />
Receive frame format<br />
STX Node Data BCC [CR]<br />
Total count Trip 1 Trip 2 Trip 3 Trip 4<br />
Trip 5 Trip 6<br />
Element Description Size Value<br />
STX Control code (STart of TeXt) 1 byte STX (0x02)<br />
Node Node (station) address of inverter 2 bytes 01 to 32<br />
Data Transmission data 440<br />
bytes<br />
(see next table)<br />
BCC Block check sum code 2 bytes Exclusive OR of Node,<br />
Command, and Data<br />
[CR] Control code (carriage return) 1 byte [CR] (0x0D)<br />
The nine bytes of data for each trip event history is listed below. The data contains the multiplier<br />
to adjust the decimal point. Divide the data by that factor to derive the actual value.<br />
No. Monitor Item Units Multiplier<br />
Data<br />
Size<br />
Notes<br />
1 Trip factor — — 8 bytes Factor code<br />
2 Inverter Status A — — 8 bytes Same as 04<br />
3 Inverter Status B — — 8 bytes<br />
command data<br />
4 Inverter Status C — — 8 bytes<br />
5 Output frequency Hz 10 8 bytes Dec. ASCII code<br />
6 Accumulated Run Mode time hours 1 8 bytes Dec. ASCII code<br />
7 Output current A 10 8 bytes Dec. ASCII code<br />
8 Output voltage V 10 8 bytes Dec. ASCII code<br />
9 Power ON time hours 1 8 bytes Dec. ASCII code
For Command 05, bytes 2, 3, and 4 of<br />
the event history are status codes A, B,<br />
and C, respectively. The tables below<br />
provide status code descriptions.<br />
Code Status A Definition Status C Definition<br />
00 Initial status On reset<br />
01 — On stopping<br />
02 On Stopping On deceleration<br />
03 On running Constant speed<br />
04 On free-run stop On acceleration<br />
05 On jog On 0 Hz running<br />
06 On dynamic braking On running<br />
07 On retry On dynamic braking<br />
08 On trip On overload restriction<br />
09 On under-voltage —<br />
Bit Status B Definition<br />
Error<br />
Code<br />
0 Ground fault E14<br />
1 IGBT error, U phase E30<br />
2 Under-voltage error E09<br />
3 Over-voltage protection E07<br />
4 Thermal trip E21<br />
5 IGBT error, V phase E30<br />
6 IGBT error, W phase E30<br />
7 Gate array error E23<br />
Data field contents<br />
byte 2<br />
Status A<br />
byte 3<br />
Status B<br />
<strong>SJ7002</strong> Inverter<br />
byte 4<br />
Status C<br />
B–13<br />
Appendix B
Appendix B B–14<br />
ASCII Mode Communications<br />
Command – 06 The 06 command reads a single parameter<br />
value from the inverter, which is specified by<br />
the data field this read command.<br />
Element Description Size Value<br />
STX Control code (STart of TeXt) 1 byte STX (0x02)<br />
Node Node (station) address of inverter 2 bytes 01 to 32<br />
Command Transmission command 2 bytes 06<br />
Data Parameter specified to be read 4 bytes (see tables below)<br />
BCC Block check sum code 2 bytes Exclusive OR of Node,<br />
Command, and Data<br />
[CR] Control code (carriage return) 1 byte [CR] (0x0D)<br />
The receive frame includes an ACK<br />
(acknowledge) character, followed by an<br />
8-byte data field.<br />
Transmit frame format<br />
STX Node Command Data BCC [CR]<br />
Receive frame format<br />
STX Node ACK Data BCC [CR]<br />
Element Description Size Value<br />
STX Control code (STart of TeXt) 1 byte STX (0x02)<br />
Node Node (station) address of inverter 2 bytes 01 to 32<br />
ACK Control code (ACKnowledge) 1 byte ACK (0x06)<br />
Data Parameter value 8 bytes Value of parameter times ten,<br />
returned as ASCII char. code,<br />
except for H003 and H203 (see<br />
table below)<br />
BCC Block check sum code 2 bytes Exclusive OR of Node,<br />
Command, and Data<br />
[CR] Control code (carriage return) 1 byte [CR] (0x0D)<br />
Use the codes in the table below to return parameters for H003 and H203 (motor capacity<br />
selection).<br />
Code Data 00 01 02 03 04 05 06 07 08 09 10<br />
Japan or U.S.A. mode (B85 = 00 or 02) 0.2 kW — 0.4 — 0.75 — 1.5 2.2 — 3.7 —<br />
EU mode (B85=01) 0.2 kW 0.37 — 0.55 0.75 1.1 1.5 2.2 3.0 — 4.0<br />
Code Data 11 12 13 14 15 16 17 18 19 20 21<br />
Japan or U.S.A. mode (B85 = 00 or 02) 5.5 kW 7.5 11 15 18.5 22 30 37 45 55 75<br />
EU mode (B85=01) 5.5 kW 7.5 11 15 18.5 22 30 37 45 55 75<br />
Code Data 22 23 24 25 26 27 28 29 30 31 32<br />
Japan or U.S.A. mode (B85 = 00 or 02) 90 kW 110 132 150 160 185 200 220 250 280 300<br />
EU mode (B85=01) 90 kW 110 132 150 160 185 200 220 250 280 300<br />
Code Data 33 34 35 36 — — — — — — —<br />
Japan or U.S.A. mode (B85 = 00 or 02) 315 kW 340 355 400 — — — — — — —<br />
EU mode (B85=01) 315 kW 340 355 400 — — — — — — —
<strong>SJ7002</strong> Inverter<br />
Command – 07 The 07 command sets a parameter value equal to the value specified in the transmission. The<br />
frame format of command 07 follows the diagram and specification table.<br />
Frame format<br />
STX Node Command Parameter Data BCC [CR]<br />
Element Description Size Value<br />
STX Control code (STart of TeXt) 1 byte STX (0x02)<br />
Node Node (station) address of inverter 2 bytes 01 to 32, and FF (broadcast to all<br />
nodes)<br />
Command Transmission command 2 bytes 07<br />
Parameter Function code of parameter 4 bytes F002..., A001..., B001..., C001...,<br />
H003..., P001...<br />
Data Transmission data 8 bytes Value of parameter times ten as<br />
ASCII char. code, except for<br />
H003 and H203 (see table below)<br />
BCC Block check sum code 2 bytes Exclusive OR of Node,<br />
Command, and Data<br />
[CR] Control code (carriage return) 1 byte [CR] (0x0D)<br />
Note that the parameter F001, the output frequency, can be set more directly with host<br />
command 01 instead of with this command. Use the codes in the following table for setting<br />
parameters associated with H003 and H203.<br />
Code Data 00 01 02 03 04 05 06 07 08 09 10<br />
Japan or U.S.A. mode (B85 = 00 or 02) 0.2 kW — 0.4 — 0.75 — 1.5 2.2 — 3.7 —<br />
EU mode (B85=01) 0.2 kW 0.37 — 0.55 0.75 1.1 1.5 2.2 3.0 — 4.0<br />
Code Data 11 12 13 14 15 16 17 18 19 20 21<br />
Japan or U.S.A. mode (B85 = 00 or 02) 5.5 kW 7.5 11 15 18.5 22 30 37 45 55 75<br />
EU mode (B85=01) 5.5 kW 7.5 11 15 18.5 22 30 37 45 55 75<br />
Code Data 22 23 24 25 26 27 28 29 30 31 32<br />
Japan or U.S.A. mode (B85 = 00 or 02) 90 kW 110 132 150 160 185 200 220 250 280 300<br />
EU mode (B85=01) 90 kW 110 132 150 160 185 200 220 250 280 300<br />
Code Data 33 34 35 36 — — — — — — —<br />
Japan or U.S.A. mode (B85 = 00 or 02) 315 kW 340 355 400 — — — — — — —<br />
EU mode (B85=01) 315 kW 340 355 400 — — — — — — —<br />
B–15<br />
Appendix B
Appendix B B–16<br />
ASCII Mode Communications<br />
Command – 08 The 08 command initializes the inverter parameters to the factory default values. First, you<br />
must set B84 (use command 07) to specify whether you want to clear the trip history at the<br />
same time. Also, set B85 to specify the country code for the initialization (use command 07).<br />
The frame format of command 08 follows the<br />
diagram and specification table.<br />
Frame format<br />
STX Node Command BCC [CR]<br />
Element Description Size Value<br />
STX Control code (STart of TeXt) 1 byte STX (0x02)<br />
Node Node (station) address of inverter 2 bytes 01 to 32, and FF (broadcast to all<br />
nodes)<br />
Command Transmission command 2 bytes 08<br />
BCC Block check sum code 2 bytes Exclusive OR of Node,<br />
Command, and Data<br />
[CR] Control code (carriage return) 1 byte [CR] (0x0D)<br />
Command – 09 The 09 command verifies whether or not it is<br />
possible to set a particular parameter in the<br />
EEPROM. The frame format of command 08<br />
follows the diagram and specification table.<br />
Element Description Size Value<br />
STX Control code (STart of TeXt) 1 byte STX (0x02)<br />
Node Node (station) address of inverter 2 bytes 01 to 32<br />
Command Transmission command 2 bytes 09<br />
BCC Block check sum code 2 bytes Exclusive OR of Node,<br />
Command, and Data<br />
[CR] Control code (carriage return) 1 byte [CR] (0x0D)<br />
The receive frame includes an ACK<br />
(acknowledge) character, followed by a<br />
2-byte data field with the result.<br />
Transmit frame format<br />
STX Node Command BCC [CR]<br />
Receive frame format<br />
STX Node ACK Data BCC [CR]<br />
Element Description Size Value<br />
STX Control code (STart of TeXt) 1 byte STX (0x02)<br />
Node Node (station) address of inverter 2 bytes 01 to 32<br />
ACK Control code (ACKnowledge) 1 byte ACK (0x06)<br />
Data Parameter value 2 bytes 00 = setting not allowed,<br />
01 = setting is allowed<br />
BCC Block check sum code 2 bytes Exclusive OR of Node,<br />
Command, and Data<br />
[CR] Control code (carriage return) 1 byte [CR] (0x0D)
Command – 0A The 0A command sets a value in the EEPROM.<br />
The frame format of command 0A follows the<br />
diagram and specification table.<br />
Frame format<br />
<strong>SJ7002</strong> Inverter<br />
STX Node Command BCC [CR]<br />
Element Description Size Value<br />
STX Control code (STart of TeXt) 1 byte STX (0x02)<br />
Node Node (station) address of inverter 2 bytes 01 to 32, and FF (broadcast to all<br />
nodes)<br />
Command Transmission command 2 bytes 0A<br />
BCC Block check sum code 2 bytes Exclusive OR of Node,<br />
Command, and Data<br />
[CR] Control code (carriage return) 1 byte [CR] (0x0D)<br />
Command – 0B The 0B command recalculates the inverter’s internal motor constants. Use this function after<br />
the base frequency or any Hxxx parameters are changed via the serial link commands.<br />
The frame format of command 0B follows the<br />
diagram and specification table.<br />
Frame format<br />
STX Node Command BCC [CR]<br />
Element Description Size Value<br />
STX Control code (STart of TeXt) 1 byte STX (0x02)<br />
Node Node (station) address of inverter 2 bytes 01 to 32<br />
Command Transmission command 2 bytes 0B<br />
BCC Block check sum code 2 bytes Exclusive OR of Node,<br />
Command, and Data<br />
[CR] Control code (carriage return) 1 byte [CR] (0x0D)<br />
B–17<br />
Appendix B
Appendix B B–18<br />
Communications Reference Information<br />
Communications Reference Information<br />
Inverter<br />
Affirmative Reply<br />
Inverter<br />
Negative Reply<br />
The standard affirmative reply from the inverter<br />
uses the ACK character (acknowledge) in the data<br />
field. The frame format of this reply follows the<br />
diagram and specification table.<br />
Element Description Size Value<br />
STX Control code (STart of TeXt) 1 byte STX (0x02)<br />
Node Node (station) address of inverter 2 bytes 01 to 32<br />
ACK Control code (ACKnowledge) 1 byte ACK (0x06)<br />
BCC Block check sum code 2 bytes Exclusive OR of Node and ACK<br />
[CR] Control code (carriage return) 1 byte [CR] (0x0D)<br />
The standard negative reply from the inverter<br />
uses the NAK character (negative acknowledge)<br />
in the data field. The frame format of<br />
this reply follows the diagram and specification<br />
table.<br />
The error codes for a NAK (negative acknowledge) are:<br />
Frame format<br />
STX Node ACK BCC [CR]<br />
Element Description Size Value<br />
STX Control code (STart of TeXt) 1 byte STX (0x02)<br />
Node Node (station) address of inverter 2 bytes 01 to 32<br />
NAK Control code<br />
(Negative ACKnowledge)<br />
1 byte NAK (0x15)<br />
Error code Code representing error type 2 bytes (See next table below)<br />
BCC Block check sum code 2 bytes Exclusive OR of Node, Data,<br />
and NAK<br />
[CR] Control code (carriage return) 1 byte [CR] (0x0D)<br />
Error<br />
Code<br />
Error Description<br />
STX Node NAK<br />
Error<br />
BCC [CR]<br />
code<br />
Error<br />
Code<br />
Frame format<br />
Error Description<br />
01H Parity error 07H Receive buffer overrun error<br />
02H Check sum error 08H Receive time-out error<br />
03H Framing error 11H Abnormal command code error<br />
04H Overrun error 13H Execution disabled<br />
05H Protocol error 16H Abnormal parameter code/value<br />
error<br />
06H ASCII code error — —<br />
If a host computer broadcasts a command to all inverter stations, no response will be returned<br />
to the host.
Block Check<br />
Code (BCC)<br />
<strong>SJ7002</strong> Inverter<br />
This section shows how the inverter protocol computes defines a BCC—block check code. The<br />
BCC is calculated for each frame transmitted and can be used to verify the integrity of data<br />
transmission. The example below shows command 01 setting the inverter frequency to 5Hz.<br />
Frame format<br />
STX Node Command Data BCC [CR]<br />
0 1<br />
0 1<br />
0 0 0 5 0 0<br />
0<br />
ASCII Code<br />
(0x 02)<br />
(0x 30 31)<br />
(0x 30 31)<br />
(0x 30 30 30 35 30 30)<br />
(0x 30 35)<br />
(0x 0D)<br />
The block check code is computed by using the ASCII codes (shown above) and applying<br />
eXclusive OR (XOR) operations. Beginning with the first pair of bytes, the result of their XOR<br />
result is then used in an XOR operation with the third byte, and so on. For this example, the<br />
BCC calculation is shown below.<br />
Data bytes:<br />
3 0 3 1 3 0 3 1 3 0 3 0 3 0 3 5 3 0<br />
0 1<br />
3 1<br />
0 0<br />
3 0<br />
0 0<br />
ASCII Code Table The table below shows only the ASCII codes used for function codes and parameter data.<br />
3 0<br />
0 5<br />
3 5<br />
3 0<br />
0 5 BCC<br />
XOR<br />
intermediate results<br />
Character ASCII Code Character ASCII Code Character ASCII Code<br />
STX 0 2 4 3 4 C 4 3<br />
ACK 0 6 5 3 5 D 4 4<br />
CR 0 D 6 3 6 E 4 5<br />
NAK 1 5 7 3 7 F 4 6<br />
0 3 0 8 38 H 4 8<br />
1 3 1 9 39 P 5 0<br />
2 3 2 A 4 1 b 6 2<br />
3 3 3 B 4 2 — —<br />
B–19<br />
Appendix B
Appendix B B–20<br />
Communications Reference Information<br />
Communication<br />
Test Mode<br />
The communication test mode verifies that the inverter can properly send and receive data via<br />
the RS485 serial port. Follow the steps below to perform the communication test.<br />
1. Remove the serial cable (if present) connected to the TM2 connector block of the control<br />
terminals, as shown below.<br />
TM2<br />
SP SN RP SN<br />
Serial<br />
communications<br />
NOTE: It is not necessary to connect a loopback jumper. The RS485 port uses a transceiver for<br />
communications, which already allows simultaneous transmitting and receiving.<br />
2. Use the front panel keypad to navigate to parameter C071, Communication Speed<br />
Selection. Change parameter C071=02 and press Store. Value 02 is the Loopback Test<br />
option. Now the inverter is ready to conduct the loopback test.<br />
3. Turn the inverter power OFF and then ON again to initiate the communication test. Observe<br />
the keypad display and compare to the results shown below.<br />
PASS FAIL<br />
4. Press the Stop/Rest button on the keypad to return the inverter keypad/ display to normal<br />
operation.<br />
5. Change C071 to its original setting (default is C071=04). Otherwise, while C071=02, the<br />
inverter will perform the communications loopback test at each powerup.
ModBus Mode Communications<br />
Transmission<br />
Procedure<br />
<strong>SJ7002</strong> Inverter<br />
The network master sends a frame to initiate communications with a slave, as shown in the<br />
figure below.<br />
Transmitting device:<br />
Query - A frame sent from the external control equipment to the inverter<br />
Response - A frame returned from the inverter to the external control equipment<br />
Wait time (C077) - If the inverter cannot complete the reception of a query from the host<br />
(master)within the communication timeout period, the inverter responds to the query and<br />
waits to receive the query from the beginning. Subsequently, the inverter returns no response<br />
to the master system.<br />
After reception timeout occurs, the inverter operates according to function C076, Action<br />
upon communication error selection (see table below). Monitoring of reception timeout<br />
begins when the first communication is performed upon inverter powerup or a reset.<br />
Reception timeout is monitored only when the inverter communicates with the master<br />
system.<br />
Function<br />
Code<br />
C076<br />
Host<br />
(master)<br />
Inverter<br />
(slave)<br />
Query<br />
Name/Description OPE Range and Settings<br />
Action upon communication<br />
error selection<br />
Response<br />
Latency time (silent interval plus C078 setting)<br />
00 Trip (E41)<br />
01 Trip (E41) after deceleration and stop<br />
02 No action (ignore errors)<br />
03 Free-run stop<br />
04 Decelerate and stop<br />
C077<br />
Communication timeout before trip<br />
Limit timer for reception timeout<br />
0.00 to 99.99 (seconds)<br />
C078 Communication wait time<br />
Time to wait until the inverter starts<br />
sending a response after reception<br />
of a query (excluding the silent<br />
interval)<br />
0.0 to 1000 (milliseconds)<br />
The inverter always sends a response frame after receiving a query frame. The inverter does not<br />
initiate any communication with the host (master).<br />
B–21<br />
Appendix B
Appendix B B–22<br />
ModBus Mode Communications<br />
Message Configuration:<br />
Query<br />
Each frame is formatted as follows:<br />
Frame Format<br />
Header (silent interval)<br />
Slave address<br />
Function code<br />
Data<br />
Error check code<br />
Trailer (silent interval)<br />
Slave address:<br />
This is a numer from 1 to 32 assigned to each inverter (slave). (Only the inverter having the<br />
address given as a slave address in the query can receive the query.)<br />
When slave address “0” is specified, the query can be addressed to all inverter simultaneously<br />
(broadcasting).<br />
In broadcasting, the host (master) cannot read inverter data nor perform a loopback test.<br />
Data:<br />
The data contains a function command.<br />
The data format used in the <strong>SJ7002</strong> corresponds to the ModBus data format below.<br />
Name of Data Description<br />
Coil Binary data that can be referenced and changed (1 bit long)<br />
Holding Register 16-bit data that can be referenced and changed<br />
Function Code:<br />
Specify a function you want to make the inverter execute. Function codes available to the<br />
<strong>SJ7002</strong> are listed below.<br />
Function<br />
Code<br />
Function<br />
Maximum data size<br />
(bytes available per<br />
message)<br />
Maximum number of<br />
data elements per<br />
message<br />
01h Read Coil Status 4 32 coils (in bits)<br />
03h Read Holding Register 8 4 registers (in bytes)<br />
05h Write in Coil 2 1 coil (in bits)<br />
06h Write in Holding Register 2 1 register (in bytes)<br />
08h Loopback Test — —<br />
0Fh Write in Coils 4 32 coils (in bits)<br />
10h Write in Registers 4 4 registers (in bytes)<br />
Error check:<br />
Modbus-RTU uses CRC (Cyclic Redundancy Check) for error checking.<br />
The CRC code is 16-bit data that is generated for 8-bit blocks of arbitrary length.<br />
The CRC code is generated by a generator polynomial CRC-16 (X 16 + X 15 + X 2 + 1).
Message<br />
Configuration:<br />
Response<br />
<strong>SJ7002</strong> Inverter<br />
Header and trailer (silent interval):<br />
Latency is the time between the reception of a query from the master and transmission of a<br />
response from the inverter.<br />
The header and trailer set the total time the inverter should wait before sending a response<br />
after having received a query from the master system.<br />
Be sure to specify the time corresponding to the transmission of 3.5 characters (24 bits) as<br />
the waiting time. If a shorter waiting time (corresponding to the transmission of fewer than<br />
3.5 characters) is specified, the inverter will not respond.<br />
The actual waiting time is the sum of the silent interval (corresponding to the transmission of<br />
3.5 characters) and the communication wait time (C078).<br />
Time required for communication:<br />
After the inverter receives a query, the inverter waits for the sum of the silent interval (corresponding<br />
to the transmission of 3.5 characters) and the communication wait time (C078)<br />
before sending a response.<br />
After receiving a response from the inverter, the master system must wait for the silent<br />
interval (corresponding to the transmission of 3.5 characters) or longer before sending the<br />
next query to the inverter.<br />
Normal response:<br />
If the query specifies the function code (08h) for the loopback test, the inverter returns a<br />
response that has the same contents as the query.<br />
If the query specifies a function code (05h, 06h, 0Fh, or 10h) for writing data to registers or<br />
coils, the inverter returns the query without a change as a response.<br />
If the query specifies a function code (01h or 03h) for reading a register or coil, the inverter<br />
returns a response that contains the slave address and function code specified in the query<br />
and the data read from the register or coil.<br />
Response when an error occurs:<br />
When finding any error in a query (except for a transmission error), the inverter returns an<br />
exception response without executing anything,<br />
You can check the error by the function code in the response. The function code of the<br />
exception response is the sum of the function code of the query and 80h.<br />
The content of the error is known from the exception code.<br />
Field Configuration<br />
Slave address<br />
Function code<br />
Exception code<br />
CRC–16<br />
Exception Code Description<br />
0 1 h The specified function is not supported.<br />
0 2 h The specified address is not found.<br />
0 3 h The format of the specified data is not acceptable.<br />
2 1 h The data to be written in a holding register is outside the inverter.<br />
B–23<br />
Appendix B
Appendix B B–24<br />
ModBus Mode Communications<br />
Exception Code Description<br />
2 2 h The specified functions are not available to the inverter.<br />
• Function to change the content of a register that cannot be changed<br />
while the inverter is in service<br />
• Function to submit an ENTER command during running (UV)<br />
• Function to write in a register during tripping (UV)<br />
• Function to write in a read-only register (or coil)<br />
No response occurs:<br />
In the cases below, the inverter ignores a query and returns no response.<br />
When receiving a broadcasting query<br />
When detecting a transmission error in reception of a query<br />
When the slave address set in the query is not equal to the slave address of the inverter<br />
When a time interval between data elements constituting a message is shorter than<br />
3.5 characters<br />
When the data length of the query is invalid<br />
NOTE: Provide a timer in the master and make the master retransmit the same query when no<br />
response is made within a preset time period after the preceding query was sent.
Explanation of<br />
Function Codes<br />
<strong>SJ7002</strong> Inverter<br />
Read Coil Status [01h]:<br />
This function reads the status (ON/OFF) of selected coils. An example follows below.<br />
Read intelligent input terminals [1] to [6] of an inverter having a slave address “8.”<br />
This example assumes the intelligent input terminals have terminal states listed below<br />
(coils 13 and 14 are OFF).<br />
Item Data<br />
Intelligent input terminal [1] [2] [3] [4] [5] [6]<br />
Coil number 7 8 9 10 11 12<br />
Terminal status ON ON ON OFF ON OFF<br />
Query:<br />
No. Field Name<br />
Example<br />
(hex)<br />
1 Slave address *1 08<br />
2 Function code 01<br />
3 Coil start number<br />
(high order)<br />
00<br />
4 Coil start number (low<br />
order)<br />
06<br />
5 Number of coils (high<br />
order) *2<br />
00<br />
6 Number of coils (low<br />
order) *2<br />
06<br />
7 CRC-16 (high order) 5C<br />
8 CRC-16 (low order) 90<br />
Note 1: Broadcasting is disabled.<br />
Note 2: The starting coil number is one<br />
less than the number of the coil to<br />
be read first.<br />
Note 3: When 0 or more than 32 is<br />
specified as a number of coils,<br />
error code “03h” is returned.<br />
Response:<br />
The data set in the response shows terminal states of coils 7 to 14.<br />
Data “17h = 00010111b” indicates the following assuming coil 7 is the LSB.<br />
Item Data<br />
No. Field Name<br />
Example<br />
(hex)<br />
1 Slave address 08<br />
2 Function code 01<br />
3 Data size (in bytes) 01<br />
4 Coil data *4 17<br />
5 CRC-16 (high order) 12<br />
6 CRC-16 (low order) 1A<br />
Note 4: Data is transferred by the specified<br />
number of data bytes (data size).<br />
Coil number 14 13 12 11 10 9 8 7<br />
Coil status OFF OFF OFF ON OFF ON ON ON<br />
When a read coil is outside the defined coils, the final coil data to be transmitted contains<br />
“0“as the status of the coil outside the range.<br />
When the Read Coil Status command cannot be executed normally, see the exception<br />
response.<br />
B–25<br />
Appendix B
Appendix B B–26<br />
ModBus Mode Communications<br />
Read Holding Register [03h]:<br />
This function reads the contents of the specified number of consecutive holding registers (of<br />
specified register addresses). An example follows below.<br />
Reading previous three trip factors from an inverter having a slave address “5”<br />
This example assumes the previous three trip factors are as follows:<br />
<strong>SJ7002</strong> Command D081 (N) D082 (N-1<br />
Register number 0012h 0013h<br />
Trib factor (upper digit) Over-voltage (E07) Decelerating (02)<br />
Query:<br />
No. Field Name<br />
Example<br />
(hex)<br />
1 Slave address *1 05<br />
2 Function code 03<br />
3 Register start number<br />
(high order)<br />
00<br />
4 Register start number<br />
(low order)<br />
11<br />
5 Number of registers<br />
(high order) *2<br />
00<br />
6 Number of registers<br />
(low order) *2<br />
02<br />
7 CRC-16 (high order) 95<br />
8 CRC-16 (low order) 8A<br />
Note 1: Broadcasting is disabled.<br />
Note 2: The starting coil number is one<br />
less than the number of the coil to<br />
be read first.<br />
The data set in the response is as follows:<br />
Response:<br />
No. Field Name<br />
Note 3: Data is transferred by the specified<br />
number of data bytes (data size). In<br />
this case, 4 bytes are used to return<br />
the content of two holding<br />
registers.<br />
Response Buffer 4 5 6 7<br />
Example<br />
(hex)<br />
1 Slave address 05<br />
2 Function code 03<br />
3 Data size (in bytes) *3 04<br />
4 Register start number<br />
(high order)<br />
00<br />
5 Register start number<br />
(low order)<br />
07<br />
6 Register start number +1<br />
(high order)<br />
00<br />
7 Register start number +1<br />
(low order)<br />
02<br />
8 CRC-16 (high order) 36<br />
9 CRC-16 (low order) 37<br />
Starting register<br />
number<br />
+0 (high order) +0 (low order) +1 (high order) +1 (low order)<br />
Register status 00h 07h 00h 02h<br />
Trip data Over-voltage trip Decelerating<br />
When the Read Holding Register command cannot be executed normally, refer to the exception<br />
response.
Write in Coil [05h]:<br />
This function writes data in a single coil. Coil status changes are as follows:<br />
Data<br />
Coil Status<br />
OFF to ON ON to OFF<br />
Change data (high order) FFh 00h<br />
Change date (low order) 00h 00h<br />
An example follows (note that to command the inverter, set A002=03):<br />
Sending a RUN command to an inverter having slave address “10”<br />
This example writes in coil number “1.”<br />
Query:<br />
No. Field Name<br />
Example<br />
(hex)<br />
1 Slave address *1 0A<br />
2 Function code 05<br />
3 Coil start number (high<br />
order)<br />
00<br />
4 Coil start number (low<br />
order) *2<br />
00<br />
5 Change data (high<br />
order)<br />
FF<br />
6 Change data (low order) 00<br />
7 CRC-16 (high order) 8D<br />
8 CRC-16 (low order) 41<br />
Note 1: Broadcasting is disabled.<br />
Note 2: The starting coil number is one<br />
less than the number of the coil to<br />
be read first.<br />
Response:<br />
No. Field Name<br />
<strong>SJ7002</strong> Inverter<br />
When the Write in Coil command cannot be executed normally, refer to the exception response.<br />
Write in Holding Register [06h]:<br />
This function writes data in a specified holding register. An example follows below.<br />
Write “50Hz” as the first Multi-speed 0 (A020) in an inverter having slave address “5.”<br />
This example uses change data “50 (0032h)” to set “50Hz” as the data resolution of the<br />
register “1203h” holding the base frequency setting (A003) is 1 Hz.<br />
<strong>SJ7002</strong> Command D081 (N) D082 (N-1<br />
Register number 0012h 0013h<br />
Trib factor (upper digit) Over-voltage (E07) Decelerating (02)<br />
Example<br />
(hex)<br />
1 Slave address 0A<br />
2 Function code 05<br />
4 Coil start number (high<br />
order)<br />
00<br />
5 Coil start number (low<br />
order)<br />
00<br />
6 Change data (high<br />
order)<br />
FF<br />
7 Change data (low order) 00<br />
8 CRC-16 (high order) 8D<br />
9 CRC-16 (low order) 41<br />
B–27<br />
Appendix B
Appendix B B–28<br />
ModBus Mode Communications<br />
Query:<br />
No. Field Name<br />
Example<br />
(hex)<br />
1 Slave address *1 05<br />
2 Function code 06<br />
3 Register start number<br />
(high order) *2<br />
12<br />
4 Register start number<br />
(low order) *2<br />
02<br />
5 Change data (high<br />
order)<br />
00<br />
6 Change data (low order) 32<br />
7 CRC-16 (high order) AD<br />
8 CRC-16 (low order) 23<br />
Note 1: Broadcasting is disabled.<br />
Note 2: The starting coil number is one<br />
less than the number of the coil to<br />
be read first.<br />
Response:<br />
No. Field Name<br />
When the Write Holding Register command cannot be executed normally, refer to the<br />
exception response.<br />
Loopback Test [08h]:<br />
This function checks a master-slave transmission using any test data. An example follows:<br />
Send test data to an inverter having slave address “1” and receiving the test data from the<br />
inverter (as a loopback test).<br />
Query:<br />
No. Field Name<br />
Note 1: Broadcasting is disabled.<br />
Example<br />
(hex)<br />
1 Slave address *1 01<br />
2 Function code 08<br />
3 Test subcode (high<br />
order)<br />
00<br />
4 Test subcode (low<br />
order)<br />
00<br />
5 Data (high order) Any<br />
6 Data (low order) Any<br />
7 CRC-16 (high order) CRC<br />
8 CRC-16 (low order) CRC<br />
The test subcode is for echo (00h,00h) only and not available to the other commands.<br />
Example<br />
(hex)<br />
1 Slave address 05<br />
2 Function code 06<br />
3 Register start number<br />
(high order)<br />
12<br />
4 Register start number<br />
(low order)<br />
02<br />
5 Change data (high<br />
order)<br />
00<br />
6 Change data (low order) 32<br />
7 CRC-16 (high order) AD<br />
8 CRC-16 (low order) 23<br />
Response:<br />
No. Field Name<br />
Example<br />
(hex)<br />
1 Slave address 01<br />
2 Function code 08<br />
3 Test subcode (high<br />
order)<br />
00<br />
4 Test subcode (low<br />
order)<br />
00<br />
5 Data (high order) Any<br />
6 Data (low order) Any<br />
7 CRC-16 (high order) AD<br />
8 CRC-16 (low order) 23
<strong>SJ7002</strong> Inverter<br />
Write in Coils [0Fh]:<br />
This function writes data in consecutive coils. An example follows:<br />
Change the state of intelligent input terminal [1] to [6] of an inverter having a slave address<br />
“5.”<br />
This example assumes the intelligent input terminals have terminal states listed below.<br />
Item Data<br />
Intelligent input terminal [1] [2] [3] [4] [5] [6]<br />
Coil number 7 8 9 10 11 12<br />
Terminal status ON ON ON OFF ON OFF<br />
Query:<br />
No. Field Name<br />
Example<br />
(hex)<br />
1 Slave address *1 05<br />
2 Function code 0F<br />
3 Coil start number<br />
(high order)<br />
00<br />
4 Coil start number (low<br />
order)<br />
06<br />
5 Number of coils (high<br />
order) *2<br />
00<br />
6 Number of coils (low<br />
order) *2<br />
06<br />
7 Byte number *3 02<br />
8 Change data (high<br />
order) *3<br />
17<br />
9 Change data (low<br />
order)*3<br />
00<br />
10 CRC-16 (high order) DB<br />
11 CRC-16 (low order) 3E<br />
Note 1: Broadcasting is disabled.<br />
Note 2: The starting coil number is one<br />
less than the number of the coil to<br />
be read first.<br />
Note 3: The change data is a set of highorder<br />
data and low-order data. So<br />
when the size (in bytes) of data to<br />
be changed is an odd number, add<br />
“1” to the data size (in bytes) to<br />
make it an even number<br />
Response:<br />
No. Field Name<br />
Example<br />
(hex)<br />
1 Slave address 05<br />
2 Function code 0F<br />
3 Coil start number<br />
(high order)<br />
00<br />
4 Coil start number (low<br />
order)<br />
06<br />
5 Number of coils (high<br />
order) *2<br />
00<br />
6 Number of coils (low<br />
order) *2<br />
06<br />
7 CRC-16 (high order) 34<br />
8 CRC-16 (low order) 4C<br />
Note 4: Data is transferred by the specified<br />
number of data bytes (data size).<br />
When the Write in Coils command cannot be executed normally, see the exception response.<br />
B–29<br />
Appendix B
Appendix B B–30<br />
ModBus Mode Communications<br />
Write in Holding Registers [10h]:<br />
This function writes data in consecutive holding registers. An example follows:<br />
Write “3000 seconds” as the first acceleration time 1 (F002) in an inverter having a slave<br />
address “1.”<br />
This example uses change data “300000 (493E0h)” to set “3000 seconds” as the data<br />
resolution of the registers “1103h” and “1104h” holding the first acceleration time 1 (F002)<br />
is 0.01 second.<br />
Query:<br />
No. Field Name<br />
Example<br />
(hex)<br />
1 Slave address *1 01<br />
2 Function code 10<br />
3 Start address (high<br />
order) *2<br />
11<br />
4 Start address (low order)<br />
*2<br />
02<br />
5 Number of holding<br />
registers (high order)<br />
00<br />
6 Number of holding<br />
registers (low order)<br />
02<br />
7 Byte number *3 04<br />
8 Change data 1 (high<br />
order)<br />
00<br />
9 Change data 1 (low<br />
order)<br />
04<br />
10 Change data 2 (high<br />
order)<br />
93<br />
11 Change data 2 (low<br />
order)<br />
E0<br />
12 CRC-16 (high order) 9E<br />
13 CRC-16 (low order) 9F<br />
Note 1: Broadcasting is disabled.<br />
Note 2: The starting coil number is one<br />
less than the number of the coil to<br />
be read first.<br />
Response:<br />
No. Field Name<br />
When the Write Holding Register command cannot be executed normally, refer to the<br />
exception response.<br />
Example<br />
(hex)<br />
1 Slave address *1 01<br />
2 Function code 10<br />
3 Register start number<br />
(high order)<br />
11<br />
4 Register start number<br />
(low order)<br />
02<br />
5 Number of holding<br />
registers (high order)<br />
00<br />
6 Number of holding<br />
registers (low order)<br />
02<br />
7 CRC-16 (high order) E5<br />
8 CRC-16 (low order) 34
<strong>SJ7002</strong> Inverter<br />
Exception Response:<br />
When sending a query (excluding a broadcasting query) to an inverter, the master always<br />
requests a response from the inverter. Usually, the inverter returns a response according to the<br />
query. However, when finding an error in the query, the inverter returns an exception response.<br />
The exception response consists of the fields shown below.<br />
Field Configuration<br />
Slave address<br />
Function code<br />
Exception code<br />
CRC–16<br />
The content of each field is explained below. The function code of the exception response is the<br />
sum of the function code of the query and 80h. The exception code indicates the factor of the<br />
exception response.<br />
Function Code<br />
Query Exception Response<br />
0 1 h 8 1 h<br />
0 3 h 8 3 h<br />
0 5 h 8 5 h<br />
0 6 h 8 6 h<br />
0 F h 8 F h<br />
1 0 h 9 0 h<br />
Exception Code Description<br />
0 1 h The specified function is not supported.<br />
0 2 h The specified address is not found.<br />
0 3 h The format of the specified data is not acceptable.<br />
2 1 h The data to be written in a holding register is outside the inverter.<br />
2 2 h The specified functions are not available to the inverter.<br />
• Function to change the content of a register that cannot be changed<br />
while the inverter is in service<br />
• Function to submit an ENTER command during running (UV)<br />
• Function to write in a register during tripping (UV)<br />
• Function to write in a read-only register (or coil)<br />
B–31<br />
Appendix B
Appendix B B–32<br />
ModBus Mode Communications<br />
Store New<br />
Register Data<br />
(ENTER<br />
Command)<br />
Neither the command (06h) to write data to a register nor the command (10h) to write data to<br />
multiple registers can store the updates they made in the internal memory of the inverter.<br />
Turning the inverter power off without storing the updates deletes them and restores the original<br />
register settings. If you intend to store register updates in the internal memory of the inverter,<br />
issue the Enter command as described below.<br />
If you have updated a control constant, you must recalculate the motor constants. In such cases,<br />
use register "0900h" for recalculation as described below.<br />
Submitting an ENTER Command:<br />
Write any data in all memory (of a holding register at 0900h) by the Write in Holding<br />
Register command [06h].<br />
Write Data Description<br />
0000 Recalculate the motor constants<br />
0001 Store the register data<br />
Other Recalculate the motor constants and store the register data<br />
NOTE: The ENTER command takes much time to run. You can check its progress by monitoring<br />
the Data Writing signal (of a coil at 001Ah).<br />
NOTE: The service life of the storage element of the inverter is limited (to about 100,000 write<br />
operations). Frequent use of the ENTER command may shorten its service life.
ModBus Data Listing<br />
<strong>SJ7002</strong> Inverter<br />
ModBus Coil List The following tables list the primary coils for the inverter interface to the network. The table<br />
legend is given below.<br />
Coil Number - The network register address offset for the coil, in hex and decimal. Actual<br />
network address is 30001 + offset. The coil data is a single bit (binary) value.<br />
Name - The functional name of the coil<br />
R/W - The read-only (R) or read-write (R/W) access permitted to the inverter data<br />
Description - The meaning of each of the states of the coils<br />
Coil number<br />
hex dec.<br />
List of Coil Numbers<br />
Name R/W Description<br />
0000h 00000 (Reserved) — —<br />
0001h 00001 Operation command R/W 0 ... Stop<br />
1 ... Run (enabled when A003=03)<br />
0002h 00002 Rotation direction command R/W 0 ... REV<br />
1 ... FW (enabled when A003=03)<br />
0003h 00003 External trip (EXT) R/W 0 ... No trip event<br />
1 ... Trip occurred<br />
0004h 00004 Trip reset (RS) R/W 0 ... No reset condition<br />
1 ... Reset<br />
0005h 00005 (Reserved) — —<br />
0006h 00006 (Reserved) — —<br />
0007h 00007 Intelligent input terminal [1] R/W 0 ... OFF *1<br />
0008h 00008 Intelligent input terminal [2] R/W<br />
1 ... ON<br />
0009h 00009 Intelligent input terminal 3] R/W<br />
000Ah 00010 Intelligent input terminal [4] R/W<br />
000Bh 00011 Intelligent input terminal [5] R/W<br />
000Ch 00012 Intelligent input terminal [6] R/W<br />
000Dh 00013 Intelligent input terminal [7] R/W<br />
000Eh 00014 Intelligent input terminal [8] R/W<br />
000Fh 00015 Run/Stop status R 0 ... Stop (corresponds to D003 monitor)<br />
1 ... Run<br />
0010h 00016 FW/REV status R 0 ... FW<br />
1 ... RV<br />
0011h 00017 Inverter ready R 0 ... Not ready<br />
1 ... Ready<br />
0012h 00018 (Reserved) R —<br />
0013h 00019 RUN (running) R 0 ... OFF<br />
0014h 00020 FA2 - Frequency Arrival<br />
(constant-speed reached)<br />
R<br />
1 ... ON<br />
0015h 00021 FA2 - Frequancy Arrival (above<br />
set frequency)<br />
R<br />
0016h 00022 OL - Overload signal R<br />
0017h 00023 OD - PID deviation signal R<br />
B–33<br />
Appendix B
Appendix B B–34<br />
ModBus Data Listing<br />
Coil number<br />
hex dec.<br />
List of Coil Numbers<br />
Name R/W Description<br />
0018h 00024 AL - Alarm signal R 0... OFF<br />
0019h 00025 FA3 - Frequency arrival signal<br />
(set frequency or above)<br />
R<br />
1... ON<br />
001Ah 00026 OTQ - Over-torque R<br />
001Bh 00027 IP - Instantaneous power failure R<br />
001Ch 00028 UV - Uundervoltage R<br />
001Dh 00029 TRQ - Torque limit R<br />
001Eh 00030 RNT - Operation time over R<br />
001Fh 00031 ONT - Plug-in time over R<br />
0020h 00032 THM - Thermal alarm signal R<br />
0021h 00033 (Reserved) — —<br />
0022h 00034 (Reserved) — —<br />
0023h 00035 (Reserved) — —<br />
0024h 00036 (Reserved) — —<br />
0025h 00037 (Reserved) — —<br />
0026h 00038 BRK - Brake release R 0... OFF<br />
0027h 00039 BER - Brake error R<br />
1... ON<br />
0028h 00040 ZS - 0 Hz detection signal R<br />
0029h 00041 DSE - Speed deviation<br />
maximum<br />
R<br />
002Ah 00042 POK - Positioning completed R<br />
002Bh 00043 FA4 - Set frequency<br />
overreached 2<br />
R<br />
002Ch 00044 FA5 - Set frequency reached 2 R<br />
002Dh 00045 OL2 - Overload notice advance<br />
signal 2<br />
R<br />
002Eh 00046 Odc - Analog O disconnection<br />
detection<br />
R<br />
002Fh 00047 OIDc - Analog OI<br />
disconnection detection<br />
R<br />
0030h 00048 O2Dc - Analog O2<br />
disconnection detection<br />
R<br />
0031h 00049 (Reserved) — —<br />
0032h 00050 FBV - PID feedback<br />
R 0... OFF<br />
comparison<br />
1... ON<br />
0033h 00051 NDc - Communication bus<br />
disconnection<br />
R<br />
0034h 00052 LOG1 - Logical operation<br />
result 1<br />
R<br />
Note 1: ON usually when either the control circuit terminal board or a coil is ON. Among<br />
intelligent input terminals, the control circuit terminal board is a high-priority terminal.<br />
If the master cannot reset the coil ON status due to a transmission line break, turn<br />
ON and OFF the control circuit terminal board to make the coil OFF status.
ModBus Holding<br />
Registers<br />
<strong>SJ7002</strong> Inverter<br />
Note 2: The content of a transmission error is held until the error is reset. (The error can be<br />
reset while the inverter is running.)<br />
The following tables list the holding registers for the inverter interface to the network. The table<br />
legend is given below.<br />
Function Code - The inverter’s reference code for the parameter or function (same as<br />
inverter keypad display). Long-word values (32) bits are listed in two rows; “H” and “L”<br />
indicate the high and low order words.<br />
Name - The standard functional name of the parameter or function for the inverter<br />
R/W - The read-only or read-write access permitted to the data in the inverter<br />
Description - How the parameter or setting works (same as Chapter 3 description)<br />
Register - The network register address offset for the value, in hex and decimal. Actual<br />
network address is 40001 + offset. Some values have a high-byte and low-byte address.<br />
Range - The numerical range for the network value that is sent and/or received<br />
TIP: The network values are binary integers. Since these values cannot have an embedded<br />
decimal point, for many parameters it represents the actual value (in engineering units) multiplied<br />
by a factor of 10 or 100. Network communications must use the listed range for network<br />
data. The inverter automatically divides received values by the appropriate factor in order to<br />
establish the decimal point for internal use. Likewise, the network host computer must apply<br />
the same factor when it needs to work in engineering units. However, when sending data to the<br />
inverter, the network host computer must scale values to the integer range listed for network<br />
communications.<br />
Resolution - This is the quantity represented by the LSB of the network value, in engineering<br />
units. When the network data range is greater than the inverter’s internal data range, this<br />
1-bit resolution will be fractional.<br />
Holding Registers, “D” Group Monitor Functions<br />
Func. Code Name R/W Description<br />
— Inverter status A R 0 = Initial status; 1 = Waiting for<br />
Vdc level; 2 = Stoping; 3 =<br />
Running; 4 = Free-run Stop<br />
(FRS); 5 = Jogging; 6 = DC<br />
Braking; 7 = Freq. is input; 8 =<br />
Retrying operation; 9 = Undervoltage<br />
(UV)<br />
— Inverter status B R 0 = Stopping; 1 = Running;<br />
2 = Tripping<br />
— Inverter status C R 0 = ---; 1 = Stopping; 2 = Decelerating;<br />
3 = Constant-speed<br />
operation; 4 = Accelerating; 5 =<br />
Forward rotation; 6 = Reverse<br />
rotation; 7 = Forward-to-reverse<br />
rotation transition; 9 = Starting<br />
forward rotation; 10 = Starting<br />
reverse rotation<br />
Register<br />
hex dec.<br />
— PID feedback R/W 0006h 00006<br />
— (Reserved) — — 0007h<br />
to<br />
0010h<br />
Network Data<br />
Range Res.<br />
0003h 00003 0 to 9 —<br />
0004h 00004 0, 1, 2 —<br />
0005h 00005 0 to 10 —<br />
00007<br />
to<br />
00016<br />
— —<br />
B–35<br />
Appendix B
Appendix B B–36<br />
ModBus Data Listing<br />
D001 H Output frequency monitor R Real-time display of output 1001h 04097 0 to 40000 0.01 Hz<br />
D001 L R<br />
frequency to motor,<br />
from 0.0 to 400.0 Hz<br />
1002h 04098<br />
D002 — Output current monitor R Filtered display of output current<br />
to motor (100 mS internal filter<br />
time constant)<br />
1003h 04099 0 to 9999 0.01 A<br />
D003 — Rotation direction monitor R 0 ...Stop<br />
1...Forward<br />
2...Reverse<br />
1004h 04100 0, 1, 2 —<br />
D004 H Process variable (PV), PID R Displays the scaled PID process 1005h 04101 0 to 9990 0.1<br />
D004 L<br />
feedback monitor<br />
R<br />
variable (feedback) value (A75 is<br />
scale factor)<br />
1006h 04102<br />
D005 — Intelligent input terminal R Displays the state of the intelli- 1007h 04103 bit 0 = [1] bit 1 bit<br />
status<br />
gent input terminals<br />
7= [8] terminals<br />
D006 — Intelligent output terminal<br />
status<br />
Holding Registers, “D” Group Monitor Functions<br />
Func. Code Name R/W Description<br />
R Displays the state of the intelligent<br />
input terminals<br />
1008h 04101 bit0 = [11]<br />
bit 4 =[15]<br />
terminals<br />
D007 H Scaled output frequency R Displays the output frequency 1009h 04105 0 to 39960 0.01<br />
D007 L<br />
monitor<br />
R<br />
scaled by the constant in B0086.<br />
Decimal point indicates range:<br />
XX.XX 0.00 to 99.99<br />
XXX.X 100.0 to 999.9<br />
XXXX. 1000 to 9999<br />
XXXX 10000 to 99990<br />
100Ah 04106<br />
D008 H Actual frequency monitor R Displays the actual shaft speed of 100Bh 04107 -40000 to 0.01 Hz<br />
D008 L R<br />
the motor, converted to<br />
frequency<br />
100Ch 04108<br />
+40000<br />
D009 — Torque command monitor R Displays the level of the torque<br />
command when the inverter is set<br />
to torque control mode<br />
100Dh 04109 -200 to 200 1 %<br />
D010 — Torque bias monitor R Displays the level of the torque<br />
bias, if enabled, when the<br />
inverter is in vector control mode<br />
with feedback<br />
Register<br />
hex dec.<br />
Network Data<br />
Range Res.<br />
1 bit<br />
100Eh 04110 -200 to 200 1 %<br />
— — (Reserved) R — 100Fh 04111 — —<br />
D012 — Torque monitor R Estimated output torque value,<br />
range is -300.0 to +300.0%<br />
1010h 04112 -200 to 200 1 %<br />
D013 — Output voltage monitor R Voltage of output to motor,<br />
range is 0.0 to 600.0V<br />
1012h 04113 0 to 6000 0.1 V<br />
D014 — Power monitor R Input power to inverter,<br />
range is 0.0 to 999.9<br />
1013h 04114 0 to 9999 0.1 kW<br />
D015 H Cumulative power monitor R Displays cumulative input power 1014h 04115 0 to 9999999 0.1<br />
D015 L R<br />
to inverter; B079 selects the<br />
multiplier for units. Range is 0.0<br />
to 999.9, 1000 to 9999, or 100 to<br />
999<br />
1014h 04116
<strong>SJ7002</strong> Inverter<br />
D016 H Cumulative operation RUN R Displays total time the inverter 1015h 04117 0 to 999900 0.1<br />
D016 L<br />
time monitor<br />
R<br />
has been in RUN mode in hours.<br />
Range is 0 to 9999 / 1000 to<br />
9999/ 100 to 999 (10,000 to<br />
99,900) hrs.<br />
1016h 04118<br />
D017<br />
(high)<br />
D017<br />
(low)<br />
H Cumulative power-on time<br />
monitor<br />
R Displays total time the inverter<br />
has had input power (ON) in<br />
L R<br />
hours. Range is:<br />
0 to 9999 / 100.0 to 999.9 /<br />
1000 to 9999 / 100 to 999 hrs.<br />
1018h 04120<br />
D018 — Heat sink temperature<br />
monitor<br />
Holding Registers, “D” Group Monitor Functions<br />
Func. Code Name R/W Description<br />
R Displays the temperature of the<br />
inverter’s heat sink<br />
1017h 04119 0 to 999900 1 hour<br />
1019h 04121 -200 to 2000 0.1 °C<br />
D019 — Motor temperature monitor R Displays motor internal temperature<br />
(requires an NTC thermistor<br />
installed in the motor and<br />
connected to [TH] and [CM1])<br />
101Ah 04122 -200 to 2000 0.1 °C<br />
— (Reserved) — — 101Bh 04123 — —<br />
— (Reserved) — — 101Ch 04124 — —<br />
D022 — Component life monitor R Displays estimated life status of 101Dh 04125 bit 0... capa- 1 bit<br />
DC bus capacitors and cooling<br />
citors<br />
fans<br />
bit 1...fans<br />
— (Reserved) — — 101Eh<br />
to<br />
1025h<br />
Register<br />
hex dec.<br />
04126<br />
to<br />
04133<br />
Network Data<br />
Range Res.<br />
— —<br />
D025 H User monitor 0 R Displays state of internal EZ 102Eh 04142 -2147483647 1<br />
D025 L R<br />
Sequence register User Monitor<br />
0<br />
102Fh 04143<br />
to<br />
2147483647<br />
D026 H User monitor 1 R Displays state of internal EZ 1030h 04144 -2147483647 1<br />
D026 L R<br />
Sequence register User Monitor<br />
2<br />
1031h 04145<br />
to<br />
2147483647<br />
D027 H User monitor 2 R Displays state of internal EZ 1032h 04146 -2147483647 1<br />
D027 L R<br />
Sequence register User Monitor<br />
2<br />
1033h 04147<br />
to<br />
2147483647<br />
D028 H Pulse counter R/W Displays accumulated pulse 1034h 04148 0 to 1<br />
D028 L R/W<br />
count of [PCNT] intelligent input<br />
terminal (option code 74) 1035h 04149<br />
2147483647<br />
D029 H Position setting monitor R Displays absolute position 1036h 04150 -2147483647 1<br />
D029 L R<br />
command for motor shaft in<br />
absolute position control mode 1037h 04151<br />
to<br />
2147483647<br />
D030 H Position feedback monitor R Displays absolute position of 1038h 04152 -2147483647 1<br />
D030 L R<br />
motor shaft when in absolute<br />
position control mode<br />
1039h 04153<br />
to<br />
2147483647<br />
D080 — Trip counter R Number of trip events 0011h 00017 0 to 65535 1 trip<br />
event<br />
B–37<br />
Appendix B
Appendix B B–38<br />
ModBus Data Listing<br />
D081 —<br />
D082 —<br />
D083 —<br />
Trip monitor 1<br />
Trip monitor 2<br />
Trip monitor 3<br />
Holding Registers, “D” Group Monitor Functions<br />
Func. Code Name R/W Description<br />
Register<br />
hex dec.<br />
Network Data<br />
Range Res.<br />
R Factor code 0012h 00018 (see codes in —<br />
R Inverter status 0013h 00019<br />
next table)<br />
—<br />
R Frequency (high) 0014h 00020 0 to 40000 0.01 Hz<br />
R Frequency (low) 0015h 00021<br />
R Current 0016h 00022 — 0.1 A<br />
R Voltage 0017h 00023 — 1 V<br />
R Run time (high) 0018h 00024 — 1 hour<br />
R Run time (low) 0019h 00025<br />
R ON time (high) 001Ah 00026 — 1 hour<br />
R ON time (low) 001Bh 00027<br />
R Factor code 001Ch 00028 (see codes in —<br />
R Inverter status 001Dh 00029<br />
next table)<br />
—<br />
R Frequency (high) 001Eh 00030 0 to 40000 0.01 Hz<br />
R Frequency (low) 001Fh 00031<br />
R Current 0020h 00032 — 0.1 A<br />
R Voltage 0021h 00033 — 1 V<br />
R Run time (high) 0022h 00034 — 1 hour<br />
R Run time (low) 0023h 00035<br />
R ON time (high) 0024h 00036 — 1 hour<br />
R ON time (low) 0025h 00037<br />
R Factor code 0026h 00038 (see codes in —<br />
R Inverter status 0027h 00039<br />
next table)<br />
—<br />
R Frequency (high) 0028h 00040 0 to 40000 0.01 Hz<br />
R Frequency (low) 0029h 00041<br />
R Current 002Ah 00042 — 0.1 A<br />
R Voltage 002Bh 00043 — 1 V<br />
R Run time (high) 002Ch 00044 — 1 hour<br />
R Run time (low) 002Dh 00045<br />
R ON time (high) 002Eh 00046 — 1 hour<br />
R ON time (low) 002Fh 00047
Holding Registers, “D” Group Monitor Functions<br />
<strong>SJ7002</strong> Inverter<br />
Network Data<br />
Func. Code Name R/W Description<br />
Register<br />
Range Res.<br />
hex dec.<br />
D084 — Trip monitor 4 R Factor code 0030h 00048 (see codes in —<br />
R Inverter status 0031h 00049<br />
next table)<br />
—<br />
R Frequency (high) 0032h 00050 0 to 40000 0.01 Hz<br />
R Frequency (low) 0033h 00051<br />
R Current 0034h 00052 — 0.1 A<br />
R Voltage 0035h 00053 — 1 V<br />
R Run time (high) 0036h 00054 — 1 hour<br />
R Run time (low) 0037h 00055<br />
R ON time (high) 0038h 00056 — 1 hour<br />
R ON time (low) 0039h 00057<br />
D085 — Trip monitor 5 R Factor code 003Ah 00058 (see codes in —<br />
R Inverter status 003Bh 00059<br />
next table)<br />
—<br />
R Frequency (high) 003Ch 00060 0 to 40000 0.01 Hz<br />
R Frequency (low) 003Dh 00061<br />
R Current 003Eh 00062 — 0.1 A<br />
R Voltage 003Fh 00063 — 1 V<br />
R Run time (high) 0040h 00064 — 1 hour<br />
R Run time (low) 0041h 00065<br />
R ON time (high) 0042h 00066 — 1 hour<br />
R ON time (low) 0043h 00067<br />
D086 — Trip monitor 6 R Factor code 0044h 00068 (see codes in —<br />
R Inverter status 0045h 00069<br />
next table)<br />
—<br />
R Frequency (high) 0046h 00070 0 to 40000 0.01 Hz<br />
R Frequency (low) 0047h 00071<br />
R Current 0048h 00072 — 0.1 A<br />
R Voltage 0049h 00073 — 1 V<br />
R Run time (high) 004Ah 00074 — 1 hour<br />
R Run time (low) 004Bh 00075<br />
R ON time (high) 004Ch 00076 — 1 hour<br />
R ON time (low) 004Dh 00077<br />
D090 — Programming error R Displays programming error 004Eh 00078 Warning —<br />
monitor<br />
code<br />
code<br />
— (Reserved) — — 004Fh 00079 — —<br />
to to<br />
08FFh 02303<br />
B–39<br />
Appendix B
Appendix B B–40<br />
ModBus Data Listing<br />
— — Write to EEPROM W 00 .Motor constant calculation<br />
01 . Set data storage in<br />
EEPROM<br />
Other... Motor constant recalculation<br />
and set data storage in<br />
EEPROM<br />
— (Reserved) — — 0901h<br />
to<br />
1000h<br />
0900h 02304 0000,<br />
0001,<br />
other<br />
02305<br />
to<br />
4096<br />
Note 1: Assume that the inverter current rating is 1000 (for D002).<br />
Note 2: When the value is 10000 (100.0 seconds), a value in the second decimal place is<br />
ignored.<br />
—<br />
— —<br />
D102 — DC voltage monitoring Displays the DC Bus voltage 1026h 04134 0 to 9999 0.1 V<br />
D103 — BRD load factor monitoring<br />
D104 — Electronic thermal<br />
overload monitoring<br />
Holding Registers, “D” Group Monitor Functions<br />
Func. Code Name R/W Description<br />
Displays the running average<br />
Dynamic Braking usage ratio<br />
(%ED)<br />
Displays the motor electronic<br />
thermal overload estimated<br />
temperature ratio. If the value<br />
reaches 100%, the inverter will<br />
trip (E05)<br />
— (Reserved) — — 1029h<br />
to<br />
102Dh<br />
Register<br />
hex dec.<br />
1027h 04135 0 to 1000 0.1 %<br />
1028h 04136 0 to 1000 0.1 %<br />
04137<br />
to<br />
04141<br />
Network Data<br />
Range Res.<br />
— —
<strong>SJ7002</strong> Inverter<br />
Trip Factor Code, HIGH order Trip Factor Code, LOW order (inverter status)<br />
Code Name Code Name<br />
0 No trip 0 Reset<br />
1 Over current event while at constant<br />
speed<br />
1 Stop<br />
2 Over current event during deceleration 2 Deceleration<br />
3 Over current event during acceleration 3 Constant speed<br />
4 Over current event during other conditions<br />
4 Acceleration<br />
5 Overload protection 5 Run Command active with 0 Hz speed<br />
reference<br />
6 Braking resistor overload 6 Starting<br />
7 Over voltage protection 7 DC braking<br />
8 EEPROM error 8 Overload restriction<br />
9 Under-voltage error 9 SON or FOC operation in progress<br />
10 CT (current transformer) error<br />
11 CPU error<br />
12 External trip<br />
13 USP<br />
14 Ground fault<br />
15 Input over-voltage<br />
16 Instantaneous power failure<br />
20 Inverter thermal trip with low fan<br />
speed<br />
21 Inverter thermal trip<br />
23 Gate array error<br />
24 Phase failure detection<br />
25 Main circuit error<br />
30 IGBT error<br />
35 Thermistor<br />
36 Brake error<br />
37 Emergency stop<br />
38 Low-speed overload protection<br />
43 Easy sequence error (invalid instruction)<br />
44 Easy sequence error (invalid nesting<br />
count)<br />
45 Easy sequence execution error 1<br />
50 to 59 Easy sequence user trip 0 to 9<br />
60 to 69 Expansion card #1 error 0 to 9<br />
70 to 79 Expansion card #2 error 0 to 9<br />
B–41<br />
Appendix B
Appendix B B–42<br />
ModBus Data Listing<br />
Holding Registers, “F” Group Main Profile Parameters<br />
Func. Code Name R/W Description<br />
Register<br />
hex dec.<br />
Network Data<br />
Range Res.<br />
F001 H Output frequency setting R/W Standard default target 0001h 00001 0 to 40000 0.01 Hz<br />
F001 L R/W<br />
frequency that determines<br />
constant motor<br />
speed (when A001 = 03)<br />
0002h 00002<br />
F002 H Acceleration (1) time R/W Standard default acceler- 1103h 04355 1 to 0.01 sec.<br />
F002 L<br />
setting<br />
R/W<br />
ation<br />
1104h 04356<br />
360000<br />
F202 H Acceleration (1) time R/W Standard default acceler- 2103h 08451 1 to 0.01 sec.<br />
F202 L<br />
setting, 2nd motor<br />
R/W<br />
ation, 2nd motor<br />
2104h 08452<br />
360000<br />
F302 H Acceleration (1) time R/W Standard default acceler- 3103h 12547 1 to 0.01 sec.<br />
F302 L<br />
setting, 3rd motor<br />
R/W<br />
ation, 3rd motor<br />
3104h 12548<br />
360000<br />
F003 H Deceleration (1) time R/W Standard default deceler- 1105h 04357 1 to 0.01 sec.<br />
F003 L<br />
setting<br />
R/W<br />
ation<br />
1106h 04358<br />
360000<br />
F203 H Deceleration (1) time R/W Standard default deceler- 2105h 08453 1 to 0.01 sec.<br />
F203 L<br />
setting, 2nd motor<br />
R/W<br />
ation, 2nd motor<br />
2106h 08454<br />
360000<br />
— — (Reserved) — — 2107h 08455 — —<br />
to to<br />
2202h 08706<br />
F303 H Deceleration (1) time R/W Standard default deceler- 3105h 12549 1 to 0.01 sec.<br />
F303 L<br />
setting, 3rd motor<br />
R/W<br />
ation, 3rd motor<br />
3106h 12550<br />
360000<br />
— — (Reserved) — — 3107h 12551 — —<br />
to to<br />
3202h 12802<br />
F004 — Keypad Run key routing R/W 1107h 04359<br />
— — (Reserved) — — 1108h<br />
to<br />
1200h<br />
04360<br />
to<br />
04608<br />
— —
Holding Registers, “A” Group Standard Functions<br />
Func. Code Name R/W Description<br />
A001 — Frequency source setting R/W 00 . Keypad potentiometer<br />
01 . Control terminal<br />
02 . Function F001 setting<br />
03 . RS485 serial command<br />
04 . Expansion board #1<br />
05 . Expansion board #2<br />
06 . Pulse train input<br />
07 . Easy sequence<br />
10 . Caltulate function input<br />
A002 — Run command source<br />
setting<br />
R/W 01 . Input [FW] or [RV]<br />
02 . Run key on keypad<br />
03 . RS485 serial command<br />
04 . Start/stop, Exp. card #1<br />
05 . Start/stop. exp. card #2<br />
Register<br />
hex dec.<br />
<strong>SJ7002</strong> Inverter<br />
Network Data<br />
1201h 04609 00 to 07,<br />
10<br />
Range Res.<br />
—<br />
1202h 04610 01 to 05 —<br />
A003 — Base frequency setting R/W 30. to max. frequency (Hz) 1203h 04611 30 to<br />
A004 val.<br />
A203 — Base frequency setting,<br />
2nd motor<br />
A303 — Base frequency setting, 3rd<br />
motor<br />
A004 — Maximum frequency<br />
setting<br />
A204 — Maximum frequency<br />
setting, 2nd motor<br />
R/W 30. to max. frequency (Hz) 2203h 08707 30 to<br />
A004 val.<br />
R/W 30. to max. frequency (Hz) 3203h 12803 30 to<br />
A004 val.<br />
1 Hz<br />
1 Hz<br />
1 Hz<br />
R/W 30. to 400. (Hz) 1204h 04612 30 to 400 1 Hz<br />
R/W 30. to 400. (Hz) 2204h 08708 30 to 400 1 Hz<br />
— (Reserved) — — 2205h<br />
to<br />
2215h<br />
A304 — Maximum frequency<br />
setting, 3rd motor<br />
— (Reserved) — — 3205h<br />
to<br />
3215h<br />
A005 — [AT] selection R/W 00 . Select between [O] and<br />
[OI] at [AT]<br />
01 . Select between [O] and<br />
[O2] at [AT]<br />
02 . Select between [O] and<br />
keypad pot.<br />
03 . Select between [OI] and<br />
keypad pot.<br />
04 . Select between [O2] and<br />
keypad pot.<br />
A006 — [O2] selection R/W 00 . No summing, [O2] and<br />
[OI]<br />
01 . Sum of [O2] and [OI],<br />
neg. sum (reverse speed<br />
reference) inhibited<br />
02 . Sum of [O2] and [OI],<br />
neg. sum (reverse speed<br />
reference) allowed<br />
03 . Disable [O2] input<br />
08709<br />
to<br />
08725<br />
— —<br />
R/W 30. to 400. (Hz) 3204h 12804 30 to 400 1 Hz<br />
12805<br />
to<br />
12821<br />
— —<br />
1205h 04613 00 to 04 —<br />
1206h 046 00 to 03 —<br />
B–43<br />
Appendix B
Appendix B B–44<br />
ModBus Data Listing<br />
— (Reserved) — — 1207h<br />
to<br />
120Ah<br />
04614<br />
to<br />
04618<br />
— —<br />
A011 H [O]–[L] input active range R/W The output frequency corre- 120Bh 04619 0 to 40000 0.01 Hz<br />
A011 L<br />
start frequency<br />
sponding to the voltage input<br />
range starting point 120Ch 04620<br />
A012 H [O]–[L] input active range R/W The output frequency corre- 120Dh 04621 0 to 40000 0.01 Hz<br />
A012 L<br />
end frequency<br />
sponding to the voltage input<br />
range ending point<br />
120Eh 04622<br />
A013 — [O]–[L] input active range R/W The starting point for the 120Fh 04623 0 to A014 1 %<br />
start voltage<br />
voltage input range<br />
value<br />
A014 — [O]–[L] input active range R/W The ending point for the 1210h 04624 A013 1 %<br />
end voltage<br />
voltage input range<br />
value to<br />
100<br />
A015 — [O]–[L] input start<br />
frequency enable<br />
A016 — External frequency filter<br />
time const.<br />
A017 — Easy sequence function<br />
enable<br />
R/W 00..Use A011 start value<br />
01..Use 0 Hz<br />
R/W n = 1 to 30 (where n =<br />
number of samples for<br />
average); 31 = 500ms filter<br />
R/W 00..Disable<br />
01..Enable<br />
1211h 04625 0, 1 —<br />
1212h 04626 1 to 30, 31 1<br />
1213h 04627 0, 1 —<br />
— (Reserved) — — 1214h 04628 — —<br />
A019 — Multi-speed operation<br />
selection<br />
Holding Registers, “A” Group Standard Functions<br />
Func. Code Name R/W Description<br />
R/W 00..Binary; up to 16-stage<br />
speed using 4 terminals<br />
01..Single-bit; up to 8-stage<br />
speed using 7 terminals<br />
Register<br />
hex dec.<br />
Network Data<br />
Range Res.<br />
1215h 04629 0, 1 —<br />
A020 H Multi-speed frequency R/W Defines the first speed of a 1216h 04630 0 or start 0.01 Hz<br />
A020 L<br />
setting<br />
multi-speed profile<br />
1217h 04631<br />
freq. to<br />
max. freq.<br />
A220 H Multi-speed frequency R/W Defines the first speed of a 2216h 08726 0 or start 0.01 Hz<br />
A220 L<br />
setting, 2nd motor<br />
multi-speed profile for 2nd<br />
motor<br />
2217h 08727<br />
freq. to<br />
max. freq.<br />
— (Reserved) — — 2218h 08728 — —<br />
to to<br />
223Ah 08762<br />
A320 H Multi-speed frequency R/W Defines the first speed of a 3216h 12822 0 or start 0.01 Hz<br />
A320 L<br />
setting, 3rd motor<br />
multi-speed profile for 3rd<br />
motor<br />
3217h 12823<br />
freq. to<br />
max. freq.<br />
— (Reserved) — — 3218h 12824 — —<br />
to to<br />
323Bh 12859<br />
A021 H Multi-speed 1 setting R/W Defines nth additional speed 1218h 04632 0 or start<br />
A021 L 1219h 04633<br />
freq. to<br />
max. freq.<br />
A022 H Multi-speed 2 setting R/W Defines nth additional speed 121Ah 04634 0 or start<br />
A022 L 121Bh 04635<br />
freq. to<br />
max. freq.<br />
A023 H Multi-speed 3 setting R/W Defines nth additional speed 121Ch 04636 0 or start<br />
A023 L 121Dh 04637<br />
freq. to<br />
max. freq.<br />
0.01 Hz<br />
0.01 Hz<br />
0.01 Hz
Holding Registers, “A” Group Standard Functions<br />
Func. Code Name R/W Description<br />
Register<br />
hex dec.<br />
<strong>SJ7002</strong> Inverter<br />
Network Data<br />
Range Res.<br />
A024 H Multi-speed 4 setting R/W Defines nth additional speed 121Eh 04638 0 or start 0.01 Hz<br />
A024 L 121Fh 04639<br />
freq. to<br />
max. freq.<br />
A025 H Multi-speed 5 setting R/W Defines nth additional speed 1220h 04640 0 or start 0.01 Hz<br />
A025 L 1221h 04641<br />
freq. to<br />
max. freq.<br />
A026 H Multi-speed 6 setting R/W Defines nth additional speed 1222h 04642 0 or start 0.01 Hz<br />
A026 L 1223h 04643<br />
freq. to<br />
max. freq.<br />
A027 H Multi-speed 7 setting R/W Defines nth additional speed 1224h 04644 0 or start 0.01 Hz<br />
A027 L 1225h 04645<br />
freq. to<br />
max. freq.<br />
A028 H Multi-speed 8 setting R/W Defines nth additional speed 1226h 04646 0 or start 0.01 Hz<br />
A028 L 1227h 04647<br />
freq. to<br />
max. freq.<br />
A029 H Multi-speed 9 setting R/W Defines nth additional speed 1228h 04648 0 or start 0.01 Hz<br />
A029 L 1229h 04649<br />
freq. to<br />
max. freq.<br />
A030 H Multi-speed 10 setting R/W Defines nth additional speed 122Ah 04650 0 or start 0.01 Hz<br />
A030 L 122Bh 04651<br />
freq. to<br />
max. freq.<br />
A031 H Multi-speed 11 setting R/W Defines nth additional speed 122Ch 04652 0 or start 0.01 Hz<br />
A031 L 122Dh 04653<br />
freq. to<br />
max. freq.<br />
A032 H Multi-speed 12 setting R/W Defines nth additional speed 122Eh 04654 0 or start 0.01 Hz<br />
A032 L 122Fh 04655<br />
freq. to<br />
max. freq.<br />
A033 H Multi-speed 13 setting R/W Defines nth additional speed 1230h 04656 0 or start 0.01 Hz<br />
A033 L 1231h 04657<br />
freq. to<br />
max. freq.<br />
A034 H Multi-speed 14 setting R/W Defines nth additional speed 1232h 04658 0 or start 0.01 Hz<br />
A034 L 1233h 04659<br />
freq. to<br />
max. freq.<br />
A035 H Multi-speed 15 setting R/W Defines nth additional speed 1234h 04660 0 or start 0.01 Hz<br />
A035 L 1235h 04661<br />
freq. to<br />
max. freq.<br />
— (Reserved) — — 1236h 04662 — —<br />
— (Reserved) — — 1237h 04663 — —<br />
A038 — Jog frequency setting R/W Defines limited speed for jog 1238h 04664 0 to 999 0.01 Hz<br />
B–45<br />
Appendix B
Appendix B B–46<br />
ModBus Data Listing<br />
A039 — Jog stop mode R/W 00..Free-run stop, jogging<br />
disabled during motor run<br />
01..Controlled deceleration,<br />
jogging disabled during<br />
motor run<br />
02..DC braking to stop,<br />
jogging disabled during<br />
motor run<br />
03..Free-run stop, jogging<br />
always enabled<br />
04..Controlled deceleration,<br />
jogging always enabled<br />
05..DC braking to stop,<br />
jogging always enabled<br />
1239h 04665 0 to 5 —<br />
— (Reserved) — — 123Ah 04666 — —<br />
A041 — Torque boost method<br />
selection<br />
A241 — Torque boost method<br />
selection, 2nd motor<br />
R/W 00..<strong>Manual</strong> torque boost<br />
01..Automatic torque boost<br />
R/W 00..<strong>Manual</strong> torque boost<br />
01..Automatic torque boost<br />
A042 — <strong>Manual</strong> torque boost value R/W Can boost starting torque<br />
between 0 and 20% above<br />
normal V/f curve<br />
A242 — <strong>Manual</strong> torque boost value,<br />
2nd motor<br />
A342 — <strong>Manual</strong> torque boost value,<br />
3rd motor<br />
A043 — <strong>Manual</strong> torque boost<br />
frequency adjustment<br />
A243 — <strong>Manual</strong> torque boost<br />
frequency adjustment, 2nd<br />
motor<br />
A343 — <strong>Manual</strong> torque boost<br />
frequency adjustment, 3rd<br />
motor<br />
A044 — V/F characteristic curve<br />
selection<br />
A244 — V/F characteristic curve<br />
selection, 2nd motor<br />
R/W Can boost starting torque<br />
between 0 and 20% above<br />
normal V/f curve<br />
R/W Can boost starting torque<br />
between 0 and 20% above<br />
normal V/f curve<br />
R/W Sets the frequency of the V/f<br />
breakpoint for torque boost<br />
R/W Sets the frequency of the V/f<br />
breakpoint for torque boost<br />
R/W Sets the frequency of the V/f<br />
breakpoint for torque boost<br />
R/W 00..V/f constant torque<br />
01..V/f variable torque<br />
02..V/f free-setting curve<br />
03..Sensorless vector SLV<br />
04..0Hz domain SLV<br />
05..Vector control with<br />
encoder feedback<br />
R/W 00..V/f constant torque<br />
01..V/f variable torque<br />
02..V/f free-setting curve<br />
03..Sensorless vector SLV<br />
04..0Hz domain SLV<br />
123Bh 04667 0, 1 —<br />
223Bh 08763 0, 1 —<br />
123Ch 04668 0 to 200 0.1 %<br />
223Ch 08764 0 to 200 0.1 %<br />
323Ch 12860 0 to 200 0.1 %<br />
123Dh 04669 0 to 500 0.1 %<br />
223Dh 08765 0 to 500 0.1 %<br />
323Dh 12861 0 to 500 0.1 %<br />
123Eh 04670 0 to 5 —<br />
223Eh 08766 0 to 4 —<br />
— (Reserved) — — 223Fh 08767 — —<br />
A344 V/F characteristic curve<br />
selection, 3rd motor<br />
Holding Registers, “A” Group Standard Functions<br />
Func. Code Name R/W Description<br />
R/W 00..V/f constant torque<br />
01..V/f variable torque<br />
Register<br />
hex dec.<br />
Network Data<br />
Range Res.<br />
323Eh 12862 0, 1 —
— (Reserved) — — 323Fh<br />
to<br />
326Ch<br />
A045 — V/f gain setting R/W Sets voltage gain of the<br />
inverter<br />
A046 — Automatic torque boost<br />
voltage gain<br />
A246 — Automatic torque boost<br />
voltage gain, 2nd motor<br />
A047 — Automatic torque boost<br />
slip gain<br />
R/W Voltage compensation gain<br />
for automatic torque boost<br />
R/W Voltage compensation gain<br />
for automatic torque boost<br />
R/W Slip compensation gain for<br />
automatic torque boost<br />
— (Reserved) — — 1242h<br />
to<br />
1244h<br />
A247 — Automatic torque boost<br />
slip gain, 2nd motor<br />
Slip compensation gain for<br />
automatic torque boost<br />
— (Reserved) — — 2242h<br />
to<br />
224Eh<br />
A051 — DC braking enable R/W 00 . Disable<br />
01 . Enable<br />
02 . Brake at set frequency<br />
only<br />
A052 — DC braking frequency<br />
setting<br />
R/W Frequency at which DC<br />
braking activates during<br />
decel.<br />
A053 — DC braking wait time R/W The delay after reaching the<br />
DC braking frequency, or<br />
[DB] signal, before DC<br />
braking begins<br />
A054 — DC braking force during<br />
deceleration<br />
A055 — DC braking time for deceleration<br />
A056 — DC braking / edge or level<br />
detection for [DB] input<br />
A057 — DC braking force for<br />
starting<br />
A058 — DC braking time for<br />
starting<br />
A059 — DC braking carrier<br />
frequency setting<br />
Holding Registers, “A” Group Standard Functions<br />
Func. Code Name R/W Description<br />
12863<br />
to<br />
12908<br />
<strong>SJ7002</strong> Inverter<br />
— —<br />
123Fh 04671 20 to 200 1 %<br />
1240h 04672 0 to 255 1<br />
2240h 08768 0 to 255 1<br />
1241h 04673 0 to 255 1<br />
04674<br />
to<br />
04676<br />
— —<br />
2241h 08769 0 to 255 1<br />
08770<br />
to<br />
08782<br />
— —<br />
1245h 04677 0, 1, 2 —<br />
1246h 04678 0 to 40000 0.01 Hz<br />
1247h 04679 0 to 50 0.1 sec.<br />
R/W Variable DC braking force 1248h 04680 0 to 80 1 %<br />
R/W Sets the duration for DC<br />
braking during decel<br />
R/W 00 . Edge detection<br />
01 . Level detection<br />
1249h 04681 0 to 600 0.1 sec.<br />
124Ah 04682 0, 1 —<br />
R/W Variable DC braking force 124Bh 04683 0 to 80 1 %<br />
R/W Sets the duration for DC<br />
braking before accel.<br />
R/W 0.5 to 15 (kHz) for models<br />
up to –550xxx, 0.5 to 10<br />
(kHz) for 750xxx to 1500xxx<br />
models<br />
Register<br />
hex dec.<br />
Network Data<br />
124Ch 04684 0 to 600 0.1 sec.<br />
124Dh 04685 5 to 150;<br />
5 to 100<br />
Range Res.<br />
0.1 kHz<br />
— (Reserved) — — 124Eh 04686 — —<br />
A061 H Frequency upper limit R/W Sets a limit on output 124Fh 04687 0, 50 to 0.01 Hz<br />
A061 L<br />
setting<br />
frequency less than the<br />
maximum frequency (A004) 1250h 04688<br />
40000<br />
B–47<br />
Appendix B
Appendix B B–48<br />
ModBus Data Listing<br />
A261 H Frequency upper limit R/W Sets a limit on output 224Fh 08783 0, 50 to 0.01 Hz<br />
A261 L<br />
setting, 2nd motor<br />
R/W<br />
frequency less than the<br />
maximum frequency (A004) 2250h 08784<br />
40000<br />
A062 H Frequency lower limit R/W Sets a limit on output 1251h 04689 0, 50 to 0.01 Hz<br />
A062 L<br />
setting<br />
R/W<br />
frequency greater than zero<br />
1252h 04690<br />
40000<br />
A262 H Frequency lower limit R/W Sets a limit on output 2251h 08785 0, 50 to 0.01 Hz<br />
A262 L<br />
setting, 2nd motor<br />
R/W<br />
frequency greater than zero<br />
2252h 08786<br />
40000<br />
— — (Reserved) — — 2253h 08787 — —<br />
to to<br />
226Eh 08814<br />
A063 H Jump (center) frequency R/W Up to 3 output frequencies 1253h 04691 0 to 40000 0.01 Hz<br />
A063 L<br />
setting<br />
R/W<br />
can be defined for the output<br />
to jump past to avoid motor<br />
resonances (center freq.)<br />
1254h 04692<br />
A064 — Jump (hysteresis)<br />
frequency width setting<br />
R/W Defines the distance from the<br />
center frequency at which the<br />
jump occurs<br />
1255h 04693 0 to 1000 0.01 Hz<br />
A065 H Jump (center) frequency R/W Up to 3 output frequencies 1256h 04694 0 to 40000 0.01 Hz<br />
A065 L<br />
setting<br />
R/W<br />
can be defined for the output<br />
to jump past to avoid motor<br />
resonances (center freq.)<br />
1257h 04695<br />
A066 — Jump (hysteresis)<br />
frequency width setting<br />
R/W Defines the distance from the<br />
center frequency at which the<br />
jump occurs<br />
1258h 04696 0 to 1000 0.01 Hz<br />
A067 H Jump (center) frequency R/W Up to 3 output frequencies 1259h 04697 0 to 40000 0.01 Hz<br />
A067 L<br />
setting<br />
R/W<br />
can be defined for the output<br />
to jump past to avoid motor<br />
resonances (center freq.)<br />
125Ah 04698<br />
A068 — Jump (hysteresis)<br />
frequency width setting<br />
Holding Registers, “A” Group Standard Functions<br />
Func. Code Name R/W Description<br />
R/W Defines the distance from the<br />
center frequency at which the<br />
jump occurs<br />
Register<br />
hex dec.<br />
Network Data<br />
Range Res.<br />
125Bh 04699 0 to 1000 0.01 Hz<br />
A069 H Acceleration stop R/W 0.00 to 400.0 (Hz) 125Ch 04700 0 to 40000 0.01 Hz<br />
A069 L<br />
frequency setting<br />
R/W 125Dh 04701<br />
A070 — Acceleration stop time<br />
frequency setting<br />
R/W 0.0 to 60.0 (seconds) 125Eh 04702 0 to 600 0.1 sec.<br />
A071 — PID Function Enable R/W 00..PID operation OFF<br />
01..PID operation ON<br />
02..PID operation ON with<br />
inverted output<br />
125Fh 04703 0, 1, 2 —<br />
A072 — PID proportional gain R/W 0.2 to 5.0 1260h 0474 2 to 50 0.2<br />
A073 — PID integral time constant R/W 0.0 to 999.9, 1000. to 3600.<br />
(seconds)<br />
1261h 04705 0 to 36000 0.1 sec.<br />
A074 — PID derivative gain R/W 0.0 to 99.99, 100.0 (seconds) 1262h 04706 0 to 10000 0.01 sec.<br />
A075 — PV scale conversion R/W 0.01 to 99.99, 100.0<br />
(seconds)<br />
1263h 04707 1 to 9999 0.01
Holding Registers, “A” Group Standard Functions<br />
Func. Code Name R/W Description<br />
A076 — PV source setting R/W 00 . [OI] (current input)<br />
01 . [O] (voltage input)<br />
02 . Communication input<br />
03 . Pulse train freq. input<br />
10 . Calculate function output<br />
A077 — Reverse PID action R/W 00 . PID input = SP – PV<br />
(normal)<br />
01 . PID input = –(SP – PV)<br />
(reverse)<br />
<strong>SJ7002</strong> Inverter<br />
1264h 04708 0 to 3, 10 —<br />
1265h 04709 0, 1 —<br />
A078 — PID output limit R/W Range is 0.0 to 100.0 1266h 04710 0 to 1000 0.1 sec.<br />
A079 — PID feed forward select R/W 00 . Disable<br />
01 . [O] (voltage input)<br />
02 . [OI] (current input)<br />
03 . [O2] (voltage input)<br />
1267h 04711 0 to 3 —<br />
— (Reserved) — — 1268h 04712 — —<br />
A081 — AVR function select R/W 00 . AVR enabled<br />
01 . AVR disabled<br />
02 . AVR enabled except<br />
during deceleration<br />
1269h 04713 0, 1, 2 —<br />
A082 — AVR voltage select R/W 200V class inverter settings:<br />
200/215/220/230/240 (V)<br />
400V class inverter settings:<br />
380/400/415/440/460/480<br />
(V)<br />
126Ah 04714 — —<br />
— (Reserved) — — 126Bh 04715 — —<br />
— (Reserved) — — 126Ch 04716 — —<br />
A085 — Operation mode selection R/W 00 . Normal operation<br />
01 . Energy-saver operation<br />
02 . Optimal accel/decel<br />
operation<br />
126Dh 04717 0, 1, 2 —<br />
A086 — Energy saving mode tuning R/W 0.0 to 100 (seconds) 126Eh 04718 0 to 1000 0.1 %<br />
— (Reserved) — — 126Fh<br />
to<br />
1273h<br />
Register<br />
hex dec.<br />
Network Data<br />
04719<br />
to<br />
04723<br />
A092 H Acceleration (2) time R/W Duration of 2nd segment of 1274h 04724 1 to<br />
A092 L<br />
setting<br />
R/W<br />
acceleration<br />
1275h 04725<br />
360000<br />
A292 H Acceleration (2) time R/W Duration of 2nd segment of 226Fh 08815 1 to<br />
A292 L<br />
setting, 2nd motor<br />
R/W<br />
acceleration, 2nd motor<br />
2270h 08816<br />
360000<br />
A392 H Acceleration (2) time R/W Duration of 2nd segment of 326Dh 12909 1 to<br />
A392 L<br />
setting, 3rd motor<br />
R/W<br />
acceleration, 3rd motor<br />
326Eh 12910<br />
360000<br />
A093 H Deceleration (2) time R/W Duration of 2nd segment of 1276h 04726 1 to<br />
A093 L<br />
setting<br />
R/W<br />
deceleration<br />
1277h 04727<br />
360000<br />
A293 H Deceleration (2) time R/W Duration of 2nd segment of 2271h 08817 1 to<br />
A293 L<br />
setting, 2nd motor<br />
R/W<br />
deceleration, 2nd motor<br />
2272h 08818<br />
360000<br />
A393 H Deceleration (2) time R/W Duration of 2nd segment of 326Fh 12911 1 to<br />
A393 L<br />
setting, 3rd motor<br />
R/W<br />
deceleration, 3rd motor<br />
3270h 12912<br />
360000<br />
Range Res.<br />
— —<br />
0.01 sec.<br />
0.01 sec.<br />
0.01 sec.<br />
0.01 sec.<br />
0.01 sec.<br />
0.01 sec.<br />
B–49<br />
Appendix B
Appendix B B–50<br />
ModBus Data Listing<br />
— (Reserved) — — 3271h<br />
to<br />
330Bh<br />
A094 — Select method to switch to<br />
Acc2/Dec2 profile<br />
A294 — Select method to switch to<br />
Acc2/Dec2, 2nd motor<br />
R/W 00..[2CH] terminal input<br />
01..transition frequency<br />
02..when motor direction<br />
reverses<br />
R/W 00..[2CH] terminal input<br />
01..transition frequency<br />
02..when motor direction<br />
reverses<br />
12913<br />
to<br />
13067<br />
— —<br />
1278h 04728 0, 1, 2 —<br />
2273h 08819 0, 1, 2 —<br />
A095 H Acc1 to Acc2 frequency R/W Output frequency at which 1279h 04729 0 to 40000 0.01 Hz<br />
A095 L<br />
transition point<br />
R/W<br />
Accel1 switches to Accel2<br />
127Ah 04730<br />
A295 H Acc1 to Acc2 frequency R/W Output frequency at which 2274h 08820 0 to 40000 0.01 Hz<br />
A295 L<br />
transition point, 2nd motor<br />
R/W<br />
Accel1 switches to Accel2<br />
2275h 08821<br />
A096 H Dec1 to Dec2 frequency R/W Output frequency at which 127Bh 04731 0 to 40000 0.01 Hz<br />
A096 L<br />
transition point<br />
R/W<br />
Decel1 switches to Decel2<br />
127Ch 04732<br />
A296 H Dec1 to Dec2 frequency R/W Output frequency at which 2276h 08822 0 to 40000 0.01 Hz<br />
A296 L<br />
transition point, 2nd motor<br />
R/W<br />
Decel1 switches to Decel2<br />
2277h 08823<br />
— (Reserved) — — 2278h 08824 — —<br />
to to<br />
230Bh 08971<br />
A097 — Acceleration curve<br />
selection<br />
R/W 00..Linear<br />
01..S-curve<br />
02..U-shape<br />
03..Reverse U-shape<br />
04..EL-S curve<br />
127Dh 04733 0 to 4 —<br />
A098 — Deceleration curve setting R/W 00..Linear<br />
01..S-curve<br />
02..U-shape<br />
03..Reverse U-shape<br />
04..EL-S curve<br />
127Eh 04734 0 to 4 —<br />
— (Reserved) — — 127Fh 04735 — —<br />
— (Reserved) — — 1280h 04736 — —<br />
A101 H [OI]–[L] input active range R/W Output frequency corre- 1281h 04637 0 to 40000 0.01 Hz<br />
A101 L<br />
start frequency<br />
R/W<br />
sponding to the current input<br />
range starting point<br />
1282h 04738<br />
A102 H [OI]–[L] input active range R/W Output frequency corre- 1283h 04739 0 to 40000 0.01 Hz<br />
A102 L<br />
end frequency<br />
R/W<br />
sponding to the current input<br />
range ending point<br />
1284h 04740<br />
A103 — [OI]–[L] input active range R/W Starting point for the current 1285h 04741 0 to A104 1 %<br />
start current<br />
input range<br />
value<br />
A104 — [OI]–[L] input active range R/W Ending point for the current 1286h 04742 A103 1 %<br />
end current<br />
input range<br />
value to<br />
100<br />
A105 — [OI]–[L] input start<br />
frequency enable<br />
Holding Registers, “A” Group Standard Functions<br />
Func. Code Name R/W Description<br />
R/W 00..Use A101 start value<br />
01..Use 0Hz<br />
Register<br />
hex dec.<br />
Network Data<br />
Range Res.<br />
1287h 04743 0, 1 —
— (Reserved) — — 1288h<br />
to<br />
128Ch<br />
04744<br />
to<br />
0448<br />
<strong>SJ7002</strong> Inverter<br />
A111 H [O2]–[L] input active R/W Output frequency corre- 128Dh 04749 -40000 to<br />
A111 L<br />
range start frequency<br />
R/W<br />
sponding to the bipolar<br />
voltage input range starting<br />
point<br />
128Eh 04750<br />
40000<br />
A112 H [O2]–[L] input active R/W Output frequency corre- 128Fh 04751 -40000 to<br />
A112 L<br />
range end frequency<br />
R/W<br />
sponding to the bipolar<br />
voltage input range ending<br />
point<br />
1290h 04752<br />
40000<br />
A113 — [O2]–[L] input active<br />
range start voltage<br />
A114 — [O2]–[L] input active<br />
range end voltage<br />
R/W Starting point for the bipolar<br />
voltage input range<br />
R/W Ending point for the bipolar<br />
voltage input range<br />
— (Reserved) — — 1293h<br />
to<br />
12A4h<br />
A131 — Acceleration curve<br />
constants setting<br />
A132 — Deceleration curve<br />
constants setting<br />
R/W Sets the curve deviation from<br />
straight-line acceleration in<br />
10 levels (01 to 10)<br />
R/W Sets the curve deviation from<br />
straight-line deceleration in<br />
10 levels (01 to 10)<br />
— (Reserved) — — 12A7h<br />
to<br />
12AEh<br />
A141 — A input select for calculate<br />
function<br />
A142 — B input select for calculate<br />
function<br />
Holding Registers, “A” Group Standard Functions<br />
Func. Code Name R/W Description<br />
R/W 00 . Digital operator (A020/<br />
A220/A320)<br />
01 . Keypad potentiometer<br />
02 . [O] input<br />
03 . [OI] input<br />
04 . Comm. port<br />
05 . Expansion card 1<br />
06 . Expansion card 2<br />
07 . Pulse train frequency<br />
train input<br />
R/W 00 . Digital operator (A020/<br />
A220/A320)<br />
01 . Keypad potentiometer<br />
02 . [O] input<br />
03 . [OI] input<br />
04 . Comm. port<br />
05 . Expansion card 1<br />
06 . Expansion card 2<br />
07 . Pulse train frequency<br />
train input<br />
A143 — Calculation symbol R/W 00 . ADD (A input + B input)<br />
01 . SUB (A input – B input)<br />
02 . MUL (A input x B input)<br />
Register<br />
hex dec.<br />
Network Data<br />
1291h 04753 -100 to<br />
A114<br />
value<br />
1292h 04754 A113<br />
value to<br />
100<br />
04755<br />
to<br />
04772<br />
— —<br />
0.01 Hz<br />
0.01 Hz<br />
1 %<br />
1 %<br />
— —<br />
12A5h 04773 1 to 10 —<br />
12A6h 04774 1 to 10 —<br />
04775<br />
to<br />
04782<br />
Range Res.<br />
— —<br />
12AFh 04783 0 to 7 —<br />
12B0h 04784 0 to 7 —<br />
12B1h 04785 0, 1, 2 —<br />
— (Reserved) — — 12B2h 04786 — —<br />
B–51<br />
Appendix B
Appendix B B–52<br />
ModBus Data Listing<br />
Holding Registers, “A” Group Standard Functions<br />
Func. Code Name R/W Description<br />
A145 H ADD frequency R/W 0.00 to 99.99,<br />
12B3h 04787 0 to 40000 0.01 Hz<br />
A145 L R/W<br />
100.0 to 400.0 (Hz)<br />
12B4h 04788<br />
A146 — ADD direction select R/W 00..Plus (adds A145 value to<br />
output frequency)<br />
01..Minus (subtracts A145<br />
value from output freq.)<br />
12B5h 04789 0, 1 —<br />
— (Reserved) — — 12B6h<br />
to<br />
12B8h<br />
A150 — EL-S curve acceleration<br />
ratio 1<br />
A151 — EL-S curve acceleration<br />
ratio 2<br />
A152 — EL-S curve acceleration<br />
ratio 3<br />
A153 — EL-S curve acceleration<br />
ratio 4<br />
— (Reserved) — — 12BDh<br />
to<br />
1300h<br />
04790t<br />
o<br />
04792<br />
— —<br />
R/W Range is 0. to 50. 12B9h 04793 0 to 50 1 %<br />
R/W Range is 0. to 50. 12BAh 04794 0 to 50 1 %<br />
R/W Range is 0. to 50. 12BBh 04795 0 to 50 1 %<br />
R/W Range is 0. to 50. 12BCh 04796 0 to 50 1 %<br />
Holding Registers, “B” Group Fine Tuning Functions<br />
Func. Code Name R/W Description<br />
B001 — Selection of restart mode R/W 00 . Alarm output after trip,<br />
automatic restart disabled<br />
01 . Resume operation after<br />
frequency matching<br />
02 . Resume operation after<br />
frequency matching<br />
03 . Resume previous freq.<br />
after freq. matching, then<br />
decelerate to stop and<br />
display trip info<br />
04 . Restart with active<br />
matching frequency<br />
B002 — Allowable under-voltage<br />
power failure time<br />
R/W The amount of time a power<br />
input under-voltage can occur<br />
without tripping the power<br />
failure alarm<br />
Register<br />
hex dec.<br />
Register<br />
Network Data<br />
04797<br />
to<br />
04864<br />
hex dec.<br />
Network Data<br />
Range Res.<br />
— —<br />
Range Res.<br />
1301h 04865 0 to 4 —<br />
1302h 04866 3 to 250 0.1 sec.
B003 — Retry wait time before<br />
motor restart<br />
B004 — Instantaneous power<br />
failure / under-voltage trip<br />
alarm enable<br />
B005 — Number of restarts on<br />
power failure / undervoltage<br />
trip events<br />
R/W Time delay after a trip condition<br />
goes away before the inverter<br />
restarts the motor<br />
R/W 00 .Disable<br />
01 .Enable<br />
02 .Disable during stop and<br />
ramp to stop<br />
R/W 00 .Restart 16 times<br />
01 .Always restart<br />
<strong>SJ7002</strong> Inverter<br />
1303h 04867 3 to 1000 0.1 sec.<br />
1304h 04868 0, 1, 2 —<br />
1305h 04869 0, 1 —<br />
B006 — Phase loss detection enable R/W 00 .Disable<br />
01 .Enable<br />
1306h 04870 0, 1 —<br />
B007 H Restart frequency thresh- R/W When the frequency of the motor 1307h 04871 0 to 40000 0.01 Hz<br />
B007 L<br />
old<br />
R/W<br />
is less than this value, the<br />
inverter will restart at 0 Hz 1308h 04872<br />
B008 — Retry after trip select R/W 00 .Always retry after trip<br />
01 .Start with 0 Hz<br />
02 .Start with frequency<br />
matching<br />
03 .Retry after deceleration<br />
and stop with matching<br />
frequency<br />
04 .Start with active<br />
matching frequency<br />
1309h 04873 0 to 4 —<br />
B009 — Retry after undervoltage<br />
select<br />
B010 — Retry count select after<br />
overvoltage or overcurrent<br />
R/W 00 .Restart 16 times<br />
01 .Unlimited<br />
130Ah 04874 0, 1 —<br />
R/W 1 to 3 (times) 130Bh 04875 1 to 3 times<br />
B011 — Retry wait time after trip R/W 0.3 to 100.0 (seconds) 130Ch 04876 3 to 1000 0.1 sec.<br />
B012 — Electronic thermal setting<br />
(calculated within the<br />
inverter from current<br />
output)<br />
B212 — Electronic thermal setting<br />
(calculated within the<br />
inverter from current<br />
output), 2nd motor<br />
B312 — Electronic thermal setting<br />
(calculated within the<br />
inverter from current<br />
output), 3rd motor<br />
B013 — Electronic thermal characteristic<br />
R/W Range is 0.2 * rated current to<br />
1.2 * rated current<br />
R/W Range is 0.2 * rated current to<br />
1.2 * rated current<br />
R/W Range is 0.2 * rated current to<br />
1.2 * rated current<br />
R/W 00 .Reduced torque<br />
01 .Constant torque<br />
02 .Free-setting<br />
130Dh 04877 200 to<br />
1000<br />
230Ch 08972 200 to<br />
1000<br />
330Ch 13068 200 to<br />
1000<br />
0.1 %<br />
0.1 %<br />
0.1 %<br />
130Eh 04878 0, 1, 2 —<br />
— (Reserved) — 130Fh 04879 — —<br />
B213 — Electronic thermal characteristic,<br />
2nd motor<br />
Holding Registers, “B” Group Fine Tuning Functions<br />
Func. Code Name R/W Description<br />
R/W 00 .Reduced torque<br />
01 .Constant torque<br />
02 .Free-setting<br />
— (Reserved) — — 230Eh<br />
to<br />
2501h<br />
Register<br />
hex dec.<br />
Network Data<br />
230Dh 08973 0, 1, 2 —<br />
08974<br />
to<br />
09493<br />
Range Res.<br />
— —<br />
B–53<br />
Appendix B
Appendix B B–54<br />
ModBus Data Listing<br />
B313 — Electronic thermal characteristic,<br />
3rd motor<br />
R/W 00 . Reduced torque<br />
01 . Constant torque<br />
02 . Free-setting<br />
— (Reserved) — — 330Eh<br />
to<br />
3506h<br />
B015 — Free setting, electronic<br />
thermal frequency (1)<br />
B016 — Free setting, electronic<br />
thermal current (1)<br />
B017 — Free setting, electronic<br />
thermal frequency (2)<br />
B018 — Free setting, electronic<br />
thermal current (2)<br />
B019 — Free setting, electronic<br />
thermal frequency (3)<br />
B020 — Free setting, electronic<br />
thermal current (3)<br />
B021 — Overload restriction operation<br />
mode<br />
R/W Data point coordinates for Hz<br />
axis (horizontal) in the free-form<br />
curve<br />
R/W Data point coordinates for<br />
Ampere axis (vertical) in the<br />
free-form curve<br />
R/W Data point coordinates for Hz<br />
axis (horizontal) in the free-form<br />
curve<br />
R/W Data point coordinates for<br />
Ampere axis (vertical) in the<br />
free-form curve<br />
R/W Data point coordinates for Hz<br />
axis (horizontal) in the free-form<br />
curve<br />
R/W Data point coordinates for<br />
Ampere axis (vertical) in the<br />
free-form curve<br />
R/W 00 . Disable<br />
01 . Enable for acceleration<br />
and constant speed<br />
02 . Enable for constant<br />
speed only<br />
03 . Enable for accel, decel,<br />
and constant speed<br />
B022 — Overload restriction setting R/W (0.20 x rated current) to (1.80 x<br />
rated current) (A)<br />
B023 — Deceleration rate at<br />
overload restriction<br />
B024 — Overload restriction operation<br />
mode (2)<br />
B025 — Overload restriction setting<br />
(2)<br />
B026 — Deceleration rate at<br />
overload restriction (2)<br />
B027 — Overcurrent suppression<br />
enable<br />
B028 — Current limit for active<br />
frequency-matching restart<br />
Holding Registers, “B” Group Fine Tuning Functions<br />
Func. Code Name R/W Description<br />
330Dh 13069 0, 1, 2 —<br />
13070<br />
to<br />
13574<br />
— —<br />
1310h 04880 0 to 400 1 Hz<br />
1311h 04881 0 to rated<br />
current<br />
0.1 A<br />
1312h 04882 0 to 400 1 Hz<br />
1313h 04883 0 to rated<br />
current<br />
0.1 A<br />
1314h 04884 0 to 400 1 Hz<br />
1315h 04885 0 to rated<br />
current<br />
0.1 A<br />
1316h 04886 0 to 3 —<br />
1317h 04887 200 to<br />
2000<br />
0.1 %<br />
R/W 0.10 to 30.00 (seconds) 1318h 04888 10 to 3000 0.1 sec.<br />
R/W 00 . Disable<br />
01 . Enable for acceleration<br />
and constant speed<br />
02 . Enable for constant<br />
speed only<br />
03 . Enable for accel, decel,<br />
and constant speed<br />
R/W (0.20 x rated current) to (1.80 x<br />
rated current) (A)<br />
1319h 04889 0 to 3 —<br />
131Ah 04890 200 to<br />
2000<br />
0.1 %<br />
R/W 0.10 to 30.00 (seconds) 131Bh 04891 1 to 3000 0.01 sec.<br />
R/W 00 . Disable<br />
01 . Enable<br />
R/W (0.20 x rated current) to (1.80 x<br />
rated current) (A)<br />
Register<br />
hex dec.<br />
Network Data<br />
131Ch 04892 0, 1 —<br />
131Dh 04893 200 to<br />
2000<br />
Range Res.<br />
0.1 %
B029 — Scan time constant for<br />
active freq. matching<br />
B030 — Restart freq. select for<br />
active freq. matching<br />
B031 — Software lock mode selection<br />
<strong>SJ7002</strong> Inverter<br />
R/W 10 to 3000 131Eh 04894 0.01 sec. 0.01 sec.<br />
R/W 00 .Frequency at last shutoff<br />
01 .Maximum frequency<br />
02 .Set frequency<br />
R/W 00 .Low-level access, [SFT]<br />
input blocks all edits<br />
01 .Low-level access, [SFT]<br />
input blocks edits (except<br />
F001 and Multi-speed<br />
parameters)<br />
02 .No access to edits<br />
03 .No access to edits except<br />
F001 and Multi-speed<br />
parameters<br />
10 .High-level access,<br />
including B031<br />
131Fh 04895<br />
1320h 04896<br />
— (Reserved) — — 1321h 04897 — —<br />
— (Reserved) — — 1322h 04898 — —<br />
B034 H Run/power-on warning R/W 0 to 9999. (0 to 99990), 1000 to 1323h 04899 0 to 65535 1 [10-<br />
B034 L<br />
time<br />
R/W<br />
6553 (10000 to 655300) (hours)<br />
1324h 04900<br />
hours]<br />
B035 — Rotational direction R/W 00 .Enable for fwd. and rev. 1325h 04901 0, 1, 2 —<br />
restriction<br />
01 .Enable for forward only<br />
02 .Enable for reverse only<br />
B036 — Reduced voltage start<br />
selection<br />
B037 — Function code display<br />
restriction<br />
R/W 000 (short) to 255 (long) 1326h 04902 0 to 255 —<br />
R/W 00 .Display all<br />
01 .Display only utilized<br />
functions<br />
02 .Display user-selected<br />
functions only<br />
03 .Data comparison display<br />
04 .Basic display<br />
B038 — Initial display selection R/W 00 .Last value dislayed when<br />
STR key was pressed<br />
01 .D001<br />
02 .D002<br />
03 .D003<br />
04 .D007<br />
05 .F001<br />
B039 — Automatic user parameter<br />
function enable<br />
R/W 00 .Disable<br />
01 .Enable<br />
B040 — Torque limit selection R/W 00 .4-quadrant mode<br />
01 .Selected by two input<br />
terminals<br />
02 .From analog [O2] input<br />
03 .From expansion card 1<br />
04 .From expansion card 2<br />
B041 — Torque limit (1) (forwarddriving<br />
in 4-quadrant<br />
mode)<br />
Holding Registers, “B” Group Fine Tuning Functions<br />
Func. Code Name R/W Description<br />
R/W 0. to 200. (%), no (disable torque<br />
limit)<br />
Register<br />
hex dec.<br />
Network Data<br />
Range Res.<br />
1327h 04903 0 to 4 —<br />
1328h 04904 0 to 5 —<br />
1329h 04905 0, 1 —<br />
132Ah 04906 0 to 4 —<br />
132Bh 04907 0 to 200,<br />
255= (no)<br />
1 %<br />
B–55<br />
Appendix B
Appendix B B–56<br />
ModBus Data Listing<br />
B042 — Torque limit (2) (reverseregenerating<br />
in 4-quadrant<br />
mode)<br />
B043 — Torque limit (3) (reversedriving<br />
in 4-quadrant<br />
mode)<br />
B044 — Torque limit (4) (forwardregenerating<br />
in 4-quadrant<br />
mode)<br />
B045 — Torque limit LADSTOP<br />
enable<br />
B046 — Reverse Run protection<br />
enable<br />
R/W 0. to 200. (%), no (disable torque<br />
limit)<br />
R/W 0. to 200. (%), no (disable torque<br />
limit)<br />
R/W 0. to 200. (%), no (disable torque<br />
limit)<br />
R/W 00 . Disable<br />
01 . Enable<br />
R/W 00 . Disable<br />
01 . Enable<br />
— (Reserved) — — 1331h<br />
to<br />
1333h<br />
B050 — Controller deceleration and<br />
stop on power loss<br />
B051 — DC bus voltage trigger<br />
level during power loss<br />
B052 — Over-voltage threshold<br />
during power loss<br />
B053 H Deceleration time setting<br />
during power loss<br />
R/W 00 . Disable<br />
01 . Constant decel to stop<br />
02 . Constant DC voltage<br />
control with resume<br />
03 . Constant DC voltage<br />
control<br />
R/W Sets trigger for controlled deceleration<br />
and stop on power loss<br />
function<br />
R/W Sets over-voltage threshold for<br />
controlled deceleration function<br />
132Ch 04908 0 to 200,<br />
255= (no)<br />
132Dh 04909 0 to 200,<br />
255= (no)<br />
132Eh 04910 0 to 200,<br />
255= (no)<br />
1 %<br />
1 %<br />
1 %<br />
132Fh 04911 0, 1 —<br />
1330h 04912 0, 1 —<br />
04913<br />
to<br />
04915<br />
— —<br />
1334h 04916 0 to 3 —<br />
1335h 04917 0 to 10000 0.1 V<br />
1336h 04918 0 to 10000 0.1 V<br />
R/W 0.01 to 99.99, 100.0 to 999.9, 1337h 04919 0 to 0.01 sec.<br />
B053 L R/W<br />
1000 to 3600 (seconds)<br />
1338h 04920<br />
360000<br />
B054 — Initial output frequency R/W Sets the initial decrease in output 1339h 04921 0 to 1000 0.01 Hz<br />
decrease during power loss frequency upon power loss<br />
B055 — Proportional gain setting<br />
for non-stop operation at<br />
power loss<br />
R/W 0.00 to 2.55 133Ah 04922 0 to 255 0.01<br />
B056 — Integral time setting for<br />
non-stop operation at<br />
power loss<br />
R/W 0.0 to 9.999, 10.00 to 65.55 133Bh 04923 0 to 65535 0.001<br />
sec.<br />
— (Reserved) — — 133Ch<br />
to<br />
133Eh<br />
B060 — [O] input max. limit level<br />
of window comparator<br />
B061 — [O] input min. limit level<br />
of window comparator<br />
B062 — [O] input hysteresis width<br />
of window comparator<br />
B063 — [OI] input max. limit level<br />
of window comparator<br />
Holding Registers, “B” Group Fine Tuning Functions<br />
Func. Code Name R/W Description<br />
R/W 0. to 100. (%)<br />
Lower limit = B061 + B062 / 2<br />
R/W 0. to 100. (%)<br />
Lower limit = B060 – B062 / 2<br />
R/W 0. to 10. (%)<br />
Lower limit = B061 – B062 / 2<br />
R/W 0. to 100. (%)<br />
Lower limit = B064 + B066 / 2<br />
Register<br />
hex dec.<br />
Network Data<br />
04924<br />
to<br />
04926<br />
Range Res.<br />
— —<br />
133Fh 04927 0 to 100 1 %<br />
1340h 04928 0 to 100 1 %<br />
1341h 04929 0 to 10 1 %<br />
1342h 04930 0 to 100 1 %
B064 — [OI] input min. limit level<br />
of window comparator<br />
B065 — [OI] input hysteresis width<br />
of window comparator<br />
B066 — [O/OI/O2] input maximum<br />
limit level of window<br />
comparator<br />
B067 — [O/OI/O2] input minimum<br />
limit level of window<br />
comparator<br />
B068 — [O/OI/O2] input hysteresis<br />
width of window<br />
comparator<br />
R/W 0. to 100. (%)<br />
Lower limit = B063 – B066 / 2<br />
R/W 0. to 10. (%)<br />
Lower limit = B063 – B064 / 2<br />
R/W –100. to 100. (%)<br />
Lower limit = B067 + B068 / 2<br />
R/W –100. to 100. (%)<br />
Lower limit = B066 – B068 / 2<br />
R/W 0. to 10. (%)<br />
Lower limit = B066 – B067 / 2<br />
<strong>SJ7002</strong> Inverter<br />
1343h 04931 0 to 100 1 %<br />
1344h 04932 0 to 10 1 %<br />
1345h 04933 0 to 100 1 %<br />
1346h 04934 0 to 100 1 %<br />
1347h 04935 0 to 10 1 %<br />
— (Reserved) — — 1348h 04936 — —<br />
B070 — [O] input disconnect<br />
threshold<br />
B071 — [OI] input disconnect<br />
threshold<br />
B072 — [O2] input disconnect<br />
threshold<br />
R/W 0 to 100 (%);<br />
255 = ignore setting<br />
R/W 0 to 100 (%);<br />
255 = ignore setting<br />
R/W 0 to 100 (%);<br />
255 = ignore setting<br />
— (Reserved) — — 134Ch<br />
to<br />
1350h<br />
B078 — Clear cumulative input<br />
power data<br />
B079 — Cumulative input power<br />
display gain setting<br />
R/W 00 .No change<br />
01 .Clear the data<br />
1349h 04937 0 to 100,<br />
255<br />
134Ah 04938 0 to 100,<br />
255<br />
134Bh 04939 0 to 100,<br />
255<br />
04940<br />
to<br />
04944<br />
1 %<br />
1 %<br />
1 %<br />
— —<br />
1351h 04945 0, 1 —<br />
R/W 1. to 1000. 1352h 04946 1 to 1000 1<br />
— (Reserved) — — 1353h 04947 — —<br />
— (Reserved) — — 1354h 04948 — —<br />
B082 — Start frequency adjustment R/W 0.10 to 9.99 (Hz) 1355h 04949 10 to 999 0.01 Hz<br />
B083 — Carrier frequency setting R/W Sets the PWM carrier (internal<br />
switching frequency)<br />
1356h 04950 5 to 150 0.1 kHz<br />
B084 — Initialization mode R/W 00 .Trip history clear<br />
1357h 04951 0, 1, 2 —<br />
(parameters or trip history) 01 .Parameter initialization<br />
02 .Trip history clear and<br />
parameter initialization<br />
B085 — Country code for initialization<br />
B086 — Frequency scaling conversion<br />
factor<br />
Holding Registers, “B” Group Fine Tuning Functions<br />
Func. Code Name R/W Description<br />
R/W 00 .Japan version<br />
01 .Europe version<br />
02 .USA version<br />
R/W Specify a constant to scale D007<br />
to display in engineering units<br />
B087 — STOP key enable R/W 00 .Enable<br />
01 .Disable<br />
02 .Disable only the STOP<br />
function<br />
Register<br />
hex dec.<br />
Network Data<br />
Range Res.<br />
1358h 04952 0, 1, 2 —<br />
1359h 04953 1 to 999 0.1<br />
135Ah 04954 0, 1, 2 —<br />
B–57<br />
Appendix B
Appendix B B–58<br />
ModBus Data Listing<br />
B088 — Restart mode after FRS R/W 00 . Restart from 0Hz<br />
01 . Restart from frequency<br />
detected from actual speed<br />
of motor<br />
02 . Restart from active matching<br />
frequency<br />
135Bh 04955 0, 1, 2 —<br />
— (Reserved) — — 135Ch 04956 — —<br />
B090 — Dynamic braking usage<br />
ratio<br />
R/W 0.0 to 100.0 (%)<br />
Set = 0.0 to disable dynamic<br />
braking<br />
B091 — Stop mode selection R/W 00 . DEC (decelerate and stop)<br />
01 . FRS (free run to stop)<br />
B092 — Cooling fan control R/W 00 . Fan always ON<br />
01 . Fan ON during RUN,<br />
OFF during STOP<br />
135Dh 04957 0 to 1000 0.1 %<br />
135Eh 04958 0, 1 —<br />
135Fh 04959 0, 1 —<br />
— (Reserved) — — 1360h 04960 — —<br />
— (Reserved) — — 1361h 04961 — —<br />
B095 — Dynamic braking control R/W 00 . Disable<br />
01 . Enable during RUN only<br />
02 . Enable always<br />
1362h 04962 0, 1, 2 —<br />
B096 — Dynamic braking activation<br />
level<br />
R/W 330 to 380 (V) (200V class),<br />
660 to 760 (V) (400V class)<br />
1363h 04963 330 to 380<br />
660 to 760<br />
— (Reserved) — — 1364h 04964 — —<br />
B098 — Thermistor for thermal<br />
protection control<br />
B099 — Thermal protection level<br />
setting<br />
Holding Registers, “B” Group Fine Tuning Functions<br />
Func. Code Name R/W Description<br />
R/W 00 . Disable<br />
01 . Enable-PTC thermistor<br />
02 . Enable-NTC thermistor<br />
R/W Thermistor resistance threshold<br />
at which trip occurs<br />
Register<br />
hex dec.<br />
Network Data<br />
Range Res.<br />
1 V<br />
1365h 04965 0, 1, 2 —<br />
1366h 04966 0 to 9999 1 Ω<br />
B100 — Free-setting V/f freq. (1) R/W 0. to Free-setting V/f freq. (2) 1367h 04967 0 to V/f 2 1 Hz<br />
B101 — Free-setting V/f voltage (1) R/W 0.0 to 800.0 (V) 1368h 04968 0 to 8000 0.1 V<br />
B102 — Free-setting V/f freq. (2) R/W 0. to Free-setting V/f freq. (3) 1369h 04969 0 to V/f 3 1 Hz<br />
B103 — Free-setting V/f voltage (2) R/W 0.0 to 800.0 (V) 136Ah 04970 0 to 8000 0.1 V<br />
B104 — Free-setting V/f freq. (3) R/W 0. to Free-setting V/f freq. (4) 136Bh 04971 0 to V/f 4 1 Hz<br />
B105 — Free-setting V/f voltage (3) R/W 0.0 to 800.0 (V) 136Ch 04972 0 to 8000 0.1 V<br />
B106 — Free-setting V/f freq. (4) R/W 0. to Free-setting V/f freq. (5) 136Dh 04973 0 to V/f 5 1 Hz<br />
B107 — Free-setting V/f voltage (4) R/W 0.0 to 800.0 (V) 136Eh 04974 0 to 8000 0.1 V<br />
B108 — Free-setting V/f freq. (5) R/W 0. to Free-setting V/f freq. (6) 136Fh 04975 0 to V/f 6 1 Hz<br />
B109 — Free-setting V/f voltage (5) R/W 0.0 to 800.0 (V) 1370h 04976 0 to 8000 0.1 V<br />
B110 — Free-setting V/f freq. (6) R/W 0. to Free-setting V/f freq. (7) 1371h 04977 0 to V/f 7 1 Hz<br />
B111 — Free-setting V/f voltage (6) R/W 0.0 to 800.0 (V) 1372h 04978 0 to 8000 0.1 V<br />
B112 — Free-setting V/f freq. (7) R/W 0. to 400.0 (V) 1373h 04979 0 to V/f 8 1 Hz<br />
B113 — Free-setting V/f voltage (7) R/W 0.0 to 800.0 (V) 1374h 04980 0 to 8000 0.1 V
— (Reserved) — — 1375h<br />
to<br />
137Ah<br />
B120 — Brake Control Enable R/W 00 .Disable<br />
01 .Enable<br />
B121 — Brake Wait Time for<br />
Release<br />
B122 — Brake Wait Time for<br />
Acceleration<br />
B123 — Brake Wait Time for<br />
Stopping<br />
B124 — Brake Wait Time for<br />
Confirmation<br />
B125 — Brake Release Frequency<br />
Setting<br />
B126 — Brake Release Current<br />
Setting<br />
R/W Sets time delay between arrival<br />
at release frequency and the<br />
brake release signal<br />
R/W Sets time delay from receipt of<br />
brake confirmation signal to start<br />
of motor acceleration<br />
R/W Sets time delay from brake<br />
confirmation signal turns OFF to<br />
inverter deceleration to 0 H<br />
R/W Sets the wait time for confirmation<br />
after turn ON/OFF of brake<br />
release<br />
R/W Sets the frequency of the brake<br />
release output signal after delay<br />
set by B121<br />
R/W Sets the minimum inverter<br />
current level above which the<br />
brake release signal is permitted<br />
04981<br />
to<br />
04986<br />
<strong>SJ7002</strong> Inverter<br />
— —<br />
137Bh 04987 0, 1 —<br />
137Ch 04977 0 to 500 0.01 sec.<br />
137Dh 04979 0 to 500 0.01 sec.<br />
137Eh 04990 0 to 500 0.01 sec.<br />
137Fh 04991 0 to 500 0.01 sec.<br />
1380h 04992 0 to 40000 0.01 Hz<br />
1381h 04993 0 to 1800 0.1 %<br />
B127 — Braking frequency R/W 0.00 to 99.99, 100.0 to 400.0 Hz 1382h 04994 0 to 40000 0.01 Hz<br />
— (Reserved) — — 1383h 04995 — —<br />
— (Reserved) — — 1384h 04996 — —<br />
B130 — Over-voltage LADSTOP R/W 00 .Disable<br />
1385h 04997 0, 1, 2 —<br />
enable<br />
01 .Enable during deceleration<br />
and constant speed<br />
02 .Enable during acceleration<br />
B131 — Over-voltage LADSTOP<br />
level<br />
B132 — Acceleration and deceleration<br />
rate at overvoltage<br />
suppression<br />
B133 — Overvoltage suppression<br />
proportional gain<br />
B134 — Overvoltage suppression<br />
integral time<br />
Holding Registers, “B” Group Fine Tuning Functions<br />
Func. Code Name R/W Description<br />
R/W 330 to 390 (V) for 200V class,<br />
660 to 780 (V) for 400V class<br />
1386h 04998 330 to 390<br />
660 to 780<br />
R/W 0.10 to 30.00 (seconds) 1387h 04999 10 to 3000 0.01 sec.<br />
R/W 0.00 to 2.55 1388h 05000 0 to 255 0.01<br />
R/W 0.000 to 9.999,<br />
10.00 to 63.53 (seconds)<br />
— (Reserved) — — 1390h<br />
to<br />
1400h<br />
Register<br />
hex dec.<br />
1389h 05001<br />
Network Data<br />
05002<br />
to<br />
05120<br />
Range Res.<br />
1 V<br />
— —<br />
B–59<br />
Appendix B
Appendix B B–60<br />
ModBus Data Listing<br />
Holding Registers, “C” Group Intelligent Terminal Functions<br />
Func. Code Name R/W Description<br />
Register<br />
hex dec.<br />
Network Data<br />
Range Res.<br />
C001 — Terminal [1] function R/W<br />
1401h 05121 1 to 9, —<br />
C002 — Terminal [2] function R/W 1402h 05122<br />
11 to 18,<br />
20 to 24,<br />
C003<br />
C004<br />
C005<br />
— Terminal [3] function<br />
— Terminal [4] function<br />
— Terminal [5] function<br />
R/W<br />
R/W<br />
R/W<br />
See “Input Terminal<br />
Configuration” on<br />
page 3–50<br />
1403h<br />
1404h<br />
1405h<br />
05123<br />
05124<br />
05125<br />
26 to 29,<br />
31 to 48,<br />
no<br />
C006 — Terminal [6] function R/W 1406h 05126<br />
C007 — Terminal [7] function R/W 1407h 05127<br />
C008 — Terminal [8] function R/W 1408h 05128<br />
— (Reserved) — — 1409h 05129 — —<br />
— (Reserved) — — 140Ah 05130 — —<br />
C011 — Terminal [1] active state R/W Select logic convention, two 140Bh 05131 0, 1 —<br />
C012 — Terminal [2] active state R/W<br />
option codes:<br />
00..Normally open (N.O.) 140Ch 05132<br />
C013 — Terminal [3] active state R/W 01..Normally closed (N.C.) 140Dh 05133<br />
C014 — Terminal [4] active state R/W 140Eh 05134<br />
C015 — Terminal [5] active state R/W 140Fh 05135<br />
C016 — Terminal [6] active state R/W 1410h 05136<br />
C017 — Terminal (7) active state R/W 1411h 05137<br />
C018 — Terminal [8] active state R/W 1412h 05138<br />
C019 — Terminal [FW] active state R/W 1413h 05139<br />
— (Reserved) — — 1414h 05140 — —<br />
C021 — Terminal [11] function R/W<br />
1415h 05141 0 to 13, —<br />
C022 — Terminal [12] function R/W 1416h 05142<br />
19 to 26<br />
C023 — Terminal [13] function R/W See “Output Terminal 1417h 05143<br />
C024<br />
C025<br />
— Terminal [14] function<br />
— Terminal [15] function<br />
R/W<br />
R/W<br />
Configuration” on<br />
page 3–55<br />
1418h<br />
1419h<br />
05144<br />
05145<br />
C026 — Alarm relay terminal<br />
function<br />
R/W 141Ah 05146<br />
C027 — [FM] signal selection R/W<br />
See “Output Terminal<br />
141Bh 05147 0 to 10, 12 —<br />
C028 — [AM] signal selection R/W Configuration” on 141Ch 05148<br />
C029 — [AMI] signal selection R/W<br />
page 3–55<br />
141Dh 05149<br />
C030 — Digital current monitor R/W Current with digital current 141Eh 05150 200 to 0.1 %<br />
reference value<br />
monitor output at 1.44 kHz<br />
2000<br />
C031 — Terminal [11] active state R/W Select logic convention, two 141Fh 05151 0, 1 —<br />
C032 — Terminal [12] active state R/W<br />
option codes:<br />
00..Normally open (N.O.) 1420h 05152<br />
C033 — Terminal [13] active state R/W 01..Normally closed (N.C.) 1421h 05153<br />
C034 — Terminal [14] active state R/W 1422h 05154<br />
C035 — Terminal [15] active state R/W 1423h 05155<br />
C036 — Alarm relay active state R/W 1424h 05156
<strong>SJ7002</strong> Inverter<br />
— (Reserved) — — 1425h 05157 — —<br />
C038 — Low current indication<br />
output mode select<br />
C039 — Low current indication<br />
detection level<br />
C040 — Overload signal output<br />
mode<br />
R/W 00 . Output during accel/<br />
decel and constant speed<br />
01 . Output only during<br />
constant speed<br />
R/W 0.0 to 2.0 x rated inverter<br />
current<br />
R/W 00 . During accel / decel /<br />
constant speed<br />
01 . During constant speed<br />
1426h 05158 0, 1 —<br />
1427h 05159 0 to 1800 0.1 %<br />
1428h 05160 0, 1 —<br />
C041 — Overload level setting R/W 0.00 x rated current to 2.00 x<br />
rated current (A)<br />
1429h 05161 0 to 1800 0.1 %<br />
C042 H Frequency arrival setting R/W Sets the frequency arrival 142Ah 05162 0 to 40000 0.01 Hz<br />
C042 L<br />
for accel.<br />
R/W<br />
setting threshold for the<br />
output frequency during<br />
acceleration<br />
142Bh 05163<br />
C043 H Arrival frequency setting R/W Sets the frequency arrival 142Ch 05164 0 to 40000 0.01 Hz<br />
C043 L<br />
for decel.<br />
R/W<br />
setting threshold for the<br />
output frequency during<br />
deceleration<br />
142Dh 05165<br />
C044 — PID deviation level setting R/W Sets the PID loop error<br />
threshold |SP - PV| (absolute<br />
value) to trigger intelligent<br />
output [OD]<br />
142Eh 05166 0 to 1000 0.1 %<br />
C045 H Frequency arrival setting R/W 0.0 to 99.99,<br />
142Fh 05167 0 to 40000 0.01 Hz<br />
C045 L<br />
for acceleration (2)<br />
R/W<br />
100.0 to 400.0 (Hz)<br />
1430h 05168<br />
C046 H Frequency arrival setting R/W 0.0 to 99.99,<br />
1431h 05169 0 to 40000 0.01 Hz<br />
C046 L<br />
for deceleration (2)<br />
R/W<br />
100.0 to 400.0 (Hz)<br />
1432h 05170<br />
— (Reserved) — — 1433h 05171 — —<br />
to to<br />
1437h 05175<br />
C052 — Maximum PID feedback<br />
(PV) data<br />
R/W 0.0 to 100.0 (%) 1438h 05176 0 to 1000 0.1 %<br />
C053 — Minimum PID feedback<br />
(PV) data<br />
R/W 0.0 to 100.0 (%) 1439h 05177 0 to 1000 0.1 %<br />
— (Reserved) — — 143Ah 05178<br />
C055 — Over-torque (forwarddriving)<br />
level setting<br />
C056 — Over-torque (reverse<br />
regenerating) level setting<br />
C057 — Over-torque (reverse<br />
driving) level setting<br />
C058 — Over-torque (forward<br />
regenerating) level setting<br />
Holding Registers, “C” Group Intelligent Terminal Functions<br />
Func. Code Name R/W Description<br />
R/W Threshold for intelligent<br />
output terminal [OTQ],<br />
quadrant I<br />
R/W Threshold for intelligent<br />
output terminal [OTQ],<br />
quadrant II<br />
R/W Threshold for intelligent<br />
output terminal [OTQ],<br />
quadrant III<br />
R/W Threshold for intelligent<br />
output terminal [OTQ],<br />
quadrant IV<br />
Register<br />
hex dec.<br />
Network Data<br />
Range Res.<br />
143Bh 05179 0 to 180 1 %<br />
143Ch 05180 0 to 180 1 %<br />
143Dh 05181 0 to 180 1 %<br />
143Eh 05182 0 to 180 1 %<br />
B–61<br />
Appendix B
Appendix B B–62<br />
ModBus Data Listing<br />
— (Reserved) — — 143Fh 05183 — —<br />
— (Reserved) — — 1440h 05184 — —<br />
C061 — Electronic thermal warning R/W Sets the threshold for 1441h 05185 0 to 100 1 %<br />
level setting<br />
intelligent output [THM]<br />
C062 — Alarm code output R/W 00..Disable<br />
01..Enable – 3-bit code<br />
02..Enable – 4-bit code<br />
1442h 05186 0, 1, 2 —<br />
C063 — Zero speed detection level R/W 0.00 to 99.99 / 100.0 (Hz) 1443h 05187 0 to 10000 0.01 Hz<br />
C064 — Heatsink overheat warning<br />
level<br />
R/W Alarm temperature threshold<br />
for heatsink in inverter<br />
— (Reserved) — — 1445h<br />
to<br />
144Ah<br />
C071 — Communication speed<br />
selection<br />
R/W 02..Test<br />
03..2400 (bps)<br />
04..4800 (bps)<br />
05..9600 (bps)<br />
06..19200 (bps)<br />
C072 Node allocation R/W Set the address of the<br />
inverter on the network<br />
C073 — Communication data<br />
length selection<br />
C074 Communication parity<br />
selection<br />
C075 — Communication stop bit<br />
selection<br />
C076 — Action upon communication<br />
error selection<br />
R/W 07..7-bit data<br />
08..8-bit data<br />
R/W 00..No parity<br />
01..Even parity<br />
02..Odd parity<br />
R/W 01..1 Stop bit<br />
02..2 Stop bits<br />
R/W 00..Trip<br />
01..Trip after deceleration<br />
and stop<br />
02..No action (ignore errors)<br />
03..Free-run stop<br />
04..Decelerate and stop<br />
1444h 05188 0 to 200 1 °C<br />
05189<br />
to<br />
05194<br />
— —<br />
144Bh 05195 2 to 6 —<br />
144Ch 05196 1 to 32 —<br />
144Dh 05197 7, 8 bits<br />
144Eh 05198 0, 1, 2 —<br />
144Fh 05199 1, 2 bits<br />
1450h 05200 0 to 4 —<br />
C077 — Communication timeout<br />
before trip<br />
R/W 0.00 to 99.99 (seconds) 1451h 05201 0 to 9999 0.01 sec.<br />
C078 — Communication wait time R/W Time the inverter waits after<br />
receiving a message before it<br />
transmits<br />
1452h 05202 0 to 1000 1 msec.<br />
C079 — Communication protocol<br />
select<br />
Holding Registers, “C” Group Intelligent Terminal Functions<br />
Func. Code Name R/W Description<br />
R/W 00..ASCII<br />
01..ModBus RTU<br />
Register<br />
hex dec.<br />
Network Data<br />
Range Res.<br />
1453h 05203 0, 1 —<br />
— (Reserved) — — 1454h 05204 — —<br />
C081 — [O] input span calibration R/W 0. to 9999., 1000 to 6553<br />
(10000 to 65530)<br />
1455h 05205 0 to 65530 1<br />
C082 — [OI] input span calibration R/W 0. to 9999., 1000 to 6553<br />
(10000 to 65530)<br />
1456h 05206 0 to 65530 1<br />
C083 — [O2] input span calibration R/W 0. to 9999., 1000 to 6553<br />
(10000 to 65530)<br />
1457h 05207 0 to 65530 1<br />
— (Reserved) — — 1458h 05208 — —
C085 — Thermistor input tuning R/W 0.0 to 999.9., 1000 1459h 05209<br />
— (Reserved) — — 145Ah<br />
to<br />
145Eh<br />
C091 — Debug mode enable R 00 . No display<br />
01 . Display<br />
— — (Reserved) — — 1460h<br />
to<br />
1468h<br />
C101 — Up/Down memory mode<br />
selection<br />
Holding Registers, “C” Group Intelligent Terminal Functions<br />
Func. Code Name R/W Description<br />
R/W 00 . Clear last freq. (return to<br />
default freq. F001)<br />
01 . Keep last frequency<br />
adjusted by UP/DWN<br />
05210<br />
to<br />
05214<br />
<strong>SJ7002</strong> Inverter<br />
— —<br />
145Fh 05215 0, 1 —<br />
05216<br />
to<br />
05224<br />
— —<br />
1469h 05225 0, 1 —<br />
C102 — Reset mode selection R/W 00 . Cancel trip state, stop<br />
inverter output, reset CPU;<br />
clear position counter at ON<br />
transition<br />
01 . Cancel trip state, stop<br />
inverter output, reset CPU;<br />
clear position counter at OFF<br />
transition<br />
02 . Cancel trip state and<br />
clear position counter; no<br />
effect if a trip does not exist<br />
03 . Cancel trip state but does<br />
not clear position counter; no<br />
effect if a trip does not exist<br />
146Ah 05226 0 to 3 —<br />
C103 — Restart mode after reset R/W 00 . Restart at 0 Hz<br />
01 . Resume operation after<br />
frequency matching<br />
02 . Restart with active<br />
matching frequency<br />
146Bh 05227<br />
— (Reserved) — — 146Ch 05228 — —<br />
C105 — FM gain adjustment R/W 50. to 200. (%) 146Dh 05229 50 to 200 1 %<br />
C106 — AM gain adjustment R/W 50. to 200. (%) 146Eh 05230 50 to 200 1 %<br />
C107 — AMI gain adjustment R/W 50. to 200. (%) 146Fh 05231 50 to 200 1 %<br />
— (Reserved) — — 1470h 05232 — —<br />
C109 — AM bias adjustment R/W 0. to 100. (%) 1471h 05233 0 to 100 1 %<br />
C110 — AMI bias adjustment R/W 0. to 100. (%) 1472h 05234 0 to 100 1 %<br />
C111 — Overload setting (2) R/W 0.00 x rated current to<br />
2.00 x rated current (A)<br />
1473h 05235 0 to 1800 0.1 %<br />
— (Reserved) — — 1474h 05236 — —<br />
to to<br />
147Ch 05244<br />
C121 — [O] input zero calibration R/W 0. to 9999., 1000 to 6553<br />
(10000 to 65530)<br />
C122 — [OI] input zero calibration R/W 0. to 9999., 1000 to 6553<br />
(10000 to 65530)<br />
Register<br />
hex dec.<br />
Network Data<br />
Range Res.<br />
147Dh 05245 0 to 65530 1<br />
147Eh 05246 0 to 65530 1<br />
B–63<br />
Appendix B
Appendix B B–64<br />
ModBus Data Listing<br />
Holding Registers, “C” Group Intelligent Terminal Functions<br />
Func. Code Name R/W Description<br />
C123 — [O2] input zero calibration R/W 0. to 9999., 1000 to 6553<br />
(10000 to 65530)<br />
— (Reserved) — — 1480h<br />
to<br />
1485h<br />
Register<br />
hex dec.<br />
Network Data<br />
147Fh 05247 0 to 65530 1<br />
05248<br />
to<br />
05253<br />
Range Res.<br />
— —<br />
C130 — Term. [11] ON-delay time R/W 0.0 to 100.0 (seconds) 1486h 05254 0 to 1000 0.1 sec.<br />
C131 — Term. [11] OFF-delay time R/W 0.0 to 100.0 (seconds) 1487h 05255 0 to 1000 0.1 sec.<br />
C132 — Term. [12] ON-delay time R/W 0.0 to 100.0 (seconds) 1488h 05256 0 to 1000 0.1 sec.<br />
C133 — Term. [12] OFF-delay time R/W 0.0 to 100.0 (seconds) 1489h 05257 0 to 1000 0.1 sec.<br />
C134 — Term. [13] ON-delay time R/W 0.0 to 100.0 (seconds) 148Ah 05258 0 to 1000 0.1 sec.<br />
C135 — Term. [13] OFF-delay time R/W 0.0 to 100.0 (seconds) 148Bh 05259 0 to 1000 0.1 sec.<br />
C136 — Term. [14] ON-delay time R/W 0.0 to 100.0 (seconds) 148Ch 05260 0 to 1000 0.1 sec.<br />
C137 — Term. [14] OFF-delay time R/W 0.0 to 100.0 (seconds) 148Dh 05261 0 to 1000 0.1 sec.<br />
C138 — Term. [15] ON-delay time R/W 0.0 to 100.0 (seconds) 148Eh 05262 0 to 1000 0.1 sec.<br />
C139 — Term. [15] OFF-delay time R/W 0.0 to 100.0 (seconds) 148Fh 05263 0 to 1000 0.1 sec.<br />
C140 — Relay output ON-delay<br />
time<br />
R/W 0.0 to 100.0 (seconds) 1490h 05264 0 to 1000 0.1 sec.<br />
C141 — Relay output OFF-delay<br />
time<br />
R/W 0.0 to 100.0 (seconds) 1491h 05265 0 to 1000 0.1 sec.<br />
C142 — Logic output 1 function A R/W All programmable output 1492h 05266 — —<br />
C143 — Logic output 1 function B R/W<br />
functions available (except<br />
LOG1 to LOG6)<br />
1493h 05267<br />
C144 — Logic output 1 operator R/W 00..AND<br />
01..OR<br />
02..XOR (exclusive OR)<br />
1494h 05268 0, 1, 2 —<br />
C145 — Logic output 2 function A R/W All programmable output 1495h 05269 — —<br />
C146 — Logic output 2 function B R/W<br />
functions available (except<br />
LOG1 to LOG6)<br />
1496h 05270<br />
C147 — Logic output 2 operator R/W 00..AND<br />
01..OR<br />
02..XOR (exclusive OR)<br />
1497h 05271 0, 1, 2 —<br />
C148 — Logic output 3 function A R/W All programmable output 1498h 05272 — —<br />
C149 — Logic output 3 function B R/W<br />
functions available (except<br />
LOG1 to LOG6)<br />
1499h 05273<br />
C150 — Logic output 3 operator R/W 00..AND<br />
01..OR<br />
02..XOR (exclusive OR)<br />
149Ah 05274 0, 1, 2 —<br />
C151 — Logic output 4 function A R/W All programmable output 149Bh 05275 — —<br />
C152 — Logic output 4 function B R/W<br />
functions available (except<br />
LOG1 to LOG6)<br />
149Ch 05276<br />
C153 — Logic output 4 operator R/W 00..AND<br />
01..OR<br />
02..XOR (exclusive OR)<br />
149Dh 05277 0, 1, 2 —<br />
C154 — Logic output 5 function A R/W All programmable output 149Eh 05278 — —<br />
C155 — Logic output 5 function B R/W<br />
functions available (except<br />
LOG1 to LOG6)<br />
149Fh 05279
C156 — Logic output 5 operator R/W 00 . AND<br />
01 . OR<br />
02 . XOR (exclusive OR)<br />
<strong>SJ7002</strong> Inverter<br />
14A0h 05280 0, 1, 2 —<br />
C157 — Logic output 6 function A R/W All programmable output 14A1h 05281 — —<br />
C158 — Logic output 6 function B R/W<br />
functions available (except<br />
LOG1 to LOG6)<br />
14A2h 05282<br />
C159 — Logic output 6 operator R/W 00 . AND<br />
01 . OR<br />
02 . XOR (exclusive OR)<br />
14A3h 05283 0, 1, 2 —<br />
C160 — Terminal [1] input<br />
response time setting<br />
C161 — Terminal [2] input<br />
response time setting<br />
C162 — Terminal [3] input<br />
response time setting<br />
C163 — Terminal [4] input<br />
response time setting<br />
C164 — Terminal [5] input<br />
response time setting<br />
C165 — Terminal [6] input<br />
response time setting<br />
C166 — Terminal [7] input<br />
response time setting<br />
C167 — Terminal [8] input<br />
response time setting<br />
C168 — Terminal [FW] input<br />
response time setting<br />
C169 — Multi-speed position determination<br />
time<br />
Holding Registers, “C” Group Intelligent Terminal Functions<br />
Func. Code Name R/W Description<br />
R/W 0. to 200. (x 2 milliseconds) 14A4h 05284 0 to 200 2 ms<br />
R/W 0. to 200. (x 2 milliseconds) 14A5h 05285 0 to 200 2 ms<br />
R/W 0. to 200. (x 2 milliseconds) 14A6h 05286 0 to 200 2 ms<br />
R/W 0. to 200. (x 2 milliseconds) 14A7h 05287 0 to 200 2 ms<br />
R/W 0. to 200. (x 2 milliseconds) 14A8h 05288 0 to 200 2 ms<br />
R/W 0. to 200. (x 2 milliseconds) 14A9h 05289 0 to 200 2 ms<br />
R/W 0. to 200. (x 2 milliseconds) 14AA<br />
h<br />
05290 0 to 200 2 ms<br />
R/W 0. to 200. (x 2 milliseconds) 14ABh 05291 0 to 200 2 ms<br />
R/W 0. to 200. (x 2 milliseconds) 14ACh 05292 0 to 200 2 ms<br />
R/W 0. to 200. (x 2 milliseconds) 14AD<br />
h<br />
— (Reserved) — — 14AEh<br />
to<br />
1500h<br />
Register<br />
hex dec.<br />
Network Data<br />
05293 0 to 200 2 ms<br />
05294<br />
to<br />
05376<br />
Range Res.<br />
— —<br />
B–65<br />
Appendix B
Appendix B B–66<br />
ModBus Data Listing<br />
Holding Registers, “H” Group Motor Constants Functions<br />
Func. Code Name R/W Description<br />
H001 — Auto-tuning setting R/W 00..Auto-tuning OFF<br />
01..Auto-tune<br />
02..Auto-tune (rotate motor)<br />
H002 — Motor data selection, 1st<br />
motor<br />
H202 — Motor data selection, 2nd<br />
motor<br />
R/W 00..Standard motor data<br />
01..Auto-tuning data<br />
02..Adaptive tuning data<br />
R/W 00..Standard motor data<br />
01..Auto-tuning data<br />
02..Adaptive tuning data<br />
Register<br />
hex dec.<br />
Network Data<br />
Range Res.<br />
1501h 05377 0, 1, 2 —<br />
1502h 05378 0, 1, 2 —<br />
2502h 9474 0, 1, 2 —<br />
H003 — Motor capacity, 1st motor R/W 0.20 to 75.00 (kW) 153h 05379 00 to 36 —<br />
H203 — Motor capacity, 2nd setting R/W 0.20 to 75.00 (kW) 2503h 9475<br />
(see next<br />
table) —<br />
H004 — Motor poles setting, 1st R/W 00..2 poles<br />
1504h 05380 0 to 4 —<br />
motor<br />
01..4 poles<br />
02..6 poles<br />
03..8 poles<br />
04..10 poles<br />
H204 — Motor poles setting, 2nd<br />
motor<br />
R/W 00..2 poles<br />
01..4 poles<br />
02..6 poles<br />
03..8 poles<br />
04..10 poles<br />
2504h 9476 0 to 4 —<br />
H005 H Motor speed constant, 1st R/W Motor proportional gain 1505h 05381 0 to 80000 0.001<br />
H005 L<br />
motor<br />
R/W<br />
constant, factory set<br />
1506h 05382<br />
H205 H Motor speed constant, 2nd R/W Motor proportional gain 2505h 9477 0 to 80000 0.001<br />
H205 L<br />
motor<br />
R/W<br />
constant, factory set<br />
2506h 9478<br />
H006 — Motor stabilization<br />
constant<br />
R/W 0. to 255. (factory set) 1507h 05383 0 to 255 1<br />
— (Reserved) — — 1508h 05384 — —<br />
to to<br />
1514h 05396<br />
H206 — Motor stabilization<br />
constant, 2nd motor<br />
— (Reserved) — — 2508h<br />
to<br />
2514h<br />
R/W 0. to 255. (factory set) 2507h 09479 0 to 255 1<br />
H306 — Motor stabilization<br />
constant, 3rd motor<br />
— (Reserved) — — 3508h<br />
to end<br />
H020 H Motor constant R1, 1st R/W 0.001 to 9.999, 10.00 to<br />
motor<br />
65.53 (Ohms)<br />
09480<br />
to<br />
09292<br />
— —<br />
R/W 0. to 255. (factory set) 3507h 13575 0 to 255 1<br />
13576<br />
to end<br />
— —<br />
1515h 05397 1 to 65530 0.001 Ω<br />
H020 L R/W 1516h 05398<br />
H220 H Motor constant R1, 2nd R/W 0.001 to 9.999, 10.00 to 2515h 09293 1 to 65530 0.001 Ω<br />
H220 L<br />
motor<br />
R/W<br />
65.53 (Ohms)<br />
2516h 09294<br />
H021 H Motor constant R2, 1st R/W 0.001 to 9.999, 10.00 to 1517h 05399 1 to 65530 0.001 Ω<br />
H021 L<br />
motor<br />
R/W<br />
65.53 (Ohms)<br />
1518h 05400
Holding Registers, “H” Group Motor Constants Functions<br />
Func. Code Name R/W Description<br />
<strong>SJ7002</strong> Inverter<br />
H221 H Motor constant R2, 2nd R/W 0.001 to 9.999, 10.00 to 2517h 09495 1 to 65530 0.001 Ω<br />
H221 L<br />
motor<br />
R/W<br />
65.53 (Ohms)<br />
2518h 09496<br />
H022 H Motor constant L, 1st R/W 0.01 to 99.99,<br />
1519h 05401 1 to 65530 0.01 mH<br />
H022 L<br />
motor<br />
R/W<br />
100.0 - 655.3 (mH)<br />
151Ah 05402<br />
H222 H Motor constant L, 2nd R/W 0.01 to 99.99,<br />
2519h 09497 1 to 65530 0.01 mH<br />
H222 L<br />
motor<br />
R/W<br />
100.0 - 655.3 (mH)<br />
251Ah 09498<br />
H023 H Motor constant Io R/W 0.01 to 99.99,<br />
151Bh 05403 1 to 65530 0.01 A<br />
H023 L R/W<br />
100.0 - 655.3 (A)<br />
151Ch 05404<br />
H223 H Motor constant Io, 2nd R/W 0.01 to 99.99,<br />
251Bh 09499 1 to 65530 0.01 A<br />
H223 L<br />
motor<br />
R/W<br />
100.0 - 655.3 (A)<br />
251Ch 09500<br />
H024 H Motor Constant J R/W 0.001 to 9.999,<br />
151Dh 05405 1 to —<br />
H024 L R/W<br />
10.00 to 99.99,<br />
100.0 to 999.9,<br />
1000 to 9999.<br />
151Eh 05406<br />
9999000<br />
— (Reserved) — — 151Fh<br />
to<br />
1523h<br />
05407<br />
to<br />
05411<br />
H224 H Motor constant J, 2nd R/W 0.001 to 9.999,<br />
251Dh 09501 1 to<br />
H224 L<br />
motor<br />
R/W<br />
10.00 to 99.99,<br />
100.0 to 999.9,<br />
1000 to 9999.<br />
251Eh 09502<br />
9999000<br />
— (Reserved) — — 221Fh<br />
to<br />
2523h<br />
Register<br />
hex dec.<br />
Network Data<br />
09503<br />
to<br />
09507<br />
Range Res.<br />
— —<br />
—<br />
— —<br />
H030 H Auto constant R1, 1st R/W 0.001 to 9.999,<br />
1524h 05412 1 to 65530 0.001 Ω<br />
H030 L<br />
motor<br />
R/W<br />
10.00 to 65.53 (Ohms)<br />
1525h 05413<br />
H230 H Auto constant R1, 2nd R/W 0.001 to 9.999,<br />
2524h 09508 1 to 65530 0.001 Ω<br />
H230 L<br />
motor<br />
R/W<br />
10.00 to 65.53 (Ohms)<br />
2525h 09509<br />
H031 H Auto constant R2, 1st R/W 0.001 to 9.999,<br />
1526h 05414 1 to 65530 0.001 Ω<br />
H031 L<br />
motor<br />
R/W<br />
10.00 to 65.53 (Ohms)<br />
1527h 05415<br />
H231 H Auto constant R2, 2nd R/W 0.001 to 9.999,<br />
2526h 09510 1 to 65530 0.001 Ω<br />
H231 L<br />
motor<br />
R/W<br />
10.00 to 65.53 (Ohms)<br />
2527h 09511<br />
H032 H Auto constant L, 1st motor R/W 0.01 to 99.99,<br />
1528h 05416 1 to 65530 0.01 mH<br />
H032 L R/W<br />
100.0 to 655.3 (mH)<br />
1529h 05417<br />
H232 H Auto constant L, 2nd R/W 0.01 to 99.99,<br />
2528h 09512 1 to 65530 0.01 mH<br />
H232 L<br />
motor<br />
R/W<br />
100.0 to 655.3 (mH)<br />
2529h 09513<br />
H033 H Auto constant Io, 1st motor R/W 0.01 to 99.99,<br />
152Ah 05418 1 to 65530 0.01 mH<br />
H033 L R/W<br />
100.0 to 655.3 (mH)<br />
152Bh 05419<br />
H233 H Auto constant Io, 2nd R/W 0.01 to 99.99,<br />
252Ah 09514 1 to 65530 0.01 mH<br />
H233 L<br />
motor<br />
R/W<br />
100.0 to 655.3 (mH)<br />
252Bh 09515<br />
B–67<br />
Appendix B
Appendix B B–68<br />
ModBus Data Listing<br />
H034 H Auto constant J, 1st motor R/W 0.001 to 9.999,<br />
152Ch 05420 1 to<br />
H034 L R/W<br />
10.00 to 99.99,<br />
100.0 to 999.9,<br />
1000 to 9999.<br />
152Dh 05421<br />
9999000<br />
H234 H Auto constant J, 1st motor R/W 0.001 to 9.999,<br />
252Ch 09516 1 to<br />
H234 L R/W<br />
10.00 to 99.99,<br />
100.0 to 999.9,<br />
1000 to 9999.<br />
252Dh 09517<br />
9999000<br />
— (Reserved) — — 152Eh<br />
to<br />
153Ch<br />
H050 — PI proportional gain for 1st<br />
motor<br />
H250 — PI proportional gain for<br />
2nd motor<br />
H051 — PI integral gain for 1st<br />
motor<br />
H251 — PI integral gain for 2nd<br />
motor<br />
H052 — P proportional gain setting<br />
for 1st motor<br />
— (Reserved) — — 1540h<br />
to<br />
1546h<br />
05422<br />
to<br />
05436<br />
0.001<br />
0.001<br />
— —<br />
R/W 0.0 to 999.9, 1000. 153Dh 05437 0 to 10000 0.1 %<br />
R/W 0.0 to 999.9, 1000. 253Dh 09533 0 to 10000 0.1 %<br />
R/W 0.0 to 999.9, 1000. 153Eh 05438 0 to 10000 0.1 %<br />
R/W 0.0 to 999.9, 1000. 253Eh 09534 0 to 10000 0.1 %<br />
R/W 0.01 to 10.00 153Fh 05439 0 to 1000 0.01<br />
H252 — P proportional gain setting<br />
for 2nd motor<br />
— (Reserved) — — 2540h<br />
to<br />
2546h<br />
05440<br />
to<br />
05446<br />
— —<br />
R/W 0.01 to 10.00 253Fh 09535 0 to 1000 0.01<br />
09536<br />
to<br />
09542<br />
— —<br />
H060 — Zero LV limit for 1st motor R/W 0.0 to 100.0 1547h 05447 0 to 1000 0.1 %<br />
H260 — Zero LV limit for 2nd<br />
motor<br />
R/W 0.0 to 100.0 2547h 09543 0 to 1000 0.1 %<br />
H061 — Zero LV starting boost<br />
current for 1st motor<br />
R/W 0. to 50. (%) 1548h 05448 0 to 50 1 %<br />
— (Reserved) — — 1549h<br />
to<br />
1550h<br />
H261 — Zero LV starting boost<br />
current for 2nd motor<br />
— (Reserved) — — 2549h<br />
to<br />
3102h<br />
H070 — Terminal selection PI<br />
proportional gain setting<br />
H071 — Terminal selection PI<br />
integral gain setting<br />
H072 — Terminal selection P<br />
proportional gain setting<br />
Holding Registers, “H” Group Motor Constants Functions<br />
Func. Code Name R/W Description<br />
Register<br />
hex dec.<br />
Network Data<br />
05449<br />
to<br />
05456<br />
— —<br />
R/W 0. to 50. (%) 2548h 09544 0 to 50 1 %<br />
09545<br />
to<br />
12546<br />
Range Res.<br />
— —<br />
R/W 0.0 to 999.9, 1000 1551h 05457 0 to 10000 0.1 %<br />
R/W 0.0 to 999.9, 1000 1552h 05458 0 to 10000 0.1 %<br />
R/W 0.00 to 10.00 1553h 05459 0 to 1000 0.01
Holding Registers, “H” Group Motor Constants Functions<br />
Func. Code Name R/W Description<br />
<strong>SJ7002</strong> Inverter<br />
H073 — Gain switching time R/W 0. to 999. (milliseconds) 1554h 05460 0 to 9999 1 msec.<br />
— (Reserved) — — 1555h<br />
to<br />
1600h<br />
Register<br />
hex dec.<br />
Network Data<br />
05461<br />
to<br />
05632<br />
Range Res.<br />
— —<br />
Use the codes in the table below to return parameters for H003 and H203 (motor capacity<br />
selection).<br />
Code Data 00 01 02 03 04 05 06 07 08 09 10<br />
Japan or U.S.A. mode<br />
(B085 = 00 or 02)<br />
0.2 kW — 0.4 — 0.75 — 1.5 2.2 — 3.7 —<br />
EU mode (B085=01) 0.2 kW 0.37 — 0.55 0.75 1.1 1.5 2.2 3.0 — 4.0<br />
Code Data 11 12 13 14 15 16 17 18 19 20 21<br />
Japan or U.S.A. mode<br />
(B085 = 00 or 02)<br />
5.5 kW 7.5 11 15 18.5 22 30 37 45 55 75<br />
EU mode (B085=01) 5.5 kW 7.5 11 15 18.5 22 30 37 45 55 75<br />
Code Data 22 23 24 25 26 27 28 29 30 31 32<br />
Japan or U.S.A. mode<br />
(B085 = 00 or 02)<br />
90 kW 110 132 150 160 185 200 220 250 280 300<br />
EU mode (B085=01) 90 kW 110 132 150 160 185 300 220 250 280 300<br />
Code Data 33 34 35 36<br />
Japan or U.S.A. mode<br />
(B085 = 00 or 02)<br />
315 kW 340 355 400<br />
EU mode (B085=01) 315 kW 340 355 400<br />
B–69<br />
Appendix B
Appendix B B–70<br />
ModBus Data Listing<br />
Holding Registers, “P” Group Expansion Card Functions<br />
Func. Code Name R/W Description<br />
P001 — Operation mode on expansion<br />
card 1 error<br />
P002 — Operation mode on expansion<br />
card 2 error<br />
R/W 00..Trip (stop motor)<br />
01..Continuous operation<br />
R/W 00..Trip (stop motor)<br />
01..Continuous operation<br />
— (Reserved) — — 1603h<br />
to<br />
160Ah<br />
P011 — Encoder pulse-per-revolution<br />
(PPR) setting<br />
R/W 128 to 65000 (pulses per<br />
revolution)<br />
P012 — Control pulse setting R/W 00..Automatic Speed<br />
Regulation (ASR) mode<br />
01..Automatic Position<br />
Regulation (APR) mode<br />
02..Absolute Position<br />
Control<br />
03..High-resolution<br />
Absolute Position Control<br />
P013 — Pulse line mode setting R/W 00..Quadrature mode<br />
01..Count and direction<br />
02..Separate forward and<br />
reverse pulse trains<br />
Register<br />
hex dec.<br />
Network Data<br />
Range Res.<br />
1601h 05633 0, 1 —<br />
1602h 05634 0, 1 —<br />
05635<br />
to<br />
05642<br />
160Bh 05643 128 to<br />
65000<br />
— —<br />
160Ch 05644 0, 1 —<br />
160Dh 05645 0, 1, 2 —<br />
P014 — Home search stop position<br />
setting<br />
R/W 0. to 4095. (pulses) 160Eh 05646 0 to 4095 1 pulse<br />
P015 — Home search speed setting R/W Start frequency to maximum<br />
frequency (up to 120.0) (Hz)<br />
160Fh 05647 0 to 12000 0.01 Hz<br />
P016 — Home search direction<br />
setting<br />
P017 — Home search completion<br />
range setting<br />
P018 — Home search completion<br />
delay time setting<br />
P019 — Electronic gear set position<br />
selection<br />
P020 — Electronic gear ratio<br />
numerator setting<br />
P021 — Electronic gear ratio<br />
denominator setting<br />
R/W 00..Forward<br />
01..Reverse<br />
R/W 0. to 9999.,<br />
1000 (10,000) (pulses)<br />
1610h 05648 0, 1 —<br />
1611h 05649 0 to 10000 1<br />
R/W 0.00 to 9.99 (seconds) 1612h 05650 0 to 999 0.01 sec.<br />
R/W 00..Position feedback side<br />
01..Position command side<br />
1613h 05651 0, 1 —<br />
R/W 0. to 9999. 1614h 05652 1 to 9999 —<br />
R/W 1 to 9999 1615h 05653 1 to 9999 —<br />
P022 — Feed-forward gain setting R/W 0.00 to 99.99, 100.0 to 655.3 1616h 05654 0 to 65535 0.01<br />
P023 — Position loop gain setting R/W 0.00 to 99.99, 100.0 1617h 05655 0 to 10000 0.01<br />
P024 — Position bias setting R/W -204 (-2048) / -999. to 2048 1618h 05656 -2048 to<br />
2048<br />
1<br />
P025 — Temperature compensa- R/W 00..No compensation 1619h 05657 0, 1 —<br />
tion thermistor enable<br />
01..With compensation<br />
P026 — Over-speed error detection<br />
level setting<br />
R/W 0.0 to 150.0 (%) 161Ah 05658 0 to 1500 0.1 %<br />
P027 — Speed deviation error R/W 0.00 to 99.99,<br />
161Bh 05659 0 to 12000 0.01 Hz<br />
detection level setting<br />
100.0 to 120.0 (Hz)<br />
1
<strong>SJ7002</strong> Inverter<br />
P028 — Numerator of motor gear<br />
ratio<br />
R/W 0. to 9999. 161Ch 05660 1 to 9999 1<br />
P029 — Denominator of motor gear<br />
ratio<br />
R/W 1 to 9999 161Dh 05661 1 to 9999 1<br />
— (Reserved) — — 161Eh 05662 — —<br />
P031 — Accel/decel time input<br />
selection<br />
P032 — Positioning command<br />
input selection<br />
P033 — Torque command input<br />
selection<br />
R/W 00 . Inverter<br />
01 . Expansion card 1<br />
02 . Expansion card 2<br />
R/W 00 . Inverter<br />
01 . Expansion card 1<br />
02 . Expansion card 2<br />
R/W 00 . [O] terminal<br />
01 . [OI] terminal<br />
02 . [O2] terminal<br />
03 . Inverter keypad (P034)<br />
161Fh 05663 0, 1, 2 —<br />
1620h 05664 0, 1, 2 —<br />
1621h 05665 0 to 3<br />
P034 — Torque command setting R/W 0. to 200. (%) 1622h 05666 0 to 180 1 %<br />
P035 — Torque command polarity<br />
selection<br />
R/W 00 . Indicated by signal<br />
polarity<br />
01 . Depends on motor<br />
direction<br />
P036 — Torque bias mode R/W 00 . Disable<br />
01 . Inverter keypad (P037)<br />
02 . [O2] terminal input<br />
1623h 05667 0, 1 —<br />
1624h 05668 0, 1, 2 —<br />
P037 — Torque bias value R/W -200. to 200. (%) 1625h 05669 0 to 180 1<br />
P038 — Torque bias polarity<br />
selection<br />
R/W 00 . Indicated by polarity<br />
01 . Depends on motor<br />
direction<br />
1626h 05670 0, 1 —<br />
P039 H Forward maximum speed R/W 0.00 to Maximum frequency 1627h 05671 0 to max. 0.01 Hz<br />
P039 L<br />
for torque-controlled<br />
operation<br />
R/W<br />
(Hz)<br />
1628h 05672<br />
frequency<br />
(up to<br />
40000)<br />
P040 H Reverse maximum speed R/W 0.00 to Maximum frequency 1629h 05673 0 to max. 0.01 Hz<br />
P040 L<br />
for torque-controlled<br />
operation<br />
R/W<br />
(Hz)<br />
162Ah 05674<br />
frequency<br />
(up to<br />
40000)<br />
— (Reserved) — — 162Bh 05675 — —<br />
— (Reserved) — — 162Ch 05676 — —<br />
— (Reserved) — — 162Dh 05677 — —<br />
P044 — DeviceNet comm<br />
watchdog timer<br />
R/W 0.00 to 99.99 (seconds) 162Eh 05678 0 to 9999 0.01 sec.<br />
P045 — Inverter action on R/W 00 . Trip<br />
162Fh 05679 0 to 4 —<br />
DeviceNet comm error<br />
01 . Decelerate and trip<br />
02 . Hold last speed<br />
03 . Free run stop<br />
04 . Decelerate and stop<br />
P046 — DeviceNet polled I/O:<br />
Output instance number<br />
Holding Registers, “P” Group Expansion Card Functions<br />
Func. Code Name R/W Description<br />
Register<br />
hex dec.<br />
Network Data<br />
R/W 20, 21, 100 1630h 05680 20, 21,<br />
100<br />
Range Res.<br />
—<br />
B–71<br />
Appendix B
Appendix B B–72<br />
ModBus Data Listing<br />
P047 — DeviceNet polled I/O:<br />
Input instance number<br />
P048 — Inverter action on<br />
DeviceNet idle mode<br />
P049 — Motor poles setting for<br />
RPM<br />
R/W 70, 71, 101 1631h 05681 70, 71,<br />
101<br />
R/W 00..Trip<br />
01..Decelerate and trip<br />
02..Hold last speed<br />
03..Free run stop<br />
04..Decelerate and stop<br />
—<br />
1632h 05682 0 to 4 —<br />
R/W 00 to 38 (even numbers only) 1633h 05683 0 to 19 1 =<br />
2poles<br />
— — (Reserved) — — 1634h<br />
to<br />
1638h<br />
05684<br />
to<br />
05688<br />
— —<br />
P055 — Pulse train frequency span R/W 1.0 to 50.0 (kHz) 1639h 05689 10 to 500 0.1 kHz<br />
P056 — Pulse train frequency time<br />
constant<br />
R/W 0.01 to 2.00 (seconds) 163Ah 05690 1 to 200 0.01 sec.<br />
P057 — Pulse train frequency bias R/W -100. to 100. (%) 163Bh 05691 -100 to<br />
100<br />
1 %<br />
P058 — Pulse train frequency limit R/W 0. to 100. (%) 163Ch 05692 0 to 100 1 %<br />
— (Reserved) — — 163Dh 05693 — —<br />
P060 H Multi-stage position R/W Reverse side to forward side 163Eh 05694 — —<br />
P060 L<br />
setting 0<br />
R/W<br />
(upper four digits including<br />
sign “–”)<br />
163Fh 05695<br />
P061 H Multi-stage position R/W Reverse side to forward side 1640h 05696 — —<br />
P061 L<br />
setting 1<br />
R/W<br />
(upper four digits including<br />
sign “–”)<br />
1641h 05697<br />
P062 H Multi-stage position R/W Reverse side to forward side 1642h 05698 — —<br />
P062 L<br />
setting 2<br />
R/W<br />
(upper four digits including<br />
sign “–”)<br />
1643h 05699<br />
P063 H Multi-stage position R/W Reverse side to forward side 1644h 05700 — —<br />
P063 L<br />
setting 3<br />
R/W<br />
(upper four digits including<br />
sign “–”)<br />
1645h 05701<br />
P064 H Multi-stage position R/W Reverse side to forward side 1646h 05702 — —<br />
P064 L<br />
setting 4<br />
R/W<br />
(upper four digits including<br />
sign “–”)<br />
1647h 05703<br />
P065 H Multi-stage position R/W Reverse side to forward side 1648h 05704 — —<br />
P065 L<br />
setting 5<br />
R/W<br />
(upper four digits including<br />
sign “–”)<br />
1649h 05705<br />
P066 H Multi-stage position R/W Reverse side to forward side 164Ah 05706 — —<br />
P066 L<br />
setting 6<br />
R/W<br />
(upper four digits including<br />
sign “–”)<br />
164Bh 05707<br />
P067 H Multi-stage position R/W Reverse side to forward side 164Ch 05708 — —<br />
P067 L<br />
setting 7<br />
R/W<br />
(upper four digits including<br />
sign “–”)<br />
164Dh 05709<br />
P068 — Home position mode R/W 00..Low<br />
164Eh 05710 0, 1, 2 —<br />
selection<br />
01..High<br />
02..High 2<br />
P069 — Home position direction<br />
selection<br />
Holding Registers, “P” Group Expansion Card Functions<br />
Func. Code Name R/W Description<br />
R/W 00..Forward<br />
01..Reverse<br />
Register<br />
hex dec.<br />
Network Data<br />
Range Res.<br />
164Fh 05711 0, 1 —
P070 — Low speed homing<br />
frequency<br />
P071 — High speed homing<br />
frequency<br />
<strong>SJ7002</strong> Inverter<br />
R/W 0.00 to 10.00 (Hz) 1650h 05712 0 to 1000 0.01 Hz<br />
R/W 0.00 to 99.99 / 100.0 to<br />
maximum frequency setting,<br />
1st motor (Hz)<br />
1651h 05713 0 to 40000 0.01 Hz<br />
P072 H Forward position range R/W 0 to 536870912 (when P012 1652h 05714 See<br />
P072 L<br />
setting<br />
R/W<br />
= 02), 0 to 2147483647<br />
(when P013 = 03) (upper<br />
four digits)<br />
1653h 05715<br />
description<br />
P073 H Reverse position range R/W 0 to 536870912 (when P012 1654h 05716 See<br />
P073 L R/W<br />
= 02), 0 to 2147483647<br />
(when P013 = 03) (upper<br />
four digits)<br />
1655h 05717<br />
description<br />
— (Reserved) — — 1656h<br />
to<br />
1665h<br />
P100 — Easy sequence parameter<br />
(U00)<br />
P101 — Easy sequence parameter<br />
(U01)<br />
P102 — Easy sequence parameter<br />
(U02)<br />
P103 — Easy sequence parameter<br />
(U03)<br />
P104 — Easy sequence parameter<br />
(U04)<br />
P105 — Easy sequence parameter<br />
(U05)<br />
P106 — Easy sequence parameter<br />
(U06)<br />
P107 — Easy sequence parameter<br />
(U07)<br />
P108 — Easy sequence parameter<br />
(U08)<br />
P109 — Easy sequence parameter<br />
(U09)<br />
P110 — Easy sequence parameter<br />
(U10)<br />
P111 — Easy sequence parameter<br />
(U11)<br />
P112 — Easy sequence parameter<br />
(U12)<br />
P113 — Easy sequence parameter<br />
(U13)<br />
P114 — Easy sequence parameter<br />
(U14)<br />
P115 — Easy sequence parameter<br />
(U15)<br />
Holding Registers, “P” Group Expansion Card Functions<br />
Func. Code Name R/W Description<br />
R/W 0. to 9999., 1000 to 6553<br />
(10000 to 65535)<br />
R/W 0. to 9999., 1000 to 6553<br />
(10000 to 65535)<br />
R/W 0. to 9999., 1000 to 6553<br />
(10000 to 65535)<br />
R/W 0. to 9999., 1000 to 6553<br />
(10000 to 65535)<br />
R/W 0. to 9999., 1000 to 6553<br />
(10000 to 65535)<br />
R/W 0. to 9999., 1000 to 6553<br />
(10000 to 65535)<br />
R/W 0. to 9999., 1000 to 6553<br />
(10000 to 65535)<br />
R/W 0. to 9999., 1000 to 6553<br />
(10000 to 65535)<br />
R/W 0. to 9999., 1000 to 6553<br />
(10000 to 65535)<br />
R/W 0. to 9999., 1000 to 6553<br />
(10000 to 65535)<br />
R/W 0. to 9999., 1000 to 6553<br />
(10000 to 65535)<br />
R/W 0. to 9999., 1000 to 6553<br />
(10000 to 65535)<br />
R/W 0. to 9999., 1000 to 6553<br />
(10000 to 65535)<br />
R/W 0. to 9999., 1000 to 6553<br />
(10000 to 65535)<br />
R/W 0. to 9999., 1000 to 6553<br />
(10000 to 65535)<br />
R/W 0. to 9999., 1000 to 6553<br />
(10000 to 65535)<br />
Register<br />
hex dec.<br />
Network Data<br />
05718<br />
to<br />
05733<br />
Range Res.<br />
1<br />
1<br />
— —<br />
1666h 05734 0 to 65530 1<br />
1667h 05735 0 to 65530 1<br />
1668h 05736 0 to 65530 1<br />
1669h 05737 0 to 65530 1<br />
166Ah 05738 0 to 65530 1<br />
166Bh 05739 0 to 65530 1<br />
166Ch 05740 0 to 65530 1<br />
166Dh 05741 0 to 65530 1<br />
166Eh 05742 0 to 65530 1<br />
166Fh 05743 0 to 65530 1<br />
1670h 05744 0 to 65530 1<br />
1671h 05745 0 to 65530 1<br />
1672h 05746 0 to 65530 1<br />
1673h 05747 0 to 65530 1<br />
1674h 05748 0 to 65530 1<br />
1675h 05749 0 to 65530 1<br />
B–73<br />
Appendix B
Appendix B B–74<br />
ModBus Data Listing<br />
P116 — Easy sequence parameter<br />
(U16)<br />
P117 — Easy sequence parameter<br />
(U17)<br />
P118 — Easy sequence parameter<br />
(U18)<br />
P119 — Easy sequence parameter<br />
(U19)<br />
P120 — Easy sequence parameter<br />
(U20)<br />
P121 — Easy sequence parameter<br />
(U21)<br />
P122 — Easy sequence parameter<br />
(U22)<br />
P123 — Easy sequence parameter<br />
(U23)<br />
P124 — Easy sequence parameter<br />
(U24)<br />
P125 — Easy sequence parameter<br />
(U25)<br />
P126 — Easy sequence parameter<br />
(U26)<br />
P127 — Easy sequence parameter<br />
(U27)<br />
P128 — Easy sequence parameter<br />
(U28)<br />
P129 — Easy sequence parameter<br />
(U29)<br />
P130 — Easy sequence parameter<br />
(U30)<br />
P131 — Easy sequence parameter<br />
(U31)<br />
Holding Registers, “P” Group Expansion Card Functions<br />
Func. Code Name R/W Description<br />
R/W 0. to 9999., 1000 to 6553<br />
(10000 to 65535)<br />
R/W 0. to 9999., 1000 to 6553<br />
(10000 to 65535)<br />
R/W 0. to 9999., 1000 to 6553<br />
(10000 to 65535)<br />
R/W 0. to 9999., 1000 to 6553<br />
(10000 to 65535)<br />
R/W 0. to 9999., 1000 to 6553<br />
(10000 to 65535)<br />
R/W 0. to 9999., 1000 to 6553<br />
(10000 to 65535)<br />
R/W 0. to 9999., 1000 to 6553<br />
(10000 to 65535)<br />
R/W 0. to 9999., 1000 to 6553<br />
(10000 to 65535)<br />
R/W 0. to 9999., 1000 to 6553<br />
(10000 to 65535)<br />
R/W 0. to 9999., 1000 to 6553<br />
(10000 to 65535)<br />
R/W 0. to 9999., 1000 to 6553<br />
(10000 to 65535)<br />
R/W 0. to 9999., 1000 to 6553<br />
(10000 to 65535)<br />
R/W 0. to 9999., 1000 to 6553<br />
(10000 to 65535)<br />
R/W 0. to 9999., 1000 to 6553<br />
(10000 to 65535)<br />
R/W 0. to 9999., 1000 to 6553<br />
(10000 to 65535)<br />
R/W 0. to 9999., 1000 to 6553<br />
(10000 to 65535)<br />
— (Reserved) — — 1686h<br />
to<br />
2102h<br />
Register<br />
hex dec.<br />
Network Data<br />
1676h 05750 0 to 65530 1<br />
1677h 05751 0 to 65530 1<br />
1678h 05752 0 to 65530 1<br />
1679h 05753 0 to 65530 1<br />
167Ah 05754 0 to 65530 1<br />
167Bh 05755 0 to 65530 1<br />
167Ch 05756 0 to 65530 1<br />
167Dh 05757 0 to 65530 1<br />
167Eh 05758 0 to 65530 1<br />
167Fh 05759 0 to 65530 1<br />
1680h 05760 0 to 65530 1<br />
1681h 05761 0 to 65530 1<br />
1682h 05762 0 to 65530 1<br />
1683h 05763 0 to 65530 1<br />
1684h 05764 0 to 65530 1<br />
1685h 05765 0 to 65530 1<br />
05766<br />
to<br />
08450<br />
Range Res.<br />
— —
Drive Parameter<br />
Settings Tables<br />
C<br />
In This Appendix.... page<br />
— Introduction ....................................................................................... 2<br />
— Parameter Settings for Keypad Entry ............................................... 2
Appendix C C–2<br />
Introduction<br />
Introduction<br />
This appendix lists the user-programmable parameters for the <strong>SJ7002</strong> series inverters and the<br />
default values for European, U.S. and Japanese product types. The right-most column of the<br />
tables is blank so you can record values you have changed from the default. This involves just a<br />
few parameters for most applications.<br />
Parameter Settings for Keypad Entry<br />
Main Profile<br />
Parameters<br />
Func.<br />
Code<br />
<strong>SJ7002</strong> series inverters provide many functions and parameters that can be configured by the<br />
user. We recommend that you record all parameters that have been edited, in order to help in<br />
troubleshooting or recovery from a loss of parameter data.<br />
Inverter model<br />
MFG. No.<br />
SJ700<br />
“F” Group Parameters Default Setting<br />
Name<br />
FEF2, FE2<br />
(Europe)<br />
}This information is printed on<br />
the specification label located<br />
on the right side of the inverter.<br />
FU2, FU2<br />
(U.S.A.)<br />
FF2, F2<br />
(Japan)<br />
F001 Output frequency setting 0.00 0.00 0.00<br />
F002 Acceleration (1) time setting 30.0 30.0 30.0<br />
F202 Acceleration (1) time setting, 2nd motor 30.0 30.0 30.0<br />
F302 Acceleration (1) time setting, 3rd motor 30.0 30.0 30.0<br />
F003 Deceleration (1) time setting 30.0 30.0 30.0<br />
F203 Deceleration (1) time setting, 2nd motor 30.0 30.0 30.0<br />
F303 Deceleration (1) time setting, 3rd motor 30.0 30.0 30.0<br />
F004 Keypad Run key routing 00 00 00<br />
User<br />
Setting
Standard<br />
Functions<br />
Func.<br />
Code<br />
“A” Group Parameters Default Setting<br />
Name<br />
FEF2, FE2<br />
(Europe)<br />
FU2, FU2<br />
(U.S.A.)<br />
<strong>SJ7002</strong> Inverter<br />
FF2, F2<br />
(Japan)<br />
A001 Frequency source setting 01 01 02<br />
A002 Run command source setting 01 01 02<br />
A003 Base frequency setting 50. 60. 60.<br />
A203 Base frequency setting, 2nd motor 50. 60. 60.<br />
A303 Base frequency setting, 3rd motor 50. 60. 60.<br />
A004 Maximum frequency setting 50. 60. 60.<br />
A204 Maximum frequency setting, 2nd motor 50. 60. 60.<br />
A304 Maximum frequency setting, 3rd motor 50. 60. 60.<br />
A005 [AT] selection 00 00 00<br />
A006 [O2] selection 03 03 03<br />
A011 [O]–[L] input active range start frequency 0.00 0.00 0.00<br />
A012 [O]–[L] input active range end frequency 0.00 0.00 0.00<br />
A013 [O]–[L] input active range start voltage 0. 0. 0.<br />
A014 [O]–[L] input active range end voltage 100. 100. 100.<br />
A015 [O]–[L] input start frequency enable 01 01 01<br />
A016 External frequency filter time const. 8. 8. 8.<br />
A017 Easy sequence function enable 00 00 00<br />
A019 Multi-speed operation selection 00 00 00<br />
A020 Multi-speed frequency setting 0.00 0.00 0.00<br />
A220 Multi-speed frequency setting, 2nd motor 0.00 0.00 0.00<br />
A320 Multi-speed frequency setting, 3rd motor 0.00 0.00 0.00<br />
A021 Multi-speed 1 setting 0.00 0.00 0.00<br />
A022 Multi-speed 2 setting 0.00 0.00 0.00<br />
A023 Multi-speed 3 setting 0.00 0.00 0.00<br />
A024 Multi-speed 4 setting 0.00 0.00 0.00<br />
A025 Multi-speed 5 setting 0.00 0.00 0.00<br />
A026 Multi-speed 6 setting 0.00 0.00 0.00<br />
A027 Multi-speed 7 setting 0.00 0.00 0.00<br />
A028 Multi-speed 8 setting 0.00 0.00 0.00<br />
A029 Multi-speed 9 setting 0.00 0.00 0.00<br />
A030 Multi-speed 10 setting 0.00 0.00 0.00<br />
A031 Multi-speed 11 setting 0.00 0.00 0.00<br />
A032 Multi-speed 12 setting 0.00 0.00 0.00<br />
A033 Multi-speed 13 setting 0.00 0.00 0.00<br />
User<br />
Setting<br />
C–3<br />
Appendix C
Appendix C C–4<br />
Func.<br />
Code<br />
Parameter Settings for Keypad Entry<br />
“A” Group Parameters Default Setting<br />
Name<br />
FEF2, FE2<br />
(Europe)<br />
FU2, FU2<br />
(U.S.A.)<br />
FF2, F2<br />
(Japan)<br />
A034 Multi-speed 14 setting 0.00 0.00 0.00<br />
A035 Multi-speed 15 setting 0.00 0.00 0.00<br />
A038 Jog frequency setting 1.00 1.00 1.00<br />
A039 Jog stop mode 00 00 00<br />
A041 Torque boost method selection 00 00 00<br />
A241 Torque boost method selection, 2nd motor 00 00 00<br />
A042 <strong>Manual</strong> torque boost value 1.0 1.0 1.0<br />
A242 <strong>Manual</strong> torque boost value, 2nd motor 1.0 1.0 1.0<br />
A342 <strong>Manual</strong> torque boost value, 3rd motor 1.0 1.0 1.0<br />
A043 <strong>Manual</strong> torque boost frequency adjustment 5.0 5.0 5.0<br />
A243 <strong>Manual</strong> torque boost frequency adjustment, 2nd<br />
motor<br />
5.0 5.0 5.0<br />
A343 <strong>Manual</strong> torque boost frequency adjustment, 3rd<br />
motor<br />
5.0 5.0 5.0<br />
A044 V/F characteristic curve selection 00 00 00<br />
A244 V/F characteristic curve selection, 2nd motor 00 00 00<br />
A344 V/F characteristic curve selection, 3rd motor 00 00 00<br />
A045 V/f gain setting 100. 100. 100.<br />
A046 Automatic torque boost voltage gain 100. 100. 100.<br />
A246 Automatic torque boost voltage gain, 2nd motor 100. 100. 100.<br />
A047 Automatic torque boost slip gain 100. 100. 100.<br />
A247 Automatic torque boost slip gain, 2nd motor 100. 100. 100.<br />
A051 DC braking enable 00 00 00<br />
A052 DC braking frequency setting 0.50 0.50 0.50<br />
A053 DC braking wait time 0.0 0.0 0.0<br />
A054 DC braking force during deceleration 0. 0. 0.<br />
A055 DC braking time for deceleration 0.0 0.0 0.0<br />
A056 DC braking / edge or level detection for [DB] input 01 01 01<br />
A057 DC braking force for starting 0. 0. 0.<br />
A058 DC braking time for starting 0.0 0.0 0.0<br />
A059 DC braking carrier frequency setting 5.0 5.0 5.0<br />
A061 Frequency upper limit setting 0.00 0.00 0.00<br />
A261 Frequency upper limit setting, 2nd motor 0.00 0.00 0.00<br />
A062 Frequency lower limit setting 0.00 0.00 0.00<br />
A262 Frequency lower limit setting, 2nd motor 0.00 0.00 0.00<br />
A063,<br />
A065,<br />
A067<br />
Jump (center) frequency setting 0.00 0.00 0.00<br />
User<br />
Setting
Func.<br />
Code<br />
A064,<br />
A066,<br />
A068<br />
“A” Group Parameters Default Setting<br />
Name<br />
FEF2, FE2<br />
(Europe)<br />
FU2, FU2<br />
(U.S.A.)<br />
Jump (hysteresis) frequency width setting 0.50 0.50 0.50<br />
A069 Acceleration stop frequency setting 0.00 0.00 0.00<br />
A070 Acceleration stop time frequency setting 0.0 0.0 0.0<br />
A071 PID Function Enable 00 00 00<br />
A072 PID proportional gain 1.0 1.0 1.0<br />
A073 PID integral time constant 1.0 1.0 1.0<br />
A074 PID derivative gain 0.0 0.0 0.0<br />
A075 PV scale conversion 1.00 1.00 1.00<br />
A076 PV source setting 00 00 00<br />
A077 Reverse PID action 00 00 00<br />
A078 PID output limit 0.00 0.00 0.00<br />
A079 PID feed forward select 00 00 00<br />
A081 AVR function select 00 00 02<br />
A082 AVR voltage select 230/400 230/460 200/400<br />
A085 Operation mode selection 00 00 00<br />
A086 Energy saving mode tuning 50.0 50.0 50.0<br />
A092 Acceleration (2) time setting 15.0 15.0 15.0<br />
A292 Acceleration (2) time setting, 2nd motor 15.0 15.0 15.0<br />
A392 Acceleration (2) time setting, 3rd motor 15.0 15.0 15.0<br />
A093 Deceleration (2) time setting 15.0 15.0 15.0<br />
A293 Deceleration (2) time setting, 2nd motor 15.0 15.0 15.0<br />
A393 Deceleration (2) time setting, 3rd motor 15.0 15.0 15.0<br />
A094 Select method to switch to Acc2/Dec2 profile 00 00 00<br />
A294 Select method to switch to Acc2/Dec2, 2nd motor 00 00 00<br />
A095 Acc1 to Acc2 frequency transition point 0.0 0.0 0.0<br />
A295 Acc1 to Acc2 frequency transition point, 2nd<br />
motor<br />
0.0 0.0 0.0<br />
A096 Dec1 to Dec2 frequency transition point 0.0 0.0 0.0<br />
A296 Dec1 to Dec2 frequency transition point, 2nd<br />
motor<br />
0.0 0.0 0.0<br />
A097 Acceleration curve selection 00 00 00<br />
A098 Deceleration curve setting 00 00 00<br />
A101 [OI]–[L] input active range start frequency 0.00 0.00 0.00<br />
A102 [OI]–[L] input active range end frequency 0.00 0.00 0.00<br />
A103 [OI]–[L] input active range start current 20. 20. 20.<br />
A104 [OI]–[L] input active range end current 100. 100. 100.<br />
<strong>SJ7002</strong> Inverter<br />
FF2, F2<br />
(Japan)<br />
User<br />
Setting<br />
C–5<br />
Appendix C
Appendix C C–6<br />
Func.<br />
Code<br />
Parameter Settings for Keypad Entry<br />
“A” Group Parameters Default Setting<br />
Name<br />
FEF2, FE2<br />
(Europe)<br />
FU2, FU2<br />
(U.S.A.)<br />
FF2, F2<br />
(Japan)<br />
A105 [OI]–[L] input start frequency enable 01 01 01<br />
A111 [O2]–[L] input active range start frequency 0.00 0.00 0.00<br />
A112 [O2]–[L] input active range end frequency 0.00 0.00 0.00<br />
A113 [O2]–[L] input active range start voltage –100. –100. –100.<br />
A114 [O2]–[L] input active range end voltage 100. 100. 100.<br />
A131 Acceleration curve constants setting 02 02 02<br />
A132 Deceleration curve constants setting 02 02 02<br />
A141 A input select for calculate function 02 02 02<br />
A142 B input select for calculate function 03 03 03<br />
A143 Calculation symbol 00 00 00<br />
A145 ADD frequency 0.00 0.00 0.00<br />
A146 ADD direction select 00 00 00<br />
A150 EL-S curve acceleration ratio 1 25. 25. 25.<br />
A151 EL-S curve acceleration ratio 2 25. 25. 25.<br />
A152 EL-S curve acceleration ratio 3 25. 25. 25.<br />
A153 EL-S curve acceleration ratio 4 25. 25. 25.<br />
User<br />
Setting
Fine Tuning<br />
Functions<br />
Func.<br />
Code<br />
“B” Group Parameters Default Setting<br />
Name<br />
FEF2, FE2<br />
(Europe)<br />
FU2, FU2<br />
(U.S.A.)<br />
<strong>SJ7002</strong> Inverter<br />
FF2, F2<br />
(Japan)<br />
B001 Selection of restart mode 00 00 00<br />
B002 Allowable under-voltage power failure time 1.0 1.0 1.0<br />
B003 Retry wait time before motor restart 1.0 1.0 1.0<br />
B004 Instantaneous power failure / under-voltage trip<br />
alarm enable<br />
00 00 00<br />
B005 Number of restarts on power failure / under-voltage<br />
trip events<br />
00 00 00<br />
B006 Phase loss detection enable 00 00 00<br />
B007 Restart frequency threshold 0.00 0.00 0.00<br />
B008 Retry after trip select 00 00 00<br />
B009 Retry after undervoltage select 00 00 00<br />
B010 Retry count select after overvoltage or overcurrent 3 3 3<br />
B011 Retry wait time after trip 1.0 1.0 1.0<br />
B012 Electronic thermal setting (calculated within the<br />
inverter from current output)<br />
Rated current for each inverter<br />
B212 Electronic thermal setting (calculated within the<br />
inverter from current output), 2nd motor<br />
Rated current for each inverter<br />
B312 Electronic thermal setting (calculated within the<br />
inverter from current output), 3rd motor<br />
Rated current for each inverter<br />
B013 Electronic thermal characteristic 01 01 00<br />
B213 Electronic thermal characteristic, 2nd motor 01 01 00<br />
B313 Electronic thermal characteristic, 3rd motor 01 01 00<br />
B015 Free setting, electronic thermal frequency (1) 0. 0. 0.<br />
B016 Free setting, electronic thermal current (1) 0.0 0.0 0.0<br />
B017 Free setting, electronic thermal frequency (2) 0. 0. 0.<br />
B018 Free setting, electronic thermal current (2) 0.0 0.0 0.0<br />
B019 Free setting, electronic thermal frequency (3) 0. 0. 0.<br />
B020 Free setting, electronic thermal current (3) 0.0 0.0 0.0<br />
B021 Overload restriction operation mode 01 01 01<br />
B022 Overload restriction setting Rated current x 1.50<br />
B023 Deceleration rate at overload restriction 1.0 1.0 1.0<br />
B024 Overload restriction operation mode (2) 01 01 01<br />
B025 Overload restriction setting (2) Rated current x 1.50<br />
B026 Deceleration rate at overload restriction (2) 1.00 1.00 1.00<br />
B027 Overcurrent suppression enable 01 01 01<br />
B028 Current limit for active frequency-matching restart Rated current x 1.0<br />
User<br />
Setting<br />
C–7<br />
Appendix C
Appendix C C–8<br />
Func.<br />
Code<br />
Parameter Settings for Keypad Entry<br />
“B” Group Parameters Default Setting<br />
Name<br />
FEF2, FE2<br />
(Europe)<br />
FU2, FU2<br />
(U.S.A.)<br />
FF2, F2<br />
(Japan)<br />
B029 Scan time constant for active freq. matching 0.50 0.50 0.50<br />
B030 Restart freq. select for active freq. matching 00 00 00<br />
B031 Software lock mode selection 01 01 01<br />
B034 Run/power-on warning time 0. 0. 0.<br />
B035 Rotational direction restriction 00 00 00<br />
B036 Reduced voltage start selection 06 06 06<br />
B037 Function code display restriction 04 04 04<br />
B038 Initial display selection 01 01 01<br />
B039 Automatic user parameter function enable 00 00 00<br />
B040 Torque limit selection 00 00 00<br />
B041 Torque limit (1) (forward-driving in 4-quadrant<br />
mode)<br />
150. 150. 150.<br />
B042 Torque limit (2) (reverse-regenerating in<br />
4-quadrant mode)<br />
150. 150. 150.<br />
B043 Torque limit (3) (reverse-driving in 4-quadrant<br />
mode)<br />
150. 150. 150.<br />
B044 Torque limit (4) (forward-regenerating in<br />
4-quadrant mode)<br />
150. 150. 150.<br />
B045 Torque limit LADSTOP enable 00 00 00<br />
B046 Reverse Run protection enable 00 00 00<br />
B050 Controller deceleration and stop on power loss 00 00 00<br />
B051 DC bus voltage trigger level during power loss 0.0 0.0 0.0<br />
B052 Over-voltage threshold during power loss 360.0/720.0 360.0/720.0 360.0/720.0<br />
B053 Deceleration time setting during power loss 1.00 1.00 1.00<br />
B054 Initial output frequency decrease during power loss 0.00 0.00 0.00<br />
B055 Proportional gain setting for non-stop operation at<br />
power loss<br />
0.20 0.20 0.20<br />
B056 Integral time setting for non-stop operation at<br />
power loss<br />
.100 .100 .100<br />
B060 [O] input max. limit level of window comparator 100 100 100<br />
B061 [O] input min. limit level of window comparator 0 0 0<br />
B062 [O] input hysteresis width of window comparator 0 0 0<br />
B063 [OI] input max. limit level of window comparator 100 100 100<br />
B064 [OI] input min. limit level of window comparator 0 0 0<br />
B065 [OI] input hysteresis width of window comparator 0 0 0<br />
B066 [O2] input maximum limit level of window<br />
comparator<br />
100 100 100<br />
B067 [O2] input minimum limit level of window<br />
comparator<br />
–100 –100 –100<br />
User<br />
Setting
Func.<br />
Code<br />
“B” Group Parameters Default Setting<br />
Name<br />
FEF2, FE2<br />
(Europe)<br />
FU2, FU2<br />
(U.S.A.)<br />
<strong>SJ7002</strong> Inverter<br />
FF2, F2<br />
(Japan)<br />
B068 [O2] input hysteresis width of window comparator 0 0 0<br />
B070 [O] input disconnect threshold 255(no) 255(no) 255(no)<br />
B071 [OI] input disconnect threshold 255(no) 255(no) 255(no)<br />
B072 [O2] input disconnect threshold 127(no) 127(no) 127(no)<br />
B078 Clear cumulative input power data 00 00 00<br />
B079 Cumulative input power display gain setting 1 1 1<br />
B082 Start frequency adjustment 0.50 0.50 0.50<br />
B083 Carrier frequency setting 3.0 3.0 3.0<br />
2.1 2.1 2.1<br />
1.9 1.9 1.9<br />
B084 Initialization mode (parameters or trip history) 00 00 00<br />
B085 Country code for initialization 01 02 00<br />
B086 Frequency scaling conversion factor 1.0 1.0 1.0<br />
B087 STOP key enable 00 00 00<br />
B088 Restart mode after FRS 00 00 00<br />
B089 Automatic carrier frequency reduction<br />
B090 Dynamic braking usage ratio 0.0 0.0 0.0<br />
B091 Stop mode selection 00 00 00<br />
B092 Cooling fan control 00 00 00<br />
B095 Dynamic braking control 00 00 00<br />
B096 Dynamic braking activation level 360/720 360/720 360/720<br />
B098 Thermistor for thermal protection control 00 00 00<br />
B099 Thermal protection level setting 3000. 3000. 3000.<br />
B100 Free-setting V/f frequency (1) 0. 0. 0.<br />
B101 Free-setting V/f voltage (1) 0.0 0.0 0.0<br />
B102 Free-setting V/f frequency (2) 0. 0. 0.<br />
B103 Free-setting V/f voltage (2) 0.0 0.0 0.0<br />
B104 Free-setting V/f frequency (3) 0. 0. 0.<br />
B105 Free-setting V/f voltage (3) 0.0 0.0 0.0<br />
B106 Free-setting V/f frequency (4) 0. 0. 0.<br />
B107 Free-setting V/f voltage (4) 0.0 0.0 0.0<br />
B108 Free-setting V/f frequency (5) 0. 0. 0.<br />
B109 Free-setting V/f voltage (5) 0.0 0.0 0.0<br />
B110 Free-setting V/f frequency (6) 0. 0. 0.<br />
B111 Free-setting V/f voltage (6) 0.0 0.0 0.0<br />
B112 Free-setting V/f frequency (7) 0. 0. 0.<br />
B113 Free-setting V/f voltage (7) 0.0 0.0 0.0<br />
User<br />
Setting<br />
C–9<br />
Appendix C
Appendix C C–10<br />
Func.<br />
Code<br />
Intelligent<br />
Terminal<br />
Functions<br />
Parameter Settings for Keypad Entry<br />
“B” Group Parameters Default Setting<br />
Name<br />
FEF2, FE2<br />
(Europe)<br />
FU2, FU2<br />
(U.S.A.)<br />
FF2, F2<br />
(Japan)<br />
B120 Brake Control Enable 00 00 00<br />
B121 Brake Wait Time for Release 0.00 0.00 0.00<br />
B122 Brake Wait Time for Acceleration 0.00 0.00 0.00<br />
B123 Brake Wait Time for Stopping 0.00 0.00 0.00<br />
B124 Brake Wait Time for Confirmation 0.00 0.00 0.00<br />
B125 Brake Release Frequency Setting 0.00 0.00 0.00<br />
B126 Brake Release Current Setting Rated current for each inverter<br />
B127 Braking frequency 0.00 0.00 0.00<br />
B130 Over-voltage LADSTOP enable 00 00 00<br />
B131 Over-voltage LADSTOP level 380/760 380/760 380/760<br />
B132 Acceleration and deceleration rate at overvoltage<br />
suppression<br />
1.0 1.0 1.0<br />
B133 Overvoltage suppression proportional gain 0.50 0.50 0.50<br />
B134 Overvoltage suppression integral time 0.060 0.060 0.060<br />
Func.<br />
Code<br />
“C” Group Parameters Default Setting<br />
Name<br />
FEF2, FE2<br />
(Europe)<br />
FU2, FU2<br />
(U.S.A.)<br />
FF2, F2<br />
(Japan)<br />
C001 Terminal [1] function 18 18 18<br />
C002 Terminal [2] function 16 16 16<br />
C003 Terminal [3] function 06 06 06<br />
C004 Terminal [4] function 11 11 11<br />
C005 Terminal [5] function 09 09 09<br />
C006 Terminal [6] function 03 13 03<br />
C007 Terminal [7] function 02 02 02<br />
C008 Terminal [8] function 01 01 01<br />
C011 Terminal [1] active state 00 00 00<br />
C012 Terminal [2] active state 00 00 00<br />
C013 Terminal [3] active state 00 00 00<br />
C014 Terminal [4] active state 00 00 00<br />
C015 Terminal [5] active state 00 00 00<br />
C016 Terminal [6] active state 00 00 00<br />
C017 Terminal (7) active state 00 00 00<br />
C018 Terminal [8] active state 00 00 00<br />
User<br />
Setting<br />
User<br />
Setting
Func.<br />
Code<br />
“C” Group Parameters Default Setting<br />
Name<br />
FEF2, FE2<br />
(Europe)<br />
FU2, FU2<br />
(U.S.A.)<br />
C019 Terminal [FW] active state 00 00 00<br />
C021 Terminal [11] function 01 01 01<br />
C022 Terminal [12] function 00 00 00<br />
C023 Terminal [13] function 03 03 03<br />
C024 Terminal [14] function 07 07 07<br />
C025 Terminal [15] function 08 08 08<br />
C026 Alarm relay terminal function 05 05 05<br />
C027 [FM] signal selection 00 00 00<br />
C028 [AM] signal selection 00 00 00<br />
C029 [AMI] signal selection 00 00 00<br />
C030 Digital current monitor reference value Rated current x 1.0<br />
C031 Terminal [11] active state 00 00 00<br />
C032 Terminal [12] active state 00 00 00<br />
C033 Terminal [13] active state 00 00 00<br />
C034 Terminal [14] active state 00 00 00<br />
C035 Terminal [15] active state 00 00 00<br />
C036 Alarm relay active state 01 01 01<br />
C038 Low current indication output mode select 01 01 01<br />
C039 Low current indication detection level Rated current x 1.0<br />
C040 Overload signal output mode 01 01 01<br />
C041 Overload level setting Rated current for each inverter<br />
C042 Frequency arrival setting for accel. 0.00 0.00 0.00<br />
C043 Arrival frequency setting for decel. 0.00 0.00 0.00<br />
C044 PID deviation level setting 3.0 3.0 3.0<br />
C045 Frequency arrival setting for acceleration (2) 0.00 0.00 0.00<br />
C046 Frequency arrival setting for deceleration (2) 0.00 0.00 0.00<br />
C052 Maximum PID feedback (PV) data 0.00 0.00 0.00<br />
C053 Minimum PID feedback (PV) data 100.0 100.0 100.0<br />
C055 Over-torque (forward-driving) level setting 100. 100. 100.<br />
C056 Over-torque (reverse regenerating) level setting 100. 100. 100.<br />
C057 Over-torque (reverse driving) level setting 100. 100. 100.<br />
C058 Over-torque (forward regenerating) level setting 100. 100. 100.<br />
C061 Electronic thermal warning level setting 80. 80. 80.<br />
C062 Alarm code output 00 00 00<br />
C063 Zero speed detection level 0.00 0.00 0.00<br />
C064 Heatsink overheat warning level 120 120 120<br />
<strong>SJ7002</strong> Inverter<br />
FF2, F2<br />
(Japan)<br />
User<br />
Setting<br />
C–11<br />
Appendix C
Appendix C C–12<br />
Func.<br />
Code<br />
Parameter Settings for Keypad Entry<br />
“C” Group Parameters Default Setting<br />
Name<br />
FEF2, FE2<br />
(Europe)<br />
FU2, FU2<br />
(U.S.A.)<br />
FF2, F2<br />
(Japan)<br />
User<br />
Setting<br />
C071 Communication speed selection 04 04 04<br />
C072 Node allocation 1. 1. 1.<br />
C073 Communication data length selection 7 7 7<br />
C074 Communication parity selection 00 00 00<br />
C075 Communication stop bit selection 1 1 1<br />
C076 Action upon communication error selection 02 02 02<br />
C077 Communication timeout before trip 0.00 0.00 0.00<br />
C078 Communication wait time 0. 0. 0.<br />
C079 Communication protocol select 00 00 00<br />
C081 [O] input span calibration Factory set Factory set Factory set<br />
C082 [OI] input span calibration Factory set Factory set Factory set<br />
C083 [O2] input span calibration Factory set Factory set Factory set<br />
C085 Thermistor input tuning 105.0 105.0 105.0<br />
C086 [AM] terminal offset tuning 0.0 0.0 0.0<br />
C087 [AMI] terminal meter tuning 80. 80. 80.<br />
C088 [AMI] terminal offset tuning Factory set Factory set Factory set<br />
C091 Debug mode enable 00 00 00 Do not edit<br />
C101 Up/Down memory mode selection 00 00 00<br />
C102 Reset mode selection 00 00 00<br />
C103 Restart mode after reset 00 00 00<br />
C105 FM gain adjustment 100. 100. 100.<br />
C106 AM gain adjustment 100. 100. 100.<br />
C107 AMI gain adjustment 100. 100. 100.<br />
C109 AM bias adjustment 0. 0. 0.<br />
C110 AMI bias adjustment 20. 20. 20.<br />
C111 Overload setting (2) Rated current for each inverter model<br />
C121 [O] input zero calibration Factory set<br />
C122 [OI] input zero calibration Factory set<br />
C123 [O2] input zero calibration Factory set<br />
C130 Terminal [11] ON-delay time 0.0 0.0 0.0<br />
C131 Terminal [11] OFF-delay time 0.0 0.0 0.0<br />
C132 Terminal [12] ON-delay time 0.0 0.0 0.0<br />
C133 Terminal [12] OFF-delay time 0.0 0.0 0.0<br />
C134 Terminal [13] ON-delay time 0.0 0.0 0.0<br />
C135 Terminal [13] OFF-delay time 0.0 0.0 0.0<br />
C136 Terminal [14] ON-delay time 0.0 0.0 0.0
Func.<br />
Code<br />
“C” Group Parameters Default Setting<br />
Name<br />
FEF2, FE2<br />
(Europe)<br />
FU2, FU2<br />
(U.S.A.)<br />
C137 Terminal [14] OFF-delay time 0.0 0.0 0.0<br />
C138 Terminal [15] ON-delay time 0.0 0.0 0.0<br />
C139 Terminal [15] OFF-delay time 0.0 0.0 0.0<br />
C140 Relay output ON-delay time 0.0 0.0 0.0<br />
C141 Relay output OFF-delay time 0.0 0.0 0.0<br />
C142 Logic output 1 function A 00 00 00<br />
C143 Logic output 1 function B 00 00 00<br />
C144 Logic output 1 operator 00 00 00<br />
C145 Logic output 2 function A 00 00 00<br />
C146 Logic output 2 function B 00 00 00<br />
C147 Logic output 2 operator 00 00 00<br />
C148 Logic output 3 function A 00 00 00<br />
C149 Logic output 3 function B 00 00 00<br />
C150 Logic output 3 operator 00 00 00<br />
C151 Logic output 4 function A 00 00 00<br />
C152 Logic output 4 function B 00 00 00<br />
C153 Logic output 4 operator 00 00 00<br />
C154 Logic output 5 function A 00 00 00<br />
C155 Logic output 5 function B 00 00 00<br />
C156 Logic output 5 operator 00 00 00<br />
C157 Logic output 6 function A 00 00 00<br />
C158 Logic output 6 function B 00 00 00<br />
C159 Logic output 6 operator 00 00 00<br />
C160 Terminal [1] input response time setting 1 1 1<br />
C161 Terminal [2] input response time setting 1 1 1<br />
C162 Terminal [3] input response time setting 1 1 1<br />
C163 Terminal [4] input response time setting 1 1 1<br />
C164 Terminal [5] input response time setting 1 1 1<br />
C165 Terminal [6] input response time setting 1 1 1<br />
C166 Terminal [7] input response time setting 1 1 1<br />
C167 Terminal [8] input response time setting 1 1 1<br />
C168 Terminal [FW] input response time setting 1 1 1<br />
C169 Multi-speed position determination time 0 0 0<br />
<strong>SJ7002</strong> Inverter<br />
FF2, F2<br />
(Japan)<br />
User<br />
Setting<br />
C–13<br />
Appendix C
Appendix C C–14<br />
Parameter Settings for Keypad Entry<br />
Motor Constants<br />
Functions<br />
Func.<br />
Code<br />
“H” Group Parameters Default Setting<br />
Name<br />
FEF2, FE2<br />
(Europe)<br />
FU2, FU2<br />
(U.S.A.)<br />
FF2, F2<br />
(Japan)<br />
H001 Auto-tuning setting 00 00 00<br />
H002 Motor data selection, 1st motor 00 00 00<br />
H202 Motor data selection, 2nd motor 00 00 00<br />
H003 Motor capacity, 1st motor Factory set<br />
H203 Motor capacity, 2nd setting Factory set<br />
H004 Motor poles setting, 1st motor 4 4 4<br />
H204 Motor poles setting, 2nd motor 4 4 4<br />
H005 Motor speed constant, 1st motor 1.590 1.590 1.590<br />
H205 Motor speed constant, 2nd motor 1.590 1.590 1.590<br />
H006 Motor stabilization constant, 1st motor 100. 100. 100.<br />
H206 Motor stabilization constant, 2nd motor 100. 100. 100.<br />
H306 Motor stabilization constant, 3rd motor 100. 100. 100.<br />
H020 Motor constant R1, 1st motor According to inverter rating<br />
H220 Motor constant R1, 2nd motor According to inverter rating<br />
H021 Motor constant R2, 1st motor According to inverter rating<br />
H221 Motor constant R2, 2nd motor According to inverter rating<br />
H022 Motor constant L, 1st motor According to inverter rating<br />
H222 Motor constant L, 2nd motor According to inverter rating<br />
H023 Motor constant Io According to inverter rating<br />
H223 Motor constant Io, 2nd motor According to inverter rating<br />
H024 Motor Constant J According to inverter rating<br />
H224 Motor constant J, 2nd motor According to inverter rating<br />
H030 Auto constant R1, 1st motor According to inverter rating<br />
H230 Auto constant R1, 2nd motor According to inverter rating<br />
H031 Auto constant R2, 1st motor According to inverter rating<br />
H231 Auto constant R2, 2nd motor According to inverter rating<br />
H032 Auto constant L, 1st motor According to inverter rating<br />
H232 Auto constant L, 2nd motor According to inverter rating<br />
H033 Auto constant Io, 1st motor According to inverter rating<br />
H233 Auto constant Io, 2nd motor According to inverter rating<br />
H034 Auto constant J, 1st motor According to inverter rating<br />
H234 Auto constant J, 2nd motor According to inverter rating<br />
H050 PI proportional gain for 1st motor 100.0 100.0 100.0<br />
H250 PI proportional gain for 2nd motor 100.0 100.0 100.0<br />
User<br />
Setting
Func.<br />
Code<br />
“H” Group Parameters Default Setting<br />
Name<br />
FEF2, FE2<br />
(Europe)<br />
FU2, FU2<br />
(U.S.A.)<br />
H051 PI integral gain for 1st motor 100.0 100.0 100.0<br />
H251 PI integral gain for 2nd motor 100.0 100.0 100.0<br />
H052 P proportional gain setting for 1st motor 1.00 1.00 1.00<br />
H252 P proportional gain setting for 2nd motor 1.00 1.00 1.00<br />
H060 Zero LV limit for 1st motor 100. 100. 100.<br />
H260 Zero LV limit for 2nd motor 100. 100. 100.<br />
H061 Zero LV starting boost current for 1st motor 50. 50. 50.<br />
H261 Zero LV starting boost current for 2nd motor 50. 50. 50.<br />
H070 Terminal selection PI proportional gain setting 100.0 100.0 100.0<br />
H071 Terminal selection PI integral gain setting 100.0 100.0 100.0<br />
H072 Terminal selection P proportional gain setting 1.00 1.00 1.00<br />
H073 Gain switching time 100. 100. 100.<br />
<strong>SJ7002</strong> Inverter<br />
FF2, F2<br />
(Japan)<br />
User<br />
Setting<br />
C–15<br />
Appendix C
Appendix C C–16<br />
Parameter Settings for Keypad Entry<br />
Expansion Card<br />
Functions<br />
Func.<br />
Code<br />
“P” Group Parameters Default Setting<br />
Name<br />
FEF2, FE2<br />
(Europe)<br />
FU2, FU2<br />
(U.S.A.)<br />
FF2, F2<br />
(Japan)<br />
P001 Operation mode on expansion card 1 error 00 00 00<br />
P002 Operation mode on expansion card 2 error 00 00 00<br />
P011 Encoder pulse-per-revolution (PPR) setting 1024 1024 1024<br />
P012 Control pulse setting 00 00 00<br />
P013 Pulse line mode setting 00 00 00<br />
P014 Home search stop position setting 0. 0. 0.<br />
P015 Home search speed setting 5.00 5.00 5.00<br />
P016 Home search direction setting 00 00 00<br />
P017 Home search completion range setting 5 5 5<br />
P018 Home search completion delay time setting 0.00 0.00 0.00<br />
P019 Electronic gear set position selection 00 00 00<br />
P020 Electronic gear ratio numerator setting 1. 1. 1.<br />
P021 Electronic gear ratio denominator setting 1. 1. 1.<br />
P022 Feed-forward gain setting 0.00 0.00 0.00<br />
P023 Position loop gain setting 0.50 0.50 0.50<br />
P024 Position bias setting 0. 0. 0.<br />
P025 Temperature compensation thermistor enable 00 00 00<br />
P026 Over-speed error detection level setting 135.0 135.0 135.0<br />
P027 Speed deviation error detection level setting 7.50 7.50 7.50<br />
P028 Numerator of motor gear ratio 1. 1. 1.<br />
P029 Denominator of motor gear ratio 1. 1. 1.<br />
P031 Accel/decel time input selection 00 00 00<br />
P032 Positioning command input<br />
selection<br />
00 00 00<br />
P033 Torque command input selection 00 00 00<br />
P034 Torque command setting 0. 0. 0.<br />
P035 Torque command polarity select 00 00 00<br />
P036 Torque bias mode 00 00 00<br />
P037 Torque bias value 0. 0. 0.<br />
P038 Torque bias polarity selection 00 00 00<br />
P039 Forward maximum speed for torque-controlled<br />
operation<br />
0.00 0.00 0.00<br />
P040 Reverse maximum speed for torque-controlled<br />
operation<br />
0.00 0.00 0.00<br />
P044 DeviceNet comm watchdog timer 01 01 01<br />
User<br />
Setting
Func.<br />
Code<br />
“P” Group Parameters Default Setting<br />
Name<br />
FEF2, FE2<br />
(Europe)<br />
FU2, FU2<br />
(U.S.A.)<br />
<strong>SJ7002</strong> Inverter<br />
FF2, F2<br />
(Japan)<br />
P045 Inverter action on DeviceNet comm error 21 21 21<br />
P046 DeviceNet polled I/O: Output instance number 71 71 71<br />
P047 DeviceNet polled I/O: Input instance number 01 01 01<br />
P048 Inverter action on DeviceNet idle mode 0 0 0<br />
P049 Motor poles setting for RPM 01 01 01<br />
P055 Pulse train frequency span 25.0 25.0 25.0<br />
P056 Pulse train frequency time constant 0.10 0.10 0.10<br />
P057 Pulse train frequency bias 0. 0. 0.<br />
P058 Pulse train frequency limit 100. 100. 100.<br />
P060 Multi-stage position setting 0 0 0 0<br />
P061 Multi-stage position setting 1 0 0 0<br />
P062 Multi-stage position setting 2 0 0 0<br />
P063 Multi-stage position setting 3 0 0 0<br />
P064 Multi-stage position setting 4 0 0 0<br />
P065 Multi-stage position setting 5 0 0 0<br />
P066 Multi-stage position setting 6 0 0 0<br />
P067 Multi-stage position setting 7 0 0 0<br />
P068 Home position mode selection 00 00 00<br />
P069 Home position direction selection 00 00 00<br />
P070 Low speed homing frequency 0.00 0.00 0.00<br />
P071 High speed homing frequency 0.00 0.00 0.00<br />
P072 Forward position range setting 268435455 268435455 268435455<br />
P073 Reverse position range setting –<br />
–<br />
–<br />
268435455 268435455 268435455<br />
P074 Position teaching selection 00 00 00<br />
P100 Easy sequence parameter (U00) 0. 0. 0.<br />
P101 Easy sequence parameter (U01) 0. 0. 0.<br />
P102 Easy sequence parameter (U02) 0. 0. 0.<br />
P103 Easy sequence parameter (U03) 0. 0. 0.<br />
P104 Easy sequence parameter (U04) 0. 0. 0.<br />
P105 Easy sequence parameter (U05) 0. 0. 0.<br />
P106 Easy sequence parameter (U06) 0. 0. 0.<br />
P107 Easy sequence parameter (U07) 0. 0. 0.<br />
P108 Easy sequence parameter (U08) 0. 0. 0.<br />
P109 Easy sequence parameter (U09) 0. 0. 0.<br />
P110 Easy sequence parameter (U10) 0. 0. 0.<br />
P111 Easy sequence parameter (U11) 0. 0. 0.<br />
User<br />
Setting<br />
C–17<br />
Appendix C
Appendix C C–18<br />
Func.<br />
Code<br />
Parameter Settings for Keypad Entry<br />
“P” Group Parameters Default Setting<br />
Name<br />
FEF2, FE2<br />
(Europe)<br />
FU2, FU2<br />
(U.S.A.)<br />
FF2, F2<br />
(Japan)<br />
P112 Easy sequence parameter (U12) 0. 0. 0.<br />
P113 Easy sequence parameter (U13) 0. 0. 0.<br />
P114 Easy sequence parameter (U14) 0. 0. 0.<br />
P115 Easy sequence parameter (U15) 0. 0. 0.<br />
P116 Easy sequence parameter (U16) 0. 0. 0.<br />
P117 Easy sequence parameter (U17) 0. 0. 0.<br />
P118 Easy sequence parameter (U18) 0. 0. 0.<br />
P119 Easy sequence parameter (U19) 0. 0. 0.<br />
P120 Easy sequence parameter (U20) 0. 0. 0.<br />
P121 Easy sequence parameter (U21) 0. 0. 0.<br />
P122 Easy sequence parameter (U22) 0. 0. 0.<br />
P123 Easy sequence parameter (U23) 0. 0. 0.<br />
P124 Easy sequence parameter (U24) 0. 0. 0.<br />
P125 Easy sequence parameter (U25) 0. 0. 0.<br />
P126 Easy sequence parameter (U26) 0. 0. 0.<br />
P127 Easy sequence parameter (U27) 0. 0. 0.<br />
P128 Easy sequence parameter (U28) 0. 0. 0.<br />
P129 Easy sequence parameter (U29) 0. 0. 0.<br />
P130 Easy sequence parameter (U30) 0. 0. 0.<br />
P131 Easy sequence parameter (U31) 0. 0. 0.<br />
User<br />
Setting
User-selectable<br />
Menu Functions<br />
Func.<br />
Code<br />
“P” Group Parameters Default Setting<br />
Name<br />
FEF2, FE2<br />
(Europe)<br />
FU2, FU2<br />
(U.S.A.)<br />
<strong>SJ7002</strong> Inverter<br />
FF2, F2<br />
(Japan)<br />
U001<br />
no no no<br />
U002 no no no<br />
U003 no no no<br />
U004 no no no<br />
U005 no no no<br />
U006 User-selected function... “no” = disabled, no no no<br />
U007 or use any of the functions D001 to P049 no no no<br />
U008 no no no<br />
U009 no no no<br />
U010 no no no<br />
U011 no no no<br />
U012 no no no<br />
User<br />
Setting<br />
C–19<br />
Appendix C
CE–EMC<br />
Installation<br />
Guidelines<br />
D<br />
In This Appendix.... page<br />
— CE–EMC Installation Guidelines....................................................... 2<br />
— Precautions for EMC, Models SJ700-004 to -1500 .......................... 4<br />
— Precautions for EMC, Models SJ700-1850 to -4000 ........................ 5
Appendix D D–2<br />
CE–EMC Installation Guidelines<br />
CE–EMC Installation Guidelines<br />
You are required to satisfy the EMC directive (89/336/EEC) when using an <strong>SJ7002</strong> inverter in<br />
an EU country. To satisfy the EMC directive and to comply with standard, follow the guidelines<br />
in this section.<br />
1. As user you must ensure that the HF (high frequency) impedance between adjustable<br />
frequency inverter, filter, and ground is as small as possible.<br />
Ensure that the connections are metallic and have the largest possible contact areas (zincplated<br />
mounting plates).<br />
2. Avoid conductor loops that act like antennas, especially loops that encompass large<br />
areas.<br />
Avoid unnecessary conductor loops.<br />
Avoid parallel arrangement of low-level signal wiring and power-carrying or noise-prone<br />
conductors.<br />
3. Use shielded wiring for the motor cable and all analog and digital control lines.<br />
Allow the effective shield area of these lines to remain as large as possible; i.e., do not<br />
strip away the shield (screen) further away from the cable end than absolutely necessary.<br />
With integrated systems (for example, when the adjustable frequency inverter is communicating<br />
with some type of supervisory controller or host computer in the same control<br />
cabinet and they are connected at the same PE-potential), connect the shields of the<br />
control lines to ground + PE (protective earth) at both ends. With distributed systems (for<br />
example the communicating supervisory controller or host computer is not in the same<br />
control cabinet and there is a distance between the systems), we recommend connecting<br />
the shield of the control lines only at the end connecting to the adjustable frequency<br />
inverter. If possible, route the other end of the control lines directly to the cable entry<br />
section of the supervisory controller or host computer. The shield conductor of the motor<br />
cables always must connected to PE at both ends.<br />
To achieve a large area contact between shield and PE-potential, use a PG screw with a<br />
metallic shell, or use a metallic mounting clip.<br />
Use only cable with braided, tinned copper mesh shield (type “CY”) with 85% coverage.<br />
The shielding continuity should not be broken at any point in the cable. If the use of<br />
reactors, contactors, terminals, or safety switches in the motor output is necessary, the<br />
unshielded section should be kept as short as possible.<br />
Some motors have a rubber gasket between terminal box and motor housing. Very often,<br />
the terminal boxes, and particularly the threads for the metal PG screw connections, are<br />
painted. Make sure there is always a good metallic connection between the shielding of<br />
the motor cable, the metal PG screw connection, the terminal box, and the motor<br />
housing. If necessary, carefully remove paint between conducting surfaces.<br />
4. Take measures to minimize interference that is frequently coupled in through<br />
installation cables.<br />
Separate interfering cables with 0.25m minimum from cables susceptible to interference.<br />
A particularly critical point is laying parallel cables over longer distances. If two cables<br />
intersect (one crosses over the other), the interference is smallest if they intersect at an<br />
angle of 90°. Cables susceptible to interference should therefore only intersect motor<br />
cables, intermediate circuit cables, or the wiring of a rheostat at right angles and never be<br />
laid parallel to them over longer distances.<br />
5. Minimize the distance between an interference source and an interference sink (interference-threatened<br />
device), thereby decreasing the effect of the emitted interference on<br />
the interference sink.<br />
You should use only interference-free devices and maintain a minimum distance of<br />
0.25 m from the adjustable frequency inverter.
<strong>SJ7002</strong> Inverter<br />
6. Follow safety measures in the filter installation.<br />
Ensure that the protective earth terminal (PE) of the filter is properly connected to the PE<br />
terminal of the adjustable frequency inverter. An HF ground connection via metal<br />
contact between the housings of the filter and the adjustable frequency inverter, or solely<br />
via cable shield, is not permitted as a protective conductor connection. The filter must be<br />
solidly and permanently connected with the ground potential so as to preclude the danger<br />
of electric shock upon touching the filter if a fault occurs.<br />
To achieve a protective ground connection for the filter:<br />
Ground the filter with a conductor of at least 10 mm2 cross-sectional area.<br />
Connect a second grounding conductor, using a separate grounding terminal parallel to<br />
the protective conductor. (The cross section of each single protective conductor terminal<br />
must be sized for the required nominal load.)<br />
<strong>SJ7002</strong> inverter with book-type filter<br />
L3 L1 L2 PE<br />
M<br />
3~<br />
D–3<br />
Appendix D
Appendix D D–4<br />
Precautions for EMC, Models SJ700-004 to -1500<br />
Precautions for EMC, Models SJ700-004 to -1500<br />
The <strong>SJ7002</strong> series inverter conforms to the requirements of Electromagnetic Compatibility<br />
(EMC) Directive (2004/108/EC). However, when using the inverter in Europe, you must<br />
comply with the following specifications and requirements to meet the EMC Directive and<br />
other standards in Europe:<br />
WARNING: This equipment must be installed, adjusted, and maintained by qualified<br />
engineers who have expert knowledge of electric work, inverter operation, and the hazardous<br />
circumstances that can occur. Otherwise, personal injury may result.<br />
Use the following checklist to ensure the inverter is within proper operating ranges and<br />
conditions.<br />
1. Power supply requirements<br />
a. Voltage fluctuation must be -15% to +10% or less.<br />
b. Voltage imbalance must be ±3% or less.<br />
c. Frequency variation must be ±4% or less<br />
d. Total harmonic distortion (THD) of voltage must be ±10% or less.<br />
2. Installation requirement<br />
a. A special filter intended for the <strong>SJ7002</strong> series inverter must be installed.<br />
3. Wiring requirements<br />
a. A shielded wire (screened cable)must be used for motor wiring, and the length must be<br />
according to the following table below.<br />
b. The carrier frequency must be set according to the following table to meet an EMC<br />
requirement.<br />
c. The main circuit wiring must be separated from the control circuit wiring.<br />
4. Environmental requirements (to be met when a filter is used)<br />
a. Ambient temperature must be within the range –10°C to 40°C.<br />
b. Relative humidity must be within the range 20% to 90% (non-condensing).<br />
c. Vibrations must be<br />
5.9 m/sec 2 (0.6 G) (10 to 55Hz) or less (0.4 to 22kW).<br />
2.94 m/sec 2 (0.3 G) (10 to 55Hz) or less (30 to 150kW).<br />
d. The inverter must be installed indoors (not exposed to corrosive gases and dust) at an<br />
altitude of 1,000 m or less.<br />
Models Cat.<br />
Cable<br />
length<br />
(m)<br />
Carrier<br />
freq.<br />
(kHz)<br />
Models Cat.<br />
Cable<br />
length<br />
(m)<br />
Carrier<br />
freq.<br />
(kHz)<br />
SJ700-004L C3 5 2.5 — — — —<br />
SJ700-007L C3 5 2.5 SJ700-007H C3 5 2.5<br />
SJ700-015L C3 5 2.5 SJ700-015H C3 5 2.5<br />
SJ700-022L C3 5 2.5 SJ700-022H C3 5 2.5<br />
SJ700-037L C3 5 2.5 SJ700-040H C3 5 2.5<br />
SJ700-055L C3 1 1 SJ700-055H C3 1 2.5<br />
SJ700-075L C3 1 1 SJ700-075H C3 1 2.5<br />
SJ700-110L C3 1 1 SJ700-110H C3 1 2.5<br />
SJ700-150L C3 1 1 SJ700-150H C3 1 2.5<br />
SJ700-185L C3 1 1 SJ700-185H C3 1 2.5<br />
SJ700-220L C3 5 2.5 SJ700-220H C3 1 2.5
<strong>SJ7002</strong> Inverter<br />
SJ700-300L C3 5 2.5 SJ700-300H C3 1 2.5<br />
SJ700-370L C3 5 2.5 SJ700-370H C3 1 2.5<br />
SJ700-450L C3 5 2.5 SJ700-450H C3 5 2.5<br />
SJ700-550L C3 5 2.5 SJ700-550H C3 5 2.5<br />
SJ700-750H C3 10 2.5<br />
SJ700-900H C3 10 2.5<br />
SJ700-1100H C3 10 2.5<br />
SJ700-1320H<br />
SJ700-1500H<br />
C3 10 2.5<br />
Precautions for EMC, Models SJ700-1850 to -4000<br />
The <strong>SJ7002</strong> series inverter conforms to the requirements of Electromagnetic Compatibility<br />
(EMC) Directive (2004/108/EC). However, when using the inverter in Europe, you must<br />
comply with the following specifications and requirements to meet the EMC Directive and<br />
other standards in Europe:<br />
WARNING: This equipment must be installed, adjusted, and maintained by qualified<br />
engineers who have expert knowledge of electric work, inverter operation, and the hazardous<br />
circumstances that can occur. Otherwise, personal injury may result.<br />
Use the following checklist to ensure the inverter is within proper operating ranges and<br />
conditions.<br />
1. Power supply requirements<br />
a. Voltage fluctuation must be -15% to +10% or less.<br />
b. Voltage imbalance must be ±3% or less.<br />
c. Frequency variation must be ±4% or less.<br />
d. Total harmonic distortion (THD) of voltage must be ±10% or less.<br />
2. Installation requirements<br />
a. A special filter and a ferrite core intended for the <strong>SJ7002</strong> large capacity series inverter<br />
must be installed, shown in the table below.<br />
b. A provided direct reactor with the SJ700 large capacity series inverter must be installed.<br />
Power<br />
supply<br />
Models Cat.<br />
Filter<br />
Direct<br />
Reactor<br />
Cable<br />
length<br />
(m)<br />
Carrier<br />
freq.<br />
(kHz)<br />
Ferrite<br />
core 1<br />
Ferrite<br />
core 2<br />
Models Cat.<br />
Inverter<br />
R, S, T U, V, W<br />
P, PD<br />
Cable<br />
length<br />
(m)<br />
Carrier<br />
freq.<br />
(kHz)<br />
Motor<br />
D–5<br />
Appendix D
Appendix D D–6<br />
Precautions for EMC, Models SJ700-1850 to -4000<br />
Models<br />
✔ = Installation<br />
✘ = No installation<br />
Filter<br />
Category C2 Category C3<br />
Ferrite<br />
Core 1<br />
Ferrite<br />
Core 2<br />
Filter<br />
Ferrite<br />
Core 1<br />
Ferrite<br />
Core 2<br />
SJ700-1850HFU2/HFE2 ✔ ✔ ✘ ✘ ✘ ✘<br />
SJ700-3150HFU2/HFE2 ✔ ✘ ✘ ✘ ✘ ✘<br />
SJ700-4000HFU2/HFE2 ✔ ✔ ✘ ✘ ✘ ✘<br />
3. Wiring requirements<br />
a. Shielded wire (screened cable) is required for motor wiring but is not required for direct<br />
reactor wiring. And, the length of the cable must be according to the following table.<br />
b. The carrier frequency setting must be less than 3 kHz (derated is required) to meet an<br />
EMC requirement.<br />
c. The main circuit wiring must be separated from the control circuit wiring.<br />
4. Environmental requirements (to be met when a filter is used)<br />
a. Ambient temperature must be within the range –10°C to 40°C.<br />
b. Relative humidity must be within the range 20% to 90% (non-condensing).<br />
c. Vibrations must be 1.96 m/sec 2 (0.2 G) (10 to 55Hz) or less.<br />
d. The inverter must be installed indoors (not exposed to corrosive gas and dust) at an<br />
altitude of 1,000 m or less.<br />
Models<br />
Cable length (m)<br />
to motor to DC reactor<br />
SJ700-1850HFU2/HFE2 5 5<br />
SJ700-3150HFU2/HFE2 10 5<br />
SJ700-4000HFU2/HFE2 10 5
Index<br />
A<br />
A Group functions 3–10<br />
Absolute Position Control Mode 3–72<br />
AC reactors 5–3<br />
Acceleration 1–16, 3–9<br />
characteristic curves 3–26<br />
second function 3–24<br />
two-stage 4–20<br />
Acceleration stop function 3–21<br />
Access levels 3–5, 3–38, 4–23<br />
Access to terminals 2–2<br />
Accessories 5–2<br />
Adaptive auto-tuning 4–73<br />
ADD frequency enable 4–34<br />
Alarm signal 4–47<br />
Algorithms 3–66<br />
Algorithms, torque control 3–5<br />
Ambient temperature 2–8, A–2<br />
Analog disconnect detection 4–55<br />
Analog input settings 3–11, 3–27<br />
Analog inputs<br />
current/voltage select 4–24<br />
operation 4–63<br />
sampling filter 4–63<br />
wiring examples 4–65<br />
Analog outputs<br />
FM type 4–67<br />
operation 4–66<br />
PWM type 4–66<br />
Analog signal calibration 3–62<br />
Anti-windmilling 3–18, 3–21<br />
Arrival frequency A–2<br />
ASCII code table B–19<br />
ASCII mode communications B–5<br />
Automatic restart 3–30<br />
Automatic voltage regulation 3–23<br />
Auto-tuning 4–71, A–2<br />
adaptive 4–73<br />
procedure 4–72<br />
Auto-tuning constants 3–66<br />
AVR 3–23<br />
B<br />
B Group functions 3–30<br />
Base frequency 2–32, A–2<br />
Bibliography A–6<br />
Block check code B–19<br />
Brake control, external 3–48, 4–32, 4–54<br />
Braking 1–16<br />
dynamic 5–6<br />
Braking resistor 2–5, A–2<br />
Braking resistor selection 5–7<br />
Braking unit 2–5<br />
Braking, dynamic 1–19<br />
Break-away torque A–2<br />
C<br />
C Group functions 3–50<br />
Capacitor life curve 6–20<br />
Capacitor life warning 4–58<br />
Capacitor replacement 6–21<br />
Carrier frequency 3–44, A–2<br />
Catching a spinning motor 3–45, 3–62<br />
CE approval A–2<br />
CE-EMC guidelines D–2<br />
Chassis ground connection 2–26<br />
Choke 2–5, A–2<br />
Choke, DC link 5–4<br />
Chopper frequency 3–44<br />
Circuit breaker sizes xv<br />
Clear cumulative power value 4–36<br />
Clearance 2–8<br />
Coasting 3–45, 3–62<br />
Commercial power source enable 4–22<br />
Communication test mode B–20<br />
Communications 3–61<br />
Communications protocol, ASCII B–5<br />
Communications protocol, ModBus B–21<br />
Communications, serial B–2<br />
Constant torque 3–15<br />
Constant volts/hertz operation 1–14
Index–2<br />
Control algorithms 3–14<br />
Control gain switching 4–26<br />
Controlled deceleration 3–42<br />
Controlled deceleration at power loss 4–4<br />
Cooling fan control 3–47<br />
Copy Unit 1–3<br />
Current forcing 4–37<br />
Current overload 3–36<br />
Current overload restriction 4–29<br />
D<br />
D Group parameters 3–6<br />
DC braking 4–18, 4–19, A–2<br />
derating 3–20<br />
settings 3–18<br />
DC link A–2<br />
choke 5–4<br />
Deadband A–2<br />
Deceleration 1–16, 3–9, 4–18<br />
characteristic curves 3–26<br />
second function 3–24<br />
two-stage 4–20<br />
Default parameter values C–2<br />
Default settings<br />
restoring 6–16<br />
Derating<br />
DC braking 3–20<br />
Derivative gain 3–22<br />
DeviceNet 5–5<br />
Digital operator 2–29, 3–3<br />
force operation 4–28<br />
removal 2–4<br />
Digital operator panel A–2<br />
Digital operators 1–3<br />
Dimensions<br />
inverter 2–9<br />
terminals 2–20<br />
Diode A–3<br />
Display restriction 3–39<br />
Droop control 4–27<br />
Duty cycle A–3<br />
Dynamic braking 5–6, A–3<br />
usage ratio 3–47, 5–6<br />
E<br />
Easy sequence 4–38<br />
Editing parameters 2–29, 2–32<br />
in Run Mode 3–5, 3–38, 4–23<br />
Electromagnetic compatibility D–2<br />
Electronic thermal overload 3–32<br />
Elevator braking 3–48<br />
EMC installation guidelines D–2<br />
EMC installation precautions D–4<br />
Emergency Stop function 2–37<br />
EMI A–3<br />
EMI filter 5–4<br />
Encoder feedback 3–17<br />
Energy savings mode 3–23<br />
Error<br />
PID loop 4–46, A–3<br />
Error codes<br />
programming 3–75<br />
trip events 6–6<br />
Event clearing 4–24<br />
Expansion bay 2–4<br />
Expansion card functions 3–69<br />
Expansion cards<br />
digital input 5–5<br />
encoder feedback 5–5<br />
input signals 4–34<br />
output signals 4–54<br />
External brake control 4–32, 4–54<br />
External trip 4–21<br />
F<br />
F Group functions 3–9<br />
Factory settings, restoring 6–16<br />
Fan default setting 3–47<br />
Fan outlet 2–8, 2–26<br />
Fan replacement 6–23<br />
Fan unit, Filler plate 1–4<br />
FAQ 1–18<br />
Features 1–2, 2–2<br />
Ferrite core 5–4<br />
Filters<br />
noise suppression 5–2<br />
Fine-tuning functions 3–30<br />
Force operation from digital operator 4–28<br />
Force terminal mode 4–35<br />
Forward run command 4–15<br />
Forward/reverse drive stop 4–41<br />
Forward/reverse rotation signals 4–61<br />
Four-quadrant operation A–3<br />
Free-run stop 3–45, 3–62, 4–18, 4–20, A–3<br />
Frequency arrival signals 4–44<br />
Frequency matching 3–45, 3–62<br />
Frequency setting A–3<br />
Frequency-related functions 3–20<br />
Frequently asked questions 1–18<br />
Functions 1–16<br />
Fuse ratings 2–18<br />
Fuse sizes xv<br />
Fuzzy logic accel/decel 3–23<br />
G<br />
Gain settings 4–26<br />
General output signals 4–60<br />
General purpose inputs 4–38<br />
Glossary of terms A–2<br />
Grommets 2–17
H<br />
H Group parameters 3–66<br />
Harmonics A–3<br />
Heatsink overheat warning 4–59<br />
History of trip events 3–8<br />
Home search A–4<br />
Horsepower A–3<br />
I<br />
IGBT 1–14, A–3<br />
test method 6–27<br />
Index of terminal functions 4–11<br />
Inertia A–3<br />
Initialization 6–16<br />
Input active range 3–27<br />
Input circuits 4–13<br />
Input terminals 2–22<br />
Inspection<br />
electrical measurements 6–25<br />
IGBT test method 6–27<br />
measurement techniques 6–26<br />
procedures 6–17<br />
unpacking 2–2<br />
Installation 2–6<br />
Instantaneous power failure 4–48<br />
Insulation test 6–19<br />
Integral gain 3–22<br />
Intelligent input terminals 3–50, 4–13<br />
Intelligent input wiring examples 4–13<br />
Intelligent output terminals 3–55, 4–43<br />
Intelligent terminal functions 3–50<br />
Intelligent terminal index 4–11<br />
Intelligent terminals A–3<br />
Inverter 1–18<br />
Inverter definition A–3<br />
Inverter ready signal 4–61<br />
Inverter specifications 1–6<br />
Isolation transformer A–4<br />
J<br />
Jog command 4–18<br />
Jog frequency settings 3–13<br />
Jogging operation A–4<br />
Jump frequency 3–21, A–4<br />
K<br />
Keypad<br />
features 2–29, 3–3<br />
navigation 2–31, 3–4<br />
navigation, trip events 6–15<br />
Keypad features 2–29<br />
Keypads 1–3, 3–2<br />
L<br />
LEDs 2–29, 3–3<br />
Line reactor A–4<br />
Linear accel/decel 3–26<br />
Logic connector 4–9<br />
Logic output signals 4–58<br />
Logic terminals 3–50, 3–55<br />
input wiring examples 4–13<br />
Low cooling fan speed 4–59<br />
Low output current signal 4–60<br />
M<br />
<strong>SJ7002</strong> Inverter<br />
Main profile parameters 3–9<br />
Maintenance procedures 6–17<br />
Major failure signal 4–61<br />
Megger test 6–19<br />
ModBus mode communications B–21<br />
Model number convention 1–5<br />
Momentum A–4<br />
Monitor mode 2–31, 2–35, 2–36, 3–4<br />
Monitoring functions 3–6<br />
Motor constants 3–66, 4–69<br />
auto-tuning 4–71<br />
manual setting of 4–74<br />
Motor load A–4<br />
Motor poles 2–34<br />
Motor selection 1–19<br />
Motor wiring 2–26<br />
Mounting location 2–6<br />
Multiple motors<br />
configuration 4–76<br />
Multi-speed operation 4–15, 4–17, A–4<br />
Multi-speed profiles 1–16<br />
Multi-speed settings 3–13<br />
Multi-stage position select 4–39<br />
N<br />
Nameplate 1–5<br />
Navigational map 2–31, 3–4<br />
trip events 6–15<br />
NEC A–4<br />
NEMA A–4<br />
NEMA compliance 2–17<br />
NEMA rating 2–8<br />
Network detection signal 4–57<br />
Noise filters 5–2<br />
AC reactor 2–5<br />
Noise suppression 1–19<br />
Index–3
Index–4<br />
O<br />
Open-collector outputs 4–43, A–4<br />
Operational modes 3–5<br />
Operator interfaces 1–3<br />
Optimal accel/decel 3–23<br />
Optional components 2–5<br />
Options 1–2<br />
Orientation A–4<br />
Output circuits 4–43<br />
Output deviation for PID control 4–46<br />
Output frequency 3–9<br />
Output overload 3–36<br />
Output terminals 2–26<br />
Over-current trip 3–30<br />
Overload advance notice signal 4–46<br />
Overload restriction 3–36, 4–29<br />
Over-torque signal 4–48<br />
P<br />
P Group functions 3–69<br />
P/PI selection 4–26<br />
Parameter editing 2–29, 2–32<br />
Parameter settings tables C–2<br />
Parameters 1–16<br />
Phase loss 3–30<br />
PID feedback second stage output 4–56<br />
PID loop 1–19, A–4<br />
Clear integrator 4–26<br />
Disable 4–26<br />
error A–3<br />
operation 4–75<br />
output deviation 4–46<br />
process variable A–4<br />
setpoint A–5<br />
settings 3–22<br />
PLC, connecting to 4–7<br />
Poles 1–19<br />
Poles of motor 2–34<br />
Potentiometer 2–33, 4–65<br />
Power factor A–4<br />
Power failure 4–48<br />
Power failure response 3–30<br />
Power loss 4–4<br />
Power loss response 3–42<br />
Power source switching 4–22<br />
Power-on time over signal 4–51<br />
Powerup test 2–27<br />
observations 2–36<br />
Powerup, unattended start 4–21<br />
Process variable A–4<br />
Program mode 2–31, 2–36, 3–4<br />
Programming device 3–2<br />
Programming error codes 3–75<br />
Programming error monitoring 3–8<br />
Proportional gain 3–22<br />
Pulse counter signals 4–42<br />
Pulse-width modulation 4–66<br />
PWM A–4<br />
R<br />
Ratings label 1–5<br />
Reactance A–5<br />
Read/write copy unit 1–3, 3–2<br />
Rectifier A–5<br />
Reduced torque 3–15<br />
Regenerative braking A–5<br />
Regulation A–5<br />
Regulatory agency approvals 1–5<br />
Relay alarm contacts 4–47<br />
Remote control 4–28<br />
Removable components 1–4<br />
Reset function 4–24<br />
Reset Mode 3–62<br />
Restart Mode 3–45, 3–62<br />
Retention screws 2–4<br />
Reverse run command 4–15<br />
Reverse torque A–5<br />
Reverse U-shape accel/decel 3–26<br />
Rotor A–5<br />
Run command 4–15<br />
Run mode 2–36, 3–5<br />
Run signal 4–44<br />
Running the motor 2–35<br />
Run-time edits 3–5, 3–38, 4–23<br />
Run-time signal 4–51<br />
S<br />
Safety messages i<br />
Saturation voltage A–5<br />
Second motor 4–19<br />
Second stage output, PID 4–56<br />
Sensorless vector control 3–14, 3–16, A–5<br />
Serial communications 3–61, B–2<br />
Set 2nd/3rd motors 4–19<br />
Setpoint A–5<br />
Sigmoid accel/decel 3–26<br />
Single-phase power A–5<br />
Sinking I/O 4–7<br />
Slip A–5<br />
Software lock 3–5, 3–38, 4–23<br />
Sourcing I/O 4–7<br />
Spare parts 6–20<br />
Specifications<br />
general 1–10<br />
logic signals 4–9<br />
Speed control 1–14, 1–16, 4–15, 4–17<br />
Speed loop gains 4–26<br />
Speed pot 2–33<br />
Speed servo ON 4–37<br />
Speed/position control select 4–41<br />
Squirrel cage A–5<br />
Standard functions 3–10<br />
Start frequency A–5<br />
Starting contact signal 4–59<br />
Stator A–5
Stop command 4–15<br />
Stop Mode 3–45<br />
Supply wiring 2–22<br />
Switching frequency 3–44<br />
Symbol definitions i<br />
System description 2–5<br />
T<br />
Tachometer A–5<br />
Teaching (position) function 3–73<br />
Technical support 1–xx<br />
Term definitions A–2<br />
Terminal block 1–4<br />
Terminal listing 4–11<br />
Thermal overload 3–32<br />
Thermal protection 4–25<br />
Thermal switch A–6<br />
Thermal warning 4–52<br />
Thermistor A–6<br />
Thermistor input 4–25<br />
Third motor 4–19<br />
Three-phase power A–6<br />
motor phase connections 1–15<br />
Three-wire interface 4–25<br />
Torque 1–14<br />
Torque boost 3–17<br />
Torque control algorithms 3–5, 3–14, 3–66<br />
tuning 4–69<br />
Torque control enable 4–35<br />
Torque limit 4–30<br />
Torque limit signal 4–51<br />
Torque specs, terminals 2–20<br />
Torque, definition A–6<br />
Transistor A–6<br />
Transporting the inverter 2–7<br />
Trip events 3–8<br />
clearing 6–5<br />
definition A–6<br />
error codes 6–6<br />
external 4–21<br />
history 6–15<br />
monitoring 6–5<br />
Trip history 6–15<br />
Trip mode 4–24<br />
Troubleshooting tips 6–3<br />
Two-stage accel/decel 4–20<br />
U<br />
<strong>SJ7002</strong> Inverter<br />
U Group functions 3–74<br />
UL instructions xii<br />
Unattended start protection 4–21<br />
Under-voltage signal 4–48<br />
Under-voltage trip 3–30<br />
Unpacking 2–2<br />
Up/Down functions 4–28<br />
User-selectable menu functions 3–74<br />
U-shape accel/decel 3–26<br />
V<br />
V/f control 3–14<br />
V/f control setting 3–47<br />
V/f free-setting 3–16<br />
Variable torque 3–15<br />
Variable-frequency drives<br />
introduction 1–14<br />
Velocity profile 1–16<br />
Ventilation 2–8, 2–26<br />
W<br />
Warnings<br />
operating procedures 4–3<br />
Warranty 6–29<br />
Watt loss A–6<br />
Windmilling 3–18, 3–21<br />
Window comparator signals 4–62<br />
Wiring<br />
analog inputs 4–65<br />
gauge 2–18<br />
intelligent input wiring examples 4–13<br />
logic 2–26<br />
logic connector 4–9<br />
output 2–26<br />
power input 2–22<br />
preparation 2–17<br />
serial communications B–3<br />
system diagram 4–8<br />
Z<br />
Zero-phase reactor 5–4<br />
Zero-return functions 4–40<br />
Index–5