Owners Manual for Shopsmith Bandsaw (PDF)
Owners Manual for Shopsmith Bandsaw (PDF)
Owners Manual for Shopsmith Bandsaw (PDF)

You also want an ePaper? Increase the reach of your titles
YUMPU automatically turns print PDFs into web optimized ePapers that Google loves.
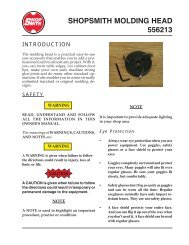
WARNING<br />
• Read the Safety section and complete the<br />
Setup procedures be<strong>for</strong>e operating the<br />
<strong>Shopsmith</strong> 11” <strong>Bandsaw</strong>.<br />
• Mount the <strong>Bandsaw</strong> on <strong>Shopsmith</strong> equipment<br />
only.<br />
• Use only <strong>Shopsmith</strong> parts and accessories on<br />
your <strong>Bandsaw</strong>. Mounting the <strong>Bandsaw</strong> on<br />
non-<strong>Shopsmith</strong> machinery or using non-<br />
<strong>Shopsmith</strong> parts could create a hazardous<br />
condition and will void your warranty.<br />
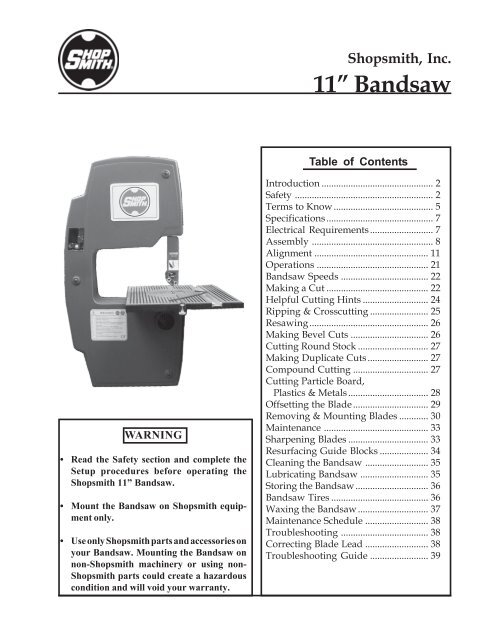
<strong>Shopsmith</strong>, Inc.<br />
11” <strong>Bandsaw</strong><br />
Table of Contents<br />
Introduction .............................................. 2<br />
Safety ......................................................... 2<br />
Terms to Know......................................... 5<br />
Specifications............................................ 7<br />
Electrical Requirements.......................... 7<br />
Assembly .................................................. 8<br />
Alignment ............................................... 11<br />
Operations .............................................. 21<br />
<strong>Bandsaw</strong> Speeds .................................... 22<br />
Making a Cut .......................................... 22<br />
Helpful Cutting Hints ........................... 24<br />
Ripping & Crosscutting ........................ 25<br />
Resawing................................................. 26<br />
Making Bevel Cuts ................................ 26<br />
Cutting Round Stock ............................. 27<br />
Making Duplicate Cuts......................... 27<br />
Compound Cutting ............................... 27<br />
Cutting Particle Board,<br />
Plastics & Metals................................. 28<br />
Offsetting the Blade............................... 29<br />
Removing & Mounting Blades ............ 30<br />
Maintenance ........................................... 33<br />
Sharpening Blades ................................. 33<br />
Resurfacing Guide Blocks .................... 34<br />
Cleaning the <strong>Bandsaw</strong> .......................... 35<br />
Lubricating <strong>Bandsaw</strong> ............................ 35<br />
Storing the <strong>Bandsaw</strong>.............................. 36<br />
<strong>Bandsaw</strong> Tires ........................................ 36<br />
Waxing the <strong>Bandsaw</strong>............................. 37<br />
Maintenance Schedule .......................... 38<br />
Troubleshooting .................................... 38<br />
Correcting Blade Lead .......................... 38<br />
Troubleshooting Guide ........................ 39
SHOPSMITH 11” BANDSAW 555943<br />
Introduction<br />
The <strong>Shopsmith</strong> <strong>Bandsaw</strong> gives you the ability<br />
to crosscut, rip, resaw, pad saw, plus cut<br />
bevels and round stock. The <strong>Bandsaw</strong> is also<br />
useful <strong>for</strong> compound cutting, creating shapes<br />
that appear to be carved. You can cut both<br />
natural and man-made woods, most plastics<br />
and some metals with the <strong>Bandsaw</strong>. Also,<br />
when the <strong>Shopsmith</strong> Speed Reducer (optional)<br />
is attached to the <strong>Shopsmith</strong> Mark V, you can<br />
properly cut an even wider range of materials<br />
(the Speed Reducer cannot be used with the<br />
Power Station or Power Stand).<br />
The <strong>Shopsmith</strong> 11" <strong>Bandsaw</strong> will accomplish<br />
many woodworking operations that are difficult<br />
or impossible with other tools. Basically,<br />
the <strong>Bandsaw</strong> blade is an endless loop (or<br />
“band”) of saw teeth revolving on two large<br />
wheels. The thin, flexible blades allow you to<br />
cut curves and other irregular shapes. The<br />
fast cutting action makes it easy to resaw<br />
thicker boards into thinner ones. But these are<br />
just two of the operations your <strong>Bandsaw</strong> will<br />
do. As you work with this machine, you’ll<br />
find it has many other features that add ease<br />
and versatility to your woodworking.<br />
Safety<br />
The <strong>Shopsmith</strong> <strong>Bandsaw</strong> has many built-in<br />
safety features. But the effectiveness of these<br />
features depends on you. Power tool safety is<br />
no more than good common sense. To protect<br />
yourself from injury: READ, UNDERSTAND<br />
AND FOLLOW ALL the in<strong>for</strong>mation in this<br />
manual. The meanings of WARNINGS, CAU-<br />
TIONS and NOTES are:<br />
Page 2<br />
WARNING<br />
• A WARNING is given when failure to follow<br />
the directions could result in injury or loss of<br />
limb or life.<br />
CAUTION<br />
A CAUTION is given when failure to follow<br />
the direction could result in temporary or<br />
permanent damage to the equipment.<br />
NOTE<br />
A NOTE is used to highlight an important<br />
procedure, practice or condition.<br />
General Safety Rules <strong>for</strong> All<br />
Power Tools<br />
WARNING<br />
• Read, understand and follow this instruction<br />
manual and the manual <strong>for</strong> whichever power<br />
source(s) you will be using (Mark V, Power<br />
Station or Power Stand).<br />
• Ground all tools (unless double-insulated).<br />
• Keep guards in place and in working order.<br />
Most injuries occur on unguarded power<br />
tools.<br />
• Remove adjusting keys and wrenches be<strong>for</strong>e<br />
attempting to operate any tool.<br />
• Do not wear loose clothing, ties, gloves or<br />
jewelry. Roll sleeves up above your elbows,<br />
wear nonslip footwear, and tuck long hair<br />
under a hat.<br />
• Do not operate power tools if you are fatigued<br />
or taking medication or are under the influence<br />
of alcohol or drugs.<br />
• Do not use power tools in damp, wet or<br />
explosive atmospheres.<br />
• Keep work areas well-lit, clean and free from<br />
clutter.
SHOPSMITH 11” BANDSAW 555943<br />
• Do not <strong>for</strong>ce the tool. It will do the job better<br />
and safer at the rate <strong>for</strong> which it was designed.<br />
• Do not use a tool or accessory to do a job <strong>for</strong><br />
which it was not designed.<br />
• Repair or replace damaged parts be<strong>for</strong>e further<br />
use. If a strange noise or vibrations<br />
develops, turn off and unplug the machine.<br />
Correct the problem.<br />
• Use clamps, fixtures and other devices to hold<br />
workpieces when practical.<br />
• Do not overreach. Keep proper footing and<br />
balance at all times.<br />
• Do not try to stop the tool by grabbing the<br />
workpiece or any part of the tool. Turn off<br />
the tool and let it come to a complete stop by<br />
itself.<br />
• Do not leave the tool running unattended.<br />
• To discontinue operations, turn the power<br />
off. Don’t leave the tool until it comes to a<br />
complete stop.<br />
• Avoid unintentional starting. Make sure the<br />
switch is in the “Off” position be<strong>for</strong>e plugging<br />
in or unplugging the tool.<br />
• Keep tools sharp, clean and maintained according<br />
to the instruction manual.<br />
• Make your workshop childproof. Unplug<br />
tools, use padlocks and master switches, and<br />
remove starter keys.<br />
• Keep children away. All visitors should stay<br />
a safe distance from power tools and wear eye<br />
and ear protection.<br />
Eye Protection<br />
• Always wear eye protection when you use<br />
power tools. Use goggles, safety glasses or a<br />
face shield to protect your eyes.<br />
• Goggles completely surround and protect<br />
your eyes. Many goggles will also fit over<br />
regular glasses. Be sure your goggles fit<br />
closely, but com<strong>for</strong>tably.<br />
• Safety glasses don’t fog as easily as goggles<br />
and can be worn all the time. Regular glasses<br />
normally have only impact-resistant lenses.<br />
They are not safety glasses.<br />
• A face shield protects your entire face, not<br />
just your eyes.<br />
Safety Rules <strong>for</strong> the <strong>Bandsaw</strong><br />
WARNING<br />
• Mount the <strong>Bandsaw</strong> only on the <strong>Shopsmith</strong><br />
Mark V, Power Station or Power Stand.<br />
Mounting the <strong>Bandsaw</strong> on non-<strong>Shopsmith</strong><br />
machinery or using non-<strong>Shopsmith</strong> machinery<br />
or using non-<strong>Shopsmith</strong> parts could create<br />
a hazardous condition and will void your<br />
warranty.<br />
• Use only <strong>Shopsmith</strong> parts and accessories on<br />
your <strong>Bandsaw</strong>.<br />
• Do not remove stock or scraps until the blade<br />
has stopped.<br />
• Maintain proper adjustment of blade tension,<br />
blade guides and bearings.<br />
• Keep the upper guide adjusted to a maximum<br />
of 1/4" above the stock.<br />
• Never reach close to the blade or under the<br />
table while the tool is running.<br />
• Hold stock firmly against the table.<br />
Page 3
SHOPSMITH 11” BANDSAW 555943<br />
• Never reach close to the blade or under the<br />
table while the tool is running.<br />
• Hold stock firmly against the table.<br />
• Never attempt a turn tighter than the blade<br />
will allow; otherwise, the blade might break.<br />
• Use a push stick to finish a resawing or ripping<br />
cut.<br />
• Keep your hands, fingers and other parts of<br />
your body out of the danger zone.<br />
• Support long stock with a roller stand.<br />
• Hold round stock in a V-block.<br />
• Never cut extremely small stock. Cut small<br />
components from larger stock.<br />
• If the blade breaks, turn off the machine and<br />
stand away until it stops.<br />
• Whenever you mount and operate the<br />
<strong>Bandsaw</strong> on the Mark V, secure the accessory<br />
mount lock, headstock lock and the<br />
<strong>Bandsaw</strong> mounting tubes. Do not exceed the<br />
speed setting “D”.<br />
• Never turn on the tool with stock pressed<br />
against the blade.<br />
• If you hear a ticking sound or other unusual<br />
noise, stop the <strong>Bandsaw</strong> immediately. A ticking<br />
sound often indicates a damaged blade.<br />
• Never reach close to the blade or under the<br />
table to make adjustments, clear away chips<br />
or <strong>for</strong> any reason whatsoever while the machine<br />
is running. Turn off the machine and<br />
let the blade come to a complete stop.<br />
• Keep your hands outside the DANGER<br />
ZONE-which is in front of the blade <strong>for</strong> the<br />
Page 4<br />
width of the table insert, and as high as the<br />
blade guard. See page 4. Never push the<br />
workpiece with your hand in line with the<br />
blade. If your hand slips, you can cut yourself<br />
severely.
SHOPSMITH 11” BANDSAW 555943<br />
1a<br />
Terms to Know<br />
Familiarize yourself with the various parts of<br />
the <strong>Shopsmith</strong> <strong>Bandsaw</strong>:<br />
1. Cover-This lightweight cover completely<br />
encloses the working parts of the <strong>Bandsaw</strong>,<br />
protecting you while the machine is running.<br />
1a. Window and slot - allows <strong>for</strong> modifying<br />
blade tension with cover installed.<br />
2. Cover Screws/Washers-These screws/<br />
washers secure the cover in place.<br />
3. Table-The table supports the work. It’s split<br />
at the front so that you can mount and<br />
remove blades. It also has an adjustable Tslot<br />
extrusion, <strong>for</strong> smooth and precise crosscutting<br />
with the optional <strong>Shopsmith</strong> Miter<br />
Gauge (505700).<br />
4. Table Insert-This insert supports the work<br />
around the blade. It’s keyed to prevent it<br />
from turning in the table and being damaged<br />
by the blade.<br />
5. Table Leveling Screw-This screw and its<br />
knurled nut keeps the two sides of the table<br />
DANGER ZONE!<br />
Keep hands fingers clear<br />
of these areas:<br />
√ In front of each blade,<br />
√ each side of the insert,<br />
√ up to the blade guard.<br />
2<br />
1<br />
7<br />
level across the front and helps keep the<br />
table flat and true.<br />
6. Dust Chute-The dust chute allows connection<br />
of a standard 2-1/2" hose <strong>for</strong> dust<br />
collection.<br />
7. Mounting Tubes-These eccentric tubes<br />
quickly mount the <strong>Bandsaw</strong> to the<br />
<strong>Shopsmith</strong> Mark V, Power Station or Power<br />
Stand. They are offset so that the drive<br />
shaft of the <strong>Bandsaw</strong> can be easily aligned<br />
with the power source (upper auxiliary<br />
spindle on the Mark V).<br />
8. Lower (Drive) Wheel-The lower wheel<br />
drives the <strong>Bandsaw</strong> blade in an endless<br />
loop.<br />
9. Upper (Idler) Wheel-The upper wheel is<br />
free-running. Its position can be adjusted<br />
to tension the blade.<br />
10. Upper Blade Guide-The upper blade guide<br />
consists of a roller bearing to back up the<br />
blade and guide blocks to keep the blade<br />
running straight above the work. The guide<br />
5<br />
6<br />
2<br />
2<br />
4<br />
3<br />
Page 5
SHOPSMITH 11” BANDSAW 555943<br />
14<br />
blocks may be reversed to twist the blade 30<br />
degrees to the right <strong>for</strong> special operations.<br />
11. Blade Guard-The guard attaches to the<br />
upper blade guide assembly. When properly<br />
adjusted, it protects you from cutting<br />
yourself on the unused portion of the blade.<br />
12. Lower Blade Guide-The lower blade guide<br />
consists of a roller bearing to back up the<br />
blade and guide blocks to keep the blade<br />
running straight below the work. Like the<br />
upper blade guide, the guide blocks can be<br />
reversed to twist the blade 30 degrees.<br />
13. Auto-Track Roller Bearing-This roller bearing<br />
keeps the blade properly positioned on<br />
the wheels.<br />
14. Blade Tensioning Screw-By turning this<br />
screw with the 5/32" Allen wrench, you<br />
can adjust the blade tension.<br />
15. Blade Tension Scale-This scale indicates the<br />
proper blade tension <strong>for</strong> any blade 1/8"-1/<br />
2" wide.<br />
16. Height Lock Handle-With this handle, you<br />
can raise and lower the upper blade guide,<br />
then secure it in position. The handle is in<br />
the “locked” position when pointing<br />
Page 6<br />
13<br />
15<br />
9<br />
11<br />
8<br />
10<br />
12<br />
16<br />
17<br />
22<br />
18<br />
21<br />
23<br />
19<br />
20<br />
straight back. Turn the handle 90 degrees<br />
to the right to release the upper blade guide<br />
assembly.<br />
17. Upper Blade Guide Adjusting Knob-This<br />
knob adjusts the front-to-back position of<br />
the upper guide blocks.<br />
18. Lower Blade Guide Adjusting Knob-This<br />
knob adjusts the front-to-back position of<br />
the lower guide blocks.<br />
19. Trunnions-The trunnions attach the table<br />
to the <strong>Bandsaw</strong> and allow it to be tilted<br />
from being perpendicular to 45 degrees<br />
right and 5 degrees left (with the auto-stop<br />
removed). A tilt scale has been stamped on<br />
the trunnions.<br />
20. Tilt Indicator-When correctly set, this vernier<br />
scale indicates the table angle to the<br />
nearest 1 degree.<br />
21. Tilt Lock-This handle secures the table in<br />
position at any angle in the tilt range.<br />
22. Table Auto-Stop-This bolt beneath the table<br />
automatically sets the table tilt perpendicular<br />
to the blade.<br />
23. Drive Shaft & Hub-The drive shaft transfers<br />
power from a motor to the <strong>Bandsaw</strong>.<br />
(The hub is not used with the Power Stand.)
SHOPSMITH 11” BANDSAW 555943<br />
Specifications<br />
These specifications of the <strong>Shopsmith</strong><br />
<strong>Bandsaw</strong> give you an idea of its capabilities:<br />
Capacities<br />
The <strong>Bandsaw</strong> will cut stock up to 6" thick.<br />
With the blade in the normal position, the<br />
cutoff capacity is 10-1/2", which is the distance<br />
across the machine’s throat. However,<br />
with the blade offset 30 degrees right, you can<br />
cut off (freehand) any length of stock up to 3-<br />
7/8" wide.<br />
Available Blades<br />
The <strong>Shopsmith</strong> <strong>Bandsaw</strong> accepts continuousloop<br />
blades 72" long and 1/16"-5/8" wide.<br />
<strong>Shopsmith</strong> offers a variety of blades from 1/<br />
16" wide to 5/8" wide <strong>for</strong> cutting wood, plastics<br />
and nonferrous metals.<br />
NOTE<br />
To use a 1/16" blade with the <strong>Bandsaw</strong>, you<br />
must install and use Cool Blocks (Part No.<br />
555374).<br />
Blade Mounting System<br />
<strong>Bandsaw</strong> blades are mounted on two cast<br />
aluminum wheels 11" in diameter. Both<br />
wheels are covered with rubber tires to protect<br />
the teeth of the blades and provide traction.<br />
The idler (upper) wheel revolves on<br />
needle bearings, while the drive (lower) wheel<br />
revolves on sealed ball bearings. The blades<br />
are tensioned by adjusting the position of the<br />
idler wheel. Blade tracking is first set and<br />
controlled by a preset roller bearing.<br />
Table<br />
The table surface is 13-1/2" x 15-1/2". The<br />
table can be tilted from 0 degree to 45 degrees<br />
right (away from the frame). If the table autostop<br />
at “0”, which helps to quickly set the<br />
table perpendicular to the blade.<br />
Speed<br />
The <strong>Bandsaw</strong> operates best at speeds between<br />
700 rpm and 1,050 rpm. In “Feet Per<br />
Minute” (fpm), the speed range is 2,000 fpm<br />
to 3,000 fpm. If you use the <strong>Shopsmith</strong> Mark<br />
V to power the <strong>Bandsaw</strong>, the speed range is<br />
“Slow” to “D”.<br />
Overall Dimensions and<br />
Weight<br />
Overall, the <strong>Shopsmith</strong> <strong>Bandsaw</strong> is 22" wide<br />
(right to left), 30-3/8" high (top to bottom),<br />
and 15" deep (front to back). It weighs 45<br />
pounds.<br />
Electrical Requirements<br />
Circuit<br />
With the <strong>Shopsmith</strong> Mark V as the power<br />
source, the 1-1/8 hp motor develops 2 hp and<br />
pulls 13-14amps and 115 volts on 60Hz electricity.<br />
The circuit should be rated at least 15<br />
amps. If you use fuses, make sure they are of<br />
the time-delay type.<br />
With the <strong>Shopsmith</strong> Power Station as the<br />
power source, the 3/4 continuous hp motor<br />
pulls 10 amps and 115 volts on 60Hz electricity.<br />
It will develop a maximum of 1hp. The<br />
circuit should be rated at least 15amps. If you<br />
use fuses, make sure they are of the timedelay<br />
type.<br />
With the <strong>Shopsmith</strong> Power Stand as the power<br />
source, the 1/2hp motor pulls 7.8 amps. The<br />
circuit should be rated at least 15 amps. The<br />
motors run on 115 volts, 60Hz. If you use<br />
fuses, make sure they are of the time-delay<br />
type.<br />
Grounding<br />
The circuit you use should be properly<br />
grounded to protect you from electrical shock.<br />
The plugs on the Mark V, Power Station and<br />
Power Stand have three prongs. The recep-<br />
Page 7
SHOPSMITH 11” BANDSAW 555943<br />
tacle should have three corresponding holes.<br />
Do not modify the plug. If it will not fit the<br />
outlet, have the proper outlet installed. If you<br />
have a two-hole receptacle, use a temporary<br />
adapter to plug in the Mark V. The grounding<br />
lug or wire on the adapter MUST be connected<br />
to a permanent ground, such as a<br />
grounded outlet box. The temporary adapter<br />
should be used only until a properly<br />
grounded outlet can be installed. (Adapters<br />
are not allowed in Canada.) If you are unsure<br />
as to whether your outlet box is grounded,<br />
ask a licensed electrician.<br />
Extension Cord<br />
If you use an extension cord, be sure it’s a<br />
three-conductor cord with a grounding plug<br />
and receptacle. The wire gauge must be large<br />
enough to prevent loss of power and overheating.<br />
Page 8<br />
Cord Length<br />
25 ft.<br />
50 ft.<br />
100 ft.<br />
Minimum Wire Size<br />
14 AWG<br />
12 AWG<br />
10 AWG<br />
Do not use an extension cord with loose wires<br />
or damaged insulation. Also, do not let the<br />
connection between the power cord and extension<br />
cord lie on damp or wet surface.<br />
Assembly<br />
Tools and Supplies Needed:<br />
Power coupling kit (555124)-not needed if<br />
you mount the <strong>Bandsaw</strong> on the Power<br />
Stand or Power Station (The power coupling<br />
kit is standard equipment with all<br />
Mark V’s manufactured after April, 1985.<br />
It is not included with the <strong>Bandsaw</strong>.)<br />
5/32" Allen wrench (provided)<br />
Adjustable wrench or 1/2" wrench<br />
Clean shop rag<br />
Mineral spirits<br />
Powered graphite<br />
10-wt. machine oil (optional)<br />
Paste floor wax or paste furniture wax<br />
PREPARE THE POWER SOURCE<br />
AND BANDSAW<br />
NOTE<br />
Steps 1-7 assume the power source is the<br />
Mark V. If you are going to use the Power<br />
Station or Power Stand as the power source<br />
<strong>for</strong> your <strong>Bandsaw</strong>, follow its respective instruction<br />
manual <strong>for</strong> preparing the power<br />
source.<br />
1. Choose the power source you will be<br />
using with your <strong>Bandsaw</strong> (<strong>Shopsmith</strong><br />
Mark V, Power Station or Power Stand).<br />
Loosen the accessory mount lock and insert<br />
the eccentric tubes (51) into the holes.<br />
The long end goes up. Orient the top<br />
portion of the eccentric tubes away from<br />
the power source, as shown in Fig, 1.<br />
Leave the accessory mount lock<br />
untightened <strong>for</strong> now.<br />
The <strong>Shopsmith</strong> <strong>Bandsaw</strong> is sent to you partially<br />
unassembled, though a 1/4" blade is<br />
already installed. Leave in the blade <strong>for</strong> all<br />
Assembly and Alignment instructions. Relax<br />
and take your time. Clear a space on your<br />
workbench and get your tools ready. The<br />
numbers in parentheses refer to the Parts List<br />
and Exploded View (printed separately.) Fig. 1
SHOPSMITH 11” BANDSAW 555943<br />
Fig. 2<br />
2. Your <strong>Bandsaw</strong> should look like Fig. 2<br />
(with the table not yet installed). Remove<br />
the three screws and washers then the<br />
cover (6), as shown in Fig. 3.<br />
3. Back out the setscrews (5) in the base of<br />
the <strong>Bandsaw</strong>, as seen in Fig. 4. Place the<br />
<strong>Bandsaw</strong> on the tubes, as seen in Fig. 5.<br />
Don’t tighten the setscrews yet.<br />
Fig. 4<br />
Fig. 3<br />
Fig. 5<br />
MOUNT AND ALIGN THE DRIVE<br />
HUBS<br />
4. If you have not already done so, mount a<br />
drive hub on the Mark V headstock’s upper<br />
auxiliary spindle. Use the long hub<br />
with a 5/8" center hole and four grooves in<br />
the circumference.<br />
5. Slide the Mark V headstock toward the<br />
<strong>Bandsaw</strong> until the two drive hubs are 1/4"<br />
apart, as illustrated in Fig. 6.<br />
Fig. 6 Fig. 7<br />
Fig. 8 Fig. 9<br />
Fig. 10 Fig. 11<br />
6. Horizontally align the <strong>Bandsaw</strong> hub (52)<br />
to the Mark V hub by hand-rotating the<br />
eccentric tubes, as seen in Fig. 7. You have<br />
up to 1/4" movement to the right or left.<br />
When the two hubs are horizontally<br />
aligned, tighten the accessory mount lock,<br />
as illustrated in Fig. 8.<br />
7. Vertically align the <strong>Bandsaw</strong> hub to the<br />
Mark V hub (shown in Fig. 9) by lifting the<br />
<strong>Bandsaw</strong> until the tops of the hubs are at<br />
the same height. When holding the<br />
<strong>Bandsaw</strong> in vertical alignment, use a 5/<br />
32" Allen wrench to tighten both setscrews,<br />
as shown in Figs. 10 and 11. You may want<br />
a helper to lift and hold the <strong>Bandsaw</strong><br />
while you are tightening the setscrews.<br />
Page 9
SHOPSMITH 11” BANDSAW 555943<br />
PREPARE THE BANDSAW AND<br />
TABLE ASSEMBLY<br />
8. Inspect the inside of the <strong>Bandsaw</strong> and<br />
wipe away any dirt of <strong>for</strong>eign material.<br />
Use a clean shop rag and mineral spirits or<br />
turpentine, but be careful around the blade.<br />
It’s sharp!<br />
9. When the table is clean, wax the top surface<br />
and the miter gauge slots with paste<br />
floor wax or paste furniture wax. Apply<br />
wax sparingly, then buff it thoroughly. A<br />
good coat of wax improves the machine’s<br />
operation by helping the wood slide<br />
smoothly over the table and the miter<br />
gauge slide easily in the table slot.<br />
NOTE<br />
Don’t use car wax or spray furniture polish<br />
on the <strong>Bandsaw</strong>. Car wax offers good protection<br />
<strong>for</strong> metal, but it’s extremely hard and has<br />
little value as a lubricant. Furniture polish<br />
isn’t hard enough. Paste floor wax or furniture<br />
wax protects and lubricates.<br />
10. Loosen the tilt lock (44) and lubricate the<br />
trunnions (37) with powdered graphite,<br />
rocking them back and <strong>for</strong>th as you apply<br />
the graphite, as seen in Fig. 12. (You will<br />
do this periodically, as discussed in the<br />
Maintenance Schedule, on page 34.)<br />
Page 10<br />
Fig. 12<br />
11. Apply graphite to lubricate the blade<br />
tensioning screw (23), upper blade guide<br />
post (71), and the threads of the upper and<br />
lower blade guide adjusting knobs<br />
(82,104).<br />
We recommend powdered graphite <strong>for</strong> lubricating<br />
the <strong>Bandsaw</strong> because it’s dry and<br />
doesn’t attract sawdust. On some parts, oil<br />
will mix with sawdust and <strong>for</strong>m a gummy<br />
substance that prevents these parts from operating<br />
smoothly. However, if you can’t get<br />
graphite, you can apply a light 10-wt. machine<br />
oil (such as sewing machine oil) sparingly.<br />
Use only 1-2 drops. Apply oil to all the<br />
parts that need lubrication, with the exception<br />
of the trunnions. If you don’t dust the<br />
trunnions with graphite, you should wax them.<br />
INSTALL THE TABLE<br />
12. Position the trunnions (37) at approximately<br />
25 degrees and lock them. Fig. 13<br />
shows the exposed trunnions. Hold the<br />
table (87) perpendicular to the blade, and<br />
mount the table on the <strong>Bandsaw</strong>, as demonstrated<br />
in Fig. 14. Make sure the table<br />
leveling bolt (89) and the table insert (95)<br />
are removed.<br />
Fig. 13<br />
Fig. 14<br />
13. Insert a thin shim washer (48) between the<br />
table (87) and each trunnion bracket.<br />
14. Attach the table to the <strong>Bandsaw</strong> with bolts<br />
(35) and thick washers (34), as shown in<br />
Fig. 15. Finger tighten only.
SHOPSMITH 11” BANDSAW 555943<br />
Fig. 16<br />
Fig. 18<br />
Fig. 15<br />
15. Screw the socket head screw (91) in the<br />
hole located at the back of the table, as<br />
seen in Fig. 16.<br />
16. Attach a hex nut (92) to the socket head<br />
screw, as shown in Fig. 17.<br />
Fig. 17<br />
17. Loosen and return the <strong>Bandsaw</strong>’s trunnion<br />
to “0”, where the table is supposed to<br />
be perpendicular to the blade. Lock the<br />
trunnion. See Fig. 18.<br />
18. Install the leveling bolt (89) and knurled<br />
nut (88) on the table, as in Fig. 19.<br />
Fig. 19<br />
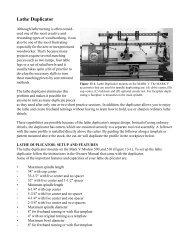
Alignment<br />
Your <strong>Shopsmith</strong> 11” <strong>Bandsaw</strong> comes to you<br />
pre-aligned from the factory. It is important<br />
to check all of the following alignment and<br />
adjustment procedures, if you have problems<br />
with your cut accuracy. Also, it is important<br />
to recheck them at regular intervals. These<br />
steps are to be pre<strong>for</strong>med using the already<br />
mounted 1/4" wide blade and in the sequence<br />
presented.<br />
Tools Needed:<br />
7/16" or adjustable wrench<br />
5/32" Allen wrench<br />
1/2" wrench<br />
Precision square<br />
Medium screwdriver<br />
Medium Phillips screwdriver<br />
Small (#0) Phillips screwdriver<br />
WARNING<br />
• The <strong>Bandsaw</strong> MUST be disconnected (or<br />
unplugged) from its power source be<strong>for</strong>e per<strong>for</strong>ming<br />
any alignment, adjustment, maintenance<br />
or repair procedure. Do NOT rely<br />
solely on the power switch.<br />
• DO NOT install the power coupler at this time<br />
or attempt to run the <strong>Bandsaw</strong> until you have<br />
completed the remainder of the procedures in<br />
this section. It is dangerous to run the <strong>Bandsaw</strong><br />
until it is COMPLETELY aligned, adjusted<br />
and inspected.<br />
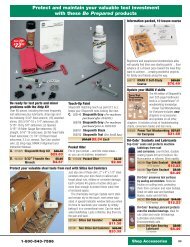
Blade Tracking System<br />
<strong>Bandsaw</strong> blades revolve in an endless loop<br />
on two wheels, the drive wheel (28) and the<br />
idler wheel (24). Each of these wheels is<br />
covered with a thin rubber tire to protect the<br />
teeth of the blade and provide traction. The<br />
idler (upper) wheel pivots on an arm (19), and<br />
this arm is drawn upward by a flat spring (15).<br />
Page 11
SHOPSMITH 11” BANDSAW 555943<br />
This mechanism compensates <strong>for</strong> slight inconsistencies<br />
in blade length and tensions the<br />
blade.<br />
The tension is adjusted by turning the blade<br />
tension screw (23) to the left of the idler wheel.<br />
This screw moves the flat spring, increasing<br />
or decreasing tension. The proper tension <strong>for</strong><br />
various blades is indicated on a scale above<br />
the blade tensioning screw. See Fig. A-1.<br />
Pivot Arm<br />
Flat<br />
Spring<br />
Blade<br />
Tension<br />
scale<br />
Blade<br />
Tension<br />
Screw<br />
Unlike many other bandsaws, blade tracking<br />
<strong>for</strong> the <strong>Shopsmith</strong> <strong>Bandsaw</strong> is done automatically<br />
with no need <strong>for</strong> adjustment. A roller<br />
bearing to the right of the blade tension indicator<br />
keeps the blade properly positioned on<br />
the wheels.<br />
A <strong>Bandsaw</strong> blade is supported and guided<br />
from both above and below. See Fig. A-2. The<br />
lower blade guide consists of a roller bearing<br />
(98) to back up the blade and two guide<br />
blocks (101,106) to keep it from twisting. Each<br />
guide block is adjusted side-to-side by loosening<br />
an Allen screw (100), and front-to-back<br />
by turning the lower blade guide adjusting<br />
knob (103). You need only to adjust the lower<br />
blade guide roller bearing side-to-side. This<br />
is done by loosening the mounting bolt (110).<br />
The upper blade guide is similar, but it has<br />
two additional adjustments. The upper blade<br />
Page 12<br />
Fig. A-1<br />
Auto-track<br />
roller bearing<br />
Upper<br />
Wheel<br />
guide’s roller bearing (63) is adjusted frontto-back<br />
by turning two screws (68). The blade<br />
guide post (71) and roller bearing can be<br />
adjusted side-to-side with the mounting bolts<br />
(64). The entire assembly can be raised and<br />
lowered after loosening the upper blade<br />
guide’s height lock handle.<br />
Fig. A-2<br />
Aligning the Blade Tension Scale<br />
The blade tension scale (12) is aligned at the<br />
factory, and under normal conditions it<br />
shouldn’t need adjustment. To check the<br />
blade tension scale’s alignment, per<strong>for</strong>m the<br />
following steps:<br />
NOTE<br />
View the tensioning screw through the window.<br />
1. Release the blade tension so the blade is<br />
completely slack on the wheels.<br />
2. Loosen the screw (10) near the top of the<br />
scale, as seen in Fig. A-3.<br />
Fig. A-3
SHOPSMITH 11” BANDSAW 555943<br />
3. Rotate the scale so it’s left edge (above the<br />
notch) is parallel to and even with the red<br />
indicator bar.<br />
4. Hold the scale in position and tighten the<br />
screw.<br />
5. Re-tension the blade to the 1/4" setting on<br />
the scale.<br />
6. Spin the upper wheel (24) several times to<br />
make sure the blade is turning freely.<br />
Adjusting the Roller Bearings<br />
The <strong>Shopsmith</strong> <strong>Bandsaw</strong> uses roller bearings<br />
to keep the blade tracking properly on the<br />
wheels and to provide support <strong>for</strong> the blade<br />
during cutting operations. These bearings<br />
are adjusted at the factory and should seldom<br />
need further attention. However, it’s a good<br />
idea to check the alignment of these bearings<br />
each time you change blades.<br />
You must mount and tension a blade in the<br />
<strong>Bandsaw</strong> be<strong>for</strong>e you can properly adjust the<br />
bearings. The blade should be centered on<br />
the three roller bearings. The back of the<br />
blade should rest against the auto-track roller<br />
bearing. The lower blade guide’s roller bearing.<br />
Also, the blade should be no more than<br />
1/64" away from the upper blade guide’s<br />
roller bearing. Be careful when you make<br />
adjustments, since the blade is sharp.<br />
Auto-Track Roller Bearing<br />
The auto-track roller bearing (56) is near the<br />
blade tension scale, at the upper left side of<br />
the machine. The bearing guides the blade<br />
onto the upper wheel. The front-to-back position<br />
of this bearing is fixed and shouldn’t be<br />
altered. However, the mounting bracket can<br />
be moved side-to-side so that you can center<br />
the bearing behind the blade.<br />
1. If the blade appears off center, loosen the<br />
1/2" mounting bolt (59) that holds the<br />
bracket (57) to the <strong>Bandsaw</strong> frame, as<br />
shown in Fig. A-4.<br />
Fig. A-4<br />
2. Slide the bracket sideways until the slot in<br />
the bearing is centered behind the blade<br />
and tighten the mounting bolt.<br />
3. Be careful to keep the sides of the bearing<br />
parallel to the blade when tightening this<br />
bolt.<br />
Lower Blade Guide’s Roller Bearing<br />
The roller bearing (98) directly below the<br />
<strong>Bandsaw</strong> table serves two functions: It guides<br />
the blade onto the drive wheel and it backs up<br />
the blade beneath the table while you’re cutting.<br />
Like the auto-track roller bearing, its<br />
front-to-back position is fixed and shouldn’t<br />
be changed. However, the entire lower blade<br />
guide assembly, including the bearing, may<br />
be adjusted side-to-side.<br />
1. If adjustment is needed, loosen the guide<br />
blocks (101,106)-if you haven’t done so<br />
already-and pull them out about 1/16"<br />
from the blade.<br />
2. Loosen the 1/2" mounting bolt (110) which<br />
holds the lower blade guide assembly to<br />
the <strong>Bandsaw</strong> frame, as seen in Fig. A-5.<br />
The head of this mounting bolt can be<br />
reached from the back of the <strong>Bandsaw</strong>, just<br />
above the trunnion.<br />
Page 13
SHOPSMITH 11” BANDSAW 555943<br />
3. Slide the lower blade guide sideways until<br />
the bearing is centered behind the blade,<br />
tighten the mounting bolt, and reset the<br />
guide blocks.<br />
4. Again, be sure to keep the bearing parallel<br />
to the blade as you’re tightening the bolt.<br />
Adjusting the Upper Blade Guide’s<br />
Roller Bearing<br />
The upper blade guide’s roller bearing (63)<br />
backs up the blade above the table. Unlike the<br />
other two bearings, it can be adjusted side-toside<br />
and front-to-back.<br />
1. Use a 7/16" wrench to remove the blade<br />
guard, as shown in Fig. A-6.<br />
Page 14<br />
Fig. A-6<br />
Fig. A-5<br />
Fig. A-7<br />
2. Set the height of the upper blade guide to<br />
about 1" above the table.<br />
3. Use a 5/32" Allen wrench to loosen the<br />
guide blocks. Pull them away from the<br />
blade about 1/16".<br />
4. Use a 1/2" wrench to loosen the two<br />
mounting bolts (64) which hold the guide<br />
post bracket (70) to the <strong>Bandsaw</strong> frame, as<br />
seen in Fig. A-7.<br />
5. Swing the upper blade guide sideways<br />
until the bearing is centered behind the<br />
blade, then tighten the mounting bolts.<br />
The upper blade guide’s roller bearing<br />
must also be adjusted so that it’s no more<br />
than 1/64" away from the back of the<br />
blade. This distance should remain the<br />
same no matter what the position of the<br />
upper blade guide is above the table.<br />
6. Be<strong>for</strong>e you adjust the upper blade guide’s<br />
roller bearing front-to-back, check the distance<br />
from the bearing to the blade close<br />
to the table and 5"-6" above the table.<br />
7. If the upper roller bearing presses against<br />
the back of the blade or if it’s farther away<br />
than 1/64" at both the high and low position,<br />
you’ll need to adjust the upper blade<br />
guide roller bearing <strong>for</strong>ward or backward.<br />
If this distance is inconsistent or if the<br />
bearing seems to press against the blade<br />
more at one position than at the other, you<br />
also need to change the tilt of the guide<br />
post. Both adjustments are similar and<br />
are per<strong>for</strong>med at the same time.<br />
8. Loosen the 1/2" jam nuts on the two guide<br />
post adjusting screws (68), as seen in Fig.<br />
A-8, then proceed in this manner:<br />
Fig. A-8
SHOPSMITH 11” BANDSAW 555943<br />
To move the guide post and bearing closer<br />
to the blade (without changing the tilt of<br />
the guide post) turn both of the adjusting<br />
screws an equal number of revolutions<br />
counterclockwise.<br />
To move the guide post and bearing away<br />
from the blade (without changing the tilt<br />
of the guide post), turn both of the screws<br />
an equal number of revolutions clockwise.<br />
9. If the bearing is not the same distance<br />
away from the blade close to the table and<br />
5"-6" above it, turn each screw equally in<br />
opposite directions. This will change the<br />
tilt of the guide post.<br />
For example, to move the bearing closer<br />
to the blade when the blade guide is at its<br />
lower position, turn the top adjusting<br />
screw clockwise, and the bottom adjusting<br />
screw counterclockwise.<br />
To move the bearing away from the blade<br />
at this position, reverse the procedure.<br />
Figs. A-9 and A-10 show making adjustments.<br />
Fig. A-9 Fig. A-10<br />
Getting these adjustments just right may<br />
take some time, but once you’ve got them<br />
right they will seldom need attention.<br />
Here are a few tips to help make this<br />
procedure a little easier:<br />
• Mark your starting position with a grease<br />
pencil and turn the screws only 1/4 revo-<br />
lution at a time until you see how much<br />
the bearing moves with each minor adjustment.<br />
• Be sure that when you lock the upper<br />
blade guide height lock handle, the upper<br />
blade guide’s roller bearing does<br />
not push the blade away from the lower<br />
blade guide roller bearing.<br />
• Each adjustment of the post will change<br />
the tension on the upper blade guide’s<br />
height lock. To adjust the lock tension,<br />
follow the procedure described in “Adjusting<br />
the Upper Blade Guide’s Height<br />
Lock” in this section. Once you’ve completed<br />
these adjustments to your satisfaction,<br />
hold the screw from turning with<br />
a screwdriver and tighten the jam nuts.<br />
See Fig. A-11.<br />
Check each roller bearing one more time.<br />
With the bearings correctly adjusted, the blade<br />
should ride in the center of all three of them.<br />
The back of the blade should lightly contact<br />
the auto-track roller bearing and the lower<br />
blade guide’s roller bearing, and it should be<br />
no more than 1/64" away from the upper<br />
blade guide’s roller bearing no matter what<br />
the position of that bearing is above the table.<br />
10. Reattach the blade guide.<br />
WARNING<br />
Never attempt to operate the <strong>Bandsaw</strong> without<br />
the blade guard in place.<br />
Fig. A-11<br />
Page 15
SHOPSMITH 11” BANDSAW 555943<br />
Adjusting the Upper Blade Guide’s<br />
Height Lock<br />
The upper blade guide can be locked at any<br />
height 0"-6" above the table. To change the<br />
height of the blade guide:<br />
1. Swing the upper blade guide’s height<br />
lock handle 90 degrees to the right to<br />
loosen the locking mechanism.<br />
2. Adjust the upper blade guide so that it’s<br />
no more than 1/4" above the surface of the<br />
stock to be cut.<br />
3. Lock the guide in place by swinging the<br />
handle so that it points straight back (toward<br />
the outfeed side of the table).<br />
4. If the movement of the upper blade guide’s<br />
height lock seems stiff (or loose), you<br />
need to adjust the tension on the locking<br />
spring (72). This tension is set by a small<br />
headless screw (73) in the left side of the<br />
guide post retainer between the mounting<br />
bolts. There should be enough tension<br />
to hold the guide post securely when<br />
locked in place, but not so much that the<br />
lock handle is difficult to operate or that<br />
the guide post will not slide easily when<br />
the lock is released. See Fig A-12.<br />
Page 16<br />
• To increase the lock tension, turn the<br />
adjusting screw counterclockwise.<br />
• To reduce the tension, turn it clockwise.<br />
NOTE<br />
The tension on the blade guide’s height lock<br />
is correctly set when you unlock the handle<br />
and the upper blade guide drops smoothly<br />
to 1/4"-1/2" above the tabletop, with no need<br />
to pull it down.<br />
Figure A-12 Figure A-13<br />
Adjusting the Upper Blade Guide’s<br />
Column Post Screw<br />
The nylon screw (65) is adjusted at the at the<br />
factory and should need only periodic checking.<br />
It helps control side-to-side movement of<br />
the column post within the column bracket.<br />
Tighten the nylon screw with a 3/8" wrench to<br />
put more pressure on the column post (thus<br />
eliminating more side to side movement”.<br />
Loosen the nylon screw to put less pressure<br />
on the column post. See Fig. A-13.<br />
ADJUST THE T-SLOT EXTRUSION<br />
1. Use a precision square to double check<br />
your miter gauge <strong>for</strong> squareness. See Fig.<br />
A-14. Adjust the miter gauge to be square,<br />
if needed.<br />
Figure A-14<br />
Figure A-15<br />
Figure A-16
SHOPSMITH 11” BANDSAW 555943<br />
2. Place the miter gauge in the table’s T-slot.<br />
3. Use a 5/32" Allen wrench to remove the<br />
expansion screw found in the center of the<br />
miter gauge’s guide bar. See Fig. A-15.<br />
4. Use a medium Phillips screwdriver to<br />
adjust the tension of each of the five screw<br />
(94) which attach the T-slot extrusion to<br />
the table, as shown in Fig. A-16. The<br />
tension should be such that the miter<br />
gauge will both travel freely in the T-slot<br />
and have a snug fit. After adjusting the<br />
screws, replace the expansion screw in<br />
the miter gauge guide bar.<br />
ALIGN THE TABLE TO THE BLADE<br />
1. With the miter gauge still in the T-slot,<br />
place the precision square against both<br />
the face of the miter gauge and the blade.<br />
See Fig. A-17.<br />
NOTE<br />
The precision square’s “blade” must contact<br />
the <strong>Bandsaw</strong> blade on either the blade’s<br />
gullet or a tooth set away from the square. If<br />
it is positioned on a tooth which is set toward<br />
the square, alignment will not be accurate.<br />
Figure A-17<br />
2. Keep the square on the miter gauge, and<br />
slide the miter gauge and square <strong>for</strong>ward<br />
until the base of the square reaches the<br />
<strong>Bandsaw</strong> blade, as in Fig. A-18. If there is<br />
a gap between the square and the <strong>Bandsaw</strong><br />
blade or if the blade gets in the path of the<br />
square, adjust the table (as the left hand is<br />
doing in Fig. A-19) until the gap is elimi-<br />
nated-or the blade is no longer in the path<br />
of the square.<br />
When the table is square to the blade, the<br />
square’s blade should slide along the<br />
<strong>Bandsaw</strong> blade without any gaps or interference.<br />
After you have adjusted the table,<br />
recheck the table’s alignment by repeating<br />
this step.<br />
Figure A-18<br />
Figure A-20<br />
Figure A-19<br />
3. Use a 1/2" wrench to securely tighten the<br />
four bolts (35) attaching the table to the<br />
<strong>Bandsaw</strong>. See Fig. A-20. It is easier to<br />
tighten the front two bolts, then tilt the<br />
table 15 degrees-25 degrees to tighten the<br />
remaining two bolts. After tightening,<br />
reset the table at 0 degree and lock the<br />
trunnion.<br />
NOTE<br />
To assure the accuracy of the table’s alignment,<br />
test cut a piece of scrap wood and<br />
check <strong>for</strong> squareness. If it is not square,<br />
repeat Steps 2 and 3.<br />
4. Remove the miter gauge from the table.<br />
Then raise the <strong>Bandsaw</strong>’s saw guard all<br />
the way and lock it.<br />
Page 17
SHOPSMITH 11” BANDSAW 555943<br />
5. Place a precision square along the side of<br />
the blade and on the table, as in Fig. A-21.<br />
6. If the blade is square to the table, use a 5/<br />
32" Allen wrench to adjust the table height<br />
screw (91) to touch the <strong>Bandsaw</strong> casting. If<br />
the blade is not square to the table, loosen<br />
the trunnion, make the necessary adjustment<br />
and lock the trunnion. Now adjust<br />
the table height screw. See Fig. A-22<br />
Page 18<br />
Figure A-21 Figure A-22<br />
Figure A-23<br />
7. Hold the table height screw in place, while<br />
you use a 1/2" wrench to tighten the hex<br />
nut against the table, see Fig. A-23.<br />
ALIGN THE TABLE SCALE TO THE TRUN-<br />
NION SCALE<br />
1. If the “0” marks on the table scale and the<br />
<strong>Bandsaw</strong>’s trunnion scale so not align, use<br />
a medium Phillips screwdriver to slightly<br />
loosen the table scale’s screws (32), as<br />
shown in Fig. A-24. Align the “0” marks<br />
and retighten the screws.<br />
Figure A-24<br />
ADJUST THE BLADE GUIDES<br />
1. Turn the blade guide adjusting knobs,<br />
shown in Figs. A-25 and A-26, until the<br />
front edges of the guide blocks are just<br />
short of the bottom of the gullets between<br />
the teeth, as illustrated in Fig. A-27. If the<br />
guide blocks extend beyond the gullets,<br />
the teeth will nick the sides of the blocks,<br />
wearing away the blade guides and dulling<br />
the blade.<br />
Figure A-25<br />
Figure A-27<br />
Figure A-26<br />
2. With the locking screws (76,100) loose,<br />
push each of the four guide blocks-two in<br />
the upper blade guide and two in the<br />
lower blade guide-toward the blade until<br />
they just barely clear it on each side. This<br />
clearance should be about .003-.005". Figs.<br />
A-28-A-31 show adjusting the four guide<br />
blocks.<br />
An easy way to gauge the distance of the<br />
blades from the blocks is with tape. Put a<br />
piece of cellophane tape on each side of<br />
the blade, then push the blocks in until<br />
they touch the tape. Tighten the locking<br />
screws and remove the tape. Again, refer<br />
to Figs. A-28-A-31. Many woodworkers<br />
use notebook paper or a crisp dollar bill to
SHOPSMITH 11” BANDSAW 555943<br />
gauge the guide clearance. Use whichever<br />
works best <strong>for</strong> you.<br />
Be careful that the guide blocks do not<br />
press the blade to one side or the other.<br />
The blade should not be deflected when<br />
the blocks are properly set, as shown in<br />
Fig. A-32.<br />
NOTE<br />
Adjust the blade guides very carefully:<br />
− If the guide blocks are too close to the<br />
blade or too far <strong>for</strong>ward, the blade guides<br />
may interfere with the running blade.<br />
− If the guide blocks are too far apart or too<br />
far back, the blade may “lead”-wander off<br />
the pattern line to one side or the other.<br />
− If you’re sure the blade guides are properly<br />
adjusted and the blade does not operate<br />
freely, check if the blade is bent or has a<br />
“high spot” at the weld.<br />
− If the blade continues to lead no matter<br />
how you adjust the guides, follow the procedure<br />
described in “Correcting Blade Lead”<br />
in the Troubleshooting section on page 34.<br />
Figure A-28<br />
Figure A-30<br />
Figure A-29<br />
Figure A-31<br />
Figure A-32<br />
3. Spin the upper (idler) wheel by hand to be<br />
certain the blade guides don’t interfere<br />
with the action of the blade. Also, watch<br />
the blade as it slips between the guide<br />
blocks. Check that the teeth remain in<br />
front of the blocks throughout the revolution<br />
of the blade. If the blade does not spin<br />
freely or the teeth stray behind the blocks,<br />
readjust the blade guides.<br />
WARNING<br />
Use only <strong>Shopsmith</strong> <strong>Bandsaw</strong> blades <strong>for</strong> your<br />
<strong>Bandsaw</strong>. If you use other blades, be certain<br />
that they are of premium quality, are 72" long<br />
(plus or minus 1/2"), and are between 1/16" and<br />
5/8" wide. ANY OTHER BLADES ARE UN-<br />
SAFE. Also, when using 1/16" blades, you must<br />
install Cool Blocks (Part No. 555374) in place of<br />
the standard metal blade guides.<br />
INSTALL THE TABLE INSERT<br />
1. The table insert (95) has two clips on its<br />
underside, as shown in Fig. A-33. Put the<br />
blade into the insert’s slot so the solid part<br />
of the insert is on the blade’s tooth side.<br />
Figure A-33<br />
Page 19
SHOPSMITH 11” BANDSAW 555943<br />
2. Clip the insert in its hole, as in Fig. A-34,<br />
with the clips going into the table first.<br />
Page 20<br />
Figure A-34<br />
3. Snap down the front of the insert, as shown<br />
in Fig. A-35.<br />
Figure A-35<br />
Figure A-36<br />
4. Use a very small Phillips screwdriver (96)<br />
to adjust the leveling screws (90) through<br />
holes in the insert so it is uni<strong>for</strong>mly flush<br />
with the edge of the Table. See Fig. A-36.<br />
5. Reattach the <strong>Bandsaw</strong> cover with the three<br />
screws and washers.<br />
Alignment and Adjustment<br />
Safety Checklist<br />
When you’ve finished aligning and adjusting the<br />
various parts of your <strong>Bandsaw</strong>, review your<br />
work according to this checklist. Make copies of<br />
it and per<strong>for</strong>m each item be<strong>for</strong>e operating you<br />
<strong>Bandsaw</strong>, especially when it has set idle <strong>for</strong> more<br />
than a few days.<br />
1. Is the <strong>Bandsaw</strong> blade properly mounted and<br />
tensioned.<br />
2. Is the blade centered on the roller bearings?<br />
Does it rest against the auto-track roller bearing<br />
and lower blade guide’s roller bearing,<br />
while remaining no more than 1/64" away<br />
from the upper blade guide’s roller bearing?<br />
3. Are the blade guides properly adjusted?<br />
4. Is the height of the upper blade guide’s height<br />
lock properly adjusted?<br />
5. Is the upper blade guide positioned no higher<br />
than 1/4" above the stock, and is locked<br />
securely in place?<br />
6. Does the blade operate freely?<br />
7. Is the table insert in place and flush with the<br />
table top?<br />
8. Is the table properly aligned to the blade?<br />
9. Is the table adjusted to the correct work angle<br />
and is the tilt lock secured?<br />
10. Are the drive hubs properly aligned?<br />
11. If you’re using the Mark V or Power Station<br />
to power the <strong>Bandsaw</strong>, is the power coupler<br />
installed correctly? Are both the accessory<br />
mount lock and the headrest lock tightened<br />
on the Mark V? Is the carriage locked on the<br />
Power Station?<br />
12. If you’ve mounted the <strong>Bandsaw</strong> on a Power<br />
Stand, is the V-belt properly tensioned and<br />
the pulley guard in place?
SHOPSMITH 11” BANDSAW 555943<br />
Operations<br />
The bandsaw blade cuts with a downward motion,<br />
toward the table. Because it cuts continuously, you’ll<br />
find the <strong>Bandsaw</strong> is one of the fastest cutting tools in your<br />
shop.<br />
You can also cut materials other than wood. With the<br />
proper blade installed, the <strong>Bandsaw</strong> will cut plastic,<br />
plastic laminates, particle board and even soft, nonferrous<br />
metals such as copper, brass and aluminum. If the<br />
Mark V is the <strong>Bandsaw</strong> power source, you can use the<br />
optional <strong>Shopsmith</strong> Speed Reducer with the <strong>Bandsaw</strong> to<br />
cut an even wider range of materials.<br />
Once you have used the tool <strong>for</strong> some time and have<br />
become thoroughly familiar with it, you may want to<br />
learn about advanced techniques such as pattern sawing,<br />
cutting dovetails, <strong>Bandsaw</strong> sculpture and more. As<br />
with any power tool, never attempt any operation that is<br />
beyond your proven skill and ability. Practice the techniques<br />
described here be<strong>for</strong>e trying more advanced operations.<br />
CAUTION<br />
Study each <strong>Bandsaw</strong> operation carefully. If<br />
you’re in doubt about how to complete it safety,<br />
do not try it. Contact <strong>Shopsmith</strong> Customer<br />
Services.<br />
Description<br />
<strong>Bandsaw</strong> Blade Selection Chart<br />
1/16" Blades-For extra fine detail work only. Use with wood and other softer<br />
materials up to 2" thick. Turning radius is 1/8". Feed stock gently and slowly. Must<br />
use optional Cool Blocks (Part No. 555374) in place of standard metal guide blocks.<br />
Not <strong>for</strong> medium-duty cuts or resawing. Note: Set the tension scale at the 1/8" setting.<br />
1/8" Blades-For very fine detail work only. Use <strong>for</strong> wood and plywood up to 3" thick.<br />
Not <strong>for</strong> heavy-duty cuts or resawing.<br />
1/4" Blades-A good general purpose blade <strong>for</strong> wood, plywood, plastics, particle<br />
board, and soft, nonferrous metals. Limit resawing to stock 4" thick, metalwork to stock<br />
1/4" thick. A 1/4" blade comes with your <strong>Bandsaw</strong> and is already installed.<br />
1/2" Blades-For heavy-duty cutting of wood, plywood, plastics, particle board, and<br />
soft, nonferrous metals. Suitable <strong>for</strong> resawing stock up to 6" thick, and metalwork<br />
in stock up to 1/2" thick.<br />
5/8" Blades-For heavy-duty resawing. Efficiently handles wood up to 6" thick.<br />
Straight cuts only. Note: set the tension scale at the 1/2" setting.<br />
Selecting the Right Blade <strong>for</strong><br />
the Job<br />
The <strong>Shopsmith</strong> <strong>Bandsaw</strong> comes with a 1/4"-wide woodcutting<br />
blade, suitable <strong>for</strong> many different woodworking<br />
operations. However, this is only one of several blades<br />
available <strong>for</strong> your machine.<br />
The <strong>Shopsmith</strong> <strong>Bandsaw</strong> can mount any blade 1/16" to<br />
5/8" wide and 72" long (within 1/2"). When using 1/16"<br />
blades, you must install optional Cool Blocks (Part No.<br />
555374) in place of the standard metal blade guides.<br />
Choosing the right blade <strong>for</strong> the job depends on:<br />
• The kind of material you’re cutting<br />
• The thickness of the stock<br />
• The <strong>Bandsaw</strong> operation you’re per<strong>for</strong>ming<br />
• The intricacy of the cut<br />
The wider the blade, the larger the teeth and the deeper<br />
the gullets. The added width makes the blade stiffer, so<br />
the cut is straight. The larger teeth and deeper gullets<br />
help clear the sawdust in a thick cut. Wider blades are<br />
the beat choice <strong>for</strong> heavy resawing or sawing thick stock.<br />
Narrower blades are suited <strong>for</strong> intricate work. And the<br />
narrower the blade is, the tighter the radius it will cut.<br />
Choose narrow blades when you need to cut complex<br />
designs.<br />
Recommended Speed<br />
Ranges (in rpm)<br />
850 rpm <strong>for</strong> hardwood<br />
850 rpm <strong>for</strong> softwood<br />
950 rpm <strong>for</strong> hardwood<br />
1,050 rpm <strong>for</strong> softwood<br />
850 rpm <strong>for</strong> hardwood<br />
950 rpm <strong>for</strong> softwood<br />
700 (or slower) rpm <strong>for</strong> other materials<br />
700 rpm <strong>for</strong> hardwood and softwood<br />
700 rpm (or slower) <strong>for</strong> other materials<br />
700 rpm <strong>for</strong> hardwood and softwood<br />
Page 21
SHOPSMITH 11” BANDSAW 555943<br />
<strong>Bandsaw</strong> Speeds<br />
The speed of the <strong>Bandsaw</strong> is determined by<br />
the blade you use and the material you cut.<br />
Generally, slow speeds are used with wide<br />
blades to cut hard, thick woods and other<br />
dense materials. High speeds are used with<br />
narrow blades in soft materials to produce<br />
smooth cuts. To determine the correct speed<br />
<strong>for</strong> a particular blade, refer to <strong>Bandsaw</strong> Blade<br />
Selection Chart on page 21.<br />
Be<strong>for</strong>e you begin any <strong>Bandsaw</strong> operation, set<br />
the machine to run at the correct speed. The<br />
speed of a <strong>Bandsaw</strong> is measured by how fast<br />
the blade travels, or “Feet Per Minute” (fpm).<br />
The <strong>Shopsmith</strong> <strong>Bandsaw</strong> operates at blade<br />
speeds from 2,000 to 3,000 fpm. This translates<br />
to “drive speeds” of 700 to 1,050 revolutions<br />
per minute (rpm), or speed settings<br />
“Slow” to “D” on the Mark V and “1” to “2” on<br />
the Power Station.<br />
Page 22<br />
WARNING<br />
NEVER run the <strong>Shopsmith</strong> <strong>Bandsaw</strong> too fast.<br />
If the <strong>Bandsaw</strong> runs too fast-ever <strong>for</strong> a minutethe<br />
blade may break, the rubber tires may spin<br />
off the wheels, and you may be injured.<br />
If you’re using the Mark V (or Power Station)<br />
as the power source, be sure the speed is set<br />
at “Slow” (or “1”). Connect the power coupler.<br />
Turn on the power source, set the speed<br />
dial, make the cut, turn the speed to “Slow”,<br />
(or “1”) and turn off the power source.<br />
If you’re using a <strong>Shopsmith</strong> Power Stand,<br />
remove the pulley guard and position the Vbelt<br />
on the 2" (smallest) groove of the 2-step<br />
motor pulley to a 4-1/2" pulley on the drive<br />
shaft of the <strong>Bandsaw</strong>. Remember to replace<br />
the pulley guard.<br />
You may also find instructions in other woodworking<br />
texts directing you to operate your<br />
<strong>Bandsaw</strong> at a certain fpm setting <strong>for</strong> a specific<br />
operation. Should you need to convert rpm to<br />
fpm (or fpm to rpm) to set the speed of your<br />
<strong>Shopsmith</strong> <strong>Bandsaw</strong>, use these two equations:<br />
2.88 x rpm = fpm<br />
fpm/2.88 = rpm<br />
WARNING<br />
Never run the <strong>Shopsmith</strong> <strong>Bandsaw</strong> at a speed<br />
higher than 3,000 fpm, 1,050 rpm, or speed<br />
setting “D” on the Mark V (or “2” on the Power<br />
Station).<br />
Making a Cut<br />
Follow these procedures every time you make<br />
a cut:<br />
1. Adjust the height of the upper blade guide<br />
so that it’s no more than 1/4" above the<br />
work, as shown in Fig. B-1.<br />
Figure B-1<br />
2. Know where you’ll put your hands as you<br />
feed the wood into the blade; make sure<br />
the work won’t be blocked by the <strong>Bandsaw</strong><br />
frame, as demonstrated in Fig. B-2. Fig. B-<br />
3 shows the correct cutting procedure.<br />
3. Turn on the power and wait until the<br />
machine comes up to running speed.<br />
4. Take a com<strong>for</strong>table stance in front and<br />
slightly to the left of the blade, and start<br />
your cut. As you work, you may shift<br />
Figure B-1
SHOPSMITH 11” BANDSAW 555943<br />
Figure B-2 Figure B-3<br />
more toward the center, but be careful not<br />
to stand on the right side of the blade.<br />
5. Slowly feed the stock into the blade. Use<br />
both hands to guide the work and keep it<br />
pressed firmly down against the table.<br />
WARNING<br />
NEVER reach close to the blade or under the<br />
<strong>Bandsaw</strong> table to make adjustments, clear away<br />
chips, or <strong>for</strong> any reason whatsoever while the<br />
machine is running. Turn off and unplug the<br />
<strong>Bandsaw</strong> first and let the blade come to a complete<br />
stop.<br />
Always turn on the <strong>Bandsaw</strong> first and let it come<br />
up to speed, then feed the workpiece into the<br />
blade. NEVER turn on the machine with stock<br />
pressed against the blade, or feed the work<br />
be<strong>for</strong>e the machine is running at full speed.<br />
As you work, watch out <strong>for</strong> several problems<br />
that may cause the <strong>Bandsaw</strong> to bog down or<br />
produce an inaccurate cut:<br />
• Feeding the work too fast<br />
• Side pressure (against the flat of the blade)<br />
• Trying to turn a radius too small <strong>for</strong> the blade<br />
• Excessive blade “lead”<br />
• Worn or dull blades<br />
Don’t <strong>for</strong>ce the work, but you can feed fairly<br />
rapidly since the machine cuts quickly. It’s all<br />
right to pause in the cut <strong>for</strong> a moment, but try<br />
not to remain stationary <strong>for</strong> too long. The<br />
blade will heat up in the kerf, burning both<br />
the wood and the blade. Feed the workpiece<br />
directly against the teeth, even when cutting<br />
curves.<br />
If the blade continually wanders off the pattern,<br />
there are several possible causes: The<br />
blade guides may be improperly adjusted.<br />
Or you could be pressing against the side of<br />
the blade. You may also be trying to cut a<br />
curve that’s too tight <strong>for</strong> the blade. If the blade<br />
wanders or “leads” just to one side or the<br />
other, the teeth are improperly set.<br />
If the machine bogs down, stop a moment to<br />
let the <strong>Bandsaw</strong> catch up. Check to see if the<br />
blade is twisting in the guides. If it is, you<br />
may be pressing against the side of the blade<br />
or trying to turn a corner too tight <strong>for</strong> the<br />
blade. If the blade is properly positioned in<br />
the guides, you’re probably feeding the work<br />
too fast. Once the <strong>Bandsaw</strong> is back up to<br />
running speed, feed the work a little slower.<br />
If the problem persists, check the blade to see<br />
if it’s worn. Replace dull or worn blades<br />
immediately.<br />
If the blade jams on a scrap, turn off the<br />
machine and unplug the power be<strong>for</strong>e you<br />
attempt to clear the scrap. If the blade breaks,<br />
move around to the left side of the machine,<br />
turn off the machine, and disconnect the<br />
power. Wait until the wheels come to a complete<br />
stop be<strong>for</strong>e removing the cover to remove<br />
the broken blade.<br />
If you mount a 1/16" or 1/8" blade after a 1/<br />
2" or 5/8" blade has been mounted <strong>for</strong> an<br />
extended period of time, the 1/16" or 1/8"<br />
blade may have a tendency to drift off the<br />
wheels. This situation is caused by long term<br />
excessive <strong>for</strong>ce (high blade tension) on the<br />
upper wheel to an incorrect angle. If this does<br />
occur:<br />
1. Turn off and unplug the machine, disconnect<br />
the power coupler, and remove the<br />
<strong>Bandsaw</strong> cover.<br />
Page 23
SHOPSMITH 11” BANDSAW 555943<br />
2. Grab the top and bottom of the upper<br />
wheel. Gently push in on the top of the<br />
wheel and pull out on the bottom.<br />
3. Mount and tension the blade. Turn the<br />
upper wheel by hand.<br />
4. Repeat the procedure until the blade remains<br />
on the wheels.<br />
5. Install the <strong>Bandsaw</strong> cover, plug in and<br />
turn on the machine, turn the speed dial to<br />
“Slow”, turn off the machine, and reconnect<br />
the power coupler.<br />
6. Turn the machine on and off quickly. If the<br />
blade stays on the wheels, turn the machine<br />
on, set the speed dial <strong>for</strong> the proper<br />
speed and make the cut.<br />
Page 24<br />
WARNING<br />
If you hear a ticking sound or any other unusual<br />
noise, stop the <strong>Bandsaw</strong> IMMEDIATELY and<br />
correct the problem be<strong>for</strong>e proceeding. A ticking<br />
sound often means the blade or blade weld is<br />
damaged and close to breaking.<br />
Helpful Cutting Hints<br />
Getting a smooth, accurate cut begins by guiding<br />
the stock carefully with both hands, feeding<br />
the stock <strong>for</strong>ward against the teeth at the<br />
proper rate, and not turning corners too tight<br />
<strong>for</strong> the blade. Here are a few additional tips to<br />
help you get the best results:<br />
Relieving Blade Tension<br />
It is always a good practice to relieve blade<br />
tension once you have completed operations<br />
and the <strong>Bandsaw</strong> will remain unused <strong>for</strong> at<br />
least several days. The relieved tension helps<br />
the blade to last longer, and it decreases the<br />
chance <strong>for</strong> the upper wheel to “set”, as described<br />
above.<br />
Cutting Outside the Pattern Line<br />
For precision work, cut slightly outside the<br />
line-in the waste stock-then sand to the final<br />
dimension with a disc sander, belt sander or<br />
drum sander, seen in Fig. B-4. Not only does<br />
this technique make it easier to be accurate,<br />
the finished edge is smoother. The mill marks<br />
left by the <strong>Bandsaw</strong> are removed when you<br />
sand up to the line.<br />
Fig. B-4<br />
Breaking Up a Cut<br />
Break complicated cuts up into simple curves<br />
and lines. Study your pattern to see how you<br />
might cut it in several easy passes. Don’t be<br />
afraid to cut into the waste stock and loop<br />
around in order to reposition the blade at a<br />
better angle to the pattern line, as shown in<br />
Fig. B-5.<br />
Fig. B-5<br />
Fig. B-6
SHOPSMITH 11” BANDSAW 555943<br />
Backtracking<br />
In order to break up intricate patterns into<br />
simple cuts, you may have to cut in to a point,<br />
then back the blade out and cut from another<br />
angle, as illustrated in Fig. B-6. This is a safe<br />
technique if done carefully, but there is always<br />
a danger that you may bind the blade,<br />
pull it out of the guides and off the wheels.<br />
Sawdust can also pile up behind the blade,<br />
preventing you from backing it out. To backtrack<br />
from a cut longer than 1", turn off the<br />
machine and let it come to a complete stop<br />
be<strong>for</strong>e backtracking. If you can, avoid backtracking<br />
in long cuts altogether.<br />
Drilling Relief Openings<br />
A few well-places holes will give you a lot of<br />
turning room to cut tight, internal curves, as<br />
seen in Fig. B-7. Making relief holes is one of<br />
the handiest techniques <strong>for</strong> cutting intricate<br />
scrollwork. Drill these holes slightly inside<br />
the pattern line in the waste stock.<br />
Fig. B-7<br />
Fig. B-8<br />
Making Relief Cuts<br />
Radial or tangential relief cuts make it possible<br />
<strong>for</strong> you to cut a curve smaller than the<br />
blade can normally turn.<br />
Make radial cuts toward the pattern line and<br />
backtrack out, as shown in Fig. B-8. Then cut<br />
the desired curve. As the blade meets each<br />
radial cut, a little piece of waste stock will fall<br />
away. This provides more room <strong>for</strong> the blade<br />
to turn.<br />
Or make tangential cuts by cutting on the<br />
pattern line until the blade starts to bind<br />
slightly, then run off at a tangent to the curve.<br />
Cut completely through to the waste stock to<br />
the edge of the workpiece, removing a small<br />
amount of stock. Start cutting the pattern line<br />
again where you ran off at a tangent. Repeat<br />
this process until you’ve cut the desired curve,<br />
as seen in Fig. B-9.<br />
NOTE<br />
Radial cuts are useful when cutting both<br />
internal and external curves. Tangential cuts<br />
can only be used on external curves.<br />
Fig. B-9<br />
“Nibbling”<br />
There are times when you’ll need to cut a<br />
detail in a pattern that’s too small to use any<br />
of the techniques described previously. For<br />
these extra-fine jobs, feed the stock very lightly<br />
against the blade and let the teeth “nibble” it<br />
away. This is handy when you need to cut<br />
tiny corners and curves.<br />
Ripping and Crosscutting<br />
As mentioned earlier, the miter gauge slot<br />
allows you to use your <strong>Shopsmith</strong> miter gauge<br />
<strong>for</strong> many <strong>Bandsaw</strong> operations. You can make<br />
crosscuts and miter cuts similar to cuts on a<br />
table saw, as seen in Fig. B-10. Your cutoff<br />
capacity is limited to 10-1/2". Longer stock<br />
will strike the <strong>Bandsaw</strong> frame.<br />
Page 25
SHOPSMITH 11” BANDSAW 555943<br />
Fig. B-10<br />
To increase the cutoff capacity when crosscutting,<br />
you can offset the blade, as described on<br />
page 26. When the blade is offset, you can cut<br />
off any length of stock that you can safely<br />
handle, as long as the stock is not more than 3-<br />
7/8" wide. This is particularly handy <strong>for</strong><br />
crosscutting 2 x 4’s, demonstrated in Fig. B-11.<br />
However, when the blade is offset, you must<br />
crosscut freehand, without the miter gauge.<br />
Page 26<br />
Fig. B-11<br />
Resawing<br />
Resawing thick stock into thin boards is one<br />
of the <strong>Bandsaw</strong>’s most useful functions. This<br />
operation cannot be per<strong>for</strong>med as efficiently<br />
on any other home workshop power tool. We<br />
recommend buying and using the optional<br />
<strong>Bandsaw</strong> Fence (Part No. 555645).<br />
To get a good resaw, first joint or sand the<br />
bottom edge of the stock. Also make sure the<br />
stock face that will rest against the fence is as<br />
smooth and flat as possible. If the board is<br />
cupped, the cup should face the fence. Check<br />
the squareness of the table to the blade and<br />
adjust it, if necessary - just 1 degree or 2<br />
degrees out of square will make the resawn<br />
board noticeably uneven.<br />
Since resawing usually involves stock several<br />
inches thick and many feet long, you<br />
should use the <strong>Bandsaw</strong> fence. You should<br />
also use a feather board to help hold the stock<br />
up on edge and flat against the fence.<br />
<strong>Shopsmith</strong> offers a feather board as part of our<br />
Safety Kit (505973).<br />
If you’re using a 1/4" blade <strong>for</strong> this operation,<br />
increase the tension to the 3/8" mark on the<br />
blade tension scale. Do not increase the tension<br />
if you’re using a 3/8" or 1/2" blade. For<br />
a 5/8" blade, set the tension at the 1/2" scale<br />
setting.<br />
As you make the cut, hold the workpiece<br />
firmly against the fence. Take your time and<br />
don’t rush the cut. If you rush, the blade may<br />
follow the annual rings in the wood, giving<br />
you an uneven cut. Blade lead can also ruin<br />
your cut. If the blade tends to wander, even<br />
when you feed the wood slowly, readjust the<br />
blade guides or the angle of the fence. If this<br />
doesn’t work, follow the procedure described<br />
in the Troubleshooting section. If none of<br />
these remedies correct the problem, use another<br />
blade <strong>for</strong> resawing.<br />
WARNING<br />
Always finish up a resawing cut with a push<br />
stick. The last few inches will bring your fingers<br />
too close to the danger zone <strong>for</strong> safety.<br />
Making Bevel Cuts<br />
To make beveled cuts, simply tilt the table tot<br />
he desired tilt and secure the tilt lock. If the<br />
accuracy of the cutting angle is critical, check<br />
the tilt with a protractor or drafting triangle.<br />
You can make beveled cuts freehand, or you<br />
can use the fence to guide and support the<br />
work, as demonstrated in Fig. B-12.<br />
Adjust the upper blade guide so that it’s as<br />
close to the work as possible. The left or<br />
uphill side of the work should barely clear the<br />
left guide block. As you cut, hold the work<br />
firmly on the table and against the fence. If
SHOPSMITH 11” BANDSAW 555943<br />
you’re making this cut freehand, be careful<br />
not to let the work slip downhill. This will put<br />
side pressure on the blade, making it hard <strong>for</strong><br />
you to follow the pattern line and possibly<br />
bogging down the <strong>Bandsaw</strong>.<br />
Fig. B-12<br />
Cutting Round Stock<br />
Cutting round stock requires extra caution<br />
because its shape makes the workpiece difficult<br />
to hold. If you’re crosscutting round<br />
stock, use the miter gauge or a V-block to<br />
push the stock into the blade. Hold the stock<br />
firmly while you’re working. By clamping a<br />
stop block to the left side of the table, you can<br />
cut duplicate lengths of dowel. Make sure the<br />
back edge of the stop block does not extend<br />
beyond the front edge of the blade.<br />
WARNING<br />
Round stock should always be supported and<br />
guided with the fence, as shown in Fig. B-13.<br />
The teeth of the blade can easily catch the stock,<br />
spinning it out of your hands, or worse, dragging<br />
your hands into the blade.<br />
Fig. B-13<br />
Making Duplicate Parts<br />
Often you’ll need two or more identical parts<br />
<strong>for</strong> a project. Although it’s possible to cut<br />
them out individually and sand them to the<br />
same size and shape, there are two simple<br />
tricks that can make your work a lot easier.<br />
Pad sawing<br />
To duplicate intricate patterns, stack two or<br />
more boards on top of each other. Tape or nail<br />
them together into a “pad” and saw them all<br />
at once, as illustrated in Fig. B-14. By placing<br />
nails in the waste stock, you’ll never see the<br />
holes in the finished project.<br />
Fig. B-14<br />
Fig. B-15<br />
Sawing and Resawing<br />
Sawing and resawing can also be used to<br />
duplicate intricate patterns. First cut the pattern<br />
in a thick block of wood, then resaw<br />
thinner pieces off as needed, as shown in Fig.<br />
B-15. Leave enough extra stock so that you<br />
can sand the resawn pieces smooth. This<br />
technique is especially useful when you need<br />
several thin, identical components.<br />
Compound Cutting<br />
By cutting a pattern in more than one side of<br />
a workpiece-compound cutting-you can make<br />
the stock appear to curve through three dimensions,<br />
as if you had carved it. This is an<br />
intriguing <strong>Bandsaw</strong> technique that’s useful<br />
on a wide variety of projects. You can use it<br />
to remove stock and simplify your lathe work,<br />
make cabriole legs <strong>for</strong> tables and chairs, or do<br />
“bandsaw sculpture” - animal shapes, patterned<br />
posts and rails, fascinating lamp bases.<br />
Begin by tracing a pattern on one side of the<br />
stock. Cut the pattern-seen in Fig. B-16, but<br />
save the waste. Tape the waste back to the<br />
workpiece in its original position. This will<br />
provide a solid base as you make other cuts.<br />
Turn the stock 90 degrees so that another side<br />
faces up, and trace a pattern on it-it can either<br />
be the same pattern or a different one. Make<br />
Page 27
SHOPSMITH 11” BANDSAW 555943<br />
a second cut with the <strong>Bandsaw</strong>, shown in Fig.<br />
B-16, but save the waste. Tape the waste back<br />
to the workpiece in its original position. This<br />
will provide a solid base as you make other<br />
cuts. Turn the stock 90 degrees so that another<br />
side faces up, and trace a pattern on it-it can<br />
either be the same pattern or a different one.<br />
Make a second cut with the <strong>Bandsaw</strong>, shown<br />
in Fig. B-17. If you want, repeat this process to<br />
make a third cut. When you remove all the<br />
waste, you’ll have a piece that looks as if you<br />
had spent hours handcarving it. Fig. B-18<br />
shows the finished cabriole leg.<br />
Page 28<br />
Fig. B-16<br />
Fig. B-17<br />
Fig. B-18<br />
Cutting Particle Board, Plastics and<br />
Metals<br />
As mentioned earlier, your <strong>Bandsaw</strong> will also<br />
cut materials other than solid wood and plywood.<br />
These include particle board, plastic,<br />
plastic laminates and soft, nonferrous metals<br />
such as brass, copper and aluminum.<br />
WARNING<br />
Be<strong>for</strong>e cutting metals, clean out the <strong>Bandsaw</strong><br />
thoroughly to prevent fires.<br />
When cutting materials other than wood, always<br />
use a “combination” or all-purpose<br />
blade. You can ruin a woodcutting blade<br />
immediately if you attempt to use it on tough<br />
stocks like these. Even a combination blade<br />
will dull rapidly if you use it constantly <strong>for</strong><br />
cutting these materials. Also, slow the speed<br />
down as far as it will go.<br />
Feed the stock very slowly-give the blade<br />
plenty of time to cut. When cutting nonferrous<br />
metal, put 1-2 drops of oil on the pattern<br />
line every inch or so to help keep the blade<br />
from overheating, as demonstrated in Fig. B-<br />
19.<br />
Fig. B-19<br />
WARNING<br />
If you’re cutting round stock, such as pipe, hold<br />
it securely with a miter gauge or V-block to help<br />
prevent the teeth from catching it and spinning<br />
it out of your hands.<br />
As a “rule of thumb,” there should usually be<br />
3 blade teeth in the stock at all times during<br />
the cut. This ensures proper cutting action of<br />
the blade, giving the best combinations of<br />
aggressiveness and smoothness of the cutwhile<br />
still providing a safe cutting action.<br />
Here’s a chart listing material thickness and<br />
the minimum teeth per inch a blade should<br />
have to cut it:<br />
Material Min. Teeth<br />
Thickness Per Inch (TPI)<br />
1/8" 24<br />
1/4" 12<br />
3/8" 8<br />
1/2" 6<br />
5/8" 4 to 6<br />
3/4" 4<br />
1-1/2" 3<br />
The optional <strong>Shopsmith</strong> Speed Reducer (Part<br />
No. 555428) is an excellent accessory to use<br />
with the <strong>Bandsaw</strong> when the Mark V is the<br />
power source. The Speed Reducer allows the<br />
Mark V to power the <strong>Bandsaw</strong> at speed as low<br />
as 100 rpm. Slower speeds are best <strong>for</strong> cutting<br />
many plastics and metals.
SHOPSMITH 11” BANDSAW 555943<br />
WARNING<br />
Particle board releases toxic <strong>for</strong>maldehyde gas<br />
when cut. When cutting particle board, always<br />
work in a well-ventilated room and use respiratory<br />
protection.<br />
NOTE<br />
When you’re finished cutting particle board,<br />
plastics or metals, remove the <strong>Bandsaw</strong> cover<br />
and clean the tires thoroughly with a stiff<br />
bristle brush. If you don’t, the filings and<br />
chips will become imbedded in the tires and<br />
damage them.<br />
Offsetting the Blade<br />
During some woodworking operations, you<br />
may find it useful to twist or offset the <strong>Bandsaw</strong><br />
blade. By offsetting the blade on your<br />
<strong>Shopsmith</strong> <strong>Bandsaw</strong> (as illustrated in Fig. B-<br />
20), you can cut off any length of stock that<br />
you can safely handle - as long as the stock is<br />
not more than 3-7/8" wide.<br />
Fig. B-20<br />
Top View<br />
Fig. B-21<br />
To offset the blade, you must reverse the<br />
guide blocks. Then the gap between the<br />
guide blocks will be angled 30 degrees to the<br />
right (as viewed from the top in Fig. B-21). As<br />
the blade runs through this gap, the guides<br />
twist it to the right. Because the guide blocks<br />
contact the blade in the offset position, they<br />
will wear more rapidly than in their normal<br />
setting. For this reason, we recommend that<br />
you offset the blade only when you have a<br />
special operation to per<strong>for</strong>m.<br />
CAUTION<br />
You may want to replace the metal guide<br />
blocks with optional Cool Blocks (Part No.<br />
555374) to help prolong the life of your<br />
bandsaw blade.<br />
We also recommend that you offset only 3/<br />
8" -and 1/2" -wide <strong>Bandsaw</strong> blades. The<br />
teeth of narrower blades will contact the<br />
guide blocks and wear them away rapidly.<br />
If you use a 1/2" blade, you will have to<br />
slightly modify your table insert.<br />
If your <strong>Bandsaw</strong> is mounted on a Power<br />
Stand with a 1/2-hp motor, you can only<br />
offset the 3/8" blade. To offset a 1/2" blade,<br />
the <strong>Bandsaw</strong> must be powered by the Mark<br />
V or the Power Station.<br />
To offset the blade on your <strong>Shopsmith</strong><br />
<strong>Bandsaw</strong>, follow this procedure carefully:<br />
1. Unplug the machine from its power source.<br />
Remove the cover and the table insert, and<br />
remove the table leveling bolt (89).<br />
2. Mount a 3/8" or 1/2" blade on the<br />
<strong>Bandsaw</strong>, if you haven’t done so already,<br />
following the procedure described in Removing<br />
and Mounting Blades in this section.<br />
However, reduce the blade tension<br />
to the 1/4" setting <strong>for</strong> 3/8" blades or the 3/<br />
8" setting <strong>for</strong> 1/2" blades.<br />
3. Adjust the blade guides so that the front<br />
edges of the guide blocks are approximately<br />
1/4" in back of the gullets between<br />
the teeth of the blade.<br />
4. Remove and reverse the guide blocks,<br />
turning them end- over-end. When you<br />
have reversed the guide blocks, the gap<br />
between them should be angles 30 degrees<br />
to the right when viewed from the<br />
Page 29
SHOPSMITH 11” BANDSAW 555943<br />
Page 30<br />
top, as shown in Fig. B-22. Do not secure<br />
the guide blocks in place yet, but back the<br />
left guide blocks out 1/4" away from the<br />
blade.<br />
Fig. B-22<br />
Fig. B-23<br />
5. Push the right guide blocks in until they<br />
contact the blade, twist the blade slightly,<br />
and push the back of the blade guide<br />
housing, as shown in Fig. B-23. Adjust the<br />
position of these guide blocks to allow 1/<br />
16" clearance between the back of the blade<br />
and the blade guide housing, then secure<br />
them in place.<br />
6. Push the left guide blocks in until they<br />
contact the blade and twist it the full 30<br />
degrees. Then back the blocks off slightly<br />
and lock them in place. When all four<br />
guide blocks are locked in place, the right<br />
guide blocks should contact the blade towards<br />
the back, and the left guide blocks<br />
should contact the blade towards the front,<br />
as shown in Fig. B-21.<br />
7. Spin the idler wheel by hand to check that<br />
the blade runs without interference. Don’t<br />
worry if the wheels seem difficult to turn;<br />
this is normal <strong>for</strong> an offset blade. However,<br />
if the blade is tight or binds in spots,<br />
the guide blocks should be readjusted.<br />
Also check that the back of the blade does<br />
not rub against the blade guide housings<br />
and that the teeth of the blade do not cut<br />
into the guide blocks.<br />
8. Replace the cover and table insert. Also,<br />
secure the table leveling bolt.<br />
9. Press a block of paraffin or soap against<br />
the flat of the blade while it’s running.<br />
This will lubricate the blade where it rubs<br />
against the guide blocks An excellent alternative<br />
is to install optional Cool Blocks.<br />
WARNING<br />
Do not run the <strong>Bandsaw</strong> <strong>for</strong> more than a few<br />
minutes at a time when the blade is offset. Otherwise,<br />
the blade will heat up and break.<br />
Removing and Mounting Blades<br />
When you mount a blade on the <strong>Bandsaw</strong>,<br />
you must carefully adjust the blade guides<br />
and the blade tension. This is critical.<br />
WARNING<br />
If the blade guides aren’t correctly aligned, the<br />
blade will wander off the line every time you<br />
make a cut. If the blade tension is too tight, the<br />
blade will soon wear out and break. If It’’ too<br />
loose, the blade will not track properly and may<br />
slip off the wheels.<br />
Follow these steps carefully each time you<br />
change blades:<br />
Removing Blades<br />
1. Disconnect the power and slide the Mark<br />
V headstock away from the <strong>Bandsaw</strong><br />
2. Unscrew the cover knobs and set the cover<br />
aside. Then reach up under the table and<br />
pop the table insert out.<br />
3. Remove the table leveling bolt. (89).
SHOPSMITH 11” BANDSAW 555943<br />
4. Adjust the height of the blade guide so<br />
that it’s not more than 1" above the table.<br />
Lock the blade guide in place by swinging<br />
the handle to the back.<br />
5. Release the blade tension by turning the<br />
blade tension screw counterclockwise with<br />
your 5/32" Allen wrench until the blade<br />
goes slack, as seen in Fig. B-24.<br />
Fig. B-24<br />
Fig. B-25<br />
6. Loosen the guide blocks by turning the<br />
guide blocks’ locking screws counterclockwise<br />
with the 5/32" Allen wrench. Then<br />
pull the blocks away from the blade about<br />
1/16".<br />
7. Slide the slack blade off the wheels and<br />
out through the slot in the table, as shown<br />
in Fig. B-25. You’ll have to flex the blade<br />
slightly to get it around the blade guard.<br />
Mounting and Tensioning Blades<br />
8. Slide the new blade into position, working<br />
it up through the table slot, around the<br />
guard, and onto the wheels, as seen in Fig.<br />
B-26. The teeth must be pointing down<br />
and toward the front of the <strong>Bandsaw</strong> (and<br />
toward you). Position the blade approximately<br />
in the center of the rubber tires and<br />
in between the guide blocks.<br />
Fig. B-26<br />
9. Check the tension scale alignment. With<br />
the blade slack on the wheels, the red<br />
indicator bar should be parallel to the left<br />
edge of the tension scale. If this is not the<br />
case, follow the alignment procedure described<br />
in Alignment section.<br />
Fig. B-27<br />
10. Tension the blade, turning the blade<br />
tensioning screw clockwise, as demonstrated<br />
in Fig. B-27. Notice that as you turn<br />
this screw, the red indicator bar moves,<br />
because it is actually the flat spring that<br />
tensions the blade. The blade tension is<br />
properly set when the edge of the bar<br />
disappears behind the scale at the marking<br />
<strong>for</strong> the blade width you’re using.<br />
On a few operations, such as sawing thick<br />
stock with a thin blade, it may be necessary<br />
to increase the blade tension slightly<br />
beyond the normal setting. However, this<br />
increased tension will shorten the life of<br />
your blade. Always remember to reset the<br />
tension screw when you no longer need<br />
the extra tension.<br />
Page 31
SHOPSMITH 11” BANDSAW 555943<br />
Page 32<br />
CAUTION<br />
Always release the blade tension when<br />
you finish operating the <strong>Bandsaw</strong>. This<br />
prolongs blade life and prevents the upper<br />
wheel from taking on an abnormal “set”.<br />
Never tension a 1/16" blade beyond the 1/<br />
8" setting, a 3/16" blade beyond 5/16" (halfway<br />
between 1/4" and 3/8" on the scale), or<br />
a 1/4" blade beyond 3/8". For 3/8" and 1/2"<br />
blades, do not go beyond their proper settings<br />
on the tension scale. For 5/8" blades,<br />
use the 1/2" settings.<br />
When the tension is set, spin the idler wheel<br />
by hand (as seen in Fig. B-28), letting the blade<br />
make several complete loops. Make sure that<br />
the blade moves freely.<br />
Pivot Arm<br />
Flat<br />
Spring<br />
Blade<br />
Tension<br />
scale<br />
Blade<br />
Tension<br />
Screw<br />
Fig. B-28<br />
Fig. B-29<br />
Auto-track<br />
roller bearing<br />
Upper<br />
Wheel<br />
Fig. B-30<br />
A - Roller bearings<br />
B - Guide blocks<br />
C - Guide block locking screws<br />
D - Guide adjusting knobs<br />
E - Mounting bolts<br />
F - Guide post’s adjusting screws<br />
G - Upper blade guide’s height lock handle<br />
11. After you’ve spun the blade several times<br />
by hand, it should be centered on the three<br />
roller bearings, indicated in Figs. B-29 and<br />
B-30. The back of the blade should rest<br />
against the auto-track roller bearing and<br />
the lower blade guide roller bearing, and<br />
it should be no more than 1/64" away<br />
from the upper blade guide roller bearing.<br />
If the blade is not properly positioned<br />
on the bearings, follow the procedure described<br />
in “Adjusting Roller Bearings” in<br />
the Alignment section.
SHOPSMITH 11” BANDSAW 555943<br />
Maintenance<br />
Caring <strong>for</strong> Your <strong>Bandsaw</strong><br />
Your <strong>Shopsmith</strong> <strong>Bandsaw</strong> is designed to deliver<br />
years of reliable service with a minimum<br />
of maintenance. Like any other power tool,<br />
however, it will per<strong>for</strong>m better more safely if<br />
you regularly take a few minutes to properly<br />
maintain it.<br />
WARNING<br />
Remember to turn off and unplug the power<br />
source and to uncouple the Mark V headstock<br />
(or Power Station) from the <strong>Bandsaw</strong> BEFORE<br />
you begin any maintenance or service procedure.<br />
DO NOT rely solely on the power switch.<br />
Sharpening <strong>Bandsaw</strong> Blades<br />
As you use your <strong>Bandsaw</strong>, the blades will<br />
naturally become dull and worn. A dull<br />
blade cuts slowly, burns the wood, and if it’s<br />
worn more on one side than another, will not<br />
track properly. File, sharpen or replace dull<br />
blades immediately.<br />
WARNING<br />
A dull blade interferes with the per<strong>for</strong>mance of<br />
your <strong>Bandsaw</strong>, and there is also a danger it may<br />
heat up and break while you’re using the machine.<br />
On the other hand, bandsaw blades are expendable<br />
items-much like sanding belts.<br />
Depending on the type and amount of use,<br />
bandsaw blades will per<strong>for</strong>m well <strong>for</strong> various<br />
lengths of time. When a blade becomes worn,<br />
many woodworkers simply replace it with a<br />
new one. However, below is in<strong>for</strong>mation on<br />
how to sharpen bandsaw blades.<br />
Professional Sharpening<br />
Even if you file your own blades regularly,<br />
you’ll eventually need to have them professionally<br />
sharpened - after you touch up a<br />
blade 2-3 times, or when it becomes badly<br />
worn. Sharpening a <strong>Bandsaw</strong> blade is an<br />
exacting operation that involves setting the<br />
teeth and grinding the hook to precise angles.<br />
Unless you have the proper equipment, we<br />
recommend you take your dull blades to a<br />
saw shop to have this done.<br />
When you have your blades sharpened, you<br />
may want to change the set of the teeth, depending<br />
on the type of woodworking you’re<br />
doing. A slightly larger set will enable you to<br />
cut a tighter radius. But it will also make the<br />
cut rougher and the blade harder to track. A<br />
smaller set is useful if you do a lot of resawing<br />
- the blade cuts more smoothly and tracks<br />
straight.<br />
NOTE<br />
Combination-style blades have hardened<br />
teeth. Some saw shops may not be able to<br />
sharpen them.<br />
Sharpening It Yourself<br />
Sharpening a bandsaw blade is not a difficult<br />
operation, but it’s tedious. And since most<br />
saw shops will sharpen <strong>Bandsaw</strong> blades <strong>for</strong><br />
such a small fee, it may not be worth your<br />
time.<br />
However, there are times when knowing how<br />
tot file a blade may come in handy - times<br />
when the blade you need is dull and the saw<br />
shop is closed. And if economy is a major<br />
concern, occasionally filing your <strong>Bandsaw</strong><br />
blades will extend their useful life. For those<br />
of you who have the need and the patience,<br />
here’s the procedure:<br />
1. Clean the built-up wood pitch from the<br />
blade. Apply mineral spirits or oven<br />
cleaner to dissolve the pitch, then wipe it<br />
off with a rag.<br />
Page 33
SHOPSMITH 11” BANDSAW 555943<br />
2. Clamp the clean blade between two blocks<br />
of wood (or a wooden-jawed vise) so that<br />
the teeth protrude slightly, as shown in<br />
Fig. C-1.<br />
Page 34<br />
Notice that the teeth of the blade are slightly<br />
bent or “set” from side to side. Their<br />
profile is slightly “hooked.” (See Fig. C-2)<br />
Pay careful attention to the set and the<br />
hook as you file the blade.<br />
Fig. C-1<br />
Gullet = 1/32” diameter<br />
Fig. C-2<br />
3. Using a slim-taper triangular file, file<br />
straight across the teeth perpendicular to<br />
the blade. Tilt the file slightly to match the<br />
hook of the teeth. (See Fig C-3.) First, file<br />
the teeth that are set toward you, then<br />
reverse the blade and file the others. This<br />
will put the burr from the filing on the<br />
inside of the tooth, where it won’t interfere<br />
with the cutting action. A blade filed from<br />
just one side may lead to the opposite<br />
side.<br />
Fig. C-3<br />
CAUTION<br />
Do not file the bottom of the gullets. Filing<br />
will score the gullets and shorten blade life.<br />
Don’t file the teeth too much; you could destroy<br />
the set. If it takes more than 3-4 strokes<br />
of the file to restore the chisel edge on the<br />
teeth, the blade needs to be professionally<br />
sharpened. Count your strokes and use the<br />
same number of strokes on each tooth.<br />
NOTE<br />
Mark the blade with a grease pencil when<br />
you begin to file it. This makes it easier to<br />
know when you’re finished. And don’t attempt<br />
to file combination blades - these have<br />
hardened teeth. When a combination blade<br />
becomes dull, either have it professionally<br />
sharpened or replace it.<br />
Resurfacing the Guide Blocks<br />
From time to time, the ends of the guide<br />
blocks may become worn or scored. If you set<br />
the blade guides properly, this shouldn’t happen<br />
very often. But if it does, resurface the<br />
guide blocks following this procedure:<br />
1. Turn off the <strong>Bandsaw</strong> and unplug its power<br />
source.<br />
2. Remove a guide block. To resurface it,<br />
you can use a whetstone (see Fig. C-4), a<br />
sanding disc (see Fig C-5), a belt sander<br />
(see Fig. C-6), or strip sander. The key to<br />
successfully resurfacing the guide block<br />
is to keep the work surface consistently<br />
flat against the abrasive surface. You may<br />
want to make a special jig to hold your<br />
guide blocks while you sharpen them.<br />
Be careful not to grind away any more of<br />
the guide blocks than you absolutely need<br />
to. If the long guide blocks should be-
SHOPSMITH 11” BANDSAW 555943<br />
come shorter than 1-3/8", or the short guide<br />
blocks shorter than 3/4", replace the guide<br />
blocks with a new set.<br />
Fig. C-4<br />
Fig. C-6<br />
3. Repeat Step 2 <strong>for</strong> any other guide block<br />
which needs resurfacing.<br />
WARNING<br />
Fig. C-5<br />
When using a belt sander, strip sander, disc<br />
sander or other powered abrasive surface to<br />
resurface guide blocks, never hold the guide<br />
block with your fingers. Use locking pliers and<br />
keep your fingers away from abrasive surface.<br />
Cleaning the <strong>Bandsaw</strong><br />
As you work, sawdust and wood pitch accumulate<br />
on the blade, blade guides, tires and<br />
in the <strong>Bandsaw</strong>. This residue can affect the<br />
machine’s per<strong>for</strong>mance.<br />
Fine sawdust can dry out the bearings and<br />
cause them to wear prematurely. Pitch can<br />
build up on the blade, blade guides and tires,<br />
interfering with the cutting action and causing<br />
the blade to track improperly.<br />
Brush off the <strong>Bandsaw</strong> and blow out or<br />
vacuum the inside of the machine. If you elect<br />
to blow it out, use an air compressor or reverse<br />
the airflow on your home or shop<br />
vacuum cleaner. Bottles of compressed air<br />
also work well.<br />
WARNING<br />
Wear a dust mask and eye protection when<br />
using compressed air to blow dust from your<br />
<strong>Bandsaw</strong>.<br />
Brush the tires with a stiff bristle brush to<br />
remove impacted sawdust. And remove any<br />
sawdust from the blade guides, adjustment<br />
assemblies, under the table insert and around<br />
the trunnions.<br />
Remove the built-up wood pitch from the<br />
blade, blade guides and tires. Apply mineral<br />
spirits to dissolve the pitch, then wipe it off<br />
with a rag.<br />
Lubricating the <strong>Bandsaw</strong><br />
Several parts of the <strong>Bandsaw</strong> require lubrication:<br />
• blade tensioning screw-Fig. C-7<br />
• upper blade guide post-Fig. C-8<br />
• threads of the upper blade guide’s adjusting<br />
screws-Fig. C-9<br />
• lower blade guide’s adjusting screws-Fig. C-9<br />
• trunnions-Fig. C-9<br />
Fig. C-7<br />
Fig. C-9<br />
Fig. C-8<br />
Page 35
SHOPSMITH 11” BANDSAW 555943<br />
Rock the trunnions back and <strong>for</strong>th as you<br />
apply the graphite. We recommend powdered<br />
graphite <strong>for</strong> lubricating the <strong>Bandsaw</strong><br />
because it’s dry and doesn’t attract sawdust.<br />
But if graphite is unavailable, you can apply<br />
10-wt. Machine oil to all the parts that need<br />
lubrication, with the exception of the trunnions.<br />
The trunnions should either be dusted<br />
with graphite or waxed. Use oil sparingly (1-<br />
2 drops only) because excess oil will mix with<br />
sawdust and impede moving parts.<br />
Grease the Upper Wheel Bearings<br />
Grease the needle bearings in the upper wheel.<br />
The upper wheel is held on the shaft by a<br />
retaining ring. Remove this ring with a small<br />
blade screwdriver, gently lifting it out of its<br />
groove. (See Fig. C-7.) Remove the fiber washer<br />
and pull the wheel from the shaft. Wipe the<br />
shaft with a clean rag to remove any dirt or<br />
dust, then grease the bearings inside the hub.<br />
Use cup grease or furnace bearing grease.<br />
To replace the wheel, put it back on the shaft<br />
with the long side of the hub toward the back<br />
of the <strong>Bandsaw</strong>. Wipe off any excess grease<br />
and replace the fiber washer. Push the retaining<br />
ring into the groove on the shaft. When<br />
you’ve finished, pull out on the wheel to be<br />
sure the ring is securely seated.<br />
Storing the <strong>Bandsaw</strong><br />
When storing a <strong>Bandsaw</strong>, you have two separate<br />
considerations: How do you store the<br />
machine? And how do you store the blades,<br />
which are almost as big as the machine when<br />
uncoiled. If you can, we recommend you<br />
store <strong>Bandsaw</strong> blades uncoiled. This will<br />
greatly reduce the chances of damaging the<br />
blades or cutting yourself.<br />
Page 36<br />
WARNING<br />
Be careful when you uncoil <strong>Bandsaw</strong> blades.<br />
They tend to spring apart, and the sharp teeth<br />
may injure you or a bystander. Coiling and<br />
uncoiling a <strong>Bandsaw</strong> blade is one of the few<br />
workshop operations where it’s safer to wear<br />
gloves.<br />
Normal use will prevent blades from rusting.<br />
However, if these blades are to be stored <strong>for</strong><br />
an extended period of time or under unusually<br />
humid conditions, spray them with a<br />
rust-inhibiting light oil.<br />
Normal use and regular waxing of the table<br />
and other exposed metal surfaces will prevent<br />
the machine from rusting. However, if<br />
the <strong>Bandsaw</strong> is to be stored <strong>for</strong> an extended<br />
period of time or under unusually humid<br />
conditions, spray all metal surfaces with a<br />
rust-inhibiting light oil. Remove this oil with<br />
mineral spirits and re-wax the <strong>Bandsaw</strong> be<strong>for</strong>e<br />
using it again.<br />
<strong>Bandsaw</strong> Tires<br />
If a tire is torn or damaged or if its surface is<br />
rough and uneven, replace the wheel assembly<br />
according to the following procedures:<br />
1. Unplug the <strong>Bandsaw</strong> and remove the<br />
blade.<br />
2. Remove the wheel. To remove the upper<br />
wheel, follow the procedure described in<br />
Lubricating the <strong>Bandsaw</strong>. To remove the<br />
lower wheel, first remove the drive hub or<br />
pulley from the drive shaft, then the bearing<br />
retainer from inside the machine. (The<br />
retainer is directly behind the wheel,) Tap<br />
the end of the drive shaft with a wooden or<br />
rawhide mallet to loosen the bearing in<br />
the frame, then pull the wheel free, as<br />
shown in Fig. C-10.<br />
CAUTION<br />
Don’t hit the drive shaft with a metal hammer.<br />
This will damage the shaft.
SHOPSMITH 11” BANDSAW 555943<br />
Fig. C-10<br />
3. Install the new wheel. To install the upper<br />
wheel, put it on the shaft with the long side<br />
of the hub toward the back of the <strong>Bandsaw</strong>.<br />
Wipe off any excess grease and replace the<br />
fiber washer. Start one end of the retaining<br />
ring in the groove and work your way<br />
around the shaft, pushing the ring into<br />
place. Then pull out on the wheel to be<br />
sure the ring is securely seated.<br />
To install the lower wheel, place the drive<br />
shaft into the cavity and tap with a wooden or<br />
rawhide mallet until securely in place. Replace<br />
the bearing retainer inside the machine<br />
and then replace the drive hub or pulley onto<br />
the drive shaft.<br />
Waxing the <strong>Bandsaw</strong><br />
Wax and buff the working surfaces <strong>for</strong> the<br />
table, miter gauge slots, and table insert. Paste<br />
wax prevents rust, lubricates the work as it<br />
slides along the table, and helps metal parts<br />
slide together smoothly.<br />
Use a good floor or furniture paste wax. DO<br />
NOT use car wax or furniture polish. Car wax<br />
<strong>for</strong>ms a protective coat, but it doesn’t lubricate.<br />
Furniture polish isn’t tough enough.<br />
Paste floor or furniture wax protects and lu-<br />
bricates. Apply wax sparingly and rub it out<br />
thoroughly. If you apply too much wax or<br />
don’t buff it, the wax will leave residue on the<br />
wood and it will also mix with sawdust and<br />
impede moving parts.<br />
NOTE<br />
Cast aluminum is porous and “soaks up” the<br />
wax when the machine is new. Wax your<br />
<strong>Bandsaw</strong> often during the first month to<br />
build up a good coat.<br />
Page 37
SHOPSMITH 11” BANDSAW 555943<br />
Maintenance Schedule<br />
The maintenance intervals shown here are based on normal operation and assume that you<br />
will be careful not to abuse your <strong>Bandsaw</strong>. If you work the machine unusually hard or use it<br />
to cut metals and other hard materials, you’ll need to maintain it more often. If an unusual<br />
noise or vibration develops, stop the machine immediately and check the blade, blade guides,<br />
roller bearings, tension, needle bearings and other parts or adjustments. Do not operate the<br />
<strong>Bandsaw</strong> until you have located and corrected the cause of the noise or vibration.<br />
As needed File or sharpen dull blades, replace worn-out blades. Resurface<br />
scored blade guide blocks.<br />
When you change blades Adjust the blade tension and blade guides. Check roller bearing<br />
position.<br />
Every 5 hours of running<br />
time*<br />
Every 10 hours of running<br />
time*<br />
Every 100 hours of running<br />
time*<br />
*To estimate running time, use this rule: you will run your<br />
power tools only 10% of the total time you spend in your shop.<br />
And the time you spend running power tools will be split<br />
between your bandsaw and other machines. So, if you work<br />
Troubleshooting<br />
<strong>Bandsaw</strong> problems usually have simple solutions-under<br />
normal use, you should rarely have to service the<br />
machine. Most problems can be corrected by maintenance,<br />
realignment, readjustment, or a change in work<br />
habits. To help diagnose and remedy any problem that<br />
may arise with your <strong>Shopsmith</strong> <strong>Bandsaw</strong>, use the following<br />
Troubleshooting Guide.<br />
Correcting Blade Lead<br />
If the blade guides are worn or improperly adjusted,<br />
or if the blade teeth are improperly set, the<br />
blade may “lead” while you’re working - wander<br />
off the pattern line to one side or the other.<br />
This can ruin your cut, particularly when you’re<br />
ripping or resawing. You may be able to compensate<br />
<strong>for</strong> this lead by simply changing the<br />
angle you feed the work into the blade. If the<br />
blade lead is excessive and interferes with your<br />
work, check the blade guides, and then:<br />
Page 38<br />
Brush off and blow out the <strong>Bandsaw</strong> completely.<br />
Repeat the previous step, plus clean the pitch from the blades,<br />
blade guides, and tires. Lubricate the trunnions, blade tension<br />
screw, blade guide post, and blade guide adjusting screws. Wax<br />
the table, miter gauge slots, and table insert. Check all alignments<br />
and adjustments.<br />
Repeat the previous steps, plus lubricate the needle bearings.<br />
Check all guide blocks, roller bearings, tires and needle bearings<br />
<strong>for</strong> wear.<br />
in your shop <strong>for</strong> 25 hours, you have probably logged 1 hour<br />
on your bandsaw. If you use the <strong>Bandsaw</strong> less often, maintenance<br />
cycles may be less frequent, but the 100-hour procedure<br />
should be per<strong>for</strong>med once a year as a matter of practice.<br />
• If the gaps between the guide blocks are too wide or the<br />
guide blocks are set too far back behind the gullets,<br />
readjust the blade guides as described in Steps 13-15<br />
of the Adjust the Roller Bearings section.<br />
• If the guide blocks are worn, grind a new face on the<br />
guide blocks as in Resurfacing the Guide Blocks.<br />
• If the blade guides are correctly adjusted and not worn,<br />
the blade lead is probably caused by the uneven set of<br />
the teeth. One clue that the teeth may be improperly set<br />
is when the blade always leads to one side or the other.<br />
If the blade lead is strong, you can only correct it by<br />
having the blade reset and resharpened at a saw shopor<br />
replace the blade.<br />
WARNING<br />
Use extreme caution when correcting <strong>for</strong> blade<br />
lead, since more of the running blade is exposed<br />
than on any other <strong>Bandsaw</strong> operation. Also,<br />
remember to wear eye protection.
SHOPSMITH 11” BANDSAW 555943<br />
Problem<br />
General Operation<br />
Drive shaft heats up or<br />
does not turn smoothly<br />
Upper wheel noisy or<br />
does not turn smoothly<br />
<strong>Bandsaw</strong> slows down<br />
or stops in heavy cuts<br />
<strong>Bandsaw</strong> won’t start<br />
or starts very slowly<br />
Power coupler difficult<br />
to install<br />
Mounting tubes<br />
difficult to insert in<br />
power mount<br />
Troubleshooting Guide<br />
Problem Area Find on Page:<br />
General Operation 35<br />
Blade Guides & Roller Bearings 36<br />
Blade 36<br />
Table 37<br />
Workpiece 38<br />
Accuracy of Cut 38<br />
Quality of Cut 39<br />
Possible Cause<br />
Lower bearings worn.<br />
If <strong>Bandsaw</strong> is driven by V-belt, belt<br />
may be too tight.<br />
Pulleys or hubs improperly aligned.<br />
Pulley or hub slips drive shaft.<br />
Needle bearings are dry.<br />
Needle bearings worn.<br />
Feed rate too fast.<br />
Poly V-belt in Mark V headstock is<br />
slipping<br />
If <strong>Bandsaw</strong> is driven by V-belt, belt may<br />
be slipping<br />
Pulleys or hubs slipping on shafts.<br />
Machine stiff from the cold.<br />
Capacitor on motor defective.<br />
Motor defective.<br />
No power to the motor.<br />
Drive hubs out of alignment.<br />
Tubes out of alignment.<br />
Accessory mount lock interfering.<br />
Solution<br />
Replace lower bearings. Have done by our<br />
Customer Service.<br />
Loosen tension on V-belt.<br />
Re-align pulleys or hubs.<br />
Secure pulley or hub.<br />
Remove upper wheel & grease bearings.<br />
Replace needle bearings. Have done by<br />
our Customer Service.<br />
Feed stock more slowly.<br />
Increase tension on poly V-belt. See Mark<br />
V instruction manual.<br />
Increase tension on V-belt.<br />
Secure pulleys or drive hubs.<br />
Warm shop to 55 degrees or above. Make<br />
sue the machine speed setting is at “Slow”.<br />
Replace capacitor.<br />
Replace or rebuild motor. Have done by<br />
our Customer Service.<br />
Check that motor is plugged in.<br />
Re-align drive hubs.<br />
Re-align tubes.<br />
Loosen accessory mount lock.<br />
Page 39
SHOPSMITH 11” BANDSAW 555943<br />
Problem Possible Cause Solution<br />
Blade Guides and<br />
Roller Bearings<br />
Upper blade guide difficult<br />
to adjust up and down.<br />
Upper blade guide will not<br />
lock in position.<br />
Upper blade guide’s roller<br />
bearing is more than 1/64"<br />
away from the blade.<br />
Upper blade guide’s roller<br />
bearing lifts the blade off<br />
the lower bearing.<br />
Guide blocks are scored or<br />
damaged.<br />
Blade does not run in the<br />
center of the roller bearings.<br />
Blade<br />
Blade “ticks” or knocks<br />
while running.<br />
Ripped or resawn boards<br />
have taper or bevel.<br />
Blade makes a scraping<br />
sound.<br />
Blade breaks.<br />
Page 40<br />
Too much spring tension on guide post.<br />
Guide post needs lubrication.<br />
Not enough spring tension on guide post.<br />
Guide post set too far back.<br />
Guide post set too far <strong>for</strong>ward.<br />
Blade guides not properly aligned.<br />
Blade twisting in guides.<br />
Roller bearings not centered behind blade.<br />
Blade or weld is damaged.<br />
Blade twisted or bent in one spot.<br />
Workpiece fed improperly.<br />
Table not square.<br />
Blade rubbing against guides.<br />
Blade tension set too high.<br />
Feed rate too fast.<br />
Cutting corner too tight <strong>for</strong> blade.<br />
Blade dull or worn.<br />
Blade binds in the cut. Cutting corner too tight <strong>for</strong> blade.<br />
Stock improperly cured.<br />
Blade dull or worn.<br />
Re-adjust tension on guide post.<br />
Lubricate guide post with graphite.<br />
Readjust tension on guide post.<br />
Adjust position and/or tilt of guide<br />
post by adjusting brass screw.<br />
Adjust position and/or tilt of guide<br />
post by adjusting brass screw.<br />
Resurface guide blocks and re-align<br />
blade guides.<br />
Resurface guide blocks.<br />
Loosen roller bearing mounts and<br />
center bearings.<br />
Stop machine immediately. Examine<br />
blade and replace if damaged.<br />
Remove blade and straighten. Replace<br />
blade if damaged.<br />
Feed workpiece carefully. Avoid side<br />
pressure.<br />
Square table.<br />
Re-align blade guides.<br />
Reduce tension to proper setting.<br />
Feed stock more slowly. Do not <strong>for</strong>ce<br />
cut.<br />
Make relief cuts or narrower blade.<br />
Sharpen or replace blade.<br />
Make relief cuts or use narrower blade.<br />
Use properly cured stock.<br />
Sharpen or replace blade.
SHOPSMITH 11” BANDSAW 555943<br />
Problem Possible Cause Solution<br />
Kerf jams with sawdust-unable<br />
to backtrack.<br />
Blade teeth scrape the guide<br />
blocks.<br />
Blade hits the table insert.<br />
Table<br />
Table is difficult to tilt.<br />
Table is not square to the flat<br />
of the blade, or not tilted as<br />
indicated.<br />
Miter gauge slots are not<br />
aligned with the flat of the<br />
blade.<br />
Table “pitched” (Not square<br />
to the back of the blade).<br />
Table will not tilt a full 45<br />
degrees.<br />
Table insert is not flush with<br />
the table top.<br />
Table wobbles or moves.<br />
Backtracking too fast or out of a long cut. Never<br />
backtrack more than 1".<br />
Stock improperly cured.<br />
Blade guides too far <strong>for</strong>ward.<br />
Blade twisting during cut.<br />
Backtracking too fast or out of a long cut. Never<br />
backtrack more than 1".<br />
Trunnions need lubrication.<br />
Foreign material on trunnions.<br />
Table mounted improperly.<br />
Auto-stop or tilt indicator out of alignment.<br />
Table mounted improperly.<br />
One side of table too low. (Note: a slight pitch is<br />
normal.)<br />
Table mounted improperly.<br />
Impacted sawdust or <strong>for</strong>eign material on trunnions.<br />
Sawdust under insert.<br />
Insert bent or warped.<br />
Tilt lock not secure.<br />
Trunnions not secure.<br />
Turn off machine, let blade stop, then<br />
backtrack.<br />
Use properly cured stock.<br />
Re-align blade guides.<br />
Make relief cuts or use narrower<br />
blade.<br />
Turn off machine, let blade stop, then<br />
backtrack.<br />
Lubricate trunnions with graphite.<br />
Remove table and clean trunnions.<br />
Loosen trunnion bolts and re-align<br />
table.<br />
Square table to blade. Re-align autostop<br />
and tilt indicator.<br />
Loosen trunnion bolts and re-align<br />
table.<br />
If pitch interferes with work, use flat<br />
washers or shims under table to raise<br />
low side.<br />
Loosen trunnion bolts and re-align<br />
table.<br />
Clean trunnions.<br />
Clean out sawdust from under insert.<br />
Place insert on flat, hard surface and<br />
tap with mallet to flatten. Or-replace<br />
insert.<br />
Tighten tilt lock.<br />
Tighten trunnion bolts.<br />
Page 41
SHOPSMITH 11” BANDSAW 555943<br />
Problem Possible Cause Solution<br />
Workpiece<br />
Workpiece is difficult to cut.<br />
Workpiece “burns” during<br />
cut.<br />
Accuracy of Cut<br />
Cut is not square or not at the<br />
indicated angle.<br />
Miter cut is not at the indicated<br />
angle.<br />
Blade wanders away from<br />
the pattern line.<br />
Page 42<br />
Blade clogged with pitch, dull, or worn.<br />
Workpiece too thick <strong>for</strong> blade being used.<br />
Stock dense and hard.<br />
Blade worn or dull.<br />
Letting blade dwell in one spot.<br />
Cutting corner too small <strong>for</strong> blade.<br />
Auto-stop or tilt indicator out of alignment.<br />
Miter gauge improperly aligned.<br />
Miter gauge slots not aligned with flat of blade.<br />
Workpiece slipped while cutting.<br />
Fence slipped during cut.<br />
Blade “leads”.<br />
Table not square to flat of blade.<br />
Blade guides not properly aligned.<br />
Knots or wood grain deflect blade.<br />
Blade “leads”.<br />
Cutting corner too tight <strong>for</strong> blade.<br />
Failure to guide work accurately.<br />
Clean, resharpen, or replace blade.<br />
Use wider blade.<br />
This is normal.<br />
Resharpen or replace blade.<br />
Keep workpiece moving.<br />
Make relief cuts or use narrower blade.<br />
Square table to blade. Re-align autostop<br />
and tilt indicator.<br />
Re-align miter gauge.<br />
Loosen trunnion bolts and re-align<br />
table.<br />
Hold workpiece securely.<br />
Be sure fence is locked in place. Use<br />
paper in miter slot to help hold fence.<br />
Adjust fence and feed stock at slight<br />
angle, hone blade to correct lead, or<br />
replace blade.<br />
Square table to blade. Re-align autostop<br />
and tilt indicator.<br />
Re-align blade guides.<br />
Feed stock more slowly.<br />
Feed stock at slight angle.<br />
Make relief cuts or use narrower blade.<br />
Take your time.
SHOPSMITH 11” BANDSAW 555943<br />
Problem Possible Cause Solution<br />
Quality of Cut<br />
Cut is rough.<br />
Inconsistent quality of cut.<br />
Cut is curved or “bowed”<br />
when resawing or cutting<br />
thick stock.<br />
Characteristics of blade being used.<br />
Cut is <strong>for</strong>ced.<br />
Blade guides not properly aligned.<br />
Blade bent or damaged in one spot.<br />
Grain pattern is not consistent in workpiece.<br />
Blade too narrow.<br />
Improper blade tension.<br />
Blade following internal grain pattern.<br />
Blade guides not properly aligned.<br />
Use blade with more teeth per inch.<br />
Feed stock more slowly.<br />
Re-align blade guides.<br />
Straighten or replace blade.<br />
Take your time, especially in hard<br />
dense parts of workpiece.<br />
Use wider blade.<br />
Increase tension to proper setting.<br />
Feed stock more slowly.<br />
Re-align blade guides.<br />
Page 43
<strong>Bandsaw</strong> 555943<br />
Customer Services:<br />
Where to write:<br />
- Send inquiries to:<br />
<strong>Shopsmith</strong>, Inc.<br />
Customer Services Department<br />
6530 Poe Avenue<br />
Dayton, Ohio 45414-2527<br />
Where to Call:<br />
<strong>Shopsmith</strong> maintains toll-free telephone numbers during normal business hours.<br />
- For technical service, call:<br />
1-800-762-7555 (Continental US, Hawaii, Alaska, Puerto Rico, and US Virgin Islands)<br />
1-937-898-6070 x-376 (Dayton OH area and Canada)<br />
- To place an order:<br />
1-800-543-7586 (Continental US, Hawaii, Alaska, Puerto Rico, and US Virgin Islands)<br />
1-937-898-6070 x-375 (Dayton OH area and Canada)<br />
1-800-722-3965 to Fax your order.<br />
Or visit our full service website and order on line, log onto www.shopsmith.com.<br />
Where to E-mail:<br />
- Send questions and inquires to:<br />
techsupport@shopsmith.com<br />
When you contact us, please tell us your Customer Number and Date Code of<br />
your equipment. (Your customer number appears on the invoice and mailing<br />
labels of the literature we send to you. The date code is located on the serial label<br />
sticker on your machine). To keep them handy, please write in the alloted spaces<br />
below.<br />
Customer No.<br />
Date Code:<br />
6530 Poe Avenue<br />
Dayton, Ohio 45414<br />
845539 Rev A 09/03<br />
©2003 <strong>Shopsmith</strong>, Inc.<br />
All Rights Reserved<br />
Printed In U.S.A.