

Edelbrock 1406 Carburetor Installation Instructions - Jegs
Edelbrock 1406 Carburetor Installation Instructions - Jegs
Edelbrock 1406 Carburetor Installation Instructions - Jegs

You also want an ePaper? Increase the reach of your titles
YUMPU automatically turns print PDFs into web optimized ePapers that Google loves.
1403-1413 Perf Series <strong>Carburetor</strong> Owner's Manual.qxd 3/31/2006 12:06 PM Page 1<br />
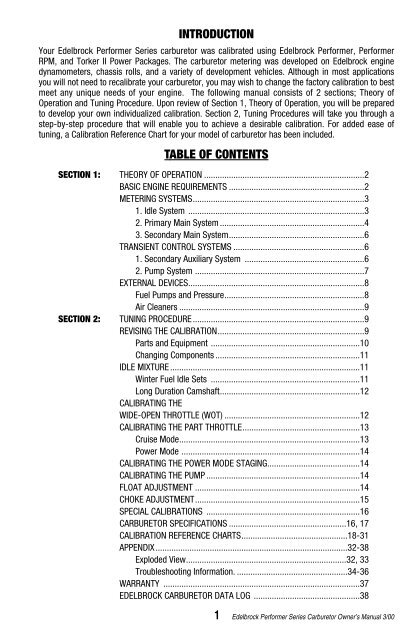
INTRODUCTION<br />
Your <strong>Edelbrock</strong> Performer Series carburetor was calibrated using <strong>Edelbrock</strong> Performer, Performer<br />
RPM, and Torker II Power Packages. The carburetor metering was developed on <strong>Edelbrock</strong> engine<br />
dynamometers, chassis rolls, and a variety of development vehicles. Although in most applications<br />
you will not need to recalibrate your carburetor, you may wish to change the factory calibration to best<br />
meet any unique needs of your engine. The following manual consists of 2 sections; Theory of<br />
Operation and Tuning Procedure. Upon review of Section 1, Theory of Operation, you will be prepared<br />
to develop your own individualized calibration. Section 2, Tuning Procedures will take you through a<br />
step-by-step procedure that will enable you to achieve a desirable calibration. For added ease of<br />
tuning, a Calibration Reference Chart for your model of carburetor has been included.<br />
TABLE OF CONTENTS<br />
SECTION 1: THEORY OF OPERATION .......................................................................2<br />
BASIC ENGINE REQUIREMENTS ............................................................2<br />
METERING SYSTEMS............................................................................3<br />
1. Idle System ..............................................................................3<br />
2. Primary Main System ................................................................4<br />
3. Secondary Main System............................................................6<br />
TRANSIENT CONTROL SYSTEMS ..........................................................6<br />
1. Secondary Auxiliary System .....................................................6<br />
2. Pump System ...........................................................................7<br />
EXTERNAL DEVICES..............................................................................8<br />
Fuel Pumps and Pressure..............................................................8<br />
Air Cleaners ..................................................................................9<br />
SECTION 2: TUNING PROCEDURE............................................................................9<br />
REVISING THE CALIBRATION.................................................................9<br />
Parts and Equipment ..................................................................10<br />
Changing Components ................................................................11<br />
IDLE MIXTURE ....................................................................................11<br />
Winter Fuel Idle Sets ..................................................................11<br />
Long Duration Camshaft..............................................................12<br />
CALIBRATING THE<br />
WIDE-OPEN THROTTLE (WOT) ............................................................12<br />
CALIBRATING THE PART THROTTLE....................................................13<br />
Cruise Mode................................................................................13<br />
Power Mode ...............................................................................14<br />
CALIBRATING THE POWER MODE STAGING.........................................14<br />
CALIBRATING THE PUMP ....................................................................14<br />
FLOAT ADJUSTMENT .........................................................................14<br />
CHOKE ADJUSTMENT.........................................................................15<br />
SPECIAL CALIBRATIONS ....................................................................16<br />
CARBURETOR SPECIFICATIONS ....................................................16, 17<br />
CALIBRATION REFERENCE CHARTS...............................................18-31<br />
APPENDIX.....................................................................................32-38<br />
Exploded View.......................................................................32, 33<br />
Troubleshooting Information. .................................................34-36<br />
WARRANTY .......................................................................................37<br />
EDELBROCK CARBURETOR DATA LOG ...............................................38<br />
1 <strong>Edelbrock</strong> Performer Series <strong>Carburetor</strong> Owner’s Manual 3/00
1403-1413 Perf Series <strong>Carburetor</strong> Owner's Manual.qxd 3/31/2006 12:06 PM Page 2<br />
BASIC ENGINE REQUIREMENTS<br />
SECTION 1: THEORY OF OPERATION<br />
The spark-ignition 4-cycle engine burns a mixture of AIR and FUEL. The air is controlled by the<br />
driver’s operation of the throttle. The fuel is mixed with the incoming air by the carburetor. The Ratio<br />
of AIR to FUEL is the AIR/FUEL Ratio (A/F). This is a ratio by WEIGHT; if 12 pounds of Air are combined<br />
with 1 pound of Fuel the A/F is 12:1, or more commonly, A/F = 12.<br />
Despite the enormous variety in engine designs, virtually all (spark-ignition 4-Cycle) engines have<br />
very similar A/F Ratio requirements. For fully warmed-up engines, the range of A/F is:<br />
A/F RATIO CHARACTERISTICS<br />
5 RICH BURN LIMIT: Combustion is weak/erratic.<br />
6-9 EXTREMELY RICH: Black smoke and low power.<br />
10-11 VERY RICH: Some supercharged engines run in this range at full power as a<br />
means of controlling detonation.<br />
12-13 RICH: Best power A/F: Un-supercharged WOT.<br />
14-15 CHEMICALLY IDEAL: At 14.6 the A/F is at the theoretical ideal ratio with no<br />
excess fuel or oxygen after combustion. Good A/F for part<br />
throttle cruise and light to moderate acceleration.<br />
16-17 LEAN: Best economy A/F ratio. Borderline for part throttle<br />
drivability (worse than borderline if EGR is used).<br />
18-19 VERY LEAN: Usual lean limit (Driveability).<br />
20-25 LEAN BURN LIMIT: Varies with engine and system.<br />
Even though engines will run anywhere between 5 and 25 A/F, the usual target values for an unsupercharged<br />
engine are a fairly narrow range (Figure 1). A/F is about 12.5 for the WOT and 14.0-<br />
15.5 at part-throttle cruise. An intermediate value of about 13.5-14.0 is usually used for mid-range<br />
power (non-WOT acceleration).<br />
2 <strong>Edelbrock</strong> Performer Series <strong>Carburetor</strong> Owner’s Manual 8/94
1403-1413 Perf Series <strong>Carburetor</strong> Owner's Manual.qxd 3/31/2006 12:06 PM Page 3<br />
METERING SYSTEMS<br />
The <strong>Edelbrock</strong> carburetor has three (3) basic systems that meter fuel to the engine: The Idle System,<br />
Primary Main System, and Secondary Main System. By understanding the operation of each you will<br />
be better prepared to calibrate your carburetor.<br />
Idle System: The Idle System delivers 100% of the idle fuel. It also meters fuel at off-idle throttle<br />
positions; a large percentage at just off of idle decreasing to a minor influence as the throttle is<br />
opened wider. The idle setting is critical both to a smooth idle at proper rpm and to a smooth<br />
transition to part-throttle operation.<br />
(1) Main Jet and<br />
Metering Rod<br />
Idle System<br />
Figure 2<br />
Lean 17.0<br />
A<br />
/<br />
F<br />
R<br />
A<br />
T<br />
I<br />
O<br />
16.0<br />
15.0<br />
14.0<br />
13.0<br />
12.0<br />
11.0<br />
X<br />
Idle<br />
(4) 1st Idle Air Bleed<br />
(2) Primary Well<br />
Part-throttle cruise<br />
Part-throttle acceleration<br />
Wide open throttle<br />
Rich 10.0<br />
0 1000 2000 3000 4000 5000 6000 7000 8000 9000<br />
Engine RPM<br />
Typical Engine A/F Ratios<br />
Figure 1<br />
(5) Idle Channel Restrictor<br />
(6) 2nd Idle Air-Bleed<br />
(3) Idle Jet<br />
(7) Transfer Slot<br />
(8) Idle<br />
Screw<br />
Port<br />
3 <strong>Edelbrock</strong> Performer Series <strong>Carburetor</strong> Owner’s Manual 8/94
1403-1413 Perf Series <strong>Carburetor</strong> Owner's Manual.qxd 3/31/2006 12:06 PM Page 4<br />
Fuel is drawn through the Idle System (Figure 2) by the intake manifold vacuum that is<br />
communicated at the Idle Screw Port (8) and Transfer Slot (7). Fuel in the bowl passes through the<br />
Primary Main Jet and Metering Rod Restriction (1) and into the Primary Well (2). The fuel for the Idle<br />
System is drawn through the restriction at the end of the Idle Jet (3) - a brass tube - and flows up the<br />
tube to the location of the 1st Idle Air Bleed (4) - a brass restrictor - where air is mixed with the liquid<br />
fuel. The emulsified air and fuel is then drawn through the Idle Channel Restrictor (5) - a drilled passage<br />
that serves to increase the velocity of the air and fuel to promote better mixing. As the emulsified fuel is<br />
discharged from the Idle Channel Restrictor, additional air is added at the 2nd Idle Air Bleed (6) - a drilled<br />
hole - and the highly aerated mixture then moves through the passages in the main-body to the location<br />
of the Transfer Slot (7) and Idle Screw Port (8). The Transfer Slot (7) is a large air bleed when the throttle<br />
is closed, but as the throttle is opened the slot is exposed to manifold vacuum and becomes a discharge<br />
port for Idle System fuel. The Idle Screw Port is a variable discharge restriction that is adjusted by the<br />
engine tuner to achieve the desired A/F Ratio at engine idle.<br />
Primary Main System: The Primary Main system delivers an increasing percentage of the fuel as<br />
throttle position increases (phasing over the Idle System) and varies fuel delivery in response to air flow<br />
and manifold vacuum.<br />
Fuel is drawn through the Main System (Figure 3) by the pressure-drop that occurs when the incoming<br />
air flow must increase in velocity in order to pass the reduced throat areas at the Main Venturi (1) and the<br />
Boost Venturi (2). This pressure-drop (or suction) is communicated to the system by the Nozzle (3)-a<br />
brass tube that opens into the inside of the Booster Venturi (2).<br />
The fuel must pass through the restriction at the Main Jet (4) and Metering Rod (5). The Rod extends<br />
through the Jet, reducing the amount of area available for fuel flow. If the diameter of the Rod is large,<br />
then fuel flow through the Jet is more restricted than if the Rod were small.<br />
After the Rod and Jet, the fuel enters the Primary Well and is drawn up the inside of the Primary Well<br />
Tube (6). Sometimes this tube is called an Emulsion Tube. Here, the fuel is mixed with air that enters the<br />
inside of the Tube through a series of small holes. The air is supplied by the Main Well Bleed (7) at the<br />
top of the Main Well. The air/fuel mixture exits from the top of the Main Well into a passage that leads it<br />
to discharge into the Booster Venturi (2) at the Nozzle (3).<br />
(2) Boost<br />
Venturi<br />
(1) Main<br />
Venturi<br />
(6) Primary<br />
Well<br />
Tube<br />
Primary Main<br />
System<br />
Figure 3<br />
(3) Nozzle<br />
(7) Main<br />
Well<br />
Bleed<br />
(8) Vacuum<br />
Passage<br />
(9) Step-Up<br />
Piston<br />
(10) Step-Up<br />
Piston Spring<br />
(5) Metering Rod<br />
(4) Main Jet (primary)<br />
4 <strong>Edelbrock</strong> Performer Series <strong>Carburetor</strong> Owner’s Manual 8/94
1403-1413 Perf Series <strong>Carburetor</strong> Owner's Manual.qxd 3/31/2006 12:06 PM Page 5<br />
The fuel flow rate in the Main System is proportional to the air flow rate; as air flow increases - from<br />
either an increase in throttle opening or an increase in engine speed at the same throttle opening -<br />
the fuel flow also increases by nearly the same degree.<br />
At higher engine loads, such as in a heavy part-throttle acceleration, there is a need for a richer<br />
mixture. This enrichment is provided by the Metering Rod and Step-Up Function (Figure 4). A vacuum<br />
passage (8) communicates the manifold vacuum to the underside of the Step-Up Piston (9). This<br />
vacuum tries to hold the Piston in the bottom of its bore by working against the force of the Step-Up<br />
Spring (10).<br />
When the manifold vacuum is high, indicating a low load such as idle, cruise, or light acceleration, it<br />
is able to overcome the force of the Step-Up Spring and hold the Step-Up Piston at the bottom of its<br />
bore, which also positions the Metering Rod at the bottom of its travel. At this point, the Rod has a<br />
large diameter that creates a high restriction through the Jet and the fairly lean A/F Ratio that is<br />
desirable for low load/low power operation. This portion of the Metering Rod is referred to as the<br />
“Lean Step” of the Rod.<br />
When the manifold vacuum is low, indicating a high load such as a heavy part-throttle (or WOT)<br />
acceleration, the Step-Up Spring is able to force the Piston to the top of its bore and position the<br />
Metering Rod at the top of its travel. This action is called “Power Mode Staging”. The portion of the<br />
rod now located in the jet has a smaller diameter, thus the restriction through the Jet is reduced and a<br />
rich A/F Ratio is provided for high load/high power operating conditions. This is the “Rich Step” of the<br />
Rod.<br />
ROD DOWN: Lean A/F Ratio HIGH LOAD: Low Vacuum<br />
LEAN STEP In Jet<br />
Step-Up Piston<br />
Step-Up Spring<br />
Metering Rod<br />
Main Jet<br />
LOW LOAD: High Vacuum ROD UP: Rich A/F Ratio<br />
Metering Rod and Step-Up Function<br />
Figure 4<br />
RICH STEP In Jet<br />
5 <strong>Edelbrock</strong> Performer Series <strong>Carburetor</strong> Owner’s Manual 8/94
1403-1413 Perf Series <strong>Carburetor</strong> Owner's Manual.qxd 3/31/2006 12:06 PM Page 6<br />
Secondary Main System: The Secondary Main System (Figure 5) delivers fuel only when the<br />
secondary throttle blades and air valve are open. It ensures that fuel delivery varies with air flow.<br />
The Secondary Throttles (1) begin to open when the Primaries are about 65% open. The Primary and<br />
Secondary Throttles arrive at the WOT stop at the same time.<br />
Air flow through the Secondary side is controlled by Air Valves (2). These valves are located in the<br />
secondary bores above the throttle blades. They are balanced against a counter weight and open to<br />
admit additional air flow only if there is enough air velocity to allow the proper operation of the<br />
Secondary Metering Systems.<br />
The principles of operation for the Secondary Main System are the same as those that govern the<br />
operation of the Primary Main System; the pressure drop (suction) arises from the increase in the airs<br />
velocity as it passes through the Venturi sections. The pressure drop (suction) at the Secondary<br />
Booster Venturi (3) is communicated into the system by the Secondary Nozzle (4).<br />
Fuel flows through the Secondary Main Jet (5) to the Secondary Well where it is drawn through the<br />
Secondary Well Tube (6). The fuel is mixed with air that enters the tube through a series of small<br />
holes. The source of the air is one of the Secondary Well Bleeds (7). There are two air-bleeds; one<br />
admits air to the outside of the Well Tube and the other allows air to flow into the passage behind the<br />
Nozzle. The fuel, now well mixed with air, flows through the slightly up-hill passage and exits into the<br />
Secondary Boost Venturi (3) through the Secondary Nozzle (4).<br />
Secondary Main<br />
Systems<br />
Figure 5<br />
TRANSIENT CONTROL SYSTEMS<br />
(6) Secondary<br />
Well Tube<br />
(5) Secondary<br />
Main Jet<br />
(7) Secondary<br />
Well Bleeds<br />
(2 bleeds)<br />
(1) Secondary<br />
Throttle<br />
(4) Secondary<br />
Nozzle<br />
(2) Air<br />
Valve<br />
(3) Secondary<br />
Boost<br />
Venturi<br />
In addition to the three (3) basic Metering Systems, there are two (2) Transient Control Systems; The<br />
Secondary Auxiliary System and The Pump System.<br />
Secondary Auxiliary System<br />
During the initial stages of Secondary Operation, the air flow rate through the secondaries is very low.<br />
Accordingly, there is not enough pressure drop (suction) at the Secondary Nozzle to induce fuel flow.<br />
In order to prevent a lean A/F condition that would be experienced by the driver as a<br />
6 <strong>Edelbrock</strong> Performer Series <strong>Carburetor</strong> Owner’s Manual 8/94
1403-1413 Perf Series <strong>Carburetor</strong> Owner's Manual.qxd 3/31/2006 12:06 PM Page 7<br />
“bog” or “flat spot” on secondary opening, it is necessary to add fuel by an auxiliary means during the<br />
time the secondary is in the transient phase.<br />
This is accomplished by placing a small Discharge Nozzle (2) at a point just under the Air Valve (1).<br />
The air flow past the edge of the Air Valve creates sufficient pressure drop to pull fuel out of the<br />
Auxiliary System. The fuel must first pass through the Secondary Main Jet (3) to the Secondary Well; it<br />
is then drawn through the Auxiliary Fuel Tube (4) and exits at the Discharge Nozzle (2). There is<br />
always an air-bleed, either in the Auxiliary Fuel Tube (near the top), or as a separate brass restriction<br />
bushing (shown).<br />
The flow of fuel in the Auxiliary System is enough to prevent a lean transient on Secondary opening.<br />
As the Air Valve is opened further by increasing air flow, the fuel flow through this system decreases.<br />
Correspondingly, the fuel flow in the Secondary Main System increases, providing a near constant A/F<br />
Ratio.<br />
(2) Discharge<br />
Nozzle<br />
(3) Secondary<br />
Main Jet<br />
(4) Auxiliary<br />
Fuel Tube<br />
(5) Air-Bleed<br />
(some PNs)<br />
Secondary Auxiliary System<br />
Figure 6<br />
(1) Air Valve<br />
Pump System<br />
When the throttle is opened rapidly, the air flow through the engine will increase immediately. The<br />
fuel, since it is much heavier than the air, will “lag” behind. This contributes to a temporary lean A/F<br />
condition. Regardless of cause, a solution is to temporarily enrichen the A/F Ratio by mechanically<br />
pumping a small quantity of fuel into the throat of the carburetor (Figure 7). The <strong>Edelbrock</strong> carburetor<br />
has a piston that draws fuel into the pump cavity past the plunger lip-seal when the throttle is closing<br />
(1). Upon opening, the lip-seal seats, allowing the plunger to force the fuel through another one-way<br />
valve, the Pump Discharge Ball and Weight (2), and the Pump Jets (3) into the primary throats.<br />
7 <strong>Edelbrock</strong> Performer Series <strong>Carburetor</strong> Owner’s Manual 8/94
1403-1413 Perf Series <strong>Carburetor</strong> Owner's Manual.qxd 3/31/2006 12:06 PM Page 8<br />
The pump plunger is not driven directly by the throttle, but through an intermediate Pump Drive Spring<br />
(4) that extends the duration of the “pump shot” past the time the throttle stops moving. The<br />
<strong>Edelbrock</strong> Performer Series carburetor has an external pump lever with three hole locations for link<br />
attachment providing three distinct pump delivery curves. This is further explained in “Calibrating The<br />
Pump”.<br />
Pump<br />
System<br />
Figure 7<br />
EXTERNAL DEVICES<br />
(3) Pump Jets<br />
(2) Pump Discharge Ball & Weight<br />
(4) Pump Drive Spring<br />
(1) Inlet Check<br />
(Lip Seal)<br />
The function of your <strong>Edelbrock</strong> Performer Series carburetor is also dependent on several external<br />
devices; the fuel pump and air cleaner.<br />
Fuel Pumps and Pressure<br />
Avoid extremes in fuel pressure. At IDLE, there should not be any more than 6.0 psi; if the vehicle has<br />
an adjustable fuel-pressure regulator, set it to 5.5 psi. With most fuel pumps the minimum fuel<br />
pressure is encountered at high rpm and WOT. Fuel pressure should not drop below 2.0 psi. If it does,<br />
a fuel pump with more capacity may be required. Note that some later model vehicles (the 5.0L Ford<br />
is one example) have mechanical pumps that will give more than 6.0 psi at idle. The vehicle will<br />
perform well, but may be prone to stalls on quick turns and stops with the clutch disengaged. If this<br />
problem occurs, check the fuel pressure. If it is more than 6.0 psi at IDLE, it should be reduced<br />
through the use of a regulator, such as <strong>Edelbrock</strong> #8190, or by creating a restricted by-pass bleed to<br />
the fuel return line. <strong>Edelbrock</strong> Street Fuel Pumps are highly recommended for all <strong>Edelbrock</strong> Performer<br />
Series carburetor installations.<br />
Always use a filter, such as <strong>Edelbrock</strong> #8873 between the pump and carburetor. Note that a good<br />
filter is large in area, so it may be able to transmit a significant amount of heat to the fuel. It is a good<br />
practice to keep the filter away from heat and not allow it to come in contact with any part of the<br />
engine.<br />
8 <strong>Edelbrock</strong> Performer Series <strong>Carburetor</strong> Owner’s Manual 8/94
1403-1413 Perf Series <strong>Carburetor</strong> Owner's Manual.qxd 3/31/2006 12:06 PM Page 9<br />
Air Cleaners<br />
Your <strong>Edelbrock</strong> carburetor was originally calibrated with a low restriction open element air cleaner<br />
configuration; a 14”x3” <strong>Edelbrock</strong> Signature Series unit. It was also evaluated for proper metering and<br />
vehicle performance using a variety of other air cleaner designs and will perform as intended with<br />
nearly any reasonable air cleaner design. While the <strong>Edelbrock</strong> Performer Series carburetor does not<br />
exhibit excessive sensitivity to the air cleaner, there are several guidelines you should follow when<br />
selecting an air cleaner:<br />
Running without an air cleaner is strongly discouraged for a street-driven vehicle. Dirt and<br />
varnish will accumulate in critical bleeds and upset the fuel metering. Dirt and debris may easily<br />
get into the fuel bowl through the bowl vents or larger bleeds and cause a multitude of<br />
problems.<br />
Any calibration testing should be performed with the air cleaner in place. Depending upon the air<br />
cleaner used, the metering typically will be leaner with the air cleaner in place.<br />
— A large 14”x3” open element air cleaner, such as <strong>Edelbrock</strong> Elite Series, Signature Series and<br />
Pro-Flo air cleaners, offers almost no resistance to air flow. Flow bench results show virtually no<br />
reduction in air flow. Also, this design should cause no change to the fuel metering.<br />
— A 10”x2” open element design will result in some definite air flow restriction but little change to<br />
the fuel metering.<br />
— Elements smaller than 10”x2” are more restrictive and have the most effect upon<br />
metering. The fuel metering at WOT will be shifted LEANER, especially at higher rpm ranges.<br />
If you have a dual-purpose vehicle that is sometimes used in competition without an air cleaner,<br />
it may be necessary to have two separate calibrations. If you are running a smaller air cleaner<br />
and have optimized the WOT with it in place, do not be surprised to find that the metering shifts<br />
RICHER when the air cleaner is removed. This may require you to calibrate the WOT with leaner<br />
Jets and Rods at the drag strip.<br />
DO NOT allow the vehicle air-stream to blow across the top of the carburetor(s) such as on an<br />
open-bodied car or full-bodied vehicle with a tunnel-ram manifold. The flow of air across the<br />
carburetor will result in an upset to the fuel metering that cannot be accommodated by<br />
recalibration since the change to the A/F Ratio will be different for every vehicle speed.<br />
SECTION 2 : TUNING PROCEDURE<br />
Before proceeding please ensure you have installed your <strong>Edelbrock</strong> Performer Series<br />
<strong>Carburetor</strong> according to the <strong>Carburetor</strong> <strong>Installation</strong> <strong>Instructions</strong> included with the carburetor<br />
REVISING THE CALIBRATION<br />
The <strong>Edelbrock</strong> Performer Series <strong>Carburetor</strong> is designed to allow quick and easy changes to the<br />
metering. Virtually any change imaginable can be performed without removing the carburetor from<br />
the manifold, and the most common changes may be performed in less than five minutes without<br />
removal of the airhorn (bowl cover).<br />
9 <strong>Edelbrock</strong> Performer Series <strong>Carburetor</strong> Owner’s Manual 8/94
1403-1413 Perf Series <strong>Carburetor</strong> Owner's Manual.qxd 3/31/2006 12:06 PM Page 10<br />
To help you calibrate your carburetor, a CALIBRATION REFERENCE CHART has been designed for each<br />
model of the <strong>Edelbrock</strong> Performer Series carburetor. These charts (pages 18—31) each consist of two<br />
sections: A Calibration Table and a Rod/Jet Reference Chart.<br />
After reading the Calibration procedures, the next step in calibrating your carburetor is to look at the<br />
Calibration Table for your model carburetor. Determine if you would like to go richer or leaner in the<br />
Cruise Mode and do the same for the Power Mode. Select the number that is closest to intersection of<br />
your Cruise and Power Mode selections. This is your calibration reference number. Now refer to the<br />
Rod/Jet Reference Chart that appears on the opposing page. Locate your calibration reference<br />
number to determine the rod/jet combination for your application.<br />
For example, you have a 1405 <strong>Edelbrock</strong> Performer Series carburetor. You have determined (by<br />
reading the rest of the manual) you would like to go 1 stage lean in the Cruise Mode and 2 stages lean<br />
in the Power Mode. The intersection of these two lines lies on the number 21. This is your calibration<br />
reference number. Now look below the Calibration Table to the Rod/Jet Reference Chart. Find the<br />
number 21 under the REF# column. The jets you should use are .098 and the rods are .070 x .052.<br />
Located at the very bottom of each Calibration Reference Chart is a guide for changing your<br />
Secondary Metering. This will be useful when calibrating the wide-open-throttle (WOT).<br />
Before you attempt to establish a new calibration, be sure that the engine is in a sound state of tune.<br />
All ignition items must be in proper working order, including reasonably fresh plugs of the correct heat<br />
range. Timing should be properly set and the air filter element and fuel filter should be clean.<br />
Proper fuel pressure should be verified and cracked or brittle vacuum lines should be<br />
eliminated. Many so-called “carburetor calibration” problems have been traced to another part of the<br />
engine system that was not functioning properly.<br />
CAUTION: Be alert to carburetor flooding when fuel is first applied. Flooding can be caused by dirt,<br />
small particles of hose cuttings, floats and inlet needles which have settled during shipping, or<br />
by other conditions as discussed below. Each <strong>Edelbrock</strong> Performer Series carburetor is flow<br />
tested in the factory for both air and liquid flow so flooding is rare. However, for safety sake<br />
please observe this caution. When the fuel pump is turned on or when the engine is first started,<br />
watch closely for signs of flooding. If flooding is apparent, tap the body of the carburetor lightly<br />
with a rawhide mallet or the wooden handle of a small hammer. If flooding continues, pinch the<br />
fuel line hose to shut off flow, run the engine to clear the carburetor, and let the fuel line flow<br />
again. If flooding continues, pinch the fuel line hose to shut off flow, run the engine to clear the<br />
carburetor, and let the fuel line flow again. If flooding still continues, stop the engine. Clean up<br />
any raw gasoline and refer to the “Trouble Shooting” section of the Owner’s Manual.<br />
Parts and Equipment —<br />
Aside from ordinary hand tools, the following items are recommended.<br />
<strong>Edelbrock</strong> Performer Series <strong>Carburetor</strong> Jet Set - Contains selections of Main Jets,<br />
Metering Rods, and Springs.<br />
Tachometer - If the vehicle is not equipped with a tach, the dwell meter style tach will<br />
be adequate. If neither is available, you will be able to use the speedometer in place<br />
of the tach for some of the procedures, but it will not be as convenient.<br />
Vacuum Gauge - Should be hooked up to read engine’s intake manifold vacuum.<br />
Without a vacuum gauge, some of the calibration procedures will be more difficult.<br />
10 <strong>Edelbrock</strong> Performer Series <strong>Carburetor</strong> Owner’s Manual 9/01
1403-1413 Perf Series <strong>Carburetor</strong> Owner's Manual.qxd 3/31/2006 12:06 PM Page 11<br />
Changing Components<br />
Metering Rod and Step-Up Spring changes can typically be made in less than five minutes and<br />
without removing the carburetor. First, loosen the Step-Up Piston Cover Screws (See pg. 32) and twist<br />
the Step-Up Piston Cover Plates to the side. The Metering Rods and Step-Up Springs can now be<br />
removed and replaced if necessary. Be sure to replace the Step-Up Piston Cover Plate and tighten the<br />
Step-Up Piston Cover Screw when finished. CAUTION: Do not overtighten the Step-Up Piston<br />
Cover Screws! They should only be tightened to 12 to 17 inch/pounds. Excessive torque will<br />
weaken or snap off the screw heads. If this happens, they may fall into the carb causing serious<br />
engine damage. If an inch/pound torque wrench is not available, snug the screw until it just touches<br />
the plate, then tighten 1/16th turn more.<br />
To replace the Primary or Secondary Metering Jets, first, remove the Metering Rods and Step-Up<br />
Springs as outlined in the preceding paragraph. Next, disconnect the Choke Cam Connector Rod,<br />
Pump Connector Rod, and Choke Connector Rod (when applicable). Finally, remove the 8 Airhorn<br />
Attaching Screws and remove the Airhorn from the carburetor body. A standard screwdriver can now<br />
be used to remove the appropriate Metering Jets. Once desired Metering Jets have been installed the<br />
carb may be reassembled by reversing this procedure.<br />
IDLE MIXTURE<br />
The <strong>Edelbrock</strong> Performer Series carburetor has conventional Idle Mixture Screws (IMS) that provide a<br />
leaner A/F when turned clockwise and richer A/F when turned counter clockwise. The idle air flow is<br />
controlled by a conventional screw that opens the Primary Throttles. The following procedure should<br />
be used to set the idle mixture and speeds.<br />
1. Fully warm engine and ensure choke is fully open.<br />
2. Air cleaner in place.<br />
3. Set desired speed with the air screw.<br />
4. Adjust the IMS on ONE side to get the maximum possible RPM. Do not go rich<br />
beyond the maximum speed point.<br />
5. If the above changed the idle speed more than 40 RPM, then readjust the speed.<br />
6. Adjust the side OPPOSITE of that in Step 4 to get maximum RPM.<br />
7. Reset the speed.<br />
8. Carefully trim each IMS to again get the maximum idle RPM.<br />
9. Go leaner just enough to get a 20 RPM drop in speed.<br />
10. Reset the speed to the desired RPM.<br />
11. This is a Lean-Best Idle Set. Setting richer than this will not improve idle quality or<br />
performance, but could tend to foul plugs.<br />
Winter Fuel Idle Sets<br />
During the winter months (in most parts of the country) the local fuel will be a “winter” blend that is<br />
very volatile, as an assist to cold-engine starting and driveability during warm-up. However, the high<br />
volatility has the disadvantage of allowing excessive vaporization of the fuel if the vehicle is operated<br />
in a heated area such as a garage. This can result in problems in the idle-set procedures since the<br />
carburetor’s internal vents will allow this excess vapor to be drawn into the throats and enrichen the<br />
mixture. The idle will be erratic and not seem to be able to hold a set. To resolve this type of problem,<br />
it is advisable to perform the final settings outdoors after the vehicle has been stabilized with a drive<br />
of several miles.<br />
11 <strong>Edelbrock</strong> Performer Series <strong>Carburetor</strong> Owner’s Manual 9/01
1403-1413 Perf Series <strong>Carburetor</strong> Owner's Manual.qxd 3/31/2006 12:06 PM Page 12<br />
Long Duration Camshaft<br />
If the engine has a fairly radical camshaft it may require an excessive amount of throttle<br />
opening for idle and/or have low idle vacuum levels. Either condition can lead to poor levels of<br />
adjustability and erratic idles.<br />
Another fix for the above condition is to run as much spark advance as possible at idle. If the<br />
distributor is fitted with a vacuum advance unit, connect it directly to manifold vacuum. If you<br />
are not able to employ vacuum advance for some reason, then the mechanical curve should<br />
have a low limit, which will allow you to use plenty of initial spark advance.<br />
Measure the manifold vacuum at idle. If it is below 7” Hg, there is a good chance that the<br />
Metering Rods are in the up (rich) position. When combined with a high idle air rate this can<br />
cause the Nozzles to discharge fuel at idle. Use a weaker Step-Up Spring (see section on Step-<br />
Up calibration) to keep the Rods down at idle. With some cams, a stiffer spring (pink or silver) is<br />
necessary. Experimentation is the best way to determine which is best for your application.<br />
CALIBRATING THE WIDE-OPEN-THROTTLE (WOT)<br />
The best place to perform your WOT calibration is on a chassis dyno. If one is not available then<br />
consider a safe, legal driving space, such as a drag strip where you are given E.T. and MPH data.<br />
1. Select an RPM Range to use in evaluating the WOT power. As a rule, use the highest 50<br />
percent of the real power band. If your engine makes good power up to 5000 RPM, then<br />
2500-5000 is a good range. If peak power is at 6500, then 3500-6500 would be a good<br />
pick. Be sure not to select RPMs that are higher than the engine’s useful power band.<br />
2. Accelerate at WOT from 1000 RPM below the range you have elected to a few hundred over<br />
the range. Time the acceleration with a stop-watch. Be sure to time only the interval while<br />
the engine is sweeping through the selected range. Make enough timed accelerations to get<br />
a good average that is not affected by wind or grade.<br />
3. Refer to the Calibration Reference Chart for your model. Find the richest Power Mode<br />
(Primary Metering) change you can make without changing a Jet — a Rod change only.<br />
This will probably be 2 stages (8%) rich.<br />
4. Change to the indicated Rods. Perform timed acceleration #2. Compare the times. Do not be<br />
surprised if there is no difference.<br />
5. Compare the results of timed acceleration #2 to the base calibration and refer to the<br />
following section that best describes your situation:<br />
Case 1: Faster than base calibration<br />
Change Secondaries 2 stages richer and perform acceleration test #3.<br />
If test #3 is the same as #2, you’re done.<br />
If test #3 is slower than #2, change to 1 stage rich for the Primary and Secondary and you’re<br />
done.<br />
If test #3 is still faster than #2, go to 3 stages rich Primary and Secondary and keep going richer<br />
until there is no change (or slower) in the times. Stay at the first “no change” level, so that you<br />
stay with the richer of any two levels of calibration that have the same power.<br />
12 <strong>Edelbrock</strong> Performer Series <strong>Carburetor</strong> Owner’s Manual 8/94
1403-1413 Perf Series <strong>Carburetor</strong> Owner's Manual.qxd 3/31/2006 12:06 PM Page 13<br />
Case 2: Slower than base calibration<br />
Go to 1 stage lean Primaries and 1 lean Secondaries and perform acceleration test #3.<br />
If test #3 is the same as base calibration, go back to the base calibration.<br />
If test #3 is faster than base calibration, go to 2 stages lean on both the Primaries and the<br />
Secondaries. Keep going in the lean direction until there is no change or slower then back up 1<br />
stage richer, so that you stay with the richer of any two levels of calibration that have the same<br />
power.<br />
Case 3: Same as base calibration<br />
Do not be surprised. Change back to base calibration.<br />
CALIBRATING THE PART-THROTTLE<br />
The Metering Rod feature used in the <strong>Edelbrock</strong> Performer allows easy calibration of the part-throttle<br />
without change to the WOT metering.<br />
Cruise Mode: The power output is low, as in a steady cruise light acceleration. Manifold Vacuum<br />
is high and the Metering Rods are down in the lean position.<br />
Power Mode: The power output is high, as in a heavy but not wide-open acceleration. Manifold<br />
Vacuum is low and the Rods are up in the rich position.<br />
As explained in the “Theory of Operation,” the Step-Up function modulates the Rods between the<br />
Cruise and Power positions.<br />
The part-throttle calibration is more “individualized” than is the Wide-Open-Throttle (WOT). It is not<br />
measured by absolute numbers, but reflects the driver’s feel for a particular<br />
combination.<br />
Carefully evaluate the driveability with the carburetor at the calibration level determined from the WOT<br />
exercise. Drive at a variety of engine speeds and throttle openings looking for any flat spots or<br />
lean/surge conditions.<br />
Cruise Mode<br />
If there are any surge or flat spot conditions in the steady speed cruises or light accelerations, a lean<br />
condition probably exists. Consult the Calibration Reference Chart and change to 1 stage rich in the<br />
Cruise Mode. If it gets better, but not completely fixed, keep going in the rich direction. The<br />
Calibration Reference Chart will give you Rod and Jet combinations that are directionally correct or<br />
you may choose your own.<br />
If the light throttle is satisfactory, trying going 1 stage lean in the Cruise Mode. If there are still no<br />
problems with surge or other indications of lean metering, do not hesitate to go to 2 stages lean in the<br />
Cruise Mode. A lean Cruise Mode has advantages in fuel economy and keeping the plugs clean. Keep<br />
going until you begin to notice driveability problems and then back up 1 stage.<br />
Power Mode<br />
Accelerations at part-throttle with low manifold vacuum (less than about 5” Hg on a vacuum gauge)<br />
are metered by the Power Mode. Avoid calibrating this portion of the engine’s<br />
operating range too lean as spark knock (detonation) and piston/valve burning can occur. If this mode<br />
has any lean driveability symptoms (surge or flat spots), it is too lean and should be recalibrated at<br />
least 1 stage richer.<br />
13 <strong>Edelbrock</strong> Performer Series <strong>Carburetor</strong> Owner’s Manual 8/94
1403-1413 Perf Series <strong>Carburetor</strong> Owner's Manual.qxd 3/31/2006 12:06 PM Page 14<br />
CALIBRATING THE POWER MODE STAGING<br />
The Step-Up function, which moves the Metering Rod to the Power Mode, is controlled by the Step-Up<br />
Spring. The base calibration has a spring which “stages” rich at 5” Hg.<br />
If your vehicle has a mid-throttle driveability problem that is encountered as the throttle is gradually<br />
opened, but then goes away upon further opening, it may be possible to eliminate the lean spot by<br />
using a stronger Step-Up Spring. The available Step-Up Springs are listed in the following chart along<br />
with their respective “staging” point. It is best to select a new spring on the basis of vacuum<br />
readings, but in the absence of a gauge, try the strongest spring (highest vacuum rating) to see if the<br />
problem goes away. If the drive problem is cured by the strong spring, try the next weakest spring as<br />
well. If the strong one does not help, then the calibration problem is related to the A/F metering stage<br />
of either the Cruise or Power Modes. Use the Calibration Reference Chart to help select another<br />
combination.<br />
Spring Color Blue Yellow Orange Pink Plain<br />
Staging Vacuum<br />
("Hg)<br />
3" 4" 5" 7" 8"<br />
A complete set of these springs is available separately as <strong>Edelbrock</strong> part #1464.<br />
CALIBRATING THE PUMP<br />
If you encounter any hesitations or stumbles that do not seem to be related to the basic metering or<br />
have not responded to changes in the basic metering, move the pump drive link to one of the holes<br />
closer to the carburetor body. This will increase the stroke length of the plunger and result in more<br />
pump delivery.<br />
FLOAT ADJUSTMENT<br />
To properly adjust the floats in the EPS carburetor, two procedures must be followed. First, invert the<br />
airhorn cover (Figure 8) holding the airhorn gasket in place. There should be 7/16” between the<br />
airhorn gasket and the top of the outer end of the float. To adjust the float level, bend the float lever<br />
until the recommended level is attained. DO NOT press the needle into the seat when adjusting the<br />
float lever. Next, you should check the float drop (Figure 9). Hold the airhorn upright and let the floats<br />
hang down. There should be 15/16" to 1" between the airhorn gasket and the top of the outer end of<br />
the float. To adjust the float drop, bend the tab on the back until the recommended float drop is<br />
attained. For the off-road float adjustment, see page 16.<br />
CHOKE ADJUSTMENT<br />
To adjust the choke piston linkage (Figure 10) open the choke valve and insert a .026” wire, with a 90<br />
degree bend 1/8” from the end, between the top of the slot in the choke piston cylinder and the<br />
bottom of the slot in the piston. Hold the wire in position and close the choke valve by pressing on<br />
piston lever A until resistance is felt. The dimension C should be .100” between the top edge of the<br />
choke valve and the air horn. To adjust, bend rod B.<br />
To adjust the fast idle linkage (Figure 11) place the fast idle screw A between the two notches on the<br />
cam. Close the choke valve as far as possible without forcing it. The dimension C should be 3/64”<br />
between the choke valve and the air horn. To adjust bend rod D.<br />
Fast idle may be adjusted to manufacturers specifications (usually 1500 rpm) during normal choke<br />
cold operation. The fast idle screw A can be adjusted with engine off and throttle held open to allow<br />
screw head access. Recheck fast idle speed after each adjustment.<br />
14 <strong>Edelbrock</strong> Performer Series <strong>Carburetor</strong> Owner’s Manual 1/01
1403-1413 Perf Series <strong>Carburetor</strong> Owner's Manual.qxd 3/31/2006 12:07 PM Page 15<br />
BEND HERE<br />
Float Drop (15/16" to 1")<br />
Figure 9<br />
C (3/64")<br />
A<br />
Fast idle linkage<br />
Figure 11<br />
D<br />
.026 Wire<br />
TAB<br />
B<br />
Slot Piston Cylinder<br />
Float Level (7/16")<br />
Figure 8<br />
7/16” Drill bit<br />
Choke piston linkage<br />
Figure 10<br />
C (.100")<br />
15 <strong>Edelbrock</strong> Performer Series <strong>Carburetor</strong> Owner’s Manual Rev 9/01<br />
A
1403-1413 Perf Series <strong>Carburetor</strong> Owner's Manual.qxd 3/31/2006 12:07 PM Page 16<br />
The length of time during which the choke will stay closed is determined by the position of the choke<br />
cap. As the choke cap is turned clockwise the choke will stay closed longer. To properly set the choke<br />
turn the choke cap to the leanest notch on the choke housing, loosen the choke housing retaining<br />
screws, and run the engine until normal operating temperature is reached. With the engine running,<br />
slowly turn the choke cap clockwise until the choke valve begins to close. Now turn the choke<br />
housing one notch counterclockwise (LEAN) and tighten the choke housing retaining screws. Periodic<br />
readjustment of the choke will be required as the temperature changes throughout the year. After<br />
each adjustment verify that the choke valve opens fully after the engine is warm.<br />
SPECIAL CALIBRATIONS<br />
The preceding calibrations and adjustments apply to carburetors used in general street applications.<br />
In the following extreme instances, special calibration procedures may need to be followed.<br />
Off-Road<br />
Although the <strong>Edelbrock</strong> Performer Series carburetor was not calibrated with hill climbing and other<br />
extreme off-road operation in mind, it can be made to perform superbly by substituting <strong>Edelbrock</strong><br />
#1465 spring loaded needle and seat for the original needle and seat. The spring loaded needle and<br />
seat act like a shock absorber, reducing the possibility of flooding during off-road operation. After<br />
installation of the new needle and seat you must reset the float level to 7/16" and drop the float drop<br />
to 15/16 to 1" as outlined in “FLOAT ADJUSTMENT”.<br />
High Fuel Flow<br />
When evidence of fuel starvation exists, first ensure that proper pressure (4-5 psi minimum) is<br />
maintained at WOT. If proper fuel pressure is supplied and fuel starvation still exists, it may be<br />
necessary to change the needle and seat to a larger size (#1466). Do not make this change unless<br />
absolutely required, as the smaller inlet is preferred for proper fuel control under most conditions.<br />
High Altitude<br />
Altitude has a direct effect on the operation of most carburetors. As the altitude increases, the air<br />
becomes less dense so a carburetor, originally calibrated at low altitude, delivers too much fuel and<br />
the engine runs richer. If the preceding tuning procedure is performed on an <strong>Edelbrock</strong> Performer<br />
Series carburetor, a proper high altitude calibration will result. If the vehicle was calibrated at lower<br />
<strong>Carburetor</strong> Specifications - All Models<br />
<strong>Carburetor</strong> CFM Main Main Metering Step-Up Needle Float<br />
Part No. Jet Jet Rod Spring & Seat Height<br />
Primary Secondary (Primary only)<br />
1404 500 .086" .095" .065" x .052" orange (5") .0935" 7/16"<br />
1405 600 .100" .095" .070" x .047" orange (5") .0935" 7/16"<br />
<strong>1406</strong> 600 .098" .095" .075" x .047" yellow (4") .0935" 7/16"<br />
1407 750 .113" .107" .071" x .047" orange (5") .0935" 7/16"<br />
1409* 600 .098" .101" .068" x .047" orange (5") .0935" 7/16"<br />
1410* 750 .113" .107" .071" x .047" orange (5") .0935" 7/16"<br />
1411 750 .110" .107" .075" x .047" orange (5") .0935" 7/16"<br />
1412 800 .113" .101" .071" x .047" orange (5") .0935" 7/16"<br />
1413 800 .113" .101" .071" x .047" orange (5") .0935" 7/16"<br />
* = <strong>Carburetor</strong> is certified to meet U.S. Coast Guard Requirements<br />
16 <strong>Edelbrock</strong> Performer Series <strong>Carburetor</strong> Owner’s Manual Rev 1/01
1403-1413 Perf Series <strong>Carburetor</strong> Owner's Manual.qxd 3/31/2006 12:07 PM Page 17<br />
altitude, however, and is to be driven at high altitude temporarily, it is not necessary to repeat the<br />
complete calibration procedure. Instead, use the rule of: “2% leaner per 1500 feet” and the<br />
Calibration Reference Chart for your model carburetor. For example, with a #1405 at baseline<br />
calibration (location #1 on the chart) and intended operation at 6000 ft. altitude, you would want 6000<br />
divided by 1500 x 2% = 8% leaner calibration. That would be location #24 on the chart which would<br />
require only a rod and jet change.<br />
Blended Fuels<br />
Typically, two types of blended fuels are available: Gasohol and gasahol. Gasohol is a blend of not<br />
more than 10% ethanol and gasoline. As long as there is no more than 10% ethanol mixed with the<br />
gasoline you carburetor will function properly. As the percentage of ethanol climbs above10%, a<br />
richer A/F ratio will be required. Also, because gasohol is more volatile than gasoline, hard hot starting<br />
and poor hot weather driveability may result.<br />
Gasahol can be a blend of either ethanol, methanol or other alcohol with gasoline. Methanol blended<br />
fuel should not be used in your <strong>Edelbrock</strong> Performer Series carburetor as it will cause corrosion of the<br />
fuel system components. It can also cause rapid failure of seals, gaskets, diaphragms and pump<br />
plungers.<br />
Always check to see if you are using a blended fuel. Although the pump may not indicate the fuel is<br />
blended, it is always advisable to verify the type of fuel the station carries.<br />
Blown Engines<br />
Two model #1405 carburetors should be used on engines with positive displacement superchargers,<br />
such as GMC 6-71 blowers or equivalent. The following calibration changes make an excellent<br />
starting point: Primary Jets - .101" (#1429); Secondary Jets - .101” (#1429); Metering Rods - .070" x<br />
.042" (#1450); Step-up Piston Springs - 5" (orange, stock); Needle & Seat assemblies - .110"<br />
(#1466).<br />
This calibration has been tested on engines ranging in size from 350 c.i.d. Chevys to 440 c.i.d.<br />
Chryslers with good results.<br />
<strong>Carburetor</strong> Specifications (continued)<br />
Float Pump Drive Accelerator Venturi Venturi Throttle Bore Throttle Bore<br />
Drop Link Pump Diameter Diameter Diameter Diameter<br />
(±1/4") Location Nozzle Diameter Primaries Secondaries Primaries Secondary<br />
1-1/4" middle hole .028" 1-3/16" 1-9/16" 1-7/16" 1-11/16"<br />
1-1/4" middle hole .028" 1-3/16 " 1-9/16" 1-7/16" 1-11/16"<br />
1-1/4" middle hole .031" 1-3/16 " 1-9/16" 1-7/16" 1-11/16"<br />
1-1/4" top hole .035" 1-7/16 " 1-9/16" 1-11/16" 1-11/16"<br />
1-1/4" middle hole .028" 1-3/16 " 1-9/16" 1-7/16" 1-11/16"<br />
1-1/4" top hole .035" 1-7/16 " 1-9/16" 1-11/16" 1-11/16"<br />
1-1/4" top hole .035" 1-7/16 " 1-9/16" 1-11/16" 1-11/16"<br />
1-1/4" top hole .035" 1-17/32 " 1-5/8" 1-3/4" 1-3/4"<br />
1-1/4" top hole .035" 1-17/32 " 1-5/8" 1-3/4" 1-3/4"<br />
17 <strong>Edelbrock</strong> Performer Series <strong>Carburetor</strong> Owner’s Manual 9/01
1403-1413 Perf Series <strong>Carburetor</strong> Owner's Manual.qxd 3/31/2006 12:07 PM Page 18<br />
Cruise Mode: High Vacuum/Low Power-Rod Down<br />
#1403/ #1404 Calibration Reference Chart / Primary Metering<br />
3 stages<br />
Rich (12%)<br />
2 stages<br />
Rich (8%)<br />
1 stage<br />
Rich (4%)<br />
Base<br />
Power<br />
Mode<br />
1 stage<br />
Lean (4%)<br />
2 stages<br />
Lean (8%)<br />
3 stages<br />
Lean (12%)<br />
1<br />
#<br />
#<br />
3 stages<br />
Lean (12%)<br />
25<br />
10<br />
Power Mode: Low Vacuum/High Power-Rod Up<br />
2 stages<br />
Lean (8%)<br />
16<br />
4<br />
5<br />
11<br />
24<br />
1 stage<br />
Lean (4%)<br />
17<br />
6<br />
12<br />
Base<br />
Power<br />
Mode<br />
1 stage<br />
Rich (4%)<br />
18 19<br />
2 stages<br />
Rich (8%)<br />
1 2<br />
3 stages<br />
Rich (12%)<br />
7 8 9<br />
13 14<br />
Lean Power Mode Rich<br />
Stock Calibration<br />
Step 1 Select the combination of Cruise Mode and Power Mode fuel-metering stages<br />
desired for your calibration. Normal calibration changes will be within the gridded<br />
diagonal area. That is, Cruise and Power mode changes should be in the same<br />
direction (either richer or leaner) and usually by the same amount.<br />
Step 2 Find the number that is nearest your desired combination. This is your Calibration<br />
Reference Number.<br />
Step 3 Go to the next page. Find the Calibration Reference Number you have just selected<br />
in Step 2. Listed will be the Main Jet and Metering Rod required to achieve the<br />
desired fuel metering for the Primaries.<br />
23<br />
Numbers in black are the steps obtainable using Calibration Kit #1486 plus<br />
the stock jets and metering rods.<br />
Numbers in white are the steps obtainable using jet and rod combinations<br />
shown on the following page.<br />
26<br />
22<br />
27<br />
21<br />
15<br />
20<br />
Lean Cruise Mode Rich<br />
18 <strong>Edelbrock</strong> Performer Series <strong>Carburetor</strong> Owner’s Manual 12/01<br />
3
1403-1413 Perf Series <strong>Carburetor</strong> Owner's Manual.qxd 3/31/2006 12:07 PM Page 19<br />
Model #1403/#1404<br />
Rod/Jet Reference Chart<br />
REF # MAIN JET METERING ROD CHANGE FROM BASE<br />
1 1423 (.086) 1460 (065 x 052) none - stock calibration<br />
2 1423 (.086) 1445 (065 x 047) Rod<br />
3 1423 (.086) 1444 (065 x 037) Rod<br />
4 1423 (.086) 1461 (065 x 057) Rod<br />
5 1422 (.083) 1441 (062 x 052) Rod & Jet<br />
6 1423 (.086) 1463 (067 x 055) Rod<br />
7 1423 (.086) 1448 (068 x 052) Rod<br />
8 1423 (.086) 1447 (068 x 047) Rod<br />
9 1423 (.086) 1446 (068 x 042) Rod<br />
10 1422 (.083) 1463 (067 x 055) Rod & Jet<br />
11 1422 (.083) 1460 (065 x 052) Jet<br />
12 1422 (.083) 1462 (067 x 049) Rod & Jet<br />
13 1423 (.086) 1452 (070 x 052) Rod<br />
14 1423 (.086) 1451 (070 x 047) Rod<br />
15 1423 (.086) 1450 (070 x 042) Rod<br />
16 1422 (.083) 1438 (058 x 052) Rod & Jet<br />
17 1422 (.083) 1437 (057 x 049) Rod & Jet<br />
18 1423 (.086) 1441 (062 x 052) Rod<br />
19 1423 (.086) 1443 (063 x 047) Rod<br />
20 1423 (.086) 1442 (063 x 037) Rod<br />
21 1424 (.089) 1445 (065 x 047) Rod & Jet<br />
22 1424 (.089) 1460 (065 x 052) Jet<br />
23 1423 (.086) 1439 (060 x 052) Rod<br />
24 1423 (.086) 1440 (060 x 057) Rod<br />
25 1422 (.083) 1436 (055 x 055) Rod & Jet<br />
26 1424 (.089) 1441 (062 x 052) Rod & Jet<br />
27 1424 (.089) 1443 (063 x 047) Rod & Jet<br />
Secondary Metering<br />
The factory calibration jet is shown in the center column. For leaner or richer calibration<br />
use the jet # indicated in the appropriate column.<br />
3 Stages 2 Stages 1 Stage SECONDARY 1 Stage 2 Stages 3 Stages<br />
Lean (12%) Lean (8%) Lean (4%) Stock Calibration Rich (4%) Rich (8%) Rich (12%)<br />
JET #1423 JET #1424 JET #1425 JET #1426 JET #1427 JET #1429 JET #1430<br />
(.086) (.089) (.092) (.095) (.098) (.101) (.104)<br />
Main Jet I.D.—All <strong>Edelbrock</strong> jets have “120-”prefix. The last three digits minus 300 = actual jet size.<br />
Examples: 120-386 = .086" jet (<strong>Edelbrock</strong> p/n 1423).<br />
120-401 = .101" jet (<strong>Edelbrock</strong> p/n 1429).<br />
19 <strong>Edelbrock</strong> Performer Series <strong>Carburetor</strong> Owner’s Manual 12/01
1403-1413 Perf Series <strong>Carburetor</strong> Owner's Manual.qxd 3/31/2006 12:07 PM Page 20<br />
Cruise Mode: High Vacuum/Low Power-Rod Down<br />
#1405 Calibration Reference Chart / Primary Metering<br />
3 stages<br />
Rich (12%)<br />
2 stages<br />
Rich (8%)<br />
1 stage<br />
Rich (4%)<br />
Base<br />
Power<br />
Mode<br />
1 stage<br />
Lean (4%)<br />
2 stages<br />
Lean (8%)<br />
3 stages<br />
Lean (12%)<br />
1<br />
#<br />
#<br />
3 stages<br />
Lean (12%)<br />
20<br />
12<br />
Power Mode: Low Vacuum/High Power-Rod Up<br />
2 stages<br />
Lean (8%)<br />
1 stage<br />
Lean (4%)<br />
5 6<br />
Base<br />
Power<br />
Mode<br />
1 stage<br />
Rich (4%)<br />
16 17<br />
7 8 9<br />
21<br />
1 2<br />
22 23<br />
2 stages<br />
Rich (8%)<br />
13 14 15<br />
24 25 26<br />
27 28 29<br />
3 stages<br />
Rich (12%)<br />
18 19<br />
Lean Power Mode Rich<br />
Stock Calibration<br />
Numbers in black are the steps obtainable using Calibration Kit #1479 plus<br />
the stock jets and metering rods.<br />
Numbers in white are the steps obtainable using jet and rod combinations<br />
shown on the following page.<br />
Step 1 Select the combination of Cruise Mode and Power Mode fuel-metering stages<br />
desired for your calibration. Normal calibration changes will be within the gridded<br />
diagonal area. That is, Cruise and Power mode changes should be in the same<br />
direction (either richer or leaner) and usually by the same amount.<br />
Step 2 Find the number that is nearest your desired combination. This is your Calibration<br />
Reference Number.<br />
Step 3 Go to the next page. Find the Calibration Reference Number you have just selected<br />
in Step 2. Listed will be the Main Jet and Metering Rod required to achieve the<br />
desired fuel metering for the Primaries.<br />
10<br />
3<br />
30<br />
11<br />
Lean Cruise Mode Rich<br />
20 <strong>Edelbrock</strong> Performer Series <strong>Carburetor</strong> Owner’s Manual 8/94<br />
4
1403-1413 Perf Series <strong>Carburetor</strong> Owner's Manual.qxd 3/31/2006 12:07 PM Page 21<br />
Model #1405<br />
Rod/Jet Reference Chart<br />
REF # MAIN JET METERING ROD CHANGE FROM BASE<br />
1 1428 (.100) 1451 (070 x 047)* none - stock calibration<br />
*Some Have ID #695<br />
2 1428 (.100) 1450 (070 x 042) Rod<br />
3 1428 (.100) 1449 (070 x 037) Rod<br />
4 1430 (.104) 1458 (075 x 037) Rod & Jet<br />
5 1427 (.098) 1448 (068 x 052) Rod & Jet<br />
6 1428 (.100) 1452 (070 x 052) Rod<br />
7 1427 (.098) 1445 (065 x 047) Rod & Jet<br />
8 1428 (.100) 1448 (068 x 052) Rod<br />
9 1428 (.100) 1446 (068 x 042) Rod<br />
10 1430 (.104) 1459 (075 x 047) Rod & Jet<br />
11 1430 (.104) 1455 (073 x 042) Rod & Jet<br />
12 1427 (.098) 1441 (062 x 052) Rod & Jet<br />
13 1429 (.101) 1448 (068 x 052) Rod & Jet<br />
14 1430 (.104) 1457 (073 x 052) Rod & Jet<br />
15 1430 (.104) 1456 (073 x 047) Rod & Jet<br />
16 1428 (.100) 1445 (065 x 047) Rod<br />
17 1430 (.104) 1452 (070 x 052) Rod & Jet<br />
18 1430 (.104) 1451 (070 x 047)* Jet<br />
*Some Have ID #695<br />
19 1430 (.104) 1450 (070 x 042) Rod & Jet<br />
20 1426 (.095) 1445 (065 x 047) Rod & Jet<br />
21 1427 (.098) 1452 (070 x 052) Rod & Jet<br />
22 1428 (.100) 1457 (073 x 052) Rod<br />
23 1428 (.100) 1455 (073 x 042) Rod<br />
24 1427 (.098) 1457 (073 x 052) Rod & Jet<br />
25 1428 (.100) 1459 (075 x 047) Rod<br />
26 1427 (.098) 1449 (070 x 037) Rod & Jet<br />
27 1426 (.095) 1446 (068 x 042) Rod & Jet<br />
28 1427 (.098) 1456 (073 x 047) Rod & Jet<br />
29 1427 (.098) 1455 (073 x 042) Rod & Jet<br />
30 1429 (.101) 1458 (075 x 037) Rod & Jet<br />
Secondary Metering<br />
The factory calibration jet is shown in the center column. For leaner or richer calibration<br />
use the jet # indicated in the appropriate column.<br />
3 Stages 2 Stages 1 Stage SECONDARY 1 Stage 2 Stages 3 Stages<br />
Lean (12%) Lean (8%) Lean (4%) Stock Calibration Rich (4%) Rich (8%) Rich (12%)<br />
JET #1423 JET #1424 JET #1425 JET #1426 JET #1427 JET #1429 JET #1430<br />
(.086) (.089) (.092) (.095) (.098) (.101) (.104)<br />
Main Jet I.D.—All <strong>Edelbrock</strong> jets have “120-”prefix. The last three digits minus 300 = actual jet size.<br />
Examples: 120-398 = .098" jet (<strong>Edelbrock</strong> p/n 1427).<br />
120-400 = .100" jet (<strong>Edelbrock</strong> p/n 1428).<br />
21 <strong>Edelbrock</strong> Performer Series <strong>Carburetor</strong> Owner’s Manual 8/94
1403-1413 Perf Series <strong>Carburetor</strong> Owner's Manual.qxd 3/31/2006 12:07 PM Page 22<br />
Cruise Mode: High Vacuum/Low Power-Rod Down<br />
#<strong>1406</strong> Calibration Reference Chart / Primary Metering<br />
3 stages<br />
Rich (12%)<br />
2 stages<br />
Rich (8%)<br />
1 stage<br />
Rich (4%)<br />
Base<br />
Power<br />
Mode<br />
1 stage<br />
Lean (4%)<br />
2 stages<br />
Lean (8%)<br />
3 stages<br />
Lean (12%)<br />
1<br />
#<br />
#<br />
3 stages<br />
Lean (12%)<br />
15<br />
20<br />
6<br />
10<br />
Power Mode: Low Vacuum/High Power-Rod Up<br />
2 stages<br />
Lean (8%)<br />
4<br />
16<br />
21<br />
11 12<br />
1 stage<br />
Lean (4%)<br />
5<br />
Base<br />
Power<br />
Mode<br />
1 stage<br />
Rich (4%)<br />
1 2<br />
7 8 9<br />
13 14<br />
2 stages<br />
Rich (8%)<br />
3 stages<br />
Rich (12%)<br />
Lean Power Mode Rich<br />
Stock Calibration<br />
Step 1 Select the combination of Cruise Mode and Power Mode fuel-metering stages<br />
desired for your calibration. Normal calibration changes will be within the gridded<br />
diagonal area. That is, Cruise and Power mode changes should be in the same<br />
direction (either richer or leaner) and usually by the same amount.<br />
Step 2 Find the number that is nearest your desired combination. This is your Calibration<br />
Reference Number.<br />
Step 3 Go to the next page. Find the Calibration Reference Number you have just selected<br />
in Step 2. Listed will be the Main Jet and Metering Rod required to achieve the<br />
desired fuel metering for the Primaries.<br />
17<br />
22<br />
24<br />
18<br />
23<br />
3<br />
25<br />
119<br />
Numbers in black are the steps obtainable using Calibration Kit #1487 plus<br />
the stock jets and metering rods.<br />
Numbers in white are the steps obtainable using jet and rod combinations<br />
shown on the following page.<br />
Lean Cruise Mode Rich<br />
22 <strong>Edelbrock</strong> Performer Series <strong>Carburetor</strong> Owner’s Manual 1/01
1403-1413 Perf Series <strong>Carburetor</strong> Owner's Manual.qxd 3/31/2006 12:07 PM Page 23<br />
Model #<strong>1406</strong><br />
Rod/Jet Reference Chart<br />
REF # MAIN JET METERING ROD CHANGE FROM BASE<br />
1 1427 (.098) 1459 (075 x 047) none - stock calibration<br />
2 1426 (.095) 1449 (070 x 037) Rod & Jet<br />
3 1427 (.098) 1458 (075 x 037) Rod<br />
4 1425 (.092) 1446 (068 x 042) Rod & Jet<br />
5 1426 (.095) 1453 (071 x 047) Rod & Jet<br />
6 1425 (.092) 1447 (068 x 047) Rod & Jet<br />
7 1426 (.095) 1456 (073 x 047) Rod & Jet<br />
8 1426 (.095) 1455 (073 x 042) Rod & Jet<br />
9 1426 (.095) 1454 (073 x 037) Rod & Jet<br />
10 1425 (.092) 1451 (070 x 047) Rod & Jet<br />
11 1425 (.092) 1453 (071 x 047) Rod & Jet<br />
12 1426 (.095) 1459 (075 x 047) Jet<br />
13 1425 (.092) 1449 (070 x 037) Rod & Jet<br />
14 1426 (.095) 1458 (075 x 037) Rod & Jet<br />
15 1426 (.095) 1448 (068 x 052) Rod & Jet<br />
16 1426 (.095) 1447 (068 x 047) Rod & Jet<br />
17 1427 (.098) 1453 (071 x 047) Rod<br />
18 1429 (.101) 1459 (075 x 047) Jet<br />
19 1427 (.098) 1449 (070 x 037) Rod<br />
20 1425 (.092) 1445 (065 x 047) Rod & Jet<br />
21 1426 (.095) 1451 (070 x 047) Rod & Jet<br />
22 1426 (.095) 1446 (068 x 042) Rod & Jet<br />
23 1427 (.098) 1455 (073 x 042) Rod<br />
24 1427 (.098) 1456 (073 x 047) Rod<br />
25 1427 (.098) 1454 (073 x 037) Rod<br />
Secondary Metering<br />
The factory calibration jet is shown in the center column. For leaner or richer calibration<br />
use the jet # indicated in the appropriate column.<br />
3 Stages 2 Stages 1 Stage SECONDARY 1 Stage 2 Stages 3 Stages<br />
Lean (12%) Lean (8%) Lean (4%) Stock Calibration Rich (4%) Rich (8%) Rich (12%)<br />
JET #1423 JET #1424 JET #1425 JET #1426 JET #1427 JET #1429 JET #1430<br />
(.086) (.089) (.092) (.095) (.098) (.101) (.104)<br />
Main Jet I.D.—All <strong>Edelbrock</strong> jets have “120-”prefix. The last three digits minus 300 = actual jet size.<br />
Examples: 120-398 = .098" jet (<strong>Edelbrock</strong> p/n 1427).<br />
120-401 = .101" jet (<strong>Edelbrock</strong> p/n 1429).<br />
23 <strong>Edelbrock</strong> Performer Series <strong>Carburetor</strong> Owner’s Manual 8/94
1403-1413 Perf Series <strong>Carburetor</strong> Owner's Manual.qxd 3/31/2006 12:07 PM Page 24<br />
Cruise Mode: High Vacuum/Low Power-Rod Down<br />
#1407 / #1410 Calibration Reference Chart / Primary Metering<br />
3 stages<br />
Rich (12%)<br />
2 stages<br />
Rich (8%)<br />
1 stage<br />
Rich (4%)<br />
Base<br />
Power<br />
Mode<br />
1 stage<br />
Lean (4%)<br />
2 stages<br />
Lean (8%)<br />
3 stages<br />
Lean (12%)<br />
1<br />
#<br />
#<br />
3 stages<br />
Lean (12%)<br />
5<br />
Power Mode: Low Vacuum/High Power-Rod Up<br />
8<br />
2 stages<br />
Lean (8%)<br />
11<br />
1 stage<br />
Lean (4%)<br />
6 7<br />
Base<br />
Power<br />
Mode<br />
1 stage<br />
Rich (4%)<br />
15 16<br />
12<br />
9 10<br />
1 2<br />
18 19 20<br />
22 23 24<br />
25 26<br />
2 stages<br />
Rich (8%)<br />
3 stages<br />
Rich (12%)<br />
Lean Power Mode Rich<br />
Stock Calibration<br />
Numbers in black are the steps obtainable using Calibration Kit #1480 plus<br />
the stock jets and metering rods.<br />
Numbers in white are the steps obtainable using jet and rod combinations<br />
shown on the following page.<br />
Step 1 Select the combination of Cruise Mode and Power Mode fuel-metering stages<br />
desired for your calibration. Normal calibration changes will be within the gridded<br />
diagonal area. That is, Cruise and Power mode changes should be in the same<br />
direction (either richer or leaner) and usually by the same amount.<br />
Step 2 Find the number that is nearest your desired combination. This is your Calibration<br />
Reference Number.<br />
Step 3 Go to the next page. Find the Calibration Reference Number you have just selected<br />
in Step 2. Listed will be the Main Jet and Metering Rod required to achieve the<br />
desired fuel metering for the Primaries.<br />
13<br />
3<br />
21<br />
27<br />
17<br />
14<br />
Lean Cruise Mode Rich<br />
24 <strong>Edelbrock</strong> Performer Series <strong>Carburetor</strong> Owner’s Manual 8/94<br />
4
1403-1413 Perf Series <strong>Carburetor</strong> Owner's Manual.qxd 3/31/2006 12:07 PM Page 25<br />
Model #1407 & #1410<br />
Rod/Jet Reference Chart<br />
REF # MAIN JET METERING ROD CHANGE FROM BASE<br />
1 1433 (.113) 1453 (071 x 047) none - stock calibration<br />
2 1433 (.113) 1450 (070 x 042) Rod<br />
3 1433 (.113) 1449 (070 x 037) Rod<br />
4 1434 (.116) 1454 (073 x 037) Rod & Jet<br />
5 1431 (.107) 1443 (063 x 047) Rod & Jet<br />
6 1432 (.110) 1445 (065 x 047) Rod & Jet<br />
7 1433 (.113) 1452 (070 x 052) Rod<br />
8 1432 (.110) 1441 (062 x 052) Rod & Jet<br />
9 1433 (.113) 1447 (068 x 047) Rod<br />
10 1434 (.116) 1456 (073 x 047) Rod & Jet<br />
11 1432 (.110) 1443 (063 x 047) Rod & Jet<br />
12 1433 (.113) 1445 (065 x 047) Rod<br />
13 1434 (.116) 1453 (071 x 047) Jet<br />
14 1434 (.116) 1449 (070 x 037) Rod & Jet<br />
15 1433 (.113) 1443 (063 x 047) Rod<br />
16 1433 (.113) 1442 (063 x 037) Rod<br />
17 1434 (.116) 1444 (065 x 037) Rod & Jet<br />
18 1432 (.110) 1452 (070 x 052) Rod & Jet<br />
19 1433 (.113) 1457 (073 x 052) Rod<br />
20 1433 (.113) 1456 (073 x 047) Rod<br />
21 1433 (.113) 1454 (073 x 037) Rod<br />
22 1431 (.107) 1445 (065 x 047) Rod & Jet<br />
23 1431 (.107) 1444 (065 x 037) Rod & Jet<br />
24 1432 (.110) 1449 (070 x 037) Rod & Jet<br />
25 1431 (.107) 1447 (068 x 047) Rod & Jet<br />
26 1432 (.110) 1456 (073 x 047) Rod & Jet<br />
27 1432 (.110) 1454 (073 x 037) Rod & Jet<br />
Secondary Metering<br />
The factory calibration jet is shown in the center column. For leaner or richer calibration<br />
use the jet # indicated in the appropriate column.<br />
3 Stages 2 Stages 1 Stage SECONDARY 1 Stage 2 Stages 3 Stages<br />
Lean (12%) Lean (8%) Lean (4%) Stock Calibration Rich (4%) Rich (8%) Rich (12%)<br />
JET #1427 JET #1429 JET #1430 JET #1431 JET #1432 JET #1433 JET #1434<br />
(.098) (.101) (.104) (.107) (.110) (.113) (.116)<br />
Main Jet I.D.—All <strong>Edelbrock</strong> jets have “120-”prefix. The last three digits minus 300 = actual jet size.<br />
Examples: 120-398 = .098" jet (<strong>Edelbrock</strong> p/n 1427).<br />
120-413 = .113" jet (<strong>Edelbrock</strong> p/n 1433).<br />
25 <strong>Edelbrock</strong> Performer Series <strong>Carburetor</strong> Owner’s Manual 8/94
1403-1413 Perf Series <strong>Carburetor</strong> Owner's Manual.qxd 3/31/2006 12:07 PM Page 26<br />
Cruise Mode: High Vacuum/Low Power-Rod Down<br />
#1409 Calibration Reference Chart / Primary Metering<br />
3 stages<br />
Rich (12%)<br />
2 stages<br />
Rich (8%)<br />
1 stage<br />
Rich (4%)<br />
Base<br />
Power<br />
Mode<br />
1 stage<br />
Lean (4%)<br />
2 stages<br />
Lean (8%)<br />
3 stages<br />
Lean (12%)<br />
1<br />
#<br />
#<br />
3 stages<br />
Lean (12%)<br />
Power Mode: Low Vacuum/High Power-Rod Up<br />
2 stages<br />
Lean (8%)<br />
25 26<br />
24<br />
23<br />
8<br />
9<br />
7<br />
22<br />
6<br />
1 stage<br />
Lean (4%)<br />
Base<br />
Power<br />
Mode<br />
1 stage<br />
Rich (4%)<br />
1 2<br />
2 stages<br />
Rich (8%)<br />
3 stages<br />
Rich (12%)<br />
Lean Power Mode Rich<br />
Step 1 Select the combination of Cruise Mode and Power Mode fuel-metering stages<br />
desired for your calibration. Normal calibration changes will be within the gridded<br />
diagonal area. That is, Cruise and Power mode changes should be in the same<br />
direction (either richer or leaner) and usually by the same amount.<br />
Step 2 Find the number that is nearest your desired combination. This is your Calibration<br />
Reference Number.<br />
Step 3 Go to the next page. Find the Calibration Reference Number you have just selected<br />
in Step 2. Listed will be the Main Jet and Metering Rod required to achieve the<br />
desired fuel metering for the Primaries.<br />
21<br />
11<br />
10 12 13<br />
Stock Calibration<br />
27<br />
5<br />
Numbers in black are the steps obtainable using Calibration Kit #1488 plus<br />
the stock jets and metering rods.<br />
Numbers in white are the steps obtainable using jet and rod combinations<br />
shown on the following page.<br />
28<br />
20<br />
4<br />
14<br />
19<br />
3<br />
15<br />
29<br />
18<br />
17<br />
16<br />
Lean Cruise Mode Rich<br />
26 <strong>Edelbrock</strong> Performer Series <strong>Carburetor</strong> Owner’s Manual 8/94
1403-1413 Perf Series <strong>Carburetor</strong> Owner's Manual.qxd 3/31/2006 12:07 PM Page 27<br />
Model #1409<br />
Rod/Jet Reference Chart<br />
REF # MAIN JET METERING ROD CHANGE FROM BASE<br />
1 1427 (.098) 1447 (068 x 047) none - stock calibration<br />
2 1427 (.098) 1446 (068 x 042) Rod<br />
3 1429 (.101) 1456 (073 x 047) Rod & Jet<br />
4 1427 (.098) 1450 (070 x 042) Rod<br />
5 1427 (.098) 1451 (070 x 047) Rod<br />
6 1427 (.098) 1452 (070 x 052) Rod<br />
7 1426 (.095) 1443 (063 x 047) Rod & Jet<br />
8 1426 (.095) 1460 (065 x 052) Rod & Jet<br />
9 1425 (.092) 1443 (063 x 047) Rod & Jet<br />
10 1426 (.095) 1452 (070 x 052) Rod & Jet<br />
11 1426 (.095) 1447 (068 x 047) Jet<br />
12 1425 (.092) 1444 (065 x 037) Rod & Jet<br />
13 1427 (.098) 1456 (073 x 047) Rod<br />
14 1429 (.101) 1459 (075 x 047) Rod & Jet<br />
15 1427 (.098) 1454 (073 x 037) Rod<br />
16 1429 (.101) 1458 (075 x 037) Rod & Jet<br />
17 1430 (.104) 1459 (075 x 047) Rod & Jet<br />
18 1430 (.104) 1456 (073 x 047) Rod & Jet<br />
19 1427 (.098) 1444 (065 x 037) Rod<br />
20 1429 (.101) 1451 (070 x 047) Rod & Jet<br />
21 1427 (.098) 1445 (065 x 047) Rod<br />
22 1427 (.098) 1460 (065 x 052) Rod<br />
23 1426 (.095) 1441 (062 x 052) Rod & Jet<br />
24 1426 (.095) 1439 (060 x 052) Rod & Jet<br />
25 1426 (.095) 1438 (058 x 052) Rod & Jet<br />
26 1427 (.098) 1441 (062 x 052) Rod<br />
27 1427 (.098) 1443 (063 x 047) Rod<br />
28 1429 (.101) 1462 (067 x 049) Rod & Jet<br />
29 1430 (.104) 1452 (070 x 052) Rod & Jet<br />
Secondary Metering<br />
The factory calibration jet is shown in the center column. For leaner or richer calibration<br />
use the jet # indicated in the appropriate column.<br />
3 Stages 2 Stages 1 Stage SECONDARY 1 Stage 2 Stages 3 Stages<br />
Lean (12%) Lean (8%) Lean (4%) Stock Calibration Rich (4%) Rich (8%) Rich (12%)<br />
JET #1425 JET #1426 JET #1427 JET #1429 JET #1430 JET #1431 JET #1432<br />
(.092) (.095) (.098) (.101) (.104) (.107) (.110)<br />
Main Jet I.D.—All <strong>Edelbrock</strong> jets have “120-”prefix. The last three digits minus 300 = actual jet size.<br />
Examples: 120-398 = .098" jet (<strong>Edelbrock</strong> p/n 1427).<br />
120-401 = .101" jet (<strong>Edelbrock</strong> p/n 1429).<br />
27 <strong>Edelbrock</strong> Performer Series <strong>Carburetor</strong> Owner’s Manual 8/94
1403-1413 Perf Series <strong>Carburetor</strong> Owner's Manual.qxd 3/31/2006 12:07 PM Page 28<br />
Cruise Mode: High Vacuum/Low Power-Rod Down<br />
#1411 Calibration Reference Chart / Primary Metering<br />
3 stages<br />
Rich (12%)<br />
2 stages<br />
Rich (8%)<br />
1 stage<br />
Rich (4%)<br />
Base<br />
Power<br />
Mode<br />
1 stage<br />
Lean (4%)<br />
2 stages<br />
Lean (8%)<br />
3 stages<br />
Lean (12%)<br />
1<br />
#<br />
#<br />
3 stages<br />
Lean (12%)<br />
14<br />
Power Mode: Low Vacuum/High Power-Rod Up<br />
2 stages<br />
Lean (8%)<br />
7 8<br />
18<br />
19<br />
6<br />
25<br />
20<br />
17<br />
1 stage<br />
Lean (4%)<br />
21<br />
16<br />
Base<br />
Power<br />
Mode<br />
1 stage<br />
Rich (4%)<br />
1 2<br />
2 stages<br />
Rich (8%)<br />
28 29<br />
3 stages<br />
Rich (12%)<br />
Lean Power Mode Rich<br />
Stock Calibration<br />
5<br />
26<br />
13<br />
9<br />
Step 1 Select the combination of Cruise Mode and Power Mode fuel-metering stages<br />
desired for your calibration. Normal calibration changes will be within the gridded<br />
diagonal area. That is, Cruise and Power mode changes should be in the same<br />
direction (either richer or leaner) and usually by the same amount.<br />
Step 2 Find the number that is nearest your desired combination. This is your Calibration<br />
Reference Number.<br />
Step 3 Go to the next page. Find the Calibration Reference Number you have just selected<br />
in Step 2. Listed will be the Main Jet and Metering Rod required to achieve the<br />
desired fuel metering for the Primaries.<br />
27<br />
22<br />
10<br />
4<br />
15<br />
Numbers in black are the steps obtainable using Calibration Kit #1489 plus<br />
the stock jets and metering rods.<br />
Numbers in white are the steps obtainable using jet and rod combinations<br />
shown on the following page.<br />
23<br />
11<br />
24<br />
12<br />
3<br />
Lean Cruise Mode Rich<br />
28 <strong>Edelbrock</strong> Performer Series <strong>Carburetor</strong> Owner’s Manual 8/94
1403-1413 Perf Series <strong>Carburetor</strong> Owner's Manual.qxd 3/31/2006 12:07 PM Page 29<br />
Model #1411<br />
Rod/Jet Reference Chart<br />
REF # MAIN JET METERING ROD CHANGE FROM BASE<br />
1 1432 (.110) 1459 (075 x 047) none - stock calibration<br />
2 1432 (.110) 1419 (075 x 042) Rod<br />
3 1432 (.110) 1458 (075 x 037) Rod<br />
4 1431 (.107) 1454 (073 x 037) Rod & Jet<br />
5 1431 (.107) 1456 (073 x 047) Rod & Jet<br />
6 1431 (.107) 1457 (073 x 052) Rod & Jet<br />
7 1430 (.104) 1445 (065 x 047) Rod & Jet<br />
8 1430 (.104) 1416 (065 x 042) Rod & Jet<br />
9 1430 (.104) 1444 (065 x 037) Rod & Jet<br />
10 1432 (.110) 1456 (073 x 047) Rod<br />
11 1432 (.110) 1455 (073 x 042) Rod<br />
12 1432 (.110) 1454 (073 x 037) Rod<br />
13 1431 (.107) 1447 (068 x 047) Rod & Jet<br />
14 1431 (.107) 1448 (068 x 052) Rod & Jet<br />
15 1431 (.107) 1458 (075 x 037) Rod & Jet<br />
16 1430 (.104) 1449 (070 x 037) Rod & Jet<br />
17 1430 (.104) 1450 (070 x 042) Rod & Jet<br />
18 1430 (.104) 1451 (070 x 047) Rod & Jet<br />
19 1430 (.104) 1453 (071 x 047) Rod & Jet<br />
20 1432 (.110) 1418 (070 x 057) Rod<br />
21 1432 (.110) 1452 (070 x 052) Rod<br />
22 1432 (.110) 1453 (071 x 047) Rod<br />
23 1432 (.110) 1450 (070 x 042) Rod<br />
24 1432 (.110) 1449 (070 x 037) Rod<br />
25 1432 (.110) 1417 (068 x 057) Rod<br />
26 1432 (.110) 1448 (068 x 052) Rod<br />
27 1432 (.110) 1447 (068 x 047) Rod<br />
28 1432 (.110) 1446 (068 x 042) Rod<br />
29 1433 (.113) 1455 (073 x 042) Rod & Jet<br />
Secondary Metering<br />
The factory calibration jet is shown in the center column. For leaner or richer calibration<br />
use the jet # indicated in the appropriate column.<br />
3 Stages 2 Stages 1 Stage SECONDARY 1 Stage 2 Stages 3 Stages<br />
Lean (12%) Lean (8%) Lean (4%) Stock Calibration Rich (4%) Rich (8%) Rich (12%)<br />
JET #1427 JET #1429 JET #1430 JET #1431 JET #1432 JET #1433 JET #1434<br />
(.098) (.101) (.104) (.107) (.110) (.113) (.116)<br />
Main Jet I.D.—All <strong>Edelbrock</strong> jets have “120-”prefix. The last three digits minus 300 = actual jet size.<br />
Examples: 120-398 = .098" jet (<strong>Edelbrock</strong> p/n 1427).<br />
120-413 = .113" jet (<strong>Edelbrock</strong> p/n 1433).<br />
29 <strong>Edelbrock</strong> Performer Series <strong>Carburetor</strong> Owner’s Manual 8/94
1403-1413 Perf Series <strong>Carburetor</strong> Owner's Manual.qxd 3/31/2006 12:07 PM Page 30<br />
#1412 & #1413 Calibration Reference Chart / Primary Metering<br />
Cruise Mode: High Vacuum/Low Power-Rod Down<br />
3 stages<br />
Rich (12%)<br />
2 stages<br />
Rich (8%)<br />
1 stage<br />
Rich (4%)<br />
Base<br />
Power<br />
Mode<br />
1 stage<br />
Lean (4%)<br />
2 stages<br />
Lean (8%)<br />
3 stages<br />
Lean (12%)<br />
1<br />
#<br />
#<br />
3 stages<br />
Lean (12%)<br />
5<br />
Power Mode: Low Vacuum/High Power-Rod Up<br />
8<br />
2 stages<br />
Lean (8%)<br />
11<br />
1 stage<br />
Lean (4%)<br />
6 7<br />
Base<br />
Power<br />
Mode<br />
1 stage<br />
Rich (4%)<br />
15 16<br />
12<br />
9 10<br />
1 2<br />
18 19 20<br />
22 23 24<br />
25 26<br />
2 stages<br />
Rich (8%)<br />
3 stages<br />
Rich (12%)<br />
Lean Power Mode Rich<br />
Stock Calibration<br />
Numbers in black are the steps obtainable using Calibration Kit #1480 plus<br />
the stock jets and metering rods.<br />
Numbers in white are the steps obtainable using jet and rod combinations<br />
shown on the following page.<br />
Step 1 Select the combination of Cruise Mode and Power Mode fuel-metering stages<br />
desired for your calibration. Normal calibration changes will be within the gridded<br />
diagonal area. That is, Cruise and Power mode changes should be in the same<br />
direction (either richer or leaner) and usually by the same amount.<br />
Step 2 Find the number that is nearest your desired combination. This is your Calibration<br />
Reference Number.<br />
Step 3 Go to the next page. Find the Calibration Reference Number you have just selected<br />
in Step 2. Listed will be the Main Jet and Metering Rod required to achieve the<br />
desired fuel metering for the Primaries.<br />
13<br />
3<br />
21<br />
27<br />
17<br />
14<br />
Lean Cruise Mode Rich<br />
30 <strong>Edelbrock</strong> Performer Series <strong>Carburetor</strong> Owner’s Manual 10/00<br />
4
1403-1413 Perf Series <strong>Carburetor</strong> Owner's Manual.qxd 3/31/2006 12:07 PM Page 31<br />
Model #1412 & #1413<br />
Rod/Jet Reference Chart<br />
REF # MAIN JET METERING ROD CHANGE FROM BASE<br />
1 1433 (.113) 1453 (071 x 047) none - stock calibration<br />
2 1433 (.113) 1450 (070 x 042) Rod<br />
3 1433 (.113) 1449 (070 x 037) Rod<br />
4 1434 (.116) 1454 (073 x 037) Rod & Jet<br />
5 1431 (.107) 1443 (063 x 047) Rod & Jet<br />
6 1432 (.110) 1445 (065 x 047) Rod & Jet<br />
7 1433 (.113) 1452 (070 x 052) Rod<br />
8 1432 (.110) 1441 (062 x 052) Rod & Jet<br />
9 1433 (.113) 1447 (068 x 047) Rod<br />
10 1434 (.116) 1456 (073 x 047) Rod & Jet<br />
11 1432 (.110) 1443 (063 x 047) Rod & Jet<br />
12 1433 (.113) 1445 (065 x 047) Rod<br />
13 1434 (.116) 1453 (071 x 047) Jet<br />
14 1434 (.116) 1449 (070 x 037) Rod & Jet<br />
15 1433 (.113) 1443 (063 x 047) Rod<br />
16 1433 (.113) 1442 (063 x 037) Rod<br />
17 1434 (.116) 1444 (065 x 037) Rod & Jet<br />
18 1432 (.110) 1452 (070 x 052) Rod & Jet<br />
19 1433 (.113) 1457 (073 x 052) Rod<br />
20 1433 (.113) 1456 (073 x 047) Rod<br />
21 1433 (.113) 1454 (073 x 037) Rod<br />
22 1431 (.107) 1445 (065 x 047) Rod & Jet<br />
23 1431 (.107) 1444 (065 x 037) Rod & Jet<br />
24 1432 (.110) 1449 (070 x 037) Rod & Jet<br />
25 1431 (.107) 1447 (068 x 047) Rod & Jet<br />
26 1432 (.110) 1456 (073 x 047) Rod & Jet<br />
27 1432 (.110) 1454 (073 x 037) Rod & Jet<br />
Secondary Metering<br />
The factory calibration jet is shown in the center column. For leaner or richer calibration<br />
use the jet # indicated in the appropriate column.<br />
3 Stages 2 Stages 1 Stage SECONDARY 1 Stage 2 Stages 3 Stages<br />
Lean (12%) Lean (8%) Lean (4%) Stock Calibration Rich (4%) Rich (8%) Rich (12%)<br />
JET #1425 JET #1426 JET #1427 JET #1429 JET #1430 JET #1431 JET #1432<br />
(.092) (.095) (.098) (.101) (.104) (.107) (.110)<br />
Main Jet I.D.—All <strong>Edelbrock</strong> jets have “120-”prefix. The last three digits minus 300 = actual jet size.<br />
Examples: 120-398 = .098" jet (<strong>Edelbrock</strong> p/n 1427).<br />
120-413 = .113" jet (<strong>Edelbrock</strong> p/n 1433).<br />
31 <strong>Edelbrock</strong> Performer Series <strong>Carburetor</strong> Owner’s Manual 10/00
1403-1413 Perf Series <strong>Carburetor</strong> Owner's Manual.qxd 3/31/2006 12:07 PM Page 32<br />
Item Description<br />
Exploded View of <strong>Edelbrock</strong> Performer Series <strong>Carburetor</strong><br />
2<br />
1<br />
6<br />
3<br />
4<br />
1<br />
2<br />
6<br />
3 16<br />
4<br />
5<br />
24<br />
22<br />
5<br />
17<br />
18<br />
16<br />
21<br />
8<br />
19<br />
14<br />
17a<br />
15<br />
1. Step-up piston cover screws (2)<br />
2. Step-up piston cover plates (2)<br />
3. Step-up pistons (2)<br />
4. Step-up (metering) rods (2)<br />
5. Step-up piston springs (2)<br />
6. Step-up rod retainer springs (2)<br />
7. Pin springs (small) (3)<br />
8. Choke connector rod & lever*<br />
9. Choke piston housing*<br />
9a. Choke piston housing seal*<br />
9b. Choke filter*<br />
10. Mounting screws (3)<br />
10a. Choke housing retainers (3)*<br />
11. Thermostatic coil assembly*<br />
12. Baffle plate*<br />
13. Choke housing gasket*<br />
14. Choke/cam connector rod<br />
15. Pump connector rod<br />
16. Airhorn attaching screw (1)<br />
17. Airhorn attaching screws (8)<br />
18. Airhorn assembly<br />
19. Pump arm screw<br />
20. Pump arm<br />
21. Pump connector link<br />
22. Fuel inlet fitting<br />
23. Fuel Strainer Screens (2)<br />
24. Fuel inlet fitting gasket<br />
25. Float lever pins (2)<br />
26. Float & lever assemblies (2)<br />
28<br />
20<br />
23<br />
7<br />
23<br />
27<br />
27<br />
25<br />
25<br />
26<br />
26<br />
32 <strong>Edelbrock</strong> Performer Series <strong>Carburetor</strong> Owner’s Manual 8/94
1403-1413 Perf Series <strong>Carburetor</strong> Owner's Manual.qxd 3/31/2006 12:07 PM Page 33<br />
39<br />
39<br />
40<br />
40<br />
31<br />
41<br />
41<br />
45<br />
31<br />
44<br />
44<br />
45<br />
42<br />
29<br />
32<br />
34<br />
43<br />
32<br />
43<br />
33<br />
27. Needle & seat assemblies (2)<br />
28. Airhorn gasket<br />
29. Pump plunger assembly<br />
30. Pump plunger spring<br />
31. Primary cluster screws (4)<br />
32. Primary venturi boosters (2)<br />
33. Venturi booster gaskets (2)<br />
34. Pump jet housing screws (2)<br />
35. Pump jet housing<br />
36. Pump jet housing gasket<br />
37. Pump discharge weight<br />
38. Pump discharge ball<br />
39. Secondary booster screws (4)<br />
40. Secondary venturi boosters (2)<br />
41. Venturi booster gaskets (2)<br />
42. Air valve & weights<br />
43. Primary metering jets (2)<br />
44. Secondary metering jets (2)<br />
45. Fuel bowl baffle plates (2)<br />
46. Idle mixture screws & springs (2)<br />
47. Fast idle cam<br />
48. Idle speed screw<br />
49. Body assembly<br />
50. Ported vacuum port<br />
51. Full-time vacuum port<br />
52. PCV valve port<br />
*Electric choke models <strong>1406</strong>, 1409,<br />
1410, &1411<br />
33<br />
35<br />
36<br />
37<br />
38<br />
10a<br />
8<br />
10<br />
30<br />
49<br />
47<br />
11<br />
12<br />
13<br />
52<br />
50<br />
9a<br />
9<br />
48<br />
46<br />
46<br />
9b<br />
51<br />
33 <strong>Edelbrock</strong> Performer Series <strong>Carburetor</strong> Owner’s Manual 8/94
1403-1413 Perf Series <strong>Carburetor</strong> Owner's Manual.qxd 3/31/2006 12:07 PM Page 34<br />
Check for air leaks. Make sure carburetor and manifold gaskets seal properly. All<br />
outlets must be plugged or connected.<br />
Check ignition system. Replace parts as necessary. Adjust timing to proper<br />
specifications.<br />
Check choke adjustment. See page 14.<br />
Change carburetor fuel filter and/or in-line fuel filter.<br />
Too lean. See Tuning Procedure.<br />
Check float level and drop. See page 14.<br />
Check idle mixture screw adjustment. See page 11.<br />
Too rich. See Tuning Procedure.<br />
Increase accelerator pump stroke. Pump squirter size change may be needed.<br />
See page 14.<br />
Off-road vehicle may need spring-loaded needle and seat kit (pg. 16).<br />
Check for dirt or metal in needles and seats. Needles and seats may need replacement.<br />
See page 36.<br />
Check for dirt blocking the low speed circuit. Clean unit and apply air pressure.<br />
Install in-line fuel filter #8873.<br />
Check floats for leakage. Replace if necessary.<br />
Check air horn gasket. Replace if deterioration or breakage is present.<br />
Fuel is boiling due to excessive under hood temperature. See page 36.<br />
Fuel pressure too high. Fuel regulator may be needed. See page 8.<br />
Fuel pressure too low. Check fuel system. See page 8.<br />
Check secondary latching device and rod for proper movement.<br />
Lower float level from 7/16” . See page 14.<br />
Troubleshooting Chart<br />
Possible Solution<br />
(Symptoms on opposite page)<br />
34 <strong>Edelbrock</strong> Performer Series <strong>Carburetor</strong> Owner’s Manual 9/01
1403-1413 Perf Series <strong>Carburetor</strong> Owner's Manual.qxd 3/31/2006 12:07 PM Page 35<br />
<strong>Carburetor</strong><br />
doesn’t adjust<br />
<strong>Carburetor</strong> floods<br />
Fuel leaks at shaft<br />
Internal fuel leak<br />
Misses or surges<br />
Stumbles or<br />
loads up<br />
Symptoms<br />
Engine<br />
won’t idle<br />
Rough idle<br />
Backfires<br />
Bogs<br />
Hard starting<br />
Lack of power<br />
Pinging at<br />
moderate cruise<br />
Engine stalls on<br />
hard braking<br />
X X X X X X X X X<br />
X X X X X X X X<br />
X X X X X X X<br />
X X X X X<br />
X X X X<br />
X X X X X<br />
X X X X<br />
X X X<br />
X X<br />
X X<br />
X X X<br />
X X X X<br />
X X X X<br />
X X X X<br />
X X X<br />
X X X X<br />
X X<br />
X<br />
Low fuel economy<br />
35 <strong>Edelbrock</strong> Performer Series <strong>Carburetor</strong> Owner’s Manual 8/94<br />
X
1403-1413 Perf Series <strong>Carburetor</strong> Owner's Manual.qxd 3/31/2006 12:07 PM Page 36<br />
Troubleshooting Information<br />
Dirt/metal shavings between the needle and seat or a<br />
“sticking float”: To correct either of these problems, lightly tap the<br />
carburetor fuel inlet area with the handle of a screwdriver. If flooding<br />
continues, pinch the fuel line (if possible). Start the engine and let it run until<br />
it stops. Release line and restart engine. If flooding persists examine the<br />
needles, seats, float level, and float drop. Adjust or replace parts if<br />
necessary.<br />
Excessive under hood temperature: Ensure fuel line is not located too<br />
close to heat sources such as the exhaust or block, causing<br />
expanding fuel to be forced past the needle and seat. Fuel can also boil<br />
inside the carburetor due to missing gaskets, spacers, or heat shields. Also<br />
check to see if the exhaust heat riser is stuck, allowing excessive heat<br />
under the carburetor. Use <strong>Edelbrock</strong> Divided Heat Insulator Gasket #9266 for<br />
dual-plane manifolds, Square-Bore Heat Insulator Gasket #9265 for singleplane<br />
manifolds, and #9267 Heat Insulator Gaskets for dual-quad manifolds.<br />
Excessive fuel pump pressure: See page 8.<br />
For further information contact the<br />
<strong>Edelbrock</strong> Technical Department:<br />
Between 7:00 am and 5:00 pm PST,<br />
Monday through Friday<br />
Tech Line: (800) 416-8628 Offices: (310) 781-2222<br />
FAX (310) 320-1187<br />
®<br />
36 <strong>Edelbrock</strong> Performer Series <strong>Carburetor</strong> Owner’s Manual 3/00
1403-1413 Perf Series <strong>Carburetor</strong> Owner's Manual.qxd 3/31/2006 12:07 PM Page 37<br />
WARRANTY<br />
EDELBROCK warrants its Performer Series <strong>Carburetor</strong>s to be free from defects<br />
in material or workmanship. This warranty is valid provided that the product is properly<br />
installed, subjected to normal use and service and is not modified or changed in any way,<br />
or used for racing or competition purposes. This warranty is extended to the original<br />
consumer purchaser and has a duration of 90 days from date of original purchase by such<br />
consumer. Any implied warranty determined to be applicable is limited in duration to the<br />
duration of this warranty. Some states do not allow limitations on how long an implied<br />
warranty is so the above limitation may not apply to you.<br />
In the event of a defect in material or workmanship, <strong>Edelbrock</strong>s sole responsibility is to<br />
repair or replace the defective product. This warranty covers the replacement or repair at<br />
<strong>Edelbrock</strong>'s option of the product only and does not cover the cost of removal or installation<br />
of the product. Final warranty determination will be the decision of EDELBROCK.<br />
EDELBROCK does not warrant products which have been modified or altered outside<br />
factory specifications; subjected to conditions such as misuse, neglect, accident, improper<br />
installation or adjustment, dirt or other contaminants, weather or corrosion, gum or varnish,<br />
use of improper or poor quality fuel or fuel additives, improper fuel pressure and faulty<br />
repair or use in other than those automotive applications recommended in a current<br />
EDELBROCK catalog. Further, there are no warranties which extend beyond those stated<br />
here.<br />
EDELBROCK shall not be responsible for (a) actual or alleged labor, transportation or other<br />
incidental charges or (b) actual or alleged consequential or other damages incurred by use<br />
of EDELBROCK Performer Series <strong>Carburetor</strong>s. <strong>Edelbrock</strong> Corp shall not be liable for any<br />
and all consequential damages occasioned by the breach of any written or implied warranty<br />
pertaining to this sale in excess of the purchase price of the product.<br />
Warranty claims will be initiated by returning the alleged defective product to the place of<br />
purchase with dated purchase receipt and with completed applicable EDELBROCK<br />
warranty claim tag. Do not send the product directly to EDELBROCK.<br />
This warranty gives you specific legal rights, and you may also have other rights which vary<br />
from state to state.<br />
The general limited Warranty supersedes all prior warranty statements. Inquiries concerning<br />
this warranty should be directed to:<br />
EDELBROCK CORP.<br />
2700 California St.<br />
Torrance, CA 90503<br />
37 <strong>Edelbrock</strong> Performer Series <strong>Carburetor</strong> Owner’s Manual 9/01
1403-1413 Perf Series <strong>Carburetor</strong> Owner's Manual.qxd 3/31/2006 12:07 PM Page 38<br />
Notes:<br />
38 <strong>Edelbrock</strong> Performer Series <strong>Carburetor</strong> Owner’s Manual 8/94
1403-1413 Perf Series <strong>Carburetor</strong> Owner's Manual.qxd 3/31/2006 12:07 PM Page 39<br />
<strong>Edelbrock</strong> <strong>Carburetor</strong> Data Log<br />
In order to get the most from your <strong>Edelbrock</strong> carburetor purchase, please complete and mail the<br />
enclosed warranty card. Also, you may want to record your calibration settings in the table below and<br />
keep it with your vehicle records.<br />
Model#:______________________________________ Purchase Date: _________________<br />
PUMP<br />
DRIVE NEEDLE REFERENCE<br />
PRI. SEC. STEP-UP LINK PUMP AND CHART<br />
DATE ROD JET JET SPRING LOCATION CLUSTER SEAT LOCATION #<br />
Comments:<br />
39 <strong>Edelbrock</strong> Performer Series <strong>Carburetor</strong> Owner’s Manual 8/94


