R-GUARD® Products Fact Sheet
R-GUARD® Products Fact Sheet
R-GUARD® Products Fact Sheet

You also want an ePaper? Increase the reach of your titles
YUMPU automatically turns print PDFs into web optimized ePapers that Google loves.
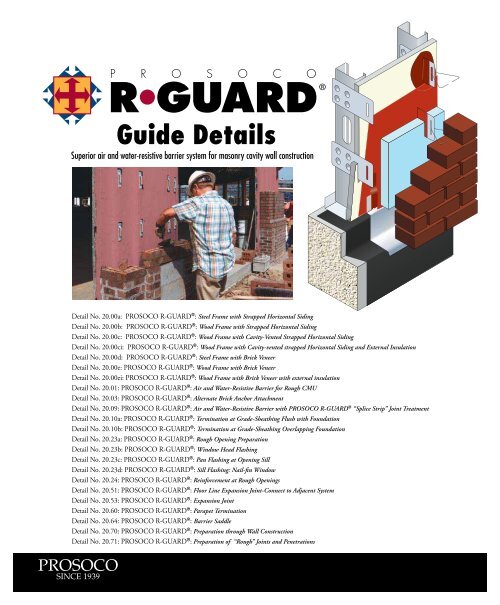
Guide Details<br />
Superior air and water-resistive barrier system for masonry cavity wall construction<br />
Detail No. 20.00a: PROSOCO R-GUARD ® : Steel Frame with Strapped Horizontal Siding<br />
Detail No. 20.00b: PROSOCO R-GUARD ® : Wood Frame with Strapped Horizontal Siding<br />
Detail No. 20.00c: PROSOCO R-GUARD ® : Wood Frame with Cavity-Vented Strapped Horizontal Siding<br />
Detail No. 20.00ci: PROSOCO R-GUARD ® : Wood Frame with Cavity-vented strapped Horizontal Siding and External Insulation<br />
Detail No. 20.00d: PROSOCO R-GUARD ® : Steel Frame with Brick Veneer<br />
Detail No. 20.00e: PROSOCO R-GUARD ® : Wood Frame with Brick Veneer<br />
Detail No. 20.00ei: PROSOCO R-GUARD ® : Wood Frame with Brick Veneer with external insulation<br />
Detail No. 20.01: PROSOCO R-GUARD ® : Air and Water-Resistive Barrier for Rough CMU<br />
Detail No. 20.03: PROSOCO R-GUARD ® : Alternate Brick Anchor Attachment<br />
Detail No. 20.09: PROSOCO R-GUARD ® : Air and Water-Resistive Barrier with PROSOCO R-GUARD ® “Splice Strip” Joint Treatment<br />
Detail No. 20.10a: PROSOCO R-GUARD ® : Termination at Grade-Sheathing Flush with Foundation<br />
Detail No. 20.10b: PROSOCO R-GUARD ® : Termination at Grade-Sheathing Overlapping Foundation<br />
Detail No. 20.23a: PROSOCO R-GUARD ® : Rough Opening Preparation<br />
Detail No. 20.23b: PROSOCO R-GUARD ® : Window Head Flashing<br />
Detail No. 20.23c: PROSOCO R-GUARD ® : Pan Flashing at Opening Sill<br />
Detail No. 20.23d: PROSOCO R-GUARD ® : Sill Flashing: Nail-fin Window<br />
Detail No. 20.24: PROSOCO R-GUARD ® : Reinforcement at Rough Openings<br />
Detail No. 20.51: PROSOCO R-GUARD ® : Floor Line Expansion Joint-Connect to Adjacent System<br />
Detail No. 20.53: PROSOCO R-GUARD ® : Expansion Joint<br />
Detail No. 20.60: PROSOCO R-GUARD ® : Parapet Termination<br />
Detail No. 20.64: PROSOCO R-GUARD ® : Barrier Saddle<br />
Detail No. 20.70: PROSOCO R-GUARD ® : Preparation through Wall Construction<br />
Detail No. 20.71: PROSOCO R-GUARD ® : Preparation of “Rough” Joints and Penetrations
page 2<br />
Integrating R-GUARD with other air barrier<br />
and moisture protection components<br />
Coordinate installation of connecting air barrier with other<br />
trades to achieve a continuous air barrier assembly.<br />
Coordinate installation of flashing and other moisture<br />
protection components to achieve complete moisture<br />
protection which drains liquid water to the exterior of the wall<br />
assembly.<br />
Some flashing components such as window and door head<br />
flashing, pan flashing, roof sidewall step flashing, etc. require<br />
a splice strip of R-GUARD Tape, Fill and Spray Wrap to<br />
create a shingle lap which sheds water onto the face of the<br />
flashing, not behind the flashing. Use R-GUARD as the<br />
splice strip to create a seamless transition.<br />
Alternatively, shingle lap with a suitable self-adhering transition<br />
membrane such as SBS modified bitumen, or sheet membrane<br />
flashing adhered and fastened with termination bars and<br />
fasteners.<br />
Use only water-based primers and neutral-cure sealants. Do<br />
not use solvent or petroleum based primers or adhesives.<br />
Preparation:<br />
Fill any voids or gaps greater than 1/8” with a low expansion urethane<br />
foam. Shave off the cured foam flush to the sheathed surface.<br />
Remove any surface contaminants which may compromise adhesion of<br />
the R-GUARD.<br />
Do not use R-GUARD over fire retardant or pressure-treated wood<br />
surfaces.<br />
Installing PROSOCO R-GUARD ® Tape:<br />
R-GUARD Tape is a self-adhering, reinforcing mesh tape designed<br />
for use with R-GUARD Fill and R-GUARD Spray Wrap. Install<br />
R-GUARD Tape in a shingling manner to promote positive drainage<br />
of bulk water.<br />
Use a seam roller or blunt tool to press and firmly adhere R-GUARD<br />
Tape to the sheathing. Round sharp corners of all installation tools to<br />
reduce a potential for damage or tearing.<br />
When multiple strips of R-GUARD Tape are required, create a<br />
minimum 2.5” (64mm) lap to insure continuity of the reinforcing<br />
mesh tape.<br />
www.prosoco.com
Supporting structure<br />
Substrate<br />
PROSOCO R-GUARD ®<br />
joint treatment (refer to<br />
detail 20.09.)<br />
PROSOCO R-GUARD ®<br />
Spray Wrap<br />
Hotizontal siding<br />
PROSOCO R-GUARD ®<br />
Spray Wrap<br />
PROSOCO R-GUARD ®<br />
joint treatment (refer to<br />
detail 20.09.)<br />
Flashing<br />
Supporting structure<br />
Substrate<br />
PROSOCO R-GUARD ®<br />
joint treatment (refer to<br />
detail 20.09.)<br />
PROSOCO R-GUARD ® MVP<br />
Hotizontal siding<br />
PROSOCO R-GUARD ® MVP<br />
PROSOCO R-GUARD ®<br />
joint treatment (refer to<br />
detail 20.09.)<br />
Flashing<br />
Notes:<br />
Detail shows the components<br />
of PROSOCO R-GUARD ® with<br />
PROSOCO R-GUARD ® Spray<br />
Wrap.<br />
PROSOCO R-GUARD ®<br />
<br />
detail 20.09)<br />
®<br />
Spray Wrap<br />
Notes:<br />
Detail shows the components<br />
of PROSOCO R-GUARD ® with<br />
PROSOCO R-GUARD ® MVP.<br />
PROSOCO R-GUARD ®<br />
<br />
detail 20.09)<br />
®<br />
MVP<br />
PROSOCO R-GUARD ®<br />
Air & Water-Resistive Barrier<br />
Steel frame with strapped<br />
horizontal siding<br />
Detail No.: 20.00a<br />
PROSOCO R-GUARD ® MVP<br />
Air & Water-Resistive Barrier<br />
Steel frame with strapped<br />
horizontal siding<br />
Detail No.: 20.00a<br />
PROSOCO details are illustrations of construction. They are guidelines, intended<br />
for use by the design/construction professional, to assist in developing project<br />
specific details. They should be modified where necessary to accommodate individual<br />
project conditions. Refer to appropriate PROSOCO specification for design<br />
requirements. Refer to local building code for any special requirements.<br />
www.prosoco.com page 3
PROSOCO R-GUARD ®<br />
Air & Water-Resistive Barrier<br />
Wood frame with strapped<br />
horizontal siding<br />
Detail No.: 20.00b<br />
PROSOCO R-GUARD ® MVP<br />
Air & Water-Resistive Barrier<br />
Wood frame with strapped<br />
horizontal siding<br />
Detail No.: 20.00b<br />
PROSOCO details are illustrations of construction. They are guidelines, intended<br />
for use by the design/construction professional, to assist in developing project<br />
specific details. They should be modified where necessary to accommodate individual<br />
project conditions. Refer to appropriate PROSOCO specification for design<br />
requirements. Refer to local building code for any special requirements.<br />
page 4<br />
www.prosoco.com<br />
Supporting structure<br />
Substrate<br />
PROSOCO R-GUARD ®<br />
<br />
detail 20.09.)<br />
PROSOCO R-GUARD ®<br />
Spray Wrap<br />
Hotizontal siding<br />
PROSOCO R-GUARD ®<br />
Spray Wrap<br />
PROSOCO R-GUARD ®<br />
<br />
detail 20.09.)<br />
Flashing<br />
<br />
<br />
PROSOCO R-GUARD ®<br />
<br />
detail 20.09.)<br />
PROSOCO R-GUARD ® MVP<br />
<br />
PROSOCO R-GUARD ® MVP<br />
PROSOCO R-GUARD ®<br />
<br />
detail 20.09.)<br />
<br />
Notes:<br />
1]<br />
2]<br />
Notes:<br />
1]<br />
2]<br />
Detail shows the components<br />
of PROSOCO R-GUARD ® with<br />
PROSOCO R-GUARD ® Spray<br />
Wrap.<br />
PROSOCO R-GUARD ®<br />
<br />
detail 20.09)<br />
®<br />
Spray Wrap<br />
Detail shows the components<br />
of PROSOCO R-GUARD ® with<br />
PROSOCO R-GUARD ® MVP.<br />
PROSOCO R-GUARD ®<br />
<br />
detail 20.09)<br />
® MVP
Supporting structure<br />
Substrate<br />
PROSOCO R-GUARD ®<br />
<br />
detail 20.09.)<br />
PROSOCO R-GUARD ®<br />
Spray Wrap<br />
Strapping<br />
Hotizontal siding<br />
PROSOCO R-GUARD ®<br />
Spray Wrap<br />
PROSOCO R-GUARD ®<br />
<br />
detail 20.09.)<br />
Flashing<br />
<br />
<br />
PROSOCO R-GUARD ®<br />
<br />
detail 20.09.)<br />
PROSOCO R-GUARD ® MVP<br />
<br />
<br />
PROSOCO R-GUARD ® MVP<br />
PROSOCO R-GUARD ®<br />
<br />
detail 20.09.)<br />
<br />
1]<br />
2]<br />
Notes:<br />
Detail shows the components<br />
of PROSOCO R-GUARD ® with<br />
PROSOCO R-GUARD ® Spray<br />
Wrap.<br />
PROSOCO R-GUARD ®<br />
<br />
detail 20.09)<br />
®<br />
Spray Wrap<br />
Notes:<br />
1] Detail shows the components<br />
of PROSOCO R-GUARD ® with<br />
PROSOCO R-GUARD ® MVP.<br />
PROSOCO R-GUARD ®<br />
<br />
detail 20.09)<br />
® 2]<br />
MVP<br />
PROSOCO R-GUARD ®<br />
Air & Water-Resistive Barrier<br />
Wood frame with cavity-vented<br />
strapped horizontal siding<br />
Detail No.: 20.00c<br />
PROSOCO R-GUARD ® MVP<br />
Air & Water-Resistive Barrier<br />
Wood frame with cavity-vented<br />
strapped horizontal siding<br />
Detail No.: 20.00c<br />
PROSOCO details are illustrations of construction. They are guidelines, intended<br />
for use by the design/construction professional, to assist in developing project<br />
specific details. They should be modified where necessary to accommodate individual<br />
project conditions. Refer to appropriate PROSOCO specification for design<br />
requirements. Refer to local building code for any special requirements.<br />
www.prosoco.com page 5
PROSOCO R-GUARD ®<br />
Air & Water-Resistive Barrier<br />
Wood frame with cavity-vented<br />
strapped horizontal siding and<br />
external insulation<br />
Detail No.: 20.00ci<br />
PROSOCO R-GUARD ® MVP<br />
Air & Water-Resistive Barrier<br />
Wood frame with cavity-vented<br />
strapped horizontal siding and<br />
external insulation<br />
Detail No.: 20.00ci<br />
PROSOCO details are illustrations of construction. They are guidelines, intended<br />
for use by the design/construction professional, to assist in developing project<br />
specific details. They should be modified where necessary to accommodate individual<br />
project conditions. Refer to appropriate PROSOCO specification for design<br />
requirements. Refer to local building code for any special requirements.<br />
page 6<br />
www.prosoco.com<br />
Supporting structure<br />
Substrate<br />
PROSOCO R-GUARD ®<br />
<br />
detail 20.09.)<br />
PROSOCO R-GUARD ®<br />
Spray Wrap<br />
Strapping<br />
Hotizontal siding<br />
Insulation<br />
<br />
PROSOCO R-GUARD ®<br />
Spray Wrap<br />
PROSOCO R-GUARD ®<br />
<br />
detail 20.09.)<br />
Flashing<br />
<br />
<br />
PROSOCO R-GUARD ®<br />
<br />
detail 20.09.)<br />
PROSOCO R-GUARD ®<br />
MVP<br />
<br />
<br />
Insulation<br />
<br />
PROSOCO R-GUARD ®<br />
MVP<br />
PROSOCO R-GUARD ®<br />
<br />
detail 20.09.)<br />
Flashing<br />
1]<br />
2]<br />
3]<br />
1]<br />
2]<br />
3]<br />
Notes:<br />
Detail shows the components<br />
of PROSOCO R-GUARD ® with<br />
PROSOCO R-GUARD ® Spray<br />
Wrap.<br />
PROSOCO R-GUARD ®<br />
<br />
detail 20.09)<br />
®<br />
Spray Wrap<br />
In colder climates provide<br />
adequate exterior insulation to<br />
maintain the dew point<br />
outbound of the sheathing in<br />
the insulation.<br />
Notes:<br />
Detail shows the components<br />
of PROSOCO R-GUARD ® with<br />
PROSOCO R-GUARD ® MVP.<br />
PROSOCO R-GUARD ®<br />
<br />
detail 20.09)<br />
® MVP.<br />
<br />
<br />
maintain the dew point<br />
outbound of the sheathing in<br />
the insulation.
Structure<br />
Anchors sealed with<br />
PROSOCO R-GUARD ®<br />
Fill<br />
PROSOCO R-GUARD ®<br />
Spray Wrap<br />
Insulation (Optional for R-Value)<br />
Masonry anchors<br />
coated with<br />
PROSOCO R-GUARD ®<br />
Fill & Spray Wrap<br />
Brick<br />
PROSOCO R-GUARD ®<br />
joint treatment (refer to<br />
detail 20.09.)<br />
Through-wall<br />
flashing<br />
Foundation<br />
waterproofing<br />
Structure<br />
Anchors sealed with<br />
PROSOCO R-GUARD ®<br />
Fill<br />
PROSOCO R-GUARD ®<br />
MVP<br />
Insulation (Optional for R-Value)<br />
Masonry anchors<br />
coated with<br />
PROSOCO R-GUARD ®<br />
Fill & MVP<br />
Brick<br />
PROSOCO R-GUARD ®<br />
joint treatment (refer to<br />
detail 20.09.)<br />
Through-wall<br />
flashing<br />
Foundation<br />
waterproofing<br />
Notes:<br />
This installation shows masonry<br />
anchors fastened to steel studs and<br />
penetrating through the wall sheathing.<br />
1] Install PROSOCO<br />
R-GUARD ® as per PROSOCO<br />
specifications. Reinforce<br />
penetrations that create a gap<br />
through the wall sheathing that<br />
exceed 1/8” (3mm) with<br />
R-GUARD Tape.<br />
Apply R-GUARD Fill<br />
to create an air seal around the<br />
masonry anchor.<br />
2] Install flashing. Integrate the<br />
flashing with a “splice strip” of<br />
PROSOCO R-GUARD ® by<br />
overlapping the upper edge of<br />
flashing with R-GUARD Tape<br />
& Fill and overcoat with R-GUARD<br />
Spray Wrap.<br />
3] Secure masonry anchors as per<br />
manufacturer's specifications.<br />
Notes:<br />
This installation shows masonry<br />
anchors fastened to steel studs and<br />
penetrating through the wall sheathing.<br />
1] Install PROSOCO<br />
R-GUARD ® as per PROSOCO<br />
specifications. Reinforce<br />
penetrations that create a gap<br />
through the wall sheathing that<br />
exceed 1/8” (3mm) with<br />
R-GUARD Tape.<br />
Apply R-GUARD Fill<br />
to create an air seal around the<br />
masonry anchor.<br />
2] Install flashing. Integrate the<br />
flashing with a “splice strip” of<br />
PROSOCO R-GUARD ® by<br />
overlapping the upper edge of<br />
flashing with R-GUARD Tape<br />
& Fill and overcoat with R-GUARD<br />
MVP.<br />
3] Secure masonry anchors as per<br />
manufacturer's specifications.<br />
PROSOCO R-GUARD ®<br />
Air & Water-Resistive Barrier<br />
Steel Frame with Brick Veneer<br />
Detail No.: 20.00d<br />
PROSOCO R-GUARD ® MVP<br />
Air & Water-Resistive Barrier<br />
Steel Frame with Brick Veneer<br />
Detail No.: 20.00d<br />
PROSOCO details are illustrations of construction. They are guidelines, intended<br />
for use by the design/construction professional, to assist in developing project<br />
specific details. They should be modified where necessary to accommodate individual<br />
project conditions. Refer to appropriate PROSOCO specification for design<br />
requirements. Refer to local building code for any special requirements.<br />
www.prosoco.com page 7
PROSOCO R-GUARD ®<br />
Air & Water-Resistive Barrier<br />
Wood Frame with Brick Veneer<br />
Detail No.: 20.00e<br />
PROSOCO R-GUARD ® MVP<br />
Air & Water-Resistive Barrier<br />
Wood Frame with Brick Veneer<br />
Detail No.: 20.00e<br />
PROSOCO details are illustrations of construction. They are guidelines, intended<br />
for use by the design/construction professional, to assist in developing project<br />
specific details. They should be modified where necessary to accommodate individual<br />
project conditions. Refer to appropriate PROSOCO specification for design<br />
requirements. Refer to local building code for any special requirements.<br />
page 8<br />
www.prosoco.com<br />
Sheathing<br />
Spot overdriven fastners with<br />
PROSOCO R-GUARD ®<br />
Fill or R-GUARD Spray Wrap<br />
PROSOCO R-GUARD ®<br />
Spray Wrap<br />
Masonry anchors<br />
fastened through<br />
PROSOCO R-GUARD ®<br />
Brick<br />
PROSOCO R-GUARD ®<br />
joint treatment (refer to<br />
detail 20.09.)<br />
Through-wall<br />
flashing<br />
Foundation<br />
waterproofing<br />
Sheathing<br />
Spot overdriven fastners with<br />
PROSOCO R-GUARD ®<br />
Fill or R-GUARD ® MVP<br />
PROSOCO R-GUARD ® MVP<br />
Masonry anchors<br />
fastened through<br />
PROSOCO R-GUARD ® MVP<br />
Brick<br />
PROSOCO R-GUARD ®<br />
joint treatment (refer to<br />
detail 20.09.)<br />
Through-wall<br />
flashing<br />
Foundation<br />
waterproofing<br />
Notes:<br />
This installation shows masonry<br />
anchors that are fastened<br />
through PROSOCO R-GUARD ® Air<br />
& Water-Resistive Barrier.<br />
1] Install PROSOCO R-GUARD ® as<br />
per Product Data <strong>Sheet</strong>.<br />
2] Install flashing. Integrate the<br />
flashing with the PROSOCO<br />
R-GUARD ® as per PROSOCO<br />
Detail 20.09.<br />
3] Secure masonry<br />
anchors as per anchor<br />
manufacturer's specifications.<br />
Refer to PROSOCO Detail<br />
20.03 for alternate<br />
installation detail.<br />
Notes:<br />
This installation shows masonry<br />
anchors that are fastened<br />
through PROSOCO R-GUARD ®<br />
MVP Air & Water-Resistive<br />
Barrier.<br />
1] Install PROSOCO R-GUARD ®<br />
MVP as per Product Data<br />
<strong>Sheet</strong>.<br />
2] Install flashing. Integrate the<br />
flashing with the PROSOCO<br />
R-GUARD ® MVP as per<br />
PROSOCO Detail 20.09.<br />
3] Secure masonry<br />
anchors as per anchor<br />
manufacturer's specifications.<br />
Refer to PROSOCO Detail<br />
20.03 for alternate<br />
installation detail.
Sheathing<br />
Fasteners spotted with<br />
PROSOCO R-GUARD ® Fill<br />
Masonry anchors<br />
fastened through<br />
PROSOCO R-GUARD ®<br />
Spray Wrap<br />
Brick<br />
Insulation<br />
PROSOCO R-GUARD ® Spray Wrap<br />
joint treatment (refer to<br />
detail 20.09.)<br />
Through-wall<br />
flashing<br />
Foundation<br />
waterproofing<br />
Sheathing<br />
Fasteners spotted with<br />
PROSOCO R-GUARD ®<br />
Fill or R-GUARD ® MVP<br />
Masonry anchors<br />
fastened through<br />
PROSOCO R-GUARD ® MVP<br />
Brick<br />
Insulation<br />
PROSOCO R-GUARD ® MVP<br />
joint treatment (refer to<br />
detail 20.09.)<br />
Through-wall<br />
flashing<br />
Foundation<br />
waterproofing<br />
Notes:<br />
1] Install PROSOCO<br />
R-GUARD ® as per PROSOCO<br />
specifications.<br />
2] Install flashing. Integrate the<br />
flashing with the PROSOCO<br />
R-GUARD ® by coating upper<br />
edge of flashing with<br />
PROSOCO R-GUARD ® Tape &<br />
Fill and overcoat with<br />
PROSOCO R-GUARD ® Spray<br />
Wrap. Refer to PROSOCO<br />
Detail 20.09.<br />
3] Secure masonry anchors as<br />
per manufacturer's<br />
specifications. Refer to<br />
PROSOCO Detail 20.03 for<br />
alternate anchor installation<br />
detail.<br />
Notes:<br />
1] Install PROSOCO<br />
R-GUARD ® MVP as per<br />
PROSOCO specifications.<br />
2] Install flashing. Integrate the<br />
flashing with the PROSOCO<br />
R-GUARD ® MVP by coating<br />
upper edge of flashing with<br />
PROSOCO R-GUARD ® Tape &<br />
Fill and overcoat with<br />
PROSOCO R-GUARD ® MVP.<br />
Refer to PROSOCO Detail<br />
20.09.<br />
3] Secure masonry anchors as<br />
per manufacturer's<br />
specifications. Refer to<br />
PROSOCO Detail 20.03 for<br />
alternate anchor installation<br />
detail.<br />
PROSOCO R-GUARD ®<br />
Air & Water-Resistive Barrier<br />
Wood Frame with Brick Veneer<br />
with External Insulation<br />
Detail No.: 20.00ei<br />
PROSOCO R-GUARD ® MVP<br />
Air & Water-Resistive Barrier<br />
Wood Frame with Brick Veneer<br />
with External Insulation<br />
Detail No.: 20.00ei<br />
PROSOCO details are illustrations of construction. They are guidelines, intended<br />
for use by the design/construction professional, to assist in developing project<br />
specific details. They should be modified where necessary to accommodate individual<br />
project conditions. Refer to appropriate PROSOCO specification for design<br />
requirements. Refer to local building code for any special requirements.<br />
www.prosoco.com page 9
PROSOCO R-GUARD ®<br />
Air & Water-Resistive Barrier<br />
Air & Moisture Barrier for Rough CMU<br />
Detail No.: 20.01<br />
PROSOCO R-GUARD ® MVP<br />
Air & Water-Resistive Barrier<br />
Air & Moisture Barrier for Rough CMU<br />
Detail No.: 20.01<br />
PROSOCO details are illustrations of construction. They are guidelines, intended<br />
for use by the design/construction professional, to assist in developing project<br />
specific details. They should be modified where necessary to accommodate individual<br />
project conditions. Refer to appropriate PROSOCO specification for design<br />
requirements. Refer to local building code for any special requirements.<br />
page 10<br />
www.prosoco.com<br />
Substrate Preparation<br />
CMU wall mortar<br />
joints struck flush<br />
with the block surface.<br />
Step 1<br />
Repair minor cracks<br />
with PROSOCO<br />
R-GUARD ® Fill.<br />
Step 2<br />
Spray apply two liberal<br />
coats of PROSOCO<br />
R-GUARD ® Spray Wrap<br />
over the entire surface<br />
of the wall.<br />
Substrate Preparation<br />
CMU wall mortar<br />
joints struck flush<br />
with the block surface.<br />
Step 1<br />
Repair minor cracks<br />
with PROSOCO<br />
R-GUARD ® Fill.<br />
Step 2<br />
Spray apply two liberal<br />
coats of PROSOCO<br />
R-GUARD ® MVP<br />
over the entire surface<br />
of the wall.<br />
Notes:<br />
1] Prepare surface and apply<br />
R-GUARD Spray Wrap as per<br />
Product Data <strong>Sheet</strong>.<br />
Notes:<br />
1] Prepare surface and apply<br />
R-GUARD MVP as per Product<br />
Data <strong>Sheet</strong>.
PROSOCO R-GUARD ®<br />
Air & Moisture Barrier<br />
Self-adhering sheet<br />
membrane<br />
Brick anchor<br />
Fasteners through sheet<br />
membrane into stud<br />
Installed anchor<br />
PROSOCO R-GUARD ® MVP<br />
Air & Moisture Barrier<br />
Transition membrane<br />
Brick anchor<br />
Fasteners through sheet<br />
membrane into stud<br />
Installed anchor<br />
Notes: PROSOCO R-GUARD ®<br />
1] Install PROSOCO<br />
R-GUARD ® over sheathing.<br />
2] Install suitable self-adhering<br />
sheet barrier membrane such<br />
as SBS modified bitumen,<br />
sheet membrane flashing or<br />
R-GUARD Transition<br />
Membrane as per membrane<br />
manufacturer’s instructions.<br />
3] Place anchor over membrane<br />
and secure to the stud<br />
through the membrane.<br />
Notes:<br />
1] Install PROSOCO<br />
R-GUARD ® MVP over<br />
sheathing.<br />
2] Install suitable self-adhering<br />
sheet barrier membrane such<br />
as SBS modified bitumen,<br />
sheet membrane flashing or<br />
R-GUARD Transition<br />
Membrane as per membrane<br />
manufacturer’s instructions.<br />
3] Place anchor over membrane<br />
and secure to the stud<br />
through the membrane.<br />
Air & Water-Resistive Barrier<br />
Alternate Brick Anchor Attachment<br />
Detail No.: 20.03<br />
PROSOCO R-GUARD ® MVP<br />
Air & Water-Resistive Barrier<br />
Alternate Brick Anchor Attachment<br />
Detail No.: 20.03<br />
PROSOCO details are illustrations of construction. They are guidelines, intended<br />
for use by the design/construction professional, to assist in developing project<br />
specific details. They should be modified where necessary to accommodate individual<br />
project conditions. Refer to appropriate PROSOCO specification for design<br />
requirements. Refer to local building code for any special requirements.<br />
www.prosoco.com page11
PROSOCO R-GUARD ®<br />
Air & Water-Resistive Barrier<br />
with PROSOCO R-GUARD ® “Splice Strip”<br />
Joint Treatment<br />
Detail No.: 20.09<br />
PROSOCO R-GUARD ® MVP<br />
Air & Water-Resistive Barrier<br />
with PROSOCO R-GUARD ® “Splice Strip”<br />
Joint Treatment<br />
Detail No.: 20.09<br />
PROSOCO details are illustrations of construction. They are guidelines, intended<br />
for use by the design/construction professional, to assist in developing project<br />
specific details. They should be modified where necessary to accommodate individual<br />
project conditions. Refer to appropriate PROSOCO specification for design<br />
requirements. Refer to local building code for any special requirements.<br />
page 12<br />
www.prosoco.com<br />
Option 1<br />
Option 2<br />
Option 1<br />
Option 2<br />
Sheathing joint<br />
R-GUARD Tape<br />
R-GUARD Fill<br />
R-GUARD Spray Wrap<br />
R-GUARD Tape<br />
R-GUARD Fill<br />
Flashing<br />
Rough opening<br />
R-GUARD Spray Wrap<br />
Sheathing joint<br />
R-GUARD Spray Wrap<br />
R-GUARD Joint Fabric<br />
R-GUARD Spray Wrap<br />
R-GUARD Spray Wrap<br />
R-GUARD Joint Fabric<br />
Flashing<br />
Rough opening<br />
R-GUARD Spray Wrap<br />
Sheathing joint<br />
R-GUARD Tape<br />
R-GUARD Fill<br />
R-GUARD MVP<br />
R-GUARD Tape<br />
R-GUARD Fill<br />
Flashing<br />
Rough opening<br />
R-GUARD MVP<br />
Sheathing joint<br />
R-GUARD MVP<br />
R-GUARD Joint Fabric<br />
R-GUARD MVP<br />
R-GUARD MVP<br />
R-GUARD Joint Fabric<br />
Flashing<br />
Rough opening<br />
R-GUARD MVP<br />
Notes:<br />
Option 1<br />
1. Apply R-GUARD Tape<br />
over sheathing joints and<br />
around rough openings<br />
and trowel R-GUARD Fill<br />
over mesh.<br />
2. Coat entire surface with<br />
R-GUARD Spray Wrap.<br />
3. Apply R-GUARD Tape<br />
over weep screed, head<br />
flashing, roof sidewall<br />
step flashing and similar<br />
conditions and trowel<br />
R-GUARD Fill over mesh.<br />
4. Apply R-GUARD Spray Wrap<br />
over the splice strip of<br />
R-GUARD Fill/Tape.<br />
Option 2<br />
1. Spray, brush or roller<br />
apply R-GUARD Spray Wrap<br />
liberally over the<br />
sheathing joints and<br />
around the rough<br />
openings.<br />
2. Immediately embed<br />
R-GUARD Joint Fabric into the<br />
R-GUARD Spray Wrap with a<br />
trowel, brush or putty knife<br />
3. Apply additional R-GUARD<br />
Spray Wrap over the R-GUARD<br />
Joint Fabric to completly<br />
cover the fabric.<br />
4. Coat the entire wall<br />
surface with R-GUARD<br />
Spray Wrap.<br />
5. Similarily apply R-GUARD<br />
Joint Fabric over weep screeds,<br />
head flashing, roof<br />
sidewall step flashing and<br />
similar conditions and<br />
cover with R-GUARD<br />
Spray Wrap.<br />
Notes:<br />
Option 1<br />
1. Apply R-GUARD Tape<br />
over sheathing joints and<br />
around rough openings<br />
and trowel R-GUARD Fill<br />
over mesh.<br />
2. Coat entire surface with<br />
R-GUARD MVP.<br />
3. Apply R-GUARD Tape<br />
over weep screed, head<br />
flashing, roof sidewall<br />
step flashing and similar<br />
conditions and trowel<br />
R-GUARD Fill over mesh.<br />
4. Apply R-GUARD MVP<br />
over the splice strip of<br />
R-GUARD Fill/Tape.<br />
Option 2<br />
1. Spray, brush or roller<br />
apply R-GUARD MVP<br />
liberally over the<br />
sheathing joints and<br />
around the rough<br />
openings.<br />
2. Immediately embed<br />
R-GUARD Joint Fabric into the<br />
R-GUARD MVP with a<br />
trowel, brush or putty knife<br />
3. Apply additional R-GUARD<br />
MVP over the R-GUARD<br />
Joint Fabric to completly<br />
cover the fabric.<br />
4. Coat the entire wall<br />
surface with R-GUARD MVP.<br />
5. Similarily apply R-GUARD<br />
Joint Fabric over weep screeds,<br />
head flashing, roof<br />
sidewall step flashing and<br />
similar conditions and<br />
cover with R-GUARD MVP.
Support structure<br />
Sheathing<br />
PROSOCO R-GUARD ® joint<br />
treatment (See options in detail<br />
20.09)<br />
PPROSOCO R-GUARD ® Spray<br />
Wrap<br />
PROSOCO R-GUARD ® joint detail<br />
(See options in detail 20.09. A<br />
third option is to use R-GUARD<br />
Transition Membrane over the top<br />
of the flashing and apply<br />
R-GUARD Spray Wrap over that.)<br />
Flashing<br />
PROSOCO R-GUARD ® Transition<br />
Membrane (coatable) or other<br />
barrier sheet membrane<br />
lapped onto the foundation<br />
waterproofing<br />
Foundation<br />
waterproofing<br />
Support structure<br />
Sheathing<br />
PROSOCO R-GUARD ® joint<br />
treatment (See options in detail<br />
20.09)<br />
PPROSOCO R-GUARD ® MVP<br />
PROSOCO R-GUARD ® joint detail<br />
(See options in detail 20.09. A<br />
third option is to use R-GUARD<br />
Transition Membrane over the top<br />
of the flashing and apply<br />
R-GUARD MVP over that.)<br />
Flashing<br />
PROSOCO R-GUARD ® Transition<br />
Membrane (coatable) or other<br />
barrier sheet membrane<br />
lapped onto the foundation<br />
waterproofing<br />
Foundation<br />
waterproofing<br />
Notes:<br />
1. Protect wall assembly from<br />
moisture rising through the<br />
concrete foundation.<br />
2. Install suitable self-adhering<br />
barrier sheet membrane to<br />
transition between PROSOCO<br />
R-GUARD ® Air & Moisture<br />
Barrier and foundation<br />
waterproofing.<br />
3. Install flashing to drain liquid<br />
water to the exterior of the wall<br />
assembly.<br />
4. Install PROSOCO R-GUARD ®<br />
joint detail to create seamless<br />
transition.<br />
Notes:<br />
1. Protect wall assembly from<br />
moisture rising through the<br />
concrete foundation.<br />
2. Install suitable self-adhering<br />
barrier sheet membrane to<br />
transition between PROSOCO<br />
R-GUARD ® MVP Air & Moisture<br />
Barrier and foundation<br />
waterproofing.<br />
3. Install flashing to drain liquid<br />
water to the exterior of the wall<br />
assembly.<br />
4. Install PROSOCO R-GUARD ®<br />
joint detail to create seamless<br />
transition.<br />
PROSOCO R-GUARD ®<br />
Air & Water-Resistive Barrier<br />
Termination at Grade-Sheathing Flush<br />
with Foundation<br />
PROSOCO details are illustrations of construction. They are guidelines, intended<br />
for use by the design/construction professional, to assist in developing project<br />
specific details. They should be modified where necessary to accommodate individual<br />
project conditions. Refer to appropriate PROSOCO specification for design<br />
requirements. Refer to local building code for any special requirements.<br />
www.prosoco.com<br />
Detail No.: 20.10a<br />
PROSOCO R-GUARD ® MVP<br />
Air & Water-Resistive Barrier<br />
Termination at Grade-Sheathing Flush<br />
with Foundation<br />
Detail No.: 20.10a<br />
page 13
PROSOCO R-GUARD ®<br />
Air & Water-Resistive Barrier<br />
Termination at Grade-Sheathing<br />
Overlapping Foundation<br />
Detail No.: 20.10b<br />
PROSOCO R-GUARD ® MVP<br />
Air & Water-Resistive Barrier<br />
Termination at Grade-Sheathing<br />
Overlapping Foundation<br />
Detail No.: 20.10b<br />
PROSOCO details are illustrations of construction. They are guidelines, intended<br />
for use by the design/construction professional, to assist in developing project<br />
specific details. They should be modified where necessary to accommodate individual<br />
project conditions. Refer to appropriate PROSOCO specification for design<br />
requirements. Refer to local building code for any special requirements.<br />
page 14<br />
www.prosoco.com<br />
Support structure<br />
Sheathing<br />
PROSOCO R-GUARD ® joint<br />
treatment (See options in detail<br />
20.09)<br />
PROSOCO R-GUARD ®<br />
Spray Wrap<br />
PROSOCO R-GUARD ® joint detail<br />
(See options in detail 20.09. A<br />
third option is to use R-GUARD<br />
Transition Membrane over the top<br />
of the flashing and apply<br />
R-GUARD Spray Wrap over that.)<br />
Flashing<br />
PROSOCO R-GUARD ® Transition<br />
Membrane (coatable) or other<br />
barrier sheet membrane<br />
lapped onto the foundation<br />
waterproofing<br />
Foundation waterproofing<br />
Support structure<br />
Sheathing<br />
PROSOCO R-GUARD ® joint<br />
treatment (See options in detail<br />
20.09)<br />
PROSOCO R-GUARD ® MVP<br />
PROSOCO R-GUARD ® joint detail<br />
(See options in detail 20.09. A<br />
third option is to use R-GUARD<br />
Transition Membrane over the top<br />
of the flashing and apply<br />
R-GUARD MVP over that.)<br />
Flashing<br />
PROSOCO R-GUARD ® Transition<br />
Membrane (coatable) or other<br />
barrier sheet membrane<br />
lapped onto the foundation<br />
waterproofing<br />
Foundation waterproofing<br />
Notes:<br />
1. Protect wall assembly from<br />
moisture rising through the<br />
concrete foundation.<br />
2. Install suitable self-adhering<br />
barrier sheet membrane to<br />
transition between PROSOCO<br />
R-GUARD ® Air &<br />
Water-Resistive Barrier and<br />
foundation waterproofing.<br />
3. Install flashing to drain liquid<br />
water to the exterior of the wall<br />
assembly.<br />
4. Install PROSOCO R-GUARD ®<br />
joint detail to create seamless<br />
transition.<br />
Notes:<br />
1. Protect wall assembly from<br />
moisture rising through the<br />
concrete foundation.<br />
2. Install suitable self-adhering<br />
barrier sheet membrane to<br />
transition between PROSOCO<br />
R-GUARD ® MVP Air &<br />
Water-Resistive Barrier and<br />
foundation waterproofing.<br />
3. Install flashing to drain liquid<br />
water to the exterior of the wall<br />
assembly.<br />
4. Install PROSOCO R-GUARD ®<br />
joint detail to create seamless<br />
transition.
Frame<br />
Rough opening protected by<br />
PROSOCO R-GUARD ® rough<br />
opening treatment. Detail 20.24<br />
or 20.27<br />
PROSOCO R-GUARD ®<br />
Spray Wrap<br />
Head Flashing<br />
Pan flashing<br />
Sill Flashing for nail fin window<br />
Frame<br />
Rough opening protected by<br />
PROSOCO R-GUARD ® rough<br />
opening treatment. Detail 20.24<br />
or 20.27<br />
PROSOCO R-GUARD ® MVP<br />
Head Flashing<br />
Pan flashing<br />
Sill Flashing for nail fin window<br />
Notes:<br />
Prepare opening<br />
prior to the installation of the<br />
window or mechanical<br />
equipment. Coordinate<br />
installation with other trades.<br />
1. Wrap the rough opening as<br />
per Detail 20.24 or Detail<br />
20.27<br />
2. Once the rough opening<br />
treatment has dried, apply<br />
R-GUARD Spray Wrap to the<br />
rough opening and the entire<br />
wall surface.<br />
3. Incorporate head flashing as<br />
noted in PROSOCO Detail<br />
20.23b.<br />
4. For box windows, incorporate<br />
a pan flashing as noted in<br />
PROSOCO Detail 20.23c.<br />
5. For nail-fin windows,<br />
incorporate a sill flashing under<br />
the window as noted in<br />
PROSOCO Detail 20.23d.<br />
Notes:<br />
Prepare opening<br />
prior to the installation of the<br />
window or mechanical<br />
equipment. Coordinate<br />
installation with other trades.<br />
1. Wrap the rough opening as<br />
per Detail 20.24 or Detail<br />
20.27<br />
2. Once the rough opening<br />
treatment has dried, apply<br />
R-GUARD MVP to the rough<br />
opening and the entire wall<br />
surface.<br />
3. Incorporate head flashing as<br />
noted in PROSOCO Detail<br />
20.23b.<br />
4. For box windows, incorporate<br />
a pan flashing as noted in<br />
PROSOCO Detail 20.23c.<br />
5. For nail-fin windows,<br />
incorporate a sill flashing under<br />
the window as noted in<br />
PROSOCO Detail 20.23d.<br />
PROSOCO R-GUARD ®<br />
Air & Water-Resistive Barrier<br />
Rough Opening Preparation<br />
Detail No.: 20.23a<br />
PROSOCO R-GUARD ® MVP<br />
Air & Water-Resistive Barrier<br />
Rough Opening Preparation<br />
Detail No.: 20.23a<br />
PROSOCO details are illustrations of construction. They are guidelines, intended<br />
for use by the design/construction professional, to assist in developing project<br />
specific details. They should be modified where necessary to accommodate individual<br />
project conditions. Refer to appropriate PROSOCO specification for design<br />
requirements. Refer to local building code for any special requirements.<br />
www.prosoco.com page 15
PROSOCO R-GUARD ®<br />
Air & Water-Resistive Barrier<br />
Window Head Flashing<br />
Detail No.: 20.23b<br />
PROSOCO R-GUARD ® MVP<br />
Air & Water-Resistive Barrier<br />
Window Head Flashing<br />
Detail No.: 20.23b<br />
PROSOCO details are illustrations of construction. They are guidelines, intended<br />
for use by the design/construction professional, to assist in developing project<br />
specific details. They should be modified where necessary to accommodate individual<br />
project conditions. Refer to appropriate PROSOCO specification for design<br />
requirements. Refer to local building code for any special requirements.<br />
page 16<br />
www.prosoco.com<br />
Structure<br />
Sheathing<br />
PROSOCO R-GUARD ®<br />
Spray Wrap<br />
Head flashing<br />
PROSOCO R-GUARD ®<br />
joint treatment (see option 1<br />
and option 2 at detail 20.09)<br />
Rough opening preparation<br />
Structure<br />
Sheathing<br />
PROSOCO R-GUARD ® MVP<br />
Head flashing<br />
PROSOCO R-GUARD ®<br />
joint treatment (see option 1<br />
and option 2 at detail 20.09)<br />
Rough opening preparation<br />
Notes:<br />
1. Prepare the rough opening<br />
as noted in detail 20.24 or<br />
detail 20.27.<br />
2. Provide head flashing as<br />
required by local codes and<br />
window manufacturer.<br />
3. Coordinate installation of<br />
moisture barrier and flashing<br />
with window installer and other<br />
related trades.<br />
Notes:<br />
1. Prepare the rough opening<br />
as noted in detail 20.24 or<br />
detail 20.27.<br />
2. Provide head flashing as<br />
required by local codes and<br />
window manufacturer.<br />
3. Coordinate installation of<br />
moisture barrier and flashing<br />
with window installer and other<br />
related trades.
Structure<br />
Sheathing<br />
PROSOCO R-GUARD ®<br />
rough opening treatment<br />
PROSOCO R-GUARD ®<br />
Spray Wrap<br />
Pan flashing<br />
Sealant bead<br />
“Air seal”<br />
PROSOCO R-GUARD ®<br />
Spray Wrap<br />
PROSOCO R-GUARD ®<br />
rough opening treatment<br />
Pan flashing<br />
Sealant bead<br />
Structure<br />
Sheathing<br />
PROSOCO R-GUARD ®<br />
rough opening treatment<br />
PROSOCO R-GUARD ® MVP<br />
Pan flashing<br />
Sealant bead<br />
“Air seal”<br />
PROSOCO R-GUARD ® MVP<br />
PROSOCO R-GUARD ®<br />
rough opening treatment<br />
Pan flashing<br />
Sealant bead<br />
Notes:<br />
1. Prepare rough opening as<br />
shown in PROSOCO Detail<br />
20.24 or detail 20.27.<br />
2. Install one or more beads of<br />
neutral-cure, silicone sealant<br />
on the sill and jamb.<br />
3. Install the sill pan flashing<br />
into the wet sealant and press<br />
it into place. Tool any excess<br />
sealant off at the top of the<br />
side dams and back edge of<br />
the pan flashing.<br />
4. When installed, the seal<br />
between the pan flashing and<br />
the rough opening protection<br />
must be air tight.<br />
5. Install PROSOCO R-GUARD ®<br />
rough opening treatment to<br />
the end dams so water<br />
draining down the jamb will be<br />
directed into the pan flashing<br />
and out of the wall assembly.<br />
PROSOCO R-GUARD ®<br />
Air & Water-Resistive Barrier<br />
Pan Flashing at Opening Sill<br />
Detail No.: 20.23c<br />
PROSOCO R-GUARD ® MVP<br />
Air & Water-Resistive Barrier<br />
Pan Flashing at Opening Sill<br />
Detail No.: 20.23c<br />
PROSOCO details are illustrations of construction. They are guidelines, intended<br />
for use by the design/construction professional, to assist in developing project<br />
specific details. They should be modified where necessary to accommodate individual<br />
project conditions. Refer to appropriate PROSOCO specification for design<br />
requirements. Refer to local building code for any special requirements.<br />
www.prosoco.com page 17
PROSOCO R-GUARD ®<br />
Air & Water-Resistive Barrier<br />
Sill Flashing: Nail-fin Window<br />
Detail No.: 20.23d<br />
PROSOCO R-GUARD ® MVP<br />
Air & Water-Resistive Barrier<br />
Sill Flashing: Nail-fin Window<br />
Detail No.: 20.23d<br />
PROSOCO details are illustrations of construction. They are guidelines, intended<br />
for use by the design/construction professional, to assist in developing project<br />
specific details. They should be modified where necessary to accommodate individual<br />
project conditions. Refer to appropriate PROSOCO specification for design<br />
requirements. Refer to local building code for any special requirements.<br />
page 18<br />
www.prosoco.com<br />
Structure<br />
Sheathing<br />
PROSOCO R-GUARD ®<br />
rough opening treatment<br />
PROSOCO R-GUARD ®<br />
Spray Wrap<br />
Sill edge<br />
PROSOCO R-GUARD ®<br />
Spray Wrap<br />
PROSOCO R-GUARD ®<br />
joint treatment<br />
(refer to detail 20.09)<br />
Flashing<br />
Air seal<br />
Window<br />
Spacer<br />
Structure<br />
Sheathing<br />
PROSOCO R-GUARD ®<br />
rough opening treatment<br />
PROSOCO R-GUARD ® MVP<br />
Sill edge<br />
PROSOCO R-GUARD ® MVP<br />
PROSOCO R-GUARD ®<br />
joint treatment<br />
(refer to detail 20.09)<br />
Flashing<br />
Air seal<br />
Window<br />
Spacer<br />
Notes:<br />
1. Prepare rough opening as<br />
shown in PROSOCO Detail<br />
20.24 or Detail 20.27<br />
2. Install flashing below the<br />
rough opening.<br />
3. Shingle lap PROSOCO<br />
R-GUARD ® joint treatment<br />
over the flashing as shown in<br />
PROSOCO Detail 20.09.<br />
4. Install the nail-fin windows<br />
with an air seal around the<br />
interior perimeter of the<br />
window and with spacers at the<br />
sill to create a gap for water to<br />
drain between the sill flange<br />
and the PROSOCO R-GUARD ®<br />
Spray Wrap.<br />
Notes:<br />
1. Prepare rough opening as<br />
shown in PROSOCO Detail<br />
20.24 or Detail 20.27<br />
2. Install flashing below the<br />
rough opening.<br />
3. Shingle lap PROSOCO<br />
R-GUARD ® joint treatment<br />
over the flashing as shown in<br />
PROSOCO Detail 20.09.<br />
4. Install the nail-fin windows<br />
with an air seal around the<br />
interior perimeter of the<br />
window and with spacers at the<br />
sill to create a gap for water to<br />
drain between the sill flange<br />
and the PROSOCO R-GUARD ®<br />
MVP.
Step 1<br />
Step 3<br />
Step 1<br />
Step 3<br />
Step 2<br />
Step 2<br />
Step 1<br />
Wrap inside corners with<br />
2" (50mm) wide strip of<br />
R-GUARD Tape lapping<br />
onto face of wall<br />
Step 2<br />
Wrap sill with 9" (230mm)<br />
wide R-GUARD Tape<br />
returning up the jambs a<br />
minimum of 4" (100mm)<br />
Place minimum 4"<br />
(100mm) wide R-GUARD<br />
Tape at all sheathing<br />
joints<br />
Step 3<br />
Wrap jambs with<br />
minimum 9" (230mm)<br />
wide R-GUARD Tape<br />
lapping minimum 2.5"<br />
(64mm) over extension<br />
from sill, then wrap head<br />
Step 4<br />
Coat the R-GUARD Tape<br />
with R-GUARD Fill then coat<br />
the entire wall surface and<br />
rough opening with<br />
R-GUARD Spray Wrap.<br />
Step 1<br />
Wrap inside corners with<br />
2" (50mm) wide strip of<br />
R-GUARD Tape lapping<br />
onto face of wall<br />
Step 2<br />
Wrap sill with 9" (230mm)<br />
wide R-GUARD Tape<br />
returning up the jambs a<br />
minimum of 4" (100mm)<br />
Place minimum 4"<br />
(100mm) wide R-GUARD<br />
Tape at all sheathing<br />
joints<br />
Step 3<br />
Wrap jambs with<br />
minimum 9" (230mm)<br />
wide R-GUARD Tape<br />
lapping minimum 2.5"<br />
(64mm) over extension<br />
from sill, then wrap head<br />
Step 4<br />
Coat the R-GUARD Tape<br />
with R-GUARD Fill then coat<br />
the entire wall surface and<br />
rough opening with<br />
R-GUARD MVP.<br />
Notes:<br />
1. Prepare opening prior to the<br />
installation of the window or<br />
mechanical equipment.<br />
2. Incorporate flashing as<br />
per other details<br />
where flashing is shown.<br />
3. The complete installation of<br />
window or mechanical<br />
equipment should include an<br />
airseal between the object<br />
and the PROSOCO R-GUARD ®<br />
protection inbound of the<br />
outer sealant joint.<br />
PROSOCO R-GUARD ®<br />
Air & Water-Resistive Barrier<br />
Reinforcement at Rough Openings<br />
Detail No.: 20.24<br />
PROSOCO R-GUARD ® MVP<br />
Air & Water-Resistive Barrier<br />
Reinforcement at Rough Openings<br />
Detail No.: 20.24<br />
PROSOCO details are illustrations of construction. They are guidelines, intended<br />
for use by the design/construction professional, to assist in developing project<br />
specific details. They should be modified where necessary to accommodate individual<br />
project conditions. Refer to appropriate PROSOCO specification for design<br />
requirements. Refer to local building code for any special requirements.<br />
www.prosoco.com page 19
PROSOCO R-GUARD ®<br />
Air & Water-Resistive Barrier<br />
Floor Line Expansion Joint-Connect to<br />
Adjacent System<br />
Detail No.: 20.51<br />
PROSOCO R-GUARD ® MVP<br />
Air & Water-Resistive Barrier<br />
Floor Line Expansion Joint-Connect to<br />
Adjacent System<br />
Detail No.: 20.51<br />
PROSOCO details are illustrations of construction. They are guidelines, intended<br />
for use by the design/construction professional, to assist in developing project<br />
specific details. They should be modified where necessary to accommodate individual<br />
project conditions. Refer to appropriate PROSOCO specification for design<br />
requirements. Refer to local building code for any special requirements.<br />
page 20<br />
www.prosoco.com<br />
Sheathing<br />
PROSOCO R-GUARD ®<br />
Spray Wrap<br />
PROSOCO R-GUARD ®<br />
Spray Wrap<br />
PROSOCO R-GUARD ®<br />
joint treatment<br />
(See options in detail 20.09.<br />
A third option is to use the<br />
R-GUARD Transition Membrane<br />
over the top of the flashing and<br />
apply R-GUARD Spray Wrap<br />
over that.)<br />
Flashing<br />
PROSOCO R-GUARD ® Transition<br />
Membrane (coatable) or other<br />
sheet membrane lapped onto<br />
the foundation waterproofing<br />
Adjacent air/moisture<br />
barrier material<br />
Sheathing<br />
PROSOCO R-GUARD ® MVP<br />
PROSOCO R-GUARD ® MVP<br />
PROSOCO R-GUARD ®<br />
joint treatment<br />
(See options in detail 20.09.<br />
A third option is to use the<br />
R-GUARD Transition Membrane<br />
over the top of the flashing and<br />
apply R-GUARD MVP<br />
over that.)<br />
Flashing<br />
PROSOCO R-GUARD ® Transition<br />
Membrane (coatable) or other<br />
sheet membrane lapped onto<br />
the foundation waterproofing<br />
Adjacent air/moisture<br />
barrier material<br />
Notes:<br />
1. Provide barrier sheet<br />
membrane to connect air and<br />
moisture plane of the<br />
PROSOCO R-GUARD ® to the<br />
adjacent air & moisture<br />
barrier.<br />
2. Provide flashing to drain<br />
any moisture above the change<br />
in membranes. Drainage from<br />
behind one cladding assembly<br />
into another is not recommended.<br />
3. Provide PROSOCO<br />
R-GUARD ® joint treatment<br />
over the upper edge of the<br />
flashing to ensure moisture is<br />
drained onto the flashing and<br />
out of the wall assembly. Refer<br />
to PROSOCO Detail 20.09.<br />
Notes:<br />
1. Provide barrier sheet<br />
membrane to connect air and<br />
moisture plane of the<br />
PROSOCO R-GUARD ® MVP to<br />
the adjacent air & moisture<br />
barrier.<br />
2. Provide flashing to drain<br />
any moisture above the<br />
change in membranes.<br />
Drainage from behind one<br />
cladding assembly into another<br />
is not recommended.<br />
3. Provide PROSOCO<br />
R-GUARD ® MVP joint<br />
treatment over the upper edge<br />
of the flashing to ensure<br />
moisture is drained onto the<br />
flashing and out of the wall<br />
assembly. Refer to PROSOCO<br />
Detail 20.09.
Sheathing<br />
PROSOCO R-GUARD ®<br />
Spray Wrap<br />
Backer rod<br />
PROSOCO R-GUARD ®<br />
Transition membrane<br />
(coatable) on non-coatable<br />
barrier membrane<br />
Wall cladding material<br />
Exterior sealant over<br />
backer rod<br />
Sheathing<br />
PROSOCO R-GUARD ® MVP<br />
Backer rod<br />
PROSOCO R-GUARD ®<br />
Transition membrane<br />
(coatable) on non-coatable<br />
barrier membrane<br />
Wall cladding material<br />
Exterior sealant over<br />
backer rod<br />
Notes:<br />
1. Provide barrier sheet<br />
membrane to connect the air<br />
and moisture plane of the<br />
R-GUARD Spray Wrap across<br />
the joint.<br />
2. Install a backer rod in the<br />
joint to provide support for<br />
the barrier sheet membrane<br />
but not restrict its movement.<br />
3. Provide exterior sealant<br />
over backer rod and weep<br />
holes over flashing to direct<br />
water that enters the cavity to<br />
the exterior of the wall<br />
cladding.<br />
Notes:<br />
1. Provide barrier sheet<br />
membrane to connect the air<br />
and moisture plane of the<br />
R-GUARD MVP across the<br />
joint.<br />
2. Install a backer rod in the<br />
joint to provide support for<br />
the barrier sheet membrane<br />
but not restrict its movement.<br />
3. Provide exterior sealant<br />
over backer rod and weep<br />
holes over flashing to direct<br />
water that enters the cavity<br />
to the exterior of the wall<br />
cladding.<br />
PROSOCO R-GUARD ®<br />
Air & Water-Resistive Barrier<br />
Expansion Joint<br />
Detail No.: 20.53<br />
PROSOCO R-GUARD ® MVP<br />
Air & Water-Resistive Barrier<br />
Expansion Joint<br />
Detail No.: 20.53<br />
PROSOCO details are illustrations of construction. They are guidelines, intended<br />
for use by the design/construction professional, to assist in developing project<br />
specific details. They should be modified where necessary to accommodate individual<br />
project conditions. Refer to appropriate PROSOCO specification for design<br />
requirements. Refer to local building code for any special requirements.<br />
www.prosoco.com page 21
PROSOCO R-GUARD ®<br />
Air & Water-Resistive Barrier<br />
Parapet Termination<br />
Detail No.: 20.60<br />
PROSOCO R-GUARD ® MVP<br />
Air & Water-Resistive Barrier<br />
Parapet Termination<br />
Detail No.: 20.60<br />
PROSOCO details are illustrations of construction. They are guidelines, intended<br />
for use by the design/construction professional, to assist in developing project<br />
specific details. They should be modified where necessary to accommodate individual<br />
project conditions. Refer to appropriate PROSOCO specification for design<br />
requirements. Refer to local building code for any special requirements.<br />
page 22<br />
www.prosoco.com<br />
Coping<br />
Blocking and support<br />
for coping<br />
Roof membrane,<br />
PROSOCO R-GUARD ®<br />
Transition Membrane (coatable)<br />
or other barrier membrane<br />
PROSOCO R-GUARD ®<br />
joint treatment<br />
(refer to Detail 20.09)<br />
PROSOCO R-GUARD ®<br />
Spray Wrap<br />
Coping<br />
Blocking and support<br />
for coping<br />
Roof membrane,<br />
PROSOCO R-GUARD ®<br />
Transition Membrane (coatable)<br />
or other barrier membrane<br />
PROSOCO R-GUARD ®<br />
joint treatment<br />
(refer to Detail 20.09)<br />
PROSOCO R-GUARD ® MVP<br />
Notes:<br />
1. Install the PROSOCO<br />
R-GUARD ® Air & Water-<br />
Resistive Barrier to the surface<br />
of the wall assembly and over<br />
the top of the parapet where<br />
possible, and/or wrap roofing<br />
membrane over the parapet to<br />
lap over PROSOCO R-GUARD ® .<br />
2. Install a durable coping<br />
flashing and support to protect<br />
the parapet from water<br />
intrusion and to direct water<br />
away from the face of the<br />
cladding.<br />
Note: It may be difficult to<br />
isolate the parapet cavity from<br />
the conditioned space on the<br />
building interior. Air leakage<br />
through the parapet can be a<br />
source of condensation,<br />
especially in cold climates<br />
where the stack effect will force<br />
warm humid air up into the<br />
parapet. The continuity of the<br />
air seal at this location is<br />
important to maintain.<br />
Notes:<br />
1. Install the PROSOCO<br />
R-GUARD ® MVP Air &<br />
Water-Resistive Barrier to the<br />
surface of the wall assembly<br />
and over the top of the parapet<br />
where possible, and/or wrap<br />
roofing membrane over the<br />
parapet to lap over PROSOCO<br />
R-GUARD ® .<br />
2. Install a durable coping<br />
flashing and support to protect<br />
the parapet from water<br />
intrusion and to direct water<br />
away from the face of the<br />
cladding.<br />
Note: It may be difficult to<br />
isolate the parapet cavity from<br />
the conditioned space on the<br />
building interior. Air leakage<br />
through the parapet can be a<br />
source of condensation,<br />
especially in cold climates<br />
where the stack effect will force<br />
warm humid air up into the<br />
parapet. The continuity of the<br />
air seal at this location is<br />
important to maintain.
Supporting structure<br />
Sheathing<br />
Supporting structure lower wall<br />
or balcony<br />
PROSOCO R-GUARD ®<br />
Spray Wrap<br />
PROSOCO R-GUARD ®<br />
joint treatment<br />
(refer to Detail 20.09)<br />
Supporting structure<br />
Sheathing<br />
Supporting structure lower wall<br />
or balcony<br />
PROSOCO R-GUARD ® MVP<br />
PROSOCO R-GUARD ®<br />
joint treatment<br />
(refer to Detail 20.09)<br />
Notes:<br />
1. Detail shows components of<br />
PROSOCO R-GUARD ® Air &<br />
Water-Resistive Barrier<br />
installed over a saddle<br />
condition.<br />
2. The PROSOCO R-GUARD ®<br />
Air & Water-Resistive Barrier<br />
is intended to be integrated<br />
with appropiate saddle and cap<br />
flashing to drain water to the<br />
face of the finish cladding.<br />
Notes:<br />
1. Detail shows components of<br />
PROSOCO R-GUARD ® MVP<br />
Air & Water-Resistive Barrier<br />
installed over a saddle<br />
condition.<br />
2. The PROSOCO R-GUARD ®<br />
MVP Air & Water-Resistive<br />
Barrier is intended to be<br />
integrated with appropiate<br />
saddle and cap flashing to<br />
drain water to the face of the<br />
finish cladding.<br />
PROSOCO R-GUARD ®<br />
Air & Water-Resistive Barrier<br />
Barrier Saddle<br />
Detail No.: 20.64<br />
PROSOCO R-GUARD ® MVP<br />
Air & Water-Resistive Barrier<br />
Barrier Saddle<br />
Detail No.: 20.64<br />
PROSOCO details are illustrations of construction. They are guidelines, intended<br />
for use by the design/construction professional, to assist in developing project<br />
specific details. They should be modified where necessary to accommodate individual<br />
project conditions. Refer to appropriate PROSOCO specification for design<br />
requirements. Refer to local building code for any special requirements.<br />
www.prosoco.com page 23
PROSOCO R-GUARD ®<br />
Air & Water-Resistive Barrier<br />
Preparation through Wall Construction<br />
Detail No.: 20.70<br />
PROSOCO R-GUARD ® MVP<br />
Air & Water-Resistive Barrier<br />
Preparation through Wall Construction<br />
Detail No.: 20.70<br />
PROSOCO details are illustrations of construction. They are guidelines, intended<br />
for use by the design/construction professional, to assist in developing project<br />
specific details. They should be modified where necessary to accommodate individual<br />
project conditions. Refer to appropriate PROSOCO specification for design<br />
requirements. Refer to local building code for any special requirements.<br />
page 24<br />
www.prosoco.com<br />
Supporting structure<br />
Sheathing<br />
PROSOCO R-GUARD ®<br />
joint treatment<br />
(refer to Detail 20.09)<br />
PROSOCO R-GUARD ®<br />
Spray Wrap<br />
Sealant with backer rod<br />
between pipe and cladding<br />
Pipe penetration<br />
Supporting structure<br />
Sheathing<br />
PROSOCO R-GUARD ®<br />
joint treatment<br />
(refer to Detail 20.09)<br />
PROSOCO R-GUARD ® MVP<br />
Sealant with backer rod<br />
between pipe and cladding<br />
Pipe penetration<br />
Notes:<br />
1. Detail assumes pipe is<br />
installed prior to the cladding.<br />
2. Provide air seal around the<br />
penetration with PROSOCO<br />
R-GUARD ® joint treatment to<br />
reduce air pressure difference<br />
across the outer cladding<br />
sealant. Refer to PROSOCO<br />
Detail 20.09.<br />
Alternate 2. Provide barrier<br />
sheet membrane in lieu of<br />
PROSOCO R-GUARD ® joint<br />
treatment at penetration. Lap<br />
barrier sheet membrane over<br />
PROSOCO R-GUARD ® Spray<br />
Wrap.<br />
4. Seal cladding to penetrating<br />
object.<br />
Notes:<br />
1. Detail assumes pipe is<br />
installed prior to the cladding.<br />
2. Provide air seal around the<br />
penetration with PROSOCO<br />
R-GUARD ® joint treatment to<br />
reduce air pressure difference<br />
across the outer cladding<br />
sealant. Refer to PROSOCO<br />
Detail 20.09.<br />
Alternate 2. Provide barrier<br />
sheet membrane in lieu of<br />
PROSOCO R-GUARD ® joint<br />
treatment at penetration. Lap<br />
barrier sheet membrane over<br />
PROSOCO R-GUARD ® MVP.<br />
4. Seal cladding to penetrating<br />
object.
Sheathing<br />
Low expansion<br />
urethane foam<br />
Cured foam shaved off<br />
flush with the surface<br />
PROSOCO R-GUARD ®<br />
joint treatment<br />
(refer to Detail 20.09)<br />
PROSOCO R-GUARD ®<br />
Spray Wrap<br />
Low expansion urethane<br />
foam applied around pipe<br />
to rough cut opening<br />
Pipe penetration<br />
Cured foam shaved off<br />
flush with the surface<br />
PROSOCO R-GUARD ®<br />
joint treatment<br />
(refer to Detail 20.09)<br />
PROSOCO R-GUARD ®<br />
Spray Wrap<br />
Sheathing<br />
Low expansion<br />
urethane foam<br />
Cured foam shaved off<br />
flush with the surface<br />
PROSOCO R-GUARD ®<br />
joint treatment<br />
(refer to Detail 20.09)<br />
PROSOCO R-GUARD ® MVP<br />
Low expansion urethane<br />
foam applied around pipe<br />
to rough cut opening<br />
Pipe penetration<br />
Cured foam shaved off<br />
flush with the surface<br />
PROSOCO R-GUARD ®<br />
joint treatment<br />
(refer to Detail 20.09)<br />
PROSOCO R-GUARD ® MVP<br />
Notes:<br />
1. Details illustrate a method of<br />
sealing joints and penetrations<br />
that exceed specified<br />
tolerances.<br />
2. Seal the opening with low<br />
expansion urethane foam.<br />
Follow the foam manufacturer’s<br />
directions for substrate<br />
preparation, installation<br />
methods and curing. The<br />
opening should be completely<br />
sealed.<br />
3. Shave off the excess foam so<br />
the surface is flush with the<br />
outer face of the sheathing.<br />
4. Apply the PROSOCO<br />
R-GUARD ® Air & Water-<br />
Resistive Barrier as per<br />
specifications.<br />
Notes:<br />
1. Details illustrate a method of<br />
sealing joints and penetrations<br />
that exceed specified<br />
tolerances.<br />
2. Seal the opening with low<br />
expansion urethane foam.<br />
Follow the foam manufacturer’s<br />
directions for substrate<br />
preparation, installation<br />
methods and curing. The<br />
opening should be completely<br />
sealed.<br />
3. Shave off the excess foam so<br />
the surface is flush with the<br />
outer face of the sheathing.<br />
4. Apply the PROSOCO<br />
R-GUARD ® MVP Air &<br />
Water-Resistive Barrier as per<br />
specifications.<br />
PROSOCO R-GUARD ®<br />
Air & Water-Resistive Barrier<br />
Preparation of “Rough” Joints and<br />
Penetrations<br />
Detail No.: 20.71<br />
PROSOCO R-GUARD ® MVP<br />
Air & Water-Resistive Barrier<br />
Preparation of “Rough” Joints and<br />
Penetrations<br />
Detail No.: 20.71<br />
PROSOCO details are illustrations of construction. They are guidelines, intended<br />
for use by the design/construction professional, to assist in developing project<br />
specific details. They should be modified where necessary to accommodate individual<br />
project conditions. Refer to appropriate PROSOCO specification for design<br />
requirements. Refer to local building code for any special requirements.<br />
www.prosoco.com page 25
page 26<br />
www.prosoco.com<br />
PROSOCO R-GUARD ®<br />
Tape<br />
PROSOCO R-<strong>GUARD®</strong><br />
Tape is a self-adhering, glass<br />
fiber tape for use with<br />
PROSOCO R-<strong>GUARD®</strong><br />
Fill to reinforce rough<br />
openings, inside and<br />
outside corners and<br />
sheathing joints. It’s<br />
part of the PROSOCO<br />
R-<strong>GUARD®</strong> systems<br />
for stopping destructive<br />
air and moisture<br />
leakage through cavity<br />
wall masonry veneer<br />
construction, as well as in<br />
stucco, EIFS and all other<br />
building wall assemblies.<br />
PROSOCO R-GUARD ®<br />
Joint Fabric<br />
PROSOCO R-<strong>GUARD®</strong> Joint Fabric<br />
is a reinforced, non-woven fabric<br />
for covering sheathing joints and<br />
rough openings. It’s part of<br />
the PROSOCO R-<strong>GUARD®</strong><br />
systems for stopping destructive<br />
air and moisture leakage<br />
through cavity wall masonry<br />
veneer construction, as well as<br />
in stucco, EIFS and all other<br />
building wall assemblies.
PROSOCO R-GUARD ®<br />
Transition Membrane<br />
PROSOCO R-<strong>GUARD®</strong> Transition Membrane<br />
is a self-adhering waterproof air barrier material<br />
which works as a secondary seal for sealant<br />
joints, or as an air barrier connection<br />
material bridging dissimilar materials.<br />
It’s part of the PROSOCO<br />
R-<strong>GUARD®</strong> systems for stopping<br />
destructive air and moisture<br />
leakage through cavity wall<br />
masonry veneer construction, as<br />
well as in stucco, EIFS and all<br />
other building wall assemblies.<br />
R-GUARD Transition<br />
Membrane has a unique<br />
fabric facing that when coated<br />
with R-GUARD Spray Wrap,<br />
MVP or VB allows for maximum<br />
UV protection. When used with<br />
R-GUARD Spray Wrap or MVP,<br />
UV protection is extended to 6-months.<br />
R-GUARD VB extends UV protection to 60days.<br />
PROSOCO R-GUARD ® EZCorner<br />
PROSOCO R-<strong>GUARD®</strong> EZCorner is a<br />
preformed fabric for quick, easy installation<br />
at corners inside rough openings. It’s<br />
part of the PROSOCO R-<strong>GUARD®</strong><br />
systems for stopping destructive air<br />
and moisture leakage through<br />
cavity wall masonry veneer<br />
construction, as well as in<br />
stucco, EIFS and all other<br />
building wall assemblies.<br />
www.prosoco.com<br />
page 27
Copyright PROSOCO 10-2009