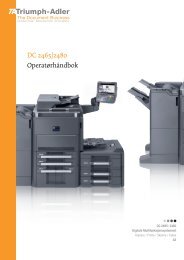
DC 2465/2480 - TA Triumph-Adler GmbH
DC 2465/2480 - TA Triumph-Adler GmbH
DC 2465/2480 - TA Triumph-Adler GmbH

You also want an ePaper? Increase the reach of your titles
YUMPU automatically turns print PDFs into web optimized ePapers that Google loves.
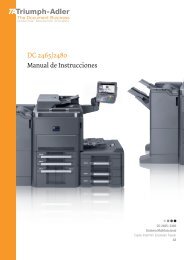
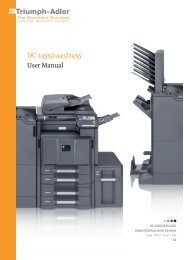
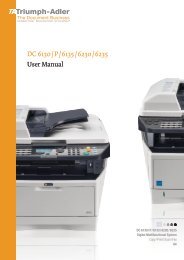
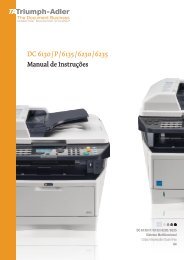
<strong>DC</strong> <strong>2465</strong>/<strong>2480</strong><br />
User Manual<br />
<strong>DC</strong> <strong>2465</strong> / <strong>2480</strong><br />
Digital Multifunctional Systems<br />
Copy / Print / Scan / Fax<br />
A3
Introduction<br />
Thank you for your purchase of CD 1480/<strong>DC</strong> <strong>2480</strong>/CD 1465/<strong>DC</strong> <strong>2465</strong>.<br />
This Operation Guide is intended to help you operate the machine correctly, perform routine maintenance and<br />
take a simple troubleshooting action as necessary, so that you can always use the machine in good condition.<br />
Please read this Operation Guide before you start using the machine, and keep it close to the machine for easy<br />
reference.<br />
We recommend the use of our own brand supplies. We will not be liable for any damage caused by the use of<br />
third party supplies in this machine.<br />
In this Operation Guide, CD 1480/<strong>DC</strong> <strong>2480</strong>/CD 1465/<strong>DC</strong> <strong>2465</strong> are referred to as 65 ppm model, and 80 ppm<br />
model respectively.<br />
Included Guides<br />
The following guides are supplied with the machine. Refer to them as necessary.<br />
Quick Guide<br />
Describes the procedures for frequently-used operations.<br />
Safety Guide<br />
Provides safety and cautionary information for the installation and use of the machine. Be sure to read this guide<br />
before using the machine.<br />
Safety Guide (CD 1480/<strong>DC</strong> <strong>2480</strong>/CD 1465/<strong>DC</strong> <strong>2465</strong>)<br />
Describes the machine installation space, cautionary labels, and other information. Be sure to read this guide<br />
before using the machine.<br />
DVD (Product Library)<br />
• Operation Guide (This Guide) • Printing System Driver User Guide<br />
• FAX Operation Guide • Network FAX Driver Operation Guide<br />
• Card Authentication Kit (B) Operation Guide • Network Tool for Direct Printing Operation Guide<br />
• Data Security Kit (E) Operation Guide • Network Print Monitor User Guide<br />
• Embedded Web Server RX Operation Guide • File Management Utility User Guide
Safety Conventions in This Guide<br />
The sections of this guide and parts of the machine marked with symbols are safety warnings meant to protect<br />
the user, other individuals and surrounding objects, and ensure correct and safe usage of the machine. The<br />
symbols and their meanings are indicated below.<br />
Symbols<br />
WARNING: Indicates that serious injury or even death may result<br />
from insufficient attention to or incorrect compliance with the<br />
related points.<br />
CAUTION: Indicates that personal injury or mechanical damage<br />
may result from insufficient attention to or incorrect compliance<br />
with the related points.<br />
The symbol indicates that the related section includes safety warnings. Specific points of attention are<br />
indicated inside the symbol.<br />
.... [General warning]<br />
.... [Warning of high temperature]<br />
The symbol indicates that the related section includes information on prohibited actions. Specifics of the<br />
prohibited action are indicated inside the symbol.<br />
.... [Warning of prohibited action]<br />
.... [Disassembly prohibited]<br />
The symbol indicates that the related section includes information on actions which must be performed.<br />
Specifics of the required action are indicated inside the symbol.<br />
.... [Alert of required action]<br />
.... [Remove the power plug from the outlet]<br />
....<br />
[Always connect the machine to an outlet with a ground<br />
connection]<br />
Please contact your service representative to order a replacement if the safety warnings in this Operation Guide<br />
are illegible or if the guide itself is missing (fee required).<br />
NOTE: An original which resembles a bank note closely may not be copied properly in some rare cases<br />
because this machine is equipped with a counterfeiting prevention function.<br />
i
Contents<br />
ii<br />
Contents<br />
Quick Guide . . . . . . . . . . . . . . . . . . . . . . . . . . . . . . . . . . . . . . . . . . . . . . . . . . . . . . . . . . . . . . . . . vi<br />
Menu Map . . . . . . . . . . . . . . . . . . . . . . . . . . . . . . . . . . . . . . . . . . . . . . . . . . . . . . . . . . . . . . . . . . . ix<br />
Environment . . . . . . . . . . . . . . . . . . . . . . . . . . . . . . . . . . . . . . . . . . . . . . . . . . . . . . . . . . . . . . . . xxii<br />
Laser Safety (Europe). . . . . . . . . . . . . . . . . . . . . . . . . . . . . . . . . . . . . . . . . . . . . . . . . . . . . . . . .xxiv<br />
Legal Restriction on Copying/Scanning . . . . . . . . . . . . . . . . . . . . . . . . . . . . . . . . . . . . . . . . . . . xxv<br />
Legal and Safety Information . . . . . . . . . . . . . . . . . . . . . . . . . . . . . . . . . . . . . . . . . . . . . . . . . . .xxvi<br />
1 Part Names<br />
Operation Panel . . . . . . . . . . . . . . . . . . . . . . . . . . . . . . . . . . . . . . . . . . . . . . . . . . . . . . . . . . . . . 1-2<br />
Machine . . . . . . . . . . . . . . . . . . . . . . . . . . . . . . . . . . . . . . . . . . . . . . . . . . . . . . . . . . . . . . . . . . . 1-4<br />
2 Preparation before Use<br />
Check the Accessories . . . . . . . . . . . . . . . . . . . . . . . . . . . . . . . . . . . . . . . . . . . . . . . . . . . . . . . . 2-2<br />
Determining the Connection Method and Preparing Cables. . . . . . . . . . . . . . . . . . . . . . . . . . . . 2-3<br />
Connecting Cables . . . . . . . . . . . . . . . . . . . . . . . . . . . . . . . . . . . . . . . . . . . . . . . . . . . . . . . . . . . 2-5<br />
Power On/Off . . . . . . . . . . . . . . . . . . . . . . . . . . . . . . . . . . . . . . . . . . . . . . . . . . . . . . . . . . . . . . . 2-9<br />
Low Power Mode and Auto Low Power Mode . . . . . . . . . . . . . . . . . . . . . . . . . . . . . . . . . . . . . 2-11<br />
Sleep and Auto Sleep . . . . . . . . . . . . . . . . . . . . . . . . . . . . . . . . . . . . . . . . . . . . . . . . . . . . . . . . 2-12<br />
Adjusting the Operation Panel Angle . . . . . . . . . . . . . . . . . . . . . . . . . . . . . . . . . . . . . . . . . . . . 2-12<br />
Switching the Language for Display [Language]. . . . . . . . . . . . . . . . . . . . . . . . . . . . . . . . . . . . 2-13<br />
Setting Date and Time . . . . . . . . . . . . . . . . . . . . . . . . . . . . . . . . . . . . . . . . . . . . . . . . . . . . . . . 2-14<br />
Network Setup (LAN Cable Connection) . . . . . . . . . . . . . . . . . . . . . . . . . . . . . . . . . . . . . . . . . 2-15<br />
Installing Software. . . . . . . . . . . . . . . . . . . . . . . . . . . . . . . . . . . . . . . . . . . . . . . . . . . . . . . . . . . 2-18<br />
Embedded Web Server RX (Settings for E-mail) . . . . . . . . . . . . . . . . . . . . . . . . . . . . . . . . . . . 2-26<br />
Loading Paper. . . . . . . . . . . . . . . . . . . . . . . . . . . . . . . . . . . . . . . . . . . . . . . . . . . . . . . . . . . . . . 2-29<br />
Loading Originals . . . . . . . . . . . . . . . . . . . . . . . . . . . . . . . . . . . . . . . . . . . . . . . . . . . . . . . . . . . 2-46<br />
3 Basic Operation<br />
Login/Logout . . . . . . . . . . . . . . . . . . . . . . . . . . . . . . . . . . . . . . . . . . . . . . . . . . . . . . . . . . . . . . . . 3-2<br />
Enter key and Quick No. Search key . . . . . . . . . . . . . . . . . . . . . . . . . . . . . . . . . . . . . . . . . . . . . 3-4<br />
Touch Panel Display . . . . . . . . . . . . . . . . . . . . . . . . . . . . . . . . . . . . . . . . . . . . . . . . . . . . . . . . . . 3-5<br />
Original Preview . . . . . . . . . . . . . . . . . . . . . . . . . . . . . . . . . . . . . . . . . . . . . . . . . . . . . . . . . . . . . 3-6<br />
Copying. . . . . . . . . . . . . . . . . . . . . . . . . . . . . . . . . . . . . . . . . . . . . . . . . . . . . . . . . . . . . . . . . . . . 3-7<br />
Sending. . . . . . . . . . . . . . . . . . . . . . . . . . . . . . . . . . . . . . . . . . . . . . . . . . . . . . . . . . . . . . . . . . . 3-22<br />
Confirmation Screen of Destinations . . . . . . . . . . . . . . . . . . . . . . . . . . . . . . . . . . . . . . . . . . . . 3-28<br />
Preparation for sending a document to a PC . . . . . . . . . . . . . . . . . . . . . . . . . . . . . . . . . . . . . . 3-29<br />
Specifying Destination. . . . . . . . . . . . . . . . . . . . . . . . . . . . . . . . . . . . . . . . . . . . . . . . . . . . . . . . 3-39<br />
Using the Document Box . . . . . . . . . . . . . . . . . . . . . . . . . . . . . . . . . . . . . . . . . . . . . . . . . . . . . 3-42<br />
Canceling Jobs . . . . . . . . . . . . . . . . . . . . . . . . . . . . . . . . . . . . . . . . . . . . . . . . . . . . . . . . . . . . . 3-51<br />
Quick Setup Screen . . . . . . . . . . . . . . . . . . . . . . . . . . . . . . . . . . . . . . . . . . . . . . . . . . . . . . . . . 3-52<br />
Program . . . . . . . . . . . . . . . . . . . . . . . . . . . . . . . . . . . . . . . . . . . . . . . . . . . . . . . . . . . . . . . . . . 3-55<br />
Registering Shortcuts (Copy, Send, and Document Box Settings) . . . . . . . . . . . . . . . . . . . . . . 3-57<br />
Using the Internet Browser . . . . . . . . . . . . . . . . . . . . . . . . . . . . . . . . . . . . . . . . . . . . . . . . . . . . 3-58<br />
Using Weekly Timer . . . . . . . . . . . . . . . . . . . . . . . . . . . . . . . . . . . . . . . . . . . . . . . . . . . . . . . . . 3-60<br />
Checking Counter . . . . . . . . . . . . . . . . . . . . . . . . . . . . . . . . . . . . . . . . . . . . . . . . . . . . . . . . . . . 3-61<br />
Help Screen . . . . . . . . . . . . . . . . . . . . . . . . . . . . . . . . . . . . . . . . . . . . . . . . . . . . . . . . . . . . . . . 3-61<br />
4 Copying Functions<br />
Original Size . . . . . . . . . . . . . . . . . . . . . . . . . . . . . . . . . . . . . . . . . . . . . . . . . . . . . . . . . . . . . . . . 4-2<br />
Paper Selection. . . . . . . . . . . . . . . . . . . . . . . . . . . . . . . . . . . . . . . . . . . . . . . . . . . . . . . . . . . . . . 4-3
iii<br />
Contents<br />
Mixed Size Originals . . . . . . . . . . . . . . . . . . . . . . . . . . . . . . . . . . . . . . . . . . . . . . . . . . . . . . . . . . 4-6<br />
Original Orientation . . . . . . . . . . . . . . . . . . . . . . . . . . . . . . . . . . . . . . . . . . . . . . . . . . . . . . . . . . . 4-9<br />
Fold . . . . . . . . . . . . . . . . . . . . . . . . . . . . . . . . . . . . . . . . . . . . . . . . . . . . . . . . . . . . . . . . . . . . . . 4-11<br />
Paper Output. . . . . . . . . . . . . . . . . . . . . . . . . . . . . . . . . . . . . . . . . . . . . . . . . . . . . . . . . . . . . . . 4-13<br />
Combine . . . . . . . . . . . . . . . . . . . . . . . . . . . . . . . . . . . . . . . . . . . . . . . . . . . . . . . . . . . . . . . . . . 4-14<br />
Margin/Centering . . . . . . . . . . . . . . . . . . . . . . . . . . . . . . . . . . . . . . . . . . . . . . . . . . . . . . . . . . . 4-16<br />
Border Erase. . . . . . . . . . . . . . . . . . . . . . . . . . . . . . . . . . . . . . . . . . . . . . . . . . . . . . . . . . . . . . . 4-18<br />
Booklet . . . . . . . . . . . . . . . . . . . . . . . . . . . . . . . . . . . . . . . . . . . . . . . . . . . . . . . . . . . . . . . . . . . 4-20<br />
Cover . . . . . . . . . . . . . . . . . . . . . . . . . . . . . . . . . . . . . . . . . . . . . . . . . . . . . . . . . . . . . . . . . . . . 4-22<br />
Form Overlay . . . . . . . . . . . . . . . . . . . . . . . . . . . . . . . . . . . . . . . . . . . . . . . . . . . . . . . . . . . . . . 4-23<br />
Page #. . . . . . . . . . . . . . . . . . . . . . . . . . . . . . . . . . . . . . . . . . . . . . . . . . . . . . . . . . . . . . . . . . . . 4-24<br />
Memo Page. . . . . . . . . . . . . . . . . . . . . . . . . . . . . . . . . . . . . . . . . . . . . . . . . . . . . . . . . . . . . . . . 4-26<br />
Image Repeat . . . . . . . . . . . . . . . . . . . . . . . . . . . . . . . . . . . . . . . . . . . . . . . . . . . . . . . . . . . . . . 4-28<br />
Text Stamp . . . . . . . . . . . . . . . . . . . . . . . . . . . . . . . . . . . . . . . . . . . . . . . . . . . . . . . . . . . . . . . . 4-30<br />
Bates Stamp . . . . . . . . . . . . . . . . . . . . . . . . . . . . . . . . . . . . . . . . . . . . . . . . . . . . . . . . . . . . . . . 4-31<br />
EcoPrint . . . . . . . . . . . . . . . . . . . . . . . . . . . . . . . . . . . . . . . . . . . . . . . . . . . . . . . . . . . . . . . . . . 4-33<br />
Sharpness. . . . . . . . . . . . . . . . . . . . . . . . . . . . . . . . . . . . . . . . . . . . . . . . . . . . . . . . . . . . . . . . . 4-34<br />
Background Density Adj.. . . . . . . . . . . . . . . . . . . . . . . . . . . . . . . . . . . . . . . . . . . . . . . . . . . . . . 4-35<br />
Prevent Bleed-thru . . . . . . . . . . . . . . . . . . . . . . . . . . . . . . . . . . . . . . . . . . . . . . . . . . . . . . . . . . 4-36<br />
Continuous Scan. . . . . . . . . . . . . . . . . . . . . . . . . . . . . . . . . . . . . . . . . . . . . . . . . . . . . . . . . . . . 4-37<br />
Auto Image Rotation . . . . . . . . . . . . . . . . . . . . . . . . . . . . . . . . . . . . . . . . . . . . . . . . . . . . . . . . . 4-38<br />
Negative Image. . . . . . . . . . . . . . . . . . . . . . . . . . . . . . . . . . . . . . . . . . . . . . . . . . . . . . . . . . . . . 4-38<br />
Mirror Image . . . . . . . . . . . . . . . . . . . . . . . . . . . . . . . . . . . . . . . . . . . . . . . . . . . . . . . . . . . . . . . 4-39<br />
Job Finish Notice . . . . . . . . . . . . . . . . . . . . . . . . . . . . . . . . . . . . . . . . . . . . . . . . . . . . . . . . . . . 4-40<br />
File Name Entry . . . . . . . . . . . . . . . . . . . . . . . . . . . . . . . . . . . . . . . . . . . . . . . . . . . . . . . . . . . . 4-42<br />
Priority Override . . . . . . . . . . . . . . . . . . . . . . . . . . . . . . . . . . . . . . . . . . . . . . . . . . . . . . . . . . . . 4-42<br />
Repeat Copy . . . . . . . . . . . . . . . . . . . . . . . . . . . . . . . . . . . . . . . . . . . . . . . . . . . . . . . . . . . . . . . 4-43<br />
DP Read Action . . . . . . . . . . . . . . . . . . . . . . . . . . . . . . . . . . . . . . . . . . . . . . . . . . . . . . . . . . . . 4-44<br />
5 Printing<br />
Printing - Printing from Applications . . . . . . . . . . . . . . . . . . . . . . . . . . . . . . . . . . . . . . . . . . . . . . 5-2<br />
Banner printing . . . . . . . . . . . . . . . . . . . . . . . . . . . . . . . . . . . . . . . . . . . . . . . . . . . . . . . . . . . . . . 5-5<br />
Using a Job Box . . . . . . . . . . . . . . . . . . . . . . . . . . . . . . . . . . . . . . . . . . . . . . . . . . . . . . . . . . . . 5-10<br />
6 Sending Functions<br />
Original Size . . . . . . . . . . . . . . . . . . . . . . . . . . . . . . . . . . . . . . . . . . . . . . . . . . . . . . . . . . . . . . . . 6-2<br />
Sending Size. . . . . . . . . . . . . . . . . . . . . . . . . . . . . . . . . . . . . . . . . . . . . . . . . . . . . . . . . . . . . . . . 6-4<br />
Zoom. . . . . . . . . . . . . . . . . . . . . . . . . . . . . . . . . . . . . . . . . . . . . . . . . . . . . . . . . . . . . . . . . . . . . . 6-6<br />
Centering . . . . . . . . . . . . . . . . . . . . . . . . . . . . . . . . . . . . . . . . . . . . . . . . . . . . . . . . . . . . . . . . . . 6-7<br />
Mixed Size Originals . . . . . . . . . . . . . . . . . . . . . . . . . . . . . . . . . . . . . . . . . . . . . . . . . . . . . . . . . . 6-8<br />
2-sided/Book Original . . . . . . . . . . . . . . . . . . . . . . . . . . . . . . . . . . . . . . . . . . . . . . . . . . . . . . . . 6-11<br />
Original Orientation . . . . . . . . . . . . . . . . . . . . . . . . . . . . . . . . . . . . . . . . . . . . . . . . . . . . . . . . . . 6-12<br />
File Format . . . . . . . . . . . . . . . . . . . . . . . . . . . . . . . . . . . . . . . . . . . . . . . . . . . . . . . . . . . . . . . . 6-14<br />
File Separation . . . . . . . . . . . . . . . . . . . . . . . . . . . . . . . . . . . . . . . . . . . . . . . . . . . . . . . . . . . . . 6-15<br />
PDF Encryption Functions . . . . . . . . . . . . . . . . . . . . . . . . . . . . . . . . . . . . . . . . . . . . . . . . . . . . 6-16<br />
Original Image. . . . . . . . . . . . . . . . . . . . . . . . . . . . . . . . . . . . . . . . . . . . . . . . . . . . . . . . . . . . . . 6-18<br />
Density . . . . . . . . . . . . . . . . . . . . . . . . . . . . . . . . . . . . . . . . . . . . . . . . . . . . . . . . . . . . . . . . . . . 6-19<br />
Scan Resolution . . . . . . . . . . . . . . . . . . . . . . . . . . . . . . . . . . . . . . . . . . . . . . . . . . . . . . . . . . . . 6-20<br />
Sharpness. . . . . . . . . . . . . . . . . . . . . . . . . . . . . . . . . . . . . . . . . . . . . . . . . . . . . . . . . . . . . . . . . 6-21<br />
Background Density Adj.. . . . . . . . . . . . . . . . . . . . . . . . . . . . . . . . . . . . . . . . . . . . . . . . . . . . . . 6-22<br />
Color Selection . . . . . . . . . . . . . . . . . . . . . . . . . . . . . . . . . . . . . . . . . . . . . . . . . . . . . . . . . . . . . 6-23<br />
Continuous Scan. . . . . . . . . . . . . . . . . . . . . . . . . . . . . . . . . . . . . . . . . . . . . . . . . . . . . . . . . . . . 6-24<br />
Prevent Bleed-thru . . . . . . . . . . . . . . . . . . . . . . . . . . . . . . . . . . . . . . . . . . . . . . . . . . . . . . . . . . 6-25<br />
Border Erase. . . . . . . . . . . . . . . . . . . . . . . . . . . . . . . . . . . . . . . . . . . . . . . . . . . . . . . . . . . . . . . 6-26
iv<br />
Contents<br />
File Name Entry . . . . . . . . . . . . . . . . . . . . . . . . . . . . . . . . . . . . . . . . . . . . . . . . . . . . . . . . . . . . 6-28<br />
E-mail Subject/Body . . . . . . . . . . . . . . . . . . . . . . . . . . . . . . . . . . . . . . . . . . . . . . . . . . . . . . . . . 6-29<br />
WSD Scan/DSM Scan . . . . . . . . . . . . . . . . . . . . . . . . . . . . . . . . . . . . . . . . . . . . . . . . . . . . . . . 6-30<br />
Scanning using TWAIN . . . . . . . . . . . . . . . . . . . . . . . . . . . . . . . . . . . . . . . . . . . . . . . . . . . . . . . 6-33<br />
Job Finish Notice . . . . . . . . . . . . . . . . . . . . . . . . . . . . . . . . . . . . . . . . . . . . . . . . . . . . . . . . . . . 6-36<br />
Send and Print . . . . . . . . . . . . . . . . . . . . . . . . . . . . . . . . . . . . . . . . . . . . . . . . . . . . . . . . . . . . . 6-37<br />
Send and Store . . . . . . . . . . . . . . . . . . . . . . . . . . . . . . . . . . . . . . . . . . . . . . . . . . . . . . . . . . . . . 6-37<br />
FTP Encrypted TX . . . . . . . . . . . . . . . . . . . . . . . . . . . . . . . . . . . . . . . . . . . . . . . . . . . . . . . . . . 6-38<br />
Text Stamp . . . . . . . . . . . . . . . . . . . . . . . . . . . . . . . . . . . . . . . . . . . . . . . . . . . . . . . . . . . . . . . . 6-39<br />
Bates Stamp . . . . . . . . . . . . . . . . . . . . . . . . . . . . . . . . . . . . . . . . . . . . . . . . . . . . . . . . . . . . . . . 6-40<br />
Color Type. . . . . . . . . . . . . . . . . . . . . . . . . . . . . . . . . . . . . . . . . . . . . . . . . . . . . . . . . . . . . . . . . 6-42<br />
Scanning with FMU Connection . . . . . . . . . . . . . . . . . . . . . . . . . . . . . . . . . . . . . . . . . . . . . . . . 6-43<br />
7 Document Box<br />
Using a Custom Box . . . . . . . . . . . . . . . . . . . . . . . . . . . . . . . . . . . . . . . . . . . . . . . . . . . . . . . . . . 7-2<br />
Job Box . . . . . . . . . . . . . . . . . . . . . . . . . . . . . . . . . . . . . . . . . . . . . . . . . . . . . . . . . . . . . . . . . . . 7-14<br />
Printing Documents Stored in Removable USB Memory . . . . . . . . . . . . . . . . . . . . . . . . . . . . . 7-22<br />
Saving Documents to USB Memory (Scan to USB) . . . . . . . . . . . . . . . . . . . . . . . . . . . . . . . . . 7-24<br />
Removing USB Memory . . . . . . . . . . . . . . . . . . . . . . . . . . . . . . . . . . . . . . . . . . . . . . . . . . . . . . 7-26<br />
8 Status / Job Cancel<br />
Checking Job Status . . . . . . . . . . . . . . . . . . . . . . . . . . . . . . . . . . . . . . . . . . . . . . . . . . . . . . . . . . 8-2<br />
Checking Job History . . . . . . . . . . . . . . . . . . . . . . . . . . . . . . . . . . . . . . . . . . . . . . . . . . . . . . . . . 8-9<br />
Pause and Resumption of Jobs . . . . . . . . . . . . . . . . . . . . . . . . . . . . . . . . . . . . . . . . . . . . . . . . 8-11<br />
Canceling of Jobs . . . . . . . . . . . . . . . . . . . . . . . . . . . . . . . . . . . . . . . . . . . . . . . . . . . . . . . . . . . 8-11<br />
Priority Override for Waiting Jobs . . . . . . . . . . . . . . . . . . . . . . . . . . . . . . . . . . . . . . . . . . . . . . . 8-12<br />
Reordering Print Jobs . . . . . . . . . . . . . . . . . . . . . . . . . . . . . . . . . . . . . . . . . . . . . . . . . . . . . . . . 8-12<br />
Checking the Remaining Amount of Toner and Paper (Paper/Supplies) . . . . . . . . . . . . . . . . . 8-13<br />
Device/Communication . . . . . . . . . . . . . . . . . . . . . . . . . . . . . . . . . . . . . . . . . . . . . . . . . . . . . . . 8-14<br />
9 Default Setting (System Menu)<br />
Common Settings . . . . . . . . . . . . . . . . . . . . . . . . . . . . . . . . . . . . . . . . . . . . . . . . . . . . . . . . . . . . 9-2<br />
Copy . . . . . . . . . . . . . . . . . . . . . . . . . . . . . . . . . . . . . . . . . . . . . . . . . . . . . . . . . . . . . . . . . . . . . 9-42<br />
Send . . . . . . . . . . . . . . . . . . . . . . . . . . . . . . . . . . . . . . . . . . . . . . . . . . . . . . . . . . . . . . . . . . . . . 9-46<br />
Document Box/Removable Memory . . . . . . . . . . . . . . . . . . . . . . . . . . . . . . . . . . . . . . . . . . . . . 9-55<br />
Printer . . . . . . . . . . . . . . . . . . . . . . . . . . . . . . . . . . . . . . . . . . . . . . . . . . . . . . . . . . . . . . . . . . . . 9-57<br />
Report . . . . . . . . . . . . . . . . . . . . . . . . . . . . . . . . . . . . . . . . . . . . . . . . . . . . . . . . . . . . . . . . . . . . 9-64<br />
Adjustment/Maintenance . . . . . . . . . . . . . . . . . . . . . . . . . . . . . . . . . . . . . . . . . . . . . . . . . . . . . 9-68<br />
Date/Timer . . . . . . . . . . . . . . . . . . . . . . . . . . . . . . . . . . . . . . . . . . . . . . . . . . . . . . . . . . . . . . . . 9-76<br />
Edit Destination (Address Book/Adding One Touch Keys) . . . . . . . . . . . . . . . . . . . . . . . . . . . . 9-81<br />
Internet . . . . . . . . . . . . . . . . . . . . . . . . . . . . . . . . . . . . . . . . . . . . . . . . . . . . . . . . . . . . . . . . . . . 9-88<br />
Application . . . . . . . . . . . . . . . . . . . . . . . . . . . . . . . . . . . . . . . . . . . . . . . . . . . . . . . . . . . . . . . . 9-90<br />
System Initialization . . . . . . . . . . . . . . . . . . . . . . . . . . . . . . . . . . . . . . . . . . . . . . . . . . . . . . . . . 9-93<br />
Restart Entire Device . . . . . . . . . . . . . . . . . . . . . . . . . . . . . . . . . . . . . . . . . . . . . . . . . . . . . . . . 9-93<br />
Network. . . . . . . . . . . . . . . . . . . . . . . . . . . . . . . . . . . . . . . . . . . . . . . . . . . . . . . . . . . . . . . . . . . 9-94<br />
Interface Block Setting . . . . . . . . . . . . . . . . . . . . . . . . . . . . . . . . . . . . . . . . . . . . . . . . . . . . . . 9-107<br />
Security Level . . . . . . . . . . . . . . . . . . . . . . . . . . . . . . . . . . . . . . . . . . . . . . . . . . . . . . . . . . . . . 9-108<br />
Document Guard. . . . . . . . . . . . . . . . . . . . . . . . . . . . . . . . . . . . . . . . . . . . . . . . . . . . . . . . . . . 9-108<br />
Data Security . . . . . . . . . . . . . . . . . . . . . . . . . . . . . . . . . . . . . . . . . . . . . . . . . . . . . . . . . . . . . 9-110<br />
Optional Function . . . . . . . . . . . . . . . . . . . . . . . . . . . . . . . . . . . . . . . . . . . . . . . . . . . . . . . . . . 9-112<br />
Accessibility Display (Enlarged Touch Panel Display) . . . . . . . . . . . . . . . . . . . . . . . . . . . . . . 9-113<br />
10 Management<br />
User Login Setting . . . . . . . . . . . . . . . . . . . . . . . . . . . . . . . . . . . . . . . . . . . . . . . . . . . . . . . . . . 10-2
v<br />
Contents<br />
Job Accounting Setting . . . . . . . . . . . . . . . . . . . . . . . . . . . . . . . . . . . . . . . . . . . . . . . . . . . . . . 10-20<br />
11 Maintenance<br />
Regular Maintenance . . . . . . . . . . . . . . . . . . . . . . . . . . . . . . . . . . . . . . . . . . . . . . . . . . . . . . . . 11-2<br />
Cleaning . . . . . . . . . . . . . . . . . . . . . . . . . . . . . . . . . . . . . . . . . . . . . . . . . . . . . . . . . . . . . . . . . 11-11<br />
12 Troubleshooting<br />
Solving Malfunctions . . . . . . . . . . . . . . . . . . . . . . . . . . . . . . . . . . . . . . . . . . . . . . . . . . . . . . . . . 12-2<br />
Responding when Error Messages. . . . . . . . . . . . . . . . . . . . . . . . . . . . . . . . . . . . . . . . . . . . . . 12-7<br />
Clearing Paper Jams . . . . . . . . . . . . . . . . . . . . . . . . . . . . . . . . . . . . . . . . . . . . . . . . . . . . . . . 12-21<br />
Appendix<br />
Optional Equipment . . . . . . . . . . . . . . . . . . . . . . . . . . . . . . . . . . . . . . . . . . . . . . . . . . . .Appendix-2<br />
Character Entry Method . . . . . . . . . . . . . . . . . . . . . . . . . . . . . . . . . . . . . . . . . . . . . . . . .Appendix-8<br />
Paper . . . . . . . . . . . . . . . . . . . . . . . . . . . . . . . . . . . . . . . . . . . . . . . . . . . . . . . . . . . . . .Appendix-11<br />
Specifications . . . . . . . . . . . . . . . . . . . . . . . . . . . . . . . . . . . . . . . . . . . . . . . . . . . . . . . .Appendix-19<br />
Glossary . . . . . . . . . . . . . . . . . . . . . . . . . . . . . . . . . . . . . . . . . . . . . . . . . . . . . . . . . . . .Appendix-28<br />
Index . . . . . . . . . . . . . . . . . . . . . . . . . . . . . . . . . . . . . . . . . . . . . . . . . . . . . . . . . . . . . . . . . . .Index-1
Quick Guide<br />
To make copies To print<br />
Be sure to read Legal and Safety Information<br />
before using this machine.<br />
It copies.<br />
Simply press the Start key to make<br />
copies. You can also fine-tune the<br />
copy settings by changing the<br />
paper size, adjusting the density,<br />
etc.<br />
It prints.<br />
What<br />
you want<br />
to do<br />
Setup<br />
Operation<br />
Copying with<br />
specific<br />
settings<br />
Placing Originals on<br />
the Platen...2-46<br />
Copying Functions<br />
...4-1<br />
Printing Documents<br />
Stored in Removable<br />
USB Memory<br />
Loading Paper...2-29<br />
Printing<br />
Documents Stored<br />
in Removable USB<br />
Memory... 7-22<br />
*1: For more information, refer to the Printing System Driver User Guide.<br />
vi<br />
Administrator tasks<br />
You can print via a network or print<br />
a PDF file directly from USB<br />
memory.<br />
Print<br />
via a<br />
network<br />
Connecting Cables<br />
Network Setup<br />
(LAN Cable Connection)<br />
Install the printer<br />
driver on your<br />
computer *1<br />
Printing -<br />
Printing from<br />
Applications<br />
...5-2
To send documents<br />
It sends.<br />
What<br />
you want<br />
to do<br />
Setup<br />
Operation<br />
You can send scanned images via a network. Or, you can also store scanned images in<br />
USB memory.<br />
Send<br />
as<br />
E-mail<br />
Connecting Cables<br />
Network Setup (LAN Cable Connection)<br />
Create a shared folder on the destination computer.<br />
vii<br />
Send to<br />
Folder<br />
(SMB)<br />
Edit Destination (Address Book/Adding One<br />
Touch Keys)...9-81 *1<br />
Placing Originals on the Platen...2-46<br />
Sending...3-22<br />
Sending Functions...6-1<br />
Administrator tasks<br />
Saving<br />
Documents to<br />
USB Memory<br />
Plug in the USB<br />
memory<br />
Saving Documents<br />
to USB Memory<br />
(Scan to USB)...7-24<br />
*1: If the destination is not stored in the address book, you can send by entering the address<br />
directly.
To send a FAX<br />
It faxes.<br />
What<br />
you want<br />
to do<br />
Setup<br />
Operation<br />
As well as sending a FAX via telephone lines, you can also send a FAX via a network.<br />
NOTE: For more information on setting up and sending a FAX, refer to the FAX System<br />
(V) Operation Guide.<br />
Send a FAX<br />
FAX Operation<br />
(Basic)...3-1<br />
on the FAX System (V)<br />
Operation Guide<br />
viii<br />
FAX directly<br />
from a<br />
computer<br />
Connect the modular cord for the<br />
telephone line to this machine.<br />
Selection of Telephone Line<br />
(Inch version only)<br />
Network Setup<br />
(LAN Cable Connection)<br />
Install the Network FAX<br />
Driver on your computer *1<br />
Using the Address Book...3-17<br />
on the FAX System (V) Operation Guide<br />
Loading Paper...2-29<br />
About Network<br />
FAX...9-1<br />
on the FAX System (V)<br />
Operation Guide<br />
Administrator tasks<br />
FAX without using the<br />
telephone line<br />
(Internet FAX (i-FAX))<br />
Internet Fax (i-FAX)<br />
(Optional)...8-1<br />
on the FAX System (V)<br />
Operation Guide<br />
*1: For more information, refer to the Network FAX Driver Operation Guide.<br />
*2: If the destination is not stored in the address book, you can send the FAX by entering the<br />
address directly.<br />
*2
Menu Map<br />
(The names displayed on the touch panel are used here. These may differ from the referenced titles.)<br />
Org./Paper/Finishing Original Size (page 4-2)<br />
ix<br />
Paper Selection (page 4-3)<br />
Mixed Size Originals (page 4-6)<br />
Original Orientation (page 4-9)<br />
Fold (page 4-11)<br />
Collate/Offset (page 3-14)<br />
Staple/Punch Staple<br />
(page 3-18)<br />
Paper Output (page 4-13)<br />
Image Quality Density (page 3-8)<br />
Original Image (page 3-9)<br />
EcoPrint (page 4-33)<br />
Sharpness (page 4-34)<br />
Background Density Adj. (page 4-35)<br />
Prevent Bleed-thru (page 4-36)<br />
Layout/Edit Zoom (page 3-10)<br />
Combine (page 4-14)<br />
Margin/Centering (page 4-16)<br />
Border Erase (page 4-18)<br />
Booklet (page 4-20)<br />
Duplex (page 3-12)<br />
Cover (page 4-22)<br />
Form Overlay (page 4-23)<br />
Page # (page 4-24)<br />
Memo Page (page 4-26)<br />
Image Repeat (page 4-28)<br />
Text Stamp (page 4-30)<br />
Bates Stamp (page 4-31)<br />
Punch<br />
(page 3-20)
Advanced Setup Continuous Scan (page 4-37)<br />
Program (page 3-55)<br />
x<br />
Auto Image Rotation (page 4-38)<br />
Negative Image (page 4-38)<br />
Mirror Image (page 4-39)<br />
Job Finish Notice (page 4-40)<br />
File Name Entry (page 4-42)<br />
Priority Override (page 4-42)<br />
Repeat Copy (page 4-43)<br />
DP Read Action (page 4-44)<br />
Destination Address Book (page 3-39)<br />
E-mail Addr Entry (page 3-23)<br />
Folder Path Entry (page 3-24)<br />
FAX No. Entry (refer to Fax Operation Guide)<br />
i-FAX Addr Entry (refer to Fax Operation Guide)<br />
WSD Scan/DSM Scan (page 6-30)<br />
Org./Sending Data Format Original Size (page 6-2)<br />
Mixed Size Originals (page 6-8)<br />
2-sided/Book Original (page 6-11)<br />
Original Orientation (page 6-12)<br />
Sending Size (page 6-4)<br />
File Format (page 6-14)<br />
File Separation (page 6-15)<br />
Long Original (refer to Fax Operation Guide)<br />
Color/Image Quality Density (page 6-19)<br />
Original Image (page 6-18)<br />
Scan Resolution (page 6-20)<br />
FAX TX Resolution<br />
(refer to Fax Operation Guide)<br />
Color Selection (page 6-23)<br />
Sharpness (page 6-21)<br />
Background Density Adj. (page 6-22)<br />
Prevent Bleed-thru (page 6-25)
Advanced Setup Zoom (page 6-6)<br />
Centering (page 6-7)<br />
Border Erase (page 6-26)<br />
Program (page 3-55)<br />
xi<br />
FAX Delayed Transmission<br />
(refer to Fax Operation Guide)<br />
Continuous Scan (page 6-24)<br />
Job Finish Notice (page 6-36)<br />
File Name Entry (page 6-28)<br />
E-mail Subject/Body (page 6-29)<br />
i-FAX Subject/Body<br />
(refer to Fax Operation Guide)<br />
FAX Direct Transmission<br />
(refer to Fax Operation Guide)<br />
FAX Polling RX<br />
(refer to Fax Operation Guide)<br />
Send and Print (page 6-37)<br />
Send and Store (page 6-37)<br />
FTP Encrypted TX (page 6-38)<br />
Text Stamp (page 6-39)<br />
Bates Stamp (page 6-40)<br />
Custom Box Store File Functions Original Size (page 6-2)<br />
Mixed Size Originals (page 6-8)<br />
2-sided/Book Original (page 6-11)<br />
Original Orientation (page 6-12)<br />
Storing Size (page 7-4)<br />
Prevent Bleed-thru (page 6-25)<br />
Density (page 6-19)<br />
Original Image (page 6-18)<br />
Scan Resolution (page 6-20)<br />
Color Selection (page 6-23)<br />
Sharpness (page 6-21)<br />
Background Density Adj. (page 6-22)<br />
Zoom (page 6-6)<br />
Centering (page 6-7)
Border Erase (page 6-26)<br />
Continuous Scan (page 6-24)<br />
Job Finish Notice (page 6-36)<br />
File Name Entry (page 6-28)<br />
Open Print Functions Paper Selection (page 4-3)<br />
Collate/Offset (page 3-14)<br />
Staple/Punch Staple<br />
(page 3-18)<br />
Punch<br />
(page 3-20)<br />
Image<br />
Paper Output (page 4-13)<br />
Combine (page 4-14)<br />
Margin/Centering (page 4-16)<br />
Booklet (page 4-20)<br />
Duplex (page 3-12)<br />
Cover (page 4-22)<br />
Form Overlay (page 7-9)<br />
Page # (page 4-24)<br />
Job Finish Notice (page 4-40)<br />
File Name Entry (page 4-42)<br />
Delete after Printed<br />
(page 7-2)<br />
Priority Override (page 4-42)<br />
EcoPrint (page 4-33)<br />
Zoom (page 6-6)<br />
Fold (page 4-11)<br />
Text Stamp (page 4-30)<br />
Bates Stamp (page 4-31)<br />
Density (page 3-8)<br />
Quality<br />
Original Image (page 3-9)<br />
Sharpness (page 4-34)<br />
Background Density Adj.<br />
(page 4-35)<br />
Prevent Bleed-thru<br />
(page 4-36)<br />
Send Destination (page 3-39)<br />
xii
Functions Sending Size (page 6-4)<br />
File Format (page 6-14)<br />
FAX TX Resolution<br />
(refer to Fax Operation<br />
Guide)<br />
Centering (page 6-7)<br />
FAX Delayed Transmission<br />
(refer to Fax Operation<br />
Guide)<br />
Job Finish Notice (page 6-36)<br />
File Name Entry (page 6-28)<br />
E-mail Subject/Body<br />
(page 6-29)<br />
i-FAX Subject/Body<br />
(refer to Fax Operation<br />
Guide)<br />
FTP Encrypted TX<br />
(page 6-38)<br />
Delete after Transmitted<br />
(page 7-8)<br />
Zoom (page 6-6)<br />
File Separation (page 6-15)<br />
Text Stamp (page 6-39)<br />
Bates Stamp (page 6-40)<br />
Color/Image Density (page 6-19)<br />
Quality<br />
Original Image (page 6-18)<br />
Resolution (page 6-20)<br />
Color Selection (page 6-23)<br />
Sharpness (page 6-21)<br />
Background Density Adj.<br />
(page 6-22)<br />
Prevent Bleed-thru<br />
(page 6-25)<br />
Join (page 7-11)<br />
Move/Copy (page 7-10)<br />
Detail (page 3-45)<br />
Search(Name) (page 3-45)<br />
Search(No.) (page 3-45)<br />
Add/Edit Box (page 7-2)<br />
xiii
Job Box Private Print/Stored Job (page 7-14)<br />
Removable<br />
Memory<br />
Quick Copy/Proof and Hold (page 7-15)<br />
Repeat Copy (page 7-18)<br />
Form for Form Overlay (page 7-20)<br />
Store File Functions Original Size (page 6-2)<br />
Mixed Size Originals (page 6-8)<br />
2-sided/Book Original (page 6-11)<br />
Original Orientation (page 6-12)<br />
Storing Size (page 7-4)<br />
Prevent Bleed-thru (page 6-25)<br />
Density (page 6-19)<br />
Original Image (page 6-18)<br />
Scan Resolution (page 6-20)<br />
Color Selection (page 6-23)<br />
Sharpness (page 6-21)<br />
Background Density Adj. (page 6-22)<br />
Zoom (page 6-6)<br />
Centering (page 6-7)<br />
Border Erase (page 6-26)<br />
Continuous Scan (page 6-24)<br />
Job Finish Notice (page 6-36)<br />
File Name Entry (page 6-28)<br />
File Format (page 6-14)<br />
Text Stamp (page 6-39)<br />
Bates Stamp (page 6-40)<br />
Print Functions Paper Selection (page 4-3)<br />
Collate/Offset (page 3-14)<br />
Staple/Punch<br />
Paper Output (page 4-13)<br />
Duplex (page 3-12)<br />
Job Finish Notice (page 4-40)<br />
Priority Override (page 4-42)<br />
Fold (page 4-11)<br />
Staple<br />
(page 3-18)<br />
Punch<br />
(page 3-20)<br />
xiv
FAX Box (refer to Fax Operation Guide)<br />
Program (page 3-55)<br />
Printing Jobs (page 8-3)<br />
Sending Jobs (page 8-5)<br />
Storing Jobs (page 8-6)<br />
Device/Communication (page 8-14)<br />
Paper/Supplies (page 8-13)<br />
xv<br />
Text Stamp (page 4-30)<br />
Bates Stamp (page 4-31)<br />
Encrypted PDF Password (page 7-23)<br />
JPEG/TIFF Print (page 7-23)<br />
XPS Fit to Page (page 7-23)<br />
Common Settings Language (page 9-2)<br />
Default Screen (page 9-3)<br />
Sound Buzzer (page 9-4)<br />
FAX Speaker Volume<br />
(refer to Fax Operation Guide)<br />
FAX Monitor Volume<br />
(refer to Fax Operation Guide)<br />
Keyboard Layout (page Appendix-8)<br />
Original / Paper Custom Original Size (page 9-4)<br />
Settings<br />
Custom Paper Size (page 9-5)<br />
Cassette Setting (page 9-6)<br />
MP Tray Setting (page 9-7)<br />
Media Type Setting (page 9-8)<br />
Default Paper Source (page 9-9)<br />
Original Auto Detect (page 9-10)<br />
Media for Auto (Color) (page 9-10)<br />
Media for Auto (B & W) (page 9-10)<br />
Paper Source for Cover (page 9-11)<br />
Special Paper Action (page 9-11)<br />
Measurement (page 9-12)
Error Handling Duplexing Error (page 9-13)<br />
Finishing Error (page 9-13)<br />
No Staple Error (page 9-13)<br />
Finishing Pages Exceeded<br />
(page 9-13)<br />
Punch Waste Full Error (page 9-14)<br />
Paper Mismatch Error (page 9-14)<br />
Inserted Paper Mismatch (page 9-14)<br />
Paper Jam before Staple (page 9-14)<br />
Skewed or multi originals (page 9-14)<br />
Paper Output (page 9-15)<br />
Orientation Confirmation (page 9-16)<br />
Function Defaults Original Orientation (page 9-16)<br />
Original Image (Copy) (page 9-17)<br />
Org. Image (Send/Store) (page 9-17)<br />
Scan Resolution (page 9-18)<br />
FAX TX Resolution<br />
(refer to Fax Operation Guide)<br />
Color Selection (page 9-18)<br />
File Format (page 9-18)<br />
File Separation (page 9-19)<br />
Backgrnd Density (Copy) (page 9-19)<br />
BackgrndDens.(Send/Store)<br />
(page 9-20)<br />
Prevent Bleed-thru (Copy) (page 9-20)<br />
Prevent Bleed(Send/Store)<br />
(page 9-20)<br />
Zoom (page 9-21)<br />
Border Erase Default (page 9-21)<br />
Border Erase to Back Page<br />
(page 9-22)<br />
Margin Default (page 9-22)<br />
Auto Image Rotation (page 9-22)<br />
EcoPrint (page 9-23)<br />
Toner SaveLevel(EcoPrint)<br />
(page 9-23)<br />
High Comp. PDF Image (page 9-24)<br />
Color TIFF Compression (page 9-24)<br />
xvi
Image Quality (File Format)<br />
(page 9-24)<br />
Collate/Offset (page 9-25)<br />
JPEG/TIFF Print (page 9-25)<br />
XPS Fit to Page (page 9-26)<br />
Continuous Scan (page 9-26)<br />
PDF/A (page 9-26)<br />
File Name Entry (page 9-27)<br />
E-mail Subject/Body (page 9-27)<br />
Repeat Copy (page 9-28)<br />
DP Read Action (page 9-28)<br />
USB Keyboard Type (page 9-29)<br />
System Stamp (page 9-29)<br />
Manual Staple (page 9-38)<br />
Customize Status Display (page 9-39)<br />
Low Toner Alert Level (page 9-39)<br />
Offset One Page Documents (page 9-40)<br />
Job Log Display (page 9-40)<br />
Message Banner Print (page 9-41)<br />
Copy Paper Selection (page 9-42)<br />
Auto Image Rotation Action (page 9-43)<br />
Auto Paper Selection (page 9-43)<br />
Auto % Priority (page 9-44)<br />
Reserve Next Priority (page 9-44)<br />
Paper Size for Small Original (page 9-44)<br />
Preset Limit (page 9-45)<br />
Quick Setup Registration (page 9-45)<br />
Send Quick Setup Registration (page 9-46)<br />
Dest. Check before Send (page 9-46)<br />
Entry Check for New Dest. (page 9-47)<br />
Color Type (page 9-47)<br />
Default Screen (page 9-48)<br />
Send and Forward (page 9-48)<br />
Document Box/ Custom Box (page 9-55)<br />
Removable Memory<br />
FAX Box (refer to Fax Operation Guide)<br />
xvii
Job Box Quick Copy Job Retention (page 7-15)<br />
Repeat Copy Job Retention<br />
(page 7-18)<br />
Deletion of Job Retention (page 7-21)<br />
Polling Box (refer to Fax Operation Guide)<br />
Quick Setup Registration (page 9-56)<br />
FAX (refer to Fax Operation Guide)<br />
Printer Emulation (page 9-57)<br />
EcoPrint (page 9-59)<br />
Toner SaveLevel(EcoPrint) (page 9-59)<br />
Override A4/Letter (page 9-59)<br />
Duplex (page 9-60)<br />
Copies (page 9-60)<br />
Orientation (page 9-61)<br />
Form Feed Timeout (page 9-61)<br />
LF Action (page 9-62)<br />
CR Action (page 9-62)<br />
Job Name (page 9-62)<br />
User Name (page 9-63)<br />
Paper Feed Mode (page 9-63)<br />
KIR (page 9-63)<br />
System Network Host Name (page 9-94)<br />
TCP/IP Setting TCP/IP<br />
(page 9-94)<br />
IPv4 (page 9-95)<br />
IPv6 (page 9-96)<br />
Protocol Detail<br />
(page 9-98)<br />
NetWare (page 9-99)<br />
AppleTalk (page 9-99)<br />
WSD Scan (page 9-100)<br />
WSD Print (page 9-100)<br />
Enhanced WSD (page 9-100)<br />
Enhanced WSD (SSL) (page 9-101)<br />
Secure Protocol SSL (page 9-101)<br />
xviii<br />
IPP Security<br />
(page 9-102)
HTTP Security<br />
(page 9-102)<br />
LDAP Security<br />
(page 9-103)<br />
SMTP Security<br />
(page 9-103)<br />
POP3 Security<br />
(User 1)<br />
(page 9-104)<br />
POP3 Security<br />
(User 2)<br />
(page 9-104)<br />
POP3 Security<br />
(User 3)<br />
(page 9-105)<br />
IPSec (page 9-105)<br />
LAN Interface (page 9-106)<br />
Restart Network (page 9-106)<br />
Restart Entire Device (page 9-93)<br />
Interface Block USB Host (page 9-107)<br />
Setting<br />
USB Device (page 9-107)<br />
Optional Interface 1 (page 9-107)<br />
Optional Interface 2 (page 9-107)<br />
Security Level (page 9-108)<br />
Document Guard (page 9-108)<br />
Data Security (page 9-110)<br />
Optional Function (page 9-112)<br />
Date/Timer Date/Time (page 9-76)<br />
Date Format (page 9-76)<br />
Time Zone (page 9-77)<br />
Auto Panel Reset (page 9-77)<br />
Auto Sleep (page 9-78)<br />
Auto Error Clear (page 9-79)<br />
Low Power Timer (page 9-78)<br />
Panel Reset Timer (page 9-77)<br />
Sleep Timer (page 9-79)<br />
Interrupt Clear Timer (page 9-80)<br />
Error Job Skip (page 9-80)<br />
Error Clear Timer (page 9-79)<br />
xix
Adjustment/<br />
Density Adjustment Copy (page 9-68)<br />
Maintenance<br />
Send/Box (page 9-68)<br />
Background Density Copy (Auto) (page 9-69)<br />
Adj.<br />
Send/Box (Auto) (page 9-69)<br />
Correcting Black Line (page 9-70)<br />
System Initialization (page 9-70)<br />
Display Brightness (page 9-71)<br />
Silent Mode (page 9-71)<br />
Auto Color Correction (page 9-71)<br />
Tone Curve Adjustment (page 9-71)<br />
Drum Refresh1 (page 9-72)<br />
Drum Refresh2 (page 9-73)<br />
Developer Refresh (page 9-73)<br />
Calibration Cycle (page 9-74)<br />
Calibration (page 9-74)<br />
Correct Paper Curl (page 9-75)<br />
Report Print Report Status Page (page 9-64)<br />
Font List (page 9-64)<br />
Network Status (page 9-65)<br />
Service Status (page 9-65)<br />
Result Report Setting Send Result Report (page 9-65)<br />
FAX RX Result Report<br />
(refer to Fax Operation Guide)<br />
Job Finish Notice Setting<br />
(refer to Fax Operation Guide)<br />
Sending Log History Auto Sending (page 9-67)<br />
Send Log History (page 9-67)<br />
Destination (page 9-66)<br />
Job Log Subject (page 9-67)<br />
Edit Destination Address Book (page 9-81)<br />
One Touch Key (page 9-85)<br />
Print List (refer to Fax Operation Guide)<br />
Address Book Sort (page 9-87)<br />
Defaults<br />
Narrow Down (page 9-87)<br />
xx
User Login/Job User Login Setting User Login (page 10-2)<br />
Accounting<br />
Local User List (page 10-5)<br />
Local Authorization (page 10-9)<br />
Group<br />
Group<br />
Authorization Set. Authorization<br />
(page 10-10)<br />
Group List<br />
(page 10-11)<br />
Guest<br />
Guest<br />
Authorization Set. Authorization<br />
(page 10-12)<br />
Guest Property<br />
(page 10-13)<br />
Obtain NW User Property<br />
(page 10-15)<br />
Simple Login Simple Login<br />
Settings<br />
(page 10-17)<br />
Simple Login Key<br />
(page 10-17)<br />
Job Accounting Job Accounting (page 10-20)<br />
Setting<br />
Print Accounting Report (page 10-32)<br />
Total Job Accounting (page 10-29)<br />
Each Job Accounting (page 10-29)<br />
Accounting List (page 10-22)<br />
Default Setting<br />
Unknown ID Job (page 10-10)<br />
User Property(page 10-9)<br />
Application (page 9-112)<br />
Internet (page 9-88)<br />
Apply Limit<br />
(page 10-26)<br />
Copy/Printer<br />
Count<br />
(page 10-24)<br />
Default Counter<br />
Limit<br />
(page 10-26)<br />
Count by Paper<br />
Size<br />
(page 10-30)<br />
xxi
Environment<br />
The service environmental conditions are as follows:<br />
• Temperature: 50 to 90.5 °F (10 to 32.5 °C)<br />
(But humidity should be 70% or less when temperature is 90.5 °F (32.5 °C).)<br />
• Humidity: 15 to 80%<br />
(But temperature should be 86 °F (30 °C) or less when humidity is 80%.)<br />
Use coated paper at a temperature of 80.6 °F (27°C) or less and a humidity of 60% or less.<br />
Adverse environmental conditions may affect the image quality. It is recommended to use the machine at a<br />
temperature: around 60.8 to 80.6 °F or less (16 to 27 °C), humidity: around 36 to 65%. In addition, Avoid the<br />
following locations when selecting a site for the machine.<br />
The machine automatically detects and displays the following message when the environmental temperature is<br />
too high or too low.<br />
Message: "Warning for high temperature. Adjust the room temperature." or "Warning for low temperature.<br />
Adjust the room temperature."<br />
To use the machine under optimum conditions, adjust the temperature and the humidity of your room if the<br />
message is displayed.<br />
• Avoid locations near a window or with exposure to direct sunlight.<br />
• Avoid locations with vibrations.<br />
• Avoid locations with drastic temperature fluctuations.<br />
• Avoid locations with direct exposure to hot or cold air.<br />
• Avoid poorly ventilated locations.<br />
If the floor is easily damaged by casters, when this machine is moved after installation, the floor material may<br />
be damaged.<br />
During copying, some ozone is released, but the amount does not cause any ill effect to one’s health. If,<br />
however, the machine is used over a long period of time in a poorly ventilated room or when making an<br />
extremely large number of copies, the smell may become unpleasant. To maintain the appropriate environment<br />
for copy work, it is suggested that the room be properly ventilated.<br />
xxii
Cautions when handling consumables<br />
CAUTION<br />
Do not attempt to incinerate the toner container or the waste toner box. Dangerous sparks may cause<br />
burns.<br />
Keep the toner container and the waste toner box out of the reach of children.<br />
If toner happens to spill from the toner container or the waste toner box, avoid inhalation and ingestion,<br />
as well as contact with your eyes and skin.<br />
• If you do happen to inhale toner, move to a place with fresh air and gargle thoroughly with a large amount of<br />
water. If coughing develops, contact a physician.<br />
• If you do happen to ingest toner, rinse your mouth with water and drink 1 or 2 cups of water to dilute the<br />
contents of your stomach. If necessary, contact a physician.<br />
• If you do happen to get toner in your eyes, flush them thoroughly with water. If there is any remaining<br />
tenderness, contact a physician.<br />
• If toner does happen to get on your skin, wash with soap and water.<br />
Do not attempt to force open or destroy the toner container or the waste toner box.<br />
Other precautions<br />
Return the exhausted toner container and waste toner box to your dealer or service representative. The<br />
collected toner container and waste toner box will be recycled or disposed in accordance with the relevant<br />
regulations.<br />
Store the machine while avoiding exposure to direct sunlight.<br />
Store the machine in a place where the temperature stays below 40ºC while avoiding sharp changes of<br />
temperature and humidity.<br />
If the machine will not be used for an extended period of time, remove the paper from the cassette and the Multi<br />
Purpose (MP) Tray, return it to its original package and reseal it.<br />
If the optional Fax kit is installed and the main power switch is off, transmitting/receiving Fax is disabled. Do not<br />
turn off the main power switch, but press the Power key on the operation panel to enter Sleep mode.<br />
xxiii
Laser Safety (Europe)<br />
Laser radiation could be hazardous to the human body. For this reason, laser radiation emitted inside this<br />
machine is hermetically sealed within the protective housing and external cover. In the normal operation of the<br />
product by user, no radiation can leak from the machine.<br />
This machine is classified as Class 1 laser product under IEC/EN 60825-1:2007.<br />
Caution: Performance of procedures other than those specified in this manual may result in hazardous radiation<br />
exposure.<br />
These labels are attached to the laser scanner unit inside the machine and are not in a user access area.<br />
The label shown below is attached on the right side of the machine.<br />
xxiv
Legal Restriction on Copying/Scanning<br />
It may be prohibited to copy/scan copyrighted material without permission of the copyright owner.<br />
Copying/Scanning the following items is prohibited and may be penalized by law.<br />
It may not be limited to these items. Do not knowingly copy/scan the items that are not to be copied/scanned.<br />
• Paper money<br />
• Bank note<br />
• Securities<br />
• Stamp<br />
• Passport<br />
• Certificate<br />
Local laws and regulations may prohibit or restrict copying/scanning of other items not mentioned above.<br />
EN ISO 7779<br />
Maschinenlärminformations-Verordnung 3. GPSGV, 06.01.2004: Der höchste Schalldruckpegel beträgt 70 dB<br />
(A) oder weniger gemäß EN ISO 7779.<br />
EK1-ITB 2000<br />
Das Gerät ist nicht für die Benutzung im unmittelbaren Gesichtsfeld am Bildschirmarbeitsplatz vorgesehen. Um<br />
störende Reflexionen am Bildschirmarbeitsplatz zu vermeiden, darf dieses Produkt nicht im unmittelbaren<br />
Gesichtsfeld platziert werden.<br />
xxv
Legal and Safety Information<br />
Please read this information before using your machine. This chapter provides information on<br />
the following topics.<br />
• Legal Information ..............................................................................xxvii<br />
• Regarding Trade Names...................................................................xxvii<br />
• Energy Saving Control Function ......................................................xxxiv<br />
• Automatic 2-Sided Copy Function ...................................................xxxiv<br />
• Paper Recycling...............................................................................xxxiv<br />
• Energy Star (ENERGY S<strong>TA</strong>R®) Program........................................xxxiv<br />
• About this Operation Guide ..............................................................xxxv<br />
xxvi
Legal Information<br />
Copying or other reproduction of all or part of this guide without the prior written consent of Copyright owner is<br />
prohibited.<br />
Regarding Trade Names<br />
• PRESCRIBE and KPDL are trademarks of Kyocera Corporation.<br />
• Microsoft, Windows, Windows XP, Windows Server 2003, Windows Vista, Windows Server 2008,<br />
Windows 7 and Internet Explorer are registered trademarks or trademarks of Microsoft Corporation in the<br />
U.S.A. and/or other countries.<br />
• PCL is a trademark of Hewlett-Packard Company.<br />
• Adobe Acrobat, Adobe Reader and PostScript are trademarks of Adobe Systems, Incorporated.<br />
• Ethernet is a registered trademark of Xerox Corporation.<br />
• Novell and NetWare are registered trademarks of Novell, Inc.<br />
• IBM and IBM PC/AT are trademarks of International Business Machines Corporation.<br />
• AppleTalk, Bonjour, Macintosh, and Mac OS are trademarks of Apple Inc., registered in the U.S. and other<br />
countries.<br />
• TypeBankG-B, TypeBankM-M and Typebank-OCR are trademarks of TypeBank ® .<br />
• All European language fonts installed in this machine are used under licensing agreement with Monotype<br />
Imaging Inc.<br />
• Helvetica, Palatino and Times are registered trademarks of Linotype <strong>GmbH</strong>.<br />
• ITC Avant Garde Gothic, ITC Bookman, ITC ZapfChancery and ITC ZapfDingbats are registered<br />
trademarks of International Typeface Corporation.<br />
• UFST MicroType ® fonts by Monotype Imaging Inc. are installed in this machine.<br />
• This machine contains the software having modules developed by Independent JPEG Group.<br />
• This machine contains the NF module developed by<br />
ACCESS Co., Ltd.<br />
• This product contains NetFront Browser of ACCESS CO.,<br />
LTD.<br />
• ACCESS, ACCESS logo and NetFront are trademarks or<br />
registered trademarks of ACCESS CO., LTD. in the United States, Japan and other countries.<br />
• © 2011 ACCESS CO., LTD. All rights reserved.<br />
• Java is a registered trademark of Oracle and/or its affiliates.<br />
All other brands and product names are registered trademarks or trademarks of their respective<br />
companies. The designations and ® will not be used in this Operation Guide.<br />
xxvii
GPL/LGPL<br />
This product contains GPL (http://www.gnu.org/licenses/gpl.html) and/or LGPL (http://www.gnu.org/licenses/<br />
lgpl.html) software as part of its firmware. You can get the source code, and you are permitted to copy,<br />
redistribute and modify it under the terms of GPL/LGPL.<br />
Open SSL License<br />
Copyright (c) 1998-2006 The OpenSSL Project. All rights reserved.<br />
Redistribution and use in source and binary forms, with or without modification, are permitted provided that the<br />
following conditions are met:<br />
1 Redistributions of source code must retain the above copyright notice, this list of conditions and the<br />
following disclaimer.<br />
2 Redistributions in binary form must reproduce the above copyright notice, this list of conditions and the<br />
following disclaimer in the documentation and/or other materials provided with the distribution.<br />
3 All advertising materials mentioning features or use of this software must display the following<br />
acknowledgment:<br />
“This product includes software developed by the OpenSSL Project for use in the OpenSSL Toolkit. (http:/<br />
/www.openssl.org/)”<br />
4 The names “OpenSSL Toolkit” and “OpenSSL Project” must not be used to endorse or promote products<br />
derived from this software without prior written permission.<br />
For written permission, please contact openssl-core@openssl.org.<br />
5 Products derived from this software may not be called “OpenSSL” nor may “OpenSSL” appear in their<br />
names without prior written permission of the OpenSSL Project.<br />
6 Redistributions of any form whatsoever must retain the following acknowledgment: “This product includes<br />
software developed by the OpenSSL Project for use in the OpenSSL Toolkit (http://www.openssl.org/)”<br />
THIS SOFTWARE IS PROVIDED BY THE OpenSSL PROJECT “AS IS” AND ANY EXPRESSED OR IMPLIED<br />
WARRANTIES, INCLUDING, BUT NOT LIMITED TO, THE<br />
IMPLIED WARRANTIES OF MERCHAN<strong>TA</strong>BILITY AND FITNESS FOR A PARTICULAR PURPOSE ARE<br />
DISCLAIMED. IN NO EVENT SHALL THE OpenSSL PROJECT OR ITS CONTRIBUTORS BE LIABLE FOR<br />
ANY DIRECT, INDIRECT, INCIDEN<strong>TA</strong>L, SPECIAL, EXEMPLARY, OR CONSEQUENTIAL DAMAGES<br />
(INCLUDING, BUT NOT LIMITED TO, PROCUREMENT OF SUBSTITUTE GOODS OR SERVICES; LOSS OF<br />
USE, DA<strong>TA</strong>, OR PROFITS; OR BUSINESS INTERRUPTION) HOWEVER CAUSED AND ON ANY THEORY<br />
OF LIABILITY, WHETHER IN CONTRACT, STRICT LIABILITY, OR TORT (INCLUDING NEGLIGENCE OR<br />
OTHERWISE) ARISING IN ANY WAY OUT OF THE USE OF THIS SOFTWARE, EVEN IF ADVISED OF THE<br />
POSSIBILITY OF SUCH DAMAGE.<br />
xxviii
Original SSLeay License<br />
Copyright (C) 1995-1998 Eric Young (eay@cryptsoft.com) All rights reserved.<br />
This package is an SSL implementation written by Eric Young (eay@cryptsoft.com). The implementation was<br />
written so as to conform with Netscapes SSL.<br />
This library is free for commercial and non-commercial use as long as the following conditions are adhered to.<br />
The following conditions apply to all code found in this distribution, be it the RC4, RSA, lhash, DES, etc., code;<br />
not just the SSL code. The SSL documentation included with this distribution is covered by the same copyright<br />
terms except that the holder is Tim Hudson (tjh@cryptsoft.com).<br />
Copyright remains Eric Young’s, and as such any Copyright notices in the code are not to be removed.<br />
If this package is used in a product, Eric Young should be given attribution as the author of the parts of the library<br />
used.<br />
This can be in the form of a textual message at program startup or in documentation (online or textual) provided<br />
with the package.<br />
Redistribution and use in source and binary forms, with or without modification, are permitted provided that the<br />
following conditions are met:<br />
1 Redistributions of source code must retain the copyright notice, this list of conditions and the following<br />
disclaimer.<br />
2 Redistributions in binary form must reproduce the above copyright notice, this list of conditions and the<br />
following disclaimer in the documentation and/or other materials provided with the distribution.<br />
3 All advertising materials mentioning features or use of this software must display the following<br />
acknowledgment:<br />
“This product includes cryptographic software written by Eric Young (eay@cryptsoft.com)”<br />
The word ‘cryptographic’ can be left out if the rouines from the library being used are not cryptographic<br />
related :-).<br />
4 If you include any Windows specific code (or a derivative thereof) from the apps directory (application<br />
code) you must include an acknowledgment:<br />
“This product includes software written by Tim Hudson (tjh@cryptsoft.com)”<br />
THIS SOFTWARE IS PROVIDED BY ERIC YOUNG “AS IS” AND ANY EXPRESS OR IMPLIED<br />
WARRANTIES, INCLUDING, BUT NOT LIMITED TO, THE IMPLIED WARRANTIES OF MERCHAN<strong>TA</strong>BILITY<br />
AND FITNESS FOR A PARTICULAR PURPOSE ARE DISCLAIMED. IN NO EVENT SHALL THE AUTHOR OR<br />
CONTRIBUTORS BE LIABLE FOR ANY DIRECT, INDIRECT, INCIDEN<strong>TA</strong>L, SPECIAL, EXEMPLARY, OR<br />
CONSEQUENTIAL DAMAGES (INCLUDING, BUT NOT LIMITED TO, PROCUREMENT OF SUBSTITUTE<br />
GOODS OR SERVICES; LOSS OF USE, DA<strong>TA</strong>, OR PROFITS; OR BUSINESS INTERRUPTION) HOWEVER<br />
CAUSED AND ON ANY THEORY OF LIABILITY, WHETHER IN CONTRACT, STRICT LIABILITY, OR TORT<br />
(INCLUDING NEGLIGENCE OR OTHERWISE) ARISING IN ANY WAY OUT OF THE USE OF THIS<br />
SOFTWARE, EVEN IF ADVISED OF THE POSSIBILITY OF SUCH DAMAGE.<br />
The licence and distribution terms for any publically available version or derivative of this code cannot be<br />
changed. i.e. this code cannot simply be copied and put under another distribution licence [including the GNU<br />
Public Licence.]<br />
xxix
Monotype Imaging License Agreement<br />
1 Software shall mean the digitally encoded, machine readable, scalable outline data as encoded in a<br />
special format as well as the UFST Software.<br />
2 You agree to accept a non-exclusive license to use the Software to reproduce and display weights, styles<br />
and versions of letters, numerals, characters and symbols (Typefaces) solely for your own customary<br />
business or personal purposes at the address stated on the registration card you return to Monotype<br />
Imaging. Under the terms of this License Agreement, you have the right to use the Fonts on up to three<br />
printers. If you need to have access to the fonts on more than three printers, you need to acquire a multiuser<br />
license agreement which can be obtained from Monotype Imaging. Monotype Imaging retains all<br />
rights, title and interest to the Software and Typefaces and no rights are granted to you other than a<br />
License to use the Software on the terms expressly set forth in this Agreement.<br />
3 To protect proprietary rights of Monotype Imaging, you agree to maintain the Software and other<br />
proprietary information concerning the Typefaces in strict confidence and to establish reasonable<br />
procedures regulating access to and use of the Software and Typefaces.<br />
4 You agree not to duplicate or copy the Software or Typefaces, except that you may make one backup<br />
copy. You agree that any such copy shall contain the same proprietary notices as those appearing on the<br />
original.<br />
5 This License shall continue until the last use of the Software and Typefaces, unless sooner terminated.<br />
This License may be terminated by Monotype Imaging if you fail to comply with the terms of this License<br />
and such failure is not remedied within thirty (30) days after notice from Monotype Imaging. When this<br />
License expires or is terminated, you shall either return to Monotype Imaging or destroy all copies of the<br />
Software and Typefaces and documentation as requested.<br />
6 You agree that you will not modify, alter, disassemble, decrypt, reverse engineer or decompile the<br />
Software.<br />
7 Monotype Imaging warrants that for ninety (90) days after delivery, the Software will perform in<br />
accordance with Monotype Imaging-published specifications, and the diskette will be free from defects in<br />
material and workmanship. Monotype Imaging does not warrant that the Software is free from all bugs,<br />
errors and omissions.<br />
The parties agree that all other warranties, expressed or implied, including warranties of fitness for a<br />
particular purpose and merchantability, are excluded.<br />
8 Your exclusive remedy and the sole liability of Monotype Imaging in connection with the Software and<br />
Typefaces is repair or replacement of defective parts, upon their return to Monotype Imaging.<br />
In no event will Monotype Imaging be liable for lost profits, lost data, or any other incidental or<br />
consequential damages, or any damages caused by abuse or misapplication of the Software and<br />
Typefaces.<br />
9 Massachusetts U.S.A. law governs this Agreement.<br />
10 You shall not sublicense, sell, lease, or otherwise transfer the Software and/or Typefaces without the prior<br />
written consent of Monotype Imaging.<br />
11 Use, duplication or disclosure by the Government is subject to restrictions as set forth in the Rights in<br />
Technical Data and Computer Software clause at FAR 252-227-7013, subdivision (b)(3)(ii) or<br />
subparagraph (c)(1)(ii), as appropriate. Further use, duplication or disclosure is subject to restrictions<br />
applicable to restricted rights software as set forth in FAR 52.227-19 (c)(2).<br />
12 You acknowledge that you have read this Agreement, understand it, and agree to be bound by its terms<br />
and conditions. Neither party shall be bound by any statement or representation not contained in this<br />
Agreement. No change in this Agreement is effective unless written and signed by properly authorized<br />
representatives of each party. By opening this diskette package, you agree to accept the terms and<br />
conditions of this Agreement.<br />
xxx
Knopflerfish License<br />
This product includes software developed by the Knopflerfish Project.<br />
http://www.knopflerfish.org<br />
Copyright 2003-2010 The Knopflerfish Project. All rights reserved.<br />
Redistribution and use in source and binary forms, with or without modification, are permitted provided that<br />
the following conditions are met:<br />
- Redistributions of source code must retain the above copyright notice, this list of conditions and the following<br />
disclaimer.<br />
- Redistributions in binary form must reproduce the above copyright notice, this list of conditions and the<br />
following disclaimer in the documentation and/or other materials provided with the distribution.<br />
- Neither the name of the KNOPFLERFISH project nor the names of its contributors may be used to endorse<br />
or promote products derived from this software without specific prior written permission.<br />
THIS SOFTWARE IS PROVIDED BY THE COPYRIGHT HOLDERS AND CONTRIBUTORS “AS IS” AND ANY<br />
EXPRESS OR IMPLIED WARRANTIES, INCLUDING, BUT NOT LIMITED TO, THE IMPLIED WARRANTIES<br />
OF MERCHAN<strong>TA</strong>BILITY AND FITNESS FOR A PARTICULAR PURPOSE ARE DISCLAIMED. IN NO EVENT<br />
SHALL THE COPYRIGHT OWNER OR CONTRIBUTORS BE LIABLE FOR ANY DIRECT, INDIRECT,<br />
INCIDEN<strong>TA</strong>L, SPECIAL, EXEMPLARY, OR CONSEQUENTIAL DAMAGES (INCLUDING, BUT NOT LIMITED<br />
TO, PROCUREMENT OF SUBSTITUTE GOODS OR SERVICES; LOSS OF USE, DA<strong>TA</strong>, OR PROFITS; OR<br />
BUSINESS INTERRUPTION) HOWEVER CAUSED AND ON ANY THEORY OF LIABILITY, WHETHER IN<br />
CONTRACT, STRICT LIABILITY, OR TORT (INCLUDING NEGLIGENCE OR OTHERWISE) ARISING IN ANY<br />
WAY OUT OF THE USE OF THIS SOFTWARE, EVEN IF ADVISED OF THE POSSIBILITY OF SUCH<br />
DAMAGE.<br />
Apache License (Version 2.0)<br />
Apache License<br />
Version 2.0, January 2004<br />
http://www.apache.org/licenses/<br />
TERMS AND CONDITIONS FOR USE, REPRODUCTION, AND DISTRIBUTION<br />
1 Definitions.<br />
“License” shall mean the terms and conditions for use, reproduction, and distribution as defined by<br />
Sections 1 through 9 of this document.<br />
“Licensor” shall mean the copyright owner or entity authorized by the copyright owner that is granting the<br />
License.<br />
“Legal Entity” shall mean the union of the acting entity and all other entities that control, are controlled by,<br />
or are under common control with that entity. For the purposes of this definition, “control” means (i) the<br />
power, direct or indirect, to cause the direction or management of such entity, whether by contract or<br />
otherwise, or (ii) ownership of fifty percent (50%) or more of the outstanding shares, or (iii) beneficial<br />
ownership of such entity.<br />
“You” (or “Your”) shall mean an individual or Legal Entity exercising permissions granted by this License.<br />
“Source” form shall mean the preferred form for making modifications, including but not limited to software<br />
source code, documentation source, and configuration files.<br />
“Object” form shall mean any form resulting from mechanical transformation or translation of a Source<br />
form, including but not limited to compiled object code, generated documentation, and conversions to<br />
other media types.<br />
xxxi
“Work” shall mean the work of authorship, whether in Source or Object form, made available under the<br />
License, as indicated by a copyright notice that is included in or attached to the work (an example is<br />
provided in the Appendix below).<br />
“Derivative Works” shall mean any work, whether in Source or Object form, that is based on (or derived<br />
from) the Work and for which the editorial revisions, annotations, elaborations, or other modifications<br />
represent, as a whole, an original work of authorship. For the purposes of this License, Derivative Works<br />
shall not include works that remain separable from, or merely link (or bind by name) to the interfaces of,<br />
the Work and Derivative Works thereof.<br />
“Contribution” shall mean any work of authorship, including the original version of the Work and any<br />
modifications or additions to that Work or Derivative Works thereof, that is intentionally submitted to<br />
Licensor for inclusion in the Work by the copyright owner or by an individual or Legal Entity authorized to<br />
submit on behalf of the copyright owner. For the purposes of this definition, “submitted” means any form of<br />
electronic, verbal, or written communication sent to the Licensor or its representatives, including but not<br />
limited to communication on electronic mailing lists, source code control systems, and issue tracking<br />
systems that are managed by, or on behalf of, the Licensor for the purpose of discussing and improving<br />
the Work, but excluding communication that is conspicuously marked or otherwise designated in writing<br />
by the copyright owner as “Not a Contribution.”<br />
“Contributor” shall mean Licensor and any individual or Legal Entity on behalf of whom a Contribution has<br />
been received by Licensor and subsequently incorporated within the Work.<br />
2 Grant of Copyright License. Subject to the terms and conditions of this License, each Contributor hereby<br />
grants to You a perpetual, worldwide, non-exclusive, no-charge, royalty-free, irrevocable copyright license<br />
to reproduce, prepare Derivative Works of, publicly display, publicly perform, sublicense, and distribute the<br />
Work and such Derivative Works in Source or Object form.<br />
3 Grant of Patent License. Subject to the terms and conditions of this License, each Contributor hereby<br />
grants to You a perpetual, worldwide, non-exclusive, no-charge, royalty-free, irrevocable (except as stated<br />
in this section) patent license to make, have made, use, offer to sell, sell, import, and otherwise transfer<br />
the Work, where such license applies only to those patent claims licensable by such Contributor that are<br />
necessarily infringed by their Contribution(s) alone or by combination of their Contribution(s) with the Work<br />
to which such Contribution(s) was submitted. If You institute patent litigation against any entity (including a<br />
cross-claim or counterclaim in a lawsuit) alleging that the Work or a Contribution incorporated within the<br />
Work constitutes direct or contributory patent infringement, then any patent licenses granted to You under<br />
this License for that Work shall terminate as of the date such litigation is filed.<br />
4 Redistribution. You may reproduce and distribute copies of the Work or Derivative Works thereof in any<br />
medium, with or without modifications, and in Source or Object form, provided that You meet the following<br />
conditions:<br />
(a)You must give any other recipients of the Work or Derivative Works a copy of this License; and<br />
(b)You must cause any modified files to carry prominent notices stating that You changed the files; and<br />
(c)You must retain, in the Source form of any Derivative Works that You distribute, all copyright, patent,<br />
trademark, and attribution notices from the Source form of the Work, excluding those notices that do<br />
not pertain to any part of the Derivative Works; and<br />
(d)If the Work includes a “NOTICE” text file as part of its distribution, then any Derivative Works that You<br />
distribute must include a readable copy of the attribution notices contained within such NOTICE file,<br />
excluding those notices that do not pertain to any part of the Derivative Works, in at least one of the<br />
following places: within a NOTICE text file distributed as part of the Derivative Works; within the Source<br />
form or documentation, if provided along with the Derivative Works; or, within a display generated by<br />
the Derivative Works, if and wherever such third-party notices normally appear. The contents of the<br />
NOTICE file are for informational purposes only and do not modify the License. You may add Your own<br />
attribution notices within Derivative Works that You distribute, alongside or as an addendum to the<br />
NOTICE text from the Work, provided that such additional attribution notices cannot be construed as<br />
modifying the License.<br />
xxxii
You may add Your own copyright statement to Your modifications and may provide additional or different<br />
license terms and conditions for use, reproduction, or distribution of Your modifications, or for any such<br />
Derivative Works as a whole, provided Your use, reproduction, and distribution of the Work otherwise<br />
complies with the conditions stated in this License.<br />
5 Submission of Contributions. Unless You explicitly state otherwise, any Contribution intentionally<br />
submitted for inclusion in the Work by You to the Licensor shall be under the terms and conditions of this<br />
License, without any additional terms or conditions. Notwithstanding the above, nothing herein shall<br />
supersede or modify the terms of any separate license agreement you may have executed with Licensor<br />
regarding such Contributions.<br />
6 Trademarks. This License does not grant permission to use the trade names, trademarks, service marks,<br />
or product names of the Licensor, except as required for reasonable and customary use in describing the<br />
origin of the Work and reproducing the content of the NOTICE file.<br />
7 Disclaimer of Warranty. Unless required by applicable law or agreed to in writing, Licensor provides the<br />
Work (and each Contributor provides its Contributions) on an “AS IS” BASIS, WITHOUT WARRANTIES<br />
OR CONDITIONS OF ANY KIND, either express or implied, including, without limitation, any warranties or<br />
conditions of TITLE, NON-INFRINGEMENT, MERCHAN<strong>TA</strong>BILITY, or FITNESS FOR A PARTICULAR<br />
PURPOSE. You are solely responsible for determining the appropriateness of using or redistributing the<br />
Work and assume any risks associated with Your exercise of permissions under this License.<br />
8 Limitation of Liability. In no event and under no legal theory, whether in tort (including negligence),<br />
contract, or otherwise, unless required by applicable law (such as deliberate and grossly negligent acts) or<br />
agreed to in writing, shall any Contributor be liable to You for damages, including any direct, indirect,<br />
special, incidental, or consequential damages of any character arising as a result of this License or out of<br />
the use or inability to use the Work (including but not limited to damages for loss of goodwill, work<br />
stoppage, computer failure or malfunction, or any and all other commercial damages or losses), even if<br />
such Contributor has been advised of the possibility of such damages.<br />
9 Accepting Warranty or Additional Liability. While redistributing the Work or Derivative Works thereof, You<br />
may choose to offer, and charge a fee for, acceptance of support, warranty, indemnity, or other liability<br />
obligations and/or rights consistent with this License. However, in accepting such obligations, You may act<br />
only on Your own behalf and on Your sole responsibility, not on behalf of any other Contributor, and only if<br />
You agree to indemnify, defend, and hold each Contributor harmless for any liability incurred by, or claims<br />
asserted against, such Contributor by reason of your accepting any such warranty or additional liability.<br />
END OF TERMS AND CONDITIONS<br />
APPENDIX: How to apply the Apache License to your work.<br />
To apply the Apache License to your work, attach the following boilerplate notice, with the fields enclosed by<br />
brackets “[]” replaced with your own identifying information. (Don't include the brackets!) The text should be<br />
enclosed in the appropriate comment syntax for the file format. We also recommend that a file or class<br />
name and description of purpose be included on the same “printed page” as the copyright notice for easier<br />
identification within third-party archives.<br />
Copyright [yyyy] [name of copyright owner]<br />
Licensed under the Apache License, Version 2.0 (the “License”); you may not use this file except in compliance<br />
with the License. You may obtain a copy of the License at<br />
http://www.apache.org/licenses/LICENSE-2.0<br />
Unless required by applicable law or agreed to in writing, software distributed under the License is distributed<br />
on an “AS IS” BASIS, WITHOUT WARRANTIES OR CONDITIONS OF ANY KIND, either express or implied.<br />
See the License for the specific language governing permissions and limitations under the License.<br />
xxxiii
Energy Saving Control Function<br />
The device comes equipped with a Low Power Mode where energy consumption is reduced after a certain<br />
amount of time elapses since the device was last used, as well as a Sleep where printer and fax functions<br />
remain in a waiting state but power consumption is still reduced to a minimum when there is no activity with the<br />
device within a set amount of time.<br />
Low Power Mode<br />
The device automatically enters Low Power Mode when 2 minutes have passed since the device was last used.<br />
The amount of time of no activity that must pass before Low Power Mode is activated may be lengthened. For<br />
more information refer to Low Power Mode and Auto Low Power Mode on page 2-11.<br />
Sleep<br />
The device automatically enters Sleep when 60 minutes have passed since the device was last used. The<br />
amount of time of no activity that must pass before Sleep is activated may be lengthened. For more information<br />
see Sleep and Auto Sleep on page 2-12.<br />
Automatic 2-Sided Copy Function<br />
This device includes 2-sided copying as a standard function. For example, by copying two 1-sided originals onto<br />
a single sheet of paper as a 2-sided copy, it is possible to lower the amount of paper used. For more information<br />
see Duplex on page 3-12.<br />
Paper Recycling<br />
This device supports the recycled paper which reduces the load on the environment. Your sales or service<br />
representative can provide information about recommended paper types.<br />
Energy Star (ENERGY S<strong>TA</strong>R ® ) Program<br />
We have determined as a participating company in the International Energy Star Program that<br />
this product is compliant with the standards laid out in the International Energy Star Program.<br />
xxxiv
About this Operation Guide<br />
This Operation Guide contains the following chapters.<br />
Chapter 1 - Part Names<br />
Identifies machine parts and operation panel keys.<br />
Chapter 2 - Preparation before Use<br />
Explains adding paper, placing originals, connecting the machine, and necessary configurations before first use.<br />
Chapter 3 - Basic Operation<br />
Describes the procedures for basic copying, printing and scanning.<br />
Chapter 4 - Copying Functions<br />
Describes the functions you can use when copying.<br />
Chapter 5 - Printing<br />
Describes the functions you can use when printing originals.<br />
Chapter 6 - Sending Functions<br />
Describes the functions you can use when sending originals.<br />
Chapter 7 - Document Box<br />
Provides a basic guide to using document boxes.<br />
Chapter 8 - Status / Job Cancel<br />
Explains how to check the job status and job history and how to cancel jobs being printed or waiting to print.<br />
Also explains how to check the remaining paper and device status and how to cancel fax transmission<br />
Chapter 9 - Default Setting (System Menu)<br />
Describes the System Menu options for general machine operation.<br />
Chapter 10 - Management<br />
Explains user login administration and job accounting.<br />
Chapter 11 - Maintenance<br />
Describes cleaning and toner replacement.<br />
Chapter 12 - Troubleshooting<br />
Explains how to handle error messages, paper jams and other problems.<br />
Appendix<br />
Explains how to enter characters, and lists the machine specifications.<br />
Introduces the convenient optional equipment available for this machine.<br />
Provides information on media types and paper sizes. Also includes a glossary of terms.<br />
xxxv
Conventions in This Guide<br />
The following conventions are used depending on the nature of the description.<br />
Convention Description Example<br />
Bold Indicates the operation panel<br />
keys or a computer screen.<br />
Description of Operation Procedure<br />
In this Operation Guide, continuous operation of the keys on the touch panel is as follows:<br />
xxxvi<br />
Press the Start key.<br />
[Regular] Indicates the touch panel keys. Press [OK].<br />
Italic Indicates a message displayed<br />
on the touch panel.<br />
Used to emphasize a key word,<br />
phrase or references to<br />
additional information.<br />
Note Indicates supplemental<br />
information or operations for<br />
reference.<br />
Important Indicates items that are required<br />
or prohibited so as to avoid<br />
problems.<br />
Caution Indicates what must be<br />
observed to prevent injury or<br />
machine breakdown and how to<br />
deal with it.<br />
Actual procedure<br />
Press [Copy].<br />
<br />
Press [Next] of Quick Setup.<br />
<br />
Press [ ] twice.<br />
<br />
Press [Change] of Original Image.<br />
Ready to copy is displayed.<br />
For more information refer to Sleep and<br />
Auto Sleep on page 2-9.<br />
NOTE:<br />
IMPOR<strong>TA</strong>NT:<br />
CAUTION:<br />
Description in this<br />
Operation Guide<br />
Press [Copy], [Next] of Quick<br />
Setup, [ ] twice, and then<br />
[Change] of Original Image.
Originals and Paper Sizes<br />
This section explains the notation used in this guide when referring to sizes of originals or paper sizes.<br />
As with A4, B5 and Letter, which may be used either in the horizontal or vertical direction, horizontal direction is<br />
indicated by an additional letter R in order to indicate the orientation of the original/paper.<br />
Icons on the Touch Panel<br />
Placement direction Indicated size *<br />
Vertical direction A4, B5, A5, B6,<br />
A6, 16K, Letter,<br />
Statement<br />
Original Paper<br />
For the originals/paper, dimension A is longer<br />
than B.<br />
Horizontal direction A4-R, B5-R, A5-R,<br />
B6-R, A6-R, 16K-<br />
R, Letter-R,<br />
Statement-R<br />
Original Paper<br />
For the originals/paper, dimension A is shorter<br />
than B.<br />
* The size of the original/paper that can be used depends on the<br />
function and source tray. For further details, refer to the page<br />
detailing that function or source tray.<br />
The following icons are used to indicate originals and paper placement directions on the touch panel.<br />
Placement direction Originals Paper<br />
Vertical direction<br />
Horizontal direction<br />
xxxvii
xxxviii
1 Part Names<br />
This chapter identifies the machine parts and operation panel keys.<br />
• Operation Panel..................................................................................1-2<br />
• Machine ..............................................................................................1-4<br />
1-1
Operation Panel<br />
Displays the Copy screen.<br />
Displays the screen for sending.<br />
You can also change this to show the address book screen.<br />
Displays the Document Box screen.<br />
Displays the Program screen.<br />
1-2<br />
Part Names<br />
Blinks during printing, fax sending and receiving, scan send, and print data receiving.<br />
Displays the FAX screen.<br />
Displays the Application screen.<br />
Displays the Status/Job Cancel screen.<br />
Blinks while the machine is accessing the hard disk, fax memory<br />
or USB memory (general-purpose item).<br />
Lights or blinks when an error occurs and a job is stopped.<br />
Switches the touch panel display<br />
to enlarged display in the Copy<br />
screen or Send screen.<br />
Displays help guidance.<br />
Puts the machine into Low<br />
Power Mode.<br />
Ends operation (logs out) on the<br />
Administration screen.
1-3<br />
Part Names<br />
Pauses the printing job in progress.<br />
Returns settings to their default states.<br />
Lit when the machine's main power<br />
is on.<br />
Puts the machine into Sleep Mode.<br />
Recovers from Sleep if in Sleep Mode.<br />
Displays the Interrupt Copy screen.<br />
Starts copying and scanning operations and processing<br />
for setting operations.<br />
Finalizes numeric key entry, and finalizes screen during setting<br />
of functions. Operates linked with the on-screen [OK].<br />
Recalls already registered destinations and programs for sending.<br />
Numeric keys. Enter numbers and symbols.<br />
Clears entered numbers and<br />
characters.<br />
Displays the System Menu.<br />
Displays number of sheets printed<br />
and number of pages scanned.<br />
1
Machine<br />
1 Mailbox (Option)<br />
2 Front Cover<br />
3 Document Finisher (Option)<br />
4 Document Processor<br />
1<br />
2<br />
3<br />
5 Operation Panel<br />
6-j<br />
6-b<br />
6-c 6-c<br />
6 Cassette 1 to 7 (5 to 7 are Options)<br />
• 6-a: Cassette 1 • 6-b: Cassette 2 • 6-c: Cassette 3 • 6-d: Cassette 4<br />
• 6-e: Cassette 5 • 6-f: Cassette 6 • 6-g: Cassette 7<br />
• 6-h: Cassette 5 • 6-i: Cassette 6 • 6-j: Cassette 7<br />
6-i<br />
6-a<br />
1-4<br />
6-e<br />
6-f<br />
6-g<br />
6-h<br />
4<br />
5<br />
6<br />
Part Names
7<br />
8 9 10<br />
7 Network Interface Connector<br />
8 USB Port (A2)<br />
9 USB Interface Connector (B1)<br />
10 Option Interface<br />
11 Original Size Indicator Plates<br />
12 Platen<br />
13 Slit Glass<br />
14 Clip Holder<br />
15 Toner Container (Black)<br />
16 Lower Left Tray (Option)<br />
17 Upper Left Tray (Option)<br />
18 Handles<br />
1-5<br />
Part Names<br />
16 17 18 19 20 21<br />
22<br />
19 Waste Toner Box<br />
20 Release key<br />
21 Cleaning Brush<br />
11<br />
22 Toner Container Release Lever<br />
12<br />
13<br />
14<br />
15<br />
1
23 24 26 27<br />
25<br />
23 Paper Length Guide<br />
24 (Paper Width Guide) Lock<br />
25 Paper Width Adjusting Tab<br />
26 USB Port (A1)<br />
27 Right Tray<br />
28 Right Cover 1<br />
29 Right Cover 1 Lever<br />
30 Right Cover 2 Lever<br />
31 Right Cover 2<br />
32 Paper Width Guide<br />
33 Support Tray Section of the Multi Purpose Tray<br />
34 Multi Purpose Tray<br />
35 Handle<br />
1-6<br />
35<br />
36 Right Cover 4<br />
36 37 38 39<br />
37 Right Cover 4 Lever<br />
38 Right Cover 3<br />
39 Right Cover 3 Lever<br />
40 Main Power Switch<br />
Part Names<br />
40<br />
28<br />
29<br />
30<br />
31<br />
32<br />
33<br />
34
2 Preparation before Use<br />
This chapter explains the preparations before using this equipment for the first time as well<br />
as the procedures for loading paper and originals.<br />
• Check the Accessories .......................................................................2-2<br />
• Determining the Connection Method and Preparing Cables...............2-3<br />
• Connecting Cables..............................................................................2-5<br />
• Power On/Off ......................................................................................2-9<br />
• Low Power Mode and Auto Low Power Mode..................................2-11<br />
• Sleep and Auto Sleep .......................................................................2-12<br />
• Adjusting the Operation Panel Angle................................................2-12<br />
• Switching the Language for Display [Language]...............................2-13<br />
• Setting Date and Time ......................................................................2-14<br />
• Network Setup (LAN Cable Connection) ..........................................2-15<br />
• Installing Software.............................................................................2-18<br />
• Embedded Web Server RX (Settings for E-mail)..............................2-26<br />
• Loading Paper...................................................................................2-29<br />
• Loading Originals..............................................................................2-46<br />
2-1
Check the Accessories<br />
Check that the following accessories are included.<br />
• Safety Guide<br />
• Quick Guide<br />
• DVD (Product Library)<br />
Documents Contained in the Included DVD<br />
2-2<br />
Preparation before Use<br />
The following documents are contained in the included DVD (Product Library). Refer to them as necessary.<br />
Documents<br />
Operation Guide (This Guide)<br />
FAX Operation Guide<br />
Card Authentication Kit (B) Operation Guide<br />
Data Security Kit (E) Operation Guide<br />
Embedded Web Server RX Operation Guide<br />
Printing System Driver User Guide<br />
Network FAX Driver Operation Guide<br />
Network Tool for Direct Printing Operation Guide<br />
Network Print Monitor User Guide<br />
File Management Utility User Guide
Determining the Connection Method and Preparing Cables<br />
2-3<br />
Preparation before Use<br />
Check the method to connect the equipment to a PC or network, and prepare the necessary cables.<br />
Connection Example<br />
Determine the method to connect the equipment to a PC or network by referring to the illustration below.<br />
Administrator’s<br />
PC<br />
Printing<br />
Network FAX<br />
(Option)<br />
FAX (Option)<br />
Connecting a scanner to your PC network with a network<br />
cable (1000BASE-T, 100BASE-TX or 10BASE-T)<br />
Embedded Web Server<br />
RX<br />
Network settings, Scanner<br />
default settings, User and<br />
destination registration<br />
FAX<br />
USB<br />
Network<br />
Network<br />
MFP<br />
Network<br />
Network<br />
Network<br />
Network<br />
Network<br />
Send E-mail<br />
Sends the image data<br />
of scanned originals to<br />
the desired recipient<br />
as a file attached to an<br />
E-mail message.<br />
Send SMB<br />
Saves the scanned<br />
image as a data file on<br />
your PC.<br />
Send FTP<br />
Sends the scanned<br />
image as a data file on<br />
the FTP.<br />
TWAIN Scanning<br />
WIA Scanning<br />
TWAIN and WIA are<br />
standardized interface<br />
for communication<br />
between software<br />
applications and image<br />
acquisition devices.<br />
2
Preparing Necessary Cables<br />
2-4<br />
Preparation before Use<br />
The following interfaces are available to connect the equipment to a PC. Prepare the necessary cables<br />
according to the interface you use.<br />
Available Standard Interfaces<br />
Function Interface Necessary Cable<br />
Printer/Scanner<br />
/Network FAX*<br />
Network interface LAN (10BASE-T or<br />
100BASE-TX, 1000BASE-T<br />
Shielded)<br />
Printer USB interface USB2.0 compatible cable<br />
(Hi-Speed USB compliant,<br />
Max. 5.0 m, Shielded)<br />
* Function available when using optional fax kit. For details on<br />
Network FAX, refer to the Fax System (V) Operation Guide.
Connecting Cables<br />
Connecting LAN Cable (Optional)<br />
Follow the steps below to connect a LAN cable to the machine.<br />
Make sure that lamps<br />
other than this lamp<br />
are off.<br />
2-5<br />
Preparation before Use<br />
1 When the machine is powered up, first press the<br />
Power key on the operation panel. Check that the<br />
Power indicator, the processing indicator and the<br />
memory indicator are off. After this, turn off the<br />
main power switch.<br />
2 Remove the covers from the machine in order from<br />
the top.<br />
2
2-6<br />
Preparation before Use<br />
3 Connect the LAN cable to the network interface<br />
connector located on left side of the body.<br />
4 Insert the cord into the groove.<br />
5 Attach the covers in order from the bottom, taking<br />
care not to pinch the cord.<br />
6 Connect the other end of the cable to the hub.<br />
7 Power on the machine, and configure the network.<br />
For details, refer to Network Setup (LAN Cable<br />
Connection) on page 2-15.
Connecting USB Cable<br />
Follow the steps below to connect a USB cable to the machine.<br />
Make sure that lamps<br />
other than this lamp<br />
are off.<br />
2-7<br />
Preparation before Use<br />
1 When the machine is powered up, first press the<br />
Power key on the operation panel. Check that the<br />
Power indicator, the processing indicator and the<br />
memory indicator are off. After this, turn off the<br />
main power switch.<br />
2 Remove the covers from the machine in order from<br />
the top.<br />
2
Connecting the Power Cable<br />
2-8<br />
Preparation before Use<br />
3 Connect the USB cable to the USB interface<br />
connector (B1) located on the left side of the body.<br />
4 Insert the cord into the groove.<br />
5 Attach the covers in order from the bottom, taking<br />
care not to pinch the cord.<br />
6 Connect the other end of the cable to the PC.<br />
Connect one end of the supplied power cable to the machine and the other end to a power outlet.<br />
IMPOR<strong>TA</strong>NT: Only use the power cable that comes with the machine. 120 V specification model uses two<br />
supplied power cables.
Power On/Off<br />
Power On<br />
When the main power indicator is lit... (Recovery from sleep)<br />
Press the Power key.<br />
When the main power indicator is off...<br />
2-9<br />
Preparation before Use<br />
Open the main power switch cover and turn the main<br />
power switch on.<br />
NOTE: If the optional Data Security Kit is installed, a message might display indicating the security function is<br />
being activated and time may be taken to start up when the power is turned on.<br />
IMPOR<strong>TA</strong>NT: When turning off the main power switch, do not turn on the main power switch again immediately.<br />
Wait more than 5 seconds, and then turn on the main power switch.<br />
2
Power Off<br />
2-10<br />
Preparation before Use<br />
Before turning off the main power switch, press the Power key on the operation panel to off. Make sure that the<br />
Power key, the processing indicator and the memory indicator are off before turning off the main power switch.<br />
If you will not switch of the main power switch, refer to Low Power Mode and Auto Low Power Mode on page 2-<br />
11,<br />
and Sleep and Auto Sleep on page 2-12.<br />
CAUTION: The hard disk may be operating when the Power key, the Processing indicator or Memory indicator<br />
is lit or blinking. Turning off the main power switch while the hard disk is operating may cause damage.<br />
Make sure that lamps<br />
other than this lamp<br />
are off.<br />
In case of not using the machine for an extended period of time<br />
CAUTION: If this machine will be left unused for an extended period (e.g. overnight), turn it off at the<br />
main power switch. If the machine will not be used for an even longer period of time (e.g. vacation),<br />
remove the power plug from the outlet as a safety precaution. If the optional Fax kit is installed, note that<br />
turning the machine off at the main power switch disables fax transmission and reception.<br />
CAUTION: Remove paper from the cassettes and seal it in the paper storage bag to protect it from humidity.
Low Power Mode and Auto Low Power Mode<br />
Low Power Mode<br />
Auto Low Power Mode<br />
2-11<br />
Preparation before Use<br />
To activate Low Power Mode, press the Energy Saver<br />
key. Touch panel and all indicators on the operation<br />
panel will go out to save power except the Energy<br />
Saver, Power, and main power indicators. This status<br />
is referred to as Low Power Mode.<br />
If print data is received during Low Power Mode, the<br />
machine automatically wakes up and starts printing.<br />
Also when fax data arrives while the machine is in Low<br />
Power Mode when using the optional fax, the machine<br />
automatically wakes up and starts printing.<br />
To resume, perform one of the following actions. The<br />
machine will be ready within 20 seconds.<br />
• Press any key on the operation panel.<br />
• Open the document processor.<br />
• Place originals in the document processor.<br />
Note that ambient environmental conditions, such as<br />
ventilation, may cause the machine to respond more<br />
slowly.<br />
Auto Low Power Mode automatically switches the machine into Low Power Mode if left idle for a preset time.<br />
The default preset time is 2 minutes.<br />
2
Sleep and Auto Sleep<br />
Sleep<br />
Auto Sleep<br />
2-12<br />
Preparation before Use<br />
To enter Sleep, press the Power key. Touch panel and<br />
all indicators on the operation panel will go out to save<br />
a maximum amount of power except the Main Power<br />
indicator. This status is referred to as Sleep.<br />
If print data is received during Sleep, the print job is<br />
performed while the touch panel remains unlit.<br />
When using the optional fax, received fax data is printed<br />
out while the operation panel also remains unlit.<br />
To resume, press the Power key. The machine will be<br />
ready within 30 seconds.<br />
Note that ambient environmental conditions, such as<br />
ventilation, may cause the machine to respond more<br />
slowly.<br />
Auto Sleep automatically switches the machine into Sleep if left idle for a preset time in the Low Power Mode.<br />
The default preset time is 60 minutes.<br />
Adjusting the Operation Panel Angle<br />
The angle of the operation panel can be adjusted as<br />
shown at left.
Switching the Language for Display [Language]<br />
Select the language displayed on the touch panel.<br />
Use the procedure below to select the language.<br />
Common Settings - Language<br />
Set the language to use for the touch panel display.<br />
Status<br />
English Deutsch Français<br />
Nederlands Português<br />
Español Italiano<br />
Cancel OK<br />
10/10/2010 10:10<br />
2-13<br />
1 Press the System Menu key.<br />
Preparation before Use<br />
2 Press [Common Settings] and then [Change] of<br />
Language.<br />
3 Press the key for the language you want to use.<br />
4 Press [OK].<br />
The touch panel language will be changed.<br />
2
Setting Date and Time<br />
2-14<br />
Preparation before Use<br />
Follow the steps below to set the local date and time at the place of installation.<br />
When you send an E-mail using the transmission function, the date and time as set here will be printed in the<br />
header of the E-mail message. Set the date, time and time difference from GMT of the region where the machine<br />
is used.<br />
NOTE: If user login administration is enabled, you can only change the settings by logging in with<br />
administrator privileges. If user login administration is disabled, the user authentication screen appears. Enter<br />
a login user name and password, and press [Login]. Refer to Adding a User (Local User List) on page 10-5 for<br />
the default login user name and password.<br />
Be sure to set the time difference before setting the date and time.<br />
If you change Date/Time setting, trial functions will be unavailable. For details, refer to Optional Function on<br />
page 9-112.<br />
Date/Timer - Time Zone<br />
Set time zone.<br />
Select the location nearest you.<br />
Status<br />
Time Zone<br />
-12:00 International Date Line West<br />
-11:00 Samoa<br />
-11:00 Universal Coordinated Time-11<br />
-10:00 Hawaii<br />
-09:00 Alaska<br />
-08:00 Baja California<br />
Date/Timer - Date/Time<br />
Status<br />
Set the date and time.<br />
2010<br />
Year<br />
10 10<br />
Month<br />
10 10 31<br />
Hour<br />
Minute<br />
1/16<br />
Cancel OK<br />
Day<br />
Second<br />
Off<br />
Cancel OK<br />
10/10/2010 10:10<br />
10/10/2010 10:10<br />
1 Press the System Menu key.<br />
2 Press [ ], [Date/Timer] and then [Change] of<br />
Time Zone.<br />
3 Select the region.<br />
NOTE: Press [ ] or [ ] to view the next region.<br />
4 Press [Off] or [On] of Summer Time and press [OK].<br />
NOTE: If you select a region that does not utilize<br />
summer time, the summer time setting screen will not<br />
appear.<br />
5 Press [Change] of Date/Time.<br />
6 Set the date and time. Press [+] or [–] in each<br />
setting.<br />
7 Press [OK].
Network Setup (LAN Cable Connection)<br />
2-15<br />
Preparation before Use<br />
The machine is equipped with network interface, which is compatible with network protocols such as TCP/IP<br />
(IPv4), TCP/IP (IPv6), IPX/SPX, NetBEUI, IPSec, and AppleTalk. It enables network printing on the Windows,<br />
Macintosh, UNIX, NetWare and other platforms.<br />
This section explains the TCP/IP (IPv4) Setup and AppleTalk Setup procedures. For other network settings,<br />
refer to the Network on 9-94.<br />
• TCP/IP (IPv4) Setup...2-15<br />
• AppleTalk Setup...2-17<br />
NOTE: If user login administration is enabled, you can only change the settings by logging in with<br />
administrator privileges. If user login administration is disabled, the user authentication screen appears. Enter<br />
a login user name and password, and press [Login]. Refer to Adding a User (Local User List) on page 10-5 for<br />
the default login user name and password.<br />
TCP/IP (IPv4) Setup (by Entering IP Addresses)<br />
Set up TCP/IP (IPv4) to connect to the Windows network. Set the IP addresses, subnet masks, and gateway<br />
addresses. The default settings are "TCP/IP Protocol: On, DHCP: On, Bonjour: Off, Auto-IP: On".<br />
NOTE: Prior to the IP address entries, obtain permission from the network administrator.<br />
Use the procedure below.<br />
System - IPv4<br />
Set TCP/IP (IPv4).<br />
* The setting will be changed after restarting the device or network.<br />
Status<br />
Off<br />
DHCP<br />
IP Address<br />
Subnet Mask<br />
On<br />
Default<br />
Gateway<br />
Off<br />
0.0.0.0<br />
0.0.0.0<br />
0.0.0.0<br />
Bonjour<br />
On<br />
Auto-IP<br />
Cancel OK<br />
10/10/2010 10:10<br />
1 Press the System Menu key.<br />
2 Press [System], [Next] of Network and then [Next]<br />
of TCP/IP Setting.<br />
3 Press [Change] of TCP/IP.<br />
4 Press [On] and then press [OK].<br />
5 Press [Change] of IPv4.<br />
6 Press [DHCP].<br />
7 Press [Off] of DHCP and then press [OK].<br />
8 Press [Bonjour].<br />
9 Press [Off] of Bonjour and then press [OK].<br />
10 Press [IP Address] and enter the address using the<br />
numeric keys.<br />
11 Press [Subnet Mask] and enter the address using<br />
the numeric keys.<br />
12 Press [Default Gateway] and enter the address<br />
using the numeric keys.<br />
2
DHCP Settings<br />
Select whether or not to use the DHCP server. The default setting is On.<br />
Use the procedure below.<br />
Bonjour Settings<br />
Select whether or not to use Bonjour. The default setting is Off.<br />
Refer to Bonjour Settings on page 9-95 about the procedures.<br />
2-16<br />
Preparation before Use<br />
13 Check if all the address entries are correct and<br />
press [OK].<br />
14 After changing the setting, restart the network from<br />
the system menu, or turn the machine OFF and<br />
then ON.<br />
For detailed information on restarting the network,<br />
refer to Restart Network on page 9-106.<br />
1 Press the System Menu key.<br />
2 Press [System], [Next] of Network and then [Next]<br />
of TCP/IP Setting.<br />
3 Press [Change] of TCP/IP.<br />
4 Press [On] and then press [OK].<br />
5 Press [Change] of IPv4.<br />
6 Press [DHCP].<br />
7 Press [On] or [Off] of DHCP and then press [OK].<br />
8 After changing the setting, restart the network from<br />
the system menu, or turn the machine OFF and<br />
then ON.<br />
For detailed information on restarting the network,<br />
refer to Restart Network on page 9-106.
Auto-IP Settings<br />
Select whether or not to use Auto-IP. The default setting is On.<br />
Use the procedure below.<br />
AppleTalk Setup<br />
2-17<br />
1 Press the System Menu key.<br />
Preparation before Use<br />
2 Press [System], [Next] of Network and then [Next]<br />
of TCP/IP Setting.<br />
3 Press [Change] of TCP/IP.<br />
4 Press [On] and then press [OK].<br />
5 Press [Change] of IPv4.<br />
6 Press [Auto-IP].<br />
Select the Apple Talk network connection. The default setting is On.<br />
Refer to AppleTalk on page 9-99 about the procedures.<br />
7 Press [On] or [Off] of Auto-IP and then press [OK].<br />
8 After changing the setting, restart the network from<br />
the system menu, or turn the machine OFF and<br />
then ON.<br />
For detailed information on restarting the network,<br />
refer to Restart Network on page 9-106.<br />
2
Installing Software<br />
2-18<br />
Preparation before Use<br />
Install appropriate software on your PC from the included Product Library DVD (Product Library) if you want to<br />
use the printer function of this machine or perform TWAIN / WIA transmission or FAX transmission from your PC.<br />
The following softwares are supported:<br />
• Printing System Driver<br />
• Printing System (XPS) Driver<br />
• Mini printer driver (PCL/KPDL)<br />
• TWAIN driver<br />
• WIA driver<br />
• Network FAX driver<br />
• File Management Utility<br />
• Network Tool for Direct Printing<br />
• Network Print Monitor<br />
• Font<br />
NOTE: Installation on Windows must be done by a user logged on with administrator privileges.<br />
The optional Fax Kit is required in order to make use of fax functionality.<br />
The WIA driver cannot be installed on Windows XP.<br />
If you are connecting this machine to a Windows PC, follow the next steps to install the software. The example<br />
shows you how to connect your machine to a Windows 7 PC.<br />
Installing Printer Driver in Windows<br />
NOTE: If the Welcome to the Found New Hardware Wizard dialog box displays, select Cancel.<br />
If the autorun screen is displayed, click Run Setup.exe.<br />
If the user account management window appears, click Allow.<br />
You can use either Express Mode or Custom Mode to install the software. Express Mode automatically detects<br />
connected machines and installs the required software. Use Custom Mode if you want to specify the printer port<br />
and select the software to be installed. For details, refer to Custom Installation in the Printing System Driver User<br />
Guide on the DVD.<br />
1 Insert the DVD.
2-19<br />
Preparation before Use<br />
2 Click View License Agreement and read the<br />
License Agreement. Click Accept.<br />
3 Click Install Software.<br />
4 Click Express Mode.<br />
5 Select the print system to be installed and click<br />
Next.<br />
NOTE: If the print system detection window appears<br />
and the installer fails to detect the machine, verify that<br />
it is connected to the computer via a network or USB<br />
cable and that it is turned on and click Reload.<br />
2
2-20<br />
Preparation before Use<br />
6 Customize the print system name if the print<br />
system is connected via a network and click Next.<br />
7 Click Install.<br />
NOTE: If the Windows security window appears, click<br />
Install this driver software anyway.<br />
8 A message appears saying that the printer has<br />
been installed successfully. Click Finish.<br />
This completes the printer driver installation procedure. Follow the on-screen instructions to restart the system,<br />
if required.<br />
The TWAIN driver and WIA driver can be installed if the machine and computer are connected via a network.<br />
You can install the WIA driver using Custom Mode.<br />
If you are installing the TWAIN driver or WIA driver, continue by configuring the Setting TWAIN Driver (page 2-<br />
24) or Setting WIA Driver (page 2-25).
Installing Printer Driver in Macintosh<br />
The machine's printer functionality can be used by a Macintosh computer.<br />
The example shows you how to connect your machine to a Macintosh running MAC OS X v10.6.<br />
2-21<br />
Preparation before Use<br />
NOTE: When printing from a Macintosh computer, set the machine’s emulation to [KPDL] or [KPDL(Auto)].<br />
For details about the configuration method, refer to Printer on page 9-57.<br />
If connecting by Bonjour, enable Bonjour in the machine's network settings. For details, refer to Bonjour<br />
Settings on page 2-16.<br />
In the Authenticate screen, enter the name and password used to log in to the operating system.<br />
This completes the printer driver installation.<br />
1 Insert the DVD.<br />
Double-click GEN_LIB icon.<br />
2 Double-click either OS X 10.2 and 10.3 Only, OS X<br />
10.4 Only or OS X 10.4 or higher depending on<br />
your Mac OS version.<br />
3 Double-click (Brand Name) OS X vx.x.<br />
4 Install the printer driver as directed by the<br />
instructions in the installation software.<br />
2
2-22<br />
Preparation before Use<br />
Next, specify the print settings. If an IP or AppleTalk connection is used, the settings below are required. If a<br />
USB connection is used, the machine is automatically recognized and connected.<br />
5 Open System Preferences and click Print & Fax.<br />
6 Click the plus symbol (+).<br />
7 Click the IP icon for an IP connection or the<br />
AppleTalk icon for an AppleTalk connection and<br />
then enter the IP address and printer name. Click<br />
Add.<br />
NOTE: When using a Bonjour connection, select<br />
[Default] and click the item that appears in "Printer<br />
Name". The driver with the same name as the machine<br />
automatically appears in "Driver".
2-23<br />
Preparation before Use<br />
8 Select the options available for the machine and<br />
click Continue<br />
9 The selected machine is added.<br />
2
Setting TWAIN Driver<br />
Register this machine to the TWAIN Driver.<br />
6<br />
8<br />
3<br />
4<br />
5<br />
7<br />
2-24<br />
Preparation before Use<br />
1 Select the Start Button of the Windows display, All<br />
Programs, (Brand Name) and then TWAIN Driver<br />
Setting. TWAIN Driver screen appears.<br />
2 Click Add.<br />
3 Enter the machine name in the Name field.<br />
4 Select this machine from the list. To scan in a<br />
document stored in a custom box, select a model<br />
name with (Box).<br />
5 Enter the machine's IP address or host name in the<br />
Scanner Address.<br />
NOTE: When the machine’s IP address is unknown,<br />
contact the Administrator.<br />
6 When using SSL, select the checkbox beside SSL.<br />
7 When user login administration is enabled, select<br />
the checkbox beside Authentication, and enter a<br />
Login User Name (up to 64 characters) and<br />
Password (up to 64 characters).<br />
To use job accounting, select the checkbox of the<br />
account, enter an Account ID (maximum of 8<br />
digits), and click OK.<br />
8 Click OK.<br />
9 Click Close.<br />
NOTE: Click Delete to delete the added machine.<br />
Click Edit to change names.
Setting WIA Driver<br />
Register this machine to the WIA Driver.<br />
The following explanation assumes that Windows 7 is being used.<br />
3<br />
4<br />
6<br />
5<br />
2-25<br />
Preparation before Use<br />
1 Click the Windows Start button and enter Scanner<br />
in Program and File Search. Click Show<br />
scanners and cameras in the search list. The<br />
Scanners and Cameras screen appears.<br />
2 Select the same name as this machine from WIA<br />
Drivers, and click Properties.<br />
3 Enter the machine name or the host name.<br />
4 When using SSL, select the checkbox beside SSL.<br />
5 When user login administration is enabled, select<br />
the checkbox beside Authentication, and enter a<br />
Login User Name (up to 64 characters) and<br />
Password (up to 64 characters).<br />
When job accounting is enabled, select the<br />
checkbox beside Account ID, and enter the<br />
account ID with as many as eight digits.<br />
6 Click OK.<br />
2
Embedded Web Server RX (Settings for E-mail)<br />
2-26<br />
Preparation before Use<br />
Embedded Web Server RX is a tool used for tasks such as verifying the operating status of the machine and<br />
changing the settings for security, network printing, E-mail transmission and advanced networking.<br />
NOTE: Here, information on the FAX settings has been omitted. For more information on using the FAX, refer<br />
to the Fax System (V) Operation Guide.<br />
The optional Fax Kit is required in order to make use of fax functionality.<br />
To change settings in Embedded Web Server RX, you must log in as an administrator of the machine.<br />
The default factory settings are set as shown below.<br />
Login User Name: Admin<br />
Login Password: Admin<br />
* Upper case and lower case letters are distinguished (case sensitive).<br />
The procedure for accessing Embedded Web Server RX is explained below.<br />
1 Launch your Web browser.<br />
2 In the Address or Location bar, enter the machine’s IP address.<br />
e.g.) http://10.183.51.41/<br />
The web page displays basic information about the machine and Embedded Web Server RX as well as their<br />
current status.<br />
3 Select a category from the navigation bar on the left of the screen. The values for each category must be<br />
set separately.<br />
If restrictions have been set for Embedded Web Server RX, enter the correct user name and password to<br />
access pages other than the startup page.<br />
For details, refer to the Embedded Web Server RX Operation Guide.
E-mail Setting<br />
2-27<br />
Preparation before Use<br />
Specifying the SMTP settings allows you to send images scanned with this machine as E-mail attachments.<br />
To use this function, this machine must be connected to a mail server using the SMTP protocol.<br />
Before sending images scanned with this machine as E-mail attachments, check the following:<br />
• The network environment used to connect this machine to the mail server<br />
A full-time connection via a LAN is recommended.<br />
• SMTP Settings<br />
Use Embedded Web Server RX to register the IP address or host name of the SMTP server.<br />
• If limits have been set on the size of E-mail messages, it may not be possible to send very large E-mails.<br />
The procedure for specifying the SMTP settings is explained below.<br />
1 Click Settings -> Advanced -> SMTP -> General.<br />
2
2 Enter the correct settings in each field.<br />
The settings to be specified in the SMTP settings screen are shown below.<br />
3 Click Submit.<br />
Item Description<br />
2-28<br />
Preparation before Use<br />
SMTP Protocol Enables or disables SMTP protocol. To use E-mail, this protocol must be<br />
enabled.<br />
SMTP Port Number Set the SMTP Port Number or use the SMTP default port 25.<br />
SMTP Server Name Enter the SMTP server IP address or its name. The maximum length of the<br />
SMTP server name and IP address is 64 characters. If entering the name, a DNS<br />
server address must also be configured. The DNS server address may be<br />
entered on the TCP/IP General tab.<br />
SMTP Server Timeout Set the amount of time to wait before time-out in seconds.<br />
Authentication<br />
Protocol<br />
Enables or disables the SMTP authentication protocol or sets POP before SMTP<br />
as the protocol. The SMTP authentication supports Microsoft Exchange 2000.<br />
Authenticate as Authentication can be set from three POP3 accounts or you can choose a<br />
different account.<br />
Login User Name When Other is selected for Authenticate, the login user name set here will be<br />
used for SMTP authentication. The maximum length of the login user name is<br />
64 characters.<br />
Login Password When Other is selected for Authenticate, the password set here will be used for<br />
authentication. The maximum length of the login password is 64 characters.<br />
SMTP Security Enables or disables the SMTP Security. When this protocol is enabled, either<br />
SSL/TLS or S<strong>TA</strong>RTTLS must be selected. To enable SMTP security, the SMTP<br />
port may have to be changed according to the server settings. Typically, 465 for<br />
SSL/TLS and 25 or 587 for S<strong>TA</strong>RTTLS are well-known SMTP ports.<br />
POP before SMTP<br />
Timeout<br />
Set the amount of time to wait before time-out in seconds when you have<br />
selected POP before SMTP as the Authentication Protocol.<br />
Test This will test if the SMTP connection can be successfully established.<br />
E-mail Size Limit Enter the maximum size of E-mail that can be sent in kilobytes. When the value is<br />
0, the limitation for E-mail size is disabled.<br />
Sender Address Enter the E-mail address of the person responsible for the machine, such as the<br />
machine administrator, so that a reply or non-delivery report will go to a person<br />
rather than to the machine. The sender address must be entered correctly for<br />
SMTP authentication. The maximum length of the sender address is<br />
128 characters.<br />
Signature Enter the signature. The signature is free form text that will appear at the end of<br />
the E-mail body. It is often used for further identification of the machine. The<br />
maximum length of the signature is 512 characters.<br />
Domain Restriction Enter the domain names that can be permitted or rejected. The maximum length<br />
of the domain name is 32 characters. You can also specify E-mail addresses.
Loading Paper<br />
2-29<br />
Preparation before Use<br />
Paper can be loaded in the four standard cassettes and the multi purpose tray. Side feeders are also available<br />
as an option (refer to Optional Equipment on Appendix-2).<br />
For the paper feed methods for each cassette, refer to the page below.<br />
Cassette Name Page<br />
Standard Cassette 1,<br />
Cassette 2<br />
Standard cassettes1 and 2 2-31<br />
Cassette 3,<br />
Cassette 4<br />
Standard cassettes3 and 4 2-34<br />
Multi Purpose Tray Multi Purpose Tray 2-38<br />
Option Cassette 5 Side Feeder (3,000-sheet) 2-37<br />
Side Feeder (500-sheet x 3)* 2-31<br />
Large Capacity Side Feeder<br />
(500*, 1,500-sheet x 2**)<br />
2-31<br />
Cassette 6<br />
Cassette 7<br />
Side Feeder (500-sheet x 3)* 2-31<br />
Large Capacity Side Feeder<br />
(500*, 1,500-sheet x 2**)<br />
2-34<br />
* The paper feed method is the same as standard cassettes 1 and 2.<br />
** The paper feed method is the same as standard cassettes 3 and 4.<br />
IMPOR<strong>TA</strong>NT:<br />
• The number of sheets that can be held varies depending on your environment.<br />
• You should not use inkjet printer paper or any paper with a special surface coating. (Such paper may cause<br />
paper jams or other faults.)<br />
2
Before Loading Paper<br />
2-30<br />
Preparation before Use<br />
When you open a new package of paper, fan the sheets<br />
to separate them slightly prior to loading in the following<br />
steps.<br />
1 Bend the whole set of sheets to swell them in the<br />
middle.<br />
2 Hold the stack at both ends and stretch it while<br />
keeping the entire stack risen.<br />
3 Raise the right and left hands alternately to create<br />
a gap and feed air between the paper.<br />
4 Finally, align the paper on a level, flat table.<br />
If the paper is curled or folded, straighten it before<br />
loading. Paper that is curled or folded may cause a<br />
jam.<br />
CAUTION: If you copy onto used paper (paper already used for copying), do not use paper that is stapled or<br />
clipped together. This may damage the machine or cause poor image quality.<br />
Avoid exposing opened paper to high temperatures and high humidity as dampness can be a cause of problems.<br />
Seal any remaining paper after loading in the multi purpose tray or cassettes back in the paper storage bag.<br />
If the machine will not be used for a prolonged period, protect all paper from humidity by removing it from the<br />
cassettes and sealing it in the paper storage bag.<br />
NOTE: Note that some paper types have a tendency to curl and may jam in the paper eject unit.<br />
If the output paper scatters or stacks unevenly, turn the paper over in the cassette, or change the orientation<br />
(vertical/horizontal) of the paper in the cassette.<br />
If you use special paper such as letterhead, paper with holes or paper with pre-prints like logo or company<br />
name, refer to the Paper on Appendix-11.
Loading Paper in the Cassettes<br />
The standard cassette 1 and 2<br />
2-31<br />
Preparation before Use<br />
The standard cassette 1 and 2 will each hold plain paper, recycled paper or color paper.<br />
Cassette 1 and 2 hold up to 500 sheets of plain paper (80 g/m 2 ) (or up to 550 sheets of 64 g/m 2 plain paper).<br />
The following paper sizes are supported: A3, B4, A4, A4-R, B5, B5-R, A5-R, Ledger, Legal, Oficio II, 12 × 18",<br />
Letter, Letter-R, Statement-R, Folio, 8K, 16K, 16K-R and 216 × 340 mm.<br />
IMPOR<strong>TA</strong>NT:<br />
• When using media types other than plain paper (such as recycled or colored paper), always specify the<br />
media type and paper weight settings. (Refer to Specifying Paper Size and Media Type for the Cassettes on<br />
page 2-42, Media Type Setting on page 9-8.)<br />
The cassettes can hold paper with weights up to 256 g/m2 . If you are using a paper weight between 106<br />
and 256 g/m2 , set the media type to Thick and set the weight of the paper you are using.<br />
• Do not load thick paper that is heavier than 256 g/m2 in the cassettes. Use the multi purpose tray for paper<br />
that is heavier than 256 g/m2 .<br />
• If you wish to use 330 × 210 mm to 356 × 220 mm paper, contact a service technician.<br />
1 Pull the cassette out toward you until it stops.<br />
NOTE: Do not pull out more than one cassette at a<br />
time.<br />
2 Squeeze the ends of the bottom of the paper length<br />
guide and move the guide to fit the length of the<br />
paper.<br />
NOTE: Paper sizes are marked on the cassette.<br />
2
Example: A4<br />
2-32<br />
Preparation before Use<br />
3 Press the (Paper Width Guide) Lock to release the<br />
lock. Grasp the paper width adjusting tab and move<br />
the paper width guides to fit the paper.<br />
4 Align the paper flush against the right side of the<br />
cassette.<br />
After removing new paper from its packaging, fan<br />
the paper before loading it in the cassette.<br />
(Refer to Before Loading Paper on page 2-30)<br />
IMPOR<strong>TA</strong>NT:<br />
• Before loading the paper, be sure that it is not<br />
curled or folded. Paper that is curled or folded may<br />
cause paper jams.<br />
• Ensure that the loaded paper does not exceed the<br />
level indicator (see illustration on the left).<br />
• When loading the paper, keep the side that was<br />
closest to the package seal facing up.<br />
• The paper length and width guides must be<br />
adjusted to the paper size. Loading the paper<br />
without adjusting these guides may cause skewed<br />
feeding and paper jams.
2-33<br />
Preparation before Use<br />
5 Be sure that the paper length and width guides rest<br />
securely against the paper. If there is a gap,<br />
readjust the guides to fit the paper.<br />
6 Press the (Paper Width Guide) Lock to lock.<br />
7 Insert the indication on the sheet so as to match the<br />
size and type of paper to be placed. (The indication<br />
is printed on both sides of the sheet.)<br />
8 Gently push the cassette back in.<br />
NOTE: If the machine will not be used for a prolonged<br />
period, protect all paper from humidity by removing it<br />
from the cassettes and sealing it in the paper storage<br />
bag.<br />
9 Select the media type (plain, recycled, etc.) loaded<br />
in the cassette. (Refer to Specifying Paper Size<br />
and Media Type for the Cassettes on page 2-42.)<br />
2
2-34<br />
Preparation before Use<br />
The standard cassette 3 and 4<br />
The standard cassette 3 and 4 will each hold plain paper, recycled paper or color paper.<br />
The standard cassette 3 and 4 hold up to 3,000 sheets (1,500-sheet x 2) of plain paper (80 g/m 2 ) (or up to 3,500<br />
sheets (1,750-sheet x 2) of 64 g/m2 plain paper).<br />
The following paper sizes are supported: A4, B5 and Letter.<br />
IMPOR<strong>TA</strong>NT:<br />
• When using media types other than plain paper (such as recycled or colored paper), always specify the<br />
media type and paper weight settings. (Refer to Specifying Paper Size and Media Type for the Cassettes on<br />
page 2-42,Media Type Setting on page 9-8.)<br />
The cassettes can hold paper with weights up to 256 g/m2 . If you are using a paper weight between 106<br />
and 256 g/m2 , set the media type to Thick and set the weight of the paper you are using.<br />
• Do not load thick paper that is heavier than 256 g/m2 in the cassettes. Use the multi purpose tray for paper<br />
that is heavier than 256 g/m2 .<br />
Clamp<br />
Paper Size Guide (A)<br />
1 Pull the cassette out toward you until it stops.<br />
2 Rotate the Paper Size Guide (A) clamp and<br />
remove. Pull the Paper Size Guide (A) up and out.<br />
3 Insert the Paper Size Guide (A) into the slot<br />
(bottom of cassette) for the paper size to be used.<br />
Make sure that the top of the paper size guide (A)<br />
matches the paper size to be used, attach the<br />
clamp, and rotate the clamp to lock it.<br />
Gently try moving the Paper Size Guide (A) to<br />
verify that it is fixed.
Paper Size Guide (B)<br />
2-35<br />
Preparation before Use<br />
4 With the bottom of the cassette pressed all the way<br />
down, press the hook on the side of the Paper Size<br />
Guide (B) to release it and pull out the Paper Size<br />
Guide (B).<br />
5 Adjust the Paper Size Guide (B) to the paper size.<br />
A4<br />
Insert the Paper Size Guide (B) into the slot marked<br />
A4 (on the bottom of the cassette), and lock the<br />
hook (it will make a "click" sound).<br />
Gently try moving the Paper Size Guide (B) to<br />
verify that it is fixed.<br />
B5<br />
Open the Paper Size Guide (B) as shown, insert<br />
into the slot marked B5 (on the bottom of the<br />
cassette), and lock the hook (it will make a "click"<br />
sound).<br />
Gently try moving the Paper Size Guide (B) to<br />
verify that it is fixed.<br />
Letter<br />
The Paper Size Guide (B) is not attached.<br />
2
2-36<br />
6 Insert the paper into the cassette.<br />
Preparation before Use<br />
After removing new paper from its packaging, fan<br />
the paper before loading it in the cassette.<br />
(Refer to Before Loading Paper on page 2-30)<br />
IMPOR<strong>TA</strong>NT:<br />
• Before loading the paper, be sure that it is not<br />
curled or folded. Paper that is curled or folded may<br />
cause paper jams.<br />
• Ensure that the loaded paper does not exceed the<br />
level indicator (see illustration below).<br />
• When loading the paper, keep the print side facing<br />
up.<br />
7 Insert the indication on the sheet so as to match the<br />
size and type of paper to be placed. (The indication<br />
is printed on both sides of the sheet.)<br />
8 Gently push the cassette back in.<br />
NOTE: If the machine will not be used for a prolonged<br />
period, protect all paper from humidity by removing it<br />
from the cassettes and sealing it in the paper storage<br />
bag.<br />
9 Select the media type (plain, recycled, etc.) loaded<br />
in the cassette. (Refer to Specifying Paper Size<br />
and Media Type for the Cassettes on page 2-42.)
Side Feeder (3,000-sheet) (Option)<br />
2-37<br />
Preparation before Use<br />
The optional side feeder hold up to 3,000 sheets of plain paper (80 g/m 2 ). The following paper sizes are<br />
supported: A4, B5, Letter.<br />
Pull the cassette out toward you until it stops and insert<br />
the paper into the cassette. After loading paper, gently<br />
push the cassette back in.<br />
NOTE: The default paper size setting is A4. If you<br />
need the paper size changed to B5 or Letter, contact<br />
your service representative.<br />
IMPOR<strong>TA</strong>NT:<br />
• Before loading the paper, be sure that it is not<br />
curled or folded. Paper that is curled or folded may<br />
cause paper jams.<br />
• Ensure that the loaded paper does not exceed the<br />
level indicator (see illustration below).<br />
• When loading the paper, keep the print side facing up.<br />
2
Loading Paper in the Multi Purpose Tray<br />
2-38<br />
Preparation before Use<br />
The multi purpose tray will hold up to 150sheets of A4 or smaller plain paper (80 g/m 2 ) (or up to 165 sheets of 64 g/<br />
m 2 plain paper) or up to 50 sheets of plain paper (80 g/m 2 ) (or up to 55 sheets of 64 g/m 2 plain paper) lager than A4.<br />
The multi purpose tray accepts paper sizes 12×18" and from A3 to A6-R and Hagaki and from Ledger to<br />
Statement-R, 8K, 16K and 16K-R. Be sure to use the multi purpose tray when you print on any special paper.<br />
IMPOR<strong>TA</strong>NT: When using media types other than plain paper (such as recycled or colored paper), always<br />
specify the media type and paper weight settings. (Refer to Specifying Paper Size and Media Type for the Multi<br />
Purpose Tray (MP Tray Setting) on page 2-44, Media Type Setting on page 9-8.) If you are using a paper weight<br />
of 106 g/m 2 or more, set the media type to Thick and set the weight of the paper you are using.<br />
The capacity of the multi purpose tray is as follows.<br />
• A4 or smaller plain paper (80 g/m 2 ), recycled paper or color paper: 150 sheets<br />
(64 g/m 2 plain paper :165 sheets)<br />
• B4 or larger plain paper (80 g/m 2 ), recycled paper or color paper: 50 sheets<br />
(64 g/m 2 plain paper :55 sheets)<br />
• Hagaki: 30 sheets<br />
• OHP film: 10 sheets<br />
• Envelope DL, Envelope C4, Envelope C5, Envelope #10 (Commercial #10), Envelope #9 (Commercial #9),<br />
Envelope #6 (Commercial #6), Monarch, Youkei 4, Youkei 2: 10 sheets<br />
• Banner paper: 470.1 mm (18.51") to a maximum of 1220.0 mm (48"):<br />
1 sheet (manual feed), 10 sheets (when optional banner tray is attached)<br />
NOTE: When you load custom size paper, enter the paper size by referring to Specifying Paper Size and<br />
Media Type for the Multi Purpose Tray (MP Tray Setting) on page 2-44.<br />
When you use special paper such as transparencies or thick paper, select the media type by referring to<br />
Specifying Paper Size and Media Type for the Multi Purpose Tray (MP Tray Setting) on page 2-44.<br />
1 Open the Multi Purpose tray until it stops.<br />
2 When loading paper sizes 12×18" and from A3 to<br />
B4 and Ledger to Legal, extend the support tray<br />
section of the multi purpose tray until the mark "∆"<br />
is fully appeared.
2-39<br />
Preparation before Use<br />
3 Adjust the paper width guides to the width of the<br />
paper.<br />
After removing new paper from its packaging, fan<br />
the paper before loading it in the multi-purpose tray.<br />
(Refer to Before Loading Paper on page 2-30)<br />
4 Insert the paper along the paper width guides into<br />
the tray until it stops.<br />
IMPOR<strong>TA</strong>NT: Keep the print side facing up.<br />
Curled paper must be uncurled before use.<br />
Straighten the top edge if it is curled.<br />
When loading paper into the multi purpose tray, check<br />
that there is no paper left over in the tray from a previous<br />
job before loading the paper. If there is just a small<br />
amount of paper left over in the multi purpose tray and<br />
you want to add more, first remove the left-over paper<br />
from the tray and include it with the new paper before<br />
loading the paper back into the tray.<br />
If there is a gap between the paper and the paper width<br />
guides, readjust the guides to fit the paper in order to<br />
prevent skewed feeding and paper jams.<br />
IMPOR<strong>TA</strong>NT: Ensure that the loaded paper does not<br />
exceed the level indicator (see illustration).<br />
2
Loading Envelopes<br />
Up to 10 envelopes may be loaded in the multi purpose tray.<br />
Acceptable envelope sizes are as follows.<br />
Acceptable Envelope Size<br />
Monarch 3 7/8"×7 1/2"<br />
Envelope #10 (Commercial #10) 4 1/8"×9 1/2"<br />
Envelope #9 (Commercial #9) 3 7/8"×8 7/8"<br />
Envelope #6 (Commercial #6) 3 5/8"×6 1/2"<br />
Envelope DL 110×220 (mm)<br />
Envelope C4 229×324 (mm)<br />
Envelope C5 162×229 (mm)<br />
Youkei 2 162×114 (mm)<br />
Youkei 4 235×105 (mm)<br />
2-40<br />
1 Open the multi purpose tray.<br />
Preparation before Use<br />
2 Adjust the paper width guides to the width of the<br />
envelope.
3 Insert along the paper width guide all the way in as shown.<br />
When you load envelopes or<br />
cardstock in the multi purpose tray<br />
Load envelopes with the print side facing down.<br />
e.g.) When printing the address.<br />
2-41<br />
Return<br />
postcard<br />
(Oufuku<br />
hagaki)<br />
IMPOR<strong>TA</strong>NT: Use unfolded return postcard (Oufuku hagaki).<br />
Cardstock<br />
(Hagaki)<br />
Open the flap.<br />
Preparation before Use<br />
Close<br />
the flap.<br />
Portrait Landscape<br />
form form<br />
envelopes envelopes<br />
IMPOR<strong>TA</strong>NT: How to load envelopes (orientation and facing) will differ depending on the type of envelope. Be<br />
sure to load it in correctly, otherwise printing may be done in the wrong direction or on the wrong face.<br />
NOTE: When you load envelopes in the multi purpose tray, select the envelope type by referring to Specifying<br />
Paper Size and Media Type for the Multi Purpose Tray (MP Tray Setting) on page 2-44.<br />
2
Specifying Paper Size and Media (Cassette Setting)<br />
2-42<br />
Preparation before Use<br />
The default paper size setting for cassettes 1 to 4, for the multi purpose tray and for the optional side feeder<br />
(cassettes 5 to 7) is [Auto], and the default media type setting is [Plain].<br />
To fix the type of paper to be used in cassettes, specify the paper size and media type setting. (Refer to<br />
Specifying Paper Size and Media Type for the Cassettes on page 2-42.)<br />
To fix the type of paper to be used in multi purpose tray, specify the paper size setting. (Refer to Specifying<br />
Paper Size and Media Type for the Multi Purpose Tray (MP Tray Setting) on page 2-44.)<br />
Specifying Paper Size and Media Type for the Cassettes<br />
To fix the type of paper to be used in cassettes 1 to 4 or the optional side feeders (cassettes 5 to 7), specify the<br />
paper size. Also, if you use a media type other than plain paper, specify the media type setting.<br />
Selection Item Selectable Size/Type<br />
Paper<br />
Size<br />
Auto Paper size is automatically detected and selected. Select whether the<br />
paper is in Metric size or in Inch size.<br />
Standard<br />
Sizes 1*<br />
Standard<br />
Sizes 2*<br />
Select from the standard sizes. Selectable paper sizes are as follows.<br />
Inch models: Ledger, Legal, Letter, Letter-R, Statement-R, 12×18",<br />
Oficio II<br />
Metric models: A3, B4, A4, A4-R, B5, B5-R, A5-R, Folio, 216×340 mm<br />
Select from the standard sizes not included in Standard Sizes 1.<br />
Selectable paper sizes are as follows.<br />
Inch models: A3, B4, A4, A4-R, A5-R, B5, B5-R, Folio, 8K, 16K, 16K-R<br />
Metric models: Ledger, Legal, Letter, Letter-R, Statement-R, 12×18",<br />
Oficio II, 8K, 16K, 16K-R<br />
Media Type Plain (105 g/m 2 or less), Rough, Vellum** (60 to 105 g/m 2 or less),<br />
Recycled, Preprinted***, Bond**, Color**, Prepunched***, Letterhead***,<br />
Thick (106 g/m 2 and more)**, High Quality and Custom 1~8**<br />
* Only A4, Letter, and B5 can be specified in cassettes 6 and 7 when cassettes 3 and 4 and the<br />
optional Large Capacity Side Feeder (500, 1,500-sheet x 2) are used.<br />
** To change to a media type other than Plain, refer to Media Type Setting on page 9-8. When<br />
the paper weight settings shown below are selected, the media indicated for each setting<br />
cannot be selected.<br />
• Rough: Heavy 5 • Vellum: Heavy 5<br />
• Preprinted: Heavy 5 • Color: Heavy 5<br />
• Letterhead: Heavy 5• Thick: Heavy 5<br />
• Custom 1 to 8: Heavy 5, or Extra Heavy<br />
*** To print on preprinted or prepunched paper or on letterhead, refer to Special Paper Action on<br />
page 9-11.<br />
NOTE: If the optional FAX kit is installed, the available media types for printing received faxes are as shown<br />
below.<br />
Plain, Recycled, Bond, Vellum, Color, Thick, High Quality, Rough and Custom 1 to 8
Common Settings - Paper Size<br />
Set cassette paper size.<br />
Status<br />
Auto<br />
Standard<br />
Sizes 1<br />
Standard<br />
Sizes 2<br />
Common Settings - Media Type<br />
Status<br />
Plain<br />
A3 A4<br />
Select type of paper in Cassette 1.<br />
Recycled Preprinted Bond<br />
Prepunched<br />
Custom 1<br />
Custom 6<br />
Letterhead<br />
Custom 2<br />
Custom 7<br />
B4 B5 B5<br />
Rough<br />
Vellum<br />
Custom 3 Custom 4<br />
Custom 8<br />
Thick<br />
A4 A5<br />
216x340mm<br />
Cancel OK<br />
Color<br />
High Quality<br />
Custom 5<br />
Cancel OK<br />
10/10/2010 10:10<br />
10/10/2010 10:10<br />
2-43<br />
1 Press the System Menu key.<br />
Preparation before Use<br />
2 Press [Common Settings], [Next] of Original /<br />
Paper Settings, [Next] of Cassette Setting.<br />
3 Cassette Setting, select one of [Cassette 1] to<br />
[Cassette 7] and press [Next].<br />
Then press [Change] of Paper Size.<br />
NOTE: [Cassette 5] to [Cassette 7] are shown when<br />
the optional side feeder is installed.<br />
4 For automatic detection of the paper size, press<br />
[Auto] and select [Metric] or [Inch] as the unit.<br />
To select the paper size, press [Standard Sizes 1]<br />
or [Standard Sizes 2] and select the paper size.<br />
5 Press [OK]. The previous screen reappears.<br />
6 Press [Change] of Media Type and select the<br />
media type. Then press [OK].<br />
2
Specifying Paper Size and Media Type for the Multi Purpose Tray (MP Tray Setting)<br />
2-44<br />
Preparation before Use<br />
To fix the type of paper to be used in the multi purpose tray, specify the paper size. When using other than a<br />
plain paper, specify the media type.<br />
Paper<br />
Size<br />
Item Description<br />
Auto Paper size is automatically detected and selected. Select whether the<br />
paper is in Metric size or in Inch size.<br />
Standard<br />
Sizes 1<br />
Standard<br />
Sizes 2<br />
Select from the standard sizes. Selectable paper sizes are as follows.<br />
Inch models: Ledger, Legal, Letter, Letter-R, Statement-R, 12×18",<br />
Oficio II, Executive<br />
Metric models: A3, B4, A4, A4-R, B5, B5-R, A5-R, B6-R, A6-R, Folio,<br />
216×340 mm<br />
Select from the standard sizes not included in Standard Sizes 1.<br />
Selectable paper sizes are as follows.<br />
Inch models: A3, B4, A4, A4-R, B5, B5-R, A5-R, B6-R, A6-R, Folio, 8K,<br />
16K, 16K-R<br />
Metric models: Ledger, Legal, Letter, Letter-R, Statement-R, 12×18",<br />
Oficio II, Executive, 8K, 16K, 16K-R<br />
Others Select from special standard sizes and custom sizes.<br />
Selectable paper sizes are as follows.<br />
ISO B5, Envelope #10 (Commercial #10), Envelope #9 (Commercial #9),<br />
Envelope #6 (Commercial #6 3/4), Envelope Monarch, Envelope DL,<br />
Envelope C5, Envelope C4, Hagaki, Oufuku hagaki, Youkei 4, Youkei 2<br />
Size<br />
Entry<br />
Enter the size not included in the standard size.<br />
Selectable paper sizes are as follows.<br />
Inch size<br />
X (Horizontal): 5.83~17.00" (in 0.01" increments),<br />
Y (Vertical): 3.86~11.69" (in 0.01" increments)<br />
Metric size<br />
X (Horizontal): 148~432 mm (in 1mm increments),<br />
Y (Vertical): 98~297 mm (in 1mm increments)<br />
Media Type Selectable media types are as follows.<br />
Plain (105g /m 2 or less), Rough, Transparency,<br />
Vellum (60 to 105 g/m 2 or less), Labels, Recycled, Preprinted**, Bond,<br />
Cardstock, Color, Prepunched**, Letterhead**, Envelope, Thick (106 g/m 2<br />
and more), Coated, High Quality and Custom 1~8<br />
* To change to a media type other than Plain, refer to Media Type Setting on page 9-8.<br />
** To print on preprinted or prepunched paper or on letterhead, refer to Special Paper Action on<br />
page 9-11.<br />
NOTE: If the optional FAX kit is installed and the multi purpose tray is used to print a received FAX, the<br />
available media types are as shown below.<br />
Plain, Labels, Recycled, Bond, Vellum, Color, Coated, Cardstock, Envelope, Thick, High Quality, Rough and<br />
Custom 1 to 8
Common Settings - Paper Size<br />
Set the multi-purpose tray paper size.<br />
Auto<br />
Standard<br />
Sizes 1<br />
Standard<br />
Sizes 2<br />
Others<br />
Status<br />
Size Entry<br />
A3 A4 A4 A5<br />
A6 B4 B5 B5<br />
B6 216x340mm<br />
Common Settings - Paper Size<br />
Set the multi-purpose tray paper size.<br />
Auto<br />
Standard<br />
Sizes 1<br />
Standard<br />
Sizes 2<br />
Others<br />
Status<br />
Size Entry<br />
X(148 - 432)<br />
# Keys<br />
297 mm<br />
Common Settings - Media Type<br />
Select type of paper in Multi-Purpose Tray.<br />
Status<br />
Plain<br />
Y(98 - 297)<br />
# Keys<br />
210 mm<br />
Cancel OK<br />
Cancel OK<br />
Transparency Rough<br />
Vellum<br />
Labels<br />
Recycled Preprinted Bond<br />
Prepunched<br />
High Quality<br />
Letterhead<br />
Custom 1<br />
Envelope<br />
Custom 2<br />
Cardstock<br />
Thick<br />
Custom 5 Custom 6 Custom 7 Custom 8<br />
Color<br />
Coated<br />
Custom 3 Custom 4<br />
Cancel OK<br />
10/10/2010 10:10<br />
10/10/2010 10:10<br />
10/10/2010 10:10<br />
2-45<br />
1 Press the System Menu key.<br />
Preparation before Use<br />
2 Press [Common Settings], [Next] of Original /<br />
Paper Settings, [Next] of MP Tray Setting, and then<br />
[Change] of Paper Size.<br />
3 For automatic detection of the paper size, press<br />
[Auto] and select [Metric] or [Inch] as the unit.<br />
To select the paper size, press any of [Standard<br />
Sizes 1], [Standard Sizes 2], [Others] or [Size<br />
Entry] and select the paper size.<br />
If you have chosen [Size Entry], press [+] or [–] to<br />
enter X (horizontal) and Y (vertical) sizes. You may<br />
enter the size directly using the numeric keys by<br />
pressing [# Keys].<br />
4 Press [OK]. The previous screen reappears.<br />
5 Press [Change] of Media Type and select the<br />
media type. Then press [OK].<br />
2
Loading Originals<br />
Follow the steps below to load originals for copying, sending or storing.<br />
Placing Originals on the Platen<br />
You may place books or magazines on the platen in addition to ordinary sheet originals.<br />
2-46<br />
1 Open the document processor.<br />
Preparation before Use<br />
NOTE: Before opening the document processor, be<br />
sure that there are no originals left on the original table<br />
or on the original eject table. Originals left on the<br />
original table or on the original eject table may fall off<br />
when the document processor is opened.<br />
When placing books or magazines on the machine, do<br />
so with the document processor in the open position.<br />
Shadows may be produced around the edges and in the<br />
middle of open-faced originals.<br />
2 Place the original. Put the scanning side facedown<br />
and align it flush against the original size indicator<br />
plates with the back left corner as the reference<br />
point.<br />
NOTE: For details on Original Orientation, refer to<br />
When placing originals on the platen on page 4-9.
2-47<br />
Original size indicator plates<br />
(Inch models)<br />
(Metric models)<br />
3 Close the document processor.<br />
Preparation before Use<br />
CAUTION: Do not leave the document processor open<br />
as there is a danger of personal injury.<br />
2
Loading Originals in the Document Processor<br />
2-48<br />
Preparation before Use<br />
The document processor automatically scans each sheet of multiple originals. Both sides of two-sided originals<br />
are scanned.<br />
Part Names of the Document Processor<br />
(1)<br />
(2)<br />
(3)<br />
Originals Supported by the Document Processor<br />
The document processor supports the following types of originals.<br />
Originals Not Supported by the Document Processor<br />
(4)<br />
(5)<br />
(6)<br />
(7)<br />
(1) Original placement indicator<br />
(2) Top cover<br />
(3) Original width guides<br />
(4) Original table<br />
(5) Original eject table<br />
(6) Original stopper<br />
(7) Opening handle<br />
Document Processor<br />
Weight 35 to 220 g/m 2 (duplex: 50 to 220 g/m 2 )<br />
Size Maximum A3 to Minimum A5<br />
Maximum Ledger to Minimum Statement-R<br />
Capacity Plain paper (80 g/m 2 ), Colored paper, Recycled paper, High<br />
Quality: 270 sheets (Mixed size originals: 30 sheets)<br />
Thick paper (157 g/m 2 ): 89 sheets<br />
Thick paper (120 g/m 2 ): 116 sheets<br />
Art paper: 1 sheet<br />
Do not use the document processor for the following types of originals.<br />
• Soft originals such as vinyl sheets<br />
• Transparencies such as OHP film<br />
• Carbon paper<br />
• Originals with very slippery surfaces<br />
• Originals with adhesive tape or glue<br />
• Wet originals<br />
• Originals with correction fluid which is not dried<br />
• Irregularly shaped (non-rectangular) originals<br />
• Originals with cut-out sections<br />
• Crumpled paper<br />
• Originals with folds (Straighten the folds before loading. Failure to do so may cause the originals to jam).<br />
• Originals bound with clips or staples (Remove the clips or staples and straighten curls, wrinkles or creases<br />
before loading. Failure to do so may cause the originals to jam).
How to Load Originals<br />
2-49<br />
Preparation before Use<br />
IMPOR<strong>TA</strong>NT: Before loading originals, be sure that there are no originals left on the original eject table.<br />
Originals left on the original eject table may cause the new originals to jam.<br />
1 Adjust the original width guides.<br />
2 Place the originals. Put the side to be scanned (or<br />
the first side of two-sided originals) face-up. Slide<br />
the leading edge into the document processor as<br />
far as it will go. The original placement indicator will<br />
be lit.<br />
NOTE: For details on Original Orientation, refer to<br />
When placing originals on the document processor on<br />
page 4-9.<br />
IMPOR<strong>TA</strong>NT: Confirm that the original width guides<br />
exactly fit the originals. If there is a gap, readjust the<br />
original width guides. The gap may cause the originals<br />
to jam.<br />
Ensure that loaded originals do not exceed the<br />
level indicator. Exceeding the maximum level may<br />
cause the originals to jam (see the figure).<br />
Originals with punched holes or perforated lines<br />
should be placed in such a way that the holes or<br />
perforations will be scanned last (not first).<br />
2
Original placement indicator<br />
2-50<br />
Preparation before Use<br />
The original placement indicator is lit or unlit depending<br />
on how originals are placed.<br />
Indications and their status are as follows.<br />
• Green lit: Original is placed properly.<br />
• Green blinking: Original is not placed properly.<br />
Remove and place again.
3 Basic Operation<br />
This chapter explains the following operations.<br />
• Login/Logout .......................................................................................3-2<br />
• Enter key and Quick No. Search key..................................................3-4<br />
• Touch Panel Display ...........................................................................3-5<br />
• Original Preview..................................................................................3-6<br />
• Copying...............................................................................................3-7<br />
• Sending.............................................................................................3-22<br />
• Confirmation Screen of Destinations ................................................3-28<br />
• Preparation for sending a document to a PC....................................3-29<br />
• Specifying Destination ......................................................................3-39<br />
• Using the Document Box ..................................................................3-42<br />
• Canceling Jobs .................................................................................3-51<br />
• Quick Setup Screen..........................................................................3-52<br />
• Program ............................................................................................3-55<br />
• Registering Shortcuts (Copy, Send, and Document Box Settings) ...3-57<br />
• Using the Internet Browser ...............................................................3-58<br />
• Using Weekly Timer..........................................................................3-60<br />
• Checking Counter .............................................................................3-61<br />
• Help Screen ......................................................................................3-61<br />
3-1
Login/Logout<br />
3-2<br />
Basic Operation<br />
If user login administration is enabled, it is necessary to enter the login user name and password to use the<br />
machine.<br />
NOTE: You will be unable to login if you forget your login user name or login password. In this event, login with<br />
administrator privileges and change your login user name or login password.<br />
If the guest authentication setting is enabled, the Authentication/Logout key must be pressed when logging in.<br />
For details, refer to the Guest Authorization Set. on page 10-12.<br />
Login<br />
Status<br />
Enter login user name and password.<br />
Login to:<br />
Login<br />
User Name<br />
Login<br />
Password<br />
Check Counter<br />
Local<br />
abcdef<br />
********<br />
Cancel<br />
# Keys<br />
# Keys<br />
ID Card<br />
Login<br />
Login<br />
10/10/2010 10:10<br />
1 If the screen shown appears during operations,<br />
press [Login User Name].<br />
Press [# Keys] to enter the login data using the<br />
numeric keys.<br />
2 Enter the login user name and press [OK].<br />
NOTE: Refer to the Character Entry Method on<br />
Appendix-8 for details on entering characters.<br />
3 Press [Login Password].<br />
Press [# Keys] to enter the login data using the<br />
numeric keys.<br />
4 Enter the password and press [OK].<br />
5 Check the login user name and password are<br />
correct, and press [Login].<br />
NOTE: If Network Authentication is selected as the<br />
user authentication method, either Local or Network<br />
can be selected as the authentication type.
Simple Login<br />
Logout<br />
Select the user to login.<br />
01 02<br />
03 No.<br />
A<br />
B<br />
C<br />
Status 10/10/2010 10:10<br />
Users are automatically logged out in the following circumstances:<br />
1/2<br />
Keyboard<br />
Login<br />
3-3<br />
Basic Operation<br />
If this screen is displayed during operations, select a<br />
user and log in.<br />
NOTE: If a login password is required, an input screen<br />
will be displayed.<br />
For details, refer to the Simple Login on page 10-17.<br />
To logout from the machine, press the Authentication/<br />
Logout key to return to the login user name/login<br />
password entry screen.<br />
• When the machine is put to Sleep by pressing the Power key.<br />
• When the Auto Sleep function is activated.<br />
• When the auto panel reset function is activated.<br />
• When Auto Low Power Mode is activated.<br />
• When the machine is placed in Low Power Mode by pressing the Energy Saver key.<br />
3
Enter key and Quick No. Search key<br />
This section explains how to use the Enter key and Quick No. Search key on the operation panel.<br />
Using the Enter ( ) key<br />
3-4<br />
Basic Operation<br />
The Enter key works in the same way as keys displayed on the touch panel, such as [OK] and [Close].<br />
The Enter symbol ( ) is displayed next to the keys whose operations are carried out by the Enter key (e.g.<br />
[ OK], [ Close]).<br />
The operation of the Enter key is explained below using copy paper selection as an example. For details of the<br />
procedure, refer to Paper Selection on page 4-3.<br />
Paper Selection<br />
Original<br />
Zoom<br />
Paper<br />
Status<br />
: A4<br />
: 100%<br />
: A4<br />
Preview<br />
Add Shortcut<br />
Auto<br />
Cassette<br />
A4<br />
Plain<br />
A3<br />
Plain<br />
A4<br />
Plain<br />
A4<br />
Plain<br />
A4<br />
Plain<br />
A4<br />
Plain<br />
A4<br />
Plain<br />
Copies<br />
MP Tray<br />
MP Tray<br />
Paper Set.<br />
Cancel OK<br />
10/10/2010 10:10<br />
Using the Quick No. Search ( ) key<br />
1 In the paper selection screen, press the key for the<br />
cassette containing the required paper size.<br />
The Enter ( ) symbol appears on the [OK] on the<br />
touch panel, indicating that the Enter key performs<br />
the same action as [OK].<br />
2 To copy using the selected paper, press the Enter<br />
key (or [OK]).<br />
Use the Quick No. Search keys to perform an action by simply entering a number directly using the numeric<br />
keys. For example, you can specify the speed dial for a transmission destination or recall a stored program by<br />
its program number.<br />
The Quick No. Search key performs the same action as the [No.] displayed on the touch panel.<br />
The use of the Quick No. Search key is explained below using an example in which a speed dial number is<br />
specified and used to select a destination. For more information on speed dialing, refer to Specifying<br />
Destination on page 3-39.<br />
Destination Detail Address<br />
A OFFICE<br />
abcd@efg.com<br />
Book<br />
E-mail<br />
B OFFICE<br />
Enter One Touch key number<br />
1/1<br />
Addr Entry<br />
C OFFICE<br />
using # keys.<br />
Folder Path<br />
(0001 - 1000)<br />
Entry<br />
On Hook<br />
0001<br />
Direct<br />
0011<br />
FAX No.<br />
Entry<br />
AAA BBB<br />
i-FAX<br />
Cancel OK<br />
Addr Entry<br />
FFF<br />
0006<br />
GGG<br />
0007<br />
HHH<br />
0008<br />
III<br />
0009<br />
JJJ<br />
0010 1/100<br />
WSD Scan<br />
/DSM Scan<br />
Status<br />
Place original.<br />
Destination Quick Setup Org./Sending Color/<br />
Data Format Image Quality<br />
Advanced<br />
Setup<br />
Destination<br />
Program<br />
10/10/2010 10:10<br />
1 Press the Quick No. Search key (or [No.]) in the<br />
basic send screen.<br />
2 In the number entry screen, use the numeric keys<br />
to enter the speed dial number.<br />
3 If you entered a speed dial number between 1 and<br />
3 digits long, press the Enter key (or [OK]).<br />
The specified destination appears in the<br />
destination list.<br />
NOTE: If you enter a 4-digit speed dial number, the<br />
operation in step 3 can be omitted. The basic send<br />
screen appears and the specified destination appears<br />
in the destinations list.
Touch Panel Display<br />
Display for Originals and Paper<br />
The touch panel displays the selected paper source and output tray.<br />
Size/orientation of<br />
original and paper<br />
Copy Image<br />
: A4<br />
: 100%<br />
: A4<br />
Display of keys that cannot be set<br />
1-sided<br />
>>1-sided<br />
Duplex<br />
Quick Setup Org./Paper/ Image Quality Layout/Edit Advanced<br />
Status<br />
Finishing<br />
Setup<br />
3-5<br />
Basic Operation<br />
Keys of features that cannot be used due to feature combination restrictions or non-installation of options are in<br />
a non-selectable state.<br />
Off<br />
Press Start key to start printing.<br />
Press [Cancel] to change settings.<br />
Cancel<br />
Normal Grayed out Hidden<br />
Off<br />
Original<br />
Zoom<br />
Paper<br />
Off<br />
Output<br />
tray<br />
Auto<br />
Paper<br />
Selection<br />
100%<br />
Off<br />
In the following cases, the key is<br />
grayed out and cannot be<br />
selected.<br />
• Cannot be used in<br />
combination with a feature that<br />
is already selected.<br />
• Use prohibited by user control.<br />
• [Preview] has been pressed.<br />
(Refer to Original Preview on<br />
page 3-6)<br />
Cannot be used because an<br />
option is not installed.<br />
Example:<br />
When a finisher is not installed,<br />
[Staple/Punch] does not appear.<br />
NOTE: If a key that you wish to use is grayed out, the settings of the previous user may still be in effect. In this<br />
case, press the Reset key and try again.<br />
If the key is still grayed out after the Reset key is pressed, it is possible that you are prohibited from using the<br />
function by user control. Check with the administrator of the machine.<br />
Zoom<br />
Combine<br />
Original<br />
position<br />
Normal 0<br />
Off<br />
Paper<br />
source<br />
Density<br />
Staple<br />
/Punch<br />
Copies<br />
Shortcut 1<br />
Shortcut 2<br />
Shortcut 3<br />
Shortcut 4<br />
Shortcut 5<br />
Shortcut 6<br />
Program<br />
10/10/2010 10:10<br />
Remaining amount of toner<br />
Combine Staple<br />
Combine Staple<br />
Combine<br />
Staple<br />
/Punch<br />
/Punch<br />
/Punch<br />
Off<br />
Off<br />
Off<br />
3
Original Preview<br />
You can display a preview image of the scanned document on the panel.<br />
3-6<br />
Basic Operation<br />
NOTE: To view a preview of an image stored in a Custom Box, refer to Previewing Documents/Checking<br />
Document Details on page 3-48.<br />
The procedure described here is for copying a single-page original.<br />
The procedure for previewing scanned originals is explained below.<br />
1 Press the Copy key and place the original on the<br />
platen.<br />
Original<br />
Zoom<br />
Paper<br />
Copy Image<br />
: A4<br />
: 100%<br />
: A4<br />
Preview<br />
Auto<br />
Paper<br />
Selection<br />
1-sided<br />
>>1-sided<br />
Duplex<br />
100%<br />
Zoom<br />
Off<br />
Combine<br />
Normal 0<br />
Density<br />
Staple<br />
/Punch<br />
Quick Setup Org./Paper/ Image Quality Layout/Edit Advanced<br />
Status<br />
Finishing<br />
Setup<br />
Original<br />
Zoom<br />
Paper<br />
Press Start key to start printing.<br />
Press [Cancel] to change settings.<br />
Copy Image<br />
: A4<br />
: 100%<br />
: A4<br />
Cancel<br />
Auto<br />
Paper<br />
Selection<br />
1-sided<br />
>>1-sided<br />
Duplex<br />
100%<br />
Zoom<br />
Off<br />
Combine<br />
Quick Setup Org./Paper/ Image Quality Layout/Edit Advanced<br />
Status<br />
Finishing<br />
Setup<br />
Off<br />
Normal 0<br />
Density<br />
Off<br />
Staple<br />
/Punch<br />
Copies<br />
Shortcut 1<br />
Shortcut 2<br />
Shortcut 3<br />
Shortcut 4<br />
Shortcut 5<br />
Shortcut 6<br />
Copies<br />
Program<br />
10/10/2010 10:10<br />
Shortcut 1<br />
Shortcut 2<br />
Shortcut 3<br />
Shortcut 4<br />
Shortcut 5<br />
Shortcut 6<br />
Program<br />
10/10/2010 10:10<br />
2 Press [Preview].<br />
3 The machine starts scanning the original. When<br />
scanning is completed, the preview image appears<br />
on the panel.<br />
4 To change the quality or the layout, press [Cancel]<br />
or the Stop key. Change the settings and press<br />
[Preview] again to see a preview image with the<br />
new settings.<br />
NOTE: If you scan a multi-page original, only the first<br />
page is previewed.<br />
5 If there is no problem with the preview image, press<br />
the Start key. Copying begins.
Copying<br />
Follow the steps as below for basic copying.<br />
Original<br />
Zoom<br />
Paper<br />
Copy Image<br />
: A4<br />
: 100%<br />
: A4<br />
Preview<br />
Auto<br />
Paper<br />
Selection<br />
1-sided<br />
>>1-sided<br />
Duplex<br />
100%<br />
Zoom<br />
Off<br />
Combine<br />
Normal 0<br />
Density<br />
Quick Setup Org./Paper/ Image Quality Layout/Edit Advanced<br />
Status<br />
Finishing<br />
Setup<br />
Off<br />
Staple<br />
/Punch<br />
Copies<br />
Shortcut 1<br />
Shortcut 2<br />
Shortcut 3<br />
Shortcut 4<br />
Shortcut 5<br />
Shortcut 6<br />
Program<br />
10/10/2010 10:10<br />
3-7<br />
1 Press the Copy key.<br />
Basic Operation<br />
NOTE: If the touch panel is turned off, press the<br />
Energy Saver key or the Power key and wait for the<br />
machine to warm up.<br />
2 Place the originals on the platen or in the document<br />
processor.<br />
NOTE: For loading instructions, refer to Loading<br />
Originals on page 2-46.<br />
3 Check that [Auto] is selected of Paper Selection on<br />
the touch panel. Paper that matches the size of the<br />
original will be selected automatically.<br />
To change the paper size, press, [Org./Paper/<br />
Finishing], [Paper Selection] and select the desired<br />
paper source.<br />
4 Use the numeric keys to enter the copy quantity.<br />
Specify the desired number up to 9999.<br />
5 Press the Start key to start copying.<br />
3
Density<br />
Use this procedure to adjust the density when copying.<br />
You can adjust density using 7 or 13 levels.<br />
The procedure for adjusting the density of copies is explained below.<br />
Density<br />
Original<br />
Zoom<br />
Paper<br />
Status<br />
: A4<br />
: 100%<br />
:<br />
A4<br />
Preview<br />
Lighter<br />
Normal<br />
Copies<br />
-3 -2 -1 0 +1 +2 +3<br />
-2.5 -1.5 -0.5 +0.5 +1.5 +2.5<br />
Add Shortcut Cancel OK<br />
Darker<br />
10/10/2010 10:10<br />
3-8<br />
1 Press the Copy key.<br />
2 Place the originals on the platen.<br />
Basic Operation<br />
3 Set the original on the platen and press [Image<br />
Quality] -> [Density].<br />
4 Adjust density pressing [-3] (Lighter) to [+3]<br />
(Darker). You can change the density level [-3]<br />
(Lighter) to [+3] (Darker) in half-steps.<br />
5 Press [OK].<br />
6 Press the Start key. Copying begins.
Original Image<br />
Select image quality suited to the type of original.<br />
The table below shows the quality options.<br />
Image Quality Option<br />
Original Image Original Type<br />
Text+Photo<br />
The procedure for selecting the quality of copies is explained below.<br />
Original Image<br />
Original<br />
Zoom<br />
Paper<br />
Status<br />
Photo<br />
Text<br />
Graphic/Map<br />
: A4<br />
: 100%<br />
:<br />
A4<br />
Preview<br />
Add Shortcut<br />
Text+Photo<br />
Photo<br />
Text<br />
Graphic<br />
/Map<br />
Original Type<br />
Printer Output<br />
3-9<br />
1 Press the Copy key.<br />
2 Place the originals on the platen.<br />
Basic Operation<br />
3 Set the original on the platen and press [Image<br />
Quality] -> [Original Image].<br />
4 Select Original Type.<br />
5 Press [OK].<br />
Description<br />
Printer Output For mixed text and photo documents<br />
printed on this machine originally.<br />
Book/Magazine For mixed text and photos printed in a<br />
magazine, etc.<br />
Printer Output For photos printed on this machine<br />
originally.<br />
Book/Magazine For photos printed in a magazine, etc.<br />
Photo Paper Suitable for photographs taken with a<br />
camera.<br />
Off<br />
(original type not set)<br />
On<br />
(original type is set)<br />
For documents that are mostly text and<br />
were originally printed on this machine.<br />
Sharply renders pencil text and fine lines.<br />
Printer Output For maps and diagrams printed on this<br />
machine originally.<br />
Book/Magazine For maps and diagrams printed in a<br />
magazine.<br />
Book<br />
/Magazine<br />
Copies<br />
Cancel OK<br />
10/10/2010 10:10<br />
6 Press the Start key. Copying begins.<br />
3
Zoom<br />
3-10<br />
Basic Operation<br />
Adjust the magnification to reduce or enlarge the original image. The following zoom options are available.<br />
Auto Zoom<br />
Manual Zoom<br />
Preset Zoom<br />
Letter-R<br />
A4<br />
25 %<br />
Ledger: 129 %<br />
A3: 141 %<br />
Statement-R: 64 %<br />
A5: 70 %<br />
Reduces or enlarges at preset magnifications.<br />
The following magnifications are available.<br />
400 %<br />
Model Zoom Level (Original Copy)<br />
Automatically reduces or enlarges the original image<br />
suitably to the selected paper size.<br />
Manually reduces or enlarges the original image in 1%<br />
increments between 25% and 400%.<br />
Inch Models 100%, Auto, 400% (Max.), 200% (STMT >><br />
Ledger), 154%(STMT >> Legal), 129% (Letter >><br />
Ledger), 121% (Legal >> Ledger), 78% (Legal >><br />
Letter), 77% (Ledger >> Legal), 64% (Ledger >><br />
Letter), 50% (Ledger >> STMT), 25% (Min.)<br />
Metric Models 100%, Auto, 400% (Max.), 200% (A5 >> A3),<br />
141% (A4 >> A3, A5 >> A4), 127% (Folio >><br />
A3), 106% (11×15" >> A3), 90% (Folio >> A4),<br />
75% (11×15" >> A4),<br />
70% (A3 >> A4, A4 >> A5), 50%, 25% (Min.)<br />
Metric Models (Asia<br />
Pacific)<br />
100%, Auto, 400% (Max.), 200% (A5 >> A3),<br />
141% (A4 >> A3, B5 >> B4), 122% (A4 >> B4,<br />
A5 >> B5), 115% (B4 >> A3, B5 >> A4), 86%<br />
(A3 >> B4, A4 >> B5), 81%(B4 >> A4, B5 >><br />
A5), 70% (A3 >> A4, B4 >> B5), 50%, 25%<br />
(Min.)
XY Zoom<br />
The procedure for using zoom copying is explained below.<br />
Zoom<br />
Original<br />
Zoom<br />
Paper<br />
Status<br />
Zoom<br />
Original<br />
Zoom<br />
Paper<br />
Status<br />
: A4<br />
: 100%<br />
: A4<br />
Preview<br />
Add Shortcut<br />
: A4<br />
: 100%<br />
:<br />
A4<br />
Preview<br />
Add Shortcut<br />
Standard<br />
Zoom<br />
XY Zoom<br />
Standard<br />
Zoom<br />
XY Zoom<br />
Max.<br />
400%<br />
A5>>A3<br />
200%<br />
A4>>A3<br />
141%<br />
A5>>A4<br />
A4>>B4<br />
122%<br />
A5>>B5<br />
B4>>A3<br />
115%<br />
B5>>A4<br />
X<br />
Y<br />
100%<br />
Auto<br />
X<br />
# Keys<br />
(25 - 400)<br />
400 %<br />
Y<br />
Copies<br />
86%<br />
81%<br />
81%<br />
70%<br />
50%<br />
25%<br />
Min.<br />
Cancel OK<br />
(25 - 400)<br />
# Keys<br />
%<br />
(25 - 400)<br />
100 %<br />
# Keys<br />
100<br />
A3>>B4<br />
A4>>B5<br />
A3>>A4<br />
A4>>A5<br />
10/10/2010 10:10<br />
Copies<br />
Top Edge<br />
on Top<br />
Original<br />
Orientation<br />
Cancel OK<br />
10/10/2010 10:10<br />
3-11<br />
Basic Operation<br />
Select vertical and horizontal magnifications<br />
individually. Reduce or enlarge original images in 1%<br />
increments between 25% and 400%.<br />
1 Press the Copy key.<br />
2 Place the originals on the platen.<br />
3 Set the original on the platen and press [Layout/<br />
Edit] -> [Zoom].<br />
4 Press [Standard Zoom] to use Auto Zoom.<br />
Press [+] or [–] to change the displayed<br />
magnification as desired. You can also enter the<br />
magnification directly using the numeric keys by<br />
pressing [# Keys].<br />
When using Preset Zoom, select the key of desired<br />
magnification.<br />
When using XY Zoom, press [XY Zoom].<br />
Press [+] or [–] to change the displayed<br />
magnifications of X (horizontal) and Y (vertical).<br />
You can also enter the magnification directly using<br />
the numeric keys by pressing [# Keys].<br />
Press [Original Orientation] to select orientation of<br />
the originals, either [Top Edge on Top] or [Top Edge<br />
on Left]. Then press [OK].<br />
5 Press [OK].<br />
6 Press the Start key. Copying begins.<br />
3
Duplex<br />
Produce two-sided copies. The following duplex options are available.<br />
3-12<br />
Basic Operation<br />
You can also create single-sided copies from two-sided originals or originals with facing pages such as books.<br />
The following modes are available.<br />
One-sided to Two-sided<br />
ghi<br />
def<br />
abc<br />
Two-sided to One-sided<br />
Two-sided to Two-sided<br />
1<br />
2<br />
3<br />
4<br />
5<br />
Original Copy<br />
ghi<br />
abc<br />
def<br />
Original Copy<br />
2<br />
1<br />
2<br />
1<br />
A B<br />
2<br />
4<br />
1<br />
3<br />
ghi<br />
abc<br />
def<br />
Original Copy<br />
4<br />
3<br />
5<br />
Original Copy<br />
1<br />
2<br />
1<br />
2<br />
4<br />
3<br />
5<br />
5<br />
Produces two-sided copies from one-sided originals. In<br />
case of an odd number of originals, the back side of the<br />
last copy will be blank.<br />
The following binding options are available.<br />
A Original Left/Right to Binding Left/Right: Images on<br />
the second sides are not rotated.<br />
B Original Left/Right to Binding Top: Images on the<br />
second sides are rotated 180°. Copies can be bound<br />
on the top edge, facing the same orientation when<br />
turning the pages.<br />
Copies each side of a two-sided original onto two<br />
individual sheets. The document processor is required.<br />
The following binding options are available.<br />
• Binding Left/Right: Images on the second sides<br />
are not rotated.<br />
• Binding Top: Images on the second sides are<br />
rotated 180°.<br />
Produces two-sided copies from two-sided originals.<br />
The document processor is required.<br />
NOTE: The paper sizes supported in Two-sided to<br />
Two-sided are A3, B4, A4, A4-R, B5, B5-R, A5-R,<br />
Ledger, Legal, Letter, Letter-R, Executive, Statement-<br />
R, Oficio II, 216×340mm and Folio.
Book to One-sided<br />
Book to Two-sided<br />
The procedure for using two-sided/duplex copying is explained below.<br />
Duplex<br />
Original<br />
Zoom<br />
Paper<br />
Status<br />
1<br />
2 1<br />
: A4<br />
: 100%<br />
:<br />
A4<br />
Preview<br />
2<br />
Add Shortcut<br />
1<br />
2<br />
Original Copy<br />
3 4<br />
4 3<br />
Original Copy<br />
1-sided<br />
>>1-sided<br />
1-sided<br />
>>2-sided<br />
2-sided<br />
>>1-sided<br />
2-sided<br />
>>2-sided<br />
Book<br />
>>1-sided<br />
Book<br />
>>2-sided<br />
2<br />
2<br />
1<br />
1<br />
4<br />
4<br />
1<br />
Facing pages<br />
-> Two-sided<br />
Finishing<br />
Binding<br />
Left/Right<br />
Binding<br />
Top<br />
3<br />
3<br />
0<br />
3<br />
1<br />
2<br />
Facing pages<br />
-> Facing pages<br />
2<br />
2 1<br />
Copies<br />
Top Edge<br />
on Top<br />
Cancel OK<br />
3<br />
0<br />
Original<br />
Orientation<br />
10/10/2010 10:10<br />
3-13<br />
Basic Operation<br />
Produces a 1-sided copy of a 2-sided or open book<br />
original.<br />
The following binding options are available.<br />
• Binding Left: Originals with facing pages are<br />
copied from left to right.<br />
• Binding Right: Originals with facing pages are<br />
copied from right to left.<br />
NOTE: The following sizes of originals and paper are<br />
supported in Two-sided to One-sided and Book to Onesided.<br />
Original: A3, B4, A4-R, B5-R, A5-R, Ledger,<br />
Letter-R and 8K. Paper: A4, B5, Letter and 16K. You<br />
may change paper size and reduce or enlarge copy to<br />
match that size.<br />
Produces two-sided copies from an open book original<br />
with facing pages.<br />
NOTE: The following sizes of originals and paper are<br />
supported in Book to Two-sided mode. Original: A3,<br />
B4, A4-R, B5-R, A5-R, Ledger, Letter-R and 8K. Paper:<br />
A4, B5 and Letter.<br />
1 Press the Copy key.<br />
2 Place the originals on the platen.<br />
3 Press [Layout/Edit] and then [Duplex].<br />
4 Select the desired Duplex option.<br />
5 If you choose [1-sided>>2-sided] or<br />
[2-sided>>2-sided], select the binding edge of the<br />
finished copies of Finishing.<br />
If you choose [Book>>2-sided], press [Book>>2sided]<br />
or [Book>> Book] of Finishing to select the<br />
setting for duplex.<br />
3
Duplex<br />
Original<br />
Zoom<br />
Paper<br />
Status<br />
Collate/Offset<br />
3-14<br />
Basic Operation<br />
6 If you choose [2-sided>>1-sided],<br />
[2-sided>>2-sided], [Book>>1-sided] or<br />
[Book>>2-sided], select the binding edge of the<br />
originals of Original.<br />
7 Press [Original Orientation] to select orientation of<br />
the originals, either [Top Edge on Top] or [Top Edge<br />
on Left]. Then press [OK].<br />
8 Press [OK].<br />
The machine can collate and offset at the same time as it copies.<br />
9 Press the Start key.<br />
You can use the Collate/Offset copy function for tasks such as those shown below.<br />
Collate<br />
Offset<br />
: A4<br />
: 100%<br />
: A4<br />
Preview<br />
Add Shortcut<br />
1-sided<br />
>>1-sided<br />
1-sided<br />
>>2-sided<br />
2-sided<br />
>>1-sided<br />
2-sided<br />
>>2-sided<br />
Book<br />
>>1-sided<br />
Book<br />
>>2-sided<br />
Original<br />
Binding<br />
Left/Right<br />
Without Document Finisher<br />
1<br />
2<br />
3<br />
Binding<br />
Top<br />
Copies<br />
Top Edge<br />
on Top<br />
Original<br />
Orientation<br />
Cancel OK<br />
3<br />
2<br />
1<br />
3<br />
2<br />
1<br />
Original Copy<br />
1<br />
2<br />
3<br />
3<br />
2<br />
1<br />
3<br />
2<br />
1<br />
10/10/2010 10:10<br />
3<br />
2<br />
1<br />
Original Copy (each set)<br />
3<br />
2<br />
1<br />
Once an original placed on the platen is scanned,<br />
replace it with the next one. Then, press the Start<br />
key.<br />
After scanning all originals, press [Finish Scan] to<br />
start copying.<br />
Scan multiple originals and deliver complete sets of<br />
copies as required according to page number.<br />
If the optional document finisher is not installed, when<br />
you use offsetting, printed copies are produced after<br />
rotating each set (or page) by 90º.<br />
NOTE: To use sorting, the same size of paper as the<br />
selected paper tray must be loaded in a different<br />
orientation in a different paper tray. The paper sizes<br />
supported in Offset are A4, B5, Letter and 16K.
With Document Finisher<br />
Collate/Offset<br />
Original<br />
Zoom<br />
Paper<br />
Status<br />
: A4<br />
: 100%<br />
: A4<br />
Preview<br />
Collate/Offset<br />
Original<br />
Zoom<br />
Paper<br />
Status<br />
Add Shortcut<br />
: A4<br />
: 100%<br />
:<br />
A4<br />
Preview<br />
Add Shortcut<br />
2<br />
3<br />
1 3<br />
2<br />
1<br />
3<br />
2<br />
1<br />
3<br />
2<br />
1<br />
Original Copy (each set)<br />
Collate<br />
Offset<br />
Collate<br />
Offset<br />
Off On<br />
Off Each Set<br />
Copies<br />
Cancel OK<br />
Off On<br />
Off Each Page<br />
Copies<br />
Cancel OK<br />
10/10/2010 10:10<br />
10/10/2010 10:10<br />
3-15<br />
Basic Operation<br />
When you use offsetting, printed copies are segregated<br />
after each set of copies (or after each page).<br />
NOTE: The optional document finisher is required.<br />
The paper sizes supported in Offset are A3, B4, A4,<br />
B5, Letter, Legal, Ledger, Oficio II, 8k, 16k,<br />
216×340mm, Folio.<br />
The procedure for using collate/offset copying is<br />
explained below.<br />
1 Press the Copy key.<br />
2 Place the originals on the platen.<br />
3 Press [Org./Paper/Finishing] and then [Collate/<br />
Offset].<br />
4 To use collate copying, press [On] of Collate.<br />
To use offset copying, press [Each Set] of Offset.<br />
Press [OK].<br />
If [Off] is selected for Collate, press [Off] or [Each<br />
Page] of Offset.<br />
5 Press [OK].<br />
6 Press the Start key. Copying begins.<br />
3
Reserve Next<br />
3-16<br />
Basic Operation<br />
This function allows you to reserve the next job during printing. Using this function, the original will be scanned<br />
while the machine is printing. When the current print job ends, the reserved copy job is printed. The procedure<br />
differs depending on the Reserve Next Priority (refer to page 9-44).<br />
If Reserve Next Priority is set to [On]<br />
The Copy function default screen appears on the touch panel during printing.<br />
Auto<br />
100%<br />
Normal 0<br />
Original : A4<br />
Paper<br />
Selection<br />
Zoom<br />
Density<br />
Zoom : 100%<br />
Paper : A4<br />
1-sided<br />
>>1-sided<br />
Off<br />
Off<br />
Preview<br />
Duplex<br />
Combine<br />
Staple<br />
/Punch<br />
Quick Setup Org./Paper/ Image Quality Layout/Edit Advanced<br />
Status<br />
Finishing<br />
Setup<br />
If Reserve Next Priority is set to [Off]<br />
The Copying screen appears on the touch panel during printing.<br />
Status<br />
Copy Image<br />
Copies<br />
Shortcut 1<br />
Shortcut 2<br />
Shortcut 3<br />
Shortcut 4<br />
Shortcut 5<br />
Shortcut 6<br />
Program<br />
10/10/2010 10:10<br />
Copies<br />
Job No.: 000021 Job Name: doc20081010101034<br />
User Name: -----<br />
Scanner Setting<br />
Printer Setting<br />
Scanned Pages<br />
Copies<br />
A4<br />
100%<br />
2-sided<br />
Top Edge on Top<br />
A4<br />
2-sided<br />
Collate<br />
Tray A<br />
Plain<br />
Cancel Reserve Next<br />
10/10/2010 10:10<br />
1 Place the originals onto the machine for reserving<br />
copy, and configure the copy settings.<br />
2 Press the Start key.<br />
The machine starts scanning the originals.<br />
When the current print job ends, the reserved copy<br />
job is printed.<br />
1 Press [Reserve Next].<br />
The default screen for copying appears.<br />
2 Place the originals onto the machine for reserving<br />
copy, and configure the copy settings.<br />
3 Press the Start key.<br />
The machine starts scanning the originals.<br />
When the current print job ends, the reserved copy<br />
job is printed.
Interrupt Copy<br />
3-17<br />
Basic Operation<br />
This function allows you to pause the current jobs in progress when you need to make copies immediately.<br />
When the interruption copy ends, the machine resumes the paused print jobs.<br />
NOTE: If the machine is left unused for 60 seconds in interrupt copy mode, interrupt copying is automatically<br />
canceled and printing resumes. You can change the delay until interrupt copying is canceled. Change the delay<br />
as required. For more information, refer to Interrupt Clear Timer on page 9-80.<br />
Copy Image<br />
Auto<br />
100%<br />
Normal 0<br />
Original : A4<br />
Paper<br />
Selection<br />
Zoom<br />
Density<br />
Zoom : 100%<br />
Paper : A4<br />
1-sided<br />
>>1-sided<br />
Off<br />
Off<br />
Preview<br />
Duplex<br />
Combine<br />
Staple<br />
/Punch<br />
Quick Setup Org./Paper/ Image Quality Layout/Edit Advanced<br />
Status<br />
Finishing<br />
Setup<br />
Copies<br />
Shortcut 1<br />
Shortcut 2<br />
Shortcut 3<br />
Shortcut 4<br />
Shortcut 5<br />
Shortcut 6<br />
Program<br />
10/10/2010 10:10<br />
1 Press the Interrupt key.<br />
The current print job is temporarily interrupted.<br />
2 Place the originals onto the machine for interrupt<br />
copy, and configure the copy settings.<br />
3 Press the Start key to start interrupt copying.<br />
4 When interrupt copying ends, press the Interrupt<br />
key.<br />
The machine resumes the paused print jobs.<br />
3
Staple<br />
Use this feature to staple your finished copies.<br />
3-18<br />
Basic Operation<br />
NOTE: Stapling requires the optional document finisher. Note also that saddle stitching (center stapling)<br />
requires the folding unit.<br />
For details on paper sizes and numbers of sheets that can be stapled, refer to Document Finisher (Option) on<br />
page Appendix-25.<br />
The following stapling options and orientations are available.<br />
Cassette Paper Load<br />
Direction<br />
Cassette Paper Load<br />
Direction<br />
Original Orientation:<br />
Top Edge (Back Edge)<br />
NOTE: B5-R and 16K-R "one staple" is not diagonal.<br />
Original Orientation:<br />
Top Edge (Back Edge)<br />
Original Orientation:<br />
Left Top Edge (Left top<br />
corner)<br />
Original Orientation:<br />
Left Top Edge (Left top<br />
corner)
Follow the steps as below for stapling.<br />
Staple/Punch<br />
Original : A4<br />
Zoom : 100%<br />
Paper : A4<br />
Preview<br />
Status<br />
Add Shortcut<br />
Staple<br />
Off<br />
Punch<br />
Off<br />
Mixed Size Stapling<br />
Top<br />
Left<br />
Top<br />
Right<br />
2 staples<br />
Left<br />
2 holes<br />
Left<br />
2 holes<br />
Top<br />
2 holes<br />
Right<br />
2 staples<br />
Top<br />
2 staples<br />
Right<br />
Bind<br />
and Fold<br />
3 holes<br />
Left<br />
3 holes<br />
Top<br />
3 holes<br />
Right<br />
Copies<br />
Top Edge<br />
on Top<br />
Original<br />
Orientation<br />
Cancel OK<br />
10/10/2010 10:10<br />
3-19<br />
1 Press the Copy key.<br />
2 Place the originals on the platen.<br />
Basic Operation<br />
NOTE: When performing Mixed Size Stapling, refer to<br />
Mixed Size Originals on page 4-6.<br />
3 Press [Org./Paper/Finishing] and then [Staple/<br />
Punch].<br />
4 Select the staple position.<br />
NOTE: To use saddle stitching, press [Saddle Stitch].<br />
When placing originals, be sure to place the cover<br />
page at the bottom. For more information on saddle<br />
stitching, refer to Booklet on page 4-20.<br />
5 Press [Original Orientation] to choose orientation of<br />
the originals, either [Top Edge on Top] or [Top Edge<br />
on Left]. Then press [OK].<br />
6 Press [OK].<br />
7 Press the Start key. Copying begins.<br />
Even with mixed paper sizes, if the sizes have the same width or same length as shown in the combinations<br />
below, the output can be stapled. The maximum number of sheets that can be stapled is 30.<br />
A4<br />
B5<br />
Letter<br />
A4<br />
B5<br />
Letter<br />
A3<br />
B4<br />
Ledger<br />
A3<br />
B4<br />
Ledger<br />
Letter-R<br />
Legal<br />
Letter-R Legal<br />
• A3 and A4<br />
• B4 and B5<br />
• Ledger and Letter<br />
• Ledger and Letter-R<br />
• 8K and 16K<br />
3
Punch<br />
Punch holes in sets of finished copies in preparation for binding.<br />
NOTE: Requires the optional document finisher and punching unit.<br />
3-20<br />
Basic Operation<br />
For details on paper sizes that can be punched, refer to Hole Punch Unit (Option) on page Appendix-25.<br />
The orientations of the original and corresponding punch positions are as follows.<br />
Original Copy<br />
Orientation of Original<br />
Platen<br />
Document<br />
processor<br />
NOTE: The inch model provides two-hole and three-hole punching. The metric model provides two-hole and<br />
four-hole punching.
Follow the steps as below for punching.<br />
Staple/Punch<br />
Original : A4<br />
Zoom : 100%<br />
Paper<br />
: A4<br />
Preview<br />
Status<br />
Add Shortcut<br />
Staple<br />
Off<br />
Punch<br />
Off<br />
Top<br />
Left<br />
Top<br />
Right<br />
2 staples<br />
Left<br />
2 holes<br />
Left<br />
2 holes<br />
Top<br />
2 holes<br />
Right<br />
2 staples<br />
Top<br />
2 staples<br />
Right<br />
Bind<br />
and Fold<br />
3 holes<br />
Left<br />
3 holes<br />
Top<br />
3 holes<br />
Right<br />
Copies<br />
Top Edge<br />
on Top<br />
Original<br />
Orientation<br />
Cancel OK<br />
10/10/2010 10:10<br />
3-21<br />
1 Press the Copy key.<br />
2 Place the originals on the platen.<br />
Basic Operation<br />
3 Press [Org./Paper/Finishing]and then press<br />
[Staple/Punch].<br />
4 Select the type of hole punching.<br />
5 Press [Original Orientation] to choose orientation of<br />
the originals, either [Top Edge on Top] or [Top Edge<br />
on Left]. Then press [OK].<br />
6 Press [OK].<br />
7 Press the Start key.<br />
If the original is placed on the platen. Place the next<br />
original and press the Start key. Copying begins.<br />
If all original pages have been scanned, press<br />
[Finish Scan]. Copying begins.<br />
3
Sending<br />
3-22<br />
Basic Operation<br />
This machine can send a scanned image as an attachment of an E-mail message or to a PC linked to the<br />
network. In order to do this, it is necessary to register the sender and destination (recipient) address on the<br />
network.<br />
A network environment which enables the machine to connect to a mail server is required. It is recommended<br />
that a Local Area Network (LAN) be used to assist with transmission speed and security issues.<br />
At the same time as you send a scanned image, you can also print the image or send it to the Document Box.<br />
To use the Scanning Function perform the following steps:<br />
• Program the settings, including the E-mail setting on the machine.<br />
• Use Embedded Web Server RX (the internal HTML web page) to register the IP address, the host name of<br />
the SMTP server, the recipient, and Settings for E-mail.<br />
• Register the destination in the Address Book or One Touch keys.<br />
• When the PC Folder (SMB/FTP) is selected, it is necessary to share the destination folder. To set up the PC<br />
Folder, contact your administrator.<br />
• Create/Register a Document Box (when a Document Box is selected as the destination)<br />
• Select detailed transmission settings (to select a Document Box as the destination or to print and send the<br />
image at the same time)<br />
Follow the steps below for basic sending. The following five options are available.<br />
• Send as E-mail: Sends a scanned original image as an E-mail attachment...page 3-23<br />
• Send to Folder (SMB): Stores a scanned original image in a shared folder of any PC...page 3-25<br />
• Send to Folder (FTP): Stores a scanned original image in a folder of an FTP server...page 3-24<br />
• Send to Document Box: Sends a document stored in a document box on this machine...page 7-7<br />
• Image Data Scanning with TWAIN / WIA: Scan the document using a TWAIN or WIA compatible application<br />
program...page 6-33<br />
NOTE: Different sending options can be specified in combination. Refer to Sending to Different Types of<br />
Destinations (Multi Sending) on page 3-41.<br />
The fax function can be used when the optional fax kit has been installed. For details about this function, refer<br />
to the FAX Operation Guide.
Send as E-mail (E-mail Addr Entry)<br />
Sends a scanned original image as an E-mail attachment.<br />
3-23<br />
Basic Operation<br />
NOTE: Access the Embedded Web Server RX beforehand and specify the settings required for sending email.<br />
For details, see Embedded Web Server RX (Settings for E-mail) on page 2-26.<br />
E-mail Address Entry<br />
Status<br />
On Hook<br />
Enter Destination.<br />
E-mail<br />
Address<br />
Add to Addr Book<br />
Add a new e-mail destination.<br />
Press [E-mail Address], then enter<br />
the address using the keyboard screen.<br />
Next Dest.<br />
Destination Detail<br />
ABCD abcd@efg.com<br />
TUVW 192.168.188.120<br />
Group1 Group1<br />
Direct<br />
Chain<br />
Destination<br />
Cancel OK<br />
Detail/Edit Delete Recall<br />
0001 0002<br />
0003 0004 0005<br />
AAA BBB CCC DDD<br />
EEE<br />
0006 0007 0008 0009 0010<br />
FFF GGG HHH III JJJ<br />
Destination Quick Setup Org./Sending Color/<br />
Status<br />
Data Format Image Quality<br />
1/1<br />
No.<br />
1/100<br />
Advanced<br />
Setup<br />
10/10/2010 10:10<br />
Destination<br />
Address<br />
Book<br />
E-mail<br />
Addr Entry<br />
Folder Path<br />
Entry<br />
FAX No.<br />
Entry<br />
i-FAX<br />
Addr Entry<br />
WSD Scan<br />
/DSM Scan<br />
Program<br />
10/10/2010 10:10<br />
1 Press the Send key.<br />
Displays the screen for sending.<br />
NOTE: Depending on the settings, the address book<br />
screen may appear. In this event, press [Cancel] to<br />
display the screen for sending.<br />
2 Place the originals on the platen.<br />
3 Press [E-mail Addr Entry] and then [E-mail<br />
Address].<br />
NOTE: Destinations can be specified using the<br />
Address Book or the One Touch Keys. Refer to<br />
Specifying Destination on page 3-39.<br />
4 Enter destination E-mail address and press [OK].<br />
5 Press [Next Dest.] and repeat step 3 to specify the<br />
destination. Up to 100 e-mail addresses can be<br />
specified.<br />
NOTE: When [Add to Addr Book] is displayed, the<br />
destinations are registered in the Address Book.<br />
6 Press [OK]. The destinations are registered in the<br />
destination list.<br />
7 Check the destination list.<br />
Select a destination and press [Detail/Edit] to check<br />
and edit it.<br />
Select a destination and press [Delete] to remove<br />
the destination from the list.<br />
3
Send to Folder (Folder Path Entry)<br />
Stores a scanned original image file in the specified shared folder of any PC.<br />
Stores a scanned original image in a folder of an FTP server.<br />
3-24<br />
Basic Operation<br />
NOTE: When selecting [On] for Entry Check for New<br />
Destination (page 9-47), the confirmation screen<br />
appears. Enter the same destination again and press<br />
[OK].<br />
When selecting [On] for Destination Check before Send<br />
(page 9-46), the confirmation screen appears after<br />
pressing the Start key. For details, refer to Confirmation<br />
Screen of Destinations on page 3-28.<br />
8 Press the Start key. Sending begins.<br />
NOTE:<br />
• Refer to Creating a Shared Folder on page 3-31 for details on how to share a folder.<br />
• Be sure that SMB Protocol or FTP in the Embedded Web Server RX is On. For details, refer to the<br />
Embedded Web Server RX Operation Guide.<br />
1 Press the Send key.<br />
Displays the screen for sending.<br />
NOTE: Depending on the settings, the address book<br />
screen may appear. In this event, press [Cancel] to<br />
display the screen for sending.<br />
2 Place the originals on the platen.<br />
3 Press [Folder Path Entry] and then [SMB] or [FTP].<br />
NOTE: Destinations can be specified using the<br />
Address Book or the One Touch Keys. For details, refer<br />
to Specifying Destination on page 3-39.
Folder Path Entry<br />
SMB<br />
FTP<br />
Status<br />
Status<br />
Enter Destination.<br />
Add to Addr Book<br />
Host Name<br />
Path<br />
Login<br />
User Name<br />
Login<br />
Password<br />
Use the keyboard to enter.<br />
Search<br />
SMB Host<br />
Next Dest.<br />
Windows<br />
Network<br />
Destination<br />
Connection<br />
Test<br />
Cancel OK<br />
! @ # $ % ^ & * ( ) _ + ˜<br />
Q W E R T Y U I O P { }<br />
A S D F G H J K L : "<br />
Z X C V B N M < > ?<br />
Lower-case<br />
Upper-case Lower-case No./Symbol Space<br />
10/10/2010 10:10<br />
Limit: 128<br />
characters<br />
Input: 0 characters<br />
Cancel OK<br />
Backspace<br />
|<br />
10/10/2010 10:10<br />
3-25<br />
Basic Operation<br />
4 Enter host name, path, login user name and login<br />
password. Press the key of each item to first<br />
display the entry screen.<br />
To search for a folder on a PC on the network,<br />
press [Search SMB Host] or [Windows Network].<br />
If you pressed [Search SMB Host], you can enter<br />
the Domain/Workgroup, and Host Name to search<br />
PCs on the network for the destination.<br />
If you pressed [Windows Network], you can search<br />
all PCs on the network for a destination.<br />
If you pressed [Windows Network], all PCs on the<br />
network are searched. A maximum of 500<br />
addresses can be displayed. Select the host name<br />
(PC name) that you want to specify in the screen<br />
that appears, and press [Next]. The login user<br />
name and login password entry screen appears.<br />
After you enter the login user name and login<br />
password name of the destination PC, the shared<br />
folders appear. Select the folder that you want to<br />
specify and press [Next]. The address of the<br />
selected shared folder is set.<br />
NOTE: Refer to the Character Entry Method on<br />
Appendix-8 for details on entering characters.<br />
Press [Connection Test] to check the connection to the<br />
computer you chose. If the connection fails, check the<br />
entries you made.<br />
Select the folder from the Search Results list, and<br />
go to step 6.<br />
5 Enter the destination data and press [OK].<br />
3
Data to be entered are as follows.<br />
3-26<br />
Basic Operation<br />
NOTE: You will be unable to send the data if you forget your login user name or login password. Contact your<br />
administrator and check your login user name or login password.<br />
For send to folder (SMB)<br />
Host Name*<br />
Item Data to be entered Max. characters<br />
For send to folder (FTP)<br />
Host name or IP address of the PC to receive the data. Up to 64 characters<br />
Path Path to the receiving folder such as follows.<br />
For example, User\ScanData.<br />
Login User Name User name to access the PC<br />
For example, abcdnet\james.smith<br />
Up to 128 characters<br />
Up to 64 characters<br />
Login Password Password to access the PC Up to 64 characters<br />
* To specify a port number different from the default (139), enter using the format “host name: port number”<br />
(e.g., SMBhostname:140).<br />
To enter the IPv6 address, enclose the address in brackets [ ].<br />
(e.g., [3ae3:9a0:cd05:b1d2:28a:1fc0:a1:10ae]:140)<br />
Host Name*<br />
Item Data to be entered Max. characters<br />
Host name or IP address of FTP server Up to 64 characters<br />
Path Path to the receiving folder.<br />
For example, User\ScanData.<br />
Otherwise the data will be saved in the home directory.<br />
Up to 128 characters<br />
Login User Name FTP server login user name Up to 64 characters<br />
Login Password FTP server login password Up to 64 characters<br />
Folder Path Entry<br />
SMB<br />
FTP<br />
* To specify a port number different from the default (21), enter using the format “host name: port number”<br />
(e.g., FTPhostname:140).<br />
To enter the IPv6 address, enclose the address in brackets [ ].<br />
(e.g., [3ae3:9a0:cd05:b1d2:28a:1fc0:a1:10ae]:140)<br />
Enter Destination.<br />
Add to Addr Book<br />
Status<br />
Host Name<br />
Path<br />
Login<br />
User Name<br />
Login<br />
Password<br />
Search<br />
SMB Host<br />
Next Dest.<br />
Windows<br />
Network<br />
Destination<br />
Connection<br />
Test<br />
Cancel OK<br />
10/10/2010 10:10<br />
6 Upon completion of all entries, press [Connection<br />
Test] to check the connection.<br />
NOTE: Connected. appears when connection to the<br />
destination is correctly established. If Cannot connect.<br />
appears, review the entry.<br />
To specify another destination, go to step 7. To<br />
specify only one destination, go to step 8.
On Hook<br />
Status<br />
Destination Detail<br />
ABCD abcd@efg.com<br />
TUVW 192.168.188.120<br />
Group1 Group1<br />
Direct<br />
Chain<br />
Detail/Edit Delete Recall<br />
0001 0002<br />
0003 0004 0005<br />
AAA BBB CCC DDD<br />
EEE<br />
0006 0007 0008 0009 0010<br />
FFF GGG HHH III JJJ<br />
Destination Quick Setup Org./Sending Color/<br />
Data Format Image Quality<br />
1/1<br />
No.<br />
1/100<br />
Advanced<br />
Setup<br />
Destination<br />
Address<br />
Book<br />
E-mail<br />
Addr Entry<br />
Folder Path<br />
Entry<br />
FAX No.<br />
Entry<br />
i-FAX<br />
Addr Entry<br />
WSD Scan<br />
/DSM Scan<br />
Program<br />
10/10/2010 10:10<br />
3-27<br />
Basic Operation<br />
7 Press [Next Dest.] and repeat steps 4 to 6 to<br />
specify the destination. You can specify a<br />
combined total of up to 10 FTP and SMB<br />
destination folders.<br />
NOTE: When [Add to Addr Book] is displayed, the<br />
entry is registered in the Address Book.<br />
8 Press [OK] to register the entry in the destination<br />
list.<br />
9 Check the destination list.<br />
Select a destination and press [Detail/Edit] to check<br />
and edit it. Edit it, if necessary, referring to steps 4<br />
to 6.<br />
Select a destination and press [Delete] to remove<br />
the destination from the list.<br />
NOTE: When selecting [On] for Entry Check for New<br />
Destination (page 9-47), the confirmation screen<br />
appears. Enter the same host name and path again,<br />
and press [OK].<br />
When selecting [On] for Destination Check before Send<br />
(page 9-46), the confirmation screen appears after<br />
pressing the Start key. For details, refer to Confirmation<br />
Screen of Destinations on page 3-28.<br />
10 Press the Start key. Sending begins.<br />
3
Confirmation Screen of Destinations<br />
3-28<br />
Basic Operation<br />
When selecting [On] for Destination Check before Send (page 9-46), the confirmation screen of destinations<br />
appears after pressing the Start key.<br />
Follow the steps below to confirm the destinations.<br />
Status<br />
Check the destination list through the last page.<br />
After checking the list, press [Check] and then Start key.<br />
Destination Detail<br />
A OFFICE 1234567890<br />
Check<br />
Cancel<br />
Destination<br />
Detail<br />
Delete<br />
10/10/2010 10:10<br />
1 Press [ ] or [ ] to confirm every destination.<br />
Press [Detail] to display the detailed information on<br />
the selected destination.<br />
To delete the destination, select the destination you<br />
want to delete and press [Delete]. Press [Yes] in the<br />
confirmation screen. The destination is deleted.<br />
To add the destination, press [Cancel] and then<br />
return to the destination screen.<br />
2 Press [Check].<br />
NOTE: Be sure to confirm every destination by<br />
displaying them on the touch panel. You cannot press<br />
[Check] unless you have confirmed every destination.<br />
3 Press the Start key to start sending.
Preparation for sending a document to a PC<br />
3-29<br />
Basic Operation<br />
Check the information that needs to be set on the machine and create a folder to receive the document on your<br />
computer. Screens of Windows 7 are used in the following explanation. The details of the screens will vary in<br />
other versions of Windows.<br />
NOTE: Log on to Windows with administrator privileges.<br />
Checking what to enter for [Host Name]<br />
Check the name of the destination computer.<br />
1 From the Start menu, select Computer and then<br />
System Properties.<br />
Check the computer name in the window that<br />
appears.<br />
In Windows XP, right-click My Computer and select<br />
Properties. The System Properties dialog box<br />
appears. Click the Computer Name tab in the<br />
window that appears and check the computer<br />
name.<br />
If there is a workgroup<br />
All characters appearing in "Full computer name"<br />
should be entered in Host Name. (Example:<br />
PC4050)<br />
If there is a domain<br />
The characters to the left of the first dot (.) in "Full<br />
computer name" should be entered in Host Name.<br />
Example: pc4050)<br />
2 After checking the computer name, click the [ X ]<br />
(Close) button to close the System Properties<br />
screen.<br />
In Windows XP, after checking the computer name,<br />
click the Cancel button to close the System<br />
Properties screen.<br />
3
Checking what to enter for [Login User Name]<br />
Check the domain name and user name for logging onto Windows.<br />
3-30<br />
Basic Operation<br />
1 From the Start menu, select All Programs (or<br />
Programs), Accessories and then Command<br />
Prompt.<br />
The Command Prompt window appears.<br />
2 At the Command Prompt, enter "net config<br />
workstation" and then click Enter.<br />
Screen example: user name "james.smith" and<br />
domain name "ABCDNET"
Creating a Shared Folder<br />
Create a shared folder to receive the document in the destination computer.<br />
3-31<br />
Basic Operation<br />
NOTE: If there is a workgroup in System Properties, configure the settings below to limit folder access to a<br />
specific user or group.<br />
1 From the Start menu, select Control Panel, Appearance and Personalization, and then Folder Options.<br />
In Windows XP, click My Computer and select Folder Options in Tools.<br />
2 Click the View tab and remove the checkmark from Use Sharing Wizard (Recommended) in Advanced<br />
settings.<br />
In Windows XP, click the View tab and remove the checkmark from Use Simple File Sharing<br />
(Recommended) in Advanced settings.<br />
3 Click the OK button to close the Folder Options screen.<br />
1 Create a folder on the local disk (C).<br />
NOTE: For example, create a folder with the name<br />
"scannerdata" on the local disk (C).<br />
2 Right-click the scannerdata folder and click Share<br />
and Advanced sharing. Click the Advanced<br />
Sharing button.<br />
The scannerdata Properties dialog box appears.<br />
In Windows XP, right-click the scannerdata folder<br />
and select Sharing and Security... (or Sharing).<br />
3
3-32<br />
Basic Operation<br />
3 Select the Share this folder checkbox and click<br />
the Permissions button.<br />
The Permissions for scannerdata dialog box<br />
appears.<br />
In Windows XP, select Share this folder and click<br />
the Permissions button.<br />
4 Click the Add button.<br />
5 Enter the user name in the text box and click the<br />
OK button.<br />
Click the location button and select the location. To<br />
select the area to be searched, select a location. If<br />
you are in a domain, your domain is selected by<br />
default as the area to be searched.
3-33<br />
Basic Operation<br />
6 Select the entered user, select the Change and<br />
Read permissions, and click the OK button.<br />
In Windows XP, go to step 8.<br />
NOTE: "Everyone" gives sharing permission to everyone on the network. To strengthen security, it is<br />
recommended that you select Everyone and remove the Read permission checkmark.<br />
7 Click the OK button in the Advanced Sharing<br />
screen to close the screen.<br />
8 Click the Security tab and then click the Edit<br />
button.<br />
In Windows XP, click the Security tab and then click<br />
the Add button.<br />
9 Select the entered user, make sure that<br />
checkmarks appear in allow Modify and allow<br />
Read & execute, and click the close button.<br />
3
Checking the [Path]<br />
Check the share name of the shared folder that will be the destination for the document.<br />
3-34<br />
Basic Operation<br />
1 Enter "\\pc4050" in "Program and File Search" in<br />
the Start menu.<br />
The Search Results screen opens.<br />
In Windows XP, click Search in the Start menu,<br />
select All files and folders, and search for the<br />
destination computer to which the file will be sent.<br />
In Search Companion, click Computers or people<br />
and then A computer on the network.<br />
In the "Computer name:" text box, enter the name<br />
of the computer that you checked (pc4050) and<br />
then click Search.<br />
2 Click "\\pc4050\scannerdata" that appears in the<br />
search results.<br />
In Windows XP, double-click the computer<br />
("pc4050") that appears in the search results.<br />
3 Click "\\pc4050\scannerdata" that appears in the<br />
search results.<br />
Check the address bar. The third and following text<br />
strings ( f ) should be entered for the path.<br />
In Windows XP, double-click the scannerdata folder<br />
and check the address bar. The text string to the<br />
right of the third backslash (\) should be entered in<br />
Path.<br />
(Example: scannerdata)<br />
NOTE: You can also specify a subfolder in the shared folder as the location where data is to be sent. In this<br />
case, "share name\name of folder in the shared folder" should be entered for the Path. In the example<br />
windowabove, "scannerdata\projectA" is the Path.
Configuring Windows Firewall (for Windows 7)<br />
Permit sharing of files and printers and set the port used for SMB transmission.<br />
NOTE: Log on to Windows with administrator privileges.<br />
Checking file and printer sharing<br />
3-35<br />
Basic Operation<br />
1 From the Start menu, select Control Panel,<br />
System and Security, and Allow a program<br />
through Windows Firewall.<br />
NOTE: If the User Account Control dialog box appears, click the Continue button.<br />
2 Click Change settings, select the File and Printer<br />
Sharing checkbox, and click OK.<br />
3
Adding a port<br />
3-36<br />
Basic Operation<br />
1 From the Start menu, select Control Panel,<br />
System and Security, and Check firewall status.<br />
2 Click Advanced settings.<br />
3 Click Inbound Rules.<br />
4 Click New Rule.<br />
5 Select Port and click Next.
3-37<br />
Basic Operation<br />
6 Select TCP, select Specific local ports, enter<br />
"139", and click Next.<br />
7 Select Allow the connection and click Next.<br />
8 Make sure all checkboxes are selected and click<br />
Next.<br />
3
3-38<br />
Basic Operation<br />
9 Enter "Scan to SMB" in "Name" and click Finish.<br />
NOTE: In Windows XP or Windows Vista, follow the procedure below to set the port.<br />
1 From the Start menu, select Control Panel, System and Security (or Security Center), and then Check<br />
Firewall Status) (or Windows Firewall).<br />
If the User Account Control dialog box appears, click the Continue button.<br />
2 Click the Exceptions tab and then the Add port... button.<br />
3 Specify Add a Port settings.<br />
Enter any name in "Name" (example: Scan to SMB). This will be the name of the new port. Enter "139" in<br />
"Port Number". Select TCP for "Protocol".<br />
4 Click the OK button to close the Add a Port dialog box.
Specifying Destination<br />
When specifying destination, choose from the Address Book or use the One Touch Keys.<br />
3-39<br />
Basic Operation<br />
NOTE: You can set the machine up so that the address book screen appears when you press the Send key.<br />
For details, refer to Default Screen on page 9-48.<br />
When the optional fax kit has been installed, you can specify the fax destination. Enter the other party’s number<br />
using the numeric keypad.<br />
Address Book<br />
Select a destination registered in the Address Book.<br />
For more information about how to register destinations in the Address Book, refer to Edit Destination (Address<br />
Book/Adding One Touch Keys) on page 9-81.<br />
On Hook<br />
Status<br />
Destination Detail<br />
ABCD abcd@efg.com<br />
TUVW 192.168.188.120<br />
Group1 Group1<br />
Direct<br />
Chain<br />
Detail/Edit Delete Recall<br />
0001 0002<br />
0003 0004 0005<br />
AAA BBB CCC DDD<br />
EEE<br />
0006 0007 0008 0009 0010<br />
FFF GGG HHH III JJJ<br />
Destination Quick Setup Org./Sending Color/<br />
Data Format Image Quality<br />
Address Book<br />
Addr Book Address Book Sort Name<br />
Dest. No. Type Name Detail<br />
Status<br />
0001<br />
0002<br />
0003<br />
0004<br />
0005<br />
E-mail<br />
ABCD abcd@efg.com<br />
TUVW tuvw@xyz.com<br />
Group1<br />
Group2<br />
Group3<br />
ABC DEF GHI JKL MNO PQRS TUV WXYZ 0-9<br />
Folder<br />
FAX<br />
i-FAX<br />
1/1<br />
No.<br />
1/100<br />
Advanced<br />
Setup<br />
Group<br />
1/2<br />
Destination<br />
Cancel OK<br />
Address<br />
Book<br />
E-mail<br />
Addr Entry<br />
Folder Path<br />
Entry<br />
FAX No.<br />
Entry<br />
i-FAX<br />
Addr Entry<br />
WSD Scan<br />
/DSM Scan<br />
Program<br />
10/10/2010 10:10<br />
Search(Name)<br />
Search(No.)<br />
Register/Edit<br />
Address Book<br />
Detail<br />
10/10/2010 10:10<br />
1 In the basic screen for sending, press [Address<br />
Book].<br />
2 Press the checkbox to select the desired<br />
destination from the list. You may choose multiple<br />
destinations. The selected destinations are<br />
indicated by a checkmark in the check box. To use<br />
an address book on the LDAP server, select [Ext<br />
Address Book] from the Addr Book pull-down menu.<br />
You can change the order in which the destinations<br />
are listed by selecting [Name] or [No.] from the Sort<br />
pull-down menu.<br />
NOTE: To cancel the selection, press the check box<br />
and remove the checkmark. For details on the external<br />
address book, refer to Embedded Web Server RX<br />
Operation Guide.<br />
3 Press [OK] to register the selected destination in<br />
the destination list.<br />
NOTE: To delete a destination in the list, select the<br />
destination and press [Delete].<br />
To change the default setting for Sort, refer to Sort on<br />
page 9-87.<br />
3
Destination Search<br />
Destinations registered in the Address Book can be searched.<br />
Advanced search by type or by initial letter is also available.<br />
Keys<br />
used<br />
The procedures for using the different search modes are explained below.<br />
Search by name<br />
(1)<br />
(2)<br />
(3)<br />
(4)<br />
Press [Search(Name)] and enter the required name.<br />
Search by address number<br />
Press [Search(No.)] and enter the address number you wish to search.<br />
Advanced search by initial letter<br />
Press the key for the required initial letter.<br />
Advanced search by destination<br />
Address Book<br />
Addr Book Address Book Sort Name<br />
Dest. No. Type Name Detail<br />
Status<br />
0001<br />
0002<br />
0003<br />
0004<br />
0005<br />
E-mail<br />
ABCD abcd@efg.com<br />
TUVW tuvw@xyz.com<br />
Group1<br />
Group2<br />
Group3<br />
ABC DEF GHI JKL MNO PQRS TUV WXYZ 0-9<br />
Folder<br />
FAX<br />
3-40<br />
Cancel OK<br />
Basic Operation<br />
Press any of [E-mail], [Folder], [FAX], [i-FAX] or [Group]. The destinations registered by that type are displayed.<br />
i-FAX<br />
Group<br />
1/2<br />
Search(Name)<br />
Search(No.)<br />
Register/Edit<br />
Address Book<br />
Detail<br />
10/10/2010 10:10<br />
Search type Subjects searched<br />
1 Search by name Search by registered name.<br />
2 Search by address<br />
number<br />
3 Advanced search<br />
by initial letter<br />
4 Advanced search<br />
by destination<br />
Search by registered address number.<br />
Advanced search by initial letter of registered name.<br />
Advanced search by type of registered destination<br />
(E-mail, Folder (SMB/FTP), FAX, i-FAX or Group).<br />
(FAX: Only when the optional fax kit is installed. i-FAX:<br />
Only when the optional internet fax kit is installed).<br />
You can set this function up so that destination types<br />
are selected when the address book is displayed.<br />
For more information, refer to Narrow Down on page 9-<br />
87.
One Touch Key<br />
On Hook<br />
Status<br />
Destination Detail<br />
ABCD abcd@efg.com<br />
TUVW 192.168.188.120<br />
Group1 Group1<br />
Direct<br />
0001 0002<br />
0003 0004 0005<br />
AAA BBB CCC DDD<br />
EEE<br />
0006 0007 0008 0009 0010<br />
FFF GGG HHH III JJJ<br />
Speed Dial<br />
Chain<br />
Detail/Edit Delete Recall<br />
Destination Quick Setup Org./Sending Color/<br />
Data Format Image Quality<br />
On Hook<br />
Status<br />
Destination Detail<br />
ABCD abcd@efg.com<br />
TUVW 192.168.188.120<br />
Group1 Group1<br />
Direct<br />
Chain<br />
Address<br />
Book<br />
E-mail<br />
Addr Entry<br />
Folder Path<br />
Entry<br />
Sending to Different Types of Destinations (Multi Sending)<br />
3-41<br />
Basic Operation<br />
Select the destination using the One Touch Keys.<br />
In the basic screen for sending, press the One Touch<br />
Keys where the destination is registered.<br />
NOTE: If the One Touch Keys for the desired<br />
destination is hidden on the touch panel, press [ ] or<br />
[ ] to scroll and view next or previous One Touch<br />
Keys.<br />
This procedure assumes that One Touch Keys have<br />
already been registered.<br />
Refer to Adding a Destination on One Touch Key (One<br />
Touch Key) on page 9-85 for more information on<br />
adding One Touch keys.<br />
Access the destination by specifying the 4-digit (0001 to<br />
1000) One Touch Key number (speed dial).<br />
In the basic screen for sending, press the Quick No.<br />
Search key or [No.] and use the numeric keys to enter<br />
the One Touch key number in the numeric entry<br />
screen.<br />
NOTE: if you entered the speed dial in 1 to 3-digit,<br />
press [OK].<br />
You can specify destinations that combine e-mail addresses, folders (SMB or FTP) and fax numbers (optional).<br />
This is referred to as Multi Sending. This is useful for sending to different types of destination (e-mail addresses,<br />
folders, etc.) in a single operation.<br />
No. of broadcast items E-mail : Up to 100<br />
Folders (SMP, FTP) : Total of 10 SMB and FTP<br />
FAX : Up to 500<br />
i-FAX : Up to 100<br />
Also, depending on the settings, you can send and print at the same time.<br />
1/1<br />
No.<br />
1/100<br />
Advanced<br />
Setup<br />
Detail/Edit Delete Recall<br />
0001 0002<br />
0003 0004 0005<br />
AAA BBB CCC DDD<br />
EEE<br />
0006 0007 0008 0009 0010<br />
FFF GGG HHH III JJJ<br />
Destination Quick Setup Org./Sending Color/<br />
Data Format Image Quality<br />
1/1<br />
No.<br />
1/100<br />
Advanced<br />
Setup<br />
Destination<br />
FAX No.<br />
Entry<br />
i-FAX<br />
Addr Entry<br />
WSD Scan<br />
/DSM Scan<br />
Program<br />
10/10/2010 10:10<br />
Destination<br />
Address<br />
Book<br />
E-mail<br />
Addr Entry<br />
Folder Path<br />
Entry<br />
FAX No.<br />
Entry<br />
i-FAX<br />
Addr Entry<br />
WSD Scan<br />
/DSM Scan<br />
Program<br />
10/10/2010 10:10<br />
Procedures are the same as used in specifying the destinations of respective types. Continue to enter E-mail<br />
address or folder path so that they appear in the destination list. Press the Start key to start transmission to all<br />
destinations at one time.<br />
NOTE: If the destinations include a fax, the images sent to all destinations will be black and white.<br />
3
Using the Document Box<br />
What is Document Box?<br />
3-42<br />
Basic Operation<br />
Document Box is an area in the hard disk in which you can save documents for later retrieval or sharing among<br />
multiple users.<br />
Document Box contains four types of component boxes which provide the following functions.<br />
Custom Box...page 7-2<br />
Custom Box is a component box which you can create within the Document Box and store data for later retrieval.<br />
You can create or delete a Custom Box, and manipulate data in various ways as described below:<br />
• Creating a box...page 7-2<br />
• Storing Documents in a Custom Box...page 7-4<br />
• Printing a Document in a Custom Box...page 7-5<br />
• Sending a Document from a Custom Box...page 7-7<br />
• Moving/ Copying /Joining Documents in a Custom Box...page 7-10<br />
• Deleting Documents in a Custom Box...page 7-13<br />
Job Box<br />
Job Box holds temporary or permanent print data for use with job options including Private Print, Stored Job,<br />
Quick Copy, Proof and Hold, Repeat copy and Form Overlay which will be discussed later.<br />
Four individual Job Boxes corresponding to these job options are already provided in the Document Box. These<br />
Job Boxes cannot be created or deleted by a user.<br />
NOTE: You can set up the machine so that temporary documents in job boxes are automatically deleted. For<br />
details, refer to Deletion of Job Retention on page 7-19.<br />
Private Print/Stored Job Box...page 7-14<br />
In Private Printing, you can specify that a job is not printed until you release the job at the operation panel. When<br />
sending the job from the application software, specify a 4-digit access code in the printer driver. The job is<br />
released for printing by entering the access code on the operation panel, ensuring confidentiality of the print job.<br />
The data will be deleted upon completion of the print job or after the main power switch is turned off.<br />
In Hold Job, access codes are not mandatory, but can be set on the printer driver if printing with PIN security is<br />
required. In this event, you need to enter the access code to print the stored jobs. Print data will be stored in the<br />
hard disk after printing. This will allow printing of the same print data repeatedly.<br />
Quick Copy/Proof and Hold Box...page 7-15<br />
Quick Copy feature facilitates additional prints of a document already printed. Activating Quick Copy and printing<br />
a document using the printer driver allow the print data to be stored in the Quick Copy Job Box. When additional<br />
copies are required, you can reprint the required number of copies from the operation panel. By default, up to<br />
32 documents can be stored. When power is turned off, all stored jobs will be deleted.<br />
NOTE: When you attempt to store documents in excess of the above maximum, the oldest document data will<br />
be overwritten by the latest document data.
3-43<br />
Basic Operation<br />
The Proof and Hold feature produces only a single proof print of multiple-print job and holds printing of the<br />
remaining copies. Printing a multiple-print job in Proof and Hold using the printer driver allows only a single copy<br />
to be printed while maintaining the document data in the Job Box. To continue to print the remaining copies, use<br />
the operation panel. You can change the number of copies to print.<br />
Repeat Copy Box...page 7-18<br />
Repeat Copy feature stores the copied original document data in the Job Box and allows you to print additional<br />
copies later. By default, up to 32 documents can be stored. When power is turned off, the original data will be<br />
deleted.<br />
NOTE: Repeat Copy function is not available when the optional Data Security Kit is installed.<br />
Form for Form Overlay Box...page 7-20<br />
Image Overlay feature copies the original document overlaid with a form or image. This Job Box is used to store<br />
the forms or images for overlaying.<br />
Removable Memory Box<br />
A USB memory inserted into the USB Port (A1) of the machine is also recognizable as a Job Box. This allows<br />
printing of the PDF data stored in the USB memory. You can print PDF data directly from the USB memory<br />
without a PC. Image files scanned using this machine can also be saved to USB memory in the PDF, TIFF,<br />
JPEG, XPS or high compression PDF format (Scan to USB).<br />
Fax Box<br />
Fax Box stores the fax data received. For details, refer to the Operation Guide supplied with the fax kit.<br />
3
Basic Operation for Document Box<br />
3-44<br />
Basic Operation<br />
This section explains basic operations for document boxes, using examples where tasks are carried out with<br />
custom boxes.<br />
NOTE: In the following explanation, it is assumed that user login administration is enabled. For details on User<br />
Logon privileges, refer to User Privileges on page 3-49.<br />
The basic procedure for using document boxes is explained below.<br />
No. Name Owner Used<br />
0001 SALES Anonymous - - - -<br />
Store File Detail Open<br />
Custom Box<br />
Status<br />
Job Box Removable<br />
Memory<br />
No. Name Owner Used<br />
0001 SALES Anonymous - - - -<br />
FAX Box<br />
Store File Detail Open<br />
Custom Box<br />
Status<br />
Job Box Removable<br />
Memory<br />
FAX Box<br />
1/1<br />
1/1<br />
Search(Name)<br />
Search(No.)<br />
Add/Edit Box<br />
Program<br />
10/10/2010 10:10<br />
Search(Name)<br />
Search(No.)<br />
Add/Edit Box<br />
Program<br />
10/10/2010 10:10<br />
1 Press the Document Box key.<br />
The default document box screen appears.<br />
2 Press [Custom Box], [Job Box] or [Removable<br />
Memory] to select the type of document box you<br />
want to work with.<br />
In this example, press [Custom Box].<br />
The box list screen appears.<br />
You can use this screen for tasks such as<br />
registering and editing boxes. For more information<br />
on using the box list, refer to Custom Box List on<br />
page 3-45.<br />
NOTE: For more information on registering boxes,<br />
refer to Creating a New Custom Box (Add/Edit Box) on<br />
page 7-2.<br />
You cannot access boxes if you forget your password.<br />
In this event, access the machine using administrator<br />
privileges and overwrite your box password.<br />
Refer to Adding a User (Local User List) on page 10-5<br />
for the default login user name and password.<br />
3 Select the box containing the document you want<br />
to work with and press [Open].<br />
The document list screen appears.<br />
You can use this screen for tasks such as printing<br />
and sending documents. For more information on<br />
using the document list, refer to Document List on<br />
page 3-46.<br />
NOTE: If a custom box is protected by a password,<br />
enter the correct password.
Custom Box List<br />
3-45<br />
Basic Operation<br />
The box list shows the registered custom boxes. The custom boxes can be listed by box number or by box name.<br />
You can manipulate the list in a range of ways, as shown below.<br />
Listing the boxes by number in<br />
ascending/descending order.<br />
Saves the document<br />
in the selected box.<br />
Listing the boxes by name in<br />
alphabetical order.<br />
No. Name Owner Used<br />
0001 SALES Anonymous - - - -<br />
Store File Detail Open<br />
Custom Box<br />
Status<br />
Job Box Removable<br />
Memory<br />
FAX Box<br />
1/1<br />
Listing the boxes by owner in<br />
alphabetical order.<br />
A box can be searched for<br />
by Box Name.<br />
Search(Name)<br />
Search(No.)<br />
Add/Edit Box<br />
Program<br />
10/10/2010 10:10<br />
A box can be searched for<br />
by Box No.<br />
Registers new boxes and<br />
checks, modifies or<br />
deletes box information.<br />
Opens the selected box.<br />
Displays the details for<br />
the selected box.<br />
3
Document List<br />
3-46<br />
Basic Operation<br />
The document list is a list of the documents stored in the custom box. Documents can be listed either by name<br />
or as thumbnails. The list can be used as shown below.<br />
List<br />
Listing the documents by name<br />
in alphabetical order.<br />
Selecting more than one<br />
document at a time.<br />
Selecting documents by<br />
checking checkboxes.<br />
Thumbnail<br />
Selecting more than one<br />
document at a time.<br />
Highlighting a document<br />
to display its details with<br />
[Detail].<br />
Selecting documents by<br />
checking checkboxes.<br />
Box:<br />
File Name Date and Time Size<br />
0001 2008101010574501 2010/10/10 09:40 21 MB<br />
0002 2008101010574511<br />
2010/10/10 09:50 21 MB<br />
0003 2008101010574521<br />
2010/10/10 10:00 21 MB<br />
Print Send Join Move/Copy Delete Store File<br />
Status<br />
Box:<br />
Listing the documents by time of update in<br />
ascending/descending order.<br />
SALES<br />
2008101010575...<br />
2008101010575...<br />
2008101010575...<br />
NOTE: You can select multiple documents by pressing the respective document checkboxes. However, note<br />
that you cannot select multiple documents when you are sending documents.<br />
1/1<br />
1/1<br />
Search(Name)<br />
Detail<br />
Preview<br />
Close<br />
Listing the documents by size in<br />
ascending/descending order.<br />
10/10/2010 10:10<br />
Detail<br />
Preview<br />
Print Send<br />
Join Move/Copy Delete<br />
Store File<br />
Status<br />
Search(Name)<br />
Close<br />
10/10/2010 10:10<br />
Highlighting a document to<br />
display its details with [Detail].<br />
Previews the selected<br />
document.<br />
Switches between list display<br />
and thumbnail display.<br />
Prints, sends, joins, moves,<br />
copies or deletes the<br />
selected documents.<br />
Saves the document in the<br />
open box.
Viewing/Editing Box Details<br />
You can check and modify box information.<br />
Use the procedure below.<br />
Document Box/Removable Memory - Add/Edit Box<br />
No. Name Owner Used<br />
0001 SALES Anonymous ----<br />
Status<br />
Box:<br />
Box No.:<br />
Status<br />
0001<br />
Change<br />
Detail/Edit Delete<br />
Box Name: Change Usage Restriction:<br />
Change<br />
SALES<br />
200 MB<br />
Auto File Deletion: Change<br />
30 day(s)<br />
Free Space:<br />
30 GB<br />
123456<br />
Box Password: Change<br />
********<br />
1/1<br />
Search(Name)<br />
Search(No.)<br />
Add<br />
Overwrite Setting: Change<br />
Permit<br />
Delete after Printed: Change<br />
Off<br />
Cancel Save<br />
Close<br />
10/10/2010 10:10<br />
10/10/2010 10:10<br />
3-47<br />
Basic Operation<br />
1 Press [Add/Edit Box] in the box list screen.<br />
2 Highlight the box whose details you wish to check<br />
or edit and press [Detail/Edit].<br />
NOTE: If a custom box is protected by a password,<br />
enter the correct password.<br />
3 Check the box details.<br />
To edit details, press [Change] of the detail you<br />
wish to edit. Edit the detail as desired and press<br />
[OK].<br />
4 If you have changed the details, press [Save] and<br />
then press [Yes] in the confirmation screen.<br />
If you did not change the details, press [No].<br />
5 Press [Close]. The display returns to the default<br />
Document Box screen.<br />
3
Previewing Documents/Checking Document Details<br />
3-48<br />
Basic Operation<br />
You can use this function to preview the documents stored in a document box or display the document details<br />
for checking.<br />
Use the procedure below.<br />
When you have zoomed in, you can use these keys to move<br />
the displayed area.<br />
Preview:<br />
Status<br />
2007040410574501<br />
Zoom out.<br />
1 Select (highlight) a document to preview and then<br />
press [Preview] or [Detail].<br />
2 Preview the document or check the document<br />
details.<br />
The operations available in the preview screen are<br />
shown below.<br />
Size<br />
Resol.<br />
Color<br />
: A4<br />
: 300x300dpi<br />
: Full Color<br />
No.<br />
1/6<br />
Close<br />
10/10/2010 10:10<br />
Zoom in.<br />
In multiple-page documents,<br />
you can change pages by<br />
entering the desired page<br />
number.<br />
In multiple-page documents,<br />
you can use these buttons to<br />
change pages.<br />
3 When you have finished previewing documents or<br />
checking document details, press [Close].
User Privileges<br />
3-49<br />
Basic Operation<br />
When user login administration is enabled, accessibility to the Document Box components will vary depending<br />
on the given user privilege.<br />
Accessibilities vary depending on user privilege as follows:<br />
Accessibility<br />
Operation<br />
Box information<br />
Restricting the Accessibility to a Box<br />
Access level<br />
Administrator User<br />
Creating a box Yes No<br />
Changing box owner Yes No<br />
Deleting a box Others Yes No<br />
Changing box<br />
number<br />
Owner Yes Yes<br />
Others Yes No<br />
Owner Yes No<br />
Renaming a box Others Yes No<br />
Changing the<br />
password to a box<br />
Adjusting the box<br />
capacity<br />
Owner Yes Yes<br />
Others Yes No<br />
Owner Yes Yes<br />
Others Yes No<br />
Owner Yes No<br />
Changing the owner Others Yes No<br />
Changing the<br />
permission<br />
Changing the<br />
period of using a<br />
box<br />
Owner Yes No<br />
Others Yes No<br />
Owner Yes Yes<br />
Others Yes No<br />
Owner Yes Yes<br />
The accessibility to a Custom Box differs depending on the level of privileges as follows:<br />
Administrator: An administrator can gain access and manipulate all boxes.<br />
User: A user can gain access and manipulate his/her own boxes and the shared boxes.<br />
3
Password Entry Requirement<br />
3-50<br />
Basic Operation<br />
When user login administration is enabled, requirement of a password differs depending on the level of<br />
privileges as follows:<br />
Administrator: The administrator is not required to enter a password to gain access<br />
to any box.<br />
User: The user is required to enter a password to gain access to a box<br />
which is protected by a password. The user is not required to enter a<br />
password to gain access to his/her own boxes.<br />
Creating new Custom Boxes when user login administration is enabled<br />
Box:<br />
Box No.:<br />
0001<br />
Change<br />
Owner:<br />
<strong>DC</strong>BA9876<br />
Change<br />
If you create a new Custom Box when user login<br />
administration is enabled, the screen appears and you<br />
can change the owner and permission settings. Only<br />
Box Name:<br />
Change<br />
Usage Restriction:<br />
Change administrators and machine administrators can create<br />
SALES<br />
200 MB<br />
new Custom Boxes.<br />
Box Password: Change<br />
Permission:<br />
Auto File Deletion:<br />
Free Space:<br />
Status<br />
********** Private<br />
30<br />
30<br />
day(s)<br />
MB<br />
Change<br />
Overwrite Setting:<br />
Permit<br />
Cancel<br />
Change<br />
Change<br />
Delete after Printed: Change<br />
Off<br />
Save<br />
10/10/2010 10:10<br />
Changing the owner: Press [Change] of Owner and<br />
select the new owner for the<br />
box from the displayed list.<br />
Then press [OK].<br />
Changing the permission:Press [Change] of<br />
Permission and select either<br />
[Private] or [Shared]. Then<br />
press [OK].<br />
NOTE: For information on specifying other settings,<br />
refer to Creating a New Custom Box (Add/Edit Box) on<br />
page 7-2.<br />
Working With User Privileges When User Login Administration is Enabled<br />
Box:<br />
Box No.:<br />
0001<br />
Owner:<br />
<strong>DC</strong>BA9876<br />
When user login administration is enabled, the owner of<br />
a box with user privileges set can change the following<br />
box information: the box name, the box password, the<br />
Box Name:<br />
Change<br />
Usage Restriction:<br />
permission, the auto file deletion and the overwrite<br />
SALES<br />
200 MB<br />
setting.<br />
Box Password:<br />
Status<br />
********<br />
Change<br />
Auto File Deletion: Change<br />
30 day(s)<br />
Free Space:<br />
30 MB<br />
Permission: Change<br />
Private<br />
Overwrite Setting:<br />
Permit<br />
Change<br />
Delete after Printed: Change<br />
Off<br />
Cancel Save<br />
10/10/2010 10:10
Canceling Jobs<br />
Follow the steps below to cancel any print or send job being executed.<br />
Canceling Jobs<br />
You can also cancel jobs by pressing the Stop key.<br />
Printing jobs<br />
Sending jobs<br />
Status<br />
Copies<br />
Job No.: 000021 Job Name: doc20081010101034<br />
User Name: -----<br />
Scanner Setting<br />
Printer Setting<br />
Scanned Pages<br />
Copies<br />
A4<br />
100%<br />
2-sided<br />
Top Edge on Top<br />
Canceling printing from a computer<br />
A4<br />
2-sided<br />
Collate<br />
Tray A<br />
Plain<br />
Cancel Reserve Next<br />
10/10/2010 10:10<br />
3-51<br />
Basic Operation<br />
1 Press the Stop key with the copy screen or send<br />
screen displayed.<br />
Cancelling job screen appears.<br />
The current print job is temporarily interrupted.<br />
2 Select the job you wish to cancel and press<br />
[Cancel]. And then press [Yes] in the confirmation<br />
screen.<br />
1 Press the Stop key with the copy screen or send<br />
screen displayed.<br />
Job Cancel appears.<br />
NOTE: Pressing the Stop key will not temporarily stop<br />
a job that you have already started sending.<br />
2 To cancel printing, select [Cancel], and then press<br />
[Yes] in the confirmation screen.<br />
NOTE:<br />
If Reserve Next Priority (refer to page 9-44) is set to<br />
[Off]<br />
The Copying screen appears in the touch panel during<br />
printing.<br />
1 Press the Stop key or [Cancel].<br />
The current print job is canceled.<br />
To cancel a print job executed using the printer driver before the printer begins printing, do the following:<br />
1 Double-click the printer icon ( ) displayed on<br />
the taskbar at the bottom right of the Windows<br />
desktop to display a dialog box for the printer.<br />
2 Click the file for which you wish to cancel printing<br />
and select Cancel from the Document menu.<br />
3
Quick Setup Screen<br />
3-52<br />
Basic Operation<br />
In the initial screen for copying and sending (the screen which appears immediately after the Copy or Send key<br />
is first pressed after power-on), important and generally often used functions are registered from among the<br />
versatile functions of this machine. This initial screen is called Quick Setup Screen. Registration of functions in<br />
the Quick Setup Screen can be adjusted to suit your work environment for better efficiency.<br />
Functions Available for Registration in the Quick Setup Screen<br />
Default registrations and the functions available for registration are as follows.<br />
For details on Quick Setup Screen for FAX, refer to the Fax System (V) Operation Guide.<br />
Function Default Registration<br />
Copying 1: Paper Selection<br />
2: Zoom<br />
3: Density<br />
4: Duplex<br />
5: Combine<br />
6: Staple/Punch<br />
Sending 1: Color Selection<br />
2: Scan Resolution<br />
3: Density<br />
4: 2-sided/Book Original<br />
5: Continuous Scan<br />
6: File Format<br />
Functions Available for<br />
Registration<br />
• Paper Selection<br />
• Zoom<br />
• Density<br />
• Duplex<br />
• Combine<br />
• Staple/Punch<br />
• Original Orientation<br />
• Collate/Offset<br />
• Original Image<br />
• Original Size<br />
• Continuous Scan<br />
• Background Density Adj.<br />
• Zoom<br />
• Scan Resolution<br />
• FAX TX Resolution<br />
• Density<br />
• 2-sided/Book Original<br />
• File Format<br />
• Original Size<br />
• Sending Size<br />
• Original Orientation<br />
• Original Image<br />
• Color Selection<br />
• Continuous Scan<br />
• Background Density Adj.
Document<br />
Box<br />
Changing Registration<br />
Copy Image<br />
Function Default Registration<br />
Document<br />
Storage<br />
Sending<br />
From Box<br />
Printing<br />
From Box<br />
Auto<br />
100%<br />
Normal 0<br />
Original : A4<br />
Paper<br />
Selection<br />
Zoom<br />
Density<br />
Zoom : 100%<br />
Paper : A4<br />
1-sided<br />
>>1-sided<br />
Off<br />
Off<br />
Preview<br />
Duplex<br />
Combine<br />
Staple<br />
/Punch<br />
Quick Setup Org./Paper/ Image Quality Layout/Edit Advanced<br />
Status<br />
Finishing<br />
Setup<br />
1: Color Selection<br />
2: Resolution<br />
3: Density<br />
4: 2-sided/Book Original<br />
5: Original Orientation<br />
6: Original Image<br />
1: File Format<br />
2: Delete after Transmitted<br />
3: FAX TX Resolution<br />
4: Sending Size<br />
1: Paper Selection<br />
2: Delete after Printed<br />
3: Collate/Offset<br />
4: Duplex<br />
5: Combine<br />
6: Staple/Punch<br />
Copies<br />
Shortcut 1<br />
Shortcut 2<br />
Shortcut 3<br />
Shortcut 4<br />
Shortcut 5<br />
Shortcut 6<br />
Program<br />
10/10/2010 10:10<br />
3-53<br />
Functions Available for<br />
Registration<br />
• Color Selection<br />
• Resolution<br />
• Density<br />
• 2-sided/Book Original<br />
• Original Orientation<br />
• Original Image<br />
• Original Size<br />
• Zoom<br />
• Continuous Scan<br />
• Storing Size<br />
• Background Density Adj.<br />
• File Format<br />
• Delete after Transmitted<br />
• FAX TX Resolution<br />
• Sending Size<br />
• Paper Selection<br />
• Delete after Printed<br />
• Collate/Offset<br />
• Duplex<br />
• Staple/Punch<br />
• Combine<br />
Basic Operation<br />
The following procedure is one example for replacing<br />
the registration of Density with Original Image in the<br />
Quick Setup Screen for copying.<br />
1 Press the System Menu key.<br />
2 Press [Copy], [Next] of Quick Setup Registration,<br />
and then [Change] of Original Image.<br />
3
Copy - Original Image<br />
Off<br />
Key 1<br />
Add Original Image to the Quick Setup screen.<br />
Key 2 Key 3<br />
Key 4 Key 5 Key 6<br />
Cancel OK<br />
Status 10/10/2010 10:10<br />
3-54<br />
Basic Operation<br />
3 Press [Key 3] here as the key to set replacement<br />
location.<br />
4 Press [OK]. A confirmation screen appears. Press<br />
[Yes]. The Original Image Quality function will be<br />
newly registered.
Program<br />
3-55<br />
Basic Operation<br />
By registering sets of frequently used functions as a single program, you can simply press the program number<br />
as needed to recall those functions. You can also name the programs for easy identification when recalling.<br />
The programs below have been preregistered. The registered contents can be re-registered for easier use in<br />
your environment.<br />
NOTE: Up to 50 functions combining copying and sending can be registered in the program.<br />
If user login administration is enabled, you can only register functions by logging in with administrator privileges.<br />
Registering Programs<br />
Number Program name Default Registration<br />
01 ID Card Copy Copying function<br />
Color: Black & White<br />
Combine: [2 in 1]<br />
Continuous Scan: [On]<br />
Original Size: Statement (A5-R)<br />
Paper Selection: Cassette 1<br />
Zoom: Auto Zoom<br />
02 Eco Copy Copying function<br />
Color: Black & White<br />
EcoPrint: [On] (Level [5])<br />
03 Confidential Stamp Copying function<br />
Color: Black & White<br />
Prevent Bleed-thru: [On]<br />
Stamp: Confidential<br />
Font Size: middle<br />
Font Color: [Black]<br />
Stamp Position: [Center]<br />
Display Pattern: [Transparent]<br />
Use the procedure below to register a program.<br />
The following procedure is an example of registering the copying function.<br />
1 Press the Program key while the copy mode is<br />
accessed.<br />
2 Press [Add] and press a number (01 to 50) for the<br />
program number.<br />
If entering Program screen from the Copy screen,<br />
Send screen or Document Box screen, go to step 4.<br />
NOTE: If you select a program number already<br />
registered, the currently registered functions can be<br />
replaced with a new set of functions.<br />
3 Check that [Copy] is selected, and press [Next].<br />
4 Enter the new program name and press [Save] to<br />
register the program.<br />
3
Recalling Programs<br />
Use the procedure below to recall a registered program.<br />
If the Program key is pressed 1 Press the Program key.<br />
01 ID Card Copy 02 Eco Copy 03 Confidential Stamp 04 Send 1<br />
05 Send 2 06 FAX 1<br />
07 FAX 2<br />
08 Box 1<br />
09 10 11 12<br />
13 14<br />
15 16<br />
17 18<br />
19 20<br />
Status<br />
Recall Add Edit<br />
If [Program] is pressed in the copy function screen<br />
01 ID Card Copy<br />
02 Eco Copy 03 Confidential Stamp 04 Send 1<br />
05 Send 2 06 FAX 1 07 FAX 2<br />
08 Box 1<br />
09 10 11 12<br />
13 14<br />
15 16<br />
17 18<br />
19 20<br />
Quick Setup Org./Paper/ Image Quality Layout/Edit Advanced<br />
Status<br />
Finishing<br />
Setup<br />
Editing and Deleting Programs<br />
You can change program number and program name, or delete program.<br />
Use the procedure below to edit or delete a program.<br />
No.<br />
10/10/2010 10:10<br />
No.<br />
Program<br />
10/10/2010 10:10<br />
3-56<br />
Basic Operation<br />
2 Press [Recall] and press the key corresponding to<br />
the program number (01 to 50) to recall. Press the<br />
Quick No. Search key or [No.] to enter the<br />
program number directly for recalling.<br />
NOTE: If the program cannot be recalled, the<br />
Document Box or the form overlay specified in the<br />
program might have been deleted. Check the<br />
Document Box.<br />
[Program] can be pressed in each function to call up<br />
the program registered for the function.<br />
3 Place the originals and press the Start key.<br />
Copying is performed according to the registered<br />
program.<br />
1 Press the Program key.<br />
2 Press [Edit] and press the key(s) corresponding to<br />
the program number (01 to 50) to change or delete.<br />
3 To edit a program, use the procedure for registering<br />
a program and press [Change]. Then change the<br />
program number and program name and press<br />
[Save]. Choose [Yes] in the confirmation screen to<br />
change the program.<br />
To delete the program, press [Delete this Program].<br />
Choose [Yes] in the confirmation screen to finally<br />
delete the program.
Registering Shortcuts (Copy, Send, and Document Box Settings)<br />
3-57<br />
Basic Operation<br />
Add shortcuts in the Quick Setup screen for easy access to the frequently used functions. A function name linked<br />
to a registered shortcut can be changed as necessary. You can register up to 6 shortcuts for copying functions,<br />
sending functions, and functions set for document box.<br />
Adding Shortcuts<br />
Shortcut registration is performed in the setup screen of each function. Shortcuts can be registered for all<br />
functions in which [Add Shortcut] appears on the screen.<br />
Use the procedure below to register a shortcut.<br />
Memo Page<br />
Status<br />
Place original.<br />
Original : : --- A4<br />
Zoom : : 100%<br />
Paper : :<br />
--- A4<br />
Preview<br />
Add Shortcut<br />
Off<br />
Layout A<br />
Layout B<br />
Layout<br />
Top<br />
L to R<br />
Top<br />
L to B<br />
Top<br />
R to L<br />
Top<br />
R to B<br />
Editing and Deleting Shortcuts<br />
Copies<br />
None<br />
Border Line<br />
Top Edge<br />
on Top<br />
Original<br />
Orientation<br />
Cancel OK<br />
10/10/2010 10:10<br />
1 After making the desired settings in the setup<br />
screen of each function, press [Add Shortcut].<br />
2 Press the keys corresponding to the shortcut<br />
number (01 to 06) to register.<br />
NOTE: If you select a shortcut number already<br />
registered, the currently registered shortcut can be<br />
replaced with a new one.<br />
3 Enter the shortcut name and press [Save] to add<br />
the shortcut.<br />
Follow the steps shown below to change a shortcut number/name or delete a shortcut.<br />
1 In the setup screen of each function, press [Add<br />
Shortcut] in the bottom of the screen.<br />
2 Press [Edit] and press the keys corresponding to<br />
the shortcut number (01 to 06) to change or delete.<br />
3 To edit a shortcut, press [Change] to change the<br />
shortcut key number and name and press [OK] and<br />
then [Save]. Choose [Yes] in the confirmation<br />
screen to change the shortcut.<br />
To delete the shortcut, press [Delete this Shortcut].<br />
Choose [Yes] in the confirmation screen to delete<br />
the shortcut.<br />
3
Using the Internet Browser<br />
This section explains how to use the Internet browser.<br />
3-58<br />
Basic Operation<br />
NOTE: To use the internet browser, internet browser must be set to [On] in Internet Browser Setting on page<br />
9-88.<br />
Launching and Exiting the Browser<br />
Use the procedure below to launch and exit the Internet browser.<br />
Weekly Timer Internet Browser<br />
Status<br />
10/10/2010 10:10<br />
1 Press the Application key.<br />
The application list screen appears.<br />
2 Press [Internet Browser].<br />
The Internet browser starts up.<br />
3 Use the browser screen to browse web pages.<br />
For information on how to use the browser screen,<br />
refer to Using the Browser Screen on page 3-59.<br />
4 To exit the browser, press [X] (Close) and then<br />
press [Yes] in the exit confirmation screen.<br />
The application list screen reappears.<br />
NOTE: You can specify preferences such as the way<br />
the Internet browser screen is displayed. For details,<br />
refer to Internet (page 9-88).
Using the Browser Screen<br />
The operations available in the Internet browser screen are shown below.<br />
U<strong>TA</strong>X - Home<br />
Status<br />
Title bar<br />
Displays the page title.<br />
Enter URL Search Menu<br />
Enter URL<br />
Use this display a desired web<br />
page by entering the URL for<br />
that page.<br />
Home page<br />
Displays your specified home page.<br />
You can set your home page in the<br />
Browser Preferences on page 9-88.<br />
Reload<br />
Updates the page.<br />
Back/Forward<br />
Displays the previous<br />
page or the next page.<br />
3-59<br />
10/10/2010 10:10<br />
Basic Operation<br />
Search box<br />
Pressing the text box displays a keyboard.<br />
You can then perform a search by entering<br />
a keyword and pressing the [Search].<br />
Close<br />
Closes the Internet browser and returns<br />
you to the application list screen.<br />
Scroll bars<br />
These allow you to scroll the<br />
displayed page up, down, left<br />
and right by pressing [ ], [ ],<br />
[ ] or [ ] or by moving one of<br />
the slide bars with your finger.<br />
Security lock icon<br />
Displayed when you are viewing<br />
a protected page.<br />
Loader/Progress bar<br />
Shows the status of page<br />
loading. When the browser is<br />
loading a web page, the loader<br />
changes to an animated display.<br />
Menu<br />
Displays the browser setup menu. You can use<br />
this menu to specify the browser's display<br />
magnification, set the text encoding scheme<br />
and check the server certificate.<br />
Search (Search Internet/Retrieval in page)<br />
Displays a search menu in which you can select [Retrieval<br />
in page] or an Internet search site.<br />
Search Internet: Use the selected search site to search<br />
with the entered keyword.<br />
Retrieval in page: Search from the entered keyword in<br />
the currently displayed page. You can<br />
continue your search by pressing<br />
[SearchUp] or [SearchDown].<br />
NOTE: Pressing the Reset key while the Internet browser is displayed will exit the browser and return you to<br />
the application list screen without displaying the browser exit.<br />
3
Using Weekly Timer<br />
3-60<br />
Basic Operation<br />
"Weekly Timer" is installed on the machine as a standard application. Weekly Timer allows you to store machine<br />
on/off times for each day of the week and set the machine to automatically turn on and off at those times.<br />
IMPOR<strong>TA</strong>NT: On/off using Weekly Timer puts the machine in the same state (sleep) as when the power key is<br />
pressed on the operation panel. When using Weekly Timer, do not turn off the main power switch.<br />
NOTE: When user management is enabled, you must log in with administrator authority to use this feature.<br />
Be sure to set the time before using Weekly Timer. For details, see Setting Date and Time on page 2-14<br />
Setting Weekly Timer<br />
1 Press the Application key.<br />
The application list screen appears.<br />
2 Press [Weekly Timer].<br />
Weekly Timer starts up.<br />
3 Press the [Enable the Application] checkbox so that<br />
a checkmark appears.<br />
4 Select the day you want to set and press [Edit].<br />
5 Press the [Enable] checkboxes for power ON/OFF<br />
so that checkmarks appear, press [+] or [-] to enter<br />
the times, and press [OK].<br />
[# Keys] can be pressed to enter the time with the<br />
numeric keys on the operation panel.<br />
6 If you need to change the number of retries made<br />
when the power is not successfully turned off,<br />
press [Retry Times].<br />
7 Set the Retry Times and the Retry Interval, and<br />
press [OK].<br />
To have retries made continuously until the<br />
machine power turns off, press the [Continue to<br />
Retry] checkbox so that a checkmark appears.<br />
8 To close, press [End].<br />
You will return to the application list screen.
Checking Counter<br />
Counter<br />
Status<br />
Printed Pages<br />
Black&White:<br />
Scanned Pages<br />
Copy<br />
Copy<br />
Originals:<br />
600<br />
Print<br />
Printed Pages<br />
Status Page by Paper Size<br />
Help Screen<br />
3-61<br />
Basic Operation<br />
Press the Counter key to check the number of sheets<br />
printed and scanned.<br />
For details, refer to Checking and Printing Counter on<br />
page 10-33.<br />
If you have difficulty operating the machine, you can check how to operate it using the touch panel.<br />
Help Screen Display<br />
Printer<br />
FAX<br />
200<br />
FAX<br />
300 600<br />
100<br />
Help titles<br />
Displays information<br />
about functions and<br />
machine operation.<br />
Show the screen of the tab<br />
that includes the function<br />
explained in Help. (In the<br />
case of this screen, the<br />
screen that appears after<br />
step 1 of Setting Procedure<br />
is performed will appear.)<br />
Others<br />
1000<br />
Total<br />
Total<br />
Selecting Paper Source<br />
Try It<br />
1000<br />
1800<br />
Close<br />
Select paper source by choosing a<br />
Cassette or MP Tray.<br />
Setting Procedure<br />
1. Press [Org./Paper/Finishing].<br />
2. Press [Paper Selection].<br />
Status<br />
10/10/2010 10:10<br />
To show the Help screen, press the Help key on the<br />
operation panel. The Help screen shows explanations<br />
of functions and how to use them.<br />
Display List<br />
Displays the Help list.<br />
1/2<br />
End<br />
10/10/2010 10:10<br />
Scrolls up and down by<br />
pressing [ ] or [ ] when<br />
the help text cannot be<br />
displayed in its entirety on a<br />
single screen.<br />
Closes the Help screen and<br />
returns to the original<br />
screen.<br />
3
3-62<br />
Basic Operation
4 Copying Functions<br />
This chapter explains the functions available for copying.<br />
• Original Size........................................................................................4-2<br />
• Paper Selection...................................................................................4-3<br />
• Mixed Size Originals ...........................................................................4-6<br />
• Original Orientation .............................................................................4-9<br />
• Fold...................................................................................................4-11<br />
• Paper Output.....................................................................................4-13<br />
• Combine............................................................................................4-14<br />
• Margin/Centering ..............................................................................4-16<br />
• Border Erase.....................................................................................4-18<br />
• Booklet..............................................................................................4-20<br />
• Cover ................................................................................................4-22<br />
• Form Overlay ....................................................................................4-23<br />
• Page #...............................................................................................4-24<br />
• Memo Page.......................................................................................4-26<br />
• Image Repeat ...................................................................................4-28<br />
• Text Stamp ........................................................................................4-30<br />
• Bates Stamp......................................................................................4-31<br />
• EcoPrint ............................................................................................4-33<br />
• Sharpness.........................................................................................4-34<br />
• Background Density Adj....................................................................4-35<br />
• Prevent Bleed-thru............................................................................4-36<br />
• Continuous Scan...............................................................................4-37<br />
• Auto Image Rotation .........................................................................4-38<br />
• Negative Image.................................................................................4-38<br />
• Mirror Image......................................................................................4-39<br />
• Job Finish Notice ..............................................................................4-40<br />
• File Name Entry ................................................................................4-42<br />
• Priority Override................................................................................4-42<br />
• Repeat Copy.....................................................................................4-43<br />
• DP Read Action ................................................................................4-44<br />
4-1
Original Size<br />
4-2<br />
Copying Functions<br />
Specify the size of originals being scanned. Be sure to specify the original size when copying non-standard<br />
sizes.<br />
The following options are available.<br />
Item How to Select Sizes<br />
Standard<br />
Sizes 1<br />
Standard<br />
Sizes 2<br />
Have the size of original<br />
detected automatically, or<br />
select from the standard<br />
sizes.<br />
Select from the standard<br />
sizes not included in the<br />
Standard Sizes 1.<br />
Others Select from envelope,<br />
postcard or the custom sized<br />
originals*.<br />
Size Entry Enter the size not included in<br />
the standard sizes 1 and 2**.<br />
Inch models: Auto, Ledger, Legal, Letter, Letter-R,<br />
Statement, Statement-R, Oficio II and 11×15"<br />
Metric models: Auto, A3, B4, A4, A4-R, B5, B5-R, A5,<br />
A5-R, B6, B6-R, A6-R, Folio and 216×340mm<br />
Inch models: A3, B4, A4, A4-R, B5, B5-R, A5, A5-R,<br />
B6, B6-R, A6-R, Folio, 8K, 16K, 16K-R and<br />
216×340mm<br />
Metric models: Ledger, Legal, Letter, Letter-R,<br />
Statement, Statement-R, Oficio II, 11×15", 8K, 16K and<br />
16K-R<br />
* For instructions on how to specify the custom original sizes (Custom 1 to 4), refer to<br />
Custom Original Size on page 9-4.<br />
** The input units can be changed in the System menu.<br />
Refer to Measurement on page 9-12.<br />
Use the procedure below to select the original size.<br />
Original Size<br />
Original<br />
Zoom<br />
Paper<br />
Status<br />
: A4<br />
: 100%<br />
: A4<br />
Preview<br />
Add Shortcut<br />
Standard<br />
Sizes 1<br />
Standard<br />
Sizes 2<br />
Others<br />
Size Entry<br />
Auto<br />
A3<br />
A4 A5<br />
A4<br />
A5<br />
A6 B4 B5<br />
B5<br />
216x340mm<br />
B6 B6<br />
Copies<br />
Cancel OK<br />
10/10/2010 10:10<br />
Hagaki, Oufuku hagaki, Custom 1 to 4<br />
Inch models<br />
Horizontal: 2.00 to 17.00" (in 0.01" increments),<br />
Vertical: 2.00 to 11.69" (in 0.01" increments)<br />
Metric models<br />
Horizontal: 50 to 432 mm (in 1 mm increments),<br />
Vertical: 50 to 297 mm (in 1 mm increments)<br />
1 Press the Copy key.<br />
2 Place the originals on the platen.<br />
3 Press [Org./Paper/Finishing] and then [Original<br />
Size].<br />
4 Press [Standard Sizes 1 ], [Standard Sizes 2 ],<br />
[Others] or [Size Entry] to select the original size.
Original Size<br />
Original<br />
Zoom<br />
Paper<br />
Status<br />
Add Shortcut<br />
Standard<br />
Sizes 1<br />
Standard<br />
Sizes 2<br />
Others<br />
:<br />
Size Entry<br />
210x297mm<br />
: 100%<br />
: A4<br />
Preview<br />
Paper Selection<br />
Select the paper source that contains the required paper size.<br />
4-3<br />
Copying Functions<br />
If [Size Entry] is selected, press [+] or [-] to specify<br />
the horizontal size (X) and the vertical size (Y).<br />
Press [# Keys] to enter the size directly using the<br />
numeric keys.<br />
5 Press [OK].<br />
6 Press the Start key to start copying.<br />
NOTE: Specify in advance the size and type of the paper loaded in the cassette (refer to Original/Paper<br />
Settings on page 9-4).<br />
When printing on paper that is wider than the paper previously used, dirt on the conveying guide may soil the<br />
edges of the paper infrequently. If you find that the paper is soiled, use the provided cleaning cloth to clean the<br />
conveying guide. (refer to Conveying Guide on page 11-14)<br />
Selecting the Cassette<br />
X<br />
Y<br />
(50 - 432)<br />
Use the procedure below to select the paper supply cassette.<br />
Paper Selection<br />
Original<br />
Zoom<br />
Paper<br />
Status<br />
: A4<br />
: 100%<br />
: A4<br />
Preview<br />
Add Shortcut<br />
Auto<br />
Cassette<br />
A4<br />
Plain<br />
A3<br />
Plain<br />
A4<br />
Plain<br />
A4<br />
Plain<br />
A4<br />
Plain<br />
A4<br />
Plain<br />
A4<br />
Plain<br />
# Keys<br />
# Keys<br />
297 mm<br />
(50 - 297)<br />
210 mm<br />
Copies<br />
Cancel OK<br />
Copies<br />
MP Tray<br />
Cancel OK<br />
10/10/2010 10:10<br />
MP Tray<br />
Paper Set.<br />
10/10/2010 10:10<br />
1 Press the Copy key.<br />
2 Place the originals on the platen.<br />
3 Press [Org./Paper/Finishing] and then [Paper<br />
Selection].<br />
4 Press the key of the paper source corresponding to<br />
the required paper size. The cassette in which the<br />
paper is loaded is selected.<br />
If [Auto] is selected, the paper matching the size of<br />
the original is selected automatically.<br />
5 Press [OK].<br />
6 Press the Start key to start copying.<br />
4
Selecting the Multi Purpose Tray<br />
Change the paper size and media type.<br />
The available paper sizes and media types are shown in the table below.<br />
Category Item<br />
Paper<br />
Size<br />
Media<br />
Type<br />
Standard<br />
Sizes 1<br />
Standard<br />
Sizes 2<br />
How to<br />
Select<br />
Choose from<br />
the standard<br />
size.<br />
Choose from<br />
the standard<br />
sizes not<br />
included in<br />
the Standard<br />
Sizes 1.<br />
Others Choose from<br />
non-standard<br />
sizes and<br />
custom<br />
sizes.<br />
Size<br />
Entry<br />
Enter the<br />
size not<br />
included in<br />
the standard<br />
sizes 1 and<br />
2**.<br />
4-4<br />
Sizes<br />
Inch models: Ledger, Legal, Letter, Letter-R,<br />
Statement, Oficio II and Executive<br />
Metric models: A3, B4, A4, A4-R, B5, B5-R,<br />
A5-R, B6, B6-R, A6-R, Folio and 216×340mm<br />
Inch models: A3, B4, A4, A4-R, B5, B5-R, A5-R,<br />
B6-R, A6-R, Folio, 8K, 16K, 16K-R and<br />
216×340mm<br />
Metric models: Ledger, Legal, Letter, Letter-R,<br />
Statement-R, Oficio II, Executive, 8K, 16K and<br />
16K-R<br />
ISO B5, Envelope #10 (Commercial #10),<br />
Envelope #9 (Commercial #9), Envelope #6<br />
(Commercial #6 3/4), Envelope Monarch,<br />
Envelope DL, Envelope C5, Envelope C4,<br />
Hagaki, Oufuku hagaki, Youkei 4, Youkei 2 and<br />
Custom 1 to 4*<br />
Inch models<br />
Horizontal: 5.83 to 17" (in 0.01" increments),<br />
Vertical: 3.86 to 11.69" (in 0.01" increments)<br />
Metric models<br />
Vertical: 98 to 297 mm (in 1 mm increments),<br />
Horizontal: 148 to 432 mm (in 1 mm increments)<br />
Plain (105 g/m 2 or less), Transparency, Rough,<br />
Vellum (60 to 105 g/m 2 or less), Labels, Recycled, Preprinted***, Bond,<br />
Cardstock, Color, Prepunched***, Letterhead***,<br />
Thick (106 g/m 2 or more), Envelope, Coated, High Quality, Custom 1 to 8***<br />
* For instructions on how to specify the custom paper sizes (Custom 1 to 4), refer to<br />
Custom Paper Size on page 9-5.<br />
** The input units can be changed in the System menu.<br />
Refer to Measurement on page 9-12.<br />
*** For instructions on how to specify the custom paper types 1 to 8, refer to Media Type<br />
Setting on page 9-8.<br />
To print on preprinted or prepunched paper or on letterhead, refer to Special Paper<br />
Action on page 9-11.<br />
Copying Functions<br />
NOTE: You can conveniently select in advance the size and type of paper that will be used often and set them<br />
as default (refer to Paper Size and Media Type Setup for Multi Purpose Tray (MP Tray Setting) on page 9-7).
Use the procedure below to select the paper size and media type.<br />
Paper Selection - Paper Settings<br />
Standard<br />
A3<br />
Sizes 1<br />
A5<br />
Standard<br />
Sizes 2<br />
B5<br />
Others<br />
Size Entry<br />
Status<br />
Paper Selection - Paper Settings<br />
Standard<br />
Sizes 1<br />
Standard<br />
Sizes 2<br />
Others<br />
Size Entry<br />
Status<br />
X<br />
Y<br />
216x340mm<br />
A4<br />
A6<br />
B5<br />
(148 - 432)<br />
# Keys<br />
(98 - 297)<br />
# Keys<br />
297 mm<br />
210 mm<br />
A4<br />
B4<br />
B6<br />
Copies<br />
Plain<br />
Media Type<br />
Cancel OK<br />
Copies<br />
10/10/2010 10:10<br />
Plain<br />
Media Type<br />
Cancel OK<br />
10/10/2010 10:10<br />
4-5<br />
1 Press the Copy key.<br />
2 Place the originals on the platen.<br />
Copying Functions<br />
3 Press [Org./Paper/Finishing], [Paper Selection]<br />
and then [Media Type].<br />
4 Press [Standard Sizes 1 ], [Standard Sizes 2 ],<br />
[Others] or [Size Entry] to select the paper size.<br />
If you select [Size Entry], press [+] or [–] to specify<br />
X (horizontal) and Y (vertical) sizes. You can enter<br />
the size directly using the numeric keys after<br />
pressing [# Keys].<br />
5 Press [Media Type].<br />
6 Select paper type, and press [OK].<br />
7 Press [OK].<br />
8 Press [OK].<br />
9 Press the Start key to start scanning the originals.<br />
10 If the specified size of paper is not loaded in the<br />
paper source cassette or multi purpose tray, a<br />
confirmation screen appears. When [Auto] is used<br />
and the same size of paper as the detected original<br />
size is not loaded, a paper confirmation screen<br />
appears.<br />
Load the required paper in the multi purpose tray<br />
and press [Continue] to start copying.<br />
4
Mixed Size Originals<br />
4-6<br />
Copying Functions<br />
Using the document processor, the originals of different sizes can be loaded in a batch and copied. In this<br />
operation, up to 30 originals of different sizes can be placed in the document processor at the same time.<br />
Supported Combinations of Originals<br />
Originals of the Same Width<br />
The supported combinations of originals are as follows.<br />
Ledger and Letter (A3 and A4)<br />
Ledger and Letter-R (Folio and A4-R)<br />
B4 and B5<br />
Ledger<br />
(A3)<br />
Legal<br />
(Folio)<br />
Letter<br />
(A4)<br />
Letter-R<br />
(A4-R)<br />
Letter<br />
(A4)<br />
Ledger<br />
(A3)<br />
Letter-R Legal<br />
(A4-R)<br />
(Folio)
Originals of Different Widths (Available for metric models only)<br />
Place all originals of different widths. The supported combinations of originals are as follows.<br />
4-7<br />
Copying Functions<br />
NOTE: When mixing the original sizes as using the following combination: A4-R, B5-R, and Folio, make sure<br />
to set the System Menu key -> Common Settings -> Original / Paper Settings -> Original Auto Detect to [On]<br />
for [Folio].<br />
For more information, refer to Original Auto Detect (Available for metric models only) on page 9-10.<br />
A3, B4, A4 and B5<br />
B4, A4-R and B5<br />
A4-R, B5-R and Folio<br />
B4 A4-R B5<br />
A4-R<br />
B5-R<br />
A4-R B4<br />
B5<br />
B5-R<br />
A4-R<br />
4
Selecting How to Copy Originals<br />
4-8<br />
Copying Functions<br />
Select whether you wish to create individual copies on different size paper matching the original sizes or to<br />
produce all copies on the same size paper.<br />
NOTE: This function is available regardless of whether originals have the same width or not.<br />
The table below shows the finished document sizes for the different original size options.<br />
Use the procedure below to copy mixed size originals.<br />
Mixed Size Originals<br />
Original<br />
Zoom<br />
Paper<br />
Status<br />
: A4<br />
: 100%<br />
:<br />
A4<br />
Preview<br />
Add Shortcut<br />
Off<br />
Mixed Size<br />
Copies<br />
Same Size<br />
Copies<br />
Option Description<br />
Mixed Size Copies Originals are detected individually for size and<br />
copied to the same size paper as originals.<br />
Same Size Copies Originals are all copied to the same size paper.<br />
Original Width<br />
Same Width<br />
Top Page Direction<br />
Long Edge<br />
Left<br />
Different<br />
Width<br />
Short Edge<br />
Left<br />
Copies<br />
Cancel OK<br />
10/10/2010 10:10<br />
1 Press the Copy key.<br />
2 Place originals on the document processor.<br />
IMPOR<strong>TA</strong>NT: When placing originals of different width,<br />
arrange the originals so that their left sides and top<br />
sides are aligned, and place the originals in alignment<br />
with the far width guide. If the originals are not aligned<br />
in this way, they may not be scanned correctly, and<br />
skewing or original jams may result.<br />
3 Press [Org./Paper/Finishing] and then [Mixed Size<br />
Originals].<br />
4 Select [Mixed Size Copies] or [Same Size Copies]<br />
as finish size.<br />
5 Select the combination of originals from [Same<br />
Width] and [Different Width].<br />
When [Same Size Copies] is selected, select [Long<br />
Edge Left] or [Short Edge Left] as the first original<br />
orientation.<br />
6 Press [OK].<br />
7 Press the Start key to start copying.
Original Orientation<br />
Select the original orientation to use the following functions.<br />
• Zoom (XY Zoom)<br />
• Duplex<br />
• Margin/Centering originals<br />
• Border erase<br />
• Combine mode<br />
• Memo mode<br />
• Page numbering<br />
• Booklets<br />
• Stapling/Punch (optional feature)<br />
• 2-sided/Book Original<br />
• Text Stamp<br />
• Bates Stamp<br />
4-9<br />
Copying Functions<br />
NOTE: If [On] is selected as the Orientation Confirmation on page 9-16 setting in the System Menu, the<br />
selection screen for original orientation appears when you select any of the above functions.<br />
When placing originals on the platen<br />
Original [Top Edge on Top] [Top Edge on Left]<br />
When placing originals on the document processor<br />
Original [Top Edge on Top] [Top Edge on Left]<br />
NOTE: To change the default setting for the original orientation, refer to Original Orientation on page 9-16.<br />
4
Use the procedure below to select the orientation when placing the originals on the platen.<br />
Original Orientation<br />
Original<br />
Zoom<br />
Paper<br />
Status<br />
: A4<br />
: 100%<br />
:<br />
A4<br />
Preview<br />
Add Shortcut<br />
Select the orientation of the<br />
original document's top edge.<br />
Top Edge<br />
on Top<br />
Top Edge<br />
on Left<br />
Copies<br />
Cancel OK<br />
10/10/2010 10:10<br />
4-10<br />
1 Press the Copy key.<br />
2 Place the originals on the platen.<br />
Copying Functions<br />
3 Press [Org./Paper/Finishing] and then [Original<br />
Orientation].<br />
4 Select [Top Edge on Top] or [Top Edge on Left] as<br />
the way the original is oriented.<br />
5 Press [OK].<br />
6 Press the Start key to start copying.
Fold<br />
You can fold finished copies.<br />
4-11<br />
Copying Functions<br />
NOTE: Folding requires the document finisher and the folding unit.<br />
For details on paper sizes and numbers of sheets that can be folded, refer to Center-Folding Unit (Option) on<br />
page Appendix-26.<br />
The following folding options and orientations are available.<br />
Tri-Fold<br />
Bi-Fold<br />
Inside<br />
Outside<br />
R to L / B to T<br />
L to R / T to B<br />
R to L / B to T<br />
L to R / T to B<br />
Orientation: Landscape Orientation: Portrait<br />
4
The procedure for using fold copying is explained below.<br />
Fold<br />
Original<br />
Zoom<br />
Paper<br />
Status<br />
: A4<br />
: 100%<br />
:<br />
A4<br />
Preview<br />
Off<br />
Bi-Fold<br />
Tri-Fold<br />
Staple<br />
Copies<br />
Off Saddle Stitch<br />
Add Shortcut Cancel OK<br />
10/10/2010 10:10<br />
4-12<br />
1 Press the Copy key.<br />
2 Place the originals on the platen.<br />
Copying Functions<br />
3 Press [Org./Paper/Finishing] and then [Fold].<br />
4 Select the fold method.<br />
NOTE: To use saddle stitching, press [Bi-Fold] and<br />
then [Saddle Stitch]. For more information on saddle<br />
stitching, refer to Booklet on page 4-20.<br />
5 Press [OK].<br />
6 Press the Start key to start copying.
Paper Output<br />
4-13<br />
Copying Functions<br />
You can use the procedure below to select an output destination such as the optional document finisher for your<br />
copies.<br />
NOTE: Optional output destinations include the job separator, 1,000 sheet document finisher, 4,000 sheet<br />
document finisher, and mailbox.<br />
The table below shows the available output destinations.<br />
NOTE: To change the default destination for copies, refer to Paper Output on page 9-15 for details.<br />
When [Heavy 3] (164 g/m 2 - ) or higher is set in Paper Weight and Mailbox (Option) is set for the output<br />
destination, the output destination is automatically changed to a tray that can be used.<br />
Use the procedure below to select the output destination.<br />
Paper Output<br />
Original<br />
Zoom<br />
Paper<br />
Status<br />
: A4<br />
: 100%<br />
:<br />
A4<br />
Preview<br />
Add Shortcut<br />
Destination Description<br />
Lower Left Tray*<br />
Upper Left Tray*<br />
Left side tray of the machine<br />
Tray A, Tray B, Tray C Trays A to C in the optional document finisher<br />
Right Tray Right side tray of the machine<br />
Tray 1 to 7 Trays 1 to 7 in the optional mailbox (tray 1 is the top tray)<br />
* This cannot be selected when the optional document finisher is installed.<br />
Tray A<br />
Tray B<br />
Tray C<br />
Tray 1 Tray 2<br />
Tray 3<br />
Tray 5<br />
Tray 6 Tray 7<br />
Copies<br />
Right Tray<br />
Tray 4<br />
Cancel OK<br />
10/10/2010 10:10<br />
1 Press the Copy key.<br />
2 Place the originals on the platen.<br />
3 Press [Org./Paper/Finishing] and then [Paper<br />
Output].<br />
4 Select the output destination for finished copies.<br />
5 Press [OK].<br />
6 Press the Start key to start copying.<br />
4
Combine<br />
4-14<br />
Copying Functions<br />
This mode allows you to copy 2 or 4 originals combined onto a single page. 2-in-1 mode or 4-in-1 mode. The<br />
page boundary of each original can be indicated.<br />
NOTE: Combine mode is available for the copy paper sizes of A3, B4, A4, A4-R, B5, B5-R, A5-R, Folio,<br />
Ledger, Legal, Oficio II, 216×340mm Letter, Letter-R, Statement-R, 8K, 16K and 16K-R.<br />
2-in-1 Mode<br />
For copying two originals onto a single sheet. This mode can be used with Duplex mode to copy four originals<br />
onto one sheet.<br />
The following 2-in-1 options and output orientations are available.<br />
Original<br />
Copy<br />
Orientation of Original<br />
Platen Document processor<br />
NOTE: When placing the original on the platen, be sure to copy the originals in page order.
4-15<br />
Copying Functions<br />
4-in-1 Mode<br />
For copying four originals onto a single sheet. This mode can be used with Duplex mode to copy eight originals<br />
onto one sheet.<br />
The following 4-in-1 options and output orientations are available.<br />
Original<br />
NOTE: When placing the original on the platen, be sure to copy the originals in page order.<br />
Types of Page Boundary Lines<br />
Copy<br />
The following types of the boundary lines are available.<br />
Orientation of Original<br />
Platen Document processor<br />
None Dotted<br />
Solid Borders<br />
(Cropmark)<br />
4
The procedure for using Combine mode copying is explained below.<br />
Combine<br />
Original<br />
Zoom<br />
Paper<br />
Status<br />
: A4<br />
: 100%<br />
: A4<br />
Preview<br />
Add Shortcut<br />
Off<br />
2 in 1<br />
4 in 1<br />
Layout<br />
Margin/Centering<br />
Right then<br />
Down<br />
Down then<br />
Right<br />
4-16<br />
1 Press the Copy key.<br />
2 Place the originals on the platen.<br />
3 Press [Layout/Edit] and then [Combine].<br />
Copying Functions<br />
4 Press [2 in 1] or [4 in 1], and choose the page layout<br />
of Layout.<br />
5 Press [Border Line] to choose the type of the lines<br />
to indicate page boundaries. Press [OK].<br />
6 Press [Original Orientation] to choose the<br />
orientation of the originals, either [Top Edge on Top]<br />
or [Top Edge on Left]. Then press [OK].<br />
7 Press [OK].<br />
8 Press the Start key. Copying begins.<br />
If the original is placed on the platen, replace the<br />
original and press the Start key.<br />
After scanning all originals, press [Finish Scan] to<br />
start copying.<br />
Shift the original image to make space on the copy for binding on the left (right) or top (bottom) side.<br />
When you copy onto paper different from the original size, you can center the original image on the paper.<br />
The following margin widths are available.<br />
Margin on the Back Side<br />
Left then<br />
Down<br />
Down then<br />
Left<br />
When duplex copying, you can also specify the margin on the back side.<br />
Auto<br />
When [Auto] is selected, an appropriate margin is applied automatically on the rear page depending on a margin<br />
specified for the front page and a binding orientation.<br />
Separate Front/Back Margins<br />
Enables you to specify the front and back settings separately.<br />
Copies<br />
None<br />
Border Line<br />
Top Edge<br />
on Top<br />
Original<br />
Orientation<br />
Cancel OK<br />
10/10/2010 10:10<br />
Input units Margin Width<br />
Inch Models -0.75 to 0.75" (in 0.01" increments)<br />
Metric Models -18 mm to 18 mm (in 1-mm increments)<br />
NOTE: You can set the default margin width. Refer to Margin Default on page 9-22 for details.
Use the procedure below to make copies with margins.<br />
Margin/Centering<br />
Original<br />
Zoom<br />
Paper<br />
Status<br />
: A4<br />
: 100%<br />
: A4<br />
Preview<br />
Add Shortcut<br />
Margin/Centering - Back Page<br />
Original<br />
Zoom<br />
Paper<br />
Status<br />
: A4<br />
: 100%<br />
: A4<br />
Preview<br />
Margin/Centering<br />
Original<br />
Zoom<br />
Paper<br />
Status<br />
Add Shortcut<br />
: A4<br />
: 100%<br />
:<br />
A4<br />
Preview<br />
Add Shortcut<br />
Off<br />
Auto<br />
Manual<br />
Off<br />
Margin<br />
Centering<br />
Margin<br />
Centering<br />
Left/Right<br />
(-18 - +18)<br />
0<br />
mm<br />
# Keys<br />
Top/Bottom (-18 - +18)<br />
0<br />
mm<br />
Left/Right<br />
# Keys<br />
Copies<br />
Auto<br />
Back Page<br />
Top Edge<br />
on Top<br />
Original<br />
Orientation<br />
Cancel OK<br />
(-18 - +18)<br />
# Keys<br />
mm<br />
Top/Bottom (-18 - +18)<br />
+6 mm<br />
# Keys<br />
+6<br />
10/10/2010 10:10<br />
Copies<br />
Cancel OK<br />
10/10/2010 10:10<br />
Copies<br />
Top Edge<br />
on Top<br />
Original<br />
Orientation<br />
Cancel OK<br />
10/10/2010 10:10<br />
4-17<br />
1 Press the Copy key.<br />
2 Place the originals on the platen.<br />
Copying Functions<br />
3 Press [Layout/Edit] and then [Margin/Centering].<br />
4 Press [Margin] to select the copy with margin.<br />
Use [+] or [–] to enter the margins for Left/Right and<br />
Top/Bottom. Press [# Keys] to use the numeric<br />
keys for entry.<br />
For duplex copying, press [Back Page] and select<br />
[Auto] or [Manual].<br />
If you selected [Auto], press [OK]. If you pressed<br />
[Manual], enter the margins in the displayed screen<br />
and then press [OK].<br />
Press [Centering] to center the original image on<br />
the paper.<br />
5 Press [Original Orientation] to choose the<br />
orientation of the originals, either [Top Edge on Top]<br />
or [Top Edge on Left]. Then press [OK].<br />
6 Press [OK].<br />
7 Press the Start key to start copying.<br />
4
Border Erase<br />
4-18<br />
Copying Functions<br />
Use Border Erase to remove black shadows that appear around the outside of the original when making copies.<br />
The following options can be selected.<br />
Border Erase Sheet<br />
Border Erase Book<br />
Original Copy<br />
Original Copy<br />
Individual Border Erase<br />
Original Copy<br />
In each option, the available ranges are as shown below.<br />
Input units Border Erase Range<br />
Inch Models 0 to 2"(in 0.01" increments)<br />
Metric Models 0 mm to 50 mm (in 1-mm increments)<br />
Erases black borders around the single sheet original.<br />
Erases black borders around the edges and in the<br />
middle of the original such as a thick book. You can<br />
specify the widths individually to erase the borders<br />
around the edges and in the center of the book.<br />
Specify border erase widths individually for all edges.<br />
NOTE: To specify the default width value of Border Erase, refer to Border Erase Default on page 9-21 for<br />
details.
Border Erase to Back Page<br />
4-19<br />
Copying Functions<br />
When scanning a 2-sided original, this allows you to erase the borders on the back of the original. The table<br />
below shows the available settings.<br />
Same as Front<br />
Page<br />
Item Detail<br />
NOTE: You can change the default setting for Border Erase to Back Page. For details, refer to Paper<br />
Selection on page 9-42.<br />
Use the procedure below to erase borders when copying.<br />
Border Erase<br />
Original<br />
Zoom<br />
Paper<br />
Status<br />
: A4<br />
: 100%<br />
: A4<br />
Preview<br />
Border Erase<br />
Original<br />
Zoom<br />
Paper<br />
Status<br />
Off<br />
Border Erase<br />
Sheet<br />
Border Erase<br />
Book<br />
Individual<br />
Border Erase<br />
Border Erase performed using the same setting<br />
as the front page<br />
Do Not Erase No Border Erase performed on the back page<br />
Border<br />
# Keys<br />
(0 - 50)<br />
6 mm<br />
Gutter (0 - 50)<br />
6 mm<br />
# Keys<br />
Copies<br />
Same as<br />
Front Page<br />
Back Page<br />
Add Shortcut Cancel OK<br />
: A4<br />
: 100%<br />
:<br />
A4<br />
Preview<br />
Add Shortcut<br />
Off<br />
Border Erase<br />
Sheet<br />
Border Erase<br />
Book<br />
Individual<br />
Border Erase<br />
Top<br />
Bottom<br />
Left<br />
Right<br />
# Keys<br />
(0 - 50)<br />
6<br />
mm<br />
6 mm<br />
6 mm<br />
6 mm<br />
10/10/2010 10:10<br />
Copies<br />
Same as<br />
Front Page<br />
Back Page<br />
Top Edge<br />
on Top<br />
Original<br />
Orientation<br />
Cancel OK<br />
10/10/2010 10:10<br />
1 Press the Copy key.<br />
2 Place the originals on the platen.<br />
3 Press [Layout/Edit] and then [Border Erase].<br />
4 Select [Border Erase Sheet] to erase borders for an<br />
individual sheet or [Border Erase Book] to erase<br />
borders for a book.<br />
Use [+] or [–] to enter the width in Border or Gutter.<br />
Press [# Keys] to use the numeric keys for entry.<br />
Press [Individual Border Erase] to select the<br />
individual border erase.<br />
Use [+] or [–] to enter the width in Top, Bottom, Left<br />
or Right. Press [# Keys] to use the numeric keys for<br />
entry.<br />
Press [Original Orientation] to select the original<br />
orientation from either [Top Edge on Top] or [Top<br />
Edge on Left]. Then press [OK].<br />
For 2-sided originals, press [Back Page] and then<br />
press [Same as Front Page] or [Do Not Erase].<br />
5 Press [OK].<br />
6 Press the Start key to start copying.<br />
4
Booklet<br />
4-20<br />
Copying Functions<br />
The Booklet copying option allows you to copy sheet originals and produce booklets such as small brochures<br />
or pamphlets. A booklet, such as a magazine, is made by folding at the center.<br />
You can copy the cover page onto colored paper or thick paper. Paper for the cover is supplied from the multi<br />
purpose tray. To feed the cover paper from the cassette, refer to Paper Source for Cover on page 9-11.<br />
NOTE: Using the document finisher and the folding unit enables you to saddle stitch your copies (fold them in two<br />
with staples in the center). This is limited to the A3, B4, A4-R, Ledger, Legal, Letter-R, 8K.<br />
The supported original and paper sizes are as follows.<br />
Type of Original Original Size Paper Size<br />
One-sided original,<br />
Two-sided original<br />
For binding on the left side<br />
For binding on the right side<br />
For top binding<br />
All*<br />
Book original A3, B4, A4-R, B5-R, A5-R,<br />
Ledger, Letter-R and 8K<br />
* Except for custom sized originals.<br />
Original Copy<br />
Original Copy<br />
Original Copy<br />
A3, B4, A4, A4-R, B5, B5-R, Ledger,<br />
Legal, Letter and Letter-R<br />
The folded copies can be read from left to right.<br />
The folded copies can be read from right to left.<br />
The folded copies can be read from top to bottom.
The procedure for using Booklet copying is explained below.<br />
Booklet<br />
Original<br />
Zoom<br />
Paper<br />
Status<br />
: A4<br />
: 100%<br />
:<br />
A4<br />
Preview<br />
Add Shortcut<br />
Off<br />
1-sided<br />
>>Booklet<br />
2-sided<br />
>>Booklet<br />
Book<br />
>>Booklet<br />
Original<br />
Finishing<br />
Binding<br />
Left/Right<br />
Binding<br />
Top<br />
Binding<br />
Left<br />
Binding<br />
Right<br />
Binding<br />
Top<br />
Off<br />
Off<br />
Copies<br />
Cover<br />
Staple<br />
/Fold<br />
Top Edge<br />
on Top<br />
Original<br />
Orientation<br />
Cancel OK<br />
10/10/2010 10:10<br />
4-21<br />
1 Press the Copy key.<br />
2 Place the originals on the platen.<br />
3 Press [Layout/Edit] and then [Booklet].<br />
Copying Functions<br />
4 Press [1-sided>>Booklet] to produce a booklet<br />
from single-sided originals.<br />
Press [2-sided>>Booklet] to produce a booklet<br />
from two-sided originals.<br />
Press [Book>>Booklet] to produce a booklet from<br />
an open book original.<br />
5 If you selected [2-sided>>Booklet] or<br />
[Book>>Booklet], choose the binding orientation in<br />
Finishing.<br />
If you selected [1-sided>>Booklet], choose the<br />
binding orientation in Finishing.<br />
6 If you choose [1-sided>>Booklet],<br />
[2-sided>>Booklet], or [Book>>Booklet] you can<br />
add the cover. Press [Cover], select [Cover] and<br />
press [OK].<br />
7 Press [Original Orientation] to choose the<br />
orientation of the originals, either [Top Edge on Top]<br />
or [Top Edge on Left]. Then press [OK].<br />
8 If the document finisher and folding unit are<br />
installed, the [Staple/Fold] option is displayed.<br />
To fold finished copies in half, press [Staple/Fold]<br />
and then press [Fold Only].<br />
To use saddle stitching, press [Staple/Fold] and<br />
then press [Saddle Stitch].<br />
NOTE: The number of sheets that can be folded or<br />
Saddle Stitch stapled varies by paper weight. For<br />
details, refer to Center-Folding Unit (Option) on page<br />
Appendix-26.<br />
9 Press [OK].<br />
10 Press the Start key. Copying begins.<br />
NOTE: When using the platen, be sure to place the<br />
originals in page order.<br />
If the originals are placed on the platen,<br />
consecutively replace each original after pressing<br />
the Start key.<br />
After scanning all originals, press [Finish Scan] to<br />
start copying.<br />
4
Cover<br />
4-22<br />
Copying Functions<br />
Add a cover to the finished copies. You can copy the first page and/or the last page onto colored paper or thick<br />
paper fed from the different paper source than the regular one. The following two options are available. Paper<br />
for the cover is supplied from the multi purpose tray.<br />
To feed the cover paper from the cassette, refer to Paper Source for Cover on page 9-11.<br />
The procedure for using Cover mode copying is explained below.<br />
Cover<br />
Original<br />
Zoom<br />
Paper<br />
Status<br />
: A4<br />
: 100%<br />
:<br />
A4<br />
Preview<br />
Add Shortcut<br />
Type of Cover Description<br />
Front Cover First page of the originals is copied on a different<br />
paper.<br />
Front and Back<br />
Covers<br />
Print the cover pages using an other paper source.<br />
Select either [Front Cover] or [Front and Back Covers].<br />
* Set paper source for cover in System Menu.<br />
Off Front Cover<br />
Front and Back<br />
Covers<br />
First page and last page of the originals are<br />
copied on different paper.<br />
Copies<br />
Cancel OK<br />
10/10/2010 10:10<br />
1 Press the Copy key.<br />
2 Place the originals on the platen.<br />
3 Press [Layout/Edit] and then [Cover].<br />
4 Press [Front Cover] or [Front and Back Covers].<br />
5 Press [OK].<br />
6 Press the Start key. Copying begins.<br />
If the originals are placed on the platen,<br />
consecutively replace each original after pressing<br />
the Start key.<br />
After scanning all originals, press [Finish Scan] to<br />
start copying.
Form Overlay<br />
Follow the steps shown below for form overlay.<br />
Form Overlay<br />
Original<br />
Zoom<br />
Paper<br />
Status<br />
Forms<br />
: A4<br />
: 100%<br />
: A4<br />
Preview<br />
Add Shortcut<br />
Form Overlay - Select Form<br />
Status<br />
Document Box<br />
Box Name<br />
Form for Form Overlay<br />
Custom Box<br />
Off<br />
Select<br />
Stored Form<br />
Scan<br />
New Form<br />
Original Copy<br />
Density<br />
(10 - 30, 100)<br />
Density<br />
:30%<br />
Density<br />
:100%<br />
%<br />
Copies<br />
None<br />
Select<br />
Form<br />
Cancel OK<br />
1/1<br />
Copies<br />
Detail<br />
10/10/2010 10:10<br />
Preview<br />
Open<br />
Up<br />
Cancel OK<br />
10/10/2010 10:10<br />
4-23<br />
Copying Functions<br />
Copy the original images onto the form. Once you scan<br />
and register the form, the form is overlaid onto the<br />
original. You can also use a form that is already<br />
registered in the machine's memory.<br />
NOTE: To register a form in advance, refer to Form for<br />
Form Overlay on page 7-20 for details.<br />
1 Press the Copy key.<br />
2 Press [Layout/Edit] and then [Form Overlay].<br />
3 Press [Scan New Form] to use the first page of<br />
originals as a form.<br />
NOTE: You can select the form density setting through<br />
4 levels from 10%, 20%, 30% or 100%. Press the [+] or<br />
[-] buttons in Density.<br />
To use the forms already registered, press [Select<br />
Stored Form]. Press [Select Form] to display the<br />
document boxes that store documents which can<br />
be used as a form. Select the desired form from the<br />
list and press [OK].<br />
NOTE: To return to a higher level folder, press [Up].<br />
4 Press [OK].<br />
5 Place the originals.<br />
Place the original for the form on top of the other<br />
originals. When using the document processor, the<br />
first page of the originals should be placed on the<br />
top.<br />
6 Press the Start key to start copying.<br />
4
Page #<br />
4-24<br />
Copying Functions<br />
Number multiple pages of originals in sequential order. The formats for numbering are [-1-], [P.1] or [1/n]. The<br />
format [1/n] prints the total number of pages in the place of n.<br />
Select Top Left, Top Middle, Top Right, Bottom Left, Bottom Middle or Bottom Right as the page numbering<br />
position.<br />
Items that can be set for the page number font are indicated below.<br />
Item Detail<br />
Font Size Set the font size of the printed page number.*<br />
Style Set the font style of the printed page number. [Bold] or [Italic]<br />
can be set.<br />
Font Set the font of the printed page number. [Courier] or [Letter<br />
Gothic] can be set.<br />
Density Set the density of the color of the printed page number.<br />
Display<br />
Pattern<br />
Original [ – 1 –] [P.1] [1/n]<br />
* Registered font sizes are displayed. For details on registering font sizes, refer to System Stamp on<br />
page 9-29.<br />
Use the procedure below to insert page numbers on your copies.<br />
Set the display method of the printed page number.<br />
[Transparent], [Clipping], or [Overwrite] can be selected.<br />
1 Press the Copy key.<br />
2 Place the originals in the document processor or on<br />
the platen.<br />
3 Press [Layout/Edit] and then [Page #].
Page #<br />
Off<br />
Status<br />
-1-<br />
P.1<br />
1/n<br />
Add Shortcut<br />
Position<br />
Top<br />
Left<br />
Bottom<br />
Left<br />
1st Page<br />
Start #<br />
(1 - 10)<br />
(1 - 999)<br />
2 2<br />
# Keys # Keys<br />
Top<br />
Middle<br />
Bottom<br />
Middle<br />
Top<br />
Right<br />
Bottom<br />
Right<br />
9 pt<br />
Black<br />
Font<br />
Copies<br />
Auto<br />
Last Page<br />
Auto<br />
Denominator<br />
#<br />
Top Edge<br />
on Top<br />
Original<br />
Orientation<br />
Cancel OK<br />
10/10/2010 10:10<br />
4-25<br />
Copying Functions<br />
4 Select the numbering format from [-1-], [P.1] or<br />
[1/n].<br />
5 Select the page numbering position.<br />
6 To start page numbering from a page other than the<br />
first page, press [+] or [–] of 1st Page and select the<br />
starting page. You can also enter the number with<br />
the numeric keys after pressing [# Keys].<br />
7 To start the numbering with a number other than 1,<br />
press [+] or [–] of Start Number and enter the<br />
starting number. You can also enter the number<br />
with the numeric keys after pressing [# Keys].<br />
8 Press [Font] and select font and display settings for<br />
the page numbering.<br />
9 If you do not want page numbering through to the<br />
last page, press [Last Page]. Select Manual and<br />
use [+] or [-] to enter the final page to be numbered<br />
(a negative number of pages counting backwards<br />
from the last page). Then press [OK]. You can set a<br />
value up to -10. You can also enter the number with<br />
the numeric keys after pressing [# Keys].<br />
10 The total number of pages n in the format [1/n] can<br />
be changed manually. Press [Denominator #] and<br />
select [Manual]. Press [+] or [–] to enter the total<br />
number of pages and press [OK]. You can also<br />
enter the number with the numeric keys after<br />
pressing [# Keys].<br />
11 Press [Original Orientation] to choose the<br />
orientation of the originals, either [Top Edge on Top]<br />
or [Top Edge on Left]. Press [OK].<br />
12 Press [OK].<br />
13 Press the Start key to start copying.<br />
4
Memo Page<br />
4-26<br />
Copying Functions<br />
Delivers copies with a space for adding notes. You can also copy two originals onto the same sheet with a space<br />
or add lines to indicate page boundaries.<br />
NOTE: Memo mode is available for the copy paper sizes of A3, B4, A4, A4-R, B5, B5-R, A5-R, Ledger, Legal,<br />
Oficio II, 216×340mm, Letter, Letter-R, Statement-R, Folio, 8K, 16K and 16K-R.<br />
Layout A<br />
Layout B<br />
Original Copy<br />
Original Copy<br />
Reduces images of each original page for printing onto<br />
half of a page, leaving the other half blank for notes.<br />
Reduces images of two original pages for copying onto<br />
half of a single page, leaving the other half blank for<br />
notes.
Types of Page Boundary Lines<br />
The following boundary lines are available.<br />
None Solid Dotted<br />
Borders<br />
(Cropmark)<br />
Use the procedures below to insert page boundary lines on your copies.<br />
Memo Page<br />
Status<br />
Place original.<br />
Original : : --- A4<br />
Zoom : : 100%<br />
Paper : :<br />
--- A4<br />
Preview<br />
Add Shortcut<br />
Off<br />
Layout A<br />
Layout B<br />
Layout<br />
Top<br />
L to R<br />
Top<br />
L to B<br />
Top<br />
R to L<br />
Top<br />
R to B<br />
Copies<br />
None<br />
Border Line<br />
Top Edge<br />
on Top<br />
Original<br />
Orientation<br />
Cancel OK<br />
10/10/2010 10:10<br />
4-27<br />
1 Press the Copy key.<br />
2 Place the originals on the platen.<br />
Copying Functions<br />
3 Press [Layout/Edit] and then [Memo Page].<br />
4 Press [Layout A] or [Layout B]. Select the page<br />
layout from Layout.<br />
5 Press [Border Line] to select the page boundary<br />
line. Press [OK].<br />
6 Press [Original Orientation] to select orientation of<br />
the originals, either [Top Edge on Top] or [Top Edge<br />
on Left]. Press [OK].<br />
7 Press [OK].<br />
8 Press the Start key to start copying.<br />
4
Image Repeat<br />
Image Repeat<br />
Double Copy<br />
Follow the steps shown below to use Image Repeat.<br />
Image Repeat<br />
Original<br />
Zoom<br />
Paper<br />
Status<br />
: A4<br />
: 100%<br />
:<br />
A4<br />
Preview<br />
Add Shortcut<br />
Off<br />
Zoom<br />
Priority<br />
Double<br />
Copy<br />
Original Copy<br />
Original Copy<br />
(25 - 400)<br />
100 %<br />
# Keys<br />
Copies<br />
Cancel OK<br />
Off<br />
Specify<br />
Repeat Area<br />
10/10/2010 10:10<br />
4-28<br />
Copying Functions<br />
Tiles the 1 copied sheet with an original image. You can<br />
also specify the area of the original to repeat.<br />
Copies the original image multiple times onto 1 sheet at<br />
a specified magnification.<br />
You can also specify how much of the original is<br />
repeatedly copied.<br />
Makes 2 copies of the same original on a single sheet.<br />
For example, you can double-copy an A4 original onto<br />
an A3 sheet which you then cut in half to make 2 copies<br />
that are identical to the original.<br />
1 Press the Copy key.<br />
2 Place the originals on the platen.<br />
3 Press [Layout/Edit] and then press [Image Repeat].<br />
4 Press [Zoom Priority].<br />
To make double copies, press [Double Copy] and<br />
proceed to step 8.<br />
5 Press [+] or [–] to set the zoom size.<br />
Press [# Keys] to enter with numeric keys.<br />
6 To set the area of the original to be repeated, press<br />
[On] for Specify Repeat Area.
4-29<br />
Copying Functions<br />
7 Press [+] or [–] to input the area of the original to be<br />
repeated.<br />
With metric models, you can enter the border width<br />
directly using the numeric keys after pressing [#-<br />
Keys].<br />
Y1: Length from top left of platen to top edge of<br />
repeat area<br />
X1: Length from Height from top left of platen to left<br />
edge of repeat area<br />
Y2: Height of repeat area<br />
X2: Width of repeat area<br />
8 Press [OK].<br />
9 Press the Start key. Copying begins.<br />
4
Text Stamp<br />
When making copies, you can print a text stamp on copy output.<br />
4-30<br />
Copying Functions<br />
NOTE: This cannot be set when Text Stamp is set in the system settings. For details, see Printing Jobs on<br />
page 9-30.<br />
The items that may be configured are as follows.<br />
Use the procedures below to specify the Text Stamp settings.<br />
Text Stamp<br />
Off<br />
On<br />
Status<br />
Stamp<br />
Method<br />
Item Detail<br />
Each Print<br />
Page<br />
Each Original<br />
Page<br />
Stamp on each printed page.<br />
Stamp each page of the document.<br />
Position Selectable positions are [Top Left], [Top Middle], [Top Right],<br />
[Middle Left], [Center], [Middle Right], [Bottom Left], [Bottom<br />
Middle], and [Bottom Right].<br />
Font Size Set the font size of the printed text stamp.*<br />
* Registered font sizes are displayed. For details on registering font sizes, refer to System Stamp on<br />
page 9-29.<br />
Add Shortcut<br />
Stamp<br />
Keyboard<br />
Style Set the font style of the printed text stamp. [Bold] or [Italic] can<br />
be set.<br />
Font Set the font of the printed text stamp. [Courier] or [Letter Gothic]<br />
can be set.<br />
Density Set the density of the color of the printed text stamp.<br />
Display<br />
Pattern<br />
URGENT COPY<br />
Each<br />
Print Page<br />
Stamp<br />
Method<br />
Top<br />
Left<br />
9<br />
pt<br />
Black<br />
Set the display method of the printed text stamp. [Transparent],<br />
[Clipping], or [Overwrite] can be selected.<br />
Copies<br />
Top Edge<br />
on Top<br />
Position Font Original<br />
Orientation<br />
Cancel OK<br />
10/10/2010 10:10<br />
1 Press the Copy key.<br />
2 Place the originals on the platen.<br />
3 Press [Layout/Edit] and then press [Text Stamp].<br />
4 Press [On].<br />
5 Press [Keyboard] and enter the text string to be<br />
printed, or select a text stamp from the displayed<br />
templates.<br />
NOTE: Templates that have been set will appear. For<br />
details on registering templates, refer to System<br />
Stamp on page 9-29.<br />
6 Press [Stamp Method] and set the stamp method<br />
for the text stamp.
Bates Stamp<br />
4-31<br />
Copying Functions<br />
7 Press [Position] and select the position of the text<br />
stamp.<br />
8 Press [Font] and select font and display settings for<br />
the text stamp.<br />
9 Press [Original Orientation] to choose the<br />
orientation of the originals, either [Top Edge on Top]<br />
or [Top Edge on Left]. Then press [OK].<br />
10 Press [OK].<br />
When making copies, you can print a bates stamp on the originals.<br />
11 Press the Start key. Copying begins.<br />
NOTE: This cannot be set when Bates Stamp is set in the system settings. For details, see Printing Jobs on<br />
page 9-30.<br />
The items that may be configured are as follows.<br />
Item Detail<br />
Position Selectable positions are [Top Left], [Top Middle], [Top Right],<br />
[Middle Left], [Center], [Middle Right], [Bottom Left], [Bottom<br />
Middle], and [Bottom Right].<br />
Font Size Set the font size of the printed bates stamp.*<br />
Style Set the font style of the printed bates stamp. [Bold] or [Italic] can<br />
be set.<br />
Font Set the font of the printed bates stamp. [Courier] or [Letter<br />
Gothic] can be set.<br />
Density Set the density of the color of the printed bates stamp.<br />
Display<br />
Pattern<br />
* Registered font sizes are displayed. For details on registering font sizes, refer to System Stamp on<br />
page 9-29.<br />
Use the procedure below to specify the Bates Stamp settings.<br />
Set the display method of the printed bates stamp.<br />
[Transparent], [Clipping], or [Overwrite] can be selected.<br />
1 Press the Copy key.<br />
2 Place the originals on the platen.<br />
3 Press [Layout/Edit] and then press [Bates Stamp].<br />
4
Bates Stamp<br />
Off<br />
On<br />
Status<br />
Add Shortcut<br />
Stamp<br />
[Date] 1/6<br />
Date User Name<br />
Numbering Text 1<br />
Numbering<br />
Default<br />
Serial Number<br />
Text 2<br />
Delete<br />
Copies<br />
Text 1 Text 2<br />
Change Change Date Format<br />
1 Top Left 9 pt<br />
Top Edge<br />
Black<br />
on Top<br />
Position Font Original<br />
Orientation<br />
Cancel OK<br />
10/10/2010 10:10<br />
4-32<br />
4 Press [On].<br />
Copying Functions<br />
5 Press [Date], [User Name], [Serial Number],<br />
[Numbering], [Text 1], or [Text 2], and set additional<br />
information to be printed in the stamp.<br />
If you selected [Text 1] or [Text 2], press [Change]<br />
below it and enter the text string to be printed.<br />
If you selected [Date], press [Date Format] and<br />
select [MM/DD/YYYY], [DD/MM/YYYY], or [YYYY/<br />
MM/DD] to set the date format.<br />
If you selected [Numbering], press [Numbering<br />
Default] and set the starting sequence number (1 to<br />
9999999).<br />
6 Press [Position] and select the position of the bates<br />
stamp.<br />
7 Press [Font] and select font and display settings for<br />
the bates stamp.<br />
8 Press [Original Orientation] to choose the<br />
orientation of the originals, either [Top Edge on Top]<br />
or [Top Edge on Left]. Then press [OK].<br />
9 Press [OK].<br />
10 Press the Start key. Copying begins.
EcoPrint<br />
4-33<br />
Copying Functions<br />
Use EcoPrint to save toner when printing. Use this function for test copies or any other occasion where high<br />
quality print is unnecessary.<br />
The procedure for making copies using EcoPrint is explained below.<br />
EcoPrint<br />
Original<br />
Zoom<br />
Paper<br />
Status<br />
: A4<br />
: 100%<br />
:<br />
A4<br />
Preview<br />
Add Shortcut<br />
Off<br />
On<br />
Toner Save Level<br />
Copies<br />
Low High<br />
1 2 3 4 5<br />
Cancel OK<br />
10/10/2010 10:10<br />
1 Press the Copy key.<br />
2 Place the originals on the platen.<br />
3 Press [Image Quality] and then [EcoPrint].<br />
4 Press [On].<br />
5 Press [1] to [5] (Low - High) to adjust the Toner<br />
Save Level.<br />
6 Press [OK].<br />
7 Press the Start key to start copying.<br />
4
Sharpness<br />
4-34<br />
Copying Functions<br />
Adjust the sharpness of image outlines. When copying penciled originals with rough or broken lines, clear copies<br />
can be taken by adjusting sharpness toward [Sharpen]. When copying images made up of patterned dots such<br />
as magazine photos, in which moire* patterns appear, edge softening and weakening of the moire effect can be<br />
obtained by setting the sharpness toward [Blur].<br />
The table below shows the available settings.<br />
* Patterns that are created by irregular distribution of halftone dots.<br />
Follow the steps below to adjust sharpness.<br />
Sharpness<br />
Original<br />
Zoom<br />
Paper<br />
Status<br />
: A4<br />
: 100%<br />
:<br />
A4<br />
Preview<br />
Add Shortcut<br />
Item Detail<br />
All Sharpen Emphasize the image outline.<br />
Blur Blur the image outline. Can weaken a Moire*<br />
effect.<br />
Text/Fine Line Normal Make letters and lines appear sharper.<br />
Only text and fine lines are emphasized.<br />
Sharpen<br />
All<br />
Text/Fine Line<br />
Blur<br />
-3<br />
-2<br />
-1<br />
Copies<br />
Cancel OK<br />
Sharpen<br />
0 1 2 3<br />
10/10/2010 10:10<br />
1 Press the Copy key.<br />
2 Place the originals on the platen.<br />
3 Press [Image Quality] and then Press [Sharpness].<br />
4 Press [All] or [Text/Fine Line].<br />
5 When [All] is selected, press [-3] to [3] (Blur -<br />
Sharpen) to adjust the sharpness.<br />
When [Text/Fine Line] is selected, press [0] to [3]<br />
(Normal - Sharpen) to adjust the sharpness.<br />
6 Press [OK].<br />
7 Press the Start key. Copying begins.
Background Density Adj.<br />
Follow the steps below to use background density adjust.<br />
Background Density Adj.<br />
Original<br />
Zoom<br />
Paper<br />
Status<br />
: A4<br />
: 100%<br />
:<br />
A4<br />
Preview<br />
Add Shortcut<br />
Off<br />
Auto<br />
Manual<br />
Original Copy<br />
Background<br />
Copies<br />
Lighter Darker<br />
1 2 3 4 5<br />
Cancel OK<br />
10/10/2010 10:10<br />
4-35<br />
Copying Functions<br />
Remove dark background from originals, such as<br />
newspapers. The smaller the number becomes lighter<br />
the background becomes. If the ground color is<br />
obtrusive, select [Auto]. If [Auto] does not remove the<br />
ground color, select [Manual] and adjust the density of<br />
the ground color.<br />
1 Press the Copy key.<br />
2 Place the originals on the platen.<br />
3 Press [Image Quality] and then press [Background<br />
Density Adj.].<br />
4 Press [Auto] or [Manual].<br />
5 When [Manual] is selected, press [1] to [5] (Lighter<br />
- Darker) to adjust the background density.<br />
6 Press [OK].<br />
7 Press the Start key. Copying begins.<br />
4
Prevent Bleed-thru<br />
Hide background colors and image bleed-through when scanning thin originals.<br />
The procedure for using prevent bleed-thru copying is explained below.<br />
Prevent Bleed-thru<br />
Original<br />
Zoom<br />
Paper<br />
Status<br />
: A4<br />
: 100%<br />
:<br />
A4<br />
Preview<br />
Add Shortcut<br />
Hide background colors and image bleed-through<br />
when scanning thin original.<br />
Off On<br />
Copies<br />
Cancel OK<br />
10/10/2010 10:10<br />
4-36<br />
1 Press the Copy key.<br />
2 Place the originals on the platen.<br />
Copying Functions<br />
3 Press [Image Quality] and then press [Prevent<br />
Bleed-thru].<br />
4 Press [On]. Prevent Bleed-thru is selected.<br />
5 Press [OK].<br />
6 Press the Start key. Copying begins.
Continuous Scan<br />
4-37<br />
Copying Functions<br />
When a large number of originals cannot be placed in the document processor at one time, the originals can be<br />
scanned in separate batches and then copied as one job. With this function, originals are scanned until you<br />
press [Finish Scan].<br />
Any of the following settings can be changed during scanning.<br />
• Original size • Paper Selection<br />
• Original orientation • Zoom<br />
• Original Image • Border erase<br />
• Duplex • Density<br />
• Background Density Adj. • Prevent Bleed-thru<br />
If you use Job Build, you can insert a blank paper during scanning or a blank page during duplex copying.<br />
The procedure for making copies using Continuous Scan is explained below.<br />
Continuous Scan<br />
Original<br />
Zoom<br />
Paper<br />
Status<br />
Status<br />
Scan next original(s).<br />
Place the originals and press Start key.<br />
Place original.<br />
: ---<br />
: 100%<br />
: A4<br />
Preview<br />
Add Shortcut<br />
Off Select desired binding orientation.<br />
On<br />
Job Build<br />
Binding<br />
Left<br />
Binding<br />
Right<br />
Copies<br />
Binding<br />
Top<br />
Cancel OK<br />
Scan next original(s).<br />
Place the originals and press Start key.<br />
Press [Finish Scan] to start copying.<br />
Copies<br />
Job No.: 000021 Job Name: doc20080505113414 User Name: -----<br />
Scanner Setting<br />
Original<br />
Size<br />
2-sided/Book<br />
Original<br />
Density<br />
Original<br />
Orientation<br />
Original<br />
Image<br />
Zoom Border Erase<br />
1/2<br />
Finishing<br />
Next Copy:<br />
On Back<br />
Sheet<br />
Insertion<br />
10/10/2010 10:10<br />
Cancel Finish Scan<br />
pages<br />
10/10/2010 10:10<br />
1 Press the Copy key.<br />
2 Press [Advanced Setup] and then [Continuous<br />
Scan].<br />
3 If Continuous Scan is selected, press [On].<br />
If Job Build is selected, press [Job Build] and select<br />
the desired binding orientation.<br />
4 Press [OK].<br />
5 Place the originals in the document processor or on<br />
the platen and press the Start key.<br />
If [Job Build] is selected, the next page can be<br />
changed. Press [Sheet Insertion] to insert a blank<br />
paper. Press [Next Copy: On Back] in duplex<br />
copying to print the next page on back page.<br />
6 Place the next original and press the Start key.<br />
Repeat these steps to scan the remaining originals.<br />
After scanning all originals, press [Finish Scan] to<br />
start copying.<br />
4
Auto Image Rotation<br />
4-38<br />
Copying Functions<br />
Automatically rotates the image when the sizes of the original and the loaded paper matches but the orientations<br />
are different. The images will be rotated 90° counter-clockwise prior to copying.<br />
NOTE: To set Auto Image Rotation as the default mode, refer to Auto Image Rotation on page 9-22.<br />
The procedure for making copies using Auto Image Rotation is explained below.<br />
Negative Image<br />
Inverts black and white portions of the image for printing.<br />
Use the procedure below to make negative image copies.<br />
1 Press the Copy key.<br />
2 Place the originals on the platen.<br />
3 Press [Advanced Setup] and then [Auto Image<br />
Rotation].<br />
4 Press [On] to select Auto Image Rotation.<br />
5 Press [OK].<br />
6 Press the Start key to start copying.<br />
1 Press the Copy key.<br />
2 Place the originals on the platen.<br />
3 Press [Advanced Setup] and then [Negative<br />
Image].<br />
4 Press [On] to select Negative Image.<br />
5 Press [OK].<br />
6 Press the Start key to start copying.
Mirror Image<br />
Copies the mirrored image of the original.<br />
Use the procedure below to make mirror image copies.<br />
4-39<br />
1 Press the Copy key.<br />
2 Place the originals on the platen.<br />
Copying Functions<br />
3 Press [Advanced Setup] and then [Mirror Image].<br />
4 Press [On] to select Mirror Image.<br />
5 Press [OK].<br />
6 Press the Start key to start copying.<br />
4
Job Finish Notice<br />
4-40<br />
Copying Functions<br />
Sends a notice by e-mail when a job is completed. Users can be notified of the completion of a job while working<br />
at a remote desk, saving the time spent waiting beside the machine to finish.<br />
NOTE: The user’s PC should be configured in advance so that E-mail can be used. For details, refer to<br />
Embedded Web Server RX (Settings for E-mail) on page 2-26.<br />
E-mail can be sent to a single destination.<br />
Example of Job Finish Notice<br />
To: h_pttr@owl-net.net<br />
Subject: 1234 Job end report mail<br />
Job No.: 000002<br />
Result: OK<br />
End Time: Sun 10 Oct 2010 10:10:10<br />
File Name: doc27042005145608<br />
Job Type: Copy<br />
------------------------------------------------<br />
1234<br />
Use the procedure below to enable job finish notification when making copies.<br />
1 Press the Copy key.<br />
Job Finish Notice<br />
Off<br />
Status<br />
Address<br />
Book<br />
Address<br />
Entry<br />
Add Shortcut<br />
Destination<br />
Detail<br />
User A abc@def.com<br />
Detail Address Book<br />
Copies<br />
Cancel OK<br />
10/10/2010 10:10<br />
2 Place the originals on the platen.<br />
3 Press [Advanced Setup] and then [Job Finish Notice].<br />
4 To select the destination from the address book,<br />
press [Address Book] on the left of the screen and<br />
then press [Address Book] in the next screen. Select<br />
the destination to be notified on the address book<br />
screen, then press [OK].<br />
NOTE: For the procedure to select the destination<br />
from the Address Book, refer Specifying Destination on<br />
page 3-39.<br />
You can view information on the notification<br />
destination by pressing [Detail].
Job Finish Notice<br />
Off<br />
Status<br />
Address<br />
Book<br />
Address<br />
Entry<br />
Add Shortcut<br />
E-mail<br />
Address<br />
Copies<br />
Cancel OK<br />
10/10/2010 10:10<br />
4-41<br />
Copying Functions<br />
To directly enter the E-mail address, press<br />
[Address Entry]. Press [E-mail Address], enter the<br />
address and press [OK].<br />
5 Press [OK].<br />
6 Press the Start key to start copying. Upon<br />
completion of the job, an E-mail notice is sent to the<br />
selected destination.<br />
4
File Name Entry<br />
4-42<br />
Copying Functions<br />
Names a copy job. Add other information such as date and time or job number as necessary. You can check a<br />
job history or job status using the job name, date and time, or job number specified here.<br />
Use the procedure below to assign a name to your copy job.<br />
File Name Entry<br />
Status<br />
Add a file name.<br />
Additional information such as Job No.<br />
and Date and Time can also be set.<br />
File Name<br />
doc<br />
Additional Info<br />
Add Shortcut<br />
Job No.<br />
Priority Override<br />
Date and Time<br />
1 Press the Copy key.<br />
2 Place the originals on the platen.<br />
3 Press [Advanced Setup] and then [File Name Entry].<br />
4 Press [File Name], enter the name for a copy job,<br />
and press [OK].<br />
To add date and time, press [Date and Time]. To<br />
add job number, [Job No.]. Added information is<br />
displayed in Additional Info.<br />
5 Press [OK].<br />
6 Press the Start key to start copying.<br />
Suspends a current job and gives the selected job priority for copying. The suspended job resumes after Priority<br />
Override copying is finished.<br />
NOTE: The current job that is selected as Priority Override cannot be suspended.<br />
Copies<br />
Cancel OK<br />
10/10/2010 10:10<br />
The procedure for using Priority Override is explained below.<br />
1 Press the Copy key.<br />
2 Place the originals on the platen.<br />
3 Press [Advanced Setup] and then [Priority<br />
Override].<br />
4 Press [On] to select Priority Override.<br />
5 Press [OK].<br />
6 Press the Start key. The current copy job is<br />
suspended and the copy job selected in Priority<br />
Override starts. The suspended job resumes after<br />
Priority Override copying is finished.
Repeat Copy<br />
4-43<br />
Copying Functions<br />
Enables additional copies in the desired quantity as necessary after a copy job is completed. For confidential<br />
documents, you can set up a pass code for the use of Repeat Copy. In such a case, the correct pass code must<br />
be entered when using Repeat Copy or copies will not be delivered.<br />
IMPOR<strong>TA</strong>NT: A Repeat Copy job is cleared when the main power switch is turned off.<br />
Repeat Copy is not available when the machine is equipped with the optional Data Security Kit.<br />
Repeat Copy cannot be used when the maximum number of Repeat Copy jobs to retain in the document box is<br />
set to zero (refer to Maximum Number of Repeat Copy Jobs Retained on page 4-44).<br />
You can select Repeat Copy as the default setting. Refer to Repeat Copy on page 9-28.<br />
Giving a file name to a copy job will facilitate identification of the data when copying (refer to File Name Entry on<br />
page 4-42).<br />
Selecting Repeat Copy<br />
Use the procedure below to select repeat copying.<br />
Repeat Copy<br />
Original<br />
Zoom<br />
Paper<br />
Status<br />
: A4<br />
: 100%<br />
:<br />
A4<br />
Preview<br />
Add Shortcut<br />
Off<br />
On<br />
Password(4digits)<br />
# Keys<br />
Outputting Repeat Copy Jobs<br />
Copies<br />
Cancel OK<br />
10/10/2010 10:10<br />
1 Press the Copy key.<br />
2 Place the originals on the platen.<br />
3 Press [Advanced Setup] and then [Repeat Copy].<br />
4 Press [On].<br />
To register a password, press [# Keys] and enter a<br />
4-digit password.<br />
IMPOR<strong>TA</strong>NT: If you forget the pass code, Repeat Copy<br />
will be unavailable. Make a note of the pass code<br />
beforehand if necessary.<br />
5 Press [OK].<br />
6 Press the Start key to start copying and register<br />
this job as a Repeat Copy job.<br />
The Repeat Copy jobs are stored in the Document Box. Refer to Job Box on page 3-42 to print out the Repeat<br />
Copy jobs.<br />
4
Maximum Number of Repeat Copy Jobs Retained<br />
4-44<br />
Copying Functions<br />
You can use the procedure below to change the maximum number of copy jobs that can be retained in the<br />
document box.<br />
Use the procedure below to change the maximum number of copy jobs retained.<br />
Document Box/Removable Memory - Repeat Copy Job Retention<br />
Set the maximum number of repeat copy jobs to retain.<br />
Use [-]/[+] or the numeric keys to enter a number.<br />
*Set this number to 0 to not retain any jobs.<br />
Status<br />
DP Read Action<br />
(0 - 50)<br />
1 Press the System Menu key.<br />
2 Press [Document Box/Removable Memory] and<br />
then [Next] of Job Box.<br />
3 Press [Change] of Repeat Copy Job Retention.<br />
4 Use the [+] or [-] key to enter the maximum<br />
retention number.<br />
You can also enter the number from the numeric<br />
keys.<br />
A number between 0 and 50 can be entered as the<br />
number of retained jobs.<br />
NOTE: If you enter a value of 0 (zero), you cannot use<br />
the Repeat Copy function.<br />
5 Press [OK].<br />
Set the operation when a document is scanned from the document processor. The table below shows the<br />
available settings.<br />
NOTE: Cannot be used when set to [On] in Document Guard on page 9-108.<br />
Use the procedure below to set a DP Read Action<br />
32<br />
job(s)<br />
Cancel OK<br />
10/10/2010 10:10<br />
Item Detail<br />
Speed Priority Priority given to scanning speed.<br />
Quality Priority Priority given to image quality.<br />
1 Press the Copy key.<br />
2 Place the original.<br />
3 Press [Advanced Setup] and then Press [DP Read<br />
Action].<br />
4 Select [Speed Priority] or [Quality Priority].<br />
5 Press [OK].<br />
6 Press the Start key. Copying begins.
5 Printing<br />
This chapter explains the functions available for printing.<br />
For details on Using the Document Box, refer to the Chapter 7 - Document Box.<br />
• Printing - Printing from Applications....................................................5-2<br />
• Banner printing....................................................................................5-5<br />
• Using a Job Box................................................................................5-10<br />
5-1
Printing - Printing from Applications<br />
Follow the steps below to print documents from applications.<br />
5-2<br />
Printing<br />
NOTE: To print the document from applications, install the printer driver on your computer from the supplied<br />
DVD (Product Library).<br />
1 Create a document using an application.<br />
2 Click File and select Print in the application. The<br />
Print dialog box appears.<br />
3 Click the button next to the Name field and select<br />
this machine from the list.<br />
4 Enter the desired print quantity in the Number of<br />
copies box. Enter any number up to 9999.<br />
When there is more than one page, select Collate<br />
to print out one by one in the sequence of the page<br />
numbers.<br />
5 Click the Properties button. The Properties dialog<br />
box appears.<br />
6 Select the Basic tab and click the Page Size button<br />
to select the paper size.<br />
To print on the special paper such as thick paper or<br />
transparency, click the Media Type menu and<br />
select the media type.<br />
7 Click Source and select the paper source.<br />
NOTE: If you choose Auto Select, paper is supplied<br />
automatically from the paper source loaded with paper<br />
of optimum size and type. To print on special paper<br />
such as envelope or thick paper, place it on the multi<br />
purpose tray and select MP Tray.<br />
8 Select paper orientation, either Portrait or<br />
Landscape, to match the orientation of the<br />
document.<br />
Selecting Rotate 180° will print the document<br />
rotated 180°.<br />
9 Click the OK button to return to the Print dialog box.<br />
10 Click the OK button to start printing.
Printer driver print settings screen<br />
The printer driver print settings screen allows you to configure a variety of print-related settings. For more<br />
information, refer to the Printing System Driver User Guide on the DVD.<br />
1<br />
2 3<br />
5-3<br />
Printing<br />
No. Description<br />
1 Quick Print<br />
Provides icons that can be used to easily configure frequently used functions. Each time you click an<br />
icon, it changes to an image resembling the print results and applies the settings.<br />
Basic<br />
This tab groups basic functions that are frequently used. You can use it to configure the paper size,<br />
destination, and duplex printing.<br />
Layout<br />
This tab lets you configure settings for printing various layouts, including booklet printing, combine<br />
mode, poster printing, and scaling.<br />
Finishing<br />
This tab lets you configure settings related to finishing of printed media, including binding and stapling.<br />
Imaging<br />
This tab lets you configure settings related to the quality of the print results.<br />
Publishing<br />
This tab lets you create covers and inserts for print jobs and put inserts between sheets of OHP film.<br />
Job<br />
This tab lets you configure settings for saving print data from the computer to the machine. Regularly<br />
used documents and other data can be saved to the machine for easy printing later. Since saved<br />
documents can be printed directly from the machine, this function is also convenient when you wish<br />
to print a document that you don't want others to see.<br />
Advanced<br />
This tab lets you configure settings for adding text pages or watermarks to print data.<br />
2 Profiles<br />
Printer driver settings can be saved as a profile. Saved profiles can be recalled at any time, so it's a<br />
convenient practice to save frequently used settings.<br />
3 Reset<br />
Click to revert settings to their initial values.<br />
5
Printer Driver Help<br />
5-4<br />
Printing<br />
The printer driver includes Help. To learn about print settings, open the printer driver print settings screen and<br />
display Help as explained below.<br />
1 Click the ? button in the upper right corner of the<br />
screen and then click the item you want to know<br />
about.<br />
2 Click the item you want to know about and press<br />
the [F1] key on your keyboard.
Banner printing<br />
5-5<br />
Printing<br />
When a document length from 470.1 mm (18.51") to a maximum of 1220.0 mm (48") is specified for printing,<br />
the print job is treated as banner printing.<br />
Max. number of sheets 1 sheet (manual feed), 10 sheets (when optional banner tray is attached*)<br />
Paper width 210 (8.26") to 304.8 (12") mm<br />
Paper length Max. 1220 (48") mm<br />
Paper weight 136 to 163 g/m2 Paper type Heavy 2<br />
* When the banner tray (option) is used, up to 10 sheets of banner paper can be fed continuously .<br />
(Refer to Using the Banner Tray (Option) on 5-7.)<br />
Follow the steps below to set banner paper in the printer driver.<br />
1 Click the Basic tab and then click the Page Sizes<br />
button.<br />
2 Click the New button, enter the name, length<br />
(470.1 mm or longer), and width of the custom<br />
paper size being registered, and click the OK<br />
button.<br />
3 Click Print size, select the custom paper size that<br />
you registered, and click the OK button.<br />
NOTE: When KPDL is used for PDL Settings of the printer driver, a length setting of 470.5 mm (18.53") or<br />
longer is handled as banner print.<br />
5
5-6<br />
Printing<br />
When you execute printing in this case, a message appears on the machine's operation panel. Place the paper<br />
in the multipurpose tray, continue to support it so that it does not fall, and press [Continue]. To cancel printing,<br />
press [Cancel].<br />
Job No.: Job Name: User Name:<br />
Use MP tray to print on the following paper.<br />
Set paper and press [Continue].<br />
210x800mm Custom 1<br />
IMPOR<strong>TA</strong>NT: If an output tray that cannot be used for banner printing such as Mailbox (option) is selected in<br />
the printer driver, the output tray automatically changes to a tray that can be used.<br />
To print on multiple sheets manually (not using the banner tray), place each sheet after the previous sheet is<br />
printed, and press [Continue].<br />
After pressing [Continue], support the paper with both hands so that it<br />
feeds in correctly.<br />
After printing starts, catch the paper when it is output so that it does<br />
not fall.<br />
Cancel<br />
Continue<br />
Status 10/10/2010 10:10
Using the Banner Tray (Option)<br />
When the banner tray (option) is used, up to 10 sheets of banner paper can be fed continuously.<br />
5-7<br />
Printing<br />
1 Open the Multi Purpose tray until it stops.<br />
Do not extend the multi purpose auxiliary tray.<br />
2 Release the paper width guide lock on the banner<br />
tray and open to the maximum width.<br />
3 Attach the banner tray to the multi purpose tray.<br />
Fit the openings on the sides of the banner tray<br />
onto the tabs on the sides of the multi purpose tray,<br />
and press into place.<br />
5
5-8<br />
Printing<br />
4 Open the paper width guides on the multi purpose<br />
tray to the maximum width.<br />
Make sure that the banner tray is attached so that<br />
the paper width guides on the banner tray are<br />
outside the paper width guides on the multi purpose<br />
tray.<br />
5 Load banner paper so that it passes under the<br />
paper clamp bar.<br />
6 Loop the banner paper back and place the end on<br />
the paper support.
IMPOR<strong>TA</strong>NT: Remove the paper when you are not performing banner printing.<br />
5-9<br />
Printing<br />
7 Adjust the paper width guides to the width of the<br />
paper.<br />
IMPOR<strong>TA</strong>NT: If there is a gap between the paper and<br />
the paper width guides, readjust the guides to fit the<br />
paper in order to prevent skewed feeding and paper<br />
jams.<br />
8 Adjust the paper width guides on the banner tray to<br />
the same width as the paper width guides on the<br />
multi purpose tray and lock.<br />
NOTE: The print confirmation screen can be set in the system menu to not appear when the banner tray is<br />
attached. This will allow continuous printing on multiple sheets. (Refer to Message Banner Print on 9-41.)<br />
5
Using a Job Box<br />
5-10<br />
Printing<br />
The Job Box stores print data in the machine's Document Box (HDD) for later printing from the operation panel<br />
as needed.<br />
Private Print<br />
Private Print stores the print data which is printed by using the printer driver to send data as a Private Print.<br />
In Private Printing, you can specify that a job is not printed until you release the job at the operation panel. When<br />
sending the job from the application software, specify a 4-digit access code in the printer driver. The job is<br />
released for printing by entering the access code on the operation panel, ensuring confidentiality of the print job.<br />
The data will be deleted upon completion of print job or after the main power switch is turned off.<br />
Refer to the Printing System Driver User Guide on how to print a job as Private Print using the printer driver.<br />
For details of the procedure for Private Print, refer to Private Print/Stored Job on page 7-14.<br />
Proof and Hold Print Box<br />
Proof and Hold box stores the print data which is printed by using the printer driver to send data as a Proof and<br />
Hold Print job.<br />
The Proof and Hold feature produces only a single proof print of multiple-print job and holds printing of the<br />
remaining copies. Printing a multiple-print job in Proof and Hold using the printer driver allows only a single copy<br />
to be printed while maintaining the document data in the Job Box. To continue to print the remaining copies, use<br />
the operation panel. You can change the number of copies to print.<br />
Refer to the Printing System Driver User Guide on how to print a job as Proof and Hold Print job using the printer<br />
driver.<br />
For details of the procedure for Proof and Hold Print Box, refer to Quick Copy/Proof and Hold on page 7-15.<br />
Automatic Delete Setting for Temporary Documents<br />
This setting specifies that documents, such as Private Printing, or Proof and Hold Printing, saved temporarily in<br />
the job box are automatically deleted after they have been saved for a set time.<br />
NOTE: This function is valid for documents saved after the function is set.<br />
Regardless of this function setting, temporary documents are deleted when the main power switch is turned off.<br />
For details of the procedure for Automatic Delete Setting for Temporary Documents, refer to Deletion of Job<br />
Retention on page 7-19.
Job Storage<br />
5-11<br />
Printing<br />
Job storage is a Job storage (e-MPS) option that lets you store a print job permanently on the hard disk for<br />
printing later. You also have the option of protecting the print job from unauthorized printing by using an access<br />
code. This feature is available when a hard disk is installed and selected in the Device Settings tab.<br />
Job storage is useful for jobs that need to be available for printing at any time, even if the printing system has<br />
been turned off and turned on again.<br />
If desired, you can attach a four-digit access code to a Job storage job, so that you can print a job without anyone<br />
else seeing it, or restrict printing to approved users. When the access code is used, the job is not printed until a<br />
user prints it at the printing system’s operation panel.<br />
Refer to the Printing System Driver User Guide on how to print a job as Proof and Hold Print job using the printer<br />
driver.<br />
5
5-12<br />
Printing
6 Sending Functions<br />
This chapter explains the functions available for sending originals.<br />
• Original Size........................................................................................6-2<br />
• Sending Size.......................................................................................6-4<br />
• Zoom...................................................................................................6-6<br />
• Centering ............................................................................................6-7<br />
• Mixed Size Originals ...........................................................................6-8<br />
• 2-sided/Book Original........................................................................6-11<br />
• Original Orientation ...........................................................................6-12<br />
• File Format........................................................................................6-14<br />
• File Separation..................................................................................6-15<br />
• PDF Encryption Functions ................................................................6-16<br />
• Original Image...................................................................................6-18<br />
• Density..............................................................................................6-19<br />
• Scan Resolution................................................................................6-20<br />
• Sharpness.........................................................................................6-21<br />
• Background Density Adj....................................................................6-22<br />
• Color Selection..................................................................................6-23<br />
• Continuous Scan...............................................................................6-24<br />
• Prevent Bleed-thru............................................................................6-25<br />
• Border Erase.....................................................................................6-26<br />
• File Name Entry ................................................................................6-28<br />
• E-mail Subject/Body..........................................................................6-29<br />
• WSD Scan/DSM Scan ......................................................................6-30<br />
• Scanning using TWAIN.....................................................................6-33<br />
• Job Finish Notice ..............................................................................6-36<br />
• Send and Print ..................................................................................6-37<br />
• Send and Store .................................................................................6-37<br />
• FTP Encrypted TX ............................................................................6-38<br />
• Text Stamp ........................................................................................6-39<br />
• Bates Stamp......................................................................................6-40<br />
• Color Type.........................................................................................6-42<br />
• Scanning with FMU Connection........................................................6-43<br />
6-1
Original Size<br />
6-2<br />
Sending Functions<br />
Select the size of originals that will serve as the basis for scanning. Be sure to select the original size when using<br />
originals of nonstandard sizes.<br />
Choose the original size from the following groups of original sizes<br />
Item Detail Size<br />
Standard<br />
Sizes 1<br />
Standard<br />
Sizes 2<br />
Select from automatic<br />
detection and standard<br />
sizes.<br />
Select from standard<br />
sizes except Standard<br />
Sizes 1 .<br />
Others Select from Hagaki and<br />
Custom Original Size *.<br />
Size Entry Enter the size that is not<br />
indicated in Standard<br />
Sizes 1 and 2**.<br />
Inch models: Auto, Ledger, Legal, Letter, Letter-<br />
R, Statement, Statement-R, Oficio II, 11×15"<br />
Metric models: Auto, A3, B4, A4, A4-R, B5, B5-<br />
R, A5, A5-R, B6, B6-R, A6-R, Folio, 216×340mm<br />
Inch models: A3, B4, A4, A4-R, B5, B5-R, A5,<br />
A5-R, B6, B6-R, A6-R, Folio, 8K, 16 K, 16K-R,<br />
216×340mm<br />
Metric models: Ledger, Legal, Letter, Letter-R,<br />
Statement, Statement-R, Oficio II, 11×15", 8K,<br />
16K, 16K-R<br />
Hagaki, Oufuku hagaki, Custom 1 to 4<br />
Inch models<br />
Horizontal: 2.00 to 17.00" (in 0.01" increments),<br />
Vertical: 2.00 to 11.69" (in 0.01" increments)<br />
Metric models<br />
Horizontal: 50 to 432 mm (in 1 mm increments),<br />
Vertical: 50 to 297 mm (in 1 mm increments)<br />
* Regarding the setting method of Custom Original Size (Custom 1 to 4), refer to Custom<br />
Original Size on page 9-4.<br />
** The input units can be changed in the System menu.<br />
Refer to Measurement on page 9-12.
Use the procedure below to select the original size when sending scanned images.<br />
Original Size<br />
Original : A4<br />
Zoom : 100%<br />
Send : A4<br />
Preview<br />
Status<br />
Original Size<br />
Original<br />
Zoom<br />
Send<br />
Status<br />
Add Shortcut<br />
Add Shortcut<br />
Standard<br />
Sizes 1<br />
Standard<br />
Sizes 2<br />
Others<br />
Size Entry<br />
Standard<br />
Sizes 1<br />
Standard<br />
Sizes 2<br />
Others<br />
Size Entry<br />
: 210x297mm<br />
: 100%<br />
: A4<br />
Preview<br />
X<br />
Y<br />
Auto<br />
A4<br />
A6<br />
B5<br />
216x340mm<br />
# Keys<br />
# Keys<br />
A3<br />
A5<br />
B4<br />
A4<br />
A5<br />
B5<br />
B6 B6<br />
Destination<br />
Cancel OK<br />
(50 - 432)<br />
(50 - 297)<br />
297 mm<br />
210 mm<br />
10/10/2010 10:10<br />
Destination<br />
Cancel OK<br />
10/10/2010 10:10<br />
6-3<br />
1 Press the Send key.<br />
2 Place the originals on the platen.<br />
Sending Functions<br />
3 Press [Org./Sending Data Format] and then<br />
[Original Size].<br />
4 Press [Standard Sizes 1], [Standard Sizes 2],<br />
[Others], or [Size Entry] to select the original size.<br />
When you have selected [Size Entry], press [+] or<br />
[-] to set the sizes of X (horizontal) and Y (vertical).<br />
By pressing [# Keys], you can use the numeric<br />
keys.<br />
5 Press [OK].<br />
6 Specify the destination, and press the Start key to<br />
start sending.<br />
6
Sending Size<br />
Select the sending size (the size of image to be sent).<br />
The table below lists the sizes.<br />
Item Detail Size<br />
Standard<br />
Sizes 1<br />
Standard<br />
Sizes 2<br />
Select from Same<br />
as Original Size or<br />
Standard Size.<br />
Select from<br />
standard size<br />
except Standard<br />
Sizes 1.<br />
Others Select from<br />
Hagaki.<br />
Relationship between Original Size, Sending Size, and Zoom<br />
Inch models: Same as Original Size, Ledger,<br />
Legal, Letter, Statement, Oficio II, 11×15"<br />
Metric models: Same as Original Size, A3, B4, A4,<br />
B5, A5, B6, A6, Folio, 216 × 340mm<br />
Inch models: A3, B4, A4, B5, A5, B6, A6, Folio,<br />
8K, 16K, 216 × 340mm<br />
Metric models: Ledger, Legal, Letter, Statement,<br />
Oficio II, 11×15", 8K, 16K<br />
6-4<br />
Sending Functions<br />
Original Size (page 6-2), Sending Size, and Zoom (page 6-6) are related to each other. Refer to the following<br />
table.<br />
Original Size and the size you<br />
wish to send as are<br />
Hagaki, Oufuku hagaki<br />
Original Size Specify as<br />
necessary<br />
Sending Size Select [Same as<br />
Original]<br />
Zoom Select [100%]<br />
(or [Auto])<br />
the same different<br />
Specify as<br />
necessary<br />
Select the<br />
required size<br />
Select [Auto]<br />
NOTE: When you select Sending Size that is different from Original Size, and select the Zoom [100%], you<br />
can send the image as the actual size (No Zoom).
Use the procedure below to select the size for transmission when sending scanned images.<br />
Sending Size<br />
Original<br />
Zoom<br />
Send<br />
Status<br />
: A4<br />
: 100%<br />
:<br />
A4<br />
Preview<br />
Add Shortcut<br />
Standard<br />
Sizes 1<br />
Standard<br />
Sizes 2<br />
Others<br />
Same as<br />
Original Size<br />
A3<br />
A5 A6<br />
A4<br />
B4<br />
Destination<br />
B5 B6 216x340mm<br />
Cancel OK<br />
10/10/2010 10:10<br />
6-5<br />
1 Press the Send Key.<br />
2 Place the originals on the platen.<br />
Sending Functions<br />
3 Press [Org./Sending Data Format] and then<br />
[Sending Size].<br />
4 Press [Standard Sizes 1], [Standard Sizes 2], or<br />
[Others] to select the sending size.<br />
5 Press [OK].<br />
6 Specify the destination, and press the Start key to<br />
start sending.<br />
6
Zoom<br />
Scans the original by automatically zooming it depending on the sending size.<br />
The table below lists the available options.<br />
6-6<br />
Sending Functions<br />
NOTE: When zooming in or out, see Sending Size on page 6-4 when selecting the sending size.<br />
Depending on the combination of original size and sending size, the image is placed at the edge of the paper.<br />
To select the original size vertically and horizontally on the page, use the centering setting described in<br />
Centering on page 6-7.<br />
Use the procedure below to enlarge or reduce the original to match the transmission size.<br />
Zoom<br />
Original<br />
Zoom<br />
Send<br />
Status<br />
: A4<br />
: 100%<br />
:<br />
A4<br />
Preview<br />
Add Shortcut<br />
Item Detail<br />
100% No Zoom (to be scanned at actual size)<br />
Auto Zoomed automatically according to the specified sending size.<br />
Enlarge or reduce the original.<br />
[100%]: Produce at actual size.<br />
[Auto]: Enlarge or reduce to match the required size.<br />
100%<br />
Auto<br />
Destination<br />
Cancel OK<br />
10/10/2010 10:10<br />
1 Press the Send key.<br />
2 Place the originals on the platen.<br />
3 Select the transmission size.<br />
4 Press [Advanced Setup] and then [Zoom].<br />
5 Press [100%] or [Auto].<br />
6 Press [OK].<br />
7 Specify the destination, and press the Start key to<br />
start sending.
Centering<br />
6-7<br />
Sending Functions<br />
When you have scanned the original after specifying the original size and sending size, depending on these<br />
sizes, a margin is created at the bottom, left, or right side of paper. By using the centering, the image is placed<br />
with a margin equally created at each of the page Top/Bottom and Left/Right.<br />
Use the procedure below to center the image when sending a scanned image.<br />
1 Press the Send key.<br />
2 Place the originals on the platen.<br />
3 Press [Advanced Setup] and then [Centering].<br />
4 Press [On]. Centering is performed.<br />
5 Press [OK].<br />
6 Specify the destination, and press the Start key to<br />
start sending.<br />
6
Mixed Size Originals<br />
6-8<br />
Sending Functions<br />
Using the document processor, the originals of different sizes can be placed in a batch and sent. In this<br />
operation, up to 30 originals of different sizes can be placed in the document processor at the same time.<br />
Originals of the Same Width<br />
When the original widths are the same, the combinations of originals that can be placed are as follows.<br />
• Ledger and Letter (A3 and A4)<br />
• Legal and Letter-R (A4-R and Folio)<br />
• B4 and B5<br />
Ledger<br />
(A3)<br />
Legal<br />
(Folio)<br />
Letter<br />
(A4)<br />
Letter-R<br />
(A4-R)<br />
Letter<br />
(A4)<br />
Ledger<br />
(A3)<br />
Letter-R Legal<br />
(A4-R)<br />
(Folio)
Originals of Different Widths (Available for metric models only)<br />
The combinations of originals of different sizes that can be placed together are as follows.<br />
6-9<br />
Sending Functions<br />
NOTE: When mixing the original sizes as using the following combination: A4-R, B5-R, and Folio, make sure<br />
to set the System Menu key -> Common Settings -> Original / Paper Settings -> Original Auto Detect to [On]<br />
for [Folio]. For more information, refer to Original Auto Detect (Available for metric models only) on page 9-10.<br />
• A3, B4, A4, B5<br />
• B4, A4-R, B5<br />
• A4-R, B5-R, Folio<br />
B4 A4-R B5<br />
A4-R<br />
B5-R<br />
A4-R B4<br />
B5<br />
B5-R<br />
A4-R<br />
6
Use the procedure below to send mixed size originals as a batch.<br />
Mixed Size Originals<br />
Original<br />
Zoom<br />
Send<br />
Status<br />
: A4<br />
: 100%<br />
:<br />
A4<br />
Preview<br />
Add Shortcut<br />
Scan all sheets in the document processor,<br />
even if differently sized, then send.<br />
*Up to 30 sheets can be placed in<br />
the document processor for mixed<br />
size originals.<br />
Off Same Width<br />
Different<br />
Width<br />
Destination<br />
Cancel OK<br />
10/10/2010 10:10<br />
6-10<br />
1 Press the Send key.<br />
Sending Functions<br />
2 Place the original into the document processor.<br />
IMPOR<strong>TA</strong>NT: When placing originals of different width,<br />
arrange the originals so that their left sides and top<br />
sides are aligned, and place the originals in alignment<br />
with the far width guide. If the originals are not aligned<br />
in this way, they may not be scanned correctly, and<br />
skewing or original jams may result.<br />
3 Press [Org./Sending Data Format] and then [Mixed<br />
Size Originals].<br />
4 Select the combination of originals from<br />
[Same Width] and [Different Width].<br />
5 Press [OK].<br />
6 Specify the destination, and press the Start key to<br />
start sending.
2-sided/Book Original<br />
Select the type and binding of the original depending on the original.<br />
The table below lists the binding directions for each original type.<br />
6-11<br />
Sending Functions<br />
Use the procedure below to select the original type and binding direction when sending scanned originals.<br />
2-sided/Book Original<br />
Original<br />
Zoom<br />
Send<br />
Status<br />
: A4<br />
: 100%<br />
: A4<br />
Preview<br />
Add Shortcut<br />
1-sided<br />
2-sided<br />
Book<br />
Original Type Binding<br />
1-sided Sheet Original 1-sided —<br />
2-sided Sheet Original 2-sided Binding Left/Right,<br />
Binding Top<br />
Open Book Original such<br />
as magazine and book<br />
Binding<br />
Left<br />
Right<br />
Destination<br />
Top Edge<br />
on Top<br />
Original<br />
Orientation<br />
Cancel OK<br />
10/10/2010 10:10<br />
Book Binding Left,<br />
Binding Right<br />
1 Press the Send key.<br />
2 Place the originals on the platen.<br />
3 Press [Org./Sending Data Format] and then [2sided/Book<br />
Original].<br />
4 Press [1-sided], [2-sided], or [Book].<br />
5 When selecting [2-sided], select the binding<br />
direction and press [Original Orientation] to select<br />
the direction in which the original is set on the<br />
platen.<br />
When selecting [Book], select the binding direction.<br />
6 Press [OK].<br />
7 Specify the destination, and press the Start key to<br />
start sending.<br />
6
Original Orientation<br />
6-12<br />
Sending Functions<br />
To send the document in the orientation that can be read properly, specify the upper orientation of the original .<br />
To use the functions below, select the orientation in which the original is set on the platen.<br />
• 2-sided/Book Original<br />
• Border Erase<br />
NOTE: If [On] is selected as the Orientation Confirmation (page 9-16) setting in the System Menu, the<br />
selection screen for original orientation appears when you select any of the above functions.<br />
When placing the original on the platen<br />
Original [Top Edge on Top] [Top Edge on Left]<br />
When placing the original on the document processor<br />
Original [Top Edge on Top] [Top Edge on Left]
6-13<br />
Sending Functions<br />
Use the procedure below to select the orientation when placing the originals on the platen for sending.<br />
Original Orientation<br />
Original<br />
Zoom<br />
Send<br />
Status<br />
: A4<br />
: 100%<br />
:<br />
A4<br />
Preview<br />
Add Shortcut<br />
Select the orientation of the<br />
original document's top edge.<br />
Top Edge<br />
on Top<br />
Top Edge<br />
on Left<br />
Destination<br />
Cancel OK<br />
10/10/2010 10:10<br />
1 Press the Send key.<br />
2 Place the originals on the platen.<br />
3 Press [Org./Sending Data Format] and then<br />
[Original Orientation].<br />
4 Select original orientation from [Top Edge on Top]<br />
and [Top Edge on Left].<br />
5 Press [OK].<br />
6 Specify the destination, and press the Start key to<br />
start sending.<br />
6
File Format<br />
Select the file format of the image to send.<br />
The table below lists the file formats and their details.<br />
File Format<br />
PDF*<br />
Adjustable range of image<br />
quality<br />
1 Low Quality (High Comp.) to<br />
5 High Quality (Low Comp.)<br />
TIFF 1 Low Quality (High Comp.) to<br />
5 High Quality (Low Comp.)<br />
JPEG 1 Low Quality (High Comp.) to<br />
5 High Quality (Low Comp.)<br />
XPS 1 Low Quality (High Comp.) to<br />
5 High Quality (Low Comp.)<br />
High Comp.<br />
PDF*<br />
Compression Ratio Priority to<br />
Quality Priority<br />
* The file format can be set to [PDF/A-1a] or [PDF/A-1b].<br />
NOTE: When [High Comp. PDF] is specified, you cannot adjust the image quality.<br />
You can use PDF encryption functions. For details, see PDF Encryption Functions on page 6-16<br />
6-14<br />
Color mode<br />
Auto Color (Color/Grayscale), Auto<br />
Color (Color/Black and White), Full<br />
Color, Grayscale, Black and White<br />
Auto Color (Color/Grayscale), Auto<br />
Color (Color/Black and White), Full<br />
Color, Grayscale, Black and White<br />
Auto Color (Color/Grayscale), Full<br />
Color, Grayscale<br />
Auto Color (Color/Grayscale), Auto<br />
Color (Color/Black and White), Full<br />
Color, Grayscale, Black and White<br />
Auto Color (Color/Grayscale), Auto<br />
Color (Color/Black and White), Full<br />
Color, Grayscale<br />
Sending Functions
Use the procedures below to select the file format for transmission.<br />
File Format<br />
Original<br />
Zoom<br />
Send<br />
Status<br />
: A4<br />
: 100%<br />
: A4<br />
Preview<br />
Add Shortcut<br />
PDF<br />
TIFF<br />
JPEG<br />
XPS<br />
High Comp.<br />
PDF<br />
File Separation<br />
Image Quality<br />
Compression<br />
Ratio Priority<br />
Off<br />
Destination<br />
Standard Quality<br />
Priority<br />
Off<br />
PDF/A<br />
Encryption<br />
Cancel OK<br />
10/10/2010 10:10<br />
6-15<br />
1 Press the Send key.<br />
2 Place the originals on the platen.<br />
Sending Functions<br />
3 Press [Org./Sending Data Format] and then [File<br />
Format].<br />
4 Select the file format from [PDF], [TIFF], [JPEG],<br />
[XPS], and [High Comp. PDF].<br />
When the color mode in scanning has been<br />
selected for Grayscale or Full Color, set the image<br />
quality.<br />
If you selected [PDF] or [High Comp. PDF], you can<br />
specify encryption or PDF/A settings.<br />
NOTE: If encryption is enabled, PDF/A settings<br />
cannot be specified.<br />
5 Press [OK].<br />
6 Specify the destination, and press the Start key to<br />
start sending.<br />
Create several files by dividing scanned original data page by page, and send the files.<br />
Use the procedures below to split scanned original data into separate files when sending scanned originals.<br />
File Separation<br />
Original<br />
Zoom<br />
Send<br />
Status<br />
: A4<br />
: 100%<br />
:<br />
A4<br />
Preview<br />
Add Shortcut<br />
Create and send a file for each page<br />
of the original that was read.<br />
Off Each Page<br />
Destination<br />
Cancel OK<br />
10/10/2010 10:10<br />
1 Press the Send key.<br />
2 Place the originals on the platen.<br />
3 Press [Org./Sending Data Format] and then [File<br />
Separation].<br />
4 Press [Each Page] to set File Separation.<br />
5 Press [OK].<br />
6 Specify the destination, and press the Start key.<br />
The scanned originals are sent after being divided<br />
into files of one page each.<br />
NOTE: A three-digit serial number such as<br />
abc_001.pdf, abc_002.pdf... is attached to the end of<br />
the file name.<br />
6
PDF Encryption Functions<br />
6-16<br />
Sending Functions<br />
If you have selected PDF or High Comp. PDF for file format, you can restrict the access level for displaying,<br />
printing, and editing PDF's by assigning a secure password.<br />
The items you can restrict the access level with are as follows.<br />
When you send a PDF file, use the procedures below to encrypt the PDF file for transmission.<br />
File Format - Encryption<br />
Item Value Detail<br />
Compatibility Acrobat 3.0 or later,<br />
Acrobat 5.0 or later<br />
Password to<br />
Open<br />
Document<br />
Password to<br />
Edit/Print<br />
Document<br />
Compatibility Acrobat 3.0 and later<br />
Encryption Level: Middle(40-bit)<br />
Password to Open<br />
Document<br />
Off<br />
Password<br />
On<br />
Confirmation<br />
Password<br />
to Edit/Print<br />
Document<br />
Status<br />
Off<br />
On<br />
Select the version that is compatible with the PDF file.<br />
Off, On Enter the password to open the PDF file<br />
Off, On Enter the password to edit the PDF file<br />
When you have entered the password to edit/print<br />
document, you can specifically limit the operation.<br />
Password<br />
Confirmation<br />
Cancel OK<br />
Detail<br />
10/10/2010 10:10<br />
1 Press the Send key.<br />
2 Place the originals on the platen.<br />
3 Press [Org./Sending Data Format], [File Format],<br />
[PDF] or [High Comp. PDF], and [Encryption].<br />
4 Press [ ] of Compatibility, select Acrobat 3.0 and<br />
later or Acrobat 5.0 and later.<br />
5 When you enter the password to open the PDF file,<br />
select [On] of Password to Open Document.<br />
6 Press [Password], enter a password (up to 256<br />
characters) and then press [OK].<br />
NOTE: Refer to the Character Entry Method on page<br />
Appendix-8 for details on entering characters.<br />
7 Press [Confirmation] and enter the password again<br />
for confirmation. Then press [OK].<br />
8 When you enter the password to edit the PDF file,<br />
select [On] of Password to Edit/Print Document.<br />
9 In the same way as the entry of Password to Open<br />
Document, enter the password to change the PDF<br />
file.<br />
10 Press [Detail].
File Format - Detail<br />
Printing Allowed Not Allowed<br />
Changes Allowed Not Allowed<br />
Copying of Text/Images/Others<br />
Status<br />
Disable<br />
Enable<br />
Cancel OK<br />
The table below shows the available settings.<br />
The table below shows the available settings.<br />
10/10/2010 10:10<br />
Item Detail<br />
6-17<br />
Sending Functions<br />
11 Restrict the access level of the PDF file. Press [ ]<br />
of Printing Allowed to select the item (the scope of<br />
limit). The item to be displayed differs according to<br />
the version of Acrobat selected in Compatibility in<br />
step 4.<br />
Not Allowed Make the printing of PDF file impossible<br />
Allowed (Low Resolution only)*<br />
Can print the PDF file only in low resolution<br />
Allowed Can print the PDF file in original resolution<br />
* Only displayed when [Acrobat 5.0 and later] is selected in Compatibility.<br />
Item Detail<br />
Not Allowed Cannot change the PDF file<br />
Inserting/Deleting/Rotating Pages*<br />
12 Press [ ] of Changes Allowed, and select the<br />
item (the scope of limit). The item to be displayed<br />
differs according to the version of Acrobat selected<br />
in Compatibility in step 4.<br />
Can only insert, delete, and rotate the pages of the<br />
PDF file<br />
Commenting Can only add commenting<br />
Page Layout except extracting<br />
Pages**<br />
Can change the page layout except extracting the<br />
pages of the PDF file<br />
Any except extracting Pages Can conduct all operations except extracting the pages<br />
of the PDF file<br />
* Only displayed when [Acrobat 5.0 and later] is selected in Compatibility.<br />
** Only displayed when [Acrobat 3.0 and later] is selected in Compatibility.<br />
13 From Copying of Text/Images/Others, select<br />
[Disable] or [Enable].<br />
6
The table below shows the available settings.<br />
Original Image<br />
Select the image quality suitable to the type of original.<br />
The table below shows the quality options.<br />
Use the procedures below to select the quality when sending scanned originals.<br />
Original Image<br />
Original<br />
Zoom<br />
Send<br />
Status<br />
: A4<br />
: 100%<br />
:<br />
A4<br />
Preview<br />
Add Shortcut<br />
Item Detail<br />
Disable Prohibit the copying of text and objects on the PDF file.<br />
Enable Can copy text and objects on the PDF file.<br />
Item Detail<br />
Text+Photo Text and photos together.<br />
Photo For photos taken with a camera.<br />
Text*<br />
Only text, no photos.<br />
6-18<br />
Sending Functions<br />
14 Press [OK] three times to return to Orig./Sending<br />
Data Format.<br />
15 Specify the destination, and press the Start key to<br />
start sending.<br />
* The for OCR setting can be turned on. When [On] is selected, scanning<br />
produces an image that is suitable for OCR. This function is only available<br />
for black and white mode.<br />
Text+Photo<br />
Photo<br />
Text<br />
Select original image type<br />
for best results.<br />
Destination<br />
Cancel OK<br />
10/10/2010 10:10<br />
1 Press the Send key.<br />
2 Place the originals on the platen.<br />
3 Press [Color/Image Quality] and then [Original<br />
Image].<br />
4 Select the original image.<br />
5 Press [OK].<br />
6 Specify the destination, and press the Start key to<br />
start sending.
Density<br />
Use the procedure below to adjust the density when scanning the originals.<br />
You can adjust density using 13 levels.<br />
The procedures for adjusting the density is explained below.<br />
Density<br />
Original<br />
Zoom<br />
Send<br />
Status<br />
: A4<br />
: 100%<br />
: A4<br />
Preview<br />
Add Shortcut<br />
Auto<br />
Lighter<br />
-3<br />
-2<br />
-1<br />
Normal<br />
0 +1 +2 +3<br />
-2.5 -1.5 -0.5 +0.5 +1.5 +2.5<br />
Destination<br />
Cancel OK<br />
Darker<br />
10/10/2010 10:10<br />
6-19<br />
1 Press the Send key.<br />
2 Place the originals on the platen.<br />
Sending Functions<br />
3 Press [Color/Image Quality] and then [Density].<br />
4 Press [-3] to [+3] (Lighter - Darker) to adjust<br />
density.<br />
5 Press [OK].<br />
6 Specify the destination, and press the Start key to<br />
start sending.<br />
6
Scan Resolution<br />
6-20<br />
Sending Functions<br />
Select the fineness of scanning resolution. The finer the scanning becomes (the larger the number becomes),<br />
the better the image quality becomes. However, better resolution also results in larger file size (file capacity) and<br />
longer scanning and sending times. The selectable resolution is 200x100dpi Normal, 200x200dpi Fine,<br />
200x400dpi Super Fine, 300x300dpi, 400x400dpi Ultra Fine, or 600x600dpi.<br />
The procedures for adjusting the scanning resolution when sending a scanned image is explained below.<br />
Scan Resolution<br />
Original<br />
Zoom<br />
Send<br />
Status<br />
: A4<br />
: 100%<br />
:<br />
A4<br />
Preview<br />
Add Shortcut<br />
Select fineness of scanning resolution.<br />
The larger the number, the better the<br />
image resolution.<br />
600x600dpi<br />
200x400dpi<br />
Super Fine<br />
400x400dpi<br />
Ultra Fine<br />
200x200dpi<br />
Fine<br />
300x300dpi<br />
200x100dpi<br />
Normal<br />
Destination<br />
Cancel OK<br />
10/10/2010 10:10<br />
1 Press the Send key.<br />
2 Place the originals on the platen.<br />
3 Press [Color/Image Quality] and then [Scan<br />
Resolution].<br />
4 Select the resolution.<br />
5 Press [OK].<br />
6 Specify the destination, and press the Start key to<br />
start sending.
Sharpness<br />
Select the sharpness of the image outline.<br />
The table below shows the available settings.<br />
Use the procedure below to set the sharpness when sending scanned images.<br />
Sharpness<br />
Original<br />
Zoom<br />
Send<br />
Status<br />
: A4<br />
: 100%<br />
:<br />
A4<br />
Preview<br />
Add Shortcut<br />
Item Detail<br />
All Sharpen Emphasize the image outline.<br />
Blur Blur the image outline. Can weaken a Moire<br />
effect (grids appearing as wavelike patterns<br />
when scanning printed photos).<br />
Text/Fine Line Normal Make letters and lines appear sharper.<br />
Only text and fine lines are emphasized.<br />
Sharpen<br />
All<br />
Text/Fine Line<br />
Sharpness<br />
Blur<br />
-3<br />
-2<br />
-1<br />
Destination<br />
Cancel OK<br />
Sharpen<br />
0 1 2 3<br />
10/10/2010 10:10<br />
6-21<br />
1 Press the Send key.<br />
2 Place the originals on the platen.<br />
Sending Functions<br />
3 Press [Color/Image Quality] and then [Sharpness].<br />
4 Press [All] or [Text/Fine Line].<br />
5 When [All] is selected, press [-3] to [+3] (Blur -<br />
Sharpen) to adjust the sharpness.<br />
When [Text/Fine Line] is selected, press [0] to [3]<br />
(Normal - Sharpen) to adjust the sharpness.<br />
6 Press [OK].<br />
7 Specify the destination, and press the Start key to<br />
start sending.<br />
6
Background Density Adj.<br />
6-22<br />
Sending Functions<br />
Remove dark background from originals, such as newspapers. The smaller the number becomes lighter the<br />
background becomes. If the ground color is obtrusive, select [Auto]. If [Auto] does not remove the ground color,<br />
select [Manual] and adjust the density of the ground color.<br />
Use the procedure below to set the background density when sending scanned images.<br />
Background Density Adj.<br />
Original<br />
Zoom<br />
Send<br />
Status<br />
: A4<br />
: 100%<br />
:<br />
A4<br />
Preview<br />
Add Shortcut<br />
Off<br />
Auto<br />
Manual<br />
Background<br />
Destination<br />
Lighter Darker<br />
1 2 3 4 5<br />
Cancel OK<br />
10/10/2010 10:10<br />
1 Press the Send key.<br />
2 Place the originals on the platen.<br />
3 Press [Color/Image Quality] and then [Background<br />
Density Adj.].<br />
4 Press [Auto] or [Manual].<br />
5 When [Manual] is selected, press [1] to [5] (Lighter<br />
- Darker) to adjust the background density.<br />
6 Press [OK].<br />
7 Specify the destination, and press the Start key to<br />
start sending.
Color Selection<br />
6-23<br />
Sending Functions<br />
This feature allows you to select the color mode used for scanning when sending images. You can select from<br />
Auto Color (Color/Gray), Auto Color (Color/B & W), Full Color, Grayscale or Black & White.<br />
Use the procedure below to select the color mode when sending scanned images.<br />
Color Selection<br />
Original<br />
Zoom<br />
Send<br />
Status<br />
: A4<br />
: 100%<br />
:<br />
A4<br />
Preview<br />
Add Shortcut<br />
Select scanning color.<br />
Use [Auto Color] to automatically produce color originals<br />
in full color and black & white originals in black & white.<br />
Auto Color<br />
(Color/Gray)<br />
Full Color<br />
Auto Color<br />
(Color/B & W)<br />
Grayscale<br />
Black & White<br />
Destination<br />
Cancel OK<br />
10/10/2010 10:10<br />
1 Press the Send key.<br />
2 Place the originals on the platen.<br />
3 Press [Color/Image Quality] and then [Color<br />
Selection].<br />
4 Select the color mode to be used for scanning.<br />
5 Press [OK].<br />
6 Specify the destination, and press the Start key to<br />
start sending.<br />
6
Continuous Scan<br />
6-24<br />
Sending Functions<br />
When the multi-page originals cannot be placed in the document processor at one time, the originals can be<br />
scanned in separate batches and then sent as one job. With this function, originals can be scanned one after<br />
another until you press [Finish Scan].<br />
Any of the following settings can be changed during scanning.<br />
• Original Size<br />
• Original Orientation<br />
• 2-sided/Book Original<br />
• Density<br />
• Original Image<br />
• Scan Resolution<br />
• Color Selection<br />
• Sending Size<br />
• Zoom<br />
• Border Erase<br />
• Prevent Bleed-thru<br />
• FAX TX Resolution (For details, refer to Fax System (V) Operation Guide.)<br />
The procedure for using continuous scanning when sending scanned images is explained below.<br />
Continuous Scan<br />
Original<br />
Zoom<br />
Send<br />
Status<br />
: A4<br />
: 100%<br />
:<br />
A4<br />
Preview<br />
Add Shortcut<br />
Scan a large number of originals<br />
in separate batches and then produce<br />
as one job.<br />
*Settings can be changed during scanning.<br />
Off On<br />
Destination<br />
Cancel OK<br />
10/10/2010 10:10<br />
1 Press the Send key.<br />
2 Press [Advanced Setup] and then [Continuous<br />
Scan].<br />
3 Press [On]. Continuous Scan is selected.<br />
4 Press [OK].<br />
5 Specify the destination.<br />
6 Place the original, and press the Start key.<br />
When the scanning is completed, change the<br />
settings as necessary.<br />
7 Place the next original, and press the Start key. Scan<br />
the remaining originals by the same procedure.<br />
When you have scanned all the originals, press<br />
[Finish Scan] to start sending.
Prevent Bleed-thru<br />
Hide background colors and image bleed-through when scanning thin originals.<br />
Use the procedure below to set the prevent bleed-thru when sending scanned images.<br />
Prevent Bleed-thru<br />
Original<br />
Zoom<br />
Send<br />
Status<br />
: A4<br />
: 100%<br />
:<br />
A4<br />
Preview<br />
Add Shortcut<br />
Hide background colors and image bleed-through<br />
when scanning thin original.<br />
Off<br />
On<br />
Destination<br />
Cancel OK<br />
10/10/2010 10:10<br />
6-25<br />
1 Press the Send key.<br />
2 Place the originals on the platen.<br />
Sending Functions<br />
3 Press [Color/Image Quality] and then press<br />
[Prevent Bleed-thru].<br />
4 Press [On]. Prevent Bleed-thru is selected.<br />
5 Press [OK].<br />
6 Specify the destination, and press the Start key to<br />
start sending.<br />
6
Border Erase<br />
6-26<br />
Sending Functions<br />
Use Border Erase to remove black shadows that appear around the outside of the original when scanning and<br />
sending originals. The following options can be selected.<br />
Border Erase Sheet<br />
Border Erase Book<br />
Individual Border Erase<br />
Original Copy<br />
Original Copy<br />
Original Copy<br />
In each option, the available ranges are as below.<br />
Input units Border Erase Range<br />
Inch models 0 to 2" (in 0.01" increments)<br />
Metric models 0 mm to 50 mm (in 1-mm increments)<br />
Erases black borders around the single sheet original.<br />
Erases black borders around the edges and in the<br />
middle of the original such as a thick book. You can<br />
specify the widths individually to erase the borders<br />
around the edges and in the center of the book.<br />
Specify border erase widths individually for all edges.
Border Erase to Back Page<br />
6-27<br />
Sending Functions<br />
When scanning a 2-sided original, this allows you to erase the borders on the back of the original. The table<br />
below shows the available settings.<br />
Same as Front<br />
Page<br />
Item Detail<br />
Border Erase performed using the same setting as the<br />
front page<br />
Do Not Erase No Border Erase performed on the back page<br />
Use the procedure below to erase borders when sending scanned originals.<br />
Border Erase<br />
Original<br />
Zoom<br />
Send<br />
Status<br />
: A4<br />
: 100%<br />
: A4<br />
Preview<br />
Border Erase<br />
Original<br />
Zoom<br />
Send<br />
Status<br />
Add Shortcut<br />
: A4<br />
: 100%<br />
:<br />
A4<br />
Preview<br />
Add Shortcut<br />
Off<br />
Off<br />
Border Erase<br />
Sheet<br />
Border Erase<br />
Book<br />
Individual<br />
Border Erase<br />
Border Erase<br />
Sheet<br />
Border Erase<br />
Book<br />
Individual<br />
Border Erase<br />
Border<br />
Gutter<br />
Top<br />
Bottom<br />
Left<br />
Right<br />
(0 - 50)<br />
# Keys<br />
(0 - 50)<br />
# Keys<br />
6 mm<br />
6 mm<br />
Destination<br />
Same as<br />
Front Page<br />
Back Page<br />
Cancel OK<br />
(0 - 50)<br />
6 mm<br />
6<br />
mm<br />
6<br />
mm<br />
6 mm<br />
# Keys<br />
10/10/2010 10:10<br />
Destination<br />
Same as<br />
Front Page<br />
Back Page<br />
Top Edge<br />
on Top<br />
Original<br />
Orientation<br />
Cancel OK<br />
10/10/2010 10:10<br />
1 Press the Send key.<br />
2 Place the originals on the platen.<br />
3 Press [Advanced Setup] and then [Border Erase].<br />
4 Press [Border Erase Sheet] to erase borders for an<br />
individual sheet or [Border Erase Book] to erase<br />
borders for a book.<br />
Use [+] or [-] to enter the width in Border or Gutter.<br />
Press [# Keys] to use the number keys for entry.<br />
Press [Individual Border Erase] to select the<br />
individual border erase.<br />
Use [+] or [-] to enter the border width or press [#<br />
Keys] and enter the width using the numeric keys.<br />
Press [Original Orientation] to select the original<br />
orientation from either [Top Edge on Top] or [Top<br />
Edge on Left], and press [OK].<br />
For 2-sided originals, press [Back Page] and then<br />
press [Same as Front Page] or [Do Not Erase].<br />
5 Press [OK].<br />
6 Specify the destination, and press the Start key to<br />
start sending.<br />
6
File Name Entry<br />
6-28<br />
Sending Functions<br />
This setting allows you to assign a document name to scanned images. A job number and the date and time can<br />
be added. You can specify a default for the document name.<br />
Use the procedure below to assign names to scanned documents that you are sending.<br />
File Name Entry<br />
Status<br />
Add a file name.<br />
Additional information such as Job No.<br />
and Date and Time can also be set.<br />
File Name<br />
Additional Info<br />
Add Shortcut<br />
doc<br />
[ Date and Time ]<br />
Job No.<br />
Date and Time<br />
Destination<br />
Cancel OK<br />
10/10/2010 10:10<br />
1 Press the Send key.<br />
2 Place the originals on the platen.<br />
3 Press [Advanced Setup] and then [File Name<br />
Entry].<br />
4 Press [File Name].<br />
5 Enter the document name, and press [OK].<br />
NOTE: Up to 32 characters can be entered for the<br />
document name.<br />
6 Press [Job No.] to enter the job No., and [Date and<br />
Time] to enter the date and time.<br />
7 Press [OK].<br />
8 Specify the destination, and press the Start key to<br />
start sending.
E-mail Subject/Body<br />
When sending E-mail, enter the subject and body of the E-mail.<br />
6-29<br />
Sending Functions<br />
Use the procedure below to enter the subject and body for an E-mail message and then send the E-mail.<br />
E-mail Subject/Body<br />
Original<br />
Zoom<br />
Send<br />
Status<br />
: A4<br />
: 100%<br />
:<br />
A4<br />
Preview<br />
Add Shortcut<br />
Subject<br />
Body<br />
Template Body 1 Body 2 Body 3<br />
Destination<br />
Cancel OK<br />
10/10/2010 10:10<br />
1 Press the Send key.<br />
2 Place the originals on the platen.<br />
3 Press [Advanced Setup] and then [E-mail Subject/<br />
Body].<br />
4 Press [Subject].<br />
5 Enter the subject, and press [OK].<br />
NOTE: Up to 60 characters can be entered for the<br />
subject.<br />
6 Press [Body].<br />
7 Enter the body and press [OK].<br />
NOTE: Up to 500 characters can be entered for the<br />
body.<br />
8 You can press [Body 1], [Body 2], or [Body 3] to<br />
enter stored text for the body text.<br />
NOTE: For details on registering templates, refer to<br />
E-mail Subject/Body on page 9-27.<br />
9 Press [OK].<br />
10 Specify the destination, and press the Start key to<br />
start sending.<br />
6
WSD Scan/DSM Scan<br />
WSD Scan (Windows 7, Windows Vista and Windows Server 2008)<br />
6-30<br />
Sending Functions<br />
WSD Scan saves images of originals scanned on this machine as files on a WSD-compatible computer.<br />
NOTE: To use WSD Scan, confirm that the computer used for WSD scanning and the machine is networkconnected,<br />
and WSD Scan (page 9-100) is set to On in the network settings. For information on operating the<br />
computer, refer to the computer’s help or the operation guide of your software.<br />
Installing Driver Software (for Windows 7)<br />
Procedure Using this machine<br />
1 Click Start and then Network in the computer.<br />
2 Right-click the machine’s icon (Brand Name:<br />
XXX:XXX) and then click Install.<br />
NOTE: If the User Account Control window appears,<br />
click Continue.<br />
If the Found New Hardware window appears, click<br />
Cancel.<br />
3 During the installation, double-click the icon shown<br />
on the task bar to display the Driver Software<br />
Installation screen. When Your devices are<br />
ready to use is displayed on the Driver Software<br />
Installation screen, the installation is completed.<br />
1 Press the Send Key.<br />
Displays the screen for sending.<br />
NOTE: Depending on the settings, the address book<br />
screen may appear. In this event, press [Cancel] to<br />
display the screen for sending.<br />
2 Place the originals in the document processor or on<br />
the platen.<br />
3 Press [WSD Scan/DSM Scan].<br />
4 Press [From Operation Panel] and press [Next].
WSD Scan - Selecting Computer<br />
Status<br />
pc000101<br />
pc000102<br />
pc000103<br />
pc000104<br />
pc000105<br />
Select the destination computer and press [OK].<br />
Computer Name<br />
Cancel<br />
Procedure Using WSD Scan from Your Computer<br />
1/1<br />
Reload<br />
Detail<br />
Back OK<br />
10/10/2010 10:10<br />
6-31<br />
Sending Functions<br />
5 Select the destination computer and press [OK].<br />
Press [Reload] to reload the computer list.<br />
You can view information on the selected computer<br />
by pressing [Detail].<br />
6 Select the type of originals, file format, etc., as<br />
necessary.<br />
7 Press the Start key. Sending begins and the<br />
software installed on the computer is activated.<br />
1 Press the Send Key.<br />
The send screen appears.<br />
NOTE: Depending on the settings, the address book<br />
screen may appear. In this event, press [Cancel] to<br />
display the screen for sending.<br />
2 Place the originals in the document processor or on<br />
the platen.<br />
3 Press [WSD Scan/DSM Scan].<br />
4 Press [From Computer] and press [Next].<br />
5 Use the software installed on the computer to send<br />
the images.<br />
6
DSM Scan (Windows Server 2008 R2 Only)<br />
6-32<br />
Sending Functions<br />
A scanned document can be automatically saved in any format or sent to any destination by reading a<br />
ScanProcess from Active Directory.<br />
NOTE:<br />
• If you are performing DSM scan, check the items below.<br />
• The machine is connected to an Active Directory on the network that the Scan Process can reference.<br />
• DSM Scan and LDAP are set to [On] in Protocol Detail (page 9-98) in Network.<br />
• SSL is set to [On] in Secure Protocol (page 9-101) in Network.<br />
• [Network Authentication] is set in User Login (page 10-2) in User Login Setting.<br />
• If the Active Directory that the Scan Process can reference is not on the network authentication server,<br />
DSM must be set in Embedded Web Server RX. For details, refer to the Embedded Web Server RX<br />
Operation Guide.<br />
DSM Scan - Selecting Scan Process<br />
Status<br />
Select the scan process and press [OK].<br />
ScanProcess001<br />
ScanProcess002<br />
ScanProcess003<br />
ScanProcess004<br />
ScanProcess005<br />
Scan Process Name<br />
Cancel<br />
1/1<br />
Reload<br />
Detail<br />
Back OK<br />
10/10/2010 10:10<br />
1 Press the Send Key.<br />
Displays the screen for sending.<br />
NOTE: Depending on the settings, the address book<br />
screen may appear. In this event, press [Cancel] to<br />
display the screen for sending.<br />
2 Place the originals in the document processor or on<br />
the platen.<br />
3 Press [WSD Scan/DSM Scan].<br />
If WSD Scan (page 9-100) is set to [Off] in the<br />
network settings, press [DSM Scan] and go to step 5<br />
4 Press [DSM Scan] and press [Next].<br />
5 Select the ScanProcess to be used and press [OK].<br />
Press [Reload] to reload the ScanProcess list.<br />
To check the settings, press [Detail].<br />
6 Change the settings and add destinations as needed.<br />
Only e-mail addresses can be added as destinations.<br />
In the send base screen, press [Detail/Edit],<br />
[Destination], and then [Address Book] or [E-mail<br />
Addr Entry], and add a destination.<br />
In some Scan Processes, it may not be possible to<br />
change settings or add destinations.<br />
7 Press the Start key. Sending begins.
Scanning using TWAIN<br />
6-33<br />
Sending Functions<br />
This section explains how to scan an original using TWAIN. The machine’s TWAIN/WIA can be used for two<br />
types of scanning: scanning a document placed in the machine, and scanning a document that has been stored<br />
in a custom box.<br />
The procedure for scanning using the TWAIN driver is explained as an example. The WIA driver is used in the<br />
same way.<br />
Scanning a document placed in the machine<br />
The settings that appear in the TWAIN dialog box are as follows.<br />
Original<br />
Configurations<br />
Send<br />
Configurations<br />
Image Quality<br />
Configurations<br />
Image Quality<br />
Settings<br />
Item Detail<br />
Original Size Select the scan size of the original.<br />
Original<br />
Orientation<br />
Specify the type of binding.<br />
1 Activate the TWAIN compatible application.<br />
2 Select the machine using the application and<br />
display the TWAIN dialog box.<br />
NOTE: For selecting the machine, see the Operation<br />
Guide or Help for each application software.<br />
3 Select scanning settings in the TWAIN dialog box<br />
that opens.<br />
Duplex Setting Specify whether the original is one-sided or two-sided.<br />
Color Setting Select the color mode.<br />
Resolution Select the resolution.<br />
Image Quality Select the image quality according to the type of original.<br />
Density Select the exposure.<br />
Prevent Bleed-thru Hide background colors and image bleed-through when<br />
scanning thin originals.<br />
6
Item Detail<br />
Scanning a document stored in a custom box<br />
6-34<br />
Sending Functions<br />
Configuration This is used to check current settings and store frequently used<br />
settings. When the Configuration button is clicked, a setting<br />
screen opens with buttons for Details, Add current<br />
configuration, and Delete selected configuration.<br />
Details Current settings can be checked.<br />
Add current Save current settings with a name and comment.<br />
configuration<br />
Delete selected Delete saved settings.<br />
configuration<br />
4 Place the originals on the platen or in the document<br />
processor.<br />
5 Click the Scan button.<br />
The document data is scanned.<br />
NOTE: To scan a document stored in a custom box, select a model name with (Box) from Model in the TWAIN<br />
driver settings screen.<br />
1 Activate the TWAIN compatible application.<br />
2 Select the machine using the application and<br />
display the TWAIN dialog box.<br />
NOTE: For selecting the machine, see the Operation<br />
Guide or Help for each application software.<br />
3 Select the Custom Box containing the document<br />
file to be scanned from the Box List. If a password<br />
has been set for the box, the password entry<br />
screen appears. Enter the password and click the<br />
OK button. When you select a box, the document<br />
files in the Custom Box appear in the Document<br />
List.
6-35<br />
Sending Functions<br />
4 Set how to display the document data. Click the<br />
Setting button to select each item.<br />
Item Detail<br />
View Change the display in the Document List field to List or Thumbnails.<br />
Delete After scanning the document data, delete the data from the Custom Box.<br />
Invert Invert the document data color to start scanning.<br />
5 Click the OK button.<br />
6 Select the document data to be scanned from<br />
Document List.<br />
Enter the document data name in the Search<br />
[Name] to find the data having the same document<br />
data name or the document data name with the<br />
same beginning.<br />
7 Click the Detail button to display the selected<br />
document data. When the document data includes<br />
multiple pages, select the checkbox beside the<br />
pages you want to scan. The selected pages will be<br />
scanned.<br />
NOTE: In this case, the scanned page or the selected<br />
document data will not be deleted from the Custom<br />
Box.<br />
8 Click the Acquire button. The document data is<br />
scanned.<br />
6
Job Finish Notice<br />
6-36<br />
Sending Functions<br />
Sends a notice by e-mail when a job is completed. Users can be notified of the completion of a job while working<br />
at a remote desk, saving the time spent waiting beside the machine to finish.<br />
NOTE: The user’s PC should be configured in advance so that E-mail can be used. For details, refer to<br />
Embedded Web Server RX (Settings for E-mail) on page 2-26.<br />
E-mail can be sent to a single destination.<br />
Use the procedure below to specify the Job Finish Notice settings.<br />
1 Press the Send key.<br />
2 Place the originals on the platen.<br />
3 Press [Advanced Setup] and then [Job Finish<br />
Notice].<br />
Destination 4 To select the destination from the address book,<br />
press [Address Book] on the left of the screen and<br />
Job Finish Notice<br />
then press [Address Book] in the next screen.<br />
Off<br />
Status<br />
Off<br />
Address<br />
Book<br />
Address<br />
Entry<br />
Add Shortcut<br />
Job Finish Notice<br />
Status<br />
Address<br />
Book<br />
Address<br />
Entry<br />
Add Shortcut<br />
E-mail<br />
Address<br />
Destination Detail<br />
Detail Address Book<br />
Cancel OK<br />
10/10/2010 10:10<br />
Destination<br />
Cancel OK<br />
10/10/2010 10:10<br />
Select the destination to be notified, then press<br />
[OK].<br />
You can view information on the notification<br />
destination by pressing [Detail].<br />
5 Specify the destination to send the finish notice,<br />
and press [OK].<br />
NOTE: For the procedure to select the destination<br />
from the Address Book, refer Specifying Destination on<br />
page 3-39.<br />
6 To directly enter the address, press [Address Entry]<br />
and then [E-mail Address].<br />
7 Enter the E-mail address, and press [OK].<br />
8 Press [OK].<br />
9 Specify the destination, and press the Start key to<br />
start sending.<br />
When the sending is completed, the finish notice is<br />
sent to the specified E-mail address.
Send and Print<br />
When you send originals, this feature allows you to print a copy of the document being sent.<br />
The procedure for using Send and Print is explained below.<br />
Send and Store<br />
6-37<br />
1 Press the Send key.<br />
2 Place the originals on the platen.<br />
Sending Functions<br />
3 Press [Advanced Setup] and then [Send and Print].<br />
4 Press [On].<br />
5 Press [OK].<br />
6 Specify the destination and press the Start key.<br />
Transmission begins and a copy of the transmitted<br />
document is printed.<br />
When you send originals, this feature allows you to store a copy of the document being sent in a Custom Box.<br />
The procedure for using Send and Store is explained below.<br />
Send and Store<br />
Off<br />
On<br />
Status<br />
Add Shortcut<br />
Custom Box<br />
No. Name Used<br />
0006 Box 6MB<br />
0007 Box 4MB<br />
0008 Box 8MB<br />
0009 Box 4MB<br />
0010 Box 2MB<br />
2/2<br />
Detail<br />
Destination<br />
Cancel OK<br />
10/10/2010 10:10<br />
1 Press the Send key.<br />
2 Place the originals on the platen.<br />
3 Press [Advanced Setup], [ ], and then [Send and<br />
Store].<br />
4 Press [On].<br />
5 Select the Custom Box in which the copy is to be<br />
stored.<br />
If a password entry screen for the Custom Box<br />
appears, enter the password.<br />
You can view information on the selected Custom<br />
Box by pressing [Detail].<br />
6 Press [OK].<br />
7 Specify the destination and press the Start key.<br />
Transmission begins and a copy of the transmitted<br />
document is stored in the specified Custom Box.<br />
6
FTP Encrypted TX<br />
6-38<br />
Sending Functions<br />
This allows you to encrypt documents when you send them. If you select [On] in this option, you can then select<br />
the encryption method in the basic send screen.<br />
Use the procedure below to scan and send originals as encrypted files.<br />
1 Press the Send Key.<br />
2 Place the originals in the document processor or on<br />
the platen.<br />
3 Press [Advanced Setup], [ ], and then [FTP<br />
Encrypted TX].<br />
4 Press [On].<br />
5 Press [OK].<br />
NOTE: You can only change the settings by logging in<br />
with administrator privileges.<br />
Refer to Adding a User (Local User List) on page 10-5<br />
for the default login user name and password.<br />
Click Settings -> Advanced -> Secure Protocols in the<br />
Embedded Web Server RX. Be sure that SSL of<br />
Secure Protocol Settings is On and one or more<br />
effective encryption are selected in Clientside<br />
Settings. For details, refer to the Embedded Web<br />
Server RX Operation Guide.
Text Stamp<br />
When sending, you can display a text stamp on the originals.<br />
6-39<br />
Sending Functions<br />
NOTE: This cannot be set when Text Stamp is set in the system settings. For details, see Sending Jobs on<br />
page 9-32.<br />
The items that may be configured are as follows.<br />
Use the procedure below to specify the Text Stamp settings.<br />
Text Stamp<br />
Off<br />
On<br />
Status<br />
Item Detail<br />
Position Selectable positions are [Top Left], [Top Middle], [Top Right],<br />
[Middle Left], [Center], [Middle Right], [Bottom Left], [Bottom<br />
Middle], and [Bottom Right].<br />
Font Size Set the font size of the printed text stamp.*<br />
* Registered font sizes are displayed. For details on registering font sizes, refer to System Stamp on<br />
page 9-29.<br />
Add Shortcut<br />
Stamp<br />
Keyboard<br />
Style Set the font style of the printed text stamp. [Bold] or [Italic] can<br />
be set.<br />
Font Set the font of the printed text stamp. [Courier] or [Letter Gothic]<br />
can be set.<br />
Color Set the color of the printed text stamp. [Black], [Cyan],<br />
[Magenta], [Yellow], [Red], [Green], or [Blue] can be set.<br />
Density Set the density of the color of the printed text stamp.<br />
Display<br />
Pattern<br />
URGENT COPY<br />
Top<br />
Left<br />
Set the display method of the printed text stamp. [Transparent],<br />
[Clipping], or [Overwrite] can be selected.<br />
Copies<br />
9 pt<br />
Top Edge<br />
Black<br />
on Top<br />
Position Font Original<br />
Orientation<br />
Cancel OK<br />
10/10/2010 10:10<br />
1 Press the Send key.<br />
2 Place the originals on the platen.<br />
3 Press [Advanced Setup] and then press [Text<br />
Stamp].<br />
4 Press [On].<br />
5 Press [Keyboard] and enter the text string to be<br />
displayed, or select a text stamp from the displayed<br />
templates.<br />
NOTE: Templates that have been set will appear. For<br />
details on registering templates, refer to System<br />
Stamp on page 9-29.<br />
6 Press [Position] and select the position of the text<br />
stamp.<br />
6
Bates Stamp<br />
When sending, you can display a Bates stamp on the originals.<br />
6-40<br />
Sending Functions<br />
7 Press [Font] and select font and display settings for<br />
the text stamp.<br />
8 Press [Original Orientation] to choose the<br />
orientation of the originals, either [Top Edge on Top]<br />
or [Top Edge on Left]. Then press [OK].<br />
9 Press [OK].<br />
10 Specify the destination, and press the Start key to<br />
start sending.<br />
NOTE: This cannot be set when Bates Stamp is set in the system settings. For details, see Sending Jobs on<br />
page 9-32.<br />
The items that may be configured are as follows.<br />
Item Detail<br />
Position Selectable positions are [Top Left], [Top Middle], [Top Right],<br />
[Middle Left], [Center], [Middle Right], [Bottom Left], [Bottom<br />
Middle], and [Bottom Right].<br />
Font Size Set the font size of the printed bates stamp.*<br />
Style Set the font style of the printed bates stamp. [Bold] or [Italic] can<br />
be set.<br />
Font Set the font of the printed bates stamp. [Courier] or [Letter<br />
Gothic] can be set.<br />
Color Set the color of the printed bates stamp. [Black], [Cyan],<br />
[Magenta], [Yellow], [Red], [Green], or [Blue] can be set.<br />
Density Set the density of the color of the printed bates stamp.<br />
Display<br />
Pattern<br />
Set the display method of the printed bates stamp.<br />
[Transparent], [Clipping], or [Overwrite] can be selected.<br />
* Registered font sizes are displayed. For details on registering font sizes, refer to System Stamp on<br />
page 9-29.
Use the procedure below to specify the Bates Stamp settings.<br />
Bates Stamp<br />
Off<br />
On<br />
Status<br />
Add Shortcut<br />
Stamp<br />
[Date]<br />
Date User Name<br />
Numbering Text 1<br />
Numbering<br />
Default<br />
Serial Number<br />
Text 2<br />
Delete<br />
1/6<br />
Copies<br />
Text 1 Text 2<br />
Change Change Date Format<br />
1 Top Left 9 pt<br />
Top Edge<br />
Black<br />
on Top<br />
Position Font Original<br />
Orientation<br />
Cancel OK<br />
10/10/2010 10:10<br />
6-41<br />
1 Press the Send key.<br />
2 Place the originals on the platen.<br />
Sending Functions<br />
3 Press [Advanced Setup] and then press [Bates<br />
Stamp].<br />
4 Press [On].<br />
5 Press [Date], [User Name], [Serial Number],<br />
[Numbering], [Text 1], or [Text 2], and set additional<br />
information to be displayed with the stamp.<br />
If you selected [Text 1] or [Text 2], press [Change]<br />
below it and enter the text string to be displayed.<br />
If you selected [Date], press [Date Format] and<br />
select [MM/DD/YYYY], [DD/MM/YYYY], or [YYYY/<br />
MM/DD] to set the date format.<br />
If you selected [Numbering], press [Numbering<br />
Default] and set the starting sequence number (1 to<br />
9999999).<br />
6 Press [Position] and select the position of the text<br />
stamp.<br />
7 Press [Font] and select font and display settings for<br />
the text stamp.<br />
8 Press [Original Orientation] to choose the<br />
orientation of the originals, either [Top Edge on Top]<br />
or [Top Edge on Left]. Then press [OK].<br />
9 Press [OK].<br />
10 Specify the destination, and press the Start key to<br />
start sending.<br />
6
Color Type<br />
6-42<br />
Sending Functions<br />
This sets the color type when you send color documents. The table below shows the available settings.<br />
Item Detail<br />
RGB Send color document in RGB.<br />
sRGB Match the color reproduction space between sRGB compatible systems.<br />
Selecting RGB displays the color profile values set on the machine.<br />
Send - Color Type<br />
Specify the color type to send color images.<br />
RGB<br />
sRGB<br />
Status<br />
Profile:<br />
RGB FINE 1<br />
Cancel OK<br />
10/10/2010 10:10<br />
1 Press System Menu key.<br />
2 Press [Send] and [Change] of Color Type.<br />
3 Select [RGB] or [sRGB].<br />
4 Press [OK].
Scanning with FMU Connection<br />
6-43<br />
Sending Functions<br />
"FMU Connection" is installed on the machine as a standard application. FMU Connection can be used to scan an<br />
original according to the settings configured with "File Management Utility" on the provided DVD, and save the<br />
image data and scanning information on a specified server or in a specified folder. Unlike regular transmission<br />
functions, this application lets you use metadata such as the scan date and time and the data format.<br />
NOTE: The first time you use FMU Connection, you must enable it in the system menu. For details, see<br />
Application on page 9-90.<br />
To use FMU Connection, you must install File Management Utility on your computer and configure settings for<br />
the multifunction machine to be used, scanning conditions, and the file save location. To install File Management<br />
Utility, refer to Installing Software on page 2-18.<br />
For information on using File Management Utility, see File Management Utility User Guide on the DVD.<br />
Using FMU Connection to scan an original<br />
1 Make sure that File Management Utility is running<br />
on the computer (or server) on which File<br />
Management Utility is installed.<br />
2 Place the original.<br />
3 Press the Application key.<br />
The application list appears.<br />
4 Press [FMU Connection].<br />
FMU Connection starts.<br />
5 Follow the on-screen instructions to enter the<br />
necessary information and press [Next].<br />
6 When the scan settings screen appears, press<br />
each item and configure the necessary settings.<br />
The features that can be set depend on File<br />
Management Utility.<br />
7 Press the Start key.<br />
Transmission starts.<br />
6
6-44<br />
Sending Functions
7 Document Box<br />
This chapter explains the typical procedure for utilizing Document Box.<br />
• Using a Custom Box ...........................................................................7-2<br />
• Job Box.............................................................................................7-14<br />
• Printing Documents Stored in Removable USB Memory..................7-22<br />
• Saving Documents to USB Memory (Scan to USB) .........................7-24<br />
• Removing USB Memory ...................................................................7-26<br />
7-1
Using a Custom Box<br />
7-2<br />
Document Box<br />
NOTE: In the following explanation, it is assumed that user login administration is enabled. For details on User<br />
Logon privileges, refer to User Privileges on page 3-49.<br />
Creating a New Custom Box (Add/Edit Box)<br />
Use the procedure below to create a new box in the user box.<br />
No. Name Owner Used<br />
0001 SALES Anonymous - - - -<br />
Store File Detail Open<br />
Custom Box<br />
Status<br />
Job Box Removable<br />
Memory<br />
FAX Box<br />
The table below lists the items to be set.<br />
1/1<br />
Search(Name)<br />
Search(No.)<br />
Add/Edit Box<br />
Program<br />
10/10/2010 10:10<br />
1 Press the Document Box key.<br />
2 Press [Custom Box] and then [Add/Edit Box].<br />
3 Press [Add].<br />
Item Detail<br />
4 Press [Change] for each item, enter the information<br />
and then press [OK].<br />
Box No. Enter the box number by pressing [-, +] or number keys.<br />
The box number can be from 0001 to 1000. A Custom Box should have a unique<br />
number. If you enter 0000, the smallest number available will be automatically<br />
assigned.<br />
Box Name Enter a box name consisting of up to 32 characters.<br />
Refer to the Character Entry Method on Appendix-8 for details on entering<br />
characters.<br />
Box Password User access to the box can be restricted by specifying a password to protect the<br />
box. Entering a password is not mandatory.<br />
Enter the same password of up to 16 characters in both [Password] and [Confirm<br />
Password].<br />
Usage Restriction To preserve the hard disk capacity, the storage capacity for a box can be restricted.<br />
To enable a capacity restriction enter a value for the storage capacity of the Custom<br />
Box in megabytes by pressing [-, +] or number keys.<br />
You can enter a limit between 1 and 30,000. (Changes according to the number of<br />
created custom boxes.)
7-3<br />
Document Box<br />
Auto File Deletion Automatically deletes stored documents after a set period of time.<br />
Press [On] to enable automatic deletion and then use [+] and [-] or the numeric keys<br />
to enter the number of days for which documents are stored.<br />
You can enter any number between 1 and 31 day(s). To disable automatic file<br />
deletion, press [Off].<br />
Overwrite Setting Specifies whether or not old stored documents are overwritten when new<br />
documents are stored.<br />
To overwrite old documents, press [Permit].<br />
To retain old documents, press [Prohibit].<br />
Delete after<br />
Printed<br />
Item Detail<br />
Setting the document deletion time<br />
Sets the time when documents stored in a custom box are deleted.<br />
The procedure for using Auto File Deletion Time is explained below.<br />
Document Box/Removable Memory - Auto File Deletion Time<br />
Set the time to automatically delete stored documents.<br />
Status<br />
Hour<br />
# Keys<br />
21<br />
Automatically delete a document from the box once printing is complete. To delete<br />
the document, press [On]. To retain the document, press [Off].<br />
Minute<br />
# Keys<br />
30<br />
Cancel OK<br />
10/10/2010 10:10<br />
NOTE: If user login administration is enabled, "Owner"<br />
and "Permission" are also displayed. Refer to Creating<br />
new Custom Boxes when user login administration is<br />
enabled on page 3-50.<br />
5 Check the details you have entered and then press<br />
[Add]. The Custom Box is created.<br />
1 Press the System Menu key.<br />
2 Press [Document Box/Removable Memory], [Next]<br />
of Custom Box, [Next] of Default Setting and then<br />
[Change] of Auto File Deletion Time.<br />
3 Set the time at which the document is deleted by<br />
pressing [+], [-]. Press [# Keys] to enter the time<br />
directly using the numeric keys.<br />
4 Press [OK]. The time for document deletion is set.<br />
7
Storing Documents (Store File)<br />
The procedure for storing documents in a custom box is explained below.<br />
No. Name Owner Used<br />
0001 SALES Anonymous - - - -<br />
Store File Detail Open<br />
Custom Box<br />
Status<br />
Job Box Removable<br />
Memory<br />
Document Store features<br />
The features below can be selected when saving a document.<br />
Storing Size<br />
Select size of image to be stored.<br />
FAX Box<br />
1/1<br />
Search(Name)<br />
Search(No.)<br />
Add/Edit Box<br />
Program<br />
10/10/2010 10:10<br />
7-4<br />
Document Box<br />
1 Press the Document Box key.<br />
2 Place the originals in the document processor or on<br />
the platen.<br />
3 Press [Custom Box], select the box where the<br />
document will be stored and then press [Store File].<br />
4 Select the type of originals, scanning density, etc.,<br />
as necessary.<br />
For the features that can be selected, refer to<br />
Document Store features on page 7-4.<br />
5 Press the Start key. The original is scanned and the<br />
data is stored in the specified Custom Box.<br />
NOTE: Enter up to 64 characters as the file name.<br />
• Original Size (page 6-2) • Density (page 6-19) • Zoom (page 6-6)<br />
• Mixed Size Originals (page 6-8) • Original Image (page 6-18) • Centering (page 6-7)<br />
• 2-sided/Book Original (page 6-11) • Scan Resolution (page 6-20) • Border Erase (page 6-26)<br />
• Original Orientation (page 6-12) • Color Selection (page 6-23) • Continuous Scan (page 6-24)<br />
• Storing Size (page 7-4) • Sharpness (page 6-21) • Job Finish Notice (page 6-36)<br />
• Prevent Bleed-thru (page 6-25) • Background Density Adj.<br />
(page 6-22)<br />
• File Name Entry (page 6-28)<br />
Item Description<br />
Same as Original Size Store an image the same size as the original.<br />
Metric Select from A3, A4, A5, A6, B4, B5, B6, Folio or 216 × 340 mm.<br />
inch Select from Ledger, Letter, Legal, Statement, 11 × 15" or Oficio II.<br />
Others Select from 8K, 16K, Hagaki or Oufuku hagaki.
Printing Documents (Print)<br />
The procedure for printing documents in a custom box is explained below.<br />
Box:<br />
0001 2008101010574501 2010/10/10 09:40 21 MB<br />
0002 2008101010574511<br />
2010/10/10 09:50 21 MB<br />
0003 2008101010574521<br />
2010/10/10 10:00 21 MB<br />
Status<br />
File Name Date and Time Size<br />
1/1<br />
Search(Name)<br />
Detail<br />
Preview<br />
Print Send Join Move/Copy Delete Store File<br />
Close<br />
10/10/2010 10:10<br />
7-5<br />
1 Press the Document Box key.<br />
Document Box<br />
2 Press [Custom Box], select the box containing the<br />
document you want to print and press [Open].<br />
NOTE: If a custom box is protected by a password,<br />
enter the correct password.<br />
3 Select the document you wish to print by checking<br />
the checkbox.<br />
The document is marked with a checkmark.<br />
NOTE: To deselect, press the checkbox again and<br />
remove the checkmark.<br />
4 Press [Print].<br />
5 Set the paper selection, duplex printing, etc., as<br />
desired.<br />
For the features that can be selected, refer to<br />
Document print features on page 7-6.<br />
If a document stored from a computer is selected,<br />
the print settings selection screen appears.<br />
• To use the settings used at the time of printing<br />
(when the document was saved), press [Print<br />
As Is]. Press [Start Print] to start printing.<br />
• To change the print settings, press [Print after<br />
Change Settings] and change the print settings.<br />
After a document saved in the machine is selected,<br />
the [User File Settings] key may appear in the<br />
setting screen for the feature to be used.<br />
• To use the settings saved with the document,<br />
press [User File Settings].<br />
• If you need to change the print settings, change<br />
the print settings.<br />
6 Press the Start key. Printing of the selected<br />
document begins.<br />
7
Document print features<br />
The features below can be selected when printing a document.<br />
7-6<br />
Document Box<br />
• Paper Selection (page 4-3) • Cover (page 4-22) • Fold (page 4-11)<br />
• Collate/Offset (page 3-14) • Form Overlay (page 7-9) • Text Stamp (page 4-30)<br />
• Staple (page 3-18) • Page # (page 4-24) • Bates Stamp (page 4-31)<br />
• Punch (page 3-20) • Job Finish Notice (page 4-40) • Density (page 3-8)<br />
• Paper Output (page 4-13) • File Name Entry (page 4-42) • Original Image (page 3-9)<br />
• Combine (page 4-14) • Delete after Printed (page 7-2) • Sharpness (page 4-34)<br />
• Margin/Centering (page 4-16) • Priority Override (page 4-42) • Background Density Adj.<br />
(page 4-35)<br />
• Booklet (page 4-20) • EcoPrint (page 4-33) • Prevent Bleed-thru (page 4-36)<br />
• Duplex (page 3-12) • Zoom (page 6-6)
Sending Documents (Send)<br />
The procedure for sending documents in a custom box is explained below.<br />
Box:<br />
0001 2008101010574501 2010/10/10 09:40 21 MB<br />
0002 2008101010574511<br />
2010/10/10 09:50 21 MB<br />
0003 2008101010574521<br />
2010/10/10 10:00 21 MB<br />
Status<br />
File Name Date and Time Size<br />
1/1<br />
Search(Name)<br />
Detail<br />
Preview<br />
Print Send Join Move/Copy Delete Store File<br />
Close<br />
10/10/2010 10:10<br />
7-7<br />
1 Press the Document Box key.<br />
Document Box<br />
2 Press [Custom Box], select the box containing the<br />
document you want to send and press [Open].<br />
NOTE: If a custom box is protected by a password,<br />
enter the correct password.<br />
3 Select the document you wish to send by checking<br />
the checkbox.<br />
The document is marked with a checkmark.<br />
NOTE: You cannot select and send multiple documents.<br />
To deselect, press the checkbox again and remove the<br />
checkmark.<br />
4 Press [Send].<br />
The screen for sending appears.<br />
NOTE: Depending on the settings, the address book<br />
screen may appear.<br />
5 Set the destination.<br />
NOTE: For more information on selecting destinations,<br />
refer to Specifying Destination on page 3-39.<br />
6 Set the sending size, original image, etc., as<br />
desired.<br />
For the features that can be selected, refer to<br />
Document send features on page 7-8.<br />
7 Press the Start key. Sending of the selected<br />
document begins.<br />
7
Document send features<br />
The features below can be selected when sending a document.<br />
Delete after Transmitted<br />
After the document is sent, the document is deleted from the document box.<br />
7-8<br />
Document Box<br />
• Sending Size (page 6-4) • i-FAX Subject/Body<br />
(refer to Fax Operation Guide)<br />
• Original Image (page 6-18)<br />
• File Format (page 6-14) • FTP Encrypted TX (page 6-38) • Resolution (page 6-18)<br />
• FAX TX Resolution<br />
(refer to Fax Operation Guide)<br />
• Delete after Transmitted<br />
(page 7-8)<br />
• Color Selection (page 6-23)<br />
• Centering (page 6-7) • Zoom (page 6-6) • Sharpness (page 6-21)<br />
• FAX Delayed Transmission<br />
(refer to Fax Operation Guide)<br />
• File Separation (page 6-15) • Background Density Adj.<br />
(page 6-22)<br />
• Job Finish Notice (page 6-36) • Text Stamp (page 6-39) • Prevent Bleed-thru<br />
(page 6-25)<br />
• File Name Entry (page 6-28) • Bates Stamp (page 6-40)<br />
• E-mail Subject/Body (page 6-29) • Density (page 6-19)
Form Overlay from Custom Boxes (Form Overlay)<br />
7-9<br />
Document Box<br />
This function allows you to retrieve images (image files), overlay them into documents stored in custom boxes<br />
and then print the results.<br />
Use the procedure below.<br />
Box:<br />
File Name Date and Time Size<br />
0001 2008101010574501 2010/10/10 09:40 21 MB<br />
0002 2008101010574511<br />
2010/10/10 09:50 21 MB<br />
0003 2008101010574521<br />
2010/10/10 10:00 21 MB<br />
Print Send Join Move/Copy Delete Store File<br />
Status<br />
Form Overlay<br />
Original<br />
Zoom<br />
Paper<br />
Status<br />
: A4<br />
: 100%<br />
:<br />
A4<br />
Preview<br />
Add Shortcut<br />
Off<br />
Select<br />
Stored Form<br />
Density<br />
(10 - 30, 100)<br />
30 %<br />
1/1<br />
Search(Name)<br />
Detail<br />
Preview<br />
Close<br />
10/10/2010 10:10<br />
Copies<br />
Form 1<br />
Select<br />
Form<br />
Cancel OK<br />
10/10/2010 10:10<br />
1 Press the Document Box key.<br />
2 Press [Custom Box], select the box containing the<br />
document you want to overlay the image into and<br />
print, and then press [Open].<br />
NOTE: If a custom box is protected by a password,<br />
enter the correct password.<br />
3 Select the document you wish to print by checking<br />
the checkbox.<br />
The document is marked with a checkmark.<br />
NOTE: To deselect, press the checkbox again and<br />
remove the checkmark.<br />
4 Press [Print].<br />
5 Press [Functions], [Form Overlay], [Select Stored<br />
Form], and then [Select Form].<br />
NOTE: You can select the form density setting through<br />
4 levels from 10%, 20%, 30% or 100%. Press the [+] or<br />
[-] buttons in Density.<br />
6 In Form Overlay - Select Form, select the image file<br />
to be overlaid onto the document from the<br />
displayed document boxes.<br />
You can only select one image file.<br />
7 Press [OK].<br />
8 Press [OK] again to return to the Functions screen.<br />
9 Press the Start key. Printing begins.<br />
7
Editing Documents<br />
7-10<br />
Document Box<br />
This function allows you to move or copy documents stored in custom boxes into other boxes or to join multiple<br />
documents together. You can also copy documents to USB memory connected to this machine.<br />
Moving a Document / Copying a Document (Move/Copy)<br />
The procedure for moving or copying documents is explained below.<br />
Box:<br />
File Name Date and Time Size<br />
0001 2008101010574501 2010/10/10 09:40 21 MB<br />
0002 2008101010574511<br />
2010/10/10 09:50 21 MB<br />
0003 2008101010574521<br />
2010/10/10 10:00 21 MB<br />
Print Send Join Move/Copy Delete Store File<br />
Status<br />
Move/Copy<br />
Status<br />
Select the required operation and press [Next].<br />
Copy to<br />
Custom Box<br />
Move to<br />
Custom Box<br />
Cancel<br />
Copy to<br />
Memory<br />
Back<br />
1/1<br />
Search(Name)<br />
Detail<br />
Preview<br />
Close<br />
10/10/2010 10:10<br />
Next<br />
10/10/2010 10:10<br />
1 Press the Document Box key.<br />
2 Press [Custom Box], select the box containing the<br />
document you want to move or copy and press<br />
[Open].<br />
NOTE: If a custom box is protected by a password,<br />
enter the correct password.<br />
3 Select the document in the list that you want to<br />
move or copy by pressing the checkbox.<br />
The document is marked with a checkmark.<br />
NOTE: To deselect, press the checkbox again and<br />
remove the checkmark.<br />
4 Press [Move/Copy].<br />
5 To move the document, press [Move to Custom<br />
Box].<br />
To copy the document, press [Copy to Custom Box]<br />
or [Copy to Memory].<br />
6 Press [Next].
Move to Custom Box<br />
Status<br />
Select the destination box and press [Move].<br />
Document<br />
No. Name Owner<br />
0001 Document1 Administrator<br />
0002 Document2 Administrator<br />
0003 Document3 Administrator<br />
0004 Document4 Administrator<br />
Cancel<br />
Joining Documents (Join)<br />
Used<br />
2 MB<br />
3 MB<br />
3 MB<br />
5 MB<br />
Back<br />
The procedure for joining documents in a custom box is explained below.<br />
Open<br />
Up<br />
Move<br />
10/10/2010 10:10<br />
7-11<br />
Document Box<br />
7 To copy or move the document to a custom box,<br />
select the destination box.<br />
To copy the document to USB memory, select the<br />
destination folder and press [Next]. If necessary,<br />
set the saved file size and the file format, etc.<br />
8 Press [Move] or [Copy] and then press [Yes] in the<br />
confirmation screen. The selected document is<br />
moved or copied.<br />
NOTE: If the box to which the document is to be<br />
moved or copied is protected by a password, enter the<br />
correct password.<br />
NOTE: You can only join a document to other documents in the same custom box. If necessary, move the<br />
documents to be joined beforehand.<br />
Box:<br />
File Name Date and Time Size<br />
0001 2008101010574501 2010/10/10 09:40 21 MB<br />
0002 2008101010574511<br />
2010/10/10 09:50 21 MB<br />
0003 2008101010574521<br />
2010/10/10 10:00 21 MB<br />
Status<br />
1/1<br />
Search(Name)<br />
Detail<br />
Preview<br />
Print Send Join Move/Copy Delete Store File<br />
Close<br />
10/10/2010 10:10<br />
1 Press the Document Box key.<br />
2 Press [Custom Box], select the box containing the<br />
documents you want to join and press [Open].<br />
NOTE: If a custom box is protected by a password,<br />
enter the correct password.<br />
3 Select the documents in the list that you wish to join<br />
by pressing the checkbox.<br />
The document is marked with a checkmark.<br />
You can join up to 10 documents.<br />
NOTE: To deselect, press the checkbox again and<br />
remove the checkmark.<br />
4 Press [Join].<br />
7
Join<br />
Status<br />
Confirm the order of documents to combine.<br />
File Name<br />
Date and Time Size<br />
2008101010574501 2010/10/10 09:40 21 MB<br />
2008101010574511 2010/10/10 09:50 21 MB<br />
2008101010574521 2010/10/10 10:10 21 MB<br />
Cancel<br />
1/1<br />
Up<br />
Down<br />
Next<br />
10/10/2010 10:10<br />
7-12<br />
Document Box<br />
5 Arrange the documents into the order in which they<br />
are to be joined.<br />
Highlight the document you want to rearrange and<br />
press [Up] or [Down] to move it to the correct place<br />
in the sequence.<br />
6 Press [Next].<br />
7 Press [File Name], enter the file name for the joined<br />
document and press [OK].<br />
NOTE: Enter up to 64 characters as the file name.<br />
8 Press [Join] and then press [Yes] in the<br />
confirmation screen. The documents are joined.<br />
NOTE: After joining, the original documents are left<br />
unchanged. Delete the documents if they are no longer<br />
needed.
Deleting Documents<br />
The procedure for deleting documents in a custom box is explained below.<br />
Box:<br />
0001 2008101010574501 2010/10/10 09:40 21 MB<br />
0002 2008101010574511<br />
2010/10/10 09:50 21 MB<br />
0003 2008101010574521<br />
2010/10/10 10:00 21 MB<br />
Status<br />
File Name Date and Time Size<br />
1/1<br />
Search(Name)<br />
Detail<br />
Preview<br />
Print Send Join Move/Copy Delete Store File<br />
Close<br />
10/10/2010 10:10<br />
7-13<br />
1 Press the Document Box key.<br />
Document Box<br />
2 Press [Custom Box], select the box containing the<br />
document you want to delete and press [Open].<br />
NOTE: If a custom box is protected by a password,<br />
enter the correct password.<br />
3 Select the document you wish to delete by<br />
checking the checkbox.<br />
The document is marked with a checkmark.<br />
NOTE: [Delete] is disabled until a document is<br />
selected.<br />
To deselect, press the checkbox again and remove the<br />
checkmark.<br />
4 Press [Delete]. The delete confirmation screen<br />
appears.<br />
5 Press [Yes]. The document is deleted.<br />
7
Job Box<br />
Private Print/Stored Job<br />
7-14<br />
Document Box<br />
Private Print/Stored Job Box stores the print data which is printed by using the printer driver as a Private Print/<br />
Stored Job.<br />
Refer to the Printing System Driver User Guide on how to print a job as Private Print or Stored Job using the<br />
printer driver.<br />
Printing a Document in Private Print/Stored Job Box<br />
You can print documents stored in a Private Print/Stored Job box.<br />
Use the procedure below to print a document.<br />
Private Print/Stored Job<br />
Status<br />
User:<br />
1 User<br />
2 User<br />
3 User<br />
4 User<br />
5 User<br />
1File<br />
2File<br />
3File<br />
4File<br />
5File<br />
User Name Files<br />
5<br />
2<br />
1<br />
1<br />
1<br />
Open<br />
Print Delete<br />
Status<br />
File Name Date and Time Size<br />
2010/10/10 09:40<br />
2010/10/10 09:45<br />
2010/10/10 09:50<br />
2010/10/10 09:55<br />
2010/10/10 10:00<br />
21 MB<br />
30 MB<br />
36 MB<br />
21 MB<br />
30 MB<br />
1/2<br />
1/1<br />
Close<br />
10/10/2010 10:10<br />
Detail<br />
Close<br />
10/10/2010 10:10<br />
1 Press the Document Box key.<br />
2 Press [Job Box].<br />
3 Select [Private Print/Stored Job] and press [Open].<br />
4 Select the creator of the document to print and<br />
press [Open].<br />
5 Select the document and press [Print].<br />
6 If the document is protected by a password, enter<br />
the password using the numeric keys.<br />
7 Specify the number of copies to print as desired.<br />
8 Press [Start Print] to start printing.<br />
Upon completion of printing, the Private Print job is<br />
automatically deleted.
Deleting a Document<br />
You can delete documents stored in a Private Print/Stored Job box.<br />
Use the procedure below to delete a document.<br />
Private Print/Stored Job<br />
Status<br />
User:<br />
1 User<br />
2 User<br />
3 User<br />
4 User<br />
5 User<br />
1File<br />
2File<br />
3File<br />
4File<br />
5File<br />
User Name Files<br />
2010/10/10 09:40<br />
2010/10/10 09:45<br />
2010/10/10 09:50<br />
2010/10/10 09:55<br />
2010/10/10 10:00<br />
Quick Copy/Proof and Hold<br />
7-15<br />
1 Press the Document Box key.<br />
2 Press [Job Box].<br />
Document Box<br />
3 Select [Private Print/Stored Job] and press [Open].<br />
4 Select the creator of the document and press<br />
[Open].<br />
5 To delete the document, select the document and<br />
press [Delete].<br />
When the delete confirmation screen appears,<br />
press [Yes].<br />
If the document is protected by a password, enter<br />
the password using the numeric keys and the<br />
document is deleted.<br />
Quick Copy/Proof and Hold box stores the print data which is printed by using the printer driver as a Quick Copy<br />
or Proof and Hold Print job.<br />
Refer to the Printing System Driver User Guide on how to print a job as Quick Copy or Proof and Hold Print job<br />
using the printer driver.<br />
Quick Copy Job Retention<br />
Close<br />
10/10/2010 10:10<br />
To maintain free space on the hard disk, you can set the maximum number of stored jobs.<br />
Use the procedure below to set the number of stored jobs.<br />
5<br />
2<br />
1<br />
1<br />
1<br />
Open<br />
File Name Date and Time Size<br />
21 MB<br />
30 MB<br />
36 MB<br />
21 MB<br />
30 MB<br />
Print Delete<br />
Status<br />
1/2<br />
1/1<br />
Detail<br />
Close<br />
10/10/2010 10:10<br />
1 Press the System Menu key.<br />
7
Document Box/Removable Memory - Quick Copy Job Retention<br />
Set the maximum number of quick copy/proof print jobs to retain.<br />
Use [-]/[+] or the numeric keys to enter a number.<br />
*Set this number to 0 to not retain any jobs.<br />
Status<br />
Printing a Document<br />
(0 - 50)<br />
You can print documents stored in the Quick Copy/Proof and Hold box.<br />
Use the procedure below to print a document.<br />
Quick Copy/Proof and Hold<br />
Status<br />
User:<br />
1 User<br />
2 User<br />
3 User<br />
4 User<br />
5 User<br />
1File<br />
2File<br />
3File<br />
4File<br />
5File<br />
32<br />
job(s)<br />
User Name Files<br />
Cancel OK<br />
5<br />
2<br />
1<br />
1<br />
1<br />
Open<br />
Print Delete<br />
Status<br />
File Name Date and Time Size<br />
2010/10/10 09:40<br />
2010/10/10 09:45<br />
2010/10/10 09:50<br />
2010/10/10 09:55<br />
2010/10/10 10:00<br />
21 MB<br />
30 MB<br />
36 MB<br />
21 MB<br />
30 MB<br />
1/2<br />
1/1<br />
10/10/2010 10:10<br />
Close<br />
10/10/2010 10:10<br />
Detail<br />
Close<br />
10/10/2010 10:10<br />
7-16<br />
Document Box<br />
2 Press [Document Box/Removable Memory], [Next]<br />
of Job Box, then [Change] of Quick Copy Job<br />
Retention.<br />
3 Press [+] or [–] to enter the maximum number of<br />
stored jobs. You can enter any number between 0<br />
and 50.<br />
You can also enter the number using the numeric<br />
keys.<br />
NOTE: If you enter a value of 0 (zero), you cannot use<br />
the Repeat Copy function.<br />
4 Press [OK]. The maximum number of stored jobs is<br />
set.<br />
1 Press the Document Box key.<br />
2 Press [Job Box].<br />
3 Select [Quick Copy/Proof and Hold] and press<br />
[Open].<br />
4 Select the creator of the document and press<br />
[Open].<br />
5 Select the document to print, and press [Print].
Deleting a Document<br />
You can delete documents stored in the Quick Copy/Proof and Hold box.<br />
Use the procedure below to delete a document.<br />
Quick Copy/Proof and Hold<br />
Status<br />
User:<br />
1 User<br />
2 User<br />
3 User<br />
4 User<br />
5 User<br />
1File<br />
2File<br />
3File<br />
4File<br />
5File<br />
User Name Files<br />
5<br />
2<br />
1<br />
1<br />
1<br />
Open<br />
Print Delete<br />
Status<br />
File Name Date and Time Size<br />
2010/10/10 09:40<br />
2010/10/10 09:45<br />
2010/10/10 09:50<br />
2010/10/10 09:55<br />
2010/10/10 10:00<br />
21 MB<br />
30 MB<br />
36 MB<br />
21 MB<br />
30 MB<br />
1/2<br />
1/1<br />
Close<br />
10/10/2010 10:10<br />
Detail<br />
Close<br />
10/10/2010 10:10<br />
7-17<br />
6 Specify the number of prints as desired.<br />
7 Press [Start Print] to start printing.<br />
1 Press the Document Box key.<br />
Document Box<br />
2 Press [Job Box], [Quick Copy/Proof and Hold], then<br />
[Open].<br />
3 Select the creator of the document and press<br />
[Open].<br />
4 Select the document to delete and press [Delete].<br />
The delete confirmation screen appears.<br />
5 Press [Yes]. The document is deleted.<br />
7
Repeat Copy<br />
Repeat Copy Job Retention<br />
To maintain free space on the hard disk, you can set the maximum number of stored jobs.<br />
Use the procedure below to specify the maximum number of stored jobs.<br />
1 Press the System Menu key.<br />
Document Box/Removable Memory - Repeat Copy Job Retention<br />
Set the maximum number of repeat copy jobs to retain.<br />
Use [-]/[+] or the numeric keys to enter a number.<br />
*Set this number to 0 to not retain any jobs.<br />
Status<br />
Printing a Document<br />
You can print the documents stored in the Repeat Copy box.<br />
Use the procedure below to print a document.<br />
Repeat Copy<br />
Print<br />
(0 - 50)<br />
32<br />
job(s)<br />
Name Date and Time Size<br />
2008101000101002 10/10/2010 10:10<br />
21 MB<br />
Status<br />
Cancel OK<br />
Delete<br />
001/001<br />
Detail<br />
10/10/2010 10:10<br />
Close<br />
10/10/2010 10:10<br />
7-18<br />
Document Box<br />
2 Press [Document Box/Removable Memory], [Next]<br />
of Job Box, [Change] of Repeat Copy Job<br />
Retention.<br />
3 Use the [+] and [–] keys or the numeric keys to<br />
enter the maximum number of stored jobs.<br />
You can enter any number between 0 and 50.<br />
NOTE: If you enter a value of 0 (zero), no jobs are<br />
stored.<br />
4 Press [OK]. The maximum number of stored jobs is<br />
set.<br />
1 Press the Document Box key.<br />
2 Press [Job Box].<br />
3 Select [Repeat Copy] box, and press [Open].<br />
4 Select the document to print and press [Print].<br />
5 If the document is protected by a password, enter<br />
the password using the numeric keys.<br />
6 Press [Start Print] to start printing.<br />
The Repeat Copy box job will be deleted when the<br />
main power switch is turned off.
Deletion of Job Retention<br />
7-19<br />
Document Box<br />
This setting specifies that documents, such as Private Printing, Quick Copying, or Proof and Hold Printing, saved<br />
temporarily in the job box are automatically deleted after they have been saved for a set time.<br />
The table below shows the available settings.<br />
Item Detail<br />
Off Temporary documents are not automatically<br />
deleted.<br />
1 hour Documents are deleted after 1 hour.<br />
4 hours Documents are deleted after 4 hours.<br />
1 day Documents are deleted after 1 day.<br />
1 week Documents are deleted after 1 week.<br />
Use the procedure below to set automatic deletion for temporary documents.<br />
1 Press the System Menu key.<br />
2 Press [Document Box/Removable Memory], [Next]<br />
of Job Box, then [Change] of Deletion of Job<br />
Retention.<br />
3 Select the time for automatic deletion.<br />
To deactivate automatic deletion, press [Off].<br />
4 Press [OK].<br />
NOTE: This function is valid for documents saved<br />
after the function is set. Regardless of this function<br />
setting, temporary documents are deleted when the<br />
main power switch is turned off.<br />
7
Form for Form Overlay<br />
Storing a Form<br />
7-20<br />
Document Box<br />
You can store forms to be used for the form overlay in the Form for Form Overlay box. One page can be<br />
registered in one form.<br />
Use the procedure below to store a form.<br />
Quick Copy/Proof and Hold<br />
Custom Box<br />
Status<br />
Name Files<br />
Private Print/Stored Job 21<br />
Repeat Copy<br />
Form for Form Overlay<br />
Form for Form Overlay<br />
Print<br />
Status<br />
Job Box<br />
Removable<br />
Memory<br />
Open<br />
FAX Box<br />
Name Date and Time Size<br />
2008101009530900 2010/10/10 09:00 21 MB<br />
2008101000530910<br />
2010/10/10 09:10 30 MB<br />
2008101000530920 2010/10/10 09:20 30 MB<br />
21<br />
21<br />
21<br />
1/1<br />
1/1<br />
Program<br />
Detail<br />
Delete Store File<br />
10/10/2010 10:10<br />
Close<br />
10/10/2010 10:10<br />
1 Press the Document Box key.<br />
2 Place the original in the document processor or on<br />
the platen.<br />
3 Press [Job Box].<br />
4 Select [Form for Form Overlay] and press [Open].<br />
5 Press [Store File].<br />
6 If necessary, select the image quality of original,<br />
scanning density, etc. before the original is<br />
scanned.<br />
7 Press the Start key. The original is scanned and<br />
stored in the Form for Form Overlay box.<br />
NOTE: For information on using image overlays with a<br />
stored form, see Form Overlay on page 4-23 and Form<br />
Overlay from Custom Boxes (Form Overlay) on page<br />
7-9.
Deleting a Form Stored<br />
You can delete the form stored in the Form for Form Overlay box.<br />
Use the procedure below to delete a form.<br />
Form for Form Overlay<br />
Print<br />
Status<br />
Name Date and Time Size<br />
2008101009530900 2010/10/10 09:00 21 MB<br />
2008101000530910<br />
2010/10/10 09:10 30 MB<br />
2008101000530920 2010/10/10 09:20 30 MB<br />
1/1<br />
Detail<br />
Delete Store File<br />
Close<br />
10/10/2010 10:10<br />
7-21<br />
1 Press the Document Box key.<br />
2 Press [Job Box].<br />
Document Box<br />
3 Select [Form for Form Overlay] and press [Open].<br />
4 Select the form to delete and press [Delete].<br />
The delete confirmation screen appears.<br />
5 Press [Yes]. The form is deleted.<br />
7
Printing Documents Stored in Removable USB Memory<br />
7-22<br />
Document Box<br />
Plugging USB memory directly into the machine enables you to quickly and easily print the files stored in the<br />
USB memory without having to use a computer.<br />
Limitations<br />
• The following file types can be printed:<br />
• PDF file (Version 1.7 or older)<br />
• TIFF file (TIFF V6/TTN2 format)<br />
• JPEG file<br />
• XPS file<br />
• Encrypted PDF file<br />
• PDF files you wish to print should have an extension (.pdf).<br />
• Files to be printed should be saved no further down than the top 3 folder levels, including the root folder.<br />
• Use USB memory properly formatted by this machine.<br />
• Plug the USB memory directly into the USB Port (A1). We do not guarantee that USB memory printing is<br />
error free if a USB hub is used.<br />
Printing (Print)<br />
Print documents stored in the removable USB memory.<br />
1 Plug the USB memory into the USB Port (A1).<br />
IMPOR<strong>TA</strong>NT: Use USB memory formatted by this<br />
machine. If a USB memory formatted by any other<br />
device is used, The removable memory is not<br />
formatted. may appear. To format a USB memory,<br />
press [Format] and follow the instructions on the screen.<br />
2 When the machine reads the USB memory,<br />
Removable Memory is recognized. Displaying files.<br />
may appear. Press [Yes] to display the removable<br />
memory screen.<br />
NOTE: If the message does not appear, press the<br />
Document Box key and then [Removable Memory].<br />
3 Select the folder containing the file to be printed<br />
and press [Open].<br />
The machine will display documents in the top 3<br />
folder levels, including the root folder.<br />
NOTE: 1000 documents can be displayed.<br />
To return to a higher level folder, press [Up].
Print<br />
Status<br />
Removable Memory<br />
Name Date and Time Size<br />
1 Document 2010/10/10 09:30 1 MB<br />
2 Document 2010/10/10 09:40 3 MB<br />
3 Document 2010/10/10 09:50 4 MB<br />
4 Document 2010/10/10 10:00 1 MB<br />
5 Document 2010/10/10 10:05 2 MB<br />
Delete<br />
Detail<br />
Custom Box Job Box Removable<br />
Memory<br />
Memory<br />
Information<br />
Document print features<br />
The features below can be selected when printing a document.<br />
001/999<br />
Remove<br />
Memory<br />
Store File<br />
7-23<br />
Document Box<br />
4 Select the file to be printed and press [Print].<br />
5 Change the number of copies, duplex printing, etc.<br />
as desired.<br />
For the features that can be selected, refer to<br />
Document print features on page 7-23.<br />
After a document saved in the machine is selected,<br />
the [User File Settings] key may appear in the<br />
setting screen for the feature to be used.<br />
• To use the settings saved with the document,<br />
press [User File Settings].<br />
• If you need to change the print settings, change<br />
the print settings.<br />
6 Press the Start key. Printing of the selected file<br />
begins.<br />
Encrypted PDF Password<br />
To print a PDF that is protected by a password, enter the password before printing.<br />
JPEG/TIFF Print<br />
Select the image size when printing JPEG or TIFF files.<br />
Open<br />
FAX Box<br />
Up<br />
Program<br />
10/10/2010 10:10<br />
• Paper Selection (page 4-3) • Duplex (page 3-12) • Bates Stamp (page 4-31)<br />
• Collate/Offset (page 3-14) • Job Finish Notice (page 4-40) • Encrypted PDF Password<br />
(page 7-23)<br />
• Staple (page 3-18) • Priority Override (page 4-42) • JPEG/TIFF Print (page 7-23)<br />
• Punch (page 3-20) • Fold (page 4-11) • XPS Fit to Page(page 7-23)<br />
• Paper Output (page 4-13) • Text Stamp (page 4-30)<br />
Item Description<br />
Paper Size Fit the image size to the selected paper size.<br />
Image Resolution Print at resolution of the actual image.<br />
Print Resolution Fit the image size to the print resolution.<br />
XPS Fit to Page<br />
Reduces or enlarges the image size to fit to the selected paper size when printing XPS files.<br />
7
Saving Documents to USB Memory (Scan to USB)<br />
7-24<br />
Document Box<br />
This function allows you to store scanned image files in USB memory connected to the machine. You can store<br />
files in PDF, TIFF, JPEG, XPS or high-compression PDF format.<br />
NOTE: The maximum number of the storable files is 100.<br />
Storing Documents (Store File)<br />
The procedure for storing documents in removable USB memory is explained below.<br />
1 Plug the USB memory into the USB Port (A1).<br />
IMPOR<strong>TA</strong>NT: Use only USB memory that has been<br />
formatted on this machine. If USB memory formatted on<br />
another device is used, The removable memory is not<br />
formatted message may appear. To format the USB<br />
memory, press [Format].<br />
CAUTION: When [Format] is pressed, all data in the<br />
external media is erased.<br />
2 When the machine reads the USB memory,<br />
Removable Memory is recognized. Displaying files.<br />
may appear. Press [Yes] to display the removable<br />
memory screen.<br />
NOTE: If the message does not appear, press the<br />
Document Box key and then [Removable Memory].
Print<br />
Removable Memory<br />
Name Date and Time Size<br />
1 Document 2010/10/10 09:30 1 MB<br />
2 Document 2010/10/10 09:40 3 MB<br />
3 Document 2010/10/10 09:50 4 MB<br />
4 Document 2010/10/10 10:00 1 MB<br />
5 Document 2010/10/10 10:05 2 MB<br />
Delete<br />
Custom Box<br />
Status<br />
Job Box Removable<br />
Memory<br />
Document Store features<br />
Detail<br />
Memory<br />
Information<br />
The features below can be selected when saving a document.<br />
Open<br />
FAX Box<br />
001/999<br />
Up<br />
Remove<br />
Memory<br />
Store File<br />
Program<br />
10/10/2010 10:10<br />
7-25<br />
Document Box<br />
3 Select the folder where the file will be stored and<br />
press [Open].<br />
The machine will display the top 3 folder levels,<br />
including the root folder.<br />
4 Press [Store File].<br />
5 Set the type of original, file format, etc., as desired.<br />
For the features that can be selected, refer to<br />
Document Store features on page 7-25.<br />
6 Press the Start key. The original is scanned and the<br />
data is stored in the USB memory.<br />
• Original Size (page 6-2) • Original Image (page 6-18) • Border Erase (page 6-26)<br />
• Mixed Size Originals (page 6-8) • Scan Resolution (page 6-20) • Continuous Scan (page 6-24)<br />
• 2-sided/Book Original<br />
(page 6-11)<br />
• Color Selection (page 6-23) • Job Finish Notice (page 6-36)<br />
• Original Orientation (page 6-12) • Sharpness (page 6-21) • File Name Entry (page 6-28)<br />
• Storing Size (page 7-4) • Background Density Adj.<br />
(page 6-22)<br />
• File Format (page 6-14)<br />
• Prevent Bleed-thru (page 6-25) • Zoom (page 6-6) • Text Stamp (page 6-39)<br />
• Density (page 6-19) • Centering (page 6-7) • Bates Stamp (page 6-40)<br />
7
Removing USB Memory<br />
Remove the USB memory.<br />
IMPOR<strong>TA</strong>NT: Be sure to follow the proper procedure to avoid damaging the data or USB memory.<br />
Print<br />
Status<br />
Removable Memory<br />
Name Date and Time Size<br />
1 Document 2010/10/10 09:30 1 MB<br />
2 Document 2010/10/10 09:40 3 MB<br />
3 Document 2010/10/10 09:50 4 MB<br />
4 Document 2010/10/10 10:00 1 MB<br />
5 Document 2010/10/10 10:05 2 MB<br />
Delete<br />
Detail<br />
Custom Box Job Box Removable<br />
Memory<br />
Open<br />
FAX Box<br />
001/999<br />
Up<br />
Memory<br />
Information<br />
Remove<br />
Memory<br />
Store File<br />
Program<br />
10/10/2010 10:10<br />
7-26<br />
1 Press the Document Box key.<br />
2 Press [Removable Memory].<br />
3 Press [Remove Memory].<br />
Document Box<br />
4 Press [OK], and remove the USB memory after<br />
Removable Memory can be safely removed. is<br />
displayed.<br />
NOTE: USB memory can also be removed after<br />
checking the status of the device.<br />
For details, refer to Check of Device Status, on page 8-<br />
14.
8 Status / Job Cancel<br />
This chapter explains how to check the status and history of jobs and cancel the jobs being<br />
processed or waiting to be printed.<br />
This chapter also explains how to check the remaining amount of toner and paper and the<br />
status of devices, and how to cancel the fax communication.<br />
• Checking Job Status ...........................................................................8-2<br />
• Checking Job History..........................................................................8-9<br />
• Pause and Resumption of Jobs........................................................8-11<br />
• Canceling of Jobs .............................................................................8-11<br />
• Priority Override for Waiting Jobs .....................................................8-12<br />
• Reordering Print Jobs .......................................................................8-12<br />
• Checking the Remaining Amount of Toner and Paper (Paper/Supplies) .....8-13<br />
• Device/Communication.....................................................................8-14<br />
8-1
Checking Job Status<br />
Check the status of jobs being processed or waiting to be printed.<br />
Available Status Screens<br />
8-2<br />
Status / Job Cancel<br />
The processing and waiting status of jobs are displayed as a list on the touch panel in three different screens -<br />
Printing Jobs, Sending Jobs, and Storing Jobs. The following job status are available.<br />
Displaying Status Screens<br />
Screen Job status to be displayed<br />
Printing Jobs • Copy<br />
• Printer<br />
• FAX reception<br />
• i-FAX reception<br />
• E-mail reception<br />
• Printing from Document Box<br />
• Printing data from removable memory<br />
• Application<br />
• Job Report /List<br />
Sending Jobs • FAX transmission<br />
• i-FAX transmission<br />
• E-mail<br />
• Folder<br />
• Application<br />
• Multiple destination<br />
• Sending Job FAX using Delayed transmission<br />
Storing Jobs • Scan<br />
• FAX<br />
• i-FAX<br />
• Printer<br />
• Join Box Document<br />
• Copy Box Document<br />
Use the procedure below to display the Status screen.<br />
Status<br />
Job No. Accepted Time Type<br />
438 14:47<br />
Cancel<br />
Status<br />
Job Type All<br />
Priority<br />
Override<br />
abc@def.com<br />
Job Name<br />
Scheduled Job<br />
User Name<br />
Detail<br />
Printing Jobs<br />
Status<br />
Sending Jobs Storing Jobs Device/<br />
Communication<br />
Log<br />
Status<br />
InProcess<br />
1/1<br />
Paper/Supplies<br />
10/10/2010 10:10<br />
1 Press the Status/Job Cancel key.<br />
2 The Status screen appears. Press either [Printing<br />
Jobs], [Sending Jobs], or [Storing Jobs] to check<br />
the status.<br />
To check the scheduled transmission job, press<br />
[Sending Jobs] and then [Scheduled Job].<br />
For an explanation of the screen, refer to Details of<br />
the Status Screens on page 8-3.
Details of the Status Screens<br />
The items and keys displayed on the status screens are as follows.<br />
For information on how to display the Status screen, see Displaying Status Screens on page 8-2.<br />
Printing Jobs<br />
Status<br />
Status Log<br />
Job Type All<br />
7<br />
Job No. Accepted Time Type Job Name User Name Status<br />
000001 10/10 09:10 doc20081010091015 AAAAA<br />
InProcess<br />
000002 10/10 09:15 doc20081010091510 AAAAA<br />
Waiting<br />
000003 10/10 09:20 doc20081010092015 BBBBB<br />
Waiting<br />
Pause All<br />
Print Jobs<br />
Status<br />
1 2 3 4 5 6<br />
8 9 10 11 12<br />
Printing Jobs<br />
Cancel Priority<br />
Override<br />
Sending Jobs<br />
Storing Jobs<br />
Move Up<br />
Detail<br />
Device/<br />
Communication<br />
The table below lists the items displayed in the Printing Jobs Status screen.<br />
1/1<br />
Paper/Supplies<br />
10/10/2010 10:10<br />
No. Item / Key Detail<br />
1 Job No. Acceptance No. of job<br />
2 Accepted Time Accepted Time of job<br />
3 Type Icons that indicate the job type<br />
Copy job<br />
Printer job<br />
Job from Document Box<br />
FAX reception<br />
i-FAX reception<br />
E-mail reception<br />
Data from Removable Memory<br />
Application job<br />
Report / List<br />
4 Job Name Job Name or file name<br />
5 User Name User Name for the executed job<br />
6 Status Status of job<br />
InProcess: The status before starting to print.<br />
Printing: Printing<br />
Waiting: Print Waiting<br />
Pause: Pausing print job or error<br />
Canceling: Canceling the job<br />
8-3<br />
Status / Job Cancel<br />
8
No. Item / Key Detail<br />
7 [ ] of Job Type Sorts by specific type of job<br />
8-4<br />
Status / Job Cancel<br />
8 [Pause All Print Jobs] Pauses all the printing jobs. By pressing this key again, the printing<br />
jobs will be resumed.<br />
9 [Cancel] Select the job to be canceled from the list, and press this key.<br />
10 [Priority Override] Select the job to be overridden, and press this key.<br />
(Refer to Priority Override for Waiting Jobs on page 8-12)<br />
11 [Move Up] In the list, select the job that you want to move up the job queue and<br />
press this key.<br />
(Refer to Reordering Print Jobs on page 8-12)<br />
12 [Detail] Select the job for displaying detailed information from the list, and<br />
press this key. (Refer to Checking the Detailed Information of<br />
Histories on page 8-10)
Sending Jobs<br />
Status<br />
Job No. Accepted Time Type<br />
438 14:47<br />
Cancel<br />
Status<br />
Status<br />
Job Type All<br />
Priority<br />
Override<br />
abc@def.com<br />
7<br />
Job Name<br />
Scheduled Job<br />
User Name<br />
Detail<br />
Printing Jobs Sending Jobs Storing Jobs Device/<br />
Communication<br />
The table below lists the items displayed in the Sending Jobs Status screen.<br />
Log<br />
Status<br />
InProcess<br />
1 2 3 4 5 6<br />
8 9<br />
10<br />
1/1<br />
Paper/Supplies<br />
10/10/2010 10:10<br />
No. Item / Key Detail<br />
1 Job No. Acceptance No. of job<br />
2 Accepted Time Accepted Time of job<br />
3 Type Icons that indicate the job type<br />
Sending Job FAX<br />
Sending Job i-FAX<br />
Sending Job E-mail<br />
Sending Job Folder<br />
Sending Job Application<br />
8-5<br />
Status / Job Cancel<br />
4 Destination<br />
Sending Job Multiple<br />
Destination (Either destination name, FAX number, E-mail address,<br />
or server name)<br />
5 User Name User Name for the executed job<br />
6 Status Status of job<br />
InProcess: The status before starting sending such as during<br />
scanning originals<br />
Sending: Sending<br />
Waiting: Sending Waiting<br />
Canceling: Canceling the job<br />
Pause: Pausing the job<br />
7 [ ] of Job Type Only selected type of jobs is displayed.<br />
8 [Cancel] Select the job you want to cancel from the list, and press this key.<br />
9 [Priority Override] Select the job to be overridden, and press this key.<br />
* Only displayed when the optional fax kit is installed.<br />
10 [Detail] Select the job whose detailed information you want to display from<br />
the list, and press this key. (Refer to Checking the Detailed<br />
Information of Histories on page 8-10)<br />
8
Storing Jobs<br />
Status<br />
Status Log<br />
Job Type All 7<br />
Job No. Accepted Time Type<br />
Job Name<br />
438 14:47 doc20070225144758<br />
User Name Status<br />
InProcess<br />
Cancel Detail<br />
Status<br />
1 2 3 4 5 6<br />
8 9<br />
Printing Jobs Sending Jobs Storing Jobs Device/<br />
Communication<br />
The table below lists the items displayed in the Storing Jobs Status screen.<br />
1/1<br />
Paper/Supplies<br />
10/10/2010 10:10<br />
No. Display / Key Details<br />
1 Job No. Acceptance No. of job<br />
2 Accepted Time Accepted Time of job<br />
3 Type Icons that indicate the job type<br />
Storing Job Scan<br />
Storing Job Printer<br />
Storing Job FAX<br />
Storing Job i-FAX<br />
Join Box Document<br />
Copy Box Document<br />
4 Job Name Job name or file name is displayed.<br />
5 User Name User Name for the executed job<br />
8-6<br />
Status / Job Cancel<br />
6 Status Status of job<br />
InProcess: The status before starting to save such as during<br />
scanning originals<br />
Storing: Storing Data<br />
Canceling: Canceling the job<br />
Pause: Pausing the job<br />
7 [ ] of Job Type Only selected type of jobs is displayed.<br />
8 [Cancel] Select the job you want to cancel from the list, and press this key.<br />
9 [Detail] Select the job whose detailed information you want to display from<br />
the list, and press this key. (Refer to Checking the Detailed<br />
Information of Histories on page 8-10)
Checking the Detailed Information of Jobs<br />
Check the detailed information of each job.<br />
Use the procedure below to check a job's information.<br />
Status<br />
Job Type All<br />
Job No. Accepted Time Type<br />
438 14:47<br />
Cancel<br />
abc@def.com<br />
Printing Jobs Sending Jobs Storing Jobs Device/<br />
Communication<br />
Status<br />
Detail Job No.:<br />
Status<br />
Priority<br />
Override<br />
Job Name<br />
Scheduled Job<br />
User Name<br />
Job No.: Status/Destination:<br />
Job Type: Destination:<br />
Sending Job - E-mail<br />
1<br />
User Name:<br />
Job Name:<br />
Accepted Time:<br />
Status<br />
000080<br />
User1<br />
doc20070404115151<br />
10:10:10<br />
Detail Job No.:<br />
000080<br />
Processing<br />
Job No.: Status/Destination:<br />
Job Type: Destination:<br />
Sending Job - E-mail<br />
1<br />
User Name:<br />
Job Name:<br />
Accepted Time:<br />
Status<br />
000080<br />
User1<br />
doc20070404115151<br />
10:10:10<br />
000080<br />
Processing<br />
Detail<br />
Log<br />
Status<br />
InProcess<br />
1/2<br />
1/2<br />
1/1<br />
Paper/Supplies<br />
Detail<br />
Detail<br />
10/10/2010 10:10<br />
Close<br />
10/10/2010 10:10<br />
Close<br />
10/10/2010 10:10<br />
8-7<br />
1 Press the Status/Job Cancel key.<br />
Status / Job Cancel<br />
2 Press [Printing Jobs], [Sending Jobs], or [Storing<br />
Jobs].<br />
To check the scheduled transmission, press<br />
[Sending Jobs] and then [Scheduled Job].<br />
3 Select the job whose details you wish to check from<br />
the list, and press [Detail].<br />
Detailed information of the selected job is<br />
displayed.<br />
Use [ ] or [ ] to see the next or previous page of<br />
information.<br />
In Sending Jobs, you can check the destination by<br />
pressing [Detail] in Status/Destination.<br />
8
Detail Job No.:<br />
Job Type All<br />
Type Destination<br />
Status<br />
Detail<br />
000081<br />
doc20070404131415<br />
User01<br />
Sending<br />
Waiting<br />
Close<br />
Status 10/10/2010 10:10<br />
1/2<br />
8-8<br />
Status / Job Cancel<br />
Status/Destination is displayed when address is<br />
selected. Press [Detail] to display the list.<br />
Press [ ] or [ ], select a destination and press<br />
[Detail]. Information on the selected job is displayed for<br />
checking.<br />
4 To exit from the detailed information, press [Close].
Checking Job History<br />
Check the history of completed jobs.<br />
8-9<br />
Status / Job Cancel<br />
NOTE: Job history is also available by Embedded Web Server RX or Network Print Monitor from the<br />
computer.<br />
If Hide All is selected in Display Jobs Log on page 9-40, users without administrator privileges cannot view the<br />
job log (except for the fax log).<br />
Available Job History Screens<br />
The job histories are displayed separately in three screens - Printing Jobs, Sending Jobs, and Storing Jobs. The<br />
following job histories are available.<br />
Displaying Job History Screen<br />
Screen Job histories to be displayed<br />
Printing Jobs • Copy<br />
• Printer<br />
• FAX reception<br />
• i-FAX reception<br />
• E-mail reception<br />
• Printing from Document Box<br />
• Job Report / List<br />
• Printing data from removable memory<br />
Sending Jobs • FAX<br />
• i-FAX<br />
• E-mail<br />
• Folder<br />
• Application<br />
• Multiple destination<br />
Storing Jobs • Scan<br />
• FAX<br />
• i-FAX<br />
• Printer<br />
• Join Box Document<br />
• Copy Box Document<br />
The procedure for displaying Job History Screen is explained below.<br />
Status<br />
Status Log<br />
Job Type All<br />
Job No. End Date Type<br />
Job Name<br />
000080 01/25 14:14 doc20070225141427<br />
000081 01/25 14:22<br />
000082 01/25 14:23<br />
000083 01/25 14:24<br />
000084 01/25 14:30<br />
User Name Result<br />
Completed<br />
doc20070225142253 Completed<br />
doc20070225142310 Completed<br />
doc20070225142458 Error<br />
doc20070225143034 Completed<br />
Printing Jobs Sending Jobs Storing Jobs<br />
Status<br />
Detail<br />
Device/<br />
Communication<br />
1/1<br />
Paper/Supplies<br />
10/10/2010 10:10<br />
1 Press the Status/Job Cancel key.<br />
2 Press either [Printing Jobs], [Sending Jobs], or<br />
[Storing Jobs] to check the log, and press [Log].<br />
NOTE: If the user authentication screen appears,<br />
enter your login user name and password and then<br />
press [Login]. For this, you need to login with<br />
administrator privileges. Refer to Adding a User (Local<br />
User List) on page 10-5 for the default login user name<br />
and password.<br />
8
Checking the Detailed Information of Histories<br />
Check the detailed information of each history.<br />
Display of the detailed information of Job Finish history<br />
Use the procedure below to check the job finish history.<br />
Status<br />
Status Log<br />
Job Type All<br />
Job No. End Date Type<br />
Job Name<br />
000080 01/25 14:14 doc20070225141427<br />
000081 01/25 14:22<br />
000082 01/25 14:23<br />
000083 01/25 14:24<br />
000084 01/25 14:30<br />
User Name Result<br />
Completed<br />
doc20070225142253 Completed<br />
doc20070225142310 Completed<br />
doc20070225142458 Error<br />
doc20070225143034 Completed<br />
Printing Jobs Sending Jobs Storing Jobs<br />
Status<br />
Detail<br />
Device/<br />
Communication<br />
1/1<br />
Paper/Supplies<br />
10/10/2010 10:10<br />
8-10<br />
1 Press the Status/Job Cancel key.<br />
Status / Job Cancel<br />
2 Press [Printing Jobs], [Sending Jobs] or [Storing<br />
Jobs] and then [Log].<br />
NOTE: If the user authentication screen appears,<br />
enter your login user name and password and then<br />
press [Login]. For this, you need to login with<br />
administrator privileges. Refer to Adding a User (Local<br />
User List) on page 10-5 for the default login user name<br />
and password.<br />
3 Select the job to check details from the list, and<br />
press [Detail].<br />
Detailed information of the selected job is<br />
displayed.<br />
NOTE: To check the information of the next/previous<br />
page, press [ ] or [ ].<br />
4 To exit from the detailed information, press [Close].
Pause and Resumption of Jobs<br />
Pause /resume all printing jobs in printing/waiting.<br />
The procedure for pausing and resuming jobs is explained below.<br />
Status<br />
Status Log<br />
Job Type All<br />
Job No. Accepted Time Type Job Name User Name Status<br />
000001 10/10 09:10 doc20081010091015 AAAAA<br />
InProcess<br />
000002 10/10 09:15 doc20081010091510 AAAAA<br />
Waiting<br />
000003 10/10 09:20 doc20081010092015 BBBBB<br />
Waiting<br />
Pause All<br />
Print Jobs<br />
Printing Jobs<br />
Status<br />
Cancel Priority<br />
Override<br />
Sending Jobs<br />
Storing Jobs<br />
Canceling of Jobs<br />
Move Up<br />
Detail<br />
Device/<br />
Communication<br />
8-11<br />
1 Press the Status/Job Cancel key.<br />
Status / Job Cancel<br />
2 Press [Pause All Print Jobs] on the Printing Jobs<br />
Status screen. Printing is paused.<br />
For more information on canceling jobs, refer to the Canceling Jobs on page 3-51.<br />
1/1<br />
Paper/Supplies<br />
10/10/2010 10:10<br />
3 When resuming the printing of jobs that have been<br />
paused, press [Resume All Print Jobs].<br />
8
Priority Override for Waiting Jobs<br />
Priority Override function suspends the current job and prints the job in waiting first.<br />
The procedure for using Priority Override is explained below.<br />
Status<br />
Status Log<br />
Job Type All<br />
Job No. Accepted Time Type Job Name User Name Status<br />
000001 10/10 09:10 doc20081010091015 AAAAA<br />
InProcess<br />
000002 10/10 09:15 doc20081010091510 AAAAA<br />
Waiting<br />
000003 10/10 09:20 doc20081010092015 BBBBB<br />
Waiting<br />
Pause All<br />
Print Jobs<br />
Printing Jobs<br />
Status<br />
Cancel Priority<br />
Override<br />
Sending Jobs<br />
Storing Jobs<br />
Move Up<br />
Reordering Print Jobs<br />
8-12<br />
1 Press the Status/Job Cancel key.<br />
2 Press [Printing Jobs].<br />
Status / Job Cancel<br />
3 Select the job to be given priority, and press<br />
[Priority Override].<br />
This function allows you to select a queued print job and raise its output priority.<br />
The procedure for reordering print jobs is explained below.<br />
Detail<br />
Device/<br />
Communication<br />
Status<br />
Status Log<br />
Job Type All<br />
Job No. Accepted Time Type Job Name User Name Status<br />
000001 10/10 09:10 doc20081010091015 AAAAA<br />
InProcess<br />
000002 10/10 09:15 doc20081010091510 AAAAA<br />
Waiting<br />
000003 10/10 09:20 doc20081010092015 BBBBB<br />
Waiting<br />
Pause All<br />
Print Jobs<br />
Printing Jobs<br />
Status<br />
Cancel Priority<br />
Override<br />
Sending Jobs<br />
Storing Jobs<br />
Move Up<br />
Detail<br />
Device/<br />
Communication<br />
1/1<br />
Paper/Supplies<br />
10/10/2010 10:10<br />
1/1<br />
Paper/Supplies<br />
10/10/2010 10:10<br />
4 Press [Yes] in the confirmation screen. The current<br />
job in printing is suspended, and the job for<br />
override printing starts.<br />
5 When the Priority Override is completed, the<br />
printing job that has been suspended will be<br />
resumed.<br />
1 Press the Status/Cancel key.<br />
2 Press the [Printing Jobs].<br />
3 Select the job to be assigned a higher priority and<br />
press [Move Up].<br />
The priority of the selected job is increased by 1 .<br />
To further raise the job's priority, press [Move Up]<br />
again. Each time you press [Move Up], the priority<br />
increases by 1.
8-13<br />
Status / Job Cancel<br />
Checking the Remaining Amount of Toner and Paper (Paper/Supplies)<br />
Check the remaining amount of toner, paper, and staples on the touch panel.<br />
Use the procedure below to check the remaining amounts.<br />
Status<br />
Toner Information Paper Others<br />
Toner Status Size Type Status Type Status<br />
Black (K) 100% A3<br />
Waste Toner OK<br />
A3<br />
A4<br />
A4<br />
A4<br />
A4<br />
A4<br />
A4<br />
Status<br />
The items you can check are described below.<br />
Remaining amount of toner<br />
1 Press the Status/Job Cancel key.<br />
2 Press [Paper/Supplies]. Check the remaining<br />
amount of toner and the status of the waste toner<br />
box in Toner Information, and the remaining<br />
amount of paper in each paper source in Paper.<br />
You can check the remaining amount of toner level from 100 to 0% (1% increments).<br />
Status of the waste toner box<br />
You can check the status of waste toner box.<br />
Paper<br />
You can check the size, orientation, type, and remaining amount of paper in each paper source. The remaining<br />
amount of paper is shown by 5 levels as 100, 80, 50, 30, and 0%, however, the paper in the multi purpose tray<br />
is shown by 2 levels as 100% and 0%.<br />
Others<br />
Plain<br />
Plain<br />
Plain<br />
Plain<br />
Plain<br />
Plain<br />
Plain<br />
Plain<br />
100%<br />
100%<br />
100%<br />
100%<br />
100%<br />
100%<br />
100%<br />
100%<br />
Printing Jobs Sending Jobs Storing Jobs Device/<br />
Communication<br />
Staple A OK<br />
Paper/Supplies<br />
10/10/2010 10:10<br />
You can check the status of staples and punch waste box.<br />
NOTE: If the optional document finisher and punch unit are installed, the Others section provides the status of<br />
the punch waste box and whether or not staples are available.<br />
8
Device/Communication<br />
8-14<br />
Status / Job Cancel<br />
Configure the devices/lines installed or connected to this machine or check their status. You can also control<br />
devices depending on their status.<br />
Displaying Device/Communication Screen<br />
The procedure for using the Device/Communication screen is explained below.<br />
Check of Device Status<br />
Status<br />
Scanner<br />
Ready.<br />
Printer<br />
Ready.<br />
Removable Memory<br />
Not connected.<br />
Format Remove<br />
FAX Port 1<br />
Line Off Manual RX<br />
Status<br />
The items you can check are described below.<br />
Scanner<br />
1 Press the Status/Job Cancel key.<br />
2 Press [Device/Communication].<br />
The screen to check the status or configure the<br />
devices is displayed.<br />
The status of an original scanning in the document processor or the error information (paper jam, opened cover,<br />
etc.) is displayed.<br />
Printer<br />
Error information such as paper jam, out of toner, or out of paper, and status such as waiting or printing are<br />
displayed.<br />
Hard Disk<br />
Hard Disk<br />
Overwriting...<br />
FAX Port 2<br />
Dialing... Receiving...<br />
Line Off<br />
FAX Log<br />
i-FAX Check New FAX<br />
Printing Jobs Sending Jobs Storing Jobs Device/<br />
Communication<br />
Paper/Supplies<br />
10/10/2010 10:10<br />
The information such as formatting, overwriting for erasure, and error occurrence is displayed.
Configuring the Devices<br />
Status<br />
Scanner<br />
Ready.<br />
Printer<br />
Ready.<br />
Removable Memory<br />
Not connected.<br />
Format Remove<br />
FAX Port 1<br />
Line Off Manual RX<br />
Status<br />
Hard Disk<br />
Overwriting...<br />
FAX Port 2<br />
Dialing... Receiving...<br />
Line Off<br />
FAX Log<br />
i-FAX Check New FAX<br />
Printing Jobs Sending Jobs Storing Jobs Device/<br />
Communication<br />
Paper/Supplies<br />
10/10/2010 10:10<br />
Detailed information on controlling devices is given below.<br />
Removable Memory (USB Memory)<br />
• The usage and capacity of the external media connected to this machine are displayed.<br />
• Press [Format] to format external media.<br />
CAUTION: When [Format] is pressed, all data in the external media is erased.<br />
8-15<br />
Status / Job Cancel<br />
• Press [Remove] to safely remove the external media. For details, refer to Removing the USB Memory in the<br />
next section.<br />
FAX Port 1, FAX Port 2<br />
• The information such as sending/receiving and dialing is displayed.<br />
• Press [Line Off] to cancel a fax in sending/receiving. For details, refer to Canceling FAX Communication on<br />
page 8-16 in the section afterwards.<br />
• Press [Manual RX] to start a fax. Use this function when you want to talk to the sender before receiving the<br />
fax originals. For details, refer to the Operation Guide of FAX kit.<br />
• Press [Log] to display the fax transmission history. For details, refer to the Operation Guide of FAX kit.<br />
8
Removing the USB Memory<br />
There is a way to remove the USB memory safely.<br />
Use the procedure below to remove the USB memory.<br />
1 Press the Status/Job Cancel key.<br />
Status<br />
Scanner<br />
Ready.<br />
Printer<br />
Ready.<br />
Removable Memory<br />
Not connected.<br />
Format Remove<br />
FAX Port 1<br />
Line Off Manual RX<br />
Canceling FAX Communication<br />
Cancel fax communication.<br />
Hard Disk<br />
FAX Port 2<br />
Dialing... Receiving...<br />
Status<br />
Use the procedure below to cancel the fax communication.<br />
Status<br />
Line Off<br />
FAX Log<br />
i-FAX Check New FAX<br />
Printing Jobs Sending Jobs Storing Jobs Device/<br />
Communication<br />
Scanner<br />
Ready.<br />
Printer<br />
Ready.<br />
Removable Memory<br />
Not connected.<br />
Format Remove<br />
FAX Port 1<br />
Line Off Manual RX<br />
Status<br />
Overwriting...<br />
Hard Disk<br />
Overwriting...<br />
FAX Port 2<br />
Dialing... Receiving...<br />
Line Off<br />
Paper/Supplies<br />
10/10/2010 10:10<br />
FAX Log<br />
i-FAX Check New FAX<br />
Printing Jobs Sending Jobs Storing Jobs Device/<br />
Communication<br />
Paper/Supplies<br />
10/10/2010 10:10<br />
8-16<br />
Status / Job Cancel<br />
2 Press [Device/Communication] > [Remove] in<br />
Removable Memory.<br />
3 When Removable memory can be safely removed.<br />
is displayed, remove the USB memory.<br />
1 Press the Status/Job Cancel key.<br />
2 Press [Device/Communication] > [Line Off] in FAX<br />
Port 1 or FAX Port 2.<br />
3 Press [Yes] in the confirmation screen. The line is<br />
disconnected, and the fax communication is<br />
canceled.
9 Default Setting (System Menu)<br />
This chapter explains how to configure various settings of the machine using the menus on<br />
the operation panel.<br />
• Common Settings ...............................................................................9-2<br />
• Copy..................................................................................................9-42<br />
• Send..................................................................................................9-46<br />
• Document Box/Removable Memory .................................................9-55<br />
• Printer ...............................................................................................9-57<br />
• Report ...............................................................................................9-64<br />
• Adjustment/Maintenance ..................................................................9-68<br />
• Date/Timer ........................................................................................9-76<br />
• Edit Destination (Address Book/Adding One Touch Keys) ...............9-81<br />
• Internet..............................................................................................9-88<br />
• Application ........................................................................................9-90<br />
• System Initialization ..........................................................................9-93<br />
• Restart Entire Device ........................................................................9-93<br />
• Network.............................................................................................9-94<br />
• Interface Block Setting....................................................................9-107<br />
• Security Level .................................................................................9-108<br />
• Document Guard.............................................................................9-108<br />
• Data Security ..................................................................................9-110<br />
• Optional Function............................................................................9-112<br />
• Accessibility Display (Enlarged Touch Panel Display) ....................9-113<br />
9-1
Common Settings<br />
Common settings include;<br />
• Language …9-2<br />
• Default Screen …9-3<br />
• Sound …9-4<br />
• Original/Paper Settings …9-4<br />
• Measurement …9-12<br />
• Error Handling …9-13<br />
• Paper Output …9-15<br />
• Orientation Confirmation …9-16<br />
• Function Defaults …9-16<br />
• USB Keyboard Type …9-29<br />
• System Stamp …9-29<br />
• Manual Staple …9-38<br />
• Customize Status Display …9-39<br />
• Low Toner Alert Level …9-39<br />
• Offset One Page Documents …9-40<br />
• Display Jobs Log …9-40<br />
• Message Banner Print …9-41<br />
9-2<br />
Default Setting (System Menu)<br />
NOTE: If user login administration is enabled, you can only change the settings by logging in with<br />
administrator privileges.<br />
Language<br />
Select the language displayed on the touch panel.<br />
Use the procedure below to select the language.<br />
1 Press the System Menu key.<br />
2 Press [Common Settings] and then [Change] of Language.<br />
3 Press the key for the language you want to use.<br />
4 Press [OK].<br />
The touch panel language will be changed.
Default Screen<br />
Select the screen appearing right after start-up (default screen). The options are as follows.<br />
The table below lists the available screens.<br />
Use the procedure below to select the default startup screen.<br />
1 Press the System Menu key.<br />
2 Press [Common Settings] and then [Change] of Default Screen.<br />
3 Select the screen to be displayed as the default screen.<br />
9-3<br />
Default Setting (System Menu)<br />
NOTE: The application names appear if the applications are installed and officially licensed on.<br />
4 Press [OK].<br />
Item Description<br />
Copy The Copy screen (the screen shown when the Copy key is pressed)<br />
appears.<br />
Send The Send screen (the screen shown when the Send key is pressed)<br />
appears.<br />
FAX*<br />
* This is displayed when the optional fax kit is installed.<br />
The Fax screen (the screen shown when the Fax key is pressed)<br />
appears.<br />
Status The Status/Job Cancel screen (the screen shown when the Status/<br />
Job Cancel key is pressed) appears.<br />
Document Box The Document Box screen (the screen shown when the Document<br />
Box key is pressed) appears.<br />
Program The Program screen (the screen shown when the Program key is<br />
pressed) appears.<br />
Application The Application selecting screen (the screen shown when the<br />
Application key is pressed) appears.<br />
Accessibility Copy The Accessibility Copy screen (the screen shown when the<br />
Accessibility Display key is pressed in the Copy screen) appears.<br />
Accessibility Send The Accessibility Send screen (the screen shown when the<br />
Accessibility Display key is pressed in the Send screen) appears.<br />
Accessibility FAX* The Accessibility Fax screen (the screen shown when the<br />
Accessibility Display key is pressed in the Fax screen) appears.<br />
Application name<br />
(Maximum 5 applications)<br />
For example, Internet Browser<br />
Each application is activated and the initial screen appears.<br />
9
Sound<br />
Set options for buzzer sound during the machine operations.<br />
The table below lists the buzzer types and their settings and details.<br />
Use the procedure below to set the sound options.<br />
1 Press the System Menu key.<br />
2 Press [Common Settings], [Next] of Sound and then [Next] of Buzzer.<br />
9-4<br />
Default Setting (System Menu)<br />
3 Press [Change] of Volume, Key Confirmation, Job Finish, Ready, Warning, or USB Keyboard.<br />
4 Select the buzzer volume level, or other sound options.<br />
Original/Paper Settings<br />
Register additional types and sizes of originals and paper.<br />
Custom Original Size<br />
Item Value Description<br />
Volume 0 (Mute), 1 (Minimum) to<br />
5 (Maximum)<br />
Set the buzzer volume level.<br />
Key Confirmation Off, On Emit a sound when the control panel<br />
and touch panel keys are pressed.<br />
Job Finish Off, On,<br />
FAX Reception Only*<br />
* This is displayed when the optional fax kit is installed.<br />
Emit a sound when a print job is<br />
normally completed.<br />
Ready Off, On Emit a sound when the warm-up is<br />
completed.<br />
Warning Off, On Emit a sound when errors occur.<br />
USB Keyboard Off, On Emit a sound when a USB keyboard is<br />
operated.<br />
Set up frequently-used custom original sizes. The custom size options are displayed on the screen to select<br />
original size. The dimensions available are as follows.<br />
The table below lists the sizes that can be registered.<br />
Input units Dimensions<br />
Inch models X: 2.00 to 17.00" (in 0.01" increments)<br />
Y: 2.00 to 11.69" (in 0.01" increments)<br />
Metric models X: 50 to 432 mm (in 1 mm increments)<br />
Y: 50 to 297 mm (in 1 mm increments)
9-5<br />
Default Setting (System Menu)<br />
Up to four custom original sizes can be added. Use the procedure below to set a custom original size.<br />
1 Press the System Menu key.<br />
2 Press [Common Settings], [Next] of Original / Paper Settings and then [Next] of Custom Original Size.<br />
3 Press [Change] of any one of Custom 1 to Custom 4, on which you wish to register the size.<br />
4 Press [On], and then press [+],[–] or numeric keys to enter X(horizontal) and Y (vertical) dimensions.<br />
5 Press [OK].<br />
6 Move to the copy, send, or document box screen and press the Reset key.<br />
Custom Paper Size<br />
Set up a maximum of four frequently-used custom paper sizes. The custom size options are displayed on the<br />
screen to select paper set in the multi purpose tray.<br />
The table below lists the sizes that can be registered.<br />
Up to four custom paper sizes can be added.<br />
Select media type for each paper size.<br />
Media type: Plain, Transparency, Rough, Vellum, Labels, Recycled, Preprinted, Bond, Cardstock, Color,<br />
Prepunched, Letterhead, Thick, Envelope, Coated, High Quality, Custom 1-8<br />
NOTE: Refer to Media Type Setting on page 9-8 for Custom 1-8 for the media type.<br />
Use the procedure below to select a custom paper size and media type.<br />
1 Press the System Menu key.<br />
2 Press [Common Settings], [Next] of Original / Paper Settings and then [Next] of Custom Paper Size.<br />
3 Press [Change] of any one of Custom 1 to Custom 4, on which you want to register the size.<br />
4 Press [On], and then press [+],[–] or numeric keys to enter X (horizontal) and Y (vertical) dimensions.<br />
5 Press [Media Type] to select the type of paper and press [OK] if necessary.<br />
6 Press [OK].<br />
Input units Dimensions<br />
Inch models H: 5.83 to 17.00" (in 0.01" increments)<br />
V: 3.86 to 11.69" (in 0.01" increments)<br />
Metric models H: 148 to 432 mm (in 1 mm increments)<br />
V: 98 to 297 mm (in 1 mm increments)<br />
7 Move to the copy or document box screen and press the Reset key.<br />
9
Paper Size and Media Type Setup for Cassettes (Cassette Setting)<br />
9-6<br />
Default Setting (System Menu)<br />
Select paper sizes and media types for Cassette 1 to 4 and optional side feeders (Cassette 5 to 7).<br />
The available paper sizes and media types are shown in the table below.<br />
Paper<br />
Size<br />
Item Description<br />
Auto Automatically detect the paper size. Select Metric or Inch for paper size.<br />
Standard<br />
Sizes 1*<br />
Standard<br />
Sizes 2*<br />
Use the procedure below to select the paper sizes and media types for each cassette.<br />
1 Press the System Menu key.<br />
Available options are as follows:<br />
Inch models: Ledger, Legal, Letter, Letter-R, Statement-R, 12×18", Oficio II<br />
Metric models: A3, B4, A4, A4-R, B5, B5-R, A5-R, Folio, 216×340 mm<br />
Select a standard size except that selected in Standard Sizes 1.<br />
Inch models: A3, B4, A4, A4-R, A5-R, B5, B5-R, Folio, 8K, 16K, 16K-R,<br />
216×340 mm<br />
Metric models: Ledger, Legal, Letter, Letter-R, Statement-R, 12×18", Oficio II,<br />
8K, 16K, 16K-R<br />
Media Type Plain (105 g/m 2 or less), Rough**, Vellum** (60 to 105 g/m 2 or less),<br />
Recycled, Preprint***, Bond**, Color**, Prepunched***, Letterhead***,<br />
Thick (106 g/m 2 and more)**, High Quality, Custom 1-8**<br />
* Only A4, Letter, and B5 can be specified in cassettes 6 and 7 when cassettes 3 and 4 and the optional<br />
Large Capacity Side Feeder (500, 1,500-sheet x 2) are used.<br />
** To change to a media type other than Plain, refer to Media Type Setting on page 9-8. When the paper<br />
weight settings shown below are selected, the media indicated for each setting cannot be selected.<br />
• Rough: Heavy 5 • Vellum: Heavy 5<br />
• Preprinted: Heavy 5 • Color: Heavy 5<br />
• Letterhead: Heavy 5 • Thick: Heavy 5<br />
• Custom 1 to 8: Heavy 5, or Extra Heavy<br />
*** To print on preprinted or prepunched paper or on letterhead, refer to Special Paper Action on page 9-11.<br />
2 Press [Common Settings], [Next] of Original / Paper Settings, [Next] of Cassette Setting, [Next] of Cassette<br />
1 to Cassette 7, on which you want to register the size, and then [Change] of Paper Size.<br />
3 To detect the paper size automatically, press [Auto] and select Metric or Inch for Paper Size.<br />
To select the paper size, press [Standard Sizes 1] or [Standard Sizes 2] for Paper Size.<br />
4 Press [OK]. The previous screen reappears.<br />
5 Press [Change] of Media Type to select media type and press [OK].
Paper Size and Media Type Setup for Multi Purpose Tray (MP Tray Setting)<br />
9-7<br />
Default Setting (System Menu)<br />
Select the sizes and media types for the multi purpose tray. Set up frequently-used sizes and media types before<br />
use.<br />
The available paper sizes and media types are shown in the table below.<br />
Paper<br />
Size<br />
Item Description<br />
Auto Automatically detect the paper size. Select Metric or Inch for paper size.<br />
Standard<br />
Sizes 1<br />
Standard<br />
Sizes 2<br />
NOTE: To change to a media type other than Plain, refer to Media Type Setting on page 9-8<br />
Use the procedure below to select the paper sizes and media types for manual paper feed.<br />
1 Press the System Menu key.<br />
Available options are as follows:<br />
Inch models: Ledger, Legal, Letter, Letter-R, Statement-R, 12×18", Oficio II,<br />
Executive<br />
Metric models: A3, B4, A4, A4-R, B5, B5-R, A5-R, B6-R, A6-R, Folio, 216×340 mm<br />
Select a standard size except that selected in Standard Sizes 1.<br />
Inch models: A3, B4, A4, A4-R, B5, B5-R, A5-R, B6-R, A6-R, Folio, 8K, 16K, 16K-R<br />
Metric models: Ledger, Legal, Letter, Letter-R, Statement-R, 12×18", Oficio II,<br />
Executive, 8K, 16K, 16K-R<br />
Others Select special standard sizes or custom sizes*.<br />
ISO B5, Envelope #10 (Commercial #10), Envelope #9 (Commercial #9), Envelope<br />
#6 (Commercial #6 3/4), Envelope Monarch, Envelope DL, Envelope C5, Envelope<br />
C4, Hagaki, Oufuku hagaki, Youkei 4, Youkei 2<br />
Size<br />
Entry<br />
Enter a size not displayed in the standard sizes.<br />
Inch models:<br />
H: 5.83 to 17.00" (in 0.01" increments)<br />
V: 3.86 to 11.69" (in 0.01" increments)<br />
Metric models:<br />
H: 148 to 432 mm (in 1 mm increments)<br />
V: 98 to 297 mm (in 1 mm increments)<br />
Media Type Plain (105 g/m 2 or less), Transparency, Rough, Vellum (60 to 105 g/m 2 or less),<br />
Labels, Recycled, Preprint**, Bond, Cardstock, Color, Prepunched**, Letterhead**,<br />
Envelope, Thick (106 g/m 2 and more), Coated, High Quality, Custom 1-8**<br />
* Refer to Custom Paper Size on page 9-5 for selecting Custom 1- 4 for Custom Paper Size.<br />
** Refer to Media Type Setting on page 9-8 for selecting Custom 1- 8 from Media Type.<br />
To print on preprinted or prepunched paper or on letterhead, refer to Special Paper Action on page 9-11.<br />
2 Press [Common Settings], [Next] of Original / Paper Settings, [Next] of MP Tray Setting and then [Change]<br />
of Paper Size.<br />
3 To detect the paper size automatically, press [Auto] and select Metric or Inch for Paper Size.<br />
To select the paper size, press [Standard Sizes 1], [Standard Sizes 2], [Others] or [Size Entry] for Paper Size.<br />
If you select [Size Entry], press [+], [–] to enter X (horizontal) and Y (vertical) dimensions.<br />
Press [# Keys] to enter the paper size using the numeric keys.<br />
4 Press [OK]. The previous screen reappears.<br />
9
5 Press [Change] of Media Type to select the media type and press [OK].<br />
Media Type Setting<br />
9-8<br />
Default Setting (System Menu)<br />
Select the weight for each media type. The options for the media type and weight of paper are as follows.<br />
Paper types and weights<br />
Paper<br />
Weight<br />
Weight (g/m 2 ),<br />
Media type<br />
Light*<br />
52 g/m 2<br />
to<br />
59 g/m 2<br />
Normal<br />
1*<br />
60 g/m 2<br />
to<br />
74 g/m 2<br />
Normal<br />
2*<br />
75 g/m 2<br />
to<br />
90 g/m 2<br />
Plain N Y Y<br />
(default)<br />
Normal<br />
3*<br />
91 g/m 2<br />
to<br />
105 g/m 2<br />
Rough N Y Y Y<br />
(default)<br />
Heavy<br />
1*<br />
106 g/m 2<br />
to<br />
135 g/m 2<br />
Vellum N Y Y Y Y<br />
(default)<br />
Y: Available N: Not available<br />
Heavy 2 Heavy 3 Heavy 4 Heavy 5<br />
136 g/m 2<br />
to<br />
163 g/m 2<br />
Labels N Y** Y** Y** Y** Y<br />
(default)<br />
Recycled N Y Y<br />
(default)<br />
Preprinted N Y Y<br />
(default)<br />
Bond N Y Y Y<br />
(default)<br />
164 g/m 2<br />
to<br />
220 g/m 2<br />
221 g/m 2<br />
to<br />
256 g/m 2<br />
257 g/m 2<br />
to<br />
300 g/m 2<br />
* The maximum number of sheets that can be stapled varies depending on the paper weight. For details, refer to Document<br />
Finisher (Option) on page Appendix-25.<br />
** The media type cannot be selected for the cassettes.<br />
Extra<br />
Heavy<br />
Transparencies<br />
Y N N N N N N<br />
Y Y Y Y Y**<br />
Y Y Y Y** N<br />
Y** Y** Y** N<br />
Y N N N N N N<br />
Y Y Y Y Y Y** N<br />
Y Y Y Y N N<br />
Cardstock N N N N Y** Y** Y** Y **<br />
(default)<br />
Color N Y Y Y<br />
(default)<br />
Prepunched N Y Y<br />
(default)<br />
Letterhead N Y Y<br />
(default)<br />
Thick N N N N Y<br />
(default)<br />
Envelope N N N N Y** Y**<br />
(default)<br />
Coated N Y** Y ** Y** Y**<br />
(default)<br />
High Quality N Y Y<br />
(default)<br />
Transparenci<br />
es<br />
N<br />
Y** N<br />
Y Y Y Y Y** N<br />
Y N N N N N N<br />
Y Y Y Y Y Y** N<br />
Y Y Y Y** N<br />
Y** Y** Y** N<br />
Y** Y** Y** Y** N<br />
Y Y N N N N N<br />
N N N N N N N N N Y**<br />
(default)<br />
Custom 1-8 Y Y Y<br />
(default)<br />
Y Y Y Y Y Y** N
For Custom 1-8, settings for duplex printing and media type name can be changed.<br />
Use the procedure below to set the paper weight.<br />
1 Press the System Menu key.<br />
9-9<br />
Default Setting (System Menu)<br />
2 Press [Common Settings], [Next] of Original / Paper Settings and then [Next] of Media Type Setting.<br />
3 Press [Next] for the media type whose weight you want to change.<br />
4 Press [Change] of Paper Weight.<br />
5 Select the weight and press [OK].<br />
The previous screen reappears.<br />
6 Press [Close].<br />
7 To change the duplex printing settings for Custom 1 (-8), press [Next] of Custom 1(-8) and then [Change]<br />
of Duplex. Select [Prohibit] or [Permit] and press [OK].<br />
The previous screen reappears.<br />
8 Press [Close].<br />
Item Description<br />
Duplex Prohibit Duplex printing not allowed.<br />
Permit Duplex printing allowed.<br />
Name Change names for Custom 1-8. Names should be not more<br />
than 15 characters. Selecting media type at multi purpose<br />
tray, the name after change will be displayed.<br />
9 To change the name for Custom 1(-8), press [Next] of Custom 1(-8) and then [Change] of Name. Enter the<br />
name and press [OK].<br />
NOTE: Refer to the Character Entry Method on page Appendix-8 for details on entering characters.<br />
Default Paper Source<br />
Select the default paper source from Cassette 1-7 and Multi Purpose Tray.<br />
NOTE: [Cassette 5] to [Cassette 7] are displayed when the following options are installed.<br />
[Cassette 5]: When a side feeder (3,000-sheet), side feeder (500-sheet x 3), or large capacity side feeder (500,<br />
1,500-sheet x 2) is installed<br />
[Cassette 6]: When a side feeder (500-sheet x 3) or large capacity side feeder (500, 1,500-sheet x 2) is<br />
installed<br />
[Cassette 7]: When a side feeder (500-sheet x 3) or large capacity side feeder (500, 1,500-sheet x 2) is installed<br />
9
Use the procedure below to select the default paper source.<br />
1 Press the System Menu key.<br />
9-10<br />
Default Setting (System Menu)<br />
2 Press [Common Settings], [Next] of Original / Paper Settings and then [Change] of Default Paper Source.<br />
3 Select a paper cassette for the default setting.<br />
4 Press [OK].<br />
5 Move to the copy or document box screen and press the Reset key.<br />
Original Auto Detect (Available for metric models only)<br />
Automatically detect originals of special or non-standard size.<br />
The table below lists the special or non-standard original sizes.<br />
Use the procedure below to set automatic detection of originals.<br />
1 Press the System Menu key.<br />
2 Press [Common Settings], [Next] of Original / Paper Settings and then [Change] of Original Auto Detect.<br />
3 Select [A6] or [Hagaki] of A6/Hagaki.<br />
Select [Off] to disable automatic detection or [On] to enable automatic detection of Folio and 11x15"<br />
respectively.<br />
4 Press [OK].<br />
Media for Auto (B&W)<br />
Select a default media type for auto paper selection when [Auto] is selected of Paper Selection. If Plain is<br />
selected, the paper source with plain paper loaded in the specific size is selected. Select [All Media Types] for<br />
the paper source with any kind of paper loaded in the specific size.<br />
Use the procedure below to select the paper sizes and media types used by Auto Selection.<br />
1 Press the System Menu key.<br />
2 Press [Common Settings], [Next] of Original / Paper Settings and then [Change] of Media for Auto (B & W).<br />
3 Select [All Media Types] or any media type for paper selection.<br />
4 Press [OK].<br />
Item Description<br />
A6/Hagaki As A6 and Hagaki are similar in size, select either one of them for<br />
automatic detection.<br />
Folio Select Folio for automatic detection.<br />
11x15" Select the 11×15" size for automatic detection.
Paper Source for Cover<br />
9-11<br />
Default Setting (System Menu)<br />
Select the paper source for cover paper from Cassette 1-7 or Multi Purpose Tray. Covers are used for Booklet<br />
(see page 4-20) and Cover (see page 4-22) modes.<br />
NOTE: [Cassette 5] to [Cassette 7] are displayed when the following options are installed.<br />
[Cassette 5]: When a side feeder (3,000-sheet), side feeder (500-sheet x 3), or large capacity side feeder (500,<br />
1,500-sheet x 2) is installed<br />
[Cassette 6]: When a side feeder (500-sheet x 3) or large capacity side feeder (500, 1,500-sheet x 2) is<br />
installed<br />
[Cassette 7]: When a side feeder (500-sheet x 3) or large capacity side feeder (500, 1,500-sheet x 2) is installed<br />
Use the procedure below to select the paper source for the cover.<br />
1 Press the System Menu key.<br />
2 Press [Common Settings], [Next] of Original / Paper Settings, [ ] and then [Change] of Paper Source for<br />
Cover.<br />
3 Select the paper source to load cover paper.<br />
4 Press [OK].<br />
Special Paper Action<br />
When printing on Prepunched, Preprint, and Letterhead, punch-holes might not be aligned or the print direction<br />
might be upside-down depending on how originals are set and the combination of copying functions. In such a<br />
case, select [Adjust Print Direction] to adjust the print direction. When paper orientation is not important, select<br />
[Speed Priority].<br />
The table below lists the available settings and their details.<br />
Item Description<br />
Adjust Print Direction Adjust print direction. Print speed is a little slower. Select this item to<br />
print on Prepunched, Preprint and Letterhead.<br />
Speed Priority Give the job speed top priority and disregard the paper orientation.<br />
Select this item when paper orientation is not important.<br />
9
If you select [Adjust Print Direction], load paper according to the steps below.<br />
Example: copying on Letterhead<br />
9-12<br />
Default Setting (System Menu)<br />
NOTE: When loading cover paper in a cassette or multi purpose tray, load the face, on which printing is<br />
supposed to be done, upward.<br />
Use the procedure below to specify the actions performed for special paper types.<br />
1 Press the System Menu key.<br />
2 Press [Common Settings], [Next] of Original / Paper Settings, [ ] and then [Change] of Special Paper<br />
Action.<br />
3 Select [Adjust Print Direction] or [Speed Priority].<br />
4 Press [OK].<br />
Measurement<br />
Select inch or metric for the unit for paper dimensions.<br />
Use the procedure below to change the input units.<br />
1 Press the System Menu key.<br />
2 Press [Common Settings] and then [Change] of Measurement.<br />
3 Select [mm] for metric or [inch] for inch.<br />
4 Press [OK].<br />
Original<br />
Original<br />
Paper<br />
Paper<br />
Finished<br />
Finished<br />
Cassette<br />
Cassette<br />
Multi Purpose Tray<br />
Multi Purpose Tray
Error Handling<br />
9-13<br />
Default Setting (System Menu)<br />
Select whether to cancel or continue the job when an error has occurred. The possible errors and what to do for<br />
the errors are as follows.<br />
Duplexing Error<br />
Select what to do when duplex printing is not possible for the selected paper sizes and media types.<br />
Finishing Error<br />
Select alternative actions when finishing (stapling or offsetting) is not available for the selected paper size or<br />
media type.<br />
No Staple Error<br />
Select what to do when staples run out during printing.<br />
NOTE: This setting is displayed when an optional document finisher is installed.<br />
Finished Pages Exceeded<br />
Item Description<br />
1-sided Printed in 1-sided<br />
Display Error Error message to cancel printing is displayed.<br />
Item Description<br />
Ignore The setting is ignored and the job is printed.<br />
Display Error Error message to cancel printing is displayed.<br />
Item Description<br />
Ignore Printing continues without stapling.<br />
Display Error Error message to cancel printing is displayed.<br />
Select what to do when finishing (stapling or offsetting) capacity is exceeded during printing.<br />
Item Description<br />
Ignore Printing continues without finishing.<br />
Display Error Error message to cancel printing is displayed<br />
NOTE: This setting is displayed when an optional document finisher is installed.<br />
9
Punch Waste Full Error<br />
Select what to do when the punch waste box becomes full during printing.<br />
Item Description<br />
Ignore Printing continues without punching.<br />
Display Error Error message to cancel printing is displayed.<br />
9-14<br />
Default Setting (System Menu)<br />
NOTE: This setting is displayed when an optional document finisher and a hole punch unit are installed.<br />
Paper Mismatch Error<br />
Select what to do when the selected paper size or type does not match paper size or type loaded in the specified<br />
paper source while printing from the computer by specifying the cassette or multi-purpose tray.<br />
Item Description<br />
Ignore The setting is ignored and the job is printed.<br />
Display Error Error message to cancel printing is displayed.<br />
Inserted Paper Mismatch<br />
Select what to do when it is detected that the cassette paper size setting does not match the actual paper size<br />
that is fed.<br />
Item Description<br />
Ignore Detection does not take place and the job is printed.<br />
Display Error Error message to cancel printing is displayed.<br />
Paper Jam before Staple<br />
The page from which printing is resumed when a paper jam occurs during a job with stapling can be selected.<br />
Item Description<br />
Resume at Top of<br />
Page<br />
Resume at Jammed<br />
Page<br />
Resume printing from the first page of the document.<br />
Resume printing from the page where the jam occurred.<br />
NOTE: This setting is displayed when an optional document finisher is installed.<br />
Skewed or multi originals<br />
When skewed originals or multi originals fed at once while scanning, select whether to scan by ignoring the error<br />
or display an error.<br />
Item Description<br />
Ignore Detection does not take place and the job is scanned.<br />
Display Error Error message to cancel scanning is displayed.
Use the procedure below to specify the settings for error handling.<br />
9-15<br />
Default Setting (System Menu)<br />
1 Press the System Menu key.<br />
2 Press [Common Settings] and then [Next] of Error Handling.<br />
3 Press [Change] at the error for which you wish to change the handling.<br />
4 Select the error handling method in the selection screen for each of the errors and then press [OK].<br />
5 The previous screen appears. To set the handling for a different error, repeat steps 3 and 4.<br />
Paper Output<br />
Select the output tray respectively for copy jobs, print jobs from Custom Box, computers, and FAX RX data. The<br />
options are as follows.<br />
Output Tray Descriptions<br />
Tray A, Tray B, Tray C Delivery to trays A - C of the optional document finisher.<br />
Upper Left Tray*<br />
Lower Left Tray*<br />
NOTE: The optional document finisher is required.<br />
When [Heavy 3] (164 g/m 2 - ) or higher is set in Paper Weight and Mailbox (Option) is set for the output<br />
destination, the output destination is automatically changed to a tray that can be used.<br />
FAX RX data output can be specified when the optional fax kit is installed.<br />
IMPOR<strong>TA</strong>NT: If you want to enable the changed defaults immediately, move to the function screen and press<br />
the Reset key.<br />
Use the procedure below to select the output tray.<br />
1 Press the System Menu key.<br />
2 Press [Common Settings] and then [Next] of Paper Output.<br />
3 Press [Change] of Copy/Custom Box, Printer, or FAX Port 1 or FAX Port 2.<br />
NOTE: FAX Port 1 appears when the optional fax kit is installed.<br />
If you have 2 optional fax kits installed, Fax Port 2 appears. You can specify the output tray for the second kit<br />
(Dual FAX).<br />
4 Select the Output Tray.<br />
Delivery to the upper left tray or lower left tray of the machine.<br />
Right Tray Delivery to the right tray of the machine.<br />
Tray 1 to 7 Delivery to trays 1 to 7 in the optional mailbox (tray 1 is the top tray).<br />
* This cannot be selected when the optional document finisher is installed.<br />
9
Orientation Confirmation<br />
9-16<br />
Default Setting (System Menu)<br />
Select whether to display a screen for selecting the orientation of the originals to be placed on the platen when<br />
using the following functions. (For more information, refer to page 4-9 for Original Orientation.)<br />
• Zoom (XY Zoom) • Page numbering<br />
• Duplex • Booklets<br />
• Margin/Centering originals • Staple/Punch (optional feature)<br />
• Border erase • 2-sided/Book Original<br />
• Combine mode • Text Stamp<br />
• Memo mode • Bates Stamp<br />
Use the procedure below to select the default Orientation Confirmation setting.<br />
1 Press the System Menu key.<br />
2 Press [Common Settings] and [Change] of Orientation Confirmation.<br />
3 Select the default for [Off] or [On].<br />
4 Press [OK].<br />
Function Defaults<br />
Defaults are the values automatically set after the warm-up is completed or the Reset key is pressed.<br />
Set the defaults for available settings such as copying and sending. Setting the frequently-used values as<br />
defaults makes subsequent jobs easier.<br />
IMPOR<strong>TA</strong>NT: If you want to enable the changed defaults immediately, move to the function screen and press<br />
the Reset key.<br />
Original Orientation<br />
Set the original orientation defaults. The available default settings are shown below.<br />
Refer to page 4-9 for Original Orientation.<br />
Use the procedure below to select the default orientation when originals are placed on the platen.<br />
1 Press the System Menu key.<br />
2 Press [Common Settings], [ ], [Next] of Function Defaults and then [Change] of Original Orientation.<br />
3 Select [Top Edge on Top] or [Top Edge on Left] for the default.<br />
4 Press [OK].<br />
Item Description<br />
Top Edge on Top Select the original's top edge at the top.<br />
Top Edge on Left Select the original's top edge at the left.
Original Image (Copy)<br />
9-17<br />
Default Setting (System Menu)<br />
Select the default original document type for copying. The available default settings are shown below.<br />
Use the procedure below to select the default quality setting for originals.<br />
1 Press the System Menu key.<br />
2 Press [Common Settings], [ ], [Next] of Function Defaults and then [Change] of Original Image (Copy).<br />
3 Select the default original document type.<br />
4 Press [OK].<br />
Org. Image (Send/Store)<br />
Select the default original document type for sending and storing in a document box. The available default<br />
settings are shown below.<br />
Use the procedure below to select the default quality setting for originals.<br />
1 Press the System Menu key.<br />
2 Press [Common Settings], [ ], [Next] of Function Defaults and then [Change] of Org. Image (Send/Store).<br />
3 Select [Text+Photo], [Photo], [Text] or [Text (for OCR)] for the default.<br />
4 Press [OK].<br />
Item Description<br />
Text+Photo (Printer) For mixed text and photo documents printed on this machine<br />
originally.<br />
Text+Photo (Magazine) For mixed text and photos printed in a magazine, etc.<br />
Photo (Printer) For photos printed on this machine originally.<br />
Photo (Magazine) For photos printed in a magazine, etc.<br />
Photo (Photo Paper) For photos taken with a camera.<br />
Text<br />
Text (Fine Line)<br />
Sharply renders pencil text and fine lines.<br />
Graphic/Map (Printer) For maps and diagrams printed on this machine originally.<br />
Graphic/Map (Magazine) For maps and diagrams printed in a magazine.<br />
Item Description<br />
Text+Photo Text and photos together.<br />
Photo For photos taken with a camera.<br />
Text Sharply renders pencil text and fine lines.<br />
Text (for OCR) Image quality suitable for OCR software.<br />
9
Scan Resolution<br />
9-18<br />
Default Setting (System Menu)<br />
Select the default scanning resolution. The options are 600x600dpi, 400x400dpi Ultra Fine, 300x300dpi,<br />
200x400dpi Super Fine, 200x200dpi Fine, 200x100dpi Normal.<br />
Use the procedure below to select the default resolution setting.<br />
1 Press the System Menu key.<br />
2 Press [Common Settings], [ ], [Next] of Function Defaults and then [Change] of Scan Resolution.<br />
3 Select the default resolution.<br />
4 Press [OK].<br />
Color Selection<br />
Select the default color mode for scanning documents. The available default settings are shown below.<br />
Use the procedure below to select the default color mode.<br />
1 Press the System Menu key.<br />
2 Press [Common Settings], [ ], [Next] of Function Defaults and then [Change] of Color Select.Select the<br />
default color mode.<br />
3 Press [OK].<br />
File Format<br />
Color mode Description<br />
Auto Color (Color/Gray) Automatically recognize whether the document is color or black<br />
and white, and scan color documents in Full Color and black and<br />
white documents in Grayscale.<br />
Auto Color (Color/B & W) Automatically recognize whether the document is color or black<br />
and white, and scan color documents in Full Color and black and<br />
white documents in Black and White.<br />
Full Color Scan document in full color.<br />
Grayscale Scan document in grayscale for smoother and finer finish.<br />
Black & White Scan document in black and white. File size is smaller than Full<br />
Color or Grayscale.<br />
Select the default file type to send the scanned originals. The available default settings are shown below.<br />
Item Description<br />
PDF Send files in PDF format.<br />
TIFF Send files in TIFF format.<br />
JPEG Send files in JPEG format.<br />
XPS Send files in XPS format.<br />
High Comp. PDF Send files in High Comp. PDF format (refer to page 6-16).
NOTE: Refer to page 6-14 for file formats.<br />
Use the procedure below to select the default file format.<br />
1 Press the System Menu key.<br />
9-19<br />
Default Setting (System Menu)<br />
2 Press [Common Settings], [ ], [Next] of Function Defaults and then [Change] of File Format.<br />
3 Select the default file format.<br />
4 Press [OK].<br />
File Separation<br />
Select the default file separation setting. The available default settings are shown below.<br />
NOTE: Refer to page 6-15 for file separation.<br />
Use the procedure below to select the default file separation.<br />
1 Press the System Menu key.<br />
2 Press [Common Settings], [ ], [Next] of Function Defaults and then [Change] of File Separation.<br />
3 Select the default for [Off] or [Each Page].<br />
4 Press [OK].<br />
Backgrnd Density (Copy)<br />
Set the default Backgrnd Density (Copy). The available default settings are shown below.<br />
Use the procedure below to select the default Backgrnd Density (Copy).<br />
1 Press the System Menu key.<br />
2 Press [Common Settings], [ ], [Next] of Function Defaults, [ ] and then [Change] of Backgrnd Density<br />
(Copy).<br />
3 Select the default Backgrnd Density (Copy).<br />
4 Press [OK].<br />
Item Description<br />
Off No file separation performed (all the pages are compiled in one file).<br />
Each Page Each scanned page is created into a separate file.<br />
Item Description<br />
Off Do not adjust background density.<br />
Auto Set to auto adjustment.<br />
Manual (Darker 5) Set to (Darker 5) in manual adjustment.<br />
9
BackgrndDens.(Send/Store)<br />
9-20<br />
Default Setting (System Menu)<br />
Select the default background density for sending and storing in a document box. The available default settings<br />
are shown below.<br />
Use the procedure below to select the default BackgrndDens.(Send/Store).<br />
1 Press the System Menu key.<br />
2 Press [Common Settings], [ ], [Next] of Function Defaults, [ ] and then [Change] of<br />
BackgrndDens.(Send/Store).<br />
3 Select the default BackgrndDens.(Send/Store).<br />
4 Press [OK].<br />
Prevent Bleed-thru (Copy)<br />
Set the default Prevent Bleed-thru (Copy).<br />
Use the procedure below to select the default Prevent Bleed-thru (Copy).<br />
1 Press the System Menu key.<br />
2 Press [Common Settings], [ ], [Next] of Function Defaults, [ ] and then [Change] of Prevent Bleed-thru<br />
(Copy).<br />
3 Set the default Prevent Bleed-thru (Copy).<br />
4 Press [OK].<br />
Prevent Bleed(Send/Store)<br />
Item Description<br />
Off Do not adjust background density.<br />
Auto Set to auto adjustment.<br />
Manual (Darker 5) Set to (Darker 5) in manual adjustment.<br />
Item Description<br />
Off Do not reduce show-through.<br />
On Reduce show-through.<br />
Set the default Prevent Bleed(Send/Store).<br />
Item Description<br />
Off Do not reduce show-through.<br />
On Reduce show-through.
Use the procedure below to select the default Prevent Bleed(Send/Store).<br />
1 Press the System Menu key.<br />
9-21<br />
Default Setting (System Menu)<br />
2 Press [Common Settings], [ ], [Next] of Function Defaults, [ ] and then [Change] of Prevent Bleed(Send/<br />
Store).<br />
3 Set the default Prevent Bleed(Send/Store).<br />
4 Press [OK].<br />
Zoom<br />
Select the enlarged/reduced default settings when paper size/sending size is changed after the originals are set.<br />
The available default settings are shown below.<br />
Use the procedure below to select the default zoom setting.<br />
1 Press the System Menu key.<br />
2 Press [Common Settings], [ ], [Next] of Function Defaults, [ ] three times and then [Change] of Zoom.<br />
3 Select the default zoom setting.<br />
4 Press [OK].<br />
Border Erase Default<br />
Set the default width to be erased as a border. The table below shows the measurement ranges that can be set.<br />
NOTE: Refer to page 4-18 and page 6-26 for Border Erase.<br />
Use the procedure below to set the default border erase width.<br />
1 Press the System Menu key.<br />
2 Press [Common Settings], [ ], [Next] of Function Defaults, [ ] and then [Change] of Border Erase Default.<br />
3 Press [+] or [–] for the Border and Gutter width to erase.<br />
You can use the numeric keys to enter the number directly.<br />
4 Press [OK].<br />
Item Description<br />
100% Copy (send/save) at actual size (100%).<br />
Auto Automatically reduce or enlarge the originals to match the paper<br />
size/ sending size.<br />
Input units Range<br />
Inch 0 to 2" (in 0.01" increments)<br />
Metric 0 mm to 50 mm (in 1 mm increments)<br />
9
Border Erase to Back Page<br />
9-22<br />
Default Setting (System Menu)<br />
Select the Border Erase Method for Back Page of a sheet. The table below shows the available settings.<br />
NOTE: Refer to page 4-18 and page 6-26 for Border Erase.<br />
Use the procedure below to specify the border erase setting for the back side of the original page.<br />
1 Press the System Menu key.<br />
2 Press [Common Settings], [ ], [Next] of Function Defaults, [ ] and then [Change] of Border Erase to Back<br />
Page.<br />
3 Press [Same as Front Page] or [Do Not Erase].<br />
4 Press [OK].<br />
Margin Default<br />
Set the default margin. The table below shows the measurement ranges that can be set.<br />
Use the procedure below to set the default margin width.<br />
1 Press the System Menu key.<br />
2 Press [Common Settings], [ ], [Next] of Function Defaults, [ ] and then [Change] of Margin Default.<br />
3 Use the [+] or [-] to enter the margin widths for Left/Right and Top/Bottom.<br />
You can use the numeric keys to enter the number directly.<br />
4 Press [OK].<br />
Auto Image Rotation<br />
Item Description<br />
Same as Front Page Border Erase performed in the same setting as the front page<br />
Do Not Erase No Border Erase performed on the back page<br />
Input units Range<br />
Inch -0.75 to 0.75" (in 0.01" increments)<br />
Metric -18 mm to 18 mm (in 1 mm increments)<br />
Select the default Auto Image Rotation setting. The table below shows the available settings.<br />
Item Description<br />
Off No Auto Image Rotation performed.<br />
On Auto Image Rotation performed.
NOTE: Refer to page 4-38 for Auto Image Rotation.<br />
Use the procedure below to set the default Auto Image Rotation settings.<br />
1 Press the System Menu key.<br />
9-23<br />
Default Setting (System Menu)<br />
2 Press [Common Settings], [ ], [Next] of Function Defaults, [ ] and then [Change] of Auto Image Rotation.<br />
3 Select the default for [Off] or [On].<br />
4 Press [OK].<br />
EcoPrint<br />
Select the EcoPrint default. The table below shows the available settings.<br />
NOTE: Refer to page 4-14 for EcoPrint.<br />
Use the procedure below to set the default EcoPrint setting.<br />
1 Press the System Menu key.<br />
2 Press [Common Settings], [ ], [Next] of Function Defaults, [ ] twice, and then [Change] of EcoPrint.<br />
3 Select [Off] or [On] for the default.<br />
4 Press [OK].<br />
Toner SaveLevel(EcoPrint)<br />
Select the default Toner SaveLevel(EcoPrint). One of five levels [1] - [5] can be set.<br />
NOTE: Raising the level reduces toner consumption, but image quality falls.<br />
IMPOR<strong>TA</strong>NT: If you want to enable the changed defaults immediately, move to the function screen and press<br />
the Reset key.<br />
Use the procedure below to select the default Toner SaveLevel(EcoPrint).<br />
1 Press the System Menu key.<br />
2 Press [Common Settings], [ ], [Next] of Function Defaults, [ ] twice, and then [Change] of Toner<br />
SaveLevel(EcoPrint).<br />
3 Select from [1] to [5] for the default Toner SaveLevel(EcoPrint).<br />
4 Press [OK].<br />
Item Description<br />
Off No EcoPrint performed.<br />
On EcoPrint performed.<br />
9
High Comp. PDF Image<br />
Select the default quality setting for high compressed PDF files.<br />
The table below shows the available settings.<br />
Use the procedure below to select the default quality setting for high compression PDF files.<br />
1 Press the System Menu key.<br />
9-24<br />
Default Setting (System Menu)<br />
2 Press [Common Settings], [ ] and [Next] of Function Defaults. Press [ ] twice and [Change] of High<br />
Comp. PDF Image.<br />
3 Select the default for [Compression Ratio Priority], [Standard], or [Quality Priority].<br />
4 Press [OK].<br />
Color TIFF Compression<br />
Select the compression method for TIFF images handled on this machine. Use the procedure below to set the<br />
default Color TIFF Compression setting.<br />
1 Press the System Menu key.<br />
2 Press [Common Settings], [ ] and [Next] of Function Defaults. Press [ ] twice and then [Change] of Color<br />
TIFF Compression.<br />
3 Select [TIFF V6] or [TTN2].<br />
4 Press [OK].<br />
Image Quality (File Format)<br />
Select the default PDF/TIFF/JPEG/XPS file quality. Five options are available from 1 Low Quality (High Comp.)<br />
to 5 High Quality (Low Comp.).<br />
NOTE: Higher quality will make the stored files larger.<br />
Refer to page 6-14 for file formats.<br />
Use the procedure below to select the default file quality setting.<br />
1 Press the System Menu key.<br />
2 Press [Common Settings], [ ] and [Next] of Function Defaults. Press [ ] twice and then [Change] of<br />
Image Quality (File Format).<br />
3 Select the default image quality from [1] (Low Quality) to [5] (High Quality).<br />
4 Press [OK].<br />
Item Description<br />
Compression Ratio Priority Compression Ratio is given priority with smaller file size.<br />
Standard Standard quality<br />
Quality Priority Image quality is given priority with larger file size.
Collate/Offset<br />
Set the defaults for Collate/Offset. The table below shows the available settings.<br />
NOTE: Refer to page 3-14 for Collate/Offset.<br />
Use the procedure below to set the default Collate/Offset settings.<br />
1 Press the System Menu key.<br />
9-25<br />
Default Setting (System Menu)<br />
2 Press [Common Settings], [ ], [Next] of Function Defaults. Press [ ] twice and [Change] of Collate/Offset.<br />
3 Select the defaults for Collate and Offset respectively.<br />
4 Press [OK].<br />
JPEG/TIFF Print<br />
Select the image size (resolution) when printing JPEG or TIFF file. The table below shows the available settings.<br />
Use the procedure below to set the default JPEG/TIFF Print settings.<br />
1 Press the System Menu key.<br />
2 Press [Common Settings], [ ], [Next] of Function Defaults. Press [ ] twice and [Change] of JPEG/TIFF<br />
Print.<br />
3 Select the default for [Fit to Paper Size], [Image Resolution], or [Fit to Print Resolution].<br />
4 Press [OK].<br />
Item Description<br />
Collate Off Collate not performed.<br />
On Collate performed.<br />
Offset Off Offset not performed.<br />
Each Set<br />
(Each Page)<br />
Offset performed. (If [Off] is selected of Collate, it is<br />
performed [Each Page].)<br />
Item Description<br />
Fit to Paper Size Fit the image size to the selected paper size.<br />
Image Resolution Print at resolution of the actual image.<br />
Fit to Print Resolution Fit the image size to the print resolution.<br />
9
XPS Fit to Page<br />
Reduces or enlarges the image size to fit to the selected paper size when printing XPS file.<br />
Use the procedure below to set the default XPS Fit to Page settings.<br />
1 Press the System Menu key.<br />
9-26<br />
Default Setting (System Menu)<br />
2 Press [Common Settings], [ ], [Next] of Function Defaults. Press [ ] twice and [Change] of XPS Fit to<br />
Page.<br />
3 Select [Off] or [On] for the default.<br />
4 Press [OK].<br />
Continuous Scan<br />
Set the continuous scan defaults. The available default settings are shown below.<br />
Refer to page 4-37 for Continuous Scan.<br />
Use the procedure below to select the default settings for continuous scanning.<br />
1 Press the System Menu key.<br />
2 Press [Common Settings], [ ], [Next] of Function Defaults, [ ] twice and then [Change] of Continuous<br />
Scan.<br />
3 Select [Off] or [On] for the default.<br />
4 Press [OK].<br />
PDF/A<br />
Set the PDF file format used on the machine.<br />
Use the procedure below to select the default PDF/A.<br />
1 Press the System Menu key.<br />
2 Press [Common Settings], [ ] and [Next] of Function Defaults. Press [ ] three times and then [Change]<br />
of PDF/A.<br />
3 Select [Off], [PDF/A-1a] or [PDF/A-1b].<br />
4 Press [OK].<br />
Item Description<br />
Off Continuous scan not performed<br />
On Continuous scan performed
File Name Entry<br />
9-27<br />
Default Setting (System Menu)<br />
Set an automatically entered name (default) for jobs. Additional information such as Date and Time and Job No.<br />
can also be set.<br />
NOTE: Refer to page 4-42 and page 6-28 for name entry.<br />
Use the procedure below to set the default file name.<br />
1 Press the System Menu key.<br />
2 Press [Common Settings], [ ], [Next] of Function Defaults, [ ] three times and then [Change] of File<br />
Name Entry.<br />
3 Press [File Name] to enter the file name in not more than 32 characters.<br />
NOTE: Refer to the Character Entry Method on page Appendix-8 for details on entering characters.<br />
4 Press [OK].<br />
5 Press [Date and Time] to add the date/time to the job, or press [Job No.] to add the job number to the job.<br />
The added information will be displayed in Additional Info.<br />
6 Press [OK].<br />
E-mail Subject/Body<br />
Set the subject and body automatically entered (default subject and body) when sending the scanned originals<br />
by E-mail. In addition, set the template for entering the body text. One of three templates can be set.<br />
NOTE: Refer to Send as E-mail (E-mail Addr Entry) on page 3-23.<br />
Use the procedure below to set the default e-mail subject and message body.<br />
1 Press the System Menu key.<br />
2 Press [Common Settings], [ ], [Next] of Function Defaults, [ ] three times, and then [Change] of E-mail<br />
Subject/Body.<br />
3 Press [Subject] to enter an E-mail subject not more than 60 characters.<br />
NOTE: Refer to the Character Entry Method on page Appendix-8 for details on entering characters.<br />
4 Press [OK].<br />
5 Press [Body 1] and enter a maximum of 500 characters for the e-mail body template.<br />
6 To register another template, press [Body 2] or [Body 3] and enter a maximum of 500 characters for the<br />
e-mail body template.<br />
7 Select the default body text from [Body 1] to [Body 3] in Default Template.<br />
8 Press [OK].<br />
9 Check that the entries are correct and press [OK].<br />
9
9-28<br />
Default Setting (System Menu)<br />
Repeat Copy<br />
Select the Repeat Copy default. The options are as follows. The table below shows the available settings.<br />
NOTE: This setting is not displayed when the optional Data Security Kit is installed or the Repeat Copy job is<br />
set to 0.<br />
Refer to page 4-43 for Repeat Copy.<br />
Use the procedure below to set the default Repeat Copy setting.<br />
1 Press the System Menu key.<br />
2 Press [Common Settings], [ ] and [Next] of Function Defaults. Press [ ] three times and [Change] of<br />
Repeat Copy.<br />
3 Select the default for [Off] or [On].<br />
4 Press [OK].<br />
DP Read Action<br />
Set the operation when a document is scanned from the document processor. The table below shows the<br />
available settings.<br />
NOTE: Cannot be used when set to [On] in Document Guard on page 9-108.<br />
Use the procedure below to set a DP Read Action.<br />
1 Press the System Menu key.<br />
2 Press [Common Settings], [ ] and [Next] of Function Defaults. Press [ ] three times and [Change] of DP<br />
Read Action.<br />
3 Select [Speed Priority] or [Quality Priority].<br />
4 Press [OK].<br />
Item Description<br />
Off No Repeat Copy is performed.<br />
On Repeat Copy is performed.<br />
Item Description<br />
Speed Priority Priority given to scanning speed.<br />
Quality Priority Priority given to image quality.
USB Keyboard Type<br />
Set the type of USB keyboard that is connected.<br />
1 Press the System Menu key.<br />
2 Press [Common Settings], [ ] and [Change] of USB Keyboard Type.<br />
3 Select [US-English], [US-English with Euro], [French] or [German].<br />
4 Press [OK].<br />
System Stamp<br />
The following header, footer, and stamp settings can be selected in System Stamp Settings.<br />
• Basic<br />
• Printing Jobs<br />
• Sending Jobs<br />
• Storing Jobs<br />
Basic<br />
Select displayed stamp settings.<br />
9-29<br />
Default Setting (System Menu)<br />
Text (Text Stamp)<br />
Set a Text (Text Stamp). The text set here can be selected as a stamp template during sending.<br />
Use the procedure below to set a Text (Text Stamp).<br />
1 Press the System Menu key.<br />
2 Press [Common Settings] > [ ] > [Next] in System Stamp > [Next] in Basic > [Add/Edit] in Text (Text<br />
Stamp).<br />
3 Select the key in which the print text will be registered, press [Add/Edit], and enter a maximum of 32<br />
characters for the text string.<br />
4 Press [OK].<br />
Font (Page #)<br />
When page numbers are used, set the font sizes that can be set.<br />
Use the procedure below to set a Font (Page #).<br />
1 Press the System Menu key.<br />
2 Press [Common Settings] > [ ] > [Next] in System Stamp > [Next] in Basic > [Next] in Font (Page #).<br />
3 Press [Change] in Size 1 - Size 3, and set the font size.<br />
4 Press [OK].<br />
9
Font (Bates Stamp)<br />
When a bates stamp is used, set the font sizes that can be set.<br />
Use the procedure below to set a Font (Bates Stamp).<br />
1 Press the System Menu key.<br />
9-30<br />
Default Setting (System Menu)<br />
2 Press [Common Settings] > [ ] > [Next] in System Stamp > [Next] in Basic > [Next] in Font (Bates Stamp).<br />
3 Press [Change] in Size 1 - Size 3, and set the font size.<br />
4 Press [OK].<br />
Font (Text Stamp)<br />
When a text stamp is used, set the font sizes that can be set.<br />
Use the procedure below to set a Font (Text Stamp).<br />
1 Press the System Menu key.<br />
2 Press [Common Settings] > [ ] > [Next] in System Stamp > [Next] in Basic > [Change] in Font (Text<br />
Stamp).<br />
3 Press [Change] in Size 1 - Size 3, and set the font size.<br />
4 Press [OK].<br />
Printing Jobs<br />
Configure settings for stamps when a document is printed.<br />
After configuring the setting, return to the Copying Functions or Document Box (Printing a Document) screen<br />
from the system menu, and press the Reset key.<br />
Text Stamp<br />
Select whether or not a text stamp is used.<br />
Use the procedure below to set a Text Stamp.<br />
1 Press the System Menu key.<br />
2 Press [Common Settings] > [ ] > [Next] in System Stamp > [Next] in Printing Jobs > [Change] in Text<br />
Stamp.<br />
3 Select [Off] or [On].<br />
4 Press [OK].<br />
NOTE: When [On] is selected, the Text Stamp settings cannot be changed when printing.<br />
Edit Text Stamp<br />
Set the default text stamp.<br />
Use the procedure below to Edit a Text Stamp.<br />
1 Press the System Menu key.<br />
2 Press [Common Settings] > [ ] > [Next] in System Stamp > [Next] in Printing Jobs > [Change] in Edit Text<br />
Stamp.<br />
3 Press [Stamp] and enter a maximum of 32 characters for the text string, or select the text stamp to be<br />
printed from the displayed templates.
4 Press [Stamp Method] and set the stamp method for the text stamp.<br />
The following settings can be selected.<br />
5 Press [Position] and set the position of the printed text stamp.<br />
9-31<br />
Default Setting (System Menu)<br />
Positions that can be selected are [Top Left], [Top Middle], [Top Right], [Middle Left], [Center], [Middle<br />
Right], [Bottom Left], [Bottom Middle], and [Bottom Right].<br />
6 Press [Font] and set font and display settings for the printed text stamp.<br />
The following settings can be selected.<br />
7 Press [OK].<br />
Bates Stamp<br />
Select whether or not to set a Bates Stamp.<br />
Use the procedure below to set a Bates Stamp.<br />
1 Press the System Menu key.<br />
2 Press [Common Settings] > [ ] > [Next] in System Stamp > [Next] in Printing Jobs > [Change] in Bates<br />
Stamp.<br />
3 Select [Off] or [On].<br />
4 Press [OK].<br />
Item Description<br />
Each Print Page Stamp on each printed page.<br />
Each Original Page Stamp each page of the document.<br />
Item Description<br />
Size Set the font size of the printed text stamp.<br />
Style Set the font style of the printed text stamp. [Bold] or [Italic] can be<br />
set.<br />
Font Set the font of the printed text stamp. [Courier] or [Letter Gothic] can<br />
be set.<br />
Density Set the density of the color of the printed text stamp.<br />
Display Pattern Set the display method of the printed text stamp. [Transparent],<br />
[Clipping], or [Overwrite] can be selected.<br />
NOTE: When [On] is selected, the Bates Stamp settings cannot be changed when printing.<br />
9
Edit Bates Stamp<br />
Set the default Bates Stamp.<br />
Use the procedure below to set an Edit Bates Stamp<br />
1 Press the System Menu key.<br />
9-32<br />
Default Setting (System Menu)<br />
2 Press [Common Settings] > [ ] > [Next] in System Stamp > [Next] in Printing Jobs > [Change] in Edit Bates<br />
Stamp<br />
3 Set the bates stamp to print.<br />
Items that can be set are [Date], [User Name], [Serial Number], [Numbering], [Text 1], and [Text 2].<br />
If you selected [Text 1] or [Text 2], press [Change] below and enter a maximum of 32 characters for the text<br />
string.<br />
4 If you selected [Date] for the bates stamp to be printed, press [Date Format] and set the date display format.<br />
Items that can be set are [MM/DD/YYYY], [DD/MM/YYYY], and [YYYY/MM/DD]<br />
5 If you set [Numbering] for the bates stamp to be printed, press [Numbering Default] and set the starting<br />
sequence number (1 - 9999999).<br />
6 Press [Position] and set the position of the printed bates stamp.<br />
Positions that can be selected are [Top Left], [Top Middle], [Top Right], [Middle Left], [Center], [Middle<br />
Right], [Bottom Left], [Bottom Middle], and [Bottom Right].<br />
7 Press [Font] and select font and display settings for the Bates Stamp to be printed.<br />
The following settings can be selected.<br />
8 Press [OK].<br />
Item Description<br />
Size Set the font size of the Bates Stamp to be printed.<br />
Style Set the font style of the Bates Stamp to be printed. [Bold] or [Italic]<br />
can be set.<br />
Font Set the font of the Bates Stamp to be printed. [Courier] or [Letter<br />
Gothic] can be set.<br />
Density Set the density of the color of the Bates Stamp to be printed.<br />
Display Pattern Set the display method of the Bates Stamp to be printed.<br />
[Transparent], [Clipping], or [Overwrite] can be selected.<br />
Sending Jobs<br />
Configure stamp settings for sending documents.<br />
After configuring the setting, return to the Sending Functions or Document Box (Sending Documents) screen<br />
from the system menu, and press the Reset key.
Text Stamp<br />
Select whether or not a text stamp is used.<br />
Use the procedure below to set a Text Stamp.<br />
1 Press the System Menu key.<br />
9-33<br />
Default Setting (System Menu)<br />
2 Press [Common Settings] > [ ] > [Next] in System Stamp > [Next] in Sending Jobs > [Change] in Text<br />
Stamp.<br />
3 Select [Off] or [On].<br />
4 Press [OK].<br />
NOTE: When [On] is selected, the Text Stamp settings cannot be changed when sending.<br />
Edit Text Stamp<br />
Set the default text stamp.<br />
Use the procedure below to Edit a Text Stamp.<br />
1 Press the System Menu key.<br />
2 Press [Common Settings] > [ ] > [Next] in System Stamp > [Next] in Sending Jobs > [Change] in Edit Text<br />
Stamp.<br />
3 Press [Stamp] and enter a maximum of 32 characters for the text string, or select the text stamp to be<br />
printed from the displayed templates.<br />
4 Press [Position] and set the position of the printed text stamp.<br />
Positions that can be selected are [Top Left], [Top Middle], [Top Right], [Middle Left], [Center], [Middle<br />
Right], [Bottom Left], [Bottom Middle], and [Bottom Right].<br />
5 Press [Font] and set font and display settings for the printed text stamp.<br />
The following settings can be selected.<br />
6 Press [OK].<br />
Item Description<br />
Size Set the font size of the printed text stamp.<br />
Style Set the font style of the printed text stamp. [Bold] or [Italic] can be set.<br />
Font Set the font of the printed text stamp. [Courier] or [Letter Gothic] can<br />
be set.<br />
Color Set the color of the printed text stamp. [Black], [Cyan], [Magenta],<br />
[Yellow], [Red], [Green], or [Blue] can be set.<br />
Density Set the density of the color of the printed text stamp.<br />
Display Pattern Set the display method of the printed text stamp. [Transparent],<br />
[Clipping], or [Overwrite] can be selected.<br />
9
Bates Stamp<br />
Select whether or not to set a Bates Stamp.<br />
Use the procedure below to set a Bates Stamp.<br />
1 Press the System Menu key.<br />
9-34<br />
Default Setting (System Menu)<br />
2 Press [Common Settings] > [ ] > [Next] in System Stamp > [Next] in Sending Jobs > [Change] in Bates<br />
Stamp.<br />
3 Select [Off] or [On].<br />
4 Press [OK].<br />
NOTE: When [On] is selected, the Bates Stamp settings cannot be changed when sending.<br />
Edit Bates Stamp<br />
Set the default Bates Stamp.<br />
Use the procedure below to set an Edit Bates Stamp<br />
1 Press the System Menu key.<br />
2 Press [Common Settings] > [ ] > [Next] in System Stamp > [Next] in Sending Jobs > [Change] in Edit Bates<br />
Stamp<br />
3 Set the bates stamp to print.<br />
Items that can be set are [Date], [User Name], [Serial Number], [Numbering], [Text 1], and [Text 2].<br />
If you selected [Text 1] or [Text 2], press [Change] below and enter a maximum of 32 characters for the text<br />
string.<br />
4 If you selected [Date] for the bates stamp to be printed, press [Date Format] and set the date display format.<br />
Items that can be set are [MM/DD/YYYY], [DD/MM/YYYY], and [YYYY/MM/DD]<br />
5 If you set [Numbering] for the bates stamp to be printed, press [Numbering Default] and set the starting<br />
sequence number (1 - 9999999).<br />
6 Press [Position] and set the position of the printed bates stamp stamp.<br />
Positions that can be selected are [Top Left], [Top Middle], [Top Right], [Middle Left], [Center], [Middle Right],<br />
[Bottom Left], [Bottom Middle], and [Bottom Right].
7 Press [Font] and select font and display settings for the Bates Stamp to be printed.<br />
The following settings can be selected.<br />
8 Press [OK].<br />
9-35<br />
Default Setting (System Menu)<br />
Storing Jobs<br />
Configure stamp settings for storing documents in removable memory.<br />
After configuring the setting, return to the Document Box (Storing Documents) screen from the system menu,<br />
and press the Reset key.<br />
Text Stamp<br />
Select whether or not a text stamp is used.<br />
Use the procedure below to set a Text Stamp.<br />
1 Press the System Menu key.<br />
2 Press [Common Settings] > [ ] > [Next] in System Stamp > [Next] in Storing Jobs > [Change] in Text<br />
Stamp.<br />
3 Select [Off] or [On].<br />
4 Press [OK].<br />
Item Description<br />
Size Set the font size of the Bates Stamp to be printed.<br />
Style Set the font style of the Bates Stamp to be printed. [Bold] or [Italic]<br />
can be set.<br />
Font Set the font of the Bates Stamp to be printed. [Courier] or [Letter<br />
Gothic] can be set.<br />
Color Set the color of the Bates Stamp to be printed. [Black], [Cyan],<br />
[Magenta], [Yellow], [Red], [Green], or [Blue] can be set.<br />
Density Set the density of the color of the Bates Stamp to be printed.<br />
Display Pattern Set the display method of the Bates Stamp to be printed.<br />
[Transparent], [Clipping], or [Overwrite] can be selected.<br />
NOTE: When [On] is selected, the Text Stamp settings cannot be changed when storing.<br />
Edit Text Stamp<br />
Set the default text stamp.<br />
Use the procedure below to Edit a Text Stamp.<br />
1 Press the System Menu key.<br />
2 Press [Common Settings] > [ ] > [Next] in System Stamp > [Next] in Storing Jobs > [Change] in Edit Text<br />
Stamp.<br />
3 Press [Stamp] and enter a maximum of 32 characters for the text string, or select the text stamp to be printed<br />
from the displayed templates.<br />
9
9-36<br />
Default Setting (System Menu)<br />
4 Press [Position] and set the position of the printed text stamp.<br />
Positions that can be selected are [Top Left], [Top Middle], [Top Right], [Middle Left], [Center], [Middle Right],<br />
[Bottom Left], [Bottom Middle], and [Bottom Right].<br />
5 Press [Font] and set font and display settings for the printed text stamp.<br />
The following settings can be selected.<br />
6 Press [OK].<br />
Bates Stamp<br />
Select whether or not to set a Bates Stamp.<br />
Use the procedure below to set a Bates Stamp.<br />
1 Press the System Menu key.<br />
2 Press [Common Settings] > [ ] > [Next] in System Stamp > [Next] in Storing Jobs > [Change] in Bates<br />
Stamp.<br />
3 Select [Off] or [On].<br />
4 Press [OK].<br />
Item Description<br />
Size Set the font size of the printed text stamp.<br />
Style Set the font style of the printed text stamp. [Bold] or [Italic] can be<br />
set.<br />
Font Set the font of the printed text stamp. [Courier] or [Letter Gothic] can<br />
be set.<br />
Color Set the color of the printed text stamp. [Black], [Cyan], [Magenta],<br />
[Yellow], [Red], [Green], or [Blue] can be set.<br />
Density Set the density of the color of the printed text stamp.<br />
Display Pattern Set the display method of the printed text stamp. [Transparent],<br />
[Clipping], or [Overwrite] can be selected.<br />
NOTE: When [On] is selected, the Bates Stamp settings cannot be changed when storing.
Edit Bates Stamp<br />
Set the default Bates Stamp.<br />
Use the procedure below to set an Edit Bates Stamp<br />
1 Press the System Menu key.<br />
9-37<br />
Default Setting (System Menu)<br />
2 Press [Common Settings] > [ ] > [Next] in System Stamp > [Next] in Storing Jobs > [Change] in Edit Bates<br />
Stamp<br />
3 Set the bates stamp to print.<br />
Items that can be set are [Date], [User Name], [Serial Number], [Numbering], [Text 1], and [Text 2].<br />
If you selected [Text 1] or [Text 2], press [Change] below and enter a maximum of 32 characters for the text<br />
string.<br />
4 If you selected [Date] for the bates stamp to be printed, press [Date Format] and set the date display format.<br />
Items that can be set are [MM/DD/YYYY], [DD/MM/YYYY], and [YYYY/MM/DD]<br />
5 If you set [Numbering] for the bates stamp to be printed, press [Numbering Default] and set the starting<br />
sequence number (1 - 9999999).<br />
6 Press [Position] and set the position of the printed bates stamp.<br />
Positions that can be selected are [Top Left], [Top Middle], [Top Right], [Middle Left], [Center], [Middle Right],<br />
[Bottom Left], [Bottom Middle], and [Bottom Right].<br />
7 Press [Font] and select font and display settings for the Bates Stamp to be printed.<br />
The following settings can be selected.<br />
8 Press [OK].<br />
Item Description<br />
Size Set the font size of the Bates Stamp to be printed.<br />
Style Set the font style of the Bates Stamp to be printed. [Bold] or [Italic]<br />
can be set.<br />
Font Set the font of the Bates Stamp to be printed. [Courier] or [Letter<br />
Gothic] can be set.<br />
Color Set the color of the Bates Stamp to be printed. [Black], [Cyan],<br />
[Magenta], [Yellow], [Red], [Green], or [Blue] can be set.<br />
Density Set the density of the color of the Bates Stamp to be printed.<br />
Display Pattern Set the display method of the Bates Stamp to be printed.<br />
[Transparent], [Clipping], or [Overwrite] can be selected.<br />
9
Manual Staple<br />
The following settings can be configured in the manual staple settings.<br />
• Manual Staple<br />
• Staple Position<br />
NOTE: When a document finisher is not installed, these settings cannot be configured.<br />
9-38<br />
Default Setting (System Menu)<br />
Manual Staple<br />
Select whether or not to set the setting for Manual Staple. The table below shows the available settings.<br />
Use the procedure below to select the default setting for Manual Staple.<br />
1 Press the System Menu key.<br />
2 Press [Common Settings] > [ ] > [Next] in Manual Staple > [Change] in Manual Staple.<br />
3 Select the default setting for Manual Staple.<br />
4 If you selected [On] in 3, set the time until manual stapling mode is automatically cancelled. The setting<br />
range is 5 to 60 seconds (5-second increments).<br />
5 Press [OK].<br />
Staple Position<br />
Set the default Staple Position. The table below shows the available settings.<br />
Use the procedure below to select the default Staple Position.<br />
1 Press the System Menu key.<br />
2 Press [Common Settings] > [ ] > [Next] in Manual Staple > [Change] in Staple Position.<br />
3 Select [A4 Long Edge] or [Letter Long Edge].<br />
4 Press [OK].<br />
Item Description<br />
Off Manual stapling cannot be used.<br />
On Manual stapling can be used.<br />
Item Description<br />
A4 Long Edge Staple on the long side of A4 size.<br />
Letter Long Edge Staple on the long side of letter size.
Customize Status Display<br />
9-39<br />
Default Setting (System Menu)<br />
Set the items that appear in the print job status screen. The table below shows the available settings.<br />
Use the procedure below to select the default Customize Status Display.<br />
1 Press the System Menu key.<br />
2 Press [Common Settings] > [ ] > [Next] in Customize Status Display.<br />
3 Select [Change] in Printing Job Column 1 or Printing Job Column 2.<br />
4 Select [Job Name], [User Name], or [Printed Pages x Copies].<br />
5 Press [OK].<br />
Low Toner Alert Level<br />
Set the amount of remaining toner to alert low toner. The setting range is 5 to 100% (increments of 1%).<br />
Selecting [Off] alerts you low toner when the amount of remaining toner becomes 5%.<br />
The procedure for setting the Low Toner Alert Level is explained below.<br />
1 Press the System Menu key.<br />
2 Press [Common Settings] > [ ] > [Change] in Low Toner Alert Level.<br />
If the user authentication screen appears, enter your login user name and password and then press [Login].<br />
For this, you need to login with administrator privileges. Refer to Adding a User (Local User List) on page<br />
10-5 for the default login user name and password.<br />
3 Press [Off] or [On].<br />
4 If you selected [On], set the toner level at which notification takes place with [+], [-] or the numeric keys.<br />
5 Press [OK].<br />
Item Description<br />
Job Name Display the job name.<br />
User Name Display the user name.<br />
Printed Pages x<br />
Copies<br />
Display the number of pages of the print job and number of copies.<br />
9
Offset One Page Documents<br />
Set whether one-page documents are sorted.<br />
NOTE: This setting is displayed when an optional document finisher is installed.<br />
The table below shows the available settings.<br />
The procedure is as follows.<br />
1 Press the System Menu key.<br />
2 Press [Common Settings] > [ ] > [Next] in Offset One Page Documents.<br />
3 Press [Off] or [On].<br />
4 Press [OK].<br />
Display Jobs Log<br />
Set Display Jobs Log.<br />
The table below shows the available settings.<br />
NOTE: The fax log can be viewed regardless of the setting for this function.<br />
The procedure is as follows.<br />
1 Press the System Menu key.<br />
2 Press [Common Settings] > [ ] twice > [Next] in Display Jobs Log.<br />
9-40<br />
Default Setting (System Menu)<br />
NOTE: If the user authentication screen appears, enter your login user name and password and then press<br />
[Login]. For this, you need to login with administrator privileges. Refer to Adding a User (Local User List) on<br />
page 10-5 for the default login user name and password.<br />
3 Press [Show All] or [Hide All].<br />
4 Press [OK].<br />
Item Description<br />
Off Does not sort one-page documents.<br />
On Sorts one-page documents.<br />
Item Description<br />
Show All All users can view the job log.<br />
Hide All Only users with administrator privileges can view the job log.
Message Banner Print<br />
9-41<br />
Default Setting (System Menu)<br />
This sets whether or not the confirmation screen appears before each sheet is printed when printing multiple<br />
banner sheets.<br />
NOTE: Select this setting when the optional banner tray is attached.<br />
The table below shows the available settings.<br />
The procedure is as follows.<br />
1 Press the System Menu key.<br />
2 Press [Common Settings] > [ ] twice > [Change] in Message Banner Print.<br />
3 Press [Off] or [On].<br />
4 Press [OK].<br />
Item Description<br />
Off The confirmation screen is not displayed. (Paper is fed continuously.)<br />
On The confirmation screen is displayed before each sheet is printed.<br />
9
Copy<br />
The following settings are available for copying functions.<br />
• Paper Selection …9-42<br />
• Auto Image Rotation Action …9-43<br />
• Auto Paper Selection …9-43<br />
• Auto % Priority …9-44<br />
• Reserve Next Priority …9-44<br />
• Paper Size for Small Original …9-44<br />
• Preset Limit …9-45<br />
• Quick Setup Registration …9-45<br />
9-42<br />
Default Setting (System Menu)<br />
NOTE: If user login administration is enabled, you can only change the settings by logging in with<br />
administrator privileges.<br />
Paper Selection<br />
Set the default paper selection. The table below shows the available settings.<br />
Use the procedure below to set the default paper selection.<br />
1 Press the System Menu key.<br />
2 Press [Copy] and [Change] of Paper Selection.<br />
3 Press [Auto] or [Default Paper Source].<br />
4 Press [OK].<br />
Item Description<br />
Auto Automatically select the cassette containing paper in the same size as<br />
originals.<br />
Default Paper Source Select the paper source set by Default Paper Source (refer to page 9-<br />
9).<br />
5 Move to the copy screen and press the Reset key.
Auto Image Rotation Action<br />
9-43<br />
Default Setting (System Menu)<br />
Set whether the image is rotated when the orientation of the document to be printed is different from the<br />
orientation of the paper.<br />
NOTE: This function is only enabled when Auto Image Rotation for the copy function (page 4-38) is set to<br />
[On].<br />
The table below shows the available settings.<br />
Unrotated<br />
Manual Copy<br />
The procedure is as follows.<br />
1 Press the System Menu key.<br />
2 Press [Copy] and [Change] of Auto Image Rotation Action.<br />
3 Select [Unrotated Manual Copy], [Apply All], or [Follow Image Size].<br />
4 Press [OK].<br />
Auto Paper Selection<br />
If [Auto] is selected for Paper Selection, set the paper size selection method when the zoom changes. The table<br />
below shows the available settings.<br />
IMPOR<strong>TA</strong>NT: If you want to enable the changed defaults immediately, move to the function screen and press<br />
the Reset key.<br />
Use the procedure below to specify the action performed for Auto Paper Selection.<br />
1 Press the System Menu key.<br />
2 Press [Copy] and [Change] of Auto Paper Selection.<br />
3 Press [Most Suitable Size] or [Same as Original Size].<br />
4 Press [OK].<br />
Item Description<br />
Apply All Rotates all images.<br />
Follow Image<br />
Size<br />
If a paper source or zoom ratio is specified, the image is not rotated.<br />
The image is rotated if the rotated image fits on the paper.<br />
Item Description<br />
Most Suitable Size Select paper based on the current zoom and the size of the original.<br />
Same as Original Size Select paper that matches the size of the original, regardless the zoom.<br />
9
Auto % Priority<br />
9-44<br />
Default Setting (System Menu)<br />
When a paper source of different size from the original is selected, select whether automatic zoom (reduce/<br />
zoom) is performed. The table below shows the available settings.<br />
IMPOR<strong>TA</strong>NT: If you want to enable the changed defaults immediately, move to the function screen and press<br />
the Reset key.<br />
Use the procedure below to specify the automatic zoom priority.<br />
1 Press the System Menu key.<br />
2 Press [Copy] and [Change] of Auto % Priority.<br />
3 Select the default for [Off] or [On].<br />
4 Press [OK].<br />
Reserve Next Priority<br />
Select the operation of the reserve copy and interrupt copy functions and for canceling jobs.<br />
Use the procedure below to select the default Reserve Next Priority setting.<br />
1 Press the System Menu key.<br />
2 Press [Copy] and [Change] of Reserve Next Priority.<br />
3 Select the default for [Off] or [On].<br />
4 Press [OK].<br />
Paper Size for Small Original<br />
Specify the paper size to be used for a case where the original is too small to be detected in the Auto Paper<br />
Selection mode.<br />
The procedure is as follows.<br />
1 Press the System Menu key.<br />
2 Press [Copy] and [Change] of Paper Size for Small Original.<br />
3 Select the paper size.<br />
The following paper sizes can be selected:<br />
Default Paper Source, A4, A4-R, A5-R, A6-R, B5, B5-R, B6-R, Letter, Letter-R, Statement-R<br />
4 Press [OK].<br />
Item Description<br />
Off No zoom performed (copied in original size).<br />
On Automatic zoom performed as appropriate.<br />
5 Move to the copy screen and press the Reset key.
Preset Limit<br />
Restrict the number of copies that can be made at one time. Options are 1-9999 copies.<br />
Use the procedure below to set the limit on the number of copies.<br />
1 Press the System Menu key.<br />
2 Press [Copy] and [Change] of Preset Limit.<br />
3 Press [+] or [–] or use the numeric keys to enter the limit for the number of copies.<br />
4 Press [OK].<br />
Quick Setup Registration<br />
9-45<br />
Default Setting (System Menu)<br />
Select the copying functions to be registered for Quick Setup. Six keys of the Quick Setup screen are allocated<br />
to typical functions but can be changed as necessary. Six items from the following options are available.<br />
Paper Selection, Zoom, Staple/Punch, Density, Duplex, Combine, Collate/Offset, Original Image,<br />
Original Size, Original Orientation, Continuous Scan, Background Density Adj.<br />
NOTE: Refer to Quick Setup Screen on page 3-52 for the Quick Setup steps.<br />
Use the procedure below to register the Quick Setup functions.<br />
1 Press the System Menu key.<br />
2 Press [Copy] and [Next] of Quick Setup Registration.<br />
3 Press [Change] of the function to be registered in Quick Setup.<br />
4 Select a key (1-6) allocated on the Quick Setup Registration screen. Press [Off] to delete a key from the<br />
Quick Setup.<br />
5 Press [OK]. If you overwrite the setting, a confirmation screen appears. Press [Yes].<br />
9
Send<br />
The sending settings allow you to specify the following sending function options.<br />
• Quick Setup Registration …9-46<br />
• Dest. Check before Send …9-46<br />
• Color Type …9-47<br />
• Entry Check for New Dest. …9-47<br />
• Default Screen …9-48<br />
• Send and Forward …9-48<br />
9-46<br />
Default Setting (System Menu)<br />
NOTE: If user login administration is enabled, you can only change the settings by logging in with<br />
administrator privileges.<br />
Quick Setup Registration<br />
Select the sending functions to be registered for Quick Setup. Six keys of the Quick Setup screen are allocated<br />
to typical functions but can be changed as necessary.<br />
Six items in the following options are available.<br />
Original Size, 2-sided/Book Original, Sending Size, Original Orientation, File Format, Density, Original Image,<br />
Scan Resolution, FAX TX Resolution, Color Selection, Zoom, Continuous Scan, Background Density Adj.<br />
Use the procedure below to register the Quick Setup functions.<br />
1 Press the System Menu key.<br />
2 Press [Send] and [Next] of Quick Setup Registration.<br />
3 Press [Change] of the function to be registered in Quick Setup.<br />
4 Select a key (1-6) allocated on the Quick Setup Registration screen. Press [Off] to delete a key from the<br />
Quick Setup.<br />
5 Press [OK]. If you overwrite the setting, a confirmation screen appears. Press [Yes].<br />
Dest. Check before Send<br />
When performing sending jobs, display the confirmation screen of destinations after pressing the Start key.<br />
The table below shows the available settings.<br />
NOTE: Refer to Confirmation Screen of Destinations on page 3-28 for the Quick Setup steps.<br />
Use the procedure below to set the destination check before send.<br />
1 Press the System Menu key.<br />
2 Press [Send] and then [Change] of Dest. Check before Send.<br />
3 Select [Off] or [On].<br />
4 Press [OK].<br />
Item Description<br />
Off Do not display the confirmation screen of destinations.<br />
On Display the confirmation screen of destinations.
Color Type<br />
9-47<br />
Default Setting (System Menu)<br />
Set the color type when you send color documents. The table below shows the available settings.<br />
Selecting RGB displays the color profile values set on the machine.<br />
Use the procedure below to set the color type.<br />
1 Press the System Menu key.<br />
2 Press [Send] and then [Change] of Color Type.<br />
3 Select [RGB] or [sRGB].<br />
4 Press [OK].<br />
Entry Check for New Dest.<br />
When adding new destination, display the entry check screen to check the entered destination. The table below<br />
shows the available settings.<br />
Use the procedure below to set entry check for new destination.<br />
1 Press the System Menu key.<br />
2 Press [Send] and then [Change] of Entry Check for New Dest..<br />
3 Select [Off] or [On].<br />
4 Press [OK].<br />
Item Description<br />
RGB Send color documents in RGB.<br />
sRGB Allows you to match the color space for machines that support sRGB.<br />
Item Description<br />
Off Do not display the entry check screen.<br />
On Display the entry check screen.<br />
9
Default Screen<br />
Use this procedure to set the default screen displayed when you press the Send key.<br />
The table below shows the available settings.<br />
Use the procedure below to set the default send screen.<br />
1 Press the System Menu key.<br />
2 Press [Send] and then [Change] of Default Screen.<br />
3 Press [Destination] or [Address Book].<br />
4 Press [OK].<br />
Send and Forward<br />
9-48<br />
Default Setting (System Menu)<br />
You can set whether transmission copies are forwarded to a specified address when documents are sent. The<br />
table below shows the available settings.<br />
Forward<br />
Set whether or not transmission copies are forwarded. The table below shows the available settings.<br />
Use the procedure below to set the settings for Forward.<br />
1 Press the System Menu key.<br />
2 Press [Send] > [Next] of Send and Forward > [Change] of Forward.<br />
3 Select [Off] or [On].<br />
Item Detail<br />
Destination Displays the destination screen when the Send key is pressed<br />
(screen for sending).<br />
Address Book Displays the address book when the Send key is pressed<br />
• Forward • File Format<br />
• Destination • File Separation<br />
• Color Setting • E-mail Subject<br />
• Scan Resolution • FTP Encrypted TX<br />
Item Detail<br />
Off Do not forward transmission copies.<br />
On Forward transmission copies.<br />
4 Select the type of address to be specified as a forwarding destination and press [OK].
Destination<br />
Set the address to which transmission copies are to be forwarded.<br />
Use the procedure below to set the default Destination.<br />
1 Press the System Menu key.<br />
2 Press [Send] > [Next] of Send and Forward > [Change] of Destination.<br />
9-49<br />
Default Setting (System Menu)<br />
3 To specify the forwarding destination from the address book, press [Address Book]. To specify by entering<br />
an e-mail address, press [E-mail Addr Entry]. To specify a folder, press [Folder Path Entry].<br />
The procedure differs depending on the transmission method selected.<br />
Specifying an address from the address book<br />
Select the address to be specified as a forwarding destination.<br />
NOTE: Destinations can be sorted or searched by destination name or address number. Refer to Specifying<br />
Destination on page 3-39 for Address List.<br />
Specifying by entering an e-mail address<br />
Press [E-mail Address], enter the e-mail address, and press [OK].<br />
NOTE: Refer to the Character Entry Method on page Appendix-8 for details on entering characters.<br />
Specifying a folder<br />
Select [FTP] or [SMB], press [Host Name], [Path], [Login User Name], and [Login Password], enter each<br />
item, and press [OK].<br />
The table below explains the items to be entered.<br />
Item Description<br />
Host Name* Host name or IP address of server or computer to be sent to. 64<br />
Path Path for the file to be stored (e.g., "User\ScanData") 128<br />
Login User Name User name server login<br />
Domain Name\User Name (e.g., "abcdnet\james.smith")<br />
Login Password Password for server login 64<br />
Max. No. of<br />
Characters<br />
* If you specify a port number other than the default (FTP: 21, SMB: 139), use the "Host name: port<br />
number" format.<br />
(e.g., FTPhostname:140)<br />
To enter the IPv6 address, enclose the address in brackets [ ].<br />
(e.g., [3ae3:9a0:cd05:b1d2:28a:1fc0:a1:10ae]:140)<br />
64<br />
9
9-50<br />
Default Setting (System Menu)<br />
To search for and register a folder on a PC on the network, press [Search SMB Host] or [Windows Network].<br />
If you pressed [Search SMB Host], enter the "Domain/Workgroup" and "Host Name" to search the PCs on<br />
the network.<br />
If you pressed [Windows Network], all PCs on the network are searched. A maximum of 500 addresses can<br />
be displayed. Select the host name (PC name) that you want to specify in the screen that appears, and<br />
press [Next]. The login user name and login password entry screen appears. After you enter the login user<br />
name and login password name, the shared folders appear. Select the folder that you want to specify and<br />
press [Next]. The address of the selected shared folder is set.<br />
NOTE: Refer to the Character Entry Method on page Appendix-8 for details on entering characters.<br />
Press [Connection Test] to check the connection to the server you chose. If the connection fails, check the<br />
entries you made.<br />
4 Check if the destination entry is correct and press [OK]. The destination is added to the Address Book.<br />
Color Setting<br />
Color settings for forwarded transmission copies can be set.<br />
The settings are described below.<br />
Auto Color<br />
(Color/Gray)<br />
Auto Color<br />
(Color/B & W)<br />
NOTE: All jobs sent by Network FAX are forwarded in black & white.<br />
Use the procedure below to set the default Color setting.<br />
1 Press the System Menu key.<br />
2 Press [Send] > [Next] of Send and Forward > [Change] of Color setting.<br />
3 Select the scanning color mode.<br />
4 Press [OK].<br />
Item Detail<br />
Full Color Forward in full color.<br />
Automatically select full color or grayscale.<br />
Grayscale Forward in grayscale.<br />
Automatically select full color or black & white.<br />
Black & White Forward in black & white.
Scan Resolution<br />
9-51<br />
Default Setting (System Menu)<br />
The resolution of forwarded copies can be set. The options are 200x100dpi Normal, 200x200dpi Fine,<br />
200x400dpi Super Fine, 300x300dpi, 400x400dpi Ultra Fine, 600x600dpi.<br />
NOTE: Jobs sent by Network FAX are sent in the same resolution as the resolution for fax transmission.<br />
Use the procedure below to set the default Scan Resolution.<br />
1 Press the System Menu key.<br />
2 Press [Send] > [Next] of Send and Forward > [Change] of Scan Resolution.<br />
3 Select the resolution.<br />
4 Press [OK].<br />
File Format<br />
Select the file format of forwarded transmission copies. The table below lists the file formats and their details.<br />
File Format<br />
PDF*<br />
Adjustable range of image<br />
quality<br />
1 Low Quality (High Comp.) to<br />
5 High Quality (Low Comp.)<br />
TIFF 1 Low Quality (High Comp.) to<br />
5 High Quality (Low Comp.)<br />
JPEG 1 Low Quality (High Comp.) to<br />
5 High Quality (Low Comp.)<br />
XPS 1 Low Quality (High Comp.) to<br />
5 High Quality (Low Comp.)<br />
High Comp.<br />
PDF*<br />
1 Compression Ratio Priority<br />
to 3 Quality Priority<br />
* The file format can be set to [PDF/A-1a] or [PDF/A-1b].<br />
Color Setting<br />
Auto Color (Color/Grayscale), Auto<br />
Color (Color/Black and White), Full<br />
Color, Grayscale, Black and White<br />
Auto Color (Color/Grayscale), Auto<br />
Color (Color/Black and White), Full<br />
Color, Grayscale, Black and White<br />
Auto Color (Color/Grayscale), Full<br />
Color, Grayscale<br />
Auto Color (Color/Grayscale), Auto<br />
Color (Color/Black and White), Full<br />
Color, Grayscale, Black and White<br />
Auto Color (Color/Grayscale), Auto<br />
Color (Color/Black and White), Full<br />
Color, Grayscale<br />
NOTE: When [High Comp. PDF] is specified, you cannot adjust the image quality.<br />
You can use PDF encryption functions. For details, refer to the following PDF Encryption Functions.<br />
9
Use the procedure below to set the default File Format.<br />
1 Press the System Menu key.<br />
2 Press [Send] > [Next] of Send and Forward > [Change] of File Format.<br />
9-52<br />
Default Setting (System Menu)<br />
3 Select the file format from [PDF], [TIFF], [JPEG], [XPS], and [High Comp. PDF].<br />
When the color mode in scanning has been selected for Grayscale or Full Color, set the image quality.<br />
If you selected [PDF] or [High Comp. PDF], you can specify encryption and PDF/A settings.<br />
NOTE: If encryption is enabled, PDF/A settings cannot be specified.<br />
4 Press [OK].<br />
PDF Encryption Functions<br />
If you have selected PDF or High Comp. PDF for file format, you can restrict the access level for displaying,<br />
printing, and editing PDF's by assigning a secure password.<br />
The items you can restrict the access level with are as follows.<br />
Item Value Detail<br />
Compatibility Acrobat 3.0 or later,<br />
Acrobat 5.0 or later<br />
Password to<br />
Open<br />
Document<br />
Password to<br />
Edit/Print<br />
Document<br />
When you send a PDF file, use the procedure below to encrypt the PDF file for transmission.<br />
1 Press the System Menu key.<br />
2 Press [Send] > [Next] of Send and Forward > [Change] of File Format.<br />
3 Press [PDF] or [High Comp. PDF], and [Encryption].<br />
Select the version that is compatible with the PDF file.<br />
Off, On Enter the password to open the PDF file<br />
Off, On Enter the password to edit the PDF file<br />
When you have entered the password to edit/print<br />
document, you can specifically limit the operation.<br />
4 Press [ ] of Compatibility, select Acrobat 3.0 and later or Acrobat 5.0 and later.<br />
5 When you enter the password to open the PDF file, select [On] of Password to Open Document.<br />
6 Press [Password], enter a password (up to 256 characters) and then press [OK].<br />
NOTE: Refer to the Character Entry Method on page Appendix-8 for details on entering characters.<br />
7 Press [Confirmation] and enter the password again for confirmation. Then press [OK].<br />
8 When you enter the password to edit the PDF file, select [On] of Password to Edit/Print Document.<br />
9 In the same way as the entry of Password to Open Document, enter the password to change the PDF file.
10 Press [Detail].<br />
9-53<br />
Default Setting (System Menu)<br />
11 Restrict the access level of the PDF file. Press [ ] of Printing Allowed to select the item (the scope of limit).<br />
The item to be displayed differs according to the version of Acrobat selected in Compatibility in step 4.<br />
The table below shows the available settings.<br />
12 Press [ ] of Changes Allowed, and select the item (the scope of limit). The item to be displayed differs<br />
according to the version of Acrobat selected in Compatibility in step 4.<br />
The table below shows the available settings.<br />
13 From Copying of Text/Images/Others, select [Disable] or [Enable].<br />
The table below shows the available settings.<br />
14 Press [OK].<br />
Item Detail<br />
Not Allowed Make the printing of PDF file impossible<br />
Allowed (Low Resolution<br />
only)*<br />
Can print the PDF file only in low resolution<br />
Allowed Can print the PDF file in original resolution<br />
* Only displayed when [Acrobat 5.0 and later] is selected in Compatibility.<br />
Item Detail<br />
Not Allowed Cannot change the PDF file<br />
Inserting/Deleting/<br />
Rotating Pages*<br />
Can only insert, delete, and rotate the pages of the<br />
PDF file<br />
Commenting Can only add commenting<br />
Layout except extracting<br />
Pages**<br />
Any except extracting<br />
Pages<br />
Can change the page layout except extracting the<br />
pages of the PDF file<br />
Can conduct all operations except extracting the pages<br />
of the PDF file<br />
* Only displayed when [Acrobat 5.0 and later] is selected in Compatibility.<br />
** Only displayed when [Acrobat 3.0 and later] is selected in Compatibility.<br />
Item Detail<br />
Disable Prohibit the copying of text and objects on the PDF file.<br />
Enable Can copy text and objects on the PDF file.<br />
9
File Separation<br />
Set whether transmission copies are divided into multiple files before being forwarded.<br />
Use the procedure below to set the default for File Separation.<br />
1 Press the System Menu key.<br />
2 Press [Send] > [Next] of Send and Forward > [Change] of File Separation.<br />
3 Press [Off] or [Each Page] to set File Separation.<br />
4 Press [OK].<br />
9-54<br />
Default Setting (System Menu)<br />
NOTE: A three-digit serial number such as abc_001.pdf, abc_002.pdf... is attached to the end of the file<br />
name.<br />
E-mail Subject<br />
Set the subject of forwarded e-mails.<br />
Use the procedure below to set the default E-mail Subject.<br />
1 Press the System Menu key.<br />
2 Press [Send] > [Next] of Send and Forward > [Change] of E-mail Subject.<br />
3 Enter a maximum of 60 characters for the e-mail subject and press [OK].<br />
NOTE: Refer to the Character Entry Method on page Appendix-8 for details on entering characters.<br />
FTP Encrypted TX<br />
Set whether transmission copies are encrypted before being forwarded.<br />
Use the procedure below to set the default FTP Encrypted TX<br />
1 Press the System Menu key.<br />
2 Press [Send] > [Next] of Send and Forward > [Change] of FTP Encrypted TX.<br />
3 Select [Off] or [On].<br />
4 Press [OK].<br />
NOTE: When the SSL setting is not enabled, FTP encryption transmission cannot be enabled.
Document Box/Removable Memory<br />
The following settings are available for Document Box.<br />
• Custom Box …9-55<br />
• Default Setting …9-55<br />
• Job Box …9-55<br />
• Quick Setup Registration …9-56<br />
Custom Box<br />
9-55<br />
Default Setting (System Menu)<br />
Creates a new box, edits a box, or checks details of a box in the custom box, or deletes a box from the custom<br />
box. For details, refer to Using a Custom Box on page 7-2.<br />
Default Setting<br />
Sets the time at which documents in the custom box are automatically deleted.<br />
For details, refer to Setting the document deletion time on page 7-3.<br />
Job Box<br />
The following three operations can be done. For details, refer to each page shown below.<br />
• Quick Copy/Proof and Hold (page 7-15)<br />
• Repeat Copy (page 7-18)<br />
• Deleting a Form Stored (page 7-21)<br />
9
Quick Setup Registration<br />
9-56<br />
Default Setting (System Menu)<br />
Select the Storing in Box, Sending from Box, Printing from Box functions to be registered for Quick Setup. Six<br />
keys of the Quick Setup screen are allocated to typical functions but can be changed as necessary.<br />
The options are as follows.<br />
Store File Quick Setup<br />
Color Selection, Storing Size, Density, 2-sided/Book Original, Resolution, Zoom,<br />
Original Orientation, Original Size, Original Image, Continuous Scan, Background Density Adj.<br />
Print Quick Setup<br />
Paper Selection, Collate/Offset, Staple/Punch, Duplex, Combine, Delete after Printed<br />
Send Quick Setup<br />
Sending Size, FAX TX Resolution, File Format, Delete after Transmitted<br />
Use the procedure below to register the Quick Setup functions.<br />
1 Press the System Menu key.<br />
2 Press [Document Box/Removable Memory] and [Next] of Quick Setup Registration.<br />
3 Press [Next] of Store File, Print, or Send.<br />
4 Press [Change] of the function to be registered in Quick Setup.<br />
5 Select a key (1-6) allocated on the Quick Setup screen. Press [Off] to delete a key from the Quick Setup.<br />
6 Press [OK]. If you overwrite the setting, a confirmation screen appears. Press [Yes].
Printer<br />
9-57<br />
Default Setting (System Menu)<br />
Printing from computers, settings are generally made on the application software screen. However, the following<br />
settings are available for configuring the defaults to customize the machine.<br />
• Emulation …9-57<br />
• EcoPrint …9-59<br />
• Toner SaveLevel(EcoPrint) …9-59<br />
• Override A4/Letter …9-59<br />
• Duplex …9-60<br />
• Copies …9-60<br />
• Orientation …9-61<br />
• Form Feed Timeout …9-61<br />
• LF Action …9-62<br />
• CR Action …9-62<br />
• Job Name …9-62<br />
• User Name …9-63<br />
• Paper Feed Mode …9-63<br />
• KIR …9-63<br />
NOTE: If user login administration is enabled, you can only change the settings by logging in with<br />
administrator privileges.<br />
Emulation<br />
Select the emulation for operating this machine by commands oriented to other types of printers.<br />
Selection of emulation<br />
The printer can emulate PCL 6, KPDL and KPDL(Auto).<br />
Use the procedure below to select the emulation.<br />
1 Press the System Menu Key.<br />
2 Press [Printer] > [Change] of Emulation.<br />
3 Select the desired emulation.<br />
NOTE: If you selected [KPDL(Auto)], set Alternative Emulation, too. (Refer to page 9-58)<br />
When you have selected [KPDL] or [KPDL(Auto)], set KPDL Error Report, too. (Refer to page 9-58)<br />
4 Press [OK].<br />
9
Setting of Alternative Emulation<br />
9-58<br />
Default Setting (System Menu)<br />
When you have selected [KPDL(Auto)] as emulation mode, you can switch between KPDL and another<br />
emulation mode (alternative emulation) automatically according to the data to print. The alternative emulation<br />
you can set is [PCL6].<br />
Use the procedure below to select the alternative emulation.<br />
1 Press the System Menu Key.<br />
2 Press [Printer] > [Change] of Emulation > [KPDL(Auto)] > [Alt Emulation].<br />
3 Select the desired alternative emulation and then press [OK].<br />
4 Press [OK].<br />
Setting of KPDL error report<br />
When an error has occurred during printing in KPDL emulation mode, set whether or not the error report is<br />
output. The default setting is Off (not output).<br />
Use the procedure below to specify the KPDL error report setting.<br />
1 Press the System Menu Key.<br />
2 Press [Printer] > [Change] of Emulation > [KPDL] or [KPDL(Auto)] > [KPDL Error Report].<br />
3 Press [On] or [Off] and then press [OK].<br />
4 Press [OK].
EcoPrint<br />
9-59<br />
Default Setting (System Menu)<br />
EcoPrint conserves toner when printing. This is recommended for test copies where lighter printing is not a<br />
problem.<br />
Use the procedure below to specify the EcoPrint setting.<br />
1 Press the System Menu key.<br />
2 Press [Printer] and [Change] of EcoPrint.<br />
3 Press [Off] or [On].<br />
4 Press [OK].<br />
Toner SaveLevel(EcoPrint)<br />
Select the default Toner SaveLevel(EcoPrint). One of five levels [1] - [5] can be set.<br />
NOTE: Raising the level reduces toner consumption, but image quality falls.<br />
Use the procedure below to select the default Toner SaveLevel(EcoPrint).<br />
1 Press the System Menu key.<br />
2 Press [Printer] and [Change] of Toner SaveLevel(EcoPrint).<br />
3 Select from [1] to [5] for the default Toner SaveLevel(EcoPrint).<br />
4 Press [OK].<br />
Override A4/Letter<br />
Select whether to treat A4 size and Letter, which are similar in size, as the same size when printing. The table<br />
below shows the available settings.<br />
Use the procedure below to specify the override A4/Letter setting.<br />
1 Press the System Menu key.<br />
2 Press [Printer] and [Change] of Override A4/Letter.<br />
3 Press [Off] or [On].<br />
4 Press [OK].<br />
Item Description<br />
On A4 and Letter are regarded as the same in size. The machine will<br />
use whichever size is in the paper source.<br />
Off A4 and Letter are not regarded as the same in size.<br />
9
Duplex<br />
Select the binding orientation for duplex mode. The table below shows the available settings.<br />
Use the procedure below to select a duplex setting.<br />
1 Press the System Menu key.<br />
2 Press [Printer] and [Change] of Duplex.<br />
3 Press [1-sided], [2-sided Bind LongEdge], or [2-sided Bind ShortEdge].<br />
4 Press [OK].<br />
Copies<br />
Set the default number of copies, from 1 to 9999.<br />
Use the procedure below to specify the default number of copies.<br />
1 Press the System Menu key.<br />
2 Press [Printer] and [Change] of Copies.<br />
3 Press [+],[–] or the numeric keys to set the default number of copies.<br />
4 Press [OK].<br />
Item Description Finish<br />
1-sided No duplex mode<br />
2-sided Bind<br />
LongEdge<br />
2-sided Bind<br />
ShortEdge<br />
Longer edge bound<br />
Shorter edge bound<br />
9-60<br />
Default Setting (System Menu)
Orientation<br />
Set the default orientation, Portrait or Landscape.<br />
Use the procedure below to set the default orientation for printing.<br />
1 Press the System Menu key.<br />
2 Press [Printer] and [Change] of Orientation.<br />
3 Press [Portrait] or [Landscape].<br />
4 Press [OK].<br />
Form Feed Timeout<br />
9-61<br />
Default Setting (System Menu)<br />
Receiving print data from the computer, the machine may sometimes wait if there is no information signaling<br />
that the last page does not have any more data to be printed. When the preset timeout passes, the machine<br />
automatically prints the document. The options are between 5 and 495 seconds.<br />
Use the procedure below to set the form feed timeout.<br />
1 Press the System Menu key.<br />
2 Press [Printer], [ ] and [Change] of Form Feed Timeout.<br />
3 Press [+] or [–] to set the Form Feed Timeout.<br />
You can set the timeout delay in seconds.<br />
You cannot use the numeric keys to enter this value.<br />
4 Press [OK].<br />
Portrait Landscape<br />
Printer Printer<br />
9
LF Action<br />
Set the line feed action when the machine receives the line feed code (character code 0AH).<br />
The table below shows the available settings.<br />
Use the procedure below to specify an LF action.<br />
1 Press the System Menu key.<br />
2 Press [Printer], [ ] and [Change] of LF Action.<br />
3 Press [LF Only], [LF and CR] or [Ignore LF].<br />
4 Press [OK].<br />
CR Action<br />
9-62<br />
Default Setting (System Menu)<br />
Set the character return action when the machine receives the character return code (character code 0DH). The<br />
table below shows the available settings.<br />
Use the procedure below to specify a CR action.<br />
1 Press the System Menu key.<br />
2 Press [Printer], [ ] and [Change] of CR Action.<br />
3 Press [CR Only], [LF and CR] or [Ignore CR].<br />
4 Press [OK].<br />
Job Name<br />
Set whether the job name set in the printer driver is displayed.<br />
Use the procedure below to set the Job Name.<br />
1 Press the System Menu key.<br />
2 Press [Printer], [ ] and [Change] of Job Name.<br />
3 Select [Off] or [On].<br />
4 Press [OK].<br />
Item Description<br />
LF Only Only line feed performed.<br />
LF and CR Line feed and character return performed.<br />
Ignore LF No line feed performed.<br />
Item Description<br />
CR Only Only character return performed.<br />
LF and CR Character return and line feed performed.<br />
Ignore CR No character return performed.
User Name<br />
Set whether the user name set in the printer driver is displayed.<br />
Use the procedure below to set the User Name.<br />
1 Press the System Menu key.<br />
2 Press [Printer], [ ] and [Change] of User Name.<br />
3 Select [Off] or [On].<br />
4 Press [OK].<br />
Paper Feed Mode<br />
9-63<br />
Default Setting (System Menu)<br />
While printing from the computer, select how to feed paper when the paper source and type are specified. The<br />
table below shows the available settings.<br />
Use the procedure below to select the paper feed mode.<br />
1 Press the System Menu key.<br />
2 Press [Printer], [ ] and [Change] of Paper Feed Mode.<br />
3 Press [Auto] or [Fixed].<br />
4 Press [OK].<br />
KIR<br />
The machine is equipped with the smoothing function, which realizes an excellent printing of about 9600 dpi (600<br />
dpi × 15 gradation) × 600 dpi.<br />
Use the procedure below to set the KIR.<br />
1 Press the System Menu key.<br />
2 Press [Printer], [ ] and [Change] of KIR.<br />
3 Select [Off] or [On].<br />
4 Press [OK].<br />
Item Description<br />
Auto Search the paper source that matches the selected paper size and type.<br />
Fixed Print on paper loaded in the specified paper source.<br />
9
Report<br />
9-64<br />
Default Setting (System Menu)<br />
Print reports to check the machine settings and status. Default settings for printing the result reports can also<br />
be configured.<br />
NOTE: If user login administration is enabled, you can only print by logging in with administrator privileges.<br />
Print Report<br />
Printable reports are as follows.<br />
Status Page<br />
Check the information including current settings, memory installed, and optional equipment installed.<br />
Font List<br />
Status Page<br />
Firmware Version<br />
Check the font samples installed in the machine.
Network Status<br />
Check the information including firmware version, network address and protocol.<br />
Service Status<br />
9-65<br />
Default Setting (System Menu)<br />
More detailed information is available than on the Status Page. Service personnel usually print the service status<br />
pages for maintenance purpose.<br />
Use the procedure below to print a report.<br />
1 Press the System Menu key.<br />
2 Press [Report] and [Next] of Print Report.<br />
3 Press [Print] for the report you want to print. A confirmation screen appears. Press [Yes]. Printing starts.<br />
Send Result Report<br />
Automatically print a report of transmission result when a transmission is complete. The table below shows the<br />
available settings.<br />
1 Press the System Menu key.<br />
2 Press [Report], [Next] of Result Report Setting, [Next] of Send Result Report and then [Change] of E-mail/<br />
Folder.<br />
3 Press [Off], [On], or [Error Only].<br />
4 Press [OK].<br />
Network Status Page<br />
Firmware Version<br />
Item Description<br />
Off No result report printed.<br />
On Result report automatically printed.<br />
Transmitted images can also be attached to the FAX result report.<br />
Error Only Result report printed only when a transmission ends in an error. If two or more<br />
destinations are registered, the reports are printed only for the destinations with<br />
the errors. Transmitted images can also be attached to the FAX result report.<br />
9
Report for Job Canceled before Sending<br />
Print a send result report when the job is canceled before being sent.<br />
1 Press the System Menu key.<br />
9-66<br />
Default Setting (System Menu)<br />
2 Press [Report], [Next] of Result Report Setting, [Next] of Send Result Report and then [Change] of<br />
Canceled before Sending.<br />
3 Press [Off], [On].<br />
4 Press [OK].<br />
Sending Log History<br />
You can send the log history by e-mail. You can either send it manually as needed or have it sent automatically<br />
whenever a set number of jobs is reached.<br />
NOTE: If the user authentication screen appears, enter your login user name and password and then press<br />
[Login]. For this, you need to login with administrator privileges. Refer to Adding a User (Local User List) on<br />
page 10-5 for the default login user name and password.<br />
Destination<br />
Set the destination to which log histories are sent.<br />
Use the procedure below to set the destination.<br />
1 Press the System Menu key.<br />
2 Press [Report], [Next] of Sending Log History and then [Change] of Destination.<br />
3 To enter a new e-mail address, press [E-mail Address Entry].<br />
Press [E-mail Address], enter the destination e-mail address and then press [OK].<br />
4 To set an address from the address book, press [E-mail Address Book].<br />
5 Press [Address Book]. Select the destination from the address book and press [OK].<br />
The selected e-mail addresses is displayed.<br />
NOTE: For information on specifying destinations, refer to Specifying Destination on page 3-39.<br />
You can view information on the selected destinations by pressing [Detail].<br />
6 Press [OK].
Auto Sending<br />
9-67<br />
Default Setting (System Menu)<br />
This function automatically sends the log history to the specified destinations whenever a set number of jobs<br />
has been logged.<br />
Use the procedure below to set automatic log history transmission.<br />
1 Press the System Menu key.<br />
2 Press [Report], [Next] of Sending Log History and then [Change] of Auto Sending.<br />
3 Press [On] and enter the number of jobs in the log history print by using [+]/[-] or the numeric keys. You can<br />
enter any number between 1 and 1500.<br />
4 Press [OK].<br />
Send Log History<br />
You can also send the log history to the specified destinations manually.<br />
Use the procedure below to send the log history manually.<br />
1 Press the System Menu key.<br />
2 Press [Report], [Next] of Sending Log History and then [Start] of Send Log History.<br />
When the confirmation screen appears, press [Yes]. The log history is sent.<br />
Job Log Subject<br />
Set the subject automatically entered when sending log histories by e-mail.<br />
Use the procedure below to set the subject.<br />
1 Press the System Menu key.<br />
2 Press [Report], [Next] of Sending Log History and then [Change] of Job Log Subject.<br />
3 Enter an e-mail subject not more than 60 characters.<br />
NOTE: Refer to the Character Entry Method on Appendix-8 for details on entering characters.<br />
4 Check that the entry is correct and press [OK].<br />
9
Adjustment/Maintenance<br />
Adjust printing quality and conduct machine maintenance.<br />
• Density Adjustment …9-68<br />
• Background Density Adj. …9-69<br />
• Correcting Black Lines …9-70<br />
• System Initialization …9-70<br />
• Display Brightness …9-71<br />
• Silent Mode …9-71<br />
• Auto Color Correction...9-71<br />
• Tone Curve Adjustment...9-71<br />
• Drum Refresh1 …9-72<br />
• Drum Refresh2 …9-73<br />
• Developer Refresh...9-73<br />
• Calibration Cycle …9-74<br />
• Calibration …9-74<br />
• Correct Paper Curl...9-75<br />
9-68<br />
Default Setting (System Menu)<br />
NOTE: If user login administration is enabled, you can only change the settings by logging in with<br />
administrator privileges.<br />
Density Adjustment<br />
The density for all copying and the density for all sending and storing in document boxes can be made darker<br />
or lighter.<br />
Use the procedures below to adjust the density.<br />
Copy<br />
1 Press the System Menu key.<br />
2 Press [ ], [Adjustment/Maintenance] and then [Next] of Density Adjustment.<br />
3 Press [Next] of Copy.<br />
4 Press [-3] - [+3] (Lighter-Darker) to adjust density.<br />
5 Press [OK].<br />
Send/Box<br />
1 Press the System Menu key.<br />
2 Press [ ], [Adjustment/Maintenance] and then [Next] of Density Adjustment.<br />
3 Press [Next] of Send/Box.<br />
4 Press [-3] - [+3] (Lighter-Darker) to adjust density.<br />
5 Press [OK].
Background Density Adj.<br />
Adjust the density used when the background of documents is automatically adjusted.<br />
Use the procedure below to set the Background Density Adj..<br />
Copy (Auto)<br />
1 Press the System Menu key.<br />
2 Press [ ], [Adjustment/Maintenance] and then [Next] of Background Density Adj..<br />
3 Press [Change] of Copy (Auto).<br />
4 Press [-3] - [+3] (Lighter-Darker) to adjust background density.<br />
5 Press [OK].<br />
Send/Box (Auto)<br />
1 Press the System Menu key.<br />
2 Press [ ], [Adjustment/Maintenance] and then [Next] of Background Density Adj..<br />
3 Press [Change] of Send/Box (Auto).<br />
4 Press [-3] - [+3] (Lighter-Darker) to adjust background density.<br />
5 Press [OK].<br />
9-69<br />
Default Setting (System Menu)<br />
9
Correcting Black Lines<br />
9-70<br />
Default Setting (System Menu)<br />
Correct fine lines (streaks caused by contamination), which may appear on the image, when the document<br />
processor is used.<br />
The table below shows the available settings.<br />
Use the procedure below to specify the setting for correcting fine black lines.<br />
1 Press the System Menu key.<br />
2 Press [ ], [Adjustment/Maintenance] and then [Change] of Correcting Black Line.<br />
3 Press [Off], [On(Low)] or [On(High)].<br />
4 Press [OK].<br />
System Initialization<br />
Paper feed<br />
direction<br />
Item Description<br />
Off No correction performed.<br />
On(Low) Correction performed.<br />
(streaks caused<br />
by contamination)<br />
On(High) Select this item if a streak remains after using [On (Low)]. The reproduction of<br />
fine lines on the original may becomes lighter than when using [On (Low)].<br />
Initialize the hard disk installed on the machine to return it to the factory defaults..<br />
Refer to System Initialization on page 9-93 about the initialization procedures.
Display Brightness<br />
Set the brightness of the touch panel.<br />
Use the procedure below to adjust the display brightness.<br />
1 Press the System Menu key.<br />
2 Press [ ], [Adjustment/Maintenance] and then [Change] of Display Brightness.<br />
3 Press [1] - [4] (Darker- Lighter) to adjust brightness.<br />
4 Press [OK].<br />
Silent Mode<br />
9-71<br />
Default Setting (System Menu)<br />
Make the machine run more quietly. Select this mode when the running noise is uncomfortable.<br />
Use the procedure below to set Silent mode.<br />
1 Press the System Menu key.<br />
2 Press [ ], [Adjustment/Maintenance] and then [Change] of Silent Mode.<br />
3 Press [Off] or [On].<br />
4 Press [OK].<br />
NOTE: When [On] is selected, preparation for the next printing may take longer.<br />
Auto Color Correction<br />
This setting allows you to adjust the detection level used by the machine to determine whether the original is<br />
color or black and white in Auto Color Selection Mode. Setting a lower value will result in more originals being<br />
identified as color, while a larger value will tend to increase the number of originals being identified as black and<br />
white.<br />
Use the procedure below to set the Auto Color Detection Level.<br />
1 Press the System Menu key.<br />
2 Press [ ], [Adjustment/Maintenance], [ ] and then [Change] of Auto Color Correction.<br />
3 Press one of keys [1] to [5] (Color - B & W) to set the detection level.<br />
4 Press [OK].<br />
Tone Curve Adjustment<br />
Makes the grayscale of the printed image more consistent with the original. Perform calibration before using tone<br />
curve adjustment. If you find that the grayscale is not improved by Calibration (see page 9-74), use tone curve<br />
adjustment.<br />
NOTE: To perform tone curve adjustment, verify that either Letter or A4 paper is loaded into a cassette.<br />
A total of 2 pattern pages (No. 1 and 2) are printed during adjustment. The printed patterns are read sequentially<br />
during the adjustment.<br />
9
Use the procedure below for normal adjustment.<br />
1 Press the System Menu key.<br />
2 Press [ ], [Adjustment/Maintenance], [ ] and then [Next] of Tone Curve Adjustment.<br />
3 Press [Start]. A pattern is printed.<br />
Check that the number "1" is printed at the bottom of the pattern.<br />
4 As shown in the illustration, place the printed side down on the<br />
platen with the edge with the arrows toward the back.<br />
5 Press [Start]. The pattern is read and adjustment begins.<br />
The second pattern is output.<br />
6 Check that the number "2" is printed at the bottom of the pattern<br />
and repeat steps 4 to 6 to read the pattern.<br />
7 Press [OK] in the adjustment end confirmation screen.<br />
Drum Refresh1<br />
Refresh the drum when image blur appear on images in copies. Takes about 90 seconds.<br />
9-72<br />
Default Setting (System Menu)<br />
NOTE: Drum Refresh1 cannot be performed while printing. Execute Drum Refresh1 after the printing is done.<br />
To use [Drum Refresh1], load Ledger or A3 size paper into the Multi Purpose tray.<br />
Use the procedure below to refresh the drum.<br />
1 Press the System Menu key.<br />
2 Press [ ], [Adjustment/Maintenance].<br />
3 Press [ ], [Next] of Drum Refresh1.<br />
4 Press [Execute] to perform Drum Refresh.<br />
5 After Drum Refresh is completed, press [OK] to return to the Adjustment/Maintenance screen.
Drum Refresh2<br />
9-73<br />
Default Setting (System Menu)<br />
Use this mode when white spots appear on images. Takes about 90 seconds.<br />
When you run [Drum Refresh 2], the machine makes a vibrating sound for about 90 seconds until drum<br />
refreshing is completed. The toner soiling on the ejected paper is normal and does not indicate a fault.<br />
NOTE: Drum Refresh2 cannot be performed while printing. Execute Drum Refresh2 after the printing is done.<br />
To use [Drum Refresh2], load Ledger or A3 size paper into the Multi Purpose tray.<br />
Use the procedure below to refresh the drum.<br />
1 Press the System Menu key.<br />
2 Press [ ], [Adjustment/Maintenance].<br />
3 Press [ ], [Next] of Drum Refresh2.<br />
4 Press [Execute] to perform Drum Refresh.<br />
5 After Drum Refresh is completed, press [OK] to return to the Adjustment/Maintenance screen.<br />
Developer Refresh<br />
When the printing is too light or incomplete, even though there is enough toner, refresh the developer.<br />
1 Press the System Menu key.<br />
2 Press [ ], [Adjustment/Maintenance], [ ] and then [Next] of Developer Refresh.<br />
3 Press [Start]. Developer Refresh begins.<br />
NOTE: Waiting time may be longer when the toner is refilled during developer refresh.<br />
4 Press [OK] after Developer Refresh is complete.<br />
9
Calibration Cycle<br />
9-74<br />
Default Setting (System Menu)<br />
After Auto Clear has been activated, or during printing, Calibration... Remaining: 50 seconds may be displayed.<br />
While this message is displayed, the machine makes adjustments to maintain image quality. Wait until the<br />
message disappears.<br />
Set the calibration cycle here. The setting items are as follows.<br />
1 Press the System Menu key.<br />
2 Press [ ], [Adjustment/Maintenance], [ ] and then [Change] of Calibration Cycle.<br />
3 Select [Auto], [Short], [Standard] or [Long].<br />
4 Press [OK].<br />
Calibration<br />
Calibrate the device to ensure consistency with the original grayscale. If you find that the grayscale is not<br />
improved by this calibration, use tone curve adjustment (see page 9-71).<br />
1 Press the System Menu key.<br />
Item Description<br />
Auto Automatically sets the cycle for calibration.<br />
Short Sets a short calibration cycle and increases the number of times<br />
performed, with priority to image quality.<br />
Standard Sets a standard calibration cycle, compromising between image<br />
quality and downtime for processing.<br />
Long Sets a long calibration cycle and decreases the number of times<br />
performed, to ensure minimal downtime.<br />
2 Press [ ], [Adjustment/Maintenance], [ ] and then [Next] of Calibration.<br />
3 Press [Execute]. Calibration begins.<br />
4 Press [OK] after Calibration is complete.
Correct Paper Curl<br />
9-75<br />
Default Setting (System Menu)<br />
Some paper types and paper stored in certain conditions may curl. This feature can be used to correct paper<br />
curling. Normally the service technician performs this operation.<br />
The table below shows the available settings.<br />
The procedure is as follows.<br />
1 Press the System Menu key.<br />
2 Press [ ], [Adjustment/Maintenance], [ ] and then [Next] of Correct Paper Curl.<br />
3 Select [Auto], [Reduce Downcurl], or [Reduce Upcurl].<br />
4 Press [OK].<br />
Item Description<br />
Auto Corrects based on the machine’s default setting.<br />
Reduce<br />
Downcurl<br />
Reduce<br />
Upcurl<br />
Corrects downward curling.<br />
Corrects upward curling.<br />
9
Date/Timer<br />
Date/Timer settings include:<br />
• Date/Time …9-76<br />
• Date Format …9-76<br />
• Time Zone …9-77<br />
• Auto Panel Reset …9-77<br />
• Low Power Timer …9-78<br />
• Auto Sleep …9-78<br />
• Error Clear Timer …9-79<br />
• Interrupt Clear Timer …9-80<br />
• Error Job Skip …9-80<br />
9-76<br />
Default Setting (System Menu)<br />
NOTE: If user login administration is enabled, you can only change the settings by logging in with<br />
administrator privileges. If user login administration is disabled, the user authentication screen appears. Enter<br />
a login user name and password, and press [Login]. Refer to Adding a User (Local User List) on page 10-5 for<br />
the default login user name and password.<br />
Date/Time<br />
Set the date and time for the location where you use the machine. If you perform Send as E-mail, the date and<br />
time set here will be displayed on the header.<br />
NOTE: Be sure to set Time Zone before the Date/Time setup.<br />
Use the procedure below to set the date and time.<br />
1 Press the System Menu key.<br />
2 Press [ ], [Date/Timer] and then [Change] of Date/Time.<br />
3 Press [+] or [–] to enter the date and time respectively.<br />
4 Press [OK].<br />
NOTE: If you try to change the date/time when a trial application (page 9-112) is running, the If you change<br />
Date/Time setting, trial functions will be unavailable. Are you sure? message is displayed. To change the date/<br />
time, press [Yes].<br />
Date Format<br />
Select the display format of year, month, and date. The year is displayed in Western notation.<br />
Use the procedure below to select the date format.<br />
1 Press the System Menu key.<br />
2 Press [ ], [Date/Timer] and then [Change] of Date Format.<br />
3 Select [MM/DD/YYYY], [DD/MM/YYYY], or [YYYY/MM/DD] and press [OK].
Time Zone<br />
Set the time difference in the location you are from GMT.<br />
Use the procedure below to set the time difference.<br />
1 Press the System Menu key.<br />
2 Press [ ], [Date/Timer] and then [Change] of Time Zone.<br />
3 Select the location.<br />
NOTE: Press [ ] or [ ] to select the location.<br />
4 Press [Off] or [On] of Summer Time and press [OK].<br />
9-77<br />
Default Setting (System Menu)<br />
NOTE: If you select a region that does not utilize summer time, the summer time setting screen will not appear.<br />
Auto Panel Reset<br />
If no jobs are run for a certain period of time, automatically reset settings and return to the default setting.<br />
NOTE: Refer to page 9-16 for the default settings.<br />
Auto Panel Reset<br />
Select to use Auto Panel Reset or not.<br />
Use the procedure below to specify the auto panel reset setting.<br />
1 Press the System Menu key.<br />
2 Press [ ], [Date/Timer] and then [Change] of Auto Panel Reset.<br />
3 Press [Off] or [On].<br />
4 Press [OK].<br />
9
Panel Reset Timer<br />
9-78<br />
Default Setting (System Menu)<br />
If you select [On] for Auto Panel Reset, set the amount of time to wait before Auto Panel Reset. Options are<br />
between 5 and 495 seconds (every five seconds).<br />
NOTE: If you select [Off] for Auto Panel Reset, the time display does not appear.<br />
Use the procedure below to set the reset time.<br />
1 Press the System Menu key.<br />
2 Press [ ], [Date/Timer] and then [Change] of Panel Reset Timer.<br />
3 Press [+] or [–] to enter the time until Auto Panel Reset is turned on.<br />
You cannot use the numeric keys to enter this value.<br />
4 Press [OK].<br />
Low Power Timer<br />
You can specify the amount of time to wait before Auto Low Power Mode.<br />
Specify a value from 1 - 240 minutes (1 minute increments).<br />
For more information on Low Power Mode, refer to the Low Power Mode and Auto Low Power Mode on page 2-<br />
11.<br />
Use the procedure below to set the Low Power Mode.<br />
1 Press the System Menu key.<br />
2 Press [ ], [Date/Timer] and then [Low Power Timer].<br />
3 Press [+],[–] or the numeric keys to enter the time until Low Power Mode is turned on.<br />
4 Press [OK].<br />
Auto Sleep<br />
If no job runs for a certain period of time, automatically enter Sleep Mode. Refer to Sleep and Auto Sleep on<br />
page 2-12 for Sleep.<br />
Auto Sleep<br />
Select whether to use Auto Sleep or not.<br />
NOTE: Time remaining before Auto Sleep can be modified as necessary.<br />
Use the procedure below to specify the auto sleep setting.<br />
1 Press the System Menu key.<br />
2 Press [ ], [Date/Timer] and then [Change] of Auto Sleep.<br />
3 Press [Off] or [On].<br />
4 Press [OK].
Sleep Timer<br />
9-79<br />
Default Setting (System Menu)<br />
Set the amount of time to wait before Auto Sleep. Options are between 1 and 240 minutes (every one minute).<br />
NOTE: If you select [Off] for Auto Sleep, the time display does not appear.<br />
Use the procedure below to set the Auto Sleep time.<br />
1 Press the System Menu key.<br />
2 Press [ ], [Date/Timer] and then [Change] of Sleep Timer.<br />
3 Press [+] and [–] or the numeric keys to enter the time until Auto Sleep is turned on.<br />
4 Press [OK].<br />
Auto Error Clear<br />
If an error occurs during printing, the print job stops to wait for the next step to be taken by the user. In the Auto<br />
Error Clear mode, automatically clear the error after a set amount of time elapses. For details, refer to<br />
Responding when Error Messages, on page 12-7.<br />
Auto Error Clear<br />
Select whether to use Auto Error Clear or not.<br />
Use the procedure below to specify the auto error clear setting.<br />
1 Press the System Menu key.<br />
2 Press [ ], [Date/Timer] and then [Change] of Auto Error Clear.<br />
3 Press [Off] or [On].<br />
4 Press [OK].<br />
Error Clear Timer<br />
If you select [On] for Auto Error Clear, set the amount of time to wait before automatically clearing errors. Options<br />
are between 5 and 495 seconds (every five seconds).<br />
NOTE: If you select [Off] for Auto Error Clear, the time display does not appear.<br />
Use the procedure below to set the automatic error clear delay.<br />
1 Press the System Menu key.<br />
2 Press [ ], [Date/Timer], [ ] and then [Change] of Error Clear Timer.<br />
3 Press [+] or [–] to enter the time until printing restarts.<br />
You cannot use the numeric keys to enter this value.<br />
4 Press [OK].<br />
9
Interrupt Clear Timer<br />
9-80<br />
Default Setting (System Menu)<br />
Set the period after which the machine reverts to Normal mode when it has been set to Interrupt Copy mode<br />
and then left unused. Any period between 5 and 495 seconds (in five-second increments) can be set.<br />
The procedure for setting the interrupt clear timer is explained below.<br />
1 Press the System Menu key.<br />
2 Press [ ], [Date/Timer], [ ] and then [Change] of Interrupt Clear Timer.<br />
3 Press [+] or [-] to enter the time for the interrupt clear timer.<br />
4 Press [OK].<br />
Error Job Skip<br />
Set whether a job for which a "Add paper in cassette #" or "Add paper in Multi Purpose tray" error occurred when<br />
the job was started is automatically skipped after a set period of time elapses. The period of time can be set<br />
within the range 5 to 90 seconds (increments of 5 seconds).<br />
NOTE: When a job is skipped, it is moved to the end of the job queue.<br />
The procedure for setting the Error Job Skip is explained below.<br />
1 Press the System Menu key.<br />
2 Press [ ], [Date/Timer], [ ] and then [Change] of Error Job Skip.<br />
3 Press [Off] or [On].<br />
4 If you selected [On], set the time until the job is skipped with [+] or [-].<br />
5 Press [OK].
Edit Destination (Address Book/Adding One Touch Keys)<br />
9-81<br />
Default Setting (System Menu)<br />
Save frequently used destinations to the Address Book or One Touch Keys. The saved destinations can be<br />
changed. The destinations are available for Send as E-mail, Send to Folder, and Fax Transmission (optional).<br />
Adding a Destination (Address Book)<br />
Add a new destination to the Address Book. There are two registering methods, contacts and groups. When<br />
adding a group, enter the group name and select group members from the Address Book.<br />
NOTE: If user login administration is enabled, you can only edit destinations in the Address Book by logging in<br />
with administrator privileges.<br />
Contact<br />
A maximum of 2,000 contact addresses can be registered. Each address can include the information such as<br />
destination name, E-mail address, FTP server folder path, SMB folder path, and FAX No. (optional).<br />
Use the procedure below to register a new individual contact.<br />
1 Press the System Menu key.<br />
2 Press [Edit Destination], [Add/Edit] of Address Book, [Add], [Contact] and then [Next].<br />
3 To specify the address number, press [Change] in Address Number.<br />
4 Press [+],[–] or numeric keys to enter a particular Address Number (1-2500).<br />
To have the number assigned automatically, enter “0000”.<br />
NOTE: Address Number is an ID for a destination. You can select any available number out of 2,000 numbers<br />
for contacts and 500 numbers for groups.<br />
If you specify an address number that is already in use, an error message appears when you press [Save] and<br />
the number cannot be registered. If you set “0000” as the address number, the address is registered under the<br />
lowest available number.<br />
5 Press [OK]. The screen shown in step 3 reappears.<br />
6 Press [Change] of Name.<br />
7 Enter the destination name (up to 32 characters) to be displayed on the Address Book and press [OK]. The<br />
screen shown in step 3 reappears.<br />
NOTE: Refer to the Character Entry Method on page Appendix-8 for details on entering characters.<br />
8 Press [E-mail] to add an e-mail address, [SMB] to add a folder on the computer, or [FTP] to add an FTP<br />
folder.<br />
The procedure differs depending on the transmission method selected.<br />
9
E-mail Address<br />
9-82<br />
Default Setting (System Menu)<br />
Press [Change] of E-mail Address, enter the E-mail address and press [OK].The table below explains the<br />
items to be entered.<br />
NOTE: Refer to the Character Entry Method on page Appendix-8 for details on entering characters.<br />
The Folder (FTP) Address<br />
Press [Change] of Host Name, Path, Login User Name and Login Password, enter the information for each<br />
item and press [OK].<br />
The table below explains the items to be entered.<br />
Item Description<br />
Host Name* FTP server host name or IP address 64<br />
Path Path for the file to be stored (e.g., "User\ScanData")<br />
If no path is entered, the file is stored in the home directory.<br />
Login User Name User name FTP server login 64<br />
Login Password Password for FTP server login 64<br />
Max. No. of<br />
Characters<br />
* If you specify a port number other than the default (21), use the "Host name: port number" format.<br />
(e.g., FTPhostname:140)<br />
To enter the IPv6 address, enclose the address in brackets [ ].<br />
(e.g., [3ae3:9a0:cd05:b1d2:28a:1fc0:a1:10ae]:140)<br />
NOTE: Refer to the Character Entry Method on page Appendix-8 for details on entering characters.<br />
Press [Connection Test] to check the connection to the FTP server you chose. If the connection fails, check the<br />
entries you made.<br />
128
The Folder (SMB) Address<br />
9-83<br />
Default Setting (System Menu)<br />
Press [Change] of Host Name, Path, Login User Name and Login Password, enter the information for each<br />
item and press [OK].<br />
The table below explains the items to be entered.<br />
Host Name*<br />
Item Description<br />
Host name or IP address of the sending computer 64<br />
Path Path to the folder used to save files (e.g., “User\ScanData”) 128<br />
Login User Name User name for folder access<br />
For example, abcdnet\james.smith<br />
Login Password Password for folder access 64<br />
Max. No. of<br />
Characters<br />
* If you specify a port number other than the default (139), use the “Host name: port number” format.<br />
(e.g., SMBhostname:140)<br />
To enter the IPv6 address, enclose the address in brackets [ ].<br />
(e.g., [3ae3:9a0:cd05:b1d2:28a:1fc0:a1:10ae]:140)<br />
To search for and register a folder on a PC on the network, press [Search SMB Host] or [Windows Network].<br />
If you pressed [Search SMB Host], enter the "Domain/Workgroup" and "Host Name" to search the PCs on<br />
the network.<br />
If you pressed [Windows Network], all PCs on the network are searched. A maximum of 500 addresses can<br />
be displayed. Select the host name (PC name) that you want to specify in the screen that appears, and<br />
press [Next]. The login user name and login password entry screen appears. After you enter the login user<br />
name and login password name, the shared folders appear. Select the folder that you want to specify and<br />
press [Next]. The address of the selected shared folder is set.<br />
NOTE: Refer to the Character Entry Method on page Appendix-8 for details on entering characters.<br />
Press [Connection Test] to check the connection to the computer you chose. If the connection fails, check the<br />
entries you made.<br />
9 Check if the destination entry is correct and press [Save]. The destination is added to the Address Book.<br />
To register the registered address in a one-touch key, press [Yes] in the pop-up screen that appears after [Save]<br />
is pressed.<br />
NOTE: To register a new One Touch Key, refer to Adding a Destination on One Touch Key (One Touch<br />
Key) on page 9-85.<br />
64<br />
9
9-84<br />
Default Setting (System Menu)<br />
Group<br />
Compile two or more contacts into a group. Designations in the group can be added at the same time. When<br />
adding a group, a maximum of 500 groups can be added in the Address Book.<br />
NOTE: Before adding a group in the Address Book, the contacts to be included in the group must be added<br />
first. Up to 100 destinations for the e-mail, 500 destinations for the FAX, and a total of 10 destinations for the<br />
FTP and SMB can be registered per group.<br />
Use the procedure below to register a group.<br />
1 Press the System Menu key.<br />
2 Press [Edit Destination], [Add/Edit] of Address Book, [Add], [Group] and then [Next].<br />
3 To specify the address number, press [Change] in Address Number.<br />
4 Use [+]/[-] or the numeric keys to enter an address number (1 to 2500).<br />
To have the number assigned automatically, set "0000".<br />
NOTE: Address Number is an ID for a group. You can select any available number out of 2,000 numbers for<br />
contacts and 500 numbers for groups.<br />
If you specify an address number that is already in use, an error message appears when you press [Save] and<br />
the number cannot be registered. If you set "0000" as the address number, the address is registered under the<br />
lowest available number.<br />
5 Press [OK]. The Add Group screen reappears.<br />
6 Press [Change] of Name.<br />
7 Enter the group name displayed on the Address Book not more than 32 characters.<br />
NOTE: Refer to the Character Entry Method on page Appendix-8 for details on entering characters.<br />
8 Press [Member].<br />
9 Press [Add].<br />
10 Select destinations (contacts) to add to the group.<br />
NOTE: Destinations can be sorted or searched by destination name or address number. Refer to Specifying<br />
Destination on page 3-39 for Address List.<br />
11 Press [OK].<br />
If you have more destinations to add, repeat Steps 9 to 11.<br />
12 Check if the selected destination was added to the group and press [Save]. Now the group is added to the<br />
Address Book.<br />
To register the registered address in a one-touch key, press [Yes] in the pop-up screen that appears after [Save]<br />
is pressed.<br />
NOTE: To register a new One Touch Key, refer to Adding a Destination on One Touch Key (One Touch<br />
Key) on page 9-85.
Editing a Destination<br />
Edit/delete the destinations (Contacts) you added to the Address Book.<br />
Use the procedure below to edit a destination.<br />
1 Press the System Menu key.<br />
2 Press [Edit Destination] and then [Add/Edit] of Address Book.<br />
3 Select a destination or group to edit.<br />
9-85<br />
Default Setting (System Menu)<br />
NOTE: Destinations can be sorted or searched by destination name or address number. Refer to Specifying<br />
Destination on page 3-39 for Address List.<br />
4 Press [Detail].<br />
The procedure differs depending on the details to be edited.<br />
Editing a Contact<br />
1 Change Address Number, Name and destination type and address. Refer to Contact on page 9-81 for<br />
the details.<br />
2 After you have completed the changes, press [Save].<br />
3 Press [Yes] in the change confirmation screen to register the changed destination.<br />
Editing a Group<br />
1 Change Address Number and Name. Refer to Group on page 9-84 for the details.<br />
2 Press [Member].<br />
3 To delete any destination from the group, select the destination and press [Delete]. Press [Yes] on the<br />
screen to confirm the deletion.<br />
4 After you have completed the changes, press [Save].<br />
5 Press [Yes] in the change confirmation screen to register the changed group.<br />
Deleting a Contact or Group<br />
Repeat Steps 1 to 3, press [Delete]. Press [Yes] on the screen to confirm the deletion. Deletion is performed.<br />
Adding a Destination on One Touch Key (One Touch Key)<br />
Add a new destination (contact or group). A maximum of 1,000 destinations can be registered.<br />
NOTE: Refer to Specifying Destination on page 3-39 for use of One Touch Key.<br />
Use the procedure below to register a new destination under a One Touch key.<br />
1 Press the System Menu key.<br />
2 Press [Edit Destination] and [Add/Edit] of One Touch Key.<br />
9
9-86<br />
Default Setting (System Menu)<br />
3 Select a One Touch Key number (0001 to 1000) for the destination, and press [Add/Edit]. Pressing Quick<br />
No. Search key or [No.] enables direct entry of a One Touch Key number.<br />
Select a One Touch Key with no registered destination.<br />
4 Press [Change] of Display Name.<br />
5 Enter the One Touch Key name (up to 32 characters) displayed in the send base screen, and press [OK].<br />
NOTE: Refer to the Character Entry Method on page Appendix-8 for details on entering characters.<br />
6 Press [Change] of Destination. The address book appears.<br />
7 Select a destination (contact or group) to add to the One Touch Key number, and press [OK].<br />
Pressing [Detail] shows the detailed information of the selected destination.<br />
NOTE: Destinations can be sorted or searched by destination name or address number. Refer to Specifying<br />
Destination on page 3-39 for Address List.<br />
8 Press [Save]. The destination will be added to the One Touch Key.<br />
Editing One Touch Key<br />
Edit/delete the destinations you added to One Touch Key.<br />
Use the procedure below to edit the One Touch key.<br />
1 Press the System Menu key.<br />
2 Press [Edit Destination] and then [Add/Edit] of One Touch Key.<br />
3 Select a One Touch Key number (0001 to 1000) for the destination. Pressing Quick No. Search key or [No.]<br />
enables direct entry of a One Touch Key number.<br />
The procedure differs depending on the details to be edited.<br />
Changing the Registered Information<br />
1 Press [Add/Edit].<br />
2 Select a new destination (Contact or group). Pressing [Detail] shows the detailed information of the<br />
selected destination.<br />
NOTE: Destinations can be sorted or searched by destination name or address number. Refer to<br />
Specifying Destination on page 3-39 for Address List.<br />
3 Press [OK].<br />
4 Press [Yes] on the screen to add the destination to the One Touch Key.<br />
Deleting the Registered Information<br />
1 Press [Delete].<br />
2 Press [Yes] on the screen to confirm the deletion of the data registered in the One Touch Key.
Sort<br />
Select the default sort setting of the address for the address book.<br />
The table below shows the available settings.<br />
Use the procedure below to specify the Sort settings.<br />
1 Press the System Menu key.<br />
2 Press [Edit Destination], [Next] of Address Book Defaults and then [Change] of Sort.<br />
3 Select [No.] or [Name].<br />
4 Press [OK].<br />
Narrow Down<br />
9-87<br />
Default Setting (System Menu)<br />
This procedure can be used to filter (narrow down) the types of destination listed when the address book is<br />
displayed.<br />
The table below shows the available settings.<br />
Use the procedure below to specify the Narrow Down settings.<br />
1 Press the System Menu key.<br />
2 Press [Edit Destination], [Next] of Address Book Defaults and then [Change] of Narrow Down.<br />
3 Select the type of destination filter.<br />
4 Press [OK].<br />
Item Detail<br />
No. Displays the destination list in order of the registered number.<br />
Name Displays the destination list in order of the registered name.<br />
Item Detail<br />
Off Displays all destination types in the destination list.<br />
E-mail Displays only e-mail destinations.<br />
Folder Displays only folder (SMB or FTP) destinations.<br />
FAX Displays only FAX destinations.<br />
i-FAX Displays only i-FAX destinations.<br />
Group Displays only groups.<br />
9
Internet<br />
9-88<br />
Default Setting (System Menu)<br />
This procedure sets up the Internet browser application. You can specify the following Internet browser settings.<br />
• Internet Browser Setting<br />
• Browser Preferences<br />
• Proxy Settings<br />
Internet Browser Setting<br />
This selects whether or not the Internet browser is used.<br />
Use the procedure below to specify the Internet browser setting.<br />
1 Press the System Menu key.<br />
2 Press [ ] and then [Internet].<br />
NOTE: If the user authentication screen appears, enter your login user name and password and then press<br />
[Login]. For this, you need to login with administrator privileges. Refer to Adding a User (Local User List) on<br />
page 10-5 for the default login user name and password.<br />
3 Press [Change] of Internet Browser.<br />
4 Press [On] or [Off].<br />
5 Press [OK].<br />
Browser Preferences<br />
This specifies Internet browser preferences such as your home page setting and how pages are displayed.<br />
NOTE: This is not displayed if you selected Off in Internet Browser Setting (page 9-88).<br />
Use the procedure below to set your Internet browser preferences.<br />
1 Press the System Menu key.<br />
2 Press [ ] and then [Internet].<br />
NOTE: If the user authentication screen appears, enter your login user name and password and then press<br />
[Login]. For this, you need to login with administrator privileges. Refer to Adding a User (Local User List) on<br />
page 10-5 for the default login user name and password.<br />
3 Press [Next] of Browser Environment.<br />
4 To set your home page, press [Change] of Home Page, press [URL], enter the URL and then press [OK].<br />
Press [OK] again.<br />
NOTE: Refer to the Character Entry Method on page Appendix-8 for details on entering characters.
9-89<br />
Default Setting (System Menu)<br />
5 To set the text size, press [Change] of Text Size, select [Large], [Medium] or [Small] as the text size and<br />
then press [OK].<br />
6 To set the display mode, press [Change] of Display Mode, select [Normal], [Just-Fit Rendering] or [Smart-<br />
Fit Rendering] as the display mode and then press [OK].<br />
7 To specify the settings for accepting cookies, press [Change] of Cookie, select [Accept All], [Reject All] or<br />
[Prompt before Accepting] as your cookie acceptance policy and then press [OK].<br />
Proxy Settings<br />
Use the procedure below to specify the proxy settings.<br />
1 Press the System Menu key.<br />
2 Press [ ] and then [Internet].<br />
NOTE: If the user authentication screen appears, enter your login user name and password and then press<br />
[Login]. For this, you need to login with administrator privileges. Refer to Adding a User (Local User List) on<br />
page 10-5 for the default login user name and password.<br />
3 Press [Change] of Proxy and then press [On].<br />
To set whether or not the same proxy server is used for all protocols<br />
1 If the same proxy server will not be used, remove the checkmark from [Use the Same Proxy Server for<br />
All Protocols].<br />
To set a proxy server (HTTP)<br />
1 Press [Keyboard] of Proxy Server (HTTP), enter the proxy address and press [OK].<br />
2 Press [# Keys] and enter the port number.<br />
To set a proxy server (HTTPS)<br />
1 Press [Keyboard] of Proxy Server (HTTPS), enter the proxy address and press [OK].<br />
2 Press [# Keys] and enter the port number.<br />
To set domains for which no proxy is used<br />
1 Press [Keyboard] of Do Not Use Proxy for Following Domains, enter the domain name and press [OK].<br />
NOTE: Refer to the Character Entry Method on page Appendix-8 for details on entering characters.<br />
4 Press [OK].<br />
9
Application<br />
9-90<br />
Default Setting (System Menu)<br />
You can install and use applications that will make your day-to-day use of this machine more efficient.<br />
Installing Applications<br />
You can install new applications.<br />
Use the procedure below to install an application.<br />
1 Insert the USB memory containing the application to be installed into the USB Port (A1).<br />
NOTE: If Removable Memory was recognized. Displaying files. appears, press [No].<br />
2 Press the System Menu key.<br />
3 Press [ ] and then [Application].<br />
NOTE: If the user authentication screen appears, enter your login user name and password and then press<br />
[Login]. For this, you need to login with administrator privileges. Refer to Adding a User (Local User List) on<br />
page 10-5 for the default login user name and password.<br />
4 Press [Add].<br />
5 Select the application to be installed and press [Install].<br />
You can view detailed information on the selected application by pressing [Detail].<br />
6 When the confirmation screen appears, press [Yes].<br />
Installation of the application begins. Depending on the application being installed, the installation may take<br />
some time.<br />
Once the installation ends, the original screen reappears.<br />
7 To install another application, repeat steps 5 to 6.<br />
8 To remove the USB memory, press [Remove Memory] and wait until the Removable Memory can be safely<br />
removed message appears. Then remove the USB memory.
Activating/Deactivating Application<br />
To use an application, set the application to Activate.<br />
Use the procedure below to start using an application.<br />
1 Press the System Menu key.<br />
2 Press [ ] and then [Application].<br />
9-91<br />
Default Setting (System Menu)<br />
NOTE: If the user authentication screen appears, enter your login user name and password and then press<br />
[Login]. For this, you need to login with administrator privileges. Refer to Adding a User (Local User List) on<br />
page 10-5 for the default login user name and password.<br />
3 Select the desired application and press [Activate].<br />
You can view detailed information on the selected application by pressing [Detail].<br />
NOTE: To exit an application, press [Deactivate].<br />
4 Enter the license key and press [Official].<br />
Some applications do not require you to enter a license key. If the license key entry screen does not appear,<br />
go to Step 5.<br />
To use the application as a trial, press [Trial] without entering the license key.<br />
5 When the confirmation screen appears, press [Yes].<br />
CAUTION: If you change the date/time while using an application, you will no longer be able to use the<br />
application.<br />
Launching Applications<br />
You can launch any application for which Activate is set.<br />
Use the procedure below to launch an application.<br />
1 Press the Application key.<br />
A list of available applications appears on the touch panel.<br />
2 Press the key for the application to be launched.<br />
The application starts up.<br />
3 To exit the application, press [✕].<br />
4 When the application exit confirmation screen appears, press [Yes].<br />
CAUTION: The procedure for exiting some applications may differ.<br />
9
Deleting Applications<br />
Use the procedure below to delete an installed application.<br />
9-92<br />
Default Setting (System Menu)<br />
CAUTION: Always exit the application to be deleted before deleting the application. (Refer to Activating/<br />
Deactivating Application on page 9-91.)<br />
1 Press the System Menu key.<br />
2 Press [ ] and then [Application].<br />
NOTE: If the user authentication screen appears, enter your login user name and password and then press<br />
[Login]. For this, you need to login with administrator privileges. Refer to Adding a User (Local User List) on<br />
page 10-5 for the default login user name and password.<br />
3 Select the application to be deleted and press [Delete].<br />
You can view detailed information on the selected application by pressing [Detail].<br />
4 When the deletion confirmation screen appears, press [Yes]. The application is deleted.
System Initialization<br />
Initialize the hard disk installed on the machine to return to the default mode.<br />
9-93<br />
Default Setting (System Menu)<br />
CAUTION: System initialization will erase Custom Document Boxes, data stored in the Document Box,<br />
addresses in the Address Book, user property, account information, and settings.<br />
NOTE: This item will not be displayed if the optional Data Security Kit is installed. Refer to the Data Security<br />
Kit (E) Operation Guide on the bundled DVD about the functions added when the Data Security Kit is installed<br />
and related procedures.<br />
Using Network Print Monitor allows you to back up addresses in the Address Book.<br />
1 Press the System Menu key.<br />
2 Press [ ], [Adjustment/Maintenance] and then [Start] of System Initialization.<br />
NOTE: If the user authentication screen appears, enter your login user name and password and then press<br />
[Login]. For this, you need to login with administrator privileges. Refer to Adding a User (Local User List) on<br />
page 10-5 for the default login user name and password.<br />
3 When the confirmation screen appears, press [Yes].<br />
Initialization starts.<br />
IMPOR<strong>TA</strong>NT: The Formatting... Do not turn off the main power switch. message appears during initialization.<br />
Wait until initialization ends.<br />
4 Once the initialization ends, the message Task is completed. Turn the main power switch off and on.<br />
appears. Turn the main power switch off.<br />
Restart Entire Device<br />
Restart the CPU without turning the main power switch off. Use this to deal with any unstable operation by the<br />
machine. (Same as the computer restart.)<br />
Use the procedure below to restart the system.<br />
1 Press the System Menu key.<br />
2 Press [System] and [Start] of Restart Entire Device.<br />
NOTE: If the user authentication screen appears, enter your login user name and password, and press<br />
[Login]. For this, you need to login with administrator privileges. Refer to Adding a User (Local User List) on<br />
page 10-5 for the default login user name and password.<br />
3 When the confirmation screen appears, press [Yes]. The system is restarted.<br />
9
Network<br />
The following network settings are available.<br />
• Host Name …9-94<br />
• TCP/IP …9-94<br />
• TCP/IP (IPv4) Setup …9-95<br />
• TCP/IP (IPv6) Setup …9-96<br />
• Protocol Detail …9-98<br />
• NetWare …9-99<br />
• AppleTalk …9-99<br />
• WSD Scan …9-100<br />
• WSD Print …9-100<br />
• Enhanced WSD …9-100<br />
• Enhanced WSD (SSL) …9-101<br />
• Secure Protocol …9-101<br />
• IPSec …9-105<br />
• LAN Interface …9-106<br />
• Restart Network …9-106<br />
Host Name<br />
Check the host name of the machine. Use the procedure below.<br />
1 Press the System Menu key.<br />
2 Press [System], [Next] of Network. Check the host name displayed under Host Name.<br />
TCP/IP<br />
Select whether or not to use TCP/IP. The default setting is Off.<br />
9-94<br />
Default Setting (System Menu)<br />
IMPOR<strong>TA</strong>NT: After changing the setting, restart the network from the system menu, or turn the machine OFF<br />
and then ON. For detailed information on restarting the network, refer to Restart Network on page 9-106.<br />
Use the procedure below.<br />
1 Press the System Menu key.<br />
2 Press [System], [Next] of Network and then [Next] of TCP/IP Setting.<br />
3 Press [Change] of TCP/IP.<br />
4 Press [On] or [Off] and then press [OK].
TCP/IP (IPv4) Setup<br />
9-95<br />
Default Setting (System Menu)<br />
Set up TCP/IP (IPv4) to connect to the Windows network. Set the IP addresses, subnet masks, and gateway<br />
addresses. The default settings are "TCP/IP Protocol: On, DHCP: On, Bonjour: Off, Auto-IP: On".<br />
This section explains the Bonjour Settings procedures. For other TCP/IP (IPv4) settings, refer to the TCP/IP<br />
(IPv4) Setup (by Entering IP Addresses) on page 2-15.<br />
NOTE: Prior to the IP address entries, obtain permission from the network administrator.<br />
IMPOR<strong>TA</strong>NT: After changing the setting, restart the network from the system menu, or turn the machine OFF<br />
and then ON. For detailed information on restarting the network, refer to Restart Network on page 9-106.<br />
Use the procedure below.<br />
1 Press the System Menu key.<br />
2 Press [System], [Next] of Network and then [Next] of TCP/IP Setting.<br />
3 Press [Change] of TCP/IP.<br />
4 Press [On] and then press [OK].<br />
5 Press [Change] of IPv4.<br />
6 Press [DHCP].<br />
7 Press [Off] of DHCP and then press [OK].<br />
8 Press [Bonjour].<br />
9 Press [Off] of Bonjour and then press [OK].<br />
10 Press [IP Address] and enter the address using the numeric keys.<br />
11 Press [Subnet Mask] and enter the address using the numeric keys.<br />
12 Press [Default Gateway] and enter the address using the numeric keys.<br />
13 Check if all the address entries are correct and press [OK].<br />
Bonjour Settings<br />
Select whether or not to use Bonjour. The default setting is Off.<br />
IMPOR<strong>TA</strong>NT: After changing the setting, restart the network from the system menu, or turn the machine OFF<br />
and then ON. For detailed information on restarting the network, refer to Restart Network on page 9-106.<br />
Use the procedure below.<br />
1 Press the System Menu key.<br />
2 Press [System], [Next] of Network and then [Next] of TCP/IP Setting.<br />
3 Press [Change] of TCP/IP.<br />
4 Press [On] and then press [OK].<br />
5 Press [Change] of IPv4.<br />
6 Press [Bonjour].<br />
7 Press [On] or [Off] of Bonjour and then press [OK].<br />
9
TCP/IP (IPv6) Setup<br />
9-96<br />
Default Setting (System Menu)<br />
Set up TCP/IP (IPv6) to connect to the network. The default settings are "TCP/IP Protocol: On, TCP/IP (IPv6):<br />
Off.<br />
IMPOR<strong>TA</strong>NT: After changing the setting, restart the network from the system menu, or turn the machine OFF<br />
and then ON. For detailed information on restarting the network, refer to Restart Network on page 9-106.<br />
Use the procedure below.<br />
1 Press the System Menu key.<br />
2 Press [System], [Next] of Network and then [Next] of TCP/IP Setting.<br />
3 Press [Change] of TCP/IP.<br />
4 Press [On] and then press [OK].<br />
5 Press [Next] of IPv6.<br />
6 Press [Change] of IPv6.<br />
7 Press [On]. Press [On]. IP Address (Link Local) appears.<br />
8 Press [OK].<br />
Manual Setting (IPv6)<br />
Manually specify the IP address, prefix length, and gateway address of TCP/IP (IPv6). The manual setting is<br />
available when selecting [On] for TCP/IP (IPv6).<br />
IMPOR<strong>TA</strong>NT: After changing the setting, restart the network from the system menu, or turn the machine OFF<br />
and then ON. For detailed information on restarting the network, refer to Restart Network on page 9-106.<br />
Use the procedure below.<br />
1 Press the System Menu key.<br />
2 Press [System], [Next] of Network and then [Next] of TCP/IP Setting.<br />
3 Press [Next] of IPv6.<br />
4 Press [Next] of Manual Setting.<br />
5 Press [IP Address (Manual)] to enter IP address. The format of the IPv6 address is a sequence of numbers<br />
(128 bit in total) separated by colons, e.g. 2001:db8:3c4d:15::1a2c:1a1f.<br />
6 Press [OK].<br />
Press [# Keys] of Prefix Length (0 - 128) to enter the prefix length using the numeric keys.<br />
7 Press [Default Gateway] to enter the default gateway.<br />
8 Check that all the entries are correct and Press [OK].
RA (Stateless) Settings<br />
9-97<br />
Default Setting (System Menu)<br />
Select whether or not to use RA (Stateless). The RA (Stateless) settings are available when selecting [On] for<br />
TCP/IP (IPv6). The default setting is On.<br />
IMPOR<strong>TA</strong>NT: After changing the setting, restart the network from the system menu, or turn the machine OFF<br />
and then ON. For detailed information on restarting the network, refer to Restart Network on page 9-106.<br />
Use the procedure below.<br />
1 Press the System Menu key.<br />
2 Press [System], [Next] of Network and then [Next] of TCP/IP Setting.<br />
3 Press [Next] of IPv6.<br />
4 Press [Change] of RA(Stateless).<br />
5 Press [On] or [Off] of RA (Stateless). When selecting [On], IP Address 1 to 5 (Stateless) appears.<br />
6 Press [OK].<br />
DHCP (IPv6) Settings<br />
Select whether or not to use the DHCP (IPv6) server. The DHCP (IPv6) Settings are available when selecting<br />
[On] for TCP/IP (IPv6). The default setting is On.<br />
IMPOR<strong>TA</strong>NT: After changing the setting, restart the network from the system menu, or turn the machine OFF<br />
and then ON. For detailed information on restarting the network, refer to Restart Network on page 9-106.<br />
Use the procedure below.<br />
1 Press the System Menu key.<br />
2 Press [System], [Next] of Network and then [Next] of TCP/IP Setting.<br />
3 Press [Next] of IPv6.<br />
4 Press [Change] of DHCP.<br />
5 Press [On] or [Off] of DHCP. When selecting [On], IP Address (Stateful) appears.<br />
6 Press [OK].<br />
9
Protocol Detail<br />
9-98<br />
Default Setting (System Menu)<br />
The table below lists the network related function settings. The network related functions are available when<br />
TCP/IP is On.<br />
Item Description<br />
NetBEUI Selects whether or not to receive documents using<br />
NetBEUI.<br />
LPD Select whether or not to receive documents using LPD as<br />
the network protocol.<br />
SMTP<br />
(E-mail TX)<br />
POP3<br />
(E-mail RX)<br />
FTP Client<br />
(Transmission)<br />
FTP Server<br />
(Reception)<br />
SMB Client<br />
(Transmission)<br />
* Y: The machine must be restarted after the setting is changed.<br />
N: The machine does not need to be restarted after the setting is changed.<br />
Default<br />
Setting<br />
Restarting<br />
the System*<br />
On Y<br />
On Y<br />
Select whether or not to send e-mail using SMTP. Off N<br />
Select whether or not to receive e-mail using POP3. Off N<br />
Select whether or not to send documents using FTP.<br />
When selecting [On], set the FTP Port Number. Use the<br />
FTP default port 21.<br />
On<br />
Port:21<br />
Select whether or not to receive documents using FTP. On Y<br />
Select whether or not to send documents using SMB.<br />
When selecting [On], set the SMB default Port Number.<br />
Use the SMB default port 139. For Windows Vista, use 445.<br />
On<br />
Port:139<br />
i-FAX Select whether or not to use i-FAX. On N<br />
LDAP Select whether or not to use LDAP. Off N<br />
SNMP Select whether or not to communicate using SNMP. On Y<br />
SNMPv3 Select whether or not to communicate using SNMPv3. Off Y<br />
HTTP Select whether or not to communicate using HTTP. On Y<br />
HTTPS Select whether or not to communicate using HTTPS.<br />
SSL must be set to [On] in SSL on page 9-101.<br />
IPP Select whether or not to communicate using IPP. When<br />
selecting [On], set the IPP default Port Number. Use the<br />
IPP default port 631.<br />
IPP over SSL Select whether or not to use IPP over SSL.<br />
SSL must be set to [On] in SSL on page 9-101.<br />
N<br />
N<br />
On Y<br />
Off<br />
Port:631<br />
Y<br />
Off Y<br />
Raw Port Select whether or not to communicate using Raw Port. On Y<br />
ThinPrint<br />
(UG-31)<br />
Select whether or not to communicate using ThinPrint. If set<br />
to [On], you can set the port number that ThinPrint uses.<br />
Normally 4,000 is used. SSL settings can also be selected.<br />
On Y<br />
DSM Scan Select whether or not to use DSM. Off N
9-99<br />
Default Setting (System Menu)<br />
IMPOR<strong>TA</strong>NT: After changing the setting, restart the network from the system menu, or turn the machine OFF<br />
and then ON. For detailed information on restarting the network, refer to Restart Network on page 9-106.<br />
Use the procedure below.<br />
The following procedure is an example for specifying the SMTP (E-mail TX) settings.<br />
1 Press the System Menu key.<br />
2 Press [System] ,[Next] of Network, [Next] of TCP/IP Setting and then [Next] of Protocol Detail to display the<br />
network settings screen.<br />
3 Display the item you want to set and press [Change] for that item.<br />
In this example, press [Change] of SMTP (E-mail TX).<br />
4 Press [On] or [Off].<br />
5 Press [OK].<br />
NetWare<br />
Select the NetWare network connection. After that, select frame types for NetWare network from Auto,<br />
Ethernet-II, 802.3, 802.2, or SNAP. The default settings are "On, Frame Type: Auto".<br />
IMPOR<strong>TA</strong>NT: After changing the setting, restart the network from the system menu, or turn the machine OFF<br />
and then ON. For detailed information on restarting the network, refer to Restart Network on page 9-106.<br />
Use the procedure below.<br />
1 Press the System Menu key.<br />
2 Press [System], [Next] of Network and then [Change] of NetWare.<br />
3 Press [On].<br />
4 Press the key for the frame type you want to use.<br />
5 Press [OK].<br />
AppleTalk<br />
Select the Apple Talk network connection. The default setting is On.<br />
IMPOR<strong>TA</strong>NT: After changing the setting, restart the network from the system menu, or turn the machine OFF<br />
and then ON. For detailed information on restarting the network, refer to Restart Network on page 9-106.<br />
Use the procedure below.<br />
1 Press the System Menu key.<br />
2 Press [System], [Next] of Network and then [Change] of AppleTalk.<br />
3 Press [On] or [Off].<br />
4 Press [OK].<br />
9
WSD Scan<br />
Select whether or not to use WSD Scan. The default setting is On.<br />
9-100<br />
Default Setting (System Menu)<br />
IMPOR<strong>TA</strong>NT: After changing the setting, restart the network from the system menu, or turn the machine OFF<br />
and then ON. For detailed information on restarting the network, refer to Restart Network on page 9-106.<br />
Use the procedure below.<br />
1 Press the System Menu key.<br />
2 Press [System], [Next] of Network and then [Change] of WSD Scan.<br />
3 Press [On] or [Off].<br />
4 Press [OK].<br />
WSD Print<br />
Select whether or not to use WSD Print. The default setting is On.<br />
IMPOR<strong>TA</strong>NT: After changing the setting, restart the network from the system menu, or turn the machine OFF<br />
and then ON. For detailed information on restarting the network, refer to Restart Network on page 9-106.<br />
Use the procedure below.<br />
1 Press the System Menu key.<br />
2 Press [System], [Next] of Network and then [Change] of WSD Print.<br />
3 Press [On] or [Off].<br />
4 Press [OK].<br />
Enhanced WSD<br />
Set whether to use our proprietary web services. The WIA driver, TWAIN driver, and Network FAX driver use<br />
this Enhanced WSD Web service. The default setting is On.<br />
IMPOR<strong>TA</strong>NT: After changing the setting, restart the network from the system menu, or turn the machine OFF<br />
and then ON. For detailed information on restarting the network, refer to Restart Network on page 9-106.<br />
Use the procedure below.<br />
1 Press the System Menu key.<br />
2 Press [System], [Next] of Network and then [Change] of Enhanced WSD.<br />
3 Press [On] or [Off].<br />
4 Press [OK].
Enhanced WSD (SSL)<br />
9-101<br />
Default Setting (System Menu)<br />
Set whether to use our proprietary web services over SSL. SSL must be set to "On" in SSL on page 9-101. The<br />
default setting is On.<br />
IMPOR<strong>TA</strong>NT: After changing the setting, restart the network from the system menu, or turn the machine OFF<br />
and then ON. For detailed information on restarting the network, refer to Restart Network on page 9-106.<br />
Use the procedure below.<br />
1 Press the System Menu key.<br />
2 Press [System], [Next] of Network and then [Change] of Enhanced WSD (SSL).<br />
3 Press [On] or [Off].<br />
4 Press [OK].<br />
Secure Protocol<br />
Encrypt the communication between your PC and the machine using the SSL encryption.<br />
IMPOR<strong>TA</strong>NT: After changing the setting, restart the network from the system menu, or turn the machine OFF<br />
and then ON. For detailed information on restarting the network, refer to Restart Network on page 9-106.<br />
The following Secure Protocol settings are available.<br />
• SSL …9-101<br />
• IPP Security …9-102<br />
• HTTP Security …9-102<br />
• LDAP Security …9-103<br />
• SMTP Security …9-103<br />
• POP3 Security (User 1) …9-104<br />
• POP3 Security (User 2) …9-104<br />
• POP3 Security (User 3) …9-105<br />
SSL<br />
Select whether or not to use SSL. The default setting is On.<br />
IMPOR<strong>TA</strong>NT: After changing the setting, restart the network from the system menu, or turn the machine OFF<br />
and then ON. For detailed information on restarting the network, refer to Restart Network on page 9-106.<br />
Use the procedure below.<br />
1 Press the System Menu key.<br />
2 Press [System], [Next] of Network, [ ], [Next] of Secure Protocol, and then [Next] of SSL.<br />
3 Press [On] or [Off].<br />
4 Press [OK].<br />
9
IPP Security<br />
9-102<br />
Default Setting (System Menu)<br />
Select the IPP security level. This setup is available when SSL is On. The default setting is IPP or IPP over SSL.<br />
NOTE: IPP must be set to [On] in Protocol Detail on page 9-98.<br />
IMPOR<strong>TA</strong>NT: After changing the setting, restart the network from the system menu, or turn the machine OFF<br />
and then ON. For detailed information on restarting the network, refer to Restart Network on page 9-106.<br />
Use the procedure below.<br />
1 Press the System Menu key.<br />
2 Press [System], [Next] of Network, [ ], [Next] of Secure Protocol, and then [Change] of IPP Security.<br />
3 Press [IPP over SSL Only] or [IPP or IPP over SSL].<br />
4 Press [OK].<br />
HTTP Security<br />
Select the HTTP security level. This setup is available when SSL is On. The default setting is HTTP or HTTPS.<br />
NOTE: HTTP or HTTPS must be set to [On] in Protocol Detail on page 9-98.<br />
IMPOR<strong>TA</strong>NT: After changing the setting, restart the network from the system menu, or turn the machine OFF<br />
and then ON. For detailed information on restarting the network, refer to Restart Network on page 9-106.<br />
Use the procedure below.<br />
1 Press the System Menu key.<br />
2 Press [System], [Next] of Network, [ ], [Next] of Secure Protocol, and then [Change] of HTTP Security.<br />
3 Press [HTTP or HTTPS] or [HTTPS Only].<br />
4 Press [OK].
LDAP Security<br />
9-103<br />
Default Setting (System Menu)<br />
Select the communication protocol according to the type of security employed by the LDAP server. The default<br />
setting is Off.<br />
NOTE: LDAP must be set to [On] in Protocol Detail on page 9-98.<br />
The table below shows the available settings.<br />
* You can change the port number using Embedded Web Server RX.<br />
Use the procedure below.<br />
1 Press the System Menu key.<br />
2 Press [System], [Next] of Network, [ ], [Next] of Secure Protocol, and then [Change] of LDAP Security.<br />
3 Press [Off], [SSL/TLS] or [S<strong>TA</strong>RTTLS].<br />
4 Press [OK].<br />
SMTP Security<br />
Item Description<br />
Off Do not use security employed by the LDAP server.<br />
SSL/TLS Encryption is applied any data communication. To enable LDAP security, the<br />
LDAP port may have to be changed according to the server settings.<br />
Typically, 636* for SSL/TLS is well-known LDAP port.<br />
S<strong>TA</strong>RTTLS Encryption is applied any data communication. Typically, 389* for<br />
S<strong>TA</strong>RTTLS is well-known LDAP port.<br />
Select the communication protocol according to the type of security employed by the SMTP server. The default<br />
setting is Off.<br />
NOTE: SMTP must be set to On in Protocol Detail on page 9-98.<br />
The table below shows the available settings.<br />
Item Description<br />
Off Do not use security employed by the SMTP server.<br />
SSL/TLS Encryption is applied any data communication. To enable SMTP security,<br />
the SMTP port may have to be changed according to the server settings.<br />
Typically, 465* for SSL/TLS is well-known SMTP port.<br />
S<strong>TA</strong>RTTLS Encryption is applied any data communication. Typically, 25* or 587* for<br />
S<strong>TA</strong>RTTLS is well-known SMTP port.<br />
* You can change the port number using Embedded Web Server RX.<br />
9
Use the procedure below.<br />
1 Press the System Menu key.<br />
9-104<br />
Default Setting (System Menu)<br />
2 Press [System], [Next] of Network, [ ], [Next] of Secure Protocol, and then [Change] of SMTP Security.<br />
3 Press [Off], [SSL/TLS] or [S<strong>TA</strong>RTTLS].<br />
4 Press [OK].<br />
POP3 Security (User 1)<br />
Select the communication protocol according to the type of security employed by the POP3 server. The default<br />
setting is Off.<br />
The table below shows the available settings.<br />
* You can change the port number using Embedded Web Server RX.<br />
Use the procedure below.<br />
1 Press the System Menu key.<br />
2 Press [System], [Next] of Network, [ ], [Next] of Secure Protocol, and then [Change] of POP3 Security<br />
(User 1).<br />
3 Press [Off], [SSL/TLS] or [S<strong>TA</strong>RTTLS].<br />
4 Press [OK].<br />
POP3 Security (User 2)<br />
Item Description<br />
Off Do not use security employed by the POP3 server.<br />
SSL/TLS Encryption is applied any data communication. To enable POP3 security, the<br />
POP3 port may have to be changed according to the server settings.<br />
Typically, 995* for SSL/TLS is well-known POP3 port.<br />
S<strong>TA</strong>RTTLS Encryption is applied any data communication. Typically, 110* for<br />
S<strong>TA</strong>RTTLS is well-known POP3 port.<br />
Set the protocol that can be used on the POP3 port. This setup is available when SSL is On. The default setting<br />
is Off.<br />
For the procedure for selecting the POP3 Security (User 2) Setting, see POP3 Security (User 1).
POP3 Security (User 3)<br />
9-105<br />
Default Setting (System Menu)<br />
Set the protocol that can be used on the POP3 port. This setup is available when SSL is On. The default setting<br />
is Off.<br />
For the procedure for selecting the POP3 Security (User 3) Setting, see POP3 Security (User 1).<br />
IPSec<br />
Sets up IPSec. The default setting is Off.<br />
IMPOR<strong>TA</strong>NT: After changing the setting, restart the network from the system menu, or turn the machine OFF<br />
and then ON. For detailed information on restarting the network, refer to Restart Network on page 9-106.<br />
Use the procedure below.<br />
1 Press the System Menu key.<br />
2 Press [System], [Next] of Network, [ ] and then [Change] of IPSec.<br />
NOTE: If the user authentication screen appears, enter your login user name and password and then press<br />
[Login]. For this, you need to login with administrator privileges. Refer to Adding a User (Local User List) on<br />
page 10-5 for the default login user name and password.<br />
3 Press [On].<br />
4 Press [OK].<br />
9
LAN Interface<br />
Specify the settings for the LAN interface to be used. The default setting is Auto.<br />
9-106<br />
Default Setting (System Menu)<br />
IMPOR<strong>TA</strong>NT: After changing the setting, restart the network from the system menu, or turn the machine OFF<br />
and then ON. For detailed information on restarting the network, refer to Restart Network on page 9-106.<br />
Use the procedure below.<br />
1 Press the System Menu key.<br />
2 Press [System], [Next] of Network, [ ] and then [Change] of LAN Interface.<br />
3 Select [Auto], [10BASE-T Half], [10BASE-T Full], [100BASE-TX Half], [100BASE-TX Full] or [1000BASE-<br />
T] as the LAN interface.<br />
4 Press [OK].<br />
Restart Network<br />
To restart the network card of the device, follow the steps below.<br />
1 Press the System Menu key.<br />
2 Press [System], [Next] of Network, [ ] and then [Start] of Restart Network.
Interface Block Setting<br />
9-107<br />
Default Setting (System Menu)<br />
This allows you to protect this machine by blocking the interface with external devices such as USB hosts or<br />
optional interfaces.<br />
The following interface block settings are available:<br />
• USB Host<br />
• USB Device<br />
• Optional interface<br />
USB Host<br />
This locks and protects the USB Port (A1) or USB port (A2) (USB host). The default setting is Unblock.<br />
Use the procedure below to specify the USB Host setting.<br />
1 Press the System Menu key.<br />
2 Press [System], [Next] of Interface Block Setting and then [Change] of USB Host.<br />
NOTE: If the user authentication screen appears, enter your login user name and password and then press<br />
[Login]. For this, you need to login with administrator privileges. Refer to Adding a User (Local User List) on<br />
page 10-5 for the default login user name and password.<br />
3 Press [Block].<br />
4 Press [OK].<br />
USB Device<br />
This locks and protects the USB interface connector (B1) (USB Device). The default setting is Unblock.<br />
Use the procedure below to specify the USB Device setting.<br />
1 Press the System Menu key.<br />
2 Press [System], [Next] of Interface Block Setting and then [Change] of USB Device.<br />
3 Press [Block].<br />
4 Press [OK].<br />
Optional interface<br />
This locks and protects the optional interface slots (OPT1 or OPT2). The default setting is Unblock.<br />
Use the procedure below to specify the optional interface setting.<br />
1 Press the System Menu key.<br />
2 Press [System], [Next] of Interface Block Setting and then [Change] of Optional Interface 1 or Optional<br />
Interface 2.<br />
3 Press [Block].<br />
4 Press [OK].<br />
9
Security Level<br />
9-108<br />
Default Setting (System Menu)<br />
The Security Level setting is primarily a menu option used by service personnel for maintenance work. There is<br />
no need for customers to use this menu.<br />
Document Guard<br />
When the optional Printed Document Guard Kit is installed, the machine prevents the unauthorized copying and/<br />
or transmission of documents that contain important confidential or personal information.<br />
Use the Security Watermark of Advanced in Printing System Driver to embed the guard pattern in a document.<br />
(Refer to the Printing System Driver User Guide for details.)<br />
We suggest you confirm how the machine performs this function in your environment.<br />
copy<br />
Print the guard<br />
pattern using<br />
Printing System<br />
Driver.<br />
Machine Operation after Detecting the Document Guard Pattern<br />
Item Description<br />
Common operation Displays the message that indicates the machine detected the document<br />
guard pattern and stops scanning the remaining documents.<br />
Copy functions Prints the documents in blank when the machine detected the document<br />
guard pattern.<br />
Send functions Cancels the job.*<br />
Document Box functions Does not store the documents in the hard disk<br />
FAX functions Does not send the documents.<br />
send<br />
or fax<br />
Canceled.<br />
* Sends the documents that are scanned before the document guard pattern is detected if you have<br />
selected File Separation. If not, every Document will not to be sent.
Limitations:<br />
Note:<br />
9-109<br />
Default Setting (System Menu)<br />
- Scanning speed will be limited to the speed of scanning 600 dpi image. (Printing speed will not<br />
be limited.)<br />
- FAX transmission will be limited to the memory transmission.<br />
- The Printed Document Guard Kit can not fully prevent a leak of information. We do not guarantee<br />
any loss incurred while using this feature or if a malfunction occurs with this feature.<br />
- The guard pattern printed on the colored paper or paper that is decorated with special design<br />
may not be detected.<br />
- We do not guarantee the integrity of the detection. If a malfunction occurs, contact your service<br />
representative.<br />
Use the procedure below to specify the Document Guard setting.<br />
1 Press the System Menu key.<br />
2 Press [System] and then [Change] of Document Guard.<br />
NOTE: If the user authentication screen appears, enter your login user name and password and then press<br />
[Login]. For this, you need to login with administrator privileges. Refer to Adding a User (Local User List) on<br />
page 10-5 for the default login user name and password.<br />
3 Press [On].<br />
4 Press [OK].<br />
9
Data Security<br />
Settings related to data stored in the machine's hard disk and memory can be configured.<br />
Data Sanitization<br />
9-110<br />
Default Setting (System Menu)<br />
All address information registered in the machine and image data saved in the machine will be erased.<br />
NOTE: About 8 hours are required to complete this processing, depending on the amount of data. Once<br />
started, the processing cannot be canceled.<br />
Before performing this task, disconnect the modular cable, network cable, and any other cables.<br />
Do not turn off the main power during sanitization. If the main power is turned off, sanitization will automatically<br />
resume when the power is turned on, but complete sanitization cannot be guaranteed.<br />
The data erased by initialization is shown below.<br />
Category Data erased<br />
Devices/jobs • Job settings set by user<br />
• Network settings<br />
• Image data saved in document boxes, etc.<br />
• Data registered in one-touch keys<br />
• Job logs<br />
• User information<br />
(user lists, address books, document boxes registered by user, etc.)<br />
• Account information for account tracking<br />
• Network certificates<br />
• Startup screen of machine changed by service technician<br />
Fax*<br />
* Only when the optional fax kit is installed<br />
• Fax settings set by user<br />
• Transmission restriction settings<br />
• Encryption key settings<br />
• Communication logs<br />
• Reserved jobs<br />
• Settings for condition-based reception/forwarding<br />
Applications/programs • Applications/programs registered by the user or service technician<br />
• Sample programs
The procedure is as follows.<br />
1 Press the System Menu key.<br />
2 Press [System], [Next] of Data Security and then [Next] of Data Sanitization.<br />
9-111<br />
Default Setting (System Menu)<br />
NOTE: If the user authentication screen is displayed, enter your login user name and password, and press<br />
[Login]. You must log in with administrator authority. Refer to Adding a User (Local User List) on page 10-5 for<br />
the default login user name and password.<br />
3 Press [Start].<br />
Initialization starts. When initialization is completed, the sanitization results will appear on the screen.<br />
Hard Disk Initialization<br />
When the optional Data Security kit is installed, [Hard Disk Initialization] is added to the Data Security settings.<br />
For details, refer to the Data Security Kit (E) Operation Guide on the bundled DVD.<br />
9
Optional Function<br />
You can use the optional applications installed on this machine.<br />
Application<br />
The applications listed below are installed on this machine.<br />
You can use these applications for a limited period on a trial basis.<br />
• Printed Document Guard Kit<br />
9-112<br />
Default Setting (System Menu)<br />
This prevents the unauthorized copying and/or transmission of documents that contain important confidential or<br />
personal information. When a document is printed from a computer, this feature imprints a special pattern on<br />
the document. When anyone attempts to copy or send that document on this machine, the machine detects the<br />
pattern and protects the information by printing the document in blank, or prohibiting transmission.<br />
NOTE: Restrictions such as the number of times the application can be used during the trial period differ<br />
depending on the application.<br />
Starting Application Use<br />
Use the procedure below to start using an application.<br />
1 Press the System Menu key.<br />
2 Press [System] and then [Next] of Optional Function.<br />
NOTE: If the user authentication screen appears, enter your login user name and password and then press<br />
[Login]. For this, you need to login with administrator privileges. Refer to Adding a User (Local User List) on<br />
page 10-5 for the default login user name and password.<br />
3 Select the desired application and press [Activate].<br />
You can view detailed information on the selected application by pressing [Detail].<br />
4 In the license key entry screen, press [Official].<br />
Some applications do not require you to enter a license key. If the license key entry screen does not appear,<br />
go to Step 5.<br />
To use the application as a trial, press [Trial] without entering the license key.<br />
5 When the confirmation screen appears, press [Yes].<br />
IMPOR<strong>TA</strong>NT: If you change the date/time while using an application, you will no longer be able to use the<br />
application.
Checking Application Details<br />
Use the procedure below to check the details of an application.<br />
1 Press the System Menu key.<br />
2 Press [System] and then [Next] of Optional Function.<br />
9-113<br />
Default Setting (System Menu)<br />
NOTE: If the user authentication screen appears, enter your login user name and password and then press<br />
[Login]. For this, you need to login with administrator privileges. Refer to Adding a User (Local User List) on<br />
page 10-5 for the default login user name and password.<br />
3 Select the application you want to check the details of and press [Detail].<br />
You can now view detailed information on the selected application.<br />
Accessibility Display (Enlarged Touch Panel Display)<br />
Touch panel characters and key displays can be enlarged. Use the numeric keys to select items and proceed<br />
to the next screen.<br />
NOTE: Accessibility can be used only with Copying and Sending registered on the Quick Setup screen.<br />
To set functions other than those displayed in the accessibility screens, you must return to the original display.<br />
Press the Accessibility Display key again.<br />
Status<br />
Copies<br />
10/10/2010 10:10<br />
Press the Accessibility Display key when in the Copy<br />
or Send (i.e. the Copy or Send key indicator is On).<br />
Enlarged keys or characters appear on the touch panel.<br />
Operation can also be made by pressing any numeric<br />
key corresponding to the number displayed. (e.g. Press<br />
the 2 key to adjust zoom.)<br />
Follow the instructions on the screen for subsequent<br />
operations.<br />
9
9-114<br />
Default Setting (System Menu)
10 Management<br />
This chapter explains the following operations.<br />
• User Login Setting ............................................................................10-2<br />
• Job Accounting Setting ...................................................................10-20<br />
10-1
User Login Setting<br />
10-2<br />
Management<br />
User login administration specifies how the user access is administered on this machine. Enter a correct login<br />
user name and password for user authentication to login.<br />
Access are in three levels - User, Administrator, and Machine Administrator. The security levels can be modified<br />
only by the machine administrator.<br />
Users that are not able to log in to the machine can be allowed to use the functions of the machine on a restricted<br />
basis. The users can use the machine without performing authentication, and thus this feature is convenient<br />
when the majority of users are managed with the same authority. You can prohibit the box store function in<br />
"Guest authorization Set." so that the box store function cannot be used unless the user logs in.<br />
If To use this function, press Authentication key and login appears while operating the machine, you must press<br />
the Authentication/Logout key and log in as a user for whom the function is not prohibited.<br />
First User Login Administration<br />
Follow these steps for the first user login administration.<br />
Enable user login administration. (page 10-2)<br />
<br />
Add a user.(page 10-5)<br />
<br />
Log out.(page 10-4)<br />
<br />
The registered user logs in for operations.(page 10-3)<br />
User Login<br />
This enables user login administration. Select one of the following authentication methods:<br />
Item Description<br />
Local Authentication User authentication based on user properties on the local<br />
user list stored in the machine.<br />
Network Authentication User authentication based on Authentication Server. Use a<br />
user property stored in an Authentication Server to access the<br />
network authentication login page.<br />
Use the procedure below to enable user login administration.<br />
1 Press the System Menu key.<br />
2 Press [User Login/Job Accounting].<br />
3 If the user authentication screen appears, enter<br />
your login user name and password and then press<br />
[Login]. For this, you need to login with<br />
administrator privileges. Refer to Adding a User<br />
(Local User List) on page 10-5 for the default login<br />
user name and password.<br />
4 Press [Next] of User Login Setting and then<br />
[Change] of User Login.
User Login/Job Accounting - User Login<br />
Off<br />
Local<br />
Authentication<br />
Network<br />
Authentication<br />
Expansion<br />
Authentication<br />
Status<br />
Login/Logout<br />
10-3<br />
Management<br />
5 Select [Local Authentication] or [Network<br />
Authentication]. Select [Off] to disable user login<br />
administration.<br />
If you select [Network Authentication], enter the<br />
host name (62 characters or less) and domain<br />
name (256 characters or less) for the<br />
Authentication Server. Select [NTLM], [Kerberos]<br />
or [Ext.] as the server type.<br />
If you selected [Ext.] for the server type, enter the<br />
port number.<br />
NOTE: If the login user name and password are<br />
rejected, check the following settings.<br />
• Network Authentication setting of the machine<br />
• User property of the Authentication Server<br />
• Date and time setting of the machine and the<br />
Authentication Server<br />
If you cannot login because of the setting of the<br />
machine, login with any administrator registered in the<br />
local user list and correct the settings.<br />
Up to 10 domains can be registered for network<br />
authentication.<br />
6 Press [OK].<br />
Once you enable user login administration, a login user name and password entry screen appears each time<br />
you use this machine.<br />
NOTE: If the guest authentication setting is enabled, the authentication/logout key must be pressed when<br />
logging in.<br />
Login<br />
Use the procedure below to login.<br />
Status<br />
User login administration.<br />
Select authentication method.<br />
Server Type<br />
NTLM<br />
Kerberos<br />
Ext.<br />
Domain<br />
Default Domain<br />
Host<br />
Host Name<br />
Enter login user name and password.<br />
Login to:<br />
Login<br />
User Name<br />
Login<br />
Password<br />
Check Counter<br />
Local<br />
abcdef<br />
********<br />
Cancel<br />
Cancel<br />
# Keys<br />
# Keys<br />
Add/Edit<br />
OK<br />
ID Card<br />
Login<br />
10/10/2010 10:10<br />
Login<br />
10/10/2010 10:10<br />
1 When the machine is operated and the next screen<br />
appears, select the authentication destination from<br />
the "Login to:" pull-down menu and press [Login<br />
User Name].<br />
Press [# Keys] to enter the login data using the<br />
numeric keys.<br />
2 Enter the login user name and press [OK].<br />
NOTE: Refer to the Character Entry Method on<br />
Appendix-8 for details on entering characters.<br />
Authentication is possible without selecting an<br />
authentication destination by entering "Login User<br />
Name@domain name" in "Login User Name".<br />
10
Logout<br />
10-4<br />
3 Press [Login Password].<br />
Management<br />
Press [# keys] to enter the login data using the<br />
numeric keys.<br />
4 Enter the login password and press [OK].<br />
NOTE: If Job Accounting is enabled, you can browse<br />
the number of pages printed and the number of pages<br />
scanned by pressing [Check Counter].<br />
If Network Authentication is selected as the user<br />
authentication method, either Local or Network can be<br />
selected as the authentication destination.<br />
5 Check the login user name and password are<br />
correct, and press [Login].<br />
To log out the machine, press the Authentication/<br />
Logout key to return to the login user name/login<br />
password entry screen.<br />
Auto Logout<br />
Logout is automatically executed in the following<br />
cases:<br />
• When the Power key is pressed to enter the<br />
sleep mode<br />
• When auto sleep is activated<br />
• When auto panel reset is activated<br />
• When auto low power mode is activated<br />
• When low power mode is activated by pressing<br />
the Energy Saver key.
Adding a User (Local User List)<br />
This adds a new user. You can add Up to 1,000 users (including the default login user name).<br />
The table below explains the user information to be registered.<br />
Item Description<br />
User Name*<br />
Enter the name displayed on the user list (up to 32 characters).<br />
Login User Name* Enter the login user name to login (up to 64 characters). The<br />
same login user name cannot be registered.<br />
Login Password Enter the password to login (up to 64 characters).<br />
Access Level* Select Administrator or User for user access privileges.<br />
Account Name Add an account where the user belongs. The user, who<br />
registered his/her account name, can login without entering the<br />
account ID. Refer to Job Accounting Setting on page 10-20.<br />
E-mail Address The user can register his/her E-mail address. The registered<br />
address will be automatically selected for subsequent operations<br />
that need any E-mail function.<br />
Local Authorization Set usage authority for each user. Local Authorization must be<br />
enabled. (Refer to page 10-9.)<br />
Use of the following items can be restricted.<br />
Print Restriction: Select whether or not use of the print function<br />
of the printer is prohibited.<br />
Copy Restriction: Select whether or not use of the copy print<br />
function is prohibited.<br />
Send Restriction: Select whether or not use of the send function<br />
is prohibited.<br />
Fax TX Restriction: Select whether or not use of the fax send<br />
function is prohibited.<br />
Storing Restr. in Box: Select whether or not use of the box<br />
store function is prohibited.<br />
* Mandatory at user registration.<br />
Storing Restr. in Memory: Select whether or not use of the<br />
external memory store function is prohibited.<br />
10-5<br />
Management<br />
10
10-6<br />
Management<br />
NOTE: By default, one of each default user with machine administrator rights and administrator privileges is<br />
already stored.<br />
Each user's properties are:<br />
Machine Administrator<br />
User Name: DeviceAdmin<br />
Login User Name: 65 ppm model : 6500, 80 ppm model : 8000<br />
Login Password: 65 ppm model : 6500, 80 ppm model : 8000<br />
Access Level: Machine Administrator<br />
Administrator<br />
User Name: Admin<br />
Login User Name: Admin<br />
Login Password: Admin<br />
Access Level: Administrator<br />
* Upper case and lower case letters are distinguished (case sensitive).<br />
It is recommended to periodically change the user name, login user name and login password regularly for your<br />
security.<br />
Use the procedure below to register a new user.<br />
Status<br />
User:<br />
User Name:<br />
01 User<br />
Login User Name:<br />
0099<br />
Access Level:<br />
User<br />
E-mail Address:<br />
abcd@efg.com<br />
Change<br />
Change<br />
Change<br />
Local Authorization: Next<br />
Login Password:<br />
**********<br />
Account Name:<br />
02Account<br />
Cancel<br />
Change<br />
Change<br />
Change ID Card Information:<br />
Empty<br />
Change<br />
Save<br />
10/10/2010 10:10<br />
1 Login as a user with administrator rights.<br />
2 Press the System Menu key.<br />
3 Press [User Login/Job Accounting].<br />
4 If the user authentication screen appears, enter<br />
your login user name and password and then press<br />
[Login]. For this, you need to login with<br />
administrator privileges. Refer to Adding a User<br />
(Local User List) on page 10-5 for the default login<br />
user name and password.<br />
5 Press [Next] of User Login Setting, [Add/Edit] of<br />
Local User List, and then [Add].<br />
6 Press [Change] of User Name.<br />
7 Enter the user name and press [OK].<br />
NOTE: Refer to the Character Entry Method on<br />
Appendix-8 for details on entering characters.<br />
8 Enter the login user name and E-mail address<br />
following 6 and 7 above.<br />
9 Press [Change] of Login Password and then<br />
[Password].
User: - Account Name<br />
Select account to which this user will be attached.<br />
Sort Name<br />
Account Name Account ID<br />
01 Account 00001000<br />
02 Account<br />
00002000<br />
03 Account<br />
00003000<br />
04 Account<br />
00004000<br />
05 Account<br />
00005000<br />
Status<br />
Status<br />
User: - Local Authorization<br />
Print Restriction:<br />
Off<br />
Copy Restriction:<br />
Off<br />
FAX TX Restriction:<br />
Off<br />
Detail<br />
Change<br />
Change<br />
Storing Restr. in Memory: Change<br />
Off<br />
Cancel<br />
Send Restriction:<br />
Off<br />
Change Storing Restr. in Box:<br />
Off<br />
1/2<br />
Search(Name)<br />
Search(ID)<br />
Other Account<br />
Change<br />
Change<br />
OK<br />
10/10/2010 10:10<br />
Close<br />
10/10/2010 10:10<br />
10-7<br />
10 Enter the login password and press [OK].<br />
11 Press [Confirm Password].<br />
Management<br />
12 Enter the same login password to confirm and<br />
press [OK].<br />
13 Press [OK].<br />
14 Press [Change] of Access Level.<br />
15 Select the user access privilege and press [OK].<br />
16 Press [Change] of Account Name.<br />
17 Select the account and press [OK].<br />
NOTE: Select [Name] and [ID] from the Sort pull-down<br />
menu to sort the account list.<br />
Press [Search(Name)] or [Search(ID)] to search by<br />
account name or account ID.<br />
18 Press [Next] of Local Authorization.<br />
19 Press [Change] of Print Restriction.<br />
20 Select [Reject Usage] or [Off] and press [OK].<br />
21 Repeat steps 19 and 20 to set Copy Restriction,<br />
Send Restriction, Fax TX Restriction, Storing Restr.<br />
in Box, and Storing Restr. in Memory.<br />
22 Press [Close].<br />
23 Press [Save] to add a new user on the local user<br />
list.<br />
NOTE: If simple login is enabled, a confirmation<br />
screen appears when new registration is finished<br />
asking if you will configure simple login settings. To<br />
configure simple login settings, press [Yes]. For the<br />
procedure for configuring simple login settings, refer to<br />
Simple Login Settings on page 10-17. If you select<br />
[No], you will return to the user list screen.<br />
10
Changing User Properties<br />
10-8<br />
Management<br />
User properties can be changed. Types of user properties that could be changed may be different depending<br />
on user access privilege.<br />
NOTE: To change the user information of the machine administrator, you must log in with machine<br />
administrator authority. You can only view user information if you log in as a regular user. Refer to Adding a<br />
User (Local User List) on page 10-5 for the default login user name and password.<br />
For a user with administrator rights who logs in<br />
User properties can be changed and users can be deleted. The items, which can be added, are all able to be<br />
changed.<br />
Use the procedure below to change the user properties.<br />
Status<br />
User:<br />
User Name:<br />
01 User<br />
Login User Name:<br />
0099<br />
Access Level:<br />
User<br />
E-mail Address:<br />
abcd@efg.com<br />
Change<br />
Change<br />
Change<br />
Local Authorization: Next<br />
Login Password:<br />
**********<br />
Account Name:<br />
02Account<br />
Cancel<br />
Change<br />
Change<br />
Change ID Card Information:<br />
Empty<br />
Change<br />
Save<br />
10/10/2010 10:10<br />
1 Press the System Menu key.<br />
2 Press [User Login/Job Accounting].<br />
3 If the user authentication screen appears, enter<br />
your login user name and password and then press<br />
[Login]. For this, you need to login with<br />
administrator privileges. Refer to Adding a User<br />
(Local User List) on page 10-5 for the default login<br />
user name and password.<br />
4 Press [Next] of User Login Setting and [Add/Edit] of<br />
Local User List.<br />
5 Select the user whose properties you wish to<br />
change.<br />
NOTE: Select [Name] and [Login Name] from the Sort<br />
pull-down menu to sort the user list.<br />
Press [Search(Name)] or [Search(Login)] to search by<br />
name or login user name.<br />
The procedure differs depending on the details to<br />
be edited.<br />
Changing user information<br />
1 Press [Detail].<br />
2 Refer to steps 6 to 19 of Adding a User (Local<br />
User List) to change a user property.<br />
3 Press [Save].<br />
4 Press [Yes] in the registration confirmation<br />
screen. The user information is changed.
10-9<br />
Management<br />
Deleting a user<br />
1 Press [Delete].<br />
2 Press [Yes] on the screen to confirm deletion.<br />
The selected user will be deleted.<br />
NOTE: The default user with administrator rights<br />
cannot be deleted.<br />
For a user without administrator rights who logs in (User Property)<br />
These users can partially change their own user properties including user name, login password, and E-mail<br />
address.<br />
Although login user name, access level, or account name cannot be changed, the users can check the present<br />
status.<br />
Use the procedure below to change user properties.<br />
1 Press the System Menu key.<br />
Status<br />
User:<br />
User Name:<br />
01 User<br />
Login User Name:<br />
0099<br />
Access Level:<br />
User<br />
E-mail Address:<br />
abcd@efg.com<br />
Change<br />
Detail<br />
Change<br />
Local Authorization<br />
Login Password:<br />
**********<br />
Account Name:<br />
02Account<br />
ID Card Information:<br />
Empty<br />
Cancel<br />
Change<br />
Detail<br />
Select whether or not to use Local Authorization.<br />
Use the procedure below.<br />
Save<br />
10/10/2010 10:10<br />
2 Press [User Property].<br />
3 Refer to steps 6 to 19 of Adding a User (Local User<br />
List) to change user properties.<br />
Press [Detail] of Login User Name or Account<br />
Name to check the present status.<br />
4 Press [Save] to finalize changed user properties.<br />
1 Press the System Menu key.<br />
2 Press [User Login/Job Accounting].<br />
3 If the user authentication screen appears, enter<br />
your login user name and password and then press<br />
[Login]. For this, you need to login with<br />
administrator privileges. Refer to Adding a User<br />
(Local User List) on page 10-5 for the default login<br />
user name and password.<br />
4 Press [Next] of User Login Setting and [Change] of<br />
Local Authorization.<br />
5 Select [Off] or [On].<br />
6 Press [OK].<br />
10
Unknown ID Job<br />
10-10<br />
Management<br />
This specifies the behavior for handling the jobs sent with unknown login user names or User ID (i.e. unsent<br />
IDs). If the User Login is set to invalid and Job Accounting is set to valid, follow the procedure when the Account<br />
ID is unknown.<br />
The table below shows the available settings.<br />
Use the procedure below to process jobs sent from unknown users.<br />
Group Authorization Set.<br />
1 Press the System Menu key.<br />
2 Press [User Login/Job Accounting].<br />
3 If the user authentication screen appears, enter<br />
your login user name and password and then press<br />
[Login]. For this, you need to login with<br />
administrator privileges. Refer to Adding a User<br />
(Local User List) on page 10-5 for the default login<br />
user name and password.<br />
4 Press [Change] of Unknown ID Job.<br />
5 Press [Reject] or [Permit].<br />
6 Press [OK].<br />
Set restrictions of the machine usage by each individual group registered in the authentication server.<br />
NOTE: To use the group authorization settings, [Network Authentication] must be selected for the<br />
authentication method in User Login on page 10-2. Select [On] for LDAP in Protocol Detail on page 9-98.<br />
Group Authorization<br />
Use the group authorization.<br />
Use the procedure below.<br />
Item Description<br />
Reject The job is rejected (not printed).<br />
Permit The job is permitted to be printed.<br />
1 Press the System Menu key.<br />
2 Press [User Login/Job Accounting].<br />
3 If the user authentication screen appears, enter<br />
your login user name and password and then press<br />
[Login]. For this, you need to login with<br />
administrator privileges. Refer to Adding a User<br />
(Local User List) on page 10-5 for the default login<br />
user name and password.<br />
4 Press [Next] of User Login Setting, [Next] of Group<br />
Authorization Set., and then [Change] of Group<br />
Authorization.<br />
5 Press [On].<br />
6 Press [OK].
Group List<br />
10-11<br />
Management<br />
Register the groups that are restricted the machine usage. Up to 20 groups can be individually registered. Other<br />
users and groups belong to Others.<br />
The table below explains the group information to be registered.<br />
Use the procedure below.<br />
Item Description<br />
Group ID*<br />
Enter the ID displayed on the group list (between 1 and 4294967295).<br />
Group Name Enter the name displayed on the group list (up to 32 characters).<br />
Access Level Select Administrator or User for group access privileges.<br />
Print Restriction Select whether or not to reject usage of print functions for the printer.<br />
Copy Restriction Select whether or not to reject usage of copy functions.<br />
Send Restriction Select whether or not to reject usage of the send functions.<br />
FAX TX Restriction Select whether or not to reject usage of the FAX transmissions.<br />
Storing Restr. in Box Select whether or not to reject usage of storing in the document boxes.<br />
Storing Restr. in Memory Select whether or not to reject usage of storing in the removable memory.<br />
* For Group ID, specify PrimaryGroupID assigned by ActiveDirectory of Windows.<br />
If you are using Windows Server 2008, check Attribute Editor tab of user properties. If you are using<br />
Windows Server 2000/2003, check ADSIEdit. ADSIEdit is a support tool included on the installation DVD for<br />
Windows Server OS (under \SUPPORT\TOOLS).<br />
User Login/Job Accounting - Group List<br />
Add or edit the groups. (Maximum: 20)<br />
Status<br />
Others<br />
Group ID Group Name<br />
Detail Delete<br />
Cancel<br />
Add<br />
Save<br />
10/10/2010 10:10<br />
1 Press the System Menu key.<br />
2 Press [User Login/Job Accounting].<br />
3 If the user authentication screen appears, enter<br />
your login user name and password and then press<br />
[Login]. For this, you need to login with<br />
administrator privileges. Refer to Adding a User<br />
(Local User List) on page 10-5 for the default login<br />
user name and password.<br />
4 Press [Next] of User Login Setting, [Next] of Group<br />
Authorization Set., [Add/Edit] of Group List, and<br />
then [Add].<br />
10
Status<br />
Group:<br />
Group ID:<br />
Access Level:<br />
Change<br />
Change<br />
Send Restriction: Change<br />
Guest Authorization Set.<br />
10-12<br />
5 Press [Change] of Group ID.<br />
6 Enter the group ID and press [OK].<br />
7 Press [Change] of Group Name.<br />
8 Enter the group name and press [OK].<br />
Management<br />
NOTE: Refer to the Character Entry Method on<br />
Appendix-8 for details on entering characters.<br />
9 Press [Change] of Access Level.<br />
10 Select the user access privilege and press [OK].<br />
11 Press [Change] of Print Restriction.<br />
12 Select [Reject Usage] or [Off] and press [OK].<br />
13 Follow steps 11 and 12 above to set Copy<br />
Restriction, Copy Send Restriction, FAX TX<br />
Restriction, Storing Restr. in Box, and Storing<br />
Restr. in Memory.<br />
14 Press [Save] to add a new group on the group list.<br />
When User Login Administration is enabled, set the functions that guest users who cannot log in to the machine<br />
are allowed to use.<br />
NOTE: To use Guest Authorization Set., User Login Administration must be enabled in User Login on page<br />
10-2.<br />
Cannot be used when the Key Counter option is used.<br />
Guest Authorization<br />
Set guest approval.<br />
Use the procedure below.<br />
Group Name:<br />
Print Restriction:<br />
Copy Restriction:<br />
Cancel<br />
1/2<br />
Change<br />
Change<br />
Change<br />
Save<br />
10/10/2010 10:10<br />
1 Press the System Menu key.<br />
2 Press [User Login/Job Accounting].<br />
3 If the user authentication screen appears, enter<br />
your login user name and password and then press<br />
[Login]. For this, you need to login with<br />
administrator privileges. Refer to Adding a User<br />
(Local User List) on page 10-5 for the default login<br />
user name and password.<br />
4 Press [Next] of User Login Setting, [Next] of Guest<br />
Authorization Set., and then [Change] of Guest<br />
Authorization.
User Login/Job Accounting - Guest Authorization<br />
Use the guest authorization.<br />
Status<br />
Off On<br />
Cancel OK<br />
10/10/2010 10:10<br />
10-13<br />
5 Select [On] or [Off].<br />
6 Press [OK].<br />
Management<br />
NOTE: If the guest authentication setting is enabled, the authentication/logout key must be pressed when<br />
logging in.<br />
In the guest user default settings, only monochrome copying can be used. If you wish to use a different<br />
function, log in as a user who can use that function, or change the settings in the guest properties.<br />
Guest Property<br />
Register guest user information and functions that are restricted.<br />
The table below explains the guest property to be registered.<br />
Item Description<br />
User Name Enter the name displayed on the user list (up to 32 characters).<br />
Access Level The authority of the user appears. This cannot be changed.<br />
Account Name Add an account where the user belongs.<br />
Authorization Rules Set usage authority for each user.<br />
Use of the following items can be restricted.<br />
Print Restriction: Select whether or not use of the print function<br />
of the printer is prohibited.<br />
Copy Restriction: Select whether or not use of the copy print<br />
function is prohibited.<br />
Send Restriction: Select whether or not use of the send function<br />
is prohibited.<br />
Fax TX Restriction: Select whether or not use of the fax send<br />
function is prohibited.<br />
Storing Restr. in Box: Select whether or not use of the box store<br />
function is prohibited.<br />
Storing Restr. in Memory: Select whether or not use of the<br />
external memory store function is prohibited.<br />
10
Use the procedure below.<br />
Status<br />
User Login/Job Accounting - Guest Property<br />
User Name:<br />
Guest<br />
Access Level:<br />
User<br />
Authorization Rules:<br />
Change<br />
Next<br />
Account Name:<br />
02Account<br />
Change<br />
Close<br />
10/10/2010 10:10<br />
10-14<br />
1 Press the System Menu key.<br />
2 Press [User Login/Job Accounting].<br />
Management<br />
3 If the user authentication screen appears, enter<br />
your login user name and password and then press<br />
[Login]. For this, you need to login with<br />
administrator privileges. Refer to Adding a User<br />
(Local User List) on page 10-5 for the default login<br />
user name and password.<br />
4 Press [Next] of User Login Setting, [Next] of Guest<br />
Authorization Set., and then [Change] of Guest<br />
Property.<br />
5 Press [Change] of User Name.<br />
6 Enter the user name and press [OK].<br />
NOTE: Refer to the Character Entry Method on<br />
Appendix-8 for details on entering characters.<br />
7 Press [Change] of Account Name.<br />
8 Select the account and press [OK].<br />
NOTE: Select [Name] and [ID] from the Sort pull-down<br />
menu to sort the account list.<br />
Press [Search(Name)] or [Search(ID)] to search by<br />
account name or account ID.<br />
9 Press [Next] of Authorization Rules.<br />
10 Press [Change] of Print Restriction.<br />
11 Select [Reject Usage] or [Off] and press [OK].<br />
12 Repeat steps 11 and 12 to set Copy Restriction,<br />
Send Restriction, Fax TX Restriction, Storing Restr.<br />
in Box, and Storing Restr. in Memory.<br />
13 Press [Close].<br />
14 Press [Save].
Obtain NW User Property<br />
10-15<br />
Management<br />
Set the required information to obtain the network user property from the LDAP server. The user name and<br />
e-mail address obtained with this setting is shown in the user information, the status confirmation screen, and<br />
the header of e-mail.<br />
NOTE: To obtain the network user property from the LDAP server, [Network Authentication] must be selected<br />
for the authentication method in User Login on page 10-2. Select [On] for LDAP in Protocol Detail on page 9-<br />
98.<br />
The table below explains the required information to be registered.<br />
Item Description<br />
Server Name* 1<br />
Enter the LDAP server name or the IP address (up to 64 characters). If a server<br />
name is not entered, user information will be acquired from the server set for<br />
Network Authentication.<br />
Port Set the LDAP port number or use the default port 389.<br />
Name 1* 2 Enter the LDAP Attribute to obtain the user name to be displayed from the<br />
LDAP server (up to 32 characters).<br />
Name 2* 3<br />
Enter the LDAP Attribute to obtain the user name to be displayed from the<br />
LDAP server (up to 32 characters).<br />
E-mail Address* 4<br />
Enter the LDAP Attribute to obtain the e-mail address from the LDAP server (up<br />
to 32 characters).<br />
Authenticat Type* 5 Set the authentication method. Select [Simple] or [SASL]. After changing the<br />
setting, restart the system or turn the power off and then on.<br />
Search Timeout Set the amount of time to wait before time-out in seconds (from 5 to 255<br />
seconds).<br />
LDAP Security Select the type of encryption according to the type of security employed by the<br />
LDAP server. The default setting is OFF.<br />
*1 If using Active Directory of Windows, the server name may be the same as the server name entered in the<br />
network authentication.<br />
*2 If using Active Directory of Windows, displayName of Attribute may be used as Name 1.<br />
*3 Name 2 can be left out. When you assign displayName in Name 1 and department in Name 2, and if the<br />
value of displayName is "Mike Smith" and the value of department is "Sales" in Active Directory of Windows,<br />
the user name appears as Mike Smith Sales.<br />
*4 If using Active Directory of Windows, mail of Attribute may be used as E-mail Address.<br />
*5 Appears when the server type is set to "Kerberos" in "Network Authentication".<br />
Use the procedure below.<br />
1 Press the System Menu key.<br />
2 Press [User Login/Job Accounting].<br />
3 If the user authentication screen appears, enter<br />
your login user name and password and then press<br />
[Login]. For this, you need to login with<br />
administrator privileges. Refer to Adding a User<br />
(Local User List) on page 10-5 for the default login<br />
user name and password.<br />
10
User Login/Job Accounting - Obtain NW User Property<br />
Get the network user information.<br />
Off<br />
On<br />
Status<br />
LDAP Server Information:<br />
Server Name<br />
Name 1<br />
Name 2<br />
E-mail<br />
Address<br />
Port:<br />
192.181.11.11<br />
389<br />
Acquisition of User Information:<br />
displayName<br />
mail<br />
# Keys<br />
Simple<br />
Authenticat<br />
Type<br />
30 sec.<br />
Search<br />
Timeout<br />
Off<br />
LDAP<br />
Security<br />
Cancel OK<br />
10/10/2010 10:10<br />
10-16<br />
Management<br />
4 Press [Next] of User Login Setting, [Change] of<br />
Obtain NW User Property.<br />
5 Press [On].<br />
6 Press [Server Name].<br />
7 Enter the LDAP server name or the IP address and<br />
press [OK].<br />
8 Press [# keys] to enter the LDAP port number using<br />
the numeric keys.<br />
9 Press [Name 1].<br />
10 Enter the LDAP Attribute to obtain the user name to<br />
be displayed and press [OK].<br />
11 Follow steps 9 and 10 above to set [Name 2].<br />
12 Press [E-mail Address].<br />
13 Enter the LDAP Attribute to obtain the e-mail<br />
address and press [OK].<br />
14 If you set the server type to [Kerberos], press<br />
[Authentication Type] and set the authentication<br />
method.<br />
15 Press [Search Timeout] to set the amount of time to<br />
wait before time-out.<br />
16 Press [+], [-] or the numeric keys to enter the time<br />
and press [OK].<br />
17 Press [LDAP Security] to select the type of<br />
encryption according to the type of security<br />
employed by the LDAP server.<br />
18 Select [Off], [SSL/TLS], or [S<strong>TA</strong>RTTLS] and press<br />
[OK].
Simple Login Settings<br />
10-17<br />
Management<br />
Simple login makes it possible to log in by simply selecting a user. The user must be previously registered.<br />
NOTE: For user registration, refer to Adding a User (Local User List) on page 10-5.<br />
To use Simple Login, User Login Administration must be enabled in User Login on page 10-2.<br />
If the guest authentication setting is enabled, Simple login cannot be enabled.<br />
Simple Login<br />
Select whether or not simple login is enabled.<br />
Use the procedure below.<br />
User Login/Job Accounting - Simple Login<br />
Use the Simple Login.<br />
Status<br />
Off On<br />
Cancel OK<br />
10/10/2010 10:10<br />
Simple Login Key<br />
Register a user for simple login. You can add Up to 20 users.<br />
Use the procedure below.<br />
1 Press the System Menu key.<br />
2 Press [User Login/Job Accounting].<br />
3 If the user authentication screen appears, enter<br />
your login user name and password and then press<br />
[Login]. For this, you need to login with<br />
administrator privileges. Refer to Adding a User<br />
(Local User List) on page 10-5 for the default login<br />
user name and password.<br />
4 Press [Next] of User Login Setting, [Next] of Simple<br />
Login Settings, and then [Change] of Simple Login.<br />
5 Select [On] or [Off].<br />
6 Press [OK].<br />
1 Press the System Menu key.<br />
2 Press [User Login/Job Accounting].<br />
3 If the user authentication screen appears, enter your<br />
login user name and password and then press<br />
[Login]. For this, you need to login with administrator<br />
privileges. Refer to Adding a User (Local User<br />
List) on page 10-5 for the default login user name<br />
and password.<br />
10
User Login/Job Accounting - Simple Login Key<br />
Status<br />
Status<br />
Add or edit the Simple Login key.<br />
Simple Login Key:<br />
Display Name:<br />
Password Login:<br />
01 02<br />
03 No.<br />
A<br />
Change<br />
Change<br />
B<br />
User:<br />
Icon:<br />
Off Male 1<br />
Simple Login Key: - User<br />
Assing the user to the Simple Login key.<br />
Select the user type.<br />
Status<br />
Simple Login Key: - User<br />
Select the user.<br />
Status<br />
A<br />
B<br />
C<br />
User Name<br />
Cancel Back<br />
Local User Network User<br />
Detail<br />
Sort Name<br />
Login User Name<br />
C<br />
1/2<br />
Add/Edit<br />
Delete<br />
Detail<br />
Change<br />
Change<br />
Close<br />
10/10/2010 10:10<br />
Save<br />
Cancel Next<br />
A<br />
B<br />
C 1/1<br />
Cancel Back<br />
10/10/2010 10:10<br />
10/10/2010 10:10<br />
Search(Name)<br />
Search(Login)<br />
OK<br />
10/10/2010 10:10<br />
10-18<br />
Management<br />
4 Press [Next] of User Login Setting, [Next] of Simple<br />
Login Settings, and then [Next] of Simple Login<br />
Key.<br />
5 Press [Add/Edit].<br />
6 Press [Change] in Display Name, enter the user<br />
name to be displayed, and press [OK].<br />
NOTE: Refer to the Character Entry Method on<br />
Appendix-8 for details on entering characters.<br />
7 Press [Change] of User.<br />
8 To specify the user from local users, select [Local<br />
User]. To specify from network users, select<br />
[Network User]. Press [Next].<br />
The next step varies depending on which<br />
specification method you selected.<br />
Specifying the user from local users<br />
9 Select the user to be set for simple login.<br />
NOTE: Destinations can be sorted or searched by<br />
destination name or address number. Refer to<br />
Specifying Destination on page 3-39 for Address List.
Simple Login Key: - User<br />
Enter login user name and password.<br />
Status<br />
Domain: User Name<br />
Login<br />
User Name<br />
Login<br />
Password<br />
Simple Login Key: - Icon<br />
Status<br />
domain 1<br />
0099<br />
**********<br />
Set the icon to use for the Simple Login key.<br />
Male 1<br />
Cancel Back<br />
Male 2 Female 1 Female 2<br />
Soccer Tennis Basketball Piano<br />
Guitar Trumpet Car Bicycle<br />
Train Dog Cat Parakeet<br />
Sunflower Tulips Earth Moon<br />
# Keys<br />
# Keys<br />
OK<br />
Cancel OK<br />
10/10/2010 10:10<br />
10/10/2010 10:10<br />
10-19<br />
Management<br />
Specifying the user from network users<br />
9 Press [Login User Name] and [Login<br />
Password], enter the information of the user<br />
to be registered, and press [OK]. If you are<br />
specifying a user for whom a domain is set<br />
in network authentication, press the Domain<br />
pull-down menu and select the domain<br />
where the user is registered.<br />
NOTE: Refer to the Character Entry Method on<br />
Appendix-8 for details on entering characters.<br />
10 Press [Change] of Password Login.<br />
11 Press [On] or [Off] and then press [OK].<br />
12 Press [Change] of Icon.<br />
13 Select the user icon to be displayed and press<br />
[OK].<br />
14 Press [Save].<br />
10
Job Accounting Setting<br />
10-20<br />
Management<br />
Job accounting Manages the copy/print count accumulated by individual accounts by assigning an ID to each account.<br />
Job accounting helps the following activities in business organizations.<br />
• Manageability of up to 1,000 individual accounts.<br />
• Availability for account IDs with as many as eight digits (between 0 and 99999999) for security.<br />
• Integrated management of printing and scanning statistics through the use of an identical account ID.<br />
• Tracking the print volume for each account and for all accounts combined.<br />
• Restricting the print counter in one-page increments up to 9,999,999 copies.<br />
• Resetting the print counter for each account or for all accounts combined.<br />
First Job Accounting Setup<br />
Follow these steps for the first job accounting setup.<br />
Enable job accounting. (page 10-20)<br />
<br />
Add an account. (page 10-22)<br />
<br />
Log out. (page 10-21)<br />
<br />
Other users login for operations. (page 10-21)<br />
Job Accounting<br />
Enable job accounting. Use the procedure below to specify the job accounting setting.<br />
1 Press the System Menu key.<br />
2 Press [User Login/Job Accounting].<br />
3 If the user authentication screen appears, enter<br />
your login user name and password and then press<br />
[Login]. For this, you need to login with<br />
administrator privileges. Refer to Adding a User<br />
(Local User List) on page 10-5 for the default login<br />
user name and password.<br />
4 Press [Next] of Job Accounting Setting, and then<br />
[Change] of Job Accounting.<br />
5 Press [On]. To disable job accounting, press [Off].<br />
6 Press [OK].<br />
NOTE: When the display returns to the System Menu<br />
default screen, logout is automatically executed and<br />
the screen to enter the Account ID appears. To<br />
continue the operation, enter the Account ID.
Login/Logout<br />
If job accounting is enabled, an account ID entry screen appears each time you use this machine.<br />
Use the procedure below to login and logout.<br />
Login<br />
Status<br />
Logout<br />
Enter the account ID.<br />
********<br />
Check Counter Login<br />
10/10/2010 10:10<br />
10-21<br />
Management<br />
1 In the screen below, enter the account ID using the<br />
numeric keys and press [Login].<br />
NOTE: If you entered a wrong character, press the<br />
Clear key and enter the account ID again.<br />
If the entered account ID does not match the registered<br />
ID, a warning beep will sound and login will fail. Enter<br />
the correct account ID.<br />
By pressing [Check Counter], you can refer to the number<br />
of pages printed and the number of pages scanned.<br />
When the screen to enter the login user<br />
name and password appears<br />
If user login administration is enabled, the screen to<br />
enter the login user name and password appears.<br />
Enter a login user name and password to login.<br />
(Refer to Login/Logout on page 10-3.) If the user<br />
has already registered the account information, the<br />
account ID entry would be skipped. (Refer to<br />
Adding a User (Local User List) on page 10-5.)<br />
2 Proceed to complete the rest of the steps.<br />
When the operations are complete, press the<br />
Authentication/Logout key to return to the account ID<br />
entry screen.<br />
10
Adding an Account (Accounting List)<br />
This section explains how to add a new account. The following entries are required.<br />
Item Description<br />
Account Name Enter the account name (up to 32 characters).<br />
Account ID Enter the account ID as many as eight digits (between 0 and 99999999).<br />
Restriction This Prohibits printing/scanning or restricts the number of sheets to<br />
load. Refer to Restricting the Use of the Machine on page 10-24.<br />
Use the procedure below to register a new account.<br />
Account: 01 Account<br />
Account Name:<br />
01 Account<br />
Status<br />
Account ID:<br />
00001000<br />
Copy Restriction (Total):<br />
Off<br />
Change<br />
Change<br />
Change<br />
Print Restriction (Total):<br />
Off<br />
Cancel<br />
1/2<br />
Change<br />
Save<br />
10/10/2010 10:10<br />
10-22<br />
1 Press the System Menu key.<br />
2 Press [User Login/Job Accounting].<br />
Management<br />
3 If the user authentication screen appears, enter<br />
your login user name and password and then press<br />
[Login]. For this, you need to login with<br />
administrator privileges. Refer to Adding a User<br />
(Local User List) on page 10-5 for the default login<br />
user name and password.<br />
4 Press [Next] of Job Accounting Setting, [Add/Edit]<br />
of Accounting List, and then [Add].<br />
5 Press [Change] of Account Name.<br />
6 Enter the account name and press [OK]. The<br />
Account screen reappears.<br />
NOTE: Refer to the Character Entry Method on<br />
Appendix-8 for details on entering characters.<br />
7 Follow steps 5 and 6 above to enter the Account ID.<br />
NOTE: Any account ID that has already registered<br />
cannot be used. Enter any other account ID.<br />
8 Activate or deactivate restriction. Refer to<br />
Restricting the Use of the Machine on page 10-24.<br />
9 Press [Save] to add a new account on the Account<br />
List.
Managing Accounts<br />
This changes the registered account information or deletes the account.<br />
Use the procedure below to manage accounts.<br />
User Login/Job Accounting - Accounting List<br />
Status<br />
Register an account that is permitted to use this machine. (Maximum: 1000)<br />
01 Account<br />
02 Account<br />
03 Account<br />
04 Account<br />
05 Account<br />
Account Name Account ID<br />
Account: 01 Account<br />
Account Name:<br />
01 Account<br />
Status<br />
Account ID:<br />
00001000<br />
Copy Restriction (Total):<br />
Off<br />
Change<br />
Change<br />
Change<br />
Detail<br />
Sort<br />
00001000<br />
00002000<br />
00003000<br />
00004000<br />
00005000<br />
Delete<br />
Name<br />
Print Restriction (Total):<br />
Off<br />
Cancel<br />
1/2<br />
1/2<br />
Search(Name)<br />
Search(ID)<br />
Add<br />
Change<br />
Close<br />
10/10/2010 10:10<br />
Save<br />
10/10/2010 10:10<br />
10-23<br />
1 Press the System Menu key.<br />
2 Press [User Login/Job Accounting].<br />
Management<br />
3 If the user authentication screen appears, enter<br />
your login user name and password and then press<br />
[Login]. For this, you need to login with<br />
administrator privileges. Refer to Adding a User<br />
(Local User List) on page 10-5 for the default login<br />
user name and password.<br />
4 Press [Next] of Job Accounting Setting and then<br />
[Add/Edit] of Accounting List.<br />
5 Select an account to change or delete.<br />
NOTE: Select [Name] or [ID] from the Sort pull-down<br />
menu to sort the account names.<br />
Press [Search(Name)] or [Search(ID)] to search by<br />
account name or account ID.<br />
The procedure differs depending on the details to<br />
be edited.<br />
Changing account information<br />
1 Press [Detail].<br />
2 Refer to steps 5 to 7 of Adding an Account and<br />
steps 2 to 5 of Restricting Using the Machine<br />
to change account information.<br />
3 Press [Save].<br />
4 Press [Yes] in the registration confirmation<br />
screen. The account information is changed.<br />
Deleting an account<br />
1 Press [Delete].<br />
2 Press [Yes]. To delete the account.<br />
10
Copy/Printer Count<br />
10-24<br />
Management<br />
You can select how the copying and printing page counts are shown - either the total of both or each of copying<br />
and printing individually. The selection may influence restriction on the count and count method. Refer to<br />
Restricting the Use of the Machine on page 10-24, Counting the Number of Pages Printed on page 10-28 and<br />
Print Accounting Report on page 10-32 for details.<br />
Use the procedure below to set the counting methods.<br />
Restricting the Use of the Machine<br />
1 Press the System Menu key.<br />
2 Press [User Login/Job Accounting].<br />
3 If the user authentication screen appears, enter<br />
your login user name and password and then press<br />
[Login]. For this, you need to login with<br />
administrator privileges. Refer to Adding a User<br />
(Local User List) on page 10-5 for the default login<br />
user name and password.<br />
4 Press [Next] of Job Accounting Setting, [Next] of<br />
Default Setting and then [Change] of Copy/Printer<br />
Count.<br />
5 Press [Total] or [Split].<br />
6 Press [OK].<br />
This section explains how to restrict the use of the machine by account or the number of sheets available.<br />
The items that can be restricted differ depending on whether [Split] or [Total] is selected for Copy/Printer<br />
Count on page 10-24.<br />
Restriction Items<br />
[Split] selected for Copy/Printer Count<br />
Item Detail<br />
Copy Restriction (Total) Limits the number of sheets used for copying.<br />
Print Restriction (Total) Limits the number of sheets used for printing.<br />
Scan Restriction (Others) Limits the number of sheets scanned (excludes copying).<br />
FAX TX Restriction Limits the number of sheets sent by fax. This is displayed<br />
when the optional fax kit is installed.<br />
FAX Port Restriction Restricts the ports used for faxing. This is displayed when two<br />
optional FAX kits are installed.
[Total] selected for Copy/Printer Count<br />
Applying Restriction<br />
Item Detail<br />
Print Restriction (Total) Limits the total number of sheets used for copying and printing.<br />
Scan Restriction (Others) Limits the number of sheets scanned (excludes copying).<br />
FAX TX Restriction Limits the number of sheets sent by fax. This is displayed<br />
when the optional fax kit is installed.<br />
FAX Port Restriction Restricts the ports used for faxing. This is displayed when two<br />
optional FAX kits are installed.<br />
Restriction can be applied in two modes as follows:<br />
Item Description<br />
Off No restriction given<br />
Counter Limit Restricts the print counter in one-page increments up to<br />
9,999,999 copies.<br />
Reject Usage Restriction is applied.<br />
* Select [Off], [Use Port 1 Only] or [Use Port 2 Only] as the FAX Port Restriction setting.<br />
Use the procedure below to select a restriction method.<br />
Account: - Copy Restriction (Total)<br />
Restrict use of the functions.<br />
Off<br />
Status<br />
Counter Limit<br />
Reject Usage<br />
Limit<br />
(1 - 9999999)<br />
99999 page(s)<br />
Cancel OK<br />
10/10/2010 10:10<br />
10-25<br />
1 Follow steps 1 to 4 of Adding an Account<br />
(Accounting List) on page 10-22.<br />
Management<br />
2 Press [Change] for the item to be restricted.<br />
3 Select the restriction mode.<br />
If [Counter Limit] is selected, press [+],[-] or<br />
numeric keys to select the number of pages.<br />
4 Press [OK].<br />
5 Repeat steps 2 to 4 for other accounts to be<br />
restricted.<br />
6 Press [Save]. The restricted account is added.<br />
10
Apply Limit<br />
10-26<br />
Management<br />
This specifies how the machine behaves when the counter has reached the limit of restriction. The table below<br />
describes the action taken.<br />
Immediately *<br />
Use the procedure below to apply the restriction limit.<br />
Default Counter Limit<br />
Item Description<br />
Job stops when the counter reaches its limit.<br />
Subsequently Printing/scanning of the job continues but the subsequent job<br />
will be rejected.<br />
Alert Only Job continues while displaying an alert message.<br />
* The next job will be prohibited in sending or in storing in the box.<br />
1 Press the System Menu key.<br />
2 Press [User Login/Job Accounting].<br />
3 If the user authentication screen appears, enter<br />
your login user name and password and then press<br />
[Login]. For this, you need to login with<br />
administrator privileges. Refer to Adding a User<br />
(Local User List) on page 10-5 for the default login<br />
user name and password.<br />
4 Press [Next] of Job Accounting Setting, [Next] of<br />
Default Setting and then [Change] of Apply Limit.<br />
5 Select [Immediately], [Subsequently], or [Alert<br />
Only].<br />
6 Press [OK].<br />
When you add a new account, you can change the default restrictions on the number of sheets used. You can<br />
set any number from 1 to 9,999,999 in 1-sheet increments.<br />
The items that can be set differ depending on whether [Split] or [Total] is selected for Copy/Printer Count on<br />
page 10-24.
Available Settings<br />
[Split] selected for Copy/Printer Count<br />
Item Detail<br />
Copy Restriction (Total) Sets the default restriction on the number of sheets used for<br />
copying.<br />
Print Restriction (Total) Sets the default restriction on the number of sheets used for<br />
printing.<br />
Scan Restriction (Others) Sets the default restriction on the number of sheets used for<br />
scanning (excludes copying).<br />
FAX TX Restriction Sets the default restriction on the number of sheets used for sending<br />
faxes. This is displayed when the optional fax kit is installed.<br />
[Total] selected for Copy/Printer Count<br />
Item Detail<br />
Print Restriction (Total) Sets the default restriction on the total number of sheets used<br />
for copying and printing.<br />
Scan Restriction (Others) Sets the default restriction on the number of sheets used for<br />
scanning (excludes copying).<br />
FAX TX Restriction Sets the default restriction on the number of sheets used for sending<br />
faxes. This is displayed when the optional fax kit is installed.<br />
Use the procedure below to specify the counter limits.<br />
User Login/Job Accounting - Copy Restriction (Total)<br />
Set the default limit value for restricting use of the functions for each account<br />
by counter.<br />
Use [-]/[+] or the numeric keys to enter a number.<br />
Status<br />
(1 - 9999999)<br />
99999<br />
Cancel OK<br />
10/10/2010 10:10<br />
10-27<br />
1 Press the System Menu key.<br />
2 Press [User Login/Job Accounting].<br />
Management<br />
3 If user login administration is disabled, the user<br />
authentication screen appears. Enter a login user<br />
name and password, and press [Login]. For this,<br />
you need to login with administrator privileges.<br />
Refer to Adding a User (Local User List) on page<br />
10-5 for the default login user name and password.<br />
4 Press [Next] of Job Accounting Setting, [Next] of Default<br />
Setting and then [Next] of Default Counter Limit.<br />
5 Press [Change] for the item you want to modify and<br />
then press [+] or [-] or use the numeric keys to enter<br />
the default restriction on the number of sheets.<br />
6 Press [OK].<br />
7 To set another default restriction, repeat steps 5 to 6.<br />
10
Counting the Number of Pages Printed<br />
10-28<br />
Management<br />
This counts the number of pages printed. Counts are classified into Total Job Accounting and Each Job Accounting.<br />
A new count can also be started after resetting the count data which was stored for a certain period of time.<br />
Types of the counts are as follows.<br />
Item Detail<br />
Printed Pages Displays the number of pages copied and printed, and the total<br />
number of pages used. You can also use [Count by Paper Size] and<br />
[Count by Duplex/Combine] to check the number of pages used.<br />
• You can use [Count by Paper Size] to check the number of<br />
pages used in the paper size set in Count by Paper Size on page<br />
10-30 as well as the number of pages used in other paper sizes.<br />
• You can use the [Count by Duplex/Combine] to check the<br />
number of pages used in Duplex (1-sided) mode, Duplex (2sided)<br />
mode and the total for both, as well as the pages used in<br />
Combine (None) mode, Combine (2in1) mode, Combine (4in1)<br />
mode and the total for all three.<br />
Scanned Pages Displays the number of pages scanned for copying, faxing* and<br />
other functions, as well as the total number of pages scanned.<br />
FAX Transmission Pages* Displays the number of pages faxed.<br />
FAX Transmission Time*<br />
Displays the total duration of fax transmissions.<br />
* Only displayed when the optional fax kit is installed.
Total Job Accounting<br />
10-29<br />
Management<br />
This counts the number of pages for all accounts and resets the counts for those accounts together at the same time.<br />
Use the procedure below to check and reset the counter.<br />
Status<br />
User Login/Job Accounting - Total Job Accounting<br />
Printed Pages:<br />
FAX Transmission Pages:<br />
2<br />
Counter Reset:<br />
Check<br />
Start<br />
Each Job Accounting<br />
Scanned Pages:<br />
FAX Transmission Time:<br />
0:00:10<br />
1 Press the System Menu key.<br />
2 Press [User Login/Job Accounting].<br />
3 If the user authentication screen appears, enter<br />
your login user name and password and then press<br />
[Login]. For this, you need to login with<br />
administrator privileges. Refer to Adding a User<br />
(Local User List) on page 10-5 for the default login<br />
user name and password.<br />
4 Press [Next] of Job Accounting Setting and then<br />
[Next] of Total Job Accounting.<br />
5 Press [Check] at the function to check the count.<br />
The results will be displayed.<br />
6 Confirm the count and press [Close].<br />
7 Press [Start] of Counter Reset to reset the counter.<br />
8 Press [Yes] on the screen to confirm the reset. The<br />
counter is reset.<br />
This counts the number of pages for each account and resets the counts by account.<br />
Use the procedure below to display and reset the counter.<br />
Check<br />
Close<br />
10/10/2010 10:10<br />
1 Press the System Menu key.<br />
2 Press [User Login/Job Accounting].<br />
3 If the user authentication screen appears, enter<br />
your login user name and password and then press<br />
[Login]. For this, you need to login with<br />
administrator privileges. Refer to Adding a User<br />
(Local User List) on page 10-5 for the default login<br />
user name and password.<br />
4 Press [Next] of Job Accounting Setting and [Check]<br />
of Each Job Accounting.<br />
10
User Login/Job Accounting - Each Job Accounting<br />
Status<br />
Maintain a separate counter for each account (department).<br />
06 Account<br />
Account: 06 Account<br />
Printed Pages:<br />
Account Name Account ID<br />
Detail<br />
Count by Paper Size<br />
Sort<br />
00006000<br />
This counts the number of pages by paper size (e.g. Letter).<br />
10-30<br />
5 Select the account to check the count.<br />
Management<br />
NOTE: Select [Name] or [ID] from the Sort pull-down<br />
menu to sort the account names.<br />
Press [Search(Name)] or [Search(ID)] to search by<br />
account name or account ID.<br />
To display an account other than your own account,<br />
press [Other Account].<br />
6 Press [Detail].<br />
7 Press [Check] at the function to check the count.<br />
The results will be displayed.<br />
8 Confirm the count and press [Close].<br />
9 Press [Start] of Counter Reset to reset the counter.<br />
10 Press [Yes] on the screen to confirm the reset. The<br />
counter will be reset.<br />
NOTE: Paper size is available in five types, - 1 to 5. These types are specified in accounting reports. Refer to<br />
Print Accounting Report on page 10-32.<br />
In addition to paper size, media type can also be specified (e.g. count the letter-size color paper used). If no<br />
media type is specified, usage is counted for all media types of that size.<br />
Use the procedure below to count the number of pages.<br />
Name<br />
Scanned Pages:<br />
FAX Transmission Pages:<br />
FAX Transmission Time:<br />
2(20) 0:00:10<br />
Status<br />
Counter Reset:<br />
Check<br />
Start<br />
2/2<br />
Search(Name)<br />
Search(ID)<br />
Other Account<br />
Check<br />
Close<br />
10/10/2010 10:10<br />
Close<br />
10/10/2010 10:10<br />
1 Press the System Menu key.<br />
2 Press [User Login/Job Accounting].<br />
3 If the user authentication screen appears, enter<br />
your login user name and password and then press<br />
[Login]. For this, you need to login with<br />
administrator privileges. Refer to Adding a User<br />
(Local User List) on page 10-5 for the default login<br />
user name and password.<br />
4 Press [Next] of Job Accounting Setting, [Next] of<br />
Default Setting, [Next] of Count by Paper Size,<br />
[Change] of Paper Size 1 to 5 and then [On].
User Login/Job Accounting - Paper Size 1<br />
Select the paper sizes and types to count.<br />
Status<br />
Off<br />
On<br />
A3<br />
A5<br />
A4<br />
B4<br />
B5 Folio<br />
Ledger Legal<br />
Letter Statement<br />
Plain<br />
Media Type<br />
Cancel OK<br />
10/10/2010 10:10<br />
10-31<br />
5 Select the paper size.<br />
6 Press [Media Type] to specify media type.<br />
7 Select the media type and press [OK].<br />
8 Press [OK].<br />
Management<br />
10
Print Accounting Report<br />
The total pages counted of all relevant accounts can be printed as an accounting report.<br />
Reports have different formats depending on how the count of copiers and printers is administered.<br />
When Split is selected for Managing the Copy/Printer Count<br />
ACCOUNT.REPORT<br />
Firmware Version<br />
For the count by paper size, the report will be printed by size.<br />
Use the procedure below to print a job accounting report.<br />
10-32<br />
Management<br />
1 Check that Letter or A4 paper is loaded in the<br />
cassette.<br />
2 Press the System Menu key.<br />
3 Press [User Login/Job Accounting].<br />
4 If the user authentication screen appears, enter<br />
your login user name and password and then press<br />
[Login]. For this, you need to login with<br />
administrator privileges. Refer to Adding a User<br />
(Local User List) on page 10-5 for the default login<br />
user name and password.<br />
5 Press [Next] of Job Accounting Setting and then<br />
[Print] of Print Accounting Report.<br />
6 Press [Yes] on the screen to confirm the printing.
Unknown ID Job<br />
10-33<br />
Management<br />
The behavior of the machine when it receives a job from an unknown account ID (i.e. unsent ID) can be<br />
specified. Refer to Unknown ID Job on page 10-10 for details.<br />
Checking and Printing Counter<br />
Counter<br />
Status<br />
Printed Pages<br />
Black&White:<br />
Scanned Pages<br />
Copy<br />
Copy<br />
Originals:<br />
600<br />
Print<br />
Printed Pages<br />
Status Page by Paper Size<br />
Printer<br />
FAX<br />
200<br />
FAX<br />
300 600<br />
100<br />
Others<br />
1000<br />
Total<br />
Total<br />
1000<br />
1800<br />
Close<br />
10/10/2010 10:10<br />
Press the Counter key to check the number of sheets<br />
printed and scanned.<br />
You can check the number of pages printed in each<br />
paper size by pressing [Printed Pages by Paper Size].<br />
10
10-34<br />
Management
11 Maintenance<br />
This chapter describes cleaning and toner replacement.<br />
• Regular Maintenance........................................................................11-2<br />
• Cleaning.......................................................................................... 11-11<br />
11-1
Regular Maintenance<br />
Toner Container Replacement<br />
11-2<br />
Maintenance<br />
When toner runs low, "Toner is running out" appears in the touch panel. Make sure you have a new toner<br />
container available for replacement.<br />
When the touch panel displays Toner is empty., replace the toner.<br />
Every time you replace the toner container, be sure to clean the parts as instructed below. Dirty parts may<br />
deteriorate output quality.<br />
NOTE:<br />
• For the toner container, always use a genuine toner container. Using a toner container that is not genuine<br />
may cause image defects and product failure.<br />
• The memory chip in the toner container of this product stores information necessary for improving customer<br />
convenience, operation of the recycling system for used toner containers, and planning and development of<br />
new products. The stored information does not include information that makes it possible to identify<br />
individuals, and is only used anonymously for the above purposes.<br />
CAUTION: Do not attempt to incinerate the toner container or the waste toner box. Dangerous sparks<br />
may cause burns.<br />
1 Open the front cover.<br />
2 Turn the toner container release lever to the vertical<br />
position.
11-3<br />
Maintenance<br />
3 Remove the toner container and insert it into the<br />
provided plastic disposal bag.<br />
4 Remove the new toner container from the box.<br />
5 Place a cushioning material on a flat surface, hold<br />
the toner container vertically on the material, and<br />
tap the upper part of the container about 5 times.<br />
Invert the toner container so that the other end is<br />
up, and hit in the same way.<br />
11
11-4<br />
Maintenance<br />
6 Shake the toner container in a wide vertical curvelike<br />
motion about 5 times as shown.<br />
7 Hold the toner container with both hands and gently<br />
push it all the way in.<br />
8 After pushing the toner container all the way in, turn<br />
the toner container release lever to the horizontal<br />
position.<br />
9 Close the front cover.<br />
NOTE: Return the exhausted toner container and waste toner box to your dealer or service representative.<br />
The collected toner container and waste toner box will be recycled or disposed in accordance with the relevant<br />
regulations
Waste Toner Box Replacement<br />
11-5<br />
Maintenance<br />
When "Waste toner box almost full" appears in the touch panel, make sure you have a new waste toner box<br />
available for replacement.<br />
When the touch panel shows “Replace the waste toner box”, immediately replace the waste toner box.<br />
CAUTION: Do not attempt to incinerate the toner container or the waste toner box. Dangerous sparks<br />
may cause burns.<br />
1 Open the front cover.<br />
2 Push up the release key for the waste toner box<br />
and pull out the waste toner box.<br />
3 Detach the accessory cap from the side of the box<br />
and attach to the tip.<br />
4 Insert into the provided plastic disposal bag.<br />
11
11-6<br />
Maintenance<br />
5 Gently remove the new waste toner box from its<br />
packaging.<br />
6 Install a new waste toner box.<br />
7 Push the waste toner box firmly all the way in.<br />
8 Close the front cover.<br />
NOTE: Return the exhausted toner container and waste toner box to your dealer or service representative.<br />
The collected toner container and waste toner box will be recycled or disposed in accordance with the relevant<br />
regulations.
Replacing Staples<br />
A staple cartridge is installed in the optional document finisher, and center-fold unit.<br />
The document finisher contains staple cartridge holder A.<br />
11-7<br />
Maintenance<br />
The optional folding unit contains staple cartridge holders B and C. The refill procedure for staple cartridge<br />
holders B and C are the same as for staple cartridge holder A.<br />
If a message displays indicating that staples have run out, the staple cartridge holder need to be replenished<br />
with staples.<br />
NOTE: If the Staple Unit runs out of staples, contact your service representative or the place of purchase.<br />
Follow the steps below to refill staples.<br />
Refilling Staple Cartridge Holder A<br />
NOTE: See page 11-8 to refill staple cartridge holder B/C of the optional folding unit.<br />
1 Open the front cover 1.<br />
2 Remove the staple cartridge holder.<br />
11
Refilling Staple Cartridge Holders B/C (Option)<br />
11-8<br />
Maintenance<br />
3 Remove the empty staple cartridge from the staple<br />
cartridge holder.<br />
NOTE: The staple cartridge can only be removed<br />
when it contains no more staples.<br />
4 Insert the new staple cartridge into the staple<br />
cartridge holder.<br />
5 Re-install the staple cartridge holder. The staple<br />
cartridge holder will click into place when it has<br />
been inserted correctly.<br />
6 Close the front cover 1.<br />
Follow the steps below to refill staples for the optional folding unit. Follow the same procedure to refill staple<br />
cartridge holders B and C.<br />
1 Open the front cover 1 and 2.
11-9<br />
2 Remove the staple cartridge holder B or C.<br />
Maintenance<br />
3 Open the stopper and remove the empty staple<br />
cartridge.<br />
NOTE: The staple cartridge can only be removed<br />
when it contains no more staples.<br />
4 Insert the new staple cartridge into the staple<br />
cartridge holder and close the stopper.<br />
5 Re-install the staple cartridge holder.<br />
When re-installing, align the triangle marks on the<br />
staple cartridge holder and the staple unit. The<br />
staple cartridge holder will click into place when it<br />
has been inserted correctly.<br />
6 Close the front cover 1 and 2.<br />
11
Emptying the Punch Waste Box (Option)<br />
11-10<br />
Maintenance<br />
If a message is displayed on the machine operation panel indicating that the waste punch box is full, be sure to<br />
empty the scraps in the punch waste box.<br />
Leave the main power switch on the machine switched ON ( | ) while performing this procedure.<br />
1 Open the front cover 1.<br />
2 Grasp the punch waste box handle and remove the<br />
box from the Document Finisher.<br />
NOTE: Take care not to spill the waste hole punch<br />
scraps when removing the container.<br />
3 Dispose of the hole punch scraps appropriately.<br />
4 Re-install the punch waste box. Align it with the<br />
guides in the Document Finisher.<br />
5 Close the front cover 1.
Cleaning<br />
Clean the machine regularly to ensure optimum output quality.<br />
CAUTION: For safety, always unplug the power cord before cleaning the machine.<br />
11-11<br />
Maintenance<br />
Platen Cover / Glass Platen<br />
Wipe the backside of the platen cover, the inside of the document processor and the glass platen with a soft<br />
cloth dampened with alcohol or mild detergent.<br />
IMPOR<strong>TA</strong>NT: Do not use thinner or other organic solvents.<br />
Platen Cover<br />
Glass Platen<br />
11
Slit Glass/Dual scanning area<br />
11-12<br />
Maintenance<br />
If black streaks or dirt appears in copies when using the document processor, clean the slit glass with the<br />
supplied cleaning cloth. The message Clean the slit glass. may be displayed if the slit glass requires cleaning.<br />
When using the document processor that features dual scanning, clean the dual scanning unit also.<br />
Status<br />
The slit glass requires cleaning.<br />
Hold<br />
02/03<br />
1. Open the document processor.<br />
2. Clean the slit glass surface and the white<br />
reading guide on the document processor with<br />
the dry accessory cloth.<br />
3. Close the document processor and press [End].<br />
Note that dirty glass and sheet may cause<br />
black streaks to appear in the output.<br />
NOTE: Wipe the slit glasses with the dry accessory cloth. Do not use water, soap or solvents for cleaning.<br />
a<br />
End<br />
10/10/2010 10:10<br />
1 Remove the cloth from the cleaning cloth<br />
compartment.<br />
2 Open the document processor and wipe the slit<br />
glass (a).
11-13<br />
3 Wipe the white guide (b) on the document<br />
processor.<br />
Maintenance<br />
4 Open the top cover of the document processor and<br />
wipe the glass (scanning unit).<br />
5 Wipe the white roller.<br />
6 Close the document processor top cover and return<br />
the cleaning cloth to the cleaning cloth<br />
compartment.<br />
7 Press [End] on the touch panel.<br />
11
Conveying Guide<br />
Clean the conveyor guide regularly (at least monthly) to ensure optimum output quality.<br />
11-14<br />
Maintenance<br />
IMPOR<strong>TA</strong>NT: Wipe the slit glasses with the dry accessory cloth. Do not use water,soap or solvents for cleaning.<br />
Do not touch the photoconductor drum.<br />
1 Pull out cassette 1 and remove the cloth from the<br />
cleaning cloth compartment.<br />
2 Pull up the lever and open the right cover 1.<br />
3 Wipe off the dirt on both sides of the conveying<br />
guide.<br />
4 Press the specified position of the right cover 1 to<br />
close.<br />
5 Return the cleaning cloth to the cleaning cloth<br />
compartment and push cassette 1 back in place<br />
securely.
Separator<br />
Clean the separator regularly (at least monthly) to ensure optimum output quality.<br />
11-15<br />
1 Open the front cover.<br />
2 Remove the cleaning brush (blue colored).<br />
Maintenance<br />
3 Pull up the lever and open the right cover 1.<br />
4 As shown in the figure, clean dirt from the separator<br />
by moving the brush from side to side along the<br />
separator.<br />
11
11-16<br />
Maintenance<br />
5 Press the specified position of the right cover 1 to<br />
close.<br />
6 Put away the cleaning brush and close the front<br />
cover.
12 Troubleshooting<br />
This chapter explains how to solve problems with the machine.<br />
• Solving Malfunctions.........................................................................12-2<br />
• Responding when Error Messages...................................................12-7<br />
• Clearing Paper Jams ......................................................................12-21<br />
12-1
Solving Malfunctions<br />
12-2<br />
Troubleshooting<br />
The table below provides general guidelines for problem solving.<br />
If a problem occurs with your machine, look into the checkpoints and perform procedures indicated on the<br />
following pages. If the problem persists, contact your Service Representative.<br />
Symptom Checkpoints Corrective Actions<br />
An application does<br />
not start.<br />
The operation panel<br />
does not respond<br />
when the main power<br />
switch is turned on.<br />
Pressing the Start key<br />
does not produce<br />
copies.<br />
Blank sheets are<br />
ejected.<br />
Printouts are too<br />
light.<br />
Is the Auto Panel Reset time<br />
short?<br />
Set the Auto Panel Reset time to<br />
30 seconds or more.<br />
Is the machine plugged in? Plug the power cord into an AC<br />
outlet.<br />
Is there a message on the<br />
touch panel?<br />
Is the machine in Sleep<br />
mode?<br />
Are the originals loaded<br />
correctly?<br />
Determine the appropriate<br />
response to the message and<br />
respond accordingly.<br />
Press the Power key to recover<br />
the machine from Sleep mode. The<br />
machine will be ready to copy<br />
within a minute.<br />
When placing originals on the<br />
platen, place them face-down and<br />
align them with the original size<br />
indicator plates.<br />
When placing originals in the<br />
document processor, place them<br />
face-up.<br />
— Check that the application software<br />
is correctly operated.<br />
Reference<br />
Page<br />
9-77<br />
2-8<br />
12-7<br />
2-12<br />
2-46<br />
2-48<br />
Is the paper damp? Replace the paper with new paper. 2-29<br />
Have you changed the<br />
density?<br />
Is the toner distributed evenly<br />
within the toner container?<br />
Is there a message indicating<br />
the addition of toner?<br />
—<br />
Select appropriate density level. 3-9<br />
9-68<br />
Shake the toner container from<br />
side to side several times.<br />
11-2<br />
Replace the toner container. 11-2<br />
Is EcoPrint mode enabled? Disable EcoPrint mode. 9-59<br />
— Run [Drum Refresh1]. 9-72<br />
— Run [Developer Refresh]. 9-73<br />
— Make sure the paper type setting is<br />
correct for the paper being used.<br />
9-4
Symptom Checkpoints Corrective Actions<br />
Printouts are too dark. Have you changed the<br />
density?<br />
Copies have a moire<br />
pattern (dots grouped<br />
together in patterns<br />
and not aligned<br />
uniformly).<br />
Printouts are not<br />
clear.<br />
Dirt on the print side<br />
of the paper.<br />
12-3<br />
Troubleshooting<br />
Select appropriate density level. 3-9<br />
9-68<br />
— Run [Calibration]. 9-74<br />
— Run [Drum Refresh1]. 9-72<br />
— Run [Developer Refresh]. 9-73<br />
Is the original a printed<br />
photograph?<br />
Did you choose appropriate<br />
image quality for the original?<br />
Is the platen or the document<br />
processor dirty?<br />
Set the image quality to [Printer<br />
Output] or [Book/Magazine] in<br />
[Photo].<br />
3-9<br />
Select appropriate image quality. 3-9<br />
Clean the platen or the document<br />
processor.<br />
11-11<br />
Is the conveying guide dirty? Clean the conveying guide. 11-14<br />
— Run [Drum Refresh1]. 9-72<br />
— Run [Developer Refresh]. 9-73<br />
Printouts are fuzzy. Is the machine being used in Use in an environment that has —<br />
very humid conditions? suitable humidity.<br />
— Run [Drum Refresh1]. 9-72<br />
Images are skewed. Are the originals placed<br />
correctly?<br />
Is the paper loaded<br />
correctly?<br />
When placing originals on the<br />
platen, align them with the original<br />
size indicator plates.<br />
When placing originals in the<br />
document processor, align the<br />
original width guides securely<br />
before placing the originals.<br />
Check the position of the paper<br />
width guides.<br />
Reference<br />
Page<br />
2-48<br />
2-48<br />
2-31<br />
12
Symptom Checkpoints Corrective Actions<br />
12-4<br />
Troubleshooting<br />
Paper often jams. Is the paper loaded<br />
correctly?<br />
Load the paper correctly. 2-31<br />
— Change the orientation in which the xxxvii<br />
paper is positioned.<br />
2-31<br />
2-38<br />
Printouts have black<br />
lines.<br />
Printouts are wrinkled<br />
or curled.<br />
Is the paper of the supported<br />
type? Is it in good condition?<br />
Is the paper curled, folded or<br />
wrinkled?<br />
Are there any loose scraps or<br />
jammed paper in the<br />
machine?<br />
Are the slit glass and the<br />
Dual scanning area dirty?<br />
Remove the paper, turn it over, and<br />
reload it.<br />
2-31<br />
Replace the paper with new paper. 2-31<br />
Remove any jammed paper. 12-21<br />
Clean the slit glass and the Dual<br />
scanning area.<br />
11-12<br />
Is the paper separator of the<br />
paper feed unit dirty?<br />
Clean the paper separator. 11-15<br />
Is the paper damp? Replace the paper with new paper. 2-29<br />
— Change the orientation in which the<br />
paper is positioned.<br />
Cannot print. Is the machine plugged in? Plug the power cord into an AC<br />
outlet.<br />
—<br />
Is the machine powered on? Turn on the main power switch. 3-2<br />
Documents are<br />
printed improperly.<br />
Cannot print with USB<br />
memory.<br />
USB memory not<br />
recognized.<br />
Are the printer cable and<br />
network cable connected?<br />
Was the machine powered<br />
on before the printer cable<br />
was connected?<br />
Connect the correct printer cable<br />
and network cable securely.<br />
Power on the machine after<br />
connecting the printer cable.<br />
xxxvii<br />
2-31<br />
2-38<br />
Is the print job paused? Resume printing. 8-3<br />
Are the application software<br />
settings at the PC set<br />
properly?<br />
Check that the printer driver and<br />
application software settings are<br />
set properly.<br />
Is the USB host blocked? Select [Unblock] in the USB host<br />
settings.<br />
— Check that the USB memory is<br />
securely plugged into the machine.<br />
Reference<br />
Page<br />
2-3<br />
2-3<br />
—<br />
9-107<br />
—
Symptom Checkpoints Corrective Actions<br />
When displaying an<br />
image sent from the<br />
machine on the PC, an<br />
image size is shrunk<br />
vertically or<br />
horizontally.<br />
Dirt on the top edge<br />
or back of the paper.<br />
Part of the image is<br />
periodically faint or<br />
blurred.<br />
Part of the image is<br />
periodically faint or<br />
shows white lines.<br />
Print on the back of<br />
the sheet is visible on<br />
the front.<br />
The background<br />
density is obtrusive.<br />
Perform Tone Curve<br />
Adjustment in the<br />
System Menu. is<br />
displayed.<br />
Have you selected<br />
200×100dpi Normal or<br />
200×400dpi Super Fine for<br />
the scan resolution?<br />
Check the paper chute and<br />
the ramp.<br />
12-5<br />
Select a scan resolution other than<br />
200×100dpi Normal or 200×400dpi<br />
Super Fine when sending an<br />
image.<br />
Open the right cover and check for<br />
toner on the paper ramp inside the<br />
paper transfer unit. Clean the<br />
paper ramp using a soft, dry, lintfree<br />
cloth.<br />
Troubleshooting<br />
— Run [Developer Refresh]. 9-73<br />
— Run [Drum Refresh1]. 9-72<br />
— Run [Drum Refresh1]. 9-72<br />
— Set [Prevent Bleed-through] to<br />
[On].<br />
—<br />
—<br />
4-36<br />
6-25<br />
9-20<br />
— Run [Background Density Adj.]. 4-35<br />
6-22<br />
9-19<br />
Over long periods of use, the<br />
effects of the ambient<br />
temperature and humidity<br />
can cause output hues to<br />
vary slightly.<br />
Run [Tone Curve Adjustment]. 9-71<br />
Reference<br />
Page<br />
12
Symptom Checkpoints Corrective Actions<br />
Cannot send via SMB. Is the network cable<br />
connected?<br />
Have the network settings for<br />
the equipment been<br />
configured properly?<br />
Have the folder sharing<br />
settings been configured<br />
properly?<br />
Has the SMB protocol been<br />
set to [On]?<br />
Has the [Host Name] been<br />
entered properly?<br />
Has the [Path] been entered<br />
properly?<br />
Has the [Login User Name]<br />
been entered properly?<br />
Has the same domain name<br />
been used for the [Host<br />
Name] and [Login User<br />
Name]?<br />
Has the [Login Password]<br />
been entered properly?<br />
Have exceptions for<br />
Windows Firewall been<br />
configured properly?<br />
Do the time settings for the<br />
equipment, domain server,<br />
and data destination<br />
computer differ?<br />
Is the touch panel displaying<br />
Send error.?<br />
* You can also enter a full computer name as the host name (for example, pc001.abcdnet.com).<br />
** You can also enter login user names in the following formats:<br />
Domain_name/user_name (for example, abcdnet/james.smith)<br />
User_name@domain_name (for example, james.smith@abcdnet)<br />
12-6<br />
Connect the correct network cable<br />
securely.<br />
Configure the TCP/IP settings<br />
properly.<br />
Check sharing settings and access<br />
privileges under the folder<br />
properties.<br />
Set the SMB protocol setting to<br />
[On].<br />
Check the name of the computer to<br />
which data is being sent.*<br />
Check the share name for the<br />
shared folder.<br />
Check the domain name and login<br />
user name.**<br />
Delete the domain name and<br />
backslash ("\") from the [Login<br />
User Name].<br />
Troubleshooting<br />
2-3<br />
9-94<br />
3-24<br />
3-24<br />
3-24<br />
3-24<br />
3-24<br />
3-24<br />
Check the login password. 3-24<br />
Configure exceptions for Windows<br />
Firewall properly.<br />
Set the equipment, domain server,<br />
and data destination computer to<br />
the same time.<br />
Reference<br />
Page<br />
3-35<br />
—<br />
Refer to Responding to Send Error. 12-17
Responding when Error Messages<br />
If the touch panel displays any of these messages, follow the corresponding procedure.<br />
Alphanumeric<br />
Error Message Checkpoints Corrective Actions<br />
Acceptable fold count<br />
exceeded.<br />
Acceptable staple<br />
count exceeded.*<br />
Is the acceptable number of<br />
sheets exceeded?<br />
Is the acceptable number of<br />
sheets exceeded?<br />
12-7<br />
Press [Continue] to print using Fold<br />
per acceptable number of sheets.<br />
Press [Cancel] to cancel the job.<br />
Press [Continue] to print without<br />
using Staple. Press [Cancel] to<br />
cancel the job.<br />
Activation error. — Failed to activate the application.<br />
Contact administrator.<br />
Add paper in cassette<br />
#.<br />
Add paper in Multi<br />
Purpose tray.<br />
— Expansion Authentication is disabled.<br />
Turn the main power switch off and<br />
on. If the error exists, contact<br />
administrator.<br />
Is the indicated cassette out<br />
of paper?<br />
Is the paper of the selected<br />
size loaded in the multi<br />
purpose tray?<br />
Load paper.<br />
Select the available paper. Press<br />
[Continue] to print.<br />
Load paper.<br />
Select the available paper. Press<br />
[Continue] to print.<br />
Box is not found. — The specified box cannot be found.<br />
Job is canceled. Press [End].<br />
Box limit exceeded.* — Document box is full, and no further<br />
storage is available. Job is canceled.<br />
Press [End].<br />
Cannot connect to<br />
Authentication<br />
Server.*<br />
— Repeat Copy box is full, and no<br />
further repeat copy is available.<br />
Press [Continue] to print scanned<br />
pages.<br />
Press [Cancel] to cancel the job.<br />
— Set machine time to match the<br />
server’s time.<br />
Troubleshooting<br />
Reference<br />
Page<br />
* When Auto Error Clear is set to [On], processing resumes automatically after a set amount of time elapses.<br />
4-11<br />
—<br />
—<br />
—<br />
2-29<br />
2-34<br />
—<br />
—<br />
—<br />
2-14<br />
— Check the domain name. 10-2<br />
— Check the host name. 10-2<br />
— Check the connection status with the<br />
server.<br />
—<br />
12
Error Message Checkpoints Corrective Actions<br />
Cannot duplex print<br />
on this paper.*<br />
Cannot find the<br />
destination computer.<br />
Check the computer.<br />
Cannot fold this<br />
paper.<br />
Cannot offset this<br />
paper.*<br />
Cannot print the<br />
specified number of<br />
copies.*<br />
Cannot process this<br />
job.*<br />
Did you select a paper size/<br />
type that cannot be duplex<br />
printed?<br />
Is the machine connected to<br />
the network?<br />
Is the PC to which the<br />
scanned image is to be sent<br />
connected to the network?<br />
Has the setting of the<br />
shared folder to which the<br />
scanned image is to be sent<br />
been changed?<br />
Is the account information<br />
(user ID, password) used to<br />
access the shared folder to<br />
which the scanned image is<br />
to be sent incorrect?<br />
Did you select a paper size/<br />
type that cannot be folded?<br />
Did you select a paper size/<br />
type that cannot be offset?<br />
12-8<br />
If the selected paper is not changed<br />
and [Continue] is pressed, duplex is<br />
released.<br />
Select the available paper. Press<br />
[Continue] to print.<br />
Make sure that the machine is<br />
connected to the network.<br />
Make sure that the destination PC is<br />
connected to the network.<br />
Return the setting for the destination<br />
shared folder to the previous setting.<br />
Enter the correct user ID and<br />
password. For a domain<br />
environment, the domain name must<br />
be specified.<br />
[User ID]@[Domain Name]<br />
Example: sa720XXXX@km<br />
If the selected paper is not changed<br />
and [Continue] is pressed, fold is<br />
released.<br />
Select the available paper. Press<br />
[Continue] to print.<br />
If the selected paper is not changed<br />
and [Continue] is pressed, offset is<br />
released.<br />
Select the available paper. Press<br />
[Continue] to print.<br />
— Only one copy is available.<br />
Press [Continue] to continue printing.<br />
Press [Cancel] to cancel the job.<br />
— Restricted by Authorization settings.<br />
The job is canceled. Press [End].<br />
— Restricted by Job Accounting.<br />
The job is canceled. Press [End].<br />
Troubleshooting<br />
Reference<br />
Page<br />
* When Auto Error Clear is set to [On], processing resumes automatically after a set amount of time elapses.<br />
3-12<br />
2-3<br />
2-3<br />
3-29<br />
—<br />
4-11<br />
3-14<br />
—<br />
—<br />
10-20
Error Message Checkpoints Corrective Actions<br />
Cannot punch at the<br />
specified position.<br />
Cannot punch this<br />
paper.<br />
Cannot staple at the<br />
specified position.<br />
Cannot staple this<br />
paper.*<br />
Cannot use ##### due<br />
to a failure.<br />
Check the document<br />
processor.<br />
Check the folder<br />
setting at the PC.<br />
Have you selected a<br />
position that cannot be<br />
punched?<br />
Did you select a paper size/<br />
type that cannot be<br />
punched?<br />
Have you selected a<br />
position that cannot be<br />
stapled?<br />
Did you select a paper size/<br />
type that cannot be stapled?<br />
12-9<br />
If the selected paper is not changed<br />
and [Continue] is pressed, punch is<br />
released.<br />
Select the available paper. Press<br />
[Continue] to print.<br />
If the selected paper is not changed<br />
and [Continue] is pressed, punch is<br />
released.<br />
Select the available paper. Press<br />
[Continue] to print.<br />
If the selected paper is not changed<br />
and [Continue] is pressed, staple is<br />
released.<br />
Select the available paper. Press<br />
[Continue] to print.<br />
If the selected paper is not changed<br />
and [Continue] is pressed, staple is<br />
released.<br />
Select the available paper. Press<br />
[Continue] to print.<br />
— Call service. —<br />
Is the document processor<br />
open?<br />
Is the top cover of the<br />
document processor open?<br />
Is the machine connected to<br />
the network?<br />
Is the PC to which the<br />
scanned image is to be sent<br />
connected to the network?<br />
Has the setting of the<br />
shared folder to which the<br />
scanned image is to be sent<br />
been changed?<br />
Is the account information<br />
(user ID, password) used to<br />
access the shared folder to<br />
which the scanned image is<br />
to be sent incorrect?<br />
Troubleshooting<br />
Reference<br />
Page<br />
* When Auto Error Clear is set to [On], processing resumes automatically after a set amount of time elapses.<br />
3-20<br />
3-20<br />
—<br />
—<br />
Close the document processor. —<br />
Close the document processor cover. —<br />
Make sure that the machine is<br />
connected to the network.<br />
Make sure that the destination PC is<br />
connected to the network.<br />
Return the setting for the destination<br />
shared folder to the previous setting.<br />
Enter the correct user ID and<br />
password. For a domain<br />
environment, the domain name must<br />
be specified.<br />
[User ID]@[Domain Name]<br />
Example: sa720XXXX@km<br />
2-3<br />
2-3<br />
3-29<br />
—<br />
12
Error Message Checkpoints Corrective Actions<br />
Check the paper in<br />
the multi purpose<br />
tray.<br />
Check the side<br />
feeder.<br />
Confidential<br />
document was<br />
detected.<br />
Empty the punch<br />
waste box.<br />
Error occurred at<br />
cassette #.<br />
Error occurred at the<br />
multi purpose tray.<br />
Failed to specify Job<br />
Accounting.*<br />
Failed to store job<br />
retention data.<br />
Folding tray is full of<br />
paper.<br />
— The paper size is different. Set<br />
selected size paper and press<br />
[Continue].<br />
— The side feeder is not installed<br />
correctly. Attach the side feeder.<br />
— The machine detects the document<br />
guard pattern. Job is canceled. Press<br />
[End].<br />
Is the punch waste box full? Follow the instructions on the touch<br />
panel and empty the punch waste<br />
box.<br />
— Open the cassette. Check inside the<br />
machine and remove the paper.<br />
— Remove the paper from the multi<br />
purpose tray.<br />
— Failed to specify Job Accounting<br />
when processing the job externally.<br />
The job is canceled. Press [End].<br />
— The job is canceled. Press [End]. —<br />
Is the acceptable storage<br />
capacity exceeded?<br />
12-10<br />
Remove the paper. Printing then<br />
resumes.<br />
Troubleshooting<br />
Reference<br />
Page<br />
* When Auto Error Clear is set to [On], processing resumes automatically after a set amount of time elapses.<br />
2-38<br />
—<br />
9-108<br />
11-10<br />
—<br />
2-38<br />
—<br />
—
Error Message Checkpoints Corrective Actions<br />
Hard Disk error. — An error has occurred on the hard<br />
disk. Job is canceled. Press [End].<br />
The possible error codes and their<br />
descriptions are as follows.<br />
01: The amount of data that can be<br />
saved at once has been<br />
exceeded. Restart the system or<br />
turn the power OFF/ON. If the<br />
error still occurs, divide the file<br />
into smaller files. If the error<br />
occurs after the file is divided, the<br />
hard disk is damaged. Execute<br />
[System Initialization].<br />
04: Insufficient space on the hard<br />
disk to complete this operation.<br />
Move data or delete unneeded<br />
data.<br />
Incorrect account ID. — The account ID was incorrect when<br />
processing the job externally. The job<br />
is canceled. Press [End].<br />
Incorrect box<br />
password.<br />
Incorrect Login User<br />
Name or Password.<br />
Incorrect password. Is an incorrect password<br />
entered?<br />
Install the punch<br />
waste box.<br />
Install the waste toner<br />
box.<br />
Job Accounting<br />
restriction exceeded.*<br />
— The box password was incorrect<br />
when processing the job externally.<br />
The job is canceled. Press [End].<br />
— The login user name or password<br />
was incorrect when processing the<br />
job externally. The job is canceled.<br />
Press [End].<br />
12-11<br />
Enter the correct password. ―<br />
— Follow the instructions on the touch<br />
panel and install the punch waste<br />
box.<br />
— The waste toner box is not installed<br />
correctly. Set it correctly.<br />
Is the acceptable printing<br />
count restricted by Job<br />
Accounting exceeded?<br />
The printing count exceeded the<br />
acceptable count restricted by Job<br />
Accounting. Cannot print any more.<br />
This job is canceled. Press [End].<br />
Troubleshooting<br />
Reference<br />
Page<br />
* When Auto Error Clear is set to [On], processing resumes automatically after a set amount of time elapses.<br />
—<br />
—<br />
—<br />
—<br />
—<br />
11-5<br />
—<br />
12
Error Message Checkpoints Corrective Actions<br />
KPDL error.* — PostScript error has occurred.<br />
The job is canceled. Press [End].<br />
Machine failure. — Internal error has occurred. Make a<br />
note of the error code displayed on<br />
the touch panel. Call service.<br />
Mailbox tray is full of<br />
paper.<br />
Main unit lower left<br />
tray is full of paper.<br />
Main unit upper left<br />
tray is full of paper.<br />
Maximum number of<br />
scanned pages.<br />
Is the acceptable storage<br />
capacity exceeded?<br />
Is the acceptable storage<br />
capacity exceeded?<br />
Is the acceptable storage<br />
capacity exceeded?<br />
Is the acceptable scanning<br />
count exceeded?<br />
12-12<br />
Remove the paper. Printing then<br />
resumes.<br />
Remove the paper and press<br />
[Continue]. Printing then resumes.<br />
Remove the paper and press<br />
[Continue]. Printing then resumes.<br />
Cannot scan pages any more. Follow<br />
the instructions on the touch panel.<br />
Memory is full.* — The memory is full and the job cannot<br />
be continued. Press [Continue] to<br />
print the scanned pages. The print<br />
job cannot be processed completely.<br />
Press [Cancel] to cancel the job.<br />
No item has been<br />
entered. Please enter<br />
item.<br />
— The process cannot be performed<br />
due to insufficient memory. If only<br />
[End] is available, press [End]. The<br />
job will be canceled.<br />
Did you enter an item name<br />
for the created item in the<br />
item create screen?<br />
Enter an item name. ―<br />
Paper left. — Remove paper from the document<br />
finisher.<br />
Paper jam. — If a paper jam occurs, the machine<br />
will stop and the location of the jam<br />
will be indicated on the touch panel.<br />
Leave the machine on and follow the<br />
instructions to remove the jammed<br />
paper.<br />
Please enter<br />
password.<br />
― Enter the password. ―<br />
Troubleshooting<br />
Reference<br />
Page<br />
* When Auto Error Clear is set to [On], processing resumes automatically after a set amount of time elapses.<br />
—<br />
—<br />
—<br />
—<br />
—<br />
—<br />
—<br />
—<br />
—<br />
12-21
Error Message Checkpoints Corrective Actions<br />
Please select at least<br />
one item.<br />
Removable memory<br />
error.*<br />
Did you select an item in the<br />
item selection screen?<br />
Is writing to a removable<br />
memory prohibited?<br />
12-13<br />
Select an item. ―<br />
An error occurred in the removable<br />
memory. The job stopped. Press<br />
[End].<br />
Possible error codes are as follows:<br />
01: Connect a removable memory<br />
that can be written to.<br />
— An error occurred in the removable<br />
memory. The job stopped. Press<br />
[End].<br />
Possible error codes are as follows:<br />
01: The amount of data that can be<br />
saved at once has been exceeded.<br />
Restart the system or turn the<br />
power OFF/ON. If the error still<br />
occurs, the removable memory is<br />
not compatible with the machine.<br />
Use the removable memory<br />
formatted by this machine. If the<br />
removable memory cannot be<br />
formatted, it is damaged. Connect<br />
a compatible removable memory.<br />
Troubleshooting<br />
Reference<br />
Page<br />
* When Auto Error Clear is set to [On], processing resumes automatically after a set amount of time elapses.<br />
—<br />
7-22<br />
12
Error Message Checkpoints Corrective Actions<br />
Removable memory<br />
is full.*<br />
Replace all originals<br />
and press [Continue].<br />
Replace the waste<br />
toner box.<br />
Remove originals in<br />
the document<br />
processor.<br />
Scanner memory is<br />
full.*<br />
— This job is canceled. Press [End].<br />
Insufficient free space in the<br />
removable memory. Delete unneeded<br />
files.<br />
— Remove originals from the document<br />
processor, put them back in their<br />
original order, and place them again.<br />
Press [Continue] to resume printing.<br />
Press [Cancel] to cancel the job.<br />
12-14<br />
Troubleshooting<br />
Reference<br />
Page<br />
* When Auto Error Clear is set to [On], processing resumes automatically after a set amount of time elapses.<br />
—<br />
2-48<br />
Is the waste toner box full? Replace the waste toner box. 11-5<br />
Are there any originals left in<br />
the document processor?<br />
Remove originals from the document<br />
processor.<br />
— Scanning cannot be performed due to<br />
insufficient memory of the scanner.<br />
Follow the instructions on the touch<br />
panel.<br />
Send error.* — An error has occurred during<br />
transmission. The job is canceled.<br />
Press [End]. Refer to Responding to<br />
Send Error for the error code and<br />
corrective actions.<br />
Staple is empty.* Has the document finisher<br />
run out of staples?<br />
Staple is empty.<br />
(Manual Staple)<br />
Has staple cartridge holder<br />
A run out of staples?<br />
If the staples are depleted, the<br />
machine will stop and the location of<br />
staple depletion will be indicated on<br />
the touch panel.<br />
Leave the machine on and follow the<br />
instructions to replace the staple case.<br />
Press [Continue] to print without stapling.<br />
Press [Cancel] to cancel the job.<br />
Add staples to staple cartridge holder<br />
A.<br />
Staple jam. — If a staple jam occurs, the machine<br />
will stop and the location of the jam<br />
will be indicated on the touch panel.<br />
Leave the machine on and follow the<br />
instructions to remove the jammed<br />
staple.<br />
System error. — System error has occurred. Follow<br />
the instructions on the touch panel.<br />
—<br />
—<br />
12-17<br />
—<br />
11-7<br />
—<br />
—
Error Message Checkpoints Corrective Actions<br />
The cover is open. Is there any cover which is<br />
open?<br />
The folding tray is<br />
open.<br />
The folding unit is<br />
open.<br />
The phone receiver is<br />
off the hook.<br />
The power cable is<br />
unplugged.<br />
The removable<br />
memory is not<br />
formatted.<br />
The slit glass requires<br />
cleaning.<br />
Toner container is<br />
empty.<br />
12-15<br />
Close the cover indicated on the<br />
touch panel.<br />
— Set the folding tray. —<br />
— Close the folding unit. —<br />
— Put down the receiver. —<br />
— Turn the main power switch off and<br />
check that the power cable is<br />
correctly plugged.<br />
After checking the power cable, turn<br />
the main power switch on.<br />
Is the removable memory<br />
formatted by this machine?<br />
Troubleshooting<br />
Reference<br />
Page<br />
—<br />
2-8<br />
Perform [Format] on this machine. —<br />
— Clean the slit glass using the cleaning<br />
cloth supplied with the document<br />
processor.<br />
— Replace the toner container to our<br />
specified toner container.<br />
Toner is empty. — Replace the toner container to our<br />
specified toner container.<br />
Toner is running out. — It is almost time to replace the toner<br />
container. Obtain a new toner<br />
container.<br />
Tray # is full of paper. Is the acceptable storage<br />
capacity exceeded?<br />
Unknown toner<br />
installed.<br />
Unknown Toner<br />
Installed. PC<br />
Is the installed toner<br />
container our own brand?<br />
Does the installed toner<br />
container's regional<br />
specification match the<br />
machine's?<br />
Remove the paper. Printing then<br />
resumes.<br />
We will not be liable for any damage<br />
caused by the use of third party<br />
supplies in this machine.<br />
11-12<br />
11-2<br />
11-2<br />
—<br />
—<br />
—<br />
Install the specified container. —<br />
12
Error Message Checkpoints Corrective Actions<br />
Warning for high<br />
temperature. Adjust<br />
the room<br />
temperature.<br />
Warning for low<br />
temperature. Adjust<br />
the room<br />
temperature.<br />
— Adjust the temperature and the<br />
humidity of your room.<br />
— Adjust the temperature and the<br />
humidity of your room.<br />
Warning low memory. — Cannot start the job. Try again later. —<br />
Waste toner box<br />
almost full.<br />
You cannot use this<br />
system.<br />
— It is almost time to replace the waste<br />
toner box. Obtain a new waste toner<br />
box.<br />
Is a workflow registered? Close FMU Connection and create a<br />
workflow. To create a workflow, File<br />
Management Utility (PC application)<br />
is required.<br />
12-16<br />
Troubleshooting<br />
Reference<br />
Page<br />
—<br />
—<br />
—<br />
File<br />
Manageme<br />
nt Utility<br />
User Guide
Responding to Send Error<br />
12-17<br />
Troubleshooting<br />
When an error occurs during transmission, Send Error appears. Check the error code and error message below,<br />
and follow the corresponding corrective actions.<br />
Error<br />
Code<br />
Error Message Corrective Actions Reference Page<br />
1101 Failed to send the e-mail.<br />
Failed to send i-FAX.<br />
Check the host name of the SMTP<br />
server on the Embedded Web Server<br />
RX.<br />
Failed to send via FTP. Check the host name of FTP.<br />
Failed to send via SMB. Check the host name of SMB.<br />
1102 Failed to send via SMB. Check the SMB settings.<br />
- Login user name and login<br />
password<br />
Failed to send the e-mail.<br />
Failed to send i-FAX.<br />
NOTE: If the sender is a domain<br />
user, specify the domain name.<br />
- Host name<br />
- Path<br />
Check the following on the<br />
Embedded Web Server RX.<br />
- SMTP login user name and login<br />
password<br />
- POP3 login user name and login<br />
password<br />
Failed to send via FTP. Check the FTP settings.<br />
- Login user name and login<br />
password<br />
NOTE: If the sender is a domain<br />
user, specify the domain name.<br />
- Path<br />
- Folder share permissions of the<br />
recipient<br />
1103 Failed to send via SMB. Check the SMB settings.<br />
- Login user name and login<br />
password<br />
NOTE: If the sender is a domain<br />
user, specify the domain name.<br />
- Path<br />
- Folder share permissions of the<br />
recipient<br />
Failed to send via FTP. Check the FTP settings.<br />
- Path<br />
- Folder share permissions of the<br />
recipient<br />
2-27<br />
3-24<br />
3-24<br />
3-24<br />
12
Error<br />
Code<br />
1104 Failed to send the e-mail. Check the e-mail address.<br />
NOTE: If the address is rejected by<br />
the domain, you cannot send the email.<br />
Failed to send i-FAX. Check the i-FAX address.<br />
NOTE: If the address is rejected by<br />
the domain, you cannot send i-FAX.<br />
1105 Failed to send via SMB. Select [On] of the SMB settings on<br />
the Embedded Web Server RX.<br />
12-18<br />
3-23<br />
Troubleshooting<br />
Error Message Corrective Actions Reference Page<br />
Failed to send the e-mail. Select [On] of the SMTP settings on<br />
the Embedded Web Server RX.<br />
Failed to send via FTP. Select [On] of the FTP settings on the<br />
Embedded Web Server RX.<br />
Failed to send i-FAX. Select [On] of the i-FAX settings on<br />
the Embedded Web Server RX.<br />
1106 Failed to send the e-mail.<br />
Failed to send i-FAX.<br />
Check the sender address of SMTP<br />
on the Embedded Web Server RX.<br />
1131 Failed to send via FTP. Select [On] of the secure protocol<br />
settings on the Embedded Web<br />
Server RX.<br />
1132 Failed to send via FTP. Check the following of the FTP<br />
server.<br />
- Is FTPS available?<br />
- Is the encryption available?<br />
2101 Failed to send via SMB.<br />
Failed to send via FTP.<br />
Failed to send the e-mail.<br />
Failed to send i-FAX.<br />
Check the network and SMB settings.<br />
Check the network and FTP settings.<br />
- The network cable is connected.<br />
- The hub is not operating properly.<br />
- The server is not operating properly.<br />
- Host name and IP address<br />
- Port number<br />
Check the network and Embedded<br />
Web Server RX.<br />
- The network cable is connected.<br />
- The hub is not operating properly.<br />
- The server is not operating properly.<br />
- POP3 server name of the POP3 user<br />
- SMTP server name<br />
FAX System (V)<br />
Operation Guide<br />
Chapter 8<br />
"Internet Faxing<br />
(i-FAX) (Option)"<br />
2-27<br />
FAX System (V)<br />
Operation Guide<br />
Chapter 8<br />
"Internet Faxing<br />
(i-FAX) (Option)"<br />
2-27<br />
2-27<br />
2-27<br />
2-27
Error<br />
Code<br />
2102<br />
2103<br />
Failed to send via FTP. Check the following of the FTP<br />
server.<br />
- Is FTP available?<br />
- The server is not operating properly.<br />
Failed to send the e-mail.<br />
Failed to send i-FAX.<br />
2201 Failed to send the e-mail.<br />
Failed to send via FTP.<br />
Failed to send via SMB.<br />
Failed to send i-FAX.<br />
2202 Failed to send the e-mail.<br />
Failed to send via FTP.<br />
Failed to send i-FAX.<br />
2203 Failed to send via FTP.<br />
Failed to send via SMB.<br />
2231 Failed to send via FTP.<br />
2204 Failed to send the e-mail.<br />
Failed to send i-FAX.<br />
3101 Failed to send the e-mail.<br />
Failed to send i-FAX.<br />
Check the network.<br />
- The network cable is connected.<br />
- The hub is not operating properly.<br />
- The server is not operating properly<br />
Check the network.<br />
- The network cable is connected.<br />
- The hub is not operating properly.<br />
- The server is not operating properly.<br />
Check the network.<br />
- The network cable is connected.<br />
- The hub is not operating properly.<br />
- The server is not operating properly.<br />
Check the e-mail size limit of the<br />
SMTP settings on the Embedded<br />
Web Server RX.<br />
Check the authentication methods of<br />
both the sender and the recipient.<br />
Failed to send via FTP. Check the network.<br />
- The network cable is connected.<br />
- The hub is not operating properly.<br />
- The server is not operating properly.<br />
3201 Failed to send the e-mail.<br />
Failed to send i-FAX.<br />
Check the SMTP user authentication<br />
method of the recipient.<br />
12-19<br />
—<br />
—<br />
2-27<br />
—<br />
—<br />
Troubleshooting<br />
Error Message Corrective Actions Reference Page<br />
12
Error<br />
Code<br />
0007<br />
4201<br />
4701<br />
5101<br />
5102<br />
5103<br />
5104<br />
7101<br />
7102<br />
7103<br />
720f<br />
— Turn the main power switch off and<br />
back on. If this error occurs several<br />
times, make a note of the displayed<br />
error code and contact your service<br />
representative.<br />
9181 — The scanned original exceeds the<br />
acceptable number of pages of 999.<br />
Send the excess pages separately.<br />
12-20<br />
—<br />
—<br />
Troubleshooting<br />
Error Message Corrective Actions Reference Page
Clearing Paper Jams<br />
JAM<br />
Status<br />
Paper jam.<br />
Hold<br />
02/04<br />
Jam Location Indicators<br />
1. Remove the paper from<br />
the paper ejector.<br />
2. Open main unit right cover 1 and<br />
remove the paper.<br />
Remove the paper from<br />
the multi purpose tray.<br />
3. Open fuser cover (A1) and<br />
remove the paper.<br />
4. Close the cover.<br />
10/10/2010 10:10<br />
12-21<br />
Troubleshooting<br />
If a paper jam occurs, the touch panel will display Paper<br />
Jam. and the machine will stop. Refer to these<br />
procedures to remove the jammed paper.<br />
If a paper jam occurs, the location of the jam will be displayed as the following figure with a letter corresponding<br />
to the affected component in the machine. Clearing instructions will also be displayed.<br />
JAM<br />
Status<br />
Paper jam.<br />
Hold<br />
02/04<br />
1. Remove the paper from<br />
the paper ejector.<br />
2. Open main unit right cover 1 and<br />
remove the paper.<br />
Remove the paper from<br />
the multi purpose tray.<br />
3. Open fuser cover (A1) and<br />
remove the paper.<br />
4. Close the cover.<br />
10/10/2010 10:10<br />
K<br />
K<br />
K<br />
K<br />
K<br />
K K<br />
K<br />
K<br />
K<br />
K<br />
J<br />
C<br />
H<br />
A<br />
B E<br />
C<br />
C<br />
E<br />
G<br />
E<br />
F<br />
I<br />
D<br />
L<br />
L M<br />
M<br />
M M<br />
M<br />
Paper Jam<br />
Location Indicator<br />
Paper Jam Location Reference Page<br />
A Cassette 1 12-22<br />
B Cassette 2 12-23<br />
C Cassette 3 or 4 12-24<br />
D Multi Purpose Tray 12-27<br />
E Inside the right cover 1, 3 or 4 12-28<br />
F Duplex unit 12-30<br />
G Fixing unit 12-33<br />
H Document processor 12-34<br />
I Right tray 12-35<br />
J Bridge Unit 12-36<br />
K Document finisher (Option) 12-37<br />
L Cassette 5 (Option) 12-44<br />
M Cassette 6,7 (Option) 12-46<br />
12
12-22<br />
Troubleshooting<br />
After you remove the jam, the machine will warm up again and the error message will be cleared. The machine<br />
resumes with the page that was printing when the jam occurred.<br />
Precautions with Paper Jams<br />
• Do not reuse jammed papers.<br />
• If the paper tears during removal, be sure to remove any loose scraps of paper from inside the machine.<br />
Scraps of paper left in the machine could cause subsequent jamming.<br />
• Discard paper that has jammed in the optional document finisher. A page affected by a paper jam will be<br />
printed again.<br />
Cassette 1<br />
CAUTION: The fixing unit is extremely hot. Take sufficient care when working in this area, as there is<br />
a danger of getting burned.<br />
Follow the steps below to clear paper jams in cassette 1.<br />
1 Pull up right cover 1 lever and open the right cover 1.<br />
2 Remove the jammed paper.<br />
3 Pull out cassette 1.
Cassette 2<br />
Follow the steps below to clear paper jams in cassette 2.<br />
12-23<br />
4 Remove the jammed paper.<br />
Troubleshooting<br />
If the paper tears, remove every loose scrap from<br />
inside the machine.<br />
5 Push cassette 1 back in place securely.<br />
6 Press the specified position to close right cover 1.<br />
1 Open right cover 3.<br />
2 Remove the jammed paper.<br />
12
Cassettes 3 and 4<br />
Follow the steps below to clear paper jams in cassettes 3 or 4.<br />
12-24<br />
3 Pull out cassette 2.<br />
4 Remove the jammed paper.<br />
Troubleshooting<br />
If the paper tears, remove every loose scrap from<br />
inside the machine.<br />
5 Push cassette 2 back in place securely.<br />
6 Close right cover 3.<br />
1 If you are using the optional side feeder, pull up the<br />
release lever and separate the side feeder from the<br />
multifunction machine.<br />
2 Open right cover 4.
12-25<br />
3 Remove the jammed paper.<br />
Troubleshooting<br />
If the paper tears, remove every loose scrap from<br />
inside the machine.<br />
4 Pull out cassettes 3 and 4.<br />
5 Remove the jammed paper.<br />
6 Pull out the paper feed unit (B1).<br />
12
12-26<br />
Troubleshooting<br />
7 Open the paper feed unit cover (B2) and remove<br />
the jammed paper.<br />
8 Close the paper feed unit cover (B2) and push the<br />
paper feed unit all the way back in.<br />
9 Push the cassette back in place securely.<br />
10 Close right cover 4.
Multi Purpose Tray<br />
Follow the steps below to clear paper jams in the multi purpose tray.<br />
12-27<br />
Troubleshooting<br />
1 Remove all sheets of paper from the multi purpose<br />
tray.<br />
2 If paper is jammed inside, pull the paper toward you<br />
to remove.<br />
3 Pull up right cover 1 lever and open the right cover 1.<br />
4 Remove the jammed paper.<br />
If the paper tears, remove every loose scrap from<br />
inside the machine.<br />
12
Inside the Right Covers 1, 3 and 4<br />
Follow the steps below to clear paper jams inside right cover 1, 3 or 4.<br />
12-28<br />
Troubleshooting<br />
5 Press the specified position to close right cover 1.<br />
1 Remove all sheets of paper from the multi purpose<br />
tray.<br />
2 If paper is jammed inside, pull the paper toward you<br />
to remove.<br />
3 Open the right cover where the paper is jammed<br />
inside.
12-29<br />
4 Remove the jammed paper.<br />
Troubleshooting<br />
If the paper tears, remove every loose scrap from<br />
inside the machine.<br />
5 If you are using the optional document finisher,<br />
follow step on page 12-36 to remove jammed paper<br />
in the optional bridge unit.<br />
6 Close the right cover.<br />
12
Duplex unit<br />
Follow the steps below to clear paper jams in the duplex unit.<br />
12-30<br />
Troubleshooting<br />
1 Pull up right cover 1 lever and open the right cover 1.<br />
2 Remove the jammed paper.<br />
3 Press the specified position to close right cover 1.
Duplex Unit and Cassette 1<br />
Follow the steps below to clear paper jams in duplex unit and cassette 1.<br />
12-31<br />
Troubleshooting<br />
1 Pull up right cover 1 lever and open the right cover 1.<br />
2 Remove the jammed paper.<br />
3 Press the specified position to close right cover 1.<br />
4 Open the right cover 2.<br />
12
12-32<br />
5 Remove the jammed paper.<br />
Troubleshooting<br />
If the paper tears, remove every loose scrap from<br />
inside the machine.<br />
6 Close the right cover 2.<br />
7 Pull out cassette 1 and remove the jammed paper.<br />
If the paper tears, remove every loose scrap from<br />
inside the machine.<br />
8 Push cassette 1 back in place securely.
Fixing unit<br />
Follow the steps below to clear paper jams in the fixing unit.<br />
12-33<br />
Troubleshooting<br />
1 Pull up right cover 1 lever and open the right cover 1.<br />
2 Remove the jammed paper.<br />
3 Open the fuser cover.<br />
CAUTION: The fixing unit is extremely hot. Take<br />
sufficient care when working in this area, as there is a<br />
danger of getting burned.<br />
4 Remove the jammed paper.<br />
If the paper tears, remove every loose scrap from<br />
inside the machine.<br />
12
Document Processor<br />
12-34<br />
Troubleshooting<br />
5 Push the fuser cover back in place, and press the<br />
specified position to close right cover 1.<br />
Follow the steps below to clear paper jams in the document processor (Dual scan DP).<br />
1 Remove the original from the original tray.<br />
2 Open the document processor top cover.<br />
3 Remove the jammed original.<br />
If the original tears, remove every loose scrap from<br />
inside the machine.
Right tray<br />
Follow the steps below to clear paper jams in the right tray.<br />
12-35<br />
Troubleshooting<br />
If the original is difficult to remove, turn the dial. The<br />
original will scroll out to a position where it can be<br />
removed easily.<br />
If the original tears, remove every loose scrap from<br />
inside the machine.<br />
4 Close the document processor top cover.<br />
5 Reload the originals on the document processor<br />
tray.<br />
1 If jammed paper is seen through the paper ejection<br />
slot of the right tray, pull it toward your side to<br />
remove it.<br />
If the paper tears, remove every loose scrap from<br />
inside the machine.<br />
2 Pull up right cover 1 lever and open the right cover 1.<br />
3 Press the lever and open the fuser cover.<br />
12
Bridge Unit<br />
12-36<br />
4 Remove the jammed paper.<br />
If a paper jam occurs in the bridge unit, follow the steps below to remove the jam.<br />
Troubleshooting<br />
If the paper tears, remove every loose scrap from<br />
inside the machine.<br />
5 Press the indicated position to close right cover 1.<br />
1 Open the front cover.<br />
2 Pull out the relay unit.<br />
3 Open the relay unit cover and remove the jammed<br />
paper.
Document Finisher<br />
12-37<br />
4 Remove the jammed paper.<br />
Troubleshooting<br />
If the paper tears, remove every loose scrap from<br />
inside the machine.<br />
5 Close the relay unit cover and push the bridge unit<br />
all the way back in.<br />
6 Close the front cover.<br />
If a paper jam occurs in the optional document finisher, follow the steps below to remove the jam.<br />
Coupling Section<br />
1 Open the front cover 1.<br />
2 Open conveyor guide (D1) and remove the jammed<br />
paper.<br />
3 Close the conveyor guide (D1) and front cover 1.<br />
12
Tray A<br />
12-38<br />
Troubleshooting<br />
1 If jammed paper is seen through the paper ejection<br />
slot, pull it toward your side to remove it.<br />
2 Open the front cover 1.<br />
3 Open the conveyor guide (D6) and remove the<br />
jammed paper.<br />
4 Close the conveyor guide (D6).<br />
5 Open the conveyor guide (D4) and remove the<br />
jammed paper.
Tray B<br />
12-39<br />
Troubleshooting<br />
NOTE: If it is difficult to remove the jammed paper,<br />
turn feed knob D3 until the jammed paper is in a<br />
location where it is easy to remove.<br />
6 Close the conveyor guide (D4) and front cover 1.<br />
1 If jammed paper is seen through the paper ejection<br />
slot, pull it toward your side to remove it.<br />
2 Open the front cover 1.<br />
3 Open the conveyor guide (D2).<br />
12
Tray C<br />
12-40<br />
Troubleshooting<br />
4 Turn the conveyor knob (D3) to the left to feed the<br />
paper along to enable easy removal.<br />
5 Close the conveyor guide (D2) and front cover 1.<br />
1 Open the upper left cover.<br />
2 Remove the jammed paper.<br />
3 Close the upper left cover.
Conveyor / Inner Tray<br />
Mailbox (Option)<br />
12-41<br />
1 Open the front cover 1.<br />
2 Open the conveyor guide (D2).<br />
Troubleshooting<br />
3 Turn the conveyor knob (D3) to the left to feed the<br />
paper along to enable easy removal.<br />
4 Follow step 2 onward on page 12-38 to remove<br />
jammed paper.<br />
1 Open the mailbox cover and remove the jammed<br />
paper.<br />
2 Close the mailbox cover.<br />
12
Center-Folding Unit (Option)<br />
Ejection Section<br />
12-42<br />
Troubleshooting<br />
1 Lift up the folding tray and remove any jammed<br />
paper.<br />
2 Push the folding unit release lever and pull out the<br />
folding unit.<br />
3 Press the release lever, open the left cover of the<br />
center fold unit, and remove the jammed paper.<br />
4 Turn feed knob D9 until the jammed paper is in a<br />
location where it is easy to remove.<br />
5 Close the folding unit left cover.<br />
6 Open the folding unit top cover and remove the<br />
paper jam.<br />
7 Turn feed knob D9 until the jammed paper is in a<br />
location where it is easy to remove.<br />
8 Close the folding unit top cover, and return the<br />
folding unit to its original position.
Conveyor Section<br />
12-43<br />
1 Open the front cover 1 and 2.<br />
Troubleshooting<br />
2 Open the conveyor guide (D7) and remove the<br />
jammed paper.<br />
3 Turn feed knob D5 until the jammed paper is in a<br />
location where it is easy to remove.<br />
If there is no paper jam in the conveyor guide (D7),<br />
proceed to the following step.<br />
4 Close the conveyor guide (D7).<br />
5 Open the conveyor guide (D8) and remove the<br />
jammed paper.<br />
6 Close the conveyor guide (D8).<br />
7 Remove the paper jammed in the center folding<br />
unit.<br />
8 Close the front cover 1 and 2.<br />
12
Cassette 5 (Option)<br />
12-44<br />
Troubleshooting<br />
If a paper jam occurs in cassette 5 when you are using the optional side feeder (3,000-sheet), side feeder (500sheet<br />
x 3), or large capacity side feeder (500, 1,500-sheet x 2), follow the steps below to remove the jam.<br />
Side Feeder (3,000-sheet)<br />
1 Pull up the release lever and separate the side<br />
feeder from the multifunction machine.<br />
2 Remove the paper from the connection port.<br />
3 Pull out cassette 5.<br />
4 Remove the jammed paper.<br />
5 Push the cassette back in place securely.<br />
6 Connect to the multifunction machine.
Side Feeder (500-sheet x 3) or Large Capacity Side Feeder (500, 1,500-sheet x2)<br />
12-45<br />
Troubleshooting<br />
1 Pull up the release lever and separate the side<br />
feeder from the multifunction machine.<br />
2 Remove the paper from the connection port.<br />
3 Open the top cover and right cover 1.<br />
4 Remove the jammed paper.<br />
12
Cassette 6,7 (Option)<br />
12-46<br />
5 Pull out cassette 5.<br />
6 Remove the jammed paper.<br />
7 Push the cassette back in place securely.<br />
8 Close the top cover and right cover 1.<br />
9 Connect to the multifunction machine.<br />
Troubleshooting<br />
If a paper jam occurs in cassette 6 or 7 when you are using the optional side feeder (500-sheet x 3) or large<br />
capacity side feeder (500, 1,500-sheet x 2), follow the steps below to remove the jam.<br />
Side Feeder (500-sheet x3)<br />
1 Pull up the release lever and separate the side<br />
feeder from the multifunction machine.<br />
2 Follow steps 2 to 5 on page 12-45 to remove the<br />
jammed paper.
12-47<br />
3 Open the right cover 2.<br />
4 Remove the jammed paper.<br />
5 Pull out the cassette in use.<br />
6 Remove the jammed paper.<br />
7 Push the cassette back in place securely.<br />
8 Close the right cover 2.<br />
9 Connect to the multifunction machine.<br />
Troubleshooting<br />
12
Large Capacity Side Feeder (500, 1,500-sheet x2)<br />
12-48<br />
Troubleshooting<br />
1 Pull up the release lever and separate the side<br />
feeder from the multifunction machine.<br />
2 Follow steps 2 to 5 on page 12-45 to remove the<br />
jammed paper.<br />
3 Open the right cover 2.<br />
4 Remove the jammed paper.<br />
5 Pull out cassettes 6 and 7.
12-49<br />
6 Remove the jammed paper.<br />
7 Pull out the paper feed unit (B1).<br />
Troubleshooting<br />
8 Open the paper feed unit cover (B2) and remove<br />
the jammed paper.<br />
9 Close the paper feed unit cover (B2) and push the<br />
paper feed unit all the way back in.<br />
10 Push the cassette back in place securely.<br />
11 Close the right cover 2.<br />
12 Connect to the multifunction machine.<br />
12
Clearing a Staple Jam<br />
12-50<br />
Troubleshooting<br />
If a message indicating a staple jam is displayed on the machine’s operation panel, remove the jammed staples.<br />
Follow the steps below to remove jammed staples.<br />
Staple cartridge holder A<br />
A<br />
1 Open the front cover 1.<br />
2 Remove the staple cartridge holder A.<br />
3 Open the cover plate (A) of the staple cartridge<br />
holder A and remove any jammed staples.<br />
4 Close the cover plate (A) of the staple cartridge<br />
holder into its original position.
Staple cartridge holder B/C<br />
12-51<br />
Troubleshooting<br />
5 Re-install the staple cartridge holder. The staple<br />
cartridge holder will click into place when it has<br />
been inserted correctly.<br />
6 Close the front cover 1.<br />
Follow the steps below to remove jammed staples from the optional folding unit.<br />
B<br />
1 Open the front cover 1 and 2.<br />
2 Remove staple cartridge holder B or C.<br />
3 Open the cover plate (B) of the staple cartridge<br />
holder and remove any jammed staples.<br />
12
12-52<br />
Troubleshooting<br />
4 Close the cover (B) plate of the staple cartridge<br />
holder into its original position.<br />
5 Re-install the staple cartridge holder.<br />
When re-installing, align the triangle marks on the<br />
staple cartridge holder and the staple unit. The<br />
staple cartridge holder will click into place when it<br />
has been inserted correctly.<br />
6 Close the front cover 1 and 2.
Appendix<br />
• Optional Equipment ...............................................................Appendix-2<br />
• Character Entry Method.........................................................Appendix-8<br />
• Paper ...................................................................................Appendix-11<br />
• Specifications.......................................................................Appendix-19<br />
• Glossary...............................................................................Appendix-28<br />
Appendix-1
Optional Equipment<br />
Overview of Optional Equipment<br />
The following optional equipment is available for the machine.<br />
Mailbox<br />
Document Finisher<br />
Hole Punch Unit<br />
Folding Unit<br />
Appendix-2<br />
Inner Job Separator<br />
(JS-732)<br />
Copy tray (D)<br />
Side Feeder<br />
(3,000-sheet)<br />
Side Feeder<br />
(500-sheet x 3)<br />
Large Capacity Side Feeder<br />
(500, 1,500-sheet x 2)
Expansion Memory FAX Kit Gigabit Ethernet Board<br />
Appendix-3<br />
Key Counter
Side Feeder (3,000-sheet)<br />
In addition to the printer's cassettes, you can also install an optional side feeder (3,000-sheet) capable of holding<br />
up to 3,000 sheets of A4, B5 or Letter paper. Refer to Side Feeder (3,000-sheet) (Option) on page 2-37 for<br />
loading paper.<br />
Side Feeder (500-sheet x 3)<br />
Three additional cassettes identical to cassette 1 can be installed in the printer. Paper capacity and loading<br />
method are the same as cassette 1.<br />
Large Capacity Side Feeder (500, 1,500-sheet x 2)<br />
In addition to the printer's cassettes, you can also install the additional cassette identical to cassette 1 and an<br />
optional feeder (3,500-sheet) capable of holding up to 3,500 sheets of A4, B5 or Letter paper.<br />
Document Finisher<br />
This is a large-capacity document finisher capable of holding large print runs and of separating and offsetting<br />
multiple copies of a printout into individual copies. It can also staple or hole-punch (optional) the offset printouts.<br />
User can select manual staple by operation button. A mail box and folding unit are also available as options.<br />
Manual staple mode<br />
You can staple copied paper manually without any copying operation. It is useful when you have forgotten to set<br />
the staple sort mode before starting copying, or when you want to staple originals.<br />
NOTE: Manual stapling cannot be executed when the machine is in operation.<br />
If there are no staples when manual stapling is performed, the stapling position lamps and stapling position key<br />
LEDs all blink. Add staples. For details, refer to Replacing Staples on page 11-7<br />
Maximum number of sheets available for manual stapling<br />
Paper size<br />
- 90 g/m 2<br />
( - 24.0 lb. Bond)<br />
Use the buttons on the stapling control section of the Finisher (optional) for manual stapling.<br />
Appendix-4<br />
Paper weight<br />
91 - 105 g/m 2<br />
(24.3 - 28.0 lb. Bond)<br />
A4, A4-R, B5, Letter, 16K 65 sheets 50 sheets<br />
A3, B4, Folio 30 sheets 30 sheets<br />
Stapling position<br />
lamps<br />
Stapling position<br />
key<br />
Stapling<br />
key / lamp
1 Press the stapling position key on the stapling control section.<br />
The shutter of the paper exit area is opened and this equipment enters into the manual staple mode.<br />
2 Press the stapling position key to select the stapling position (Back / Front / 2 Points ).<br />
3<br />
Operation is not possible while the stapling position lamps are blinking. Operate after the lamps light solidly.<br />
Straighten the edges of the paper well and place the paper<br />
front side down in the shutter opening of the output unit.<br />
If the near side of the paper ( ) will be stapled, place the<br />
paper against the front guide (A).<br />
If the far side of the paper ( ) will be stapled, place the paper<br />
against the back guide (B).<br />
If the edge of the paper ( ) will be stapled at two points, B<br />
place the paper with the center aligned to the center point<br />
between the two side guides (A and B).<br />
A<br />
CAUTION: Do not insert your hand inside the open shutter.<br />
NOTE: Press the stapling position key before you place the paper. Once the paper is placed, the stapling<br />
position key cannot be used.<br />
The stapling lamp lights when the paper is properly placed. If it does not light, replace the paper.<br />
4 Let go of the paper, and then press the stapling key.<br />
Stapling starts. Stapling finishes and the output is delivered to tray A.<br />
CAUTION: Be sure that your hands are away from the paper while stapling is in progress.<br />
Finishing the manual staple mode<br />
Press the stapling position button several times until the stapling position lamps turn off. The shutter of the<br />
paper exit area closes. It means that manual stapling is finished. If no operation is performed for approx. 10<br />
seconds, the manual staple mode will be automatically finished.<br />
NOTE: The time after which manual staple mode is automatically exited can be changed. For details, refer to<br />
Manual Staple on page 9-38<br />
Mailbox<br />
Makes it easy to sort output into separate trays. Installing this option adds 7 output trays. When multiple<br />
computer users share the printer, each user can print to a specified tray. Installs on the 4,000-sheet finisher.<br />
NOTE: To deliver output to the mail box, change the Paper Output selection on the operation panel or in the<br />
printer driver, or change in the default settings. (For details, refer to Paper Output on page 9-15.)<br />
Folding Unit<br />
Folds printed output at the center or in tri-fold to enable the creation of simple booklets. Installs on the 4,000sheet<br />
finisher.<br />
Banner Tray<br />
This tray enables continuous feeding of banner paper. Up to 10 sheets of banner paper can be loaded. To attach<br />
the tray and load paper, refer to Using the Banner Tray (Option) on page 5-7.<br />
Appendix-5
Key Counter<br />
Use the key counter to monitor machine usage. The key counter offers a convenient solution for centralized<br />
management of copy volume for different departments in a large company.<br />
Inserting the Key Counter<br />
FAX Kit<br />
Appendix-6<br />
Insert the key counter securely into the key counter slot.<br />
NOTE: When the key counter function is activated,<br />
copies can only be made when a key counter is<br />
inserted. If the key counter is not inserted, Insert key<br />
counter. will be displayed.<br />
By installing the FAX kit, fax send/receive is enabled. Also, it is possible to use it as a network fax, by using it<br />
with a computer. When two FAX kits are installed, the units can be connected to two different telephone lines<br />
which will enable quicker message transmission to a number of recipients. If one of the lines is dedicated to<br />
receiving, the busy line time can be reduced. For further details, refer to Fax System (V) Operation Guide.<br />
Expansion Memory<br />
Image storage memory (128 MB) that allows the machine to receive more pages of incoming faxed originals.<br />
Expansion memory should only be installed or removed by the service representative.<br />
Gigabit Ethernet Board<br />
The Gigabit Ethernet Board provides a high-speed connection for the Gigabit-per-second interface. Since the<br />
kit was designed to work with TCP/IP, NetWare, NetBEUI, and AppleTalk protocols, in the same way as the main<br />
unit, it fulfills the network printing demands on Windows, Macintosh, and UNIX environments. This expansion<br />
kit is also compatible with ThinPrint.<br />
Internet FAX Kit (A)<br />
Installing the Internet FAX Kit (A) sends and receives faxes via the Internet without using a phone line. It can<br />
only be added when the FAX Kit is installed.<br />
Data Security Kit<br />
The Data Security Kit overwrites all unnecessary data in the storage area of the hard disk so that it cannot be<br />
retrieved. The Data Security Kit encrypts data before storing it in the hard disk. It guarantees higher security<br />
because no data cannot be decoded by ordinary output or operations.
Printed Document Guard Kit<br />
This prevents the unauthorized copying and/or transmission of documents that contain important confidential or<br />
personal information. When a document is printed from a computer, this feature imprints a special pattern on<br />
the document. When anyone attempts to copy or send that document on this machine, the machine detects the<br />
pattern and protects the information by printing the document in blank and prohibiting transmission.<br />
Emulation Option<br />
Enables emulation whereby the machine operates using commands for other printers. Installing this option<br />
enables IBM Proprinter, DIABLO 630, and EPSON LQ-850 emulation.<br />
USB Keyboard<br />
A USB keyboard can be used to enter information into the text fields on the operation panel. A special mount is<br />
also available to install the keyboard on the MFP. Please contact your dealer or service representative for<br />
information on keyboards that are compatible with your MFP before you purchase one.<br />
Copy tray (D)<br />
These are attached to the left side of the machine when the optional Document Finisher is not used. There are<br />
two trays: the Upper Left Tray and the Lower Left Tray.<br />
Appendix-7
Character Entry Method<br />
To enter characters for a name, use the on-display keyboard in the touch panel following the steps as explained<br />
below.<br />
NOTE: Keyboard Layout<br />
QWERTY, QWERTZ and AZERTY are available as keyboard layouts the same as a PC keyboard. Press the<br />
System Menu key, [Common Settings] and then [Change] of Keyboard Layout to choose the desired layout.<br />
QWERTY layout is used here as an example. You may use another layout following the same steps.<br />
Entry Screens<br />
Lower-case Letter Entry Screen<br />
1<br />
6<br />
Status<br />
Use the keyboard to enter.<br />
! @ # $ % ^ & * ( ) _ + ˜<br />
Q W E R T Y U I O P { }<br />
A S D F G H J K L : "<br />
Upper-case<br />
Z X C V B N M < > ?<br />
Lower-case<br />
Lower-case<br />
No./Symbol Space<br />
Appendix-8<br />
Limit: 128 characters<br />
Input: 0 characters<br />
Cancel OK<br />
7 8 9 10 11<br />
No. Display/Key Description<br />
1 Display Displays entered characters.<br />
Backspace<br />
|<br />
10/10/2010 10:10<br />
2 Limit Display Displays maximum number of characters.<br />
3 Cursor Key Press to move the cursor on the display.<br />
4 [Backspace] Press to delete a character to the left of the<br />
cursor.<br />
5 Keyboard Press a character to enter.<br />
6 [Upper-case] Press to use upper-case letters.<br />
7 [Lower-case] Press to use lower-case letters.<br />
8 [No./Symbol] Press to enter numbers and symbols.<br />
9 [Space] Press to insert a space.<br />
2<br />
3<br />
4<br />
5
Upper-case Letter Entry Screen<br />
Number/Symbol Entry Screen<br />
No. Display/Key Description<br />
10 [Cancel] Press to cancel entered characters and return<br />
to the screen before the entry.<br />
11 [OK] Press to finalize entry and return to the screen<br />
before the entry.<br />
Status<br />
Status<br />
Use the keyboard to enter.<br />
! @ # $ % ^ & * ( ) _ + ˜<br />
Q W E R T Y U I O P { }<br />
A S D F G H J K L : "<br />
Z X C V B N M < > ?<br />
Lower-case<br />
Upper-case Lower-case No./Symbol Space<br />
Use the keyboard to enter.<br />
Lower-case<br />
Upper-case Lower-case No./Symbol<br />
Space<br />
Appendix-9<br />
Limit: 128 characters<br />
Input: 0 characters<br />
Cancel OK<br />
1 2 3 4 5 6 7 8 9 0 ! " #<br />
$ % & ’ ( ) * + , - . / :<br />
; < = > ? @ [ \ ] ^ _ ` {<br />
| } ˜<br />
Limit: 128 characters<br />
Input: 0 characters<br />
Cancel OK<br />
Backspace<br />
|<br />
Backspace<br />
10/10/2010 10:10<br />
No. Display/Key Description<br />
10/10/2010 10:10<br />
12 [ ]/[ ] To enter a number or symbol not shown in the<br />
keyboard, press the cursor key and scroll the<br />
screen to view other numbers or symbols to<br />
enter.<br />
12
Entering Characters<br />
Follow the steps shown below to enter List A-1 for example.<br />
Status<br />
Use the keyboard to enter.<br />
L<br />
! @ # $ % ^ & * ( ) _ + ˜<br />
Q W E R T Y U I O P { }<br />
A S D F G H J K L : "<br />
Z X C V B N M < > ?<br />
Upper-case<br />
Lower-case<br />
Lower-case No./Symbol Space<br />
Status<br />
Use the keyboard to enter.<br />
Limit: 128 characters<br />
Input: 1 characters<br />
Cancel OK<br />
1 2 3 4 5 6 7 8 9 0 ! = `<br />
Upper-case Lower-case No./Symbol Space<br />
Status<br />
List<br />
q w e r t y u i o p [ ]<br />
a s d f g h j k l ; ’<br />
z x c v b n m , . /<br />
Use the keyboard to enter.<br />
List_A-1<br />
@ _<br />
Cancel OK<br />
Backspace<br />
|<br />
10/10/2010 10:10<br />
Limit: 128 characters<br />
Input: 4 characters<br />
1 2 3 4 5 6 7 8 9 0 ! " #<br />
$ % & ’ ( ) * + , - . / :<br />
; < = > ? @ [ \ ] ^ _ ` {<br />
| } ˜<br />
Upper-case<br />
Lower-case<br />
Lower-case No./Symbol Space<br />
Backspace<br />
\<br />
10/10/2010 10:10<br />
Limit: 128<br />
characters<br />
Input: 8 characters<br />
Cancel OK<br />
Backspace<br />
10/10/2010 10:10<br />
Appendix-10<br />
1 Press [Upper-case].<br />
2 Press [L]. The letter L is shown on the display.<br />
3 Press [Lower-case].<br />
4 Press [i], [s], [t] and [Space].<br />
5 Press [Upper-case].<br />
6 Press [A].<br />
7 Press [No./Symbol].<br />
8 Press [ ] or [ ] repeatedly to view the keyboard<br />
containing [-] and [1].<br />
9 Press [-] and [1].<br />
10 Check that the entry is correct. Press [OK].
Paper<br />
This section explains the paper sizes and types that can be used in the paper source.<br />
Cassettes 1<br />
Cassettes 2<br />
Cassettes 3, 4<br />
Supported types Supported paper sizes No. of sheets<br />
Plain paper (60 to 256 g/m 2 )<br />
Recycled paper (60 to 256 g/m 2 )<br />
Multi Purpose tray (MP tray)<br />
A3, B4, A4, A4-R, B5, B5-R, A5-R, Ledger,<br />
Legal, Oficio II, 12 × 18", Letter, Letter-R,<br />
Statement-R, Folio, 8K, 16K, 16K-R<br />
216 × 340 mm<br />
Appendix-11<br />
550 (64 g/m 2 )<br />
500 (80 g/m 2 )<br />
Supported types Supported paper sizes No. of sheets<br />
Plain paper (60 to 256 g/m 2 )<br />
Recycled paper (60 to 256 g/m 2 )<br />
A3, B4, A4, A4-R, B5, B5-R, A5-R, Ledger,<br />
Legal, Oficio II, 12 × 18", Letter, Letter-R,<br />
Statement-R, Folio, 8K, 16K, 16K-R<br />
216 × 340 mm<br />
550 (64 g/m 2 )<br />
500 (80 g/m 2 )<br />
Supported types Supported paper sizes No. of sheets<br />
Plain paper (60 to 256 g/m 2 )<br />
Recycled paper (60 to 256 g/m 2 )<br />
A4, B5, Letter 3,500 (64 g/m 2 )<br />
3,000 (80 g/m 2 )<br />
Supported types Supported paper sizes No. of sheets<br />
Plain paper (60 to 300 g/m 2 )<br />
Recycled paper (60 to 300 g/m 2 )<br />
Colored paper (60 to 300 g/m 2 )<br />
Plain paper (60 to 300 g/m 2 )<br />
Recycled paper (60 to 300 g/m 2 )<br />
Colored paper (60 to 300 g/m 2 )<br />
Postcards<br />
Oufuku hagaki (return postcard)<br />
A4, A4-R, B5, B5-R, A5-R, B6-R, A6-R,<br />
Letter, Letter-R, Executive-R, Statement,<br />
Folio, 16K, 16K-R<br />
Other sizes:<br />
Portrait - 3 7/8 to 11 5/8" or 98 to 297 mm<br />
Landscape - 5 7/8 to 17" or 148 to 432 mm<br />
A3, B4, Ledger, Legal, Oficio II,<br />
12 × 18", 8K<br />
Postcards (100 × 148 mm)<br />
Return postcard (148 × 200 mm)<br />
165 (64 g/m 2 )<br />
150 (80 g/m 2 )<br />
55 (64 g/m 2 )<br />
50 (80 g/m 2 )<br />
30
Basic Paper Specifications<br />
This machine is designed to print on standard copy paper as used in regular ('dry') copiers and page printers<br />
such as laser printers. It also supports a variety of other types of paper that conform to the specifications given<br />
in this appendix.<br />
Be careful when choosing paper. Paper unsuitable for the machine may cause jams or may be wrinkled.<br />
Supported Paper<br />
Supported types Supported paper sizes No. of sheets<br />
Envelopes Envelope DL, Envelope C5, Envelope C4,<br />
Envelope #10 (Commercial #10),<br />
Envelope #9 (Commercial #9),<br />
Envelope #6 (Commercial #6 3/4),<br />
Monarch, ISO B5, Youkei 2, Youkei 4<br />
Other sizes:<br />
Portrait - 3 7/8 to 11 5/8" or 98 to 297 mm<br />
Landscape - 5 7/8 to 17" or 148 to 432 mm<br />
Transparency (OHP film) A4, A4-R, Letter, Letter-R 10<br />
Use standard copy paper for regular copiers or laser printers. The printing quality will be affected by the quality<br />
of paper. Poor quality paper may result in unsatisfactory output.<br />
Basic Paper Specifications<br />
The following table lists the specifications of paper that is supported with this machine. Refer to the subsequent<br />
sections for further details.<br />
Criteria Specifications<br />
Weight Cassettes: 60 to 256 g/m 2<br />
Multi purpose tray: 60 to 300 g/m 2<br />
Thickness 0.086 to 0.110 mm<br />
Dimensional accuracy ±0.7 mm<br />
Squareness of corners 90° ±0.2°<br />
Moisture content 4 to 6%<br />
Pulp content 80% or more<br />
NOTE: Some recycled paper does not meet requirements for use with this machine as listed in the Basic<br />
Paper Specifications shown below, such as moisture or pulp content. For this reason, we recommend<br />
purchasing a small amount of recycled paper as a sample for testing prior to use. Choose recycled paper that<br />
gives the best printing results and contains low levels of paper dust.<br />
We are not responsible for the problems occurred from the use of paper that does not conform to our<br />
specifications.<br />
Appendix-12<br />
10
Choosing the Appropriate Paper<br />
This section describes guidelines for choosing paper.<br />
Condition<br />
Avoid using paper with bent corners or that is curled, dirty, or torn. Do not use paper that has a rough surface or<br />
paper fiber lint, or that is especially delicate. Use of paper in any of these conditions will not only deliver poor<br />
copies but may also cause jams and shorten the useful life of the machine. Choose paper with a smooth and even<br />
surface; however, avoid coated paper or paper with a treated surface as it may damage the drum or fusing unit.<br />
Ingredients<br />
Do not use paper such as paper that has been coated or surface-treated or paper that contains plastic or carbon.<br />
Those types of paper may produce harmful fumes from the heat of printing and may damage the drum.<br />
Be sure to use the standard paper that contains at least 80% pulp, i.e., not more than 20% of the total paper<br />
content consists of cotton or other fibers.<br />
Supported Paper Sizes<br />
Paper of the following sizes is supported by the machine.<br />
Measurements in the table take into account a ±0.7 mm dimensional accuracy for length and width. Corner<br />
angles must be 90° ± 0.2°.<br />
Multi Purpose Tray Cassette or Multi Purpose Tray<br />
A6-R (105 × 148 mm) A3 (297 × 420 mm)<br />
B6-R (128 × 182 mm) B4 (257 × 364 mm)<br />
Hagaki (100×148mm) A4 (297 × 210 mm)<br />
Oufuku hagaki (148 × 200 mm) A4-R (210 × 297 mm)<br />
Executive (7 1/4 ×10 1/2") B5 (257 × 182 mm)<br />
Envelope DL (110 × 220 mm) B5-R (182 × 257 mm)<br />
Envelope C5 (162 × 229mm) A5-R (148 × 210 mm)<br />
Envelope C4 (229 × 324mm) Folio (210 × 330 mm)<br />
ISO B5 (176 × 250 mm) Ledger<br />
Envelope #10 (Commercial #10) (4 1/8 × 9 1/2") Legal<br />
Envelope #9 (Commercial #9) (3 7/8 × 8 7/8") Letter<br />
Envelope #6 (Commercial #6 3/4) (3 5/8 × 6 1/2") Letter-R<br />
Envelope Monarch (3 7/8 ×7 1/2") Statement-R<br />
Youkei 2 (114 × 162 mm) Oficio II<br />
Youkei 4 (105 × 235 mm) 12 × 18"<br />
Appendix-13
Smoothness<br />
The paper surface should be smooth, but it must be uncoated. With paper that is too smooth and slippery,<br />
several sheets may accidentally be supplied at once, causing jams.<br />
Basis Weight<br />
In countries that use the metric system, basis weight is the weight in grams of one sheet of paper one square<br />
meter in area. In the United States, basis weight is the weight in pounds of one ream (500 sheets) of paper cut<br />
to the standard size (or trade size) for a specific grade of paper. Paper that is too heavy or too light may be<br />
supplied incorrectly or cause paper jams, which may cause excessive wear of the machine. Mixed paper weight<br />
(i.e., thickness) may cause several sheets to be supplied at once accidentally and may also cause blurring or<br />
other printing problems if the toner fails to adhere correctly.<br />
Thickness<br />
Avoid using paper that is too thick or thin. Signs that paper may be thin include frequent problems with paper<br />
jams or with several sheets being supplied at once. Paper jams may also indicate that the paper is too thick. The<br />
proper thickness is between 0.086 and 0.110 mm.<br />
Moisture Content<br />
Multi Purpose Tray Cassette or Multi Purpose Tray<br />
Size Entry (98 × 148 to 297 × 432 mm) 8K (273 × 394 mm)<br />
Paper moisture content is the ratio of moisture to dryness expressed as a percentage. Moisture affects how the<br />
paper is supplied, the electrostatic chargeability of the paper, and how the toner adheres.<br />
Paper moisture content varies depending on the relative humidity in the room. High relative humidity causes<br />
paper to become damp, making the edges expand so it appears wavy. Low relative humidity causes paper to<br />
lose moisture, making the edges tighten and weakening print contrast.<br />
Wavy or tight edges may cause the paper to slip when it is supplied. Try to keep the moisture content between<br />
4 to 6%.<br />
To maintain the right level of moisture content, bear in mind the following considerations.<br />
• Store paper in a cool, well-ventilated place.<br />
• Store paper flat and unopened in the package. Once the package is opened, reseal it if the paper is not to<br />
be used for a while.<br />
• Store paper sealed in the original package and box. Put a pallet under the carton to keep it raised above the<br />
floor. Especially during rainy seasons keep the paper a sufficient distance away from wooden or concrete<br />
floors.<br />
• Before using paper that has been stored, keep it at the proper moisture level for at least 48 hours.<br />
• Do not store paper where it is exposed to heat, sunlight, or dampness.<br />
Appendix-14<br />
16K (273 × 197 mm)<br />
16K-R (197 × 273 mm)<br />
216 × 340 mm
Other Paper Specifications<br />
Porosity: The density of the paper fibers<br />
Stiffness: Paper must be stiff enough or it may buckle in the machine, causing jams.<br />
Curl: Most paper naturally tends to curl after the package is opened. When paper passes through the fixing unit,<br />
it curls upward slightly. To deliver flat printouts, load the paper so that the curl faces towards the bottom of the<br />
paper tray.<br />
Static electricity: During printing, paper is electrostatically charged so that the toner adheres. Choose paper<br />
that can be discharged quickly so that copies do not cling together.<br />
Whiteness: Paper whiteness affects print contrast. Use whiter paper for sharper, brighter copies.<br />
Quality: Machine problems may occur if sheet sizes are not uniform or if corners are not square, edges are<br />
rough, sheets are uncut, or edges or corners are crushed. In order to prevent these problems, be especially<br />
careful when you cut the paper yourself.<br />
Packaging: Choose paper that is properly packaged and stacked in boxes. Ideally, the packaging itself should<br />
have been treated with a coating to inhibit moisture.<br />
Specially treated paper: We do not recommend printing onto the following types of paper, even if it conforms to<br />
the basic specifications. When you use these kinds of paper, purchase a small amount first as a sample to test.<br />
• Glossy paper<br />
• Watermarked paper<br />
• Paper with an uneven surface<br />
• Perforated paper<br />
Special Paper<br />
This section describes printing onto special paper and print media.<br />
The following paper and media can be used.<br />
• Transparencies<br />
• Preprinted paper<br />
• Bond paper<br />
• Recycled paper<br />
• Thin paper (from 60 g/m 2 to105 g/m 2 or less)<br />
• Letterhead<br />
• Colored paper<br />
• Prepunched paper<br />
• Envelopes<br />
• Cardstocks (Hagaki)<br />
• Thick paper (from 106 g/m 2 to 300 g/m 2 or less)<br />
• Labels<br />
• Coated paper<br />
• High-quality paper<br />
Appendix-15
When using these paper and media, choose those that are designed specifically for copiers or page printers (such<br />
as laser printers). Use the multi purpose tray for transparencies, thick paper, envelopes, cardstocks, and label<br />
paper.<br />
Choosing Special Paper<br />
Although special paper that meets the following requirements can be used with the machine, print quality will<br />
vary considerably due to differences in the construction and quality of special paper. Thus, special paper is more<br />
likely than regular paper to cause printing problems. Before purchasing special paper in volume, try testing a<br />
sample to ensure the print quality is satisfactory. General precautions when printing onto special paper are given<br />
below. Note that we are not responsible for any harm to the user or damage to the machine caused by moisture<br />
or specifications of special paper.<br />
Select a cassette or multi purpose tray for special paper.<br />
Transparencies<br />
Transparencies must be able to withstand the heat of printing. Transparencies must meet the following<br />
conditions.<br />
To avoid problems, use the multi purpose tray for transparencies and load transparencies with the long side<br />
facing the machine.<br />
If transparencies jam frequently at output, try pulling the leading edge of sheets gently as they are ejected.<br />
Hagaki<br />
Burrs<br />
Criteria Specifications<br />
Heat resistance Must withstand at least 190°C<br />
Thickness 0.100 to 0.110 mm<br />
Material Polyester<br />
Dimensional accuracy ±0.7 mm<br />
Squareness of corners 90° ±0.2°<br />
Burrs<br />
Before loading Hagaki into the multi purpose tray, fan<br />
them and align the edges. If the Hagaki paper is curled,<br />
straighten it before loading. Printing onto curled Hagaki<br />
may cause jams.<br />
Use unfolded Oufuku hagaki (available at post offices).<br />
Some Hagaki may still have rough edges developed by<br />
a paper cutter on the back side. Remove any such<br />
rough edges by placing the Hagaki on a flat surface and<br />
rubbing the edges gently a few times with a ruler.<br />
Envelopes<br />
Use the multi purpose tray for envelopes.<br />
Due to the structure of envelopes, printing evenly over the entire surface may not be possible in some cases.<br />
Thin envelopes in particular may be wrinkled by the machine in some cases as they pass through. Before<br />
purchasing envelopes in volume, try testing a sample to ensure the print quality.<br />
Appendix-16
Storing envelopes for a long period may cause them to become wrinkled. Thus, keep the package sealed until<br />
you are ready to use them.<br />
Keep the following points in mind.<br />
Do not use envelopes with exposed adhesive. In addition, do not use the type of envelope in which the adhesive<br />
is exposed after the top layer is peeled off. Serious damage may be caused if the paper covering the adhesive<br />
comes off in the machine.<br />
Do not use envelopes with certain special features. For example, do not use envelopes with a grommet for<br />
winding a string to close the flap or envelopes with an open or film-covered window.<br />
If paper jams occur, load fewer envelopes at once.<br />
To prevent paper jams when printing onto multiple envelopes, do not allow more than ten envelopes to remain<br />
in the output tray at once.<br />
Thick Paper<br />
Before loading thick paper in the multi purpose tray, fan it and align the edges. Some thick paper may still have<br />
rough edges developed by a paper cutter on the back side. Remove any such rough edges just as with Hagaki<br />
by placing the paper on a flat surface and rubbing the edges gently a few times with a ruler. Printing onto paper<br />
with rough edges may cause jams.<br />
NOTE: If the paper is not supplied correctly even after it is smoothed, load the paper in the multi purpose tray<br />
with the leading edge raised a few millimeters.<br />
Label<br />
Be sure to feed labels from the multi purpose tray.<br />
For selecting labels, use extreme care so that the adhesive may not come in direct contact with any part of the<br />
machine and that the labels are not easily peeled from the carrier sheet. Adhesives that stick to the drum or<br />
rollers and peeled labels remaining in the machine may cause a failure.<br />
When printing onto labels, you must be liable for the print quality and possible trouble.<br />
Top sheet<br />
Adhesive layer<br />
Carrier sheet<br />
Labels consist of three layers as shown in the<br />
illustration. The adhesive layer contains materials that<br />
are easily affected by the force applied in the machine.<br />
The carrier sheet bears the top sheet until the label is<br />
used. This composition of labels may cause more<br />
problems.<br />
The label surface must be covered completely with the<br />
top sheet. Gaps between labels may cause peeling of<br />
labels, resulting in a serious failure.<br />
Appendix-17
Some label paper has large margins on the top sheet. When using such paper, do not peel these margins from<br />
the carrier sheet before completing output.<br />
Use label paper that conforms to the following specifications.<br />
Colored Paper<br />
Colored paper must conform to the specifications listed on page 2 of the Appendix. In addition, the pigments in<br />
the paper must be able to withstand the heat of printing (up to 200°C or 392°F).<br />
Preprinted Paper<br />
Preprinted paper must conform to the specifications listed on page 2 of the Appendix. The colored ink must be<br />
able to withstand the heat of printing. It must be resistant to silicone oil as well. Do not use paper with a treated<br />
surface such as glossy paper used for calendars.<br />
Recycled Paper<br />
Allowed<br />
Item Specifications<br />
Top sheet weight 44 to 74 g/m²<br />
Basis weight<br />
(overall paper weight)<br />
Top sheet<br />
Carrier sheet<br />
104 to 151 g/m²<br />
Top sheet thickness 0.086 to 0.107 mm<br />
Overall paper thickness 0.115 to 0.145 mm<br />
Moisture content 4 to 6 % (composite)<br />
Recycled paper must conform to the specifications listed on page 2 of the Appendix; however, its whiteness may<br />
be considered separately.<br />
NOTE: Before purchasing recycled paper in volume, try testing a sample to ensure satisfactory print quality.<br />
Appendix-18<br />
Not allowed
Specifications<br />
IMPOR<strong>TA</strong>NT: Specifications are subject to change without notice.<br />
Common functions<br />
Item Description<br />
Type Console<br />
Printing Method Electrophotography by semiconductor laser<br />
Paper Weight Cassette 1, 2 60 to 256 g/m 2<br />
Cassette 3, 4 60 to 256 g/m 2<br />
Multi Purpose<br />
Tray<br />
60 to 300 g/m 2<br />
Paper Type Cassette 1, 2 Plain, Rough, Vellum, Recycled, Preprinted, Bond, Color (Colour),<br />
Prepunched, Letterhead, Thick, High Quality, Custom 1 to 8 (Duplex:<br />
Same as Simplex)<br />
Cassette 3, 4 Plain, Recycled, Thick<br />
Multi Purpose<br />
Tray<br />
Plain, Transparency (OHP film), Rough, Vellum, Labels, Recycled,<br />
Preprinted, Bond, Cardstock, Color (Colour), Prepunched, Letterhead,<br />
Thick, Coated, Envelope, High Quality, Custom 1 to 8<br />
Paper Size Cassette 1, 2 Maximum: 12 × 18"/A3 (Duplex: 12 × 18"/A3)<br />
Minimum: Statement-R/A5-R (Duplex: Statement-R/A5-R)<br />
Cassette 3, 4 A4, B5, Letter<br />
Warm-up Time<br />
(22°C/71.6°F,<br />
60%)<br />
Paper<br />
Capacity<br />
Multi Purpose<br />
Tray<br />
Maximum: 12 × 48"/304.8 × 1220.0 mm<br />
Minimum: Statement-R/A6-R<br />
Power on 65 ppm model: 30 seconds or less<br />
80 ppm model: 30 seconds or less<br />
Low Power 65 ppm model: 20 seconds or less<br />
80 ppm model: 20 seconds or less<br />
Sleep 65 ppm model: 30 seconds or less<br />
80 ppm model: 30 seconds or less<br />
Cassette 1 500 sheets (80 g/m 2 )<br />
Cassette 2 500 sheets (80 g/m2 )<br />
Cassette 3, 4 1,500 sheets (80 g/m2 )<br />
Multi Purpose A4/Letter or less<br />
Tray<br />
150 sheets (80 g/m2 )<br />
More than A4/Letter<br />
50 sheets (80 g/m2 )<br />
Appendix-19
Item Description<br />
Output Tray<br />
Capacity<br />
Lower Left<br />
Tray<br />
Upper Left<br />
Tray<br />
250 sheets (80 g/m 2 ) (JS-732)<br />
100 sheets (80 g/m 2 )<br />
Right tray 70 sheets (80 g/m 2 )<br />
Image Write System Semiconductor laser and electrophotography<br />
Main Memory Standard 2048 MB<br />
Maximum 2048 MB<br />
Hard Disk 65:160GB or more (standard)<br />
80:160GB or more (standard)<br />
Interface Standard USB Interface Connector: 1 (USB Hi-Speed)<br />
USBPort: 2 (Hi-Speed USB)<br />
Network interface: 1 (10 BASE-T/100 BASE-TX/1000 BASE-T)<br />
Option Network interface: 1 (10 BASE-T/100 BASE-TX/1000 BASE-T)<br />
Fax: 2<br />
A maximum of two interface options can be installed.<br />
Only one network interface can be installed.<br />
When a network interface is installed, only one fax line can be installed.<br />
Operating Temperature 10 to 32.5°C/50 to 90.5°F<br />
Environment<br />
Humidity 15 to 80 %<br />
Altitude 2,500 m/8,202 ft maximum<br />
Brightness 1,500 lux maximum<br />
Dimension (W × D × H) 40 57/64 × 28 15/32 ×53 1/64"<br />
(Main unit only)<br />
1,039 × 723 × 1,347 mm<br />
Weight 339.5 lb/154 kg<br />
Space Required (W × D)<br />
(Using multi purpose tray)<br />
40 57/64 × 28 15/32"<br />
1,039 × 723 mm<br />
Power Source 120 V Specification Model:<br />
120 V AC 60 Hz 5.0 A + 12.0 A (IH)<br />
230 V Specification Model:<br />
220 to 240 V AC 50/60 Hz 9.5 A<br />
Options Document Finisher, Key Counter, FAX Kit, Expansion Memory,<br />
Data Security Kit, Printed Document Guard Kit, Internet Fax Kit (A),<br />
Folding Unit, Mailbox, Side Feeder (3,000-sheet),<br />
Side Feeder (500-sheet x 3), Gigabit Ethernet Board,<br />
Large Capacity Side Feeder (500, 1,500-sheet x2), Emulation Option,<br />
Hole Punch Unit, USB Keyboard, Banner Tray<br />
Appendix-20
Copy functions<br />
Item Description<br />
Copy Speed<br />
Black and White copying<br />
65 ppm A4/Letter 65sheets/min<br />
model A4-R/Letter-R 45 sheets/min<br />
A3/Ledger 32 sheets/min<br />
B4/Legal 32 sheets/min<br />
B5 65 sheets/min<br />
80 ppm A4/Letter 80 sheets/min<br />
model A4-R/Letter-R 56 sheets/min<br />
A3/Ledger 40 sheets/min<br />
B4/Legal 40 sheets/min<br />
B5 80 sheets/min<br />
First Copy Black and 65 ppm model: 5.2 seconds or less<br />
Time<br />
(A4, feed from<br />
Cassette)<br />
White 80 ppm model: 4.7 seconds or less<br />
Zoom Level Manual mode: 25 to 400%, 1% increments<br />
Auto mode: Preset Zoom<br />
Continuous Copying 1 to 9999 sheets<br />
Resolution 600 × 600 dpi<br />
Supported Original Types Sheet, Book, 3-dimensional objects (maximum original size: 12 × 18"/<br />
A3)<br />
Original Feed System Fixed<br />
Appendix-21
Printer functions<br />
Item Description<br />
Printing<br />
Speed 65 ppm model<br />
First Print<br />
Time<br />
(A4, feed<br />
from<br />
Cassette)<br />
80 ppm model<br />
Black and<br />
White<br />
Resolution 600 × 600 dpi<br />
Black and White copying<br />
A4/Letter 65sheets/min<br />
A3/Ledger 32 sheets/min<br />
A4/Letter 80 sheets/min<br />
A3/Ledger 40 sheets/min<br />
65 ppm model: 5.8 seconds or less<br />
80 ppm model: 5.4 seconds or less<br />
Operating System Windows XP, Windows Server 2003, Windows Vista, Windows 7 ,<br />
Windows Server 2008, Mac OS 10.x<br />
Interface Standard USB Interface Connector: 1 (USB Hi-Speed)<br />
Network interface: 1 (10 BASE-T/100 BASE-TX/1000 BASE-T)<br />
Page Description Language PRESCRIBE<br />
Emulations PCL6 (PCL5e, PCL-XL), KPDL3 (PostScript3 compatible)<br />
Appendix-22
Scanner functions<br />
*1 When using the dual scan document processor (except TWAIN and WIA scanning)<br />
*2 Available Operating System : Windows XP, Windows Server 2003, Windows Vista, Windows Server 2008,<br />
Windows 7<br />
*3 Available Operating System : Windows Vista, Windows 7, Windows Server 2008<br />
Document Processor<br />
Item Description<br />
System requirements CPU: 600Mhz or higher<br />
RAM: 128MB or more<br />
Resolution 600 dpi, 400 dpi, 300 dpi, 200 dpi, 200 ×100 dpi, 200 × 400 dpi<br />
(Resolution in FAX mode included)<br />
File Format PDF (high compressive, encrypted, PDF/A), JPEG, TIFF, XPS<br />
Scanning Speed *1<br />
65 ppm model<br />
1-sided B/W 100 Images/min<br />
80 ppm model<br />
Color 70 Images/min<br />
2-sided B/W 160 Images/min<br />
Color 100 Images/min<br />
(A4 landscape, 300 dpi,<br />
Image quality: Text/Photo original)<br />
Interface Ethernet (10 BASE-T/100 BASE-TX/1000 BASE-T)<br />
Network Protocol TCP/IP<br />
Transmission<br />
System<br />
Item<br />
Original Feed<br />
Method<br />
Supported<br />
Original Types<br />
Automatic feed<br />
Sheet originals<br />
Paper Size Maximum: Ledger/A3<br />
Minimum: Statement-R/A5-R<br />
Paper Weight 1-sided: 35 to 220 g/m2 2-sided: 50 to 220 g/m2 Loading Capacity 270 sheets (50 to 80 g/m 2 ) maximum<br />
Mixed original sizes (auto selection):<br />
30 sheets (50 to 80 g/m 2 ) maximum<br />
PC transmission SMB Scan to SMB<br />
FTP Scan to FTP, FTP over SSL<br />
E-mail transmission SMTP Scan to E-mail<br />
TWAIN scan* 2<br />
WIA scan* 3<br />
Appendix-23<br />
Description<br />
Document Processor (Dual scan DP)
Side Feeder (500-sheet x 3) (Option)<br />
Paper Supply<br />
Method<br />
Item Description<br />
Large Capacity Side Feeder (500, 1,500-sheet x 2) (Option)<br />
Side Feeder (3,000-sheet) (Option)<br />
Feed & reverse roller method<br />
(No. Sheets: 500, 80 g/m 2 , 3 cassettes/No. Sheets: 550, 64 g/m 2 , 3 cassettes)<br />
Paper Size A3, B4, A4, A4-R, B5-R, A5-R, Ledger, Legal, Oficio II, 12 × 18", Letter, Letter-R,<br />
Statement-R, Folio, 8K, 16K, 16K-R, 216 × 340 mm<br />
Supported Paper Paper weight: 60 - 256 g/m2 Media types: standard, recycled, Thick<br />
Dimensions<br />
(W) × (D) × (H)<br />
23 35/64 × 28 11/32 × 21 7/64"<br />
598 × 720 × 536 mm<br />
Weight Approx. 114.6 lbs. / Approx. 52 kg<br />
Paper Supply<br />
Method<br />
Item Description<br />
Feed & reverse roller method (No. Sheets: 500 sheets (80 g/m 2 ) × 1 cassette, 1,500<br />
sheets (80 g/m 2 ) × 2 cassettes/No. Sheets: 550 sheets (64 g/m 2 ) × 1 cassette, 1,750<br />
sheets (64 g/m 2 ) × 2 cassettes)<br />
Paper Size Tray 5 A3, B4, A4, A4-R, B5-R, A5-R, Ledger, Legal, Oficio II,<br />
12 × 18", Letter, Letter-R, Statement-R, Folio, 8K, 16K,<br />
16K-R, 216 × 340 mm<br />
Tray 6, 7 A4, B5, Letter<br />
Supported Paper Paper weight: 60 - 256 g/m 2<br />
Media types: standard, recycled, Thick<br />
Dimensions<br />
(W) × (D) × (H)<br />
23 35/64 × 28 11/32 × 21 7/64"<br />
598 × 720 × 536 mm<br />
Weight Approx. 112.4 lbs / Approx. 51 kg<br />
Paper Supply<br />
Method<br />
Item Description<br />
Paper Size A4, B5, Letter<br />
Feed & reverse roller method<br />
(No. Sheets: 3,000, 80 g/m 2 /No. Sheets: 3,500 64 g/m 2 )<br />
Supported Paper Paper weight: 60 - 300 g/m 2<br />
Media types: standard, recycled, Thick<br />
Dimensions<br />
(W) × (D) × (H)<br />
12 41/64 × 24 13/32 × 19 27/32"<br />
321 × 620 × 504 mm<br />
Weight Approx. 55.1 lbs. / Approx. 25 kg<br />
Appendix-24
Document Finisher (Option)<br />
Item Description<br />
Number of Trays 3 trays<br />
Paper<br />
Size<br />
(80 g/<br />
m 2 )<br />
Tray A<br />
(Non-<br />
Stapling)<br />
Hole Punch Unit (Option)<br />
A3, B4, B5-R, Ledger, Legal, 8K: 1,500 sheets<br />
A4, A4-R, B5, Letter, Letter-R, 16K, 16K-R, Folio: 4,000 sheets* , **<br />
A5, B6, Statement-R: 500 sheets<br />
Tray B A4, A4-R, B5, B5-R, A5, A5-R, Folio, Ledger, Legal, 12 × 18", A3, B4, 8K,Letter,<br />
Letter-R, Statement-R, 16K, 16K-R: 200 sheets<br />
Tray C A4, B5, B5 (ISO), B5-R, B6, A5, A5-R, A6, A6-R, Letter, Statement-R, 16K,<br />
Cardstock, Oufuku hagaki: 100 sheets<br />
Stapling Maximum<br />
Number<br />
Media<br />
types<br />
Dimensions<br />
(W) × (D) × (H)<br />
A3, B4, B5-R, Ledger, Legal, Oficio II,<br />
12 × 18", 216 × 340 mm, Folio, 8K,<br />
16K-R<br />
* When the Folding Unit is installed, 3000 sheets.<br />
** 2000 sheets when output is on the tray.<br />
Appendix-25<br />
30 sheets (52 to 90 g/m 2 )<br />
20 sheets (91 to 105 g/m 2 )<br />
2 cover sheet only (106 g/m 2 to 135 g/m 2 )<br />
A4, A4-R, B5, Letter, Letter-R, 16K 65 sheets (52 to 90 g/m 2 )<br />
55 sheets (91 to 105 g/m 2 )<br />
2 cover sheet only (106 g/m 2 to 135 g/m 2 )<br />
Plain, Recycled, Prepunched<br />
23 29/32 × 26 5/16 × 41 25/32"<br />
607.2 × 668.5 × 1,061.3 mm<br />
Weight Approx. 88.2 lbs or less / Approx. 40 kg or less<br />
Item Description<br />
Paper Size A3, B4, A4, A4-R, B5, Folio, 8K, 16K, Letter-R, Legal, 12 × 18", Statement-R, A5-R,<br />
B5-R, 16K-R<br />
Paper Weight 45 - 300 g/m 2<br />
Media types Plain, Transparency, Preprinted, Bond, Recycled, Rough, Letterhead, Color (Colour),<br />
Prepunched, Thick, Coated, High Quality
Mailbox (Option)<br />
Item Description<br />
Number of Trays 7<br />
Paper Size<br />
(80 g/m 2 )<br />
Dimensions<br />
(W) × (D) × (H)<br />
Center-Folding Unit (Option)<br />
A3, B4, Ledger, Legal: 50 sheets<br />
A4, A4-R, B5, B5-R, A5-R, Letter, Letter-R, 216 × 340 mm, Executive, Folio, 8K,<br />
16K, 16K-R, Statement-R, Oficio II: 100 sheets<br />
20 1/16 × 15 3/4 × 18 1/2"<br />
510 mm × 400 mm × 470 mm<br />
Weight Approx. 22 lbs. / Approx. 10 kg<br />
Item Description<br />
Sizes Bi-Fold A3, B4, A4-R, Ledger, Legal, Letter-R, Oficio II, 8K<br />
Saddle Stitch A3, B4, A4-R, Ledger, Legal, Letter-R, Oficio II, 8K<br />
Tri-Fold A4-R, Letter-R<br />
Number of Sheets Bi-Fold 5 sheets (60 to 90 g/m 2 )<br />
3 sheets (91 to 120 g/m 2 )<br />
1 sheet (121 to 256 g/m 2 )<br />
Saddle Stitch 16 sheets (60 to 90 g/m 2 )<br />
13 sheets (91 to 105 g/m 2 )<br />
1 cover sheet only (106 g/m 2 or heavier)<br />
Tri-Fold 5 sheets (60 to 90 g/m 2 )<br />
3 sheets (91 to 120 g/m 2 )<br />
Maximum Number<br />
for Storage<br />
(80 g/m2 Bi-Fold 5 sheets or less per set: 30 sets or more<br />
6 to 10 sheets per set: 20 sets or more<br />
)<br />
11 to 16 sheets per set: 10 sets or more.<br />
Saddle Stitch 5 sheets or less per set: 30 sets or more<br />
6 to 10 sheets per set: 20 sets or more<br />
11 to 16 sheets per set: 10 sets or more.<br />
Tri-Fold 1 sheet per set: 30 sets or more<br />
2 to 5 sheets per set: 5 sets or more<br />
Media types Bi-Fold Plain, Bond, Recycled, Prepunched, High Quality<br />
Saddle Stitch Plain, Recycled, Prepunched<br />
Tri-Fold Plain, Recycled, Prepunched<br />
Appendix-26
Banner Tray (Option)<br />
Item Description<br />
Max. number of<br />
sheets<br />
10 sheets (Multi Purpose tray)<br />
Paper length 210 (8.26") to 304.8 (12") mm<br />
Paper weight Max. 1220 (48") mm<br />
Paper Type Paper weight: 136 to 163 g/m 2<br />
Paper type: Heavy 2<br />
Dimensions 9 27/32 × 14 23/32 × 5 63/64"<br />
(W) × (D) × (H) 250 × 374 × 152 mm<br />
Weight Approx. 0.78 lbs. / Approx. 0.352 kg<br />
NOTE: Consult your dealer or service representative for recommended paper types.<br />
Appendix-27
Glossary<br />
Accessibility<br />
The machine is designed featuring good accessibility even for the elderly and those who are physically<br />
challenged or visually impaired. Touch panel characters can be enlarged while the touch panel is adjustable in<br />
two angles.<br />
AppleTalk<br />
AppleTalk, which comes with Apple Computer's Mac OS, is a network protocol. AppleTalk enables file/printer<br />
sharing and also enables you to utilize application software that is on another computer on the same AppleTalk<br />
network.<br />
Auto Form Feed Timeout<br />
During data transmission, the machine may sometimes have to wait until receiving the next data. This is the auto<br />
form feed timeout. When the preset timeout passes, the machine automatically prints output. However, no<br />
output is performed if the last page has no data to be printed.<br />
Auto-IP<br />
Auto-IP is a module that enables dynamic IPv4 addresses to be assigned to a device on startup. However,<br />
DHCP requires a DHCP server. Auto-IP is a server-less method of choosing an IP address. IP addresses<br />
between 169.254.0.0 to 169.254.255.255 are reserved for Auto-IP and assigned automatically.<br />
Auto Paper Selection<br />
A function to automatically select paper in the same size as originals when printing<br />
Auto Sleep<br />
A mode designed for electrical power saving, activated when the machine is left unused or there is no data<br />
transfer for a specific period. In Sleep mode, power consumption is kept to a minimum.<br />
Bonjour<br />
Bonjour, also known as zero-configuration networking, is a service that automatically detects computers,<br />
devices and services on an IP network. Bonjour, because an industry-standard IP protocol is used, allows<br />
devices to automatically recognize each other without an IP address being specified or DNS server being set.<br />
Bonjour also sends and receives network packets by UDP port 5353. If a firewall is enabled, the user must check<br />
that UDP port 5353 is left open so that Bonjour will run correctly. Some firewalls are set up so as to reject only<br />
certain Bonjour packets. If Bonjour does not run stably, check the firewall settings and ensure that Bonjour is<br />
registered on the exceptions list and that Bonjour packets are accepted. If you install Bonjour on Windows XP<br />
Service Pack 2 or later, the Windows firewall will be set up correctly for Bonjour.<br />
Default Gateway<br />
This indicates the device, such as a computer or router, that serves as the entrance/exit (gateway) for accessing<br />
computers outside the network that you are on. When no specific gateway is designated for a destination IP<br />
address, data is sent to the host designated as the Default Gateway.<br />
Appendix-28
DHCP (Dynamic Host Configuration Protocol)<br />
Dynamic Host Configuration Protocol (DHCP) that automatically resolves IP addresses, subnet masks, and<br />
gateway addresses on a TCP/IP network. DHCP minimizes the load of network management employing a large<br />
number of client computers because it relieves individual clients including printers from the IP address being<br />
assigned.<br />
DHCP (IPv6)<br />
DHCP (IPv6) is the next-generation of the Internet's Dynamic Host Configuration Protocol and supports IPv6. It<br />
extends the BOOTP startup protocol that defines the protocols used for transferring configuration information to<br />
hosts on the network. DHCP (IPv6) permits the DHCP server to use its expanded functionality to send<br />
configuration parameters to an IPv6 node. Because the network addresses that can be used are allocated<br />
automatically, the IPv6 node management workload is reduced in systems where the administrator has to<br />
exercise close control over IP address allocation.<br />
dpi(dots per inch)<br />
A unit for resolution, representing the number of dots printed per inch (25.4 mm).<br />
EcoPrint Mode<br />
A printing mode that helps save toner. Copies made in this mode are thus lighter than normal.<br />
Emulation<br />
The function to interpret and execute other printers' page description languages. The machine emulates<br />
operation of PCL6, KPDL3 (PostScript 3 compatible).<br />
FTP(File Transfer Protocol)<br />
A protocol to transfer files on the TCP/IP network, whether the Internet or an intranet. Along with HTTP and<br />
SMTP/POP, FTP is now frequently used on the Internet.<br />
Grayscale<br />
A computer color expression. Displayed images of this sort are typically composed of shades of gray, varying<br />
from black at the weakest intensity to white at the strongest, without any other colors. Gray levels are displayed<br />
in numerical levels: that is, white and black only for 1 bit; 256 gray levels (including white and black) for 8 bits;<br />
and 65,536 gray levels for 16 bits.<br />
Help<br />
A Help key is provided on this machine's operation panel. If you are unsure of how to operate the machine,<br />
would like more information on its functions or are having problems getting the machine to work properly, press<br />
the Help key to view a detailed explanation on the touch panel.<br />
IP Address<br />
An Internet protocol address is a unique number that represents a specific computer or related device on the<br />
network. The format of an IP address is four sets of numbers separated by dots, e.g. 192.168.110.171. Each<br />
number should be between 0 and 255.<br />
Appendix-29
IPP<br />
IPP (Internet Printing Protocol) is a standard that uses TCP/IP networks such as the Internet to enable print jobs<br />
to be sent between remote computers and printers. IPP is an extension of the HTTP protocol used to view<br />
websites and enables printing to be carried out via routers on printers in remote locations. It also supports the<br />
HTTP authentication mechanisms along with SSL server and client authentication as well as encryption.<br />
KPDL (Kyocera Page Description Language)<br />
Kyocera's PostScript page description language compatible with Adobe PostScript Level 3.<br />
Multi Purpose (MP) Tray<br />
The paper supply tray on the right side of the machine. Use this tray instead of the cassettes when printing onto<br />
envelopes, Hagaki, transparencies, or labels.<br />
NetBEUI (NetBIOS Extended User Interface)<br />
An interface, developed by IBM in 1985, as an update from NetBIOS. It enables more advanced functions on<br />
smaller networks than other protocols such as TCP/IP, etc. It is not suitable for larger networks due to lack of<br />
routing capabilities to choose the most appropriate routes. NetBEUI has been adopted by IBM for its OS/2 and<br />
Microsoft for its Windows as a standard protocol for file sharing and printing services.<br />
NetWare<br />
Novell's network management software that is able to run on a variety of operating systems.<br />
PDF/A<br />
This is "ISO 19005-1. Document management - Electronic document file format for long-term preservation - Part<br />
1: Use of PDF (PDF/A)", and is a file format based on PDF 1.4. It has been standardized as ISO 19005-1, and<br />
is a specialization of PDF, which has been mainly used for printing, for long-term storage. A new part, ISO<br />
19005-2 (PDF/A-2), is currently being prepared.<br />
POP3 (Post Office Protocol 3)<br />
A standard protocol to receive E-mail from the server in which the mail is stored on the Internet or an intranet.<br />
PostScript<br />
A page description language developed by Adobe Systems. It enables flexible font functions and highlyfunctional<br />
graphics, allowing higher quality printing. The first version called Level 1 was launched in 1985,<br />
followed by Level 2 that enabled color printing and two-byte languages (e.g. Japanese) in 1990. In 1996, Level<br />
3 was released as an update for the Internet access and PDF format as well as gradual improvements in<br />
implementation technologies.<br />
PPM (prints per minute)<br />
This indicates the number of A4 size printouts made in one minute.<br />
Printer Driver<br />
The software to enable you to print data created on any application software. The printer driver for the machine<br />
is contained in the DVD enclosed in the package. Install the printer driver on the computer connected to the<br />
machine.<br />
Appendix-30
RA(Stateless)<br />
The IPv6 router communicates (transmits) information such as the global address prefix using ICMPv6. This<br />
information is the Router Advertisement (RA). ICMPv6 stands for Internet Control Message Protocol, and is a<br />
IPv6 standard defined in the RFC 2463 "Internet Control Message Protocol (ICMPv6) for the Internet Protocol<br />
Version 6 (IPv6) Specification".<br />
Send as E-mail<br />
A function to send the image data stored in the machine as an E-mail attachment. E-mail addresses can be<br />
selected from the list or entered at each time.<br />
SMTP (Simple Mail Transfer Protocol)<br />
A protocol for E-mail transmission over the Internet or an intranet. It is used for transferring mail between mail<br />
servers as well as for sending mail from clients to their servers.<br />
Status Page<br />
The page lists machine conditions, such as the memory capacity, total number of prints and scans, and paper<br />
source settings.<br />
Subnet Mask<br />
The subnet mask is a way of augmenting the network address section of an IP address. A subnet mask<br />
represents all network address sections as 1 and all host address sections as 0. The number of bits in the prefix<br />
indicates the length of the network address. The term "prefix" refers to something added to the beginning and,<br />
in this context, indicates the first section of the IP address. When an IP address is written, the length of the<br />
network address is indicated by the prefix length after a forward slash (/). For example, "24" in the address<br />
"133.210.2.0/24". In this way, "133.210.2.0/24" denotes the IP address "133.210.2.0" with a 24-bit prefix<br />
(network section). This new network address section (originally part of the host address) made possible by the<br />
subnet mask is referred to as the subnet address. When you enter the subnet mask, be sure to set the DHCP<br />
setting to Off.<br />
TCP/IP (Transmission Control Protocol/Internet Protocol)<br />
TCP/IP is a suite of protocols designed to define the way computers and other devices communicate with each<br />
other over a network.<br />
TCP/IP (IPv6)<br />
TCP/IP (IPv6) is based on the current Internet protocol, TCP/IP (IPv4). IPv6 is the next-generation Internet<br />
protocol and expands the available address space, which resolves the problem of the lack of addresses under<br />
IPv4, while also introducing other improvements such as additional security functionality and the capacity to<br />
prioritize data transmission.<br />
TWAIN (Technology Without An Interesting Name)<br />
A technical specification for connecting scanners, digital cameras, and other image equipment to computers.<br />
The TWAIN compatible devices enable you to process image data on any relevant application software. TWAIN<br />
is adopted on a large amount of graphic software (e.g. Adobe Photoshop) and OCR software.<br />
Appendix-31
USB (Universal Serial Bus)2.0<br />
A USB interface standard for Hi-Speed USB 2.0. The maximum transfer rate is 480 Mbps. This machine is<br />
equipped with USB 2.0 for high-speed data transfer.<br />
WIA (Windows Imaging Acquisition)<br />
A function to import images supported after Windows Me/XP from digital cameras and other peripheral devices.<br />
This function replaces what TWAIN used to do. The feature is provided as a part of Windows functions and<br />
improves ease of operation, so that you import images directly to My Computer without using any application.<br />
Appendix-32
Index<br />
Symbols<br />
(Paper Width Guide) Lock 1-6<br />
Numerics<br />
2-sided/Book Original 6-11<br />
4,000-sheet Finisher Appendix-4<br />
A<br />
Accessibility 9-113, Appendix-28<br />
Accounting Setting<br />
Accounting List 10-22<br />
Address Book<br />
Contact 9-81<br />
Group 9-84<br />
Adjusting the Operation Panel Angle 2-12<br />
Adjustment/Maintenance<br />
Auto Color Correction 9-71<br />
Background Density Adj. 9-69<br />
Calibration 9-74<br />
Color Calibration Cycle 9-74<br />
Correct Paper Curl 9-75<br />
Correcting Black Lines 9-70<br />
Density Adjustment 9-68<br />
Developer Refresh 9-73<br />
Display Brightness 9-71<br />
Drum Refresh1 9-72<br />
Drum Refresh2 9-73<br />
Silent Mode 9-71<br />
System Initialization 9-70<br />
Tone Curve Adjustment 9-71<br />
Apache License (Version 2.0) xxxi<br />
AppleTalk Appendix-28<br />
Setup 2-17<br />
Applications<br />
Installing Applications 9-90<br />
Launching Applications 9-91<br />
Authorization Rules<br />
Index-1<br />
Copy Restriction 10-13<br />
Fax TX Restriction 10-13<br />
Print Restriction 10-13<br />
Send Restriction 10-13<br />
Storing Restr. in Box 10-13<br />
Storing Restr. in Memory 10-13<br />
Auto Image Rotation 4-38<br />
Auto Low Power Mode 2-11<br />
Auto Paper Selection Appendix-28<br />
Auto Sending<br />
Sending Log History 9-67<br />
Auto Sleep 2-12, Appendix-28<br />
B<br />
Background density adj.<br />
Copy 4-35<br />
Send 6-22<br />
Banner Tray Appendix-5<br />
Bates Stamp 4-31, 6-40<br />
Bonjour Appendix-28<br />
Booklet 4-20<br />
Booklet from Sheets<br />
Left side 4-20<br />
Right side 4-20<br />
Top binding 4-20<br />
Border Erase<br />
Copy 4-18<br />
Send 6-26<br />
Bundled Items 2-2<br />
C<br />
Calibration 9-74<br />
Calibration Cycle 9-74<br />
Cassette<br />
Loading Paper 2-31<br />
Paper Size and Media Type 9-6<br />
Cassette 1 to 7 1-4<br />
Cassette 5 (Option)<br />
Index
Paper Jams 12-44<br />
Cassette 6,7 (Option)<br />
Paper Jams 12-46<br />
Center-Folding Unit (Option)<br />
Paper Jams 12-42<br />
Centering 6-7<br />
Changing Language 2-13, 9-2<br />
Character Entry Method Appendix-8<br />
Cleaning<br />
Conveying Guide 11-14<br />
Dual scanning area 11-12<br />
Glass Platen 11-11<br />
Platen Cover 11-11<br />
Platen Cover / Glass Platen 11-11<br />
Separator 11-15<br />
Slit Glass 11-12<br />
Cleaning Brush 1-5<br />
Clip Holder 1-5<br />
Collate/Offset 3-14<br />
Color<br />
Background Density Adj. 4-35, 6-22<br />
Calibration Cycle 9-74<br />
Color Selection 6-23<br />
Color Type 6-42, 9-47<br />
Tone Curve Adjustment 9-71<br />
Color type 6-42<br />
Combine<br />
Copy 4-14<br />
Combine Mode<br />
2-in-1 Mode 4-14<br />
4-in-1 Mode 4-15<br />
Page Boundary Lines 4-15<br />
Common Settings<br />
Customize Status Display 9-39<br />
Default Screen 9-3<br />
Display Jobs Log 9-40<br />
Error Handling 9-13<br />
Function Defaults 9-16<br />
Language 9-2<br />
Low Toner Alert Level 9-39<br />
Manual Staple 9-38<br />
Message Banner Print 9-41<br />
Offset One Page Documents 9-40<br />
Orientation Confirmation 9-16<br />
Original/Paper Settings 9-4<br />
Paper Output 9-15<br />
Index-2<br />
Sound 9-4<br />
System Stamp 9-29<br />
USB Keyboard Type 9-29<br />
Connecting<br />
LAN Cable 2-5<br />
Power Cable 2-8<br />
USB Cable 2-7<br />
Connection Method 2-3<br />
Continuous Scan<br />
Copy 4-37<br />
Send 6-24<br />
Conventions in This Guide xxxvi<br />
Conveyor Guide<br />
Cleaning 11-14<br />
Copy 9-42, Appendix-7<br />
Collate/Offset 3-14<br />
Combine 4-14<br />
Density 3-8<br />
Duplex 3-12<br />
EcoPrint 4-33<br />
Original Image 3-9<br />
Originals 4-2<br />
Zoom 3-10<br />
Copy Settings<br />
Auto % Priority 9-44<br />
Auto Image Rotation Action 9-43<br />
Auto Paper Selection 9-43<br />
Border Erase for Back Page 9-42<br />
Paper Size for Small Original 9-44<br />
Preset Limit 9-45<br />
Quick Setup Registration 9-45<br />
Reserve Next Priority 9-44<br />
Copy trays (D) Appendix-7<br />
Copying Functions 4-1<br />
Correct Paper Curl 9-75<br />
Counting the Number of Pages<br />
Printed 10-28<br />
Counting the Number of Pages Printed<br />
Counter 3-61, 10-33<br />
Unknown ID Job 10-33<br />
Cover 4-22<br />
Custom Box<br />
Creating a New Box 7-2<br />
Deleting Documents 7-13<br />
Editing Documents 7-10<br />
Form Overlay 7-9<br />
Index
D<br />
Join Documents 7-11<br />
Move Documents 7-10<br />
Printing Documents 7-5<br />
Sending Documents 7-7<br />
Storing Documents 7-4<br />
User Privileges 3-49<br />
Daily Maintenance<br />
Emptying the Punch Waste Box (Option)<br />
11-10<br />
Replacing Staples 11-7<br />
Toner Container Replacement 11-2<br />
Waste Toner Box Replacement 11-5<br />
Data Security<br />
Data Sanitization 9-110, 9-111<br />
Data Security Kit Appendix-6<br />
Date/Timer<br />
Auto Error Clear 9-79<br />
Auto Panel Reset 9-77<br />
Auto Sleep 9-78<br />
Date Format 9-76<br />
Date/Time 9-76<br />
Error Job Skip 9-80<br />
Interrupt Clear Timer 9-80<br />
Low Power Timer 9-78<br />
Time Zone 9-77<br />
Default 9-16<br />
Auto Image Rotation 9-22<br />
Backgrnd Density (Copy) 9-19<br />
BackgrndDens.(Send/Store) 9-20<br />
Border Erase 9-21<br />
Border Erase to Back Page 9-22<br />
Collate/Offset 9-22<br />
Color TIFF Compression 9-24<br />
Continuous Scan 9-26<br />
DP Read Action 9-28<br />
EcoPrint 9-23<br />
E-mail Subject/Body 9-27<br />
File Format 9-18, 9-19<br />
File Name Entry 9-27<br />
High Comp. PDF Image 9-24<br />
Image Quality (File Format) 9-24<br />
JPEG/TIFF Print 9-25<br />
Margin Default 9-22<br />
Index-3<br />
Index<br />
Original Image (Copy) 9-17<br />
Original Image (Send/Store) 9-17<br />
Original Orientation 9-16<br />
PDF/A 9-26<br />
Prevent Bleed(Send/Store) 9-20<br />
Prevent Bleed-thru (Copy) 9-20<br />
Repeat Copy 9-28<br />
Scan Resolution 9-18<br />
Toner SaveLevel(EcoPrint) 9-23<br />
XPS Fit to Page 9-26<br />
Zoom 9-21<br />
Default Gateway Appendix-28<br />
Default Setting<br />
Apply Limit 10-26<br />
Copier/Printer Count 10-24<br />
Count by Paper Size 10-30<br />
Density 6-19<br />
Copy 3-8<br />
Send 6-19<br />
Dest. Check before Send 9-46<br />
Destination<br />
Address Book 3-39<br />
Editing 9-85<br />
Narrow Down 9-87<br />
One Touch Key 3-41<br />
Quick No. Search key 3-4<br />
Search 3-40<br />
Sending to Different Types of<br />
Destinations (Multi Sending) 3-41<br />
Sort 9-87<br />
Speed Dial 3-41<br />
Device 8-14<br />
Canceling FAX Communication 8-16<br />
Checking Status 8-14<br />
Configuring 8-15<br />
Displaying Screen 8-14<br />
USB Memory 8-16<br />
DHCP Appendix-29<br />
DHCP (IPv6) Appendix-29<br />
Document Box 3-42, 7-1<br />
Basic Operation 3-44<br />
Custom Box 3-42, 7-2<br />
Document deletion time 7-3<br />
Form Overlay 7-9<br />
Job Box 3-42, 7-14<br />
Quick Setup Registration 9-56
What is Document Box? 3-42<br />
Document Finisher 1-4<br />
Document Processor 1-4, Appendix-23<br />
How to Load Originals 2-49<br />
Loading Originals 2-48<br />
Not Supported Originals 2-48<br />
Part Names 2-48<br />
Supported Originals 2-48<br />
Double Copy 4-28<br />
DP Read Action 4-44<br />
dpi Appendix-29<br />
DSM Scan 6-32<br />
Protocol Detail 9-98<br />
Duplex 3-12, 9-60<br />
Duplex unit 12-30<br />
Duplex Unit and Cassette 1 12-31<br />
DVD 2-2<br />
E<br />
EcoPrint 4-33<br />
EcoPrint Mode Appendix-29<br />
Print 9-59<br />
Edit Destination<br />
Address Book 9-81<br />
One Touch Key 9-85<br />
E-mail<br />
Send as E-mail 3-23<br />
E-mail Subject/Body<br />
Sending 6-29<br />
Embedded Web Server RX 2-26<br />
Emulation Appendix-29<br />
Selection 9-57<br />
Emulation Option Appendix-7<br />
Energy Star Program xxxiv<br />
Enhanced WSD<br />
Setup 9-100<br />
Enhanced WSD (SSL)<br />
Setup 9-101<br />
Enlarged Display 9-113<br />
Enter key 3-4<br />
Entry<br />
File Name 4-42<br />
Entry Check for New Dest. 9-47<br />
Error Handling<br />
Duplexing Error 9-13<br />
Index-4<br />
Finished Pages Exceeded 9-13<br />
Finishing Error 9-13<br />
Inserted Paper Mismatch 9-14<br />
No Staple Error 9-13<br />
Paper Jam before Staple 9-14<br />
Paper Mismatch Error 9-14<br />
Punch Waste Full Error 9-14<br />
Skewed or multi originals 9-14<br />
Error Job Skip 9-80<br />
Error Messages 12-7<br />
Expansion Memory Appendix-6<br />
F<br />
FAX Kit Appendix-6<br />
File<br />
Format 6-14<br />
PDF 6-16<br />
File Name Entry 4-42<br />
Sending 6-28<br />
File Separation 6-15<br />
Fixing unit 12-33<br />
Fold 4-11<br />
Folding Unit Appendix-5<br />
Form Overlay 4-23<br />
Storing a Form 7-20<br />
Front Cover 1-4<br />
FTP Appendix-29<br />
FTP (Reception)<br />
Protocol Detail 9-98<br />
FTP Encrypted TX 6-38<br />
G<br />
Gigabit Ethernet Board Appendix-6<br />
Glass Platen<br />
Cleaning 11-11<br />
GPL/LGPL xxviii<br />
Grayscale 6-23, Appendix-29<br />
H<br />
Handle 1-6<br />
Handles 1-5<br />
Help Appendix-29<br />
Help Screen 3-61<br />
Index
Checking what to enter for 3-29<br />
Host Name 9-94<br />
HTTP<br />
Protocol Detail 9-98<br />
HTTP Security<br />
Setup 9-102<br />
HTTPS<br />
Protocol Detail 9-98<br />
I<br />
Image Repeat 4-28<br />
Included Guides 2<br />
Installing<br />
Macintosh 2-21<br />
Software 2-18<br />
Windows 2-18<br />
Interface Block 9-107<br />
Interface Block Setting<br />
Optional interface 9-107<br />
USB Device 9-107<br />
USB Host 9-107<br />
Internet Browser 3-58<br />
Internet Browser Setting<br />
Browser Preferences 9-88<br />
Internet Browser Setting 9-88<br />
Proxy Settings 9-89<br />
Internet Fax Kit (A) Appendix-6<br />
Interrupt Clear Timer 9-80<br />
Interrupt Copy 3-17<br />
IP Address Appendix-29<br />
IPP Appendix-30<br />
IPP over SSL<br />
Protocol Detail 9-98<br />
IPP Security<br />
Setup 9-102<br />
IPSec 9-105<br />
J<br />
Job<br />
Available Status 8-2<br />
Canceling 3-51, 8-11<br />
Checking History 8-9<br />
Checking Status 8-2<br />
Detailed Information 8-7<br />
Index-5<br />
Index<br />
Detailed Information of Histories 8-10<br />
Details of the Status Screens 8-3<br />
Displaying History Screen 8-9<br />
Displaying Status Screens 8-2<br />
Pause and Resumption 8-11<br />
Reordering 8-12<br />
Sending the Log History 9-66<br />
Job Accounting<br />
Restricting the Use of the Machine 10-<br />
24<br />
Job Accounting Setting 10-20<br />
Each Job Accounting 10-29<br />
Job Accounting 10-20<br />
Print Accounting Report 10-32<br />
Total Job Accounting 10-29<br />
Job Box<br />
Form for Form Overlay 7-20<br />
Private Print/Stored Job Box 7-14<br />
Quick Copy/Proof and Hold 7-15<br />
Repeat Copy 7-18<br />
Job Finish Notice 6-36<br />
Copy 4-40<br />
Send 6-36<br />
Job Log Subject<br />
Sending Log History 9-67<br />
K<br />
Key Counter Appendix-6<br />
Knopflerfish License xxxi<br />
KPDL Appendix-30<br />
L<br />
Label Appendix-17<br />
LAN Cable<br />
Connecting 2-5<br />
LAN Interface<br />
Setup 9-106<br />
LDAP<br />
Protocol Detail 9-98<br />
LDAP Security<br />
Setup 9-103<br />
Legal Information xxvii<br />
Local Authorization<br />
Copy Restriction 10-5
Fax TX Restriction 10-5<br />
Print Restriction 10-5<br />
Send Restriction 10-5<br />
Storing Restr. in Box 10-5<br />
Storing Restr. in Memory 10-5<br />
Login 3-2, 10-3<br />
Logout 3-2, 10-3<br />
Long document 5-5<br />
Low Power Timer 9-78<br />
Lower Left Tray 1-5<br />
LPD<br />
Protocol Detail 9-98<br />
M<br />
Mailbox 1-4, Appendix-5<br />
Main Power Switch 1-6<br />
Management 10-1<br />
Manual Staple<br />
Manual Staple 9-38<br />
Staple Position 9-38<br />
Manual staple mode Appendix-4<br />
Margin/Centering 4-16<br />
Measurement 9-12<br />
Media for Auto (B&W) 9-10<br />
Media Type Setting 9-8<br />
Memo Page 4-26<br />
Mirror Image 4-39<br />
Mixed Size Originals 4-6<br />
Combinations 4-6<br />
Copy Size 4-8<br />
Send 6-8<br />
Monotype Imaging License Agreement xxx<br />
Multi Purpose (MP) Tray Appendix-30<br />
Paper Size and Media 2-44, 9-7<br />
Multi Purpose Tray 1-6<br />
Multi Sending (Sending to Different Types<br />
of Destinations ) 3-41<br />
N<br />
Negative Image 4-38<br />
NetBEUI Appendix-30<br />
Protocol Detail 9-98<br />
NetWare Appendix-30<br />
Setup 9-99<br />
Index-6<br />
Network<br />
Enhanced WSD 9-100<br />
Enhanced WSD (SSL) 9-101<br />
Host Name 9-94<br />
IPSec 9-105<br />
LAN Interface 9-106<br />
NetWare 9-99<br />
Preparation 2-15<br />
Restart Network 9-106<br />
Secure Protocol 9-101<br />
TCP/IP (IPv4) 9-95<br />
TCP/IP (IPv6) 9-96<br />
WSD Print 9-100<br />
WSD Scan 9-100<br />
Network Cable 2-4<br />
Connecting 2-5<br />
Network Interface 2-4<br />
Network Interface Connector 1-5<br />
O<br />
Index<br />
One Touch Key<br />
Changing the Registered<br />
Information 9-86<br />
Deleting the Registered<br />
Information 9-86<br />
Editing 9-86<br />
Open SSL xxviii<br />
Operation Panel 1-4<br />
Option<br />
Copy trays (D) Appendix-7<br />
Data Security Kit Appendix-6<br />
Emulation Option Appendix-7<br />
Expansion Memory Appendix-6<br />
FAX Kit Appendix-6<br />
Folding Unit Appendix-5<br />
Gigabit Ethernet Board Appendix-6<br />
Internet Fax Kit (A) Appendix-6<br />
Key Counter Appendix-6<br />
Large Capacity Side Feeder (500,<br />
1,500-sheet x 2) Appendix-4<br />
Mailbox Appendix-5<br />
Overview Appendix-2<br />
Printed Document Guard Kit Appendix-<br />
7<br />
Side Feeder (3,000-sheet) Appendix-4
Side Feeder (500-sheet x 3) Appendix-<br />
4<br />
USB Keyboard Appendix-7<br />
Option Interface 1-5<br />
Orientation Confirmation 9-16<br />
Original<br />
Loading in the Document<br />
Processor 2-48<br />
Placing on the Platen 2-46<br />
Size xxxvii<br />
Original Auto Detect 9-10<br />
Original Image<br />
Send 6-18<br />
Original Orientation<br />
Copy 4-9<br />
Document Processor 4-9<br />
Orientation Confirmation 9-16<br />
Send 6-12<br />
Original Placement Indicator<br />
Indications and Status 2-50<br />
Original Size<br />
Send 6-2<br />
Original Size Indicator Plates 1-5, 2-46<br />
Original SSLeay License xxix<br />
Originals<br />
Automatic Detection 9-10<br />
Copy 4-2<br />
Custom 9-4<br />
Setup 9-4<br />
Size Selection 4-2, 6-2<br />
P<br />
Page # 4-24<br />
Paper<br />
Appropriate Paper Appendix-13<br />
Auto Selection 9-10<br />
Before Loading 2-30<br />
Cassette 9-6<br />
Checking the Remaining Amount of<br />
Paper 8-13<br />
Custom 9-5<br />
Default Paper Source 9-9<br />
Loading Envelopes 2-40<br />
Loading in the Cassettes 2-31<br />
Loading in the Multi Purpose Tray 2-38<br />
Index-7<br />
Index<br />
Multi Purpose Tray 9-7<br />
Paper Source for Cover Paper 9-11<br />
Setup 9-4<br />
Size and Media 2-42, Appendix-11<br />
Special Paper 9-11, Appendix-15<br />
Specifications Appendix-12<br />
Weight 9-8<br />
Paper Jam 12-21<br />
Bridge Unit (Option) 12-36<br />
Cassette 1 12-22<br />
Cassette 2 12-23<br />
Cassettes 3 and 4 12-24<br />
Document Processor 12-34<br />
Inside the Right Covers 1, 3 and 4 12-28<br />
Jam Location Indicators 12-21<br />
Multi Purpose Tray 12-27<br />
Precaution 12-22<br />
Paper Jams<br />
Cassette 5 (Option) 12-44<br />
Cassette 6,7 (Option) 12-46<br />
Center-Folding Unit (Option) 12-42<br />
Right tray 12-35<br />
Paper Length Guide 1-6, 2-31<br />
Paper Output 4-13<br />
Paper Selection 4-3<br />
Cassette 4-3<br />
Multi Purpose Tray 4-4<br />
Paper Size for Small Original 9-44<br />
Paper Width Adjusting Tab 1-6<br />
Paper Width Guide 1-6<br />
Paper Width Guides 2-32<br />
Part Names 1-1<br />
PDF/A Appendix-30<br />
Platen 1-5<br />
Placing Originals 2-46<br />
Platen Cover<br />
Cleaning 11-11<br />
POP Security (User 1)<br />
Setup 9-104<br />
POP Security (User 2)<br />
Setup 9-104<br />
POP Security (User 3)<br />
Setup 9-105<br />
POP3 Appendix-30<br />
POP3 (E-mail RX)<br />
Protocol Detail 9-98
PostScript Appendix-30<br />
Power Cable<br />
Connecting 2-8<br />
Power Off 2-10<br />
Power On 2-9<br />
PPM Appendix-30<br />
Preparation 2-1<br />
Preparation for sending a document to a PC<br />
3-29<br />
Preparing Cables 2-4<br />
Prevent Bleed-thru 4-36, 6-25<br />
Print Job<br />
Reordering 3-52<br />
Print Report<br />
Font List 9-64<br />
Network Status 9-65<br />
Service Status 9-65<br />
Status Page 9-64<br />
Printed Document Guard Kit Appendix-7<br />
Printer Driver Appendix-30<br />
Printer Settings<br />
Copies 9-60<br />
CR Action 9-62<br />
Duplex 9-60<br />
EcoPrint 9-59<br />
Emulation 9-57<br />
Form Feed Timeout 9-61<br />
Job Name 9-62<br />
KIR 9-63<br />
LF Action 9-62<br />
Orientation 9-61<br />
Override A4/Letter 9-59<br />
Paper Feed Mode 9-63<br />
Toner SaveLevel(EcoPrint) 9-59<br />
User Name 9-63<br />
Printing 5-2<br />
Help 5-4<br />
Long document 5-5<br />
print settings 5-3<br />
Printing from Applications 5-2<br />
Printing Reports/Sending Notice<br />
Send Result Report 9-65<br />
Priority Override 4-42, 8-12<br />
Product Library 2-2<br />
Programmed Copying 3-55<br />
Editing and Deleting 3-56<br />
Index-8<br />
Recalling 3-56<br />
Registering 3-55<br />
Protocol Detail 9-98<br />
Punch 3-20<br />
Q<br />
Index<br />
Quick No. Search key 3-4<br />
Quick Setup Screen 3-52<br />
Changing Registration 3-53, 9-45, 9-46,<br />
9-56<br />
R<br />
RA (Stateless) Appendix-31<br />
Raw Port<br />
Protocol Detail 9-98<br />
Regular Maintenance 11-2<br />
Release key 1-5<br />
Repeat Copy 4-43<br />
Maximum Number 4-44<br />
Outputting 4-43<br />
Selecting 4-43<br />
Report<br />
Print Report 9-64<br />
Reserve Next 3-16<br />
Reserve Next Priority 9-44<br />
Resolution Appendix-22<br />
Restart Network 9-106<br />
Right Cover 1 1-6<br />
Right Cover 1 Lever 1-6<br />
Right Cover 2 1-6<br />
Right Cover 2 Lever 1-6<br />
Right Cover 3 1-6<br />
Right Cover 3 Lever 1-6<br />
Right Cover 4 1-6<br />
Right Cover 4 Lever 1-6<br />
Right Tray 1-6<br />
Right tray<br />
Paper Jams 12-35<br />
S<br />
Safety Conventions i<br />
Scan Resolution 6-20<br />
Default settings 9-18
Scanning<br />
TWAIN 6-33<br />
Secure Protocol 9-101<br />
HTTP Security 9-102<br />
IPP Security 9-102<br />
LDAP Security 9-103<br />
POP Security (User 1) 9-104<br />
POP Security (User 2) 9-104<br />
POP Security (User 3) 9-105<br />
SMTP Security 9-103<br />
SSL 9-101<br />
Send<br />
Default Screen 9-48<br />
Dest. Check before Send 9-46<br />
Entry Check for New Dest. 9-47<br />
File Format 6-14<br />
Original Image 6-18<br />
Original Size 6-2<br />
Print 6-37<br />
Sending Size 6-4<br />
Store 6-37<br />
Send and Forward<br />
Color Setting 9-50<br />
Destination 9-49<br />
E-mail Subject 9-54<br />
File Format 9-51<br />
File Separation 9-54<br />
Forward 9-48<br />
FTP Encrypted TX 9-54<br />
Scan Resolution 9-51<br />
Send Log History<br />
Sending Log History 9-67<br />
Send to Folder<br />
Sending 3-24<br />
Sending 9-46<br />
E-mail Subject/Body 6-29<br />
File Name Entry 6-28<br />
Send as E-mail 3-23<br />
Send to Folder 3-24<br />
Send to Folder (FTP) 3-26<br />
Send to Folder (SMB) 3-26<br />
Sending E-mail 2-27<br />
Sending Functions 6-1<br />
Sending Log History<br />
Auto Sending 9-67<br />
Job Log Subject 9-67<br />
Index-9<br />
Index<br />
Send Log History 9-67<br />
Sending Settings<br />
Color Type 9-47<br />
Quick Setup Registration 9-46<br />
Send and Forward 9-48<br />
Sending Size 6-4<br />
Sending to Different Types of Destinations<br />
(Multi Sending) 3-41<br />
Separator<br />
Cleaning 11-15<br />
Setting Date and Time 2-14<br />
Setting Driver<br />
TWAIN 2-24<br />
WIA 2-25<br />
Sharpness 4-34<br />
Copy 4-34<br />
Sharpness adjust<br />
Send 6-21<br />
Shortcuts 3-57<br />
Adding 3-57<br />
Sleep 2-12<br />
Slit Glass 1-5<br />
Cleaning 11-12<br />
SMTP Appendix-31<br />
SMTP (E-mail TX)<br />
Protocol Detail 9-98<br />
SMTP Security<br />
Setup 9-103<br />
SNMP<br />
Protocol Detail 9-98<br />
SNMPv3<br />
Protocol Detail 9-98<br />
Solving Malfunctions 12-2<br />
Specifications Appendix-19<br />
Banner Tray Appendix-27<br />
Center-Folding Unit Appendix-26<br />
Common functions Appendix-19<br />
Copy functions Appendix-21<br />
Document Finisher Appendix-25<br />
Document Processor Appendix-23<br />
Hole Punch Unit Appendix-25<br />
Large Capacity Side Feeder (500,<br />
1,500-sheet x 2) Appendix-24<br />
Mailbox Appendix-26<br />
Printer functions Appendix-22<br />
Scanner functions Appendix-23
Side Feeder (3,000-sheet) Appendix-<br />
24<br />
Side Feeder (500-sheet x 3) Appendix-<br />
24<br />
Specifying Destination 3-28, 3-39<br />
SSL<br />
Setup 9-101<br />
Staple<br />
Mixed Size Stapling 3-19<br />
Staple Jam 12-50<br />
Status / Job Cancel 8-1<br />
Status Page 9-64, Appendix-31<br />
Subnet Mask Appendix-31<br />
Supplies<br />
Checking the Remaining Amount 8-13<br />
Support Tray Section of the Multi Purpose<br />
Tray 1-6<br />
Switching the Language 2-13<br />
Symbols i<br />
System<br />
Data Security 9-110<br />
Document Guard 9-108<br />
Optional Functions 9-112<br />
Restart Entire Device 9-93<br />
System Initialization 9-93<br />
System Menu 9-1<br />
Adjustment/Maintenance 9-68<br />
Application 9-90<br />
Common Settings 9-2<br />
Copy 9-42<br />
Date/Timer 9-76<br />
Document Box/Removable Memory 9-<br />
55<br />
Edit Destination 9-81<br />
Internet 9-88<br />
Network 9-94<br />
Printer 9-57<br />
Report 9-64<br />
Send 9-46<br />
User Property 10-9<br />
System Stamp<br />
Basic 9-29<br />
Printing Jobs 9-30<br />
Sending Jobs 9-32<br />
Storing Jobs 9-35<br />
T<br />
Index-10<br />
TCP/IP Appendix-31<br />
TCP/IP (IPv4)<br />
Setup 2-15<br />
TCP/IP (IPv6) Appendix-29<br />
TCP/IP Setting<br />
IPv4 9-95<br />
IPv6 9-96<br />
Protocol Detail 9-98<br />
Text Stamp 4-30, 6-39<br />
ThinPrint<br />
Protocol Detail 9-98<br />
Tone Curve Adjustment 9-71<br />
Toner Container 1-5<br />
Checking the Remaining Amount of<br />
Toner 8-13<br />
Toner Container Release Lever 1-5<br />
Trade Names xxvii<br />
TWAIN Appendix-31<br />
U<br />
Upper Left Tray 1-5<br />
USB Appendix-32<br />
USB Cable<br />
Connecting 2-7<br />
USB Interface 2-4<br />
USB Interface Connector (B1) 1-5<br />
USB Keyboard Appendix-7<br />
USB Memory<br />
Printing Documents 7-22<br />
Removing 7-26<br />
Saving Documents 7-24<br />
USB Port (A1) 1-6<br />
USB Port (A2) 1-5<br />
User Login Administration<br />
Adding 10-5<br />
Changing User Properties 10-8<br />
Guest Authorization Settings 10-12<br />
Login 10-3<br />
Logout 10-4<br />
User Login Setting 10-2<br />
Group Authorization Set. 10-10<br />
Local Authorization 10-9<br />
Obtain NW User Property 10-15<br />
Index
User Login 10-2<br />
User Login/Job Accounting<br />
Job Accounting Setting 10-20<br />
Unknown ID Job 10-10<br />
User Login Setting 10-2<br />
W<br />
Waste Toner Box 1-5<br />
Status 8-13<br />
Weekly Timer 3-60<br />
WIA Appendix-32<br />
WSD Print<br />
Setup 9-100<br />
WSD Scan 6-30<br />
Setup 9-100<br />
WSD Scan/DSM Scan 6-30<br />
X<br />
Index-11<br />
Index<br />
XPS<br />
File formats 6-14, 9-18<br />
Printing documents stored in<br />
Removable USB Memory 7-22<br />
Saving documents to Removable USB<br />
Memory 7-24<br />
Z<br />
Zoom 3-10<br />
Zoom Copying<br />
Auto Zoom 3-10<br />
Manual Zoom 3-10<br />
Preset Zoom 3-10<br />
XY Zoom 3-11<br />
Zoom Mode<br />
Copy 6-6<br />
Send 6-6
Index-12<br />
Index
We recommend the use of our own brand supplies. We will not be liable for any damage caused by the<br />
use of third party supplies in this machine.
<strong>TA</strong> <strong>Triumph</strong>-<strong>Adler</strong> <strong>GmbH</strong><br />
Betriebsstätte Norderstedt<br />
Ohechaussee 235<br />
22848 Norderstedt<br />
Germany<br />
Rev.2 2012.4<br />
2LFUTEN002