Caution - TA Triumph-Adler
Caution - TA Triumph-Adler
Caution - TA Triumph-Adler

You also want an ePaper? Increase the reach of your titles
YUMPU automatically turns print PDFs into web optimized ePapers that Google loves.
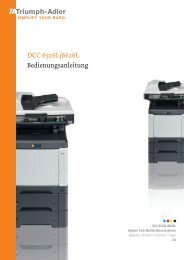
Instruction Handbook<br />
Basic<br />
DCC 2625 | 2632 | 2635<br />
Digital Colour Copying<br />
and Printing System
This Operation Guide is for models DCC 2625, DCC 2632 and DCC 2635.<br />
In this guide, DCC 2625 refers to the 25/25 ppm (prints per minutes) model,<br />
DCC 2632 to the 32/32 ppm model and DCC 2635 to the 40/35 ppm<br />
model.<br />
NOTE: This Operation Guide contains information that corresponds to using both the inch and<br />
metric versions of these machines.<br />
The inch versions of these machines are shown in the screens in this guide. If you are using the<br />
metric version, use the messages provided for the inch version as reference only. In the body<br />
text, only the inch messages are given if these versions differ only in capitalization. When there<br />
is even a slight difference in the message, we have listed the information for the inch version<br />
followed, in brackets, by the corresponding information for the metric version.
Taking Advantage of Advanced Functions<br />
Basic Copying...See Operation Guide Chapter 3<br />
Duplex Mode<br />
Create two-sided copies automatically<br />
from any kind of original<br />
Advanced Copying<br />
Offset Mode<br />
Handy option to stack sets in<br />
alternating orientations<br />
3<br />
2<br />
1<br />
1<br />
2<br />
Centering Originals<br />
Customize output by centering the<br />
image on the page<br />
Page Numbering<br />
3<br />
4<br />
3<br />
2<br />
1<br />
5<br />
Print sequential page numbers on the<br />
copies<br />
A<br />
B<br />
C<br />
D<br />
E<br />
3<br />
2<br />
1<br />
2<br />
4<br />
1<br />
3<br />
3<br />
2<br />
1<br />
5<br />
A<br />
B<br />
C<br />
D<br />
-1-<br />
E<br />
-2-<br />
-3-<br />
-4-<br />
-5-<br />
Split Mode<br />
Copy double-sided or two-page<br />
originals onto separate sheets<br />
automatically<br />
1<br />
1<br />
Combine Mode<br />
Combine two or four originals on a<br />
single page<br />
Border Erase<br />
Eliminate unnecessary borders on the<br />
original for cleaner output<br />
Cover Mode<br />
2<br />
2<br />
Use a distinctive front and/or back<br />
cover<br />
1<br />
1<br />
2<br />
2<br />
Margin Mode<br />
Set up blank margin or gutter space<br />
for your binding needs<br />
Poster<br />
Copy an enlarged image onto several<br />
pages<br />
Booklet<br />
Copy pages for stacking and folding<br />
into booklets<br />
i
Memo Mode<br />
Add space for notes next to copied<br />
images<br />
Background Exposure Adjust<br />
Adjust the background of color<br />
images<br />
OHP Backing Sheet Mode<br />
Insert plain paper backing sheets<br />
when printing transparencies for<br />
projectors<br />
Mirror Copying<br />
Create mirror images of originals<br />
ii<br />
Batch Scanning<br />
Copy high-volume originals in a single<br />
copy job<br />
1<br />
Proof Copy<br />
Copy a test sheet before a<br />
high-volume job<br />
3<br />
2<br />
1<br />
3<br />
2<br />
1<br />
EcoPrint<br />
100<br />
200<br />
Use toner more efficiently as<br />
necessary<br />
Image Repeat Copy<br />
Tiles a copied sheet with an original<br />
image<br />
1<br />
3<br />
2<br />
1<br />
Sharpness Adjust<br />
Adjust the sharpness of image<br />
outlines<br />
Repeat Copy<br />
Produce more copies as needed after<br />
making the initial copies<br />
Inverted Copying<br />
Invert both black and white and color<br />
images<br />
Color Balance Adjust<br />
Change the strength of image colors
Hue Adjust<br />
Adjust the color (hue) of images<br />
Single Color Copy<br />
Make copies in 1 other than black<br />
Job Build<br />
One Touch Image Adjust<br />
Convenient document/output management functionality<br />
Adjust image quality to match the<br />
image<br />
Programmed Copying<br />
Remember commonly used settings<br />
Set cover page, middle pages and for each page set shrink/enlarge<br />
and border erase settings and<br />
Shared Data Box<br />
2<br />
4<br />
1<br />
6<br />
3<br />
8<br />
5<br />
7<br />
Vivid<br />
Dull<br />
Sharp<br />
Store frequently used documents to reproduce them later as needed<br />
even without the original<br />
1<br />
2<br />
3<br />
4<br />
5<br />
Color/B&W Selection<br />
Make color and B&W copies in one<br />
operation<br />
copy all pages in single operation<br />
2<br />
4<br />
1<br />
6<br />
3<br />
8<br />
5<br />
7<br />
iii
Synergy Print Box<br />
Store commonly used documents... to make them instantly available later<br />
in combination with other copying jobs<br />
Printing Functionality<br />
Duplex Path<br />
Automatic duplex printing<br />
Private Print ††<br />
Delay printing until entry from the<br />
operation panel<br />
iv<br />
2<br />
4<br />
1<br />
3<br />
5<br />
Quick Copy †<br />
Reprint as many sheets as needed<br />
from the operation panel<br />
Job Storage †<br />
Enable printing commonly used data<br />
any time from the operation panel<br />
† Optional hard disk required for quick copy, job storage, and virtual mailbox<br />
Output Management<br />
Modify and manage the output queue<br />
Proof and Hold ††<br />
Bulk print after test print<br />
Virtual Mailbox †<br />
†† Proof and hold and private print require RAM disk to be configured or optional hard disk<br />
3<br />
2<br />
1<br />
1<br />
2<br />
3<br />
4<br />
3<br />
2<br />
1<br />
1<br />
4<br />
3<br />
2<br />
Save print data to a virtual mailbox<br />
3<br />
2<br />
1
Scanning Functionality<br />
Full-color Scan<br />
Make high quality scans of even color<br />
documents<br />
Scan to FTP<br />
Upload scanned images to FTP<br />
server directly<br />
Programmed Scanning<br />
Remember destination and feature<br />
settings<br />
Features for Easier Copying<br />
Job Accounting<br />
Use department codes to manage<br />
total copy volume<br />
A B C<br />
Scan to PC<br />
Send scanned images to a computer<br />
as PDF or JPEG files<br />
TWAIN<br />
Import images using a<br />
TWAIN-compliant application<br />
Language<br />
Choose the language to display<br />
messages<br />
English<br />
Deutsch<br />
Send E-mail<br />
Send scanned images as e-mail<br />
Database Connection<br />
Send scanned images to a computer<br />
after adding text data<br />
v
Full optional equipment lineup... See Optional Equipment on page 4-1<br />
Document Processor Paper Feeder 3000 Sheet Paper Feeder<br />
Document Finisher 3000 Sheet Document Finisher (When equipped with a mailbox and<br />
folding unit)<br />
Job Separator Key Counter Fax Kit<br />
Memory Card (CompactFlash) Hard Disk Additional Memory<br />
Security Kit Network Interface Card Serial Interface<br />
Document Table<br />
vi
Legal and Safety Information<br />
Please read this information before using your machine. This chapter provides information on<br />
the following topics:<br />
• Legal Information...viii<br />
• Regarding Tradenames...ix<br />
• Energy Saving Control Function...x<br />
• Automatic 2-Sided Copy Function...x<br />
• Paper Recycling...x<br />
• Energy Star (ENERGY S<strong>TA</strong>R ® ) Program...x<br />
• Safety Conventions in This Guide...xi<br />
• <strong>Caution</strong> Labels...xii<br />
• Installation Precautions...xiii<br />
• Precautions for Use...xiv<br />
vii
Legal Information<br />
viii<br />
Notice The information in this guide is subject to change without notification. Additional pages may be<br />
inserted in future editions. The user is asked to excuse any technical inaccuracies or<br />
typographical errors in the present edition.<br />
No responsibility is assumed if accidents occur while the user is following the instructions in this<br />
guide. No responsibility is assumed for defects in the printer’s firmware (contents of its read-only<br />
memory).<br />
This guide, any copyrightable subject matter sold or provided with or in connection with the sale<br />
of the machine, are protected by copyright. All rights are reserved. Copying or other<br />
reproduction of all or part of this guide, any copyrightable subject matter without the prior written<br />
consent of <strong>TA</strong> <strong>Triumph</strong>-<strong>Adler</strong> is prohibited. Any copies made of all or part of this guide,<br />
any copyrightable subject must contain the same copyright notice as the material from which the<br />
copying is done.<br />
Legal Restriction On Copying<br />
• It may be prohibited to copy copyrighted material without permission of the copyright owner.<br />
• It is prohibited under any circumstances to copy domestic or foreign currencies.<br />
• Copying other items may be prohibited.
Regarding Tradenames<br />
• PRESCRIBE and ECOSYS are registered trademarks of Kyocera Corporation.<br />
• KPDL is trademark of Kyocera Corporation.<br />
• Windows and Windows Server are registered trademarks of Microsoft Corporation.<br />
• Windows NT is a trademark of Microsoft Corporation.<br />
• PCL and PJL are registered trademarks of Hewlett-Packard Company.<br />
• Adobe, Adobe Acrobat and Adobe Reader are registered trademarks of Adobe Systems<br />
Inc.<br />
• PowerPC is a trademark of International Business Machines Corporation.<br />
• CompactFlash is a trademark of SanDisk Corporation.<br />
All other brand and product names are registered trademarks or trademarks of their respective<br />
companies. The designations and ® will not be used in this Operation Guide.<br />
ix
Energy Saving Control Function<br />
x<br />
The device comes equipped with a Low Power Mode where printer and fax functions remain in a<br />
waiting state but energy consumption is still reduced after a certain amount of time elapses<br />
since the device was last used, as well as a Sleep Mode where printer and fax functions remain<br />
in a waiting state but power consumption is still reduced to a minimum when there is no activity<br />
with the device within a set amount of time.<br />
Low Power Mode<br />
The device automatically enters Low Power Mode when 7 minutes have passed since the<br />
device was last used. The amount of time of no activity that must pass before Low Power Mode<br />
is activated may be lengthened. For more information see Low-Power Mode on page 3-35.<br />
Sleep Mode<br />
The device automatically enters Sleep Mode when 29 minutes (25/25 ppm model) or 44 minutes<br />
(32/25, 32/32 and 40/35 ppm models) have passed since the device was last used. The amount<br />
of time of no activity that must pass before Sleep Mode is activated may be lengthened. For<br />
more information see Sleep Mode on page 3-36.<br />
Automatic 2-Sided Copy Function<br />
Paper Recycling<br />
The Energy Star Program encourages the use of 2-sided copying which reduces the load on the<br />
environment and this device includes 2-sided copying as a standard function. For example, by<br />
copying two 1-sided originals onto a single sheet of paper as a 2-sided copy, it is possible to<br />
lower the amount of paper used. For more information see Duplex Mode on page 3-11.<br />
The Energy Star Program encourages the use of recycled paper which reduces the load on the<br />
environment and this device supports recycled paper. Your sales or service representative can<br />
provide information about recommended paper types.<br />
Energy Star (ENERGY S<strong>TA</strong>R ® ) Program<br />
We have determined as a participating company in the International Energy Star Program that<br />
this product is compliant with the standards laid out in the International Energy Star Program.
Safety Conventions in This Guide<br />
Please read this Operation Guide before using the machine. Keep it close to the machine<br />
for easy reference.<br />
The sections of this guide and parts of the machine marked with symbols are safety warnings<br />
meant to protect the user, other individuals and surrounding objects, and ensure correct and<br />
safe usage of the machine. The symbols and their meanings are indicated below.<br />
Symbols<br />
The symbol indicates that the related section includes safety warnings. Specific points of<br />
attention are indicated inside the symbol.<br />
The symbol indicates that the related section includes information on prohibited actions.<br />
Specifics of the prohibited action are indicated inside the symbol.<br />
The symbol indicates that the related section includes information on actions which must be<br />
performed. Specifics of the required action are indicated inside the symbol.<br />
Please contact your service representative to order a replacement if the safety warnings in this<br />
Operation Guide are illegible or if the guide itself is missing. (fee required)<br />
Note<br />
WARNING: Indicates that serious injury or even death may result from<br />
insufficient attention to or incorrect compliance with the related points.<br />
CAUTION: Indicates that personal injury or mechanical damage may result from<br />
insufficient attention to or incorrect compliance with the related points.<br />
.... [General warning]<br />
.... [Warning of danger of electrical shock]<br />
.... [Warning of high temperature]<br />
.... [Warning of prohibited action]<br />
.... [Disassembly prohibited]<br />
.... [Alert of required action]<br />
.... [Remove the power plug from the outlet]<br />
.... [Always connect the machine to an outlet with a ground connection]<br />
An original which resembles a bank note closely may not be copied properly in some rare cases<br />
because this machine is equipped with a counterfeiting prevention function.<br />
xi
xii<br />
Label 1, 2<br />
<strong>Caution</strong> Labels<br />
High temperature inside. Do not<br />
touch parts in this area,<br />
because there is a danger of<br />
getting burned.<br />
<strong>Caution</strong> labels have been attached to the machine at the following locations for safety purposes.<br />
Be sufficiently careful to avoid fire or electric shock when removing a paper jam or when<br />
replacing toner.<br />
NOTE: Do not remove these labels.
Installation Precautions<br />
Environment<br />
<strong>Caution</strong><br />
Avoid placing the machine on or in locations which are unstable or not level. Such<br />
locations may cause the machine to fall down or fall over. This type of situation presents<br />
a danger of personal injury or damage to the machine.<br />
Avoid locations with humidity or dust and dirt. If dust or dirt become attached to the<br />
power plug, clean the plug to avoid the danger of fire or electrical shock.<br />
Avoid locations near radiators, heaters, or other heat sources, or locations near<br />
flammable items, to avoid the danger of fire.<br />
To keep the machine cool and facilitate changing of parts and maintenance, allow access<br />
space as shown below. Leave adequate space, especially around the rear cover, to allow<br />
air to be properly ventilated out of the machine.<br />
Other precautions<br />
19 11/16"<br />
50 cm<br />
3 15/16"<br />
10 cm<br />
39 3/8"<br />
100 cm<br />
11 13/16"<br />
30 cm<br />
The service environmental conditions are as follows:<br />
• Temperature: 50 to 90.5 °F (10 to 32.5 °C), but humidity should be 70 % or less when<br />
temperature is 90.5 °F (32.5 °C)<br />
• Humidity: 15 to 80 %, but temperature should be 86 °F or less (30 °C or less) when humidity<br />
is 80%<br />
However, adverse environmental conditions may affect the image quality. It is recommended to<br />
use the machine at a temperature: around 60.8 to 80.6 °F (16 to 27 °C), humidity: around 36 to<br />
65 %. In addition, avoid the following locations when selecting a site for the machine.<br />
• Avoid locations near a window or with exposure to direct sunlight.<br />
• Avoid locations with vibrations.<br />
• Avoid locations with drastic temperature fluctuations.<br />
• Avoid locations with direct exposure to hot or cold air.<br />
• Avoid poorly ventilated locations.<br />
xiii
xiv<br />
Small amounts of ozone and other chemicals are released during copying, but the quantities do<br />
not present any health risk to humans. If, however, the machine is used over a long period of<br />
time in a poorly ventilated room or when making an extremely large number of copies, the smell<br />
may become unpleasant. To maintain the appropriate environment for copy work, it is suggested<br />
that the room be properly ventilated.<br />
Do not install this machine beneath fluorescent lights. The original size may be detected<br />
incorrectly.<br />
Power supply/Grounding the machine<br />
Warning<br />
Do not use a power supply with a voltage other than that specified. Avoid multiple<br />
connections in the same outlet. These types of situations present a danger of fire or<br />
electrical shock.<br />
Plug the power cord securely into the outlet. If metallic objects come in contact with the<br />
prongs on the plug, it may cause a fire or electric shock.<br />
Always connect the machine to an outlet with a ground connection to avoid the danger of<br />
fire or electrical shock in case of an electric short. If an earth connection is not possible,<br />
contact your service representative.<br />
Other precautions<br />
Connect the power plug to the closest outlet possible to the machine.<br />
Handling of plastic bags<br />
Warning<br />
Keep the plastic bags that are used with the machine away from children. The plastic<br />
may cling to their nose and mouth causing suffocation.<br />
Precautions for Use<br />
<strong>Caution</strong>s when using the machine<br />
Warning<br />
Do not place metallic objects or containers with water (flower vases, flower pots, cups,<br />
etc.) on or near the machine. This of situation presents a danger of fire or electrical shock<br />
should they fall inside.<br />
Do not remove any of the covers from the machine as there is a danger of electrical<br />
shock from high voltage parts inside the machine.<br />
Do not damage, break or attempt to repair the power cord. Do not place heavy objects on<br />
the cord, pull it, bend it unnecessarily or cause any other type of damage. These types of<br />
situations present a danger of fire or electrical shock.<br />
Never attempt to repair or disassemble the machine or its parts as there is a danger of<br />
fire, electrical shock or damage to the laser. If the laser beam escapes, there is a danger<br />
of it causing blindness.<br />
If the machine becomes excessively hot, smoke appears from the machine, there is an<br />
odd smell, or any other abnormal situation occurs, there is a danger of fire or electrical<br />
shock. Turn the main power switch off ( position) immediately, be absolutely certain to<br />
remove the power plug from the outlet and then contact your service representative.
If anything harmful (paper clips, water, other fluids, etc.) falls into the machine, turn the<br />
main power switch off ( position) immediately. Next, be absolutely certain to remove the<br />
power plug from the outlet to avoid the danger of fire or electrical shock. Then contact<br />
your service representative.<br />
Do not remove or connect the power plug with wet hands, as there is a danger of<br />
electrical shock.<br />
Always contact your service representative for maintenance or repair of internal parts.<br />
<strong>Caution</strong><br />
Do not pull the power cord when removing it from the outlet. If the power cord is pulled,<br />
the wires may become broken and there is a danger of fire or electrical shock. (Always<br />
grasp the power plug when removing the power cord from the outlet.)<br />
Always remove the power plug from the outlet when moving the machine. If the power<br />
cord is damaged, there is a danger of fire or electrical shock.<br />
Always hold the designated parts only when lifting or moving the machine.<br />
For safety purposes, always remove the power plug from the outlet when performing<br />
cleaning operations.<br />
If dust accumulates within the machine, there is a danger of fire or other trouble. It is<br />
therefore recommended that you consult with your service representative in regard to<br />
cleaning of internal parts. This is particularly effective if accomplished prior to seasons of<br />
high humidity. Consult with your service representative in regard to the cost of cleaning the<br />
internal parts of the machine.<br />
Other precautions<br />
If the optional fax kit is installed, when the main power switch is off ( position), fax send/receive<br />
is disabled. To turn the power off, press the Power key on the operation panel.<br />
Do not place heavy objects on the machine or cause other damage to the machine.<br />
Do not open the front cover, turn off the main power switch, or pull out the power plug during<br />
copying.<br />
When lifting or moving the machine, contact your service representative.<br />
Do not touch electrical parts, such as connectors or printed circuit boards. They could be<br />
damaged by static electricity.<br />
Do not attempt to perform any operations not explained in this handbook.<br />
<strong>Caution</strong>: Use of controls or adjustments or performance of procedures other than those<br />
specified herein may result in hazardous radiation exposure.<br />
Do not look directly at the light from the scanning lamp as it may cause your eyes to feel tired or<br />
painful.<br />
This machine comes equipped with an HDD (hard disk). Do not attempt to move the machine<br />
while the power is still on; Since any resulting shock or vibration may cause damage to the hard<br />
disk, be sure to turn off the power before attempting to move the machine.<br />
Other precautions (for users in California, the United States)<br />
This product contains a CR Coin Lithium Battery which contains Perchlorate Material - special<br />
handling may apply. See www.dtsc.ca.gov/hazardouswaste/perchlorate.<br />
xv
xvi<br />
<strong>Caution</strong>s when handling consumables<br />
<strong>Caution</strong><br />
Do not attempt to incinerate the toner container or the waste toner box. Dangerous<br />
sparks may cause burns.<br />
Keep the toner container and the waste toner box out of the reach of children.<br />
If toner happens to spill from the toner container or the waste toner box, avoid inhalation<br />
and ingestion, as well as contact with your eyes and skin.<br />
• If you do happen to inhale toner, move to a place with fresh air and gargle thoroughly<br />
with a large amount of water. If coughing develops, contact a physician.<br />
• If you do happen to ingest toner, rinse your mouth out with water and drink 1 or 2 cups of<br />
water to dilute the contents of your stomach. If necessary, contact a physician.<br />
• If you do happen to get toner in your eyes, flush them thoroughly with water. If there is any<br />
remaining tenderness, contact a physician.<br />
• If toner does happen to get on your skin, wash with soap and water.<br />
Do not attempt to force open or destroy the toner container or the waste toner box.<br />
Other precautions<br />
After use, always dispose of the toner container and the waste toner box in accordance with<br />
Federal, State and Local rules and regulations.<br />
If the machine will not be used for an extended period of time, remove the paper from the<br />
cassette and the MP tray (multi-purpose tray), return it to its original package and reseal it.<br />
Don’t store the unit in a place exposed to:<br />
• Direct sunlight<br />
• High or rapidly variable temperature or humidity (limit: 104 °F or 40 °C)
Laser Safety (Europe)<br />
Laser radiation could be hazardous to the human body. For this reason, laser radiation emitted<br />
inside this machine is hermetically sealed within the protective housing and external cover. In<br />
the normal operation of the product by user, no radiation can leak from the machine.<br />
This machine is classified as Class 1 laser product under IEC 60825.<br />
<strong>Caution</strong>: Performance of procedures other than those specified in this manual may result in<br />
hazardous radiation exposure.<br />
These labels are attached to the laser scanner unit inside the machine and are not in a user<br />
access area.<br />
The label shown below is attached on the right side of the machine.<br />
xvii
Safety Instructions Regarding the Disconnection of Power<br />
xviii<br />
<strong>Caution</strong>: The power plug is the main isolation device! Other switches on the equipment are only<br />
functional switches and are not suitable for isolating the equipment from the power source.<br />
VORSICHT: Der Netzstecker ist die Hauptisoliervorrichtung! Die anderen Schalter auf dem<br />
Gerät sind nur Funktionsschalter und können nicht verwendet werden, um den Stromfluß im<br />
Gerät zu unterbrechen.<br />
Radio Frequency Transmitter<br />
Radio Tag Technology<br />
DECLARATION OF CONFORMITY<br />
TO<br />
89/336/EEC, 73/23/EEC, 93/68/EEC and 1995/5/EC<br />
We declare under our sole responsibility that the product to which this<br />
declaration relates is in conformity with the following specifications.<br />
EN55024<br />
EN55022 Class B<br />
EN61000-3-2<br />
EN61000-3-3<br />
EN60950<br />
EN60825-1<br />
EN300330-1<br />
EN300330-2<br />
This machine contains the transmitter module. We, the manufacturer hereby declare that this<br />
equipment is in compliance with the essential requirements and other relevant provisions of<br />
Directive 1999/5/EC.<br />
In some countries the radio tag technology used in this equipment to identify the toner container<br />
may be subject to authorization and the use of this equipment may consequently be restricted.
xix
Safety Instructions Regarding the Disconnection of Power<br />
xx<br />
<strong>Caution</strong>: The power plug is the main isolation device! Other switches on the equipment are only<br />
functional switches and are not suitable for isolating the equipment from the power source.<br />
Attention: Le débranchement de la fiche secteur est le seul moyen de mettre l’appareil hors<br />
tension. Les interrupteurs sur l’appareil ne sont que des interrupteurs de fonctionnement: ils ne<br />
mettent pas l’appareil hors tension.<br />
WARNING<br />
This equipment has been tested and found to comply with the limits for a Class B digital device, pursuant to<br />
Part 15 of the FCC Rules. These limits are designed to provide reasonable protection against harmful<br />
interference in a residential installation. This equipment generates, uses and can radiate radio frequency<br />
energy and, if not installed and used in accordance with the instructions, may cause harmful interference to<br />
radio communications. However, there is no guarantee that interference will not occur in a particular<br />
installation. If this equipment does cause harmful interference to radio or television reception, which can be<br />
determined by turning the equipment off and on, the user is encouraged to try to correct the interference by<br />
one or more of the following measures:<br />
• Reorient or relocate the receiving antenna.<br />
• Increase the separation between the equipment and receiver.<br />
• Connect the equipment into an outlet on a circuit different from that to which the receiver is connected.<br />
• Consult the dealer or an experienced radio/TV technician for help.<br />
• The use of a non-shielded interface cable with the referenced device is prohibited.<br />
CAUTION — The changes or modifications not expressly approved by the party responsible for compliance<br />
could void the user’s authority to operate the equipment.<br />
This device complies with Part 15 of FCC Rules and RSS-Gen of IC Rules.<br />
Operation is subject to the following two conditions; (1) this device may not cause interference, and (2) this<br />
device must accept any interference, including interference that may cause undesired operation of the device.<br />
* The above warning is valid only in the United States of America.<br />
Radio Tag Technology<br />
In some countries the radio tag technology used in this equipment to identify the toner container may be<br />
subject to authorization and the use of this equipment may consequently be restricted.<br />
MERCURY WARNING<br />
THE LAMP(S) INSIDE THIS PRODUCT CON<strong>TA</strong>IN MERCURY AND MUST BE RECYCLED OR<br />
DISPOSED OF ACCORDING TO LOCAL, S<strong>TA</strong>TE OR FEDERAL LAWS.
xxi
xxii
About this Operation Guide<br />
This Operation Guide contains the following chapters:<br />
1 Part Names<br />
Identifies machine parts and operation panel keys.<br />
2 Preparation for Usage<br />
Explains adding paper, placing original, connecting the machine, and necessary configurations<br />
before first use.<br />
3 Basic Operation<br />
Describes the procedures for basic copying, printing and scanning.<br />
4 Optional Equipment<br />
Introduces the convenient optional equipment available for this machine.<br />
5 Maintenance<br />
Describes cleaning and toner replacement.<br />
6 Troubleshooting<br />
Explains how to handle error messages, paper jams, and other problems.<br />
Appendix<br />
Lists the machine specifications.<br />
xxiii
Included Guides<br />
xxiv<br />
The following guides are included with this machine. Refer to the proper guide based on your<br />
requirements.<br />
Operation Guide (This Guide)<br />
Describes how to load paper, basic copy, print and scan operations, and troubleshooting.<br />
Advanced Operation Guide<br />
Explains copying, printing and scanning features in depth, as well as default settings. This guide<br />
is contained on the CD-ROM as a PDF file.<br />
Extended Driver User Guide<br />
Explains how to install and setup the printer driver. This guide is contained on the CD-ROM as a<br />
PDF file.<br />
PRESCRIBE Commands Command Reference<br />
Explains each command for realizing various features and controls through prescribed<br />
commands. This guide is contained on the CD-ROM as a PDF file.
Conventions in This Guide<br />
The following conventions are used depending on the nature of the description.<br />
Convention Description Example<br />
Bold Indicates a message or button<br />
displayed on the operation panel key or<br />
a computer screen.<br />
Press the Start key.<br />
[Regular] Indicates touch panel keys. Press [Basic].<br />
Italic Indicates touch panel messages. Ready to copy is displayed.<br />
Note Indicates supplemental information or<br />
operations for reference.<br />
NOTE: -<br />
Important Indicates items that are required or<br />
prohibited so as to avoid problems.<br />
IMPOR<strong>TA</strong>NT: -<br />
xxv
Originals and Paper Sizes<br />
xxvi<br />
This section explains the notation used in this guide when referring to sizes of originals or paper<br />
sizes.<br />
As in A4 and B5, which may be used either in the horizontal or vertical direction, in order to<br />
indicate the orientation of the original/paper, horizontal orientation is indicated by an additional R<br />
character.<br />
Set direction Indicated size †<br />
Vertical direction<br />
A4, B5, A5, B6, A6, 16K<br />
For original/paper, dimension A is longer than B.<br />
Horizontal direction<br />
B B<br />
A A<br />
A<br />
Original Size<br />
B B<br />
For original/paper, dimension A is shorter than B.<br />
A<br />
Original Size<br />
A4R, B5R, A5R, B6R, A6R,<br />
16KR<br />
† The size of original/paper that can be used depends on the function and source tray. For<br />
further details, refer to the page detailing that function or source tray.
Contents<br />
Legal and Safety Information ....................................................................................................................... vii<br />
About this Operation Guide ....................................................................................................................... xxiii<br />
1 Part Names .................................................................................................... 1-1<br />
Body ........................................................................................................................................ 1-2<br />
Operation Panel ...................................................................................................................... 1-4<br />
Touch Panel ............................................................................................................................ 1-5<br />
2 Preparation for Usage ................................................................................... 2-1<br />
Loading Paper ......................................................................................................................... 2-2<br />
Setting Paper Type and Size for the Cassettes and MP Tray ................................................. 2-7<br />
Placing Originals ................................................................................................................... 2-16<br />
Language .............................................................................................................................. 2-20<br />
Connecting Cables ................................................................................................................ 2-21<br />
Preparing the Printer ............................................................................................................. 2-22<br />
Preparing the Scanner .......................................................................................................... 2-31<br />
3 Basic Operation ............................................................................................ 3-1<br />
Basic Copying Procedures ...................................................................................................... 3-2<br />
Selecting Image Quality .......................................................................................................... 3-5<br />
Adjusting Exposure ................................................................................................................. 3-6<br />
Reducing/Enlarging ................................................................................................................. 3-7<br />
Duplex Mode ......................................................................................................................... 3-11<br />
Split Mode ............................................................................................................................. 3-14<br />
Sort Mode .............................................................................................................................. 3-16<br />
Interrupt Copy ....................................................................................................................... 3-17<br />
Job Reservation .................................................................................................................... 3-18<br />
Canceling a Print Job ............................................................................................................ 3-19<br />
Scanner Operation ................................................................................................................ 3-20<br />
Low-Power Mode .................................................................................................................. 3-35<br />
Sleep Mode ........................................................................................................................... 3-36<br />
4 Optional Equipment ...................................................................................... 4-1<br />
Overview of Optional Equipment ............................................................................................. 4-2<br />
Document Processor ............................................................................................................... 4-4<br />
Paper Feeder .......................................................................................................................... 4-4<br />
3000 Sheet Paper Feeder ....................................................................................................... 4-4<br />
Document Finisher .................................................................................................................. 4-5<br />
3000 Sheet Document Finisher ............................................................................................... 4-5<br />
Job Separator .......................................................................................................................... 4-5<br />
Key Counter ............................................................................................................................ 4-6<br />
Fax Kit ..................................................................................................................................... 4-6<br />
Memory Card (CompactFlash) ............................................................................................... 4-6<br />
Hard Disk ............................................................................................................................... 4-7<br />
Additional Memory .................................................................................................................. 4-7<br />
Security Kit .............................................................................................................................. 4-7<br />
Network Interface Card ........................................................................................................... 4-8<br />
Serial Interface ........................................................................................................................ 4-8<br />
Document Table ...................................................................................................................... 4-8<br />
5 Maintenance .................................................................................................. 5-1<br />
Cleaning .................................................................................................................................. 5-2<br />
Toner Container and Waste Toner Box Replacement ............................................................. 5-5<br />
xxvii
6 Troubleshooting ............................................................................................ 6-1<br />
Solving Malfunctions ............................................................................................................... 6-2<br />
Responding to Error Messages .............................................................................................. 6-4<br />
Clearing Paper Jams ............................................................................................................ 6-15<br />
Appendix .................................................................................................... Appendix-1<br />
xxviii<br />
Specifications ............................................................................................................ Appendix-2<br />
Index .................................................................................................................. Index-1
1 Part Names<br />
This chapter identifies machine parts and operation panel keys.<br />
• Body...1-2<br />
• Operation Panel...1-4<br />
• Touch Panel...1-5<br />
1-1
Part Names<br />
Body<br />
1<br />
2<br />
3<br />
4<br />
11<br />
12<br />
8<br />
1-2<br />
1 Original Platen (Option)<br />
2 Platen<br />
3 Original Size Indicator Plates<br />
4 Operation Panel<br />
5 MP Tray (multi-purpose tray)<br />
6 Slider<br />
7 MP Tray Extension<br />
8 Cassette 1<br />
9 Cassette 2<br />
10 Paper Length Guide<br />
11 Paper Width Guide<br />
12 Paper Width Adjusting Tab<br />
13 Interface Cover<br />
14 Network Interface Connector (Printer)<br />
15 USB Interface Connector<br />
16 Parallel Port Interface Connector<br />
17 Memory Card (CompactFlash) Slot<br />
18 Network Interface Connector (Scanner)<br />
19 Main Power Switch<br />
20 Main Power Switch Cover<br />
9<br />
10<br />
14 15 17 16 18<br />
13<br />
5<br />
7<br />
6<br />
19 20
22<br />
23<br />
31<br />
21 Output Tray<br />
22 Left Cover 1<br />
23 Left Cover 2<br />
24 Front Cover<br />
25 Toner Container (Black)<br />
26 Toner Container (Yellow)<br />
27 Toner Container (Cyan)<br />
28 Toner Container (Magenta)<br />
29 Toner Container Lock Lever<br />
30 Waste Toner Box<br />
31 Carrying Handles<br />
21<br />
25<br />
26<br />
27<br />
28<br />
30<br />
29<br />
24<br />
Part Names<br />
1-3
Part Names<br />
Operation Panel<br />
1-4<br />
2<br />
3<br />
4<br />
5<br />
1 6<br />
10 11 12 13 14 15 16 17 18 19<br />
Basic<br />
1 Brightness Adjustment Dial<br />
2 Copier Key (Indicator/Lamp)<br />
3 Printer Key (Indicator/Lamp)<br />
4 Scanner Key (Indicator/Lamp)<br />
5 Fax Key (Indicator/Lamp)<br />
6 System Menu/Counter Key<br />
7 Auto Color Key<br />
8 Full-Color Key<br />
9 Black&White Key<br />
10 Document Management Key/Indicator<br />
11 Print Management Key/Indicator<br />
12 Repeat Copy Key/Indicator<br />
13 Job Build Key/Indicator<br />
14 Auto Selection Key/Indicator<br />
15 Job Accounting Key<br />
16 Interrupt Key/Indicator<br />
17 Energy Saver Key/Indicator<br />
18 Power Key/Indicator<br />
19 Main Power Indicator<br />
20 Touch Panel<br />
21 Numeric Keys<br />
22 Reset Key<br />
11×8½"<br />
Plain<br />
11×17"<br />
Color<br />
11×8½"<br />
Plain<br />
11×8½"<br />
Plain<br />
23 Stop/Clear Key<br />
MP tray<br />
Plain<br />
User choice<br />
24 Start Key/Indicator<br />
Ready to copy. ( Full-Color )<br />
APS Auto %<br />
100%<br />
Reduce<br />
Exposure<br />
/Enlarge Mode<br />
Function<br />
Auto<br />
Exposure<br />
Color func.<br />
9 8 7<br />
20<br />
Paper Size Set<br />
11×8½"<br />
100%<br />
Staple Off<br />
Staple<br />
Left Top<br />
Staple<br />
Program<br />
Combine<br />
Margin/<br />
Centering<br />
Sheet<br />
Erase<br />
21<br />
22<br />
23<br />
24
Touch Panel<br />
Copy Screen<br />
Displayed by pressing the Copier key. Screen changes when 1, 2, 3, 4, and 5 are pressed.<br />
1 [Basic] screen<br />
11×8½"<br />
Plain<br />
11×17"<br />
Color<br />
11×8½"<br />
Plain<br />
11×8½"<br />
Plain<br />
Basic<br />
2 [User choice] screen<br />
3 [Function] screen<br />
4 [Color func.] ([Colour<br />
func.]) screen<br />
Ready to copy. ( Full-Color )<br />
APS Auto %<br />
MP tray<br />
Plain<br />
User choice<br />
100%<br />
Reduce<br />
Exposure<br />
/Enlarge Mode<br />
Function<br />
Auto<br />
Exposure<br />
Color func.<br />
1 2 3 4 5<br />
Paper Size Set<br />
11×8½"<br />
100%<br />
Staple Off<br />
Staple<br />
Left Top<br />
Staple<br />
Program<br />
Combine<br />
Margin/<br />
Centering<br />
Sheet<br />
Erase<br />
Ready to copy. (Full-Color)<br />
11×8½"<br />
2 sided/ Orig.Image Sort/<br />
Margin/ Border<br />
Separation Quality Offset<br />
Centering Erase<br />
Combine<br />
Basic<br />
Page #<br />
User choice<br />
Select<br />
2 sided/<br />
Paper Separation<br />
Exposure Reduce<br />
Mode /Enlarge<br />
Orig.Image<br />
Quality<br />
Sort/<br />
Offset<br />
Ready to copy.<br />
Basic<br />
Margin/<br />
Centering<br />
Border<br />
Erase<br />
User choice<br />
Ready to copy.<br />
Mono Background<br />
color exp. adj.<br />
Basic<br />
User choice<br />
Booklet<br />
Function<br />
(Full-Color)<br />
Select<br />
Orig.Size<br />
Auto<br />
Selection<br />
Page #<br />
Cover<br />
Mode<br />
Function<br />
Cover<br />
Mode<br />
(Full-Color)<br />
Color func.<br />
Combine<br />
Batch<br />
Scanning<br />
Booklet<br />
Color func.<br />
Color<br />
Adjust Hue<br />
One touch Color/B&W<br />
balance image<br />
selection<br />
Function<br />
Select<br />
Orig.Size<br />
Part Names<br />
Paper Size Set<br />
Program<br />
100%<br />
Paper Size Set<br />
11×8½"<br />
100%<br />
Up<br />
Poster Down<br />
Color func.<br />
Program<br />
Paper Size Set<br />
11×8½"<br />
100%<br />
Program<br />
Combine<br />
Margin/<br />
Centering<br />
Sheet<br />
Erase<br />
Combine<br />
Margin/<br />
Centering<br />
Sheet<br />
Erase<br />
Combine<br />
Margin/<br />
Centering<br />
Sheet<br />
Erase<br />
1-5
Part Names<br />
Printer Screen<br />
Scanner Screen<br />
1-6<br />
5 [Program] screen<br />
Displayed by pressing the<br />
Printer key.<br />
Displayed by pressing the<br />
Scanner key.<br />
Ready to copy.<br />
Recall<br />
abc<br />
list a<br />
list b<br />
list c<br />
Basic<br />
Printer<br />
Menu<br />
Send<br />
E-mail<br />
User choice<br />
Ready to print.<br />
list d<br />
file 1<br />
file 2<br />
Function<br />
Select scanner function.<br />
Database<br />
Connection<br />
Scan to PC TWAIN<br />
Scan to<br />
FTP<br />
( Full-Color )<br />
Color func.<br />
Cancel<br />
Recall Program<br />
Paper Size Set<br />
11×8½"<br />
100%<br />
Reg./Delete<br />
Register<br />
Delete<br />
Change<br />
Name<br />
Program<br />
GO<br />
08/08/’05 14:00<br />
Combine<br />
Margin/<br />
Centering<br />
Sheet<br />
Erase<br />
Edit<br />
Addr. Book<br />
Change<br />
User Info.<br />
History<br />
of Sending
2 Preparation for Usage<br />
This chapter explains the preparations required before using the machine.<br />
• Loading Paper...2-2<br />
• Setting Paper Type and Size for the Cassettes and MP Tray...2-7<br />
• Placing Originals...2-16<br />
• Language...2-20<br />
• Connecting Cables...2-21<br />
• Preparing the Printer...2-22<br />
• Preparing the Scanner...2-31<br />
2-1
Preparation for Usage<br />
Loading Paper<br />
Before Loading Paper<br />
Loading Paper into Cassette 1, 2<br />
2-2<br />
Load paper in the 2 cassettes, the MP tray, and/or the optional paper feeder or 3000 sheet paper<br />
feeder.<br />
When you open a new package of paper, fan through the sheets to separate them slightly prior to<br />
loading as described below.<br />
1 Bend the stack of paper so that the<br />
middle of the paper lifts upwards.<br />
2 Gripping both ends of the paper, push<br />
inward to cause the stack of paper to<br />
fluff up.<br />
3 Introduce air into the stack of paper by<br />
alternately raising and lowering your left<br />
and right hands.<br />
4 Finally, align the edges of the paper<br />
using a flat surface such as a<br />
countertop.<br />
If the paper is curled or folded, straighten it before loading. Overloading may cause paper jams.<br />
IMPOR<strong>TA</strong>NT: If you copy onto used paper (paper already used for copying), do not use paper that<br />
is stapled or clipped together. This may damage the machine or cause poor image quality.<br />
If output paper curls or does not line up properly, try<br />
flipping over the paper loaded into the cassette.<br />
Avoid exposing opened paper to high temperatures<br />
and high humidity as dampness may cause copying<br />
problems. Seal any remaining paper after loading the<br />
MP tray or a cassette in its original package. If the<br />
machine will not be used for a prolonged period,<br />
protect all paper from humidity by removing from the<br />
cassettes and sealing in the original package.<br />
Cassettes 1 and 2 support standard, recycled, and colored paper. 500 sheets of standard paper less<br />
than 11 × 8 1/2" or A4 in size (80 g/m 2 ), or 250 sheets of standard paper greater than 8 1/2 ×14" or B4<br />
size (80 g/m 2 ) may be loaded into Cassette 1. 500 sheets of standard paper (80 g/m 2 ) may be<br />
loaded into Cassette 2.<br />
Supported paper sizes are 11 × 17", 8 1/2 ×14", 11×81/2", 8 1/2 ×11", 51/2 ×81/2", 8 1/2 ×13",<br />
8 1/2 ×131/2", A3, B4, A4, A4R, B5, B5R, A5R, Folio, 8K, 16K and 16KR.<br />
Load paper into the optional paper feeder (Cassettes 3 and 4) in the same manner.<br />
IMPOR<strong>TA</strong>NT: When making color copies, use special color paper for best results.<br />
Do not use inkjet printer paper or paper with special surface coatings. (They may cause a failure,<br />
such as a paper jam.)<br />
After loading paper, be sure to specify the type and size of the paper loaded in the cassettes on the<br />
operation panel. For further details, refer to Specifying Paper Size on page 2-7 and Specifying the<br />
Paper Type on page 2-8.
1 Pull the cassette out toward you until it stops.<br />
2 Adjust the paper length guide to fit the paper size.<br />
NOTE: Paper sizes are marked on the cassette.<br />
3 Holding the paper width adjusting tab both ends, move<br />
the paper width guide to fit the paper.<br />
NOTE: Paper sizes are marked on the cassette.<br />
When loading paper smaller than 11 × 8 1/2" or A4 into<br />
Cassette 1, raise the support lever as shown in the<br />
illustration.<br />
4 Align the paper flush against the left side of the<br />
cassette as you load it.<br />
Preparation for Usage<br />
2-3
Preparation for Usage<br />
2-4<br />
IMPOR<strong>TA</strong>NT: Verify that the paper is pressed snugly<br />
against the vertical and horizontal size guides. If a gap<br />
is present, reset the width guide or length guide.<br />
Overloading may cause paper jams.<br />
Before loading the paper, be sure that it is not curled<br />
or folded. Overloading may cause paper jams.<br />
Ensure that the loaded paper does not exceed the<br />
level indicated. Overloading may cause paper jams.<br />
5 Insert the appropriate paper size card in the slot to<br />
indicate the size of the loaded paper.<br />
6 Gently push the cassette back in all the way.<br />
Loading Paper into 3000 Sheet Paper Feeder<br />
3000 sheets of 11 × 8 1/2" or A4 paper (80 g/m 2 ) may be loaded into the optional 3000 sheet paper<br />
feeder (Cassette 3).<br />
IMPOR<strong>TA</strong>NT: When making color copies, use special color paper for best results.<br />
Do not use inkjet printer paper or paper with special surface coatings. (They may cause a failure,<br />
such as a paper jam.)<br />
Specify the type of paper loaded in the 3000 paper feeder. Refer to Specifying the Paper Type on<br />
page 2-8 for details.<br />
1 Pull the cassette out toward you until it stops.<br />
2 Align the paper to the center of the cassette as you<br />
load it.
NOTE: Before loading the paper, be sure that it is not<br />
curled or folded. Curled or folded paper may cause<br />
paper jams.<br />
Ensure that the loaded paper does not exceed the<br />
level indicated.<br />
3 Gently push the cassette back in all the way.<br />
Loading Paper in the MP Tray<br />
Preparation for Usage<br />
In addition to standard and recycled paper, special paper (60 - 220 g/m 2 ) may be loaded. 100 sheets<br />
of 11 × 8 1/2" or A4 or smaller size paper (80 g/m 2 ) or 50 sheets of 8 1/2 × 14" or B4 or larger paper<br />
(80 g/m 2 ) may be loaded.<br />
Paper sizes 11 × 17" - 5 1/2 ×81/2", A3 - A6R, 8K, 16K, and 16KR can be loaded.<br />
The capacity of the MP tray is as follows.<br />
Paper types Capacity<br />
Standard paper (80 g/m2 ), recycled paper,<br />
colored paper<br />
Standard paper (120 g/m2 , 160 g/m2 , 200 g/m2 )<br />
or transparencies<br />
IMPOR<strong>TA</strong>NT: When making color copies, use special color paper for best results.<br />
Do not use inkjet printer paper or paper with special surface coatings. (They may cause a failure,<br />
such as a paper jam.)<br />
After loading paper, be sure to specify the type and size of the paper loaded in the MP tray on the<br />
operation panel. For further details, refer to Specifying the Paper Size to the MP Tray on page 2-10<br />
and Specifying the Paper Type to the MP Tray on page 2-15.<br />
1 Open the MP tray.<br />
When loading paper larger than 8 1/2 × 11" or A4R, pull<br />
out the MP tray extension.<br />
11 × 8 1/2" or A4 or smaller: 100 sheets,<br />
8 1/2 × 14"or B4 or larger: 50 sheets<br />
10 sheets<br />
2-5
Preparation for Usage<br />
2-6<br />
2 Adjust the sliders to fit the width of the paper.<br />
3 Insert the paper along the sliders into the tray until it<br />
stops.<br />
Ensure that the sliders are flush against the edges of<br />
the paper.<br />
IMPOR<strong>TA</strong>NT: Before loading postcards and other<br />
types of thick paper that may be curled, straighten out<br />
the paper. The paper may not be fed depending on the<br />
paper quality.<br />
To print on both the front and back side of the post<br />
card, be sure to print the back side before printing the<br />
address side.<br />
Only load paper into the MP tray when it is in use.<br />
Avoid leaving paper in the MP tray.<br />
Ensure that the loaded paper does not exceed the<br />
level indicated. Overloading may cause paper jams.<br />
When loading envelopes, place with the envelope flap<br />
closed and keep the printing side face-up. Insert<br />
envelopes against the guide with the flap on the front<br />
or left side until they stop.
Setting Paper Type and Size for the Cassettes and MP Tray<br />
Specifying Paper Size<br />
Preparation for Usage<br />
When loading paper into Cassette 1 and 2 and the optional paper feeders (Cassette 3 and 4), set<br />
the paper size and type. Refer to Specifying Paper Size and Specifying the Paper Type on page 2-8<br />
below.<br />
When loading paper into the optional 3000 sheet paper feeder (Cassette 3), set the paper type.<br />
Refer to Specifying the Paper Type on page 2-8.<br />
After loading paper in the MP tray, specify both the paper type and size. Refer to Specifying the<br />
Paper Size to the MP Tray on page 2-10 and Specifying the Paper Type to the MP Tray on<br />
page 2-15.<br />
When loading paper into Cassette 1 and 2 and the optional paper feeders (Cassette 3 and 4), set<br />
the paper size. To automatically detect the paper size, set to [Auto Detection] and select either<br />
[Centimeter] or [Inch] units.<br />
The following paper sizes are available.<br />
11 × 17", 8 1/2 ×14", 11×81/2", 8 1/2 ×11", 51/2 ×81/2", 8 1/2 ×131/2", 8 1/2 × 13" (Oficio 2), A3, B4,<br />
A4, A4R, B5, B5R, A5R, Folio, 8K, 16K, 16KR<br />
1 Press the System Menu/Counter key.<br />
2 Press the [Machine Default] key.<br />
System Menu / Counter<br />
System Menu<br />
3 Use the numeric keys to enter the 4 digit management code. The default setting is 2500 for the<br />
25/25 ppm model, 3200 for the 32/25 and 32/32 ppm models and 4000 for the 40/35 ppm model.<br />
Copy<br />
Default<br />
Scanner<br />
Default<br />
Machine<br />
Default<br />
Printer<br />
Default<br />
Document<br />
Management<br />
Language<br />
MP tray<br />
Setting<br />
Register<br />
Orig. Size<br />
Job<br />
Accounting<br />
BOX<br />
Management<br />
If the correct management code has been entered, the Machine Default screen will be displayed.<br />
NOTE: If the optional security kit has been installed, the management code is 8 digits long. The<br />
default setting is 25002500 for the 25/25 ppm model, 32003200 for the 32/25 and 32/32 ppm<br />
models and 40004000 for the 40/35 ppm model.<br />
Print<br />
Report<br />
2-7<br />
A
Preparation for Usage<br />
2-8<br />
4 Press [] or [], select the cassette you<br />
wish to set the paper size from Paper<br />
size (1st cassette) - Paper size (4th<br />
cassette) and press [Change #].<br />
NOTE: 3rd cassette and 4th cassette are shown when the optional paper feeder or 3000 sheet<br />
paper feeder have been installed.<br />
5 If [Auto Detection] is selected, choose<br />
the unit type. If [Standard sizes] is<br />
selected, choose the paper size.<br />
Press [Close].<br />
6 Press [Close].<br />
Specifying the Paper Type<br />
7 Press [End]. The display returns to the [Basic] screen.<br />
When loading paper into Cassette 1 and 2 or the optional paper feeder (Cassette 3 and 4) or the<br />
3000 sheet paper feeder (Cassette 3), set the paper size.<br />
The following paper types are available.<br />
Plain, Rough, Vellum, Recycled, Preprinted, Bond, Color (Colour), Prepunched, Letterhead, High<br />
Quality, Custom 1 - 8<br />
1 Press the System Menu/Counter key.<br />
System Menu / Counter<br />
Machine Default<br />
Default menu<br />
Auto cassette switching<br />
Paper size (1st cassette)<br />
Paper size (2nd cassette)<br />
Paper size (3rd cassette)<br />
Paper size (4th cassette)<br />
System Menu<br />
Paper size (1st cassette)<br />
Auto<br />
Detection<br />
Standard<br />
sizes<br />
Select paper size.<br />
A3 B4<br />
Setting mode<br />
On / All types of paper<br />
Auto/Inch<br />
Auto/Inch<br />
Auto/Inch<br />
Auto/Inch<br />
Key Description<br />
[Close] Keeps the settings and returns to the previous page.<br />
[Back] Cancels settings and returns to the previous page.<br />
A4<br />
A4<br />
A5<br />
System Menu - Machine Default<br />
B5<br />
B5<br />
Folio<br />
5½×8½"<br />
8½×13½"<br />
8½×13"<br />
8K<br />
Back<br />
16K<br />
16K<br />
Change #<br />
Close
2 Press [Machine Default].<br />
Preparation for Usage<br />
3 Use the numeric keys to enter the 4 digit management code. The default setting is 2500 for the<br />
25/25 ppm model, 3200 for the 32/25 and 32/32 ppm models and 4000 for the 40/35 ppm model.<br />
If the correct management code has been entered, the Machine Default screen will be displayed.<br />
NOTE: If the optional security kit has been installed, the management code is 8 digits long. The<br />
default setting is 25002500 for the 25/25 ppm model, 32003200 for the 32/25 and 32/32 ppm<br />
models and 40004000 for the 40/35 ppm model.<br />
4 Press [] or [], select the cassette you<br />
wish to set the paper type from Paper<br />
type (1st cassette) - Paper type (4th<br />
cassette) and press [Change #].<br />
NOTE: 3rd cassette and 4th cassette are shown when the optional paper feeder or 3000 sheet<br />
paper feeder have been installed.<br />
5 Select the paper type and press [Close].<br />
6 Press [Close].<br />
7 Press [End]. The display returns to the [Basic] screen.<br />
System Menu / Counter<br />
System Menu<br />
Copy<br />
Default<br />
Scanner<br />
Default<br />
Machine<br />
Default<br />
Printer<br />
Default<br />
Document<br />
Management<br />
System Menu / Counter<br />
Machine Default<br />
System Menu<br />
Default menu<br />
Paper type (1st cassette)<br />
Paper type (2nd cassette)<br />
Paper type (3rd cassette)<br />
Paper type (4th cassette)<br />
Store Paper Size for MPT<br />
Paper type (1st cassette)<br />
Select and display paper type.<br />
Plain<br />
Rough<br />
Vellum<br />
System Menu<br />
Preprinted<br />
- Machine Default<br />
Plain<br />
Color<br />
Plain<br />
Plain<br />
Language<br />
MP tray<br />
Setting<br />
Register<br />
Orig. Size<br />
Setting mode<br />
Job<br />
Accounting<br />
BOX<br />
Management<br />
Print<br />
Report<br />
Change #<br />
Back<br />
Custom 1 Custom<br />
Recycled Color Custom 2 Custom<br />
Prepunched<br />
Bond Letterhead High<br />
Quality<br />
Custom 3 Custom<br />
Custom 4 Custom<br />
2-9<br />
A
Preparation for Usage<br />
Specifying the Paper Size to the MP Tray<br />
2-10<br />
Specify the paper size when using the MP tray.<br />
The following paper sizes are available.<br />
Setting method Unit Paper size<br />
Auto Detect Inch 11 × 17", 8 1/2 ×14", 11×81/2", 8 1/2 ×11", 51/2 ×81/2"<br />
Centimeter A3, B4, A4, A4R, B5, B5R, A5R, B6R, A6R<br />
Other Standard Sizes ISO B5, Envelope DL, Envelope C5, Envelope C4, Comm. #10,<br />
Comm. #9, Comm. #6-3/4, Monarch, Executive, OUFUKU<br />
HAGAKI (return postcard), YOUKEI 2, YOUKEI 4, 8 1/2 ×131/2",<br />
8 1/2 × 13" (Oficio 2), 8K, 16K, 16KR<br />
Input Size Inch models<br />
Height: 3 7/8 - 11 5/8" (1/8" increments)<br />
Width: 5 7/8 - 17" (1/8" increments)<br />
Auto Detect<br />
The paper size is automatically detected. Select between [Centimeter] ([Centimetre]) and [Inch]<br />
measurement units.<br />
1 Press the System Menu/Counter key.<br />
2 Press [MP tray Setting].<br />
Metric models<br />
Height: 98 - 297 mm (1 mm increments)<br />
Width: 148 - 432 mm (1 mm increments)<br />
Custom Size Pre-assigned paper size 1-4<br />
Assignable paper sizes<br />
Inch models<br />
Height: 3 7/8 - 11 5/8" (1/8" increments)<br />
Width: 5 7/8 - 17" (1/8" increments)<br />
Metric models<br />
Height: 98 - 297 mm (1 mm increments)<br />
Width: 148 - 432 mm (1 mm increments)<br />
System Menu / Counter<br />
System Menu<br />
Copy<br />
Default<br />
Scanner<br />
Default<br />
Machine<br />
Default<br />
Printer<br />
Default<br />
Document<br />
Management<br />
Language<br />
MP tray<br />
Setting<br />
Register<br />
Orig. Size<br />
Job<br />
Accounting<br />
BOX<br />
Management<br />
Print<br />
Report<br />
A
3 Press [Auto Detection].<br />
4 Select [Centimeter] ([Centimetre]) or [Inch].<br />
5 Press [Close]. The display returns to the [Basic] screen.<br />
Other Standard Sizes<br />
Specify special standard sizes.<br />
1 Press the System Menu/Counter key.<br />
2 Press [MP tray Setting].<br />
3 Press [Others Standard] and press<br />
[Select size].<br />
4 Select the paper size.<br />
5 Press [Close].<br />
System Menu / Counter<br />
MP tray Setting<br />
Auto<br />
Detection<br />
Input size<br />
Others<br />
Standard<br />
Preparation for Usage<br />
Back<br />
Paper Size Unit<br />
Paper Type<br />
Centimeter<br />
Inch<br />
System Menu / Counter<br />
System Menu<br />
Copy<br />
Default<br />
Scanner<br />
Default<br />
Machine<br />
Default<br />
Printer<br />
Default<br />
Document<br />
Management<br />
System Menu / Counter<br />
MP tray Setting<br />
Auto<br />
EX<br />
Select<br />
Detection size<br />
Input size<br />
Others<br />
Standard<br />
Language<br />
MP tray<br />
Setting<br />
Register<br />
Orig. Size<br />
Plain<br />
Job<br />
Accounting<br />
BOX<br />
Management<br />
Print<br />
Report<br />
Back<br />
Paper Size Paper Type<br />
System Menu / Counter<br />
Select size<br />
ISO B5 Comm.#10 EX<br />
Envelope<br />
DL<br />
Envelope<br />
C5<br />
Envelope<br />
C4<br />
Comm.#9<br />
Comm.<br />
#6-3/4<br />
OUFUKU<br />
HAGAKI<br />
YOUKEI 2<br />
MO YOUKEI 4<br />
8½×13½"<br />
8½×13"<br />
8K<br />
16K<br />
16K<br />
Plain<br />
Back<br />
Cust<br />
1111/1<br />
1111/1<br />
1111/1<br />
2-11<br />
A<br />
1111/1
Preparation for Usage<br />
2-12<br />
6 Press [Close]. The display returns to the [Basic] screen.<br />
Input Size<br />
Specify the required paper size.<br />
1 Press the System Menu/Counter key.<br />
2 Press [MP tray Setting].<br />
3 Press [Input size].<br />
4 Press [+] and [–] to set the Y (height) and X (width) sizes.<br />
With the metric models, you may enter the size directly using the numeric keys by pressing<br />
[#-Keys].<br />
5 Press [Close]. The display returns to the [Basic] screen.<br />
System Menu / Counter<br />
System Menu<br />
Copy<br />
Default<br />
Scanner<br />
Default<br />
Machine<br />
Default<br />
Printer<br />
Default<br />
Document<br />
Management<br />
System Menu / Counter<br />
MP tray Setting<br />
Auto<br />
Detection<br />
Input size<br />
Others<br />
Standard<br />
Y<br />
Language<br />
MP tray<br />
Setting<br />
Register<br />
Orig. Size<br />
.1111/16 " X .169/16 "<br />
Job<br />
Accounting<br />
BOX<br />
Management<br />
Print<br />
Report<br />
Back<br />
Paper Size (37/8~115/8)<br />
(57/8~17)<br />
Paper Type<br />
Plain<br />
A
Custom Size<br />
Preparation for Usage<br />
Store frequently used paper sizes as custom sizes. Also, the paper type can be set for each custom<br />
size.<br />
Assignment Method<br />
1 Press the System Menu/Counter key.<br />
2 Press [Machine Default].<br />
3 Use the numeric keys to enter the 4 digit management code. The default setting is 2500 for the<br />
25/25 ppm model, 3200 for the 32/25 and 32/32 ppm models and 4000 for the 40/35 ppm model.<br />
If the correct management code has been entered, the Machine Default screen will be displayed.<br />
NOTE: If the optional security kit has been installed, the management code is 8 digits long. The<br />
default setting is 25002500 for the 25/25 ppm model, 32003200 for the 32/25 and 32/32 ppm<br />
models and 40004000 for the 40/35 ppm model.<br />
4 Press [] or [] to select Store Paper<br />
Size for MPT, and press [Change #].<br />
5 Press [] or [], select the number to<br />
register from Paper size (User reg. 1 - 4)<br />
and press [Change #].<br />
System Menu / Counter<br />
System Menu<br />
Copy<br />
Default<br />
Scanner<br />
Default<br />
Machine<br />
Default<br />
Printer<br />
Default<br />
Document<br />
Management<br />
System Menu / Counter<br />
Machine Default<br />
Paper type (1st cassette)<br />
Paper type (2nd cassette)<br />
Paper type (3rd cassette)<br />
Paper type (4th cassette)<br />
Store Paper Size for MPT<br />
System Menu<br />
Default menu<br />
Store Paper Size for MPT<br />
Stores Paper Size for MP Tray<br />
Default menu<br />
Paper size (User reg. 1)<br />
Paper size (User reg. 2)<br />
Paper size (User reg. 3)<br />
Paper size (User reg. 4)<br />
System Menu - Machine Default<br />
Plain<br />
Color<br />
Plain<br />
Plain<br />
Language<br />
MP tray<br />
Setting<br />
Register<br />
Orig. Size<br />
Setting mode<br />
Setting mode<br />
1111/16×169/16"<br />
1111/16×169/16"<br />
1111/16×169/16"<br />
1111/16×169/16"<br />
Job<br />
Accounting<br />
BOX<br />
Management<br />
Print<br />
Report<br />
Change #<br />
Change #<br />
2-13<br />
A
Preparation for Usage<br />
2-14<br />
6 Press [On] and press [+] or [–] to set the<br />
Y (Length) and X (Width) sizes.<br />
With the metric models, you may enter<br />
the size directly using the numeric keys<br />
by pressing [#-Keys].<br />
To specify a paper type, press [Select<br />
Paper Type]. Select the paper type and<br />
press [Close].<br />
7 Press [Close].<br />
8 Press [Close].<br />
9 Press [End]. The display returns to the [Basic] screen.<br />
Setting Method<br />
1 Press the System Menu/Counter key.<br />
2 Press [MP tray Setting].<br />
3 Press [Others Standard] and press<br />
[Select size].<br />
4 Select the paper size from Custom Size<br />
(Use regist).<br />
5 Press [Close].<br />
Paper size (User reg. 1)<br />
Stores Paper Size for MP Tray<br />
Color/B&W selection (37/8~115/8) (57/8~17)<br />
Y 1111/16 " X .169/16 "<br />
Off<br />
On<br />
System Menu - Machine Default - Store Paper Size for MPT<br />
System Menu / Counter<br />
System Menu<br />
Copy<br />
Default<br />
Scanner<br />
Default<br />
Machine<br />
Default<br />
Printer<br />
Default<br />
Document<br />
Management<br />
System Menu / Counter<br />
MP tray Setting<br />
Auto<br />
EX<br />
Select<br />
Detection size<br />
Input size<br />
Others<br />
Standard<br />
Language<br />
MP tray<br />
Setting<br />
Register<br />
Orig. Size<br />
Back<br />
100%<br />
Paper Type<br />
Plain<br />
Job<br />
Accounting<br />
BOX<br />
Management<br />
Print<br />
Report<br />
Back<br />
Paper Size Paper Type<br />
m Menu / Counter<br />
e<br />
e<br />
e<br />
Comm.#10 EX<br />
Comm.#9<br />
Comm.<br />
#6-3/4<br />
OUFUKU<br />
HAGAKI<br />
YOUKEI 2<br />
MO YOUKEI 4<br />
8½×13½"<br />
8½×13"<br />
8K<br />
16K<br />
16K<br />
Back<br />
Plain<br />
Close<br />
Custom Size<br />
1111/16×169/ 16"<br />
1111/16×169/ 16"<br />
1111/16×169/ 16"<br />
1111/16×169/ 16"<br />
A
6 Press [Close]. The display returns to the [Basic] screen.<br />
Specifying the Paper Type to the MP Tray<br />
Set the paper type when using the MP tray.<br />
The following paper types are available.<br />
Preparation for Usage<br />
Plain, Transparency, Rough, Vellum, Labels, Recycled, Preprinted, Bond, Cardstock, Color<br />
(Colour), Prepunched, Letterhead, Thick paper, Envelope, Coated, High Quality, Custom 1 - 8<br />
NOTE: Paper type cannot be changed for MP tray paper size when a Custom size has been<br />
selected that has already set the paper type.<br />
1 Press the System Menu/Counter key.<br />
2 Press [MP tray Setting].<br />
3 Press [Select Paper Type].<br />
4 Select the paper type.<br />
5 Press [Close].<br />
6 Press [Close]. The display returns to the [Basic] screen.<br />
System Menu / Counter<br />
System Menu<br />
Copy<br />
Default<br />
Scanner<br />
Default<br />
Machine<br />
Default<br />
Printer<br />
Default<br />
m Menu / Counter<br />
Document<br />
Management<br />
Language<br />
MP tray<br />
Setting<br />
Register<br />
Orig. Size<br />
g Back<br />
Unit<br />
Paper Type<br />
Centimeter<br />
Inch<br />
System Menu / Counter<br />
Select Paper Type<br />
Plain<br />
Transparency<br />
Rough<br />
Vellum<br />
Labels Cardstock<br />
Preprinted<br />
Thick<br />
paper<br />
Plain<br />
Job<br />
Accounting<br />
BOX<br />
Management<br />
Print<br />
Report<br />
Close<br />
Select<br />
Paper Type<br />
Back<br />
Custom 1 Custom<br />
Recycled Color Envelope Custom 2 Custom<br />
Bond Letterhead<br />
Prepunched Coated Custom 3 Custom<br />
High<br />
Quality<br />
Custom 4 Custom<br />
2-15<br />
A
Preparation for Usage<br />
Placing Originals<br />
Loading Originals on the Platen<br />
2-16<br />
This section explains how to place an original for copying or scanning.<br />
Open the original platen and place the original on the platen. You may also place non-sheet<br />
originals such as books or magazines.<br />
1 Open the original platen.<br />
NOTE: If the optional document processor has been<br />
installed, open the document processor. Before<br />
opening the document processor, be sure that there<br />
are no originals left on the original tray or on the<br />
original eject table. Originals left on the original table or<br />
on the original eject table may fall off the machine<br />
when the document processor is opened.<br />
For originals over 4 cm thick, leave the document<br />
processor open during copying.<br />
2 Place the original. Place the side to be copied face<br />
down and starting from the back left corner, align flush<br />
against the original size indicator plates.<br />
Original size indicator plates<br />
(Inch models)
(Metric models)<br />
3 Close the original platen.<br />
Preparation for Usage<br />
IMPOR<strong>TA</strong>NT: Do not push the original platen or document processor forcefully when you close it.<br />
Excessive pressure may crack the platen glass.<br />
Shadows may appear around the edges and in the middle of copies of open-faced originals such as<br />
books.<br />
<strong>Caution</strong>: Do not leave the document processor open as there is a danger of<br />
personal injury.<br />
2-17
Preparation for Usage<br />
Loading Originals in the Document Processor (option)<br />
2-18<br />
Use the optional document processor to automatically read multi-page originals one page at a time.<br />
Also automatically turn over and read both sides of two-sided originals.<br />
The document processor supports the following types of originals.<br />
Item Specifications<br />
Weight 1-sided original: 45 g/m2 - 160 g/m2 2-sided original: 50 g/m2 - 120 g/m2 Size Maximum 11 × 17"/A3 - Minimum 5 1/2 ×81/2"/A5R<br />
Capacity Standard paper (80 g/m2 , 11 × 8 1/2"/A4 or smaller), color paper (11 × 8 1/2"/A4<br />
or smaller), recycled paper (11 × 8 1/2"/A4 or smaller): 100 sheets or less<br />
(Auto Selection Mode: 30 sheets)<br />
Standard paper (80 g/m2 , 8 1/2 × 14"/B4 or larger), color paper (8 1/2 ×14"/B4<br />
or larger), recycled paper (8 1/2 × 14"/B4 or larger): 70 sheets or less<br />
Art paper: 1 sheet<br />
Precautions on Types of Originals for Document Processor<br />
Do not use the document processor for the following types of originals. Additionally, if originals have<br />
punched holes or perforations, load them with the holes or perforations away from the leading edge.<br />
• Transparent films such as OHP transparencies<br />
• Delicate originals such as carbon paper, heavily crumpled paper, or vinyl sheets<br />
• Irregularly shaped (non-rectangular) originals, wet originals, or originals containing adhesive<br />
tape or glue<br />
• Remove clips or staples and straighten any curls, wrinkles, or creases before loading. Failure to<br />
do so may cause the originals to jam.<br />
• Originals with cut-out sections or with very slippery surfaces<br />
• Originals with correction fluid that has not dried<br />
• Straighten the folds of bent originals before loading. Failure to do so may cause the originals to<br />
jam.<br />
Document Processor Part Names<br />
1 Original table<br />
2 Original width guides<br />
3 Original eject table<br />
4 Document processor cover<br />
5 Original loaded indicator<br />
6 Cleaning cloth compartment<br />
NOTE: Original loaded indicator shows the state of the originals.<br />
When upper indicator is lit green: The original is set.<br />
When upper indicator blinks green: Reset the original.<br />
When lower indicator blinks red: The original is jammed. Refer to Clearing Paper Jams on<br />
page 6-15.<br />
How to Load Originals<br />
Follow these steps to load originals in the document processor.<br />
5<br />
4 2 1 3 6
Preparation for Usage<br />
IMPOR<strong>TA</strong>NT: Before loading originals, be sure there are no originals left on the original eject table.<br />
Originals left on the original eject table may cause the new originals to jam.<br />
1 Adjust the original width guides to fit the originals.<br />
2 Place the originals. Place the side to be read facing up<br />
(the front side up for two-sided originals) and push the<br />
front edge of the original deep into the document<br />
processor.<br />
IMPOR<strong>TA</strong>NT: Confirm that the original width guides<br />
exactly fits the originals. If there is a gap, readjust the<br />
original width guides. Failure to do so may cause the<br />
originals to jam.<br />
Ensure that loaded originals do not exceed the level<br />
indicated. Exceeding the maximum level may cause<br />
the originals to jam.<br />
2-19
Preparation for Usage<br />
Language<br />
2-20<br />
Select the language displayed on the touch panel.<br />
The following languages are available.<br />
Model Type Language<br />
Inch models English, French (Français), Spanish (Español), Japanese (<br />
Portuguese (Português)<br />
),<br />
Metric models English, German (Deutsch), French (Français), Spanish (Español),<br />
Italian (Italiano)<br />
1 Press the System Menu/Counter key.<br />
2 Press [Language].<br />
3 Select the key for the language you<br />
would like to set. The touch panel<br />
display will change to that language.<br />
System Menu / Counter<br />
System Menu<br />
Copy<br />
Default<br />
Scanner<br />
Default<br />
Machine<br />
Default<br />
Language<br />
System Menu<br />
Printer<br />
Default<br />
Document<br />
Management<br />
Language<br />
MP tray<br />
Setting<br />
Register<br />
Orig. Size<br />
English Français Español<br />
Português<br />
Job<br />
Accounting<br />
BOX<br />
Management<br />
Print<br />
Report
Connecting Cables<br />
Preparation for Usage<br />
Connect to a computer to use the printer and scanner features. This device has the following<br />
interfaces for connecting to computers.<br />
Use the type of cable appropriate for the interface used.<br />
Function Interface Required cable<br />
Printing<br />
Functionality<br />
Scanning<br />
Functionality<br />
NOTE: Use shielded USB, 10Base-T and 100Base-TX cables.<br />
1 Open the main power switch cover, and switch the<br />
main power switch to off ( position).<br />
Turn off the computer’s power when connecting a<br />
parallel port cable.<br />
2 Open the interface cover on the right side of the unit<br />
and connect the cable to the interface.<br />
A: Network interface (printer)<br />
B: USB interface (printer)<br />
C: Parallel port interface (printer)<br />
D: Network interface (scanner)<br />
Parallel port interface Parallel Port Cable (IEEE1284 specification, 1.5 m or<br />
less)<br />
USB Interface Hi-Speed USB-compatible cable (Hi-Speed USB<br />
specification, 5.0 m or less) shielded cable<br />
Network interface Network Cable (10Base-T or 100Base-TX)<br />
Network interface Network Cable (10Base-T or 100Base-TX)<br />
3 Connect the other end of the cable to the computer or a hub (network switching device).<br />
4 Open the main power switch cover, and switch the<br />
main power switch to on ( | position).<br />
NOTE: For network cable connections, configure the<br />
network after connecting the cables. For details, refer<br />
to Network (TCP/IP) Settings on page 2-22 and<br />
Scanner Basic Settings on page 2-32.<br />
A B C D<br />
2-21
Preparation for Usage<br />
Preparing the Printer<br />
Network (TCP/IP) Settings<br />
2-22<br />
To use this device as a network printer, first set the device IP address.<br />
NOTE: Set the IP address according to the operating environment. Obtain this address from your<br />
network administrator.<br />
For environments that use DHCP or BOOTP to automatically assign the IP address, this setting is<br />
not required because the DHCP or BOOTP setting is enabled by default.<br />
1 Press the Printer key.<br />
2 Press [Printer Menu].<br />
3 Press [Interface].<br />
4 Press [Network].<br />
Ready to print.<br />
Printer<br />
Menu<br />
Select item.<br />
Printer menu<br />
Print Status<br />
Page<br />
Interface<br />
Emulation<br />
Interface<br />
Font<br />
Page Set<br />
Print<br />
Quality<br />
NetWare<br />
On<br />
TCP/IP On<br />
Ethertalk On<br />
Network Status Page Off<br />
Printer menu<br />
Parallel Network<br />
Paper<br />
Handling<br />
Color Mode<br />
RAM DISK<br />
Mode<br />
Setting Item Value<br />
USB<br />
Cancel<br />
Others<br />
Change #
5 Press [] or [] to select TCP/IP and<br />
press [Change #].<br />
6 Press [On] below TCP/IP.<br />
7 Press [] or [] to select DHCP and<br />
press [Change #].<br />
8 Press [Off] and press [Close].<br />
9 Press [] or [] to select BOOTP and press [Change #].<br />
10 Press [Off] and press [Close].<br />
Interface<br />
Setting Item Value<br />
NetWare<br />
On<br />
TCP/IP On<br />
Ethertalk On<br />
Network Status Page Off<br />
Printer menu<br />
TCP/IP<br />
Off<br />
On<br />
Parallel Network<br />
TCP/IP<br />
Printer menu- Interface - Network<br />
terface - Network<br />
DHCP Setting<br />
Off<br />
On<br />
USB<br />
Preparation for Usage<br />
Change #<br />
Back<br />
Setting Item Value<br />
DHCP On<br />
BOOTP On<br />
IP Address 0. 0. 0. 0<br />
Subnet Mask 0. 0. 0. 0<br />
Gateway 0. 0. 0. 0<br />
Back<br />
Setting Item Value<br />
DHCP On<br />
BOOTP On<br />
IP Address 0. 0. 0. 0<br />
Subnet Mask 0. 0. 0. 0<br />
Gateway 0. 0. 0. 0<br />
Printer menu - Interface - Network - TCP/IP<br />
BOOTP Setting<br />
Off<br />
On<br />
Printer menu - Interface - Network - TCP/IP<br />
Close<br />
Change #<br />
Back<br />
Back<br />
2-23
Preparation for Usage<br />
2-24<br />
11 Press [] or [] to select IP Address<br />
and press [Change #].<br />
12 Enter the IP address using the numeric<br />
keys. Input the address for the 3 digits<br />
displayed in reverse black and white and<br />
press the # key.<br />
Verify the 3 digits entered # key.<br />
13 Input the address for the next 3 digits displayed in reverse black and white and press the # key.<br />
To correct an address entry, press the # key to select the 3 digit address you would like to correct<br />
and reenter the address using the numeric keys.<br />
14 After inputting the rest of the address in the same manner, press [Close]. The display returns to the<br />
TCP/IP screen.<br />
Press [Back] to delete the entered address and set the previous address.<br />
15 Press [] or [] to select Subnet Mask and press [Change #].<br />
16 Set the address in the same manner as Steps 12 - 14 to set the IP address.<br />
17 Press [] or [] to select Gateway and press [Change #].<br />
18 Set the address in the same manner as Steps 12-14 to set the IP address.<br />
19 Press [Close] after all settings are complete.<br />
20 Press [Close].<br />
21 Press [Close]. The display returns to Printer mode.<br />
Included Printer Utilities<br />
This product includes the following printer utilities Install them as necessary. For details, refer to the<br />
manual included with each utility.<br />
• Network Tool for Clients<br />
• Direct Printing<br />
• Print Monitor<br />
• Port Setup<br />
• Quick Setup<br />
Interface - Network<br />
IP Address<br />
Confirm per 3 lines pressing # key.<br />
Back<br />
Setting Item Value<br />
DHCP On<br />
BOOTP On<br />
IP Address 0. 0. 0. 0<br />
Subnet Mask 0. 0. 0. 0<br />
Gateway 0. 0. 0. 0<br />
.10<br />
.0 .0 .0<br />
Printer menu- Interface - Network - TCP/IP<br />
(with #key)<br />
Close<br />
Change #<br />
Back
Installing the Printer Driver<br />
Preparation for Usage<br />
Install the printer driver to connect this device to a computer. Install from the included Software<br />
Library CD-ROM for connections via the parallel port interface, network interface or the USB<br />
interface.<br />
The following procedures are based on a Windows XP installation, but the same procedure may be<br />
followed to install on other Windows operating systems.<br />
NOTE: Installation on Windows XP, Windows NT 4.0/2000 and Server 2003 must be installed by a<br />
user logged on with administrator privileges.<br />
Plug and Play is disabled on this device when in Sleep Mode. Wake the device from Sleep Mode<br />
before continuing. See Sleep Mode on page 3-36<br />
1 Refer to Connecting Cables on page 2-21 to connect<br />
this device to the computer. After connecting, switch<br />
the main power switch to on ( | position) and switch on<br />
the computer.<br />
If a Plug and Play window like that shown at right<br />
appears, click the Cancel button.<br />
2 Insert the included Software Library CD-ROM into the<br />
CD-ROM drive.<br />
A usage agreement is displayed. Click the Accept<br />
button to accept the agreement terms. The Main Menu<br />
screen is displayed.<br />
If the screen is not displayed even after loading the<br />
CD-ROM, open the CD-ROM drive letter and<br />
double-click on the setup.exe file shown in the<br />
window.<br />
3 Click on Install KX Driver.<br />
2-25
Preparation for Usage<br />
2-26<br />
4 Click the Next button.<br />
NOTE: If an older driver is already installed, the Install<br />
Wizard will automatically detect it and display the<br />
existing driver upgrade screen. Click the Next button<br />
and follow the screen prompts to upgrade the driver.<br />
5 Select Local connection and press the Next button.<br />
For Network connection, refer to the IB-21E/IB-22<br />
Operation Guide on the included CD-ROM.<br />
6 Select the device and press the Next button. At this<br />
point the Plug and Play window may reappear. Cancel<br />
any Printer Found screens that appear.
It is safe to proceed if the Hardware Installation<br />
screen appears. Press the Continue Anyway button.<br />
If the Network Printer Port Monitor screen is<br />
displayed, select Yes and click the Next button.<br />
Preparation for Usage<br />
7 The Select the Printer Port screen is displayed. Follow the procedure below for parallel port or<br />
USB connection. Skip to Step 9 for network port connection.<br />
8 For parallel port connection, select LPT1 in the Use<br />
the following port list, click the Next button, and skip<br />
to Step 19.<br />
For USB connection, select the USB port (example:<br />
USB001, KMUSB001), click the Next button, and skip<br />
to Step 19. If the USB port to be used is not found, go<br />
to Step 17.<br />
9 Click on Create a new port. Set the type to KPrint<br />
Port and click the Next button.<br />
2-27
Preparation for Usage<br />
2-28<br />
10 Select Print using LPR and click the Next button.<br />
The following steps may vary slightly if KPrint has been<br />
installed before.<br />
11 Input the IP address or host name for this device in IP<br />
address or Host name and go to Step 14. If you don’t<br />
know the IP address or host name for this device, click<br />
Search and go to the next step.<br />
12 A list of printers available on the network is displayed.<br />
Select this device and click the OK button.<br />
13 The IP address or host name selected in Step 12 is displayed in IP address or Host name.<br />
14 Confirm the print server port and click the Next button.<br />
15 Input the Destination printer port name and click the<br />
Next button.
16 Confirm settings and click the Finish button. Go to<br />
Step 19.<br />
17 Click on Create a new port. Set the type to KM USB<br />
Port and click the Next button.<br />
18 Confirm the Port name. The Serial number can be<br />
confirmed after clicking the Advanced button. Click the<br />
OK button.<br />
If Serial number is empty, USB port recognition has<br />
failed. Cancel the installation, switch the main power<br />
switch to off ( position), and begin again from Step 1.<br />
Preparation for Usage<br />
19 Confirm that the model name for this device is shown in Printer name and click the Next button.<br />
Follow the remaining screen prompts to complete the installation.<br />
20 After completing the printer driver installation, install<br />
the optional printer components. Select Yes to install<br />
the components and click the Next button to proceed<br />
to the next step. Press No to skip installation, click the<br />
Next button and proceed to Step 23.<br />
2-29
Preparation for Usage<br />
2-30<br />
21 Select the desired items according to the screen<br />
prompts and click the Next button.<br />
22 Confirm selection and click the Install button. The<br />
printer components will be installed.<br />
23 To end the installation, select No and click the Finish<br />
button. To continue installing another printer driver,<br />
select Yes and click the Next button.<br />
This concludes the printer driver installation.<br />
Depending on the operating system, the computer may<br />
prompt you to be restarted. If so, follow the display to<br />
reboot the computer.
Preparing the Scanner<br />
Connecting to a Computer<br />
Printer<br />
Administrator<br />
PC<br />
This section explains the necessary operations to prepare the scanner function.<br />
Connection Example<br />
Preparation for Usage<br />
Connect the scanner and computer with a network cable (10Base-T or 100Base-TX). Refer to<br />
Connecting Cables on page 2-21.<br />
Web Browser<br />
Address Editor<br />
DB Assistant<br />
Network Settings<br />
Scanner Settings<br />
User/Destination<br />
Registration<br />
Parallel<br />
USB<br />
Network<br />
SMTP<br />
Server<br />
Send<br />
E-mail<br />
Scan to PC<br />
Scan to<br />
FTP<br />
FTP<br />
Server<br />
Send E-mail<br />
Send scanned images<br />
as e-mail attachments.<br />
Scan to PC<br />
Send scanned image<br />
files to a computer.<br />
Scan to FTP<br />
Send scanned image<br />
files to an FTP server.<br />
TWAIN<br />
Imports images<br />
scanned from a<br />
TWAIN-compliant<br />
application.<br />
2-31
Preparation for Usage<br />
Scanner Basic Settings<br />
2-32<br />
The network settings for this device must be configured before using the scanner feature. The<br />
setting items are as follows.<br />
Configuration Item Description<br />
Host name Input a scanner host name no longer than 32 characters.<br />
IP address Enter the scanner interface IP address in ‘XXX.XXX.XXX.XXX’<br />
notation.<br />
Subnet Mask Enter the scanner subnet mask in ‘XXX.XXX.XXX.XXX’<br />
notation.<br />
Default Gateway Enter the scanner default gateway in ‘XXX.XXX.XXX.XXX’<br />
notation.<br />
DHCP/BOOTP Set DHCP and BOOTP to either [Valid] or [Invalid]. The default<br />
setting is [Valid].<br />
RARP Set RARP to either [Valid] or [Invalid]. The default setting is<br />
[Valid].<br />
DNS Server (primary) For sending data using host names in environments that have<br />
DNS servers available, enter the primary DNS server IP<br />
address in this field in ‘XXX.XXX.XXX.XXX’ notation.<br />
DNS Server (secondary) Enter the secondary DNS server IP address in<br />
‘XXX.XXX.XXX.XXX’ notation.<br />
DNS Domain name Enter the domain name in less than 64 characters.<br />
WINS Server (primary) To use WINS (Windows Internet Name Service) to resolve<br />
computer names from IP addresses, enter the primary WINS<br />
server IP address in ‘XXX.XXX.XXX.XXX’ notation.<br />
WINS Server (secondary) Enter the secondary WINS server IP address in this field in<br />
‘XXX.XXX.XXX.XXX’ notation.<br />
SMTP Enter into this field the SMTP server host name or IP address in<br />
‘XXX.XXX.XXX.XXX’ notation.<br />
DB Assistant Enter the IP address or hostname (under 32 characters) of the<br />
computer with DB Assistant installed.<br />
Administrator’s E-mail ad Enter the administrator e-mail address. Scanner status log files<br />
and error reports will be via e-mail to this address.<br />
IMPOR<strong>TA</strong>NT: E-mail cannot be sent if the SMTP and Administrator’s E-mail ad are not properly set.<br />
NOTE: Set the IP address according to the operating environment. Obtain this address from your<br />
network administrator.<br />
Scanner basic settings may be also configured from a computer using a web browser.<br />
1 Press the System Menu/Counter key.
2 Press [Scanner Default].<br />
Preparation for Usage<br />
3 Use the numeric keys to enter the 4 digit management code. The default setting is 2500 for the<br />
25/25 ppm model, 3200 for the 32/25 and 32/32 ppm models and 4000 for the 40/35 ppm model.<br />
If the correct management code has been entered, the Scanner setting menu screen will be<br />
displayed.<br />
NOTE: If the optional security kit has been installed, the management code is 8 digits long. The<br />
default setting is 25002500 for the 25/25 ppm model, 32003200 for the 32/25 and 32/32 ppm<br />
models and 40004000 for the 40/35 ppm model.<br />
4 Press [System Basic].<br />
NOTE: If Unable to use scanner is<br />
displayed, return to the System Menu<br />
screen, and after waiting (about 2<br />
minutes), press [System Basic] again.<br />
5 Press [] or [] to select Host name<br />
and press [Change #].<br />
6 Input the host name and press [End]. The host name is saved and the System Basic screen is<br />
displayed.<br />
7 Refer to Steps 5 - 6 to continue setting other items.<br />
System Menu / Counter<br />
System Menu<br />
Copy<br />
Default<br />
Scanner<br />
Default<br />
Machine<br />
Default<br />
Printer<br />
Default<br />
Document<br />
Management<br />
System Menu / Counter<br />
Scanner setting menu<br />
Language<br />
MP tray<br />
Setting<br />
Register<br />
Orig. Size<br />
8 Press [Close] after all settings are complete. Scanner setting menu screen is displayed.<br />
System<br />
Basic<br />
System Menu<br />
Func. Def.<br />
setting.<br />
System Menu / Counter<br />
System Basic<br />
Default menu<br />
Host name.<br />
IP address<br />
Subnet Mask<br />
Default Gateway<br />
DHCP/BOOTP<br />
System Menu - Scanner setting menu<br />
Setting mode<br />
Scanner.<br />
10.181.125.31.<br />
255.255.0.0.<br />
10.181.125.1.<br />
Valid<br />
Job<br />
Accounting<br />
BOX<br />
Management<br />
Print<br />
Report<br />
User<br />
registr.<br />
Change #<br />
2-33<br />
A
Preparation for Usage<br />
Registering User Information<br />
2-34<br />
Please register a user. The setting items are as follows.<br />
Configuration Item Description<br />
E-mail address For Send E-mail, mail will be sent to this address when<br />
recipients reply to the received mail. Also, transmission error<br />
notifications will be sent to this address.<br />
IP address or host name When selecting Scan to PC as the destination, select Save to<br />
User PC to send a graphic image to the computer at this<br />
address.<br />
Name to display Username shown during user selection. This value must be<br />
entered.<br />
User password Input a password less than 8 characters long (numerals only) to<br />
be input during user selection. (Password entry is optional)<br />
Save folder No. Folder number to specify as destination when Save to User PC<br />
is selected. Use Scanner File Utility to set the folder<br />
corresponding to this number. Input a 3 digit number (from<br />
001-100).<br />
1 Continue the process Scanner Basic Settings on page 2-32 for 1 to 3.<br />
2 Press [User registr.] ([User register]).<br />
3 Press [] or [] to select the user<br />
number to register and press [Change<br />
User Info.].<br />
To correct an already registered user,<br />
press [] or [] to select the user to<br />
correct and press [Change User Info.].<br />
If a user password has been set, enter<br />
the password.<br />
NOTE: To delete a registered user, press [] or [] to select the user to delete and press [Delete].<br />
4 Press [] or [] to select the item to<br />
configure and press [Change #].<br />
Continue to follow the screen<br />
instructions.<br />
Only one save location folder number may be registered here.<br />
System Menu / Counter<br />
Scanner setting menu<br />
System<br />
Basic<br />
System Menu<br />
elete<br />
- Scanner setting menu<br />
Func. Def.<br />
setting.<br />
User Up<br />
User A<br />
Correct User Info.<br />
Registration list:user list<br />
Setting item<br />
E-mail address<br />
IP address or host name<br />
Name to display<br />
User password<br />
Save folder No.<br />
Information<br />
User number : 2.<br />
Down<br />
Setting value<br />
(Not specified)<br />
(Not specified)<br />
(Not specified)<br />
(Not specified)<br />
(Not specified)<br />
User<br />
registr.<br />
End<br />
Change<br />
User Info.<br />
Delete<br />
Change #
Modifying Common Address Book<br />
Register a destination in the common address book.<br />
Preparation for Usage<br />
E-Mail Common Address Book ... address book used when sending e-mail attachments<br />
Scan to PC Common Address Book ... address book used to directly send to recipient computer<br />
FTP Common Address Book ... address book used to send data to an FTP server<br />
NOTE: New addresses may also be registered.<br />
A web browser can also be used to make additions to the Common Address Book.<br />
Use Address Editor to add entries to the E-Mail Common Address Book and the Scan to PC<br />
Common Address Book.<br />
E-Mail Common Address Book and Scan to PC Common Address Book registration fields are as<br />
follows.<br />
Configuration Item Description<br />
E-mail address For Send E-mail, sends graphic image as an e-mail attachment<br />
to this address.<br />
IP address or host name For Scan to PC, sends graphic image data to the computer at<br />
this address.<br />
Name to display Configure the destination name to be displayed in the Address<br />
Book.<br />
Save folder No. For Scan to PC, the folder number set as the destination. Set<br />
the folder corresponding to this number with the Scanner File<br />
Utility on the destination computer.<br />
Add dest. For group registration, add the destination to be added to the<br />
group from the Common Address Book.<br />
The configuration items for the FTP Common Address Book are as follows.<br />
Configuration Item Description<br />
IP address or host name Graphic images are sent to the FTP server at this address.<br />
Name to display Configure the destination name to be displayed in the Address<br />
Book.<br />
Port Enter the port number for the FTP server. (Usually 21)<br />
Path Enter the path to the folder to which you wish to upload. For<br />
example, to save to a ScanData folder in the home directory,<br />
input ScanData. Data will be saved to the home directory if<br />
nothing is input.<br />
User Name & Password Input the user name and password used to logon to the FTP<br />
server. This item is displayed if Skip Auth. info Input is set to<br />
[On].<br />
Skip Auth. info Input If set to [On], users are not prompted for user name and<br />
password when sending. To set to [On], register User Name &<br />
Password.<br />
2-35
Preparation for Usage<br />
2-36<br />
1 Press the Scanner key.<br />
2 Press [Edit Addr. Book].<br />
3 Input the sending user’s user number<br />
and press [Enter].<br />
NOTE: Input the user number registered during user registration. For example, in the screen shown<br />
in the process on page 2-34 for Step 3, the user number for User A is ‘001’.<br />
If a password was set during user registration, enter that password.<br />
4 Select the Common Address Book you<br />
wish to edit.<br />
5 To add a destination, press [Register<br />
new dest.] and go to Step 6.<br />
To add a group, press [Register new<br />
group] and go to Step 7.<br />
To edit a destination that already exists<br />
or to add a destination to a group, press<br />
[] or [] to select the destination you<br />
wish to modify and press [Address<br />
Properties] ([Correct Dest. Info]) and<br />
make the modifications.<br />
scanner function.<br />
de.<br />
Scan to PC TWAIN<br />
Scan to<br />
FTP<br />
User number<br />
Edit Address Book<br />
Select the list<br />
to PC<br />
0-9<br />
t.<br />
Common<br />
Send Email<br />
GHI<br />
O PQR<br />
X YZ<br />
Select the list to edit.<br />
Destination<br />
Common<br />
Scan to PC<br />
Recall Program<br />
(with #key)<br />
08/08/’05 14:00<br />
Edit<br />
Addr. Book<br />
Change<br />
User Info.<br />
History<br />
of Sending<br />
To delete a registered destination, press [] or [] to select the destination and press [Delete].<br />
User B<br />
UserGroup<br />
Clear<br />
FTP Common<br />
Add. Book<br />
Up<br />
Down<br />
Enter<br />
Stop<br />
End<br />
Address<br />
Properties<br />
Delete<br />
Register<br />
new dest.<br />
Register<br />
new group<br />
# of register. 2/100
6 Destination Registration<br />
Select the item to be configured using<br />
[] or [] and press [Change #]. The<br />
settings configuration screen is<br />
displayed. Follow the screen instructions<br />
to make the changes. When done, press<br />
[Complete entering] to save the<br />
destination.<br />
7 Group Registration<br />
Press [Information], press [] or [] to<br />
select the item to be configured and<br />
press [Change #]. The settings<br />
configuration screen is displayed. Follow<br />
the screen instructions to make the<br />
changes.<br />
Press [Destination] and press [Add<br />
dest.]. The destination registration<br />
screen is displayed. Press [] or [] to<br />
select the destination to be added and<br />
press [Add].<br />
When done, press [Complete entering]<br />
to save the group.<br />
Preparation for Usage<br />
NOTE: Perform destination registration before group registration. Destinations will not be shown in<br />
the list until destinations have been registered.<br />
Group registration is not possible for Scan to FTP.<br />
Configuring Date/Time and Time Difference<br />
Configure the necessary regional information for the e-mail sending functionality.<br />
The time the e-mail was sent from the scanner will be recorded as the transmission time in the<br />
e-mail header. Follow the steps below to set the date, current time and time difference from GMT<br />
(Greenwich Mean Time).<br />
1 Press the System Menu/Counter key.<br />
New Dest. Register<br />
Registra.list:Scan to PC address book<br />
Setting item<br />
Setting value<br />
IP address or host name (Not specified)<br />
Name to display<br />
(Not specified)<br />
Save folder No.<br />
(Not specified)<br />
Information<br />
Register new group<br />
Registra.list:Scan to PC address book<br />
Setting item<br />
Setting value<br />
Name to display<br />
(Not specified)<br />
Password<br />
(Not specified)<br />
Information Destination<br />
Register new group<br />
Registra.list:Scan to PC address book<br />
Display name<br />
Destination<br />
UserA<br />
10.111.111.112<br />
UserB<br />
10.111.111.113<br />
UserC<br />
10.111.111.114<br />
Information<br />
Destination<br />
Change #<br />
Change #<br />
Delete<br />
Add<br />
dest.<br />
# of re<br />
# of re<br />
# of re<br />
2-37
Preparation for Usage<br />
2-38<br />
2 Press [Machine Default].<br />
3 Use the numeric keys to enter the 4 digit management code. The default setting is 2500 for the<br />
25/25 ppm model, 3200 for the 32/25 and 32/32 ppm models and 4000 for the 40/35 ppm model.<br />
If the correct management code has been entered, the Machine Default screen will be displayed.<br />
NOTE: If the optional security kit has been installed, the management code is 8 digits long. The<br />
default setting is 25002500 for the 25/25 ppm model, 32003200 for the 32/25 and 32/32 ppm<br />
models and 40004000 for the 40/35 ppm model.<br />
4 Press [] or [] to select Time<br />
difference and press [Change #].<br />
5 Press [+] and [–] to set the time<br />
difference.<br />
Example: Washington - GMT-5:00,<br />
London - GMT 0:00<br />
6 Press [Close]. Settings are saved.<br />
7 Press [] or [] to select Date/Time<br />
and press [Change #].<br />
System Menu / Counter<br />
System Menu<br />
Copy<br />
Default<br />
Scanner<br />
Default<br />
Machine<br />
Default<br />
System Menu<br />
Printer<br />
Default<br />
Document<br />
Management<br />
System Menu / Counter<br />
Machine Default<br />
Default menu<br />
Notify (Ready)<br />
Notify (Attention)<br />
Silent Mode<br />
Date/Time<br />
Time difference<br />
Time difference<br />
System Menu<br />
GMT+01:00<br />
- Machine Default<br />
System Menu / Counter<br />
Machine Default<br />
System Menu<br />
Language<br />
MP tray<br />
Setting<br />
Register<br />
Orig. Size<br />
Setting mode<br />
On<br />
On<br />
On<br />
‘05/07/20 14:00<br />
GMT+01:00<br />
Job<br />
Accounting<br />
BOX<br />
Management<br />
Print<br />
Report<br />
Change #<br />
Back<br />
Default menu<br />
Setting mode<br />
Notify (Ready)<br />
On<br />
Notify (Attention)<br />
On<br />
Silent Mode<br />
On<br />
Date/Time<br />
‘05/07/20 14:00<br />
Time difference GMT+01:00<br />
Change #<br />
A
8 Press [+] and [–] to set the time and<br />
date.<br />
NOTE: Set the date and time after setting the time difference.<br />
Preparation for Usage<br />
Daylight savings time is disabled if daylight savings time and time/date are changed at the same<br />
time.<br />
9 Press [Close]. Settings are saved.<br />
Installing the Scanner Utilities<br />
The CD-ROM contains the following utilities for this scanner system.<br />
• Scanner File Utility<br />
• Address Book for Scanner<br />
• Address Editor (Administrator Tool)<br />
• DB Assistant (Administrator Tool)<br />
• TWAIN Source<br />
The following procedures are based on a Windows XP installation, but the same procedure may be<br />
followed to install on other Windows operating systems.<br />
1 Start up Windows.<br />
Close any other running applications.<br />
2 Insert the included Software Library CD-ROM into the<br />
CD-ROM drive.<br />
A usage agreement is displayed. Click the Accept<br />
button to accept the agreement terms. The Main Menu<br />
screen is displayed.<br />
If the screen is not displayed even after loading the<br />
CD-ROM, open the CD-ROM drive letter and<br />
double-click on the setup.exe file shown in the<br />
window.<br />
3 Click on Scanner Utilities.<br />
Date/Time<br />
System Menu<br />
Year<br />
Month<br />
Day<br />
Time<br />
.2005<br />
.7<br />
.20<br />
14:00<br />
- Machine Default<br />
Back<br />
2-39<br />
S<br />
O<br />
O
Preparation for Usage<br />
2-40<br />
4 Click on the name of the utility you would like to install.<br />
The installation screen for the utility is displayed. Follow the screen prompts to perform the<br />
installation.<br />
Using the Scanner File Utility<br />
This section explains the necessary software installation and configuration steps to use the Scanner<br />
File Utility to use the Scan to PC functionality.<br />
Installing Scanner File Utility<br />
This section explains how to install the Scanner File Utility.<br />
1 Display the Scanner Utilities screen, referring to Steps 1-3 of Installing the Scanner Utilities on<br />
page 2-39.<br />
2 Click on Scanner File Utility.<br />
3 Click the Next button.<br />
4 Confirm the installation directory and<br />
click the Next button.
5 Select Install a desktop mode and click<br />
the Next button.<br />
6 Select the components to install and<br />
click the Next button.<br />
7 Click the Next button.<br />
8 Click the Finish button.<br />
Registering File Save Folders<br />
Specify in Scanner File Utility which folders to use to save scanned documents.<br />
Preparation for Usage<br />
NOTE: The following explanation is based on a Desktop Mode installation of Scanner File Utility.<br />
1 Launch the Scanner File Utility by clicking on the start Menu and clicking Programs Scanner<br />
User Software Scanner File Utility.<br />
2-41
Preparation for Usage<br />
2-42<br />
2 Double-click the Scanner File Utility icon<br />
shown in the taskbar to show the start<br />
dialog box.<br />
3 Click the Setup button.<br />
4 Click the New button.<br />
5 Input the file save folder number in the<br />
No. column and click the ... button.<br />
NOTE: Input a number (from 1-100) for the file save folder No. column.<br />
Enter the file save folder number from the No. column (001 in this example) into Save Number in<br />
Step 5 of Setting from a Web Browser on page 2-44.
6 Choose a folder and click the OK button.<br />
7 Click the OK button.<br />
8 The save folder is registered. Click the<br />
OK button.<br />
9 Click the OK button.<br />
Preparation for Usage<br />
2-43
Preparation for Usage<br />
2-44<br />
Setting from a Web Browser<br />
Register users into this device using a web browser.<br />
NOTE: The network configuration for this device must be done before performing this setting.<br />
Contact your system administrator.<br />
This function is not available during scanning. Verify that the scanner function is not in use before<br />
configuring.<br />
1 Start Internet Explorer or another web browser.<br />
2 Input the device’s IP address into the<br />
web browser’s address bar and press<br />
the Enter key on the your keyboard.<br />
NOTE: Check with your administrator for the device IP address.<br />
Please note that the IP address set for scanning functionality and the IP address set for printing<br />
functionality are different.<br />
3 Click on Sender List.<br />
4 Click on the number of the Sender<br />
(User) List to register.<br />
5 Input the Registration Name, Address<br />
of Address Book installed PC, and<br />
Save Number.
Preparation for Usage<br />
NOTE: For Address of Address Book installed PC, enter the address of the computer on which<br />
Scanner File Utility is installed.<br />
For Save Number, enter the file save folder number you entered in the No. column in Step 5 of<br />
Registering File Save Folders on page 2-41.<br />
6 Click the Registration button.<br />
NOTE: Be sure to click the Registration button. Settings are not saved if you change screens or<br />
close the browser window without pressing Registration.<br />
After the above settings have been completed, scanned images can be sent to user PCs<br />
(computers registered in the Sender list) using Scan to PC.<br />
To send to destinations other than User PCs, register the destination using a web browser, the<br />
Address Editor, or Address Book for Scanner.<br />
2-45
Preparation for Usage<br />
2-46
3 Basic Operation<br />
This chapter explains the following operations.<br />
• Basic Copying Procedures...3-2<br />
• Selecting Image Quality...3-5<br />
• Adjusting Exposure...3-6<br />
• Reducing/Enlarging...3-7<br />
• Duplex Mode...3-11<br />
• Split Mode...3-14<br />
• Sort Mode...3-16<br />
• Interrupt Copy...3-17<br />
• Job Reservation...3-18<br />
• Canceling a Print Job...3-19<br />
• Scanner Operation...3-20<br />
• Low-Power Mode...3-35<br />
• Sleep Mode...3-36<br />
3-1
Basic Operation<br />
Basic Copying Procedures<br />
3-2<br />
Follow the steps as below for basic copying.<br />
1 Open the main power switch cover and move the main<br />
power switch to on ( | position).<br />
After warm-up is complete, the Start key’s Start<br />
indicator will glow green.<br />
2 Press the Copier key.<br />
3 Place the original.<br />
NOTE: Refer to Placing Originals on page 2-16 for<br />
original placement instructions.<br />
4 Press the Auto Color, Full Color or Black&White key<br />
to select a color mode.<br />
Color Mode Description<br />
Auto color mode Automatically detects color and black and white originals and copies<br />
color originals in color and black and white originals in black and white.<br />
Full Color mode Copies all originals in full color.<br />
Black and White mode Copies all originals in black and white.
5 Confirm that [APS] is selected. In this<br />
mode, paper that matches the size of the<br />
originals will be selected automatically.<br />
To change the paper size, press the<br />
desired paper size to select the paper<br />
source.<br />
6 Use the numeric keys to enter the copy quantity. You<br />
can specify up to 999 copies.<br />
7 Press the Start key.<br />
NOTE: Adjust the angle of the operation panel by<br />
pulling the operation panel lower lever.<br />
8 Remove the finished copies from the output tray.<br />
The output tray can hold up to 250 sheets of standard<br />
paper (80 g/m2 ). However, the actual capacity varies<br />
depending on the type and condition of the paper.<br />
Ready to copy. ( Full-Color )<br />
11×8½"<br />
Plain<br />
11×17"<br />
Color<br />
11×8½"<br />
Plain<br />
11×8½"<br />
Plain<br />
Basic<br />
APS Auto %<br />
MP tray<br />
Plain<br />
User choice<br />
100%<br />
Reduce<br />
Exposure<br />
/Enlarge Mode<br />
Function<br />
Auto<br />
Exposure<br />
Basic Operation<br />
Color func.<br />
Paper Size<br />
11×8<br />
100%<br />
Staple Off<br />
Staple<br />
Left Top<br />
Staple<br />
Program<br />
3-3
Basic Operation<br />
3-4<br />
Turning off the main power switch<br />
Press the Power key on the operation panel, and after<br />
verifying the Power indicator has gone off, switch off<br />
the main power switch. Switching off the main power<br />
switch before pressing the Power key may cause<br />
damage to the internal hard disk.<br />
If the optional fax kit is installed, when the main power<br />
switch is off ( position), fax send/receive is disabled.<br />
To turn the power off, press the Power key on the<br />
operation panel.
Selecting Image Quality<br />
Choose the image quality suited to the type of original.<br />
1 Place the original.<br />
2 Press [Function].<br />
3 Press [Orig. Image Quality] ([Image<br />
Quality]).<br />
4 Select the image quality.<br />
5 Press the Start key. Copying begins.<br />
Basic Operation<br />
Image Quality Description<br />
Text+Photo Appropriate for mixed text and photo originals.<br />
Photo Appropriate for photo originals taken with a camera.<br />
Print Appropriate for photo originals from magazines or printed media.<br />
Text Appropriate for document originals with large amounts of text.<br />
Map Appropriate for map originals.<br />
Ready to copy. ( Full-Color )<br />
11×8½"<br />
Plain<br />
11×17"<br />
Color<br />
11×8½"<br />
Plain<br />
11×8½"<br />
Plain<br />
Basic<br />
Select<br />
2 sided/<br />
Paper Separation<br />
Exposure Reduce<br />
Mode /Enlarge<br />
Orig.Image<br />
Quality<br />
Sort/<br />
Offset<br />
Basic<br />
APS Auto %<br />
MP tray<br />
Plain<br />
100%<br />
Auto<br />
Exposure<br />
Reduce<br />
Exposure<br />
/Enlarge Mode<br />
User choice Function Color func.<br />
Ready to copy.<br />
Orig.Image Quality<br />
Text+Photo<br />
Photo<br />
Print<br />
Margin/<br />
Centering<br />
Border<br />
Erase<br />
User choice<br />
( Full-Color )<br />
Select<br />
Orig.Size<br />
Auto<br />
Selection<br />
Page #<br />
Cover<br />
Mode<br />
Function<br />
Combine<br />
Batch<br />
Scanning<br />
Booklet<br />
Ready to copy. (Full-Color)<br />
Text<br />
Map<br />
Color func.<br />
Paper Size<br />
11×8<br />
100%<br />
Staple Off<br />
Staple<br />
Left Top<br />
Staple<br />
Program<br />
Paper Size<br />
11×8½<br />
100%<br />
Up<br />
Poster Down<br />
Shortcut<br />
Program<br />
Back<br />
Paper Size<br />
11×8½<br />
100%<br />
Text+Photo:Text+Photo original.<br />
Photo: For photographic prints<br />
Print: For book and magazine ima<br />
Text: For text, pencil,or fine lines<br />
Map: For maps or pencil illustratio<br />
3-5
Basic Operation<br />
Adjusting Exposure<br />
3-6<br />
Adjust the exposure automatically or manually. The default setting is [Manual]. Follow the steps as<br />
below for Manual mode.<br />
1 Place the original.<br />
2 Press the exposure adjustment key<br />
( / ) to adjust the exposure level.<br />
Press [Auto Exposure] to use Auto<br />
Exposure mode. The machine<br />
determines a suitable exposure level for<br />
copying. To change the exposure mode<br />
from [Auto] to [Manual], press the<br />
exposure adjustment key ( / ).<br />
NOTE: Auto Exposure mode is only available for black and white copying. Also, copies will be made<br />
in Manual Exposure mode if the Auto Color mode detects a full color original.<br />
3 Press the Start key. Copying begins.<br />
NOTE: Press [Exposure Mode] to display the<br />
Exposure Mode screen. You can also adjust the<br />
exposure from this screen.<br />
Ready to copy. ( Full-Color )<br />
11×8½"<br />
Plain<br />
11×17"<br />
Color<br />
11×8½"<br />
Plain<br />
11×8½"<br />
Plain<br />
Basic<br />
APS Auto %<br />
MP tray<br />
Plain<br />
User choice<br />
100%<br />
Reduce<br />
Exposure<br />
/Enlarge Mode<br />
Function<br />
Auto<br />
Exposure<br />
Color func.<br />
Paper Size<br />
11×8<br />
100%<br />
Staple Off<br />
Staple<br />
Left Top<br />
Staple<br />
Program
Reducing/Enlarging<br />
Auto Zoom<br />
Adjust the magnification to reduce or enlarge the original image.<br />
The following zoom modes are available.<br />
Basic Operation<br />
• Auto Zoom – Automatically reduces or enlarges the original image suited to the selected paper<br />
size.<br />
• Manual Zoom – Reduces or enlarges the original image in 1 % increments between 25 - 400 %.<br />
• Preset Zoom – Reduces or enlarges at preset magnifications.<br />
• XY Zoom – Independently adjust vertical and horizontal magnifications. Set zoom size in 1 %<br />
increments between 25 - 400 %.<br />
Automatically reduces or enlarges the original image<br />
suited to the selected paper size.<br />
Follow the steps below to use auto zoom.<br />
1 Place the original and select paper size.<br />
2 Press [Auto %].<br />
The magnification will be displayed.<br />
11×8½"<br />
Plain<br />
11×17"<br />
Color<br />
11×8½"<br />
Plain<br />
11×8½"<br />
Plain<br />
Basic<br />
3 Press the Start key. The image will be automatically<br />
reduced or enlarged for copying onto the selected<br />
paper.<br />
MP tray<br />
Plain<br />
8 1/2 ×11"<br />
A4<br />
Ready to copy. ( Full-Color )<br />
APS Auto %<br />
User choice<br />
100%<br />
Function<br />
11 × 17": 129 %<br />
A3: 141 %<br />
5 1/2 ×81/2": 64 %<br />
A5: 70 %<br />
Auto<br />
Exposure<br />
Reduce<br />
Exposure<br />
/Enlarge Mode<br />
Ready to copy. ( Full-Color )<br />
11×8½"<br />
Plain<br />
11×17"<br />
Color<br />
11×8½"<br />
Plain<br />
11×8½"<br />
Plain<br />
Basic<br />
APS Auto %<br />
MP tray<br />
Plain<br />
User choice<br />
100%<br />
Function<br />
Color func.<br />
Auto<br />
Exposure<br />
Reduce<br />
Exposure<br />
/Enlarge Mode<br />
Color func.<br />
Paper Size<br />
11×1<br />
100%<br />
Staple Off<br />
Staple<br />
Left Top<br />
Staple<br />
Program<br />
Paper Size<br />
11×17<br />
100%<br />
Staple Off<br />
Staple<br />
Left Top<br />
Staple<br />
Program<br />
3-7
Basic Operation<br />
Manual Zoom<br />
3-8<br />
Reduces or enlarges the original image in 1 %<br />
increments between 25 - 400 %.<br />
Follow the steps as below to use manual zoom.<br />
1 Place the original and press<br />
[Reduce/Enlarge].<br />
2 Press [+] and [–] to set the displayed<br />
magnification.<br />
Press [# keys] ([#-Keys]) to enter with<br />
numeric keys.<br />
3 Press the Start key. Copying begins.<br />
11×8½"<br />
Plain<br />
11×17"<br />
Color<br />
11×8½"<br />
Plain<br />
11×8½"<br />
Plain<br />
Basic<br />
MP tray<br />
Plain<br />
25 %<br />
Ready to copy. ( Full-Color )<br />
Reduce/Enlarge<br />
Standard<br />
Zoom<br />
XY Zoom<br />
APS Auto %<br />
User choice<br />
Ready to copy.<br />
# keys<br />
100%<br />
Reduce<br />
Exposure<br />
/Enlarge Mode<br />
Function<br />
( Full-Color )<br />
Auto %<br />
100%<br />
400%<br />
Auto<br />
Exposure<br />
Color func.<br />
Shortcut<br />
200%<br />
5½×8½"11×17"<br />
400 %<br />
Paper Size<br />
11×8<br />
100%<br />
Staple Off<br />
Staple<br />
Left Top<br />
Staple<br />
Program<br />
Back<br />
Paper Size<br />
11×8<br />
100%<br />
154%<br />
5½×8½"8½×14"<br />
129%<br />
8½×11"11×17"<br />
121%<br />
8½×14"11×17"<br />
78%<br />
8½×14"8½×11"<br />
77%<br />
11<br />
64%<br />
11<br />
50%<br />
11×<br />
25%
Preset Zoom<br />
Reduces or enlarges at preset magnifications.<br />
Follow the steps as below to use preset zoom.<br />
1 Place the original and press<br />
[Reduce/Enlarge].<br />
2 Select the magnification.<br />
NOTE: You can also adjust the<br />
magnification in 1 % increments as<br />
desired by pressing [+] and [–].<br />
3 Press the Start key. Copying begins.<br />
Basic Operation<br />
Model Type Zoom Level<br />
Inch models 200 % (5 1/2 ×81/2"11 × 17"), 154 % (5 1/2 ×81/2"8 1/2 × 14"),<br />
129 % (8 1/2 ×11"11 × 17"), 121 % (8 1/2 ×14"11 × 17"),<br />
78 % (8 1/2 ×14"81/2 × 11"), 77 % (11 × 17"8 1/2 ×14"),<br />
64 % (11 × 17"8 1/2 × 11"), 50 % (11 × 17"5 1/2 ×81/2")<br />
Metric models 200 % (A5A3), 141 % (A4A3, A5A4), 127 % (FolioA3),<br />
106 % (11 × 15"A3), 90 % (FolioA4), 75 % (11 × 15"A4),<br />
70 % (A3A4, A4A5)<br />
Metric models (Asia<br />
Pacific)<br />
200 % (A5A3), 141 % (A4A3, B5B4), 122 % (A4B4, A5B5),<br />
115 % (B4A3, B5A4), 86 % (A3B4, A4B5),<br />
81 % (B4A4, B5A5), 70 % (A3A4, B4B5)<br />
e<br />
Ready to copy. ( Full-Color )<br />
11×8½"<br />
Plain<br />
11×17"<br />
Color<br />
11×8½"<br />
Plain<br />
11×8½"<br />
Plain<br />
Basic<br />
to copy.<br />
# keys<br />
APS Auto %<br />
MP tray<br />
Plain<br />
User choice<br />
Auto %<br />
100%<br />
400%<br />
100%<br />
( Full-Color )<br />
Reduce<br />
Exposure<br />
/Enlarge Mode<br />
Function<br />
Shortcut<br />
200%<br />
5½×8½"11×17"<br />
Auto<br />
Exposure<br />
Color func.<br />
154%<br />
5½×8½"8½×14"<br />
129%<br />
8½×11"11×17"<br />
121%<br />
8½×14"11×17"<br />
78%<br />
8½×14"8½×11"<br />
Paper Size Set<br />
11×8½"<br />
100%<br />
Paper Size<br />
11×8<br />
100%<br />
Staple Off<br />
Staple<br />
Left Top<br />
Staple<br />
Program<br />
Back Close<br />
77%<br />
11×17"8½×14"<br />
64%<br />
11×17"8½×11"<br />
50%<br />
11×17"5½×8½"<br />
25%<br />
3-9
Basic Operation<br />
XY Zoom<br />
3-10<br />
Select vertical and horizontal magnifications<br />
individually. Set zoom size in 1 % increments between<br />
25 - 400 %.<br />
Follow the steps as below to use XY zoom.<br />
1 Place the original and press<br />
[Reduce/Enlarge].<br />
2 Press [XY Zoom].<br />
3 Press [+] and [–] to set the X and Y<br />
zoom ratios.<br />
Press [# keys] ([#-Keys]) to enter with<br />
numeric keys.<br />
4 Under Select Original Image Direction,<br />
select [Top Edge] ([Back Edge]) or [Left<br />
Top Edge] ([Left top corner]).<br />
5 Press the Start key. Copying begins.<br />
e<br />
Ready to copy. ( Full-Color )<br />
11×8½"<br />
Plain<br />
11×17"<br />
Color<br />
11×8½"<br />
Plain<br />
11×8½"<br />
Plain<br />
Basic<br />
Reduce/Enlarge<br />
Standard<br />
Zoom<br />
XY Zoom<br />
to copy.<br />
APS Auto %<br />
MP tray<br />
Plain<br />
User choice<br />
Ready to copy.<br />
Y<br />
Y<br />
100%<br />
Function<br />
X<br />
Auto<br />
Exposure<br />
Reduce<br />
Exposure<br />
/Enlarge Mode<br />
# keys # keys<br />
( Full-Color )<br />
# keys # keys<br />
X<br />
( Full-Color )<br />
Shortcut<br />
X<br />
Color func.<br />
Shortcut<br />
Y<br />
Paper Size Set<br />
11×8½"<br />
100%<br />
Back<br />
Select Original Image<br />
Direction.<br />
Top Edge<br />
Paper Size<br />
11×8<br />
100%<br />
Staple Off<br />
Staple<br />
Left Top<br />
Staple<br />
Program<br />
Paper Size<br />
11×8½<br />
100%<br />
Back<br />
Select Original I<br />
Direction.<br />
Top Edge<br />
Close<br />
Left Top<br />
Edge
Duplex Mode<br />
Use Duplex mode to create two-sided copies from a<br />
variety of originals, including facing pages (such as<br />
books or magazines) and two-sided originals.<br />
One-sided to Two-sided<br />
Basic Operation<br />
Produces two-sided copies from one-sided originals. The back side of the last copied page will be<br />
blank for originals with an odd number of pages.<br />
The following binding options are available.<br />
• Original Left/Right Bind to Finish Left/Right Bind: Back side is copied with same orientation as<br />
front side. ...A<br />
• Original Left/Right Bind to Finish Top Bind: Images are copied onto the back side rotated 180°.<br />
Pages of the copied document are in the same orientation if pages are flipped upward. ...B<br />
ghi<br />
def<br />
abc<br />
Two-sided to Two-sided<br />
Produces two-sided copies from two-sided originals.<br />
1<br />
2<br />
3<br />
4<br />
5<br />
Original Copy<br />
ghi<br />
abc<br />
Original Copy<br />
NOTE: This operation requires the optional document processor.<br />
Supported paper sizes for Two-sided to Two-sided operation are: 11 × 17", 8 1/2 ×14", 11×81/2",<br />
8 1/2 ×11", 51/2 ×81/2", 8 1/2 × 13", 8 1/2 ×131/2", A3, B4, A4, A4R, B5, B5R, A5R and Folio.<br />
def<br />
Original Copy<br />
2<br />
1<br />
4<br />
3<br />
5<br />
A B<br />
2<br />
4<br />
1<br />
3<br />
1<br />
5<br />
2<br />
ghi<br />
abc<br />
def<br />
Original Copy<br />
2<br />
1<br />
4<br />
3<br />
5<br />
3<br />
4<br />
5<br />
2<br />
4<br />
1<br />
3<br />
5<br />
3-11
Basic Operation<br />
3-12<br />
Book to Two-sided<br />
Produces two-sided copies from originals such as books and magazines with facing pages.<br />
NOTE: Supported paper sizes for Book to Two-Sided operation are limited to: 11 × 17", 8 1/2 ×11",<br />
A3, B4, A4R, B5R, A5R, and 8K.<br />
Follow the steps as below to use duplex copying.<br />
1 Press [Function].<br />
2 Press [2 sided/Separation]<br />
([2-sided/Split]).<br />
2 1<br />
3 Select the desired Duplex mode.<br />
4 For [2 sided 2 sided] ([2-sided <br />
2-sided]) or [Book 2 sided] ([Book <br />
2-sided]), select the bind direction for<br />
Original.<br />
1<br />
2<br />
3 4<br />
4 3<br />
Original Copy<br />
11×8½"<br />
Plain<br />
11×17"<br />
Color<br />
11×8½"<br />
Plain<br />
11×8½"<br />
Plain<br />
Basic<br />
2<br />
2<br />
1<br />
1<br />
MP tray<br />
Plain<br />
4<br />
4<br />
User choice<br />
3<br />
3<br />
APS Auto %<br />
100%<br />
0<br />
3<br />
Function<br />
1<br />
2<br />
2 1<br />
Ready to copy. ( Full-Color )<br />
Select<br />
2 sided/<br />
Paper Separation<br />
Exposure Reduce<br />
Mode /Enlarge<br />
Orig.Image<br />
Quality<br />
Sort/<br />
Offset<br />
Ready to copy.<br />
Basic<br />
1 sided<br />
1 sided<br />
2 sided<br />
1 sided<br />
Book<br />
1 sided<br />
Margin/<br />
Centering<br />
Border<br />
Erase<br />
User choice<br />
2 sided mode.<br />
2 sided/Separation<br />
1 sided<br />
2 sided<br />
2 sided<br />
2 sided<br />
Book<br />
2 sided<br />
2 sided mode.<br />
2 sided/Separation<br />
1 sided<br />
1 sided<br />
2 sided<br />
1 sided<br />
Book<br />
1 sided<br />
1 sided<br />
2 sided<br />
2 sided<br />
2 sided<br />
Book<br />
2 sided<br />
3<br />
0<br />
Auto<br />
Exposure<br />
Reduce<br />
Exposure<br />
/Enlarge Mode<br />
( Full-Color )<br />
Select<br />
Orig.Size<br />
Auto<br />
Selection<br />
Page #<br />
Cover<br />
Mode<br />
Function<br />
(Full-Color)<br />
(Full-Color)<br />
Original<br />
Open from<br />
Left/Right<br />
Open from<br />
top<br />
Color func.<br />
Combine<br />
Batch<br />
Scanning<br />
Booklet<br />
Color func.<br />
Paper Size<br />
11×8<br />
100%<br />
Staple Off<br />
Staple<br />
Left Top<br />
Staple<br />
Program<br />
Paper Size<br />
11×8½<br />
100%<br />
Up<br />
Poster Down<br />
Shortcut<br />
Finished<br />
Open from<br />
Left/Right<br />
Open from<br />
top<br />
Shortcut<br />
Finished<br />
Open from<br />
Left/Right<br />
Open from<br />
top<br />
Program<br />
Paper Size<br />
11×8½<br />
100%<br />
Back<br />
Select Original I<br />
Direction.<br />
Top Edge<br />
Paper Size<br />
11×8½<br />
100%<br />
Back<br />
Select Original I<br />
Direction.<br />
Top Edge
For [1 sided 2 sided] ([1-sided <br />
2-sided]) or [2 sided 2 sided] ([2-sided<br />
2-sided]), select the bind direction for<br />
Finished.<br />
For [Book 2 sided] ([Book 2-sided]),<br />
set the copy page order for Finished.<br />
For [1 sided 2 sided] ([1-sided <br />
2-sided]) or [2 sided 2 sided] ([2-sided<br />
2-sided]), set [Top Edge] ([Back<br />
Edge]) or [Left Top Edge] ([Left top<br />
corner]) from Select Original Image<br />
Direction.<br />
5 Place the original and press the Start key.<br />
If the original has been placed on the optional<br />
document processor, copying begins automatically.<br />
If the original is placed on the platen, Scan next<br />
original(s) is displayed. Place the next original page<br />
and press the Start key.<br />
If all original pages have been scanned, press<br />
[Scanning finished]. Copying begins.<br />
2 sided mode.<br />
2 sided/Separation<br />
1 sided<br />
1 sided<br />
2 sided<br />
1 sided<br />
Book<br />
1 sided<br />
2 sided/Separation<br />
1 sided<br />
1 sided<br />
2 sided<br />
1 sided<br />
Book<br />
1 sided<br />
d mode.<br />
ation<br />
1 sided<br />
2 sided<br />
2 sided<br />
2 sided<br />
Book<br />
2 sided<br />
1 sided<br />
2 sided<br />
2 sided<br />
2 sided<br />
Book<br />
2 sided<br />
2 sided mode.<br />
1 sided<br />
2 sided<br />
2 sided<br />
2 sided<br />
Book<br />
2 sided<br />
(Full-Color)<br />
Original<br />
Open from<br />
Left/Right<br />
Open from<br />
top<br />
( Full-Color )<br />
( Full-Color )<br />
Original<br />
Open from<br />
left<br />
Open from<br />
right<br />
Shortcut<br />
Finished<br />
Open from<br />
Left/Right<br />
Open from<br />
top<br />
Basic Operation<br />
Shortcut<br />
Finished<br />
Open from<br />
Left/Right<br />
Open from<br />
top<br />
Shortcut<br />
Finished<br />
Book<br />
2 sided<br />
Book<br />
Book<br />
Paper Size<br />
11×8½<br />
100%<br />
Back<br />
Select Original I<br />
Direction.<br />
Top Edge<br />
Paper Size Set<br />
11×8½"<br />
100%<br />
Back<br />
Close<br />
Select Original Image<br />
Direction.<br />
Top Edge<br />
Paper Size<br />
11×8½<br />
100%<br />
Back<br />
Set the book orig<br />
top side direct to<br />
Left Top<br />
Edge<br />
3-13
Basic Operation<br />
Split Mode<br />
3-14<br />
Use Split mode to create single-sided copies from two-sided originals or originals with facing pages<br />
(such as books or magazines) as follows.<br />
Two-sided to One-sided<br />
Copies each side of a two-sided original onto two individual sheets.<br />
NOTE: This operation requires the optional document processor.<br />
The following binding options are available.<br />
• Open from Left/Right: The back side and front side of the original are copied with the same<br />
orientation.<br />
• Open from top: The back side is copied rotated 180 ° from the orientation of the front side.<br />
Book to One-sided<br />
Copies each page of originals with facing pages (such as books or magazines) onto two individual<br />
sheets.<br />
The following binding options are available.<br />
• Open from left: Originals with facing pages are copied from left to right.<br />
• Open from right: Originals with facing pages are copied from right to left.<br />
NOTE: Original sizes for split mode copy mode are limited to 11 × 17", 8 1/2 × 11", A3, B4, A4R, B5R<br />
and 8K. Paper sizes are limited to 11 × 8 1/2", A4, B5 and 16K. Change the paper size to fit the<br />
original to that size.<br />
Follow the steps as below to use Split mode.<br />
1 Press [Function].<br />
1<br />
2<br />
1<br />
Original Copy<br />
2<br />
Original Copy<br />
1<br />
11×8½"<br />
Plain<br />
11×17"<br />
Color<br />
11×8½"<br />
Plain<br />
11×8½"<br />
Plain<br />
Basic<br />
1<br />
2<br />
Ready to copy. ( Full-Color )<br />
MP tray<br />
Plain<br />
User choice<br />
2<br />
APS Auto %<br />
100%<br />
Reduce<br />
Exposure<br />
/Enlarge Mode<br />
Function<br />
Auto<br />
Exposure<br />
Color func.<br />
Paper Size<br />
11×8<br />
100%<br />
Staple Off<br />
Staple<br />
Left Top<br />
Staple<br />
Program
2 Press [2 sided/Separation]<br />
([2-sided/Split]).<br />
3 Select the desired Split mode.<br />
4 Specify the binding in the Original<br />
section.<br />
5 When [2 sided 1 sided] ([2-sided <br />
1-sided]) is selected, select [Top Edge]<br />
([Back Edge]) or [Left Top Edge] ([Left<br />
top corner]) for Select Original Image<br />
Direction.<br />
6 Place the original and press the Start key.<br />
If the original has been placed on the optional<br />
document processor, copying begins automatically.<br />
If the original is placed on the platen, Scan next<br />
original(s) is displayed. Place the next original page<br />
and press the Start key.<br />
If all original pages have been scanned, press<br />
[Scanning finished]. Copying begins.<br />
Select<br />
2 sided/<br />
Paper Separation<br />
Exposure Reduce<br />
Mode /Enlarge<br />
Orig.Image<br />
Quality<br />
Sort/<br />
Offset<br />
Ready to copy.<br />
Basic<br />
2 sided/Separation<br />
1 sided<br />
1 sided<br />
2 sided<br />
1 sided<br />
Book<br />
1 sided<br />
Margin/<br />
Centering<br />
Border<br />
Erase<br />
User choice<br />
Ready to copy.<br />
2 sided/Separation<br />
1 sided<br />
1 sided<br />
2 sided<br />
1 sided<br />
Book<br />
1 sided<br />
to copy.<br />
ation<br />
1 sided<br />
2 sided<br />
2 sided<br />
2 sided<br />
Book<br />
2 sided<br />
1 sided<br />
2 sided<br />
2 sided<br />
2 sided<br />
Book<br />
2 sided<br />
Ready to copy.<br />
1 sided<br />
2 sided<br />
2 sided<br />
2 sided<br />
Book<br />
2 sided<br />
(Full-Color)<br />
Original<br />
Open from<br />
Left/Right<br />
Open from<br />
top<br />
(Full-Color)<br />
Select<br />
Orig.Size<br />
Auto<br />
Selection<br />
Page #<br />
Cover<br />
Mode<br />
Function<br />
( Full-Color )<br />
Original<br />
Open from<br />
Left/Right<br />
Open from<br />
top<br />
( Full-Color )<br />
Original<br />
Open from<br />
Left/Right<br />
Open from<br />
top<br />
Shortcut<br />
Booklet<br />
Basic Operation<br />
Combine<br />
Batch<br />
Scanning<br />
Color func.<br />
Paper Size<br />
11×8½<br />
100%<br />
Up<br />
Poster Down<br />
Shortcut<br />
Shortcut<br />
Program<br />
Paper Size<br />
11×8½<br />
100%<br />
Back<br />
Select Original I<br />
Direction.<br />
Top Edge<br />
Paper Size<br />
11×8½<br />
100%<br />
Back<br />
Select Original I<br />
Direction.<br />
Top Edge<br />
Paper Size Set<br />
11×8½"<br />
100%<br />
Back<br />
Close<br />
Select Original Image<br />
Direction.<br />
Top Edge<br />
Left Top<br />
Edge<br />
3-15
Basic Operation<br />
Sort Mode<br />
3-16<br />
Scans multiple originals to deliver complete sets of<br />
copies as required according to page number.<br />
Follow the steps as below to use Sort mode.<br />
1 Press [Function].<br />
2 Press [Sort/Offset] ([Sort/Group]).<br />
3 Press [Sort: On].<br />
4 Use the numeric keys to enter the copy quantity.<br />
5 Place the original and press the Start key.<br />
If the original has been placed on the optional<br />
document processor, copying begins automatically.<br />
If the original is placed on the platen, Scan next<br />
original(s) is displayed. Place the next original page<br />
and press the Start key.<br />
If all original pages have been scanned, press<br />
[Scanning finished]. Copying begins.<br />
11×8½"<br />
Plain<br />
11×17"<br />
Color<br />
11×8½"<br />
Plain<br />
11×8½"<br />
Plain<br />
Basic<br />
Complete sets of copies will be delivered on the output<br />
tray.<br />
APS Auto %<br />
MP tray<br />
Plain<br />
User choice<br />
1<br />
2<br />
3<br />
3<br />
2<br />
1<br />
3<br />
2<br />
1<br />
3<br />
2<br />
1<br />
Original Copy<br />
Ready to copy. ( Full-Color )<br />
Select<br />
2 sided/<br />
Paper Separation<br />
Exposure Reduce<br />
Mode /Enlarge<br />
Orig.Image<br />
Quality<br />
Sort/<br />
Offset<br />
Ready to copy.<br />
Basic<br />
Margin/<br />
Centering<br />
Border<br />
Erase<br />
User choice<br />
100%<br />
Reduce<br />
Exposure<br />
/Enlarge Mode<br />
Function<br />
( Full-Color )<br />
Select<br />
Orig.Size<br />
Auto<br />
Selection<br />
Page #<br />
Cover<br />
Mode<br />
Function<br />
Ready to copy. ( Full-Color )<br />
Sort/Offset<br />
Sort:Off<br />
Sort:On<br />
Sort Offset<br />
Off<br />
On<br />
Auto<br />
Exposure<br />
Color func.<br />
Combine<br />
Batch<br />
Scanning<br />
Booklet<br />
Color func.<br />
Paper Size<br />
11×8<br />
100%<br />
Staple Off<br />
Staple<br />
Left Top<br />
Staple<br />
Program<br />
Paper Size<br />
11×8½<br />
100%<br />
Up<br />
Poster Down<br />
Shortcut<br />
Program<br />
Paper Size<br />
11×8<br />
100%<br />
Back
Interrupt Copy<br />
Interrupt copying is useful to pause one copy job and<br />
copy other originals with different copy settings. After<br />
completing the urgent job, you can resume the<br />
interrupted jobs according to their original settings. You<br />
can also pause copy or print jobs to make emergency<br />
copies.<br />
Follow the steps as below to use interrupt copying.<br />
1 Press the Interrupt key.<br />
Interrupt Mode OK will be displayed.<br />
2 Temporarily remove and set aside the original pages of the current job.<br />
3 Place the original for the interrupt job.<br />
4 Specify the copy settings for the interrupt job and press<br />
the Start key.<br />
5 After the interrupt job is completed, remove the originals and press the Interrupt key.<br />
The previous settings will be restored. If there was a job being printed, it will be resumed.<br />
6 Replace the interrupted original and press the Start key to restart the job.<br />
Basic Operation<br />
3-17
Basic Operation<br />
Job Reservation<br />
3-18<br />
Scan an original and reserve the next job even when a copy or print job is being outputted. The<br />
reserved job will be started after the current job is completed. If the optional fax is installed, reserve<br />
jobs even when received fax data is being printed.<br />
Follow the steps as below to use Job Reservation mode.<br />
1 Press [Reserve next copy].<br />
Copying can be reserved will be<br />
displayed.<br />
2 Place the Job Reservation original.<br />
3 Specify the copy settings for the<br />
reserved job.<br />
To cancel a reserved job, press [Finish<br />
Job res.] ([Job resrv. finished]).<br />
opying.<br />
Auto %<br />
11×8½"<br />
Plain<br />
11×17"<br />
Color<br />
11×8½"<br />
Plain<br />
11×8½"<br />
Plain<br />
Basic<br />
4 Press the Start key. Scanning of the original begins.<br />
After scanning all the originals, the touch panel will<br />
return to output screen.<br />
The reserved job will be started after the current job is<br />
completed.<br />
Count/Set<br />
11×8½" Plain<br />
Color, 1 side<br />
APS Auto %<br />
MP tray<br />
Color<br />
User choice<br />
Function<br />
Output<br />
Top tray<br />
Copying can be reserved. (Full-Color)<br />
100%<br />
Auto<br />
Exposure<br />
Reduce<br />
Exposure<br />
/Enlarge Mode<br />
Color func.<br />
Reserve<br />
next copy<br />
Pause<br />
Paper Size<br />
11×8½<br />
100%<br />
Staple Off<br />
Staple<br />
Left Top<br />
Staple<br />
Program
Canceling a Print Job<br />
Follow the steps below to cancel printing and clear data.<br />
Canceling a Print Job Currently Being Processed<br />
Use the printer screen to cancel a print job that is currently spooling.<br />
1 Press the Printer key.<br />
2 Press [Cancel].<br />
3 Select the interface to cancel.<br />
4 Printing is canceled.<br />
Processing.<br />
Orig. Page<br />
11×8½"<br />
Network I/F<br />
User name: NO USER NAME<br />
On<br />
Select interface to cancel the job.<br />
Current<br />
Job<br />
Parallel<br />
Serial<br />
Network<br />
USB<br />
Basic Operation<br />
Cancel<br />
Back<br />
3-19
Basic Operation<br />
Scanner Operation<br />
Scan an Image for Send E-mail<br />
3-20<br />
This section explains basic scanner operation. The following 5 methods may be used to scan<br />
originals.<br />
• Scan an Image for Send E-mail...3-20<br />
• Scan an Image for Scan to PC...3-23<br />
• Scan an Image Using TWAIN...3-27<br />
• Database Connection Setup...3-28<br />
• Scan an Image for Scan to FTP...3-32<br />
Use Send E-mail to send a scanned original image to an e-mail recipient as an attachment.<br />
Before using Send E-mail<br />
This operation requires the scanner SMTP to be set (see Scanner Basic Settings on page 2-32).<br />
Also, the Registered Name and E-mail Address for the destination must also be registered (see<br />
Registering User Information on page 2-34).<br />
NOTE: refer to Modifying Common Address Book on page 2-35 for how to add to the Common<br />
Address Book from the operation panel.<br />
Scan an image for Send E-mail<br />
1 Press the Scanner key.<br />
2 Press [Send E-mail].<br />
3 Select a destination (user name). Either<br />
press the number key or use the<br />
numeric keys to enter the user number<br />
and press [Enter].<br />
name.<br />
Send<br />
E-mail<br />
Select scanner function.<br />
Database<br />
Connection<br />
Scan to PC TWAIN<br />
Scan to<br />
FTP<br />
Recall Program<br />
08/08/’05<br />
Stop<br />
User number<br />
(with #key)<br />
Enter
Basic Operation<br />
NOTE: If the scanner default setting for Selec. of senders (users) is set to [On], user number 001<br />
will automatically be selected.<br />
If a password was entered when the user was registered, the password input screen is displayed.<br />
Input the password and press [Enter]. If the password is correct, the scanner settings screen is<br />
displayed.<br />
4 To input a mail address, press [Enter<br />
dest.].<br />
5 Enter the e-mail address for the<br />
destination (recipient). After inputting,<br />
press [End] to display the sending<br />
method screen.<br />
6 Select whether to send as [To:], [CC:], or<br />
[BCC:] and press [Enter].<br />
7 Press [Address Book] to use a private<br />
address book or common address book.<br />
8 Press [Common] ([Common book]) or<br />
[Private] ([Private book]) to display the<br />
destinations stored in the selected<br />
address book. In this example a<br />
destination is selected from the<br />
Common Address Book.<br />
Press [] or [] to select a destination<br />
and select whether to send as [To:],<br />
[CC:], or [BCC:].<br />
s<br />
Ready to scan. ( Full-Color )<br />
Place the original and select destination.<br />
Send E-mail-Sending<br />
Destination<br />
Enter<br />
dest.<br />
Address<br />
Book<br />
Register Prgrm<br />
Original<br />
11×8½"<br />
08/08<br />
Cont. TX to<br />
Auto<br />
Top Edge<br />
Select<br />
Orig.Size<br />
Orig. Set<br />
Direction<br />
Auto size<br />
200dpi<br />
Select<br />
Send Size<br />
Scanning<br />
Resolution<br />
Basic Quality<br />
When a destination is selected, an ⌧ is displayed next to it in the Select column to the right of the<br />
Address column.<br />
Delete<br />
Char.Limit:64 letters including #<br />
Space<br />
Stop<br />
End<br />
Back Del.<br />
d of receiver. Back<br />
Stop<br />
To:<br />
CC:<br />
BCC: Enter<br />
Ready to scan. ( Full-Color )<br />
Place the original and select destination.<br />
Send E-mail-Sending<br />
Destination<br />
Enter<br />
dest.<br />
Address Book<br />
Symbol 0-9<br />
ABC DEF GHI<br />
JKL MNO PQR<br />
STU VWX YZ<br />
Address<br />
Book<br />
Common Private<br />
Delete<br />
Register Prgrm<br />
Original<br />
11×8½"<br />
08/08<br />
Cont. TX to<br />
Auto<br />
Top Edge<br />
Select<br />
Orig.Size<br />
Orig. Set<br />
Direction<br />
Auto size<br />
200dpi<br />
Select<br />
Send Size<br />
Scanning<br />
Resolution<br />
Basic Quality<br />
Address Select: 1. Up<br />
User A<br />
Down<br />
3-21
Basic Operation<br />
3-22<br />
NOTE: The private address book is not displayed if the Address Book for Scanner is not running on<br />
the sender(user)’s computer.<br />
9 Confirm the destination(s) and press [Close].<br />
Return to Step 4 to continue adding recipients.<br />
10 Confirm the destination(s). Press [] or<br />
[] to confirm that all selected<br />
destinations are correct. Press [Delete] if<br />
a selected destination is not needed.<br />
Scanner Setup<br />
11 Press the Auto Color, Full Color or Black&White key<br />
to select a color mode.<br />
12 The scanner setup screen is displayed<br />
in the right side of the screen. Press the<br />
appropriate keys to configure the various<br />
settings. This section explains the setup<br />
procedure using [Orig. Set Direction] as<br />
an example.<br />
Press [Orig. Set Direction].<br />
13 If the original has been loaded with Top<br />
edge set at the rear, select [Top Edge]<br />
([Back Edge]). If the original has been<br />
set to the left, press [Left Top Edge]<br />
([Left top corner]). Press [Close] to save<br />
the setting, or press [Back] to leave<br />
settings as they are and return to the<br />
screen shown in Step 10.<br />
Ready to scan. ( Full-Color )<br />
Place the original and select destination.<br />
Send E-mail-Sending<br />
Destination<br />
To: User A<br />
To: User B<br />
Enter<br />
dest.<br />
Address<br />
Book<br />
riginal and select destination.<br />
ending<br />
Address<br />
Book<br />
Register Prgrm<br />
Original<br />
11×8½"<br />
08/08<br />
Cont. TX to<br />
Auto<br />
Top Edge<br />
Select<br />
Orig.Size<br />
Orig. Set<br />
Direction<br />
Auto size<br />
200dpi<br />
Select<br />
Send Size<br />
Scanning<br />
Resolution<br />
Basic Quality<br />
NOTE: The original may not be scanned correctly if original set direction is not correctly configured.<br />
Be sure to confirm the original set direction when configuring the scanner.<br />
Delete<br />
to scan. ( Full-Color )<br />
A<br />
B<br />
to scan.<br />
Delete<br />
riginal and select destination.<br />
tion<br />
Register Prgrm<br />
( Full-Color )<br />
"Check direction of original" shown at<br />
right side of display. Follow the steps.<br />
If setting mode is wrong, incorrect send<br />
will result.<br />
Auto<br />
Top Edge<br />
Select<br />
Orig.Size<br />
Orig. Set<br />
Direction<br />
Auto size<br />
200dpi<br />
Select<br />
Send Size<br />
Scanning<br />
Resolution<br />
Original Send<br />
11×8½" 8½×11"<br />
08/08/’05 14:00<br />
Cont. TX to<br />
Cancel<br />
Auto<br />
File Name<br />
Input<br />
JPEG<br />
File Type<br />
Basic Quality Edit<br />
Original Send<br />
11×8½" 8½×11"<br />
08/08/’05 14:00<br />
Back<br />
Select Original Image<br />
Direction.<br />
Top Edge<br />
Close<br />
Left Top<br />
Edge
14 Confirm settings, place the original, and<br />
press the Start key.<br />
Scanning of the original begins.<br />
If continuous scan is enabled, proceed<br />
to Step 15. If continuous sending is<br />
enabled, proceed to Step 16.<br />
15 If [Batch Scanning] is set to [On] from<br />
[Edit] from the scanner settings screen,<br />
after scanning is complete, a screen<br />
prompt appears asking whether to<br />
continue scanning or to finish.<br />
To continue scanning, place the next<br />
original, select scanner settings as<br />
necessary and press the Start key.<br />
When done, press [Scanning finished].<br />
16 If [Continuous TX] is enabled from the<br />
scanner settings screen, after a<br />
transmission is complete, the scanner<br />
settings screen is displayed with the<br />
same settings used in the previous<br />
transmission.<br />
Scan an Image for Scan to PC<br />
To continue, place the next original,<br />
select scanner settings as necessary<br />
and press the Start key.<br />
To end the operation, press [Cancel] ([Job cancel]).<br />
Basic Operation<br />
Use Scan to PC to save scanned original images as files to a folder on a computer. Access to this<br />
feature is provided by installing the Scanner File Utility on the target computer.<br />
Before using Scan to PC<br />
Configure the following before using Scanner File Utility for the first time.<br />
1 Install Scanner File Utility on the sending computer.<br />
Now scanning originals.<br />
Orig. Page<br />
11×8½"<br />
1 sided<br />
Top Edge<br />
User name: UserA<br />
2 Launch Scanner File Utility and register the folders to save image files.<br />
Send E-mail<br />
3 From the operation panel, register the IP address of the target computer, a registration name and a<br />
save number.<br />
In the save number entry field, enter the same number (from 001-100) as registered for the save<br />
folder in Scanner File Utility.<br />
NOTE: Refer to Modifying Common Address Book on page 2-35 for how to add to the Common<br />
Address Book from the operation panel.<br />
.3<br />
riginal(s).<br />
riginals and press start key.<br />
nning finished" key to finish scanning.<br />
Step .2<br />
Top Edge<br />
Orig. Set<br />
Direction<br />
200dpi<br />
Scanning<br />
Resolution<br />
Quality<br />
Auto<br />
File Name<br />
Input<br />
JPEG<br />
File Type<br />
Edit<br />
Place the original and select destination.<br />
Send E-mail-Continuous TX<br />
Destination<br />
To:<br />
User A<br />
Enter<br />
dest.<br />
Address<br />
Book<br />
Send<br />
8½×11"<br />
SCAN0006_nnn.jpg<br />
Original<br />
1. Page<br />
SCAN0004_nnn.jpg<br />
Ready to scan. ( Full-Color )<br />
Delete<br />
Register Prgrm<br />
08/08/’05 14:00<br />
Cancel<br />
Scanning<br />
finished<br />
08/08<br />
Original<br />
11×8½"<br />
08/08<br />
Single Scan<br />
Auto<br />
Top Edge<br />
Select<br />
Orig.Size<br />
Orig. Set<br />
Direction<br />
Auto size<br />
200dpi<br />
Select<br />
Send Size<br />
Scanning<br />
Resolution<br />
Basic Quality<br />
3-23
Basic Operation<br />
3-24<br />
Scanning an Image for Scan to PC<br />
1 Press the Scanner key.<br />
2 Press [Scan to PC].<br />
3 Select a destination (user name). Either<br />
press the number key or use the<br />
numeric keys to enter the user number<br />
and press [Enter].<br />
NOTE: If the scanner default setting for Selec. of senders (users) is set to [On], user number 001<br />
will automatically be selected.<br />
If a password was entered when the user was registered, the password input screen is displayed.<br />
Input the password and press [Enter]. If the password is correct, the scanner settings screen is<br />
displayed.<br />
4 To save a copy for the sender (user),<br />
press [Save at User PC].<br />
The sender (user) is displayed in the<br />
destination column.<br />
5 Press [Address Book] to use a private<br />
address book or common address book.<br />
name.<br />
Send<br />
E-mail<br />
Select scanner function.<br />
Database<br />
Connection<br />
Scan to PC TWAIN<br />
Scan to<br />
FTP<br />
Place the original and select destination.<br />
Scan to PC-Sending<br />
Destination<br />
Address<br />
Book<br />
Recall Program<br />
Ready to scan. ( Full-Color )<br />
Save at<br />
User PC<br />
Delete<br />
Place the original and select destination.<br />
Scan to PC-Sending<br />
Destination<br />
Address<br />
Book<br />
Register Prgrm<br />
08/08/’05<br />
Stop<br />
User number<br />
(with #key)<br />
Enter<br />
Original<br />
11×8½"<br />
08/08<br />
Cont. TX to<br />
Auto<br />
Top Edge<br />
Select<br />
Orig.Size<br />
Orig. Set<br />
Direction<br />
Auto size<br />
200dpi<br />
Select<br />
Send Size<br />
Scanning<br />
Resolution<br />
Basic Quality<br />
Ready to scan. ( Full-Color )<br />
Save at<br />
User PC<br />
Delete<br />
Register Prgrm<br />
Original<br />
11×8½"<br />
08/08<br />
Cont. TX to<br />
Auto<br />
Top Edge<br />
Select<br />
Orig.Size<br />
Orig. Set<br />
Direction<br />
Auto size<br />
200dpi<br />
Select<br />
Send Size<br />
Scanning<br />
Resolution<br />
Basic Quality
6 Press [Common] ([Common book]) or<br />
[Private] ([Private book]) to display the<br />
destinations stored in the selected<br />
address book. In this example a<br />
destination is selected from the<br />
Common Address Book.<br />
Press [] or [], select the desired<br />
destination to be added and press<br />
[Enter] ([Add dest.]).<br />
Basic Operation<br />
When a destination is selected, an ⌧ is displayed next to it in the Select column to the right of the<br />
Address column.<br />
NOTE: The private address book is not displayed if the Address Book for Scanner is not running on<br />
the sender(user)’s computer.<br />
7 Confirm the destination(s) and press [Close].<br />
Return to Step 5 to continue adding recipients.<br />
8 Confirm the destination(s). Press [] or<br />
[] to confirm that all selected<br />
destinations are correct. Press [Delete] if<br />
a selected destination is not needed.<br />
Scanner Setup<br />
9 Press the Auto Color, Full Color or Black&White key<br />
to select a color mode.<br />
10 The scanner setup screen is displayed<br />
in the right side of the screen. Press the<br />
appropriate keys to configure the various<br />
settings. This section explains the setup<br />
procedure using [Orig. Set Direction] as<br />
an example.<br />
Press [Orig. Set Direction].<br />
0-9<br />
GHI<br />
O PQR<br />
X<br />
Address<br />
Private<br />
Group A<br />
Group B<br />
User A<br />
User B<br />
User C<br />
Select<br />
Place the original and select destination.<br />
Scan to PC-Sending<br />
Destination<br />
Group A<br />
Address<br />
Book<br />
1.<br />
Up<br />
Down<br />
Ready to scan. ( Full-Color )<br />
Save at<br />
User PC<br />
riginal and select destination.<br />
ding<br />
Address<br />
Book<br />
Delete<br />
to scan. ( Full-Color )<br />
Delete<br />
Register Prgrm<br />
Register Prgrm<br />
Auto<br />
Top Edge<br />
Select<br />
Orig.Size<br />
Orig. Set<br />
Direction<br />
Auto size<br />
200dpi<br />
Select<br />
Send Size<br />
Scanning<br />
Resolution<br />
Close<br />
Address<br />
Properties<br />
Enter<br />
Original<br />
11×8½"<br />
08/08<br />
Cont. TX to<br />
Auto<br />
Top Edge<br />
Select<br />
Orig.Size<br />
Orig. Set<br />
Direction<br />
Auto size<br />
200dpi<br />
Select<br />
Send Size<br />
Scanning<br />
Resolution<br />
Basic Quality<br />
Original Send<br />
11×8½" 8½×11"<br />
08/08/’05 14:00<br />
Cont. TX to<br />
Cancel<br />
Auto<br />
File Name<br />
Input<br />
JPEG<br />
File Type<br />
Basic Quality Edit<br />
3-25
Basic Operation<br />
3-26<br />
11 If the original has been loaded with Top<br />
edge set at the rear, select [Top Edge]<br />
([Back Edge]). If the original has been<br />
set to the left, press [Left Top Edge]<br />
([Left top corner]). Press [Close] to save<br />
the setting, or press [Back] to leave<br />
settings as they are and return to the<br />
screen shown in Step 8.<br />
NOTE: The original may not be scanned correctly if original set direction is not correctly configured.<br />
Be sure to confirm the original set direction when configuring the scanner.<br />
12 Confirm settings, place the original, and<br />
press the Start key.<br />
Scanning of the original begins.<br />
If continuous scan is enabled, proceed<br />
to Step 13. If continuous sending is<br />
enabled, proceed to Step 14.<br />
13 If [Batch Scanning] is set to [On] from<br />
[Edit] from the scanner settings screen,<br />
after scanning is complete, a screen<br />
prompt appears asking whether to<br />
continue scanning or to finish.<br />
To continue scanning, place the next<br />
original, select scanner settings as<br />
necessary and press the Start key.<br />
When done, press [Scanning finished].<br />
14 If [Continuous TX] is enabled from the<br />
scanner settings screen, after a<br />
transmission is complete, the scanner<br />
settings screen is displayed with the<br />
same settings used in the previous<br />
transmission.<br />
To continue, place the next original,<br />
select scanner settings as necessary<br />
and press the Start key.<br />
to scan.<br />
riginal and select destination.<br />
To end the operation, press [Cancel] ([Job cancel]).<br />
tion<br />
( Full-Color )<br />
"Check direction of original" shown at<br />
right side of display. Follow the steps.<br />
If setting mode is wrong, incorrect send<br />
will result.<br />
Now scanning originals.<br />
Orig. Page<br />
11×8½"<br />
1 sided<br />
Top Edge<br />
User name: UserA<br />
Scan to PC<br />
Original Send<br />
11×8½" 8½×11"<br />
08/08/’05 14:00<br />
NOTE: If Permit File Overwrite is checked in Scanner File Utility, files with already existing names<br />
will be overwritten. Exercise caution when inputting file names during Batch Scanning mode.<br />
.3<br />
riginal(s).<br />
riginals and press start key.<br />
nning finished" key to finish scanning.<br />
Step .2<br />
Top Edge<br />
Orig. Set<br />
Direction<br />
200dpi<br />
Scanning<br />
Resolution<br />
Quality<br />
Auto<br />
File Name<br />
Input<br />
JPEG<br />
File Type<br />
Edit<br />
Place the original and select destination.<br />
Scan to PC-Continuous TX<br />
Destination<br />
Address<br />
Book<br />
Send<br />
8½×11"<br />
SCAN0004_nnn.jpg<br />
Original<br />
Back<br />
Select Original Image<br />
Direction.<br />
Top Edge<br />
.1 Page<br />
SCAN0005_nnn.jpg<br />
Ready to scan. ( Full-Color )<br />
Save at<br />
User PC<br />
Delete<br />
Register Prgrm<br />
Close<br />
Left Top<br />
Edge<br />
08/08/’05 14:00<br />
Cancel<br />
Scanning<br />
finished<br />
08/08<br />
Original<br />
11×8½"<br />
08/08<br />
Single Scan<br />
Auto<br />
Top Edge<br />
Select<br />
Orig.Size<br />
Orig. Set<br />
Direction<br />
Auto size<br />
200dpi<br />
Select<br />
Send Size<br />
Scanning<br />
Resolution<br />
Basic Quality
Scan an Image Using TWAIN<br />
Basic Operation<br />
TWAIN provides method to connect to the scanner from within TWAIN-compatible applications.<br />
Install the TWAIN driver together with the application you plan to use. This section only explains the<br />
settings to be made to the machine to enable TWAIN usage.<br />
Initiating the Connection from the Machine<br />
1 Press the Scanner key.<br />
2 Press [TWAIN].<br />
3 Place the original.<br />
4 Launch TWAIN Source from your application.<br />
The TWAIN Source main dialog box appears.<br />
5 Click the Scan. Setup button to confirm that this machine is selected.<br />
If this machine is not selected, click the Edit button and input the IP address or host name, for the<br />
scanner to be used, in Scanner Address, then click the OK button.<br />
6 Click the OK button.<br />
7 Make necessary settings here, click the Connect(s) button on the dialog box, and after connecting<br />
to the scanner click the Scan button. Scanning begins.<br />
Initiating the Connection from the Computer<br />
1 Launch TWAIN Source from your application.<br />
The TWAIN Source main dialog box appears.<br />
Send<br />
E-mail<br />
Select scanner function.<br />
Database<br />
Connection<br />
Scan to PC TWAIN<br />
Scan to<br />
FTP<br />
Recall Program<br />
08/08/’05<br />
3-27
Basic Operation<br />
3-28<br />
2 Click the Scan. Setup button to confirm that this machine is selected.<br />
If this machine is not selected, click the Edit button and input the IP address or host name, for the<br />
scanner to be used, in Scanner Address, then click the OK button.<br />
3 Click the OK button.<br />
4 Make necessary settings here and check the Waiting Scan checkbox.<br />
NOTE: Scanning begins after pressing the Start key on the operation panel while Waiting Scan is<br />
checked.<br />
5 Click the Connect(s) button on the dialog box, and after connecting to the scanner click the Scan<br />
button.<br />
Connection may fail if the machine is currently starting up or in use. If this happens, press [TWAIN]<br />
from the scanner function screen to enable TWAIN mode.<br />
6 At the machine, place the original, and press the Start<br />
key to begin scanning.<br />
Database Connection Setup<br />
NOTE: Configure various settings from the operation<br />
panel. Change settings as necessary. If a setting is<br />
changed from both the computer and from the<br />
operation panel, the settings from the operation panel<br />
take priority.<br />
When originals are converted to data, Database Connection allows text information to be added and<br />
the data stored in a folder on a computer. The image transmission method is the same as Scan to<br />
PC.<br />
Before using Database Connection<br />
Configure the following before using Database Connection.<br />
1 Install DB Assistant onto the administrator’s computer.<br />
2 Launch DB Assistant and configure Database Connection.<br />
3 Launch Scanner File Utility on the save destination computer and configure Database Connection.<br />
In the save number entry field, enter the same number (from 001-100) as registered for the save<br />
folder in Scanner File Utility.<br />
The computer to which DB Assistant was installed and the computer to which Scanner File Utility<br />
was installed must be pre-registered using from a web browser or the operation panel.<br />
This section focuses on how to setup DB Assist (functionality to add keywords as text data to<br />
scanned images).
Database Connection Setup<br />
1 Press the Scanner key.<br />
2 Press [Database Connection].<br />
3 Select a destination (user name). Either<br />
press the number key or use the<br />
numeric keys to enter the user number<br />
and press [Enter].<br />
Basic Operation<br />
NOTE: If the scanner default setting for Selec. of senders (users) is set to [On], user number 001<br />
will automatically be selected.<br />
If a password was entered when the user was registered, the password input screen is displayed.<br />
Input the password and press [Enter].<br />
4 Select the input data source. Press []<br />
or [], select the desired input data<br />
source, and press [Enter].<br />
This section explains how to select<br />
DB Assist (functionality to add<br />
keywords as text data to scanned<br />
images).<br />
nection<br />
me.<br />
ection<br />
0-9<br />
Send<br />
E-mail<br />
Select scanner function.<br />
Database<br />
Connection<br />
GHI<br />
PQR<br />
YZ<br />
on from the list.<br />
Scan to PC TWAIN<br />
Recall Program<br />
NOTE: Press [] or [], select the input source verify and press [Information]. This screen allows<br />
confirmation of details such as the IP address of the data input source PC and the save folder<br />
number.<br />
Password entry is required if DB Assist (functionality to create CSV files from scanned image files<br />
and text data) is selected and a password has been set from DB Assistant.<br />
Scan to<br />
FTP<br />
Stop<br />
User number<br />
(with #key)<br />
Enter<br />
Cancel<br />
Dest. of input data Infor-<br />
Up<br />
mation<br />
File A<br />
Down<br />
Enter<br />
08/08/’05<br />
3-29
Basic Operation<br />
3-30<br />
5 Select the save folder for the desired<br />
image. From the folder selection screen,<br />
to save the image to the currently<br />
selected folder, press [Enter]. The text<br />
data screen is displayed (Proceed to<br />
Step 7). To save to a subfolder of the<br />
selected folder, press [Change inp.<br />
Folder]. The contents of the specified<br />
folder are displayed.<br />
NOTE: Folder names may not be displayed correctly in the folder selection screen if the save folder<br />
name contains a period ( . ) .<br />
The input source cannot be modified from DB Assist.<br />
6 Press [] or [] to select the desired<br />
save folder and press [Enter].<br />
NOTE: To move to the next higher<br />
folder level, select [up] and press<br />
[Enter]. Folders higher than the folder<br />
specified in Scanner File Utility cannot<br />
be set as input sources.<br />
7 Select the item to register and press<br />
[Enter]. The settings screen is displayed<br />
for the selected item. Here, Keyword is<br />
selected.<br />
NOTE: Use File Name to change the filename for the scanned image.<br />
Keyword, Subject, Creator, and Comment may all be saved as text data keywords.<br />
The configuration items may vary if DB Assist Function has been selected.<br />
8 Select the keyword to add and press<br />
[Enter].<br />
To input a new keyword other than those<br />
included with DB Assistant, select<br />
(Other) after the item and press [Enter].<br />
New keywords may be entered. To enter<br />
new letters, press [Type letter].<br />
0-9<br />
nation folder.<br />
0-9<br />
nation folder.<br />
1<br />
2<br />
3<br />
4<br />
5<br />
word.<br />
Cancel<br />
\100.<br />
Up<br />
Change<br />
inp.Folder<br />
[100].<br />
Down<br />
Back<br />
Enter<br />
Cancel<br />
\100. Change<br />
Up<br />
inp.Folder<br />
[up]<br />
[A].<br />
[B].<br />
[C].<br />
[D].<br />
File Information<br />
Indexing completed<br />
File Name<br />
Subject<br />
Keyword<br />
Comment<br />
Please select item for setting. 003-006 can be set for PDF only.<br />
New Keyword<br />
Please enter new keyword.<br />
Keyword6<br />
(Other)<br />
Down<br />
Creator<br />
Back<br />
Type<br />
letter<br />
Enter<br />
Enter<br />
Back<br />
Cancel<br />
Select:<br />
Cancel all<br />
keywords
9 Changed items are identified with a *<br />
mark. When satisfied with changes,<br />
select Indexing complete and press<br />
[Enter].<br />
10 At the machine, place the original, and press the Start<br />
key to begin scanning.<br />
NOTE: Configure various settings from the operation<br />
panel. Change settings as necessary.<br />
If a setting is changed from both the computer and<br />
from the operation panel, the settings from the<br />
operation panel take priority.<br />
To reconfigure text data input, press [Try<br />
again input data].<br />
To end the operation, press [Cancel]<br />
([Job cancel]).<br />
11 The following screen is displayed when<br />
scanning is complete. To finish scanning<br />
originals, press [Input data complete].<br />
The DB Assist function adds text the<br />
previously registered text information<br />
(keywords) to the scanned image and<br />
saves to the specified folder.<br />
The Database Assist function adds text<br />
information from the scanned image as<br />
a CSV file and save to the specified folder.<br />
File Information<br />
Indexing completed<br />
File Name<br />
Subject<br />
Keyword<br />
Comment<br />
Please select item for setting. 003-006 can be set for PDF only.<br />
to scan. ( Full-Color )<br />
als then press Start key.<br />
ection<br />
ata<br />
Try again<br />
input data<br />
Press 'Input data complete'key.<br />
Select the method to continue<br />
Dest. of input data:<br />
File A<br />
User name: 001.<br />
Sel.folder<br />
input data<br />
Basic Operation<br />
NOTE: To re-use the database connection, press [Sel. folder input data]. Follow Step 4 from<br />
page 3-29.<br />
To re-use the database connection with the same settings, press [Same mode input data]. Follow<br />
Step 6 from page 3-30.<br />
To re-use the database connection with the same Assist function selection, press [Input of new<br />
data]. Follow Step 5 from page 3-30.<br />
Creator<br />
Back<br />
Original Send<br />
11×8½" 8½×11"<br />
08/08/’05 14:00<br />
Cancel<br />
Auto<br />
Top Edge<br />
Select<br />
Orig.Size<br />
Orig. Set<br />
Direction<br />
Auto size<br />
200dpi<br />
PDF<br />
Select<br />
Send Size<br />
Scanning<br />
Resolution<br />
File Type<br />
Basic Quality Edit<br />
How-continue<br />
Same mode<br />
input data<br />
Input of<br />
new data<br />
08/08<br />
3-31
Basic Operation<br />
Scan an Image for Scan to FTP<br />
3-32<br />
Scan FTP is a feature that converts original data scanned using the machine to PDF or TIFF format<br />
data and uploads directly to an FTP server.<br />
Up to 10 destination FTP servers can be saved and data can be simultaneously uploaded to those<br />
10 saved FTP servers.<br />
If you already have a running FTP server, no additional software is necessary.<br />
IMPOR<strong>TA</strong>NT: Connection to servers outside the local area network (LAN) may fail due to network<br />
configuration.<br />
Before using Scan to FTP<br />
Before using Scan to FTP, confirm with your administrator the credentials to access the FTP server<br />
and save these to the machine.<br />
• User name<br />
• Password<br />
• FTP Server hostname or IP address<br />
• Port number (Usually 21)<br />
• Path (Path from the FTP server home directory to the save folder)<br />
NOTE: Refer to Modifying Common Address Book on page 2-35 for how to add to the Common<br />
Address Book from the operation panel.<br />
Scanning an image for Scan to FTP<br />
1 Press the Scanner key.<br />
2 Press [Scan to FTP].<br />
Send<br />
E-mail<br />
Select scanner function.<br />
Database<br />
Connection<br />
Scan to PC TWAIN<br />
Scan to<br />
FTP<br />
Recall Program<br />
08/08/’05
3 Select a destination (user name). Either<br />
press the number key or use the<br />
numeric keys to enter the user number<br />
and press [Enter].<br />
Basic Operation<br />
NOTE: If the scanner default setting for Selec. of senders (users) is set to [On], user number 001<br />
will automatically be selected.<br />
If a password was entered when the user was registered, the password input screen is displayed.<br />
Input the password and press [Enter].<br />
4 Press [Address Book].<br />
5 Press [] or [], select the desired<br />
destination FTP server and press [Enter]<br />
([Add dest.]). Log in to the destination<br />
FTP Server.<br />
When a destination is selected, an ⌧ is<br />
displayed next to it in the Select column<br />
to the right of the Address column.<br />
6 If destination FTP server is selected<br />
where in Skip Auth. info Input (Modifying<br />
Common Address Book on page 2-35)<br />
has been set to [Off], at the following<br />
step enter the usename and password<br />
and press [Close].<br />
Username entry<br />
1 Press [Change #] for the username.<br />
2 Input the username.<br />
3 Press [End].<br />
Password entry<br />
1 Press [Change #] for the password.<br />
2 Enter the password.<br />
3 Press [End].<br />
7 Press [Close].<br />
name.<br />
0-9<br />
Place the original and select destination.<br />
Scan to FTP-Sending<br />
Destination<br />
GHI<br />
O PQR<br />
X YZ<br />
Ready to scan. ( Full-Color )<br />
Address<br />
FTP01<br />
Address<br />
Book<br />
User Name & Password<br />
On<br />
Destination :ftp001<br />
User name<br />
Password<br />
Select:<br />
Delete<br />
0.<br />
Register Prgrm<br />
Stop<br />
User number<br />
(with #key)<br />
Enter<br />
Original<br />
11×8½"<br />
08/08<br />
Cont. TX to<br />
Auto<br />
Top Edge<br />
Select<br />
Orig.Size<br />
Orig. Set<br />
Direction<br />
Auto size<br />
200dpi<br />
Select<br />
Scanning<br />
Send Size Resolution<br />
Basic Quality<br />
Up<br />
Down<br />
Close<br />
Address<br />
Properties<br />
Enter<br />
Back<br />
Change #<br />
Change #<br />
3-33
Basic Operation<br />
3-34<br />
8 Configure the scan settings.<br />
9 Place the original and press the Start<br />
key. Scanning of the original begins.<br />
After scanning is complete, the machine<br />
uploads the scanned data to the<br />
destination FTP server(s).<br />
to scan. ( Full-Color )<br />
riginal and select destination.<br />
nding<br />
Address<br />
Book<br />
Delete<br />
Register Prgrm<br />
Now scanning originals.<br />
Orig. Page<br />
3.<br />
11×8½"<br />
1 sided<br />
Top Edge<br />
User name: UserA<br />
Auto<br />
Top Edge<br />
Select<br />
Orig.Size<br />
Orig. Set<br />
Direction<br />
Auto size<br />
200dpi<br />
Select<br />
Scanning<br />
Send Size Resolution<br />
Original Send<br />
11×8½" 8½×11"<br />
08/08/’05 14:00<br />
Cont. TX to<br />
Cancel<br />
Auto<br />
File Name<br />
Input<br />
JPEG<br />
File Type<br />
Basic Quality Edit<br />
Scan to FTP<br />
Send<br />
8½×11"<br />
SCAN0004_nnn.jpg<br />
08/08
Low-Power Mode<br />
Auto Low-Power Mode<br />
To activate Low-Power mode, press the Energy Saver<br />
key.<br />
On the operation panel, only the Energy Saver,<br />
Power, and main power indicators will remain lit.<br />
The machine automatically wakes and begins printing<br />
if print data is received during Low-Power mode. If the<br />
optional fax is installed, the machine also wakes up<br />
and begins printing when a fax is received.<br />
To resume copying, perform one of the following<br />
actions. The machine returns to a copy-ready<br />
condition.<br />
• Press any key on the operation panel.<br />
• Open the original platen or the optional document processor.<br />
• Place originals in the optional document processor.<br />
The machine will resume copy functionality in 30 seconds.<br />
Basic Operation<br />
In Auto Low-Power mode, the machine automatically switches to Low-Power mode if left idle for a<br />
preset period. The default period for Auto Low-Power mode is 7 minutes.<br />
3-35
Basic Operation<br />
Sleep Mode<br />
Auto Sleep Mode<br />
3-36<br />
To activate Sleep mode, press the Power key.<br />
On the operation panel, only the Main Power indicator<br />
will remain lit. The machine will use much less power<br />
than Low-Power mode.<br />
Without illuminating the operation panel, printing<br />
begins automatically if print data is received during<br />
Sleep mode. If the optional fax is installed, the machine<br />
also wakes up and begins printing when a fax is<br />
received, without illuminating the operation panel.<br />
To resume copying, press the Power key again. The<br />
machine will resume copy functionality in 45 seconds.<br />
In Auto Sleep mode, the machine automatically switches to Sleep mode if left idle for a preset<br />
period. The default period for Auto Sleep mode is 29 minutes for the 25/25 ppm model and<br />
44 minutes for the 32/25, 32/32 and 40/35 ppm models.
4 Optional Equipment<br />
This chapter introduces the optional equipment available for the machine.<br />
• Overview of Optional Equipment...4-2<br />
• Document Processor...4-4<br />
• Paper Feeder...4-4<br />
• 3000 Sheet Paper Feeder...4-4<br />
• Document Finisher...4-5<br />
• 3000 Sheet Document Finisher...4-5<br />
• Job Separator...4-5<br />
• Key Counter...4-6<br />
• Fax Kit...4-6<br />
• Memory Card (CompactFlash)...4-6<br />
• Hard Disk...4-7<br />
• Additional Memory...4-7<br />
• Security Kit...4-7<br />
• Network Interface Card...4-8<br />
• Serial Interface...4-8<br />
• Document Table...4-8<br />
4-1
Optional Equipment<br />
Overview of Optional Equipment<br />
4-2<br />
Mailbox<br />
Document Finisher<br />
3000 Sheet Document<br />
Finisher<br />
Folding Unit<br />
The following optional equipment is available for the machine.<br />
Document Processor<br />
Paper Feeder<br />
Key Counter<br />
3000 Sheet Paper<br />
Feeder<br />
Document Table<br />
Job Separator
Serial Interface<br />
Network Interface<br />
Card<br />
Memory Card<br />
(CompactFlash)<br />
Hard Disk<br />
Additional Memory<br />
Security Kit<br />
Optional Equipment<br />
Fax Kit<br />
4-3
Optional Equipment<br />
Document Processor<br />
Paper Feeder<br />
3000 Sheet Paper Feeder<br />
4-4<br />
Automatically scans each page of single sided<br />
originals. Also automatically flips over 2-sided originals<br />
for duplex copying and split copying. For document<br />
processor usage operation, see Loading Originals in<br />
the Document Processor (option) on page 2-18.<br />
Add an additional 2 paper cassettes like Cassette 2 of<br />
the main unit. Paper capacity and loading method is the<br />
same as Cassettes 1 and 2. See Loading Paper into<br />
Cassette 1, 2 on page 2-2.<br />
NOTE: Left cover 3 is located on the left side of the<br />
paper feeder for use in clearing paper jams.<br />
In addition to the standard cassettes, a 3,000 sheet<br />
paper feeder can be added which holds 3,000 sheets of<br />
11 × 8 1/2" or A4 paper.<br />
See Loading Paper into 3000 Sheet Paper Feeder on<br />
page 2-4 for paper loading operation.<br />
NOTE: Left cover 3 is located on the left side of the<br />
3,000 sheet paper feeder for use in clearing paper<br />
jams.
Document Finisher<br />
The document finisher holds a large quantity of finished<br />
copies. The finisher offers a convenient means of<br />
sorting. Sorted finished copies may also be stapled.<br />
For further details, refer to the document finisher<br />
Operation Guide.<br />
3000 Sheet Document Finisher<br />
Job Separator<br />
The document finisher holds a large quantity of finished<br />
copies. The finisher offers a convenient means of<br />
sorting. It can also staple finished sets and punch holes<br />
if equipped with the appropriate optional accessories.<br />
For further details, refer to the 3000 sheet document<br />
finisher Operation Guide. Other options include the<br />
mailbox and folding unit. (See images below.)<br />
Separates paper according to output destination for<br />
easier sorting. Specify an output destination for copy or<br />
print jobs. Or, specify the default mode output<br />
destination for copying or faxing with the optional fax<br />
kit.<br />
Optional Equipment<br />
4-5
Optional Equipment<br />
Key Counter<br />
Fax Kit<br />
4-6<br />
Use the key counter to monitor machine usage. The<br />
key counter offers a convenient solution for centralized<br />
management of copy volume for different departments<br />
in a large company.<br />
Inserting the Key Counter<br />
Insert the key counter securely into the key counter<br />
slot.<br />
NOTE: When the key counter function is activated,<br />
copies can only be made when a key counter is<br />
inserted into the machine. If the key counter is not<br />
inserted securely, Insert key counter will be displayed.<br />
By installing the fax kit, fax send/receive is enabled.<br />
Also, it is possible to use it as a network fax, by using it<br />
with a computer. For further details, refer to the Fax kit<br />
Operation Guide.<br />
Memory Card (CompactFlash)<br />
A microchip card for storing optional fonts, macros or<br />
forms. Insert into the memory card slot on the<br />
machine’s right side.
Hard Disk<br />
Additional Memory<br />
Security Kit<br />
The hard disk is used to store print queue data. Also,<br />
the hard disk is required to use all e-MPS functionality.<br />
Increase the memory available to the printer. Additional<br />
memory enables printing more complex data. An<br />
additional 128 MB, 256 MB or 512 MB may be added.<br />
This machine functions by temporarily storing scanned<br />
data on an internal hard disk. After being used for<br />
copying, this data is not accessible from the operation<br />
panel, but a record of the data remains on the hard disk<br />
until it is overwritten by other data. Thus, the data could<br />
conceivably be retrieved by accessing the hard disk<br />
using specialized tools.<br />
For greater security, the security kit prevents this by<br />
overwriting all unnecessary data in the storage area of<br />
the hard disk so that it cannot be retrieved.<br />
Optional Equipment<br />
4-7
Optional Equipment<br />
Network Interface Card<br />
Serial Interface<br />
Document Table<br />
4-8<br />
Like the machine’s standard network interface, the<br />
network interface card supports TCP/IP, IPX/SPX,<br />
NetBEUI and EtherTalk protocols to enable network<br />
printing for Windows, Macintosh, UNIX, Netware and<br />
other environments.<br />
Install for connecting to printers with serial port<br />
interfaces. Supports the RS-232C serial interface.<br />
Place original or other documents when using the<br />
machine. It has a drawer to accommodate clips.
5 Maintenance<br />
This chapter describes cleaning and toner replacement.<br />
• Cleaning...5-2<br />
• Toner Container and Waste Toner Box Replacement...5-5<br />
5-1
Maintenance<br />
Cleaning<br />
Original Platen and Platen<br />
Document Processor (option)<br />
5-2<br />
Clean the machine regularly to ensure optimum copy quality.<br />
<strong>Caution</strong>: For safety, always unplug the power cord before cleaning the machine.<br />
Open the document processor. Wipe the platen and<br />
the backside of the document processor with a soft<br />
cloth dampened with alcohol or mild detergent.<br />
IMPOR<strong>TA</strong>NT: Do not use thinner or other organic<br />
solvents.<br />
Open the document processor. Wipe the backside of<br />
the document processor and the white rollers with a<br />
soft cloth dampened with alcohol or mild detergent.<br />
IMPOR<strong>TA</strong>NT: Do not use thinner or other organic<br />
solvents.
Slit Glass<br />
Separator<br />
When black streaks or dirt appears in<br />
copies when using the optional<br />
document processor, clean the slit glass<br />
with the included cleaning cloth. The<br />
message: Clean the slit glass for original<br />
fed from DP (Clean the slit glass for<br />
original fed) may be displayed if the slit<br />
glass requires cleaning. After cleaning,<br />
press [End].<br />
Maintenance<br />
IMPOR<strong>TA</strong>NT: Lightly wipe the slit glass with a dry cloth. To remove adhesive material or ink, apply<br />
alcohol to a cloth and wipe lightly. Do not use water, thinner, or organic solvents.<br />
1 Remove the cloth from the cleaning cloth compartment.<br />
2 Open the document processor and wipe slit glass A.<br />
If wrinkles appear in the output paper, clean the separator.<br />
1 Open the front cover.<br />
2 Remove the cleaning brush.<br />
Clean the slit glass for original fed from DP.<br />
A<br />
1.Open the document processor.<br />
2.Clean the surface of narrower glass<br />
located at left with a dry cloth.<br />
3.Please close the document processor.<br />
4.Press END key<br />
If the slit glass is dirty, black line<br />
will appear on the copy.<br />
5-3
Maintenance<br />
5-4<br />
3 Open left cover 1.<br />
4 Open duplex unit A1.<br />
5 As shown in the figure, clean dirt from the separator by<br />
moving the brush from side to side along the separator.<br />
6 Set duplex unit A1 securely to the original position and<br />
close left cover 1.<br />
IMPOR<strong>TA</strong>NT: Push the indicated position to close left<br />
cover 1 securely.<br />
7 Put away the cleaning brush and close the front cover.
Toner Container and Waste Toner Box Replacement<br />
This machine uses 4 types of toner:<br />
cyan (C), magenta (M), yellow (Y) and<br />
black (K). When the touch panel displays<br />
Add toner. [C] [M] [Y] [K], replace the<br />
toner container for the color shown.<br />
Replace the toner without delay when<br />
this message is displayed. When<br />
replacing the toner container, also<br />
replace the waste toner box.<br />
Replace the toner container only if this<br />
messages appears.<br />
NOTE: Press [Adding toner] to display the replacement instructions on the touch panel.<br />
If you close the front cover without<br />
installing toner containers, a screen<br />
asking to check whether the toner<br />
containers are installed is displayed on<br />
the touch panel.<br />
Open the front cover and check whether<br />
all four toner containers are installed. If<br />
all four toner containers are installed,<br />
press [Yes].<br />
Maintenance<br />
IMPOR<strong>TA</strong>NT: If you press [Yes] when one or more toner containers are not installed, the machine<br />
may be damaged. Be sure to close the front cover after all four toner containers have been installed.<br />
Also if toner containers other than specified by our company are installed, the same check screen is<br />
displayed. The machine can be used by pressing [Yes]. To ensure quality, though, it is<br />
recommended to use the toner containers specified by our company.<br />
If a toner container where toner was added is installed to another machine of the same model, the<br />
message indicating unknown toner may be displayed. But, in this case, this toner container can be<br />
used.<br />
Replacement of black toner is explained here as an example.<br />
1 Open the front cover.<br />
Add toner.<br />
[C][M]<br />
Open the front cover of the machine<br />
and replace the toner container<br />
See the toner container box or<br />
operation manual for replacement procedures<br />
Are all of four toner containers installed?<br />
Yes No<br />
<strong>Caution</strong>: Do not attempt to incinerate the toner container or the waste toner box.<br />
Dangerous sparks may cause burns.<br />
<strong>Caution</strong>: Do not attempt to force open or destroy the toner container or the waste<br />
toner box.<br />
5-5
Maintenance<br />
5-6<br />
2 Turn the toner container lock lever to the vertical<br />
position.<br />
3 Push up the toner container top clip A and pull the<br />
toner container down towards you.<br />
4 Lift the toner container up and out.<br />
5 Close the pickup opening, with the cap attached to the<br />
back side, on the old toner container.<br />
<strong>Caution</strong>: Do not attempt to incinerate the toner container or the waste toner box.<br />
Dangerous sparks may cause burns.<br />
<strong>Caution</strong>: Do not attempt to force open or destroy the toner container or the waste<br />
toner box.<br />
A
6 Place the used toner container in the provided plastic<br />
disposal bag.<br />
7 Remove the new toner container from the box.<br />
8 Hold the toner container with the toner container lock<br />
lever positioned on the top, and tap the top side ten<br />
times or more while keeping the container horizontal.<br />
9 Holding the toner container in both hands, hold<br />
vertically and shake up and down strongly at least ten<br />
times to distribute the toner evenly.<br />
IMPOR<strong>TA</strong>NT: Do not install the toner container<br />
before shaking it sufficiently. This may cause errors<br />
due to insufficient toner replenishment.<br />
10 Insert the new toner container into the machine.<br />
11 Press in the toner container upper portion. There will be<br />
an audible ‘click’ when the container is inserted in the<br />
correct position.<br />
Maintenance<br />
5-7
Maintenance<br />
5-8<br />
12 Return the toner container lock lever to its original<br />
position.<br />
Replace the other toner colors in the same fashion.<br />
13 Hold down waste toner box release lever B, and slowly<br />
pull out the waste toner box.<br />
NOTE: Do not turn the removed old waste toner box<br />
upside down.<br />
14 As shown in the illustration, seal the old waste toner<br />
box with a cap.<br />
15 Place the used toner container in the provided plastic<br />
disposal bag.<br />
16 Remove the cap from the new waste toner box.<br />
B
17 Install the new waste toner box.<br />
18 Close the front cover.<br />
After use, always dispose of the toner container and the waste toner box in accordance with<br />
Federal, State and Local rules and regulations.<br />
Maintenance<br />
5-9
Maintenance<br />
5-10
6 Troubleshooting<br />
This chapter explains how to solve problems with the machine.<br />
• Solving Malfunctions...6-2<br />
• Responding to Error Messages...6-4<br />
• Clearing Paper Jams...6-15<br />
6-1
Troubleshooting<br />
Solving Malfunctions<br />
6-2<br />
The table below provides general guidelines for problem solving.<br />
If a problem occurs with your machine, check the checkpoints and perform procedures indicated on<br />
the following pages. If the problem persists, contact your Service Representative.<br />
Symptom Checkpoints Corrective Actions Reference<br />
Page<br />
The operation panel does<br />
not respond when the<br />
machine is turned on ( |<br />
position).<br />
Pressing the Start key<br />
does not produce copies.<br />
The original size is not<br />
detected properly.<br />
Is the machine plugged in? Plug the power cord into an AC outlet. —<br />
Is a message displayed on the touch<br />
panel?<br />
Determine the appropriate response to<br />
the message and take action<br />
accordingly.<br />
Are the originals loaded correctly? When placing originals on the platen,<br />
place them face-down and align them<br />
with the original size indicator plates.<br />
Is the machine installed beneath<br />
fluorescent lights?<br />
Place originals face-up in the optional<br />
document processor.<br />
Do not install this machine beneath<br />
fluorescent lights.<br />
Blank sheets are output. Are the originals loaded correctly? When placing originals on the platen,<br />
place them face-down and align them<br />
with the original size indicator plates.<br />
Is the machine installed beneath<br />
fluorescent lights?<br />
Printing is too light. Is the machine set to Manual Exposure<br />
mode?<br />
Is the toner distributed evenly within the<br />
toner container?<br />
Is there a message indicating the<br />
addition of toner?<br />
Place originals face-up in the optional<br />
document processor.<br />
Do not install this machine beneath<br />
fluorescent lights.<br />
Use the exposure adjustment key to set<br />
the correct exposure level.<br />
Shake the toner container up and down<br />
approximately 10 times.<br />
page 6-4<br />
page 2-16<br />
page 2-18<br />
—<br />
page 2-16<br />
page 2-18<br />
—<br />
page 3-6<br />
page 5-5<br />
Replace the toner container. page 5-5<br />
Is the copy paper damp? Replace the copy paper with new paper. page 2-2<br />
Printing is too dark. Is the machine set to Manual Exposure<br />
mode?<br />
Copies have a moire<br />
pattern (dots grouped<br />
together in patterns and<br />
not aligned uniformly).<br />
Use the exposure adjustment key to set<br />
the correct exposure level.<br />
page 3-6<br />
Is the original a printed photograph? Set the image quality to [Print]. page 3-5<br />
Copies are not clear. Did you choose appropriate image<br />
quality for the original?<br />
Select an appropriate Image Quality<br />
mode.<br />
page 3-5<br />
Is the copy paper damp? Replace the copy paper with new paper. page 2-2<br />
Is special color copy paper being used? Use special color copy paper. —<br />
Copies are dirty. Are the original platen or platen dirty? Clean the original platen or platen glass. page 5-2<br />
Printer output is fuzzy. Is the copy paper damp? Replace the copy paper with new paper. page 2-2<br />
Is special color copy paper being used? Use special color copy paper. —
Troubleshooting<br />
Symptom Checkpoints Corrective Actions Reference<br />
Page<br />
Printing is skewed. Are the originals loaded correctly? When placing originals on the platen,<br />
place them face-down and flush against<br />
the original size indicator plates.<br />
page 2-16<br />
Paper jams frequently<br />
occur.<br />
Copies from the optional<br />
document processor<br />
have black lines.<br />
Copies from the 3000<br />
sheet document finisher<br />
are curled.<br />
When placing originals in the document<br />
processor, align the original width<br />
guides securely before placing the<br />
originals.<br />
Is the paper loaded correctly? Check the position of the paper width<br />
guides.<br />
page 2-18<br />
page 2-2<br />
Is the paper loaded correctly? Load the paper correctly. page 2-2<br />
Is the paper of the supported type? Is it<br />
in good condition?<br />
Remove the paper from the cassette,<br />
turn it over, and reload it.<br />
page 2-2<br />
Is the paper curled, folded, or wrinkled? Replace the paper with new paper. page 2-2<br />
Are there any loose scraps or jammed<br />
paper in the machine?<br />
Remove any jammed paper. page 6-15<br />
Is the copy paper damp? Replace the copy paper with new paper. page 2-2<br />
Is special color copy paper being used? Use special color copy paper. —<br />
Is the slit glass dirty? Clean the slit glass. page 5-2<br />
— Remove the paper from the cassette,<br />
turn it over, and reload it.<br />
page 2-2<br />
Printing is wrinkled. Is the separator dirty? Clean the separator. page 5-3<br />
Is the copy paper damp? Replace the copy paper with new paper. page 2-2<br />
Is special color copy paper being used? Use special color copy paper. —<br />
Is the paper set in a proper orientation? Change the orientation in which the<br />
paper is positioned.<br />
—<br />
Unable to print. Is the machine plugged in? Plug the power cord into an AC outlet. —<br />
Is the machine switched on? Turn the main power switch to on ( |<br />
position).<br />
—<br />
Is the printer cable connected? Confirm the printer cable is securely<br />
connected.<br />
page 2-21<br />
Was the printer switched off when Switch on the printer after connecting page 2-21<br />
connecting the printer cable?<br />
the printer cable.<br />
Characters are not<br />
printed correctly.<br />
Is the device in Offline mode? Press the Printer key and press [GO] to<br />
restore Online mode.<br />
Is the printer cable connected? Confirm the printer cable is securely<br />
connected.<br />
Are the computer settings configured<br />
correctly?<br />
Print output is not correct. Are the computer settings configured<br />
correctly?<br />
Confirm printer driver and application<br />
software settings.<br />
Confirm printer driver and application<br />
software settings.<br />
—<br />
page 2-21<br />
—<br />
—<br />
6-3
Troubleshooting<br />
Responding to Error Messages<br />
Copy Error Messages<br />
6-4<br />
If the touch panel displays any of these messages, follow the corresponding procedure.<br />
If the Copy mode touch panel displays any of these messages, follow the corresponding procedure.<br />
Error Messages Checkpoints Corrective Actions Reference<br />
Page<br />
Close ### cover. Is the indicated cover open? Close all covers securely. —<br />
Check the cover. Are any covers open?<br />
Does the message indicate which<br />
cover is open?<br />
Close Document processor. Is the optional document processor<br />
open while loading the original?<br />
Close Document processor<br />
cover.<br />
Set cassette #.<br />
(Close paper cassette #.)<br />
Open cassette #, check and<br />
remove paper from inside of the<br />
machine.<br />
(Open cassette #, check and<br />
remove paper from inside of<br />
machine.)<br />
Reset feeding unit for paper<br />
cassette.<br />
Add paper in cassette #.<br />
(Add paper cassette #.)<br />
Add paper in the Multipurpose<br />
tray.<br />
## size<br />
(Place paper on the<br />
Multipurpose tray.<br />
## size)<br />
Add paper in the Multipurpose<br />
tray.<br />
(Add paper on the Multipurpose<br />
tray.)<br />
Place transparency in the<br />
Multipurpose tray.<br />
(Place transparencies on the<br />
Multipurpose tray.)<br />
Is the optional document<br />
processor’s document processor<br />
cover open?<br />
Is the indicated cassette not fully<br />
closed?<br />
Close all covers securely. —<br />
Close the document processor. —<br />
Close the document processor<br />
cover.<br />
Pull out the cassette and push in<br />
securely.<br />
— Completely pull out the indicated<br />
cassette and remove any paper<br />
inside.<br />
Is the paper feeder securely pushed<br />
into the machine?<br />
Is the indicated cassette out of<br />
paper?<br />
Is paper of the specified size loaded<br />
in the MP tray?<br />
Has all the paper on the MP tray<br />
been fed?<br />
Are any transparencies loaded in the<br />
MP tray?<br />
Change the size of MP tray. Is the specified size paper loaded in<br />
the MP tray?<br />
Pull out the paper feeder and<br />
securely push it all the way into the<br />
machine.<br />
Load paper. If the same type of<br />
paper is loaded in another cassette<br />
in the same orientation, you can<br />
press either one of paper selection<br />
keys on the left of the touch panel to<br />
switch to that cassette for copying.<br />
Load paper of the size indicated in<br />
the MP tray.<br />
page 6-27<br />
—<br />
—<br />
page 6-20<br />
—<br />
page 2-5<br />
Load paper in the MP tray. page 2-5<br />
Place transparencies on the MP tray. page 2-5<br />
Reconfigure the size of the MP tray. page 2-10
Check paper size. Is the specified size paper loaded? Load paper of a size that can be<br />
used.<br />
Reposition original. Is the orientation of the specified<br />
paper different from that of the<br />
original?<br />
Check paper size. Copy paper is<br />
not the same size as original.<br />
(Paper size in cassette differs<br />
from actual size.<br />
Check paper size in cassette.)<br />
Reposition original or change<br />
cassette.<br />
(Reset original or select another<br />
paper cassette.)<br />
Is the specified paper loaded? Or<br />
are the settings incorrect?<br />
Is the orientation of the specified<br />
paper different from that of the<br />
original?<br />
Is the copier installed beneath<br />
fluorescent lights?<br />
Change the orientation of the<br />
original. If you press the Start key<br />
without doing so, the original will be<br />
copied at the current size.<br />
Load the specified paper. Adjust any<br />
settings that are incorrect.<br />
Change the orientation of the<br />
original.<br />
Do not install this machine beneath<br />
fluorescent lights.<br />
Troubleshooting<br />
Error Messages Checkpoints Corrective Actions Reference<br />
Page<br />
Reset originals in processor. — Remove originals from the optional<br />
document processor, stack them<br />
uniformly and reset them.<br />
page 2-16<br />
Reset all originals in processor.<br />
— Remove originals from the optional page 2-16<br />
(Reset originals in processor.)<br />
document processor, and reset them<br />
in the original order.<br />
Reset all originals in Document<br />
Processor.<br />
(Reset originals in Document<br />
Processor.)<br />
Are there any originals left in the<br />
optional document processor?<br />
Cannot copy this paper type. Can the specified copy functions be<br />
used with the selected paper type?<br />
Cannot staple this paper type. Did you select a paper type that<br />
cannot be stapled?<br />
Cannot punch this paper type. Did you select a paper type that<br />
cannot be punched?<br />
Cannot staple this size. Is stapling available for the size of<br />
the loaded paper? For further<br />
(Cannot staple this paper size.)<br />
details, see the optional document<br />
finisher or 3000 sheet document<br />
finisher Operation Guide.<br />
Cannot punch this size. Is punching available for the size of<br />
the loaded paper? For further<br />
(Cannot punch this paper size.)<br />
details, refer to the optional 3000<br />
sheet document finisher Operation<br />
Guide.<br />
Cannot staple.<br />
## :maximum capacity (Staple)<br />
(Cannot staple.<br />
## :Max. staples)<br />
The top tray is full of paper.<br />
Remove paper, and press "Start"<br />
key.<br />
Is the maximum page quantity for<br />
stapling exceeded? For further<br />
details, see the optional document<br />
finisher or 3000 sheet document<br />
finisher Operation Guide.<br />
During copying, is the maximum<br />
capacity of the output tray<br />
exceeded?<br />
Reset all originals in the optional<br />
document processor.<br />
Select another type of paper. —<br />
Select another type of paper. —<br />
Select another type of paper. —<br />
—<br />
—<br />
—<br />
—<br />
—<br />
—<br />
Change the paper size. —<br />
Change the paper size. —<br />
Decrease the number of sheets to<br />
be stapled to less than the maximum<br />
staple sheet count.<br />
Remove some pages from the<br />
output tray and press the Start key.<br />
Printing continues.<br />
—<br />
—<br />
6-5
Troubleshooting<br />
Error Messages Checkpoints Corrective Actions Reference<br />
Page<br />
The top tray is full of paper.<br />
Remove paper, and press<br />
"Continue" key.<br />
Finisher paper capacity<br />
exceeded. (Tray #)<br />
Remove paper, and press "Start"<br />
key.<br />
Finisher paper capacity<br />
exceeded. (Tray #)<br />
Remove paper, and press<br />
"Continue" key.<br />
6-6<br />
During printing, is the maximum<br />
capacity of the output tray<br />
exceeded?<br />
During copying, is the maximum<br />
capacity of the optional document<br />
finisher or 3000 sheet document<br />
finisher output tray exceeded?<br />
During printing, is the maximum<br />
capacity of the optional document<br />
finisher or 3000 sheet document<br />
finisher output tray exceeded?<br />
Remove paper. Finisher tray. Is the maximum capacity of the<br />
optional document finisher output<br />
tray exceeded?<br />
These functions cannot be<br />
combined.<br />
Have you selected functions that<br />
cannot be used together?<br />
Insert key counter. Is the key counter inserted<br />
correctly?<br />
Remove some pages from the<br />
output tray and press [Continue].<br />
Printing continues.<br />
Remove some pages from the<br />
optional document finisher or 3000<br />
sheet document finisher and press<br />
the Start key. Printing continues.<br />
Remove some pages from the<br />
optional document finisher or 3000<br />
sheet document finisher and press<br />
[Continue]. Printing continues.<br />
Remove some pages from the<br />
optional document finisher.<br />
—<br />
—<br />
—<br />
—<br />
Check the settings. —<br />
Insert the key counter securely and<br />
completely.<br />
Memory full — The current copy cannot be<br />
processed because there is no more<br />
copy memory free space, or the<br />
number of original pages exceeded<br />
the maximum 999 pages. When the<br />
following message is displayed<br />
select the resolution method.<br />
Toner will be empty soon. [C],<br />
[M], [Y], [K]<br />
Ready to copy.<br />
Add toner. [C], [M], [Y], [K]<br />
[Cancel]: Cancels copying.<br />
[Continue]: Copies up to the last<br />
scanned page.<br />
— The toner container will need to be<br />
replaced soon. Prepare the<br />
replacement toner container for the<br />
indicated color.<br />
—<br />
—<br />
page 5-5<br />
— The machine is running low on<br />
toner; only one page may be printed<br />
at a time. Prepare the replacement<br />
toner container.<br />
page 5-5<br />
Add toner. [C], [M], [Y], [K] — Replace the toner container for the<br />
indicated color.<br />
Image cycle.<br />
— Toner replenishment is in progress.<br />
(Now adding toner.)<br />
Wait until the process is completed.<br />
Please wait.<br />
Now in the fusing temperature<br />
adjustment process.<br />
Check waste toner box. Is the waste toner box securely<br />
fastened?<br />
— Performing internal maintenance.<br />
Wait until the process is completed.<br />
page 5-5<br />
Securely fasten the waste toner box. page 5-5<br />
Replace the waste toner box. — Replace the waste toner box. page 5-5<br />
Clean the slit glass for original<br />
— Rub the slit glass with the included page 5-3<br />
fed from DP.<br />
dry cleaning cloth.<br />
(Clean the slit glass for original<br />
fed.)<br />
—<br />
—
Troubleshooting<br />
Error Messages Checkpoints Corrective Actions Reference<br />
Page<br />
Check the waste punch box.<br />
(Check Punch Hole box.)<br />
Is the optional 3000 sheet document<br />
finisher waste punch box securely<br />
fastened?<br />
Empty waste punch box. Is the container for hole punch waste<br />
paper in the optional 3000 sheet<br />
document finisher full?<br />
Out of staples.<br />
Add staples.<br />
(Stapler empty.<br />
Add staples.)<br />
Is the optional document finisher or<br />
3000 sheet document finisher out of<br />
staples?<br />
Refer to the optional 3000 sheet<br />
document finisher Operation Guide<br />
to securely fasten the waste punch<br />
box.<br />
Refer to the optional 3000 sheet<br />
document feeder Operation Guide to<br />
empty the waste punch box.<br />
Refer to the optional document<br />
finisher or 3000 sheet document<br />
finisher Operation Guide to refill<br />
staples.<br />
Time for maintenance. — Periodic maintenance is required to<br />
keep your machine in good<br />
condition. Contact your Service<br />
Representative or Authorized<br />
Service Center promptly.<br />
Paper misfeed. — If a paper jam occurs, the location of<br />
the jam will be indicated on the<br />
touch panel and the machine will<br />
stop. Leave the machine switched<br />
on (| position) and follow the<br />
instructions to remove the jammed<br />
paper.<br />
Remove paper from inner tray of<br />
Finisher.<br />
Remove paper from the folding<br />
unit of the finisher.<br />
Is there any paper left in the optional<br />
document finisher or 3000 sheet<br />
document finisher?<br />
Is there any paper left in the folding<br />
unit of the optional 3000 sheet<br />
document finisher?<br />
Staple jam. Is the optional document finisher or<br />
3000 sheet document finisher<br />
experiencing a staple jam?<br />
System error.<br />
Call service.<br />
Paper cassette is out of order.<br />
Select another paper cassette.<br />
(Paper cassette is out of order.<br />
Select other paper cassette.)<br />
System error.<br />
Main Power Switch Off / On.<br />
HDD error.<br />
Cannot activate Job Accounting<br />
mode.<br />
Is it re-displayed after opening and<br />
closing the front cover, turning off<br />
and on the main power switch, and<br />
plugging out and plugging in the<br />
power plug in the power outlet?<br />
Remove all paper left in the optional<br />
document finisher or 3000 sheet<br />
document finisher.<br />
Refer to the optional 3000 sheet<br />
document finisher Operation Guide<br />
to remove all paper left in the<br />
ejection section of the folding unit.<br />
Refer to the optional document<br />
finisher or 3000 sheet document<br />
finisher Operation Guide to remove<br />
the jammed staple.<br />
Make a note of this message (C<br />
followed by a number). Turn off the<br />
machine ( position), unplug the<br />
power cord, and contact your<br />
Service Representative or<br />
Authorized Service Center.<br />
— The cassette in use has a problem<br />
and is temporarily unavailable.<br />
Contact your Service Representative<br />
or Authorized Service Center<br />
promptly. To continue copying, use<br />
another cassette.<br />
— A system error has occurred. Turn<br />
the main power switch off and on<br />
again.<br />
Is it re-displayed after opening and<br />
closing the front cover, turning off<br />
and on the main power switch, and<br />
plugging out and plugging in the<br />
power plug in the power outlet?<br />
A hard disk error has occurred.<br />
Contact your Service Representative<br />
or Authorized Service Center.<br />
—<br />
—<br />
—<br />
—<br />
page 6-15<br />
—<br />
—<br />
—<br />
—<br />
—<br />
—<br />
6-7
Troubleshooting<br />
Error Messages Checkpoints Corrective Actions Reference<br />
Page<br />
Please wait.<br />
Remote edit.<br />
Security key is not recognized.<br />
Not available.<br />
Printer Error Messages<br />
6-8<br />
Is Job account editing being done<br />
from a network connected<br />
computer?<br />
Is it re-displayed after opening and<br />
closing the front cover, turning off<br />
and on the main power switch, and<br />
plugging out and plugging in the<br />
power plug in the power outlet?<br />
Copying is not possible until editing<br />
is complete.<br />
Contact your Service Representative<br />
or Authorized Service Center.<br />
If the Printer mode touch panel displays any of these messages after pressing the Printer key,<br />
follow the corresponding procedure.<br />
Error Messages Checkpoints Corrective Actions Reference<br />
Page<br />
Load Paper.<br />
## size (##)<br />
Use alternative?<br />
Press GO.<br />
Does the print data match the feed<br />
paper size and paper type?<br />
Replace the size or type of source<br />
paper.<br />
To change the paper source, select<br />
paper source from the touch panel<br />
and press [GO].<br />
To print on the loaded paper, press<br />
the Printer key and press [GO].<br />
To cancel printing, press the Printer<br />
key and press [Cancel].<br />
— Displayed when paper source is<br />
changed. Press [GO].<br />
Set paper Press GO. — This mode supplies paper one sheet<br />
at a time even if multiple sheets<br />
have been loaded. To feed each<br />
sheet, press [GO].<br />
—<br />
—<br />
page 2-2<br />
Load Paper. Is the paper source empty? Load more paper. page 2-2<br />
Out of staples.<br />
Add staples.<br />
(Stapler empty.<br />
Add staples.)<br />
Is the optional document finisher or Refer to the optional document<br />
3000 sheet document finisher out of finisher or 3000 sheet document<br />
staples?<br />
finisher Operation Guide to refill<br />
staples.<br />
Call service. — An internal error has occurred.<br />
Contact your Service Representative<br />
or Authorized Service Center.<br />
Account ID mismatch. — No matching ID-code found. Verify<br />
the registered ID-code using the<br />
driver.<br />
Error has occurred. Change to<br />
printer screen and check.<br />
Option interface error<br />
Code: ##<br />
Is the installed option interface slot<br />
incorrect?<br />
— Shown when a printer error has<br />
occurred when other modes are<br />
currently being displayed. Press the<br />
Printer key to switch to the printer<br />
screen and display the specific error<br />
message.<br />
Switch the main power switch to off<br />
( position) and install in the correct<br />
slot.<br />
—<br />
—<br />
—<br />
—<br />
—<br />
—<br />
—
Troubleshooting<br />
Error Messages Checkpoints Corrective Actions Reference<br />
Page<br />
File not found Press GO. — A file error has occurred. Press<br />
[GO].<br />
Warning image adapt. — Printing not possible at currently set<br />
resolution due to insufficient<br />
memory. Add memory to the printer<br />
or change the print resolution.<br />
Print overrun Press GO. — Overrun has occurred due to<br />
insufficient memory.<br />
Press the Printer key to switch to<br />
printer mode.<br />
Press [GO] to continue printing.<br />
Press [Cancel] to cancel printing.<br />
If resume time has been configured<br />
for Auto Continue, printing resumes<br />
automatically after the set time has<br />
elapsed. After displaying this<br />
message, Page Protect mode is<br />
automatically set to [On].<br />
Memory overflow Press GO. — The current print job cannot be<br />
processed due to insufficient free<br />
memory.<br />
Interface is occupied. Is the selected interface currently in<br />
use?<br />
Press the Printer key to switch to<br />
printer mode.<br />
Press [GO] to continue printing. The<br />
remaining pages will be printed up to<br />
the final processed data.<br />
Press [Cancel] to cancel printing.<br />
If RAM Disk is enabled, decrease<br />
the RAM disk size. Additional printer<br />
memory is recommended if this error<br />
frequently occurs. For additional<br />
printer memory, contact your Service<br />
Representative or Authorized<br />
Service Center. If resume time has<br />
been configured for Auto Continue,<br />
printing resumes automatically after<br />
the set time has elapsed.<br />
—<br />
—<br />
—<br />
—<br />
Try the operation again later. —<br />
Opt. ROM error Press GO. — An option ROM read error has<br />
occurred. Press the Printer key and<br />
press [GO]. The error is cleared.<br />
Check the waste punch box.<br />
(Check Punch Hole box.)<br />
Is the optional 3000 sheet document<br />
feeder waste punch box securely<br />
fastened?<br />
Refer to the optional 3000 sheet<br />
document feeder Operation Guide to<br />
securely fasten the waste punch<br />
box.<br />
—<br />
—<br />
6-9
Troubleshooting<br />
Scanner Error Messages<br />
6-10<br />
If the Scanner mode touch panel displays any of these messages after pressing the Scanner key,<br />
follow the corresponding procedure.<br />
Error Messages Checkpoints Corrective Actions Reference<br />
Page<br />
Unable to use scanner. Is the network cable connected<br />
properly?<br />
This name is already in use.<br />
Input new name again.<br />
This number is already in use.<br />
Input new number again.<br />
Registration full.<br />
You can not add any more.<br />
(Registration full.<br />
Cannot register anymore.)<br />
E-mail size, exceeds data<br />
capacity.<br />
(E-mail size exceeds send<br />
capacity limit.)<br />
Destination address is not being<br />
registered.<br />
(This number is not registered.<br />
Input number again.)<br />
Unable to find SMTP server.<br />
Contact administrator.<br />
SMTP Authentication error.<br />
Contact Administrator.<br />
Unable to find PC for personal<br />
address list.<br />
Check the PC.<br />
Is the network cable connected<br />
properly?<br />
Confirm the network cable is<br />
properly connected. If the scanner<br />
has just been started, try again later<br />
(approximately 2 minutes).<br />
— Change the name and re-enter. —<br />
— Change the number and re-enter. —<br />
— Delete unnecessary entries before<br />
registering a new entry.<br />
— Resend after decreasing the number<br />
of sheets to be transmitted or<br />
decreasing resolution.<br />
— The specified number does not<br />
exist.<br />
Check the number and try again.<br />
Confirm the network cable is<br />
properly connected. If the scanner<br />
has just been started, try again later<br />
(approximately 2 minutes).<br />
Is the SMTP server running? Contact your system administrator<br />
or support personnel.<br />
Have the correct login account name<br />
and password for SMTP<br />
authentication been set?<br />
Is Address Book for Scanner<br />
running on the computer?<br />
Is the network properly connected<br />
on the specified computer?<br />
Is the network cable properly<br />
connected to the scanner network<br />
interface?<br />
Contact your system administrator<br />
or support personnel.<br />
—<br />
—<br />
—<br />
—<br />
page 2-21<br />
—<br />
—<br />
Launch Address Book for Scanner. —<br />
Confirm the computer is properly<br />
connected to the network.<br />
Confirm the network cable is<br />
properly connected to the scanner<br />
network interface.<br />
Network scanner system error. — Switch the device off and back on<br />
again.<br />
Communication error. Scan to PC:<br />
Sending computer status.<br />
E-Mail Send:<br />
Is the SMTP server running?<br />
Database Connection:<br />
Save destination computer status.<br />
—<br />
page 2-21<br />
—<br />
Try retransmitting. —<br />
Contact your system administrator. —<br />
An unsupported response was<br />
received from DB Assistant. Check<br />
the computer running DB Assistant.<br />
Destination PC’s system error. Sending PC computer status. Try retransmitting. —<br />
—
The file was not saved.<br />
Check the destination PC.<br />
Has the maximum hard disk usage<br />
set by Scanner File Utility at the<br />
sending PC been exceeded?<br />
Increase available space and try<br />
again.<br />
Troubleshooting<br />
Error Messages Checkpoints Corrective Actions Reference<br />
Page<br />
Destination PC is in use.<br />
Try again later.<br />
PC’s version of personal address<br />
list is different.<br />
Contact administrator.<br />
PC of personal address list is in<br />
use.<br />
Try again later.<br />
(PC’s version of personal<br />
address list is in use.<br />
Try again later.)<br />
Sender (user) is not registered.<br />
Contact administrator.<br />
No Destination address being<br />
registered.<br />
(Destination address has not<br />
being registered.)<br />
Wrong password.<br />
(Incorrect password.)<br />
Check domain name and host<br />
name.<br />
Overflow of original pages.<br />
Scanned documents were sent.<br />
Check the DB Assistant PC.<br />
Contact administrator.<br />
DB Assistant Server version is<br />
different.<br />
Contact administrator.<br />
DB Assistant Server error.<br />
Contact administrator.<br />
DB Assistant Server is in use.<br />
Try again later.<br />
Are you trying to send from multiple<br />
scanners using the same filename?<br />
Is the Address Book for Scanner<br />
version different?<br />
Is the sender (user) registered as<br />
User No. 001 in the scanner’s<br />
sender (user) list?<br />
Is the specified destination<br />
registered?<br />
Scanner domain name, host name<br />
not set.<br />
Try again later or change the<br />
filename.<br />
— A connection currently exists<br />
between the sending PC and a<br />
scanner. Try retransmitting later.<br />
Contact your system administrator<br />
or support personnel.<br />
— A connection current exists between<br />
the specified Address Book for<br />
Scanner and a scanner. Try making<br />
the selection again later.<br />
Create a new user number 001 entry<br />
or select another user after setting<br />
the scanner default for Selec. of<br />
senders (user) to [Off].<br />
Create a new entry or select another<br />
destination.<br />
—<br />
—<br />
—<br />
—<br />
—<br />
page 2-34<br />
— Enter the correct password. —<br />
Limit of 999 pages that can be sent<br />
at 1 time has been exceeded.<br />
Is the DB Assistant version<br />
different?<br />
Check if domain name and host<br />
name have been configured.<br />
Send the excess pages separately.<br />
Depending on 2-sided or book<br />
original settings, the maximum<br />
sheets that can be sent may be 998<br />
pages.<br />
— DB Assistant not found. Make sure<br />
that DB Assistant is running on the<br />
computer which has DB Assistant<br />
installed.<br />
Contact your system administrator<br />
or support personnel.<br />
— An error has occurred with DB<br />
Assistant or the computer running<br />
DB Assistant. Communication<br />
cannot continue. Check the<br />
computer running DB Assistant.<br />
— DB Assistant currently connected to<br />
another scanner. Try connecting<br />
again later.<br />
—<br />
page 2-32<br />
—<br />
—<br />
—<br />
—<br />
—<br />
6-11
Troubleshooting<br />
Error Messages Checkpoints Corrective Actions Reference<br />
Page<br />
Unable to find FTP server.<br />
Contact administrator.<br />
Unable to Log in to the FTP<br />
Server.<br />
The Path attempted to use for<br />
saving does not exist.<br />
Error occurred at FTP Server.<br />
Please contact Administrator.<br />
Unable to find POP3 server.<br />
Contact Administrator.<br />
6-12<br />
Is the network cable connected<br />
properly?<br />
Confirm the network cable is<br />
properly connected.<br />
Is the FTP server running? Contact your server administrator or<br />
support personnel.<br />
Is the network cable connected<br />
properly?<br />
— FTP server login failed. Make sure<br />
username and password have been<br />
configured.<br />
— Save folder does not exist or path to<br />
save folder is incorrect. Verify that<br />
the FTP server save folder and the<br />
path registered in the machine<br />
match.<br />
— FTP server returned an unexpected<br />
error. Unable to save. Ask your<br />
server administrator to verify that the<br />
logged in user account has write<br />
permissions.<br />
Confirm the network cable is<br />
properly connected.<br />
page 2-21<br />
—<br />
page 2-35<br />
page 2-35<br />
—<br />
page 2-21<br />
Is the POP3 server running? Start the POP3 server. —
Scanner Error Codes<br />
Below is a list of scanner send log error codes and their corrective actions.<br />
Troubleshooting<br />
Error code Detail contents Corrective Actions Reference<br />
Page<br />
E001 User initiated cancel during send. —<br />
E010 Connection to destination PC lost during<br />
data transmission (an error greater than<br />
E011 has occurred that cannot be further<br />
categorized). Or, connection to the<br />
computer running Address Book for<br />
Scanner (Private Address Book) has been<br />
lost.<br />
E011 Transmission aborted due to error in<br />
transmitted image data.<br />
E012 Access to Address Book for Scanner<br />
(Private Address Book) data during image<br />
transmission was lost due to a line fault.<br />
E020 Connection to SMTP server lost while<br />
opening E-mail transmission.<br />
E022 Recipient(s) list includes e-mail address not<br />
recognizable by SMTP server.<br />
• Confirm that there is no link fault by<br />
checking whether the network cable is<br />
properly connected.<br />
• Check that the destination PC is running<br />
properly.<br />
page 2-21<br />
Retry the operation. —<br />
Check that the computer running Address<br />
Book for Scanner (Private Address Book) is<br />
properly connected.<br />
Confirm that there is no link fault by<br />
checking whether the network cable is<br />
properly connected. Otherwise, ask your<br />
system administrator or support personnel<br />
to check that the SMTP server is working<br />
properly.<br />
Check that the destination e-mail address<br />
has been correctly entered.<br />
E023 SMTP server not functioning correctly. Ask system administrator or support<br />
personnel to verify SMTP server is<br />
functioning properly.<br />
E030 Unable to recognize destination PC.<br />
Scanner File Utility not running or already<br />
connected to another scanner.<br />
E031 Scanner password and destination PC<br />
password do not match when preparing for<br />
image transmission.<br />
E032 During Scan to PC, destination PC hard<br />
disk usage limit exceeded.<br />
E033 Version of the Scanner File Utility is<br />
different.<br />
E034 Scanner File Utility connected to another<br />
scanner. Send failed.<br />
E035 No match for Scanner File Utility folder<br />
number during group send. Configuration<br />
change was made during send operation.<br />
E036 During scanned image compression,<br />
compressed data overran available<br />
memory.<br />
• Verify that Scanner File Utility is running<br />
on the destination PC and if it is<br />
currently connected to another scanner.<br />
• Confirm that there is no link fault by<br />
checking whether the network cable is<br />
properly connected.<br />
—<br />
page 2-21<br />
—<br />
—<br />
page 2-21<br />
Check the destination PC password. —<br />
Try again after increasing available space<br />
on the destination PC hard disk.<br />
Check the Scanner File Utility version. —<br />
Try Scan to PC again after closing<br />
connection to another scanner.<br />
Check the Scanner File Utility settings. —<br />
Decrease data size as follows and try<br />
again.<br />
• Decrease resolution.<br />
• Set image quality to OCR.<br />
• Decrease number of pages scanned in<br />
one operation.<br />
—<br />
—<br />
—<br />
6-13
Troubleshooting<br />
Error code Detail contents Corrective Actions Reference<br />
Page<br />
E039 Invalid command received from computer<br />
during Scan to PC. An unexpected<br />
condition has occurred on the destination<br />
PC.<br />
E059 Command received from computer is<br />
invalid. An error condition on the computer<br />
running Address Book for Scanner (Private<br />
Address Book).<br />
E061 An error has occurred for one of the group<br />
members (destinations) when group is<br />
selected during E-Mail Send or Scan to PC.<br />
E080 The network cable is not connected<br />
properly.<br />
6-14<br />
• Check that the Scanner File Utility on<br />
the destination PC is running properly.<br />
• Confirm that no other programs to<br />
receive network data are running on the<br />
computer other than Scanner File Utility.<br />
• Resolve the error condition on the<br />
destination PC.<br />
• Confirm that Address Book for Scanner<br />
(Private Address Book) is running<br />
properly on the destination PC.<br />
• Confirm that no other programs to<br />
receive network data are running on the<br />
computer other than Address Book for<br />
Scanner (Private Address Book).<br />
• Resolve the error condition on the<br />
destination PC.<br />
Check the group member (destination)’s<br />
computer and clear the error condition, if<br />
any.<br />
Confirm the network cable is properly<br />
connected. Also, ask system administrator<br />
or support personnel to verify FTP server is<br />
functioning properly.<br />
E081 FTP server login failed. Make sure username and password have<br />
been configured.<br />
E082 Save folder does not exist or path to save<br />
folder is incorrect.<br />
E083 FTP server returned an unexpected error.<br />
Unable to save.<br />
Verify that the FTP server save folder and<br />
the path registered in the machine match.<br />
Ask your server administrator to verify that<br />
the logged in user account has write<br />
permissions.<br />
E090 POP3 server not found. • Check that the POP3 server is running<br />
properly.<br />
E101 Error occurred when multiple destinations<br />
selected.<br />
• Confirm that there is no link fault by<br />
checking whether the network cable is<br />
properly connected.<br />
Check for error for each individual selection<br />
and resolve the error condition.<br />
—<br />
—<br />
—<br />
page 2-21<br />
page 2-35<br />
page 2-35<br />
—<br />
page 2-21<br />
—
Clearing Paper Jams<br />
Jam Location Indicators<br />
If a paper jam occurs, the touch panel<br />
will display Paper misfeed and the<br />
copying will stop. Refer to these<br />
procedures to remove the jammed<br />
paper.<br />
Paper misfeed.<br />
Troubleshooting<br />
1.Remove paper.<br />
2.Open duplex unit A1 and<br />
remove any paper that is inside.<br />
3.Open cassette 1.<br />
4.Remove paper.<br />
5.Reset the cassette and close the cover.<br />
When a paper jam occurs, the jam location indicators and corrective action are displayed. Jam<br />
location indicators indicate the paper jam position, as shown below.<br />
Paper misfeed.<br />
JAM 00<br />
Jam Location<br />
Indicators<br />
1.Remove paper.<br />
2.Open duplex unit A1 and<br />
remove any paper that is inside.<br />
3.Open cassette 1.<br />
4.Remove paper.<br />
5.Reset the cassette and close the cover.<br />
JAM 00<br />
<br />
<br />
<br />
<br />
<br />
<br />
<br />
<br />
<br />
Paper Jam Location Reference<br />
Page<br />
A Cassette 1 page 6-16<br />
B Cassette 2 page 6-18<br />
C Cassette 3, 4 (option) page 6-19<br />
D MP Tray page 6-20<br />
E Left Cover 1 Interior page 6-23<br />
F Left Cover 2 Interior page 6-24<br />
G Fixing Unit page 6-25<br />
H Document Processor (option) page 6-27<br />
I Document Finisher (option) page 6-28<br />
After clearing the jam, the machine will warm up again and the error message will be cleared. The<br />
machine resumes from the page on which the jam occurred.<br />
<br />
<br />
<br />
<br />
<br />
<br />
<br />
<br />
<br />
<br />
<br />
<br />
<br />
<br />
<br />
<br />
6-15
Troubleshooting<br />
Paper Jam Precautions<br />
Cassette 1<br />
6-16<br />
• Do not reuse paper cleared from a jam.<br />
• If the paper was torn during removal, be sure to remove any loose scraps of paper from the<br />
machine inside. Scraps of paper left in the machine may cause subsequent jamming.<br />
• Jammed paper from the document finisher (option) or 3000 sheet document finisher (option)<br />
will be fed out again. Do not return this paper to the document finisher tray.<br />
<strong>Caution</strong>: The fixing unit of this product is extremely hot. Take sufficient care when<br />
working in this area, as there is a danger of getting burned.<br />
Follow the steps below to clear Cassette<br />
1 jams.<br />
1 Open left cover 1.<br />
2 Remove any jammed paper.<br />
If the paper tears, remove any loose scraps from the<br />
machine.<br />
3 Open duplex unit A1.<br />
Paper misfeed.<br />
JAM 00<br />
1.Remove paper.<br />
2.Open duplex unit A1 and<br />
remove any paper that is inside.<br />
3.Open cassette 1.<br />
4.Remove paper.<br />
5.Reset the cassette and close the cover.
4 Remove any jammed paper.<br />
If the paper tears, remove any loose scraps from the<br />
machine.<br />
5 Pull out Cassette 1.<br />
6 Remove any jammed paper.<br />
If the paper tears, remove any loose scraps from the<br />
machine.<br />
7 Gently push Cassette 1 back in all the way.<br />
8 Set duplex unit A1 securely to the original position and<br />
close left cover 1.<br />
IMPOR<strong>TA</strong>NT: Push the indicated position to close left<br />
cover 1 securely.<br />
Troubleshooting<br />
6-17
Troubleshooting<br />
Cassette 2<br />
6-18<br />
Follow the steps below to clear Cassette<br />
2 jams.<br />
1 Open left cover 2.<br />
2 Remove any jammed paper.<br />
If the paper tears, remove any loose scraps from the<br />
machine.<br />
3 Pull out Cassette 2.<br />
4 Remove any jammed paper.<br />
If the paper tears, remove any loose scraps from the<br />
machine.<br />
5 Gently push Cassette 2 back in all the way.<br />
6 Close left cover 2.<br />
Paper misfeed.<br />
JAM 00<br />
1.Open left cover 2 of the machine<br />
and remove any paper that is inside.<br />
2.Open cassette 2.<br />
3.Remove paper.<br />
4.Reset the cassette and close the cover.
Cassette 3, 4 (option)<br />
Follow the steps below to clear paper<br />
jams when using the optional paper<br />
feeder or 3000 sheet paper feeder and a<br />
jam occurs in Cassettes 3 or 4.<br />
1 Open left cover 3.<br />
2 Remove any jammed paper.<br />
If the paper tears, remove any loose scraps from the<br />
machine.<br />
3 Pull out the cassette in use.<br />
4 Remove any jammed paper.<br />
5 Gently push the cassette back in all the way.<br />
6 Close left cover 3.<br />
Paper misfeed.<br />
JAM 00<br />
Troubleshooting<br />
1.Open the left cover 3 of the machine<br />
and remove any paper.<br />
2.Open cassette 3.<br />
3.Remove paper.<br />
4.Reset the cassette and close the cover.<br />
6-19
Troubleshooting<br />
MP Tray<br />
6-20<br />
Follow the steps below to clear paper<br />
jams in the MP tray.<br />
1 Open left cover 1.<br />
2 Remove any jammed paper.<br />
If the paper tears, remove any loose scraps from the<br />
machine.<br />
3 Open duplex unit A1.<br />
4 Remove any jammed paper.<br />
If the paper tears, remove any loose scraps from the<br />
machine.<br />
Paper misfeed.<br />
JAM 00<br />
1.Remove paper.<br />
2.Open duplex unit A1 and paper feed<br />
guide B1 to remove any paper.<br />
3.Remove any paper from<br />
the multi purpose tray.<br />
4.Open cassette 1. Follow the guidance.
5 Open feed guide B1.<br />
6 Remove any jammed paper.<br />
If the paper tears, remove any loose scraps from the<br />
machine.<br />
Troubleshooting<br />
<strong>Caution</strong>: The fixing unit of this product is extremely hot. Take sufficient care when<br />
working in this area, as there is a danger of getting burned.<br />
7 Remove all paper from the MP tray.<br />
8 Pull out Cassette 1.<br />
9 Rotate Handle B2 to the left at least 10 times. Jammed<br />
paper will be fed inside the left cover.<br />
B1<br />
6-21
Troubleshooting<br />
6-22<br />
10 Remove any jammed paper. Follow the steps below if<br />
unable to remove jammed paper.<br />
11 Pull out paper feed unit B3.<br />
12 Open the cover B4 and remove the jammed paper.<br />
13 If the paper tears, pull paper feed unit B3 out fully, lift<br />
upward and remove.<br />
14 Pull Cassette 1 out fully, lift upward and remove.
Left Cover 1 Interior<br />
15 Remove any jammed paper.<br />
16 Return Cassette 1 and paper feed unit B3 to their original positions.<br />
17 Set feed guide B1 and duplex unit A1 securely to each<br />
original position and close left cover 1.<br />
IMPOR<strong>TA</strong>NT: Push the indicated position to close left<br />
cover 1 securely.<br />
18 Reload the paper in the MP tray.<br />
Follow the steps below to clear jams<br />
occurring inside left cover 1.<br />
1 Open left cover 1.<br />
2 Remove any jammed paper.<br />
If the paper tears, remove any loose scraps from the<br />
machine.<br />
Paper misfeed.<br />
JAM 00<br />
Troubleshooting<br />
1.Open left cover 1.<br />
2.Remove paper.<br />
3.Open duplex unit A1 and<br />
remove any paper that is inside.<br />
4.Close the cover.<br />
6-23
Troubleshooting<br />
Left Cover 2 Interior<br />
6-24<br />
3 Open duplex unit A1.<br />
4 Remove any jammed paper.<br />
If the paper tears, remove any loose scraps from the<br />
machine.<br />
5 Set duplex unit A1 securely to the original position and<br />
close left cover 1.<br />
IMPOR<strong>TA</strong>NT: Push the indicated position to close left<br />
cover 1 securely.<br />
Follow the steps below to clear jams<br />
occurring inside left cover 2.<br />
Follow the steps below at left cover 3 to<br />
clear paper jams when using the<br />
optional paper feeder or 3000 sheet<br />
paper feeder and a jam occurs in<br />
Cassette 3.<br />
1 Open left cover 2.<br />
Paper misfeed.<br />
JAM 00<br />
1.Open left cover 2 of the machine.<br />
2.Remove the paper.<br />
3.Close the cover.
Fixing Unit<br />
2 Remove any jammed paper.<br />
If the paper tears, remove any loose scraps from the<br />
machine.<br />
3 Close left cover 2.<br />
Follow the steps below to clear paper<br />
jams in the fixing unit.<br />
1 Open left cover 1.<br />
2 Remove any jammed paper.<br />
If the paper tears, remove any loose scraps from the<br />
machine.<br />
3 Open duplex unit A1.<br />
Paper misfeed.<br />
JAM 00<br />
Troubleshooting<br />
1.Remove paper.<br />
2.Open duplex unit A1 and remove any<br />
3.Open fixing cover A2 to check<br />
paper inside.<br />
4.Close the cover.<br />
6-25
Troubleshooting<br />
6-26<br />
4 Remove any jammed paper.<br />
If the paper tears, remove any loose scraps from the<br />
machine.<br />
5 Open fixing unit cover A2.<br />
<strong>Caution</strong>: The fixing unit of this product is extremely hot. Take sufficient care when<br />
working in this area, as there is a danger of getting burned.<br />
6 Remove any jammed paper.<br />
If the paper tears, remove any loose scraps from the<br />
machine.<br />
7 If jammed paper can be seen around the eject section,<br />
remove by pulling toward you.<br />
8 Set fixing unit A2 and duplex unit A1 securely to each<br />
original position and close left cover 1.<br />
IMPOR<strong>TA</strong>NT: Push the indicated position to close left<br />
cover 1 securely.
Document Processor (option)<br />
Follow the steps below to clear paper<br />
jams in the document processor.<br />
1 Remove any originals on the original table.<br />
2 Open the document processor cover.<br />
3 Remove the jammed paper.<br />
If the original cannot be easily removed, turn the feed<br />
knob. The original will move to a more easily<br />
accessible location.<br />
If the original tears, remove any loose scraps from<br />
inside the machine.<br />
Paper misfeed.<br />
JAM 00<br />
Troubleshooting<br />
1.Open the document processor top cove<br />
2.Hold up the reverse unit.<br />
3.Turn the left dial.<br />
4.Remove the original.<br />
5.Close the document processor top cove<br />
6-27
Troubleshooting<br />
6-28<br />
4 Lift up the reverse unit.<br />
5 Remove the jammed paper.<br />
If the original tears, remove any loose scraps from<br />
inside the machine.<br />
6 Return the reverse unit to its original position and close the document processor cover.<br />
7 Replace the originals into the original table.<br />
Document Finisher (option)<br />
If a paper jam occurs in the optional document finisher or 3000 sheet document finisher, clear jams<br />
according to the corresponding Operation Guide.
Appendix<br />
This section explains the specifications of this device.<br />
• Body...Appendix-2<br />
• Copying Performance...Appendix-3<br />
• Printing Performance...Appendix-4<br />
• Scanning Performance...Appendix-4<br />
• Document Processor (option)...Appendix-5<br />
• Paper Feeder (option)...Appendix-5<br />
• 3000 Sheet Paper Feeder (option)...Appendix-5<br />
• Document Finisher (option)...Appendix-6<br />
• 3000 Sheet Document Finisher (option)...Appendix-6<br />
• Job Separator (option)...Appendix-7<br />
• Environmental Specifications...Appendix-7<br />
Appendix-1
Appendix<br />
Specifications<br />
Body<br />
Appendix-2<br />
NOTE: These specifications are subject to change without notice.<br />
Copying System Dry static transfer copy system (Laser), Tandem drum system<br />
Supported Original Types Sheet, Book, 3-dimensional objects (maximum original size:<br />
11 × 17"/A3)<br />
Copy Sizes<br />
Cassette 1, 2<br />
11 × 17", 8 1/2 × 14", 11 × 8 1/2", 8 1/2 ×11", 51/2 ×81/2", 8 1/2 × 13",<br />
8 1/2 ×131/2", A3, B4, A4, A4R, B5, B5R, A5R, Folio, 8K, 16K, 16KR<br />
MP Tray<br />
11 × 17" - 5 1/2 ×81/2", A3 - A6R, 8K, 16K, 16KR, YOUKEI 2,<br />
YOUKEI 4<br />
During Duplex Usage 11 × 17" - 5 1/2 ×81/2", A3 - A5R<br />
Non-Copying Margin 4mm or less<br />
Paper Supply Capacity<br />
Cassette 1<br />
Cassette 2<br />
MP Tray<br />
Output Tray Capacity 250 Sheets (80 g/m 2 )<br />
500 sheets (80 g/m 2 , 11 × 8 1/2"/A4 or smaller), 250 sheets (80 g/m 2 ,<br />
8 1/2 × 14"/B4 or larger)<br />
500 sheets (80 g/m 2 )<br />
100 sheets (80 g/m 2 , 11 × 8 1/2"/A4 or smaller), 50 sheets (80 g/m 2 ,<br />
8 1/2 × 14"/B4 or larger)<br />
Warm-up Time Less than 45 seconds<br />
Recovery time from energy save mode: 30 seconds or less<br />
Recovery time from sleep mode: 45 seconds or less<br />
(Room temperature 71.6 °F/22 °C, humidity 60 %)<br />
Memory<br />
For Copying/<br />
For Scanner<br />
For Printing<br />
Additional Memory<br />
Operating Environment<br />
Temperature<br />
Humidity<br />
Altitude<br />
Brightness<br />
768 MB<br />
256 MB<br />
Printer: 128 MB, 256 MB, 512 MB<br />
10 to 32.5 °C (However, the humidity should be 70 % or less when the<br />
temperature is 90.5 °F (32.5 °C))<br />
15 to 80 % (However, the temperature should be 86 °F or less (30 °C<br />
or less) when the humidity is 80 %)<br />
2,500 m or less<br />
1,500 lux or less<br />
Power Supply AC 120 V 60 Hz 12 A<br />
AC 220 to 240 V 50 Hz 7.2 A<br />
Dimensions<br />
(W) × (D) × (H)<br />
23 13/16 ×26×295/16"<br />
605 × 660 × 745 mm<br />
Weight 215.6 lbs./98 kg (excluding toner containers and waste toner box)<br />
Space Required<br />
(W) × (D)<br />
35 × 26"<br />
889 × 660 mm
Copying Performance<br />
Copying Speed (When using the cassette)<br />
25/25 ppm model Black and White copy<br />
11 × 17"/A3: 13 sheets/min<br />
8 1/2 × 14"/B4: 13 sheets/min<br />
11 × 8 1/2"/A4: 25 sheets/min<br />
8 1/2 × 11"/A4R: 17 sheets/min<br />
B5: 25 sheets/min<br />
B5R: 17 sheets/min<br />
32/25 ppm model Black and White copy<br />
11 × 17"/A3: 16 sheets/min<br />
8 1/2 × 14"/B4: 16 sheets/min<br />
11 × 8 1/2"/A4: 32 sheets/min<br />
8 1/2 × 11"/A4R: 22 sheets/min<br />
B5: 32 sheets/min<br />
B5R: 22 sheets/min<br />
32/32 ppm model Black and White copy<br />
11 × 17"/A3: 16 sheets/min<br />
8 1/2 × 14"/B4: 16 sheets/min<br />
11 × 8 1/2"/A4: 32 sheets/min<br />
8 1/2 × 11"/A4R: 22 sheets/min<br />
B5: 32 sheets/min<br />
B5R: 22 sheets/min<br />
40/35 ppm model Black and White copy<br />
11 × 17"/A3: 20 sheets/min<br />
8 1/2 × 14"/B4: 20 sheets/min<br />
11 × 8 1/2"/A4: 40 sheets/min<br />
8 1/2 × 11"/A4R: 28 sheets/min<br />
B5: 40 sheets/min<br />
B5R: 28 sheets/min<br />
First Copy Time<br />
25/25 ppm model<br />
32/25 ppm model<br />
32/32 ppm model<br />
Appendix<br />
Color copy<br />
11 × 17"/A3: 13 sheets/min<br />
8 1/2 × 14"/B4: 13 sheets/min<br />
11 × 8 1/2"/A4: 25 sheets/min<br />
8 1/2 × 11"/A4R: 17 sheets/min<br />
B5: 25 sheets/min<br />
B5R: 17 sheets/min<br />
Color copy<br />
11 × 17"/A3: 13 sheets/min<br />
8 1/2 × 14"/B4: 13 sheets/min<br />
11 × 8 1/2"/A4: 25 sheets/min<br />
8 1/2 × 11"/A4R: 17 sheets/min<br />
B5: 25 sheets/min<br />
B5R: 17 sheets/min<br />
Color copy<br />
11 × 17"/A3: 16 sheets/min<br />
8 1/2 × 14"/B4: 16 sheets/min<br />
11 × 8 1/2"/A4: 32 sheets/min<br />
8 1/2 × 11"/A4R: 22 sheets/min<br />
B5: 32 sheets/min<br />
B5R: 22 sheets/min<br />
Color copy<br />
11 × 17"/A3: 18 sheets/min<br />
8 1/2 × 14"/B4: 18 sheets/min<br />
11 × 8 1/2"/A4: 35 sheets/min<br />
8 1/2 × 11"/A4R: 25 sheets/min<br />
B5: 35 sheets/min<br />
B5R: 25 sheets/min<br />
B/W: 5.9 seconds or less (1:1, 11 × 8 1/2"/A4)<br />
Full color - Single color: 7.9 seconds or less (1:1, 11 × 8 1/2"/A4)<br />
40/35 ppm model B/W: 5.3 seconds or less (1:1, 11 × 8 1/2"/A4)<br />
Full color - Single color: 7.5 seconds or less (1:1, 11 × 8 1/2"/A4)<br />
Resolution Scanning: 600 × 600 dpi<br />
Printing: 600 × 600 dpi<br />
Continuous Copying 1 - 999 sheets<br />
Zoom Level Any level of zoom from 25 - 400 % (in 1 % increments)<br />
includes preset zoom levels<br />
Appendix-3
Appendix<br />
Printing Performance<br />
Scanning Performance<br />
Appendix-4<br />
Printing Speed Same as Copying Speed (When using the cassette)<br />
First Print Time Same as First Copy Time<br />
Resolution 600 dpi (2/4 bit)<br />
Supported Operating<br />
Systems<br />
Windows 95 OSR2, Windows 98 Second Edition,<br />
Windows NT 4.0 Service Pack 5 or later,<br />
Windows 2000 Service Pack 2 or later, Windows Me, Windows XP,<br />
Windows Server 2003, Apple Macintosh OS 9.x/OS X 10.x<br />
Interface Parallel port interface: 1 IEEE1284<br />
Network interface: 1<br />
USB: 1 Hi-Speed USB<br />
Network interface cards (option): 1<br />
Serial interface (option): 1<br />
Hardware IBM PC/AT Compatible<br />
Supported Operating<br />
Systems<br />
Windows 95 OSR2, Windows 98 Second Edition,<br />
Windows NT 4.0 Service Pack 5 or later,<br />
Windows 2000 Service Pack 2 or later, Windows Me, Windows XP,<br />
Windows Server 2003, Mac OS 9.1-9.2.2, Mac OS 10.1.5-10.4<br />
(TWAIN: Mac OS 10.2-10.4)<br />
Operating Environment CPU Pentium 133 MHz or higher (Windows Me 150 MHz or<br />
higher, Windows XP Celeron 600 MHz or higher,<br />
Macintosh PowerPC G3 or higher)<br />
Recommended<br />
Environment<br />
RAM 64 MB or greater (Windows XP 128 MB)<br />
HDD 20 MB or greater<br />
CPU Celeron 266 MHz or higher (Windows XP Celeron<br />
800 MHz or higher)<br />
RAM 64 MB or greater<br />
HDD 300 MB or greater<br />
CD-ROM 1 drive<br />
Ethernet 10BASE-T/100BASE-TX<br />
Network Protocol TCP/IP<br />
Communications Protocols Proprietary (image transferring, setting via utility), SMTP (e-mail<br />
sending), HTTP (setting via web), FTP (When sending FTP), TWAIN<br />
(When using TWAIN)
Document Processor (option)<br />
Paper Feeder (option)<br />
Original Feed Method Automatic feed<br />
Supported Original Types Sheet originals<br />
Paper Size Maximum: 11 × 17"/A3<br />
Minimum: 5 1/2 ×81/2"/A5R<br />
Paper Weight 1-sided original: 45 - 160 g/m2 2-sided original: 50 - 120 g/m2 Original No. of Sheets 11 × 8 1/2"/A4 or smaller: 100 sheets or less 50 - 80 g/m2 8 1/2 × 14"/B4 or larger: 70 sheets or less 50 - 80 g/m2 Device Dimensions 22 1/2 ×193/16 ×51/4"<br />
(W) × (D) × (H)<br />
571 × 488 × 134 mm<br />
3000 Sheet Paper Feeder (option)<br />
Weight Approx. 25.3 lbs./Approx. 11.5 kg<br />
Appendix<br />
Paper Supply Method Friction Feed (No. Sheets: 500, 80 g/m2 , 2 cassettes)<br />
Paper Size 11 × 17", 8 1/2 ×14", 11×81/2", 8 1/2 × 11", 10 1/2 ×71/4", 7 1/4 ×101/2",<br />
5 1/2 ×81/2", 8 1/2 ×13", 81/2 ×131/2", A3, B4, A4, A4R, B5, B5R, A5R,<br />
Folio, 8K, 16K, 16KR<br />
Supported Paper Paper weight: 60 - 105 g/m2 Paper types: standard, recycled, color<br />
Dimensions<br />
23 5/16 ×231/4 ×123/8"<br />
(W) × (D) × (H)<br />
585 × 590 × 315 mm<br />
Weight Approx. 57.2 lbs. / Approx. 26 kg<br />
Paper Supply Method Friction retard method (No. sheets: 3000, 80 g/m2 )<br />
Paper Size 11 × 8 1/2", A4<br />
Supported Paper Paper weight: 60 - 105 g/m2 Paper types: standard, recycled, color<br />
Dimensions<br />
23 5/16 ×235/8 ×123/8"<br />
(W) × (D) × (H)<br />
585 × 600 × 314 mm<br />
Weight Approx. 50.6 lbs. / Approx. 23 kg<br />
Appendix-5
Appendix<br />
Document Finisher (option)<br />
Appendix-6<br />
Number of Trays 1 tray<br />
Paper Size<br />
(Non-stapling)<br />
Supported Paper<br />
Weight<br />
Maximum Sheets for<br />
Stapling †<br />
Dimensions<br />
(W) × (D) × (H)<br />
NOTE: When using the document finisher or 3000 sheet document finisher, the optional job<br />
separator must be installed.<br />
Only paper that can be fed from the cassette can be ejected from the document finisher or 3000<br />
sheet document finisher.<br />
3000 Sheet Document Finisher (option)<br />
11 × 17", 8 1/2 × 14", A3, B4: 500sheets<br />
11 × 8 1/2", 8 1/2 × 11", A4, A4R, B5, B5R, Folio: 1000 sheets<br />
Stapling: 80 g/m 2 or less<br />
11 × 17", 8 1/2 × 14", A3, B4: 20 sheets, 11 × 8 1/2", 8 1/2 × 11", A4, A4R,<br />
B5: 30 sheets (Paper weight 80 g/m2 or less)<br />
22 × 20 11/16 ×361/16"<br />
558 × 526 × 916 mm<br />
Weight Approx. 55 lbs./Approx. 25 kg<br />
† When using color copy paper, stapling up to the number of allowed sheets may not be<br />
possible due to paper quality.<br />
Number of Trays 3 tray<br />
Paper Size<br />
Tray A (Non-stapling) 11 × 17", 8 1/2 × 14" A3, B4, 8K: 1500 sheets<br />
11 × 8 1/2", 8 1/2 × 11", A4, A4R, B5, Folio, 16K: 3000 sheets<br />
Tray B<br />
11 × 17", 8 1/2 × 14" A3, B4, 8K: 100 sheets<br />
11 × 8 1/2", 8 1/2 ×11", 51/2 ×81/2", A4, A4R, B5, B5R, A5, A5R, B6R, A6R,<br />
Folio, 16K, 16KR: 200 sheets<br />
Postcard: 50 sheets<br />
Tray C<br />
11 × 8 1/2", 5 1/2 ×81/2", A4, B5, A5, A5R, B6R, A6R, 16K: 50 sheets<br />
Postcard: 10 sheets<br />
Supported Paper Stapling: 90 g/m<br />
Weight<br />
2 or less<br />
Punchingoption: 45 - 200 g/m2 Maximum Sheets for<br />
Stapling †<br />
Dimensions<br />
(W) × (D) × (H)<br />
11 × 17", 8 1/2 × 14", A3, B4: 30 sheets, 11 × 8 1/2", 8 1/2 × 11", A4, A4R,<br />
B5: 50 sheets (Paper weight 90 g/m 2 or less)<br />
26 15/16 ×223/16 ×4213/16"<br />
684 × 563 × 1087 mm<br />
Weight Approx. 105.6 lbs. or less/Approx. 48 kg or less<br />
† When using color copy paper, stapling up to the number of allowed sheets may not be<br />
possible due to paper quality.<br />
NOTE: When using the document finisher or 3000 sheet document finisher, the optional job<br />
separator must be installed.<br />
Only paper that can be fed from the cassette can be ejected from the document finisher or 3000<br />
sheet document finisher.
Job Separator (option)<br />
Environmental Specifications<br />
NOTE: Contact your Dealer or Service Representative for recommended paper types.<br />
Appendix<br />
Number of Trays 1 tray<br />
Maximum Sheets 100 sheets (80 g/m2 )<br />
Paper Size 11 × 17", 8 1/2 ×14", 11×81/2", 8 1/2 ×11", 71/4 ×101/2", 5 1/2 ×81/2",<br />
8 1/2 × 13", 8 1/2 ×131/2", A3, B4, A4, A4R, B5, B5R, A5R, Folio<br />
Paper Type Paper weight: 60 - 105 g/m2 Paper type: standard, recycled, color, thin, letterhead<br />
Device Dimensions 22 7/16 ×227/16 ×91/2"<br />
(W) × (D) × (H) 570 × 570 × 240 mm<br />
Weight 5.06 lbs. or less /2.3 kg or less<br />
Recovery time from Low-Power mode 30 seconds or less<br />
Time to Low-Power mode (factory default setting) 7 minutes<br />
Time to Sleep mode (factory default setting) 25/25 ppm model 29 minutes<br />
32/25 ppm model<br />
32/32 ppm model<br />
40/35 ppm model<br />
44 minutes<br />
Duplexing Standard<br />
Paper supply capability Paper with 100 % recycled paper<br />
content may be used<br />
Appendix-7
Appendix<br />
Appendix-8
Index<br />
Numerics<br />
3000 sheet document finisher 4-5<br />
Paper jams 6-28<br />
Specifications Appendix-6<br />
3000 sheet paper feeder 4-4<br />
Loading paper 2-4<br />
Paper jams 6-19<br />
Specifications Appendix-5<br />
Specifying the paper type 2-8<br />
A<br />
Additional memory 4-7<br />
Adjusting exposure<br />
Auto Exposure mode 3-6<br />
Manual Exposure mode 3-6<br />
Auto Low-Power mode 3-35<br />
Auto Sleep mode 3-36<br />
B<br />
Background exposure adjust ii<br />
Batch scanning ii<br />
Booklet i<br />
Border erase i<br />
C<br />
Cable connection<br />
Network interface 2-21<br />
Parallel port interface 2-21<br />
USB interface 2-21<br />
Canceling a print job 3-19<br />
Carrying handles 1-3<br />
Cassette<br />
Cassette 1 1-2, 2-2<br />
Cassette 2 1-2, 2-2<br />
Loading paper 2-2<br />
Paper jams 6-16, 6-18<br />
Specifying paper size 2-7<br />
Specifying the paper type 2-8<br />
<strong>Caution</strong> labels xii<br />
Centering originals i<br />
Cleaning<br />
Original platen, platen 5-2<br />
Separator 5-3<br />
Slit glass 5-3<br />
Document processor 5-2<br />
Color balance adjust ii<br />
Color/B&W selection iii<br />
Combine mode i<br />
Conventions in this guide xxv<br />
Copy<br />
Adjusting exposure 3-6<br />
Basic copying procedures 3-2<br />
Duplex mode 3-11<br />
Error message 6-4<br />
Interrupt copy 3-17<br />
Job reservation 3-18<br />
Reducing/Enlarging 3-7<br />
Selecting image quality 3-5<br />
Sort mode 3-16<br />
Specifications Appendix-3<br />
Split mode 3-14<br />
Copy screen 1-5<br />
Copying speed Appendix-3<br />
Cover mode i<br />
D<br />
Database connection v, 3-28<br />
Document finisher 4-5<br />
Paper jams 6-28<br />
Specifications Appendix-6<br />
Document processor 4-4<br />
Cleaning 5-2<br />
Loading originals 2-18<br />
Paper jams 6-27<br />
Part names 2-18<br />
Precautions 2-18<br />
Specifications Appendix-5<br />
Document Table 4-8<br />
Duplex mode i, 3-11<br />
Duplex path iv<br />
E<br />
EcoPrint ii<br />
Energy Star program x<br />
Environmental specifications Appendix-7<br />
Error code 6-13<br />
Error message<br />
Copy 6-4<br />
Printer 6-8<br />
Scanner 6-10<br />
F<br />
Fax kit 4-6<br />
First copy time Appendix-3<br />
First print time Appendix-4<br />
Front cover 1-3, 5-3, 5-5<br />
Full-color scan v<br />
G<br />
Grounding the machine xiv<br />
H<br />
Hard disk 4-7<br />
Index<br />
Index-1
Index<br />
Hue adjust iii<br />
I<br />
Image repeat copy ii<br />
Included guides xxiv<br />
Installation precautions xiii<br />
Interface cover 1-2, 2-21<br />
Interrupt copy 3-17<br />
Inverted copying ii<br />
J<br />
Job accounting v<br />
Job build iii<br />
Job reservation 3-18<br />
Job separator 4-5<br />
Specifications Appendix-7<br />
Job storage iv<br />
K<br />
Key counter 4-6<br />
How to insert 4-6<br />
L<br />
Language v, 2-20<br />
Left cover 1 1-3, 5-4, 6-16, 6-20<br />
Left cover 2 1-3, 6-18, 6-24<br />
Legal and safety information<br />
Automatic 2-sided copy function x<br />
<strong>Caution</strong> labels xii<br />
Energy saving control function x<br />
Energy Star program x<br />
Grounding the machine xiv<br />
Installation precautions xiii<br />
Legal information viii<br />
Paper recycling x<br />
Power supply xiv<br />
Precautions for use xiv<br />
Regarding tradenames ix<br />
Safety conventions xi<br />
Symbols xi<br />
Legal information viii<br />
List of functions i<br />
Low-Power mode 3-35<br />
M<br />
Main power switch 1-2, 2-21, 3-2, 3-4<br />
Main power switch cover 1-2, 2-21, 3-2<br />
Maintenance 5-1<br />
Margin mode i<br />
Memo mode ii<br />
Memory card 4-6<br />
Memory card slot 1-2, 4-6<br />
Mirror copying ii<br />
MP tray 1-2<br />
Index-2<br />
Loading paper 2-5<br />
Paper jams 6-20<br />
Specifying paper size 2-10<br />
Specifying the paper type 2-15<br />
MP tray extension 1-2, 2-5<br />
N<br />
Names<br />
Body 1-2<br />
Operation panel 1-4<br />
Touch panel 1-5<br />
Network interface 1-2, 2-21<br />
Network interface card 4-8<br />
O<br />
Offset mode i<br />
OHP backing sheet mode ii<br />
One touch image adjust iii<br />
Operation panel 1-2, 1-4<br />
Option<br />
3000 sheet document finisher 4-5<br />
3000 sheet paper feeder 4-4<br />
Additional memory 4-7<br />
Document finisher 4-5<br />
Document processor 4-4<br />
Document table 4-8<br />
Fax kit 4-6<br />
Hard disk 4-7<br />
Job separator 4-5<br />
Key counter 4-6<br />
Memory card 4-6<br />
Network interface card 4-8<br />
Overview of optional equipment 4-2<br />
Paper feeder 4-4<br />
Security kit 4-7<br />
Serial interface 4-8<br />
Original<br />
Loading on the platen 2-16<br />
Loading originals in the document processor<br />
2-18<br />
Size xxvi<br />
Original platen 1-2, 2-16<br />
Cleaning 5-2<br />
Original size indicator plates 1-2, 2-16<br />
Output management iv<br />
Output tray 1-3, 3-3<br />
P<br />
Page numbering i<br />
Paper<br />
Loading paper in the MP tray 2-5<br />
Loading paper into 3000 sheet paper feeder 2-4<br />
Loading paper into Cassette 1, 2 2-2<br />
Loading paper into paper feeder 2-2<br />
Note 2-2
Size xxvi, 2-7, 2-10<br />
Type 2-8, 2-15<br />
Paper feeder 4-4<br />
Loading paper 2-2<br />
Paper jams 6-19<br />
Specifications Appendix-5<br />
Specifying paper size 2-7<br />
Specifying the paper type 2-8<br />
Paper jams 6-15<br />
3000 sheet document finisher 6-28<br />
3000 sheet paper feeder 6-19<br />
Cassette 1 6-16<br />
Cassette 2 6-18<br />
Document finisher 6-28<br />
Document processor 6-27<br />
Fixing unit 6-25<br />
Jam location indicators 6-15<br />
Left cover 1 6-23<br />
Left cover 2 6-24<br />
MP tray 6-20<br />
Paper feeder 6-19<br />
Paper jam precautions 6-16<br />
Paper length guide 1-2, 2-3<br />
Paper width adjusting tab 1-2, 2-3<br />
Paper width guide 1-2, 2-3<br />
Parallel port interface 1-2, 2-21<br />
Part names 1-1<br />
Platen 1-2, 2-16<br />
Cleaning 5-2<br />
Poster i<br />
Power supply xiv<br />
Precautions for use xiv<br />
Preparation 2-1<br />
Printer<br />
Cancel 3-19<br />
Error message 6-8<br />
Included printer utilities 2-24<br />
Installing the printer driver 2-25<br />
Network Settings 2-22<br />
Specifications Appendix-4<br />
Printer driver 2-25<br />
Printer screen 1-6<br />
Printing speed Appendix-4<br />
Private print iv<br />
Programmed copying iii<br />
Programmed scanning v<br />
Proof and hold iv<br />
Proof copy ii<br />
Q<br />
Quick copy iv<br />
R<br />
Reducing/Enlarging<br />
Auto zoom 3-7<br />
Manual zoom 3-7, 3-8<br />
Preset zoom 3-7, 3-9<br />
XY zoom 3-7, 3-10<br />
Repeat copy ii<br />
Resolution Appendix-3, Appendix-4<br />
S<br />
Safety conventions xi<br />
Scan to FTP v, 3-32<br />
FTP Common Address Book 2-35<br />
Scan to PC v, 3-23<br />
Scan to PC Common Address Book 2-35<br />
Scanner<br />
Basic settings 2-32<br />
Configuring date/time 2-37<br />
Configuring time difference 2-37<br />
Connection 2-31<br />
Database connection 3-28<br />
Error code 6-13<br />
Error message 6-10<br />
Installing utilities 2-39<br />
Modifying Common Address Book 2-35<br />
Registering user information 2-34<br />
Scan to FTP 3-32<br />
Scan to PC 3-23<br />
Scanner File Utility 2-40<br />
Send E-mail 3-20<br />
Specifications Appendix-4<br />
TWAIN 3-27<br />
Scanner File Utility<br />
Installing 2-40<br />
Registering file save folders 2-41<br />
Setting from a web browser 2-44<br />
Scanner screen 1-6<br />
Security kit 4-7<br />
Selecting image quality 3-5<br />
Map 3-5<br />
Photo 3-5<br />
Print 3-5<br />
Text 3-5<br />
Text+Photo 3-5<br />
Send E-mail v, 3-20<br />
E-mail Common Address Book 2-35<br />
Separator<br />
Cleaning 5-3<br />
Serial interface 4-8<br />
Shared data box iii<br />
Sharpness adjust ii<br />
Single color copy iii<br />
Sleep mode 3-36<br />
Slider 1-2, 2-6<br />
Slit glass<br />
Cleaning 5-3<br />
Solving malfunctions 6-2<br />
Sort mode 3-16<br />
Specifications<br />
3000 sheet document finisher Appendix-6<br />
Index<br />
Index-3
Index<br />
3000 sheet paper feeder Appendix-5<br />
Body Appendix-2<br />
Copying performance Appendix-3<br />
Document finisher Appendix-6<br />
Document processor Appendix-5<br />
Environmental specifications Appendix-7<br />
Job separator Appendix-7<br />
Paper feeder Appendix-5<br />
Printing performance Appendix-4<br />
Scanning performance Appendix-4<br />
Split mode i, 3-14<br />
Symbols xi<br />
Synergy print box iv<br />
T<br />
TCP/IP 2-22<br />
Toner container 1-3<br />
Replacement 5-5<br />
Toner container lock lever 1-3, 5-6<br />
Touch panel 1-5<br />
TWAIN v, 3-27<br />
Initiating the connection from the computer 3-27<br />
Initiating the connection from the machine 3-27<br />
U<br />
USB interface 1-2, 2-21<br />
V<br />
Virtual mailbox iv<br />
W<br />
Warm-up 3-2<br />
Waste toner box 1-3<br />
Replacement 5-5<br />
Index-4
For best results and machine performance, we recommend that you use only our original supplies for<br />
your products.<br />
E1
U<strong>TA</strong>X GmbH, Ohechaussee 235, 22848 Norderstedt, Germany