Livedesign Evaluation Board Test Procedures Guide - Altium
Livedesign Evaluation Board Test Procedures Guide - Altium
Livedesign Evaluation Board Test Procedures Guide - Altium

Create successful ePaper yourself
Turn your PDF publications into a flip-book with our unique Google optimized e-Paper software.
Summary<br />
<strong>Guide</strong><br />
GU0106 (v1.0) December 7, 2004<br />
LiveDesign <strong>Evaluation</strong> <strong>Board</strong><br />
<strong>Test</strong> <strong>Procedures</strong><br />
This guide takes you through the steps of testing the<br />
peripherals and features of the LiveDesign <strong>Evaluation</strong><br />
<strong>Board</strong>.<br />
<strong>Test</strong> procedures were developed to test the LiveDesign <strong>Evaluation</strong> <strong>Board</strong>(s) during its development<br />
phase to verify correct operation. The following test procedures allow the LiveDesign <strong>Evaluation</strong> <strong>Board</strong><br />
to be tested using the supplied cables and with some standard computer equipment.<br />
<strong>Board</strong> Preparation<br />
Parts required<br />
• PC running DXP 2004<br />
• Power Supply and Power Supply Cord*<br />
• Parallel Cable (26 way IDC – DB25)*<br />
• PS2 Keyboards (x2)<br />
• VGA Color Monitor<br />
• Standard PC Speakers<br />
• Headphones<br />
• RS232 (Male) Serial Port Loop-Back Connector<br />
• User Header Cable (20 way IDC – 20 way IDC)*<br />
* Supplied with LiveDesign <strong>Evaluation</strong> Kit<br />
GU0106 (v1.0) December 7, 2004 1
LiveDesign <strong>Evaluation</strong> <strong>Board</strong> <strong>Test</strong> <strong>Procedures</strong> <strong>Guide</strong><br />
Connecting the board<br />
The following section describes the test setup required for running all tests. A subset of tests can be<br />
performed if not all external cables are available. The tests that require special hardware will fail if the<br />
test hardware is not connected; the following table shows what functional tests require additional<br />
connected hardware.<br />
User<br />
Header<br />
Cable<br />
User Header A and B �<br />
RS232 Serial<br />
Port Loop-Back<br />
Connector<br />
RS232 Serial Port �<br />
1. Connect the LiveDesign <strong>Evaluation</strong> <strong>Board</strong> to your<br />
PC using the parallel cable, via the parallel<br />
header socket.<br />
2. Connect the power supply to the power supply<br />
socket. Connect the power supply cord to the<br />
power supply and plug it in to a standard power<br />
socket.<br />
VGA<br />
Color<br />
Monitor<br />
VGA Port �<br />
PS2<br />
Keyboards<br />
Keyboard / Mouse Ports �<br />
PC<br />
Speakers<br />
Headphones<br />
Audio system � �<br />
2 GU0106 (v1.0) December 7, 2004
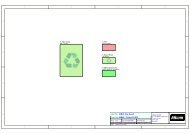
3. Connect the 20-way IDC User Header Cable from<br />
User Header A (HDR9) to User Header B<br />
(HDR10) in a one to one configuration.<br />
4. Connect the RS232 Serial Port Loop-Back<br />
Connector into the RS232 Serial Port (J4).<br />
This diagram shows the pin out connections for<br />
the (Male) RS232 Serial Port Loop-Back<br />
connector.<br />
5. Connect the VGA Color Monitor into the VGA<br />
Port (J5).<br />
LiveDesign <strong>Evaluation</strong> <strong>Board</strong> <strong>Test</strong> <strong>Procedures</strong> <strong>Guide</strong><br />
GU0106 (v1.0) December 7, 2004 3
LiveDesign <strong>Evaluation</strong> <strong>Board</strong> <strong>Test</strong> <strong>Procedures</strong> <strong>Guide</strong><br />
6. Connect the two PS2 Keyboards into the two PS2<br />
sockets (J2 and J3).<br />
7. Connect the powered PC Speakers to the Audio<br />
Line Out socket (J1).<br />
Connect the Headphones to the Audio<br />
Headphone socket (J6).<br />
4 GU0106 (v1.0) December 7, 2004
Main Functional <strong>Test</strong><br />
LiveDesign <strong>Evaluation</strong> <strong>Board</strong> <strong>Test</strong> <strong>Procedures</strong> <strong>Guide</strong><br />
Opening the test project and testing the board connection<br />
Once the LiveDesign <strong>Evaluation</strong> <strong>Board</strong> has been powered up, connected to your PC and the additional<br />
hardware has been connected you are now ready to perform the full functional test. This section will<br />
take you through the steps of opening the functional test project and checking that the DXP 2004<br />
software can successfully connect to the LiveDesign <strong>Evaluation</strong> <strong>Board</strong>.<br />
1. Start the DXP 2004 software from the Start<br />
menu. Once the software has loaded select<br />
File >> Open from the menus.<br />
2. Navigate to the \<strong>Altium</strong>2004\Examples\<br />
LiveDesign <strong>Evaluation</strong> <strong>Board</strong>\Eval<strong>Board</strong><br />
<strong>Test</strong>ing\EB1 EB2 <strong>Test</strong>er\ folder.<br />
GU0106 (v1.0) December 7, 2004 5
LiveDesign <strong>Evaluation</strong> <strong>Board</strong> <strong>Test</strong> <strong>Procedures</strong> <strong>Guide</strong><br />
3. In this folder, open the file<br />
Eval<strong>Board</strong><strong>Test</strong>er.PrjFpg. When the project<br />
has loaded, the Projects panel on the left side<br />
of the workspace will display the files in this<br />
project.<br />
4. Select View >> Devices View from the menus<br />
to display the Devices View window.<br />
5. Ensure that the Live checkbox is enabled and<br />
that the Connected indicator is green. This<br />
indicates that the system is connected and<br />
communicating with the LiveDesign <strong>Evaluation</strong><br />
<strong>Board</strong>.<br />
If the Devices View does not show the status<br />
as connected, or no FPGA icon is visible, refer<br />
to the Troubleshooting connection problems<br />
section within the LiveDesign <strong>Evaluation</strong> <strong>Board</strong><br />
Technical Reference Manual. The ‘No<br />
Nano<strong>Board</strong>s Found’ message will be shown,<br />
but is not relevant in the use of the LiveDesign<br />
<strong>Evaluation</strong> <strong>Board</strong>.<br />
6 GU0106 (v1.0) December 7, 2004
Downloading and running the test<br />
LiveDesign <strong>Evaluation</strong> <strong>Board</strong> <strong>Test</strong> <strong>Procedures</strong> <strong>Guide</strong><br />
This section will guide your through each functional test of the LiveDesign <strong>Evaluation</strong> <strong>Board</strong>.<br />
Note: The user interface including; user input, status and error messages of this functional test<br />
sequence is displayed on a VGA monitor. You must connect a VGA-compatible RGB video monitor to<br />
the VGA Port (J5) of the LiveDesign <strong>Evaluation</strong> <strong>Board</strong> before continuing.<br />
6. To process the project and<br />
download it to the<br />
LiveDesign <strong>Evaluation</strong><br />
<strong>Board</strong>, click the Program<br />
FPGA button in the Devices<br />
View window.<br />
The full test sequence will run automatically and you will be prompted for appropriate actions<br />
between each test. Any errors during the test will be indicated by an “ERROR” message on the<br />
VGA monitor and sound from the speakers. If an error message occurs it must be acknowledged<br />
by pressing the “TEST/RESET” button to continue with the functional test sequence. Images for<br />
all the functional test error messages are listed in Appendix A at the end of this guide.<br />
7. START TEST<br />
After the version message appears you will be prompted to press the <strong>Test</strong>/Reset (SW7) button.<br />
Press the button and the functional test sequence will begin.<br />
GU0106 (v1.0) December 7, 2004 7
LiveDesign <strong>Evaluation</strong> <strong>Board</strong> <strong>Test</strong> <strong>Procedures</strong> <strong>Guide</strong><br />
8. KEYPAD ARRAY TEST<br />
Press all the keypad array buttons (SW1 – SW6) one at a time. Verify the decimal point of each 7<br />
segment display is turned off after pressing the corresponding button. Once all the buttons have<br />
been successfully pressed the test will continue the next functional test.<br />
9. LED ARRAY, DIPSWITCH TEST<br />
Turn on and off each switch of the DIP Switch (S1). Verify on the VGA monitor that an asterix (*)<br />
symbol is displayed for each corresponding switch tested. You should also notice that each LED<br />
(LD0 - LD7) above the switch is illuminated when the DIP switch is turned on. Once all switches<br />
have been successfully toggled on/off the test will continue.<br />
8 GU0106 (v1.0) December 7, 2004
LiveDesign <strong>Evaluation</strong> <strong>Board</strong> <strong>Test</strong> <strong>Procedures</strong> <strong>Guide</strong><br />
The following tests will run automatically with no user input required, unless an error occurs.<br />
Verify that each test passes without errors on the VGA monitor.<br />
10. 7-SEGMENT DISPLAY TEST<br />
Verify that each single segment and decimal point of all six digits is turned on and off one by one.<br />
RS232 SERIAL PORT TEST<br />
Verify TXD->RCD and RTS->CTS messages are displayed.<br />
GU0106 (v1.0) December 7, 2004 9
LiveDesign <strong>Evaluation</strong> <strong>Board</strong> <strong>Test</strong> <strong>Procedures</strong> <strong>Guide</strong><br />
USER HEADER A AND B TEST<br />
Verify User I/O test passes.<br />
KEYBOARD AND MOUSE PORT TEST<br />
Verify PS2 Port test passes.<br />
AUDIO SYSTEM TEST<br />
Verify the on-board speakers, PC speakers and<br />
headphones are correctly working in stereo mode.<br />
IMG_0113.jpg<br />
IMG_0113.jpg<br />
10 GU0106 (v1.0) December 7, 2004
STATIC RAM TEST<br />
Verify the memory test is progressing by 64kb<br />
increments to a total of 1024kb.<br />
Congratulations!<br />
You have just completed a full functional test of the<br />
LiveDesign <strong>Evaluation</strong> <strong>Board</strong>. If all tests passed the<br />
you should see a SUCCESS !!! message on the<br />
VGA monitor. If one or more tests failed then the<br />
message will display the number of unsuccessful<br />
tests. See Appendix A for a complete listing and<br />
images of possible error messages.<br />
LiveDesign <strong>Evaluation</strong> <strong>Board</strong> <strong>Test</strong> <strong>Procedures</strong> <strong>Guide</strong><br />
GU0106 (v1.0) December 7, 2004 11
LiveDesign <strong>Evaluation</strong> <strong>Board</strong> <strong>Test</strong> <strong>Procedures</strong> <strong>Guide</strong><br />
Appendix A<br />
Error Messages<br />
RS232 SERIAL PORT TEST<br />
USER HEADER A AND B TEST KEYBOARD AND MOUSE PORT TEST<br />
STATIC RAM TEST<br />
12 GU0106 (v1.0) December 7, 2004
Revision History<br />
Date Version No. Revision<br />
11-Oct-2004 1.0 New product release<br />
LiveDesign <strong>Evaluation</strong> <strong>Board</strong> <strong>Test</strong> <strong>Procedures</strong> <strong>Guide</strong><br />
Software, hardware, documentation and related materials:<br />
Copyright © 2004 <strong>Altium</strong> Limited.<br />
All rights reserved. You are permitted to print this document provided that (1) the use of such is for personal use<br />
only and will not be copied or posted on any network computer or broadcast in any media, and (2) no modifications<br />
of the document is made. Unauthorized duplication, in whole or part, of this document by any means, mechanical or<br />
electronic, including translation into another language, except for brief excerpts in published reviews, is prohibited<br />
without the express written permission of <strong>Altium</strong> Limited. Unauthorized duplication of this work may also be<br />
prohibited by local statute. Violators may be subject to both criminal and civil penalties, including fines and/or<br />
imprisonment. <strong>Altium</strong>, CAMtastic, Design Explorer, DXP, LiveDesign, Nano<strong>Board</strong>, NanoTalk, Nexar, nVisage,<br />
CircuitStudio, P-CAD, Protel, Situs, TASKING, and Topological Autorouting and their respective logos are<br />
trademarks or registered trademarks of <strong>Altium</strong> Limited or its subsidiaries. All other registered or unregistered<br />
trademarks referenced herein are the property of their respective owners and no trademark rights to the same are<br />
claimed.<br />
GU0106 (v1.0) December 7, 2004 13