

Multilanguage Guide - OvisLink
Multilanguage Guide - OvisLink
Multilanguage Guide - OvisLink

Create successful ePaper yourself
Turn your PDF publications into a flip-book with our unique Google optimized e-Paper software.
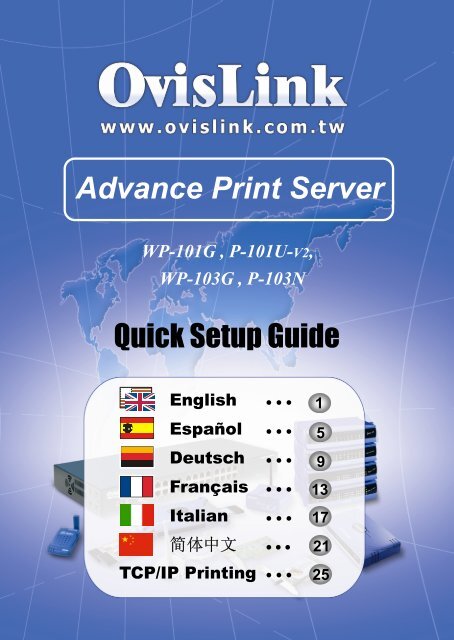
Advance Print Server<br />
WP-101G , P-101U-V2,<br />
WP-103G , P-103N<br />
Quick Setup <strong>Guide</strong><br />
English ● ● ●<br />
Español ● ● ●<br />
Deutsch ● ● ●<br />
Français ● ● ●<br />
Italian ● ● ●<br />
简体中文 ● ● ●<br />
TCP/IP Printing<br />
简体中文 ● ● ●<br />
1<br />
5<br />
9<br />
13<br />
17<br />
21<br />
25
English<br />
Hardware Installation<br />
Follow these steps for a trouble-free start of the print server<br />
operations with your print server.<br />
1. Confirm proper operation of the printer to be connected to<br />
the print server.<br />
2. When you have confirmed proper operation of the printer,<br />
turn off its power.<br />
3. Confirm that your network is operating normally.<br />
4. Connect the print server to the network (through the RJ-45<br />
connector of the print server)<br />
WARNING: Configuration problems may result if the print server<br />
is powered up without first establishing its network connection.<br />
Please follow this procedure to avoid complications at the<br />
configuration stage.<br />
5. While the printer is powered off, plug the print server to the<br />
printer (parallel or USB interface).<br />
6. Turn on the printer’s power.<br />
7. Connect the DC end of the AC Power adapter to the DC<br />
power input socket of the print server and the AC end to<br />
the wall outlet. This will supply power to the print server<br />
immediately<br />
NOTE: Your print server is built with a default IP Address. To<br />
prevent from any conflict in your network, it is recommended to<br />
use the PS-Utility program to change the IP setting when there<br />
is some other device’s IP Address is the same as the print<br />
server’s default IP Address<br />
Using The Utilities<br />
This section describes the software utilities for the print server<br />
PS-Utility and PS Wizard.<br />
Ovislink Print Server<br />
English<br />
1<br />
English
English<br />
TIP: To avoid the conflict in your network, you can use PS-Utility<br />
to change the related settings of your print server (such as the IP<br />
address) after finishing the installation.<br />
Installing PS-Utility<br />
Follow the procedure outlined below to install PS Utility:<br />
1. Insert the print server’s Installation CD into the CD-ROM<br />
drive.<br />
2. Click Install Utility from the Auto-Run menu screen.<br />
3. Once executed, the Setup program will extract files to<br />
launch the InstallShield Wizard; then, follow it step by step<br />
to complete the installation process.<br />
After installing the utility, the application program for the print<br />
server is automatically installed to your computer, and creates a<br />
folder in Start\Programs\PS-Utility. Now, you can begin using<br />
PS Utility.<br />
Launching PS-Utility<br />
To launch PS Utility:<br />
1. Click Start -> Programs -> PS-Utility, and then click the<br />
PS-Utility v2.00 item.<br />
2. The main screen will appear as below, and it starts to<br />
search the connected print server within the network.<br />
4<br />
1<br />
Your print server<br />
Ovislink Print Server<br />
2<br />
2<br />
English<br />
3<br />
2<br />
English
English<br />
Device List: Display the connected print server within the<br />
network.<br />
Control Buttons: Change IP Address, Update Firmware,<br />
Show Web Setup, Factory Reset, Discover Device, About,<br />
and Close.<br />
Information Field: Display the basic information of the<br />
selected print server in the Device List.<br />
Status Bar: Display the system status.<br />
Before you can print over the network using your print server, you<br />
may need to perform some basic setup tasks through PS-Utility.<br />
These settings include.<br />
1. Change the print server’s IP Address: clicking the<br />
Change IP Address button will bring up a dialog box that<br />
allows you to change the IP Address of selected print<br />
server.<br />
2. Perform web configuration: click the Show Web Setup<br />
button to open your web browser and launch the<br />
Configuration Utility; alternately, you can double-click the<br />
selected print server in the Device List to launch the<br />
Configuration Utility.<br />
3. Search the available devices: click the Discover Device<br />
button to re-search the connected print server within the<br />
network.<br />
4. Resume the default settings: click the Factory Reset<br />
button to reload the factory settings of the print server.<br />
5. Update Firmware: click the Update Firmware button to<br />
update the firmware of the print server.<br />
Using PS Wizard<br />
PS Wizard is a convenient utility that allows you to set up the print<br />
server’s port connection. To launch PS Wizard:<br />
Ovislink Print Server<br />
English<br />
3<br />
English
English<br />
1. Insert the print server’s Installation CD into the CD-ROM<br />
drive.<br />
2. Click PS Wizard from the<br />
Auto-Run menu screen to<br />
launch the Setup Wizard.<br />
Click Next in the welcome<br />
screen of Setup Wizard.<br />
3. In the following window,<br />
select one printer in the<br />
Printer List to set up port<br />
connection, and then click<br />
Next.<br />
4. Select one printer port in<br />
the Print Server List, and<br />
click Next.<br />
5. The configuration is completed, click Finish to close it or<br />
click Continue to setup another printer.<br />
6. PS Wizard will help you to complete the port connection<br />
automatically. You can start your printing task without any<br />
complex configuration.<br />
TIP: If you use Windows 98, the system will restart after<br />
configuration.<br />
Ovislink Print Server<br />
Your print server name<br />
Your printer port name<br />
English<br />
4<br />
English
Español<br />
Instalación del hardware<br />
Siga estos pasos para comenzar a utilizar el servidor de<br />
impresión sin problemas.<br />
1. Compruebe el funcionamiento y la conexión de la<br />
impresora al servidor de impresión.<br />
2. Cuando haya comprobado el funcionamiento de la<br />
impresora, apáguela.<br />
3. Confirme que la red funciona con normalidad.<br />
4. Conecte el servidor de impresión a la red (mediante la<br />
conexión RJ-45 del servidor de impresión).<br />
ADVERTENCIA: Si se enciende el servidor de impresión sin<br />
establecer una conexión de red, pueden aparecer problemas de<br />
configuración. Siga este procedimiento para evitar<br />
complicaciones en la fase de configuración.<br />
5. Con la impresora apagada, enchufe el servidor de<br />
impresión a la impresora (interfaz paralela o USB).<br />
6. Encienda la impresora.<br />
7. Conecte el terminal de alimentación del adaptador de<br />
corriente en la entrada del servidor de impresión y el<br />
enchufe en una toma de corriente. Esto proporcionará<br />
alimentación inmediatamente al servidor de impresión.<br />
NOTA: El servidor de impresión incluye una dirección IP. Para<br />
evitar conflictos con la red, es recomendable que utilice el<br />
programa PS-Utility para cambiar la configuración IP cuando la<br />
dirección IP de otro dispositivo coincida con la dirección<br />
predeterminada del servidor de impresión.<br />
Utilización de las utilidades<br />
Esta sección describe las utilidades de software del servidor de<br />
impresión: PS-Utility y PS Wizard.<br />
Ovislink Print Server<br />
Español<br />
5<br />
Español
Español<br />
SUGERENCIA: Para evitar conflictos con la red, puede utilizar<br />
PS-Utility para cambiar la configuración relacionada con el<br />
servidor de impresión (como, por ejemplo, la dirección IP) tras<br />
completar la instalación.<br />
Instalación de PS-Utility<br />
Siga el procedimiento detallada a continuación para instalar PS<br />
Utility:<br />
1. Inserte el CD de instalación del servidor de impresión en la<br />
unidad de CD-ROM.<br />
2. Haga clic en Instalar utilidad en el menú de ejecución<br />
automática.<br />
3. Una vez ejecutado, el programa de configuración extraerá<br />
los archivos para ejecutar el asistente InstallShield y, a<br />
continuación, siga los pasos para completar el proceso de<br />
instalación<br />
Tras instalar la utilidad, el programa de aplicación del servidor de<br />
impresión se instalará automáticamente en el equipo y creará una<br />
carpeta llamada Inicio\Programas\PS-Utility. A partir de este<br />
momento puede comenzar a utilizar PS Utility.<br />
Ejecución de PS-Utility<br />
Para ejecutar PS Utility:<br />
1. Haga clic en Inicio -> Programas -> PS-Utility y, a<br />
continuación, haga clic en el elemento PS-Utility v2.00.<br />
2. La pantalla principal aparecerá como la siguiente y<br />
comenzará a buscar el servidor de impresión de la red.<br />
1<br />
4<br />
Ovislink Print Server<br />
El servidor de<br />
impresión<br />
2<br />
3<br />
2<br />
Español<br />
6<br />
Español
Español<br />
Lista de dispositivos: Muestra el servidor de impresión<br />
de la red.<br />
Botones de control: Cambiar dirección IP, Actualizar<br />
Firmware, Mostrar configuración Web, Restaurar valores<br />
de fábrica, Detectar dispositivo, Acerca de y Cerrar.<br />
Campo Información: Muestra la información básica del<br />
servidor de impresión seleccionado en la Lista de<br />
dispositivo.<br />
Barra de estado: Muestra el estado del sistema.<br />
Antes de poder imprimir a través de la red utilizando el servidor de<br />
impresión, puede que sea necesario realizar algunas tareas de<br />
configuración básicas mediante PS-Utility. Esta configuración<br />
incluye:<br />
1. Cambiar la dirección IP del servidor de impresión: Al<br />
hacer clic en el botón Cambiar dirección IP, se abrirá un<br />
cuadro de diálogo en el que podrá cambiar la dirección IP<br />
del servidor de impresión seleccionado.<br />
2. Configuración web: Haga clic en el botón Mostrar<br />
configuración web, para abrir el navegador y ejecutar la<br />
Utilidad de configuración; también es posible hacer doble<br />
clic en el servidor de impresión seleccionado en la Lista de<br />
dispositivos para ejecutar la Utilidad de configuración.<br />
3. Buscar dispositivos disponibles: Haga clic en el botón<br />
Detectar dispositivos para volver a buscar el servidor de<br />
impresión conectado a la red.<br />
4. Restaurar configuración predeterminada: Haga clic en<br />
el botón Restaurar configuración de fábrica para<br />
recargar la configuración de fábrica del servidor de<br />
impresión.<br />
5. Actualizar firmware: Haga clic en el botón Actualizar<br />
firmware para actualizar el firmware del servidor de<br />
impresión.<br />
Utilización de PS Wizard<br />
PS Wizard es una cómoda utilidad que le permite configurar la<br />
conexión del puerto del servidor de impresión. Para ejecutar PS<br />
Wizard:<br />
Ovislink Print Server<br />
Español<br />
7<br />
Español
Español<br />
1. Inserte el CD de instalación del servidor de impresión en<br />
la unidad de CD-ROM.<br />
2. Haga clic en PS Wizard en la<br />
pantalla de ejecución<br />
automática para ejecutar el<br />
Asistente de configuración.<br />
Haga clic en Next (Siguiente)<br />
en la pantalla de bienvenida<br />
del Asistente de configuración.<br />
3. En la pantalla siguiente,<br />
seleccione la impresora de la<br />
Lista de impresoras para<br />
configurar la conexión del<br />
puerto y, a continuación, haga<br />
clic en Next (Siguiente)<br />
4. Seleccione un Puerto de<br />
impresora de la Lista de<br />
servidor de impresión y haga<br />
clic en Next (Siguiente).<br />
5. La configuración se ha completado, haga clic en Terminar<br />
para completarla o haga clic en Continuar para configurar<br />
otra impresora.<br />
6. PS Wizard le ayudará a completar automáticamente la<br />
conexión del Puerto. Puede comenzar las tareas de<br />
impresión sin necesidad de complicados procesos de<br />
configuración.<br />
SUGERENCIA: Si utiliza Windows 98, el sistema se<br />
reiniciará tras la configuración.<br />
Ovislink Print Server<br />
Nombre de su servidor<br />
de impresión<br />
Nombre de su servidor<br />
de impresión<br />
Español<br />
8<br />
Español
Deutsch<br />
Hardware-Installation<br />
Beachten Sie folgende Schritte, um einen störungsfreien<br />
Betriebsstart des Druckerservers mit Ihrem Drucker zu<br />
gewährleisten.<br />
1. Vergewissern Sie sich, dass der an den Druckerserver<br />
anzuschließende Drucker fehlerfrei funktioniert.<br />
2. Wenn der Drucker gut funktioniert, schalten Sie ihn aus.<br />
3. Vergewissern Sie sich, dass Ihr Netzwerk fehlerfrei<br />
funktioniert.<br />
4. Verbinden Sie den Druckerserver mit dem Netzwerk (über<br />
den RJ-45-Anschluss des Druckerservers).<br />
ACHTUNG: Konfigurationsprobleme könnten entstehen, wenn<br />
der Druckerserver beim Einschalten noch nicht mit dem<br />
Netzwerk verbunden ist. Beachten Sie diese Schritte, um<br />
Komplikationen im Konfigurationsstadium zu vermeiden.<br />
5. Ist der Drucker ausgeschaltet, schließen Sie den<br />
Druckerserver an den Drucker an (parallele oder<br />
USB-Schnittstelle).<br />
6. Schalten Sie den Drucker ein.<br />
7. Verbinden Sie das Gleichstromende des Netzteils mit dem<br />
Gleichstromeingang des Druckerservers und das<br />
Netzstromende mit einer Netzsteckdose. Der<br />
Druckerserver wird dann sofort mit Strom versorgt.<br />
HINWEIS: Im Druckerserver ist eine Standard-IP-Adresse<br />
integriert. Um Konflikte mit Ihrem Netzwerk zu vermeiden,<br />
sollten Sie die IP-Einstellung mit dem PS-Utility-Programm<br />
ändern, wenn die IP-Adresse eines anderen Geräts der<br />
Standard-IP-Adresse des Druckerservers entspricht.<br />
Verwenden der Utilities<br />
Dieser Abschnitt beschreibt Software-Utilities für den<br />
Druckerserver: PS-Utility und PS Wizard.<br />
Ovislink Print Server<br />
Deutsch<br />
9<br />
Deutsch
Deutsch<br />
TIPP: Um Netzwerkkonflikte zu vermeiden, können Sie nach der<br />
Installation entsprechende Einstellungen Ihres Druckerservers<br />
(z.B. IP-Adresse) mit PS-Utility ändern.<br />
Installieren von PS-Utility<br />
Installieren Sie PS-Utility anhand folgender Schritte:<br />
1. Legen Sie die Installations-CD des Druckerservers in das<br />
CD-ROM-Laufwerk.<br />
2. Klicken Sie im Autorun-Menü auf Utility installieren.<br />
3. Sobald das Setup-Programm ausgeführt ist, werden die<br />
Dateien des InstallShield-Assistenten extrahiert; beachten<br />
Sie dann die Schritte zur Fertigstellung der Installation.<br />
Nach Installation der Utility wird das Anwendungsprogramm für<br />
den Druckerserver automatisch auf Ihrem Computer installiert und<br />
ein Ordner in Start\Programme\PS-Utility erstellt. Sie können<br />
jetzt mit PS-Utility arbeiten.<br />
Starten von PS-Utility<br />
So wird PS-Utility gestartet:<br />
1. Klicken Sie auf Start -> Programme -> PS-Utility und<br />
dann auf den Punkt PS-Utility V2.00.<br />
2. Der Hauptbildschirm, siehe unten, erscheint, und der im<br />
Netzwerk angeschlossene Druckerserver wird gesucht.<br />
4<br />
1<br />
Ihr<br />
Druckerserver<br />
Ovislink Print Server<br />
2<br />
2<br />
3<br />
Deutsch<br />
10<br />
Deutsch
Deutsch<br />
Geräteliste: Zeigt den im Netzwerk angeschlossenen<br />
Druckerserver an.<br />
Kontroll-Schaltflächen: IP-Adresse ändern, Firmware<br />
aktualisieren, Web-Setup anzeigen, Werkseitiger Standard,<br />
Gerät entdecken, Info und Schließen.<br />
Informationsfeld: Zeigt grundlegende Informationen über<br />
den in der Geräteliste ausgewählten Druckerserver.<br />
Statusleiste: Zeigt den Systemstatus an.<br />
Bevor Sie über das Netzwerk auf Ihrem Druckerserver drucken<br />
können, müssen Sie mit der PS-Utility einige grundlegende<br />
Setup-Aufgaben ausführen. Diese Einstellungen sind:<br />
1. IP-Adresse des Druckerservers ändern: Klicken Sie auf<br />
die Schaltfläche IP-Adresse ändern, woraufhin ein<br />
Dialogfeld erscheint, in dem Sie die IP-Adresse des<br />
ausgewählten Druckerservers ändern können.<br />
2. Web-Konfiguration durchführen: Klicken Sie auf die<br />
Schaltfläche Web-Setup anzeigen, um Ihren Webbrowser<br />
zu öffnen und das Konfigurationsprogramm zu starten;<br />
alternativ können Sie den ausgewählten Druckerserver in<br />
der Geräteliste doppelt anklicken, um das<br />
Konfigurationsprogramm zu starten.<br />
3. Nach verfügbaren Geräten suchen: Klicken Sie auf die<br />
Schaltfläche Gerät erkennen, um den im Netzwerk<br />
angeschlossenen Druckerserver zu finden.<br />
4. Standardeinstellungen wiederherstellen: Klicken Sie auf<br />
die Schaltfläche Werkseitiger Standard, um die<br />
werkseitigen Einstellungen des Druckerservers zu laden.<br />
5. Firmware aktualisieren: Klicken Sie auf die Schaltfläche<br />
Firmware aktualisieren, um die Firmware des<br />
Druckerservers zu aktualisieren.<br />
Verwenden von PS Wizard<br />
PS Wizard ist eine praktisches Programm, mit dem Sie die<br />
Portverbindung des Druckerservers konfigurieren können. So wird<br />
PS Wizard gestartet:<br />
Ovislink Print Server<br />
Deutsch<br />
11<br />
Deutsch
Deutsch<br />
1. Legen Sie die Installations-CD des Druckerservers in das<br />
CD-ROM-Laufwerk.<br />
2. Klicken Sie im Autorun-Menü<br />
auf PS Wizard, um den<br />
Setup-Assistenten zu starten.<br />
Klicken Sie im<br />
Begrüßungsbildschirm des<br />
Setup-Assistenten auf Next<br />
(Weiter).<br />
3. Im folgenden Fenster wählen<br />
Sie einen Drucker aus der<br />
Druckerliste, um die<br />
Portverbindung zu<br />
konfigurieren, und klicken Sie<br />
dann auf Next (Weiter).<br />
4. Wählen Sie einen Druckerport<br />
in der Druckerserverliste und<br />
klicken Sie auf Next (Weiter).<br />
5. Die Konfiguration ist abgeschlossen; klicken Sie auf Finish<br />
(Fertig stellen), um sie zu beenden, oder klicken Sie auf<br />
Continue (Fortsetzen), um einen weiteren Drucker zu<br />
konfigurieren.<br />
6. PS Wizard hilft Ihnen, die Portverbindung automatisch<br />
fertigzustellen. Sie können mit Ihrer Druckaufgabe ohne<br />
aufwendige Konfiguration beginnen.<br />
TIPP: Bei Verwendung von Windows 98 startet das System<br />
nach der Konfiguration neu.<br />
Ovislink Print Server<br />
IIhr Druckerservername<br />
Ihr Druckerportname<br />
Deutsch<br />
12<br />
Deutsch
Français<br />
Installation Matérielle<br />
Suivez ces étapes pour débuter une utilisation de votre serveur<br />
d’impression sans soucis.<br />
1. Assurez-vous que l’imprimante est en bon état de<br />
fonctionnement et qu’elle est connectée au serveur<br />
d’impression.<br />
2. Une fois que vous avez vérifié le bon fonctionnement de<br />
l’imprimante, coupez son alimentation.<br />
3. Assurez-vous que votre réseau fonctionne correctement.<br />
4. Connectez le serveur d’impression au réseau (à l’aide du<br />
connecteur RJ-45 du serveur d’impression).<br />
AVERTISSEMENT : Des problèmes liés à la configuration<br />
peuvent se produire si le serveur d’impression est mis sous<br />
tension sans avoir préalablement établi sa connexion réseau.<br />
Veuillez suivre cette procédure pour éviter toute complication à<br />
l’étape de configuration.<br />
5. Avec l’imprimante mise hors tension, branchez le serveur<br />
d’impression à l’imprimante (interface parallèle ou USB).<br />
6. Mettez l’imprimante sous tension.<br />
7. Connectez l’extrémité DC de l’adaptateur d’alimentation<br />
CC au connecteur d’entrée d’alimentation DC du serveur<br />
d’impression et l’extrémité CC à une prise murale. Cela<br />
permettra d’alimenter le serveur d’impression<br />
immédiatement.<br />
Remarque: Votre serveur d’impression dispose d’une adresse<br />
IP par défaut. Pour éviter tout conflit se produisant sur votre<br />
réseau, il est recommandé d’utiliser le programme « PS-Utility »<br />
pour modifier le paramétrage IP lorsque l’adresse IP d’un autre<br />
périphérique est identique à l’adresse IP par défaut du serveur<br />
d’impression.<br />
Utiliser les Utilitaires<br />
Cette section décrit les logiciels utilitaires pour le serveur<br />
d’impression: PS-Utility et PS Wizard.<br />
Ovislink Print Server<br />
Français<br />
13<br />
Français
Français<br />
ASTUCE : Pour éviter tout conflit se produisant sur votre réseau,<br />
vous pouvez utiliser PS-Utility pour modifier les paramètres<br />
correspondants de votre serveur d’impression (comme l’adresse<br />
IP) après avoir terminé l’installation.<br />
Installer PS-Utility<br />
Suivez la procédure indiquée ci-dessous pour installer le logiciel<br />
utilitaire PS Utility:<br />
1. Insérez le CD d'installation du serveur d’impression dans<br />
votre lecteur de CD-ROM.<br />
2. Cliquez sur Install Utility[Utilitaire d’installation] sur<br />
l’écran du menu Exécution Automatique(Auto-Run).<br />
3. Une fois lancé, le programme d’Installation extraira les<br />
fichiers pour lancer l’assistant InstallShield Wizard; ensuite<br />
suivez ses instructions pour terminer étape par étape le<br />
processus d’installation.<br />
Après avoir installé l’utilitaire, le programme d’application pour le<br />
serveur d’impression sera automatiquement installé sur votre<br />
ordinateur et créera un dossier sous<br />
Démarrer\Programmes\PS-Utility. Maintenant vous pouvez<br />
commencer à utiliser l’utilitaire « PS Utility ».<br />
Lancer PS-Utility<br />
Pour lancer PS-Utility :<br />
1. Cliquez sur Démarrer -> Programmes -> PS-Utility, puis<br />
cliquez sur PS-Utility v2.00.<br />
2. L’écran principal apparaîtra comme indiqué ci-dessous, et<br />
le programme débutera la recherche des serveurs<br />
d’impression connectés sur le réseau.<br />
1<br />
4<br />
Ovislink Print Server<br />
Votre serveur<br />
d’impression<br />
2<br />
3<br />
2<br />
Français<br />
14<br />
Français
Français<br />
Liste des périphériques : Affiche les serveurs<br />
d’impression connectés sur le réseau.<br />
Boutons de Contrôle: Changer l’adresse IP, Mettre à jour<br />
le microprogramme, Afficher la Configuration Web, Réinit.<br />
Valeurs Par Défaut, Découvrir les Périphériques, A Propos<br />
et Fermer.<br />
Champ Informations : Affiche les informations de base<br />
du serveur d’impression sélectionné sur la Liste des<br />
Périphériques.<br />
Barre d’état : Indique l’état du système.<br />
Avant de pouvoir effectuer une impression par réseau en utilisant<br />
votre serveur d’impression, vous devez effectuer quelques<br />
configurations de base à l’aide du PS-Utility. Ces configurations<br />
comprennent :<br />
1. Changer l’adresse IP du serveur d’impression: cliquer<br />
sur le bouton Changer l’adresse IP fera apparaître une<br />
boîte de dialogue dans laquelle vous pourrez changer<br />
l’adresse IP du serveur d’impression sélectionné.<br />
2. Effectuer la configuration Web: cliquez sur le bouton<br />
Afficher la Configuration Web pour lancer votre<br />
navigateur Web et exécuter l’Utilitaire de Configuration;<br />
alternativement, vous pouvez double-cliquer sur le serveur<br />
d’impression sélectionné dans la Liste des Périphériques<br />
pour lancer l’Utilitaire de Configuration.<br />
3. Rechercher des périphériques disponibles : cliquez sur<br />
le bouton Découvrir les Périphériques pour lancer la<br />
recherche des serveurs d’impression connectés sur le<br />
réseau.<br />
4. Réinitialiser les paramètres par défaut: cliquez sur le<br />
bouton Réinit.Valeurs Par Défaut pour recharger les<br />
paramètres par défaut d’usine du serveur d’impression.<br />
5. Mettre à jour le microprogramme : cliquez sur le bouton<br />
Mettre à jour le microprogramme pour mettre à jour le<br />
microprogramme du serveur d’impression.<br />
Utiliser PS Wizard<br />
PS Wizard est un utilitaire pratique qui vous permet de configurer<br />
la connexion du port du serveur d’impression. Pour lancer PS<br />
Wizard:<br />
Ovislink Print Server<br />
Français<br />
15<br />
Français
Français<br />
1. Insérez le CD d'installation du serveur d’impression dans<br />
votre lecteur de CD-ROM.<br />
2. Cliquez sur PS Wizard<br />
(Assistant PS) sur l’écran du<br />
menu Exécution Automatique<br />
pour lancer l’assistant<br />
d’installation « Setup Wizard ».<br />
Cliquez sur Next (Suivant) sur<br />
l’écran de bienvenue de<br />
l’assistant d’installation<br />
« Setup Wizard ».<br />
3. Dans la fenêtre suivante,<br />
sélectionnez une imprimante<br />
dans la Liste des Imprimantes<br />
pour configurer la connexion<br />
de port puis cliquez sur Next<br />
(Suivant).<br />
4. Sélectionnez un port<br />
d’imprimante dans la Liste des<br />
Serveurs d’Impression puis<br />
cliquez sur Next (Suivant).<br />
5. La configuration est terminée, cliquez sur Finish<br />
(Terminer) pour fermer la fenêtre ou cliquez sur Continue<br />
(Continuer) pour configurer une autre imprimante.<br />
6. PS Wizard vous aidera à terminer automatiquement la<br />
connexion du port. Vous pouvez commencer vos tâches<br />
d’impression sans avoir à effectuer aucune configuration<br />
complexe.<br />
ASTUCE : Si vous utilisez Windows 98, votre système<br />
redémarrera à la fin de la configuration.<br />
Ovislink Print Server<br />
Nom de votre serveur d’impression<br />
Nom de votre port d’imprimante<br />
Français<br />
16<br />
Français
Italian<br />
Installazione dell’hardware<br />
Per utilizzare al meglio e senza difficoltà le funzioni del server di<br />
stampa, si raccomanda di attenersi alla seguente procedura:<br />
1. Verificare che la stampante da collegare al server di<br />
stampa funzioni correttamente.<br />
2. Dopo questa verifica di funzionamento, spegnere la<br />
stampante.<br />
3. Accertarsi che la rete funzioni normalmente.<br />
4. Collegare il server di stampa alla rete (utilizzando il<br />
connettore RJ-45 del server di stampa).<br />
ATTENZIONE: L’accensione del server di stampa prima del suo<br />
collegamento alla rete può essere causa di problemi di<br />
configurazione. Si raccomanda pertanto di seguire la<br />
procedura indicata per non incorrere in complicazioni in fase di<br />
configurazione.<br />
5. Con la stampante spenta, collegare il server di stampa alla<br />
stampante (dalla porta parallela o USB).Turn on the<br />
printer’s power.<br />
6. Accendere la stampante.<br />
7. Collegare il capo CC dell’adattatore CA alla presa di<br />
alimentazione CC del server di stampa e il capo CA alla<br />
presa di corrente a muro. Questo servirà a far arrivare<br />
corrente al server di stampa.<br />
NOTA: Il server di stampa è configurato con un Indirizzo IP<br />
predefinito.. Per evitare conflitti di rete, si raccomanda di<br />
modificare l'impostazione dell'IP con la PS-Utility nel caso che<br />
un altro dispositivo della rete presenti lo stesso indirizzo IP del<br />
server di stampa.<br />
Uso delle utilità<br />
In questo capitolo sono descritti i software di gestione del server di<br />
stampa: PS-Utility e PS Wizard.<br />
Ovislink Print Server<br />
Italian<br />
17<br />
Italian
Italian<br />
SUGGERIMENTO: PS-Utility può servire per la modifica delle<br />
impostazioni del server di stampa (per esempio l’indirizzo IP)<br />
dopo l’installazione, al fine di evitare conflitti all'interno della rete.<br />
Installazione di PS-Utility<br />
La procedura di installazione di PS Utility è la seguente:<br />
1. Inserire nell'unità CD-ROM il CD di installazione del server<br />
di stampa.<br />
2. Sullo schermo di esecuzione automatica, fare clic su<br />
Install Utility (Installa Utility).<br />
3. Una volta eseguito il comando, il programma di<br />
installazione estrarrà i file per il lancio dell'installazione<br />
guidata InstallShield; seguire le indicazioni sullo schermo<br />
per completare l'installazione.<br />
Al termine dell'installazione, l'applicazione di gestione del server<br />
di stampa sarà automaticamente installata nel computer, il quale<br />
conterrà una cartella dedicata in Avvio\Programmi\PS-Utility.<br />
A questo punto, PS Utility è pronto all'uso.<br />
Avvio di PS-Utility<br />
Per aprire PS-Utility:<br />
1. Fare clic su Avvio -> Programmi -> PS-Utility, e<br />
successivamente sulla voce PS-Utility v2.00.<br />
2. Apparirà la seguente schermata principale, e verrà avviata<br />
la ricerca del server di stampa collegato alla rete.<br />
4<br />
1<br />
Server di stampa<br />
Ovislink Print Server<br />
Italian<br />
2<br />
3<br />
2<br />
18<br />
Italian
Italian<br />
Elenco periferiche: Vi è visualizzato il server di stampa<br />
collegato alla rete.<br />
Pulsanti: Change IP Addres (Cambia IP), Update<br />
Firmware (Aggiorna firmware), Show Web Setup (Mostra<br />
configurazione Web), Factory Reset (Ripristina predefiniti),<br />
Discover Device (Cerca periferica), About (Informazioni<br />
su...), e Close (Chiudi).<br />
Campo Informazioni : In questo campo sono riportate le<br />
informazioni principali sul server di stampa selezionato<br />
nell’elenco periferiche.<br />
Barra di stato: Indica lo stato del sistema.<br />
Prima di poter eseguire lavori di stampa in tutta la rete con il<br />
server di stampa, potrebbero essere necessarie alcune operazioni<br />
di configurazione con PS-Utility. Le impostazioni da configurare<br />
sono:<br />
1. Modifica dell’indirizzo IP del server di stampa: facendo<br />
clic sul pulsante Change IP Address, si richiama una<br />
finestra di dialogo nella quale è possibile modificare<br />
l'indirizzo IP del server di stampa selezionato.<br />
2. Configurazione sul web: Attivando il pulsante Show Web<br />
Setup, si apre il browser web e si avvia l’utilità di<br />
configurazione; in alternativa, l’utilità di configurazione può<br />
essere lanciata facendo due volte clic sul server di stampa<br />
selezionato nell’elenco periferiche.<br />
3. Ricerca delle periferiche disponibili: con un clic sul<br />
pulsante Discover Device, si avvia la ricerca del server di<br />
stampa collegato alla rete.<br />
4. Ripristino delle impostazioni predefinite: con il pulsante<br />
Factory Reset, si richiamano le impostazioni predefinite in<br />
fabbrica del server di stampa.<br />
5. Aggiornamento firmware: facendo clic sul pulsante<br />
Update Firmware, è possibile aggiornare il firmware del<br />
server di stampa.<br />
Uso di PS Wizard<br />
PS Wizard è una comoda utilità che consente di configurare la<br />
connessione del server di stampa. Per aprire PS Wizard:<br />
Ovislink Print Server<br />
Italian<br />
19<br />
Italian
Italian<br />
1. Inserire nell'unità CD-ROM il CD di installazione del server<br />
di stampa.<br />
2. Sullo schermo di<br />
esecuzione automatica,<br />
fare clic su PS Wizard per<br />
aprire l’installazione<br />
guidata.<br />
Nello schermo di apertura,<br />
fare clic su Next (Avanti).<br />
3. Nella finestra successiva,<br />
selezionare una<br />
stampante<br />
dall’elenco delle stampanti<br />
per impostarne la<br />
connessione, e fare clic su<br />
Next (Avanti).<br />
4. Dall’elenco dei server di<br />
stampa, selezionare una<br />
porta stampante e fare clic<br />
su Next (Avanti).<br />
5. The configuration is completed, click Finish to close it or<br />
click Continue to setup another printer.<br />
6. PS Wizard will help you to complete the port connection<br />
automatically. You can start your printing task without any<br />
complex configuration.<br />
TIP: If you use Windows 98, the system will restart after<br />
configuration.<br />
Ovislink Print Server<br />
Nome del server di stampa<br />
Nome del server di stampa<br />
Italian<br />
20<br />
Italian
简<br />
体<br />
中<br />
文<br />
硬件安装<br />
按照下列步骤在打印服务器上顺利地执行打印服务器操作。<br />
1. 确认即将连接到打印服务器的打印机工作正常。<br />
2. 确认打印机工作正常后,关闭打印机电源。<br />
3. 确认网络工作正常。<br />
4. 将打印服务器连接到网络(通过打印服务器的 RJ-45<br />
接头)。<br />
警告:如果打印服务器通电之前没有建立网络连接,可能<br />
会导致配置问题。请执行此过程以避免配置过程复杂化。<br />
5. 在打印机电源关闭时,将打印服务器接到打印机(并<br />
口或 USB 接口)。<br />
6. 打开打印机的电源。<br />
7. 将交流电源适配器的直流一端接到打印服务器的直流<br />
电源输入插口,交流一端插入墙壁电源插座。这样就<br />
可以立即为打印服务器供电。<br />
注意:此打印服务器内置了默认的 IP 地址。为防止在网<br />
络中发生冲突,当其它设备的 IP 地址与打印服务器的默<br />
认 IP 地址相同时,建议您使用 PS-Utility 程序更改 IP<br />
设置。<br />
使用实用程序<br />
本节介绍此打印服务器的软件实用程序:<br />
PS-Utility 和 PS Wizard。<br />
Ovislink Print Server<br />
简体中文<br />
21<br />
简<br />
体<br />
中<br />
文
简<br />
体<br />
中<br />
文<br />
提示:为避免在网络中发生冲突,可以在完成安装后使用<br />
PS-Utility 来更改打印服务器的相关设置(如 IP 地址)。<br />
安装 PS-Utility<br />
按照下列步骤安装 PS Utility:<br />
1. 将打印服务器的安装光盘插入 CD-ROM 驱动器中。<br />
2. 在自动运行菜单屏幕中,单击 Install Utility(安装实<br />
用程序)。<br />
3. 开始执行后,安装程序将解压缩文件以启动<br />
InstallShield Wizard;接下来,按照分步说明完成安装<br />
过程。<br />
安装完此实用程序后,打印服务器的应用程序会自动安装到<br />
计算机中,并在开始\程序\PS-Utility 中创建一个文件夹。<br />
此时,您就可以开始使用 PS Utility 了。<br />
启动 PS-Utility<br />
启动 PS Utility:<br />
1. 单击开始->程序-> PS-Utility,然后单击 PS-Utility<br />
v2.00 项目。<br />
2. 将显示如下所示的主屏幕,并开始搜索网络中已连接<br />
的打印服务器。<br />
4<br />
1<br />
您的打印服务器<br />
Ovislink Print Server<br />
2<br />
2<br />
简体中文<br />
3<br />
22<br />
简<br />
体<br />
中<br />
文
简<br />
体<br />
中<br />
文<br />
设备列表:显示网络中已连接的打印服务器。<br />
控制按钮:Change IP Address(更改 IP 地址)、Update<br />
Firmware(更新固件)、Show Web Setup(显示 Web 设置)、<br />
Factory Reset(出厂默认设置)、Discover Device(查找设备)、<br />
About(关于)和 Close(关闭)。<br />
信息区域:显示在设备列表中选择的打印服务器的基本信息。<br />
状态栏:显示系统状态。<br />
在通过网络使用打印服务器进行打印之前,需要利用<br />
PS-Utility 执行一些基本设置任务。这些设置包括:<br />
1. 更改打印服务器的 IP 地址:单击 Change IP Address(更改<br />
IP 地址)按钮将弹出一个对话框,以便您更改所选打印服务<br />
器的 IP 地址。<br />
2. 执行 Web 配置:单击 Show Web Setup(显示 Web 设置)<br />
按钮将打开您的 Web 浏览器并启动 Configuration Utility<br />
(配置实用程序);另外,您也可以通过在设备列表中双击所<br />
选的打印服务器来启动 Configuration Utility。<br />
3. 搜索可用的设备:单击 Discover Device(查找设备)按钮将<br />
重新搜索网络中已连接的打印服务器。<br />
4. 恢复默认设置:单击 Factory Reset(出厂默认设置)<br />
按钮将重新加载打印服务器的出厂设置。<br />
5. 更新固件:单击 Update Firmware(更新固件)按钮<br />
将更改打印服务器的固件。<br />
使用 PS Wizard<br />
PS Wizard 是一个方便的实用程序,可以利用它来设置打印<br />
服务器的端口连接。启动 PS Wizard:<br />
Ovislink Print Server<br />
简体中文<br />
23<br />
简<br />
体<br />
中<br />
文
简<br />
体<br />
中<br />
文<br />
1. 将打印服务器的安装光盘插入 CD-ROM 驱动器中。<br />
2. 在自动运行菜单屏幕中,<br />
单击 PS Wizard 以启<br />
动安装向导。<br />
在安装向导的欢迎屏幕<br />
中单击 Next(下一步)。<br />
3. 在接下来的窗口中,从打<br />
印机列表内选择一个打<br />
印机以设置端口连接,然<br />
后单击 Next(下一步)。<br />
4. 在打印服务器列表中选<br />
择一个打印机端口,然后<br />
单击 Next(下一步)。<br />
5. 配置过程至此结束,单击 Finish(完成)关闭实用程<br />
序;或者单击 Continue(继续)设置另一个打印机。<br />
6. PS Wizard 将帮助您自动完成端口连接。您不需要进<br />
行任何复杂的配置就可以开始执行打印任务。<br />
提示:如果使用的是 Windows 98,系统将在配置完成<br />
后重新启动。<br />
Ovislink Print Server<br />
您的打印服务器名称<br />
您的打印机端口名称<br />
简体中文<br />
24<br />
简<br />
体<br />
中<br />
文
Understand your Print Server<br />
Please use this installation procedure only if the setup instruction<br />
in the previous pages doesn’t work.<br />
Your print server is identified on your network by its Print Server’s Name<br />
and Port Name. You can view and change the information by using the<br />
web configuration (Under Configuration->System)<br />
There are 2 different ways to set up your PC to print using the print server:<br />
1. Through Microsoft Network<br />
2. LPR (TCP/IP) Printing.<br />
The first method is much easier to use. However, if you have trouble uses<br />
the first method, please use the LPR Printing.<br />
Apple Mac user, please refer to page 8 for installation <strong>Guide</strong><br />
The default IP address for the print server is 192.168.0.1 (This can be<br />
changed from web configuration under Configuration->TCP/IP<br />
The default print server’s name is “PS-XXXXXX”, where the “XXXXXX”<br />
is last six digit of your MAC address (printed on the back label of the<br />
print server). For example, if your printer’s MAC address is<br />
“0006AB01C4CD”, your print server’s name is “PS-01C4CD”<br />
The default Port Name is “-XN>”. ‘X’ is your<br />
port type (‘P” for parallel, ‘U’ for USB). “N” is the number of the port.<br />
For example, if you have purchase the P-103 which has 3 parallel<br />
ports. The second parallel port’s name is “PS-01C4CD-P2”.<br />
The above settings can be view and changed in the web<br />
configuration.<br />
Hardware Installation<br />
The print server’s default IP is 192.168.0.1. Please make sure there is no<br />
other device that uses this IP address in your network.<br />
Wired Model<br />
Connect the power cord, printers, and Ethernet network cable (RJ-45)<br />
to the print server<br />
Wireless Model<br />
The default wireless SSID is “default”, channel is “11”. Please connect<br />
with the print server through RJ-45 Ethernet first. Then use the web<br />
browser to change the SSID and channel to the same as your network<br />
Ovislink Print Server<br />
TCP/IP Printing 25
TCP/IP Setup<br />
Please make sure your print server IP address is in the same subnet as the<br />
rest of your network (the first 3 number of the IP address is the same, for<br />
example 192.168.0.X). The print server’s default IP is 192.168.0.1<br />
To find out your computer’s IP address:<br />
WinXP/2000 From Start menu, run Start-> Program-> Accessories-><br />
Command Prompt. Type “IPCONFIG” at the command prompt<br />
Win98/ME From Start menu, run “WINIPCFG”<br />
If your PC is in the same IP subnet as the printer server’s<br />
IP(192.168.0.X). Please make sure the print server’s IP address is<br />
not used by other device. To verify: disconnect the print server from<br />
the network. Type “PING 192.168.0.1” at your Windows command<br />
prompt. There shouldn’t be any response.<br />
If the default IP address is used buy other device or if the print server is<br />
in a different IP subnet. Please follow the instruction below to change<br />
the printer’s IP address.<br />
WinXP/2000<br />
1. Click on the Start button and select Settings then click on Control<br />
Panel.<br />
2. Click on Network Connections to open the “network control panel”.<br />
Right Click on the Local Area Connection to highlight it and select<br />
Properties.<br />
3. Click on Internet Protocol (TCP/IP) to highlight it and then click on<br />
Properties.<br />
4. On the Network Property Dialog box, select “Use the following IP<br />
address”. Then enter “192.168.0.202”<br />
Win98/ME<br />
1. On the desktop, right Click on “My Network Places” or “Network<br />
Neighborhood” to highlight it and select Properties.<br />
2. The Network Property Dialog box will open. Click on Internet<br />
Protocol ( TCP/IP ) to highlight it and then click on Properties.<br />
3. The TCP/IP Properties dialog box will open, in IP address section,<br />
select “Specificy an IP address”. Then Enter “192.168.0.202”<br />
4. Click “okay” and the computer should reboot to new settings.<br />
Now, please open your web browser and enter “192.168.0.1” to get into<br />
your printer server for configuration.<br />
Ovislink Print Server<br />
TCP/IP Printing<br />
26
Inside the web configuration:<br />
Click on “Configuration -> Network -> Microsoft Network”. Change<br />
the Workgroup field to the same as your network. Press “Save” to<br />
save changes.<br />
Click on “Configuration -> Network -> TCP/IP”. Then change the IP<br />
address to the same IP subnet as the rest of your network (the same<br />
first 3 numbers)<br />
Press “Save” to save changes. And your print server will be at the new<br />
IP address<br />
Now, please change your computer’s IP address back to the original<br />
settings (Assign IP automatically or the original IP). You should be able to<br />
find the print server at its new IP address..<br />
Microsoft Network Printing<br />
This section is to help you setup your<br />
network printer through My Network<br />
Places(WinME/2000/XP) or Network<br />
Neighborhood(Win98).<br />
Please install the “Client for Microsoft<br />
Network” and NETBEUI protocol if you have<br />
not done so. Refer to “TCP/IP SETUP”<br />
section on how to get to the Network<br />
Properties Dialog box. From there,<br />
select<br />
ADD->Protocol->Microsoft->NETBEUI to<br />
install NETBEUI protocol.<br />
For WINXP NETBEUI installation, please<br />
follow the instruction (NETBEUI.TXT) in the<br />
“VALUEADD->MSFT->NET->NETBEUI”<br />
directory of your WINXP CD-ROM.<br />
1. On the Desktop, right click on “My<br />
Network Places” or “Network<br />
Neighborhood”, then select<br />
“Search for Computers”<br />
2. Enter the print server’s name and<br />
press the “Search” button. (See<br />
the graph in the following page)<br />
Ovislink Print Server<br />
<strong>OvisLink</strong> ATX<br />
<strong>OvisLink</strong> ATX<br />
OvisL<br />
TCP/IP Printing<br />
27
3. The computer should find the print server and display it on the right<br />
hand side window.<br />
4. Double click on the print server, it will display the ports inside. Now<br />
double click on the port where you connect the printer. The computer<br />
should automatically ask you to install the driver for the printer.<br />
5. Follow the instruction to install the driver for your printer.<br />
6. After installation, your printer should appear in your Printer control<br />
panel. You can now use the printer for printing.<br />
LPR (TCP/IP) Printing<br />
Please use this method to install the network print only if the Microsoft<br />
Network Printing doesn’t work. To setup the LPR printing, please prepare<br />
the following:<br />
Make sure the print server’s IP address is in the same subnet as the<br />
rest of your network. Please refer to the “TCP/IP Setup” section<br />
Write down the print server’s name and port name for reference<br />
Win98/ME Installation<br />
Ovislink Print Server<br />
Print Server Name<br />
The Windows 98/ME TCP/IP printing involve a 3-step process<br />
Add LPR service to your Microsoft Network<br />
Add LPR printer port<br />
Add printer using the LPR port<br />
We strongly recommend using the Microsoft Network Printing for<br />
Win98/ME machine. If you must use the LPR printing, please insert the<br />
Print Server Installation CD into your computer’s CD-ROM drive. From<br />
the CD menu, select Manual->LPR to read the LPR user’s guide.<br />
TCP/IP Printing<br />
28
Win2000/XP Installation<br />
1. From Window task bar, click Start->Settings->Printer<br />
2. From the File menu, select “Add Printer”. The wizard will start.<br />
3. Select “Local Printer” when the following screen appear. Then press<br />
“Next”<br />
4. Create a new port and select “Standard TCP/IP Port”<br />
Ovislink Print Server<br />
TCP/IP Printing<br />
29
5. Click “Next” to proceed. When the following screen appears. Enter<br />
the print server’s IP address and Port Name. Then click “Next”<br />
6. When the next screen appears, click on Custom settings.<br />
7. Select “LPR”, and put the Port name in the field labeled “Queue Name”.<br />
Then Click “OK”.<br />
Ovislink Print Server<br />
TCP/IP Printing<br />
30
8. Click on Okay, then click on next. The computer should finish setting<br />
up the port. Click on “Finish” to proceed.<br />
9. Now the print server will ask you to install the printer driver for the<br />
printer. Please follow your printer’s installation guide to install the<br />
driver. After finishing the installation, you can print through the<br />
network.<br />
Ovislink Print Server<br />
Port Name<br />
TCP/IP Printing<br />
31
Apple Mac installation <strong>Guide</strong><br />
1. Click on the apple icon (apple menu) located on the top left corner of the<br />
screen and scroll to "choser"<br />
2. A dialog box will appear, click on the "laser writer" icon and a menu<br />
screen will appear on the right hand side<br />
3. From the menu highlight the print server model e.g "PS-xxxxxx-P1"<br />
where xxxxxx is the MAC address of the print server and P1 number of<br />
ports available on the print server.<br />
4. Click the "setup" icon located below the menu screen<br />
5. A dialog box will appear and click "select PPD" icon<br />
6. A dialog box will appear, select the printer you will be using and follow<br />
stated operating procedure to complete the printer driver installation<br />
After installation, the print server icon will appear on the desktop screen.<br />
Ovislink Print Server<br />
TCP/IP Printing<br />
32
