Equotip Using Hardness Test Blocks - Proceq
Equotip Using Hardness Test Blocks - Proceq
Equotip Using Hardness Test Blocks - Proceq
Create successful ePaper yourself
Turn your PDF publications into a flip-book with our unique Google optimized e-Paper software.
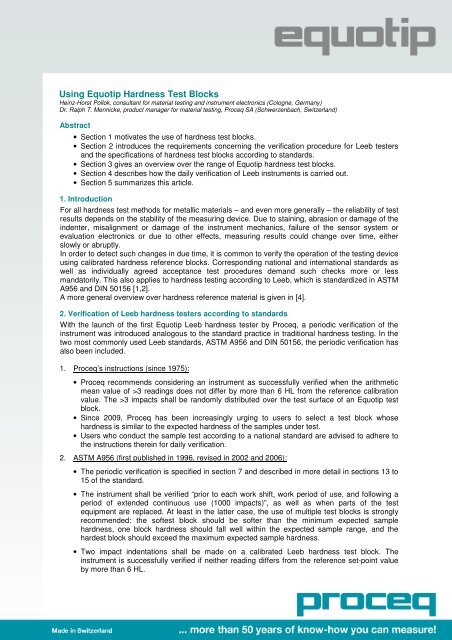
<strong>Using</strong> <strong>Equotip</strong> <strong>Hardness</strong> <strong>Test</strong> <strong>Blocks</strong><br />
Heinz-Horst Pollok, consultant for material testing and instrument electronics (Cologne, Germany)<br />
Dr. Ralph T. Mennicke, product manager for material testing, <strong>Proceq</strong> SA (Schwerzenbach, Switzerland)<br />
Abstract<br />
• Section 1 motivates the use of hardness test blocks.<br />
• Section 2 introduces the requirements concerning the verification procedure for Leeb testers<br />
and the specifications of hardness test blocks according to standards.<br />
• Section 3 gives an overview over the range of <strong>Equotip</strong> hardness test blocks.<br />
• Section 4 describes how the daily verification of Leeb instruments is carried out.<br />
• Section 5 summarizes this article.<br />
1. Introduction<br />
For all hardness test methods for metallic materials – and even more generally – the reliability of test<br />
results depends on the stability of the measuring device. Due to staining, abrasion or damage of the<br />
indenter, misalignment or damage of the instrument mechanics, failure of the sensor system or<br />
evaluation electronics or due to other effects, measuring results could change over time, either<br />
slowly or abruptly.<br />
In order to detect such changes in due time, it is common to verify the operation of the testing device<br />
using calibrated hardness reference blocks. Corresponding national and international standards as<br />
well as individually agreed acceptance test procedures demand such checks more or less<br />
mandatorily. This also applies to hardness testing according to Leeb, which is standardized in ASTM<br />
A956 and DIN 50156 [1,2].<br />
A more general overview over hardness reference material is given in [4].<br />
2. Verification of Leeb hardness testers according to standards<br />
With the launch of the first <strong>Equotip</strong> Leeb hardness tester by <strong>Proceq</strong>, a periodic verification of the<br />
instrument was introduced analogous to the standard practice in traditional hardness testing. In the<br />
two most commonly used Leeb standards, ASTM A956 and DIN 50156, the periodic verification has<br />
also been included.<br />
1. <strong>Proceq</strong>’s instructions (since 1975):<br />
• <strong>Proceq</strong> recommends considering an instrument as successfully verified when the arithmetic<br />
mean value of >3 readings does not differ by more than 6 HL from the reference calibration<br />
value. The >3 impacts shall be randomly distributed over the test surface of an <strong>Equotip</strong> test<br />
block.<br />
• Since 2009, <strong>Proceq</strong> has been increasingly urging to users to select a test block whose<br />
hardness is similar to the expected hardness of the samples under test.<br />
• Users who conduct the sample test according to a national standard are advised to adhere to<br />
the instructions therein for daily verification.<br />
2. ASTM A956 (first published in 1996, revised in 2002 and 2006):<br />
• The periodic verification is specified in section 7 and described in more detail in sections 13 to<br />
15 of the standard.<br />
• The instrument shall be verified “prior to each work shift, work period of use, and following a<br />
period of extended continuous use (1000 impacts)”, as well as when parts of the test<br />
equipment are replaced. At least in the latter case, the use of multiple test blocks is strongly<br />
recommended: the softest block should be softer than the minimum expected sample<br />
hardness, one block hardness should fall well within the expected sample range, and the<br />
hardest block should exceed the maximum expected sample hardness.<br />
• Two impact indentations shall be made on a calibrated Leeb hardness test block. The<br />
instrument is successfully verified if neither reading differs from the reference set-point value<br />
by more than 6 HL.
3. DIN 50156 (first published in 2007):<br />
• Appendix A of Part 1 (out of 3) deals with the periodic verification.<br />
• For each impact device type, three hardness ranges are specified. For the most common<br />
types D and G, these are as follows:<br />
type D < 500 HLD 500 … 700 HLD > 700 HLD<br />
type G < 450 HLG 450 … 600 HLG > 600 HLG<br />
Tab. 1: <strong>Hardness</strong> ranges for the daily verification of Leeb impact devices types D and G<br />
according to the test standard DIN 50156.<br />
• “The performance check of the instrument should be carried out prior to use on each day the<br />
instrument is used, at approximately each hardness level and for each scale that is to be<br />
used.”<br />
• At least 3 impacts should be made on a calibrated Leeb hardness test block. The instrument is<br />
considered as “verified satisfactory” if the arithmetic mean value and the reference calibration<br />
value do not differ by more than 15 HL.<br />
From this, it seems ASTM requires a closer matching of the measurement and the “real” value than<br />
DIN 50156. However, this is put into a different perspective when considering that DIN refers to<br />
certified reference material traceable to a national etalon held by Physikalisch-Technische<br />
Bundesanstalt (PTB) in Germany. This fixes the Leeb hardness scales according to DIN 50156. In<br />
contrast, the ASTM standard is not based on a standardized national Leeb scale, but test blocks are<br />
calibrated with Leeb testers certified by the instrument manufacturers. Different testers may hold<br />
systematic deviations between each other that cannot be revealed through checks on the same<br />
manufacturer’s blocks. Only a test on a genuine <strong>Equotip</strong> block would permit determination of the<br />
bias (and thus the uncertainty) with respect to the inventor’s genuine Leeb scale and other<br />
manufacturers’ in-house standards.<br />
3. Range of Leeb hardness test blocks<br />
The standard specifications of Leeb hardness test blocks in DIN 50156-3 and ASTM A956, section<br />
17 are very similar. The key parameters are listed in Tab. 2.<br />
type of impact device D/DC, DL, C, S, E / G<br />
diameter of test block ≥ 90 mm / ≥ 120 mm)<br />
thickness of test block ≥ 54 mm / ≥ 70 mm)<br />
roughness of calibrated test surface ASTM: Ra ≤ 0.4 µm<br />
DIN: Ra ≤ 0.025 µm<br />
roughness of other surfaces ASTM: Ra ≤ 7 µm<br />
homogeneity of calibrated test<br />
surface<br />
DIN: not specified<br />
ASTM: R 1) < 13 HL<br />
DIN: V 2) ≤ 2.0 % (< 450 HL)<br />
V ≤ 1.5 % (450 to 750 HL)<br />
V ≤ 1.0 % (> 750 HL)<br />
reference calibration value average from 10 readings, randomly- and<br />
evenly-distributed over the test surface<br />
two-sided calibration of test block permitted<br />
1) R: range, difference between the lowest and the highest reading out of the 10 readings<br />
2) V: variation coefficient, standard deviation of 10 readings, divided by their average<br />
Tab. 2: Requirements on Leeb hardness test blocks according to ASTM A956 and DIN 50156-3.<br />
The ASTM homogeneity requirement is generally slightly tighter than the DIN specification.<br />
The most striking difference between Leeb test blocks and blocks for static hardness tests (such as<br />
HRC or HB) is the size of the blocks. The larger block size is important as the Leeb method<br />
assumes that the dynamic Leeb test impact is carried out on a sufficiently large and heavy sample.
Reference [5] reasons that the range of readings (min/max), or alternatively the variation coefficient,<br />
is not a “genuine” measure of the homogeneity of the test block surface. In addition, readings often<br />
decrease slightly from the center to the edge of the Leeb test blocks due the measurement principle.<br />
<strong>Proceq</strong> offers the widest range of Leeb hardness test blocks worldwide.<br />
1. <strong>Hardness</strong> test blocks of diameter ~90 mm, thickness ~55 mm, weight ~2.8 kg:<br />
impact device<br />
type<br />
low<br />
hardness range<br />
(
<strong>Hardness</strong> test blocks calibrated by <strong>Proceq</strong> are supplied along with calibration certificates. The<br />
certificates contain the same data as such issued by accredited test laboratories. The calibration<br />
procedure is carried out as specified in DIN 50156-3 and ASTM A956. In particular, <strong>Proceq</strong>’s plantinternal<br />
primary reference measuring device is identical in construction to the German national<br />
standard Leeb measuring device of Physikalisch-Technischen Bundesanstalt (PTB) in Germany and<br />
National Institute of Metrology (NIM) in China. In addition, the reference values are engraved in the<br />
test surface and quoted on barcode labels on the block circumference.<br />
The validity of <strong>Proceq</strong> test block certificates is not bindingly limited in time. However, they contain a<br />
reference to DIN 50156-3, according to which the validity should be limited to 5 years. In theory, it<br />
should be highlighted that the hardness of the material can change with time, particularly when<br />
speaking of very hard and very soft material. From experience, however, <strong>Equotip</strong> hardness test<br />
blocks have proven stable even over much longer periods of time provided proper storage.<br />
Supplemental to <strong>Proceq</strong>’s calibration certificate, additional calibrations from accredited institutes are<br />
available for <strong>Equotip</strong> test block surfaces:<br />
• Leeb hardness scales HLD, HLE, HLS and HLG according to DIN 50156-3<br />
• Brinell hardness scale HB according to ISO 6506-3<br />
• Vickers hardness scale HV according to ISO 6507-3<br />
• Rockwell hardness scales HRC, HRB according to ISO 6508-3<br />
The reference measurement equipment used by the accredited institute for these calibrations is<br />
traceable to national hardness etalons.<br />
4. How to carry out periodic instrument checks<br />
According to DIN 50156-1, the periodic check of Leeb hardness testers shall be carried out at<br />
ambient air temperatures between 10 and 35°C. ASTM A956 limits the test piece temperature to 4 to<br />
38°C. If this is not possible, the user should report the relevant temperature in the test report.<br />
• Remove the protective sticker or alternative corrosion protection from the test surfaces of the<br />
hardness test block.<br />
• Carefully clean the test surface with acetone (or any other acid-free non-polar cleaning agent).<br />
• Clean the ball indenter of the impact body with acetone.<br />
• Place the test block on a plane solid support. The support must not move or vibrate during the<br />
measurement. A plane and smooth steel plate of at least 200 x 200 mm and a thickness of<br />
more than 25 mm is ideally suited. To ensure good contact and avoid scratching of the<br />
backside test surface, sandwich a plastic film between support and test block.<br />
• As described further above, a number of Leeb impacts shall be distributed evenly across the<br />
test surface. Take care that the distance between the edges of two adjacent indentations<br />
exceeds three times the indentation diameter. Otherwise, higher hardness values will be<br />
measured: around existing indentations, the material has been cold work hardened [3].<br />
The measurements shall be compared against the reference set-point value as per instructions<br />
given in the referred standards.<br />
• If the periodic check fails, carefully clean the impact device with the supplied cleaning brush,<br />
and then repeat the check.<br />
• It is recommended to keep records of the results of the check, quoting at least the serial<br />
number of the device, the serial number of the test block, the results, the date of the check,<br />
and the name of the inspector. In addition, any circumstances should be reported that can<br />
have affected the test result (such as an ambient temperature outside the limits specified in<br />
the relevant test standard).<br />
• When finished, clean both test surfaces of the block with acetone. Even slight hand<br />
perspiration under finger prints may cause rapid corrosion of the surfaces!<br />
• Protect the test surfaces against corrosion (e.g. with protective stickers or acid-free oil).<br />
• <strong>Hardness</strong> test blocks must be stored in a dry place that does not undergo excessive<br />
temperature variations.
With an increasing number of indentations on the surface of a test block, the measured hardness<br />
values will increase and scatter more [4]. If there are too many indentations on a surface to adhere<br />
to the minimum distance of 3 indentation diameters between indentation edges, the test surface<br />
must not be used anymore. Neither must test surfaces be used if they are corroded, (heavily)<br />
scratched or have other obvious damages.<br />
Never “recycle” test surfaces by grinding off the upper skin. On the one hand, the hardness may be<br />
affected from the machining. On the other hand, remainders of the cold work hardened zones of the<br />
ground indentations will lead to higher hardness values and larger scatter of the values. And finally,<br />
the block parameters specified in Tab. 2 will not normally be met anymore.<br />
Conclusions<br />
As for any other hardness test devices, the accuracy and stability of Leeb hardness testers should<br />
periodically be verified using calibrated <strong>Equotip</strong> hardness test blocks. The test standards ASTM<br />
A956 and DIN 50156 specify the requirements on the hardness test blocks and provide very useful<br />
guidelines for instrument checks. <strong>Proceq</strong> offers a portfolio of Leeb hardness test blocks that covers<br />
the requirements of these standards. Also traceability to primary standards is secured.<br />
Periodic instrument checks with <strong>Equotip</strong> hardness test blocks are pretty much straightforward. When<br />
a few simple rules are followed, there should hardly emerge any problems.<br />
For further information please contact your <strong>Proceq</strong> representative or visit http://www.proceq.com and<br />
http://www.equotip.com.<br />
References<br />
[1] ASTM A956, Standard <strong>Test</strong> Method for Leeb <strong>Hardness</strong> <strong>Test</strong>ing of Steel Products, 2006.<br />
[2] DIN 50156, Metallische Werkstoffe – Härteprüfung nach Leeb, 2007.<br />
[3] K. Herrmann et al., Härteprüfung an Metallen und Kunststoffen, Expert Verlag, 2007.<br />
[4] T. Yamamoto, Role and use of standard hardness blocks, 2002.<br />
[5] T. Yamamoto, M. Yamamoto, K. Miyahara, Accuracy for Standard <strong>Blocks</strong> for <strong>Hardness</strong> and<br />
Uncertainty of <strong>Hardness</strong>, XIX IMEKO World Congress, 2009.


