expert cont to Lykk harness.pdf 333KB Jun - Tanco Autowrap
expert cont to Lykk harness.pdf 333KB Jun - Tanco Autowrap
expert cont to Lykk harness.pdf 333KB Jun - Tanco Autowrap

Create successful ePaper yourself
Turn your PDF publications into a flip-book with our unique Google optimized e-Paper software.
Subject Retro fit <strong>cont</strong>roller<br />
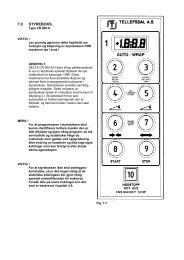
Description RDS <strong>expert</strong> <strong>cont</strong>roller <strong>to</strong> <strong>Lykk</strong>etronic <strong>harness</strong><br />
Modified 2 May 2007 B Kynas<strong>to</strong>n.<br />
Location Electrical <strong>cont</strong>rol<br />
Model 280ARC, 580A, 1080A, 404EH<br />
<strong>Tanco</strong> Au<strong>to</strong>wrap<br />
Technical information<br />
Description<br />
From 2003 all <strong>Tanco</strong> Bale wrappers were delivered with RDS <strong>cont</strong>rol systems. Prior <strong>to</strong><br />
this <strong>Lykk</strong>etronic units were used.<br />
<strong>Lykk</strong>etronic <strong>cont</strong>roller<br />
RDS <strong>cont</strong>roller with <strong>Lykk</strong>etronic junction box<br />
An RDS <strong>cont</strong>rol box can be used with a <strong>Lykk</strong>etronic wiring <strong>harness</strong> only if the following<br />
changes are made.<br />
1. Change over the table UP / Down<br />
Hirschman Connec<strong>to</strong>rs<br />
2. Open the <strong>Jun</strong>ction box & remove the 8 screws holding the 2 PCB’s , this<br />
allows access <strong>to</strong> the wiring.<br />
The information <strong>cont</strong>ained in this document is for reference only.<br />
<strong>Tanco</strong> Au<strong>to</strong>wrap is not responsible for damage caused <strong>to</strong> machines due <strong>to</strong> incorrect adjustment.
3. Each cable is identified by a number.<br />
4 wires require cutting and re-connecting in<br />
different positions.<br />
Crimp connections should be used.<br />
<strong>Tanco</strong> Au<strong>to</strong>wrap<br />
Technical information<br />
4. Line 6 Cutter Closed Line 7 Cutter Open<br />
Wire 6, 7 can be cut close <strong>to</strong> the PCB. These now require joining with wires<br />
on the front of the PCB.<br />
Line 6 on the rear of the panel should be joined <strong>to</strong> line 7 on the front.<br />
Line 7 on the rear of the panel should be joined <strong>to</strong> line 6 on the front.<br />
6 & 7<br />
5. Line 13 Open Grab Line 10 JD Valve<br />
Line 10 should be connected <strong>to</strong> line 13 & 13 <strong>to</strong> 10<br />
The information <strong>cont</strong>ained in this document is for reference only.<br />
<strong>Tanco</strong> Au<strong>to</strong>wrap is not responsible for damage caused <strong>to</strong> machines due <strong>to</strong> incorrect adjustment.
6. Tip/Cut Sensor position requires moving<br />
<strong>Tanco</strong> Au<strong>to</strong>wrap<br />
Technical information<br />
Move wire from position 1 Tip/Cut Sensor <strong>to</strong> position 2 12 volt<br />
1 2<br />
<strong>Jun</strong>ction box Connection identification.<br />
If a remote <strong>cont</strong>rol was previously used and is still required, only an RDS unit can now be<br />
used.<br />
The information <strong>cont</strong>ained in this document is for reference only.<br />
<strong>Tanco</strong> Au<strong>to</strong>wrap is not responsible for damage caused <strong>to</strong> machines due <strong>to</strong> incorrect adjustment.