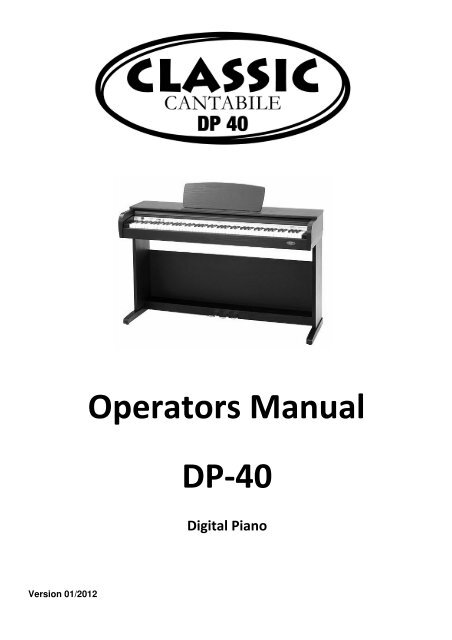
Operators Manual DP-40 Digital Piano
Operators Manual DP-40 Digital Piano
Operators Manual DP-40 Digital Piano

Create successful ePaper yourself
Turn your PDF publications into a flip-book with our unique Google optimized e-Paper software.
Version 01/2012<br />
<strong>Operators</strong> <strong>Manual</strong><br />
<strong>DP</strong>-<strong>40</strong><br />
<strong>Digital</strong> <strong>Piano</strong>
2<br />
INFORMATION FOR YOUR SAFETY!<br />
THE FCC REGULATION WARNING (for USA)<br />
This equipment has been tested and found to comply with<br />
the limits for a Class B digital device, pursuant to Part 15 of<br />
the FCC Rules.<br />
These limits are designed to provide reasonable protection<br />
against harmful interference in a residential installation. This<br />
equipment generates, uses, and can radiate radio frequency<br />
energy and, if not installed and used in accordance with the<br />
instructions, may cause harmful interference to radio<br />
communications. However, there is no guarantee that<br />
interference will not occur in a particular installation.<br />
If this equipment does cause harmful interference to radio or<br />
television reception, which can be determined by turning the<br />
equipment off and on, the user is encouraged to try to<br />
correct the interference by one or more of the following<br />
measures:<br />
Reorient or relocate the receiving antenna.<br />
Increase the separation between the equipment and<br />
receiver.<br />
Connect the equipment into an outlet on a circuit<br />
different from that to which the receiver is connected.<br />
Consult the dealer or an experienced radio/TV technician<br />
for help.<br />
Unauthorized changes or modification to this system can<br />
void the user's authority to operate this equipment.<br />
CAUTION<br />
The normal function of the product may be disturbed by<br />
Strong Electro Magnetic Interference. If so, simply reset<br />
the product to resume normal operation by following the<br />
owner's manual. In case the function could not resume,<br />
please use the product in other location.<br />
PRECAUTIONS<br />
PLEASE READ CAREFULLY BEFORE PROCEEDING<br />
Please keep this manual in a safe place for future reference.<br />
Power Supply<br />
Please connect the designated AC adaptor to an AC outlet<br />
of the correct voltage.<br />
Do not connect it to an AC outlet of voltage other than that<br />
for which your instrument is intended.<br />
Unplug the AC power adaptor when not using the<br />
instrument, or during electrical storms.<br />
Connections<br />
Before connecting the instrument to other devices, turn off<br />
the power to all units. This will help prevent malfunction and<br />
/ or damage to other devices.<br />
Location<br />
Do not expose the instrument to the following conditions to<br />
avoid deformation, discoloration, or more serious damage:<br />
Direct sunlight<br />
Extreme temperature or humidity<br />
Excessive dusty or dirty location<br />
Strong vibrations or shocks<br />
Close to magnetic fields<br />
Interference with other electrical devices<br />
Radios and televisions placed nearby may experience<br />
reception interference. Operate this unit at a suitable<br />
distance from radios and televisions.<br />
Cleaning<br />
Clean only with a soft, dry cloth.<br />
Do not use paint thinners, solvents, cleaning fluids, or<br />
chemical-impregnated wiping cloths.<br />
Handling<br />
Do not apply excessive force to the switches or controls.<br />
Do not let paper, metallic, or other objects into the<br />
instrument. If this happens, unplug the AC adaptor from the<br />
wall outlet. Then have the instrument inspected by qualified<br />
service personnel.<br />
Disconnect all cables before moving the instrument.
Contents<br />
Panel Description<br />
Front Panel.......................................... .................................................................................................... .....................4<br />
Rear Panel....................................................................................................................................................................5<br />
Setup<br />
Part List........................................................................................................................................................................6<br />
Setup Guide..................................................................................................................................................................6<br />
Power Supply................................................................................................................................................................8<br />
Connections<br />
Connecting a pair of Headphones................................................................................................................................ 9<br />
Connecting an Audio Equipment.................................................................................................................................. 9<br />
Connecting an MP3/CD................................................................................................................................................9<br />
Connecting a Computer................................................................................................................................................ 9<br />
Listening to the Demo song...........................................................................................................................10<br />
Adjusting the Volume........................................................................................................................................<br />
10<br />
Playing Voices<br />
Selecting a Voice........................................................................................................................................................ 10<br />
Playing two Voice Simultaneously.............................................................................................................................. 11<br />
Playing a Lower Voice................................................................................................................................................ 11<br />
Touch Response......................................................................................................................................................... 11<br />
<strong>Digital</strong> Effects.......................................................................................................................................................12<br />
Metronome............................................................................................................................................................12<br />
Tempo......................................................................................................................................................................13<br />
Beep Tone..............................................................................................................................................................13<br />
Troubleshooting..................................................................................................................................................14<br />
Specifications......................................................................................................................................................14<br />
Appendices<br />
Voice List.................................................................................................................................................................14<br />
MIDI Implementation List chart...................................................................................................................................15<br />
3
4<br />
Panel Description<br />
Front Panel<br />
1 2 3 4 5<br />
Electric<br />
<strong>Piano</strong> - +<br />
1. POWER ON / OFF<br />
Turn the power ON or OFF.<br />
2. MASTER VOLUME<br />
Adjust the master volume.<br />
3. FUNCTION Button<br />
Hold down this button and press the special keys to<br />
realize different functions.<br />
16. SUSTAIN Pedal<br />
Step on the sustain pedal, all notes played on the<br />
keyboard would have a longer sustain.<br />
17. SOSTENUTO Pedal<br />
Step on the sostenuto pedal, the notes played before<br />
you step on would have a sustain effect.<br />
18. SOFT Pedal<br />
Step on the soft pedal, all notes played on the keyboard<br />
would have a softer effect.<br />
4. VOICE SELECT Key<br />
Hold down the [FUNCTION] button and press the<br />
key to select a voice.<br />
5. TEMPO ADJUST Key<br />
Hold down the [ FUNCTION] button and press the<br />
key to adjust the current tempo.<br />
18<br />
17<br />
16
6 7 8 9<br />
6. METRONOME Key<br />
Hold down the [FUNCTION] button and press the<br />
[ ON/ OFF] key to turn the metronome ON or OFF.<br />
Hold down the [ FUNCTION] button and press the<br />
other key to select the time signature.<br />
7. REVERB Key<br />
Hold down the [FUNCTION] button and press the<br />
[ON/OFF] key to turn reverb effect ON or OFF.<br />
Hold down the [ FUNCTION] button and press the<br />
other key to select the reverb type.<br />
Rear Panel<br />
12. USB Jack<br />
Connect to a computer.<br />
13. AUX. OUT Jack<br />
Connect the audio equipment.<br />
14. AUX. IN Jack<br />
Connect an external sound source, such as an MP3 or<br />
CD player.<br />
15. DC IN Jack<br />
Connect the DC 12V power adaptor.<br />
10 11<br />
Panel Description<br />
8. CHORUS Key<br />
Hold down the [FUNCTION] button and press the<br />
[ON/OFF] key to turn chorus effect ON or OFF.<br />
Hold down the [ FUNCTION] button and press the<br />
other key to select the chorus type.<br />
9. TOUCH Key<br />
Hold down the [FUNCTION] button and press the<br />
key to select different touch response level.<br />
10. DEMO Key<br />
Hold down the [FUNCTION] button and press the<br />
key to start or stop playing the demo song.<br />
11. BEEP Key<br />
Hold down the [FUNCTION] button and press the<br />
key to turn the prompt tone ON or OFF.<br />
12 13 14 15<br />
5
6<br />
Setup<br />
This section contains information about setting up your instrument and preparing to play. Please go through this section carefully<br />
before turning the power on.<br />
Part List<br />
Before you proceeding to assemble the stand, get a Philip's<br />
screwdriver (not supplied).<br />
Make sure you have the following parts, which are supplied into<br />
package.<br />
Setup Guide<br />
A. Fix and well tighten the left and right side boards [4] & [5] to the<br />
pedal box [3] with Screw 2 [8] . The screw Cover(4pcs) [9] above<br />
Screw 2.<br />
4<br />
4<br />
1<br />
2<br />
3<br />
10<br />
3<br />
9<br />
8<br />
5<br />
1. <strong>Piano</strong> Cabinet<br />
2. Rear Board<br />
3. Pedal Box<br />
4. Left Side Board<br />
5. Right Side Board<br />
6. Hand Screw<br />
7. Screw1<br />
15mm (8 pcs)<br />
8. Screw230<br />
mm(4 pcs)<br />
9. Screw2 Cover(4 pcs)<br />
10. Pedal Cable<br />
5<br />
6 7 8 9
B. Fix the rear board [2] to the left and right side boards [4] & [5] with<br />
Screw1 [7].<br />
C. Place the piano cabinet [1] on the stand, fix it with Hand<br />
Screw [6]<br />
4<br />
7<br />
4<br />
1<br />
.<br />
3<br />
3<br />
D. Insert the pedal cable [10] into the proper socket of the<br />
cabinet [1] .<br />
10<br />
2<br />
2<br />
6<br />
5<br />
5<br />
Setup<br />
7
Setup<br />
1.<br />
Power Supply<br />
2. Connect the AC adaptor to the power supply jack.<br />
3.<br />
Please make sure that POWER ON/OFF switch of the instrument is<br />
set to OFF. Then move the MASTER VOLUME knob leftwards to set<br />
the minimum volume level.<br />
Plug the AC adaptor into an AC outlet. And when turning the power<br />
OFF, simply reverse the procedure please.<br />
4. Turn the power ON. The LED on the panel will light up.<br />
Note:<br />
When the keyboard is not in use or in the time of thunderstorm, please<br />
disconnect the power for safety purpose.<br />
8<br />
OFF ON
Connecting a pair of Headphones<br />
A standard pair of stereo headphones can be plugged in here for<br />
private practice or late-night playing.<br />
Jack1:<br />
When a pair of headphones is plugged into the Jack 1, the<br />
sound can be heard from headphones and speakers of the<br />
instrument.<br />
Jack2: When a pair of headphones is plugged into Jack 2, the internal<br />
stereo speaker system is automatically shut off . The sound<br />
can be heard from headphones.<br />
Note:<br />
Do not listen with the headphones at high volume for long periods of<br />
time. Doing so may cause hearing loss.<br />
Connecting an Audio Equipment<br />
The rear-panel AUX.OUT jack delivers the output of the instrument for<br />
connection to a keyboard amplifier, stereo sound system, a mixing<br />
console, or tape recorder. Use an audio cord to plug into the AUX.OUT<br />
jack located on the rear board then plug the other end of the cord into<br />
AUX.IN of the amplifier.<br />
Note:<br />
To avoid damaging the speakers, please ensure that the volume has<br />
been set to the minimum level before connecting the power and other<br />
devices.<br />
Connecting an MP3/CD Player<br />
Connect the audio output of an MP3/CD player or other audio source<br />
to the stereo AUX. IN jack on the rear panel.<br />
The input signal is mixed with the piano signal, allowing you to play<br />
along.<br />
Connecting a Computer<br />
Connect PC or other USB host devices that support USB audio<br />
For devices with USB cable, you can simply connect the MIDI/USB<br />
converter to your USB connector on the device and plug the USB cable<br />
into the piano, after the driver is installed and initialization is finished,<br />
you can choose USB Audio Device in the device menu of the software<br />
to transfer midi data.<br />
Note:<br />
Do not select USB audio device in both of input and output setting<br />
together, otherwise the sound overlaps.<br />
.<br />
Connections<br />
Headphone Jack 1<br />
Headphone Jack 2<br />
9
10<br />
Listening to the Demo song<br />
While holding down the [ FUNCTION] button, press DEMO key to start<br />
the demo song playing. Press it again to stop playing.<br />
The keyboard would be disabled when the demo song is playing.<br />
Adjusting the Volume<br />
Move the [ VOLUME] knob rightwards, the volume increases. Moving it<br />
leftwards will turn the volume down.<br />
Playing Voices<br />
Selecting a Voice<br />
While holding down the [FUNCTION] button, press corresponding key<br />
in voice selecting area to select the voice you want.<br />
Note:<br />
While only one voice is selected, the dual voice and lower voice will be<br />
turned off automatically.<br />
Electric<br />
<strong>Piano</strong><br />
Electric<br />
<strong>Piano</strong>
Playing two Voice Simultaneously<br />
You can play two voices synchronously on the keyboard by selecting a<br />
dual voice.<br />
While holding down the [ FUNCTION] button, press 2 keys<br />
simultaneously in voice selecting area. Press the first key to select the<br />
upper voice, press the second key to select the dual voice.<br />
Notes:<br />
While dual voice is turned on, lower voice would be turned off<br />
automatically<br />
.<br />
Playing a Lower Voice<br />
While holding down the [FUNCTION] button, select the Strings (Lower)<br />
on the keyboard. This will select Strings (Lower) as lower voice and<br />
split the keyboard at F#3 automatically.<br />
Lower<br />
Touch Response<br />
Split Pt<br />
While holding down the [FUNCTION] button, press a key in the<br />
TOUCH selecting area to select different touch response level<br />
0: OFF<br />
1: Soft<br />
2: Medium<br />
3: Hard<br />
.<br />
Electric<br />
<strong>Piano</strong><br />
Electric<br />
<strong>Piano</strong><br />
Electric<br />
<strong>Piano</strong><br />
Electric<br />
<strong>Piano</strong><br />
Playing Voices<br />
11
12<br />
<strong>Digital</strong> Effects<br />
While holding down the [ FUNCTION] button, press the corresponding<br />
keys in effect setting area to select the voice effect type.<br />
Reverb Value:<br />
0: OFF<br />
1: Room<br />
2: Small Hall<br />
3: Large Hall<br />
4: Stadium<br />
Chorus Value:<br />
0: OFF<br />
1: Light Chorus<br />
2: Medium Chorus<br />
3: Deep Chorus<br />
4: Flanger<br />
Metronome<br />
Turn on the metronome:<br />
While holding down the [ FUNCTION] button, press METRONOME<br />
ON/OFF key to turn the metronome ON or OFF.<br />
Select different time signature:<br />
While holding down the [ FUNCTION] button, select a demanded time<br />
signature by pressing the corresponding keys in metronome setting<br />
area. There are 6 types of time signature: 0, 2, 3, 4, 5, 6.
While holding down the [ FUNCTION] button, press corresponding keys<br />
in TEMPO selection area. You can change the tempo by input number<br />
or using tap tempo, or press tempo +/- keys to change current tempo.<br />
Notes:<br />
1. Press [ tempo +] and [ tempo – ] keys simultaneously to set the tempo<br />
value back to the default (120).<br />
2. The tempo range is :30 ~ 280<br />
3. If you want to change tempo value by the number keys, you should<br />
input 3 numbers. For example, if you want to set the tempo value as<br />
85, you should input “ 085”.<br />
While holding down the [ FUNCTION] button, press beep key to turn the<br />
Beep Tone ON or OFF. The default setting is ON.<br />
If you turn on the beep tone, you can hear a beep sound when you<br />
press a valid functional key while the [ FUNCTION] button is held down.<br />
-<br />
+<br />
-<br />
+<br />
Tempo<br />
Beep Tone<br />
13
14<br />
Troubleshooting<br />
Problem<br />
The speakers produce a “pop” sound whenever the<br />
power is turned ON or OFF.<br />
No sound when the keyboard is played.<br />
When using a mobile phone, noise is produced.<br />
Specifications<br />
Keyboard<br />
88 Hammer-action keys<br />
Polyphony<br />
64<br />
Voice<br />
11(including 1 Lower Voice)<br />
Demo<br />
1<br />
Tempo<br />
30-280<br />
Control Button<br />
Power On/Off switch, Volume, Function.<br />
Appendices<br />
Voice List<br />
1. Grand <strong>Piano</strong> 1<br />
2. Grand <strong>Piano</strong> 2<br />
3. Electric <strong>Piano</strong><br />
4. Harpsichord<br />
5. Vibraphone<br />
6. Church Organ<br />
7. Stereo Strings<br />
8. Sweet Trumpet<br />
9. Soprano Sax<br />
10. Sweet Oboe<br />
Lower: Strings (Lower)<br />
Possible Cause and Solution<br />
This is normal and is no cause for alarm.<br />
Make sure the voice volumes are set at appropriate levels.<br />
Using a mobile phone in close proximity to the instrument<br />
may produce interference. To prevent this, turn off the<br />
mobile phone or use it further away from the instrument.<br />
Control Key<br />
Voice Select Keys, Tempo Tap, Tempo +/-, Tempo<br />
Number Keys, Metronome On/Off, Metronome select<br />
keys, Reverb On/Off, Reverb Type Select Keys,<br />
Chorus On/Off, Chorus Type Select Keys, Touch<br />
On/Off, Touch Select Keys, Demo, Beep.<br />
Connectors<br />
DC IN, Headphones (2 standard. ¼” phone), AUX IN,<br />
AUX OUT, USB, Pedals( Sustain, Soft, Sostenuto)<br />
Power Supply<br />
DC 12V<br />
Speaker<br />
20W + 20W<br />
Dimensions<br />
1365(W) x 435(D) x 945(H) mm<br />
Weight<br />
45KG
MIDI Implementation List chart<br />
15