
You also want an ePaper? Increase the reach of your titles
YUMPU automatically turns print PDFs into web optimized ePapers that Google loves.
Art.no. 00025073<br />
Version 12/2011<br />
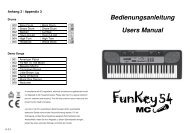
<strong>Operators</strong> <strong>Manual</strong><br />
<strong>Funkey</strong> M-<strong>30</strong><br />
Digital Keyboard
2<br />
Congratulations<br />
Congratulations on your purchase of this electronic keyboard!<br />
This keyboard is easy-to-use, with advanced functions especially suitable for self-learning beginners.<br />
No matter you are adult or children, you will enjoy playing the keyboard as it provides amazing styles<br />
for accompaniment, expressive tones, and real time record. Other features such as numbered musical<br />
notation display chord dictionary, variety of songs will help you better master the playing skill.<br />
You are recommended to study this manual carefully before using the unit.<br />
Inside This Package<br />
Please make sure the package completely contains the following:<br />
The Instrument<br />
Music Stand<br />
12V Adaptor<br />
Instruction <strong>Manual</strong>
Important Notes<br />
Your keyboard will give you years of playing<br />
pleasure if you follow the simple rules given<br />
below:<br />
Location<br />
Do not expose the unit to the following<br />
conditions to avoid deformation,<br />
discoloration, or more serious damage.<br />
Direct sunlight.<br />
High temperature (near a heat source,or<br />
inside a car under long exposure of<br />
sunlight.<br />
Excessive humidity<br />
Excessive dust<br />
Strong vibration<br />
Power Supply<br />
Make sure the suitable AC adaptor is<br />
used, and the AC outlet voltage at your<br />
country matches the input voltage<br />
specified on the AC adaptor's label.<br />
Turn the power switch OFF when the<br />
instrument is not in use.<br />
An AC adaptor should be unplugged from<br />
the AC outlet if the instrument is not<br />
going to be used for an extended period of<br />
time.<br />
Unplug the AC adaptor during electric<br />
storms.<br />
Avoid plugging the AC adaptor into the<br />
same AC outlets as appliances with high<br />
power consumption, such as electric<br />
heaters or ovens. Also avoid using multiplug<br />
adaptors since this could reduce<br />
sound's quality, causes operation errors<br />
and damages.<br />
Turn Power OFF When Making<br />
Connections<br />
To avoid damaging the instrument and<br />
other devices to which it is connected,<br />
turn the power switches of all related<br />
devices OFF prior to connecting or<br />
disconnecting cables.<br />
Cleaning<br />
Clean the unit with a soft dry cloth.<br />
A slightly dampened cloth may remove<br />
stubborn grime and dirt.<br />
Never use cleaners such as alcohol or<br />
thinner.<br />
Avoid placing vinyl object on top of the<br />
unit (vinyl might discolor and stick to the<br />
surface).<br />
Handling and Transporting<br />
Never apply excessive force to the<br />
controls, connectors or other parts of the<br />
instrument.<br />
Always unplug cables by gripping the plug<br />
firmly, but not pulling the cables.<br />
Disconnect all cables before moving the<br />
instrument.<br />
Physical shocks caused by dropping,<br />
bumping, or placing heavy objects on the<br />
instrument could result in scratches or<br />
even severe damages.<br />
Electrical Interference<br />
This instrument contains digital circuitry<br />
and may cause interference if it is placed<br />
too close to radio or television receivers.<br />
If this occurs, move the instrument<br />
further away from the receivers.<br />
The normal function of the product may be disturbed by Strong Electro Magnetic Interference.<br />
Caution!<br />
If so, simply reset the product to resume normal operation by following the instruction manual.<br />
In case the function could not resume, please use the product in other location.<br />
3
4<br />
Main Features<br />
KEYBOARD<br />
61-key touch keyboard<br />
OPERATION<br />
Use numeric keypad and [+/YES] [-/NO] to select voice, style and song,Function including Beat,<br />
Split point, MIDI IN,MIDI OUT, Bank select.<br />
VOICE<br />
395 voices in total.<br />
STYLE<br />
150 styles in total, including 10 PIANO styles.<br />
SONG<br />
100 songs in total. Each song has its learning mode.<br />
DEMO<br />
2 demos.<br />
SONG LESSON<br />
There are 3 different ways to practise the songs. Lesson1、Lesson2、Lesson3. This keyboard<br />
also offers the GRADE function in all 3 learning modes to help you know well about your progress.<br />
CHORD MODE<br />
Both Single finger chords and Fingers chords.<br />
CHORD DICTIONARY<br />
Provide chord information for users.<br />
RECORD FEATURE<br />
One recorded song.<br />
STYLE CONTROL<br />
Sync,Start/Stop,Fill/A,Fill/B,Intro/Ending<br />
OTHER FEATURES<br />
Transpose, Octave, Accomp volume, Piano, Dual, Memory, O.T.S, Touch,Metronome,Demo,<br />
Sustain, Pitch wheel and etc.
Contents<br />
General Guide.............................. 6<br />
*Front Panel................................................. 6<br />
*Rear Panel................................................... 6<br />
*LCD Display................................................... 6<br />
Preparation................................... 7-8<br />
*Power Supply................................................... 7<br />
*Setting the Music Stand................................. 8<br />
Connections....................................... 8-9<br />
*Headphones Jack........................................ 8<br />
*Sustain Jack......................................... 9<br />
*USB Jack................................................. 9<br />
Basic Operation................................. 10<br />
*Power Switch & Volume............................. 10<br />
*Demo...................................................... 10<br />
Voices and Effects............................ 11-13<br />
*Select a Voice............................................ 11<br />
*Dual Voice..................................................... 11-12<br />
*Sustain................................................... 12<br />
*Touch............................................................ 12<br />
*Metronome................................................... 13<br />
*Piano............................................................ 13<br />
*Pitch Bend........................................... 13<br />
*Transpose........................................... 14<br />
*Octave......................................... 14<br />
Style Control....................................... 15-20<br />
*Select a Style.............................................. 15<br />
*Start a Style............................................. 16-17<br />
*Fill A/Fill B.......................................... 17<br />
*Stop a Style.......................................... 18<br />
*Tempo....................................................... 18<br />
*Accomp Volume................................... 18<br />
*Chord Recognize.................................... 19-20<br />
Memory........................................... 21<br />
One Touch Setting.......................... 21<br />
Record.................................................... 22<br />
*Start Record............................................................. 22<br />
*Stop Record......................................................... 22<br />
*Playback Record................................................ 22<br />
Function Menu................................ 23-24<br />
*Beat................................................<br />
23<br />
*Split Point............................................................. 23<br />
*MIDI IN........................................................ 23<br />
*MIDI OUT................................................ 24<br />
*Bank Select............................................. 24<br />
Song..................................................... 25-27<br />
*LESSON Mode............................................. 25<br />
*Lesson 1................................................ 26<br />
*Lesson 2................................................ 26<br />
*Lesson 3............................................. 27<br />
*Grade Function............................................. 27<br />
Chord Dictionary.................................. 28<br />
MIDI Function................................. 29<br />
*What is MIDI.......................................................28 29<br />
*USB Connection...................................................... 29<br />
*MIDI Application............................................. 29<br />
Specifications.......................................... <strong>30</strong><br />
Trouble Shooting.................................... <strong>30</strong><br />
Appendix.......................................... 31-37<br />
*Appendix 1 - Voice List............................................ 31-33<br />
*Appendix 2 - Demo List................................................ 33<br />
*Appendix 3 - Style List.......................................... 34<br />
*Appendix 4 - Song List.......................................... 35<br />
*Appendix 5 - Chord List........................................... 36<br />
*Appendix 6 - MIDI List..........................................7 37<br />
5
ON<br />
OFF<br />
1<br />
212<br />
3<br />
4<br />
5<br />
6<br />
7<br />
8<br />
9<br />
10<br />
11<br />
12<br />
13<br />
14<br />
212<br />
3<br />
4<br />
5<br />
6<br />
7<br />
8<br />
9<br />
General Guide<br />
Front Panel<br />
POWER<br />
1<br />
VOLUME<br />
2<br />
100 SONGS<br />
001-014 CLASSIC<br />
015-040 FAVORITE<br />
041-066 FOLK<br />
067-080 KID S SONG<br />
081-085 BALLROOM<br />
086-100 PIANO & KEYBOARD<br />
ACCOMP<br />
VOL<br />
3<br />
TEMPO<br />
4<br />
L & R<br />
5<br />
LESSON<br />
150 STYLES<br />
001-031 BEAT & POP<br />
032-053 ROCK<br />
054-067 DANCE<br />
068-080 SOUL & FUNK<br />
081-093 JAZZ<br />
094-109 COUNTRY<br />
6<br />
CHORD<br />
DICT.<br />
FUNCTION<br />
7 8<br />
110-128 LATIN<br />
129-139 TRADITIONAL<br />
140-150 PIANO<br />
LESSON 1<br />
LESSON 2<br />
LESSON 3<br />
A.B.C.<br />
395 VOICES<br />
001-055 PIANO<br />
056-102 MALLET<br />
103-129 ORGAN<br />
1<strong>30</strong>-153 GUITAR<br />
154-178 BASS<br />
179-196 STRINGS<br />
9<br />
197-224 STRING ENSEMBLE<br />
225-258 BRASS<br />
259-284 REED<br />
285-296 PIPE<br />
297-327 LEAD<br />
328-349 PAD<br />
O.T.S. M1 M2 M3 M4 M5 M6<br />
350-364 EFFECTS<br />
365-372 ETHNIC<br />
373-381 PERCUSSIVE<br />
382-389 SOUND EFFECTS<br />
390-395 DRUM SET<br />
16<br />
START/STOP SYNC INTRO/ENDING FILL A FILL B A.B.C. STORE<br />
M1 M2 M3 M4 M5 M6<br />
O.T.S.<br />
METRO DUAL TOUCH SUSTAIN<br />
PLAY<br />
STYLE<br />
SONG<br />
18<br />
20 21 22 23 24 25 26 27<br />
17<br />
REPEAT A/B<br />
ONE TOUCH SETTING<br />
19<br />
POWER ON/OFF<br />
MASTER VOLUME<br />
ACCOMP. VOLUME -/+<br />
TEMPO -/+<br />
LEFT/RIGHT HAND<br />
CHORD DICTIONARY<br />
LESSON<br />
FUNCTION<br />
LCD DISPLAY<br />
DEMO<br />
STYLE<br />
VOICE<br />
SONG<br />
TRANSPOSE +/-<br />
LCD Display<br />
LESSON 1<br />
1 10<br />
LESSON 2<br />
LESSON 3<br />
A.B.C.<br />
BEAT<br />
VOLUEM<br />
CHORD<br />
STYLE/SONG/VOICE<br />
ONE TOUCH SETTING<br />
Rear Panel<br />
1 USB JACK<br />
212<br />
6<br />
PHONES JACK<br />
11<br />
12<br />
13<br />
14<br />
15<br />
16<br />
17<br />
3<br />
4<br />
15<br />
16<br />
OCTAVE +/-<br />
STYLE CONTROL<br />
-START/STOP<br />
-SYNC<br />
-INTRO/ENDING<br />
-FILL A<br />
-FILL B<br />
-AUTO BASS CHORD<br />
17 SONG CONTROL<br />
-START/STOP<br />
-PAUSE<br />
-REW<br />
-FF<br />
STORE M1-M6<br />
RIGHT<br />
LEFT<br />
DUAL<br />
TOUCH<br />
BASS CLEF<br />
TREBLE CLEF<br />
61 KEYBOARD<br />
SUSTAIN JACK<br />
12V JACK<br />
-REPEAT A/B<br />
1<br />
2<br />
3<br />
4<br />
LESSON 1<br />
LESSON 2<br />
LESSON 3<br />
A.B.C.<br />
RIGHT<br />
LEFT<br />
DUAL<br />
TOUCH<br />
18<br />
19<br />
20<br />
21<br />
22<br />
23<br />
24<br />
25<br />
26<br />
27<br />
28<br />
29<br />
10<br />
PIANO<br />
STYLE<br />
STORE<br />
2 DEMOS<br />
001 LITTER BROWN JUG<br />
002 CHA CHA<br />
11 12<br />
13<br />
SONG<br />
VOICE<br />
TRANSPOSE<br />
14<br />
OCTAVE<br />
15<br />
PANEL MEMORY<br />
-M1-M6<br />
ONE TOUCH SETTING<br />
PIANO<br />
METRONOME<br />
DUAL<br />
TOUCH<br />
SUSTAIN<br />
RECORD<br />
PLAY<br />
NUMERIC KEYS<br />
PITCH BEND<br />
15<br />
17<br />
16<br />
O.T.S. M1 M2 M3 M4 M5 M6<br />
9 10<br />
USB 12V<br />
1 2 3 4<br />
RESET<br />
29<br />
RIGHT<br />
LEFT<br />
DUAL<br />
TOUCH<br />
28<br />
11<br />
12<br />
13<br />
14
1.<br />
2.<br />
Preparation<br />
Power Supply<br />
This electronic keyboard can be powered by the current<br />
of a standard household wall outlet (using the specified<br />
AC adaptor) or by batteries.<br />
Using The AC Adaptor<br />
Make sure that only the AC adaptor specified for this<br />
electronic keyboard is used. The adaptor shall be 12V<br />
DC output, and center positive type. Be sure to turn off<br />
the electronic keyboard before you connect the adaptor<br />
into the AC wall outlet and the cord into the unit.<br />
Using Batteries<br />
Always make sure to turn the keyboard off before<br />
inserting new batteries or replacing old ones.<br />
To insert batteries<br />
Open the battery compartment on the bottom of the<br />
keyboard.<br />
Insert 6 D-size (SUM-1, R-20) batteries into the battery<br />
compartment and follow the correct polarity.<br />
Replace the compartment cover and make sure that it<br />
locks firmly in place.<br />
Low battery indications<br />
Any of the following symptoms indicate low battery<br />
power. Replace the batteries as soon as possible<br />
whenever any of the following occurs.<br />
A dim and difficult-to-read LCD display.<br />
Abnormally low speaker/headphone volume.<br />
Distortion of the sound output.<br />
Sudden power failure when playing at high volume.<br />
Abnormal rhythms or demo songs are played.<br />
Dimming of the display when playing at high volume.<br />
CAUTIONS!<br />
USB 12V<br />
CAUTIONS!<br />
Use only the specified AC adaptor. Using other types<br />
of adaptor creates the risk of fire and electrical shock.<br />
For safety sake, be sure to unplug the AC adaptor<br />
from the wall outlet whenever leaving the electronic<br />
keyboard unattended for a long time.<br />
When inserting batteries, make sure to follow the<br />
polarity marking.<br />
Never use batteries of different types.<br />
Never mix old batteries with new ones.<br />
Replace the batteries as soon as possible after any<br />
sign of discharge.<br />
Always remove the batteries from the battery<br />
compartment when the keyboard is not expected to<br />
be used for a long period of time.<br />
7
1.<br />
2.<br />
8<br />
Preparation<br />
Setting Music Stand<br />
Please set up the music stand as the instruction below:<br />
Connections<br />
Headphones Jack<br />
If you prefer to play with headphones for high quality<br />
personal monitoring, plug a set of stereo headphones<br />
into the rear panel PHONES jack.<br />
Plug a set of headphones into the PHONES jack and<br />
the speakers will be disabled automatically.<br />
NOTE:<br />
Never use headphones in high volume,<br />
as it may hurt your ears.<br />
USB 12V
1.<br />
2.<br />
1.<br />
2.<br />
Sustain Jack<br />
An optional footswitch can be plugged into the<br />
SUSTAIN jack for sustain control.<br />
The footswitch functions like the damper pedal of a<br />
piano. Press for sustain, release for normal sound.<br />
USB Jack<br />
Connect PC or other USB host devices that support<br />
USB Audio.<br />
For devices with USB cable, after the driver is installed<br />
and initialization is finished, you can choose USB Audio<br />
Device in the device menu of the software to transfer<br />
midi data.<br />
Connections<br />
USB 12V<br />
WARNING<br />
To avoid damages, turn the power switches of<br />
this keyboard and all related devices OFF if you<br />
want to plug in or unplug between this instrument<br />
with all related devices.<br />
9
1.<br />
2.<br />
10<br />
Basic Operation<br />
Power Switch & Volume<br />
3. Rotate [VOLUME] button to adjust the volume.<br />
Demo<br />
1. Press [DEMO] key to enter the DEMO mode.<br />
2.<br />
3.<br />
First, please ensure the correct connection has been<br />
made based on the previous instruction.<br />
Turn the [POWER] switch on. The LCD display lights<br />
up.<br />
NOTE:<br />
If the LCD display does not light up after you<br />
turned on the keyboard, please check the<br />
power supply.<br />
NOTE:<br />
If the keyboard is silent, that means the<br />
volume has adjusted to its minimum level.<br />
This keyboard includes 2 classic demo songs.<br />
Select a demo song with [+], [-] or number buttons<br />
[1] [2] .<br />
Press [START/STOP] or [DEMO] key again to exit<br />
the demo mode.<br />
NOTE:<br />
In the demo mode, all function keys except<br />
DEMO, START/STOP, TEMPO, +, -, No 1,<br />
No 2, MASTER VOLUME will be disabled.<br />
ON<br />
OFF<br />
ON<br />
OFF<br />
DEMO<br />
POWER<br />
POWER<br />
STYLE<br />
VOLUME<br />
VOLUME<br />
SONG<br />
VOICE
1.<br />
2.<br />
Voices and Effects<br />
There are 395 voices in total (See appendix).<br />
Select a Voice<br />
Press the [VOICE] button to enter the voice mode.<br />
The default VOICE 1 is NO:01; LCD will display VOICE 1<br />
and its number.<br />
The [+] and [-] buttons:<br />
Press [+] or [- button to choose your desired voice.<br />
The selected voice number will be shown on the display.<br />
The number buttons:<br />
The number buttons can be pressed directly to select<br />
your desired voice.<br />
3. After selecting a voice, you can now play the keyboard.<br />
Dual Voice<br />
This keyboard has the " dual voice " function. This function<br />
is capable to enhance the delicacy of your music by<br />
playing two voices of musical instruments simultaneously;<br />
new combinations of voices and music could be created<br />
then. When the dual function is off, the voice indicated<br />
is VOICE 1, when the dual function is on, the voice indicated<br />
would be VOICE 2.<br />
1. During the VOICE 1 status, press [DUAL] button to<br />
enter the dual voice function. " VOICE 2 " and " DUAL "<br />
signal would be lightened simultaneously. The number<br />
of the dual voice will be displayed on the LCD. Now,<br />
two different sounds will be appeared at the same time<br />
just by pressing one key.<br />
DEMO<br />
STYLE<br />
SONG<br />
VOICE<br />
DUAL TOUCH SUSTAIN<br />
PLAY<br />
Eg. Piano<br />
Eg. Cello<br />
Two voice will sound<br />
at the same time.<br />
11
2.<br />
3.<br />
1.<br />
2.<br />
3.<br />
1.<br />
2.<br />
3.<br />
4.<br />
12<br />
Voices and Effects<br />
Press [+] / [-] button or numeric keypad to select your<br />
desired voice. The default DUAL VOICE number is NO.50<br />
Strings2.<br />
Press [DUAL] button again to turn off the DUAL VOICE.<br />
VOICE 2 will be disabled, the notes you play will return<br />
to the single voice of VOICE 1.<br />
Sustain<br />
This function helps you to get a voice with a<br />
sustained effect, while playing the keyboard.<br />
Press [SUSTAIN] button to activate the sustain effect.<br />
LCD lights the SUSTAIN flag. The keyboard will be played<br />
with a sustain effect.<br />
Press [SUSTAIN] button again to eliminate the sustain<br />
effect. The SUSTAIN flag will disappear.<br />
Default sustain is disabled accordingly.<br />
Touch<br />
This function allows you to turn on the dynamic<br />
level while playing the keyboard.<br />
Press [TOUCH] button to turn off the touch response<br />
function. LCD will eliminate the TOUCH flag, it means<br />
touch response is disabled.<br />
Press [TOUCH] button again to turn on the touch<br />
response effect. LCD lights up the TOUCH flag.<br />
Default touch is activated.<br />
To experience the effect, play any note on the keyboard<br />
after you turn this function on.<br />
NOTE:<br />
In DUAL VOICE status, only section above<br />
split point on keyboard has dual voice.<br />
DUAL<br />
TOUCH SUSTAIN<br />
NOTE:<br />
When you step on the sustain pedal, the<br />
sustain effect will be stronger than the<br />
effect produced by the [SUSTAIN] button.<br />
DUAL<br />
TOUCH SUSTAIN<br />
PLAY<br />
PLAY
1.<br />
2.<br />
3.<br />
1.<br />
2.<br />
3.<br />
Metronome<br />
Press [METRO] button to enable to the metronome.<br />
Press [METRO] button again to disable it.<br />
Metronome could not be played in SONG/CHORD DICT<br />
mode.<br />
NOTE:<br />
Metronome can be played along with the tempo<br />
as accompaniment whenever you turn on a<br />
style.<br />
Metronome could be played in the recording<br />
mode, but it would not be recorded.<br />
Piano<br />
Press [PIANO] button to enter to the piano mode.<br />
The LCD displays PIANO, and the voice changes<br />
to piano immediately. In this mode, A.B.C. will be<br />
disabled.<br />
Press [PIANO] button again to exit the PIANO mode.<br />
If any of the [FUNCTION] / [DEMO] / [VOICE] / [SONG] /<br />
[STYLE] buttons has been pressed to recall the memory<br />
the piano mode will be quit.<br />
Pitch Bend Wheel<br />
The PITCH BEND wheel can be used to bend the note<br />
lower or higher, ranges between +/- 2 semitone.<br />
When the wheel is released, the note will be return<br />
back to the normal status.<br />
PIANO<br />
PIANO<br />
higher<br />
(+2)cent<br />
lower<br />
(-2 )cent<br />
Voices and Effects<br />
METRO<br />
METRO<br />
13
1.<br />
2.<br />
3.<br />
1.<br />
2.<br />
3.<br />
14<br />
Transpose<br />
You can change the key of the entire keyboard<br />
with the TRANSPOSE function by adjusting the<br />
pitch in semitones steps.<br />
Press [TRANSPOSE+] / [TRANSPOSE-]button to enter<br />
TRANSPOSE sub-menu.The LCD displays the current<br />
transpose value.<br />
Use [TRANSPOSE+] / [TRANSPOSE-] to adjust the<br />
transpose value from +6 to -6 semitones only for the<br />
right area of the keyboard.<br />
Press [TRANSPOSE+] and [TRANSPOSE-] together<br />
to set the default value:00.<br />
Octave<br />
Press [OCTAVE+]/[OCTAVE-] button to enter OCTAVE<br />
sub-menu.The LCD displays the octave value.<br />
Use [OCTAVE+]/[OCTAVE-] to adjust the octave value<br />
from +1 to -1 octaves only for the right area of the keyboard.<br />
Press [OCTAVE+] and [OCTAVE-] together to set the<br />
default value:00.<br />
Voices and Effects<br />
TRANSPOSE<br />
TRANSPOSE<br />
OCTAVE<br />
OCTAVE
1.<br />
2.<br />
3.<br />
4.<br />
Style Control<br />
The keyboard has a total of 150 styles, from 01<br />
to 150, including 10 piano styles.<br />
Select a Style<br />
Press the [STYLE] button to set the keyboard to the<br />
style mode. The default STYLE 1 is NO:01;<br />
LCD will display the STYLE flag and its number.<br />
[+] and [-O] buttons:<br />
Press [+] or [-] to choose your desired style.<br />
The selected style number will be shown on the display.<br />
The number buttons:<br />
The number buttons can be pressed directly for selecting<br />
the number of your desired style.<br />
After selecting a style, you can start playing the<br />
keyboard.<br />
When a style is playing, you can select a new style at<br />
any time. The number of the new style will be displayed<br />
on the LCD immediately. If the style changes at beat<br />
one, the new style will be played at once; if the style<br />
changes at other beats, the new style will start in the<br />
next measure. The new style will be playing with the<br />
old tempo.<br />
DEMO<br />
STYLE<br />
SONG<br />
VOICE<br />
15
Start a Style<br />
1. Start immediately:<br />
Press [START/STOP] button to start the style, the<br />
drum beats of the style will be played at once.<br />
The beats will be shown on the LCD alternately.<br />
2. A.B.C. mode<br />
The default setting of A.B.C. is disable. Press [A.B.C.]<br />
button to turn on this auto bass chord mode; the A.B.C.<br />
flag on the LCD is lightened accordingly.<br />
SONG<br />
The left side of the split point is known as the chord<br />
area. When playing the chord, both the bass and the<br />
chord voices will be performed.<br />
3. Sync Start<br />
16<br />
STYLE<br />
START/STOP<br />
SYNC INTRO/ENDING FILL A<br />
FILL B<br />
REPEAT A/B<br />
A.B.C.<br />
Press [SYNC] button to enter the sync start waiting<br />
mode. The beats on the LCD flash together.<br />
If the A.B.C. mode is on, play any key on the left section<br />
of the keyboard and the style starts playing with the<br />
bass and chord.<br />
If the A.B.C. mode is off, play any key on the keyboard,<br />
and the style plays only the drum voice.<br />
STYLE<br />
SONG<br />
STYLE<br />
SONG<br />
START/STOP<br />
START/STOP<br />
Style Control<br />
SYNC INTRO/ENDING FILL A<br />
SYNC INTRO/ENDING FILL A<br />
FILL B<br />
REPEAT A/B<br />
FILL B<br />
REPEAT A/B<br />
A.B.C.<br />
A.B.C.<br />
Flash together
Style Control<br />
4. Intro Start:<br />
1.<br />
2.<br />
3.<br />
Press [INTRO/ENDING] button when the style is not<br />
playing, NOR or VAR flag will flash on the LCD,<br />
indicating the intro section is ready to play. Length of<br />
the intro varies in different styles.<br />
Press [START/STOP] button, then the style starts with<br />
an intro section, followed by the main section.<br />
Fill A/ Fill B<br />
Press [FILL A] button to insert 1 or 2 measure fill and<br />
LCD flashes 'NOR'. After one measure is over, NORMAL<br />
style will be returned.<br />
Press [FILL B] button to insert 1 ot 2 measure fill and<br />
LCD flashes 'VAR', After one measure is over, VIRIATION<br />
style will be returned.<br />
Press and hold down the [FILL A] or [FILL B] button,<br />
when the style is playing, the fill section will be played<br />
repeatedly.<br />
STYLE<br />
SONG<br />
START/STOP<br />
SYNC INTRO/ENDING FILL A<br />
FILL B<br />
REPEAT A/B<br />
A.B.C.<br />
Press and<br />
hold down<br />
STYLE<br />
SONG<br />
STYLE<br />
SONG<br />
STYLE<br />
SONG<br />
STYLE<br />
SONG<br />
START/STOP<br />
START/STOP<br />
START/STOP<br />
START/STOP<br />
SYNC INTRO/ENDING FILL A<br />
SYNC INTRO/ENDING FILL A<br />
SYNC INTRO/ENDING FILL A<br />
SYNC INTRO/ENDING FILL A<br />
Flashing until button<br />
is released<br />
FILL B<br />
REPEAT A/B<br />
FILL B<br />
REPEAT A/B<br />
FILL B<br />
REPEAT A/B<br />
FILL B<br />
REPEAT A/B<br />
A.B.C.<br />
A.B.C.<br />
A.B.C.<br />
A.B.C.<br />
17
Stop a Style<br />
1. Stop immediately<br />
The accompaniment can be stopped at any time by<br />
pressing the [START/STOP] button.<br />
Ending stop<br />
2.<br />
Press the [INTRO/ENDING] button to complete the style<br />
with an ending section. The ending section will begin<br />
from the start of the next measure.<br />
Sync stop<br />
3.<br />
1.<br />
2.<br />
3.<br />
1.<br />
2.<br />
3.<br />
18<br />
Press the [SYNC] button to stop playing the style;<br />
the synchronized start mode will be activated.<br />
Tempo<br />
Press the [TEMPO +] or [TEMPO - ] button to<br />
change the tempo.<br />
Press the [TEMPO +] and [TEMPO - ] button<br />
simultaneously to set the tempo value back to its<br />
default.<br />
The keyboard will not change the default tempo of<br />
the style even if you change the style when it is playing.<br />
Accomp Volume<br />
Press [ACCOMP VOLUME+] / [ACCOMP VOLUME-]<br />
button to enter ACCOMP VOLUME menu, the LCD<br />
displays the ACCOMP volume value which ranges<br />
between 0 and 31.(Default Accomp Value is 24.)<br />
Use [ACCOMP VOLUME+]/[ACCOMP VOLUME-] to<br />
adjust the ACCOMP volume value .<br />
Press [ACCOMP VOLUME+] and [ACCOMP VOLUME-]<br />
together will set the ACCOMP volume value to off.<br />
STYLE<br />
SONG<br />
STYLE<br />
SONG<br />
STYLE<br />
SONG<br />
START/STOP<br />
START/STOP<br />
START/STOP<br />
SYNC INTRO/ENDING FILL A<br />
SYNC INTRO/ENDING FILL A<br />
SYNC INTRO/ENDING FILL A<br />
TEMPO<br />
TEMPO<br />
ACCOMP<br />
VOL<br />
ACCOMP<br />
VOL<br />
Style Control<br />
FILL B<br />
REPEAT A/B<br />
FILL B<br />
REPEAT A/B<br />
FILL B<br />
REPEAT A/B<br />
A.B.C.<br />
A.B.C.<br />
A.B.C.
Style Control<br />
Chord Recognize<br />
"A.B.C." is disabled during the default setting.<br />
Press [A.B.C.] button to turn on this "auto bass chord"<br />
function; the A.B.C. flag on the LCD is lightened. The<br />
left section of the keyboard is known as the "chord area",<br />
while playing the chord, both the bass and the chord<br />
voices phonate.<br />
NOTE:<br />
Since the chord detection of A.B.C. is based on the<br />
Chord Root priority, some chords that could be played<br />
under the Chord Dictionary may not be recognised<br />
by A.B.C. though, eg. B6、bB6、Baug、bBm6、<br />
Bm6、bBdim7、Bdim7.<br />
There are 2 ways to detect a chord: "single finger detect" and "multi fingers<br />
detect".<br />
If the chord played is based on "multi fingers detect", it is recognized as the "multi fingers chord".<br />
If not, "single finger chord" will be recognized.<br />
Single Finger Chords<br />
This method allows you to play chords easily within<br />
the accompaniment range of the keyboard using<br />
only one, two, or three fingers.<br />
Examples of Single Finger Chord are "C, Cm, C7<br />
and Cm7", shown as below:<br />
To play a major chord<br />
Press the root note of the chord<br />
To play a minor chord<br />
Press the root note together with the<br />
nearest black key to the left of it .<br />
To play a seventh chord<br />
Press the root note together with the<br />
nearest white key to the left of it .<br />
To play a minor seventh chord<br />
Press the root notes together with<br />
the nearest white and black keys to<br />
the left of it (three keys altogether) .<br />
NOTE:<br />
When A.B.C. is on, press the keys on the left<br />
of the split point. The chord will be recognized<br />
as single finger chords.<br />
STYLE<br />
SONG<br />
START/STOP SYNC INTRO/ENDING FILL A FILL B A.B.C.<br />
Multi Finger Chords<br />
This method allows you to produce an accompaniment<br />
by playing chords with normal fingerings<br />
within the accompaniment range of the keyboard.<br />
To play Multi Chords ( Example for C chords)<br />
A total of 16 chords are provided as below:<br />
Notes enclosed in parentheses are optional;<br />
the chords could be recognized without them.<br />
REPEAT A/B<br />
19
20<br />
Chord Basics<br />
Three or more notes played together constitute a "chord".<br />
The most basic chord type is the "triad" consisting three notes:<br />
the root, third, and fifth degrees of the corresponding scale.<br />
A "C major triad", for example, is made up of the notes C (the root),<br />
E(the third note of the C major scale),and G (the fifth note of the<br />
C major scale).<br />
Reading Chord Names<br />
Some Chord Types<br />
Style Control<br />
In the C major triad shown as above, the lowest note is the " root" of the chord(this is the chord's "root<br />
position"...using other chord notes for the lowest note results in "inversion"). The root is the central<br />
sound of the chord, which supports and anchors other chord notes.<br />
The distance(interval) between adjacent notes of triad in root position is either a major or minor third.<br />
The lowest interval in our root-position triad (between the root and the third) determines whether the triad<br />
is a major or minor chord, and we can shift the highest note up or down by a semitone to produce two<br />
additional chords, as shown below.<br />
The basic characteristics of the chord sound remain intact even if we change the order of the notes to create<br />
different inversions. Successive chords in a chord progression can be smoothly connected, for example, by<br />
choosing the appropriate inversions (or chord "voicings ").<br />
Chord names tell you just about everything you need to know about<br />
a chord (other than the inversion/voicing). The chord name tells you<br />
what the root of a chord is, whether it is a major, minor, or diminished,<br />
whether it requires a major or flatted seventh and what alterations<br />
or tension does it use...all at a glance.
1.<br />
Memory<br />
There are 6 memories (M1-M6) for storage.<br />
Press and hold [STORE], press [M1](or [M2]-[M6])<br />
meanwhile. The data will be stored into M1 (M2-M6).<br />
2. The data which can be stored into the memory are as<br />
follows:<br />
Voice , Sustain, Style, Tempo, ACCOMP volume ,Octave,<br />
Transpose ,ABC,SPLIT POINT、VAR/NOR and TOUCH etc.<br />
1.<br />
2.<br />
4.<br />
One Touch Setting<br />
Press [O.T.S.] button to turn this mode on and the<br />
O.T.S. flag on the LCD will be lightened.<br />
Press any of the[M1] ~ [M4] buttons, the relative<br />
type of the parameter will be loaded according to the<br />
current style.<br />
The keyboard will turn the A.B.C. mode on automatically<br />
while the O.T.S. is on.<br />
Press any of the M1-M4 buttons, which is corresponded<br />
to your desired setting.<br />
NOTE:<br />
If the current data is different from the<br />
current memory data, the corresponding<br />
memory flag on the LCD will flash.<br />
The memory data will change to its default<br />
after power off.<br />
One Touch Setting is a powerful and convenient function that allows you to reconfigure all settings<br />
instantly with the touch of a single button. In this function, 4 types of parameters (M1~M4)<br />
will be loaded for operating the current style.<br />
3. Press [O.T.S.] button again to turn off the O.T.S. Mode.<br />
5.<br />
Press [O.T.S] to turn on the O.T.S mode, it will insert<br />
a “Fill in” section automatically.<br />
While you are recording or playbacking a recorded song,<br />
press [M1~M4]button, no “ FILL IN ”be inserted .<br />
STORE<br />
STORE<br />
STORE<br />
M1 M2 M3 M4 M5 M6<br />
M1<br />
M1<br />
ONE TOUCH SETTING<br />
M2<br />
ONE TOUCH SETTING<br />
M2<br />
M3<br />
M3<br />
ONE TOUCH SETTING<br />
M4<br />
M4<br />
M5<br />
M5<br />
M6<br />
M6<br />
O.T.S.<br />
O.T.S.<br />
O.T.S.<br />
21
1.<br />
2.<br />
1.<br />
2.<br />
22<br />
Record<br />
Start Recording<br />
Press the [RECORD] button, the four-beat on the LCD<br />
will flash simultaneity, indicating the "record waiting<br />
status".<br />
A voice, style and memory can be selected in this status.<br />
The ACCOMP track and MELODY track can be recorded<br />
together.<br />
After all the settings in the "record waiting status"<br />
have been selected, play the keyboard (the chord area<br />
when recording ACCOMP) or press the [START/STOP]<br />
button; it will start recording and the beat will be<br />
displayed according to the current tempo.<br />
NOTE:<br />
Once the recording of one track is started,<br />
the original data in the track will be<br />
overwritten.<br />
Stop Recording<br />
STOP AUTOMATICALLY<br />
While recording, once the capability is full, the recording<br />
will be stopped automatically. "FULL" will be displayed<br />
on the LCD.<br />
STOP MANUALLY<br />
Press [RECORD] button again to stop the recording<br />
immediately.<br />
When a style is playing, press the [INTRO/END] button,<br />
it will stop recording automatically after "ending".<br />
Playback the Recording<br />
Press [PLAY] button, the recorded data will be played.<br />
NOTE:<br />
The record data can be saved when the keyboard<br />
turn off power.<br />
DUAL<br />
DUAL<br />
DUAL<br />
TOUCH SUSTAIN<br />
STYLE<br />
SONG<br />
TOUCH SUSTAIN<br />
TOUCH SUSTAIN<br />
M3<br />
PLAY<br />
PLAY<br />
PLAY<br />
Flash together<br />
START/STOP SYNC INTRO/ENDING FILL A FILL B A.B.C.<br />
REPEAT A/B
Function Menu<br />
Press [FUNCTION] key to enter the menu of function.<br />
The default option of the menu is "BEAT".<br />
Everytime when you enter the menu, it will return to<br />
the option that you selected last time.<br />
Press [FUNCTION] key to select the option you would<br />
like to set.<br />
Use the [+] / [-] button to set the parameter.<br />
The option and the parameters are indicated on the<br />
right:<br />
NOTE:<br />
If there is no action 5 seconds after pressing<br />
the [FUNCTION] key ,it will quit the function<br />
menu automatically.<br />
Beat<br />
Press the [FUNCTION] button to enter the BEAT<br />
sub-menu.<br />
The LCD displays the current beat value.<br />
Use [+] / [-] to select the beat value.<br />
The beat value includes: 0, 2-9, 9 types of value.<br />
Split Point<br />
Press the [FUNCTION] button to enter SPLIT POINT<br />
sub-menu. The LCD displays the current split point<br />
value.<br />
Use [+] / [-] to select the beat value. The keyboard<br />
can be also used to change the split point.<br />
The key of the split point is the part of the left area.<br />
MIDI IN<br />
RECEIVE can be used to set the channel of MIDI IN.<br />
Channel 1-16 can be selected by pressing [+] /[-]<br />
button.<br />
The default setting is ALL.<br />
L & R<br />
LESSON<br />
CHORD<br />
DICT.<br />
FUNCTION<br />
Option LCD Display<br />
Range<br />
BEAT BET 04 0, 2...9 4<br />
SPLIT POINT SPT 19 1...61<br />
MIDI IN CHI ALL 01...16, ALL ALL<br />
MIDI OUT CHO 01 01...16 01<br />
BANK SELECT BAK 01 01...128 01<br />
Default<br />
#<br />
19( F3)<br />
23
24<br />
MIDI OUT<br />
TRANSMIT can be used to set the channel of MIDI<br />
OUT.<br />
Channel 1-16 can be selected by pressing [+] / [-]<br />
button.<br />
The default setting is 001.<br />
Bank Select<br />
Press [FUNCTION] button to enter BANK SELECT<br />
sub-menu, the LCD display BNK 01.<br />
The bank of the MIDI output sound could be adjusted<br />
from 1-128.<br />
Function Menu
1.<br />
2.<br />
3.<br />
4.<br />
1.<br />
2.<br />
Song<br />
There are total 100 songs in this keyboard<br />
(see Appendix). Each song can be practised<br />
in the MELODY OFF mode.<br />
START/STOP the song<br />
Press [SONG] button to enter the "song mode", the<br />
song flag on the LCD will show up. All songs will be<br />
played in a loop.<br />
Press [START/STOP] button to stop playing the song,<br />
but it will not quit the song mode.<br />
LOOP:<br />
The second time you start playing the song by pressing<br />
[START/STOP] button, it will play the current song repeatedly.<br />
SELECT the song:<br />
Use [+] / [] button or numeric keypad to select<br />
your desired song.<br />
REW, FF and PAUSE<br />
When a song is playing, press [FF] button to fast<br />
forward the song;<br />
Press [REW] to rewind the song (base on the measure);<br />
Press [PAUSE] to pause the song.<br />
When the song is stopped, press [STYLE], [VOICE],<br />
[DUAL] to exit the song mode.<br />
Lesson Mode<br />
Learning a new song primarily involves with the timing<br />
of the piece and the accuracy of a note. Thus the song<br />
learning function focuses on these two elements to<br />
help you better play a song.<br />
In song mode (when a song is not playing), press<br />
[LESSON] button to enter the Lesson mode.<br />
There are 3 levels to score the performance of your<br />
playing. You can use [R] or [L] button to select<br />
which hand to practice. If neither hand is selected,<br />
the keyboard will choose the right hand automatically.<br />
If [L] and [R] are both selected, you can use two hands<br />
to do the lesson togther.<br />
NOTE:<br />
STYLE<br />
CHORD<br />
DICT.<br />
SONG<br />
VOICE<br />
L & R L & R<br />
LESSON LESSON<br />
The contents for practising with left hand varied according to different types of songs. If you choose a chord<br />
song, the left hand practices the chord, otherwise, the left hand will be used to practise the melody.<br />
When a song is playing, the notes and keyboard displayed on the LCD indicate the melody and chord<br />
position, the numbered musical notation displayed on the LCD shows the last note played by the RIGHT track,<br />
and it will be convenient for you to practice .<br />
STYLE<br />
SONG<br />
STYLE<br />
SONG<br />
START/STOP<br />
START/STOP<br />
SYNC INTRO/ENDING FILL A<br />
SYNC INTRO/ENDING FILL A<br />
PAUSE FF REW<br />
FILL B<br />
REPEAT A/B<br />
FILL B<br />
REPEAT A/B<br />
A.B.C.<br />
A.B.C.<br />
CHORD<br />
DICT.<br />
25
1.<br />
2.<br />
3.<br />
4.<br />
5.<br />
6.<br />
1.<br />
2.<br />
3.<br />
4.<br />
5.<br />
6.<br />
26<br />
Lesson 1-Practice an timing<br />
Press [LESSON] button to enter the LESSON 1 mode,<br />
the lesson 1 flag is lightened on the LCD.<br />
Evaluation is based on the accuracy of the time value,<br />
and the accuracy of note playing will not be graded.<br />
Press [START/STOP] to begin.<br />
If [R] is selected; it will mute the melody of the right<br />
hand position and you will have to follow the timing of<br />
the right hand. As long as the timing is correct, the<br />
melody will be sounded.<br />
If [L] is selected ; it will mute the changing chord and<br />
melody by the left hand. You will have to follow the<br />
timing of the left hand. As long as the timing is correct,<br />
the chord / melody will be sounded.<br />
If [L] and [R] are both selected, the melody on both<br />
hands will be muted. You will have to follow the timing<br />
of both the left and right hands, and the song will then<br />
play accordingly.<br />
Once the lesson is completed, the result of evaluation<br />
will be announced.<br />
Lesson 2-Practice a note accuracy<br />
Press [LESSON] button again to enter the LESSON 2<br />
mode. Evaluation is based on the accuracy of notes<br />
playing. Accuracy of time value will not be considered<br />
as the song could keep going only if the correct note<br />
is played.<br />
Press [START/STOP ] button to begin.<br />
If [R] is selected, only the left hand will be played<br />
automatically until the first note on the right hand is<br />
played. The song will not proceed until the correct<br />
note is played.<br />
If [L] is selected, only the right hand will be played.<br />
The song will not proceed until the notes of the left<br />
hand are played correctly.<br />
If [L] and [R] are both selected, the song will proceed<br />
only when the notes of both hands are played correctly.<br />
Once the lesson is completed, the result of evaluation<br />
will be announced.<br />
STYLE<br />
SONG<br />
STYLE<br />
SONG<br />
L & R<br />
LESSON<br />
START/STOP<br />
L & R<br />
LESSON<br />
START/STOP<br />
CHORD<br />
DICT.<br />
SYNC INTRO/ENDING FILL A<br />
CHORD<br />
DICT.<br />
SYNC INTRO/ENDING FILL A<br />
FILL B<br />
REPEAT A/B<br />
FILL B<br />
REPEAT A/B<br />
Song<br />
A.B.C.<br />
A.B.C.
1.<br />
2.<br />
3.<br />
4.<br />
5.<br />
6.<br />
Song<br />
Lesson 3-Melody off<br />
Press [LESSON] button in LESSON 2 to enter the<br />
LESSON 3 mode.<br />
In this mode, evaluation is based on the correctiveness<br />
of both the time value and notes.<br />
Press [START/STOP ] button to begin.<br />
If [R] is selected, the melody in the right hand will be<br />
muted. Unlike LESSON 1, the correct notes must be<br />
played to produce correct the melody.<br />
If [L] is selected, the chord / melody in the left hand<br />
will be muted. Unlike LESSON 1, the correct chord or<br />
melody must be played to produce a correct chord or<br />
melodic line.<br />
If [L] and [R] are both selected, both the left and right<br />
hands will be muted, only the accompaniment will be<br />
sounded. Both hands must be played correctly to<br />
produce the accurate song.<br />
Once the lesson is completed, the result of evaluation<br />
will be announced.<br />
Grade Function<br />
Lesson 1 / Lesson 2 / Lesson 3 all have the grading<br />
function. There are four levels, including: OK , GOOD,<br />
VERY GOOD, EXCELLENT.<br />
After a grade is given, the song will be played again<br />
and retain the lesson mode.<br />
STYLE<br />
SONG<br />
L & R<br />
LESSON<br />
CHORD<br />
DICT.<br />
START/STOP SYNC INTRO/ENDING FILL A FILL B A.B.C.<br />
REPEAT A/B<br />
27
1.<br />
2.<br />
3.<br />
4.<br />
5.<br />
28<br />
Chord Dictionary<br />
Chord Dictionary is essentially a built-in "chord book" showing you the individual notes of the<br />
chords.<br />
It is ideal for you to learn the name of certain chords and to learn how to play them instantly.<br />
Press [CHORD DICT./R] button to enter the DICT mode.<br />
The LCD shows " dict ". In this mode, the keyboard<br />
notes in the right area can be played to assign the<br />
Chord Type and the Chord Root.<br />
For example, if we want to play a Cm7 Chord. Press<br />
the C key in the section of the keyboard labeled<br />
Chord Root. (The note does not sound) the root<br />
note you set will be shown on the display.<br />
Press the m7 key in the section of the keyboard<br />
which has labeled Chord Type (The note does not<br />
sound).The notes you should play for the specified<br />
chord (root note and chord type) are shown on the<br />
display as the notation and also in the keyboard<br />
diagram.<br />
When the Chord Type and Chord Root are confirmed,<br />
the LCD will display the Chord and its keyboard<br />
position. A bell sound will be heard if you play it<br />
correctly.<br />
Press [CHORD DICT./R] button again to exit the Chord<br />
Dictionary mode.<br />
Some fingerings may be recognised as different<br />
chords by A.B.C. , eg. B6、bB6、Baug、bBm6、<br />
Bm6、bBdim7、Bdim7.<br />
NOTE:<br />
L & R<br />
LESSON<br />
CHORD<br />
DICT.<br />
Individual notes<br />
of chord(keyboard)<br />
The notes you played in order to assign as the Chord Type / Chord Root<br />
could not be heard.<br />
If you play the chord correctly, you could hear the applause sound.<br />
If the chords are not be played correctly, a bass sound would be heard.<br />
The chord should be played below the split point(chord area).<br />
Chord name<br />
(root and type)<br />
Notation of chord<br />
Specify and play the Chord Type and the Chord Root<br />
that you would like to play on the keyboard as shown<br />
below:
1.<br />
2.<br />
MIDI Function<br />
What is MIDI<br />
MIDI stands for " Musical Instrument Digital Interface ",<br />
that is the standard interface between a PC and other<br />
electronic instrument(s).<br />
USB connection can be used for midi data transference<br />
with a computer or other USB host devices that support<br />
USB audio devices.<br />
3. The keyboard can only be connected to the PC.<br />
4.<br />
Use the keyboard as a tone generator, the data (MIDI)<br />
recorded on the PC can be played on the keyboard.<br />
USB Connection<br />
1. System Requirements<br />
CPU: <strong>30</strong>0 MHz or higher, Pentium 2<br />
Memory: 64MB or more<br />
Driver: CDROM 24X<br />
OS: WINDOWS 2000/XP<br />
2. The Method of Connection<br />
Connect a standard USB cable between the rear-panel<br />
of the USB jack of this instrument and the USB jack<br />
of your computer (USB cable will be sold separately).<br />
3. USB Precautions<br />
Please observe the following precautions while connecting<br />
the instrument with the a computer via a USB<br />
cable.Failure to do, so can cause the instrument and/or<br />
the computer to hang up(freeze), possibly causing<br />
corruption or losing the data.<br />
If the instrument or computer hangs up, turn the<br />
power of both devices off and then turn it on again<br />
after a few seconds.<br />
MIDI Application<br />
1. PC recorded data (MIDI) can be played on the keyboard.<br />
2.<br />
3.<br />
In order to transfer songs between your computer and<br />
the keyboard, you will need to install other applications.<br />
You need not to install the USB Driver for WINDOWS<br />
2000/XP.<br />
NOTE:<br />
While a recorded data and a style are being<br />
played, you can not use the MIDI IN function,<br />
or the song you are playing will have an error<br />
occurs for the same channel.<br />
CAUTIONS!<br />
Activate the computer from a sleep/suspended/<br />
standby mode before connecting the USB cable.<br />
Connect the USB cable to the instrument and<br />
a computer before turning the power of the<br />
instrument on.<br />
29
<strong>30</strong><br />
Specifications<br />
LCD display<br />
Keys<br />
Polyphony<br />
Voice<br />
Style<br />
Demo Song<br />
Control button<br />
Accompaniment Control<br />
Song Control<br />
Record Function<br />
Panel Memory<br />
Power Supply<br />
Connectors<br />
Speaker<br />
Dimension<br />
Weight<br />
Attachment<br />
Trouble Shooting<br />
Multi-functional LCD<br />
61 keys with Touch Response<br />
32-note polyphony(max)<br />
395 Voices<br />
150 Styles<br />
100 Songs; 2 Demos<br />
12V<br />
AC Power, Headphones, Sustain, USB<br />
4Ω 5w x 2<br />
986(L)x348(W)x142(H)mm<br />
6kg(without batteries)<br />
Adaptor, Music stand, <strong>Manual</strong><br />
Problem Possible Cause and Solution<br />
No matter the instrument is turned on or off, a popping<br />
sound has temporarily produced.<br />
There is no sound even when the keyboard is played or<br />
when a song or style is being played.<br />
The volume is too soft.<br />
The sound quality is poor.<br />
The rhythm stops unexpectedly or not responding.<br />
The recorded data of the song is not playing correctly.<br />
The LCD display suddenly goes dark, and all panel settings<br />
are reset.<br />
Power ON/OFF, Master Volume,Tempo +/-, R / Chord Dictionary, L ,<br />
Lesson, Voice, Style, Song, O.T.S. , M1-M6, Store, Start/Stop, Sync,<br />
Intro/Ending, Fill A, Fill B A.B.C. , Record, Play, Dual, Touch, Sustain,<br />
Metromonme, Demo, +, -, Piano, Transpose +/-, Octave +/-, Pitch Bend<br />
Start/Stop, Sync, Intro/Ending, Fill A, Fill B<br />
Start/Stop , Pause , Rew , FF<br />
Record, Play<br />
6 Memory Storage<br />
All specifications and appearances are subject to change without prior notice.<br />
This is normal and indicates that the instrument<br />
is receiving electrical power.<br />
Check if any cable or headphone is connected to<br />
the PHONES jack on the rear panel. When a set<br />
of headphones is plugged into this jack, no sound<br />
will be produced.<br />
The batteries are low or dead. Replace all six<br />
batteries with completely new ones, or use the<br />
optional AC adaptor.
01<br />
02<br />
03<br />
04<br />
05<br />
06<br />
07<br />
08<br />
09<br />
10<br />
11<br />
12<br />
13<br />
14<br />
15<br />
16<br />
17<br />
18<br />
19<br />
20<br />
21<br />
22<br />
23<br />
24<br />
25<br />
26<br />
27<br />
28<br />
29<br />
<strong>30</strong><br />
31<br />
32<br />
33<br />
34<br />
35<br />
36<br />
37<br />
38<br />
39<br />
40<br />
41<br />
42<br />
43<br />
44<br />
45<br />
46<br />
47<br />
48<br />
49<br />
50<br />
51<br />
52<br />
53<br />
54<br />
55<br />
Appendix 1- Voice List<br />
PIANO<br />
Stereo Grand Piano<br />
Stereo Piano Dark<br />
Acoustic Grand Piano<br />
Grand Piano / W<br />
Octave Piano 1<br />
Octave Piano 2<br />
Piano & Strings<br />
Piano & Stereo Strings<br />
Dreamscape<br />
Piano & Choir<br />
Synth Piano<br />
Bright Piano 1<br />
Bright Piano?2<br />
Bright Piano / W<br />
Stereo Bright Piano<br />
Detuned Piano<br />
Chorus Piano<br />
Velocity Crossfade Piano<br />
Piano Pad<br />
Piano & Vibraphone<br />
Electric Grand Piano 1<br />
Electric Grand Piano 2<br />
Electric Grand Piano / W<br />
Honky-Tonk<br />
Honky-Tonk / W<br />
Stereo Honk-Tonk<br />
Honky-Tonk Dark<br />
E Piano 1<br />
E Piano 2<br />
E Piano 3<br />
Soft E.P.<br />
Hard E.P.<br />
E.Piano 1 / W<br />
E.Piano 2 / W<br />
Detuned E.P. 1<br />
Detuned E.P. 2<br />
Stereo Hard E.P.<br />
Velocity Crossfade E.P. 1<br />
Velocity Crossfade E.P. 2<br />
Warm E.P.<br />
Cloudy E.P.<br />
Deep E.P.<br />
Nylon E.P.<br />
Layered E.P. 1<br />
Layered E.P. 2<br />
Harpsichord 1<br />
Harpsichord 2<br />
Grand Harpsichord<br />
Harpsichord 1 / W<br />
Harpsichord 2 / W<br />
Harpsichord / R<br />
Harpsichord / O<br />
Harpsichord Octave 1<br />
Harpsichord Octave 2<br />
Piano & Harpsichord<br />
56<br />
57<br />
58<br />
59<br />
60<br />
61<br />
62<br />
63<br />
64<br />
65<br />
66<br />
67<br />
68<br />
69<br />
70<br />
71<br />
72<br />
73<br />
74<br />
75<br />
76<br />
77<br />
78<br />
79<br />
80<br />
81<br />
82<br />
83<br />
84<br />
85<br />
86<br />
87<br />
88<br />
89<br />
90<br />
91<br />
92<br />
93<br />
94<br />
95<br />
96<br />
97<br />
98<br />
99<br />
100<br />
101<br />
102<br />
103<br />
104<br />
105<br />
106<br />
107<br />
Mallet<br />
Clavichord 1<br />
Clavichord 2<br />
Stereo Clavichord<br />
Clavichord 1 / W<br />
Clavichord 2 / W<br />
Punchy Clavichord<br />
Clavichord Wah<br />
Celesta 1<br />
Celesta 2<br />
Bright Celesta<br />
Gamelan<br />
Reecho Bell<br />
Celesta & Music Box<br />
Celesta & Sine<br />
Glockenspiel 1<br />
Glockenspiel?2<br />
Glockenspiel? & Sine<br />
Glockenspiel? & Celesta<br />
Music Box 1<br />
Music Box 2<br />
Music Box 3<br />
Music Box & Harp<br />
Toy Box<br />
Vibraphone 1<br />
Vibraphone 2<br />
Vibraphone 3<br />
Vibraphone 1 / W<br />
Vibraphone 2 / W<br />
Stereo Vibraphone<br />
Rigid Vibraphone<br />
Vibraphone & Bell<br />
Vibraphone & Harpsichord<br />
Marimba 1<br />
Marimba 2<br />
Marimba? / W<br />
Stereo Marimba<br />
Sine Marimba<br />
Marimba & Vibraphone<br />
Wood Drum<br />
Xylophone<br />
Xylophone / W<br />
Dark Xylophone<br />
Tubular Bells 1<br />
Tubular Bells 2<br />
Tubular Bells 3<br />
Dulcimer 1<br />
Dulcimer 2<br />
Organ<br />
Drawbar Organ<br />
Drawbar Organ Detuned<br />
Drawbar Organ Stereo<br />
Soft Stereo Drawbar Organ<br />
Bright Drawbar Organ<br />
108<br />
109<br />
110<br />
111<br />
112<br />
113<br />
114<br />
115<br />
116<br />
117<br />
118<br />
119<br />
120<br />
121<br />
122<br />
123<br />
124<br />
125<br />
126<br />
127<br />
128<br />
129<br />
1<strong>30</strong><br />
131<br />
132<br />
133<br />
134<br />
135<br />
136<br />
137<br />
138<br />
139<br />
140<br />
141<br />
142<br />
143<br />
144<br />
145<br />
146<br />
147<br />
148<br />
149<br />
150<br />
151<br />
152<br />
153<br />
154<br />
155<br />
156<br />
157<br />
158<br />
PIANO<br />
Mellow Drawbar Organ<br />
1960 Drawbar Organ<br />
Percussive Organ<br />
Percussive Organ Detuned<br />
1970 Percussive Organ<br />
Light Click Organ<br />
Percussive Organ<br />
Rock Organ<br />
Rotary Organ<br />
Stereo Rotary Organ<br />
Slow Rotary Organ<br />
Church Organ 1<br />
Church Organ 2<br />
Detuned Church Organ<br />
Pureness<br />
Octave Church Organ<br />
Reed Organ<br />
Accordion<br />
Accord It Solo<br />
Harmonica<br />
Detuned Harmonica<br />
Tango Accordion<br />
Guitar<br />
Nylon G.T. 1<br />
Nylon G.T. 2<br />
Bright Nylon G.T.<br />
Nylon G.T. / R<br />
Detuned Nylon G.T.<br />
Chorus Nylon G.T.<br />
Steel G.T.<br />
Nylon & Steel G.T.<br />
Jazz G.T.<br />
Mellow G.T.<br />
Clean G.T.<br />
Chorus Clean G.T.<br />
Muted G.T.<br />
Muted Steel Guitar<br />
Overdriven G.T.<br />
Distortion G.T. 1<br />
Distortion G.T. 2<br />
Feedback G.T. 1<br />
Feedback G.T. 2<br />
Stereo Distorted G.T.<br />
Distortion G.T. Octave<br />
Distorted Rhythm G.T.<br />
5th Distortion<br />
G.T. Harmonics<br />
Bass<br />
Acoustic Bass<br />
Jazz Style<br />
Wah Bass<br />
Finger Bass 1<br />
Finger Bass 2<br />
31
159<br />
160<br />
161<br />
162<br />
163<br />
164<br />
165<br />
166<br />
167<br />
168<br />
169<br />
170<br />
171<br />
172<br />
173<br />
174<br />
175<br />
176<br />
177<br />
178<br />
179<br />
180<br />
181<br />
182<br />
183<br />
184<br />
185<br />
186<br />
187<br />
188<br />
189<br />
190<br />
191<br />
192<br />
193<br />
194<br />
195<br />
196<br />
197<br />
198<br />
199<br />
200<br />
201<br />
202<br />
203<br />
204<br />
205<br />
206<br />
207<br />
208<br />
209<br />
210<br />
32<br />
Appendix 1- Voice List<br />
Finger Bass Dark<br />
Finger Slap Bass<br />
Bass & Distorted Elec Guitar<br />
Pick Bass<br />
Muted Pick Bass<br />
Fretless Bass<br />
Fretless Bass Detuned 1<br />
Fretless Bass Detuned 2<br />
Fretless Bass Detuned 3<br />
Fretless Bass & Sine<br />
Slap Bass 1<br />
Slap Bass 2<br />
Resonant Slap Bass<br />
Synth Bass 1<br />
Synth Bass 2<br />
Synth Bass 3<br />
Synth Bass 4<br />
Super Synth Bass<br />
Tech Synth Bass<br />
Dark Synth Bass<br />
Strings<br />
Violin<br />
Viola 1<br />
Viola 2<br />
Viola 3<br />
Viola 4<br />
Dark Viola<br />
Cello 1<br />
Cello 2<br />
Cello 3<br />
Celloen 16'<br />
Contrabass<br />
Tremolo Strings 1<br />
Tremolo Strings 2<br />
Slow Tremolo Strings<br />
Pizzicato Strings<br />
Orchestral Harp<br />
Africa<br />
Timpani<br />
Bass<br />
Strings Ensemble 1<br />
Strings Ensemble 2<br />
Slow Strings<br />
Legato Strings<br />
Arco Strings<br />
Stereo Slow Strings<br />
Sforzato Strings<br />
Orchestra<br />
The Strings<br />
Strings Solo<br />
Resonant Strings<br />
1960 Strings<br />
1970 Strings<br />
Synth Strings 1<br />
211<br />
212<br />
213<br />
214<br />
215<br />
216<br />
217<br />
218<br />
219<br />
220<br />
221<br />
222<br />
223<br />
224<br />
225<br />
226<br />
227<br />
228<br />
229<br />
2<strong>30</strong><br />
231<br />
232<br />
233<br />
234<br />
235<br />
236<br />
237<br />
238<br />
239<br />
240<br />
241<br />
242<br />
243<br />
244<br />
245<br />
246<br />
247<br />
248<br />
249<br />
250<br />
251<br />
252<br />
253<br />
254<br />
255<br />
256<br />
257<br />
258<br />
259<br />
260<br />
261<br />
PIANO<br />
Synth Strings 2<br />
Synth Strings 3<br />
Synth Strings 4<br />
Synth Strings 5<br />
Choir Aahs 1<br />
Choir Aahs 2<br />
Choir Aahs 3<br />
Stereo Choir Aahs<br />
Mellow Choir<br />
Strings Choir<br />
Voice Oohs<br />
Oohs & Strings<br />
Synth Voice<br />
Orchestra Hit<br />
Brass<br />
Trumpet 1<br />
Trumpet 2<br />
Trumpet 3<br />
Dark Trumpet<br />
Sweet Trumpet<br />
Trumpet & Strings<br />
Trombone 1<br />
Trombone 2<br />
Dark Trombone<br />
Strings & Trombone<br />
Tuba 1<br />
Tuba 2<br />
Muted Trumpet<br />
French Horn<br />
5th Horn Orchestr<br />
Brass Section 1<br />
Brass Section 2<br />
Brass Swell<br />
Bright Brass Section<br />
Dark Brass<br />
Brass Section Octave<br />
Brassband<br />
Sforzato Brass<br />
Stereo Brass & Strings<br />
Synth Brass 1<br />
Synth Brass 2<br />
Synth Brass 3<br />
Synth Brass 4<br />
Synth Brass 5<br />
Leap Brass<br />
Octave Synth Brass<br />
Synth Brass & Strings 1<br />
Synth Brass & Strings 2<br />
Sooth Brass<br />
Reed<br />
Soprano Sax 1<br />
Soprano Sax 2<br />
Sweet Soprano Sax<br />
262<br />
263<br />
264<br />
265<br />
266<br />
267<br />
268<br />
269<br />
270<br />
271<br />
272<br />
273<br />
274<br />
275<br />
276<br />
277<br />
278<br />
279<br />
280<br />
281<br />
282<br />
283<br />
284<br />
285<br />
286<br />
287<br />
288<br />
289<br />
290<br />
291<br />
292<br />
293<br />
294<br />
295<br />
296<br />
297<br />
298<br />
299<br />
<strong>30</strong>0<br />
<strong>30</strong>1<br />
<strong>30</strong>2<br />
<strong>30</strong>3<br />
<strong>30</strong>4<br />
<strong>30</strong>5<br />
<strong>30</strong>6<br />
<strong>30</strong>7<br />
<strong>30</strong>8<br />
<strong>30</strong>9<br />
310<br />
311<br />
312<br />
Slow Soprano Sax<br />
Soprano Sax Soft<br />
Alto Sax<br />
Super Alto Sax<br />
Alto Sax & Breath<br />
Sax Band<br />
Tenor Sax 1<br />
Tenor Sax 2<br />
Baritone Sax<br />
Baritone Sax & Breath<br />
Oboe 1<br />
Oboe 2<br />
Oboe 3<br />
Sweet Oboe<br />
English Horn 1<br />
English Horn 2<br />
Analog Horns<br />
Woodwinds<br />
Bassoon 1<br />
Bassoon 2<br />
Clarinet 1<br />
Clarinet 2<br />
Clarinet 3<br />
Pipe<br />
Piccolo<br />
Flute 1<br />
Flute 2<br />
Recorder 1<br />
Recorder 2<br />
Pan Flute<br />
Sweet Pan Flute<br />
Blown Bottle<br />
Shakuhachi<br />
Whistle 1<br />
Whistle 2<br />
Ocarina<br />
Lead<br />
Lead 1 (square)<br />
Lead Sine<br />
Square Lead 1<br />
Square Lead 2<br />
Slow Square Lead<br />
Square<br />
Corrie<br />
Thick Square<br />
2 Oscillators Lead<br />
Quint<br />
Sine Solo<br />
Lead 2 (sawtooth) 1<br />
Lead 2 (sawtooth) 2<br />
Slow Saw<br />
Heavy Sawtooth<br />
Wavy Sawtooth
313<br />
314<br />
315<br />
316<br />
317<br />
318<br />
319<br />
320<br />
321<br />
322<br />
323<br />
324<br />
325<br />
326<br />
327<br />
328<br />
329<br />
3<strong>30</strong><br />
331<br />
332<br />
333<br />
334<br />
335<br />
336<br />
337<br />
338<br />
339<br />
340<br />
341<br />
342<br />
343<br />
344<br />
345<br />
346<br />
347<br />
348<br />
349<br />
01<br />
02<br />
Appendix 1- Voice List<br />
Ead<br />
Bauble Lead<br />
Synther<br />
Super Analog<br />
Lead 3 (calliope)<br />
PWM 4th<br />
Lead 4 (chiff)<br />
Lead 5 (charang)<br />
Lead 6 (voice)<br />
Lead 7 (fifths)<br />
Fifth Lead<br />
Fifths Lead Soft<br />
Lead 8 (Bass & Lead)<br />
Bass Lead<br />
Massiness<br />
Pad<br />
Pad 1 (newage)<br />
Slow Square<br />
Pad2 (warm)<br />
Warmly Pad<br />
PWM Pad<br />
Horn Pad<br />
Sine Pad<br />
Pad 3 (Polysynth)<br />
Poly Synth Pad<br />
Poly Pad<br />
Click Pad<br />
Analog Pad<br />
Pad 4 (choir) 1<br />
Pad 4 (choir) 2<br />
Pad 5 (bowed)<br />
Pad 6 (metallic)<br />
Pan Pad<br />
Pad 7 (halo)<br />
Pad 8 (sweep)<br />
Rising<br />
Congregate<br />
Dipolar Pad<br />
Little Brown Jug<br />
Cha Cha<br />
350<br />
351<br />
352<br />
353<br />
354<br />
355<br />
356<br />
357<br />
358<br />
359<br />
360<br />
361<br />
362<br />
363<br />
364<br />
365<br />
366<br />
367<br />
368<br />
369<br />
370<br />
371<br />
372<br />
Appendix 2- Demo List<br />
Effects<br />
FX1 (rain)<br />
FX2 (soundtrack)<br />
Prelude<br />
Progenitor<br />
FX3 (crystal)<br />
FX4 (atmsphere)<br />
Warm Air<br />
FX5 (brightness)<br />
Smog<br />
FX6 (goblins)<br />
FX7 (echoes)<br />
Reecho Pan<br />
Large Pan<br />
Fantasyland<br />
FX8 (sci-fi)<br />
Ethnic<br />
Sitar<br />
Banjo<br />
Shamisen<br />
Koto<br />
Kalimba<br />
Bagpipe<br />
Fiddle<br />
Shanai<br />
373<br />
374<br />
375<br />
376<br />
377<br />
378<br />
379<br />
380<br />
381<br />
382<br />
383<br />
384<br />
385<br />
386<br />
387<br />
388<br />
389<br />
390<br />
391<br />
392<br />
393<br />
394<br />
395<br />
Percu ssive<br />
Tinkle Bell<br />
Agogo<br />
Detune Agogo<br />
Steel Drums<br />
Wood Block<br />
Taiko Drum<br />
Melodic Tom<br />
Synth Drum<br />
Reverse Cymba<br />
Sound Effects<br />
Guitar Fret Noise<br />
Breath Noise<br />
Seashore<br />
Bird Tweet<br />
Telephone Ring<br />
Helicopter<br />
Applause<br />
Gunshot<br />
Drum Kit<br />
tandard Kit<br />
Power Kit<br />
Dance<br />
Analog Kit<br />
Brush Kit<br />
Jazz Kit<br />
33
01<br />
20<br />
03<br />
04<br />
05<br />
06<br />
07<br />
08<br />
09<br />
10<br />
11<br />
12<br />
13<br />
14<br />
15<br />
16<br />
17<br />
18<br />
19<br />
20<br />
21<br />
22<br />
23<br />
24<br />
25<br />
26<br />
27<br />
28<br />
29<br />
<strong>30</strong><br />
31<br />
32<br />
33<br />
34<br />
35<br />
36<br />
37<br />
38<br />
39<br />
40<br />
41<br />
42<br />
43<br />
44<br />
45<br />
46<br />
47<br />
48<br />
49<br />
50<br />
51<br />
52<br />
53<br />
34<br />
Appendix 3- Style List<br />
BEAT & POP<br />
8 Beat 1<br />
8 Beat 2<br />
8 Beat 3<br />
8 Beat 4<br />
8 Beat 5<br />
8 Beat 6<br />
8 Beat 7<br />
60's 8 Beat<br />
8 Beat Pop<br />
8 Beat Ballad<br />
8 Beat Rock<br />
Pop Funk<br />
16 Beat 1<br />
16 Beat 2<br />
16 Beat 3<br />
16 Beat 4<br />
16 Beat Pop<br />
Pop 16 Beat 1<br />
16 Beat Shuffle<br />
Ballad<br />
Ballad 1<br />
Slow Ballad<br />
Slow Ballad 1<br />
16 Beat Ballad<br />
16 Beat Ballad 1<br />
Pop Ballad<br />
Funk Ballad<br />
Fusion<br />
Shuffle<br />
Fusion Shuffle<br />
Unplugged<br />
ROCK<br />
Rock<br />
Pop Rock<br />
Flok Rock<br />
Soft Rock<br />
Easy Rock<br />
Jazz Rock<br />
Fast Rock<br />
Slow Rock 1<br />
Slow Rock 2<br />
Slow Rock 3<br />
Rock & Roll<br />
Rock 'N' Roll 1<br />
Rock 'N' Roll 2<br />
Rock Shuffle<br />
Heavy Metal<br />
Blues Boogie<br />
Blues<br />
4/4 Blues<br />
Shuffle<br />
Blues Shuffle<br />
Rock Shuffle<br />
Charlston<br />
54<br />
55<br />
56<br />
57<br />
58<br />
59<br />
60<br />
61<br />
62<br />
63<br />
64<br />
65<br />
66<br />
67<br />
68<br />
69<br />
70<br />
71<br />
72<br />
73<br />
74<br />
75<br />
76<br />
77<br />
78<br />
79<br />
80<br />
81<br />
82<br />
83<br />
84<br />
85<br />
86<br />
87<br />
88<br />
89<br />
90<br />
91<br />
92<br />
93<br />
94<br />
95<br />
96<br />
97<br />
98<br />
99<br />
100<br />
101<br />
102<br />
DANCE<br />
Disco 1<br />
Disco 2<br />
Disco 3<br />
Disco Funk<br />
Dance<br />
House 1<br />
House 2<br />
Rap<br />
Euro Beat<br />
Hip Hop<br />
Hip Hop 1<br />
Down Beat<br />
Techno<br />
Techno 1<br />
SOUL & FUNK<br />
Jay R&B<br />
Funky Pop<br />
Funk<br />
Jazz Funk<br />
Cool Funky<br />
Soul 1<br />
Soul 2<br />
Soul 3<br />
Soul Shuffle<br />
Soul Blues<br />
R & B<br />
6/8 Gospel<br />
Pop Groove<br />
JAZZ<br />
Swing<br />
Swing 1<br />
Cool Jazz<br />
Cool Jazz Ballad<br />
Pop Swing<br />
Swing Fox<br />
Big Band<br />
Big Band Meduim<br />
Jazz Waltz<br />
Ragtime<br />
Dixeland<br />
Dixeland 1<br />
Quick Step<br />
COUNTRY<br />
Country 1<br />
Country 2<br />
Country 3<br />
Pop Country<br />
Country Pop 1<br />
Country Rock<br />
Country Rock 1<br />
Country Folk<br />
3/4 Country<br />
103<br />
104<br />
105<br />
106<br />
107<br />
108<br />
109<br />
110<br />
111<br />
112<br />
113<br />
114<br />
115<br />
116<br />
117<br />
118<br />
119<br />
120<br />
121<br />
122<br />
123<br />
124<br />
125<br />
126<br />
127<br />
128<br />
129<br />
1<strong>30</strong><br />
131<br />
132<br />
133<br />
134<br />
135<br />
136<br />
137<br />
138<br />
139<br />
140<br />
141<br />
142<br />
143<br />
144<br />
145<br />
146<br />
147<br />
148<br />
149<br />
150<br />
Country Waltz<br />
Country Shuffle<br />
Country Boogie<br />
Country Blues<br />
Country Quick Step<br />
Bluegrass<br />
Bluegrass 1<br />
LATIN<br />
Bossa Nova 1<br />
Bossa Nova 2<br />
Bossa Nova 3<br />
Rhumba<br />
Pop Rhumba<br />
Cha Cha<br />
Cha Cha 1<br />
Pop Cha Cha<br />
Pop Cha Cha 1<br />
Tango<br />
Tango 1<br />
Beguine<br />
Samba<br />
Jazz Samba<br />
Disco Samba<br />
Reggae<br />
Reggae 1<br />
Pop Reggae<br />
Pop Reggae 1<br />
TRADITIONAL<br />
1-Mar<br />
2-Mar<br />
German March<br />
6/8 March<br />
Polka<br />
Pop Polka<br />
Waltz<br />
Slow Waltz<br />
Vienna Waltz<br />
Orchestra Waltz<br />
Musette<br />
PIANO<br />
8 Beat<br />
Ballad<br />
Boogie<br />
Jazz<br />
Swing<br />
Jazz Waltz<br />
Twist<br />
March<br />
6/8 March<br />
Waltz<br />
Slow Rock
01<br />
02<br />
03<br />
04<br />
05<br />
06<br />
07<br />
08<br />
09<br />
10<br />
11<br />
12<br />
13<br />
14<br />
15<br />
16<br />
17<br />
18<br />
19<br />
20<br />
21<br />
22<br />
23<br />
24<br />
25<br />
26<br />
27<br />
28<br />
29<br />
<strong>30</strong><br />
31<br />
32<br />
33<br />
34<br />
35<br />
36<br />
37<br />
38<br />
39<br />
40<br />
41<br />
42<br />
43<br />
44<br />
45<br />
46<br />
47<br />
48<br />
49<br />
50<br />
Appendix 4- Song List<br />
CLASSIC<br />
Cannon<br />
Thais Meditation<br />
Old France<br />
Minuet<br />
Ode To Joy<br />
Wiegenlied<br />
“he Surprise” Symphony<br />
Swan Lake<br />
Spring From “The Four Seasons”<br />
Habanera From “Carmen”<br />
Joy To The World<br />
Toy Symphony<br />
Humoreske<br />
Kuckuckswalzer<br />
FAVORITE<br />
Long, Long Ago<br />
Old Folks At Home<br />
Oh! Susanna<br />
Jeannie With The Light Brown Hair<br />
Bill Bailey Won't You Come Home<br />
Annie Laurie<br />
From The New World<br />
The Yellow Rose Of Texas<br />
Ave Maria<br />
My Old Kentucky Home<br />
Turkey In The Straw<br />
Deck The Halls<br />
Grandfather's Clock<br />
America The Beautiful<br />
The Sideway<br />
The Entertainer<br />
The Old Gray Mare<br />
Aloha Oe<br />
Solveig's Song<br />
Camptown Races<br />
Carry Me Back To Old Viginia<br />
The Blue-Bells Of Scotland<br />
O'Solo Mio<br />
Jingle Bells<br />
Battle Hymne Of The Republic<br />
Silent Night<br />
FOLK<br />
Orohek<br />
Aula Lee<br />
House Of The Rising Son<br />
Danny Boy<br />
I've Been Working On The Railroad<br />
In The Rain<br />
She Wore A Yellow Ribbon<br />
My Bonnie<br />
Yankee Doodle<br />
Red River Valley<br />
51<br />
52<br />
53<br />
54<br />
55<br />
56<br />
57<br />
58<br />
59<br />
60<br />
61<br />
62<br />
63<br />
64<br />
65<br />
66<br />
67<br />
68<br />
69<br />
70<br />
71<br />
72<br />
73<br />
74<br />
75<br />
76<br />
77<br />
78<br />
79<br />
80<br />
81<br />
82<br />
83<br />
84<br />
85<br />
86<br />
87<br />
88<br />
89<br />
90<br />
91<br />
92<br />
93<br />
94<br />
95<br />
96<br />
97<br />
98<br />
99<br />
100<br />
Auld Lang Syne<br />
When The Saints Go Marching In<br />
Twinkle Twinkle Little Star<br />
Happy Birthday To You<br />
Little Brown Jug<br />
Michael Row The Boat Ashore<br />
Old King Cole<br />
Jamaica Farewell<br />
Τройка<br />
Cielito Lindo<br />
If You're Happy And You Know It,<br />
Clap Your Hands<br />
American Patrol<br />
When Johnny Comes Marching Home<br />
Green Sleeves<br />
Santa Lucia<br />
Szla Dzieweczka<br />
KID'S SONG<br />
Angels We Have Heard On High<br />
Skip To My Lou<br />
London Bridge Is Falling Down<br />
Humpty Dumpty<br />
Home On The Range<br />
This Old Man<br />
Butterfly<br />
Ten Little Indians<br />
Polly-Wolly-Doodle<br />
Santa Claus Is Coming To Town<br />
Sippin Cider Through A Straw<br />
La Cucaracha<br />
Home Sweet Home<br />
Up On The House Top<br />
BALLROOM<br />
ExamineOneGramOFDance<br />
MusicsInTheStorehouse<br />
Samba<br />
Tango Of Cuba<br />
Russian<br />
Polka<br />
PIANO & KEYBOARD<br />
Four Little Swans<br />
Did You Ever See a Lassie<br />
Spring<br />
Impromptu<br />
Gavotte<br />
Nocturne<br />
Pizzicato Polka<br />
Musical Moments<br />
Reggae<br />
All Kind Of My Everything<br />
Valse No.6 “etit Chien”<br />
Rondeau<br />
Chrysanf<br />
Invention a 2 Voix<br />
Jesus,Saviour Pilot me<br />
35
36<br />
Appendix 5- Chord List<br />
CMadd9
Appendix 6- MIDI List<br />
Function Transmitted Recognized Remarks<br />
Basic Default<br />
1ch<br />
1-16ch<br />
Channel Changed<br />
X<br />
X<br />
Default<br />
X<br />
3<br />
Mode Messages<br />
X<br />
X<br />
Note<br />
Number<br />
Velocity :<br />
After<br />
Touch<br />
Pitch B end<br />
Control<br />
Change<br />
Program<br />
Change :<br />
System Exclusive<br />
System<br />
Common<br />
System<br />
Real Time<br />
Aux<br />
Messages<br />
Note:<br />
Altered<br />
True voice<br />
Note on<br />
Noteoff<br />
Keys<br />
Chs<br />
0<br />
1<br />
7<br />
5<br />
6<br />
10<br />
11<br />
64<br />
65<br />
66<br />
67<br />
80<br />
81<br />
91<br />
93<br />
120<br />
121<br />
123<br />
true #<br />
:Song Position<br />
:Song Select<br />
:<br />
Tune<br />
:Clock<br />
:Commands<br />
:LOCAL ON/OFF<br />
:All Notes Off<br />
:Active sense<br />
:Reset<br />
***********<br />
12-120<br />
***********<br />
O NH,V=1-127<br />
X<br />
(9nH,V=0)<br />
X<br />
X<br />
O<br />
O<br />
***********<br />
X<br />
O<br />
X<br />
0...127<br />
0...127<br />
9nH,V=1-127<br />
X (9nH,V=0; 8nH,V=0-127<br />
X<br />
X<br />
O<br />
O<br />
0...127<br />
Mode 1: OMNI ON , POLY Mode 2 : OMNI ON , MONO O : YES<br />
Mode 3: OMNI OFF , POLY Mode 4 : OMNI OFF , MONO X : NO<br />
O<br />
O<br />
X<br />
X<br />
X<br />
X<br />
X<br />
O<br />
X<br />
X<br />
X<br />
X<br />
X<br />
X<br />
X<br />
X<br />
X<br />
X<br />
X<br />
X<br />
X<br />
X<br />
X<br />
X<br />
X<br />
X<br />
X<br />
O<br />
O<br />
O<br />
O<br />
O<br />
O<br />
O<br />
O<br />
O<br />
O<br />
O<br />
O<br />
O<br />
O<br />
O<br />
O<br />
O<br />
O<br />
O<br />
X<br />
X<br />
X<br />
X<br />
X<br />
X<br />
O<br />
O<br />
O<br />
Bank Select<br />
Modulation<br />
Portamento Time<br />
Data Entry<br />
Volume<br />
Pan<br />
Expression<br />
Sustain Pedal<br />
Portamento ON/OFF<br />
Sostenuto Pedal<br />
Soft Pedal<br />
Reverb Program<br />
Chorus Program<br />
Reverb<br />
Level<br />
Chorus Level<br />
All Sound<br />
Off<br />
Reset All C ontrollers<br />
All Notes Off<br />
*1<br />
When the accompaniment is started, an FAH message is transmitted.<br />
When accompaniment is stoped, an FCH message is transmitted.<br />
When an FAH message is received, accompaniment is started.<br />
When an FCH message is received, accompaniment is stoped.<br />
37