You also want an ePaper? Increase the reach of your titles
YUMPU automatically turns print PDFs into web optimized ePapers that Google loves.
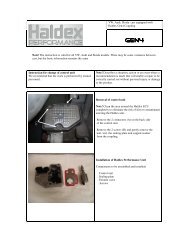
<strong>performance</strong><br />
Traction Systems Division<br />
Form No. 9802489-03/2002-08-28/E Fransén/I Brink W:\20045053.doc<br />
VW, Audi, Skoda (mk 5) cars equipped with<br />
Haldex Gen2 Coupling<br />
Docnr. 20045053<br />
Note! The instruction is valid for all VW, Audi and Skoda models. There may be some variances between<br />
cars, but the basic information remains the same<br />
Instruction for change of control unit<br />
We recommend that the work is performed by trained<br />
personnel.<br />
Note! Describes a situation, action or an event where a<br />
recommendation is made that will enable a repair to be<br />
correctly carried out without personal injury or damage<br />
to the product.<br />
Removal of control unit<br />
Note! Clean the area around the Haldex ECU<br />
completely to eliminate the risk of dirt or contaminants<br />
entering the Haldex unit.<br />
Remove the 2 connectors (A) on the back side<br />
of the control unit.<br />
Remove the 2 screws (B) and gently remove the<br />
unit. incl. the sealing plate and cupped washer<br />
from the coupling.<br />
Remove the throttle valve (A).<br />
Use pliers for removal. Grip the end of the<br />
metallic part and gently and pull it straight out.<br />
Note! Be careful when removing it. The<br />
throttle valve can not be replaced separately.<br />
Remove the pressure/temperature sensor (B)<br />
same way as above.
Remove the O-ring (A) from the throttle<br />
valve seat in the coupling.<br />
Traction Systems Division<br />
Form No. 9802489-03/2002-08-28/E Fransén/I Brink W:\20045053.doc<br />
Note! The new version has the O-ring mounted<br />
directly on the throttle valve instead of inside the<br />
coupling (see pic.).<br />
Installation of Haldex Performance Unit<br />
Components to be assembled and installed:<br />
. Control unit ( A)<br />
. Sealing plate (B)<br />
. Washer (C)<br />
. Throttle valve (D)<br />
. Temperature\pressure sensor with O-ring (E)<br />
. Screws (F)<br />
Positioning the components in the Control Unit
Traction Systems Division<br />
Form No. 9802489-03/2002-08-28/E Fransén/I Brink W:\20045053.doc<br />
. Place the sealing plate into position.<br />
. Press the throttle valve into position on the<br />
control unit.<br />
. Place the washer between the<br />
Temperature/pressure sensor and control unit.<br />
Note! The Throttle valve is calibrated against the<br />
ECU and therefore they have to be<br />
mounted as a pair and can not be mixed.<br />
Note! Place washer with convex side against the<br />
Sensor (A). When connecting the<br />
temperature\pressure sensor make sure<br />
that it is turned in the correct direction.<br />
The connector on sensor has a wider space<br />
on one side and that should face the throttle<br />
valve (B).
Traction Systems Division<br />
Form No. 9802489-03/2002-08-28/E Fransén/I Brink W:\20045053.doc<br />
Installing the control unit on the Haldex coupling<br />
Make sure that the surfaces are clean before installing<br />
the unit.<br />
Press the control unit gently towards the housing.<br />
Install the 2 screws alternately and tighten them to a<br />
tightening torque of<br />
0.57 +/- 0.03 kpm (5.7 +/- 0.3 Nm)<br />
Connect the connectors to the control unit and the<br />
pump by pressing them until they “click”
Performance<br />
erformance<br />
Features:<br />
New <strong>performance</strong> software for generation 2 developed by Haldex that has an option where the driver can choose between<br />
3 different parameter settings.<br />
Option 1.<br />
As default when no switch is installed the software is fixed in sport mode which will give the car a sportier and more<br />
over steered handling <strong>performance</strong>.<br />
Option 2.<br />
Installing a switch that can be mounted on the dashboard and the driver will have the possibilities to choose between 3<br />
different parameter settings.<br />
Standard setting. Standard mode is similar to the original setting in the standard vehicle.<br />
This mode is recommended to be used during normal driving.<br />
Sport setting. Sport mode will make the handling more fun and sportier with increased torque<br />
transfer to the rear axle during accelerations.<br />
Racing setting. Racing mode will increase the torque transfer to the rear axle even more during<br />
accelerations and also react faster depending on how fast the driver pushes the throttle.<br />
All safety features works as in the original software, for example during ABS braking<br />
or an ESP intervention the coupling will stop transferring torque to avoid<br />
interference with the cars safety systems.<br />
Example: measurement of torque transfer to rear axle during acceleration in corner<br />
Traction Systems Division<br />
Form No. 9802489-03/2002-08-28/E Fransén/I Brink W:\20045053.doc