Physical Evidence Handbook - Crime Scene Investigator Network
Physical Evidence Handbook - Crime Scene Investigator Network
Physical Evidence Handbook - Crime Scene Investigator Network

Create successful ePaper yourself
Turn your PDF publications into a flip-book with our unique Google optimized e-Paper software.
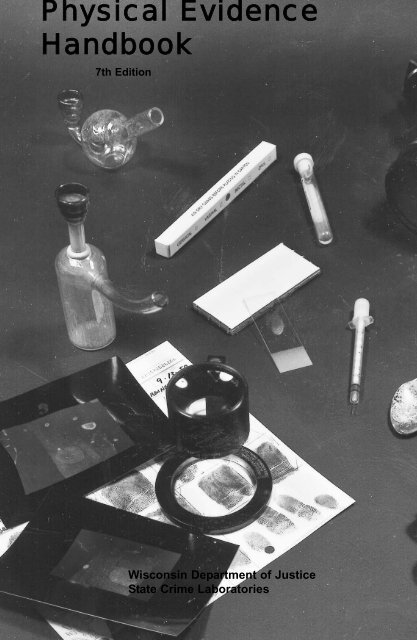
<strong>Physical</strong> <strong>Evidence</strong><br />
<strong>Handbook</strong><br />
7th Edition<br />
Wisconsin Department of Justice<br />
State <strong>Crime</strong> Laboratories
<strong>Physical</strong> <strong>Evidence</strong> <strong>Handbook</strong><br />
7th Edition<br />
Wisconsin Department of Justice<br />
State <strong>Crime</strong> Laboratories
Please direct orders to:<br />
Wisconsin Department of Administration<br />
Document Sales Unit<br />
202 S Thornton Avenue<br />
PO Box 7840<br />
Madison, WI 53707-7840<br />
Prepayment is required. Checks should be payable to:<br />
Wisconsin Department of Administration<br />
VISA ® or MasterCard ® orders are also accepted.<br />
Call 1-800-DOC-SALE (362-7253) to place a credit card order.<br />
Local customers may place credit card orders by calling 264-9419.<br />
For general information, please call: (608) 266-3358.<br />
Copyright © 2003 by the State of Wisconsin Department of Justice.<br />
All rights reserved.<br />
May not be reproduced in part or in whole in any form without the express permission of<br />
the Department of Justice.<br />
Printed in the United States of America<br />
____________________<br />
First Edition - 1968<br />
Second Edition - 1973<br />
Third Edition - 1981<br />
Fourth Edition - 1987<br />
Fifth Edition - 1993<br />
Sixth Edition - 2001<br />
Seventh Edition - 2003<br />
____________________
Table of Contents<br />
Preface . . . . . . . . . . . . . . . . . . . . . . . . . . . . . . . . . . . . . . . . i<br />
Introduction . . . . . . . . . . . . . . . . . . . . . . . . . . . . . . . . . . . . iii<br />
1. Bloodborne Pathogens . . . . . . . . . . . . . . . . . . . . . . . . . . . . 1<br />
2. <strong>Evidence</strong> Integrity . . . . . . . . . . . . . . . . . . . . . . . . . . . . . . . 5<br />
3. Field Service . . . . . . . . . . . . . . . . . . . . . . . . . . . . . . . . . . . 25<br />
4. Photography . . . . . . . . . . . . . . . . . . . . . . . . . . . . . . . . . . . . 27<br />
5. Videotapes and Audiotapes . . . . . . . . . . . . . . . . . . . . . . . . . 53<br />
6. Body Fluid Stains and Standards . . . . . . . . . . . . . . . . . . . . 57<br />
7. Firearms and Ammunition . . . . . . . . . . . . . . . . . . . . . . . . . 63<br />
8. Casts . . . . . . . . . . . . . . . . . . . . . . . . . . . . . . . . . . . . . . . . . 71<br />
9. Latent and Inked Prints . . . . . . . . . . . . . . . . . . . . . . . . . . . 79<br />
10. Footwear and Tire Impressions . . . . . . . . . . . . . . . . . . . . . . 99<br />
11. Burglary . . . . . . . . . . . . . . . . . . . . . . . . . . . . . . . . . . . . . . . 103<br />
12. Building Materials . . . . . . . . . . . . . . . . . . . . . . . . . . . . . . . 109<br />
13. Glass . . . . . . . . . . . . . . . . . . . . . . . . . . . . . . . . . . . . . . . . . 113<br />
14. Woods and Sawdust . . . . . . . . . . . . . . . . . . . . . . . . . . . . . . 117<br />
15. Tool Marks . . . . . . . . . . . . . . . . . . . . . . . . . . . . . . . . . . . . . 119<br />
16. Paints . . . . . . . . . . . . . . . . . . . . . . . . . . . . . . . . . . . . . . . . . 125<br />
17. Metals . . . . . . . . . . . . . . . . . . . . . . . . . . . . . . . . . . . . . . . . 129<br />
18. Clothing and Fabrics . . . . . . . . . . . . . . . . . . . . . . . . . . . . . 131<br />
19. Fracture and Tear Matches . . . . . . . . . . . . . . . . . . . . . . . . . 133<br />
20. Autopsy . . . . . . . . . . . . . . . . . . . . . . . . . . . . . . . . . . . . . . . 135<br />
21. Identification of Unknown Deceased . . . . . . . . . . . . . . . . . 143<br />
22. Dental Identification of Human Remains . . . . . . . . . . . . . . 149<br />
23. Bite Marks . . . . . . . . . . . . . . . . . . . . . . . . . . . . . . . . . . . . . 159<br />
24. Sexual Offenses . . . . . . . . . . . . . . . . . . . . . . . . . . . . . . . . . 163<br />
25. Hairs and Fibers . . . . . . . . . . . . . . . . . . . . . . . . . . . . . . . . . 169<br />
26. Toxicology . . . . . . . . . . . . . . . . . . . . . . . . . . . . . . . . . . . . . 173<br />
27. Poisoning . . . . . . . . . . . . . . . . . . . . . . . . . . . . . . . . . . . . . . 179<br />
28. Drug Identification . . . . . . . . . . . . . . . . . . . . . . . . . . . . . . . 183<br />
29. Arson . . . . . . . . . . . . . . . . . . . . . . . . . . . . . . . . . . . . . . . . . 193<br />
30. Explosives, Bombs, Fireworks . . . . . . . . . . . . . . . . . . . . . . 197<br />
31. Soils and Sand . . . . . . . . . . . . . . . . . . . . . . . . . . . . . . . . . . 201<br />
32. Vehicles . . . . . . . . . . . . . . . . . . . . . . . . . . . . . . . . . . . . . . . 205<br />
33. Documents . . . . . . . . . . . . . . . . . . . . . . . . . . . . . . . . . . . . . 215<br />
34. Computer <strong>Evidence</strong> . . . . . . . . . . . . . . . . . . . . . . . . . . . . . . 229<br />
Index . . . . . . . . . . . . . . . . . . . . . . . . . . . . . . . . . . . . . . . . . 235
Preface<br />
The need for proper recognition, collection, and preservation of<br />
physical evidence is apparent to all who are involved in the criminal<br />
justice system. <strong>Physical</strong> evidence can directly or indirectly lead to the<br />
solution of a crime. Charging and prosecution decisions may be affected<br />
by the quality of the physical evidence supporting the case. United States<br />
and Wisconsin Supreme Court decisions have placed great emphasis<br />
upon physical evidence in criminal cases.<br />
The Wisconsin State <strong>Crime</strong> Laboratories provide an important link<br />
between collection and court presentation of such evidence—most<br />
agencies within the state rely on the Laboratories for forensic<br />
examinations. It sometimes happens, however, that materials submitted<br />
to the Laboratory prove inadequate for proper analysis, or that improper<br />
collection or packaging methods destroy valuable evidence.<br />
It is unrealistic to expect that all submitters will know how to<br />
collect evidence in the manner required by the Laboratory, however,<br />
submitters should have at least general knowledge of proper techniques<br />
to guide them.<br />
This handbook is offered in the belief that increased knowledge<br />
leads to understanding and that understanding leads to excellence. It was<br />
written to provide information regarding the legal and Laboratory<br />
requirements surrounding collection and preservation of physical<br />
evidence.<br />
This handbook is not intended to be a comprehensive treatment of<br />
all of the factors involved in criminal investigation. Rather, it is a general<br />
procedural guide outlining methods for collecting and preserving<br />
physical evidence. Readers should keep in mind that the information and<br />
procedures presented here are intended to be used as guidelines when<br />
encountering other types of evidence not specifically covered.<br />
Because the laws and legal precedents concerning collection of<br />
physical evidence are subject to change, it is impossible to give specific,<br />
up-to-date information on acceptable procedures. It is, however, of the<br />
i
Preface<br />
utmost importance that great care be taken to use only approved methods<br />
when obtaining evidence of any kind. Therefore, it is imperative that<br />
during an investigation, close liaison be maintained between the<br />
prosecutor’s office and those persons responsible for the collection of<br />
physical evidence.<br />
The staff of the State <strong>Crime</strong> Laboratories has revised and updated<br />
this 6th edition of the <strong>Handbook</strong> in the hope that it will continue to be of<br />
value to our users. Grateful acknowledgement is made to former<br />
Laboratory staff members for their many contributions to the work, to our<br />
colleagues in other crime Laboratories who have offered valuable<br />
comments and suggestions.<br />
ii
Introduction<br />
State <strong>Crime</strong> Laboratories<br />
There are three crime laboratories within the Division of Law<br />
Enforcement Services, Wisconsin Department of Justice:<br />
State <strong>Crime</strong> Laboratory-Madison<br />
4706 University Avenue<br />
Madison, WI 53705-2174<br />
Phone: (608) 266-2031<br />
Fax: (608) 267-1303<br />
State <strong>Crime</strong> Laboratory-Milwaukee<br />
1578 South 11th Street<br />
Milwaukee, WI 53204-2860<br />
Phone: (414) 382-7500<br />
Fax: (414) 382-7507<br />
State <strong>Crime</strong> Laboratory-Wausau<br />
7100 West Stewart Avenue<br />
Wausau, WI 54401-8410<br />
Phone: (715) 845-8626<br />
Fax: (715) 848-5833<br />
The first Wisconsin State <strong>Crime</strong> Laboratory, located in Madison,<br />
was created by the Legislature in 1947. A second laboratory was opened<br />
in the Milwaukee area in 1975. In 1991, the Wausau facility opened (See<br />
map in Chapter 3). These laboratories provide technical assistance in<br />
criminal matters when requested by authorized parties.<br />
iii
Introduction<br />
Staff and Services<br />
The Laboratory 1 provides specialists in the fields of Drug<br />
Identification, DNA, Toxicology, Trace <strong>Evidence</strong> 2, Questioned<br />
Documents, Identification (finger, foot, and palm prints, and footwear),<br />
Firearms, Toolmarks, Imaging, Computer <strong>Evidence</strong>, and <strong>Crime</strong> <strong>Scene</strong><br />
Assistance. The experienced staff examines and identifies materials such<br />
as suspected accelerants, drugs, explosive residues, fingerprints, fibers,<br />
glass, metals, paints, poisons, biological stains, and soils to extract as<br />
much information as possible.<br />
The Laboratory examines questioned 3 materials and compares<br />
them with known4 materials to determine whether or not the source is the<br />
same, or whether or not a relationship exists. The Laboratory’s findings<br />
may serve to focus an investigation in an entirely different area from that<br />
originally thought to be most significant.<br />
At present, the laboratories located in Madison and Milwaukee are<br />
full service facilities while the Wausau laboratory supports Drug<br />
analysis, Fingerprint/Footwear analysis, Imaging, Audio Tape<br />
Enhancement, and Field Response.<br />
______________________________<br />
1 The capitalized term “Laboratory” is used in this handbook to refer specifically to the Wisconsin<br />
State <strong>Crime</strong> Laboratories.<br />
2 Where “Trace” or “Trace <strong>Evidence</strong>” is used in this book, the term refers to minute particles that<br />
normally require the use of a microscope for preparation and/or manipulation for further physical<br />
and chemical testing (examples: explosive residues, fibers, glass, metal fragments, paint, and soil).<br />
3 Where “questioned” is used in this book with reference to evidence of any type, it refers to<br />
evidence or material of an unknown or unacknowledged source. Example: paint chips recovered<br />
from clothing of a victim of a hit-and-run vehicle accident would be questioned material.<br />
4 Where “known” is used in this book with reference to evidence of any type, the term refers to<br />
genuine evidence or material from a known or acknowledged source which is to be compared to<br />
unknown or questioned material. Example: paint scrapings from a suspect automobile to be used<br />
for comparison with paint chips from hit-and-run victim, would be known material. “Knowns”<br />
can consist of blood, paper, grease, wood, handwriting, etc.<br />
iv
Procedure For Requesting Aid<br />
Introduction<br />
The Laboratory is authorized to participate in a criminal<br />
investigation only at the request of authorized governmental officials (see<br />
table). Services of the Laboratory are available to the defendant in a<br />
felony action upon his or her request and with the approval of the<br />
presiding judge (Wis.Stat. §165. 79(1)). The Laboratory also cooperates<br />
with federal and other state agencies.<br />
Governmental Officials Authorized<br />
to Request Laboratory Assistance<br />
(Wis. Stat. §165.75(3)(b))<br />
___________________________________________<br />
Sheriff Chief of Police<br />
Coroner Attorney General<br />
Medical Examiner Governor<br />
District Attorney Head of any State Agency<br />
___________________________________________<br />
The head of any Wisconsin State department may request investigations.<br />
In such cases, the services provided by the Laboratory shall be<br />
limited to the fields of health, welfare, and law enforcement responsibility<br />
which has by statute been vested in the particular state department.<br />
Examples of such state departments include the Department of Natural<br />
Resources, the Department of Agriculture, the Department of Health and<br />
Family Services, and others.<br />
When laboratory assistance is desired, it is suggested that the<br />
district attorney of the appropriate county be advised that an investigation<br />
is being undertaken and the Laboratory’s services are needed and<br />
requested. The Department is authorized by statute to decline to provide<br />
Laboratory service in any matter not involving a potential felony charge.<br />
v
Introduction<br />
Technical Support<br />
Whether or not it may accept a case, the Laboratory is available for<br />
consultation. If in doubt, law enforcement officials are urged to<br />
communicate with the Laboratory for advice, counsel, and/or recommendations<br />
relative to the particular problems confronting them in their<br />
investigation. The Laboratories are open Monday through Friday, 7:45<br />
AM to 4:30 PM, except holidays. Forensic Scientists are available 24<br />
hours a day to answer questions concerning evidence recognition,<br />
collection, and preservation. Contact the Laboratory in your service area.<br />
If unable to reach a Forensic Scientist or the Field Response Team after<br />
business hours, contact the Time Control Center at (608) 266-7633.<br />
Court Presentation of Findings<br />
In addition to returning a written report of scientific findings, staff<br />
members are authorized and qualified to appear in courts of law as expert<br />
witnesses. At preliminary hearings, a Forensic Scientist’s report can stand<br />
in place of an actual appearance. Wisconsin Statutes §970. 03 (12)(b)<br />
reads, in part:<br />
vi<br />
At any preliminary examination, a report of one of the crime<br />
laboratory’s ... findings with reference to ... the evidence<br />
submitted, certified as correct by the attorney general ... or a<br />
person designated by ... them, shall, when offered by the state or<br />
the accused, be received as evidence ... The expert who made the<br />
findings need not be called as a witness.<br />
A pretrial conference between the expert who conducted the<br />
examination and the prosecutor assigned the case, or with the defense<br />
attorney (if the expert is to appear as a witness for the defense) is<br />
recommended in all cases where expert testimony by a Forensic Scientist<br />
is presented at trial. Forensic Scientists are available for consultation and<br />
assistance in preparation of those portions of the case involving their<br />
testimony.
Field Services<br />
Introduction<br />
When requested by an authorized law enforcement official, the<br />
Laboratory provides field services to assist in processing crime scenes of<br />
major offenses. Mobile units are equipped to aid in the recognition,<br />
recovery, and preservation of physical materials which may have<br />
evidentiary value, and to transport these materials to the Laboratory for<br />
processing. Laboratory personnel are not vested with power of arrest and,<br />
therefore, require that suitable law enforcement personnel be present to<br />
protect and assist laboratory personnel when processing scenes for<br />
physical evidence.<br />
Informational and Training Services<br />
The Laboratory presents training programs and seminars<br />
throughout the state for law enforcement, professional, and medical<br />
groups. Special training sessions for law enforcement officers may be<br />
held at the local level from time to time when deemed feasible. Requests<br />
for training by Laboratory personnel should be made through the<br />
Training Coordinator at the Wausau Laboratory.<br />
Special articles are written by the Laboratory staff when warranted.<br />
Often these articles appear in the Law Enforcement Bulletin, published by<br />
the Wisconsin Department of Justice. If you are interested in receiving a<br />
subscription, contact the Division of Law Enforcement Services at (608)<br />
266-7751. Ask to speak with the Bulletin Editor.<br />
District attorneys, coroners, sheriffs, chiefs of police, and members<br />
of their staffs are invited to visit our Laboratories for an informational<br />
tour when in Madison, Milwaukee, or Wausau. If desired and if advance<br />
arrangements are made, the staff is available to explain and demonstrate<br />
some of the scientific methods used in collecting, preserving, and<br />
processing evidence. Laboratory tours are limited to law enforcement<br />
personnel and to technical and professional groups by prior arrangement.<br />
vii
1<br />
Bloodborne Pathogens<br />
________________________________________________<br />
AIDS, hepatitis, and other diseases have brought public attention to<br />
the term bloodborne pathogens. Bloodborne pathogens are microorganisms<br />
present in blood, or other potentially infectious materials,<br />
which can cause illness or death. The Bloodborne Pathogen Control<br />
Exposure Plan is required by the State of Wisconsin. The purpose of this<br />
plan is to offer guidelines to minimize your chances of exposure to these<br />
pathogens.<br />
A basic premise of the plan is the use of universal precautions.<br />
This means all human blood and other potentially infectious materials are<br />
treated as infectious for HIV (Human Immunodeficiency Virus [AIDS])<br />
or HBV (Hepatitis B Virus).<br />
I. Bloodborne Exposure Control Plan<br />
Each agency is required to develop and implement a plan to<br />
encompass your needs in potential exposure situations. The plan should<br />
include training and information on the types of exposures, record<br />
keeping, engineering and work practice controls, personal protective<br />
equipment, housekeeping schedules, Hepatitis B vaccinations, postexposure<br />
evaluations, the use of biohazard labels and other means to aid<br />
in your protection.<br />
It is your employer’s responsibility to offer Hepatitis B<br />
vaccinations at no cost. Vaccination is not mandatory and you may<br />
refuse. However, vaccinations must be provided at no cost if you later<br />
change your mind.<br />
A copy of your agency’s Bloodborne Exposure Control Plan should<br />
be readily available. For more information on exposure control contact<br />
the Wisconsin Department of Commerce.<br />
The Laboratory has added this topic to the <strong>Handbook</strong> as a reminder<br />
to be aware of exposures. Disease may be spread when you are in contact<br />
1
1 - Bloodborne Pathogens<br />
with blood or other potentially infectious materials. Become familiar<br />
with your agency’s procedures for bloodborne pathogen exposure<br />
control. Actively implement these precautions for your own health and<br />
that of your co-workers.<br />
Other potentially infectious materials include, but are not limited to:<br />
2<br />
seminal fluid pleural fluid (lungs)<br />
vaginal secretions pericardial fluid (around heart)<br />
cerebrospinal fluid peritoneal fluid (abdominal)<br />
synovial fluid (joint) amniotic fluid (around fetus).<br />
Feces, nasal secretions, sweat, tears, vomit and urine (when they<br />
are not contaminated with blood) are not addressed under universal<br />
precautions. However, they can transmit other infectious diseases so<br />
caution is advised. Any body fluid must be handled with caution.<br />
II. General Guidelines<br />
A. Assess a situation beforehand and wear appropriate personal<br />
protective equipment (gloves, mask, goggles, shoe coverings,<br />
coveralls, etc.).<br />
B. Protect eyes, nose and mouth by using goggles and a mask.<br />
These provide a barrier to spraying, splashing or aerosol<br />
transmission of infectious materials.<br />
C. Gloves minimize the risk of infectious materials entering the<br />
body through a cut or other skin lesion. Most latex gloves have<br />
microscopic “holes” and openings. Double gloving (wearing<br />
two pair of gloves at the same time) and changing gloves<br />
frequently aids in protection.<br />
D. Wash your hands after removing gloves. Frequent hand<br />
washing is a good safety practice.<br />
E. Items that are soaked with blood or other body secretions<br />
should be carefully air dried. Dry in a manner that minimizes<br />
the exposure of other staff to the liquid or dried material.<br />
F. Do not assume that a dried sample is risk-free. Current research<br />
indicates that the infectious activity of some organisms persists<br />
more than several days after drying.
Bloodborne Pathogens - 1<br />
G. Minimize or avoid direct handling of contaminated sharp or<br />
pointed objects. Collect syringes in puncture-resistant, leakproof<br />
containers and attach a biohazard label. Never shear,<br />
break or bend a contaminated sharp.<br />
H. Smoking, drinking or eating at a crime scene is hazardous.<br />
Avoid these activities when handling evidence.<br />
3
4<br />
Notes
2<br />
<strong>Evidence</strong> Integrity<br />
_________________________________________________________<br />
In any criminal investigation, the validity of information derived<br />
from examination of the physical evidence depends entirely upon the care<br />
with which the evidence has been protected from contamination. In other<br />
words, if the evidence has been improperly collected, handled, or stored,<br />
its value may be destroyed and no amount of laboratory work will be of<br />
assistance. Therefore, it is important that items of evidence be collected,<br />
handled, and stored in a way that will ensure their integrity. In doing so,<br />
the likelihood is increased that useful information can be extracted by<br />
examination and that the item will be considered admissible in court<br />
proceedings.<br />
Protecting the <strong>Crime</strong> <strong>Scene</strong><br />
The first officer at the scene of a crime has several immediate<br />
responsibilities. As you near the scene, you should note persons and<br />
vehicles in the general area. This information may provide valuable leads<br />
later during the investigation. If persons are seen leaving the scene itself,<br />
attempt to obtain identification - either personally or by requesting that<br />
back-up officers do so.<br />
As the first officer on the scene, you must attempt to “freeze” the<br />
scene as closely as possible to the condition in which it was found. This<br />
means that no one is allowed to needlessly move about or alter the scene.<br />
Persons present - victims or witnesses - must be isolated or removed from<br />
the scene so that they do not purposely or inadvertently alter or destroy<br />
evidence.<br />
There are other responsibilities to fulfill. First, you must ensure<br />
your own safety and the safety of others. If there is any question in this<br />
regard, check the scene as soon as it can be done safely. The welfare of<br />
victims is also important. Render first aid if required, but do so in a way<br />
that minimizes destruction of evidence (e.g., do not cut through holes in<br />
clothing).<br />
5
2 - <strong>Evidence</strong> Integrity<br />
Once these other responsibilities have been fulfilled, concern for<br />
the integrity of the scene becomes preeminent. The crime scene must be<br />
protected until all physical evidence has been collected. Consult a<br />
recognized text on crime scene investigation for detailed information on<br />
techniques of crime scene search, security, etc.<br />
One of the most difficult challenges is to exclude “official sightseers”:<br />
officers, superiors, or government officials who are not involved<br />
in processing the scene or investigating the incident but who demand to<br />
be admitted. Every attempt should be made to exclude such persons,<br />
explaining the potential consequences of disturbing the scene.<br />
It is a good practice to keep a crime scene log in which the name,<br />
department, and badge number or other identifying information of each<br />
person at the scene is recorded. The log should include the time of arrival<br />
and departure. If there is a later question regarding who was present, such<br />
a log is invaluable.<br />
6<br />
Fig. 2-1<br />
Example of a crime scene visitor log
Collection of <strong>Evidence</strong><br />
<strong>Evidence</strong> Integrity - 2<br />
It is important to properly collect, seal, and identify collected items<br />
for two reasons. First, you must be able to prove that the item introduced<br />
in court is the same item that was collected at the scene. Second, you<br />
must ensure that the item is not altered or contaminated between the time<br />
it is collected and the time it is examined forensically or entered as<br />
evidence. These objectives are best achieved by proper packaging and<br />
sealing of evidence.<br />
I. Packaging<br />
Packaging materials should protect the item from contamination,<br />
tampering, or alteration. To help select an appropriate packaging method,<br />
ask two questions:<br />
1. What information is sought from analysis?<br />
2. What could cause the item itself or the sample sought to<br />
deteriorate?<br />
With respect to the first question, ask yourself, “Why am I<br />
collecting this item? What piece of information might it give me that will<br />
help prove this case?” Knowing what you’re seeking will help to identify<br />
unacceptable packaging methods.<br />
Sometimes preservation of the underlying surface may be as<br />
important as preserving the evidence sought itself. Packaging materials<br />
should not cause deterioration. For instance, a shirt or pair of shoes<br />
should not be packaged in material that traps moisture. A certain amount<br />
of moisture is imparted during wear and if it cannot escape, samples may<br />
be destroyed and the item itself can eventually disintegrate.<br />
Therefore, items that might contain residual moisture should be<br />
packaged using a material that allows moisture to pass through-paper or<br />
cardboard. (Note: items for DNA examination should always be<br />
packaged in paper or cardboard, even if they appear dry.) Unless it is<br />
intended to be a liquid sample, items that are wet should be allowed to<br />
dry before being packaged and then packaged in paper or cardboard.<br />
On the other hand, there are occasions when a vapor-tight barrier is<br />
required. One example is when flammable liquid vapors are sought in fire<br />
debris. Such an item must be packaged in a vapor-impervious container.<br />
7
2 - <strong>Evidence</strong> Integrity<br />
Another way that packaging could contribute to deterioration is<br />
through abrading the surface of the item, thereby removing surface<br />
deposits. Fingerprints can be obliterated by friction between the<br />
container and the item, for instance.<br />
Only new, unused materials should be used to package evidence. If<br />
the packaging has been previously used, trace evidence can be imparted<br />
to the item, negating the value of some examinations. Common<br />
packaging materials include: paper, cardboard, plastic, metal cans, and<br />
glass.<br />
A. Paper. Paper goods are appropriate packaging for many different<br />
types of items. Paper is porous-it allows water vapor to escape. As a<br />
result, it is the packaging of choice for items which may contain<br />
residual moisture (unless it is important that the vapors be trapped).<br />
Clothing and other cloth items which are to be examined for DNA<br />
evidence should always be packaged in paper; moisture can destroy<br />
the evidentiary value of these DNA samples.<br />
8<br />
Plant materials such as marijuana or mushrooms which are<br />
confiscated fresh, should be thoroughly dried before submission to<br />
the Laboratory. When stored in plastic, plant material will mold, or,<br />
with enough time elapsed, may decompose into a moldy ooze (see<br />
Drugs in the Form of Plant Material, Chapter 28, Drug Identification).<br />
Paper is also more appropriate than plastic for very small samples<br />
such as hairs, paint chips, and other small items. Surface treatments<br />
and static electricity may cause trace evidence to cling to plastic. This<br />
is not as great a problem with paper. The primary concern when using<br />
paper with trace samples is that the paper is securely folded and<br />
sealed so that the sample cannot escape through an opening.<br />
Bags. Paper bags come in many sizes. Bags are a good choice for<br />
bulky items. Choose a bag that is sized to the item-don’t use a fullsize<br />
grocery bag to collect a wrist watch or a paint chip. Bags may<br />
leak at the seams and corners, and may not be suitable for powdery<br />
evidence unless all possible openings are taped.<br />
Envelopes. Envelopes also come in a variety of sizes. Manila<br />
“coin envelopes” are good for small samples. Letter-size<br />
envelopes work well for many items. Large manila envelopes can<br />
be useful for larger moderately heavy items. Some manila<br />
envelopes designed to hold evidence are constructed with a clear
<strong>Evidence</strong> Integrity - 2<br />
acetate window which allows the contents to be viewed while<br />
retaining the breathability of paper. Like paper bags, envelopes<br />
may leak at the seams and may not be suitable for powdery<br />
evidence unless the seams are taped.<br />
B. Cardboard Boxes. Large cardboard boxes work well for heavy or<br />
bulky items. Unless they have a waxy finish, cardboard shares<br />
paper’s porous nature and is a good choice for items that might<br />
contain residual moisture or for DNA samples. Cardboard boxes<br />
should not be used for trace evidence or when the item is to be<br />
examined for trace evidence.<br />
Small “slide boxes” are useful for samples such as bullets and bullet<br />
fragments.<br />
Fig. 2-2<br />
Paper bags come in an assortment of sizes. It is wise to have an assortment of sizes<br />
available so that the bag can be sized to the item.<br />
9
2 - <strong>Evidence</strong> Integrity<br />
10<br />
Fig. 2-3<br />
The large variety of envelopes available make it easy to match the item to<br />
an appropriately sized container.<br />
Fig. 2-4<br />
Some commercially available manila envelopes have a clear acetate<br />
window which allows inspection of the contents while retaining the<br />
advantages of paper.
<strong>Evidence</strong> Integrity - 2<br />
C. Plastic. Plastic has several obvious advantages: it has great strength<br />
for its weight and transparent plastic allows inspection of the<br />
contents. There are several disadvantages which must be respected,<br />
however.<br />
First, water vapor does not freely pass through plastic. Most evidence<br />
is adversely affected by prolonged exposure to water: steel will rust,<br />
cardboard or paper may decompose, biological materials (blood,<br />
semen, etc.) are destroyed, natural clothing materials (leather, wool,<br />
cotton) mold and degrade.<br />
Paradoxically, some vapors other than water can pass through plastic<br />
and therefore may allow sought-after samples to escape. See the next<br />
section, “Metal cans” for further details.<br />
Plastic is acceptable for items that you are certain are dry, especially<br />
plastics, paper, drug powders and tablets, etc.<br />
Fig. 2-5<br />
Example of condensation that can build in a sealed plastic bag. Plastic<br />
bags allow good visual access to the contents. They should only be used<br />
for items that are absolutely dry, such as powders, capsules, plastics, and<br />
so forth.<br />
11
2 - <strong>Evidence</strong> Integrity<br />
D. Metal cans. New, clean paint cans are ideal for storing nonbiological<br />
samples that could evaporate. The most common examples<br />
are flammable liquid accelerants found in fire debris (e.g., gasoline,<br />
charcoal lighter fluid, etc.) It should be obvious that a previously<br />
used can is not acceptable; paints contain solvents that are similar to<br />
an arsonist’s accelerants. For the same reason, you should never reuse<br />
any evidence packaging materials, including cans.<br />
E. Glass vials and jars. Glass vials and jars are useful for liquid<br />
samples: blood, alcohol, flammable liquids, water and so forth.<br />
Blood samples should be collected by following instructions<br />
contained in <strong>Handbook</strong> chapters on Toxicology, DNA samples and<br />
Autopsy. The vial or jar must have a tight-fitting top and must be<br />
protected from breakage once collected.<br />
12<br />
As noted above, plastic allows hydrocarbon vapors to escape. Plastic<br />
may also be attacked and destroyed by high concentrations of vapors.<br />
For these reasons, volatile samples should only be stored in metal and<br />
never in plastic.<br />
Fig. 2-6<br />
New metal paint cans are usually available from paint wholesalers or<br />
retailers. Once again, use a can that is sized to the sample.
<strong>Evidence</strong> Integrity - 2<br />
Fig. 2-7<br />
Glass vials are available from hospital and scientific supply outlets.<br />
Fig. 2-8<br />
Use a new clean pipette to transfer liquids to glass vials. Use a rubber bulb<br />
or other device designed for the purpose of providing suction. Never use<br />
your mouth-the practice is dangerous and may contaminate the sample.<br />
13
2 - <strong>Evidence</strong> Integrity<br />
This general discussion is intended to give guidance in situations<br />
where specific instructions are not provided elsewhere in the <strong>Handbook</strong>.<br />
Consult chapters dealing with specific types of cases or evidence and<br />
follow instructions given there, if they are provided.<br />
II. Sealing<br />
<strong>Evidence</strong> received by the Laboratory must be properly sealed.<br />
A proper seal provides proof that an item has not been accessible and<br />
therefore could not have been altered or contaminated during storage. The<br />
primary requisite of a good seal is that if it is tampered with, the<br />
tampering can be detected.<br />
There are many recognized sealing methods and a number are<br />
discussed below. All are used by the Laboratory. Methods of sealing<br />
evidence include: heat sealing in plastic, staples and tape, tamper-proof<br />
tapes, tamper proof adhesive strips, or a combination of these methods.<br />
14<br />
Fig. 2-9<br />
Use an indelible pen to write your initials across the heat seal to<br />
authenticate it. There are several different types of plastics that can be used<br />
with heat sealers, but each requires a different time/temperature<br />
combination. Make sure that you sufficiently heat the plastic to ensure the<br />
halves are fused together.
<strong>Evidence</strong> Integrity - 2<br />
A. Heat sealing. The heat sealing method partially melts the (plastic)<br />
packaging and fuses it together. When using this method, emboss an<br />
identifiable mark into the seal and use an indelible marker to write<br />
your initials across the seal. These markings provide evidence that<br />
the package was not opened and then resealed.<br />
B. Tape and staples. Cellophane or cloth tape can provide a tamperevident<br />
seal on some surfaces. However, tape on plastic does not<br />
provide an acceptable seal because it can be easily removed and<br />
replaced. Paper and other fibrous materials will adhere to the adhesive<br />
surface of the tape and tear, revealing tampering. The security of this<br />
method is improved by use of tapes with organizational names printed<br />
thereon (thereby limiting the number of persons who could reseal the<br />
item). Use an indelible pen to write your initials across the junction<br />
of the tape ends. If disturbed, it will be nearly impossible to<br />
reposition the tape so that it precisely matches.<br />
Fig. 2-10<br />
Close the opening of the container by folding over the opening more<br />
than once. Staple the fold in several places and cover the staples with<br />
tape. Use a wax seal or an indelible pen to write the sealers initials<br />
across the junction of the tape ends.<br />
15
2 - <strong>Evidence</strong> Integrity<br />
16<br />
Do Not<br />
Place Seal<br />
in This Area<br />
Fig. 2-11<br />
An example of a cloth tape and wax seal across the junction of the tape ends,<br />
authenticated by impressing an identifying mark (usually a fingerprint). Do<br />
not place the seal over the manufacturer’s opening. The Laboratory attempts<br />
to leave the original seal in place, poor positioning will require its<br />
destruction to open.<br />
Fig. 2-12<br />
An example of a tamper-proof tape and a wax seal across the junction of<br />
the tape ends, authenticated by impressing an identifying mark (usually a<br />
fingerprint).
<strong>Evidence</strong> Integrity - 2<br />
C. Wax. One of the oldest methods to assure the authenticity of a seal is<br />
the use of sealing wax and an imprint across the junction of the tape<br />
ends. When used for sealing evidence, this is often combined with<br />
staples and white cloth tape: the opening of the package is closed,<br />
stapled, and secured with cloth tape; then, heated, liquid sealing wax<br />
is pooled over the junction of the tape ends and onto the packaging.<br />
When the sealing wax has cooled somewhat but is still soft and<br />
pliable, some object (usually a finger print) is impressed into the wax<br />
to leave a mark of authenticity. Be aware that wax does not adhere<br />
well to certain types of tape.<br />
D. Tamper-proof tapes. Tamper-proof tapes are destroyed by efforts to<br />
remove them. Traditionally, the security feature was created by a<br />
combination of a tenacious adhesive and a low tensile strength<br />
backing. Some new tapes change color or have words develop when<br />
disturbed. The tapes come both in long rolls and in short, individual<br />
strips.<br />
These tapes are advertised as providing tamper-proof seals on all<br />
surfaces. In reality, some brands of tape can be removed from plastic<br />
bags without evidence of tampering. Always check for permanence<br />
on an identical test object before using a particular tape. If the brand<br />
of tape or packaging is changed, retest.<br />
Fig. 2-13<br />
Tamper-proof tape is available from a number of suppliers and in several<br />
different forms.<br />
17
2 - <strong>Evidence</strong> Integrity<br />
18<br />
Fig. 2-14<br />
Use an indelible pen to write the sealer’s initials across the junction of<br />
the tape ends. It is nearly impossible to reposition the tape correctly<br />
once disturbed.<br />
Fig. 2-15<br />
Use an indelible pen to write the sealer’s initials on the plastic bag over<br />
the adhesive seal.
<strong>Evidence</strong> Integrity - 2<br />
One advantage of tamper-proof tapes is that they are designed to<br />
shred or tear when pulled or stressed. This advantage is a potential<br />
disadvantage, however, if a mechanically strong joint is required.<br />
Unless somehow reinforced, the tape may spontaneously shred if<br />
stressed. When the tape joint may be strained, use another method to<br />
secure the joint (tape, staples, etc.) and then use tamper-proof tape<br />
across the joint.<br />
Some tamper-proof tapes will not adhere to very cold metal surfaces.<br />
E. Tamper-proof adhesive strip. Tamper-proof adhesive strips<br />
attached to plastic bags are a quick and easy method of sealing plastic<br />
bags. Remove the plastic protective cover from the adhesive and<br />
either squeeze the sides of the plastic bag together or on some bags<br />
fold the plastic flap over the adhesive strip and squeeze together.<br />
Write your initials on the plastic bag directly over the adhesive seal.<br />
Any attempt to disturb the seal results in distortion of the plastic bag<br />
and/or the initials.<br />
F. Staples. Stapling by itself is not a proper or acceptable method to<br />
seal evidence. However, it can be used in conjunction with other<br />
sealing materials. Be aware, exposed staples can present a sharps<br />
hazard.<br />
19
2 - <strong>Evidence</strong> Integrity<br />
III. Chain of Custody<br />
The chain of custody is a written record that documents every<br />
person that had custody and control of an item from the time it was<br />
collected until its introduction into court. It allows the courts to question<br />
all persons who possessed an item regarding their handling procedures<br />
and the actions they took.<br />
The importance of a properly documented chain of custody cannot<br />
be overemphasized. The chain is often closely scrutinized. <strong>Evidence</strong> is<br />
challenged and sometimes rejected because of improper handling or<br />
documentation. Thus it is extremely important that proper methods be<br />
used in collecting, preserving, and documenting physical evidence.<br />
The chain should be no longer than necessary. Ideally, it should<br />
include only:<br />
20<br />
• The investigator who recovers the evidence<br />
• The departmental evidence custodian (in cases when the item is<br />
not immediately transported to the Laboratory by the recovering<br />
investigator)<br />
• The person who transports it to the Laboratory (if possible, one<br />
of the two preceding individuals)<br />
• The person (normally the evidence specialist) who receives the<br />
evidence at the Laboratory.<br />
• The Laboratory scientist who examines the evidence.<br />
• The person that retrieves it from the Laboratory (if possible, one<br />
of the first two individuals)
<strong>Evidence</strong> Integrity - 2<br />
Transmittal of Criminal <strong>Evidence</strong> form<br />
When submitting a new case or additional items for a case already<br />
submitted, a Transmittal of Criminal <strong>Evidence</strong> form must accompany the<br />
evidence (Fig. 2-16). This form supplies important details that are needed<br />
for <strong>Crime</strong> Laboratory record management. It also ensures that reports of<br />
analysis will be associated with the correct offense. If your agency does<br />
not have these forms or if you have any questions about proper<br />
completion, contact the Laboratory in your service area. An electronic<br />
version of the Transmittal of Criminal <strong>Evidence</strong> form is available upon<br />
request from the Laboratory in your service area.<br />
Each offense should be submitted as a separate case. For instance, if<br />
fingerprints were found at three businesses burglarized on the same night<br />
in the same strip mall, each burglary could result in a separate criminal<br />
count. Therefore, each incident should be submitted on a separate form.<br />
In a drug case, if more than one buy/deal occurs involving the same<br />
suspect on the same day, the Laboratory considers each buy/deal a<br />
separate case which must be submitted on a separate transmittal form.<br />
Make sure all entries are legibly recorded. Hand printing or<br />
typewriting is preferred. If there are special instructions, note them on the<br />
Transmittal form or include them in a letter in the same envelope.<br />
Information to be supplied includes:<br />
1. Submitting Agency. Name of agency submitting case (Police<br />
Department, Sheriff’s Office, MEG Unit, etc.)<br />
2. Submitting Agency Case Number.<br />
3. City of Agency. Municipality where agency is located.<br />
4. County of Agency. County where agency is located.<br />
5. Date Transmitted. Date case is mailed/brought to the Laboratory.<br />
6. Offense Committed in City/Town/Village. If known.<br />
7. County of Offense. List only one county.<br />
8. Offense Date. Only one incident per transmittal form. Must be one<br />
specific date, not between a general time frame.<br />
21
2 - <strong>Evidence</strong> Integrity<br />
9. Criminal Offense. List all charge(s) defendant(s) face. Be specific. In<br />
drug cases, this is typically possession, possession with intent,<br />
delivery, manufacturing, etc. In cases such as arson, burglary, or theft,<br />
be sure to indicate the type of property burned, burglarized, or stolen.<br />
10. Trial Date. Date of jury trial, if known.<br />
11. Victim(s). Victim(s) of the crime. In drug cases, there are usually no<br />
victims. In the case of multiple burglaries, each burglary is a<br />
separate case even though the same suspect(s) may be involved.<br />
Each victim must be listed on a separate transmittal form. If a<br />
business is involved, include name of business, owner and any<br />
employees involved; list the cashier in armed robbery, etc.<br />
12. Suspect(s). All suspect(s) in the crime, whether or not charged.<br />
13. Sex/Race. Sex and race of victim(s) and suspect(s). This information<br />
is necessary in sexual assault cases for both victim and suspect.<br />
14. Age/Date of Birth. Age and date of birth of victim(s) and suspect(s).<br />
15. Agency Exhibit Number. If submitting agency has a an exhibit<br />
number, item number or inventory number for the piece of evidence,<br />
it may be listed here.<br />
16. Number of Items. Number of pieces of evidence being submitted<br />
under your item number or inventory number.<br />
17. Item Description and Source. Brief description of evidence.<br />
18. Full Name of Submitting Officer. Full, printed name of officer<br />
submitting case. (No initials or nick names—i.e., James J. not J.J.;<br />
William not Bill.)<br />
19. Phone Number. Phone number of submitting agency.<br />
If evidence is mailed or shipped to the Laboratory, place the<br />
Transmittal of Criminal <strong>Evidence</strong> form in an envelope and attach it to the<br />
outside of the package.<br />
22<br />
A packaging checklist follows Figure 2-16.
<strong>Evidence</strong> Integrity - 2<br />
Fig. 2-16<br />
Transmittal of Criminal <strong>Evidence</strong> form<br />
Transmittal of Criminal <strong>Evidence</strong> form. The form is available upon request from the<br />
Laboratory in your service area. The form should be used whenever a case is submitted<br />
to the Laboratory.<br />
23
2 - <strong>Evidence</strong> Integrity<br />
Packaging Checklist<br />
24<br />
Before shipping evidence ask yourself:<br />
• Has evidence been properly collected, preserved, and sealed for<br />
submission to the Laboratory (heat seals marked with the sealer’s<br />
initials, all tape seals marked with the sealer’s initials across the<br />
junction of the tape ends?<br />
• Has evidence, to include fingerprint cards, been properly sealed?<br />
• Has evidence been properly packaged for shipping to the<br />
Laboratory?<br />
• Has Transmittal of Criminal <strong>Evidence</strong> form been properly<br />
completed?<br />
• Has Transmittal of Criminal <strong>Evidence</strong> form been put in an<br />
envelope attached to the outside of the package?<br />
• When using certified mail, the envelope containing the<br />
Transmittal of Criminal <strong>Evidence</strong> form must be attached to the<br />
outside of the package.<br />
• When using registered mail, the edges of the envelope must be<br />
completely covered with brown paper tape.
3<br />
Field Service<br />
_________________________________________________________<br />
The Field Response unit provides field assistance in cases of<br />
priority, primarily death investigations. It is staffed and equipped to aid<br />
in the recognition, proper recovery, and preservation of physical<br />
materials which may have evidentiary value, and to transport those<br />
materials to the Laboratory for examination. Laboratory examinations<br />
are not conducted in the field.<br />
Field assistance may be requested by those governmental officials<br />
authorized to do so. (See table, below.)<br />
Governmental Officials Authorized to Request<br />
Laboratory Assistance<br />
(Wis. Stats §165. 75(3)(b))<br />
_______________________________________________<br />
Sheriff Chief of Police<br />
Coroner Attorney General<br />
Medical Examiner Governor<br />
District Attorney Head of any State Agency<br />
________________________________________________<br />
When field assistance is requested, it is important that the crime<br />
scene be protected and kept secured by law enforcement personnel. All<br />
personnel must remain outside the perimeter of the scene. The requesting<br />
agency should assign the officer most familiar with the case to assume<br />
responsibility for the investigation. Also, during the examination and<br />
processing of the crime scene, the officer who is assigned the case and<br />
other officers who have attended the death investigation and/or evidence<br />
technician courses, should be made available to assist the Laboratory<br />
personnel.<br />
Law enforcement agencies requesting assistance for crime scene<br />
investigations may contact the Madison and Wausau <strong>Crime</strong> Laboratories<br />
at the following telephone numbers:<br />
25
3 - Field Service<br />
26<br />
Agencies in the southern 24-county area served by the<br />
<strong>Crime</strong> Laboratory - Madison - (608) 266-2031 (24-hours a day)<br />
Agencies in the southeastern 8 county area served by the<br />
<strong>Crime</strong> Laboratory - Milwaukee - should contact the <strong>Crime</strong><br />
Laboratory - Madison - (608) 266-2031 (24-hours a day)<br />
Agencies in the northern 40-county area served by the<br />
<strong>Crime</strong> Laboratory - Wausau - (715) 845-8626 (24-hours a day)<br />
If unable to reach any of the Laboratories at any time call the<br />
Time Control Center at (608) 266-7633.<br />
Fig. 3-1<br />
Laboratory service areas.<br />
The Madison Laboratory field service area includes the Milwaukee Laboratory area.<br />
Agencies in the Milwaukee Laboratory areas should contact the Madison Laboratory for<br />
field service. For all other matters, agencies in the Milwaukee service area should contact<br />
the Milwaukee Laboratory.
4<br />
Photography<br />
_________________________________________________________<br />
The Forensic Imaging Unit provides analysis of photographic<br />
materials and physical evidence, using photographic and electronic<br />
imaging techniques. Limited analysis of videotapes, electronic images<br />
and computer enhancement of images is available.<br />
Photographic services provided include conventional and<br />
electronic imaging of physical evidence, either at the laboratory or on<br />
location. Preparation of demonstrative exhibits for court and<br />
processing/printing of color and black and white film are additional<br />
services accessible on a limited basis. Training for law enforcement<br />
agencies and consulting in forensic photography can be provided<br />
depending on availability of personnel.<br />
Requests for photographic analysis and services should be directed<br />
to the Forensic Imaging Unit of the Laboratory servicing your area. The<br />
unit leader will evaluate your request and advise your agency as to the<br />
quantity of evidence/material required, amount of time required to<br />
complete your request, type of accessory equipment or material required<br />
and submission procedures.<br />
Photographic Procedures and Techniques<br />
<strong>Evidence</strong> photography is indispensable to the evaluation, interpretation,<br />
and presentation of physical evidence. It is important that<br />
evidence photographs be of consistently high quality as well as a fair and<br />
accurate representation. The following recommendations have been<br />
compiled to produce photographs that meet these recommendations.<br />
27
4 - Photography<br />
I. Criminal Investigations<br />
A. General Guidelines<br />
28<br />
1. Upon arriving at the scene, the photographer should obtain all<br />
available information from either the first officer on the scene or<br />
the officer-in-charge. Using this information, the photographer<br />
should mentally decide what photographs are needed and in<br />
which order they are to be produced. Do not move or disturb any<br />
evidence, bodies or items within the boundaries of the scene<br />
before they have been photographed, measured, sketched and<br />
released for collection by the officer in charge.<br />
2. Do not take a suspect or any item of physical evidence that has<br />
been moved or disturbed back to the scene for photographic or<br />
other purposes.<br />
3. Do not include yourself, other persons, or any other object not<br />
part of the scene in the photographs. If positions need to be<br />
denoted in photographs, take a photograph without any<br />
alterations and then retake the photograph with inanimate<br />
markers in place. Be extremely careful not to disturb any items<br />
of evidence.<br />
4. Film or electronic medium are the cheapest part of processing a<br />
scene. A good axiom to follow is: If in doubt, photograph it!<br />
B. Procedures<br />
1. Determine a photographic starting point and progressively take<br />
photographs working your way into the scene. Photographs<br />
should maintain continuity between each other to present a<br />
“picture story” of the scene.<br />
2. Photograph rooms from each corner, with a minimum of four<br />
views. Additional photographs may be required of ceilings,<br />
floors, doorways or hallways if not covered in the four minimum<br />
views.<br />
3. Photograph bodies from all angles (be careful of distortion when<br />
photographing from head and feet) and overhead, if possible. Do<br />
not disturb body or clothing on body to take photographs. Body<br />
will be photographed and examined at autopsy.
Photography - 4<br />
4. <strong>Scene</strong>s should be photographed keeping four basic views in<br />
mind:<br />
a. OVERALL VIEWS - these show general locations,<br />
conditions and surroundings.<br />
1) Should be done at photographer’s eye level unless<br />
duplicating a witness’s point of view. Then the camera<br />
should be placed at height of the witness’s eyes and<br />
looking in their direction when event was witnessed.<br />
2) A large outdoor scene, a scene involving several<br />
buildings or a route used may require aerial photographs.<br />
3) All scenes should have 360 degree overall views looking<br />
toward the scene and looking away from the scene. If<br />
possible, include identifiers like street numbers, fire<br />
numbers, permanent reference points, etc. Structures<br />
should have all sides, surrounding areas and adjacent<br />
buildings photographed.<br />
4) Interior overall views, using the minimum four corner<br />
technique, should be produced of all rooms connected<br />
with the scene.<br />
b. MEDIUM VIEWS - these show a significant segment of the<br />
scene that has been previously recorded in the overall views.<br />
An example would be a body lying in the middle of the room.<br />
An overall view would show where the body was in relation<br />
to everything else in the room. A medium view would focus<br />
our attention to the particulars of that body to give details<br />
like type of clothing, position of extremities, items close to<br />
the body, etc.<br />
c. CLOSE-UP VIEWS - are used to specifically show position<br />
and detail. This would include items such as: a gun in<br />
relation to the hand, ejected cartridge cases, a bullet lodged<br />
in wall, ligatures, gags, bindings, entry damage to door jam,<br />
etc. Close-ups of all evidence should be accomplished before<br />
collection, measuring and sketching take place.<br />
d. SPECIFIC EVIDENCE VIEWS - these photographs<br />
selectively record an item of evidence or something peculiar<br />
29
4 - Photography<br />
30<br />
to that item. These views may be taken during the initial<br />
photography or after processing of the scene. Additional<br />
photographs may be necessary as evidence is discovered or<br />
processed. Some examples include: footwear/tire<br />
impressions, fingerprints, footprints, processed fingerprints<br />
before lifting, tool and pry marks, fabric impression, bite<br />
marks, serial numbers, etc.<br />
1) Can be very similar to a close-up view or may have been<br />
taken previously as a close-up view.<br />
2) Depending on type of evidence, photographs may be<br />
taken back at the agency after item has been collected<br />
from scene/autopsy.<br />
5. When the photographic recording of the scene has been<br />
completed, the photographer should confer with the officer-incharge<br />
and describe all the photographs that have been made.<br />
Take any additional photographs as directed by the <strong>Investigator</strong><br />
or officer-in-charge.<br />
C. Photographic Notes<br />
1. Generally, departmental policies will dictate what type of<br />
information the photographer needs to record. It is suggested that<br />
some type of “running” log be maintained.<br />
2. Log information that might be considered: frame number,<br />
photographer, date, case number, time started/ended, camera<br />
direction (use compass directions) and general description of<br />
item being photographed.<br />
3. Do not mix cases on a roll of film and do not discard your bad<br />
negatives, keep them as part of your log.<br />
4. Data backs may be used. Be aware of where the data is being<br />
imprinted on the negative. Sometimes this data can obscure<br />
important elements of the picture!<br />
5. Statutorily you are not required to record data, but you may be<br />
asked this information during court testimony.
II. Autopsy Photographic Procedure<br />
Photography - 4<br />
Most photographers will probably not have occasion to photograph<br />
an autopsy. In the event that such a situation should arise, however, the<br />
following guidelines are suggested.<br />
A. Seals and identification tags: these may be located on bags used for<br />
transporting bodies, on refrigeration storage units and/or the body<br />
itself. All should be photographed showing how seal is affixed and<br />
any identifiers which may have been placed on the seal or tag.<br />
B. Identification photographs: particularly important if person is<br />
unidentified.<br />
1. Overall view of body, both sides.<br />
2. Frontal view of face similar to a “booking” type photograph.<br />
3. Profile of face, both sides, again similar to a “booking” type<br />
photograph.<br />
4. Scars, tattoos and identifying marks; scaled & unscaled.<br />
C. Overalls showing general condition of body.<br />
1. Body clothed (if found with clothing on), both sides and back.<br />
2. Body unclothed, both sides and back.<br />
3. Views of affected areas, unwashed, and if wounds, both scaled<br />
and unscaled.<br />
4. Views of affected areas, washed, and if wounds, both scaled and<br />
unscaled.<br />
D. Lividity patterns, especially if conflicting.<br />
E. Areas of special interest, scaled and unscaled.<br />
1. Wounds.<br />
2. Bruises, scratches, lacerations and fractures.<br />
3. Pattern impressions; bite marks, fabric, tool marks, etc.<br />
31
4 - Photography<br />
32<br />
4. Ligatures, bindings, knots, asphyxial devices, protruding items,<br />
etc.<br />
F. Any additional photographs as directed by attending pathologist.<br />
G. Copies of x-rays if desired.<br />
III. Scaling Photographs<br />
In criminal investigations, properly taken scaled photographs are<br />
indispensable in the evaluation and interpretation of physical evidence.<br />
The location, relative position, appearance, physical size, depth and<br />
shape of any object that possesses potential evidentiary value should be<br />
photographed, both scaled and unscaled, using the following recommendations.<br />
A. Required Equipment<br />
1. Camera with precise viewing/focusing system and manual<br />
exposure controls.<br />
2. Tripod is essential. Should be sturdy enough for camera system<br />
you are using, having a three-way head and preferably equipped<br />
with an accessory “L” extension arm.<br />
3. Cable release for camera.<br />
4. Electronic flash or portable lighting unit.<br />
5. Flash extension cord to permit use of off-camera flash.<br />
6. Precise ruled scale.<br />
a. Machinist type with “chrome-clad or satin-clad” type<br />
surface, either English or Metric ruled.<br />
b. Scale should be as thin as possible without excessive<br />
flexibility. Scales similar to retractable or folding rulers,<br />
school type rulers, paper rulers or stainless steel rulers<br />
should not be used. They generally are not precise, too thick,<br />
too flexible, will photograph as black or will produce<br />
specular highlights when photographed.
Typical 35mm image recieved at Laboratory for fingerprint<br />
identification.<br />
Fig. 4-1<br />
Correctly framed image, with fingerprint filling up the full 35mm<br />
frame. If the fingerprint is for an AFIS search, the finished photo<br />
must be 1:1 (life size).<br />
Photography - 4<br />
33
4 - Photography<br />
34<br />
Fig. 4-2<br />
Proper scaling of a footwear impression.
Photography - 4<br />
c. Paper stick-on type scales are acceptable for fingerprint<br />
photography, if accurate. It is advisable to submit the actual<br />
scale used when submitting the photographs for more<br />
accurate sizing of the fingerprints.<br />
d. An ABFO #2 (American Board of Forensic Odontologist)<br />
“L” shaped scale is suggested for bite mark photography.<br />
B. General Scaling Recommendations<br />
1. Camera must be placed on tripod.<br />
2. Compose subject in viewfinder and make subject as large as<br />
possible in the viewfinder (See Figure 4-1), unless photographing<br />
to a specific magnification ratio, such as a 1:1 (100% of life size)<br />
for AFIS. Critically focus on subject.<br />
3. Film plane should be placed parallel to object plane with lens<br />
directly over center of object and perpendicular to object. (See<br />
Figure 4-2)<br />
4. A scale should be placed on same plane as area of primary<br />
interest in subject. If done properly, scale will also be parallel to<br />
camera’s film plane.<br />
5. Scale placement should not obscure any detail or characteristics<br />
of the subject.<br />
6. The scale should be of sufficient length to provide accuracy for<br />
printing and size determination.<br />
7. Care should be taken to avoid a direct reflection off the scale into<br />
the camera lens when lighting subject.<br />
IV. Pattern Impression Photography<br />
A. General Lighting Recommendations<br />
1. Depending on the depth of the impression and the surface of<br />
material it is in/on, the light should be placed at a low angle to<br />
the impression, from 10 o to 45 o . On-camera flash is seldom used<br />
for pattern impressions.<br />
35
4 - Photography<br />
36<br />
Fig. 4-3<br />
Lighting effects on pattern impressions.<br />
2. Light should be at a distance from the impression to evenly<br />
illuminate the entire length/width of the impression. It is<br />
important to avoid brighter areas at one end of the impression<br />
than the other end. A reflector card may be used to “fill-in” the<br />
end farthest from the light, provided the shadows or detail are not<br />
eliminated.
Fig. 4-4<br />
Proper scaling of impressions.<br />
Photography - 4<br />
3. When the light is placed at a low angle, shadows are created that<br />
highlight individual characteristics. Oblique lighting allows for<br />
good delineation but a low light angle also causes a problem, as<br />
depicted in Figure 4-3. The shadows can hide possible important<br />
detail. To alleviate this problem, at least two (2) photographs<br />
should be taken:<br />
37
4 - Photography<br />
a. One photograph with the light placed at one end of the<br />
impression. Advance the film while making sure not to move<br />
the camera. Then take another photograph with the light<br />
placed at the other end of the impression.<br />
b. Additional photographs may be taken with the light from<br />
other positions relative to the impression. (See Figure 4-3.)<br />
B. Footwear Impressions<br />
38<br />
1. Camera must be on tripod!<br />
2. Scale must be used! See Section III, Scaling.<br />
3. Consider the depth of the impression and scrape away material,<br />
along side of impression, to provide space for the scale. Do not<br />
disturb the impression. Also, be careful to not “cave” in the<br />
sides of the impression if in soft ground, sand or snow.<br />
4. Set the scale at the level of the deepest plane of the impression<br />
and laying on the same plane as the impression. (See Figure 4-4.)<br />
5. If an impression consists of two different levels (see Figure 4-4),<br />
such as the sole level and a deeper heel impression, then three (3)<br />
photographs are called for:<br />
a. on level and plane of sole impression<br />
b. on level and plane of heel impression<br />
c. an overall view, scaled on plane of sole level impression, for<br />
recording length<br />
6. Each photograph submitted should be labeled indicating the level<br />
at which the scale is placed.<br />
7. Film plane in camera must be parallel to impression, scale and<br />
with the lens directly centered over both and the entire image<br />
filling up the viewfinder.<br />
8. For lighting, refer to Section IV., A., General Lighting<br />
Recommendations.
C. Tire Impression Photography<br />
1. Camera must be on a tripod!<br />
Photography - 4<br />
2. Scale must be used! See Section III, Scaling, for further<br />
reference.<br />
3. If the tire impression is long, markers of some sort with numbers<br />
or letters are suggested. Visually divide the long impression into<br />
smaller sections by using the numbered markers (do not actually<br />
alter impression) and place markers along side of the<br />
impression.<br />
4. Once the markers have been placed, make an overall photograph<br />
of the impression from a high angle. Place camera perpendicular<br />
to the length of the tire impression and in a centered position,<br />
showing overall length of the impression and placement of<br />
markers (see Figure 4-5).<br />
5. After the overall photograph is completed, proceed to<br />
photograph each individual and marked section of the tire<br />
impression as you would for a footwear impression (Section IV.,<br />
B.). Be sure to indicate which section is being photographed, so<br />
that reference can be made back to the overall photograph.<br />
Fig. 4-5<br />
Overall record photograph showing tire impression segments.<br />
39
4 - Photography<br />
40<br />
6. Section sizes of the overlapping photographs of the tire<br />
impression should be approximately 12 to 18 inches long and<br />
should fill up the viewfinder as much as possible.<br />
7. Film plane in camera must be parallel with the impression and<br />
scale, and the lens directly centered over both.<br />
8. For lighting, refer to Section IV., A., General Lighting<br />
Recommendations.<br />
D. Bite Mark Impressions<br />
1. Camera must be on a tripod!<br />
2. A scale must be used! An ABFO #2 scale and a thin precise<br />
ruled scale are recommended.<br />
3. When photographing the scaled impression, the camera film<br />
plane must be parallel to the impression and scale, with the lens<br />
directly centered over both.<br />
4. Take an overall view of the person, showing the part of the body<br />
where the bite mark impression is located.<br />
5. Take a medium view showing the bite mark and the area around<br />
the bite mark impression.<br />
6. Consider the depth of the impression and the contour of the area<br />
of the bite mark impression. An impression on a severely curved<br />
portion of the victim’s body may call for more than one<br />
photograph of a specific bite mark. See Figure 4-6.<br />
7. A scale should be placed, as much as possible, on the same<br />
plane as area of primary interest and parallel with the<br />
impression and film plane. Remember, camera is on tripod, film<br />
plane parallel to impression and lens centered directly over<br />
impression. The scale should not obscure any detail or characteristics.<br />
8. After overall and medium photographs are taken, take a closeup<br />
unscaled photograph of the bite mark, making sure the<br />
entire image fills up the viewfinder, using lighting techniques<br />
described in Section IV., A.
Photography - 4<br />
9. Place a scale next to the bite mark impression, as outlined in 6 -<br />
7 above, and take a scaled photograph without changing any of<br />
the equipment positions.<br />
10. Close-up, scaled and unscaled, photographs with black and white<br />
film, using appropriate contrast filters to enhance bite area, are<br />
also suggested (see color plate following p. 28).<br />
11. Additional photographs may be taken with the light from other<br />
positions relative to the impression or using a ring light so as not<br />
to create shadows, if appropriate.<br />
12. Depending on appearance of bite mark, photographs may have to<br />
be made over an extended period. This may be a time frame of<br />
several days or more, depending on whether the victim is living<br />
or deceased, the condition of body, storage facilities, etc.<br />
Fig. 4-6<br />
41
4 - Photography<br />
E. Swabbing bite mark impressions - After finishing the photography of<br />
the bite mark impression, the impression should be swabbed for<br />
saliva, that may be used in an attempt to obtain the DNA profile of<br />
the individual who made the impression.<br />
42<br />
1. Swab the bite mark impression with a cotton swab that has been<br />
moistened with distilled water. Thoroughly air dry the swab and<br />
place in a clean paper envelope. Properly label and seal the<br />
envelope.<br />
2. If swabbing results in uncovering more detail in the bite mark,<br />
the impression should be rephotographed.<br />
F. Photographs of victim’s or suspect’s teeth - Photographs of the teeth<br />
require specific photographic equipment and procedures as directed<br />
by a forensic odontologist, who will require a professional fee for<br />
services. For information concerning this service, contact the<br />
Laboratory Forensic Imaging Unit.<br />
V. Video Taping<br />
A. Video taping is not recommended for the exclusive recording of the<br />
crime scene or autopsy. The Laboratory recommends use of video<br />
taping to provide:<br />
1. A realistic view of the overall scene based on a continuous<br />
recording of what a viewer sees, rather than an overall pictorial.<br />
2. A depiction a particular event in motion that would not be<br />
suitably depicted through still photography.<br />
3. <strong>Evidence</strong> at trials by videotape, as provided by State Statute (Wis.<br />
Stat. §885).<br />
4. A real-time product for investigators to use for briefings, strategy<br />
sessions and interrogations.<br />
5. A record of a new or unusual technique developed in the field to<br />
process the scene or collect evidence.<br />
6. A training vehicle for use to instruct personnel.<br />
7. A review of the scene or autopsy for briefing of incoming
Photography - 4<br />
personnel or to verify that all the items have been recovered and<br />
equipment has been removed from the scene.<br />
B. Authentication, Identifying and Labeling Videotapes<br />
1. It is suggested that the following information be recorded on each<br />
videotape, on the audio track:<br />
a. Camera operator’s name, agency and address<br />
b. Personnel present from agency processing scene<br />
c. Date, time and exact location of taping<br />
d. Agency case number and officer-in-charge<br />
2. Each videotape produced should be labeled as to the case name,<br />
agency number, date produced and name of videographer.<br />
3. Tape label should also be signed and dated by videographer<br />
authenticating that videotape is a “True and Accurate<br />
Reproduction” and is an unedited original.<br />
4. Record tab should be removed from cassette.<br />
C. Taping Procedures<br />
1. Prior to taping of event, authentication should be placed on the<br />
beginning of videotape, as described in Section V., B. Do not<br />
record more than one case per tape.<br />
2. If video taping an event where testimony or sound is not relevant,<br />
the camera’s sound recording mode or microphone should be<br />
turned off. If a switch is not available, insert a “dummy”<br />
microphone plug into the auxiliary microphone jack. This will<br />
disable the camera’s microphone. If camera microphone cannot<br />
be disabled, care should be taken as to any sounds that may be<br />
picked-up by microphone during recording. Depending on<br />
design, microphones on cameras can pick-up sounds behind the<br />
camera as well as in front of the camera.<br />
3. Using a very slow panning speed, pan the scene to provide an<br />
overall view of the entire scene. A walk-through type of view,<br />
with the camera on the shoulder is usually adequate. Try to avoid<br />
“jerky” camera movements, either right to left or up and down.<br />
43
4 - Photography<br />
44<br />
Movement should be as smooth as possible. An alternative to the<br />
“walk-through” technique would be to record the scene as if<br />
photographing it using the four basic views from a stationary<br />
position.<br />
4. Avoid excessive “zooms”. Zoom-in on items only when needed<br />
to show detail and keep your zooms slow. Remember, still<br />
photographs are going to be taken to record individual items and<br />
details.<br />
5. Do not include equipment, personnel or unnecessary elements<br />
into your videotape. Be careful of reflective surfaces, such as<br />
mirrors, that may show your reflection or other items on the<br />
videotape.<br />
6. If light levels are too low where camera will not record or camera<br />
gain must be used, consider using an on-camera video light or<br />
additional light sources.<br />
7. Complete pans should be made of exteriors of buildings and<br />
areas involved, looking toward structures and a 360 o view<br />
looking away from structure and surrounding area.<br />
8. Most consumer type video cameras have lenses that are biased<br />
toward the longer focal lengths. Generally speaking, it is<br />
advisable to set your zoom lens to its widest angle of view<br />
(shorter focal length) for your overall pans.<br />
9. A continuously running camera is preferable to excessive fadein/outs<br />
when doing the overall pans and changing viewpoint.<br />
D. Duplicating Video Tapes<br />
1. Duplicate video tapes should be authenticated/labeled using the<br />
same procedure as camera originals.<br />
2. Duplicates should be labeled as duplicates and labeled as either<br />
“Unedited Duplicates” (no changes from original, an<br />
uninterrupted dupe from start to finish), or “Edited Duplicate”<br />
(additions, deletions or change of sequence of events).<br />
3. Edited duplicates should have a log on file describing what edits<br />
were applied and who did the editing.<br />
4. Record tabs should be removed from duplicate cassettes when<br />
duplicating is completed.
Recommended Equipment for<br />
Forensic Photography<br />
I. Photographer’s Kit<br />
Photography - 4<br />
New equipment should be coordinated with existing equipment for<br />
system compatibility. The following recommendations are designed for<br />
35mm camera equipment.<br />
A. Camera<br />
1. Have full manual capability.<br />
a. Full range of adjustable apertures (f-stops)<br />
b. Full range of adjustable shutter speeds including bulb (B) or<br />
time (T)<br />
2. If automatic mode is offered, suggest that choice be made toward<br />
aperture priority or program capability (camera can always be<br />
placed on tripod if it selects slow shutter speed).<br />
3. Camera should have a flash synch of at least a 1/60th of a second,<br />
with 1/125th or higher preferred.<br />
4. Must have a precise focusing system (combination of microprism<br />
and split image is best), accurate viewfinder and be a single lens<br />
reflex (SLR) not a rangefinder type.<br />
5. Have built-in light meter.<br />
6. Have interchangeable lens capability.<br />
7. External P.C. fitting very desirable and must have at least a “hot<br />
shoe” for flash.<br />
8. Have receptacle for a cable release.<br />
9. Must have tripod fitting for 1/4 x 20 screw thread.<br />
10. Mirror lock-up is desirable for close-up photography.<br />
45
4 - Photography<br />
B. Lenses for the Camera<br />
46<br />
1. Lenses in the 50 to 60mm range that are macro (prime) lenses are<br />
suggested for use as a general purpose lens. A matched extender<br />
should be purchased with the lens if it is not capable of a 1:1<br />
(100% or life-size) reproduction ratio.<br />
2. Lenses in the 24 to 35mm range are also suggested. These are the<br />
“medium” wide-angle lenses and are good for overall views in<br />
some crime scene situations.<br />
3. If surveillance photography is to be accomplished, lenses in the<br />
300 to 1000mm range should be considered. The lower the<br />
maximum aperture, the better and the higher the cost. General<br />
rule of thumb states that 1mm per foot of distance should be used<br />
for chest to head image size on film. 2mm per foot for full face<br />
detail on film. For example, if using the 2mm rule: if the subject<br />
is 300 feet away, then a 600mm lens is needed.<br />
4. If cost is a factor and versatility is to be achieved, a zoom lens<br />
may be purchased while considering the following features:<br />
a. For general purpose forensic photography the zoom ratio<br />
should be no shorter than 24mm and no longer than 135mm.<br />
b. The zoom has macro (close up) capability (not just close<br />
focusing), with a reproduction ratio of at least 1:3 (1/3rd life<br />
size) without use of an extender. A 1:2 ratio, or larger, is<br />
preferred if a choice is to be made. Also, it is better if the<br />
macro feature is used in the longer focal length portion of the<br />
zoom, around 100mm or longer. This will allow you to be<br />
further away from your subject and present more room for<br />
your lights, scale, etc.<br />
c. Has one-touch focusing/zooming, is an automatic lens and, if<br />
offered, has a “zoom lock” or preventive system to keep<br />
zoom from drifting when used in a vertical position.<br />
5. For advanced applications, more sophisticated devices are<br />
available, such as a night vision device or electronic<br />
amplification.
C. Electronic Flash<br />
Photography - 4<br />
1. Must have a guide number, when in manual, of at least 100 when<br />
using I.S.O. 100 speed film. For forensic work, a guide number<br />
of 120, 160 or higher is better. Do not purchase a flash unit with<br />
a guide number of less than 100. You are wasting money.<br />
2. Has automatic and manual modes.<br />
3. Gives you a choice of at least three apertures (f-stops) in the<br />
automatic mode.<br />
4. Has an “open flash” button. This will let you flash your unit<br />
without it being connected to the camera (used for painting with<br />
light and multiple “pops”).<br />
5. Has a ready light.<br />
6. Has an external synch cord to camera capability.<br />
7. Power ratio selector is desirable, but not a must. In manual, this<br />
would allow you to select either full power, 1/2, 1/4 power, etc.<br />
Very useful feature for using fill flash and when doing close-ups.<br />
8. Tilting, rotating and focusable head is desirable, but not a must.<br />
Tilting capability is very useful with bounce flash in the<br />
automatic mode.<br />
D. Tripod<br />
1. Generally speaking, a good heavy duty tripod will start at<br />
$100.00 and range upwards to $200.00+. Do not buy an<br />
inexpensive light weight tripod. If they flex when you put your<br />
leaning weight on it, don’t buy it.<br />
2. Features considered important:<br />
a. Quick release legs<br />
b. Three way pan head<br />
c. Can provide you eye level camera height without extending<br />
center column<br />
d. Has a center column which can be extended and can also be<br />
removed and reversed into tripod to get camera close to<br />
ground<br />
47
4 - Photography<br />
48<br />
e. Legs can collapse to accommodate different levels or will<br />
allow tripod to lay flat on the ground<br />
f. “L” arm accessory is desirable, but not a must.<br />
E. Accessories<br />
1. Hard or soft shell case/bag to hold equipment.<br />
2. Lens accessories.<br />
a. Lens shade(s)<br />
b. U. V. filter(s) for each lens (not “sky light”)<br />
c. Lens cleaning tissue (not eye glass cleaning tissue) or<br />
Microfiber cleaning cloth<br />
d. Lens cleaning fluid<br />
e. Camel’s hair brush or blowing device for blowing air onto<br />
lens to remove particulate matter<br />
3. Locking cable release that is at least six inches long.<br />
4. Flash synch cords.<br />
a. Have at least two spare cords<br />
b. Extension synch cord for flash cord<br />
1) suggest coiled type<br />
2) at least six feet long<br />
5. Precise scales.<br />
a. Chrome or satin clad surface machinist scales, one 6" and<br />
one 12" long<br />
b. ABFO #2 scale (available from forensic suppliers)<br />
c. Transparent photo evidence ruler (also available from<br />
forensic suppliers)<br />
6. Angle finder or inclinometer (Available from some hardware<br />
stores, photo suppliers or forensic suppliers)<br />
7. Directional compass.
Photography - 4<br />
8. Black and white contrast filters:<br />
a. Number 15 (yellow-orange)<br />
b. Number 29 (red)<br />
c. Number 47 (blue)<br />
d. Number 58 (green)<br />
e. Number 22 (orange) if using alternative light sources<br />
9. Data sheets for notes, drawings, comments, etc.<br />
10. Kodak 18% neutral grey card.<br />
11. Hand held light/flash meter is suggested, especially if your<br />
camera does not have a built-in meter.<br />
II. Film<br />
A. Color Negative<br />
1. 400 to 800 I.S.O. for general purpose and overall views with<br />
electronic flash.<br />
2. 100 I.S.O., or slower, for close-ups requiring detail: wounds,<br />
subtle bruising, etc. Use a tripod whenever possible.<br />
3. 100 I.S.O. for outdoor scenes of extreme brightness. Examples<br />
would include snow or sandy beaches in sunlight.<br />
4. 1600 I.S.O. for dimly lit surveillance situations where color is<br />
important.<br />
5. Tungsten film, that has a range of I.S.O.’s, depending on<br />
exposure time, for situations requiring very long exposures or<br />
using lighting balanced for 3200 o K. Primarily used with tungsten<br />
location lighting, studio tungsten lighting or where a<br />
predominance of orange to red wavelengths of light may be<br />
present (like sunrises and sunsets).<br />
49
4 - Photography<br />
B. Black and White Negative<br />
50<br />
1. 100 I.S.O., or slower, for close-ups requiring detail: fingerprints,<br />
footwear/tire impressions, tool marks, pattern impressions, serial<br />
numbers, items of evidence, etc. Remember to use your tripod<br />
whenever your photographs are scaled and are going to be used<br />
for metric or comparative analysis.<br />
2. 400 I.S.O. where film speed is more important than maximum<br />
resolution. Need may arise when magnification is large, a dense<br />
filter is used and/or lighting is so minimal that extra film speed is<br />
important to minimize vibration effects during long exposure<br />
time.<br />
3. 3200 I.S.O., pushable to 12,500. Very good film for low level<br />
lighting situations in surveillance photography.<br />
C. Specialty Films<br />
1. Any high contrast panchromatic film with characteristics similar<br />
to the following films.<br />
a. Black and White negative: KODAK Tech Pan, variable<br />
I.S.O. that depends on application and type of developer<br />
used. Film is very useful in document, fingerprint and pattern<br />
impression photography, especially when using filters. It can<br />
have higher contrast than “normal” black and white film,<br />
depending on developer choice.<br />
2. KODAK Kodalith Ortho Type 3 that is a high contrast black and<br />
white film, that is only blue & green sensitive. Multiple uses for<br />
documents, faint writing, fingerprints, overlays, etc. Not too<br />
many applications with contrast filters.<br />
3. Infrared, black and white: Sensitive in the far red wavelengths<br />
and Infrared wavelengths, effectively to about 890 nm. I.S.O.<br />
varies based upon application/developer used. Good uses in<br />
documents, gunshot cases and surveillance applications.<br />
4. ILFORD Chromogenic XP2, Kodak CN or Select (black and<br />
white) or Konica Monochrome: normal ISO of 400, but can be<br />
exposed at ISO range of 50 to 1600 when processed in color<br />
(C41 type) chemicals.
III. Basic Studio Type Equipment<br />
A. 4"x 5" film view camera with swings, tilts and shifts.<br />
Photography - 4<br />
1. An array of lenses; 90mm wide angle, 150mm normal and a<br />
300mm. If a lot of macro work is to be done within your studio,<br />
then a macro lens should be considered, that has a focal length in<br />
the 100 to 130mm range.<br />
2. Use a camera that allows focusing by moving camera rail instead<br />
of front and rear standards.<br />
3. An extra long bellows is important, especially if doing macro<br />
type photography.<br />
B. Polaroid ® Model 545 film holder (takes 4"x 5" Polaroid ® materials).<br />
1. Normal contrast Polaroid ® film - types 52, 54 and 58.<br />
2. High contrast Polaroid ® film - type 51.<br />
3. Color Polaroid ® film - type 58 or 59.<br />
C. 4"x 5" film holders for sheet (cut) film.<br />
D. Lighting equipment.<br />
1. Tungsten lights for forensic photography.<br />
a. Two 12" reflector floods<br />
b. One 5" reflector flood<br />
c. One mini spot with snoots<br />
2. A boom arm on a castered stand is recommended.<br />
3. Various light stands.<br />
E. Background paper and a background roll paper stand/system.<br />
F. Studio camera stand or studio tripod with “L” arm extension.<br />
G. Hand-held light/flash meter.<br />
H. Focusing cloth and magnifier/loupe.<br />
I. Incidental accessories listed previously for Photographer’s Kit.<br />
51
4 - Photography<br />
Reference Books And Material<br />
Note: * - Denotes material that is recommended in addition to <strong>Physical</strong><br />
<strong>Evidence</strong> <strong>Handbook</strong> (6th ed.) as a minimal reference library for forensic<br />
photographers. Texts can be ordered through local book sellers or through<br />
Kodak dealers for Kodak books.<br />
Applied Infrared Photography, Eastman Kodak, Rochester, NY<br />
Buchanan, J.C., Bos, C.D. and Heller, F.I., How to Use Video in<br />
Litigation: A Guide to Technology, Strategies and Techniques; 1986,<br />
Prentice-Hall, Englewood Cliffs, NJ<br />
Chernoff, G. and Sarbin, H.B., Photography and the Law (5th ed.),<br />
Amphoto, New York, NY<br />
Davis, A. and Fennessy, P., Digital Imaging for Photographers (3rd<br />
ed.), 1998, focal Press, Oxford England<br />
Davis, Phil, Photography (7th ed.) 1995, Wm C. Brown<br />
Communications, Inc., Dubuque, IA<br />
Fire and Arson Photography, Eastman Kodak, Rochester, NY<br />
<strong>Handbook</strong> of Kodak Photographic Filters, Eastman Kodak, Rochester,<br />
NY<br />
Joseph, G.P., Modern Visual <strong>Evidence</strong>, 1984 Litigation Series, Law<br />
Journal Seminars-Press, New York, NY<br />
* London, B., A Short Course In Photography, An Introduction to<br />
Black-and-White Photographic Technique (3rd ed.), Harper-Collins,<br />
New York, NY<br />
* McDonald, J.A., Close-up & Macro Photography for <strong>Evidence</strong><br />
Technicians (2nd ed.), Phototext Books, Arlington, Heights, IL<br />
[available through Lightning Powder Company, 1-800-852-0300]<br />
* Miller, Larry S., Police Photography (4th ed.), 1998, Anderson,<br />
Cincinnati, OH<br />
Photomacrography, Eastman Kodak Company, Rochester, NY<br />
* Redsicker, D.R., Practical Methodology of Forensic Photography,<br />
(2nd ed.) 2001, Elsevier, New York, NY<br />
Using Photography to Preserve <strong>Evidence</strong>, Eastman Kodak,<br />
Rochester, NY<br />
52
5<br />
Videotapes and Audiotapes<br />
________________________________________________<br />
Videotapes and audiotapes of activities are becoming more<br />
prevalent as evidence in investigations of criminal activity. The Imaging<br />
Units have resources for extracting frames from videotapes, providing<br />
computer adjusted still photographs and “real time” duplicate tapes of the<br />
recorded activity. Audiotapes and videotapes may also be processed to<br />
clarify recordings and help minimize distracting background noise.<br />
Voice identification, authentication, acoustical analysis and<br />
photogammetry is not provided from recordings by the laboratories.<br />
Recording<br />
When planning to record an activity, use a new tape every time. Do<br />
not record over previously recorded material. This will diminish<br />
image/audio quality and may cause judicial concerns at trial.<br />
Record an audio slate at the beginning - an audio slate should be<br />
produced at the beginning of each tape, describing who the recorder of<br />
record is, agency responsible for recording event, where the event is<br />
being recorded, date and time of the event, what the tape is to portray and<br />
where the tape will be stored.<br />
Labeling<br />
It is the responsibility of the recorder to further authenticate the<br />
tape integrity by placing the following upon the tape shell, either directly<br />
or by means of a label: recorder's initials, date and case number. It is also<br />
recommended that the recorder place their initials on the tape leader.<br />
53
5 - Videotapes and Audiotapes<br />
Making the Tape Safe<br />
Prior to viewing, duplicating, sealing and submitting of the video<br />
or audiotape, disable the record mode by either removing the record tab<br />
or moving a slider switch to the non record position. These are usually<br />
located on the spine portion of the tape shell.<br />
Viewing<br />
Do not repeatedly view an original tape, whether newly recorded or<br />
seized as evidence. Repeated viewing can cause information to be lost,<br />
especially if it is an old tape that has been recorded over numerous times.<br />
Pausing for extended periods can also cause damage. Duplicate the<br />
original and view the duplicate as often as needed. Make sure that the<br />
original tape is submitted to the Laboratory for any analysis.<br />
Submissions of videotapes and audiotapes have special considerations<br />
for sealing prior to final packaging for shipment. It is important to<br />
demonstrate tape integrity along with package integrity as described<br />
within the chapter on “<strong>Evidence</strong> Integrity”.<br />
54<br />
Fig 5-1<br />
Position of record tabs in record and safe mode.
Sealing<br />
Videotapes and Audiotapes - 5<br />
Fig 5-2<br />
Sealing tapes and placing initials.<br />
The actual videotape and audiotape, that has the evidence upon it,<br />
are housed within a shell that can be removed and access allowed to the<br />
tape within. Place some type of seal over the ends of the shell to<br />
demonstrate that tape access has been prevented. Seal both sides so it<br />
does not interfere with normal tape operation. Do not place the seal over<br />
55
5 - Videotapes and Audiotapes<br />
the record tab area or this may disable that function. The ends of the<br />
sealing tape and shell should be initialed and dated. There are companies<br />
that provide labels specifically for this purpose or the standard tamperproof<br />
tapes may also be used.<br />
Once the shells have been sealed and record tabs removed, tapes<br />
may be sealed in paper evidence bags or an evidence box as described in<br />
the chapter on <strong>Evidence</strong> Integrity. Plastic bags should not be used when<br />
the possibility of condensation may occur.<br />
56
6<br />
Body Fluid Stains<br />
and Standards<br />
________________________________________________<br />
Laboratory examination of body fluids (i.e., blood, semen, saliva,<br />
etc.) may produce significant information in certain investigations. This<br />
chapter considers the recognition, collection, and preservation of some of<br />
these commonly encountered forms of biological evidence.<br />
I. Bloodstains and Blood Standards<br />
In crimes of violence, blood is usually found in the form of dried<br />
stains. Blood can frequently be identified and genetically compared to<br />
blood standards from individuals if a sufficient quantity is properly collected<br />
and submitted.<br />
In addition to identification and comparison testing, the shape and<br />
pattern of the bloodstaining may provide information concerning how the<br />
blood was deposited.<br />
A. Bloodspatter Pattern Analysis<br />
The examination of bloodstain patterns has always been a part of<br />
crime scene investigation, but it seems to have gained more emphasis in<br />
recent years as a separate discipline. Careful observation, measurement,<br />
and documentation of the size, shape and pattern of bloodstains can<br />
reveal significant information in some cases, e.g., direction and angles of<br />
bloodspatter, origination point(s), and the minimum number of blows in<br />
a beating or stabbing incident.<br />
When there may be special relevance to the bloodspatter found at a<br />
scene, it is essential to preserve those patterns until someone trained in<br />
the examination of bloodspatter patterns can examine them. Although<br />
photography is useful in the recording of some of the aspects of<br />
bloodspatter at a crime scene, it does not substitute for a detailed<br />
examination.<br />
57
6 - Body Fluid Stains and Standards<br />
B. Procedure When Blood is Found at the <strong>Scene</strong><br />
58<br />
1. Record the following:<br />
a. <strong>Physical</strong> state (fluid, moist, dry)<br />
b. Amount present (few drops, small pool, etc.)<br />
c. Shape (smear, round drops)<br />
d. Exact location in relation to fixed objects<br />
e. Pattern of stains (all in one spot, trail)<br />
f. Atmosphere conditions (temperature, humidity)<br />
g. Date and time of observation<br />
2. Take scaled and unscaled photographs of stains.<br />
3. Liquid blood:<br />
If a pool of fluid blood is present, collect in the following<br />
manner:<br />
a. Wear gloves, mask and eye protection while soaking up<br />
samples. Using cotton swabs, soak the suspected blood onto<br />
the swabs. Continue collecting the stain until it is either<br />
completely collected or until five swabs have been saturated.<br />
Do not touch the swabs with your fingers.<br />
Make sure to avoid contaminating your supply of swabs.<br />
Change your gloves frequently but change them<br />
immediately if you suspect any contamination of your<br />
gloves.<br />
b. Allow the swabs to dry in place or place them on a nonporous<br />
surface like a glass microscope slide and allow to<br />
thoroughly air dry.<br />
c. Package the dried swabs in a paper container (i.e., white slide<br />
box, envelope, paper bag, etc.). Use separate containers for<br />
each area recovered. Label the paper container with a<br />
“biohazard” sign.<br />
d. Properly label and seal each container.<br />
e. Select an unstained area adjacent to the suspected bloodstain<br />
and collect a sample from this area as described in 4.a.<br />
through 4.d. This sample will serve as a control. Package,<br />
label, and seal this control separately from the stained<br />
material.
4. Dried or moist bloodstain recovery:<br />
Body Fluid Stains and Standards - 6<br />
If the stained object is transportable, submit the item intact. If the<br />
suspected blood is still moist, allow it to thoroughly air dry in a<br />
well ventilated but draft-free area prior to packaging. Label the<br />
area with “biohazard” signs. Package item in a clean paper<br />
container, seal and label. (See Chapter 18, Clothing and Fabrics.)<br />
If it is impractical to submit the bloodstained item to the Laboratory<br />
or it is not possible to cut or remove a portion of the stained<br />
and unstained area of the item, then collect in the following<br />
manner:<br />
a. Wear gloves, mask and eye protection while collecting<br />
samples. Moisten a sufficient number of cotton swabs to<br />
collect the stain. It is better to underestimate the amount of<br />
swabs required as additional swabs can always be used. Wet<br />
the swabs using distilled water, or clean tap water if distilled<br />
water is not available. Do not touch the cotton with your<br />
fingers and do not dilute the stain by using too many swabs<br />
or too much water.<br />
b. Gently swab the stain with the moistened swabs until the<br />
swabs thoroughly absorb the blood and are a dark reddish<br />
brown coloration. Continue collecting the stain until it is<br />
either completely collected or five swabs have been saturated.<br />
c. Allow the stained swabs to thoroughly air dry either directly<br />
on the stained object or on a clean glass microscope slide. To<br />
avoid contamination, swabs can also be dried by making a<br />
small perforation in a pillbox and placing the swab into the<br />
perforation. This will allow the swab to dry without<br />
contacting any other surfaces.<br />
d. Package, label, and seal the air-dried swabs in a paper<br />
container (i.e., white slide box, envelope, etc.). Label with a<br />
“biohazard” sign.<br />
e. Select an unstained area adjacent to the suspected bloodstain<br />
and collect a sample from this area as described in 4.a.<br />
through 4.d. This sample will serve as a control. Package,<br />
label, and seal this control separately from the stained<br />
material.<br />
59
6 - Body Fluid Stains and Standards<br />
C. Procedure for Collecting Standard Blood Samples from Victims and<br />
Suspects<br />
60<br />
1. Collect at least 5 mL of blood into an EDTA (lavender-top) tube.<br />
2. If alcohol and/or drug analysis is required. Blood samples must<br />
be drawn by a licensed physician, nurse, or medical technician<br />
using an antiseptic skin towelette (e.g., Zephiran ® or<br />
benzalkonium chloride) to clean the site where the blood sample<br />
will be drawn. Draw 20 mL (2 tubes) of blood into grey-top<br />
tubes. These tubes contain sodium fluoride and potassium<br />
oxalate as a preservative and anticoagulant. These tubes are<br />
commercially available and are also found in the OWI Kits.<br />
Lavender top tubes may be used if grey-top tubes are<br />
unavailable. In some cases, blood is in short supply and<br />
toxicology and DNA testing may be required. Toxicology can<br />
use DNA specimens but DNA can have difficulty with<br />
toxicology blood preservatives. For cases where limited blood is<br />
available and DNA and toxicology are to use the same blood<br />
sample, lavender-top tubes should be used.<br />
II. Saliva<br />
Label all tubes and seal them in an appropriate styrofoam container.<br />
Store in refrigerator.<br />
Label with a “biohazard” sign on the outside of the box.<br />
Saliva stains are not usually evident from a visual examination.<br />
However, certain types of evidence frequently contain traces of saliva<br />
(e.g., cigarette butts, gummed surfaces of envelopes, stamps, bite marks,<br />
areas where oral contact may have occurred, etc.) and sometimes the<br />
amount of saliva present is sufficient to determine the DNA type of the<br />
individual who is the source of the saliva.<br />
A. Procedure for the Collection of Evidential Forms of Saliva<br />
1. Transportable objects<br />
Easily transportable objects such as individual cigarette butts and<br />
envelopes should be placed in a paper container (i.e., paper bag<br />
or envelopes) and the container should be properly labeled and<br />
sealed.
2. Non-transportable objects<br />
Body Fluid Stains and Standards - 6<br />
If transporting the object is not practical, such as in the case of<br />
bite marks on the body of sexual assault victims, then the saliva<br />
can be collected as follows:<br />
a. Moisten a cotton swab with distilled water.<br />
b. Shake the swab to eliminate excess water.<br />
c. Gently swab the suspected saliva stain. Using a dry swab go<br />
over the stained area to absorb any remaining moisture.<br />
d. Allow the swabs to thoroughly AIR DRY prior to packaging,<br />
labeling, and sealing in a paper envelope. Air drying can be<br />
accomplished by making a perforation in the center of a<br />
pillbox, inserting the swab into the perforation and allowing<br />
the swab to air dry.<br />
e. Select an unstained area and collect as in 4.a. through 4.d.<br />
Package, label, and seal separately from the stained material.<br />
This swab will serve as a control.<br />
B. Standards Required to Complete Saliva Comparisons<br />
A standard saliva sample is not required to perform saliva<br />
comparisons. Standard blood samples are normally used for this<br />
purpose. Collect standard blood as described under IC1.<br />
III. Seminal Stains<br />
Where a sexual offense has occurred, stains may be found on<br />
clothing, bedding, rags, upholstery or other objects. Seminal stains can<br />
be helpful in establishing whether or not an alleged sexual act occurred<br />
and can also provide information concerning the person who contributed<br />
the semen.<br />
A. Procedure for the Collection of Seminal Stains<br />
1. Carefully recover all suspected stained material including the<br />
clothing worn by the victim and the suspect at the time of the<br />
offense. Each item of evidence should be packaged separately,<br />
labeled and sealed.<br />
61
6 - Body Fluid Stains and Standards<br />
62<br />
2. Air dry all damp stains in a well-ventilated but draft-free area. Clean<br />
paper should be spread under the item to catch any debris, which may<br />
be dislodged during the drying process.<br />
3. Package, label, and seal each item along with the paper upon which the<br />
item dried. Use only paper containers for packaging (i.e., paper bags).<br />
4. If the suspected seminal stain is on an object, which cannot be<br />
transported, collect as in II.A.2.<br />
B. Standards Required to Complete Semen Comparisons<br />
A standard semen sample is not required to perform semen compar-isons.<br />
Standard blood samples are normally used for this purpose. Collect standard<br />
blood as described above in IC1.<br />
IV. Other Body Fluids<br />
Vaginal secretions in the form of a foreign DNA (DNA that did not<br />
originate from the individual swabbed) can sometimes be attributed to another<br />
individual when the penis of a suspected sexual perpetrator is swabbed at the<br />
time he is apprehended. The sample is collected by wetting a cotton swab with<br />
distilled water and swabbing the external area of the penis. This type of analysis<br />
is most successful when the perpetrator is apprehended shortly after the alleged<br />
occurrence of sexual activity, generally within twenty-four hours and prior to<br />
bathing. The outer area of condoms can also yield this type of DNA.<br />
V. Preservation of Dried Biological <strong>Evidence</strong><br />
The ideal way to preserve biological evidence is to freeze it. This can<br />
become impractical with large amounts of evidence. <strong>Evidence</strong> with dried<br />
biological stains can be stored in a temperature-controlled room, which is<br />
maintained at normal room temperature or colder. Large fluctuations in<br />
temperature should be avoided.<br />
When biological evidence is returned after processing by the DNA unit of<br />
the crime laboratory, it frequently will contain a manila envelope, which is<br />
labeled “DNA packet”. this packet contains cuttings of stains and extracts of<br />
those stains. This packet needs to be frozen. If this packet is included with your<br />
evidence, it will be noted on the return release form and the evidenxe will be<br />
labeled “Biological <strong>Evidence</strong> Enclosed, Please Remove and Freeze”.
7<br />
Firearms and Ammunition<br />
_________________________________________________________<br />
The following information is intended to assist the investigator in the<br />
recognition, evaluation, marking, packaging, and transmittal of firearms<br />
exhibits and related items to the Laboratory.<br />
When requested, the Laboratory will process firearms exhibits and<br />
related items for fingerprints and trace evidence as well as the possible<br />
determinations listed in Table 7-1.<br />
All exhibits should be properly inventoried. Record the description of<br />
the item, source, case number, item number, initials of person collecting,<br />
and the date and time collected. Sketch the area of recovery, indicating<br />
relative positions in feet and inches between exhibits and fixed objects,<br />
and supplement with photographs.<br />
It is often possible to restore manufacturer's serial numbers, property<br />
marks, or other die-stamped markings which have been removed, altered,<br />
or obliterated on firearms (as well as on typewriters, binoculars, bicycles,<br />
or other metal objects).<br />
Firearms and fired ammunition may be delivered to the Laboratory in<br />
person or via parcel post, certified mail, or United Parcel Service (UPS).<br />
Loaded ammunition must be delivered in person. United States postal<br />
regulations prohibit shipment through the mail.<br />
All firearms shipped to the Laboratory must be unloaded and marked<br />
on the outside package, with a transmittal form in an envelope attached<br />
to the outside of the package. Indicate what kinds of examinations are<br />
requested - e.g., DNA, Trace <strong>Evidence</strong>, Identification, etc.<br />
Firearms or other metal objects recovered from water (liquid), should<br />
immediately be placed in a container of the same liquid, completely submerged.<br />
When in a liquid, the oxidation process is considerably retarded,<br />
and during the period necessary to transport the firearm to the<br />
Laboratory, only a small amount of change will take place.<br />
63
7 - Firearms and Ammunition<br />
64<br />
Table 7-1<br />
Possible Laboratory Determinations<br />
Resulting from Firearms Section Examinations<br />
EVIDENCE REQUIRED BY<br />
LABORATORY<br />
FIRED BULLET<br />
FIRED CARTRIDGE CASE<br />
TWO OR MORE FIRED<br />
BULLETS<br />
TWO OR MORE FIRED<br />
CARTRIDGE CASES OR<br />
SHOT SHELLS<br />
FIRED BULLET AND<br />
SUSPECTED FIREARM<br />
FIRED CARTRIDGE CASE AND<br />
SUSPECTED FIREARM<br />
SUSPECTED FIREARM,<br />
AMMUNITION, SCALED<br />
PHOTOGRAPH OR POWDER<br />
OR SHOT PATTERN AND<br />
VICTIM’S CLOTHING<br />
SHOT PELLETS AND WADS<br />
POSSIBLE LABORATORY<br />
DETERMINATION<br />
Make, caliber, type of firearms from<br />
which each could have been discharged;<br />
type of propellant used in firing; name of<br />
maker and maker’s designation as to<br />
type, caliber, etc.<br />
Make, caliber, type of firearm in which<br />
each cold have been fired; type of<br />
propellant used in firing; name of maker<br />
and maker’s designation as to type,<br />
caliber, etc.<br />
In addition to determination possible with<br />
a single fired bullet, whether two or all<br />
were fired from the same firearm.<br />
In addition to determination possible with<br />
a single cartridge case, whether two or<br />
all were fired in the same firearm.<br />
In addition to determination possible with<br />
a single fired bullet, whether bullet,<br />
whether bullet was fired from suspected<br />
firearm.<br />
In addition to determination possible with<br />
a single cartridge case, whether cartridge<br />
case was fired in suspected firearm.<br />
Approximate distance at which shot was<br />
discharged.<br />
Size of shot, and gauge designation<br />
of wads.
I. Marking of Firearms<br />
Firearms and Ammunition - 7<br />
Use extreme care in marking recovered firearms for purposes of identification.<br />
Attach a reinforced identification tag to the trigger guard.<br />
Mark the tag with appropriate identifying data, including the serial<br />
number and description of the firearm, source, case number, item number,<br />
initials of person collecting, and the date and time collected<br />
II. Marking of Bullets, Fragments, Cartridge Cases,<br />
Shotgun, Shells, Pellets, and Unfired Ammunition<br />
All firearms and firearm related items should be handled with the belief<br />
they will be fingerprinted. Therefore, only the packaging should be marked.<br />
In this manner the possibility of damage, loss or contamination of trace<br />
evidence, and destruction of possible fingerprints is greatly diminished. These<br />
items should never be packaged in cotton or sealed in plastic.<br />
All packages should be properly sealed, with initials of collector over the<br />
seal, and marked with accompanying information such as the description of<br />
the item, source, case number, item number, initials of person collecting, and<br />
the date and time collected, as described in Table 7-2.<br />
In situations where through-and-through penetration of the victim's body<br />
has occurred and the bullet is found on the floor, in walls, etc., bullets or bullet<br />
fragments should not be touched with bare fingers. A small piece of clean<br />
white paper should be slipped under the bullet, then fold-ed and placed in a<br />
rigid container, and finally sealed and identified. This procedure will<br />
minimize the possibility that the recovering officer will contaminate traces of<br />
blood which may be present on the bullet.<br />
The above recommendations should also apply to shotgun pellets and<br />
wads.<br />
65
7 - Firearms and Ammunition<br />
Table 7-2<br />
Instructions For Handling, Marking, and Shipping Firearms Exhibits<br />
66<br />
EXHIBIT<br />
FIREARMS<br />
FIRED<br />
BULLETS<br />
FIRED<br />
METALLIC<br />
CARTRIDGE<br />
CASES<br />
FIRED<br />
SHOT<br />
SHELLS<br />
SHOT<br />
PELLETS<br />
SHOT WADS<br />
LOADED<br />
SHELLS OR<br />
CARTRIDGES<br />
SHOT OR<br />
POWDER<br />
PATTERNS<br />
GENERAL<br />
INSTRUCTIONS<br />
Check for fingerprints. Remove<br />
magazine from autoloading<br />
firearms. Don not clean or fire. Do<br />
not operate mechanism except to<br />
unload. If loaded revolver, mark<br />
hammer position and sketch<br />
positions. See column on marking<br />
for identification.<br />
Every precaution should be taken<br />
to prevent loss of trace evidence<br />
or abrading or mutilating riffling<br />
surface in any way. Do not wash<br />
or clean.<br />
Do not mar, mutilate, scratch, or<br />
nick head of case. See column on<br />
marking for identification.<br />
Do not mar, mutilate, scratch, or<br />
nick head of shell.<br />
Recover as many as possible. do<br />
not mutilate in removal.<br />
Recover as many as possible. do<br />
not mutilate in removal.<br />
If loaded ammunition or fired<br />
cartridge cases are recovered in<br />
investigation, forward to<br />
Laboratory. If ammunition maker’s<br />
boxes are recovered, forward to<br />
Laboratory for latents.<br />
If on clothing send only clothing to<br />
Laboratory that contains powder,<br />
powder residues, or bullet or shot<br />
penetrations. If on skin. doors,<br />
walls, etc., consult Laboratory<br />
concerning scaled photographs.<br />
DESCRIPTIVE RECORD<br />
TO BE KEPT BY<br />
PERSON RECOVERING<br />
A record of make, model, type,<br />
caliber or gauge designation, serial<br />
and lot numbers. If a loaded<br />
revolver, draw a sketch indicating<br />
position of hammer and cartridges.<br />
Assumed caliber. Sketch showing<br />
relative position of fired bullets, if<br />
recovered on floor, street, etc.<br />
Transmit a copy of this information<br />
to the Laboratory.<br />
Sketch showing relative position of<br />
cases if recovered on floor, street,<br />
etc., or position of hammer and<br />
cartridges in revolver. Transmit a<br />
copy of this information to<br />
Laboratory.<br />
sketch showing relative position of<br />
shells, if recovered on floor, street,<br />
etc. Transmit a copy of this<br />
information to Laboratory.<br />
sketch showing relative position of<br />
shells, if recovered on floor, street,<br />
etc. Transmit a copy of this<br />
information to Laboratory.<br />
sketch showing relative position of<br />
shells, if recovered on floor, street,<br />
etc. Transmit a copy of this<br />
information to Laboratory.<br />
sketch showing relative position of<br />
shells, if recovered on floor, street,<br />
etc. Transmit a copy of this<br />
information to Laboratory.<br />
Description and source of garment<br />
containing shot or powder<br />
patterns. Location and size of shot<br />
or powder patterns on walls,<br />
doors, or other immovable objects.
Firearms and Ammunition - 7<br />
Table 7-2 (continued)<br />
Instructions For Handling, Marking, and Shipping Firearms Exhibits<br />
RECOMMENDED METHOD OF<br />
PACKAGING, MARKING FOR IDENTIFICATION,<br />
AND SHIPPING TO THE LABORATORY<br />
Attach and ID tag and mark tag with initials, case #, date, and item #.<br />
Secure firearms and magazineds to cardboard box or rigid container<br />
with fasteners. Package each cartidge deparately in cardboard box or<br />
rigid container and mark containers according to your sketch. Seal the<br />
package, initial the seal, and lavel each container with case #, date,<br />
item # and source. Forward to Laboratory along with the descriptive<br />
record.<br />
Package each separately in cardboard slide box or rigid container. Do<br />
not put in evnelope. Mark on the container the source of each bullet.<br />
Seal the package, initial the seal, and label each container with case<br />
#, date, item #, and source. Forward to Laboratory along with the<br />
descriptive record.<br />
Package each separately in cardoard slide box or rigid container. Seal<br />
the package, initial the seal, and label each container with case #,<br />
date, item #, and source. Forward to Laboratory along with the<br />
secriptive record.<br />
Same as above.<br />
Same as above ( all of the available fine shot can go in a single box).<br />
Same as above.<br />
Same as above.<br />
Place each individual air-dried item of clothing in a separate clean<br />
paper bag. Seal each bag, initial each seal, and label each bag with<br />
case #, date, itesm #, and source. Forward to Laboratory along with<br />
the descriptive record.<br />
EXHIBIT<br />
FIREARMS<br />
FIRED<br />
BULLETS<br />
FIRED<br />
METALLIC<br />
CARTRIDGE<br />
CASES<br />
FIRED<br />
SHOT<br />
SHELLS<br />
SHOT<br />
PELLETS<br />
SHOT WADS<br />
LOADED<br />
SHELLS OR<br />
CARTRIDGES<br />
SHOT OR<br />
POWDER<br />
PATTERNS<br />
67
7 - Firearms and Ammunition<br />
III. BULLET PATH RECONSTRUCTION<br />
Defining a bullet path at a shooting scene is a useful element of<br />
crime scene reconstruction. A shooter's position and final bullet location<br />
can both be defined by determining the path of a bullet or bullets through<br />
a sequence of materials. Such reconstructions are most accurate when a<br />
bullet has created both a bullet hole and a subsequent impact site or two<br />
or more bullet holes in successive planes of material, e.g. sheet rock on<br />
both sides of an interior wall. Inserting rods through the bullet holes (or<br />
from bullet hole to impact site) will define a bullet path that can direct the<br />
investigator to the shooter's position or to the bullet's likely location (see<br />
figure 7-1). Rods should not be inserted in any bullet hole until<br />
documentation and examination of the bullet hole has been completed.<br />
Over short distances, string can be attached to the rods to project the<br />
bullet path. This technique is especially useful in reconstructing shootings<br />
involving vehicles due to their double-panel construction. However, as<br />
the projected bullet path increases in distance from the bullet hole, greater<br />
imprecision will be introduced into the reconstruction. For bullet path<br />
reconstructions over long distances, a combination of spacer cones, rods<br />
and lasers will offer much better precision, especially if meaningful<br />
diagramming of the reconstruction is desired.<br />
Unless a bullet passes through a significant thickness of material,<br />
a single bullet hole will usually not allow useful reconstruction of the<br />
bullet path. However, bullet direction can be determined from throughand-through<br />
bullet holes in many materials. For example, the passage of<br />
a bullet through metal will create an indentation on the metal surface<br />
facing the bullet origin and metal stretch on the surface in the direction<br />
away from bullet origin, clearly defining the direction of the bullet<br />
through the metal. Bullets that pass through auto glass, skull and some<br />
plastics will create a crater on the side of the material away from the bullet<br />
origin. In other words the crater opens up in the direction of bullet travel<br />
(see figure 7-2). Even a portion of a bullet hole in a destructively fractured<br />
skull can define the direction of the bullet and subsequently establish exit<br />
and entrance. The combination of glass cratering and radial glass fracture<br />
in a window can even define the sequence of shots through the window,<br />
particularly when working with vehicle shootings.<br />
68
Firearms and Ammunition - 7<br />
Fig. 7-1<br />
Buttlet paths A&B define two shooter locations outside the vehicle. Such<br />
diagrams can be included in crime scene diagrams to aid in shooting reconstructions.<br />
Fig. 7-2<br />
Note the angled or beveled edges of the skull at the entrance bullet hole. The<br />
bone surface through which the bullet passed last will present a cratered<br />
appearance.<br />
69
70<br />
Notes
8<br />
Casts<br />
________________________________________________<br />
Footwear and Tire Impressions<br />
The identification of an impression as having been made by one<br />
particular tire or shoe is based upon the correspondence of individual<br />
characteristics caused by wear. Nail marks, cuts, or other accidental or<br />
deliberate markings on the tread surfaces - sufficient in number and/or<br />
uniqueness to rule out coincidence - must be found before an identification<br />
can be made. If sufficient individual characteristics are lacking, it is<br />
not possible to make a positive identification.<br />
The presence of corresponding class characteristics - basic tread<br />
design and overall physical dimensions - may permit the conclusion that<br />
an impression could have been made by a particular tire or shoe.<br />
However, in this case, the stipulation must be made that the impression<br />
could also have been made by any other tire or shoe having the same class<br />
characteristics.<br />
Therefore, the investigator should be aware that, while a tire or<br />
footwear impression may in some cases be conclusive evidence, under<br />
other circumstances it may serve only as an investigative lead.<br />
Caution: Observe laws relating to the collection of evidence.<br />
I. Procedure-General<br />
A. Record the following information:<br />
1. Location of impressions in relation to the other objects at scene.<br />
2. Accurate measurements and dimensions of impression(s).<br />
3. Draw pattern or design appearing in impression.<br />
4. Date and time of day impressions located.<br />
5. Attempt to establish time at which impressions were made, e.g.,
8 - Casts<br />
after recent snowfall or heavy rain, or after recent plowing of<br />
field.<br />
B. Photograph impression to scale. If there is more than one impression,<br />
an over-all photograph should be taken. (See Chapter 4,<br />
Photography.)<br />
C. Preserve impressions as follows:<br />
1. Carefully remove all loose material such as leaves, twigs, or<br />
debris not embedded in the impression.<br />
2. Impressions in dry powdery soil or sand should be carefully<br />
sprayed with shellac or acrylic lacquer to preserve any fine detail<br />
which may be present. Caution must be used to prevent the direct<br />
force of the spray from disturbing the surface detail. Spray over<br />
the impression into the air and let the mist settle down onto the<br />
impression. Several light layers of shellac or lacquer should be<br />
applied, and each layer should be allowed to dry thoroughly<br />
before a subsequent coat is applied.<br />
3. If the soil is frozen or extremely hard, the impression may be<br />
sprinkled with a thin layer of talcum powder or a fine spray of<br />
light machine or mineral oil to permit subsequent removal of the<br />
casting medium.<br />
4. It is necessary to use a retaining frame to keep the casting<br />
medium from flowing over a large area of surrounding ground.<br />
The frame is built around the impression, leaving at least a oneinch<br />
margin on all sides of the impression. A commercial<br />
retaining frame may be used or strips of wood or sheet metal<br />
approximately two inches wide, which are gently pushed into the<br />
ground.<br />
5. All casts of tire impressions must be identified as to the inside<br />
and outside of the tire, and if possible, identify which tire(s) has<br />
been cast (e.g., driver’s side front, passenger’s side rear, etc.).<br />
II. Impressions in Soil and Sand (Dental Stone Casting)<br />
A. Follow procedures listed under I., Procedures - General, above.
B. Materials needed:<br />
Method 1<br />
Casts - 8<br />
1. Class I dental stone. (Make sure it is dental stone and not dental<br />
plaster).<br />
2. Mixing bowl.<br />
3. Spoon or stirring stick.<br />
4. Water. Approximately 4-5 ounces of water are needed to each<br />
pound of stone.<br />
5. A pre-made form, or material with which a form can be made<br />
around the impression to contain the dental stone and give the<br />
cast thickness.<br />
C. Mixing procedure:<br />
Place the form around the impression. Be careful not to place the<br />
form so close to the impression that it risks distorting it. Two to three<br />
pounds of dental stone are sufficient for a footwear impression cast,<br />
depending on whether it is a small or large footwear impression.<br />
For each pound used, place four to five ounces of water in the mixing<br />
container. Pour the dental stone powder into the water in the mixing<br />
bowl. It should “cone-up” a couple of inches out of the water. If it<br />
doesn’t, add additional dental stone until it cones-up out of the water.<br />
Allow the mixture to soak for approximately one minute. Then stir<br />
thoroughly until the dental stone has dissolved. The mixture should be a<br />
watery consistency. Stir well every 60 seconds. After approximately 10<br />
to 12 minutes, the viscosity of the mixture will become similar to<br />
pancake batter. At this time it should be poured. (If the mixture is poured<br />
too soon, when it is still watery, it may erode much of the detail in the<br />
impression. If it is poured after it gets too thick, it will not flow evenly<br />
and also will not pick up the detail well.)<br />
D. Pouring procedures:<br />
Pour the mixture onto the spoon or stirring stick while holding the<br />
spoon or stick to the side of the impression. In this way, you can direct<br />
the flow of the mixture against the side of the form and let it flow<br />
indirectly back into the footwear impression. (Do not pour the mixture<br />
directly into the impression.)<br />
Before the cast hardens, scratch the necessary identifying data into<br />
the back of the cast. Let the cast set undisturbed for 20 to 30 minutes,
8 - Casts<br />
after which time the cast can be carefully lifted. Some soil or sand may<br />
adhere to the impression, however, do not attempt to clean off the cast.<br />
Allow the cast to air dry for at least 48 hours. The Forensic Scientist who<br />
will be conducting the examination of the cast impression will clean any<br />
sand or soil off the cast at the time it is received. (This sand or soil may<br />
be used as a known soil sample by the Forensic Scientist if needed.) If<br />
the cast is to be sent to the Laboratory, do not package it in plastic. Use<br />
a porous packing material.<br />
Note: Dental stone is much harder than plaster of Paris and, therefore,<br />
does not require reinforcement material to strengthen the cast.<br />
Although many books dealing with crime scene investigations<br />
contain information on casting, the only way to become skilled in the art<br />
of casting is to make numerous practice casts under varied circumstances<br />
to determine for one’s self what is meant by “pancake-batter” consistency<br />
and how much dental stone is needed for an impression of a particular<br />
size.<br />
Fig. 8-1<br />
Casting an impression. When pouring dental stone on an<br />
impression, a deflector is used to prevent alteration of the<br />
detail.
D. Materials needed:<br />
Method 2<br />
Casts - 8<br />
1. Class I dental stone, 2 pounds of dental stone pre-measured into<br />
a thick ZipLoc ® type plastic bag<br />
2. 10-12 ounces of water<br />
3. Pouring stick<br />
4. Pre-made form<br />
E. Mixing procedure:<br />
1. Pour the water into the ZipLoc ® type bag containing the dental<br />
stone.<br />
2. Knead the stone and water until it has the consistency of pancake<br />
batter, making sure there are no lumps.<br />
F. Pouring procedures:<br />
Pouring procedures are the same for each mixture whether mixed in<br />
the bowl or the ZipLoc ® type bag.<br />
III. Impressions in Snow (Sulfur casts)<br />
The casting of impressions in snow creates many problems not<br />
encountered in the casting of impressions in soil. The use of dental stone<br />
alone, for example, is not recommended, for it gives off heat while<br />
hardening, and may destroy the impression. (Dental stone may be used<br />
with SnowPrint-wax, as described in IV, below).<br />
The Laboratory therefore recommends the use of sulfur as a<br />
satisfactory casting medium for snow impressions.<br />
A. Follow procedures listed under I., Procedure - General, A and B.<br />
B. Materials needed:<br />
1. Sublimed sulfur (powder).<br />
2. Stove.<br />
3. Gallon paint can or comparable sized pan.<br />
4. “Zetex” asbestos-free protection gloves.
8 - Casts<br />
Fig 8-2<br />
A sulfur cast of a footwear impression made in snow. The air temperature at the<br />
time the cast was made was -20 degrees F. Careful examination of the<br />
photograph and the photograph of the sole of the suspect footwear (next page)<br />
reveal the presence of a number of corresponding individual charactaristics<br />
which permit the identification of the impression as having been made by the<br />
shoe pictured.<br />
5. Stirring rod.<br />
6. Deflector (piece of metal, wood, cardboard, etc.).<br />
7. Build a dam of wood, metal, or snow around the impression.
C. Procedure:<br />
Fig 8-3<br />
Suspect footwear compared to the sulfur cast (preceding figure).<br />
Casts - 8<br />
1. Place sulfur in pan and heat until thoroughly melted. (One-half<br />
filled gallon can will cast the average footwear impression.)<br />
2. Periodically stir sulfur until completely melted (approximately 15<br />
or 20 minutes).
8 - Casts<br />
3. Remove from heat source and allow to cool (periodically stirring)<br />
until sulfur begins to crystallize on the surface.<br />
4. Pour sulfur into impression (a deflector should be used).<br />
5. The sulfur will begin to harden immediately but allow cast to<br />
cool completely (at least 20 minutes) before removing cast.<br />
6. Back up sulfur cast with dental stone cast. That is, add a layer of<br />
dental stone to the top of the sulfur cast to give increased<br />
strength.<br />
D. Cautions:<br />
1. Melt sulfur outdoors or in exhaust hood. Avoid inhaling fumes.<br />
2. Sulfur casts are extremely fragile - handle with care.<br />
3. When pouring deep impressions, casts may appear to be set-up,<br />
however, molten sulfur may still be in the center of casts.<br />
4. Sulfur may flame-up if overheated.<br />
5. Liquid sulfur will become a thick syrup-type substance if<br />
overheated.<br />
IV. Impressions in Snow<br />
(Dental Stone and “SnowPrint-wax”)<br />
Dental stone may be used to cast footwear and tire impressions in<br />
snow and ice, however, SnowPrint-wax must be sprayed into the<br />
impression prior to casting the impression with dental stone. Several<br />
layers are advised and the procedure for spraying shellac or lacquer<br />
should be followed. SnowPrint-wax may be purchased commercially<br />
through law enforcement supply catalogs.
9<br />
Latent and Inked Prints<br />
________________________________________________<br />
Finger, Palm, and Foot<br />
Fingerprints, palm prints and footprints are among the most<br />
definitive types of physical evidence; few other forms of evidence can<br />
exclude all other persons except the maker and thereby establish presence<br />
at a place or possession of a thing. Because the potential value of friction<br />
ridge impressions is so great, all objects at a crime scene should be<br />
considered as possible sources of prints.<br />
The acquisition of an Automated Fingerprint Identification System<br />
(AFIS) by the Department of Justice makes it possible to search crime<br />
scene fingerprints against the state repository criminal fingerprint cards<br />
even when no suspect is named. The <strong>Crime</strong> Laboratoryalso has limited<br />
access to search a nationwide database of criminal fingerprint cards. At<br />
this time, it is not possible to search latent palmprints, although the<br />
technology is imminent. These capabilities further underline the<br />
importance of a thorough search for fingerprints at crime scenes.<br />
The Laboratory encourages user agencies to submit victim<br />
elimination fingerprints for comparison prior to any searching of the<br />
AFIS or IAFIS databases. Elimination fingerprint forms and other<br />
supplies are commercially available through law enforcement supply<br />
catalogs.<br />
Agencies with their own evidence processing personnel shall<br />
develop and preserve latent prints and submit the lift cards or<br />
photographs for comparison with fingerprint and/or palmprint<br />
exemplars, or searching through the AFIS and IAFIS databases.<br />
There is an exception to this general policy: the use of powders and<br />
chemicals may interfere with physical and chemical analysis, particularly<br />
in the case of blood, hairs, fibers and documents. Therefore, in cases<br />
79
9 - Latent and Inked Prints<br />
involving items with material adhering to their surfaces and/or which will<br />
require other types of analysis, fingerprint processing should not be done<br />
by the investigator. Rather, the unprocessed items should, when possible,<br />
be submitted to the Laboratory which will process for fingerprints when<br />
other examinations are completed.<br />
All police agencies should properly train and equip several members<br />
of their department in the procedure of obtaining good, clear and legible<br />
finger and/or palm prints at crime scenes. Prints can then be lifted and<br />
preserved by one of several recommended methods and transmitted to the<br />
Laboratory for comparison purposes.<br />
Because procedures for submission or preferences for processing<br />
procedures may vary from Laboratory to Laboratory, submitters are<br />
encouraged to contact the Laboratory in their service area if questions<br />
arise.<br />
I. General Procedures<br />
A systematic search should be conducted. Start at one point and work<br />
around the entire area. Do not skip from one location to another. Attempt<br />
to reconstruct the suspect’s path through the scene to determine where<br />
fingerprints are likely to be found. Door knobs, broken glass, weapons<br />
and items that were disturbed are obvious places to begin.<br />
Persons processing a crime scene should keep in mind two seemingly<br />
paradoxical truths. Latent prints can be found on almost any type of<br />
surface; however, latent prints will not be developed on every attempt.<br />
Past studies have shown that many departments locate usable latent prints<br />
at 30-50% of the scenes visited—and in some of those cases, the prints<br />
belong to persons with legitimate access. <strong>Investigator</strong>s should not be<br />
discouraged by recovery rates of 1 in 3 scenes. The likelihood of the<br />
recovery of usable latent prints is increased by the resourcefulness and<br />
diligence of the person conducting the search.<br />
Another important consideration is to initiate a search for latent prints<br />
as soon as possible after the discovery of the crime and to protect areas<br />
to be processed for prints from adverse weather conditions. Ordinarily,<br />
fingerprints are primarily composed of water and body fats and oils. They<br />
can evaporate if not processed in a timely manner or if they are exposed<br />
to sun, heat or wind; or they may be washed away by rain or dew if not<br />
protected.<br />
80
Latent and Inked Prints - 9<br />
It is important to clear the scene of non-essential personnel including<br />
the victims to minimize the chance that latent print evidence will be<br />
destroyed by careless handling and to minimize the likelihood that<br />
additional friction ridge prints will be deposited. The investigator should<br />
also be careful to not leave prints while processing evidence. A good rule<br />
would be for everyone entering the crime scene to wear gloves at all<br />
times.<br />
Friction ridge impressions found at the scenes of crimes can fall into<br />
one of three types: latent, visible or plastic impressions. Plastic<br />
impressions are those impressed in clay, putty or other moldable material.<br />
<strong>Investigator</strong>s should be alert to their presence when putty or other pliable<br />
material has been disturbed, such as when putty is removed from a<br />
window.<br />
Visible prints are those made by some substance which contrasts with<br />
the background. These prints can be likened to the inked fingerprints<br />
recorded on a standard arrest card. Examples include prints made in<br />
blood, ink, dirt or paint. If the suspect (or victim) was bleeding during the<br />
commission of the crime or if he/she disturbed materials that could have<br />
coated the hands or feet with the types of materials listed above,<br />
investigators should be especially alert for this type of evidence.<br />
While any chance friction ridge impression is commonly referred to<br />
as a “latent print,” most technically latent prints are those which are not<br />
immediately visible by casual inspection. These prints require some form<br />
of chemical or physical development to make them visible. Surfaces to<br />
be examined can ordinarily be divided into two categories: porous and<br />
non-porous. In most cases, different techniques are used to examine<br />
porous surfaces as opposed to non-porous surfaces.<br />
When examining smooth, reflective surfaces to determine if latent<br />
prints are present, one of the simplest methods to locate prints is to<br />
examine the object using reflected light. This is done by moving either<br />
the light or the object being examined so that the reflected light strikes<br />
the viewer in the eyes. Latent prints will often defuse the reflection,<br />
making the print appear dark against a light (reflected light) background.<br />
Remember, not all fingerprints are readily visible; therefore, an object<br />
suspected of bearing fingerprints should be processed using one or more<br />
appropriate methods. Another easy method used in conjunction with the<br />
light is called “huffing”. Exhale a “huff” of warm, moist air over the<br />
surface of the item. Ridge detail will appear during the mist cover. When<br />
the mist disappears, the ridge detail will, too.<br />
81
9 - Latent and Inked Prints<br />
II. When Fingerprints Are Discovered<br />
A. Inspect all items visually before processing. If prints are visible, take<br />
scaled photographs before processing. (This is important. Latent<br />
prints can sometimes be destroyed by the processing techniques.)<br />
B. Choose an appropriate processing technique depending upon the type<br />
of surface. The sequence of methods used is important. The methods<br />
listed in table 9-1 should be used in the order they are listed. Powder<br />
should NOT be used first, if an Alternate Light Source or laser is not<br />
available to the user agency, and the items will be submitted to the<br />
Laboratory for this process.<br />
82<br />
Table 9-1<br />
Commonly Used Latent Print Development Techniques<br />
Non-Porous<br />
(Glass, metal, etc)<br />
Reflected light<br />
Cyanoacrylate vapors<br />
(Superglue ® )<br />
Fluorescent dye stains<br />
(ALS/laser)<br />
Powders<br />
Small Particle Reagent<br />
(SPR)<br />
Semi-Porous<br />
(Glass, metal, etc)<br />
Reflected light<br />
Cyanoacrylate vapors<br />
(Superglue ® )<br />
Fluorescent dye stains<br />
(ALS/laser)<br />
Magnetic Powders 1<br />
Small Particle Reagent<br />
(SPR)<br />
Porous 2<br />
(Paper, cardboard, etc)<br />
Ninhydrin<br />
<strong>Physical</strong> Developer<br />
1 On plastic surfaces, the use of magnetic powder is recommended. Regular powder tends to<br />
“paint” the entire surface of the item rather than adhere only to the friction ridges.<br />
2 Superglue ® is not normally used on paper unless it has a smooth, shiny or glossy surface. If it<br />
does, Superglue ® should be used before any chemical processes.<br />
When using fingerprint powder, choose one that contrasts with the<br />
background. If black powder (which has the finest milling) does not<br />
provide sufficient contrast with the darker background, powders<br />
called “Bi-Chromatic” or “Dual-Use” are commercially available<br />
that show up as a light gray on the darker backgrounds and a dark<br />
gray on the lighter backgrounds. When lifted and placed on a white<br />
lift card, the powder is always dark gray.
Latent and Inked Prints - 9<br />
The use of white, silver, or fluorescent powders takes considerably<br />
more skill and practice to get good, usable latent prints and does not<br />
develop as consistent results as the black or bi-chromatic powders.<br />
These latent lifts must also be placed on black lift cards, rather than<br />
white.<br />
C. Once a print has been developed, take scaled photographs.<br />
D. There are several methods of lifting latent prints developed with<br />
powder. One method is to pull a length of tape away from the roll, but<br />
leaving the lifting tape, (clear, frosted, stretch - for irregular or curved<br />
surfaces), attached to the roll. Fold a small portion of the free end<br />
over to provide a gripping end and place the end of the tape about 1"<br />
beyond the latent print you want to lift (Fig. 9-1), and begin<br />
smoothing the tape toward and over the latent print, eliminating air<br />
bubbles as you go (Fig. 9-2). This can be accomplished by using the<br />
fingers as in Figure 9-2, or by using the flat surface of the fingernail,<br />
(NOT the sharp edge), or a pencil eraser. The same method can be<br />
used on a piece of tape removed from the roll.<br />
Fig. 9-1<br />
Tape piece still attached to the roll and anchored at one end beyond<br />
the suitable latent prints to be lifted.<br />
83
9 - Latent and Inked Prints<br />
84<br />
Fig. 9-2<br />
Smooth the tape over the suitable latent prints, from one end to the<br />
other, eliminating air bubbles.<br />
Another method of lifting is to remove a length of tape from the roll<br />
and “bow” the piece in the middle (Fig. 9-3), settle the bowed area<br />
directly over the latent print you want to lift and smooth out the air<br />
bubbles from the middle of the print outward (Fig. 9-4).<br />
Fig. 9-3<br />
Bow the piece of tape in the middle.
Latent and Inked Prints - 9<br />
Fig. 9-4<br />
Place the bowed area directly over the suitable latent print and<br />
smooth the air bubbles outward from the middle of the print<br />
Depending on the surface, many latent prints can be developed and<br />
lifted more than once. The initial lift may clear away debris around<br />
and between the ridges and the second lift may reveal a much better<br />
quality print. The lifting method used depends on the comfort level<br />
of the lifter and the amount of practice. Any method will take practice<br />
to use well.<br />
Do not mark the lifting surface of the tape with circles or arrows or<br />
other marks to indicate where latent prints may be. You might mark<br />
through a very faint latent print that is right next to the one you can<br />
see easily.<br />
On lifts from larger objects (cars, walls, etc.), you should mark an<br />
arrow on the lift card, but NOT on the tape, to indicate which<br />
direction is “up” in relation to the latent print.<br />
All lifts should be properly documented for later identification.<br />
Information recorded should include the case number, date,<br />
officers name or initials and the location where the print was<br />
developed. An attempt should then be made to redevelop the print on<br />
the object and if successful, it should be covered with transparent<br />
tape to protect it from destruction and to document its location.<br />
Remember at all times: <strong>Crime</strong> scene fingerprints are perishable.<br />
85
9 - Latent and Inked Prints<br />
E. In those cases when the item is to be examined for other types of<br />
evidence in addition to prints (such as blood, hairs, fibers,<br />
documents, etc.), the item is to be submitted to the Laboratory with<br />
the print intact and not covered with tape. Proper packaging<br />
techniques are illustrated on the following pages.<br />
86<br />
Too Much Powder Not Enough Powder Brush Damage<br />
Three major errors in dusting<br />
To avoid brush damage, attempt to follow the flow of the ridge lines with the brush<br />
strokes. This cleans between the ridges. Experiment with powder and dusting technique<br />
on a similar surface before attempting to powder a print.<br />
Fig. 9-5<br />
A properly dusted print
III. Packaging<br />
Latent and Inked Prints - 9<br />
An object bearing friction ridge prints must be properly handled and<br />
packaged to avoid destroying the prints while in transit. (See examples of<br />
proper techniques below.)<br />
DO NOT place items in plastic bags, or allow surfaces which<br />
contain latent prints to come in contact with or rub against the<br />
sides of the packaging materials.<br />
Mark containers with the word FINGERPRINTS.<br />
Fig. 9-6<br />
Firearms must be unloaded prior to acceptance by the <strong>Crime</strong> Laboratory. The<br />
agency should unload all weapons prior to packaging.<br />
87
9 - Latent and Inked Prints<br />
88<br />
Fig. 9-7<br />
Automotive rearview mirror. Rearview mirrors may bear fingerprints on both<br />
front and back surfaces. Attach mirror to cardboard as shown above and<br />
package as for a knife (below).<br />
Fig. 9-8<br />
Knife bearing prints. Secure knife to a piece of cardboard by use of string or<br />
wire. The cardboard can then be attached to the inside bottom of a box. Do not<br />
use any wrapping material around the knife.
Latent and Inked Prints - 9<br />
Fig. 9-9<br />
Exhibit packaged for shipment to the Laboratory:<br />
A. Exhibit secured in rigid container<br />
B. Container sealed and labeled<br />
C. Container with outer wrapping, with Laboratory<br />
form “Transmittal of <strong>Evidence</strong>” attached.<br />
89
9 - Latent and Inked Prints<br />
90<br />
Fig. 9-10<br />
Cash box bearing prints. Attach cash box or register drawer bearing fingerprint<br />
to a board as shown above. Note: Place wooden slats between item and board to<br />
act as spacers, thus protecting the undersurface of the item from rubbing.<br />
Fig. 9-11<br />
Bottle bearing prints. A bottle may be secured as shown above.
Latent and Inked Prints - 9<br />
Fig. 9-12<br />
Light bulb bearing prints. Screw the light bulb into a socket which has been<br />
previously attached to a board. Attach the board to the inside bottom of a box.<br />
Note: Do not overlook light bulbs because burglars will occasionally unscrew<br />
the bulb, using the concealment of darkness while working with a flashlight.<br />
Flashlight batteries should also be examined for fingerprints and, if submitted<br />
to the Laboratory for processing, the batteries should not be removed from the<br />
flashlight.<br />
Fig. 9-13<br />
Glass bearing prints. Glass should be packaged as shown above. The surface<br />
bearing prints should be placed away from the open end of the box.<br />
91
9 - Latent and Inked Prints<br />
IV. Automated Fingerprint Identification System<br />
The Laboratory can search unidentified fingerprints against the state<br />
repository of known (inked) criminal fingerprint cards using the<br />
Automated Fingerprint Identification System (AFIS). The <strong>Crime</strong><br />
Laboratory also has limited access to search a nationwide database of<br />
criminal fingerprint cards. These capabilities allow fingerprints from<br />
crime scenes (or from unidentified deceased) to be checked in an effort<br />
to make identification when no suspect or victim is known. Consult the<br />
Laboratory serving your area for information on training programs and<br />
submission requirements for AFIS cases. Note that AFIS requires high<br />
quality inked fingerprints in the database for the best chance of success.<br />
Thus, read and follow the following section, V., carefully.<br />
V. Preparing Fingerprint Cards<br />
Law enforcement personnel should strive to develop the skills<br />
necessary to take legible record (“inked”) finger and palm prints.<br />
Absolute clarity of detail is paramount. Unless ridge detail is perfectly<br />
clear, it may be impossible to conduct comparisons against the latent<br />
prints. This can result in identifications not being made that would have<br />
been possible if the inked impression had been clearly recorded.<br />
Carefully study the “Properly Inked and Rolled” impression recorded in<br />
Figure 9-14. Unless the impressions you take are this clear, continue to<br />
re-print the hand or digit until clarity is achieved.<br />
Submit to the Laboratory record finger and palm prints of all persons<br />
known to have had or suspected of having had access to the item or<br />
scene. (It is especially important to secure finger and palm prints of the<br />
victim if he/she has died, since it will be nearly impossible to secure<br />
prints once the body has been interred. See B., Autopsy fingerprinting,<br />
below.)<br />
A. Taking record fingerprints from the living.<br />
92<br />
1. Preparing inked fingerprint cards<br />
a. Prepare the inking slab by placing several small dabs of ink<br />
on the surface and rolling it uniformly over the surface. Be<br />
careful not to use too much ink (see Figure 9-14). The rolled<br />
out ink should be only thick enough so that when a digit is
Latent and Inked Prints - 9<br />
rolled across the surface, the areas where the ridges picked<br />
up the ink will appear clean. The print recorded should have<br />
good contrast with the card. Practice will allow for proper<br />
inking on a consistent basis.<br />
b. Make a test ink impression on a scrap of paper to check for<br />
proper ink density.<br />
c. If possible, adjust the fingerprint card holder so that it is at<br />
the height of the person’s elbow.<br />
d. Have the person wash his/her hands if excessive grease, dirt<br />
or perspiration is present. Note: Do not take inked<br />
impression of digits having open cuts.<br />
e. Instruct the person being fingerprinted not to assist you, but<br />
to cooperate by relaxing his/her arm so it pivots easily.<br />
f. With the person positioned at your right side and slightly to<br />
the rear, grasp the right hand with your right hand. Hold the<br />
four fingers back and clear of the inking slab; ink the thumb<br />
by rolling it toward the body. Then roll the inked thumb in<br />
the designated space on the card. Repeat the process for the<br />
fingers, rolling away from the person’s body. This prevents<br />
possible drag and secures a more uniform impression.<br />
When the right hand is completed, have the person turn so<br />
he/she is standing at right angles to the card stand, with<br />
his/her back to you. Grasp the left hand and repeat the<br />
process. Do not push down on the fingers while recording<br />
them; use only enough pressure to guide and to ensure the<br />
digit does not slip. Excessive pressure will blur the<br />
impression.<br />
g. To take simultaneous impressions, re-roll ink on the slab<br />
(add more ink if necessary) and have the person wipe excess<br />
ink from his/her fingers with lint-free toweling.<br />
Simultaneous prints are not rolled; the four fingers are<br />
extended and joined. Ink and print by pressing them straight<br />
down in the appropriate block. Use only a very slight amount<br />
of pressure on the back of the person’s fingers when pressing<br />
them onto the card. Repeat with the thumbs.<br />
93
9 - Latent and Inked Prints<br />
94<br />
h. Compare the inked impressions with the Figure 9-14. If they<br />
are not properly inked or recorded, retake them.<br />
i. Have the person sign the fingerprint card in the appropriate<br />
place in your presence.<br />
j. The officer taking the prints should date and sign the card in<br />
the appropriate place.<br />
k. If palm prints are found at the crime scene, take palm prints<br />
from suspect(s) and victim(s). Remove excess ink from the<br />
person’s hands and then re-ink the entire palm and fingers.<br />
Palm prints are more clearly recorded by the following<br />
method: secure an 8" x 8" plain card to a 3" x 4" diameter<br />
cylinder with rubber bands. Possible cylinders include a<br />
short section of plastic drain pipe or a section of the<br />
cardboard tubing on which carpet is shipped.<br />
Place the tube (with card attached) on a counter top so it can<br />
roll toward the front edge, placing it so it can make one<br />
complete revolution. After inking the palm, instruct the<br />
person to hold his/her hand perfectly flat, palm down and<br />
parallel to the counter top. Grasp the person’s arm and guide<br />
the hand so the wrist is placed on the card at the bottom,<br />
ending with the tips of the fingers at the top edge of the card.<br />
As the palm draws across the card, apply very slight pressure<br />
to the back of the person’s hand with the heel of your hand<br />
(this will ensure the hollow of the palm will be recorded).<br />
The impression will be more clear if only slight pressure is<br />
applied during the procedure (only enough pressure to<br />
ensure the hand does not slip across the surface of the card).<br />
l. All finger and palm print cards must be signed and dated by<br />
both the person and the officer. The fingerprinted person<br />
should fill out all information required on the card. This<br />
information should appear in the person’s handwriting or<br />
printing.<br />
m. Make duplicate fingerprint cards as required for adequate<br />
distribution if the person has been arrested (the Laboratory,
Latent and Inked Prints - 9<br />
Wisconsin <strong>Crime</strong> Information Bureau, FBI, local agency,<br />
etc).<br />
2. Preparing “Live Scan,” electronically recorded fingerprint cards<br />
a. While electronic “live scan” readers have the potential to<br />
produce clear, nail-to-nail ridge detail, operators should not<br />
assume that this will automatically occur. Inspect the<br />
finished card to ensure that the reader and printer are<br />
functioning properly and that the finger has been properly<br />
rolled/positioned. The fingerprint image in Fig. 9-14 marked<br />
“Properly Inked and Rolled” is what a properly taken livescan<br />
image should look like as well. The last two images in<br />
Fig. 9-14 illustrate live-scan images that were either<br />
corrupted by a malfunctioning printer, or the results of<br />
incorrect rolling of the fingers.<br />
B. Autopsy fingerprinting.<br />
The importance of securing a clear set of finger and palm prints from<br />
deceased persons cannot be overstated. If the name of the person is not<br />
known or the body is disfigured beyond recognition, existing fingerprint<br />
records can be used to establish identity. Autopsy fingerprint cards must<br />
be taken as carefully as those taken at the time of an arrest. If even one<br />
of the ten fingers is smeared or inadequately recorded, a search of nonautomated<br />
fingerprint files might be precluded.<br />
Post-mortem prints may also be used to account for (eliminate) the<br />
maker of crime scene fingerprints. Only clearly recorded prints which<br />
record all areas of ridge detail will be adequate for making comparisons.<br />
It is important for investigators to remember the suitability of the autopsy<br />
prints may not be evaluated by fingerprint technicians or Laboratory staff<br />
until after the body has been interred. For that reason, clear, complete<br />
records must be made.<br />
A number of methods have been devised to record postmortem prints.<br />
The following pages describe three. Selection of any one method<br />
depends on personal preferences and case circumstances.<br />
Method 1 - Ink is applied to the fingers in a number of ways. Either<br />
the ink roller is rolled around the finger pattern areas, inking foils may be<br />
used, Porelon ® pads, etc. Never use regular stamp pads. The weave<br />
pattern or texture of the surface will interfere with the minute detail of the<br />
95
9 - Latent and Inked Prints<br />
fingerprint ridges. A fingerprint card is cut into strips, one strip with each<br />
of the five fingers of one hand. The strip may either be cupped in the<br />
fingers of the person taking the deceased’s fingerprints, or slipped into a<br />
post mortem “spoon” specifically designed for this task. Then the strip is<br />
rotated once around the pattern area of the finger. It may be necessary to<br />
make several attempts at each finger in order to record a clear and<br />
complete impression. Remember, you will probably only get one chance<br />
to fingerprint the deceased. The strips are then attached in proper order<br />
to a full-sized fingerprint card.<br />
Method 2 - Fingerprint powder and stretchable fingerprint lifting<br />
tape may also be used to record post-mortem fingerprints. The fingers are<br />
lightly dusted with fingerprint powder (dedicate one fingerprint brush<br />
only for post-mortem fingerprinting), and individual pieces of stretch<br />
tape are smoothed over the pattern area of the finger. If the tape is applied<br />
directly to a fingerprint card, remember that the fingerprint impressions<br />
will be reversed, and must be marked immediately as to which finger is<br />
which and placed in their correct positions on the card. The tape may also<br />
be applied to clear acetate pieces, which can then be turned over and<br />
taped to the fingerprint card in their correct orientations for comparison.<br />
Method 3 - Another method of taking post-mortem prints which is<br />
especially good for taking palmprints is the Handiprint ® method, which<br />
is available from Kinderprint Co, Inc. Handiprint ® is a smooth, white,<br />
slightly stretchable sheet of adhesive paper. Lightly dust the entire palm<br />
and fingers with fingerprint powder and smooth the Handprint ® sheet<br />
over the palm, making sure to get all the “nooks and crannies”, without<br />
excessive pressure. The sheet is then lifted off the palm and covered with<br />
a sheet of clear acetate. Any parts of the thumb and fingers missed may<br />
be rolled at the edges prior to covering with the acetate sheet.<br />
96
Latent and Inked Prints - 9<br />
Too Much Ink Not Enough Ink Dirt and Grease<br />
Incompletely Rolled Properly Inked and Rolled<br />
Examples of poor results using "live scan" electronic print recording.<br />
Fig. 9-14<br />
Examples of common problems with inked and “live scan” fingerprint cards, and an<br />
example of a properly inked and rolled print.<br />
97
98<br />
Notes
10<br />
Footwear and<br />
Tire Impressions<br />
________________________________________________<br />
Footwear Impressions<br />
This section deals only with surface impressions found on flat, rigid<br />
surfaces such as wood, tile, linoleum, or paper. Impressions in mud,<br />
snow, and other pliable or semi-plastic materials are discussed in the<br />
chapter on Casts.<br />
Footwear impressions may yield information as to the type, make<br />
and approximate size of the shoe or boot. In some cases, conclusive identification<br />
can be made, linking a particular shoe to the crime scene<br />
impression. The likelihood of conclusive identification is a function of<br />
several factors, but it is primarily governed by the amount of wear<br />
sustained by the outsole, the ability of the receiving surface to resolve the<br />
fine detail of the impression, and the fineness of the material by which the<br />
impression is deposited.<br />
A footwear impression may be either positive or negative: the<br />
impression may be the result of dust or other material being deposited on<br />
a clean surface, or it may be the result of the outsole removing dust or<br />
other material from the surface. Either type of impression has the<br />
potential of being suitable for comparison and identification.<br />
Impressions made in dust, particularly those made on hard, smooth<br />
surfaces, are the most likely to yield a conclusive identification.<br />
<strong>Investigator</strong>s should be alert to the possibility of such impressions when<br />
broken glass is found in an area where the perpetrator could have stepped.<br />
Another potential source of such impressions is plastic windows in outof-the-way<br />
areas that are rarely cleaned (such as in gas stations or<br />
warehouses). In some cases the window will be forced out with the foot,<br />
or once forced will be stepped on, removing dust from the surface and<br />
creating a negative record of the outsole.<br />
99
10 - Footwear and Tire Impressions<br />
Whenever possible, submit the original item on which the<br />
impression appears. Lifts made in the field and improperly taken<br />
photographs rarely show the fine detail necessary to make a conclusive<br />
identification.<br />
I. Procedure: Surface or Dust Impressions<br />
A. Photograph entire area to show walking pattern or relation of<br />
impressions to surrounding objects.<br />
B. Take scaled photograph of each footwear impression. (See the<br />
Photography chapter for procedures.)<br />
C. Prepare scaled diagram showing the position of the impression(s) in<br />
relation to fixed objects at the scene.<br />
II. Recovery of Objects and/or Impressions<br />
A. Recover and preserve the object bearing the impression.<br />
B. If this is impossible, the impressions should be lifted by using an<br />
“electrostatic lifter,” a transparent footwear residue lifter or a rubber<br />
footwear lifter.1<br />
C. Submit the object bearing the impression or the lift, copies of<br />
diagrams, photographs, etc., to the Laboratory.<br />
Tire Impressions<br />
Tire impressions sometimes permit identification of type and make<br />
of the tire. In some cases, a tire may be conclusively identified as the<br />
maker of an impression. Contact the Laboratory serving your area for<br />
further information on requirements and submission procedures for cases<br />
involving tire impressions.<br />
1 Available from law enforcement equipment supply houses.<br />
100
I. Procedure: Surface or Dust Impressions<br />
Footwear and Tire Impressions - 10<br />
A. Photograph entire area to show tire pattern or relation of impressions<br />
to surrounding objects.<br />
B. Take scaled photograph of tire impressions(s). (See the Photography<br />
chapter for procedures.)<br />
C. Prepare scaled diagram showing the position of impression(s) in<br />
relation to fixed objects at the scene.<br />
II. Recovery of Objects and/or Impressions<br />
A. Recover and preserve objects bearing impressions.<br />
B. If this is impossible, the impressions should be lifted by using one of<br />
the methods described in Footwear Impressions, II, B, above.<br />
C. Submit the object bearing the impression or the lift, copies of<br />
diagrams, photographs, etc., to the Laboratory.<br />
101
102<br />
Notes
11<br />
Burglary<br />
________________________________________________<br />
Evidentiary Considerations<br />
Burglary is one of the offenses most commonly encountered by law<br />
enforcement officers. The initial investigation of a burglary scene is<br />
extremely important, for the objective is not only to determine what may<br />
be missing, but also to locate and recover physical evidence which<br />
associates the burglar with the crime scene. The following outline may be<br />
used by the investigating officer as a procedural guide when processing<br />
a burglary scene.<br />
Caution: Observe laws relating to the collection of evidence.<br />
I. Security and Protection at the <strong>Scene</strong><br />
A. Allow authorized personnel only.<br />
B. Rope off or barricade area under investigation.<br />
C. Protect outside areas from elements with a new tarpaulin or plastic<br />
sheet.<br />
D. Maintain security until the scene is completely processed.<br />
II. What to Look for<br />
A. In surrounding area:<br />
1. Footwear impressions (determine origin)<br />
2. Tire marks (determine origin)<br />
3. Drag marks<br />
4. Abandoned loot, tools, clothing, etc.<br />
B. At scene:<br />
1. Point and method of entry<br />
2. Object of burglary<br />
3. Point and method of exit<br />
103
11 - Burglary<br />
4. Obvious objects of value “passed up”<br />
5. Fingerprints, glove imprints<br />
C. At point of entry:<br />
1. Hairs, fibers, other materials<br />
2. Chips of paint, wood, glass, and tools<br />
3. Blood<br />
4. Tool marks (photo)<br />
5. Tools<br />
6. Other items of evidence<br />
D. Inside burglarized premises:<br />
1. Finger, foot, footwear, and palm prints<br />
2. Burglarized objects<br />
3. Tools and source of tools (property of victim or perpetrator)<br />
4. Tool marks (photograph)<br />
5. Broken or fractured pieces of tools (may be recovered in floor<br />
sweepings)<br />
E. Suspect:<br />
1. Trace materials may be present on the clothing of a suspect.<br />
Therefore, all clothing should be submitted to the Trace<br />
<strong>Evidence</strong> section according to procedures outlined in Chapter<br />
18, Clothing and Fabrics.<br />
2. The vehicle involved should be thoroughly searched for the<br />
presence of physical evidence. Vacuum seats, floors, dash<br />
separately.<br />
III. Procedure at <strong>Scene</strong><br />
A. Photograph and diagram the crime scene.<br />
B. Recover, mark, and preserve physical evidence found, according to<br />
directions set forth in section pertaining to evidence of that type.<br />
IV. Materials Required by Laboratory<br />
A. Photographs and diagrams or sketches of crime scene.<br />
B. <strong>Physical</strong> evidence that has been photographed, recovered, marked,<br />
and preserved in the proper manner.<br />
104
Safe Burglary<br />
Burglary - 11<br />
In some rare cases, a safe may be drilled with a core drill to gain<br />
entrance. In these sophisticated types of burglary, the Laboratory should<br />
be contacted for assistance.<br />
A diagram describing the accepted nomenclature of parts usually<br />
encountered in a safe burglary investigation has been included in an<br />
effort to show the correct names of safe parts. Knowledge and use of this<br />
terminology will aid the investigator and the Forensic Scientist in<br />
communicating effectively regarding safe burglaries.<br />
Although explosives are not employed very often in safe burglaries,<br />
the possibility of their use should not be overlooked. If there is reason to<br />
suspect explosives were used, it is recommended the scene be evacuated<br />
and secured. Then, for guidance in handling the situation contact one of<br />
the following:<br />
- A local bomb squad<br />
- The Federal Bureau of Alcohol, Tobacco and Firearms (ATF) -<br />
in Wisconsin, 414 - 297 - 3100<br />
- The nearest Explosive Ordnance Disposal Unit -<br />
in Wisconsin, at Fort McCoy, 608 - 388 - 3315<br />
Fig. 11-1<br />
Combination lock nomenclature<br />
A Dial Knob D Tube Nut G Lock Case<br />
B Dial E Dial Ring H Wheel<br />
C Spindle F Spindle Tube I Cover<br />
105
11 - Burglary<br />
If explosives are expected:<br />
106<br />
Do not attempt to neutralize or destroy remaining explosives.<br />
Do not turn on any electrical switches.<br />
Do not walk or step in a liquid or suspected explosive material.<br />
Do not move any object.<br />
Do not smoke or use matches in area.<br />
Do not pick up any detonators or explosives.<br />
Do not breathe any vapors which may be present. Nitroglycerine may<br />
cause a very severe headache.<br />
Fig 11-2<br />
Safe Nomenclature<br />
A Locking Bolt F Dial Ring<br />
B Carrying Bar G Dial<br />
C Cladding (outer metal shell) H Hinge Acorn<br />
D Firewall Material I Hinge<br />
E Door Handle J Front Plate
Fig. 11-3<br />
Fracture Matches-broken tools.<br />
Burglary - 11<br />
After the scene has been processed for finger-, foot-, and palm prints, it should<br />
be carefully swept to recover all debris. The debris pile should be thoroughly<br />
searched for the presence of broken tool parts and other physical evidence.<br />
Broken tool parts may be fracture matched with a suspect tool. This is a<br />
conclusive type of identification and is not uncommon in burglary investigations.<br />
The recovery and search for debris is frequently overlooked, however,<br />
resulting in the loss of valuable evidence.<br />
107
108<br />
Notes
12<br />
Building Materials<br />
________________________________________________<br />
In investigations which involve breaking and entering, building<br />
materials such as paint, glass, wood, plaster, metal, etc., may adhere to<br />
the perpetrator’s clothing or tools. These fragments may later be<br />
identified as originating from the scene. Building materials from different<br />
sources -which appear by visual examination to be similar - may be differentiated<br />
by their physical and chemical properties.<br />
Procedure<br />
A. <strong>Crime</strong> scene:<br />
1. At the point of entry, or at any point of damage, collect samples<br />
of each type of building material involved (Fig. 12-1). Do not cut<br />
through tool marks. If one type of material has been damaged in<br />
several places, obtain known samples from each site, since the<br />
composition may vary.<br />
2. Any tool or instrument impressions found on building materials<br />
should be properly preserved and submitted to the Laboratory.<br />
Recover known sample of building materials from point of entry<br />
(see Fig. 12-1). Foreign paint in the impression may be linked to<br />
paint on a suspect tool. Use caution to preserve foreign matter.<br />
3. When glass has been broken, collect all glass found at the scene.<br />
If more than one window has been broken, glass from each pane<br />
should be packaged and submitted separately. This also applies<br />
to thermo- or double pane windows and laminated windows. If<br />
the direction of force used to break a window is in question,<br />
collect all glass from the window frame and from the ground<br />
inside and out. If the glass is removed from the frame, be sure to<br />
mark one surface to indicate whether it was “inside” or “outside”<br />
when in the frame. Package each sample separately or submit the<br />
window frame with the glass in place (see Chapter 13, Glass).<br />
109
12 - Building Materials<br />
110<br />
4. Care should be taken in choosing a container, to avoid loss or<br />
contamination of the evidence. Do not use plastic petri dishes<br />
or mailing envelopes.<br />
5. Container should be marked with the following information,<br />
sealed, then submitted to the Laboratory:<br />
a. Description of contents<br />
b. Exact source of contents<br />
c. Date and time recovered<br />
d. Case and item number<br />
e. Name of officer recovering the material<br />
6. Recover all tools remaining at the scene for possible fingerprints.<br />
B. Suspects:<br />
1. Collect all clothing worn by the suspect at the time of crime,<br />
including shoes (see Chapter 18, Clothing and Fabrics).<br />
2. Examine head and all bare skin areas (hands, arms, legs, feet) for<br />
fresh cuts that might contain building materials, especially glass.<br />
Building materials trapped in hair can be recovered by combing<br />
over a clean piece of paper or cloth sheet. Collect all trace<br />
evidence and combings.<br />
3. Collect all suspect tools.<br />
4. Examine interior and trunk of suspect’s car for debris and traces<br />
of building materials.<br />
5. If the suspect claims a source for materials found, obtain a known<br />
sample from the claimed source.<br />
6. Package all of these samples separately as described above.<br />
Avoid cross-contaminating samples taken from the suspect with<br />
those taken from the scene.
Fig. 12-1<br />
Building Materials - 12<br />
This cross section of a burglary scene shows the various materials that should be<br />
recovered. In this case, an unsuccessful attempt was made to gain entry by forcing the<br />
door frame and adjoining wall. Entry was finally gained through the window. Known<br />
samples should be taken of all damaged materials:<br />
A Known glass remaining C Building insulation<br />
in the window frame D Building block and mortar<br />
B Wallboard, plaster, wallpaper, E Brick and mortar<br />
paint, etc. F Wood from door<br />
Note: Recover and package separately building materials from ground outside point of<br />
entry (i.e., at the door) as well as glass fragments found inside and outside the building.<br />
111
12 - Building Materials<br />
112<br />
Fig. 12-2<br />
Trace transfer of materials may be found adhering to pry bars.<br />
Fig. 12-3<br />
Glass chips recovered from the suspect's clothes which are consistent<br />
with glass broken at the scene.
13<br />
Glass<br />
__________________________________________________________<br />
One of the more important types of physical evidence which is<br />
frequently overlooked by the investigator is glass. Its evidentiary value<br />
lies in the fact that there are thousands of different formulae used in the<br />
manufacturing of glass.<br />
Recovered glass samples may be separated into several groups: two<br />
of the main groups are window/windshield glass and headlight glass.<br />
EXAMPLE 1: The glass recovered from a broken window at a<br />
burglary scene and glass recovered from the clothing and shoes<br />
removed from a person suspected of committing the burglary.<br />
EXAMPLE 2: The glass remaining in a broken vehicle headlight<br />
assembly and the glass recovered at the scene of a hit-and-run<br />
investigation.<br />
Considering these examples, it should be noted that the glass which<br />
is recovered from a known source, such as a broken window or a broken<br />
headlight, is considered known glass. The glass recovered from the<br />
clothing and shoes or the hit-and-run scene is considered questioned<br />
glass.<br />
Comparison of irregularly shaped fractured edges of pieces of glass<br />
may reveal a puzzle-like match which indicates that two sources of glass<br />
were at one time a part of the same object.<br />
If a fracture match is not possible, comparison of known glass with<br />
questioned glass may reveal similarities in their physical, optical, or<br />
chemical properties. This type of examination may result in a class identification.<br />
That is, there is more than one headlight or window that will<br />
have the same properties as the known headlight or window. Therefore,<br />
specific identification can not result from measurements of physical,<br />
optical, or chemical properties.<br />
113
13 - Glass<br />
It is also possible to determine the direction of force used to break<br />
glass by examining stress marks present on the broken edges. In order to<br />
do this, it is necessary to reconstruct as much of the original pane as<br />
possible. Therefore, all glass from the scene must be recovered to<br />
reconstruct the item so the point of impact can be determined and<br />
detailed examination of the individual fragments can be conducted.<br />
114<br />
Caution: Observe laws relating to the collection of evidence.<br />
Procedure<br />
A. Fracture matches<br />
1. Fracture matching is the most positive form of identification and<br />
therefore it is of utmost importance that all glass fragments be<br />
recovered, since it is impossible to know in advance which<br />
recovered pieces will mate with one another.<br />
2. Collect all glass fragments from all sources (i.e., scene, vehicles,<br />
clothing, etc.) and package glass from each source separately in<br />
order to associate the glass from any one source with the scene.<br />
B. Chemical analysis<br />
1. Collected for comparison with glass samples recovered from<br />
remote locations or from the clothing to show commonality of<br />
chemical make-up. (Does not individualize a sample to a single<br />
source.)<br />
2. Recover a sample of glass still in the frame. Glass from the<br />
window frame is the only source that can be used as a known for<br />
chemical analysis.<br />
C. Determination of the direction of force<br />
1. It is preferable to remove the window frame with the remaining<br />
glass still in place and to submit it to the Laboratory. If this is<br />
impossible and the glass must be removed from the frame, be<br />
sure to mark each piece to indicate the “inside” surface or the<br />
“outside” surface before removed from the frame. Collect all<br />
glass from the window frame.<br />
2. Glass found in different areas should be recovered and packaged<br />
separately. Example: Glass found on the floor inside should be
D. Packaging<br />
Glass - 13<br />
packaged separately from glass found outside. It cannot be<br />
overemphasized that glass recovered from different areas should<br />
be packaged separately.<br />
1. Package glass pieces in rigid containers. Protect the broken or<br />
fractured edges of the pieces of glass from any additional<br />
damage or breakage.<br />
2. The value of the procedure for packaging glass from different<br />
sources separately will be nullified if the packaging material<br />
tears or breaks, allowing transfer of small pieces or fragments of<br />
glass between packages. Do not package glass in paper, mailing<br />
envelopes, cellophane, or plastic bags.<br />
115
116<br />
Notes
14<br />
Woods and Sawdust<br />
________________________________________________<br />
Wood slivers and chips from doors, siding, or broken window frames,<br />
frequently adhere to suspect’s clothing and may be related to their source.<br />
Large items of wood such as boards, logs, trees, or blocking may also be<br />
identified by appropriate Laboratory examination and comparison.<br />
The investigator should consider the possibility of sawdust on shoes,<br />
in trouser cuffs, and in pockets of suspects who have recently left a crime<br />
scene such as a butcher shop, lumber yard, construction site, or similar<br />
location. Since sawdust is generally composed of many types of species,<br />
Laboratory findings of correspondence between samples from both the<br />
suspect and the scene may provide valuable information.<br />
Caution: Observe laws relating to the collection of evidence.<br />
Procedure<br />
Damaged wood found at burglary sites should be submitted for<br />
comparison with recovered wood fragments from suspect’s clothing<br />
and/or tools used to commit the crime. All clothing (including shoes)<br />
worn by the suspect at the time of the crime should be submitted to the<br />
Laboratory. See Chapter 18, Clothing and Fabrics for packaging<br />
procedure. If there are wood chips or sawdust at the scene, take several<br />
samples from different areas, package separately, mark, and seal.<br />
Samples can be placed in small glass bottles or vials. Avoid use of<br />
envelopes, since wood fragments may be damaged in transmittal if not<br />
protected by rigid container. Package, seal, and label the container. See<br />
Chapter 13, Glass.<br />
117
14 - Woods and Sawdust<br />
118<br />
Fig. 14-1<br />
Wood sliver fracture match.<br />
The 1/2 " wood sliver illustrated above was found in the trousers of a burglary<br />
suspect and was subsequently fracture matched to wood form the scene.
15<br />
Tool Marks<br />
________________________________________________<br />
I. General<br />
For the purposes of this chapter, a tool is any instrument or object<br />
capable of making a mark on another object.<br />
Tool mark identification techniques may be applied to many types of<br />
investigations (knife marks on bone; fractured knife blades; homemade<br />
explosive devices; crimp marks on detonators; cut marks on wire;<br />
fractured radio antennas), as well as burglary.<br />
A close examination of a tool mark may reveal the type of tool,<br />
contour of the cutting edge, blade width and color of the tool, or the<br />
presence of trace material.<br />
II. Types of Tool Marks<br />
Generally, tool marks encountered at a crime scene may be in the<br />
form of embossed “impressions,” striated “drag” or “shear” marks, or a<br />
combination of both. (See Figs 15-1 and 15-2.) For example, a drive<br />
punch will generally leave an embossed impression, whereas a<br />
screwdriver or pry bar will frequently leave a striated mark, as well as an<br />
embossed impression of the tip of the tool.<br />
III. Location of Tool Marks<br />
Tool marks may be found at points of entry and exit at victimized<br />
premises and upon objects which have been attacked.<br />
119
15 - Tool Marks<br />
IV. Recovery of Tool Marks<br />
A. Always submit object containing tool mark to Laboratory.<br />
B. If not practical to submit the object, remove section of material<br />
containing tool mark and submit to Laboratory.<br />
C. Only as a last resort, make a cast of the tool mark.<br />
D. Mark, protect and individually package item(s) containing tool<br />
mark(s) and forward to Laboratory.<br />
V. Casting of Tool Marks<br />
Silicone plastic-type materials have been found satisfactory for<br />
casting tool marks. They are available through scientific and law<br />
enforcement supply houses. Directions for their use are contained in each<br />
kit.<br />
Do not use plasticine, plaster of Paris, patch plaster, and similar<br />
materials which have a tendency to shrink.<br />
VI. Tools<br />
120<br />
Caution: Observe laws relating to the collection of evidence.<br />
Recover all suspect tools and inventory, observing the following<br />
precautions, and submit them to the Laboratory for examination and<br />
comparison with tool marks.<br />
A. Never place a suspect tool in contact with a questioned tool mark or<br />
cast.<br />
B. Inscribe identification marks on tools for later identification.<br />
Exercise extreme care in handling and marking tool(s) if it is to be<br />
checked for fingerprints and/or trace material.<br />
C. Package each tool individually to protect the tool for possible<br />
fingerprint, and/or trace material examination.
Tool Marks - 15<br />
Fig 15-1<br />
Embossed Tool Mark<br />
A-AA portion of the tool mark reveals the class characteristics (size and shape) of<br />
the tool.<br />
B-BB reveals individual characteristics of this particular tool. B are grinding or<br />
manufacturer's marks; BB is a nick in the edge of the tool.<br />
121
15 - Tool Marks<br />
122<br />
Fig 15-2<br />
Striated tool mark<br />
Area A shows the entire blade width, or both class limits of the tool making mark. The<br />
intervening line, or striations, are the tool's individual characteristics.<br />
Area B, a partial tool mark, shows one blade edge, or class limit, of the screwdriver and<br />
individual characteristics.<br />
Area C, a partial tool mark, does not show either class limit but does show individual<br />
characteristics.<br />
Inset circle shows an enlarged view of the edge of the tool blade, showing individual characteristics<br />
acquired during manufacture, use, misuse, regrinding, or intentional alteration.
Tool Marks - 15<br />
Fig. 15-3<br />
Double-blade tools such as bolt cutters are often used to cut padlock shackles. When<br />
recovered in the possession of a suspect, they may connect the offender with the crime.<br />
Fig. 15-4 Fig. 15-5<br />
Fig. 15-4. Damage to the cutting edge of the blades causes individual characteristics to<br />
be reproduced on cut surfaces.<br />
Fig. 15-5. Individual characteristics are caused by these defects as shown in this<br />
comparison microphotograph.<br />
123
124<br />
Notes
16<br />
Paints<br />
________________________________________________<br />
Paint chips and fragments of other protective coatings such as<br />
varnishes, sealers, lacquers, enamels, and plastics are frequently<br />
recovered at scenes of burglaries, hit and run vehicles and scenes, forced<br />
entries, etc. A determination of common origin is possible in cases where<br />
irregularly shaped adjoining edges of paint chips can be physically joined<br />
to form a fracture match (see Figure16-1). However, the value of a<br />
single-layered paint chip or paint smear should not be overlooked.<br />
Fig. 16-1<br />
Fracture match of paint chips. Two fragments of paint showing a common fracture match.<br />
One fragment was found at the scene of a crime. The other was recovered from the<br />
suspect vehicle.<br />
Fig 16-2<br />
Cross section of multi-layer paint chip. Each layer represents a different color, type, and<br />
a separate painting operation. (Magnification approximately X350).<br />
125
16 - Paints<br />
Procedure<br />
The following procedures are recommended for recovery of paint<br />
samples.<br />
126<br />
Caution: Observe laws relating to the collection of evidence.<br />
A. Recover, package, and seal all paint samples separately.<br />
B. Recover known paint samples from areas immediately adjacent to the<br />
damaged area. The hoods, trunks, and fenders of vehicles may not be<br />
painted at the same location or with the same paint used on the body.<br />
Therefore, it is of utmost importance that a known paint sample be<br />
taken from the exact part of the vehicle upon which the damage<br />
occurred. In hit-and-run investigations, the known paint samples<br />
should be taken near the point of impact, but should not be taken<br />
from areas of corrosion, such as the rocker panels.<br />
C. When tool marks exist on a damaged object, recover paint samples<br />
from areas immediately adjacent to tool marks without mutilating the<br />
tool mark.<br />
Fig 16-3<br />
Recovery of Paint Sample<br />
Tape a clean sheet of paper (do not use envelopes) to the object in the manner shown,<br />
forming a pocket. Mark the paper for identification. Scrape the questioned paint into the<br />
pocket formed by the paper. It is important to use a new, disposable scalpel blade or razor<br />
blade for each sample to avoid contamination. Some razor blades are coated with oil to<br />
prevent rusting. Therefore, all razor blades should be thoroughly cleaned with a clean<br />
cloth or tissue just before they are used.
Paints - 16<br />
Fig 16-4<br />
Packaging Paint Sample<br />
Carefully remove the paper from the object and fold each edge toward the center so that<br />
the packet is completely closed.<br />
Fig. 16-5<br />
Properly sealed Paint Sample<br />
Insert each packet into a separate new, clean bottle, together with the scalpel blade or<br />
razor blade used in recovering the sample. Seal and label according to instructions<br />
previously recommended.<br />
D. When areas of paint are missing from sheet metal parts of vehicles or<br />
doors and windows of residences and businesses, consideration<br />
should be given to bringing the entire part to the Laboratory for<br />
possible fracture match analysis.<br />
E. Avoid use of any container which would permit loss or contamination<br />
of contents, especially envelopes and plastic petri dishes, since the<br />
manufacturer’s seal is not leak proof.<br />
F. Use a new, clean scalpel blade or razor blade for each sample<br />
recovered; enclose in bottle with sample.<br />
G. Do not use gummed tape to recover paint samples because it<br />
interferes with the chemical analysis.<br />
127
128
17<br />
Metals<br />
_________________________________________________________<br />
It is possible to compare metals on the basis of their elemental<br />
composition and surface morphology. Even minute particles can be<br />
examined. Questioned metal fragments which have been broken from<br />
their original source may often be fracture matched to that source.<br />
Caution: Observe laws relating to the collection of evidence.<br />
Procedure<br />
Recover all metal fragments found at the scene. These should be<br />
sealed in vials, bottles, paper bags or other suitable containers. Package<br />
and label (see Chapter 14, Woods and Sawdust).<br />
Recover and submit all metal objects involved or encountered in an<br />
investigation. Although metal fragments may not be found at the scene,<br />
they may be detected later when the clothing is examined, since they may<br />
adhere to the surface or lodge in pockets and cuffs or to shoes. Therefore,<br />
it is important to have for comparison the object from which the<br />
fragments may have originated.<br />
Fig. 17-1<br />
Trace metal and glass fragments can often be recovered from the soles of shoes<br />
if the suspect walks through such evidence during commission of the offense.<br />
129
130<br />
Notes
18<br />
Clothing and Fabrics<br />
__________________________________________________________<br />
Clothing fibers or small pieces of fabric found at burglary scenes, on<br />
suspect hit-and-run vehicles, weapons, or other objects can often be<br />
compared or even matched with a suspect’s or victim’s clothing. Small<br />
particles of paint, plastic, metal, wood, glass, soil, or other materials<br />
frequently adhere to clothing (pockets, trousers, cuffs, etc.) and may be<br />
related to the scene.<br />
The Laboratory has special equipment to recover trace evidence from<br />
clothing. Clothing recovered for examination should be handled with<br />
care to avoid damage to critical areas. It is important to collect clothing<br />
before it is cleaned or otherwise altered. Trace materials are usually<br />
removed or lost in the cleaning process.<br />
Caution: Observe laws relating to the collection of evidence.<br />
I. General Procedure<br />
A. Recover clothing to be examined. Clothing should be carefully<br />
removed from the person or body. Care should be taken to minimize<br />
damage to garments. Do not cut through stains, bullet holes, or knife<br />
penetrations. Collect and package each item separately. It is<br />
extremely important to keep items separated to avoid contamination<br />
during recovery, storage, and transmittal to the Laboratory.<br />
B. A tag marked with all pertinent information should be attached to<br />
each item. Lead wire seals or locking plastic cable ties may be used<br />
to attach the tag to the clothing. If a lead seal is used, it can be<br />
crimped and inscribed with the officer’s initials. Plastic cable ties can<br />
be marked with an indelible marker.<br />
131
18 - Clothing and Fabrics<br />
C. Clothing or other items that are damp or wet with blood, urine, water,<br />
etc., should be air dried in a draft-free place prior to packaging. Do<br />
not package damp clothing or other damp items in plastic bags.<br />
A piece of clean paper should be spread under drying items to catch<br />
any debris which might be dislodged. The paper and any debris<br />
thereon should be packaged with the item. Label, seal and submit to<br />
the Laboratory.<br />
D. Package each dry item in a clean paper bag, label and seal.<br />
E. Plastic bags are not suitable at any time for packaging shoes and<br />
other leather objects. A new, clean paper bag should be used for each<br />
leather object.<br />
II. Packaging Items<br />
A. Mark the paper bag with identifying data (description, source, date,<br />
time of recovery, case number, initials of persons involved in<br />
recovery, and other pertinent information).<br />
B. Seal the bag using one of the methods discussed in Chapter 2,<br />
<strong>Evidence</strong> Integrity.<br />
132
19<br />
Fracture and Tear Matches<br />
__________________________________________________________<br />
If the irregularly shaped fractured or torn edges of two pieces of any<br />
material can be joined together to form a continuous section, then it can<br />
be concluded that the two pieces at one time shared a common origin.<br />
This comparison is the most positive conclusion that can be drawn in the<br />
area of trace evidence. The Forensic Scientist has eliminated all other<br />
similar materials as the source of these two pieces.<br />
<strong>Investigator</strong>s often carefully check a scene for fingerprints, knowing<br />
their value to conclusively link a person to the scene - while overlooking<br />
a torn piece of paper, a broken piece of metal or glass, or other broken<br />
item. Any of those items can, if another piece is found in the possession<br />
of a suspect, form just as conclusive a link with the scene.<br />
A puzzle or fracture match results when two pieces of rigid material<br />
(plastic, wood, glass, metal, etc.) from separate locations are<br />
reconstructed to form a continuous section of that material. A cut or tear<br />
match results when two pieces of pliable material (such as, plastic bags,<br />
paper, foil, fabric, etc.) from separate locations are reconstructed to form<br />
a continuous section of that material. Perforated paper products (checks,<br />
notebook paper, LSD blotter paper, etc.) can often be linked back to their<br />
source via tear matches.<br />
Importance of Thorough Collection<br />
and Proper Preservation<br />
It is of the utmost importance that all pieces of the broken item(s) at<br />
the scene be collected and preserved for later comparison with similar<br />
evidence collected from the suspect, victim, vehicle, home or other<br />
scenes; it is impossible to know in advance which pieces will be matched<br />
to each other. This requires a careful and thorough search of the scene.<br />
Package items from each location separately. In order to confidently<br />
establish a link between an item left at the scene and another item<br />
recovered elsewhere, each item’s origin must be documented. If items<br />
are, or could be co-mingled during collection, storage, or transport, their<br />
133
19 - Fracture and Tear Matches<br />
evidentiary value is lost. See Chapter 2, <strong>Evidence</strong> Integrity, for further<br />
information on packaging and sealing.<br />
For information on specific types of fracture matches and procedures<br />
associated with their collection, see the following chapters: Chapter 11,<br />
Burglary; Chapter 12, Building Materials; Chapter 13, Glass; Chapter 14,<br />
Woods and Sawdust; Chapter 15, Tool Marks; Chapter 16, Paints;<br />
Chapter 17, Metals; Chapter 32, Automobiles and Other Vehicles; and<br />
Chapter 33, Documents.<br />
134<br />
Table 19-1<br />
Examples of Potential Sources for Fracture Matches<br />
Motor Vehicles Bicycles Burglary Miscellaneous<br />
_________________________________________________________<br />
paint chips tubular metal paint† knives<br />
headlights reflectors wood† feathers<br />
grill lights tool parts stone<br />
ext’r mirrors tires glass bones:<br />
antenna inner tubes safe wall animal<br />
windshields spokes metal: human<br />
wipers fenders doors<br />
parking lights baskets trim<br />
tail lights machinery<br />
trim pieces<br />
† - fractured material may be found adhering to a tool<br />
Table 19-2<br />
Examples of Potential Sources for Tear/Perforation Matches<br />
____________________________________________________<br />
matches cardboard<br />
documents money<br />
paper bags LSD blotter paper<br />
checks drug folds<br />
stamps cloth/fabric<br />
sheet plastic plastic bags
20<br />
Autopsy<br />
Autopsy - 20<br />
__________________________________________________________<br />
An autopsy is required in all violent or unattended deaths to<br />
determine the approximate time and precise cause of death. An<br />
unattended death is one for which there was no preexisting illness,<br />
medical condition, or reasonable explanation.<br />
Where there is reason to believe foul play is involved in a human<br />
death, and when a request is made by an authorized agency, Laboratory<br />
personnel may assist a forensic pathologist during the autopsy.<br />
I. Procedure for the Officer<br />
A. Obtain authorization for the autopsy from the coroner or medical<br />
examiner. This authorization must be in writing and delivered to the<br />
pathologist prior to performance of the autopsy.<br />
B. A complete set of x-rays should be taken of the entire body. If metal<br />
fragments are detected, a side view should be taken to help locate the<br />
exact position of the fragments.<br />
C. Record the following and any other information considered pertinent:<br />
1. Name and date of birth of deceased (if known).<br />
2. Any emergency medical treatment performed on victim.<br />
3. Time, date, and location of autopsy.<br />
4. Names and titles of persons in attendance.<br />
D. Inform the pathologist of all pertinent information relative to the<br />
case.<br />
135
20 - Autopsy<br />
E. If the pathologist is unaware of the specimens required by the<br />
Laboratory for their analyses or the methods preferred by the<br />
Laboratory to recover and preserve specimens, provide him/her with<br />
Section II of this chapter.<br />
F. Photograph the body as outlined in Chapter 4, Photography -<br />
Autopsy Photographic Procedure.<br />
G. Recover the (new) sheet used to convey the victim from the scene to<br />
the hospital or morgue. Air dry if wet or bloodstained and place in a<br />
separate clean paper bag. Avoid unnecessary handling of the sheet to<br />
prevent loss of trace evidence. Properly mark for identification.<br />
H. Bindings used to restrain victim, if any, should be recovered by<br />
cutting an area where no knots, cuts, tears, or stains are present. Do<br />
not cut through knots or stains. Mark the cut ends to distinguish from<br />
existing ends of bindings or twine.<br />
I. Bite marks. The first step in the processing of bite marks is to photographically<br />
document the impression. The photography is critical and<br />
the specific method is described in Chapter 4 - Photography. Because<br />
of the specific requirements required to produce workable evidence it<br />
is recommended to request technical assistance from the Laboratory.<br />
136<br />
IT IS EXTREMELY IMPORTANT TO SWAB THE BITE<br />
MARK AREA FOR DNA EVIDENCE COLLECTION. This can<br />
be accomplished by using the Wisconsin State <strong>Crime</strong> Laboratory<br />
BIOLOGICAL SPECIMENS collection kit, or by following the<br />
procedure described below.<br />
After the bite mark is thoroughly documented photographically, the<br />
impression should be swabbed with a moist cotton applicator to<br />
collect any potential traces of the assailant’s saliva. Thoroughly air<br />
dry the swab and place in a clean paper envelope. Properly label and<br />
seal the envelope.<br />
When three dimensional characteristics are apparent, the evidence<br />
can be further documented with an impression material. This can be<br />
difficult to obtain the detail necessary. Technical assistance is<br />
available by calling the Laboratory for a referral of a Board Certified<br />
expert. There is a nominal fee for this forensic specialty.<br />
J. Recover clothing of victim after it has been examined by the<br />
pathologist. Note any cutting or tearing of clothing by anyone who
Autopsy - 20<br />
may have rendered first aid, by attending physicians, or by the<br />
pathologist. Place each item of clothing in a separate clean paper bag.<br />
Air dry if wet or bloodstained. Avoid unnecessary handling of<br />
clothing to prevent loss of trace evidence. Properly mark for identification.<br />
K. After examination by the pathologist, all bruises and wounds should<br />
be photographed. Scaled and unscaled views should be taken prior to<br />
and after washing of affected areas. Scaling should be accomplished<br />
following procedures outlined in Chapter 4, Photography - III.,<br />
Scaling Photographs and IV., Pattern Impression Photography.<br />
L. In cases where the victim may have, or is suspected of having had<br />
physical contact with the assailant, recover standard specimens of<br />
body and head hairs and package them separately, by source, in clean<br />
containers. See Chapter 25, Hairs and Fibers.<br />
M. Fingerprint and palm print victim. Also consider footprints.<br />
Investigation at crime scene may reveal palm prints or footprints.<br />
Personal identifications may be confirmed by footprint. If victim is<br />
too young to have been fingerprinted, hospital records may contain<br />
newborn footprints.<br />
N. Package, seal, and label all items recovered, making sure the<br />
pathologist describes the contents and places his mark of identification<br />
on each item or container. It is important that the officer in<br />
attendance be equipped with adequate containers and sealing<br />
apparatus to package clothing, body fluids, organs, hair samples,<br />
fingernail scrapings, etc.<br />
O. Request that the pathologist forward a copy of the autopsy report to<br />
the coroner/medical examiner and to the Laboratory.<br />
II. Procedure for the Pathologist<br />
A. A complete series of full body x-rays should be taken of the victim.<br />
B. Collect the clothing of the victim by carefully removing in a normal<br />
manner. Should this not be possible, it can be removed by cutting, so<br />
long as great care is taken not to cut through or near any cuts, tears,<br />
holes, or trace evidence or areas that might have evidential<br />
significance.<br />
137
20 - Autopsy<br />
C. Recover wound areas:<br />
138<br />
1. Photograph wounds as outlined in Chapter 4, Photography — II.,<br />
Autopsy Photographic Procedure, III., Scaling Photographs, and<br />
IV., Pattern Impression Photography.<br />
2. The body may be sketched and wound areas diagrammed on<br />
anatomical outlines similar to those shown in Fig. 20-1. All<br />
drawings should be initialed and dated.<br />
Fig. 20-1<br />
Anatomical outlines.
Autopsy - 20<br />
3. It is recommended that tissue sections surrounding gunshot<br />
wounds be recovered as shown in Fig. 20-2.<br />
a. The tissue section should contain most or all of the powder<br />
staining and/or residues. For proper orientation, it should be<br />
removed in the form of a tear drop. The “point” of the section<br />
of tissue should be towards the top of the head. If the bullet<br />
penetrated bone, obtain a section of the bone penetrated and<br />
underlying bullet track surrounding the bullet hole. The<br />
recovered sections of tissue and/or bone should be placed in<br />
a wide mouth screw cap jar with a ten percent solution of<br />
formaldehyde, sealed, and labeled.<br />
b. Do not submit these sections to the Laboratory. The<br />
Laboratory does not analyze tissue specimens for the<br />
presence of gun shot residue. They should be examined by a<br />
Forensic Pathologist or retained for future use.<br />
Fig 20-2<br />
Recovery of wound area.<br />
139
20 - Autopsy<br />
D. Collect all evidence, including fragments of bullets or other objects<br />
which have pierced or adhered to the skin. The pathologist should<br />
place a mark of identification on the sealed container in which the<br />
recovered evidence is placed. An alternative method is to mark the<br />
individual item and the sealed container. See Chapter 7, Firearms and<br />
Ammunition, for marking and packaging procedure. In cases<br />
involving gunshot deaths, or gunshot injuries suspected to have been<br />
self-inflicted, it is important to obtain measurements of arm length<br />
(fingertip to shoulder, arm extended). It is also important to<br />
photograph all bloodstains on all exposed areas of flesh, such as<br />
hands, wrists and arms.<br />
E. Additional specimens should routinely be collected at autopsy (if<br />
applicable) and submitted to the Laboratory:<br />
140<br />
See Chapter 24: Sexual Offenses - collect the appropriate specimens<br />
for the situation.<br />
See Chapter 25: Hairs and Fibers - collect the appropriate specimens<br />
for the situation.<br />
See Chapter 26: Toxicology - collect the appropriate specimens for<br />
the situation.
Autopsy - 20<br />
Fig. 20-3<br />
Many of the samples required for toxicological analysis can be collected using an<br />
Autopsy Kit available from the State <strong>Crime</strong> Laboratory in Madison (address on<br />
p. iii). Specimens for sexual assault analysis should also be collected, especially<br />
in any homicide involving a female victim-even if sexual assault is not<br />
immediately suspected. A Sexual Assault <strong>Evidence</strong> Collection Kit is available for<br />
this purpose, also available through the State <strong>Crime</strong> Laboratory in Madison.<br />
There is a nominal charge for both kits. Additional information on sexual<br />
offenses can be found in Chapter 24.<br />
141
142<br />
Notes
Identification of Unknown Deceased - 21<br />
21<br />
Identification of<br />
Unknown Deceased<br />
__________________________________________________________<br />
Identification of an unknown deceased victim is of the utmost<br />
importance and must be vigorously pursued until every investigative lead<br />
has been exhausted. Much information can be obtained by a detailed<br />
examination of a body, clothing on the body, and personal effects found<br />
in clothing pockets or at the scene. Caution should be used, however, in<br />
attempting positive identifications from clothing and personal effects<br />
alone, since it is possible an unknown body may be clothed in the<br />
garments and personal effects of another.<br />
The condition of a body when recovered is a limiting factor in identification;<br />
however, a thorough examination may reveal information<br />
which initially would appear to be impossible to obtain.<br />
The positive identification of a deceased victim should not be<br />
construed to be the duty of the Forensic Scientist or of the investigating<br />
officer, but rather a joint effort of all persons concerned. Few of the<br />
following listed “investigative leads” are, in themselves, a basis for<br />
positive identification. But several together, supported by a thorough<br />
investigation, may be sufficient basis upon which to establish a possible<br />
or probable identification.<br />
The following checklist will provide investigative leads which, if<br />
properly pursued, may lead to a positive identification.<br />
A. Visual external examination of body:<br />
1. Fingerprints, palm prints, and footprints<br />
2. Complete physical description to include:<br />
a. Sex<br />
b. Age<br />
143
21 - Identification of Unknown Deceased<br />
144<br />
c. Weight<br />
d. Height<br />
e. Build<br />
f. Color of eyes<br />
(1) Glass eye<br />
g. Race<br />
h. Skin:<br />
(1) Complexion<br />
(2) Tattoos<br />
(3) Warts, moles, birthmarks<br />
(4) Skin disease<br />
(5) Scars—injury or surgical<br />
(6) Needle punctures (narcotic addicts or diabetics)<br />
(7) Ring mark on finger (ring missing)<br />
i. Hair:<br />
(1) Color<br />
(2) Length and how combed<br />
(3) Straight, wavy, and amount<br />
(4) Natural, wig or toupee<br />
(5) Beard, mustache, type<br />
j. Teeth:<br />
(1) Natural or false<br />
(2) Appearance (shape, stains)<br />
(3) Dental work (fillings, missing teeth, bridgework)<br />
k. Fingernails:<br />
(1) Long, short, chewed or broken<br />
(2) Manicured, fingernail polish<br />
(3) Discolored due to occupation<br />
(4) Artificial nails<br />
l. Amputations and deformities
B. Examination of clothing:<br />
1. Description and size of all garments<br />
2. Manufacturer, store, tailor labels<br />
Identification of Unknown Deceased - 21<br />
3. Laundry markings (some can be seen by use of ultra-violet light)<br />
4. Laundry tags left on clothing<br />
5. Monograms<br />
6. Repair of tears and holes<br />
7. Belt buckles<br />
8. Buttons (missing, broken, special type)<br />
9. Trace material which may indicate occupation<br />
C. Identification photographs to include frontal and side views of the<br />
victim’s head, and any scars, tattoos, jewelry, or other visible<br />
identifying characteristics or objects.<br />
D. Review of missing person reports and viewing of body by family or<br />
acquaintances of missing persons.<br />
E. Internal examination of the body:<br />
1. X-ray examination. A body which is unidentifiable by external<br />
means should be subjected to a complete x-ray examination in<br />
order to determine the presence of:<br />
a. Foreign bodies:<br />
(1) Pieces of shrapnel<br />
(2) Fired bullets<br />
(3) Prosthetic devices (metal skull plate, metal pins in bone,<br />
etc.)<br />
b. Mended bone fractures<br />
c. Other abnormalities which may aid in identification<br />
2. Body organs missing as a result of surgery<br />
3. Improper location of body organs<br />
145
21 - Identification of Unknown Deceased<br />
146<br />
4. <strong>Evidence</strong> of a present or prior illness:<br />
a. Heart disease<br />
b. Ulcers<br />
c. Arteriosclerosis<br />
d. Pathological changes due to age, occupation, or geographical<br />
residence<br />
e. Stomach contents<br />
F. Personal effects:<br />
1. Driver’s license<br />
2. Credit cards<br />
3. Social Security card<br />
4. Identification card<br />
5. Identification tag<br />
6. Photographs:<br />
a. Self<br />
b. Family<br />
c. Acquaintances<br />
d. Locations<br />
e. Names and other writing on photographs<br />
7. Letter or other notes<br />
8. Company checks or check stubs<br />
9. Paid and due invoices<br />
10. Rings:<br />
a. Wedding rings<br />
b. Class rings<br />
c. Organization rings<br />
d. Initials<br />
11. Cigarette case and lighter
12. Car and house keys<br />
Identification of Unknown Deceased - 21<br />
13. Key rings: initials or other personalization, registration number<br />
for lost key return service<br />
14. Monogrammed wallet<br />
15. Watch:<br />
a. Engravings<br />
b. Jeweler repair marks<br />
16. Corrective lenses:<br />
a. Contact lenses<br />
b. Prescription<br />
17. Hearing aids<br />
G. Additional Techniques:<br />
1. X-ray examination of teeth<br />
2. X-ray of skull superimposed over negative or print of photograph<br />
of victim’s head<br />
3. DNA profiles from the body may be matched to DNA collected<br />
from personal effects of missing persons, or searched against<br />
national data bases.<br />
4. Blood type and factor: the type may be rare, and the victim a<br />
donor whose name may be on file at hospital or blood bank.<br />
Blood typing such as is in the ABO or Rh system is not longer<br />
performed at the crime laboratory. If ABO or Rh typing is<br />
required, a private or clinical laboratory should be contacted.<br />
5. Facial reconstruction<br />
147
148<br />
Notes
22<br />
Dental Identification of<br />
Human Remains<br />
________________________________________________<br />
If you are unable to establish the identification of an individual by<br />
visual means, fingerprints or other identifying data, then a dental<br />
examination should be done. Due to the medicolegal ramifications, this<br />
should be carried out by a qualified Forensic Odontologist. Human<br />
remains will usually be burned, mutilated, decomposed or skeletonized.<br />
There have been numerous times when dental examinations have been<br />
done on victims who are visually identifiable.<br />
If a body is recovered and cannot be identified, the dental records<br />
should be submitted to NCIC, after a very thorough post-mortem dental<br />
examination. It is also appropriate to place the dental records of missing<br />
persons in the NCIC. If a person is missing for a period of time (30-90<br />
days), the dental records can be obtained and entered into the NCIC<br />
computer. If this information is not filled out correctly, it can prevent an<br />
identification from taking place. There is a large amount of information<br />
for the family dentist to read, and it may be difficult to understand the<br />
NCIC form if he/she only sees one of these forms in his/her career. If you<br />
would like an NCIC form completed for a missing person, the Laboratory<br />
can direct you to one of their consultants who will complete it at no<br />
charge.<br />
Steps to Follow in a Post-mortem<br />
Forensic Dental Examination<br />
I. Examination of the Oral Tissues<br />
A In certain circumstances the examination can begin at the site where<br />
the body was found or a return trip may be warranted.<br />
149
22 - Dental Identification of Human Remains<br />
150<br />
1. A Forensic Odontologist may be able to help locate and identify<br />
dental remains that are decomposed, charred or traumatically<br />
mutilated. Some of the fragments may appear to be burned pieces<br />
of wood or other debris.<br />
B. A single tooth, jaw fragment or even a portion of a tooth may be vital<br />
to the identification.<br />
C. As easily as teeth break down throughout life, they will outlast all<br />
other body tissues after death.<br />
D. Post-mortem head and neck x-rays (or full body x-rays) may locate<br />
dislodged teeth or fragments. X-ray examination of dirt or charred<br />
debris may also reveal fragmentary evidence.<br />
E. Conditions of the bodies that may be examined.<br />
1. Normal condition or visually identifiable.<br />
a. A dental examination should be conducted if there are:<br />
(1) No reports of a missing person or clues to the identity<br />
(2) No personal effects are found<br />
(3) No fingerprints are on file<br />
b. Dental examination should proceed with no disfigurement to<br />
the face (no resection or removal of the jaws). Body may be<br />
viewed by relatives<br />
c. Dental examination would consist of photographs of the<br />
teeth, a dental chart, a full mouth series of standard dental xrays<br />
with a portable dental x-ray machine and impressions of<br />
the teeth.<br />
2. Completely decomposed or skeletonized.<br />
a. Easiest to work on.<br />
b. Some of the teeth will dislodge from the jaw since the<br />
periodontal ligaments (tissue that attached the teeth to the<br />
bone) have been destroyed in the decomposition process. All<br />
loose teeth should be recovered and replaced in their sockets.<br />
3. Partially decomposed.<br />
a. Difficult to examine due to the odor and presence of insects<br />
(e.g., maggots, flies, beetles, etc.).<br />
b. Jaws need to be resected.
Dental Identification of Human Remains - 22<br />
4. Burned.<br />
a. Access to the teeth is very difficult, as the tissues are very<br />
rigid.<br />
b. Jaws need to be resected.<br />
c. Caution is advised in resecting heavily burned or calcined<br />
jaws since they are extremely fragile. Fixation with clear<br />
acrylic spray is recommended.<br />
5. Mutilated.<br />
a. Teeth and jaws may be fragmented and distorted.<br />
b. Recovery of all the teeth may be a problem.<br />
c. Dental evidence may be imbedded in other areas of the body<br />
or strewn about the area.<br />
F. Resection of the maxilla (upper jaw) and the mandible (lower jaw).<br />
1. Usually in cases of advanced decomposition, severe mutilation,<br />
and bodies that are charred or burned beyond recognition, the<br />
jaws will need to be resected or removed.<br />
2. Resection of the jaws should be accomplished if there is no open<br />
casket or viewing of the body.<br />
3. The Forensic Odontologist can accomplish a more complete and<br />
comprehensive examination, and obtain better quality x-rays and<br />
photographs by resection of the jaws.<br />
4. If the jaws need to be retained for a period of time, they may be<br />
preserved in 10% formalin.<br />
II. Preparation of Post-mortem Records<br />
A. Photographs.<br />
1. Full face.<br />
2. Close-up of the anterior or front teeth.<br />
3. Right and left lateral views of the teeth in occlusion or their<br />
proper bite.<br />
4. Views of the occlusal or chewing surfaces of the teeth in the<br />
upper jaw and in the lower jaw.<br />
151
22 - Dental Identification of Human Remains<br />
152<br />
5. Close-up photography of any additional features which may be<br />
important.<br />
B. Radiographs or x-rays.<br />
1. Essential to any forensic dental examination.<br />
3. Exposure time is reduced by 1/3 for resected jaws and 1/2 for<br />
skeletonized jaws.<br />
4. X-ray examination is mandatory for estimation of age of the<br />
victim.<br />
C. Notes and charts.<br />
1. A dental chart should be prepared indicating all pertinent<br />
information.<br />
2. This information should include, but is not limited to:<br />
a. Which teeth are present and which are missing<br />
b. Which teeth are restored or filled, what the restoration or<br />
filling material is, and which surfaces of the teeth are<br />
involved<br />
c. Indicate if root canals have been performed<br />
d. Describe any prosthetic and/or orthodontic appliances<br />
e. Describe the location and size of the decayed surfaces<br />
(cavities) of the teeth, or if there are any chipped or fractured<br />
teeth<br />
f. Describe any malpositions or rotations of teeth<br />
g. Describe unusual anatomy or shapes of teeth<br />
h. Describe the occlusion (the manner in which the teeth bite<br />
together)<br />
i. Describe any oral pathology or other anatomic features<br />
which may be of potential importance<br />
D. Study models or casts of the teeth.<br />
1. Impressions can be taken of the victim’s teeth and then casts are<br />
made by using dental stone.<br />
2. It is usually not necessary or practical to take impressions of the
Dental Identification of Human Remains - 22<br />
victim’s teeth. However, there have been many occasions where<br />
casts have proven to be very valuable.<br />
3. The consulting Forensic Odontologist will decide if this<br />
procedure is warranted.<br />
III. Securing of Ante Mortem Records<br />
A. Types of ante mortem records.<br />
1. X-rays.<br />
a. X-rays are the most important ante mortem records.<br />
b. Recover and submit all x-rays, including those x-rays taken<br />
10-20 years ago. These x-rays may reveal additional<br />
information and may compare more favorably with the postmortem<br />
x-rays of the remains.<br />
c. Obtain the original x-rays if at all possible. The dentist should<br />
duplicate the x-rays and retain the duplicates for his/her<br />
records. The original film should be a better quality x-ray<br />
than the duplicate.<br />
Fig. 22-1<br />
Example of charred dental remains. The mandible (lower jaw) has the crowns of<br />
the teeth fractured off.<br />
153
22 - Dental Identification of Human Remains<br />
154<br />
Fig. 22-2<br />
Examples of charred fragmentary dental remains (teeth and bone fragments).<br />
Fig 22-3<br />
Examples of charred, fragmentary dental remains. Many of the fragments may<br />
look like charred pieces of wood or debris. The fragment that is second from the<br />
left in the top row is a charred piece of wood.
Dental Identification of Human Remains - 22<br />
d. Obtain the most recent ante mortem records. Most<br />
individuals have probably been treated by more than one<br />
dentist throughout their lifetime.<br />
e. If conventional dental x-rays are unavailable, recover<br />
medical or chiropractic x-rays that may show the teeth.<br />
f. Electronic transmission of scanned images of dental x-rays,<br />
saved as bit map files, can be accomplished when<br />
expediency is required. An initial rule-in or rule-out<br />
comparison can be made of the electronic image on screen.<br />
The original films can be sent later, if necessary.<br />
2. Dental charts.<br />
a. Obtain the original dental chart if possible. If the dentist<br />
sends a copy, make sure the copy is legible.<br />
b. Dental charts can be very valuable, but the Forensic<br />
Odontologist must be aware that there may be errors<br />
incorporated into the chart by the dentist, the dental assistant<br />
or the hygienist making the entry. For this reason, x-rays are<br />
a much better means of making a comparison.<br />
3. Study models or casts of the teeth.<br />
a. If the dentist has retained models, they can be very valuable.<br />
If the individual has seen an orthodontist, there may be a very<br />
good possibility of obtaining study models.<br />
4. Photographs.<br />
a. Many dentists are obtaining photographs of their patient’s<br />
teeth as a means of documenting their dental condition.<br />
b. Family snapshots, graduation, wedding or military pictures<br />
may reveal a “smiling photograph.” Teeth may be visible and<br />
disclose a missing, discolored, broken or chipped tooth.<br />
5. If partial dentures or full dentures are involved, request that all<br />
additional sets of dentures be recovered. A bite splint, mouth<br />
guard or orthodontic retainer should also be recovered.<br />
B. Recover all ante mortem records available, (including charts, x-rays,<br />
photographs and study models). X-rays that may be requested are<br />
bite-wing x-rays, periapical x-rays, a full mouth series of x-rays<br />
(consists of periapical and bite-wing x-rays), a Panoramic x-ray or a<br />
lateral skull x-ray.<br />
155
22 - Dental Identification of Human Remains<br />
C. How to locate the treating dentist, to obtain the ante mortem dental<br />
records.<br />
156<br />
1. Inquire of family, friends and co-workers what dental clinic or<br />
dentist treated the individual.<br />
2. Inquire if the individual was treated or consulted by a dental<br />
specialist (oral surgeon, orthodontist, etc.).<br />
3. Inquire if the individual had a dental insurance plan, a union<br />
dental plan, medical assistance or welfare benefits. This could<br />
lead to a dentist’s name.<br />
4. Examine military and prison records.<br />
5. Examine medical records to see if the physician has a record of<br />
the name of the dentist.<br />
6. In a small community, it may be necessary to contact all the<br />
dentists and inquire if they have treated this individual.<br />
IV. Comparison of the Ante Mortem and Post-mortem<br />
Records and X-rays<br />
A. The more areas of alterations or problems with the teeth, the greater<br />
the potential for a positive identification. With a perfect set of teeth<br />
(no decay, no fillings or restorations and a good occlusion or bite), or<br />
if there are minimal post mortem or ante mortem remains for<br />
examination, an identification may be more difficult. It may still be<br />
accomplished, however, meticulous attention needs to be paid to all<br />
minute detail. Excellent ante mortem and post-mortem x-rays are<br />
always preferable.<br />
B. A positive identification must bear no unexplainable inconsistencies.<br />
Any differences in the ante mortem and post-mortem records must be<br />
thoroughly and adequately explained.<br />
C. There is no specific number of characteristics needed for a positive<br />
identification. Occasionally, a single tooth or jaw fragment may<br />
possess the degree of specificity necessary to establish a positive<br />
identification. The final decision as to the degree of credibility of the<br />
dental identification rests with the judgement and experience of the<br />
Forensic Odontologist.
Dental Identification of Human Remains - 22<br />
D. Occasionally, the post-mortem records are only consistent with the<br />
ante mortem records, and a positive identification cannot be effected<br />
based on the dental information alone. However, a dental finding of<br />
“consistent” may be a significant contribution. It may be used in<br />
combination with other modes of identification (fingerprints,<br />
personal effects, anthropological or other medical findings, serology,<br />
etc.), and serve as corroborating evidence and increase the credibility<br />
of the final identification.<br />
157
158<br />
Notes
23<br />
Bite Marks<br />
________________________________________________<br />
Human bite marks have played a significant role in criminal<br />
investigation in the past. A distinctly registered bite has the potential of<br />
linking the assailant when properly documented and analyzed by a<br />
qualified forensic Odontologist.<br />
This form of blunt force trauma, commonly seen on the skin of<br />
victims of assault, has also been found on inanimate objects, e.g., food,<br />
leather, metal and soap. Occasionally the victim, as a defense, bites the<br />
assailant. Another rare occurrence to consider is that the bite is self<br />
inflicted. If this is a possibility because of the anatomic location,<br />
consideration should be given to documenting the dentition of the victim.<br />
Bite marks may be present as bruises, abrasions, indentations or<br />
lacerations. Most have an overall ovoid appearance. This ovoid area is<br />
generally made up of two or more arcs of rectangular patterns made by<br />
the incisal edges of individual teeth. Occasionally, only one arch registers<br />
and it is not uncommon to find multiple, superimposed bites. It is the<br />
registration of the size, shape, individual position and other specific<br />
features which make this patterned evidence unique and capable, in many<br />
instances of linking the perpetrator to the crime (e.g., State vs. Stinson,<br />
[134 Wis 2d 224, 397 NW 2d 136]).<br />
Since the media in whom the bite marks are registered is often subject<br />
to dehydration and subsequent distortion, prompt preservation of this<br />
type of evidence is necessary and is best handled, because of the<br />
complexity of the procedure, by a qualified expert.<br />
The most common means of documenting the bite patterns is by<br />
scaled photography (see Chapter 4 - Photography). Because of the<br />
specific requirements to produce workable evidence and because of the<br />
infrequency with which agencies encounter this type of evidence, it is<br />
recommended that technical assistance be requested from the Imaging<br />
Unit of the Laboratory.<br />
159
23 - Bite marks<br />
Swab the area surrounding the bite mark to collect potential traces<br />
of the assailant’s saliva. This must be done prior to washing, casting, or<br />
other procedures which might remove the saliva or deposit another<br />
material which interferes with testing. See the chapter on Autopsy for<br />
further information on collection procedures.<br />
160<br />
Fig. 23-1<br />
Bite mark on homicide victim.<br />
Fig. 23-2<br />
Bite mark on homicide victim.
Bite marks - 23<br />
Those specimens exhibiting indentations (three dimensional characteristics)<br />
can be further documented by casting the area with an<br />
impression material. This too, can be a difficult procedure for someone<br />
not trained in taking fine, detailed impressions. Technical assistance for<br />
this procedure is available and referral of a qualified expert can be<br />
obtained from the Laboratory. Since the State of Wisconsin does not<br />
employ forensic experts in this field, agencies should be aware that there<br />
is a nominal fee for this service.<br />
A further step in the preservation of this evidence, if possible, is to<br />
have the pathologist conducting the autopsy remove the area of the bite<br />
by en bloc dissection and preserve it in formalin. Normal anatomic<br />
contour of the tissue is maintained by attaching a custom-made acrylic<br />
ring and suturing and fixing the tissue to the ring with cyanoacrylate<br />
before it is removed. Technical advice is also available on this technique.<br />
The second phase in the collection of this type of evidence comes<br />
into play when the investigation has developed a suspect. It then becomes<br />
necessary for a licensed forensic dentist to conduct a complete<br />
odontologic work-up including an examination of the jaws, mouth and<br />
teeth. This examination is documented by photography, impressions,<br />
saliva sample and exemplars in wax of the biting edges of the teeth. To<br />
be admissible as evidence, a trained forensic Odontologist should do this<br />
procedure acting under a signed and witnessed informed consent from<br />
the suspect, or a court order, or a search warrant.<br />
The success in gathering, analysis and courtroom presentation of this<br />
type of evidence will be dependent upon the training, skills and<br />
experience of the examiner.<br />
161
162<br />
Notes
24<br />
Sexual Offenses<br />
__________________________________________________________<br />
In all cases it is essential to have the victim(s) examined by a<br />
medical professional as soon as possible after the assault and before the<br />
affected areas (pubic area, vagina, rectum, etc.) or clothing are washed or<br />
cleaned.<br />
The Laboratory has made available a Sexual Assault <strong>Evidence</strong><br />
Collection Kit that can assist the attending medical professional in<br />
properly collecting the specimens required by the Laboratory. This kit can<br />
be used to collect appropriate samples from both male and female sexual<br />
assault victims and suspects. In the event that a kit is not used, the<br />
procedure described below should be followed during the course of the<br />
medical examination. The steps should be performed in the order in<br />
which they are given.<br />
I. Procedure for the Collection of <strong>Physical</strong> <strong>Evidence</strong><br />
by the Attending Medical Professional<br />
Standard<br />
1. Obtain necessary information from the patient.<br />
2. Clothing. Have the patient undress while standing on a clean piece<br />
of examination table paper. As each article of clothing is removed,<br />
it should be placed in a new, clean paper bag. A separate paper bag<br />
should be used for each article of clothing. See Section II for<br />
additional instructions concerning the disposition of clothing<br />
articles. Carefully fold the examination table paper and place it in<br />
a separate paper bag as well. Seal, date and initial each paper bag<br />
collected.<br />
3. Pubic hair combings. Place a piece of paper under the pubic<br />
region of the patient and comb through the entire pubic area to<br />
dislodge any foreign hairs or other material that may be present.<br />
Place the used comb onto the paper and fold the paper around the<br />
comb being careful not to lose any of the dislodged evidence. Place<br />
the wrapped comb in a clean envelope. Seal and label with the<br />
proper information.
24 - Sexual Offenses<br />
4. Vaginal swabs (four) and smear (one). Using four swabs simultaneously,<br />
thoroughly swab the vaginal vault making sure to coat<br />
all four (4) swabs completely. Immediately prepare one smear<br />
using all four swabs simultaneously. Allow swabs (4) and smear<br />
(1) to thoroughly Air Dry. Package the dried swabs in a clean<br />
properly labeled paper envelope, and seal. Package the dried<br />
smear in a clean slide mailer and seal the mailer to prevent opening<br />
during transit. Package the mailer in a clean properly labeled<br />
paper envelope, and seal.<br />
5. Cervical swabs (two) and smear (one). Using two (2) swabs<br />
simultaneously, thoroughly swab the cervix. Immediately prepare<br />
one smear using both swabs simultaneously. Allow swabs (2) and<br />
smear (1) to thoroughly Air Dry. Package the dried swabs in a<br />
clean properly labeled paper envelope, and seal. Package the dried<br />
smear in a clean slide mailer and seal the mailer to prevent opening<br />
during transit. Package the mailer in a clean properly labeled paper<br />
envelope, and seal.<br />
6. Rectal swabs (two) and smear (one). (Collect only if rectal assault<br />
occurred) Using two (2) swabs simultaneously, thoroughly swab the<br />
rectal canal. Immediately prepare a smear using both swabs simultaneously.<br />
Allow swabs (2) and smear (1) to thoroughly Air Dry.<br />
Package the dried swabs in a clean properly labeled paper<br />
envelope and seal. Package the dried smear in a clean slide mailer<br />
and seal the mailer to prevent opening during transit. Package the<br />
mailer in a clean properly labeled paper envelope, and seal.<br />
7. Oral swabs (two) and smear (one). (Collect only if oral-genital contact<br />
occurred) Using two (2) swabs simultaneously, thoroughly swab the<br />
oral cavity, especially the area between the patient's cheek and<br />
gums. Immediately prepare a smear using both swabs simultaneously.<br />
Allow swabs and smear to thoroughly Air Dry. Package the<br />
dried swabs in a clean properly labeled paper envelope, and seal.<br />
Package the dried smear in a clean slide mailer and seal the mailer<br />
to prevent opening during transit. Package the mailer in a clean<br />
properly labeled paper envelope, and seal. Unwaxed dental floss<br />
can be used for the areas between the teeth. Have the patient floss<br />
his/her own teeth using a minimum amount of floss. Have patient<br />
place floss in envelope with swabs.<br />
8. Pubic hair standards. Obtain at least twenty hairs by cutting<br />
them at the skin surface. The hairs should be collected from<br />
various areas within the pubic region. Place the hairs in a clean<br />
properly labeled paper envelope, and seal. The victim and suspect<br />
164
Sexual Offenses - 24<br />
may collect their own pubic hair standard as long as they follow<br />
the procedure described above and are supervised by medical<br />
personnel.<br />
9. Penile swab (one). Collect from suspect(s) and/or male victim(s)<br />
if he/they has/have not bathed since the alleged assault. Using a<br />
single sterile swab from your hospital stock, moisten with sterile<br />
water and thoroughly swab the external area of the entire penis.<br />
Allow the swab to Air Dry. Package the swab in a clean properly<br />
labeled paper envelope, and seal.<br />
10. Buccal Cell Standard. Have the person providing the same rinse<br />
his or her mouth with water before collecting the sample. Using<br />
one swab, place the swab in solid contact with the inner cheek and<br />
gum surface during sampling. Gently move the cotton tip in and<br />
out five or six times, rotating the swab while rubbing. Repeat this<br />
process with a second swab on the other inner cheek and gum<br />
surface. Allow swabs to thoroughly Air Dry. Package the swabs in<br />
a clean properly labeled paper envelope, and seal. DO NOT<br />
COLLECT FROM THE TEETH OR ALONG THE EDGES OF<br />
THE TEETH.<br />
Miscellaneous<br />
11. Fingernail scraping (if indicated). If there is reason to believe<br />
some evidence may exist under the patient's fingernails such as<br />
blood, skin, hair, fibers, etc., then the fingernail should be gently<br />
scraped with a wood applicator stick or toothpick into a clean<br />
white paper envelope. Alternatively, the fingernail can be clipped<br />
and the clippings placed into a clean white paper envelope.<br />
Properly label and seal each envelope. Each hand should be done<br />
separately.<br />
Swabbings - Fingernail swabbings can be used if the fingernails<br />
are short. Use one swab for each set of nails, moisten the swab<br />
with sterile water and thoroughly swab the fingernails. Allow the<br />
swab to thoroughly Air Dry. Package the swabs in a clean properly<br />
labeled paper envelope, and seal.<br />
12. Finger(s) swab (one). For suspects only. If the victim was<br />
digitally assaulted, the suspect's finger(s) should be swabbed with<br />
a sterile swab that has been moistened with sterile water. Allow<br />
swab(s) to thoroughly Air Dry. Package the dried swab(s) in a<br />
clean properly labeled paper envelope, and seal.<br />
165
24 - Sexual Offenses<br />
13. Bite marks. The first step in the processing of bite marks is to photographically<br />
document the impression. The photography is<br />
critical and the specific method is described in Chapter 4 -<br />
Photography.<br />
166<br />
After the bite mark is thoroughly documented photographically,<br />
the impression should be swabbed with a sterile swab moistened<br />
with sterile water to collect any potential traces of the assailant's<br />
saliva. Reswab the impression using a second sterile dry swab.<br />
Allow the swabs to thoroughly Air Dry. Package in a clean<br />
properly labeled paper envelope, and seal.<br />
14. Toxicology specimens (with the permission of the patient). Blood<br />
alcohol samples must be drawn by a licensed physician, nurse, or<br />
medical technician using an antiseptic skin towelette (e.g.,<br />
Zephiran ® or benzalkonium chloride) to clean the site where the<br />
blood sample will be drawn. If a blood alcohol or drug screen is<br />
required, collect 10 mL in a gray-stoppered (sodium fluoride and<br />
potassium oxalate) blood collection tube, either from hospital<br />
stock or an OWI kit. Drugs are detectible in urine for a longer<br />
period of time than in blood, therefore it is strongly suggested to<br />
collect urine if a sexual assault is suspected. See Chapter 26 -<br />
Toxicology.<br />
All liquid blood and urine samples must be refrigerated.<br />
II. Other Relevant <strong>Physical</strong> <strong>Evidence</strong><br />
The clothing of the victim and suspect(s) is the next most<br />
important type of evidence. Articles of clothing worn by the victim (and<br />
suspect, if possible) should be submitted to the Laboratory for<br />
examination, as there may be seminal stains, blood stains, foreign hairs<br />
and fibers or other trace evidence adhering to the clothing. In addition,<br />
items at the crime scene may provide important evidence that associates<br />
either the victim, the suspect or both to the scene.<br />
A. Procedure for clothing:<br />
1. Clothing of the victim must be kept separate from that of<br />
the suspect at all times.<br />
2. Clothing worn at the time of or immediately after the<br />
offense must be recovered and preserved. This includes<br />
undergarments, handkerchiefs, sanitary napkins and/or
Sexual Offenses - 24<br />
tampons (only if used during or after the offense).<br />
3. Garments should be handled as little as possible to avoid<br />
the loss of trace evidence. Package as described in<br />
Chapter 18 - Clothing and Fabrics.<br />
B. Processing the scene:<br />
1. Check for fingerprints. See Chapter 9 - Latent and Inked<br />
Prints.<br />
2. Recover articles such as handkerchiefs, rags, tissues,<br />
etc., which may have been used as a wipe after<br />
ejaculation. Label, package, and seal. See Chapter 18 -<br />
Clothing and Fabrics.<br />
3. Recover and submit any articles that may have become<br />
stained during the offense or might have foreign hairs<br />
present (bedding, rugs, sofa cushions, etc.). Label,<br />
package, and seal. See Chapter 18 - Clothing and<br />
Fabrics.<br />
III. Unusual Sexual Offenses<br />
When unusual situations are encountered, contact the Laboratory<br />
for specific instructions for evidence collection.<br />
IV. Condoms<br />
When condoms are recovered in suspected sexual assault cases,<br />
they should be placed in a glass specimen jar and frozen until submitted<br />
to the <strong>Crime</strong> Laboratory.<br />
167
24 - Sexual Offenses<br />
168<br />
Fig. 24-1<br />
A pre-packaged kit is useful for recovering samples from sexual offense victims.<br />
Its routine use should be considered in any homicide involving a female victim,<br />
even if a sexual assault is not immediately suspected. A Sexual Assault <strong>Evidence</strong><br />
Collection Kit is available from the State <strong>Crime</strong> Laboratories in Madison and<br />
Wausau (address on p. iii, Introduction). There is a nominal charge for the kit.
25<br />
Hairs and Fibers<br />
__________________________________________________________<br />
In crimes where personal contact has occurred, especially if there was<br />
physical force, hair and fibers are frequently found as evidence. A cross<br />
transfer of hair and/or fibers between a victim and an assailant can<br />
provide supportive evidence of an association. In addition, hair recovered<br />
from the scene may serve to associate an individual with the scene. Fibers<br />
recovered from the clothing of the victim, suspect and crime scene can be<br />
compared to known textile materials to determine possible sources of<br />
origin.<br />
If a hair is determined to be of human origin and is deemed probative<br />
to a case, DNA analyses may be performed on the root (if present) of the<br />
hair. If DNA is obtained from a questioned hair root, this DNA can be<br />
compared to DNA from a standard blood sample from an individual.<br />
Identification may be the result.<br />
Note: Another form of DNA analysis may be performed on the hair<br />
shaft (if the root is absent). Please contact the <strong>Crime</strong> Laboratory for<br />
information regarding this analysis.<br />
I. Collection of Hair and Fiber Standards<br />
It is necessary to obtain standard hair and fiber samples from all<br />
possible sources (suspect, victim and scene) for comparison with<br />
questioned hairs and fibers.<br />
DNA analysis on hair roots has replaced microscopic hair<br />
comparisons. Pubic and head hair standards are still necessary for<br />
determining which foreign, questioned hairs may be subjected to DNA<br />
analysis. Due to the ease of head hair transfer and potential limited<br />
probative value, DNA analysis on hairs will be limited.<br />
169
25 - Hairs and Fibers<br />
A. Head hair standards. Obtain at least fifty (50) head hairs by cutting<br />
them at the skin surface. These hairs should be collected from various<br />
areas of the head such as the crown, sides, front and back to assure<br />
that all shades of color and texture have been adequately sampled.<br />
The quantity of hairs obtained from a deceased individual should be<br />
doubled and the hairs should be pulled. Place the hairs in a clean<br />
properly labeled envelope, and seal.<br />
B. Pubic hair standards. Obtain at least twenty (20) pubic hairs by<br />
cutting them at the skin surface. The hairs should be collected from<br />
various areas within the pubic region. If this is a deceased individual,<br />
double the number of hairs to be collected and pull them. Place the<br />
hairs in a clean properly labeled envelope, and seal.<br />
C. Known fibers should be obtained from all possible sources (clothing,<br />
drapes, rugs, etc.).<br />
170<br />
1. Submit the suspected source in total if possible. Place the source<br />
in a clean properly labeled paper bag, and seal. (See Chapter 18,<br />
Clothing and Fabrics.)<br />
2. If it is not feasible to submit the source in total, a sufficient<br />
quantity should be taken to ensure that each color and kind of<br />
fiber involved has been sampled. Place the fibers in a clean<br />
properly labeled envelope or glass jar, and seal. (See Chapter 18,<br />
Clothing and Fabrics.)<br />
II. Collection of Questioned Hair and Fibers<br />
A. Pubic hair combings. (usually collected in sexual assault cases and<br />
from homicide victims).<br />
Place a piece of paper under the pubic region of the individual and<br />
comb through the entire pubic area to dislodge any foreign hairs or<br />
other material that may be present. Place the used comb onto the<br />
paper and fold the paper around the comb being careful not to lose<br />
any of the dislodged evidence. Place the wrapped comb in a clean<br />
properly labeled envelope, and seal.<br />
B. Other Recovered Questioned Hairs and Fibers. Separately package<br />
the hairs and fibers collected from different persons and different<br />
locations.
Hairs and Fibers - 25<br />
1. When the amount of evidence is very small, extreme care should<br />
be exercised so that the material is not contaminated or<br />
inadvertently lost.<br />
2. The hair or fiber should be placed on a piece of clean white paper<br />
and the paper should be tightly folded around the hair or fiber.<br />
Place the paper packet in a clean properly labeled envelope or<br />
glass jar, and seal.<br />
171
172<br />
Notes
26<br />
Toxicology<br />
________________________________________________<br />
During investigations where there is cause to believe that the<br />
subject may have been under the influence of alcohol and/or drugs,<br />
efforts should be made to obtain blood and/or urine samples for<br />
toxicological analysis. These results can be helpful in determining<br />
whether or not an individual was under the influence of drugs and/or<br />
alcohol. Toxicology results on autopsy cases are oftentimes crucial in<br />
determining the cause and mode of death (see Chapter 20 - Autopsy).<br />
Caution: Observe laws relating to the collection of evidence.<br />
I. Collection of Specimens<br />
Blood and/or urine is analyzed to determine the presence or absence<br />
of alcohol and/or drugs in an individual. In cases where it is necessary to<br />
determine the effect of alcohol and/or drugs on the individual, blood is<br />
the specimen of choice. Drugs are detectible in urine for a longer period<br />
of time than in blood, therefore it is strongly suggested to collect urine if<br />
a sexual assault is suspected.<br />
Many therapeutic drugs prescribed by physicians taken in<br />
combination with small, non-intoxicating amounts of alcohol may<br />
produce the perceptual and behavioral disturbances associated with<br />
alcohol intoxication. Subjects who exhibit intoxication by alcohol and<br />
have undergone breath alcohol tests with a low alcohol result should be<br />
suspected of drug use. Caution: Some medical conditions may have<br />
similar signs as inebriation. In these cases it is important to obtain both<br />
blood and urine (subject to legal restrictions) for alcohol and drug<br />
analyses following the procedures described below. Observations<br />
regarding the subject's behavior and apparent condition should be<br />
recorded by the law enforcement officer or physician to document the<br />
individual's behavior.<br />
173
26 - Toxicology<br />
Urine samples have a number of advantages over blood samples.<br />
Besides the fact that drugs can be detected for a longer period of time in<br />
urine, for some drugs (e.g., LSD), urine may be the only specimen where<br />
the drug is in high enough concentration to be positively identified by<br />
current methods. Secondly, urine collection does not require trained<br />
personnel to collect. And finally, urine is not considered biohazardous<br />
unless it has blood in it. The main disadvantage to urine is that drug<br />
levels in urine cannot be used to judge impairment in the individual<br />
except in the controlled collection procedure used for urine alcohol<br />
determinations.<br />
Twenty milliliters (2 tubes) of blood should be collected in tubes<br />
containing sodium fluoride and potassium oxalate as preservative and<br />
anticoagulant. This is most easily accomplished by using commercially<br />
available grey-top blood tubes. Gently mix the tubes by inversion, seal<br />
and label the blood collection tubes with the date and time the sample<br />
was drawn, the person who drew the sample and the subject's name. The<br />
tubes should be sealed by placing sealing tape over the top of the rubber<br />
cap and wrapping the tube label around the ends of the sealing tape.<br />
Blood alcohol samples must be drawn by a licensed physician,<br />
nurse, or medical technician using an antiseptic skin towelette (e.g.,<br />
Zephiran ® or benzalkonium chloride) to clean the site where the blood<br />
sample will be drawn.<br />
Urine samples should be collected in a plastic or glass screw-top jar<br />
of the type used by hospitals for urine collection. Be sure the lid is tightly<br />
secured and then seal and label the urine container with the date and time<br />
the sample was collected, the subject's name and the name of the<br />
authority witnessing the sample collection. Place the urine sample in a<br />
ZipLoc ® -type bag sealed to retain any possible leaks. Collection of a<br />
urine sample must be witnessed by an authority since the subject could<br />
dilute the urine sample with water from the tap or toilet. This<br />
inconvenience can be avoided if colored toilet water is used and all other<br />
water sources are unavailable in the collection room.<br />
174<br />
Both blood and urine samples should be refrigerated until analysis.<br />
If victim or suspect is deceased, a complete autopsy should be<br />
performed (see Chapter 20 - Autopsy), at which time tissue and other<br />
specimens should be removed and packaged. These specimens should<br />
include:
Toxicology - 26<br />
1. Blood. Collect at least 20 mL (two grey-top tubes). If prescription<br />
drugs are suspected, blood from a peripheral site should be<br />
collected, usually from the femoral vein. One grey-top blood<br />
tube is sufficient for this purpose if cardiac blood has already<br />
been collected.<br />
2. Urine. Collect entire contents of the bladder in a glass jar. If urine<br />
volume is less than 15 mL or is unavailable, collect a kidney<br />
sample (100 grams in a glass jar).<br />
3. Stomach contents. Collect the entire contents, or measured<br />
portion of the stomach contents in a glass jar. If only a portion of<br />
the stomach contents is submitted, mark what percentage is<br />
submitted, e. g. “1/2 of total contents submitted,” on the label.<br />
4. Liver. At least 100 grams in glass jar (approximately 3-4 oz.).<br />
5. Hair. Collect a large sample (See Chapter 25, Hairs and Fibers).<br />
6. Eye fluid (vitreous humor). 1 mL in a grey-top blood tube.<br />
7. Bile. Collect 5 mL in a grey-top blood tube.<br />
If possible, collect all ante mortem blood and urine samples drawn<br />
by emergency personnel before death.<br />
In general, keep any toxicology specimens refrigerated until<br />
analysis and, if the specimens are to be sent through the mail, follow the<br />
U. S. Postal Service laws relating to shipment of biohazardous evidence.<br />
Of special importance is that blood samples sent through the mail should<br />
carry a “biohazard” sticker on the outside of the box to alert the couriers<br />
of the potential hazard inside, should be double packaged, should be<br />
wrapped in enough absorbent material to absorb three times the amount<br />
of fluid sent, and must be sent by First-Class, Priority, or Express Mail.<br />
For more information see U. S. Postal Service, Domestic Mail Manual,<br />
Exhibits 124. 383 and 124. 385a.<br />
175
26 - Toxicology<br />
II. Toxicology Testing: Routine and Special Requests<br />
Toxicology testing can be as routine as a single blood alcohol test<br />
or as complex as determining levels of a half dozen drugs and their<br />
metabolites in a single sample. The level of testing depends on the case.<br />
A couple of different groups of tests are usually sufficient. Toxicology<br />
tests available are:<br />
Blood alcohol only<br />
Felony operating while intoxicated cases (OWI), crimes of violence such<br />
as domestic abuse, reckless use and endangering safety. Additionally<br />
probation and parole violations where the initial charge is a felony will<br />
be accepted. Please note for the above listed cases, if the alcohol level is<br />
over 0.100 grams per 100 milliliters, no further analysis will be<br />
conducted.<br />
Blood alcohol and drug screen<br />
Includes alcohol analysis and testing for the following drugs/drug<br />
classes:<br />
Controlled Substances Group:<br />
Cocaine/cocaine metabolite<br />
Opiates (codeine, morphine, heroin, etc.)<br />
Amphetamine/methamphetamine<br />
Marijuana/marijuana metabolites<br />
Benzodiazepines (Valium ® group)<br />
Barbiturates<br />
Phencyclidine (PCP)<br />
LSD<br />
GHB<br />
Basic drug screen (methadone, antihistamines, antidepressants, etc.)<br />
Acid/neutral drug screen (phenytoin, meprobamate, etc.)<br />
Special Requests<br />
Includes but is not limited to:<br />
Carbon monoxide<br />
Cyanide<br />
Heavy metals (arsenic, bismuth, antimony, and mercury)<br />
Salicylates (aspirin)<br />
Acetaminophen (Tylenol ® )<br />
Please specify the type of testing requested on the transmittal sheet.<br />
176
Toxicology - 26<br />
III. Laboratory Choices:<br />
Hygiene Laboratory verses <strong>Crime</strong> Laboratory<br />
The State of Wisconsin has two independent FORENSIC<br />
TOXICOLOGY laboratory systems. One is the Wisconsin State <strong>Crime</strong><br />
Laboratory, part of the Wisconsin Department of Justice. The other is the<br />
State Laboratory of Hygiene (SLH), part of the University of Wisconsin<br />
- Madison. The following table will help you determine which state<br />
toxicology laboratory to use.<br />
By statute, the <strong>Crime</strong> Laboratories may only accept cases where<br />
there is a felony or potential felony charge associated with the evidence.<br />
The submitter should select the correct Laboratory prior to<br />
mailing. Valuable time is lost and chain of custody is extended when<br />
specimens are sent to the wrong Laboratory.<br />
Offense<br />
Driving Under the<br />
Influence (DUI)<br />
Impaired by alcohol<br />
and/or by other drugs<br />
including controlled<br />
substances<br />
Death<br />
Investigations<br />
Probation and<br />
Parole Violations<br />
<strong>Crime</strong>s of Violence<br />
Domestic Abuse<br />
Reckless Use<br />
Endangering Safety<br />
State Laboratory<br />
of Hygiene<br />
ALL OFFENCES<br />
including<br />
snowmobile,<br />
motorboat, ATV,<br />
great bodily harm,<br />
vehicular homicide<br />
Suicides, routine<br />
death investigations<br />
submitted by coroner<br />
or medical examiner<br />
only<br />
Initial charge must be<br />
a MISDEMEANOR<br />
*FEE<br />
NOT ACCEPTED<br />
State <strong>Crime</strong><br />
Laboratory<br />
ONLY IF FELONY<br />
Vehicular homicide<br />
and great bodily<br />
harm are<br />
ACCEPTED.<br />
Death is suspicious.<br />
Possible FELONY<br />
charges<br />
Initial charge must be<br />
a FELONY<br />
ACCEPTED<br />
177
26 - Toxicology<br />
The <strong>Crime</strong> Laboratory facilities for toxicology are located in<br />
Madison and Milwaukee. The addresses are listed in the Introduction on<br />
page iii.<br />
The Wisconsin State Laboratory of Hygiene (WSLH) is located at<br />
2601 Agriculture Drive, P.O. Box 7996, Madison, WI 53707-7996,<br />
(608) 224-6241<br />
In addition to the state laboratories there are also independent<br />
laboratories which are approved to analyze blood and urine specimens<br />
for alcohol under Wisconsin Statute 343.305(6)(a). A list of all approved<br />
laboratories can be obtained by calling the Department of Health and<br />
Family Services, Division of Supportive Living, Clinical Laboratory<br />
Unit at (608) 267-9862.<br />
Please note for DUI cases, if the alcohol level is over 0.100 grams<br />
per 100 milliliters, no further analyses will be conducted.<br />
The State <strong>Crime</strong> Laboratory provides autopsy and sexual assault<br />
kits for a fee. Consult the <strong>Crime</strong> Laboratoryto obtain these kits. The<br />
WSLH provides blood and urine collection kits intended for use in<br />
driving under the influence (DUI) related offenses free of charge. The<br />
WSLH also provides blood and urine collection kits to coroners and<br />
medical examiners for death investigations.<br />
If the specimen is for the WSLH and you are using a WSLH kit,<br />
simply tape the styrofoam box securely and attach the WSLH address<br />
label provided. If the specimen is for the <strong>Crime</strong> Laboratory and you are<br />
using a WSLH kit, please wrap the styrofoam box in brown paper or<br />
place it in a mailing envelope and address it to the Madison or<br />
Milwaukee <strong>Crime</strong> Laboratories. The Madison <strong>Crime</strong> Laboratory<br />
Toxicology Unit also services the Wausau <strong>Crime</strong> Laboratory agencies.<br />
If you have questions concerning the submission of evidence, call<br />
the <strong>Crime</strong> Laboratories between the hours of 7:45 a.m. and 4:30 p.m.<br />
Monday through Friday. The Madison <strong>Crime</strong> Laboratory can also be<br />
reached during the evening and weekend hours by calling the TIME<br />
CONTROL CENTER (608) 266-7633 and asking to speak with the<br />
<strong>Crime</strong> Laboratory Field Response Team Leader. We seek to provide you<br />
with the most effective and timely service possible. Please be assured of<br />
our continued cooperation. Addresses and phone numbers of each lab are<br />
listed before the table and on page iii.<br />
178
27<br />
Poisoning<br />
________________________________________________<br />
Some poisonings are readily recognized and present no problem in<br />
detection. At times, however, poisoning symptoms resemble those of<br />
natural illnesses, and the occurrence of the poisoning may be difficult to<br />
detect. The investigator should always be alert for clues which may<br />
suggest poisoning, whether it be intentional or accidental.<br />
Caution: Observe laws relating to the collection of evidence.<br />
Poisoning - Human<br />
I. Procedure Relating to the <strong>Scene</strong><br />
Thoroughly search the immediate area for containers (medicine<br />
bottle, drinking glass, spoon, hypodermic syringe, needles, aerosol<br />
containers, etc.), taking care to preserve any fingerprints which may be on<br />
the evidence. The last food items consumed should be considered<br />
evidence in some poisonings.<br />
II. Procedure Relating to Victim<br />
A. Note any symptoms (vomiting, shivering, unconsciousness, unusual<br />
color, or rigor mortis).<br />
B. If victim is living, have a physician recover blood and urine<br />
specimens. (See Chapter 6, Section I., C., Procedure for Collecting<br />
Standard Blood Samples from Victims and Suspects.)<br />
C. If victim is dead, a complete autopsy should be performed, at which<br />
time tissue and other specimens should be removed and packaged.<br />
These specimens should include:<br />
179
27 - Poisoning<br />
180<br />
1. Blood. Collect at least 20 mL (two grey-top tubes). If prescription<br />
drugs are suspected, blood from a peripheral site should be<br />
collected, usually from the femoral vein. One grey-top blood<br />
tube is sufficient for this purpose if cardiac blood has already<br />
been collected.<br />
2. Urine. Collect entire contents of the bladder in a glass jar. If urine<br />
volume is less than 15 mL or is unavailable, collect a kidney<br />
sample (100 grams in a glass jar).<br />
3. Stomach contents. Collect the entire contents, or measured<br />
portion of the stomach contents in a glass jar. If only a portion of<br />
the stomach contents is submitted, mark what percentage is<br />
submitted (e.g., 1/2 of total contents submitted) on the label.<br />
4. Liver. At least 100 grams in glass jar (approximately 3-4 oz.).<br />
5. Hair. Collect a large sample (See Chapter 25, Hairs and Fibers).<br />
6. Ante mortem blood and urine. Collect all samples drawn by<br />
emergency personnel before death.<br />
7. Eye fluid (vitreous humor). 1 mL in a grey-top blood tube.<br />
8. Bile. Collect 5 mL in a grey-top blood tube.<br />
III. Procedure Relating to Supplementary Information<br />
A. Record information from victim’s family or other sources:<br />
1. Name, age, sex, and weight of victim.<br />
2. Date and approximate time victim was last seen.<br />
3. Type and quantity of substance thought to have been cause of<br />
death, including statements made by victim which would point to<br />
a particular poison.<br />
4. Other drugs or medicines which the victim might have taken in<br />
the three days prior to the onset of symptoms. Check the<br />
medicine cabinet for possible medications.<br />
5. If death was sudden, obtain details of last known food or meal.
Poisoning - 27<br />
6. If the exact time of death is unknown, list date and time deceased<br />
was found.<br />
B. Record medical information as follows:<br />
1. Victim’s medical history, including a complete list of all<br />
medications used.<br />
2. Attending physician’s observations and treatment of symptoms<br />
exhibited by victim prior to death.<br />
3. Copy of the autopsy report including the pathologist’s<br />
observations and conclusions.<br />
4. List all drugs administered in resuscitation attempts made by<br />
emergency personnel.<br />
Poisoning - Animal<br />
Cases of animal poisoning may be submitted to the Laboratory if a<br />
criminal offense is suspected and the results of the toxicological findings<br />
could contribute to the completion of the investigation. Cases of<br />
accidental animal poisoning should not be submitted to the Laboratory.<br />
The Wisconsin Department of Agriculture, Bureau of Veterinary<br />
Laboratories, Toxicology Laboratory in Madison can handle non-felony<br />
poisonings of animals. Their telephone number is (608) 266-2465, fax:<br />
(608) 267-0636.<br />
It is essential that the investigating officer obtain as much data as<br />
possible relative to the suspected offense. Suspected animal poisonings<br />
frequently occur in cycles, and often a number of animals in the same<br />
vicinity are stricken. Detailed information concerning the circumstances<br />
preceding the death and accurate descriptions of the animal’s symptoms<br />
may suggest the type of poison involved.<br />
I. Procedure Relating to Animal Suspected of Being<br />
Poisoned<br />
A. If animal is living, recover the following specimens:<br />
1. Vomitus.<br />
181
27 - Poisoning<br />
182<br />
2. Blood. (with preservative) 50 mL<br />
3. Urine. All possible<br />
4. Suspected source of poison. (meat, bread, etc.)<br />
B. If animal is dead, an autopsy should be performed and the following<br />
specimens recovered:<br />
1. Blood. (with preservative) 50 mL<br />
2. Liver. 100 grams (approximately 3-4 oz.)<br />
3. Kidney. 100 grams (approximately 3-4 oz.)<br />
4. Stomach contents. Entire contents in a glass jar<br />
5. Urine. Entire contents of bladder in a glass jar<br />
II. Procedure Relating to Supplementary Information<br />
A. Obtain a copy of the autopsy report, including the veterinarian’s<br />
observations and conclusions.<br />
B. Record the following information:<br />
1. Name and address of the owner of the animal(s)<br />
2. Number and kind of animals involved, and whether the animals<br />
had been confined (tied, in a pen, etc.) or allowed to run at large<br />
3. Reports of any similar complaints in the area<br />
4. Description of symptoms exhibited by the animal prior to death<br />
5. Reports of vermin eradication programs: if any, give date,<br />
location, type of eradication used, and how applied
28<br />
Drug Identification<br />
________________________________________________<br />
Forensic Scientists can detect and analyze controlled substances and<br />
other dangerous drugs in plant materials, powders, syringes, packets,<br />
capsules, tablets, cigarettes and many forms of paraphernalia. Common<br />
sense should be used in transporting these items to the Laboratory for<br />
analysis. For example, if the amount of evidence is very small, extreme<br />
care should be exercised so that the material is not contaminated or<br />
inadvertently lost. On the other hand, if the amount of evidence is very<br />
large, the investigating officer should use some discretion and send in for<br />
analysis only those items or amounts which are vital to the case. The<br />
remaining items or material can be retained by the officer in case<br />
additional testing is required at a later date. If small samples taken from<br />
larger amounts of evidence are submitted for analysis, the following<br />
minimum quantities are desirable for routine chemical testing: plant<br />
material, about 5 grams; powders, at least 0. 5 gram; and tablets, capsules<br />
or other dosage forms (such as LSD blotter acid), at least 5 dosage units<br />
(preferably 10 to 20 dosage units for LSD).<br />
To help discriminate between items which may or may not be of later<br />
evidentiary value to the case, commercial field testing Pouch Kits have<br />
been made available for purchase through a state contract. Although the<br />
results of these tests, when performed by an officer in the field, are not<br />
sufficient to serve at trial as definitive chemical analysis, they often will<br />
suffice for probable cause at the preliminary hearing. In many instances,<br />
they can be used to obtain search and arrest warrants. Since these tests<br />
may have such significant value, extreme care should be taken to perform<br />
these tests exactly as they are described in the instructions accompanying<br />
each Pouch Kit.<br />
With very small items it is also important not to use too much of the<br />
sample in performing the test. In cases where quantities are severely<br />
limited, never use more than 1/10 (10%) of the sample for the test. If<br />
there is not enough material to run the test, omit it in favor of the<br />
Laboratory’s more complete chemical analysis.<br />
183
28 - Drug Identification<br />
Also, do not send the plastic packets containing the results of field<br />
tests to the Laboratory as evidence.<br />
A note about syringes: do not attempt to perform a field test on the<br />
contents of syringes. Because of the dangers of contracting bloodborne<br />
diseases such as AIDS and hepatitis through accidental needle punctures,<br />
syringes and syringe needles used for the administration of drugs should<br />
not be handled unless absolutely necessary. Do not send these items to<br />
the Laboratory unless they are vital to your case. If syringes, syringe<br />
needles, razor blades or any other sharp items are to be submitted to the<br />
Laboratory for analysis, be sure to handle them with extreme care and to<br />
package them in puncture proof containers. Caution should also be<br />
taken when packaging items which contain blood or body fluids. The<br />
packaging of such items should follow the guidelines as recommended in<br />
Chapter 26, Toxicology.<br />
Drug tablets and capsules which are seized can frequently be<br />
identified through the Product Identification Code stamped or printed on<br />
their surfaces. The officer should consult reference books such as the<br />
Physicians Desk Reference and the Ident-A-Drug <strong>Handbook</strong> to determine<br />
if the evidence is likely to lead to controlled substances charges.<br />
Alternate sources of information about marked tablets and capsules are<br />
area pharmacists, local or regional poison control centers, or the<br />
Laboratory. If the tablets are unidentifiable or a trial is scheduled, the<br />
evidence should be submitted to the Laboratory for a chemical analysis.<br />
Any labeled bottles containing drugs or prescriptions should also be<br />
submitted, as they may save the chemist time by indicating the type of<br />
drug involved.<br />
184<br />
Fig. 28-1<br />
Examples of puncture-proof syringe containers. Make sure that syringes are<br />
inserted in the correct direction, according to directions on the container.
Drugs in the Form of Plant Material<br />
Drug Identification - 28<br />
The most common plant material submitted to the Laboratory for<br />
analysis is marijuana. Marijuana contains the controlled substance<br />
tetrahydrocannabinol, commonly known as THC. Upon seizing the<br />
evidence, the officer should perform a Duquenois-Levine field test on the<br />
suspect plant material. A positive field test should be sufficient for<br />
probable cause at a preliminary hearing. Once a trial is scheduled, the<br />
dried plant material should be submitted to the Laboratory for a chemical<br />
analysis. Associated paraphernalia such as pipes, cigarette papers, and<br />
roaches often found with suspected plant material should only be<br />
submitted to the Laboratory if they are essential to the case.<br />
Other plant materials containing controlled substances may also be<br />
encountered. Examples are psilocybe mushrooms, peyote (mescaline) or<br />
opium poppies. Plant material of this nature may be submitted to the<br />
Laboratory for analysis anytime after the plant material has been<br />
thoroughly dried.<br />
Fresh plant material, which is packaged in airtight containers such as<br />
plastic bags, rots fairly rapidly like wet silage, forming a soft, watery<br />
mass with a foul pungent odor. In addition, the material usually becomes<br />
moldy. This moldy plant material is a potential health risk, demanding<br />
special precautions.<br />
The time to dry plant material is immediately upon confiscation.<br />
The larger the amount, the more important this is and the longer this may<br />
take. There are no significant health risks involved with handling fresh or<br />
freshly dried plant material, but problems compound rapidly the longer<br />
the material sits in a wet state. If your agency confiscates fresh plant<br />
material, the following should be done:<br />
1. Air dry the material in a well-ventilated, secure area until<br />
thoroughly dry.<br />
2. After obtaining the weight of the evidence, take representative<br />
samples of the dried plant material from each batch (container,<br />
package, etc.) and seal them for transmittal to the Laboratory. A<br />
few grams of material from each item is sufficient for analysis.<br />
3. Package the dried plant material in a sealed paper bag, if possible,<br />
to further reduce the possibility of spoilage. Under such<br />
conditions, plant material can be stored safely for many months.<br />
185
28 - Drug Identification<br />
Latent Prints on Packaging Materials<br />
It is possible to conduct latent print examinations on drug packaging<br />
materials. Latent prints which have been deposited on paper or other<br />
porous materials are relatively stable over time and impervious to<br />
destruction by being “wiped away.” However, prints which are deposited<br />
on non-porous surfaces such as plastic bags, glossy paper, etc., are quite<br />
fragile. Prints on non-porous materials can deteriorate over a relatively<br />
short period of time and be easily obliterated or smeared by handling<br />
even by a gloved hand. Unfortunately, many drug items are packaged in<br />
non-porous materials, thus making it difficult to obtain prints.<br />
When it is anticipated that latent print examination will be<br />
requested, drug items should be separated from the original<br />
packaging materials when it is reasonable to do so. The drug item<br />
and its packaging should be sealed separately and submitted for<br />
analysis. All persons handling the materials should wear gloves to<br />
prevent depositing their own prints. Please contact the Laboratory if<br />
you have any questions regarding the repackaging of evidence.<br />
If such materials are submitted for fingerprint identification and drug<br />
analyses, notify the Laboratory of such a request at the time the evidence<br />
is submitted to the Laboratory.<br />
Clandestine Drug Laboratories<br />
Domestic clandestine drug laboratories range from crude makeshift<br />
operations to highly sophisticated and technologically advanced<br />
facilities, some of which are mobile. They can be set up anywhere and<br />
are often found in private residences, motel and hotel rooms, house<br />
trailers, houseboats, campgrounds and commercial establishments. Often<br />
these laboratories are hidden in nondescript houses or barns in remote<br />
rural areas. Some of these facilities may contain sophisticated<br />
surveillance equipment and may be booby-trapped. This may be done to<br />
prevent intruders and law enforcement personnel from entering or to<br />
destroy any evidence if the facility is discovered.<br />
Extreme care and caution should be used whenever investigating<br />
or processing a clandestine lab site. The substances used in the<br />
production of controlled substances may be caustic, corrosive,<br />
186
Drug Identification - 28<br />
Fig. 28-2<br />
Clandestine laboratories are usually set up in places designed to deflect<br />
attention.<br />
Fig. 28-3<br />
Due to possible explosive chemical reactions involved in the clandestine<br />
manufacture of controlled substances, only a DEA certified chemist,<br />
knowledgeable in clandestine manufacturing, should interrupt any ongoing<br />
chemical processes.<br />
187
28 - Drug Identification<br />
carcinogenic, poisonous, irritating, explosive, or flammable. Law<br />
enforcement personnel engaged in clandestine drug laboratory investigations<br />
and seizures should have specialized training in the investigation of<br />
such laboratories, the appropriate health and safety procedures, and the<br />
use of personal protective equipment. Clandestine drug laboratories may<br />
also involve the removal and proper destruction of large quantities of<br />
hazardous toxic chemicals. The disposal of these chemicals is strictly<br />
regulated by state and federal environmental protection agencies. The<br />
liability for the removal and disposal of these chemical hazards is often<br />
the single largest cost-producing portion of any clandestine lab<br />
investigation, a cost that most law enforcement agencies may not be able<br />
to afford.<br />
Therefore, any law enforcement agency that believes there is a<br />
possible clandestine drug laboratory in their vicinity should first contact<br />
their regional Division of Narcotics Enforcement (DNE) office for<br />
assistance in the investigation.<br />
Fig. 28-4<br />
Short and long term toxic effects have been documented in individuals responding to<br />
clandestine drug laboratories. Some solvents may be explosive. Once a site has been<br />
secured, it should be vacated until qualified individuals respond to the scene.<br />
188
Drug Identification - 28<br />
Fig. 28-5<br />
Cocaine is commonly sold in folded paper packets, often made of colorful<br />
magazine paper. A razor blade is often used for “cutting a line” on a small mirror.<br />
The powder is then inhaled (“snorted”) through the nostrils using glass, plastic,<br />
metal, or paper tubes (rolled up currency is popular) or using tiny metal spoons.<br />
Fig. 28-6<br />
“Blotter Acid.” LSD is often encountered absorbed onto sheets of heavy blotter<br />
paper, which may be perforated into small squares, and having a virtually infinite<br />
number of fanciful designs printed on them.<br />
189
28 - Drug Identification<br />
190<br />
Fig. 28-7<br />
Crack, which is cocaine base, is commonly manufactured through a simple<br />
chemical reaction utilizing sodium bicarbonate (baking soda). Chunks of crack,<br />
called “rocks” are often sold in small “gem bags” or knotted plastic bag corners.<br />
Crack is generally ingested by smoking.
Drug Identification - 28<br />
Fig. 28-8<br />
Marijuana and smoking devices. Whole marijuana leaves are pictured in the<br />
lower right corner. At the bottom left is a sandwich bag filled with<br />
approximately one ounce of dried marijuana. Below the whole leaves are several<br />
hand-rolled “joints,” rolled using commercial cigarette papers. Behind are<br />
several large metal and plastic “bongs” and an assortment of smaller metal,<br />
plastic, and wood “pot pipes” and “hash pipes.”<br />
191
28 - Drug Identification<br />
192<br />
Fig 28-9<br />
Psilocybe mushrooms contain the hallucinogenic substance psilocybin .<br />
Fig. 28-10<br />
Methamphetamine can vary from white crystals called “ice” to tan or<br />
brown chunky powder material referred to as “crystal” or “crank”.
29<br />
Arson<br />
________________________________________________<br />
Many times it is difficult to ascertain whether a fire was accidental or<br />
arson. This is especially true when simple ignition devices such as a<br />
match and paper were used to start the fire. Frequently flammable liquids<br />
such as gasoline, oil, fuel oil, charcoal lighter fluid, etc., are used as<br />
accelerants. If used, and if the fire origin can be determined, it may be<br />
possible to detect and classify accelerants. The Laboratory is equipped<br />
with sensitive instruments capable of detecting and classifying trace<br />
quantities of volatile hydrocarbons. Detection is not possible if the fire<br />
completely consumes the accelerant or if the samples are not from the<br />
fire’s origin. Because flammable liquids readily evaporate, great care<br />
must be taken in the collection and packaging of fire debris suspected of<br />
containing them. Containers of arson evidence need to be air tight to<br />
prevent loss by evaporation, and possible contamination. Moisture is not<br />
a problem. Do not air dry arson evidence.<br />
Caution: Observe laws relating to the collection of evidence.<br />
In considering whether or not a fire is a case of arson, review the<br />
possible motives (financial gain, personal satisfaction, concealment of<br />
another crime, revenge, or pyromania). Following is a brief general<br />
procedural guide for use in investigation of suspected arson cases.<br />
I. Procedure at <strong>Crime</strong> <strong>Scene</strong><br />
A. Note (and photograph to scale whenever applicable):<br />
1. Condition of all locks, doors, windows. If entry has been forced,<br />
see Chapter 12, Building Materials, and Chapter 11, Burglary.<br />
2. Origin of fire (one or many sites?).<br />
3. Identification of igniting material (foreign to the scene?).<br />
193
29 - Arson<br />
194<br />
4. Presence of flammable liquids by:<br />
a. Odor of petroleum products, paint solvents, alcohol, etc.<br />
b. Stains on floor or other material<br />
c. <strong>Evidence</strong> of explosions not due to heat (shattered glass)<br />
d. Unusual burning patterns (splashed areas or trailers)<br />
e. Rapid spread of fire not explainable by structure, weather, or<br />
other conditions<br />
f. Smoke not explainable by building materials<br />
g. Characteristic heavy soot<br />
h. Unusual flame coloration<br />
5. <strong>Evidence</strong> of another crime which the fire might conceal (items<br />
stolen, evidence of violence).<br />
6. Recent similar fires in the vicinity (date, time, location, intended<br />
victim).<br />
B. Collect in separate, airtight containers (e.g., one-pint through fivegallon<br />
new, unused, unlined metal paint cans):<br />
1. All igniting devices (fuses, candles, wicks, trailers, rags, etc.).<br />
2. Charred debris and related material from the origin where the<br />
accelerant was placed (container should be one-half to threequarters<br />
full).<br />
3. Samples of plaster, upholstery, wood or other substances that may<br />
have been penetrated by flammable liquids. Any fresh stains<br />
should be collected.<br />
4. Samples of soil (two to three quarts) which may have been<br />
saturated by flammable fluids (container should be three-quarters<br />
full).<br />
5. Any trace evidence left by the arsonist such as hair, clothing,<br />
fibers, blood stains, fingerprints, etc. (For proper collection<br />
procedure see chapter pertaining to that specific type of<br />
evidence.)<br />
6. Any and all tools or pieces of metal at the scene (airtight<br />
container not necessary).<br />
7. Liquids should be collected in airtight clean glass bottles sealed<br />
with Teflon ® -lined caps or absorbed onto a clean cloth and placed<br />
in an airtight container.
Arson - 29<br />
8. Samples of carpeting and/or padding collected from around the<br />
point of origin in vehicles as well as buildings readily absorb<br />
flammable liquids. A sample of uncontaminated carpeting<br />
and/ or padding must be collected separately and<br />
submitted for comparison purposes.<br />
9. When fire debris consists of carpeting, cloth, plastics,<br />
polymers, synthetic, or any material, uncontaminated known<br />
samples must be collected. Vapors from these kinds of<br />
substances can be detected in the Laboratory as easily as<br />
vapors from flammable liquids. Control samples allow the<br />
scientist to distinguish between natural or fire produced<br />
artifacts and flammable liquids.<br />
C. If a container is found that has a flammable label on it and is<br />
suspected of being involved in the fire, a container of the same<br />
labeling should be purchased from an area store and submitted to<br />
the Laboratory. If unavailable, send in the description of the<br />
flammable contents from the label.<br />
D. In cases involving large volumes of flammable liquids or<br />
suspected flammable liquids, contact the Laboratory for the proper<br />
procedures in handling and packaging.<br />
Fig. 29-1<br />
New, clean paint cans make ideal containers for preserving evidence<br />
suspected of containing accelerants. Cans are available from paint<br />
stores or wholesalers.<br />
195
29 - Arson<br />
II. Suspects<br />
Incidental to arrest, with consent, with a search warrant, or a with<br />
combination of the above, obtain the following:<br />
196<br />
A. Fuels, flammable solvents, tools, or starting devices in the<br />
suspect’s car and home. Submit fire starting devices only after<br />
they have been deactivated and properly packaged.<br />
B. Clothing worn at the time of the crime, including shoes<br />
(packaged in an airtight container).<br />
C. Any stains on car interior if it is possible the car may have been<br />
involved in transporting the suspect or incendiary materials to or<br />
from the crime scene.<br />
D. Any trace evidence (paint, glass, soil, other building materials)<br />
which might relate the suspect to the scene, found on suspect’s<br />
clothing or in suspect’s car or home.<br />
Fig. 29-2<br />
Char pattern typical of the use of accelerants. The area where the accelerant is in contact<br />
burns hotter and therefore leaves a char pattern that is different from surrounding areas.<br />
Door propped open, holes chopped in floors, “trailer” used to direct the fire from one<br />
area to another, etc., are all reasons to suspect that a fire is due to arson.
30<br />
Explosives, Bombs,<br />
Fireworks<br />
________________________________________________<br />
Explosives and Bombs<br />
When the explosion is the result of a criminal act, a very careful and<br />
methodical search of the scene will frequently reveal evidence indicating<br />
the type of explosive involved; further, the search may reveal fragments<br />
or parts of either the container, the fuse mechanism, or a time delay<br />
device. The scene should be roped off, guarded, and all nonessential<br />
personnel evacuated from the area. The Laboratory, upon request, will<br />
assist the law enforcement agencies in properly processing the scene.<br />
In those instances where suspected explosives or explosive devices<br />
are encountered, it is suggested that no attempt be made to move or<br />
neutralize the explosive or device. A local bomb squad, the federal<br />
Bureau of Alcohol, Tobacco and Firearms (ATF) or the nearest Explosive<br />
Ordinance Disposal (EOD) unit should be contacted by telephone and<br />
assistance requested. In Wisconsin, ATF can be contacted at (414) 297-<br />
3937; EOD is located at Fort McCoy, telephone (608) 388-3315. Both<br />
numbers are answered 24 hours a day.<br />
Because of the danger and complexity involved, no attempt is being<br />
made in this handbook to outline safe or recommended procedures to be<br />
followed in the handling or neutralizing of suspected explosive materials.<br />
The ATF or EOD should be informed by telephone as to the nature, type,<br />
size, location, etc., of the suspected explosive substance, as well as any<br />
other pertinent information. This will then permit the ATF or EOD to<br />
make preliminary recommendations regarding precautionary measures<br />
which can and should be taken. If explosives are encountered:<br />
Do not attempt to neutralize or destroy explosives.<br />
Do not turn on any electrical switches.<br />
197
30 - Explosives, Bombs, Fireworks<br />
198<br />
Do not walk or step in any liquid or suspected explosive material.<br />
Do not smoke or use matches in area.<br />
Do not move any objects.<br />
If a suspected bomb or package foreign to scene is encountered:<br />
Do not move, turn over, or disturb package or suspected bomb.<br />
Do not immerse in any liquid.<br />
Evacuate building and immediate area.<br />
Do not pick up or handle any detonators or explosives.<br />
Do not breath any vapors which may be present. Nitroglycerine may<br />
cause a very severe headache.<br />
DO NOT transport suspected explosive devices or bombs to the<br />
Laboratory.<br />
CAUTION: Electric blasting caps may be detonated by police radio<br />
transmission.<br />
Fig 30-1<br />
Although the destruction caused by a bomb is great, the pieces of the device which survive<br />
are surprising. <strong>Investigator</strong>s should be alert to the investigative leads such debris can<br />
provide.
Fireworks<br />
Explosives, Bombs, Fireworks - 30<br />
The current law regulating the manufacture, possession, sale and use<br />
of fireworks is contained in Wisconsin Statutes §167.10. By definition,<br />
fireworks means anything manufactured, processed or packaged for<br />
exploding, emitting sparks or combustion, which does not have another<br />
common use. Certain devices are specifically excluded from regulation<br />
as fireworks, unless controlled locally by city, village or town ordinance.<br />
A list of excluded (non-permit) devices is contained in Wisconsin<br />
Statutes §167.10. All other devices require a permit for their possession<br />
and use.<br />
199
200<br />
Notes
31<br />
Soils and Sand<br />
________________________________________________<br />
Sand or soil is encountered in many types of investigations and<br />
should not be overlooked by the investigating officer. The following<br />
items frequently have soil related to the crime scene adhering to their<br />
surfaces: footwear, clothing, tool containers, vehicle operating pedals,<br />
under-carriages, or wheel wells. Soil found on the floor of a vehicle may<br />
also become valuable evidence.<br />
Most soil adhering to such objects is representative of the upper onefourth<br />
inch of surface soil from which it originated and may be associated<br />
with its source if proper knowns are recovered.<br />
Caution: Observe laws relating to the collection of evidence.<br />
I. Procedure<br />
A. Photograph impressions (tire, footwear, etc.) that have patterns<br />
containing discernible class and/or individual characteristics.<br />
(See Chapter 4, Photography.)<br />
B. Do not recover soil samples until proper photographs and casts<br />
have been made. (See Chapter 8, Casts.)<br />
C. Obtain samples consisting of three (3) tablespoonfuls of soil<br />
from the top 1/4" of soil from within the impression. Collect a<br />
soil sample from each impression that has a different color or<br />
texture (dirt, clay, sand, etc.).<br />
D. The tablespoon should be cleaned after each area has been<br />
sampled to avoid cross-contamination of samples.<br />
E. The soil samples should be recovered using a systematic method.<br />
F. Prepare a diagram of the area showing the point from which each<br />
201
31 - Soils and Sand<br />
202<br />
Fig 31-1<br />
Example of a soil sample diagram<br />
sample was recovered and submit copy of diagram. On the<br />
diagram, show distance and direction of each sample recovered.<br />
The diagram should be oriented with fixed objects in the area<br />
such as buildings, utility pole, etc. (See Fig. 31-1.)<br />
G. If soil samples can be immediately transported to the Laboratory,<br />
put samples in individual clean glass containers and seal.
Soils and Sand - 31<br />
H. If samples cannot be transported to the Laboratory immediately,<br />
to prevent the growth of mold, spread the samples on separate<br />
sheets of clean paper to air dry for at least 24 hours. When dry,<br />
package and seal. (See Chapter 6, Body Fluid Stains and<br />
Standards.) Do not mix or contaminate samples.<br />
I. If suspect shoes have been recovered and soil is present on the<br />
shoes, recover soil sample from the area of the footwear<br />
impression that corresponds to the location of the soil on<br />
recovered shoes. Example: clump of soil adhering to arch of<br />
shoe.<br />
J. When excavating grave sites, remember soil could be adhering to<br />
the tools used by the suspects or their clothing. Therefore, a core<br />
sample should be taken from as close to the grave as possible and<br />
to a depth equal or greater than the grave itself. The core sample<br />
should be kept intact and packaged so the layer structure is not<br />
altered or damaged during drying, handling or shipping.<br />
203
204<br />
Notes
32<br />
Vehicles<br />
________________________________________________<br />
The Laboratory accepts cases involving automobile accidents which<br />
have resulted in injury or death and where criminal negligence is<br />
suspected. Vehicles involved in accidents of this type should be<br />
immediately impounded. Where skid damage on the vehicle’s tires may<br />
indicate related important conditions prior to or at the time of impact, the<br />
vehicle should be conveyed on a trailer to a storage facility. The<br />
Laboratory also may accept vehicles involved with the commission of a<br />
sexual assault or conveyance of a body. Contact your area Laboratory<br />
before submitting the vehicle.<br />
It is also very important that the submitting agency obtain proper<br />
photographs of the scene, skid marks, damage to vehicles, impact<br />
damage, etc. The Laboratory does not perform accident reconstruction or<br />
determination of the condition of mechanical or electrical systems. These<br />
types of analysis must be sought from another source.<br />
Criminal Damage to Motor Vehicles and Engines<br />
The perpetrators of criminal damage to motor vehicles may add a<br />
foreign substance, such as emery dust or sand, to the vehicle engine or<br />
transmission. Where internal damage of this type is suspected, a sample,<br />
consisting of one pint of oil from the top and bottom of the oil pan of the<br />
damaged engine, should be submitted. Any foreign residue found on top<br />
of the engine in the carburetor, or near the oil spout should also be<br />
submitted. It is important that as much sediment as possible be obtained<br />
from the oil pan or gear box. In cases involving addition of sugar or other<br />
materials to gasoline, it is important to submit at least one pint of gasoline<br />
from the tank. Because sugar has a low solubility in gasoline, it is<br />
imperative that the intact fuel filter as well as a sample of the sediment<br />
or condensation (water) in the bottom of the gasoline tank be submitted.<br />
Samples from fuel pump bowls should be avoided because they contain<br />
sediments which interfere with tests. However, the sediment bowl may be<br />
205
32 - Vehicles<br />
removed so that a sample of gasoline may be pumped directly into the<br />
sample container. Containers with rubber or waxed paper seals should<br />
not be used, since they dissolve in petroleum products and give erroneous<br />
test results. Pistons, bearings, gears, and scrapings from the combustion<br />
chamber or rings may also be submitted. Samples of the radiator coolant<br />
also may be examined for evidence of foreign substances when indicated.<br />
206<br />
Caution: It is unlawful to send flammable liquids via mail.<br />
Stolen Vehicles<br />
The Laboratory may be able to identify stolen vehicles which have<br />
been repainted or stripped, or which have had the serial or manufacturing<br />
numbers altered or replaced.<br />
If a vehicle is suspected of having been repainted, it is possible to<br />
analyze and photograph the paint layers as confirmatory evidence and to<br />
establish the original factory color. See Chapter 16, Paints for the<br />
recovery technique.<br />
When an automobile has been stripped and the suspect parts are<br />
found, the Laboratory may be able to physically match these to the<br />
vehicle.<br />
Stamped serial numbers may be removed by grinding or altered by<br />
other methods. Frequently, they may be restored. When alteration of the<br />
serial number is suspected, the object or part bearing the serial number<br />
should be submitted.<br />
For general technical information, contact the Laboratory or the<br />
National Insurance <strong>Crime</strong> Bureau, Central Division, 10330 South<br />
Roberts Road, Palos Hills, IL 60465, (847) 430-5100 (formerly, the<br />
National Automobile Theft Bureau). In some cases, confidential, hidden<br />
vehicle identification numbers may be present to assist in determining<br />
authentic vehicle identification.<br />
Hit-and-Run Investigations<br />
In attempting accident reconstruction, the investigator should be<br />
mindful that showing a relationship between materials or items recovered<br />
from different locations is most important. Materials or items recovered<br />
from different sources or at a later date that can be related to each other<br />
constitutes very important evidence.
Vehicles - 32<br />
Three primary sources should be considered: The accident scene,<br />
vehicles, and victims.<br />
I. Accident <strong>Scene</strong><br />
A. Initial Procedures:<br />
1. Request ambulance personnel at scene to preserve blankets and<br />
clothing which may contain trace evidence such as broken glass,<br />
paint chips, metal parts, plastic, etc.<br />
2. In vehicular accidents, an officer should be assigned to the<br />
hospital to assist in the recovery of clothing and body fluids.<br />
B. Protect scene from:<br />
1. Additional accident damage<br />
2. Bystanders<br />
3. Theft from vehicles<br />
C. Establish a written record:<br />
1. Date<br />
2. Time<br />
3. Location<br />
4. Description of incident<br />
5. Weather conditions<br />
6. Temperature<br />
7. Road conditions<br />
8. Victim’s location upon your arrival, his condition, and tentative<br />
identification<br />
9. If a description of the hit-and-run vehicle can be obtained,<br />
immediately have dispatcher alert other officers in the<br />
surrounding area. The vehicle’s description may be obtained<br />
from eye witnesses or materials recovered at the scene.<br />
207
32 - Vehicles<br />
D. Attempt to locate the fleeing driver and/or vehicle.<br />
E. Photograph the scene. See Chapter 4, Photography.<br />
F. Diagram the scene:<br />
208<br />
1. Take measurements, using a metal tape or ruler.<br />
2. Record location and identifying information with at least two<br />
fixed objects (through triangulation), such as:<br />
a. Street sign pole<br />
b. Corner of a house (record address)<br />
c. Utility pole number<br />
d. Fire lane number<br />
e. Fixed point on a bridge (corner, superstructure girder, etc.)<br />
3. Include the date and time as well as your initials on the diagram.<br />
At the top, indicate which direction is north.<br />
4. Items recovered at the scene should be noted on the diagram with<br />
description and location of each.<br />
G. Recognition of potentially valuable materials:<br />
1. Broken glass (headlights, mirrors, and windshield) or plastic<br />
from scene or from victim’s clothing may be fracture matched<br />
with remaining glass or plastic from suspect vehicle.<br />
2. Broken or fractured pieces of metal (trim, antenna, or sheet metal<br />
pieces) may also be fracture matched with section remaining on<br />
vehicle.<br />
3. Paint chips from scene or vehicle may be fracture matched with<br />
suspect vehicle. Paint layer relationship may be valuable<br />
evidence (see Figs. 16-1 and 16-2 in Chapter 16).<br />
4. Dirt deposits recovered from road surface may be indicative of<br />
approximate point of impact.<br />
5. <strong>Physical</strong> impressions left on objects at the scene may indicate the<br />
make of vehicle causing the impact. They should be properly<br />
recorded and collected for possible comparison purposes at a<br />
later date.
Vehicles - 32<br />
6. Skid marks and three-dimensional and surface impressions<br />
sometimes can be used to determine direction and speed. There<br />
are limitations to the usefulness of skid marks, debris, and gouge<br />
marks in establishing the exact point of impact. They will,<br />
however, indicate the approximate location of the collision.<br />
Broken parts found at the accident scene may bounce and roll;<br />
therefore, reliable information as to exact point of impact may<br />
not be able to be determined.<br />
II. Victim<br />
A. Living:<br />
1. Obtain complete identifying data to include full name, date and<br />
place of birth, permanent address, temporary address (if nonresident),<br />
telephone number where he/she can be reached when<br />
discharged from hospital.<br />
2. Recover blankets used in conveying victim to hospital. Tag<br />
blankets and place each in a separate paper bag. Air dry if wet or<br />
blood stained. Avoid handling blankets any more than necessary,<br />
to preclude loss of trace material.<br />
3. Recover clothing worn by victim at time of accident. Note any<br />
cutting or tearing of clothing by nurse, attending physician, or<br />
other person rendering aid. Tag each item of clothing and place<br />
in a separate clean paper bag. Air dry if wet or blood stained.<br />
Avoid unnecessary handling of clothing to prevent loss of trace<br />
material.<br />
4. Collect body fluids:<br />
a. Collect at least 5 mL of blood in a lavender-stoppered<br />
(EDTA) blood collection tube, then print patient's name on<br />
the blood tube label. Using a small syringe and needle, insert<br />
needle through the rubber stopper of the liquid blood<br />
standard tube (EDTA) then withdraw approximately 1 mL of<br />
blood. Using a DNA Stain Collection Card, fill all four (4)<br />
of the printed circles on the card with blood. Allow<br />
bloodstains to thoroughly Air Dry, then write patient’s name<br />
on the DNA Stain Collection Card. Package the Stain<br />
Collection card in a clean properly labeled paper envelope,<br />
and seal. Package the blood tube in a styrofoam shipping<br />
container, label properly and seal. Store in refrigerator.<br />
209
32 - Vehicles<br />
210<br />
Collect 20 mL (two tubes) of blood in gray-stoppered<br />
(sodium flouride) blood collection tubes for toxicological<br />
analysis. Print the patient’s name on the blood tube labels.<br />
Package the blood tubes in a styrofoam shipping container,<br />
label properly, and seal. See Chapter 26, Toxicology.<br />
b. Collect all available urine in a plastic or glass jar used by<br />
hospitals for sample collection. Preservatives are not<br />
necessary. Seal and label for identification. Store in<br />
refrigerator. See Chapter 26, Toxicology.<br />
5. Ensure that chain of custody is maintained. All persons involved<br />
in the collection of an item must mark containers or tags<br />
indicating their association with the item. Everyone who has the<br />
item in his/her custody, even for a short time, must be<br />
documented. See Chapter 2, <strong>Evidence</strong> Integrity for further<br />
discussion of this topic.<br />
B. Deceased:<br />
1. Photograph the body. See Chapter 4, Photography.<br />
2. Note position of body. If postmortem lividity has developed,<br />
determine if it is consistent with position of body when found.<br />
3. Use caution when removing body, to avoid loss of possible trace<br />
material. The body should be placed in a new, unused white sheet<br />
before being placed in a clean, sealed body bag.<br />
4. Check under victim for trace evidence.<br />
5. See Chapter 20, Autopsy for additional information including<br />
procedures for recovery of clothing and foreign materials.<br />
6. See Chapter 26, Toxicology.<br />
III. Vehicle<br />
A. Avoid touching any part of the vehicle which may bear fingerprints,<br />
e.g., steering wheel, mirrors, door handles, brake handle, gear shift<br />
handle, seat belt fasteners, hood, windshield, roof, or any other places<br />
likely to bear fingerprints. To shift gears for towing, grasp the stick<br />
rather than the end knob where suspect may have left prints.
Vehicles - 32<br />
B. Protect the vehicle from contamination by covering with new<br />
wrapping paper or plastic sheeting.<br />
C. Transport on a flatbed truck or trailer or tow (do not drive) vehicle to<br />
nearest garage. The proper examination of the under-structure<br />
requires the use of a hoist.<br />
1. The vehicle should not be towed any extended distance. Trace<br />
evidence such as blood or hair may be lost or destroyed.<br />
2. The vehicle should be towed or hauled from the undamaged end<br />
to avoid additional damage and to avoid destruction or addition<br />
of evidence during towing.<br />
3. The vehicle should be placed under lock and key. Police security<br />
should be maintained to ensure the custodial chain of the vehicle.<br />
D. Photograph the vehicle. See Chapter 4, Photography.<br />
E. Record an accurate description of the vehicle.<br />
F. Recover known and questioned paint samples. Paint samples should<br />
be taken from both the damaged areas and adjacent undamaged areas.<br />
The latter serve as controls or knowns during Laboratory<br />
comparisons. Paint samples should also be taken from the victim’s<br />
vehicle. Fenders, hoods and doors with areas of missing paint should<br />
be removed for fracture match analysis with recovered paint samples.<br />
Where bicycles, baby strollers, snowmobiles, power lawn mowers, or<br />
other small vehicles are struck, the entire object should be sent to the<br />
Laboratory. See Chapter 16, Paints for procedure in recovering paint<br />
samples.<br />
G. In the event that glass has been broken, recover and submit all<br />
knowns and questioned samples.<br />
H. Metal, glass, and plastic pieces showing fractured edges should be<br />
removed, because they may be fracture matched to pieces from the<br />
scene.<br />
I. A systematic examination should be made of the vehicle exterior,<br />
including the undercarriage. See Fig. 32-1.<br />
J. If the suspect vehicle is located some time after the accident (after<br />
having secured the properly-executed search warrant), immediately<br />
record the temperature of the radiator and out-of-doors temperature.<br />
Record serial numbers, vehicle identification numbers (VIN), license<br />
211
32 - Vehicles<br />
212<br />
numbers, condition of brakes, tires (evidence of skidding), mileage<br />
reading, service record, approximate amount of fuel in tank, and<br />
condition of all lights.<br />
K. Examine vehicle for presence of blood, hair, and fibers. If<br />
investigation indicates vehicle passed over victim, the understructure<br />
should be examined, and known samples of grease should<br />
be recovered and recovery location noted.<br />
L. Fabric weave impressions on metal surfaces or paint, and in grease,<br />
should not be overlooked. When possible, the bumpers, hoods, or the<br />
entire vehicle should be conveyed to the Laboratory for proper<br />
photographic documentation of such impressions. To be of use for<br />
comparison, all photos must be life-size (1:1) and include a scale.<br />
M. Sketch vehicle and note on sketch the locations of materials<br />
recovered. This will be useful during your recollection at any court<br />
proceedings (see Fig. 32-1).<br />
N. Properly mark vehicle for identification.
Fig 32-1<br />
Suggested vehicle sketches.<br />
Drawings showing the front, rear, and sides of the vehicle. Similar,<br />
larger drawings should be used to record the location of trace<br />
material and other related evidence.<br />
Vehicles - 32<br />
213
214<br />
Notes
33<br />
Documents<br />
________________________________________________<br />
Questioned document problems involved in criminal matters may be<br />
submitted to the Laboratory for examination and comparison of<br />
handwriting, typewriting, ink, paper, and related materials.<br />
A questioned document may be a will, note, check, or other document<br />
on which the signature, endorsement, or other writing is allegedly forged<br />
or altered; it may be an anonymous letter or a suicide note; it may be an<br />
invoice or receipt which is reportedly altered.<br />
Handwritings can be compared with known or standard handwritings<br />
and, in most instances, identified as to writer.<br />
A questioned document may have been partially destroyed by<br />
burning or tearing, or by other means; it may be a sheet which has been<br />
torn from a book and which involves the matching of torn edges, etc. (See<br />
below.)<br />
Questioned typewriting can be compared with typewriting from<br />
suspect typewriters and, in most instances, (providing samples from the<br />
“guilty” machine are available) be identified as having been typed on that<br />
typewriter, or as not having been typed on the suspect typewriter. (See<br />
below.)<br />
Indentations appearing on a document can often be deciphered by<br />
photographic or other processes.<br />
It can often be determined whether or not handwritten and/or<br />
typewritten additions, alterations, or deletions have been made on<br />
documents. In many instances, the original writing can be deciphered by<br />
visual, chemical, or photographic processes. Infrared and ultraviolet<br />
viewing, photography, and, where warranted, chemical methods are used<br />
in problems involving alteration of documents (See the following).<br />
215
33 - Documents<br />
The final result in an examination of documents is governed by the<br />
quality and quantity of material available to the document examiner for<br />
comparison. Therefore, it is incumbent upon the investigator to submit all<br />
of the questioned (unknown) material involved in the matter, and as much<br />
standard (known) handwriting or other material as possible. It is, of<br />
216<br />
Fig 33-1<br />
Counterfeit checks were passed by unknown subjects and subsequently many<br />
small scraps of paper were recovered from a wastebasket on a suspect's<br />
premises by investigating officers.<br />
Photo A above shows on the left, scrap from wastebasket and on right,<br />
portion of one of the counterfeit checks. Pieces are separated to show<br />
individual characteristics of the cutting blade. Photos B and C show the edges<br />
matched with small projection on check fitted into corresponding area on<br />
stub. Scale: A and B - 1:1, C - 3X.
A<br />
B<br />
Documents - 33<br />
course understood that in some instances desirable standards will be<br />
difficult to obtain. However, where documents are to be used as evidence<br />
in a case, immediate steps should be taken to secure the proper standards<br />
in line with suggestions and recommendations set forth in this chapter.<br />
I. Standards<br />
A. Requested Exemplars:<br />
Fig 33-2<br />
Typewriting samples from two Royal typewriters. Line A is questioned<br />
material. Line B is typed on a suspect but “innocent” typewriter. Enlarged<br />
7X.<br />
Note the scars in the typeface which point to non-identity:<br />
The serif at the bottom of the staff of the “d” is present on line A; it is not<br />
on line B.<br />
Lower curve of “s” is damaged on Line A enlargement: it is not on line B.<br />
The outer right-hand serif on the right side of the “w” is present on line A;<br />
it is not on line B.<br />
The typewriter on which the questioned material was typed was eventually<br />
recovered and identified as the source of the questioned material.<br />
1. Requested exemplars are handwriting specimens written by<br />
request for the purpose of comparison with questioned<br />
handwriting. The text of the suspect writing on the questioned<br />
document should be duplicated on the requested exemplars.<br />
217
33 - Documents<br />
218<br />
The text of the questioned and standard material must be<br />
comparable: A’s can be compared only to A’s, r’s to r’s, and 4’s to<br />
4’s; hand printing can be compared only to hand printing and<br />
handwriting to handwriting. Requested exemplars should<br />
therefore contain the exact wording of the questioned<br />
document or words having similar combinations of letters<br />
written in the same way.<br />
2. To facilitate the taking of requested exemplars, a Handwriting<br />
Exemplar booklet is available to all law enforcement agencies in<br />
the state at no charge. The booklet is strongly recommended for<br />
cases involving checks. It is self contained with instructions, so<br />
that an investigator with no prior training may obtain suitable<br />
requested exemplars for comparison purposes. It is imperative<br />
that the booklet be completed in its entirety, with the same text as<br />
is used on the questioned document.<br />
Fig 33-3<br />
A check was tendered in the amount of $60.00 and cash received in that amount. the<br />
drawer of the check insisted that it was for $6.00, the payee insisted it was for $60.00.<br />
Illustrations A show areas of interest on the check, photographed under normal document<br />
lighting, and by use of regular Laboratory photographic techniques and materials.<br />
Illustrations B show the same areas as in A, but photographed using techniques and<br />
materials which detect and record infrared luminescence.<br />
Payee name and additions to the amount were written using a ball pen of similar blue ink<br />
to that used in the original entries, but containing a component which produced the<br />
infrared luminescent reaction. Scale: 1:1.
3. Procedures For Taking Requested Exemplars:<br />
Documents - 33<br />
a. Do not permit subject to see questioned document while<br />
exemplars are being written.<br />
b. Specimens should be written under the observation of the<br />
investigator or witness at all times. (Do not leave subject.)<br />
c. Have subject seated in a natural position at a table or desk<br />
having a smooth writing surface. Exception: If it is claimed<br />
that questioned material was written under unusual<br />
circumstances (on a car seat; while standing, etc.), take<br />
specimens under like conditions.<br />
d. Furnish subject with paper similar to that used in questioned<br />
writings, i.e., paper should be same size and provide the<br />
same space for writing as does the questioned document. If<br />
the writing in question is on a check, requested exemplars<br />
should be written on individual check blanks. Always<br />
provide subject with a separate sheet for each specimen;<br />
requested exemplars should not be written one beneath<br />
the other on a single sheet.<br />
e. Duplicate the writing instrument. If the questioned document<br />
is written in ink or in ball pen, furnish subject with pen and<br />
ink, or ball pen; if written with an instrument of another kind,<br />
furnish subject with other writing instruments necessary to<br />
duplicate questioned writing. The quality of the writing is<br />
influenced by the writing instrument, and may have a direct<br />
bearing on the identification of the writer.<br />
f. Dictate material to be written (or printed, if questioned<br />
material is hand printed) at a comfortable rate of speed for<br />
subject; give no assistance in spelling or arrangement on<br />
page. Exception: If subject spells a name or word differently<br />
from its spelling on the questioned document, after three or<br />
four specimens have been written, request subject to use<br />
designated spelling.<br />
g. Request subject to initial each specimen as completed.<br />
h. Remove each specimen immediately upon completion by<br />
subject; number in sequence; add date and time, and identify<br />
by initial on each specimen. <strong>Investigator</strong>’s notations should<br />
be placed inconspicuously in an area removed from subject’s<br />
handwriting.<br />
219
33 - Documents<br />
220<br />
i. Dictate at a fairly rapid rate of speed one or two paragraphs<br />
of material unrelated to the investigation, e.g., article from<br />
newspaper, magazine, or book. Dictate numerals 1 through<br />
10 in various combinations.<br />
j. Inform the Laboratory of the age and apparent physical<br />
condition of the subject or of any circumstance (illness,<br />
fatigue, intoxication, etc.) which might influence his/her<br />
handwriting at the time the standards are taken.<br />
k. Observe and report to the Laboratory the handedness of the<br />
subject, and obtain at least one sample written using<br />
opposite hand. (If subject is right-handed, obtain one<br />
specimen written with the left hand, and vice versa.)<br />
l. Have subject under investigation write by hand in narrative<br />
form and sign any statements that she/he gives.<br />
m. When in doubt, telephone the Laboratory before taking any<br />
requested exemplars. Improper or inadequate requested<br />
exemplars may preclude a definite opinion.<br />
B. Collected Standards<br />
1. Collected standards are genuine writings of the suspects (and<br />
victims) which are written not for the purpose of a handwriting<br />
examination, but during the course of daily activities. Collected<br />
standards exhibit the natural characteristics of the subject’s<br />
handwriting and will indicate to the examiner whether the<br />
request writing is natural or disguised.<br />
2. Genuine writing is handwriting made in the past and admitted by<br />
the writer. Sources include:<br />
a. Handwriting made in the past and admitted by the writer<br />
b. Handwriting witnessed by another person<br />
c. Canceled checks<br />
d. Legal, government, or official documents<br />
e. Employment records<br />
(See Suggested Sources for Collected Handwriting Standards,<br />
following.)
II. Procedure-General<br />
Documents - 33<br />
Document problems vary considerably, and no brief formula could<br />
cover all problems involving documents but, in general, when<br />
handwriting comparisons are desired, submit all writing, papers, tablets,<br />
and pads found at scene of suicide, homicide, or other criminal investigations<br />
where document problems may be involved. Standards should be<br />
submitted in accordance with the guidelines listed below.<br />
A. Forgery<br />
1. All original documents bearing the alleged forgeries.<br />
(Photocopies are generally not adequate for comparison<br />
purposes.)<br />
2. Ten or more collected specimens of the genuine signature,<br />
written at approximately the same date or period as the<br />
questioned signature.<br />
3. A completed requested exemplar booklet written by the person<br />
whose name is allegedly forged.<br />
4. In addition to the requested exemplar booklet, ten to twenty<br />
request specimens of the signature in question written by<br />
suspects. (See pp. 218-219 of this chapter for directions on taking<br />
request specimens.)<br />
5. All available collected standards written by the suspects and<br />
consisting of general handwriting (or hand printing if the<br />
questioned material is hand printed).<br />
B. Anonymous Writings<br />
1. All of the anonymous writings, including envelopes.<br />
(Anonymous letters in the same series are often received by a<br />
number of persons.)<br />
2. Collected specimens from all of the victims, including writings<br />
of a general nature, not signatures alone. (In some cases the<br />
writer of anonymous letters is one of the “victims.”)<br />
3. Collected specimens from suspects consisting of writing of a<br />
general nature, not signatures alone.<br />
221
33 - Documents<br />
222<br />
4. Requested exemplars from suspects and victims, consisting of at<br />
least two 8-1/2 x 11-inch sheets of written material including the<br />
questioned text or material having similar words and<br />
combinations of letters.<br />
C. Typewriting<br />
1. All original documents bearing the typewriting in question.<br />
2. Collected specimens from suspect typewriters. Identify each<br />
specimen with serial number and make of machine.<br />
3. Collected specimens typed by suspect typists.<br />
a. Identify each specimen with serial number and make of machine.<br />
b. Identify each specimen with name of typist.<br />
4. Specimens of the text of the questioned document typed on<br />
“suspect” typewriters exactly as it appears on questioned<br />
document. (Typewriting specimens must bear the serial number,<br />
make of typewriter, and owner’s name.)<br />
5. Ribbon sample showing all characters on keyboard, both upper<br />
and lower case, typed twice.<br />
6. Carbon paper sample showing all characters on keyboard typed<br />
twice in both upper and lower case. (Place sheet of new carbon<br />
on top of sheet of clean white paper and insert in typewriter,<br />
carbon showing. Place ribbon control in “Stencil” position - or<br />
remove ribbon - and type sample through carbon.)<br />
7. “Suspect” typewriter (or other printing machine) if possible to<br />
obtain; if not possible, the ribbon from machine.<br />
8. Information regarding repairs to and/or ribbon changes on<br />
suspect and standard typewriters when possible to obtain.<br />
D. Computer Generated Printing<br />
1. Collect specimens from printers.<br />
2. Proceed as in collection of typewriter specimens.
III. Procedure - Care and Marking of Questioned<br />
Documents<br />
Documents - 33<br />
Questioned documents are minutely examined and often yield<br />
valuable hidden information. For example, examination of a document<br />
may reveal the presence of indentations, which can often be deciphered<br />
by photographic or other means. The presence of wire-staple<br />
perforations, or apparently unrelated traces of carbon or other carbonlesscopy<br />
dyes on a document may prove to be important evidence. Therefore,<br />
it is imperative that extreme care be taken in the handling, marking, and<br />
packaging of questioned documents in order to preserve intact all characteristics<br />
of the document as it is and to avoid the inadvertent<br />
introduction of extraneous characteristics, such as impressions from the<br />
marking of the mailing envelope, etc. The following procedures should<br />
be utilized whenever document cases are to be submitted.<br />
A. Avoid excessive handling.<br />
B. When recovering documents for examination by the Laboratory, the<br />
investigator should always consider the possibility of processing the<br />
questioned material for fingerprints. If documents are to be processed<br />
for fingerprints, they should be handled with gloves. (See the chapter<br />
on Latent and Inked Prints.)<br />
C. No marks of any kind are to be placed upon questioned documents.<br />
Exception: The investigator should place his/her initials and the date<br />
lightly on the reverse side of document in an area away from any<br />
handwriting appearing on either side of the document.<br />
D. Questioned documents (standards as well) should not be folded,<br />
stapled, or pinned together. (Staples may puncture endorsement or<br />
signature, impair its use for identification purposes, and destroy<br />
evidence.)<br />
E. Avoid pointing to or touching questioned document with a pencil,<br />
pen, pointed instrument, or any object which might damage or deface<br />
the document.<br />
F. Documents which have been damaged by tearing or cutting, or by<br />
water, should not be pasted or glued together in an attempt to repair.<br />
They should be placed in protective envelopes or boxes in the same<br />
condition as when recovered.<br />
223
33 - Documents<br />
G. Mark envelope of sufficient size to take the document, “<strong>Evidence</strong>”<br />
“Documents” (and if fingerprint processing is desired,<br />
“Fingerprints”).<br />
H. Insert document, with a backing of cardboard, into the envelope and<br />
continue packaging as shown Fig. 33-4.<br />
Charred Documents<br />
Printing, typewriting, and handwriting on charred paper or paper<br />
which has been subjected to extremely high temperatures can, in many<br />
instances, be deciphered providing the remains are delicately handled.<br />
When paper has been reduced to ashes, restoration of text is not possible.<br />
I. Procedure-Recovery<br />
A. When burned documents are contained in a metal cash box, cabinet,<br />
or any similar receptacle, the container should be carefully<br />
transported to the Laboratory without removal of contents.<br />
B. If the container cannot be transported to the Laboratory, or if the<br />
burned documents are found in the open, they should be gently lifted<br />
from their resting place by use of a thin but firm cardboard of<br />
sufficient size to raise the entire document or documents. The corners<br />
of the cardboard should be rounded to avoid damage to the<br />
documents. The fragments should be put gently into a rigid box of<br />
sufficient size (shoe box, cereal box, corrugated carton) which has<br />
been prepared by padding the bottom with absorbent cotton or similar<br />
soft material. Cotton may be placed between layers of documents.<br />
(Do not attempt to separate charred sheets when they are found<br />
together or attached.)<br />
C. Individual recovery locations or sources should be recorded.<br />
224
II. Procedure-Packaging and Delivery<br />
Documents - 33<br />
A. It is recommended that delivery of charred documents to the<br />
Laboratory be made in person.<br />
B. When necessary to ship by mail or express, the container holding the<br />
documents should be gently filled to the top with cotton to prevent<br />
shifting of contents.<br />
C. Wrap and seal as recommended. Label wrapper “This Side Up,”<br />
“<strong>Evidence</strong>,” “Fragile.”<br />
D. Place in an outer, larger box; pad all four sides with packing material<br />
(newspaper, Styrofoam peanuts, etc).<br />
E. Wrap outer box (excepting wooden boxes) as for ordinary shipment<br />
and address to the Laboratory. Mark outside “Fragile.”<br />
F. Attach letter of transmittal and completed Transmittal of Criminal<br />
<strong>Evidence</strong> form in a white envelope to the top side of the wrapped<br />
container.<br />
225
33 - Documents<br />
A. Mark empty envelope as shown in A.<br />
B. Insert document, unfolded, with a protective backing sheet.<br />
C. Seal envelope; write lightly, in ink, identifying data on tape.<br />
D. Place sealed inner envelope in outer envelope.<br />
E. Seal, address in usual manner; attach completed Transmittal of Criminal<br />
<strong>Evidence</strong> form to outside of envelope. Mail via certified or registered mail.<br />
226<br />
Fig 33-4<br />
Packaging documents for shipping.
Suggested Sources for Collected<br />
Handwriting Standards<br />
BANK RECORDS<br />
Canceled Checks<br />
Deposit Slips<br />
Microfilm<br />
Mortgages<br />
Promissory Notes*<br />
Safety Deposit Vault Register<br />
Signature Cards*<br />
Withdrawal Slips<br />
CITY RECORDS<br />
Building Department<br />
Building Permits<br />
City Auditor<br />
Canceled Checks<br />
City Clerk<br />
Licenses (Peddler, Tavern,<br />
Special Permits, etc.)*<br />
Voter Registration Lists<br />
Personnel Department<br />
Civil Service Applications<br />
COUNTY RECORDS<br />
County Clerk<br />
Civil Service Applications<br />
Claims for Services or<br />
Merchandise<br />
Fishing, Hunting, and<br />
Marriage Licenses*<br />
Purchasing Department<br />
Bids and Contracts<br />
Register of Deeds<br />
Deeds<br />
Birth Certificates<br />
Public Assistance Applications*<br />
ID Card Applications<br />
Selective Service (Local Board)<br />
Registrations<br />
Treasurer<br />
Canceled Checks<br />
Documents - 33<br />
The following is a list of possible sources of genuine signatures, not<br />
all of which may be accepted in court, but which may prove to be<br />
valuable investigative aids. Those items starred (*) are most likely to be<br />
accepted as standards:<br />
DEPARTMENT STORE RECORDS<br />
Applications for Credit<br />
Complaints and Correspondence<br />
Receipts for Merchandise<br />
Signed Sales Checks<br />
DRUG STORE RECORDS<br />
Register for Exempt Narcotics, Poisons<br />
EMPLOYMENT RECORDS<br />
Application for Employment<br />
(if witnessed)*<br />
Canceled Payroll Checks<br />
Credit Union<br />
Personnel Jacket, Letters, Memos<br />
Receipts for Bonds, Salary, etc.<br />
Withholding Exemption Forms<br />
Work Product (Notes, Ledgers,<br />
Sales Checks, etc.)<br />
FEDERAL RECORDS<br />
(Most Federal Records are Privileged)<br />
Civil Service Regional<br />
Offices Applications (No. 57)<br />
Department of Justice (FBI)<br />
Fingerprint Cards*<br />
Military Records*<br />
Air Force, Army, Coast Guard,<br />
Marines, Navy<br />
(Bases and Stations)<br />
Record Depots (Ex-Service<br />
Members)<br />
Post Office Department<br />
Application for P.O. Box<br />
Registered and Special Delivery<br />
Receipts<br />
Social Security Administration<br />
Applications for Card, Benefits<br />
Veterans Administration<br />
Applications for Benefits<br />
U.S. Treasury<br />
Canceled Payroll Checks<br />
227
33 - Documents<br />
IN THE HOME<br />
Books (Flyleaf Signatures)<br />
Canceled Checks, Notes<br />
Correspondence<br />
Diaries<br />
Insurance Policies*<br />
Military Discharge Papers*<br />
Notebooks<br />
Passports*<br />
Receipts (Rent, Cooking)<br />
Wills<br />
HOSPITAL RECORDS<br />
Admissions, Releases<br />
HOTEL AND MOTEL RECORDS<br />
Registrations, Reservations<br />
INSURANCE RECORDS (LIFE)<br />
Applications for Insurance*<br />
LIBRARY RECORDS<br />
Applications for Cards<br />
ON THE PERSON<br />
Contents of Wallet<br />
(Signed ID Cards of all types)<br />
Letters, Post Cards<br />
Notebooks<br />
Passport*<br />
POLICE AND SHERIFFS'<br />
DEPARTMENT RECORDS<br />
Complaints<br />
Fingerprint Cards*<br />
Receipts for Returned Property*<br />
Canteen Slips<br />
Statements Written by the Suspect<br />
PUBLIC UTILITY RECORDS<br />
Applications for Service<br />
Electricity<br />
Gas<br />
Telephone<br />
Water<br />
REAL ESTATE RECORDS<br />
Property Listing Agreements<br />
228<br />
RELATIVES<br />
Letters, Post Cards<br />
Greeting Cards<br />
SCHOOL AND COLLEGE<br />
RECORDS<br />
Applications for entrance<br />
Daily Assignments<br />
Registration Cards<br />
STATE RECORDS<br />
Conservation Files<br />
Boat, Fishing, Hunting<br />
Licenses*<br />
Department of Revenue<br />
State Income Tax Returns<br />
Worker and Unemployment Files<br />
Unemployment Compensation<br />
Canceled Checks<br />
Motor Vehicle Files<br />
Drivers' Files*<br />
Title Files*<br />
Personnel Files<br />
Civil Service Applications<br />
and Examinations<br />
Corrections Files<br />
Probation and Parole Reports*<br />
Secretary of State<br />
Application for Notary Public*<br />
Taxation Files<br />
Beverage and Cigarette Tax<br />
Applications*<br />
State Treasurer<br />
Canceled Checks<br />
MISCELLANEOUS<br />
Building After-hour Registers<br />
Express Company, Cartage,<br />
Movers' Receipts<br />
Rent Receipts to Tenants
34<br />
Computer <strong>Evidence</strong><br />
________________________________________________<br />
More and more frequently computers are being used in the<br />
furtherance of criminal activity, and when found at a crime scene should<br />
be regarded as a possible source of evidence. Computers are being used<br />
to store records of drug transactions, money laundering, child<br />
pornography, prostitution and many other criminal activities. The<br />
information presented in this section refers specifically to stand-alone<br />
IBM PC compatible (DOS/Windows) computers. If the investigator<br />
suspects a network, mainframe, or some other type of system, a computer<br />
specialist should be consulted prior to disturbing or seizing any of the<br />
components. Specialists in computer seizure are available at the<br />
Laboratory for consultation. It should also be noted that the information<br />
presented here is accurate as of the date of publishing. Computer<br />
technology is constantly changing, and seizure methods may change in<br />
the future. If you have any questions, please contact the Laboratory for<br />
technical assistance.<br />
I. Safeguarding Data<br />
If information stored within a computer is incriminating, users can<br />
devise methods to destroy the data if an unauthorized person attempts to<br />
use the system. For this reason, it is essential that precautions are taken<br />
to safeguard the evidence when a computer is seized.<br />
When you discover a computer, immediately remove everyone from<br />
the area. Do not allow them any further contact with the computer<br />
system, since a single keystroke can execute a program that erases<br />
information. Take a photograph of the screen to document any<br />
information that is displayed, and then immediately unplug the computer.<br />
Unplug the computer from the back of the central processing unit (CPU<br />
or main box), not from a wall receptacle. Uninteruptable power supplies<br />
(UPS) are common and can be programmed to execute destructive<br />
processes upon loss of power from a wall receptacle. Do not use the<br />
power switch, since the power switch can be rigged to damage the hard<br />
drive or other components.<br />
229
34 - Computer <strong>Evidence</strong><br />
230<br />
Fig. 34-1<br />
Upon encountering a computer, immediately move people away. Next,<br />
photograph the screen to document the information displayed.<br />
Fig. 34-2<br />
Photograph the connections on the back of the computer.
Computer <strong>Evidence</strong> - 34<br />
Do not execute any commands on the computer prior to pulling<br />
the plug. Commands, such as DIR and PARK can be altered to execute<br />
destructive processes. If there is a modem connected, unplug the modem<br />
cable from the wall. Leave the connections on the back of the computer<br />
undisturbed until they can be documented.<br />
Photograph the cable connections at the rear of the computer. Mark<br />
all cables with evidence tape or tags, and mark the corresponding ports<br />
on the computer in an identical manner. Photograph and document<br />
peripherals, and the marked connections on the back of the computer<br />
system prior to disconnection. This will facilitate the reassembly of the<br />
computer system and the peripherals in the office, courtroom, or at the<br />
Laboratory.<br />
It is recommended that all computer hardware, software, disks, and<br />
manuals be seized. It is a reasonable and common practice to retain<br />
business records on computer media, in addition to the traditional (paper)<br />
method used to maintain and store business records and documents.<br />
All computer hardware should be seized. Conducting a search of a<br />
computer system, documenting the search and making evidentiary<br />
and discovery copies is a lengthy process. It is necessary to determine<br />
that no security devices are in place which could cause the<br />
destruction of evidence during the search, and in some cases, it is<br />
impossible even to conduct the search without expert technical<br />
assistance. Since it would be extremely difficult to secure the system<br />
on the premises during the entire period of the search, and computer<br />
evidence is extremely vulnerable, removal of the system from the<br />
premises will assist in retrieving the records authorized to be seized,<br />
while avoiding accidental destruction or deliberate alteration of the<br />
records. All peripherals should be seized, since some software<br />
programs are designed to work with specific hardware. Without all<br />
the components connected, it may be difficult, if not impossible, to<br />
recover and print the files of interest.<br />
All computer software and disks should be seized. Specific<br />
software programs may be needed to view files stored on the system.<br />
Also, it would be impossible, without examination, to determine that<br />
disks purporting to contain standard, commercially available<br />
software have not been altered or used to store records instead. It is<br />
also possible that disks may contain information other than what is<br />
labeled, and unlabeled disks may contain files.<br />
All manuals and pieces of paper found near the computer should<br />
be seized. The analyst may have to refer to the manual and hand-<br />
231
34 - Computer <strong>Evidence</strong><br />
232<br />
written notes to operate the system and to recover the records<br />
authorized to be seized. Many programs can be password protected,<br />
and it is common for users to write passwords and other information<br />
in manuals and on scraps of paper.<br />
II. Packaging and Transporting the <strong>Evidence</strong><br />
Computers are delicate electronic instruments that are sensitive to<br />
temperature, physical shock, static electricity, and magnetic fields. When<br />
transported, care should be taken to ensure that computer components are<br />
well cushioned and protected. The original box and packaging material,<br />
if it can be located, is a good container for storing and transporting the<br />
computer. Magnetic media, such as computer hard drives, floppy disks,<br />
magnetic tapes, etc., are very sensitive to magnetic fields. When placing<br />
computer evidence in a car, remember that police radio transmitters are<br />
strong sources of magnetic fields. Do not place computer evidence in<br />
the trunk of a car if the trunk contains a police radio. Once again,<br />
photograph the scene after all computer equipment has been removed.<br />
III. Search Warrants<br />
If you suspect that records of a crime are stored in a computer, or on<br />
floppy disks, magnetic tapes, etc., it is important to include language in<br />
the affidavit and search warrant that allows the search and seizure of this<br />
type of evidence. If you can determine in advance the type of computer<br />
system to be seized, this specific information should also be included in<br />
the search warrant. Contact the Laboratory if you need assistance in<br />
preparing search warrant language.<br />
As mentioned above, when the search warrant is executed, it is<br />
important to immediately isolate the computer from human contact. This<br />
will minimize the likelihood of destruction of information contained in<br />
the computer.<br />
IV. Examination of Computer <strong>Evidence</strong><br />
The examination of computer evidence is a highly technical area of<br />
Forensic Science. As such, it is vitally important that computer evidence,<br />
once seized, be handled in accordance with specific procedures intended
Computer <strong>Evidence</strong> - 34<br />
to preserve the integrity of the information stored on the computer<br />
system. The current accepted practice in the field of computer forensics<br />
is to prepare “forensic copies” of all computer media (hard disks, floppy<br />
disks, compact disc recordables, etc.). A forensic copy is defined as the<br />
copying of the entire physical and/or logical addressable storage space<br />
contained on a piece of computer media. A forensic copy will contain<br />
files that were present on the computer system at the time of seizure as<br />
well as recoverable deleted files, file slack and unused space containing<br />
residual file data. A commercial backup program, such as Microsoft<br />
Backup or equivalent, will not recover this additional information.<br />
Once the forensic copy is prepared, it is the copy which is examined, not<br />
the original media. This practice ensures that no deleterious change can<br />
occur to the original information on the media, thereby protecting the<br />
integrity of the evidence.<br />
Failure to follow prescribed procedures for examining computer<br />
evidence will result in irreversible changes to the files on the<br />
computer system. Simply turning a computer on can alter hundreds<br />
and potentially thousands of files during the short duration of time it<br />
takes an operating system to load.<br />
Due to the highly technical nature of computer forensics, only<br />
specially trained individuals should examine computer evidence. The<br />
Laboratory system provides expertise in computer forensics. It is the<br />
responsibility of the investigating authority to ensure that computer<br />
evidence is handled and examined properly by a competent expert.<br />
Failure to do so could jeopardize the successful finding of truth in your<br />
case.<br />
233
34 - Computer <strong>Evidence</strong><br />
234<br />
Computer Seizure Checklist<br />
DOS/Windows-Based PC<br />
The following checklist is provided for stand-alone DOS/Windowsbased<br />
IBM PC compatible computers. If the investigator is unable to<br />
identify the type of system encountered or suspects a network,<br />
mainframe, or some other type of system, a computer specialist should be<br />
consulted prior to disturbing or seizing any of the components.<br />
• Remove person(s) from the computer area.<br />
• Disable/disconnect the modem, if there is one.<br />
• Photograph the screen.<br />
• Unplug the computer from the back of the CPU. Do not use the<br />
computer on/off switch.<br />
• Disconnect power to the printer and other peripherals.<br />
• Mark all cables, both input and output, on the cable and at the<br />
connection.<br />
• Photograph all the marked connections prior to disassembly of<br />
the system. Also photograph or record the serial numbers of the<br />
system components, if they are available.<br />
• Seal computer CPU and other evidence using appropriate<br />
evidence tape. Seal over power connector and cover to ensure<br />
that the computer cannot be powered-up and the cover cannot be<br />
removed.<br />
• Package the computer for transmittal, remove it from the area,<br />
and photograph the scene. Magnetic media should only be<br />
packaged in static-shielded bags or paper. Keep magnetic media<br />
away from electromagnetic fields, such as radio transmitters,<br />
magnets, etc.<br />
• Complete the search of the area, looking for floppy diskettes,<br />
manuals, and notations which might include passwords for<br />
locked files, etc.
A<br />
Accident reconstruction 205<br />
Address<br />
crime laboratories iii<br />
AFIS<br />
See Latent prints<br />
AIDS 1<br />
Air Drying<br />
method 131<br />
plant materials 185<br />
Alcohol<br />
body fluids, in 46, 173-174<br />
use with drugs 173-174<br />
Ammunition<br />
bearing print 86<br />
handling, marking, shipping 65-67<br />
possible determinations 64<br />
See also Bullet; Cartridge<br />
Amniotic fluid<br />
as biohazard 2<br />
Anal swab/smear 164<br />
Anatomical outlines 138-139<br />
Animals<br />
hair identification 169-170<br />
poisoning, procedure 179-182<br />
poisoning, supplementary<br />
information 179-180<br />
Anonymous writing<br />
submitting procedure 221<br />
See also Documents<br />
Antemortem<br />
blood sample recovery 173-174, 180<br />
urine sample recovery 173-174, 180<br />
Arson 193-197<br />
determination of 193-197<br />
flammable liquids 193-197<br />
scenes, evidence 193-197<br />
suspects, evidence 193-197<br />
See also Flammable liquids<br />
Audio Tapes - 53-56<br />
Automated Fingerprint Identification<br />
System<br />
See Latent prints<br />
Automobile<br />
See Hit-and-run; Vehicle<br />
Automobiles—National Insurance <strong>Crime</strong><br />
Index<br />
Bureau (formerly: National Auto<br />
Theft Bureau) 206<br />
Autopsy 135-142<br />
anatomical outlines 138<br />
authorization 135<br />
bite mark recovery 136<br />
body fluids and organs 137-141<br />
clothing 137-138<br />
fingerprinting 95-96, 137, 143<br />
firearms evidence 140<br />
hair 137, 140, 169-170, 180<br />
identification of unknown<br />
deceased 143-148<br />
officer procedure 143-148<br />
pathologist procedure 137<br />
photography 18-19, 135-139<br />
poisoning - animal 181<br />
poisoning - human 179-180<br />
report 137, 180-181<br />
specimen collection kit 141<br />
wound area recovery 137, 139<br />
x-ray dental records 153<br />
x-rays 155, 137, 145, 147, 150-152,<br />
156<br />
B<br />
Bile<br />
autopsy recovery 175,180<br />
Biohazard<br />
labels, use of 1-2, 174<br />
shipment 174<br />
Bite marks 159-162<br />
bruises, abrasions, indentations 159<br />
casting 159<br />
legal decisions relating to 159<br />
photography 30, 159<br />
recovery at autopsy 162<br />
removal and preservation 157<br />
saliva recovery 60, 136, 159, 166<br />
suspect work-up 162<br />
Blasting caps 198<br />
Blood<br />
autopsy recovery 58, 130-137, 140, 149<br />
bullets, blood on 64<br />
crime scene procedure 58-60<br />
drug-alcohol determination, in 173<br />
235
hit-and-run, in 131, 210-212<br />
identification of unknown<br />
deceased, in 148<br />
packaging 60, 174<br />
poisoning, in 179, 182<br />
recovery, dried 58<br />
recovery, liquid 58<br />
recovery, moist 58<br />
sexual offenses, in 166<br />
standard samples 60<br />
Bloodborne Pathogen Control<br />
Exposure Plan 1<br />
Bloodborne pathogens 1-2<br />
general guidelines 2<br />
Hepatitis B 1<br />
HIV 1<br />
body fluids containing (table) 2<br />
protection against exposure 2<br />
universal precautions 1<br />
Bloodspatter 57<br />
Body<br />
See Autopsy; Body fluids; Body organs<br />
and parts; Deceased<br />
Body fluids 57-62<br />
drug-alcohol in 60, 57-62, 166,<br />
173-175<br />
evidentiary value 57<br />
packaging 57-62, 137, 165, 174<br />
poison, in 179-180<br />
sexual assault, in 164-180<br />
See also names of individual organs<br />
Body organs and parts<br />
autopsy, in 28, 165, 179-180<br />
Bombing procedures 197-198<br />
Breath test 173<br />
Building materials 109-112<br />
at scene 109<br />
suspect procedures 110<br />
See also Glass; Metal; Paint; Wood<br />
Bullet<br />
detection by x-ray 145<br />
handling, marking, shipping 65-67<br />
tissue, in 138-139<br />
Burglary 103-108<br />
scene, procedure 103<br />
suspect, procedure 104<br />
See also Building materials<br />
236<br />
Camera<br />
See Photography<br />
Carbon paper sample<br />
typewriting identification, in 222<br />
Cardboard boxes<br />
as packaging 9<br />
Cartridge<br />
bearing fingerprints 87<br />
handling, marking, shipping<br />
65-67<br />
possible determinations 64<br />
Casting<br />
See Impressions; Tool Marks<br />
Casts 71<br />
dental stone 72-75<br />
marking 73<br />
SnowPrint-wax 75, 78<br />
sulfur 75-78<br />
Cerebrospinal fluid<br />
as biohazard 2<br />
Cervical swab/smear 164, 135<br />
Chain of custody<br />
See Custodial chain<br />
Checks<br />
counterfeit 216<br />
forged 218<br />
as standards 219-220, 227-228<br />
Chemicals<br />
clandestine drug labs, and 186, 188<br />
fingerprint detection, use in 82<br />
Clandestine drug laboratories 186-188<br />
Clothing<br />
air drying 59, 62, 131-132<br />
autopsy recovery 136-137<br />
identification of unknown<br />
deceased, in 143, 145<br />
recovery and packaging 131-132<br />
seminal stains in 61-62<br />
sexual offenses, in 61, 163, 166<br />
shot or powder patterns in 69<br />
Computer generated printing 222<br />
Computer <strong>Evidence</strong> 229-233<br />
computer seizure checklist 234<br />
DOS computers 229<br />
execution of commands 229, 231<br />
mainframe 229<br />
network 229<br />
packaging and transporting 232<br />
C
"parking" hard disk 231<br />
photography 229-231<br />
search warrants 232<br />
technical assistance 229<br />
what to seize 231-232<br />
Condoms 167<br />
Controlled substances<br />
See Drugs<br />
Courts<br />
custodial chain, and 20<br />
Laboratory services, and iv, v<br />
<strong>Crime</strong> Laboratories<br />
field services vii, 25-26<br />
location and function iii<br />
reports stand in lieu of appearance<br />
at preliminary hearings vi<br />
requesting aid from v-vii, 25-26<br />
services iv<br />
tours of viii<br />
See also Field service<br />
<strong>Crime</strong> scene<br />
protection 5-6<br />
visitors log 6<br />
Criminal damage to motor vehicles<br />
205-206<br />
Custodial chain 20<br />
D<br />
Deceased<br />
hit-and-run, in 210<br />
sexual offenses, and 167<br />
Poisoning; also-names of<br />
specific investigation types<br />
See also Autopsy; Deceased, unknown<br />
Deceased, unknown 143-147<br />
clothing 145<br />
external examination 143-144<br />
identification photographs 145<br />
internal examination 145-146<br />
personal effects 146-147<br />
Dental identification 149-157<br />
evidentiary significance 157-157<br />
examination procedures 149-151<br />
how to locate antemortem<br />
records 156<br />
identification of unknown<br />
deceased 150<br />
NCIC 149<br />
preparation of postmortem<br />
records 151-153<br />
securing antemortem records 153,<br />
155-156<br />
Dental stone 72-75<br />
Documents 215-228<br />
bearing fingerprints 223<br />
care and marking 223-224<br />
charred 224<br />
computer generated 222<br />
indentations on 215, 223<br />
packaging 223-224<br />
photocopies 221<br />
possible determinations 215, 223<br />
standards 217-220, 227-228<br />
See also Anonymous writing; Checks;<br />
Forgery; Handwriting; Typewriting<br />
Division of Narcotics Enforcement<br />
assist in clandestine labs 188<br />
Drug laboratories, clandestine 186-188<br />
Drugs<br />
body fluids, in 173-176<br />
capsule/tablet identification 184<br />
fingerprints on packaging 186<br />
fresh plant material dried 185<br />
marijuana/THC 185<br />
prescription 147, 173-175,<br />
179-181, 184<br />
product identification code 184<br />
sample size for analysis 183<br />
street drugs 183, 185<br />
syringes 173<br />
use with alcohol 173<br />
See also Field drug testing kit; Drug<br />
laboratories, clandestine<br />
E<br />
Electronic imaging<br />
See Photography<br />
Engine<br />
criminal damage to 205<br />
Envelopes<br />
as packaging 7-10<br />
hairs and fibers,<br />
as packaging for 170<br />
manila, as packaging 10<br />
<strong>Evidence</strong> collection 7-12, 18<br />
<strong>Evidence</strong>, marking 15, 18<br />
Explosives<br />
assistance 197-198<br />
237
fireworks 199<br />
precautions 105, 197-198<br />
safe burglary, in 105<br />
Eye fluid<br />
autopsy recovery 80<br />
F<br />
Fabric<br />
air drying 131<br />
impressions 212<br />
recovery and packaging 131-132, 166<br />
sexual offenses, recovery 166<br />
Fibers 169-171<br />
evidentiary value 169-170<br />
packaging 169-171<br />
known sample 169-170<br />
See also Clothing; Fabric<br />
Field Drug Testing Kit 183<br />
Field response<br />
See Field service<br />
Field service<br />
function 25-26<br />
procedures 25<br />
Film<br />
photography 30, 49-50<br />
Fingernails<br />
identification of unknown<br />
deceased, in 144<br />
scrapings 137, 165<br />
Fingerprints<br />
See Latent prints; Inked prints<br />
Fire<br />
See Arson<br />
Firearms 63-69<br />
handling, marking, shipping 63-67<br />
possible determinations 64, 68, 69<br />
recovered from water/liquid 63<br />
See also Ammunition<br />
Fireworks 199<br />
Flammable liquids<br />
arson 7, 193-196<br />
clandestine labs 186<br />
collection and packaging 7-8, 12,<br />
193-195, 205<br />
gasoline 205<br />
unlawful to mail 206<br />
Fluids<br />
See Body fluids; Flammable liquids<br />
Footprints<br />
238<br />
See Impressions; Prints, footwear<br />
and tire<br />
Footwear impressions<br />
See Impressions<br />
Forgery<br />
submission procedures 221<br />
See also Checks; Documents;<br />
Handwriting; Typewriting<br />
Fracture matching 133-134<br />
(table) 134<br />
See also Specific kinds of evidence<br />
G<br />
Gasoline<br />
foreign materials in 205-206<br />
See also Flammable liquids<br />
Glass<br />
as evidence for fracture<br />
match 109, 113-115, 208, 210<br />
as packaging 12, 10-12, 174, 180-182,<br />
194, 202<br />
collection and packaging 115<br />
hit-and-run, in 207-208, 211<br />
objects bearing fingerprints 80<br />
recovery and packaging 109, 115<br />
known samples 113<br />
Gun<br />
See Firearms<br />
Gunshot residue 57-60<br />
clothing 60<br />
evidentiary value 57<br />
kit 57, 59<br />
packaging swabs 59<br />
precautions 59<br />
procedure 57, 59<br />
See also Powder, gunshot;<br />
Powder pattern<br />
Hair 169-171<br />
autopsy recovery 135-141<br />
collection of standards 163-164<br />
evidentiary value 169-171<br />
head, standard sample 170<br />
identification of unknown<br />
deceased, in 144<br />
packaging 137, 163, 164, 170, 171<br />
poisoning, in 180<br />
H
pubic combings 137, 163, 170<br />
pubic, standard sample 137, 164, 170<br />
sexual offenses, recovery in<br />
163-164, 166-167<br />
Handwriting<br />
anonymous writings 221-222<br />
collected standards 20, 227-228<br />
evidentiary value 215<br />
forgery 221<br />
request standards 217-220<br />
See also Checks; Documents<br />
Hepatitis B Virus 1<br />
protection against exposure 2<br />
vaccination against 1<br />
Hit-and-run 206-213<br />
body fluids 209-210<br />
clothing 209<br />
deceased victim procedure 210<br />
diagraming 208<br />
fingerprints 210<br />
glass recovery 113-115, 207-208, 211<br />
grease recovery 212<br />
impressions 208, 212<br />
metal recovery 208, 211<br />
paint recovery 126-127, 208, 211<br />
photography 208, 210-211<br />
scene procedure 207-209<br />
skid marks 209<br />
soil recovery 208<br />
towing 210-211<br />
vehicle procedure 210-213<br />
vehicle sketches 212-213<br />
victim living, procedure 209-210<br />
HIV 1<br />
protection against exposure 1-2<br />
I<br />
Impressions<br />
bite marks—See Bite marks<br />
casting material retaining frame 72<br />
documents, on 223<br />
dust, in 100<br />
evidentiary value 99-100<br />
fabric 212<br />
footwear 71-78, 99-100, 103<br />
footwear, photography 34, 38<br />
hit-and-run 208, 212<br />
photography 35-42<br />
preserving 72<br />
procedure, general 71, 99-101<br />
soil, in 201<br />
tire 71-78, 100-101<br />
tire photography 39-40<br />
tool mark 109<br />
See also Tool marks; Casts<br />
Indentations<br />
See Impressions<br />
Inked prints 92-97<br />
autopsy 95-96, 137<br />
electronically recorded live scan 94-95<br />
identification of unknown deceased<br />
143<br />
postmortem 95-96<br />
recording, generally 92-95<br />
fingerprints 93-94<br />
palm prints 94<br />
See also Latent prints<br />
Intoxication, testing for 173-174<br />
K<br />
Kidney<br />
animal recovery 182<br />
autopsy recovery 180<br />
Knife<br />
marks on bone 119<br />
preserving cuts in clothing 129<br />
"Known," definition iv<br />
Known sample<br />
See specific type of evidence<br />
Laboratories, <strong>Crime</strong><br />
address and phone number iii<br />
Laboratory of Hygiene, State 176-178<br />
Latent prints 79-91<br />
AFIS 79, 92<br />
arson 194<br />
burglary 104<br />
developing 82-83<br />
development techniques (table) 82<br />
documents 223<br />
drug packaging materials, on 186<br />
film for imaging 50<br />
firearms 64<br />
frequency of occurrence 80<br />
general procedures 80-81<br />
hit-and-run 210<br />
lifting 83-85<br />
L<br />
239
local agency responsibility 79<br />
packaging for preservation 8, 87-91<br />
poisoning 179<br />
procedure 80-81<br />
sexual offenses 167<br />
tools 110, 121<br />
Law Enforcement Bulletin vii<br />
Leather<br />
packaging 11, 132<br />
Liver<br />
animal recovery 182<br />
autopsy recovery 180<br />
LSD 183<br />
tear match 133-134<br />
M<br />
Machine guns<br />
See Firearms<br />
Manila envelopes<br />
as packaging 8, 10, 170, 171<br />
Marijuana<br />
description 185<br />
packaging 8, 185<br />
Marking evidence, generally 14-19<br />
Medical history of deceased 181<br />
Medication<br />
use with alcohol 173<br />
Metal 129<br />
autopsy recovery 135<br />
detection by x-ray 135, 145<br />
evidentiary value 129<br />
fabric weave impressions on 212<br />
hit-and-run, in 207-208, 211<br />
immersed in liquid 63<br />
recovery of samples 129<br />
Metal cans<br />
as packaging 12, 194-195<br />
Mushrooms<br />
See Psilocybe mushrooms<br />
N<br />
Narcotics<br />
See Drugs<br />
National Automobile Theft Bureau<br />
See National Insurance <strong>Crime</strong> Bureau<br />
National Insurance <strong>Crime</strong> Bureau 206<br />
NCIC<br />
dental identification, and 149<br />
240<br />
Necrophilia<br />
See Sexual offenses, unusual<br />
Nitroglycerine 198<br />
Numbers, altered 63, 206<br />
documents, on 215, 219<br />
O<br />
Oral swabs 164<br />
Organs, body<br />
See Body organs<br />
Other body fluids 62<br />
P<br />
Packaging<br />
ammunition 64, 68-69<br />
arson investigations, clothing 196<br />
arson samples 193-195<br />
autopsy samples 136-140<br />
biohazard samples 174<br />
blood samples 58-60<br />
body fluids 58-62, 137, 174, 180-182<br />
building materials 109-110<br />
cardboard boxes 9<br />
casts 74<br />
charred documents 224-225<br />
computers 232<br />
documents 223-224<br />
evidence, generally 7-19<br />
fabrics 131-132<br />
fabrics in sexual assault<br />
investigations 166-167<br />
fibers 170-171<br />
firearms 63-64, 68-69<br />
flammable liquids 194, 205-206<br />
for fingerprint examination 87-91<br />
glass samples 109, 115<br />
glass vials and jars 12-13<br />
hair 163-164, 170-171<br />
latent fingerprint on 186<br />
leather 132<br />
marijuana 185<br />
metal cans 12<br />
oral swabs 164, 165<br />
paint samples 126-127<br />
paper 8-11<br />
plant material 185<br />
plastic 11<br />
saliva samples 61, 164
separate collection 131-132<br />
separating items 62<br />
sexual assault evidence 61-62, 163-<br />
167<br />
slide boxes 9, 58, 68-69<br />
soil core samples 203<br />
swabs 164-166<br />
syringes 184<br />
tissue specimens 179-180<br />
tools 121<br />
toxicology specimens 174<br />
urine samples 174<br />
vaginal swabs 164<br />
wood chips from burglaries 117<br />
Paint 125-127<br />
as evidence in burglaries 104<br />
as trace evidence in arson 196<br />
evidentiary value 109, 125<br />
fabric-weave impressions, in 212<br />
fabrics, on 131<br />
fracture matches 125<br />
hit-and-run, in 207-208, 211<br />
packaging 126-127<br />
recovery 126-127<br />
small vehicles, on 211<br />
stolen vehicles 206<br />
tool marks, and 126<br />
Palm prints<br />
See Latent prints; Inked prints<br />
Paper<br />
handwriting standards, in 219<br />
Paper bags<br />
as packaging 8-9<br />
Pathologist<br />
autopsy procedures, general 137-140<br />
autopsy procedures, poisoning<br />
179-180<br />
role in identification of unknown<br />
deceased 143-147<br />
Pen in handwriting standards 219<br />
Perforation matching 133<br />
(table) 134<br />
Pericardial fluid<br />
as biohazard 2<br />
Peritoneal fluid<br />
as biohazard 2<br />
Photocopies and documents 221<br />
Photography 27-52<br />
autopsy 31, 136-138<br />
bite mark 40-42, 136, 166<br />
bloodspatter 57-58<br />
building, exterior 29<br />
building, interior 28-29<br />
burglary 104<br />
casting, prior to 72<br />
computers, seized 229-231<br />
continuity of images 28<br />
document 215<br />
document indentations 215<br />
electronic flash 47<br />
evidentiary value 27, 32<br />
filling frame with image 33<br />
film 49-50<br />
fingerprints 82-83<br />
footwear impressions 38, 100<br />
forensic, general 27-51<br />
"four views" of rooms 28<br />
hit-and-run 208, 210-211<br />
impressions 35-42, 100-101, 201<br />
large format 51<br />
lenses for crime scenes 46<br />
lenses for surveillance 46<br />
lenses, general 46<br />
lenses, macro 46<br />
lighting 32, 35-37<br />
motor vehicle accidents 205<br />
photo log 30<br />
recommended equipment 45-51<br />
reference books suggested 52<br />
scaling 31-35, 37<br />
scaling, required equipment 32, 35<br />
services offered by Laboratory 27<br />
supporting investigations,<br />
procedures 27-30<br />
suspect 28<br />
tire impressions 39-40, 100-101<br />
tool marks 104<br />
training 27<br />
tripod 47-48<br />
unknown deceased 145<br />
victim 28-32<br />
written records 30<br />
Physician<br />
poisoning procedures 179-180<br />
sexual offense procedures 163<br />
See also Pathologist; Veterinarian<br />
Physicians Desk Reference 184<br />
Pipette<br />
liquid transfer, and 13<br />
Pistol<br />
241
handling, marking, shipping 65-69<br />
possible determinations 70<br />
Plaster of paris<br />
See Dental stone<br />
Plastic<br />
as evidence 125, 208<br />
as fire debris 195<br />
as packaging 11, 210<br />
cable ties 64, 131<br />
hit-and-run 208, 210<br />
trace evidence 131<br />
Plastic bags<br />
as packaging 11<br />
fingerprints 180<br />
when not used 8-9, 64, 74, 87,<br />
131-132, 185<br />
Plastic impressions<br />
fingerprints 81<br />
Pleural fluid<br />
as biohazard 2<br />
Poisoning, animal<br />
procedures 181-182<br />
supplementary information 182<br />
Poisoning, human<br />
autopsy procedure 179-180<br />
scene procedure 179<br />
supplementary information 180-181<br />
victim procedure 179-180<br />
Powder<br />
drugs, sample size for analysis 183<br />
fingerprint 79, 82-83, 96<br />
gunshot, in tissue 139<br />
packaging considerations 8<br />
talcum, as cast release agent 72<br />
Powder pattern<br />
in clothing 69<br />
possible determinations 70<br />
Preservative<br />
blood samples 60, 174<br />
Pretrial conference v<br />
Printing, hand 218-219, 221<br />
Prints<br />
burglary 104<br />
footwear and tire 99-100<br />
Prints, footwear and tire 71-72<br />
photography 30<br />
procedure 100-101<br />
See also Impressions, footwear;<br />
Impressions, tire<br />
Psilocybe mushrooms 185, 192<br />
242<br />
packaging 185<br />
Q<br />
"Questioned," definition iv<br />
R<br />
Rape<br />
See Sexual offenses<br />
Reports<br />
stand in lieu of appearance<br />
at preliminary hearings v<br />
Restoring serial numbers 63<br />
Retaining frame<br />
casting impressions 72<br />
Revolver<br />
handling, marking, shipping 65, 67-69<br />
possible determinations 70<br />
Rifle<br />
handling, marking, shipping 66-69<br />
possible determinations 70<br />
S<br />
Saliva<br />
collection procedure 60-61<br />
evidentiary value 60<br />
Sample, standard<br />
See specific type of evidence<br />
Sand<br />
casting impressions in 72-75, 201<br />
photographing impressions in 38, 201<br />
vehicle engines, in 205<br />
See also Soil<br />
Sawdust<br />
See Wood<br />
Screwdriver, marks 119<br />
Sealing evidence 14-19<br />
heat sealing 14<br />
staples, and use of 15, 19<br />
tamper-proof tape 16-17<br />
tamper-proof adhesive strip 19<br />
tape and staples 15<br />
wax 15-16<br />
Seminal fluid<br />
as biohazard 2<br />
Seminal stains<br />
recovery 61-62<br />
sexual offenses, in 62, 166-167<br />
Serial number
estoration 63<br />
Serial numbers<br />
altered 63, 206<br />
computer seizure 234<br />
film for imaging 50<br />
Sexual assault<br />
autopsy procedures 140, 163<br />
bite marks 60-61, 166<br />
blood samples 166<br />
clothing 61-62, 163, 166<br />
evidence collection 163-167<br />
fabrics as evidence 166<br />
involving animals 167<br />
involving dead 167<br />
oral swabs 164-165<br />
pubic hair combings 163, 170<br />
pubic hair standards 164, 170<br />
saliva samples 164<br />
scene processing 165-167<br />
seminal stains 61-62, 166-167<br />
toxicology specimens 166<br />
trace evidence 166<br />
See also Sexual Assault <strong>Evidence</strong><br />
Collection Kit<br />
Sexual Assault <strong>Evidence</strong><br />
Collection Kit 141, 163, 168, 177<br />
Sexual offenses, unusual 167<br />
Shellac<br />
use with impressions 72<br />
Shoes<br />
arson investigations 196<br />
burglary investigations 110, 132<br />
glass fragments adhering to 113<br />
packaging 7-8, 132<br />
sawdust adhering to 117<br />
soil adhering to 203<br />
wood fragments adhering to 117<br />
See also Impressions; Prints,<br />
footwear and tire<br />
Shot patterns 69-70<br />
in tissue 138-139<br />
Shotgun<br />
handling, marking, shipping 68-69<br />
possible determinations 70<br />
Skid marks 205, 209<br />
Slide box, as packaging 9, 58-59<br />
Snow, impressions in 75-78<br />
Sodium fluoride 60, 166, 174, 210<br />
Soil 201-203<br />
arson, in 194<br />
casting impressions in 72-75<br />
evidentiary value 131, 201<br />
footwear, and 203<br />
grave sites 203<br />
hit-and-run 208<br />
packaging 202-203<br />
photographing impressions in 38<br />
questioned location 201<br />
recovery procedure 201, 203<br />
standard sample from cast 74<br />
trace evidence 196<br />
Standards<br />
document examination 215-216<br />
document, collected 220, 227-228<br />
document, packaging 223<br />
document, request 217-220<br />
typewriting 222<br />
State Laboratory of Hygiene<br />
See Toxicology<br />
Stomach contents<br />
animal, recovery 181-182<br />
human, recovery 146, 180<br />
Sulfur casting 75-78<br />
Synovial fluid<br />
as biohazard 2<br />
Syringes<br />
as biohazard 3, 184<br />
packaging 184<br />
T<br />
Tear matching 133-134<br />
(table) 134<br />
Telephone number<br />
crime laboratories iii<br />
Tissue<br />
autopsy recovery 139, 179<br />
fingernail scrapings, in 165<br />
shot or powder patterns in 139<br />
See Body fluids; Body organs and parts<br />
Tool marks 119-123<br />
burglary, in 104, 119<br />
casting 120<br />
evidentiary value 119<br />
film for imaging 50<br />
paint samples, and 125-126<br />
preservation 109, 120<br />
recovery 119, 109<br />
standards for comparison 121<br />
types and location 119<br />
243
types of investigations 119<br />
Tools<br />
arson investigation, and 194, 196<br />
burglary investigations, in 103-104<br />
evidentiary value 119<br />
fragments 104<br />
packaging 121<br />
recovery from scene 110<br />
standards for comparison 121<br />
trace evidence, and 109<br />
types of investigations 119<br />
See also Tool marks<br />
Tours vii<br />
Towing<br />
hit-and-run vehicle 211<br />
Toxicology 173-182<br />
alcohol and drugs 173-177<br />
animal poisoning, in 181-182<br />
autopsy specimens 137, 141<br />
autopsy, value in 173<br />
drugs and alcohol 173-177<br />
hit-and-run, in 209-210<br />
samples, where to submit 177-178<br />
sexual offenses, in 166<br />
specimen preservation 174<br />
specimens, when blood is<br />
in short supply 60<br />
State Laboratory of Hygiene 176-178<br />
testing: routine and special requests<br />
175-176<br />
where to submit (table) 177<br />
"Trace evidence," definition iv<br />
See also specific types of evidence<br />
Training programs vii, 27, 920<br />
Transmittal of Criminal <strong>Evidence</strong> form<br />
checklist for use 21, 22<br />
general 21-24<br />
Typewriter<br />
serial number restoration 63<br />
typewriting standards, and 215, 222<br />
See also Typewriting<br />
Typewriting<br />
possible determinations 215<br />
submittal procedures 222<br />
See also Typewriter<br />
U<br />
Universal precautions 1<br />
244<br />
Urine<br />
animal, recovery 182<br />
as biohazard 2<br />
clothing, in 131<br />
drugs and alcohol 173-174<br />
hit-and-run, in 210<br />
human, recovery 179, 180<br />
packaging 174<br />
poisoning, in 179-180<br />
sample storage 174<br />
V<br />
Vaginal secretions<br />
as biohazard 2<br />
Vaginal swabs<br />
sexual offenses, in 164<br />
Vehicle 205-213<br />
arson, in 196<br />
burglary, used in 104<br />
criminal damage to 205<br />
fiber transfer 131<br />
fingerprints 210<br />
fractured parts from 208<br />
hit-and-run, in 125, 126, 206<br />
impoundment 206, 211<br />
moving 211<br />
note in area of crime scene 5<br />
paint samples 207-208<br />
physical impressions left by 208<br />
repainted 206<br />
sketches of 212-213<br />
skid damage 205, 209<br />
soil, and 201<br />
stolen 206<br />
stripped parts, matching 206<br />
trace evidence on operating pedals 201<br />
See also Impressions; Prints,<br />
footwear and tire<br />
Veterinarian<br />
poisoning procedure 181<br />
Victim<br />
photography 28-31, 40-42, 136, 140,<br />
145<br />
recovery of body fluids and<br />
tissue from 71, 60, 61, 139,<br />
163-166, 174, 179, 180<br />
Video taping, Video tapes<br />
authentication 43<br />
duplicating 44
not recommended as exclusive<br />
recording medium 42<br />
procedures 43, 44, 53-56<br />
submitting 53-56<br />
usefulness 42<br />
Vitreous humor<br />
autopsy recovery , 180<br />
Vomitus, recovery 181<br />
W<br />
Water<br />
dilution of urine samples 174<br />
distilled - used in saliva recovery 61<br />
documents wetted 223<br />
drying wetted clothing 131<br />
evidence packaging, and 11, 12<br />
metal immersed in 63<br />
mixing dental plaster, in 73, 75<br />
Wood<br />
evidentiary value 117<br />
sawdust adhering to shoes 117<br />
submission procedure 117<br />
Wound areas<br />
autopsy procedure 138<br />
autopsy recovery 139<br />
photography at autopsy 31<br />
X<br />
X-rays<br />
autopsy 135, 137<br />
dental identification 147, 150-156<br />
superimposition, and 147<br />
to locate dislodged teeth or<br />
fragments 150<br />
unknown deceased identification 145<br />
245