Create successful ePaper yourself
Turn your PDF publications into a flip-book with our unique Google optimized e-Paper software.
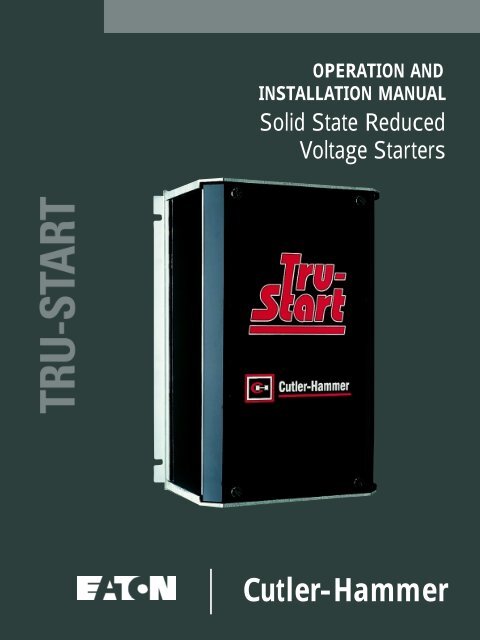
OPERATION AND<br />
INSTALLATION MANUAL<br />
Solid State Reduced<br />
Voltage Starters<br />
<strong>Cutler</strong>-<strong>Hammer</strong>
FOR YOUR SAFETY<br />
Only qualified personnel should install this equipment,<br />
after first reading and understanding all the information in<br />
this manual. All instructions should be strictly adhered to.<br />
The user should consult <strong>Cutler</strong>-<strong>Hammer</strong> or its supplier for<br />
clarification of the contents of this manual should any doubt<br />
or questions arise.<br />
The installation of this equipment must be conducted in<br />
accordance with all national, regional and local electrical<br />
codes.<br />
All drawings and technical representations included in this<br />
manual are for typical installations and should not in any<br />
way be considered for specific applications or<br />
modifications. Consult <strong>Cutler</strong> - <strong>Hammer</strong> for supplemental<br />
instructions.<br />
<strong>Cutler</strong> - <strong>Hammer</strong> <strong>Canada</strong>. accepts no liability for any<br />
consequences resulting from inappropriate, negligent or<br />
incorrect installation, application or adjustment of this<br />
equipment.<br />
The contents of this manual are believed to be correct at<br />
the time of printing. In following with our commitment to<br />
the ongoing development and improvement of our products<br />
C-H reserves the right to change the specification of this<br />
product and/or the content of this instruction manual<br />
without notice.
1 DESCRIPTION ........................................ . PAGE 1<br />
1.1 OVERVIEW ................................................... ... PAGE 1<br />
1.1.1 STANDARD FEATURES...................................... ... PAGE 1<br />
1.1.2 OPTIONAL FEATURES ....................................... ... PAGE 2<br />
1.2 APPLICATION NOTES ........................................ ... PAGE 2<br />
1.2.1 OPERATION MODES ......................................... ... PAGE 2<br />
1.2.2 CHOOSING STARTING MODE .............................. ... PAGE 3<br />
1.2.3 MOTOR AND LOAD TYPES ................................. ... PAGE 4<br />
1.2.4 STARTING AC MOTORS IN PARALLEL .................... ... PAGE 5<br />
2 SPECIFICATIONS .................................... . PAGE 7<br />
2.1 POWER RATING ............................................. ... PAGE 7<br />
2.2 MAXIMUM RATINGS ......................................... ... PAGE 7<br />
2.3 SERVICE CONDITIONS ....................................... ... PAGE 7<br />
2.4 FUSE SIZING ................................................ ... PAGE 8<br />
2.5 DIMENSIONS ................................................ ... PAGE 9<br />
2.5.1 STANDARD UNIT ............................................ ... PAGE 9<br />
2.5.2 REVERSING UNITS .......................................... . PAGE 10<br />
2.6 SCR INSTALLATION SPECIFICATIONS ...................... . PAGE 11<br />
2.6.1 SCR TIGHTENING PROCEDURE ............................ . PAGE 11<br />
3 CARD FUNCTIONS ................................... PAGE 13<br />
3.1 CARD LAYOUT ............................................... . PAGE 13<br />
3.2 ANNUNCIATION ............................................. . PAGE 14<br />
3.2.1 LED INDICATIONS ........................................... . PAGE 14<br />
3.2.2 NEON INDICATIONS ......................................... . PAGE 14<br />
3.3 ADJUSTMENTS ............................................... . PAGE 14<br />
3.3.1 POTENTIOMETERS .......................................... . PAGE 14<br />
3.3.2 LINK SELECTION ............................................ . PAGE 15<br />
3.3.3 PUSHBUTTON AND SWITCHES............................. . PAGE 15<br />
3.4 TERMINALS .................................................. . PAGE 15<br />
3.4.1 CUSTOMER TERMINALS .................................... . PAGE 15<br />
3.4.2 TERMINALS FOR INTERNAL USE .......................... . PAGE 16<br />
3.5 FAULTS ...................................................... . PAGE 16<br />
3.5.1 OVER TEMPERATURE ....................................... . PAGE 16<br />
3.5.2 MOTOR OVERLOAD ......................................... .<br />
PAGE 16
3.5.3 PHASE LOSS .................................................. . PAGE 16<br />
4 INSTALLATION AND START-UP ....................... PAGE 17<br />
4.1 INSPECTION ................................................. . PAGE 17<br />
4.2 SAFETY PRECAUTIONS ...................................... . PAGE 17<br />
4.3 MOUNTING GUIDELINES ..................................... . PAGE 17<br />
4.4 WIRING GUIDELINES ........................................ . PAGE 18<br />
4.5 START-UP .................................................... . PAGE 18<br />
4.5.1 BEFORE POWER-UP ......................................... . PAGE 18<br />
4.5.2 WITH POWER ON ............................................ . PAGE 19<br />
4.5.3 HEAVY DUTY CURRENT CALIBRATION TABLE.......... . PAGE 20<br />
5 OPAL OPTION CARDS................................ PAGE 21<br />
5.1 SOFT STOP .................................................. . PAGE 21<br />
5.1.1 POTENTIOMETERS .......................................... . PAGE 22<br />
5.1.2 TERMINALS .................................................. . PAGE 22<br />
5.2 SOLID STATE REVERSING .................................. . PAGE 23<br />
5.3 UP-TO-SPEED, SHEAR PIN, AND ENERGY SAVER......... . PAGE 24<br />
5.3.1 UP-TO-SPEED AND SCR BY-PASS .......................... . PAGE 24<br />
5.3.2 SHEAR PIN PROTECTION ................................... . PAGE 25<br />
5.3.3 ENERGY SAVER ............................................. . PAGE 25<br />
5.3.4 EXTENDED OVERLOAD ..................................... . PAGE 25<br />
5.4 SHORTED SCR DETECTION................................. . PAGE 26<br />
5.5 LINEAR ACCEL/DECEL OPTION ............................. . PAGE 27<br />
5.5.1 POTENTIOMETERS .......................................... . PAGE 27<br />
5.5.2 LINK SELECTION ............................................ . PAGE 28<br />
5.5.3 TERMINALS .................................................. . PAGE 28<br />
5.5.4 START-UP .................................................... . PAGE 28<br />
6 TYPICAL CONNECTIONS ............................. PAGE 29<br />
6.1 TRU-START WITH 2-WIRE CONTROL AND EXTERNAL RESET . . PAGE 30<br />
6.2 TRU-START WITH 3-WIRE CONTROL, OPTIONAL RUN ..... PAGE 31<br />
AND READY PILOT LIGHT ...................................<br />
6.3 TRU-START WITH SOFT STOP ............................. . PAGE 32<br />
6.4 TRU-START WITH SOLID STATE REVERSING ............. . PAGE 33<br />
6.5 TRU-START WITH BYPASS CONTACTOR FOR NEMA 4 ....<br />
OR 12 125A AND BELOW ....................................<br />
PAGE 34
6.6 TRU-START WITH BYPASS CONTACTOR FOR NEMA 4 .... .<br />
OR 12 200A AND ABOVE .....................................<br />
PAGE 35<br />
6.7 TRU-START WITH SHORTED SCR OPTION ................ . PAGE 36<br />
6.8 TRU-START WITH LINEAR ACCEL/DECEL CARD ........... . PAGE 37<br />
7 SPARE PARTS ....................................... PAGE 39<br />
7.1 STANDARD UNIT ............................................ . PAGE 39<br />
7.2 OPTION CARDS .............................................. . PAGE 39<br />
8 TROUBLESHOOTING................................. PAGE 41
1 DESCRIPTION<br />
1.1 OVERVIEW<br />
The TRU-START series is a line of solid state reduced voltage starters for use with 3ø<br />
induction motors. This series also includes various optional features that can be appended.<br />
A solid state starter provides a step-less, thus smooth current ramp to the motor. This<br />
characteristic eliminates current surges and mechanical torque transients. Since these units<br />
are solid state, we now eliminate the maintenance of moving contacts which are involved in<br />
almost any other method of starting an AC induction motor.<br />
1.1.1 STANDARD FEATURES<br />
200-600 VAC 3ø Universal voltage, 50/60Hz with no adjustments<br />
Single controller card throughout the TRU-START range<br />
Current regulated, closed loop<br />
Dual operation modes to match any application :<br />
Constant Current mode for light loads or limited power supplies<br />
Current Ramp mode for high inertia or heavy loads<br />
LED and NEON status and diagnostics<br />
Prevents starting with any phase missing<br />
Phase rotation insensitive<br />
Instantaneous electronic over-current trip<br />
Class 20 electronic motor overload<br />
Overload capacity :<br />
500 % for 35 seconds<br />
Form C dry fault contact<br />
N/O dry run contact<br />
115 % continuous<br />
Simple user set-up and current calibration by rotary switch<br />
Two or three wire control<br />
PAGE 1
1.1.2 OPTIONAL FEATURES<br />
Solid State Reversing<br />
Through the addition of 4 Silicon Controlled Rectifiers ( SCR's ) and a reversing card,<br />
smooth motor reversing is achieved without having to stop the motor.<br />
Soft Stop<br />
Motor deceleration is controlled to eliminate water hammer effect on pump<br />
applications.<br />
By-Pass Contactor<br />
Once the motor has reached operational speed, the by-pass contactor is closed. This<br />
shorts the SCR's which eliminates the voltage drop across the SCR's, in turn being<br />
more efficient and ridding excess heat.<br />
Up-To-Speed Contact / Shear Pin Protection / Energy Saver<br />
Shorted SCR Sensor and Protection<br />
Sensor detects shorted SCR and trips circuit breaker or contactor upstream.<br />
Linear Accel\Decel Card<br />
Provides linear accel and decel independent of load with the use of speed feedback<br />
DC Injection Braking<br />
Through the addition of 4 SCR's and a DC Injection card, adjustable braking of an<br />
AC motor is performed. More information is provided in the TRU-START, DC<br />
INJECTION manual.<br />
External Reset Push Button<br />
Start, Stop, Reverse Push Buttons<br />
NEMA 4 or NEMA 12 Enclosures<br />
1.2 APPLICATION NOTES<br />
1.2.1 OPERATION MODES<br />
MAX<br />
RPM<br />
0<br />
1.2.1.1 Constant Current Mode<br />
600<br />
%FLC<br />
TIME<br />
SPEED VS TIME<br />
60 SEC.<br />
MAX<br />
0<br />
PAGE 2<br />
150-350%<br />
TIME<br />
CURRENT VS TIME<br />
Applications<br />
*Compressors<br />
*Empty Mixers<br />
*Empty Crushers<br />
*Chippers<br />
*Pumps/Fans<br />
*Centrifuges
MAX<br />
RPM<br />
0<br />
1.2.1.2 Current Ramp Mode<br />
LIGHT LOAD<br />
HEAVY LOAD<br />
TIME 60 SEC.<br />
MAX<br />
0<br />
TIME<br />
SPEED VS TIME<br />
CURRENT VS TIME<br />
1.2.2 CHOOSING STARTING MODE<br />
600<br />
500<br />
%FLC<br />
Applications<br />
*Conveyors<br />
*Extruders<br />
*Mixers<br />
*Stamping Machines<br />
*Cranes<br />
*Shredders<br />
*<strong>Hammer</strong> Mills<br />
With any induction motor the design is such that starting currents and torques are very<br />
high. Across the line starting for a basic NEMA B design motor creates an in-rush<br />
current of 600% or more of the nameplate rating. Often these levels are so high that<br />
they cause problems with mechanical or auxiliary electrical. An example of this is the<br />
high starting torques which cause belt slip and high currents, creating large voltage<br />
dips. The basis of choosing the correct starting mode is determining the problem to be<br />
solved.<br />
Torque Reduction on heavy loads is accomplished by using the Current Ramp<br />
Mode.<br />
The idea is to reduce starting current to just above the level which will produce enough<br />
torque to get the motor to move. This is commonly referred to as "break-away<br />
torque". As the current ramps up from this point, the torque also increases as time<br />
passes. If at the initiation of start, the motor torque is less than the load, the motor<br />
will remain stalled until the torque ramps to a sufficient level for acceleration.<br />
Soft Starting for light loads or reducing starting current are accomplished by using<br />
the Constant Current Mode.<br />
On some applications the starting time is still too fast in the current ramp mode because<br />
the load is too light. In this application it is best to select the constant current mode<br />
which will allow the acceleration torque to be better controlled, actually kept constant.<br />
If the available current is limited and causes significant voltage drops, the constant<br />
current mode will allow flexibility in setting the current draw. Remember that the<br />
current level must be great enough to provide acceleration torque and this level is<br />
determined by the load.<br />
For all other applications, or if in doubt, select the Current Ramp Mode.<br />
PAGE 3
1.2.3 MOTOR AND LOAD TYPES<br />
1.2.3.1 Squirrel Cage Motors<br />
Squirrel cage motors, with a single winding and of any NEMA design may be<br />
connected to the TRU-START starter.<br />
1.2.3.2 Wound Rotor Motors<br />
Wound Rotor Induction Motors ( WRIM ) and solid state starters make an excellent<br />
combination for frequent starting, jogging, plug-stopping and reversing applications.<br />
These WRIM motors use multiple steps of resistors to provide various speed torque<br />
characteristics. This allows a high starting torque characteristic while providing low<br />
starting current when compared to NEMA B designs.<br />
One disadvantage has been the high maintenance costs of the resistor and shorting<br />
contactor bank. The use of an TRU-START allows an improvement to this<br />
arrangement by allowing the current to be limited without use of the multiple steps.<br />
Usually the load characteristic is such that this starting may be accomplished with only<br />
one or two starting steps. By eliminating several contactors a major savings is realised<br />
that often pays for the installation cost.<br />
The common method is to add only one step of resistance at 20% ( Rotor volts divided<br />
by Rotor Amps times 20% ). This resistance value will provide relatively high starting<br />
torque and the TRU-START will be used to limit the current. As little as 200% of motor<br />
full load current can provide 100% starting torque unlike squirrel cage NEMA B motors<br />
which would require 500% current. The resistor bank may be shorted with a contactor<br />
at full speed to reduce the slip and eliminate the watt losses in the resistors.<br />
TO<br />
PROTECTED<br />
MAIN<br />
SUPPLY<br />
TO<br />
PROTECTED<br />
MAIN<br />
SUPPLY<br />
PAGE 4<br />
SQUIRREL<br />
CAGE<br />
MOTOR<br />
M<br />
M<br />
R<br />
R<br />
R
1.2.3.3 Other Types Of AC Motors<br />
TRU-START starters may also be used to start 2-speed motors with multiple windings<br />
or connections. Proper contactor selection and sequencing is required for the specific<br />
motor.<br />
1.2.3.4 Resistive and Inductive Loads<br />
The TRU-START is well suited for use as a phase controller or current regulator on<br />
resistive or inductive loads such as heaters. When applied with a Temperature PI<br />
controller, the TRU-START will maintain smooth control to avoid the overheating<br />
associated with on/off type controllers. Improved temperature accuracy and longer<br />
heater element life can be expected over standard control methods.<br />
1.2.4 STARTING AC MOTORS IN PARALLEL<br />
TRU-START starters can be used to start motors in parallel but they must have individual<br />
overload devices added.<br />
When the paralleled motors are also connected to the same load, mechanically or<br />
through the material , then load sharing must be considered.<br />
When the motors are mechanically tied, the load sharing is determined by how closely<br />
the motor characteristics are to each other. It is important to keep the motors exactly<br />
the same. Even changing the manufacturers of the motors can cause some variations in<br />
load sharing. The TRU-START size is determined by the total of the motor current ratings.<br />
PAGE 5
PAGE 6
2 SPECIFICATIONS<br />
2.1 POWER RATING<br />
POWER 3ø, 200-600VAC, 50/60 Hz<br />
CONTROL 115 VAC@50 Hz or 120 VAC@60 Hz, 12VA (fans are extra)<br />
RATING See Section 2.2<br />
All models have 1600V PIV SCR's<br />
CONTACTS Run and fault relay contacts rated at 0.2A, 115VAC<br />
PROTECTION Short circuit by HRC fuses or circuit breaker<br />
(supplied upon request)<br />
2.2 MAXIMUM RATINGS<br />
TRU-START<br />
MODEL<br />
Voltage surge protection by MOV's across the SCR's<br />
HORSE POWER<br />
230V 460V 575V<br />
TRU-15 5 10 15<br />
TRU-30 10 25 30<br />
TRU-50 20 40 50<br />
TRU-80 30 60 75<br />
TRU-125 50 100 125<br />
TRU-200 75 150 200<br />
TRU-360 150 300 350<br />
TRU-500 200 400 500<br />
TRU-600 250 500 600<br />
TRU-800 300 600 800<br />
2.3 SERVICE CONDITIONS<br />
ELEVATION For altitudes in excess of 2000 meters / 6600 feet above sea level,<br />
all assemblies must be derated 1% for every 100 meters / 330 feet<br />
above<br />
AMBIENT<br />
TEMPERATURE<br />
Do not install in areas where ambient temperature falls below<br />
0°C / 32°F or exceeds 40 °C / 104°F<br />
PAGE 7
2.4 FUSE SIZING<br />
TRU-START MOTOR<br />
HP J FUSE AMPS<br />
MODEL FLC 460V 575V FAST ACTING TIME DELAY<br />
5 3 5 15 10<br />
TRU-15 10 7.5 10 25 15<br />
15 10 15 40 25<br />
20 15 20 50 30<br />
TRU-30 25 20 25 60 40<br />
30 --- 30 70 50<br />
34 25 30 70 50<br />
TRU-50 40 30 40 80 60<br />
52 40 50 100 80<br />
60 --- 60 125 90<br />
TRU-80 65 50 --- 150 90<br />
75 60 75 150 100<br />
TRU-125 100 75 100 200 150<br />
125 100 125 250 175<br />
150 125 150 300 200<br />
TRU-200 180 150 --- 400 250<br />
200 --- 200 400 300<br />
250 200 250 500 350<br />
TRU-360 300 250 300 600 400<br />
360 300 --- --- 500<br />
TRU-500 400 --- 400 --- 500<br />
500 400 500 --- 600<br />
PAGE 8
2.5 DIMENSIONS<br />
This is a general guideline for dimensions as they may change slightly based on different<br />
options used.<br />
2.5.1 STANDARD UNIT<br />
TRU-START<br />
MODEL<br />
TRU-15<br />
TRU-30<br />
TRU-50<br />
TRU-80<br />
TRU-125<br />
TRU-200<br />
TRU-360<br />
TRU-500<br />
TRU-600<br />
TRU-800<br />
Height × Width × Depth<br />
CHASSIS NEMA 1 NEMA 12<br />
33cm × 22cm × 15cm 33cm × 22cm × 18cm 33cm × 22cm × 18cm<br />
13" × 8.5" × 6" 13" × 8.5" × 7" 13" × 8.5" × 7"<br />
41cm × 22cm × 15cm 41cm × 22cm × 18cm 61cm × 50cm × 30cm<br />
16" × 8.5" × 6" 16" × 8.5" × 7" 24" × 20" × 12"<br />
43cm × 27cm × 19cm 43cm × 30cm × 27cm 43cm × 30cm × 27cm<br />
17" × 10.5" × 7.5" 17" × 12" × 10.5" 17" × 12" × 10.5"<br />
43cm × 27cm × 22cm 43cm × 30cm × 27cm 43cm × 30cm × 27cm<br />
17" × 10.5" × 8.5" 17" × 12" × 10.5" 17" × 12" × 10.5"<br />
53cm × 27cm × 24cm 53cm × 30cm × 27cm 53cm × 30cm × 27cm<br />
21" × 10.5" × 9.5" 21" × 12" × 10.5" 21" × 12" × 10.5"<br />
34cm × 52cm × 27cm 76cm × 61cm × 41cm 122cm × 91cm × 41cm<br />
13.5" × 20.5" × 10.5" 30" × 24" × 16" 48" × 36" × 16"<br />
48cm × 56cm × 28cm 91cm × 76cm × 41cm 122cm × 91cm × 41cm<br />
19" × 22" × 11" 36" × 30" × 16" 48" × 36" × 16"<br />
50cm × 64cm × 34cm 107cm × 91cm × 41cm 152cm × 122cm × 41cm<br />
19.5" × 25" × 13.5" 42" × 36" × 16" 60" × 48" × 16"<br />
50cm × 64cm × 34cm 107cm × 91cm × 41cm 152cm × 122cm × 41cm<br />
19.5" × 25" × 13.5" 42" × 36" × 16" 60" × 48" × 16"<br />
65cm × 71cm × 42cm 122cm × 91cm × 51cm 152cm × 152cm × 51cm<br />
25.5" × 28" × 16.5" 48" × 36" × 20" 60" × 60" × 20"<br />
PAGE 9
2.5.2 REVERSING UNITS<br />
TRU-START<br />
MODEL<br />
TRU-15R<br />
TRU-30R<br />
TRU-50R<br />
TRU-80R<br />
TRU-125R<br />
TRU-200R<br />
TRU-360R<br />
TRU-500R<br />
TRU-600R<br />
TRU-800R<br />
Height × Width × Depth<br />
CHASSIS NEMA 1 NEMA 12<br />
33cm × 22cm × 17cm 33cm × 22cm × 18cm 33cm × 22cm × 18cm<br />
13" × 8.5" × 6.5" 13" × 8.5" × 7" 13" × 8.5" × 7"<br />
41cm × 22cm × 17cm 41cm × 22cm × 18cm 61cm × 50cm × 30cm<br />
16" × 8.5" × 6.5" 16" × 8.5" × 7" 24" × 20" × 12"<br />
43cm × 27cm × 20cm 43cm × 30cm × 27cm 43cm × 30cm × 27cm<br />
17" × 10.5" × 8" 17" × 12" × 10.5" 17" × 12" × 10.5"<br />
43cm × 27cm × 22cm 43cm × 30cm × 27cm 43cm × 30cm × 27cm<br />
17" × 10.5" × 8.5" 17" × 12" × 10.5" 17" × 12" × 10.5"<br />
53cm × 27cm × 24cm 53cm × 30cm × 27cm 53cm × 30cm × 27cm<br />
21" × 10.5" × 9.5" 21" × 12" × 10.5" 21" × 12" × 10.5"<br />
58cm × 52cm × 28cm 91cm × 76cm × 41cm 122cm × 91cm × 41cm<br />
23" × 20.5" × 11" 36" × 30" × 16" 48" × 36" × 16"<br />
81cm × 56cm × 29cm 122cm × 76cm × 41cm 122cm × 91cm × 41cm<br />
32" × 22" × 11.5" 48" × 30" × 16" 48" × 36" × 16"<br />
83cm × 64cm × 36cm 122cm × 91cm × 41cm 152cm × 122cm × 41cm<br />
32.5" × 25" × 14" 48" × 36" × 16" 60" × 48" × 16"<br />
83cm × 64cm × 36cm 122cm × 91cm × 41cm 152cm × 122cm × 41cm<br />
32.5" × 25" × 14" 48" × 36" × 16" 60" × 48" × 16"<br />
109cm × 71cm × 42cm 152cm × 91cm × 51cm 183cm × 152cm × 51cm<br />
43" × 28" × 16.5" 60" × 36" × 20" 72" × 60" × 20"<br />
PAGE 10
2.6 SCR INSTALLATION SPECIFICATIONS<br />
2.6.1 SCR TIGHTENING PROCEDURE<br />
2.6.1.1 Clean both heat sink and SCR surfaces.<br />
2.6.1.2 Apply a thin layer of joint compound (Noalox) to both SCR surfaces.<br />
2.6.1.3 Observe correct SCR polarity.<br />
2.6.1.4 Install SCR so that roll pins engage dimples on both sides of the SCR.<br />
2.6.1.5 Tighten clamp bolts evenly until finger-tight.<br />
2.6.1.6 Tighten each bolt according to table below (based on number of spring bars and<br />
size of bars).<br />
* Note : SMALL clamps are 4.25 inches / 10.5 cm and LARGE clamps are 5 inches /<br />
12.5 cm.<br />
CLAMP SIZE SPRING BARS BOLT TURNS PAST<br />
FINGER TIGHT<br />
SMALL 1 0.75<br />
SMALL 2 1<br />
LARGE 3 1.75<br />
LARGE 4 1.75<br />
PAGE 11
PAGE 12
3 CARD FUNCTIONS<br />
OPT<br />
ribbon to option cards<br />
3.1 CARD LAYOUT<br />
RV1<br />
RATE<br />
RV2<br />
LD5<br />
LD1<br />
LD2<br />
LD3<br />
LD4<br />
DST5-36<br />
TR1<br />
TB1<br />
A<br />
A A<br />
A A<br />
RESET<br />
+15V<br />
OVER<br />
TEMP<br />
READY<br />
RUN<br />
MOTOR<br />
OVRLD<br />
2<br />
4<br />
6<br />
8<br />
10<br />
12<br />
14<br />
16<br />
18<br />
20<br />
STEP<br />
FUSE AT 3A 250VAC<br />
LIGHT HEAVY<br />
JP1<br />
duty<br />
ON OFF<br />
JP3<br />
rate<br />
VR1<br />
-V<br />
VR2<br />
+V<br />
SECONDARY<br />
PRIMARY<br />
FUSE MUST BE<br />
REPLACED WITH<br />
SAME RATED DEVICE<br />
FU1<br />
AC<br />
AC1<br />
IC1<br />
IC2<br />
IC3<br />
CA392-3<br />
CAUTION RESISTOR HOT<br />
R40<br />
N<br />
IC4<br />
IC5<br />
relay on = fault<br />
RP1<br />
STARTER CARD<br />
FAULT<br />
BURDEN RESISTOR PKG<br />
IC8<br />
K1 K2<br />
FAULT RELAY<br />
RUN RELAY<br />
STOP<br />
1 2 3 4 5<br />
TB<br />
RESET<br />
BURDEN<br />
SELECT<br />
IC6<br />
IC7<br />
START<br />
6<br />
SW1<br />
SW2<br />
7<br />
CA392-3 - TRU-START CONTROLLER CARD<br />
PAGE 13<br />
IC9<br />
IC10<br />
IC13<br />
OVR TMP<br />
FAN<br />
INHIBIT RELAY<br />
OT<br />
IC11<br />
IC12<br />
K3<br />
CURRENT<br />
XFMR<br />
T3<br />
T2<br />
T4 PHASE "S"<br />
CAUTION<br />
TWO (2) POWER SOURCES<br />
MAINS AND CONTROL<br />
T5<br />
T6<br />
C-H<br />
CAUTION<br />
1 2 3<br />
PHASE "R"<br />
PHASE "T"<br />
IMPEDANCE ISOLATED TO MAINS<br />
T1<br />
4<br />
CT<br />
NE1<br />
K1<br />
G1<br />
NE2<br />
K2<br />
G2<br />
NE3<br />
K3<br />
G3<br />
NE4<br />
K4<br />
G4<br />
NE5<br />
K5<br />
G5<br />
NE6<br />
K6<br />
G6<br />
L1 ON SCR 1,2<br />
SCR1<br />
SCR2<br />
SCR 3,4<br />
SCR3<br />
L2 ON<br />
SCR4<br />
SCR 5,6<br />
SCR5<br />
L3 ON<br />
SCR6
3.2 ANNUNCIATION<br />
3.2.1 LED INDICATIONS<br />
LED NAME COLOUR DESCRIPTION<br />
LD 1 OVER<br />
TEMP<br />
RED On when unit is faulted because of an open Over<br />
Temperature switch at the OT terminal<br />
LD 2 READY GREEN This LED is illuminated when there are no faults<br />
present, thus meaning "ready" to run<br />
LD 3 RUN GREEN Indication of run commanded to starter<br />
LD 4 MOTOR<br />
OVRLD<br />
RED When lit an IOC (instantaneous over-current) or an<br />
inverse time overload fault exists<br />
LD 5 +15V GREEN Illuminated when +15V power supply is okay<br />
3.2.2 NEON INDICATIONS<br />
NEON NAME DESCRIPTION<br />
NE1 SCR 1 , 2 Should be lit during stop and extinguished when the motor is<br />
up to speed. This represents the status of SCR 1 and 2<br />
NE2 L1 ON Indicates voltage is present on L1<br />
NE3 SCR 3 , 4 Should be lit during stop and extinguished when the motor is<br />
up to speed. This represents the status of SCR 3 and 4<br />
NE4 L2 ON Indicates voltage is present on L2<br />
NE5 SCR 5 , 6 Should be lit during stop and extinguished when the motor is<br />
up to speed. This represents the status of SCR 5 and 6<br />
NE6 L3 ON Indicates voltage is present on L3<br />
3.3 ADJUSTMENTS<br />
3.3.1 POTENTIOMETERS<br />
POT NAME RANGE DEFAULT<br />
SETTING<br />
DESCRIPTION<br />
RV1 RATE 2-30 sec 50% Adjusts the time of the current ramping<br />
CW rotation decreases the time<br />
RV2 STEP 150-350% 50% Adjusts the starting current or breakaway<br />
torque<br />
CW increases the torque (current)<br />
PAGE 14
3.3.2 LINK SELECTION<br />
LINK NAME POSITION DESCRIPTION<br />
JP1 DUTY NO JUMPER With no jumper present, heavy duty mode selected<br />
Shipped from factory with no jumper<br />
JP3 RATE OFF Selects constant current mode<br />
RV1 has no bearing<br />
*Note : JP2 does not exist on this version<br />
3.3.3 PUSHBUTTON AND SWITCHES<br />
SWITCH NAME DESCRIPTION<br />
ON This selects current ramp mode which is dependent<br />
on RV1<br />
SW1 RESET Resets IOC or inverse time overload fault<br />
SW2 BURDEN<br />
SELECT<br />
3.4 TERMINALS<br />
3.4.1 CUSTOMER TERMINALS<br />
TERMINAL NO. DESCRIPTION<br />
Calibrates current for nameplate rating of motor<br />
Refer to current table on starter or Section 4.5.3.<br />
TB 1 115 VAC supplied to this input will enable the unit to run<br />
2 Common Fault relay contact<br />
The relay is energized when a fault exists<br />
3 Normally open Fault relay contact<br />
4 Normally closed Fault relay contact<br />
5 115 VAC supplied for control logic<br />
6, 7 Dry run contact for external use or sealing contact for start<br />
pushbutton with three wire control<br />
AC AC1, N 115 VAC control voltage input<br />
AC1 input is protected with internal fuse, 3A 250 VAC<br />
TB1 RESET A contact closure across these terminals will reset any faults that<br />
exist.<br />
For local panel door use, low voltage control.<br />
PAGE 15
3.4.2 TERMINALS FOR INTERNAL USE<br />
TERMINAL DESCRIPTION<br />
3.5 FAULTS<br />
OT This two pin connector is for an over temperature switch on units with<br />
fans and must be shorted if an OT switch is not used<br />
FAN Fused 115 VAC for fan connection<br />
SCR1-6 Gate lead connections for SCR firing<br />
OPT Provided for ribbon cable link to C-H's TRU-START option cards<br />
Any TRU-START fault energizes the fault relay and shuts down the starter. Whenever any<br />
fault exists, the READY LED will be off indicating the starter won't run. Once the fault is cleared,<br />
READY will be illuminated if no other faults exist. Terminal TB-2 to 3 will be open when no<br />
fault exists and closed during a fault condition, TB2 to 4 is vice versa.<br />
3.5.1 OVER TEMPERATURE<br />
TRU-START units with fans have over temperature switches fastened to the heatsink(s).<br />
This switch or switches in series, are connected in the OT terminal on the control card.<br />
Units without fans have a jumper installed. In the case where there is a fan failure or<br />
fan blockage and the heatsink temperature exceeds 85°C / 185°F ± 5°C / 41°F, the<br />
over temperature switch opens, faulting the TRU-START. This fault is indicated by LD1,<br />
OVERTEMP. When the heatsink cools enough, creating switch closure, the OVER<br />
TEMP LED will extinguish.<br />
3.5.2 MOTOR OVERLOAD<br />
This fault has two conditions, instantaneous over current (IOC) or inverse timed<br />
overload. Both of these faults are indicated by LD4, MOTOR OVRLD. If started<br />
into a short, the TRU-START should trip on an IOC dependent upon the impedance of<br />
the incoming lines. This condition is resettable instantly by the RESET button. The<br />
inverse time overload is a class 20 overload that simulates the heating of the motor.<br />
This electronic circuitry begins to integrate whenever the current to the motor exceeds<br />
115% of the current setup with SW2. This current calibration switch should be setup<br />
to the name plate current rating of the motor. Once the overload circuitry reaches the<br />
trip level, the unit faults and shuts down. This trip is allowed to be cleared with the<br />
RESET button after a time period of approximately 5-7 minutes. This time allows for<br />
the motor to cool before restarting.<br />
3.5.3 PHASE LOSS<br />
If any of the incoming lines are not present before starting the TRU-START will be faulted.<br />
Each line is indicated by a corresponding neon lamp. Once the missing phase(s) is/are<br />
present and no other faults exist, the unit will be ready to run.<br />
PAGE 16
4 INSTALLATION AND START-UP<br />
4.1 INSPECTION<br />
The TRU-START has been packaged to protect it from damage caused by normal handling<br />
durring shipment, however mishandling may cause damage to the OPAL. Unpack the unit as<br />
soon as it is received and check for any shipping or storage damages.<br />
If damage is found, notify the carrier. Any damage claim must be filed by the customer since<br />
all shipments are F.O.B. Culter-<strong>Hammer</strong> plant unless otherwise specified.<br />
If theTRU-START is not installed when received, store it in a clean, dry, well ventilated<br />
area, free from heat, humidity, oil, dust, and metal particles.<br />
4.2 SAFETY PRECAUTIONS<br />
CAUTION<br />
Equipment is at line voltage when AC power is connected.<br />
Pressing "STOP" pushbutton does not remove AC mains potential.<br />
All phases must be disconnected before it is safe to work on machinery, touch<br />
motor terminals or control equipment parts.<br />
The electrical code requires all equipment, starter, motor, operator station, etc. to be<br />
grounded properly.<br />
An incoming circuit breaker or disconnect switch must be locked open before wiring or<br />
servicing this starter, motor, or other related equipment. This equipment must be installed<br />
and serviced only by qualified personnel, familiar with this starter.<br />
The user is responsible for ensuring that proper short circuit protection is provided by either a<br />
circuit breaker or HRC fuses.<br />
4.3 MOUNTING GUIDELINES<br />
Standard Nema 1 TRU-START Starters must be installed indoors in a well ventilated area,<br />
free from heat, humidity, oil, dust and metal particles.<br />
One foot of clearance must be kept all around in a natural cooled unit. The equipment must<br />
be mounted away from any heat source. See Section 2 for additional specifications.<br />
Be aware that the heatsink may reach 70° C / 158°F during normal operation. Do not install<br />
the starter in contact with any material that can not accept this temperature.<br />
The starter must be mounted vertically and where it will not experience excessive shock or<br />
vibration.<br />
PAGE 17
4.4 WIRING GUIDELINES<br />
The electrical code requires that an approved circuit disconnecting device be installed in the<br />
incoming AC supply, mounted in a location readily accessible to personnel installing or<br />
servicing this equipment.<br />
Power factor correcting capacitors MUST NOT be connected to the TRU-START output.<br />
If desired, they must be added ahead of the starter. Capacitors can be connected before starting<br />
or after the motor has reached full speed. It is recommended that the Up-to-Speed option<br />
card be used to connect the capacitors after full speed has been reached.<br />
In-line contactors are not required, however they can be used on the line side or the motor<br />
side without detriment to the starter. It is recommended that the contactor be sequenced to<br />
open and close under no-load conditions to prolong the life of the contacts.<br />
Size the power wiring as per local code. On long wire runs it is recommended to use a larger<br />
wire size.<br />
All three phases of the incoming power wires must pass through the same hole in the<br />
enclosure. This rule also applies to all phases of the outgoing or motor wires.<br />
If an electro-mechanical brake is used in the system, it must be powered from the line side of<br />
the starter, to ensure full voltage to the brake.<br />
For short-circuit fuse protection, we suggest referencing the table in Section 2.<br />
4.5 START-UP<br />
4.5.1 BEFORE POWER-UP<br />
4.5.1.1 Ensure that all electrical connections are completed as shown on the<br />
schematics, and that connections are properly tightened.<br />
4.5.1.2 Read motor full load current from the nameplate and rotate SW2 to match the<br />
motor full load current, according to the label attached or the current chart in<br />
Section 4.5.3.<br />
4.5.1.3 Check 120 VAC control voltage to the TRU-START unit.<br />
4.5.1.4 Set RV1 and RV2 to mid-position, for 15 sec ramp time and 250% starting<br />
current.<br />
4.5.1.5 Check link positions. The factory settings are current ramp mode and no<br />
jumper for heavy duty.<br />
PAGE 18
4.5.2 WITH POWER ON<br />
4.5.2.1 With the motor connected and power on, all neon lamps should be illuminated<br />
and no faults should exist.<br />
4.5.2.2 Once start has been initiated the motor must start rotating immediately, it must<br />
not stall. Increase the starting current if necessary by rotating RV2, STEP,<br />
clockwise.<br />
4.5.2.3 The RATE could be re-adjusted to extend or decrease the accelerating time. To<br />
speed up the acceleration rate, turn RV1 clockwise. The actual motor<br />
accelerating time depends on the motor current as well as the mechanical load.<br />
This setting has no effect when constant current mode has been selected. Refer<br />
to diagram below.<br />
4.5.2.4 The RATE adjusts the time from the STEP setting to 500% of motor full load<br />
current.<br />
4.5.2.5 Some readjustments may be required when the motor is started to suit specific<br />
applications.<br />
PAGE 19
4.5.3 HEAVY DUTY CURRENT CALIBRATION TABLE<br />
SW2<br />
POSITION<br />
TRU-START MODEL (TRU -)<br />
15 30 50 80 125 200 360 500 600 800<br />
0 1 12 24 47 77 103 150 286 420 494<br />
1 2 13 26 50 80 109 164 300 432 514<br />
2 3 15 28 52 84 116 178 315 444 535<br />
3 4 16 30 54 87 122 192 330 456 555<br />
4 5 17 32 56 90 129 206 343 468 576<br />
5 6 19 34 58 93 135 220 357 480 596<br />
6 7 20 36 61 96 142 234 372 492 616<br />
7 8 22 38 63 100 148 248 386 504 637<br />
8 9 23 40 65 103 155 262 400 516 657<br />
9 10 24 42 67 106 161 276 415 528 678<br />
A 11 26 44 69 109 168 290 429 540 698<br />
B 12 27 46 72 112 174 304 443 552 718<br />
C 13 29 48 74 116 181 318 458 564 739<br />
D 14 30 51 76 119 187 332 472 576 759<br />
E 15 31 53 78 122 194 346 486 588 780<br />
F 16 33 55 80 125 200 360 500 600 800<br />
PAGE 20
5 TRU-START OPTION CARDS<br />
Refer to Section 6 for typical connections of any of the options listed in this section.<br />
5.1 SOFT STOP<br />
CA390-2 - SOFT STOP CARD<br />
This option has been designed to provide a closed loop current controlled stop, to eliminate<br />
the water hammering effect associated with fluid pumping applications. When stop is pressed<br />
the ramp down begins at the level of current the load was demanding when stop was initiated.<br />
Adjustments are available for the slope of the ramp, the minimum level of current the ramp<br />
goes down to and the time the soft stop is active.<br />
Current<br />
100%<br />
0<br />
running stop pressed<br />
RV1<br />
Decel Ramp<br />
RV3<br />
Soft Stop Time<br />
PAGE 21<br />
RV2 Final Current<br />
Time
5.1.1 POTENTIOMETERS<br />
POT NAME DESCRIPTION<br />
RV1 DECEL<br />
RAMP<br />
RV2 FINAL<br />
CURRENT<br />
RV3 SOFT STOP<br />
TIME<br />
5.1.2 TERMINALS<br />
This pot sets the slope of the current ramp down from 100% to 0<br />
The ramp is settable from 10 to 40 seconds, clockwise rotation of<br />
the pot increases the time<br />
Sets a minimum level of current the ramp goes down to<br />
This allows a range of 0-50% current, clockwise increases level<br />
Adjusts time which soft stop is active<br />
Time is from 5-30 seconds, clockwise increases time<br />
TERMINAL NO. DESCRIPTION<br />
J1 1,2 Normally open contact which closes when run is initiated and<br />
remains closed until the soft stop is finished if the soft stop is<br />
not disabled<br />
3,4 When these terminals are shorted, soft stop is disabled<br />
PAGE 22
5.2 SOLID STATE REVERSING<br />
CA388-4 - SOLID STATE REVERSING CARD<br />
This option provides a smooth, current controlled, motor rotation reversal without any<br />
current surge or torque jerk. Motor stopping is not required. Additions to the TRU-START<br />
include a reversing card, CA388-4, plus four additional SCR's.<br />
Terminal block AC, terminals 1 and 2 are to be connected to 115 VAC control voltage. An<br />
external switch or contact must be connected to AC, terminals 3 and 4 of this card. The<br />
forward bridge is selected with the switch closed. With the switch open the starter will fire<br />
the reverse bridge. Terminal block J1 is a form C dry contact rated at 0.2A, 115 VAC for an<br />
indication of the direction selected and by-pass contactor sequencing for a reverse/by-pass<br />
combination. The red LED, LD1 indicates the reverse selection and the green LED, LD2<br />
annunciates that the forward bridge is chosen.<br />
A REVERSING DELAY TIME potentiometer, RV1, sets the time the TRU-START remains<br />
off when switching directions, from 1 to 10 seconds. Clockwise rotation increases dwell time.<br />
The factory default setting is 1 second.<br />
When the motor is running and the forward/reverse switch changes states, the TRU-START<br />
trun all SCR's off. After an adjustable time delay set up by RV1, the TRU-START is switched<br />
back on, triggering a different set of SCR's. This effectively switches two output lines, decelerates<br />
the motor down to zero speed, and continues to accelerate it to full speed in the opposite<br />
direction. The motor reversal is performed under complete current control via the RAMP<br />
and STEP potentiometers on the CA392-3.<br />
PAGE 23
5.3 UP-TO-SPEED, SHEAR PIN, AND ENERGY SAVER<br />
RV1<br />
JP1 JP2<br />
LD1 LD2 LD3<br />
PHASE BACK<br />
ADJUST<br />
OFF ON<br />
OFF TRIP ON<br />
ENERGY SAVER SHEAR PIN<br />
A<br />
A<br />
ENERGY SHEAR<br />
SAVE TRIP<br />
A<br />
UP-TO<br />
SPEED<br />
OPT<br />
CA391 - MULTI OPTION CARD<br />
5.3.1 UP-TO-SPEED AND SCR BY-PASS<br />
19<br />
1<br />
U1<br />
2<br />
20<br />
U2<br />
U3<br />
1<br />
2<br />
3<br />
U4<br />
K1<br />
J1<br />
A three pole contactor used in conjunction with the Up-To-Speed contact eliminates<br />
the SCR losses by shorting them out after the motor has reached full speed. This<br />
feature is a true Watt Saver modification and permits the use of the TRU-START in a NEMA<br />
4 or NEMA 12 enclosure. The by-pass contactor is switched on only after the motor<br />
has reached full speed and as such sees only motor full load current. At stop, the<br />
by-pass contactor is opened while the SCR's are triggered fully on, limiting the power<br />
contacts opening voltage. The SCR's are then switched off without having any voltage<br />
surge.<br />
When a by-pass contactor is used in conjunction with reversing, the FWD/REV<br />
contacts of the CA388 must be connected in series for proper sequencing of the<br />
contactor(s).<br />
When the motor reaches full speed, the Up-To-Speed relay is energized and the red<br />
UP-TO-SPEED LED, LD3 is illuminated. A form C dry relay contact rated at 1A,<br />
120VAC, is provided on J1 terminals 1, 2 and 3 for by-pass sequencing. Large<br />
contactors require a control relay to handle the high in rush current to the coil.<br />
PAGE 24<br />
RELAY CONTACTS<br />
RATED 220V @ 10A<br />
(RESISTIVE)<br />
U5<br />
SHEAR PIN<br />
TRIP RESET<br />
C-H<br />
CA391-3<br />
MADE IN CANADA<br />
U6<br />
PB1<br />
CAUTION !!! IMPEDANCE ISOLATED TO MAINS
5.3.2 SHEAR PIN PROTECTION<br />
This feature has been designed to provide motor jam protection, similar to a mechanical<br />
shear pin.<br />
Once the motor has reached full speed, indicated by LD3 being on, the TRU-START<br />
will trip if the motor current increases to 300%. The red SHEAR TRIP LED, LD2 will<br />
indicate this trip and is resettable via the red RESET pushbutton on the option card.<br />
Link LP2enables or disables this optional feature.<br />
5.3.3 ENERGY SAVER<br />
This option is designed to phase back the SCR's under light load, and keep them fully<br />
phased on under medium to full load. This optional feature is intended for use on small<br />
motors in applications where the motor runs under no load for an extensive time but<br />
can not be switched off. The energy save is not effective on motors over 25 HP. The<br />
TRU-START starter is designed for repeated starting and stopping. The most efficient<br />
operation is to switch the motor off when ever possible.<br />
Link JP1 enables or disables this optional feature. The red ENERGY SAVE LED,<br />
LD1 will come on to announce that this feature is active. To calibrate this feature, turn<br />
RV1, PHASE BACK ADJUST pot clockwise until the motor starts to become<br />
unstable. Once this occurs, turn the pot slightly counter-clockwise until the motor is<br />
again stable. Energy save is not operational with the use of a bypass contactor.<br />
5.3.4 EXTENDED OVERLOAD<br />
With a high inertia load such as a chipper, a Class 20 overload may not allow enough<br />
time for the motor to reach full speed without nuisance overload tripping.<br />
In such a scenario an extended overload option can be implemented. This allows the<br />
motor 500% current for a longer period of time. This option only affects the overload<br />
when the motor is started.<br />
The extended overload is not a factory option and must be specifically requested.<br />
Consult factory for more details.<br />
PAGE 25
5.4 SHORTED SCR DETECTION<br />
LD1<br />
SHORTED SCR<br />
A<br />
OPT<br />
19<br />
1<br />
U1<br />
2<br />
20<br />
J4<br />
1<br />
2<br />
3<br />
K1<br />
CA395-2 - SHORTED SCR CARD<br />
U2<br />
U3<br />
SHORTED SCR MODULE<br />
U4<br />
CA395-2<br />
MADE IN CANADA<br />
This option provides protection against the unlikely event of a shorted Silicon Controlled<br />
Rectifier ( SCR ). This card only functions when the TRU-START is not running and<br />
should be used in conjunction with a shunt trip circuit breaker or an in-line contactor.<br />
In the event of a shorted SCR, it is not sufficient to merely trip the starter. The incoming 3ø<br />
power must be removed. The danger associated with a shorted SCR is that even when the<br />
starter is not running, current may pass freely through the motor.<br />
If a shorted SCR is detected, the Shorted SCR relay is energized. The form C relay contact<br />
rated at 1 Amp, 120 VAC on terminals 1, 2 and 3 of J1, is provided for means of opening the<br />
circuit breaker or contactor used. Large contactors require a control relay to handle the high<br />
in rush current to the coil. A red LED, LD1 will illuminate during this condition of a shorted<br />
device.<br />
The CA395 will indicate a shorted SCR if the motor is not connected. In reversing<br />
applications, two shorted SCR cards must be used. When using an TRU-START with an<br />
intergral DC Injection option, the DCI contact from the TRU-START DC Injection must be used<br />
in conjunction with the shorted SCR contact to eliminate erroneous trips during DC injection.<br />
PAGE 26<br />
C-H<br />
R13<br />
R14<br />
T2<br />
R15<br />
R16<br />
L2<br />
R17<br />
R18<br />
T3<br />
L3<br />
T1<br />
L1<br />
J3<br />
J2<br />
J1
5.5 LINEAR ACCEL/DECEL OPTION<br />
CA385 - LINEAR ACCEL/DECEL CARD<br />
This option card combined with a 60 tooth magnetic pulse pick-up or a tachometer<br />
provides linear acceleration and deceleration independent of load. The ramp reference<br />
can be via internal ramp generator or an auxiliary reference. A form C dry contact<br />
indicating when the unit is running is available for external use and illuminated via LD1.<br />
5.5.1 POTENTIOMETERS<br />
POT NAME DESCRIPTION<br />
RV1 STAB Adjustment for stability of the ramping transition<br />
RV2 TACH<br />
SCALE<br />
Sets up speed feedback for the regulator by adjusting voltage at TP1<br />
(below JP2)<br />
CW decreases voltage at TP1<br />
For internal ramp set TP1 for -9.2V or less at full speed<br />
For aux ref set TP1 = maximum reference -0.667 or slightly less at<br />
full speed<br />
RV3 DECEL Adjusts decel time of ramp, 5 - 50 seconds<br />
CW increases time<br />
RV4 ACCEL Adjusts accel time of ramp, 5 - 50 seconds<br />
CW increases time<br />
PAGE 27
5.5.2 LINK SELECTION<br />
LINK NAME DESCRIPTION<br />
JP1 AUX Reference from auxiliary input<br />
INT Internal reference from ramp generator<br />
JP2 PULSE Feedback from magnetic pick-up input on J1<br />
5.5.3 TERMINALS<br />
TACH Feedback from tachometer input on J2<br />
TERMINAL NO. NAME DESCRIPTION<br />
J1 1 PULSE<br />
FEEDBACK<br />
Connection point for pulse pick up feedback<br />
2 COMMON Common point for pulse pick up feedback<br />
and auxiliary reference<br />
3 AUX REF Input for auxiliary reference when JP1 is at<br />
AUX<br />
Range is 0 - 15V maximum<br />
4 NO Normally open starter status contact<br />
5 NC Normally closed starter status contact<br />
6 COM Common of ramp status form C contacts<br />
Energized when unit started and<br />
de-energized when ramp reference or<br />
auxiliary input reaches 0V<br />
J2 TACH<br />
FEEDBACK<br />
Input for tachometer feedback<br />
Scaled by resistor at J3<br />
J3 CAL R Scaling resistor for tach feedback<br />
Resistor should be 1 Watt or greater<br />
CAL R = (max. tach volts -13.4) ÷ 12<br />
in kilo-ohms<br />
5.5.4 START-UP<br />
5.5.4.1 STEP (RV2) should be set at 0 and the RATE jumper (JP3) must be OFF or<br />
removed on the CA392-3 control card. Ensure SW2 is in correct position.<br />
5.5.4.2 Set JP1 and JP2 on CA385 at settings for your application. If tach feedback is<br />
being used, install resistor as per above procedure in TERMINALS.<br />
5.5.4.3 Set all pots to 50%.<br />
5.5.4.4 Start unit and adjust speed feedback according to the procedure in the table<br />
POTENTIOMETERS, RV2 description when at full speed. If accel or decel is<br />
too slow adjust appropriate pot. If motor does not seem to get up to full speed,<br />
reduce the level at TP1 by turning RV2 clock-wise.<br />
PAGE 28
6 TYPICAL CONNECTIONS<br />
Listed in this section are diagrams containing typical single option connections. Notice that<br />
multi-option connections are possible, meaning a combination of a starter with two or more<br />
options attached. The only connection difference between the various sized TRU-START power<br />
units, other than the obvious sizes and ratings of devices, is the location of the current<br />
transformers. This should be of no concern because any modification involving this<br />
configuration should be done at the factory or be consulted by <strong>Cutler</strong>-<strong>Hammer</strong> <strong>Canada</strong>.<br />
PAGE 29
6.1 TRU-START WITH 2-WIRE CONTROL AND EXTERNAL RESET<br />
SCR1<br />
MOV<br />
CT1<br />
T1<br />
L1<br />
FU1<br />
SCR2<br />
SCR3<br />
MOV<br />
T2 3 PHASE<br />
INDUCTION<br />
MOTOR<br />
CT2<br />
L2<br />
FU2<br />
PROTECTED<br />
200-600V<br />
3 PHASE<br />
50/60HZ<br />
SCR4<br />
SCR5<br />
MOV<br />
CT3<br />
T3<br />
L3<br />
FU3<br />
SCR6<br />
TO SCR GATES<br />
K5 G6 K6<br />
K3 G4 K4 G5<br />
G3<br />
G1 K1 G2 K2<br />
2 1<br />
3<br />
4<br />
PAGE 30<br />
FAULT<br />
RATE<br />
CA392-3<br />
AC1<br />
RUN<br />
FAULT<br />
RUN<br />
N<br />
PROTECTED<br />
120V, 60Hz/<br />
110V ,50Hz<br />
SUPPLY<br />
STEP<br />
OPT<br />
RESET<br />
TB<br />
6 7<br />
1 2 3 4 5<br />
EXTERNAL<br />
RESET<br />
CUSTOMER<br />
INTERLOCK<br />
TO RUN LOGIC<br />
RUN<br />
**NOTE : LOW VOLTAGE SIGNAL, PANEL DOOR USE ONLY<br />
*NOTE : RUN MUST BE UNSEALED WHEN A FAULT<br />
IS INDICATED BY THE FAULT RELAY
6.2 TRU-START WITH 3-WIRE CONTROL, OPTIONAL RUN AND<br />
READY PILOT LIGHT<br />
CT1<br />
T1<br />
SCR1<br />
MOV<br />
L1<br />
FU1<br />
SCR2<br />
SCR3<br />
MOV<br />
CT2<br />
3 PHASE<br />
INDUCTION<br />
MOTOR<br />
T2<br />
L2<br />
FU2<br />
PROTECTED<br />
200-600V<br />
3 PHASE<br />
50/60HZ<br />
SCR4<br />
SCR5<br />
MOV<br />
CT3<br />
T3<br />
L3<br />
FU3<br />
SCR6<br />
TO SCR GATES<br />
K3 G4 K4 G5 K5 G6 K6<br />
G3<br />
K1 G2 K2<br />
G1<br />
1<br />
4 3 2<br />
FAULT<br />
RATE<br />
CA392-3<br />
AC1<br />
RUN<br />
FAULT<br />
RUN<br />
N<br />
PROTECTED<br />
120V, 60Hz/<br />
110V ,50Hz<br />
SUPPLY<br />
STEP<br />
PAGE 31<br />
RESET<br />
OPT<br />
6 7<br />
4 5<br />
2 3<br />
1<br />
TB<br />
START<br />
READY<br />
G<br />
CUSTOMER<br />
INTERLOCK<br />
RUN<br />
STOP<br />
G<br />
ONE LINE DIAGRAM OF 3-WIRE CONTROL<br />
CA392-3<br />
FAULT<br />
FUSE<br />
NEUTRAL<br />
RUN<br />
AC1<br />
120VAC<br />
N<br />
RUN<br />
1<br />
7<br />
6<br />
5<br />
START STOP<br />
CUSTOMER<br />
INTERLOCK
6.3 TRU-START WITH SOFT STOP<br />
SCR1<br />
T1<br />
CT1<br />
MOV<br />
L1<br />
FU1<br />
SCR2<br />
SCR3<br />
3 PHASE<br />
INDUCTION<br />
MOTOR<br />
T2<br />
CT2<br />
MOV<br />
L2<br />
FU2<br />
PROTECTED<br />
200-600V<br />
3 PHASE<br />
50/60HZ<br />
SCR4<br />
T3<br />
CT3<br />
MOV<br />
SCR5<br />
L3<br />
FU3<br />
SCR6<br />
TO SCR GATES<br />
1<br />
2<br />
3<br />
G5 K5 G6 K6 4<br />
K4<br />
G3 K3 G4<br />
K2<br />
G1 K1 G2<br />
FAULT<br />
RATE<br />
CA392-3<br />
AC1<br />
PAGE 32<br />
RUN<br />
FAULT<br />
RUN<br />
N<br />
PROTECTED<br />
120V, 60Hz/<br />
110V ,50Hz<br />
SUPPLY<br />
STEP<br />
RESET<br />
OPT<br />
TB<br />
7<br />
5 6<br />
3 4<br />
2<br />
1<br />
START<br />
OPT<br />
CUSTOMER<br />
INTERLOCK<br />
SOFT STOP<br />
TIME<br />
STOP<br />
CA390-3<br />
RAMP TIME<br />
SSRUN<br />
FINAL<br />
CURRENT<br />
ENABLE/<br />
DISABLE<br />
3 4<br />
J1 1 2<br />
ENABLE/DISABLE<br />
SOFT STOP
6.4 TRU-START WITH SOLID STATE REVERSING<br />
SCR9<br />
MOV<br />
SCR10<br />
SCR7<br />
MOV<br />
SCR8<br />
T1<br />
CT1<br />
SCR1<br />
MOV<br />
L1<br />
FU1<br />
SCR2<br />
CT2<br />
SCR3<br />
MOV<br />
3 PHASE<br />
INDUCTION<br />
MOTOR<br />
T2<br />
L2<br />
FU2<br />
PROTECTED<br />
200-600V<br />
3 PHASE<br />
50/60HZ<br />
SCR4<br />
T3<br />
CT3<br />
SCR5<br />
MOV<br />
L3<br />
FU3<br />
SCR6<br />
TO SCR GATES<br />
PAGE 33<br />
TO SCR GATES<br />
2 1<br />
K5 G6 K6 4 3<br />
G5<br />
K3 G4 K4<br />
G3<br />
K1 G2 K2<br />
G1<br />
K10<br />
G10<br />
G7 K7 G8 K8 G9 K9<br />
FAULT<br />
CA392-3<br />
REVERSING<br />
TIME DELAY<br />
FWD<br />
RATE<br />
CA388-4<br />
P1<br />
IC13<br />
FWD<br />
REV<br />
RUN<br />
FAULT<br />
RUN<br />
PROTECTED AC1<br />
120V, 60Hz/<br />
110V ,50Hz<br />
SUPPLY<br />
N<br />
REV<br />
STEP<br />
120V NEUT. FWD/REV<br />
1 2 3 4 AC<br />
RESET<br />
OPT<br />
OPT<br />
J1<br />
3<br />
2<br />
1<br />
5 6 7<br />
3 4<br />
1 2<br />
TB<br />
START<br />
FWD/REV<br />
SWITCH<br />
CUSTOMER<br />
INTERLOCK<br />
STOP
6.5 TRU-START WITH BYPASS CONTACTOR FOR NEMA 4 OR 12<br />
80A AND BELOW<br />
BPM<br />
T1<br />
BPM T1<br />
SCR1<br />
MOV<br />
BPM L1<br />
CT1<br />
L1<br />
FU1<br />
BPM<br />
SCR2<br />
BPM T2<br />
SCR3<br />
MOV<br />
T2 3 PHASE<br />
INDUCTION<br />
MOTOR<br />
BPM L2<br />
CT2<br />
L2<br />
FU2<br />
PROTECTED<br />
200-600V<br />
3 PHASE<br />
50/60HZ<br />
BPM<br />
SCR4<br />
T3<br />
BPM T3<br />
SCR5<br />
MOV<br />
BPM L3<br />
CT3<br />
L3<br />
FU3<br />
SCR6<br />
TO SCR GATES<br />
K5 G6 K6<br />
G5<br />
G3 K3 G4 K4<br />
G1 K1 G2 K2<br />
2 1<br />
4 3<br />
FAULT<br />
RATE<br />
CA392-3<br />
AC1<br />
RUN<br />
FAULT<br />
RUN<br />
PROTECTED<br />
120V, 60Hz/<br />
110V ,50Hz<br />
SUPPLY<br />
PAGE 34<br />
STEP<br />
N<br />
RESET<br />
OPT<br />
7<br />
5 6<br />
TB 2 3 4<br />
1<br />
START<br />
OPT<br />
PHASE<br />
BACK<br />
ENERGY<br />
SAVE<br />
CUSTOMER<br />
INTERLOCK<br />
STOP<br />
CA391-3<br />
UP-TO SPEED/<br />
BYPASS<br />
SHEAR PIN<br />
TRIP<br />
BYPASS<br />
CONTACTOR<br />
BPR BPM<br />
TB1<br />
3<br />
1 2<br />
UP-TO<br />
SPEED<br />
BPR<br />
BYPASS<br />
RELAY<br />
*NOTE : BYPASS RELAY MUST BE USED<br />
FOR 200A AND ABOVE COTATORS.
6.6 TRU-START WITH BYPASS CONTACTOR FOR NEMA 4 OR 12<br />
125 AND ABOVE<br />
BPM<br />
T1<br />
BPM T1 CT1<br />
SCR1<br />
MOV<br />
BPM L1<br />
L1<br />
FU1<br />
SCR2 BPM<br />
CT2<br />
BPM T2<br />
SCR3<br />
MOV<br />
T2 3 PHASE<br />
INDUCTION<br />
MOTOR<br />
BPM L2<br />
L2<br />
FU2<br />
200-600V<br />
3 PHASE<br />
50/60HZ<br />
SCR4 BPM<br />
T3<br />
CT3<br />
BPM T3<br />
SCR5<br />
MOV<br />
BPM L3<br />
L3<br />
FU3<br />
SCR6<br />
TO SCR GATES<br />
2 1<br />
3<br />
K5 G6 K6 4<br />
G5<br />
G3 K3 G4 K4<br />
G1 K1 G2 K2<br />
FAULT<br />
PAGE 35<br />
RATE<br />
CA392-3<br />
AC1<br />
RUN<br />
FAULT<br />
RUN<br />
N<br />
PROTECTED<br />
120V, 60Hz/<br />
110V ,50Hz<br />
SUPPLY<br />
STEP<br />
RESET<br />
OPT<br />
7<br />
5 6<br />
TB 2 3 4<br />
1<br />
START<br />
OPT<br />
CUSTOMER<br />
INTERLOCK<br />
PHASE<br />
BACK<br />
ENERGY<br />
SAVE<br />
STOP<br />
CA391-3<br />
UP-TO SPEED/<br />
BYPASS<br />
BYPASS<br />
CONTACTOR<br />
BPR BPM<br />
SHEAR PIN<br />
TRIP<br />
TB1<br />
3<br />
1 2<br />
UP-TO<br />
SPEED<br />
BPR<br />
BYPASS<br />
RELAY<br />
*NOTE : BYPASS RELAY MUST BE USED<br />
FOR 200A AND ABOVE COTATORS.
6.7 TRU-START WITH SHORTED SCR OPTION<br />
CT1<br />
SCR1<br />
MOV<br />
T1<br />
L1<br />
SCR2<br />
CT2<br />
SCR3<br />
MOV<br />
T2 3 PHASE<br />
INDUCTION<br />
MOTOR<br />
L2<br />
PROTECTED<br />
200-600V<br />
3 PHASE<br />
50/60HZ<br />
SCR4<br />
CT3<br />
SCR5<br />
MOV<br />
T3<br />
L3<br />
SCR6<br />
TO SCR GATES<br />
SHUNT TRIP<br />
2 1<br />
3<br />
G6 K6 4<br />
K5<br />
K3 G4 K4 G5<br />
K1 G2 K2 G3<br />
G1<br />
FAULT<br />
RATE<br />
CA392-3<br />
AC1<br />
RUN<br />
FAULT<br />
RUN<br />
N<br />
PROTECTED<br />
120V, 60Hz/<br />
110V ,50Hz<br />
SUPPLY<br />
PAGE 36<br />
STEP<br />
RESET<br />
OPT<br />
7<br />
6<br />
TB 1 2 3 4 5<br />
START<br />
L1<br />
L1<br />
OPT<br />
CUSTOMER<br />
INTERLOCK<br />
STOP<br />
T1<br />
T1<br />
CA395-2<br />
L2<br />
L2<br />
SHORTED<br />
SCR<br />
T2<br />
T2<br />
SHORTED SCR<br />
L3<br />
L3<br />
T3<br />
T3<br />
TB1<br />
2 3<br />
1
6.8 TRU-START WITH LINEAR ACCEL/DECEL CARD<br />
CT1<br />
T1<br />
SCR1<br />
MOV1<br />
L1<br />
FU1<br />
SCR2<br />
SCR3<br />
MOV2<br />
3%%C<br />
INDUCTION<br />
MOTOR<br />
CT2<br />
T2<br />
L2<br />
FU2<br />
200-600V<br />
3%%C<br />
50/60HZ<br />
SCR4<br />
CT3<br />
T3<br />
SCR5<br />
MOV3<br />
L3<br />
FU3<br />
T<br />
SCR6<br />
FU4 FU5<br />
TO SCR GATES<br />
H1<br />
T1 H2<br />
600/120V<br />
150VA<br />
X1 X2<br />
K2 G3 K3 G4 K4 G5 K5 G6 K6<br />
4<br />
3 2 1<br />
G2<br />
G1 K1<br />
26<br />
FU6 25<br />
1<br />
FAULT<br />
(250V)TRM<br />
PAGE 37<br />
RATE<br />
CA392-3<br />
AC1<br />
RUN<br />
FAULT<br />
RUN<br />
STEP<br />
N<br />
OPT<br />
5 6 7<br />
2 3 4<br />
TB 1<br />
START<br />
J2<br />
OPT<br />
CA385<br />
CUSTOMER<br />
INTERLOCK<br />
STOP<br />
J3<br />
TACH<br />
SCALING<br />
RESISTOR<br />
ZERO<br />
SPEED<br />
DECEL<br />
ACCEL<br />
COM AUX<br />
REF<br />
4 5 6<br />
2 3<br />
PULSE<br />
FDBK<br />
J1 1
PAGE 38
7 SPARE PARTS<br />
7.1 STANDARD UNIT<br />
TRU-START<br />
MODEL<br />
C/T<br />
RATIO<br />
C/T<br />
PART NO.<br />
SCR<br />
PART NO.<br />
MOV<br />
PART NO.<br />
CONTROL<br />
CARD<br />
DESCRIPTION<br />
TRU-15 1500:1 T261122 N10SP13 O210050 CA392-3<br />
TRU-30 1500:1 T261122 N10SP03 O210050 CA392-3<br />
TRU-50 1500:1 T261122 N10SP06 O210050 CA392-3<br />
TRU-80 2500:1 T262320 N10SP16 O210050 CA392-3<br />
TRU-125 2500:1 T262320 N20SP06 O210050 CA392-3<br />
TRU-200 2500:1 T262320 N728452 O210050 CA392-3<br />
TRU-360 5000:1 T265320 N718602 O210050 CA392-3<br />
TRU-500 8500:1 T268320 N718133 O210050 CA392-3<br />
TRU-600 8500:1 T268320 N718153 O210050 CA392-3<br />
TRU-800 10000:1 T261321 N718552 O210050 CA392-3<br />
L1<br />
CT1<br />
L2 T2<br />
CT2<br />
L3 T3<br />
CT3<br />
7.2 OPTION CARDS<br />
OPTION CARD MULTI<br />
OPTION<br />
MOV<br />
MOV<br />
SCR<br />
MOV<br />
SCR<br />
SCR<br />
SCR<br />
SCR<br />
SCR<br />
SOLID STATE<br />
REVERSING<br />
SOFT<br />
STOP<br />
SHORTED<br />
SCR<br />
LINEAR<br />
ACCEL/DECEL<br />
DESCRIPTION CA391-3 CA388-4 CA390-1 CA395-2 CA385<br />
PAGE 39<br />
T1
PAGE 40
8 TROUBLESHOOTING<br />
PROBLEM POSSIBLE CAUSE CORRECTION<br />
OVER TEMP (LD1) lit Fan failure Replace fan<br />
Fan blockage Clear blockage<br />
Jumper missing from OT Replace jumper, units without fans<br />
only<br />
READY (LD2) not lit Fault present Refer to section 3.5 FAULTS<br />
Does not start and RUN<br />
(LD3) doesn't illuminate<br />
MOTOR OVRLD (LD4)<br />
lit<br />
Motor overload trips<br />
before motor is up to<br />
speed<br />
Control wiring Refer to section 6 TYPICAL<br />
CONNECTIONS and check wiring<br />
Shorted motor or output Check motor and output<br />
SW2 not calibrated for<br />
motor<br />
Burden pack not installed<br />
or not installed correctly<br />
Refer to current calibration chart on<br />
unit<br />
Install burden pack and/or correctly<br />
SW2 setup may be wrong Confirm SW2 is setup for the motor<br />
connected<br />
RAMP and STEP setup<br />
or extended overload<br />
necessary<br />
+15V (LD5) not lit Control voltage not<br />
present<br />
Motor runs in wrong<br />
direction<br />
Neons 1, 3, or 5 not lit at<br />
stop<br />
Increase RV1 and RV2, refer to<br />
section 4<br />
Check control voltage and FU1 on<br />
control card<br />
Phase reversal Interchange any two incoming or<br />
motor leads<br />
Shorted SCR Measure continuity between line and<br />
output terminals<br />
Motor not connected Connect motor<br />
Neons 2, 4, or 6 not lit 3ø supply Check incoming line voltage<br />
Motor sounds rough<br />
when starting<br />
Motor starts similar to<br />
across the line<br />
Loose connections or gateConfirm<br />
good connections and all<br />
leads<br />
gate leads to SCR's and the CA392<br />
control card are secure<br />
Lightly loaded Decrease STEP and RAMP or maybe<br />
try CONSTANT CURRENT mode<br />
Incorrect line, terminal<br />
and bypass connections<br />
PAGE 41<br />
Incoming lines must be connected to<br />
L1, L2, L3<br />
Motor must be connected to T1, T2,<br />
T3<br />
Bypass contactor must be connected<br />
to BPM L1-3, BPM T1-T3
PAGE 42
PAGE 43
Company Information<br />
<strong>Eaton</strong>’s <strong>Cutler</strong>-<strong>Hammer</strong> business is a worldwide leader providing customer-driven<br />
solutions. From power distribution and electrical control products to industrial<br />
automation, the <strong>Cutler</strong>-<strong>Hammer</strong> business utilizes advanced product<br />
development, world-class manufacturing and offers global engineering<br />
services and support. To learn more about <strong>Eaton</strong>’s innovative <strong>Cutler</strong>-<strong>Hammer</strong><br />
products and solutions call 1-800-268-3578, for engineering services call<br />
1-800-498-2678, or visit www.cutler-hammer.ca .<br />
<strong>Eaton</strong> Corporation is a global $7.3 billion diversified industrial manufacturer that is a<br />
leader in fluid power systems; electrical power quality, distribution and control;<br />
automotive engine air management and fuel economy; and intelligent truck systems<br />
for fuel economyand safety. <strong>Eaton</strong> has 48,000 employees and sells products in<br />
more than 50 countries. For more information visit www.eaton.com.<br />
<strong>Eaton</strong> Corporation<br />
<strong>Cutler</strong>-<strong>Hammer</strong> Group<br />
3228 South Service Rd.<br />
Burlington, ON L7N 3H8<br />
<strong>Canada</strong><br />
905-333-6442<br />
www.cutler-hammer.ca<br />
<strong>Cutler</strong>-<strong>Hammer</strong><br />
©2003 <strong>Eaton</strong> Corporation<br />
All Rights Reserved<br />
Printed in <strong>Canada</strong><br />
IL.TS-001A<br />
May 2003


