

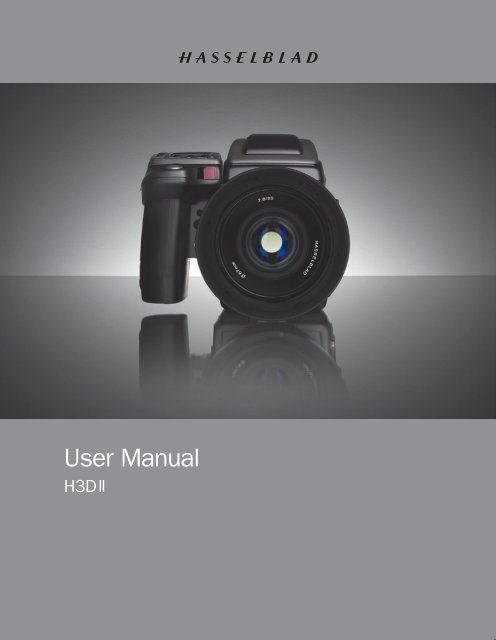
User Manual
User Manual
User Manual

You also want an ePaper? Increase the reach of your titles
YUMPU automatically turns print PDFs into web optimized ePapers that Google loves.
<strong>User</strong> <strong>Manual</strong><br />
H3D ll
C O N T E N T S<br />
Introduc tion 4<br />
1 General over view of body and<br />
view finder —<br />
control and display 8<br />
Grip display 10<br />
Viewfinder display 12<br />
Audio feedback 16<br />
2 Camera Body 18<br />
Carrying strap 19<br />
Rechargeable battery 19<br />
Battery charger 19<br />
Charging the battery 20<br />
Rechargeable battery grip − general 20<br />
Rechargeable battery grip − precautions 21<br />
Reserve lithium-battery grip 21<br />
Battery life 21<br />
Battery status (rechargeable battery only) 22<br />
Viewfinder screen 22<br />
Accessory connection 23<br />
PC-connector 23<br />
Base plate 23<br />
3 Viewfinder 24<br />
Parts & Components 25<br />
Attaching and removing the viewfinder 25<br />
Eyepiece adjustment 25<br />
Eye cup 25<br />
Integral flash unit 25<br />
4 Lenses 26<br />
Parts & Components 27<br />
Attaching a lens 27<br />
Removing a lens 27<br />
Lens cap 27<br />
Filters 27<br />
Lens shades 27<br />
Shutter and aperture control 27<br />
Depth-of-field calculation 28<br />
Depth-of-field / visual preview 28<br />
Infrared focus settings 28<br />
Focus aid 28<br />
CF adapter 29<br />
Specific-lens information 29<br />
5 General over view of digital<br />
capture unit 30<br />
The control panel 32<br />
Overview of menu system and navigation 34<br />
Overview of menu structure 35<br />
6 Initial General Settings and<br />
Preparation 36<br />
Setting the menu language 36<br />
Storage and shooting 37<br />
Image storage modes / shooting 37<br />
Selecting the current medium 37<br />
Using compact flash memory cards 38<br />
Working with an ImageBank-II 39<br />
Tethered to a computer 40<br />
7 Storage working with media<br />
and batches 41<br />
Organizing work with batches 41<br />
Navigating media and batches 41<br />
Creating new batches 43<br />
Using Instant Approval Architecture 44<br />
Reading and changing approval status 45<br />
Browsing by approval status 46<br />
Deleting by approval status 46<br />
8 Over view of viewing, deleting<br />
and copying images 47<br />
Basic image browsing 47<br />
Choosing the current batch 47<br />
Browsing by approval status 47<br />
Zooming in and out 47<br />
Zooming in for more detail 48<br />
Thumbnail views 48<br />
Preview modes 49<br />
Histogram mode 50<br />
Full-details mode 51<br />
Battery-saver mode 51<br />
Full-screen mode 51<br />
Overexposure indicator 51<br />
Not all the images in this manual were taken with a Hasselblad H3D II. They are used for illustrative purposes only and are not intended to represent the image quality produced by a Hasselblad H3D II. © Jens Karlsson/Hasselblad , David Jeffery and Mats Bengtsson
Deleting images 52<br />
Transferring images 52<br />
9 MENU — ISO, White balance,<br />
Media, Browse 53<br />
Menu system overview 53<br />
Navigating the menu system 53<br />
Menu structure 54<br />
Items on the main menu 54<br />
Language 55<br />
Settings check 55<br />
ISO 56<br />
White balance 56<br />
Media 58<br />
Browse 59<br />
10 MENU—Storage 60<br />
Delete 61<br />
Format 65<br />
Copy 66<br />
Batch 68<br />
Default Approval Level 69<br />
11 MENU—Settings 70<br />
<strong>User</strong> Interface 71<br />
Camera 72<br />
About 77<br />
Default 77<br />
Custom Options 78<br />
12 Light Metering &<br />
Exposure Control 79<br />
Metering method 80<br />
Exposure method 81<br />
<strong>Manual</strong> exposure mode 81<br />
Automatic exposure mode 82<br />
ISO /WB 83<br />
AE-L button 84<br />
Exposure compensation/Quick Adjust 85<br />
13 General Functions 86<br />
Power−ON 87<br />
Power−Standby 87<br />
Power−OFF 87<br />
M a n u a l f o c u s 87<br />
<strong>Manual</strong> focus mode 88<br />
Autofocus override in manual mode 88<br />
Autofocus 88<br />
3<br />
Single Shot 88<br />
Continuous 89<br />
Autofocus mode 89<br />
Profiles 90<br />
Using profiles 91<br />
Making a profile 90<br />
Changing a profile name 91<br />
14 Advanced Features 92<br />
General overview of camera menu 93<br />
Self Timer 94<br />
Bracketing 96<br />
Interval 98<br />
Settings 99<br />
Custom Options 99<br />
Image Info 104<br />
Text setting 104<br />
Date & Time 105<br />
System status 106<br />
Drive 107<br />
15 Flash 108<br />
Flash measure 111<br />
16 Multi Shot 112<br />
17 Optional Accessories 113<br />
18 Appendix 117<br />
Glossary 118<br />
Technical specifications 122<br />
Care, digital capture unit 125<br />
Equipment care and service 127
Welcome to Hasselblad !<br />
The H3D II represents the forefront of medium format photography. This unrivalled<br />
position is based on an accumulation of experience spanning more than<br />
fifty years. By using Hasselblad equipment you share the decision made by of<br />
some of the world’s best and most famous photographers. Congratulations on<br />
a wise choice!<br />
The H3D II is a development of the world’s first full-frame, large-sensor, medium-format<br />
DSLR camera. The H3D II has been developed around a brand new<br />
digital camera engine producing increased lens performance and a new level of<br />
image sharpness. By focusing solely on digital camera architecture, Hasselblad<br />
is able to offer photographers the full benefits of professional medium-format<br />
digital cameras as well as the ease of use of the best 35mm DSLRs.<br />
The H3D II delivers outstanding performance, taking full advantage of the<br />
virtues of medium format photography. The result is flexibility for the professional<br />
photographer, including the freedom to choose between eye-level and<br />
waist-level viewfinders, digitally APO corrected lenses, and on-the-fly classification<br />
of images. Hasselblad’s Natural Color Solution delivers out-of-the-box<br />
image quality only achievable in a true digital camera system.<br />
Medium Format digital capture advantage<br />
In digital photography, the advantages of large format cameras have become even more<br />
obvious. The 6×4.5 cm window allows the H3D II to use the largest image sensors currently<br />
available in digital photography – up to more than twice the physical size of a 35mm camera<br />
sensor. Consequently the sensor holds more and larger pixels, which deliver the highest possible<br />
image quality in terms of moiré-free color rendering without gradation break-ups in even<br />
the finest lit surfaces.<br />
An impressive lens line<br />
The highly renowned HC/HCD lens line includes 10 Auto-Focus lenses, all with central shutters.<br />
Range is from 28mm to 300mm, 50-110mm zoom, 35-90mm zoom and 1.7X converter. The<br />
HTS 1.5 tilt/shift adapter delivers an easy to use, portable tilt/shift solution for 5 HC/HCD lenses<br />
ranging from 28mm to 100mm. The CF adapter allows use of the classic CF-lenses from the<br />
Hasselblad V-camera, with full use of their central shutters, allowing flash to be employed at<br />
4
shutter speeds up to 1/800s. The central shutter also improves image<br />
quality by reducing camera vibration. And thanks to the large format<br />
of the H System cameras, there is a considerably shallower depth of<br />
field range, making it much easier to utilize selective focus to creative<br />
effect.<br />
A choice of large and bright viewfinders<br />
One of the important traditional advantages of the medium format<br />
is the extra-large and bright viewfinder image, enabling extremely<br />
precise compositions and easy operation in dim lighting. The H3D II<br />
comes with the HVD 90x viewfinder designed for full performance<br />
over the large 36x48mm sensor. Hasselblad has added an interchangeable<br />
waist-level viewfinder, the HVM, for the entire range of<br />
H system cameras. The bright and large viewfinder image is ideal for<br />
creative composing and the photographer is able to shoot in the fashion<br />
that suits them most; maintaining eye contact with the model,<br />
or gaining impact by shooting from a point lower than eye-level, for<br />
example.<br />
Phocus software for the professional<br />
Phocus provides an advanced software toolbox that has been especially<br />
designed to achieve optimum workflow and absolute image<br />
perfection from Hasselblad raw image files. With the H3D II camera<br />
system Phocus provides:<br />
• Uncompromising Image Quality<br />
• Special extended camera controls with which to operate your H3D<br />
II camera. These features, such as live video for easier shot set-up<br />
and workflow, or the ability to control the lens drive for focusing<br />
when the camera is in a remote position or when the digital capture<br />
unit is mounted on a view camera, bring an entirely new level of<br />
flexibility to the way you shoot.<br />
• Moiré Removal Technology automatically applied directly on the<br />
raw data, leaving image quality intact and eliminating the need to<br />
carry out special masking selections or other manual procedures,<br />
saving hours of tedious post-production work.<br />
• Flexible Workflow. The Phocus GUI features easy-to-use options<br />
that allow you to customize your set-up to suit a range of different<br />
workflow situations, such as choice of import source, browsing/comparison<br />
functions, file management, image export in a<br />
number of file formats, pre-setting of options for upcoming shoots,<br />
and much, much more.<br />
• New Metadata (GPS, etc). The extended metadata included in all<br />
Phocus images provides for accurate and detailed cataloguing and<br />
5<br />
indexing, easy image management, and includes added GPS data<br />
functionality in order to allow a range of new functions. Phocus<br />
links GPS data directly to Google Earth, for example, making geographic<br />
reference a snap and image storage and retrieval much<br />
easier.<br />
• Perfect Viewing Quality. The Phocus Viewer delivers image viewing<br />
quality that matches every detail of what you will see later in<br />
Photoshop. In addition, the Phocus Viewer allows you to customize<br />
layout and composition to suit your current or desired workflow,<br />
providing a wide range of options including full view, compare,<br />
browse, horizontal, or vertical view, and so on. You can have multiple<br />
folders open simultaneously for side-by-side viewing, comparison,<br />
and selection.<br />
Ultra-Focus and Digital Auto Correction for image<br />
perfection<br />
The H3D II camera allows information from the lens and exact capture<br />
conditions to be fed to the camera processor for ultra-fine-tuning<br />
of the auto-focus mechanism, taking into account the design specifications<br />
of the lens and the optical specifications of the sensor. In this<br />
way the full HC lens program is even further enhanced, bringing a new<br />
level of sharpness and resolution. Digital correction for color aberration,<br />
distortion and vignetting is also added. “Digital Auto Correction”<br />
(DAC), is an APO-chromatic correction of the images based on a<br />
combination of the various parameters concerning each specific lens<br />
for each specific shot, ensuring that each image represents the best<br />
that your equipment can produce. Based upon these techniques,<br />
Hasselblad has been able to expand our lens program with a 35–90<br />
mm zoom lens that has been especially developed for the H3D product<br />
family. The design of this lens has been optimized for the actual<br />
36x48mm area of the sensor to make it more compact and to work<br />
in conjunction with DAC. This is a critical part of the technology behind<br />
capturing perfect images with this extraordinary lens. The result<br />
is clear: DAC increases image resolution and delivers perfect pixels,<br />
thereby providing an ideal basis for optimal image rendering.<br />
Hasselblad’s unique natural colors<br />
Hasselblad’s Natural Color Solution (HNCS) enables you to produce<br />
outstanding and reliable out-of-the-box colors, with skin tones, specific<br />
product colors and other difficult tones reproduced easily and<br />
effectively. In order to incorporate our new unique HNCS and DACfeatures<br />
we have developed a custom Hasselblad raw file format<br />
called 3F RAW (3FR). This file format includes lossless image compression,<br />
which reduces the required storage space by 33%. The 3FR<br />
files can be converted into Adobe’s raw image format DNG (‘Digital<br />
Negative’), bringing this new technology standard to the professional
photographer for the first time. In order to utilize DAC and optimize<br />
the colors of the DNG file format, conversion from 3FR must take<br />
place through Phocus.<br />
GPS Recording Flexibility<br />
Hasselblad’s Global Image Locator (GIL) is an accessory for use with<br />
any Hasselblad H-System digital capture product. With the GIL device,<br />
all images captured outside are tagged with GPS coordinates,<br />
time and altittude. This data provides the key to a number of future<br />
applications involving image archiving and retrieval. One example is<br />
the direct mapping of images in Phocus software to the Google Earth<br />
application.<br />
Instant Approval Architecture<br />
Building on the success of its Audio Exposure Feedback technology,<br />
Hasselblad has created Instant Approval Architecture (IAA), an enhanced<br />
set of feedback tools, designed to enable the photographer<br />
to focus o n the shoot rather than the selection process. IAA triggers<br />
audible and visual signals for each image captured, notifying the<br />
photographer immediately of its classification status. The information<br />
is recorded both in the file and in the file name, providing a quick<br />
The primary goal of all camera development is of course the seamless and unobtrusive<br />
production of superb images, regardless of situation. Hasselblad cameras have<br />
abilities and features that you may not think you need yet; each individual has their<br />
own way of working. But the H3D II has tremendous scope for fine-tuning your technique<br />
possibly beyond your present ambitions.<br />
Take your time to learn the intricacies and potentials of your new camera. Go at your<br />
own pace and explore the possibilities when you feel ready for the next step. Results<br />
will be good from the word go, that’s guaranteed, but when you want to make improvements<br />
or work more efficiently perhaps, the capabilities are there for you.<br />
The supreme Hasselblad potential is there, it’s up to you to exploit it!<br />
6<br />
and easy way to classify and select images, in the field or back at the<br />
studio. IAA is a Hasselblad trademark and Hasselblad has a patent<br />
pending on the invention. Extra large 3” display on the H3D II provides<br />
a realistic, high quality and perfect contrast image view, even<br />
in bright sunlight.<br />
Three modes of operation and storage<br />
The H3D II offers a choice of storage devices: portable CF cards, the<br />
flexible ImageBank-II or a computer hard drive. With these three operating<br />
and storage options, you are able to select a mode to suit the<br />
nature of the work in hand, whether in the studio or on location.<br />
Options for working with tilt/shift<br />
Two basic options are available for tilt/shift work with H3D II. A simple,<br />
portable adapter solution and the classic view camera solution.<br />
The HTS tilt/shift adapter for H3D II allows for portable tilt/shiftwith<br />
the HC/HCD lens range from 28mm to 100mm (please refer to the<br />
separate datasheet on this product for details).<br />
To further increase usability, the H3D II has been designed to allow<br />
the digital capture unit to be detached and used on a view camera<br />
by way of an adapter (please refer to the separate datasheet on<br />
Hasselblad View Camera solutions for details).
Computer system requirements<br />
Digital files naturally end up on a computer for processing. Image-storage and<br />
correction requires a certain minimum standard regarding computer capabilities.<br />
Large images will require a high-performance computer with plenty of memory,<br />
advanced graphics capabilities and a recent operating system. In most cases, the<br />
computer should include a FireWire 800/400 connector, which will enable you<br />
to load images directly from the camera or ImageBank-II (see note below). To<br />
load images stored on the removable compact-flash card, you could instead use<br />
a compact-flash card reader, but FireWire is recommended for maximum flexibility.<br />
Warnings and restrictions<br />
■ If you want to power the H3D II from a PC laptop (as opposed to a Macintosh laptop),<br />
you must ensure that the FireWire port on the computer is capable of supplying power.<br />
Please note the following:<br />
• Most recent Macintosh computers are compatible, both desktops and laptops.<br />
• Most recent desktop PC computers are compatible.<br />
• Most laptop PC computers are NOT compatible (but can be modified in many<br />
cases).<br />
■ Keep the H3D II and all other computer equipment away from moisture wherever<br />
possible. If your camera becomes wet, disconnect from power and allow it to dry before<br />
attempting to operate again.<br />
■ Always take great care when you remove the digital capture unit for cleaning<br />
—the exposed CCD sensor protective filter is vulnerable to damage.<br />
■ Keep all cables connected to or from your camera and computer out of the way where<br />
they will not be tripped over.<br />
■ Ensure the ventilation openings remain uncoverd on the digital capture unit when it is<br />
active.<br />
■ Your new Hasselblad camera may have been supplied in kit form or as separate items.<br />
There are a number of possible combinations depending on factors such as offers, bundles<br />
etc. Please ensure that all the items noted on the accompanying packing information<br />
have been supplied and are correct.<br />
■ Contact your Hasselblad dealer or distributor immediately if anything is missing or<br />
seems faulty in any way, quoting the serial numbers and purchase details where<br />
appropriate.<br />
■ Please keep purchase details and the warranty in a safe place.<br />
■ Familiarise yourself with the various parts and components. Leave protective covers<br />
on as much as possible and avoid touching glass surfaces and inserting fingers into<br />
the camera body. Hasselblad equipmentthas a robust construction and is capable of<br />
withstanding fairly rough treatment but nevertheless is a precision instrument and will<br />
serve you longer if treated with respect from the beginning.<br />
■ Finally, please check occasionally on the Hasselblad website–www.hasselblad.com–<br />
for any updates regarding user instructions, changes, news, or other information.<br />
If you have no Internet access, please contact your Hasselblad dealer or distributor for<br />
the latest information.<br />
7
1<br />
General overview of<br />
body and viewfinder<br />
– control and display<br />
LCD display on camera<br />
LED display in viewfinder<br />
Upgradeable firmware<br />
Rapidly accessible menu<br />
Interactive display<br />
Customizable functions<br />
All functions and settings on the H3D II camera body are accessed<br />
and altered by the control buttons and wheels on and<br />
around the grip aided visually by the display user-interface.<br />
The information on the grip display has a great deal in<br />
common with display menus found in mobile/cell phones,<br />
etc. It is pixel based and therefore has a greater capacity<br />
to produce user-friendly symbols for rapid and secure<br />
interpretation.<br />
8
Below is an overview of the primary functions of the control wheels and buttons. Some controls have dual or triple<br />
functions according to the state of the menu or setting. A full description can be found further on in this manual.<br />
M.UP button<br />
Raises and lowers mirror. Can be<br />
reassigned to another function.<br />
Remote release cord port<br />
For attaching a remote release cord<br />
(electrical).<br />
STOP DOWN button<br />
Stops down aperture to current<br />
setting. Can be reassigned to<br />
another function.<br />
Shutter release button<br />
Releases shutter. Also activates<br />
camera from standby mode.<br />
FLASH / (CONTROL LOCK) button<br />
Locks settings to avoid inadvertent<br />
change. Also accesses flash settings<br />
as well as acting as Exit button.<br />
AF button<br />
Accesses focus modes.<br />
ISO/WB button<br />
Accesses ISO and White Balance<br />
settings. Also acts as Save button.<br />
Front control wheel<br />
Accesses and changes various<br />
settings.<br />
AE-L button<br />
Locks light reading made in both<br />
automatic and manual exposure<br />
modes. Can be reassigned to another<br />
function.<br />
Format button<br />
Re-formats CF card.<br />
USER button<br />
<strong>User</strong> assignable-function button.<br />
9<br />
MENU button<br />
Accesses menu.<br />
Illumination/Battery status button<br />
Illuminates grip display. Acesses<br />
battery status and general information<br />
screen.<br />
ON.OFF (PROFILES/ESC) button<br />
Turns the camera on and off.<br />
Accesses Profiles and acts as escape<br />
button for other functions.<br />
Rear control wheel<br />
Accesses and changes various<br />
settings.<br />
Eyesight correction adjustment wheel<br />
Personal eyesight adjustment<br />
facility.<br />
EV correction adjustment button<br />
Produces EV exposure compensation.<br />
EXP button<br />
Accesses exposure mode and metering<br />
method.
Grip display<br />
Typical camera grip display. (The information in brackets describes this particular example only).<br />
Flash condition indication<br />
(No exposure compensation,<br />
normal flash synchronisation)<br />
Aperture setting<br />
(f/5.6)<br />
Exposure Value display<br />
(EV 9.3)<br />
Exposure mode indication<br />
(Aperture priority setting)<br />
Typical camera grip display when changing settings.<br />
Focus setting<br />
(Autofocus setting, single<br />
shot mode)<br />
Metering method<br />
indication<br />
(Centre weighted)<br />
Command indication<br />
The upper row on the screens describes commands (which<br />
change according to the setting). The button immediately above<br />
each command effects the change. So in this case, for example,<br />
you would press the FLASH button to ‘exit’ from the screen.<br />
See note below.<br />
Settings symbols<br />
Symbolize the options available when settings are changed.<br />
The active symbol is depicted by a drop shadow.<br />
Control wheel description and direction<br />
Arrowheads symbolize which control wheel should be used to<br />
change the setting they are beside. In this case, the Bracketing<br />
option is chosen by the front control wheel and the number of<br />
captures in that option is chosen by the rear control wheel.<br />
10<br />
White balance<br />
(Daylight)<br />
. . . = front control wheel<br />
= rear control wheel<br />
Drive condition<br />
(Single setting)<br />
Shutter speed setting<br />
(1/400s)<br />
ISO setting<br />
(50 ISO/ASA)<br />
Low battery symbol<br />
‘Capture counter’<br />
(1286 shots remaining on<br />
chosen storage medium)<br />
Setting information<br />
The lower row on the screen displays information about the current<br />
state of the setting. In short, the upper row displays what you<br />
can do, and the lower row displays the current state of settings or<br />
what you have done.
Examples<br />
Some buttons have a toggle function, the ON.OFF button has a quick<br />
‘click’ action as well as a longer (half-second) ‘press’ action and the shutter<br />
release has two positions: ‘half-press’ and ‘full-press’.<br />
Several buttons on the grip are multifunctional, according to the state of<br />
the menu. In the example illustrated here, the FLASH button functions as<br />
the EXIT button, the AF button functions as the ON button and the ISO/<br />
WB button functions as the SAVE button.<br />
The front and rear control wheels can also be used to navigate the menu<br />
on the digital capture unit.<br />
At very low temperatures the displays require a few seconds to present new<br />
settings.<br />
The control wheels are also used to navigate the menu on the digital capture<br />
unit.<br />
The FLASH button also acts as an EXIT button and the ISO/WB button<br />
acts as an OK button when navigating the digital capture unit menu.<br />
The following is a list of the various terms describing the various<br />
actions that appear in the menu (on the grip display):<br />
Enter : moves screen down one level on the menu.<br />
Exit : moves screen back up one level on the menu. Does not save any<br />
settings.<br />
Off : deactivates the particular function being set.<br />
On : activates the particular function being set.<br />
Sel. : (Select) - selects the character marked for image info and profile<br />
name<br />
ESC : (Escape) - terminates an action and returns to the main screen.<br />
Does not save any settings.<br />
Save : saves a setting and also moves screen back up one level on the<br />
menu. Can save many changes made in a setting sequence.<br />
Remember the following groupings of ‘saved’ and ‘not-saved’ actions when making settings changes:<br />
SAVED NOT SAVED<br />
‘Quick save’ - half-press shutter release button<br />
Save - press save button (ISO/WB button)<br />
The basic principle behind making changes is that the appropriate button is first<br />
pressed to access the menu and then settings altered by way of the control wheels.<br />
The appropriate control wheel is designated by arrowheads alongside the setting<br />
description.<br />
11<br />
Escape - press ESC button (PROFILES /ESC button)<br />
Exit - press exit button (FLASH button)
Viewfinder display<br />
Typical viewfinder display. Note the LEDs will only be visible when activated (by the camera or a setting).<br />
(The information in brackets describes this particular example only).<br />
Exposure method indication<br />
(‘aperture priority’ mode)<br />
Warning triangle<br />
LED<br />
Some examples of various viewfinder displays visible with standard settings and when specific control buttons are pressed.<br />
Standard settings<br />
FLASH<br />
AF<br />
DRIVE<br />
MENU<br />
+ /–<br />
EXP<br />
Flash LED<br />
Normal screen Normal screen in AE lock state Normal screen with<br />
exposure compensation set<br />
Flash mode<br />
AF mode<br />
Drive mode<br />
Menu mode<br />
Aperture setting<br />
(f/5.6)<br />
Exposure compensation setting<br />
(+0.7 EV)<br />
Exposure compensation mode<br />
Exposure method and metering method<br />
Exposure compensation<br />
setting reminder symbol<br />
12<br />
Shutter speed setting<br />
(1/30 second)<br />
Metering method setting<br />
(Centre weighted)<br />
Focus Aid LED<br />
‘Capture counter’
Menu charts – general<br />
Throughout this manual you will find charts to explain the steps<br />
and procedures required to alter the various settings. These<br />
charts are laid out to graphically illustrate in a simple manner<br />
how to navigate through the menus. While they include all the<br />
information that would be presented on the display relevant to<br />
that section, they cannot illustrate all the possible combinations<br />
of the various symbols seen on a screen at one time as that would<br />
be impractical and too confusing. If you are familiar with mobile/<br />
cell phone menus, for example, then the design of the layout and<br />
working practice will not be unfamiliar.<br />
You should find that, in practice, working your way through a<br />
menu on the camera is a good deal simpler and more obvious<br />
than the written explanation implies!<br />
In the descriptions, various terms are used regarding menu navigation.<br />
Menus have ‘trees’, for example, which describes their imaginary<br />
graphical layout where you could trace a navigational<br />
path along its ‘branches’. Each new section, or stopping off point<br />
on the branches, seen on the display is called a ‘screen’. Therefore<br />
a screen is the graphical display of where you are on the menu<br />
and represents the current state of settings.<br />
Symbols used in the charts<br />
F<br />
R<br />
MENU<br />
ISO/WB<br />
Enter<br />
AF<br />
On<br />
Use front control wheel<br />
(direction depends on user setting)<br />
Use rear control wheel<br />
(direction depends on user setting)<br />
Press button or turn wheel<br />
MENU button on the grip<br />
Choose ENTER<br />
(by pressing ISO/WB button on grip)<br />
Choose ON<br />
(by pressing AF button on grip)<br />
13<br />
The H3D II features the advantage of multiple customization of<br />
settings. This means that your personal choice of settings, and<br />
thereby appearance of various combinations of symbols on the<br />
display at any time, will not necessarily be the same as many of<br />
the screens illustrated in this manual.<br />
To simplify the descriptions, reference is often made to a ‘main’<br />
or standard screen. Apart from default settings, there is no actual<br />
standard setting in the normal sense and therefore you create<br />
your own ‘standard’, which of course can be changed at any<br />
time.<br />
The ‘main’ screen is therefore the one you have currently created<br />
and is the one visible on the display when photographing (except<br />
where a particular mode is in actual operation, such as self-timer,<br />
for example).<br />
ISO/WB<br />
Save<br />
Choose Save<br />
(by pressing the ISO / WB button on<br />
grip) The new setting will be saved<br />
and chosen action can be carried<br />
out. Setting will be retained until<br />
changed.<br />
Functions in loop on menu<br />
A loop means that the available<br />
functions on that particular branch<br />
of the menu can be successively<br />
accessed in either direction of the<br />
control wheels without a break in<br />
flow. That is, you could turn the<br />
wheel clockwise or anticlockwise to<br />
arrive at the desired function.<br />
Main direction of path<br />
through menu<br />
The main path traces step-bystep<br />
the path that has to be taken<br />
through the various branches of the<br />
menu tree as they appear on the display<br />
to reach the relevant functions.
A<br />
B C D E<br />
I<br />
F<br />
G<br />
H<br />
Shutter release button A<br />
This button has half-press and full-press positions. By pressing half-way (or softly) the<br />
camera, auto focus function and exposure meter can be activated. By pressing all the way<br />
down (or more firmly) the shutter will be released (or the chosen exposure procedure will<br />
begin, as relevant. For example, the self timer is activated with this button)<br />
FLASH / (CONTROL LOCK) button / (EXIT) B<br />
This is a triple function button. If you press the button for one second, the beeper will<br />
sound (if set) and a key symbol will appear on the grip display signifying that the controls<br />
(except the shutter release) have been locked and therefore cannot be altered unintentionally<br />
in use. Press the button for one second again to unlock (this function can be altered<br />
to lock all controls or control wheels only in ‘Custom options’).<br />
Quickly clicking the button will access the flash settings information on the display from<br />
the main screen. See separate section for full details.<br />
This button also acts as the EXIT button for many other settings including an EXIT button<br />
when navigating the digital capture unit menu.<br />
AF button / (ON) / (SEL.) C<br />
This is a triple function button. Press this button to directly access the autofocus/manual<br />
focus choice screen from the main screen. See separate section for full details. It also acts<br />
as the ON and SEL. (= select) buttons for many other settings.<br />
ISO/WB button / (SAVE) / (ENTER) D<br />
This is a triple function button. It provides direct access to the ISO and White Balance<br />
settings (see separate section for full details).<br />
It also acts as the SAVE and ENTER buttons for many other settings as well as an OK button<br />
when navigating the digital capture unit menu.<br />
Front control wheel E<br />
The front and rear control wheels are used to make changes in exposure settings, access<br />
the various loop sections of the menu for settings as well as navigate the digital capture<br />
unit’s menu. The effect of the wheels’ direction is customizable.<br />
MENU button F<br />
Accesses the first level of the menu for settings changes.<br />
Illumination/Battery status button G<br />
Press to illuminate the display. Remains active until camera enters standby mode. Hold<br />
down to access battery status/general information screen.<br />
ON.OFF (PROFILES/ESC) button H<br />
Press the button for 1 second to activate the camera. The H3D II start-up logo will appear<br />
and then the main screen. After a few seconds (customizable) the camera will enter<br />
Standby mode.<br />
A long press of the button will turn the camera off completely (even from Standby mode)<br />
signified by an audible signal (if set). A quick ‘click’ on the button will access the Profiles<br />
section of the menu from the main screen.<br />
Note the difference in results between a long press and a quick click of the this button.<br />
Rear control wheel I<br />
The front and rear control wheels are used to make changes in exposure settings, access<br />
the various loop sections of the menu for settings as well as navigate the digital capture<br />
unit’s menu. The effect of the wheels’ direction is customizable.<br />
14
J<br />
K<br />
L<br />
M<br />
N<br />
O<br />
On the rear of the grip, as well as the rear control wheel, there are a further three<br />
control buttons:<br />
AE-L button J<br />
This button can lock a light reading made in both automatic and manual exposure modes.<br />
It can also be used in Zone mode to take a new reading.<br />
Can be reassigned in Custom Settings to another function.<br />
See section on the AE-L button (“Light Metering and Exposure Control”) for full details.<br />
Card format button K<br />
Re-formats the CF card. Purposefully recessed to prevent unintentional use. Dialogue<br />
appears for confirmation.<br />
USER button L<br />
This button is purely user programmable to rapidly access a chosen function or screen.<br />
For example, you might use bracketing a great deal and so by one press of this button<br />
you could access the bracketing function without having to navigate through the menu.<br />
The AE-L, Mirror -UP and Stop Down buttons are also user-programmable but are by default<br />
initially assigned the functions according to their names<br />
The reassignable capability of these buttons is particularly useful and can save you a<br />
great deal of time and effort depending on how you work. You are advised to investigate<br />
their potential fully. See under ‘Custom settings’ for full details.<br />
On the front of the grip there are two more control buttons plus the remote cord<br />
release port:<br />
M.UP button M<br />
Press this button to raise the mirror and press again to lower it (toggle function). A quick<br />
double press of the button (two within a half second) will immediately access the ‘Self<br />
timer’ function.<br />
Can be reassigned in Custom Settings to another function.<br />
Remote release cord port N<br />
For attaching a remote release cord (electrical). The Hasselblad accessory jack plug socket<br />
is protected by a captive rubber plug.<br />
STOP DOWN button O<br />
Press this button to make a visual check of the depth-of-field on the viewfinder screen at<br />
the chosen aperture. The aperture will close according to the setting and remain closed<br />
as long as the pressure is maintained. You can alter the aperture at the same time to see<br />
the changes taking place.<br />
Can be reassigned in Custom Settings to another function.<br />
15
P Q R<br />
Audio feedback<br />
ON: ON:<br />
OFF: OFF:<br />
Error: Error:<br />
Ready:<br />
Low Low Battery: battery:<br />
Overexposure:<br />
There are also two control buttons on the viewfinder, as well as the eyesight<br />
correction adjustment wheel:<br />
Eyesight correction adjustment wheel P<br />
The personal eyesight adjustment facility has a diopter range of -5 to +3.5, to suit most<br />
users.<br />
ON:<br />
EV correction adjustment button Q<br />
Press this button to access the EV compensation screen. Settings are made with either<br />
the front or rear control wheels. An EV correction symbol appears OFF: on the grip and<br />
viewfinder display as confirmation.<br />
EXP button<br />
Error:<br />
R<br />
The EXP (Exposure) button accesses the exposure mode and metering method options<br />
screen. Settings are made with the front and rear control wheels and the appropriate<br />
symbols appear on the grip and viewfinder displays accordingly. Ready:<br />
16<br />
ON:<br />
OFF:<br />
Error:<br />
Ready:<br />
There are 14 different sounds to help provide immediate information. A button press has a normal mechanical 1 ‘click’ image sound left: while the remaining<br />
actions listed here are more musical. For example, a capture rated as overexposed is signified by three rapid notes going up the musical<br />
scale, whereas an underexposed capture has three rapid notes going down the musical scale, as illustrated here.<br />
See later section about available options on the digital capture Low unit battery:<br />
for activation and volume control.<br />
Media full:<br />
Overexposure:<br />
Underexposure:<br />
5 images 5 images left: left:<br />
1 image 1 image left: left:<br />
Media Media full: full:<br />
IAA yellow:<br />
Low battery:<br />
Overexposure:<br />
Underexposure:<br />
5 images left:<br />
IAA IAA yellow:<br />
Overwrite red:<br />
Transfer Transfer complete:
Customizable button function list<br />
• The USER, AE-L, STOP DOWN and M.UP buttons can all be reassigned to different functions.<br />
• The USER button has no function until specifically assigned one (default is ‘None’). The AE-L, STOP DOWN and M.UP<br />
buttons, however, by default are assigned the function appropriate to the name, until assigned otherwise, as follows:.<br />
None<br />
The user button has no function.<br />
Standby<br />
Sets the camera in standby mode to save battery consumption.<br />
Stop down<br />
Stops the lens down to the chosen aperture.<br />
Flash Measure<br />
Initiates flash measure function.<br />
Interval timer<br />
Initiates interval timer function.<br />
Self timer<br />
Initiates self timer function.<br />
Bracketing<br />
Initiates bracketing function.<br />
AF Drive<br />
Activates the AF system in any focusing mode. When the<br />
button is pressed the AF system sets the correct focusing point<br />
automatically. This is a rapid, accurate and handy way of<br />
using the AF system when the camera is set to manual focus<br />
mode. In this manner you take advantage of the accuracy<br />
and certainty of the autofocus system while retaining the<br />
control inherent in manual focusing mode.<br />
Mirror up<br />
Controls the mirror up or down function (same function<br />
as the M-UP button).<br />
A quick way to program the customizable buttons (and<br />
to access the Custom Option level in general) is to use<br />
the short-cut as follows:<br />
17<br />
B mode<br />
Sets the camera to B exposure mode.<br />
T mode<br />
Sets the camera to T exposure mode.<br />
Histogram<br />
Recalls the last shown histogram on the grip display.<br />
Grey balance exp.<br />
Initiates a grey balance exposure using the marker frame<br />
to select the desired tone.<br />
Cycle LM mode<br />
Changes the light-metering method in a loop manner: Centre<br />
Weighted/CentreSpot/Spot.<br />
Delete last image<br />
Activates the delete function for the last capture.<br />
Dig. foc check<br />
Displays last capture at 100% scale to check focus.<br />
IAA toggle<br />
Allows IAA rating change of last capture.<br />
Expose<br />
Acts as alternative shutter release button.<br />
AE-lock<br />
Activates AE lock function.<br />
1) Press the MENU button.<br />
2) Then press the USER button.<br />
This directly accesses the “Custom options” level in the menu<br />
where you can access the desired option for a setting change.
2<br />
Camera Body<br />
Aluminium cast in one piece<br />
Stainless steel shell<br />
Integral quick-coupling plate<br />
Digitally controlled<br />
Upgradeable firmware<br />
Modular design<br />
Integral ergonomic grip<br />
Pixel based user interface<br />
The H3D II camera body is a robust construction of cast<br />
aluminium with a stainless steel shell for extreme durability.<br />
The integral ergonomic grip houses the main control interface<br />
and also contains the battery holder. The camera body also<br />
contains the viewfinder screen, which can be easily removed<br />
or exchanged without the use of special tools or adjustment<br />
procedures.<br />
Please take extra care when handling the camera body without<br />
a protective cover or the digital capture unit in place to<br />
protect the auxiliary shutter. Likewise, the front opening of<br />
the camera body reveals the mirror when unprotected by<br />
a cover or lens. Do not touch or attempt to clean the mirror<br />
yourself—marks or dust particles will not impair results<br />
in any case. More noticeable problems, however, should be<br />
taken care of by a Hasselblad Authorized Service Center.<br />
18
1 2<br />
3<br />
5<br />
6<br />
7<br />
1A<br />
B<br />
C<br />
4<br />
19<br />
Carrying strap 1, 2<br />
The carrying strap is attached by firstly withdrawing the safety<br />
collar. The hook is then freed and attached to the strap lug (fig. 1).<br />
Slide back the safety collar (fig. 2) to ensure the hook remains in<br />
the locked position between the small protruding lugs. The collar<br />
is purposely a tight fit and might need some effort to slide.<br />
Rechargeable battery grip<br />
The Battery grip rechargeable 7.2V (3043348) is the standard<br />
power source for the H3D II camera and is an environmentally<br />
approved Li-ion type. The H3D II requires a power supply for all<br />
actions as there is no mechanical reserve facility. When working<br />
untethered, it is therefore advisable to keep the reserve battery<br />
grip complete with fresh lithium batteries handy (if you do not<br />
use a spare rechargeable battery grip). As is the case with most<br />
batteries, problems might be encountered when used in very low<br />
temperatures. In this situation it is advisable to keep the reserve<br />
battery in an inside pocket, for example, to maintain it near body<br />
temperature (both sorts of battery grips are referred to as the<br />
‘battery’ in this manual).<br />
Fitting and removing a battery 3, 4, 5<br />
The fitting and removing procedure is the same for both types of<br />
battery grip.<br />
Remove the battery from the camera by depressing the battery<br />
holder button (A) and simultaneously swinging the battery holder<br />
retaining lever (B) down until it stops. Pull the battery downwards<br />
(C).<br />
If you intend to store the battery separately from the camera you<br />
should ensure that the safety cover is in place (to prevent shortcircuiting).<br />
It snaps into place and is removed by pulling outwards<br />
and upwards on the locking clip (fig. 4).<br />
To fit, hold the battery flat against the camera body and aligning<br />
the two upper lugs with the slot, slide it back into position as far<br />
as it will go. Swing back the battery holder retaining lever until it<br />
clicks back into place.<br />
Please note if you want to use the rechargeable battery with<br />
an H1/H1D model, the firmware in the camera must be version<br />
8.2.2 or later for the battery grip to function properly.<br />
The battery charger 6, 7<br />
The battery charger unit is supplied with five plug attachments to<br />
suit various types of domestic electrical sockets available worldwide.<br />
Other types of socket will require a domestic socket converter.<br />
Attach the chosen plug (fig 7) by sliding it into position, ensuring<br />
that the two electrical contact prongs on the charger correctly<br />
enter the two contact sockets on the plug attachment. Removal is<br />
by the reverse procedure.<br />
Please note the Battery charger BC-H Li-ion 7.2 VDC (3053568) is<br />
designed for use with Battery grip rechargeable 7.2V units only.
8<br />
Charging the battery 8<br />
With the battery removed from the camera, insert the jack plug from the battery charger<br />
into the socket on the battery grip. Insert the battery charger into a standard (100–240V~<br />
/50–60 Hz) domestic socket.<br />
It will take about 12 hours to load the battery properly the first time.<br />
There are two types of battery charger. Please check here for the relevant description of<br />
the LED indicator, etc.<br />
On (not flashing) Battery is charging<br />
Slow flashing (0.8 Hz) Charging is complete and condition is being maintained.<br />
Or occasionally<br />
Rapid flashing (3 Hz) Deeply discharged battery is charging (with reduced current)<br />
Please note that rapid flashing of the LED indicator is not to be expected. The battery<br />
will not normally be so deeply discharged because the camera will shut down<br />
automatically before complete battery discharge takes place. The indicator might<br />
also flash rapidly for a few moments in some instances when the charger is connected<br />
to the electrical supply. The normal indication is therefore either ‘not flashing’ or<br />
‘slow flashing’.<br />
— continuous yellow Standby<br />
– – – slow flashing yellow Pre charge<br />
- - - - - rapid flashing green Charging ( 75% )<br />
— continuous green Ready ( 100% )<br />
- - - - - rapid flashing yellow Fault condition<br />
Rechargeable battery grip – general<br />
• The battery should be charged for approximately 12 hours before first time use.<br />
• The battery is best charged at an ambient temperature of 10°−45°C (50°− 113°F).<br />
• Maximum battery capacity is reached only after the battery has been charged and discharged several times.<br />
• Avoidfrequentfulldischarges (afulldischargeis signalled bytheappearance ofthe‘Replacebattery’ warning on<br />
the grip display). As the battery is a Li-ion type, it hasno ‘memory effect’ of practical importance and therefore<br />
frequent recharges will cause no problems such as loss of capacity or poor performance. It is therefore better<br />
policy to recharge the battery at very regular intervals, regardless of use.<br />
• Remove the battery if you intend to store the camera for some while as it will eventually become completely<br />
drained, even though the camera is turned off.<br />
• Thebatteryhasanintegrated‘fuelgauge’capabilitythatsupportsthe‘Replacebattery’and‘Batterystatus’functionsonthegripdisplay.AswithmostLi-ionbatteries,thiscapabilityshouldbeoccasionallycalibrated,depending<br />
on how much the battery is used. To do this, leave the camera on (or use it), until the ‘Replace battery’ warning<br />
appears. Then, recharge the battery for 12 hours. This will improve the accuracy of the measurements.<br />
• When removing a battery from the charger and immediately replacing it with another, allow a few seconds to<br />
elapse so that the charger can automatically reset for the next charging procedure.<br />
• It is perfectly normal for the battery to become warm when being charged.<br />
• A slight temporary loss of battery performance might be noticed at very high or low temperatures. Take the<br />
appropriate measures if this is the case.<br />
• Ifyoudo not intend to use the batteryfor awhile, itis best to store itatroom temperaturewithan approximate<br />
30 to 40% charge. You can check the percentage level on the status screen.<br />
• According to the CIPA standard, 200 shots should be expected from a fully charged battery,thoughthis depends<br />
on camera use. In practice, however, with short intervals between shots 1,000 shots can be achieved.<br />
• The battery should have a useable service life of around 400 recharge/discharge cycles.<br />
20
9<br />
10<br />
11<br />
12<br />
13<br />
14<br />
Camera battery<br />
warning<br />
ImageBank-ll<br />
battery warning<br />
Rechargeable battery grip – precautions<br />
The following precautions should be followed:<br />
• Connect the battery grip to the camera correctly.<br />
• Keep the protective cover in place when not in use. (Short-circuiting across keys in a pocket, for example,<br />
could cause a fire risk).<br />
• Do not use the battery grip for anything other than an H1/H1D/H2/H2D camera.<br />
• Do not immerse the battery grip in liquids.<br />
• Do not incinerate the battery grip. Please recycle or discard in an environmentally approved manner.<br />
• Do not use any other charger than the Hasselblad battery charger BC-H Li-ion 7.2 VDC (3053568).<br />
Battery charger BC-H Li-ion 7.2 VDC:<br />
• Read the instructions before using the charger.<br />
• Use indoors only (protect against moisture).<br />
• Do not use charger for anything else than charging of Battery grip rechargeable 7.2 V (3043348).<br />
• Do not short-circuit the jack plug.<br />
• Do not alter the charger in any way other than changing the plug attachment.<br />
Reserve lithium-battery grip (31 and 39 Mpixel models only) 9, 10<br />
The reserve lithium-battery grip is attached and removed in the same manner as the<br />
rechargeable grip.<br />
Press the red battery cassette retaining button inwards on the holder to release the battery<br />
cassette (fig 9). Load three CR-123 lithium (or equivalent) into the cassette, ensuring the<br />
polarity of each battery is correctly oriented (see the ‘+’ markings on the batteries and<br />
the cassette) (fig 10, 11). Re-insert the cassette into the battery holder, ensuring that it is<br />
seated properly in place and that the red button returns fully into the locked position.<br />
Holding the battery flat against the camera body and aligning the two upper lugs with the<br />
slot, slide it back into position as far as it will go. Swing back the battery holder retaining<br />
lever as far as it will go into the locked position.<br />
Do not use a lithium-battery grip with the 50 Mpixel model.<br />
Battery life 11, 12, 13, 14<br />
Battery life is dependent on a number of variable factors and therefore cannot be exactly<br />
predicted. If the camera is left in the active state instead of standby for long periods, for<br />
example, then the battery will become exhausted much faster.<br />
A low camera battery state is indicated by a symbol on the grip display (fig. 11) as well as<br />
on the digital capture unit display (fig. 12). In addition, an audible signal can be heard.<br />
The warning on the display (fig. 12) appears as a flashing yellow icon in the top right of<br />
the screen signifying that the battery should be charged (or changed) as soon as possible.<br />
The warning icon will also appear with a FireWire connection and will in addition turn<br />
red to signify that the camera battery is completely exhausted.<br />
Another battery warning also appears signifying ImageBank-II battery exhaustion (fig.<br />
13). This icon appears on the top left of the display screen. It too flashes yellow as the<br />
initial warning and changes to red to signify complete exhaustion.<br />
When the battery is almost completely exhausted, a warning message ‘Replace battery’<br />
will appear on the grip display (fig. 14).<br />
When the ‘Low battery’ icon appears, the camera automatically enters a temporary<br />
power-saving mode. This is recognizable by a slower pace for all the actions in a capture<br />
sequence. The camera actions also sound differently .<br />
This mode is designed so that you can continue working for a while, even though the<br />
power remaining in the battery is too low for working in the normal manner. Naturally,<br />
you should replace the battery as soon as possible to restore normal action again.<br />
21
16<br />
15<br />
Viewfinder screen showing<br />
composition frame marking<br />
(22/39/50MPix).<br />
17<br />
Viewfinder screen showing composition<br />
frame marking (31MPix).<br />
22<br />
Battery status (rechargeable battery only) 15<br />
An immediate full-screen information and battery status check<br />
appears on the grip display by holding down the illumination/<br />
battery status button. This screen displays:<br />
• the firmware version<br />
• the number of captures taken since the last battery recharge / change.<br />
• a rechargeable-battery status icon that provides a quick visual check as well as a<br />
figure estimate in percent.<br />
The information regarding the number of captures taken is intended<br />
to help you make an estimate of the number of possible remaining<br />
captures according to your way of working. For example, if you<br />
regularly browse a great deal when shooting or you leave the camera<br />
in ON-mode with no standby, you would naturally expect to drain<br />
the battery sooner than others who don’t. You should soon be able<br />
to build up a picture of how you usually work and can therefore<br />
estimate that after X number of captures, you normally expect to<br />
be able to take Y captures before the battery is exhausted (when<br />
working in a similar manner in similar conditions).<br />
The percentage information, however, provides another kind of<br />
estimate based more on the amount of power left in the battery<br />
rather than on your normal way of working.<br />
Remember that these are only estimates and that there are a number<br />
of factors affecting remaining battery, ambient temperature for<br />
example, as well as general practice.<br />
Viewfinder screen 16, 17<br />
The H3D II is fitted with a Spherical Acute-Matte D viewfinder<br />
screen for extreme brightness, clarity and even illumination. An<br />
optional accessory screen with a grid pattern is also available.<br />
To change a viewfinder screen, remove the viewfinder to access the<br />
viewfinder screen. To remove the screen, place the tip of a ballpoint<br />
pen or similar in the viewfinder screen removal lug and pull upwards.<br />
To replace the screen, position the right side of the screen in<br />
place so that it sits correctly in the recess. Place the tip of a ballpoint<br />
pen or similar in the viewfinder screen replacement indentation and<br />
press downwards until the screen snaps into position. Try to avoid<br />
touching either surface of the screen with bare fingers.<br />
Do not attempt to clean the screen by immersing it in water, or<br />
use any kind of cleaning fluid. If the screen becomes damp, do<br />
not use hot air to dry it. Use a soft cloth on the upper surface only.<br />
Seek advice from an Authorized Hasselblad Service Center if the<br />
screen becomes particularly soiled. Remember that particles or<br />
greasy marks on the screen might impair the viewfinder image<br />
but have no effect whatsoever on the recorded image.
18<br />
20<br />
21<br />
19<br />
22<br />
23<br />
Accessory connection 18, 19<br />
On the left hand side of the camera body are two accessory-retaining<br />
screw threads (M5), as well as a databus connector, protected<br />
beneath a cover.<br />
The cover can be removed by inserting a pointed object, such as<br />
a pen, in the small hole and then sliding it to the left, as in the illustration.<br />
The cover-retaining clip can then also be removed to<br />
access the connector.<br />
PC-connector 20<br />
A PC connector for non TTL-flash synchronisation is located on<br />
the left side of the body. It is protected by a captive rubber plug.<br />
Protective base plate 21, 22<br />
To attach the protective base plate, slip it over the camera foot<br />
until it stops. To remove it, lift the securing catch while pushing<br />
the plate back as in the illustration.
3<br />
Viewfinder<br />
Multi-mode light metering<br />
Full exposure information<br />
100% image<br />
90° viewing angle for eye-line composition<br />
Full image for spectacle wearers<br />
Integral dioptre adjustment<br />
Integral flash unit<br />
The HVD 90X viewfinder provides a laterally corrected 100%<br />
image at eye-line level. It features a wide-range diopter adjustment<br />
to suit most users. The viewing distance is designed<br />
to provide full frame view even for eyeglass wearers. The<br />
bright Spherical Acute-Matte D focusing screens (located in<br />
the camera body) are interchangeable to suit preference,<br />
each of them naturally indicating the spot light-metering<br />
area for accuracy in exposure calculation. The information<br />
display located beneath the viewing frame is continually updated<br />
and visible and is back lit for optimum visibility. This<br />
display also duplicates much information visible on the grip<br />
display for immediate checking. In addition to the display,<br />
there are four LEDs providing general warnings, flash and<br />
focus information. The viewfinder also features a pop-up fillflash<br />
unit for added convenience.<br />
24
1<br />
2<br />
A B C D E F G H<br />
A. Rubber eye cup D. Exposure compensation button G. Flash unit button<br />
B. Hot shoe E. Exposure method / mode button H. Viewfinder release button<br />
C. Eyesight adjustment wheel F. Integral flash unit<br />
1 2<br />
Attaching and removing the viewfinder 1<br />
While holding the viewfinder at a slight angle and resting it on the top of the camera,<br />
slide the viewfinder forward until the front locating pin is in position in the recess in<br />
the front edge of the viewfinder screen aperture on camera body. Press the rear part of<br />
the viewfinder firmly downwards until it clicks into place.<br />
Ensure that both sides of the viewfinder are seated correctly and that it has been firmly<br />
attached and locked into position. Failure to do so could cause an intermittent malfunction<br />
if the databus interface connections between the viewfinder and camera body are<br />
not positively secured.<br />
To remove, grasp the viewfinder in the right hand and while depressing the viewfinder<br />
release button, lift the rear of the viewfinder up and away from the camera body.<br />
Eyepiece adjustment 2<br />
No corrective lenses are needed to adjust the eyepiece to suit most requirements.<br />
The diopter range is from -5 to +3.5. Eyeglass wearers can rapidly and accurately change<br />
the settings according to whether they wish to wear eyeglasses for viewing or not.<br />
Personal eyepiece adjustments can be carried out by pointing the camera at the sky or<br />
similar smoothly toned area. While holding the camera in your left hand, you can with<br />
your right thumb turn the adjustment wheel until the markings on the viewfinder screen<br />
reach the optimum sharpness for your eyesight.<br />
If you normally wear eyeglasses for distance viewing and intend to wear them for camera<br />
use then do not remove them for the above procedure. If, on the other hand, you prefer<br />
to remove your eyeglasses for camera work, then repeat the above procedure without<br />
wearing your eyeglasses.<br />
Rubber eye cup<br />
Two rubber eye cups are available for the H3D II. The one supplied is suitable for users<br />
who do not intend to use eyeglasses when photographing. The second shorter eye cup is<br />
for those who either prefer to position their eye further from the viewfinder and those<br />
who wish to wear eyeglasses.<br />
The eye cups can be rapidly changed by a Hasselblad Authorized Service Center.<br />
Integral flash unit<br />
See section on ‘Flash’ for full details.<br />
25<br />
Parts and components
4<br />
Lenses<br />
Rapid and accurate automatic focusing capability<br />
Central electronic shutter<br />
Instant manual focus override with natural friction<br />
Instant automatic-focus access in manaul mode<br />
Non-rotation of filter or accessory when focusing<br />
Non-rotation of focus ring in automatic focusing mode<br />
Flash sync at shutter speeds from 32s to 1/800s<br />
Reversed lens shade serves as protection<br />
Automatic detection of extension rings and converters<br />
All HC lenses have been specially formulated for the H system<br />
to produce the extremely high performance expected from<br />
Hasselblad to meet the demands from digital photo graphy<br />
alike. In addition to extreme sharpness, the design also<br />
incorporates a soft, pleasant looking boké (the visual quality<br />
of the out-of-focus areas of the image). All lenses feature<br />
an electronically controlled central shutter designed to<br />
extremely fine tolerances for supreme accuracy. To ensure<br />
reliable and fast autofocus in low contrast and low light conditions,<br />
a focusing-assist light (on the grip) is automatically<br />
activated. Aperture and shutter control is set via the control<br />
wheels on the camera grip.<br />
As a general rule, lens shades should always be fitted to<br />
achieve optimum performance. Protective filters (UV / Sky)<br />
should also be considered at least when working outdoors in<br />
harsh conditions.<br />
(See Accessories section for information about the CF Adapter<br />
that allows the use of C type lenses from the Hasselblad<br />
V-system).<br />
26
1<br />
A<br />
B<br />
C<br />
D<br />
E<br />
3<br />
5 6<br />
2<br />
4<br />
2<br />
1<br />
27<br />
Parts and components 1<br />
A. Lens shade index<br />
B. <strong>Manual</strong> focus ring<br />
C. Focusing distance scales<br />
D. Depth-of-field scales<br />
E. Lens index<br />
Attaching a lens 2, 3<br />
Remove the front protective cover on the camera body by depressing<br />
the lens release button and keeping it depressed while turning the<br />
cover counter-clockwise. Remove the rear lens cap by unscrewing<br />
it in a counter-clockwise direction. Align the index on the lens<br />
with the index on the camera body and rotate the lens clockwise<br />
(bayonet fitting) until it clicks into place.<br />
Removing a lens<br />
Depress the lens release button and keep it depressed while rotating<br />
the lens counter-clockwise until it stops and lift it out. Replace<br />
protective caps on the lens immediately and on the camera body<br />
if necessary.<br />
If you try to rotate the lens before you press the lens release button,<br />
it might lock. In this case, rotate the lens clockwise a little first<br />
and then re-attempt removal with the correct procedure: button<br />
first, then lens.<br />
Front lens cap 4<br />
Front lens caps are released for removal and attachment by inserting<br />
a thumb and index finger into the recesses and pinching in the<br />
direction of the arrows.<br />
Filters<br />
Filters have a screw thread fitting (67 / 77 / 95 mm, according to<br />
lens) and are screwed clockwise into place. As there is no rotation<br />
of the front section of the lens when focus is changed, filters do not<br />
rotate either. This is particularly useful when using polarizing or<br />
graduated filters where the orientation is normally critical.<br />
Lens shades 5, 6<br />
All lenses are supplied with lens shades that additionally provide<br />
extra protection for transport and storage when mounted in reverse.<br />
Lens shades have a bayonet fitting and are turned clockwise into<br />
place after ensuring the index on the lens shade aligns with the<br />
index on the front of the lens. When mounted in reverse, they are<br />
attached by matching the indexes and turning clockwise.<br />
Shutter and aperture control<br />
Both the shutter and aperture are electronically controlled and are<br />
adjusted by the control wheels on the grip. There are no separate<br />
manual setting rings on the lenses or camera body.<br />
The chosen settings are displayed both on the grip display and in<br />
the viewfinder display. See the ‘Exposure Control’ chapter for a<br />
complete explanation.
10<br />
11<br />
12<br />
7<br />
8<br />
9<br />
Lens focus setting too far<br />
beyond the distance of the<br />
subject framed by the central<br />
section in the viewfinder<br />
Focus setting too close for<br />
the distance of the subject<br />
framed by the central section<br />
in the viewfinder<br />
Focus setting correct<br />
28<br />
Depth-of-field calculation 7<br />
There are two distance scales (in feet and metres) visible through<br />
the focus distance window on the upper part of the lens barrel.<br />
There is also a central lens index mark and a depth-of-field scale.<br />
The focusing distance is read off the chosen scale from the central<br />
lens index.<br />
Depth-of-field can be calculated as follows:<br />
1. Focus the lens as required.<br />
2. Make an exposure reading (auto or manual) and note the<br />
aperture setting.<br />
3. Find the markings on either side of the central index that correspond<br />
to the chosen aperture.<br />
4. From these two markings, read off on the required lens distance<br />
scale the two corresponding distances.<br />
5. The depth-of-field (at that particular aperture and focus setting)<br />
will be the area included between these two distances.<br />
In the example given here, the focusing distance is set at nearly 3<br />
metres. At an aperture of f/22, the depth-of-field would therefore<br />
extend from just over 2 m to approximately 4.5 m. Note that depth<br />
of field is not an absolute. Perception of it depends on several factors<br />
and so it should be seen only as a rough guide.<br />
Stop down / depth-of-field 8<br />
A visual depth-of-field preview can be made by depressing the STOP<br />
DOWN button while viewing the image on the viewfinder screen.<br />
Infrared focus settings 9<br />
As infrared rays form an image at a different plane to that formed<br />
by visible light, the normal focus settings do not apply. Proceed as<br />
follows in manual focus mode:<br />
1. Focus the lens in the conventional manner until satisfied.<br />
2. Note the distance setting against the central lens index.<br />
3. Re-align this distance setting against the infrared mark<br />
(coloured red) instead of the central lens index.<br />
Alternatively if you have already calculated the required distance,<br />
you can make a manual distance setting by using the distance<br />
scales together with the infrared mark instead of the central lens<br />
index.<br />
Focus aid 10, 11, 12<br />
As well as the conventional view on the focusing screen to ensure<br />
a sharp image, the H3D II also features LED focus aid capability<br />
appearing as two arrowheads to the right of the viewfinder display<br />
(except for lenses with a maximum aperture of f/6.7 or smaller).<br />
The arrowheads provide confirmation of a precision focus setting<br />
and are a useful aid when making a setting with eyesight alone.<br />
<strong>Manual</strong> focus setting<br />
When the left arrowhead alone appears it means the focus setting<br />
is too far beyond the chosen distance (the area framed within the<br />
central zone in the viewfinder) and when the right arrowhead<br />
alone appears it means the focus setting is too close. Focus is correct<br />
when both arrowheads appear together. If the focus cannot<br />
be established, then both arrowheads flash.
1<br />
2<br />
HC 3.5 / 300<br />
A B<br />
Landscape orientation Portrait orientation<br />
HC 4 / 120 (Macro)<br />
Full scan = 0.39 m – ∞<br />
Inf. scan = 0.9 m – ∞<br />
Near scan = 0.39 m – 1m<br />
A<br />
29<br />
Automatic focus setting<br />
Focus is correct when both arrowheads are visible together. Focus<br />
is incorrect if only one arrowhead is visible. If the focus cannot be<br />
established, then both arrowheads flash.<br />
CF Adapter<br />
The CF adapter is an optional accessory that allows virtually all<br />
C type lenses from the V-system to be used on H-system camera<br />
bodies. This provides an economical alternative way of extending<br />
the lens range. The automatic focusing system in the H camera can<br />
be used as a guide for manual focus setting. Light is measured at<br />
full aperture with all lenses which produces aperture and shutter<br />
speed information display in the camera for manual setting. With<br />
CFE lenses, however, a preset aperture is automatically transferred<br />
to the camera. Shutter cocking is manual with all lenses and is<br />
swiftly carried out by an easily accessible lever.<br />
Specific-lens information<br />
HC 3.5 / 300 1<br />
When using a tripod with a 300mm you should use the (removable)<br />
tripod mounting bracket to provide optimum balance. This<br />
is attached via a sleeve so that the camera body can be rotated<br />
for landscape/portrait formats without altering the tripod head<br />
position. The rotation is secured by a locking screw (A). Correct<br />
90° orientation can be ensured by aligning white index markers<br />
(B) for both landscape and portrait orientations.<br />
HC 4 / 120 (Macro) 2<br />
In addition to the metres/feet scale, the 120 mm lens also displays<br />
magnification ratio scale (A). In the illustration, the scale shows a<br />
focusing distance of 1.27 feet / 0.39 metres which in turn produces<br />
a 1:1 (lifesize) magnification.<br />
With the 120mm lens mounted on the camera, addition screens<br />
will appear on the grip display when autofocus is chosen to signify<br />
a focus limit setting. Three are available – Full scan, Infinity scan<br />
and Near scan – accessed by the rear control wheel. This time-saving<br />
function is a form of presetting that restricts the scanning range of<br />
the lens to prevent it searching across the whole focus scale. Simply<br />
make a rough assesment of the approximate focusing distance and<br />
then choose the most suitable of the three ranges. The lens will<br />
then be able to find the critical focus much faster.<br />
HC 3.5 – 4.5 / 50 – 110 Zoom lens<br />
Please read the advice that is included with this lens before use<br />
regarding how it should be placed or stored.
5<br />
General overview of<br />
digital capture unit<br />
3 operating and storage modes<br />
Direct shooting to 3FR<br />
Phocus / FlexColor<br />
Instant Approval Architecture<br />
H system cameras were designed with digital photo graphy<br />
in mind right from the outset so the H3D II is a natural development<br />
within the world famous H system.<br />
Seamless integration and consequently increased efficiency<br />
and improved workflow are the results of such a design that<br />
features shared information visible on the displays as well as<br />
a shared battery, for example.<br />
Phocus, the image processing software that is included with<br />
an H3D II, can take advantage of the information that is<br />
stored with each capture both for future reference and for<br />
enhanced processing to fine-tune optical characteristics, for<br />
example.<br />
Phocus also provides for tethered use allowing digital capture<br />
control directly from the computer.<br />
30
In very simple terms, a digital capture unit holds a light sensitive sensor in place at the film plane.<br />
The electronic signals from the sensor are then processed and stored as a digital file.<br />
As an electronic colour image is made up of three components − red, green and blue which combine<br />
to form a so-called RGB image − the sensor’s task is to convert a multi spectrum light image into<br />
three digital files (red, green and blue) for combination later on.<br />
The H3D II uses a CCD (Charged Couple Device) type sensor that has millions of light sensitive areas<br />
on its surface each of which creates a pixel.<br />
Each pixel in the sensor is filtered to create the three separate red, green and blue files. Software then<br />
processes these electronic files as a package into a Hasselblad 3FR file which in turn is processed in<br />
Phocus to produce Hasselblad 3F files or various other formats such as DNG, TIFF, JPEG etc.<br />
The three components of the image file are later recombined on the computer screen to produce the<br />
familiar full colour image.<br />
31<br />
•<br />
The captured image can be temporarily stored internally on a CF card. Externally, captures can be<br />
stored via a FireWire connection onto a Hasselblad ImageBank-II or onto the hard disk of a computer.<br />
When using the camera tethered in a studio you can control all the digital aspects of camera<br />
operation from a computer using Phocus. See the separate Phocus manual for further details.<br />
As the H3D II is a purely electronic device, attention to power supply is vital. When working untethered<br />
it is therefore important to plan either battery loading or battery replacement to ensure continued<br />
workflow. Likewise, image storage is limited, particularly when using flash cards and appropriate<br />
steps should also be taken when planning a shoot.<br />
•<br />
When attaching and removing the digital capture unit, pay particular attention to the image sensor<br />
area. The sensor itself is covered and protected by a glass IR filter but take great care when handling.<br />
If you need to clean the filter, see later section for specific details. When storing separated from the<br />
camera, always ensure you have replaced the protective cover.<br />
If you scratch or mark the filter in any way, it will show up on every shot. Replacements are expensive<br />
so treat the glass surface with at least as much care as you would a lens.<br />
The sensor itself is not accessible for any kind of cleaning or maintenance by a user. Do not attempt<br />
any such action as you will almost certainly damage it irreparably.<br />
As is the case with all electronic devices pay extra care when working in damp en vironments and<br />
avoid damp conditions for storage.<br />
<br />
Take note of the ways of working you can adopt to improve workflow efficiency. Using batches, naming<br />
batches, IAA etc will speed things up when working on image development in both FlexColor<br />
and Phocus (the Hasselblad image processing software included).
A<br />
B<br />
C<br />
H I J K L M N O P<br />
Parts, components & control panel buttons<br />
The control panel with its bright TFT display is the main graphical user-interface for image checking and capture settings changes, while the grip display<br />
is the interface for focus and exposure settings (when not tethered to a computer).<br />
The buttons are used for browsing images and navigating the menu system. Two of the buttons, located at the bottom-right and -left of the screen,<br />
are given an on-screen label that changes according to the current context. For example, the Approval button sets the approval rating when browsing<br />
images, but becomes an OK button to confirm settings.<br />
Zoom- in/-out button A<br />
Zoom-in /out rocker button for the preview image. You<br />
can zoom in to view close-ups for focus checking. You can<br />
zoom out to view several small images at once and finally<br />
to view and select batches and media. Also acts as a selection<br />
button for value setting on the menu.<br />
MENU / (EXIT) button B<br />
Opens and closes the menu system. Also used for<br />
various other tasks (EXIT button, for example)<br />
as you issue commands within the menu system<br />
indicated by a description beside the button on the<br />
preview screen.<br />
32<br />
Navigation button C<br />
A four-way rocker button enabling you to step through<br />
preview images and navigate the menu system. To use<br />
it, press the side of the button that corresponds to what<br />
you wish to do (e.g., move up, left, right or down).<br />
Display D<br />
The display is a 3 inch, TFT, 24 bit, 230,000 pixel type. Contrast<br />
and brilliance can be adjusted.<br />
View-mode button E<br />
Steps through the various view modes for the preview<br />
image: standard, histogram overlay, image details, screen<br />
off and full-screen.<br />
D<br />
E<br />
F<br />
G
Approval / (OK) button F<br />
This button steps through the three approval levels,<br />
thereby assigning an approval status to the image<br />
currently displayed (or selected) in the preview<br />
screen. (part of the Instant Approval Architecture system). Also<br />
acts as a confirmation button (OK button) for some types of menu<br />
operations, such as deleting images; indicated by a label beside the<br />
button on the preview screen.<br />
Busy-light G<br />
Flashes to indicate that the digital capture unit is performing an<br />
operation (such as saving a new capture). Although a new capture<br />
cannot be made while the light is flashing, focusing, aperture and<br />
shutter speed settings can all be changed.<br />
Red signifies a problem (an explanatory message will be displayed).<br />
Flash-card slot H<br />
Flash-card removal button I<br />
Flash-card slot cover J<br />
Safety catch K<br />
Used when removing the digital capture unit.<br />
General<br />
33<br />
CCD and IR filter L<br />
This is the light-sensitive element, which is positioned behind<br />
a permanently mounted IR filter. Always be very careful not to<br />
touch or scratch the surface of the filter when it is exposed and to<br />
replace the protective cover whenever the digital capture unit is<br />
not mounted on a camera.<br />
WARNING: never attempt to remove the glass filter—you will<br />
probably ruin the CCD if you do so.<br />
See Cleaning the CCD section for cleaning.<br />
Databus connectors M<br />
For digital communication with camera body.<br />
Flash sync input N<br />
Flash synch connector (protected behind a rubber cover) for when<br />
the digital capture unit is used with a view camera.<br />
Flash sync output O<br />
Flash synch connector (protected behind a rubber cover) for when<br />
the digital capture unit is used with a view camera.<br />
FireWire connector P<br />
Insert a FireWire 800 cable here to connect the digital capture unit<br />
to a computer or ImageBank-II.<br />
Using the menu on the H3D II is very similar to using a menu on a mobile/cell phone or similar. When<br />
you enter the menu (by pressing the MENU / button) you will be see an initial list:<br />
ISO<br />
White Bal.<br />
Media<br />
Browse<br />
.............<br />
Storage<br />
Settings<br />
It is advisable to initially quickly skim through the following section of the manual to<br />
build up a picture of the menu structure and its various sections.<br />
Note that some of the buttons have a double function while others remain single function.<br />
For example, the navigation button always takes you through the menu in the direction<br />
that the arrowhead illustrates. The zoom in/out buttons ( + and – ) though, for example,<br />
act as image enlargers and reducers as well as confirmation buttons, according to where<br />
you are on the menu.<br />
Time & Date settings on the digital capture unit (which are included with files and<br />
batch labels) are updated automatically through a FireWire/Phocus connection.<br />
These settings are retained for about two consecutive weeks by a small rechargeable<br />
cell that is automatically recharged by the main battery or Firewire with regular use.<br />
If problems occur, charge the cell by leaving the digital capture unit turned ON for<br />
around 12 hours.
Simple introductory overview of menu access, navigation and settings choice.<br />
=<br />
=<br />
The menu is structured in a manner similar to mobile/cell phones and similar small electronic devices.<br />
Various branches within the tree system are accessed by pressing the navigation button until you reach<br />
the point where a choice has to be made.<br />
The OK (Approve) button or SELECTION (Zoom-in/Zoom-out) buttons are then used to confirm choice.<br />
Both the front and rear control wheels can also be used to navigate the menu. The rear control wheel<br />
navigates up and down the menu list and the front control wheel navigates sideways in the direction of<br />
the menu arrows. The front control wheel also functions in the same as way as the plus and minus button<br />
functions for settings choice.<br />
After pressing the MENU button, the main menu list appears. The blue frame highlights where<br />
you are on the menu. Press on the ‘up’ and ‘down’ symbols on the navigation button to move<br />
up and down the list.<br />
You can return to the standard image view by pressing either on the ‘left’ symbol on the navigation<br />
button or on the EXIT/MENU button again.<br />
The need to continue further into the menu is indicated by the arrow symbol beside the menu<br />
item.<br />
Press the ‘right’ arrow symbol on the navigation button to access the next part of the menu.<br />
When you reach the final destination of your choice (this might take several moves), PLUS and<br />
MINUS symbols appear to the right in the frame round the item. You then press the Zoom-in<br />
/Zoom-out /SELECTION buttons to access a loop list of choices.<br />
In the example on the left, 50 is the ISO value shown. By pressing either button the alternatives<br />
appear – 100, 200, 400 and then back to 50 again – both on the list as well as on the<br />
upper low to the left (in the case of ISO value).<br />
Pressing the EXIT/MENU button will then confirm the new setting.<br />
In the next example on the left, the name of a new batch is changed by pressing a combination<br />
of the Zoom-in /Zoom-out /SELECTION buttons as well as the navigation button. You<br />
can then confirm your choice with the OK (Approve) button or revert to the previous status by<br />
pressing the EXIT/MENU button. Note that how the MENU button is now described as EXIT<br />
on the screen, and the Instant Approval button is described as the OK button.<br />
See later sections for more comprehensive information.<br />
The rear control wheel navigates up and<br />
down the menu list and the front control<br />
wheel navigates sideways in the direction<br />
of the menu arrows.<br />
The front control wheel also functions in<br />
the same as way as the PLUS and MINUS<br />
button functions for settings choice.<br />
34<br />
The FLASH button<br />
on the grip also acts<br />
as a menu EXIT button<br />
and the ISO /WB<br />
button acts as an OK<br />
button.
MENU<br />
STORAGE<br />
SETTINGS<br />
By using the buttons on the control panel you<br />
can navigate down through the various levels<br />
in the menu. It provides the source of information<br />
about image files and also provides a<br />
way of making custom settings so the digital<br />
capture unit suits your way of working.<br />
Below is a simple overview of what is available<br />
and where it is situated on the menu.<br />
ISO<br />
Sets the light sensitivity of<br />
the sensor. Equivalent to<br />
‘film speed’.<br />
MEDIA<br />
Determines where files<br />
will be stored (flash card,<br />
ImageBank-II).<br />
DELETE<br />
For single For single or multiple or multiple deledeletiontion of images. of images.<br />
BATCH<br />
UsedUsedtocreatenewstorage to create new storage<br />
folders folders(batches)andname<br />
(batches) and name<br />
them. them.<br />
USER INTERFACE<br />
Sets menu language, power<br />
down, sound, date & time<br />
and several other custom<br />
settings.<br />
DEFAULT ABOUT<br />
Resets Displaysserialnumberand<br />
all custom settings<br />
backfirmware to the original version. factory<br />
settings.<br />
35<br />
WHITE<br />
BALANCE<br />
Set to match the color temperature<br />
of light used.<br />
BROWSE<br />
Sets the approval status<br />
(classification) filter for<br />
easier and quicker image<br />
browsing.<br />
FORMAT<br />
Used to format CF cards and<br />
ImageBank-IIs for optimum<br />
use.<br />
DEFAULT<br />
APP LEVEL<br />
Assigns a default approval<br />
status (classification) to all<br />
new images.<br />
CAMERA<br />
Sets options when digital<br />
capture unit is attached to a<br />
view camera.<br />
CUSTOM<br />
OPTIONS<br />
Sets options regarding file<br />
copying to an ImageBank-II.<br />
Overview<br />
of menu<br />
structure<br />
COPY<br />
Copies files from a CF card to<br />
an ImageBank-II.<br />
ABOUT<br />
Displays serial number and<br />
firmware version.<br />
GPS<br />
Sets options for the GIL<br />
(Global Image Locator ) GPS<br />
accessory when attached.
6<br />
1 2<br />
3 4<br />
5 6<br />
Initial General Settings<br />
and Preparation<br />
36<br />
The initial general setting is language choice. This choice is retained but<br />
can be changed at any time. You can choose between:<br />
ENGLISH<br />
GERMAN<br />
FRENCH<br />
ITALIAN<br />
SPANISH<br />
JAPANESE<br />
CHINESE<br />
Before each shoot, just as in analogue photography, an ISO setting should<br />
be made, though in the digital world it matches the job in hand and circumstances<br />
as opposed to the sensitivity of the film chosen. A white balance<br />
setting should also be made. This is for your convenience regarding<br />
the appearance of the image on the display though; it will not affect the<br />
raw file.<br />
ISO and White Balance are immediately accessible by pressing the ISO/WB<br />
button on the grip. They are also shown on-screen in most preview modes,<br />
so you can easily keep an eye on them as you work.<br />
The description below is a general illustration of how settings are<br />
changed. See later section in this manual for details regarding ISO and<br />
White Balance.<br />
Setting the menu language<br />
Proceed as follows:<br />
1. Press the MENU/EXIT ( ) button to open the menu.<br />
2. Press the NAVIGATOR button ( and ) to select the<br />
SETTINGS sub-menu.<br />
3. Press the NAVIGATOR button () to open the SETTINGS<br />
menu.<br />
4. Press the NAVIGATOR button () to select the USER<br />
INTERFACE sub-menu.<br />
5. Press either ZOOM button ( + or – ) to choose a new language<br />
(in this case, Spanish).<br />
6. Press the MENU/EXIT ( ) button again to close the menu.
Storage & Shooting<br />
Image storage modes / shooting<br />
The H3D II can store captured images in three ways:<br />
1. Untethered / Compact flash card mode<br />
In this mode the H3D II acts independently of other connections. Images are stored on<br />
the internal, removable compact-flash card.<br />
• The main advantage with this mode is the freedom of cables and extra equipment.<br />
• The main disadvantages with this mode in the field are the battery power capacity<br />
and the size of the card’s holding capacity.<br />
Please note that the recommended types of CF cards are Sandisk Extreme-III/IV or Lexar<br />
Professional 133x/233x. Other cards will work but offer a reduced capture rate.<br />
2. Semi-tethered / Imagebank-II mode<br />
This mode enables you to attach the camera to a portable Hasselblad ImageBank-II via a<br />
FireWire cable. The ImageBank-II features massive storage capacity (100GB) and highspeed<br />
data transfer. It is small, lightweight, battery powered and easily clips to your belt,<br />
so the solution is just as portable as the untethered option.<br />
• The main advantage with this mode is the great number of images that can be<br />
stored without a pause.<br />
• The main disadvantage with this mode is the extra equipment and cablage needed<br />
that might restrict mobility in some cases.<br />
3. Tethered / Studio mode<br />
This mode enables you to connect your H3D II directly to a computer and to operate the<br />
system using Hasselblad Phocus software and store images on a computer hard-disk.<br />
• The main advantages with this mode are the almost limitless storage capacity and<br />
being able to work on the images (with Hasselblad Phocus) on a large screen.<br />
• The main disadvantage with this mode is the lack of mobility to any great<br />
extent.<br />
Selecting the current medium<br />
The current storage medium is the location to which new shots are saved and from which<br />
you can browse using the navigation button. In many cases, the destination medium is<br />
selected automatically, for example:<br />
• When you are connected to a computer, then images are always saved directly to<br />
the computer hard disk.<br />
• When only one medium is connected (e.g., a compact-flash card), then this medium<br />
is automatically selected.<br />
However, if you are working away from your computer and have several media attached<br />
(e.g., both a card and an ImageBank-II, then you may need to select a medium explicitly<br />
if you want to browse its contents and store images new to it).<br />
37
1 2<br />
3 4<br />
A<br />
B<br />
38<br />
There are two ways of selecting the current storage medium:<br />
• See “Selecting the Current Storage Medium” for details.<br />
• Use the zoom-out button to zoom all the way up to the top<br />
level, which shows all connected media, and then zoom in<br />
on the appropriate medium and batch.<br />
See “Navigating Media and Batches” for more information<br />
about selecting media and batches in this way.<br />
Using compact flash memory cards<br />
When shooting to a compact-flash card, the H3D II is completely<br />
self-contained. No additional wires or connectors need to be<br />
attached.<br />
The H3D II is shipped with a 2GB (or larger) compact-flash card,<br />
which is able to hold over 40 shots. Lossless compression is applied<br />
to the images, so the actual size of each capture can vary, thereby<br />
affecting the total number of shots you can fit on the card.<br />
Inserting a card<br />
1. Open the CF card slot cover on the digital capture unit.<br />
2. Behind the cover, you can see a slot for the card (A), possibly<br />
with a card already inside, and a release button (B) below the<br />
slot. (If a card is already installed, then remove it as described<br />
in “Removing a Card”, below).<br />
3. Hold the compact-flash card so that the connector holes face<br />
into the slot in the digital capture unit, with the brand label<br />
facing in the same direction as the digital capture unit preview<br />
screen, as in the illustration. Gently press the card into<br />
the slot. If you encounter resistance, it might be because you<br />
are holding the card backwards or upside down.<br />
4. When the card is able to drop very easily nearly all the way<br />
into the digital capture unit, then you are doing it right. Once<br />
you have achieved this, press the card firmly into place until<br />
it sinks another couple of millimeters into the digital capture<br />
unit and is held fast.<br />
5. Snap the slot cover shut again.<br />
You can reformat a card by pressing the Card format button<br />
on the camera grip or on the digital capture unit:<br />
Menu>Storage>Format.
1<br />
2<br />
3 4<br />
2<br />
1<br />
39<br />
Removing a card<br />
1. Open the CF card slot cover on the digital capture unit. Behind<br />
the cover, you can see the bottom edge of the card in its slot<br />
and a release button immediately below the card.<br />
2. Press the release button a little way in to release it into the<br />
active position.<br />
3. Press the now extended release button all the way back into<br />
the digital capture unit again. Some force is required. As you<br />
do this, the card will be pushed out a few millimeters.<br />
4. Grasp the card between your thumb and forefinger and pull<br />
it away from the digital capture unit. (Insert a new card as<br />
described in “Inserting a Card”, if required).<br />
5. Snap the slot cover shut again.<br />
Working with an ImageBank-II<br />
There are no practical differences between storage on the internal<br />
CF card or on an ImageBank-II. However, when several media<br />
are mounted, you must be sure to select the correct destination<br />
medium (see also “Working with Media and Batches”).<br />
Working with a Hasselblad ImageBank-II<br />
The ImageBank-II is an optional add-on for your digital camera<br />
system. It is essentially an external FireWire hard disk optimized<br />
for digital photography, providing extensive storage space and<br />
high-speed data transfer. It is small, light and battery powered. You<br />
can easily clip it to your belt, so the solution is nearly as portable<br />
as the stand-alone camera.<br />
Older digital backs in the ‘ixpress’ line used a different external<br />
disk and controller called simply the “ImageBank”. This older version<br />
is not compatible with the H3D II. Only use the Hasselblad<br />
ImageBank-II with an H3D II.<br />
To use an ImageBank-II with the H3D II, assemble it and connect<br />
the two with a standard FireWire 800 (IEEE 1394b) cable. See the<br />
ImageBank-II manual for complete details.<br />
To remove the ImageBank-II, simply disconnect the FireWire<br />
cable when all disk activity (indicated by the LED) has stopped.<br />
The digital capture unit will then revert to saving and browsing<br />
images on the internal flash card (if available).
Tethered to a computer<br />
When tethered to a computer, you can control many camera functions using Phocus software.<br />
Even if you never shoot while connected, you will probably connect the camera to<br />
your computer each time you want to download your images, though you might instead<br />
use a compact-flash card reader and/or connect your ImageBank-II directly.<br />
Connecting to a computer<br />
To connect to a computer, simply attach a FireWire cable from the FireWire port on<br />
your computer to the port on the side of the digital capture unit. The port is protected<br />
behind a hinged cover.<br />
Shooting with Phocus running<br />
When you are connected to a computer, the following rules apply:<br />
• The destination medium and location are controlled from Phocus.<br />
• All exposure settings, including ISO, aperture and exposure time, are controlled<br />
from Phocus if you choose to expose from Phocus.<br />
• The screen and menu system on the digital capture unit are disabled.<br />
• The digital capture unit will take power from the FireWire cable if it is available<br />
(not all computers supply power here, notably laptops). This will help conserve<br />
the battery power of the H3D II. However, you must still have a charged battery<br />
connected as the camera body requires this battery in order to operate.<br />
When initiating a shot from Phocus, the computer sends a signal to the digital capture<br />
unit, which triggers the shutter and strobe/flash (if any). The digital capture unit then<br />
sends the image back over the FireWire connection to the computer, where it is displayed<br />
on the computer screen and saved as a 16-bit 3F file in the currently selected folder of<br />
the computer hard disk.<br />
3FR is a proprietary Hasselblad format for storing raw captures. It contains the complete raw<br />
image exactly as it was captured by the camera, plus technical details that enable Phocus<br />
to process and display the image correctly, amongst other things. This 3FR file is converted<br />
into a 3F file (denoted by each file now bearing the suffix “.fff”) that furthermore stores<br />
a complete history of the Phocus settings that you have applied to each image and stores<br />
meta-data such as camera settings, image name, photographer, copyright, etc.<br />
If you prefer not to correct and adjust your captures in Phocus, then you can export converted<br />
3F files from Phocus (and Aperture/Mac OS 10.5.2) directly to DNG, TIFF or PSD<br />
and use Adobe Photoshop, for example. (Please note that a direct export will not enable<br />
DAC and those benefits will therefore be lost).<br />
Please refer to the Phocus Software Reference manual for further instructions about using<br />
Phocus.<br />
40
7<br />
Storage overview–<br />
working with media<br />
and batches<br />
General<br />
Whichever way you choose to store your images, they should be filed in batches for efficient<br />
workflow.<br />
Organizing your work with batches<br />
Batches help you to organize your shots as you work. They function exactly as folders on<br />
a computer. Batches have the following properties:<br />
• When you create a new batch, you assign a name to it and it is created as a new<br />
folder.<br />
• When you copy images from a compact-flash card, each batch is saved as a subfolder<br />
on the destination disk.<br />
• When deleting multiple images, you are able to restrict your delete command so<br />
that it affects just a single batch.<br />
• When browsing images, you will only see images from the current batch.<br />
• You can change between batches by using the navigation controls of the digital<br />
capture unit front panel.<br />
• The batch name also shows the date on which it was created (using the Year/<br />
Month/Day convention).<br />
Please note that each new image will be saved in the latest created batch only. You<br />
cannot select any other batch to save a new image in.<br />
Navigating media and batches<br />
The camera always works with a current medium and a current batch. This is the location at<br />
which the camera will save all new shots and the location in which you can browse using<br />
the navigator button on the front panel. There are two ways of selecting the current<br />
medium and/or batch:<br />
• Using the zoom and navigator buttons on the front panel. This method enables<br />
you to select any existing batch and is therefore useful even when only one type<br />
of medium is attached. This method is explained in the procedure below.<br />
• Choose MAIN MENU > Storage to select a medium. This is only relevant when more<br />
than one medium is attached (e.g., both a compact flash card and an Imagebank).<br />
When you use this function, you will always go to the most recently created batch<br />
from the medium you select. Please see Selecting the Current Storage Medium<br />
for a complete description of this method.<br />
41
Introductory overview<br />
The MEDIA list.<br />
In this example a CF card and a<br />
FireWire disk are illustrated and therefore<br />
connected.<br />
The blue frame around the CF card<br />
symbol tells you that captured images<br />
will be saved to the CF card and not the<br />
FireWire disk. This is the Current Medium<br />
The BATCH list.<br />
The blue frame around a folder tells<br />
you that it is the Current Batch.<br />
You work your way deeper into the menu branching off the selected item (framed in blue) each time you<br />
press the + button to view media, batch, thumbnail view etc.<br />
Conversely, you work your way back out of the menu each time you press the – button.<br />
– – – – –<br />
+ + + + +<br />
Media list Batch list 9-Thumbnail view 4-Thumbnail view Normal view Zoomed<br />
Continue to press (+) to zoom further<br />
42<br />
Medium-type icon (Compact Flash)<br />
Medium name<br />
Number of green, yellow and red shots<br />
currently stored on the medium<br />
Medium capacity in bytes and shots in the batch<br />
Medium-type icon (FireWire disk)<br />
Batch name<br />
Date the batch was created<br />
Number of green, yellow and red<br />
shots in the batch (IAA classification)
1a 1b<br />
2 3<br />
4 5<br />
6 7<br />
8 9<br />
Example: nine-thumbnail view<br />
43<br />
To select the current medium and view batches using the browse<br />
controls:<br />
1. Press the zoom-out ( ) button repeatedly until you are<br />
all the way at the top zoom level. If you start with the singleimage<br />
preview view, then you pass through the following<br />
views to get there:<br />
• Single-image preview (as in fig 1a)<br />
• Four-thumbnail view<br />
• Nine-thumbnail view (as in fig 1b)<br />
• Batch list (as in fig 3)<br />
• Media list (as in fig 4)<br />
2. Each medium shows a name, total size and an estimate for<br />
how many images will fit on it. To the right of the medium<br />
name is a set of three coloured numbers in parentheses.<br />
These indicate the total number of images of each approval<br />
status (green, yellow and red) that currently exist on that<br />
medium. For example, if you see a card that shows (18 / 5<br />
/ 3), then that card contains a total of 26 images: 18 green<br />
(APPROVED), 5 yellow (UNCLASSIFIED) and 3 red (DELETE).<br />
If more than one medium is listed, then use and to highlight<br />
the medium you wish to use.<br />
3. The currently selected medium shows a blue border.<br />
4. Press the zoom-in ( + ) button to zoom-in on the currently<br />
highlighted medium.<br />
5. A list of batches on this medium now appears. Each batch<br />
appears as a folder icon with a name and the date on which it<br />
was created. As with the media list, you can read the number<br />
of shots of each approval status that are stored in each batch.<br />
6. As with media, use and to highlight the batch you wish<br />
to view.<br />
7. The currently selected batch shows a blue border.<br />
8. Press the zoom-in ( + ) button to zoom in on the currently<br />
highlighted batch.<br />
9. The nine-thumbnail view of your selected batch now appears.<br />
Please note the difference between ‘selecting’ a medium and<br />
‘browsing’ a batch. Each new image will automatically be saved<br />
in the latest created batch only on the selected medium. You<br />
cannot ‘select’ a batch for storage.<br />
Creating new batches<br />
You can create any number of batches on each medium. To create<br />
a new batch, first make sure you have selected the correct current<br />
medium (see Navigating Media and Batches) and then choose<br />
MAIN MENU > STORAGE > BATCH to create the new batch. See<br />
Creating Batches for a detailed procedure.
Using Instant Approval Architecture<br />
The Instant Approval Architecture system helps you to evaluate your images as quickly<br />
as you take them. It works by supplying immediate audio feedback, which tells you<br />
instantly whether each new picture is exposed correctly or likely to be over- or underexposed.<br />
Thereafter, the system enables you to assign each image one of three status levels.<br />
Though you can use the system any way you like, the intention (based on the ‘traffic light’<br />
principle) is that you should assign the levels as follows:<br />
• GREEN for your best shots.<br />
• YELLOW for images that need closer inspection.<br />
• RED for images that you are unlikely to use.<br />
Please note, when the current storage medium is full, red-status images will be<br />
deleted (one at a time) to make room for new shots. You can continue shooting until<br />
no red-status images remain; if you then try to take additional new shots you will get<br />
a medium-full message.<br />
Image File Name<br />
Green images start with “A”<br />
Yellow images start with “B”<br />
Red images start with “C”<br />
Press the approve button to<br />
change the status of the currently<br />
selected image<br />
Press and hold the approve button<br />
to change the status of the<br />
currently selected image<br />
One of the greatest advantages of digital photography compared to film is that it costs<br />
no more to shoot 100 images than it does to shoot one. Photographers therefore tend to<br />
take many more pictures when shooting digitally. By assigning approval levels as you<br />
work, it can be much easier to sort through and select images when you get back to your<br />
computer.<br />
The default approval level is set by going Menu > Storage > Default Appr Level.<br />
See later section for details.<br />
Standard Instant Approval workflow<br />
The standard method of working with the Instant Approval Architecture is as follows:<br />
1. Take a shot.<br />
2. The camera analyzes the shot to find out if it seems to be over- or underexposed. If it<br />
suspects a problem, it does the following:<br />
• Provides audio feedback (if this option has been chosen) by making a warning<br />
sound, which immediately alerts you to a possible problem even if you are not<br />
looking at the screen. The warning sound is a rapid string of notes going up the<br />
musical scale if the image is judged as overexposed or conversely a rapid string<br />
of notes going down the musical scale if the image is judged as underexposed.<br />
• Downgrades the approval status to yellow (if Approval is set to ‘Auto’).<br />
44<br />
Current approval status (green) and<br />
browse-filter setting (show all)<br />
Show all<br />
Show green and yellow only<br />
Show green only<br />
Show yellow only<br />
Show red only
Note that some shots may trigger the warning even though they are exposed according<br />
to your intentions. You should consider these warnings only as a guideline. This<br />
feature can be turned off.<br />
3. If no problem is detected, then the image is saved with the chosen default approval<br />
status.<br />
If you set Approval to ‘Auto’, all images will be stored as Green if judged as correct and<br />
Yellow if judged as technically doubtful. No images are ever stored as Red automatically!<br />
4. When you are browsing through your shots, keep an eye on the approval status of<br />
each and consider whether you should promote or demote each shot based on its<br />
appearance on the preview screen. You can also apply a browse filter to, for example,<br />
browse only red shots when looking for images to delete or to browse only green<br />
shots to make sure you have a good version of each shot that you need.<br />
5. When you begin working with the images on your computer, use the approval status<br />
as a guide for organizing your work. For example, you might begin by opening and<br />
optimizing the green shots and then go to the yellow shots only if you still need more<br />
images and then, finally, check the red shots as a last resort.<br />
Note that the system is very flexible so you can use it in any way that you like. For example,<br />
you can set the camera to assign all new images a yellow or green status regardless<br />
of the exposure warning. Be careful when assigning red status because red images may<br />
be deleted if the current storage medium becomes full.<br />
Reading and changing the approval status<br />
The current approval status of each shot is indicated in two ways:<br />
• In most preview modes, the current status is indicated by a coloured dot in the<br />
bottom-right corner of the screen.<br />
• Each image is given a name that indicates its approval status. Approved (green)<br />
image names start with “A” (e.g., “A0000043”); warning (yellow) images start with<br />
“B” (e.g., “B0000043”); and images marked for delete (red) start with “C”. Because<br />
of this naming convention, you will also be able to sort your image files by status<br />
after you have imported them onto your computer (e.g., by listing the folder by<br />
file name).<br />
See also the diagram showing where you can read the image name and approval status<br />
on the screen.<br />
By keeping an eye on the file name and/or coloured dot as you browse your images at<br />
the single-image, four-thumbnail or nine-thumbnail level, you can easily see the current<br />
approval status of each of them.<br />
To change the approval status of the currently displayed/selected image, simply press the<br />
approval button until the desired approval status is shown.<br />
Note that you can set the camera to filter by approval status as you browse, which<br />
means that some images may be hidden (though they are still there). See “Browsing<br />
by Approval Status”, below, for details about how to work with the filter.<br />
Be careful when assigning red status because red images may be deleted if the current<br />
storage medium becomes full.<br />
45
Show all<br />
Show green and yellow only<br />
Show green only<br />
Show yellow only<br />
Show red only<br />
Browsing by approval status<br />
You can set the camera to browse by approval status, which means, for example, that you<br />
will see only green-status images as you browse a batch (or both green and yellow, or only<br />
red, etc.). The current filter setting is indicated on-screen, as illustrated. Filtered images<br />
are still there, but they will not be shown until you change the filter setting. Also, if you<br />
change the status of an image, the image may ‘disappear’ if it no longer passes the filter.<br />
For example, if you have set the camera to browse only green-status images and then<br />
change an image to yellow status, that image will not be shown again until you change<br />
the browse filter.<br />
There are many ways to make use of this feature. For example:<br />
• Set the filter to show only yellow images. Then step through each image and decide<br />
whether any of them should be promoted to green or demoted red.<br />
• If you are running out of space, set the filter to show only red images and then step<br />
through to find shots you can delete.<br />
• Set the filter to show only green images. Then step through to make sure you have<br />
at least one ‘good’ example of each shot that you need.<br />
There are two ways to set the browse filter:<br />
• Press and hold until the filter you want to use is shown by the indicator.<br />
• Choose MAIN MENU > Browse. See Setting the Browse Filter for a detailed<br />
procedure.<br />
Deleting by approval status<br />
There are many ways to delete images, including one-at-a-time and multiple delete by<br />
batch, media and/or approval status. When deleting several images, you first pick the medium<br />
or batch from which you want to delete and then choose MAIN MENU > STORAGE<br />
> Delete to specify the status of the images to delete. You can choose to delete:<br />
• All red-status images from the selected batch or medium<br />
• All red- and yellow-status images from the selected batch or medium<br />
• All images from the selected batch or medium<br />
See MAIN MENU > Delete for detailed procedures describing each of the delete options.<br />
Setting the default status<br />
As outlined in Standard Instant Approval Workflow, the camera normally works by<br />
assigning a green status to all images that pass a basic exposure test and a yellow status<br />
to all images that fail the test. However, you can change this behaviour if you prefer an<br />
alternative workflow. You have the following options:<br />
• Auto: works as described in Standard Instant Approval Workflow .<br />
• Green: gives all new images a green status, regardless of the exposure warning.<br />
• Yellow: gives all new images a yellow status, regardless of the exposure warning.<br />
Regardless of this setting, audio feedback will still be provided if an image is judged to<br />
be badly exposed.<br />
Choose MAIN MENU > Browse to make this setting. See also Setting the Default<br />
Approval Status for a detailed procedure.<br />
46
8<br />
Overview of viewing, deleting<br />
and copying images<br />
Basic image browsing<br />
The large, full-colour display enables you to inspect your shots while you are still onlocation.<br />
It offers full-screen previews, high-magnification zoom, two levels of thumbnails<br />
and analysis tools including a full histogram and camera settings.<br />
When you first turn on the camera, the display opens in standard browse mode, showing<br />
the last image taken (if any) for the current medium and batch. Likewise, after each new<br />
shot, the display shows a preview of the shot.<br />
To browse the images of the current batch, simply press the left () and right () arrows<br />
of the navigator button.<br />
Choosing the current batch<br />
When you browse using the navigator button, you will only see images from the current<br />
batch on the current medium. To view another batch, you must navigate to it by zooming<br />
out to the batch or media level and then zooming in on the appropriate folder. See<br />
Navigating Media and Batches for complete details about how to select the current<br />
medium and/or batch.<br />
Browsing by approval status<br />
It is possible to set the camera to browse only images of one or more specific approval<br />
levels from the current batch. You can use this, for example, to review all of your redstatus<br />
shots to make sure you don’t need them or to review all of your yellow-status shots<br />
to decide whether they should be moved to green or red status. When you use the browse<br />
filter, you will not see images excluded by the filter, but they are still there.<br />
See Using Instant Approval Architecture for complete details about how to check and<br />
set the browse filter.<br />
Zooming in and out<br />
As illustrated below, you can use the Zoom in/out button to see various levels of detail<br />
in your images. You can furthermore zoom all the way out to view and select batches<br />
and media.<br />
– – – – –<br />
+ + + + +<br />
Media list Batch list 9-Thumbnail view 4-Thumbnail view Normal view Zoomed<br />
Continue to press (+)<br />
to zoom further<br />
47
1<br />
2<br />
3<br />
4<br />
or<br />
Zooming in for more detail<br />
The preview display has a much lower resolution than your images. You can therefore<br />
zoom very far into the images to inspect small details. To do this:<br />
1. Browse to the image you wish to zoom into with the navigation button.<br />
2. Press the zoom-in ( + ) button to zoom in one step. The screen updates to show<br />
both a zoomed image and a thumbnail image that includes a red box outlining<br />
the portion of the images currently shown.<br />
3. You can now do the following as needed:<br />
• Use the navigator button to move the zoom area if you wish to inspect a different<br />
part of the image.<br />
• Zoom further by pressing the zoom-in ( + ) button more times.<br />
• Zoom back out one step by pressing the zoom-out ( – ) button.<br />
4. When you are finished, press and hold the zoom-out ( – ) button to return to<br />
browsing at the standard zoom level.<br />
Thumbnail views<br />
Preview thumbnails are small versions of each preview, sized to fit either four or nine<br />
images on the screen at once. Use them to get an overview of your work so far and to<br />
help find specific shots.<br />
To see the thumbnails, start with the standard preview display and press the zoom-out<br />
button once to see four thumbnails or twice to see nine.<br />
When viewing thumbnails, the selected image shows a blue border. When an image is<br />
selected, you can zoom in on it using the zoom-in button or delete it using MAIN MENU ><br />
STORAGE > Delete (see also MAIN MENU > STORAGE > Delete for a detailed procedure).<br />
Use and to scroll the thumbnails when you have more shots than can be shown.<br />
If you continue to zoom out beyond the nine-thumb view, you will come to the batch<br />
list and then to the media list. You can use this to select the current medium and batch<br />
for browsing and for storing new images. See Working with Media and Batches for<br />
details.<br />
48
Full-screen<br />
preview mode<br />
Battery saver mode<br />
Standard preview mode<br />
Preview Modes<br />
Choosing the Preview mode<br />
49<br />
Histogram<br />
mode<br />
Histogram and full details mode<br />
Preview Modes<br />
You can cycle<br />
through all the available<br />
preview modes<br />
by pressing the View-<br />
Mode button.<br />
You can use the View Mode button to cycle through the available preview modes which<br />
are:<br />
• Standard preview:<br />
Shows a preview image surrounded by a display of a few important settings. Note<br />
that the information covers some of the image. Go to Full–screen mode to see whole<br />
image.<br />
• Histogram:<br />
Shows a preview image overlaid with a histogram.<br />
• Histogram and full details:<br />
Shows a preview image overlaid with both a histogram and camera-setting details.<br />
• Battery saver:<br />
Turns off the screen, but you can still use the menus and take pictures.<br />
• Full-screen preview:<br />
Shows the preview only, with no frame or settings information.<br />
To cycle through the various modes, press the View Mode button on the front panel. The<br />
order is on a loop.<br />
Regardless of the current mode, if you zoom in on the image or zoom out to the thumbnails,<br />
the display reverts to showing the “standard” preview frame, which shows information<br />
about the current image and camera settings around the edges. When you return to the<br />
standard zoom level, however, you will then also return to your last-selected preview<br />
mode.<br />
Note that the screen can also operate in menu mode, which does not show a preview, but<br />
enables you to make digital capture unit settings. To enter menu mode, press the menu<br />
button. See Working with the Menus for details.
Standard Preview<br />
Button label<br />
ISO setting<br />
Image file name<br />
1<br />
2<br />
3<br />
White balance<br />
Current storage medium<br />
Approval status and<br />
browse filter setting<br />
Storage capacity<br />
(Shots taken / shots remaining)<br />
Histogram Mode 1, 2, 3<br />
Using the histogram<br />
The histogram provides a graph that indicates the total number of pixels at each brightness<br />
level, with brightnesses going from black on the left to white on the right. It is a valuable<br />
tool for evaluating your capture. A well-exposed shot usually has a full range of levels,<br />
while under- and overexposed shots tend to show levels concentrated at the left or right<br />
part of the scale, respectively.<br />
Look at the histogram examples and the explanations below:<br />
Underexposure 1<br />
A histogram display that is concentrated on the left with few pixels elsewhere indicates<br />
a likely underexposure. Many details will be lost in the shadows.<br />
Even exposure 2<br />
A histogram display that is spread across the full range indicates a likely good exposure.<br />
There may still be a few pixels at the extremes, indicating a few spectral highlights and<br />
saturated shadows, but this is often normal in a good exposure.<br />
Overexposure 3<br />
A histogram display that is concentrated on the right with few pixels elsewhere indicates<br />
a likely overexposure. Many details will be lost in the highlights.<br />
The histogram is only an indicator that should be interpreted—there are many situations<br />
in which a questionable histogram will match an exposure that is perfectly<br />
acceptable for the intended effect (and vice-versa).<br />
50<br />
The Standard Preview display is the one<br />
shown when you first turn on the camera<br />
and is probably the view you will use most<br />
often.<br />
It features a preview of your most recent<br />
shot and basic information about the settings<br />
and the image itself.<br />
Furthermore, the display enables you to<br />
navigate the menu system and make camera<br />
settings; see Working with the Menus<br />
for details.
4<br />
5<br />
6<br />
7<br />
Full Details Mode 4<br />
In full-details mode, you can read a complete list of camera settings, plus see the<br />
histogram and, in the background, a darkened preview of the image.<br />
The camera-setting details are stored with the image, so you can refer to them using Phocus<br />
even after you have loaded the image to your computer and stored it in your archive.<br />
Battery-Saver Mode 5<br />
In this mode, the digital capture unit is fully responsive, so you can take pictures but the<br />
screen is not lit up, thereby saving battery power.<br />
You can enter the menu system while shooting in this mode (which activates the screen<br />
until you exit the menu system again) but the approval, zoom and navigator buttons<br />
have no effect.<br />
You can also save battery power by turning down the brightness and/or contrast of the<br />
display using the entries of the MAIN MENU > SETTINGS > USER INTERFACE > DISPLAY<br />
menu. See ‘Making Display Settings’ for details.<br />
Other ways to save battery power include setting a display time-out and/or a powerdown<br />
time-out (each of these is disabled by default). Use MAIN MENU > SETTINGS ><br />
USER INTERFACE > Power Down to set a power-down time out. Use MAIN MENU ><br />
SETTINGS > USER INTERFACE > DISPLAY > Timeout to set a display time-out. See also<br />
‘Entries of the USER INTERFACE Menu’ and ‘Making Display Settings’ for details about<br />
these settings.<br />
Full-Screen Mode 6<br />
In full-screen mode, you can browse your images at standard preview resolution without<br />
any distracting data surrounding them.<br />
Because the current approval setting is not shown in full-screen mode, the approval<br />
button has no effect. This will prevent you from accidentally assigning the wrong status<br />
without knowing it.<br />
Overexposure indicator 7<br />
Though the histogram shows you when some of your pixels are overexposed, it does not<br />
tell you which ones. In a shot with many bright areas, it can be hard to know whether the<br />
key parts of your image are just bright or completely overexposed. To help you find them,<br />
the digital capture unit can provide an overexposure indicator, which shows precisely<br />
which areas of your shot are overexposed (i.e., pixels that are at maximum brightness,<br />
thereby eliminating details).<br />
When enabled, the overexposure indicator flashes the overexposed pixels from black to<br />
white.<br />
To enable or disable the overexposure indicator, choose MAIN MENU > SETTINGS ><br />
USER INTERFACE > Mark Overexp. .<br />
Please see Entries of the USER INTERFACE Menu for a detailed procedure.<br />
SHORTCUT<br />
Press and hold until the indicator<br />
is working as you would<br />
like (enabled or disabled).<br />
51
Overexposure<br />
indicator shortcut !<br />
Press and hold until the<br />
indicator is working as you<br />
would like (enabled or disabled).<br />
Deleting images − general<br />
The H3D II enables you to delete images using any of the following techniques:<br />
• Delete the currently selected image only.<br />
• Delete all images from the current batch<br />
• Delete all images from the current medium<br />
• Delete all red-status images from the current batch<br />
• Delete all red-status images from the current medium<br />
• Delete all red- or yellow-status images from the current batch<br />
• Delete all red- or yellow-status images from the current medium<br />
Another way of working is to simply assign unwanted images as Red. In this way, you<br />
retain the option (for a while) of changing your mind later while allowing the system<br />
to automatically delete the unwanted images as the storage medium fills up.<br />
You will always be asked to confirm each delete operation.<br />
For complete details about how to use the menu system to delete single or multiple images,<br />
please see MAIN MENU > STORAGE > Delete.<br />
Transferring images<br />
Transferring to a computer<br />
To transfer images stored on the compact-flash card to your computer, simply connect the<br />
digital capture unit to a computer using a FireWire cable and then run Phocus. Alternatively,<br />
use a card reader and connect to a computer. See the Phocus manual for details.<br />
See also Connecting to the Computer for details about how to connect to a computer.<br />
Delete shortcut !<br />
Select a target image and then<br />
press and hold until the confirm-delete<br />
dialog opens.<br />
52<br />
Set browse filter !<br />
Press a nd hold u ntil the<br />
preferred filter is indicated.<br />
Repeat if necessary.
9<br />
Menu:<br />
• ISO<br />
• White Balance<br />
• Media<br />
• Browse<br />
Menu system overview<br />
The main menu contains those settings that you will need to access most often as you work on an<br />
assignment. It also provides sub-menus that give you access to all other settings, most of which you<br />
will need less often.<br />
Item name (in white) and<br />
current setting in yellow<br />
Sub-menus show a rightpointing<br />
arrow, press the<br />
right-arrow on the navigator<br />
button to open the submenu<br />
(or, in some cases a<br />
dialogue window)<br />
53<br />
- button label<br />
(Here shown as EXIT)<br />
Navigating the menu system<br />
Current menu name<br />
Selected item (indicated by blue frame). The<br />
+ and − signs indicate that you can use the<br />
(+) and (−) buttons to change the value<br />
-button label<br />
(Here shown inactive)<br />
To enter to the menu system, press the MENU button on the panel. Any image visible is<br />
then replaced by the first level of the menu. Use the navigator button to scroll through<br />
the menu items and use the Zoom in/out ( – or + ) button to change the selected setting.<br />
See also The Control Panel for button diagrams and descriptions.<br />
Any given menu may include both items and/or sub-menus.<br />
• Items are settings that are available at the current menu level; they show their<br />
current settings next to the item name. To make an item setting, use the navigator<br />
( ) button to select the item and then use the zoom ( – or + ) button to select<br />
the desired option for that item.<br />
• Sub-menus do not have settings at the current level; they lead to another menu<br />
or dialog. Sub-menus show a right-pointing arrowhead () instead of a value. To<br />
open a sub-menu, use the up/down arrowheads ( and ) of the navigator button<br />
to select the sub-menu and then press the right side of the button to open it.<br />
There can be several levels of sub-menus.<br />
• When you are in a sub-menu, you can go back to the parent menu by pressing the<br />
left arrowhead () of the navigator button.<br />
• Some sub-menus open a dialog. Dialogs require that you either make a setting or<br />
exit the dialog (e.g., to confirm or cancel a delete command). The left arrowhead<br />
will have no effect.
ISO ratings depend on model<br />
54<br />
Menu structure<br />
Items on the main menu
1 2<br />
3 4<br />
5 6<br />
1<br />
3<br />
ISO/WB<br />
ISO/WB<br />
Save<br />
2<br />
F<br />
55<br />
Language<br />
As a practical example, a MAIN MENU > SETTINGS > USER<br />
INTERFACE > Language item instruction would involve the following<br />
procedure:<br />
1. Making sure you feel confident to return to your choice of<br />
language by navigating in another, press the menu (MENU)<br />
button to open the menu.<br />
2. Use and to select the SETTINGS sub-menu.<br />
3. Press to open the SETTINGS menu.<br />
4. Press to select the USER INTERFACE sub-menu.<br />
5. Press either the zoom ( – or + ) button to choose a new language<br />
(in this case Spanish).<br />
6. Press the MENU/EXIT button again to close the menu.<br />
Note also that the menu and approval buttons are situated just<br />
outside the bottom-left and bottom-right corners of the screen.<br />
As you work through the various menu entries, the screen shows<br />
a label for each of these buttons. In the text, we therefore give the<br />
generic name for the button and the screen name. For example we<br />
will refer to: the menu (MENU) button, the menu (EXIT) button,<br />
or the approval (OK) button.<br />
Settings check<br />
ISO, White Balance, Media and Browse settings should be<br />
checked before each session. They are therefore placed at the top<br />
level of the menu for quick and easy access. They are also shown<br />
on-screen in most preview modes, so you can easily keep an eye<br />
on them as your work.<br />
ISO<br />
The ISO setting can be made using the ISO/WB button on the<br />
grip or on the digital capture unit. The “natural” sensitivity of the<br />
CCD is ISO 50 for H3DII 39/50 models and 100 ISO for H3DII<br />
31 models, so you will get best results with this setting if the light<br />
conditions allow.<br />
To set the ISO on the grip:<br />
The ISO/WB button provides immediate access to ISO settings.<br />
The front control wheel is used to make the desired changes. The<br />
settings are automatically and simultaneously transferred from the<br />
camera to the digital capture unit. Please note that the changes are<br />
only displayed on the digital capture unit unit when the settings<br />
have been saved.<br />
1) Press the ISO/WB button on the grip.<br />
2) To make an ISO setting, turn the front control wheel to<br />
choose between:<br />
50, 100, 200 and 400 (39 and 50 Mpix models)<br />
50, 100, 200, 400 and 800 (31 Mpix models)<br />
3) Press SAVE (ISO/WB button) to save the setting.
1 2<br />
3<br />
1<br />
3<br />
4<br />
ISO/WB<br />
ISO/WB<br />
Save<br />
2<br />
R<br />
56<br />
Note that the default sensitivity of the CCD sensor is either ISO<br />
50 or ISO 100. Higher ISO settings result in progressively noisier<br />
images (just as higher ISO film becomes grainer). It is recommended<br />
that you use the lowest ISO setting that the lighting<br />
situation allows.<br />
To set the ISO on the digital capture unit<br />
1. Choose MAIN MENU > ISO. This is the top item of the top<br />
menu, so it will be selected by default when you enter the<br />
menu system. (See also Navigating the Menu System for<br />
details about how to find this setting.)<br />
2. Use the zoom ( – or + )button to step through the available<br />
ISO settings until the setting you want is shown.<br />
3. Either move on to another setting by using the navigator button<br />
or press the menu button to exit the menu system and<br />
keep your setting.<br />
White balance / Grey balance setting<br />
There are several ways to make a white/grey balance setting adjustment.<br />
When untethered on location you might prefer to make a<br />
quick preset adjustment setting at the same time that you check the<br />
ISO and Media settings. Tethered in the studio you might prefer<br />
to take the first shot of a grey scale and make the adjustment in<br />
Phocus/FlexColor for that session. In addition, you might want to<br />
assign the <strong>User</strong> Button as a rapid white balance check in a mixed<br />
lighting situation.<br />
A white balance setting can be made either on the grip or on<br />
the digital capture unit. Changes made on one are recorded and<br />
displayed on the other.<br />
To set the white balance on the grip<br />
The ISO/WB button provides immediate access to white balance<br />
settings. The rear control wheel is used to make the desired changes.<br />
The settings are automatically and simultaneously transferred<br />
from the camera to the digital capture unit. Please note that the<br />
changes are only displayed on the digital capture unit unit when<br />
the settings have been saved.<br />
1) Press the ISO/WB button on the grip.<br />
2) To make a preset White Balance setting, turn the rear control<br />
wheel to choose between:<br />
Daylight, Shade, Cloudy, Flash, Fluorescent and Tungsten<br />
3) To make a <strong>Manual</strong> White Balance setting (not a White<br />
balance test exposure), press the Man. (AF) button and<br />
then turn the rear control wheel to choose a color temperature:<br />
2000 – 10000 K<br />
4) Press SAVE (ISO/WB button) to save the setting.<br />
White Balance settings are only approximate color temperature<br />
settings. They are only used for user convenience when viewing.<br />
3F/3FR files are raw format files and therefore contain all the<br />
information required for correction in Phocus / FlexColor and/<br />
or other software, regardless of the original color temperature<br />
at the time of exposure .
1a 1<br />
3a<br />
There are seven ‘White Balance’ settings to choose from.<br />
White Bal. Setting Setting description<br />
Daylight For general outdoor use in direct sunlight.<br />
Cloudy For general outdoor use in cloudy weather.<br />
Shade For general outdoor use in shady locations out of direct sunlight.<br />
Flash For general indoor use when using a normal flash/strobe system.<br />
Fluorescent For use when using fluorescent lighting (strip lights).<br />
Tungsten For use when shooting indoors under standard tungsten/B lamps.<br />
<strong>Manual</strong> For a manual setting<br />
3b<br />
2a<br />
1<br />
4a<br />
Color temperature can be set<br />
manually or read off after a<br />
test capture.<br />
57<br />
To set the white balance on the digital capture unit<br />
To select a preset white balance:<br />
1a. Press the MENU button on the digital capture unit.<br />
2a. Use and to select the White Bal: sub-menu.<br />
3a. Use the zoom( – or + ) button to step through the available<br />
choices until the one you want is shown.<br />
4a. Either move on to another setting by using the navigator<br />
button or press the MENU button to exit the menu system<br />
and keep your setting.<br />
To make a manual white balance setting:<br />
1a. Choose MAIN MENU > White Bal > <strong>Manual</strong>.<br />
2a. Use the button to call up the ‘<strong>Manual</strong> White Balance’ screen.<br />
3b. Here, you can adjust the color temperature to a specific<br />
numeral setting in degrees K with the zoom ( – or + )<br />
button.<br />
Alternatively, you can position the central spot in the viewfinder<br />
over an area that you consider should be rendered as<br />
neutral in color in the image (a ‘grey card’ or even a sheet<br />
of white paper is ideal) and make a test capture (ensure the<br />
exposure is approximately correct otherwise you will get a<br />
warning message).<br />
A small rectangle appears on the display marking that particular<br />
area. Calculations then take place automatically so that<br />
the following shots use the area chosen as the new ‘white<br />
balance’ standard. Using this method you can also read off<br />
the screen what the color temperature of the light source has<br />
been judged to be in degrees Kelvin.<br />
4a. Press the MENU button to exit the menu system and keep<br />
your setting.<br />
New settings are retained even when the camera has been<br />
turned off and re-activated, so don’t forget to make new<br />
settings when required.
1<br />
White Balance Shot screen<br />
appears after test capture to<br />
illustrate the area chosen for<br />
white balance calculation.<br />
3 14<br />
2<br />
58<br />
To make a rapid <strong>User</strong> Button white balance setting:<br />
(Please note: this function works with a CF card or an ImageBank-<br />
II only)<br />
1. Assign the <strong>User</strong> Button (or AE-L, STOP DOWN or M.UP<br />
button) to activate Grey balance exp. (see later section –<br />
Advanced Features / Customizable button function list – for<br />
details).<br />
2. While framing the centre spot in the viewfinder over a neutrally<br />
colored surface, press the assigned button.<br />
A small rectangle appears on the OLED marking that particular<br />
area. Calculations then take place automatically so that<br />
the following shots use the area chosen as the new ‘white balance’<br />
standard.<br />
Media<br />
The storage setting controls where your digital capture unit will<br />
store new images and which stored images will be visible in the<br />
browse window.<br />
Often, you have just one type of storage media available—the<br />
internal compact-flash card. However, if you have several media<br />
attached (e.g., a card and one or more external disks), then you<br />
may need to switch between them.<br />
If your selected storage medium has more than one batch (folder)<br />
on it, then the batch selected when you use the storage menu item<br />
will be the one you most recently created.<br />
To select the medium to which to save new shots and from which<br />
to browse previous shots:<br />
1. Press the MENU button.<br />
2. Use and to select the MEDIA sub-menu.<br />
3. Use the zoom ( – or + ) button to step through the available<br />
media until the name for destination/source you wish to use is<br />
shown.<br />
4. Either move on to another setting by using the navigator button,<br />
or,<br />
press the MENU button to exit the menu system and keep<br />
your setting.<br />
Note that you can also select media using just the (+) and (-)<br />
buttons while browsing images. This method also enables<br />
you to select a batch as you zoom in from media to batch to<br />
thumbnails to preview. See Navigating Media and Batches for<br />
complete details about this method.
1<br />
<br />
2 3<br />
Browse filter<br />
shortcut !<br />
There is also a one-button shortcut<br />
for changing the browse filter.<br />
To use it, press and hold (do not<br />
click!) the Instant Approval button<br />
until the approval status colour<br />
appears. Browsing will then only<br />
display the images with that classification.<br />
59<br />
Browse<br />
The browse filter complements the instant-approval system by<br />
enabling you to browse through images according to their approval<br />
status. You have the following choices:<br />
• All: browses all of the images in the current batch, regardless<br />
of their approval status. This is the default.<br />
• Red: browses only red-status images from the current batch.<br />
These are images that you have marked for likely deletion. You<br />
might browse these images to make sure you have not eliminated<br />
any usable images and/or to find images that you can delete to<br />
make room for new shots.<br />
• Green: browses only green-status images from the current<br />
batch. These are either new shots that did not trigger an exposure<br />
warning or shots that you manually assigned to green<br />
after overriding an exposure warning.<br />
• Green & Yellow: browses green and yellow-status images, but<br />
does not show red-status images. These are probably images<br />
that you have either decided to keep or not yet checked for<br />
approval status.<br />
•<br />
For more information about using the instant-approval system,<br />
please see Using Instant Approval Architecture.<br />
To set the browse filter using the menus:<br />
1. Choose MAIN MENU > Browse. The current setting is displayed<br />
here.<br />
2. Use the zoom ( – or + ) button to step through the filter<br />
options (described above) until you have selected the filter<br />
you wish to use.<br />
3. Either move on to another setting by using the navigator button<br />
or press the menu button to exit the menu system and<br />
keep your setting.<br />
The appearance of the ‘Empty Browse Filter’ message signifies that<br />
there are no images with that particular approval status.
10<br />
Navigating the STORAGE settings<br />
Menu: Storage<br />
This section describes file storage, file transference, storage organization, file classification<br />
and related subjects.<br />
60
1<br />
3<br />
4<br />
5<br />
<br />
<br />
2<br />
6<br />
Delete shortcut !<br />
Select a target image and then<br />
press and hold until the confirmdelete<br />
dialog opens.<br />
61<br />
MAIN MENU > STORAGE<br />
The Storage menu provides entries for working with storage media.<br />
Here, you can format media, copy images from the camera to<br />
an ImageBank-II and create new batches on available media. You<br />
can also set the initial approval status (green or yellow) assigned<br />
to new pictures.<br />
The first item on the storage list is file deletion. The great advantage<br />
of digital capture is of course the ability to judge images on the spot,<br />
delete them immediately if necessary and thereby make room for<br />
more valuable captures. There are several ways to delete images:<br />
• Delete a single image<br />
• Delete all images from a batch<br />
• Delete all images from a medium<br />
• Delete all images of a specified approval status (e.g. red)<br />
from a batch or medium<br />
DELETE<br />
In this example, one image is to be deleted from a batch containing<br />
nine images.<br />
To delete a single image:<br />
1. Use the – button to go to the nine-thumbnail (in this case)<br />
view to make an initial search.<br />
2. Use the navigator button to select the image you wish to<br />
delete. When you are viewing thumbnails, the selected image<br />
has a coloured border around it. When you are viewing single<br />
images, the selected image is the one currently shown. (You<br />
can delete an image either from single image view or from<br />
thumbnail view).<br />
3. Select MAIN MENU > STORAGE<br />
4. Press to open the Delete dialog.<br />
5. You are now shown a full-size preview of the selected image<br />
and asked to confirm the delete. Press OK.<br />
6. You now return to the main menu. Notice that the unwanted<br />
image has been deleted and the batch only contains the three<br />
remaining images. Either move on to another image by using<br />
the navigator button or press the menu button to exit the<br />
menu system.<br />
or:<br />
1. Use the – button to make an initial search and then the +<br />
button to reach full-size preview.<br />
2. Hold down on the navigator button open the Delete dialog.<br />
Use the delete shortcut immediately after an unwanted capture<br />
to save space on a card.
1 2<br />
3<br />
4<br />
A.<br />
B.<br />
C.<br />
D.<br />
<br />
62<br />
Deleting several images from a batch<br />
Menus for deleting<br />
several images from<br />
a batch.<br />
To delete several images from a selected batch:<br />
1. Starting at the single-image preview display, Select MAIN<br />
MENU > STORAGE > Delete. (See also Navigating the<br />
Menu System for details about how to find this setting.)<br />
2. Use to enter the Delete submenu or use shortcut.<br />
3. Use the – or + button to select:<br />
A. This image - deletes the current image only<br />
B. All red in batch - deletes all red images in the current<br />
batch<br />
C. All yellow/red in batch - deletes all yellow and red images<br />
in the current batch<br />
D. All in batch - deletes all images in the current batch<br />
4. Press OK to confirm the delete (to exit without delete, press<br />
EXIT).
5 6<br />
1<br />
2<br />
4<br />
<br />
<br />
<br />
3<br />
63<br />
5. You now return to the main menu. Either move on to another<br />
setting by using the navigator button or<br />
6. Press the menu (EXIT) button to exit the menu system.<br />
Deleting several images from a selected medium<br />
To delete several images at once:<br />
1. Starting at the single-image preview display, press the – button<br />
until you reach the media list.<br />
2. Use and to select the medium from which you wish to<br />
delete. You will be deleting from all batches stored on that<br />
item.<br />
Note that both each listed medium shows a set of three coloured<br />
numbers in parentheses to the right of the medium name.<br />
These indicate the total number of images of each approval<br />
status (green, yellow and red) that exist on the medium. For<br />
example, if you see a medium that shows (18/5/3), then the<br />
medium contains a total of 26 images: 18 green (approved), 5<br />
yellow (unclassified) and 3 red (marked for probable delete).<br />
3. Select MAIN MENU > STORAGE > Delete. (See also<br />
Navigating the Menu System for details about how to find<br />
this setting.)<br />
4. Press to open the Delete Image dialog.
5<br />
6<br />
<br />
7 8<br />
64<br />
Menus for deleting<br />
several images from<br />
all batches from a<br />
selected storage<br />
medium.<br />
5. You must now select the approval status that you wish to<br />
delete. All images from the selected medium that are also of<br />
the status that you select here will be deleted by the operation.<br />
Use and to select All Red, All Red & Yellow or All.<br />
6. Then press to open the delete dialog for your selected<br />
status.<br />
You are now asked to confirm the delete.<br />
7. • To confirm, press the + button to change the status to Yes<br />
and then press the OK button to execute the delete.<br />
• To cancel, press the menu button to exit; or press the – button<br />
to set the status to No and then press the OK button to<br />
cancel.<br />
You now return to the main menu. Either move on to another<br />
setting by using the navigator button or<br />
8. Press the menu (EXIT) button to exit the menu system.
1<br />
2<br />
3<br />
<br />
<br />
<br />
<br />
4 5<br />
65<br />
FORMAT<br />
The camera is only able to read and write to storage media that have<br />
been formatted. New cards or disks sometimes have no formatting,<br />
or you might want to convert media that are currently using<br />
a format that the camera cannot read.<br />
Each time you get a new compact-flash card, it is recommended<br />
that you format it as described below, even if the digital capture<br />
unit is already able to read it. This will enable the digital capture<br />
unit to use the card more efficiently.<br />
The digital capture unit is capable of formatting any type of<br />
medium connected to it, including compact flash cards and<br />
ImageBank-II units. When you do this, all data contained on<br />
the target medium will be erased.<br />
You can also use the format command to delete all images on<br />
a disk. This is sometimes faster than using the delete function,<br />
but it is not as flexible because all data from all batches will<br />
always be erased.<br />
There are two ways to format cards. The quickest way is to use the<br />
Format card button on the grip. If you prefer, you can also use the<br />
menu on the digital capture unit.<br />
Format card button / camera<br />
Press the Format Card button on the camera grip. It is purposely<br />
recessed to avoid unintentional use, so use a ball-point pen or<br />
similar. A warning is displayed as verification.<br />
Format card / digital capture unit<br />
1. If you have more than one type of medium connected (e.g. a<br />
compact-flash card and ImageBank-II), then start by selecting<br />
the medium you wish to format by choosing Storage (see<br />
also Selecting the Current Storage Medium ).<br />
2. Select MAIN MENU > STORAGE > Format. (See also<br />
Navigating the Menu System for details about how to find<br />
this setting.)<br />
3. Press the to open the Format Card dialog.<br />
4. You are now asked to confirm the operation.<br />
• To confirm, press the OK button. This will carry out the format<br />
and delete all data on the current medium.<br />
• To cancel, press the EXIT.<br />
5. You now return to the STORAGE menu. Either move on to<br />
another setting by using the navigator button or press the<br />
menu (EXIT) button to exit the menu system.
1<br />
2<br />
3<br />
Navigating the STORAGE settings<br />
<br />
<br />
<br />
66<br />
COPY<br />
To free up space on a CF card, while on location for example, files<br />
can be copied onto an ImageBank-II. All batches and files remain<br />
on the card until deleted.<br />
There are several options available and these choices should be<br />
selected before copying to ensure the correct action takes place.<br />
Proceed as follows:<br />
1. Press MENU and navigate down to select SETTINGS.<br />
2. Press the button and navigate down to Custom Options.<br />
3. Press the button to select between Copy to I-Bank or I-B<br />
connection. Both options have two choices selected by the<br />
the – or + buttons:<br />
Copy to I-Bank: Choose between copying files from the<br />
active batch only or all files from the entire card:<br />
I-B connection: Choose between copying files into the batch<br />
already present or into a new one:
1<br />
2<br />
3<br />
4<br />
<br />
<br />
<br />
67<br />
Navigating the STORAGE<br />
settings to COPY IMAGES.<br />
To copy files:<br />
With an ImageBank-II attached to the camera by a FireWire cable<br />
and turned on:<br />
1. Press MENU and navigate down to select STORAGE.<br />
2. Press the button and navigate down to COPY.<br />
3. Press the button to reach the confirmation dialogue.<br />
To confirm, press the OK button. (To cancel, press the EXIT<br />
button.)<br />
Confirmation will make a copy of all batches and files and<br />
store them on the ImageBank-II in a newly created folder<br />
called ‘CARD0001’ (for example). If you connect the camera<br />
to the ImageBank-ll again, a new folder can be automatically<br />
created with the name ‘CARD0002’ (for example) and so<br />
on, depending on setting (see Menu > Settings > Custom<br />
Options).<br />
4. The copying dialogue now appears to inform you of progress.<br />
Press STOP if you want to cancel the procedure.
1<br />
2<br />
3<br />
<br />
<br />
<br />
4 5<br />
68<br />
BATCH<br />
Batches help you to organize your work. They are very similar to<br />
folders on a computer hard disk. Use the Batch command of the<br />
STORAGE menu each time you want to create a new batch.<br />
For more information about batches, please see Working with<br />
Media and Batches .<br />
To create a new batch:<br />
1. Press the MENU button.<br />
2. Press to navigate down and select the Storage dialog.<br />
Press and then to navigate down and select Batch.<br />
3 Press to open the Batch dialog. The new batch name will<br />
always begin with a three-digit number, which automatically<br />
increments by one with each new batch. Following this is five<br />
letters, which you can assign yourself to help make the batch<br />
easier to identify. To set the letters:<br />
Use and to select one of the five letters. Then use the<br />
+ or – button to step the currently selected letter up or<br />
down the alphabet until you have found the letter you want.<br />
Continue working until you have set the name you want.<br />
4. Press the approve (OK) button to save the new batch with the<br />
name you selected.<br />
5. You now return to the BATCH menu. Either move on to<br />
another setting by using the navigator button or press the<br />
menu (EXIT) button to exit the menu system.<br />
Remember that all new images are stored automatically in<br />
the latest batch. It is not possible to store new images in older<br />
batches.
1<br />
2<br />
3<br />
4<br />
<br />
<br />
69<br />
DEFAULT APPR. LEVEL<br />
The Instant Approval Architecture system helps you to evaluate and<br />
mark each image based on how well it has come out. By default, the<br />
system assigns an initial approval status for each new shot based<br />
on an analysis of the distribution of exposure levels. In the factory<br />
configuration, the status of each new shot is assigned as follows:<br />
• Green (approved):<br />
The new shot seems to have been exposed correctly.<br />
• Yellow / Amber (unclassified):<br />
The new shot seems to have been over- or under-exposed.<br />
However, you might choose instead to override this system and<br />
have all new shots assigned either as green or yellow, regardless<br />
of the exposure analysis results. A typical strategy could be to assign<br />
all shots to yellow and then review all of the shots later and<br />
promote only the best ones to green status. At the same time you<br />
might demote the most doubtful shots to red status.<br />
See also Using Instant Approval Architecture for complete details<br />
about working with the approval system.<br />
To change the default status assigned to each new image:<br />
1. Press the MENU button.<br />
2. Press to navigate down and select the Storage level.<br />
Press and then to navigate down and select Default<br />
Appr. level. Press to open the Default Appr. level dialog.<br />
3. Use the the + or – button to step through the available settings<br />
until the default status you wish to use (auto, green or<br />
yellow) is shown.<br />
4. Either move on to another setting by using the navigator button<br />
or press the menu (EXIT) button to exit the menu system<br />
and keep your setting.
11<br />
Menu: Settings<br />
There are a number of settings grouped under the general “Settings”<br />
heading which are:<br />
• <strong>User</strong> Interface<br />
• Camera<br />
• About<br />
• Default<br />
• Custom Options<br />
70<br />
Navigating the<br />
USER INTERFACE<br />
settings
MAIN MENU > SETTINGS > <strong>User</strong> Interface<br />
By altering the <strong>User</strong> Interface settings, you can control the way the digital capture unit<br />
interacts to suit you and your preferred way of working. It also includes date and time<br />
settings.<br />
USER INTERFACE menu items<br />
The user interface menu includes both items and sub-menus as follows:<br />
• Language:<br />
The menu system can be displayed in any of seven languages. This menu item<br />
enables you to select your preferred language for the menus.<br />
• Power Down:<br />
To help preserve the charge of the battery, you can set the digital capture unit<br />
to power down after a specified period of inactivity. The effect is exactly the<br />
same as though you had pressed the off button on the camera. Once it has<br />
powered down, you must turn the H3D II on before you can continue working.<br />
Set this to Never to disable this feature (this is the default setting). Set to<br />
a value between 3 and 99 minutes to establish a time-out.<br />
• Mark Overexp.:<br />
This feature helps draw your attention to areas of your images that are overexposed.<br />
When this feature is enabled, the single-image preview display will<br />
highlight each overexposed pixel by flashing it white and black.<br />
Set this item to On to enable the feature; set to Off to disable it.<br />
• Sound:<br />
The H3D II uses audio feedback to help let you know if each new image is exposed<br />
correctly. This is described in Standard Instant Approval Workflow.<br />
This menu item has Volume (choose between High, Low and Off), Key Click<br />
(choose between On and Off) and Exposure Warning (choose between On<br />
and Off).<br />
• Date & Time:<br />
The H3D II has an internal clock that keeps track of the date and time. This<br />
information is used to mark each shot with the date and time at which it was<br />
taken. It is also used to label batches with the date on which each batch was<br />
created. (See note under ‘General overview of digital capture unit’ about keeping<br />
the internal battery charged to maintain Date and Time settings).<br />
• Display:<br />
This feature also sets the level of Contrast (on a scale of 1-10) on the display.<br />
Usually, you should leave this set to the default level of 5; however in some<br />
viewing environments and/or with some types of images you may wish to<br />
increase or decrease this value. A value of 10 provides maximum contrast; a<br />
value of 0 provides no contrast (a black screen). You can also help save battery<br />
power by using a low value here.<br />
This feature also sets the Brightness (on a scale of 1-10) on the display. This<br />
sets the brightness shown on the screen. Usually, you should leave this set to<br />
the default level of 5, however in some viewing environments and/or with some<br />
types of images you may wish to increase or decrease this value. A value of 10<br />
provides maximum brightness; a value of 0 provides minimal brightness. You<br />
can also help save battery power by using a low value here.<br />
71
1 2<br />
3 4<br />
5 6<br />
72<br />
Setting the options under the <strong>User</strong> Interface menu<br />
Each of the above items can be set by similar menu navigation.<br />
Language, Power Down and Mark Overex can be set immediately by<br />
the + or – button while Sound, Date & Time and Display require<br />
another move to sub menu for final choice.<br />
Proceed as follows:<br />
1. Press the menu (MENU) button to open the menu.<br />
2. Use and to select the SETTINGS sub-menu.<br />
3. Press to open the SETTINGS menu.<br />
4. Press to select the USER INTERFACE sub-menu.<br />
5. Use and to select the required item.<br />
Press either the + or – button to make the new settings in the<br />
case of Language, Power Down and Mark Overex or press <br />
again to access Sound, Date & Time and Display.<br />
6. Press the EXIT button again to save the new settings and close<br />
the menu.<br />
MAIN MENU > SETTINGS > Camera<br />
The H3D II digital capture unit can also be used with view cameras<br />
(with the appropriate adapter and cables).<br />
The exposure time set on the unit sets the maximum length of exposure.<br />
The default setting is 1/8 sec and this is the setting that can<br />
be kept for all exposures from 1/8 sec through 1/2000sec. However,<br />
this setting should be changed in accordance with the time required<br />
if it exceeds 1/8 sec. Times of up to 32 seconds can be set.<br />
If you prefer, you can connect the ‘Flash sync input cable’ between<br />
the lens PC socket and the unit which allows you to retain the<br />
default setting of 1/8 second while still being able to use exposure<br />
times longer than 1/8 second. This method also allows the use of<br />
the B setting.<br />
Model setting variations<br />
When using the H3D II digital capture unit with a view camera you<br />
should make the appropriate setting change accordingly. Don’t forget<br />
to change the setting again if you change camera model!<br />
The five options are:<br />
• H3D Set automatically<br />
• Schneider For use with view cameras and Schneider lenses.<br />
• LensCtrlS For use with view cameras.<br />
• Pinhole<br />
Intended primarily for use in a studio environment where<br />
complete darkness can be achieved and captures made accordingly<br />
(also useful for ‘light painting’). In this mode the<br />
H3D II uses the exposure time (as well as other required stages<br />
in a capture sequence) set in the Capture Sequence dialog.<br />
The back can be triggered either via the START (MENU/<br />
EXIT) button or from FlexColor (see later section for full<br />
description of Capture Sequence settings procedure).<br />
• Flash sync<br />
For use with view cameras.
The CAMERA item on the<br />
menu remains dimmed when<br />
the digital capture unit is<br />
attached to the H3D II body.<br />
Connectivity diagram<br />
H3D II<br />
digital capture unit<br />
View camera<br />
adapter for<br />
Hasselblad H<br />
cameras<br />
(not available<br />
from Hasselblad)<br />
Flash sync<br />
input cable<br />
73<br />
Any view camera with<br />
Hasselblad H adapter<br />
Horseman ISS electronic<br />
shutter with lens control<br />
Navigating the<br />
CAMERA settings<br />
Any shutter<br />
with X sync<br />
Rollei electronic<br />
shutter with<br />
lens control
1<br />
3 4<br />
5<br />
7 8<br />
9<br />
2<br />
6<br />
74<br />
Setting CAMERA model and options<br />
These settings are only available when the digital capture unit<br />
is not attached to an H3D II body.<br />
Proceed as follows:<br />
1. Press the menu (MENU) button to open the menu.<br />
2. Use and to select the SETTINGS sub-menu.<br />
3. Press to open the SETTINGS menu.<br />
4. Use and to select CAMERA.<br />
5. Press to open the CAMERA menu.<br />
6. Press either the + or – button to select camera model.<br />
7. Use and to select EXPOSURE TIME or CAPTURE SEQ.<br />
if required.<br />
8. Press either the + or – button to make new settings if<br />
required.<br />
9. Press the menu (EXIT) button to exit the menu system and<br />
keep your settings.<br />
Options available for PINHOLE and FLASH SYNC<br />
Shutter Delay<br />
The normal setting is Default and cannot be changed.<br />
Exposure Time<br />
This setting should be changed for cable-free exposure times longer<br />
than 1/8 second, ensuring that it matches the shutter speed/exposure<br />
time on the camera/lens. The settings range from 1/8 second<br />
to 32 seconds (1/8 second is the default setting).<br />
Capture Sequence<br />
This feature functions in the same manner as an interval timer.<br />
Initial delay: Controls the amount of time required to elapse<br />
before the first capture.<br />
Delay: Controls the amount of time required between each<br />
capture.<br />
Count: Controls the total number of captures required.
1 2<br />
3 4<br />
5 6<br />
7 8<br />
9 10<br />
75<br />
Setting EXPOSURE TIME and CAPTURE SEQUENCE<br />
Proceed as follows:<br />
1. Press the menu (MENU) button to open the menu.<br />
2. Use and to select the SETTINGS sub-menu.<br />
3. Press to open the SETTINGS menu.<br />
4. Use and to select CAMERA.<br />
5. Press to open the CAMERA menu.<br />
6. Press either the + or – button to select PINHOLE.<br />
7. Press or to select EXPOSURE TIME.<br />
8. Press either + or – to make an exposure time setting.<br />
9. Press to select CAPTURE SEQUENCE.<br />
10. Press to open the CAPTURE SEQUENCE menu.
11 12<br />
13 14<br />
15 16<br />
17<br />
19<br />
18<br />
11. Press either the + or – button to make an INITIAL DELAY<br />
setting.<br />
This setting controls the amount of time that elapses<br />
before the first capture in the sequence.<br />
12. Press to select DELAY.<br />
13. Press either + or – to make a DELAY setting.<br />
This setting controls the amount of time between each<br />
capture in the sequence.<br />
14. Press to select COUNT.<br />
15. Press either + or – to make a COUNT setting.<br />
This setting controls the number of captures in the<br />
sequence.<br />
16. Press OK to confirm all the settings.<br />
17. The unit is now ready for a sequence start. Note that the<br />
MENU/EXIT button now diplays START instead:<br />
18. Press START to set the sequence running.<br />
19. Note that the EXIT button now displays STOP. The sequence<br />
can be stopped at any time by pressing this button and the<br />
standard menu display returns.<br />
76
1<br />
2<br />
1<br />
2<br />
<br />
<br />
<br />
<br />
77<br />
MAIN MENU > SETTINGS > About<br />
The About box<br />
Occasionally, Hasselblad releases updates to the internal software<br />
(“firmware”) of the digital capture unit. These updates may fix<br />
small errors and/or add new features. You will probably receive<br />
additional assistance from Hasselblad technical support if and<br />
when a new update is available. In this case, it may be important<br />
to know the serial number and current firmware vision of your<br />
digital capture unit.<br />
The About box also shows the focus calibration ID (which must<br />
match the information on the grip display under 'System Status'<br />
to obtain the optimum performance). Each digital capture unit<br />
is carefully adjusted to match the corresponding camera body,<br />
which in turn produces the matching verifications respectively.<br />
If you want to use different digital capture units with different<br />
camera bodies, please refer to a Hasselblad Service Center for<br />
more information.<br />
To find this out:<br />
1. Select MAIN MENU > SETTINGS > ABOUT. (See also<br />
Navigating the Menu System or details about how to find<br />
this setting.)<br />
2. Press to open the About dialog, which shows the serial<br />
number and firmware version. When you are done reading<br />
the information, press the menu (EXIT) button to return to the<br />
SETTINGS menu. Either move on to another setting by using<br />
the navigator button or press the menu (EXIT) button again<br />
to exit the menu system.<br />
MAIN MENU > SETTINGS > Default<br />
The DEFAULT setting will reset all custom settings you have made<br />
back to the original default / factory settings.<br />
To reset all settings:<br />
1. Select the MAIN MENU > SETTINGS > DEFAULT entry.<br />
2. Press the OK button and then the EXIT to return.
1<br />
2<br />
3<br />
<br />
<br />
<br />
78<br />
MAIN MENU > SETTINGS ><br />
Custom Options<br />
Selecting an option<br />
Proceed as follows:<br />
1. Press MENU and navigate down to select SETTINGS.<br />
2. Press the button and navigate down to Custom Options.<br />
3. Press the button to select the option. Choices are selected<br />
by the + or – buttons.<br />
• Copy to I-Bank<br />
When copying files to an ImageBank-II, you can choose whether<br />
you want to copy files from the active batch only or all files<br />
from the entire card.<br />
• I-B connection<br />
You can choose whether you want to add files to the last<br />
batch or create a new batch every time the ImageBank-II is<br />
connected.<br />
• Tilt sensor<br />
The tilt sensor sets the viewing orientation of captures when they<br />
appear in Phocus / FlexColor. In order to avoid unintentional<br />
orientation changes when the camera is pointing straight up<br />
or down, for example, the tilt setting can be locked at:<br />
Auto, Lock at 0 degrees, Lock at 90 degrees, Lock at 180 degrees<br />
and Lock at 270 degrees.<br />
• Menu Ctrl.<br />
This sets whether the front and rear control wheels are active<br />
or inactive when navigating the sensor menu.<br />
• Display<br />
This setting allows you to turn the digital capture unit display<br />
on when half-pressing the shutter release button. Three options<br />
are available:<br />
• Display ON by half-press<br />
• Display OFF by half-press<br />
• Toggle display by half-press
12<br />
Light Metering<br />
& Exposure Control<br />
Three metering methods<br />
Five exposure method<br />
Extremely accurate light metering<br />
The light metering system of the HVD90X is capable of selective<br />
sensitivity producing three reflective metering methods:<br />
Average, CentreSpot and Spot. All methods are measured in<br />
increments of 1/12 EV. Information transfer is rapid and automatic<br />
ensuring consistently correct exposure settings even<br />
in difficult and changeable lighting situations.<br />
Light measurement is made through the lens (TTL) and exposure<br />
is controlled manually or automatically by the control<br />
wheels and/or settings. The information is visible on both the<br />
grip display and the viewfinder display.<br />
A great deal of control is available ranging from 100%<br />
manual through to sophisticated fully automatic by way of<br />
the various exposure methods: <strong>Manual</strong>, Aperture priority,<br />
Shutter priority, Program and Program variable.<br />
79
Centre Weighted<br />
(23 x 20 mm) ≈ 25%<br />
CentreSpot<br />
(23 x 20 mm) ≈ 25%<br />
Spot<br />
(diameter 7.5mm) ≈ 2.5%<br />
Light metering and exposure control<br />
Two primary factors have to be considered when making exposure control choice, namely, metering<br />
method and exposure method:<br />
Metering method determines in which manner the light measurement is made and how much<br />
of the image is taken into account( Centre Weighted, CentreSpot and Spot).<br />
Exposure method involves the parameters and deciding factors about how the light measurement<br />
is translated into aperture and shutter speeds. Here the choice is about the camera controls<br />
and their effect on the result or suitability for the subject. Included in this choice is the type of automation<br />
too (<strong>Manual</strong> for 100% user control, Aperture priority, Program, etc for automated control).<br />
Some methods and modes are much more suited to various situations and applications than others,<br />
while some depend to a greater degree on personal preference and ways of working. A discussion<br />
of the points to consider in this context is beyond the scope of this manual. If you are not sure<br />
about choice, please check in other general photographic literature for a fuller explanation. Also<br />
check our website occasionally – www.hasselblad.com – for articles and discussions concerning<br />
such matters.<br />
Remember that all exposure configurations are only applicable to the ISO setting in use!<br />
Since the light measuring system is TTL, filter factors, lens extension / extension ring factors, etc, are<br />
automatically taken into account for average purposes. However, some combinations of methods<br />
and equipment can cause slight discrepancies for various reasons and therefore for critical work<br />
you should make alternative captures to suit personal preference.<br />
Exposures are displayed on the grip display to within 1, 1/2 and 1/3 EV tolerances<br />
(dependent on setting). This means that ‘half-stops’ are shown in a form that can<br />
differ from more traditional displays. For example, the position between f/ 8 and f/11<br />
is displayed as f9.5 and likewise the position between 1/30s and 1/60s is displayed<br />
as 45. Therefore a display showing ‘f 9.5 45’ simply means ‘f/9.5 at 1/45 second’. The<br />
appearance of an ‘s’ after the shutter speed signifies whole seconds so, for example,<br />
‘32s’ on the display signifies an exposure time of 32 seconds, not 1/30.<br />
Metering method<br />
There are three metering methods available. All three are reflective methods (measuring the light<br />
reflected off various selected parts of the subject according to method) and are through the lens<br />
(TTL). These have the following designations (with their respective display symbols):<br />
— Centre Weighted<br />
— CentreSpot<br />
— Spot<br />
Centre Weighted: Commonly used for ‘average’ light situations where there is no particular<br />
dominance of light or dark areas across the tonal range. Takes into account approximately 25% of<br />
the image seen in the viewfinder.<br />
CentreSpot: Emphasises the central section of the focusing screen equivalent to approximately<br />
25% of the image. This provides a balanced assessment and is a typical choice where the main<br />
subject is in the centre of the image.<br />
Spot: The sensitive area is equivalent to approximately 2.5% of the image area (the central spot<br />
on the viewfinder screen). Any parts of the image outside of this area will not affect the exposure<br />
reading. This provides a very accurate measurement of specific tones.Typically used in the zone<br />
system and similar light measuring situations where maximum control is required. Also excellent<br />
for tonal comparison measurements. The spot mode can display ‘zones’ instead of EVs in the viewfinder<br />
display (see Camera Options).<br />
80
1<br />
1<br />
EXP<br />
EXP<br />
2<br />
3<br />
2<br />
3<br />
R<br />
ISO / WB<br />
Save<br />
F<br />
ISO / WB<br />
Save<br />
81<br />
Selecting metering method<br />
Proceed as follows with the camera in active mode:<br />
1. Press the EXP button on the viewfinder.<br />
2. Turn the rear control wheel (in either direction 2a) to successively<br />
access the three choices: Centre Weighted, Centre<br />
Spot and Spot 2b.<br />
3. Press Save (ISO / WB button) to retain the setting.<br />
Exposure method<br />
Exposure can be controlled either manually or by using one of<br />
four automatic modes. These have the following designations on<br />
the grip display:<br />
M – <strong>Manual</strong><br />
A – Aperture (priority)<br />
S – Shutter (priority)<br />
P – Program<br />
Pv – Program variable<br />
In each mode you can see both the aperture and the shutter speed<br />
information on the grip display and on the viewfinder display.<br />
In manual mode, aperture is set by the front control wheel and<br />
the shutter speed by the rear control wheel unless set otherwise<br />
in Custom Options #26<br />
In the automatic modes, the aperture and shutter speed settings are<br />
controlled by the camera, either partially or completely according<br />
to setting. Within this mode there are four choices.<br />
(Please see the Appendix for P and Pv mode charts that describe<br />
the aperture and shutter speed setting combinations).<br />
MANUAL EXPOSURE — M 1, 2, 3, 4<br />
<strong>Manual</strong> mode will provide total user control of the shutter and<br />
aperture settings.<br />
To set the <strong>Manual</strong> mode, proceed as follows with the camera in<br />
active mode:<br />
1) Press the EXP button on the viewfinder.<br />
2) Turn the front control wheel (either direction 2a) until you<br />
reach M (<strong>Manual</strong>) 2b.<br />
3) Press Save (ISO / WB button) to retain the setting.<br />
In this mode the shutter speed and aperture settings are manually<br />
chosen by turning the front and rear control wheels.<br />
The standard exposure setting is obtained when the pointer over<br />
the exposure scale is positioned above the central index (in the<br />
viewfinder display).<br />
Any deviation from this standard setting is displayed by:<br />
• the pointer appearing elsewhere than above the central index<br />
and<br />
• by figures above the scale representing the amount of<br />
adjustment in EVs.
4<br />
1<br />
EXP<br />
2<br />
3<br />
F<br />
ISO / WB<br />
Save<br />
82<br />
A ‘+ 0.7’ above the scale in the display, as in illustration 4 for example,<br />
would indicate a ‘0.7 EV overexposure’ setting. Conversely,<br />
a ‘-2’ , for example, would indicate a ‘2EV underexposure’ setting.<br />
Note that the appearance of a +/- symbol on the grip and viewfinder<br />
displays in manual mode means that a change has been made to<br />
the exposure compensation setting. See later section on ‘Exposure<br />
compensation’.<br />
The actual aperture settings and shutter speeds are indicated to the<br />
right of the exposure scale in the conventional manner. (Note: ‘fullstops’,<br />
‘half-stops’ and ‘third-stops’ are also displayed, according<br />
to setting (see ‘increment setting). For example, a setting between<br />
f/8 and f/11 will appear as f/9,5 if ‘half-stop’ is chosen).<br />
AUTOMATIC EXPOSURE — A, S, P, Pv 1, 2, 3<br />
Automatic exposure provides a choice of two ways of controlling<br />
shutter speed and aperture settings semi-automatically and two<br />
ways fully automatically:<br />
Aperture priority: A - The aperture is manually chosen by<br />
you by turning the front control wheel, and the shutter speed is<br />
automatically chosen by the camera.<br />
Shutter priority: S - The shutter speed is manually chosen by<br />
you by turning the front control wheel, and the aperture is automatically<br />
chosen by the camera.<br />
Programmed: P - In this mode, an aperture / shutter combination<br />
is chosen by the camera according to the EV measured<br />
(metering method remains as your choice), though only within<br />
pre-set appropriate limitations to suit various requirements and<br />
applications.<br />
Programmed variable: Pv - This mode is very similar to<br />
Programmed, except with the additional parameters of lens focal<br />
length being automatically taken into account. For example, long<br />
shutter speeds will automatically be avoided with a long focal<br />
length lens.<br />
To set one of the modes, proceed as follows with the camera in<br />
active mode:<br />
1) Press the EXP button on the viewfinder.<br />
2) Turn the front control wheel (either direction) until you reach<br />
the required setting.<br />
3) Press Save (ISO / WB button) to retain the setting.<br />
In Automatic mode the front control wheel selects alternative aperture<br />
/shutter combinations while maintaining the same EV and<br />
the rear control wheel alters the amount of exposure compensation.<br />
The compensation appears as a +/- symbol on the grip display and<br />
viewfinder display.<br />
Variations (chosen by using the front control wheel) from the<br />
specific combination selected by the P or Pv mode are signified by<br />
a double arrow symbol appearing between the aperture and speed<br />
settings on the grip display. These new variations, however, still<br />
provide the correct exposure.<br />
Aperture and shutter speed settings can both be changed even<br />
while the busy light on digital capture unit is flashing.
1<br />
3 4<br />
5<br />
ISO/WB<br />
R<br />
ISO/WB<br />
Save<br />
2<br />
F<br />
83<br />
ISO & White Balance button<br />
The ISO/WB button provides immediate access to ISO and<br />
White Balance settings. The front and rear control wheels are<br />
used to make the desired changes. The settings are automatically<br />
and simultaneously transferred from the camera to the<br />
digital capture unit. Please note that the changes are only displayed<br />
on the digital capture unit unit when the settings have<br />
been saved.<br />
1) Press the ISO/WB button on the grip.<br />
2) To make an ISO setting, turn the front control wheel to<br />
choose between:<br />
50, 100, 200 and 400 (39 and 50 Mpix models)<br />
100, 200, 400 and 800 (31 Mpix models)<br />
3) To make a preset White Balance setting, turn the rear control<br />
wheel to choose between:<br />
Daylight, Shade, Cloudy, Flash, Fluorescent and Tungsten<br />
4) To make a <strong>Manual</strong> White Balance setting (not a White<br />
balance test exposure), press the Man. (AF) button and<br />
then turn the rear control wheel to choose a color temperature:<br />
2000 – 10000 K<br />
5) Press SAVE (ISO/WB button) to save the setting.<br />
White Balance settings are only approximate color temperature<br />
settings. They are only used for user convenience when viewing.<br />
3F/3FR files are raw format file and therefore contain all the<br />
information required for correction in FlexColor and/or other<br />
software, regardless of the original color temperature at the<br />
time of exposure .
1 2<br />
3<br />
4<br />
5<br />
6<br />
New metered area is 1.8 EV lower than the area metered<br />
when the AE-L button was pressed.<br />
AE-L button pressed to call the metered area ‘Zone 5’.<br />
Metered area reads ‘Zone 8’.<br />
Metered area above ‘Zone 10’.<br />
84<br />
AE- L button 1, 2, 3, 4, 5, 6<br />
This button has two main functions that can be incorporated in<br />
various working methods involving exposure locking. It also has<br />
an extra function for the flash meter capability (see AE-L section<br />
under Flash). The AE-L button can:<br />
a) lock an EV setting in manual and automatic modes.<br />
b) be used as a Zone System placement button.<br />
a) When the button is pressed (fig 1), the light metering facility is<br />
locked to the EV setting at that moment. An L (= locked) symbol<br />
appears between the shutter speed and the aperture indication (fig<br />
2) on the grip display and viewfinder display to confirm the status.<br />
Press the AE-L button again to unlock (toggle function).<br />
In the locked setting, the aperture and shutter speed become<br />
interlocked. In this way, a new aperture/shutter combination that<br />
still represents the same EV, can be rapidly chosen. For example,<br />
if you set the shutter at 1/125s and the aperture at f/8 and lock<br />
them together, you can access new EV-equivalent combinations<br />
of, for example, 1/30s a f/16 or 1/500s at f/4 just by moving the<br />
front control wheel.<br />
In practice this means you could, for example, in auto mode, position<br />
the metering area (spot setting) over an area in the subject<br />
that you determine to be equivalent to a mid-grey and lock it with<br />
the AE-L button. You can then recompose the picture with the<br />
metering zone positioned over an area much brighter or darker<br />
while still retaining the original exposure setting and choose a new<br />
combination of aperture and shutter speed settings.<br />
b) The AE-L button also allows the spot metering function to make<br />
zone placements. When the AE-L button is pressed, the metered<br />
area is saved as a mid-grey (Zone 5). When the spot area is then<br />
placed over another part of the scene, the new area is then compared<br />
to the saved area and the difference can be read off the scale<br />
seen in the viewfinder. For example, in a landscape situation you<br />
could meter the foreground, lock the reading with the AE-L button<br />
(thereby locking that area to be reproduced as the equivalent to a<br />
mid-grey 18%), point the camera at some rocks to see by how much<br />
darker they are compared to the foreground by the EV difference<br />
read off the scale (illus 3).<br />
If you have chosen Spot together with Zone display (see ‘Custom<br />
options’ for settings and ‘Zone’ in the Appendix for further information<br />
about the zone system.) as well as one of the automatic<br />
modes A, S, P or Pv, point the spot marking at an area that you<br />
decide should be a Zone 5 and click the AE-L button (illus 4). The<br />
meter will now display different parts of the subject as zone values<br />
(illus 5) in the viewfinder display, instead of EV deviations, as you<br />
move the spot marking over the subject. (Included are Lo and Hi<br />
(illus 6)to signify areas beyond the range of the sensor).<br />
Alternatively you can choose to re-classify an area as another zone<br />
and then check the rest of the subject to see how other areas fall<br />
on the zone scale. Do this by following the above procedure and<br />
then turning the rear control wheel until you see the new desired<br />
zone value in the viewfinder display. You will also see the new<br />
exposure that will now produce that new zone. For example, you<br />
might have measured a rock at zone 5 but wish to make it darker.<br />
By moving the rear control wheel you could re-classify it as zone<br />
4. You will then be able to see, for example, whether white clouds<br />
are now falling within the exposure range by their new Zone<br />
classification.
1 2<br />
3<br />
5<br />
A<br />
+/-<br />
B<br />
ISO / WB<br />
Save<br />
Custom Options #3, #17<br />
and #22 used to deactivate<br />
and alter the settings<br />
for the rear control wheel/<br />
Quick Adjust facility.<br />
4<br />
6<br />
F<br />
AF<br />
Clr<br />
R<br />
85<br />
Alternatively, you can also pre-set the initial zone reading in order<br />
to save time and effort where there is no freely available ‘zone 5’<br />
subject for light measuring. For example, you might be on a sandy<br />
beach where you know that sand is normally classified as zone 6.<br />
You can pre-programme the zone placement by holding down<br />
the AE-L button while choosing the new zone value and turning<br />
the front control wheel until zone 6 appears. All new placements<br />
will then be zone 6.<br />
Exposure compensation/Quick Adjust 1, 2, 3, 4, 5<br />
The exposure compensation facility, for both manual and automatic<br />
modes can be set from -5 to +5 EV, in 1/3, 1 or 1/2 EV increments<br />
(Custom Option #3) and is visible above the scale in the viewfinder<br />
and as a ± symbol on the grip display.<br />
The quickest way to make an adjustment in auto-exposure mode<br />
is use the rear control wheel.<br />
To make a temporary compensation setting in an auto-exposure<br />
mode using the Quick Adjust facility:<br />
a) Select chosen auto exposure mode.<br />
b) Turn the rear control wheel to select the chosen amount of<br />
compensation.<br />
The amount is displayed in the viewfinder as both an EV figure<br />
complete with a ‘minus’ or ‘plus’ prefix (A in illustration 3),<br />
and as a marker above a ‘minus’ to ‘plus’ scale (B in illustration<br />
3).<br />
Default settings provide 1/3 EV compensation and an immediate<br />
clearing of the setting after capture.<br />
However, in Custom Options #3 you can select 1/3, 1 or 1/2 EV<br />
increment changes, in Custom Options #22 you can choose to<br />
retain the setting after capture and in Custom Options #17 you<br />
can deactivate the facility.<br />
To make a fixed exposure compensation setting, proceed as follows<br />
with the camera in active mode:<br />
1) Press the +/- button on the viewfinder.<br />
2) Turn either the front or rear control wheels to increase or<br />
decrease the amount of compensation in 1/3 EV steps.<br />
3) The amount is displayed in the viewfinder as both an EV figure<br />
complete with a ‘minus’ or ‘plus’ prefix (A in illustration) ,<br />
and as a marker above a ‘minus’ to ‘plus’ scale (B in illustration).<br />
4) Press Clr (AF button) to reset any compensation back to zero.<br />
5) Press Save (ISO / WB button) to retain the setting.<br />
6) A ‘±’ symbol is then displayed between the aperture and shutter<br />
speed setting as confirmation of the setting.
13<br />
General Functions<br />
<strong>Manual</strong> and autofocus modes<br />
Two drive modes<br />
Profiles<br />
This section describes the basic and general functions used<br />
in most situations.<br />
By understanding the capabilities of the H system you will be<br />
able to gain a great deal of control of how you work in the<br />
future. By taking advantage of the many features available,<br />
you might well find your normal practices changing for the<br />
better. As all features are user controllable, you tailor the way<br />
the camera works according to your preferences.<br />
Features such as the Quick adjust wheel and Profiles, for example,<br />
do not have to be used of course, but you are advised<br />
to read about them and see if they might suit your way of<br />
working.<br />
86
Power<br />
The camera can be set at two active power modes − ON or Standby − as well as OFF. In active<br />
modes, battery consumption is least in Standby mode and most in ON mode. The camera enters<br />
Standby mode to preserve battery consumption after 10 seconds (Default. Can be changed in<br />
Custom Options #1). Both the grip and the digital capture unit displays are dimmed accordingly.<br />
The digital capture unit becomes inactive after the period set in POWER DOWN (Menu > Settings<br />
> <strong>User</strong> Interface > Power Down).<br />
ON<br />
To activate the camera press the red ON.OFF button until you see the start-up H3D<br />
logo appear on the grip display. The logo is automatically followed by the main screen.<br />
The camera is now in ON mode.<br />
After a set period of inactivity (programmable in Custom Options) the camera automatically<br />
enters Standby mode, signalled by the appearance of the H3D logo again.<br />
Standby<br />
In this mode the camera is in a mainly inactive ‘standby’ mode and is ready to be immediately<br />
reactivated to the ON mode by:<br />
• pressing the shutter release button half way<br />
• pressing the Stop down button<br />
• clicking the ON.OFF button<br />
• pressing the Mirror up button.<br />
In this mode, signalled by the standby H3D II logo appearing on the grip display, the<br />
demand on the batteries is very low. It is ideal for general use where intervals between<br />
shots exceed a few seconds.<br />
Standby mode is automatically set from the ON mode after 10 seconds (default) of<br />
inactive use (programmable in Custom Options).<br />
OFF<br />
From the active screen, press (not click !) the red ON.OFF button for a half second. All<br />
buttons (except the ON.OFF button) remain ineffective, producing virtually no demand<br />
on the battery. This is the normal mode when transporting or storing the camera or<br />
where there might be a risk of inadvertently activating the camera. (However, remove the<br />
batteries if you are going to store the camera for a period of more than a few weeks).<br />
In this mode neither the viewfinder display nor grip display information is available.<br />
<strong>Manual</strong> focus<br />
There is both a <strong>Manual</strong> Focus mode setting and a <strong>Manual</strong> Override capability. <strong>Manual</strong> Focus<br />
is a specific setting that you actively make, whereas <strong>Manual</strong> Override is always available as a<br />
temporary override of an autofocus setting.<br />
In <strong>Manual</strong> Focus mode, focusing is carried out by rotating the focusing ring in the conventional<br />
manner. The focus setting remains until changed as with a conventional non-autofocus lens. This<br />
means that pressing the shutter release button will not activate a focus setting change as it does in<br />
autofocus. To change back to autofocus, you must make a new setting (by pressing the AF button<br />
and choosing AF S or AF C).<br />
With <strong>Manual</strong> Override, you can manually alter a focus setting that has been made in the autofocus<br />
mode, by rotating the lens barrel in the conventional manner and without having to change<br />
modes. As long as the shutter release button is kept at the half-press position, the new focus setting<br />
is maintained. By releasing the pressure on the shutter release button and pressing again, the autofocus<br />
function is immediately reactivated.<br />
87
1<br />
2<br />
3<br />
4<br />
F<br />
AF<br />
ISO / WB<br />
Save<br />
<strong>Manual</strong> focus mode<br />
The <strong>Manual</strong> focus mode is set by the front control wheel on the grip in the following manner:<br />
In camera active mode:<br />
1) Press the AF button on the grip.<br />
2) Turn the front control wheel to: <strong>Manual</strong><br />
3) Press Save to store the setting.<br />
You can also use the shutter release button ‘half-press’ function to save a new setting<br />
and automatically return to the main screen.<br />
Natural friction is inherent in the design to purposely reproduce the secure feel of a completely<br />
manual lens.<br />
Please note that when focusing manually, the infinity and closest distance marks on the<br />
lens scale can appear to be positioned beyond the central index. This is only an apparent<br />
effect and does not change the focusing range of the lens.<br />
Autofocus override in <strong>Manual</strong> mode<br />
See Autofocus section for a description of how to use the advantages of a rapid autofocus<br />
check while remaining in <strong>Manual</strong> mode.<br />
Autofocus<br />
Autofocus mode can be either Single Shot or Continuous and is activated by pressing the shutter<br />
release to the half-press position. Its operative range from EV1 - 19 at ISO100. The point of focus<br />
is determined according to the vertical and horizontal areas (see illus 4.) within the central rectangular<br />
zone on the focusing screen. When light levels are too low or the contrast of the subject is too<br />
low, auxiliary illumination (situated on the top of the grip) is automatically activated if desired. The<br />
operative distance is approximately six metres from the camera. Alternatively, a suitable attached<br />
flash unit that has a similar facility ( a Metz 54/70, for example) can also be used instead. This feature<br />
can be altered in settings; see under Custom options/AF assist light.<br />
The autofocus range on the HC 4/120 Macro lens can be limited by a specific setting<br />
on the camera allowing for near range, far range or full range. This only appears on<br />
the grip display together with this particular lens.<br />
Single Shot<br />
In Single Shot setting (AF S), the shutter release will be blocked until the camera finds<br />
the optimum focus setting. This ensures that no captures can be made that are not finely<br />
focused. However, this delay will normally be only a fraction of a second in good lighting<br />
conditions with a clear focusing pattern.<br />
Note though that in this mode the lens will focus at a distance and will remain focused<br />
at that distance while pressure remains on the shutter release button. In this way, you<br />
can focus on a nearby object for example, temporarily positioned within the focusing<br />
zone on the viewing screen and then without releasing pressure on the shutter release<br />
button, recompose knowing that the focus remains on the object chosen even though<br />
it is now outside the focusing zone. Releasing the pressure on the shutter release button<br />
and pressing again half way would now change the focus setting to the distance of the<br />
object within the focusing zone.<br />
See under ‘<strong>Manual</strong> override in autofocus mode’ for a useful way of working with manual<br />
and autofocus settings in a combined manner.<br />
88
1<br />
AF<br />
2<br />
3<br />
F<br />
ISO / WB<br />
Save<br />
89<br />
Continuous<br />
At Continuous setting (AF C), the shutter can be released rapidly<br />
before the lens is focused in order to capture a split-second shot<br />
(in Single Shot, a capture cannot be made until the camera has<br />
had time to focus). However, the camera will continue to focus if<br />
a moving subject is within the focusing zone or if you recompose,<br />
even though the shutter release button is half pressed.<br />
One method to exploit this feature when photographing in a rapidly<br />
changing situation such as photojournalism, for example, is<br />
to keep the shutter release button pressed down. In this way the<br />
lens focuses constantly (according to the focusing zone) and by<br />
momentarily releasing the pressure on the shutter release and then<br />
immediately pressing again, you minimize the amount of time<br />
needed for the lens to check focus, thus ensuring a split-second<br />
shot at optimum focus.<br />
Autofocus mode<br />
Autofocus is set via the control wheels in the following manner:<br />
In camera active mode:<br />
1) Press the AF button on the grip.<br />
2) Turn the front control wheel to: Single Shot or Continuous<br />
as required.<br />
3) Press Save (ISO/WB button) to store the setting.<br />
<strong>Manual</strong> override in autofocus mode<br />
<strong>Manual</strong> override is always possible in automatic focus mode without<br />
any need to make a new setting; just rotate the focusing ring<br />
in the conventional manner. As the lens barrel does not rotate in<br />
autofocus mode, you can hold the focusing ring for instant manual<br />
adjustments as you would with a conventional lens. However, to<br />
retain the new manual focus adjustments, you must maintain the<br />
pressure on the shutter release button. You can instantly return<br />
to the automatic focusing mode by releasing the pressure on the<br />
shutter release button first and then pressing the release button<br />
halfway again.<br />
The instant manual override facility produces a convenient way of<br />
working. You can take advantage of autofocus while retaining an<br />
instantly adjustable manual focus check if preferred for pin-point<br />
accuracy without making any changes in the settings.<br />
Another method for users who prefer more manual focus control<br />
while maintaining the benefits of the accuracy of autofocus is<br />
to set the camera to <strong>Manual</strong> focus and the <strong>User</strong> button to AF<br />
(Single) drive (see ‘<strong>User</strong> button function list’).<br />
Focus is then adjusted manually with the focusing ring as<br />
normal but when the <strong>User</strong> button is pressed, the autofocus<br />
facility temporarily operates in AF S mode. After the new focus<br />
adjustment has been made automatically, the camera reverts<br />
immediately to manual focus control when the <strong>User</strong> button is<br />
released. Therefore, you can recompose the picture without<br />
having to maintain pressure on the release button in order to<br />
retain the newly automatically made focus setting.
1<br />
3<br />
4<br />
5<br />
ISO / WB<br />
Save<br />
F<br />
R<br />
ISO / WB<br />
Save<br />
ISO / WB<br />
Save<br />
ISO/WB<br />
MENU<br />
2<br />
ON•OFF<br />
PROFILES/ESC<br />
To quickly reset all profiles back to<br />
the original factory settings:<br />
1. Remove battery.<br />
2. Wait 5–10 seconds.<br />
3. Replace the battery while keeping<br />
both the Menu and IS0/WB<br />
buttons pressed.<br />
90<br />
Profiles<br />
The profiles feature allows rapid access to pre-determined combinations<br />
of settings that increase the speed and security of workflow. One example<br />
might be in a social situation where there might be a need for formal<br />
outdoor portraiture followed by informal indoor handheld flash-assisted<br />
wide-angle shots, both situations requiring very different settings in a<br />
stressful environment. By predetermining the relevant settings required<br />
beforehand for each situation, they can be saved collectively as a profile.<br />
By calling up the profile, you can then be assured that all the settings are<br />
correct at the press of one button.<br />
For example, you might choose – autofocus single, bracketing, programmed<br />
exposure, etc – for outdoors. Once set, you would click on the<br />
red PROFILES button, select a profile name and press SAVE. A new<br />
name can be entered for the new profile - ‘Outdoors’, for instance - and<br />
saved again. New settings are made for the indoor shots changing to<br />
flash, Pv setting, etc and the procedure repeated. By simply accessing<br />
‘Outdoors’ or ‘Indoors’ in the profile list, all the relevant settings will be<br />
instantly and correctly implemented to match the situation.<br />
There are four profiles: Standard, Full auto, Studio and Fill flash. All<br />
except Standard can be changed and renamed.<br />
The pre-set profiles feature the following:<br />
Standard: normal flash sync, autofocus (single), single drive, autoexposure<br />
(aperture priority), average metering, user button -None<br />
Full auto: normal flash sync, autofocus (single), single drive, programmed<br />
exposure, centre weighted metering, user button -None<br />
Studio: normal flash sync, manual focus, single drive, manual exposure,<br />
spot metering. user button - AF drive<br />
Fill flash: normal flash sync (adjusted output -1.7EV), autofocus (single),<br />
single drive, autoexposure, average metering.<br />
All user profiles can be restored to default values again simply by removing<br />
the battery and holding down the MENU and ISO/WB buttons together<br />
and while keeping them depressed, replace the battery. There will<br />
be an audible signal that denotes the restoration.<br />
All settings are stored when a profile is created. This includes<br />
the ISO, white balance, color temperature and color tint settings<br />
that were current at the time the profile was created. These<br />
profile settings will override the settings in use at the time the<br />
profile button was pressed. In other words, remember to check<br />
for unintentional ISO, white balance or color temperature<br />
changes when using profiles. (Color tint is not a user setting<br />
but is stored after a manual white balance has been made).<br />
Making a profile<br />
1) Activate the camera and go through the various settings (for<br />
example, autofocus, aperture priority, fill flash exposure compensation,<br />
etc.) you require for the particular purpose and<br />
save them as you go.<br />
2) When all the required settings have been made, click (not<br />
press!) the PROFILES button (ON.OFF button) on the grip<br />
and the profile screen will appear.<br />
3) Use either the front or rear control wheel to scroll through the<br />
list of profiles. Choose a profile name (except Standard). You<br />
can either save the new settings under this name or change<br />
the name you want to change.
1 2<br />
3<br />
1 2<br />
3 4<br />
5<br />
ON•OFF<br />
PROFILES/ESC<br />
AF<br />
Load<br />
ON•OFF<br />
PROFILES/ESC<br />
AF<br />
Load<br />
ISO / WB<br />
Save<br />
F<br />
F<br />
ON•OFF<br />
R<br />
R<br />
PROFILES/ESC<br />
91<br />
4) Press Save (ISO/WB button).<br />
The Profile name screen is then displayed where you can<br />
rename the profile to what suits you (see section Image Info<br />
4.2 further on in this manual for procedure details).<br />
5) Press Save (ISO/WB button) to keep the combination of settings<br />
with the new name.<br />
To use a profile from the main screen, press the PROFILES button<br />
to reach the profiles screen again. Scroll down the list to the profile<br />
you want and then press the Load (AF) button. All the saved settings<br />
will then be automatically implemented.<br />
If you decided to change the settings but nevertheless keep<br />
the Profile name on the list, the new set of parameters will<br />
be retained under that name. That is to say, the settings will<br />
not be the same as listed here, despite the name. It might be<br />
safer practice to always change the profile name to avoid later<br />
confusion.<br />
Using profiles<br />
1) From the main screen, click PROFILES (ON.OFF button) on<br />
the grip and the profile screen will appear.<br />
2) Use either the front or rear control wheel to scroll through the<br />
list and highlight the desired profile.<br />
3) Press Load (AF button). The camera is now set according to<br />
all the parameters stored according to the name.<br />
Changing a profile name<br />
You can change a profile name (except ‘Standard’) at any time.<br />
Proceed as follows:<br />
1) From the main screen, click PROFILES (ON.OFF button) on<br />
the grip and the profile screen will appear.<br />
2) Use either the front or rear control wheel to scroll through the<br />
list and highlight the desired profile.<br />
3) Press Load (AF button).<br />
4) Click PROFILES (ON.OFF button) again.<br />
5) Press Save (ISO/WB button)<br />
6) The Profile name screen is then displayed where you can<br />
rename the profile to what suits you (see section Image Info<br />
4.2 further on in this manual for procedure details).
14<br />
Advanced Features<br />
Programmable self timer<br />
Programmable bracketing<br />
Programmable interval setting<br />
30 custom options<br />
This section describes the features that are not normally used<br />
on every occasion but can be exploited wisely to obtain the<br />
optimum from the system.<br />
The custom options are designed to work for you in the background,<br />
ensuring security and also helping to bring down<br />
the barriers between you and capturing the image. Each one<br />
can be changed to suit your preferences so that the whole<br />
camera becomes a reflection of the way you like to work.<br />
92
General overview of<br />
camera menu<br />
Self timer options Bracketing options Interval options<br />
Custom Options<br />
93<br />
MENU<br />
Settings<br />
options<br />
System<br />
status<br />
Text<br />
setting<br />
Drive
There are a number of more advanced features that while not necessarily used every day still remain<br />
immediately accessible through the menu system. They provide the integral finesses that make the<br />
H3D II a powerful and sophisticated tool to satisfy a variety of professional demands.<br />
There are five main functions:<br />
1. Self timer<br />
2. Bracketing<br />
3. Interval timer<br />
4. Settings<br />
5. Drive<br />
An important point to remember is that certain options are only available when the relevant screen<br />
has been accessed. For example, in Self Timer the choice of ‘delay/mirror up’ or ‘mirror up/ delay’ is<br />
only available (by turning the rear control wheel - lower row on display) when the relevant function<br />
has been chosen (by turning the front control wheel - upper row on display)<br />
1 Self timer<br />
The self timer allows a delay in the activation of the shutter and a change in sequence of<br />
the mirror movement. Normally the mirror is raised before the shutter is tripped creating<br />
a pause between the two actions to minimize camera vibration. However, during<br />
this pause there will be no image in the viewfinder and no light metering available for<br />
any eventual exposure change. Therefore the Self timer function can be set to a sequence<br />
where the delay is followed by the mirror being raised instead. Normally the mirror will<br />
instantly return after a capture but you can also choose a setting where the mirror remains<br />
raised. The Self Timer can be set to provide virtually vibration-free shutter release. It<br />
can be used instead of a remote release cable/cord/device when split-second timing is<br />
not critical. The camera’s exposure settings (<strong>Manual</strong> or Auto) will be according to the<br />
light metering requirements just prior to the mirror being raised so choose your method<br />
accordingly with long delays in very changeable lighting conditions.<br />
94<br />
1 Self Timer<br />
options available<br />
options available<br />
options available<br />
2 - 60 s<br />
DELAY / MIRROR UP<br />
or<br />
MIRROR UP / DELAY<br />
MIRROR GOES DOWN<br />
or<br />
MIRROR REMAINS UP
1 2<br />
MENU<br />
3 4<br />
ISO/WB<br />
Enter<br />
5 6<br />
‘Delay’ highlighted with drop<br />
shadow. 10 seconds chosen.<br />
7 8<br />
9 10<br />
11 12<br />
F<br />
Mirror down /up highlighted.<br />
‘Mirror down after capture’<br />
chosen as option.<br />
ISO/WB<br />
Save<br />
AF<br />
On<br />
R R<br />
F<br />
F<br />
Mirror sequence highlighted.<br />
‘Delay first, then mirror raised’<br />
chosen as option.<br />
AF<br />
On<br />
ISO/WB<br />
Enter<br />
95<br />
Self timer setting<br />
The Self timer function is set in the following manner:<br />
1) Press the MENU button on the grip.<br />
2) Turn the front control wheel until Self Timer appears.<br />
3) Press ENTER (ISO/WB button) on the grip.<br />
4) Turn the front control wheel to access the options, that are:<br />
Delay<br />
Mirror sequence<br />
Mirror Up / Mirror Goes Down<br />
(A drop shadow will be displayed beneath the selected symbol,<br />
for example<br />
)<br />
5) When Delay is highlighted - - turn the rear control wheel<br />
to choose a delay range from 2 - 60s in 1s intervals.<br />
6) Turn the front control wheel again to choose Delay / Mirror<br />
Up, Mirror Up/ Delay sequence - . When highlighted<br />
turn the rear control wheel to choose.<br />
Delay / Mirror Up sequence =<br />
Delay for set amount of time — mirror raised — capture<br />
made.<br />
Mirror Up/ Delay sequence =<br />
Mirror raised — delay for set amount of time — capture<br />
made.<br />
7) Turn the front control wheel again for<br />
Mirror goes down / Mirror remains up - .- choice.<br />
Turn the rear control wheel to choose.<br />
Mirror goes down =<br />
Mirror returns to its normal position and the camera is made<br />
ready for the next capture.<br />
Mirror raised =<br />
Mirror remains in raised position. No image is visible in the<br />
viewfinder until M UP button pressed.<br />
8) Press On (AF button). Note that this now reads Off and the<br />
line of text at the bottom of the screen reads ‘Self timer on’.<br />
9) Press SAVE (ISO/WB button) to save the setting.<br />
10) Press ENTER (ISO/WB button) again from the Self Timer<br />
screen to activate the function.<br />
11) Click On (AF button).<br />
12) Half-press the shutter release button to standby mode for this<br />
function (press the shutter release button again (full press)<br />
for activation) or full-press the shutter release for immediate<br />
activation.<br />
Check the lower text-row on the screen for ON or OFF status.<br />
You can halt the sequence by clicking the ON / OFF ( ESC )<br />
button.<br />
Press the Mirror Up button twice within 0.5s to access the self<br />
timer mode directly.
2 Bracketing<br />
96<br />
2 Bracketing<br />
options available<br />
options available<br />
options available<br />
2 frames<br />
or<br />
3 frames<br />
or<br />
5 frames<br />
1/3 EV<br />
or<br />
1/2 EV<br />
or<br />
1 EV<br />
The bracketing facility provides an automatic series of captures; one at the standard<br />
exposure setting (<strong>Manual</strong> or Auto) and the others with pre-determined deviations in<br />
EV from the standard exposure. This is particularly useful for images containing a very<br />
wide tonal range, for example.<br />
Firstly you make an assessment concerning the number of extra frames required, the<br />
order in which they should be taken, and by how much EV deviations there should be<br />
and the setting made accordingly. The first metered exposure (<strong>Manual</strong> or Auto) is the<br />
EV that determines the calculations for the bracketing sequence.<br />
Note the difference in operation between Single and Continuous drive settings:<br />
• In Single you must press the shutter release button separately for every separate<br />
capture until the sequence is finished.<br />
• In Continuous you can either maintain the pressure on the button to take all frames<br />
without stopping or you can release the pressure on the button and press again to continue<br />
to the end of the sequence without losing any frames within the set sequence.
1<br />
3<br />
5<br />
7<br />
MENU<br />
Number of captures highlighted.<br />
3 captures chosen as option.<br />
ISO/WB<br />
Enter<br />
A B C D<br />
Step highlighted.<br />
1/3 EV variation chosen as option.<br />
EXAMPLE EXAMPLE<br />
Screen after Bracketing setting activated<br />
indicating 3 frames remaining<br />
in a Standard, Over, Under, sequence<br />
with no adjustment to the next frame.<br />
2<br />
4<br />
6<br />
R R<br />
8<br />
R DRIVE Save<br />
9<br />
F<br />
F<br />
Sequence highlighted. ‘Standard,<br />
over, under’ chosen as option.<br />
ISO/WB<br />
ISO/WB<br />
Save<br />
Enter<br />
ON•OFF<br />
PROFILES/ESC<br />
Viewfinder display indicating no<br />
adjustment to next frame and three<br />
frames left in the sequence.<br />
97<br />
Bracketing setting<br />
The Bracketing function is set in the following manner:<br />
1) Press the MENU button.<br />
2) Turn the front control wheel until Bracketing appears<br />
3) Press Enter (ISO/WB) button on the grip<br />
4) Turn the front control wheel to access the options, that are:<br />
Number of Captures (the number of captures required in<br />
the sequence)<br />
Sequence (the sequential order of the over- or<br />
under- exposures)<br />
Step (the amount of EV variation from the standard<br />
exposure setting)<br />
(A drop shadow will be displayed beneath the selected symbol, for<br />
example )<br />
5) In turn the rear wheel to choose the number of frames<br />
required: 2, 3, 5, 7 or 9.<br />
6) In turn the rear wheel to choose one of four sequences:<br />
A: Standard, Over, Under<br />
B: Standard, Under, Over<br />
C: Over, Standard, Under<br />
D: Under, Standard, Over<br />
7) In turn the rear wheel to choose the amount of EV variation<br />
required: 1, 1/2, 1/3 EV.<br />
8) Press SAVE (ISO/WB button) to save the setting.<br />
9) Press ENTER (ISO/WB button) again from the Bracketing screen<br />
to activate the function. Press On (AF button). Note that this now<br />
reads Off and the line of text at the bottom of the screen reads<br />
‘Bracketing on’.<br />
Half-press the shutter release button to standby mode for this<br />
function (press the shutter release button again (full press) for<br />
activation) or full-press the shutter release for immediate activation.<br />
To escape from this mode press MENU, then Enter (ISO/WB<br />
button on the Bracketing screen, then Off (AF button).<br />
Check the lower text-row on the screen for ON or OFF status<br />
The default setting is a shutter speed change in a bracketing<br />
sequence. However, if the camera is set in <strong>Manual</strong> mode, you can<br />
choose an aperture change instead (Custom Options - Bracket<br />
param. in <strong>Manual</strong> - 25).<br />
See note at the beginning of this section regarding the difference<br />
between Single and Continuous drive settings. In both<br />
cases, the bracketing function is automatically reset for a new<br />
sequence.<br />
A bracketing sequence can be stopped mid-sequence by pressing<br />
the ESC (ON.OFF) button.<br />
As an example, a 5 frame sequence with an EV 1 variation setting<br />
at ‘Standard, Over, Under’ would produce: Standard (O EV<br />
variation), +1EV, -1EV, +2EV, -2EV.
1<br />
3<br />
5<br />
Number of captures highlighted.<br />
2 frames variation chosen as option.<br />
7<br />
8<br />
AF<br />
On<br />
ISO/WB<br />
Enter<br />
MENU<br />
2<br />
4<br />
ISO/WB F<br />
Enter<br />
6<br />
R R<br />
ISO/WB<br />
Save<br />
EXAMPLE<br />
F<br />
Interval duration highlighted.<br />
5 seconds variation chosen as option.<br />
Screen after Interval setting activated<br />
indicating 3 shots remaining at 30<br />
second intervals.<br />
98<br />
3 Interval<br />
3 Interval<br />
options available 2 frames −<br />
255 frames<br />
options available 1 second −<br />
1 hour<br />
By using the interval setting, you can allow the camera to take a series of<br />
captures automatically over a set period. This is often required for time<br />
and motion studies, security surveillance, nature study, etc. The exposure<br />
and focus settings (<strong>Manual</strong> or Auto) will be according to the camera settings<br />
at the time of capture.<br />
Interval setting<br />
1) Press the MENU button on the grip.<br />
2) Turn the front control wheel until Interval appears.<br />
3) Press the ISO/WB (Enter) button on the grip.<br />
4) Turn the front control wheel to access the options, that are:<br />
Number of captures<br />
(the number of captures required)<br />
Interval duration<br />
(the time interval between the captures)<br />
(The chosen symbol is indicated by a drop shadow)<br />
5) In Number of captures, turn the rear wheel to choose the<br />
number of captures required: 2 – no limit<br />
6) In Interval duration, turn the rear wheel to choose:<br />
1 second – 1 hour<br />
7) Press SAVE (ISO/WB button) to save the setting.<br />
8) Press ENTER (ISO/WB button) again from the Interval screen<br />
to activate the function. Press On (AF button). Note that this<br />
now reads Off and the line of text at the bottom of the screen<br />
reads ‘Interval on’.<br />
Half-press the shutter release button to standby mode for this<br />
function (press the shutter release button again (full press) for<br />
activation) or full-press the shutter release for immediate activation.<br />
In Custom Options #27 you can select an initial delay of None,<br />
2, 10, 60 seconds or the interval time.<br />
Check the lower text-row on the screen for ON or OFF status.<br />
An Interval setting can be stopped mid-sequence by pressing<br />
the ESC button.
1 2<br />
MENU<br />
3 4<br />
ISO/WB<br />
Enter<br />
5 6<br />
ISO/WB<br />
Enter<br />
7 8<br />
R<br />
4 Settings / 4.1 Custom Options<br />
F<br />
F<br />
F<br />
ISO/WB<br />
Save<br />
99<br />
4 Settings<br />
options available<br />
CUSTOM OPTIONS<br />
From the Settings screen you can access three main sub-settings:<br />
Custom options, Image Info and System status by turning the<br />
front control wheel. From each of these three sub-settings you can access<br />
further screens. Custom options has 30 screens, Image info has two<br />
more screens each with more choices and System status has two more<br />
screens. Look at the main menu chart to get an idea of where all the options<br />
are on the menu tree<br />
4.1 Custom options<br />
1) Press the MENU button on the grip.<br />
2) Turn the front control wheel until Settings appears.<br />
3) Press the ISO/WB (Enter) button on the grip.<br />
4) Turn the front control wheel to access 4.1 Custom options.<br />
5) Press the ISO/WB (Enter) button to access the more than 25<br />
choices available.<br />
6) Turn the front control wheel to the desired Option.<br />
7) Turn the rear control wheel to the desired Setting.<br />
8) Press Save<br />
As a shortcut to the Custom Option level, press MENU and then<br />
the USER button. After making any changes, press the shutter<br />
release button to save the new setting.<br />
In the following list, the options marked in red are the default settings. So,<br />
in the case of the <strong>User</strong> button, for example, as None is the default there<br />
will be no reaction from the camera until you make a specific choice and<br />
save it.<br />
If you want to reset the camera to the default setting for all options, press<br />
the ON.OFF button quickly to enter Profiles, select Standard and then<br />
press Load.
4.1 Custom options<br />
The following is a description of all 30 Custom Options. They are<br />
accessed by Menu > Settings > Custom Options. The words and<br />
figures in red signify the default setting for that option.<br />
Standby timeout 1<br />
• 10s • 5s • 15s • 30s<br />
Determines the amount of time the camera<br />
remains active before it automatically<br />
reverts to standby mode (indicated<br />
on the grip display by the H3D II logo).<br />
Minimises battery consumption.<br />
EV increment 2<br />
• 1/2 Step • 1 Step • 1/3 Step<br />
Determines the amount of EV change<br />
applied (per click of either the front or<br />
rear control wheels) to either aperture<br />
or shutter speed.<br />
Exp adjust increment 3<br />
• 1/3 Step • 1 Step • 1/2 Step<br />
Determines the amount of EV change applied<br />
(per click of the rear control wheels)<br />
when making fixed exposure adjustment<br />
settings.<br />
<strong>User</strong> button function 4<br />
• None •<br />
Standby • Stop Down• Flash Measure •<br />
Interval timer • Self Timer • Bracketing<br />
• AF drive • Mirror up • B mode • T mode<br />
• Histogram • Grey balance exposure<br />
• Cycle LM mode • Delete last image •<br />
Digital focus check • IAA toggle • Expose<br />
• AE-lock<br />
Sets which function will be immediately<br />
activated when the <strong>User</strong> button is pressed<br />
(you cannot alter the setting in this mode<br />
though, only use it). The button has a toggle<br />
function so that by pressing it again<br />
the new setting will be de-activated.<br />
AE-Lock button function 5<br />
• AE-lock<br />
but can be reassigned to:<br />
Self Timer • Bracketing • AF drive • Mirror<br />
up • B mode • T mode • Histogram • Grey<br />
balance exposure • Cycle LM mode •<br />
100<br />
Delete last image • Digital focus check<br />
• IAA toggle • Expose • AE-lock • None •<br />
Standby • Stop Down• Flash Measure •<br />
Interval timer<br />
Stop down button function 6<br />
• Stop Down<br />
but can be reassigned to:<br />
• Flash Measure • Interval timer • Self<br />
Timer • Bracketing • AF drive • Mirror<br />
up • B mode • T mode • Histogram • Grey<br />
balance exposure • Cycle LM mode •<br />
Delete last image • Digital focus check<br />
• IAA toggle • Expose • AE-lock • None •<br />
Standby<br />
M.UP button function 7<br />
• Mirror up<br />
but can be reassigned to:<br />
• B mode • T mode • Histogram • Grey<br />
balance exposure • Cycle LM mode •<br />
Delete last image • Digital focus check<br />
• IAA toggle • Expose • AE-lock • None •<br />
Standby • Stop Down• Flash Measure •<br />
Interval timer • Multiple exposure • Self<br />
Timer • Bracketing • AF drive<br />
Control wheel direction 8<br />
• Clockwise • Counter clockwise<br />
Determines the effect the direction of the<br />
controls wheels have on a setting.<br />
For example, by moving the front control<br />
wheel to the left you can alter the aperture<br />
setting from f/8 to f/6.8 to f/5.6 and so on.<br />
By changing the wheel direction setting<br />
however, the same action of turning the<br />
wheel to the left would then produce the<br />
opposite effect, that is, the aperture settings<br />
would change from f/ 8 to f/ 9.5 to<br />
f/ 11, and so on.<br />
Flash ready exposure lock 9<br />
• Yes • No<br />
Allows you to make a capture before the<br />
flash is fully charged. For use with integral<br />
flash unit or other TTL compatible<br />
flash units connected to the hot-shoe.<br />
Not valid for flash units connected by<br />
the PC connector.<br />
Yes blocks the shutter until flash is<br />
ready.<br />
No allows shutter release before flash is<br />
ready.
Magazine exposure lock 10<br />
• No • Yes<br />
Allows you to release the lens and auxilliary<br />
shutter in camera body without a<br />
digital capture unit attached.<br />
Yes blocks the lens shutter and auxilliary<br />
shutter in camera body if the digital<br />
capture unit is not attached. Generates<br />
message on grip display if attempted.<br />
No allows the lens shutter and auxilliary<br />
shutter in camera body to be released without<br />
the digital capture unit attached.<br />
Lens exposure lock 11<br />
• Yes • No<br />
Allows you to release the auxilliary shutter<br />
in camera body without a lens attached.<br />
Yes blocks the release of auxilliary shutter<br />
in camera body if there is no lens attached.<br />
Generates message on grip display if attempted.<br />
No allows a release of auxilliary shutter in<br />
camera body without a lens attached.<br />
Out of range exposure lock 12<br />
• No • Yes<br />
Allows you to release the camera when either<br />
the aperture or shutter speed setting<br />
is beyond the working range (indicated<br />
on the displays by “—”).<br />
Yes blocks the shutter if beyond the working<br />
range.<br />
No allows the shutter to be released (1/800s<br />
or 32s) if beyond the working range.<br />
True exposure 13<br />
• On • Off<br />
Determines whether the exposure is<br />
automatically adjusted to create a true exposure<br />
setting. (See Appendix, Glossary<br />
of Terms for full explanation).<br />
On allows the adjustment.<br />
Off retains the normal setting.<br />
If using flash/strobe as the main light<br />
source and 1/800s shutter speed, remember<br />
to turn off the True Exposure<br />
option.<br />
101<br />
Spot mode 14<br />
• Normal • Zone<br />
Determines how the camera behaves<br />
when set to Spot Mode.<br />
Normal makes the camera behave in the<br />
same fashion as when set to Average or<br />
Centre Weighted.<br />
Zone makes the camera behave in the<br />
same fashion as the Hasselblad 205FCC.<br />
That is, the central spot is placed over<br />
a particular area of the subject and the<br />
AE-L button is pressed. The exposure is<br />
then calculated assuming that the metered<br />
area is 18% grey or Zone 5 and is indicated<br />
on the display as Zone 5 (see Appendix<br />
/ Glossary of Terms). Alternatively, the<br />
area can be reassigned to another zone<br />
by turning the rear control wheel.<br />
Then, when the camera is moved, the areas<br />
within the central spot are indicated by<br />
their zone values.<br />
Focus aid in MF 15<br />
• Half press • Always • Off<br />
Sets how the focus aid arrowhead LED<br />
symbols appear in the viewfinder display<br />
in manual focus mode.<br />
Half press makes them visible when<br />
the shutter release button is pressed half<br />
way.<br />
Always makes them visible all of the time<br />
when camera is active.<br />
Off disables them completely.<br />
AF assist light 16<br />
• Ext flash • Camera • Off<br />
Allows projection of light pattern to assist<br />
the autofocus system in poor light or low<br />
contrast situations.<br />
Camera sets the integral AF assist illumination<br />
to be always active.<br />
External flash activates the AF assist<br />
illumination projected by a suitable attached<br />
external flash unit. When detached,<br />
however, the integral system is<br />
automatically used.<br />
Off sets the AF assist illumination to remain<br />
always inactive.<br />
Rear wheel quick adjust 17<br />
• Yes • No<br />
Allows rear control wheel to make a rapid<br />
EV adjustment (or EV compensation) in<br />
auto-exposure mode.
Yes turns the setting on. By turning the<br />
rear control wheel, the adjustment is made<br />
and appears on both displays as a ± symbol<br />
between the shutter speed and aperture<br />
values. The amount of deviation also appears<br />
above the scale to the left of the aperture<br />
value on the viewfinder display.<br />
No turns the function off completely.<br />
Control lock 18<br />
• All controls • Wheels • Off<br />
Sets the amount of locking used when the<br />
Control Lock button is pressed.<br />
All controls locks control wheels and buttons.<br />
Wheels locks only control wheels. They remain<br />
operable in any setting mode, however.<br />
Off disables lock function.<br />
Beeper 19<br />
• On • Off<br />
Sets the audible beeper signal.<br />
On enables the signal.<br />
Off disables the signal.<br />
Show histogram 20<br />
• Yes • No<br />
Sets whether a histogram of a capture<br />
appears on the display after exposure.<br />
Yes enables the setting.<br />
No disables the setting.<br />
Interval & Self Timer 21<br />
• Exit • Stay<br />
Allows either the Interval or Self Timer<br />
mode to remain active after a capture or<br />
immediately return to standard setting.<br />
Exit clears the setting and produces an<br />
automatic return to standard setting after<br />
a capture.<br />
Stay retains the setting after a capture.<br />
102<br />
AE lock / Quick adjust 22<br />
• Exp reset • Saved<br />
Allows either the AE-Lock or Quick<br />
adjust mode to remain active after a capture<br />
or immediately return to standard<br />
setting.<br />
Exp Reset clears the settings and produces<br />
an automatic return to standard setting<br />
after a capture.<br />
Saved retains the AE-Lock or Quick adjust<br />
settings after a capture.<br />
Show EV 23<br />
• Yes • No<br />
Allows the display of EV settings on the<br />
grip display.<br />
Yes enables the display.<br />
No disables the display.<br />
Show ISO 24<br />
• Yes • No<br />
Allows the display of ISO settings on the<br />
grip display<br />
Yes enables the display.<br />
No disables the display.<br />
Bracket param. in <strong>Manual</strong> 25<br />
• Shutter speed • Aperture<br />
Selects either the shutter speed or the<br />
aperture as the parameter which changes<br />
in a bracketing sequence when in <strong>Manual</strong><br />
exposure mode.<br />
Shutter speed selects changes in shutter<br />
speed.<br />
Aperture selects changes in aperture<br />
settings.<br />
Aperture control in <strong>Manual</strong> 26<br />
• Front wheel • Rear wheel<br />
Selects which control wheel changes<br />
the aperture setting when in <strong>Manual</strong><br />
exposure mode.<br />
Front wheel selects the front control<br />
wheel to change the aperture setting.<br />
Rear wheel selects the rear control wheel<br />
to change the aperture setting.
Low flash warning 27<br />
• On • Off<br />
Controls the display of the ‘Low flash’<br />
warning message and triangle.<br />
ON enables the function.<br />
OFF disables the function.<br />
Interval timer initial delay 28<br />
• None • 2s •10s • 60s • Interval time<br />
Allows an initial delay before the first<br />
capture of an interval timer function<br />
operation.<br />
103<br />
Aperture indication 29<br />
• Normal • Light meter<br />
Allows choice of aperture indication<br />
display (in <strong>Manual</strong> mode only).<br />
Normal selects conventional display (f5.6,<br />
f8, etc)<br />
Light meter selects ‘light meter’ type<br />
display (f5.6⁰, f8.⁵, etc)<br />
Extra mirror-delay 30<br />
50 ms • 100 ms • 200 ms • None • 25 ms<br />
Extends the delay period between the<br />
mirror being raised and the opening<br />
of the lens shutter thereby reducing the<br />
negative effect of vibration on longer<br />
exposure times.<br />
• The USER, AE-L, STOP DOWN and M.UP buttons can all be reassigned to different functions. The USER button has no<br />
function until specifically assigned one (default is ‘None’). The AE-L, STOP DOWN and M.UP buttons, however, by default<br />
are assigned the function appropriate to the name, until assigned otherwise.<br />
None<br />
The user button has no function.<br />
Standby<br />
Sets the camera in standby mode to save battery consumption.<br />
Stop down<br />
Stops the lens down.<br />
Flash Measure<br />
Initiates flash measure function.<br />
Interval timer<br />
Initiates interval timer function.<br />
Self timer<br />
Initiates self timer function.<br />
Bracketing<br />
Initiates bracketing function.<br />
AF Drive<br />
Activates the AF system in any focusing mode. When the<br />
button is pressed the AF system sets the correct focusing point<br />
automatically. This is a rapid, accurate and handy way of<br />
using the AF system when the camera is set to manual focus<br />
mode. In this manner you take advantage of the accuracy<br />
and certainty of the autofocus system while retaining the<br />
control inherent in manual focusing mode.<br />
Mirror up<br />
Controls the mirror up or down function (same function<br />
as the M-UP button).<br />
A quick way to program the customizable buttons<br />
(and to access the Custom Option level in general) is<br />
to use the short-cut as follows:<br />
B mode<br />
Sets the camera to B exposure mode.<br />
T mode<br />
Sets the camera to T exposure mode.<br />
Histogram<br />
Recalls the last shown histogram on the grip LCD.<br />
Grey balance exp.<br />
Initiates a grey balance exposure using the marker frame<br />
to select the desired tone.<br />
Cycle LM mode<br />
Changes the light-metering method in a loop manner: Centre<br />
Weighted/CentreSpot/Spot.<br />
Delete last image<br />
Activate the delete function for the last image in a digital<br />
back.<br />
(to be implemented at a later stage)<br />
Dig. foc check<br />
Displays last exposure taken at 100% scale on digital backs<br />
with LCD.<br />
IAA toggle<br />
Allows IAA rating change of last capture.<br />
Expose<br />
Acts as alternative shutter release button.<br />
AE-lock<br />
Activates AE lock function.<br />
1) Press the MENU button.<br />
2) Then press the chosen button to customize.<br />
This directly accesses the “Custom options” level in the<br />
menu where you can access the desired option for a setting<br />
change.
1<br />
3<br />
5<br />
7<br />
MENU<br />
2<br />
4<br />
ISO/WB F<br />
Enter<br />
ISO/WB<br />
Enter<br />
ISO/WB<br />
Enter<br />
6<br />
F<br />
104<br />
4.2 Image Info<br />
4.2 Image Info<br />
In Image info you can compose your own combination of letters, words,<br />
symbols, etc to be included in the metadata. The same procedure is also<br />
used to change a Profile name.<br />
Text setting<br />
1) Press the MENU button on the grip.<br />
2) Turn the front control wheel until Settings appears.<br />
3) Press Enter (ISO/WB button) on the grip.<br />
4) Turn the front control wheel to access 4.2 Image info.<br />
5) Press Enter (ISO/WB button) to access the list of characters<br />
and figures available.<br />
6) By turning the front control wheel, the character selector cursor<br />
will will move to the left and right in the available characters<br />
while the rear control wheel moves it up and down.<br />
The chart of characters will automatically scroll to reveal the<br />
whole set. The space character is top left in the list.<br />
On the left side of the screen there is a small box frame containing<br />
two arrow symbols and an X symbol. By selecting the<br />
arrows you can position the cursor in the line of text you have<br />
created. The X symbol deletes the selected character.<br />
To create a line of text, select the desired character and press<br />
then Sel (AF button). That character is then automatically<br />
added to the line of text below the character chart. Press<br />
Save (ISO/WB button) to store the new setting.
1 2<br />
3 4<br />
5 6<br />
7<br />
8<br />
105<br />
Changing text - an example<br />
Here is an example of how to change existing text (in this case the word<br />
‘Text’ to a copyright symbol plus a photographer’s name -’Jens Karlsson’).<br />
See previous section ‘4.2 Image info' for procedure description.<br />
1) Start by accessing the Image info screen. On the text row<br />
towards the bottom of the screen, the text line cursor is automatically<br />
placed to the right of the character that is to be<br />
changed. Turn the front and rear control wheels to move the<br />
selector cursor until the X symbol is highlighted.<br />
2) Press Sel. (AF button) and the character will be erased.<br />
3) Repeated pressing of Sel. will progressively erase all the characters<br />
in the line.<br />
4) After erasing unwanted text, turn the front and rear control<br />
wheels until the desired character is highlighted by the selector<br />
cursor (in this case the copyright symbol) and press Save.<br />
Note that more symbols have automatically appeared as you<br />
scrolled down the screen.<br />
5) Choose the next character in the same manner (in this case a<br />
space) and press Save.<br />
6) The capital letter ‘J’ has been highlighted and saved in this<br />
example.<br />
7) Repeat the procedure until all the letters and characters you<br />
want appear. As you progress with more characters, those to<br />
the left will temporarily disappear from the screen so that you<br />
can see what you are adding. Don’t forget there is a maximum<br />
of approximately 40 characters.<br />
If you make a mistake you must remove each character singly<br />
(see steps 1-3 above) until you reach where you want to make<br />
a change and then return to the ‘Adding text’ procedure<br />
again.<br />
8) This example shows a completed 15 character text line with<br />
symbols, spaces, upper and lower case (large and small)<br />
letters.<br />
4.3 Date & Time<br />
Date and time is set on the digital capture unit:<br />
Menu > Settings > <strong>User</strong> Interface > Date & Time
1<br />
3<br />
5<br />
7<br />
MENU<br />
2<br />
4<br />
ISO/WB F<br />
Enter<br />
ISO/WB<br />
Enter<br />
ISO/WB<br />
Enter<br />
6<br />
F<br />
106<br />
4.4 System status<br />
4.4 System status<br />
Check component usage and general servicing information as follows:<br />
1) Press the MENU button on the grip.<br />
2) Turn the front control wheel until Settings appears.<br />
3) Press the Enter (ISO/WB button) on the grip.<br />
4) Turn the front control wheel to access System Status.<br />
5) Press the Enter (ISO/WB button).<br />
6) The display now shows a list of camera components Info-<br />
Usage and to the right of each individual component a figure<br />
that represents the number of actions taken by that component.<br />
Please note that even a completely new camera will<br />
have registered actions as these occur during testing before<br />
delivery.<br />
7) Press the Next (ISO/WB) button to display Info-Version<br />
to display the software version for each item. Press the Next<br />
(ISO/WB) button again to display Info-Calib for focus calibration<br />
information.
1<br />
3<br />
5<br />
MENU<br />
ISO / WB<br />
Enter<br />
ISO / WB<br />
Save<br />
2<br />
4<br />
F<br />
F<br />
107<br />
Drive<br />
There are two drive modes: Single and Continuous.<br />
Single and Continuous<br />
5 Drive<br />
In Single mode, a capture is made when the shutter release button<br />
is pressed and the camera is made ready for the next capture. To<br />
make the next capture however, you must first release the shutter<br />
release button and then press again.<br />
In Continuous mode, the camera automatically makes captures<br />
and makes ready for the next capture in a continuous manner as<br />
long as you maintain pressure on the shutter release. Please note<br />
the speed is dependent on the time taken to save the capture according<br />
to equipment.<br />
In camera active mode:<br />
1) Press the MENU button on the grip.<br />
2) Turn the front control wheel to Drive<br />
3) Press Enter (ISO/WB button).<br />
4) Turn the front control wheel to Single or Continuous<br />
5) Press Save to store the setting.
15<br />
Flash<br />
Sync at all shutter speeds to 1/800s<br />
Integral fill-flash<br />
SCA 3002 compatible<br />
Flash measure capability<br />
Rear sync capability<br />
The H system meets professional demands for a variety of<br />
situations where flash is required.<br />
It includes an integral flash primarily intended for fill-flash<br />
use but strong enough for simple close work.<br />
Combined with an adapter and a portable unit, H cameras<br />
can exploit the automatic features offered by Metz and other<br />
top names in the field for powerful and reliable solutions<br />
When in the studio, the H system is capable of providing flash<br />
metering for maximum control and security.<br />
108
The H3D can be used together with most flash units in manual mode. However, to make use of a<br />
TTL automatic function, you must ensure the flash unit is compatible with the SCA 3002 system.<br />
Connection is either by the PC socket or by the hot shoe (see warning note below).<br />
The viewfinder houses an integral fill-flash with a guide number of 12 and features OTF/TTL flash<br />
control. This unit is capable of providing enough illumination for many fill flash functions outdoors<br />
as well as simple indoor shots at shorter distances.<br />
Flash output can be adjusted separately from ambient exposure for optimum control.<br />
Separate flash units can be used in dedicated mode when connected to the hot shoe if the unit is<br />
compatible with the SCA3002 (Metz) system using a Hasselblad SCA3902 adapter. This provides a<br />
cable free link up for information transfer.<br />
Flash synchronisation can be set to normal or rear (the beginning or end of a capture).<br />
Please see the relevant user manuals for information regarding separate flash units.<br />
As with all strobe/studio flash use, very particular attention should be taken to ensure<br />
correct connections and general handling practice. Potential dangers might increase<br />
when cameras are also connected to electronic peripherals (digital backs, computers,<br />
lighting units, etc) and should diminish when IR and similar wireless flash release<br />
devices are used.<br />
Victor Hasselblad AB and Hasselblad A/S can accept no responsibility whatsoever for<br />
accidents that might occur or damage caused when Hasselblad equipment is used in<br />
combination with third-party units of any description.<br />
Do not attempt to connect a flash unit dedicated for use with another camera brand<br />
via the hot shoe. The flash unit and / or camera could be damaged.<br />
General<br />
When using the A or S setting together with flash, the exposure requirements of the camera<br />
will dominate which might produce slow shutter speeds indoors, for example, requiring<br />
the use of a tripod. If, on the other hand, you select P or Pv instead, then a shutter speed<br />
of 1/60 or faster is automatically chosen by the camera enabling you to hand hold.<br />
When using flash close up or when using larger aperture settings, remember that the<br />
flash unit’s output has a specific minimum duration which might still be too great for<br />
correct exposure. Read the unit’s output specifications for further information regarding<br />
any potential restrictions.<br />
You can use the flash metering capability with external flash units of all kinds (TTL<br />
flashes must be set to <strong>Manual</strong> mode).<br />
Rear sync is a useful feature used either for effect or to produce a more ‘natural’ look<br />
when combining long exposures involving light trails and flash.<br />
When using suitable dedicated units (compatible with SCA3002), adjustments are made<br />
automatically and governed by the settings on the camera. This applies to whether the<br />
flash unit is set to TTL or whether it is set to its own integral metering system (A).<br />
Control of either the integral flash unit or separate SCA3002 compatible flash unit regarding<br />
the two functions, exposure compensation and shutter sync, is via the grip. The<br />
flash measure function can be used for flash units that are not SCA 3002 compatible or<br />
for SCA 3002 compatible units at manual setting.<br />
Only flash units specially adapted for use with the H3D should be connected to the hot<br />
shoe on the camera.<br />
If using flash/strobe as the main light source and 1/800s shutter speed, remember to<br />
turn off the True Exposure facility (Custom Option #13).<br />
To change the balance between flash output and camera exposure requirements to<br />
produce a variety of effects, use the exposure compensation function. For various long<br />
exposure effects use the sync function. To make flash exposure tests use the flash measure<br />
function.<br />
109
1<br />
FLASH<br />
3 4<br />
5<br />
5<br />
R<br />
1 2<br />
3 4<br />
F<br />
R<br />
Red warning triangle and green LED flash<br />
symbol to left of viewfinder LCD display.<br />
2<br />
AF<br />
Clr<br />
F<br />
Example of viewfinder display showing<br />
Flash set to Rear sync as well as<br />
´- 1EV´ exposure compensation.<br />
FLASH<br />
ISO/WB<br />
Save<br />
110<br />
To access the controls:<br />
1) Activate the camera and press the FLASH button once.<br />
2) Turn the front control wheel to set the amount of compensation<br />
required:<br />
• from +3EV through -3EV<br />
• press Clr (AF button) to clear the setting quickly if required.<br />
3) Turn the rear control wheel to set:<br />
• normal sync (flash triggered just after the shutter opens)<br />
• rear sync (flash triggered just before the shutter closes)<br />
• flash measure (with non-TTL flash units or TTL units in<br />
<strong>Manual</strong> mode)<br />
4) The grip display shows the flash mode - Normal or Rear - in<br />
the standard display.<br />
5) When set to Flash Measure, a specific screen requests you to<br />
press the AE-L button in order to make a reading. See below<br />
for details.<br />
Integral flash<br />
The integral flash unit features the following specifications:<br />
Guide no. 12<br />
Coverage 56º horizontal, 44º vertical<br />
Maximum light fall-off at side centres - 1EV (50%)<br />
Colour temperature (full flash) 5,000 – 5,600º K<br />
To raise the flash unit into its operative position, slide the flash-unit<br />
catch backwards in the direction of the flash symbol. To return<br />
the flash unit into its closed position, push down on the top of the<br />
unit until it clicks back into place. The flash unit is automatically<br />
activated when it is in the operative position and de-activated when<br />
returned to its stored position.<br />
The green LED flash symbol blinks in the viewfinder when the<br />
flash unit is charging and remains stationary when fully charged.<br />
The flash output can also be adjusted for optimum light balance<br />
in fill-flash situations.<br />
Do not use the integral flash together when another external<br />
TTL flash unit is connected (and used in TTL or A mode)<br />
For full coverage with the integral flash, use 80 mm or longer<br />
lenses (without a lens shade).<br />
Using the integral flash:<br />
1) Slide the flash-unit catch backwards in the direction of the<br />
flash symbol.<br />
2) Press the FLASH button.<br />
3) Choose between Normal or Rear sync by turning the rear<br />
control wheel and the amount of compensation (if required)<br />
by turning the front control wheel.<br />
4) Press Save (ISO/WB ) button. Make an exposure.
1 2<br />
FLASH<br />
3 4<br />
ISO/WB<br />
Save<br />
5 6<br />
AE-LL<br />
R<br />
F<br />
111<br />
5) If the settings were incorrect to match the output of the flash<br />
unit, the viewfinder display shows a red triangle alongside a<br />
flashing green ‘flash’ symbol plus a warning message - ‘Low<br />
flash’. The grip display will also show a warning message -<br />
‘Low flash’.<br />
Conventional measures should then be taken to correct the<br />
situation. (That is: move closer to the main subject, use a<br />
larger aperture setting or use a higher ISO setting).<br />
The ‘Low Flash’ warning can be turned off in Custom Option<br />
#26 if preferred.<br />
Separate flash unit connection and use<br />
Separate flash units can be electrically connected either by way of<br />
the hot shoe accessory holder (see previous warnings) on the top<br />
of the viewfinder or via a cord to the PC connection port on the<br />
left hand side of the camera body. Slave unit switches/ transmitters<br />
can also be connected similarly dependant on unit (see specific<br />
user manuals for details).<br />
Keep the plastic safety cover in place in the hot shoe when not<br />
in use.<br />
Flash measure of separate flash unit<br />
You can measure the effect of an attached flash unit (with PC connected<br />
flash units and SCA3902 compatible flash units set to M<br />
mode), where the camera acts much as a flash meter would. The<br />
aperture setting can be adjusted and more trial exposures made<br />
until the information on the grip display is satisfactory.<br />
To use flash measure:<br />
1) Press the FLASH button on the grip to access the flash option<br />
screen.<br />
2) Turn the rear control wheel until Flash measure appears.<br />
3) Press Save (ISO/WB button) to access the flash exposure<br />
screen.<br />
4) Make preliminary required aperture setting by turning the<br />
front control wheel.<br />
5) Press the AE-L button. The camera will close the aperture,<br />
raise the mirror and fire the flash. Light reflected from the<br />
flash lit subject will be reflected off a white spot on the auxiliary<br />
shutter to the meter sensor.<br />
6) Deviations from a normal exposure are displayed as differences<br />
in EV on the grip display and the viewfinder display. If<br />
‘high’ or ‘low’ appears, change the aperture accordingly and<br />
make a new test reading.<br />
Change the aperture until Diff EV: 0 appears, or the desired<br />
amount of deviation from the normal exposure.<br />
Diff EV: Low signifies more than 2 EV under<br />
Diff EV: High signifies more than 2 EV over
16<br />
Multi Shot<br />
112<br />
Multi-shot<br />
The H3D II multi-shot capability is available with the H3D II-39MS<br />
product. Multi-shot provides a capture mode where four separate<br />
images are saved that are captures of the same object with the<br />
sensor offset by one pixel between the shots. The resulting image<br />
shows ultimate color definition and eliminates unwanted moiré<br />
and artefacts in studio type stills photography.<br />
To make a multi-shot capture, you must work tethered to the<br />
computer and have the Hasselblad software FlexColor or Phocus<br />
running. From the capture menu simply choose the capture type<br />
“multi-shot”. Multi-shot images are saved as 3F raw files directly<br />
into the capture destination folder of FlexColor or Phocus. Please<br />
see the FlexColor/Phocus user manuals for full intructions.<br />
The technology behind the multi-shot is high precision piezo controlled<br />
movements of the sensor in pixel sized increments. Four<br />
separate shots are taken in succession (one for each color, but with<br />
green captured twice for extra sharpness) that are then combined<br />
into a single, high-resolution image. Images taken in multi-shot<br />
mode will be sharper and contain more detail than single-shot<br />
images. Multi-shot images will also stand up to greater enlargement<br />
later in production.<br />
In use, it is essential to ensure that there is no movement in either<br />
the camera or the subject. Because of this, these methods are<br />
only suitable for tripod/camera stand use for studio-like environments,<br />
technical shots, product shots, architectural subjects and<br />
similar.
17<br />
Front view<br />
Rear view<br />
TILT and shIfT adapTer<br />
HTS 1.5<br />
(75020359)<br />
The HTS 1.5 is a shift and tilt adapter<br />
designed for the HCD28mm, HC35mm,<br />
HC50mm, HC80mm and the HC100mm<br />
lenses. It not only solves technical challenges<br />
but also provides exciting opportunities<br />
for creative solutions as well.<br />
HVM waist level viewfinder<br />
(3053328)<br />
The HVM waist level viewfinder allows<br />
a comfortable lower viewing angle either<br />
for effect or where eye contact with the<br />
subject is desirable in portrait photography,<br />
for example. Autofocus function<br />
of all lenses fully retained. Optimized<br />
for horizontal format shooting and not<br />
suitable for vertical format use.<br />
www.hasselblad.com<br />
Optional Accessories<br />
HTS 1.5<br />
HVM waist level viewfinder<br />
Proshade V/H 60 – 95<br />
GIL<br />
Tripod quick coupling<br />
Flash adapter<br />
Proshade V/H 60 – 95<br />
(3040740)<br />
An adjustable bellows lens shade that provides<br />
highly efficient protection against<br />
stray light. Its compact, flat folding design<br />
saves space in the equipment case. With<br />
adapters fits all HC lenses and virtually<br />
all V system lenses. Also features a<br />
filter holder for glass, gelatin, or plastic<br />
filters.<br />
113<br />
Filters<br />
Support strap H<br />
Camera strap H<br />
Focusing screens<br />
Release cord<br />
Lens accessories<br />
Optional accessories provide the opportunity to extend the capabilities<br />
of your system or just to add extra convenience to suit your way<br />
of working.<br />
(The figures in brackets after the headings are the product codes.)<br />
Proshade adapters<br />
(3043415, 3043417, 3043419)<br />
67 mm, 77 mm and 95 mm adapters with<br />
bayonet mount for HC lenses. Features<br />
lock to provide positive and secure<br />
attachment.<br />
Tripod quick coupling H<br />
(3043326)<br />
Mounted on a tripod, this accessory facilitates<br />
rapid attachment and removal<br />
of the camera. The camera is firmly held<br />
in an exact and repeatable position. Two<br />
integrated spirit levels make horizontal<br />
positioning of the camera easy. The<br />
Tripod quick-coupling H fits 1/4” and 3/8”<br />
tripod threads and has a safety catch.<br />
GIL (Global Image Locator)<br />
(3053300)<br />
The Hasselblad GIL (3053300 ) provides<br />
automatic creation and storage of GPS<br />
information for all H-system digital cameras.<br />
The data is tagged to each individual<br />
image file and can be read directly by<br />
Phocus. The unit requires no extra external<br />
battery or power source and works<br />
seamlessly in the background for ease<br />
of use.
HC lens accesories<br />
Flash adapter SCA 3902<br />
(3053393)<br />
For connecting flashes compatible with<br />
the SCA 3002 system to the Hasselblad<br />
H3D II.<br />
UV-sky filters<br />
(3053470, 3053474 and 3053478)<br />
Absorbs UV radiation and reduces blue<br />
haze without affecting colours. Also protects<br />
the front lens surface. Particularly<br />
recommended when the camera is used<br />
in harsh conditions. Available in three<br />
sizes to suit various lenses: UV-sky 67<br />
mm (3053470), UV-sky 77 mm (3053474)<br />
and UV-sky 95 mm (3053478).<br />
Pola filters<br />
(3053482, 3053486 and 3053490)<br />
Reduces non-specular reflections and<br />
glare. Increases colour saturation in general.<br />
Can intensify a blue sky. Available<br />
in three sizes.<br />
Support strap H<br />
(3053623)<br />
Improves comfort and security with<br />
hand-held photography.<br />
Camera strap H<br />
(3053616)<br />
Extra wide camera strap with anti-slip<br />
backing.<br />
Release cord H<br />
(3043370)<br />
Remote release cord with a cable length<br />
of 0.5 m.<br />
Converter H 1.7X<br />
(3023717)<br />
The Converter attaches between the lens<br />
and the body to increase the focal length<br />
by a factor of 1.7. This provides a convenient<br />
way to expand your range of lenses.<br />
The Converter H 1.7 X features the same<br />
outstanding optical and mechanical<br />
quality as all the lenses in the Hasselblad<br />
H system. The optical design consists of<br />
6 elements in 4 groups.<br />
H 13, 26 and 52 Extension tubes<br />
(3053513, 3053526 and 3053542)<br />
The Extension tubes attach between the<br />
lens and the body to reduce the close fo-<br />
114<br />
Focusing screens H3D<br />
All focusing screens are of the Spherical<br />
Acute-Matte D type with or without grid<br />
and central markings for spot (ø 7.5) and<br />
AF metering area. Grid patterns provide<br />
aid in technical, architectural, documentation<br />
and other similar fields.<br />
Available with or without masking for<br />
the sensor format<br />
See www.hasselblad.com for details.<br />
Focusing screen H3D 22/39/50<br />
(3043328)<br />
Supplied with all H3DII 39 and 50 Mpixel<br />
camera bodies.<br />
Focusing screen H3D 31<br />
(3043330)<br />
Supplied with all H3DII 31 Mpixel camera<br />
bodies.<br />
Check on the Hasselblad website – www.<br />
hasselblad.com – for further details or<br />
news of new accessories.<br />
cusing distance for close up photography.<br />
They are available in three sizes: 13mm,<br />
26mm and 52 mm. As the H3D has a<br />
TTL light metering system, exposure<br />
compensation is automatic.<br />
CF Adapter<br />
(3043500)<br />
The CF adapter allows virtually all<br />
lenses from the V-system to be used on<br />
H-system camera bodies. This automatically<br />
expands the potential lens range for<br />
H cameras by more than a dozen different<br />
focal lengths.
HC lens range<br />
HCD 4/28 mm HC 3.5/35 mm HC 3.5/50 mm<br />
HC 2.8/80 mm HC 2.2/100 mm HC Macro 4/120 mm<br />
HC 3.2/150 mm HC 4/210 mm HC 4.5/300 mm<br />
Specification subject to change without notice<br />
HASSELBLAD<br />
HCD 4,0-5,6/35-90 Aspherical<br />
GENERAL LENS DAtA:<br />
Focal length 36,3 (87) mm<br />
Aperture range 4,0 (5,6) - 32<br />
Angle of view diag/hor/vert 83°/70°/55° (39°/31°/24°)<br />
Length/diameter 167 mm/102,5 mm<br />
Weight 1410 g<br />
Filter diameter 95 mm<br />
CLoSE FoCuS RANGE DAtA:<br />
Minimum distance object to image plane 0.65 m<br />
Maximum image scale 1:13 (1:5,4)<br />
Corresponding area of coverage 64 x 48 (26 x 20) cm<br />
Corresponding exposure reduction 0 f-stop<br />
CoMPAtIBILItY<br />
the HCD 4,0-5,6/35-90 mm lens is not compatible with the converter H1.7x<br />
and the HtS 1.5 tilt/Shift adapter.<br />
LENS DESIGN<br />
13 elements in 11 groups<br />
1 Aspherical surface<br />
ENtRANCE PuPIL PoSItIoN<br />
35 mm setting: 187 mm<br />
50 mm setting: 178 mm<br />
90 mm setting: 193 mm<br />
In front of the image plane<br />
35 mm<br />
115<br />
LENSES<br />
HC 3.5–4.5/50–110 mm HC 4.0–5.6/35–90 mm V system C type lenses<br />
FoCuS tYPE<br />
Internal focusing<br />
with optional CF lens adapter
Connectivity diagram<br />
This diagram illustrates the compatibility of the H3D II resulting from the modular concept. Even large format cameras<br />
can be used in conjunction with the digital capture unit to maximise the useability and extend the range even further.<br />
Optional viewfinders<br />
Optional storage<br />
Imagebank II<br />
100 GB External<br />
storage<br />
Accessories<br />
GIL GPS receiver<br />
Large format cameras<br />
View camera adapter<br />
for Hasselblad H<br />
cameras<br />
(not available from<br />
Hasselblad)<br />
H3D-II Camera<br />
Digital capture unit<br />
(included)<br />
Flash sync<br />
input cable<br />
HV 90x<br />
viewfinder<br />
HVD 90x viewfinder<br />
(included)<br />
Camera body<br />
Any view camera with<br />
Hasselblad H adapter<br />
116<br />
Horseman ISS<br />
electronic shutter<br />
HVM waist-level<br />
viewfinder<br />
Optional V system lenses<br />
Lenses<br />
Schneider Shutter<br />
Control ES<br />
CF lens adapter<br />
(DAC function<br />
unavailable)<br />
All HC lenses,<br />
including HCD 28,<br />
extension tubes<br />
and converter<br />
Any shutter<br />
with X sync<br />
Rollei electronic<br />
shutter
18<br />
Appendix<br />
Glossary of Terms<br />
P and Pv explanatory charts<br />
Technical specifications<br />
Problems, Equipment Care & Service<br />
This section provides an insight into the more technical<br />
aspects as well as some important reference information.<br />
117
Glossary of Terms<br />
For the sake of clarity, here are short and simple explanations of several<br />
terms, items and features mentioned in the manual that may be unfamiliar<br />
to some.<br />
Bracketing<br />
The practice of making extra exposures over or under (normally<br />
both) the ‘standard’ exposure to ensure the desired result. This is<br />
particularly useful in difficult, wide-ranging lighting conditions.<br />
Easily set and controlled with the H3D II.<br />
Custom setting<br />
The setting chosen by the user that differs from the default setting.<br />
Click / Press – On.Off button<br />
The ON.OFF button can be depressed in two different ways which<br />
in turn cause different results. This distinction is referred to in the<br />
text as clicking and pressing. Clicking is a very rapid depressing<br />
of the button with immediate release whereas pressing is a longer<br />
depression of the button with maintained pressure.<br />
EV<br />
Exposure Value. It represents the standard photographic notation<br />
within exposure control. For example, if you change the aperture<br />
on a lens from f/11 to f/8, you will increase the exposure by 1EV.<br />
Similarly, if you change the shutter speed from 1/15s to 1/60s you<br />
will decrease the exposure by 2EV. A change in EV can therefore<br />
represent a change in aperture, shutter speed or a mixture of both.<br />
It is a simpler and more useful way of referring to the essential<br />
effective combination when making exposure settings without<br />
referring to the implications and sometimes confusing aspects of<br />
specific shutter speeds or apertures.<br />
As a practical example, if you are using ‘exposure compensation’, the<br />
settings are in EV’s (often referred to as ‘stops’ in older descriptions)<br />
or fractions of EVs (or ‘stops’). Therefore an exposure compensation<br />
of +1EV, for example, will provide ‘one stop overexposure’<br />
and similarly an exposure compensation of -1/2EV, for example,<br />
will provide ‘ a half stop underexposure’.<br />
See the chart in this manual for cross reference of EVs and their<br />
aperture/shutter speed equivalents<br />
DAC<br />
The “Digital APO Correction” or DAC feature optimizes lens<br />
performance by automatically including lens specific metadata<br />
with every image. APO-chromatic correction is then implemented<br />
which reduces colour fringing and corrects distortion to provide<br />
the optimum performance of the lens at all settings.<br />
Default setting / factory setting<br />
A standard setting that a device is set to in the first instance during<br />
manufacture and returns to if a setting change is halted or<br />
interrupted in any way.<br />
FireWire<br />
FireWire is an interface standard that provides the rapid communication<br />
of data information between separate units. The H3D II<br />
uses Firewire to connect to an ImageBank II or computer.<br />
118<br />
Half-press / Full press – Shutter release button<br />
The shutter release button can be depressed in two different ways.<br />
This distinction is referred to in the text as half-press and full-press<br />
positions. A half-press is a rapid, soft press whereas a full-press is<br />
a firmer and longer depression of the button.<br />
IAA<br />
Instant Approval Architecture or IAA provides the user with a<br />
method of classifying images either immediately after capture or<br />
at any other time. This greatly improves workflow efficiency.<br />
LCD<br />
Liquid Crystal Display. An electronic information panel. The grip<br />
has an LCD panel.<br />
LED<br />
Light Emitting Diode. Electronic devices used in information<br />
displays. The viewfinder display has LED’s to the left and right of<br />
the integral LCD panel.<br />
Mid-grey / 18% grey<br />
An important point to be remembered is that all photographic<br />
exposure meters / light metering systems are calibrated to provide<br />
a reading that will reproduce a ‘mid-grey or 18% grey tone’ from<br />
the measured subject tone. This is an international photographic<br />
standard upon which all exposure calculations must be based. The<br />
H3D II has very accurate and sophisticated exposure measuring<br />
modes. Pre-programmed information is taken into account via the<br />
metering system when calculations are automatically made. This<br />
provides a very satisfactory compromise for a host of photographic<br />
situations and many users will certainly be very satisfied with<br />
the consistently high quality of results. Nevertheless, some situations<br />
are either so technically difficult or open to interpretation<br />
that manual intervention is advised to ensure the desired result.<br />
Naturally, many seasoned users always prefer manual control but<br />
they base their calculations and decisions on much experience.<br />
To illustrate this point, imagine the following example:<br />
Pin two sheets of paper, one black and the other white, onto a<br />
grey wall. Take three exposures using an average light reading;<br />
a close-up of the black sheet, a close-up of the white sheet, and a<br />
distance shot of the whole wall including the two sheets. Without<br />
any manipulation, the first two exposures will produce a tone that<br />
is similar to the wall, namely, a grey tone; not black or white. The<br />
third exposure, however, will reproduce the wall as a grey tone<br />
while the two respective sheets now appear as black and white<br />
respectively, as originally observed.<br />
However confusing this might at first seem, it is fundamental to<br />
mastering exposure calculations and exposure control. If you are at<br />
all unsure about this basic concept, you are strongly recommended<br />
to refer to a general photographic manual for a fuller explanation<br />
in order to obtain the maximum from your H3D.
OTF<br />
Off The Film - the original literal description of the light measurement<br />
mechanics regarding flash exposure measurement that now<br />
applies to digital sensors too.<br />
Profile<br />
You can allow the H3D II to be set according to ‘profiles’. These<br />
profiles are combinations of modes, methods and settings (custom<br />
or default) that suit specific photographic situations. By using<br />
a personal profile - which you can create, name and save - the<br />
camera is immediately configured for a specific purpose without<br />
any need to check through the menus. This is a very rapid and<br />
secure way of working when repeatedly confronted with similar<br />
photographic situations.<br />
As an example you might regularly take outdoor portraits of<br />
wedding couples with a long lens. You want a specific aperture to<br />
restrict depth-of-field and a fairly fast shutter speed to freeze any<br />
movement. You are concerned about the couple blinking during the<br />
exposure and so want to take several shots in succession, possibly<br />
with slight variations in exposure settings for safety’s sake so you<br />
might choose the bracketing option too. All these parameters can<br />
be preset and stored as a profile that is rapidly accessible.<br />
Quick save<br />
When altering settings, a half-press of the shutter release button<br />
will cause a return to the main screen and save the new setting at<br />
the same time.<br />
Standard exposure<br />
A ‘standard exposure’ in the manual refers to the concept of<br />
technically correct in accordance with internationally accepted<br />
photographic measurement standards (see section on Mid-grey /<br />
18% grey). This does not imply, however, that it would automatically<br />
be the preferred choice or be ‘correct’ according to the desired<br />
result. See section on Bracketing.<br />
Main screen<br />
To simplify the descriptions, reference is often made to a ‘main’<br />
screen regarding the menu. Apart from default settings, there is no<br />
standard setting in the normal sense and therefore you create your<br />
own ‘standard’, which of course can be changed at any time.<br />
The ‘main’ screen is therefore the one you have currently created<br />
and is the one visible on the display when photographing (except<br />
where a particular mode is in actual operation, such as self-timer,<br />
for example).<br />
TTL<br />
Through The Lens - a literal description of the light measurement<br />
mechanics. The advantage is that only the essential parts of the<br />
subject in front of the camera are included. Accessories such as<br />
filters, bellows, close-up rings, converters, etc that could affect<br />
exposure are also taken into account automatically with exposure<br />
evaluation (for general purposes).<br />
119<br />
Tethered / Untethered<br />
When the H3D II saves digital files directly to a computer - it is<br />
described as tethered..<br />
When files are saved to an internal CF card or an ImageBank II,<br />
it is described as untethered.<br />
Time out<br />
This is the time interval that a temporary setting is maintained<br />
for before it automatically returns to the original setting (default<br />
or custom).<br />
Zone (system)<br />
The Zone System is a method of combined exposure calculation/<br />
film development providing a great deal of tonal control. It was<br />
originally devised by Ansel Adams - the classic landscape photographer<br />
and Hasselblad user - and now exists in various forms<br />
for both black & white and colour photography.<br />
Naturally in the case of the H3D II or any other digital camera,<br />
the film development part of the method can not apply. However,<br />
some photographers are used to its philosophy and are familiar<br />
with its terminology and might like to still refer to it.<br />
An integral part of the method includes the classification and<br />
grouping of any given scene into a range of nine (or ten) so-called<br />
zones, hence the name. Concerning the H3D II, the word zone<br />
refers to the grouping and classification of various tones, where<br />
Zone V is the equivalent (whether in black & white or colour) to<br />
18% mid-grey on a scale of Zone I (black) through Zone IX (white).<br />
See specific literature for a complete description of this method.<br />
3F / 3FR<br />
The H3D II produces Hasselblad 3FR files after capture. These<br />
RAW format files are automatically converted into 3F files when<br />
imported to a computer using Phocus or FlexColor.
True exposure<br />
Shutter position<br />
Open<br />
Closed<br />
T 3 = T 1<br />
T 1<br />
T 2<br />
When using flash/strobe as the main light source<br />
and using the 1/800s shutter speed, you should<br />
turn off the True Exposure facility (Custom Option<br />
#13). Failure to do so will cause underexposure.<br />
You can download a full explanation of this<br />
situation from www. hasselblad.com.<br />
120<br />
Exposure at max aperture (e.g. f/2,8)<br />
Exposure at aperture f/4<br />
Exposure at aperture f/4 adjusted with true exposure<br />
True exposure<br />
Time<br />
The effective shutter speed for a central lens shutter is defined as<br />
the length of time between the opening and closing when measured<br />
at the half height position when expressed in diagram form (see<br />
diagram). The fact that it will take some time to open and close<br />
the shutter will have an influence on the effective shutter speed as<br />
the lens aperture closes to its setting. The faster the shutter opens<br />
and closes, the less this influence will be. It is also follows that the<br />
influence will be greater on shorter shutter speeds.<br />
With the lens at full aperture (largest opening), the amount of<br />
light at the film plane appears as illustrated by the blue curve in<br />
the diagram. The effective shutter speed then becomes T1. If the<br />
lens is now closed down by one stop, the amount of light appears<br />
as illustrated by the red dashed curve. The effective shutter speed<br />
is now increased to T2, which is longer that T1. The result is that<br />
the exposure is not reduced by exactly one stop (1EV), however,<br />
but slightly less. At the shorter shutter speeds, the exposure error<br />
can be as much as 0,5 – 0,8 EV.<br />
The True exposure mode can compensate for this exposure error<br />
since the behaviour of the shutter is a known and predictable factor.<br />
At shutter speeds of 1/150 second or shorter (faster), the camera<br />
will shorten the shutter speed to compensate, as illustrated by<br />
the green dashed curve. At the fastest shutter speeds, however, it<br />
is not possible to adjust the shutter speed and so the aperture is<br />
adjusted instead.<br />
Although it is probably an infrequently used combination, please<br />
note nevertheless that the fastest shutter speed / minimum aperture<br />
combination cannot be adjusted by True exposure.
Aperture Aperture<br />
Automatic exposure — P & Pv Mode<br />
2.0<br />
2.8<br />
4.0<br />
5.6<br />
8<br />
11<br />
16<br />
22<br />
32<br />
45<br />
64<br />
90<br />
64s<br />
32s<br />
16s<br />
35<br />
80<br />
210<br />
8s<br />
4s<br />
2s<br />
P Mode Pv Mode<br />
50 50-110 @ 50<br />
120<br />
150<br />
EV -5 -4 -3 -2 -1 0 1 2 3 4 5 6 7 8 9 10 11<br />
1.4<br />
12<br />
1s 2 4 8 15<br />
Shutter Shutterspeed speed<br />
P-mode<br />
30<br />
50-110 @ 110<br />
60<br />
13<br />
14<br />
15<br />
16<br />
17<br />
18<br />
19<br />
20<br />
21<br />
22<br />
23<br />
125 250 500 1000<br />
Light metering method sensitivity distribution with an HVD 90X viewfinder<br />
121<br />
Aperture<br />
EV -5 -4 -3 -2 -1 0 1 2 3 4 5 6 7 8 9 10 11<br />
1.4<br />
12<br />
2.0<br />
2.8<br />
4.0<br />
5.6<br />
8<br />
11<br />
16<br />
22<br />
32<br />
45<br />
64<br />
90<br />
64s<br />
32s<br />
16s<br />
35<br />
80<br />
210<br />
8s<br />
4s<br />
2s<br />
50 50-110 @ 50<br />
120<br />
150<br />
1s 2 4 8 15<br />
Shutter Shutterspeed speed<br />
Pv-mode<br />
30<br />
Centre Weighted<br />
(23 x 20 mm)<br />
≈ 25%<br />
CentreSpot<br />
(23 x 20 mm)<br />
≈ 25%<br />
50-110 @ 110<br />
60<br />
Spot<br />
(diameter 7.5 mm)<br />
≈ 2.5%<br />
13<br />
14<br />
15<br />
16<br />
17<br />
18<br />
19<br />
20<br />
21<br />
22<br />
23<br />
125 250 500 1000
Technical specifications<br />
Camera Type<br />
Construction<br />
Lenses<br />
Viewfinder (HVD 90X)<br />
Focusing<br />
Shutter<br />
Flash control<br />
Flash measurement<br />
Exposure metering<br />
Auto bracketing<br />
Interval timer<br />
ISO range<br />
Displays<br />
Focusing screen<br />
Compatibility<br />
Accessory connection<br />
Customization<br />
Auto-focus, auto-exposure digital SLR camera with interchangeable viewfinders and lenses.<br />
One piece stainless steel shell. Die-cast aluminium internal structure. Tripod sockets (1/4 and 3/8”) and<br />
quick coupling tripod plate for rapid mounting.<br />
Hasselblad HC/HCD lenses with built-in electronically controlled shutter and aperture. Automatic or manual<br />
focusing with instant manual focus override. All HC/HCD lenses meet the exacting requirements of digital<br />
photography. Lens shades can be mounted in reverse for transport. V- system lenses can be used with a CF<br />
adapter.<br />
A 90° reflex viewfinder, providing 100% field of view even when wearing eyeglasses, and built-in<br />
multi-mode light metering system. Image magnification 3.1x. Integrated fill-in flash with guide number<br />
12. Hot-shoe for automatic flash (Metz SCA3002 system / adapter SCA3902). Dot matrix display with<br />
presentation of all relevant information. Built-in diopter adjustment from –5 to + 3.5D. Interchangeable.<br />
Automatic and manual focusing with electronic focus aid in manual mode. Instant manual focus<br />
override. Automatic focusing using passive central cross type phase detection sensor. AF metering range<br />
EV 1 to 19 (ISO 100).<br />
Electronically controlled lens shutter with speeds ranging from 32 seconds to 1/800. Flash sync at all<br />
speeds.<br />
TTL centre-weighted system. Can be used with the built-in flash or a wide variety of flashes compatible<br />
with the SCA3002 (Metz) system using adapter SCA3902. ISO range16 to 6400. Flash output can be<br />
adjusted (-3 to +3EV) for fill-in purposes independent of ambient light.<br />
The H3D II has a built-in measurement system that measures flash light from non-TTL flashes, such as<br />
studio flashes.<br />
Multi-mode exposure metering using 90° reflex viewfinder. Metering options are: Spot (diameter 7.5<br />
mm), Centre Weighted, and CentreSpot. Metering range at f/2.8 and ISO100: Spot: EV2 to 21, Centreweighted:<br />
EV1 to 21, CentreSpot: EV1 to 21.<br />
Bracketing using predetermined number of captures (2, 3, 5, 7 or 9) in 1/3, 1/2, or 1 EV step difference<br />
intervals.<br />
Number of captures from 2 to ‘no limit’ and interval from 1 second to 1 hour.<br />
ISO range: 50 to 400 (39 and 50 Mpix models), 100 to 800 (31 Mpix model).<br />
The camera features two dot-matrix displays that provide clear and easy-to-understand information to<br />
the user. One is located on the grip and the other in the 90° viewfinder. The digital capture unit has a<br />
high contrast 3 inch TFT type display.<br />
Bright Spherical Acute-Matte type D with sensor format markings. Grid marked type also available as option.<br />
All H System lenses and accessories except film magazines. V System C type lenses with optional CF lens<br />
adapter.<br />
Provided with two M5 threads and an electrical connector for accessories.<br />
A large number of the H3D II’s functions can be customized by the user to suit specific styles or<br />
situations through the built-in menu system.<br />
122
<strong>User</strong> interface<br />
Battery grip rechargeable 7.2 V<br />
Battery charger Li-ion 7.2 VDC<br />
External dimensions<br />
Weight<br />
DIGITAL CAPTURE UNIT<br />
Sensor size<br />
Sensor dimensions<br />
Image size<br />
Capture rate<br />
Storage capacity<br />
ISO speed range<br />
Shooting mode<br />
Color definition<br />
Color management<br />
Image storage<br />
Battery type<br />
Color display<br />
Histogram /Acoustic feedback<br />
IR filter<br />
File format<br />
Software<br />
Platform support<br />
Host connection type<br />
View camera compatibility<br />
Operating temperature<br />
Dimensions<br />
Weight<br />
Both basic and advanced functions are set using buttons and control wheels on the camera body in<br />
conjunction with the grip and viewfinder graphic interface displays. Digital capture unit menu visible<br />
and controllable from unit’s display and from Phocus/FlexColor on a tethered computer.<br />
Li-ion type. 7.2 V / 1850 mAh output.<br />
Uses DV charge termination technique to prevent over-charging.100–240 VAC / 50–60 Hz input.<br />
6.0–7.9 VDC/ 800mA output<br />
Complete camera with 2.8/80 mm lens:<br />
153 x 131 x 213 mm – 6.0 x 5.2 x 8.4 ins. (W x H x L)<br />
Complete camera with Li-Ion battery and CF card: 2175 g / 4lb 12oz.<br />
31 Mpixels 39 Mpixels 50 Mpixels<br />
31 Mpixels: (4872 x 6496 pixels) 39 Mpixels: (5412 x 7212 pixels) 50 Mpixels:<br />
33.1 x 44.2 mm 36.8 x 49.1 mm 36.8 x 49.1 mm<br />
Raw 3FR capture 40MB on average Raw 3FR capture 50 MB on average Raw 3FR capture 65 MB on average<br />
8 bit TIFF: 95 MB 8 bit TIFF: 117 MB 8 bit TIFF: 150MB<br />
1.2 seconds per capture 1.4 seconds per capture 1.1 seconds per capture<br />
42 captures per minute 39 captures per minute 33 captures per minute<br />
2 GB CF card holds 50 images 2 GB CF card holds 40 images 4 GB CF card holds 60 images<br />
on average on average on average<br />
ISO 100, 200, 400 and 800 ISO 50, 100, 200 and 400 ISO 50, 100, 200 and 400<br />
Single shot<br />
16 bit<br />
Hasselblad Natural Color Solution<br />
CF card type U-DMA (e.g. SanDisk extreme IV), ImageBank-II or tethered to a Mac or PC<br />
RechargeableLi-ionbattery(7.2VDC/1850mAh).Optionalcassettefor3CR-123lithiumbatteriesincluded.<br />
(31 and 39 Mpixel models only).<br />
Yes – TFT 3 inch, 24 bit color<br />
Yes<br />
Mounted on CCD sensor<br />
Lossless compressed Hasselblad 3FR/3F<br />
Phocus/FlexColor (supplied, for Mac and PC)<br />
Mac: OSX version 10.5, Windows: NT, 2000, XP, XP64, Vista and Vista 64<br />
FireWire 800 (IEEE1394b)<br />
Yes, controlled via flash sync. Electronic shutters must be controlled from local panel.<br />
0 – 45 ˚C / 32 – 113 ˚F<br />
Complete camera w.HC80 mm lens: 153 x 131 x 213 mm (W x H x D)<br />
2290 g (complete with HC80 mm lens, Li/ion battery and CF card)<br />
123
Default Settings (“Standard” profile)<br />
Exp.mode A (Aperture priority)<br />
LM mode Centre weighted<br />
Exp. adjust 0<br />
Focus mode AF-S<br />
Drive mode S<br />
Flash sync Normal (beginning of exp.)<br />
Flash adjust 0<br />
Self timer delay 10 sec<br />
Sequence Mirror up / Delay<br />
Mirror mode Mirror goes down<br />
Bracketing Frames 3<br />
Sequence Normal - over - under<br />
EV diff 0,5 EV<br />
Interval timer Frames 3<br />
Interval 0 min 30 sec<br />
Custom options 1 Standby timeout 10 sec<br />
2 EV increment 1/2 step (0.5 EV)<br />
3 Exp adjust increment 1/3 step (0.3 EV)<br />
4 <strong>User</strong> button function None<br />
5 AE-Lock button function AE-lock<br />
6 Stop Down button function Stop down<br />
7 M.UP button function Mirror up<br />
8 Control wheel direction CW<br />
9 Flash ready exposure lock Yes<br />
10 Magazine exposure lock Yes<br />
11 Lens exposure lock Yes<br />
12 Out of range exposure lock No<br />
13 True exposure On<br />
14 Spot mode Normal<br />
15 Focus aid in MF Half press<br />
16 AF assist light Ext. Flash<br />
17 Rear wheel quick adjust Yes<br />
18 Control lock All controls<br />
19 Beeper On<br />
20 Show histogram Yes<br />
21 Interval & Selftimer Exit<br />
22 AE-lock & Quick adjust Exp. reset<br />
23 Show EV Yes<br />
24 Show ISO Yes<br />
25 Bracket param. in <strong>Manual</strong> Shutter speed<br />
26 Aperture control in <strong>Manual</strong> Front wheel<br />
27 Low flash warning On<br />
28 Interval timer initial delay None<br />
29 Aperture indicator Normal<br />
30 Extra mirror-delay 50ms<br />
124
1<br />
2<br />
3<br />
B<br />
C<br />
A<br />
Care and maintenance of digital capture unit<br />
Handling and storage<br />
• Always replace the protective CCD/filter cover when the digital capture unit is not<br />
mounted on your camera.<br />
• Do not touch the exposed CCD/filter with your fingers.<br />
• Keep all foreign objects out of the camera opening.<br />
• Store your digital capture unit away from moisture and excessive heat. Please see<br />
“Technical Specifications” for complete operational and storage requirements.<br />
• Protect your digital capture unit from impact—do not drop it.<br />
Cleaning the CCD Infrared Filter<br />
If you see dark or coloured spots or lines in your images, then you may need to clean<br />
the outer surface of digital capture unit’s infrared (IR) filter. In most cases, the careful<br />
use of compressed air will be adequate though if you use canned compressed air, read<br />
the intructions very carefully before use to avoid spraying impurities or even ice on the<br />
filter! Sometimes, however, small particles will get stuck to the surface of the IR filter,<br />
requiring for a more thorough cleaning, involving either fluid or wipes. For a good safe<br />
cleaning, follow descriptions below.<br />
Basic air-cleaning procedure / removing the digital capture unit<br />
1. Remove a FireWire if connected.<br />
2. Remove the viewfinder (see ‘Attaching and removing the viewfinder’ if unsure).<br />
3. While pushing the safety catch backwards on the digital capture unit (3 illus. A) push<br />
the lever of the digital capture unit release button to the right (3 illus. B) and while<br />
maintaining that position press the centre of the button firmly inwards towards the<br />
camera body (3 illus. C) to finally release the magazine.<br />
4. Clean the outside surface of IR filter by spraying it with clean compressed air (see<br />
warning above first). If this is not enough, then use one of the procedures outlined<br />
below.<br />
5. Reattach the digital capture unit to the camera immediately after cleaning to check<br />
results.<br />
6. If you still see spots on your shot after you have cleaned the outside of the infrared<br />
filter, then you may have dust either on the inside of the IR filter or on the CCD itself.<br />
WARNING:<br />
Never attempt to remove the glass filter from the front of the CCD—you will probably<br />
ruin the CCD if you do so. If dust manages to get between the IR filter and CCD,<br />
it can only be removed at the Hasselblad factory. Contact your Hasselblad dealer for<br />
assistance.<br />
Cleaning using the HAMA cleaning fluid and tissues<br />
Note! Hasselblad recommends HAMA Optic Cleaning Fluid 5902.<br />
1. Carefully spray the fluid onto the IR filter at a distance of 10-15 cm (4-5 inches), so<br />
that the fluid is applied onto the filter as a thin, even haze. 1-2 sprays are enough. If<br />
you apply too little, the fluid will start to dry up before you start wiping the filter. As<br />
an alternative you can spray the fluid onto the tissue first, and then apply it to the<br />
filter as you wipe it.<br />
125
2. Fold the tissue several times to match the width of the IR filter—you might use two<br />
or three tissues at a time if necessary (to give you a better grip). Be sure to fold the<br />
paper so that the coated glossy side faces outwards—do not use the other side, as it<br />
can do more harm than good!<br />
3. Gently place the folded tissue onto the edge of the filter using two or three fingers.<br />
Be sure to wipe the entire surface evenly. Sweep the filter only once. Do not wipe the<br />
same area twice with the same tissue as you might reapply dirt removed in the first<br />
sweep.<br />
4. Finally check if the IR filter has been properly cleaned either by visual inspection or<br />
by mounting the digital capture unit to the camera and making a shot. If further<br />
cleaning is needed, repeat cleaning procedure.<br />
Cleaning with an E-Wipe<br />
E-wipes are individually packed wet tissues.<br />
1. Tear at the notch to break seal.<br />
2. Remove e-wipe from its packaging and continue without delay.<br />
3. Fold the tissue to match the width of the IR filter.<br />
4. Apply firm pressure using two or three fingers at the edge of the wipe to ensure an<br />
even, firm contact with filter surface. Wipe the surface in one unbroken motion.<br />
Note! Do not use same side of the e-wipe twice as you will be likely to reapply any<br />
particles removed in the first pass.<br />
5. Finally check if the IR filter has been properly cleaned either by visual inspection or<br />
by mounting the digital capture unit to the camera and making a shot. If further<br />
cleaning is needed, repeat cleaning procedure.<br />
Attaching the digital capture unit<br />
Position the digital capture unit retention groove onto the digital capture unit support<br />
on the camera body ensuring that they are correctly positioned. Swing the digital capture<br />
unit towards the camera body and firmly press into place with a click. If there is resistance,<br />
the magazine retaining catch on the camera has probably been inadvertently released.<br />
In that case, push the release button again to reset the catch.<br />
Cleaning the housings<br />
If the camera becomes dirty, clean it with a soft, clean cloth lightly moistened with water<br />
only. Do not use any other solvents and do not allow water to seep in the openings.<br />
126
Problems, Equipment Care & Service<br />
The H3D II is a very sophisticated camera that relies on much information being passed<br />
and processed to and from each modular unit to produce the correct behaviour. It is<br />
therefore essential that reasonable care is taken in attaching, detaching and storing<br />
the viewfinder, lenses, extension tubes, etc to ensure that the databus connections<br />
are not damaged or soiled in any way. Also when lifting or handling the camera try to<br />
always use the grip or strap and avoid holding the camera just by the digital capture<br />
unit or viewfinder. Warning messages are normally easily addressed and remedied<br />
but ‘Error’ messages require further attention as they denote a fault, temporary or otherwise.<br />
You should methodically investigate the situation to see for example whether<br />
the recent attachment of an accessory has coincided with the appearance of an error<br />
message. Standard procedure is to detach and re-attach the viewfinder, lens etc ensuring<br />
that they are positioned firmly and correctly to see whether the problem disappears.<br />
Failing that, removal of the battery grip for about ten seconds or so will reset<br />
the camera’s processors. Persistent error messages might well signify a more complex<br />
problem and you are advised to contact your nearest Hasselblad Authorized Service<br />
Center for advice. You may receive a feedback report on either the grip display or the<br />
capture unit display. Please note this message carefully as it can facilitate support response<br />
greatly, as well as improve on firmware updates . As well as the error message,<br />
a description of the camera’s behaviour and an account of what action you were trying<br />
to take when it happened could be also beneficial. Also, please remember that if a<br />
hardware icheck is to be made, the Center will almost certainly want to inspect all of<br />
the items that were involved when the error message first appeared.<br />
In certain situations, it is possible that the camera can be affected by a discharge of<br />
static electricity particularly if the area around the control buttons on the grip comes<br />
into contact with a conductive cord or material that is connected to earth, directly or<br />
indirectly (a lighting stand, for example). This might temporarily deactivate the camera<br />
though it does not cause any damage. Press the red ON.OFF button on the grip<br />
again to reactivate the camera.<br />
If a problem does occur you are advised not to attempt any repairs yourself. Some<br />
service operations require very sophisticated instruments to check, measure and adjust<br />
and there is a real danger of creating more problems than solving them if such<br />
attempts are made in any other way.<br />
EQUIPMENT CARE<br />
A Hasselblad camera is designed to withstand the rigours of professional use in most<br />
environments. To avoid the possibility of damage however, it should be protected<br />
from harsh conditions and in particular avoid oil fumes, steam, humid conditions and<br />
dust.<br />
Extremes of temperature: High temperatures can have an adverse effect equipment.<br />
Try to avoid frequent and severe temperature changes. Be particularly careful in humid<br />
environments. Allow the equipment to acclimatize before assembly. Try to ensure<br />
the storage conditions in such environments are as dry as possible.<br />
Dust and grit: Take care to prevent dust and grit from getting into your equipment.<br />
In coastal areas take measures to protect your equipment from sand and salt water<br />
spray. Dust on the lens glass and focusing screen can be removed with a blower brush<br />
or very soft lens brush if necessary. Smears on the lens glass should be treated with<br />
great caution. In some cases they may be removed with a high quality lens cleaning<br />
solution on a tissue but be careful not to scratch the lens or touch any of the glass<br />
surfaces with your fingers. If in any doubt, do not attempt to clean lens glass surfaces<br />
yourself but allow a “Hasselblad Authorized Service Center” to treat them.<br />
Impact: Your equipment can be damaged by severe physical shocks so practical protective<br />
precautions should be taken. Some form of protective case or camera bag is<br />
advised for transportation.<br />
Loss: Hasselblad equipment is much sought after and you should take obvious steps<br />
to prevent theft. Never leave it visible in an unattended car, for example. Separate and<br />
specific camera insurance cover should be considered by professional users.<br />
SERVICE<br />
Return your equipment to a service centre for occasional checking and preventive<br />
maintenance to ensure optimal reliability. You can easily keep a check on service<br />
intervals by looking under ‘Info’ in the menu. If your camera is used constantly and<br />
intensively, regular periodic check-ups are recommended at one of the “Hasselblad<br />
Authorized Service Centers”. They have the expert staff and specialised equipment<br />
necessary to ensure that your equipment remains in perfect working order.<br />
127<br />
CAUTION<br />
• Keep all equipment and accessories out of the reach of small<br />
children.<br />
• Do not place heavy objects on the equipment.<br />
• Do not use the batteries except as specified.<br />
• Use only the batteries specified for use with the camera.<br />
• Remove the batteries when cleaning the camera or if you intend to leave the<br />
camera unused for a long period.<br />
• If you use spare (standard or rechargeable) battery packs be particularly<br />
careful to use the supplied protective cap when storing. There is a potential<br />
fire risk if the contacts are short circuited across a conductive object (such as<br />
keys in a pocket, for example).<br />
• Take particular care when working with strobe / studio flash units to prevent<br />
damage to equipment and personal injury.<br />
• Do not attempt to open the digital capture unit.<br />
• Keep your digital capture unit and all other computer equipment away from<br />
moisture. If your digital capture unit becomes wet, disconnect from power<br />
and allow it to dry before attempting to operate again.<br />
• Never cover the ventilation openings on the digital capture unit.<br />
• Always replace the protective CCD/filter cover when the digital capture unit is<br />
not connected to your camera--the exposed CCD and filter are vulnerable to<br />
damage.<br />
• Never try to remove the glass IR filter from the front of the CCD; this will probably<br />
ruin the CCD. If dust manages to get between the CCD and IR filter, please<br />
contact your Hasselblad dealer for assistance.<br />
Disposal<br />
If you need to dispose of the digital capture unit, ImageBank-CF and/or<br />
batteries, please do so in an environmentally friendly manner at the local<br />
waste plant/ recycling centre or similar.
The information in this manual is furnished for informational use<br />
only, is subject to change without notice, and should not be construed<br />
as a commitment by Victor Hasselblad AB & Hasselblad A/S.<br />
Not all the images in this manual were taken with a Hasselblad H3D<br />
II. They are used for illustrative purposes only and are not intended<br />
to represent the image quality produced by a Hasselblad H3D II.<br />
The text in this manual cannot be reprinted or reused without the<br />
express permission of Victor Hasselblad AB & Hasselblad A/S.<br />
The images in this manual cannot be reprinted or reused without<br />
the express permission of the photographers who took them.<br />
All text in this manual :<br />
© Victor Hasselblad AB & Hasselblad A/S.<br />
All images in this manual :<br />
© Jens Karlsson/Hasselblad and David Jeffery.<br />
Cover shot: © Mats Bengtsson<br />
Victor Hasselblad AB & Hasselblad A/S assumes no responsibility<br />
or liability for any errors or inaccuracies that may appear in this<br />
manual.<br />
Victor Hasselblad AB & Hasselblad A/S assumes no responsibility or<br />
liability for loss or damage incurred during or as a result of using<br />
Hasselblad software or products.<br />
Hasselblad, Imacon, Ixpress, Phocus and FlexColor are trademarks<br />
of Victor Hasselblad AB & Hasselblad A/S. Adobe and Adobe<br />
Photoshop are trademarks of Adobe Systems, Inc. Macintosh, Mac<br />
OS and FireWire are registered trademarks of Apple Computer, Inc.<br />
InfoLithium is a registered trademark of Sony Corporation.<br />
Copyright © 2008<br />
Victor Hasselblad AB & Hasselblad A/S<br />
All rights reserved.
Hasselblad A/S<br />
Hejrevej 30, DK - 2400 Copenhagen,<br />
Denmark<br />
Victor Hasselblad AB<br />
Box 220, SE - 401 23 Göteborg,<br />
Sweden<br />
H3DII - UK v.6 - 02.2009 - item no. 80500475<br />
129


![Einladung [07.02.2006] - Hochschule für Gestaltung Offenbach am ...](https://img.yumpu.com/13375413/1/184x260/einladung-07022006-hochschule-fur-gestaltung-offenbach-am-.jpg?quality=85)


