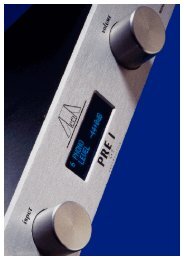
manual MAP1 en - Audionet
manual MAP1 en - Audionet
manual MAP1 en - Audionet

You also want an ePaper? Increase the reach of your titles
YUMPU automatically turns print PDFs into web optimized ePapers that Google loves.
5 Activities key: Press this key to view a list of Activities you have added. Press the<br />
button next to the Activity you want to select, and the Harmony One will control<br />
your <strong>en</strong>tertainm<strong>en</strong>t system (see separate user's <strong>manual</strong> of Harmony One).<br />
Important:<br />
• The Power key is only available for Activities. In Device Mode the Power key<br />
has no function. Ev<strong>en</strong> without using an Activity, the user is able to control all<br />
functions of the MAP 1 using the Harmony One in Device Mode. The keys<br />
described below to control the MAP 1 refer to the factory default programming of<br />
the <strong>Audionet</strong> System Remote Control Harmony One. Understandably, any changes<br />
done to this setup by the user cannot be discussed here.<br />
Tip:<br />
• In order to switch the MAP 1 on/off, without using an Activity, please use the keys<br />
Power On , Power Off and/or Power Toggle scre<strong>en</strong> page 9. Of course, it is<br />
possible to control the MAP 1 without any Activity, but to tap the full pot<strong>en</strong>tial of<br />
the Harmony One you need to configure Activities customized to your needs (please<br />
refer to the separate <strong>manual</strong> of the Harmony One).<br />
Note:<br />
• Please read the separate user's <strong>manual</strong> to your <strong>Audionet</strong> System Remote Control<br />
Harmony One. Activities, Devices and Device Mode as well as customizing the<br />
remote control are discussed there.<br />
The Device Mode for MAP 1 comprises a total of 9 scre<strong>en</strong> pages containing all infrared<br />
commands. Scre<strong>en</strong> pages 1 and 2 include the corresponding keys for directly accessing<br />
the input channels of the MAP 1. All keys relevant while list<strong>en</strong>ing, you will find on<br />
scre<strong>en</strong> pages 3 to 5. If you want to change any setup options, use keys on page 6. Scre<strong>en</strong><br />
pages 7 and 8 contain commands to setup the parametric digital equalizer. On page 9<br />
you find the commands to switch the MAP 1 on/off while using the Harmony One in<br />
Device Mode.<br />
Navigate through a setup m<strong>en</strong>u of the MAP 1:<br />
Press a m<strong>en</strong>u key to <strong>en</strong>ter the corresponding m<strong>en</strong>u option. Details on every m<strong>en</strong>u item<br />
you will find in the following sections. To navigate through the m<strong>en</strong>u items, use the<br />
Ch+ and Ch- keys. Key Ch- has the same function as the set key on the front<br />
panel. To select an option, use Vol+ and Vol- keys. Vol+ works like the up key at<br />
the front panel, Vol- works like the down key.<br />
There are three ways to leave a m<strong>en</strong>u:<br />
1. Press the same m<strong>en</strong>u key again to get back to RUN mode.<br />
2. Press any other m<strong>en</strong>u key to <strong>en</strong>ter a new m<strong>en</strong>u.<br />
3. Wait for approx. 12 seconds without using any key. After this time the MAP 1 goes<br />
back to RUN mode automatically.<br />
14