Engine Cylinder Head Installation - JustAnswer
Engine Cylinder Head Installation - JustAnswer
Engine Cylinder Head Installation - JustAnswer

Create successful ePaper yourself
Turn your PDF publications into a flip-book with our unique Google optimized e-Paper software.
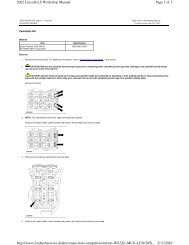
clamping force and may damage the fastener. Use the correct tightening<br />
sequence and specifications when installing fasteners in order to avoid<br />
damage to parts and systems.<br />
Exhaust Camshaft Actuator Notice: The exhaust camshaft actuator must<br />
be fully advanced during installation. <strong>Engine</strong> damage may occur if the<br />
camshaft actuator is not fully advanced. Refer to Camshaft Position Actuator<br />
Diagnosis in SI.<br />
Important: To aid in aligning the actuator to the camshaft, use a 25 mm<br />
(1 in) open end wrench on the hex of the camshaft to rotate. This will ensure<br />
the alignment pin is properly engaged with the camshaft and Hand Tighten<br />
the new exhaust camshaft sprocket bolt.<br />
5. Install the exhaust camshaft actuator/sprocket and chain onto the exhaust<br />
camshaft. Use scribe marks as an alignment guide.<br />
Important: To aid in aligning the intake sprocket to the camshaft, use a<br />
25 mm (1 in) open end wrench on the hex of the camshaft to rotate. This will<br />
ensure the alignment pin is properly engaged with the camshaft and Hand<br />
Tighten the new intake camshaft sprocket bolt.<br />
6. Install the intake camshaft sprocket and chain onto the intake camshaft. Use<br />
scribe marks as alignment guide.<br />
7. Tighten the new intake camshaft sprocket bolt. Refer to the above illustration.<br />
Tighten<br />
Tighten the intake camshaft sprocket bolt to 20 N·m (15 lb ft).<br />
Torque Angle Meter<br />
Use the J 45059 - Torque Angle Meter to rotate the intake camshaft sprocket<br />
bolt an additional 100 degrees.