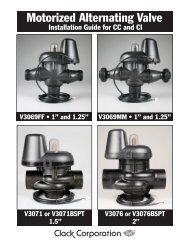
Water Specialist 1.5", 2" and 2L Control Valve ... - ClackValves.Net
Water Specialist 1.5", 2" and 2L Control Valve ... - ClackValves.Net
Water Specialist 1.5", 2" and 2L Control Valve ... - ClackValves.Net

You also want an ePaper? Increase the reach of your titles
YUMPU automatically turns print PDFs into web optimized ePapers that Google loves.
WS1.5, 2 & <strong>2L</strong> Drawings & Service Man u al Page 7<br />
Meter Assembly for WS2 <strong>and</strong> WS<strong>2L</strong> <strong>Valve</strong>s<br />
Note: Only 2" meters should be used on WS2 valves.<br />
St<strong>and</strong>ard meter cable used for spacing up to 3" between valve body <strong>and</strong> meter body, longer distance requires longer cable #V3221.<br />
Service or replace the turbine by:<br />
1. Turn the bypass for the system off <strong>and</strong> relieve the pressure on the system.<br />
2. Press downward on the remote meter assembly to relieve tension on the retaining clip V3632 (or the U-shaped V3223 WS2 Meter<br />
Clip). Remove the clip <strong>and</strong> take the meter assembly out of the housing.<br />
3. Remove the bend from the two exposed tips of the retaining clip V3501 <strong>and</strong> remove clip.<br />
4. Service or replace the V3118-03 WS15/2 Turbine Assembly <strong>and</strong> place it back in the turbine shaft.<br />
5. Insert the V3501 WS15/2 Turbine Clip <strong>and</strong> re-bend the exposed ends of the clip. The V3118-03 turbine has a groove to line up<br />
with the V3501 WS15/2 Turbine Clip.<br />
6. Insert meter assembly back into the meter housing.<br />
7. Re-install the meter retaining clip V3632 as shown below (or the U-shaped V3223 WS2 Meter Clip).<br />
8. Open the bypass for the system slowly to bring back into service <strong>and</strong> check to be sure you have no water leaks.<br />
The V3118-03 has a groove to line up with the V3501 WS1.5/2 Turbine Clip.<br />
B indicates BSPT<br />
N indicates NPT<br />
6a<br />
Drawing No. Order No. Description Quantity<br />
1 V3003-02* WS1.5/<strong>2L</strong>/2H Meter Commercial Asy 1<br />
2 V3118-03 WS1.5/2 Turbine Asy 1<br />
3 V3105 O-Ring 215 1<br />
4 V3501 WS1.5/2 Turbine Clip 1<br />
5<br />
V3222-01<br />
V3222BSPT-01<br />
WS2 Meter NPT Housing<br />
WS2 Meter BSPT Housing<br />
1<br />
6a V3223 WS2 Meter Clip 1<br />
6b V3632** WS1.5/2/3 Meter Retaining Clip 1<br />
Not Shown V3488 WS2 Flow Straightener (located inside meter housing) 1<br />
Installation of the WS2 Meter NPT Assembly can be accomplished with 2” NPT pipe or by using a 2½” groove lock coupling. For<br />
WS2 Meter BSPT Assembly use 63mm pipe. When installing the WS2 Meter Assembly it is necessary that the meter be installed in<br />
a horizontal position. After installing the meter, break out the tab in the back plate <strong>and</strong> thread the meter cord through.<br />
WHEN INSTALLING THE METER, MAKE SURE THE ARROW ON THE METER BODY IS GOING THE SAME<br />
DIRECTION AS THE WATER FLOW.<br />
OPERATING PRESSURES: 20 PSI MINIMUM / 125 PSI MAXIMUM • OPERATING TEMPERATURES: 40°F MINIMUM /<br />
110°F MAXIMUM<br />
*Order number V3003-02 includes V3118-03, V3501 <strong>and</strong> V3105.<br />
1<br />
B indicates BSPT<br />
N indicates NPT<br />
Typical meter retaining clip installation.<br />
Ensure clip is fully engaged in groove<br />
<strong>and</strong> tabs positioned in slot as shown.<br />
Bend clip<br />
after install<br />
** In 2008 a modifi cation was made to Meter Housings to use V3632 WS1.5/2/3 Meter Retaining Clip. Do not use V3632 on old<br />
style housings which have holes through the castings to accept the U-shaped V3223 WS2 Meter Clip.<br />
2<br />
5<br />
4<br />
3<br />
6b<br />
Area of<br />
detail