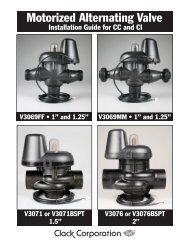
Water Specialist 1.5", 2" and 2L Control Valve ... - ClackValves.Net
Water Specialist 1.5", 2" and 2L Control Valve ... - ClackValves.Net
Water Specialist 1.5", 2" and 2L Control Valve ... - ClackValves.Net

You also want an ePaper? Increase the reach of your titles
YUMPU automatically turns print PDFs into web optimized ePapers that Google loves.
Page 24 WS1.5, 2 & <strong>2L</strong> Drawings & Service Man u al<br />
Replace the motor if necessary. Do not lubricate the motor or the gears. To reinstall the motor, move the spring clip loop to the<br />
right <strong>and</strong> hold. Gently turn the motor while inserting so that the gear on the motor meshes with the gears under the drive gear cover.<br />
Release the spring clip loop <strong>and</strong> continue to rotate the motor until the motor housing engages the small plastic bulge inside the drive<br />
bracket motor retainer. Reconnect the motor plug to the two-pronged jack on the lower left h<strong>and</strong> side of the PC board. If the motor<br />
will not easily engage with the drive gear when reinstalling, lift <strong>and</strong> slightly rotate the motor before reinserting. Reconnect the<br />
power plug.<br />
Replace the valve cover. After completing any valve maintenance, press <strong>and</strong> hold NEXT <strong>and</strong> REGEN buttons for 3 seconds or<br />
unplug power source jack (black wire) <strong>and</strong> plug back in. This resets the electronics <strong>and</strong> establishes the service piston position. The<br />
display should fl ash all wording, then fl ash the software version <strong>and</strong> then reset the valve to the service position.<br />
Drive Cap Assembly, Main Piston <strong>and</strong> Regenerant Piston<br />
The drive assembly must be removed to access the drive cap assembly. The drive cap assembly must be removed to access the<br />
piston(s). The drive cap assembly is threaded into the control valve body <strong>and</strong> seals with an o-ring. To remove the drive cap as sem bly<br />
use the special plastic wrench (V3193-02 Figure 1) or insert a ¼” to ½” fl at bladed screwdriver into one of the slots around the top<br />
2” of the drive cap as sem bly so it engages the notches molded into the drive back plate around the top 2” of the piston cavity. See<br />
Figure 2. The notches are visible through the holes. Lever the screwdriver so the drive cap assembly turns counter clockwise. Once<br />
loosened unscrew the drive cap assembly by h<strong>and</strong> <strong>and</strong> pull straight out.<br />
Loosens Drive Cap<br />
Figure: 1<br />
Part Number<br />
V3193-02<br />
Figure: 2<br />
The drive cap assembly contains the drive cap, the main drive gear, drive cap spline, piston rod <strong>and</strong> various other parts that should<br />
not be dissembled in the fi eld. The only replaceable part on the drive cap assembly is the o-ring. Attached to the drive cap assembly<br />
is the main piston (down fl ow) <strong>and</strong> if a regenerant is used, a regenerant piston.<br />
The regenerant piston (the small diameter one behind the main piston) is removed from the main piston by unsnapping it from its<br />
latch. Chem i cal ly clean in dilute sodium bisulfi te or vinegar or replace the regenerant piston if needed. To remove the main down<br />
fl ow piston fully extend the piston rod <strong>and</strong> then unsnap the main piston from its latch by pressing on the side with the number.<br />
Chem i cal ly clean in dilute sodium bisulfi te or vinegar, or replace the main piston. The main piston is tefl on coated. If the tefl on<br />
coating is abraided, replace the main piston.<br />
Reattach the main piston to the drive cap assembly. Reattach the regenerant piston (if needed) to the main piston. Do not lubricate<br />
the piston rod, main piston or regenerant piston. Lubricant will adversely affect the clear lip seals. Reinsert the drive cap assembly<br />
<strong>and</strong> piston into the spacer stack assembly <strong>and</strong> h<strong>and</strong> tighten the drive cap assembly. Continue to tighten the drive cap assembly using<br />
a screwdriver as a ratchet or the V3193-01 wrench until the black o-ring on the spacer stack assembly is no longer visible through<br />
the drain port. Excessive force can break the notches molded into the drive back plate. Make certain that the main drive gear still<br />
turns freely. The exact position of the piston is not important as long as the main drive gear turns freely.