WSTC Filter - ClackValves.Net
WSTC Filter - ClackValves.Net
WSTC Filter - ClackValves.Net

You also want an ePaper? Increase the reach of your titles
YUMPU automatically turns print PDFs into web optimized ePapers that Google loves.
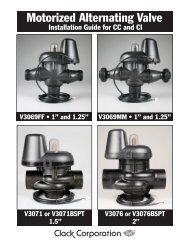
WS1 TC FILTER INSTALLATION GUIDE<br />
General installation & Guide<br />
The control valve, fittings and/or bypass are designed to accommodate minor plumbing misalignments but are not designed to support the weight of a<br />
system or the plumbing.<br />
Do not use Vaseline, oils, other hydrocarbon lubricants or spray silicone anywhere. A silicone lubricant may be used on black o-rings but is not<br />
necessary. Avoid any type of lubricants, including silicone on red or clear lip seals.<br />
Do not use pipe dope or other sealants on threads. Teflon tape must be used on the threads of the 1” or the ¼” connection and on the threads for the<br />
drain line connection. Teflon tape is not necessary on the nut connections or cap because o-rings seals are used. The nuts and caps are designed to be<br />
tightened by hand or with the special plastic service wrench, #V3193-XXX. If necessary a pliers can be used to unscrew the nut or cap. Do not use a<br />
pipe wrench. Do not place screwdriver in slots on caps and/or tap with a hammer.<br />
1. The distance between the drain and the water filter should be as short as possible. All plumbing should be done in accordance with local<br />
plumbing codes.<br />
2. Do not install any water filter with less than 10 feet of piping between its outlet and the inlet of a water heater.<br />
3. Do not locate unit where it or its connections (including the drain and overflow lines) will ever be subjected to room temperatures under<br />
34F.<br />
4. Inlet/outlet plumbing: connect to a supply line and install an inlet shutoff valve.<br />
5. Drain line: Be sure that the drain can handle the backwash rate of the system and install a flexible plastic tube to the Drain Line Assembly.<br />
6. Serial number: Record the serial number on the installer’s and customer’s records.<br />
Bypass Valve (optional)<br />
The bypass valve is used to isolate the control valve from the plumbing system in order to perform valve repairs or maintenance.<br />
1. Normal Operation Position: The inlet and outlet handles point in the direction of flow indicated by the engraved arrows on the control<br />
valve. (See Figure 1)<br />
2. Bypass Position: The inlet and outlet handles point to the center of the bypass. Untreated water is supplied to the plumbing system. (See<br />
Figure 2)<br />
Start-up Instructions<br />
- After installation is completed rotate the bypass handles to the bypass position.<br />
- Fully open a cold water faucet<br />
- Allow water to run until clear to ride pipes of debris, which may have occurred during installation.<br />
- The system is now ready for testing:<br />
1. Press and hold the UP and DOWN buttons simultaneously for three seconds until the drive motor starts. Wait until the<br />
motor stops and the display reads “CI”<br />
2. Open the inlet handle of the bypass valve very slightly allowing water to fill the tank slowly in order to expel air.<br />
CAUTION: If water flow is too rapid, there will be a loss of media out of the drain.<br />
3. When the water is flowing steadily to the drain without the presence of air, fully open the inlet bypass valve handle.<br />
4. Press the UP button again to advance the control to the next positions and allow water to run to drain for 2-3 minutes.<br />
Control will transfer and the display will read C3 or C4 depending on the program used. If C3 is displayed, press the<br />
UP button to advance the control to the rinse position C4. Allow water to run to drain until clear.<br />
5. Press the UP button to advance the control to the service position.<br />
PAGE | 1
SYSTEM SETUP<br />
PAGE | 2
SYSTEM SETUP – CONTINUED<br />
PAGE | 3
GENERAL INFORMATION<br />
Figure 1 Figure 2<br />
PAGE | 4