

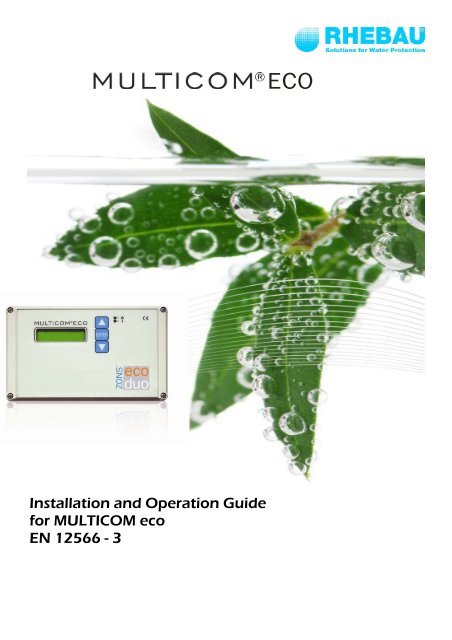
Installation and Operation Guide for MULTICOM eco EN 12566 - 3
Installation and Operation Guide for MULTICOM eco EN 12566 - 3
Installation and Operation Guide for MULTICOM eco EN 12566 - 3

Create successful ePaper yourself
Turn your PDF publications into a flip-book with our unique Google optimized e-Paper software.
<strong>Installation</strong> <strong>and</strong> <strong>Operation</strong> <strong>Guide</strong><br />
<strong>for</strong> <strong>MULTICOM</strong> <strong>eco</strong><br />
<strong>EN</strong> <strong>12566</strong> - 3<br />
ECO
Introduction<br />
© RHEBAU GmbH<br />
ECO<br />
With the <strong>MULTICOM</strong> <strong>eco</strong>, we focussed on developing a control unit that meets future<br />
dem<strong>and</strong>s.<br />
Further developments in engineering <strong>and</strong> rising legal requirements can be achieved<br />
without problems by updates<br />
The most important features of the <strong>MULTICOM</strong> <strong>eco</strong>:<br />
− Text display<br />
− Three key h<strong>and</strong>ling<br />
− Comprehensive <strong>and</strong> simple menu navigation<br />
− Self test of the control unit<br />
− Password protection<br />
− Digital operation journal<br />
− Optical <strong>and</strong> acoustic alarms<br />
− Floating distance contact <strong>for</strong> external alarm devices<br />
The function of the control unit depends on the inserted software. The unit saves all<br />
parameters on an internal EEPROM. Thus, these parameters are being preserved in case of<br />
an alternating current dump.<br />
The unit has a double-spaced LCD display with 16 signs each. The unit is operated by three<br />
keys. A blinking green LED signalises operation, a red LED signalises disturbances. After<br />
achieving normal voltage, the unit undergoes a self test of the program memory. If this test<br />
is executed successfully, the unit starts the main program.<br />
The device features a floating distance alarm relay <strong>for</strong> the connection of an external alarm<br />
device. It is also equipped with an acoustical alarm device.<br />
The egressions are combined with a protection fused <strong>and</strong> get controlled with a combined<br />
trans<strong>for</strong>mer.<br />
The Multicom <strong>eco</strong> are serial appointed with a fuse F1 = 3,15 AT. Please use maximal a fuse<br />
6,,3 AT.<br />
The total connected load from the pumps/valves should not be overtravel 2.500 VA.<br />
Seite 2
Security advice<br />
© RHEBAU GmbH<br />
ECO<br />
This guide is valid <strong>for</strong> the <strong>MULTICOM</strong> control unit <strong>for</strong> ZONS <strong>eco</strong>.<br />
It contains important advice <strong>and</strong> safety regulations. It is written <strong>for</strong> both the installer <strong>and</strong> the<br />
operator. Please, read this guide carefully be<strong>for</strong>e installing <strong>and</strong> commissioning the plant.<br />
All safety regulations must be respected.<br />
The control unit may only be connected <strong>and</strong> operated by authorised staff!<br />
Be<strong>for</strong>e opening the control unit, turn off the power!<br />
Only open the lower cover, not the upper enclosure!<br />
Further in<strong>for</strong>mation <strong>and</strong> instruction can be inquire by the producer.<br />
In case of disregarding the Producer from the Multicom <strong>eco</strong> assume no responsibility.<br />
<strong>Installation</strong> <strong>and</strong> commissioning<br />
The condition <strong>for</strong> installation <strong>and</strong> h<strong>and</strong>ling of the control unit is only authorised by appointed<br />
staff.<br />
The control unit is intended <strong>for</strong> wall installation.<br />
Install the control unit in a designated place that is roofed over <strong>and</strong> always accessible.<br />
Do not turn the power on until the installation is complete!<br />
The measures <strong>for</strong> the installation wholes are indicated on the back of the control unit.<br />
With the enclosed boring template, specify <strong>and</strong> flag 4 boreholes.<br />
Boring 6 mm holes<br />
<strong>and</strong> take the enclosed 6 mm dowel.<br />
Be<strong>for</strong>e you arm the Multicom <strong>eco</strong> open it.<br />
Assure that not any particles from the equipment<br />
will be damaged<br />
Arm the control box, with the enclosed<br />
screws on the designated area (4,0 x45 mm)<br />
Seite 3
Be<strong>for</strong>e commissing <strong>and</strong> turning on power, make sure that<br />
− the unit doesen`t show any visible damage<br />
− The technical equipment is installed correctly<br />
− All connections are made correctly<br />
− The power supply meets all regulations in <strong>for</strong>ce<br />
− The unit is closed properly<br />
All safety regulations in <strong>for</strong>ce have to be respected!<br />
© RHEBAU GmbH<br />
ECO<br />
Adjust the parameters (see <strong>Guide</strong> <strong>for</strong> <strong>Operation</strong> <strong>and</strong> Maintenance)<br />
After attachment close the Multicom <strong>eco</strong> <strong>and</strong> attach the plug of the ZONS <strong>eco</strong><br />
Cable to the plug in the control unit <strong>and</strong> screw the plug<br />
If all operations made on the sewage treatment plant ,<br />
the construction can be conected on the network.<br />
At the end take all required settings <strong>and</strong> start up.<br />
Seite 4
Menu navigation<br />
System code<br />
0000<br />
Rhebau-VLC<br />
Version V1.00.7<br />
Aerator ON<br />
normal xx min<br />
Serial no.<br />
0000000<br />
Service level<br />
SBR NORM<br />
Cycle 00:00:00<br />
Alarm reset<br />
© RHEBAU GmbH<br />
Aerator Pause<br />
normal xx min<br />
Typ of plant<br />
SBR<br />
M1 ---> OFF<br />
I-ist --> 00,0 A<br />
Manual<br />
operation<br />
Aerator ON<br />
save xx min<br />
Population total<br />
XX<br />
V1 ---> OFF<br />
I --> 00,0 A<br />
Low current<br />
M1 0,0A<br />
Current<br />
measurement<br />
M1:ON M2:OFF<br />
V1: ON V2:OFF<br />
Aerator Pause<br />
save xx min<br />
Start-up period<br />
disabled<br />
V2 ---> OFF<br />
I --> 00,0 A<br />
High current<br />
M1 0,0A<br />
<strong>Operation</strong> hours<br />
clear --> Yes<br />
Operating hours<br />
Line > 00000,0h<br />
Operating hours<br />
Operating hours<br />
Line -->00000,0h<br />
Operating hours<br />
Feed init.<br />
ON xxx sec<br />
Time<br />
00:00:00<br />
M2 ---> OFF<br />
I-ist --> 00,0 A<br />
<strong>Operation</strong> hours<br />
clear --> no<br />
Operating hours<br />
M1 > 00000,0h<br />
System language<br />
English<br />
Operating hours<br />
M1 -->00000,0h<br />
Power failure<br />
ECO<br />
Feed<br />
PAUSE xx min<br />
Date<br />
Mo 00:00:0000<br />
Leave area<br />
High current<br />
V1 0,0A<br />
Error memory<br />
Operating hours<br />
V1 -->00000,0h<br />
Error memory<br />
Dentrification<br />
ON xx min<br />
Setting<br />
Running times<br />
<strong>Operation</strong> hours<br />
V2 > 00000,0h<br />
Operating hours<br />
V2 -->00000,0h<br />
Leave area<br />
Time: 00:00:00<br />
Date: 00:00:0000<br />
Return sludge<br />
backflow xx sec<br />
Leave area<br />
High current<br />
V2 0,0A<br />
Operating hours<br />
M2 -->00000,0h<br />
System control<br />
Sedimentation<br />
period xxx min<br />
Leave area<br />
Leave area<br />
Clearwater<br />
pump-off xxx min<br />
Scavenge impulse<br />
1/10x xx sec<br />
Leave area<br />
Leave area<br />
Arrow keys<br />
Enter<br />
Seite 5
© RHEBAU GmbH<br />
ECO<br />
The menu navigation <strong>and</strong> input of the parameters is done by the enter key <strong>and</strong> the<br />
arrow keys. In the setting levels listed below, the red arrows st<strong>and</strong> <strong>for</strong> the arrow keys<br />
<strong>and</strong> the green arrows st<strong>and</strong> <strong>for</strong> the enter key. Every input must be confirmed by pressing<br />
“enter”.<br />
Main menu<br />
Rhebau-VLC<br />
Version V1.00.7<br />
SBR NORM<br />
Cycle 00:00:00<br />
Alarm reset<br />
M1:ON M2:OFF<br />
V1 :ON V2:OFF<br />
Operating hours<br />
Power failurel<br />
Error memory<br />
Time: 00:00:00<br />
Date: 00:00:0000<br />
System control<br />
To the control menu<br />
Arrow keys<br />
Enter<br />
Operating hours<br />
Line -->00000,0h<br />
Operating hours<br />
M1 -->00000,0h<br />
Operating hours<br />
V1 -->00000,0h<br />
Operating hours<br />
V2 -->00000,0h<br />
Operating hours<br />
M2 -->00000,0h<br />
Leave area<br />
shows the type of plant<br />
the alarm is confirmed with<br />
display of the aggregates, “L” st<strong>and</strong>s<br />
<strong>for</strong> “line (on)”, “O” st<strong>and</strong>s <strong>for</strong> “off”<br />
here, the operation hours of aggregates<br />
can be observed<br />
alternating current dumps with date <strong>and</strong> time<br />
alarm messages with date <strong>and</strong> time<br />
time <strong>and</strong> date display<br />
leeds to the password level by pressing “enter”<br />
Seite 6
System menu<br />
© RHEBAU GmbH<br />
ECO<br />
The system code is entered by pressing “enter”<br />
<strong>and</strong> the arrow keys<br />
to basic level settings<br />
to the test run level<br />
to ammeter level<br />
to operation hours level of the aggregates<br />
system language can be switched from English to<br />
Seite 7
Service level<br />
Settings are executed<br />
by pressing<br />
“enter” <strong>and</strong><br />
the arrow keys<br />
© RHEBAU GmbH<br />
*<br />
Serial no.<br />
0000000<br />
Typ of plant<br />
SBR<br />
Population total<br />
XX<br />
Start-up period<br />
disabled<br />
Time:<br />
00:00:00<br />
Date<br />
Mo 00:00:0000<br />
Setting<br />
running times<br />
Leave area<br />
To the menu item<br />
Service area<br />
Arrow keys<br />
Enter<br />
ECO<br />
Aerator ON<br />
normal xx min<br />
Aerator Pause<br />
normal xx min<br />
Aerator ON<br />
spar xx min<br />
Aerator Pause<br />
save xx min<br />
Feed init.<br />
ON xxx sec<br />
Feed<br />
PAUSE xx min<br />
Denitrification<br />
ON xx min<br />
Return sludge<br />
backflow xx sec<br />
Sedimentation<br />
period xxx min<br />
Clearwater<br />
pump-off xxx min<br />
Scavenge impulse<br />
1/10x xx sec<br />
Leave area<br />
Settings are<br />
executed by<br />
pressing<br />
“enter” <strong>and</strong> the<br />
arrow keys<br />
* start-up period enabled:<br />
The surpuls sludge backflow is disabled, regardless of the settings. Three months after comissoining, the start-up period is disabled<br />
automatically<br />
* start-up period disabled:<br />
The surpuls sludge backflow is activated.<br />
Seite 8
Test run level<br />
Settings are executed<br />
by pressing<br />
“enter” <strong>and</strong><br />
the arrow keys<br />
© RHEBAU GmbH<br />
System code<br />
0000<br />
Service level<br />
Manual<br />
operation<br />
Current<br />
measurement<br />
Operating hours<br />
System language<br />
English<br />
Leave area<br />
To the conrol menu<br />
Arrow keys<br />
Enter<br />
ECO<br />
M1 ---> OFF<br />
I --> 00,0 A<br />
V1 ---> OFF<br />
V2 ---> OFF<br />
M2 ---> OFF<br />
t I<br />
--> 00,0 A<br />
Leave area<br />
Settings are executed<br />
by pressing<br />
“enter” <strong>and</strong><br />
the arrow keys<br />
Seite 9
Ammeter level<br />
Settings are executed<br />
by pressing<br />
“enter” <strong>and</strong><br />
the arrow keys<br />
© RHEBAU GmbH<br />
System code<br />
0000<br />
Service level<br />
Manual<br />
operating<br />
Current,<br />
measurement<br />
Operating hours<br />
System language<br />
English<br />
Leave area<br />
To the control menu<br />
Arrow keys<br />
Enter<br />
ECO<br />
Low current<br />
M1 0,0A<br />
High current<br />
M1 0,0A<br />
High current<br />
V1 0,0A<br />
High current<br />
V2 0,0A<br />
High current<br />
M2 0,0A<br />
Leave area<br />
Settings are executed<br />
by pressing<br />
“enter” <strong>and</strong><br />
the arrow keys<br />
Seite 10
Operating hours level<br />
Settings are executed<br />
by pressing<br />
“enter” <strong>and</strong><br />
the arrow keys<br />
© RHEBAU GmbH<br />
System code<br />
0000<br />
Service level<br />
Manual<br />
operating<br />
Current<br />
measurement<br />
Operating hours<br />
System language<br />
English<br />
Leave area<br />
To the control menu<br />
Arrow keys<br />
Enter<br />
ECO<br />
Operating hours<br />
Line > 00000,0h<br />
Operating hours<br />
M1 > 00000,0h<br />
Operating hours<br />
V1 > 00000,0h<br />
Operating hours<br />
V2 > 00000,0h<br />
Operating hours<br />
M2 > 00000,0h<br />
Leave area<br />
Operating hours<br />
Clear --> yes<br />
Operating hours<br />
Clear --> No<br />
Settings are<br />
executed by<br />
pressing “enter”<br />
<strong>and</strong> the arrow<br />
keys<br />
Seite 11
Specifications<br />
© RHEBAU GmbH<br />
ECO<br />
Case Synthetic material, light grey<br />
<strong>Installation</strong> Wall installation on three screws<br />
Mechanical rating IP 54<br />
Mains connection 230 V ~ 50 Hz + 10%<br />
1,5 m Mains connection conductor with<br />
Shockproof plug<br />
Aggregates 230 V /50 Hz<br />
M1, M2, P < 0,75 kW<br />
V1, V2 < 0,1 Kw<br />
Maximum installed power 2500 VA<br />
Area of ammeter min. 0,25 5 A<br />
Max. 0,05 1 A<br />
+ 10%<br />
Temperature rise guard of the pumps: about thermostat relay at the motor<br />
In chain with the motor<br />
Current consumption typ. 5 VA<br />
Required fuse 16 A G<br />
Entries In1, In2<br />
Contact voltage 24 V<br />
Contact current 1 mA (typ.)<br />
Alarm relays Maximum contact voltage 230 V~<br />
Maximum contact current 5A; Ac1<br />
Internal buzzer typ. 70 dB (A)<br />
Displays 2x 16 LCD display<br />
1x LED green<br />
1x LED red<br />
H<strong>and</strong>ling Three key h<strong>and</strong>ling<br />
Temperature range -10°C to 50°C (14°F to 122°F)<br />
Humidity: 0-90% RH, non-condensing<br />
Dimensions: 200 x 120 x 58 mm<br />
Seite 12
CE Labelling<br />
© RHEBAU GmbH<br />
ECO<br />
The control unit complies with the EU directives <strong>for</strong> CE labelling.<br />
Type of device <strong>MULTICOM</strong> <strong>eco</strong><br />
Control unit <strong>for</strong> automatic control of small biological<br />
wastewater treatment plants according to DIN 4261<br />
Directives EMV directives 89/336/EWG<br />
Low voltage directive 73/23/EWG<br />
Applied harmonised norms<br />
Norms: EMVG <strong>EN</strong> 50081-1<br />
<strong>EN</strong> 50082-1<br />
<strong>EN</strong> 61000-3-2<br />
Low voltage directive <strong>EN</strong> 60204-1<br />
Manufacturer Scharco Elektronik GmbH & Co. KG<br />
Tilsiter Straße 8<br />
D-42277 Wuppertal<br />
Seite 13
