ASSEMBLY MANUAL - Hobie Cat
ASSEMBLY MANUAL - Hobie Cat
ASSEMBLY MANUAL - Hobie Cat

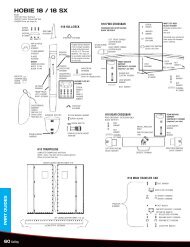
Create successful ePaper yourself
Turn your PDF publications into a flip-book with our unique Google optimized e-Paper software.
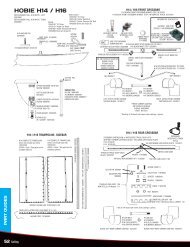
After both main trampoline halves are in place, but not laced,<br />
install the forward trampoline following the same technique as<br />
with the main. Except, because the forward trampoline is one<br />
piece, it is necessary to<br />
alternate from side to side<br />
while feeding it into the<br />
tracks.<br />
As the trampoline becomes more<br />
difficult to feed, Alternate from one<br />
side to the other keeping the<br />
trampoline somewhat even. You can<br />
sit or lay on the trampoline to stretch<br />
it a bit.<br />
Carefully feed the<br />
trampoline into the tracks.<br />
Continue to feed the<br />
trampoline equally on both<br />
sides.<br />
6<br />
Once the forward<br />
trampoline is<br />
nearly all the way<br />
into the track it<br />
may be<br />
necessary to use<br />
the Bow<br />
Spreader Pole for<br />
leverage to pull it taught. Tie a lace line to the grommet. Wrap<br />
the line around the beam and then pass it back through the<br />
grommet again. This will create a 3:1 purchase to help pull the<br />
trampoline forward. Once again, alternate from side to side to<br />
keep the trampoline even. Carefully feed at the opposite end<br />
to prevent the trampoline from getting wedged in the track<br />
opening. Pull the trampoline all the way tight.<br />
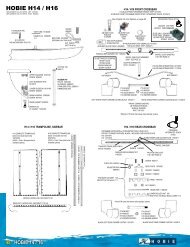
LACE FORWARD TRAMPOLINE - Slide<br />
the longer (of the two provided) lace rod<br />
into the forward trampolines pocket. Tie<br />
the lace<br />
line to the<br />
eyelet.<br />
Pass the line through the<br />
grommet in the trampoline.<br />
Continue to each slide and<br />
cutout across the tramp.<br />
Come back to the starting<br />
point and begin tightening<br />
the lace line to pull the<br />
trampoline tight.<br />
Work your way across the<br />
trampoline to the other<br />
side, then tie off with half<br />
hitches.<br />
Pass the line back through the<br />
eyelet, then over to the first<br />
slide. Pass the line to the first<br />
cutout and around the rod.<br />
Then back to the first slide.