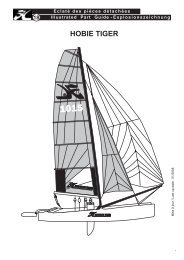
ASSEMBLY MANUAL - Hobie Cat
ASSEMBLY MANUAL - Hobie Cat
ASSEMBLY MANUAL - Hobie Cat

You also want an ePaper? Increase the reach of your titles
YUMPU automatically turns print PDFs into web optimized ePapers that Google loves.
DOCKING<br />
Docking the Getaway properly will prevent damage. Always<br />
dock and rig on the leeward side of a dock (the side the wind<br />
reaches last). Come in slowly and always be aware of the<br />
wind direction so you can properly de-power the boat when<br />
needed. The stronger the wind the more difficult the docking<br />
will be. Until you feel confident, you may want to practice with<br />
a friend who will remain on the dock and help slow you down if<br />
necessary.<br />
BEACH LANDINGS<br />
Landing on a beach is simple. The idea is to reach the beach<br />
in the point of sail nearest straight into the wind as possible.<br />
This will assure that you can properly de-power the sail once<br />
beached.<br />
Approaching a beach when the wind is blowing from the beach<br />
out towards the water will require some planning so that you<br />
maintain power. Turn into shore just before the hulls or<br />
rudders touch bottom. Plan so the final tack towards the<br />
location you choose to land is the tack that is nearest straight<br />
into the wind. Get a little closer to the beach than you need on<br />
the pervious tack to account for wind shifts in direction and<br />
speed. This will give you a little room for error. This will allow<br />
you to point a little further away from the wind after the tack to<br />
gain speed before heading up into the beach to de-power at<br />
the last moment.<br />
When approaching a beach when the wind is blowing onshore,<br />
sail in towards the beach from either side of the landing spot.<br />
Sail in just short of touching the bottom with the rudders. Allow<br />
some distance to turn the boat out towards the water and into<br />
the wind just out from the landing spot. Turn sharply to head<br />
into the wind and stall the boat. Raise the rudders and drift<br />
back onto the beach.<br />
Always keep the boat pointed into the wind while beached and<br />
keep the sail trimmed out and un-cleated.<br />
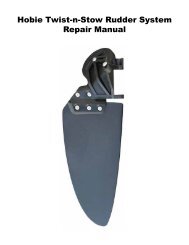
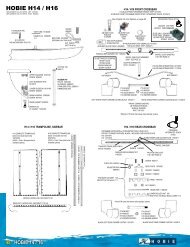
RUDDER TUNING<br />
You may adjust the rake of your rudder blades on your <strong>Hobie</strong><br />
Getaway. The amount of rake in a rudder blade affects the<br />
"feel" at the tiller. Basically, more forward blade rake<br />
neutralizes the pull on the tiller and less forward rake<br />
increases the pull on the tiller. Tuning blades for a comfortable<br />
feel is a matter of individual preference but a close to neutral<br />
"feel" generally provides the best steering. The following<br />
sketches are of a <strong>Hobie</strong> 16 rudder assembly but the<br />
adjustments are the same.<br />
1) The first step in making any rudder rake adjustment is to<br />
determine the existing rake. This is done with the rudder<br />
assembly hanging on the boat's transom, blade down and<br />
locked. Using a straight edge or snap line, extend the<br />
16<br />
12"<br />
1-1/8"<br />
Aft for more pull on<br />
the tiller<br />
Forward for less<br />
pull on the tiller<br />
centerline of the rudder pivot<br />
pins down, across the leading<br />
edge of the blade and draw a<br />
pencil line along that length.<br />
Measure the distance from the<br />
pencil line to the most forward<br />
spot 12" down the blade from<br />
the bottom of the casting..<br />
Rudder blade rake is pre-set at the factory to 1-1/8". This<br />
amount will be best for the average sailor and is a good<br />
starting point from which to begin any adjustments.<br />
2) To make any adjustment<br />
to the rake, unlock the tiller<br />
arm from the rudder<br />
housing and leave it<br />
unlocked.<br />
Screw<br />
3) If you wish to increase<br />
the amount of forward rake<br />
in the rudder blade, turn the<br />
Sketch B<br />
rake adjusting screw<br />
counterclockwise using a<br />
3/16" Allen wrench. Determine the increase in the rake by<br />
extending a new line from the centerline of the pivot pins. Remeasure<br />
the distance from the pencil line to the leading edge.<br />
Continue to adjust and measure until you have the desired<br />
amount of forward rake.<br />
4) If you wish to decrease the amount of forward rake turn the<br />
adjusting screw clockwise using a 3/16" Allen wrench. Check<br />
the decrease in the rake by the procedure in step 3 above .<br />
5) Next, while holding the rudder forward against the lower<br />
casting, carefully latch the tiller arm down onto rudder housing.<br />
Loosen the adjusting screw on top of the tiller arm about 3/4<br />
turn. Slide the adjusting screw forward (toward bow of boat)<br />
until it stops, then retighten. See sketch C.<br />
Sketch C<br />
Screw