ASSEMBLY MANUAL - Hobie Cat
ASSEMBLY MANUAL - Hobie Cat
ASSEMBLY MANUAL - Hobie Cat

Create successful ePaper yourself
Turn your PDF publications into a flip-book with our unique Google optimized e-Paper software.
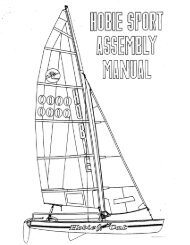
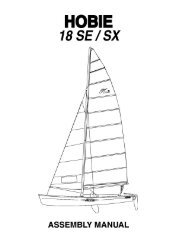
<strong>ASSEMBLY</strong><br />
<strong>MANUAL</strong>
WELCOME TO THE<br />
HOBIE WAY OF LIFE<br />
Congratulations on the purchase of your new HOBIE Getaway and welcome to the HOBIE® sailing family. The HOBIE<br />
Getaway cannot be outgrown. It can be sailed by children up through senior citizens. A single adult can sail it at top<br />
performance - and a crew of four can cruise in comfort.<br />
We offer this manual as a guide to increased safety and enjoyment of your new boat. The purpose of this publication is to<br />
provide easy, simple and accurate instructions on how to get your Getaway ready for the water. Please read them carefully<br />
and familiarize yourself with the boat and all of the parts spread before you.<br />
Whether you are a new sailor or a veteran of many years, we recommend that you read this thoroughly before your first sail<br />
and TRY IT OUR WAY FIRST! If you are new to sailing, this manual alone is not intended to teach you how to sail. There are<br />
many excellent books, videos and courses on the safe handling of small sailboats. We suggest that you contact your local<br />
sailboat dealer, college or Coast Guard Auxiliary for recommendations.<br />
Watch for overhead wires whenever you are rigging, launching, sailing or trailering with the mast up. CONTACT OF THE<br />
MAST WITH POWER LINES COULD BE FATAL! Be certain that the rigging area and the area that you will be sailing in are<br />
free of overhead power lines. Report any such power lines to your local power authority and sail elsewhere.<br />
We take pride in presenting the Getaway to you and hope that you'll take as much pride in owning her.<br />
Fair winds and good sailing!
GETAWAY <strong>ASSEMBLY</strong> <strong>MANUAL</strong><br />
This assembly manual takes you stepby-step<br />
through the setting-up and<br />
sailing of your new HOBIE Getaway.<br />
This manual will help you understand<br />
each part in detail.<br />
Setting up your Getaway PAGE<br />
Getaway terminology............................2<br />
List of parts...........................................3<br />
Knots to use .........................................4<br />
The hulls...............................................4<br />
Crossbars & Trampolines..................4-7<br />
Mast assembly ..................................8-9<br />
Mast Wires ...........................................9<br />
Stepping the mast ...........................9-10<br />
Main Sail and Battens ...................10-11<br />
Raising the main sail ..........................11<br />
Downhaul and adjustment..................11<br />
Mainsheet...........................................12<br />
Rigging the jib sail ..............................12<br />
Rudder assembly ...............................13<br />
Tiller cross bar and Extension ............13<br />
Righting line........................................13<br />
1<br />
Sailing your Getaway .................PAGE<br />
Balancing the boat ...................................14<br />
Steering ....................................................14<br />
Sail power.................................................14<br />
Turning......................................................15<br />
Launching.................................................15<br />
Righting the boat......................................15<br />
Docking and landing ................................16<br />
Rudder tuning...........................................16<br />
Trailering...................................................17<br />
Safety tips ..................................Back page
RUDDER CASTINGS<br />
SHROUD<br />
SAIL CLEW<br />
MAIN SHEET SYSTEM<br />
RUDDER<br />
BATTENS<br />
TILLER ARM<br />
Getaway Terminology<br />
SAIL<br />
HULL<br />
2<br />
MAST FLOAT<br />
FORESTAY<br />
DOWNHAUL<br />
MAST<br />
FORESTAY / BRIDLE<br />
ADJUSTER<br />
BRIDLE
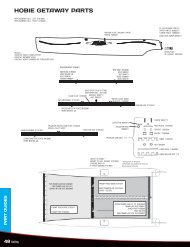
LIST OF PARTS<br />
Check the boat and parts carefully to be sure that all of the parts are<br />
present and that the boat is in good order.<br />
SMALL PARTS<br />
Mainsheet system<br />
Downhaul line<br />
Righting line<br />
Shroud wires<br />
Main halyard line<br />
Trampoline lace lines<br />
8<br />
5<br />
7<br />
6<br />
4<br />
3<br />
9<br />
3<br />
2<br />
1<br />
LARGE PARTS<br />
You should have:<br />
(2) Hulls with hardware<br />
➀ (1) Mast float<br />
➁ (1) Box of small parts<br />
➂ (1) Sail, battens and sail bag<br />
➃ (1) Forestay assembly with jib, bag<br />
➄ (1) Tiller cross bar, Tramp rods<br />
➅ (1) Front cross bar (Spreader)<br />
➆ (1) Rear cross bar<br />
➇ (1) Main cross bar (Mid)<br />
with Trampoline<br />
➈ (2) Rudder assemblies<br />
NOT SHOWN:<br />
(1) Upper mast section<br />
(1) Lower mast section<br />
(2) Trampoline lace rods
THE HULLS<br />
Lay the hulls on the ground, on their sides with bottoms to the<br />
center (graphics down), as shown above. A tarpoline or pads<br />
under the hull may be desirable if the ground surface is rough.<br />
Place the hulls about seven feet apart.<br />
CROSSBARS AND<br />
TRAMPOLINES<br />
The forward and main<br />
trampolines are rolled<br />
onto the front crossbar.<br />
Position the crossbar<br />
between the hulls near<br />
the forward cross bar<br />
sleeve in each hull.<br />
KNOTS TO USE<br />
FIGURE 8 KNOT<br />
AT END OF LINE<br />
FIGURE 8 KNOT BOWLINE KNOT HALYARD KNOT CLEATING OFF A LINE<br />
<strong>ASSEMBLY</strong> INSTRUCTIONS<br />
Note: There is one plug in the rear of each hull. These plugs<br />
are used to drain the hulls. The plugs should be in place<br />
before sailing. Remove the plugs after sailing to drain any<br />
water that may have leaked into the hulls. It is best to travel<br />
with and store the boat with the plugs removed to allow for<br />
pressure changes due to heating, cooling and altitude<br />
changes. This will prevent warping of the hull surface.<br />
Main Beam with Trampoline<br />
4<br />
Remove the bolt that is<br />
threaded into the<br />
plastic block on each<br />
end of the Bow<br />
Spreader Pole.<br />
1. 2.<br />
The rear crossbar has the main sheet traveler car and swivel<br />
cam cleat installed. Position it near the aft crossbar sleeve in<br />
each hull.<br />
The Bow Spreader Bar<br />
has slides, eye straps,<br />
bridle wires (2) and the<br />
roller furler installed.<br />
Position it near the<br />
recesses on each bow.
Insert the crossbars into one hull. See<br />
that the crossbars seat fully into their<br />
sockets in the hull.<br />
Using a cross bar as a lever arm, pull the hull to an upright<br />
position so that the crossbars are horizontal.<br />
Lifting one hull, or the<br />
other, at the rear can<br />
help align the socket<br />
for the forward<br />
spreader bar.<br />
Slide the other hull onto<br />
the crossbars until the<br />
hulls come in contact<br />
with the stop plates<br />
(located on the<br />
underside of the main<br />
and aft crossbars).<br />
5<br />
Re-Install the screws<br />
into each end form<br />
the outside of the<br />
hull. Do not over<br />
tighten or compress<br />
the plastic hull<br />
material.<br />
Be sure the<br />
f o r w a r d<br />
spreader is fully<br />
seated in both<br />
hulls.<br />
Unroll the trampolines from the forward crossbar. Slide the<br />
main trampoline bolt ropes into the hull trampoline tracks.<br />
Soapy water can be used as a lubricant (Do not use an oil or<br />
silicon lubricant on the trampoline track or the bolt rope).<br />
Sliding the bolt rope into the track is a 2 person job. One<br />
person should pull the trampoline and the other feed the bolt<br />
rope into the track.
After both main trampoline halves are in place, but not laced,<br />
install the forward trampoline following the same technique as<br />
with the main. Except, because the forward trampoline is one<br />
piece, it is necessary to<br />
alternate from side to side<br />
while feeding it into the<br />
tracks.<br />
As the trampoline becomes more<br />
difficult to feed, Alternate from one<br />
side to the other keeping the<br />
trampoline somewhat even. You can<br />
sit or lay on the trampoline to stretch<br />
it a bit.<br />
Carefully feed the<br />
trampoline into the tracks.<br />
Continue to feed the<br />
trampoline equally on both<br />
sides.<br />
6<br />
Once the forward<br />
trampoline is<br />
nearly all the way<br />
into the track it<br />
may be<br />
necessary to use<br />
the Bow<br />
Spreader Pole for<br />
leverage to pull it taught. Tie a lace line to the grommet. Wrap<br />
the line around the beam and then pass it back through the<br />
grommet again. This will create a 3:1 purchase to help pull the<br />
trampoline forward. Once again, alternate from side to side to<br />
keep the trampoline even. Carefully feed at the opposite end<br />
to prevent the trampoline from getting wedged in the track<br />
opening. Pull the trampoline all the way tight.<br />
LACE FORWARD TRAMPOLINE - Slide<br />
the longer (of the two provided) lace rod<br />
into the forward trampolines pocket. Tie<br />
the lace<br />
line to the<br />
eyelet.<br />
Pass the line through the<br />
grommet in the trampoline.<br />
Continue to each slide and<br />
cutout across the tramp.<br />
Come back to the starting<br />
point and begin tightening<br />
the lace line to pull the<br />
trampoline tight.<br />
Work your way across the<br />
trampoline to the other<br />
side, then tie off with half<br />
hitches.<br />
Pass the line back through the<br />
eyelet, then over to the first<br />
slide. Pass the line to the first<br />
cutout and around the rod.<br />
Then back to the first slide.
LACE MAIN TRAMPOLINE - Tie a bowline knot to the forward<br />
left/port grommet in the<br />
trampoline.<br />
Pass the line through the<br />
opposite grommet, top/down<br />
and then through the lacing<br />
flap.<br />
Come up through the next<br />
(left) grommet and then<br />
continue to lace towards<br />
the aft of the trampoline<br />
following this pattern<br />
(down through the right<br />
grommets and up through<br />
the left grommets). Keep<br />
the laces loose at this time. Lace as far aft as the line will go.<br />
Locate the aft lace rod. Feed<br />
the rod through the rear pocket<br />
as shown. Center the rod, from<br />
left to right, in the pocket.<br />
Locate the aft lace lines. Tie<br />
to the rear grommets using a<br />
long looped bowline as shown<br />
(left and right sides).<br />
Let the tramp hang below the aft<br />
crossbar. Pull the lace lines under<br />
the cross bar and tight. Begin the<br />
aft lacing by routing the left line up<br />
and over the first lace peg.<br />
Cross over to the next peg<br />
then down and around the<br />
rod. Pull the lace line tight<br />
then up and over the peg<br />
and then over to the next<br />
one and so on... Then<br />
start with the right side<br />
and work towards the<br />
7<br />
center.<br />
Image to left shows the proper<br />
routing of the lace lines around<br />
rod and peg.<br />
When you reach the center,<br />
the pattern must be changed<br />
slightly. Pass up and over the<br />
last peg, before the center, and then down around the rod in<br />
the gap between tramp halfs. Then, come up and through the<br />
trampoline grommet on the<br />
opposite side. Once tied off<br />
loosely at the center, cinch the<br />
line tight from each side working<br />
towards the center.<br />
Tie off to the main<br />
trampoline grommets just<br />
forward of the aft cross<br />
bar.<br />
Tuck the lace flap into the<br />
opposite side lace line. The<br />
flap will help keep you drier<br />
while sailing and keep lines<br />
from slipping into the water<br />
between the laces.<br />
Once the aft lace is tight, begin<br />
cinching the center lace tight<br />
from forward to aft. You will<br />
notice that as you get the<br />
trampoline tight you will have<br />
more lace line aft to complete the<br />
lacing.<br />
Work your way aft until the entire trampoline is<br />
tight. Tie off the line with a few half hitches.
MAST <strong>ASSEMBLY</strong><br />
WARNING!! The lower section of the mast is aluminum<br />
and displays warnings against assembling and sailing<br />
near overhead wires and<br />
power lines. The upper<br />
section is fiberglass and is<br />
designed to help prevent<br />
injury that can occur if the<br />
mast does contact a high<br />
power line. Before raising the<br />
mast, check that you are in a<br />
safe area and always<br />
remember this warning.<br />
* Getaway mast extrusion to CompTip assembly<br />
(normally performed by dealer prior to delivery)<br />
The purpose is to bond the two section together and<br />
seal out water. This will also keep the joint in proper<br />
alignment. This can affect sail shape if the fit<br />
becomes loose.<br />
Use some masking tape or the like, and mask off the<br />
area above and below the joint to make clean up<br />
easier. Also block off the luff tracks to prevent glue<br />
from bridging the sail openings due to excess glue<br />
oozing out of the joint.<br />
Be prepared to use force during the insertion. Air<br />
trapped inside the joint can prevent easy insertion.<br />
(The small black cap just below the joint can be<br />
removed and an air-release path can be poked<br />
through the foam if needed.) Place the mast on saw<br />
horses or blocks. Place the base of the mast against<br />
a solid, padded object.<br />
Apply the bonding agent to the inside and outside of<br />
the mating sections. Fit the two parts together as far<br />
as possible. If force is required, hold the upper<br />
section and pull the entire assembly a few inches<br />
away from the “solid object” (wall, tree, post) slide<br />
the assembly up against the “solid object” with some<br />
force. When the mast assembly (base) contacts the<br />
“solid object” the inertia will help slide the CompTip<br />
(upper section) deeper into the lower section.<br />
Repeat as many times as necessary to fully seat the<br />
sections together.<br />
Prop the mast up so that the track is straight up and<br />
then sight down the length with your eye to check the<br />
alignment at the joint. Straighten if necessary.<br />
Remove masking tape before glue dries.<br />
Allow bonding agent to dry.<br />
8<br />
Insert the upper section into the lower section. *We<br />
recommend that the upper<br />
section be bonded into the lower<br />
section with epoxy. The mast<br />
can be used without bonding the<br />
upper section into the lower to<br />
make storage easier if desired.<br />
MAST <strong>ASSEMBLY</strong><br />
Install the mast float to the upper<br />
mast section as shown. Be sure<br />
the blunt end of the float is facing<br />
forward towards blunt side of the<br />
mast. You may have to loosen<br />
the bracket bolts that pass<br />
through the mast head to get the<br />
screws aligned in the float.<br />
Pass the halyard line through the<br />
mast head from rear (track side) to<br />
front. Pull both ends of the halyard<br />
down the mast and tie off at the<br />
halyard cleat on the side of the<br />
mast near the base.<br />
To step the mast upright, position the<br />
mast base next to the mast step ball.<br />
The mast top and float should be<br />
positioned to the rear of the boat in<br />
the center of the rear crossbar. The<br />
arrow stickers<br />
on the mast and<br />
main crossbar<br />
must be aligned.<br />
Turn the mast onto it’s side to align<br />
the arrows.
MAST <strong>ASSEMBLY</strong> continued...<br />
Connect the mast base to the<br />
step ball by positioning the step<br />
ball inside the mast base cup.<br />
Pass the pin through the mast<br />
base as shown. Pass the ring<br />
through the pin to keep it captive.<br />
This pin should remain in place<br />
while sailing.<br />
MAST WIRES<br />
Attach the shackle to the lower<br />
hole in the mast tang. Tighten<br />
the screw pin with pliers.<br />
Route the two side stays to each<br />
hull. Be sure there are no tangles<br />
or twists in the wires. The wire<br />
that crosses the mast should be<br />
routed over (on top of) the mast.<br />
Locate the mast wires and<br />
uncoil. There are two side stays<br />
attached to a shackle. Find the<br />
jib assembly with swivel and<br />
upper pig tail. Pull all three wires<br />
to the mast tang. Hang the<br />
pigtail wire between the two side<br />
stay wires on the shackle.<br />
Use the safety wire provided to<br />
keep the pin from backing out<br />
due to vibration. Thread the wire<br />
through the pin head and around<br />
the shackle hoop. Twist the<br />
ends together with pliers to lock<br />
the pin in place.<br />
Check to be sure the wires are<br />
not crossed. Check that they are<br />
clear to allow the mast to swing<br />
to the upright position.<br />
9<br />
Once again, check the wires to see that they are positioned<br />
properly on the mast tang shackle and that they are routed to<br />
the hulls over the mast.<br />
STEPPING THE MAST<br />
Attach the adjusters to each hull<br />
as shown. Be sure the adjuster<br />
cover boots are installed on the<br />
wires first. Attach the side stay<br />
(shroud) wires to the top hole on<br />
each side of the boat.<br />
Slide the boots over the wire and<br />
adjusters.<br />
WARNING!!<br />
Watch for overhead power lines. Never rig,<br />
trailer or sail the boat near overhead power lines.<br />
Mast contact with a power line<br />
could be fatal.<br />
Before continuing, once again check for overhead power line<br />
wires that could contact the mast when raising it or when<br />
moving to the water for launching.<br />
Stand on the trampoline near the rear crossbar and lift the<br />
mast to your shoulder.
STEPPING THE MAST continued...<br />
Lean your weight<br />
against the mast to<br />
hold it in this<br />
position. The mast<br />
base/crossbar<br />
arrow alignment is<br />
no longer required.<br />
Be sure to keep the arrows at the<br />
mast base and front crossbar<br />
aligned. Face forward on the<br />
boat with a wide stance for<br />
stability. Walk forward while<br />
lifting the mast until the side<br />
shrouds go tight preventing the<br />
mast from further forward<br />
movement.<br />
Insert the forestay<br />
adjuster into the furler drum one or two holes and pin in place.<br />
Run the furling line from the drum<br />
to the cleat next to the mast.<br />
Pass the line through the cleat<br />
and tie a small figure 8 knot in the<br />
end of the line to keep it from<br />
slipping back through the cleat.<br />
At this time, pull the furling line to<br />
unwind the drum completely.<br />
The drum will be rewound when<br />
the sail is unfurled.<br />
10<br />
After stepping the mast, adjustments can be made to tension<br />
the wires and for raking the mast forward or aft. Positioning<br />
the shrouds lower in the shroud adjusters will rake (lean) the<br />
mast aft. This can help boat-handling in higher winds.<br />
There is a limit to the amount of mast rake aft that is possible.<br />
This will be seen when the main sail block on the sail clew<br />
nears or touches the block attached to the rear crossbar when<br />
fully sheeted while sailing. Too much mast rake will not allow<br />
you to sheet the sail properly. It may also be more difficult to<br />
tack the boat.<br />
At this time adjust / tension the<br />
shroud wires lower in their<br />
adjuster plates, one side at a<br />
time. Use the main halyard to<br />
hold the mast up while your crew<br />
makes the adjustments. Be very<br />
careful to tie off the halyard at<br />
the mast cleat in such a way as<br />
it will not slip during this<br />
process. You will be holding the mast with this line alone.<br />
Step aft and away from the boat on the side to be adjusted.<br />
Tension the halyard line to ease the shroud tension on that<br />
side. Lower one side a few holes then refasten the keeper pin<br />
and ring. Do the same for the opposite side. Repeat until all<br />
three mast supporting wires are taunt and the shroud wires<br />
are as nearly equally adjusted as possible. Once the proper<br />
adjustments are made, you will not have to repeat this process<br />
again. Unless you want to make adjustments to the mast rake<br />
angle.<br />
MAIN SAIL AND BATTENS.<br />
Unfurl the sail on the trampoline.<br />
Getaway sails are shipped from<br />
the factory with the battens<br />
installed. It is important that the<br />
means of securing the battens in<br />
the sail be understood.<br />
Note that the batten ends have a<br />
"V" jam cleat molded into them.<br />
These "V" jam cleats will keep the tension line from slipping in<br />
only one direction. Note the hollowed-out side of the cleats.<br />
Pull the line from the flush side toward the hollowed side when<br />
cleating.<br />
Cleat at mouth of each tip<br />
Batten pocket<br />
Start here with a<br />
bowline knot<br />
Hollowed-out<br />
side of tip
RAISING THE MAIN SAIL<br />
As shown, hook the halyard to the top of<br />
the sail.<br />
Feed the top portion of sail into the mast<br />
track opening.<br />
Begin pulling on the halyard line. Use<br />
caution to be sure the sail feeds smoothly<br />
into the mast while raising.<br />
It will be necessary to help feed the sail<br />
into the track while hoisting.<br />
The lines are threaded through<br />
each batten end cap but are not<br />
tensioned. To tension the battens.<br />
pull tension on the line forcing the<br />
batten into the pocket and cleat it.<br />
Tension each batten so that the<br />
batten is well seated and the<br />
wrinkles in the batten pockets are<br />
removed. Excessive batten<br />
tension will cause the sail to be<br />
more difficult to handle. Many sailors release the batten<br />
tension at the end of the day. This action releases the<br />
pressure that might otherwise be stretching the sail while it is<br />
not in use.<br />
Tie a small figure 8 knot in the end<br />
of each line to prevent the battens<br />
from falling from the sail if the line<br />
releases from the cleat. For extra<br />
security, tuck the line under itself.<br />
This insures that the line will not<br />
work it’s way loose from the jam<br />
cleat.<br />
Hoist the sail all the way to the top of<br />
the mast.<br />
11<br />
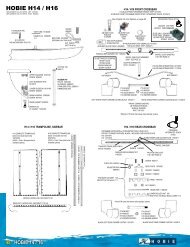
DOWNHAUL AND ADJUSTMENT<br />
1<br />
3<br />
4<br />
Hook<br />
Once the sail is fully<br />
hoisted, pull the halyard,<br />
with tension, forward<br />
and away from the<br />
mast. Then pull the line<br />
back against the mast.<br />
(Keep the line centered<br />
with the mast). This will<br />
place the locking bead<br />
below the “2 fingered”<br />
hook. Release the halyard to engage the<br />
hook. Repeat the process if the sail does<br />
not remain at the top of the mast. Tie off<br />
the halyard to the cleat.<br />
Tie the downhaul line to the grommet at the<br />
bottom of the main sail nearest the mast.<br />
Use a bowline knot.<br />
Pass the line down and<br />
through the downhaul cleat<br />
located in the mast track.<br />
Pass the line back up and through the<br />
downhaul (tack) grommet. Using the 3:1<br />
purchase this creates, tension the luff of the<br />
sail until the sail looks smooth and horizontal<br />
wrinkles are removed.<br />
Tie off the line at the cleat.<br />
The downhaul should be tensioned just<br />
enough to remove the horizontal wrinkles in<br />
the sail luff (forward area). The boat will<br />
perform best with light tension in light air and<br />
a bit more when the wind is stronger. When<br />
not sailing, totally relieving the tension on the downhaul will<br />
greatly reduce sail flogging from wind.<br />
2
MAINSHEET SYSTEM<br />
Connect the main sheet block to the<br />
traveler car. Attach the shackle that is<br />
part of the block<br />
through the clevis pin<br />
on the traveler car.<br />
Hook the mainsheet<br />
to the "clew"<br />
grommet at the rear<br />
of the main sail.<br />
The tail end of the main sheet line<br />
is used for traveler adjustment.<br />
Pass this line end through the<br />
swivel cleat jaws (from forward<br />
towards rear of the boat) then<br />
eye. Pass the line through the<br />
traveler car. Pass the line through<br />
the stainless eye on the rear side of<br />
the cross bar. Tie a figure 8 knot in<br />
the end of the line to keep it from<br />
coming out of the eye. When sailing<br />
upwind, cleat the traveler more to<br />
the center of the boat. On a reach<br />
across the wind or when sailing<br />
downwind adjust and cleat the<br />
traveler further out the track. When<br />
sailing in strong winds you can move the car further out to help<br />
keep the boat more level and limit heeling or tipping.<br />
Keep the mainsheets loose when the boat is on the beach to<br />
prevent an accidental capsize.<br />
RIGGING THE JIB SAIL<br />
Thread the jib sheet line starting from<br />
the eye next to the starboard (right<br />
side) swivel cleat. Pass the line<br />
through the stainless eye and tie a<br />
figure 8 knot. Thread the onthe end<br />
through one of the jib clew blocks and<br />
then through the swivel cleat. Pass<br />
the line through the swivel eye and<br />
then the jaw and onto the main<br />
trampoline. Cross over to the port (left) side and repeat the<br />
process in reverse ending at the stainless eye with another<br />
figure 8 knot.<br />
The jib is furled on the forestay and<br />
covered by a "snorkel". To remove<br />
the snorkel, simply unzip as it is pulled<br />
down.<br />
12<br />
The jib is held furled by a snap hook<br />
that is attached to the jib clew.<br />
Before releasing the snap hook, spin<br />
the jib clockwise 2 or 3 turns to start<br />
spooling the furler line onto the furler<br />
spool. Release the hook from the<br />
loop and attach the 2 jib clew blocks<br />
to the snap hook. The jib can now<br />
be unfurled by pulling on the jib clew or tightening one side of<br />
the jib sheets. This action will automatically roll the furling line<br />
onto the furler spool as the jib un-furls. (If the jib is not furled<br />
and the line is also not loaded in the drum, wrap the jib<br />
around the forestay until it is furled. Then when you<br />
unfurl, it will load the drum as desired.)<br />
To furl the jib, ease off on the<br />
mainsheet tension and release<br />
the jib sheets, pull on the jib furler<br />
line. Keep light tension on the jib<br />
sheet as the sail is being furled to<br />
get a nice tight wrap. Cleat the<br />
furler line in the furler cleat to<br />
keep the sail furled.<br />
There is a luff adjustment line that is installed at the jib top<br />
(head) and may need to be adjusted. While the mainsheet is<br />
tensioned, and the forestay is taunt, there should be just<br />
enough tension to smooth the sail and remove the horizontal<br />
wrinkles at the luff. Too much tension can damage the sail or<br />
pull the head or tack grommet out when under sailing loads.<br />
To adjust the line you must tip the boat onto it’s side or drop<br />
the mast down to access the tensioning line at the jib top.<br />
If the boat is being put away for the day the snorkel should be<br />
installed. To do so, unhook the jib clew blocks and snap the<br />
hook onto the loop sewn into the sail. This will keep the sail<br />
tightly furled while the snorkel is installed. Re-attach the<br />
zipper and slide the snorkel up the sail as it is zipped up.<br />
The main halyard can be used to pull the snorkel up over the<br />
jib, but if the sail is tightly furled, the halyard will not be<br />
required. Route the halyard under a shroud and hook to the<br />
snorkel and hoist. Tie the halyard to the halyard cleat.
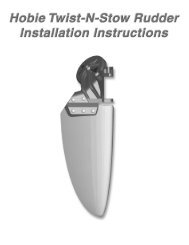
RUDDER <strong>ASSEMBLY</strong><br />
There is a left and a right<br />
rudder. Note the arms<br />
extending from the upper<br />
rudder castings. These<br />
"upper rudder" castings<br />
have an angle molded into<br />
them. The arms should be<br />
angled towards the center of<br />
the boat. You will also see a<br />
colored tab on the end of each arm, one green, one red. The<br />
red tab indicates the left rudder and the green the right.<br />
As shown, line up the rudder pintles<br />
(metal pegs on the hulls) with the<br />
rudder castings (holes with plastic<br />
bushings).<br />
Push the<br />
rudder<br />
castings down<br />
onto the<br />
pintles. The<br />
rudder arm may need to be unlocked<br />
to allow easy positioning.<br />
Insert the retainer pins to lock the<br />
rudders in place. The pins will prevent<br />
the rudders from falling off the boat in<br />
the event of a capsize.<br />
The rudders are locked in the down position by pushing the<br />
rudder arm aft which will seat the rudder. Push the arm down<br />
to engage the locking cam. To release, lift the arm, then pull<br />
the arm forward until the rudder is in the "up" position. Place<br />
the arm down to engage the upper casting with the lower<br />
casting. Beaching will automatically release the rudders. Keep<br />
a small amount of lubricating grease on the plunger and cam<br />
mechanism. If this assembly becomes dry, it will inhibit proper<br />
function.<br />
TILLER CROSSBAR AND EXTENSION<br />
The rudder arms are connected by<br />
a bar called the tiller crossbar. One<br />
end is labeled starboard (right) and<br />
the other port (left). There is a hole<br />
in each end of the tiller crossbar<br />
and a pin on swivel on each rudder<br />
(tiller) arm. The pin is to be inserted<br />
into the hole in the arm such that<br />
the tiller crossbar is above the tiller arm and the tiller extension<br />
is on top of the tiller crossbar. Capture the tiller arm to the<br />
tiller crossbar with the keyhole retainer clip on the tiller arm.<br />
13<br />
Be sure that the tiller extension<br />
hinge is on top.<br />
Install the hiking stick.<br />
INSTALLING THE RIGHTING LINE<br />
A self-retracting righting-line is provided with the boat. Thread<br />
one end of the line through a grommet located at the rear of<br />
the trampoline (on one side or the other of the boat) from the<br />
bottom, going upwards. Tie a figure 8 knot in the end of the<br />
line. The knot will be on top of the trampoline and the rightingline<br />
below. Thread the other end of the righting-line forward to<br />
the main crossbar (under the boat). Pass the line through the<br />
ring attached to the underside of the main crossbar. Pass the<br />
line across the main crossbar to, and through, the other ring.<br />
Pass the line through then back to and up through the aft<br />
grommet on the opposite side. Pass the line upwards through<br />
the grommet. Tie a figure 8 knot in the end of the line (the knot<br />
will be on top of the trampoline).<br />
Refer to page 15 for righting techniques.<br />
NOTES:<br />
The cooler lids may not be water tight. The storage areas are<br />
not to be considered dry storage areas.<br />
Freezing weather conditions can damage the boat if water is<br />
trapped inside the hulls or aluminum extrusions. These areas<br />
must be drained and dry during freezing conditions
SAILING YOUR GETAWAY<br />
Safe and sane guideline for the beginner; and an easy review<br />
for the experienced.<br />
Always wear a life jacket when boating.<br />
BALANCING THE BOAT<br />
When sailing, sit on the upwind side of the boat (wind on your<br />
back) just in front of the tiller, facing the sail. Balance your<br />
weight further outboard as the boat begins to tip or heel over<br />
with the wind in the sails. Tuck one foot under the hiking strap<br />
for balance. Use your hand that is forward to hold and control<br />
the mainsheet. Use your hand that is aft to steer.<br />
STEERING<br />
Steer the boat by pushing the tiller away from you to turn<br />
towards the wind. Pull the tiller towards you to turn away from<br />
the wind. Keep the movement of the tiller to a minimum to<br />
prevent over-steering. This will help you keep the boat moving<br />
in a straight line as you pay attention to other watercraft and<br />
sail adjustments.<br />
SAIL POWER<br />
Face the sail in order to pay close attention to the trim or<br />
adjustment of the sail. When the front of the sail, just behind<br />
the mast, luffs or flutters in the breeze, you lose power. To<br />
start moving, pull the sail in just enough to stop the sail from<br />
luffing. There are also short ribbons hanging on either side of<br />
the sail. Follow the diagram of sail and course adjustments<br />
above using the "tell tails" to get the most performance out of<br />
the sail for all angles of sailing. The tell tails react to air flowing<br />
over the sail and will help you see that the sail is pulled in too<br />
tight or too loosely. If you pull the sail too tight you will stall<br />
the sail power. Ease the sail out until it luffs, then pull it in just<br />
a little until it stops luffing. You will adjust the trim whenever<br />
the wind changes direction or you change course.<br />
CAN'T SAIL IN<br />
Close Hauled<br />
Close Reach<br />
Medium Reach<br />
Broad Reach<br />
WIND<br />
Downwind Run<br />
THIS AREA<br />
Close Hauled<br />
Close Reach<br />
Medium Reach<br />
Broad Reach<br />
14<br />
Refer to the sail trim diagram below for approximate sail<br />
settings for the different points of sail or directions you will be<br />
sailing. Note the "can't sail zone". You cannot sail in this<br />
direction due to the fact that the sail will luff constantly when<br />
pointed into the wind. If you get stuck in irons (or stop pointed<br />
into the wind) you will need to reverse the rudder and push the<br />
sail forward to back-wind it. The jib should be back winded by<br />
the crew to assist. This will back the boat up. Reverse the<br />
rudders and let the sail out until the boat is positioned more<br />
across the wind (close reach). Then you can correctly trim the<br />
sail and start moving forward.<br />
FALLING<br />
OFF<br />
HEADING UP<br />
WIND<br />
COMING<br />
ABOUT
TURNING<br />
To tack or turn the boat into and across the wind to the<br />
opposite direction (also known as "coming about"), follow the<br />
points of sail guide illustration and take the boat to the close<br />
hauled point of sail. This is when you are nearly 35 degrees<br />
from sailing straight into the wind. With the boat moving<br />
forward and not stalling, push the tiller away from you slowly.<br />
When the boat is pointing straight into the wind the boat will<br />
become level. Ease the mainsheet trim out just a little. At this<br />
time move your body to the other side of the boat, switch<br />
hands with tiller and mainsheet and begin to bring the rudder<br />
back to straight. The crew should move across the trampoline<br />
at the same time. The crew is responsible to ease the jib<br />
sheet just after the main sail is released and sheet the jib onto<br />
the new course before the mainsheet is trimmed. This action<br />
by the crew will prevent the boat stalling head to wind. As the<br />
boat comes across the wind and falls off onto the opposite,<br />
close hauled point of sail, bring the tiller all the way back to<br />
the straight position and pull the mainsail back in for the<br />
proper sail trim. If you stall pointing into the wind and you<br />
cannot steer the boat, refer back to the sail power description<br />
concerning getting stuck in irons.<br />
When sailing downwind, the turn from one point of sail across<br />
to the other is called a jibe. The jibe is completed by turning<br />
away from the wind (falling off) to the opposite point of sail<br />
rather than into the wind as when tacking. Care must be taken<br />
when attempting a jibe as the boat will be at full power and<br />
you cannot easily de-power it without turning back into the<br />
wind. Also, be aware that the boat will be less stable in this<br />
maneuver as the sail will now have to swing clear across from<br />
fully out one side of the boat to fully out the other.<br />
To start a jibe, turn the boat away from the wind and let the<br />
sail out slowly. Keep the turn going at a steady rate and begin<br />
pulling the sail back in as the boat nears the straight downwind<br />
direction. This will help prevent the sail from slamming all the<br />
way across when the sail fills from the opposite side. Duck<br />
below the sail to avoid getting hit as the wind fills the sail from<br />
the opposite side and swings across the boat. Attempt to<br />
control the speed of the sail while it crosses the deck by<br />
maintaining some tension on the mainsheet. Then ease the<br />
mainsheet out quickly as the boat turns past the downwind<br />
direction onto the new point of sail. Trim the sail correctly for<br />
the desired point of sail.<br />
LAUNCHING THE BOAT<br />
Launching the boat is easiest when the boat can be pointed<br />
into the wind to keep it de-powered and floated into deep<br />
enough water to lower the rudders. It is possible to launch in<br />
shallow water with the rudders partly up. Try not to steer with<br />
too much force on the rudders until you lock them in the down<br />
position. Keep the sail loose and trimmed out completely until<br />
you can power up and steer away from any obstacle. Trim the<br />
sail in quickly to get the boat moving forward and steer away<br />
from the wind slightly to prevent stalling into the wind.<br />
When launching from a beach where the wind is blowing from<br />
the beach towards the water you simply keep the boat pointed<br />
15<br />
into the wind. Drift backwards with the rudders in the up<br />
position and your weigh towards the front of the boat. Stay<br />
forward as the boat drifts into deeper water.You can hold the<br />
sail out to catch wind backwards to increase reverse speed.<br />
Then move to the rear and lower the rudders. It will be easiest<br />
to lower only one rudder while moving backwards. Then lower<br />
the other when the boat begins to move forward again. Be<br />
aware of the intended direction you wish to sail when lowering<br />
the rudder and steer the boat as the rudder drops into the<br />
water. There will be a lot of force on the rudder to turn one<br />
way or the other when going backwards. Plan ahead and steer<br />
the rudders so that they will be pointing in that direction before<br />
dropping it into the water. Steer the boat while going<br />
backwards so the bow turns away from the wind and toward<br />
the direction you wish to sail. As the sail begins to fill with<br />
wind, the boat will slow then begin to move forward. Trim in<br />
the sail and off you go.<br />
RIGHTING THE BOAT<br />
If you tip the boat over, stay<br />
with the boat. The boat will<br />
not sink and is easy to right.<br />
It is not necessary, but it is<br />
easier, to right the boat when<br />
the bow and the mast are<br />
pointed into the wind as in<br />
the following diagram.<br />
There will be less wind<br />
resistance and better<br />
control in this position.<br />
Be sure the mainsheet<br />
is released, then swim<br />
around to the bottom of the<br />
boat. Skipper and crew<br />
should climb up on the hull<br />
and stand up. Using the<br />
righting line, skipper and<br />
crew pull the righting line that is against the upper hull and<br />
hold the line while slowly leaning back away from the<br />
trampoline. Lean to approximately 45 degrees for best<br />
leverage. As the mast and sail lift out of the water and the<br />
upper hull begins to drop back into the water, drop down to<br />
your knees then into the water. Hold onto the righting line near<br />
the crossbar or the crossbar itself near the hull that you were<br />
standing on. This will prevent the hull from being lifted into the<br />
air by momentum which could cause the boat to capsize once<br />
again. Be well aware of the hull and crossbar coming down<br />
over your head. Holding the crossbar or righting line will also<br />
insure that you remain with the boat when it is righted. Climb<br />
aboard and continue sailing.
DOCKING<br />
Docking the Getaway properly will prevent damage. Always<br />
dock and rig on the leeward side of a dock (the side the wind<br />
reaches last). Come in slowly and always be aware of the<br />
wind direction so you can properly de-power the boat when<br />
needed. The stronger the wind the more difficult the docking<br />
will be. Until you feel confident, you may want to practice with<br />
a friend who will remain on the dock and help slow you down if<br />
necessary.<br />
BEACH LANDINGS<br />
Landing on a beach is simple. The idea is to reach the beach<br />
in the point of sail nearest straight into the wind as possible.<br />
This will assure that you can properly de-power the sail once<br />
beached.<br />
Approaching a beach when the wind is blowing from the beach<br />
out towards the water will require some planning so that you<br />
maintain power. Turn into shore just before the hulls or<br />
rudders touch bottom. Plan so the final tack towards the<br />
location you choose to land is the tack that is nearest straight<br />
into the wind. Get a little closer to the beach than you need on<br />
the pervious tack to account for wind shifts in direction and<br />
speed. This will give you a little room for error. This will allow<br />
you to point a little further away from the wind after the tack to<br />
gain speed before heading up into the beach to de-power at<br />
the last moment.<br />
When approaching a beach when the wind is blowing onshore,<br />
sail in towards the beach from either side of the landing spot.<br />
Sail in just short of touching the bottom with the rudders. Allow<br />
some distance to turn the boat out towards the water and into<br />
the wind just out from the landing spot. Turn sharply to head<br />
into the wind and stall the boat. Raise the rudders and drift<br />
back onto the beach.<br />
Always keep the boat pointed into the wind while beached and<br />
keep the sail trimmed out and un-cleated.<br />
RUDDER TUNING<br />
You may adjust the rake of your rudder blades on your <strong>Hobie</strong><br />
Getaway. The amount of rake in a rudder blade affects the<br />
"feel" at the tiller. Basically, more forward blade rake<br />
neutralizes the pull on the tiller and less forward rake<br />
increases the pull on the tiller. Tuning blades for a comfortable<br />
feel is a matter of individual preference but a close to neutral<br />
"feel" generally provides the best steering. The following<br />
sketches are of a <strong>Hobie</strong> 16 rudder assembly but the<br />
adjustments are the same.<br />
1) The first step in making any rudder rake adjustment is to<br />
determine the existing rake. This is done with the rudder<br />
assembly hanging on the boat's transom, blade down and<br />
locked. Using a straight edge or snap line, extend the<br />
16<br />
12"<br />
1-1/8"<br />
Aft for more pull on<br />
the tiller<br />
Forward for less<br />
pull on the tiller<br />
centerline of the rudder pivot<br />
pins down, across the leading<br />
edge of the blade and draw a<br />
pencil line along that length.<br />
Measure the distance from the<br />
pencil line to the most forward<br />
spot 12" down the blade from<br />
the bottom of the casting..<br />
Rudder blade rake is pre-set at the factory to 1-1/8". This<br />
amount will be best for the average sailor and is a good<br />
starting point from which to begin any adjustments.<br />
2) To make any adjustment<br />
to the rake, unlock the tiller<br />
arm from the rudder<br />
housing and leave it<br />
unlocked.<br />
Screw<br />
3) If you wish to increase<br />
the amount of forward rake<br />
in the rudder blade, turn the<br />
Sketch B<br />
rake adjusting screw<br />
counterclockwise using a<br />
3/16" Allen wrench. Determine the increase in the rake by<br />
extending a new line from the centerline of the pivot pins. Remeasure<br />
the distance from the pencil line to the leading edge.<br />
Continue to adjust and measure until you have the desired<br />
amount of forward rake.<br />
4) If you wish to decrease the amount of forward rake turn the<br />
adjusting screw clockwise using a 3/16" Allen wrench. Check<br />
the decrease in the rake by the procedure in step 3 above .<br />
5) Next, while holding the rudder forward against the lower<br />
casting, carefully latch the tiller arm down onto rudder housing.<br />
Loosen the adjusting screw on top of the tiller arm about 3/4<br />
turn. Slide the adjusting screw forward (toward bow of boat)<br />
until it stops, then retighten. See sketch C.<br />
Sketch C<br />
Screw
6) <strong>Hobie</strong> <strong>Cat</strong> rudder blades<br />
are preset to break away<br />
from the locked down<br />
position at 17-26 pounds by<br />
testing with a line around the<br />
rudder blade seven inches<br />
above the lowest tip of the<br />
blade. Once the rake is<br />
changed, the breakaway<br />
tension should be<br />
rechecked. The tension may<br />
be adjusted by turning the<br />
3/4" internal screw in the<br />
housing. The screw tensions<br />
an internal spring. Turn it<br />
clockwise to increase<br />
and counter clockwise<br />
to decrease the tension.<br />
TRAILERING<br />
CAUTION: Boat and mast should be securely attached to<br />
trailer with adequate tie-down straps. Failure to do so could<br />
cause extensive damage or serious injury!<br />
LOADING YOUR TRAILER<br />
The weight of the boat, equipment and additional gear should<br />
never exceed the manufacturer's rated weight capacity. Proper<br />
distribution of the load is of vital importance. Too much weight<br />
on the hitch will cause "tail dragging" of the towing vehicle,<br />
impairing steering and raising headlights into the eyes of<br />
oncoming traffic. Too little or negative weight on the hitch, and<br />
the trailer will sway or "fishtail". The solution to proper<br />
distribution is often adjusting movable gear. A more<br />
permanent solution is to shift the axle position before taking<br />
your boat to water the very first time.<br />
TOWING<br />
Extra caution is necessary when towing any trailer. The<br />
heavier the rig, the more time required to accelerate, pass,<br />
and stop. For this reason, the maximum speed for vehicles<br />
with trailers is less than without a trailer in most states. A long<br />
rig requires a larger turning radius. Curbs and obstructions<br />
should be given wide clearance. Most boats on trailers<br />
obstruct the rear view of the driver. When this happens, an<br />
additional rear view mirror on the right side of the towing<br />
vehicle is required by law.<br />
The trailer boatman should be familiar with traffic and highway<br />
laws relating to the towing of trailers. Towing a <strong>Hobie</strong> has<br />
particular hazards that should be mentioned. A <strong>Hobie</strong> is very<br />
wide. Obstacles should be given plenty of room when you are<br />
passing them. Tie down straps or lashings should be of<br />
sufficient size and diameter and placed on all four corners.<br />
17<br />
The mast support on a trailer is subject to a lot of side-to-side<br />
motion and consequently may fatigue where it is welded to the<br />
trailer. All this can be reduced by tying a line from each bow to<br />
the mast support. This will stiffen the rig up and prolong the life<br />
of the trailer.<br />
LAUNCHING AND RETRIEVING<br />
Prepare boat for launching at the top of the ramp or parking<br />
facility. Remove all tie-down straps, check boat plugs and<br />
fasten boat painter. Do not release winch line until the boat is<br />
in the water. Back trailer to the left if possible; backing left<br />
gives better launching visibility. Avoid dunking wheel bearings<br />
wherever possible. Never leave the towing vehicle unattended<br />
on the ramp with only the parking brake set. If vehicle must be<br />
left while on the ramp, set transmission in "park" or first gear,<br />
in addition to setting the parking brake. In retrieving your boat,<br />
make sure that the boat is properly placed on the trailer. Pull<br />
trailer up steadily to prevent spinning the wheels.<br />
MAINTENANCE<br />
Lights: Most state laws require two red taillights on the rear<br />
that may be combined with the stop and turn signals. Vehicles<br />
over 80 inches in width require clearance lights. If lights are<br />
dunked, waterproof light fixtures should be used. If water is<br />
allowed to enter, the lamp may crack and short out the entire<br />
system. Water also promotes contact corrosion. Always carry<br />
spare lamps. The wire coupling to the towing vehicle should<br />
be high enough to stay dry. Never rely on the trailer hitch for<br />
ground connection. Four-pole connectors should be used.<br />
The mast should not extend over three feet behind the rear<br />
light assembly.<br />
Wheels: Tires should ALWAYS be inflated to manufacturer's<br />
recommended pressure. Always carry a spare wheel and a<br />
jack that fit the boat trailer. If wheel bearings are always<br />
dunked, waterproof bearings and caps should be considered.<br />
If water is allowed into the hub, lubricating grease will float<br />
away and bearings will burn out or seize, causing damage and<br />
a safety hazard. Waterproofed bearings should be inspected<br />
prior to each boating season, others more often. Special care<br />
should be given when traveling on unimproved roadways with<br />
small diameter wheels.<br />
If a spare wheel is not available, a spare wheel bearing set<br />
should be taken on long trips in case the grease seal has been<br />
broken.<br />
FRAME AND ROLLERS<br />
Rust should not be allowed to accumulate. Remove rust and<br />
repaint with anti-rust paint. Some trailers offer galvanized<br />
coating to prevent rust. Rollers should roll freely and should<br />
not have checks, breaks or flat spots.<br />
TOWING VEHICLE<br />
Most vehicles are limited in towing capacity. Towing heavy<br />
loads places extra demands on the engine, transmission,<br />
brakes and other systems vital to the vehicle. Towing<br />
"packages" are available through most auto dealers and<br />
should be considered for heavy boats.
CAUTION / SAFETY TIPS<br />
• Watch for overhead power lines. Never rig,<br />
trailer or sail the boat near overhead power lines.<br />
Contact with a power line could be fatal.<br />
• Sail to your experience. Do not try to do more<br />
than you can. Do not take the Getaway out in the<br />
surf and do not head out for the ocean unless you<br />
are a real professional.<br />
• Wear a life jacket. Wearing life vests while sailing<br />
is important for everyone. Due to the large number<br />
of novice sailors that have purchased the Getaway,<br />
it is even more important to review this safety<br />
issue. Wearing a life vest is a smart thing to do.<br />
Also, a sailboat could sail away by itself if a person<br />
were to fall overboard. The best advice to a sailor<br />
is to stay with the boat. If they happen to fall<br />
overboard, or when righting the boat, they should<br />
hold onto the boat and not let it get away.<br />
• Learn the right-of-way rules and when in<br />
doubt, give way to others.<br />
• Adhere to car roof rack manufacturer's<br />
weight limitations and tie down suggestions<br />
when car-topping the Getaway. (The combined<br />
weight of the Getaway hulls and mast is approx.<br />
150 lbs.)<br />
• When trailering the Getaway be sure to tie the<br />
boat and all the loose parts to the trailer in a<br />
secure manner. Stop and check the tie downs<br />
often.<br />
• <strong>Hobie</strong> <strong>Cat</strong> does not recommend leaving the<br />
Getaway in the water on a mooring. Accelerated<br />
wear to the boat and rigging will be experienced.<br />
Damage to the hull material is possible. Limitation<br />
of the mast rotation and tensioning of the rigging<br />
are required to lessen this wear. Inspect rigging<br />
often and tape rigging rings and shackles to prevent<br />
loosening.<br />
HOBIE CAT<br />
4925 Oceanside Blvd.<br />
Oceanside, CA. 92056<br />
Phone (760) 758-9100 Fax (760) 758-1841<br />
For your nearest HOBIE dealer<br />
or<br />
for help and information call:<br />
1 (800) HOBIE - 49