Create successful ePaper yourself
Turn your PDF publications into a flip-book with our unique Google optimized e-Paper software.
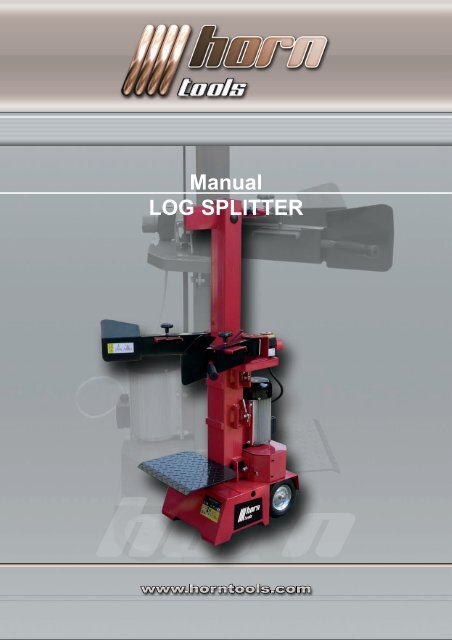
<strong>Manual</strong><br />
<strong>LOG</strong> <strong>SPLITTER</strong>
2<br />
1<br />
1.1
2 3<br />
4 5<br />
6 7<br />
3
4<br />
CONTENTS<br />
Explanation of the Warning Symbols.................................................................................................................. Page 5<br />
General Safety Instructions.................................................................................................................................. Page 6<br />
Electrical Safety.................................................................................................................................................... Page 7<br />
Assembly and Package Contents........................................................................................................................ Page 8<br />
Assembly and Preparation................................................................................................................................... Page 8<br />
Startup / Application............................................................................................................................................. Page 9<br />
Maintenance and Care.......................................................................................................................................... Page 11<br />
Environment, Recycling and Disposal................................................................................................................ Page 12<br />
Spare Parts and Parts Subject to Wear............................................................................................................... Page 12<br />
Specifications........................................................................................................................................................ Page 13<br />
Troubleshooting and Fault Clearance................................................................................................................. Page 13<br />
Exploded View....................................................................................................................................................... Page 14<br />
Spare Parts List..................................................................................................................................................... Page 15
EXPLANATION OF THE WARNING SYMBOLS<br />
This User‘s Guide describes safety symbols as well as internationally used symbols and pictograms placed on this machine.<br />
Prior to using this machine, you must have read all safety warnings. Improper usage of this log splitter may cause injuries as a result of<br />
fire or electric shock, or entail cutting injuries and damage to property.<br />
Keep this User‘s Guide in a safe place.<br />
WARNING: Read the<br />
safety warnings and operating<br />
instructions given in this User‘s<br />
Guide and keep the latter in a<br />
safe place for later reference.<br />
Do not allow any persons<br />
to stay within your working area.<br />
Any persons or animals around<br />
must be at least 5 m away from<br />
this machine.<br />
WARNING: Never use<br />
your hands to remove a<br />
log jammed on the splitting<br />
blade.<br />
Use a suitable tool to do so.<br />
Wear solid footwear to<br />
protect your feet from falling<br />
logs<br />
Waste oil must be disposed of<br />
in accordance with the locally<br />
applicable laws and must never<br />
flow into the environment.<br />
WARNING: Pull the mains<br />
plug before doing any cleaning<br />
and maintenance work.<br />
Wear safety gloves to protect<br />
your hands from wood chips<br />
and splinters<br />
CAUTION: There is a hazard<br />
of cutting or crushing injuries.<br />
Keep your hands off the splitting<br />
blade when the latter is moving.<br />
Never remove any guards<br />
and safety devices<br />
Wear safety goggles or a<br />
visor to protect your eyes<br />
from wood chips and splinters<br />
coming off.<br />
WARNING: Closely watch<br />
the direction of the log pusher.<br />
WARNING: Do not use<br />
this wood splitter in the rain.<br />
Also avoid use under wet conditions.<br />
5
6<br />
GENERAL SAFETY INSTRUCTIONS<br />
Read this chapter with utmost care. Exact knowledge of the described dangerous situations during the operation of the machine<br />
and of the instructions for proper usage is indispensable to avoid injuries of persons and animals as well as damage to property.<br />
IMPORTANT: This log splitter exclusively serves for splitting logs, whose dimensions must correspond to the recommendations given<br />
herein. Any other use shall be considered improper, and the manufacturer will not be liable to any consequential injuries of persons or<br />
animals as well as to any damage to property as a result of improper usage of this machine.<br />
The user must be within the specified working area and must use both hands to actuate the control device. Under no<br />
circumstances must the user employ any other systems. Any other persons or animals, with the exception of the user, must keep<br />
a safety distance of 5 m around this log splitter while it is in use. Check the ground on which you intend to work for stability and firm<br />
hold. This log splitter may only be used with its protective facilities properly installed. Disregarding the instructions given in<br />
this chapter can result in severe consequential personal injuries or damage to property or to this machine itself.<br />
1. Only one person is allowed to work on this machine.<br />
2. No one may use this log splitter without having read its User‘s Guide before, or without having been instructed on the rules<br />
for proper and safe machine usage.<br />
3. The operator must be at least 18 years old. Trainees at a minimum age of 16 years may only work on this machine under<br />
supervision.<br />
4. Never wear any jewellery (rings, necklaces, watches, etc.) or wide clothes such as oversized overalls, gloves or shoes as<br />
these could be caught by moving parts. Specific protective clothing such as safety shoes and special gloves are mandatory.<br />
Always wear a hair net if you have longer or long hair.<br />
5. Always wear safety goggles. Bear in mind that normal glasses do not offer sufficient protection as they can even cause more<br />
severe injuries as a result of glass breakage.<br />
6. Always use this log splitter on dry, level and unfrozen ground. If you use this log splitter outdoors on a lawn make sure that the<br />
grass has been cut short.<br />
7. Ensure good footing so that you can keep your balance. Never stand on your log splitter. Ensure that the log splitter is firmly<br />
placed on the ground so that it cannot fall over. This can avoid serious injuries.<br />
8. Stay sufficiently away from the splitting blade to avoid injuries caused by chips and splinters coming off.<br />
9. Keep any other persons away. Any other persons, children or animals, with the exception of the user, must keep a safety dis-<br />
tance of 5 m around this log splitter while it is in use.<br />
10. Make sure whether you have removed any foreign bodies from the log you want to split to prevent them from coming off<br />
during splitting and cause damage to this machine<br />
11. Never split any logs which contain nails, cables or dangerous foreign substances. Make sure that always both ends of the<br />
log you are just processing are split as square as possible. This is the only way to guarantee that the log will not be forced out<br />
of its vertical position, while branches must have been cut off flush.<br />
12. Never split any logs, whose dimensions are bigger than those specified under „Size of Logs“. Otherwise, injuries or irreparable<br />
damage to the machine will be the result.<br />
13. Split the logs along the grain. Never place a log on this splitter crosswise to split it this way. This could result in injuries and<br />
damage to the machine.<br />
14. Never pile up the logs in order to process several logs at the same time. Parts of the wood could be flung off into the air and<br />
hit you.<br />
15. ONLY use your hands to operate the levers. Never use your feet, knees, a rope or similar means to operate the levers.<br />
Continuously concentrate on the movements of the splitting blade. Never try to load the log splitter while its splitting blade<br />
is in motion. Do not put your hands in the vicinity of the moving parts of this machine.<br />
16. Protect your hands. Never bring your hands in the vicinity of any gaps opening in the log as these may close in a matter of<br />
seconds and crush or even cut off your hands. Do not remove any jammed parts of a log with your hands. When the<br />
splitting blade of the log splitter is returning keep your hands off the machine, as this log splitter has been designed so that<br />
it will automatically stop once the cylinder has fully retracted.<br />
17. Do not run this log splitter under full load for more than 5 seconds by keeping the cylinder pressed, for example, or if you want<br />
to split a hard log. This would result in quick overheating of the pressurized oil causing consequential damage to the<br />
machine. It is advisable to turn the log 90° and to try to split it at this position. If it is still impossible to split such log please<br />
dispose of it instead of subjecting it to any further splitting process to avoid damage to the machine.<br />
18. Do not press the splitting blade against the log. You could cause breakage of the blade or damage to the column.<br />
19. Do not use the log splitter under any circumstances when you are under the influence of alcohol, drugs or medications, or if<br />
you are tired.<br />
20. This machine must never be used in damp or potentially explosive areas. Never use this machine in rooms containing aggres-<br />
sive vapours (natural gas, petrol vapours or inflammable vapours).<br />
21. ever smoke while you are working on this machine and make sure that there are no open fire sources or oil tanks in the<br />
vicinity of your working area. DANGER – EXPLOSION HAZARD.<br />
22. Check whether your power supply circuit is efficiently fused and conforms with the properties of the motor. Conformity with the<br />
power rating, the voltage and the frequency (refer to the values indicated on the type label), earthing and a standard voltage<br />
transformer connected in series are indispensable.
23. Never leave this machine unattended after you have powered it up, or while it is working. Keep an eye on the machine until<br />
it has come to a complete standstill. Unplug the power cord when you do not use this machine, or before you do any mainte-<br />
nance work, change the connections and move the machine. Please read this User‘s Guide before doing any maintenance<br />
work.<br />
24. Keep your workplace inaccessible to children. Lock your working room. Store your log splitter in a room which is inaccessible<br />
to children and other persons who are not familiar with how to use this machine.<br />
Proper Usage<br />
• This machine is in conformity with the applicable EC Machine Directive.<br />
• Logs may only be split in the direction of the grain. Never try to split logs lying in horizontal position or crosswise to the grain.<br />
• The safety, working and maintenance instructions given by the manufacturer as well as the dimensions indicated in the<br />
technical specifications must be kept.<br />
• The relevant rules for the prevention of accidents and all other generally accepted safety regulations must be observed.<br />
• This log splitter may only be used, maintained or repaired by skilled persons who are familiar with it and have been informed<br />
on the hazards related to it. Any unauthorized modifications made to this log splitter will exclude the manufacturer‘s liability to<br />
any damage resulting therefrom.<br />
• This log splitter may only be used in connection with original accessories and tools from its manufacturer.<br />
• Any usage in excess of this will be considered improper. The manufacturer will not be liable to any damage resulting there-<br />
from, and the risk of it shall solely be borne by the user.<br />
NOTE: This machine has been designed and built on condition that this User‘s Guide be followed. Any modifications to this machine or<br />
using it for any purposes it has not been designed for can lead to serious or fatal accidents and will result in the annulment of any right<br />
to claim under warranty.<br />
Residual Risks<br />
Even proper usage can still involve the following residual risks:<br />
• Injuries to your fingers and hands caused by the splitting tool.<br />
• Injuries by workpieces and parts coming off as a result of improper holding and guiding.<br />
• Injuries by contact with live parts when electric components are opened or defective.<br />
• Hearing impairment after working for a long time without wearing ear protection.<br />
• Residual hazards can be minimized if you follow the instructions given in the „Proper Usage“ and „Safety Instructions“<br />
chapters as well as in this User‘s Guide in general.<br />
Operating Conditions<br />
This log splitter is designed for outdoor temperatures between +5 °C and 40 °C and for installation at a maximum altitude of<br />
1000 m above sea level. The air humidity at the workplace should not exceed 50 % at 40 °C. This machine can be stored or handled at<br />
outdoor temperatures between -25 °C and 55 °C.<br />
ELECTRICAL SAFETY<br />
IMPORTANT: Make sure that the electric circuit is fused, and that the power, voltage and frequency of the motor is supported by<br />
your mains supply. Also, make sure, that your power supply is earthed. Connect your log splitter to earth. Never open the<br />
ON/OFF switchbox. However, if it should become necessary to do so, contact a skilled electrician. Make sure that you will never touch<br />
live contacts, specifically when you plug or unplug your log splitter. This machine and its power cord must never get into contact with<br />
water.<br />
Never use its power cord to move/shift your log splitter. Always unplug the power cord before handling your log splitter. Do not<br />
yank the plug out of the wall socket by the cable and protect the latter against heat sources, oil and objects which can damage it. Neither<br />
expose your log splitter to rain nor to wetness.<br />
NOTE:When equipment like this is being started a short-time voltage drop may occur, particularly if the mains quality is poor. Such<br />
drops can affect other consumers (e. g. flickering of a lamp). At a mains impedance of Zmax < 0.448 Ω, such trouble is not<br />
to be expected. (For further information, please contact your local energy supply company.)<br />
Electrical Connection<br />
The three-phase 400 V/50 Hz motor of this log splitter should be connected to a standard 400 V + 10 %/50 Hz + 1 Hz power supply<br />
source provided with a residual-current circuit breaker. The main connection and any extension cables must have five wires = 3P + N +<br />
PE (3/N/PE). Also, the main connection must be fused (16 A max.) Electric cables must be of H 07 RN type and in conformity with EN<br />
60245<br />
CAUTION: Any unprofessional use of extension cables can cause overheating of this log splitter. Ensure that the extension cable is not<br />
7
8<br />
longer than 10 m and its wire cross section is not less than 2.5 mm². Never use uninsulated or bare cables, respectively. The extension<br />
cable must be suitable for outdoor use.<br />
ASSEMBLY (FIG. 1)<br />
1. Transport handle<br />
2. Stroke adjusting rod<br />
3. Splitting blade<br />
4. Column<br />
5. Switch<br />
6. Coupling brake<br />
7. Motor guard<br />
8. Motor<br />
9. Front table side bracket<br />
10. Table locking hook<br />
11. Piping cover<br />
12. Wheels<br />
13. Stand<br />
14. Oil tank plug/vent valve<br />
15. Front table holding bracket<br />
16. Operating lever guard<br />
17. Operating lever<br />
18. Adjustable log clamping claw<br />
19. Log clamping claw star knob<br />
SCOPE OF SUPPLIES (FIG. 1.1)<br />
1x log splitter frame (A)<br />
2x operating levers with hand guard (B)<br />
1x removable front table<br />
1x User‘s Guide<br />
ASSEMBLY AND PREPARATION:<br />
Unpacking (Fig. 8).<br />
Unpacking this log splitter requires at least two persons. To place the log splitter on the floor, proceed step by step as described below.<br />
Ensure that block (B) supports the log splitter box (A) at a point above its middle. The other end of block (B) should rest<br />
on a fixed object such as a wall. Fasten wedge (C) under the lifted box to prevent the latter from slipping off. After that, you can remove<br />
the packing carton from the log splitter.<br />
Fig. 8
Assembly (Fig. 9)<br />
1. Pull out spring (A) to release lock (B). Apply a thin film of grease to the points marked in the sketch below. Then insert the le-<br />
ver and make sure that it has reached its intended end position (C). Now, latch the lever by lock (B) and spring (A). Perform<br />
the same procedure for the other lever.<br />
2. You can set three different table positions to be able to split logs of various lengths. Insert the table into one of the three<br />
fixtures (E) provided for this purpose and turn hooks (D) by 90° lock it on either side.<br />
Fig. 9<br />
Transporting the Log Splitter to the Working Area (Fig. 2)<br />
For easier handling, this log splitter is provided with two small wheels. To move the log splitter hold transport handle (A) with your hand<br />
and carefully tilt back the log splitter. Make sure that the oil tank cap is closed<br />
NOTE: IF YOU USE A CRANE TO HANDLE THE <strong>LOG</strong> <strong>SPLITTER</strong> USE A SUITABLE LIFTING ROPE TO SLING THE<br />
HOUSING AND HOIST THE MACHINE CAREFULLY. NEVER HANG THE CRANE HOOK INTO THE TRANSPORT HANDLE.<br />
STARTUP<br />
Please follow the instructions given below before getting started:<br />
• The machine must be placed so as to be stable and secured against skidding. Provide sufficient room around your log splitter<br />
so that you can safely operate it.<br />
• Ensure that no unauthorized persons (especially children) can approach your working area.<br />
• Prior to startup, all guards and safety devices must have been properly attached. Check whether all screws, bolts, hydraulic<br />
couplings and pipe clamps have been properly tightened. Always make sure before each starting that the hydraulic oil level<br />
is sufficient.<br />
• This machine must never be used when it is in an inoperable condition or needs some maintenance. Before using this log<br />
splitter, get familiar with its controls and safety elements and with how they work.<br />
• Make sure that the data indicated on the type label conform with your mains data before you connect your log splitter.<br />
Size of Logs (Fig. 3)<br />
1. Choose your workplace in consideration of your safety regulations. Keep your logs to be split ready to hand. Remove the split<br />
logs from the working area.<br />
2. Before you split your logs, sort out those logs which are longer than 104 cm. If you want to split logs which are very big in<br />
diameter it is recommended that they should not exceed a maximum length of 100 cm. You can adjust three different table<br />
heights (Fig. 3): 52 cm, 78 cm and 104 cm. Always choose the suitable height for the respective log length. Always use the<br />
locking device to secure the table at the desired position.<br />
3. Do not run this log splitter under full load for more than 5 seconds.<br />
9
10<br />
NOTE: NEVER TRY TO SPLIT FRESH WOOD.<br />
DRY WOOD IS MUCH EASIER TO SPLIT THAN FRESH, WET <strong>LOG</strong>S. IN ADDITION, IT DOES NOT TEND TO GET JAMMED DU-<br />
RING SPLITTING SO FREQUENTLY.<br />
APPLICATION (FIGS. 4 – 7)<br />
IMPORTANT: There is a vent plug at the machine front side (Fig. 4). Every time you want to begin your work, you should screw<br />
out this plug some four turns to guarantee good air circulation in the oil tank. Before you transport this machine, close this plug to avoid<br />
oil leakage.<br />
If you leave the vent plug tightened while you are working the hydraulic movements will lead to some overpressure which can damage<br />
your machine.<br />
1. To ensure longer life apply some grease to the sliding surfaces of the arm whenever you intend to use this machine (Fig. 5).<br />
2. Always lay the power cord so that it cannot be damaged (by your working).<br />
3. Open the vent plug. Open the hydraulic oil tank cap for a few turns whenever you start your log splitter. Completely close the<br />
hydraulic oil tank cap after work.<br />
4. Check the running direction of the motor. When you start the motor the splitting blade will be automatically moved to its<br />
topmost position. If the splitting blade is already at its topmost position press the two operating levers down to activate the<br />
splitting mechanism. This will bring the splitting blade down. If the splitting blade does not move upward after you have<br />
started the motor immediately stop the machine. After that, use a screwdriver to change the polarity of the motor (Fig. 6). If<br />
you have no adequate qualification to do so contact an electrician under any circumstances.<br />
CAUTION: NEVER RUN THE MOTOR IN THE WRONG DIRECTION. THIS WILL INEVITABLY LEAD TO DAMAGE TO THE PUM-<br />
PING SYSTEM, AS A RESULT OF WHICH YOU WILL NO LONGER BE ENTITLED TO CLAIM UNDER WARRANTY.<br />
5. If you want to run this log splitter at very low temperatures run the machine idle for 15 min. before beginning to work to allow<br />
the hydraulic oil to warm up.<br />
6. Prior to beginning your work, perform the following steps to check the functionality of your log splitter.<br />
a. Press both operating levers down. This must bring the splitting blade down. The splitting blade must then<br />
come to a standstill some 5 cm above the topmost table position.<br />
b. If you release one of the two levers the splitting blade will stop at its current position.<br />
c. Releasing both levers will induce the splitting blade to automatically return to the top.<br />
7. To set the splitting blade follow the steps described below (Fig. 7):<br />
a. Bring the splitting blade into the desired position. The topmost position of the splitting blade should then be<br />
some 3-5 cm above the log.<br />
b. Release one of the operating levers or stop your log splitter.<br />
c. Use a suitable tool to slacken star grip (A). Set the stroke adjusting rod so that it will act as a stop at the<br />
desired position. After that, re-tighten star grip (A).<br />
d. Release both operating levers or restart the motor.<br />
e. Check your newly set positions.<br />
8. Now, place vertically under the splitting blade the log to be split. Make sure that the log is even and does not fall over<br />
on the splitting table. Never try to split canted logs.<br />
IMPORTANT: ALWAYS SPLIT YOUR <strong>LOG</strong>S ALONG THE GRAIN. NEVER LOAD THE <strong>LOG</strong>S CROSSWISE TO THE GRAIN, AS THIS<br />
CAN LEAD TO SEVERE DAMAGE TO THE MECHANICAL AND HYDRAULIC SYSTEMS.<br />
9. Adjust the two levers, depending on the log diameters.<br />
10. Hold the log with both levers to guarantee a stable standing position of the log. Then move both levers down to split the log.<br />
Releasing one of the two levers will induce the splitting blade to stop. If you release both levers the splitting blade will auto-<br />
matically move to its topmost position. (Refer to Fig. 10.)<br />
11. Immediately remove the split log parts from your working area and pile them up, if necessary. Thus you can reduce the risk<br />
of working accidents.<br />
12. After you have finished your work, allow the splitting blade and the arm move to their topmost positions (parking positions).<br />
Then stop the motor and unplug the machine from your power supply source. Allow the machine to cool down. After that,<br />
you should clean and, if necessary, lubricate your machine. This log splitter may only be stored in vertical position and at a dry<br />
and clean place. Ensure that the oil tank cap is well closed and that no oil will emerge during storage.
Fig. 10<br />
CAUTION: ACCUMULATED <strong>LOG</strong> PARTS AND WOOD CHIPS ARE SOURCES OF DANGER. ALWAYS KEEP YOUR<br />
SURROUNDING AREA CLEAN SO THAT YOU CANNOT SLIP.<br />
CAUTION:<br />
• Always disconnect your power supply source from your machine before you begin to release any jammed logs.<br />
• Do not allow any other persons to assist you in releasing a jammed log.<br />
• When releasing a jammed log, never stick into your log splitter any means such as foreign objects of any kind. Please<br />
do not maltreat the jammed log with your feet or with any objects either, as a sudden release of the jammed piece will cause<br />
the log pusher to give way which can lead to personal injuries or damage to your machine, respectively.<br />
• All safety rules contained in the „General Safety Instructions“ chapter shall apply to any of the interventions described<br />
before. The manufacturer will not be liable to any injuries of persons or animals or to damage to property as a result of impro-<br />
per use of this machine or of non-observance of the safety regulations.<br />
MAINTENANCE AND CARE<br />
Maintain your log splitter carefully. Clean the machine after each use. To guarantee the best possible and safest performance<br />
keep your log splitter clean. Lubricate the machine according to the instructions. Check all seals, pipes and couplings for leakage before<br />
you start your log splitter. Keep the operating levers and the mains switch clean, dry and free of oil or grease.<br />
Cleaning the Log Splitter<br />
1. Unplug the power cord.<br />
2. Use a moist cloth to clean the plastic parts. Do not use any cleaning agents, solvents or pointed objects.<br />
3. Use a soft brush to remove dust deposits from the motor ventilation slots and from moving parts at regular intervals.<br />
4. Apply some oil to all moving parts at regular intervals.<br />
Hydraulic Oil Change<br />
IMPORTANT: The oil tank is factory-filled with high-grade viscosity class 20 hydraulic oil. Take waste oil to a public receiving depot or<br />
observe the relevant disposal regulations of your country where this log splitter is used. Do not dispose of the oil into sewerage systems,<br />
into the soil or into water bodies of any kind.<br />
The hydraulic system is a closed system consisting of an oil tank, an oil pump and of control valves. Too low an oil level can damage<br />
the pump. The oil level should not be lower than 1 – 2 cm above the lower surface of the oil tank.<br />
Change the oil completely once per year.<br />
• Ensure that no foreign particles will get into the oil tank.<br />
• Properly dispose of the waste oil after each oil change.<br />
• Allow your log splitter to run idle for a few minutes after each oil change before you place it into operation again.<br />
The following oil grades are suitable for this log splitter:<br />
SHELL Tellus 22<br />
MOBIL DTE 11<br />
ARAL Vitam GF 22<br />
BP Energol HLP-HM 22<br />
11
12<br />
Changing the Oil Filter<br />
This log splitter is provided with an oil filter to guarantee that the oil will be kept<br />
clean over a longer period. After the life of the filter has expired, proceed as follows<br />
to replace it:<br />
• Empty the oil tank.<br />
• Slacken pipe coupling (A) and remove pipe (B).<br />
• Take off connecting piece (C) containing oil filter (D).<br />
• Remove the used oil filter and properly dispose of it.<br />
Screw a new filter into the connecting piece. Once the filter touches the filter head, add<br />
another ¾ of a turn. Only hand-tighten the filter.<br />
Cleaning and Sharpening Sliding Surfaces<br />
This log splitter is equipped with a specifically treated splitting blade. After a long period of being in<br />
use, it can happen that<br />
guiding surfaces have experienced some abrasion and are getting dull. Using a suitable file, you<br />
can remove material deposits and resharpen the blade. In the end, it is recommended that the<br />
surface you have treated be moistened with some oil or other lubricant.<br />
ENVIRONMENT, RECYCLING AND DISPOSAL<br />
Packaging and products should be properly disposed of by being brought to the responsible disposal facility.<br />
Carton packaging and electric equipment can be taken to a corresponding recycling materials receiving depot<br />
or be conveniently disposed of through the manufacturer, for instance. With your cooperation, we can contribute<br />
to protect our environment by recirculating recycled materials into the production process. Please note:<br />
Do not dispose of this product into your dustbin. Synthetic parts are suitably labelled for plastics recycling.<br />
SPARE PARTS AND PARTS SUBJECT TO WEAR<br />
All spare parts and parts subject to wear may be purchased (at low cost) any time by contacting the address indicated on your<br />
Warranty Card. Our competent service team will be happy to answer any questions that may come up and is receptive to your suggestions<br />
and criticism.
SPECIFICATIONS<br />
Motor 400V~ 50Hz 3500W IP54<br />
Splitting capacity<br />
Diameter 12cm to 32 cm<br />
Length 104 cm / 78 cm / 52 cm<br />
Hydraulic oil volume 6 litres<br />
Splitting blade stroke 480 mm<br />
Forward speed 5.4 cm / sec<br />
Reverse speed 11.7 cm / sec<br />
Noise level 80.1 dB(A) idling; 92.5 dB(A) under load<br />
Dimensions<br />
Length 83 cm<br />
Width 93 cm<br />
Height 147 cm<br />
Weight 115 kg<br />
TROUBLESHOOTING AND FAULT CLEARANCE<br />
Problem Possible Cause Remedy<br />
1.1 No power in wall socket. 1.1 heck fuse box.<br />
1. Motor does not start.<br />
1.2 Extension cable defective.<br />
1.3 Wrong supply, 400 V, three-phase<br />
current.<br />
1.2 Unplug, check and use new one, if<br />
necessary.<br />
1.3 5-pole plug with 1.5 mm diameter.<br />
1.4 Switch defective. 1.4 Have it checked by electrician.<br />
2.1 Change polarity using a screwdriver<br />
2. Wrong motor direction 2.1 Wrong polarity.<br />
(electrician).<br />
2.2 Change polarity (electrician).<br />
3.<br />
4.<br />
Splitter not moving although<br />
motor is running<br />
Splitter working, however,<br />
with untypical noise and<br />
vibration.<br />
3.1 Valve not opened, caused by loose<br />
connection.<br />
3.1 Tighten loose parts.<br />
3.2 Oil level too low. 3.2 Replenish oil.<br />
4.1 Oil level too low. 4.1 Replenish oil.<br />
13
14<br />
EXPLODED VIEW
SPARE PARTS LIST<br />
Item ID No. Description Quantity Item ID No. Description Quantity<br />
1 1167101 Log support 2 1 39 1167139 Bolt M10 x 30 4<br />
2 1167102 Circulate stem 2 40 1167140 Double Steel Wire Hoop 15-26 4<br />
3 1167103 Screw M6 x 20 4 41 1167141 Epispastic’s Oil Pipe 1<br />
4 1167104 Washer 6 17 42 1167142 Pump Oil Ingoing Spigot 1<br />
5 1167105 Armguard Enclose 2 43 1167143 Gear pump 1<br />
6 1167106 Armguard Cover, Ø 22 2 44 1167144 Spring Washer 8 6<br />
7 1167107 Manipulative Armguard 2 45 1167145 Inner Hexangular Screw M8 x 35 4<br />
8 1167108 Right Armguard Hold assembly 1 46 1167146 Annular High Pressure oil pipe 3 1<br />
9 1167109 Locknut M6 5 47 1167147 Valve Pipe Oil Spigot 2<br />
10 1167110 Star Model Armguard 2 48 1167148 Valve Oil Out Spigot 1<br />
11 1167111 Clamp Timber Claw 2 2 49 1167149 Quadrate Cover 1<br />
12 1167112 Left Armguard Hold Assembly 2 50 1167150 CA Valve 1<br />
13 1167113 Armguard Handle Pin 2 51 1167151 Washer groupware 20 6<br />
14 1167114 Thin Nut M8 2 52 1167152 Valve Stem 1<br />
15 1167115 Washer 8 10 53 1167153 Subulate three Passage 1<br />
16 1167116 Bolt M8 x 45 2 54 1167154 Annular High Pressure oil pipe 1 1<br />
17 1167117 Adjustable Lever 1 55 1167155 Annular High Pressure oil pipe 2 1<br />
18 1167118 Clip, Ø 3 2 56 1167156 Three Passage Nut Cap 1<br />
19 1167119 Locknut M8 4 57 1167157 Bolt M8 x 25 2<br />
20 1167120 Clamp Timber Claw 1 1 58 1167158 Bolt M6 x 30 1<br />
21 1167121 Four Star Armguard 1 59 1167159 Pump Jacket 1<br />
22 1167122 Quadrade Cover 1 60 1167160 Wheel 2<br />
23 1167123 Nut Cap M8 1 61 1167161 Snap Washer - Shaft, Ø 16 2<br />
24 1167124 Tense Pole 1 62 1167162 Screw M6 x 16 4<br />
25 1167125 Short Axis d 1 63 1167163 Locknut M10 10<br />
26 1167126 Snap washer - shaft, Ø 22 4 64 1167164 Oleaginous Cover 1<br />
27 1167127 Above Slip Plank 1 1 65 1167165 Lock Handle 6<br />
28 1167128 Above Slip Plank 4 1 66 1167166 O- Ring 32 x 3,55 1<br />
29 1167129 Inner Hexangular Screw M6 x 16 2 67 1167167 Bolt M10 x 35 6<br />
30 1167130 Locknut M4 2 68 1167168 Wheel Cover 2<br />
31 1167131 Above Slip Plank 2 1 69 1167169 Bolt M16 x 25 1<br />
32 1167132 Above Slip Plank 3 1 70 1167170 Washer Groupware 16 1<br />
33 1167133 Inner Hexangular Screw M6 x 10 2 71 1167171 Machine Shelf 1<br />
34 1167134 Armguard Hold Limitative Plank 2 72 1167172 Nether Axis 1<br />
35 1167135 Thin Nut M16 1 73 1167173 C3 Oily Vat 1<br />
36 1167136 Screw M4 x 6 2 74 1167174 Slip Plank 4<br />
37 1167137 Motor 1 75 1167175 Knife Rest Pipe 1<br />
38 1167138 Washer 10 32<br />
15
HORN TOOLS<br />
Stöckenstr. 12-14 . 6850 Dornbirn . AUSTRIA<br />
email: office@horntools.com<br />
UID: ATU59720608


