How, What and Why to do things with your American Saddlebred ...
How, What and Why to do things with your American Saddlebred ...
How, What and Why to do things with your American Saddlebred ...

You also want an ePaper? Increase the reach of your titles
YUMPU automatically turns print PDFs into web optimized ePapers that Google loves.
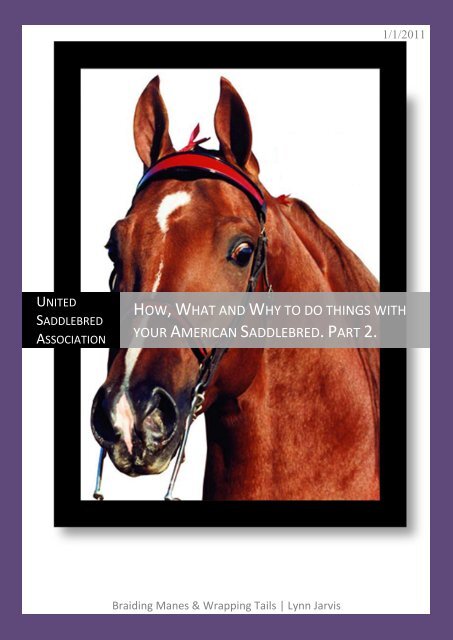
UNITED<br />
SADDLEBRED<br />
ASSOCIATION<br />
Braiding Manes & Wrapping Tails | Lynn Jarvis<br />
1/1/2011<br />
HOW, WHAT AND WHY TO DO THINGS WITH<br />
YOUR AMERICAN SADDLEBRED. PART 2.
HOW TO … TRIM AND BRAID THE BRIDLE PATH<br />
The first question <strong>to</strong> answer is why <strong>do</strong> we trim <strong>and</strong> braid our <strong>Saddlebred</strong>s? Nowhere in the rule<br />
book (any rule book) will you read that <strong>your</strong> horse MUST be trimmed <strong>and</strong> braided, however some<br />
rule books will have rules AGAINST trimming <strong>and</strong> braiding – so read them carefully. (For example<br />
you cannot show <strong>your</strong> hunter or western horse <strong>with</strong> braids). Back in the depths of his<strong>to</strong>ry,<br />
<strong>Saddlebred</strong>s were shown <strong>with</strong> their forelocks <strong>and</strong> the first part of their manes plaited (<strong>and</strong> left<br />
<strong>do</strong>wn, not rolled like we <strong>do</strong> <strong>with</strong> our riding horses <strong>and</strong> hunters). The purpose of this was simply <strong>to</strong><br />
keep their hair from interfering <strong>with</strong> the <strong>do</strong>uble bridle. This subsequently developed in<strong>to</strong> the bridle<br />
path being trimmed <strong>to</strong> make it easier <strong>to</strong> get the bridle on <strong>and</strong> off. As shows developed there was a<br />
natural competition between horse owners, who soon found ways <strong>to</strong> a<strong>do</strong>rn their “peacocks of the<br />
show ring” – <strong>and</strong> mane <strong>and</strong> forelock braiding were introduced. Any colour is acceptable <strong>and</strong><br />
traditionally reds <strong>and</strong> maroons <strong>do</strong>minate in the <strong>American</strong> show ring. In Australia they have a<br />
registry system where barns register their barn colours – <strong>and</strong> these are the colours their<br />
<strong>Saddlebred</strong>s show under – presumably other barns are not allowed <strong>to</strong> use their competi<strong>to</strong>rs’<br />
colours.<br />
There are different ways of trimming the bridle path of the <strong>American</strong> <strong>Saddlebred</strong> Horse – one<br />
involves leaving the forelock alone, the other involves thinning the forelock (by trimming the sides<br />
off) or removing it completely. Before you decide which suits you best, think about how <strong>your</strong> horse<br />
lives (<strong>do</strong>es he live out most the time <strong>and</strong> so would benefit from a forelock <strong>to</strong> keep the flies out of<br />
his eyes?) <strong>and</strong> what else you <strong>do</strong> <strong>with</strong> him apart from showing in <strong>Saddlebred</strong> classes (if you show in<br />
other classes, say coloured classes, some of them may have stipulations about whether he can be<br />
shown <strong>with</strong> or <strong>with</strong>out a forelock). Obviously once the hair has been trimmed off, you have <strong>to</strong> wait<br />
till it grows back if you have made a mistake or change <strong>your</strong> mind.<br />
Correct length for bridle path –<br />
the length of the ear.<br />
Bridle path <strong>to</strong>o long<br />
TRIMMING<br />
The first thing <strong>to</strong> <strong>do</strong> is <strong>to</strong> trim the bridle path – as a<br />
rule of thumb the amount <strong>to</strong> take off is dependent<br />
on the length of <strong>your</strong> horse’s ears. Carefully bend<br />
<strong>your</strong> horse’s ears backwards (like he is pinning them<br />
back) <strong>and</strong> where ever the tip of the ear finishes is<br />
roughly how much of the mane you want <strong>to</strong><br />
remove. If <strong>your</strong> horse is very fine through the throat<br />
latch you may want <strong>to</strong> take off less <strong>and</strong> if he is very<br />
heavy through the throat latch you may want <strong>to</strong><br />
take a bit more off (<strong>to</strong> give the impression of a finer<br />
throat line) – however beware of taking TOO much<br />
off, or you end up <strong>with</strong> hardly any mane. Any<br />
trimming should ENHANCE <strong>your</strong> horse, not detract<br />
from it.<br />
On<strong>to</strong> the forelock – if you have decided <strong>to</strong> leave it,<br />
that is fine. Simply wet the forelock <strong>and</strong> put a plait<br />
in it at shows <strong>and</strong> connect the front braid <strong>to</strong> the<br />
headpiece of <strong>your</strong> horse’s noseb<strong>and</strong> (this is<br />
explained later on). If you decide <strong>to</strong> thin it out, then
clip upwards on either side of the forelock, so that a bit is left in the middle for you <strong>to</strong> braid <strong>with</strong>.<br />
Or, you may want <strong>to</strong> take it off al<strong>to</strong>gether –<br />
Left: Ear before trimming<br />
again if this is the case you will need <strong>to</strong> attach<br />
Right: The Right: ear after The trimming. ear after trimming. The inside of the ear<br />
has not been trimmed in this pho<strong>to</strong>. the front braid <strong>to</strong> the headpiece of <strong>your</strong><br />
horse’s noseb<strong>and</strong>.<br />
Folding the ear <strong>to</strong> trim<br />
Trimmed ears<br />
Folding the ear <strong>to</strong> trim<br />
more alert <strong>and</strong> interested in his surroundings when his ears are pricked.<br />
From experience I have found the thinning of<br />
the forelock unsuccessful. No matter how<br />
hard you try, you will always lose some hair<br />
when you put in <strong>and</strong> take out <strong>your</strong> braids, so<br />
you eventually end up <strong>with</strong> hardly any<br />
forelock at all. My older horse has no forelock<br />
(I trim it off – after years of it being trimmed it<br />
simply <strong>do</strong>esn’t grow much anymore, so even<br />
though she is retired, she still has her forelock<br />
removed), my younger horse I leave the<br />
forelock alone.<br />
After you have trimmed the bridle path the<br />
next step is <strong>to</strong> tidy the ears up. Again you<br />
have a choice. You can simply close the ear<br />
<strong>to</strong>gether (cup the back of the ear in <strong>your</strong> h<strong>and</strong><br />
<strong>and</strong> close you h<strong>and</strong> gently so that the two<br />
edges of the ear meet) <strong>and</strong> trim the excess<br />
hair on the outside. This gives a neater look <strong>to</strong><br />
the horse in the show ring, whilst still<br />
affording him some protection from the flies.<br />
The other alternative is <strong>to</strong> <strong>do</strong> this AND <strong>to</strong> trim<br />
the inside, leaving a small V of unclipped hair<br />
at the <strong>to</strong>p of the ear (on the inside) – this<br />
accentuates the fineness of the ears <strong>and</strong><br />
creates an optical illusion that the tips are<br />
curling in <strong>to</strong>wards each other (they may well<br />
<strong>do</strong> this naturally anyway, so you are simply<br />
accentuating it). <strong>Why</strong>? It makes the horse look<br />
I use Wahl Adelar clippers – they are lightweight, portable <strong>and</strong> above all else QUIET! It is perfectly<br />
possible <strong>to</strong> trim the bridle path <strong>and</strong> the outside of the ears using scissors. <strong>How</strong>ever, whether using<br />
scissors or clippers the main thing <strong>to</strong> have is patience – it is far better <strong>to</strong> have someone help you<br />
(<strong>and</strong> twitch the horse is necessary) <strong>and</strong> get the job <strong>do</strong>ne <strong>with</strong>out nicking the horse. From<br />
experience <strong>with</strong> both scissors <strong>and</strong> clippers I know how hard it is <strong>to</strong> get the job <strong>do</strong>ne, when right at<br />
the critical moment the horse bobs its head up, or <strong>do</strong>wn, or turns it away. To clean the ears after<br />
trimming, take a soft cloth <strong>with</strong> 50% alcohol <strong>and</strong> 50% baby oil, <strong>and</strong> gently wipe the inside. This<br />
removes any debris (if you use the baby oil on it’s own it can be <strong>to</strong>o thick – the alcohol helps <strong>to</strong><br />
evaporate it). It is best NOT <strong>to</strong> trim <strong>your</strong> horse’s ears immediately before a class – if there are any<br />
hairs left inside he may start shaking his head or not wearing his ears (pinning them back). It is best<br />
<strong>to</strong> trim 1-2 days before the show.
BRAIDING – <strong>do</strong> you use hair ointments? This is really a personal<br />
choice – my own choice is that I find it much easier <strong>to</strong> plait a horse<br />
(I use the term plait here <strong>to</strong> refer <strong>to</strong> the normal but<strong>to</strong>n type plaits<br />
that we put on our riding horses) when the hair is, dare I say it, a<br />
tad on the dirty side! <strong>How</strong>ever, when showing you want <strong>your</strong><br />
horse <strong>to</strong> be spick <strong>and</strong> span, so we will assume his mane is spotless<br />
<strong>and</strong> squeaky clean, which can create a problem! Simple water<br />
works well (not a lot) – just dampen the piece of mane that you<br />
are about <strong>to</strong> plait. You <strong>do</strong>n’t want it <strong>to</strong>o wet, as this will make the<br />
braid wet <strong>and</strong> the colour may run – not so good on our pin<strong>to</strong>’s <strong>with</strong><br />
white bits. I personally like the Wahl Detangler as it is not silicone<br />
based, so <strong>do</strong>es not leave a residue, nor alcohol based so it <strong>do</strong>es not<br />
dry out the hair, plus <strong>with</strong> all Wahl stuff you can leave it in <strong>with</strong>out<br />
it causing any problems (you are actually meant <strong>to</strong> leave the<br />
detangler in). Use whatever works for you, but when braiding the<br />
<strong>Saddlebred</strong> for the show ring you are braiding so little hair, that<br />
there really is no need <strong>to</strong> use anything, other than water <strong>to</strong><br />
dampen the hair.<br />
To braid, either the mane or the forelock, you simply take 3 pieces<br />
of braiding ribbon <strong>and</strong> plait them <strong>to</strong>gether. In the mane you also<br />
take a few str<strong>and</strong>s of hair <strong>with</strong> each piece of ribbon – fold the<br />
ribbon over so the hair is in the middle (this protects the hair <strong>and</strong><br />
ensures the colour of the ribbon is seen) – <strong>and</strong> then plait. There is<br />
no need <strong>to</strong> tie a knot at the beginning – have someone hold all 3<br />
pieces <strong>and</strong> st<strong>and</strong> on the opposite side of the horse that the mane<br />
falls on. Separate the mane you are going <strong>to</strong> plait in<strong>to</strong> 3 pieces (it is<br />
useful <strong>to</strong> clip or b<strong>and</strong> the next bit of mane that you <strong>do</strong> not want so<br />
that it <strong>do</strong>esn’t get in the way). Have the person holding the ribbons<br />
lay them over the mane so that they are on the side you are<br />
working <strong>and</strong> start plaiting – one piece of ribbon for each piece of<br />
the mane that you have separated. Once you have plaited the first<br />
3 inches or so, then there is no longer any need for the other<br />
person <strong>to</strong> be holding the ribbon at the <strong>to</strong>p. Plait the ribbon – carry<br />
on past the mane until you have a couple of inches of ribbon left –<br />
then tie it off.<br />
To <strong>do</strong> this, take one piece of ribbon, wrap it round the plait, then<br />
pass it through <strong>and</strong> tighten. Take the remaining two pieces of<br />
ribbon <strong>and</strong> tie a simple knot. Now you have <strong>to</strong> tidy up the ends<br />
(both at the <strong>to</strong>p of the plait where you started <strong>and</strong> at the bot<strong>to</strong>m<br />
where you have tied it off). Cut each ribbon in<strong>to</strong> a “V” shape, <strong>with</strong><br />
the bot<strong>to</strong>m of the V always <strong>to</strong>wards the mane.<br />
You braid the forelock exactly the same way. If you are attaching the braid <strong>to</strong> the bridle you will<br />
have <strong>to</strong> use a knot at the beginning (or if you are super efficient you could stitch all 3 pieces of<br />
ribbon <strong>to</strong>gether). Two pieces of ribbon pass under the headpiece <strong>and</strong> one over <strong>and</strong> then you plait
away. Tie the end off <strong>and</strong> cut <strong>your</strong> “Vs” as described before. If you use a braid that is attached <strong>to</strong><br />
the bridle it is feasible <strong>to</strong> reuse it for more than one show. For any braid that is plaited <strong>with</strong> hair,<br />
then you will need <strong>to</strong> uplait it after the show (take care not <strong>to</strong> pull any hair out) <strong>to</strong> relax the hair –<br />
simply cut the knot off at the bot<strong>to</strong>m end (there should be no hair there) <strong>and</strong> unplait.<br />
Pho<strong>to</strong> left – bridle path trimmed <strong>and</strong><br />
all of forelock removed. Forelock braid<br />
is attached <strong>to</strong> the <strong>to</strong>p of the noseb<strong>and</strong><br />
– under the crown piece of the bridle,<br />
so that the look is seamless.<br />
Pho<strong>to</strong> right – the horse has a forelock,<br />
which has been braided <strong>and</strong> so is in<br />
front of the bridle.<br />
Pho<strong>to</strong> right – forelock left untrimmed, but plaited, separately <strong>to</strong> the braiding. If it is in<br />
the way, the forelock can be taped <strong>to</strong> the browb<strong>and</strong> <strong>to</strong> keep it in place (electrical tape,<br />
usually black, as it is very easy <strong>to</strong> remove <strong>with</strong>out tearing the hair out). The excess braid<br />
(which you want) is wrapped around the cheek piece of the bridle (on the same side<br />
that the mane falls). The trick is <strong>to</strong> allow enough room at the <strong>to</strong>p for the horse <strong>to</strong> use<br />
his ears (otherwise they will not use them well – looser would have been better than<br />
depicted in this pho<strong>to</strong>) <strong>and</strong> <strong>to</strong> wrap the braid around the cheek piece. WHY is it<br />
wrapped? So that the end bit can be tucked between the keepers, which keeps it in<br />
place <strong>and</strong> s<strong>to</strong>ps it coming un<strong>do</strong>ne. If it <strong>do</strong>es you can be left <strong>with</strong> it hanging at worse<br />
(not a pretty picture) or annoying the horse, who may then start <strong>to</strong> shake or <strong>to</strong>ss his<br />
head, right as you are <strong>do</strong>ing <strong>your</strong> pass in front of the judge – again, not what you want.<br />
<strong>What</strong> colour you use is up <strong>to</strong> you – all 3 ribbons can be the same colour, or they can be<br />
contrasting. <strong>What</strong> type of ribbon <strong>to</strong> use? Any type is fine, but the best is the stiff kind that I have<br />
only been able <strong>to</strong> source from America. Normal silk ribbon is generally <strong>to</strong>o soft <strong>and</strong> flexible (what<br />
happens is the “Vs” <strong>do</strong> not st<strong>and</strong> upright, they flop over). The closest I can find in the UK is the<br />
ribbon that decorates flowers, however the colour tends <strong>to</strong> bleed <strong>and</strong> it is a thinner weave so the<br />
colour is muted when you plait the hair in it. The ribbon should be around 1 inch in width.<br />
<strong>What</strong>ever type you use, test run it before the show – cut a little bit off <strong>and</strong> get it wet <strong>and</strong> see what<br />
happens. If the colour runs, especially if it is a dark colour <strong>and</strong> you have a light coloured horse, <strong>do</strong><br />
not use it!<br />
Accessories – yes I use a lot of Wahl products. Their warehouse is up the road from where I stable<br />
my horse, so it is easy <strong>to</strong> get. But, having tried most of the products on the market the ones I have<br />
expressed a preference for in this (or any future) article are the ones I believe <strong>to</strong> the job best.<br />
Bibliography<br />
USA-UK Newsletter No 5 (1996)<br />
USA-UK Year Book 2010.
HOW TO … WRAP A TAIL<br />
<strong>Why</strong> would you want <strong>to</strong>? To keep it clean <strong>and</strong> free from dirt <strong>and</strong> <strong>to</strong> enable you <strong>to</strong> grow it long –<br />
not a necessity for the show ring, but it <strong>do</strong>es enhance the overall look of the <strong>American</strong> <strong>Saddlebred</strong><br />
in saddle seat classes.<br />
There are 3 key points in wrapping a tail – if you remember nothing else, then remember these:<br />
1. Do not braid the tail when wet (if you leave it in when it is wet for any length of time, next time<br />
you unwrap it the tail hair will have rotted <strong>and</strong> it will fall off).<br />
2. Do not braid the tail <strong>to</strong>o tight<br />
3. Do not braid <strong>to</strong>o close <strong>to</strong> the <strong>do</strong>ck (both these last two points are because if you put <strong>to</strong>o much<br />
pressure on the tail hair roots, these can pull the hair out. In worse case scenarios the root can<br />
become permanently damaged <strong>and</strong> the hair will not grow back).<br />
You <strong>do</strong>n’t need <strong>to</strong> have a clean tail <strong>to</strong> wrap it, but generally, as the tail is left in for a while, it is<br />
best <strong>to</strong> shampoo <strong>and</strong> condition the tail before wrapping. Make sure the tail is dry <strong>and</strong> carefully<br />
h<strong>and</strong> pick or brush through the tail removing any tangles <strong>and</strong> knots.<br />
Hold the tail in one h<strong>and</strong> (take care when st<strong>and</strong>ing behind any horse not <strong>to</strong> be kicked) <strong>and</strong><br />
separate out the tail feathers from the <strong>to</strong>p of the tail. Regardless of how long these are, these<br />
should not be braided – they are left loose <strong>to</strong> offer protection.<br />
The remaining tail is divided in<strong>to</strong> 3 equal sections approx. 2-3 inches BELOW the <strong>do</strong>ck (the end of<br />
the tail bone). Loosely plait at the start – you can tighten the plait as you progress <strong>do</strong>wn the tail.<br />
Once you have plaited the length of the tail the end can be secured <strong>with</strong> a b<strong>and</strong>, or can be left<br />
unsecured – if leaving it unsecured keep hold of it until you have applied the vet wrap or it will<br />
unravel.<br />
Fold the plait back on itself, threading it through the <strong>to</strong>p of the plait – depending on how<br />
long/thick the hair is you may need <strong>to</strong> <strong>do</strong> this a couple of times <strong>and</strong> secure this in place using vet<br />
wrap (the kind that sticks <strong>to</strong> itself). The vet wrap is placed through the <strong>to</strong>p of the plait so that it<br />
hangs <strong>do</strong>wn both the front <strong>and</strong> the back of the plait <strong>and</strong> then wrapped around the plait so that the<br />
hair <strong>with</strong>in is protected <strong>and</strong> it forms a bang.<br />
This is <strong>your</strong> horse’s tail wrapped – you need <strong>do</strong> no more <strong>to</strong> it unless you want <strong>to</strong>, but for <strong>your</strong><br />
horse’s comfort you may want <strong>to</strong> add some sort of switch so that they can swish the flies away.<br />
The easiest way <strong>to</strong> make one is from an old sock – make a small hole at the “<strong>to</strong>e” end <strong>and</strong> secure<br />
from it some string or twine (bailer twine is fine). At the other end (the “leg” end), make a cut<br />
lengthways <strong>do</strong>wn the sock for about 2-3 inches, so that you have some “tie-tags”.<br />
Place the sock over the tail bang (which is now wrapped in vet wrap) so that the string is at the<br />
bot<strong>to</strong>m, <strong>and</strong> cover the wrapped tail. The <strong>to</strong>p end of the sock is secured by putting one end of the<br />
“tie-tag” through the <strong>to</strong>p of the plait <strong>and</strong> tying the two ends in a knot. Cut the hanging twine <strong>to</strong> a<br />
suitable length <strong>and</strong> you are <strong>do</strong>ne.
Starting the tail plait<br />
Folding the tail plait<br />
Vet wrap on the tail<br />
Using a tail sock<br />
Bibliography:<br />
USA-UK Newsletter No 10 (1997)<br />
Saddle & Bridle Magazine (1997)<br />
USA-UK Newsletter May 2011.<br />
References:<br />
http://www.omegafields.com (Accessed 14 December 2010).<br />
When you unwrap the tail, if you need <strong>to</strong> cut away the<br />
vet wrap, take care not <strong>to</strong> cut any of the tail hair <strong>to</strong>o!<br />
Unbraid the hair carefully, detangle, brush, wash <strong>and</strong><br />
condition, dry <strong>and</strong> re-wrap. Usually you will <strong>do</strong> this a<br />
couple of days before a show. After a show, <strong>to</strong> travel<br />
home, you can loosely plait the tail <strong>and</strong> secure <strong>with</strong> a<br />
small amount of vet wrap. The tail may well have<br />
collected debris from the show ring so it is advisable <strong>to</strong><br />
wash the tail out after the show before wrapping it up<br />
again for any length of time.<br />
Tips: When cleaning the tail, make sure you clean the tail<br />
bone well. There should be no gummy, sticky or dirty<br />
spots on the tail bone after you have washed it. This may<br />
mean cleaning <strong>and</strong> rinsing the tail more than once. You<br />
may want <strong>to</strong> use a dilute vinegar solution as the last<br />
rinse between shampooing <strong>and</strong> conditioning (approx.<br />
16oz vinegar <strong>to</strong> a bucket of water) – this helps remove<br />
the last residues of shampoo <strong>and</strong> leaves the tail squeaky<br />
clean. You may want <strong>to</strong> use a hair dryer <strong>to</strong> dry the hair –<br />
<strong>with</strong> any electrical equipment, take care around horses<br />
<strong>and</strong> water! If using a hair dryer, leave for half an hour<br />
before wrapping it, as the heat from the dryer may give<br />
the impression that the tail is dry when it is still slightly<br />
damp.<br />
<strong>What</strong> we want as the end result – a long tail!. Ref:<br />
www.omegafields.com