

English Instructions - 4M-IND.com
English Instructions - 4M-IND.com
English Instructions - 4M-IND.com

Create successful ePaper yourself
Turn your PDF publications into a flip-book with our unique Google optimized e-Paper software.
41-02743/1<br />
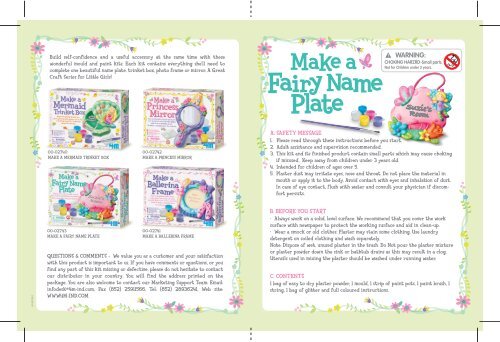
Build self-confidence and a useful accessory at the same time with these<br />
wonderful mould and paint kits. Each kit contains everything she’ll need to<br />
<strong>com</strong>plete one beautiful name plate, trinket box, photo frame or mirror. A Great<br />
Craft Series for Little Girls!<br />
00-02740<br />
MAKE A MERMAID TRINKET BOX<br />
00-02743<br />
MAKE A FAIRY NAME PLATE<br />
00-02742<br />
MAKE A PRINCESS MIRROR<br />
00-02741<br />
MAKE A BALLERINA FRAME<br />
QUESTIONS & COMMENTS - We value you as a customer and your satisfaction<br />
with this product is important to us. If you have <strong>com</strong>ments or questions, or you<br />
find any part of this kit missing or defective, please do not hesitate to contact<br />
our distributor in your country. You will find the address printed on the<br />
package. You are also wel<strong>com</strong>e to contact our Marketing Support Team: Email:<br />
infodesk@4m-ind.<strong>com</strong>, Fax (852) 25911566, Tel: (852) 28936241, Web site:<br />
WWW.<strong>4M</strong>-<strong>IND</strong>.COM<br />
Suzie’s<br />
Room<br />
A. SAFETY MESSAGE<br />
1. Please read through these instructions before you start.<br />
2. Adult assistance and supervision re<strong>com</strong>mended.<br />
3. This kit and its finished product contain small parts which may cause choking<br />
if misused. Keep away from children under 3 years old.<br />
4. Intended for children of ages over 5.<br />
5. Plaster dust may irritate eyes, nose and throat. Do not place the material in<br />
mouth or apply it to the body. Avoid contact with eyes and inhalation of dust.<br />
In case of eye contact, flush with water and consult your physician if dis<strong>com</strong>fort<br />
persists.<br />
B. BEFORE YOU START<br />
• Always work on a solid, level surface. We re<strong>com</strong>mend that you cover the work<br />
surface with newspaper to protect the working surface and aid in clean-up.<br />
• Wear a smock or old clothes. Plaster may stain some clothing. Use laundry<br />
detergent on soiled clothing and wash separately.<br />
Note: Dispose of wet, unused plaster in the trash. Do Not pour the plaster mixture<br />
or plaster powder down the sink or bathtub drains as this may result in a clog.<br />
Utensils used in mixing the plaster should be washed under running water.<br />
C. CONTENTS<br />
1 bag of easy to dry plaster powder, 1 mould, 1 strip of paint pots, 1 paint brush, 1<br />
string, 1 bag of glitter and full coloured instructions.
D. INSTRUCTIONS<br />
1 Mould<br />
3 Sprinkle Glitter<br />
4<br />
2<br />
Paint<br />
Write your name<br />
Suzie’s<br />
Room<br />
Before you start mixing the plaster, please note following: Plaster powder starts to<br />
harden once it is mixed with water. It is a gradual process in which the viscosity of<br />
the mixture reduces gradually until it be<strong>com</strong>es hard. Always check the condition<br />
of the mixture when mixing. Perform the moulding when the mixture is like a<br />
smooth paste, approximately 3-5 minutes after the plaster is mixed with water. It<br />
will be too hard to use for moulding when it starts to develop into a “lumpy”<br />
condition.<br />
1. MOULD : Place the mould on a flat working surface. You will need approximately<br />
60-80ml of water, a mixing bowl and a stirring instrument (a spoon or popsicle<br />
stick works well). Cut open one bag of plaster powder and pour it into the mixing<br />
bowl. Do not add all the water at once, as that may make the plaster mixture too<br />
runny for moulding. Watch the condition of the plaster paste and add the water<br />
in small amounts as required until the mixture resembles a smooth paste. Depending<br />
on the atmospheric conditions, the plaster will normally be<strong>com</strong>e a smooth paste<br />
after approximately 60-80 ml of water is mixed with it. Place the string onto the<br />
mould, and remind to make a knots on both ends. Pour the plaster mixture into the<br />
mould. Gently agitate the mould to eliminate air bubbles. Leave the plaster mixture<br />
to set. This will take approximately 20 - 30 minutes and will release some warmth<br />
at normal room temperature. Once the plaster has fully hardened, gently press the<br />
mould to release the name plate.<br />
2. PAINT: For best result, allow the plaster to dry <strong>com</strong>pletely before painting. This<br />
can take up to 24 hours depending on weather conditions. Paint your own design<br />
or refer to the following painting tips and colour guide.<br />
3. SPRINKLE GLITTER: While the paint is still wet, have an adult cut the corner of<br />
the glitter packet then carefully sprinkle the glitter over your name plate to make<br />
it sparkle.<br />
4. WRITE YOUR NAME: Once the plaster name plate is <strong>com</strong>pletely dry, write your<br />
name onto the name plate & hang it on your wall or door. Now you have your very<br />
own fairy name plate.<br />
COLOUR MIXING GUIDE<br />
Green<br />
Orange<br />
Purple<br />
Turquoise<br />
Brown<br />
=<br />
=<br />
=<br />
=<br />
=<br />
HELPFUL HINTS<br />
Yellow +<br />
Yellow +<br />
Blue +<br />
Blue +<br />
Red +<br />
Blue<br />
Red<br />
Red<br />
White<br />
Yellow<br />
Sky Blue =<br />
Pink =<br />
Lime Green =<br />
+ a little Yellow<br />
+ a little Black<br />
White +<br />
White +<br />
Yellow +<br />
a little Blue<br />
Red<br />
a little Blue<br />
Cover and protect your work surface before you begin to paint.<br />
For best results, apply two or more layers of paint, but wait until the first layer is<br />
dry before applying a second coat.<br />
It is always easier to paint a darker colour on a lighter colour back-ground. Use<br />
lighter colours on your first coat of paint.<br />
Adding a small drop of dishwashing detergent to the paint will help the paint apply<br />
more easily.<br />
Avoid mixing too many colours together as they will make the final colour look<br />
muddy.<br />
Wash the brush before changing to another colour and dry the brush by dabbing it<br />
on a paper towel.<br />
If the paint strip be<strong>com</strong>es dry, dilute it with a few drops of water.


