C08 - Reed Replacement - Hohner
C08 - Reed Replacement - Hohner
C08 - Reed Replacement - Hohner

Create successful ePaper yourself
Turn your PDF publications into a flip-book with our unique Google optimized e-Paper software.
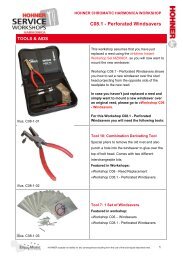
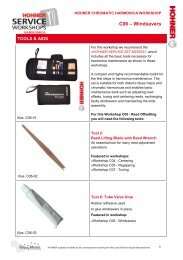
TOOLS & AIDS<br />
Illus. <strong>C08</strong>-01<br />
Illus. <strong>C08</strong>-02<br />
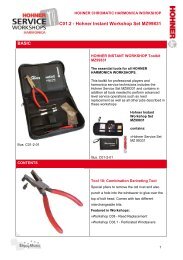
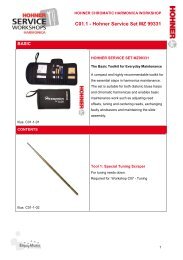
HOHNER CHROMATIC HARMONICA WORKSHOP<br />
<strong>C08</strong> - <strong>Reed</strong> <strong>Replacement</strong><br />
For this workshop we recommend the »<strong>Hohner</strong><br />
Instant Workshop Set MZ99831, the essential<br />
tools for all HOHNER HARMONICA<br />
WORKSHOPS.<br />
This toolkit for professional players and<br />
harmonica service technicians includes the<br />
<strong>Hohner</strong> Service Set MZ99331 and contains in<br />
addition all further tools necessary for replacing<br />
individual defective reeds as described in this<br />
workshop.<br />
For this Workshop <strong>C08</strong> - <strong>Reed</strong> <strong>Replacement</strong><br />
you will need the following tools:<br />
Tool 2:<br />
<strong>Reed</strong> Lifting Blade with <strong>Reed</strong> Wrench<br />
An essential tool for many reed adjustment<br />
operations.<br />
Featured in workshops:<br />
»Workshop C04 - Centering<br />
»Workshop C05 - Regapping<br />
»Workshop C07 - Tuning<br />
H HOHNER accepts no liability for any consequences resulting from the use of the techniques described here. 1
<strong>C08</strong> - <strong>Reed</strong> <strong>Replacement</strong><br />
Illus. <strong>C08</strong>-03<br />
Illus. <strong>C08</strong>-04<br />
Illus. <strong>C08</strong>-05<br />
2<br />
Tool 10: Combination Deriveting Tool<br />
Special pliers to remove the old rivet and also<br />
punch a hole into the windsaver to glue over the<br />
top of bolt head. Comes with two different<br />
interchangeable bits.<br />
Featured in Workshops:<br />
»Workshop <strong>C08</strong> - <strong>Reed</strong> <strong>Replacement</strong><br />
»Workshop <strong>C08</strong>.1 - Perforated Windsavers<br />
Tool 11: Reamer 1.4<br />
To ream up the holes in reed plate and reed so<br />
that they fit the new stud bolt for mounting the<br />
replacement reed.<br />
Used in workshop:<br />
»Workshop <strong>C08</strong> - <strong>Reed</strong> <strong>Replacement</strong><br />
Tool 12: Universal Holder<br />
Holds the reamer and is also needed to set the<br />
stud bolt in the plate.<br />
Used in workshop:<br />
»Workshop <strong>C08</strong> - <strong>Reed</strong> <strong>Replacement</strong>
<strong>C08</strong> - <strong>Reed</strong> <strong>Replacement</strong><br />
Illus. <strong>C08</strong>-06<br />
Illus. <strong>C08</strong>-07<br />
Illus. <strong>C08</strong>-08<br />
3<br />
Tool 13: Drill Bit<br />
Needed for deburring reed plate and<br />
replacement reed.<br />
Used in workshop:<br />
»Workshop <strong>C08</strong> - <strong>Reed</strong> <strong>Replacement</strong><br />
Tool 14: Tap 1.4<br />
Cuts an M1.4 thread into the reed plate.<br />
Used in workshop:<br />
»Workshop <strong>C08</strong> - <strong>Reed</strong> <strong>Replacement</strong><br />
Tool 15: Screwdriver<br />
To affix the stud bolt.<br />
Used in workshop:<br />
»Workshop <strong>C08</strong> - <strong>Reed</strong> <strong>Replacement</strong>
<strong>C08</strong> - <strong>Reed</strong> <strong>Replacement</strong><br />
Illus. <strong>C08</strong>-09<br />
Illus. <strong>C08</strong>-10<br />
Illus. <strong>C08</strong>-11<br />
4<br />
Tool 16: Star Nut Spanner<br />
To secure the special star nut with which the<br />
replacement reed is affixed.<br />
Used in workshop:<br />
»Workshop <strong>C08</strong> - <strong>Reed</strong> <strong>Replacement</strong><br />
Aid 17: Special Nut 1.4<br />
Screws onto the stud bolt to fix the replacement<br />
reed into place<br />
Used in workshop:<br />
»Workshop <strong>C08</strong> - <strong>Reed</strong> <strong>Replacement</strong><br />
Aid 18: Stud Bolt M1.4<br />
Screws into the reed plate to durably mount<br />
the replacement reed.<br />
Used in workshop:<br />
»Workshop <strong>C08</strong> - <strong>Reed</strong> <strong>Replacement</strong>
<strong>C08</strong> - <strong>Reed</strong> <strong>Replacement</strong><br />
Step 01 - Remove the defective reed<br />
Illus. <strong>C08</strong>-12<br />
Illus. <strong>C08</strong>-13<br />
Illus. <strong>C08</strong>-14<br />
5<br />
There is a significant disadvantage to replacing<br />
complete sets of reed plates: Usually only one or<br />
two reeds are actually defective, the remainder<br />
are frequently perfectly OK.<br />
Instead of discarding entire reed plates with up to<br />
31 reeds in good working order, it really does<br />
make sense to simply replace the broken reeds.<br />
Remove the windsaver from the opposite side of<br />
the reed plate to the defective reed. You don't<br />
even have to clean the surface yet, this can be<br />
done later.<br />
To enable the player to remove defective reeds,<br />
<strong>Hohner</strong> has developed<br />
Combined De-Riveting Tool (10).<br />
This is a special pair of pliers with two<br />
interchangeable bits (10a & 10b) designed for<br />
two different purposes:<br />
To press out the rivet with which the old reed is<br />
affixed to the reed plate (10a).<br />
To punch a hole into a windsaver as described in<br />
»Workshop <strong>C08</strong>.1 - Perforated Windsavers<br />
(10b).<br />
It's therefore essential to select the correct bit<br />
10a for the de-riveting process, as shown in Ill.<br />
<strong>C08</strong>-14.
<strong>C08</strong> - <strong>Reed</strong> <strong>Replacement</strong><br />
Illus. <strong>C08</strong>-15<br />
Illus. <strong>C08</strong>-16<br />
Illus. <strong>C08</strong>-17<br />
6<br />
Here the bit 10a for de-riveting has been<br />
screwed into the pliers.<br />
Ill. <strong>C08</strong>-16 shows the side from which you have<br />
to access the reed plate.<br />
The rivet head (thicker part) is placed into the<br />
hole of the de-riveting pliers, facing downwards.<br />
And here's how to punch out the reed.<br />
Make sure that the pin is positioned exactly on<br />
the center of the rivet before you close the pliers.<br />
You'll need to press quite hard.
<strong>C08</strong> - <strong>Reed</strong> <strong>Replacement</strong><br />
Step 02 - Ream the rivet hole to 1.3mm<br />
Illus. <strong>C08</strong>-18<br />
Step 03 - Deburring<br />
Illus. <strong>C08</strong>-19<br />
Step 04 - Tapping M1.4<br />
7<br />
In order to be able to screw in a stud bolt to<br />
attach the new reed, we first have to use the<br />
Reamer (11), mounted in the Universal Holder<br />
(12), to enlarge the rivet hole to approx. 1.3mm<br />
diameter so that it fits the stud bolt.<br />
Caution:<br />
As the core diameter of the stud bolt is only<br />
1.3mm and this is a 1.4mm reamer, please only<br />
ream about halfway in.<br />
Illus. <strong>C08</strong>-18<br />
When reaming out the hole, a tiny burr forms on<br />
the reed plate. In order to avoid play at a later<br />
point in time between reed and plate, it's<br />
necessary to deburr the plate with the Drill Bit<br />
(13), using minimal pressure.<br />
Illus. <strong>C08</strong>-19-1
<strong>C08</strong> - <strong>Reed</strong> <strong>Replacement</strong><br />
Illus. <strong>C08</strong>-20<br />
Illus. <strong>C08</strong>-21<br />
Step 06 - Reaming out the hole in the reed<br />
8<br />
Now the thread for the stud bolt is cut into the<br />
reed plate using the Tap M1.4 (14).<br />
When performing this operation, it's extremely<br />
important that the tap is positioned exactly at<br />
right angles to the reed plate on both axes before<br />
you start to cut the thread. Then twist the tap<br />
until it turns smoothly in the thread.<br />
Illus. <strong>C08</strong>-20-1<br />
In order to accurately insert the stud bolt into the<br />
thread you have cut in the reed plate, the bolt<br />
should first be mounted in the Universal Holder<br />
(12).<br />
Now you can screw the stud M1.4 (18) into the<br />
reed plate.<br />
Illus. <strong>C08</strong>-21-1<br />
As soon as the screw has found the thread,<br />
release it from the holder. Of course you can<br />
insert and screw the stud in by hand, but it's<br />
easier using the holder.
<strong>C08</strong> - <strong>Reed</strong> <strong>Replacement</strong><br />
Illus. <strong>C08</strong>-22<br />
Illus. <strong>C08</strong>-23<br />
Step 07 - Deburring and mounting the reed<br />
Step 08 - Setting the star nut<br />
9<br />
The existing hole in the reed needs to be<br />
enlarged to fit the external diameter of the stud<br />
bolt (1.4mm).<br />
The Reamer 1.4 (11) in the Universal Holder<br />
(12) is inserted into the hole at rights angles to<br />
the surface of the reed and pushed in the whole<br />
way.<br />
It's better that the hole in the reed is too large<br />
than too small, as this facilitates centering the<br />
reed and is one of the major advantages of this<br />
method as opposed to riveting.<br />
Caution:<br />
Be careful not to deform the reed between your<br />
fingers or by pushing the reamer in too hard.<br />
Illus. <strong>C08</strong>-22-1<br />
When reaming out the hole, a tiny burr will form<br />
on the reed. In order to avoid play at a later point<br />
in time between reed and plate, it's necessary to<br />
deburr the reed with the Drill Bit (13), using<br />
minimal pressure.<br />
Illus. <strong>C08</strong>-23-1
<strong>C08</strong> - <strong>Reed</strong> <strong>Replacement</strong><br />
Illus. <strong>C08</strong>-24<br />
10<br />
First of all the Star Nut (17) is placed in the Star<br />
Nut Spanner (16). In order to prevent the little nut<br />
from falling out of the spanner, you have to work<br />
from underneath to place it upon the stud.<br />
Illus. <strong>C08</strong>-24-1
<strong>C08</strong> - <strong>Reed</strong> <strong>Replacement</strong><br />
Step 09 - Centering and Locking<br />
Illus. <strong>C08</strong>-25<br />
Now proceed as shown in:<br />
»Workshop C04 - Centering<br />
»Workshop C05 - Regapping<br />
»Workshop C07 - Tuning<br />
The reed needs to be centered so that it can<br />
oscillate freely through the slot just like any other<br />
reed. Adjust the offset to your liking, tune the<br />
reed and your instrument is ready to go again!<br />
Illus. <strong>C08</strong>-25-1<br />
© <strong>Hohner</strong> Musikinstrumente GmbH. & Co. KG, Trossingen, service@hohner.de, www.hohner.de 11