C06 – Windsavers - Hohner
C06 – Windsavers - Hohner
C06 – Windsavers - Hohner

Create successful ePaper yourself
Turn your PDF publications into a flip-book with our unique Google optimized e-Paper software.
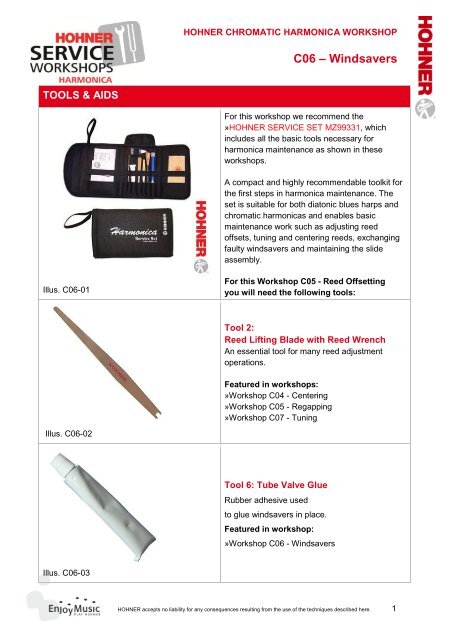
TOOLS & AIDS<br />
Illus. <strong>C06</strong>-01<br />
Illus. <strong>C06</strong>-02<br />
Illus. <strong>C06</strong>-03<br />
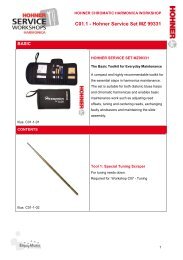
HOHNER CHROMATIC HARMONICA WORKSHOP<br />
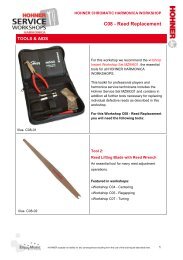
<strong>C06</strong> <strong>–</strong> <strong>Windsavers</strong><br />
For this workshop we recommend the<br />
»HOHNER SERVICE SET MZ99331, which<br />
includes all the basic tools necessary for<br />
harmonica maintenance as shown in these<br />
workshops.<br />
A compact and highly recommendable toolkit for<br />
the first steps in harmonica maintenance. The<br />
set is suitable for both diatonic blues harps and<br />
chromatic harmonicas and enables basic<br />
maintenance work such as adjusting reed<br />
offsets, tuning and centering reeds, exchanging<br />
faulty windsavers and maintaining the slide<br />
assembly.<br />
For this Workshop C05 - Reed Offsetting<br />
you will need the following tools:<br />
Tool 2:<br />
Reed Lifting Blade with Reed Wrench<br />
An essential tool for many reed adjustment<br />
operations.<br />
Featured in workshops:<br />
»Workshop C04 - Centering<br />
»Workshop C05 - Regapping<br />
»Workshop C07 - Tuning<br />
Tool 6: Tube Valve Glue<br />
Rubber adhesive used<br />
to glue windsavers in place.<br />
Featured in workshop:<br />
»Workshop <strong>C06</strong> - <strong>Windsavers</strong><br />
H HOHNER accepts no liability for any consequences resulting from the use of the techniques described here. 1
<strong>C06</strong> <strong>–</strong> <strong>Windsavers</strong><br />
Illus. <strong>C06</strong>-04<br />
Tool 7: 1 Set of <strong>Windsavers</strong><br />
Featured in workshop:<br />
»Workshop <strong>C06</strong> - <strong>Windsavers</strong><br />
STEP 01 - Remove old windsaver and remains of old glue<br />
Illus. <strong>C06</strong>-05<br />
Illus. <strong>C06</strong>-06<br />
Remover the old windsaver by carefully<br />
pulling it off.<br />
Using the reed lifting blade (2), scrape the<br />
remains of the old glue from the the riveting<br />
point, where the windsaver was affixed to the<br />
reed plate. If necessary you can use the tip of a<br />
screwdriver or even your thumbnail.<br />
It doesn't matter if you should scratch the surface<br />
of the reed plate at the point of contact in the<br />
process, surface roughness helps the glue to<br />
stick better.<br />
Warning:<br />
Don't try to use solvents here, as these can<br />
dissolve the old glue and distribute it more<br />
widely.<br />
If glue residues get into the gap between reed<br />
and slot, you will have great difficulty in<br />
getting the reed to function properly again!<br />
2
<strong>C06</strong> <strong>–</strong> <strong>Windsavers</strong><br />
STEP 02 - Applying the glue<br />
Illus. <strong>C06</strong>-07<br />
STEP03 - Raising Reed Offsets<br />
Illus. <strong>C06</strong>-08<br />
STEP03 - Raising Reed Offsets<br />
Illus. <strong>C06</strong>-09<br />
Illus. <strong>C06</strong>-10<br />
In order to ensure that the new windsaver<br />
functions properly, it's important to dose the<br />
quantity of glue correctly. If you apply too much it<br />
can run into the gap between reed and plate. If<br />
you use too little the valve may fall off.<br />
The photo on the left shows the right quantity.<br />
When you press the new windsaver on, it's<br />
important that no excess glue gets into the slot.<br />
If you need to renew windsavers frequently it can<br />
be a help to use tweezers.<br />
Press the new windsaver gently but firmly onto<br />
the reed plate at the point where the tip of the<br />
rivet is visible ......<br />
... and align it carefully.<br />
The glue needs 30 minutes to dry.<br />
Then you can test the new windsaver.<br />
3
<strong>C06</strong> <strong>–</strong> <strong>Windsavers</strong><br />
STEP 04 - Problem Solving<br />
Illus. <strong>C06</strong>-11<br />
Windsaver valves are the cause of most of the<br />
common problems which occur with chromatic<br />
harmonicas.<br />
If you follow the general rules shown here, you<br />
should have a lot less trouble.<br />
When Installing <strong>Windsavers</strong><br />
Bend the base of the windsaver<br />
slightly down towards the plate<br />
beforehand.<br />
The base should overlap the<br />
plate by about the same amount<br />
as the rivet pad of the reed.<br />
Centered<br />
Flat<br />
No glue in the slot<br />
Parallel to the reed slot<br />
Symmetrical<br />
Absolutely flat<br />
Point A<br />
Point B<br />
Point C<br />
Not projecting away from plate<br />
Minimal overhang at tip<br />
Despite all precautions, valves can sometimes<br />
vibrate to produce extraneous noise if the form of<br />
the player's vocal tract supports their resonance<br />
frequency. Often this can be corrected by<br />
changing the throat shape.<br />
Another possibility is to change the natural<br />
resonant frequency of the windsaver.<br />
Possible Remedies:<br />
Use a slightly longer valve (contradicts<br />
rule C),<br />
Shorten the upper layer of the valve<br />
Shorten the entire valve at point C so that<br />
it no longer provides a complete seal.<br />
© <strong>Hohner</strong> Musikinstrumente GmbH. & Co. KG, Trossingen, service@hohner.de, www.hohner.de 4