

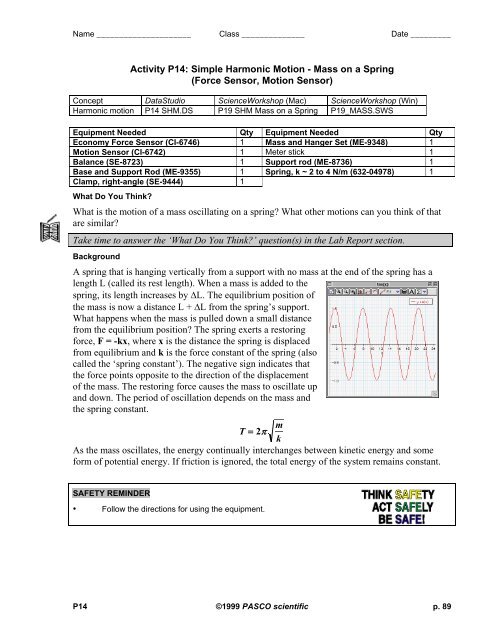
Activity P14: Simple Harmonic Motion - Mass on a Spring (Force ...
Activity P14: Simple Harmonic Motion - Mass on a Spring (Force ...
Activity P14: Simple Harmonic Motion - Mass on a Spring (Force ...

Create successful ePaper yourself
Turn your PDF publications into a flip-book with our unique Google optimized e-Paper software.
Name _____________________ Class ______________ Date _________<br />
<str<strong>on</strong>g>Activity</str<strong>on</strong>g> <str<strong>on</strong>g>P14</str<strong>on</strong>g>: <str<strong>on</strong>g>Simple</str<strong>on</strong>g> <str<strong>on</strong>g>Harm<strong>on</strong>ic</str<strong>on</strong>g> <str<strong>on</strong>g>Moti<strong>on</strong></str<strong>on</strong>g> - <str<strong>on</strong>g>Mass</str<strong>on</strong>g> <strong>on</strong> a <strong>Spring</strong><br />
(<strong>Force</strong> Sensor, <str<strong>on</strong>g>Moti<strong>on</strong></str<strong>on</strong>g> Sensor)<br />
C<strong>on</strong>cept DataStudio ScienceWorkshop (Mac) ScienceWorkshop (Win)<br />
<str<strong>on</strong>g>Harm<strong>on</strong>ic</str<strong>on</strong>g> moti<strong>on</strong> <str<strong>on</strong>g>P14</str<strong>on</strong>g> SHM.DS P19 SHM <str<strong>on</strong>g>Mass</str<strong>on</strong>g> <strong>on</strong> a <strong>Spring</strong> P19_MASS.SWS<br />
Equipment Needed Qty Equipment Needed Qty<br />
Ec<strong>on</strong>omy <strong>Force</strong> Sensor (CI-6746) 1 <str<strong>on</strong>g>Mass</str<strong>on</strong>g> and Hanger Set (ME-9348) 1<br />
<str<strong>on</strong>g>Moti<strong>on</strong></str<strong>on</strong>g> Sensor (CI-6742) 1 Meter stick 1<br />
Balance (SE-8723) 1 Support rod (ME-8736) 1<br />
Base and Support Rod (ME-9355) 1 <strong>Spring</strong>, k ~ 2 to 4 N/m (632-04978) 1<br />
Clamp, right-angle (SE-9444) 1<br />
What Do You Think?<br />
What is the moti<strong>on</strong> of a mass oscillating <strong>on</strong> a spring? What other moti<strong>on</strong>s can you think of that<br />
are similar?<br />
Take time to answer the ‘What Do You Think?’ questi<strong>on</strong>(s) in the Lab Report secti<strong>on</strong>.<br />
Background<br />
A spring that is hanging vertically from a support with no mass at the end of the spring has a<br />
length L (called its rest length). When a mass is added to the<br />
spring, its length increases by ΔL. The equilibrium positi<strong>on</strong> of<br />
the mass is now a distance L + ΔL from the spring’s support.<br />
What happens when the mass is pulled down a small distance<br />
from the equilibrium positi<strong>on</strong>? The spring exerts a restoring<br />
force, F = -kx, where x is the distance the spring is displaced<br />
from equilibrium and k is the force c<strong>on</strong>stant of the spring (also<br />
called the ‘spring c<strong>on</strong>stant’). The negative sign indicates that<br />
the force points opposite to the directi<strong>on</strong> of the displacement<br />
of the mass. The restoring force causes the mass to oscillate up<br />
and down. The period of oscillati<strong>on</strong> depends <strong>on</strong> the mass and<br />
the spring c<strong>on</strong>stant.<br />
T = 2π m<br />
k<br />
As the mass oscillates, the energy c<strong>on</strong>tinually interchanges between kinetic energy and some<br />
form of potential energy. If fricti<strong>on</strong> is ignored, the total energy of the system remains c<strong>on</strong>stant.<br />
SAFETY REMINDER<br />
• Follow the directi<strong>on</strong>s for using the equipment.<br />
<str<strong>on</strong>g>P14</str<strong>on</strong>g> ©1999 PASCO scientific p. 89
Physics Labs with Computers, Vol. 1 Student Workbook<br />
<str<strong>on</strong>g>P14</str<strong>on</strong>g>: <str<strong>on</strong>g>Simple</str<strong>on</strong>g> <str<strong>on</strong>g>Harm<strong>on</strong>ic</str<strong>on</strong>g> <str<strong>on</strong>g>Moti<strong>on</strong></str<strong>on</strong>g> - <str<strong>on</strong>g>Mass</str<strong>on</strong>g> <strong>on</strong> a <strong>Spring</strong> 012-07000A<br />
Pre-Lab For You To Do<br />
In the Pre-lab use the <strong>Force</strong> Sensor to measure the weight of a hanging mass. Use ‘Keyboard<br />
Sampling’ to enter the displacement of the spring from equilibrium. Use DataStudio or<br />
ScienceWorkshop to determine the spring c<strong>on</strong>stant k for the spring.<br />
Pre-Lab PART I: Computer Setup<br />
1. C<strong>on</strong>nect the ScienceWorkshop interface to the computer,<br />
turn <strong>on</strong> the interface, and turn <strong>on</strong> the computer.<br />
2. C<strong>on</strong>nect the DIN plug of the <strong>Force</strong> Sensor to Analog<br />
Channel A.<br />
scientific<br />
scientific 300<br />
3. Open the document titled as shown:<br />
DataStudio ScienceWorkshop (Mac) ScienceWorkshop (Win)<br />
<str<strong>on</strong>g>P14</str<strong>on</strong>g> Prelab SHM.DS X19 <strong>Spring</strong> C<strong>on</strong>stant X19_SPNG.SWS<br />
500<br />
PASCO<br />
Interface<br />
PASCO<br />
ANALOG CHANNELS<br />
Science Workshop DATA LOGGING INSTRUCTIONS<br />
• The DataStudio document has a Workbook display. Read the instructi<strong>on</strong>s in the Workbook.<br />
• The ScienceWorkshop document has a Graph display of <strong>Force</strong> versus Stretch and a Digits<br />
display of <strong>Force</strong>.<br />
• Data recording is set for 5 Hz. Use ‘Keyboard Sampling’ to enter the distance stretched in<br />
meters.<br />
Pre-Lab PART II: Sensor Calibrati<strong>on</strong> and Equipment Setup<br />
• To calibrate the <strong>Force</strong> Sensor, refer to the descripti<strong>on</strong> in the<br />
<strong>Force</strong> Sensor Manual.<br />
1. Using the rod and support stand, the clamp, and the sec<strong>on</strong>d<br />
rod, mount the <strong>Force</strong> Sensor vertically so its hook end is<br />
down.<br />
2. Suspend the spring from the <strong>Force</strong> Sensor’s hook so that it<br />
hangs vertically.<br />
3. Use the meter stick to measure the positi<strong>on</strong> of the bottom end<br />
of the spring (without any mass added to the spring). For<br />
your reference, record this measurement as the spring’s<br />
equilibrium positi<strong>on</strong> in the Data Table in the Lab Report<br />
secti<strong>on</strong>.<br />
p. 90 ©1999 PASCO scientific <str<strong>on</strong>g>P14</str<strong>on</strong>g><br />
Science<br />
Workshop<br />
Interface
Name _____________________ Class ______________ Date _________<br />
Pre-Lab PART II: Data Recording<br />
1. Press the tare butt<strong>on</strong> <strong>on</strong> <strong>Force</strong> Sensor to zero the <strong>Force</strong> Sensor.<br />
2. Start data recording. The program will begin Keyboard Sampling. Enter 0.000 in units of<br />
meters (m) because the spring is unstretched.<br />
In DataStudio, move the Table display so you can see it clearly.<br />
• Click <strong>on</strong> the ‘Start’ butt<strong>on</strong> to start recording data. The ‘Start’ butt<strong>on</strong> changes to a ‘Keep’<br />
and a ‘Stop’ butt<strong>on</strong> ( ). The <strong>Force</strong> will appear in the first cell in the Table<br />
display. Click the ‘Keep’ butt<strong>on</strong> to record the force value.<br />
In ScienceWorkshop, click the ‘REC’ butt<strong>on</strong> to begin collecting data.<br />
• The ‘Keyboard Sampling’ window will open. Move it so you can also see the Digits<br />
display. The default value for ‘Entry #1’ is 10.000. Type in ‘0’ as the stretch. Click ‘Enter’<br />
to record the stretch and force values. The entered stretch value will appear in the Data list.<br />
3. Add 20 grams of mass to the end of the spring (be sure to include the mass of the hanger).<br />
4. Measure the new positi<strong>on</strong> of the end of the spring. Enter the difference between the new<br />
positi<strong>on</strong> and the equilibrium positi<strong>on</strong> as the Δx, ‘Stretch’ (in meters), and record a <strong>Force</strong><br />
value for this Stretch value by clicking <strong>on</strong> ‘Keep’ in DataStudio, or ‘Enter’ in<br />
ScienceWorkshop.<br />
5. Add 10 grams to the spring (for a total of 30 g additi<strong>on</strong>al mass). Measure the new positi<strong>on</strong><br />
of the end of the spring, enter the stretch value and click ‘Keep’ or ‘Enter’ to record the<br />
force value.<br />
6. C<strong>on</strong>tinue to add mass in 10 gram increments until you have added 70 grams. Each time<br />
you add mass, measure and enter the new displacement value from equilibrium. Click<br />
‘Keep’ in DataStudio, or ‘Enter’ in ScienceWorkshop to record the force value.<br />
7. End data recording.<br />
• In DataStudio, stop data recording by clicking <strong>on</strong> the ‘Stop’ butt<strong>on</strong>.<br />
• In ScienceWorkshop, stop data recording by clicking the ‘Stop Sampling’ butt<strong>on</strong> in the<br />
Keyboard Sampling window.<br />
• The data will appear as Run #1.<br />
Pre-Lab Analyzing the Data<br />
1. Determine the slope of the <strong>Force</strong> vs. Stretch Graph.<br />
• In DataStudio, click the ‘Scale to fit’ butt<strong>on</strong> ( ) to rescale the Graph axes to fit the data.<br />
Next, click the ‘Fit’ menu butt<strong>on</strong> ( ). Select ‘Linear’.<br />
• In ScienceWorkshop, click the ‘Autoscale’ butt<strong>on</strong> ( ) to rescale the Graph axes to fit the<br />
data. Click the ‘Statistics’ butt<strong>on</strong> to open the Statistics area <strong>on</strong> the right side of the Graph.<br />
<str<strong>on</strong>g>P14</str<strong>on</strong>g> ©1999 PASCO scientific p. 91
Physics Labs with Computers, Vol. 1 Student Workbook<br />
<str<strong>on</strong>g>P14</str<strong>on</strong>g>: <str<strong>on</strong>g>Simple</str<strong>on</strong>g> <str<strong>on</strong>g>Harm<strong>on</strong>ic</str<strong>on</strong>g> <str<strong>on</strong>g>Moti<strong>on</strong></str<strong>on</strong>g> - <str<strong>on</strong>g>Mass</str<strong>on</strong>g> <strong>on</strong> a <strong>Spring</strong> 012-07000A<br />
In the Statistics area, click the Statistics Menu butt<strong>on</strong> ( ). Select ‘Curve Fit, Linear<br />
Fit’ from the Statistics Menu.<br />
2. Record the slope of the linear fit in the Data Table in the Lab Report secti<strong>on</strong>.<br />
p. 92 ©1999 PASCO scientific <str<strong>on</strong>g>P14</str<strong>on</strong>g>
Name _____________________ Class ______________ Date _________<br />
For You To Do<br />
Use the <str<strong>on</strong>g>Moti<strong>on</strong></str<strong>on</strong>g> Sensor to record the moti<strong>on</strong> of a mass <strong>on</strong> the end of the spring. Use DataStudio<br />
or ScienceWorkshop to determine the period of oscillati<strong>on</strong> and compare the value to the<br />
theoretical period of oscillati<strong>on</strong>.<br />
PART I: Computer Setup<br />
1. Unplug the <strong>Force</strong> Sensor’s DIN plug from the<br />
interface.<br />
2. C<strong>on</strong>nect the <str<strong>on</strong>g>Moti<strong>on</strong></str<strong>on</strong>g> Sensor’s stereo ph<strong>on</strong>e plugs into<br />
Digital Channels 1 and 2 of the interface. Plug the<br />
yellow-banded (pulse) plug into Digital Channel 1 and<br />
the sec<strong>on</strong>d plug (echo) into Digital Channel 2.<br />
3. Open the document titled as shown:<br />
500<br />
scientific<br />
scientific 300<br />
DataStudio ScienceWorkshop (Mac) ScienceWorkshop (Win)<br />
<str<strong>on</strong>g>P14</str<strong>on</strong>g> SHM.DS P19 SHM <str<strong>on</strong>g>Mass</str<strong>on</strong>g> <strong>on</strong> a <strong>Spring</strong> P19_MASS.SWS<br />
PASCO<br />
Interface<br />
PASCO<br />
ANALOG CHANNELS<br />
Science Workshop DATA LOGGING INSTRUCTIONS<br />
• The DataStudio document has a Workbook display. Read the instructi<strong>on</strong>s in the Workbook.<br />
• The ScienceWorkshop document has a Graph display of Positi<strong>on</strong> and Velocity vs. Time.<br />
PART II: Sensor Calibrati<strong>on</strong> and Equipment Setup<br />
• You do not need to calibrate the <str<strong>on</strong>g>Moti<strong>on</strong></str<strong>on</strong>g> Sensor.<br />
1. Using a support rod and clamp, suspend the spring so that it<br />
can move freely up-and-down. Put a mass hanger <strong>on</strong> the end<br />
of the spring.<br />
2. Add enough mass to the hanger so that the spring's stretched<br />
length is between 6 and 7 times its unloaded length (about 70<br />
grams if you are using the harm<strong>on</strong>ic spring from the PASCO<br />
Introductory Dynamics System.)<br />
3. Remove the hanger and masses temporarily. Measure and<br />
record their total in the Data secti<strong>on</strong>. Return the hanger and<br />
masses to the end of the spring.<br />
4. Place the <str<strong>on</strong>g>Moti<strong>on</strong></str<strong>on</strong>g> Sensor <strong>on</strong> the floor directly beneath the<br />
mass hanger.<br />
5. Adjust the positi<strong>on</strong> of the spring so that the minimum<br />
distance from the mass hanger to the <str<strong>on</strong>g>Moti<strong>on</strong></str<strong>on</strong>g> Sensor is greater than the <str<strong>on</strong>g>Moti<strong>on</strong></str<strong>on</strong>g> Sensor’s<br />
minimum distance at the maximum stretch of the spring.<br />
<str<strong>on</strong>g>P14</str<strong>on</strong>g> ©1999 PASCO scientific p. 93<br />
Science<br />
Workshop<br />
Interface
Physics Labs with Computers, Vol. 1 Student Workbook<br />
<str<strong>on</strong>g>P14</str<strong>on</strong>g>: <str<strong>on</strong>g>Simple</str<strong>on</strong>g> <str<strong>on</strong>g>Harm<strong>on</strong>ic</str<strong>on</strong>g> <str<strong>on</strong>g>Moti<strong>on</strong></str<strong>on</strong>g> - <str<strong>on</strong>g>Mass</str<strong>on</strong>g> <strong>on</strong> a <strong>Spring</strong> 012-07000A<br />
PART III: Data Recording<br />
1. Pull the mass down to stretch the spring about 20 cm. Release the mass. Let it oscillate a<br />
few times so the mass hanger will move up-and-down without much side-to-side moti<strong>on</strong>.<br />
2. Begin recording data.<br />
3. The plots of the positi<strong>on</strong> and velocity of the oscillating mass will be displayed. C<strong>on</strong>tinue<br />
recording for about 10 sec<strong>on</strong>ds.<br />
4. End data recording.<br />
• The data will appear as ‘Run #1’.<br />
• The positi<strong>on</strong> curve should resemble the plot of a sine functi<strong>on</strong>. If it does not, check the<br />
alignment between the <str<strong>on</strong>g>Moti<strong>on</strong></str<strong>on</strong>g> Sensor and the bottom of the mass hanger at the end of the<br />
spring. You may need to increase the reflecting area of the mass hanger by attaching a<br />
circular paper disk (about 2” diameter) to the bottom of the mass hanger.<br />
• To erase a run of data, select the run in the Data list and press the “Delete” key.<br />
Analyzing the Data<br />
1. Rescale the Graph axes to fit the data.<br />
• In DataStudio, click <strong>on</strong> the ‘Scale to Fit’ butt<strong>on</strong> ( ).<br />
• In ScienceWorkshop, click <strong>on</strong> the ‘Autoscale’ butt<strong>on</strong> ( ).<br />
2. Find the average period of oscillati<strong>on</strong> of the mass.<br />
In DataStudio, click the ‘Smart Tool’ butt<strong>on</strong> ( ).<br />
• Move the Smart Tool to the first peak in the plot of positi<strong>on</strong> versus time and read the value<br />
of time. Record the value of time in the Data Table in the Lab Report secti<strong>on</strong>.<br />
• Move the Smart Tool to each c<strong>on</strong>secutive peak in the plot and record the value of time<br />
shown for each peak.<br />
In ScienceWorkshop, in the Graph display, click the ‘Smart Cursor‘ ( ).<br />
• Move the Smart Cursor to the first peak in the plot of positi<strong>on</strong> versus time and read the<br />
value of time (shown below the horiz<strong>on</strong>tal axis). Record the value of time in the Data<br />
Table in the Lab Report secti<strong>on</strong>.<br />
• Move the Smart Cursor to each c<strong>on</strong>secutive peak in the plot and record the value of time<br />
shown below the horiz<strong>on</strong>tal axis for each peak.<br />
3. Find the period of each oscillati<strong>on</strong> by calculating the difference between the time for each<br />
successive peak. Find the average of the periods. Record your result in the Data Table.<br />
Record your results in the Lab Report secti<strong>on</strong>.<br />
p. 94 ©1999 PASCO scientific <str<strong>on</strong>g>P14</str<strong>on</strong>g>
Name _____________________ Class ______________ Date _________<br />
<str<strong>on</strong>g>P14</str<strong>on</strong>g> ©1999 PASCO scientific p. 95
Physics Labs with Computers, Vol. 1 Student Workbook<br />
<str<strong>on</strong>g>P14</str<strong>on</strong>g>: <str<strong>on</strong>g>Simple</str<strong>on</strong>g> <str<strong>on</strong>g>Harm<strong>on</strong>ic</str<strong>on</strong>g> <str<strong>on</strong>g>Moti<strong>on</strong></str<strong>on</strong>g> - <str<strong>on</strong>g>Mass</str<strong>on</strong>g> <strong>on</strong> a <strong>Spring</strong> 012-07000A<br />
Lab Report - <str<strong>on</strong>g>Activity</str<strong>on</strong>g> <str<strong>on</strong>g>P14</str<strong>on</strong>g>: <str<strong>on</strong>g>Simple</str<strong>on</strong>g> <str<strong>on</strong>g>Harm<strong>on</strong>ic</str<strong>on</strong>g> <str<strong>on</strong>g>Moti<strong>on</strong></str<strong>on</strong>g> - <str<strong>on</strong>g>Mass</str<strong>on</strong>g> <strong>on</strong> a <strong>Spring</strong><br />
What Do You Think?<br />
What is the moti<strong>on</strong> of a mass oscillating <strong>on</strong> a spring? What other moti<strong>on</strong>s can you think of that<br />
are similar?<br />
Pre-Lab Data Table<br />
Data Table<br />
<str<strong>on</strong>g>Mass</str<strong>on</strong>g> = _________ kg<br />
Item Value<br />
Equilibrium Positi<strong>on</strong><br />
<strong>Spring</strong> C<strong>on</strong>stant (slope)<br />
Peak<br />
Time (s)<br />
Period (s)<br />
1 2 3 4 5 6 7<br />
Average period of oscillati<strong>on</strong> = ________ sec<br />
Questi<strong>on</strong>s<br />
1. Calculate the theoretical value for the period of oscillati<strong>on</strong> based <strong>on</strong> the measured value of<br />
the spring c<strong>on</strong>stant of the spring and the mass <strong>on</strong> the end of the spring.<br />
T = 2π m<br />
k<br />
2. How does your calculated value for oscillati<strong>on</strong> compare to the measured value of the<br />
period of oscillati<strong>on</strong>? What is the percent difference?<br />
p. 96 ©1999 PASCO scientific <str<strong>on</strong>g>P14</str<strong>on</strong>g>
Name _____________________ Class ______________ Date _________<br />
3. When the positi<strong>on</strong> of the mass is farthest from the equilibrium positi<strong>on</strong>, what is the<br />
velocity of the mass?<br />
4. When the absolute value of the velocity of is greatest, where is the mass relative to the<br />
equilibrium positi<strong>on</strong>?<br />
<str<strong>on</strong>g>P14</str<strong>on</strong>g> ©1999 PASCO scientific p. 97


