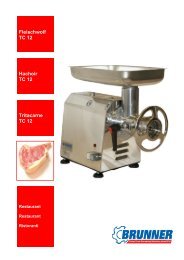
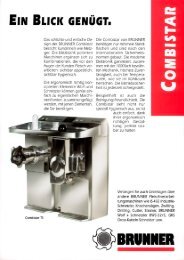
Industrial grater IR 250 - Brunner
Industrial grater IR 250 - Brunner
Industrial grater IR 250 - Brunner
Create successful ePaper yourself
Turn your PDF publications into a flip-book with our unique Google optimized e-Paper software.
GB<br />
Operating Instructions<br />
to<br />
<strong>Industrial</strong> Food-Processor<br />
<strong>IR</strong> <strong>250</strong><br />
<strong>Brunner</strong> Corp. Tel.: (+41) (0)44 814 17 44<br />
CH - 8302 Kloten Fax: (+41) (0)44 803 01 30<br />
www.brunner-anliker.com mail@brunner-anliker.com<br />
1
The company <strong>Brunner</strong> Corp. reserves the right to make unannounced changes concerning technical<br />
progress.<br />
© Copyright 2004 <strong>Brunner</strong> Corp. Kloten.<br />
2
Contents Page<br />
Congratulations 4<br />
Safety references 4<br />
Equipment 5<br />
Setting up and attaching 5<br />
Thus you grate or granulate 6<br />
Thus you cut your cutting good 7<br />
Cleaning the machine 8<br />
Remedy for disturbances 10<br />
Technical data 10<br />
CE - conformity explanation 12<br />
3
Congratulations<br />
Safety references<br />
4<br />
Congratulations to the purchase of the <strong>Brunner</strong> <strong>Industrial</strong> Food Processor <strong>IR</strong><br />
<strong>250</strong>. This robust and high-performance machine will achieve you good services<br />
in various applications. The design in total stainless steel makes it especially<br />
durable. It can easily be cleaned after every use. We are sure that the <strong>Industrial</strong><br />
Food Processor <strong>IR</strong> <strong>250</strong> will render you good services for many years and will<br />
confirm the rightness of your investment.<br />
Yet with construction of the industrial <strong>grater</strong> a lot of safety has been integrated<br />
it is necessary that attention should be paid to certain safety instructions during<br />
operation. Read these precautions attentively.<br />
• While setting up and attaching:<br />
The machine should be placed on an even, firm terrain! Always make sure that<br />
both front wheels are safely blocked. It should be installed preferably near to a<br />
power socket. To avoid a trip over do not lay the cable over a passageway.<br />
• While changing the alternating parts for all applications:<br />
Primarily, always turn off the industrial <strong>grater</strong>. Before opening the grating box<br />
wait until the drum and blade have stopped moving! To avoid getting finger<br />
caught the alternating parts should be gripped with both hands at the suggested<br />
surfaces. The closed top is to be secured with fastening screw.<br />
• While loading of goods for processing:<br />
Never should foreign objects get into the supply opening. Under no<br />
circumstances, never ever grip into the supply opening! Neither to distribute<br />
grating goods nor to take out foreign objects. In this case the machine is to be<br />
switched off and the grating box completely to be emptied.<br />
• While cleaning:<br />
Dismantle only so far as intended for the operator. The machine is splash water<br />
proofed. If available, the housing may be washed with a high pressure cleaner.<br />
• In case of disturbances: Emergency stop<br />
This should be the first reaction to possible disturbances of any kind: Switch off<br />
the machine ! The power plug must be pulled out of the socket if unpleasant<br />
smells should arise.<br />
Fig. 1<br />
The emergency stop button is identical with the normal on-off switch.<br />
It is easily to reach at the right hand side of the motor housing.
Equipment<br />
The equipment contains together with the machine with power cable according<br />
to the individual order the following parts:<br />
• grating- / granulating drum • grating- / granulating wing • set of spanners<br />
• strain drum and wing • ejector • cutting disc<br />
• cutting element • operating instructions<br />
<strong>Industrial</strong> Food Processor <strong>IR</strong> <strong>250</strong><br />
Setting up and attaching<br />
grating drum grating-/granulating wing<br />
granulating drum set of spanner<br />
strainer drum strainer wing<br />
ejector cutting disc cutting element<br />
The grating drums are available in various grain sizes<br />
from 1.5 to 13 mm hole diameter for many different<br />
applications. The set of cutting discs is continually<br />
enlarged.<br />
Figs. 2 - 12<br />
operating instructions<br />
The mobile machine should be placed on an even, firm and not sloping ground<br />
and must be arrested. Therefore the clip has to be pushed down with the foot<br />
until it catches. Sufficient space should be existent for the preparation and supply<br />
of grating goods and the pick up container. The machine can also be disposed<br />
for automatically loading. Therefore the funnel cover with circular port is to be<br />
used. The grating good can such wise continuously be supplied such as through<br />
5
Thus you grate or granulate<br />
6<br />
Fig. 13<br />
Arrest the machine with the breaks at the two front wheels.<br />
a channel. The power plug must be installed by an authorized electrician. The<br />
power plug must be plugged into a high voltage current socket. ( 400 V )<br />
According to the application the suitable grating or granulating drum with the<br />
wing has to be installed or to be checked wether the right part is prepared<br />
Fig. 14 and 15<br />
The fastening-screw is loosened.<br />
The top is swiveled backwards<br />
completely as far as the stop.<br />
already. Loosen the fastening screw and swivel the funnel with the cover<br />
backwards as far as the stop. The suitable grating or granulating drum can now<br />
be installed. The drums are marked at the inner top edge of the grating sheet.<br />
Fig. 16<br />
The grating drum is inserted best with two hands. The<br />
designation is for example A-10D.<br />
Fig. 17<br />
The grating drum is fixed with two socket head screws.<br />
It is fixed with two hexagon socket screws and the appropriate spanner.<br />
Afterwards the suitable grating or granulating wing is inserted and fixed with<br />
the central hexagon screw. Make sure that no loose parts remain in the grating<br />
drum or housing. Swivel the top forward to close the grating box. The locking
screw is to be fitted into the fork of the lid and to be fastened by hand. To pick up<br />
the grated goods place a suitable container under the outlet. The machine can<br />
now be switched on. According to the grating goods and availability you can<br />
Fig. 18<br />
switch up to level II. The grating goods can now gradually be filled into the<br />
loading mouth. Arrange feeding in case of continuous loading.<br />
Thus you cut your cutting good<br />
The grating wing is inserted and slightly turned until the tappet<br />
snaps in.<br />
Fig. 19<br />
The grating wing is fixed by the central hexagon screw.<br />
Open the working area as for grating and granulating. The ejector is installed<br />
first so that the protruding plastic part is facing downwards. Secure these with<br />
two socket head screws and the enclosed spanner. To insert the cutting disc<br />
hold it by the hub. A slight turning ensures a secure click into place of the cams.<br />
Fig. 20<br />
The ejector is inserted and attached with two socket head<br />
screws.<br />
Fig. 21<br />
The cutting disc is inserted and with a slight turning the cam<br />
clicks into place.<br />
Finally, the cutting element is inserted. You hold it most safely on its wings and<br />
insert the stopper in the area of the outlet. The cutting element is attached with<br />
the central hexagon screw. Close the working area by swiveling the top forwards.<br />
Turn up the fastening screw and tighten it by hand. Provide a bowl to pick up<br />
7
Cleaning the machine<br />
8<br />
Fig. 23<br />
Fig. 22<br />
The cutting element is inserted with the stopper ahead.<br />
The cutting element is secured with the central hexagon screw and<br />
the enclosed spanner.<br />
cut goods. Switch on the machine. The goods for cutting can now gradually be<br />
filled in. Arrange feeding in case of continuous loading. According to the good<br />
to be cutted and the availability, the machine can be switched up to level II.<br />
First of all, you have to switch of the industrial <strong>grater</strong> on the main switch. Unplug<br />
the power plug for safety reasons. Release the fastening screw to open the<br />
grating box and swivel the top backwards to the stop. Dismount the grating /<br />
straining wing or cutting element according to the latest application. All of them<br />
Fig. 24<br />
The top is swiveled backwards to clean the grating box.<br />
are fixed with the central hexagon screw. With the enclosed box spanner they<br />
will be released. In case of cutting applications the cutting disc can now be<br />
lifted out on the hub. Depending the foregoing application, the grating / straining<br />
drum or ejector are dismounted as next. All three are secured with two socket<br />
Fig. 25<br />
The grating wing is dismounted.
had screws. Release them with the appropriate spanner. Additionally the whole<br />
top can be dismounted. Release for it the knurled thumb screw and pull out the<br />
Fig. 26<br />
The cutting disc is only putted on and can safely lifted out by<br />
seizing on the hub.<br />
hinge shaft. The working area and the dismounted parts can now be cleaned<br />
without trouble. The machine is so-called «Splash water protected» may also<br />
Fig. 27<br />
The ejector is dismounted. Release for it the two socked head<br />
screws.<br />
be washed with high-pressure cleaner. Otherwise clean all parts with a damp<br />
cloth or in rinsing water with washing-up liquid usual in trade.<br />
Fig. 28<br />
The top is dismounted. The knurled thumb screw can be<br />
released by hand.<br />
The mounting of the parts after cleaning is to be made analogous in reverse<br />
order. Put the top onto the grating box and push the hinge shaft from the right<br />
through the drilling. Secure the shaft with the knurled thumb screw on the left<br />
end. The further steps corresponds to the setting up of the industrial <strong>grater</strong> for<br />
a particular grating- or cutting good like described in the chapters «Thus you<br />
grate or granulate» on page 6 or «Thus you cut your cutting good» on page 7.<br />
9
Remedy for disturbances<br />
Technical data<br />
10<br />
The machine in fact is built highly durable, so that disturbances hardly should<br />
arise. Otherwise the following instructions can help you surely:<br />
Fig. 29<br />
• General disturbance - Emergency stop<br />
The normal on-off switch is also the emergency stop. In case<br />
of disturbances first of all switch off the machine.<br />
First action in case of possible disturbances of any kind: Switch off the machine!<br />
If any unusual noise occur, foreign objects are possibly reached at the grating<br />
box. Switch off the machine. Open the grating box and remove possibly foreign<br />
objects. Close the grating box again and continue with your current application.<br />
Unplug the machine immediately if any unpleasant smell occurs!<br />
If these instructions should not help or disturbances arise, which are not specified<br />
here, the service - place of the company <strong>Brunner</strong> can help you surely:<br />
Tel. (+41) (0)44 814 17 44<br />
motor performance 4 kW or 7.5 kW<br />
Voltage 3 x 400 V 50 Hz<br />
Rotation speed 750 rpm or 380 a. 750 rpm ( 1- or 2-tiered )<br />
hourly output up to 2´000 kg depending on processing goods<br />
protection class IP 65<br />
weight 155 kg<br />
The illustration on the next page informs about the main dimensions of the<br />
<strong>Industrial</strong> Grater <strong>IR</strong> <strong>250</strong>.
CE - conformity explanation<br />
12<br />
The company <strong>Brunner</strong> Corp. declares that the<br />
<strong>Brunner</strong> <strong>Industrial</strong> Food Processor <strong>IR</strong> <strong>250</strong><br />
corresponds to all relevant fundamental safety and health requirements and<br />
complies with the following guidelines and standards.<br />
ECC - guidelines machines 98 / 37 / EG<br />
EN 292-1 / -2, EN 294, EN 954 - 1, EN 1050<br />
EN 1088, EN 1672 - 2, EN 1678, EN 60204<br />
<strong>Brunner</strong> Corp.<br />
Machines and pumps<br />
<strong>Brunner</strong>gässli 1 - 5<br />
CH - 8302 Kloten<br />
Kloten, November 22 2004<br />
Robert <strong>Brunner</strong><br />
managing director


