

Turnings - Tudor Rose Woodturners
Turnings - Tudor Rose Woodturners
Turnings - Tudor Rose Woodturners

You also want an ePaper? Increase the reach of your titles
YUMPU automatically turns print PDFs into web optimized ePapers that Google loves.
Issue 16 - Winter 2008 ‘<strong>Turnings</strong>’ from the <strong>Tudor</strong> <strong>Rose</strong> <strong>Woodturners</strong> 1<br />
Newsletter 16, Winter 2008 - Free to members, £1 where sold<br />
Contents<br />
The Club Stuff<br />
2 42 Years On<br />
3 Hands On, 9 th Oct.<br />
4 The Secretary’s<br />
Announcements<br />
15 Turnathon ’08<br />
30 The 2009 Calendar<br />
31 The Back Page<br />
Demonstrations<br />
11 Tony Walton<br />
17 John Berkeley<br />
19 Nick Arnull<br />
23 Simon Whitehead<br />
Articles<br />
5 Weather or Not.<br />
7 Ashley Iles<br />
8 AWGB Training<br />
9 Stoneleigh Show<br />
10 Grinding Tip<br />
13 Unusual<br />
Commissions<br />
13 A Monthly<br />
Competition (or not)<br />
21 Watch This Space<br />
22 Tool Tips With<br />
A Difference<br />
25 Harrogate Show<br />
The Rest<br />
14 Wordsearch<br />
27 Gallery<br />
28 Tekno-Page<br />
29 For Sale<br />
In This Issue of ‘<strong>Turnings</strong>’<br />
Full demonstration reports for<br />
Tony Walton, John Berkeley, Nick Arnull,<br />
and Simon Whitehead<br />
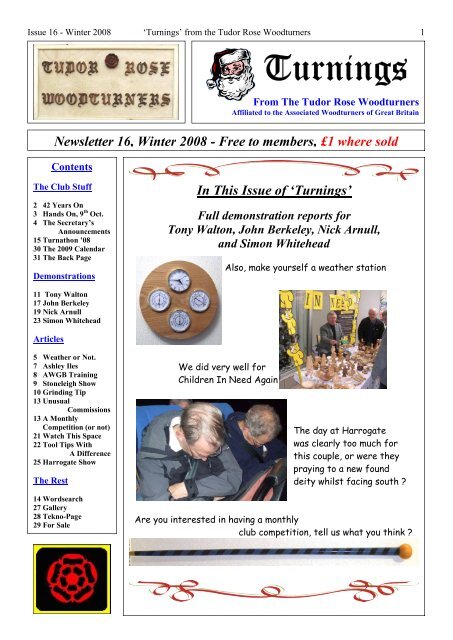
Also, make yourself a weather station<br />
We did very well for<br />
Children In Need Again<br />
<strong>Turnings</strong><br />
From The <strong>Tudor</strong> <strong>Rose</strong> <strong>Woodturners</strong><br />
Affiliated to the Associated <strong>Woodturners</strong> of Great Britain<br />
The day at Harrogate<br />
was clearly too much for<br />
this couple, or were they<br />
praying to a new found<br />
deity whilst facing south ?<br />
Are you interested in having a monthly<br />
club competition, tell us what you think ?
Issue 16 - Winter 2008 ‘<strong>Turnings</strong>’ from the <strong>Tudor</strong> <strong>Rose</strong> <strong>Woodturners</strong> 2<br />
42 Years On<br />
I find it quite amazing that this is already the fourth newsletter I have produced for <strong>Tudor</strong>-<br />
<strong>Rose</strong>, and I would like to express my sincere thanks to all those who have contributed to this<br />
and the previous issues. I am surprised at how much time it takes to create an issue. Needless<br />
to say, the more help I get, the better the results will be. I often get comments from people<br />
regarding the newsletter, and a recent one which pleased me came from David Springett, he<br />
says “the newsletters are remarkable in their length and content”, thanks David. Comments<br />
like this show us all that the newsletter is a valued document which can only continue so long<br />
as I am given material to include, so please, can you all try to help a little, and don’t leave<br />
things until the deadline before you offer them for publication. Help could involve doing a full<br />
demonstration write-up, or something as simple as passing on a picture of your latest failure<br />
to make firewood, so please, keep the bits coming in, and don’t leave it all to one or two<br />
regulars.<br />
Now an apology to John Berkeley. I have learned how to spell your name now.<br />
The newsletter cut-off dates have moved to be the last club event in February, May, August<br />
and November, and the corresponding issue dates are now the first club event in March,<br />
June, September and December. Hence, you are now reading “The Christmas Issue” of<br />
<strong>Turnings</strong>. When I first laid down a timetable of newsletter dates, it was imperative that a new<br />
issue was produced as soon as possible (that was April 2008). Without thinking, it was decided<br />
to produce subsequent issues quarterly from that date on, which unfortunately meant we<br />
would have issues in October and January but not at Christmas. Some felt this oversight<br />
needed to be put right, and having now done that, I am able to wish all members of <strong>Tudor</strong>-<br />
<strong>Rose</strong> “A Very Merry Xmas and a Happy New Year”, and please enjoy reading issue<br />
16 of the newsletter.<br />
Issue 17 of ‘<strong>Turnings</strong>’, the <strong>Tudor</strong> <strong>Rose</strong> Newsletter<br />
Will members please note that the cut off date for the Spring issue will be<br />
The ‘Hands On’ evening on February 26 th , 2009.<br />
As a general rule, the cut off dates for each newsletter will be the last club event in<br />
February, May, August and November<br />
Jon Simpson<br />
If you want articles or gallery items in the newsletter, please let me have your words and pictures<br />
in .Doc and .Jpg format as soon as you can, rather than wait till the last minute.<br />
Please do not use .DocX format as offered by MS Word Version 7.xx<br />
We reserve the right to edit any article, and any opinions expressed therein<br />
are not necessarily supported by <strong>Tudor</strong> <strong>Rose</strong><br />
Jon Simpson, 5 Crabb Tree Drive, Northampton, NN3 5DR.<br />
Tel: 01604 491510 / 07818 445308, Email: JonAndBron@GoogleMail.Com
Issue 16 - Winter 2008 ‘<strong>Turnings</strong>’ from the <strong>Tudor</strong> <strong>Rose</strong> <strong>Woodturners</strong> 3<br />
The “Hands On” Evening – 9 th October 2008<br />
Colin Hovland was going to<br />
make (or had he already made)<br />
a Beech rolling pin, and a small<br />
Maple platter (see it on the<br />
gallery page).<br />
Alison Scrivens, a visitor and prospective member, having a bit<br />
of tuition from John Johnson and Geoff Freeman and making a<br />
Yew needle case (see gallery page also). Alison later said “Its<br />
been a very good and informative evening, I have enjoyed it”.<br />
Alan Jennings did an Ash off-centre turning in the style<br />
of a pottery vase.<br />
Colin Devlin made a rocket launcher puzzle with some help<br />
from Harry Readwin.<br />
Richard Findley gave a bit of valuable<br />
guidance to Richard Ryan on how to<br />
roll a bead with a skew chisel.<br />
Bernard Jolley turned up with a rose engine and<br />
demonstrated its use. It was suggested that he had<br />
perhaps purchased the machine with his raffle winnings<br />
from 2 weeks earlier.
Issue 16 - Winter 2008 ‘<strong>Turnings</strong>’ from the <strong>Tudor</strong> <strong>Rose</strong> <strong>Woodturners</strong> 4<br />
Secretary’s Announcements<br />
There are still plenty of spaces available for the Eli Avisera Demonstration on Sunday January<br />
4th, this is due to us wangling the main hall for the day as well. We shall be holding the demo in<br />
the large hall and using the Lounge for Tea/Coffee breaks & Lunch. So if you or your friends or<br />
family or any of other clubs you belong to want to attend, as they say, the more the merrier.<br />
For some reason I seem to be without any other announcements this issue, this may be due to<br />
our beloved editor deciding to bring forward the issue date, so I would like to say a few thank<br />
you’s instead.<br />
Firstly to Guy Ravine. Due to his heavy work load Guy very rarely manages to make club evenings,<br />
or committee meetings for that matter, but he always makes time to prepare and serve lunch for<br />
the 20 or so people who attend our Saturday demos. Also thanks to Penny Loseby who can also<br />
be found in the kitchen helping Guy with the food. Also to be found in the kitchen, not only on<br />
Saturdays but also on Thursday club nights, is Dennis Stanbridge and Stan Bird. Dennis is always<br />
early to arrive in the evening, quite often before myself, and is always willing to not only make<br />
Tea/Coffee for anyone who wants a cuppa but always helps me set up the lathe etc. Stan not<br />
only distributes drinks but has also been Treasurer for the past 3 years. His tireless work has<br />
helped the club build not only its bank balance, but also its membership. He can always be seen<br />
at Woodex, both spring and winter, accosting anyone who strays too close to our stand, and I<br />
must admit he does it better than I ever could. This year due to my work commitments I was<br />
unable to co-ordinate our 3rd annual 24hr “Turnathon”. This task was taken on by Martin<br />
Harper, who not only managed to ably organise the weekend event but secured a pitch inside the<br />
Clock Towers shopping centre in Rugby from which to sell our turned products. In doing this we<br />
have greatly surpassed last year’s total, with about £1500 to come in. Martin certainly gets my<br />
vote to do the job again next year. Finally I would like to thank Jon Simpson for doing such a<br />
sterling job with the newsletter. When Paul Loseby told me that he was no longer going to be<br />
able to edit and print the newsletter I was sure it was going to turn into a 2 page leaflet like<br />
some other clubs give out on a monthly basis, but he took the bull by the horns and has produced<br />
a newsletter that I think rivals some of the GMC publications, I just hope he doesn’t want paying<br />
Mark Bakers wages.<br />
Over the next few weeks I will be starting to put together the calendar for 2010. I already<br />
have a few ideas for demonstrators but if you have anyone who you’d really like to see, or see<br />
again, let me know. Also if there is anyone who you really didn’t enjoy then I have no problem in<br />
not inviting someone who is only going to attract half a dozen people.<br />
Early next year we will be having our AGM. This is you opportunity to have your say about how<br />
the club is being run. If you wish to join the committee we’re always looking for additional<br />
officers, as they say, many hands make light work.<br />
Finally from myself and the rest of the <strong>Tudor</strong> <strong>Rose</strong> may I wish you all a very Merry Christmas<br />
and a prosperous New Year.<br />
Phil Manners
Issue 16 - Winter 2008 ‘<strong>Turnings</strong>’ from the <strong>Tudor</strong> <strong>Rose</strong> <strong>Woodturners</strong> 5<br />
So, What’s The Weather Looking Like ?<br />
During July 2008 Bron and I were on holiday in the Cotswolds, and<br />
I called in at MeanTime Design to buy a clock, and a set of gauges<br />
for temperature, pressure, and humidity, each having a front bezel<br />
diameter of 80 mm. I decided to install them into an Ash plaque<br />
measuring 280 mm diameter, with the clock at the top, and the<br />
other three set equally to the left, right, and bottom.<br />
Having chosen the Ash blank, it was important to decide on the<br />
front / back / top / bottom orientation of the blank before the<br />
turning process started, because I wanted to do it without the use<br />
of spigots or dovetails. Also, very few of us have a lathe capable<br />
of turning 42 cm over the bed which is what I needed for this<br />
project (21 cm swing) to bore the instrument holes, so to make it<br />
all work I did the following:<br />
1) I made up a 26cm diameter back plate from good quality chip<br />
board, to which I then bolted a 100mm faceplate ring with<br />
countersunk bolts (each let into the front outside face of the<br />
chipboard, with the nuts and bolt ends on the headstock side).<br />
2) I installed a chuck with 100 mm jaws to mount the faceplate<br />
ring. This allowed me to achieve the necessary 21 cm. swing by<br />
rotating the headstock to no more than 30 degrees, moving the<br />
work away from the lathe bed. The important point here is that I<br />
would be able to reach the workface with the standard tool rest. A<br />
faceplate fitted direct onto the headstock would have meant<br />
rotating the headstock to a point where the normal tool rest would<br />
not be able to reach the work.<br />
3) I used a Jacobs chuck in the tailstock to drill a pilot hole in the<br />
centre of the back plate for a central location pin, this should not<br />
be a through-hole. I found a hardwood dowel measuring 6 mm<br />
diameter was going to be good for this job. While the back plate is<br />
still on the lathe, scribe a circle having an 8 cm radius, and use<br />
the lathe indexing to mark 4 points on the circle at 90 degrees to<br />
each other and drill them through with a 5 mm bit.<br />
The turning process takes place in two very distinct phases. First,<br />
I screwed the back plate to the FRONT of the blank with screws<br />
in the 8 cm locations. Make sure the screws go into what will<br />
become waste timber where the gauges and the clock will fit. The<br />
back face was trued up, sanded, and finished with 50/50 sanding<br />
sealer and friction polish. DO NOT be tempted to cut the edge
Issue 16 - Winter 2008 ‘<strong>Turnings</strong>’ from the <strong>Tudor</strong> <strong>Rose</strong> <strong>Woodturners</strong> 6<br />
profile, leave it in the rough. The next job is to remove the blank and re-mount it by screwing<br />
the back plate onto the BACK of the blank. Get it as close to centre as you can, and again, put<br />
the screws into what will become waste wood. True up the edge and the front face, and I also<br />
added a simple cove detail to the edge. Sand through the grits, and finish with 50/50 sanding<br />
sealer and friction polish. Now, accurately mark the front with the 4 centres where the<br />
instruments will be. I set the tool rest on the centre line of the front face, and with the blank<br />
indexed into the correct orientation; I marked the position of the first instrument, 7 cm from<br />
the edge of the wood. Index the work through 90 degrees, mark the 2nd position, and ditto for<br />
the 3rd and 4th positions. Remove the blank from the back plate and drill 6 mm through holes at<br />
the instrument centres, preferably with a pillar drill. These holes are to accept the indexing pin<br />
when fitted in the centre of the back plate. End of phase 1.<br />
The next, and much more interesting phase is to cut the 4 holes for the instruments, this was all<br />
done with the blank mounted 7 cm. 'off centre'. I needed to bore the blank 59 mm on the front<br />
and 70mm on the back for the weather instruments, and 74 mm on the front for the clock.<br />
Complete the clock boring with a 25mm forstner hole on the back. With the 6 mm index pin<br />
located in the centre of the back plate, mount the blank in one of the weather instrument<br />
positions with the FRONT FACING OUTWARDS. Drill through 2 of the remaining pilot holes with<br />
a 6 mm bit, and bolt the blank firmly onto the back plate (with the index pin still in place).<br />
Mount the back plate in the chuck. Check, double, and treble check that the job will rotate<br />
without fowling the lathe bed. With the lathe running at about 300 rpm, make the first cut. My<br />
aim was to cut a trench about 10 mm deep and 10 mm wide, the outer diameter of the trench<br />
being the correct clearance fit for the instruments, and make sure you leave the central core of<br />
the hole intact. Remove the blank from the back plate, and repeat this process for the other 2<br />
instrument locations. When cutting the front hole for the clock, leave the central core at a<br />
diameter of about 20 mm, with about 5 mm of timber in the bottom of the clock recess.<br />
Remove the blank, re-fit the other way round, with the back facing outwards and repeat the<br />
process for the 3 instrument holes. Make the rear cuts deep enough to leave 5 mm of timber in<br />
the bottom of the hole, clearing out the hole until the central core drops out. This will leave a<br />
clean clearance hole in the front of the blank and a larger recess in the back to allow for the<br />
fixing rings. As you rotate the blank for cutting the other 2 instrument locations, you will need<br />
to insert a softwood block into the rear recess. This will provide a new bolt hole location for<br />
mounting the blank to the back plate. The final hole to be drilled is the rear access for the<br />
clock. A simple 25mm forstner hole is all that is needed to remove the final central core. This<br />
hole will allow the clock to be pushed out from the back for setting and battery changing.<br />
The last job, fit a hanging plate on the back above the clock, or as I did, a thin copper wire can<br />
be fitted across the back of the 25 mm forstner hole which offers very easy centralisation when<br />
hanging the plaque on the wall.<br />
So, fit the instruments and the clock, hang it on the wall, and most important, don't forget to<br />
tap the barometer every time you pass it.<br />
Jon Simpson
Issue 16 - Winter 2008 ‘<strong>Turnings</strong>’ from the <strong>Tudor</strong> <strong>Rose</strong> <strong>Woodturners</strong> 7<br />
A Visit To Ashley Iles - 18 th September, 2008<br />
On Thursday 18th September Colin Hovland and I went to visit<br />
Ashley Iles in Lincolnshire. The main purpose of our visit was<br />
for Colin to describe and discuss the turning tool he made (as<br />
described in issue 15 of the newsletter). Both Barry and Tony<br />
Iles were most interested in the<br />
tool, and it looks as if they are<br />
going to do an initial production<br />
run and then offer the tool to<br />
the trade and a number of<br />
professionals to test. That is all going to take place in the first<br />
half of 2009, so, watch this space. This time next year Colin<br />
could be entertaining riches beyond his dreams, please stand in<br />
line, I'm at the front of the queue.<br />
Like all good factory visits, we had a guided tour of the premises,<br />
which was all very interesting. The factory was a bit smaller than<br />
I was expecting, but then I had not realised that the entire<br />
operation consists of no more than about 10 people. On the day,<br />
several of the staff were out for a variety of reasons (maternity<br />
leave, holiday, flexi-time, etc.) so the place was quite quiet. That<br />
aside, we were given a personal demonstration of all the major<br />
processes involved in the tool production cycle, which is:<br />
Steel rod, brought in from Sheffield is cut to length and heated<br />
to 1080 degrees C. This is then forged under a power hammer<br />
into a bolster and is known as a "Mood".<br />
After cooling and re-heating, the power hammer is used to draw<br />
out the blade to the required length and thickness.<br />
Yet more cooling and re-heating,<br />
after which, excess metal is removed<br />
and the shoulders are forged in,<br />
closely followed by the 'gouging'<br />
process in a hydraulic press to create<br />
the final curve in the tool.<br />
Finally, the tool blank is "normalised"
Issue 16 - Winter 2008 ‘<strong>Turnings</strong>’ from the <strong>Tudor</strong> <strong>Rose</strong> <strong>Woodturners</strong> 8<br />
by re-heating to 800 degrees C. and is then allowed to cool to room temperature before being<br />
taken into the grinding shop where the front and back of each blade is rough ground (see wet<br />
grinding note below). Further grinding operations include dry grinding the flute, linishing on a<br />
belt grinder, and glazing. After hardening, polishing and sharpening, the handle is fitted, and<br />
tool is ready for use. The process involves a lot more steps than I had expected, and I hope<br />
the above gives some idea of what takes place (assuming I have written it in the right sort of<br />
order). The process of making a carving tool is slightly different to the making of a turning<br />
tool, but the above should be enough to describe the general process chain.<br />
Wet Grinding Note - see 3 pictures at foot of previous page: The wet grinding wheel<br />
starts its life as a 42 inch diameter stone running in a wet pit. During its 2 year life, the stone<br />
will be worn down to almost nothing, as shown. The new stone is ready for fitting, and when it<br />
is first run up, it is left over night, running at full speed. During this time it "MIGHT" let go.<br />
This has happened once during the life of the factory, as is evidenced by the hole in the<br />
ceiling in the third picture, through which a large part of a wheel passed and landed in the<br />
field next to the factory.<br />
The Ashley Iles range of tools consists of 400 different carving tools and 350 different<br />
woodturning tools, all forged, ground and tempered by time-served craftsmen using the<br />
traditional methods of the golden age of tool making. The guarantee is very simple: Any goods<br />
manufactured by Ashle Iles which are found to be faulty in either material or edge keeping<br />
quality will be replaced unconditionally. Also, return ANY Ashle Iles tool and it will be reground,<br />
free of charge, all you pay is the postage. This is a small, family run firm. Its story<br />
began in the autumn of 1949 when, as pattern maker, Ashley Iles gave up his day job and set<br />
out on his own to make and sell tools. He began by renting a small workshop in Sheffield for 5<br />
shillings a week and ended up with a factory making carving and woodturning tools with a name<br />
known all over the world. Today the company is run by two of his sons, Tony and Barry, with<br />
the help of Tony's wife, Christine, who as Company Secretary, looks after the administrative<br />
and clerical details.<br />
Jon Simpson<br />
A.W.G.B. Demonstrator Training<br />
This is a one day course designed to enable proficient or experienced turners to be taught<br />
skills to help them present their demonstrating techniques safely and effectively. I have<br />
spoken to Peter Bradwick (the A.W.G.B. training officer) and he informed me that 4 turners<br />
would be required to partake. There are already 2 people who wish to take this up, so 2 more<br />
are needed. Please give this serious thought, and let me know if you are interested. See page<br />
71 in Woodturning issue 195 for more detail.<br />
Colin Hovland
Issue 16 - Winter 2008 ‘<strong>Turnings</strong>’ from the <strong>Tudor</strong> <strong>Rose</strong> <strong>Woodturners</strong> 9<br />
The Midland Woodworking Show, Stoneliegh, 10 th – 12 th October 2008<br />
This is the first show to be organized in the Midlands by SK Promotions, which is the company<br />
that organizes the successful North of England Woodworking Show in Harrogate and the<br />
Scottish National Woodworking Show in Glasgow.<br />
The expected exhibitors list was indeed, very extensive, and included Ashley Iles, Carroll<br />
Tools, Charnwood, Chestnut Products, Craft Supplies, Crown, Hegner, Lincolnshire Woodcraft,<br />
Meantime Design, Phil Irons, Proops, Record, Robert Sorby, Scheppach, SIP, Snainton,<br />
Stobart Davies, T & J Tools, Toolpost, and Turners Retreat. In addition, there was a good<br />
selection of demonstrators present, many of whom we can all relate to in some way, including<br />
Barry Iles, Bob Neill, John Berkeley, Les Thorne, Reg Sherwin, and Reg Slack.<br />
The pre-show publicity stated that in excess of 60<br />
exhibitors, demonstrators, clubs and associations were<br />
attending, bringing in the widest possible range of<br />
manufacturers, and the show was expected to be the<br />
biggest and best woodworking and power tool show seen<br />
in the Midlands for a number of years. Was this true, I<br />
don’t know, but Stan Bird paid a visit, and all that follows<br />
is his account of the show.<br />
“Its quarter past ten, its seven pounds fifty pence to go<br />
in, and I’ve only two hours to spare, I hope its worth it”<br />
were the thoughts in my mind as I walked towards to the<br />
exhibition hall at Stoneleigh. Four hours later I was<br />
thinking that I could stay all day. By then I’d seen most of the stands but I hadn’t watched<br />
any of the advertised demonstrations.<br />
Guy Ravine was on the RPT stand – what a useful place<br />
to leave our bargains as we did our shopping. 24” Dewalt<br />
tool boxes at £5 each; a bargain I can’t resist even<br />
though I don’t need one and now haven’t the faintest<br />
idea what to do with it. Alan bought one, Bert bought<br />
one; other club members bought one, I even think Guy<br />
bought one. The stack of tool boxes behind his stand<br />
grew steadily.<br />
The RPT stand had some very nice pieces on it. Two<br />
ideas that caught my eye (see pictures) were offset<br />
candles and shallow natural edge bowls, both of which I
Issue 16 - Winter 2008 ‘<strong>Turnings</strong>’ from the <strong>Tudor</strong> <strong>Rose</strong> <strong>Woodturners</strong> 10<br />
now intend to try.<br />
We watched Reg Slack turning a nice offset goblet and while turning to speak to someone, he<br />
withdrew his gouge sideways, instead of straight back, catching the side of the work and<br />
spoiling it. He shrugged his shoulders and said “hazards of demonstrating”. Although it’s<br />
always sad to see nice work spoilt its somehow quietly re-assuring that even the experts<br />
occasionally make the sort of mistakes that we amateurs do, all too frequently. The show was<br />
never really crowded even at the busiest time, in the middle of the day. I’m told that<br />
Saturday was quieter, with Sunday very quiet. Will it survive and continue in future years? I<br />
hope so; time will tell. I eventually went home, with my toolbox and another bargain, three<br />
bowl blanks for a fiver, having thoroughly enjoyed the show”. Jon Simpson / Stan Bird<br />
Take Your Time When You Are Grinding<br />
Very recently at a tuition night I noticed a person on one lathe in some difficulty. He was<br />
attempting to hollow out a blank mounted in a chuck with a spindle gouge, and the noise from<br />
the ensuing vibration was quite horrendous.<br />
The reason for his difficulty became apparent when I examined his gouge. Instead of a nice<br />
fingernail shaped curve, the tip was ground to a point, and this was despite using a jig to get<br />
the "so called" perfect grind. The grindstone wheel removes metal more slowly when a greater<br />
area of steel is presented to it than when a thin section is; so the centre of the gouge, having<br />
a greater area than on either side will need more time spent on grinding in order to attain the<br />
correct profile.<br />
Jigs are fine for getting your tools sharpened with a consistent presentation angle etc., but<br />
practise is required in order to keep the edge profiles correct. This is very important,<br />
regardless of whether you grind free-hand or with a jig.<br />
Colin Hovland<br />
Back To The Joey Richardson Demonstration, 11 th September 2008<br />
In Joey’s demonstration, she said “the optimum wood thickness to pierce is 1/16", using a<br />
#169L bit for soft and medium density, and a #699L bit for hard wood”. I have decided to<br />
give it a try sometime, and so needed to track down a supply of suitable bits for the drill. I<br />
found a supplier on the internet who was quite happy to send bits out with an invoice, “payable<br />
upon receipt”, most unusual these days. I purchased 7 bits which were sent out ‘post free’ for<br />
the grand sum of £14.63, if you are interested, the company is Roots Vet Dental Supplies Ltd,<br />
1 Knox Crescent, St Nicolas Park, Nuneaton, CV11 6DS. Try taking a look at<br />
WWW.VetDentalServices.Com Jon Simpson
Issue 16 - Winter 2008 ‘<strong>Turnings</strong>’ from the <strong>Tudor</strong> <strong>Rose</strong> <strong>Woodturners</strong> 11<br />
The Tony Walton Demonstration, 23 rd October, 2008<br />
It was at Secondary modern school in Stratton (just outside Bude) where<br />
Tony was introduced to woodturning. Tony has had a number of jobs over<br />
the years including an injection moulder in a plastics factory, a fettler<br />
(files the burrs of the mouldings) in an aluminium foundry, sharpening<br />
band saw blades, and a wireman in the telecommunications industry<br />
working on telephone exchanges. In 2005 he was accepted onto the<br />
Register of Professional Turners supported by the Worshipful Company of<br />
Turners. Like many of our demonstrators, this was a proud moment for<br />
him.<br />
Tony is associated with two woodturning clubs, and enjoys all forms of<br />
turning. A pet hate is people who pick up a piece of wood and then decide<br />
to make something with it, rather than having a feel for what they want<br />
to make and then finding a suitable piece of wood. Also, an important<br />
thought is to let the tool do the cutting, rather than applying pressure to<br />
force the cutting edge into the work piece.<br />
The theme of the demonstration was going to be “THIN”, and he started off with<br />
a thin stemmed goblet from a piece of WET Sycamore. Having set up the log<br />
between centres, he explained the importance of making sure that the pith was<br />
well off centre, as this would ensure that the stem had maximum strength. The<br />
first task was to turn a spigot, reverse the log, mount it in a chuck, and bring up<br />
the tail stock to add support until you are ready to hollow out the cup. A bowl<br />
gouge was used to rough down to a round section. When using branch wood, this<br />
method often gives a lot more tool stability than can be had from a traditional<br />
roughing gouge. The next stage was to cut the outer profile of the goblet cup. If<br />
you want to do any sanding on this project, make sure you do it as you go, because<br />
you will not be able to return to any area after you have moved on. Use a spindle<br />
gouge to trim the end, drill out, shape, and finish the inner profile of the cup.<br />
With a light set up inside the cup, continue to work on the outer profile leaving a 1<br />
to 2 mm thin-walled cup. You should never try to return to working on the cup in<br />
any way after you start working on the stem, it WILL break. With a piece of folded tissue in the goblet<br />
cup, hold it in place with a "used" live centre at all times now, and do not stop the lathe, re-starting it<br />
will (you have guessed it) snap the stem, and if you use a new live centre, it<br />
will be too tight to revolve freely and will also twist the stem off. Work on<br />
the stem in very small stages working down to a final diameter of about 2 mm<br />
using the side wing of a spindle gouge in the same fashion as you would a<br />
skew. Continue to work back along the stem in 1" stages with the spindle<br />
gouge, and then a skew as soon as there is enough room to get the tool into<br />
the wood. Support the stem with your fingers at all times. By the time that<br />
Tony had cut about half of the stem down to size, it was quite clearly<br />
whipping, and I think that most of the audience were expecting it to break at<br />
any moment (or tie itself into a knot). To part off, work from the chuck end<br />
with a skew, making progressively deeper 'V' cuts on each stroke. You need<br />
to create a cone of wood in the chuck which comes to a point in the centre<br />
of the (hollowed) goblet base. In this way, the goblet finishes up supported
Issue 16 - Winter 2008 ‘<strong>Turnings</strong>’ from the <strong>Tudor</strong> <strong>Rose</strong> <strong>Woodturners</strong> 12<br />
by a point at both ends, and does not drop off the lathe when the final cut breaks through. During the<br />
demo, Tony had one minor dig-in while shaping the base, most of which disappeared into the ever growing<br />
pile of shavings on the floor and over the camera stand. As a result of this, Tony had to cut a new base a<br />
little nearer the chuck, which also created a problem with the space needed for the skew while parting<br />
off. Tony's only comment was "well, we can all make mistakes", well done Tony for rescuing a very<br />
interesting and skilful demonstration. When finally parted off, the goblet stood on its base, and moved<br />
around in the air currents in the room.<br />
Next, a thin walled cup, again, from WET Sycamore. This demonstration was aimed at showing how to<br />
create work suitable for piercing. As always, mount the log between centres, turn a spigot, reverse, mount<br />
it in the chuck, and use the tail stock to add support until you are ready to hollow out the cup. Turn log<br />
down to get rid of any sap wood, leaving the firmer interior grain. Using 'V' cuts with the skew to form<br />
the general outer profile, you can then refine the surface with a spindle gouge and the skew. Cut out the<br />
bulk of the interior with a spindle gouge or a mini Rolly Munro if you have one. Don’t drill too deep with<br />
the spindle gouge at any one time, it will then stay a lot cooler. With a light on the outside of the form,<br />
continue to work on the interior of the cup. A good tool for this is a round nosed scraper which has been<br />
ground well up the side of the blade. Tilt the tool over to avoid too aggressive cuts, and don’t be put off<br />
by comments like "DON’T USE A SCRAPER", you should use whatever tool you have which will give you the<br />
finish you need. Work down the interior of the cup an inch at a time, leaving a wall thickness of between 1<br />
and 2 mm. At one stage, Tony checked the work piece and said "I'm getting a bit thicker as I go". An<br />
instant comment that back from the cheaper seats was "What about the wood?", M.H., we know who you<br />
are. Leave the bottom of the base section at about 10mm to give the cup some weight, and blend it into<br />
the thin wall section. Gradually work your way round and through the exterior base section with a spindle<br />
gouge using the light on the inside of the cup to help maintain a correctly graduated thickness as you go,<br />
and make the final parting cuts with the skew. Having created a thin-walled cup, it can be pierced straight<br />
away, but may well be easier to work and sand to a nice finish if left to dry out first (which does not take<br />
long with this type of work).<br />
Transferring an image onto the piece was all very similar to the demonstration write-up for Joey<br />
Richardson (see newsletter 15, page 23). But in brief, Tony gets an image, enlarges it to cover a full A4<br />
page, trace round it, and then he scans it back into the computer and reduces it to the size he wants.<br />
This will get rid of any inaccuracy in the tracing process. Print out the image you want to use on a laser<br />
printer or get a photocopy, you cannot transfer an inkjet image. Cut it out, tape it face down onto the<br />
work piece and use a graphics blender pen on the back of the paper to transfer the image to the wood,<br />
use a hard edge on the back of the paper to help with the transfer process. Use a straight cutter for<br />
piercing operations, not forgetting to leave some wood in the outline sections. If you don't, the whole of<br />
the image falls out. Use a ball cutter to add texture. If the vessel changes shape while drying, the effect<br />
can often be hidden by creating an indented rim. All in all, an excellent demonstration enjoyed by<br />
everybody, thanks very much Tony.<br />
Jon Simpson<br />
Brian Berry: Very interesting, I learnt a lot.<br />
Peter Fagg: Absolutely brilliant.<br />
John Johnson: I really enjoyed it, a good demonstration.<br />
Kevin Divine: Very entertaining, but I am not sure how the goblet stayed together.<br />
Nick Godwin: Very good, very impressive.
Issue 16 - Winter 2008 ‘<strong>Turnings</strong>’ from the <strong>Tudor</strong> <strong>Rose</strong> <strong>Woodturners</strong> 13<br />
Unusual Commissions!<br />
Most of us have heard of the car or know of the film<br />
"Genevieve" about a car race from Brighton to London (the film<br />
was vice versa!). The car in question was a British Darracq,<br />
made in 1904. I was approached by the present owner to make<br />
a piece for the car instrument panel, apparently the gauges,<br />
speedometer etc. are mounted on Oak rings that lift the<br />
instruments away from the dashboard. The ring was to be<br />
precise in its dimensions, 13mm thick by 72mm outside diameter<br />
and 52mm inside diameter.<br />
It was these precise measurements that proved difficult because<br />
although the Oak was kiln dried, it obviously cut much more easily<br />
with the grain than across it, and tended to be oval internally<br />
rather than round. At times I found myself cutting more air than<br />
wood but managed to complete the piece as the picture shows.<br />
Eventually the ring was sealed and varnished and by all accounts<br />
it gives the vehicle a completeness which it previously lacked.<br />
Secondly, our friend John<br />
Berkeley reports on how he was<br />
approached with a view to making a walking stick incorporating<br />
an artificial hip joint from someone’s grandfather! He states<br />
that “fortunately” the commissioner did not pursue the<br />
arrangement!<br />
Thirdly, another poster who calls himself Tonyletournier, his<br />
sister-in-law advises the youth of today on sexual health issues,<br />
a subject which also involves the correct and safe way to fit a<br />
condom. The picture is self explanatory (I hope)!<br />
Peter Fagg<br />
A Monthly Turning Competition At <strong>Tudor</strong> <strong>Rose</strong> ?<br />
The West Northants club holds<br />
a monthly competition. The<br />
walking stick pictured here was<br />
submitted by Colin Hovland, and was judged the competition winner in early November. The<br />
judging is done by the members attending the club event on the night, each putting a ten pence<br />
piece in a cup next to the items on display, the winner (who then gets to choose the subject for<br />
the next competition) is the item which draws the most money during the evening. In the case of<br />
West Northants, the collection goes to the Air Ambulance. The <strong>Tudor</strong> <strong>Rose</strong> committee would be<br />
interested to hear your views on a regular activity of this sort. The idea certainly gets my vote.<br />
Jon Simpson
Issue 16 - Winter 2008 ‘<strong>Turnings</strong>’ from the <strong>Tudor</strong> <strong>Rose</strong> <strong>Woodturners</strong> 14<br />
Word Search Competition<br />
I had thought the issue 15 competition was going to go un-claimed, but<br />
then, with only 2 hours and 49 minutes to the absolute cut-off, Dick<br />
Wright came up with the winning word, well done Dick. For those who<br />
were frustrated by not being able to find the answer, you were<br />
looking for ‘Purpleheart’, which appeared in the position indicated in<br />
the small grid on the right. A small number of members (slightly less<br />
than 2) thought the answer was ‘Eli’. Sorry, but the occurrence of<br />
those 3 letters was a pure fluke.<br />
So, once again you can win what I<br />
believe to be a very worthwhile<br />
prize (a piece that originated in<br />
Sheffield this time), courtesy of<br />
the John Johnson Woodturning<br />
Emporium.<br />
The search grid offered contains<br />
all the words noted below, plus one<br />
EXTRA which is not included in the<br />
list.<br />
The prize will go to the first club<br />
member to email, text, tell or call<br />
me with the mystery answer, which<br />
as always, is most definitely,<br />
wood or club related even though<br />
the offered clues are all Christmas<br />
related.<br />
The words you need to look for in this grid are:<br />
Christmas, Presents, Candle, Tinsel, Turkey, Crackers, Baubles, Streamers,<br />
Nativity, Carols, Holly, Mistletoe, Trifle, Santa Clause, Reindeer, Sleigh,<br />
The Three Kings, Stocking, Mince Pies, Plum Pudding, Decorations, Cards,<br />
The Queens Speech, Boxing Day<br />
Happy Hunting (and don’t let the squirrels get your nuts), Jon Simpson
Issue 16 - Winter 2008 ‘<strong>Turnings</strong>’ from the <strong>Tudor</strong> <strong>Rose</strong> <strong>Woodturners</strong> 15<br />
The “Children In Need” Turnathon, 8 th / 9 th November 2008<br />
For the third year in a row, <strong>Tudor</strong> <strong>Rose</strong> held its<br />
Turnathon event in aid of “Children In Need”,<br />
and I had wondered for some time how to<br />
cover this event in a couple of pages. It was<br />
going to last for 24 hours, and there was no way I could<br />
see that would give all concerned the coverage they<br />
richly deserved. So, I needed<br />
a plan. My first idea was to<br />
cover the start (the first<br />
pieces to go on the table), and<br />
the end (the last pieces to go on the table). My second idea was to<br />
go with plan (a).<br />
The first half hour or so saw several events, in that Phil Manners<br />
was turning a piece of glued up Beech and it fell in two in the lathe,<br />
where upon he moved on to a piece of Mahogany, and in the early<br />
stages he was left with the<br />
foot in the lathe and the bowl portion in his hand. This<br />
piece was then re-branded as a desk calendar. Albert was<br />
also having problems. First he could not reach the lathe<br />
and had to go and get his box to stand on, and then the<br />
first light pull he worked on fell in two where a<br />
particularly large knot<br />
passed through.<br />
Regardless of that, he managed to rescue the piece of Yew,<br />
completed it quite nicely, and had the first piece on the<br />
table.<br />
Elaine Morrice made a ring stand from Spalted Birch, and a<br />
small shallow bowl<br />
from the stub left in the chuck. Jane George made a<br />
spinning top and launcher. John Holtom made a goblet<br />
from a length of Ash which was surprisingly damp<br />
considering it had been felled almost a year<br />
previously. This item was promptly bought by a couple<br />
of my guests who had turned up to see what we got up<br />
to when we were left to play. So, the first sale of the<br />
day had also been made, thanks go to Nick and Carolyn<br />
for their much valued donation to the cause.
Issue 16 - Winter 2008 ‘<strong>Turnings</strong>’ from the <strong>Tudor</strong> <strong>Rose</strong> <strong>Woodturners</strong> 16<br />
By late morning on Sunday the table was a-wash with turned items of all descriptions,<br />
basically, you name it, and it was there somewhere. The final item made, and on the table<br />
within the 24 hours was from David Spencer. I thought it was a mushroom, but David was very<br />
quick to correct me, saying it was a toadstool, because there was not mush room on the table<br />
(what a fungi he is).<br />
As noted in the Winter Woodex report in newsletter 15, Nick Arnull donated a decorated<br />
hollow form to the club to be sold off for the best price we could raise, thanks Nick, it was<br />
very much appreciated. The piece was raffled off within the club, it raised £61. The raffle<br />
was drawn by Nick Arnull on Saturday 15 th November, and was won by Mike Peverill.<br />
Geoff Freeman: It’s all gone pretty well, we have made much more smaller stuff this year<br />
which hopefully will be easier to turn into cash.<br />
Malcolm Hill: We’ve had a good time. I made about 19 bottle stoppers which we should be able<br />
to sell for about £2.50 each.<br />
David Spencer: I enjoyed myself, it is wonderful, and we have made a lot more stuff this time.<br />
Martin Harper : Over all, a good event. My thanks go to Phil, Geoff, and many others for the<br />
help they gave setting up and clearing away. I am very pleased with the quantity and quality we<br />
have produced, and I look forward to selling all that we can, hopefully, with increased takings<br />
over previous years.<br />
Also, my thanks go to those people who provided work to put on the table rather than turn<br />
during the event. As for the turners, I need to thank Phil Manners, Albert Haughton, John<br />
Holtom, Jane George, Elaine Morrice, Bryon Brumfield, John Johnson, Paul Miller, Stan Bird,<br />
Alan Jennings, Dave Stewart, Eric Milner, Geoff Freeman, Alison Scrivens, Malcolm Hill, and<br />
Dave Spencer for the time they all put in on the lathes, and just as important, Dennis<br />
Stanbridge, who turned cold water into hot drinks for us.<br />
It was a great effort which looks as if it is going to raise<br />
close to £1600, and it gives us an improved base on which to<br />
build next time. The centre management at the Clock<br />
towers seem warm to us actually turning in the mall next<br />
year. Thanks to Geoff for the idea. We had a good day<br />
selling albeit we had quiet times which I am sure would be<br />
more than enhanced by actually producing some items in<br />
situ. Sorry if anyone has been missed in the thanks, blame<br />
me, and let me know.<br />
Jon Simpson
Issue 16 - Winter 2008 ‘<strong>Turnings</strong>’ from the <strong>Tudor</strong> <strong>Rose</strong> <strong>Woodturners</strong> 17<br />
The John Berkeley Demonstration, 13th November, 2008<br />
John, who is based in Lutterworth, began turning about twelve years ago,<br />
having previously been involved with the restoration of metal antiques, a dirty<br />
job! From the first time his arm was twisted to make bone cribbage pegs, an<br />
interest in things softer than brass began to grow. He "graduated" to<br />
earrings in bone, and then wood, dolls house bits, including goblets, chess<br />
pieces, rattles and many other things. His current speciality is puzzles and<br />
boxes, mostly with hand chased screw threads.<br />
Though he rarely used oak, it was easy to see how "large trees from little<br />
acorns grew", learning from magazines and books, and watching demonstrators<br />
at shows. John says "All my senses drew me to the writings and demos of a<br />
certain Mr. W Jones, who I regard as my mentor. and now fortunately as my<br />
friend. I unashamedly try to emulate his skills and do so with varying degrees<br />
of success. We all owe him such a lot for his help over the years". Quite clearly, John is a total<br />
professional, and highly skilled at what he does, and there is no way that this demonstration<br />
report can go into the skills and techniques of thread chasing. To find out more, please consult<br />
the various DVD’s available, or talk to John. I am sure he will be able to pass on much more<br />
than I can say here.<br />
The first half of the demonstration was to be a screw top box<br />
made from Anjan with a recessed lid and an African Blackwood<br />
knob. A right hand thread on the lid, and a left hand thread on<br />
the knob. The length of Anjan was mounted between centres, a<br />
section was brought into the round and a spigot was added at the<br />
tailstock end. Having reversed the piece and mounted it in a chuck,<br />
add a spigot at the new tailstock end, and parted off a section for<br />
the bottom half of the box. Put a new spigot on the blank and part<br />
off a section for the lid. With the box section now mounted in the<br />
lathe, the body was planed and sanded, drill a hole in centre of the<br />
top surface to act as a depth marker, and hollow out with either a spindle gouge or a scraper.<br />
Under cut the inner wall to allow space for the thread to be chased in without encountering<br />
problems with a 'rear wall'. Sand and polish the interior. With the lathe running at about 450<br />
rpm, John used a Uni-Chaser (from Ashley Iles) on an arm rest to cut the box thread. Keep the<br />
chaser moving at all times when the tool is in contact with the work. If you don't, you will either<br />
create circular grooves or a 'stripped thread'. Remove the top half of the thread to create a<br />
recess for the lid. Clean out the piece, and wax the thread. With<br />
the lid section in the chuck, reduce it in size to fit the recess in the<br />
box rim, add a new shoulder to match the maximum size of the box<br />
thread, clean the inner surface and add any decoration you may<br />
require. Chase a thread onto the male spigot to fit the box, clean<br />
and wax. With the lid still in the lathe, screw on the box section and<br />
refine the final shape of the base and foot, sand, and finish. With<br />
this particular box, it was going to be helpful to keep a foot on the
Issue 16 - Winter 2008 ‘<strong>Turnings</strong>’ from the <strong>Tudor</strong> <strong>Rose</strong> <strong>Woodturners</strong> 18<br />
box with an external shoulder, capable of being mounted back in the chuck. Remove the box and<br />
part off the lid. Put the box base back in the lathe with the foot protected with tissue, screw<br />
on the lid, clean off the top surface of the lid with gentle cuts, and add a small bevel to the<br />
edge of the box. Bore out the centre of the lid for the knob, chase in a left hand thread,<br />
clean, polish, and wax the thread. Apply patterning to the lid as required. The top knob was<br />
made from African Blackwood, cut a spigot to match the maximum thread size in the centre of<br />
the lid. Chase on a left hand thread to fit the lid. Shape and refine the knob with fillets and<br />
coves, sand, part off and reverse the knob in the jaws to finish it off.<br />
The second half of the demonstration was done with a piece of 'Zebra' cast polyester resin<br />
(plastic, not acrylic). This material turns well with small scrapers, not gouges, and keep the lathe<br />
speed low to avoid heat build-up in the work piece. Put a spigot on the end of the blank and part<br />
off the box section. Hollow out the lid section, cut a recess in the side wall behind where the<br />
thread will finish, chase in the thread, clean up with T-Cut or burnishing cream and part off.<br />
Mount the box section in the lathe, hollow out as required, create a spigot at the rim to match<br />
the max thread size of the lid, add a chamfer on the leading edge. Chase a thread onto the box<br />
section, trim the rear shoulder and depth of thread until the box and lid fit and the patterns<br />
match correctly. Put the lid on the box and finish the top surface. With this type of work, you<br />
often get a 'gappy' joint between the box and the lid, so make a feature of it with a point tool.<br />
Sand and polish the lid and the box interior with T-Cut. Re-mount the box on a "spare" thread<br />
to complete the base, sand and finish as before.<br />
A great demonstration from John, which also contained the following selection of valuable tips.<br />
If members of the audience want to talk, they should do it OUTSIDE the demo room, so as to<br />
not provide distraction for the others who want to listen to the demonstrator.<br />
Good dust protection and extraction is most important at all times.<br />
As said by Richard Findley on 14th August, the first sanding is the most important because any<br />
marks left at this stage will not be removed with finer grades of paper.<br />
When applying melamine lacquer to wood, always do it with the wood stationary, apply the lacquer<br />
along the grain, and make sure it is dry before you turn on the lathe to polish it.<br />
When you first start trying to cut threads, leave yourself plenty of room, make long male<br />
threads fitting into long, shoulderless female threads, and normally, it is easier to cut the<br />
female thread first, then cut the male thread to fit.<br />
Jon Simpson<br />
Brian Berry: An absolutely fabulous evening, I am going to buy the tools and have a go.<br />
Maurice Medhurst: Very very good indeed. I liked the alternate materials, and I will go in the<br />
workshop tomorrow and have a go.
Issue 16 - Winter 2008 ‘<strong>Turnings</strong>’ from the <strong>Tudor</strong> <strong>Rose</strong> <strong>Woodturners</strong> 19<br />
The Nick Arnull Demonstration, 15 th November 2008<br />
Nick Arnull describes himself as a professional turner with an<br />
artistic background. He lives near Norwich, from where he<br />
writes for GMC, demonstrates, and teaches. Also, he has<br />
demonstrated in the USA and South Africa.<br />
For the morning session Nick demonstrated the making of a<br />
rippled Sycamore "Celestial Bowl". Having mounted the blank on<br />
a screw chuck, Nick started off with a series of long pull cuts<br />
to true up the face with a long grind bowl gouge, and gradually<br />
refined this action with 3/8” and 1/4” square grind gouges to<br />
create the outer profile, working ever closer towards the top<br />
of the rim with each stroke. This was all done without<br />
putting a tool on the outer edge to bring the piece into<br />
balance, this was saved until the main outer profile was<br />
complete. Mark up for a spigot by setting a pair of<br />
dividers to the required radius, and with one leg in a<br />
central dimple, mark the spigot size while the second<br />
divider leg is resting on the tool rest. Do not apply a<br />
vernier to the work piece, Nick say’s it is too dangerous<br />
(I tend to agree). Plunge a parting tool into the wood at<br />
the marked point to create the spigot, and make the dovetail<br />
undercut with a round skew. Complete the final outer profile<br />
of your bowl with long, slow cuts with the bowl gouge, and<br />
don't forget to breath as you go. The gentle application of a<br />
round skew chisel to the outside profile will create a super<br />
smooth finish if you are careful. Sand to 400 grit, and make<br />
sure you are using good extraction. NOTE: if your grinder is<br />
fitted with an 80 grit wheel, that should be the size of the<br />
tool marks on your work piece, so there is little point in<br />
starting to sand any lower than about 120 grit. Finally, Nick<br />
finished off with a 400 grit disc on a hand held sander fitted with an interface pad. This allows<br />
the sanding disc to make good contact with the work. In<br />
brief, the finishing process for the bottom and rim was<br />
1) acrylic sanding sealer, 2) cut back with Nyweb, 3)<br />
0000 wire wool, 4) matt black car paint, 5) acrylic satin<br />
lacquer. Turn the piece round, and mount the foot in the<br />
jaws. No chucking marks will be left so long as you cut<br />
the foot to the correct size to match the jaws, also, do<br />
not over tighten the jaws otherwise the piece will move<br />
off-centre. Use a bowl gouge to true up the top face<br />
with a clean, steady cut, and sand through the grits.<br />
Seal and finish as per 1 to 4 above without using the
Issue 16 - Winter 2008 ‘<strong>Turnings</strong>’ from the <strong>Tudor</strong> <strong>Rose</strong> <strong>Woodturners</strong> 20<br />
final lacquer coat. Decide what size the bowl rim will be using the 1/3rds rule as a guide. On<br />
this 9" piece, the rim looked good at 2" wide, which was then decorated with a countersink bit<br />
applied in a random pattern to create the effect of large and small stars. Turn out the bowl<br />
centre, and finish off with a fine scraper if necessary (but be gentle with it). Sand, seal,<br />
lacquer (including the rim area), and burnish to a high gloss shine giving a wet look.<br />
Once again at a Saturday do we were treated to a fine cold lunch and pud, put on by the Guy<br />
Ravine School of Catering.<br />
The afternoon session was used to create a large, end-grain, thin walled vessel. Having roughed<br />
a Sycamore log into the round, a parallel spigot was put on at the tailstock end (because the<br />
chuck had parallel jaws), the piece was turned, mounted it in the chuck, trued up with the<br />
tailstock in place to add extra support, and drilled out with a spindle gouge to provide the<br />
required depth marker. Proceeding with the hollowing, Nick used a variety of tools including a<br />
long grind bowl gouge, a Rolly Munro, and a Woodcut hollowing tool amongst others. Having<br />
shaped and sanded the interior, he proceeded with a bowl gouge on the outside, and a lamp on<br />
the inside to create the outer profile. The top inch or so of the vessel wall was parallel cut and<br />
no more than 2 mm thick. Aim for consistent translucency, as indicated by the lamp shining<br />
through from the inside. Part off most of the way, and when down to about 1/4", cut the piece<br />
free using a junior hacksaw. This will avoid that annoying patch of torn and twisted fibres in the<br />
centre of the base.<br />
Nick then proceeded to give us a demonstration of piercing and patterning, both on the vessel<br />
and on a blank panel which was marked off in squares, each used to show different ways of<br />
creating carved effects with a ball cutter in an Axminster Multi-Tool. You can use a brass<br />
bristle brush to clean up the work, or a soft blue nylon brush (100 mm diameter), it costs<br />
£4.70, and is available from Phil Irons. The bristles of these brushes are loaded with fine<br />
abrasive, and can be used to sand without destroying definition. They are also very useful for<br />
cleaning debris from the rims of natural edged bowls, and with the brush held in a drill chuck on<br />
the lathe small items can be cleaned or sanded easily. This was actually a very good<br />
demonstration on how to cope with problems, as the piece of Sycamore Nick used turned out to<br />
be most un-friendly. Many problems were encountered during the afternoon, such as tool rest<br />
and banjo problems, lots of vibration and chatter which resulted in cutting a couple of inches off<br />
the blank to reduce the overhang, problems reaching the bottom of the hole (chasing the pith),<br />
possible issues with the blank being too wet, and maybe the jaw set and spigot should have been<br />
a size larger, BUT, perseverance provided us with excellent demonstration material.<br />
Jon Simpson<br />
John Holtom: Very good, very interesting, the things Nick showed us are going to be useful.<br />
Paul Loseby: Excellent, several techniques I have not seen before, great.<br />
Mark Innes: Very interesting, more techniques to try out.<br />
Note: Axminster AMT Multi-Tool, Part number 340029-26, a complete kit containing drive unit,<br />
flexible shaft, hand pieces, and a set of cutting bits and burr's, £69.50, look at<br />
WWW.Shesto.Co.UK for cutters, look at WWW.ProopsBrothers.Com for 20 assorted dental<br />
burr's, ref S7028, for £4.95
Issue 16 - Winter 2008 ‘<strong>Turnings</strong>’ from the <strong>Tudor</strong> <strong>Rose</strong> <strong>Woodturners</strong> 21<br />
Watch This Space<br />
For the A.W.G.B. clock competition in May I selected a small<br />
watch for my entry, which measured 1” diameter. The wood I<br />
chose was Oak measuring 4” diameter by 1” thick, with an Ebony<br />
inlay. A hole ½” diameter by 2” deep was drilled in the top to<br />
take a glass tube for dried flowers. I needed to make sure that<br />
the hole on top did not interfere with the watch recess. I give<br />
special thanks to Paul and Penny Loseby for sending the entry to<br />
the A.W.G.B. via their computer for me.<br />
Also, while I am in print, Hot Tip 1: Fit a bathroom / kitchen<br />
extractor fan in your workshop, they only cost between £25 and<br />
£30, they come complete with ducting and fittings, and are<br />
available from B&Q, Wickes, Focus, Homebase, etc. Hot Tip 2:<br />
Join 2 4” strips of Velcro together back to back. Wrap them<br />
round your fingers, and use this to mount sanding discs etc. This<br />
method lets your fingers stay a little further away from the work.<br />
The One-Eyed Redhead<br />
Maurice Medhurst<br />
A man is dining in a fancy restaurant and there is a gorgeous redhead sitting at the next table.<br />
He had been checking her out since he sat down, but lacked the nerve to talk with her.<br />
Suddenly she sneezed, and her glass eye flew out of its socket towards the man. He reached<br />
out, grabbed it out of the air, and handed it back. "Oh my, I am so sorry" the woman said as<br />
she popped her eye back in place. "Let me buy your dinner to make it up to you" she said. They<br />
enjoy a wonderful dinner together, and afterwards they went to the theatre, followed by<br />
drinks. They talk, they laugh, she shared her deepest dreams and he shared his.<br />
Albert Standing In 5’ 3” Of Snow<br />
After paying for everything, she asked him if he would<br />
like to come to her place for a nightcap and maybe, to<br />
stay for breakfast. They had a wonderful, wonderful<br />
time. The next morning, she cooked a gourmet meal<br />
with all the trimmings. The guy is amazed! Everything<br />
had been SO incredible!<br />
"You know" he said, "you are the perfect woman. Are<br />
you this nice to every guy you meet? "<br />
"No" she replies, "you just happened to catch my eye."
Issue 16 - Winter 2008 ‘<strong>Turnings</strong>’ from the <strong>Tudor</strong> <strong>Rose</strong> <strong>Woodturners</strong> 22<br />
Tools And Their Proper Uses, Part 1<br />
DRILL PRESS: A tall upright machine useful for suddenly snatching flat metal bar stock out of your hands<br />
so that it smacks you in the chest and flings your soda pop across the room, splattering it against that<br />
freshly-stained heirloom piece you were drying.<br />
WIRE WHEEL: Cleans paint off bolts and then throws them somewhere under the workbench with the<br />
speed of light. Also removes fingerprints and hard-earned guitar calluses from fingers in about the time it<br />
takes you to say, "What the h...."<br />
ELECTRIC HAND DRILL: Normally used for spinning pop rivets in their holes until you die of old age.<br />
SKIL SAW: A portable cutting tool used to make studs too short.<br />
PLIERS: Used to round off bolt heads. Sometimes used in the creation of blood-blisters. The most often<br />
tool used by ladies.<br />
BELT SANDER: An electric sanding tool commonly used to convert minor touch-up jobs into major<br />
refinishing jobs.<br />
HACKSAW: One of a family of cutting tools built on the Ouija board principle. It transforms human energy<br />
into a crooked, unpredictable motion, and the more you attempt to influence its course, the more dismal<br />
your future becomes.<br />
VICE-GRIPS: Generally used after pliers to completely round off bolt heads. If nothing else is available,<br />
they can also be used to transfer intense welding heat to the palm of your hand.<br />
WELDING GLOVES: Heavy duty leather gloves used to prolong the conduction of intense welding heat to<br />
the palm of your hand.<br />
OXYACETYLENE TORCH: Used almost entirely for setting various flammable objects in your shop on fire.<br />
Also handy for igniting the grease inside the wheel hub you want the bearing race out of.<br />
WHITWORTH SOCKETS: Once used for working on older British cars and motorcycles, they are now used<br />
mainly for impersonating that 9/16" socket you've been searching for the last 45 minutes.<br />
TABLE SAW: A large stationary power tool commonly used to launch wood projectiles and testing wall<br />
integrity.<br />
HYDRAULIC FLOOR JACK: Used for lowering an automobile to the ground after you have installed your<br />
new brake shoes, trapping the jack handle firmly under the bumper.<br />
EIGHT-FOOT long PINE 2X4: Used for levering an automobile upward off of a trapped hydraulic jack<br />
handle.<br />
TWEEZERS: A tool for removing wood splinters and wire wheel wires.<br />
More Next Time......... Courtesy of Peter Fagg
Issue 16 - Winter 2008 ‘<strong>Turnings</strong>’ from the <strong>Tudor</strong> <strong>Rose</strong> <strong>Woodturners</strong> 23<br />
The Ssssimon Wwwww-ww-whitehead Ddd-demo, 27 th November 2008<br />
Anybody who reads "GMC Woodturning" will be familiar with the antics of Simon Whitehead,<br />
some say, for all the wrong sort of reasons. So, is what we read really true? If a log would not<br />
fit in the lathe, Simon would attack it with all manner of tools, ranging from a chain saw to an<br />
electric carving knife (not recommended). Simon openly admits to being "Dangerously Untidy",<br />
and has related tales of band saw blades being buried in the shavings, flying wood, broken<br />
windows, and run-away Banksia nuts. Some members of <strong>Tudor</strong> <strong>Rose</strong> were in favour of getting<br />
the exhibition safety screens out for the duration of this demonstration. Were they right to<br />
be worried, all would be revealed in the next two and a half hours.<br />
Having been a wood turner for 22 years, Simon appears to have started as a pro, but is now an<br />
amateur? He is a member of the West Riding club, and does woodturning to simply enjoy it.<br />
Basically, he loves standing in front of an audience and having fun. The fact that Simon has a<br />
sssssss-stuttt-t-ttterrrrrr doesn’t phase him out, for him it is all part of the demo. He has<br />
noticed however, he can swear and yodel as much as he wants or needs without a problem.<br />
So, on with the demonstration. Part one was an Ash<br />
bowl with a coloured rim. With the blank on a large<br />
screw chuck, Simon said “why bother rounding off the<br />
blank, when it is going to finish up round anyway”, so he<br />
didn’t. Instead, he simply got on with rounding off the<br />
bottom, and stopped when he had got about half way up<br />
the edge of the blank. With a dove tail foot added,<br />
Simon very quickly moved on to the sanding stages.<br />
HOT TIP: if, after the turning is complete, you have a<br />
bit of grain tear, wet it to raise the grain, then sand<br />
through the grits. Also, don’t use the ordinary sandpaper you get from DIY stores, the only<br />
thing you will do is sand blast your groin, not a good idea, and<br />
don’t be tempted to drop old sand paper on the floor in with the<br />
muck and shavings, because it is too easy to be tempted later to<br />
pick it up and use it again. Seal, wax, and polish. Turn the blank<br />
in the lathe, and do it all again from the edge of the rim to the<br />
centre, so that you finish up with a rather fat discus shape.<br />
Raise the grain and sand as before. This piece was going to be<br />
coloured with spirit stains, so when sanding, you need to take<br />
extra care to ensure you get every mark out of the piece, as<br />
stains will reveal them all. Apply the stains with tissue in any<br />
random pattern you like, working from dark to lighter colours.<br />
When first applied it often looks bad. If that opinion remains<br />
when the piece is complete, you can always cut it all out and
Issue 16 - Winter 2008 ‘<strong>Turnings</strong>’ from the <strong>Tudor</strong> <strong>Rose</strong> <strong>Woodturners</strong> 24<br />
make an open bowl instead. If it looks ok, press on, they normally turn out ok. After staining,<br />
turn out the centre of the bowl. Don’t be concerned about using a scraper to help with the<br />
finish, but do use a gentle touch. Sand out the bowl section, and take great care to NOT<br />
scratch the stained area, and then seal the centre section only. If you are happy with the<br />
colour distribution you have applied, dab sealer over the top surface, if not, you can use the<br />
(spirit based) sealer to massage the colours on the surface. Rub back the whole of the top<br />
with 0000 steel wool. Look at the top area with care, and if there are any faults, mask them<br />
with a decorative score line, and finally, wax and polish, jobs a good’un.<br />
Part 2 was an Ash box, mounted between centres, bring it into the round and add a dovetail<br />
foot at one end. HOT TIP: When rounding off with a roughing gouge, keep moving, it will help<br />
keep you fit. Now mount the blank in the chuck to finish the roughing operation. Part in at<br />
about the mid-point, 1/4" deep and about 3/4” wide, and keep the bottom of the groove flat<br />
because this will eventually become the lip on the lid. Also, you can part in to leave the wood<br />
ready for the top and bottom beads. Cut away the waste wood, leaving the raw outline of the<br />
domed top and the finial. As and when you cut to harshly and the finial drops on the floor, you<br />
simply re-shape what is left into a short sharp point and say “that lllllooks nice, ddddoesn’t it”.<br />
Refine the entire top shape, leaving a step in the dome which will later be fitted into the<br />
chuck to allow the interior to be completed. Sand, seal, polish, and part off. Using the lump<br />
left in the chuck to make the bottom, hollow out the centre, and using a skew on the flat, part<br />
in to shape and trim the rim until the top is a nice fit. Continue hollowing to the bottom using<br />
either a spindle or bowl gouge, sand, seal, and polish. Part in at the base, shape the foot, and<br />
refine the outer shape, sand, seal, polish and part off. HOT TIP: an industrial high speed<br />
steel saw blade will make an excellent parting tool, but take the teeth off first. Turn the base<br />
round in the chuck to complete the bottom, sand, seal, etc. Using the small shoulder you left<br />
on the domed top as a mounting point (don’t over tighten it, otherwise you end up with two half<br />
tops), turn out the interior of the top, and sand, seal, etc.<br />
My personal point of view on Simon Whitehead: This was one of the most enjoyable<br />
demonstrations I have seen, and. I hope Simon is invited back again, and is what we read really<br />
true, ABSOLUTELY.<br />
Jon Simpson<br />
Frank Barnstable: Very good, very entertaining, and genuinely funny<br />
Clive Taylor: Most entertaining, I thoroughly enjoyed it<br />
Mike Peverill: Brilliant, absolutely brilliant, and I am pleased with my Nick Arnull prize<br />
Colin Hovland: The most entertaining demo I have seen in a long time, really good.<br />
And finally,<br />
Martin Harper: ZZZZZZZZ................
Issue 16 - Winter 2008 ‘<strong>Turnings</strong>’ from the <strong>Tudor</strong> <strong>Rose</strong> <strong>Woodturners</strong> 25<br />
The Jolly Boys Outing To Harrogate, 28th November 2008<br />
For the 16th year, the North of England Woodworking and Power Tool Show was held at the<br />
Great Yorkshire Showground from the 28th to the 30th November 2008, and <strong>Tudor</strong> <strong>Rose</strong> put<br />
on a coach trip for the day to go and see what it was all about. An unprecedented range of<br />
exhibitors, demonstrators, and craft associations were expected to turn up, plus of course,<br />
the Association of <strong>Woodturners</strong> of Great Britain was to be in attendance. This makes it the<br />
biggest, friendliest and best woodworking show in the country (or so the event organisers<br />
would have us believe).<br />
The sharp eyed amongst us will have noted that the Simon Whitehead demonstration was on<br />
Thursday night the 27th November which finished early, but then I sat up till after midnight<br />
to write the report. This day trip was to start quite early, less than 7 hours later in fact. So,<br />
for me, the day started with a quick bowl of shreddies, and then a drive back to Daventry for<br />
06:45 a.m. I actually thought (but not for long) about sleeping in the car at Daventry. I am<br />
glad I didn’t, because it was !”£$%^^&* cold.<br />
The trip was organised by Stan Bird with his usual efficiency. The coach was hired from Swift<br />
Valley Caches of Lutterworth, a UK company providing luxury coach hire across Leicestershire,<br />
Market Harborough, Birmingham, Coventry, Warwickshire, Northamptonshire and throughout<br />
the UK and Europe. Our transport for the day turned out to be a Toyota Caetano Optima,<br />
registration number BV55 TXH, powered by a 4 cylinder 4.009 litre diesel, and driven by Iain<br />
Dolman. I dug a little deeper, and discovered that Iain was expecting to use a burger van for<br />
his lunch, what did he know that I didn’t? If you want to read more about the coach, please<br />
visit www.Caetano.Co.Uk.<br />
Having got on the coach, Stan seemed to be in his element, doing a roll call and a head count,<br />
with lots of money being handed over. We were sure it was going into Stan’s ‘new lathe’ fund.<br />
Albert was quite concerned about all the noise down the front, as several pensioners were<br />
trying to sleep, and John Holtom took precautions before<br />
wee started off, and paid another visit to the toilet.<br />
Knowing that<br />
many who were<br />
not able join us<br />
would want to<br />
know, I enquired<br />
which way we<br />
were going, and<br />
the chosen route<br />
was the A361/A5<br />
One Of The Best One Of The Worst
Issue 16 - Winter 2008 ‘<strong>Turnings</strong>’ from the <strong>Tudor</strong> <strong>Rose</strong> <strong>Woodturners</strong> 26<br />
to Crick and then the M1 / M18 / A1 / A1M to junction 46 where we cut off for Harrogate.<br />
Few realise that the M1 as we know it is really a modern feature, first opened late in 1959 as<br />
far as Crick at junction 18. By late 1969 however, the road had been pushed through to<br />
Doncaster, and the upper reaches of the M1 and the M1-A1 Link were not opened until the<br />
12th February 1999.<br />
Our journey was quick and easy, but the weak bladdered amongst us needed to stop off at<br />
Woodall Services for a wee while. Some had a smoke, some took on further liquids, and<br />
Richard Findley fuelled up on a king size ‘Yorkie Bar’. Having arrived at the show ground, the<br />
coach managed to drop us right outside the main entrance where we were able to take full<br />
advantage of our advanced tickets and walk straight in with no delay.<br />
Of the dozen or so demonstrators on show, the high lights were watching Mark Baker give a<br />
master class on salad bowl turning, Ray Jones showing how he taught the absolute basics of<br />
spindle turning, Jimmy Clewes doing anything, Bob Neill, who is demonstrating to us on 11 th<br />
December, and Andrew Hall. Andrew makes and sells wooden hats, I suspect, for a great deal<br />
of money. His first influence in woodturning was in 1975 at the age of 14 when the woodwork<br />
teacher gave freely of his evenings to educate three very keen students in woodworking and<br />
furniture making. (Phil, I think this man should be asked to demonstrate to us, he does come<br />
down this far). The low points of the day just had to be the never changing pair of demo’s for<br />
“these bits will drill through concrete, masonry, high speed steel, wood, ceramic, and you<br />
cannot blunt them”, and that interminable man trying to sell the “15 in 1 tool to strip wire,<br />
sharpen knives, cut glass, ceramics, tiles, etc., etc.”. I was looking for an ‘Air Cap’, none were<br />
on display, some bristle sanders from Phil Irons, he hadn’t brought any with him, and a Xylene<br />
blender pen, nobody knew what it was or what it was for. I did buy a Super-Nova chuck from<br />
the Record stand; I paid for it, and left it for collection later. By 3 pm it had been stolen, and<br />
they had to give me another off the shelf.<br />
Back on the bus for 3.30, all loaded up with goodies, to the extent that some needed to use<br />
the boot space. The person with the biggest box appeared to be Stan, so perhaps our earlier<br />
thoughts about our money and his spending intentions were actually true. Back to Daventry by<br />
7 pm, not a bad drive back considering that it was Friday tea time rush hour. This was a really<br />
tiring day, as is evidenced by the picture on page 1. The Harrogate show is THE place to go for<br />
almost anything related to woodturning and to meet up with the trade, the professionals and<br />
old acquaintances, plus, we had a grand day out. It is hard to know what else to say about the<br />
show, was it big, “Yes”, was it busy, “Yes”, was it tiring, “Yes”, was it any different to many<br />
other shows, “Well, no not really”, I know I am not alone in this view, but I also know that<br />
others thought it was all “Top Notch”. Loads of trade stands, a very good demonstrator mix,<br />
and a really poor restaurant (for £5.80 I got a cup of tea and a bacon and egg roll you could<br />
have used as a mallet). Will I go to this show again, probably not? Was it worth going, most<br />
definitely, but not with 6 hours travel and 5 hours to loose?<br />
Jon Simpson
Issue 16 - Winter 2008 ‘<strong>Turnings</strong>’ from the <strong>Tudor</strong> <strong>Rose</strong> <strong>Woodturners</strong> 27<br />
Gallery<br />
Two more rose engine pieces from Bernard Jolley,<br />
African Blackwood and Lignum Vitae.<br />
The Yew needle case made by Geoff Freeman with Alison<br />
Scrivens at hands on night on 9 th October.<br />
Colin Hovland’s small Maple platter also made on 9 th October,<br />
and donated to the Turnathon. This picture was taken with a<br />
club program tucked under the edge to show the size.<br />
This finely coloured turning (left) was done by an unknown member, and gives us<br />
all a standard to aspire to.<br />
A Spalted Beech platter (below right) turned by Paul Loseby, and<br />
pyrogified by Penny Loseby. The piece is entitled “Walking On The<br />
Beach”.<br />
These unique awards, made by Richard Findley, were<br />
sent to The Old Bailey in London for a prize<br />
presentation. Made of Oak, these Gavel Awards are<br />
scaled down, each being 3/4 the size of the previous<br />
one.<br />
This shallow bowl (left) was<br />
made from Rippled Sycamore<br />
and is finished with 50/50<br />
sanding sealer and friction<br />
polish. The bowl was made as<br />
a wedding present for a close friend. Jon Simpson
Issue 16 - Winter 2008 ‘<strong>Turnings</strong>’ from the <strong>Tudor</strong> <strong>Rose</strong> <strong>Woodturners</strong> 28<br />
Tekno-Page<br />
John Johnson (RPT), a member of <strong>Tudor</strong> <strong>Rose</strong>, decorative, utility, and architectural turning, plus sales of<br />
Chestnut, Multistar, and Record equipment. See www.johnjohnsonwoodturning.co.uk<br />
John Berkeley (RPT), a member of <strong>Tudor</strong> <strong>Rose</strong> www.johnberkeley.co.uk<br />
Richard Findley offers a wide range of turned wooden items for the home and kitchen, plus a good range<br />
of wood turning products at www.turnersworkshop.co.uk<br />
Jon Simpson’s web site – for what its worth, www.Wood-Be-Nice.Co.UK<br />
Stiles & Bates (Dover), 01304 366360, www.stilesandbates.co.uk, The shop is well stocked, and the staff<br />
are helpful and knowledgeable.<br />
Axminster Power Tool Centre, 0800 371822, www.axminster.co.uk, huge catalogue, decent prices, good<br />
customer service.<br />
Metal Finishing Supplies Ltd, Cannock, Staffs., 01543 505771, www.thepolishingshop.co.uk is well worth a<br />
visit, where it is possible to buy polishes and mops at the very best prices.<br />
Good Timber, New Creation Farm, Nether Heyford, 01327 344550, www.GoodTimber.com In the shop you<br />
can fill a bag with off-cuts for £20<br />
Everybody should acquaint themselves with the web site belonging to Brian Clifford. There is so much<br />
information there. The site address is www.turningtools.co.uk<br />
Snainton Woodworking Supplies, 01723 859545, an excellent company to deal with, and good stocks of<br />
tools and timber. www.snaintonwoodturning.co.uk<br />
If you browse www.laymar-crafts.co.uk make sure you set aside plenty of time.<br />
Phil Irons, purveyor of VicMarc lathes, chucks, turning tools, and many other good things. Visit<br />
www.philironswoodturning.co.uk to see what is available.<br />
www.woodturningonline.com has some very useful information on it.<br />
Bob Prichard leads you into the world of lamination at www.outofcontrol-woodturning.com<br />
www.peterchild.co.uk is another of those web sites packed full of good information<br />
The web site for Tony Osborne is www.t-jtools.co.uk. He specialises in diamond sharpening tools and top<br />
quality abrasives, all at very competitive prices.<br />
All the Chestnut products can be seen, plus a full list of the UK suppliers at www.chestnutproducts.co.uk<br />
WWW.MeanTimeDesign.Com - Purveyors of clocks, watch inserts, thermometers, barometers, magnifiers,<br />
pen kits, box hinges, letter openers, pot pourii lids, calendars, etc., etc.
Issue 16 - Winter 2008 ‘<strong>Turnings</strong>’ from the <strong>Tudor</strong> <strong>Rose</strong> <strong>Woodturners</strong> 29<br />
For Sale<br />
Myford Mystro woodturning lathe. Electronic<br />
variable speed control. Bowl turning up to 20<br />
inches, 40 inches between centres. Swivel<br />
headstock, 24 point indexing, Reverse rotation,<br />
Taper roller bearings. 4” and 7” facelpates.<br />
Insert for Vicmarc chuck, 4 tool rests from Record Power BS300 band saw.<br />
5” to 12”. Price: £700, Contact Colin Hovland Reasonable offers to Alan Watts<br />
on 01604 642924 for further details. on 01676 532133 please.<br />
“Big Brother” hollowing system.<br />
An excellent tool for that large hollow form you<br />
have always wanted to create. Contact Colin Hovland<br />
as above. £75.00<br />
Coronet Minor lathe. Fully restored, and mounted on a portable base. Quick release handles, 3<br />
step multi-groove belt drive giving 450, 1000, & 2000 rpm. Hinged motor (with new starter)<br />
allows for easy speed changing. 4<br />
tool rests including a double stem<br />
unit for longer turnings. 1MT head<br />
and tailstock, 3/4" 16 tpi thread<br />
with protector, centre ejector, and<br />
face plate. Contact Colin Hovland as<br />
above. £150.00<br />
Mike Place (an ex <strong>Tudor</strong>-<strong>Rose</strong> member) is selling an Axminster 4” belt & 6” disk sander, a<br />
Rexon fretsaw, and a Rexon pillar drill for £20 each, and a Band Saw, approx 3’ high which<br />
requires a new rubber on drive wheel, £30.00, Please contact Mike on 01327 705016<br />
(evenings) if you are interested.
Issue 16 - Winter 2008 ‘<strong>Turnings</strong>’ from the <strong>Tudor</strong> <strong>Rose</strong> <strong>Woodturners</strong> 30<br />
Forthcoming Club Events – 2009<br />
th . . . . . .<br />
SUNDAY January 4<br />
Eli Avisera<br />
Thursday January 8 th . . . . . . . Andy Coates RPT<br />
Thursday January 22 nd<br />
. . . . . . Guy Ravine RPT<br />
Thursday February 12 th<br />
. . . . . . AGM & Bill Care RPT<br />
Saturday February 14 th<br />
. . . . . . Allan Batty<br />
Thursday February 26 th<br />
(Newsletter 17 Cut Off) . Hands On<br />
Thursday March 12 th . (Newsletter 17 Issue) . . Stuart King RPT<br />
th.<br />
Thursday March 26<br />
. . . . .<br />
. Steve Heely RPT<br />
Thursday April 9 th<br />
. . . . . . Richard Findley<br />
Thursday April 23 rd . . . . . . . Peter Fagg<br />
Thursday May 14 th<br />
. . . . . . . Alan Truman RPT<br />
Saturday May 23 rd . . . . . . . Bob Chapman RPT<br />
Thursday May 28 th<br />
. (Newsletter 18 Cut Off) . Hands On<br />
Thursday June 11 th<br />
. (Newsletter 18 Issue) . . Mark Raby (Chestnut)<br />
th<br />
Thursday June 25<br />
.<br />
. . . . . . John Johnson RPT<br />
th<br />
Thursday July 9<br />
. . . . .<br />
. . Gary Rance RPT<br />
Thursday July 23 rd<br />
. . . . . . . Brian Froggatt<br />
Thursday August 13 th<br />
. . . . . . Hands On<br />
Thursday August 27 th<br />
(Newsletter 19 Cut Off) . Paul Nesbitt<br />
Thursday September 10 th<br />
(Newsletter 19 Issue) . . Ian George<br />
Saturday September 19 th . . . . . . Sue Harker RPT<br />
Thursday September 24 th . . . . . . Colin Hovland<br />
th<br />
Thursday October 8<br />
. . . .<br />
. . Malcolm Hill<br />
Thursday October 22 nd<br />
. . . . . . David Springett RPT<br />
Thursday November 12 th<br />
. . . . . . John Berkeley RPT<br />
Saturday November 14 th . . . . . . Phil Irons RPT<br />
Thursday November 26 th<br />
Thursday December 10 th<br />
(Newsletter 20 Cut Off) . Hands On<br />
(Newsletter 20 Issue) . . Jennie Starbuck
Issue 16 - Winter 2008 ‘<strong>Turnings</strong>’ from the <strong>Tudor</strong> <strong>Rose</strong> <strong>Woodturners</strong> 31<br />
We are on the internet and can be found at:<br />
WWW.<strong>Tudor</strong>-<strong>Rose</strong>-Turners.Co.UK<br />
Previous issues of the club newsletter can also be browsed on the web<br />
<strong>Tudor</strong> <strong>Rose</strong> <strong>Woodturners</strong> Club<br />
The club was formed by a steering committee in the summer of 2002, as it was felt that there was a need for<br />
an AWGB branch in Northamptonshire. The first meetings were held in Willoughby, but the club soon moved on<br />
to Braunston, and then on to our current venue, the Community Centre at Ashby Road, Daventry. The club is<br />
fortunate in that it has several professional turners in its ranks, all of whom are regular demonstrators.<br />
At present, meetings are held on the 2 nd and 4 th Thursday of the month, doors opening at 7 pm for a 7.15 start.<br />
The programme is based on demonstrations and lectures, and we hope that there will be something worth<br />
learning at each meeting. There is always time for socialising at the meetings, and the club is trying to build a<br />
strong and friendly identity. There is usually some wood and woodturning supplies on sale at the meetings.<br />
Our full day demonstration programme is intended to present the leading contemporary turners to both club<br />
members and a wider audience.<br />
An excellent quality buffet lunch is always on offer at these demonstrations, and is included in the price. It is<br />
hoped that the club will continue to grow, that it will accumulate its own equipment, and present an ever<br />
improving programme for its members.<br />
Guy Ravine – Founder Member<br />
Committee Members<br />
Chairman: Paul Miller, 4 Wheatens Close, Brixworth, Northampton, NN6 9UP.<br />
Tel. 01604 882912 chairman@tudor-rose-turners.co.uk<br />
Secretary: Phil Manners, 67 Brinkburn Grove, Banbury, Oxon, OX16 3WX.<br />
Tel. 01295 264539 phil_manners@hotmail.co.uk<br />
Treasurer: Stan Bird, 94 Tennyson Avenue, Rugby, CV22 6JF.<br />
Tel. 01788 813162 treasurer@tudor-rose-turners.co.uk<br />
Richard Findley, 9 Grosvenor Close, Glen Parva, Leicester, LE2 9UG.<br />
Tel. 01162 782687 richard@turnersworkshop.co.uk<br />
Geoff Freeman, 2 Gleneagles Close, Daventry, NN11 4PF.<br />
Tel. 01327 705205 / 07752039712 geoffrey.freeman@homecall.co.uk<br />
John Johnson, 7, The Slade, Silverstone, NN12 8UH.<br />
Tel. 01327 857032 john@johnjohnsonwoodturning.co.uk<br />
Guy Ravine, Old Dairy Farm, Upper Stowe, Northants, NN7 4SH.<br />
Tel.01327 340410 g.ravine@btinternet.com<br />
Nick Godwin, 39 Overslade Lane, Rugby, CV22 6DY.<br />
Tel. 01788 813187 angbt@btinternet.com<br />
Jon Simpson, 5 Crabb Tree Drive, Northampton, NN3 5DR.<br />
Tel. 01604 491510 / 07818 445308 JonAndBron@GoogleMail.Com

