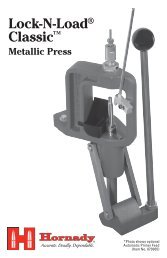
Lock-N-Load AP - Hornady
Lock-N-Load AP - Hornady
Lock-N-Load AP - Hornady

Create successful ePaper yourself
Turn your PDF publications into a flip-book with our unique Google optimized e-Paper software.
insTruCTions<br />
Step 1: Mounting the <strong>Lock</strong>-N-<strong>Load</strong> Auto Progressive<br />
Your work area should be well lit and have plenty of room for your reloading accessories. Your <strong>Hornady</strong><br />
<strong>Lock</strong>-N-<strong>Load</strong> <strong>AP</strong> should be mounted securely 2 1/4 " from the edge of a solid level bench. (Check for obstructions<br />
on or below the bench before you drill any holes.)<br />
Mount the press using (2) 5/16" bolts that are long enough to secure the press to the bench with plenty of<br />
clearance for the nuts. (Due to variation of benches these bolts are not provided.) We also recommend using<br />
5/16" flat washers top and bottom, in addtion to lock washers on the bottom side.<br />
Insert and secure the right-hand mounting bolt first. Next, insert and secure the left-hand bolt, placing the<br />
cartridge catcher bracket (13) underneath the bolt head and washer before tightening.<br />
Thread the press Handle (44) into the Toggle (39) at the bottom of the press and tighten the Jam Nut (43)<br />
using a 15/16" wrench.<br />
5/16 BOLT<br />
5/16 FLAT WASHER<br />
CARTRIDGE CATCHER BRACKET (13)<br />
Figure 1: <strong>AP</strong> Mounting<br />
- 3 -<br />
JAM NUT (43)<br />
TOGGLE (39)