YOUR SOLAR HOME - Solar Schoolhouse
YOUR SOLAR HOME - Solar Schoolhouse
YOUR SOLAR HOME - Solar Schoolhouse

Create successful ePaper yourself
Turn your PDF publications into a flip-book with our unique Google optimized e-Paper software.
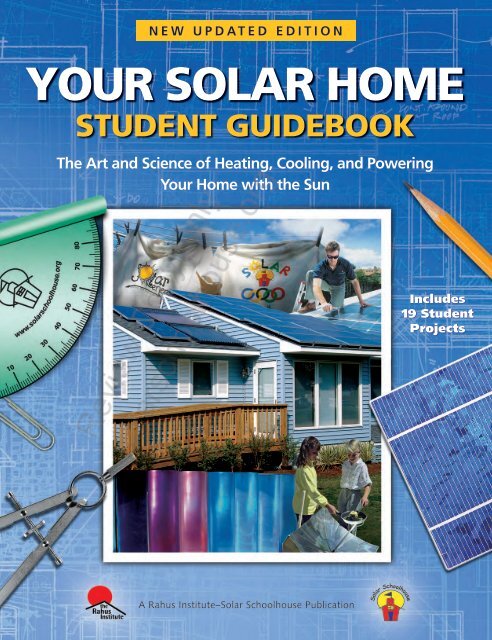
NEW UPDATED EDITION<br />
Your <strong>Solar</strong> Home<br />
STuDeNT GuiDebook<br />
The Art and Science of Heating, Cooling, and Powering<br />
Your Home with the Sun<br />
Review Copy Only<br />
solarschoolhouse.org<br />
A Rahus Institute–<strong>Solar</strong> <strong>Schoolhouse</strong> Publication<br />
Includes<br />
19 Student<br />
Projects
Education Energized by the Sun<br />
The <strong>Solar</strong> <strong>Schoolhouse</strong> is a K-12+<br />
energy education program developed<br />
by The Rahus Institute. The program<br />
introduces students to the concepts<br />
of solar energy in a fun, intriguing,<br />
and meaningful way. Using handson,<br />
project-based teaching tools,<br />
the program seeks to raise energy literacy in schools<br />
throughout the country by educating students<br />
about solar and renewable energy, energy resource<br />
conservation, and other energy topics.<br />
The central theme of the program is teaching about<br />
solar energy by developing a personal connection to<br />
our homes. With every home a potential solar collector,<br />
learning about solar energy becomes an exercise in<br />
discovering and understanding how our homes can<br />
capture sunlight to provide heating, cooling, lighting,<br />
cooking, and power for our daily lives.<br />
Review Copy Only<br />
solarschoolhouse.org<br />
Principal features of the program include:<br />
• Lesson plans correlated to state and national<br />
curriculum standards. Lessons are modular for ease<br />
of integration within the existing school programs.<br />
• Teacher training in the form of half- and full-day<br />
workshops, and the 5-day <strong>Solar</strong> <strong>Schoolhouse</strong><br />
Summer Institute.<br />
• Assistance and consultation with the development<br />
and implementation of new curriculum, the<br />
installation of solar electric (photovoltaic) systems<br />
at schools and special solar projects.<br />
• <strong>Solar</strong> <strong>Schoolhouse</strong> Olympics is a student competition<br />
to creatively design projects that demonstrate the<br />
concepts of renewable energy.<br />
• Resource materials including solar panels, the <strong>Solar</strong><br />
Power Monitor Set, the <strong>Solar</strong> Cell Classroom Set, sun<br />
ovens, and more.<br />
• Guidebooks including solar fountain design, and<br />
activities for environmental outdoor educators.<br />
• <strong>Solar</strong>ific News is an e-newsletter highlighting solar<br />
school projects.<br />
• Your <strong>Solar</strong> Home video, poster, student and teacher<br />
guidebooks.<br />
• Teaching <strong>Solar</strong>, A Teachers’ Guide to Integrating<br />
<strong>Solar</strong> Energy into Classroom Curriculum<br />
• Real time monitoring system for grid-tied solar<br />
electric systems, allows students and faculty to<br />
compare performance of their school solar system<br />
with schools across the country.<br />
• ‘Experienced’ solar electric modules provided at<br />
low-cost to schools for small grid-tie arrays,<br />
fountains, lighting, etc.<br />
For more information, visit www.solarschoolhouse.org.
Your <strong>Solar</strong> Home<br />
The Art & Science of Heating,<br />
Cooling & Powering Your Home<br />
with the Sun<br />
Review Copy Only<br />
Guidebook<br />
solarschoolhouse.org
Your <strong>Solar</strong> Home – Student Guidebook<br />
“The Art and Science of Heating, Cooling, and Powering Your<br />
Home with the Sun”<br />
A Rahus Institute –<strong>Solar</strong> <strong>Schoolhouse</strong> Publication<br />
Copyright ©2009 The Rahus Institute. All Rights Reserved<br />
First Printing January 2006<br />
Written by Clay Atchison, Tor Allen, and Hal Aronson<br />
Illustrated by Clay Atchison<br />
Historical sections and images provided by John Perlin<br />
For more information visit online:<br />
The Rahus Institute<br />
Sebastopol, CA 95472<br />
707-829-3154<br />
www.rahus.org<br />
www.solarschoolhouse.org<br />
Cover Design by Anne Washmera, www.amcdesigns.net<br />
Printed by Alonzo Printing, Hayward, California.<br />
Review Copy Only<br />
ISBN - 978-0-9776342-4-8<br />
solarschoolhouse.org<br />
1. <strong>Solar</strong> Energy 2. Environment 3. Education<br />
Second Edition<br />
ii Your <strong>Solar</strong> Home • Student Guidebook
Contents<br />
Acknowledgements..............................................................................vi<br />
Introduction........................................................................................vii<br />
Chapter 1: Facing the Sun<br />
How to Get More <strong>Solar</strong> Energy All Year Long ..................................... 12<br />
The Earth’s tilted axis and the Sun’s path across the sky<br />
The Reasons for the Seasons ............................................................ 14<br />
The Earth’s Orbit, Solstices & Equinoxes<br />
The Sun’s Angle and Intensity ........................................................... 15<br />
Energy & Sun Angles, Flashlight Example<br />
Measuring the Sun’s Position ........................................................... 16<br />
Altitude & Azimuth, Sun Path Charts<br />
There are Two North Poles ............................................................... 19<br />
True North & Magnetic North, Magnetic Declination Maps<br />
In the Real World: Facing the Sun ..................................................... 21<br />
Chapter 2: Understanding Heat<br />
What Happens When an Object Gets Hot? .......................................... 24<br />
Heat is a form of energy: the energy of atoms in motion, Atoms & Molecules,<br />
Hot Objects Expand<br />
Radiation, Convection & Conduction .................................................. 25<br />
Light & Heat, Radiation & Heat Transfer, Colors & Heat, Conduction in Solids,<br />
Convection in Liquids, Air Acts Like a Liquid<br />
Insulation Blocks Heat Flow .............................................................. 28<br />
Stationary Air Acts as an Insulator .................................................... 29<br />
Review Copy Only<br />
Chapter 3: <strong>Solar</strong> Ovens<br />
solarschoolhouse.org<br />
How to Cook Food With The Sun ........................................................ 34<br />
The Greenhouse Effect, A <strong>Solar</strong> Box Cooker<br />
Principles of <strong>Solar</strong> Cooking ............................................................... 35<br />
Bring in Sunlight, Absorb the Heat, Keep the Heat<br />
<strong>Solar</strong> History: <strong>Solar</strong> Cooking ............................................................. 36<br />
In the Real World: <strong>Solar</strong> Ovens ......................................................... 37<br />
iii
Chapter 4: <strong>Solar</strong> Hot Water<br />
Heating Water With Sunlight ............................................................ 40<br />
Standard Water Heaters, <strong>Solar</strong> Batch Heaters<br />
<strong>Solar</strong> Collectors ................................................................................ 41<br />
<strong>Solar</strong> for Swimming Pools, Flat Plate Collectors<br />
Integral Collector Storage ................................................................. 42<br />
Thermosiphon Systems, Drainback Systems<br />
Active Indirect Systems ..................................................................... 43<br />
Drainback Systems<br />
Tankless Water Heaters .................................................................... 44<br />
Heat Exchangers, <strong>Solar</strong> Preheat<br />
<strong>Solar</strong> History: <strong>Solar</strong> Water Heating .................................................... 45<br />
In the Real World: <strong>Solar</strong> Hot Water ................................................... 48<br />
Chapter 5: Passive <strong>Solar</strong> Design<br />
How to Stay Comfortable All Year Long ............................................. 52<br />
<strong>Solar</strong> Design Principles, Thermal Mass vs. Insulation<br />
Use Sunlight for Warmth .................................................................. 53<br />
Suntempering, Window to Floor Ratio<br />
Use Shade to Stay Cool ..................................................................... 55<br />
Overhangs, Using Trees for Seasonal Shade<br />
Use Insulation to Keep Heat In or Out ............................................... 56<br />
SIPs<br />
Use Thermal Mass to Store Heat & “Coolth” ..................................... 57<br />
Direct Gain Systems, Trombe Walls, Using the Earth’s Thermal Mass<br />
Use Air to Move Heat & Coolness ...................................................... 61<br />
Nighttime & Daytime Cooling, Earth Cooling<br />
Use Daylighting ............................................................................... 62<br />
Overhangs, Curtains & Blinds, Skylights, Shading, Clerestories<br />
Review Copy Only<br />
<strong>Solar</strong> History: <strong>Solar</strong> Design ............................................................... 65<br />
In the Real World: Passive <strong>Solar</strong> Design ............................................ 68<br />
Chapter 6: <strong>Solar</strong> Electricity<br />
solarschoolhouse.org<br />
Making Electricity with Photovoltaics ................................................. 72<br />
Photovoltaic Cells, Photons, Electrons, Protons, Electrical Charges<br />
The Photovoltaic Effect ...................................................................... 73<br />
Cells, Modules & Arrays, Sun Angles, Tilt Angles, Shadows<br />
iv Your <strong>Solar</strong> Home • Student Guidebook
Basic Electrical Circuits ...................................................................... 76<br />
Elements of electrical circuits, Volts, Amps, Watts<br />
Increasing Power ............................................................................. 78<br />
Series & Parallel Wiring, The Power Formula<br />
Using <strong>Solar</strong> Electricity ....................................................................... 80<br />
PV direct systems, Battery backup systems, DC & AC, Inverters, Utility Intertie<br />
<strong>Solar</strong> History: Photovoltaics .............................................................. 83<br />
In the Real World: <strong>Solar</strong> Electricity .................................................... 88<br />
Chapter 7: System Sizing<br />
How Much Energy Do You Need? ...................................................... 92<br />
Using Energy Efficiently, Energy Guide Label, Phantom Loads & Vampires<br />
Energy Audits .................................................................................. 96<br />
Measuring Electricity Use, Rate of Energy Use, Watts & Kilowatts,<br />
Total Energy Used, Watt-Hours and Kilowatt Hours<br />
Auditing Loads ................................................................................. 98<br />
Hours of Use, Electric Bills<br />
Electric meters ............................................................................... 100<br />
Array sizing................................................................................... 102<br />
Peak Sun, Peak Sun Hours, Peak Sun Hours per Day, Module Output,<br />
System Sizing Worksheet ............................................................... 104<br />
In the Real World: <strong>Solar</strong> Electricity .................................................... 88<br />
Projects .......................................................................................... 109<br />
Glossary ........................................................................................ 143<br />
Review Copy Only<br />
Index .............................................................................................. 147<br />
solarschoolhouse.org<br />
v
vi<br />
Acknowledgements<br />
Thanks goes to the following organizations for supporting various experiences and<br />
development of solar educational materials, the sum of which is this book and its<br />
accompanying video: California Energy Commission, Alameda Power & Telecom,<br />
Berkeley Ecohouse, Rising Sun Energy Center, City of Palo Alto Utilities, City of Lodi<br />
Electric Utility Department, Imperial Irrigation District, San Diego Regional Energy Office,<br />
US DOE Million <strong>Solar</strong> Roofs, Sacramento Municipal Utility District, Roseville Electric,<br />
Association for Environmental Outdoor Educators, Pasadena Water & Power, Redwood<br />
Energy Authority, Anaheim Public Utilities, SMA-America, Home Power, Imperial Valley<br />
Regional Occupational Program, <strong>Solar</strong> Living Institute, Glendale Water & Power, Redding<br />
Electric Utilities, City of San Jose, San Diego Office of Education, City of Biggs<br />
and <strong>Solar</strong> Energy International.<br />
Thanks to the many schools and teachers working to integrate solar<br />
energy into their classrooms, with a special thanks to:<br />
Carolyn Griffith (Alameda High School – Alameda, CA), Leslie Dumas (San Ramon Valley<br />
High School – Danville, CA), Otak Jump (Ohlone Elementary School – Palo Alto, CA)<br />
Lisa Wu (Gunn High School—Palo Alto, CA), Jim Jones (Valley View Elementary<br />
School—Coachella, CA), Andrea Hardman (Pioneer Elementary School – Brentwood, CA)<br />
Robert Macholtz (Central Union High School—El Centro, CA), Bill Dodge (Lincoln<br />
Middle School – Alameda, CA), Lise Schikel Goddard (Midlands School – Los Olivos,<br />
CA), Kerry Langdale (Canyon High School – Anaheim, CA), Maureen Kleppe (Weimar<br />
Hills School – Weimar, CA), Randy Smith (Brawley High School – Brawley, CA), Nancy<br />
Kellogg (Brawley High School – Brawley, CA), Wilton Goo (Calipatria High School<br />
– Calipatria, CA), Michael Gohl (The SunWorks – Niland, CA), Jeff Campbell (Indio<br />
High School – Indio, CA), Kathy Swartz (Camp Arroyo Outdoor School – Livermore,<br />
CA), Eric Schlavin (Sierra Ridge Middle School – Pollock Pines, CA), Maurie Jacinto<br />
(Victor Elementary School – Victor, CA), Keith Jacinto (Reese Elementary School,<br />
Lodi, CA), Dave Greulich (Lodi High School – Lodi, CA), Roger Crane (Bear Creek<br />
High School – Stockton, CA), Brenda Huiras (Elkhorn Elementary School – Stockton,<br />
CA), Julie Chinnock (Lodi SDA Elementary – Lodi, CA), Susan Massey (Holtville<br />
High School, Holtville, CA), Eduardo Neibla (Holtville High School, Holtville, CA),<br />
Alfonso Massey (in Memory of – Imperial, CA), David Avila (Holtville Middle &<br />
High Schools, Holtville, CA), Floyd Green (Corning High School, Corning, CA)<br />
Ted Rice (Desert Sands USD, Indio, CA), Alice Young (Desert Sands USD—Indio, CA),<br />
Susan Jones (Hidden Valley Elementary, Martinez, CA), Todd Menadier (Essex Tech<br />
Review Copy Only<br />
School—Essex, New Jersey), Oscar Soto (Center for Employment Training—San Jose,<br />
CA), Jack Geer (LAUSD—Los Angeles, CA), Woody Williams (Long Beach, CA), Sue<br />
Hayden (In Memory Of—Placentia, CA), Bonnie Sorenson (Holtville HS—Holtville, CA)<br />
solarschoolhouse.org<br />
Thanks to reviewers: Eric Schlavin, Maureen Kleppe, Otak Jump, Andrea Hardman,<br />
Jim Jones, Dena Allen, Jannike Allen, Pauline Allen, Joe Armstrong, and Floyd Green.<br />
Your <strong>Solar</strong> Home • Student Guidebook
Review Copy Only<br />
solarschoolhouse.org<br />
Introduction
Your <strong>Solar</strong> Home<br />
Usually we do these things by burning fossil fuels<br />
like coal and natural gas. But fossil fuels are running<br />
out, and burning them is hurting the environment.<br />
The Sun, however, is a non-polluting source of<br />
energy that should last for billions of years.<br />
Review Copy Only<br />
solarschoolhouse.org<br />
viii Your <strong>Solar</strong> Home • Student Guidebook<br />
This book shows you how to use<br />
solar energy in your home.<br />
You’ll see how to keep your<br />
house warm in the winter,<br />
and cool in the summer,<br />
using just sunlight for fuel.<br />
Not only that, you’ll find<br />
out how to heat water and<br />
cook food with the Sun.<br />
You’ll even see how to turn<br />
sunlight into electricity.<br />
This book starts by explaining what<br />
solar energy is, and how to get as much<br />
of it as we need throughout the year.<br />
We then find out how sunlight is<br />
transformed into heat, and how<br />
this heat can be transferred and<br />
stored. Several methods of using<br />
the Sun’s heat are presented.<br />
Next the book shows how to make<br />
electricity from sunlight, and how to use<br />
that electricity in many different ways.<br />
There are also sections showing how<br />
earlier societies used solar power, from<br />
the early Greeks to modern America.
<strong>Solar</strong> Powered Projects<br />
To understand how to use solar energy, you can build projects that use sunlight<br />
as fuel. The first projects are very simple, and use everyday materials.<br />
There are also more advanced projects, like solar race cars, that use special<br />
equipment. Information on where to obtain this equipment can be found<br />
at the <strong>Solar</strong> <strong>Schoolhouse</strong> website: www.solarschoolhouse.org<br />
<strong>Solar</strong> Powered Projects<br />
Boxes like this appear throughout the book showing<br />
projects you can make. For complete details go to<br />
the projects section at the back of the book.<br />
Pizza Box <strong>Solar</strong> Oven<br />
This oven can bake brownies with the sun.<br />
(see page 120)<br />
Review Copy Only<br />
<strong>Solar</strong> History & Real World Examples<br />
solarschoolhouse.org<br />
This book also contains sections exploring the history of solar energy use,<br />
and examples of the many ways the Sun’s energy is being used today.<br />
Review Questions and Further Exploration<br />
The end of each chapter has review questions to increase your understanding of<br />
solar power. If you have further questions, or would like to learn more about solar<br />
energy, go to the <strong>Solar</strong> <strong>Schoolhouse</strong> website: www.solarschoolhouse.org<br />
Now let’s begin exploring Your <strong>Solar</strong> Home.<br />
Introduction<br />
ix
Review Copy Only<br />
solarschoolhouse.org<br />
x Your <strong>Solar</strong> Home • Student Guidebook
1<br />
Facing the Sun<br />
Review Copy Only<br />
solarschoolhouse.org
12<br />
How to Get More <strong>Solar</strong> Energy All Year Long<br />
We get the most solar energy when facing directly toward the Sun. The problem is,<br />
the Sun’s position is constantly changing. During the day it moves across the sky<br />
from east to west. During the year the Sun’s actual path across the sky changes<br />
position. In the winter, the sun’s path is lower in the sky; in the summer it’s higher.<br />
Facing the sun is easy with<br />
devices like solar ovens: just<br />
point them at the sun, and<br />
move them a few times during<br />
the day to keep them aimed<br />
(or oriented) correctly.<br />
<strong>Solar</strong> homes are different.<br />
To stay warm in the winter, a<br />
solar home’s windows need<br />
to let in plenty of the lower<br />
sun’s light. In the summer,<br />
however, the windows need to<br />
be shaded from the higher sun<br />
or the house can get too hot.<br />
Because of this, we need to<br />
know where the sun’s path<br />
will be during the year.<br />
To choose a site for a solar electric system we also need to know where the sun will be in<br />
the sky throughout the year, and when it will be shaded by trees and other obstacles.<br />
To begin this process, we’ll start by exploring the relationship of the Sun and the Earth.<br />
This will also help us understand why it’s colder in the winter and warmer in the summer.<br />
The Earth is spinning<br />
Review Copy Only<br />
The Earth is a giant ball spinning on it’s<br />
north-south axis. This axis is an imaginary<br />
line through the center of the Earth from<br />
the north pole to the south pole.<br />
Around the middle of the Earth is another<br />
imaginary line called the equator.<br />
The equator divides the planet into<br />
two halves called hemispheres.<br />
The United States in is in the Northern<br />
Hemisphere, the half of the Earth on<br />
the north pole side of the equator.<br />
Your <strong>Solar</strong> Home • Student Guidebook<br />
SUMMER SUN PATH<br />
WINTER SUN PATH<br />
South<br />
In North America the Sun’s path is lower in the<br />
southern sky during the winter.<br />
solarschoolhouse.org<br />
The Earth rotates daily on it’s north-south axis.
The Earth’s axis is tilted<br />
You’ll notice that the Earth’s axis isn’t perpendicular<br />
to the sun’s rays. This is another way of saying the<br />
Earth’s poles are not straight up and down. The Earth’s<br />
rotational axis is tilted at an angle to the Sun’s rays.<br />
The tilt angle of the Earth’s axis is 23.5 degrees. This<br />
tilt has a lot to do with the seasons, as we’ll soon see.<br />
The Earth spins around once on its axis every 24 hours.<br />
When our part of the Earth is facing the Sun, it’s day. When<br />
we’re facing away, it’s night. Because the Earth is spinning,<br />
we see the Sun rise in the east and set in the west.<br />
The Sun isn’t actually moving. It only seems to move across<br />
the sky because the Earth is rotating on its axis. We sometimes<br />
say the Sun follows an apparent path across the sky.<br />
The Sun’s Path Across the Sky<br />
What direction should we face to get more solar energy when we<br />
need it the most: during the shorter, colder days of the winter?<br />
It depends on where we are on the Earth’s surface. In the northern hemisphere<br />
the Sun’s arc across the sky moves toward the south in the winter.<br />
The house in the picture below is oriented toward the south. This means that<br />
the side of the building with the most windows is facing toward the south pole.<br />
In the winter, the lower Sun<br />
shines in through the southfacing<br />
windows and heats the<br />
house. As the Sun’s path moves<br />
northward in the spring and<br />
summer, the overhanging roof<br />
begins to shade the windows.<br />
Review Copy Only<br />
Remember: In the southern<br />
hemisphere it’s just the opposite:<br />
buildings are oriented toward the<br />
north to get more solar energy.<br />
This is also true for other<br />
solar devices. <strong>Solar</strong> electric<br />
(photovoltaic) systems and<br />
solar hot water panels are<br />
also angled toward the south<br />
in the northern hemisphere<br />
to get more solar energy.<br />
solarschoolhouse.org<br />
Earth’s axis is tilted 23.5 degrees.<br />
A compass “needle”<br />
is a magnet that<br />
points to the north &<br />
south poles.<br />
Sun paths above a house in the northern hemisphere<br />
Chapter 1: Facing the Sun<br />
13
14<br />
Facing the Sun<br />
To understand why we face south<br />
to get more solar energy, imagine<br />
a person standing near the equator<br />
at noon. This person would see<br />
the Sun high above them.<br />
At the same time, a person<br />
standing near the north pole<br />
would see the Sun lower in the<br />
southern sky, in the direction of<br />
the equator. The closer this person<br />
gets to the north pole, the further<br />
south the sun will be in the sky.<br />
Now let’s see why the Sun’s<br />
path moves up and down<br />
throughout the year. This will<br />
help us understand why we have<br />
winter, spring, summer and fall.<br />
The Reasons for the Seasons<br />
What causes the seasons? Some people think it’s because the Earth is closer to the<br />
Sun in the summer, and farther away in the winter. That seems like it might be true, but<br />
actually the Earth is 3 million miles closer to the sun in January than it is in July.<br />
Besides, when it’s<br />
summer in the northern<br />
hemisphere, it’s<br />
winter in the southern<br />
hemisphere.<br />
To find out why we<br />
have the seasons of<br />
the year, remember<br />
that the Earth isn’t<br />
just spinning on it’s<br />
axis; it’s also traveling<br />
around the Sun.<br />
Every year the Earth<br />
orbits the Sun in a<br />
huge circular path<br />
through space.<br />
During summer in the<br />
northern hemisphere<br />
(June to September),<br />
Review Copy Only<br />
Your <strong>Solar</strong> Home • Student Guidebook<br />
The closer you are to the north pole, the farther south the<br />
Sun will be in the sky.<br />
solarschoolhouse.org<br />
The tilt of the Earth’s axis causes the seasons of the year.
the north pole is tilted toward the Sun. This causes the northern half of the Earth to<br />
receive more light and heat than it does during the winter (December to March).<br />
On the first day of summer, around June 21st, the northern hemisphere is tilted the<br />
most toward the Sun. This is called the Summer Solstice, and the Sun’s path is<br />
higher in the sky than it is on any other day of the year. Because the Sun is in the<br />
sky for more hours, the Summer Solstice is also the longest day of the year.<br />
These extra hours of sunlight give the Sun more time to heat the Earth.<br />
This is one of the main reasons that summer is the hottest season.<br />
As the Earth continues its orbit, it reaches a point where it’s tilted sideways to the Sun. This<br />
is called the Autumnal Equinox. Both the day and the night are the same number of hours.<br />
The Earth reaches<br />
the other side of<br />
the Sun on the<br />
shortest day of the<br />
year, the Winter<br />
Solstice. This is the<br />
first day of winter,<br />
and the northern<br />
hemisphere is<br />
tilted farthest away<br />
from the Sun.<br />
As the Earth<br />
travels back toward<br />
summer it passes<br />
another point<br />
where the axis is<br />
tilted sideways<br />
to the Sun. Once<br />
again day and<br />
night are the<br />
same length. This<br />
day is called the<br />
Vernal Equinox.<br />
NORTH<br />
The Sun’s Angle and Intensity<br />
The Sun’s path is higher in the summer, & the days are longer. This<br />
gives the Sun more time to heat the Earth. (Northern hemisphere view)<br />
Review Copy Only<br />
SUMMER & WINTER SUNPATHS<br />
EAST<br />
WEST<br />
Summer<br />
Solstice<br />
solarschoolhouse.org<br />
We know that in the summer our location is tilted toward the Sun, so we have<br />
longer days, and thus more solar heating. But there’s another reason summer is<br />
hotter: the Earth’s tilt also makes sunlight more intense in the summer.<br />
To see why, remember that we receive the greatest amount of solar<br />
energy when facing (oriented) directly to the Sun’s rays.<br />
In other words, light is strongest when it hits an object straight<br />
on, at a perpendicular or 90 degree angle.<br />
SOUTH<br />
Winter<br />
Solstice<br />
Chapter 1: Facing the Sun<br />
15
16<br />
This is what happens near the equator, where the weather is warm all<br />
year long. As we move closer to the north and south poles the Sun’s<br />
light shines at an angle, and it doesn’t give as much heat.<br />
To make this idea easier to understand, you can use a flashlight in a darkened room.<br />
The Flashlight Example<br />
First, shine the flashlight onto a piece of paper at a<br />
right (90 degree) angle. Then tilt the flashlight and<br />
notice what happens to the spot of light on the paper.<br />
The light shining straight on (at a<br />
perpendicular angle) makes a smaller<br />
circle and is more concentrated: it provides<br />
more light and heat per unit of area.<br />
When the flashlight is tilted, the light hits the paper<br />
at an oblique angle. The circle of light is larger, but it<br />
is less bright. It provides less energy per unit of area.<br />
This is the same thing that happens with<br />
sunlight. In the summer the Sun’s path is higher<br />
in the sky, so the light strikes us more directly,<br />
and we receive more energy per unit area.<br />
In the winter the Sun’s path is lower in the<br />
sky, so sunlight hits the Earth’s surface at<br />
a more oblique angle. The amount of heat<br />
it provides is weaker per unit of area.<br />
These two things, the different length of day and<br />
the different strength of sunlight, are what causes<br />
the summer to be hotter than the winter, and are<br />
the reasons we have the seasons of the year.<br />
Review Copy Only<br />
Measuring the Sun’s Position<br />
solarschoolhouse.org<br />
The next step in learning to use solar<br />
energy is to actually measure the Sun’s<br />
exact location in the sky. The Sun’s position<br />
can then be drawn on a map of the sky.<br />
To visualize the Sun’s position, pretend<br />
the sky is a giant dome. Then imagine the<br />
Sun travels around on the inside surface<br />
of the dome. Pretend the dome sits on<br />
a huge circle with compass degrees<br />
marked around the outside edge.<br />
Your <strong>Solar</strong> Home • Student Guidebook<br />
Light shining at a 90 degree angle gives<br />
the most light & heat per unit of area.<br />
Light shining at oblique angles give<br />
less light and heat per unit of area.<br />
Imagine the sky is a dome on top of a huge compass.
Altitude and Azimuth<br />
There are two basic measurements used to<br />
describe the Sun’s position: altitude and azimuth.<br />
The Sun’s Altitude is it’s height above the<br />
horizon. Altitude is measured in degrees from 0º<br />
to 90º. Measurement starts at 0º at the horizon.<br />
At dawn for example, when the Sun is just<br />
peeking over the horizon, its altitude is 0º. When<br />
the Sun is directly overhead its altitude is 90º.<br />
Azimuth describes the compass direction at<br />
which the Sun can be found. At any instant, a<br />
vertical line from the Sun to the horizon would<br />
cross a degree of a circle starting with north*<br />
at 0º. Measure clockwise around the circle.<br />
These two measurements identify an exact<br />
point in the sky, and can be plotted on a piece<br />
of graph paper to show the Sun’s position.<br />
By mapping the Sun’s position several times<br />
a day, we can make a picture of the Sun’s<br />
path across the sky (see the picture below).<br />
By repeating this exercise several times a year<br />
we can make a map of the Sun’s path during a<br />
whole year. This map is called a Sun Path Chart.<br />
Review Copy Only<br />
*True north, see page 19.<br />
solarschoolhouse.org<br />
The Sun’s altitude is it’s height above the horizon.<br />
The Sun’s azimuth is it’s direction on a compass.<br />
Chapter 1: Facing the Sun<br />
17
18<br />
Sun Path Charts<br />
Sun Path Charts are used when designing solar houses. They’re also used when deciding<br />
where to put solar electric systems. They’re made for a specific place, and show the<br />
sun’s position as it changes over the seasons. Trees & buildings can be mapped onto<br />
the chart to see if they will shade the Sun at different times of the day and the year.<br />
Sun path chart with trees and shading obstacles drawn under monthly sun path lines.<br />
<strong>Solar</strong> professionals use special tools and software that instantly chart sun path data for<br />
a full year at a given location. The <strong>Solar</strong> Pathfinder (http://www.solarpathfinder.com) is<br />
one such tool; the SunEye (http://www.solmetric.com/) is another.<br />
Sun path charts for your location are also available online from the University of Oregon at:<br />
http://solardat.uoregon.edu/SunChartProgram.html<br />
You can use these charts to check measurements made with these two do-it-yourself projects.<br />
Project #1 Sun Angle Quadrant<br />
Review Copy Only<br />
solarschoolhouse.org<br />
Make a simple paper tool to<br />
safely measure the Sun’s<br />
altitude. See pg. 110<br />
Your <strong>Solar</strong> Home • Student Guidebook<br />
Project #2 <strong>Solar</strong> Azimuth Finder<br />
Make a simple paper tool to<br />
measure the compass direction<br />
of the Sun. See pg. 111-112
There are Two North Poles<br />
You might be surprised to know that a magnetic compass does not usually point to<br />
the true north pole. The compass needle actually points to a different place called<br />
the magnetic north pole. The magnetic north pole is in northern Canada.<br />
Not only that, the magnetic north pole is<br />
moving! It’s traveling in a northwesterly<br />
direction at about 26 miles per year.<br />
The magnetic pole also wanders daily<br />
around an average position.<br />
The angle between the magnetic<br />
north pole and the true north pole<br />
is called magnetic declination.<br />
This angle changes over the<br />
course of many years.<br />
The angle between magnetic<br />
north and true north also<br />
depends on where you are<br />
on the Earth’s surface.<br />
Review Copy Only<br />
15° east<br />
In San Francisco a compass needle<br />
reads 15° east when the “N” (north<br />
cardinal point) points true north.<br />
San Francisco<br />
solarschoolhouse.org<br />
15° east<br />
Viewed from San Francisco, the magnetic north<br />
pole is about 15° to the east of the true north pole.<br />
East Declination<br />
Suppose you were in San Francisco, and wanted<br />
to find the true north pole with a compass.<br />
If you pointed the “N” of the compass toward<br />
the true north pole, the compass needle would<br />
point 15 degrees to the right (or east) of north.<br />
We say that the magnetic declination in<br />
San Francisco is 15 degrees east.<br />
Chapter 1: Facing the Sun<br />
19
20<br />
West Declination<br />
Viewed from Boston, magnetic north is about<br />
15 degrees to the left or west of true north.<br />
This is west declination of 15 degrees.<br />
In Boston, a compass needle points<br />
15 degrees west of north when the “N”<br />
points toward the true north pole.<br />
Magnetic Declination Maps<br />
In order to find true north or south from any location, you can use Magnetic Declination Maps.<br />
To get the most current maps visit websites such as the National Geophysical Data Center at:<br />
15 E<br />
10 E<br />
http://www.ngdc.noaa.gov<br />
NOTE: A web link to the National Geophysical Data Center is also available at the <strong>Solar</strong> <strong>Schoolhouse</strong><br />
website: www.solarschoolhouse.org<br />
United States Magnetic Declination 2004<br />
Review Copy Only<br />
solarschoolhouse.org<br />
5<br />
E 0<br />
This map shows what your compass needle will read when the “N”<br />
(north cardinal point) points toward the true north pole.<br />
Your <strong>Solar</strong> Home • Student Guidebook<br />
Viewed from Boston, the magnetic north pole is<br />
about 15° to the left of the true north pole.<br />
5<br />
W<br />
15° west<br />
10 W<br />
15 W<br />
Boston
©Aerodata International Surveys/Europa Technologies<br />
In the Real World: Facing the Sun<br />
Location, location, location.<br />
The first step in designing a solar or energy<br />
efficient home is a solar site evaluation. Before<br />
plans are begun, architects and home builders<br />
evaluate the annual path of the sun in relation to<br />
the specific building site. That knowledge is<br />
useful when making decisions such as the<br />
building orientation, floor plan, roof design,<br />
overhangs, window placement, building materials<br />
and landscaping.<br />
The sun’s path also effects the optimal size,<br />
location and position of a PV system for maximum<br />
exposure to sunlight. The more sunlight a PV<br />
system gets, the more electricity it will generate.<br />
For more information on Amersfoort, the Netherlands,<br />
visit: http://showcase.hcaacademy.co.uk.<br />
The town of Amersfoort, the Netherlands is one<br />
the greenest cities in Europe. In its Waterkwartier<br />
district (upper left corner above), the worlds’<br />
largest urban PV project (1999) has been<br />
realized. The project consists of more than 500<br />
houses and other buildings such as schools and<br />
a sports facility with PV solar modules integrated<br />
in the façade and the roofs.<br />
The Waterkwartier<br />
sports facility has<br />
506 south-facing<br />
solar modules (right).<br />
Review Copy Only<br />
solarschoolhouse.org<br />
© Photographer: Jan van IJken<br />
Solmetric SunEye is<br />
a hand held electronic<br />
tool that uses digital<br />
photography to display<br />
site-specific solar access<br />
and shading. In this<br />
example you can see<br />
when the site will experience shade due to<br />
surrounding trees during the course of the year.<br />
<strong>Solar</strong> Pathfinder (above) is a non-electronic<br />
instrument that accurately measures the shading<br />
of a site, allowing the user to see what could<br />
shade the system throughout the year. <strong>Solar</strong><br />
installers use this tool to determine the placement<br />
of PV panels for optimum performance.<br />
Chapter 1: Facing the Sun<br />
21
22<br />
Review Questions<br />
1. The Sun’s direction on a compass rose is a measure of it’s:<br />
A. Altitude<br />
B. Azimuth<br />
C. Declination<br />
2. The Earth’s north-south axis is tilted:<br />
A. To the south<br />
B. Toward the solstices<br />
C. 23.5 degrees<br />
3. At noon in the summer, a person at the equator would see the sun high in the sky. At the<br />
same time, a person closer to the north pole would always see the sun:<br />
A. Farther to the south<br />
B. At an easterly angle<br />
C. Over their right shoulder<br />
3. It’s colder in the winter because the Earth is:<br />
A. Farther from the Sun<br />
B. Tilted on its axis<br />
C. Covered with clouds<br />
D. All of the above<br />
4. Because the Earth is spinning on its axis, the Sun moves across the sky from<br />
_____________ to _____________.<br />
5. ______________________ is the season when the Sun’s path is lowest in the sky.<br />
6. When is the northern hemisphere tilted most toward the Sun?<br />
A. July 24<br />
B. The Vernal Equinox<br />
C. The Summer Solstice<br />
7. A compass needle points toward the ___________________________________________.<br />
Review Copy Only<br />
8. True or False (Circle one): The Earth’s magnetic north pole is moving.<br />
solarschoolhouse.org<br />
9. _______________________________________________ is the angle between true north<br />
and magnetic north.<br />
10. When the “N” on a compass is pointing toward true north, the compass needle<br />
will show:<br />
A. The magnetic declination<br />
B. True south<br />
C. The distance from the equator<br />
D. None of the above<br />
Your <strong>Solar</strong> Home • Student Guidebook<br />
Answers available at www.solarschoolhouse.org
2<br />
Understanding Heat<br />
Review Copy Only<br />
solarschoolhouse.org
24<br />
What Happens When an Object Gets Hot?<br />
To heat our homes with sunlight, we first need to understand what<br />
heat is, and how heat flows from one object to another.<br />
Heat is a form of energy: the energy of atoms in motion<br />
All matter is made of incredibly tiny particles called atoms. Atoms are usually clustered together in<br />
groups called molecules. Atoms and molecules are constantly moving and jiggling. The hotter an<br />
object is, the faster its molecules vibrate. The faster they vibrate, the more space they take up.<br />
Everything is made of<br />
vibrating atoms.<br />
Atoms are often found in<br />
groups called molecules.<br />
Hot Objects Expand<br />
As a substance heats up, its tiny particles<br />
vibrate faster, and push each other<br />
farther apart. This means that the same<br />
number of particles takes up more space,<br />
or volume. As a result the substance<br />
expands and becomes lighter.<br />
Review Copy Only<br />
Each particle has a certain amount of<br />
weight. The hotter substance weighs<br />
less because the same amount of<br />
volume contains fewer particles.<br />
With less particles per unit of volume,<br />
the volume itself weighs less.<br />
That is why a hot air balloon floats.<br />
The hotter air inside takes up more space,<br />
and is lighter than the outside air.<br />
molecules<br />
Molecules are so small that<br />
there are trillions & trillions of<br />
them in the head of a pin.<br />
solarschoolhouse.org<br />
Your <strong>Solar</strong> Home • Student Guidebook<br />
The hotter an object<br />
is, the faster its<br />
molecules vibrate.<br />
Hotter air inside the balloon is<br />
lighter than the cool air outside.
Radiation, Convection & Conduction<br />
Heat always flows from warmer areas to cooler areas. It only<br />
stops flowing when both areas reach the same temperature.<br />
This heat energy moves from hotter places to cooler places in<br />
three ways: through radiation, convection and conduction.<br />
RADIATION is the direct transfer of heat by electromagnetic waves<br />
Light behaves in two different ways. It acts both like waves,<br />
and like particles. When sunlight behaves like waves we call<br />
them electromagnetic waves. When sunlight acts like particles<br />
we call these individual packets of energy photons.<br />
Light is a form of radiation, and it can move through the<br />
vacuum of space. Light can also move through air or water.<br />
As a result, radiation can transfer heat between<br />
objects that are not directly touching each other.<br />
The sun produces different kinds of light<br />
These include: visible light, ultraviolet<br />
light, and infrared light, as well as several<br />
other types of energy. Infrared light is<br />
also called heat (or heat waves).<br />
Each of these types of light<br />
behaves like electromagnetic<br />
waves, and each has its own<br />
wavelength. The shorter<br />
the wavelength, the more<br />
energy the light has.<br />
A prism separates visible light<br />
into a spectrum, and we can<br />
see the different wavelengths.<br />
All forms of light are part of the<br />
electromagnetic spectrum.<br />
Review Copy Only<br />
Dark Colors absorb more heat<br />
solarschoolhouse.org<br />
When sunlight shines on an object, it’s either<br />
absorbed into the object or bounces off,<br />
depending upon how reflective the surface is.<br />
Black surfaces absorb almost all of the<br />
sunlight that falls on them. White and<br />
mirror-like surfaces reflect light and heat.<br />
Black surfaces<br />
absorb heat.<br />
Prisms separate light into a spectrum.<br />
White surfaces<br />
reflect heat.<br />
Chapter 2: Understanding Heat<br />
25
26<br />
When visible light is absorbed into an object it turns into heat<br />
Much of the Sun’s energy<br />
that reaches the Earth’s<br />
surface is visible light.<br />
This energy is converted<br />
into heat once sunlight is<br />
absorbed into an object.<br />
The hotter it becomes,<br />
the more an object<br />
gives off heat waves.<br />
These heat waves then<br />
transfer energy to the air<br />
and to nearby objects.<br />
CONDUCTION is the movement of heat through direct contact<br />
Conduction is the transfer of heat by the direct contact of particles of matter. Heat moves<br />
by conduction when two objects of different temperatures are touching each other. The<br />
warmer object will conduct heat to the cooler object until both reach the same temperature.<br />
An egg in contact with a hot pan<br />
will absorb heat by conduction.<br />
HEAT FLOW<br />
Visible light is absorbed<br />
into the black surface,<br />
and changes into heat.<br />
This is what happens when an egg cooks in a frying<br />
pan. The cooler egg is in direct contact with the hot<br />
surface of the pan, and absorbs heat by conduction.<br />
This is also why you’ll get burned if you try to grab<br />
the handle of the pan with bare hands: the heat of<br />
the metal will be rapidly conducted into your skin.<br />
Conduction is also the movement of heat through solid objects<br />
When one end of a metal bar is held in a flame, the other end soon gets hot. This is another<br />
example of heat transfer by conduction. This time the particles of matter are in one object,<br />
not two. Let’s imagine we can see what’s happening to the atoms in the metal bar as it’s heated.<br />
Review Copy Only<br />
solarschoolhouse.org<br />
Each metal atom is attached to its neighbors. As the atoms heat up, they jiggle faster, and<br />
cause the neighboring atoms to shake too. Soon the energy spreads through the entire bar.<br />
Your <strong>Solar</strong> Home • Student Guidebook<br />
The hot<br />
surface then<br />
radiates heat.
Because the atoms are so tiny we can’t see them jiggling, but we can<br />
feel the temperature increasing at the other end of the metal bar.<br />
Substances that transfer heat well are called conductors. Metals, especially<br />
copper and aluminum, transfer heat easily, and are good conductors.<br />
CONVECTION is the movement of heat through gases & liquids<br />
Heat also travels through the air as moving currents. If air isn’t moving, it’s a poor<br />
conductor, and transfers heat very slowly. But if currents start moving in the air, they<br />
transfer heat more quickly. This is the process of heat transfer by convection.<br />
Hold your hand in front of a candle and<br />
you can feel the heat radiating to you.<br />
But put your hand above the candle and<br />
it quickly gets very hot! This extra heat is<br />
being transferred to your hand by the air.<br />
The air in contact with the flame absorbs heat,<br />
expands and rises. Cooler air below moves<br />
in to take the place of the rising warm air.<br />
The faster the air is moving, the more<br />
quickly it can transfer heat by convection.<br />
Like all forms of heat transfer, the<br />
warmer area (the flame), transfers<br />
heat to the cooler area (the air).<br />
RADIATION<br />
Convection can be used to cool things down<br />
Review Copy Only<br />
HEAT<br />
Photovoltaic (solar electric) modules<br />
don’t work as well when they get hot.<br />
solarschoolhouse.org<br />
Moving air carries heat from the cup.<br />
CONVECTION<br />
RADIATION<br />
Moving air transfers heat by convection.<br />
Moving air can also be used to transfer heat<br />
away from an object to cool it down.<br />
This is what happens when you blow on a cup<br />
of hot cocoa. Heat from the cup is transferred<br />
by convection to the moving air.<br />
When they are mounted with an air<br />
space between them and the roof,<br />
cool breezes can flow underneath, and<br />
pull heat away from the modules. Convection cooling of solar modules.<br />
Chapter 2: Understanding Heat<br />
27
28<br />
Heat Loss by Convection<br />
We’ve seen how moving air transfers heat away<br />
from an object and cools it down. The same thing<br />
happens when wind blows across the roof of a house.<br />
The house can lose a lot of heat to the wind<br />
by convection; the faster the wind is moving,<br />
the more heat it pulls from the roof.<br />
Convection currents transfer heat in fluids<br />
We’ve seen how air can move in currents like<br />
water and other liquids. Because of this, we group<br />
air and gases together in a category called fluids.<br />
Fluids in general transfer heat by convection.<br />
This is what happens to a pot of water on a stove top. As<br />
water close to the burner heats up, it rises. The colder water<br />
at the sides moves into the space left by the rising hot water.<br />
Remember: when gases or liquids are heated, the<br />
area closest to the heat source expands and rises.<br />
Insulation blocks heat flow<br />
Now we know how heat flows from one object to another. Remember, heat will<br />
continue to flow from the hotter object to the cooler object until both are the same<br />
temperature. But sometimes we want to keep objects at different temperatures.<br />
On a cold day we probably want to keep our bodies warmer by wearing thick clothes. When<br />
camping, we use thick sleeping bags to stay warm through the cold night. In both cases<br />
we’re using insulation to slow the movement of heat from our bodies to the cold outside air.<br />
Insulation is a substance that slows down<br />
convection, conduction and radiation.<br />
Review Copy Only<br />
solarschoolhouse.org<br />
Many materials, such as Styrofoam and leather,<br />
are poor conductors and transfer heat slowly.<br />
Poor conductors are also called insulators.<br />
Reflective materials can stop heat from<br />
flowing by radiation. But how do we slow<br />
down heat transfer by convection?<br />
Remember that if air is standing still, it transfers heat<br />
very slowly. If we can trap the air, and keep it from<br />
moving, convection currents won’t be able to form.<br />
Your <strong>Solar</strong> Home • Student Guidebook<br />
Wind transfers heat from a roof.<br />
C O L D<br />
HOT<br />
This sleeping bag is filled with goose<br />
down, an excellent insulator.<br />
C O L D<br />
Boiling water in a pot forms<br />
convection currents.
Stationary air acts as an insulator<br />
Let’s look inside a down<br />
vest. The down stuffing has<br />
thousands of tiny spaces that<br />
trap air, and keep currents<br />
from flowing. This trapped air<br />
now acts as an insulator.<br />
The thicker the layer of<br />
trapped air, the harder it is<br />
for the heat to escape.<br />
Now that we know what heat is, and how heat moves from one place to<br />
another, we can use this information to do many useful things. In the next<br />
chapter we’ll see how to use this knowledge to cook food with sunlight.<br />
Review Copy Only<br />
Down stuffing has thousands of air spaces to trap heat.<br />
Project #8: Save That Ice Cube!<br />
solarschoolhouse.org<br />
Use insulation to keep an ice cube from<br />
melting. Have a contest to see who can keep<br />
their ice cube frozen the longest. See pg. 119<br />
Chapter 2: Understanding Heat<br />
29
Review Questions<br />
30<br />
1. Heat is a form of ______________________.<br />
2. When most substances heat up, they:<br />
A. Expand<br />
B. Shrink<br />
C. Rotate<br />
3. The hotter an object is:<br />
A. The more molecules it has<br />
B. The faster its molecules vibrate<br />
C. The smaller it becomes<br />
D. None of the above<br />
4. When next to colder air, hot air:<br />
A. Rises<br />
B. Takes up less space<br />
C. Is a form of Conduction<br />
D. All of the above<br />
5. Heat always flows from:<br />
A. Top to bottom<br />
B. Warmer areas to cooler areas<br />
C. South to north<br />
6. Which of the following is NOT a form of heat transfer:<br />
A. Radiation<br />
B. Conduction<br />
C. Convention<br />
7. The Sun produces different kinds of light, including: ______________________________,<br />
______________________________, and _______________________________.<br />
Review Copy Only<br />
8. Infrared light is also called ___________________________.<br />
9. Dark colors absorb more:<br />
A. Light<br />
B. Heat<br />
C. Energy<br />
D. All of the above<br />
solarschoolhouse.org<br />
10. White surfaces _________________ light; black surfaces ________________ light.<br />
11. The greatest amount of energy is absorbed when light strikes an object:<br />
A. From the north<br />
B. At a 90 degree angle<br />
C. In the summer<br />
Your <strong>Solar</strong> Home • Student Guidebook<br />
Answers available at www.solarschoolhouse.org
12. After it is absorbed into an object, light turns into ______________________.<br />
13. Conduction is the movement of heat through_______________________________.<br />
14. Convection currents transfer heat in:<br />
A. Fluids<br />
B. Water<br />
C. Air<br />
D. All of the above<br />
15. A spotlight is shining onto black paper. Energy is being transferred by<br />
___________________________________.<br />
16. If air is standing still, it transfers heat:<br />
A. Slowly<br />
B. Quickly<br />
C. Not at all<br />
17. Materials that trap air and keep convection currents from forming are good:<br />
A. Conductors<br />
B. Radiators<br />
C. Insulators<br />
D. None of the above.<br />
Review Copy Only<br />
solarschoolhouse.org<br />
Answers available at www.solarschoolhouse.org Chapter 2: Understanding Heat<br />
31
Review Copy Only<br />
solarschoolhouse.org<br />
32 Your <strong>Solar</strong> Home • Student Guidebook
3<br />
Review Copy Only<br />
solarschoolhouse.org<br />
<strong>Solar</strong> Ovens
How to Cook Food With The Sun<br />
Have you ever been inside a greenhouse? Greenhouses are made<br />
of see-through materials like glass or plastic. They’re used to grow<br />
heat-loving plants during the winter. They do this by trapping both<br />
the heat energy and the visible light energy from the sun.<br />
Much of the Sun’s heat is absorbed by the Earth’s atmosphere,<br />
and doesn’t make it to the Earth’s surface. Visible light passes<br />
through the atmosphere more easily than heat does.<br />
Visible light also passes easily through the glass of the greenhouse. It’s absorbed<br />
by the plants and structures inside, and changes into heat. Heat (infrared<br />
radiation) doesn’t pass out through the glass as easily as visible light passes in.<br />
We can use these principles to cook food with sunlight. To do this we<br />
need to remember all the things we’ve learned so far:<br />
1. Sunlight is absorbed by dark-colored surfaces, and turns into heat.<br />
2. Sunlight is reflected by white and mirror-like surfaces.<br />
3. Glass lets sunlight in more easily than it lets heat out.<br />
4. Facing the sun directly gives more solar energy.<br />
5. Insulation slows heat loss.<br />
A <strong>Solar</strong> Box Cooker<br />
34<br />
<strong>Solar</strong> Box Cookers can<br />
reach 400 degrees<br />
Sunlight<br />
passes<br />
through the<br />
glass<br />
Sunlight is<br />
absorbed<br />
& turns to<br />
heat<br />
Greenhouses trap<br />
the sun’s heat.<br />
Thus more of the radiant heat stays trapped inside the greenhouse. The glass walls also slow the<br />
movement of air between the inside and the outside, and decrease the loss of heat by convection.<br />
Review Copy Only<br />
solarschoolhouse.org<br />
Heat (infrared<br />
radiation) is<br />
reflected and<br />
absorbed by<br />
the glass<br />
Heat dynamics in a Greenhouse.<br />
A box can make a great solar oven. A transparent top lets sunlight in, and black surfaces inside<br />
absorb the light and turn it into heat. Because light moves in a particular direction, we can reflect it<br />
into the solar oven. We do this with shiny metal reflectors that bring more sunlight inside, and thus<br />
gather more heat. Insulation in the walls and floor keeps the box from losing too much heat.<br />
Your <strong>Solar</strong> Home • Student Guidebook
Principles of <strong>Solar</strong> Cooking<br />
Remember: NEVER LOOK DIRECTLY AT THE SUN!<br />
The basic ideas of solar cooking can be remembered with the word “BAKE”<br />
B stands for: “Bring in” as much sunlight as possible.<br />
To bring as much sunlight as possible<br />
into a solar cooker, keep the top facing<br />
toward the sun. You will need to turn the<br />
box during cooking to follow the sun.<br />
Reflectors also bring more light in. Mirrors,<br />
aluminum foil and certain types of metallic<br />
paint can be used to make reflectors.<br />
A stands for: “Absorb” energy from sunlight.<br />
Remember: Much of the Sun’s heat is absorbed<br />
by the Earth’s atmosphere. Visible light<br />
reaches the Earth’s surface more easily.<br />
We need to absorb heat from the Sun. We<br />
also need to absorb visible light, and change<br />
it into heat inside the cooker. To do this,<br />
make sure the bottom of the box is black<br />
to absorb both visible and infrared light.<br />
Using a black pot to hold the food also<br />
helps absorb more energy from the sun.<br />
K stands for: “Keep” the heat inside the cooker.<br />
The glass (or clear plastic) top lets sunlight in<br />
better than it lets heat out. If the box is sealed<br />
tightly, it will also be hard for air currents to carry<br />
away heat by convection or infiltration.<br />
Review Copy Only<br />
E stands for: “Eat & Enjoy” the sun-cooked food!<br />
Heat is lost<br />
to the air by<br />
convection.<br />
solarschoolhouse.org<br />
If the walls are insulated, heat loss by conduction<br />
will be slowed down too. Different materials<br />
like crumpled paper, cardboard and fiberglass<br />
are used for insulation in solar cookers. These<br />
methods help the oven get hotter and cook<br />
more quickly. The food will also keep cooking<br />
if clouds block the sun for a little while.<br />
Mirror-like panels<br />
reflect more solar<br />
radiation into the box.<br />
Heat is lost to the ground<br />
by conduction.<br />
Black cookware & tray inside<br />
the box absorb heat.<br />
Pizza Box <strong>Solar</strong> Oven: pg. 120<br />
Make your own solar<br />
oven using a pizza box!<br />
Pizza Box <strong>Solar</strong> Oven<br />
Chapter 3: <strong>Solar</strong> Ovens<br />
Insulated<br />
walls &<br />
floor slow<br />
heat loss.<br />
35
36<br />
<strong>Solar</strong> History<br />
In ancient China, the son in charge of lighting the stove carried a curved<br />
mirror in his belt. He used this to start a fire by focusing sunlight onto kindling.<br />
Europeans in the time of Leonardo da Vinci lit the family stove in the same way.<br />
The first meal in history cooked only with sunlight was made<br />
by Horace de Saussure in 1767. He heated soup in an<br />
insulated box topped with several layers of glass.<br />
In the 1830’s, Sir John Herschel used a similar solar oven to cook a “very<br />
respectable stew of meat.” This meal was eaten “with no small relish by<br />
the entertained bystanders” at the Cape of Good Hope in South Africa.<br />
French Foreign Legionnaires in North Africa in the 1870’s had no<br />
fuel to cook with except sunlight. They used a different kind of<br />
solar oven designed by Augustin Mouchot. This cooker used a<br />
cylindrical pot inside a reflector shaped like a lampshade.<br />
Mouchot’s sun oven could<br />
be adjusted throughout the<br />
day to keep it facing the<br />
sun. It was also collapsible,<br />
so the soldiers could easily<br />
take it with them on their<br />
famously long marches.<br />
Using his portable solar<br />
oven, Mouchot baked<br />
a pound of bread in 45<br />
minutes, and boiled over<br />
two pounds of potatoes in<br />
one hour. He also cooked<br />
a roast “whose juices<br />
sizzled to the bottom” in<br />
less than half an hour.<br />
Review Copy Only<br />
solarschoolhouse.org<br />
Mouchot’s concentrator solar cooker<br />
This type of oven is called a concentrator solar cooker. Concentrator<br />
cookers can reach much higher temperatures than solar box cookers. Mouchot<br />
made one model that could melt tin, lead, and zinc in a matter of minutes.<br />
Your <strong>Solar</strong> Home • Student Guidebook
In the Real World: <strong>Solar</strong> Ovens<br />
Food for Thought<br />
Building a solar oven out of a pizza box, is a fun<br />
way to demonstrate the power of the sun to cook<br />
food. For many impoverished families however, a<br />
solar oven is their primary means of cooking food<br />
and boiling water.<br />
The United Nations’ Food and Agriculture<br />
Organization estimates that 2.4 billion people<br />
lack adequate cooking fuels. In many developing<br />
countries families may spend as much on cooking<br />
oil and wood as they do on food. Searching and<br />
gathering firewood can take up to 7 hours a day<br />
in some parts of the world. Cooking fires also<br />
contribute to deforestation, poorer air quality and<br />
increased health problems such as lung disease,<br />
eye disease and accidental burns.<br />
<strong>Solar</strong> ovens offer an alternative to traditional<br />
cooking fires. They provide a significant financial<br />
benefit for families previously dependent only on<br />
fuels such as oil and wood. Sun powered cooking<br />
allows families to spend more money on food,<br />
clothing and health care. Freeing their need for<br />
firewood also gives them more time to work and<br />
go to school.<br />
<strong>Solar</strong> ovens are inexpensive, easy to build and<br />
easy to use. Currently there are solar oven<br />
projects worldwide bringing impoverished people<br />
the safety and convenience of solar cooking.<br />
For more information on solar ovens visit: www.solarcookers.org.<br />
Peru<br />
Review Copy Only<br />
<strong>Solar</strong> ovens are an important part of daily life<br />
for residents of developing areas in Central and<br />
South America, Africa and Asia.<br />
Bolivia<br />
solarschoolhouse.org<br />
Ethiopia<br />
Chapter 3: <strong>Solar</strong> Ovens<br />
37
38<br />
Review Questions<br />
1. Glass rooms let sunlight in more easily than they let _______________ out.<br />
2. The greenhouse effect:<br />
A. Doesn’t work in solar ovens<br />
B. Uses conduction<br />
C. Traps infrared radiation (heat)<br />
D. All of the above.<br />
3. The inside of a solar oven uses ______________________ surfaces to absorb heat.<br />
4. To bring more sunlight into a solar cooker:<br />
A. Use reflectors<br />
B. Face north<br />
C. Use insulation<br />
5. To keep heat from escaping through the bottom and sides, a solar oven uses:<br />
A. Reflectors<br />
B. Insulation<br />
C. A transparent top<br />
D. All of the above<br />
6. When using a solar oven it’s important to:<br />
A. Not look directly at the Sun.<br />
B. Keep the oven pointed directly at the Sun.<br />
C. Use pot holders<br />
D. All of the above<br />
7. To reduce heat loss by convection, be sure to:<br />
A. Seal the oven tightly<br />
B. Point the oven toward the south<br />
C. Bake in the middle of the day<br />
D. None of the above.<br />
Review Copy Only<br />
8. __________________________passes more easily through glass than infrared light does.<br />
solarschoolhouse.org<br />
9. ___________________________________ solar cookers can reach much higher<br />
temperatures than solar box cookers.<br />
10. In the 1800s, Augustin Mouchot made a solar cooker that could melt<br />
A. Tin<br />
B. Lead<br />
C. Zinc<br />
D. All of the above<br />
Your <strong>Solar</strong> Home • Student Guidebook<br />
Answers available at www.solarschoolhouse.org
4<br />
Review Copy Only<br />
solarschoolhouse.org<br />
<strong>Solar</strong> Hot Water
40<br />
Heating Water With Sunlight<br />
We use hot water for many different things, like bathing, cleaning<br />
our clothes and washing the dishes. Heating this water with fossil<br />
fuels is not only harmful to the environment, it’s expensive.<br />
About 14% of the energy used by the average American household<br />
goes to heating water, according to the U.S. Department of Energy.<br />
Fortunately, the same principles we used to heat food in solar<br />
ovens can be used to heat water in our houses. To see how,<br />
let’s start by looking at the way we usually heat water.<br />
Standard Water Heaters<br />
The hot water we use in our<br />
homes comes from a big tank<br />
called a water heater.<br />
The water heater uses a gas<br />
burner (or an electric element) to<br />
heat water. As the water warms<br />
up, it rises to the top of the tank.<br />
When a hot water faucet is opened,<br />
cold water flows into the bottom of the<br />
tank and pushes hot water out the top.<br />
<strong>Solar</strong> Batch Water Heaters<br />
Review Copy Only<br />
solarschoolhouse.org<br />
Breadbox water heater<br />
Your <strong>Solar</strong> Home • Student Guidebook<br />
water heater<br />
Inside view of standard gas water heater<br />
Cold water enters at the bottom pushes<br />
hot water out the top.<br />
One of the easiest ways to heat water with<br />
sunlight is to paint a water heater tank black,<br />
and put it outside in an insulated box.<br />
This is one kind of solar batch heater,<br />
called a breadbox heater.<br />
The front and top of the “breadbox” are made<br />
of glass. Hinged reflectors are attached, and<br />
can be closed at night to keep the tank warm.<br />
The cold water flows through the breadbox<br />
heater first, and then into the standard water<br />
heater. This way the Sun preheats the water,<br />
and the standard water heater adds heat if<br />
the water from the breadbox isn’t hot enough.
<strong>Solar</strong> Collectors<br />
Unfortunately, heating a whole tank of water<br />
in the sun takes a long time, often all day.<br />
One way to heat water more quickly<br />
is to use a solar collector.<br />
Instead of one big tank, solar collectors<br />
run liquid through several smaller<br />
tubes connected to metal fins or<br />
absorber plates. This provides more<br />
surface area to absorb sunlight.<br />
Have you noticed how hot the water can<br />
get in a garden hose left in the Sun? This is<br />
the same principle used in solar collectors.<br />
<strong>Solar</strong> for Swimming Pools<br />
Some of the simplest solar collectors are used to heat<br />
water for swimming pools. Swimming pools use a lot of<br />
energy. According to the U.S. Department of Energy,<br />
hundreds of billions of cubic feet of natural gas are<br />
consumed each year to heat the nation’s pools.<br />
One type of solar pool heater pumps pool water through<br />
a long black tube with several bends in it. The tube can<br />
be attached to a black metal or plastic absorber plate.<br />
This is called a flat plate solar collector<br />
because the absorber plate (or flat plate)<br />
absorbs heat too, and conducts it to the tube.<br />
This design heats water quickly, but it’s not<br />
surrounded by glass, so the water doesn’t get as hot<br />
as it could (which is fine for heating pool water).<br />
Review Copy Only<br />
solarschoolhouse.org<br />
Glass-Covered Flat Plate Collectors<br />
An enclosed flat plate collector is more efficient. The whole<br />
system is put in an insulated glass covered box to trap the heat<br />
inside. Glass transmits visible and ultraviolet light better than<br />
it does infrared light (heat). The glass cover also traps air in<br />
the space, thus reducing heat losses by convection. The collector<br />
housing is also insulated to block heat loss by conduction.<br />
There are several types of solar collectors, and many<br />
ways to connect them to household water systems.<br />
Project #11 Soda Can Water Heater<br />
Make your own solar water heater<br />
using a soda can. See pg. 122.<br />
<strong>Solar</strong> collector for swimming pool<br />
The flat plate<br />
conducts heat<br />
to the<br />
water<br />
tubes.<br />
cold water<br />
from pool<br />
hot water<br />
to pool<br />
Enclosed Flat Plate Collector<br />
Chapter 4: <strong>Solar</strong> Hot Water<br />
41
42<br />
Integral Collector Storage<br />
The simplest solar collector systems use<br />
the collector as the storage tank. The<br />
tubes in this system are larger to hold<br />
more water, and there’s no absorber<br />
plate like there is a flat plate collector.<br />
The cold water enters the solar<br />
collector at the bottom, is warmed<br />
by the Sun, and rises to the top.<br />
Now when hot water is drawn out of the<br />
standard water heater, it’s replaced by<br />
preheated water from the solar collector.<br />
The problem with this system is that the hot<br />
water stays in the collector until a faucet opens.<br />
The water in the collector gets very hot, but the<br />
heat is not transferred to the water heater tank<br />
until the water moves. To make the system<br />
more effective, it is necessary to circulate the<br />
solar heated water to the water heater tank.<br />
Thermosiphon Systems<br />
Hot<br />
water<br />
out<br />
Cold<br />
water in<br />
Cold water<br />
falls to the<br />
bottom of the<br />
collector...<br />
The solarheated<br />
water rises<br />
into the<br />
tank.<br />
Review Copy Only<br />
...and is heated<br />
by sunlight in<br />
the collector.<br />
solarschoolhouse.org<br />
Thermosiphon systems place the<br />
tank above the collector.<br />
Your <strong>Solar</strong> Home • Student Guidebook<br />
Cutaway view of integral collector<br />
The solar collector preheats the water.<br />
The simplest way to keep water flowing<br />
between the collector and the tank is<br />
to use a thermosiphon system.<br />
In this system a water tank is attached<br />
above the solar collector.<br />
Now as the sun heats the water, it rises<br />
out of the top of the collector into the<br />
tank. Cold water falls from the tank to the<br />
bottom of the collector, and a convection<br />
loop forms (see Chapter Two, pg. 28).<br />
A thermosiphon system circulates<br />
the water without using a pump.<br />
These systems work best in mild climates.<br />
If the outside temperature is below freezing<br />
for more than several hours, the water in the<br />
pipes can freeze too. In this case, antifreeze<br />
runs through the collector, and is separated<br />
from the water in the standard heater by<br />
a heat exchanger. (see pgs. 43-44)
Active Indirect Systems<br />
In harsh winters the water in the solar collector can freeze.<br />
This will stop the water from moving, and can also damage<br />
the pipes. This is because water expands a little when<br />
freezing. One way to make sure this doesn’t happen is to<br />
drain the water from the collector when the weather is cold.<br />
This is a type of active system, because it uses a pump to<br />
move the water through the system. It’s indirect because<br />
the water in the collector flows through a loop that’s<br />
separate from the standard water heater plumbing.<br />
Note: Some indirect systems run antifreeze<br />
instead of water through the collector loop.<br />
Drainback Systems<br />
WATER HEATER LOOP<br />
A pump sends water<br />
through the heat<br />
exchanger<br />
Drainback system<br />
Cutaway view showing heat exchanger<br />
A drainback system uses two separate tanks. One tank is connected to the solar collector. An<br />
electric pump pushes the water from this tank through the collector. When the water reaches<br />
the top of the collector it falls (or drains back) to the tank. This is the drainback tank.<br />
The second tank is a standard water heater. The water in this heater doesn’t mix with the water<br />
in the drainback tank. Instead, it passes through a metal coil inside the drainback tank. The coil<br />
acts as a heat exchanger, and transfers heat from the drainback tank to the water heater.<br />
When the weather is too cold, the<br />
collector pump shuts off. Gravity<br />
causes the water to drain back<br />
from the collector to the tank.<br />
Now there’s nothing left in<br />
the collector to freeze.<br />
This is just one<br />
type of active<br />
(pump-driven)<br />
solar water<br />
heating system.<br />
Review Copy Only<br />
solarschoolhouse.org<br />
The solar collector heats<br />
the fluid in the drainback<br />
tank, and the heat exchanger<br />
transfers that heat to the<br />
water heater.<br />
drainback tank<br />
COLLECTOR LOOP<br />
A pump sends<br />
fluid through the<br />
solar collector<br />
A drainback system drains the water from the collector when the weather freezes.<br />
Chapter 4: <strong>Solar</strong> Hot Water<br />
43
44<br />
Tankless Water Heaters<br />
Whether or not they’re connected to solar collectors,<br />
standard water heaters still waste energy. This is<br />
because water is kept hot all the time, even when<br />
it’s not being used. This is like keeping a car running<br />
all the time, even when no one is driving it.<br />
Remember: heat is always moving from hotter areas<br />
to cooler areas. Although a water heater may be<br />
insulated, it’s still losing heat to the outside air.<br />
A more efficient way to heat water is by using<br />
a demand or tankless water heater.<br />
Heat Exchangers<br />
Instead of a big tank of water,<br />
gas-fired tankless water<br />
heaters use a metal coil<br />
called a heat exchanger.<br />
When a hot water faucet<br />
opens, a gas burner lights,<br />
and rapidly heats the water<br />
as it flows through the coil.<br />
The coil is made of an<br />
excellent conductor, such<br />
as copper. The moving<br />
water rapidly absorbs<br />
the heat from the pipe.<br />
Review Copy Only<br />
Tankless water heater<br />
Inside view of tankless water heater<br />
The burner heats water as it flows through the heat exchanger.<br />
solarschoolhouse.org<br />
Cutaway of solar collector attached to tankless heater.<br />
Your <strong>Solar</strong> Home • Student Guidebook<br />
<strong>Solar</strong> Preheat<br />
Some types of tankless<br />
water heaters can even be<br />
attached to solar collectors.<br />
This way the sun can preheat<br />
the water before it goes<br />
through the heat exchanger.
<strong>Solar</strong> History<br />
It may surprise you that the first commercial solar water heater<br />
went on the market in 1891. Clarence Kemp invented and<br />
sold it through his Baltimore appliance factory outlet.<br />
Kemp had seen earlier solar water heaters put together by farmers—metal<br />
water tanks painted black and placed directly in the sun out in the fields<br />
during the summer. By late afternoon, when farm work had everyone’s<br />
skin full of grit, grime, and sweat, and their bodies exhausted, farmhands<br />
opened up the spigot on the tank, and filled buckets with water hot enough<br />
to soothe their aching muscles and refresh their overheated bodies.<br />
The problem with these simple solar heaters, Kemp observed, was not whether<br />
they could produce hot water, but when and for how long. Even on clear, hot<br />
days, it usually took from morning to early afternoon for the water to get hot. And<br />
as soon as the sun set, the tanks rapidly lost heat because they were uninsulated<br />
and unprotected from the cool night air.<br />
Kemp had also read in popular journals how<br />
the American astrophysicist Samuel Pierpoint<br />
Langley had taken an insulated, glasscovered<br />
box and exposed it to the sun on<br />
the snow-covered slopes of Mount Whitney.<br />
Though outside temperatures had dropped<br />
below freezing, the inside of the box heated<br />
up above the boiling point of water. Kemp<br />
realized that if he placed several tanks painted<br />
black inside a glass-covered box, he would<br />
have a superior method of heating water<br />
with the sun. In 1891, he won a patent for<br />
the new heater, and called it the Climax, the<br />
world’s first commercial solar water heater.<br />
Review Copy Only<br />
solarschoolhouse.org<br />
The first solar water heaters were<br />
bare metal tanks painted black.<br />
He advertised his heater as “the acme of simplicity” compared with conventional<br />
water heaters. Just turn on the faucet and “instantly out comes the hot water,”<br />
the sales literature boasted. Thanks to the Climax, according to company<br />
brochures, housewives no longer had to fire up the stove in summer, and<br />
wealthy gentlemen, who had to stay behind to work while their families and<br />
servants left sultry Baltimore to summer in more pleasant climes, could<br />
return home at night and instantly draw hot water with no fuss or bother.<br />
Chapter 4: <strong>Solar</strong> Hot Water<br />
45
46<br />
Sales of the Climax really took off in<br />
California. By 1897, one-third of households<br />
in Pasadena relied on the Climax for heating<br />
water. More than 1,600 were sold in southern<br />
California by 1900. Economics was the prime<br />
lure of the Climax. For an investment of $25,<br />
the owner saved about $9 a year on coal.<br />
As one journalist pointed out, exorbitant<br />
fuel prices forced Californians “to take the<br />
asset of sunshine into full partnership. In<br />
this section of the country where soft coal<br />
sells for $13 a ton (and the huge peaches bring only $2<br />
a ton), a builder cannot afford to waste his sun-rays.<br />
California is in particular need of its solar heaters.”<br />
Daily Gifts<br />
Others, though, saw a more important reason for going<br />
solar. Charles Pope, writing in 1903, urged consumers<br />
to “consider that wood and oil and coal and gas are<br />
steadily consumed by use. Not only will the coming<br />
generations be less comfortably supplied—a thing most<br />
of us care very little about—but the drain today may<br />
produce distress in our own homes and lay an embargo<br />
on our own business tomorrow. Contrast this with the<br />
freedom of the people who receive daily gifts of fuel from<br />
the Creator, taking all they wish, all they can use, freely.”<br />
Between 1898 and 1909, more than a dozen inventors filed patents for<br />
new solar water heaters, but everyone merely refined the Climax design. In<br />
1909, William J. Bailey saw the shortcomings of the glass-covered tank solar<br />
water heaters—collecting and storing solar heated water in the same unit<br />
allowed the water to cool down after dark or when the weather got bad.<br />
Review Copy Only<br />
Clarence M. Kemp<br />
Inventor of the Climax<br />
solar collector<br />
Bailey revolutionized the solar water heater industry by separating the solar<br />
collector from the storage unit. He attached narrow water pipes to a black<br />
metal plate and put them into a shallow, glass-covered, insulated box. Then he<br />
connected the collector to an elevated, autonomous, insulated storage unit. As<br />
the sun heated the water, it became lighter than the colder water below, naturally<br />
rising into the storage tank. His solar water heater worked better than Kemp’s<br />
because the sun heated a smaller volume of water at a time, and the heated<br />
water immediately went to a storage tank protected from the elements.<br />
solarschoolhouse.org<br />
Your <strong>Solar</strong> Home • Student Guidebook
Bailey called his company the Day and Night<br />
<strong>Solar</strong> Heater Company, because unlike the<br />
Climax, it supplied solar heated water during<br />
the day and at night. The added benefits of<br />
the Day and Night soon put those manufacturing<br />
the Climax out of business. By the end<br />
of World War I, more than 4,000 households<br />
in southern California heated their water with<br />
Day and Night solar water heaters.<br />
Cheap Gas & Electricity<br />
The discovery of cheap local supplies of<br />
natural gas concurrent with the development<br />
of the thermostatically controlled gas<br />
water heater in the early 1920s killed the<br />
solar water heater industry in southern<br />
California. The solar water heater business<br />
then migrated to southern Florida, where a<br />
booming housing market and high energy<br />
costs created much demand for Bailey’s<br />
invention. By 1941, more than half the<br />
William J. Bailey, founder of the<br />
households in Miami heated their water with Day & Night <strong>Solar</strong> Heater Company<br />
the sun. But war came, the government froze<br />
the use of copper, and the solar water heater<br />
industry came to an abrupt halt. <strong>Solar</strong> water heating took off again after the war,<br />
but cheap electric rates, combined with aggressive sales of electric water heaters<br />
by the utilities, stymied new growth. The once thriving Floridian solar water heater<br />
industry was reduced to a small service business by 1955. The two oil embargoes of<br />
the 1970s encouraged new interest in solar water heating. Subsequent sharp drops<br />
in fossil fuel prices, combined with the end of tax credits for purchasing solar water<br />
heaters, once again put a damper on the American solar water heater industry.<br />
Ahead of Us<br />
Review Copy Only<br />
Other parts of the world have enthusiastically embraced Bailey’s invention.<br />
Millions of Japanese have purchased solar water heaters. More than ninety<br />
percent of Israelis heat their water with the sun. In Europe, so many people use<br />
solar water heaters like the Day and Night design that they save the equivalent<br />
of the energy produced by five large nuclear power plants. Most never imagined<br />
that the technology they use dates back so far and comes from California!<br />
solarschoolhouse.org<br />
John Perlin<br />
Chapter 4: <strong>Solar</strong> Hot Water<br />
47
In the Real World: <strong>Solar</strong> Hot Water<br />
Tapping the Sun’s Rays<br />
Every two years, the U.S. Department of Energy<br />
hosts the <strong>Solar</strong> Decathlon—a competition in<br />
which teams of college and university students<br />
compete to design, build, and operate the most<br />
attractive, effective, and energy-efficient solarpowered<br />
house.<br />
Heating water is one of the categories in the<br />
competition, and the homes all have a system<br />
for solar hot water production. Most systems use<br />
either externally mounted air-evacuated glass<br />
tubes or flat-plate collectors. Evacuated tubes<br />
are filled with a non-freezing liquid and absorb<br />
the sun’s heat while remaining cool to the touch.<br />
Flat-plate collectors are thin, insulated boxes<br />
with small liquid-filled tubes. In both cases,<br />
water is heated when exposed to the hot liquid.<br />
The heated water can then stored in specially<br />
insulated tanks for later use.<br />
All decathlon entries use solar hot water for<br />
typical domestic chores such as washing clothes<br />
and bathing. In some other homes however, solar<br />
hot water can play a larger role. It can be pumped<br />
through pipes in the floor for radiant heating.<br />
<strong>Solar</strong> hot water can also used to cool their<br />
homes in a process known as absorption chilling.<br />
This refrigeration technology uses heat instead<br />
of traditional (and energy thirsty) mechanical<br />
compression.<br />
For more information on the <strong>Solar</strong> Decathlon visit<br />
www.solardecathlon.org or www.rahus.org.<br />
Review Copy Only<br />
solarschoolhouse.org<br />
Cornell University’s house has the evacuated<br />
tubes mounted to the roof.<br />
48 Your <strong>Solar</strong> Home • Student Guidebook<br />
University of Maryland placed evacuated tubes<br />
on the front of their <strong>Solar</strong> Decathlon house.<br />
China leads the world<br />
with over 30 million (2004)<br />
solar hot water systems<br />
installed. Most of these are<br />
a low-cost version using<br />
evacuated tube collectors<br />
such as those on the left.<br />
Water for this campground shower in Oregon<br />
(below), is heated using a drainback flat-plate<br />
collector system. This system heats the water<br />
in the collectors and then circulates it directly<br />
into use for bathing. Flat plate collectors are still<br />
common in many parts of the world.
Review Questions<br />
1. A black water tank inside a glass-covered box is called a<br />
_____________________________________ heater.<br />
2. Flat plate solar collectors heat water with:<br />
A. <strong>Solar</strong> electricity<br />
B. Several tubes<br />
C. Condensation<br />
3. Water flows between a solar collector and a storage tank without a pump in a<br />
______________________________________system.<br />
4. Where must the storage tank be in the system in Question #3?<br />
A. In the attic<br />
B. On the roof<br />
C. Above the solar collector<br />
4. Systems where the solar collector is attached directly to a water heater are NOT<br />
recommended:<br />
A. For swimming pools<br />
B. In harsh winter climates<br />
C. For flat plate collectors<br />
D. None of the above<br />
5. A ___________________________________ system uses two separate tanks.<br />
6. What moves liquid between the tank and the solar collector in the system in<br />
Question #5?<br />
A. Gravity<br />
B. A pump<br />
C. A & B<br />
D. None of the above<br />
Review Copy Only<br />
7. Water does an unusual thing when it freezes. It __________________________.<br />
solarschoolhouse.org<br />
8. A water heater that heats water only when a faucet is on is called a:<br />
A. Breadbox heater<br />
B. Flatplate collector<br />
C. Tankless heater<br />
9. A __________________________________________ is a device (often a metal coil) that<br />
transfers heat between fluids that aren’t in direct contact.<br />
10. The first solar water heaters in the U.S. were just black painted____________________ .<br />
Answers available at www.solarschoolhouse.org Chapter 4: <strong>Solar</strong> Hot Water<br />
49
11. The first commercial solar water heater, the Climax, was patented in:<br />
A. 1891<br />
B. 1924<br />
C. 1972<br />
12. The first commercial solar water heaters were better than many home-built solar water<br />
heaters because they were:<br />
A. Covered with glass<br />
B. Facing south<br />
C. On metal sheets<br />
D. All of the above<br />
13. The Day and Night solar heater had:<br />
A. Narrow pipes on a metal plate<br />
B. An insulated glass-covered box<br />
C. A separate storage tank<br />
D. All of the above<br />
Review Copy Only<br />
solarschoolhouse.org<br />
50 Your <strong>Solar</strong> Home • Student Guidebook Answers available at www.solarschoolhouse.org
5<br />
Review Copy Only<br />
Passive <strong>Solar</strong> Design<br />
solarschoolhouse.org
52<br />
How to Stay Comfortable All Year Long<br />
Most homes burn fossil fuels to stay warm in the winter<br />
and keep air conditioners running in the summer.<br />
Passive solar home design uses many of the ideas<br />
we’ve just studied to keep buildings comfortable all<br />
year long with little fuel besides sunlight. Passive solar<br />
home designers work with six different principles.<br />
<strong>Solar</strong> Design Principles<br />
1. Use sunlight for warmth.<br />
2. Use shade to stay cool.<br />
3. Use thermal mass to store warmth & “coolth.”<br />
4. Use insulation to keep heat in or out.<br />
5. Use air to move heat & coolness<br />
6. Use daylighting to save energy.<br />
How you use these principles depends on where you live. A house<br />
in the desert will focus more on using shade to stay cool, while a<br />
house in a cold climate will use every bit of sunlight to stay warm.<br />
We’ll start with a quick overview of these principles. Then we’ll explore<br />
them in more detail, and see how to use the principles in different locations.<br />
How to Control Temperature Inside a Container<br />
First let’s look at a simple experiment with three<br />
cups. Each cup has a lid with a thermometer sticking<br />
through it to measure the temperature inside.<br />
Review Copy Only<br />
solarschoolhouse.org<br />
The cups are placed in the Sun to get warm, and<br />
then put in the shade to cool down. A record is kept<br />
of how the temperature changes over time.<br />
The first cup is empty, and it heats up quickly in the warm<br />
sun. It also cools down quickly when placed in the shade.<br />
The second cup is filled with wet sand. This cup heats up<br />
more slowly than the first. It also holds its heat longer, staying<br />
warm for a longer time when placed in the shade.<br />
Your <strong>Solar</strong> Home • Student Guidebook<br />
A thermometer in a cup shows how<br />
wet sand can store heat & “coolth<br />
The empty cup heats up<br />
and cools down quickly.<br />
The wet sand changes<br />
temperature more slowly.
This is because the wet sand has more matter, or mass, than the air. The<br />
more dense an object is, the more slowly it heats up or cools down.<br />
Objects that are very dense are called thermal mass<br />
because of their ability to absorb or store heat.<br />
Thermal mass can also store “coolth.” This means cool<br />
thermal mass inside a building will absorb heat on a hot<br />
day and keep the interior from heating up quickly.<br />
Thermal Mass vs. Insulation<br />
The third cup contains the same wet sand, but it’s wrapped<br />
on the top, bottom and sides with thick cardboard. This cup<br />
stays cooler in the hot sun than either of the other two. It also<br />
holds its heat better in the shade than the other cups.<br />
This is because the tiny air spaces in the cardboard slow<br />
down the movement of heat. Cardboard acts as an insulator<br />
and blocks heat from entering or leaving the cup.<br />
The insulated cup holds<br />
its temperature longer.<br />
It’s important to remember that thermal mass is just the opposite of insulation. Thermal<br />
mass is very dense. It can hold its temperature, and heat can move through it. Insulation<br />
is very light; it can’t hold or store heat, but it can block the movement of heat.<br />
Now that we have a basic idea of how to control temperature in a cup, we can take a closer look at<br />
how to do this in a house. Unless otherwise noted, examples will be for the northern hemisphere.<br />
1. Use Sunlight for Warmth<br />
The single most important method<br />
for solar heating is to orient the<br />
building to capture sunlight.<br />
For home heating, this means aiming windows<br />
toward the south. It’s usually better to have the<br />
longer side of the building facing south.<br />
Review Copy Only<br />
Suntempering<br />
The simplest passive solar<br />
design is called suntempering.<br />
Suntempering just adds windows<br />
to the south side of a house.<br />
solarschoolhouse.org<br />
Designing a house with south-facing<br />
glass is an easy and effective way<br />
to heat with sunlight, and often adds<br />
very little to the cost of the home.<br />
W<br />
N<br />
Aim windows toward the<br />
south to capture sunlight.<br />
S<br />
E<br />
Suntempering adds windows<br />
to the south side.<br />
Chapter 5: Passive <strong>Solar</strong> Design<br />
53
54<br />
Window to Floor Ratio<br />
The ratio, or percentage, of south facing glass to floor area<br />
determines how much heat the house will get from the<br />
Sun. This ratio varies according to climate. The hotter<br />
the location, the less south facing glass it should have.<br />
Suntempered homes in temperate climates work well<br />
with about a seven percent ratio of south facing windows<br />
to floor area. For example, a 100 square foot room would<br />
have about 7 square feet of south facing windows.<br />
Windows do lose heat<br />
Heat, or infrared radiation, doesn’t pass through windows<br />
as easily as visible light does, but windows do lose heat.<br />
In fact, an average window can lose several times as<br />
much heat as the same area of wall. That’s why you<br />
often feel colder when you stand near a window.<br />
Remember: sunlight passes in through<br />
the window glass, is absorbed inside<br />
the house, and turns to heat.<br />
Some of this heat doesn’t pass out through<br />
the window. Some is absorbed by the<br />
glass. The glass itself heats up, and<br />
then it transfers heat to the outside.<br />
Many newer windows are designed to transfer heat<br />
more slowly. They often use two panes of glass with<br />
a space in between. The space acts as an insulator.<br />
Some windows use a special kind of glass,<br />
called low-e glass. Low-e glass has an<br />
invisible, thin metal coating that reflects heat.<br />
Review Copy Only<br />
solarschoolhouse.org<br />
Low-e glass blocks some of the summer sun’s heat<br />
It also blocks some heat from escaping in the winter.<br />
However, low-e glass can also keep solar heat from<br />
entering the home in the winter when it’s needed.<br />
Put fewer windows on the north side<br />
Windows on the north side of a house can lose a lot of<br />
heat, and get very little useful sunlight in the winter. Passive<br />
solar designs usually have few north facing windows.<br />
Your <strong>Solar</strong> Home • Student Guidebook<br />
SOUTH<br />
7 square feet<br />
of SOUTH GLASS<br />
for every<br />
100 square feet of FLOOR<br />
Window to floor ratio for a home without<br />
thermal mass in a temperate climate.<br />
Double paned windows<br />
with special coatings lose<br />
much less heat.<br />
Low-e glass blocks some of the Sun’s<br />
energy, & traps heat inside.<br />
N<br />
W E<br />
S<br />
Use as few windows on<br />
the north as possible.
2. Use Shade to Stay Cool<br />
Overhangs<br />
Overhangs are sections of the roof that “hang<br />
over” windows, and shade them from the hot<br />
summer Sun. They are also called eaves. Cloth<br />
awnings can be used for this purpose too.<br />
Because of the Earth’s tilt, the Sun’s<br />
path across the sky is higher in the<br />
summer and lower in the winter.<br />
Overhangs block the direct light and heat<br />
from the high summer Sun, but let the<br />
lower winter Sun heat the building.<br />
The length of the overhang varies with<br />
the latitude of the building, and the local<br />
climate. In temperate climates overhangs<br />
are often sized to completely shade the<br />
windows on the summer solstice.<br />
In hotter climates overhangs may be sized to<br />
shade the windows between the equinoxes.<br />
In very hot climates the overhangs may<br />
shade the windows all year round.<br />
With overhangs, a window can still get soft,<br />
indirect light in the summer. Overhangs can<br />
also be used as light shelves to reflect light<br />
deeper into a room. (See page 63.)<br />
Review Copy Only<br />
Project #13: <strong>Solar</strong> Home Model<br />
solarschoolhouse.org<br />
Design & build a scale model<br />
solar home. See pg. 124-128<br />
Winter Sun<br />
Overhangs<br />
shade the<br />
window from the<br />
high summer<br />
sun…<br />
…but let the lower<br />
winter sun in.<br />
Summer Sun<br />
Properly sized overhangs are measured from<br />
seasonal sun angles at the home’s latitude.<br />
Chapter 5: Passive <strong>Solar</strong> Design<br />
55
56<br />
Using Trees for Seasonal Shade<br />
SUMMER<br />
Deciduous trees shade the afternoon sun.<br />
On the north side, evergreens can protect the<br />
house from harsh weather, and winter winds.<br />
Hills on the north side of the house can<br />
also give protection from winter weather.<br />
Before building, passive solar designers<br />
often spend time at the building site, paying<br />
attention to the Sun, wind and weather.<br />
Some trees (called deciduous trees)<br />
drop their leaves in the winter. They can<br />
shade the house in summer, and let<br />
sunlight in during winter. On the west<br />
side, deciduous trees can block heat<br />
from the low afternoon summer sun.<br />
Trees and bushes which keep their<br />
leaves all year are called evergreens.<br />
WEST<br />
NORTH<br />
3. Use Insulation to Keep Heat In or Out<br />
Insulation is made from many different<br />
things, like fiberglass, paper fiber,<br />
and special plastics like Styrofoam.<br />
It’s added to the walls, ceiling and floors<br />
to slow the heat loss from a building.<br />
Review Copy Only<br />
Because heat rises, it’s very important<br />
to insulate the roof and ceiling.<br />
The thicker the insulation is, the more time<br />
it takes for the building to cool down.<br />
Building insulation works like the<br />
down stuffing in sleeping bags. It has<br />
thousands of tiny spaces that trap air.<br />
solarschoolhouse.org<br />
EAST<br />
SOUTH<br />
IN WINTER, bare deciduous trees let sunlight in.<br />
Heat rises: use more<br />
insulation under the roof.<br />
HEAT<br />
The trapped air keeps convection currents from forming, and slows down conduction.<br />
Reflective coverings like aluminum foil can stop heat loss by radiation too.<br />
Your <strong>Solar</strong> Home • Student Guidebook
SIPs<br />
Special walls are made using solid foam insulation<br />
sandwiched between two sheets of structural<br />
board. These are called SIPs, short for structural<br />
insulated panels, and they trap heat better than<br />
standard wood frame walls with fiberglass insulation.<br />
It’s important to seal cracks by windows and<br />
doors to stop drafts. A lot of heat can be lost<br />
by air flowing quickly through small holes.<br />
This is called infiltration, and it can be a<br />
major source of heat loss. New houses<br />
often put a thin layer of plastic between<br />
the walls to stop air and moisture.<br />
Even with the best insulation, a house will<br />
eventually cool down. The colder it is outside,<br />
the faster a house will cool down.<br />
4. Use Thermal Mass to Store Heat & “Coolth”<br />
Have you noticed that after a hot day the sidewalk<br />
stays warm at night? That’s because a concrete<br />
sidewalk is a good example of thermal mass.<br />
Remember that thermal mass is any material that is<br />
dense enough to absorb and store heat well. Materials<br />
like stone and water have high thermal mass.<br />
<strong>Solar</strong> homes place thermal mass inside the building,<br />
and locate the south facing windows so that the<br />
Sun shines on the mass during the colder time of<br />
year. The thermal mass then absorbs sunlight for<br />
Review Copy Only<br />
many hours during the day, and the visible light<br />
turns into heat. At night, the stored heat is released<br />
for many hours to keep the house warm.<br />
solarschoolhouse.org<br />
Not all thermal mass in a building has to receive direct<br />
sunlight; it can be in shaded areas and still absorb heat.<br />
However, thermal mass that isn’t in direct sun is only<br />
about 70% as efficient at absorbing the Sun’s energy.<br />
Thermal mass inside buildings keeps them<br />
from heating up too quickly on sunny days,<br />
and from cooling off quickly at night.<br />
SIPs or Structural Insulated Panels<br />
insulate better than standard walls<br />
A boulder heats up during the<br />
day and releases heat at night.<br />
Water can store heat or cold<br />
better than concrete or stone.<br />
Chapter 5: Passive <strong>Solar</strong> Design<br />
57
58<br />
Direct Gain Systems<br />
Another common passive solar design is<br />
a direct gain system. It uses south facing<br />
windows like the suntempered house, and<br />
adds thermal mass inside to store heat.<br />
The mass heats up during the day, and<br />
releases that heat into the room at night.<br />
Walls and floors of concrete or stone are<br />
often used for thermal mass, but many<br />
other materials store heat well too.<br />
Bricks, tile, adobe and even water<br />
can be used as thermal mass. Water<br />
must be put in sturdy containers, but<br />
it can absorb about twice as much<br />
heat as stone per unit of volume.<br />
Direct gain systems are simple and<br />
low cost, and can take advantage<br />
of materials used in many standard<br />
homes: windows and concrete.<br />
Direct gain homes can have a higher ratio of<br />
south facing glass to floor area: typically seven<br />
to twelve percent in temperate climates.<br />
Sunspaces<br />
Some passive solar designs separate<br />
the windowed area from the rest of the<br />
house. This glassed-in room is called<br />
a sunspace, or solar greenhouse.<br />
Review Copy Only<br />
Sunspaces are isolated gain systems because<br />
sunlight is collected in an area which can<br />
be closed off from the rest of the house.<br />
A thermal mass<br />
wall absorbs<br />
the sun’s heat<br />
during the day…<br />
solarschoolhouse.org<br />
Sunspaces can supply a lot of heat to a<br />
house, but are often too hot to be in.<br />
Thermal mass is used to store solar energy in the sunspace. Doors or windows next to the<br />
sunspace can be opened during the day to let heat move into the house by convection.<br />
…and releases<br />
that heat into the<br />
room at night.<br />
Because of the large amount of glass, sunspaces often heat up very quickly during the day,<br />
and lose heat quickly after sunset. They need a large amount of thermal mass, and may still get<br />
very hot during the day. Sunspaces are often closed off from the rest of the house at night.<br />
It’s usually better to have a solid and well insulated roof over the sunspace. Although glass roofs<br />
collect more sunlight, they also lose more heat during the night. And they can cause overheating<br />
in warm weather. Thick curtains, or movable window insulation will also slow heat loss at night.<br />
Your <strong>Solar</strong> Home • Student Guidebook
Trombe Walls<br />
Trombe walls were developed by<br />
a Frenchman named Felix Trombe<br />
(Trombe rhymes with Tom).<br />
A Trombe wall is just a thermal mass wall<br />
placed directly behind a south facing window.<br />
The wall is usually painted black, and has<br />
vents or windows at the top and bottom.<br />
Sunlight heats<br />
the wall during<br />
the day.<br />
Daytime Heating with Trombe Walls<br />
With the wall vents open, convection<br />
currents carry heat into the room.<br />
As air between the window and the wall<br />
heats up it rises, and passes into the room.<br />
Cooler air near the floor moves into<br />
the space left by the rising hot air.<br />
Review Copy Only<br />
Nighttime Heating with Trombe Walls<br />
The Trombe<br />
wall heats<br />
the room at<br />
night.<br />
solarschoolhouse.org<br />
A trombe wall is a mass wall behind a window.<br />
During the day, the house acts like a solar collector,<br />
and the Trombe wall captures the sun’s energy.<br />
It takes several hours for the sun to heat the<br />
wall, and the room behind it stays cool.<br />
If the room needs to be heated during the<br />
day, the vents in the wall can be opened.<br />
Convection<br />
currents heat<br />
the room.<br />
The heat of the sun works its way slowly<br />
through the wall by conduction.<br />
During the evening, the inside of<br />
the wall is warm, and begins to<br />
radiate heat into the room.<br />
The vents in the wall are closed to keep<br />
heat from escaping through the window.<br />
Chapter 5: Passive <strong>Solar</strong> Design<br />
59
60<br />
Using the Earth’s Thermal Mass<br />
The biggest source of thermal mass<br />
for solar homes is the Earth itself.<br />
The top few feet of the ground heat up<br />
and cool down with the weather, the<br />
seasons, and the day and night cycles.<br />
Once you get below the frost line, however, the<br />
Earth’s temperature doesn’t change much.<br />
The frost line is the level below which<br />
water in the ground doesn’t freeze. In<br />
most of the United States the frost line is<br />
about three or four feet down, and below<br />
that the temperature averages about<br />
56 degrees Fahrenheit all year long.<br />
This means the ground a few feet down can<br />
often supply all of the “coolth” we’d need in the<br />
summer. This is useful for hot southern areas<br />
where cooling is more important than heating<br />
for most of the year. Homes in very hot places<br />
can also face north to reduce solar gain.<br />
Heat inside an earth-sheltered house flows to<br />
the cool earth a few feet below the surface.<br />
To use the Earth’s thermal mass a building needs to be in direct contact with<br />
the ground. One way to do this is to build on a concrete slab.<br />
A more effective way to use the Earth’s fairly constant subsurface temperature is to<br />
build into the ground several feet. Earth can be piled against the sides of the building<br />
in a process called berming. This is also called an earth-sheltered house.<br />
Earth-sheltered homes are quieter and need less energy for heating and cooling.<br />
They also require special techniques for construction and waterproofing.<br />
Review Copy Only<br />
Model of an earth bermed home<br />
made by high school students.<br />
solarschoolhouse.org<br />
Your <strong>Solar</strong> Home • Student Guidebook<br />
A network of underground tubes<br />
cools incoming air (see next page).
5. Use Air to Move Heat & Coolness<br />
Nighttime cooling<br />
The simplest way to cool a passive solar home<br />
is to open windows and vents at night.<br />
Thermal mass can then radiate heat to the outside. Hot<br />
air rising through ceiling vents will draw cooler air into the<br />
house. This air will absorb heat from a mass floor or wall.<br />
The next day the mass will be a source of “coolth,”<br />
and absorb heat from the inside of the house. If the<br />
south facing windows are covered and shaded, the<br />
house often stays cool through the heat of the day. Open windows and vents let<br />
heat escape at night.<br />
Daytime cooling<br />
Escaping hot air draws cooler air into the house.<br />
Earth cooling<br />
Review Copy Only<br />
Another way to cool with convection<br />
is by drawing outside air through<br />
tubes buried in the ground.<br />
solarschoolhouse.org<br />
Tubes made of good conductors are buried<br />
several feet underground to avoid the<br />
warm daytime surface temperature.<br />
As rising hot air leaves the building, it draws<br />
outside air in. The outside air transfers heat<br />
to the cool earth as it moves through the<br />
tubes, and cools the house as it enters.<br />
Mass walls are also used<br />
to bring cooler air into the<br />
house during the day.<br />
To do this, outside vents are<br />
placed above the mass wall.<br />
Low vents are placed on the<br />
cooler north side of the house.<br />
Hot air rising past the mass wall<br />
is then vented to the outside. This<br />
draws cooler air into the building<br />
through the north side vents.<br />
The earth<br />
cools<br />
incoming<br />
air.<br />
Chapter 5: Passive <strong>Solar</strong> Design<br />
61
62<br />
6. Use Daylighting<br />
Sunlight in your home does much more than<br />
provide heat. Natural light can make a house more<br />
comfortable, brighten your mood and, according<br />
to the U.S. Department of Energy, may even<br />
improve your health and productivity.<br />
Using sunlight to light our buildings also<br />
reduces the energy needed for electric lights.<br />
But the glare of too much direct sunlight<br />
is uncomfortable, and can overheat a<br />
house, especially in the summer.<br />
Good daylighting balances natural<br />
lighting with solar heating.<br />
Daylighting is not the same as sunlighting.<br />
Daylighting is the practice of bringing<br />
soft, indirect sunlight into buildings, and<br />
reducing the direct sun’s heat and glare.<br />
Indirect sunlight is sunlight that’s reflected into<br />
a room, or filtered through a white translucent<br />
skylight or window. Sunlight is often reflected off<br />
the ceiling to imitate the soft light of the sky.<br />
Indirect sunlight also comes through windows<br />
on the north (or shady) side of the house, and<br />
through windows protected by overhangs.<br />
Overhangs<br />
With overhangs, a window can get soft, indirect light in the<br />
summer, and also receive direct sunlight in the winter for<br />
solar heating. Overhangs can also be used as light shelves<br />
to reflect light deeper into a room. (See next page.)<br />
Review Copy Only<br />
Overhangs block the direct light from<br />
the high summer sun, but still let<br />
indirect sunlight into the house.<br />
solarschoolhouse.org<br />
A simple overhang can shade noontime<br />
sunlight in the summer, but it might<br />
not let light deep into the room. One<br />
way to do both is to use light shelves.<br />
Your <strong>Solar</strong> Home • Student Guidebook<br />
Overhangs<br />
provide soft,<br />
indirect light in<br />
the summer.<br />
Daylighting with indirect sunlight<br />
from adjustable blinds, northfacing<br />
windows and a skylight.
Light Shelves<br />
One of the best ways to use daylighting is to bounce<br />
sunlight off the ceiling. This brings a soft, even light<br />
deep into the room. Light shelves can do this well.<br />
A light shelf is a flat overhang put above eye-level over a<br />
south-facing window. Above this overhang is a small window.<br />
The light shelf protects the lower window from the summer sun,<br />
and also reflects light through the small window onto the ceiling.<br />
Curtains & Blinds<br />
Curtains and blinds can soften natural sunlight, and be adjusted<br />
to provide different amounts of light. They also slow heat transfer<br />
by radiation, and can keep the house cooler in the summer.<br />
Thin curtains will let some indirect sunlight into the room, yet<br />
still reduce heat gain. A valance or box along the top also<br />
helps slow convection currents behind the curtain.<br />
Wide slat blinds can reflect direct sunlight up to the ceiling and<br />
walls, providing soft natural light and stopping bright glare.<br />
Adjustable blinds also let direct sunlight in when and<br />
where you want it, perhaps in a kitchen breakfast nook.<br />
In the winter, curtains and blinds can slow heat lost<br />
through the windows, and keep the house warmer.<br />
Skylights<br />
Skylights are windows in the roof. White<br />
translucent skylights are not see-through, but<br />
they do let light in. They also block heat.<br />
Review Copy Only<br />
solarschoolhouse.org<br />
If you use a clear skylight, make sure it has a<br />
special low-e coating that blocks most of the heat<br />
from the sun. Without this coating, clear skylights<br />
would be a poor choice, because they let in a large<br />
amount of heat in the summer, when the sun is<br />
high in the sky. They also lose heat in the winter.<br />
Skylights that open and close can be used to<br />
vent summer heat as it rises to the ceiling.<br />
Light shelves reflect<br />
light onto the ceiling.<br />
Curtains soften<br />
direct sunlight.<br />
Blinds reflect<br />
sunlight up into<br />
the room.<br />
White translucent skylights let in<br />
light and block heat.<br />
Chapter 5: Passive <strong>Solar</strong> Design<br />
63
64<br />
Tubular Skylights<br />
Tubular skylights reflect sunlight<br />
into the house.<br />
Clerestory Windows<br />
Tubular skylights reflect sunlight<br />
from the roof to the inside of the<br />
house through a long shiny tube.<br />
At the end of the tube is a<br />
white or prismatic diffuser.<br />
The diffuser blocks heat and<br />
spreads the light out evenly.<br />
Clerestory windows are used to bring light deep into a building.<br />
They’re placed high on the wall, and let sunlight shine on the ceiling.<br />
This gives a pleasant light, similar to the light of the sky.<br />
Sometimes daylighting seems to work against passive solar heating.<br />
For example, a north-facing clerestory might be used for non-glare<br />
indirect light, but for solar heating you’d face the clerestory south.<br />
South-facing clerestory provides<br />
direct sunlight for solar heat.<br />
Tubular skylights are an<br />
inexpensive way to bring natural<br />
sunlight into rooms with few or<br />
no windows, through an attic.<br />
The art in passive solar design balances good daylighting with passive solar heating.<br />
Review Copy Only<br />
solarschoolhouse.org<br />
Your <strong>Solar</strong> Home • Student Guidebook<br />
North-facing clerestory gives<br />
indirect light without heat.
<strong>Solar</strong> History<br />
The 5th Century<br />
During the fifth century BC., the<br />
Greeks faced severe fuel shortages.<br />
Fortunately, an alternative source<br />
of energy was available—the sun.<br />
Archaeological evidence shows<br />
that a standard house plan evolved<br />
during the fifth century so that every<br />
house, whether rural or urban,<br />
could make maximum use of the<br />
sun’s warm rays during winter.<br />
Those living in ancient Greece<br />
confirm what archaeologists have<br />
found. Aristotle noted, builders<br />
made sure to shelter the north<br />
side of the house to keep out the<br />
cold winter winds. And Socrates,<br />
who lived in a solar-heated house,<br />
observed, “In houses that look<br />
toward the south, the sun penetrates<br />
the portico in winter” which keeps<br />
the house heated in winter.<br />
The great playwright Aeschylus went<br />
so far as to assert that only primitives<br />
and barbarians “lacked knowledge<br />
of houses turned to face the winter<br />
sun, dwelling beneath the ground like<br />
swarming ants in sunless caves.”<br />
Review Copy Only<br />
Ancient Rome<br />
solarschoolhouse.org<br />
The ancient Greeks planned whole<br />
cities in Greece and Asia Minor such as<br />
Priene, shown in the illustration, to allow<br />
every homeowner access to sunlight<br />
during winter to warm their homes.<br />
By running the streets in a checkerboard<br />
pattern running east-west and northsouth<br />
every home could face south,<br />
permitting the winter sun to flow into the<br />
house throughout the day.<br />
Fuel consumption in ancient Rome was even more profligate<br />
than in Classical Greece. In architecture, the Romans remedied<br />
the problem in the same fashion as did the Greeks.<br />
Chapter 5: Passive <strong>Solar</strong> Design<br />
65
66<br />
Vitruvius, the preeminent Roman architectural writer of the 1st century BC.,<br />
advised builders in the Italian peninsula, “Buildings should be thoroughly shut<br />
in rather than exposed toward the north, and the main portion should face the<br />
warmer south side.” Varro, a contemporary of Vitruvius, verified that most houses<br />
of at least the Roman upper class followed Vitruvius’ advice, stating, “What men<br />
of our day aim at is to have their winter rooms face the falling sun [southwest].”<br />
The Romans improved on Greek solar architecture by covering<br />
south-facing windows with clear materials such as mica or glass.<br />
They also passed sun-right laws that forbade other builders from<br />
blocking a solar-designed structure’s access to the winter sun.<br />
Cross section of a Roman<br />
heliocaminus. The term means<br />
“sun furnace.” The Romans used<br />
the term to describe their southfacing<br />
rooms.<br />
They became much hotter in<br />
winter than similarly oriented<br />
Greek homes because the<br />
Romans covered their window<br />
spaces with mica or glass while<br />
the Greeks did not.<br />
Review Copy Only<br />
solarschoolhouse.org<br />
Your <strong>Solar</strong> Home • Student Guidebook<br />
Clear materials like mica or glass<br />
act as solar heat traps: they readily<br />
admit sunlight into a room but hold<br />
in the heat that accumulates inside.<br />
So the temperature inside a glazed<br />
window would rise well above<br />
what was possible in a Greek<br />
solar oriented home, making the<br />
heliocaminus truly a “sun furnace”<br />
when compared to its Greek<br />
counterpart.
<strong>Solar</strong> Greenhouses<br />
Like the ancient Romans, the<br />
18th century Dutch and others<br />
in Europe at the time, used<br />
glass-covered south-facing<br />
greenhouses to capture solar<br />
heat in wintertime to keep their<br />
exotic plants warm.<br />
To prevent the solar heat<br />
captured during the day from<br />
escaping, the Dutch covered<br />
the glass at night with canvas<br />
coverings.<br />
The ancient Romans not only used window coverings to hold in solar heat<br />
for their homes but also relied on such solar heat traps for horticulture so that<br />
plants would mature quicker, produce fruits and vegetables out of season,<br />
and allow for the cultivation at home of exotic plants from hotter climates.<br />
With the fall of the Roman Empire, so too came the collapse of glass for<br />
either buildings or greenhouses. Only with the revival of trade during the<br />
16th century came renewed interest in growing in solar-heated greenhouses<br />
Review Copy Only<br />
solarschoolhouse.org<br />
exotics brought back from the newly-discovered lands of the East Indies<br />
and the Americas. Trade also created expendable incomes that allowed the<br />
freedom to take up such genteel pursuits as horticulture once more.<br />
John Perlin<br />
Chapter 5: Passive <strong>Solar</strong> Design<br />
67
In the Real World: Passive <strong>Solar</strong> Design<br />
Saltbox Design<br />
This house in Bonny Doon, California (Santa<br />
Cruz County) was designed and built in 1982<br />
by the Aronson family. It is located far from the<br />
electrical grid on a south facing slope. Its design<br />
uses many of the passive solar design strategies<br />
discussed in this chapter.<br />
The structure is based on a traditional colonial<br />
“Saltbox” design with two stories of south facing<br />
glass and a single story facing north. This<br />
configuration provides plenty of solar gain in the<br />
winter months. Thermal mass is provided by a<br />
double layer of sheet rock on most of the walls,<br />
a brick floor in the “sun room” on the southeast<br />
corner of the house, and a slab section under<br />
the house.<br />
The house has generous eaves on the south and<br />
west facing walls to keep it cooler in the warm<br />
summer and fall months. Deciduous trees on the<br />
south and west side also reduce solar gain in the<br />
summer months. Because the house is so wellinsulated,<br />
a single wood burning stove is the only<br />
back-up heat source needed.<br />
Placement of large windows with low-E glass<br />
provides ample interior daylight. Manual window<br />
shades enhance occupant control over light and<br />
temperature variances. Clerestory windows add<br />
additional lighting and reduce the need for electric<br />
lights during daylight hours.<br />
Review Copy Only<br />
solarschoolhouse.org<br />
A model of the saltbox<br />
design during construction.<br />
68 Your <strong>Solar</strong> Home • Student Guidebook
Review Questions<br />
1. ____________________________trees may block the summer Sun, but not<br />
the winter Sun.<br />
2. Trees and bushes that protect against winter winds are called<br />
________________________.<br />
3. Adding windows to the south side of a house is the simplest type of<br />
passive solar design, and is called:<br />
A. Suntempering<br />
B. South-facing<br />
C. Orientation<br />
4. Glass with a special coating to slow heat loss is called:<br />
A. Double pane glass<br />
B. Low-e glass<br />
C. Passive solar glass<br />
D. All of the above<br />
5. To slow heat transfer, it’s important to insulate:<br />
A. Walls<br />
B. Floors<br />
C. Ceiling<br />
D. All of the above<br />
6. Air leaking through cracks and spaces by doors and windows, is called<br />
___________________________________.<br />
Review Copy Only<br />
solarschoolhouse.org<br />
7. Thermal mass is the ability of an object to ______________________ and<br />
____________________ heat.<br />
8. Which has greater thermal mass?<br />
A. Stone<br />
B. Styrofoam<br />
C. Water<br />
Answers available at www.solarschoolhouse.org Chapter 5: Passive <strong>Solar</strong> Design<br />
69
9. A solar design using south facing glass and thermal mass floors is called a<br />
_______________________________________system.<br />
10. An isolated gain system uses:<br />
A. A sunspace (or solar greenhouse)<br />
B. Summer winds<br />
C. Drainback systems<br />
D. All of the above<br />
11. A thermal mass wall placed directly behind south facing glass is called a<br />
_________________________________________.<br />
12. The heat of the Sun works its way slowly through thermal mass by:<br />
_________________________________________.<br />
13. Convection cooling with a Trombe wall uses:<br />
A. High outside vents near the top of the Trombe wall<br />
B. Low vents on the cooler side of the house<br />
C. Low vents in the Trombe wall<br />
D. All of the above<br />
14. The part of the roof that shades windows is called an<br />
__________________________________________.<br />
15. Ancient Greeks took advantage of solar energy by:<br />
A. Using glass<br />
B. Suntempering<br />
C. Facing buildings south<br />
D. All of the above<br />
Review Copy Only<br />
solarschoolhouse.org<br />
16. Houses that use daylighting can include:<br />
A. Tubular skylights<br />
B. Wide slat blinds<br />
C. Clerestory windows<br />
D. All of the above<br />
70 Your <strong>Solar</strong> Home • Student Guidebook Answers available at www.solarschoolhouse.org
6<br />
Review Copy Only<br />
solarschoolhouse.org<br />
<strong>Solar</strong> Electricity
72<br />
Making Electricity with Photovoltaics<br />
Light energy can be turned directly into electricity. The device<br />
that does this is called a photovoltaic cell. It’s also called<br />
a solar cell, or a PV cell. The term photovoltaic combines<br />
photo, from the Greek word for light, with voltaic, named after<br />
Alessandro Volta, a pioneer in the science of electricity.<br />
Photovoltaic cells have no moving parts, and run silently, without<br />
polluting the environment. They are made of semiconductor materials<br />
like silicon, the most common element in the Earth’s crust.<br />
The silicon in PV cells is chemically treated to make a<br />
positive and a negative layer. Between these two layers<br />
an electrical field is created, similar to a battery.<br />
Photons<br />
PV cells have<br />
positive and<br />
negative layers.<br />
To see how solar cells work, we need to know more about the nature of light.<br />
We also need to understand some basic principles of electricity.<br />
Review Copy Only<br />
solarschoolhouse.org<br />
Light acts like particles called photons.<br />
Your <strong>Solar</strong> Home • Student Guidebook<br />
Besides acting like waves, light<br />
also behaves like a stream of tiny<br />
chunks, or particles of energy.<br />
These particles are called photons.<br />
Photons are an unusual kind of<br />
particle because they don’t seem<br />
to have any weight or mass.<br />
They also don’t have<br />
any electric charge.<br />
Photovoltaic Cell<br />
-<br />
negative layer<br />
silicon<br />
atoms<br />
positive layer<br />
+<br />
PV cell cross section
Electrons<br />
Even though atoms are incredibly tiny, they aren’t<br />
the smallest bits of matter. If we could look inside<br />
atoms we’d see even tinier particles. The center of<br />
the atom is called the nucleus. Spinning around the<br />
nucleus are particles of electricity called electrons.<br />
Opposite electrical charges attract<br />
Electrons have a negative charge. The nucleus has<br />
positively charged particles called protons. Opposite<br />
electrical charges attract, and pull toward each other.<br />
The Photovoltaic Effect<br />
When light shines on a photovoltaic cell electricity is produced. The illustration below<br />
shows how this happens. As photons of light hit the cell, their energy is absorbed by some<br />
of the electrons in the atoms. If an electron absorbs enough energy, its orbit gets so big it<br />
breaks away from the nucleus. The electron is now a free, negatively charged particle.<br />
Photons release electrons from the atoms.<br />
The electrons move through the wire.<br />
nucleus<br />
This attraction keeps the electrons in orbit around the nucleus. The electrons don’t<br />
fall into the center of the atom because they have too much energy. The more<br />
energy an electron has, the bigger its orbit will be around the nucleus.<br />
photon<br />
Review Copy Only<br />
electrons<br />
solarschoolhouse.org<br />
+<br />
These electrons will try to return to<br />
their atoms, but the design of the<br />
cell pushes them up through the<br />
negative layer. If a wire is connected<br />
between the top and bottom<br />
layers of the cell, the electrons<br />
will flow through it, and combine<br />
with atoms in the positive layer.<br />
This flow of negatively<br />
charged electrons is called<br />
an electrical current.<br />
The process of photons<br />
releasing electrons is called<br />
the photovoltaic effect.<br />
electron -<br />
Inside an atom, electrons orbit<br />
the nucleus.<br />
Electrical current is like the current of water in a stream, or water moving through<br />
a hose. It is a source of energy: the energy carried by the moving charged<br />
particles. In wire, these charged particles are negatively charged electrons,<br />
but positively charged protons can also carry electrical energy.<br />
NOTE: “How a <strong>Solar</strong> Cell Works” animation viewable online at: “http://www.solarschoolhouse.org<br />
Chapter 6: <strong>Solar</strong> Electricity<br />
73
74<br />
PV Cells and PV Modules<br />
Photovoltaic (PV) cells come in different sizes. They can be smaller than a quarter of an inch<br />
across, and bigger than five inches across. Bigger cells produce more power, but even large cells<br />
usually produce less than 3 watts. That’s not enough energy to power most household appliances.<br />
For more power, several cells are connected together in weather tight packages called<br />
photovoltaic modules. Photovoltaic modules are also called solar panels or PV modules.<br />
Each photovoltaic<br />
cell produces a small<br />
amount of power.<br />
<strong>Solar</strong> arrays<br />
Even large solar panels<br />
don’t produce a huge<br />
amount of electric power.<br />
To supply electricity for an<br />
entire house, many solar<br />
panels are connected<br />
together in a large group<br />
called a solar array (or<br />
photovoltaic array).<br />
Some PV<br />
modules are<br />
flexible.<br />
Review Copy Only<br />
To increase power, cells are grouped into<br />
photovoltaic modules (also called solar panels).<br />
Flexible modules<br />
solarschoolhouse.org<br />
Your <strong>Solar</strong> Home • Student Guidebook<br />
There are different kinds of photovoltaic<br />
modules. Most are made with hard, crystalline<br />
silicon. Some are flexible however, and can<br />
be rolled out and glued onto metal roofs.<br />
PV modules can be connected together in a solar array.
How to Get the Most Electricity from <strong>Solar</strong> Panels<br />
Remember: more energy is absorbed<br />
when light strikes at a 90 degree angle.<br />
PV modules generate the most electricity<br />
when facing the sun directly.<br />
Daily sun angles<br />
A solar panel placed flat<br />
on the ground will produce<br />
different amounts of power<br />
throughout the day.<br />
It will produce more electricity<br />
at noon when the sun is<br />
most directly overhead,<br />
and less in the morning<br />
and afternoon when the<br />
sun is lower in the sky.<br />
Tilt angles<br />
North of the equator, a solar<br />
panel flat on the ground would<br />
not face the sun directly.<br />
Even at noon, it would<br />
be tilted slightly away.<br />
The farther north you are,<br />
the greater this tilt will be.<br />
To correct for this, the solar<br />
panel is angled up toward<br />
the south to face the sun.<br />
Shadows<br />
9 AM<br />
Review Copy Only<br />
This tilt angle is related to<br />
the latitude, a number which<br />
measures the distance a<br />
place is from the equator.<br />
Less power<br />
generated<br />
solarschoolhouse.org<br />
More power<br />
generated<br />
NOON<br />
90<br />
angle<br />
A 90 degree angle produces the most electricity.<br />
S<br />
S<br />
Be sure to keep PV modules out of the shade, and in direct sunlight. This is most important<br />
in the middle of the day when the sun supplies the most energy. Even a shadow the<br />
size of person’s hand can greatly decrease the amount of power a panel produces.<br />
N<br />
N<br />
Away from the<br />
equator panels<br />
are tilted to face<br />
the sun.<br />
3 PM<br />
Less power<br />
generated<br />
Chapter 6: <strong>Solar</strong> Electricity<br />
75
76<br />
Basic Electrical Circuits<br />
Now we that we’ve seen how solar cells work, we can start using them<br />
to power electrical devices. To do this, we need to create an electrical<br />
circuit. A circuit is a closed path for electrons to follow. 2. Load (Lightbulb)<br />
Elements of electrical circuits<br />
This flashlight is an<br />
example of a simple<br />
electrical circuit.<br />
It includes these<br />
basic parts.<br />
1. Voltage<br />
Source<br />
(Batteries)<br />
3. Conductor<br />
(metal strip)<br />
4. Switch<br />
(shown in<br />
the “off”<br />
or “open”<br />
position)<br />
1. A voltage source is anything that supplies electrical force. Electrical force (measured in volts)<br />
is what pushes electrons through the circuit. In the flashlight the batteries are the voltage<br />
source. These batteries produce about 1.5 volts of pressure. Car batteries produce about 12<br />
volts, and the outlets in your house supply 120 volts of electrical pressure. Voltage sources<br />
have positive and negative ends. The flashlight circuit starts at the negative end, and finishes at<br />
the positive end.<br />
2. A load is anything that uses electricity. The lightbulb in the flashlight is the load. Things like<br />
electric motors, microwave ovens, and computers are other kinds of loads.<br />
3. Conductors are materials that carry electricity. We<br />
know metals are good conductors of heat; they’re<br />
also good conductors of electricity. The flashlight has<br />
metal conductors for the electrons to flow through.<br />
Wires made of copper are excellent conductors. Wires are usually<br />
covered with a plastic or rubber coating. This coating acts as an<br />
electrical insulator, and resists the flow of electrical current.<br />
Review Copy Only<br />
solarschoolhouse.org<br />
5. Safety devices: The flashlight doesn’t have a safety device, but<br />
most circuits include a way to protect wires from overheating<br />
and causing fires. Fuses and circuit breakers are examples.<br />
Wires heat up when electrical current flows through them. If<br />
there is too much current, they melt, or burn off their insulation.<br />
Fuses are designed to break a circuit if too much current flows.<br />
An alligator clip makes<br />
connecting this wire easy.<br />
4. Switches turn current flow on & off. They open the circuit, and make a break in the path the<br />
electrons are following. Electricity will only flow if it has an unbroken path to follow. When the<br />
switch on the side of the flashlight is ‘off’, it is in the open position, and the circuit is broken.<br />
Your <strong>Solar</strong> Home • Student Guidebook<br />
The thin wire in this<br />
fuse melts if too<br />
much current flows.
How Electricity Works<br />
The way electricity flows through a circuit is<br />
similar to the way water flows through pipes.<br />
Imagine a tank of water with a pipe coming<br />
out the bottom, and a valve on the pipe.<br />
The water is heavy, and pushes down on the<br />
bottom of the tank. The water’s weight pushes<br />
it through the pipe when the valve is opened.<br />
If we put a water wheel in front of the pipe, the<br />
water current spins the wheel. The pressure<br />
pushing the water through the pipe is like<br />
electrical pressure (voltage) in circuits.<br />
Electrical pressure (voltage)<br />
voltage<br />
Battery voltage pushes electrons through the wire.<br />
The current of electrons lights the bulb.<br />
Electrical current (amperage)<br />
Review Copy Only<br />
The current of electrons moving through the bulb<br />
makes it glow. Current is measured in amperes (or<br />
amps). An amp is a number of electrical charges<br />
moving past a point in one second. In a wire, those<br />
charges are electrons. 1 amp is about 6 quintillion<br />
electrons passing a point in a wire in one second.<br />
That’s 6,000,000,000,000,000,000 electrons a second.<br />
Electrical power (watts)<br />
solarschoolhouse.org<br />
pressure<br />
The water’s weight pushes it through the pipe.<br />
The current of water turns the wheel.<br />
A battery is like the tank of water. One<br />
end of the battery has more electrons<br />
(negative charges). The other end has<br />
more protons (positive charges).<br />
Opposite charges attract. The<br />
electrons push on the negative end<br />
of the battery, trying to flow through<br />
the circuit to the positive end.<br />
Turn the switch, and this<br />
electrical force (voltage), pushes<br />
electrons through the wire.<br />
Project #16<br />
Simple <strong>Solar</strong> Cell Circuits<br />
Make electrical circuits with solar<br />
cells & electric motors. See pg. 131<br />
It takes power to turn the waterwheel, or light the lightbulb. In electrical circuits, power is<br />
measured in watts. Watts are units that show how fast energy is being used. Watts show<br />
how much energy is being used per second. (See pg. 96 for more about watts.)<br />
Chapter 6: <strong>Solar</strong> Electricity<br />
77
78<br />
Increasing Power<br />
What if we wanted to use more power, to<br />
spin the waterwheel faster, for example,<br />
or make the lightbulb burn brighter?<br />
One way to get more power is to push the<br />
water through the pipe with more pressure.<br />
To do this, we could use a taller tank.<br />
The higher the column of water, the<br />
more it weighs, and the more pressure<br />
it exerts on the bottom of the tank.<br />
This greater pressure pushes the water through<br />
the pipe with more force, and the more forceful<br />
current of water spins the wheel faster.<br />
This is similar to what happens in an electric<br />
circuit when we increase the voltage.<br />
Increasing voltage (electrical pressure)<br />
To increase the pressure that pushes<br />
electrons through the circuit, we can<br />
connect another battery in series.<br />
In series means we connect the batteries in a<br />
chain, attaching the positive end of one battery<br />
to the negative end of the other. This increases<br />
the voltage, but not the maximum amount of<br />
current each battery can supply. Remember:<br />
Series wiring adds voltage.<br />
Now we have one big battery with the combined<br />
voltage of both smaller batteries. For example:<br />
two 1.5 volt batteries connected in series<br />
(+ to -) produce 3 volts of electrical pressure.<br />
Review Copy Only<br />
1.5 volts + 1.5 volts = 3 volts<br />
The pressure pushing the current<br />
through the circuit is twice as great,<br />
and the bulb will be brighter.<br />
solarschoolhouse.org<br />
pressure<br />
A higher column of water pushes the<br />
current harder. The wheel spins faster.<br />
voltage<br />
The combined voltage pushes the<br />
current harder. The bulb is brighter.<br />
We have increased the power (watts) supplied to the lightbulb by adding the voltages<br />
of the two batteries. Sometimes, however, we need to increase the power, and keep<br />
the voltage the same. We can do this by connecting the batteries in parallel.<br />
Your <strong>Solar</strong> Home • Student Guidebook
Increasing amperage (electrical current)<br />
Many devices run at the same voltage, but different<br />
power levels. Most lights in your house use 120 volts,<br />
but some burn brighter than others. For example: a 100<br />
watt bulb is much brighter than a 25 watt bulb.<br />
The bigger bulb draws more current<br />
(or amps). More electrons per<br />
second are moving through it.<br />
A large bulb may quickly use all the<br />
current a single battery can provide.<br />
Batteries only provide current for limited<br />
amount of time before they “run out.” To<br />
draw more current, for a longer time, a<br />
second battery is connected in parallel.<br />
In parallel means the positive ends<br />
of the batteries are connected to each<br />
other, and the negative ends are<br />
too. Now the current has two paths<br />
to follow through the batteries.<br />
Once they’re connected in parallel,<br />
each battery only needs to supply half<br />
of the current drawn by the lightbulb.<br />
The Power Formula<br />
voltage<br />
Parallel adds amps; volts stay the same.<br />
25 watt bulb 100 watt bulb<br />
Parallel wiring<br />
The maximum current available from the batteries<br />
is added together. Voltage stays the same.<br />
The voltage stays the same as it is for one battery, but the maximum amount<br />
of current available from each battery is added together. Remember:<br />
Review Copy Only<br />
Units of power (watts) measure the amount of energy produced or used per second. We’ve seen<br />
how to can get more power in two ways: by increasing current (parallel wiring), and by increasing<br />
voltage (series wiring). This works because power is the product of voltage times amperage.<br />
solarschoolhouse.org<br />
Watts = volts x amps (or volts = watts ÷ amps, or amps = watts ÷ volts)<br />
This is the “power formula,” and it lets us get the same amount of power at different voltages.<br />
For example: We have 120 volt circuits in our homes. At 120 volts, it takes 0.5<br />
amps to power a 60 watt lightbulb. 120 volts x 0.5 amps = 60 watts.<br />
We have 12 volt circuits in our cars. Some headlights use 60 watts. At 12 volts, it<br />
takes 5 amps to power a 60 watt headlight. 12 volts x 5 amps = 60 watts.<br />
Chapter 6: <strong>Solar</strong> Electricity<br />
79
80<br />
Using <strong>Solar</strong> Electricity<br />
We can use photovoltaic cells as a voltage supply instead of batteries. The principles<br />
are the same, except PV cells only supply power when light shines on them.<br />
PV cells can be wired in series (+ to -) to increase voltage. This is important because<br />
each cell only supplies about 0.5 volt. Many electrical appliances need at least<br />
12 volts, and the devices we use in our homes need 120 volts. This is one reason<br />
why solar panels are made with several individual cells wired in series: to increase<br />
their voltage. Many solar panels supply 12 volts; some supply 24 volts or more.<br />
There are many ways to use solar electricity in our homes. Let’s start with the simplest.<br />
PV direct systems<br />
We can attach PV cells directly to the equipment we want to power.<br />
A common example is a solar powered calculator. The calculator has<br />
a built in solar panel. This is called a PV direct system. The solar<br />
panel is connected directly to the load. <strong>Solar</strong> powered calculators<br />
need very little electricity, and can even run on indoor light. Many PV<br />
direct systems need more power, and only work in direct sunlight.<br />
To have power when the sun isn’t shining, one or more batteries<br />
are added to the circuit. This is called a battery backup system.<br />
Review Copy Only<br />
Battery backup<br />
systems charge<br />
batteries during<br />
the day…<br />
solarschoolhouse.org<br />
…and the<br />
batteries power<br />
the load at night.<br />
Battery backup systems<br />
<strong>Solar</strong> powered<br />
calculator<br />
Battery backup systems store energy during<br />
the day to use at night. The solar panel is<br />
connected to a battery, and charges it during<br />
the day. At night the battery powers the load.<br />
Large battery backup systems use many photovoltaic modules and several batteries. They<br />
can power wilderness cabins, sailboats and even large homes. Battery backup systems need<br />
a device called a charge controller to make sure the batteries are charged correctly.<br />
Your <strong>Solar</strong> Home • Student Guidebook
Types of Electricity<br />
If we want to power our houses with solar electricity,<br />
there’s something else we need to know. The type of<br />
electricity we get from solar panels is not the same<br />
type of electricity supplied to our homes. These are<br />
two different kinds of electricity: direct current (or DC)<br />
electricity and alternating current (or AC) electricity.<br />
Direct Current<br />
All of the circuits we’ve looked at so far use direct<br />
current (DC) electricity. Direct current travels<br />
through a wire in only one direction: from negative to<br />
positive. Batteries and photovoltaic modules supply<br />
DC electricity. Most devices in your home run on<br />
a different type of electricity: alternating current.<br />
Alternating current<br />
Alternating current (AC) electricity is a back-and-forth movement of electrons. First<br />
the current flows in one direction, and then it changes direction, and flows the other way.<br />
The direction of current flow alternates back-and-forth 60 times a second. This is the<br />
type of electricity supplied to homes and businesses by electric utility companies.<br />
Review Copy Only<br />
AC electricity flows in one<br />
direction…<br />
solarschoolhouse.org<br />
Utility companies produce electricity with large<br />
generators. These generators run on different sources<br />
of energy including fossil fuels, hydropower and nuclear<br />
energy. The electricity is then sent through power lines<br />
as high voltage alternating current. This system of<br />
generators and power lines is called the utility grid.<br />
Before it enters our homes, the electricity passes through an<br />
electric meter, which measures how much electricity we use.<br />
DC electricity flows in only one<br />
direction: from negative to positive.<br />
…then “alternates” and flows<br />
the other way.<br />
A meter measures how<br />
much electricity we use.<br />
Chapter 6: <strong>Solar</strong> Electricity<br />
81
82<br />
Inverters<br />
To run the devices in our homes on the direct current<br />
supplied by solar panels, we need to turn it into alternating<br />
current. The device that does this is called an inverter.<br />
Inverters change the DC electricity from batteries<br />
and solar panels into the AC electricity used in<br />
our homes. They also change the voltage.<br />
<strong>Solar</strong> arrays are often wired to supply 12, 24 or 48 volts<br />
of direct current. The inverter turns this low voltage<br />
DC electricity into the 120 volt alternating current used<br />
by household lights, TVs and other appliances.<br />
Utility Intertie Systems<br />
Inverters change DC<br />
electricity into AC electricity.<br />
There’s another way to make electricity during the day, and have it available at night. It’s called<br />
a utility intertie system (also called a gridtie system). Gridtie systems don’t need batteries.<br />
They use a special inverter that can pump electricity from the solar panels into the utility grid.<br />
During the day the solar array pumps electricity through the inverter into the grid, and<br />
the electric meter turns backwards. At night, or when using more electricity than the solar<br />
array produces, electricity flows from the utility grid, and the meter turns forward.<br />
During the day electricity flows<br />
through the inverter into the grid.<br />
Net Metering<br />
Review Copy Only<br />
solarschoolhouse.org<br />
At night electricity flows from the<br />
utility grid into the house.<br />
Many utility companies give credit for the electricity supplied to the grid by<br />
the solar array. The value of the electricity pumped into the grid is subtracted<br />
from the cost of the electricity taken out. This is called net metering.<br />
Your <strong>Solar</strong> Home • Student Guidebook
<strong>Solar</strong> History<br />
In 1953, the Bell telephone system had a problem. Traditional dry cell batteries<br />
that worked fine in mild climates degraded too rapidly in the tropics and ceased<br />
to work when needed. The company<br />
asked its famous research arm, Bell<br />
Laboratories, to explore other freestanding<br />
sources of electricity. It assigned the<br />
task to Daryl Chapin. Chapin tested wind<br />
machines, thermoelectric generators,<br />
and steam engines. He also suggested<br />
that the investigation include solar cells,<br />
and his supervisor approved the idea.<br />
Chapin soon discovered that selenium<br />
solar cells, the only type on the market,<br />
produced too little power, a mere five watts<br />
per square meter, and converted less than<br />
0.5 percent of the incoming sunlight into<br />
electricity. Word of Chapin’s problems<br />
came to the attention of another Bell<br />
researcher, Gerald Pearson. This was not<br />
strange, since Pearson and Chapin had<br />
been friends for years. They had attended<br />
the same university, and Pearson had<br />
even spent time on Chapin’s tulip farm.<br />
At the time, Pearson was engaged in<br />
The first advertisement for the Bell<br />
pioneering semiconductor research with<br />
solar cell, from the August 1954<br />
Calvin Fuller. They took silicon solid-state issue of National Geographic.<br />
devices from their experimental stage<br />
to commercialization. Fuller, a chemist,<br />
had discovered how to control the introduction of the impurities necessary<br />
to transform silicon from a poor to a superior conductor of electricity.<br />
Review Copy Only<br />
solarschoolhouse.org<br />
P-N Junction<br />
Fuller provided Pearson with a piece of silicon containing a small amount of gallium.<br />
The introduction of gallium made it positively charged. Pearson then dipped the<br />
gallium-rich silicon into a hot lithium bath, according to Fuller’s instructions. Where<br />
the lithium penetrated, an area of poorly bound electrons was created, and it became<br />
negatively charged. A permanent electrical force developed where the positive and<br />
negative silicon meet. This is the P-N junction, the core of any semiconductor device.<br />
Chapter 6: <strong>Solar</strong> Electricity<br />
83
84<br />
The P-N junction is like a dry riverbed, which has an incline that provides the means for<br />
flow, should it fill with water. The P-N junction will push electrons in an orderly fashion,<br />
commonly called electrical current, when some type<br />
of energy hits those loosely bound electrons nearby<br />
with enough power to tear them away from their<br />
atomic glue. Shining lamplight onto the lithium gallium<br />
doped silicon provided the necessary energy, and<br />
Pearson’s ammeter recorded a significant electron<br />
flow. To Pearson’s surprise, he had made a solar<br />
cell superior to any other available at the time.<br />
Silicon Is the Answer<br />
Hearing of his colleague’s poor results with selenium,<br />
Pearson went directly to Chapin’s office to advise him<br />
not to waste another moment on selenium, and to start<br />
working on silicon. Chapin’s tests on the new material<br />
proved Pearson right. Exposing Pearson’s silicon solar cell to strong sunlight, Chapin found<br />
that it performed significantly better than the selenium—it was five times more efficient.<br />
Theoretical calculations brought even more encouraging news. An ideal silicon<br />
solar cell, Chapin figured, could use 23 percent of the incoming solar energy to<br />
produce electricity. But building a silicon solar cell that would convert around 6<br />
percent of sunlight into electricity would satisfy Chapin and rank as a viable energy<br />
source. His colleagues concurred and all his work focused on this goal.<br />
Try as he might, though, Chapin could not improve on what Pearson had accomplished.<br />
“The biggest problem,” Chapin reported, “appears to be making electrical contact to the<br />
silicon.” Not being able to solder the leads right to the cell forced Chapin to electroplate a<br />
portion of the negative and positive silicon layers to tap into the electricity generated<br />
by the cell. Unfortunately, no metal plate would adhere well, presenting a seemingly<br />
insurmountable obstacle to grabbing more of the electricity generated.<br />
Moving the Junction<br />
Chapin also had to cope with the inherent instability of the lithium-bathed silicon, which<br />
Review Copy Only<br />
solarschoolhouse.org<br />
Pearson, Chapin, & Fuller<br />
principal developers of the<br />
silicon solar cell<br />
moved deep into the cell at room temperatures. This caused the location of the P-N junction,<br />
the core of any photovoltaic device, to leave its original location at the surface, making it<br />
more difficult for light to penetrate the junction, where all photovoltaic activity occurs.<br />
Then, an inspired guess changed Chapin’s tack. He correctly hypothesized, “It<br />
appears necessary to make our P-N junction very next to the surface so that nearly<br />
all the photons are effective.” He turned to Calvin Fuller for advice on creating a<br />
solar cell that would permanently fix the P-N junction at the top of the cell.<br />
Your <strong>Solar</strong> Home • Student Guidebook
Coincidentally, Fuller had done just that two years earlier while trying to make a transistor.<br />
He then replicated his prior work to satisfy his colleague’s need. Instead of doping the cell<br />
with lithium, the chemist vaporized a small amount of phosphorous onto the otherwise<br />
positive silicon. The new concoction almost doubled previous performance records.<br />
<strong>Solar</strong> Cell vs. Atomic Battery<br />
Still, the lingering failure to obtain good contacts frustrated Chapin from reaching the<br />
6 percent efficiency goal he was aiming for. While Chapin’s work reached an impasse,<br />
arch rival RCA announced that its scientists had come up with a nuclear-powered<br />
silicon cell, dubbed the atomic battery. Its development coincided with the U.S Atoms<br />
for Peace program, which promoted the use of nuclear energy throughout the world.<br />
Instead of photons supplied by the sun, the atomic<br />
battery ran on those emitted from Strontium 90, one<br />
of the deadliest nuclear residues. To showcase the<br />
new invention, RCA decided to put on a dramatic<br />
presentation in New York City. David Sarnoff, founder<br />
and president of RCA, who had initially gained<br />
fame as the telegraph operator who tapped out the<br />
announcement to the world that the Titanic had sunk,<br />
hit the keys of an old-fashioned telegraph powered by<br />
the atomic battery to send the message, “Atoms for<br />
Peace.” The atomic battery, according to RCA, would one<br />
day power homes, cars, and locomotives with radioactive<br />
waste—Strontium 90—produced by nuclear reactors.<br />
What its public relations people failed to mention,<br />
however, was why the Venetian blinds had to be closed during Sarnoff’s demonstration.<br />
Years later, one of the lead scientists involved in the project came clean: If the silicon<br />
device had been exposed to the sun’s rays, solar energy would have overpowered the<br />
contribution of the Strontium 90. Had the nuclear element been turned off, the battery<br />
would have continued to work on the solar energy streaming through the window.<br />
Review Copy Only<br />
The director of RCA Laboratories did not mince words when he ordered his scientific<br />
staff to go along with the deception, telling them, “Who cares about solar energy?<br />
Look, what we have is this radioactive waste converter. That’s the big thing that’s<br />
going to catch the attention of the public, the press, the scientific community.”<br />
solarschoolhouse.org<br />
Calvin Fuller placing<br />
arsenic-laced silicon into a<br />
quartz-tube furnace.<br />
The director had gauged the media well. The New York Times, for example, called Sarnoff’s<br />
demonstration “prophetic.” It predicted that electricity from the atomic battery would allow<br />
“hearing aids and wrist watches [to] run continuously for the whole of a man’s useful life.”<br />
Chapter 6: <strong>Solar</strong> Electricity<br />
85
86<br />
Cells with a Future<br />
RCA’s success stirred management at Bell Laboratories to pressure the solar<br />
investigators to hurry up and produce something newsworthy as well. Luckily<br />
for them, Fuller had busied himself in his lab to discover an entirely new way to<br />
make more efficient solar cells. He began with silicon cut into long, narrow strips<br />
modeled after Chapin’s best performing cells. That’s where the similarity ended.<br />
Instead of adding gallium to the pure silicon and producing positive silicon, Fuller<br />
introduced a minute amount of arsenic to make the starting material negative. Then he<br />
placed the arsenicdoped<br />
silicon into a<br />
furnace to coat it with<br />
a layer of boron. The<br />
LIGHT<br />
controlled introduction<br />
of an ultra thin layer<br />
of boron gave the<br />
cell a P-N junction<br />
extremely close to<br />
the surface. The Bell<br />
team had no trouble<br />
in making good<br />
electrical contacts<br />
to the boron-arsenic<br />
silicon cells, resolving<br />
the main obstacle<br />
in extracting electricity<br />
when exposing<br />
them to sunlight.<br />
ARSENIC - DOPED<br />
SILICON<br />
METAL<br />
CONTACTS<br />
BORON - DOPED<br />
LAYER<br />
Cross-section diagram of the first Bell power<br />
cell doped with boron and arsenic.<br />
All cells built according to Fuller’s new method did much better than previously.<br />
One, however, outperformed the rest, reaching the efficiency goal Chapin had set.<br />
The best-performing cell seemed to have the ideal width for peak performance.<br />
Bell scientists built cells to the same dimensions as that best performing cell.<br />
Review Copy Only<br />
- p-n<br />
BOUNDARY<br />
+ +<br />
Chapin then confidently referred to these as “photocells intended to be primary power<br />
sources.” Assured of success, the Bell solar team began putting together modules to<br />
publicly demonstrate this major breakthrough. On April 25, 1954, proud Bell executives<br />
held a press conference where they impressed the media with Bell solar cells<br />
powering a radio transmitter, broadcasting voice and music. One journalist thought it<br />
important for the public to know that “linked together electrically, the Bell solar cells<br />
deliver power from the sun at the rate of fifty watts per square yard while the atomic<br />
cell announced recently by the RCA Corporation merely delivers a millionth of a watt”<br />
solarschoolhouse.org<br />
Your <strong>Solar</strong> Home • Student Guidebook
over the same area. U.S. News & World Report believed one day such silicon<br />
strips “may provide more power than all the world’s coal, oil, and uranium.”<br />
Harnessing the Sun<br />
The New York Times probably best summed up what Chapin, Fuller, and<br />
Pearson had accomplished. On page one of its April 26, 1954 issue, it stated<br />
that the construction of the first PV module to generate useful amounts<br />
of electricity marks “the beginning of a new era, leading eventually to the<br />
realization of one of mankind’s most cherished dreams—the harnessing<br />
of the almost limitless energy of the sun for the uses of civilization.”<br />
Just think: fifty years ago the world had less than a watt of solar cells<br />
capable of running electrical equipment. Today, fifty years later, a<br />
billion watts of solar-electric modules are in use around the world.<br />
They run satellites; ensure the safe passage of ships and trains; bring water,<br />
electricity, and telephone service to many who had done without; and supply<br />
clean energy to those already connected to the grid. We hope that the next<br />
fifty years will see solar cells on rooftops throughout the world, fulfilling the<br />
expectation triggered by the pioneering work of Chapin, Fuller, and Pearson.<br />
Review Copy Only<br />
solarschoolhouse.org<br />
John Perlin<br />
Chapter 6: <strong>Solar</strong> Electricity<br />
87
In the Real World: <strong>Solar</strong> Electricity<br />
<strong>Solar</strong> in the Neighborhood<br />
Built in 2001 by Ed<br />
Hancock, this solar<br />
home looks like any<br />
other family house in<br />
the hills of Northern<br />
Virginia. However, this<br />
home is a designated<br />
“Zero Net-Energy<br />
Home.”<br />
Photovoltaic panels are<br />
installed on the roofs of<br />
the home and its free<br />
standing garage; the<br />
total system is 6 kW.<br />
The photovoltaic arrays<br />
harvest electricity and<br />
two inverters convert it<br />
to AC electricity for immediate home use, battery<br />
storage for future use, and transfer of surplus<br />
into the grid. Over a full year, a zero net-energy<br />
house produces at least as much electricity as<br />
it consumes. Nights balance out against days,<br />
sunny summer months balance out against dark<br />
winter months.<br />
The house features a sophisticated data-collection<br />
system which the National Renewable Energy<br />
Laboratory has used to measure overall energy<br />
performance. The NREL studies that data to<br />
develop new technologies which can make zeroenergy<br />
homes more commercially viable.<br />
Review Copy Only<br />
For more information on zero energy homes visit www.nrel.gov.<br />
solarschoolhouse.org<br />
A pair of inverters<br />
convert the solar<br />
electricity (DC) to AC<br />
current for use by the<br />
Hancock family.<br />
88 Your <strong>Solar</strong> Home • Student Guidebook<br />
Homes with solar electric roofs are becoming<br />
more common throughout the United States.<br />
In this California neighborhood, solar roofs are<br />
offered as a standard feature.<br />
Photo courtesy of DOE/NREL, Credit–Ed Hancock Photo courtesy of DOE/NREL, Credit–Ed Hancock
Review Questions<br />
1. The device that changes light into electricity is called a<br />
________________________________ cell.<br />
2. Most solar modules are made of<br />
A. Silicon<br />
B. The most common element in the Earth’s crust<br />
C. A semiconductor material<br />
D. All of the above<br />
3. Light acts like waves, and like<br />
A. Electrons<br />
B. Protons<br />
C. Particles<br />
4. Individual packets of light energy are called ______________________.<br />
5. The center of an atom is called the ______________________.<br />
6. The center of an atom is surrounded by negatively-charged particles called<br />
_______________________.<br />
7. A group of photovoltaic modules connected together is called a:<br />
A. <strong>Solar</strong> array<br />
B. <strong>Solar</strong> system<br />
C. <strong>Solar</strong> assembly<br />
D. All of the above<br />
Review Copy Only<br />
solarschoolhouse.org<br />
8. The force, or pressure, pushing electrical charges through a wire is called:<br />
A. Current<br />
B. Voltage<br />
C. Wattage<br />
9. Electrons flowing through a wire are called:<br />
A. Current<br />
B. Volts<br />
C. Watts<br />
Answers available at www.solarschoolhouse.org Chapter 6: <strong>Solar</strong> Electricity<br />
89
90<br />
9. Electrical current is measured in _______________________.<br />
10. To increase voltage connect batteries:<br />
A. In series (+ to -, + to -)<br />
B. In parallel (+ to +, - to -)<br />
C. With the power formula<br />
11. The units of power that measure how fast electricity is<br />
generated or used:<br />
A. Current<br />
B. Volts<br />
C. Watts<br />
12. Watts equals ________________ times ______________________.<br />
13. A 6 volt bicycle light draws half of an amp.<br />
How many watts is it using?<br />
Review Copy Only<br />
solarschoolhouse.org<br />
Your <strong>Solar</strong> Home • Student Guidebook<br />
Answers available at www.solarschoolhouse.org
7<br />
Review Copy Only<br />
solarschoolhouse.org<br />
System Sizing
92<br />
How Much Energy Do You Need?<br />
<strong>Solar</strong> energy systems can heat and cool buildings, cook food, heat water and make<br />
electricity. How big do these systems need to be? That depends mainly on 3 things:<br />
1. Where you live<br />
2. The size & lifestyle of your family<br />
3. How efficiently you use energy<br />
The size and location of our family makes a big difference in the size of our systems. A<br />
house in the arctic needs more south-facing windows than the same house in the desert.<br />
A larger family needs a bigger solar hot water system. We can’t do too much about family<br />
size and location, but there are many things we can do to use energy more efficiently.<br />
Using Energy Efficiently<br />
Using energy efficiently means doing the same job with less energy. Super-efficient<br />
washing machines, for example, use much less electricity and water. By using energy<br />
efficiently we can meet our needs with smaller, less expensive solar energy systems.<br />
Over half of home energy is used to heat and cool buildings,<br />
and to heat water (U.S. Department of Energy). In previous<br />
chapters we covered many ways to do these things with<br />
sunlight. Now we’ll see how to do them more efficiently.<br />
Then we’ll focus on energy efficiency and solar electricity.<br />
After discussing more efficient ways to use electricity,<br />
we’ll see how to measure how much electricity we<br />
consume. This information is used to find out how<br />
many solar modules we need to power our home.<br />
Heating, Cooling and Hot Water<br />
Space<br />
Heating &<br />
Cooling<br />
44%<br />
US Dept. of Energy<br />
Fridge<br />
9%<br />
Lights,<br />
Cooking<br />
& Other<br />
Appliances<br />
33%<br />
Water<br />
Heating<br />
14%<br />
Average U.S.A. home energy use<br />
Passive solar homes sometimes use fossil fuel-powered heaters and air conditioners on<br />
very hot or cold days. Heaters can be used less if heating vents are closed in unused rooms,<br />
curtains are drawn after sunset, and thermostats set to 55°F at bedtime. Air conditioners<br />
can be used less if curtains are closed on summer days, and thermostats set to 78<br />
degrees and above.These steps cost nothing, and can save large amounts of energy.<br />
Review Copy Only<br />
solarschoolhouse.org<br />
You can conserve the energy used to heat water too. The easiest<br />
way is to use less hot water with things like low flow showerheads.<br />
Washing clothes with cold water helps too. The U.S. Department<br />
of Energy estimates that about 80% to 85% of the energy<br />
used for washing clothes goes to heating the water.<br />
Fixing leaky hot water faucets and installing waterefficient<br />
faucet heads also saves energy inexpensively.<br />
So does insulating water heaters and hot water pipes.<br />
Your <strong>Solar</strong> Home • Student Guidebook<br />
Low flow showerheads<br />
save energy & water.
Lighting, Cooking and Appliances<br />
The rest of household energy goes to lighting, cooking and appliances.<br />
Lighting is one of the easiest areas to save energy.<br />
Standard (incandescent) lightbulbs are very wasteful. Only about 10%<br />
of the energy they use is given out as light, according to the California<br />
Energy Commission. The other 90% of the energy just heats up the<br />
lightbulb. Fortunately, there are other kinds of lightbulbs we can use.<br />
Compact Fluorescents<br />
Compact Fluorescent Lamps, or CFL’s, use much<br />
less electricity, and give the same amount of light.<br />
Over 80% of the energy they use is given out as light.<br />
CFL’s cost more, but last up to 10 times longer<br />
than regular bulbs. They are also 3 to 4 times<br />
more efficient at producing light. A 15 watt CFL<br />
can produce the same amount of light as a 60 watt<br />
incandescent bulb. They save money in the long run.<br />
Which appliances should run on solar power?<br />
Compact Fluorescent Lamps<br />
Most modern homes have a variety of household appliances like toasters,<br />
TV’s and microwave ovens. All of these appliances can be powered by solar<br />
electricity, but some of them should run on other fuels. In general, large appliances<br />
used for heating and cooking should not run on solar electricity.<br />
Clothes dryers and electric stoves for<br />
example, would need very large and<br />
expensive solar arrays. It’s better to use<br />
a clothesline when possible, and have a<br />
gas-powered clothes dryer for backup.<br />
Review Copy Only<br />
solarschoolhouse.org<br />
If it’s not possible to use a solar oven,<br />
a gas stove is better than an electric<br />
stove running on solar panels.<br />
When using solar electricity, It’s best to<br />
use the most energy efficient appliances,<br />
ones that can be powered by the smallest<br />
possible photovoltaic system. This is<br />
especially true with refrigerators.<br />
Electric stoves and clothes dryers<br />
should not run on solar power.<br />
Chapter 7: System Sizing<br />
93
94<br />
Refrigerators<br />
Refrigerators are some of the biggest energy hogs in the home. They often need<br />
more electricity than any other appliance, except air conditioners and electric<br />
water heaters. Newer models are much more efficient. In fact, many of today’s<br />
refrigerators use a fraction of the electricity used by a 15 year old model.<br />
This is important because many refrigerators last over 20 years. When using solar electricity,<br />
It’s usually cheaper in the long run to buy a new, energy efficient fridge. The cost of a new fridge<br />
is much less than the cost of the extra PV modules needed to power an old, inefficient model.<br />
This old fridge needs<br />
the electricity from<br />
14 solar modules.<br />
Review Copy Only<br />
Both of these refrigerators hold the same amount<br />
of food. The new one on the right is bigger<br />
because it has much thicker insulation. It’s one<br />
of the most energy efficient models made.<br />
solarschoolhouse.org<br />
The old fridge on the left uses over four times<br />
as much electricity as the super efficient model.<br />
The cost of the new fridge is much less<br />
than the cost of the extra solar modules<br />
needed to power the old fridge.<br />
Your <strong>Solar</strong> Home • Student Guidebook<br />
Which fridge uses<br />
less electricity?<br />
This super efficient<br />
fridge needs only three<br />
solar modules.
Energy Guide Label<br />
When shopping for an energy efficient fridge, or other<br />
appliance, imagine two price tags. The first is the<br />
purchase price. The second price tag is the cost of<br />
running the appliance over its lifetime. You pay on that<br />
second price tag every month with your utility bill.<br />
If you use solar electricity, the second price tag is the cost of<br />
the photovoltaic equipment needed to power the appliance.<br />
To get an idea of how much energy a new appliance will use,<br />
look at the Energy Guide Label posted on it. The Energy<br />
Guide Label shows about how much electricity an appliance<br />
will use per year, and compares it to similar appliances.<br />
Phantom Loads<br />
Phantom loads are appliances that use<br />
electricity even when switched “off”.” Things<br />
like TV’s, VCR’s, garage door openers, and<br />
any device that can be turned on by a remote<br />
control are phantom loads. They’re always<br />
“listening” to receive the signal from the remote.<br />
Devices with an electric clock, like a<br />
microwave oven or a VCR, also use a<br />
small amount of electricity all the time.<br />
Vampires<br />
Some small appliances, like telephone answering machines,<br />
electric toothbrushes and cordless phones, have little<br />
transformer cubes at the end of their power cords.<br />
These are known in the electric industry as<br />
vampires because they “suck” electricity even<br />
when the device they’re powering is “off.”<br />
They’re also very inefficient. For every<br />
dime of energy they use, 6 to 8 cents is<br />
wasted as heat. That’s why they’re always<br />
warm. If possible “vampires” should be<br />
unplugged, or attached to power strips<br />
and switched off, when not in use.<br />
VCR’s and other phantom loads use<br />
electricity even when turned “off.”<br />
Phantom Loads may only use a few extra watts, but this energy adds up, and can require<br />
extra PV modules. By plugging them into switched outlets or power strips, phantom<br />
loads can be completely turned off when not in use.<br />
Review Copy Only<br />
solarschoolhouse.org<br />
Vampires suck<br />
energy.<br />
Connect phantom loads &<br />
vampires to powerstrips so<br />
they can be turned “off.”<br />
Chapter 7: System Sizing<br />
95
96<br />
Energy Audits<br />
Now that we’ve seen several ways to conserve electricity, let’s find out how much we<br />
actually use in our homes. One way to do this is to perform an electric energy audit.<br />
An energy audit measures how much energy is used in a building, paying special<br />
attention to how energy is wasted. There are different kinds of energy audits. Some look<br />
at all forms of energy use. Others focus on a single type of energy, like electricity.<br />
An electric energy audit is a very important first step before installing a photovoltaic<br />
system, because it tells us how big a system we’ll need. We can identify which loads use<br />
the most electricity, and which can be replaced with more efficient equipment. Before<br />
we begin an electric energy audit, we’ll have to know how electricity is measured.<br />
Measuring Electricity Use<br />
There are two ways to measure electricity use. We can measure how fast a device uses<br />
electricity, and we can measure how much electricity it uses over a period of time.<br />
So far we’ve been measuring how fast a device uses electricity.<br />
A 100 watt lightbulb, for example, uses electricity twice as fast as a<br />
50 watt bulb. It uses twice as much energy per second as a 50 watt bulb.<br />
Rate of Energy Use<br />
This can also be called the rate of energy use.<br />
The higher an electric device’s rate of energy<br />
use, the more electricity it uses per second.<br />
Remember that watts is a measurement of power.<br />
Power is just another way of saying “rate of energy<br />
use.” A watt is a measurement of how much<br />
electrical energy is being used per second.<br />
Review Copy Only<br />
Watts measure the speed at which electricity is converted<br />
into other forms of energy, like light and heat.<br />
A 100 watt bulb uses electricity<br />
twice as fast as a 50 watt bulb.<br />
“Watts” is like “miles per hour.” Both show how fast something is happening. Both measure<br />
rate or speed. But remember: there’s no such thing as “watts per hour.” Watts is already a<br />
measurement of speed. Saying “watts per hour” is like saying “miles per hour per hour.”<br />
Watts and Kilowatts<br />
solarschoolhouse.org<br />
Different loads consume energy at different speeds. A small TV, for example, may use 100 watts.<br />
An electric heater can use over 1,000 watts. A thousand watts is also called a kilowatt, (or KW)<br />
Your <strong>Solar</strong> Home • Student Guidebook<br />
1,000 watts = 1 kilowatt
The more watts a device uses, the more electrical energy it consumes for every second<br />
it’s on. This is often called the wattage of the device, whether it’s 1 watt or 10 kilowatts.<br />
Total energy used<br />
Now we’ll measure the total amount of energy used by an appliance over a period of time,<br />
like an hour, a day, or a month, or a year. To do this we need to know the wattage of the<br />
appliance, and how many total hours we’ve used it. Multiply these two numbers, and you<br />
have the total energy consumed by the appliance. The equation for energy used is:<br />
Energy Used = Power x Time<br />
It’s often abbreviated like this: E = P x T. Remember: power (watts) is the rate of energy use.<br />
Watt-Hours and Kilowatt Hours<br />
The units of the equation are:<br />
Energy Used (in watt-hours) = Power (in watts) x Time (in hours)<br />
For example, if an electric heater uses 1,000 watts (1 kilowatt) of electricity, and we<br />
have it on for 1 hour, we’ll use 1,000 watt-hours (1 kilowatt-hour) of electricity.<br />
Review Copy Only<br />
This heater uses electricity<br />
at a rate of 1,000 Watts…<br />
1,000 watts x 1 hour = 1,000 watt-hours<br />
X =<br />
solarschoolhouse.org<br />
if it uses energy at that<br />
rate for 1 hour…<br />
…it will have used 1,000<br />
WATT-HOURS of electricity.<br />
The term “watt-hours” may seem confusing, since we just said there’s no such thing as “watts<br />
per hour.” Watt-hours are different. Watt-hours (or WH) are an amount of energy, not a speed,<br />
or rate of energy use. Watt-hours are like miles traveled, and watts are like miles per hour.<br />
A kilowatt-hour is equal to 1,000 watt-hours. It’s often abbreviated as: KWH or kWh.<br />
1,000 watts-hours = 1 kilowatt-hour (KWH)<br />
Chapter 7: System Sizing<br />
97
98<br />
Auditing Loads<br />
Now that we know how to measure electricity, we can begin the electric energy<br />
audit. Start by figuring out how much electricity is used by every device in the<br />
house each week. Then divide that figure by 7 to get a daily total.<br />
This is the first step in finding out how many solar<br />
panels we’ll need to supply our electricity.<br />
WAFFLEWIZARD INC.<br />
Toastown, Mo. U.S.A.<br />
WAFFLEWIZARD 120v 1200W 60Hz. INC.<br />
First find the wattage of each load. The wattage is usually<br />
printed somewhere on the device. Often it’s on the<br />
Toastown, MODEL Mo. 345 U.S.A.<br />
HOUSEHOLD 120v 1200W 60Hz. TYPE<br />
MODEL 345<br />
back or bottom of an appliance, or on its “nameplate.”<br />
Made HOUSEHOLD in USA TYPE<br />
LIsted<br />
Sometimes only the amperage and voltage<br />
are shown. We can use the power formula<br />
Oven Made Broiler in USA422B<br />
LIsted<br />
Oven Broiler 422B<br />
to find the wattage of the appliance.<br />
Look for the wattage on the<br />
watts = volts x amps<br />
Model No.<br />
appliance nameplate.<br />
CTZ-1651B<br />
Multiplying the voltage times the amperage<br />
will give us the wattage of the appliance.<br />
Serial Model No. MR1149872 CTZ-1651B<br />
For example, the nameplate at the right is from<br />
an appliance that uses 1 amp at 120 volts.<br />
Power Serial No. Rating 120V MR1149872 60HZ<br />
Manufactured<br />
Power Rating 120V MAY 60HZ 1998<br />
Max Amps1.0<br />
Max Amps1.0<br />
120 volts is typical for a household circuit.<br />
Manufactured MAY 1998<br />
120 volts X 1 amp = 120 watts<br />
Here are some sample wattages:<br />
CD player 35<br />
Clock radio 10<br />
Coffee maker 800-1200<br />
POWER USED BY APPLIANCES (IN WATTS)<br />
Review Copy Only<br />
Clothes washer 350-500<br />
Clothes dryer 1800-5000<br />
Computer<br />
PC—awake / asleep 120 / 30<br />
Monitor: 19” LCD—awake / asleep 55 / 1<br />
Laptop 50<br />
Dishwasher 1200-2400<br />
Electric blanket 60-100<br />
Fan-Ceiling 50-175<br />
Hair dryer 1200-1875<br />
Heater (portable) 750-1500<br />
Clothes Iron 1000-1800<br />
solarschoolhouse.org<br />
Your <strong>Solar</strong> Home • Student Guidebook<br />
Sometimes all that’s listed is<br />
voltage and amperage.<br />
Lights:<br />
Incandescent 100<br />
CFL (100 watt equivalent) 30<br />
Microwave oven 750-1100<br />
Refrigerator (hours per day)<br />
Old 16 cubic foot (13 hours) 475<br />
New 16 cu. ft. (7 hrs) 145<br />
TV (color) 19” Tube-type 110<br />
TV (color) 19” LCD 55<br />
Toaster 800-1400<br />
VCR/DVD player 20-40<br />
Vacuum cleaner 1000-1440<br />
Washer (standard, .5 hr per load) 600<br />
Washer (super-efficient, .5 hr per load) 300<br />
Water heater (40 gallon) 4500-5500
Hours of Use<br />
Once you know how quickly each device consumes electricity (its wattage) you need to find<br />
out how many hours each day you use it. You may have to estimate, or give it your best<br />
guess. Some appliances like refrigerators only run part of the time. Others, like washing<br />
machines, are not used everyday. You can list this information in a chart like the one below.<br />
Electric Device Watts Hours<br />
X used per X<br />
day<br />
Days<br />
used per<br />
week<br />
Fridge 145 7 hours 7 days ÷ ÷÷÷<br />
÷ 7<br />
There are other ways to find out how much electricity you use on average each day. The easiest<br />
is with your electric bill. Utility companies charge you for electricity by the kilowatt-hour (or KWH).<br />
Every month the utility company sends a bill charging a certain amount for each kilowatt-hour used.<br />
The bill below shows average daily KWH consumption this month, last month and this<br />
month last year. It also has a graph that shows monthly KWH usage over the last year.<br />
Average<br />
watt-hours<br />
per day<br />
X X<br />
7 = 1,015 WH<br />
Washing Machine 500 X 0.5 hours X 4 days 7 = 143 WH<br />
Fluorescent light 30 X 3 hours X 7 days 7 = 90 WH<br />
CD player 35 X 3 hours X 5 days 7 = 75 WH<br />
Electric Bills<br />
Meter<br />
Number<br />
456 987<br />
Total average watt-hours used per day =<br />
Electric Bill<br />
Your Meter Reading Results…<br />
From<br />
Service Dates<br />
To<br />
Number<br />
of Days<br />
Prior<br />
Reading<br />
Current<br />
Reading<br />
Multiplier Consumption<br />
KWH USED<br />
05/09/2002 06/10/2002 33 1,973 2,176 10 2,030<br />
Customer Charges 3.60<br />
Consumption (2,030 KWH@ 0.0784 /KWH) 159.15<br />
Energy Cost Adjustment (2,030 KWH@ .0136/KWH 27.61<br />
State Mandated Charges: Public Benefit Charge ( 190.53 @ 0.0285) 5.43<br />
California Energy Surcharge (2,030 KHW @.0002/KWH) 0.41<br />
Wind City Utility User Fee (190.53 @ .03994) 7.61<br />
Review Copy Only<br />
<strong>YOUR</strong> UTILITY COMPANY<br />
PO BOX 123, Photon, CA 95000<br />
solarschoolhouse.org<br />
Current<br />
Month<br />
Prior Month<br />
This Year<br />
Same Month<br />
Last Year<br />
Your Consumption History<br />
Days of<br />
Service Consumption<br />
(KWH)<br />
Average Daily<br />
Usage<br />
33 2,030 61.52<br />
29 1,280 44.14<br />
33 2,230 67.58<br />
Graph of Your Monthly Consumption History<br />
The utility company knows how many KWH you’ve used by looking at (or “reading”)<br />
your electric meter. Electric meters give us a third way to measure energy use.<br />
KWH<br />
2,500<br />
2,000<br />
1,500<br />
1,000<br />
500<br />
0<br />
JUN AUG OCT DEC FEB APR JUN<br />
JUL SEP NOV JAN MAR MAY<br />
=<br />
Total Current Charges 203.81<br />
3,170 WH<br />
Chapter 7: System Sizing<br />
99
100<br />
Electric meters<br />
Your electric meter is on the outside of the house, where the power lines are attached<br />
to the building. It measures energy use in two ways. It shows how fast you’re<br />
using energy right now, and it shows how much total energy you’ve used.<br />
You can read your meter at the same time each day to see how much electricity<br />
you’ve used. If you shut off all loads, it will tell you if there are any phantom loads.<br />
If you have only one load on, the meter will show how many watts that load uses.<br />
The meter has two types of dials on the front:<br />
1. A set of small dials facing you<br />
2. One large dial facing up.<br />
As electricity flows through the meter into the building, it causes these dials to turn.<br />
The top set of small dials shows how many total kilowatt-hours have been used since<br />
the meter was installed. They turn so slowly it’s hard to tell they’re moving.<br />
The large dial in the middle measures a smaller amount of electricity, and moves more quickly.<br />
The speed at which it turns is an indication of how fast your household is using electricity. The<br />
faster it turns, the faster you’re using electricity. The faster it turns, the more watts you’re using.<br />
Electric meters show HOW MUCH<br />
electricity you have used over time…<br />
Review Copy Only<br />
…and HOW FAST you’re using<br />
electricity right now!<br />
solarschoolhouse.org<br />
The top set of dials shows how much<br />
electricity you’ve used over time.<br />
The speed of the big dial shows how<br />
fast you’re using electricity right now.<br />
The small dials show place values of the number of kilowatt-hours. The dial<br />
farthest to the right shows the ones; the next position to the left is the tens, then<br />
the hundreds, thousands, and finally ten-thousands of kilowatt-hours.<br />
ten-thousands<br />
thousands<br />
Your <strong>Solar</strong> Home • Student Guidebook<br />
hundreds<br />
tens<br />
ones
Electric meters and speedometers<br />
Note: Some utility companies are switching to digital meters; your meter<br />
may be different than the meter shown in the pictures below.<br />
An electric meter is a little like a speedometer in a car. Both show speed (rate) and totals.<br />
The speedometer needle shows how fast the car is moving in miles per hour. The big<br />
dial in the electric meter shows how fast electricity is being used, in energy per second<br />
(watts). The faster the dial spins, the more energy per second is being used.<br />
The odometer in a car shows how far you’ve traveled, in miles. The small dials of<br />
an electric meter show how much electricity you’ve used, in kilowatt-hours.<br />
Electric meter (top view)<br />
The big dial shows how fast you’re using<br />
electricity, in energy per second (watts).<br />
The small dials show how many<br />
total kilowatt-hours you’ve used.<br />
Project #14: Read Your Electric Meter<br />
Review Copy Only<br />
solarschoolhouse.org<br />
It’s no mystery! Your electric meter can be<br />
easily read if you know some basic principles.<br />
Read your meter at<br />
the same time each<br />
day to see how much<br />
electricity you’ve used.<br />
See pg. 129<br />
Speedometer<br />
A speedometer needle shows how fast<br />
you’re going, in miles per hour.<br />
The odometer shows how many<br />
total miles you’ve traveled.<br />
Chapter 7: System Sizing<br />
101
102<br />
Array sizing<br />
Now that we know how many kilowatt-hours per day we use, we can estimate how many<br />
solar panels will produce that much electricity. To do this we need to know two things:<br />
1. How much power each solar panel produces in “peak sun” conditions.<br />
2. How many hours of “peak sun’ we have at our home daily.<br />
Peak Sun<br />
Peak sun (or “full sun equivalent”) is the brightest the sun ever gets at any one instant, anywhere<br />
on Earth. It’s about equal to the sunlight falling on the equator at noon on a clear day. Peak<br />
sun is equal to 1 kilowatt per square meter. Although equal to kilowatts, this is NOT electricity.<br />
This power comes as radiant energy. We can think of peak sun as “maximum solar power.”<br />
If a solar panel could turn all of that radiant energy into electricity, a 1 square meter-sized<br />
panel would produce 1 kW in peak sun. But solar panels turn about 5% to 20% of the sun’s<br />
power into electricity. The most a square meter-sized panel will produce is about 200 watts.<br />
Peak Sun = “maximum solar power”<br />
Module manufacturers use this amount of light to test<br />
their modules. They rate their modules by how much<br />
electricity they produce under peak sun conditions.<br />
Unless we live on the equator, we‘ll probably never get<br />
full peak sun conditions. The amount of sunlight at our<br />
house changes all the time too, depending on the time of<br />
day, the time of year, and how cloudy or clear the sky is.<br />
Peak Sun Hours<br />
Peak sun only falls on the equator for a<br />
moment at noon, then the energy decreases<br />
as the sun moves across the sky.<br />
Review Copy Only<br />
If that level of sunlight could last for a<br />
whole hour, a square meter of the surface<br />
would receive 1 kilowatt-hour of energy.<br />
solarschoolhouse.org<br />
one meter<br />
Peak sun conditions provide radiant<br />
energy at a rate of 1 KW per square meter.<br />
This amount of solar energy is called “peak sun hours.” Peak sun hours are just another way<br />
of saying “kilowatt-hours of radiant energy per square meter.” Although we seldom get full peak<br />
sun conditions at our house, we can still get the equivalent of several peak sun hours of energy<br />
during a day. 12 hours of less than maximum solar power may add up to 5 or 6 kilowatt-hours of<br />
radiant energy. 12 hours of less than maximum solar power may equal 5 or 6 peak sun hours.<br />
We need to find out how many hours of peak sun we get on average each day.<br />
This is the total number of peak sun hours per year divided by 365 days.<br />
Your <strong>Solar</strong> Home • Student Guidebook
Peak Sun Hours per Day<br />
The United States Government has measured the amount of solar energy<br />
reaching the Earth for many years. The National Renewable Energy Laboratory’s<br />
(NREL) Renewable Resource Data Center provides maps showing the<br />
average number of peak sun hours a day at various places in the U.S.<br />
Yearly Average<br />
5<br />
4<br />
3<br />
PEAK SUN HOURS PER DAY<br />
6<br />
5<br />
4.5<br />
5<br />
4<br />
4.7 4.7<br />
(Courtesy D.O.E.)<br />
This map gives a very rough idea of how many hours of full sun equivalent per<br />
day reach areas of the United States. The amount of solar energy you receive<br />
may be very different, but we can make a rough guess. Find the line closest<br />
to your house, and record the number of average peak sun hours.<br />
Module Output<br />
Review Copy Only<br />
Now we need to choose a solar panel. The manufacturers tell us<br />
how much electricity each panel produces in peak sun conditions.<br />
The module at the right is rated to produce 120 watts in peak sun.<br />
solarschoolhouse.org<br />
The actual amount of energy you get from your system will be<br />
much less for many reasons. Inverters, batteries and wires lose<br />
energy. Modules aren’t as efficient when they get hot. Dust on the<br />
panels can block sunlight. The actual AC output of photovoltaic<br />
modules may be closer to 70% of the manufacturers’ rating.<br />
Now we’re ready to enter our data in a chart,<br />
and calculate the system size.<br />
4<br />
4.5<br />
This module produces<br />
120 watts in peak sun.<br />
Chapter 7: System Sizing<br />
103
104<br />
System Sizing Worksheet<br />
Your energy audit will show you how many average watt-hours per day you use (line 1).<br />
Divide line 1 by a .7 to make up for inefficiencies in the system (line 2). This gives the total<br />
number of watt-hours your solar panels need to produce each day on average (line 3).<br />
On line 4 enter the average number of peak sun hours in your region from the chart on the<br />
last page. Divide line 3 by line 4. This gives the total number of watts your solar array needs to<br />
provide at peak power (line 5). Divide by the number of watts each module produces, and you<br />
have the total number of modules you need (line 7). Round up to the nearest whole number.<br />
Sample worksheet using data from energy audit on page 91<br />
1. Average Watt-hours used per day 3,170<br />
2. 70% Efficiency correction factor .7<br />
3. Total daily watt-hours 4529<br />
4. Average peak sun hours per day 5<br />
5. <strong>Solar</strong> array peak watts 906<br />
6. Module wattage rating 120<br />
7. Number of modules in array 8<br />
Sizing a solar electric system is actually more complicated than this. There are many other things<br />
to consider, like how many volts your system is, and if you use a gridtie or battery backup system.<br />
Now you know the basic principles for powering your home with the sun. Choose a few loads and do<br />
the calculations on pg. 99. Then fill in the system sizing worksheet below. (Use 120 watt modules).<br />
1. Average Watt-hours used per day<br />
Review Copy Only<br />
2. 70% Efficiency correction factor .7<br />
solarschoolhouse.org<br />
3. Total daily watt-hours<br />
4. Average peak sun hours per day 5<br />
5. <strong>Solar</strong> array peak watts<br />
6. Module wattage rating 120<br />
7. Number of modules in array<br />
Your <strong>Solar</strong> Home • Student Guidebook<br />
÷<br />
=<br />
÷<br />
=<br />
÷<br />
=<br />
÷<br />
=<br />
÷<br />
=<br />
÷<br />
=
In the Real World: System Sizing<br />
Not Too Big, Not Too Small<br />
Large factories require very large solar systems<br />
but a single family home may only need a small<br />
PV array. Determining the size of a solar system<br />
depends on how, where and who will be using it.<br />
The end use and user of each system, along its<br />
location dictates the optimum size.<br />
These photos show a variety of solar systems<br />
SFPUC of<br />
demonstrating how the size and complexity of<br />
each system relates to its use. Courtesy<br />
The solar module on this camel helps cool<br />
essential medication in sun drenched Sahara,<br />
providing a much needed service.<br />
Review Copy Only<br />
solarschoolhouse.org<br />
A single PV panel can supply enough electricity<br />
for uses such as lighting, powering a computer or<br />
satellite phone. Because they are portable, small<br />
PV systems have the potential to bring electricity<br />
to people who live far from the electrical grid.<br />
Large venues like Moscone Convention Center<br />
in San Francisco (above) and the 400-unit Villa<br />
Nueva Apartment complex in San Ysidro (below)<br />
require complex systems with many solar panels.<br />
In drought stricken Mali, Africa, residents use<br />
a modest solar array to power the pump that<br />
supplies clean water to their village.<br />
Chapter 7: System Sizing<br />
105
Review Questions<br />
1. Using energy efficiently means doing the same job with<br />
______________________________________.<br />
2. Compared to regular lightbulbs, compact fluorescent lights:<br />
A. Are 3 to 4 times more efficient at producing light<br />
B. Last up to 10 times longer<br />
C. Cost more to buy, but save money in the long run<br />
D. All of the above<br />
3. True or False: Large appliances used for heating and cooking should not run<br />
on solar electricity.<br />
4. Which of the following is not a phantom load:<br />
A. VCR<br />
B. Garage door opener<br />
C. TV with remote control<br />
D. None of the above<br />
5. A______________ is a unit of measurement that shows how fast a device is<br />
generating or consuming electricity<br />
6. True or False: Kilowatt-hours measure how much electricity has been used.<br />
7. One kilowatt equals ________________ watts.<br />
Review Copy Only<br />
8. Energy used = power x _______________.<br />
solarschoolhouse.org<br />
9. A radio draws 20 watts for two hours. How much electricity has it used?<br />
10. An electric meter can show:<br />
A. How much electricity you use each day<br />
B. How fast you’re using electricity right now<br />
C. How much electricity you’ve used this month<br />
D. All of the above<br />
106 Your <strong>Solar</strong> Home • Student Guidebook Answers available at www.solarschoolhouse.org
11. True or False: Peak Sun is the maximum power available from the Sun.<br />
12. Peak Sun is equal to _________________________ per square meter.<br />
13. Commercial solar modules convert how much of the Sun’s energy into<br />
electricity?<br />
A. about 65% to 85%<br />
B. about 2% to 3%<br />
C. about 5% to 20%<br />
14. A vacuum cleaner draws 8 amps. The utility provides 120 volts. How<br />
fast does the vacuum use electricity (in watts)?<br />
15. Your old fridge uses 5 kilowatt hours per day, and you get an average<br />
of 5 hours of Peak Sun per day. How many watts must your solar array<br />
provide at maximum power to run your refrigerator? (Assume 100%<br />
efficiency).<br />
16. The refrigerator in Question #15 “runs” for 10 hours a day. How many<br />
amps does it draw? (House voltage = 120 volts) Round off your answer<br />
to the nearest tenth of an amp.<br />
A. 5.7<br />
B. 4.2<br />
C. 500<br />
Review Copy Only<br />
solarschoolhouse.org<br />
Answers available at www.solarschoolhouse.org Chapter 7: System Sizing<br />
107
Review Copy Only<br />
solarschoolhouse.org<br />
108 Your <strong>Solar</strong> Home • Student Guidebook
Review Copy Only<br />
solarschoolhouse.org<br />
Projects<br />
Projects<br />
109
110<br />
<strong>Solar</strong> <strong>Schoolhouse</strong><br />
Directions<br />
E<br />
Make a simple tool to measure the Sun’s angular height above the horizon.<br />
4. Fold on this solid line<br />
6. Tape along this line<br />
NEVER STARE AT THE SUN!<br />
80 70 60 50 40 30 20 10<br />
1. Cut on dotted line<br />
1. Cut on this dotted line<br />
Project #1: Sun Angle Quadrant<br />
1. Cut on the outside dotted line A .<br />
2. Cut HALFWAY on the dotted line B .<br />
3. Punch holes for string with a pencil.<br />
4. Fold over on solid line E with the printed side out.<br />
5. Fold in half on solid line F with the printed side out.<br />
6. Tape the sides of the quadrant together, & tape along line E .<br />
7. Roll the square section over a pencil to make a tube & tape it to the quadrant.<br />
8. Thread 1 foot of string thru the hole. Enlarge the hole with a pencil if needed.<br />
9. Thread the string thru 2 paperclips & tie the ends.<br />
10. When the tube’s shadow is a circle<br />
read the sun’s altitude on the<br />
gauge. DON”T LOOK<br />
B<br />
1. Cut on this dotted line<br />
AT THE SUN<br />
THRU THE<br />
TUBE!<br />
4. Fold this<br />
piece over<br />
on line 8 E .<br />
www.solarschoolhouse.org<br />
Review Copy Only<br />
Your <strong>Solar</strong> Home • Student Guidebook<br />
2. cut on this dotted line 5. Fold on this solid line<br />
F<br />
3. Punch holes (for string)<br />
E<br />
✄<br />
Stop<br />
here!<br />
solarschoolhouse.org<br />
F<br />
7. Roll this piece<br />
over a pencil to<br />
make a tube.<br />
Tape it down<br />
lengthwise.<br />
www.solarschoolhouse.org<br />
NEVER STARE AT THE SUN!<br />
✄<br />
10 20 30 40 50 60 70 80<br />
1. Cut on dotted line<br />
© Rahus Institute. OK to reproduce for educational purposes only.<br />
A
<strong>Solar</strong> <strong>Schoolhouse</strong><br />
190 180<br />
270 260 250 240 230 220 210 200<br />
SOUTH<br />
Project #2: <strong>Solar</strong> Azimuth Finder - page one<br />
Make a simple tool to measure the Sun’s direction on a compass.<br />
1. Photocopy this page and tape it to a piece of cardboard. This will be the base for the Azimuth Finder.<br />
2. Punch a hole in the center of the base with a sharp pencil. Make the <strong>Solar</strong> Azimuth Finder (see next page).<br />
3.Attach the Azimuth Finder to the base with a brass brad. Tape the back side of the brad down to the back of the base.<br />
4. Align the base to true north. Aim the tube of the Azimuth Finder toward the sun until the tube’s shadow forms a circle.<br />
5. Look down from directly above the Azimuth Finder. See where the end of the tube closest to the sun points to the<br />
compass rose on the base (this is the end of the tube that’s opposite the shadow).<br />
6. From above, read the degrees of solar azimuth<br />
under the end of the tube closest to the Sun.<br />
170 160 150 140 130 120 110<br />
Review Copy Only<br />
WEST<br />
solarschoolhouse.org<br />
EAST<br />
100 90<br />
From directly above, read the sun’s<br />
azimuth angle under the tube<br />
(on the end opposite the shadow).<br />
350 340 330 320 310 300 290 280<br />
10 0<br />
80 70 60 50 40 30 20<br />
NORTH<br />
0<br />
Projects<br />
111
1. Cut on the solid lines A & B & on the entire outside<br />
border. The part labeled “Azimuth Finder” will be the<br />
HOLDER. The other part will be the TUBE.<br />
2. Fold the HOLDER in half lengthwise on dotted line .<br />
3. Tape the HOLDER together along its outside edges.<br />
4. Crease & unfold on the remaining dotted lines .<br />
5. Fold on dotted line E & tape it down.<br />
6. Crease on dotted line F & unfold it to lay flat.<br />
7. Roll the part labeled TUBE over a pencil. Tape it on line F .<br />
8. Punch small holes in the crossed dots with a sharp pencil.<br />
9. Tape the Azimuth Gauge (separate page) to a piece of<br />
cardboard, & punch a hole in the center of it with a sharp pencil.<br />
10. Attach the HOLDER to the Azimuth Gauge with a brad paper<br />
fastener, & tape the brad flat on the back side of the cardboard.<br />
11. Push a wooden skewer or toothpick<br />
through the holes to mount the TUBE<br />
to the HOLDER as shown in Fig. 1.<br />
12. Align the Azimuth Gauge to true<br />
north & aim the TUBE at the sun.<br />
Avoid eye damage by never looking<br />
through the tube at the sun.<br />
13. When the shadow cast by the tube<br />
forms a circle, measure the sun’s azimuth<br />
Figure 1<br />
from directly above the gauge.<br />
✄<br />
1. Cut on this solid line<br />
B<br />
B<br />
112<br />
Directions for Making The Azimuth Finder<br />
5. Fold on dotted line E with this side facing out.<br />
Tape the edge down.<br />
E<br />
Project #2: <strong>Solar</strong> Azimuth Finder - page two<br />
6. Crease on dotted line & unfold it to lay at<br />
F<br />
F<br />
E F<br />
8. Punch small hole s in the crossed<br />
dots with a sharp pencil.<br />
D<br />
C<br />
7. Roll down over a pencil to make a tube.<br />
Tape the edge along dotted line F<br />
Review Copy Only<br />
TUBE<br />
A<br />
✄ ✄<br />
1. Cut on this solid line<br />
A<br />
8. Punch small hole<br />
with a sharp pencil.<br />
Azimuth<br />
Finder<br />
NEVER LOOK<br />
AT THE SUN<br />
THRU THE TUBE!<br />
www.solarschoolhouse.org<br />
to the Azimuth Gauge<br />
10. Put a paper fastener thru<br />
this hole to attach the HOLDER<br />
solarschoolhouse.org<br />
Your <strong>Solar</strong> Home • Student Guidebook<br />
D<br />
D<br />
www.solarschoolhouse.org<br />
NEVER LOOK<br />
AT THE SUN<br />
THRU THE TUBE!<br />
Azimuth<br />
Finder<br />
8. Punch small hole<br />
with a sharp pencil.<br />
2. Crease on this dotted line 2. Crease on this dotted line<br />
4. Crease & unfold on this line<br />
8. Punch a hole with a<br />
sharp pencil.<br />
C<br />
4. Crease & unfold on this line<br />
C<br />
8. Punch small hole<br />
with a sharp pencil.<br />
Azimuth<br />
Finder<br />
NEVER LOOK<br />
AT THE SUN<br />
THRU THE TUBE!<br />
www.solarschoolhouse.org<br />
10. Put a paper fastener thru<br />
this hole to attach the HOLDER<br />
to the Azimuth Gauge<br />
D<br />
D<br />
www.solarschoolhouse.org<br />
NEVER LOOK<br />
AT THE SUN<br />
THRU THE TUBE!<br />
Azimuth<br />
Finder<br />
8. Punch small hole<br />
with a sharp pencil.<br />
8. Punch a hole with a<br />
sharp pencil.<br />
3. Tape along the outside edges.3. Tape along the outside edges.
<strong>Solar</strong> Elevation (Altitude)<br />
Project #3: Reading Sun Path Charts<br />
<strong>Solar</strong> <strong>Schoolhouse</strong> A Sun Path Chart graphs the sun’s path across the sky at a specific location as it changes over the<br />
seasons. These charts are useful for analyzing sites for solar buildings and photovoltaic systems.<br />
Sun Path Charts for your location are available online from the University of Oregon at:<br />
http://solardat.uoregon.edu/SunChartProgram.html.<br />
At this website specify your location by zip code and select your time zone in parenthesis.<br />
For example: (PST) = Pacific Standard Time, (MST) = Mountain Standard Time, etc. Choose to plot<br />
the data between solstices from either December to June or June to December, and plot the hours in<br />
Local Standard Time. Accept the rest of the default settings and click the “create chart” button.<br />
How to Read Sun Path Charts<br />
There are two basic measurements used to describe<br />
the sun’s position: altitude and azimuth. The sun’s<br />
ALTITUDE<br />
altitude is its height above the horizon in degrees from<br />
0º to 90º, measured up from 0º at the horizon.<br />
East South<br />
The sun’s Azimuth describes the compass direction at which it<br />
can be found. At any instant, a vertical line from the sun to the<br />
horizon would intersect a degree of a circle measuring clockwise North West<br />
AZIMUTH<br />
from north at 0º. This degree measures the sun’s azimuth angle.<br />
The sun path chart below has two sets of curved lines: the solid lines chart the days of<br />
the year; the dotted lines chart the hours of the day. The intersection of the two curved<br />
lines shows the position of the sun at a precise time of day on a particular date.<br />
For example: The large ‘X’ on the chart below marks the sun’s position at eleven o’clock in<br />
the morning on January 21st (and November 21st). To find the sun’s altitude at that moment,<br />
follow the nearest grid line to the y-axis on the left. It reads about 25º above the horizon. Follow<br />
the nearest grid line down to the x-axis to find the sun’s azimuth at that time: about 158º.<br />
Note: During Daylight Savings Time subtract an hour from the time line you read. For example:<br />
At 1pm on June 21st, the sun’s position would be found on the 12pm line in the chart below.<br />
(Note: Daylight Savings Time is in effect from the 2nd Sunday in March to the 1st Sunday in November).<br />
1. In the chart below what is the sun’s altitude & azimuth at 5pm on September 21st?<br />
<strong>Solar</strong> Altitude: <strong>Solar</strong> Azimuth:<br />
90º Sun Path Chart<br />
Lat: 44º; Long: -123º<br />
75º<br />
(Standard) time zone: -8<br />
Eugene, Oregon<br />
60º<br />
45º<br />
30º<br />
15º<br />
6 AM<br />
Review Copy Only<br />
7 AM<br />
8 AM<br />
solarschoolhouse.org<br />
9 AM<br />
10 AM<br />
11 AM<br />
12 PM<br />
June 21<br />
May & Jul 21<br />
Apr & Aug 21<br />
Mar & Sep 21<br />
Feb & Oct 21<br />
Jan & Nov 21<br />
December 21<br />
5 AM<br />
0º<br />
60º 75º 90º 105º 120º 135º 150º 165º 180º 195º 210º 225º 240º 255º 270º<br />
7 PM<br />
285º 300º<br />
East <strong>Solar</strong> Azimuth<br />
West<br />
© Rahus Institute. OK to reproduce for educational purposes only. Projects<br />
1 PM<br />
00<br />
900<br />
2 PM<br />
3 PM<br />
1800<br />
4 PM<br />
2700<br />
5 PM<br />
6 PM<br />
113
114<br />
<strong>Solar</strong> <strong>Schoolhouse</strong><br />
Project #4: <strong>Solar</strong> Site Analysis<br />
Sun Path Charts are useful for analyzing sites for solar buildings and photovoltaic systems.<br />
By measuring the height and position of shading obstacles like trees and buildings, and then<br />
graphing them on a Sun Path Chart for your location, you can make a picture of the available sunlight at any time<br />
of day throughout the year. Note: the Sun delivers maximum energy between 9 AM and 3 PM; it’s important that<br />
photovoltaic systems aren’t shaded during this time frame.<br />
Materials<br />
• Sun Angle Quadrant (see Project #1)<br />
ALTITUDE<br />
• <strong>Solar</strong> Azimuth Finder (see Project # 2)<br />
• Sun Path Chart for your location (see Project #3)<br />
East South<br />
• Magnetic compass<br />
• Pencil<br />
What to Do<br />
North West<br />
1. Create a Sun Path Chart online for your location, and print it out<br />
AZIMUTH<br />
(see Project #3 for complete details).<br />
2. Stand at the location where you intend to build a solar building or install a photovoltaic system. For the most<br />
precise results, this analysis would be done on all four corners of the exact location (i.e. the roof of a house for a<br />
roof-mount photovoltaic system), but, for simplicity’s sake, this project can be done in one spot on the ground.<br />
3. Orient the Azimuth Finder base to true north with a compass. Correct for magnetic declination (see pgs. 19-20).<br />
4. On the Sun Path Chart find the sun path curve for June 21st. Find the azimuth at which the sun rises on<br />
June 21st. In the sample Chart below this is 60º. Point the Azimuth Finder to this azimuth.<br />
5. Align the Sun Angle Quadrant with this azimuth, and look through the Quadrant tube to see the top of any<br />
shading obstacle (i.e. tree, house, etc.). Measure the degrees of altitude on the Quadrant, and put a dot at this<br />
number of degrees on the “Y” axis (<strong>Solar</strong> Elevation) of the Sun Path Chart. In the sample below the tallest<br />
obstacle at dawn on June 21st has an altitude of about 23º. Since the Sun rises at 60º on June 21st, a mark<br />
would be made at the intersection of 23º <strong>Solar</strong> Elevation & 60º <strong>Solar</strong> Azimuth. An ‘X” shows this on the<br />
sample below.<br />
6. Repeat these steps every 10º to 15º until you reach the azimuth at which the sun sets on June 21st.<br />
7. Draw a line connecting the marks. Fill in the area beneath this line all the way to the “X” axis (<strong>Solar</strong><br />
Azimuth) of the Chart. This area shows approximately where the Sun will be shaded during the year.<br />
Note: Sun Path Charts are divided into 15º wide vertical columns. Recording the highest obstacle in each<br />
column gives an acceptable idea of the shading; to be more precise take measurements every 5º of azimuth.<br />
<strong>Solar</strong> Elevation (Altitude)<br />
90º Sun Path Chart<br />
Lat: 44º; Long: -123º<br />
75º<br />
(Standard) time zone: -8<br />
Eugene, Oregon<br />
60º<br />
45º<br />
30º<br />
15º<br />
6 AM<br />
Review Copy Only<br />
7 AM<br />
8 AM<br />
9 AM<br />
solarschoolhouse.org<br />
10 AM<br />
11 AM<br />
June 21<br />
May & Jul 21<br />
Apr & Aug 21<br />
Mar & Sep 21<br />
Feb & Oct 21<br />
Jan & Nov 21<br />
December 21<br />
0º<br />
60º<br />
5 AM<br />
75º 90º 105º 120º 135º 150º 165º 180º 195º 210º 225º 240º 255º 270º<br />
7 PM<br />
285º 300º<br />
East <strong>Solar</strong> Azimuth<br />
West<br />
Your <strong>Solar</strong> Home • Student Guidebook<br />
12 PM<br />
1 PM<br />
00<br />
900<br />
2 PM<br />
3 PM<br />
1800<br />
4 PM<br />
2700<br />
5 PM<br />
6 PM<br />
© Rahus Institute. OK to reproduce for educational purposes only.
<strong>Solar</strong> <strong>Schoolhouse</strong><br />
Make a sundial using a cereal box and a stick. Watch the shadow of the stick<br />
change as the sun moves across the sky, and use the shadow to tell time.<br />
Materials<br />
• Empty cereal box<br />
• Pens, pencils or crayons of at least 2 colors<br />
• Paper<br />
• Tape or gluestick<br />
• Kabob stick or pencil<br />
• Chalk<br />
• Pushpin or small nail<br />
• Compass<br />
What to Do<br />
1. Remove the liner from inside the cereal box.<br />
Draw arrows on the top, bottom and sides of the box.<br />
2. Label one long side “South.”<br />
3. Poke the kabob stick through the box at an angle as shown.<br />
It helps to make 2 holes first with a pushpin or a nail.<br />
4. Glue or tape a piece of paper on the top of the box.<br />
5. Use a compass to find south.<br />
6. Early in the morning, place the cereal box on the ground.<br />
Make sure the side labeled “South” points to the south.<br />
7. Mark the points where the arrows meet the ground with chalk.<br />
Draw a triangle where the “South” arrow touches the ground.<br />
This is so you can put the box in the same place if you move it.<br />
8. At 10 am, mark where the stick’s shadow is with<br />
a pencil. Write the time below this mark.<br />
9. Mark the shadow again at 11 am, 12 noon and 1 pm.<br />
10. Look at your sundial and guess<br />
where the shadow will be at 2 PM.<br />
Mark where you think the shadow<br />
will be on your sundial. Use a<br />
different color for this mark.<br />
The Next Day<br />
1. Return the sundial to the marked<br />
position at 2 PM, align the<br />
arrows, and see if your guess for<br />
the 2 PM shadow was right.<br />
2. Mark the real shadow and<br />
compare it with your guess.<br />
Project #5: Cereal Box Sundial<br />
Review Copy Only<br />
solarschoolhouse.org<br />
Chalk marks<br />
© Rahus Institute. OK to reproduce for educational purposes only.<br />
Projects<br />
115
116<br />
<strong>Solar</strong> <strong>Schoolhouse</strong><br />
Project #6: Shadow Tool - page one<br />
Purpose: To make a sun angle tool to measure changes in the sun’s altitude above the horizon.<br />
NOTE: This project uses a saw and drill, and should be done with the help of an adult!<br />
Materials<br />
• 1” x 6” pine board<br />
• 3/8” dowel<br />
• Drill and 3/8” drill bit<br />
• Saw<br />
• Pencil and permanent marker<br />
• Ruler<br />
• Bull’s eye level (from hardware store)<br />
• Small screws to mount level<br />
• Graph paper<br />
• Protractor<br />
• Wood glue, or glue gun and hot glue<br />
To Make the Shadow Tool<br />
1. Cut a 14” long piece of the pine board.<br />
2. Cut the dowel to a length of about 4½.”<br />
3. Draw a line down the middle of the board.<br />
4. Drill a 3/8” diameter hole through the line about 1” from<br />
one end of the board. Make the hole perpendicular to<br />
the board. Glue the dowel in the hole with 4” on top.<br />
5. Mark the line every half inch. Number each whole<br />
inch mark, starting at 1” from the base of the dowel.<br />
6. Screw the bull’s eye level to the board.<br />
To Use the Shadow Tool<br />
Take readings of the sun’s shadow at the same time of day, once a<br />
week. If possible, do this at 12 noon Standard Time (1 pm Daylight<br />
Savings Time). Note: Daylight Savings Time is in effect from the<br />
2nd Sunday in March to the 1st Sunday in November.<br />
1. Face the shadow tool toward the sun so the dowel’s<br />
shadow falls on the numbered line.<br />
2. Align the bubble in the level to make<br />
sure the shadow tool is level.<br />
3. Record the length of the shadow.<br />
4. Draw a triangle on graph paper. Use the shadow length as<br />
the triangle’s base, and the dowel’s height as the triangle’s<br />
height. Draw the hypotenuse. Record the date and time.<br />
5. Measure the angle between the base and the hypotenuse<br />
with a protractor. This is the sun’s altitude.<br />
6. Take shadow readings once a week from the Fall Equinox<br />
(September 23rd) until the Winter Solstice (December 22nd).<br />
Record the readings on graph paper to find the sun’s altitude.<br />
7. Make a graph of all the sun’s altitudes<br />
from the Equinox to the Solstice.<br />
Review Copy Only<br />
solarschoolhouse.org<br />
Your <strong>Solar</strong> Home • Student Guidebook<br />
© Rahus Institute. OK to reproduce for educational purposes only.
<strong>Solar</strong> <strong>Schoolhouse</strong><br />
Project #6: Shadow Tool - page two<br />
Purpose: To measure changes in the sun’s height in the sky throughout the<br />
year, and to understand how this relates to the changing seasons.<br />
Date Time Length in Inches<br />
Sun Altitude<br />
Angle<br />
Was date shifted<br />
due to clouds?<br />
INSTRUCTIONS: Take readings of the sun’s shadow using the sun angle tool at the same time of<br />
day, once a week. If possible, do this at 12 noon Standard Time (1 pm Daylight Savings Time).<br />
If it is cloudy, take the reading on the next clear day at 12 noon Standard Time. Be sure to note the<br />
date. Also, in the right hand column note that the day of taking the reading had to be shifted.<br />
Review Copy Only<br />
Make sure the tool is level on the ground, and aim it so that the sun’s shadow falls on the measuring<br />
scale. Record shadow length. Draw pictures on graph paper. Measure sun angles with a protractor.<br />
solarschoolhouse.org<br />
sun altitude angle<br />
© Rahus Institute. OK to reproduce for educational purposes only. Projects<br />
117
<strong>Solar</strong> <strong>Schoolhouse</strong><br />
Guess which<br />
color gets the<br />
hottest, and test<br />
your guess by<br />
melting ice cubes on<br />
different colored surfaces.<br />
Experiment with ways of making<br />
the ice cubes melt faster and slower.<br />
Materials<br />
• Construction paper of different colors<br />
• Aluminum foil<br />
• Same-sized ice cubes<br />
• Cardboard (optional)<br />
• Plastic wrap or plastic bags (optional)<br />
What to Do<br />
1. Guess which color will melt an ice cube fastest.<br />
2. Put different colored pieces of paper (and a piece of aluminum foil) in the sun.<br />
3. Place an ice cube on each surface.<br />
4. See which ice cube melts first, and which melts last.<br />
Which surface caused the ice cube to melt the fastest? Why?<br />
OPTIONAL:<br />
Project #7: Ice Cube Meltdown!<br />
Some colors absorb light and heat better than others.<br />
Some colors are better at reflecting light and heat.<br />
Review Copy Only<br />
solarschoolhouse.org<br />
Put a piece of cardboard under the colored surfaces. Would this make any difference in<br />
how long it takes the ice cubes to melt? Why?<br />
Now try putting the ice cubes in plastic bags, or covering them with plastic wrap.<br />
Would this make any difference in how long it takes the ice cubes to melt? Why?<br />
118 Your <strong>Solar</strong> Home • Student Guidebook<br />
© Rahus Institute. OK to reproduce for educational purposes only.
<strong>Solar</strong> <strong>Schoolhouse</strong><br />
Foam cups keep hot drinks hot, and cold drinks cold. That’s because<br />
foam is a good insulator, and slows the movement of heat.<br />
Your challenge is to use several kinds of<br />
insulation, and make a superinsulated cup.<br />
Then put an ice cube in the cup, and see<br />
how long the ice cube takes to melt.<br />
It’s even better to have a contest with several<br />
people, and see who does the best job of<br />
insulating. At the end of the contest, find<br />
out who’s ice cube melts more slowly by<br />
measuring the amount of water in the cup.<br />
Remember: the best insulation blocks radiation, convection and conduction!<br />
Materials<br />
• Paper or foam cups (with tops)<br />
• Measuring cup or spoon (to measure water from cups)<br />
• Masking Tape, Clear Tape, Glue (optional)<br />
• Scissors<br />
• Same-sized ice cubes<br />
• INSULATION<br />
• Construction paper of different colors<br />
• Aluminum foil<br />
• Felt (or various fabrics)<br />
• Newspaper<br />
• Cardboard<br />
• Puffed cereal<br />
• Leaves or grass clippings<br />
• Packing materials: “peanuts,” bubble wrap, etc.<br />
Review Copy Only<br />
What to Do<br />
1. Each contestant insulates their cup to slow heat transfer. Try wrapping the cup with<br />
different things, like felt or bubble wrap. You can also make another container, and put the<br />
cup inside it. Then fill the outside container with insulation.<br />
2. At a set time, everyone puts an ice cube in their cup, and places it in the sun.<br />
3. After a certain amount of time has passed, remove the ice cubes from the cups.<br />
4. Pour the water from each cup and measure it.<br />
Project #8: Save That Ice Cube!<br />
solarschoolhouse.org<br />
The contestant with the least amount of water wins!<br />
© Rahus Institute. OK to reproduce for educational purposes only.<br />
Projects<br />
119
What to Do<br />
1. Cut windows from Reynolds Oven<br />
Bag plastic. Draw a line on the top<br />
of the pizza box about 1/2” in from<br />
the edges of the oven bag window.<br />
2. Cut along the line. Don’t cut along the<br />
top edge where the hinge of the box is!<br />
3. Gently fold the flap back along the<br />
uncut edge to form a crease.<br />
4. Put a piece of aluminum foil on the inside of the flap, and fold the<br />
edges around the back of the flap. Have the shinier side facing up.<br />
Smooth the foil, and tape the edges on the back of the flap with<br />
masking tape. Keep the tape from showing on the front side of the flap.<br />
This foil will reflect sunlight into the box. If time permits attach<br />
the foil with a glue/water mixture for smoother results.<br />
5. Open the box and put a piece of piece of cardboard in the<br />
bottom for more insulation. Cover it with black paper to help<br />
absorb the sun’s energy.<br />
6. Tape the oven bag window to the inside of the box top with clear tape.<br />
Tape one side, then pull the plastic tight and tape the other three sides.<br />
It must be airtight! Double-sided tape works best.<br />
7. Roll up some newspaper, and fit it around the inside edges of the box<br />
top. This is the insulation to hold the sun’s heat. It should be 1” to 1.5”<br />
thick. Use tape to hold it in place. A continuous roll of newspaper<br />
works best.<br />
8. Use the kabob stick to hold the top flap up. Adjust it to reflect as much<br />
sunlight as possible into the box. To hold it in place, stick it about an<br />
inch through the top, and tape the other end to the box.<br />
9. Review the online Pizza Box Cooker tutorial for more hints: www.solarschoolhouse.org.<br />
120<br />
<strong>Solar</strong> <strong>Schoolhouse</strong><br />
Project #9: Pizza Box <strong>Solar</strong> Cooker<br />
Have you noticed how a car parked in the sun stays warm<br />
inside, even on cold days? That’s because clear materials like glass and plastic trap<br />
the heat from the sun. We can use this principle to make solar powered ovens.<br />
Materials<br />
• 1 Medium Sized Pizza Box<br />
• Black Construction Paper<br />
• Aluminum Foil<br />
• 1 Reynolds Oven Cooking Bag (made of nylon that can take up to 400<br />
degrees F.) Note:You can get 8 rectangular windows from a turkey-size bag.<br />
• Masking Tape, Clear Tape (about 1” wide), Double-sided Tape, Glue (optional)<br />
• Scissors (or Craft Knife if an adult helps)<br />
• Pie Tins (or dark-colored oven-safe containers) to fit inside box<br />
• Kabob stick (or wooden skewer) to hold flap open<br />
• Newspaper for insulation<br />
• Oven Thermometer (optional)<br />
• Infrared Thermometer (optional instructor’s tool)<br />
Review Copy Only<br />
Your <strong>Solar</strong> Home • Student Guidebook<br />
PIZZA<br />
solarschoolhouse.org<br />
© Rahus Institute. OK to reproduce for educational purposes only.
<strong>Solar</strong> <strong>Schoolhouse</strong><br />
Have you noticed how a car parked in the sun stays warm inside, even on cold<br />
days? That’s because clear materials like glass and plastic trap the heat from the<br />
sun. We can use this principle to make solar powered ovens.<br />
What to Do<br />
1. Cut windows from the Oven Bag plastic.<br />
Draw a line on the top of the shoe box about<br />
1/2” in from the edges of the oven bag window.<br />
2. Cut along the line. Don’t cut<br />
along the top edge where the<br />
hinge of the box is!<br />
3. Gently fold the flap back along the<br />
uncut edge to form a crease.<br />
Project #10: Shoebox <strong>Solar</strong> Cooker<br />
Materials<br />
• 1 Shoebox<br />
• 1 Reynolds Oven Cooking Bag (made of nylon that can take up<br />
to 400 degrees F.) Note:You can get 8 rectangular windows from a turkey-size bag.<br />
• Aluminum Foil<br />
• Black Construction Paper<br />
• Masking Tape, Clear Tape (about 1” wide), Glue (optional)<br />
• Scissors (or Craft Knife if an adult helps)<br />
• Pie Tins (or dark-colored oven-safe containers) to fit inside box<br />
• Kabob stick (or wooden skewer) to hold flap open<br />
• Newspaper & cardboard for insulation<br />
• Oven Thermometer (optional)<br />
4. Put a piece of aluminum foil on the inside of the flap, and fold the<br />
edges around the backside of the flap. Use the shinier side of the foil<br />
facing up, and try to smooth the foil. Tape the foil edges on the back<br />
of the flap with masking tape, keeping the tape from showing on the front<br />
side of the flap. This foil will reflect sunlight into the box.<br />
Review Copy Only<br />
5. Open the box, and put a piece of cardboard on the bottom for insulation. Cover<br />
the bottom with a piece of black paper to help absorb the sun’s energy.<br />
solarschoolhouse.org<br />
6. Make an inside wall of cardboard. You can do this by taping pieces together,<br />
or by cutting slots to join the pieces. Make sure the top of this wall is even<br />
with the outside wall of the box. Fill the space between the walls with rolledup<br />
newspaper or other insulation. Make sure there are no gaps in the corners.<br />
7. Tape the oven bag window to the inside of the box top with clear tape. Tape one<br />
side, then pull the plastic tight and tape the other three sides. It must be airtight!<br />
8. Make a thin roll of newspaper to use as a “gasket” between the box walls and the lid to retain heat.<br />
9. Use the kabob stick to hold the top flap up. Adjust it to reflect as much sunlight as possible into the<br />
box. To hold it in place, stick it about an inch through the top, and tape the other end to the box.<br />
© Rahus Institute. OK to reproduce for educational purposes only.<br />
Projects<br />
121
<strong>Solar</strong> <strong>Schoolhouse</strong><br />
Project #11: Shoebox <strong>Solar</strong> Water Heater<br />
The Shoebox Cooker in Project #6 can be used as a solar water heater too. Just put soda<br />
cans filled with water inside the cooker.<br />
Materials<br />
• 1 Shoebox Cooker (see Project #6)<br />
• Oven Thermometer<br />
• Soda Cans<br />
• Black Paint (or wide tipped felt marker)<br />
OR<br />
• Black Paper & Rubber Bands<br />
• Extra kabob stick to hold flap open<br />
• Aluminum Foil<br />
• Masking Tape<br />
• Scissors (or Craft Knife if an adult helps)<br />
• Newspaper & cardboard for insulation<br />
What to Do<br />
1. Paint a soda can black to absorb heat. If you don’t have paint you can use a felt marker, or even<br />
wrap the can with black paper. Secure the paper with tape or rubber bands.<br />
2. Use kabob stick to punch a hole through<br />
one of the long sides of the shoebox. The<br />
hole should be about 2” from the back of<br />
the box. This is for the thermometer.<br />
3. You may want to add several layers of<br />
cardboard inside. This acts as insulation, and<br />
makes it easier for the thermometer to reach<br />
the can. Try wrapping the cardboard with<br />
aluminum foil to reflect heat onto the can.<br />
Review Copy Only<br />
4. (Optional) Attach another reflector with tape. Puncture the reflectors with kabob sticks, and slide them<br />
through the reflectors. Use the sticks to hold the reflectors open.<br />
5. Lay the shoebox on its side in the sun. You can lean it against a wall to<br />
face the sun. Fill the soda can about 3/4 full with water, and place it in the<br />
box. Insert the thermometer, and record the temperature. Take temperature<br />
readings at regular intervals (15 minutes or more). You can also record<br />
how long it takes the water to cool down after sunset.<br />
6. (Optional) Try using a black-painted can and a plain can to see how<br />
fast each heats up. Make a chart to record your results.<br />
solarschoolhouse.org<br />
122 Your <strong>Solar</strong> Home • Student Guidebook<br />
© Rahus Institute. OK to reproduce for educational purposes only.
<strong>Solar</strong> <strong>Schoolhouse</strong><br />
Project #12: Shoebox <strong>Solar</strong> Home Model<br />
Make a solar home model using an ordinary<br />
shoebox. Include solar features like south-facing windows<br />
with overhangs, thermal mass and photovoltaic cells.<br />
Materials<br />
• Shoebox & lid<br />
• Masking tape, Clear tape, Glue sticks<br />
• Scissors (or Craft Knife if an adult helps)<br />
• Hot glue gun & glue sticks (optional)<br />
• Pencil<br />
• Ruler<br />
• File folders for roof (legal size)<br />
• Cardboard & construction paper<br />
• Mini solar electric modules (optional)<br />
• Fan motor & popsicle stick for blade (optional)<br />
• Clear plastic for windows (packaging scraps work well)<br />
What to Do<br />
1. Cut a piece of cardboard to fit inside one end of the box.<br />
2. Draw a line where the top of the box meets the cardboard.<br />
3. Mark a point at the top of the cardboard, and make cuts from this<br />
mark to the ends of the line. This will be one side of the house.<br />
4. Repeat these steps to make another side.<br />
5. Tape or glue the sides inside the ends of the box.<br />
6. Cut out the door. Be sure to cut only three sides so the<br />
door stays attached to the house. Fold it open.<br />
7. Measure how wide and long the shoebox is. Multiply the<br />
length times the width to get the area of the floor.<br />
Example: 8” wide X 12” long = 96 square inches of floor area<br />
8. To heat the house with sunlight, we’ll have about 12 square<br />
inches of south-facing windows for every 100 square inches of<br />
floor area. This means we multiply the floor area by 0.12<br />
Example: 96 X .12 = 11.5 or about 12 square inches of windows<br />
9. A window 2’ high and 3’ long would be 6 square inches in area. Our<br />
example needs 2 windows this size. Calculate the windows you’ll<br />
need, and cut them out. Be sure to cut only 3 sides so you can fold up<br />
the overhang. Put the windows on the long side of the shoebox.<br />
10. Put the lid on the box, and use a file folder for the<br />
roof. You might have to trim the folder to fit.<br />
11. Add other windows, plastic for glass, and other solar features. Draw tiles on<br />
construction paper for a thermal mass floor, or make a thermal mass wall.<br />
You can even put solar cells on the roof, and power a small fan or lights.<br />
Review Copy Only<br />
solarschoolhouse.org<br />
© Rahus Institute. OK to reproduce for educational purposes only.<br />
Projects<br />
123
124<br />
<strong>Solar</strong> <strong>Schoolhouse</strong><br />
Design and build a model solar home the way architects do: using plans drawn to scale.<br />
This project guide shows a sample solar home: the saltbox house.<br />
Materials<br />
• Ruler or Architect’s scale (optional)<br />
• Hot glue gun and glue sticks, &/or glue<br />
• Scissors (or Craft Knife if an adult helps)<br />
• Pencil<br />
• Right triangle<br />
• Cardboard<br />
• Mini solar electric modules (optional)<br />
• Small motor & fan (optional)<br />
• Graph paper: 4 squares per inch is recommended<br />
Objective<br />
Make a model home that uses sunlight to heat the building, heat water and make electricity. Design the home<br />
to stay cool in the summer. Use the solar design principles from chapter five of Your <strong>Solar</strong> Home:<br />
1. South-facing windows and glass doors to catch the winter sun’s energy.<br />
2. Insulation to keep heat in during the winter, and keep heat out in the summer.<br />
3. Thermal mass to store heat in the winter, and store “coolth” in the summer.<br />
4. Overhangs to block the summer sun.<br />
5. Air circulation: ventilation and convection currents to stay cooler in the summer.<br />
Making Plans<br />
Start by drawing 3 or 4 views of the home. The first view is the Plan View, or floorplan. It’s what you’d see<br />
looking down on the model with the roof off. The views are drawn to scale on graph paper. Each square<br />
on the paper represents a certain number of feet in the actual home. We’ll use a scale of 1 square (1/4 inch)<br />
equals 1 foot.<br />
PLAN VIEW<br />
40 feet long<br />
24 feet wide<br />
South<br />
Project #13: Custom <strong>Solar</strong> Home - page 1<br />
Door<br />
Window<br />
Review Copy Only<br />
solarschoolhouse.org<br />
1 foot by 1 foot<br />
square<br />
Your <strong>Solar</strong> Home • Student Guidebook<br />
TILE FLOOR: 10’ x 40’<br />
= 400 square feet of<br />
thermal mass<br />
Total area of first floor: 24’ x 40’ = 960 square feet<br />
© Rahus Institute. OK to reproduce for educational purposes only.
<strong>Solar</strong> <strong>Schoolhouse</strong><br />
Calculating the Amount of South Facing Glass<br />
Each window facing south is a solar heating machine. The amount of south facing glass depends on many<br />
things, including: where the home is, how well it’s insulated, and how much sunlight is available year round.<br />
To estimate how much south glass we need, we’ll aim for 12 square feet of glass for every 100 square feet of<br />
floor area. This means we multiply the floor area by 0.12.<br />
1. Find the AREA of floor space (first floor), by multiplying the length of the home by the width:<br />
40 feet x 24 feet = 960 square feet of area on the first floor<br />
2. Use this area to find out how much south facing glass to put in the first floor of the house:<br />
960 sq. ft. x 0.12 = 115 sq. ft. of south facing glass on the first floor<br />
This doesn’t need to be exact. 100 sq. ft. of south facing glass would still do a good job of heating the house.<br />
60 sq. ft. isn’t as good, but it’s much better than nothing.<br />
South Elevation<br />
The south elevation shows what the south side of the house looks like. We’ll sketch in enough windows<br />
to fully heat the house. On the first floor we’ve put 4 windows of 16 sq. ft each, 3 glass door sections with<br />
12 sq. ft. of glass each, and a narrow window with 12 sq. ft. of glass.<br />
4 windows x 16 sq. ft. = 64 sq. ft.; 3 doors x 12 sq. ft. = 36; 1 window x 12 sq. ft. = 12<br />
Add the products up:<br />
64 sq. ft. + 36 sq. ft. + 12 sq. ft. = 112 sq. ft.<br />
We’re happy; this amount is very close to our goal of 115 square feet of south facing glass. We should<br />
repeat these steps to calculate the solar gain (south-facing glass) for the 2nd floor.<br />
Thermal Mass<br />
Project #13: Custom <strong>Solar</strong> Home - page 2<br />
Review Copy Only<br />
solarschoolhouse.org<br />
There needs to be enough thermal mass in the house to absorb the sunlight coming through the windows. If<br />
there isn’t, the house will overheat. It’s best if the thermal mass is uncovered, and the sun shines directly on it.<br />
© Rahus Institute. OK to reproduce for educational purposes only.<br />
Projects<br />
125
126<br />
<strong>Solar</strong> <strong>Schoolhouse</strong><br />
Project #13: Custom <strong>Solar</strong> Home - page 3<br />
Calculating the Amount of Thermal Mass<br />
The area of thermal mass depends on many things too. A thermal mass area that’s<br />
at least 3 times the south glass area is a good place to start. Having extra thermal<br />
mass is fine. This means we multiply the south glass area by 3:<br />
112 sq. ft. of south glass x 3 = 336 sq. ft. of thermal mass needed on the first floor<br />
We have enough thermal mass with the tile floor on the south side of the house:<br />
10 ft. x 40 ft. = 400 sq. ft. of thermal mass (tile floor)<br />
Repeat these steps to find the thermal mass needed for the 2nd floor.<br />
East Elevation<br />
The east elevation shows the roof overhangs (eaves) so we can be sure the sun shines in during<br />
the winter, but not during the summer. To see how big an overhang we need, we have<br />
to know how high the sun will get in the summer, and how low it will be in the winter. The<br />
sun’s height is an angle called the sun’s altitude, and it depends on our latitude.<br />
You can find the sun’s highest altitude on any day of the year at the U.S. Naval Observatory website.<br />
http://aa.usno.navy.mil/data/docs/AltAz.html<br />
Enter your city and the date, then find the highest altitude around 12 noon on that day. You can<br />
also figure out the sun’s highest and lowest altitude during the year with these equations:<br />
Sun’s altitude at noon on summer solstice (June 21st) = 90 + 23.5 - (your latitude)<br />
Sun’s altitude at noon on winter solstice (December 21st) = 90 - 23.5 - (your latitude)<br />
This equation shows the sun’s altitude on the equinoxes:<br />
Sun’s altitude at noon on Spring/Fall Equinoxes (Mar. 20th & Sep. 20th) = 90 - (your latitude)<br />
You can find your latitude here using your zip code or city name:<br />
http://www.census.gov/cgi-bin/gazetteer<br />
Review Copy Only<br />
Winter Sun<br />
Angle<br />
Summer Sun<br />
Angle<br />
solarschoolhouse.org<br />
altitude angle<br />
East Elevation showing the sun’s highest altitude at the winter & summer solstices<br />
The East Elevation (above) shows us that the winter sun will shine deeply into the building, and heat the<br />
tile floor directly. The overhangs will block the summer sun.<br />
Your <strong>Solar</strong> Home • Student Guidebook<br />
© Rahus Institute. OK to reproduce for educational purposes only.
<strong>Solar</strong> <strong>Schoolhouse</strong><br />
Draw winter & summer sun angles on the east elevation plan<br />
to see what size overhangs we’ll need. For example, our<br />
saltbox house is at San Francisco, about 38.5 degrees north<br />
latitude. To find the sun’s highest altitude in the summer:<br />
90 + 23.5 - (38.5) = 75 degrees<br />
Project #13: Custom <strong>Solar</strong> Home - page 4<br />
Calculating Overhangs<br />
Use a protractor and ruler to see how big the overhangs<br />
need to be to block the noontime summer<br />
sun. Align the ruler at 75 degrees, and make sure<br />
the ruler touches the bottom of the window.<br />
Draw a line along the ruler. The overhang has to touch this<br />
line to shade the window on the summer solstice.<br />
Use 90 - 23.5 - 38.5 to find the winter sun angle.<br />
North Elevation<br />
The main purpose of the North Elevation is to plan the small amount of window space on the<br />
north side of the house. Fewer windows on this shady side reduce the energy lost through the<br />
glass. One still wants windows for bringing light into the building and for cross-ventilation. Having<br />
a drawing of the north side of the building is also helpful for building our models.<br />
Review Copy Only<br />
Skylight<br />
solarschoolhouse.org<br />
North Elevation showing minimal windows to reduce energy loss.<br />
Note also the placement of three skylights for daylighting on the north roof. Skylights do cause<br />
some heat loss. Avoid skylights on the south facing roof as they may cause the house to over heat<br />
in the summer. Operable skylights are useful in warm months for venting off extra heat.<br />
Note: The numbers for window area and mass area are general guidelines. Climates with<br />
hot summers and mild winters could use less window area; climates with mild summers<br />
and cold winters would need more south glass area and more thermal mass.<br />
© Rahus Institute. OK to reproduce for educational purposes only.<br />
Projects<br />
127
128<br />
<strong>Solar</strong> <strong>Schoolhouse</strong><br />
Project #13: Custom <strong>Solar</strong> Home - page 5<br />
Tips for Designing and Building Model <strong>Solar</strong> Homes<br />
1. It helps to use building blocks while experimenting with a design. Start with basic solar design<br />
principles and an idea of the climate for which you are designing; then experiment with blocks.<br />
Next draw the plans, and finally build the model. Note: Geoblocks for designing are available<br />
at www.didax.com<br />
2. A solar home should be comfortable year round: it should use the<br />
sun to heat the home in the winter, and also be designed to stay cool<br />
in the summer. This is done with shading and eaves. Thermal mass<br />
and insulation improve the performance of a home in all four<br />
seasons. For example, thermal mass stores warmth for use in the<br />
winter evenings, and also absorbs excess warmth in the summer.<br />
3. Try using a variety of materials. Glass tubes, stone, tile or clay are nice for representing thermal mass.<br />
<strong>Solar</strong> electric panels can be incorporated into the roof. Some students have even used straw and cob in<br />
their structures. Other materials include cardboard, wood, plaster, and clear plastic.<br />
4. Remember landscaping. A good solar home also makes use of trees, earth, etc. for shading and<br />
windbreaks to provide better year round comfort. You may want to enlarge the base of the model to<br />
make room for landscaping features.<br />
5. Make a written description of your model. Note the location and climate the home is being designed<br />
for, such as: Oakland, CA , Latitude = 38 degrees. Climate description: temperate moderate climate,<br />
cooling not an issue. Try doing a web search using google.com and key words “climate yourcityname”<br />
to find a site that will provide information on your city’s local climate.<br />
6. Scale. Use a scale of anywhere from 1/5 inch = one foot to 1/2 inch = one foot. 1/5 inch scale is best<br />
for solar village projects. Note your scale in the write up of your model.<br />
7. Orientation and angle. Note which direction is South on your model. In your write-up you may want to<br />
address the summer, spring/fall, and winter solar angles and how your design takes these into account.<br />
8. You can also create your own Sun Angle chart showing the sun’s path throughout the year at your<br />
home’s latitude. Go to this University of Oregon website:<br />
http://solardat.uoregon.edu/SunChartProgram.html.<br />
A how-to-read sample chart is posted here:<br />
http://www.solarschoolhouse.org/pdfs/ssh/sun-chart-example_38lat.pdf<br />
9. In judging your model the judges will use the rubric (p.110) as well as noting how interesting and<br />
innovative your design is. They will also take note of the materials used in the model, how neatly the<br />
work is executed, and how well the solar features are described.<br />
Review Copy Only<br />
solarschoolhouse.org<br />
10. <strong>Solar</strong> Electric features. Use a solar cell, motor and fan/wheel in your home design, if possible.<br />
Make sure to orient the panel in the best direction.<br />
11. Incorporating <strong>Solar</strong> Hot water features. Incorporate a batch type, ICS, or other type of solar hot water<br />
system for your home. This does not need to be a functioning model.<br />
Check this site for a primer on different types of solar hot water systems.<br />
http://www.azsolarcenter.com/technology/solarh20.html<br />
Your <strong>Solar</strong> Home • Student Guidebook<br />
© Rahus Institute. OK to reproduce for educational purposes only.
<strong>Solar</strong> <strong>Schoolhouse</strong><br />
It’s easy to read your electric meter if you understand some basic rules.<br />
Each small dial represents one digit of the present reading. These dials turn both clockwise<br />
and counter clockwise. When a hand is between numbers, record the smaller number.<br />
If you can’t tell if a hand is past a number or not, just look at the dial to the right. If it has passed zero,<br />
then the hand is pointing to the correct number. If the dial to the right has not passed zero, then use the<br />
next smaller number.<br />
Let’s try an example:<br />
4 6 3 9 2<br />
Reading on Monday<br />
Project #14: Read Your Electric Meter<br />
© Rahus Institute. OK to reproduce for educational purposes only.<br />
1 2 3 4 5 6 7 8 9 0<br />
9 8 7 6 5 4 3 2 1 0<br />
10 thousands thousands hundreds tens ones<br />
10 thousands thousands hundreds tens ones<br />
The third digit is a three because the hand to the right has not yet passed zero. If the second dial from the<br />
right was between the zero and the one, then the third digit would have been a four.<br />
4 6<br />
Now figure out the next day’s reading: 4 6<br />
Reading on Tuesday<br />
Once you determine Tuesday’s reading, subtract<br />
Monday’s reading from it to find out how much<br />
energy (kilowatt hours) was used in the day<br />
between the 2 readings.<br />
1 2 3 4 5 6 7 8 9 0<br />
1 2 3 4 5 6 7 8 9 0<br />
9 8 7 6 5 4 3 2 1 0<br />
10 thousands thousands hundreds tens ones<br />
Try recording readings at your home for several days in a row. By subtracting yesterday’s reading from<br />
today’s reading, you can get a feel for how much energy (kilowatt hours) you use each day.<br />
Instant Electric “DEMAND” Reading from a Electric Meter<br />
To find out how fast you’re using electricity right now:<br />
Review Copy Only<br />
1. Note Kh found on the meter face (A).<br />
2. Select a number of revolutions to be counted (B)<br />
3. Time how long the revolutions take in seconds (C)<br />
5. Apply the following formula:<br />
Demand = Kilowatt [kW] = 3.6 x A x B<br />
C<br />
Example: A = 7.2 Kh, B = 1, C = 30 seconds<br />
solarschoolhouse.org<br />
4 6 3 9 2<br />
1 2 3 4 5 6 7 8 9 0<br />
( A )<br />
Demand = Kilowatt [kW] = 3.6 x 7.2 x 1 = .864 kW = 864 watts<br />
30<br />
If this meter is on a PV array, this is the amount of Power that is being produced by the PV array at this<br />
instant. This value will change throughout the day based on the available sunlight.<br />
9 8 7 6 5 4 3 2 1 0<br />
9 8 7 6 5 4 3 2 1 0<br />
10 thousands thousands hundreds tens ones<br />
1 2 3 4 5 6 7 8 9 0<br />
1 2 3 4 5 6 7 8 9 0<br />
1 2 3 4 5 6 7 8 9 0<br />
1 2 3 4 5 6 7 8 9 0<br />
Tuesday: 46, kWh<br />
Monday: - 46,392 kWh<br />
Energy used = kWh<br />
9 8 7 6 5 4 3 2 1 0<br />
9 8 7 6 5 4 3 2 1 0<br />
9 8 7 6 5 4 3 2 1 0<br />
9 8 7 6 5 4 3 2 1 0<br />
Projects<br />
1 2 3 4 5 6 7 8 9 0<br />
1 2 3 4 5 6 7 8 9 0<br />
1 2 3 4 5 6 7 8 9 0<br />
1 2 3 4 5 6 7 8 9 0<br />
129
<strong>Solar</strong> <strong>Schoolhouse</strong><br />
Find out how much energy and money you can save by using energy efficient lighting.<br />
Pick a room in your house that is used a lot. Then pick the regular (incandescent) light bulb<br />
in the room that is used the most. Do the following steps; use a calculator if you like:<br />
Step 1: Find out how much it costs to<br />
power the light.<br />
__________ watts (write in bulb wattage)<br />
x_________ # of hours a day the light is<br />
on (round to closest full hour)<br />
=_________ total energy used in one day.<br />
(This is called watt-hours)<br />
x 30 (average # of days in each month)<br />
=_________ energy used in a month<br />
(in watt-hours)<br />
by 1000 to convert watt-hours to<br />
kilowatt-hours or KWH (this is what you<br />
see on your electric bill)<br />
=__________ approximate KWH per month<br />
x $0.15 ($0.15 per KWH is about what<br />
you’re charged for electricity)<br />
= $_________ this is about how much you<br />
pay each month to power the light.<br />
Step 2: Pick a replacement fluorescent<br />
light bulb that uses less energy (watts),<br />
but gives the same amount of light.<br />
Regular<br />
Lightbulb<br />
Project designed by Andrea Long<br />
Project #15: Light Bulb Savings!<br />
Review Copy Only<br />
Compact<br />
Fluorescent<br />
R Amount of<br />
Light<br />
solarschoolhouse.org<br />
60 watts 15 watts 900 lumens<br />
75 watts 18 watts 1200 lumens<br />
100 watts 23 watts 1500 lumens<br />
120 watts 30 watts 1800 lumens<br />
Step 1: Find out how much it costs to<br />
power the new fluorescent light.<br />
__________ watts (new bulb wattage)<br />
x_________ # of hours used per day (same<br />
hours you used before)<br />
=_________ watt-hours per day<br />
x 30 (average # of days in each month)<br />
=__________ watt-hours per month<br />
by 1000 to convert to KWH<br />
=__________ approximate KWH per month<br />
x $0.15 per KWH<br />
= $_________ this is about how much you<br />
pay each month to power the new light.<br />
Step 4: Subtract to see how much you<br />
save each month by changing the bulb.<br />
$__________ cost per month of old light<br />
- $__________ cost per month of new light<br />
$__________ monthly savings<br />
Step 4: Subtract to see how much energy<br />
you can save by changing the bulb.<br />
__________ KWH per month (old light)<br />
- __________ KWH per month (new light)<br />
__________ KWH per month saved<br />
x 12 _____________ KWH per year saved<br />
x 5 ________________ KWH saved per year<br />
by replacing the 5 most-used lightbulbs in the<br />
house.<br />
130 Your <strong>Solar</strong> Home • Student Guidebook<br />
© Rahus Institute. OK to reproduce for educational purposes only.
<strong>Solar</strong> <strong>Schoolhouse</strong><br />
NOTE: This project uses the <strong>Solar</strong> Cell Classroom Set from www.solarschoolhouse.org.<br />
Explore series and parallel circuits with a photovoltaic cell (solar cell) and a DC motor. Find<br />
out how to make the motor turn faster, and which circuit works better on a cloudy day.<br />
Record your results for the following experiments on a separate sheet of paper.<br />
Materials<br />
• <strong>Solar</strong> cells (also called PV cells)<br />
• Direct current hobby motor<br />
• Plastic fan<br />
Project #16: Simple <strong>Solar</strong> Cell Circuits<br />
Simple Circuit to Motor<br />
A simple circuit includes a power source<br />
(the solar cell), conductors to carry<br />
electricity (wires), and a load (the motor).<br />
1. Clip the wires from the<br />
solar cell to the metal rings<br />
at the end of the motor wires. Aim the solar cell at the sun and observe. Change the<br />
angle of the solar cell to the sun. What angle makes the motor spin fastest?<br />
2. Notice which way the motor spins. Reverse polarity by switching the alligator clip<br />
connections on the motor wires, and observe. What happens when you reverse polarity?<br />
Parallel Circuit to Motor<br />
When PV cells are wired in parallel,<br />
the positives (+) of each cell are<br />
connected to one side of the load,<br />
and the negatives (-) of each cell are<br />
connected to the other. This gives<br />
two paths for the current to follow through the load.<br />
1. Clip the red wires from two solar cells onto the metal ring on one motor wire. Clip the black<br />
wires form the cells onto the other motor wire ring. What is the speed of the motor<br />
compared to the simple and series circuits?<br />
2. What happens when you shade one cell? Why do you think this happens in a parallel circuit?<br />
NOTE: Parallel circuits are useful for powering loads when there is less sunlight, like on a cloudy day.<br />
© Rahus Institute. OK to reproduce for educational purposes only.<br />
Set Up<br />
1. Push a fan onto the motor shaft about 1/8” to 1/4.”<br />
Once attached, leave the fan connected to the motor;<br />
the blades might break if you try to remove the fan.<br />
Series Circuit to Motor<br />
Series wiring connects PV cells in a chain,<br />
from positive (+) to negative (–) between<br />
each cell. There’s only one path for the<br />
electricity to follow: through one cell<br />
after another & then through the load.<br />
1. Connect the black (-) wire of one solar<br />
cell to the red (+) wire of another<br />
cell. Connect the remaining wire from<br />
each cell to the motor wires. Is the motor’s speed different than it was in the simple circuit? How?<br />
2. What happens to the motor’s speed when you connect more cells in series?<br />
3. What happens when you shade one cell? Why do you think this happens in a series circuit?<br />
Review Copy Only<br />
solarschoolhouse.org<br />
DC Motor<br />
Red Wire<br />
Black Wire<br />
Projects<br />
131
You’re challenged to power a radio with solar cells. You need to figure out how many volts<br />
the radio needs, and how to connect the solar cells to provide the needed voltage.<br />
You know the following:<br />
• Each solar cell supplies 0.5 volts and 0.4 amps in full sun.<br />
• Alkaline batteries supply 1.5 volts when fully charged.<br />
Start by counting the number of batteries the radio uses, and multiply by 1.5 volts to<br />
get the voltage the radio needs. Then wire solar cells in series to supply that voltage.<br />
Example:<br />
The <strong>Solar</strong> Cell Set radio uses two 1.5 volt batteries<br />
for a total of 3.0 volts (1.5v x 2 = 3.0v)<br />
6 solar cells wired in series deliver 3.0 volts (6 x 0.5v = 6.0v)<br />
By stringing the solar cells together in series, connecting positive (+) to negative (–)<br />
between each cell, the voltage of the cells is added together. The total current<br />
(amperage) of the series string is the same as a single cell. Red wires are usually<br />
(+) and black wires (–). The positive wire at<br />
the end of the series string is clipped to the<br />
(+) wire from the radio. The negative wire is<br />
clipped to the (–) spring in the battery area.<br />
Troubleshooting: If there’s no sound:<br />
1. Make sure the volume knob is on.<br />
2. Set the switch to “spk” (speaker) not phone.<br />
3. Check for a short circuit caused by two<br />
alligator clips touching that shouldn’t be.<br />
4. Check the polarity (+) & (–).<br />
5. Check the voltage with a multimeter<br />
at the connections to the radio.<br />
Series-Parallel Wiring<br />
Suppose you’re in light overcast or shade (diffuse<br />
sunlight), and the circuit doesn’t have enough power<br />
to run the radio. Although the voltage is right, the<br />
cells can’t supply enough current (or amps).<br />
You can wire six more cells in another series string, and<br />
connect both strings together in parallel. The positive<br />
wires (+) at the end of each string are connected to the<br />
(+) radio wire, and the negative wires (–) are connected<br />
together to one end of a jumper wire. The other end<br />
of the jumper is clipped to the (–) radio spring.<br />
The current (amps) of both series strings is added;<br />
the voltage stays the same as a single string: 3 volts.<br />
Exercise:<br />
What is the maximum output of the<br />
series-parallel circuit on the right in full sun:<br />
132<br />
<strong>Solar</strong> <strong>Schoolhouse</strong><br />
Project #17: Power a Radio with Sunlight<br />
NOTE: This project uses the <strong>Solar</strong> Cell Classroom Set from www.solarschoolhouse.org.<br />
Review Copy Only<br />
Volts Amps Watts<br />
solarschoolhouse.org<br />
Remember: Power formula: watts = volts x amps<br />
Your <strong>Solar</strong> Home • Student Guidebook<br />
1.5V<br />
© Rahus Institute. OK to reproduce for educational purposes only.<br />
1.5V<br />
The back of the radio<br />
holds two 1.5V batteries.<br />
By wiring cells in series, the voltages are<br />
added together & the amps stay the same: 3.0 Volts, 0.4 Amps<br />
With the series strings in parallel the amps of each<br />
string are added; the voltage is the same as one string.
<strong>Solar</strong> <strong>Schoolhouse</strong><br />
Make a solar powered model car and have races! Learn about gear<br />
ratios, reducing friction, and how to make model cars that are<br />
lightweight and strong. This sample car uses a kit of wheels, motor and gears. The car<br />
body is made of wood, but all kinds of materials can be used including: foamboard,<br />
cardboard, plastic containers, parts from broken VCRs, etc. Cars have even been made<br />
from CDs and plastic soda bottles. Use your imagination! These are just guidelines.<br />
NOTE: This project uses knives & hot glue, & should be done with the help of an adult!<br />
Equipment Suppliers:<br />
<strong>Solar</strong> World: www.solar-world.com (719) 635-5125 has:<br />
• Axle gears, wheels, axles (Jr. <strong>Solar</strong> Sprint Accessory Bag JSS-ACC)<br />
• DC mounting brackets and motor gears (Jr.<strong>Solar</strong> Sprint JSS-B/G)<br />
• 3 watt modules (3 volt x 1 amp) Evergreen <strong>Solar</strong> Modules<br />
• DC motors (solar world JSS-M)<br />
Pitsco: www.shop-pitsco.com has:<br />
• lightweight modules (“Ray Catcher”)<br />
• various gears and wheels<br />
Kelvin: www.kelvin.com has least expensive car kits:<br />
• economy solar racer with wood body<br />
• solar racer bulk parts kit: code # 841415<br />
From local craft and hobby stores:<br />
• small screweyes (for axles and car guides)<br />
• velcro or rubber bands for attaching solar module to car<br />
• 3/16” by 3/16” by 24” lengths of basswood (about 4–5 per car body)<br />
• 1/8” by 4” by 24’ lengths of basswood for motor base (about 3” x 4” per car, use 1 sheet for 7 cars)<br />
• jumper wires with alligator clip ends to connect the motor to the module<br />
• Fishing line for track guideline (30 to 60 lb. test)<br />
Tools:<br />
• Side cutters to cut basswood sticks<br />
• Hot glue gun and glue sticks<br />
• Tiny Phillips screwdriver<br />
• Wire cutter and stripper<br />
• Small pliers<br />
• Drill and 1/16” drill bits<br />
• Small hobby saws and utility knives<br />
Project #18: Model <strong>Solar</strong> Race Car - page 1<br />
Review Copy Only<br />
solarschoolhouse.org<br />
Gearing<br />
1. Decide which gears to use. The biggest gear goes on the axle.<br />
One of the smaller gears goes on the motor. The more teeth the<br />
motor gear has, the faster the car will go, and the longer it will<br />
take to reach that speed. If you use the smallest gear on the motor,<br />
the car will accelerate quickly, but not reach as high a speed.<br />
2. Slide the big gear onto the axle, holding the axle with pliers.<br />
Be careful not to bend the axle. If the gear is too tight to slide,<br />
drill the hole bigger with the 1/16” bit. If you drill the hole too<br />
big, and the gear slips on the axle, use hot glue in the hole.<br />
The motor can go<br />
on the top or bottom<br />
of the frame.<br />
Jumpers connect the motor<br />
to the solar module.<br />
axle<br />
gear<br />
motor gear<br />
FAST<br />
STARTING<br />
HIGH<br />
TOP<br />
SPEED<br />
© Rahus Institute. OK to reproduce for educational purposes only. Projects<br />
133
134<br />
<strong>Solar</strong> <strong>Schoolhouse</strong><br />
Project #18: Model <strong>Solar</strong> Race Car - page 2<br />
Mounting the Motor<br />
1. Measure the width of the solar module. Cut a piece of the 4” basswood to be as<br />
long as the module is wide. Cut a notch to make room for the axle gear.<br />
2. Put the motor bracket on the basswood, and mark the points where screws<br />
will go with a pencil. Drill 1/16” starter holes through the pencil marks.<br />
3. Put the motor into the bracket, and slide the gear onto the motor shaft. Lock<br />
the motor with the set-screw, and screw the bracket to the basswood.<br />
Making the Frame<br />
1. Use the 3/16” sticks to make a box as wide as the solar module, and a<br />
little bit longer. Hot glue the joints, making sure the box is square.<br />
2. Put the motor mount on the frame to mark its position. Remove the mount.<br />
3. The axles will be held on with screw eyes. Mark points for the screw eye holes<br />
on the front and back of the frame. Keep the axles square with the frame so<br />
the car will drive straight (or be sure the axles are parallel to each other).<br />
4. Drill 1/16” starter holes at the pencil marks, and screw in the screw eyes.<br />
5 Put a wheel on an axle, slip the axle through a screw eye, and slide on<br />
the big gear. Slip the axle through the other screw eye. Slide the wheels<br />
close to the screw eyes, or the gears may slip out of position.<br />
Keep the wheels close to the screw eyes<br />
or the gears may slip out of place. Leave<br />
enough room for the wheels to spin freely.<br />
Attaching the Motor Mount<br />
1. Put the motor mount on the frame, and make sure the<br />
gears line up snugly. Screw the mount to the frame.<br />
Mounting the <strong>Solar</strong> Module<br />
1. Use the 3/16” sticks to build a framework for the solar module. Try to make it<br />
both light and strong. It can be titled to a certain sun angle, or kept low to cut<br />
wind resistance. Remember to put a bumper in front to hold and protect the module.<br />
2. Screw a screw eye into the bottom of the frame at each end.<br />
These will hold the car to a fishing line guide on the racetrack.<br />
Before attaching the screw eyes, open them a little with<br />
Review Copy Only<br />
pliers so you’ll be able to slip the fishing line through.<br />
3. Attach the module with big rubber bands, or<br />
glue velcro to the module and the frame.<br />
4. Clip jumper wires from the motor terminals to the<br />
module leads. The clips can act as a switch.<br />
solarschoolhouse.org<br />
Be sure the<br />
gears fit firmly.<br />
Screw eyes hold the car to<br />
fishing line on the track.<br />
Racing<br />
1. For a track use a flat smooth surface, like a tennis court.<br />
Have two people for each car: one to release the car, and one to catch it.<br />
2. Tie thick fishing line to heavy weights at each end of the track (cinder blocks work well). The<br />
line should be 1” to 3” above the ground. Slip the fishing line into the car’s screw eyes.<br />
3. To start the race: racers lift the cardboard shading the solar panel on each car.<br />
Your <strong>Solar</strong> Home • Student Guidebook<br />
© Rahus Institute. OK to reproduce for educational purposes only.
<strong>Solar</strong> <strong>Schoolhouse</strong><br />
Project #18: Model <strong>Solar</strong> Race Car - page 3<br />
© Rahus Institute. OK to reproduce for educational purposes only.<br />
Tips for Racing <strong>Solar</strong> Model Cars<br />
Racing Partners:<br />
This event requires two people for each car & lane: one to release the car and another to catch it on the other<br />
end. As students from the same school site often compete with one another, it’s best to have a partner that is not<br />
obligated to another car. Having a partner ready ahead of race day will save some confusion before each heat.<br />
Guide line height<br />
The cars run the full length of the course along a guideline: a length of larger gauge nylon fishing line (30-<br />
60lb test). This line will be anchored a few feet beyond the 20-meter course on each end, allowing room<br />
for the cars to be behind the start line while allowing the car to fully cross the finish line at the other end.<br />
The average height of this line should be between 1 & 3 inches from the ground.<br />
Participants will benefit from bending the fishing line up or down in their lane depending<br />
on the needs of their car. This will help their cars reach their potential top speeds.<br />
Hot Glue, White Glue & Clear Plastic Packing Tape<br />
White glue gives the strongest bonds, but takes much longer to set than hot glue. With some materials, hot<br />
glue bonds well, with others – such as certain plastics – the hot glue holds well indoors, but breaks loose<br />
outside in the hot sun. At one race, only one of six cars was able to complete a pass down the course (imagine<br />
the frustration!) If you plan to use hot glue, thoroughly testing its adhesion to different materials might save<br />
a few tears. The wood strips of Kelvin cars can be quickly taped together with clear packing or duct tape.<br />
Tool Kit<br />
As the solar cars are often fairly fragile, teams can often stay in the competition with some last minute<br />
repairs on site. A team member, instructor or parent might bring a tool kit with the following: needle-nosed<br />
pliers, masking tape, electrical tape, Super Glue or similar product, screwdrivers, a small file, electrical<br />
wire, anything else that might be suitable. A folding table helps too, but it’s certainly not necessary.<br />
<strong>Solar</strong> Panels<br />
The <strong>Solar</strong> World panels are lightweight & powerful, but they’re fragile. The two common failures are<br />
cracked cells (usually from dropping/bending the panel or crashing the car) and loose wire terminals.<br />
Using care when handling the panels & using partners when testing cars will reduce the number of<br />
cracked cells. As for the loose/broken wire terminals, students will often pull the terminals away<br />
from the back of the panel to get a bit more length. This isn’t recommended because the integrity of<br />
the connection then relies on the weak connection at the cell inside the panel. This results in a nearly<br />
irreparable failure. Re-tape the terminals to the back of the panel using electrical or masking tape<br />
before the panels are used. Keeping those troublesome leads tacked down to the back of the panel<br />
will greatly extend their life. It also doesn’t hurt to run a little extra long on the wire to the motor, so<br />
that there’s a bit of slack on the leads. To reduce cost several racers can share the same module.<br />
Review Copy Only<br />
solarschoolhouse.org<br />
Test, test & test again!<br />
One team had some really fast cars, but hadn’t tested them on a guide line; the results were less than<br />
spectacular. Two problems that could have been solved by testing: the linkage to the guide lines<br />
wasn’t sufficient & caused lots of extra friction, and the wheels weren’t adequate for the surface of<br />
the racecourse. Thoroughly test the cars along a guide line and on various surfaces. The link between<br />
the car & the guide line might take many tries to perfect. In the past, teams have bent paperclips<br />
and attached them on each end of the car. They’re cheap & easily bent to serve the purpose.<br />
Projects<br />
135
136<br />
<strong>Solar</strong> <strong>Schoolhouse</strong><br />
Project #19: <strong>Solar</strong> Power Monitor - page 1<br />
NOTE: This project uses the <strong>Solar</strong> Power Monitor Set available from the<br />
<strong>Solar</strong> <strong>Schoolhouse</strong>. (www.solarschoolhouse.org)<br />
Build and test several solar electric circuits with the<br />
<strong>Solar</strong> Power Monitor! Practice wiring solar modules<br />
in series and parallel to change voltage and amperage.<br />
Experiment with the photovoltaic effect<br />
by wiring modules in short circuit and<br />
changing module angles to the Sun.<br />
Build circuits to power various DC<br />
loads, including a water pump.<br />
CAUTION: For use only with DC power! Fan and light need 12-20 volts DC. Voltage for<br />
output loads will vary.<br />
The <strong>Solar</strong> Power Monitor is a Plexiglas circuit board with ports for plugging in solar modules.<br />
It also has meters to measure current and voltage. There are two small DC loads (a light and<br />
fan) on the Monitor, places to connect external loads, and switches to turn loads on and off.<br />
Review Copy Only<br />
Other items included with the <strong>Solar</strong> Power Monitor:<br />
solarschoolhouse.org<br />
• Compass—to see which direction produces the most power.<br />
• Protractor & Ruler—for studying Sun Angles (<strong>Solar</strong> Geometry)<br />
• Jumpers with alligator clip ends—set of 10. To connect modules in series, and short circuit<br />
switch #3 when testing solar modules.<br />
• Test Leads (Red & Black)—3 sets. With banana plug on one end and alligator clip on the other.<br />
For connecting modules to the Power Monitor, or to connect external loads (such as the water<br />
pump) to the power monitor.<br />
• 3 Watt <strong>Solar</strong> Modules—8 frameless silicon crystal PV modules. 3 volts, 1.0 amps DC each<br />
• 12 volt DC Water pump<br />
Your <strong>Solar</strong> Home • Student Guidebook
<strong>Solar</strong> <strong>Schoolhouse</strong><br />
3. Fuse & Holder<br />
1. Power In Ports (Red)<br />
POSITIVE<br />
1B. Power In Ports (Black)<br />
NEGATIVE<br />
Project #19: <strong>Solar</strong> Power Monitor - page 2<br />
<strong>SOLAR</strong> POWER MONITOR FEATURES<br />
6. Amp Meter<br />
1. POWER INPUT PORTS: For inserting leads to connect <strong>Solar</strong> Modules. NOTE: There are two pairs<br />
of Input Ports (red and black make a pair). Connect one module to each pair for parallel wiring.<br />
2. POWER OUTPUT PORTS: For inserting leads to power external loads, like the<br />
water pump. NOTE: Switch #3 must be turned on to power external loads.<br />
3. FUSE: Wired in the positive side of the circuit, it acts as overcurrent protection. For example, if a battery<br />
is connected to the Power In Ports, and a jumper short circuits the Power Out Ports (or a load connected<br />
to the Power Out Ports is short circuited), the battery will dump too much energy all at once, and damage<br />
the Power Monitor. To prevent this, the fuse melts, breaks the circuit, and protects the Power Monitor.<br />
Review Copy Only<br />
5. Voltmeter<br />
Light<br />
4. SWITCHES: Wired in parallel to separately control the Light (#1), Fan (#2), & Ext. Load (#3).<br />
solarschoolhouse.org<br />
4. Switches<br />
5. VOLTMETER: Measures voltage, and shows if you have enough for a specific load.<br />
For example, if you wire three of the 3-volt modules in series to power a 9 volt radio, the<br />
voltmeter will show about 9 volts. If polarity is reversed (+ and - wires in the wrong ports),<br />
the needle will go below the “0” mark. This helps prevent wiring a radio backwards, which<br />
can damage the radio. Polarity determines the direction in which the electricity flows.<br />
6. AMP METER: Measures the electric current flowing through the circuit. For amps to show<br />
on the meter a switch must be turned on, and connected to a load. It’s okay to short circuit<br />
solar modules by connecting the Power Out Ports with a jumper. This shows the maximum<br />
amps the module can provide. Different loads need different amounts of current. The light on<br />
switch #1 glows at 0.1 Amps and is bright at 0.3 Amps. The fan runs strong at 0.1 Amps.<br />
Fan<br />
2. Power Out Ports<br />
(Red) POSITIVE<br />
2B. Power Out Ports<br />
(Black) NEGATIVE<br />
Projects<br />
137
138<br />
<strong>Solar</strong> <strong>Schoolhouse</strong><br />
Project #19: <strong>Solar</strong> Power Monitor - page 3<br />
MEASURING MODULE OUTPUT<br />
One of the 1st things to do with the Power Monitor is check the<br />
maximum voltage and current your solar modules can supply.<br />
The modules are rated at 3 volts, but this varies with load<br />
and sunlight. In test conditions, the modules will produce<br />
more than 3 volts of electrical pressure. Here’s how:<br />
Measure the Maximum Voltage<br />
1. Plug leads (banana plug ends) into one positive and one<br />
negative Input Port. Clip the other ends to the module wires.<br />
Red = + , black =<br />
2. Record the Voltmeter reading with all switches off. This<br />
is the open circuit voltage (Voc), the maximum module<br />
voltage when no current is flowing. If the reading is below 0,<br />
reverse the alligator clips connected to the solar module.<br />
3. Check the Amp Meter. What does it read? Why?<br />
Measuring Maximum Amperage<br />
Review Copy Only<br />
solarschoolhouse.org<br />
Your <strong>Solar</strong> Home • Student Guidebook<br />
Clip a jumper<br />
between the<br />
Output Ports<br />
Measuring Maximum Voltage<br />
Measure the Maximum Amperage (Current)<br />
1. Clip a jumper between the Output<br />
Ports. Turn on switch #3.<br />
2. Record the Amp Meter reading. This<br />
is the short-circuit current (Isc), the<br />
maximum current possible without a load.<br />
Normal loads will draw less current.<br />
3. Experiment with the current produced by<br />
changing the module’s angle to the Sun.<br />
4. Check the voltmeter. What does it read? Why?
<strong>Solar</strong> <strong>Schoolhouse</strong><br />
Project #19: <strong>Solar</strong> Power Monitor - page 4<br />
MAKING A SERIES STRING—Series Wiring<br />
A series string is any number of photovoltaic modules connected in series to give a single<br />
electrical output. Let’s wire four solar modules in series to make a series string.<br />
Remember:<br />
SERIES WIRING ( + to ) ADDS VOLTS.<br />
Connect Four 3 Volt Modules to<br />
Make a 12 Volt Series String<br />
1. Clip the positive wire (red) of each module<br />
to the negative wire (black) of the next.<br />
2. Connect the end wires of the group of modules<br />
(series string) to the Power Monitor Input Ports with<br />
test leads. The color of the test lead,<br />
and the module wire it clips to, should<br />
match the Power Monitor port color.<br />
3. Check the Voltmeter. With the<br />
switches off, the open circuit<br />
voltage should be above 12 volts.<br />
4. If the reading is below 0, the<br />
polarity is reversed. This means the<br />
positive and negative connections<br />
are reversed. Switch the series string<br />
test lead clips to correct this.<br />
5. If there is no voltage, part of your<br />
circuit isn’t connected. Check all<br />
the alligator clips and the input port<br />
connections to see if any are loose.<br />
6. Check the Amp Meter.<br />
No current should be flowing.<br />
Measure the Load Amperage<br />
1. Turn on switch #1 to power the light. Check the Amp<br />
Meter reading. This is the current drawn by the light.<br />
Remember: the light and fan need 12 volts to operate.<br />
2. Turn on switch #2, and check the Amp Meter.<br />
This is the total current drawn by both loads.<br />
3. Try attaching the water pump (see next page). Be<br />
sure to submerge the pump in water before turning<br />
on switch #3. The pump should work, but not at full<br />
power. To increase the power of the pump, connect<br />
another series string in parallel (see next page).<br />
Review Copy Only<br />
solarschoolhouse.org<br />
Four 3 Volt Modules in a 12 Volt Series String<br />
Tip: Peel & stick one layer of industrial velcro tape to the backs of the modules. Stick the other layer to<br />
a wooden board. Attaching the modules to the board with velcro keeps the them in place while testing.<br />
Projects<br />
139
140<br />
<strong>Solar</strong> <strong>Schoolhouse</strong><br />
Project #19: <strong>Solar</strong> Power Monitor - page 5<br />
MAKING A <strong>SOLAR</strong> ARRAY—Series/Parallel Wiring<br />
To run at full power, the water pump needs more current than one series string provides.<br />
We want to increase the current, but not the voltage. We can wire a second series string to<br />
the Power Monitor in parallel. This is called series/parallel wiring. Remember:<br />
PARALLEL WIRING ( + to + , to ) ADDS PV AMPS.<br />
The entire group of solar modules is called a solar array. A solar array is any number of<br />
photovoltaic modules connected together to provide a single electrical output.<br />
Make a <strong>Solar</strong> Array with Two Series Strings.<br />
1. Make another four module series string (see previous page).<br />
2. Connect the end wires of the second series string to the second set of Input Ports on the Power Monitor.<br />
The color of the test lead, and the module wire it clips to, should match the Power Monitor port color.<br />
3. Check the open circuit voltage with switch #3 off. It should be the same as one series string.<br />
4. With the pump in water, turn on switch #3, and check the Amp Meter. It should read<br />
higher than it did for one string, and the pump should work very well.<br />
Connect series strings in<br />
parallel: positive to positive<br />
( red to red ), and negative to<br />
negative ( black to black ).<br />
Be sure all modules<br />
are aimed at full sun,<br />
and not shaded.<br />
PUT THE PUMP IN WATER<br />
BEFORE TURNING<br />
ON SWITCH #3.<br />
Review Copy Only<br />
solarschoolhouse.org<br />
12 Volt Series String<br />
Your <strong>Solar</strong> Home • Student Guidebook<br />
The Voltmeter will read the<br />
same with 2 series strings;<br />
the Amp Meter will increase.<br />
12 Volt Series String
<strong>Solar</strong> <strong>Schoolhouse</strong><br />
Project #19: <strong>Solar</strong> Power Monitor - page 6<br />
PUMPING WATER—Flow Rate vs. Sunlight<br />
Measure flow rate using the water pump, <strong>Solar</strong> Power Monitor and stop watch.<br />
Connect pump to Port #3. Pump should be in 2-3 gallons of water. Put tubing in measurement container (e.g.<br />
1 gallon milk jug). Connect solar module to Port A, and point it at the sun to maximize power output. Turn on<br />
switch #3 and start the stop watch at the same time. Note Volts and Amps. When measuring container is full (i.e.<br />
1 gallon), turn off the switch and stop watch and record the time. Fill in the chart: calculate the gallons per hour<br />
(gph) and Watts (Watts = Volts x Amps). Combine solar panels in parallel to increase amperage (connect positive<br />
leads to positive leads, & negative leads to negative leads). Add one module (or array) at a time, and repeat<br />
exercise. See if you can maximize the flow rate per maximum specifications for the pump.<br />
Note for 3 volt modules: Wire (4) - 3V modules in series (positive to<br />
negative, positive to negative) to make 12V arrays.<br />
# 12V<br />
Modules<br />
(or 12V<br />
Arrays)<br />
1<br />
2<br />
3<br />
4<br />
Volume<br />
(gal) or (l)<br />
Time<br />
min (hrs)<br />
gph<br />
(lph)<br />
Volts Amps Watts<br />
1. Chart gph (x-axis) vs. Watts (y-axis). Were you able to push the pump to its flow capacity?<br />
2. What happens at night or on cloudy days?<br />
3. Analyze the pros and cons of using solar energy<br />
for water pumping in developing countries, or<br />
water pumping for livestock, or water pumping<br />
for irrigation on California’s farms.<br />
Review Copy Only<br />
solarschoolhouse.org<br />
Rule Pump – Specifications<br />
360 Gallons Per Hour (0.38 lps) @<br />
13.6V open flow (no lift)<br />
330 gph (0.35 lps) @ 12V open flow<br />
max amp draw<br />
2.5A @ 13.6 V<br />
2.1 A @ 12V<br />
Reference:<br />
http://www.rule-industries.com<br />
Bilge pump: model 24<br />
3.785 liters = 1 gallon<br />
Projects<br />
141
142<br />
<strong>Solar</strong> <strong>Schoolhouse</strong><br />
Project #19: <strong>Solar</strong> Power Monitor - page 7<br />
<strong>Solar</strong> Cells (& modules) have 3 characteristic electrical measurements: Open Circuit Voltage (Voc),<br />
Short Circuit Current (Isc), and the Maximum Power Point for current (Imp) and for voltage (Vmp). Voc<br />
and Isc are measured without a load, while Imp and Vmp are measured with a load. Each module is rated<br />
at the maximum power (watts) it can produce under a clear sunny day condition.<br />
In this exercise, you will measure Voc and Isc at a variety of azimuth and tilt<br />
angles. Mark a “Compass” on the sidewalk with chalk. Connect the black test<br />
lead from Black Port A on the <strong>Solar</strong> Power Monitor to the black wire on the<br />
solar module. Set the module in the middle of your sidewalk Compass. One<br />
45°<br />
90°<br />
team member will adjust the tilt and azimuth angles. Use a protractor or Sun<br />
Angle Quadrant (p.9) to measure tilt angles. Record measurements and fill in the<br />
0°<br />
chart below. Make sure not to shade the module while taking measurements.<br />
Date: Time:<br />
Conditions (clear, partly cloudy, warm, etc.):<br />
Azimuth Tilt Angle Voc*[Volts] Isc**[Amps] Power***[Watts]<br />
East (90° clockwise<br />
from North)<br />
0° (horizontal)<br />
East 45°<br />
East 90° (vertical)<br />
South (180°) 45°<br />
South 90°<br />
West (270°) 45°<br />
West 90°<br />
North (0°) 45°<br />
North 90°<br />
*Voc = Voltage Open Circuit; All switches #1 - 3 should be OFF.<br />
**Isc = Short Circuit Current [Amps]; a complete circuit with no load. Connect a<br />
jumper across Port #3, then Switch #3 ON. The voltage meter should go to Zero.<br />
***Power [Watts] = Volts x Amps<br />
Graph your data using bar graphs on another piece of paper. Answer the following questions:<br />
1. What varies (changes) most with solar module orientation, amps or volts or watts?<br />
2. Why do you think that is?<br />
MAXIMIZING POWER—Optimum Orientation<br />
Review Copy Only<br />
solarschoolhouse.org<br />
3. What are the azimuth and tilt angles for maximum power?<br />
4. What are the azimuth and tilt angles for least power?<br />
5. How would your results change if these experiments were conducted 6 months from now?<br />
Your <strong>Solar</strong> Home • Student Guidebook
Review Copy Only<br />
solarschoolhouse.org<br />
Glossary
A<br />
AC electricity Electric current that changes<br />
direction many times per second.<br />
alternating current See AC electricity.<br />
ampere The unit of electrical current, often<br />
abreviated as “amp.” A number of electrical<br />
charges flowing past a point in one second.<br />
Autumnal Equinox The beginning of autumn.<br />
Around September 23rd in the Northern<br />
Hemisphere. Day and night are the same<br />
length.<br />
B<br />
battery backup system A solar electric<br />
system using batteries to store photovoltaic<br />
electricity.<br />
breadbox heater Simple solar water heater<br />
using a tank of water in a glass-covered<br />
insulated box aimed at the sun.<br />
C<br />
circuit breakers An automatic switch<br />
that stops the flow of electric current in an<br />
overloaded electric circuit.<br />
compact fluorescent lamps An energy saving<br />
lightbulb with an integrated ballast.<br />
conduction 1. The way heat moves through<br />
a solid by vibration of particles (atoms,<br />
molecules). 2. The way an electric current is<br />
carried through substances by the movement of<br />
free electrons.<br />
conductors 1. A substance through which heat<br />
can easily flow. 2. A substance through which<br />
electric current can flow.<br />
convection The way heat moves through<br />
fluids (liquids and gases). The area closest to<br />
the heat source expands and rises. The cooler<br />
area sinks.<br />
convection current Movement of fluids by<br />
convection<br />
D<br />
Daylighting Use of indirect sunlight to light<br />
building interiors and reduce electrical demand.<br />
DC electricity Electric current that moves in<br />
only one direction.<br />
deciduous trees Trees that lose their leaves in<br />
the fall.<br />
direct current See DC electricity.<br />
direct gain <strong>Solar</strong> design that uses sun-facing<br />
144<br />
Review Copy Only<br />
solarschoolhouse.org<br />
Your <strong>Solar</strong> Home • Student Guidebook<br />
windows to allow sunlight to heat thermal mass.<br />
drainback system <strong>Solar</strong> hot water system<br />
using two separate tanks connected by a heat<br />
exchanger. The fluid in the solar collector drains<br />
back into one tank when tempertures fall.<br />
E<br />
electrical circuit The path through which an<br />
electric current flows.<br />
electrical current The flow of electrically<br />
charged particles. Measured in amperes.<br />
electrical insulator A susbtance that resists<br />
the flow of electrical current.<br />
electric meter Device for measuring electricity<br />
consumption<br />
electromagnetic waves Radiation consisting<br />
of waves of energy, including radio waves,<br />
infrared, visible light, ultraviolet, X rays, and<br />
gamma rays.<br />
electrons Negatively charged particles existing<br />
around the nuclei of atoms.<br />
energy audit An evaluation of the way energy<br />
is used.<br />
energy efficiency The ability to perform work<br />
using the least amount of energy.<br />
Energy Guide Label attached to new<br />
appliances estimating projected energy use in<br />
comparison with similar models.<br />
equator An imaginary circle around the middle<br />
of the Earth separating the north and south<br />
hemispheres.<br />
evergreen trees Trees that keep their leaves<br />
throughout the year.<br />
F<br />
flat plate solar collector A device that<br />
transfers the sun’s heat to a fluid using tubes<br />
attached to a dark-colored sheet.<br />
full sun equivalent See Peak Sun.<br />
fuse Safety device containing a metal element<br />
that melts, and opens the circuit, when current<br />
exceeds a specific amperage.<br />
.<br />
G<br />
greenhouse effect A warming that happens<br />
when solar radiation is trapped by a substance<br />
which lets sunshine pass through, but absorbs<br />
radiated heat. This substance can be the glass<br />
in a greenhouse, or gases in the atmosphere.
H<br />
heat exchanger A device that transfers heat<br />
from a fluid on one side of a barrier to a fluid<br />
on the other side without bringing the fluids into<br />
direct contact.<br />
hemisphere One half of a sphere separated by<br />
a great circle, such as the Northern Hemisphere<br />
of the Earth.<br />
hours of use The total number of hours an<br />
electrical device draws current over a given<br />
period of time.<br />
I<br />
indirect sunlight Sunlight that has been<br />
reflected or diffused. See Daylighting<br />
infiltration Air leaking into a building through<br />
cracks and spaces, especially around doors and<br />
windows.<br />
infrared radiation Also called heat.<br />
Electromagnetic radiation with wavelengths<br />
longer than visible light and shorter than radio<br />
waves. Given off by anything hot.<br />
insulators 1. Substances that do not conduct<br />
electricity. 2. Substances that do not conduct<br />
heat well.<br />
inverter Electrical device that changes DC<br />
electricity into AC electricity. Special inverters<br />
can synchronize with the utility grid, and allow<br />
PV power to backfeed into the grid.<br />
isolated gain systems A solar design in which<br />
sunlight is collected in an area that can be<br />
closed off from the rest of the house.<br />
K<br />
kilowatt (kW) A rate of energy used or<br />
produced (power) equal to 1,000 watts.<br />
kilowatt-hour (kWh) An amount of energy<br />
used or produced, equal to 1 kilowatt for 1 hour.<br />
Review Copy Only<br />
solarschoolhouse.org<br />
L<br />
latitude The angular distance north or south of<br />
the earth’s equator, measured in degrees along<br />
a meridian.<br />
load Any device using energy (electricity).<br />
low-e glass Glass coated with a material<br />
(usually metal) to reduce the movement of heat.<br />
light shelf A horizontal overhang between two<br />
windows to shade the lower window, and reflect<br />
light through the upper window..<br />
M<br />
Magnetic Declination The angular difference<br />
between the true north pole and the magnetic<br />
north pole.<br />
N<br />
net metering A method of accounting in which<br />
electricity sold to the utility by their customer is<br />
given full retail credit.<br />
nucleus The center of an atom containing<br />
protons and (except hydrogen) neutrons.<br />
O<br />
overhangs Horizontal projections on buildings<br />
that shade windows.<br />
P<br />
parallel wiring An electrical circuit with more<br />
than one path for current to follow. Made by<br />
connecting plus to plus and minus to minus.<br />
Increases current without affecting voltage.<br />
passive solar design Using the sun to heat<br />
and cool buildings, with little or no use of<br />
machines or other fuel.<br />
peak sun The maximum solar energy received<br />
at any one instant, anywhere on Earth. Equal to<br />
1 kilowatt per square meter.<br />
peak sun hours The amount of radiant energy<br />
equal to one hour of peak sun. 1 peak sun hour<br />
equals 1 kilowatt hour per square meter.<br />
peak sun hours per day The total amount of<br />
radiant energy received per day.<br />
phantom loads Loads that consume energy<br />
even when turned “off.”<br />
photons Individual “packets” of light or<br />
electromagnetic radiation.<br />
photovoltaic array A number of photovoltaic<br />
modules connected together.<br />
photovoltaic cell A single semiconductor that<br />
converts light into electricity.<br />
photovoltaic effect The basic physical<br />
process through which a solar<br />
cell produces voltage when exposed to radiant<br />
energy (especially light).<br />
photovoltaic modules A group of PV cells<br />
connected together, and sealed for protection<br />
from the environment.<br />
protons A positively charged subatomic<br />
particle in the nucleus of an atom.<br />
PV direct system An electrical device<br />
connected directly to a photovoltaic supply.<br />
Glossary<br />
145
R<br />
radiation Energy radiated or transmitted<br />
as rays, waves, or in the form of particles<br />
(photons). The most efficient form of heat<br />
transfer, requiring no material to conduct heat.<br />
rate of energy use A measurement of the<br />
speed at which energy is used. Also called<br />
“power.” See Watt.<br />
S<br />
series wiring An electric circuit in which the<br />
current passes through one element after<br />
another, following only one path. Made by<br />
connecting plus to minus and plus to minus.<br />
Increases voltage without affecting current.<br />
solar array See Photovoltaic Array.<br />
solar collector Common term for solar water<br />
heating panel used to “collect” the sun’s heat<br />
and transfer it to a fluid.<br />
solar panels Common term for a panel which<br />
converts light into electricity. See Photovoltaic<br />
Module.<br />
Summer Solstice The time of year when the<br />
sun’s arc is highest in the sky. On or about June<br />
21 in the Northern Hemisphere.<br />
sunspace A separate, glassed in room used<br />
to accept and store solar heat for transfer to the<br />
main building.<br />
suntempering The simplest passive solar<br />
design using sun-facing windows to accept solar<br />
heat.<br />
T<br />
tankless water heater A device using a heat<br />
exchanger to rapidly heat water flowing through<br />
it. Also called a demand water heater.<br />
thermal mass Material used to absorb and<br />
store heat. Reduces temperature swings, and<br />
allows for later use of stored heat.<br />
thermosiphon system A solar water heating<br />
system that doesn’t need pumps. The collector<br />
is below the storage tank, and the rising hot<br />
water causes circulation.<br />
Trombe walls a sun-facing thermal mass wall<br />
built combined with an air space to form a large<br />
solar thermal collector. The wall is named after<br />
the inventor Felix Trombe, who popularized the<br />
design in 1964. Edward Morse patented the<br />
design in 1881.<br />
146<br />
Review Copy Only<br />
solarschoolhouse.org<br />
Your <strong>Solar</strong> Home • Student Guidebook<br />
U<br />
utility grid The transmission and distribution<br />
system supplying electricity to homes and<br />
businesses. Also called the Electrical Grid.<br />
utility intertie system A solar electric system<br />
using a special inverter that can pump electricity<br />
from the solar panels into the utility grid.<br />
V<br />
valance A horizontal structure on the inside of<br />
a window often supporting curtains. Reduces<br />
heat loss from windows.<br />
vampires Inefficient transformers for small<br />
appliances which are always “on” and wasting<br />
energy.<br />
Vernal Equinox The beginning of spring.<br />
Around March 21 in the Northern Hemisphere,<br />
Day and night are the same length.<br />
voltage The pressure “pushing” electrons in an<br />
electric circuit.<br />
volt A measure of electrical “pressure,” or<br />
force.<br />
W<br />
watt A unit of power. A measure of the speed<br />
at which electrical energy is used or produced.<br />
Named after James Watt, a British engineer<br />
who improved the steam engine.<br />
watt-hour An amount of energy used or<br />
produced equal to 1 watt for 1 hour.<br />
wattage Rate of energy flow, often used<br />
to describe the electrical requirement of an<br />
appliance or load.<br />
Winter Solstice The time of year when the<br />
sun’s arc is lowest in the sky. On or about<br />
December 22 in the Northern Hemisphere.
Index<br />
A<br />
AC electricity 81<br />
alternating current 81<br />
ampere 77<br />
measuring short circuit amperage<br />
with <strong>Solar</strong> Power Monitor 138<br />
Autumnal Equinox 15<br />
B<br />
battery backup system 80<br />
blinds 63<br />
breadbox heater 40<br />
C<br />
circuit breakers 76<br />
clerestory windows 64<br />
compact fluorescent lamps 93<br />
conduction 26<br />
conductors of electricity 76<br />
conductors of heat 27<br />
convection 27<br />
curtains 63<br />
D<br />
DC electricity 81<br />
deciduous 56<br />
direct current 81<br />
direct gain 58<br />
drainback system 43<br />
E<br />
electrical circuit 76<br />
electrical current 73<br />
electrical insulator 76<br />
electric bill 99<br />
electric meter 81, 100<br />
how to read 129<br />
electromagnetic waves 25<br />
electrons 73<br />
energy audit 96<br />
energy efficiency 92<br />
energy guide label 95<br />
evergreens 56<br />
F<br />
flat plate solar collector 41<br />
full sun equivalent 102<br />
fuses 76<br />
G<br />
gridtie system 82<br />
H<br />
heat exchanger 44<br />
hours of use 99<br />
I<br />
infiltration 57<br />
insulators 28<br />
inverter 82<br />
isolated gain systems 58<br />
K<br />
kilowatt 96<br />
kilowatt-hour 97<br />
L<br />
latitude 75<br />
light shelf 63<br />
load 76<br />
low-e glass 54<br />
M<br />
model solar cars<br />
project guide 133–137<br />
module output 103<br />
N<br />
net metering 82<br />
nucleus 73<br />
P<br />
Review Copy Only<br />
parallel wiring 79<br />
with <strong>Solar</strong> Cell Classroom Set 131<br />
peak sun 102<br />
peak sun hours 102<br />
peak sun hours per day 103<br />
phantom loads 95<br />
photons 25, 72<br />
photovoltaic array 74<br />
photovoltaic cell 72<br />
photovoltaic effect 73<br />
photovoltaic modules 74<br />
power formula 79<br />
power used by appliances 98<br />
protons 73<br />
PV direct system 80<br />
solarschoolhouse.org<br />
R<br />
radiation 25<br />
Radiation 25<br />
rate of energy use 96<br />
refrigerators 94<br />
S<br />
series/parallel wiring<br />
with <strong>Solar</strong> Cell Classroom Set 132<br />
with <strong>Solar</strong> Power Monitor 140<br />
series wiring 78<br />
with <strong>Solar</strong> Cell Classroom Set 131<br />
with <strong>Solar</strong> Power Monitor 139<br />
skylights 63<br />
solar array 74<br />
<strong>Solar</strong> Cell Classroom Set<br />
powering a radio with 132<br />
simple circuits with 131<br />
solar collector 41<br />
solar cookers<br />
pizza box sun oven project 120<br />
solar greenhouse 58<br />
solar panels 74<br />
<strong>Solar</strong> Power Monitor<br />
project guide 136–140<br />
Summer Solstice 15<br />
sun path chart<br />
how to read 113<br />
sunspace 58<br />
suntempering 53<br />
system sizing worksheet 104<br />
T<br />
tankless water heater 44<br />
thermal mass 57<br />
thermosiphon system 42<br />
Trombe walls 59<br />
U<br />
utility grid 81<br />
utility intertie system 82<br />
V<br />
valance 63<br />
vampires 95<br />
Vernal Equinox 15<br />
voltage 77<br />
measuring open circuit voltage<br />
with <strong>Solar</strong> Power Monitor 138<br />
voltage source 76<br />
volts 76<br />
W<br />
water heater 40<br />
watt 77, 96<br />
watt-hour 97<br />
wattage 97<br />
Winter Solstice 15<br />
Index<br />
147
Notes<br />
Review Copy Only<br />
solarschoolhouse.org<br />
148 Your <strong>Solar</strong> Home • Student Guidebook
Review Copy Only<br />
solarschoolhouse.org<br />
Notes<br />
149
150<br />
Notes<br />
Review Copy Only<br />
solarschoolhouse.org<br />
Your <strong>Solar</strong> Home • Student Guidebook
Review Copy Only<br />
solarschoolhouse.org<br />
Notes<br />
151
152<br />
About the Authors<br />
Tor Allen<br />
Executive Director, The Rahus Institute<br />
Founder of The Rahus Institute, a non-profit, educational organization with<br />
a focus on renewable energy.<br />
A graduate of University of California, Santa Barbara with a B.S. and M.S. in<br />
Mechanical Engineering, Tor has more than 18 years experience in the renewable<br />
energy field including: design, research, marketing, program and policy development,<br />
installation work, and teaching.<br />
Current projects include: The California <strong>Solar</strong> Center—a web-based source of<br />
solar energy information relevant to California; <strong>Solar</strong> e-Clips—an e-newsletter<br />
covering current stories and legislative updates; organizing <strong>Solar</strong> Forums throughout<br />
California; coordinating the California PV Utility Manager working group; and <strong>Solar</strong><br />
<strong>Schoolhouse</strong>—a hands-on, project-based solar for schools program.<br />
Hal Aronson<br />
Co-Creator & Senior Instructor, <strong>Solar</strong> <strong>Schoolhouse</strong> Program, The Rahus Institute<br />
Hal develops curriculum and resource kits on renewable energy and energy<br />
conservation and conducts training seminars for the <strong>Solar</strong> <strong>Schoolhouse</strong> program. He<br />
also trains electricians, contractors, and entrepreneurs in solar design and installation.<br />
Hal’s work as a carpenter in the early 80’s led to the design and construction of a<br />
passive solar off-grid home for his parents in the Santa Cruz area, providing a handson,<br />
real world experience that can be brought into the classroom. Hal holds a Ph.D. in<br />
Environmental Sociology, an M.A. in Sociology, a single-subject teaching certificate,<br />
and a B.A. in Politics from the University of California, Santa Cruz.<br />
Clay Atchison<br />
Director of Media Development, The Rahus Institute<br />
Clay Atchison has taught solar and renewable energy technologies for several years,<br />
including classes in <strong>Solar</strong> Electric Systems at California State University Sonoma.<br />
In addition to his work on the Your <strong>Solar</strong> Home Guidebook, he was editor, illustrator<br />
and a co-author of Teaching <strong>Solar</strong>: A Teacher’s Guide to Integrating <strong>Solar</strong> Energy<br />
into Classroom Curriculum. Clay is also a certified photovoltaic installer, and an<br />
award-winning videographer. He has written, directed and produced animations for<br />
several solar and clean technology films, including <strong>Solar</strong> Decathlon: A <strong>Solar</strong> Village<br />
on the National Mall. He has an interdisciplinary Bachelor of Arts in Environmental<br />
Studies and Painting, and a M.A. in Art Education.<br />
Review Copy Only<br />
solarschoolhouse.org<br />
John Perlin<br />
Your <strong>Solar</strong> Home • Student Guidebook<br />
John Perlin has authored A Golden Thread: Twenty-Five Hundred Years of <strong>Solar</strong><br />
Architecture and Technology (with Ken Butti), A Forest Journey: The Story of Wood<br />
and Civilization, and From Space to Earth: The Story of <strong>Solar</strong> Electricity. He was<br />
recently the principal researcher and writer of the documentary film The Power of the<br />
Sun with Nobel Laureates Dr. Walter Kohn and Dr. Alan Heeger.
Solutions for a<br />
Sustainable World<br />
Founded in 1998, The Rahus Institute is a 501c3<br />
the<br />
non-profit, research and educational organization<br />
Rahus with a focus on resource efficiency. The word,<br />
Institute<br />
Rahus (raw-hoos) is derived from the name of<br />
Solutions the Egyptian sun god, ‘Ra’ combined with the<br />
for a<br />
Norwegian Sustainable word World for house ‘hus’; literally, sun house. Our motto, Solutions<br />
for a Sustainable World, sums up our guiding goal to create a better world and<br />
better lives through the use of clean technology and intelligent implementation.<br />
The Rahus Institute aspires to accelerate the use of resource efficient<br />
technologies typeface is RotisSemiSans and practices. We foster research, development, demonstration,<br />
education and policy change using a variety of programs and targeting<br />
multiple audiences. This approach is achieved through a collaboration of<br />
renewable energy experts, engineers, educators, media and financing specialists.<br />
Review Copy Only<br />
Key programs developed by The Rahus Institute include the <strong>Solar</strong><br />
<strong>Schoolhouse</strong>, the California <strong>Solar</strong> Center, <strong>Solar</strong> e-Clips, the <strong>Solar</strong> Forum and<br />
the California PV Utility Manager Working Group. The Institute also develops<br />
educational displays, signage and provides general consulting services.<br />
solarschoolhouse.org<br />
For more information, visit www.rahus.org.
$18 uSD <strong>Solar</strong> energy/environment/education<br />
Your <strong>Solar</strong> Home Student Guidebook and<br />
DVD have several audiences. For schools, it<br />
can be used to integrate solar energy activities<br />
into the existing classroom curriculum. The<br />
companion Teaching <strong>Solar</strong> guide highlights<br />
teaching strategies and provides links to national<br />
subject standards.<br />
Outside the classroom, Your <strong>Solar</strong> Home Student<br />
Guidebook provides the tools needed to better<br />
understand and utilize a sustainable resource<br />
that’s been around since the beginning...the Sun!<br />
Founded in 1998, The Rahus Institute is a 501c3 non-profit organization<br />
dedicated to the promotion of renewable energy and resource efficiency.<br />
©2009 The Rahus Institute Sebastopol, California www.rahus.org<br />
Why did the ancient Greeks face their<br />
buildings to the south?<br />
Can you really bake cookies with sunlight?<br />
How does a Trombe wall keep a house<br />
cooler in the summer?<br />
An incredible amount of energy comes to earth<br />
in the form of sunlight. Every house is a potential<br />
solar collector, ready to harness this endless<br />
supply of energy and put it to work for us.<br />
Your <strong>Solar</strong> Home helps to demystify the concept<br />
of a solar home, providing the scientific basis for<br />
the many ways you can capture the sun’s energy<br />
to heat, cool, and power your home.<br />
Topics covered include:<br />
• <strong>Solar</strong> orientation through the seasons<br />
• Principles of energy and heat transfer<br />
• Passive solar heating and cooling<br />
• Heating water with the sun<br />
• Cooking with sunlight<br />
• <strong>Solar</strong> electricity<br />
• Historical references and interesting<br />
solar energy facts<br />
“I teach a solar energy unit every other year with the solar house model as the culminating project.<br />
I will use the book as a text for teaching concepts and a resource book during the<br />
construction of the models. Thanks for doing this. It’s a resource that is sorely needed.”<br />
Review Copy Only<br />
—Otak Jump, Ohlone School, Palo Alto, CA<br />
“Your <strong>Solar</strong> Home Student Guidebook and DVD have been invaluable in our class.<br />
We’re using the book as the text for our renewable energy class. Thanks for a great resource!”<br />
—Floyd Green, Corning High School, Corning, CA<br />
This project was printed on Grays Harbor Offset 100, made with 100% post-consumer waste, and<br />
New Leaf Reincarnation Matte Cover, made with 100% recycled fiber and 50% post-consumer<br />
waste. Both papers were processed chlorine free and are certified by the Forest Stewardship Council.<br />
By using these recycled papers instead of virgin stock the following resources we saved:<br />
Virgin Wood Net Energy Greenhouse Gases Solid Waste Water<br />
7 tons 15 million BTUs 4,579 pounds 1,335 pounds 21,705 gallons<br />
Calculations based on the Environmental Defense Fund Paper Calculator.<br />
solarschoolhouse.org