Mixtainer - Thermo Fisher
Mixtainer - Thermo Fisher
Mixtainer - Thermo Fisher

Create successful ePaper yourself
Turn your PDF publications into a flip-book with our unique Google optimized e-Paper software.
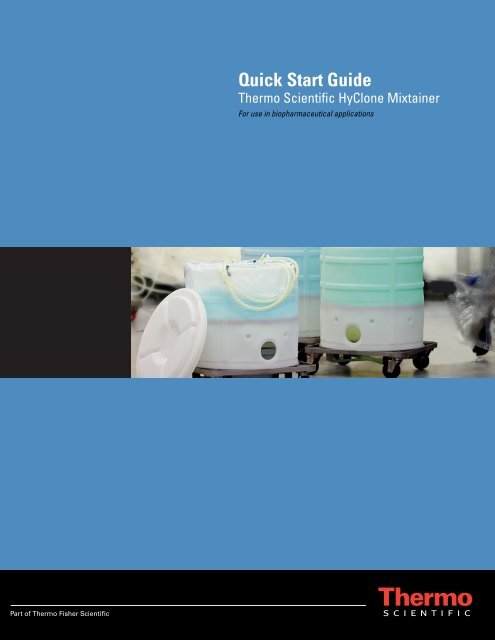
Quick Start Guide<br />
<strong>Thermo</strong> Scientific HyClone <strong>Mixtainer</strong><br />
For use in biopharmaceutical applications
Quick Start Guide<br />
<strong>Thermo</strong> Scientific HyClone <strong>Mixtainer</strong><br />
Rev. 1.0
Components<br />
The <strong>Mixtainer</strong> consists of a dolly, steel support, magnetic stirrer, drum lid<br />
and single-use, pre-sterilized <strong>Mixtainer</strong> BPC.<br />
Stainless Steel Support<br />
Stainless Steel Dolly<br />
50 L<br />
Available Drums<br />
Magnetic Stirrer<br />
<strong>Thermo</strong> Scientific <strong>Mixtainer</strong> Quick Start Guide 1<br />
100 L<br />
Lid<br />
200 L
Assembly<br />
The <strong>Mixtainer</strong> assembles without tools.<br />
Lid<br />
Flexible BPC ®<br />
(sold seperately)<br />
Stirrer Controls<br />
Drum<br />
Magnetic Stirrer<br />
Dolly<br />
Stir-Bar Dish<br />
Latches<br />
Access Hole<br />
Stainless<br />
Steel Support<br />
<strong>Thermo</strong> Scientific <strong>Mixtainer</strong> Quick Start Guide 2
Assembly<br />
Place motor on dolly<br />
• Situate the stainless steel support on the dolly using the corner<br />
brackets to line it up.<br />
Place the magnetic stir motor on top of support piece<br />
• Place the magnetic stirrer on the steel support.<br />
• Route the power cord and remote control box with cables<br />
underneath the dolly, routing them within the ring portion.<br />
Place the drum on the dolly<br />
Ring<br />
1. Place the drum inside the ring ensuring that it is fully seated.<br />
2. Look down from the top of the drum to confirm that the top plate<br />
of the stirrer aligns with the hole in the bottom of the drum.<br />
3. Reposition the magnetic stirrer if necessary.<br />
Brackets for<br />
stainless steel<br />
support piece<br />
Insert a new BPC into the drum<br />
Put the BPC into the drum such that the stir-bar dish rests firmly on<br />
the magnetic stirrer. Feel the bottom of the BPC to locate the rigid<br />
polyethylene stir-bar dish, and sight down the drum at the hole in the base<br />
so you know exactly where to center the dish.<br />
1. You may wish to add a few liters of liquid to the BPC to help<br />
maneuver the stir-bar dish into the hole in the bottom of the drum.<br />
(Follow the fill instructions in the next section.) The weight of the<br />
liquid helps pull the stir-bar dish through the hole in the drum and<br />
into the stir plate.<br />
<strong>Thermo</strong> Scientific <strong>Mixtainer</strong> Quick Start Guide 3
A stir-bar dish is welded into the<br />
bottom of every <strong>Mixtainer</strong> BPC.<br />
Place the <strong>Mixtainer</strong> system on a<br />
scale to monitor contents by weight.<br />
Measure the empty weight before<br />
adding contents.<br />
2. Guide the BPC by lifting upward where needed to center the stirbar<br />
dish. Let the stir-bar dish drop through the hole in the drum<br />
onto the magnetic stir plate.<br />
3. Extend the port tubes outside the top of the drum so they are not<br />
caught between the drum and liner.<br />
Filling the BPC<br />
Add liquid to the <strong>Mixtainer</strong> BPC through one of the top lines. A typical<br />
filling rate is about 10 L per minute. Filling rate depends on tubing<br />
diameter, tubing length, and pump capacity. Make sure that you can turn<br />
off the flow into the <strong>Mixtainer</strong> while simultaneously monitoring the level.<br />
Use an assistant if necessary.<br />
1. Position the <strong>Mixtainer</strong> at the filling site.<br />
2. Make a sterile connection between the fill-tube and the supply<br />
vessel.<br />
3. Use either a pump or gravity to transfer liquids into the <strong>Mixtainer</strong>.<br />
4. Fill a pre-measured amount, or fill by weight. You can also monitor<br />
liquid level by looking through the top of the BPC.<br />
5. Add any powder through the 1.5” diameter powder port if<br />
applicable.<br />
You can begin mixing as soon as liquid covers the stir-bar dish at the<br />
bottom of the BPC. See the section on mixing instructions.<br />
Using the lid<br />
Use of the lid is optional. It prevents objects from falling into the drum.<br />
• Apply the lid after filling the BPC.<br />
<strong>Thermo</strong> Scientific <strong>Mixtainer</strong> Quick Start Guide 4
To optimize mixing, try different<br />
speed settings. Look through the top<br />
of the BPC for a visual indication of<br />
mixing action.<br />
Use only safe electric outlets<br />
that conform to the power<br />
requirements shown on the<br />
magnetic stir motor.<br />
Locate the <strong>Mixtainer</strong> in a<br />
temperature controlled space to<br />
dispense warm or cool liquid.<br />
Mixing<br />
Activate the magnetic stirrer to dissolve solutes into solution, to keep nonsolutes<br />
in suspension, to blend liquid-to-liquid mixtures, and to ensure the<br />
dispensed product is homogeneous. It is possible to begin mixing as soon<br />
as the stir-bar is immersed, but it is usually just as effective to wait until<br />
the BPC is filled. The filling process is itself a mixing operation. To start<br />
mixing:<br />
1. Confirm the magnetic stirrer is plugged into an appropriate electric<br />
supply and the speed knob on the control box is in the OFF<br />
position (fully counterclockwise).<br />
2. Start mixing by slowly and smoothly turning the speed control<br />
clockwise.<br />
3. The second knob allows you to set the duration of mixing in<br />
minutes.<br />
The speed setting for best mixing depends on the volume and physical<br />
characteristics of the liquid in the BPC. You will need to determine the<br />
agitation speed appropriate for your application.<br />
If you try to run the stirrer too fast or change speed too quickly, the stir-bar<br />
and stirrer will decouple. This is not harmful, but it results in a knocking<br />
sound and virtually no mixing. If the sound does not stop within several<br />
seconds, set the speed to zero, wait for the knocking to stop, and then<br />
slowly increase the speed.<br />
Dispensing<br />
1. Position the <strong>Mixtainer</strong> at the dispense site.<br />
2. Make a sterile connection, if required, between the dispense port<br />
and your dispense line.<br />
3. Use a peristaltic pump to dispense.<br />
<strong>Thermo</strong> Scientific <strong>Mixtainer</strong> Quick Start Guide 5
Do not immerse the magnetic<br />
stirrer in liquid.<br />
Removing the BPC<br />
Removing the BPC is the reverse of installing it.<br />
1. Remove the lid from the drum.<br />
2. Empty the BPC using a peristaltic pump.<br />
3. Disconnect user-tubing from the BPC.<br />
4. Lift the BPC out of the drum.<br />
Cleaning the drum, lid and dolly<br />
The drum, lid and dolly require no routine maintenance other than<br />
occasional cleaning. Use water and ordinary detergents, and then rinse<br />
thoroughly.<br />
Do not use organic solvents that could damage plastic.<br />
Never use hydrochloric acid (HCl) or saline solutions on stainless steel.<br />
Rinse with water if those liquids contact the dolly.<br />
<strong>Thermo</strong> Scientific <strong>Mixtainer</strong> Quick Start Guide 6
©2010 <strong>Thermo</strong> <strong>Fisher</strong> Scientific Inc. All rights reserved.<br />
Cell Culture & BioProcessing 925 West 1800 South In Americas/Asia In Europe www.thermo.com/hyclone<br />
<strong>Thermo</strong> Scientific<br />
Logan, UT<br />
84321<br />
435-792-8000<br />
435-792-8001 fax<br />
+32 53 85 71 80<br />
+32 53 85 74 31 fax<br />
Single-Use Bioreactor (S.U.B.) 7