

T2 Humeral Nailing System Operative Technique - Stryker
T2 Humeral Nailing System Operative Technique - Stryker
T2 Humeral Nailing System Operative Technique - Stryker

Create successful ePaper yourself
Turn your PDF publications into a flip-book with our unique Google optimized e-Paper software.
<strong>Operative</strong> <strong>Technique</strong> – Retrograde <strong>Technique</strong><br />
Static Oblique Locking Mode<br />
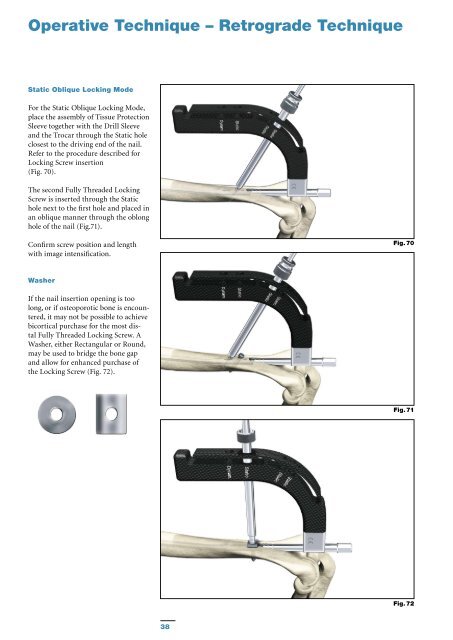
For the Static Oblique Locking Mode,<br />
place the assembly of Tissue Protection<br />
Sleeve together with the Drill Sleeve<br />
and the Trocar through the Static hole<br />
closest to the driving end of the nail.<br />
Refer to the procedure described for<br />
Locking Screw insertion<br />
(Fig. 70).<br />
The second Fully Threaded Locking<br />
Screw is inserted through the Static<br />
hole next to the first hole and placed in<br />
an oblique manner through the oblong<br />
hole of the nail (Fig.71).<br />
Confirm screw position and length<br />
with image intensification.<br />
Washer<br />
If the nail insertion opening is too<br />
long, or if osteoporotic bone is encoun -<br />
tered, it may not be possible to achieve<br />
bicortical purchase for the most distal<br />
Fully Threaded Locking Screw. A<br />
Wash er, either Rectangular or Round,<br />
may be used to bridge the bone gap<br />
and allow for enhanced purchase of<br />
the Locking Screw (Fig. 72).<br />
38<br />
Fig. 70<br />
Fig. 71<br />
Fig. 72


