CO2 Dragster Design and Construction Tips
CO2 Dragster Design and Construction Tips
CO2 Dragster Design and Construction Tips

You also want an ePaper? Increase the reach of your titles
YUMPU automatically turns print PDFs into web optimized ePapers that Google loves.
CO 2 <strong>Dragster</strong> <strong>Design</strong> <strong>and</strong> <strong>Construction</strong> <strong>Tips</strong><br />
<strong>Design</strong>ing a <strong>CO2</strong> Racer<br />
Before putting pencil to paper, consider these important points:<br />
• Follow the specifications given to you for the car.<br />
• Do you want to focus on the car’s performance or appearance?<br />
• What is most important to you: speed at any price, show-stopping good looks, or<br />
some combination of the two?<br />
If you're in it for the speed, know that the following design factors have an enormous<br />
impact on performance: weight — the lighter, the better; aerodynamics — you want your<br />
car to cheat the wind; <strong>and</strong> rolling resistance — less is more!<br />
Thumbnail Sketching<br />
Now is the time to get some of those racecar design<br />
ideas — undoubtedly floating around in your head — on<br />
paper. The best way to start is with concept sketches,<br />
also known as thumbnail sketches. Thumbnails are<br />
small, quick sketches used by engineers <strong>and</strong> designers to<br />
rapidly communicate ideas. They should not be detailed<br />
or even carefully done.<br />
Be sure to experiment with different ideas <strong>and</strong> be as<br />
creative as possible.<br />
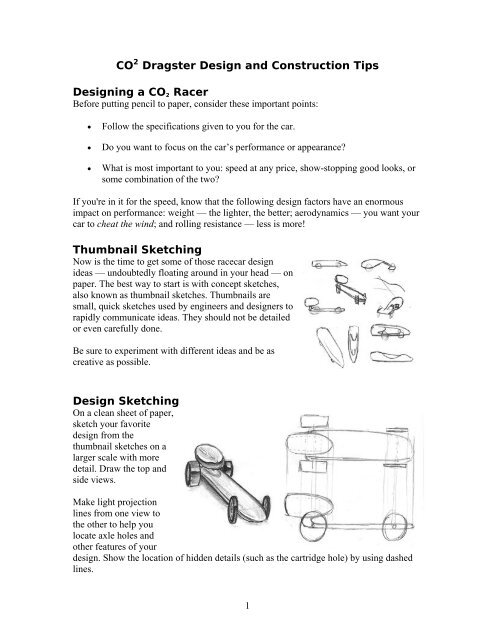
<strong>Design</strong> Sketching<br />
On a clean sheet of paper,<br />
sketch your favorite<br />
design from the<br />
thumbnail sketches on a<br />
larger scale with more<br />
detail. Draw the top <strong>and</strong><br />
side views.<br />
Make light projection<br />
lines from one view to<br />
the other to help you<br />
locate axle holes <strong>and</strong><br />
other features of your<br />
design. Show the location of hidden details (such as the cartridge hole) by using dashed<br />
lines.<br />
1
Remember to obtain the list of specs <strong>and</strong> read it. While doing so, look at your design<br />
sketch to see how each spec applies to your design. You may find it necessary to take<br />
notes or even change your design.<br />
Working Drawing<br />
The working drawing is a precise, 1:1 scale drawing that describes your car <strong>and</strong> its<br />
features. Working drawings should have top <strong>and</strong> side, or profile, views. An accurate<br />
working drawing is important for two reasons: 1) A copy of the working drawing serves<br />
as a template for rough-cutting your car blank. 2) You may be required to submit your<br />
working drawing. It could be part of your grade or even be scored for competition points<br />
(ask your teacher about this).<br />
Pitsco car kits include a large sheet of grid paper intended for the working drawing. Start<br />
by measuring <strong>and</strong> drawing the top <strong>and</strong> side views of the car blank, <strong>and</strong> then accurately<br />
locate the power plant housing on your drawing.<br />
Be sure to refer to the specifications sheet as you go.<br />
When your drawing is complete, make at least two copies. This enables you to make<br />
templates for your prototype <strong>and</strong> production racecar <strong>and</strong> have an extra copy for the<br />
teacher if necessary.<br />
Prototyping<br />
Prototyping involves the construction of a three-dimensional model of your design. In<br />
this case you can use the polystyrene body blank provided in the Pitsco car kit to build<br />
your prototype. Prototyping is a quick way to put your design ideas to test. It gives<br />
designers the opportunity to make changes if necessary before the final version is<br />
produced.<br />
2
Making the Prototype<br />
1. Cut out the top <strong>and</strong> side (profile) views from a copy of your working drawing.<br />
Then, carefully outline the views onto the polystyrene blank.<br />
2. Use a hot wire foam cutter to roughly shape the blank:<br />
a. Turn the blank on its side <strong>and</strong> cut out the profile view first.<br />
b. Fit the waste pieces <strong>and</strong> working piece together <strong>and</strong> secure them by<br />
wrapping two b<strong>and</strong>s of masking tape around the assembly.<br />
c. Set the blank assembly upright <strong>and</strong> cut out the top view. Note: The hot<br />
wire will not cut through the masking tape, so you’ll have to work around<br />
the tape. When ready, remove the tape <strong>and</strong> carefully cut those areas last.<br />
d. If you haven’t already done so, remove the masking tape <strong>and</strong> discard all<br />
the waste pieces.<br />
3. Smooth the corners of your prototype with a sharp knife, the hot wire cutter, or<br />
s<strong>and</strong>paper. Note: You may have limited success with s<strong>and</strong>paper on polystyrene.<br />
Testing the Prototype<br />
3
• Visual inspection – Does your prototype look<br />
like you envisioned it? Automobile<br />
manufacturers test the visual appeal of their<br />
new designs long before they put them into<br />
production.<br />
• Specifications – Measure the car in<br />
appropriate places to see if it adheres to the<br />
specifications.<br />
• Wind tunnel – Look for eddies around the car body.<br />
Can certain features be streamlined to reduce turbulence? Turbulence causes<br />
aerodynamic drag, which is an enemy of speed!<br />
Based on test results, you might want to modify your design. If you do, then you’ll<br />
need to make a new working drawing <strong>and</strong>, of course, make copies of it.<br />
Testing for Tolerances<br />
This simply means to check your car against the official rules <strong>and</strong> specifications to<br />
prevent any rules violations. In most competitions, a<br />
car is disqualified if it violates even one of the rules.<br />
Conduct checks regularly during the construction of a<br />
racecar. Even in the design drawing stage, the<br />
specifications should be considered to avoid problems<br />
down the road.<br />
For TSA specs, a h<strong>and</strong>y Go/No Go Gauge is available<br />
from Pitsco. It enables quick checking of several body<br />
measurements.<br />
4
Vehicle weight is a critical factor in competition. Because weight is an enemy of speed,<br />
the idea is to get the weight to the absolute minimum. Remember to weigh the car with<br />
all the wheels <strong>and</strong> hardware (axles, washers, screw eyes, <strong>and</strong> so forth).<br />
Testing for Rolling Resistance<br />
The items in this list are potential sources of rolling resistance. Be sure you test for each<br />
one.<br />
• Surface friction between two surfaces moving relative to one another –<br />
Examples include the wheels<br />
<strong>and</strong> axles, or the axles <strong>and</strong> car<br />
body. Test for spinning<br />
friction by rolling your car<br />
down a ramp <strong>and</strong> observing<br />
how far the vehicle travels. Another (perhaps less scientific) method<br />
is to spin the wheels while holding the car in an inverted position <strong>and</strong><br />
note the time that has elapsed when the wheels come to a stop.<br />
Experiment with different bearing materials or use a lubricant such as<br />
dry powder graphite to improve performance.<br />
• Improper wheel alignment – This happens<br />
when axle holes are not drilled straight.<br />
(Stated more precisely, straight means the<br />
holes should be perpendicular to the car’s<br />
longitudinal axis.) Roll the car forward on a<br />
flat smooth surface. It should go fairly<br />
straight. If the car veers drastically to the<br />
right or left, there’s a good chance the<br />
wheels are misaligned.<br />
• Careless location of screw eyes – The<br />
guideline can actually drag on the<br />
body or wheels of the car as it moves<br />
down the track, causing a great deal<br />
of friction. Invert your car <strong>and</strong> thread<br />
an 18" length of monofilament line<br />
(fishing line) through both screw<br />
eyes. Pull the line taut, <strong>and</strong> move it<br />
back <strong>and</strong> forth. If the movement of<br />
the line is restricted, consider relocating one or both of the screw eyes.<br />
5
• Wheel imperfections – Small imperfections from the molding process may be<br />
found on the rolling surface of a wheel. Examine your wheels <strong>and</strong> carefully<br />
remove any imperfections with fine-grit<br />
s<strong>and</strong>paper.<br />
Transferring <strong>Design</strong> to Body<br />
Blank<br />
Cut out the top <strong>and</strong> side (profile) views from a copy of<br />
your working drawing. Then, carefully trace the outline of the views onto the wood<br />
blank.<br />
Drilling Axle Holes<br />
1. Transfer the axle hole locations onto<br />
the blank by using a sharp pointed<br />
tool such as an awl to puncture<br />
through the template <strong>and</strong> into the<br />
wood blank.<br />
6<br />
2. Lay the car blank on its side <strong>and</strong> drill<br />
the axle holes. Axle holes should be<br />
drilled perpendicular to the car’s<br />
longitudinal axis in order for the car<br />
to roll freely <strong>and</strong> straight down the<br />
track. A drill press is highly<br />
recommended because it makes<br />
drilling perpendicular holes a cinch.
Rough Shaping Your Car Body<br />
1. If you haven’t drilled the axle holes yet, do this before shaping the body.<br />
2. Use a b<strong>and</strong> saw to roughly shape the blank:<br />
a. Turn the blank on its side <strong>and</strong> cut out the<br />
profile view first.<br />
b. Fit the waste pieces <strong>and</strong> working<br />
piece back together <strong>and</strong> secure them<br />
by wrapping two b<strong>and</strong>s of masking<br />
tape around the assembly.<br />
c. Set the blank assembly upright <strong>and</strong><br />
cut out the top view.<br />
d. Remove the masking tape <strong>and</strong> discard all the waste pieces.<br />
3. Smooth the corners of your car body. Use a bench-mounted s<strong>and</strong>er, sharp knife,<br />
wood rasp, files, or rough s<strong>and</strong>paper (80 grit) to smooth the car to its basic<br />
rounded shape.<br />
4. Periodically check your car against the spec sheet (especially weight) to make<br />
sure the car is still within tolerances. When weighing your car, put the wheels,<br />
axles, washers, screw eyes, <strong>and</strong> any other necessary hardware on the scale along<br />
with the body.<br />
7
If your design calls for a hollowed-out body, a high-speed rotary multi-tool works nicely.<br />
A variety of milling <strong>and</strong> s<strong>and</strong>ing bits are helpful for making cavities in the car body.<br />
Whenever using power tools to shape the car body, go slowly <strong>and</strong> cautiously. It’s very<br />
easy to remove too much wood <strong>and</strong> ruin your car!<br />
Fine Shaping Your Car Body<br />
At this point, your car has assumed its basic shape. Now you’re at the stage that separates<br />
the really fine cars from the mediocre cars. Extra time <strong>and</strong> effort spent during the fine<br />
shaping, or pre-painting, stage have a huge payoff in the curbside appeal of the final<br />
product.<br />
Use s<strong>and</strong>paper to remove unwanted bumps <strong>and</strong><br />
irregularities from the body. Use progressively finer grit<br />
paper as you go. For example, you might start with 80-grit<br />
paper (very course, removes a lot of material) <strong>and</strong> progress<br />
to 220-grit (fine paper for smoothing surfaces).<br />
Check your car for symmetry, <strong>and</strong> s<strong>and</strong> the body as needed. Also, exposing your car to<br />
bright light can help reveal imperfections that need attention.<br />
8
Painting Your Car Body<br />
As in the fine shaping stage, extra patience <strong>and</strong> effort put into the finishing stage can pay<br />
big dividends. Be aware that using several coats of paint can add weight to your car.<br />
allow the paint to dry.<br />
1. Insert a 2-foot length of 5/8" hardwood<br />
dowel into the power plant housing of<br />
the car body. This makes a very<br />
convenient h<strong>and</strong>le for turning the body<br />
to paint it from all angles. Pitsco also<br />
makes a racecar paint st<strong>and</strong> for this<br />
purpose.<br />
2. Use a spray can or airbrush to apply<br />
paint to the body. Spray light coats <strong>and</strong><br />
wait several minutes between coats to<br />
Final Assembly:<br />
Mounting Wheels <strong>and</strong> Hardware<br />
Don’t overlook the importance of this stage. A huge factor in race performance is how<br />
smoothly the car rolls down the track. Some meticulously shaped cars have failed to<br />
finish races because of improperly installed hardware!<br />
1. Gather your hardware: two axles, two straw bearings, four wheels, four washers,<br />
<strong>and</strong> two screw eyes. Depending on the configuration of the car body, different<br />
hardware might be required. Shell cars (with internal wheels) often require wheel<br />
spacers <strong>and</strong> clips to affix the axles to the car body.<br />
2. Check your spec sheet for rules about wheels, axles, washers, <strong>and</strong> spacers.<br />
9
3. Carefully mount the wheels <strong>and</strong> axles as dictated by your design. Be careful not to<br />
damage the fragile car body during installation.<br />
4. Roll test the car on a smooth, horizontal surface. The car should roll freely, <strong>and</strong><br />
the wheels should spin without restriction. Make adjustments if necessary.<br />
5. Install the screw eyes on the underside of the car body. Important: Plan the<br />
location of the screw eyes so the guideline does not rub against the car body or<br />
wheels.<br />
<strong>Construction</strong> <strong>Tips</strong><br />
Template Transfer<br />
Template Alternative: Use adhesive spray to attach blank-shaped templates to the top <strong>and</strong> a side<br />
of the blank. Drill <strong>and</strong> cut the blank with paper templates attached.<br />
Drilling Axle Holes<br />
Drill First: Axle holes in the body blank should be drilled before doing any shape cutting.<br />
Otherwise, it's difficult to drill straight.<br />
10
Rough Shaping<br />
Waste Pieces: After cutting the profile view, fit the waste pieces <strong>and</strong> body back together <strong>and</strong><br />
secure with masking tape. This simplifies the cutting of the top view.<br />
Fine Shaping<br />
Haste Makes Waste: Take time <strong>and</strong> care when using power tools to shape your car body. With<br />
soft balsa wood, it's very easy to remove more material than you intended.<br />
Painting<br />
Paint Adds Weight: Applying several coats of paint can add some weight to your car. Remember<br />
to plan for this.<br />
Fill 'er Up!: Want a super smooth finish on porous balsa wood? Before painting, use a wood filler<br />
<strong>and</strong> s<strong>and</strong>ing primer to fill problematic end-grain areas.<br />
Smooth Coats: Put your car under an inc<strong>and</strong>escent bulb between paint coats. The warmth<br />
smoothes the surface of the paint as it dries.<br />
Finish Protection: Clear coats provide glossy protection for paint <strong>and</strong> decals, but read paint labels<br />
for compatibility information.<br />
Painting Caution: Take care when painting inside the power plant housing. Excess paint can<br />
prevent the cartridge from fitting properly.<br />
Custom Graphics: Pitsco offers an extensive selection of decals <strong>and</strong> pinstripes specially designed<br />
for CO 2 racecars.<br />
Final Assembly<br />
Just a Lil' Dab: A drop of epoxy can help solidify screw eye mountings in soft balsa. But first, make<br />
sure the rules allow it.<br />
Screwy Eyes: Don’t use screw eyes that are partially open. Doing so can cause your car to detach<br />
from the guideline <strong>and</strong> slow or even damage your car.<br />
Lube 4 Speed: Heard of dry powder graphite? It's a great lubricant for axles.<br />
Sweet Wheels: Custom wheels can really accent a nice paint job <strong>and</strong> give your car a look of its<br />
own!<br />
11