Border Print Fabrics - Jinny Beyer Studio
Border Print Fabrics - Jinny Beyer Studio
Border Print Fabrics - Jinny Beyer Studio

You also want an ePaper? Increase the reach of your titles
YUMPU automatically turns print PDFs into web optimized ePapers that Google loves.
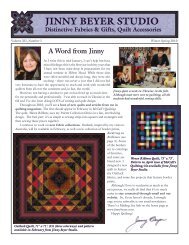
<strong>Jinny</strong> <strong>Beyer</strong><br />
<strong>Border</strong> <strong>Print</strong>s<br />
Creative Ideas &<br />
Tips for Quilters
<strong>Border</strong> <strong>Print</strong>s the <strong>Jinny</strong> <strong>Beyer</strong> Way<br />
T<br />
M<br />
he use of Indian fabrics started me<br />
on my own creative quilting journey<br />
and eventually to designing my own<br />
fabric collections. These collections<br />
always include a border print –<br />
a fabric of repeated decorative stripes.<br />
W hile living in India<br />
in the early 1970s,<br />
I became fascinated with block-printed Indian cotton<br />
fabrics. These were sold by the piece (usually a bed cover<br />
or table cloth) rather than by the yard, and each piece had<br />
a decorative border around the edge. I cut up the fabric for<br />
garments and often used the borders for decoration. With<br />
lots of scraps left over, I decided to make a quilt and chose<br />
the Grandmother’s Flower Garden pattern.<br />
ore than 35 years later, I am still inspired by the wonderful effects that border prints<br />
can give our quilts and quilted projects. I hope that this booklet will show you how easy<br />
and exciting it is to use border prints when you know just a few of my secrets.<br />
©2010 <strong>Jinny</strong> <strong>Beyer</strong> www.jinnybeyer.com<br />
Page 1
Designed for Quilters<br />
T he <strong>Jinny</strong> <strong>Beyer</strong> border print fabrics created for RJR <strong>Fabrics</strong> are designed specifically for quilters. Every fabric<br />
design has several characteristics that ensure the fabric does triple duty:<br />
• Each border print fabric has a wide design stripe and a narrow design<br />
stripe so there are lots of design options. And the wide stripe is repeated<br />
at least four times across the width of the fabric so that calculating<br />
how much is needed to make borders for a quilt is easy: the<br />
length of the longest side of the quilt plus about 18" for mitering<br />
corners and matching design repeats.<br />
• The fabric design includes at least 1/2" between design stripes so<br />
when you cut down the center of this space, there is always at least<br />
1/4" seam allowance on both sides of the design stripes.<br />
You can use every bit of fabric!<br />
• As the examples that follow show, it’s important for the design<br />
motifs to have mirror-image repeats. This provides lots of<br />
options for creating dramatic effects – easily – with border prints.<br />
<strong>Border</strong> prints can add detail to patchwork blocks,<br />
frame a quilt, or add interest to quilted<br />
<strong>Border</strong> <strong>Print</strong> Place Mat<br />
or projects for the home.<br />
To spark your<br />
creativity,<br />
Made with just six pieces of<br />
border print fabric so it works up very fast.<br />
<strong>Border</strong> <strong>Print</strong> Tote<br />
A great tote is indispensable<br />
and this one certainly qualifies.<br />
It’s a generous size and one pattern<br />
gives you two great design options.<br />
©2010 <strong>Jinny</strong> <strong>Beyer</strong><br />
Page 2<br />
here are<br />
three projects<br />
that put<br />
border prints<br />
to work for<br />
you.<br />
Seam Allowance<br />
Space<br />
Braided Palette Table Runner<br />
Seam Allowance<br />
Space<br />
Features a border print medallion in the center,<br />
beautifully shaded fabric strips, and border print edging.<br />
The Place Mat and Table Runner patterns can be downloaded free at www.jinnybeyer.com/borderprojects.<br />
<strong>Border</strong> <strong>Print</strong> Tote kits and patterns are available at your local quilt shop and www.jinnybeyer.com.
<strong>Border</strong> <strong>Print</strong>s in Patchwork Blocks<br />
Q uilters have been fussy-cutting fabric since the very beginning, and border prints create unique effects when<br />
cut carefully to fit a specific patch. As in the examples below, it can be as simple as replacing a single patch in a block<br />
or subdividing a large shape and using an identical piece of border print in each of those new pieces. For more examples,<br />
see <strong>Jinny</strong>’s book, The Quilter’s Album of Patchwork Patterns.<br />
Stars and Cross<br />
The plain strips in this<br />
block have been replaced with<br />
a narrow border print stripe.<br />
Basket of Flowers<br />
Different portions of a single<br />
border print fabric are used<br />
to enhance the basket and<br />
the base of the flowers.<br />
Queen’s Crown<br />
Replacing the diamonds in the block<br />
with border print patches that mirror<br />
where they meet creates a “frame”<br />
around the block’s center.<br />
©2010 <strong>Jinny</strong> <strong>Beyer</strong> www.jinnybeyer.com<br />
Page 3
Tips For Maximum Effect<br />
Keeping a few things in mind when<br />
cutting patches will make a big<br />
difference in how the finished<br />
block or quilt will look.<br />
Here are just three:<br />
1. Align the sewing line on the<br />
bottom of the template with<br />
a straight line printed on the<br />
fabric. This gives a nice, strong<br />
edge to the patch that helps define<br />
the shape, as in Basket of Flowers.<br />
2. When the same shape is repeated<br />
in a block, center the template<br />
on a mirror-image motif and<br />
cut identical pieces to give your<br />
block pleasing symmetry, as in<br />
Stars and Cross.<br />
3. Draw a portion of the design<br />
motif from the fabric onto your<br />
template. That will help you find<br />
the identical motif elsewhere on the<br />
fabric so you can cut identical<br />
patches.<br />
Rising Sun<br />
The octagon in the center of this<br />
block has been divided and replaced<br />
with eight identical border print triangles.<br />
White Nights<br />
Adding a small triangle of<br />
identical border print to the<br />
corner of four blocks that<br />
meet creates a lovely<br />
medallion effect.<br />
©2010 <strong>Jinny</strong> <strong>Beyer</strong> Page 4<br />
www.jinnybeyer.com
Creating <strong>Border</strong> <strong>Print</strong> Shapes<br />
Squares<br />
S<br />
quares are the most common shape in patchwork blocks. If a block includes a large center square,<br />
consider replacing it with a border print square made from four identical triangles. Or, rather than<br />
alternating pieced blocks with plain ones, use border print squares for the alternate blocks for<br />
lots of impact with very little sewing!<br />
Step 1<br />
Determine the finished size of the square needed. Divide the square diagonally from<br />
corner to corner to create four triangles. Make a template from one of the triangles<br />
from see-through template material. Be sure to add a ¼-inch seam allowance<br />
around all sides of the piece. Draw a line down the middle of the template to use as<br />
a “mirror line”.<br />
Step 2<br />
Using the mirror line as a guide, center the template on one of the<br />
motifs in the border print fabric, making sure that a line from the<br />
border print falls just inside the sewing line on the long side of the<br />
triangle template. (This ensures that you will have a nice line or<br />
frame around the outside of the finished square.) Mark some<br />
portion of the design directly onto the template to use as a guide<br />
for cutting the remaining pieces. Carefully draw around the<br />
template and cut the piece out.<br />
Placing your triangle on different<br />
portions of the border print will<br />
produce different effects!<br />
If you want to see what the square will look like before actually<br />
cutting the pieces, position the template onto the fabric, then place<br />
two mirrors on the two short sides of the triangle so they meet at a<br />
right angle. Carefully remove the template to see what the finished<br />
square will look like.<br />
Step 3<br />
Cut three more triangles identical to<br />
the first, then sew them together to<br />
complete the square.<br />
©2010 <strong>Jinny</strong> <strong>Beyer</strong> www.jinnybeyer.com<br />
Page 5
Other Shapes<br />
Other geometric shapes can be made with a border print in the same way as a square. The secret is to divide the shape<br />
into identical triangles. Create a template for that triangle (be sure to add the seam allowance), then cut as many<br />
triangles as you need from identical portions of the border print.<br />
Octagons<br />
Equilateral<br />
Triangles<br />
Hexagons<br />
©2010 <strong>Jinny</strong> <strong>Beyer</strong> www.jinnybeyer.com<br />
Page 6
Mirror-Image <strong>Border</strong> <strong>Print</strong> Patches<br />
In the Queen’s Crown block, the illusion of a border print frame is<br />
achieved by putting one patch right beside another that is its exact<br />
mirror image. If two patches will meet, using one regular and one<br />
mirror-image patch will allow the design to seem to reflect naturally<br />
around the corner. Mark the design motif on your template and use it<br />
to cut the number of regular patches you need. Then, just flip the<br />
template over and use it to cut your mirror-image patches, lining up<br />
your design motif markings with the matching motifs on your fabric.<br />
Diamonds You can create spectacular effects using this technique in diamond-shaped patches.<br />
To create a border print diamond, you need four triangles: two are the same and two<br />
are exact mirror images.<br />
Step 1<br />
Divide the diamond in half lengthwise and crosswise. Make a<br />
template from one of the four resulting triangles. Add the seam<br />
allowance to the outside and an arrow to show the lengthwise<br />
grain of fabric.<br />
Step 2<br />
Position the template onto the fabric and draw a design motif<br />
from the fabric onto the template. Cut two identical triangles.<br />
Now, flip the template upside down and align the markings on<br />
the template with the fabric grain and the matching design motif<br />
on the fabric. Cut two of these triangles.<br />
Step 3<br />
You will have two sets of mirror-image triangles that form<br />
an intricate-looking diamond when sewn together.<br />
©2010 <strong>Jinny</strong> <strong>Beyer</strong> www.jinnybeyer.com<br />
Page 7
Framing a Quilt with <strong>Border</strong> <strong>Print</strong>s<br />
J<br />
inny <strong>Beyer</strong>’s border prints are designed specifically with the quilter in mind. Each fabric has a wide and a narrow<br />
stripe which coordinate in both design and color. Both stripes have mirror-image motifs which are essential for perfectly<br />
mitered corners. In addition, the two different stripes in the border print are separated by at least a half-inch so that a<br />
1/4" seam allowance is provided for on both sides of the stripes. From selvage to selvage, there are always at least four<br />
repeats of each stripe across the fabric so calculating the yardage needed to border a quilt is easy: you need the length of<br />
the longest side of the quilt plus an additional half-yard to match design elements and allow for the miters at the corners.<br />
Framing a Square Quilt<br />
Step 1<br />
Place a strip of the border print across the middle of the quilt, centering a motif from the border at the exact center of<br />
the quilt. (Because of minor differences in seam allowances taken and stretching that can occur on bias edges, opposite<br />
edges of a quilt often measure slightly differently. Using a measurement taken from the middle of the quilt will help<br />
keep the quilt from “ruffling” at the edges.)<br />
Step 2<br />
To mark the first miter, position a right-angle triangle<br />
so that one of the sides of the right angle runs along<br />
the bottom edge of the border print. Then carefully<br />
move the triangle until the angled side touches the<br />
point where the top edge of the border print meets<br />
the edge of the quilt. (See arrow in Diagram 1.)<br />
Mark, then cut the miter line. (Because you have<br />
cut the miter right at the edge of the quilt<br />
the seam allowance is already included.)<br />
Step 3<br />
If you used the triangle to cut the miter on the second side,<br />
your design motifs might not be an exact match. So, carefully<br />
pick up the mitered side of the border strip and lay it –<br />
right side down – on top of the strip on the opposite side<br />
of the quilt, placing the top edge of the strip at the edge of<br />
the quilt. If necessary, adjust the top strip so that the top and<br />
bottom design motifs match exactly. (If you have centered<br />
a motif from the border print in the middle of the quilt, the<br />
designs should match at the edges.) Mark and cut the second miter.<br />
Step 4<br />
Using this first mitered strip as a guide, cut three<br />
more identical pieces, making sure that the design on<br />
the border print is exactly the same on all four pieces.<br />
Diagram 1<br />
Diagram 2<br />
©2010 <strong>Jinny</strong> <strong>Beyer</strong> www.jinnybeyer.com<br />
Page 8
Step 5 Diagram 3<br />
Mark a seam allowance intersection dot<br />
on the short side of each of your borders as in<br />
Diagram 3. To find the spot, simply draw a short line<br />
1/4-inch inside the mitered edge and the short edge of<br />
the border. Draw the dot where the two lines intersect.<br />
Do the same for each corner of your quilt.<br />
Step 6<br />
To sew the borders to the quilt, pin the mid-point of one of the border<br />
pieces to the middle of one of the edges of the quilt. Next, match and<br />
pin the dots on each side of your border with the dots on the quilt<br />
corners. Continue pinning the border to the quilt, easing in any<br />
fullness. (The edge of the quilt is usually a little wider than the center<br />
because of bias edges or seams.) Sew the border to the quilt, starting<br />
and stopping at the dots. Sew the mitered seams last, starting from the<br />
inside dot. When pinning the edges together, be sure to match the<br />
design elements on both pieces.<br />
Framing a Rectangular Quilt<br />
With rectangles, you cannot always be assured that the fabric designs<br />
will automatically match at the corners. So, you must take an extra step.<br />
Step 1<br />
First, follow Steps 1-3 above and cut two identical strips for the short ends of the quilt. The pieces for the other<br />
two sides of the quilt must be cut differently: for the corners on all pieces to match, there must be a seam in these<br />
long borders at the exact center of the quilt.<br />
Step 2<br />
Place one of the cut strips on top of a length of the border print<br />
stripe, matching the fabric designs. Cut one miter to match the<br />
miter on the top strip. Set the top strip aside. Lay the newly cut<br />
strip on top of the quilt through the center, aligning one mitered<br />
edge with the edge of the quilt. Mark the center of the quilt on<br />
the strip. (See Diagram 5.) Move the strip from the quilt and<br />
cut it off ¼" beyond the center mark. Using this cut<br />
strip as a guide, cut one more piece identical to it.<br />
You also need two strips that are the exact mirror<br />
images of these pieces. Using one of the strips<br />
you just cut, flip it over and lay it on a strip<br />
of border print, matching the fabric design<br />
exactly. (The two strips will be right sides<br />
together.) Cut the miter and straight edges<br />
to match the top piece. Using the newly<br />
cut strip as a guide, cut one more piece.<br />
Center of quilt<br />
Diagram 5<br />
Diagram 4<br />
Cut on<br />
solid line<br />
Center of quilt<br />
Sew on<br />
dotted line<br />
©2010 <strong>Jinny</strong> <strong>Beyer</strong> www.jinnybeyer.com<br />
Page 9
Diagram 6<br />
Applying Multiple <strong>Border</strong>s<br />
<strong>Jinny</strong> often designs quilts to make full use of the<br />
border prints. She will first frame the quilt with<br />
the narrow border stripe, then add a coordinating<br />
fabric as a second border. The quilt is finished off<br />
with the wide stripe from the border print.<br />
<strong>Jinny</strong> personally measures and adds each border<br />
separately. However, when the middle border<br />
is a fabric that doesn't have to be matched at<br />
the corners, she recommends the following<br />
method as being a little faster: Sew the second<br />
border to the first and then measure and cut them<br />
as a single border in the steps above. Measure, cut<br />
and sew the third border separately after the first<br />
two borders have been completed and sewn to<br />
the quilt.<br />
Step 3<br />
Sew the seams at the middle of two mirror-imaged strips and<br />
attach these borders to the quilt as in Steps 5 and 6 above. Sewing<br />
the borders to a rectangular quilt in this manner assures that the<br />
corners will match. There will be a seam at the center of the long<br />
strips (Diagram 7), but the design at that center will mirrorimage<br />
as well, allowing the design to flow around the quilt.<br />
Diagram 7<br />
The black line marks<br />
the center seam.<br />
Note how the design<br />
motif reflects the<br />
seam line.<br />
©2010 <strong>Jinny</strong> <strong>Beyer</strong> www.jinnybeyer.com<br />
Page 10