Series 90 Lighted Pushbutton Switches - Staco Systems
Series 90 Lighted Pushbutton Switches - Staco Systems
Series 90 Lighted Pushbutton Switches - Staco Systems

You also want an ePaper? Increase the reach of your titles
YUMPU automatically turns print PDFs into web optimized ePapers that Google loves.
<strong>Series</strong> <strong>90</strong> <strong>Lighted</strong> <strong>Pushbutton</strong> <strong>Switches</strong>
Company History<br />
<strong>Staco</strong> <strong>Systems</strong> has designed and manufactured switches since its commencement<br />
in 1958. During the early years, a small manufacturing and assembly team<br />
accomplished the first series 30 switch used in a Fokker F-27 in 1960. Fifty years<br />
later, <strong>Staco</strong> <strong>Systems</strong> has evolved into an internationally recognized, high-tech<br />
endeavor with numerous experienced experts in manufacturing, engineering,<br />
sales, and quality control. Our product line has expanded to include rugged<br />
keyboards and keypads, electronic controllers, and panel assemblies for<br />
hundreds of applications worldwide.<br />
Switch History<br />
1960 1962 1967 1978 1986<br />
<strong>Series</strong> 30, 1M<br />
Fokker F-27<br />
<strong>Series</strong> 40<br />
Lockheed P3<br />
Rotary <strong>Switches</strong><br />
Douglas DC-7B<br />
<strong>Series</strong> 30, 40, 60,<br />
1M<br />
Boeing E-3A<br />
<strong>Series</strong> 93, 99<br />
British Aerospace<br />
Hawk 200<br />
1988 1989 1991 1996 Today<br />
<strong>Series</strong> 97 Matrix<br />
Northrop B2<br />
<strong>Series</strong> 80, <strong>90</strong><br />
Aeritalia AMX<br />
<strong>Series</strong> <strong>90</strong><br />
Boeing E-8C<br />
Lockheed F-22<br />
<strong>Series</strong> 93<br />
British Aerospace<br />
Nimrod 2000<br />
Full Sub-Assembly<br />
Capabilities
CONTENTS<br />
Product Line Overview ................................................................................................................................................2<br />
Quick Reference Guide .........................................................................................................................................3<br />
Figure & Table Listings ..........................................................................................................................................4<br />
Individual Mount ..........................................................................................................................................................5<br />
Individual Mount, PC or Solder, Switch/Indicators ................................................................................................5<br />
Display <strong>Pushbutton</strong> ...............................................................................................................................................6<br />
Mounting Procedure - Individual Mount, Crimp or Solder ...................................................................................11<br />
Dimensions - Switch/Indicator, <strong>Pushbutton</strong> .........................................................................................................12<br />
Individual Mount, Crimp Pin, Switch/Indicators ...................................................................................................13<br />
Dimensions - Switch/Indicator .............................................................................................................................14<br />
Seals - Watertight & Solvent Resistant ...............................................................................................................18<br />
Matrix Mount ..............................................................................................................................................................21<br />
Matrix Housing Assemblies .................................................................................................................................21<br />
Matrix Assembly Exploded Views .......................................................................................................................23<br />
Dimensions - Rear Flange Mount Matrix Housing ..............................................................................................25<br />
Dimensions - Front Dress Bezel Matrix Housing ................................................................................................28<br />
Product Design and Engineering Data ......................................................................................................................31<br />
Military and Environmental Specifications ...........................................................................................................31<br />
Electrical and Mechanical Data ...........................................................................................................................33<br />
Display System ....................................................................................................................................................35<br />
Incandescent and LED Circuits and Lighting Control .........................................................................................35<br />
LED Schematics ..................................................................................................................................................36<br />
Legends ...............................................................................................................................................................39<br />
Sunlight Readable Displays ................................................................................................................................40<br />
Night Vision Imaging System Displays................................................................................................................41<br />
Materials and Quality Standards .........................................................................................................................43<br />
Military Cross Reference ...........................................................................................................................................44<br />
MIL-22885/101 ....................................................................................................................................................44<br />
MIL-22885/112.....................................................................................................................................................47<br />
Tables ........................................................................................................................................................................50<br />
Accessories and Other <strong>Staco</strong> <strong>Systems</strong> Products .....................................................................................................59<br />
Ordering Information .................................................................................................................................................63<br />
Model 91 and 92 .................................................................................................................................................63<br />
Model 93 ..............................................................................................................................................................64<br />
Model 98 ..............................................................................................................................................................64<br />
Model 99 ..............................................................................................................................................................64<br />
Seals ...................................................................................................................................................................66<br />
Front Dress Bezel Mount ....................................................................................................................................66<br />
Rear Flange Mount .............................................................................................................................................67<br />
Complete <strong>Systems</strong> ..............................................................................................................................................67<br />
All information in this catalog is effective on the publication date and is subject to change without notice.<br />
All printing and clerical errors are subject to correction.<br />
Visit www.stacosystems.com or call 714-549-3041 for more information<br />
1
OVERVIEW<br />
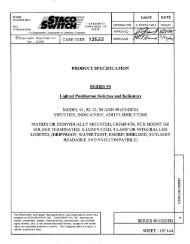
The <strong>Staco</strong> <strong>Systems</strong> <strong>Series</strong> <strong>90</strong> is a broad product line of lighted pushbutton switches and indicators. This catalog<br />
identifies performance features and options, gives specifications and engineering data, and provides ordering<br />
information.<br />
These manually operated, illuminated switch/indicator and pushbutton assemblies are identified as Models 91, 92,<br />
93, 98, and 99.<br />
The <strong>Series</strong> <strong>90</strong> Matrix Housing Assemblies, which utilize these switches and indicators, are identified as Models<br />
94, 95, 96 and 97.<br />
This product line meets the general requirements of MIL-S-22885, MIL-STD-3009, and, in matrix form,<br />
MIL-S-24317. It specifically meets the requirements of MIL-S-22885/101and MIL-S-22885/112.<br />
2<br />
SERIES <strong>90</strong><br />
<strong>Lighted</strong> Display <strong>Pushbutton</strong> <strong>Switches</strong> and Indicators<br />
• Individual Mount or Matrix Mount<br />
• Light Weight, Short Length<br />
• LED or Incandescent Lighting<br />
• Sunlight Readable Displays<br />
• Night Vision Goggle Compatible Displays<br />
• Standard <strong>Lighted</strong> Displays<br />
• Numerous Switching Options<br />
• Popular Termination Styles<br />
• Dripproof, Splashproof, Watertight (Immersion) Seal, and Solvent<br />
Resistant Options<br />
• Qualified to MIL-PRF-22885/101 for Incandescent Lighting<br />
•<br />
Qualified to MIL-PRF-22885/112 for High Bright LED Lighting and Short<br />
Crimp Pin Termination.<br />
• Meets or Exceeds All Applicable MIL-SPEC Requirements<br />
• High Impact Shock in Accordance with MIL-S-<strong>90</strong>1
QUICK REFERENCE<br />
SWITCHES AND INDICATORS<br />
MODEL DESCRIPTION TERMINATION REFERENCE INFORMATION<br />
91 Switch or indicator assembly Solder or PCB pp. 5,11, 63<br />
(without pushbutton) mount fig. 1-4<br />
in short housing<br />
92 Display pushbutton assembly Into Models pp. 6, 7, 8, 9, 10, 63<br />
91 or 98 fig. 5-14<br />
93 Switch or indicator assembly Solder or PCB pp. 12, 64, 65<br />
with pushbutton in mount fig. 15-21<br />
short housing<br />
98 Switch or indicator (without Crimp pin pp. 13, 14, 15, 16 17, 64<br />
pushbutton) in long housing<br />
99 Switch or indicator with Crimp pin pp. 13, 14, 15, 16, 17, 63, 64<br />
pushbutton in long housing fig. 22-37<br />
MATRIX HOUSINGS<br />
MODEL DESCRIPTION TERMINATION REFERENCE INFORMATION<br />
94 Rear flange mount Solder or PCB pp. 21-22, 25-27, 30<br />
short housing mount fig. 43, 46-49, 59-60<br />
95 Rear flange mount Crimp pin pp. 21-27, 29, 67<br />
long housing fig. 42, 45-49, 59-60<br />
96 Front dress bezel mount Solder or PCB pp. 21-23, 28-30, 66<br />
short housing mount fig. 40, 50, 53-54, 59-60<br />
97 Front dress bezel mount Crimp pin pp. 21-22, 28-30, 66<br />
long housing fig. 51-55, 59-60<br />
SPECIAL PART NUMBERS<br />
PART NUMBER DESCRIPTION PART NUMBER DESCRIPTION<br />
92PXXXX Unique pushbutton with special 94/XXXX<br />
artwork or other non-standard<br />
design requirements.<br />
63XXXX Standard switch with a 92P 95/XXXX Matrix assembly. <strong>Staco</strong> <strong>Systems</strong><br />
pushbutton and switches with assigned code for special despecial<br />
marking or construction. tailed requirements. Includes<br />
housing, switch, pushbutton<br />
15XXX Accessories 96/XXXX and any other special features.<br />
<strong>90</strong>/005 Immersion Seal/High Impact<br />
<strong>90</strong>/006 Shock option. Applicable to 97/XXXX<br />
models 91, 92, 93, 98 and 99.<br />
Visit www.stacosystems.com or call 714-549-3041 for more information<br />
3
4<br />
Figure Listing<br />
Fig. Pg. Description<br />
1 5 Switch schematics, SPDT and DPDT<br />
2 5 Printed circuit board or solder terminals<br />
3 5 Terminal identification<br />
4 5 PCB layout dimensions<br />
5A 7 Incandescent pushbutton types 2, 3, 4, 5, 8, or 9<br />
5B 8 Incandescent pushbutton types 1, 6, 7, or 0<br />
6 8 LED pushbutton display<br />
7 8 Replaceable legend plates, type 8, 9, or 0<br />
8 9 Incandescent lighting schematics<br />
9 9 Typical 5 volt LED circuit diagram<br />
10 9 Typical 28 volt LED circuit diagram<br />
11 10 LED lighting, current sourcing<br />
12 10 LED lighting, current sinking<br />
13 10 CIE chromaticity diagram, incandescent colors<br />
14 10 CIE chromaticity diagram, NVIS compatible colors<br />
15 11 Slot mounting panel cut out<br />
16 12 Dimensions - model 93, flush mount<br />
17 12 Dimensions - model 93, flush mount w/ panel seal<br />
18 12 Dimensions - model 93, extended mount unsealed<br />
19 12 Dimensions - model 93, extended mount w/ panel seal<br />
20 12 Dimensions - model 93, extended mount unsealed<br />
21 12 Dimensions - model 93, matrix mount w/ panel seal<br />
22 14 Model 99 switch/indicator exploded view, long crimp<br />
23 14 Dimensions - Model 99, flush mount<br />
24 14 Dimensions - Model 99, flush mount w/ panel seal<br />
25 15 Dimensions - Model 99, extended mount<br />
26 15 Dimensions - Model 99, extended mount w/ panel seal<br />
27 15 Switch Indicator<br />
28 15 Mounting screw location<br />
29 15 Panel cut out<br />
30 16 Model 99 switch/indicator exploded view, short crimp<br />
31 16 Dimensions - Model 99, flush mount<br />
32 16 Dimensions - Model 99, flush mount w/ panel seal<br />
33 17 Dimensions - Model 99, extended mount<br />
34 17 Dimensions - Model 99, extended mount w/ panel seal<br />
35 17 Switch/indicator assembly<br />
FIGURE & TABLE LISTINGS<br />
Table Listing<br />
Tbl. Pg. Description<br />
1 50 Terminations, circuitry and contact material<br />
2 51 Switch action and pushbutton retainer<br />
3 53 EMI/RFI and sealing<br />
4 53 Incandescent or LED, ground operations and EMI/RFI<br />
5 54 Display style and character definition<br />
6A 55 Incandescent lamp selection and sealing<br />
6B 56 LED configuration and sealing<br />
7 56 Display type<br />
8 57 Cell color<br />
Figure Listing<br />
Fig. Pg. Description<br />
36 17 Receptacle Assembly<br />
37 17 Mounting Screw Location<br />
38 18 Watertight seal dimensions<br />
39 20 <strong>Pushbutton</strong> guard for watertight seal<br />
40 23 Matrix assembly with direct to switch terminations<br />
41 23 Matrix assembly with long crimp pin terminations<br />
42 24 Matrix assembly with short crimp terminations<br />
43 25 Rear flange mount, solder or PCB termination<br />
44 25 Rear flange mount, crimp pin termination<br />
45 26 Rear flange mount, short crimp pin termination<br />
46 27 Rear flange mount, horizontal flanges, unsealed<br />
47 27 Rear flange mount, vertical flanges, unsealed<br />
48 27 Rear flange mount, horizontal flanges, unsealed<br />
49 27 Rear flange mount, four flanges, sealed or unsealed<br />
50 28 Front dress bezel mount, solder or PCB termination<br />
51 29 Front dress bezel mount, long crimp pin termination<br />
52 29 Front dress bezel mount, short crimp pin termination<br />
53 30 Front dress bezel mounting, minimum spacing<br />
54 30 Front dress bezel, mounting cleat assembly<br />
55 30 Front dress bezel, mounting cleat requirements<br />
56 36 LED Voltage Dimming Curve<br />
57 37 5 volt LED circuit schematics<br />
58 38 28 volt Led circuit schematics<br />
59 67 Ordering <strong>Systems</strong><br />
60 67 Ordering <strong>Systems</strong><br />
9 57 Rear flange mount dimensions and panel cutouts<br />
10 58 Front dress bezel mount dimensions and panel cutouts
INDIVIDUAL MOUNT SWITCH/INDICATORS<br />
Switch/Indicator Options<br />
<strong>Switches</strong> are available with SPDT or DPDT circuitry, momentary or<br />
alternate switch action, silver or gold contacts, EMI/RFI shielding,<br />
sealed or unsealed, immersion seal/high shock, and a choice of<br />
solder, printed circuit, or crimp pin terminations. Matching indicators<br />
are also available.<br />
Switch Schematics<br />
Terminals 5 & 7 are Normally Closed (NC).<br />
Terminals 1 & 4 are Normally Open (NO).<br />
Terminals 8 & 10 are Common (C).<br />
For indicator, omit Terminals 1, 4, 5, 7, 8 & 10.<br />
See Figure 8, for lamp circuit schematics.<br />
PC or Solder Terminals<br />
Figure 2<br />
Terminal Identification<br />
Figure 3<br />
PCB Layout Dimensions<br />
Terminal pattern shown above depicts switch terminal<br />
dimensions as viewed from rear of the switch, and shows<br />
all pin diameters and spacing. It is not a circuit board<br />
layout. When laying out the circuit board, hole sizes and<br />
spacing must accommodate the switch terminals and<br />
manufacturing tolerance conditions. Holes not required for<br />
omitted terminals.<br />
REAR VIEW OF<br />
SWITCH HEADER<br />
Figure 4<br />
.040 .001 DIA PIN<br />
(1.02 .03) 12 PLACES<br />
.367<br />
(9.32)<br />
.520<br />
(13.21)<br />
.138<br />
(3.51)<br />
Figure 1<br />
CENTERLINE<br />
OF HEADER<br />
.091<br />
(2.31)<br />
Visit www.stacosystems.com or call 714-549-3041 for more information<br />
2<br />
11<br />
9<br />
.262<br />
(6.65)<br />
.524<br />
(13.31)<br />
.360<br />
(9.14)<br />
.164<br />
(4.17)<br />
5<br />
1<br />
4<br />
8 10<br />
6<br />
.152<br />
(3.86)<br />
7 3<br />
.325<br />
(8.26) .428<br />
(10.87)<br />
12<br />
CENTERLINE<br />
OF HEADER<br />
.513<br />
(13.03)<br />
.260<br />
(6.60)<br />
5
6<br />
SERIES <strong>90</strong> DISPLAY PUSHBUTTON<br />
LED or Incandescent Illumination<br />
Incandescent display pushbuttons accept four T-1 midget flange based<br />
lamps that may be easily serviced from the front mounting panel. The<br />
display pushbutton is also available with a serviceable High Bright LED<br />
light plate, which provide an extended service life. Low power consumption<br />
of the LEDs, as well as the heat sink capabilities of the switch/<br />
indicator assembly, result in a pushbutton that is cool to the touch.<br />
Standard <strong>Lighted</strong> Display<br />
INCANDESCENT LED<br />
Ten Display Types Seven Display Types<br />
Eight Standard Colors Six Standard Colors<br />
Four NVG Colors Seven NVG Colors<br />
Eight Display Styles Eight Display Styles<br />
Five Legend Heights Five Legend Heights<br />
There are ten display types offering a combination of legend characters<br />
or background illumination color. LED configurations are available<br />
in seven types. Designer matched colors enhance display appearance<br />
and contribute to increased operator attention and efficiency.<br />
Graphic designs and custom legend heights in these ten display types<br />
are available. Display styles include full-screen displays, two-way, three-way and four-way split screen displays.<br />
Each of these sections may have its own color and be lighted independently of the others.<br />
Night Vision Goggle Compatibility<br />
Display certification of Night Vision Imaging System (NVIS) compatibility per the requirements of MIL-<br />
STD-3009. Unique lighting capabilities of the <strong>Series</strong> <strong>90</strong> provide display<br />
legends that are fully qualified for both Type I Class A and Type II Class B<br />
night vision goggles. Legends with incandescent lighting are available in<br />
four colors, NVIS Green A, NVIS Green B, NVIS Yellow, and NVIS Red,<br />
all qualified to MIL-STD-3009. LED based units provide NVG compatibility<br />
with NVIS Green B, NVIS Yellow and NVIS Red NVIS Blue and<br />
NVIS White. Trimmed to low level for night operations, the legends are<br />
sharp and clear with no glare or hot spots, and are not detrimental to<br />
darkness adaptation for unaided eye visual monitoring outside the crew<br />
station. For incandescent configurations and white LED-based pushbuttons,<br />
sunlight readable legends and NVG compatibility are combined in<br />
the same pushbutton display.
Sunlight Readable Display<br />
SERIES <strong>90</strong> DISPLAY PUSHBUTTON<br />
Illuminated sunlight readable legend is clearly legible in 10,000 footcandle ambient light. When not lighted, the<br />
legend is not readable when viewed in the same ambient light.<br />
<strong>Staco</strong> <strong>Systems</strong>'s sunlight readable displays are clearly legible in direct sunlight eliminating the problem of loss of<br />
legend legibility due to reflection of bright ambient light ... the equivalent of direct sunlight at 70,000 feet altitude.<br />
When the display’s dead-front face is unlit, the legend is indiscernible. The display has a viewing angle of an<br />
80°cone perpendicular to the viewing surface. All lighting measurements are made in <strong>Staco</strong> <strong>Systems</strong>'’s in-plant Mil<br />
certified light laboratory. Certification is performed photometrically per the exacting requirements of MIL-S-22885.<br />
Typical <strong>Pushbutton</strong> Display<br />
Choice of seven factory installed Display Types or three customer<br />
assembled and installed Display Types. (See Table 7). All are available<br />
with choice of eight Display Styles (Table 5 ). A color filter, in a choice of<br />
eight designer proven colors (Table 8), goes over each of the four lamps.<br />
Display Type Codes 2, 3, 4, 5, 8 or 9<br />
Configuration shown applies to Type Codes 2, 3, 4, 5, 8 or 9<br />
Figure 5A<br />
Visit www.stacosystems.com or call 714-549-3041 for more information<br />
7
8<br />
SERIES <strong>90</strong> DISPLAY PUSHBUTTON<br />
Display Type Codes 1, 6, 7, or 0<br />
Configuration shown applies to Type Codes 1, 6, 7,or 0<br />
Figure 5B<br />
Typical LED <strong>Pushbutton</strong> Display<br />
Figure 6<br />
Replaceable Legend Plates<br />
For those applications where the customer wishes<br />
to provide or replace legend plates, an alternative<br />
assembly is available in three display styles for use<br />
only with the T-1 flange based lamp pushbutton.<br />
These are similar to factory installed Type 2, Type 5<br />
and Type 6 Displays.<br />
Display Types 8, 9 and 0, consisting of a customer<br />
supplied legend plate stacked between the factory<br />
supplied face screen and diffuser plate, may be substituted<br />
for the standard bonded face plate assembly<br />
in the T-1 lamp pushbuttons. Display Types 9 and<br />
0 replaceable legends are available for LED pushbuttons.<br />
(See Table 7). The usable legend area is<br />
.520” square. Overall size of the face screen is<br />
.575” square with a viewing area of .495” square.<br />
Customer installed legends may not be of equal quality<br />
as compared to the laminated factory installed<br />
assemblies.<br />
SERVICEABLE LED LAMP MODULE<br />
Figure 7
Incandescent Lamp Grounds<br />
Three types of incandescent lamp circuits are available. The schematics<br />
are shown in Figure 8 and the ordering codes in Table 4.<br />
The “Common Lamp Ground” configuration is used when the power<br />
for the display is from a single power bus. “Vertically Split” and<br />
“Horizontally Split” Lamp Grounds allow the use of two power sources<br />
to illuminate the display of a given pushbutton. It should be noted<br />
that the specific lamp circuit option which is utilized is totally independent<br />
of the display style (i.e., full screen, 2-way, 3-way or 4-way<br />
splits) of Table 5.<br />
SERIES <strong>90</strong> DISPLAY PUSHBUTTON<br />
Typical 5 Volt LED Circuit Diagram<br />
Single Common<br />
Circuit Rear View<br />
Figure 9<br />
LED Lighting<br />
Split Common<br />
Circuit Rear View<br />
Single Common<br />
Circuit Rear View<br />
Figure 10<br />
Front View Front View<br />
Visit www.stacosystems.com or call 714-549-3041 for more information<br />
COMMON LAMP GROUND<br />
VERTICAL SPLIT LAMP GROUND<br />
HORIZONTAL SPLIT LAMP GROUND<br />
Split Common<br />
Circuit Rear View<br />
LED displays may be configured as either “current sourcing” or “<br />
current sinking.” Simplified control circuits for each are shown in Figures 11 and 12. Application information is provided<br />
in the Product Design and Engineering Data section. Brightness control and schematics for all 5 and 28 volt<br />
LED display pushbuttons are also provided there. Voltage dimming is an option with 28 volt versions.<br />
Figure 8<br />
Typical 28 Volt LED Circuit Diagram<br />
9
Display <strong>Pushbutton</strong> Colors<br />
SERIES <strong>90</strong> DISPLAY PUSHBUTTON<br />
LED LIGHTING CONTROLS<br />
Typical Current Sourcing Application<br />
Figure 11 Figure 12<br />
Colors are described by the international standard method of coordinates on CIE chromaticity diagrams. Figure<br />
13 represents the colors available for <strong>Series</strong> <strong>90</strong> incandescent configurations plotted in terms of x-y coordinate<br />
areas on the 1931 CIE chart. These colors include the seven colors of MIL-S-22885/101C (red, aviation yellow,<br />
white, lunar white, blue and aviation green) plus lemon yellow.<br />
Night Vision Imaging System colors are plotted in the U’-V’ coordinates of 1976 CIE chart of figure 14. All four of<br />
the colors defined in MIL-STD-3009 are available in incandescent displays. LED applications may use green B,<br />
yellow and red. When ordering, colors are selected from Table 8.<br />
10<br />
Typical Current Sinking Application<br />
Figure 13 – Incandescent colors Figure 14 – NVIS Compatible colors
Mounting Procedure<br />
SERIES <strong>90</strong> DISPLAY PUSHBUTTON<br />
1. Remove pushbutton from switch/indicator assembly by pulling straight out. Use tool # 151<strong>90</strong> for easier removal.<br />
2. Rotate locking screws inside front of switch/indicator assembly counter clockwise with a small screwdriver.<br />
This will release mounting cams.<br />
3. Slide mounting sleeve and panel spacer off of the switch/indicator assembly.<br />
4. Install switch/indicator assembly through panel cut-out from front of panel. Assembly is marked with word “TOP”<br />
to help properly orient position of the assembly in the panel.<br />
5. Replace panel spacer and mounting sleeve.<br />
6. Rotate locking screws clockwise to bring mounting cams to lock position. Recommended mounting torque is 10±2<br />
oz. in. (0.071+ 0.014Nm).<br />
7. Be certain that pushbutton has lamps or dummy lamps installed in all four positions before inserting into mating<br />
switch/indicator assembly.<br />
8. To Insert the pushbutton properly, be sure that the index post is at the top and that the pushbutton is held square<br />
to the switch housing.<br />
9. The two panel spacers, together with the mounting sleeve, provide various options for fitting the switch/ indicator<br />
assembly to mounting panels with thicknesses ranging from essentially zero to a maximum of about .75” (see<br />
dimensional drawings for exact thickness for each configuration).<br />
10. For extended mounting of the assembly, as in conjunction with edge-lit panels, the black panel spacer is left<br />
installed on the assembly before it is inserted in the panel cut-out so as to be in front of the panel when<br />
installation is complete.<br />
11. On sealed switch/indicator assemblies mounted flush, the panel seal is installed under the housing flange and on<br />
the front of the panel. On the extended mount sealed units, the panel seal is place between the panel spacer<br />
and the front the panel. (Refer to dimensional drawings.)<br />
Slot Mounting Panel Cut Out<br />
Mounting Cam<br />
Mounting Sleeve<br />
HORIZONTAL OR VERTICAL SLOT CUT-OUT FOR MODEL 93 OR<br />
MODEL 99 SWITCH/INDICATOR WITH PUSHBUTTON ASSEMBLY<br />
For those applications where horizontal or vertical slot<br />
mounting of two or more individual mount switch/indicators<br />
is required, the formula above provides cut-out dimensions<br />
for the slot.<br />
L = Length of horizontal mounting slot (or height of vertical)<br />
n = Number of units in a row<br />
Panel Spacers<br />
Index Post<br />
<strong>Pushbutton</strong> Assembly with Lamps<br />
Visit www.stacosystems.com or call 714-549-3041 for more information<br />
Figure 15<br />
11
Flush Mount Unsealed<br />
Extended Mount Unsealed<br />
Matrix Mount Unsealed<br />
12<br />
DIMENSIONS – MODEL 93<br />
Flush Mount With Panel Seal<br />
Figure 16 Figure 17<br />
Extended Mount With Panel Seal<br />
Figure 18 Figure 19<br />
Matrix Mount With Panel Seal<br />
Figure 20 Figure 21
Crimp Pin Termination<br />
MODEL 99 SWITCH/INDICATOR<br />
Reduced wiring time with increased reliability - <strong>Staco</strong> <strong>Systems</strong>'s Model<br />
98 Switch/Indicator and the Model 99 Switch/Indicator and Display<br />
<strong>Pushbutton</strong>, offer individually mounted units with crimp pin termination<br />
receptacles. These units provide the advantage of fast and easy wiring<br />
as well as quick and simple post installation maintenance. The crimp<br />
pin terminals and the termination receptacle, may be removed from<br />
switch/indicator. All soldering is eliminated, greatly reducing installation<br />
time. Termination receptacles may also be prewired for connection after<br />
switch/indicator assemblies have been installed. The crimp pin terminals<br />
and associated installation tools are all military standard parts to assure<br />
wide availability and high reliability.<br />
Connecting wires, with socket contact crimp pins, are shown inserted in the switch/indicator termination recep-<br />
tacle. Wires can be removed and replaced individually, or the termination receptacle, with all wires left in place,<br />
can be removed and replaced as a single unit.<br />
Switch/Indicator Options<br />
Model 98 and 99 assemblies with crimp pin termination receptacles are available with SPDT or DPDT circuitry,<br />
momentary or alternate switch action, silver or gold contacts, EMI/RFI shielding, with or without moisture sealing<br />
and with the optional Immersion Seal/High Impact Seal/Solvent Resistant Seal. Matching Indicators are also<br />
available.<br />
Display <strong>Pushbutton</strong> Options<br />
Model 92 lighted display pushbutton is used with both the Model 93 and Model 99 Switch/Indicator with<br />
<strong>Pushbutton</strong> assembly. The same illumination and display options are available for both the Model 93 and Model<br />
99 Assemblies.<br />
Assembly<br />
Model 99 assembly is comprised of a termination receptacle, a switch/indicator body, and a display pushbutton.<br />
The termination receptacle and/or individual wires and the pushbutton can be removed for servicing and<br />
replaced without disturbing the switch/indicator installed in a control panel.<br />
Visit www.stacosystems.com or call 714-549-3041 for more information<br />
13
14<br />
MODEL 99 SWITCH/INDICATOR - LONG CRIMP PIN<br />
Exploded View<br />
Figure 22<br />
DIMENSIONS – MODEL 99 - LONG CRIMP PIN<br />
Flush Mount Unsealed Flush Mount With Panel Seal<br />
Figure 23<br />
Figure 24
DIMENSIONS – MODEL 99 - LONG CRIMP PIN<br />
Extended Mount Unsealed<br />
Switch/Indicator Assembly<br />
Model 9816 through 9820 assembly<br />
Receptacle<br />
Assembly<br />
(MIL-C-3<strong>90</strong>29/16-168)<br />
Extended Mount With Panel Seal<br />
Figure 25 Figure 26<br />
Figure 27<br />
Figure 29<br />
Panel Cut Out<br />
Mounting Screw Location<br />
VIEW FROM FRONT OF PANEL<br />
Figure 28<br />
Visit www.stacosystems.com or call 714-549-3041 for more information 15
16<br />
MODEL 99 SWITCH/INDICATOR - SHORT CRIMP PIN<br />
Exploded View<br />
Flush Mount Unsealed Flush Mount With Panel Seal<br />
Figure 31<br />
Figure 30<br />
DIMENSIONS – MODEL 99 - SHORT CRIMP PIN<br />
Figure 32
DIMENSIONS - MODEL 99 - SHORT CRIMP PIN<br />
Extended Mount Unsealed<br />
Switch/Indicator Assembly<br />
Model 9821 through 9825 assembly<br />
Figure 37<br />
Extended Mount With Panel Seal<br />
Figure 33 Figure 34<br />
Figure 35<br />
Mounting Screw Location<br />
(18.92)<br />
Receptacle Assembly<br />
(MIL-C-3<strong>90</strong>29/22-192)<br />
Figure 36<br />
Visit www.stacosystems.com or call 714-549-3041 for more information<br />
VIEW FROM FRONT<br />
OF PANEL<br />
17
WATERTIGHT SEAL<br />
The Watertight Seal is part of the <strong>Staco</strong> <strong>Systems</strong> <strong>Series</strong> <strong>90</strong> fam-<br />
ily of illuminated pushbutton switches and indicators. It is covered<br />
by MIL-S-22885/112. Assemblies incorporating this seal can be<br />
ordered as an option to the <strong>Series</strong> <strong>90</strong>.<br />
This Watertight Seal is a flexible elastomeric boot which is an inte-<br />
gral part of the pushbutton and provides a seal at the front panel.<br />
The flexible nature of the seal allows actuation of the switch under<br />
three feet of water while still sealing against leakage through the<br />
switch or panel opening.<br />
This same seal performs as a Splashproof Seal to protect against<br />
washdowns using directed streams of water.<br />
The seal is intended to protect the switch/indicator, as well as the behind-the-panel areas, against elements such<br />
as rain, fog, snow, salt spray, sand and dust.<br />
The watertight seal also insures that the pushbutton remains attached to the switch under high impact shock con-<br />
ditions (approximately 1,500 Gs). The combination of pushbutton with watertight seal will remain attached to the<br />
switch when tested per MIL-S-<strong>90</strong>1 for Class I and Class II equipment.<br />
Panel Spacing of switches or indicators with watertight seals installed is 1.06 inches (26.9 mm) minimum center<br />
to center horizontally or vertically. If the <strong>Pushbutton</strong> Guard (Assembly 15204/005) is to be installed, the minimum<br />
horizontal center to center spacing is 1.40 inches (35.6 mm).<br />
Dimensions<br />
18<br />
Figure 38
Watertight Seal Specifications<br />
WATERTIGHT SEAL<br />
When properly assembled and installed the Watertight Seal<br />
will perform to the following requirements.<br />
Temperature Storage 65°C to +95°C;<br />
Operating 55°C to +85°C<br />
Thermal Shock -55°C to +85°C per MIL-STD-202, Method 107,<br />
Test Condition A<br />
Vibration 15 Gs, 10 to 2 kHz per MIL-STD-202, Method 204,<br />
Test Condition B<br />
Shock, Standard 75 G’s per MIL-STD-202, Method 213 Test Condition B<br />
Shock, High Impact Per MIL-S-<strong>90</strong>1, Class II - no damage or contact transfers.<br />
Per MIL-S-<strong>90</strong>1, Class I - no damage and no parts come<br />
adrift but electrical contacts may transfer until reactuated.<br />
Splashproof, Sealed Per MIL-S-22885, para. 4.8.20.1,and MIL-STD-108,<br />
para. 4.9 when Watertight Seal installed.<br />
Watertight, Sealed Per MIL-S-22885, para. 4.8.20.2, and MIL-STD-108, para. 4.13<br />
(3 feet of water, 1.3 psi) when Watertight Seal installed.<br />
Dripproof, Sealed Per MIL-S-22885, para. 4.8.20.3, and MIL-STD-108,<br />
para. 4.3, when Watertight Seal installed.<br />
Salt Spray Per MIL-STD-202, Method 101, Test Condition B.<br />
No evidence of excessive corrosion.<br />
Sand and Dust Per MIL-STD-202, Method 110,<br />
Test Condition B and MIL-S-22885.<br />
Solvent Resistant Seal<br />
The Solvent Resistant Seal is identical to the watertight seal except that it is made of materials resistant to petroleum<br />
based products and solvents. The seal is intended to protect the switch/indicator, as well as the behind-thepanel<br />
areas, against petroleum based products and solvents in factory, flightline or refinery environments.<br />
The Solvent Resistant Seal material and the pushbutton faceplate protective coating are resistant to the following substances:<br />
Motor Oil (multipurpose) Transmission Fluid<br />
Petroleum Oil (crude) Silicone Greases<br />
Unleaded Gasoline Animal Fats<br />
Diesel Fuel Prestone Antifreeze<br />
JP-4 Denatured Alcohol<br />
JP-5 Mineral Oil<br />
Methanol Linseed Oil<br />
Water Soap Solutions<br />
Ethanol<br />
Hydrochloric Acid 10%<br />
Sodium Hydroxide 10%<br />
Ammonium Hydroxide 10%<br />
Kerosene<br />
Isopropyl Alcohol<br />
Sea water<br />
Detergent Solutions<br />
Solvent Resistant Seals can be ordered by adding /006 to the coded part number (see ordering information; the<br />
/005 would be replaced by the /006).<br />
Visit www.stacosystems.com or call 714-549-3041 for more information<br />
19
Hazardous Environment Seal<br />
WATERTIGHT SEAL<br />
For switches or indicators intended for use in a nuclear, biological or chemical warfare (NBC) environment,<br />
please consult the factory. Hazardous Environmental Seals can be ordered by adding /007 to the coded part<br />
number.<br />
<strong>Pushbutton</strong> Guard For Watertight Seal<br />
The pushbutton guard is for application with the Watertight Seal or Solvent Resistant Seal. For application with<br />
unsealed or dripproof sealed configurations, see the Accessories section.<br />
<strong>Pushbutton</strong> Guard is transparent and spring loaded.<br />
Lift to allow switch actuation.<br />
Prevents accidental operation.<br />
Slips over switch housing upon installation.<br />
Minimal panel spacing is 1.40” (35.6 mm).<br />
See the Accessories section for <strong>Pushbutton</strong> Guards for general purpose applications which do not use<br />
watertight seals.<br />
20<br />
PART NUMBER APPLICATION<br />
15204/005 Watertight Seal<br />
15204/006 Solvent Resistant Seal<br />
15204/007<br />
Figure 39<br />
NBC Resistant Seal
MATRIX HOUSING ASSEMBLIES<br />
<strong>Series</strong> <strong>90</strong> Matrix Housing Assemblies<br />
Matrix Housings are available in two different<br />
mounting configurations and any<br />
matrix arrangement to meet the customer’s<br />
required number of stations. Constructed of<br />
square aluminum alloy tubes, the lightweight,<br />
yet rugged assembly actually strengthens<br />
the panel, regardless of cutout size. Matrix<br />
Housings are constructed to meet the<br />
requirements of MIL-S-24317. Installation<br />
time is greatly reduced, requiring only one<br />
panel cutout instead of many. For non-EMI/<br />
RFI applications, a black anodized finish per<br />
MIL-A-8625 is applied to the housing. For<br />
EMI/RFI shielded applications, a chemical<br />
film finish, per MIL-C-5541, is applied. <strong>Series</strong><br />
<strong>90</strong> <strong>Switches</strong> and Indicators are inserted in<br />
the front of the matrix and locked in place by<br />
rotating the screw actuated locking cams.<br />
Termination Options<br />
Solder, PCB, and crimp pin terminations are available. Model 94 and 96 Matrix Housings for solder and printed<br />
circuit terminations provide for direct connection of wires to the switch/indicator terminals. Model 95 and 97<br />
Matrix Housings, for crimp pin connections, are lengthened to accommodate a crimp pin receptacle. The<br />
mounted receptacle mates with a standard crimp pin switch/indicator, enabling the crimp pin socket contact to<br />
make electrical connection to the switch/indicator terminals. The crimp pin matrix assembly allows the switch<br />
to be removed from the front of the housing, leaving the receptacle and wiring in place. The receptacle can<br />
also be removed from the rear of the housing, leaving the switch in place, or the wire may be removed from the<br />
receptacle without disturbing the receptacle or switch/indicator assembly.<br />
Rear Flange Mount Matrix Housings<br />
Model 94 and 95 Matrix Housings for rear mounting of the assembly to the customer’s control panel are available<br />
with flanges having slotted mounting holes. Flanges may be located horizontally on the top and bottom<br />
of the housing, vertically on the two sides, or on all four sides for applications where extreme vibration may<br />
be encountered or for EMI/RFI shielding to assure complete panel contact for grounding. All units conform to<br />
shock requirements of MIL-STD-202, Method 213, condition B.<br />
Flange set-back is custom made to accommodate customer’s desired panel thickness. Flange set-back, dimension “H”<br />
shown on housing drawings, measured from the pushbutton top to front of the mounting flange is variable, depending on<br />
panel thickness and desired pushbutton extension, and must be specified by customer in the part number rationale. See<br />
ordering information. The matrix housing is shipped fully assembled, ready to be installed in the customer’s control panel.<br />
Visit www.stacosystems.com or call 714-549-3041 for more information<br />
21
MATRIX HOUSING ASSEMBLIES<br />
Front Dress Bezel Mount Matrix Housings<br />
Models 96 and 97 Matrix Housings are supplied with attractive extruded aluminum dress bezel. The entire<br />
assembly mounts from the front of the customer’s control panel through a single panel cutout. Mounting<br />
cleats, inserted in a groove on the rear of the dress bezel and self-locking screws, tightened against the rear<br />
panel, securely fasten the matrix housing assembly in place. No mounting hardware is visible from the front<br />
panel. The required number of mounting cleats, with self locking screws, are supplied with the fully assembled<br />
housing. Additional cleat assemblies, packaged 5 per bag, may be ordered separately as Part number 15098.<br />
Model 95 and 97 Matrix Housing and<br />
Crimp Pin Termination Receptacles<br />
Crimp pin receptacles are supplied installed in the Model 95 and<br />
97 Matrix Housings. Locking cams, actuated by screws in the rear<br />
of the receptacle securely lock the receptacle into the housing.<br />
Model 95 Switch Indicator<br />
Easily inserted or removed from front of panel using<br />
only a small screwdriver to tighten or loosen the<br />
screw actuated locking cams on each side.<br />
Model 92 Display <strong>Pushbutton</strong><br />
Up to four lighted message areas. Accepts<br />
four T-1 flange based lamps. Also available<br />
with integral LED lighted areas.<br />
Model 94 Matrix Housing With Rear Mount Flanges<br />
Flange set-back is custom made to fit desired<br />
panel thicknesses. Housing accepts switch/indicator<br />
assemblies with solder, or printed circuit terminations.<br />
Switch/indicators are securely held in place by screw<br />
actuated locking cams. Switch/indicator terminations<br />
protrude from rear of the matrix housing.<br />
Locking Cams<br />
22<br />
MATRIX MOUNTING<br />
Actuated by screws (2) in front of switch/indicator assembly. Locking cams securely<br />
hold receptacle in the matrix housing frame. Recommended mounting torque 10 ± 2<br />
oz. in. (0.071 ± 0.014 Nm).<br />
Locking Cams<br />
Actuated by screws (2) in rear of receptacle.<br />
Locking cams securely hold receptacle in the<br />
matrix housing frame. Recommended mounting<br />
torque 10 ± 2 oz. in. (0.071 ± 0.014 Nm).<br />
Locking Cams<br />
Actuated by screws (2) in front of switch/indicator<br />
assembly. Locking cams securely hold receptacle<br />
in the matrix housing frame. Recommended<br />
mounting torque 10 ± 2 oz. in. (0.071 ± 0.014 Nm).<br />
Model 91 Switch Indicator<br />
Easily inserted or removed from front of<br />
panel using only a small screwdriver to<br />
tighten or loosen the screw actuated locking<br />
cams. Wires are connected directly<br />
to the switch/indicator terminations. Unit<br />
shown has solder terminations.<br />
Model 92 Display <strong>Pushbutton</strong><br />
Up to four lighted message areas. Accepts<br />
four T-1 flange based lamps. Also available<br />
with integral LED lighted areas.
MATRIX ASSEMBLY<br />
Matrix Assembly With Direct To Switch Terminations<br />
Model 96 Front Dress Bezel Mount with Short Housing<br />
(Model 97 is Dress Bezel with Long Housing and Crimp Terminations)<br />
Figure 40<br />
Matrix Assembly With Crimp Pin Terminations<br />
Long Crimp Pin<br />
Model 95 Rear Flange Mount with Long Housing and Crimp Terminations<br />
(Model 94 is Flange Mount with Short Housing)<br />
Figure 41<br />
FEMALE<br />
OR 15280<br />
Visit www.stacosystems.com or call 714-549-3041 for more information<br />
23
Short Crimp Pin<br />
CRIMP CONTACT, 15276<br />
MIL-C-3<strong>90</strong>29/22-192<br />
24<br />
MATRIX ASSEMBLY<br />
MATRIX ASSEMBLY<br />
Matrix Assembly With Crimp Pin Terminations<br />
Figure 42
DIMENSIONS REAR FLANGE - MODEL MOUNT99<br />
Rear Flange Mount – Solder or PCB Termination<br />
Model 94<br />
Rear Flange Mount – Crimp Pin Terminations<br />
Model 95<br />
1<br />
Figure 43<br />
Figure 44<br />
Visit www.stacosystems.com or call 714-549-3041 for more information<br />
NOTES:<br />
1<br />
Flange set-back<br />
(Dimension “H”) is the distance<br />
from the face of the<br />
pushbutton to the surface<br />
of the mounting flange. for<br />
an unsealed unit,, only the<br />
panel thickness and relationship<br />
of pushbutton to<br />
front panel need be considered.<br />
for a sealed unit, the<br />
thickness of the switch and<br />
panel seal also need to be<br />
considered.<br />
25
26<br />
REAR FLANGE MOUNT<br />
Rear Flange Mount – Short Crimp Pin Terminations<br />
Model 95<br />
NOTES:<br />
1<br />
Figure 45<br />
Flange set-back<br />
(Dimension “H”) is the distance from the face of the pushbutton to the surface of the mounting<br />
flange. for an unsealed unit,, only the panel thickness and relationship of pushbutton to front<br />
panel need be considered. for a sealed unit, the thickness of the switch and panel seal also<br />
need to be considered.
FLANGE OPTION CODES<br />
Rear Flange Mount Matrix Housing<br />
Horizontal Flanges, Unsealed<br />
Horizontal Flange Unsealed<br />
Dripproof Seals<br />
Figure 46<br />
Flange Option Code 2; Station Configuration 0302<br />
Figure 48<br />
Flange Option Code 2; Station Configuration 0103<br />
Matrix housings may be ordered with a sealed option<br />
for either the dress bezel front mounting or the<br />
four-flange rear mounting configuration.<br />
When either of these matrix housing assemblies are panel<br />
mounted using a customer-furnished panel seal gasket<br />
and all matrix stations are loaded with switches or indicators<br />
utilizing switch and pushbutton seals, the matrix<br />
assembly is classified as dripproof. Behind the panel<br />
equipment will be protected and the switches and indicators<br />
will operate in the presence of a coarse liquid spray<br />
directed at it. Mounted as described, the unit may be<br />
subjected to the dripproof test of MIL-STD-108, 15 degree<br />
method, with a five gallon quantity of water flowing over<br />
the specimen for a period of five minutes duration.<br />
Vertical Flanges, Unsealed<br />
Four Flanges, Sealed or Unsealed<br />
Flange Option Codes<br />
CODE DESCRIPTION<br />
1 No flanges (unsealed)<br />
Visit www.stacosystems.com or call 714-549-3041 for more information<br />
2 Horizontal flanges only (unsealed)<br />
3 Vertical flanges only (unsealed)<br />
6 Four flange (sealed)<br />
Model 94 or 95<br />
Figure 47<br />
Flange Option Code 2; Station Configuration 0103<br />
Figure 49<br />
Flange Option Code 6 or 7; Station Configuration 0304<br />
7 Four flange (unsealed)<br />
27
Solder or PCB Termination<br />
Model 96 or 97<br />
Model 96<br />
28<br />
Figure 50<br />
FRONT DRESS BEZEL MOUNT
Crimp Pin Termination<br />
Long Crimp Pin<br />
Model 97<br />
Figure 51<br />
Short Crimp Pin<br />
Figure 52<br />
FRONT DRESS BEZEL MOUNT<br />
10)<br />
Visit www.stacosystems.com or call 714-549-3041 for more information<br />
29
30<br />
FRONT DRESS BEZEL MOUNTING INFORMATION<br />
Minimum Spacing<br />
Mounting Cleat Assembly and Requirements<br />
Figure 54<br />
Figure 53<br />
Figure 55
PRODUCT DIMENSIONS DESIGN & ENGINEERING - MODEL 99 DATA<br />
General Information<br />
<strong>Staco</strong> <strong>Systems</strong> products are designed and manufactured to meet specifications of Original Equipment<br />
Manufacturers who demand dependability, attractive appearance, and maximum value from their products.<br />
Combining imaginative engineering with manufacturing know-how.<br />
Military Specs And Standards<br />
<strong>Staco</strong> <strong>Systems</strong> <strong>Series</strong> <strong>90</strong> <strong>Switches</strong>, Indicators and Display <strong>Pushbutton</strong>s are manufactured to meet or exceed the<br />
requirements of the following specifications and standards where applicable.<br />
Military Specifications<br />
MIL-PRF-22885 <strong>Switches</strong>, <strong>Pushbutton</strong>, Illuminated, General Specification for.<br />
MIL-PRF-22885/101 Switch, <strong>Pushbutton</strong>, Matrix or Individually Mounted, Illuminated, 4-Lamp, SPDT and DPDT, 5.0<br />
Amperes, Silver contacts, 1 Ampere, Gold Contacts (Dripproof, Sunlight Readable,<br />
EMI/RFI Shielded).<br />
MIL-PRF-22885/112 <strong>Switches</strong>, <strong>Pushbutton</strong>, White Light Emitting Diode (LED) Illuminated, Standard, Night Vision<br />
Imaging System (NVIS) and Sunlight Readable Displays, Dimmable SPDT and DPDT,<br />
Low Level to 7 Amperes, Sealed and Unsealed, Solder and Common Termination<br />
System (CTS) Terminations.<br />
MIL-S-24317 Switch Matrix Frame, Multistation.<br />
MIL-S-<strong>90</strong>1 Shock Tests, H.I. (High-Impact),Shipboard Machinery, Equipment and <strong>Systems</strong>, Requirements for.<br />
Military Standards<br />
MIL-STD-3009 Lighting, Aircraft, Interior, Night Vision Imaging System (NVIS) Compatible.<br />
MIL-STD-108 Definitions of, and Basic requirements for, Enclosures for Electric and Electronic Equipment.<br />
MIL-STD-202 Test Methods For Electronic and Electrical Component Parts.<br />
Other Military Specifications<br />
DSCC DWG Switch, <strong>Pushbutton</strong>, Illuminated, 4 Lamp <strong>90</strong>020 (MIL-S-22885/101 w/Legend).<br />
Visit www.stacosystems.com or call 714-549-3041 for more information<br />
31
32<br />
PRODUCT MODEL DESIGN 99 SWITCH/INDICATOR<br />
& ENGINEERING DATA<br />
Environmental Specifications<br />
Temperature Range Operating -55°C to +85°C<br />
Storage -65°C to +95°C<br />
Thermal Shock MIL-STD-202, Method 107, Test Condition A (-55°C to +85°C)<br />
Vibration MIL-PRF-22885 vibration grade 3 (10-2,000 Hz) MIL-STD-202, Method 204, Test Condition B<br />
(15 G peak)<br />
Shock MIL-STD-202, Method 213, Condition B (75G)<br />
Shock - High Impact MIL-S-<strong>90</strong>1, Grade A, Class II (for deck-mounted equipment; hull-mounting not<br />
recommended). Moisture Resistance MIL-STD-202, Method 106, (wet 10 megohms, dry<br />
1,000 megohms).<br />
Dripproof Seal MIL-PRF-22885 Symbol 2 option, test procedures of MIL-STD-108 (5 gal/min).<br />
Splashproof Seal MIL-PRF-22885 Symbol 4 option, test procedures of MIL-STD-108 (15 gal/min).<br />
Watertight Seal MIL-PRF-22885 Symbol 3 option, test procedures of MIL-STD-108 (3 foot submersion,<br />
1 hour).<br />
Solvent Resistant Option is splashproof and water tight plus seal is resistant to most petroleum-based<br />
fuels, solvents, oils, and greases.<br />
Salt Spray MIL-STD-202, Method 101, Test Condition A, (Corrosion, 96 hours).<br />
Explosion MIL-STD-202, Method 109.<br />
Sand and Dust MIL-STD-202, Method 110, Condition B and MIL-S-22885. (Applies to switches equipped<br />
with seals for Dripproof, Splashproof, Watertight or Solvent Resistant options.)<br />
Dripproof Seal of Matrix <strong>Systems</strong><br />
When matrix housing assemblies are mounted to the panel using a customer furnished panel seal gasket and<br />
all matrix stations are loaded with switch/indicators utilizing switch and pushbutton seals, the matrix assembly<br />
will be dripproof. All behind the panel equipment will be protected and the enclosed switch/indicators will operate<br />
satisfactorily in the presence of a coarse spray of liquid directed at it or its mounting surface. With the<br />
matrix assembly mounted as described, the unit may be subjected to the dripproof test of MIL-STD-108 (five<br />
gallons of water flowing over the specimen for a period of five minutes).<br />
Other Matrix Seals<br />
Splashproof seals, watertight seals and solvent resistant seals are not available for matrix configurations.
PRODUCT DIMENSIONS DESIGN & ENGINEERING - MODEL 99 DATA<br />
Electrical Specifications<br />
Switch Contact Ratings<br />
Power Circuits (silver contacts)<br />
250 VAC<br />
UL listed L7 7 Amps, (21 SK83-H 340).<br />
Low level Circuits (gold contacts) Typical application<br />
would be 30 milliamps at 30 millivolts<br />
Switch Contact Resistance<br />
New: < 25 milliohms<br />
End of life: Per MIL-S-22885 (typical < 40 milliohms)<br />
At reduced barometric pressure:<br />
per MIL-STD-202, Method 105, test potential<br />
400 Vrms; test condition C (maximum pressure<br />
of 1.31”Hg or 33.00 mm Hg to simulate an<br />
altitude of 70,000 feet or 21,336 meters).<br />
Switch Schematics<br />
Single-pole double-throw (SPDT) and double-pole double-throw (DPDT) switch circuits are shown schematically in Figure 1.<br />
Mechanical<br />
Physical Dimensions<br />
In this document, all dimensions are shown in inches with millimeters given as reference information. Unless other-<br />
wise specified, tolerances are:<br />
.xx = ± .02 inch (± .5 mm)<br />
.xxx = ± .010 inch (± .25 mm)<br />
Resistive<br />
Indicators .030 inch (.76 mm)<br />
Latchdown Actuation and Displacement<br />
On alternate action (maintained) contact switches, the pushbutton is retained in a latch-down or actuated switch position until<br />
the pushbutton is depressed a second time, releasing the pushbutton and deactivating the switch. When in the actuated<br />
position, the face of the pushbutton is mechanically held depressed from its normal height by approximately .080 inch (2.03 mm).<br />
Actuation Force<br />
The force required to actuate momentary and maintained switches ranges from 1.1 lbs. for unsealed, SPDT, to 2.2<br />
lbs. sealed, DPDT (4.9 tp 9.8N). Add an additional 0.6 lbs. (2.7N) for immersion seal configuration.<br />
<strong>Pushbutton</strong> Extraction Force<br />
Per MIL-S-22885/101, the extraction force is between 2 to 5 lbs. (9 to 22N).<br />
<strong>Pushbutton</strong> Retainer<br />
As an option, a pushbutton retainer tie is available to keep a given pushbutton physically linked to a given switch<br />
during relamping operations.<br />
Visit www.stacosystems.com or call 714-549-3041 for more information<br />
Altitude 28 VDC 115 VAC<br />
(Feet) (Amps) 60 HZ (Amps)<br />
Sea Level 7 7<br />
50,000’ 4 –<br />
Inductive Sea Level 4 7<br />
50,000’ 2.5 –<br />
Lamp Sea Level 2.5 2<br />
50,000’ 2.5 –<br />
Switch Operational Life<br />
Typical application would be 30 Milliamps at 30<br />
Millivolts<br />
Dielectric Strength<br />
At atmospheric pressure:<br />
<strong>Pushbutton</strong> Actuation Travel<br />
Per MIL-STD-202, Method 1,000 Vrms.<br />
<strong>Switches</strong> .12 inch (3.0 mm)<br />
33
Weights<br />
34<br />
PRODUCT MODEL DESIGN 99 SWITCH/INDICATOR<br />
& ENGINEERING DATA<br />
Solder Terminals<br />
Solder terminals are double turret to ensure that wires can be mechanically secured prior to soldering and are<br />
tin-lead plated per MIL-P-81728. Solderability testing is in accordance with MIL-STD-202, Method 208. Terminal<br />
strength tests are conducted as prescribed by MIL-STD-202, Method 211, test condition A.<br />
Printed Circuit Terminals<br />
Printed circuit terminals are plated to facilitate hand, wave or flow soldering methods.<br />
Crimp Pin Terminals<br />
Crimp pin terminals are gold plated per MIL-G-45204. NOTE: crimp pin terminals mate with crimp-on wire terminations<br />
per MIL-C-3<strong>90</strong>29/16-168 and MIL-C-3<strong>90</strong>29/22-192.<br />
EMI/RFI Shielding<br />
When tested per MIL-S-22885 shielding efficiency method, the minimum shielding attenuation is at least 60 dB<br />
over the frequency range from 100 to 1,000 MHz.<br />
The typical weights of the switch or indicator, including mounting hardware of .07 oz., (2 gms) and the pushbutton are:<br />
SWITCH/INDICATOR WITH PUSHBUTTON WEIGHT<br />
Assembly Ounces Grams<br />
Mdl 93 Switch (DPDT w/PB & 4 lamps/LEDs) .061 17<br />
Mdl 93 Switch (SPDT w/PB & 4 lamps/LEDs) .058 16<br />
Mdl 93 Indicator (w/PB & 4 lamps/LEDs) 0.5 14<br />
Mdl 99 Switch (DPDT w/PB & 4 lamps/LEDs) 1.09 31<br />
Mdl 99 Switch (DPDT w/PB & 4 lamps/LEDs) 1.06 30<br />
Mdl 99 Indicator (w/PB & 4 lamps/LEDs) .98 28<br />
<strong>Pushbutton</strong> (w/4 lamps/LEDs 0.13 4<br />
Additional weight for watertight seals 0.08 2<br />
Matrix Weight Per Station<br />
Front Mount<br />
Rear Flange Mount Dress Bezel<br />
Components Termination Termination<br />
Solder/PC Crimp Pin Solder/PC Crimp Pin<br />
1. Matrix Housing .140 oz. .205 oz. .140 oz. .205 oz.<br />
2. Receptacle<br />
Assy.<br />
3. Flange<br />
(per inch) w/rivets<br />
4. Dress Bezel<br />
(per lin. inch)<br />
– .315 oz. – .315 oz.<br />
.075 oz. .075 oz. – –<br />
– – .162 oz. .162 oz.<br />
5. Contact Socket<br />
(12 max per – .006 oz. ea. – .006 oz. ea.<br />
station)<br />
6. Cleat Assy.<br />
(2 to 10 req.)<br />
– – .146 oz. .146 oz.<br />
Matrix Housing Weight Examples<br />
Rear flange mount matrix, 4x3, with 4 flanges,<br />
crimp pin, and 12 pins utilized<br />
Housings 12 @ 0.205 oz. 2.460 oz.<br />
Receptacle Assy 3.780 oz.<br />
Flange 13.61 inches @ .075 oz./in. 1.021 oz.<br />
Socket contacts 12 x 12 @ .006 oz. 0.864 oz.<br />
Matrix housing total 8.125 oz.<br />
Front dress bezel mount matrix, 2x2, w/solder<br />
termination<br />
Housings 4 @ 0.140 oz. 0.560 oz.<br />
Dress bezel 7.97 inches @ .1621 .291 oz.<br />
Cleat assy 2 @ 0.146 0.292 oz.<br />
Matrix housing total 2.143 oz.<br />
Matrix System Total Weight<br />
To obtain matrix system total weight, include<br />
matrix housing, plus switch or indicator weights<br />
with pushbuttons, less individual mounting hard-<br />
ware weights of .07 oz., (2 gms) per station.
PRODUCT DIMENSIONS DESIGN & ENGINEERING - MODEL 99 DATA<br />
Display System<br />
Field of View<br />
The visibility of any legend, symbology or alphanumerics can be viewed from a distance of three feet, without any restrictions<br />
by the periphery of the enclosure for the display, at all angles within an 80 o cone perpendicular to the viewing surface.<br />
Light Sources<br />
Two means for legend lighting are available in the <strong>Series</strong> <strong>90</strong><br />
product line, either incandescent or LED.<br />
Incandescent Lamps<br />
Lamps are flange based, incandescent, T-1 sub-midget type,<br />
which are field replaceable from the front panel. Selection options<br />
are specified in Table 6A. When lamps are not furnished with<br />
the pushbuttons, a removable fiberboard plate will be installed<br />
at the factory. This plate is removed and discarded when lamps<br />
are installed in the field. For proper operation, either this “discard”<br />
plate, four T-1 lamps, or a combination of lamps and “dummy<br />
plugs” (devices which simulate the specified lamps) must be used to prevent damage to the unit.<br />
Factory-supplied lamps have nominal brightness as specified by the manufacturer in Table 6A. These have a mean spherical<br />
candle power (MSCP) tolerance of ± 25%. Unless otherwise specified, all brightness tests performed at the factory, and those<br />
published in this document utilize calibrated lamps with a luminous intensity of .15 ± .01 MSCP.<br />
Light Emitting Diodes (LEDs)<br />
The voltage options are 5 or 28 volts. LED polarity and other options are as specified in Table 6B. These LEDs<br />
are a serviceable part of the pushbutton.<br />
Incandescent Lighting Circuits<br />
Electrical connections for pushbuttons lighted with incandescent lamps are shown in Figure 8. The lamp circuit is<br />
optionally available with:<br />
a) Common lamp ground for all four lamps (full ground plate); b) Vertically split ground plate (the two lamps on<br />
the left half and the two lamps on the right half may be on separate power circuits with separate grounding);<br />
c) Horizontally split ground plate (lighting for the top half and the bottom half may be on separate power circuits).<br />
The choice of lamp circuit grounding scheme is completely independent of the selection of legend display style (full screen<br />
display, two-way horizontal split, etc., as shown in Table 5). The split grounds allow the lamps of a display to be powered from<br />
two separate power sources.<br />
Each incandescent lamp is lighted independently from the other three by applying power to the pin designated in the schematic.<br />
The power may be dc or low-voltage ac, within the rating of the lamp. Standard lamp selections are listed in Table 6A.<br />
Incandescent-based displays are available in the colors indicated in the chromaticity diagram of Figure 13.<br />
LED Lighting Circuits<br />
Visit www.stacosystems.com or call 714-549-3041 for more information<br />
Legend Viewing Dimensions<br />
The display area available for legends:<br />
Viewing Area Nominal Dimensions<br />
Inch (mm)<br />
Full Screen .495” (12.57) square<br />
Half Screen, horizontal .495 x .217” (12.57 x 5.51)<br />
Half Screen, vertical .217 x .495” (5.51 x 12.57)<br />
Quarter Screen .217” (5.51) square<br />
Light emitting diode (LED) arrays within the <strong>Series</strong> <strong>90</strong> pushbuttons are available as an alternative to incandescent lamps.<br />
Each of the four quadrants of a display is lighted using an assembly of three LED chips, giving a total of 12 LED junctions per<br />
pushbutton. Schematics for typical LED configurations are shown in Figures 9 and 10. The required current regulating resistors<br />
are included in the pushbutton. There is also a voltage dimming option.<br />
Unlike the incandescent pushbutton versions without common bussed switch bases, some LED configurations power need<br />
only to be applied to one pin to control the lighting of a half-screen LED display if the display style is full-screen or half-screen<br />
displays.<br />
35
36<br />
PRODUCT MODEL DESIGN 99 SWITCH/INDICATOR<br />
& ENGINEERING DATA<br />
For common lamp circuit configurations common terminals (pins 6 and 9) may be used as the common return circuit for redundancy.<br />
The schematics of Figures 9 and 10 are typical. Figures 56 and 57 provide a complete set of schematics for all standard colored<br />
LED configurations.<br />
Current Requirements for LED Lighting: For 5 volt dc systems, all configurations use 45 mA per quadrant when illuminated.<br />
Thus, a full-screen unit would use 180 mA, a two-way split with one half lighted would use <strong>90</strong> mA, etc.<br />
For 28 volt systems, the current requirements dependent upon the configuration. When operated at 28 volts dc, either for a<br />
full-screen or two-way configuration, the forward current is 20 mA for each half screen which is illuminated (40 mA with both illuminated).<br />
For three-way split, the one-half screen is 20 mA and each quarter screen is 20 mA (for a total of 60 mA with all three<br />
areas illuminated). On four-way split configurations, each quadrant uses 20 mA ( mA with all four areas illuminated).<br />
Maximum current usage for each configuration is tabulated in Table 6B. The current requirements listed are worst-case with all<br />
legend areas lighted at maximum brightness.<br />
LED Lighting Control<br />
The accompanying schematics identify the pins to control the lighting of the specific portions of the displays on<br />
LED-based pushbuttons.<br />
Current Sourcing/Sinking for LEDs<br />
Figures 11 and 12 show simplified schematics of typical control circuits for driving the LED circuits. LED lighted pushbuttons<br />
may be configured through Table 4 for either current sourcing (codes 7 and 9) or current sinking (codes 8 and 10).<br />
One characteristic of current sourcing is that it can be used to isolate the lamp load from direct power connection<br />
if desired. For this, the cathode side of the LEDs is always grounded through a current-regulating resistor. The<br />
driving circuits supply voltage to the anode side of the LEDs to illuminate them.<br />
Current sinking, on the other hand, enables the controlling circuits to switch the cathodes to ground to light the<br />
LEDs. The is a simpler control circuit to implement if MOSFET logic is being used. Also multi-channel output driver<br />
ICs with common grounded emitters are readily available.<br />
Dimming<br />
While incandescent lighting may be controlled by varying the amplitude of the applied ac or dc voltage, this is<br />
not the ideal way to control LED lighting. LEDs are current-driven devices and operate best at the rated current.<br />
Dimming is best accommodated<br />
by turning the LEDs on and off at<br />
a rate of several thousand times<br />
per second. During the period of<br />
time that they are on, they are<br />
driven at their rated current. The<br />
ratio of on-time to off-time then<br />
controls the brightness. The <strong>Staco</strong><br />
<strong>Systems</strong> DDM111 and DDM111A<br />
Digital Dimming Module are an<br />
ideal way to precisely control<br />
LED brightness. The DDM111<br />
and DDM111A may also be voltage<br />
dimmed provided the option<br />
is selected from the catalog<br />
(only available in 28 volts) The<br />
DDM111 and DDM111A are briefly<br />
<br />
described on page 56.<br />
Figure 56
PRODUCT DIMENSIONS DESIGN & ENGINEERING - MODEL 99 DATA<br />
5 Volt LED Circuit Schematics<br />
Common Circuit Split Circuit<br />
Display Styles Code Sealed Code Sealed<br />
Common Lamp Split Lamp<br />
Code Front View Circuit Sourcing Sinking Circuit Sourcing Sinking<br />
Rear View A B Rear View C D<br />
No Yes No Yes No Yes No Yes<br />
1 2 Full<br />
1<br />
Screen<br />
3 4<br />
1 2 Horiz.<br />
2 3 4 Split<br />
Screen<br />
31 41 51 61 31 41 51 61<br />
Vert.<br />
3 Split 31 41 51 61 31 41 51 61<br />
Screen<br />
3 Way<br />
4 Horiz.<br />
Split<br />
Screen<br />
33 43 53 63 33 43 53 63<br />
4 Way<br />
5 Split 35 45 55 65 35 45 55 65<br />
Screen<br />
3 Way<br />
6 Vert.<br />
Split<br />
Screen<br />
3 Way<br />
7 Horiz.<br />
Split<br />
Screen<br />
3 Way<br />
8 Vert.<br />
Split<br />
Screen<br />
12<br />
33 43 53 63 33 43 53 63<br />
33 43 53 63 33 43 53 63<br />
33 43 53 63 33 43 53 63<br />
Figure 57<br />
Visit www.stacosystems.com or call 714-549-3041 for more information<br />
NOTES: See Table 4 for current sourcing and sinking codes 7, 8, 9 and 0.<br />
See Table 5 for display style codes 1 through 8.<br />
See Table 6B for circuit and seal codes 31 through 66.<br />
37
38<br />
PRODUCT MODEL DESIGN 99 SWITCH/INDICATOR<br />
& ENGINEERING DATA<br />
28 Volt LED Circuit Schematics<br />
Common Circuit Split Circuit<br />
Display Styles Code Sealed Code Sealed<br />
Common Lamp Split Lamp<br />
Code Front View Circuit Sourcing Sinking Circuit Sourcing Sinking<br />
Rear View A B Rear View C D<br />
No Yes No Yes No Yes No Yes<br />
1 2 Full<br />
1<br />
Screen<br />
2<br />
3 4<br />
1<br />
3<br />
2<br />
4<br />
Horiz.<br />
Split<br />
Screen<br />
32 42 52 62 32 42 52 62<br />
Vert.<br />
3 Split 32 42 52 62 32 42 52 62<br />
Screen<br />
3 Way<br />
4 Horiz.<br />
Split<br />
Screen<br />
34 44 54 64 34 44 54 64<br />
4 Way<br />
5 Split 36 46 56 66 36 46 56 66<br />
Screen<br />
3 Way<br />
6 Vert.<br />
Split<br />
Screen<br />
3 Way<br />
7 Horiz.<br />
Split<br />
Screen<br />
3 Way<br />
8 Vert.<br />
Split<br />
Screen<br />
2<br />
1<br />
NOTES: See Table 4 for current sourcing and sinking codes 7, 8, 9 and 0.<br />
See Table 5 for display style codes 1 through 8.<br />
See Table 6B for circuit and seal codes 31 through 66.<br />
34 44 54 64 34 44 54 64<br />
34 44 54 64 34 44 54 64<br />
34 44 54 64 34 44 54 64<br />
Figure 58
Legends<br />
PRODUCT DIMENSIONS DESIGN & ENGINEERING - MODEL 99 DATA<br />
Type Style and Fonts<br />
The standard type face used for legend text is Alternate Gothic Number 2 (AG2), a condensed gothic, sans serif style.<br />
The nominal letter height-to-width ratio is approximately 6:1. Always Visible White (AVW) legends are an exception;<br />
they use the Helvetica Light font.<br />
Character Heights<br />
The character height, as defined in this document, is the distance (in decimal inches) from the top to bottom of a<br />
capital letter (no descenders) in the standard font AG2. Unless otherwise specified, the size of punctuation and<br />
symbols in that font will be artistically proportional to the size specified for the capital letters.<br />
As listed in Table 5, the standard character heights for the <strong>Series</strong> <strong>90</strong> Product Line are .072, .087, .100, .125 and<br />
.145. Other AG2 character heights, available by special order (or if needed, for special artwork) are: .060, .066, .075, .077,<br />
.080, .082, .0<strong>90</strong>, .094, .097, .105, .110, .114, .120, .132, .139, .155, .164, .175, .188, .203, .219, .239, .263, .293 and .329.<br />
Standard Character/Symbol Set<br />
The standard AG2 typeface provides capital letters and numerics in all the sizes listed above. Lower case characters<br />
are not available in this font. Many typical European characters such as Ä, Å, É, Ö, Ñ, Ü, and others, are<br />
available as standard within this font. Other symbols available in AG2 include arrows, @, #, $, %, &, (, ), ', !, ., +, /,<br />
:, ;, =, ?, \, _, , *, ±, °, 1 / 2 , 1 / 4 , and others.<br />
The “character height” of an arrow is the length from the tip of the point to the end of the shaft, independently of its<br />
orientation, i.e., a .145” arrow will have the same appearance if vertical or horizontal.<br />
The symbols * and # are available either as proportional to the size of the AG2 font or as full-size characters with<br />
the same height of the capital letters. Unless otherwise specified, the symbol used will be the proportional one.<br />
Optional Fonts<br />
By special order Helvetica Light and Helvetica Medium are available in a range of sizes similar to that of AG2. Either<br />
of these Helvetica typefaces may also be ordered in their normal, condensed, bold, or expanded variations. Both of<br />
these typefaces provide capital letters, numbers, lower case characters, and many of the symbols and European<br />
characters identified in the previous paragraphs. The “characters per legend area” of Table 5 does not apply.<br />
Math and Greek Symbols Sets<br />
Math symbols and Greek characters available by special order and may be mixed with the standard AG2 font.<br />
Other Non-Roman Alphabets<br />
Camera ready art, at 10 times the final size, is required for legends using other non-Roman characters<br />
such as Hebrew, Japanese, Korean, Chinese, Russian, Arabic, Sanskrit, etc. A bold face character set,<br />
with a stroke width ration of 6:1 or 8:1 is recommended.<br />
Special Artwork<br />
Simple shapes, such as squares, rectangles, borders, circles or diagonal lines may be generated in the normal legend-making<br />
process. For complex shapes, icons, or others graphic symbols, it is recommended that the customer<br />
supply camera-ready artwork at a 10:1 scale (to fit in a 4.95” square area) for photographic reproduction.<br />
Characters Per Legend Display Area<br />
The approximate number of AG2 characters of a given size which will fit into a display area is given in Table<br />
5. AG2 characters are proportionately spaced (i.e., a character “M” or “W” is about three times as wide as<br />
the character “I”). The actual number of characters will depend on the specific characters used. If the specific<br />
characters used in a given area exceed the space available, but by no more than 10%, the characters<br />
will be condensed by 10%, using the same height but less width, on order to accommodate the legend as<br />
requested by the customer.<br />
Visit www.stacosystems.com or call 714-549-3041 for more information<br />
39
40<br />
PRODUCT MODEL DESIGN 99 SWITCH/INDICATOR<br />
& ENGINEERING DATA<br />
Display Types<br />
The display types available as standard products in the <strong>Series</strong> <strong>90</strong> are listed in Table 7, along with the corresponding<br />
symbol used in MIL-PRF-22885.<br />
Legend and Faceplate Assemblies<br />
The lens and faceplate assemblies are part of the pushbutton assembly. These pushbuttons are removable<br />
from the front of the panel to allow the replacement of incandescent lamps without the need for special tools.<br />
LEDs are not replaceable.<br />
Color Filters<br />
Incandescent and LED display types 2, 3, 4, 5, 8 and 9 utilize color filter caps which may be interchanged<br />
among the four color cell areas or replaced with color caps ordered from the factory. Incandescent display<br />
types 1, 6, 7 and 0 utilize flat color filters which are an integral part of the faceplate assembly and are not<br />
replaceable in the field.<br />
Customer Replaceable Legends<br />
Display types 8, 9 and 0 allow for the customer to replace the legends. Each type is available in configurations<br />
with incandescent lamps. For LED-lighted pushbuttons display types 9 and 0 are available. The overall size of<br />
the replaceable faceplate is .575” (14.6 mm) square, with a viewing area of .495” (12.6 mm) square. Displays<br />
with customer installed legends may not be of equal quality to that of factory installed assemblies that are lami-<br />
nated together.<br />
Sunlight Readability<br />
Sunlight readable displays in the <strong>Series</strong> <strong>90</strong> Product Line provide a black, non-reflective, dead-front appearance<br />
when no lighted and provide brightly lighted legend characters, in the specified colors, when the displays are energized.<br />
This display (type 6) protects the crew station viewer from false indications in direct sunlight at high altitude.<br />
The design overcomes two problems associated with high-intensity light directed at the instrument panel. First,<br />
when lighted, it enables the viewer to read the legend despite the intense brightness of direct sunlight at 70,000<br />
feet altitude. Secondly, the design prevents this high intensity light from causing the legends to falsely appear to be<br />
lighted when the are actually unlighted. The measure of its effectiveness is by means of calculating two sets of con-<br />
trast ratios based on laboratory measurements conducted under very specific conditions.<br />
Contrast Ratios<br />
The average contrast ratio of each legend character to the background is measured with an incidental illumination<br />
of 10,000 foot-candles minimum, at 5,000° ±500° Kelvin color temperature, directed at an angle of 45°<br />
±2° to the normal of the viewing surface. Luminance readings are point readings taken with a calibrated photoelectric<br />
photometer directed perpendicular to the display surface. At least three readings are taken at equally<br />
spaced points on each legend character and the readings averaged. At least three readings are then taken at<br />
points in the background immediately adjacent to each character. The contrast ratios C L , and C UL , are calcu-<br />
lated for each character.<br />
The lighted contrast (ON/BACKGROUND) is defined by C L = (B 2 - B 1 )/B 1<br />
The unlighted contrast (OFF/BACKGROUND) is defined by C L = (B 2 - B 1 )/B 1<br />
B 1 = Average background luminance<br />
B 2 = Average character luminance, legend lighted<br />
B 3 = Average character luminance, legend unlighted
PRODUCT DIMENSIONS DESIGN & ENGINEERING - MODEL 99 DATA<br />
Lamps for testing are aged and selected for a mean spherical candlepower (mscp) of .15 ± .02, for general testing,<br />
and .15 ± .01 for QPL testing. The standard legend for SLR testing has a character height of 0.1 inch (2.54 mm),<br />
two display lines, and the words “REMOTE” on the top half and “ALT LOW” on the bottom half.<br />
Incandescent Type 6<br />
The average contrast ratio of each lighted legend character to background is 0.6 minimum, except for blue<br />
which will be 0.2 minimum. In the unlighted legend condition, the average contrast ratio of each legend character<br />
to the background will have an absolute value less than or equal to 0.1.<br />
SLR And NVIS-Compatibility<br />
Incandescent LED pushbuttons with NVIS-compatible colors will have an average contrast ratio of each lighted<br />
legend character to the background of at least 0.6 in accordance with MIL-STD-3009. The unlighted contrast<br />
ratio for each individual character will not exceed 0.1. Incandescent lighted NVIS Red will have an average<br />
lighted contrast ratio for the entire legend of 0.6 or greater, however, individual characters may be below that<br />
contrast ratio. LED pushbuttons add NVIS White and NVIS Blue to the available colors.<br />
Sunlight readability requirements apply to NVIS-compatible LED pushbutton configurations.<br />
SLR Sealed Displays<br />
SLR performance is not degraded for standard Dripproof, Splashproof or Watertight seals. SLR requirements do<br />
not apply to Solvent Resistant or Hazardous Environment Seals.<br />
Night Vision Imaging System<br />
<strong>Series</strong> <strong>90</strong> Products, when type 7 legends are specified, provide instrumentation displays which are compatible with<br />
night vision imaging systems (NVIS). NVIS compatibility is ensured with extensive testing and analysis by a computer<br />
controlled and calibrated spectral radiometer, the most accurate and sophisticated NVIS laboratory equipment<br />
available. This system is used to qualify products, to evaluate incoming filters and to perform certifications.<br />
Also, all NVIS-compatible products are 100% inspected for IR leakage prior to shipment.<br />
NVIS Qualifications<br />
The <strong>Series</strong> <strong>90</strong> incandescent versions are fully qualified to MIL-STD-3009 under MIL-S-22885/101 for NVIS compatibility<br />
for the colors Green A, Green B, Yellow and Red, and for Type I systems, Class A and Class B goggles,<br />
and for Type II systems, Class A and Class B goggles, where applicable. These NVIS units are also “sunlight read-<br />
able” per MIL-S-22885/101.<br />
NVIS Green A and B: Shall meet all Class A and Class B equipment requirements for illuminated controls. NVIS<br />
Yellow: Shall meet all Class A and Class B equipment requirements for caution and warning signals. NVIS Red:<br />
Shall meet Type I and Type II Class B equipment requirements for electronic and electro-optical displays (multicolor).<br />
NVIS Blue: NVIS radiance shall meet all Class A and Class B equipment for illuminated controls. Color<br />
coordinates shall be within the following limits of the CIE 1976 UCS chromaticity diagram: u'1=.175, v'1=.167,<br />
r=.040 (Blue color is not specified by existing military standards for NVIS compatible lighting at the time of prepa-<br />
ration of this slash sheet.<br />
Visit www.stacosystems.com or call 714-549-3041 for more information<br />
41
42<br />
PRODUCT MODEL DESIGN 99 SWITCH/INDICATOR<br />
& ENGINEERING DATA<br />
Chromaticity requirements (MIL-STD-3009, Table II) are simplified and given in accompanying table and are shown<br />
graphically in CIE chart form in Figure 14.<br />
TABLE II. NVIS chromaticity requirements. 1/<br />
NVIS WHITE NVIS RED NVIS NVIS NVIS NVIS BLUE<br />
GREEN A GREEN B YELLOW<br />
Code NW Code NR Code GA Code GB Code NY Code NB<br />
u’1 v’1 r u’1 v’1 r u’1 v’1 r u’1 v’1 r u’1 v’1 r u’1 v’1 r<br />
0.1<strong>90</strong> 0.4<strong>90</strong> 0.040 0.450 0.550 0.060 0.088 0.543 0.037 0.131 0.623 0.057 0.274 0.622 0.083 0.175 0.167 0.040<br />
1/ The colors are expressed as ‘ u’1 ‘, “ v’1 “ and ‘ r ‘ on the CIE 1976 UCS chromaticity<br />
diagram. Illuminated colors, measured as specified herein, shall be within the limits<br />
bounded by the coordinates listed for each color.<br />
Night Vision Imaging System Types<br />
MIL-STD-3009 defines night vision imaging systems by type and class. Type I is direct view imaging where the<br />
Gen III night vision goggle (NVG) is used to view outside the cockpit and the pilot glances under the goggles to<br />
view the instruments. Type II also is a Gen III goggle, but uses a projected image where the pilot simultaneously<br />
views both external and internal information through optical mixers.<br />
Night Vision Imaging System Classes<br />
Two NVIS classes have been defined, based on the cut-off frequency of the filters used in the goggles. Class A NVIS<br />
uses the 625 nanometer (nm) minus blue objective lens filter while Class B uses the 665 nm filter. The lower cut-off<br />
of the Class A filters allows for maximum near-IR response to tree bark, grass and other green vegetation, a general<br />
requirement for helicopter applications operating below tree-top level. The Class B filter, with the higher cut-off, allows<br />
the goggles to be used in conjunction with orange and red warning indicators in the cockpit, and is intended for aircraft<br />
which are operating above tree level.<br />
NVIS Radiance<br />
The NVIS radiance (NR) is measured for Class A (NRA) for compatibility with 625 nm applications, and for Class<br />
B (NRB) for 665 nm systems. Both are the result of spectral radiance measurements, in 5 nm increments, from<br />
450 to 930 nm. The readings are automatically scaled by the spectroradiometer system to a selected brightness level<br />
given in footlamberts.<br />
NVIS Radiance Requirements<br />
The accompanying table summarizes the NVIS<br />
radiance specification (MIL-STD-3009, Table IX) for<br />
configurations which are applicable to the <strong>Series</strong> <strong>90</strong><br />
product line.<br />
NVIS Radiance Requirements of NVIS-Compatible Light Sources<br />
Type I <strong>Systems</strong><br />
NVIS Class A Goggles Class B Goggles Luminance<br />
Color<br />
Min NRA Max NRA Min NRB Max NRB<br />
fL<br />
Green A – 1.7E-10 – 1.7E-10 0.1<br />
Green B – 1.7E-10 – 1.7E-10 0.1<br />
Yellow 5.0E-8 1.5E-7 4.7E-8 1.4E-7 15.0<br />
Red Not Applicable 4.7E-8 1.4E-7 15.0<br />
Type II <strong>Systems</strong><br />
NVIS Class A Goggles Class B Goggles Luminance<br />
Color<br />
Min NRA Max NRA Min NRB Max NRB<br />
fL<br />
Green A – 1.7E-10 – 1.7E-10 0.1<br />
Green B – 1.7E-10 – 1.7E-10 0.1<br />
Yellow – 1.5E-7 – 1.4E-7 15.0<br />
Red Not Applicable – 1.4E-7 15.0
Materials<br />
PRODUCT DIMENSIONS DESIGN & ENGINEERING - MODEL 99 DATA<br />
Finish<br />
Black anodize over aluminum alloy, when used, is per MIL-STD-3009, Type II, Class 2. Chemical film<br />
finishes, when used, are per MIL-C-5541, Class 3. Dull black chrome finish, when used, is applied over<br />
electroless nickel per MIL-C-14538.<br />
Terminal Plating<br />
Tin-lead plating of solder terminals is per MIL-P-81728. Gold plating, when specified, is per MIL-G-45204.<br />
Printed circuit board terminals are suitably plated to facilitate hand, wave or flow soldering methods. Crimp pin terminals<br />
are gold plated per MIL-G-45204.<br />
Silicone Rubber<br />
Silicone rubber, when used, is in accordance with ZZ-R-765, rubber, silicone.<br />
Fluorosilicone Rubber<br />
Fluorosilicone rubber, when used, is in accordance with MIL-R-25988, rubber, fluorosilicone elastomer, oil<br />
and fuel resistant.<br />
Prohibited Finishes<br />
Cadmium plating is not used on any part for the product line. Pure tin plating is also prohibited as a final<br />
finish or as an undercoat since it may result in tin whisker growth which may adversely affect the operation<br />
of electronic equipment systems. Use of tin-lead (Sn-Pb) finishes are acceptable provided that the minimum<br />
lead content is 3%.<br />
Ozone Depleting Chemicals<br />
Ozone depleting chemicals (OCD’s) are not used in any products or manufacturing processes used in this<br />
product line. [ODC’s include chlorofluorocarbons (CFC’s), hydrochloroflurocarbons (HCFC’s), methyl chloroform,<br />
carbon tetrachloride and halons.]<br />
Quality<br />
Material and products are controlled and inspected per the requirements of MIL-I-45208. The maintenance<br />
of the calibration system to control the accuracy of the measuring and test equipment is in accordance<br />
with MIL-STD-45662. Product inspection for delivery consists of Group A inspectors per MIL-PRF-22885<br />
and the applicable slash sheet.<br />
<strong>Staco</strong> <strong>Systems</strong> maintains a fully equipped and certified laboratory to perform environmental and lighting<br />
tests in accordance with the requirements of MIL-PRF-22885 and MIL-STD-3009.<br />
Visit www.stacosystems.com or call 714-549-3041 for more information<br />
43
44<br />
MILITARY CROSS REFERENCE MIL-PRF-22885/101<br />
Various <strong>Series</strong> <strong>90</strong> <strong>Switches</strong>, Indicators and Display<br />
Screen <strong>Pushbutton</strong> have been granted Qualified<br />
Products Listing under MIL-PRF-22885. The following<br />
list is a random selection of MIL-Spec part numbers.<br />
It does not include lamps, legends or retainers.<br />
Should you wish to order assemblies with these<br />
features, please utilize the coded part number system<br />
detailed within this catalog or contact the factory for<br />
special ten digit part numbers unique to your specific<br />
project application. Specific cross reference part<br />
numbers are available on request.<br />
Example:<br />
M22885/101E031W2GR 9305611201052211<br />
A 1X Full ScreenDisplay requires that all 4X positions<br />
be coded with the same color code number from the<br />
table below.<br />
1X 1<br />
2XX<br />
1<br />
2<br />
A 2XX Horizontal Split Screen<br />
Display requires that the first two<br />
X positions be coded with the<br />
color digit desired in Area 1 and<br />
the last two X positions be coded<br />
with the color digit in Area 2.<br />
MIL-S-22885 Description <strong>Series</strong> <strong>90</strong><br />
Symbol Code<br />
Display Types<br />
C Colored Background 1<br />
B<br />
H<br />
Hidden Legend,<br />
<strong>Lighted</strong> Background<br />
Hidden Legend,<br />
<strong>Lighted</strong> Characters<br />
N Opaque Background 4<br />
W White Background 5<br />
S Sunlight Background 6<br />
S NVIS Compatible 7<br />
Standard Colors<br />
W White 0<br />
R Red 1<br />
G Green 2<br />
Y Aviation Yellow 3<br />
D Lunar White 4<br />
– Lemon Yellow 5<br />
B Blue 6<br />
Z Aviation Green 7<br />
NVIS Colors<br />
H Green A 6<br />
J Green B 2<br />
K Yellow 5<br />
L Red 1<br />
2<br />
3
Indicators<br />
MILITARY CROSS REFERENCE MIL-22885/101<br />
Dripproof Seal, Non-RFI Dripproof Seal, RFI Shielded<br />
M22885/101E 930551 M22885/101E 930552<br />
031N1X 110104XXXX 087N1X 410104XXXX<br />
031N2XX 120104XXXX 087N2XX 420104XXXX<br />
031W1X 110105XXXX 087W1X 410105XXXX<br />
031W2XX 120105XXXX 087W2XX 420105XXXX<br />
031S1X 110106XXXX 087S1X 410106XXXX<br />
031S2XX 120106XXXX 087S2XX 420106XXXX<br />
174N1X 210104XXXX 184N1X 510104XXXX<br />
174N2XX 220104XXXX 184N2XX 520104XXXX<br />
174W1X 210105XXXX 184W1X 510105XXXX<br />
174W2XX 220105XXXX 184W2XX 520105XXXX<br />
174S1X 210106XXXX 184S1X 510106XXXX<br />
174S2XX 220106XXXX 184S2XX 520106XXXX<br />
032N1X 310104XXXX 088N1X 610104XXXX<br />
032N2XX 320104XXXX 088N2XX 620104XXXX<br />
032W1X 310105XXXX 088W1X 610105XXXX<br />
032W2XX 320105XXXX 088W2XX 620105XXXX<br />
032S1X 310106XXXX 088S1X 610106XXXX<br />
032S2XX 320106XXXX 088S2XX 620106XXXX<br />
<strong>Switches</strong>, SPDT, Silver Contacts Momentary<br />
Dripproof Seal, Non-RFI Dripproof Seal,RFI Shielded<br />
M22885/101E 930111 M22885/101E 930112<br />
035N1X 110104XXXX 091N1X 410104XXXX<br />
035N2XX 120104XXXX 091N2XX 420104XXXX<br />
035W1X 110105XXXX 091W1X 410105XXXX<br />
035W2XX 120105XXXX 091W2XX 420105XXXX<br />
035S1X 110106XXXX 091S1X 410106XXXX<br />
035S2XX 120106XXXX 091S2XX 420106XXXX<br />
175N1X 210104XXXX 185N1X 510104XXXX<br />
175N2XX 220104XXXX 185N2XX 520104XXXX<br />
175W1X 210105XXXX 185W1X 510105XXXX<br />
175W2XX 220105XXXX 185W2XX 520105XXXX<br />
175S1X 210106XXXX 185S1X 510106XXXX<br />
175S2XX 220106XXXX 185S2XX 520106XXXX<br />
036N1X 310104XXXX 092N1X 610104XXXX<br />
036N2XX 320104XXXX 092N2XX 620104XXXX<br />
036W1X 310105XXXX 092W1X 610105XXXX<br />
036W2XX 320105XXXX 092W2XX 620105XXXX<br />
036S1X 310106XXXX 092S1X 610106XXXX<br />
036S2XX 320106XXXX 092S2XX 620106XXXX<br />
<strong>Switches</strong>, SPDT, Gold Contacts Momentary<br />
Dripproof Seal, Non-RFI Dripproof Seal,RFI Shielded<br />
M22885/101E 930311 M22885/101E 930312<br />
039N1X 110104XXXX 095N1X 410104XXXX<br />
039N2XX 120104XXXX 095N2XX 420104XXXX<br />
039W1X 110105XXXX 095W1X 410105XXXX<br />
039W2XX 120105XXXX 095W2XX 420105XXXX<br />
039S1X 110106XXXX 095S1X 410106XXXX<br />
039S2XX 120106XXXX 095S2XX 420106XXXX<br />
176N1X 210104XXXX 186N1X 510104XXXX<br />
176N2XX 220104XXXX 186N2XX 520104XXXX<br />
176W1X 210105XXXX 186W1X 510105XXXX<br />
176W2XX 220105XXXX 186W2XX 520105XXXX<br />
176S1X 210106XXXX 186S1X 510106XXXX<br />
176S2XX 220106XXXX 186S2XX 520106XXXX<br />
040N1X 310104XXXX 096N1X 610104XXXX<br />
040N2XX 320104XXXX 096N2XX 620104XXXX<br />
040W1X 310105XXXX 096W1X 610105XXXX<br />
040W2XX 320105XXXX 096W2XX 620105XXXX<br />
040S1X 310106XXXX 096S1X 610106XXXX<br />
040S2XX 320106XXXX 096S2XX 620106XXXX<br />
<strong>Switches</strong>, DPDT, Silver Contacts Momentary<br />
Visit www.stacosystems.com or call 714-549-3041 for more information<br />
Dripproof Seal, Non-RFI Dripproof Seal,RFI Shielded<br />
M22885/101E 930211 M22885/101E 930212<br />
043N1X 410104XXXX 099N1X 410104XXXX<br />
043N2XX 420104XXXX 099N2XX 420104XXXX<br />
043W1X 410105XXXX 099W1X 410105XXXX<br />
043W2XX 420105XXXX 099W2XX 420105XXXX<br />
043S1X 410106XXXX 099S1X 410106XXXX<br />
043S2XX 420106XXXX 099S2XX 420106XXXX<br />
177N1X 510104XXXX 187N1X 510104XXXX<br />
177N2XX 520104XXXX 187N2XX 520104XXXX<br />
177W1X 510105XXXX 187W1X 510105XXXX<br />
177W2XX 520105XXXX 187W2XX 520105XXXX<br />
177S1X 510106XXXX 187S1X 510106XXXX<br />
177S2XX 520106XXXX 187S2XX 520106XXXX<br />
044N1X 610104XXXX 100N1X 610104XXXX<br />
044N2XX 620104XXXX 100N2XX 620104XXXX<br />
044W1X 610105XXXX 100W1X 610105XXXX<br />
044W2XX 620105XXXX 100W2XX 620105XXXX<br />
044S1X 610106XXXX 100S1X 610106XXXX<br />
044S2XX 620106XXXX 100S2XX 620106XXXX<br />
<strong>Switches</strong>, DPDT, Gold Contacts Momentary<br />
Dripproof Seal, Non-RFI Dripproof Seal,RFI Shielded<br />
M22885/101E 930411 M22885/101E 930412<br />
047N1X 410104XXXX 103N1X 410104XXXX<br />
047N2XX 420104XXXX 103N2XX 420104XXXX<br />
047W1X 410105XXXX 103W1X 410105XXXX<br />
047W2XX 420105XXXX 103W2XX 420105XXXX<br />
047S1X 410106XXXX 103S1X 410106XXXX<br />
047S2XX 420106XXXX 103S2XX 420106XXXX<br />
178N1X 510104XXXX 188N1X 510104XXXX<br />
178N2XX 520104XXXX 188N2XX 520104XXXX<br />
178W1X 510105XXXX 188W1X 510105XXXX<br />
178W2XX 520105XXXX 188W2XX 520105XXXX<br />
178S1X 510106XXXX 188S1X 510106XXXX<br />
178S2XX 520106XXXX 188S2XX 520106XXXX<br />
048N1X 610104XXXX 104N1X 610104XXXX<br />
048N2XX 620104XXXX 104N2XX 620104XXXX<br />
048W1X 610105XXXX 104W1X 610105XXXX<br />
048W2XX 620105XXXX 104W2XX 620105XXXX<br />
048S1X 610106XXXX 104S1X 610106XXXX<br />
048S2XX 620106XXXX 104S2XX 620106XXXX<br />
<strong>Switches</strong>, SPDT, Silver Contacts Alternate Action<br />
Dripproof Seal, Non-RFI Dripproof Seal,RFI Shielded<br />
M22885/101E 930121 M22885/101E 930122<br />
050N1X 410104XXXX 106N1X 410104XXXX<br />
050N2XX 420104XXXX 106N2XX 420104XXXX<br />
050W1X 410105XXXX 106W1X 410105XXXX<br />
050W2XX 420105XXXX 106W2XX 420105XXXX<br />
050S1X 410106XXXX 106S1X 410106XXXX<br />
050S2XX 420106XXXX 106S2XX 420106XXXX<br />
197N1X 510104XXXX 213N1X 510104XXXX<br />
197N2XX 520104XXXX 213N2XX 520104XXXX<br />
197W1X 510105XXXX 213W1X 510105XXXX<br />
197W2XX 520105XXXX 213W2XX 520105XXXX<br />
197S1X 510106XXXX 213S1X 510106XXXX<br />
197S2XX 520106XXXX 213S2XX 520106XXXX<br />
201N1X 610104XXXX 217N1X 610104XXXX<br />
201N2XX 620104XXXX 217N2XX 620104XXXX<br />
201W1X 610105XXXX 217W1X 610105XXXX<br />
201W2XX 620105XXXX 217W2XX 620105XXXX<br />
201S1X 610106XXXX 217S1X 610106XXXX<br />
201S2XX 620106XXXX 217S2XX 620106XXXX<br />
45
46<br />
MILITARY CROSS REFERENCE MIL-22885/101<br />
<strong>Switches</strong>, SPDT, Gold Contacts Alternate Action<br />
Dripproof Seal, Non-RFI Dripproof Seal,RFI Shielded<br />
M22885/101E 930321 M22885/101E 930322<br />
052N1X 410104XXXX 108N1X 410104XXXX<br />
052N2XX 420104XXXX 108N2XX 420104XXXX<br />
052W1X 410105XXXX 108W1X 410105XXXX<br />
052W2XX 420105XXXX 108W2XX 420105XXXX<br />
052S1X 410106XXXX 108S1X 410106XXXX<br />
052S2XX 420106XXXX 108S2XX 420106XXXX<br />
198N1X 510104XXXX 214N1X 510104XXXX<br />
198N2XX 520104XXXX 214N2XX 520104XXXX<br />
198W1X 510105XXXX 214W1X 510105XXXX<br />
198W2XX 520105XXXX 214W2XX 520105XXXX<br />
198S1X 510106XXXX 214S1X 510106XXXX<br />
198S2XX 520106XXXX 214S2XX 520106XXXX<br />
202N1X 610104XXXX 218N1X 610104XXXX<br />
202N2XX 620104XXXX 218N2XX 620104XXXX<br />
202W1X 610105XXXX 218W1X 610105XXXX<br />
202W2XX 620105XXXX 218W2XX 620105XXXX<br />
202S1X 610106XXXX 218S1X 610106XXXX<br />
202S2XX 620106XXXX 218S2XX 620106XXXX<br />
<strong>Switches</strong>, DPDT, Silver Contacts Alternate Action<br />
Dripproof Seal, Non-RFI Dripproof Seal,RFI Shielded<br />
M22885/101E 930221 M22885/101E 930222<br />
054N1X 410104XXXX 110N1X 410104XXXX<br />
054N2XX 420104XXXX 110N2XX 420104XXXX<br />
054W1X 410105XXXX 110W1X 410105XXXX<br />
054W2XX 420105XXXX 110W2XX 420105XXXX<br />
054S1X 410106XXXX 110S1X 410106XXXX<br />
054S2XX 420106XXXX 110S2XX 420106XXXX<br />
199N1X 510104XXXX 215N1X 510104XXXX<br />
199N2XX 520104XXXX 215N2XX 520104XXXX<br />
199W1X 510105XXXX 215W1X 510105XXXX<br />
199W2XX 520105XXXX 215W2XX 520105XXXX<br />
199S1X 510106XXXX 215S1X 510106XXXX<br />
199S2XX 520106XXXX 215S2XX 520106XXXX<br />
203N1X 610104XXXX 219N1X 610104XXXX<br />
203N2XX 620104XXXX 219N2XX 620104XXXX<br />
203W1X 610105XXXX 219W1X 610105XXXX<br />
203W2XX 620105XXXX 219W2XX 620105XXXX<br />
203S1X 610106XXXX 219S1X 610106XXXX<br />
203S2XX 620106XXXX 219S2XX 620106XXXX<br />
<strong>Switches</strong>, DPDT, Gold Contacts Alternate Action<br />
Dripproof Seal, Non-RFI Dripproof Seal,RFI Shielded<br />
M22885/101E 930421 M22885/101E 930422<br />
056N1X 410104XXXX 112N1X 410104XXXX<br />
056N2XX 420104XXXX 112N2XX 420104XXXX<br />
056W1X 410105XXXX 112W1X 410105XXXX<br />
056W2XX 420105XXXX 112W2XX 420105XXXX<br />
056S1X 410106XXXX 112S1X 410106XXXX<br />
056S2XX 420106XXXX 112S2XX 420106XXXX<br />
200N1X 510104XXXX 216N1X 510104XXXX<br />
200N2XX 520104XXXX 216N2XX 520104XXXX<br />
200W1X 510105XXXX 216W1X 510105XXXX<br />
200W2XX 520105XXXX 216W2XX 520105XXXX<br />
200S1X 510106XXXX 216S1X 510106XXXX<br />
200S2XX 520106XXXX 216S2XX 520106XXXX<br />
204N1X 610104XXXX 220N1X 610104XXXX<br />
204N2XX 620104XXXX 220N2XX 620104XXXX<br />
204W1X 610105XXXX 220W1X 610105XXXX<br />
204W2XX 620105XXXX 220W2XX 620105XXXX<br />
204S1X 610106XXXX 220S1X 610106XXXX<br />
2040S2XX 620106XXXX 220S2XX 620106XXXX
MILITARY CROSS REFERENCE MIL-PRF-22885/112<br />
Part or Identify Number (PIN): The PIN shall be constructed as illustrated in the following example:<br />
E 2 4 4 G<br />
Basic specification and detail configuration slash sheet number.<br />
Codes from table IV through table VII.<br />
<strong>Pushbutton</strong> display and LED configuration - table VIII.<br />
<strong>Pushbutton</strong> display circuit configuration - table VII.<br />
Switch circuit, action, and contact material - table V.<br />
Housing enclosure design - table IV.<br />
Legend details and display screen colors are not defined by the PIN. These details are specified by user's<br />
acquisition documents in accordance with the acquisition requirements for category II switches, see section 6<br />
of MIL-PRF-22885. For the convenience of users, and extension to the PIN may be utilized on the acquisition<br />
document to define the legend details and colors. The method of constructing this extension is illustrated<br />
below. The extension is for convenience only and is not part of the PIN.<br />
M22885/XXXE244G<br />
Switch housing and termination configuration - table VI.<br />
PIN<br />
22 4 AY RD XX (TURBINE; HEAT) (HI)<br />
Visit www.stacosystems.com or call 714-549-3041 for more information<br />
Acquisition document details for<br />
pushbutton legend and display.<br />
Callouts must be in the sequence<br />
shown.<br />
Legends for display screen areas 1,<br />
2, and 3 respectively. Legends for<br />
each area enclosed by parentheses.<br />
Multiple legend lines separated by<br />
semicolon.<br />
Color code for display screen areas<br />
1,2, and 3 respectively. See tables I<br />
and II for color selection. When any<br />
of these areas are not applicable,<br />
insert XX in that space.<br />
Type of legend display illumination<br />
and contrast. See table X for<br />
selection.<br />
Legend character size. See table IX<br />
for selection<br />
47
48<br />
MILITARY CROSS REFERENCE MIL-PRF-22885/112<br />
MIL-PRF-22885/1 12<br />
TABLE IV. Codes for housing enclosure design.<br />
Enclosure design Without EMI/RFI<br />
shielding<br />
75 G High-impact<br />
shock shock<br />
With solder terminations:<br />
Unsealed<br />
A<br />
---<br />
Dripproof<br />
B<br />
---<br />
Watertight/splashproof<br />
With CTS terminations:<br />
C<br />
S<br />
Unsealed<br />
E<br />
---<br />
Dripproof<br />
F<br />
---<br />
Watertight/splashproof<br />
G<br />
U<br />
75 G<br />
shock<br />
TABLE V. Codes for switch circuit, action, and contact material.<br />
Switch circuit Contact material<br />
Silver Gold<br />
Momentary action:<br />
Single pole, double throw (SPDT) 1 5<br />
Double pole, double throw (DPDT) 2 6<br />
Alternate action:<br />
Single pole, double throw (SPDT) 3 7<br />
Double pole, double throw (DPDT) 4 8<br />
Indicator: --- 0<br />
TABLE VI. Codes for termination type.<br />
Termination type Code<br />
Turret, solder 1<br />
Common termination system (CTS):<br />
Without termination module 1/ 3<br />
With termination module<br />
per MIL-C-3<strong>90</strong>29/16-168 2/ 4<br />
With termination module<br />
per MIL-C-3<strong>90</strong>29/22-192 2/ 5<br />
1/ Designates CTS switch housing without connector<br />
module. Connector modules may be supplied prewired<br />
to wire harness assembly.<br />
2/ Designates CTS MIL-PRF-22885/1 switch housing 12 with connector<br />
module installed. Sealing plugs and termination<br />
pins not included.<br />
TABLE VII. <strong>Pushbutton</strong> display module LED circuit configuration.<br />
Common circuit configuration Code<br />
Single Split<br />
common common<br />
Negative common (ground)<br />
1<br />
3<br />
Positive common (ground)<br />
2<br />
4<br />
17<br />
TABLE VIII. <strong>Pushbutton</strong> display screen and LED design.<br />
J<br />
K<br />
L<br />
N<br />
O<br />
P<br />
With EMI/RFI<br />
shielding<br />
High-impact<br />
shock<br />
---<br />
---<br />
W<br />
---<br />
---<br />
Y<br />
Display screen design code
MILITARY CROSS REFERENCE MIL-PRF 22885/112<br />
1/ Alpha-numeric character format is alternate gothic number 2, Sans-serif.<br />
2/ Number of characters shown above is number of lines times number of<br />
characters per line. For example, 5 x 12 is 5 lines of 12 characters each.<br />
3/ Maximum number of characters per line shown above is an approximate value. The<br />
actual number of characters may be more or less, depending on characters used.<br />
4/ Size codes 10, 20, and 30 are not applicable to legend codes 6 and 7 of<br />
table X.<br />
TABLE X. Legend display and illumination details.<br />
Code Nonilluminated LED illuminated MIL-PRF-22885<br />
display type<br />
Legend Background Legend Background<br />
4 1/ White Black Filter color Black N<br />
5 1/ Black White Black Filter color W<br />
6 2/ Hidden Black Filter color Black S<br />
7 2/ Hidden Black NVIS filter<br />
color<br />
Black S<br />
Visit www.stacosystems.com or call 714-549-3041 for more information<br />
49
50<br />
TABLES<br />
Table 1 – Terminations, Circuitry & Contact Material<br />
CODE<br />
TYPE OF<br />
TERMINATION<br />
NUMBER OF POLES OR INDICATORS<br />
SWITCH<br />
CONTACT<br />
MATERIAL<br />
01 Solder Single Pole Double Throw (SPDT) Silver<br />
02 Solder Double Pole Double Throw (DPDT) Silver<br />
03 Solder Single Pole Double Throw (SPDT) Gold<br />
04 Solder Double Pole Double Throw (DPDT) Gold<br />
05 Solder Indicator Only None<br />
06 PCB Single Pole Double Throw (SPDT) Silver<br />
07 PCB Double Pole Double Throw (DPDT) Silver<br />
08 PCB Single Pole Double Throw (SPDT) Gold<br />
09 PCB Double Pole Double Throw (DPDT) Gold<br />
10 PCB Indicator Only None<br />
16 Crimp Pin 1/ Single Pole Double Throw (SPDT) Silver<br />
17 Crimp Pin 1/ Double Pole Double Throw (DPDT) Silver<br />
18 Crimp Pin 1/ Single Pole Double Throw (SPDT) Gold<br />
19 Crimp Pin 1/ Double Pole Double Throw (DPDT) Gold<br />
20 Crimp Pin 1/ Indicator Only None<br />
21 Crimp Pin 2/ Single Pole Double Throw (SPDT) Silver<br />
22 Crimp Pin 2/ Double Pole Double Throw (DPDT) Silver<br />
23 Crimp Pin 2/ Single Pole Double Throw (SPDT) Gold<br />
24 Crimp Pin 2/ Double Pole Double Throw (DPDT) Gold<br />
25 Crimp Pin 2/ Indicator Only None<br />
1/ Used with Model 98 Switch Base or Model 99 Switch Assembly, and <strong>Series</strong> 95 or 97 Matrix<br />
Assemblies (long) requiring MIL-C-3<strong>90</strong>29/16-168 Crimp Pin Receptacles.<br />
2/ Used with Model 98 Switch Base or Model 99 Switch Assembly, and <strong>Series</strong> 95 or 97 Matrix<br />
Assemblies (short) requiring MIL-C-3<strong>90</strong>29/22-192 Crimp Pin Receptacles.<br />
NOTE: Code numbers 11 through 15 have been deleted. They previously represented wire wrap terminations<br />
and have been discontinued.
CODE<br />
TYPE OF<br />
UNIT<br />
TYPE OF<br />
ACTION<br />
TABLES<br />
Table 2 – Switch Action, <strong>Pushbutton</strong> Retainer, and Lamp Wiring Requirement<br />
PUSHBUTTON<br />
RETAINER<br />
Visit www.stacosystems.com or call 714-549-3041 for more information<br />
LAMP WIRING<br />
COMMON BUS<br />
CONFIGURATION<br />
1 Switch Momentary Yes 1/ No<br />
2 Switch Alternate Yes 1/ No<br />
3 Switch Momentary No No<br />
4 Switch Alternate No No<br />
5 Indicator None Yes 1/ No<br />
6 Indicator None No No<br />
7 Switch Momentary Yes 1/<br />
8 Switch Alternate Yes 1/<br />
9 Switch Momentary No<br />
0 Switch Alternate No<br />
A . Indicator None Yes 1/<br />
B Indicator None No<br />
C Switch Momentary Yes 1/<br />
D Switch Alternate Yes 1/<br />
E Switch Momentary No<br />
F Switch Alternate No<br />
G Indicator None Yes 1/<br />
H Indicator None No<br />
Yes 2/<br />
Single<br />
Two or Three Wire System<br />
Yes 2/<br />
Single<br />
Two or Three Wire System<br />
Yes 2/<br />
Single<br />
Two or Three Wire System<br />
Yes 2/<br />
Single<br />
Two or Three Wire System<br />
Yes 2/<br />
Single<br />
Two or Three Wire System<br />
Yes 2/<br />
Single<br />
Two or Three Wire System<br />
Yes 2/<br />
Horizontal<br />
Three or Four Wire System<br />
Yes 2/<br />
Horizontal<br />
Three or Four Wire System<br />
Yes 2/<br />
Horizontal<br />
Three or Four Wire System<br />
Yes 2/<br />
Horizontal<br />
Three or Four Wire System<br />
Yes 2/<br />
Horizontal<br />
Three or Four Wire System<br />
Yes 2/<br />
Horizontal<br />
Three or Four Wire System<br />
51
52<br />
Table 2 (continued)<br />
CODE<br />
TYPE OF<br />
UNIT<br />
TYPE OF ACTION<br />
TABLES<br />
PUSHBUTTON<br />
RETAINER<br />
i 3/ Switch Momentary Yes 1/<br />
J Switch Alternate Yes 1/<br />
K Switch Momentary No<br />
L Switch Alternate No<br />
M Indicator None Yes 1/<br />
N Indicator None No<br />
_ 4/ Switch Momentary Yes 1/<br />
P Switch Alternate Yes 1/<br />
Q Switch Momentary No<br />
R Switch Alternate No<br />
S Indicator None Yes 1/<br />
T Indicator None No<br />
U Switch Momentary Yes 1/<br />
V Switch Alternate Yes 1/<br />
W Switch Momentary No<br />
X Switch Alternate No<br />
Y Indicator None Yes 1/<br />
Z Indicator None No<br />
LAMP WIRING<br />
COMMON BUS<br />
CONFIGURATION<br />
Yes 2/<br />
Bottom<br />
Four or Five Wire System<br />
Yes 2/<br />
Bottom<br />
Four or Five Wire System<br />
Yes 2/<br />
Bottom<br />
Four or Five Wire System<br />
Yes 2/<br />
Bottom<br />
Four or Five Wire System<br />
Yes 2/<br />
Bottom<br />
Four or Five Wire System<br />
Yes 2/<br />
Bottom<br />
Four or Five Wire System<br />
Yes 2/<br />
Top<br />
Four or Five Wire System<br />
Yes 2/<br />
Top<br />
Four or Five Wire System<br />
Yes 2/<br />
Top<br />
Four or Five Wire System<br />
Yes 2/<br />
Top<br />
Four or Five Wire System<br />
Yes 2/<br />
Top<br />
Four or Five Wire System<br />
Yes 2/<br />
Top<br />
Four or Five Wire System<br />
Yes 2/<br />
Vertical<br />
Three or Four Wire System<br />
Yes 2/<br />
Vertical<br />
Three or Four Wire System<br />
Yes 2/<br />
Vertical<br />
Three or Four Wire System<br />
Yes 2/<br />
Vertical<br />
Three or Four Wire System<br />
Yes 2/<br />
Vertical<br />
Three or Four Wire System<br />
Yes 2/<br />
Vertical<br />
Three or Four Wire System<br />
1/ Retainer applies only when ordered as part of assemblies which include pushbuttons.
Table 3 – EMI/RFI & Sealing<br />
TABLES<br />
2/ Common bus configuration applies only to incandescent lamp based switch and indicator.<br />
3/ Lower case letter "i". Do not use upper case letter "I" to differentiate it with number “1”<br />
4/ Underscore "_". Do not use dash "-", because a dash is used as a delimiter between the switch<br />
and pushbutton portions of a part number within <strong>Staco</strong> <strong>Systems</strong>.<br />
CODE TYPE OF DRIP SEAL VS. EMI/RFI VS.<br />
MOUNTING UNSEALED NON-EMI/RFI<br />
SHIELDING<br />
01 Individual Sealed Non-EMI/RFI<br />
02 Individual Sealed EMI/RFI<br />
03 Individual Unsealed Non-EMI/RFI<br />
04 Individual Unsealed EMI/RFI<br />
1<br />
05 Matrix Sealed Non-EMI/RFI<br />
06 Matrix 1<br />
Sealed EMI/RFI<br />
1<br />
07 Matrix Unsealed Non-EMI/RFI<br />
1<br />
08 Matrix Unsealed EMI/RFI<br />
1<br />
For mounting in models 94, 95, 96 and 97 matrix frame assemblies.<br />
Table 4 – Incandescent or LED, Ground Options and EMI/RFI<br />
CODE LIGHT SOURCE<br />
COMMON<br />
CIRCUIT<br />
CONFIGURATION<br />
EMI/RFI<br />
SHIELDED<br />
Visit www.stacosystems.com or call 714-549-3041 for more information<br />
CURRENT<br />
SOURCING<br />
OR SINKING<br />
1 Incandescent Single Common No Not Applicable<br />
2 Incandescent Vertical Split No Not Applicable<br />
3 Incandescent Horizontal Split No Not Applicable<br />
4 Incandescent Single Common EMI/RFI Not Applicable<br />
5 Incandescent Vertical Split EMI/RFI Not Applicable<br />
6 Incandescent Horizontal Split EMI/RFI Not Applicable<br />
A High Brightness (HB) LED Single Common EMI/RFI Sourcing<br />
B High Brightness (HB) LED Single Common EMI/RFI Sinking<br />
C High Brightness (HB) LED Split Common EMI/RFI Sourcing<br />
D High Brightness (HB) LED Split Common EMI/RFI Sinking<br />
E HB LED with Voltage Dimming 1/ Single Common EMI/RFI Sourcing<br />
F HB LED with Voltage Dimming 1/ Single Common EMI/RFI Sinking<br />
G HB LED with Voltage Dimming 1/ Split Common EMI/RFI. Sourcing<br />
H HB LED with Voltage Dimming 1/ Split Common EMI/RFI Sinking<br />
1/ Available for 28V DC only.<br />
53
54<br />
TABLES<br />
Table 5 – Display Style And Character Definition<br />
CODE CHARACTER DISPLAY LEGEND AREA Display<br />
No. SIZE IN<br />
INCHES (Ref.)<br />
AREA NO. (H) Horizontal lines per area<br />
(C) Characters per line<br />
1<br />
Style<br />
Descriptions<br />
1 HXC 2 HXC 3 HXC 4 HXC<br />
10 none none none none none<br />
11 .072 5x12 X X X<br />
12<br />
13<br />
.087<br />
.100<br />
1<br />
4x10<br />
4x9<br />
X<br />
X<br />
X<br />
X<br />
X<br />
X<br />
Full Screen<br />
Display<br />
14 .125 3x7 X X X<br />
15 .145 2x6 X X X<br />
20 none none none none none<br />
21<br />
22<br />
.072<br />
.087<br />
1<br />
2x12<br />
2x10<br />
2x12<br />
2x10<br />
X<br />
X<br />
X<br />
X<br />
2 Way<br />
Horizontal<br />
23<br />
24<br />
.100<br />
.125<br />
2<br />
1x9<br />
1x7<br />
1x9<br />
1x7<br />
X<br />
X<br />
X<br />
X<br />
Split Screen<br />
Display<br />
25 .145 1x6 1x6 X X<br />
30 none none none none none<br />
31 .072 5x6 5x6 X X 2 Way<br />
32<br />
33<br />
.087<br />
.100<br />
1 2<br />
4x4<br />
4x4<br />
4x4<br />
4x4<br />
X<br />
X<br />
X<br />
X<br />
Vertical<br />
Split Screen<br />
34 .125 3x3 3x3 X X Display<br />
35 .145 2x2 2x2 X x<br />
40<br />
41<br />
42<br />
43<br />
44<br />
45<br />
none<br />
.072<br />
.087<br />
.100<br />
.125<br />
.145<br />
2<br />
1<br />
3<br />
none<br />
2x12<br />
2x10<br />
1x9<br />
1x7<br />
1x6<br />
none<br />
2x6<br />
2x4<br />
1x4<br />
1x3<br />
1x2<br />
none<br />
2x6<br />
2x4<br />
1x4<br />
1x3<br />
1x2<br />
none<br />
X<br />
X<br />
X<br />
X<br />
X<br />
3 Way<br />
Split Screen<br />
Display<br />
(Horizontal<br />
Top Half)<br />
50 none none none none none<br />
51<br />
52<br />
.072<br />
.087<br />
1 2<br />
2x6<br />
2x4<br />
2x6<br />
2x4<br />
2x6<br />
2x4<br />
2x6<br />
2x4<br />
4 Way<br />
Split Screen<br />
53<br />
54<br />
.100<br />
.125<br />
3 4<br />
1x4<br />
1x3<br />
1x4<br />
1x3<br />
1x4<br />
1x3<br />
1x4<br />
1x3<br />
Display<br />
55 .145 1x2 1x2 1x2 1x2<br />
60<br />
61<br />
62<br />
63<br />
64<br />
65<br />
none<br />
.072<br />
.087<br />
.100<br />
.125<br />
.145<br />
1<br />
2<br />
3<br />
none<br />
5x6<br />
4x4<br />
4x4<br />
3x3<br />
2x2<br />
none<br />
2x6<br />
2x4<br />
1x4<br />
1x3<br />
1x2<br />
none<br />
2x6<br />
2x4<br />
1x4<br />
1x3<br />
1x2<br />
none<br />
X<br />
X<br />
X<br />
X<br />
X<br />
3 Way<br />
Split Screen<br />
Display<br />
(Vertical<br />
Left Half)<br />
70<br />
71<br />
72<br />
73<br />
74<br />
75<br />
none<br />
.072<br />
.087<br />
.100<br />
.125<br />
.145<br />
1<br />
3<br />
2<br />
none<br />
2x6<br />
2x4<br />
1x4<br />
1x3<br />
1x2<br />
none<br />
2x6<br />
2x4<br />
1x4<br />
1x3<br />
1x2<br />
none<br />
2x12<br />
2x10<br />
1x9<br />
1x7<br />
1x6<br />
none<br />
X<br />
X<br />
X<br />
X<br />
X<br />
3 Way<br />
Split Screen<br />
Display<br />
(Horizontal<br />
Bottom Half)<br />
80<br />
81<br />
82<br />
83<br />
84<br />
85<br />
none<br />
.072<br />
.087<br />
.100<br />
.125<br />
.145<br />
1<br />
3<br />
2<br />
none<br />
2x6<br />
2x4<br />
1x4<br />
1x3<br />
1x2<br />
none<br />
5x6<br />
4x4<br />
4x4<br />
3x3<br />
2x2<br />
none<br />
2x6<br />
2x4<br />
1x4<br />
1x3<br />
1x2<br />
none<br />
X<br />
X<br />
X<br />
X<br />
X<br />
3 Way<br />
Split Screen<br />
Display<br />
(Vertical<br />
Right Half)<br />
NOTES:<br />
1 This is an approximate<br />
value. Actual number of<br />
characters will depend on<br />
the specific characters<br />
used. If the specific<br />
characters used exceed<br />
the space available, the<br />
characters will be condensed,<br />
but only by 10%<br />
using the same height,<br />
in order to accommodate<br />
the legend requested.<br />
2 The character format for<br />
legend alphanumeric is<br />
Alternate Gothic No. 2<br />
(AG2), a condensed,<br />
sans serif font.<br />
3 The character height, as<br />
defined here, is the dis-<br />
tance (in decimal inches)<br />
from the top to bottom of<br />
a capital letter (excluding<br />
descenders) in the stand-<br />
ard AG2 font. Unless<br />
otherwise specified, the<br />
punctuation and symbols<br />
in that font will be artist-<br />
ically proportional to the<br />
size specified for the<br />
capital letters.<br />
4 The standard type font,<br />
AG2, provides capitals<br />
and numerics; lowercase<br />
characters are not avail-<br />
able in this font. Many<br />
foreign characters, such<br />
as Å, É, O, Ñ, U and<br />
others are available.<br />
Helvetica typefaces,<br />
math symbols and Greek<br />
characters are available<br />
by special order.<br />
5 Camera ready art, at 10<br />
times the final size, is<br />
required for non-Roman<br />
characters (such as<br />
Hebrew, Japanese,<br />
Korean, Chinese and<br />
Russian).<br />
6 For special graphic artwork,<br />
contact the<br />
factory-based Sales<br />
department.
TABLES<br />
Table 6A – Incandescent Lamp Selection & Sealing<br />
NOTES:<br />
CODE<br />
NOT SEALED INCANDESCENT MAXIMUM MAXIMUM RESULTING AVERAGE LIFE<br />
SEALED LAMP TYPE DESIGN MILLIAMPS POWER M.S.C.P. HOURS<br />
VOLTS PER WATTS<br />
7 1 2<br />
00 10 Fiberboard Plate “DISCARD” Required<br />
1 All lamps are T-1 sub-midget flange based.<br />
2 Lamp code numbers 01 through 09 and 11 through<br />
19 require four (4) each per pushbutton.<br />
3 Current (milliamp) values are with all four quadrants<br />
lighted.<br />
4 Lamp specifications and performance are published<br />
by the lamp manufacturers. <strong>Staco</strong> <strong>Systems</strong> does not<br />
warrant lamp performance as specified.<br />
5 When lamps are not furnished with pushbuttons, a<br />
removable fiberboard plate is installed at the factory<br />
in order to insure the pushbutton returns to full<br />
normal position. This plate is removed and discarded<br />
when lamps are installed. Applies to code 00 and 10.<br />
6 Caution: Do not install pushbutton without lamps or<br />
dummy lamps in all four positions, or a fiberboard<br />
(discard) in place. Otherwise, when power is<br />
connected, a short circuit will result.<br />
7 <strong>Pushbutton</strong> with Night Vision Imaging System (NVIS)<br />
compatible display (Type 7, NVG) must be “sealed.”<br />
8 Recommended for lower faceplate temperature.<br />
9 SLR performance may be degraded with these lamps.<br />
10 Unless otherwise specified, MSCP values are ± 25%.<br />
PUSHBUTTON PER P/B<br />
01 11 3071 5.0 240 1.2 0.15 5,000<br />
02 12 718 5.0 460 2.3 0.15 40,000<br />
03 13 N/A<br />
8<br />
04 14 3335 28.0 64 1.8 0.08 2,500<br />
05 15 3042 6.0 240 1.4 0.13 3,000<br />
06 16 1099 12.0 240 2.9 0.15 16,000<br />
07 17 3229 14.0 160 2.2 0.15 16,000<br />
08 18 6838 28.0 96 2.7 0.15 16,000<br />
09 19 15091 Dummy Lamp Plug<br />
8<br />
6<br />
Visit www.stacosystems.com or call 714-549-3041 for more information<br />
3<br />
APPLICATION NOTES:<br />
The faceplate temperature will stabilize at ambient<br />
room temperature of 72°F, and with no forced air<br />
movement, 120°F with .72W to 1.14W of power input,<br />
depending on display type, and at 140°F with .87W to<br />
1.62W. It is recommended to reduce the input power<br />
and improve the heat exchange efficacy of the push-<br />
button either by:<br />
1. Reducing the input power to the lamp.<br />
2. Utilizing forced air movement.<br />
3. Reducing duty cycle, thus reducing over all input<br />
power per unit of time of each lamp.<br />
4. Reducing the number of active lamps for long<br />
periods of operation.<br />
5. Mitigating excessive power radiation and conduc-<br />
tion with reductions in ambient temperature,<br />
increased flow of cooling air, and enhanced<br />
heat-sinking of mounting panels.<br />
6. Using low wattage lamps, such as the 3071 for<br />
5 volt applications or the 3335 for 28 volt<br />
applications.<br />
7. Changing design to higher efficacy illuminant<br />
source, Light Emitting Diodes (LED) lighting.<br />
10<br />
5<br />
9<br />
9<br />
55
56<br />
TABLES<br />
Table 6B – LED Configuration & Sealing<br />
CODE<br />
CURRENT CURRENT MAXIMUM<br />
SOURCING SINKING MILLIAMPS<br />
LED DISPLAY DESIGN PER<br />
NOT<br />
SEALED<br />
NOT<br />
SEALED SEALED<br />
SEALED<br />
CONFIGURATION VOLTS PUSHBUTTON<br />
31 41 51 61 Full & 2-Way 5 180<br />
32 42 52 62 Full & 2-Way 28 40<br />
33 43 53 63 3-Way 5 180<br />
34 44 54 64 3-Way 28 60<br />
35 45 55 65 4-Way 5 180<br />
36 46 56 66 4-Way 28 80<br />
NOTES TABLE 6B:<br />
1 All pushbutton with voltage dimming require 80 mA at 28 V.<br />
2 Actual current can be significantly lower.<br />
Table 7 – Display Type<br />
1<br />
2<br />
3<br />
4<br />
5<br />
6<br />
7<br />
8<br />
9<br />
0<br />
Type Code<br />
note /<br />
2<br />
2<br />
2<br />
2<br />
6<br />
1<br />
2<br />
3<br />
4<br />
5<br />
6 8<br />
6<br />
Lamps Off<br />
Lamps On<br />
9<br />
7<br />
MIL-S-<br />
22885<br />
SYMBOL<br />
LEGEND<br />
C Black<br />
B<br />
Hidden<br />
Black<br />
BACK-<br />
GROUND<br />
Translucent<br />
Color<br />
H Hidden Black<br />
N<br />
Transluce<br />
nt White<br />
W Black<br />
LEGEND<br />
Black Black<br />
Black<br />
Translucent<br />
White<br />
S Hidden Black<br />
BACK-<br />
GROUND<br />
INCAN-<br />
DESCENT<br />
LAMP<br />
2<br />
HIGH BRIGHTNESS<br />
LED<br />
Black Color Flat Filter Flat Filter<br />
Visible in<br />
Color<br />
Visible in<br />
Color<br />
Visible in<br />
Color<br />
Lamp Cap<br />
Black Lamp Cap<br />
Black Lamp Cap Flat Filter<br />
Black Color Lamp Cap Flat Filter<br />
Visible in<br />
Color<br />
Black Flat Filter Flat Filter<br />
S Hidden Black NVG Color Black NVG Filter NVG Filter<br />
B<br />
Hidden<br />
Black<br />
W Black<br />
NON-ILLUMINATED<br />
H Hidden Black<br />
ILLUMINATED<br />
LIGHT SOURCE AND COLOR<br />
SOURCES<br />
Customer Replaceable Legends<br />
Black Black<br />
Visible in<br />
Color<br />
Lamp Cap<br />
Translucent<br />
White<br />
Black Color Lamp Cap<br />
Visible in<br />
Color<br />
Black Flat Filter Flat Filter<br />
1 4 5 9<br />
1 2 3 4 5 6 7 8 9 0<br />
NOTES TABLE 7:<br />
1<br />
2<br />
3<br />
4<br />
5<br />
6<br />
7<br />
8<br />
9<br />
Type 1- Styles 20 through<br />
85 (Ref. Table 5) will have<br />
.026” black bars as visual<br />
split screen separators.<br />
Available in LED lighted<br />
configurations.<br />
LED Type 5 Styles 20<br />
through 85 (Ref. Table 5)<br />
will have .046” black bars<br />
as visual split screen<br />
separators.<br />
Type 6 - Sunlight Readable<br />
The display is readily<br />
discernible under 10,000<br />
footcandles of direct<br />
light when tested per<br />
Mil-PRF-22885/101. Nonilluminated<br />
legends are not<br />
discernible. Recommended<br />
legend height is .100.<br />
Type 7 -Night Vision<br />
Imaging System (NVIS)<br />
compatible display. When<br />
illuminated, legends are<br />
compatible with NVIS<br />
(Gen. III) night vision<br />
goggles. Applies to<br />
incandescent and LED<br />
configurations. Botht versions<br />
are also sunlight<br />
readable. Non-illuminated<br />
legends are not discernible.<br />
(Available in “sealed” version<br />
only.)<br />
Customer replaceable legends<br />
(Display Types 8,9<br />
and 0) may not be of equal<br />
quality to those which are<br />
factory assembled.<br />
Type 8 - Similar to Type 2.<br />
Type 9 - Similar to Type 5.<br />
Type 0 - Similar to Type 6.
Table 8 – Cell Color<br />
CODE<br />
NO.<br />
INCANDESCENT<br />
LAMP<br />
LEGEND DISPLAY<br />
All types Except 7<br />
2/<br />
MIL-PRF-<br />
22885<br />
INCANDESCENT<br />
LAMP<br />
OR LED<br />
TABLES<br />
LEGEND DISPLAY<br />
NIGHT VISION GOGGLE<br />
(NVG) COMPATIBILITY<br />
Types 7 Only<br />
(AVAILABLE PER /112 ALSO)<br />
MIL-PRF-<br />
22885<br />
HIGH<br />
BRIGHTNESS<br />
LED<br />
LEGEND<br />
DISPLAY<br />
Types 0, 1, 4, 5<br />
& 6<br />
2/<br />
MIL-PRF<br />
22885/112<br />
COLOR<br />
/101<br />
SYMBOL<br />
COLOR<br />
/101<br />
SYMBOL COLOR<br />
0 White W NVIS Blue White<br />
1 Red R NVIS Red L Red<br />
2 Green G NVIS Green B J Green<br />
3<br />
Aviation<br />
Yellow<br />
Y<br />
NVIS Yellow<br />
Class B<br />
K<br />
Aviation<br />
Yellow<br />
4<br />
Lunar<br />
White<br />
D NVIS White ---<br />
5<br />
Lemon<br />
Yellow<br />
--<br />
NVIS Yellow<br />
Class A<br />
K<br />
Lemon<br />
Yellow<br />
6 Blue 3/ B NVIS Green A H Blue<br />
7<br />
Aviation<br />
Green 4/<br />
Z --- --- ---<br />
NOTES:<br />
1 All NVIS filters availability per MIL-STD-3009 are subject to<br />
final R&D test results.<br />
2/ Colors of incandescent lamp and High Brightness LED are<br />
slightly different.<br />
3/ May not be suitable for high intensity light applications.<br />
4/ For types 2, 3, 4, 5, 8, and 9 use <strong>90</strong>-CODED/016.<br />
Table 9 – Rear Flange Mount<br />
Dimensions & Panel Cutouts<br />
In Inches In Millimeters<br />
NUMBER<br />
OF UNITS<br />
MATRIX<br />
DIMENSIONS<br />
CUTOUT<br />
DIMENSION<br />
ON SIDE A OR B C OR D<br />
± .015 +.03 -.00<br />
1 .755 .77<br />
2 1.510 1.53<br />
3 2.265 2.28<br />
4 3.020 3.04<br />
5 3.775 3.79<br />
6 4.530 4.55<br />
N .755 x N .76 x N<br />
Visit www.stacosystems.com or call 714-549-3041 for more information<br />
NUMBER<br />
OF UNITS<br />
MATRIX<br />
DIMENSIONS<br />
CUTOUT<br />
DIMENSION<br />
ON SIDE A OR B C OR D<br />
± .38 +.8 -.0<br />
1 19.18 19.6<br />
2 38.35 38.9<br />
3 57.53 57.9<br />
4 76.71 77.2<br />
5 95.89 96.3<br />
6 115.06 115.6<br />
N 19.18 x N 19.3 x N<br />
57
Table 10 – Front Dress Bezel Mount<br />
Dimensions & Panel Cutouts<br />
NUMBER<br />
OF UNITS<br />
MATRIX<br />
DIMENSIONS<br />
CUTOUT<br />
DIMENSION<br />
ON SIDE A OR B C OR D<br />
± .015 +.030 -.000<br />
58<br />
1 .755 1.124<br />
2 1.510 1.879<br />
3 2.265 2.634<br />
4 3.020 3.389<br />
5 3.775 4.144<br />
6 4.530 4.899<br />
N .755 x N A or B + N<br />
TABLES<br />
In Inches In Millimeters<br />
NUMBER<br />
OF UNITS<br />
MATRIX<br />
DIMENSIONS<br />
CUTOUT<br />
DIMENSION<br />
ON SIDE A OR B C OR D<br />
± .038 +.76 -.00<br />
1 19.18 28.55<br />
2 38.35 47.73<br />
3 57.53 66.<strong>90</strong><br />
4 76.71 86.08<br />
5 95.89 105.26<br />
6 115.06 124.43<br />
N 19.18 x N A or B + 9.37
ACCESSORIES DIMENSIONS & OTHER - MODEL PRODUCTS<br />
99<br />
Crimp Pin Tool and Positioner<br />
• Attaches female crimp pins to #20-24 stranded wire<br />
• For Models 95 or 97 Matrix Housing or Models 98 or 99 Individual Mount<br />
• Specify part number 15191 for M22520/2-01 Crimp Tool for use<br />
with Long Crimp Pins part number 15095<br />
• Specify part number 15192 for M22520/2-14 Turret for use with Long<br />
Crimp Pins part number 15095<br />
• Specify part number 15278 for M22520/2-01 Crimp Tool for use with Short Crimp Pins part number 15276<br />
• Specify part number 15279 for M22520/2-14 Turret for use with Short Crimp Pins part number 15276<br />
Socket Contact Crimp Pins<br />
• Used for connection to #20-24 stranded wire for Models 95, 97, 98 or 99<br />
• Specify part number 15095 for M3<strong>90</strong>29/16-168 Female Crimp Pins for Long<br />
Crimp Pins Receptacles<br />
• Specify part number 15276 for M3<strong>90</strong>29/22-192 Female Crimp Pins for Short<br />
Crimp Pins Receptacles<br />
Insulator Plugs<br />
• Close off unused terminal openings in termination receptacles for models 95, 97, 98 or 99<br />
• Specify part number 15177 for MS27488 Insulator Plugs<br />
<strong>Pushbutton</strong> Extractor Tool<br />
• Facilitates removal of display pushbuttons<br />
• Specify part number 15193<br />
Matrix Switch Extraction Tool<br />
• Facilitates removal of Switch/Indicator from matrix housings<br />
• Remove pushbutton; loosen two locking cams; insert tool from<br />
front of assembly; screw looped handle to tighten<br />
rubber block; pull to remove<br />
• Specify part number 15056<br />
Crimp Pin Termination Receptacles<br />
Matrix Mount<br />
• Receptacles supplied with models 95 and 97 Matrix housings<br />
• Additional receptacles may be ordered separately, as replacement parts<br />
• Specify part number 15096 for Long Crimp Pin Receptacle<br />
• Specify part number 15280 for Short Crimp Pin Receptacle<br />
Individual Mount<br />
• Receptacles supplied with models 98 and 98 Switch/Indicator<br />
• Additional receptacles may be ordered separately, as replacement parts<br />
• Specify part number 15197 for Long Crimp Pin Receptacle<br />
• Specify part number 15273 for Short Crimp Pin Receptacle<br />
59
<strong>Pushbutton</strong> Guard<br />
• Lift to allow switch actuation<br />
• Prevents accidental actuation<br />
• Specify part number 15097<br />
60<br />
ACCESSORIES MODEL 99 SWITCH/INDICATOR<br />
& OTHER PRODUCTS<br />
• <strong>Pushbutton</strong> guard is transparent and spring loaded<br />
• Slips over switch housing<br />
• Minimum panel spacing required .871” (22.1 mm)<br />
• Specify part number 15089<br />
Metal <strong>Pushbutton</strong> Guard<br />
• Lift to allow switch actuation, spring loading ensures that cover will close after actuation<br />
• Rigid metal guard prevents accidental actuation for critical systems in challenging<br />
environments<br />
• <strong>Pushbutton</strong> guard is an open metal ‘cage’ that does not restrict the view of the<br />
pushbutton legend<br />
• Easily slips over switch housing when switch is installed<br />
• Minimum panel spacing required is .871” (22.1 mm)<br />
• Specify part number 15600<br />
<strong>Pushbutton</strong> Retainer Tie<br />
• Retainer Tie secures pushbutton to switch/indicator assembly, eliminat-<br />
ing pushbutton mix-up during relamping<br />
• Allows pushbutton to be relamped from front panel<br />
• Supplied with models 93 or 99 Switch/Indicator with display pushbutton<br />
assemblies when ordered in “retained pushbutton” configuration<br />
• To order separately, specify part number 15093<br />
Dummy Lamp<br />
• Substitute for a T-1 flange base lamp<br />
• Must be installed to maintain uniform actuation force when all lamps not installed<br />
• Specify part number 15091<br />
Dress Bezel Mounting Cleat Assembly<br />
• Required for installing models 96 and 97 matrix housings<br />
• Quantity supplied as standard parts depending on housing<br />
size, refer to figure 55, page 30<br />
• Additional cleat assemblies packaged 5 per envelope, specify part number 15098<br />
• For printed circuit board mounting application, use shorter slotted fillister head cleat, part<br />
number 15213<br />
Panel Seal<br />
• Converts unsealed model 91 switch to a sealed unit<br />
• As a replacement or for conversion<br />
• Packaged 10 per envelope
ACCESSORIES DIMENSIONS & OTHER - MODEL PRODUCTS 99<br />
Insertion and Removal Tool<br />
• Used for inserting or removing connector wire with Crimp Pin attached<br />
• Specify part number 151<strong>90</strong> for M81969/16-01 Tool<br />
Color Filter Caps<br />
• Allows changing pushbutton cell area colors<br />
when using incandescent lighted display types<br />
2,3,4,5,8, and 9<br />
• For use with model 92 and T-1 flange based<br />
lamps, not used with LED lighting.<br />
• Kits contain 25 pieces of given color<br />
• Specify part number below<br />
Single Lamp Switch/Indicators<br />
<strong>Series</strong> 60<br />
• QPLs M22885/18, M22885/19 and M22885/99<br />
• 2 circuit 2PDT; 2A resistive, 1.5 A inductive, 28 VDC/115 VAC<br />
• Momentary or alternative switch action or indicator<br />
• <strong>Pushbutton</strong> display lens has seven display types in six colors<br />
• Request catalog GC-6/4<br />
<strong>Series</strong> C8/C8P<br />
• Commercial equivalent to model 60<br />
• 2 circuit 2PDT; 3A resistive, 28 VDC/115 VAC<br />
• Momentary or alternate switch action or indicator<br />
• <strong>Pushbutton</strong> display lens has seven display types in six colors<br />
• Model C8 has bezel mount, C8P has snap dress bezel mount<br />
• Request catalog GC-6/4<br />
Unlighted <strong>Switches</strong><br />
<strong>Series</strong> 30<br />
• M8805/99 QPL listed pushbutton switch<br />
• 2 circuit 2PDT; 3A resistive, 1.5 A inductive, 28 VDC/115 VAC<br />
• Momentary or alternate switch action<br />
• <strong>Pushbutton</strong> in either red or black with black dress ring<br />
• Panel seal dress ring, makes switch panel opening moisture tight<br />
• Request catalog GC-6/4<br />
15194-X<br />
Color<br />
0 Clear, Transparent White<br />
1 Red<br />
2 Green<br />
3 Aviation, Yellow<br />
4 Lunar White<br />
5 Lemon Yellow<br />
6 Blue<br />
7 Aviation Green<br />
Basic Part Number<br />
61
62<br />
ACCESSORIES MODEL 99 SWITCH/INDICATOR<br />
& OTHER PRODUCTS<br />
<strong>Series</strong> 80 Sunlight Readable Display <strong>Switches</strong><br />
• <strong>Lighted</strong> legend is clearly legible even in 10,000 footcandle light<br />
• Uniform lighting, no hot spots even when dimmed for night viewing<br />
• Dead front hidden legend, avoids false energized appearance<br />
• Individual or Matrix mount, 4PDT and 2PDT or indicator<br />
• Momentary, alternate or solenoid held<br />
• Request catalog GC-6/6<br />
<strong>Series</strong> 50 Dripproof Display <strong>Switches</strong><br />
• For applications exposed to rain, open deck spray, or condensation<br />
• Meets or exceeds MIL-STD-108 of MIL-S-22885<br />
• Captive rubber pushbutton seal closes moisture paths into switch<br />
• Legend area is not covered by seal so lighted message remains<br />
bright and clear<br />
• Request <strong>Staco</strong> <strong>Systems</strong> Catalog GC-6/7<br />
<strong>Series</strong> 40 QPL and Industrial Display<br />
• M22885/52, /53, /56, /86, /95<br />
• Standard lighted displays<br />
• Individual or matrix mount<br />
• Momentary, alternate action, latchdown and solenoid held<br />
• Four and two pole switches and indicators<br />
• Square or rectangular<br />
• Solder, PC Wirewrap or Crimp Pin termination<br />
• Matrix mount with crimp pin terminations qualified to MIL-S-24317/9 and<br />
MIL-S-24317/10<br />
• Request <strong>Staco</strong> <strong>Systems</strong> Catalog GC-6/2<br />
Digital Dimmer<br />
For dimming of both LED and incandescent devices<br />
• LED and incandescent dimming<br />
• 16 levels of brightness control<br />
• Full brightness<br />
• Full blank lamp test<br />
• Remote Up/Down input<br />
• 4 bit digital input<br />
• Sourcing or sinking<br />
• Full MIL spec construction<br />
• Specify part number DDM111 OR DDM111A
Models 91, 92 & 98<br />
ORDERING SECTION INFORMATION<br />
HEADS<br />
The tables not only identify the code numbers associated with each option, but also supply additional information<br />
relating to the option. The convention for notes is that a number followed by a period (i.e., 1.) is a general note and<br />
the text which follows applies to the entire table. Whereas a specific note refers only to the item with the corresponding<br />
symbol (i.e., 2 ) in a manner similar to a “delta note” on a drawing.<br />
The term “sealed” for switches and pushbuttons in the following tables are for “dripproof” seals (to withstand a spray of five<br />
gallons in five minutes). For “splashproof”, “immersion” and “solvent-resistant” seals, see the section beginning on page 20.)<br />
To have a dripproof unit, both the switch and the pushbutton should be ordered as “sealed”. All Type 7 display<br />
pushbuttons, NVIS compatible, are configured as sealed units.<br />
Model 91 Switch/Indicator Without <strong>Pushbutton</strong><br />
Model 92 <strong>Pushbutton</strong><br />
Visit www.stacosystems.com or call 714-549-3041 for more information<br />
63
64<br />
ORDERING SECTION INFORMATION<br />
HEADS<br />
Model 98 Switch/Indicator Without <strong>Pushbutton</strong><br />
Models 93 & 99<br />
Each of the standard and optional features of the <strong>Series</strong> <strong>90</strong> Switch and Indicator are described in this catalog. The<br />
part numbering rationale provides for ordering a complete switch or indicator assembly with a pushbutton assembly,<br />
including illumination source, legend, colors, and display style. Individual switch or Indicator assemblies and individual<br />
pushbuttons may also be ordered separately.<br />
To determine the type of switch or indicator and push-button you need, simply insert the code numbers from Tables 1<br />
through 8, as outlined in the following pages, in the appropriate locations in the part number listed with the charts.<br />
Model 98 Switch/Indicator is supplied with a crimp pin termination receptacle installed. To designate the type of<br />
switch or indicator required simply insert the appropriate code numbers from Tables 1, 2, and 3 on pages 12 and 13.<br />
The Model 99 includes a Switch/Indicator and a Display <strong>Pushbutton</strong>. To designate a complete Model 99 assembly,<br />
insert the code numbers from Tables 1-8. The associated crimp pins are not furnished with each part, but may be<br />
ordered separately as part number 15095.<br />
The Model 93 configurator, shown below, provides the part number information to define switch and pushbutton<br />
assemblies. It is a 16-digit part number, with no spaces or hyphens, followed by the text for the display.<br />
Example: Following the code number 93, the next four sets of digits, from Tables 1 through 4, define the switch portion<br />
of the assembly. The rest of the part number, from Tables 5 through 8, defines the display pushbutton. The color<br />
for each of the four quadrants must be included, even if they are all the same color in a full-screen display.<br />
The convention for legend text is to enclose the text for each area within parenthesis and to indicate a new line by<br />
inserting a semi-colon. In the example below, the Display Style (of Table 5) is a 42. This represents a three-way split<br />
with character height of .087 ".<br />
The top half has two lines, OIL and OK. The lower left quadrant has the text LO; the lower right quadrant has the<br />
text HOT. The quantity of parenthesis pairs corresponds to the area numbers identified in Table 5. The text for each<br />
area is enclosed by parenthesis. If one area is blank, a space would be inserted between the parenthesis, for example:<br />
(OIL;OK)(LO)( ).
ORDERING INFORMATION<br />
Model 93 and 99 <strong>Lighted</strong> Switch Assembly<br />
99 18 4 2 8 15 62 5 7777 (BRIGHT; LEDS)<br />
Customer Legend for Areas 1, 2, 3 and 4<br />
Table 8 Cell Color Code, page 57<br />
Table 7 Display Type, page 56<br />
Table 6 Lamp or LED Selection and <strong>Pushbutton</strong> Sealing, page 55-56<br />
Table 5 Display Style and Character Definition, page 54<br />
Table 4 Lamp or LED, Ground Options and EMI/RFI Status, page 53<br />
Table 3 EMI/RFI Sealing, page 53<br />
Table 2 Switch Action and <strong>Pushbutton</strong> Retainer, page 51<br />
Table 1 Terminations, No. of Poles and Contact Material, page 50<br />
Model 99 Switch/Indicator with <strong>Pushbutton</strong> Assembly<br />
Visit www.stacosystems.com or call 714-549-3041 for more information<br />
65
Watertight Seals<br />
66<br />
ORDERING INFORMATION<br />
The Watertight Seal option is specified by adding /005 to the coded part number. In the following part numbers the<br />
Xs represent the digits of the coded part number for a similar assembly without this seal option.<br />
Switch Indicator Assembly 91XXXX/005<br />
Switch Indicator Assembly 98XXXX/005<br />
<strong>Pushbutton</strong> Assembly 92XXXXXXXXXX/005<br />
Switch Indicator Assembly with <strong>Pushbutton</strong> 93XXXXXXXXXXXXXX/005<br />
Switch Indicator Assembly with <strong>Pushbutton</strong> 99XXXXXXXXXXXXXX/005<br />
Text for legends, when applicable, follows the /005. An example using the Model 99 would be as follows:<br />
9917418156257777/005 (Bright; LEDs)<br />
<strong>Switches</strong>, indicators and pushbuttons cannot be reworked in the field to retrofit existing equipment with the Watertight<br />
Seal. All applications requiring the use of the watertight seal must use factory supplied and assembled hardware.<br />
A switch/indicator service kit is offered which contains ten sets of panel seals and retainers. This kit, P/N:<br />
15196/005, can be used to replace damaged or misplaced hardware.<br />
Matrix assemblies utilizing <strong>Series</strong> <strong>90</strong> switches cannot make use of this watertight seal. Customer replaceable<br />
legends (<strong>Pushbutton</strong> Types 8 and 9) are not available with watertight seals.<br />
Front Dress Bezel Mount
Rear Flange Mount<br />
Complete <strong>Systems</strong><br />
ORDERING DIMENSIONS INFORMATION - MODEL 99<br />
When ordering complete systems…matrix housing, switch/indicator,<br />
and pushbuttons…an Assembly Part Number will be assigned by the<br />
factory to cover the complete system.<br />
Each station within the matrix (fig. 48) must be identified with a specific<br />
switch or indicator part number and pushbutton assembly part number.<br />
Each station in the matrix (fig. 47) is identified by a digit-dash-digit<br />
number, called a Location Code.<br />
The first digit in the Location code identifies the hori-<br />
zontal row and the second digit identifies the vertical<br />
column. In the example 2-3 is the second row down<br />
and the third<br />
column to the right. Location 1-1 will always be top<br />
left as viewed by the operator. Pre-numbered work<br />
sheets are available from the factory upon request.<br />
Figure 59<br />
Visit www.stacosystems.com or call 714-549-3041 for more information<br />
Figure 60<br />
67
1139 Baker Street • Costa Mesa, CA 92626-4191<br />
714-549-3041 • Fax: 714-549-0930 • www.stacosystems.com